tastytrendingredients

  • Home
  • Recipes
    • Appetizers
    • Breakfast
    • Dessert
    • Dinner
    • Drinks
    • Salads
    • Snacks
    • Soups
  • About me
  • Contact
menu icon
go to homepage
  • Home
  • Recipes
    • Appetizers
    • Breakfast
    • Dessert
    • Dinner
    • Drinks
    • Salads
    • Snacks
    • Soups
  • About me
  • Contact
search icon
Homepage link
  • Home
  • Recipes
    • Appetizers
    • Breakfast
    • Dessert
    • Dinner
    • Drinks
    • Salads
    • Snacks
    • Soups
  • About me
  • Contact
×

Savory Spinach Mushroom Chicken Crepes for Happy Mornings

February 24, 2026 by Grace Snow Leave a Comment

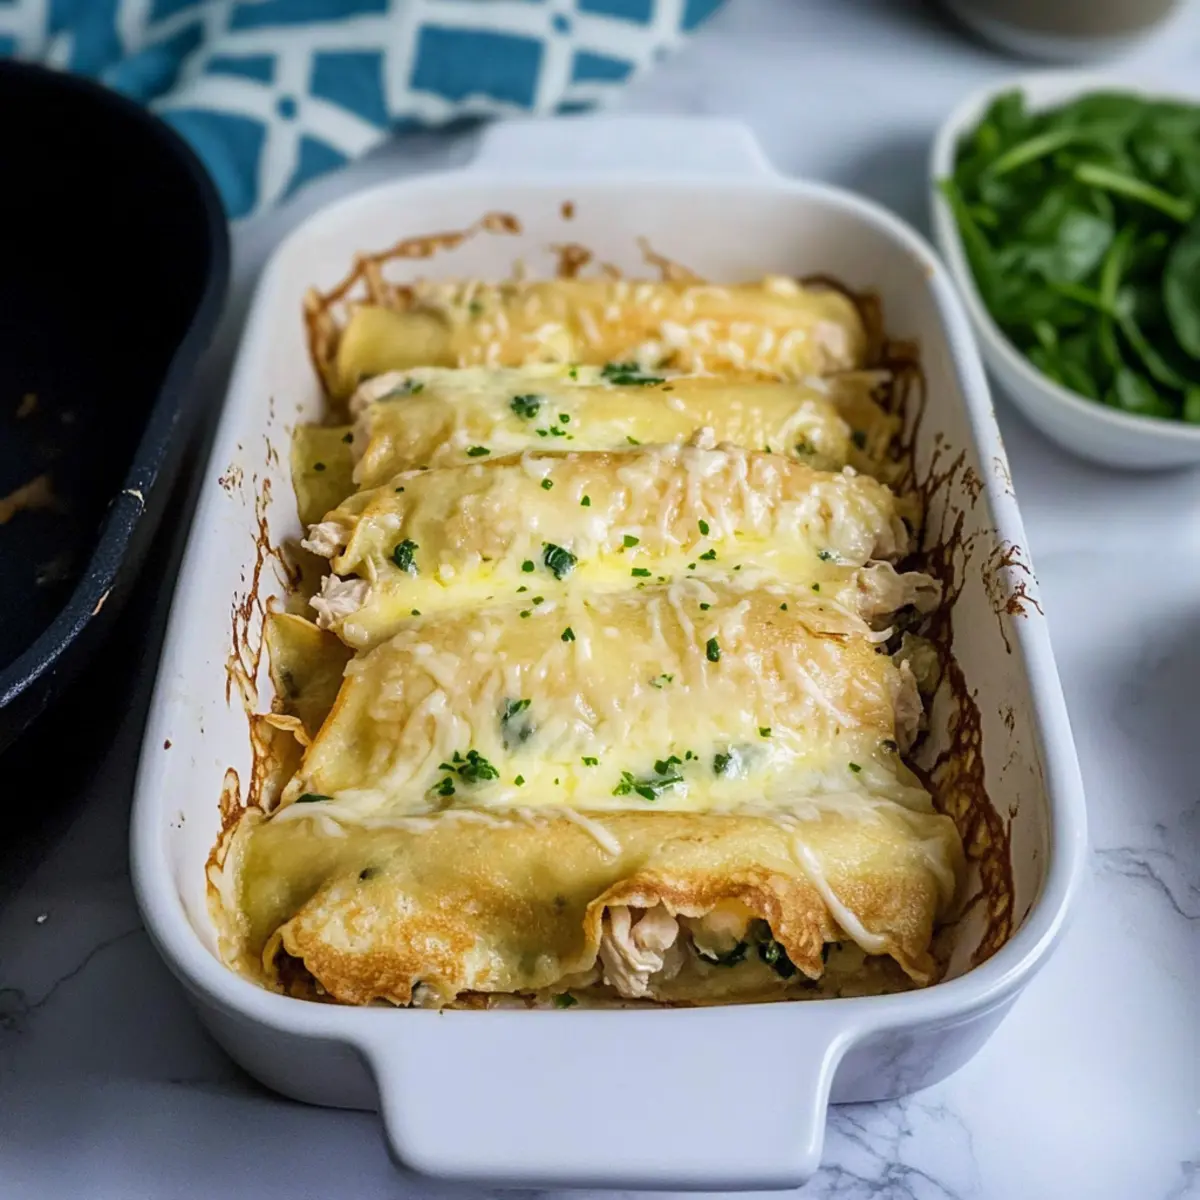
As I flipped through my recipe book one afternoon, a delightful whiff of sautéed mushrooms and garlic wafted through my kitchen, sparking a longing for something special. That’s when the idea hit me to whip up Spinach Mushroom Chicken Crepes. This dish not only brings together tender chicken with earthy mushrooms, but it also lets you indulge all your culinary creativity, making it the perfect solution when you're craving a comforting meal that feels extraordinary. With just a short prep time, you can impress your loved ones while keeping it light and nutritious—this is homemade goodness at its finest! Curious about how to take your next meal to delectable heights? Let’s dive into this scrumptious recipe together!

Why are Spinach Mushroom Chicken Crepes irresistible?

Deliciously unique: This recipe combines creamy spinach, hearty mushrooms, and tender chicken, creating a taste sensation that’s truly one-of-a-kind.

Quick and easy: With just a handful of ingredients and a bit of time, you can elevate your meal game without fuss—perfect for busy weekends!

Versatile delight: Whether it’s breakfast, brunch, or a light dinner, these crepes fit seamlessly into any meal plan. Pair them with a refreshing side salad and you’re all set!

Crowd-pleaser: Everyone loves crepes! You can impress your family or guests, creating a dining experience they'll rave about for days.

A nutritious choice: Filled with veggies and lean protein, these crepes offer a wholesome yet indulgent meal option. For a more tantalizing twist, consider pairing with Spinach Pie Deliciously or Honey Garlic Chicken for an exciting feast!

Spinach Mushroom Chicken Crepes Ingredients

For the Crepes
• All-purpose flour – a staple for creating light and tender crepes.
• Eggs – bind the ingredients while adding richness.
• Milk – use whole milk for a creamy texture; almond milk works as a dairy-free substitute.
• Salt – a pinch enhances the overall flavor of your crepes.

For the Filling
• Cooked chicken – shredded or diced, it brings protein and heartiness to the dish.
• Fresh spinach – packed with nutrients, it adds a vibrant color and flavor.
• Mushrooms – sautéed for a savory depth; consider using cremini or button mushrooms.
• Garlic – minced for an aromatic punch that elevates the filling.
• Cream cheese – adds creaminess; for a lighter option, you can substitute with Greek yogurt.
• Parmesan cheese – grated for a hearty flavor boost that complements the filling beautifully.

To Garnish
• Fresh herbs – parsley or chives brighten and add freshness to your finished dish.
• Black pepper – cracked over the top for finishing touches, it enhances the flavors of the Spinach Mushroom Chicken Crepes wonderfully.

Step‑by‑Step Instructions for Spinach Mushroom Chicken Crepes

Step 1: Prepare the Crepe Batter
In a mixing bowl, whisk together 1 cup of all-purpose flour, 2 eggs, and 1 cup of whole milk until the mixture is smooth. Add a pinch of salt and allow the batter to rest for about 15 minutes at room temperature. This rest period helps achieve tender Spinach Mushroom Chicken Crepes, so keep an eye on the consistency—it should be pourable but not too runny.

Step 2: Cook the Crepes
Heat a non-stick skillet over medium-high heat with a small dab of butter. Using a ladle, pour about a quarter cup of the crepe batter into the center and swirl the pan to spread it evenly. Cook for about 1-2 minutes until the edges lift and the crepe is lightly golden. Carefully flip and cook for another 1 minute. Repeat this process until all the batter is used, stacking the cooked crepes on a plate to keep warm.

Step 3: Sauté the Vegetables
In the same skillet, add a dash more butter and toss in 1 cup of sliced mushrooms and 2 cloves of minced garlic over medium heat. Sauté until the mushrooms are browned and tender, about 5 minutes, then stir in 2 cups of fresh spinach. Cook until wilted, which should take an additional 2-3 minutes. Once ready, remove from heat and let the mixture cool slightly.

Step 4: Mix the Filling
In a medium bowl, combine the sautéed spinach and mushrooms with 1-2 cups of cooked, shredded chicken and 4 ounces of cream cheese. Mix thoroughly until the cream cheese is fully incorporated and the filling is creamy and luscious, adding ¼ cup of grated Parmesan cheese for an extra burst of flavor. This hearty filling brings your Spinach Mushroom Chicken Crepes to life!

Step 5: Fill the Crepes
Take each cooked crepe and place it on a clean surface. Spoon a generous amount of the filling along the center of each crepe, then fold the edges over the filling. You can roll them up or simply fold for a nice presentation. Repeat this with all the crepes, making sure they are filled just enough to hold together without overflowing.

Step 6: Garnish and Serve
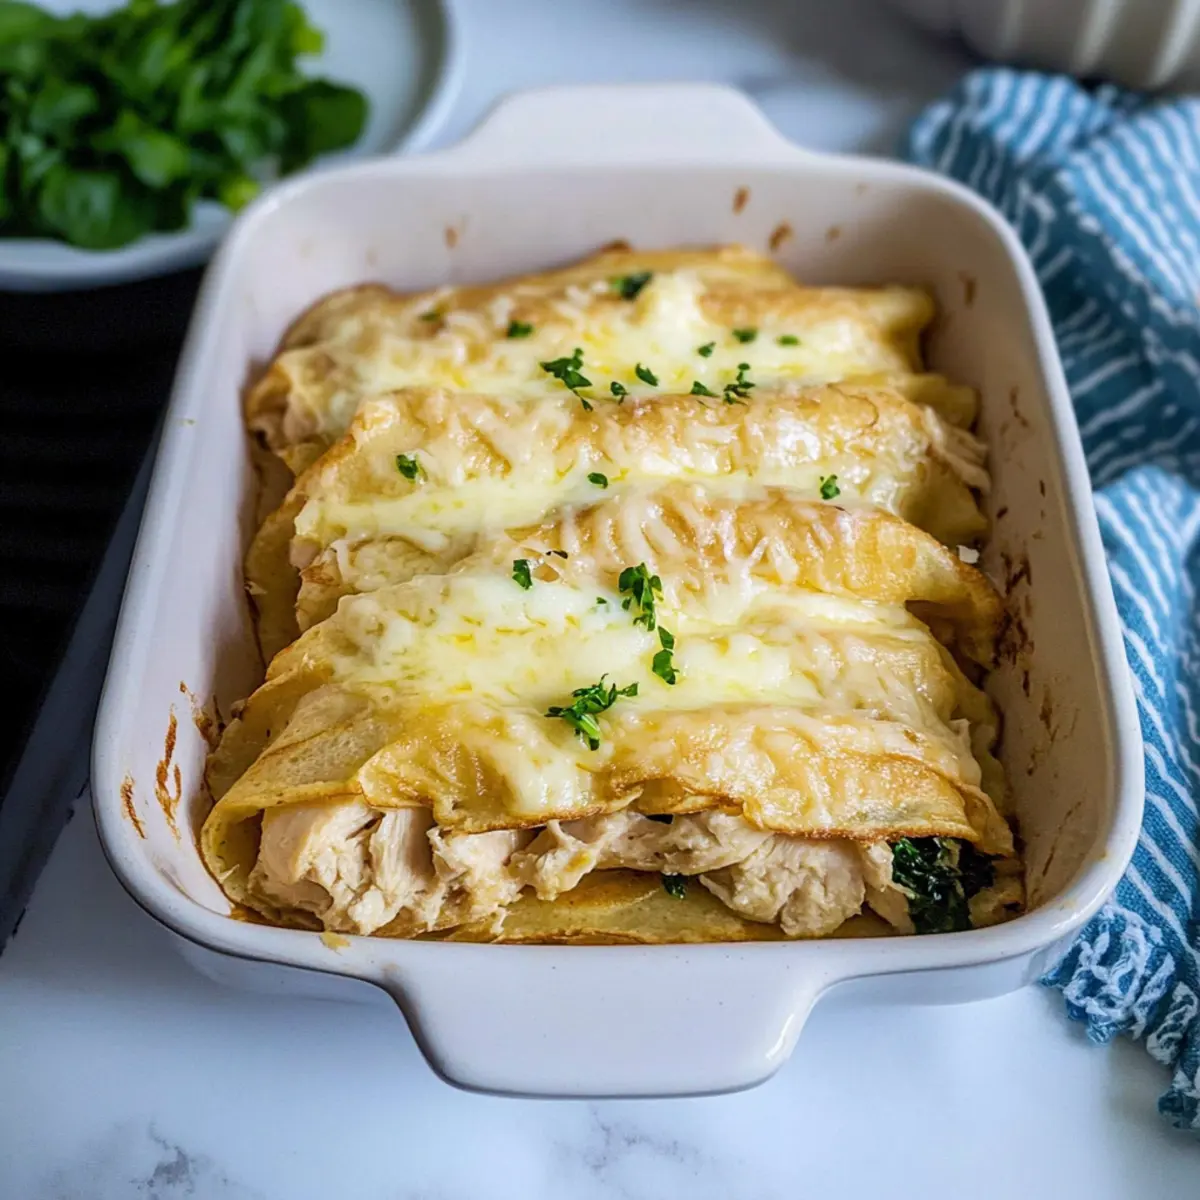
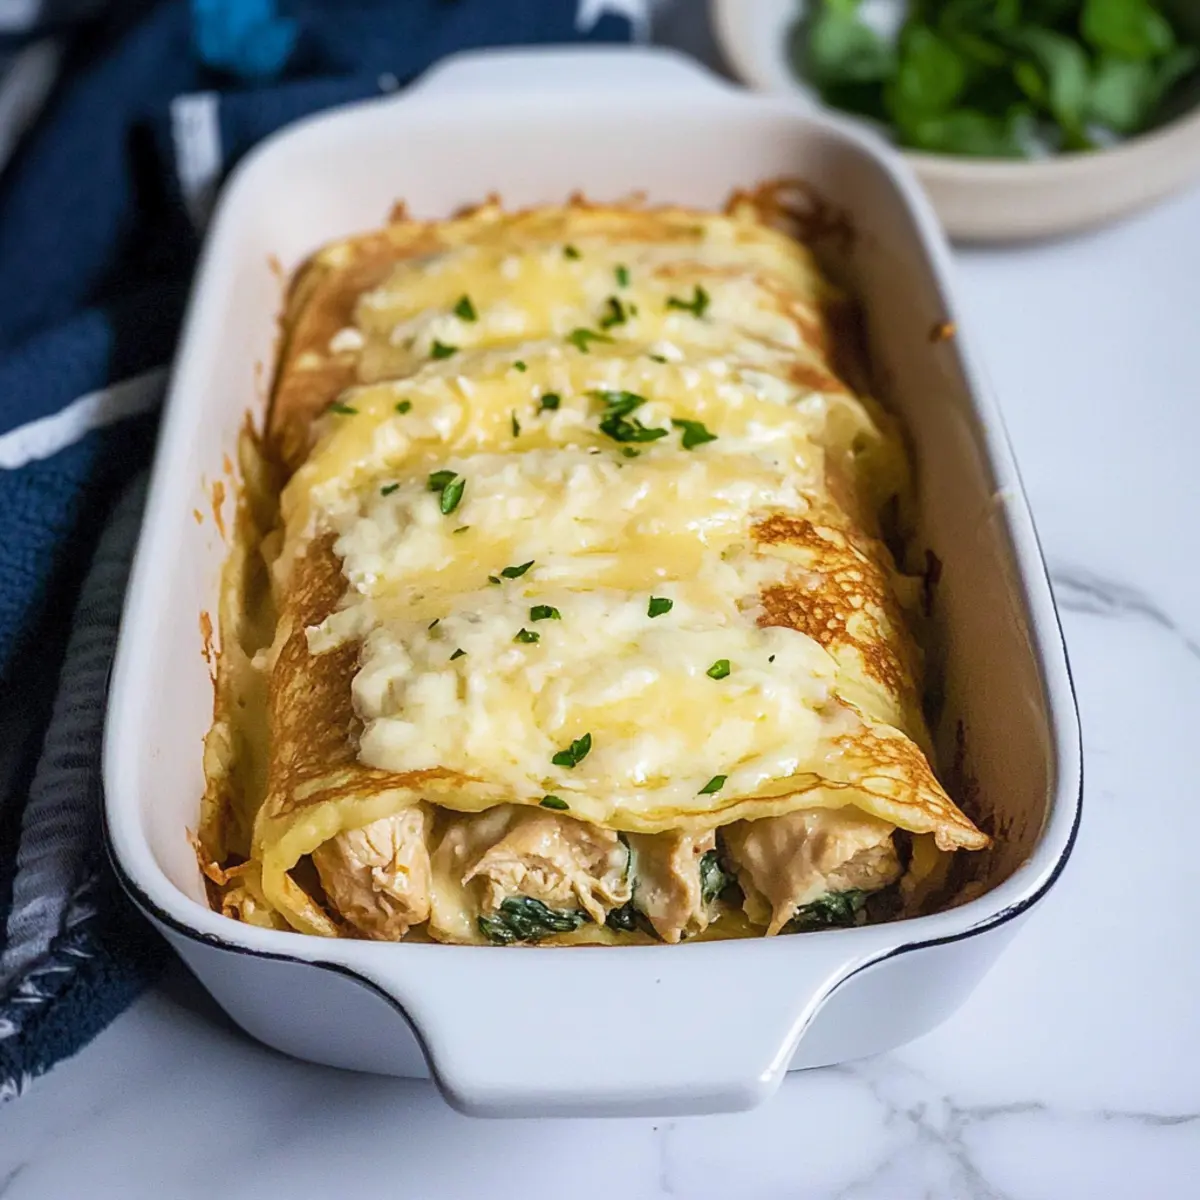
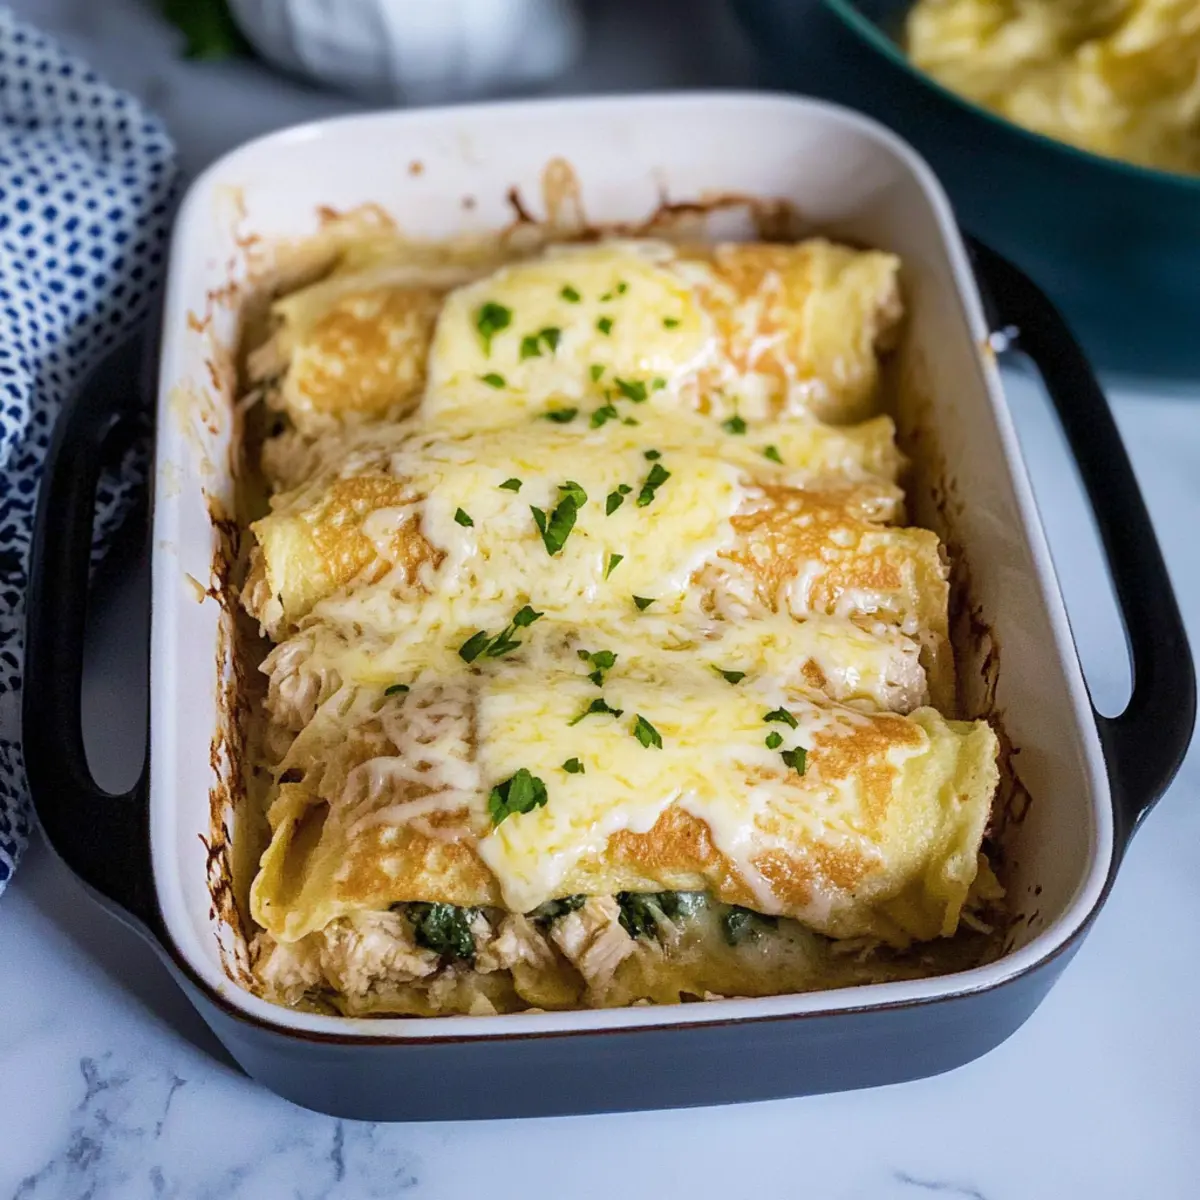
Arrange the filled Spinach Mushroom Chicken Crepes on a serving platter. For an inviting finish, sprinkle freshly chopped herbs, like parsley or chives, on top, and add a crack of black pepper for a bit of spice. Serve them warm alongside a fresh salad or your favorite dipping sauce for a delightful meal that will impress family and guests alike.

Expert Tips for Spinach Mushroom Chicken Crepes

  • Rest the Batter: Allowing the crepe batter to rest helps achieve a tender texture—don’t skip this step for the best Spinach Mushroom Chicken Crepes!

  • Perfect Heat: Ensure your skillet is at medium-high heat; if it’s too hot, the crepes may burn, and if too low, they won't cook evenly.

  • Measure Wisely: Use a ladle for consistent crepe sizes; uneven crepes can lead to different cooking times and textures.

  • Don’t Overfill: Be generous but cautious with the filling; too much can cause spills while cooking and serving, affecting presentation.

  • Versatile Ingredients: Feel free to tweak the filling with your favorite vegetables or cheese; this keeps your Spinach Mushroom Chicken Crepes exciting and varied!

  • Storage Tips: Store any leftovers in an airtight container; reheat in the oven for the best texture rather than the microwave, keeping them lovely and warm!

Make Ahead Options

These Spinach Mushroom Chicken Crepes are perfect for busy weeknights or meal prep enthusiasts! You can prepare the crepe batter and filling up to 24 hours in advance; simply refrigerate the batter and store the filling in an airtight container. To maintain quality, give the batter a good whisk before cooking the crepes and reheat the filling gently on the stove. When you’re ready to serve, just cook the crepes and assemble them with the filling, covering with béchamel sauce and cheese before baking. For those with a busy schedule, you can also freeze the assembled crepes for up to 2 months—thaw overnight in the fridge and pop them in the oven for a comforting meal with minimal effort!

What to Serve with Spinach Mushroom Chicken Crepes

Elevate your dining experience with delightful sides that beautifully complement the creamy, savory goodness of your crepes.

  • Crispy Green Salad: A refreshing mix of greens with a zesty vinaigrette balances the richness of the crepes, adding crunch and brightness.

  • Garlic Roasted Asparagus: Tender asparagus tossed in garlic and olive oil brings earthy flavors that harmonize perfectly with the buttery filling.

  • Herbed Quinoa: This fluffy side dish, infused with fresh herbs, offers a wholesome alternative while enhancing the overall presentation with its nutty flavor.

  • Tomato Basil Soup: A warm bowl of this comforting classic pairs wonderfully, providing a comforting, rustic backdrop that contrasts nicely with the delicate crepes.

  • Crispy Sweet Potato Fries: Pairing with sweet potato fries adds a fun, crispy texture and a hint of sweetness that enhances the savory filling of the crepes.

  • Sparkling Lemonade: An invigorating drink option, the fizz and citrus notes refresh the palate, making each bite of your Spinach Mushroom Chicken Crepes even more enjoyable.

Consider these suggestions to create a well-rounded meal that your family and friends will love!

How to Store and Freeze Spinach Mushroom Chicken Crepes

Fridge: Store leftover Spinach Mushroom Chicken Crepes in an airtight container for up to 3 days to maintain their freshness and flavor.

Freezer: For longer storage, freeze assembled crepes for up to 2 months. Wrap each crepe tightly in plastic wrap and place them in a freezer-safe bag.

Reheating: To reheat frozen crepes, thaw overnight in the refrigerator, then bake at 350°F (175°C) for about 15-20 minutes until heated through.

Make-Ahead: You can prepare the crepes and filling separately ahead of time; refrigerate the filling and reheat before assembly to save time on busy days.

Spinach Mushroom Chicken Crepes Variations

Feel free to play around with these delightful variations to make this recipe uniquely yours!

  • Vegetarian Option: Replace shredded chicken with sautéed spinach and tofu for a tasty, protein-packed filling.
  • Dairy-Free Delight: Use almond milk in the crepe batter and swap cream cheese for silken tofu to keep it creamy yet dairy-free.
  • Different Cheeses: Experiment with feta or goat cheese to add a tangy twist to your béchamel sauce and filling.
  • Flavor Boost: Add a dash of nutmeg or smoked paprika to the béchamel sauce for an elevated taste experience!
  • Exotic Vegetables: Swap out mushrooms for roasted eggplant or zucchini to introduce new textures and flavors into your filling.
  • Spicy Kick: Incorporate a sprinkle of red pepper flakes into the mushroom and spinach mixture for a hint of warmth.
  • Herb Infusion: Stir in fresh herbs like thyme or basil into your filling; they add a refreshing burst and elevate the overall dish.
  • Grains Optional: For a heartier experience, consider adding quinoa or farro into the filling alongside the chicken—deliciously satisfying!

With so many options, you can craft a favorite dish that speaks to every palate! Enjoy your culinary adventure—perhaps check out Crock Pot Chicken to complement your dining experience further!

Spinach Mushroom Chicken Crepes Recipe FAQs

What type of flour should I use for the crepes?
Absolutely! For gluten-free options, I recommend using gluten-free flour as it provides structure for the crepes. If you're not gluten-sensitive, all-purpose flour works perfectly well for this recipe, creating a deliciously tender texture.

How should I store leftover crepes?
Very! Store any leftover Spinach Mushroom Chicken Crepes in an airtight container in the refrigerator for up to 3 days. Be sure to place parchment paper between layers to prevent sticking. When you're ready to enjoy them again, you can reheat them in the oven for the best texture.

Can I freeze assembled crepes?
Yes, you can! To freeze your Spinach Mushroom Chicken Crepes, tightly wrap each filled crepe in plastic wrap and place them in a freezer-safe bag. They can be stored for up to 2 months. Just remember to thaw them overnight in the refrigerator before reheating.

What if my crepe batter turns out lumpy?
Don't worry! If you find your batter is lumpy, simply whisk it again or blend it in a blender until smooth. Avoid over-whisking originally, as this can create tough crepes. If lumps persist, straining the batter through a fine mesh sieve can help.

Are there any substitutions for the filling ingredients?
Absolutely! If you're looking for alternatives, consider replacing shredded chicken with sautéed spinach, tofu, or even legumes for a vegetarian option. For the béchamel sauce, you can use different cheeses such as cheddar or feta for varied flavors. The more the merrier when it comes to ingredients!

Can I make the filling in advance?
Very much so! I often prepare the filling the day before. Just store it in the refrigerator in an airtight container; when you're ready to assemble, give it a quick reheat in a pan or microwave. This will save you time and let the flavors meld beautifully!

Savory Spinach Mushroom Chicken Crepes for Happy Mornings

Delightful Spinach Mushroom Chicken Crepes for a comforting meal that feels extraordinary.
Print Recipe
Prep Time 15 minutes mins
Cook Time 30 minutes mins
Resting Time 15 minutes mins
Total Time 1 hour hr
Servings: 4 crepes
Course: Dinner
Cuisine: French
Calories: 350
Ingredients Equipment Method Nutrition Notes

Ingredients
  

For the Crepes
  • 1 cup all-purpose flour a staple for creating light and tender crepes.
  • 2 large eggs bind the ingredients while adding richness.
  • 1 cup whole milk for a creamy texture; almond milk works as a dairy-free substitute.
  • 1 pinch salt enhances the overall flavor of your crepes.
For the Filling
  • 2 cups cooked chicken shredded or diced, it brings protein and heartiness to the dish.
  • 2 cups fresh spinach packed with nutrients, it adds a vibrant color and flavor.
  • 1 cup mushrooms sautéed for a savory depth; consider using cremini or button mushrooms.
  • 2 cloves garlic minced for an aromatic punch that elevates the filling.
  • 4 ounces cream cheese adds creaminess; for a lighter option, you can substitute with Greek yogurt.
  • ¼ cup Parmesan cheese grated for a hearty flavor boost that complements the filling beautifully.
To Garnish
  • 1 handful fresh herbs parsley or chives brighten and add freshness.
  • to taste black pepper cracked over the top for finishing touches.

Equipment

  • Mixing Bowl
  • non-stick skillet
  • Ladle

Method
 

Step‑by‑Step Instructions
  1. In a mixing bowl, whisk together the all-purpose flour, eggs, and whole milk until the mixture is smooth. Add a pinch of salt and allow the batter to rest for about 15 minutes at room temperature.
  2. Heat a non-stick skillet over medium-high heat with a small dab of butter. Pour about a quarter cup of the crepe batter into the skillet and swirl to spread it evenly. Cook for about 1-2 minutes until lightly golden, then flip and cook for another minute.
  3. In the same skillet, add more butter and sauté the sliced mushrooms and minced garlic over medium heat for about 5 minutes, then stir in the fresh spinach and cook until wilted.
  4. Combine the sautéed spinach and mushrooms with the cooked chicken and cream cheese in a bowl. Mix until creamy and smooth, then add grated Parmesan cheese.
  5. Take each cooked crepe and fill with the mixture, folding the edges over to encase the filling.
  6. Place the filled crepes on a platter, garnish with fresh herbs and black pepper, and serve warm.

Nutrition

Serving: 1crepeCalories: 350kcalCarbohydrates: 30gProtein: 25gFat: 15gSaturated Fat: 8gPolyunsaturated Fat: 2gMonounsaturated Fat: 4gCholesterol: 90mgSodium: 500mgPotassium: 400mgFiber: 2gSugar: 2gVitamin A: 5000IUVitamin C: 20mgCalcium: 200mgIron: 3mg

Notes

Resting the crepe batter helps achieve the best texture. Use a consistent heat for cooking crepes and do not overfill them to avoid spills.

Tried this recipe?

Let us know how it was!

Delicious Chicken Florentine Crepes: A Low-Carb Delight

February 24, 2026 by Grace Snow Leave a Comment

As I whisked together my ingredients, the smell of melted butter mixed with the earthy aroma of spinach transported me straight to a cozy European café. Today, I’m thrilled to share my take on Chicken Florentine Crepes, a delightful dish that marries the lightness of coconut flour with a creamy filling that’s undeniably comforting. These crepes not only shine with rich flavors but are also designed to fit seamlessly into a low-carb, gluten-free lifestyle. With a quick prep time and the versatility to easily adapt to your favorite cheeses or add-ins, this dish is sure to impress at any meal. So, are you ready to roll up your sleeves and create something truly special? Let’s dive in!

Why are Chicken Florentine Crepes irresistible?

Unbelievably Simple: Making these Chicken Florentine Crepes is a breeze! With just a few easy steps, you’ll have a delicious meal on the table in no time.

Amazing Flavor Fusion: The combination of tender chicken, creamy filling, and the subtle sweetness of coconut flour creates a flavor profile that’s simply divine.

Versatile and Adaptable: Feel free to customize your crepes with different cheese blends or fillings. Whether it’s adding Chicken Adobo Again or incorporating veggies, the options are endless!

Low-Carb Comfort: Enjoy all the comforts of a hearty meal without any guilt—each crepe is low in carbs and gluten-free, making it perfect for health-conscious eaters.

Crowd-Pleasing Delight: Serve these crepes at your next gathering, and watch them disappear! Everyone will be begging for seconds of this delightful dish.

Chicken Florentine Crepes Ingredients

  • For the Crepes
    • Coconut Flour – This gluten-free base gives structure while keeping it light.
    • Eggs – Essential for binding; they create a soft texture.
    • Milk – Use dairy or a non-dairy substitute for the crepe batter.
    • Salt – Just a pinch enhances overall flavor.

  • For the Filling
    • Chicken Breast (boneless/skinless) – The main protein source; shredded rotisserie chicken can save time.
    • Spinach (cooked fresh/frozen) – Adds nutritious greens; fresh is best for flavor.
    • Heavy Cream – Provides a rich creaminess in the filling; opt for a lighter alternative if preferred.
    • Parmesan Cheese (grated) – Adds a sharp flavor and creamy texture; can swap for other hard cheeses.
    • Mozzarella Cheese (grated) – Gives a melty richness; try Cheddar for a different twist.
    • Butter – For greasing the pan and enhancing flavor.
    • Garlic Powder – A sprinkle boosts the dish's overall flavor; substitute fresh garlic if desired.
    • Salt & Black Pepper – Essential seasonings to taste, balancing the dish perfectly.

Get ready to enjoy these Chicken Florentine Crepes, packed with flavor and perfect for a low-carb lifestyle!

Step‑by‑Step Instructions for Chicken Florentine Crepes

Step 1: Preheat the Oven
Begin by preheating your oven to 180°C (350°F). This ensures that your Chicken Florentine Crepes will bake to golden perfection. While the oven heats up, gather all your ingredients and equipment, including a frying pan, a potato masher, and a buttered baking dish to make the process smoother.

Step 2: Sauté the Chicken
Melt 2 tablespoons of butter in your frying pan over medium heat. Once the butter is bubbling, add in your diced boneless, skinless chicken breast. Sauté the chicken for about 7 minutes, turning occasionally until it’s fully cooked and no longer pink in the center. This step builds a delicious base flavor for your crepes.

Step 3: Add the Spinach
After the chicken is thoroughly cooked, stir in your cooked spinach and sauté for an additional 2 minutes. The spinach should be wilted and warm, which enhances the flavor of the filling. Make sure to combine everything well, allowing the flavors to meld beautifully in your Chicken Florentine Crepes.

Step 4: Create the Creamy Filling
Reduce the heat to low and pour in the heavy cream, followed by the grated Parmesan cheese. Stir until the cheese melts and the mixture is creamy and smooth, about 2 minutes. This luxurious filling will bring richness to your Chicken Florentine Crepes, making them absolutely delectable.

Step 5: Assemble the Crepes
Lay your coconut flour crepes on a flat surface. Spoon an ample amount of the chicken and spinach mixture along the center of each crepe. Roll them up tightly like a cannoli, ensuring that none of the filling escapes. This step is essential for a satisfying bite of Chicken Florentine Crepes.

Step 6: Place in Baking Dish
Carefully transfer your rolled crepes into the buttered baking dish, seam side down. If you’d like, you can arrange them close together for an appealing presentation. This will keep them warm and help them meld together while they bake—enhancing the flavors of your Chicken Florentine Crepes.

Step 7: Top with Cheese
Sprinkle the remaining mozzarella cheese generously over the rolled crepes. This final layer will melt beautifully, creating a comforting, cheesy crust as it bakes. Don’t be shy with the cheese—it’s one of the highlights of these Chicken Florentine Crepes.

Step 8: Bake to Perfection
Place the baking dish in the preheated oven and bake for about 15 minutes. Keep an eye on your Chicken Florentine Crepes as they cook; they’re ready when the cheese is melted and bubbly, forming a golden crust on top. This is when your kitchen will start to smell divine!

Expert Tips for Chicken Florentine Crepes

  • Properly Cooked Chicken: Ensure your chicken is fully cooked and no longer pink before filling the crepes. Undercooked chicken can ruin the dish.
  • Use Rotisserie Chicken: For quicker preparation, shredded rotisserie chicken can save time without sacrificing flavor in your Chicken Florentine Crepes.
  • Avoid Soggy Crepes: Don't overload crepes with filling; a generous spoonful is enough to create a delicious balance without making them soggy.
  • Grease the Dish Well: Coating the baking dish with butter prevents sticking and makes serving your Chicken Florentine Crepes a breeze.
  • Experiment with Flavors: Don't hesitate to swap cheeses or add ingredients like mushrooms for a unique twist on the classic filling.

Chicken Florentine Crepes Variations

Feel free to explore these delightful twists and substitutions to make your Chicken Florentine Crepes truly your own!

  • Cheese Swap: Experiment with different cheese blends, like Gouda or Cheddar, for unique flavor profiles.

  • Veggie Boost: Incorporate sautéed mushrooms or sun-dried tomatoes for a burst of earthy goodness—perfect for elevating your filling.

  • Poultry Alternative: Swap out chicken for cooked ground turkey or sautéed vegetables for a lighter, vegetarian version that retains its comfort.

  • Dairy-Free Option: Replace heavy cream with coconut milk for a richer filling that aligns with a dairy-free lifestyle while keeping it creamy and delicious.

  • Extra Crunch: Add toasted pine nuts or crushed walnuts into the filling for a delightful crunch that elevates the texture.

  • Zesty Kick: Stir in a pinch of red pepper flakes or fresh herbs like basil to ignite flavor and give your crepes a little heat.

  • Herb-Infused Crepes: Mix fresh herbs such as chives or parsley into the crepe batter for an aromatic touch that complements the filling beautifully.

  • Nutty Flavor: For a wholesome twist, substitute half of the coconut flour with almond flour, bringing in a deliciously nutty essence to the crepes.

Enhance your culinary adventure by pairing these with a side salad or a light soup. You might also enjoy serving alongside Honey Garlic Chicken or Honey BBQ Chicken for an extra flavor boost. The possibilities are endless!

How to Store and Freeze Chicken Florentine Crepes

Fridge: Store any leftover Chicken Florentine Crepes in an airtight container for up to 2 days to maintain freshness. Reheat gently in the microwave or oven before serving.

Freezer: For long-term storage, freeze unbaked filled crepes in an airtight container for up to 2 months. When ready to enjoy, thaw in the refrigerator overnight before baking.

Reheating: If reheating from the fridge, place the crepes in a baking dish, cover with foil, and warm in a 180°C (350°F) oven for about 10-15 minutes until heated through.

Preparation Tips: Make the crepes ahead of time and store them separately in the fridge or freezer. This way, you can assemble and bake whenever you're craving a comforting meal!

What to Serve with Chicken Florentine Crepes

Imagine savoring your Chicken Florentine Crepes surrounded by delightful sides that enhance every aspect of your meal experience.

  • Mixed Green Salad: Bright greens tossed with a tangy vinaigrette cleanse the palate and add freshness. The acidity balances the creaminess of the crepes beautifully.

  • Roasted Asparagus: Tender, nutty asparagus spears add a delightful crunch; their earthy flavor complements the richness of the dish, creating an elegant harmony.

  • Garlic Bread: Golden, crispy garlic bread serves as a savory companion, perfect for wiping up any delicious filling that might escape from your crepes.

  • Creamy Tomato Soup: This smooth, warm soup offers a delightful contrast to the crepes. The tomato's acidity pairs wonderfully with the richness of chicken and cheese.

  • Steamed Broccoli: Lightly steamed broccoli adds a pop of color and a healthy crunch, providing a fresh bite to offset the creamy filling.

  • Chardonnay or Sauvignon Blanc: A glass of crisp white wine harmonizes perfectly with your dish. The bright citrus notes and refreshing acidity will elevate your dining experience.

  • Dark Chocolate Mousse: For dessert, a luscious dark chocolate mousse delivers a rich, decadent end to the meal, delightfully contrasting the savory flavors of the crepes.

Make Ahead Options

These Chicken Florentine Crepes are an excellent choice for meal prep enthusiasts! You can prepare the filling—made with chicken, spinach, cream, and cheeses—up to 3 days in advance. Simply sauté the chicken and spinach as directed, then mix in the cream and cheeses. Allow the mixture to cool, and store it in an airtight container in the refrigerator. You can also make the crepes ahead of time and refrigerate them for up to 24 hours; just ensure they are stacked with parchment paper in between to prevent sticking. When you’re ready to serve, reassemble the crepes and bake as directed, achieving a hot and bubbly dish that tastes just as fresh as if made that day!

Chicken Florentine Crepes Recipe FAQs

What type of coconut flour should I use for the crepes?
Absolutely! It's important to use a finely ground coconut flour for the best texture. Look for brands that specifically indicate they are for baking, as they yield the lightest crepes. Avoid using coarse varieties, as they can lead to a grainy texture in your Chicken Florentine Crepes.

How do I store leftover Chicken Florentine Crepes?
Store any leftovers in an airtight container in the refrigerator for up to 2 days. This keeps the crepes fresh and ensures the flavors maintain their integrity. To reheat, place the crepes in an oven-safe dish, cover with foil, and warm them in a preheated oven at 180°C (350°F) for about 10-15 minutes until heated through.

Can I freeze Chicken Florentine Crepes?
Definitely! For longer storage, freeze the unbaked filled crepes in an airtight container for up to 2 months. To do this, lay them in a single layer and separate layers with parchment paper to prevent sticking. When you’re ready to enjoy them, simply thaw in the refrigerator overnight, then bake as directed.

What should I do if my crepes are too thick or too thin?
If your crepes are too thick, it may be a sign that your batter is too heavy on the coconut flour or not enough liquid was added. To fix this, add a teaspoon of milk or water at a time until you reach a smooth, pourable consistency. Conversely, if they’re too thin and fall apart, simply let the batter rest for a few minutes before cooking, as this can help thicken.

Are Chicken Florentine Crepes suitable for a gluten-free diet?
Absolutely! The use of coconut flour makes these crepes gluten-free, fitting perfectly into a low-carb lifestyle while still giving you that comforting feel of your favorite pasta dish. Just make sure to check all other ingredients (like cheese and cream) to ensure they are gluten-free if you’re stockpiling for a dietary restriction!

Chicken Florentine Crepes

Delicious Chicken Florentine Crepes: A Low-Carb Delight

A delightful Chicken Florentine Crepes recipe combining tender chicken, creamy filling, and a low-carb, gluten-free base.
Print Recipe Pin Recipe
Prep Time 15 minutes mins
Cook Time 30 minutes mins
Total Time 45 minutes mins
Servings: 4 crepes
Course: Dinner
Cuisine: European
Calories: 250
Ingredients Equipment Method Nutrition Notes

Ingredients
  

For the Crepes
  • 1/2 cup Coconut Flour This gluten-free base gives structure while keeping it light.
  • 3 large Eggs Essential for binding; they create a soft texture.
  • 1 cup Milk Use dairy or a non-dairy substitute for the crepe batter.
  • 1 teaspoon Salt Just a pinch enhances overall flavor.
For the Filling
  • 2 cups Chicken Breast (boneless/skinless) The main protein source; shredded rotisserie chicken can save time.
  • 2 cups Spinach (cooked fresh/frozen) Adds nutritious greens; fresh is best for flavor.
  • 1/2 cup Heavy Cream Provides a rich creaminess in the filling; opt for a lighter alternative if preferred.
  • 1/4 cup Parmesan Cheese (grated) Adds a sharp flavor and creamy texture; can swap for other hard cheeses.
  • 1/2 cup Mozzarella Cheese (grated) Gives a melty richness; try Cheddar for a different twist.
  • 2 tablespoons Butter For greasing the pan and enhancing flavor.
  • 1 teaspoon Garlic Powder A sprinkle boosts the dish's overall flavor; substitute fresh garlic if desired.
  • To taste Salt & Black Pepper Essential seasonings to taste, balancing the dish perfectly.

Equipment

  • frying pan
  • potato masher
  • Baking Dish

Method
 

Cooking Instructions
  1. Preheat your oven to 180°C (350°F).
  2. Melt 2 tablespoons of butter in your frying pan over medium heat. Add in the diced boneless, skinless chicken breast and sauté for about 7 minutes, turning occasionally until fully cooked.
  3. Stir in your cooked spinach and sauté for an additional 2 minutes.
  4. Reduce the heat to low and pour in the heavy cream, followed by the grated Parmesan cheese. Stir until the cheese melts.
  5. Lay your coconut flour crepes on a flat surface and spoon an ample amount of the chicken and spinach mixture along the center of each crepe. Roll them up tightly.
  6. Carefully transfer your rolled crepes into the buttered baking dish, seam side down.
  7. Sprinkle the remaining mozzarella cheese generously over the rolled crepes.
  8. Place the baking dish in the preheated oven and bake for about 15 minutes until the cheese is melted and bubbly.

Nutrition

Serving: 1crepeCalories: 250kcalCarbohydrates: 10gProtein: 20gFat: 15gSaturated Fat: 8gPolyunsaturated Fat: 1gMonounsaturated Fat: 6gCholesterol: 120mgSodium: 400mgPotassium: 300mgFiber: 2gSugar: 2gVitamin A: 500IUVitamin C: 5mgCalcium: 200mgIron: 2mg

Notes

Enjoy these Chicken Florentine Crepes for a low-carb and gluten-free meal option. Customize with different cheeses or additional fillings if desired.

Tried this recipe?

Let us know how it was!

Delicious Fish Puttanesca: A Quick Mediterranean Marvel

February 23, 2026 by Grace Snow Leave a Comment

Traveling through the sun-soaked coasts of the Mediterranean, I stumbled upon a delightful dish that has quickly become a favorite in my kitchen: Fish Puttanesca. This easy recipe combines flaky white fish with a robust puttanesca sauce, bursting with anchovies, olives, and capers. What's not to love about a dish that can be whipped up in under 35 minutes while still impressing dinner guests? Not only does it make weeknight dinners feel special, but it also offers a healthy twist that takes your taste buds on a flavorful journey. So, whether you're in need of a quick meal or a comforting escape, this Fish Puttanesca is sure to become your next go-to delight. Are you ready to dive into this Mediterranean wonder?

Why make Fish Puttanesca tonight?

Bold flavors: The rich combination of anchovies, olives, and capers creates an irresistible, savory sauce that elevates any meal.
Quick and easy: This dish can be ready in under 35 minutes, making it the perfect option for busy weeknights.
Versatile: Enjoy it over crispy garlic bread or pair with pasta for a delightful twist.
Healthy choice: Packed with protein and omega-3s from the fish, it’s a nutritious alternative to typical fast food.
Crowd-pleaser: Impress friends and family with this vibrant Mediterranean dish, suitable for all occasions! If you're looking for more quick seafood ideas, check out our delicious Air Fryer Fish or try some Fish Taco Bowls for a flavorful twist!

Fish Puttanesca Ingredients

For the Sauce
• Unsalted butter – Adds moisture and richness; replace with olive oil for a lighter taste.
• Garlic – Essential for an aromatic base; fresh garlic yields the best flavor.
• Anchovy fillets – Provide deep umami flavor; you can use 1.5 teaspoons of anchovy paste instead.
• Dry white wine (Sauvignon Blanc or Pinot Grigio) – Introduces acidity and depth; chicken broth works as a substitute if needed.
• Canned whole tomatoes (preferably San Marzano) – This is the base of the sauce; crushed tomatoes can be used as well.
• Dried oregano and thyme – Infuse herbaceous notes; fresh herbs can be substituted in double the amount.
• Black or Castelvetrano olives – Bring savory, salty notes; any pitted olives can be used as an alternative.
• Capers – Add tangy bites that enhance flavor; you can skip them if they're not your favorite.

For the Fish
• White fish (cod, halibut, tilapia) – The main protein; any fresh white fish available will work well.
• Sea salt – Enhances all flavors; adjust the amount to your personal taste.

For Garnishing
• Fresh basil or flat-leaf parsley (optional) – Adds a touch of freshness; feel free to use any fresh herbs you have on hand.
• Red pepper flakes (optional) – For that extra kick of heat; omit if you prefer a milder flavor.

Step‑by‑Step Instructions for Fish Puttanesca

Step 1: Preheat the Oven
Start by preheating your oven to 400°F (200°C). This prepares the cooking environment for your Fish Puttanesca, ensuring everything cooks evenly. Position the oven rack in the center so that your dish cooks perfectly without burning. While the oven heats, gather your ingredients and equipment to streamline your cooking process.

Step 2: Sauté Aromatics
In a large ovenproof skillet, melt 2 tablespoons of unsalted butter over medium heat. Add 3 minced garlic cloves and 2 anchovy fillets, sautéing for 1-2 minutes until fragrant. Watch for the garlic to turn golden and the anchovies to dissolve, creating a flavorful base for your puttanesca sauce. This delightful aroma sets the stage for the deliciousness to come!

Step 3: Deglaze with Wine
Pour in a generous 1/2 cup of dry white wine, like Sauvignon Blanc, and stir to combine. Allow the wine to simmer for about 4 minutes, reducing slightly. This step enhances the sauce's depth, enriching the flavors of the Fish Puttanesca. You’ll know it’s ready when the alcohol scent dissipates, leaving a fragrant, tangy aroma behind.

Step 4: Create the Sauce
Add a 28-ounce can of whole tomatoes (preferably San Marzano), along with 1 teaspoon of dried oregano and 1 teaspoon of dried thyme. Bring the mixture to a gentle simmer, cooking for approximately 10 minutes until the sauce thickens. Stir occasionally, watching for the tomatoes to break down and meld with the herbs, creating a luscious, savory sauce.

Step 5: Incorporate Olives and Capers
Stir in 1/2 cup of pitted olives and 2 tablespoons of capers into your simmering sauce. This adds briny, savory notes that complement the Fish Puttanesca beautifully. Let the sauce simmer for another 3-5 minutes, giving the flavors time to meld together while keeping an eye on the consistency—it should be thick and aromatic.

Step 6: Season the Fish
While the sauce is bubbling, season 4 pieces of fresh white fish (like cod or tilapia) with sea salt. Gently place the seasoned fish fillets directly into the simmering sauce, ensuring they're nestled into the flavorful mix. This allows the fish to absorb those delicious Mediterranean flavors while it cooks.

Step 7: Bake the Fish
Carefully transfer the skillet to your preheated oven. Bake the Fish Puttanesca for 8-10 minutes, or until the fish is opaque and flakes easily with a fork. Keep an eye on it to avoid overcooking—golden edges and a slightly firm surface indicate it's ready to indulge!

Step 8: Serve and Garnish
Once cooked, remove the skillet from the oven and plate the fish alongside a generous spoonful of sauce. Optionally, garnish with fresh basil or flat-leaf parsley and a sprinkle of red pepper flakes for an extra kick. This final touch elevates your Fish Puttanesca, making it both vibrant and inviting—perfect for sharing with loved ones!

Fish Puttanesca Variations & Substitutions

Customize your Fish Puttanesca to reflect your personal taste! Enjoy a culinary adventure by experimenting with unique ingredients.

  • Seafood Swap: Replace white fish with shrimp or scallops for a delightful seafood twist. The sweet ocean flavors will create an unforgettable dish.
  • Gluten-Free Option: Serve over rice or gluten-free pasta instead of traditional noodles, making it accessible for gluten-sensitive diners.
  • Herb Variations: Choose fresh herbs like cilantro or dill instead of oregano and thyme for a refreshing spin. These will enhance the dish with their unique flavors.
  • Pasta Style: Instead of placing fish in the sauce, toss the puttanesca sauce with al dente spaghetti for a traditional pasta dish. A hearty choice that’ll satisfy any pasta lover!
  • Flavor Boost: Add 1 tablespoon of caper brine to the sauce for an extra layer of tangy goodness. This small adjustment can make a big difference!
  • Heat Levels: For more spice, increase red pepper flakes or add a dash of cayenne pepper. Adjust to fit your preference for a more fiery bite.
  • Vegan Twist: Use tofu or tempeh for a vegetarian version while crafting a similar rich tomato sauce for those looking for a plant-based option.
  • SAVORY FINAL TOUCH: Complete the dish with a sprinkle of nutritional yeast or vegan parmesan for a cheesy flavor without dairy. It’ll add depth and richness!

Explore these variations, and don't forget to pair your delicious Puttanesca with some crusty garlic bread or consider trying out our mouthwatering Fish Taco Bowls for a casual feast, or toss with our flavorful Air Fryer Fish for crispy perfection!

How to Store and Freeze Fish Puttanesca

Fridge: Store leftover Fish Puttanesca in an airtight container for up to 2 days. Make sure it’s completely cooled before refrigerating to maintain freshness.

Freezer: For long-term storage, freeze the sauce without the fish for up to 3 months. Portion it in airtight containers, and thaw in the refrigerator before reheating.

Reheating: Gently reheat on the stovetop or in the oven to preserve the texture and flavors. Add a splash of water or broth if the sauce thickens too much during thawing.

Enjoying Leftovers: Transform your leftovers by tossing the puttanesca sauce with pasta for a quick meal, keeping the delightful flavors of this Fish Puttanesca alive!

Expert Tips for Fish Puttanesca

• Skillet Size Matters: Use a skillet large enough to hold both the sauce and fish. This ensures even cooking and prevents overcrowding.

• Watch for Flakiness: Keep a close eye on the fish; it’s done when it’s opaque and flakes easily with a fork. Avoid overcooking for a tender bite!

• Cooking Time Adjustments: If your fish pieces are thick, increase the cooking time slightly to ensure they’re cooked through without drying out.

• Stovetop Alternative: For a stovetop method, cover the pan with a lid instead of transferring to the oven. Cook until the fish is cooked through, checking for doneness.

• Amp Up the Flavor: Don’t hesitate to adjust the amount of capers and olives based on your preference. These elements truly enhance the savory taste of your Fish Puttanesca!

• Serving Variations: Serve the puttanesca sauce over pasta or rice for a hearty meal, or enjoy it with crusty garlic bread for a delightful dipping experience.

Make Ahead Options

Prepare your Fish Puttanesca in advance for a stress-free dinner experience! You can easily make the puttanesca sauce up to 3 days ahead, keeping it in the refrigerator in an airtight container. Simply simmer everything minus the fish, allowing the flavors to meld beautifully, and cool before storing. When you're ready to enjoy your meal, just reheat the sauce in a skillet and add the seasoned fish, then bake until fully cooked (about 8-10 minutes). To preserve the quality, avoid pre-cooking the fish, as it’s best cooked fresh to maintain its flaky texture. This approach not only saves time but ensures your Fish Puttanesca remains just as delicious!

What to Serve with Easy Fish Puttanesca

A delightful dinner deserves equally delightful accompaniments to create a well-rounded meal experience.

  • Crusty Garlic Bread: Perfect for sopping up the rich puttanesca sauce, this warm, buttery bread adds comforting crunch to every bite.
    With its crispy exterior and soft, pillowy inside, garlic bread is a wonderful way to complement the savory flavors of the fish.

  • Mediterranean Quinoa Salad: Light and fresh, this salad combines quinoa, cucumbers, feta, and olives, brightening the meal while adding a delightful crunch.
    The tanginess of the feta pairs beautifully with the bold flavors of the Fish Puttanesca, offering a vibrant counterpoint to the dish.

  • Simple Green Salad: A refreshing mix of greens with a lemon vinaigrette provides a light, crisp contrast to the rich sauce and fish.
    This salad not only adds freshness but also balances the hearty flavors, making each forkful feel rejuvenating.

  • Steamed Asparagus: Tender asparagus lightly seasoned with sea salt and lemon enhances the dish's vibrant Mediterranean flair while adding a pop of color.
    The crisp texture and bright flavor of asparagus elevate the overall experience, inviting a new taste sensation with each bite of fish.

  • Sauvignon Blanc: This crisp, acidic wine complements the Mediterranean flavors, enhancing the savory notes of the puttanesca sauce beautifully.
    Sip on a glass as you savor your meal, creating a delightful symphony of flavors that transports you to sun-soaked coastal shores.

  • Lemon Sorbet: A light, refreshing dessert completes the meal, cleansing the palate with its zesty, bright flavor.
    This sweet, icy treat offers a satisfying end, making it a perfect finale to your delicious Fish Puttanesca experience.

Fish Puttanesca Recipe FAQs

How do I select the best fish for my Puttanesca?
When choosing white fish for your Fish Puttanesca, look for fresh fillets with a clean smell and a fleshy, moist appearance. I often recommend cod, halibut, or tilapia, as they hold up well in cooking and absorb the sauce beautifully. Avoid fish with dark spots or an overly fishy odor, as this indicates it may not be fresh.

How should I store leftover Fish Puttanesca?
Absolutely! Store any leftover Fish Puttanesca in an airtight container and refrigerate for up to 2 days. It's essential to let it cool completely before sealing to maintain optimum flavor and freshness. To reheat, gently warm it on the stovetop or in the oven, ensuring the fish stays moist.

Can I freeze Fish Puttanesca?
Yes, you can! I often freeze the puttanesca sauce without the fish for up to 3 months. To do this, let the sauce cool completely, then pour it into airtight containers, leaving a little space for expansion. When you're ready to use it, thaw in the refrigerator overnight and gently reheat, adding fresh fish before serving.

What if my Fish Puttanesca sauce turns out too salty?
If you find your sauce too salty, the key is to balance it out. You can add more canned tomatoes to dilute the saltiness, cooking the mixture a bit longer to blend the flavors. Additionally, adding a pinch of sugar can help counteract the saltiness. Taste as you go, ensuring a harmonious blend of flavors!

Are there any dietary considerations for this recipe?
Very! This Fish Puttanesca can be modified to accommodate various dietary needs. For gluten-free options, serve over rice or gluten-free noodles instead of regular pasta. Always check for any allergies related to the ingredients, particularly anchovies and capers, which can be common allergens for some individuals.

Can I use this recipe for feeding my pets?
It's best to avoid sharing Fish Puttanesca with your pets. The sauce contains ingredients like garlic and onions, which can be harmful to dogs and cats. Stick to plain, cooked white fish without seasoning as a treat for your furry friends!

Fish Puttanesca

Delicious Fish Puttanesca: A Quick Mediterranean Marvel

Quick and delicious Fish Puttanesca combines flaky white fish with savory sauce featuring anchovies, olives, and capers.
Print Recipe Pin Recipe
Prep Time 10 minutes mins
Cook Time 25 minutes mins
Total Time 35 minutes mins
Servings: 4 servings
Course: Dinner
Cuisine: Mediterranean
Calories: 350
Ingredients Equipment Method Nutrition Notes

Ingredients
  

For the Sauce
  • 2 tablespoons unsalted butter Replace with olive oil for a lighter taste.
  • 3 cloves garlic Minced.
  • 2 fillets anchovy Can use 1.5 teaspoons anchovy paste instead.
  • 1/2 cup dry white wine Sauvignon Blanc or Pinot Grigio.
  • 28 ounces canned whole tomatoes Preferably San Marzano.
  • 1 teaspoon dried oregano
  • 1 teaspoon dried thyme
  • 1/2 cup black or Castelvetrano olives Pitted.
  • 2 tablespoons capers Omit if preferred.
For the Fish
  • 4 pieces white fish like cod or tilapia.
  • to taste sea salt
For Garnishing
  • to taste fresh basil or flat-leaf parsley Optional.
  • to taste red pepper flakes Optional.

Equipment

  • Ovenproof skillet

Method
 

Step‑by‑Step Instructions
  1. Preheat your oven to 400°F (200°C), positioning the oven rack in the center.
  2. Melt 2 tablespoons of unsalted butter over medium heat in a large ovenproof skillet. Add 3 minced garlic cloves and 2 anchovy fillets, sautéing for 1-2 minutes until fragrant.
  3. Pour in 1/2 cup of dry white wine and stir. Simmer for about 4 minutes, allowing the alcohol scent to dissipate.
  4. Add a 28-ounce can of whole tomatoes, 1 teaspoon of dried oregano, and 1 teaspoon of dried thyme. Simmer for about 10 minutes until sauce thickens.
  5. Stir in 1/2 cup of olives and 2 tablespoons of capers into the sauce and simmer for another 3-5 minutes.
  6. Season 4 pieces of fresh white fish with sea salt and gently place them into the simmering sauce.
  7. Transfer the skillet to the oven and bake for 8-10 minutes until the fish is opaque and flakes easily.
  8. Remove from oven, plate the fish alongside the sauce, and garnish optionally with fresh herbs and red pepper flakes.

Nutrition

Serving: 1servingCalories: 350kcalCarbohydrates: 12gProtein: 30gFat: 20gSaturated Fat: 7gPolyunsaturated Fat: 2gMonounsaturated Fat: 10gCholesterol: 70mgSodium: 800mgPotassium: 500mgFiber: 2gSugar: 6gVitamin A: 800IUVitamin C: 10mgCalcium: 50mgIron: 2mg

Notes

Use a skillet large enough to hold both sauce and fish for even cooking. Adjust caper and olive amounts to taste.

Tried this recipe?

Let us know how it was!

Cheesy Mediterranean Quesadilla: Quick, Flavor-Packed Comfort

February 20, 2026 by Grace Snow Leave a Comment

As I flipped the golden-brown quesadilla, the comforting aroma of melting cheese and earthy spinach wafted through my kitchen, instantly transporting me to a bustling Mediterranean market. Today, I’m excited to share my Cheesy Mediterranean Quesadilla with Spinach & Feta—a dish that effortlessly blends vibrant flavors for a quick dinner that even the kids will adore. Not only is this recipe vegetarian-friendly, but it also packs a nutritious punch with fresh tomatoes and greens, ensuring you can savor a wholesome meal without sacrificing taste. Each bite is a delightful experience, combining crispy tortillas and gooey cheese that feels like a warm hug. Are you ready to toss aside the fast food and whip up something spectacular tonight? Let's dive into this delicious culinary adventure!

Why is this quesadilla a must-try?

Quick and Easy: This Cheesy Mediterranean Quesadilla comes together in just 20 minutes, making it perfect for busy weeknights.

Flavor Explosion: Fresh ingredients like tomatoes, spinach, and zesty feta cheese meld into a mouthwatering filling that’s hard to resist.

Vegetarian Delight: Packed with nutritious veggies, this recipe is not just a meal; it’s a healthy choice that doesn’t skimp on flavor.

Family-Friendly: The melty cheese makes this a favorite among kids, ensuring even the pickiest eaters will be asking for seconds!

Endless Variations: Feel free to customize with your favorite Mediterranean ingredients, such as olives or artichokes, just like in my Cheesy Corn Fritters for even more inspiration.

Crispy and Cheesy: Experience the delightful contrast of crunchy tortillas enveloping gooey cheese—every bite is a satisfying treat!

Cheesy Mediterranean Quesadilla Ingredients

For the Filling
• 1 large tomato – adds freshness and sweetness; use campari or vine-ripened for the best flavor.
• 1/4 cup red onion – provides sharpness and crunch; substitute with green onions for a milder flavor.
• 2 cups spinach – contributes nutrients and color; pat dry or sauté briefly before use to prevent excess moisture.
• 3/4 cup crumbled feta cheese – adds creaminess and tangy flavor; can substitute with goat cheese if preferred.
• 1 cup shredded mozzarella cheese – provides melty texture; blend with other cheeses for a different flavor profile.
• 3 flour tortillas (8-inch) – the base of the quesadilla; whole wheat or burrito-sized tortillas can be used for added fiber.
• 1/2 teaspoon dried oregano – enhances the Mediterranean flavor; fresh oregano can be used but adjust the amount to taste.

Step‑by‑Step Instructions for Cheesy Mediterranean Quesadilla

Step 1: Prep Filling
In a medium bowl, combine the diced tomato, finely chopped red onion, and spinach. Add the crumbled feta and shredded mozzarella cheese along with the dried oregano. Mix gently until everything is well distributed, ensuring to squeeze the spinach gently to remove any excess moisture. The filling should be vibrant and fragrant, ready to pack in those delicious quesadillas.

Step 2: Assemble Quesadillas
On a clean surface, lay out the three flour tortillas. Take about one-third of the prepared filling and place it on one half of each tortilla. Gently fold the other half over to enclose the filling, pressing down lightly to secure it. This step is crucial for keeping the cheesy Mediterranean quesadilla intact when cooking and flipping.

Step 3: Cook
Heat a skillet over medium heat and add just a splash of oil to prevent sticking. Carefully place each folded quesadilla in the skillet, cooking for 3–4 minutes or until golden brown on the bottom. Keep an eye on them for crispness, then flip and cook the other side for another 3–4 minutes, until the cheese is melted and the tortillas are crispy and golden.

Step 4: Rest and Serve
Once cooked, remove the quesadillas from the skillet and allow them to rest on a cutting board for about one minute. This resting period helps the cheese set slightly, making them easier to cut. Slice the cheesy Mediterranean quesadilla into wedges and serve warm, perhaps with a fresh salad or a drizzle of tzatziki for an added burst of flavor.

How to Store and Freeze Cheesy Mediterranean Quesadilla

• Room Temperature: It's best to enjoy your quesadilla fresh. If left out, consume within 2 hours to maintain quality.

• Fridge: Store leftover Cheesy Mediterranean Quesadilla in an airtight container for up to 3 days. Reheat in a skillet for that crispy texture.

• Freezer: To freeze, place cooled quesadillas in a single layer on a baking sheet, then wrap in plastic wrap and store in an airtight bag for up to 2 months.

• Reheating: When ready to enjoy, reheat directly from frozen in a skillet over medium heat for about 5-7 minutes, flipping halfway, until heated through and crispy.

Make Ahead Options

These Cheesy Mediterranean Quesadillas are perfect for meal prep enthusiasts! You can prepare the filling (diced tomatoes, red onion, spinach, feta, mozzarella, and oregano) up to 24 hours in advance. Simply mix all ingredients in a bowl, ensuring to squeeze the spinach dry to prevent excess moisture. Store the filling in an airtight container in the refrigerator. When you’re ready to enjoy your quesadillas, assemble and cook them according to the recipe instructions. This way, you can savor a warm, comforting meal with minimal effort on busy weeknights. Rest assured, the quesadillas will be just as delicious and satisfying, ready to delight your family!

What to Serve with Cheesy Mediterranean Quesadilla

Elevate your dining experience with delicious sides that enhance the vibrant flavors of this crispy delight.

  • Refreshing Cucumber Salad: This cool, crisp salad with a zesty lemon dressing contrasts beautifully with the warm quesadilla, adding a burst of freshness.
  • Creamy Tzatziki Sauce: A smooth, garlicky yogurt dip perfectly complements the Mediterranean spices in the quesadilla and adds a refreshing touch.
  • Roasted Chickpeas: These crunchy, seasoned legumes provide a nutty contrast that balances the melting cheese and soft spinach in each bite.
  • Herbed Quinoa: Fluffy, seasoned quinoa tossed with fresh herbs brings a nutritious and hearty aspect to your meal while being pleasantly filling.
  • Zesty Tomato Salsa: A vibrant, spicy salsa made from ripe tomatoes and cilantro can elevate each bite, offering a zesty kick alongside the quesadilla.
  • Grilled Vegetables: Smoky, charred veggies like zucchini and bell peppers add depth of flavor and a satisfying textural contrast to the cheesy quesadilla.
  • Light Red Wine: A glass of light-bodied red wine, such as Pinot Noir, enhances the flavors of the Mediterranean ingredients and complements the overall meal.
  • Minted Yogurt Dip: This lively yogurt dip infused with fresh mint gives a cooling contrast and pairs wonderfully with the quesadilla’s savory notes.

Expert Tips for Cheesy Mediterranean Quesadilla

• Portion Control: Stick to about 1/3 cup of filling per quesadilla to avoid spillage when flipping.

• Mind the Heat: Cook on medium heat to ensure the cheese melts thoroughly without burning the tortillas.

• Don’t Press Down: Avoid pressing down on the quesadilla while cooking; this helps retain that delicious gooey cheese inside.

• Customize Ingredients: Feel free to add your favorite Mediterranean flavors, like olives or artichokes, to enhance your cheesy Mediterranean quesadilla experience.

• Prevent Sogginess: Sauté spinach briefly or dry it before mixing to prevent excess moisture from making tortillas soggy.

Cheesy Mediterranean Quesadilla Variations

Ready to mix things up with your Cheesy Mediterranean Quesadilla? Here are some delightful twists to enhance your culinary adventure!

  • Spicy Kick: Add sliced jalapeños to the filling for a zesty surprise that’s sure to wake up your taste buds. Mix the heat with the coolness of feta for balance.

  • Extra Tang: Toss in Kalamata olives or marinated artichokes for a burst of Mediterranean flavor. These additions create an exciting flavor profile, transporting you straight to a sunny café by the sea.

  • Cheese Medley: Swap out mozzarella for a blend of provolone and cheddar for a unique taste that still delivers on that melty goodness. Experimenting with cheeses can elevate your quesadilla to gourmet levels!

  • Herb Infusion: Try fresh herbs like basil or dill in place of oregano for a refreshing twist. The fragrant herbs will remind you of warm Mediterranean gardens.

  • Veggie Delight: Load those quesadillas up with thinly sliced bell peppers or zucchini for added crunch and nutrients. The vibrant veggies add a splash of color and crunch to each bite.

  • Whole Grain Goodness: Use whole wheat or spinach tortillas instead of flour for a healthier twist. Not only will they add fiber, but they also boast a lovely earthy flavor that complements the Mediterranean ingredients beautifully.

  • Creamy Avocado: Layer in some mashed avocado or sliced avocado for that creamy richness that contrasts perfectly with the crispy tortillas. It's a fantastic way to make your quesadilla extra satisfying.

And if you're ever craving a more classic cheesy experience, why not try your hand at a delicious Cheesy Garlic Bread alongside your quesadilla? Each of these variations can make your meal feel like a new culinary journey!

Cheesy Mediterranean Quesadilla Recipe FAQs

What kind of tomatoes should I use for the quesadilla?
Absolutely use fresh, flavorful tomatoes like campari or vine-ripened for the best flavor! They add a delightful sweetness and freshness that truly enhances your Cheesy Mediterranean Quesadilla. If you have access to small heirloom varieties, those are also a fantastic option!

How can I store leftover quesadillas?
After you've enjoyed your delicious quesadillas, store any leftovers in an airtight container in the fridge for up to 3 days. To keep them from getting soggy, try to separate them with parchment paper. When you're ready to indulge again, pop them in a skillet over medium heat for a couple of minutes on each side until heated through and crispy!

Can I freeze my Cheesy Mediterranean Quesadilla?
Yes, you can absolutely freeze these quesadillas for later enjoyment! Once cooled, lay them flat on a baking sheet and freeze for about 1–2 hours. Then, wrap each quesadilla tightly in plastic wrap, place them in an airtight freezer bag, and they’ll keep well for up to 2 months. When you're ready to eat, just reheat them directly from frozen in a skillet for about 5-7 minutes, flipping halfway through for that crispy goodness!

What should I do if my tortillas are tearing while I assemble?
If your tortillas are tearing, they might be too cold. Try that classic trick: warm them up briefly in a microwave for about 10-15 seconds, or cover them with a damp paper towel. This makes them more pliable and less likely to tear when you fill and fold them.

Are there any dietary considerations I should be aware of?
Great question! The Cheesy Mediterranean Quesadilla is vegetarian-friendly, making it a great choice for those with meat-free diets. However, if you have dairy allergies or are lactose intolerant, you can substitute the cheeses with plant-based alternatives. Just ensure you check that the tortilla is also dairy-free!

How can I customize my quesadilla filling?
The more the merrier! You can make this dish your own by adding ingredients like sliced jalapeños for spice, sundried tomatoes for a richer flavor, or olives and artichokes for that true Mediterranean flair. Mix and match according to your taste preference!

Cheesy Mediterranean Quesadilla

Cheesy Mediterranean Quesadilla: Quick, Flavor-Packed Comfort

Enjoy a Cheesy Mediterranean Quesadilla packed with spinach and feta, perfect for quick dinners with vibrant flavors that the whole family will love.
Print Recipe Pin Recipe
Prep Time 10 minutes mins
Cook Time 10 minutes mins
Resting Time 1 minute min
Total Time 20 minutes mins
Servings: 3 quesadillas
Course: Dinner
Cuisine: Mediterranean
Calories: 350
Ingredients Equipment Method Nutrition Notes

Ingredients
  

For the Filling
  • 1 large tomato adds freshness and sweetness; use campari or vine-ripened for the best flavor
  • 1/4 cup red onion provides sharpness and crunch; substitute with green onions for a milder flavor
  • 2 cups spinach contributes nutrients and color; pat dry or sauté briefly before use to prevent excess moisture
  • 3/4 cup crumbled feta cheese adds creaminess and tangy flavor; can substitute with goat cheese if preferred
  • 1 cup shredded mozzarella cheese provides melty texture; blend with other cheeses for a different flavor profile
  • 1/2 teaspoon dried oregano enhances the Mediterranean flavor; fresh oregano can be used but adjust the amount to taste

Equipment

  • Skillet

Method
 

Step-by-Step Instructions for Cheesy Mediterranean Quesadilla
  1. In a medium bowl, combine the diced tomato, finely chopped red onion, and spinach. Add the crumbled feta and shredded mozzarella cheese along with the dried oregano. Mix gently until everything is well distributed, ensuring to squeeze the spinach gently to remove any excess moisture.
  2. On a clean surface, lay out the three flour tortillas. Take about one-third of the prepared filling and place it on one half of each tortilla. Gently fold the other half over to enclose the filling, pressing down lightly to secure it.
  3. Heat a skillet over medium heat and add just a splash of oil to prevent sticking. Carefully place each folded quesadilla in the skillet, cooking for 3–4 minutes or until golden brown on the bottom. Flip and cook the other side for another 3–4 minutes, until the cheese is melted and the tortillas are crispy.
  4. Once cooked, remove the quesadillas from the skillet and allow them to rest on a cutting board for about one minute. Slice the cheesy Mediterranean quesadilla into wedges and serve warm.

Nutrition

Serving: 1quesadillaCalories: 350kcalCarbohydrates: 32gProtein: 17gFat: 18gSaturated Fat: 9gPolyunsaturated Fat: 1gMonounsaturated Fat: 8gCholesterol: 45mgSodium: 680mgPotassium: 350mgFiber: 3gSugar: 2gVitamin A: 2050IUVitamin C: 15mgCalcium: 320mgIron: 2.5mg

Notes

Customize your quesadilla with olives or artichokes for additional Mediterranean flavor. Properly sauté spinach to prevent sogginess.

Tried this recipe?

Let us know how it was!

Savor the Flavor: Vegetarian Black Bean Enchiladas Delight

February 20, 2026 by Grace Snow Leave a Comment

As I slid the piping hot Vegetarian Black Bean Enchiladas out of the oven, the kitchen filled with an irresistible aroma that felt like a warm hug. This dish is more than just a meal—it’s a celebration of flavors wrapped in warm tortillas, bringing together spiced black beans, sweet corn, and gooey cheese in a delightful embrace. With the option for a vegan twist and the flexibility to toss in your favorite veggies, these enchiladas are not only quick to prepare but also a wholesome choice for busy weeknights. Best of all, they transform ordinary dinner time into a festive fiesta sure to impress family and friends alike. Are you ready to elevate your weeknight meals?

Why Choose Vegetarian Black Bean Enchiladas?

Versatile: These enchiladas can easily be customized with different veggies or a vegan option, making them a favorite for everyone at the table.

Quick to Prepare: With minimal prep time, you can whip up this delicious meal in no time, perfect for busy weekdays.

Flavor-Packed: The combination of spiced black beans, sweet corn, and zesty chili sauce creates a burst of flavor in every bite, which is sure to satisfy even the pickiest eaters.

Crowd-Pleaser: Whether you're serving a family dinner or hosting friends, these enchiladas are guaranteed to impress, transforming your gathering into a culinary celebration.

For a delightful side, consider pairing them with a fresh salad or a scoop of guacamole. And if you're interested in exploring more delightful vegetarian options, check out my recipes for Sweet Potatoes Black and Tuscan White Bean.

Vegetarian Black Bean Enchiladas Ingredients

For the Filling
• Cooked Black Beans – Your main protein source; use canned for convenience or cook from scratch for extra flavor.
• Corn Kernels – Adds a touch of sweetness and texture; feel free to use fresh, frozen, or canned corn.
• Bell Pepper – Brings crunch and color; any variety will do, so choose your favorite!
• Red Onion – Offers a savory base flavor that enhances the filling; yellow onions can be a great substitute.
• Garlic – Intensifies the flavor profile; fresh garlic is always preferable to powder.
• Ground Cumin – Provides warmth and depth; an essential spice for Mexican dishes.
• Chili Powder – Packs heat and flavor; adjust to your preferred spice level for the perfect kick.
• Rice – Adds bulk and texture; leftover rice works wonderfully in this recipe.

For the Enchiladas
• Corn/Flour Tortillas – The delicious wrap for your filling; opt for corn tortillas for a gluten-free option.
• Enchilada Sauce – Ensures moisture and zest, whether you choose store-bought or homemade.
• Shredded Cheese – Melts beautifully for a creamy topping; go for cheddar, Monterey Jack, or vegan cheese for a dairy-free option.

For Cooking
• Olive Oil – Used for sautéing your veggies; feel free to substitute with another cooking oil of your choice.

For Garnishing
• Fresh Cilantro (optional) – Adds a pop of freshness and color on top of your enchiladas.
• Lime Wedges (optional) – Squeeze over the dish to elevate the flavors even further; a zesty touch that complements the enchiladas beautifully.

These Vegetarian Black Bean Enchiladas are not only easy to make but also versatile enough to cater to your family’s varying tastes, making this dish a go-to in any kitchen!

Step‑by‑Step Instructions for Vegetarian Black Bean Enchiladas

Step 1: Preheat the Oven
Begin by preheating your oven to 375°F (190°C) to ensure it reaches the perfect temperature for baking. This step is crucial as it allows the enchiladas to cook evenly and thoroughly, giving them that comforting bubbly texture. Position the oven rack in the middle while it warms to prepare for your delicious Vegetarian Black Bean Enchiladas.

Step 2: Sauté the Vegetables
In a large skillet, heat a tablespoon of olive oil over medium heat. Add the diced red onion and bell pepper, sautéing for 5 to 7 minutes until softened and fragrant. Stir occasionally to prevent sticking, ensuring they caramelize beautifully, bringing a lovely sweetness to your enchiladas that complements the black beans and corn perfectly.

Step 3: Add Spices and Garlic
Once your vegetables are tender, incorporate minced garlic, ground cumin, and chili powder into the skillet. Cook for an additional minute, stirring continuously until the garlic becomes fragrant and begins to soften. This step infuses the filling for your Vegetarian Black Bean Enchiladas with a depth of flavor that enhances the overall taste.

Step 4: Mix the Filling
Next, add the cooked black beans, corn kernels, and cooked rice to the skillet, stirring well to combine. Heat this mixture through for 2 to 3 minutes, until everything is warmed and the flavors mingle. Remove the skillet from heat, allowing the filling to rest while you prepare the baking dish.

Step 5: Prepare the Baking Dish
Spread a thin layer of enchilada sauce at the bottom of a baking dish, creating a flavorful base for your enchiladas. This layer not only adds moisture but prevents the tortillas from sticking, ensuring that your Vegetarian Black Bean Enchiladas come out perfectly tender and ready to serve.

Step 6: Assemble the Enchiladas
Warm the corn or flour tortillas slightly to make them pliable. Fill each tortilla with a generous scoop of the black bean filling, rolling them tightly and placing them seam-side down in the prepared baking dish. Arrange the enchiladas closely together to maximize flavor and ensure they stay moist during baking.

Step 7: Add Sauce and Cheese
Pour the remaining enchilada sauce evenly over the assembled tortillas, coating them generously. Then sprinkle the shredded cheese of your choice on top, allowing it to melt beautifully during baking. This step is essential for achieving that gooey, cheesy layer that makes vegetarian black bean enchiladas so irresistible.

Step 8: Bake the Enchiladas
Cover the baking dish with foil and place it in the preheated oven. Bake for 20 minutes to allow the flavors to meld and the enchiladas to heat through. After that, remove the foil and continue baking for an additional 10 minutes until the cheese is bubbling and turns a delightful golden color.

Step 9: Cool and Garnish
Once baked to perfection, exit your Vegetarian Black Bean Enchiladas from the oven and allow them to cool for a few minutes. This step helps the filling set, making it easier to serve. Garnish with fresh cilantro for a touch of brightness and flavor, elevating the dish visually as well.

Step 10: Serve and Enjoy
Serve the enchiladas with lime wedges on the side, which add a zesty finish to each bite. Feel free to pair them with a fresh salad or a scoop of guacamole for a complete and satisfying meal. Enjoy the vibrant flavors of your wonderful Vegetarian Black Bean Enchiladas with family and friends!

What to Serve with Vegetarian Black Bean Enchiladas?

Elevate your meal with delightful pairings that balance flavors and textures, turning your veggie fiesta into a complete dining experience.

  • Fresh Garden Salad: A crisp salad adds a refreshing crunch, harmonizing beautifully with the warm, cheesy enchiladas.

  • Guacamole and Tortilla Chips: Creamy guacamole provides a luscious contrast and the crunch of chips adds excitement before the main meal.

  • Mexican Street Corn: This sweet and smoky side enhances the flavor profile, echoing the spices in the enchiladas.

  • Cilantro Lime Rice: Tangy and fragrant, this dish complements the enchiladas while providing a fluffy, filling base to your plate.

  • Pico de Gallo: Bright, fresh salsa brings a zesty kick and tons of color, brightening up every bite.

  • Spicy Black Bean Soup: A warm bowl of soup ties in the black bean theme, adding depth and warmth to the overall meal.

  • Margaritas: A classic pairing, these tangy drinks uplift the festive atmosphere, perfect for a delightful dinner.

  • Churros: Cap off the meal with sweet churros, their cinnamon-sugar dusting contrasting wonderfully with the savory enchiladas.

How to Store and Freeze Vegetarian Black Bean Enchiladas

Fridge: Store baked enchiladas in an airtight container for up to 2 days to maintain freshness and prevent them from drying out.

Refrigerate Before Baking: Assemble your enchiladas ahead of time and refrigerate them unbaked for up to 2 days. Just cover tightly with foil until ready to pop in the oven.

Freezer: To freeze, wrap unbaked enchiladas tightly in plastic wrap and then aluminum foil; they can last up to 1 month in the freezer. Thaw in the fridge overnight before baking.

Reheating: To reheat, place baked enchiladas in a preheated oven at 350°F (175°C) for about 15-20 minutes until heated through, ensuring the Vegetarian Black Bean Enchiladas remain warm and comforting.

Make Ahead Options

These Vegetarian Black Bean Enchiladas are perfect for busy weeknights or meal prep enthusiasts! You can assemble the enchiladas up to 24 hours in advance—just cover the baking dish tightly with foil and refrigerate. If you prefer, you can also prepare the filling and store it in an airtight container for up to 3 days; ensure it cools completely before refrigerating to prevent sogginess. When you’re ready to serve, simply pour the sauce over the tortillas, sprinkle with cheese, and bake right away. This way, you'll enjoy just as delicious enchiladas with minimal effort, making your cooking experience both enjoyable and efficient!

Vegetarian Black Bean Enchiladas Variations

Feel free to unleash your creativity with these delightful variations, adding your personal touch to the enchiladas.

  • Dairy-Free: Swap the cheese for vegan alternatives like cashew cheese or nutritional yeast for a dairy-free delight.
    This switch keeps the flavors vibrant while ensuring everyone at the table can enjoy them guilt-free.

  • Extra Veggies: Toss in diced zucchini, chopped spinach, or roasted sweet potatoes for a nutritional boost.
    These additions not only enhance the filling but also add wonderful textures that your family will love!

  • Spicy Kick: Spice things up with a sprinkle of smoked paprika or a dash of cayenne pepper to elevate the heat.
    Adjust the heat level to suit your taste buds, making the dish perfect for both spice enthusiasts and those who prefer milder flavors.

  • Gluten-Free: Use corn tortillas instead of flour to make the entire dish gluten-free and just as delicious.
    They offer a delightful crunch and are a wonderful option for anyone with gluten sensitivities.

  • Hearty Twist: Incorporate lentils or quinoa alongside the black beans for a heartier filling that packs an extra protein punch.
    This transformation is not only filling but offers an exciting twist on classic enchiladas.

  • Flavor Boosts: Elevate the flavor with fresh herbs like cilantro or a squeeze of lime juice right before serving for a zesty finish.
    These fresh touches can brighten the entire dish and invigorate your taste buds!

  • Sauteéd Veggies: Experiment with sautéing other vegetables, such as mushrooms or carrots, for added depth and variety.
    These ingredients bring earthiness and sweetness to the enchiladas, making each bite a delightful surprise.

Explore additional recipes that resonate with your culinary journey, including my delightful Blackberry Crisp Amp or a hearty Coconutty Beans Greens to round out your meal planning!

Expert Tips for Vegetarian Black Bean Enchiladas

Warm Tortillas: Always warm your tortillas before filling to prevent tearing. This small step ensures a smoother rolling process and keeps your enchiladas intact.

Use Fresh Ingredients: Fresh vegetables and herbs enhance flavor, so opt for fresh garlic and seasonal produce whenever possible. They'll take your Vegetarian Black Bean Enchiladas to the next level.

Layer Sauce Properly: Spread a thin layer of enchilada sauce at the bottom of the baking dish. This not only adds flavor but also prevents sticking, ensuring perfect enchiladas.

Don’t Overstuff: While it’s tempting to fill your tortillas to the brim, overstuffing can lead to messy enchiladas. Aim for a generous but manageable amount of filling for ease of rolling.

Bake with Care: Cover your dish with foil for the initial baking time to keep moisture in, then uncover to achieve that perfect golden, bubbly cheese on top.

Flavor Balance: Adjust the amount of chili powder according to your spice preference. Remember, adding too much can overwhelm the other flavors in your Vegetarian Black Bean Enchiladas.

Vegetarian Black Bean Enchiladas Recipe FAQs

What type of black beans should I use?
You can use either canned black beans for convenience or make your own from scratch. If using canned, rinse and drain them well to reduce sodium content. Freshly cooked beans offer a richer flavor, so go for it if you have the time!

How should I store leftover enchiladas?
Store any leftover baked Vegetarian Black Bean Enchiladas in an airtight container in the fridge for up to 2 days. To keep them fresh and prevent drying out, I recommend placing a layer of plastic wrap directly on top of the enchiladas before sealing the container.

Can I freeze unbaked enchiladas?
Absolutely! To freeze, wrap your unbaked Vegetarian Black Bean Enchiladas tightly in plastic wrap, then in aluminum foil to prevent freezer burn. They can be stored like this for up to 1 month. When you're ready to bake, simply thaw them in the fridge overnight before popping them into the oven.

What if my enchiladas are falling apart after baking?
If your enchiladas are falling apart, it usually happens due to overstuffing or if the tortillas were not warmed adequately. Be sure to warm them first to make them pliable, and don't overload the fillings. If they’re sticking to the dish, spreading some enchilada sauce at the bottom will help.

Are these enchiladas suitable for a gluten-free diet?
Yes! To make gluten-free Vegetarian Black Bean Enchiladas, simply use corn tortillas instead of flour ones. Always check the labels to ensure they are certified gluten-free, and you’re all set to enjoy this delicious dish without worry!

Can my pets eat these enchiladas?
While the vegetable filling may be safe for pets in small quantities, avoid giving them enchiladas with garlic, onion, or cheese, which can be harmful. Always consult with your vet before sharing food to ensure it’s safe for your furry friends.

Vegetarian Black Bean Enchiladas

Savor the Flavor: Vegetarian Black Bean Enchiladas Delight

Delight in the flavors of Vegetarian Black Bean Enchiladas, wrapped in tortillas and bursting with black beans, corn, and cheese.
Print Recipe Pin Recipe
Prep Time 15 minutes mins
Cook Time 30 minutes mins
Cooling Time 5 minutes mins
Total Time 50 minutes mins
Servings: 4 enchiladas
Course: Dinner
Cuisine: Mexican
Calories: 300
Ingredients Equipment Method Nutrition Notes

Ingredients
  

For the Filling
  • 2 cups cooked black beans canned or homemade
  • 1 cup corn kernels fresh, frozen, or canned
  • 1 medium bell pepper any variety
  • 1 medium red onion or yellow onion
  • 2 cloves garlic fresh minced
  • 1 teaspoon ground cumin
  • 1 teaspoon chili powder adjust for spice preference
  • 1 cup cooked rice leftover rice works
For the Enchiladas
  • 8 pieces corn/flour tortillas use corn for gluten-free
  • 2 cups enchilada sauce store-bought or homemade
  • 1 cup shredded cheese cheddar, Monterey Jack, or vegan
For Cooking
  • 1 tablespoon olive oil or another cooking oil
For Garnishing
  • 0.5 cups fresh cilantro optional
  • 2 pieces lime wedges optional for serving

Equipment

  • Skillet
  • Baking Dish
  • Oven

Method
 

Preparation Instructions
  1. Preheat your oven to 375°F (190°C).
  2. In a large skillet, heat olive oil over medium heat. Sauté diced red onion and bell pepper for 5 to 7 minutes until softened.
  3. Add minced garlic, ground cumin, and chili powder. Cook for an additional minute.
  4. Mix in cooked black beans, corn kernels, and cooked rice. Heat through for 2 to 3 minutes.
  5. Spread enchilada sauce at the bottom of a baking dish.
  6. Warm tortillas slightly. Fill each with black bean filling, rolling them seam-side down in the dish.
  7. Pour remaining enchilada sauce over the tortillas and sprinkle shredded cheese on top.
  8. Cover with foil and bake for 20 minutes. Remove foil and bake for an additional 10 minutes until cheese is golden.
  9. Allow to cool for a few minutes, garnish with cilantro, and serve with lime wedges.
  10. Enjoy your Vegetarian Black Bean Enchiladas!

Nutrition

Serving: 1enchiladaCalories: 300kcalCarbohydrates: 45gProtein: 10gFat: 12gSaturated Fat: 5gPolyunsaturated Fat: 2gMonounsaturated Fat: 4gCholesterol: 20mgSodium: 600mgPotassium: 400mgFiber: 7gSugar: 2gVitamin A: 500IUVitamin C: 15mgCalcium: 150mgIron: 3mg

Notes

These Vegetarian Black Bean Enchiladas are customizable to suit individual tastes and dietary preferences.

Tried this recipe?

Let us know how it was!

Creamy Garlic Parmesan Cabbage: A Comforting Low-Carb Delight

February 20, 2026 by Grace Snow Leave a Comment

As I ladled the creamy garlic Parmesan sauce over the seared cabbage, a wave of comfort washed over me, instantly reminding me of cozy family dinners. This Creamy Garlic Parmesan Cabbage dish transforms the humble vegetable into an irresistible low-carb skillet recipe that dazzles both the eyes and the taste buds. Not only is this side dish quick to prepare—taking just 30 minutes from pan to plate—but it's also a delightful way to indulge your cravings without the guilt. The blend of rich cream and savory Parmesan envelops perfectly tender cabbage, making every bite a satisfying experience. Whether served alongside grilled meats or as a standalone vegetarian option, this recipe is sure to bring a touch of elegance to your meals. Are you ready to elevate your cabbage game?

Why Is This Cabbage Recipe a Game-Changer?

Simplicity: With only 30 minutes from start to finish, this recipe makes it easy to whip up a gourmet dish any night of the week.
Rich, Velvety Sauce: The creamy garlic Parmesan sauce transforms cabbage into a side dish that's both comforting and indulgent.
Low-Carb Delight: Perfect for those following a keto diet, you can enjoy this dish without guilt while keeping your carb intake in check.
Versatile Pairing: This creamy dish pairs wonderfully with anything from grilled steak to crispy Fried Shrimp Cabbage.
Crowd-Pleaser: Both kids and adults will love this delicious twist on a humble vegetable, ensuring everyone at the table will come back for seconds!

Creamy Garlic Parmesan Cabbage Ingredients

• Discover the key elements for this delightful dish!

For the Cabbage

  • Green Cabbage – The star of the dish, providing a hearty texture; red cabbage can be a fun visual alternative.

For the Sauce

  • Unsalted Butter – Adds richness; feel free to swap for salted butter but adjust salt accordingly.
  • Olive Oil – Enhances flavor and assists in searing the cabbage; other neutral oils can be used in place.
  • Yellow Onion – Adds a sweet, aromatic depth to the sauce; white or sweet onions can also work well.
  • Garlic (minced) – Fresh garlic gives a robust flavor; avoid powdered garlic for a more intense taste.
  • Heavy Cream – Provides the creamy base of the sauce; half-and-half can lighten this dish if desired.
  • Parmesan Cheese (freshly grated) – This is key for rich, umami flavor and thickening the sauce; pre-shredded won't melt as nicely.
  • Cajun Seasoning – Adds a nice kick; swap this for Italian seasoning for a milder flavor profile.
  • Salt and Black Pepper – Essential for enhancing overall flavor; season to your taste.

For Garnish

  • Fresh Parsley (chopped) – Brightens up the dish; dried parsley can be a substitute in a pinch.

Elevate your culinary experience with this Creamy Garlic Parmesan Cabbage, making it a perfect addition to your home-cooked meals!

Step‑by‑Step Instructions for Creamy Garlic Parmesan Cabbage

Step 1: Heat the Skillet
Begin by placing a large skillet over medium-high heat. Once hot, add 2 tablespoons of unsalted butter along with 1 tablespoon of olive oil. Allow the mixture to melt and shimmer, creating a rich base for your Creamy Garlic Parmesan Cabbage. This will enhance both the flavor and texture of the cabbage as it cooks.

Step 2: Sear the Cabbage
Take your green cabbage and slice it into thick wedges. Carefully lay the wedges flat-side down in the sizzling skillet. Sear each side for about 3–4 minutes, or until beautifully golden brown. You'll know they're ready when they develop a lovely caramelized crust, adding depth to the overall flavor of the dish.

Step 3: Remove and Cook the Onions
Once the cabbage is seared, gently remove the wedges from the skillet and set them aside. Lower the heat to medium, then add one chopped yellow onion to the remaining fat in the pan. Stir and cook for about 5 minutes, or until the onion becomes soft and translucent. This will infuse the oil with sweet, aromatic flavors.

Step 4: Add Garlic and Seasoning
Now it's time to enhance the aroma! Stir in 3 cloves of minced garlic and 1 tablespoon of Cajun seasoning, allowing them to cook for another minute. Keep an eye on it, as you want the garlic to become fragrant but not browned. This step is key to achieving the robust flavor in your creamy sauce.

Step 5: Deglaze with Cream
With the aromatic mixture ready, pour in 1 cup of heavy cream. Using a wooden spoon, scrape up any browned bits left in the pan—these will add a burst of flavor to your sauce. Bring the mixture to a gentle simmer and let it bubble for about 2–3 minutes, thickening slightly and creating a luscious sauce.

Step 6: Incorporate Parmesan
Next, add in 1 cup of freshly grated Parmesan cheese, stirring continuously until the cheese melts completely and blends into the cream. The sauce should now appear smooth and creamy. Taste and season with salt and black pepper as needed. This is what makes your Creamy Garlic Parmesan Cabbage truly indulgent!

Step 7: Return the Cabbage
Carefully return the seared cabbage wedges to the skillet, spooning some sauce over the top. Partially cover the skillet and allow it to cook for about 5 minutes, or until the cabbage is fork-tender but still retaining some firmness. This step allows the flavors to meld beautifully while ensuring the cabbage doesn't become mushy.

Step 8: Garnish and Serve
Finally, remove the skillet from the heat and sprinkle the dish with freshly chopped parsley for a burst of color and fresh flavor. Plate your delicious Creamy Garlic Parmesan Cabbage and serve immediately as a delightful side to your favorite grilled meats or as a satisfying vegetarian option.

What to Serve with Creamy Garlic Parmesan Cabbage?

Imagine a warm, inviting dinner table, where comforting flavors and fresh ingredients greet you, turning any meal into a special occasion.

  • Grilled Lemon Chicken: The bright citrus notes and succulent texture balance perfectly with the creamy, rich cabbage, ensuring a delightful dining experience.
  • Savory Pork Chops: The juicy, savory flavors of grilled or pan-seared pork complement the garlic and Parmesan, making them a match made in heaven.
  • Roasted Vegetables: A colorful medley of roasted seasonal vegetables adds crunch and a touch of sweetness, enhancing the meal’s overall appeal.
  • Cauliflower Rice: This light, low-carb alternative absorbs the luscious sauce, creating a deliciously cohesive dish while maintaining the keto-friendly theme.
  • Crusty Bread: A warm, crusty loaf is perfect for swiping up every bit of the creamy sauce, adding a satisfying textural contrast.
  • Herbed Quinoa: Nutty quinoa tossed with fresh herbs provides a nutritious boost that pairs beautifully with the indulgent cabbage, balancing flavors and textures.
  • Chilled White Wine: A crisp Pinot Grigio or Sauvignon Blanc refreshes and lightens the palate, making each bite of the creamy garlic Parmesan cabbage even more enjoyable.
  • Chocolate Mousse: Conclude your meal with a rich chocolate mousse for a decadent treat that satisfies your sweet tooth and rounds out a memorable dining experience.

Creamy Garlic Parmesan Cabbage Variations

Feel free to let your creativity shine and customize this delightful dish to suit your taste!

  • Dairy-Free: Swap heavy cream for coconut cream or a plant-based cream to maintain creaminess without dairy.
  • Spicy Kick: Add diced jalapeños or red pepper flakes for an extra layer of heat that elevates the flavor profile.
  • Smoky Flavor: Incorporate smoked paprika or chipotle seasoning for a delicious smoky twist that adds depth to the dish.
  • Herb Variations: Use fresh thyme or rosemary instead of parsley to bring an aromatic herbal note, enhancing the dish’s overall appeal.
  • Savory Cabbage Toast: Serve the creamy cabbage over toasted sourdough for a tasty open-faced sandwich, perfect for brunch!
  • Cheesy Cabbage Bake: Transform leftovers into a cheesy casserole by adding more cheese and broiling until golden brown and bubbly, reminiscent of a decadent gratin.
  • Nutty Texture: Sprinkle with toasted pine nuts or walnuts right before serving for a pleasing crunch that balances the creamy sauce.
  • Veggie Boost: Mix in some sautéed mushrooms, spinach, or broccoli for added nutrition and color, creating a heartier dish that feels indulgent.

No matter how you choose to tweak it, this recipe will still remind you of warm family dinners and happy moments shared around the table! For a fantastic pairing, consider serving it alongside Cheesy Garlic Bread or grilled meats to create a complete meal experience.

Make Ahead Options

These Creamy Garlic Parmesan Cabbage wedges are a fantastic meal prep solution for busy cooks! You can slice and sear the cabbage up to 24 hours before cooking, ensuring that it retains its texture and flavor. Once seared, store the cabbage in an airtight container in the refrigerator. The creamy sauce can also be made in advance and stored separately for up to 3 days. When you're ready to serve, simply reheat the sauce on the stove, add the cooked cabbage, and warm through until fork-tender, giving you a delicious dish with minimal effort that tastes just as fresh as when it was first prepared!

How to Store and Freeze Creamy Garlic Parmesan Cabbage

Fridge: Store leftovers in an airtight container for up to 4 days. This preserves the flavors of your creamy garlic Parmesan cabbage while keeping it fresh.

Reheating: Gently rewarm the cabbage on the stove over low heat, adding a splash of cream to loosen the sauce and maintain its creamy consistency.

Freezer: Freezing is not recommended for this dish, as the cabbage texture changes and may become mushy when thawed. Enjoy it fresh for the best experience!

Expert Tips for Creamy Garlic Parmesan Cabbage

  • Don’t Rush the Browning: Take your time searing the cabbage wedges to achieve a golden crust; this crucial step builds rich flavor.
  • Choose Fresh Ingredients: Using fresh garlic and freshly grated Parmesan ensures the best flavor and texture in your creamy sauce.
  • Watch the Cooking Time: Avoid overcooking the cabbage; it should be tender yet firm. This ensures a satisfying bite in your creamy garlic Parmesan cabbage.
  • Experiment with Spice: Adjust the Cajun seasoning based on your preference or replace it with Italian seasoning if you prefer a milder flavor.
  • Garnish Matters: Fresh parsley isn’t just for looks; it adds a hint of brightness that complements the dish's rich flavors perfectly.

Creamy Garlic Parmesan Cabbage Recipe FAQs

What type of cabbage works best for this recipe?
Absolutely! Green cabbage is the star of this dish, providing a hearty texture that holds up beautifully in the skillet. You can also use red cabbage for a vibrant visual twist, though it may add a slightly different flavor.

How should I store leftover Creamy Garlic Parmesan Cabbage?
Very good question! Store your leftovers in an airtight container in the refrigerator for up to 4 days. When you're ready to enjoy it again, gently rewarm it on the stove with a splash of cream to bring the sauce back to life.

Can I freeze Creamy Garlic Parmesan Cabbage?
It's best not to freeze this dish. Freezing can change the cabbage’s texture, making it mushy upon thawing. If you want to save any extra, stick to refrigerating it for the freshest flavor and texture.

What if my cabbage is not browning as expected?
No worries! If your cabbage isn't browning, check that your skillet is adequately heated before adding the wedges. Make sure not to overcrowd the pan, as this can cause steaming instead of searing. Aim for a flat, even surface for the best caramelization.

Is this dish suitable for those with dietary restrictions?
Yes! The Creamy Garlic Parmesan Cabbage is naturally low-carb and keto-friendly, making it a great option for those watching their carb intake. However, please note that it contains dairy; for a dairy-free version, try substituting heavy cream with a non-dairy cream alternative and ensuring cheese replacements fit your dietary needs.

What can I do if I don't have heavy cream?
If heavy cream is unavailable, you can substitute it with half-and-half for a lighter sauce without losing the creaminess. For a lower-fat option, consider using a plant-based cream alternative, but keep in mind that this may slightly alter the flavor.

Creamy Garlic Parmesan Cabbage

Creamy Garlic Parmesan Cabbage: A Comforting Low-Carb Delight

Creamy Garlic Parmesan Cabbage is an irresistible low-carb skillet recipe perfect for cozy dinners.
Print Recipe Pin Recipe
Prep Time 10 minutes mins
Cook Time 20 minutes mins
Total Time 30 minutes mins
Servings: 4 servings
Course: Dinner
Cuisine: American
Calories: 250
Ingredients Equipment Method Nutrition Notes

Ingredients
  

For the Cabbage
  • 1 head Green Cabbage Red cabbage can be a substitute.
For the Sauce
  • 2 tablespoons Unsalted Butter Salted butter can be used but adjust salt accordingly.
  • 1 tablespoon Olive Oil Other neutral oils can also be used.
  • 1 medium Yellow Onion White or sweet onions can be used.
  • 3 cloves Garlic (minced) Use fresh garlic for the best flavor.
  • 1 cup Heavy Cream Half-and-half can be used for a lighter option.
  • 1 cup Parmesan Cheese (freshly grated) Pre-shredded won't melt as nicely.
  • 1 tablespoon Cajun Seasoning Can be replaced with Italian seasoning for a milder flavor.
  • to taste Salt and Black Pepper Essential for enhancing overall flavor.
For Garnish
  • 1 tablespoon Fresh Parsley (chopped) Dried parsley can be used if needed.

Equipment

  • Skillet

Method
 

Step-by-Step Instructions for Creamy Garlic Parmesan Cabbage
  1. Heat the skillet over medium-high heat. Add the butter and olive oil and let it melt.
  2. Sear the cabbage wedges flat-side down for 3-4 minutes until golden brown.
  3. Remove the cabbage and cook the chopped onion in the remaining fat for about 5 minutes until soft.
  4. Add minced garlic and Cajun seasoning, cooking for another minute until fragrant.
  5. Pour in the heavy cream and scrape up any browned bits in the pan. Simmer for 2-3 minutes.
  6. Stir in the freshly grated Parmesan cheese until melted and smooth. Season with salt and pepper.
  7. Return the seared cabbage to the skillet and spoon some sauce over the top. Cook for about 5 minutes.
  8. Garnish with parsley before serving hot.

Nutrition

Serving: 1servingCalories: 250kcalCarbohydrates: 10gProtein: 5gFat: 23gSaturated Fat: 12gPolyunsaturated Fat: 1gMonounsaturated Fat: 9gCholesterol: 60mgSodium: 400mgPotassium: 300mgFiber: 3gSugar: 2gVitamin A: 500IUVitamin C: 40mgCalcium: 250mgIron: 1mg

Notes

Take care not to rush the browning of the cabbage for best flavor. Fresh ingredients yield the best results.

Tried this recipe?

Let us know how it was!

Delicious Irish Potato Pie with Bacon for Cozy Comfort Food

February 19, 2026 by Grace Snow Leave a Comment

As I stood in my kitchen, the comforting aroma of sizzling bacon mingled with the earthy scent of onions, awakening memories of cherished family gatherings. This Savory Irish Potato Pie is my go-to recipe for St. Patrick’s Day, transforming humble ingredients into a cozy, show-stopping dish. Stuffed with layers of creamy potatoes, crunchy onions, and crispy bacon, this pie not only makes for a delightful main course but is also incredibly make-ahead-friendly—perfect for those busy celebrations. Whether you’re looking to impress guests or simply enjoy a comforting meal at home, this Irish Potato Pie hits all the right notes. Are you ready to create a warm, delicious masterpiece that will surely leave everyone asking for seconds?

Why is this Irish Potato Pie special?

Comforting, Homey Flavor: This Irish Potato Pie combines crispy bacon and creamy potatoes for a dish that warms the soul.

Make-Ahead Marvel: Prepare it in advance and store it for stress-free entertaining, making your St. Patrick’s Day celebrations a breeze!

Versatile Serving Options: Enjoy it as a stand-alone meal or a hearty side at brunches, pairing perfectly with a fresh green salad or even warm Irish soda bread.

Visual Feast: The golden, flaky crust and layered filling create an eye-catching centerpiece, sure to impress your guests!

Crowd-Pleaser: Its rich ingredients and satisfying texture will have everyone coming back for more, making it an instant favorite—especially after a busy week! Dive into this comforting dish that brings everyone together around the table.

Irish Potato Pie Ingredients

• Get ready to create a comforting dish that everyone will love!

For the Crust

  • Frozen Puff Pastry – The base of the pie providing a crispy texture; homemade pie crust can be used for a heartier feel.

For the Filling

  • Butter – Adds richness and flavor; consider using unsalted butter for more control over saltiness.
  • Thick-Cut Bacon – Introduces savory flavor and a satisfying crunch; substitute with cooked sausage or omit for a vegetarian option.
  • Potatoes – (Russet or Yukon Gold) Form the hearty base of the filling; use a mandolin slicer for even thickness.
  • Onion – Adds sweetness and depth to the filling; shallots can be used for a milder taste.
  • Fresh Dill – Enhances the flavor profile of the dish; dried dill can be used, but reduce the quantity.
  • Heavy Cream – Provides creaminess; half-and-half can be substituted for a lighter version.
  • Salt and Pepper – Essential for seasoning; adjust according to your taste preferences.

For Garnish

  • Chive or Scallion – Adds a refreshing touch of color and flavor to finish your Irish Potato Pie beautifully.

This Irish Potato Pie is bound to become a cherished recipe in your home, perfect for cozy gatherings!

Step‑by‑Step Instructions for Irish Potato Pie

Step 1: Preheat the Oven
Begin by preheating your oven to 350°F (175°C). This temperature ensures that your Irish Potato Pie bakes evenly, resulting in a golden, crispy crust. While the oven warms up, gather your ingredients and prepare the puff pastry, making sure it's thawed and ready for rolling.

Step 2: Prepare the Puff Pastry
Roll out the thawed puff pastry and gently press it into an 8 or 9-inch tart pan, carefully crimping the edges to create a decorative border. Place the lined tart pan in the refrigerator to chill while you prepare the delicious filling. This keeps the pastry crisp once baked, preventing a soggy bottom.

Step 3: Cook the Bacon
In a large skillet, melt 2 tablespoons of butter over medium-high heat. Once bubbling, add the thick-cut bacon and sauté until it’s crispy, which should take about 5–7 minutes. Stir often to ensure even cooking, and savor the rich aroma as it fills your kitchen. Once crisp, transfer the bacon to a plate lined with paper towels to drain.

Step 4: Sauté Onions and Potatoes
In the same skillet, add the sliced onions, cooking them in the flavorful bacon grease for about 2–3 minutes or until they turn soft and translucent. Next, add the mandolin-sliced potatoes and fresh dill, seasoning generously with salt and pepper. Stir occasionally for another 3–5 minutes, ensuring the potatoes remain slightly crisp as you mix everything together.

Step 5: Assemble the Filling
Carefully transfer the warm potato mixture into the chilled puff pastry crust, spreading it evenly with a spatula. Drizzle the heavy cream over the mixture, allowing it to seep through the layers. This creamy addition enhances the richness of the Irish Potato Pie, creating a luscious filling that's hard to resist.

Step 6: Bake the Pie
Place the assembled Irish Potato Pie in the preheated oven and bake for 35–45 minutes. Keep an eye on it; the pie is ready when the crust is a beautiful golden color and the potatoes are fork-tender. Allow the tantalizing aroma to fill your home as it bakes.

Step 7: Let It Rest and Garnish
Once baked to perfection, remove the Irish Potato Pie from the oven and let it rest for about 10 minutes. This resting time allows the filling to set slightly, making it easier to slice. Before serving, sprinkle the top with chopped chives or scallions for an extra touch of color and freshness.

How to Store and Freeze Irish Potato Pie

Fridge: Store your Irish Potato Pie in an airtight container in the fridge for up to 4-5 days. This keeps it fresh and ready for quick reheating.

Freezer: For longer storage, freeze the pie for up to 6 months. Wrap it tightly in plastic wrap and aluminum foil to prevent freezer burn.

Reheating: To reheat, thaw the pie overnight in the fridge, then warm it in a preheated oven at 350°F for about 20-25 minutes until heated through.

Make-Ahead: If you want to prepare in advance, assemble your Irish Potato Pie and freeze it unbaked. Bake straight from frozen, adding about 10-15 minutes to the cooking time.

Irish Potato Pie Variations & Substitutions

Feel free to adapt this recipe to suit your tastes and dietary needs—let your creativity shine!

  • Cheesy Delight: Add shredded cheese like Gruyère or cheddar to the filling for an indulgent twist!

  • Herb Swap: Replace fresh dill with rosemary or thyme to explore new flavor profiles that complement the dish.

  • Vegetarian Version: Omit the bacon entirely and use sautéed mushrooms or smoked turkey for a savory alternative.

  • Spicy Kick: Add a pinch of cayenne or crushed red pepper flakes to the filling for a delightful heat that balances the creamy layers.

  • Extra Veggies: Incorporate sautéed spinach or kale into the filling for added nutrition and vibrant color.

  • Creamy Twist: For a lighter option, substitute heavy cream with half-and-half or a non-dairy milk like almond or oat milk.

  • Sweet Element: Consider adding caramelized onions for a touch of sweetness that beautifully contrasts with the savory elements.

If you're looking for more delightful potato recipes, check out my Smoky Sweet Potatoes for a flavorful side dish or try my Potato and Blue Cheese Pizza for a delicious twist!

What to Serve with Irish Potato Pie

Imagine the enticing aroma of your Irish Potato Pie pervading the kitchen as you prepare the perfect side dishes to enhance this comforting masterpiece.

  • Fresh Green Salad: A vibrant salad with mixed greens, cucumbers, and a tangy vinaigrette balances the richness of the pie, adding refreshing crunch.
  • Roasted Root Vegetables: Carrots and parsnips, roasted until caramelized, bring earthy sweetness that pairs beautifully with the savory pie layers.
  • Irish Soda Bread: Soft and slightly tangy, this classic bread offers a heartwarming touch and is perfect for mopping up any creamy filling left on your plate.

Delve into these pairings for a complete meal that speaks to tradition while pleasing modern palates. Each bite harmonizes with the pie, turning an ordinary meal into an extraordinary experience.

  • Steamed Asparagus: Bright and flavorful, steamed asparagus brings a touch of elegance to your table while complementing the pie’s rich filling.
  • Colcannon: This Irish classic mashed potato dish with cabbage adds a hearty touch, echoing the comforting flavors of your potato pie.
  • Herb-Infused Cream Sauce: A drizzle of creamy sauce with fresh herbs elevates each slice, enhancing the layers of flavors in the pie.

Pairing these delightful sides will not only enhance your dining experience but also create cherished memories around the table filled with laughter and love.

Expert Tips for Irish Potato Pie

  • Thin Slices Needed: Ensure potatoes are peeled and sliced thin for the best texture—thick slices may lead to uneven cooking.

  • Bacon Timing: Don't overcook the bacon before adding onions; it should remain crisp for texture in your Irish Potato Pie.

  • Crust Check: Always confirm your crust is crimped properly to prevent any overflow during baking—this helps maintain a tidy presentation.

  • Chill Before Baking: Refrigerating the assembled pie before baking aids in achieving a flakier pastry, keeping it crispy.

  • Add Cheese: For a richer flavor, try mixing in shredded cheese like Gruyère or cheddar into the filling—it's a delightful twist!

Make Ahead Options

These delicious Irish Potato Pies are perfect for busy cooks looking to save time! You can prepare the filling (potatoes, onions, bacon, and cream) up to 24 hours in advance by cooking everything as instructed, letting it cool, and then storing it in an airtight container in the refrigerator. As a result, the flavors will deepen overnight. The puff pastry can also be rolled out and kept in the fridge, ensuring it's ready when you are. When you're ready to bake, simply fill the prepared crust with the prepped mixture, bake as directed, and enjoy a comforting meal that feels freshly made with minimal effort!

Irish Potato Pie Recipe FAQs

What type of potatoes are best for this pie?
Absolutely! For the Irish Potato Pie, I recommend using Russet or Yukon Gold potatoes. These varieties become wonderfully creamy when baked and hold their shape well. If possible, use a mandolin slicer to achieve even, thin slices, which will help ensure the potatoes cook uniformly.

How should I store leftover Irish Potato Pie?
Very! Store your Irish Potato Pie in an airtight container in the fridge for up to 4-5 days. This keeps it fresh and flavorful for those delightful leftovers. When ready to enjoy, you can simply reheat it in the oven for a few minutes until warmed through.

Can I freeze Irish Potato Pie?
Absolutely! You can freeze the pie for up to 6 months. Be sure to wrap it tightly in plastic wrap and then in aluminum foil to prevent freezer burn. For the best results, freeze it unbaked so you can bake it fresh later. If you choose this option, just add about 10-15 minutes to the baking time when cooking from frozen.

What if my crust is getting too brown while baking?
No worries! If you notice your crust turning too brown before the pie is fully cooked, you can cover the edges with strips of aluminum foil. This will protect the crust while allowing the filling to finish cooking, so you get that perfect golden pie without risking a burnt crust.

Is this pie suitable for vegetarians?
Absolutely! You can easily make this Irish Potato Pie vegetarian by omitting the bacon. For added flavor, consider substituting it with cooked sausage or even smoked turkey if you want to maintain a savory profile. Fresh herbs and a generous sprinkle of cheese are great ways to enhance the taste too!

Can my dog eat this pie?
While the ingredients are generally safe, it’s important to be cautious. Potatoes and herbs like dill are fine for dogs in moderation, but rich ingredients like butter, heavy cream, and bacon can upset their stomachs. Always consult your vet before sharing any human food with your furry friends!

Irish Potato Pie

Delicious Irish Potato Pie with Bacon for Cozy Comfort Food

This Irish Potato Pie combines crispy bacon and creamy potatoes for a comforting dish perfect for St. Patrick’s Day celebrations.
Print Recipe Pin Recipe
Prep Time 30 minutes mins
Cook Time 40 minutes mins
Resting Time 10 minutes mins
Total Time 1 hour hr 20 minutes mins
Servings: 8 slices
Course: Dinner
Cuisine: Irish
Calories: 320
Ingredients Equipment Method Nutrition Notes

Ingredients
  

For the Crust
  • 1 package Frozen Puff Pastry Homemade pie crust can be used for a heartier feel.
For the Filling
  • 2 tablespoons Butter Consider using unsalted butter for more control over saltiness.
  • 5 strips Thick-Cut Bacon Can substitute with cooked sausage or omit for a vegetarian option.
  • 4 cups Potatoes Russet or Yukon Gold, sliced thin.
  • 1 cup Onion Shallots can be used for a milder taste.
  • 2 tablespoons Fresh Dill Dried dill can be used, but reduce the quantity.
  • 1 cup Heavy Cream Half-and-half can be substituted for a lighter version.
  • 1 teaspoon Salt Adjust according to taste preferences.
  • 1 teaspoon Pepper Adjust according to taste preferences.
For Garnish
  • 2 tablespoons Chives or Scallions Adds color and flavor.

Equipment

  • Large skillet
  • 8 or 9-inch tart pan
  • mandolin slicer
  • Oven

Method
 

Step-by-Step Instructions
  1. Preheat your oven to 350°F (175°C). Gather your ingredients and prepare the puff pastry.
  2. Roll out the thawed puff pastry and press it into the tart pan. Chill in the refrigerator.
  3. Melt 2 tablespoons of butter in a large skillet. Cook the bacon until crispy, about 5–7 minutes.
  4. Sauté sliced onions in the same skillet for 2–3 minutes, then add potatoes and fresh dill.
  5. Transfer the potato mixture into the crust, drizzle heavy cream on top.
  6. Bake for 35–45 minutes until the crust is golden and potatoes are fork-tender.
  7. Let the pie rest for 10 minutes, then garnish with chopped chives or scallions.

Nutrition

Serving: 1sliceCalories: 320kcalCarbohydrates: 30gProtein: 8gFat: 20gSaturated Fat: 10gPolyunsaturated Fat: 1gMonounsaturated Fat: 5gCholesterol: 50mgSodium: 600mgPotassium: 500mgFiber: 3gSugar: 1gVitamin A: 300IUVitamin C: 15mgCalcium: 40mgIron: 2mg

Notes

This pie can be prepared in advance and stored. It is perfect for cozy gatherings and impressive enough for guests.

Tried this recipe?

Let us know how it was!

Hearty Irish Stew with Mashed Potatoes for Cozy Nights

February 19, 2026 by Grace Snow Leave a Comment

Standing in my kitchen, the tantalizing aroma of simmering meat and vegetables transports me straight to the heart of Ireland. This Traditional Irish Stew with Creamy Mashed Potatoes captures the spirit of comfort food, perfect for cozy dinners at home or sharing with loved ones. With tender chunks of beef or lamb melding with a colorful array of vegetables, each bite is a hearty embrace. Not only is this stew a filling meal that warms the soul, but it's also wonderfully adaptable—you can easily swap the lamb for beef based on what's in your pantry, making this a budget-friendly option without sacrificing flavor. As the rich broth thickens and the flavors deepen with each stirring, I can't help but wonder: how will you make this classic dish your own?

Why Is This Irish Stew a Must-Try?

Comforting Warmth: This Irish Stew with Mashed Potatoes is the ultimate comfort food, embracing you with every spoonful.

Hearty & Filling: With tender beef (or lamb) simmered alongside vibrant vegetables, it provides a satisfying meal perfect for chilly evenings.

Affordable & Adaptable: Easily swap lamb for beef, making it accessible without compromising that rich flavor profile we all crave. Try adding frozen peas for a fresh pop of color!

Easy Preparation: Simplistic enough for beginners yet delicious enough to impress seasoned chefs, this recipe streamlines the cooking process.

Nutrient-Rich: Each serving packs a punch with approximately 59g of protein, ensuring everyone leaves the table full and happy.

Ready to elevate your dinner game? Pair this stew with some warm Irish Soda Bread for an unbeatable meal experience!

Irish Stew With Mashed Potatoes Ingredients

For the Stew

  • Olive Oil – Adds richness and helps in browning the meat.
  • Beef Stew Meat or Lamb (3 pounds) – Main protein source, bringing hearty flavor; substitute beef if lamb is unavailable.
  • All-Purpose Flour (¼ cup) – Thickens the stew and adds body.
  • Sea Salt (2 teaspoons) – Enhances flavor and balances the dish.
  • Black Pepper (1 teaspoon) – Adds mild heat and depth to the flavor.
  • Garlic Powder (1 teaspoon) – Provides a savory base flavor that enhances the meat.
  • Onion Powder (1 teaspoon) – Adds sweetness and depth for a rounded taste.
  • Fresh Rosemary (2 teaspoons) – Offers aromatic herbal notes; fresh herbs are preferred, but dried can be used as a substitute.
  • Dried Thyme (1 teaspoon) – Adds earthy flavor that complements the stew.
  • Beef Broth (4 cups) – The stew's liquid base, enriching the overall taste.
  • Carrots (5 each) – Adds sweetness and texture; cut into chunks for heartiness.
  • Frozen Peas (1 cup) – Stirred in at the end for a burst of color and sweetness.
  • Bay Leaves (2 each) – Infuses the stew with aromatic flavor for depth.

For the Mashed Potatoes

  • Potatoes (2 pounds) – Choose Yukon Gold for a creamy texture.
  • Salted Butter (½ cup) – Ensures the mashed potatoes are rich and creamy.
  • Whole Milk or Cream (½ cup) – Adds smoothness to your mash; use cream for extra decadence.
  • Salt (to taste) – Enhances the flavor of the potatoes.
  • Black Pepper (to taste) – Adds a slight kick and enhances the overall taste profile.

This Irish Stew with Mashed Potatoes will surely warm your heart and fill your belly with every spoonful!

Step‑by‑Step Instructions for Irish Stew With Mashed Potatoes

Step 1: Heat the Oil
Begin by heating 2 tablespoons of olive oil in a large Dutch oven over medium-high heat. Allow the oil to shimmer slightly, indicating it’s hot enough for cooking. This step is crucial as it helps in browning the meat properly for your hearty Irish stew.

Step 2: Prepare the Meat
In a large zip-top bag, season the 3 pounds of beef stew meat (or lamb) with ¼ cup of all-purpose flour, 2 teaspoons of sea salt, 1 teaspoon of black pepper, 1 teaspoon of garlic powder, 1 teaspoon of onion powder, 2 teaspoons of fresh rosemary, and 1 teaspoon of dried thyme. Toss the bag gently to coat the meat evenly, then carefully add it to the hot Dutch oven, searing until brown on all sides—about 5-7 minutes.

Step 3: Add the Broth
Once the meat is well-browned, slowly pour in 4 cups of beef broth while stirring constantly to combine the flavors. As the broth heats, you’ll notice the sizzling sound—this is your stew beginning to come together. This step enhances the deep flavors, setting the stage for a rich base in your Irish stew.

Step 4: Incorporate the Vegetables
Next, add 5 chopped carrots and 2 bay leaves into the pot. Stir gently to mix the ingredients, then increase the heat until the stew reaches a gentle boil. The vibrant colors of the carrots will become a delightful sight, signaling that your dish is moving along beautifully.

Step 5: Simmer the Stew
Once boiling, reduce the heat to medium-low and cover the pot. Allow the stew to simmer for about 45 minutes, stirring occasionally. The long, slow cooking will tenderize the meat and meld the flavors, creating the comforting essence of this Irish stew.

Step 6: Add Final Touches
Five minutes before serving, stir in 1 cup of frozen peas to add a pop of color and sweetness. Don’t forget to remove the bay leaves at this stage; they’ve done their job of infusing flavor. The stew should be thick and fragrant, enticing you as it nears completion.

Step 7: Prepare the Mashed Potatoes
While the stew simmers, peel and chop 2 pounds of potatoes, then boil them in salted water for about 15-20 minutes until fork-tender. Drain the water and return the potatoes to the pot, mashing them with ½ cup of salted butter and ½ cup of whole milk or cream. The goal is a creamy, smooth texture that pairs perfectly with the hearty Irish stew.

Step 8: Serve and Enjoy
Spoon the rich Irish stew into bowls, ensuring each one is brimming with tender meat and vibrant vegetables. Serve with a generous helping of your creamy mashed potatoes, allowing for a delightful combination of flavors. This comforting meal is perfect for cozy nights or sharing with loved ones.

Make Ahead Options

This Irish Stew with Mashed Potatoes is an excellent choice for meal prep, saving you precious time on busy nights! You can prepare the stew base up to 24 hours in advance; simply sear the meat, add the broth and vegetables, and refrigerate before simmering. To maintain the dish’s quality, store it in an airtight container to prevent any spoilage. When you're ready to serve, just reheat the stew in a pot, let it simmer until heated through, and stir in the frozen peas as it warms. Prepare the mashed potatoes fresh, or make them up to 3 days ahead; just reheat with a splash of milk to bring back their creamy goodness. This way, you’ll enjoy a comforting, hearty meal with minimal effort!

What to Serve with Irish Stew With Mashed Potatoes

Transform your comforting Irish stew into a complete meal with delightful pairings that echo its hearty essence.

  • Warm Irish Soda Bread: This classic accompaniment is perfect for soaking up the rich broth, bringing a touch of tradition to the table. Freshly baked, it offers a soft, tender texture that complements the stew beautifully.

  • Steamed Green Beans: Bright, tender green beans add a fresh crunch and vibrant color. Their slight bitterness balances the stew's rich flavors, creating a delightful contrast on your plate.

  • Colcannon: Swap out the standard mashed potatoes for this Irish classic made with mashed potatoes and cabbage. Its creamy texture will elevate your meal, while the cabbage adds a unique flavor twist.

  • Garlic Butter Roasted Mushrooms: These savory bites bring an earthy depth to your dinner. Their succulent, juicy texture infuses each forkful with umami, enhancing the overall experience.

  • Cheesy Cauliflower Bake: A creamy, cheesy side that melds wonderfully with the robust stew. Its rich flavor and creamy texture offer a delightful harmony that pleases the palate.

  • Crisp Salad with Vinaigrette: A light, refreshing salad balances the hearty stew with its crisp textures and bright, tangy notes. Toss in some crunchy cucumbers and ripe tomatoes for a refreshing uplift.

  • Rich Irish Cream Liqueur: End your meal with a touch of sweetness. This sumptuous drink enhances the comforting experience of your dinner and pairs beautifully with the rich flavors of the stew.

With these pairings, your Irish Stew With Mashed Potatoes promises not just a meal, but a warm, heartfelt gathering around the table.

How to Store and Freeze Irish Stew With Mashed Potatoes

Fridge: Store leftovers in an airtight container for up to 4 days. Allow the stew to cool completely before sealing to maintain freshness.

Freezer: This hearty Irish stew freezes beautifully. Portion it into freezer-safe containers and store for up to 3 months. Make sure it's properly sealed to prevent freezer burn.

Thawing: When ready to enjoy, thaw overnight in the fridge, then reheat gently on the stove or in the microwave until hot throughout.

Reheating: Stir the stew while reheating to ensure even warmth. Add a splash of broth if it appears too thick after freezing, creating that comforting texture again.

Irish Stew With Mashed Potatoes Variations

Feel free to get creative with this classic dish and make it your own!

  • Colcannon Style:
    Swap traditional mashed potatoes for colcannon mash, mixing in cabbage or kale for a delightful twist.

  • Vegetable Boost:
    Toss in extra root vegetables like parsnips or turnips for added nutrition and texture. This makes the stew even heartier!

  • Spicy Kick:
    Add a pinch of red pepper flakes or diced jalapeños to the stew while simmering for a bright, spicy flavor that elevates the dish.

  • Creamy Upgrade:
    For richer mashed potatoes, use half-and-half instead of milk for added creaminess. A touch of garlic in the mash adds even more flavor.

  • Herb Infusion:
    Try adding fresh thyme and parsley right before serving to brighten the stew's flavors and add a fresh touch.

  • Smoky Flavor:
    Incorporate smoked paprika to give the stew a warm, smoky depth. It pairs wonderfully with the rich meat and vegetables.

  • Bean Addition:
    For a protein boost, mix in some canned white beans like cannellini or great northern beans during the last 10 minutes of cooking.

  • Creole Kick:
    Infuse your Irish stew with a splash of Worcestershire sauce and a few dashes of hot sauce for a zesty twist on this traditional favorite.

With these variations, the hearty flavors of Smoky Sweet Potatoes or a comforting Pot Chicken Stew could inspire additional ideas. Each twist adds a unique flair to your cozy nights!

Expert Tips for Irish Stew With Mashed Potatoes

Sear the Meat Well: Ensure you brown the beef stew meat (or lamb) thoroughly before adding the broth. This step builds a rich flavor base for the stew.

Gradual Thickening: If your stew appears too thin after cooking, slowly add instant mashed potato flakes until you reach your desired thickness for your Irish Stew with Mashed Potatoes.

Use Fresh Herbs: Fresh rosemary and thyme provide better flavor than dried. If using dried, reduce the amount to prevent overpowering the dish.

Don’t Skimp on Simmering: Allow the stew to simmer for the full 45 minutes. This patiently develops the flavors, resulting in a truly comforting experience.

Experiment with Vegetables: Feel free to add extra veggies like potatoes or parsnips for additional nutrition and texture in your stew.

Irish Stew With Mashed Potatoes Recipe FAQs

What kind of meat is best for Irish stew?
I recommend using beef stew meat or lamb, both of which bring that hearty flavor essential to Irish stew. If lamb is unavailable or too pricey, beef works just as well, ensuring you don’t sacrifice taste.

How should I store leftovers of Irish stew?
Store your Irish stew in an airtight container in the refrigerator for up to 4 days. Allow the stew to cool completely before sealing it to preserve its flavors and prevent spoilage.

Can I freeze Irish stew?
Absolutely! This dish freezes beautifully. Let it cool entirely, then portion it into freezer-safe containers. It can last for up to 3 months in the freezer. When you’re ready to enjoy it, thaw in the refrigerator overnight and reheat gently on the stove.

How can I thicken my Irish stew if it's too thin?
If your stew turns out thinner than desired, you can gradually add instant mashed potato flakes, stirring continuously until you reach your preferred thickness. This little trick not only thickens the stew but also enhances the comforting texture!

Are there dietary considerations I should keep in mind?
When preparing Irish stew, be aware of dietary restrictions. For those with gluten sensitivities, substitute all-purpose flour with a gluten-free option. Additionally, if you’re using fresh herbs or spices, ensure that there are no allergens present; fresh ingredients often have the purest forms but can hold potential for allergies.

How do I know if the vegetables in my stew are fresh enough?
Choose vegetables that are firm and vibrant! For instance, carrots should be crisp and not have dark spots all over, while onions should feel heavy for their size. If they have soft spots or an unpleasant odor, it’s best to pass on those. Brightly colored veggies not only add flavor but also a wholesome look to your Irish stew!

Irish Stew With Mashed Potatoes

Hearty Irish Stew with Mashed Potatoes for Cozy Nights

This hearty Irish stew with mashed potatoes is the ultimate comfort food, perfect for cozy nights.
Print Recipe Pin Recipe
Prep Time 20 minutes mins
Cook Time 45 minutes mins
Total Time 1 hour hr 5 minutes mins
Servings: 6 servings
Course: Dinner
Cuisine: Irish
Calories: 450
Ingredients Equipment Method Nutrition Notes

Ingredients
  

For the Stew
  • 2 tablespoons Olive Oil Adds richness and helps in browning the meat.
  • 3 pounds Beef Stew Meat or Lamb Main protein source.
  • 0.25 cup All-Purpose Flour Thickens the stew.
  • 2 teaspoons Sea Salt Enhances flavor.
  • 1 teaspoon Black Pepper Adds mild heat.
  • 1 teaspoon Garlic Powder Provides a savory flavor.
  • 1 teaspoon Onion Powder Adds sweetness.
  • 2 teaspoons Fresh Rosemary Offers aromatic notes.
  • 1 teaspoon Dried Thyme Adds earthy flavor.
  • 4 cups Beef Broth Liquid base for the stew.
  • 5 each Carrots Cut into chunks.
  • 1 cup Frozen Peas Adds color and sweetness.
  • 2 each Bay Leaves Infuses flavor.
For the Mashed Potatoes
  • 2 pounds Potatoes Yukon Gold preferred.
  • 0.5 cup Salted Butter Ensures creaminess.
  • 0.5 cup Whole Milk or Cream Adds smoothness.
  • to taste Salt Enhances flavor.
  • to taste Black Pepper Adds slight kick.

Equipment

  • Dutch oven

Method
 

Step-by-Step Instructions
  1. Heat 2 tablespoons of olive oil in a large Dutch oven over medium-high heat until shimmering.
  2. Season 3 pounds of beef stew meat (or lamb) with flour, salt, pepper, garlic powder, onion powder, rosemary, and thyme. Toss to coat, then sear in the Dutch oven until brown on all sides.
  3. Pour in 4 cups of beef broth and stir to combine.
  4. Add 5 chopped carrots and 2 bay leaves. Stir and bring to a gentle boil.
  5. Reduce heat to medium-low, cover, and let simmer for about 45 minutes, stirring occasionally.
  6. Five minutes before serving, stir in 1 cup of frozen peas and remove bay leaves.
  7. Peel and chop 2 pounds of potatoes, boil them in salted water until fork-tender. Drain and mash with butter and milk or cream.
  8. Serve the stew with a generous helping of creamy mashed potatoes.

Nutrition

Serving: 1bowlCalories: 450kcalCarbohydrates: 45gProtein: 59gFat: 20gSaturated Fat: 10gPolyunsaturated Fat: 1gMonounsaturated Fat: 6gCholesterol: 70mgSodium: 900mgPotassium: 800mgFiber: 5gSugar: 4gVitamin A: 500IUVitamin C: 15mgCalcium: 50mgIron: 3mg

Notes

This stew can be paired with warm Irish Soda Bread for a complete meal experience.

Tried this recipe?

Let us know how it was!

Savory German Potato Cake: Your New Comfort Food Craving

February 19, 2026 by Grace Snow Leave a Comment

As I stood in the kitchen, the familiar sounds of sizzling onions and the enticing aroma of bacon wafted through the air, instantly transporting me back to family gatherings filled with laughter and love. Today, I’m excited to share my take on Savory German Potato Cake, or Potthucke, a wonderful dish that's both comforting and budget-friendly. This recipe is a delightful canvas for creativity, allowing you to customize it with different add-ins according to your taste or dietary needs—whether you're going vegetarian, vegan, or simply trying to sneak in some extra veggies. Not only does this savory cake make a perfect main course, but it also holds up beautifully in the fridge or freezer, making it a lifesaver for busy weeknight dinners. Are you ready to create a little piece of culinary nostalgia that’s sure to impress your loved ones? Let’s dive in!

Why is this German Potato Cake special?

Comforting and Familiar: This Savory German Potato Cake is like a warm hug on a plate, evoking cherished memories of home-cooked meals with family and friends.

Versatile Options: Whether you're craving a hearty bacon-filled loaf or a lighter vegetarian version, this recipe adapts beautifully to suit all tastes.

Budget-Friendly: Super affordable ingredients make this dish not only delicious but also easy on the wallet, perfect for families or anyone looking to save.

Time-Saving: With straightforward steps and minimal prep, you can have this comforting dish ready to enjoy in less than an hour.

Nutrient-Rich: Packed with potatoes, veggies, and the option for lean protein, you’re feeding both the soul and body. Combine it with a fresh side salad or applesauce for a complete meal, just like we do with German Potato Salad.

Savory German Potato Cake Ingredients

• Discover what makes a truly comforting dish with these simple ingredients!

For the Base

  • Russet Potatoes – Foundation ingredient providing fluffiness; substitute with Yukon Gold for added creaminess.
  • Cream – Adds moisture and richness; replace with milk or any dairy-free alternative for a lighter option.
  • Eggs – Essential for binding the loaf; for vegan options, use flaxseed meal (1 tbsp flaxseed meal + 2.5 tbsp water).

For Flavor

  • Bacon – Adds savory richness; can be swapped with vegetarian options or omitted for a meat-free version.
  • Onions – Contributes a sweet, caramelized flavor; try red onions for a sharper taste.
  • Salt – Enhances flavors; adjust to personal taste for a perfect balance.
  • Black Pepper – Infuses subtle warmth; freshly ground provides the best flavor.
  • Thyme – Adds herbal depth; substitute with rosemary if desired.
  • Nutmeg – Provides aromatic warmth; freshly grated is preferred for a robust flavor.

Optional Add-Ins

  • Diced Smoked Sausage – Adds heartiness and extra flavor.
  • Grated Zucchini or Carrots – Increases nutrition and moisture content, making it lighter.

This Savory German Potato Cake is an adaptable dish that's sure to bring warmth and comfort to your kitchen!

Step‑by‑Step Instructions for Savory German Potato Cake

Step 1: Prep Oven and Pan
Begin by preheating your oven to 375°F (190°C). While it warms, prepare a 9-by-5-inch loaf pan by greasing it well and lining the bottom with parchment paper, ensuring easy removal of your Savory German Potato Cake afterward.

Step 2: Boil Potatoes
Peel and chop half of the russet potatoes into small chunks, and place them in a large pot of salted water. Bring to a boil, then reduce to a simmer, cooking for 20-25 minutes until tender. Once cooked, drain the potatoes and mash them until smooth for the base of your cake.

Step 3: Cook Bacon
In a skillet over medium heat, add diced bacon and cook for about 5 minutes, stirring occasionally until crispy. Once done, use a slotted spoon to transfer the bacon to a plate lined with paper towels to drain excess grease, retaining a bit of the fat in the skillet for the onions.

Step 4: Sauté Onions
In the same skillet with the remaining bacon fat, add the diced onions and sauté on medium heat for about 5-8 minutes. Stir frequently until the onions are translucent and slightly caramelized, then remove from heat and allow them to cool slightly.

Step 5: Grate Remaining Potatoes
Using the remaining russet potatoes, coarsely grate them with a box grater or food processor. After grating, place the potato shreds in a clean dish towel and wring out excess moisture to avoid a soggy Savory German Potato Cake; the drier, the better.

Step 6: Combine Ingredients
In a large mixing bowl, combine the mashed potatoes, grated potatoes, crispy bacon, sautéed onions, cream, eggs, salt, black pepper, thyme, and nutmeg. Mix everything together until the ingredients are evenly blended and form a cohesive mixture, ensuring every bite is flavorful.

Step 7: Bake
Transfer the potato mixture into the prepared loaf pan, smoothing the top with a spatula. Place the pan in the oven and bake for 50-60 minutes, or until the top is golden brown and a toothpick inserted into the center comes out clean. Your Savory German Potato Cake will be beautifully set.

Step 8: Cool
Once baked, remove the loaf pan from the oven and let the Savory German Potato Cake cool in the pan for about 30 minutes. This cooling period will help the cake firm up for easier slicing. For an extra touch, consider pan-searing the slices in butter before serving for a crispy finish.

Storage Tips for Savory German Potato Cake

  • Room Temperature: The Savory German Potato Cake can be left out for up to 2 hours; after that, it's best to refrigerate for freshness.

  • Refrigerate: Store in an airtight container for up to 3 days; reheat slices on a skillet with a bit of butter to crisp them up nicely before serving.

  • Freezing: Wrap cooled slices tightly in plastic wrap and store in a freezer bag for up to 3 months. Thaw in the fridge overnight, then reheat in a skillet for delightful results.

  • Reheating: For an indulgent twist, pan-sear frozen or refrigerated slices in butter for extra flavor and crispness before enjoying!

Variations & Substitutions for Savory German Potato Cake

Customize your Savory German Potato Cake to suit your taste buds and dietary needs, making every bite uniquely yours!

  • Bacon Replacement: Swap the bacon for diced smoked sausage or sautéed mushrooms to explore different savory flavors.
  • Vegetarian Delight: Omit bacon entirely and load it up with colorful bell peppers or mushrooms for a fresh take while keeping that comforting vibe.
  • Vegan Adaptation: Use flaxseed meal mixed with water in place of eggs to ensure your cake binds beautifully without using animal products.
  • Extra Creaminess: Opt for Yukon Gold potatoes instead of russet for a richer, more buttery texture in your cake.
  • Crunch Factor: Mix in some breadcrumbs or crushed crackers to give your cake a delightful crunch, enhancing its texture.
  • Spicy Kick: Add a dash of cayenne pepper or red pepper flakes for an exciting warming heat that contrasts wonderfully with the other flavors.
  • Nutmeg Punch: For an elevated depth of flavor, add freshly grated nutmeg into the mix—it truly transforms the taste experience!
  • Vegetable Boost: Incorporate grated zucchini or carrots to sneak in extra nutrition while keeping your dish moist and delicious.

Feel free to mix and match these variations based on what you have on hand or your preferences, just like we often do when preparing our family favorites, such as German Chocolate Poke Cake. Make it your own!

Make Ahead Options

Preparing the Savory German Potato Cake ahead of time is a fantastic way to save precious minutes during busy weeknights! You can boil and mash the russet potatoes up to 24 hours in advance, storing them in an airtight container in the refrigerator to maintain freshness. Additionally, you can cook the bacon and sauté the onions the day before, ensuring they stay flavorful. When you're ready to serve, simply mix all the prepped ingredients together and bake as directed. For optimal taste, try to bake the cake within 3 days for the best texture. Just remember to let the cake cool completely before sealing it for storage—this helps keep it from becoming soggy and ensures that your Savory German Potato Cake remains just as delicious as the day it was made!

Expert Tips for Savory German Potato Cake

  • Moisture Control: Ensure to drain both the boiled and grated potatoes thoroughly; excess moisture can lead to a soggy Savory German Potato Cake.

  • Cooling Time: Let the cake cool in the pan for at least 30 minutes before slicing for clean, perfect pieces that hold their shape.

  • Nutmeg Freshness: For a more aromatic flavor, try using freshly grated nutmeg; it adds depth and warmth that's truly delightful.

  • Bacon Crispiness: Keep a close eye on the bacon while cooking; it can burn quickly, which would alter the flavor of your cake.

  • Customizable Add-Ins: Don't hesitate to experiment with different vegetables or proteins based on your taste or dietary needs—this cake welcomes creativity!

What to Serve with Savory German Potato Cake

The perfect dish deserves equally delightful companions to create a heartwarming meal that embraces your senses.

  • Applesauce: This traditional pairing brings a sweet-tart contrast, cutting through the richness of the potato cake and elevating every bite.
  • Fresh Side Salad: A crisp garden salad with vinaigrette adds refreshing acidity and crunch, balancing the hearty flavors of the dish.
  • Steamed Broccoli: Tender, bright broccoli provides a vibrant pop of color and a healthy boost, complementing the savory notes beautifully.
  • Caramelized Brussels Sprouts: The sweet, nutty essence of these caramelized sprouts offers a lovely texture contrast, enhancing the heartiness of your potato cake.
  • German Beer: A smooth, light lager or wheat beer enhances the traditional vibe and pairs well with the savory richness.
  • Sour Cream or Greek Yogurt: A dollop of creamy goodness provides a tangy finish that complements the flavors, adding a delightful touch of richness.
  • Roasted Carrots: Sweet and earthy, roasted carrots bring additional layers of flavor and a tender bite that pairs wonderfully with the cake.
  • Lemonade or Iced Tea: A refreshing beverage like lemonade or iced tea adds a zesty touch to your meal, cleansing the palate delightfully.

Savory German Potato Cake Recipe FAQs

What kind of potatoes should I use for this Savory German Potato Cake?
Absolutely! I recommend using Russet potatoes as they provide a fluffy texture. However, for a creamier result, you can substitute them with Yukon Gold potatoes, which are equally delicious and lend a different flavor profile.

How should I store the Savory German Potato Cake?
You can store the Savory German Potato Cake in an airtight container in the refrigerator for up to 3 days. Make sure to reheat slices on a skillet with a little butter for optimal crispiness, giving a delightful reintroduction of those mouthwatering flavors.

Can I freeze the Savory German Potato Cake?
Very! To freeze, let the cake cool completely, then wrap slices tightly in plastic wrap and place them in a freezer bag. It can be stored for up to 3 months. To reheat, thaw slices in the fridge overnight and pan-sear them in butter for a golden, crispy finish—your taste buds will thank you!

What if my Savory German Potato Cake turns out soggy?
No worries! If the texture isn't right, check that you’ve thoroughly drained the excess moisture from both the boiled and grated potatoes. Next time, consider squeezing the grated potatoes in a clean dish towel after grating to eliminate any extra liquid, ensuring a perfectly fluffy outcome.

Are there any allergy concerns with this recipe?
Absolutely! This Savory German Potato Cake can be made gluten-free by ensuring all ingredients, particularly the cream and any add-ins, are certified gluten-free. For dairy allergies, substitute cream with a non-dairy alternative like almond milk or coconut cream. If you're preparing for pets, keep in mind that onions should never be given to dogs or cats, so feel free to omit them.

Savory German Potato Cake

Savory German Potato Cake: Your New Comfort Food Craving

Savory German Potato Cake is a comforting dish that brings nostalgia and warmth to family meals.
Print Recipe Pin Recipe
Prep Time 15 minutes mins
Cook Time 1 hour hr
Cooling Time 30 minutes mins
Total Time 1 hour hr 45 minutes mins
Servings: 8 slices
Course: Dinner
Cuisine: German
Calories: 250
Ingredients Equipment Method Nutrition Notes

Ingredients
  

For the Base
  • 2 lbs Russet Potatoes or Yukon Gold
  • 1 cup Cream or dairy-free alternative
  • 2 large Eggs or 1 tbsp flaxseed meal + 2.5 tbsp water for vegan
For Flavor
  • 6 oz Bacon or omit for vegetarian
  • 1 medium Onion or use red onions
  • 1 tsp Salt
  • 1 tsp Black Pepper freshly ground
  • 1 tsp Thyme or use rosemary
  • 1/4 tsp Nutmeg freshly grated preferred
Optional Add-Ins
  • 1 cup Diced Smoked Sausage
  • 1 cup Grated Zucchini or Carrots for added nutrition

Equipment

  • Loaf pan
  • Skillet
  • pot
  • Box grater
  • Mixing Bowl

Method
 

Directions
  1. Preheat your oven to 375°F (190°C) and prepare a 9-by-5-inch loaf pan by greasing it and lining the bottom with parchment paper.
  2. Peel and chop half of the russet potatoes into small chunks and boil in salted water for 20-25 minutes until tender.
  3. Drain the potatoes and mash them until smooth.
  4. In a skillet, cook diced bacon until crispy, about 5 minutes.
  5. Sauté diced onions in the remaining bacon fat for 5-8 minutes until caramelized.
  6. Coarsely grate the remaining russet potatoes and wring out excess moisture.
  7. Combine mashed potatoes, grated potatoes, bacon, onions, cream, eggs, salt, black pepper, thyme, and nutmeg in a mixing bowl and mix well.
  8. Transfer the mixture to the prepared loaf pan and bake for 50-60 minutes until the top is golden brown.
  9. Cool the cake in the pan for 30 minutes before slicing.

Nutrition

Serving: 1sliceCalories: 250kcalCarbohydrates: 30gProtein: 8gFat: 12gSaturated Fat: 7gPolyunsaturated Fat: 1gMonounsaturated Fat: 3gCholesterol: 70mgSodium: 400mgPotassium: 600mgFiber: 3gSugar: 1gVitamin A: 350IUVitamin C: 20mgCalcium: 50mgIron: 1.5mg

Notes

Experiment with different veggies or proteins according to your dietary needs for a personalized touch.

Tried this recipe?

Let us know how it was!

Irresistibly Creamy Irish Champ for Ultimate Comfort Food

February 19, 2026 by Grace Snow Leave a Comment

As I stood in my kitchen, the scent of boiling potatoes filled the air, transporting me to a cozy Irish pub where warmth and laughter wrapped around me like a favorite blanket. Today, I’m thrilled to share my twist on the classic Irish Champ, a delightful dish that brings voices of tradition and comfort to your table. This creamy concoction, made from fluffy mashed potatoes and fresh scallions, not only serves as a crowd-pleaser but also showcases a quick prep time that makes it perfect for weeknight meals or special gatherings alike. Whether you choose to keep it classic or experiment with flavors like garlic or bacon, this gluten-free side dish is sure to become a cherished favorite. Are you ready to discover just how easily you can serve up a plate of pure comfort? Let’s dive in!

Why is Irish Champ a Must-Try?

Comforting Deliciousness: This creamy Irish Champ is no ordinary side dish; it's the epitome of warmth that welcomes you home.

Versatile Variations: Whether you prefer it classic or take a leap with garlic or cheesy twists, the options make this dish endlessly adaptable for all palates.

Quick and Simple: With just a few pantry staples, you can whip up this comforting dish in no time, freeing you to enjoy family dinners or casual get-togethers.

Gluten-Free Goodness: Perfect for those seeking gluten-free options without compromising on flavor, this dish is a delightful addition to any meal.

Crowd-Pleasing Appeal: Irish Champ's creamy texture paired with fresh scallions makes it a universally loved side, guaranteed to impress your guests. For more delightful ideas, check out easy weeknight meals.

Irish Champ Ingredients

For the Potatoes
• Yukon Gold Potatoes – The perfect base for ultra-creamy texture; russets work too if you prefer.

For the Creaminess
• Whole Milk or Cream – Adds richness; substitute with cream for an indulgent touch.
• Unsalted Butter – Gives richness and flavor; make sure it’s softened for easy blending.

For Flavor
• Fresh Scallions – Imparts a mild onion flavor that brightens up the dish; always go for fresh for the best taste.
• Salt – Essential for seasoning; enhances the natural flavors of the Irish Champ.
• Freshly Ground Black Pepper – Adds depth and a hint of heat to balance the flavors.

With these ingredients in hand, you'll be ready to create a plate of comforting Irish Champ that is sure to wow your family and friends!

Step‑by‑Step Instructions for Irish Champ

Step 1: Prepare the Potatoes
Begin by peeling and chopping 2 pounds of Yukon Gold potatoes into equal-sized chunks, about 1 to 2 inches each, for even cooking. Place the chopped potatoes in a large pot, ensuring they have space to move freely. This preparation is crucial for creating that delightful creamy texture in your Irish Champ.

Step 2: Boil
Fill the pot with cold water, covering the potatoes by about an inch. Add a generous pinch of salt, which will enhance the flavor of the potatoes. Bring the water to a rolling boil over high heat, then reduce the heat slightly and let it simmer, uncovered, for about 15 to 20 minutes. The potatoes are ready when easily pierced with a fork.

Step 3: Drain
Once the potatoes are tender, carefully drain them into a colander, allowing all excess water to escape. Return the drained potatoes to the pot over low heat to evaporate any residual moisture. This step ensures you avoid watery Irish Champ, letting you achieve that ultra-creamy consistency.

Step 4: Mash
Using a potato masher or ricer, mash the potatoes in the pot until they reach a smooth and fluffy consistency. Take your time here—gentle mashing will produce a lighter texture. It’s essential to avoid over-mashing, which may lead to a gluey texture. This is a key step in achieving the beloved softness of Irish Champ.

Step 5: Heat Milk
In a small saucepan, pour in 1 cup of whole milk (or cream for extra decadence) and heat gently over medium-low until warm—around 2 to 3 minutes. Stir occasionally and avoid boiling. Warming the milk helps it blend seamlessly into the mashed potatoes, contributing to that silky smoothness characteristic of classic Irish Champ.

Step 6: Combine
Gradually pour the warm milk into the mashed potatoes, stirring continuously until the mixture is creamy and well combined. Adjust the amount according to your desired creaminess. This step transforms the mashed potatoes into a luscious base for your Irish Champ, creating the perfect companion for your scallions.

Step 7: Add Butter
Stir in 4 tablespoons of softened unsalted butter, mixing until it melts entirely into the creamy potatoes. This addition enriches the flavor profile, enhancing the overall taste of your Irish Champ. Continue mixing until everything is incorporated and the mixture is velvety smooth.

Step 8: Season
Add a handful of finely chopped fresh scallions, along with salt and freshly ground black pepper to taste. Mix well to ensure that the scallions are evenly distributed throughout the Irish Champ. This final burst of flavor brings a fresh, mild onion note that enhances the comforting essence of this dish.

Step 9: Serve
Transfer your creamy Irish Champ to a warm serving bowl. For an extra touch of indulgence, create a small well in the center and place a pat of butter. This visual presentation not only looks inviting but adds another layer of richness for your eager guests. Serve immediately and watch it vanish!

Make Ahead Options

These Irish Champ are perfect for busy home cooks looking to streamline meal prep! You can prepare the mashed potatoes up to 24 hours in advance by following all the initial steps and then refrigerating them in an airtight container. To maintain their creamy texture, make sure to cover them well to prevent drying. When you’re ready to serve, simply reheat the potatoes on the stove with a splash of milk, stirring until they've reached a silky consistency again. For optimal flavor, add in the scallions right before serving to keep them fresh and vibrant. Enjoy effortless, comforting Irish Champ with minimal effort on those busy weeknights!

Expert Tips for Irish Champ

  • Ingredient Quality Matters: Choose fresh, high-quality Yukon Gold potatoes and scallions for the best flavor and texture in your Irish Champ.

  • Avoid Gluey Potatoes: Don't over-mash the potatoes. Gentle mashing ensures a light, fluffy consistency, keeping your Irish Champ dreamy and smooth.

  • Season Gradually: Always adjust salt and pepper to taste before serving. Start with a little and add more as needed to enhance the dish’s flavors.

  • Experiment with Add-ins: Feel free to explore variations like garlic or cheesy options. Just remember that balance is key, so don’t overwhelm the flavors of the Irish Champ.

  • Warm Your Dairy: Always warm your milk or cream before adding it to the mashed potatoes. This helps create that luxuriously creamy texture we all adore!

What to Serve with Creamy Irish Champ

Transform your Irish Champ into a full meal with these delightful pairings that promise to elevate your dining experience.

  • Hearty Irish Stew: The rich, flavorful broth complements the creamy texture of the Champ, creating a harmony that warms the soul. Imagine spooning tender meat alongside fluffy potatoes, each bite a comforting embrace.

  • Bangers and Mash: Juicy sausages served over traditional mashed potatoes is a classic combo, and Irish Champ takes it to new heights with its smooth scallion notes. The savory sausage and buttery potatoes blend beautifully, igniting nostalgia in every bite.

  • Grilled Salmon: A light, flaky salmon pairs perfectly with the creamy density of champ. The fresh, zesty flavors of the fish contrast delightfully with the earthy richness, bringing both health and indulgence to your plate.

  • Roasted Brussels Sprouts: These crispy greens add a burst of vibrant color and a satisfying crunch to the meal. Their slight bitterness beautifully balances the creaminess of the Irish Champ, ensuring a well-rounded bite every time.

  • Garlic Butter Shrimp: Juicy shrimp coated in garlicky goodness creates an irresistible flavor punch alongside the potatoes. This seafood treat introduces brightness that harmonizes with the comforting base of your dish.

  • Crispy Fried Onions: A topping of crunchy onions adds texture and a savory crunch, enhancing the overall experience. Sprinkle some over your Irish Champ for that extra layer of excitement on every forkful.

  • Homemade Irish Soda Bread: This warm, crusty bread is a classic complement, perfect for scooping up creamy goodness. Its slight sweetness contrasts with the savory potatoes, inviting a satisfying dip into each bite.

  • Apple Crisp: Finish off your meal with a comforting dessert like warm apple crisp. The sweet spiced apples provide a delightful contrast to the savory Champ, making for a well-rounded dining experience that lingers beautifully on the palate.

Irish Champ Variations & Substitutions

Feel free to make this dish your own and let your culinary creativity flow with these delightful twists!

  • Garlic Champ: Add roasted garlic for a rich, sweet depth of flavor that elevates the dish. Imagine the aroma wafting through your kitchen as it bakes!
  • Cheesy Champ: Mix in shredded cheddar or Parmesan cheese for a deliciously cheesy touch. It adds creaminess and a savory bite that will have everyone coming back for seconds!
  • Herbed Champ: Incorporate fresh herbs like thyme or dill to infuse a vibrant flavor profile. The freshness of the herbs will really make this dish sing at your next gathering.
  • Bacon Champ: Stir in crispy bacon bits for a smoky crunch that pairs beautifully with the creamy potatoes. It’s a crowd-pleaser that combines comfort and indulgence!
  • Vegan Champ: Swap out whole milk and butter for plant-based alternatives to make this dish vegan-friendly. Use coconut milk or almond milk for creaminess, ensuring all can enjoy this dish without compromise.
  • Spicy Champ: Add a pinch of red pepper flakes for a kick of heat that will surprise and delight your taste buds. It’s a fun twist that adds excitement to your meal!
  • Mustard Champ: For a tangy twist, add a spoonful of Dijon mustard. It brings an unexpected but delightful zing to this comforting classic.
  • Sour Cream Champ: Mix in sour cream or Greek yogurt for an extra twang and creamy texture. It adds a luscious richness that contrasts beautifully with the freshness of the scallions.

Whichever variation you choose, you can find more inspiration in delicious easy weeknight meals and enjoy the comforting taste of homemade goodness.

How to Store and Freeze Irish Champ

Fridge: Store leftover Irish Champ in an airtight container for up to 3-4 days. Ensure it’s cooled to room temperature before sealing to prevent condensation.

Freezer: For longer storage, freeze portions in meal-sized containers for up to 3 months. Allow to cool completely before transferring to avoid freezer burn.

Reheating: To reheat, thaw in the fridge overnight, then warm gently on the stove. Add a splash of milk to restore creaminess as needed.

Serving Tips: Before serving, give the Champ a good stir, and consider topping with a fresh pat of butter for that extra touch of warmth!

Irish Champ Recipe FAQs

What type of potatoes are best for Irish Champ?
Absolutely! I recommend using Yukon Gold potatoes for their creamy texture and rich flavor. However, Russet potatoes can also be used as an alternative if you prefer.

How should I store leftover Irish Champ?
For best results, store leftover Irish Champ in an airtight container in the fridge. It should stay good for about 3-4 days. Make sure to let it cool to room temperature before sealing to avoid moisture buildup.

Can I freeze Irish Champ?
Very! To freeze your Irish Champ, first allow it to cool completely. Then, scoop portions into meal-sized containers or freezer bags, and store them in the freezer for up to 3 months. When you're ready to enjoy it, thaw in the fridge overnight and reheat gently on the stove, adding a splash of milk to restore creaminess.

What should I do if my Irish Champ is too gluey?
If you find your Irish Champ has turned out gluey, it typically means the potatoes were over-mashed. To salvage it, you can blend it gently with a little more warm milk or cream to loosen the texture. Remember to handle them carefully next time!

Is Irish Champ safe for my gluten-free diet?
Absolutely! Irish Champ is naturally gluten-free, making it a fantastic side option for those adhering to gluten-free diets. Just be sure to check any additional ingredients you might add, such as bacon or cheese, to ensure they are also gluten-free.

Can I add ingredients to customize my Irish Champ?
Of course! Feel free to add variations such as roasted garlic, shredded cheddar, or herbs like thyme for added flavor. The more the merrier when it comes to customizing your Irish Champ to fit your palate!

Irish Champ

Irresistibly Creamy Irish Champ for Ultimate Comfort Food

This Irish Champ is a comforting dish made from creamy mashed potatoes and scallions, perfect for any mealtime.
Print Recipe Pin Recipe
Prep Time 10 minutes mins
Cook Time 20 minutes mins
Total Time 30 minutes mins
Servings: 4 servings
Course: Dinner
Cuisine: Irish
Calories: 200
Ingredients Equipment Method Nutrition Notes

Ingredients
  

For the Potatoes
  • 2 pounds Yukon Gold potatoes or russets if preferred
For the Creaminess
  • 1 cup whole milk or cream for indulgence
  • 4 tablespoons unsalted butter softened for easy blending
For Flavor
  • 1 bunch fresh scallions finely chopped
  • to taste salt
  • to taste freshly ground black pepper

Equipment

  • Large pot
  • potato masher or ricer
  • small saucepan
  • Colander

Method
 

Step-by-Step Instructions
  1. Peel and chop 2 pounds of Yukon Gold potatoes into chunks, then place in a large pot.
  2. Cover the potatoes with cold water and add a pinch of salt. Boil, then simmer for 15-20 minutes until tender.
  3. Drain the potatoes in a colander and return to the pot over low heat to evaporate any moisture.
  4. Mash the potatoes until smooth and fluffy. Avoid over-mashing to prevent a gluey texture.
  5. Heat 1 cup of whole milk or cream in a saucepan until warm, then gradually combine with mashed potatoes.
  6. Stir in 4 tablespoons of softened unsalted butter until melted and well incorporated.
  7. Add finely chopped scallions, salt, and pepper, mixing well to distribute evenly.
  8. Transfer the Irish Champ to a warm serving bowl and serve immediately, optionally topping with a pat of butter.

Nutrition

Serving: 1cupCalories: 200kcalCarbohydrates: 32gProtein: 4gFat: 8gSaturated Fat: 5gMonounsaturated Fat: 3gCholesterol: 30mgSodium: 300mgPotassium: 600mgFiber: 2gSugar: 1gVitamin A: 500IUVitamin C: 15mgCalcium: 100mgIron: 1mg

Notes

Store leftovers in an airtight container for up to 3-4 days. Reheat gently, adding a splash of milk if necessary.

Tried this recipe?

Let us know how it was!
  • « Previous Page
  • 1
  • …
  • 31
  • 32
  • 33
  • 34
  • 35
  • …
  • 87
  • Next Page »

Welcome!

Hi, I’m Grace, a Sydney-based home cook with a passion for bold flavors and trending ingredients. Whether you’re a busy beginner or a seasoned foodie, you’ll find dishes here that are fresh, fun, and full of flavor.

More about me

Popular Recipes

  • One Pot Keto Tuna Casserole
    One Pot Keto Tuna Casserole: Creamy Comfort in Minutes
  • Ultimate Jalapeno Popper Chicken Salad
    Ultimate Jalapeno Popper Chicken Salad That'll Wow Your Tastebuds
  • Green Chile Cheese Dip
    Mouthwatering Green Chile Cheese Dip for Cozy Gatherings
  • Easy Chimichurri Sauce
    Fresh and Zesty Easy Chimichurri Sauce in Just Minutes

Footer

↑ back to top

About

  • Privacy Policy
  • Disclaimer
  • Terms & Conditions

Newsletter

  • Sign Up! for emails and updates

Contact

  • About me
  • Contact me

Copyright © 2025 TastyTrendIngredients