tastytrendingredients

  • Home
  • Recipes
    • Appetizers
    • Breakfast
    • Dessert
    • Dinner
    • Drinks
    • Salads
    • Snacks
    • Soups
  • About me
  • Contact
menu icon
go to homepage
  • Home
  • Recipes
    • Appetizers
    • Breakfast
    • Dessert
    • Dinner
    • Drinks
    • Salads
    • Snacks
    • Soups
  • About me
  • Contact
search icon
Homepage link
  • Home
  • Recipes
    • Appetizers
    • Breakfast
    • Dessert
    • Dinner
    • Drinks
    • Salads
    • Snacks
    • Soups
  • About me
  • Contact
×

Mediterranean Chicken Tacos: Your Next Healthy Fiesta!

April 20, 2026 by Grace Snow Leave a Comment

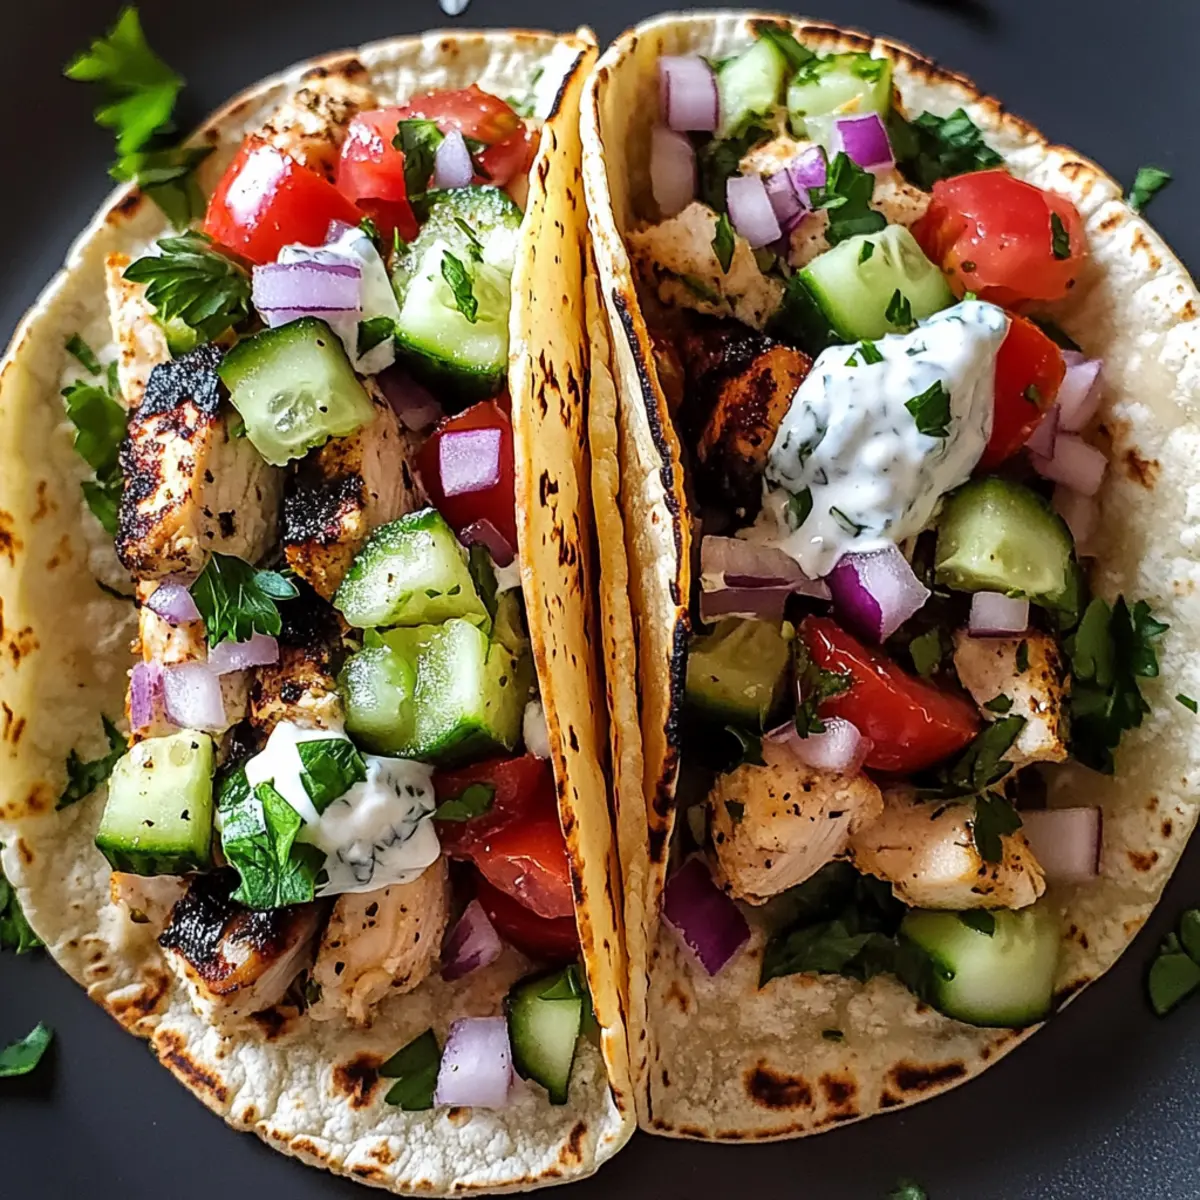
There’s something magical about summer nights when flavors come alive and the sizzle of the grill fills the air. That’s exactly how I feel about these Mediterranean Chicken Tacos. Packed with juicy marinated chicken, crisp veggies, and a tangy yogurt sauce, they’re a feast for both the eyes and the taste buds. Best of all, each taco is under 400 calories, perfect for those looking for a healthier meal option without sacrificing taste. In just 50 minutes, you can whip up a dish that's not only quick but also endlessly customizable. Whether you're feeding a crowd or enjoying a cozy dinner at home, these tacos are sure to delight everyone at the table. Curious about how to elevate your taco game? Let’s dive into the recipe!

Why Choose Mediterranean Chicken Tacos?

Healthy Yet Flavorful: Each taco is under 400 calories, making it a guilt-free indulgence that doesn’t compromise on taste.
Customizable Options: Switch up the protein with turkey or shrimp, or even go vegetarian with grilled veggies—there’s something for everyone!
Quick Preparation: Ready in just 50 minutes, these tacos are a time-saving marvel perfect for busy weeknight dinners.
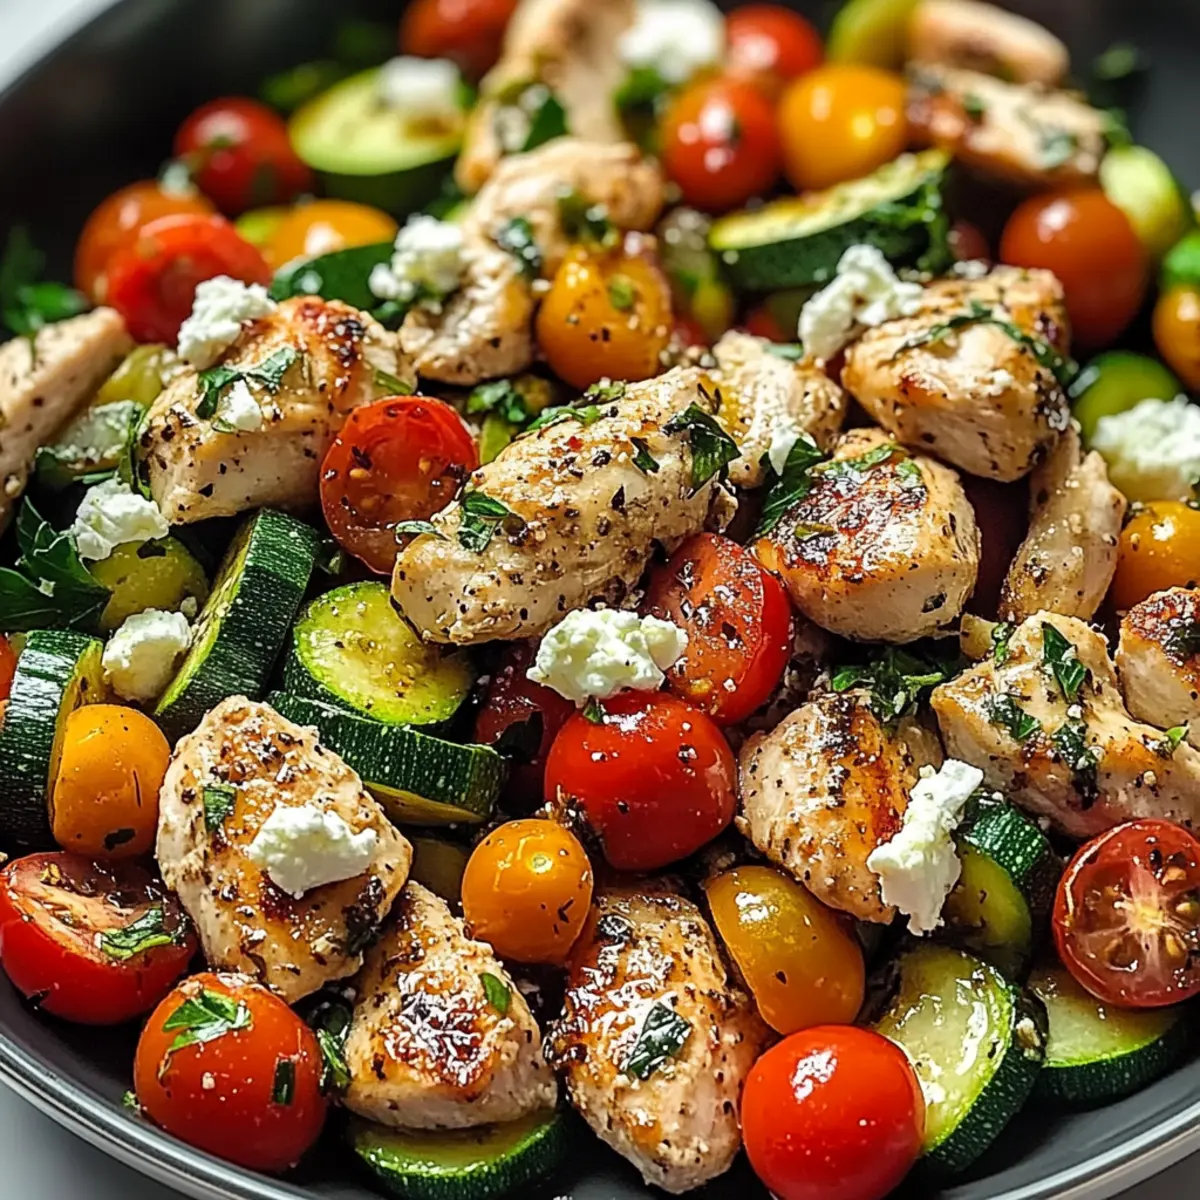
Vibrant Textures: Enjoy the crunch of fresh veggies paired with juicy chicken and a creamy yogurt sauce—each bite is a delightful mosaic of flavors.
Perfect for Sharing: Whether you're hosting a party or enjoying a family meal, these tacos steal the show and impress every guest.
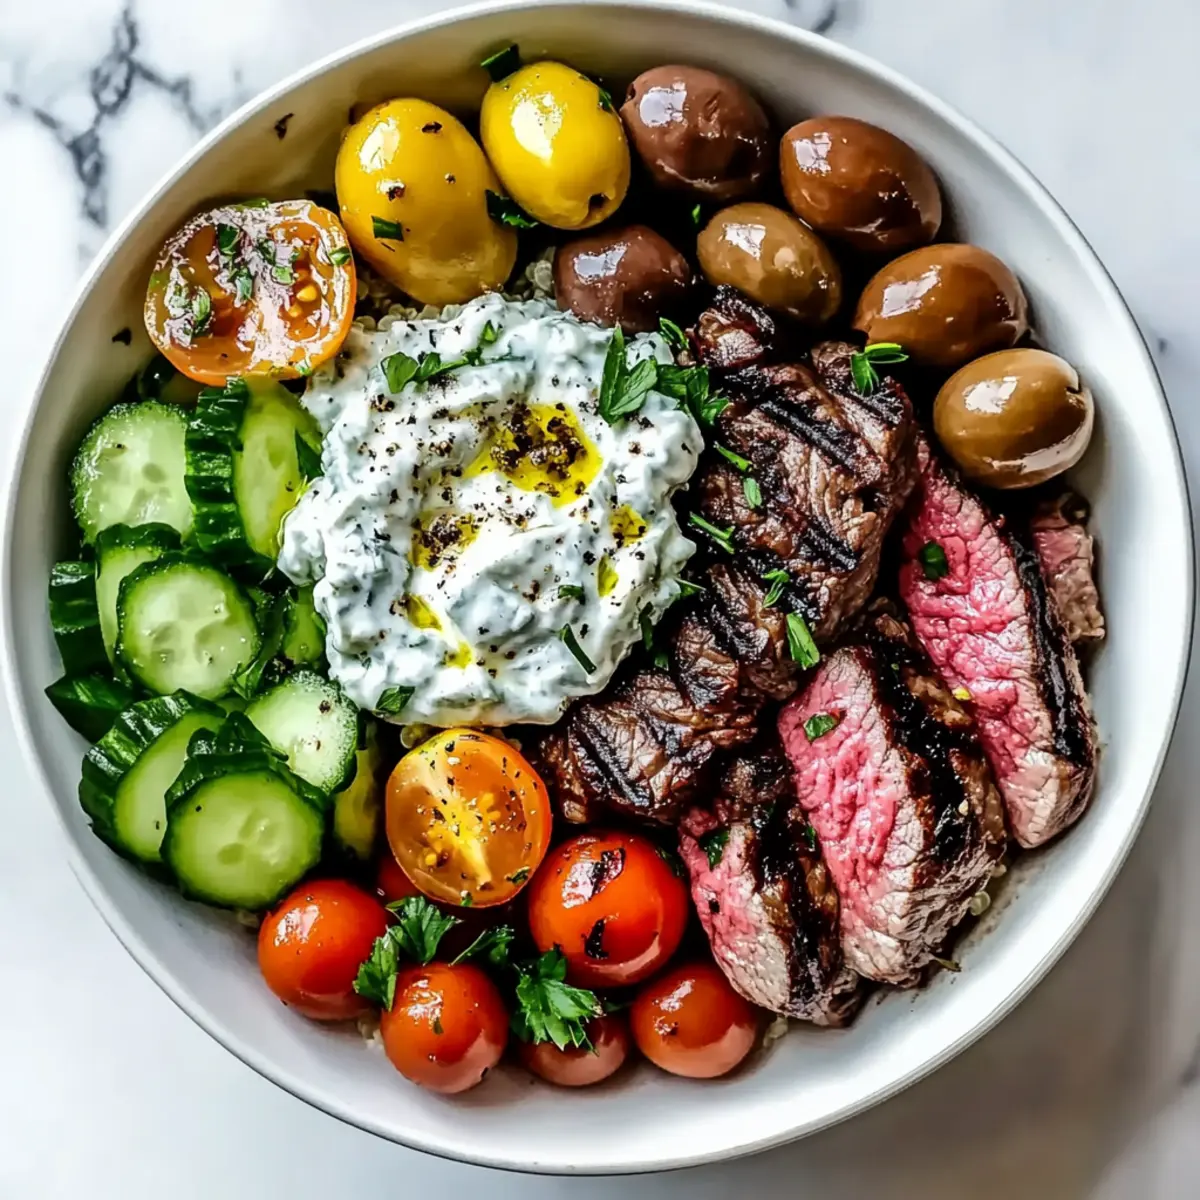
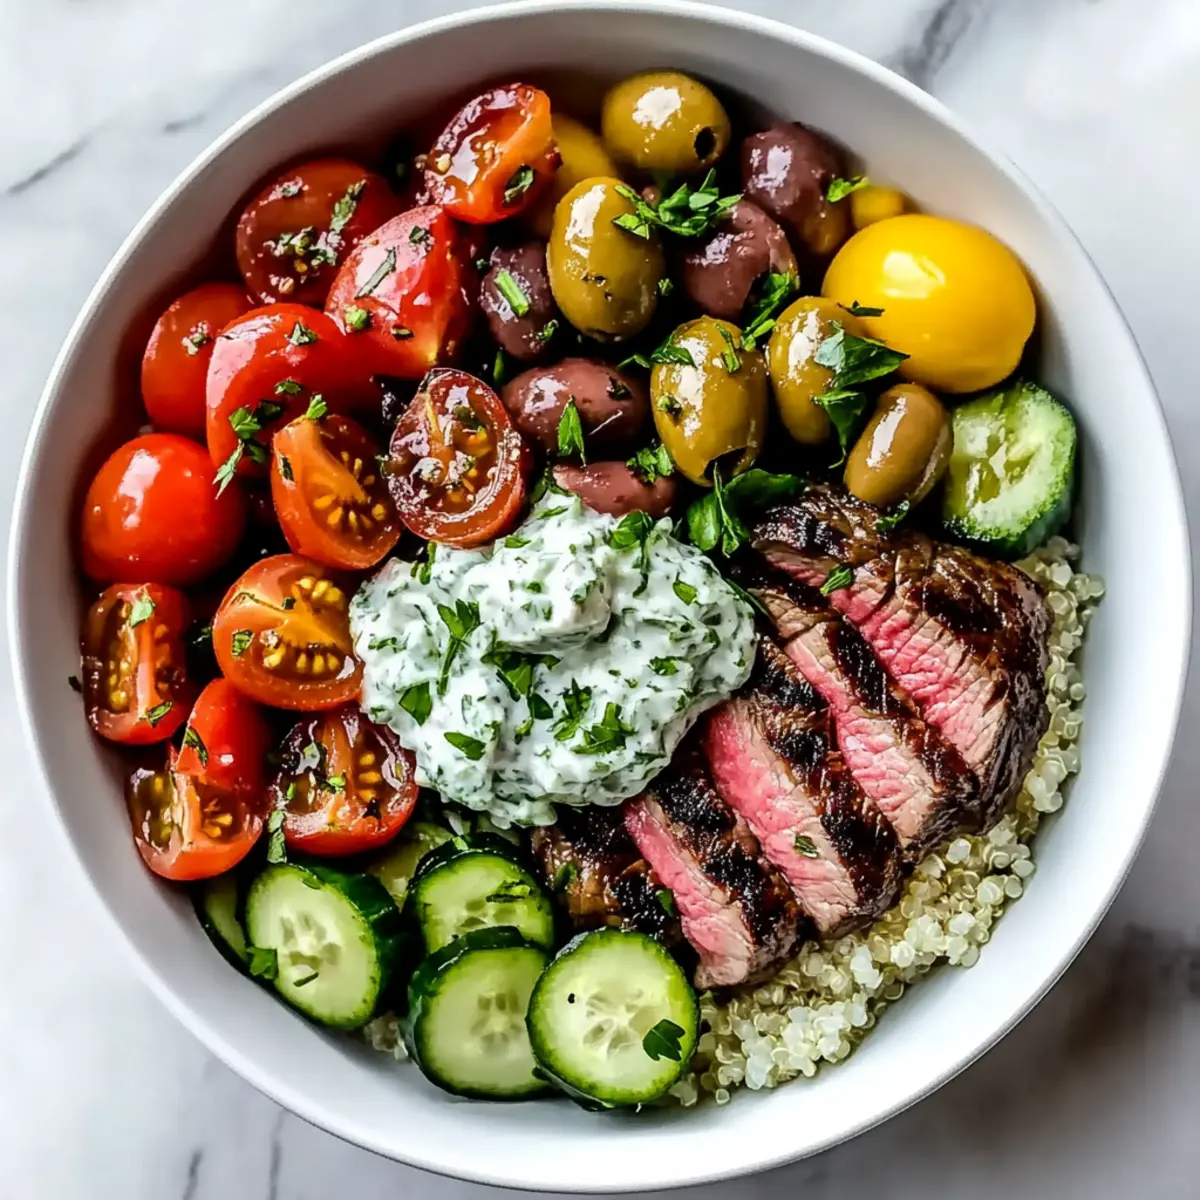
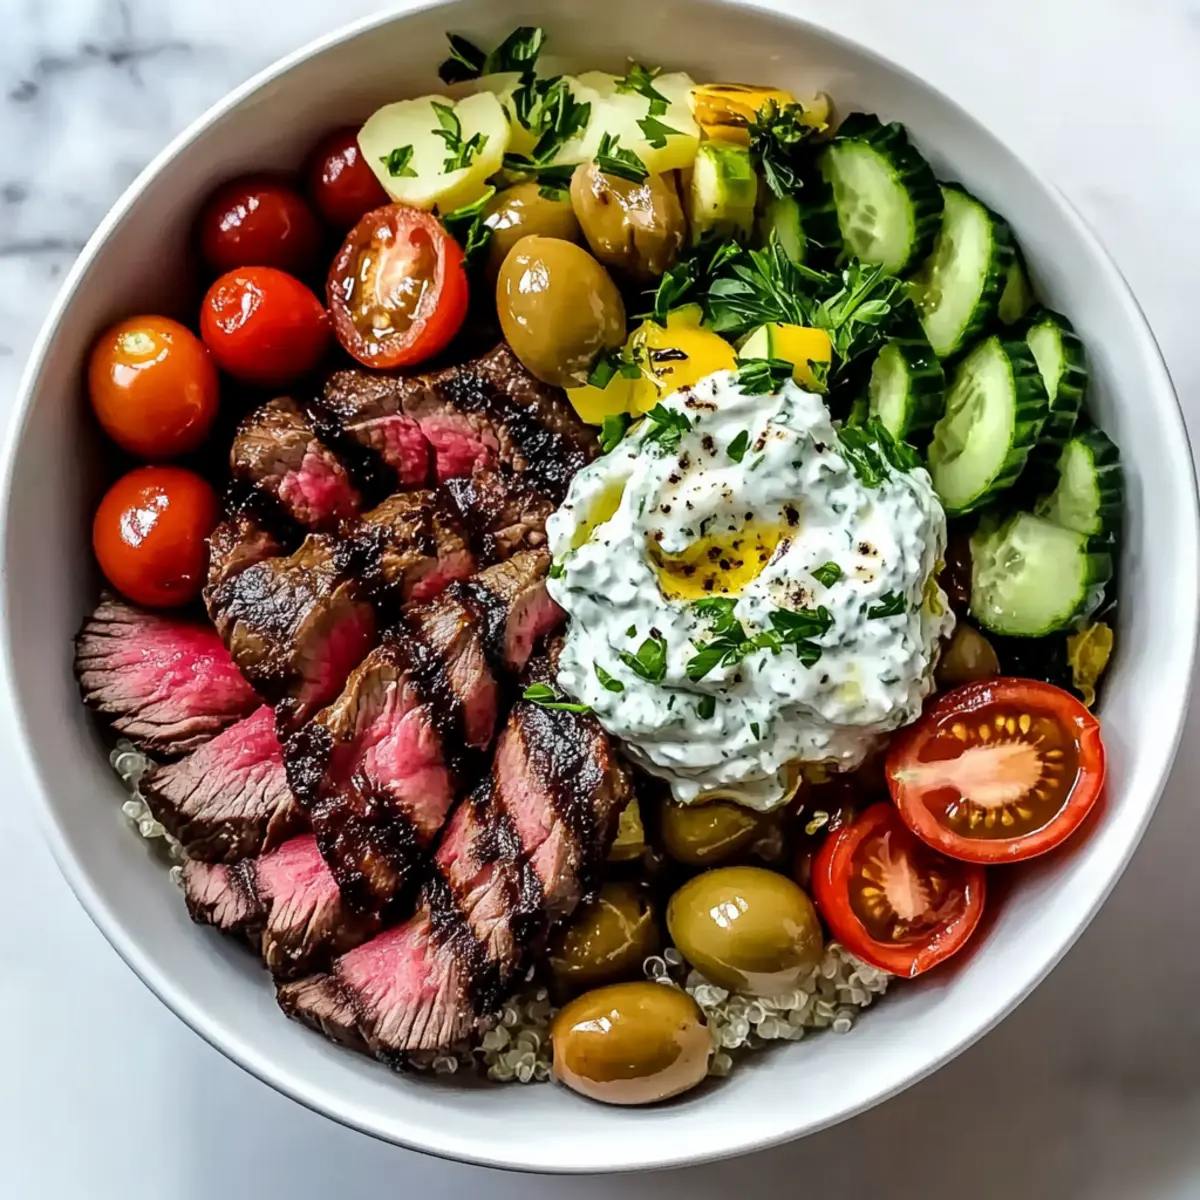
For a refreshing side, try serving with a Greek salad or tzatziki to complete your Mediterranean experience!

Mediterranean Chicken Tacos Ingredients

For the Chicken

  • Chicken Breasts – Boneless and skinless for the main protein; turkey or shrimp can be used as a tasty substitute.
  • Olive Oil – Essential for marinating, it adds moisture and rich flavor to keep your chicken juicy.
  • Minced Garlic – Provides aromatic depth and enhances the overall flavor profile of the marinated chicken.
  • Dried Oregano – A classic Mediterranean herb that brings earthy notes to your taco filling.
  • Ground Cumin – Adds warmth and a subtle nutty flavor, elevating your taco experience.
  • Salt and Pepper – Enhance flavors; adjust according to your taste preferences.

For the Yogurt Sauce

  • Plain Greek Yogurt – Acts as a creamy base for the sauce; substitute with plant-based yogurt for a dairy-free option.
  • Whole Lemon – Juiced to add freshness and a zesty taste that brightens the sauce.

For the Veggie Filling

  • Diced Tomatoes – Introduces fresh color and juiciness to balance the savory chicken.
  • Diced Cucumber – Provides a crispy texture and refreshing crunch, for a delightful contrast.
  • Red Onion – Finely chopped to add a mild bite that complements the other fresh ingredients.
  • Kalamata Olives – Pitted and sliced, they offer a briny depth characteristic of Mediterranean cuisine.
  • Crumbled Feta Cheese – Adds a tangy contrast to the tacos, enhancing the overall flavor.

For Assembly

  • Corn Tortillas – The perfect vessel for holding all the delicious fillings; heat briefly for flexibility during assembly.
  • Fresh Parsley – For garnish; adds a pop of color and a fresh herbal flavor to finish your tacos beautifully.

With these Mediterranean Chicken Tacos ingredients, you're on your way to a healthy fiesta that captures the essence of summer on your plate!

Step‑by‑Step Instructions for Mediterranean Chicken Tacos

Step 1: Marinate Chicken
In a medium bowl, combine ¼ cup of olive oil, 3 minced garlic cloves, 1 tablespoon of dried oregano, 1 teaspoon of ground cumin, and salt and pepper to taste. Add the boneless, skinless chicken breasts, ensuring they are fully coated in the marinade. Cover and let it marinate for at least 30 minutes in the refrigerator for optimal flavor, or up to overnight if possible.

Step 2: Cook Chicken
Preheat your grill or skillet over medium-high heat, ensuring it's hot enough to sear the chicken. Place the marinated chicken breasts on the grill and cook for about 6–7 minutes on each side until the internal temperature reaches 165°F and the chicken is beautifully golden. Remove from heat and let rest for 5 minutes before slicing thinly.

Step 3: Prepare Sauce
In a small mixing bowl, whisk together 1 cup of plain Greek yogurt and the juice of one whole lemon until smooth and creamy. Adjust the seasoning with a pinch of salt for added flavor. This zesty yogurt sauce will add a delightful creaminess to your Mediterranean Chicken Tacos, making each bite irresistible.

Step 4: Make Salad Topping
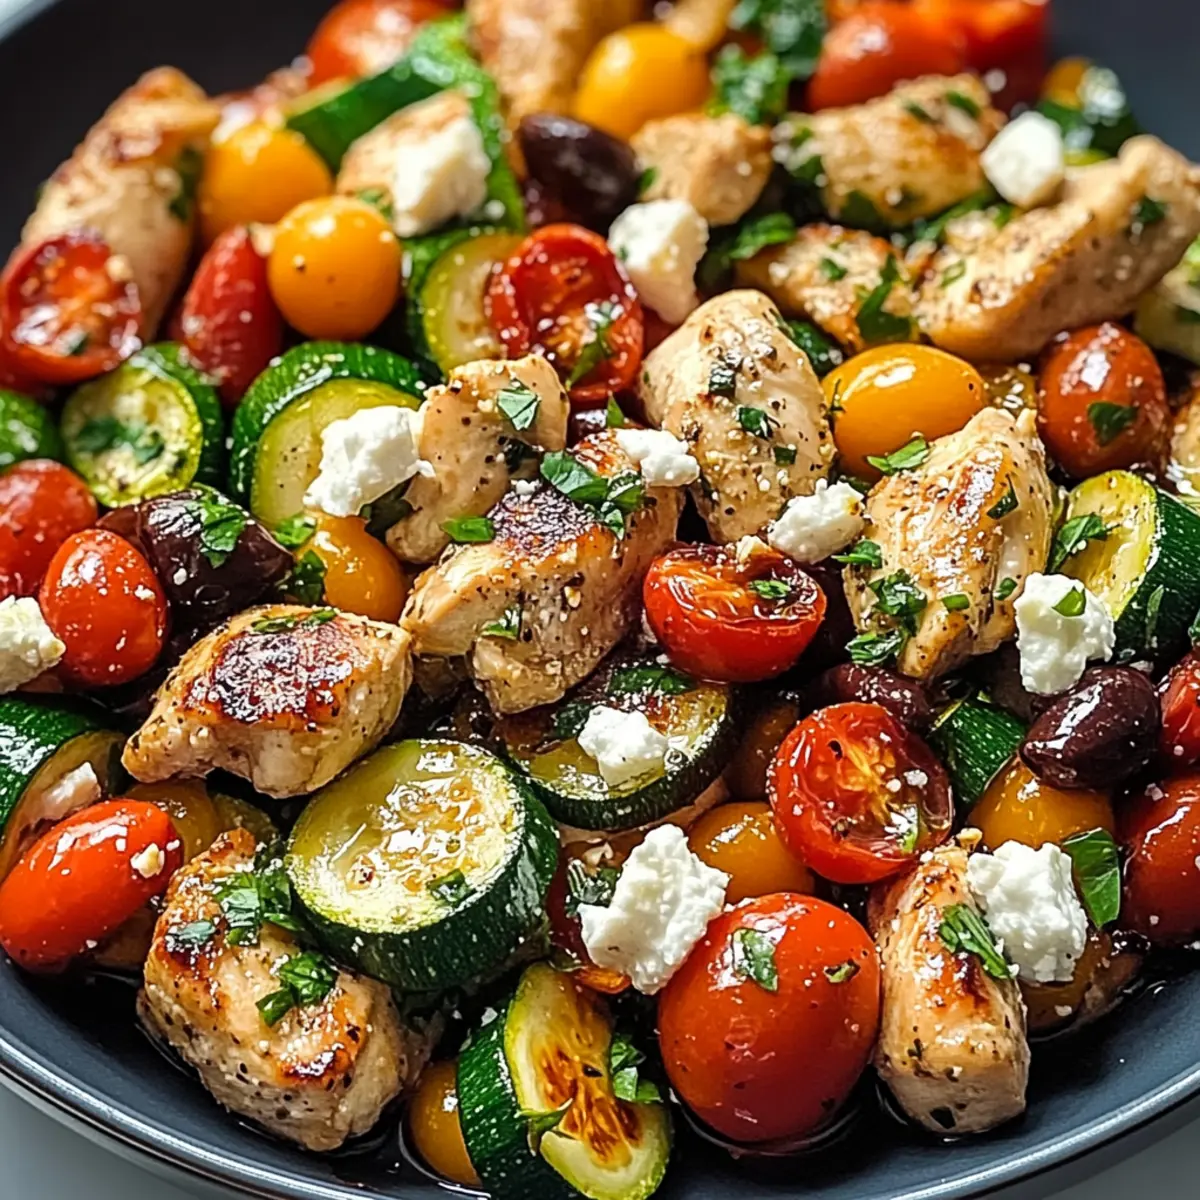
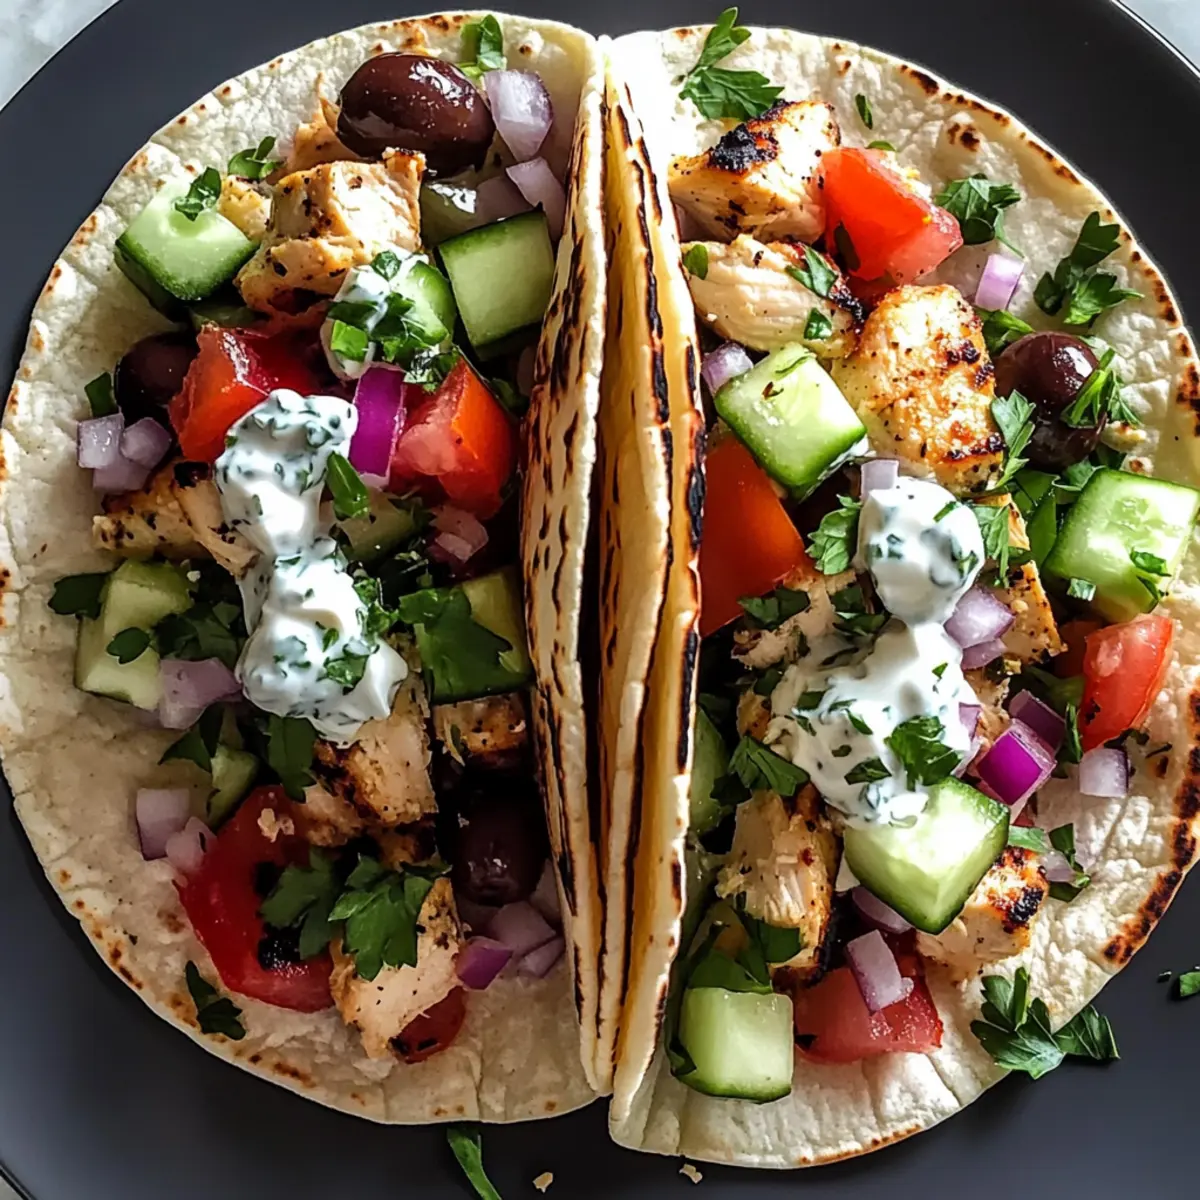
In a separate mixing bowl, combine 1 cup of diced tomatoes, 1 cup of diced cucumber, ½ cup of finely chopped red onion, ½ cup of sliced kalamata olives, and ½ cup of crumbled feta cheese. Toss gently to mix, ensuring all the ingredients are well incorporated. This fresh salad topping will add a vibrant crunch to your tacos.

Step 5: Warm Tortillas
To prepare your corn tortillas, heat a dry skillet over medium heat. Briefly warm each tortilla for about 30 seconds on each side, or until pliable and slightly toasted. This step prevents the tortillas from cracking when you fill them, making your Mediterranean Chicken Tacos easy to assemble and enjoyable to eat.

Step 6: Assemble Tacos
On each warmed tortilla, layer in slices of grilled chicken, followed by a generous scoop of the salad mixture. Drizzle the tangy yogurt sauce over the top, allowing it to cascade down the fillings. You can adjust the amount of each filling according to your preference for a personalized Mediterranean Chicken Taco experience.

Step 7: Garnish & Serve
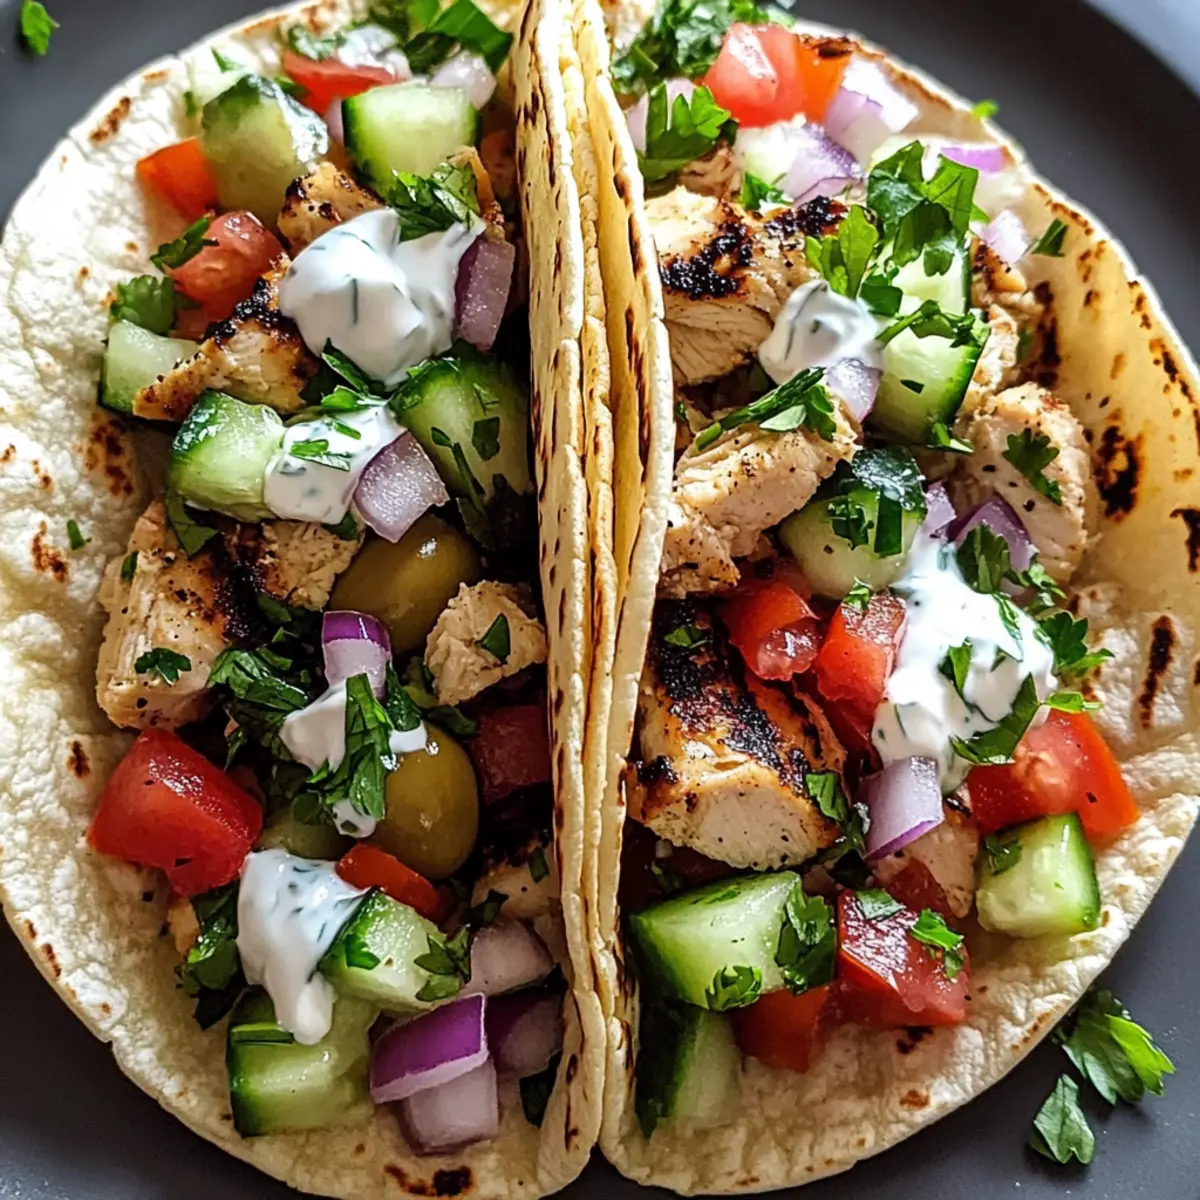
Finish your Mediterranean Chicken Tacos with a sprinkle of fresh parsley to add a burst of color and flavor. Serve immediately while warm, and watch as your family or guests enjoy this healthy, vibrant dish that captures the essence of Mediterranean cuisine.

Mediterranean Chicken Tacos Variations & Substitutions

Customization is the name of the game here! Feel free to mix things up and create your own delicious twists on these Mediterranean Chicken Tacos.

  • Turkey Swap: Use boneless turkey for a leaner yet equally juicy protein option.
  • Shrimp Delight: Try replacing chicken with shrimp for a succulent seafood twist that pairs perfectly with the creamy sauce.
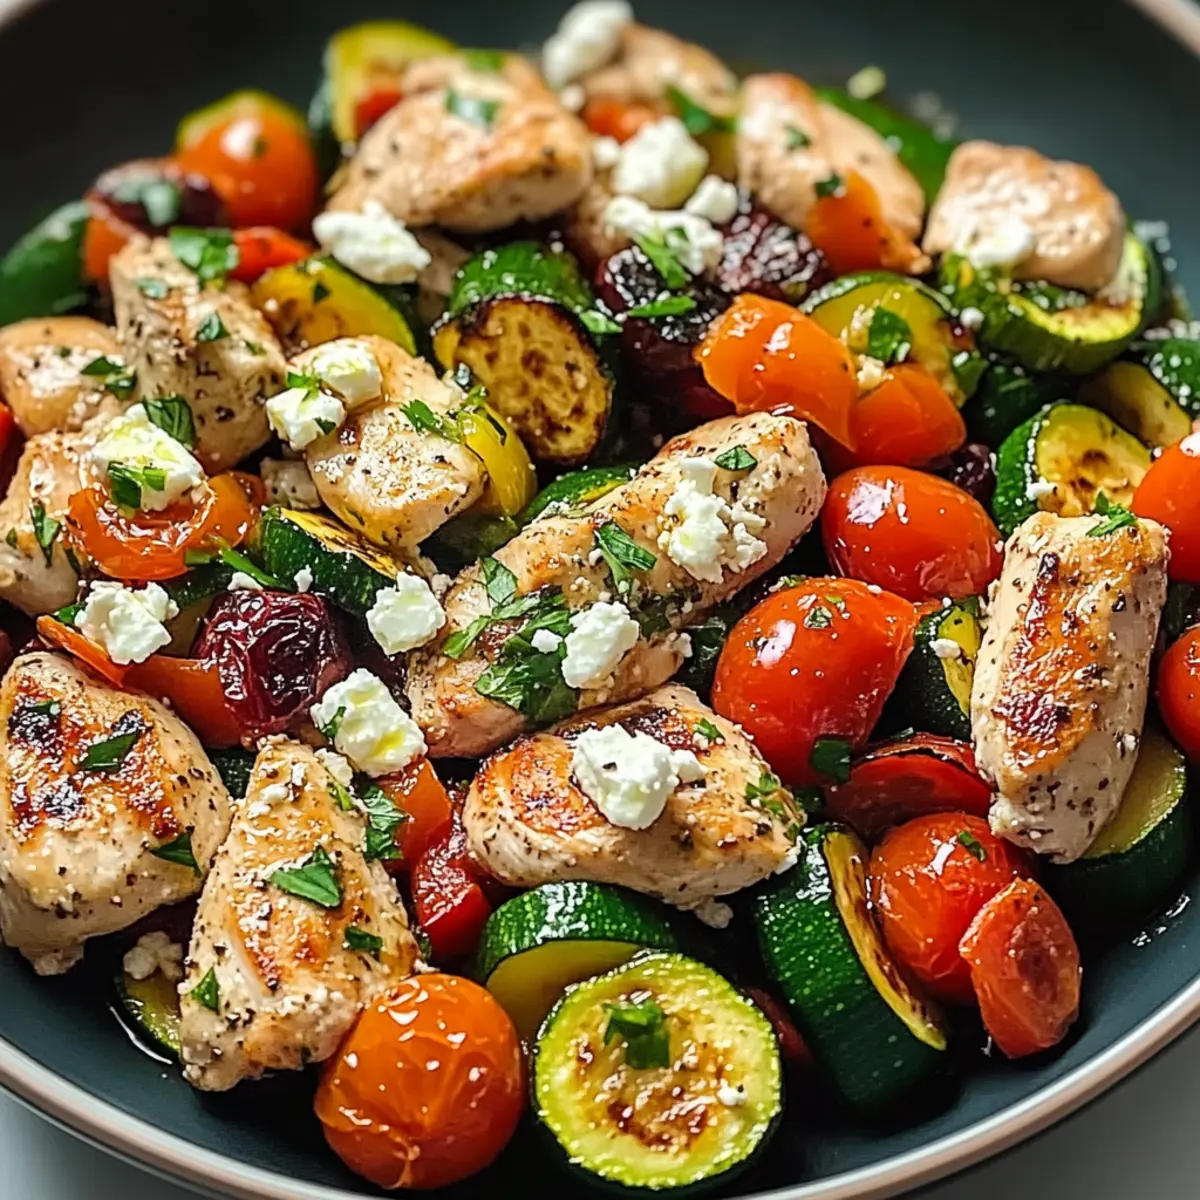
  • Vegetable Medley: Use a mix of grilled zucchini, bell peppers, and mushrooms for a vibrant and hearty vegetarian option, celebrating the freshness of summer produce.
  • Spicy Kick: Add red pepper flakes or diced jalapeños for an extra layer of heat that will wake up your taste buds and bring the fiesta to life!
  • Hummus Spread: Instead of yogurt, spread a layer of hummus on the tortillas for a rich, nutty flavor that complements the fresh veggies beautifully.
  • Avocado Boost: Incorporate sliced or mashed avocado for a creamy texture that pairs deliciously with the tangy yogurt sauce.
  • Herbaceous Zing: Mix in fresh herbs like dill or mint into your salad topping for an aromatic twist that elevates those Mediterranean flavors.
  • Chipotle Twist: Add some smoky chipotle seasoning to the chicken marinade for a smoky, spicy flavor that transforms these tacos into something sensational.

While you explore these variations, consider pairing your Mediterranean Chicken Tacos with a refreshing Greek salad or a creamy tzatziki sauce for the full Mediterranean experience!

Expert Tips for Mediterranean Chicken Tacos

  • Marinate Wisely: For the best flavor, let the chicken marinate for at least 1 hour or overnight if possible, allowing the spices to infuse deeply.
  • Check Temperature: Always ensure chicken reaches an internal temperature of 165°F to keep it juicy and safe to eat. Avoid overcooking, as this can lead to dry tacos.
  • Warm Tortillas: To prevent cracking, briefly warm corn tortillas on a skillet before filling. This keeps them pliable and enhances the overall taco experience.
  • Customize Fillings: Don’t shy away from personalizing your Mediterranean Chicken Tacos with extra veggies or your favorite spices to suit your taste.
  • Sauce Variation: For a dairy-free option, substitute Greek yogurt with a plant-based yogurt or hummus for a delicious twist on the sauce.
  • Serve Fresh: These tacos are best enjoyed immediately after assembly for optimal freshness, so gather your guests around the table to share the moment!

What to Serve with Mediterranean Chicken Tacos?

When it comes to creating a delightful meal, think beyond the tacos—bring in complementary flavors that enhance this Mediterranean feast!

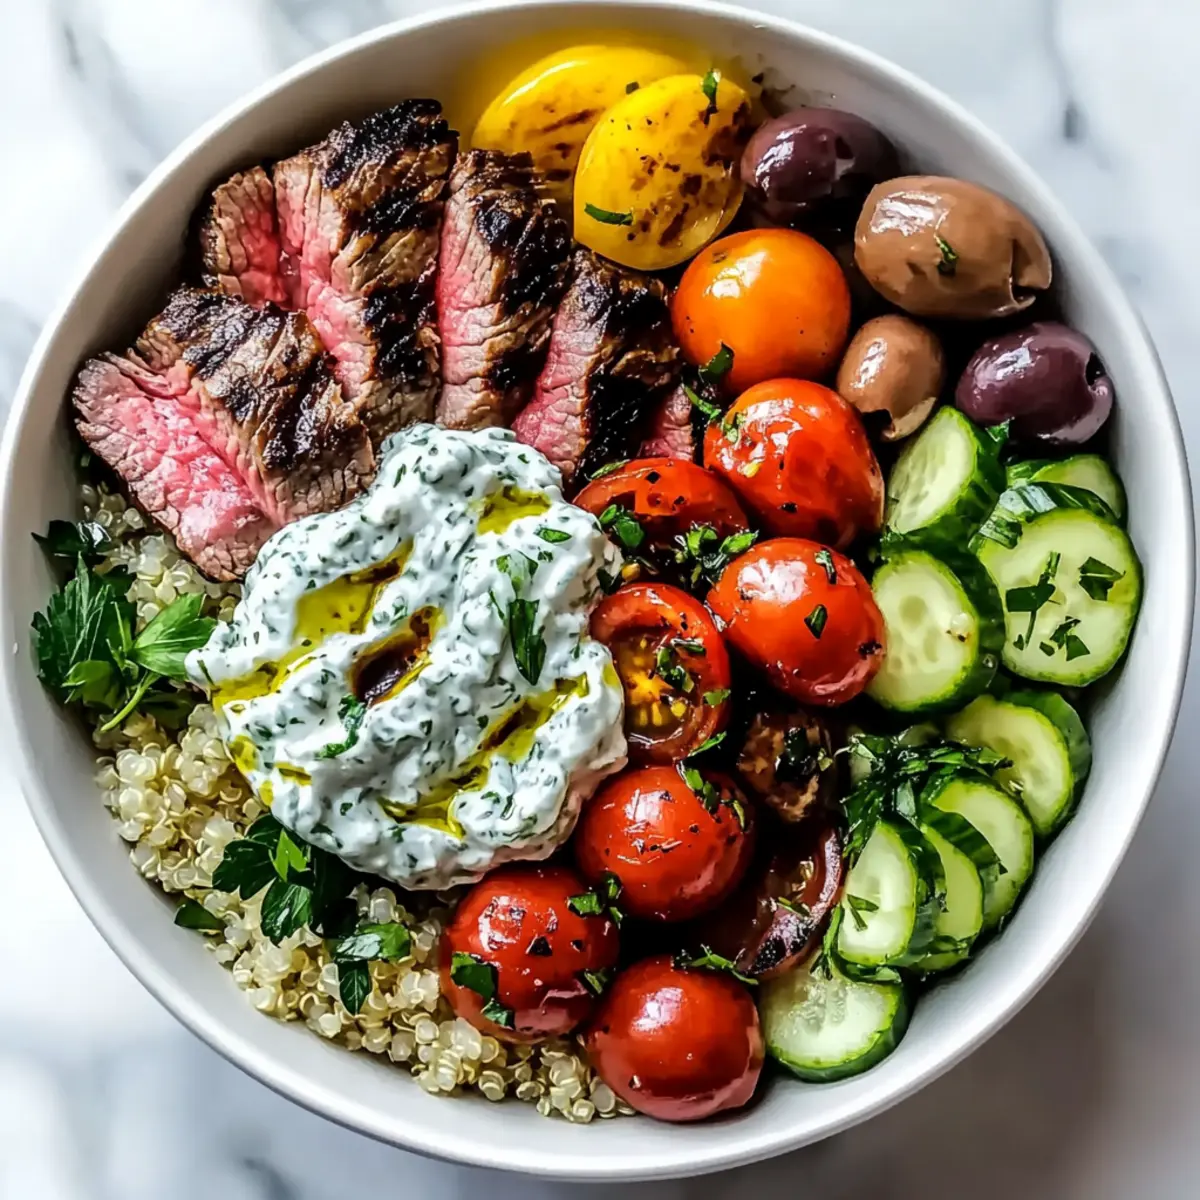
  • Greek Salad: A fresh, crisp salad features cucumbers, tomatoes, and feta, providing a refreshing contrast to the warm tacos.

  • Tzatziki Sauce: Creamy and cool with its yogurt, cucumber, and garlic, this dip brings out the delicious spices of the tacos.

  • Roasted Vegetables: Seasoned with oregano and olive oil, these veggies add a savory, caramelized element that pairs excellently with the chicken.

  • Quinoa Tabouli: Light and herbaceous, this salad offers a whole grain perspective, making every bite vibrant and nutritious.

  • Corn on the Cob: Grilled and brushed with garlic butter, this sweet side is the perfect accompaniment to the Mediterranean flavors.

  • Chickpea Hummus: Serve with warm pita for a rich, nutty dip that balances well with the freshness of tacos.

  • Sangria: A fruity, chilled glass of sangria adds a refreshing pop and makes the meal feel festive and fun.

  • Pistachio Baklava: End the meal with sweet layers of flaky pastry and nuts, adding the perfect sweet touch to your Mediterranean journey.

With these options, you’re sure to create a joyous scene that transforms your Mediterranean Chicken Tacos into a true celebration of flavors!

How to Store and Freeze Mediterranean Chicken Tacos

Fridge: Store any leftover Mediterranean Chicken Tacos in an airtight container for up to 3 days. Keep the yogurt sauce separate to prevent sogginess.

Freezer: If you have leftover cooked chicken, freeze it in a sealed freezer bag for up to 3 months. Make sure to cool the chicken completely before freezing.

Reheating: When ready to enjoy, thaw the chicken in the fridge overnight, then reheat in a skillet over medium heat until warmed through. For tortillas, briefly warm them on a skillet to regain pliability.

Prep Ahead: You can also prepare the salad topping and store it separately in the fridge for up to 3 days to make assembly quick and easy!

Make Ahead Options

These Mediterranean Chicken Tacos are perfect for meal prep enthusiasts looking to save time during busy weeknights! You can marinate the chicken up to 24 hours ahead, allowing its flavors to deepen, which will enhance the overall dish. Additionally, prepare the salad topping (diced tomatoes, cucumber, red onion, kalamata olives, and feta cheese) and store it in an airtight container in the refrigerator for up to 3 days. To maintain quality, keep the yogurt sauce separate and whisk it before serving for a fresh taste. When you’re ready to enjoy, simply grill the marinated chicken and assemble your tacos using your prepped ingredients for a delicious and stress-free meal!

Mediterranean Chicken Tacos Recipe FAQs

What type of chicken should I use for the Mediterranean Chicken Tacos?
Use boneless, skinless chicken breasts for the main protein. If you prefer alternatives, turkey breast or shrimp work beautifully in this recipe, offering delightful variations in flavor and nutrition.

How should I store leftover Mediterranean Chicken Tacos?
Store any leftover tacos in an airtight container in the refrigerator for up to 3 days. It's best to keep the yogurt sauce separate to avoid sogginess, ensuring the tortillas and fillings maintain their delicious texture.

Can I freeze cooked chicken from the Mediterranean Chicken Tacos?
Absolutely! If you have leftover cooked chicken, you can freeze it in a sealed freezer bag for up to 3 months. Be sure the chicken is fully cooled before placing it in the freezer. To reheat, thaw it in the fridge overnight and warm it in a skillet until heated through.

What are some common troubleshooting tips for Mediterranean Chicken Tacos?
If the chicken turns out dry, it may have been overcooked. Always check that the internal temperature reaches 165°F, and let it rest for 5 minutes before slicing to retain juices. Additionally, if the tortillas crack while assembling, try heating them a bit longer, making them more pliable and easier to work with.

Is this recipe suitable for people with dietary restrictions?
Yes! Each taco is customizable to fit various dietary needs. You can substitute Greek yogurt with plant-based yogurt for a dairy-free option, and feel free to omit the feta cheese or use a dairy-free alternative if necessary. Always check the ingredients for any allergies, especially with items like olives and certain condiments.

How can I enhance the flavor of my Mediterranean Chicken Tacos?
To elevate the flavor, consider marinating the chicken for longer—at least 1 hour or even overnight. Experimenting with additional herbs and spices can also add depth. You might want to include a sprinkle of red pepper flakes for a touch of heat or add avocado slices for creaminess. Your taco, your rules!

Mediterranean Chicken Tacos

Mediterranean Chicken Tacos: Your Next Healthy Fiesta!

Enjoy these Mediterranean Chicken Tacos packed with flavor and under 400 calories for a healthy meal.
Print Recipe Pin Recipe
Prep Time 20 minutes mins
Cook Time 30 minutes mins
Marinating Time 30 minutes mins
Total Time 50 minutes mins
Servings: 4 tacos
Course: Dinner
Cuisine: Mediterranean
Calories: 400
Ingredients Equipment Method Nutrition Notes

Ingredients
  

For the Chicken
  • 4 pieces Boneless skinless chicken breasts Turkey or shrimp can be used as a substitute.
  • ¼ cup Olive oil Essential for marinating.
  • 3 cloves Minced garlic Provides aromatic depth.
  • 1 tablespoon Dried oregano Classic Mediterranean herb.
  • 1 teaspoon Ground cumin Adds warmth and subtle flavor.
  • to taste Salt Enhances flavors.
  • to taste Pepper Enhances flavors.
For the Yogurt Sauce
  • 1 cup Plain Greek yogurt Can substitute with plant-based yogurt.
  • 1 whole Lemon Juiced for freshness.
For the Veggie Filling
  • 1 cup Diced tomatoes Introduces freshness.
  • 1 cup Diced cucumber Provides a refreshing crunch.
  • ½ cup Finely chopped red onion Adds a mild bite.
  • ½ cup Sliced Kalamata olives Offers a briny depth.
  • ½ cup Crumbled feta cheese Adds a tangy contrast.
For Assembly
  • 8 pieces Corn tortillas Heat briefly for flexibility.
  • to taste Fresh parsley For garnish.

Equipment

  • Grill
  • Mixing Bowl
  • Skillet
  • Whisk

Method
 

Step‑by‑Step Instructions
  1. In a medium bowl, combine ¼ cup of olive oil, 3 minced garlic cloves, 1 tablespoon of dried oregano, 1 teaspoon of ground cumin, and salt and pepper to taste. Add the boneless, skinless chicken breasts, ensuring they are fully coated in the marinade. Cover and let marinate for at least 30 minutes in the refrigerator.
  2. Preheat your grill or skillet over medium-high heat. Place the marinated chicken breasts on the grill and cook for about 6–7 minutes on each side until the internal temperature reaches 165°F. Remove from heat and let rest for 5 minutes before slicing thinly.
  3. In a small mixing bowl, whisk together 1 cup of plain Greek yogurt and the juice of one whole lemon until smooth. Adjust seasoning with a pinch of salt.
  4. In a separate bowl, combine 1 cup of diced tomatoes, 1 cup of diced cucumber, ½ cup of finely chopped red onion, ½ cup of sliced Kalamata olives, and ½ cup of crumbled feta cheese. Toss gently to mix.
  5. To prepare your corn tortillas, heat a dry skillet over medium heat. Briefly warm each tortilla for about 30 seconds on each side.
  6. On each warmed tortilla, layer in slices of grilled chicken, followed by a scoop of the salad mixture. Drizzle the yogurt sauce over the top.
  7. Finish tacos with a sprinkle of fresh parsley and serve immediately.

Nutrition

Serving: 1tacoCalories: 400kcalCarbohydrates: 35gProtein: 30gFat: 15gSaturated Fat: 4gPolyunsaturated Fat: 1gMonounsaturated Fat: 9gCholesterol: 75mgSodium: 600mgPotassium: 600mgFiber: 5gSugar: 3gVitamin A: 500IUVitamin C: 25mgCalcium: 150mgIron: 2mg

Notes

These tacos are best enjoyed immediately for optimal freshness. Customize fillings to your taste.

Tried this recipe?

Let us know how it was!

Mediterranean Baked Cod with Olives: A Healthy Family Favorite

April 20, 2026 by Grace Snow Leave a Comment

As I stood by the window, the sun streamed in, casting a warm glow over the kitchen, reminding me of Mediterranean summers spent by the sea. That's when I decided to whip up a dish that encapsulates all that sun-kissed vibrance—Mediterranean Baked Cod with Olives. This recipe is not only a breeze to prepare, taking just 40 minutes from start to finish, but it also delivers a healthy, tasty meal that will have your family raving for more. With flaky cod fillets mingling with briny olives and sweet cherry tomatoes, it's a culinary delight that appeals to even the pickiest eaters. Whether you're racing against the clock during a busy weeknight or simply craving a fresh and flavorful dinner, this dish promises to brighten your table. Ready to dive into the flavors of the Mediterranean? Let's get cooking!

Why is Mediterranean Baked Cod a must-try?

Quick and Easy: This recipe comes together in just 40 minutes, perfect for busy weeknights or spontaneous dinners.
Flaky and Flavorful: The cod fillets are incredibly tender and moist, melding beautifully with the briny olives and sweet tomatoes.
Healthy Ingredients: Packed with Omega-3 fatty acids and fresh veggies, this dish promotes a heart-healthy lifestyle.
Family-Friendly Appeal: Even the pickiest eaters will love this vibrant, colorful meal, making it a hit for everyone at the table.
Customizable Options: Whether you want to try different fish like salmon or add a sprinkle of feta, this dish offers endless variations. For more inspiration, explore my Matcha Baked Doughnuts or the refreshing Smoky Sweet Potatoes as healthy sides!

Mediterranean Baked Cod with Olives Ingredients

• Here’s everything you need to make this delicious meal!

For the Cod and Vegetables

  • Cod Fillets – main protein; flaky and mild in flavor, perfect for absorbing the surrounding aromas.
  • Kalamata Olives – adds brininess; can be replaced with green olives or olives of choice for a slight flavor twist.
  • Cherry Tomatoes – sweet and juicy; can substitute with diced regular tomatoes for a more substantial bite.
  • Red Onion – provides sweetness and crunch; substitute with yellow onion or shallots if desired.
  • Garlic – adds aroma and depth; fresh garlic preferred, but garlic powder works in a pinch.
  • Capers – imparts a tangy flavor; optional, but swapping with pickles gives a similar zest.
  • Olive Oil – used for drizzling; can substitute with avocado oil for a unique touch.
  • Dried Oregano – adds herbal notes; use fresh oregano instead, doubling the amount for extra flavor.
  • Fresh Lemon – for juice and zest to enhance flavor; can be substituted with lime if needed.
  • Salt and Black Pepper – essential seasonings; adjust to taste for perfect seasoning.
  • Fresh Parsley – for garnish; can replace with basil or cilantro for a fresh twist.

Step‑by‑Step Instructions for Mediterranean Baked Cod with Olives

Step 1: Preheat the Oven
Begin by preheating your oven to 400°F (200°C). This step is crucial to ensure your Mediterranean Baked Cod with Olives bakes evenly and reaches that delightful flakiness. While the oven is warming up, gather your baking dish and prepare your ingredients for the upcoming steps.

Step 2: Prepare the Baking Dish
Lightly grease a suitable baking dish with a touch of olive oil to prevent sticking. The greased surface will allow the vegetables and cod to roast beautifully without clinging to the dish. Once done, set your baking dish aside as you move on to chopping your vegetables.

Step 3: Chop the Vegetables
Slice the red onion thinly and halve the cherry tomatoes, making sure to keep the pieces uniform for even cooking. These vibrant vegetables will lay the foundation for your Mediterranean Baked Cod with Olives, infusing flavor into the dish while baking.

Step 4: Arrange the Vegetables
Layer the chopped onions and halved tomatoes in the prepared baking dish, spreading them out evenly. Sprinkle the olives and capers over the veggies, creating a colorful palette. This arrangement not only looks appealing but also allows the flavors to meld beautifully as everything bakes together.

Step 5: Season the Vegetables
Drizzle the vegetables generously with olive oil, ensuring they get a good coating. Sprinkle with salt, black pepper, and dried oregano to enhance the Mediterranean flavors. By seasoning at this stage, you're setting the groundwork for a delicious base for the cod.

Step 6: Prepare the Cod Fillets
Pat your cod fillets dry with a paper towel to remove excess moisture, which helps achieve that perfect texture. Season them lightly with salt and black pepper on both sides before placing them on top of the seasoned vegetables in the baking dish, allowing their flavors to blend.

Step 7: Add Olive Oil and Lemon Zest
Drizzle the seasoned cod fillets with a little extra olive oil and sprinkle some fresh lemon zest on top. This adds a zesty brightness that complements the Mediterranean Baked Cod with Olives beautifully, enhancing the flavors of the fish and vegetables as they roast.

Step 8: Bake
Place the baking dish in the preheated oven and bake for about 20 minutes. The cod is ready when it flakes easily with a fork and the vegetables are tender. Keep an eye on the cooking process to ensure the fish stays moist and doesn't overcook.

Step 9: Finish with Lemon Juice and Garnish
Once baked, remove the dish from the oven and squeeze fresh lemon juice over the top for a burst of flavor. Finally, garnish with freshly chopped parsley to add color and a fresh herbaceous note to your beautiful Mediterranean Baked Cod with Olives before serving.

What to Serve with Mediterranean Baked Cod with Olives

To create a vibrant and mouthwatering meal, consider these delightful pairings that complement the rich flavors of your Mediterranean Baked Cod.

  • Creamy Mashed Potatoes: The buttery texture of creamy mashed potatoes contrasts beautifully with the flaky cod, creating a delightful harmony on your plate.

  • Quinoa Salad: A light and nutty quinoa salad packed with fresh herbs and cucumbers provides a refreshing side that enhances the Mediterranean vibe.

  • Garlic Roasted Asparagus: The crunchy, earthy notes of garlic roasted asparagus bring a satisfying texture and herbal flavor, balancing the meal perfectly.

  • Mediterranean Couscous: Fluffy couscous topped with herbs, feta, and cherry tomatoes adds a hint of sweetness and a texture that pairs wonderfully with the cod.

  • Simple Green Salad: A crisp green salad drizzled with lemon vinaigrette brightens the meal, offering a refreshing bite and a touch of acidity.

  • Tzatziki Sauce: This cool, creamy dip made with yogurt and cucumber serves as a delightful accompaniment, adding a tangy twist that pairs beautifully with the cod.

Adding a glass of crisp white wine can elevate your dining experience, bringing out the aromatic flavors of the dish while enhancing the Mediterranean experience.

Expert Tips for Mediterranean Baked Cod

  • Thaw Completely: Ensure your cod is fully thawed before cooking for even baking; ice crystals will prevent proper cooking.
  • Check Doneness: Use a fork to test if the cod flakes easily; it should reach 145°F (63°C) to avoid drying out the fish.
  • Cheese Boost: If you love cheese, add crumbled feta or mozzarella in the last 5-10 minutes of baking for a mouthwatering twist to your Mediterranean Baked Cod with Olives.
  • Fresh Herb Finish: Brighten the dish with fresh herbs like basil or cilantro added just before serving instead of cooking them; this enhances freshness and flavor.
  • Veggie Varieties: Feel free to mix other Mediterranean vegetables like zucchini or bell peppers for added nutrition and color, making it a customizable feast.

Make Ahead Options

These Mediterranean Baked Cod with Olives are a fantastic choice for meal prep, saving you time on busy weeknights! You can chop the vegetables (red onion and cherry tomatoes) and layer them in the baking dish up to 24 hours in advance, storing the dish covered in the refrigerator. Additionally, season the cod fillets and keep them in a separate airtight container for optimal freshness. When it's time to cook, all you need to do is place the cod on top of the prepared vegetables, drizzle with olive oil and lemon zest, and bake as directed. This ensures that the dish remains just as delicious and flavorful while allowing you to enjoy a healthy homemade meal with minimal effort!

Storage Tips for Mediterranean Baked Cod with Olives

Fridge: Store the Mediterranean Baked Cod with Olives leftovers in an airtight container for up to 3 days. This preserves the flavors and moisture of the fish and vegetables.

Freezer: For longer storage, freeze the leftovers in an airtight container or freezer bag for up to 3 months. Make sure to label with the date to keep track.

Reheating: To reheat, place the cod and vegetables in an oven preheated to 350°F (175°C) for about 15-20 minutes, ensuring the fish remains moist and tender.

Serving Fresh: For the best flavor experience, enjoy your Mediterranean Baked Cod with Olives fresh, but don't hesitate to store leftovers for a delightful next-day meal!

Mediterranean Baked Cod with Olives Variations

Feel free to get creative with this Mediterranean Baked Cod with Olives recipe and make it your own with delightful twists!

  • Fish Swap:
    Try using salmon or halibut for a richer flavor profile while maintaining the same cooking method.

  • Vibrant Veggies:
    Add zucchini or bell peppers for a pop of color and extra nutrition, making each bite even more enjoyable!

  • Cheesy Goodness:
    Blend in crumbled feta cheese during the last 5-10 minutes of baking for a creamy texture that pairs beautifully with the fish.

  • Herb Infusion:
    Experiment with fresh herbs like basil or cilantro instead of parsley for a fragrant contrast that brightens every mouthful.

  • Lemon Zest Twist:
    Swap regular lemon for lime to introduce a different citrus flair that complements the dish's overall taste.

  • Spice it Up:
    Add a pinch of red pepper flakes for a mild heat that plays perfectly with the briny olives and sweetness of the tomatoes.

  • Grilled Delight:
    Instead of baking, try grilling the dish using foil packets to hold the vegetables, resulting in a smoky flavor that’s simply irresistible.

  • Mediterranean Grain:
    Serve alongside a bed of quinoa or couscous to add hearty texture, transforming your meal into a complete Mediterranean feast.

Feel inspired by these ideas, and don’t forget to check out my Tagliatelle Asparagus Peas for another delicious twist on seasonal veggies!

Mediterranean Baked Cod with Olives Recipe FAQs

How do I choose the best cod fillets for this recipe?
Absolutely! When selecting cod fillets, look for firm, moist fish with a mild scent. The flesh should be pearly white to off-white and free from dark spots. If frozen, ensure it's fully thawed for even cooking. Alternatively, you can use halibut or snapper as delicious substitutes if cod isn't available.

How should I store leftovers from the Mediterranean Baked Cod with Olives?
Store any leftovers in an airtight container in the fridge for up to 2-3 days. This will help maintain the moisture of the fish and the freshness of the vegetables. Just be sure to let it cool completely before sealing to avoid condensation, which could make things soggy.

Can I freeze the Mediterranean Baked Cod with Olives?
Definitely! To freeze, allow leftovers to cool to room temperature, then place them in an airtight container or a freezer bag. Be sure to label it with the date! The dish will remain delicious for up to 3 months. When you're ready to enjoy, thaw it overnight in the refrigerator before reheating.

What if the cod is overcooked and not flaky?
Very understandable! If you think your cod is overcooked, it could have dried out. To avoid this in the future, use a timer and take the cod out as soon as it flakes with a fork. Additionally, check that your oven is properly calibrated. A good rule is to pull it at about 145°F (63°C). Remember, it's better to slightly undercook than overcook since residual heat will continue cooking the fish outside the oven.

Is this recipe suitable for a gluten-free diet?
Absolutely! The Mediterranean Baked Cod with Olives is gluten-free as it uses only fresh ingredients and no gluten-containing items. Just be mindful of any additional seasonings and toppings, such as sauces or pre-packaged condiments, that may contain gluten. Always read labels to ensure they meet your dietary needs.

Mediterranean Baked Cod with Olives

Mediterranean Baked Cod with Olives: A Healthy Family Favorite

Mediterranean Baked Cod with Olives is a quick, healthy recipe that delivers flaky cod fillets with olives, tomatoes, and more in just 40 minutes.
Print Recipe Pin Recipe
Prep Time 20 minutes mins
Cook Time 20 minutes mins
Total Time 40 minutes mins
Servings: 4 servings
Course: Dinner
Cuisine: Mediterranean
Calories: 300
Ingredients Equipment Method Nutrition Notes

Ingredients
  

For the Cod and Vegetables
  • 4 fillets Cod flaky and mild in flavor
  • 1 cup Kalamata Olives can be replaced with green olives
  • 1 cup Cherry Tomatoes can substitute with diced regular tomatoes
  • 1 medium Red Onion substitute with yellow onion or shallots if desired
  • 3 cloves Garlic fresh garlic preferred
  • 2 tablespoons Capers optional, can swap with pickles
  • 2 tablespoons Olive Oil can substitute with avocado oil
  • 1 teaspoon Dried Oregano use fresh oregano instead for extra flavor
  • 1 large Fresh Lemon for juice and zest, can substitute with lime
  • to taste Salt essential seasoning
  • to taste Black Pepper essential seasoning
  • 2 tablespoons Fresh Parsley for garnish, can replace with basil or cilantro

Equipment

  • Baking Dish
  • Knife
  • Cutting Board

Method
 

Step-by-Step Instructions
  1. Preheat your oven to 400°F (200°C).
  2. Lightly grease a baking dish with olive oil.
  3. Slice the red onion thinly and halve the cherry tomatoes.
  4. Layer the chopped onions and halved tomatoes in the baking dish, sprinkle with olives and capers.
  5. Drizzle with olive oil, and sprinkle with salt, black pepper, and oregano.
  6. Pat the cod fillets dry, season with salt and pepper, and place them on top of the vegetables.
  7. Drizzle cod with olive oil and sprinkle with lemon zest.
  8. Bake for about 20 minutes until the cod flakes easily with a fork.
  9. Remove from oven, squeeze lemon juice over the top, and garnish with parsley before serving.

Nutrition

Serving: 1servingCalories: 300kcalCarbohydrates: 10gProtein: 30gFat: 15gSaturated Fat: 2gPolyunsaturated Fat: 1gMonounsaturated Fat: 11gCholesterol: 70mgSodium: 800mgPotassium: 600mgFiber: 2gSugar: 3gVitamin A: 500IUVitamin C: 15mgCalcium: 30mgIron: 1mg

Notes

For best flavor, enjoy fresh. Leftovers can be stored in the fridge for up to 3 days or frozen for up to 3 months.

Tried this recipe?

Let us know how it was!

Tilapia in Roasted Pepper Sauce for a Quick Mediterranean Feast

April 20, 2026 by Grace Snow Leave a Comment

As I stood in my kitchen, the tantalizing aroma of roasted red bell peppers teasing my senses, I knew it was time to whip up something special: Tilapia in Roasted Pepper Sauce. This Mediterranean-inspired dish marries the delicate, flaky texture of fresh tilapia with a vibrant, smoky sauce that redefines weeknight dinners. What I love most is how quick this recipe is to prepare—perfect for those busy evenings when you crave something homemade yet effortless. Plus, it’s gluten-free and brimming with fresh ingredients, making it a guilt-free pleasure! Are you ready to bring a taste of sunshine to your table? Let’s dive into this delightful recipe!

Why is Tilapia in Roasted Pepper Sauce special?

Quick Preparation: You can whip up this meal in under 30 minutes, making it perfect for hectic weeknights.

Vibrant Flavor: The blend of sweet roasted peppers with garlic creates a sauce that dances on your palate, elevating your dish from ordinary to extraordinary.

Gluten-Free Delight: This recipe is naturally gluten-free, allowing everyone at the table to enjoy with peace of mind.

Versatile Pairing: Serve over fluffy couscous, steamed jasmine rice, or a crisp salad—each bite will leave you feeling satisfied.

Wholesome Ingredients: Packed with fresh, seasonal produce, it highlights the essence of Mediterranean cooking, ensuring a healthy dish that doesn’t skimp on flavors.

Discover a recipe that not only feeds your hunger but also nurtures your love for homemade meals!

Tilapia in Roasted Pepper Sauce Ingredients

For the Tilapia
• Tilapia Fillets – A primary protein that provides a flaky texture; you can substitute it with cod, haddock, or halibut for similar delicious results.

For the Roasted Pepper Sauce
• Red Bell Peppers – The star of the sauce offers a sweet, vibrant flavor and color; jarred roasted peppers can be used for convenience.
• Olive Oil – Essential for roasting and sautéing; choose a high-quality oil to enhance the flavors beautifully.
• Garlic – Adds aromatic depth to the sauce; fresh garlic is best, but jarred minced garlic works in a pinch.
• Lemon Juice – Brightens the sauce with its acidity; prefer fresh juice over bottled for the best flavor profile.
• Salt and Pepper – Crucial for seasoning; adjust according to your taste for a balanced dish.

By gathering these fresh ingredients, you're just steps away from creating a stunning dish of Tilapia in Roasted Pepper Sauce that will surely impress your family and friends!

Step‑by‑Step Instructions for Tilapia in Roasted Pepper Sauce

Step 1: Preheat the Oven
Begin by preheating your oven to 400°F (200°C). This temperature will ensure that your roasted red bell peppers cook evenly and develop a slightly charred exterior, enhancing their natural sweetness. While your oven warms up, gather the necessary baking sheet and parchment paper for easy cleanup.

Step 2: Prepare the Peppers
Next, slice the red bell peppers into quarters and remove the seeds. Toss them in a bowl with a drizzle of olive oil, a pinch of salt, and freshly cracked pepper. Spread the seasoned peppers onto a baking sheet lined with parchment paper, ensuring they have ample space to roast without overcrowding for about 20 minutes, or until they are tender and slightly caramelized.

Step 3: Blend the Sauce
Once the peppers are roasted, transfer them to a blender or food processor. Add the minced garlic and a splash of fresh lemon juice, then blend until you achieve a smooth, vibrant sauce. Scrape down the sides if needed, and taste for seasoning, adjusting with salt and pepper as desired.

Step 4: Cook the Tilapia
In a large skillet, heat a tablespoon of olive oil over medium heat. Gently place the tilapia fillets in the hot skillet, cooking for 3-4 minutes on one side until they are golden brown. Carefully flip each fillet and cook for an additional 3-4 minutes until the fish is flaky and cooked through, reaching a beautifully golden hue.

Step 5: Add the Sauce
Once the tilapia is perfectly cooked, pour the blended roasted pepper sauce over the fillets in the skillet. Let the sauce simmer with the fish for about 1 minute, allowing all the flavors to meld together beautifully and the dish to warm through.

Step 6: Serve and Garnish
To serve your delightful Tilapia in Roasted Pepper Sauce, plate the fish along with the sauce generously drizzled over top. Garnish with chopped fresh parsley or basil, and a sprinkle of lemon zest for an extra touch of brightness. Pair it with fluffy couscous, jasmine rice, or a fresh salad for a stunning Mediterranean meal.

Storage Tips for Tilapia in Roasted Pepper Sauce

Fridge: Store leftovers in an airtight container for up to 2 days. The roasted pepper sauce may deepen in flavor, making it even tastier the next day.

Freezer: While freezing cooked tilapia is not recommended due to texture changes, you can freeze the roasted pepper sauce for up to 1 month in a tightly sealed container.

Reheating: For best results, reheat the leftover fish gently in a skillet over low heat, adding a splash of water or broth to keep it moist.

Serving Freshness: Enjoy the vibrant flavor of Tilapia in Roasted Pepper Sauce fresh for the best texture and taste, but don't hesitate to save leftovers for a quick meal!

What to Serve with Tilapia in Roasted Pepper Sauce

Elevate your Mediterranean meal experience with delightful side dishes that complement the flavors of this vibrant dish.

  • Fluffy Couscous: Its light, airy texture pairs beautifully with the rich sauce, absorbing the flavors while adding a lovely bite.

  • Steamed Jasmine Rice: The subtle fragrance of jasmine rice enhances the dish. Its simplicity balances the boldness of the roasted pepper sauce perfectly.

  • Citrusy Leaf Salad: A refreshing salad with mixed greens, citrus segments, and a light vinaigrette lifts the meal, providing a crisp contrast to the flaky fish.

  • Garlic Bread: Perfect for soaking up every drop of the sauce, warm garlic bread adds a comforting element that makes the meal feel complete.

  • Grilled Vegetables: A medley of zucchini, bell peppers, and asparagus offers a colorful, healthy addition, echoing the roasted flavors in the sauce.

  • White Wine: A glass of chilled Sauvignon Blanc or a light Pinot Grigio can enhance the meal, pairing beautifully with the seafood and sauce.

Indulge in these pairings and create a full Mediterranean feast that will have everyone asking for seconds!

Make Ahead Options

Preparing Tilapia in Roasted Pepper Sauce ahead of time is a fantastic way to save precious minutes on busy weeknights! You can roast the red bell peppers and blend them into the sauce up to 3 days in advance; simply refrigerate the sauce in an airtight container. The tilapia itself can be seasoned and stored in the fridge for up to 24 hours before cooking. When you're ready to enjoy this delightful dish, simply pan-sear the tilapia and pour the pre-made sauce over it for an effortless meal. This method ensures the flavors are just as vibrant and delicious while allowing you to enjoy quality homemade food with minimal last-minute effort!

Tilapia in Roasted Pepper Sauce Variations

Feel free to get creative! Here are some delightful spins on the classic dish to elevate your culinary experience.

  • Spicy Twist: Add red pepper flakes to the roasted peppers before blending for a warm kick. This variation will bring an exciting heat to each bite.

  • Creamy Addition: Stir in a dollop of Greek yogurt or sour cream into the sauce after blending for a rich and creamy texture. It adds a luscious contrast to the vibrant sauce.

  • Herb Infusion: Introduce fresh herbs like basil or oregano to the sauce for aromatic layers of flavor. This will provide an earthy richness that complements the roasted peppers beautifully.

  • Substitution Opportunity: Swap tilapia for shrimp. Cook them in the sauce for a few minutes until they are pink and tender, delivering a succulent seafood alternative.

  • Zesty Lemon Boost: Add extra lemon zest or a splash of lemon juice just before serving for that refreshing burst of citrus. It enhances the dish with brightness and depth.

  • Veggie Lover's Version: Toss in chopped spinach or kale into the sauce after blending for added nutrients and a pop of green color. This keeps the dish healthy and visually appealing.

  • Chickpea Delight: Blend cooked chickpeas into the sauce for added protein and a creamier texture. This will elevate it to a wholesome, vegetarian option that is still rich in flavor.

  • Make-Ahead Convenience: Prepare the roasted pepper sauce in advance and refrigerate it overnight. The flavors will marry beautifully overnight, saving you time on busy evenings.

Whichever variation you choose, you're guaranteed a delightful dish that brings warmth and comfort to your table, echoing the essence of Mediterranean cooking. For an exciting side, consider pairing it with fluffy couscous or Maple Roasted Sweet Potatoes with Pecans for a complete meal experience!

Expert Tips for Tilapia in Roasted Pepper Sauce

Hot Skillet: Ensure your skillet is hot before adding tilapia; a well-heated pan helps achieve a golden, crispy crust.

Don’t Disturb: Avoid flipping the fish too soon; let it sear for 3-4 minutes until it releases easily from the pan.

Smooth Sauce: Blend the roasted peppers thoroughly for a velvety sauce; chunky sauce can detract from the fish's delicate texture.

Adjust Seasoning: Taste the sauce before adding it to the tilapia; don’t hesitate to adjust salt and pepper to suit your palate.

Enjoy Freshness: This recipe is best enjoyed fresh; reheating should be gentle—consider adding a splash of water to maintain moisture.

Get ready to impress with your delicious Tilapia in Roasted Pepper Sauce!

Tilapia in Roasted Pepper Sauce Recipe FAQs

What type of tilapia should I choose?
Absolutely! When selecting tilapia, look for fillets that are bright and moist with a clean scent. If you prefer alternatives, cod, haddock, or halibut work beautifully and offer similar flaky textures.

How should I store leftovers?
For the best taste, store any leftover Tilapia in Roasted Pepper Sauce in an airtight container in the refrigerator for up to 2 days. The roasted pepper sauce tends to deepen in flavor overnight, so it can be even tastier the next day!

Can I freeze tilapia once it's cooked?
While I don’t recommend freezing cooked tilapia, as it may lose its lovely texture, you can certainly freeze the roasted pepper sauce! Simply transfer it to a tightly sealed container and store it in the freezer for up to 1 month. When you're ready to use it, thaw it overnight in the fridge, then reheat gently.

What are some common issues I might face while cooking?
One common trouble is overcooking the tilapia, leading to a dry texture. To avoid this, make sure your skillet is hot and allow the fish to sear undisturbed for 3-4 minutes. If it's hard to flip, give it a bit more time to release naturally from the pan!

Is this dish safe for those with dietary restrictions?
Yes, this recipe is naturally gluten-free, making it a great choice for those with gluten sensitivities. Always double-check ingredient labels, especially for the sauce, to ensure no hidden gluten is present.

How can I incorporate more vegetables into this dish?
Very! You can add sautéed spinach, zucchini, or cherry tomatoes to the skillet as you cook the tilapia. This not only boosts the nutritional value but adds even more color. Just toss them in during the last minute of cooking for a quick, flavorful addition!

Feel free to enjoy the warmth and freshness of your Tilapia in Roasted Pepper Sauce and don't hesitate to reach out if you have more questions!

Tilapia in Roasted Pepper Sauce

Tilapia in Roasted Pepper Sauce for a Quick Mediterranean Feast

Experience Tilapia in Roasted Pepper Sauce, a quick Mediterranean dish that combines flaky fish with vibrant flavors.
Print Recipe Pin Recipe
Prep Time 10 minutes mins
Cook Time 20 minutes mins
Total Time 30 minutes mins
Servings: 4 portions
Course: Dinner
Cuisine: Mediterranean
Calories: 300
Ingredients Equipment Method Nutrition Notes

Ingredients
  

For the Tilapia
  • 4 fillets Tilapia Can be substituted with cod, haddock, or halibut.
For the Roasted Pepper Sauce
  • 3 large Red Bell Peppers Or use jarred roasted peppers for convenience.
  • 2 tablespoons Olive Oil Use high-quality oil.
  • 3 cloves Garlic Fresh garlic is best.
  • 2 tablespoons Lemon Juice Preferably fresh.
  • to taste Salt
  • to taste Pepper

Equipment

  • Oven
  • Skillet
  • Blender
  • Baking Sheet
  • Parchment Paper

Method
 

Step-by-Step Instructions
  1. Preheat your oven to 400°F (200°C).
  2. Slice the red bell peppers into quarters, remove the seeds, and toss them with olive oil, salt, and pepper. Spread them on a baking sheet lined with parchment paper.
  3. Roast for about 20 minutes until tender and slightly caramelized.
  4. Blend roasted peppers with garlic and lemon juice until smooth.
  5. Heat olive oil in a skillet over medium heat. Cook the tilapia fillets for 3-4 minutes on each side until golden and flaky.
  6. Pour the roasted pepper sauce over tilapia and allow to simmer for 1 minute.
  7. Serve garnished with parsley or basil and lemon zest, paired with couscous, rice, or salad.

Nutrition

Serving: 1portionCalories: 300kcalCarbohydrates: 15gProtein: 25gFat: 15gSaturated Fat: 2gPolyunsaturated Fat: 1gMonounsaturated Fat: 10gCholesterol: 70mgSodium: 300mgPotassium: 600mgFiber: 2gSugar: 3gVitamin A: 2000IUVitamin C: 60mgCalcium: 50mgIron: 1mg

Notes

Best enjoyed fresh, but leftovers can be stored for a quick meal.

Tried this recipe?

Let us know how it was!

Mediterranean Chicken Stir Fry: Healthy 30-Minute Delight

April 20, 2026 by Grace Snow Leave a Comment

As I sliced through the vibrant assortment of fresh vegetables, the aroma of garlic and herbs wafted through the kitchen, transporting me straight to the sun-kissed shores of the Mediterranean. In just 30 minutes, I had a colorful Mediterranean Chicken Stir Fry—my go-to meal for those busy weeknights when I want something quick yet satisfying. This recipe is perfect for home chefs eager to embrace healthy eating without sacrificing flavor, and it accommodates any dietary preference with easy substitutions like tofu for a vegetarian twist. Imagine serving a dish that brings the whole family together, offering both nutrition and delightful taste. Ready to elevate your weeknight dinners? Let’s dive into this simple, delicious journey!

Why is this stir fry special?

Quick and Easy Preparation: In just 30 minutes, you'll create a dish that impresses. Perfect for those busy weeknights!
Vibrant Flavors: The blend of fresh herbs, zesty lemon, and creamy feta brings the Mediterranean to your table.
Versatile Ingredients: Customize with your favorite veggies or proteins—try tofu for a satisfying vegetarian option!
Healthy and Wholesome: Packed with nutrients, this stir fry is not just tasty but also a nourishing meal choice.
Crowd-Pleasing Meal: Great for gatherings—everyone will love the colorful presentation and delicious taste. This recipe can hold its own alongside favorites like Crock Pot Chicken or Honey Garlic Chicken!

Mediterranean Chicken Stir Fry Ingredients

For the Chicken
• Boneless, Skinless Chicken Breasts – Main protein source; tender and juicy when cooked properly. Substitution: Turkey or beef can be used.

For the Vegetables
• Zucchini – Adds moisture and texture; mild flavor. Note: Any squash can be a substitute.
• Red Bell Peppers – Sweet and colorful; enhance the dish's aesthetic and taste. Substitution: Any sweet pepper variety works.
• Red Onion – Offers sweetness and depth of flavor. Substitution: Yellow onion can be used in a pinch.
• Cherry Tomatoes – Adds juiciness and acidity. Substitution: Diced regular tomatoes may be used.

For Flavor
• Garlic – Provides a strong aromatic quality; essential for Mediterranean recipes. Note: Fresh garlic preferred for stronger flavor.
• Juice of 1 Lemon – Brightens the dish and balances flavors with acidity. Note: Vinegar can be used as an alternative for acidity.
• Mixed Fresh Herbs (Thyme, Oregano, Basil) – Contributes to the Mediterranean flavor profile. Note: Fresh herbs are ideal, but dried herbs can be substituted (1/3 amount).
• Crumbled Feta Cheese – Adds creaminess and saltiness; a classic Mediterranean ingredient. Substitution: Goat cheese for a tangier flavor.
• Olives – Adds a salty, briny flavor to the dish. Optional: Use your favorite variety (Kalamata or green olives).

For Cooking
• Extra Virgin Olive Oil – Provides healthy fats and enriches flavor. Note: Can substitute with avocado oil for higher smoke point.

This Mediterranean Chicken Stir Fry is filled with fresh, vibrant ingredients that deliver the essence of the Mediterranean right to your home!

Step‑by‑Step Instructions for Mediterranean Chicken Stir Fry

Step 1: Prep Ingredients
Start by preparing all your ingredients for the Mediterranean Chicken Stir Fry. Chop the zucchini, red bell peppers, and red onion into bite-sized pieces, and halve the cherry tomatoes. Next, cut the boneless, skinless chicken breasts into cubes. This efficient prep ensures that you can cook quickly and seamlessly as you move through each step.

Step 2: Sear Chicken
Heat 2 tablespoons of extra virgin olive oil in a large skillet over medium-high heat. Once the oil is shimmering, add the cubed chicken, seasoning generously with salt and pepper. Sauté the chicken for about 5–7 minutes, stirring occasionally until it turns golden brown and is cooked through (internal temperature should reach 165°F). Then, remove the chicken from the skillet and set it aside on a plate.

Step 3: Sauté Vegetables
In the same skillet, add a splash more of olive oil if needed, then toss in the chopped red onion and minced garlic. Sauté for 1-2 minutes until fragrant and the onion begins to soften. Now, add the zucchini and red bell peppers to the skillet, cooking for an additional 4-5 minutes. The vegetables should be tender but still vibrant in color, showcasing that fresh Mediterranean flair.

Step 4: Combine
Return the cooked chicken to the skillet with the sautéed vegetables. Stir well to combine all the ingredients thoroughly, allowing the flavors to meld together for about a minute. This step is crucial as it reintroduces the chicken, ensuring every bite of your Mediterranean Chicken Stir Fry packs a flavorful punch.

Step 5: Finish
To elevate the dish, drizzle the fresh juice of one lemon over the chicken and vegetables. Next, fold in the crumbled feta cheese and, if using, sliced olives for that briny richness. Allow everything to heat through for an additional minute, maintaining a vibrant, colorful presentation. Your Mediterranean Chicken Stir Fry is now ready to be served!

How to Store and Freeze Mediterranean Chicken Stir Fry

Fridge: Store leftovers in an airtight container in the refrigerator for up to 3 days. Reheat gently in the microwave or on the stovetop for a quick meal.

Freezer: If you want to keep it longer, freeze in a freezer-safe container for up to 2 months. Allow it to cool completely before sealing to avoid freezer burn.

Thawing: When you're ready to enjoy again, thaw in the fridge overnight or defrost in the microwave. Reheat thoroughly before serving.

Reheating: For best results, reheat the Mediterranean Chicken Stir Fry on medium heat, adding a splash of water or broth to maintain moisture.

What to Serve with Mediterranean Chicken Stir Fry

Elevate your weeknight dinner with these delightful side dishes that enhance the vibrant flavors of your Mediterranean Chicken Stir Fry!

  • Fluffy Quinoa: This nutty, protein-packed grain perfectly complements the stir fry, absorbing the delicious lemony juices for added flavor.

  • Garlic Bread: The buttery, garlicky goodness of warm bread is perfect for soaking up the tasty sauce from your stir fry, making every bite memorable.

  • Greek Salad: A refreshing medley of cucumbers, tomatoes, olives, and feta adds a crisp, cool element that harmonizes beautifully with the dish.

  • Creamy Hummus: Serve alongside pita for dipping; the rich, creamy texture provides a satisfying contrast to the vivid flavors of the stir fry.

  • Roasted Vegetable Medley: A mix of seasonal veggies caramelized to perfection adds depth and pairs wonderfully with the colorful stir fry.

  • Chilled White Wine: A glass of crisp Sauvignon Blanc or a light Pinot Grigio can enhance the meal’s Mediterranean flair and brighten the overall experience.

  • Lemon Sorbet: Finish on a refreshing note with this light dessert, echoing the zesty lemon flavors in the stir fry while cleansing your palate.

Make Ahead Options

These Mediterranean Chicken Stir Fry components are perfect for meal prep, allowing you to save time during those bustling weeknights! You can chop all your vegetables and marinate the cubed chicken with olive oil, lemon juice, salt, and your favorite herbs up to 24 hours in advance to enhance the flavors. Storing the prepped ingredients in airtight containers in the refrigerator will keep them fresh. When you're ready to cook, simply sauté the chicken, then add the vegetables and cooked items together, finishing with a drizzle of lemon juice and crumbled feta. This method ensures delicious, quick dinners that feel just as fresh as if you made them the same day!

Expert Tips for Mediterranean Chicken Stir Fry

  • Ingredient Prep: Always prep all ingredients before starting to cook for a smoother process, ensuring your Mediterranean Chicken Stir Fry comes together seamlessly.

  • Cooking Chicken: Avoid overcooking chicken; it should be just golden and cooked through. Use a meat thermometer for best results—aim for an internal temperature of 165°F.

  • Seasoning Layers: Season every layer as you go; this builds depth of flavor in your Mediterranean Chicken Stir Fry and enhances every bite.

  • Vegetable Freshness: Always use fresh vegetables for the best taste; they significantly improve the final flavor and texture of the dish.

  • Customize Smartly: Don't hesitate to experiment with your choice of vegetables or proteins. A vegetarian option is just as satisfying with tofu or tempeh!

Mediterranean Chicken Stir Fry Variations

Feel free to get creative and adapt this recipe to make it your own delicious masterpiece!

  • Vegetarian Option: Replace chicken with tofu or tempeh for a heart-healthy, plant-based meal that doesn’t skimp on flavor.
  • Protein Swap: Switch the chicken for turkey or beef; just be sure to adjust cooking times for optimal tenderness.
  • Spicy Kick: Add crushed red pepper flakes or a dash of cayenne to bring some heat to this Mediterranean delight.
  • Cooking Oils: Try avocado oil instead of olive oil for a higher smoke point and a unique flavor twist.
  • Herb Variations: Experiment by using fresh cilantro or parsley instead of the typical herbs for a refreshing change.
  • Extra Crunch: Toss in some toasted pine nuts or sliced almonds right before serving for an added layer of texture.
  • Zesty Twists: Stir in some lemon zest along with the juice for an irresistible burst of freshness that will elevate the entire dish.
  • Veggie Medley: Consider adding other vegetables such as broccoli, asparagus, or snap peas, depending on your pantry's treasures!

Whether you're inspired by a classic dish like Chicken Adobo Again or looking to create a delightful contrast like in Dill Shrimp Stir, the Mediterranean Chicken Stir Fry is a fantastic canvas for your culinary creativity!

Mediterranean Chicken Stir Fry Recipe FAQs

How do I select ripe vegetables for my stir fry?
Absolutely! When choosing vegetables, look for vibrant colors and firm textures. Zucchini should be glossy and without dark spots, while bell peppers should be smooth and crisp. Fresh herbs should smell fragrant, indicating their quality.

How long can I store leftovers of Mediterranean Chicken Stir Fry?
You can store leftovers in an airtight container in the refrigerator for up to 3 days. To enjoy them again, simply reheat on medium heat in a skillet or microwave until warmed through.

Can I freeze Mediterranean Chicken Stir Fry?
Yes, you can! Freeze your Mediterranean Chicken Stir Fry in a freezer-safe container for up to 2 months. Allow it to cool completely before sealing. When you're ready to eat, thaw it in the refrigerator overnight, then reheat gently to serve.

What should I do if my chicken turns out dry?
Very! If you find that your chicken is dry, it likely was overcooked. To avoid this, use a meat thermometer to monitor its internal temperature, ensuring it reaches 165°F but isn't cooked longer. If it happens, serve it with a sauce or broth to add moisture back into the dish.

Are there any dietary considerations I should be aware of?
Of course! If someone has allergies, make sure to check for any sensitivities to ingredients like dairy (feta cheese) or certain vegetables (like olives) in your stir fry. For a vegetarian option, feel free to replace chicken with tofu or tempeh. Always adapt according to dietary needs!

What’s the best way to maintain the vibrancy of my vegetables during cooking?
To keep your vegetables colorful and crisp, avoid overcooking them. After sautéing the onions and garlic, add zucchini and bell peppers last, cooking just until tender (around 4-5 minutes). Keep the heat medium-high to allow a quick sauté while retaining their bright textures.

Mediterranean Chicken Stir Fry

Mediterranean Chicken Stir Fry: Healthy 30-Minute Delight

A quick and flavorful Mediterranean Chicken Stir Fry packed with fresh ingredients, ready in just 30 minutes.
Print Recipe Pin Recipe
Prep Time 15 minutes mins
Cook Time 15 minutes mins
Total Time 30 minutes mins
Servings: 4 servings
Course: Dinner
Cuisine: Mediterranean
Calories: 350
Ingredients Equipment Method Nutrition Notes

Ingredients
  

For the Chicken
  • 1 pound Boneless, Skinless Chicken Breasts Tender and juicy when cooked properly.
For the Vegetables
  • 1 medium Zucchini Adds moisture and texture.
  • 2 medium Red Bell Peppers Enhance the dish's aesthetic and taste.
  • 1 medium Red Onion Offers sweetness and depth of flavor.
  • 1 cup Cherry Tomatoes Adds juiciness and acidity.
For Flavor
  • 3 cloves Garlic Fresh garlic preferred for stronger flavor.
  • 1 juiced Lemon Brightens the dish.
  • 1 cup Mixed Fresh Herbs (Thyme, Oregano, Basil) Fresh herbs are ideal.
  • 1 cup Crumbled Feta Cheese A classic Mediterranean ingredient.
  • 1/2 cup Olives Optional, use your favorite variety.
For Cooking
  • 2 tablespoons Extra Virgin Olive Oil Can substitute with avocado oil.

Equipment

  • Large skillet

Method
 

Step-by-Step Instructions
  1. Prep all your ingredients: chop zucchini, red bell peppers, and red onion into bite-sized pieces, halve cherry tomatoes, and cut chicken into cubes.
  2. Heat olive oil in a large skillet over medium-high heat, add chicken, season with salt and pepper, and sauté for 5–7 minutes until cooked through.
  3. In the same skillet, sauté chopped red onion and minced garlic for 1-2 minutes, then add zucchini and red bell peppers and cook for an additional 4-5 minutes.
  4. Return the cooked chicken to the skillet and stir well to combine all ingredients.
  5. Drizzle lemon juice, fold in feta cheese and olives. Heat through for an additional minute and serve.

Nutrition

Serving: 1servingCalories: 350kcalCarbohydrates: 15gProtein: 30gFat: 20gSaturated Fat: 6gPolyunsaturated Fat: 4gMonounsaturated Fat: 8gCholesterol: 90mgSodium: 600mgPotassium: 800mgFiber: 3gSugar: 6gVitamin A: 15IUVitamin C: 120mgCalcium: 20mgIron: 10mg

Notes

Always prep all ingredients before cooking for a smoother process. Avoid overcooking chicken for best results. Use fresh vegetables for optimal flavor.

Tried this recipe?

Let us know how it was!

Mediterranean Steak Bowl Recipe for Flavorful Meal Prep Bliss

April 20, 2026 by Grace Snow Leave a Comment

A tantalizing aroma wafted through my kitchen as I seared the sirloin steak, tempting me with thoughts of what was to come. This Quick & Easy Mediterranean Steak Bowl Recipe marries high-protein goodness with the vibrant flavors of fresh vegetables and creamy tzatziki. Whether you’re craving a weeknight dinner or need a meal prep solution, this bowl serves it all up in under 30 minutes—perfect for those of us juggling busy lives yet still yearning for homemade fare. Not only is it customizable to fit gluten-free and low-carb diets, but it also guarantees a deliciously satisfying experience with every bite. Can you already feel the Mediterranean sun on your face as you imagine assembling your bowl? Let’s dig in!

Why Choose This Mediterranean Steak Bowl?

Customizable Options: This recipe allows you to tailor ingredients to fit any dietary need, ensuring everyone can enjoy a hearty meal.

Quick Prep: With everything ready in under 30 minutes, it’s the ultimate go-to for busy weeknights!

Flavor Explosion: The vibrant mix of fresh vegetables and juicy steak brings the Mediterranean to your kitchen, elevating your dining experience.

Meal Prep Friendly: Perfect for storing separately, these components maintain freshness and make meal prep a breeze for the week ahead.

Hearty and Wholesome: Packed with high-protein goodness, this dish is not only satisfying but also nutritious, making it a guilt-free indulgence.

Indulge yourself while staying healthy; if you're looking for more meal prep ideas, don’t miss my Acai Bowl Nutritious or Pitaya Smoothie Bowl recipes!

Mediterranean Steak Bowl Ingredients

• Dive into the flavors of the Mediterranean with this delightful Mediterranean Steak Bowl Recipe!

For the Steak and Marinade

  • Sirloin Steak – A lean protein source; choose about 1-inch thick for even cooking.
  • Olive Oil – Enhances flavor and moisture while marinating the steak and making dressing.
  • Garlic – Use fresh minced cloves for a deeper flavor profile.
  • Lemon Juice – Brightens the dish; fresh juice offers the best taste.
  • Dried Oregano and Thyme – Add aromatic qualities; adjust according to taste.
  • Salt and Black Pepper – Essential seasoning agents for flavor enhancement.

For the Bowl Base

  • Cooked Grains – Choose brown rice or quinoa; substitute with cauliflower rice for low-carb.
  • Roasted Chickpeas – Optional for added protein and crunch; great for paleo or keto versions.

For the Fresh Toppings

  • Cherry Tomatoes and Cucumber – Fresh vegetables that add texture and light flavors.
  • Red Onion – For a sharp bite; can be omitted for a milder flavor.
  • Kalamata Olives – Essential for that authentic Mediterranean flavor; briny and delicious.
  • Feta Cheese – Creamy and tangy; omit for a dairy-free option.
  • Fresh Herbs (Parsley or Dill) – Brighten and freshen the dish for a lush finish.

For the Tzatziki Sauce

  • Greek Yogurt – The creamy base for tzatziki; substitute with coconut yogurt for a dairy-free option.
  • Honey – Adds a touch of sweetness; optional for those on Whole30.

Now that we've gathered all the delicious ingredients, let's embark on creating this Mediterranean masterpiece!

Step‑by‑Step Instructions for Mediterranean Steak Bowl Recipe

Step 1: Marinate the Steak
In a bowl, whisk together olive oil, minced garlic, lemon juice, dried oregano, thyme, salt, and black pepper to create a flavorful marinade. Coat your sirloin steak completely with this mixture, ensuring every inch is covered for maximum flavor. Allow it to marinate at room temperature for 30 minutes, or refrigerate for up to 4 hours for deeper flavor penetration.

Step 2: Prepare Tzatziki
While the steak marinates, mix together Greek yogurt, freshly chopped cucumber, minced garlic, lemon juice, a pinch of salt, and a drizzle of honey in a separate bowl. Stir until all ingredients are well combined and creamy in texture. Once ready, place the tzatziki in the fridge to chill and allow the flavors to meld together while you continue with the Mediterranean Steak Bowl preparation.

Step 3: Make Vinaigrette
In a small bowl, whisk together olive oil, lemon juice, a pinch of salt, and pepper to create a bright and zesty vinaigrette. Blend the ingredients for about 1-2 minutes until emulsified. Set aside to let the flavors develop while you cook the steak, adding an extra pop of freshness to your Mediterranean Steak Bowl.

Step 4: Cook Steak
Heat a skillet over medium-high heat and add a splash of oil. Once hot, add your marinated sirloin steak and sear for about 4-5 minutes on one side, until it reaches a beautiful golden-brown crust. Flip the steak and cook for an additional 4-5 minutes for medium-rare doneness. Remove the steak from the skillet and let it rest on a cutting board, allowing the juices to redistribute while you prepare the rest of the bowl.

Step 5: Assemble Bowl
Now it's time to build your Mediterranean Steak Bowl! Start with a base layer of your choice of cooked grains like brown rice or quinoa. Slice the rested steak thinly against the grain and layer it on top of the grains. Add cherry tomatoes, cucumber, red onion, kalamata olives, and any other toppings you desire. Finally, drizzle the creamy tzatziki and vinaigrette over the top, creating a beautiful and inviting dish full of Mediterranean flavors.

Make Ahead Options

These Mediterranean Steak Bowl components are perfect for meal prep enthusiasts! You can marinate the steak and store it in the refrigerator for up to 24 hours, enhancing its flavor. Prepare the tzatziki sauce a day in advance, as it benefits from sitting overnight to meld the refreshing flavors beautifully. The grains can be cooked ahead and stored for up to 3 days in an airtight container to maintain their fluffy texture. When ready to serve, simply sear the marinated steak, assemble your bowl with the prepped grains, and top with fresh vegetables and tzatziki. This way, you’ll enjoy a delicious Mediterranean Steak Bowl without the last-minute hustle!

What to Serve with Mediterranean Steak Bowl Recipe

Create a delightful dining experience by pairing this vibrant bowl with complementary sides and beverages.

  • Creamy Hummus: This smooth, garlicky spread adds a rich layer of flavor, perfect for dipping warm pita or fresh veggies. The combination carries the Mediterranean theme beautifully.

  • Tzatziki Sauce: Extra tzatziki elevates each bite with its cool, tangy richness. It works wonderfully as a refreshing dip on the side or drizzled over the bowl for added creaminess.

  • Greek Salad: A light, refreshing Greek salad brings a crunchy contrast and bursts of freshness with its ripe tomatoes and crisp cucumbers, making it a perfect companion.

  • Roasted Vegetables: A medley of seasonal roasted vegetables, like zucchini and bell peppers, enhances the dish with earthy, caramelized flavors—perfectly complementing the savory steak.

  • Cauliflower Rice: This low-carb alternative offers a light base that absorbs flavors while remaining delicate, making it a match for the hearty meat.

  • Sparkling Water with Lemon: A refreshing drink choice enhances the meal’s Mediterranean vibes with a touch of brightness from the citrus.

Elevate your Mediterranean Steak Bowl experience with these delightful pairings that round out the feast!

How to Store and Freeze Mediterranean Steak Bowl

Fridge: Store leftover components of the Mediterranean Steak Bowl in separate airtight containers for optimal freshness; they can last up to 3 days.

Freezer: For longer storage, freeze the marinated steak in a freezer-safe bag for up to 3 months. Thaw in the fridge overnight before cooking.

Reheating: Reheat the cooked steak gently in a skillet over medium heat, adding a splash of water to keep it moist. Serve with fresh toppings for a revitalized Mediterranean Steak Bowl experience.

Room Temperature: If you're enjoying a freshly prepared bowl, do not leave it at room temperature for more than 2 hours to ensure food safety.

Expert Tips for the Best Mediterranean Steak Bowl

  • Perfect Steak Temperature: Aim for medium-rare by using a meat thermometer; it should read about 135°F for ideal tenderness.
  • Marinade Time: For maximum flavor, let the steak marinate for a minimum of 30 minutes—up to 4 hours for an even richer taste.
  • Layering is Key: When assembling your Mediterranean Steak Bowl, layer ingredients thoughtfully to balance flavors and textures for each bite.
  • Fresh is Best: Use fresh herbs and vegetables for the most vibrant flavors and nutrients—don’t skimp on the toppings!
  • Customizable Base: Feel free to swap out the grain base; try quinoa or cauliflower rice depending on your dietary needs for the Mediterranean Steak Bowl Recipe.

Mediterranean Steak Bowl Recipe Variations

Feel free to let your creativity flow and make this dish your own with these delightful twists and substitutes!

  • Low-Carb Base: Swap cooked grains for cauliflower rice to keep it light and low in carbs while maintaining delicious flavor.
  • Meatless Marvel: Substitute steak with grilled halloumi cheese or marinated tofu for a satisfying vegetarian option that's equally savory.
  • Seasonal Veggies: Use whatever fresh vegetables are in season—add bell peppers, zucchini, or sautéed spinach for an extra burst of flavor!
  • Nutty Addition: Toss in some toasted pine nuts or walnuts for added texture and a delightful crunch. They marry beautifully with the Mediterranean theme.
  • Spicy Kick: Sprinkle chili flakes or add sliced jalapeños for those who crave a bit of heat in their bowl; it truly brings everything to life!
  • Creamy Twist: For a different tzatziki flavor, replace Greek yogurt with creamy avocado; the rich, smooth texture is simply irresistible.
  • Dairy-Free: Omit feta cheese and add nutritional yeast for a cheesy flavor without the dairy; it’s a great vegan alternative!
  • Extra Protein: Boost protein content by including roasted chickpeas or a handful of lentils, offering a hearty bite that complements the steak beautifully.

Let your gourmet imagination take flight with this Mediterranean Steak Bowl! And if you're searching for even more scrumptious meal ideas, don't miss my favorite Poor Man's Burrito Bowls or Crispy Fish Taco Bowls. Happy cooking!

Mediterranean Steak Bowl Recipe FAQs

What type of steak is best for the Mediterranean Steak Bowl?
Absolutely! A sirloin steak, about 1-inch thick, is perfect as it remains tender while providing great flavor. You might also consider flank or ribeye if you're looking for something with a bit more marbling, though keep in mind these may have different cooking times.

How should I store leftovers from the Mediterranean Steak Bowl?
For sure! Store the leftover components in separate airtight containers in the fridge, and they'll stay fresh for up to 3 days. Keeping them separate helps maintain the textures and flavors of the ingredients.

Can I freeze the Mediterranean Steak Bowl?
Very much so! To freeze, place your marinated steak in a freezer-safe bag and it can last up to 3 months. Just remember to thaw it in the fridge overnight before cooking. Cooked grains and fresh veggies generally don't freeze well, so simply add those when you're ready to enjoy your bowl again.

What if my steak is overcooked? How can I salvage my Mediterranean Steak Bowl?
If your steak has turned out overcooked, don't worry! Slice it thinly and serve it with lots of tzatziki and vinaigrette to add moisture and flavor. You could also turn it into a salad by adding plenty of crunchy fresh veggies and maybe even a bit more olive oil for extra richness.

Are there any common allergies to consider with this Mediterranean Steak Bowl?
Indeed! This recipe includes ingredients like dairy (feta cheese and Greek yogurt) and gluten (if using traditional grains), which can trigger allergies for some people. For gluten-free diners, simply substitute with cauliflower rice or quinoa and use coconut yogurt for the tzatziki. Always check for freshness and alternative options to accommodate various dietary needs.

What's the best way to ensure the vegetables stay crisp in the Mediterranean Steak Bowl?
To keep your vegetables crispy, store them separately from the cooked components until you're ready to eat. Also, only dress your vegetables just before serving to avoid any wilting. This will ensure each bite is fresh and crunchy!

Mediterranean Steak Bowl Recipe

Mediterranean Steak Bowl Recipe for Flavorful Meal Prep Bliss

Enjoy a Mediterranean Steak Bowl that combines high-protein goodness with vibrant flavors, perfect for meal prep or a quick dinner in under 30 minutes.
Print Recipe Pin Recipe
Prep Time 30 minutes mins
Cook Time 10 minutes mins
Marinating Time 30 minutes mins
Total Time 1 hour hr 10 minutes mins
Servings: 4 bowls
Course: Dinner
Cuisine: Mediterranean
Calories: 600
Ingredients Equipment Method Nutrition Notes

Ingredients
  

For the Steak and Marinade
  • 1 pound Sirloin Steak Choose about 1-inch thick for even cooking.
  • 2 tablespoons Olive Oil Enhances flavor and moisture while marinating.
  • 3 cloves Garlic Use fresh minced for deeper flavor.
  • 2 tablespoons Lemon Juice Fresh juice offers the best taste.
  • 1 teaspoon Dried Oregano Add aromatic qualities.
  • 1 teaspoon Dried Thyme Add aromatic qualities.
  • 1 teaspoon Salt Essential seasoning.
  • 1/2 teaspoon Black Pepper Essential seasoning.
For the Bowl Base
  • 2 cups Cooked Grains Brown rice or quinoa; substitute with cauliflower rice for low-carb.
  • 1 can Roasted Chickpeas Optional for added protein.
For the Fresh Toppings
  • 1 cup Cherry Tomatoes Adds texture and light flavors.
  • 1 cup Cucumber Adds texture; can also use chopped.
  • 1/2 cup Red Onion Can be omitted for milder flavor.
  • 1/2 cup Kalamata Olives Essential for authentic flavor.
  • 1/2 cup Feta Cheese Omit for a dairy-free option.
  • 1/4 cup Fresh Herbs (Parsley or Dill) Brighten and freshen the dish.
For the Tzatziki Sauce
  • 1 cup Greek Yogurt Substitute with coconut yogurt for dairy-free option.
  • 1 tablespoon Honey Optional for those on Whole30.

Equipment

  • Skillet
  • Mixing bowls
  • Meat Thermometer

Method
 

Step-by-Step Instructions
  1. Marinate the Steak: Whisk together olive oil, minced garlic, lemon juice, oregano, thyme, salt, and pepper. Coat the steak and marinate at room temperature for 30 minutes or refrigerate for up to 4 hours.
  2. Prepare Tzatziki: Mix Greek yogurt, chopped cucumber, minced garlic, lemon juice, salt, and honey in a bowl. Stir until creamy and refrigerate.
  3. Make Vinaigrette: Whisk together olive oil, lemon juice, salt, and pepper in a small bowl. Set aside.
  4. Cook Steak: Heat skillet over medium-high heat. Sear marinated steak for 4-5 minutes on one side, then flip and cook for another 4-5 minutes for medium-rare. Let it rest.
  5. Assemble Bowl: Begin with cooked grains, slice the steak, and layer it along with vegetables and toppings. Drizzle with tzatziki and vinaigrette.

Nutrition

Serving: 1bowlCalories: 600kcalCarbohydrates: 50gProtein: 30gFat: 25gSaturated Fat: 5gPolyunsaturated Fat: 3gMonounsaturated Fat: 15gCholesterol: 80mgSodium: 600mgPotassium: 800mgFiber: 10gSugar: 5gVitamin A: 100IUVitamin C: 15mgCalcium: 150mgIron: 3mg

Notes

Perfect for meal prep; store components separately for up to 3 days in airtight containers.

Tried this recipe?

Let us know how it was!

Creamy Salmon Broccoli Pasta: A Nutritious Comfort Bowl

April 19, 2026 by Grace Snow Leave a Comment

Amid the hustle of dinner preparations, I found myself in a small victory—turning pantry staples into a comforting, nutritious masterpiece: Creamy Salmon Broccoli Pasta. It’s a delightful blend of tender, flaky salmon and bright, crunchy broccoli, all wrapped in a luscious creamy sauce that’s perfect for any occasion. The best part? This protein-rich dish packs in heart-healthy omega-3s while still being ready in under 30 minutes! Whether you’re looking to impress dinner guests or simply craving a cozy night in, this recipe is your ticket to satisfying cravings and healthy eating without the fuss. Curious about how to elevate your weeknight meals? Let’s dive into this quick culinary adventure together!

What makes this pasta recipe irresistible?

Nutritious and Delicious: This dish perfectly balances rich flavors and health benefits, filled with omega-3 fatty acids from salmon and vibrant veggies.
Easy to Prepare: With straightforward steps and minimal ingredients, you’ll have a masterpiece in just 30 minutes! Even busy weeknights can be gourmet.
Customizable Options: Feel free to swap in whole wheat pasta or Greek yogurt for a lighter twist, catering to your health goals.
Appeal for Everyone: Whether you're a home cook or a seasoned chef, this recipe satisfies cravings without sacrificing nutrition, making it ideal for the whole family.
Simple Cleanup: One skillet is all you need, saving you time on cleanup so you can relish every bite of this delightful meal!

Creamy Salmon Broccoli Pasta Ingredients

• Create your own comforting bowl with these essentials!

For the Pasta

  • Penne Pasta – The main carbohydrate source; feel free to substitute with whole wheat or gluten-free pasta for added fiber.

For the Sauce

  • Heavy Cream – Provides a luxurious creaminess to the dish; swap with half-and-half or Greek yogurt for a lighter option.
  • Parmesan Cheese – Adds depth and flavor; nutritional yeast is a great dairy-free substitute.

For the Protein

  • Salmon Fillet – The star ingredient packed with omega-3s; wild-caught salmon is recommended for the best flavor.

For the Veggies

  • Broccoli – Provides crunch and nutrients; can be substituted with other veggies like bell peppers or peas for a fun twist.

For Cooking

  • Olive Oil – Used for sautéing and adds a lovely richness; butter can work for a different flavor profile.
  • Garlic Powder – Essential for flavor enhancement; adjust the amount to taste.
  • Salt and Pepper – Important seasonings that elevate the dish; balance to your personal preference.

Now, with these carefully selected ingredients, you're set to whip up a nutritious and delicious Creamy Salmon Broccoli Pasta that your family will love!

Step‑by‑Step Instructions for Creamy Salmon Broccoli Pasta

Step 1: Prepare the Ingredients
Start by measuring out the penne pasta, roughly 8 ounces, and set it aside. Chop one head of fresh broccoli into bite-sized florets, and flake 2 cooked salmon fillets into chunky pieces. Gather your other essentials, including olive oil, heavy cream, Parmesan cheese, garlic powder, salt, and pepper, to ensure a smooth cooking process.

Step 2: Cook the Pasta
In a large pot, bring salted water to a vigorous boil over high heat. Carefully add the penne pasta and cook it according to package directions, usually around 8 to 10 minutes, until al dente. Stir occasionally to prevent sticking, then drain the pasta and reserve about ½ cup of cooking water for later use.

Step 3: Sauté the Broccoli
In a large skillet, heat 2 tablespoons of olive oil over medium heat until shimmering. Add the chopped broccoli and sauté it for about 4-5 minutes until the florets are bright green and slightly tender but still crisp. Keep stirring to ensure even cooking and prevent any browning. Once done, remove the broccoli and set it aside in a bowl.

Step 4: Cook the Salmon
In the same skillet, add the flaked salmon, seasoning it with garlic powder, salt, and pepper. Cook for about 4-5 minutes, gently stirring to warm the salmon through and slightly crisp the edges. The salmon should be flaked and heated, absorbing the flavors of the seasoning while remaining tender.

Step 5: Combine Pasta and Sauce
Return the cooked penne pasta and broccoli to the skillet with the salmon. Pour in 1 cup of heavy cream and stir to combine everything thoroughly over low heat. Allow the mixture to simmer for about 2-3 minutes until it begins to thicken, creating a luxurious creamy coating.

Step 6: Adjust the Sauce Consistency
If the sauce is too thick, gradually stir in the reserved pasta water, a few tablespoons at a time, until you reach your desired creaminess. Continue to gently mix everything together, allowing the tartness of the cream to integrate with the salmon and broccoli, creating a cohesive dish that is both comforting and delicious.

Step 7: Serve and Garnish
Once combined and heated through, remove the skillet from heat. Serve the Creamy Salmon Broccoli Pasta in wide bowls, garnishing with freshly grated Parmesan cheese and chopped herbs, like parsley, for added flavor and color. Each bowl should be a comforting delight ready for you and your loved ones!

How to Store and Freeze Creamy Salmon Broccoli Pasta

Fridge: Store leftover Creamy Salmon Broccoli Pasta in an airtight container for up to 3 days to maintain freshness and flavor.

Freezer: For longer storage, freeze the pasta in a freezer-safe container for up to 2 months. Allow it to cool completely before sealing to prevent freezer burn.

Reheating: To reheat, thaw overnight in the refrigerator, then warm on the stovetop over low heat, adding a splash of milk or reserved pasta water to restore creaminess.

Make-Ahead Tips: Prepare the creamy sauce and store it separately from the pasta and salmon for easy meal prep. Combine before serving to avoid sogginess.

Creamy Salmon Broccoli Pasta Variations

Feel free to get creative with your dish; explore these delightful adaptations that will have your taste buds dancing!

  • Whole Wheat: Swap regular penne for whole wheat for added fiber and a nutty flavor.
  • Gluten-Free: Use gluten-free pasta to accommodate dietary needs without compromising taste.
  • Veggie Boost: Add fresh spinach or kale for extra greens and vibrant color. The added nutrients will make this dish even healthier!
  • Lemon Zest: A squeeze of fresh lemon juice brightens the flavors and adds a refreshing zing to the creamy sauce.
  • Spicy Kick: Sprinkle in crushed red pepper flakes for a gentle heat that complements the richness of the salmon.
  • Creamy Alternative: Replace heavy cream with Greek yogurt for a lighter option that still delivers on creaminess. This is a fantastic substitution if you want a protein boost too!
  • Cheesy Delight: Experiment with different cheeses, like goat cheese or mozzarella, for exciting flavor twists.
  • One-Pot Wonder: For a simpler approach, try this as a one-pot meal, combining all ingredients into a single pot to cook seamlessly. This technique could simplify your cooking process, perfect for busy weeknights.

If you're in the mood for something else, check out these delicious recipes like Skillet Pasta Sun or the hearty Tuscan White Bean Pasta for more variety. Happy cooking!

Make Ahead Options

These Creamy Salmon Broccoli Pasta bowls are perfect for meal prep enthusiasts! You can prepare the sauce and cook the salmon up to 3 days in advance, refrigerating them in airtight containers to maintain freshness. The broccoli can also be blanched ahead of time; simply immerse it in boiling water for 1-2 minutes, then transfer it to an ice bath to preserve its vibrant color and crunch. When you're ready to serve, just reheat the sauce and salmon gently in a skillet, add the cooked penne pasta, and toss in the broccoli. This saves you time during busy weeknights while ensuring that each bite remains just as delicious!

What to Serve with Creamy Salmon Broccoli Pasta

Elevate your dining experience with these delightful accompaniments that perfectly balance flavors and textures.

  • Garlic Bread: The crispy, buttery flavor of garlic bread pairs wonderfully with the creamy pasta, allowing you to soak up every delicious bite. Just imagine the crunch of each bite against the smooth sauce—pure bliss!

  • Light Green Salad: A refreshing salad with mixed greens, cherry tomatoes, and a lemon vinaigrette enhances the meal with brightness and crunch, creating a perfect contrast to the richness of the pasta.

  • Roasted Vegetables: Sweet and caramelized roasted carrots or zucchini add depth to the meal, bringing an earthy flavor that complements the salmon beautifully. Plus, they’re a wonderfully healthy choice.

  • Steamed Asparagus: The tender, crisp texture of asparagus drizzled with a touch of olive oil or lemon creates an elegant side, adding an extra layer of nutrition and color to your table.

  • White Wine: A glass of chilled Sauvignon Blanc or Chardonnay harmonizes with the dish’s rich creaminess and salmon, enhancing the dining experience. The acidity cuts through the cream and creates a delightful balance.

  • Dessert Option: A light lemon sorbet provides a refreshing, zesty finish that cleanses the palate after the creamy goodness. Its bright flavor will leave you refreshed and satisfied!

With these perfect pairings, your Creamy Salmon Broccoli Pasta meal will be both flavorful and memorable!

Expert Tips for Creamy Salmon Broccoli Pasta

  • Fresh Ingredients Matter: Using fresh salmon and broccoli enhances flavor and nutrition. Ditch frozen options for a tastier experience.

  • Avoid Overcooking: Keep salmon flaky and broccoli vibrant by monitoring cooking times. Overcooked veggies lose crunch, while salmon can become dry.

  • Adjust to Your Taste: Always taste as you go! Feel free to tweak salt and pepper levels to customize your creamy salmon broccoli pasta to your liking.

  • Experiment with Cheese: For a creamier texture, try mixing in different cheeses like mozzarella or goat cheese. This adds depth and richness to the dish.

  • Make it Your Own: Don’t hesitate to add extra veggies like spinach or cherry tomatoes for a colorful, nutrient-packed twist.

Creamy Salmon Broccoli Pasta Recipe FAQs

How do I select the best salmon for this recipe?
Absolutely! When choosing salmon, opt for wild-caught varieties if available, as they tend to offer superior flavor and quality. Look for a fresh fillet that has a bright, vibrant color and a moist appearance. Avoid salmon that shows any signs of discoloration or dryness, which can indicate age.

What’s the best way to store leftovers of Creamy Salmon Broccoli Pasta?
Store any leftover Creamy Salmon Broccoli Pasta in an airtight container in the refrigerator for up to 3 days. Make sure it’s cooled completely before sealing to keep the flavors fresh. I often find that it tastes almost just as good the next day!

Can I freeze Creamy Salmon Broccoli Pasta?
Yes! To freeze, allow the dish to cool completely, then transfer it to a freezer-safe container. It can be stored in the freezer for up to 2 months. When you're ready to enjoy it, simply thaw it overnight in the refrigerator and reheat gently on the stovetop, adding a splash of milk or reserved pasta water to return its creamy texture.

What should I do if the sauce is too thick?
No worries! If your sauce turns out to be too thick, gradually add in some of the reserved pasta water, stirring to achieve your desired consistency. This method not only thins the sauce but keeps it creamy. Start with one tablespoon at a time until you get it just right.

Are there any dietary considerations for this recipe?
Definitely! If you’re cooking for someone with lactose intolerance, consider substituting heavy cream with a dairy-free alternative like coconut cream or Greek yogurt. For those allergic to fish, you can omit the salmon and perhaps add chickpeas or more veggies for a protein boost. Always taste as you go to ensure everything's just right!

Can I use frozen broccoli instead of fresh?
Very! Frozen broccoli can be used in place of fresh but be sure to avoid overcooking it. You can add the frozen florets directly to the pasta water in the last couple of minutes of cooking. This will heat them through while keeping them tender-crisp!

Creamy Salmon Broccoli Pasta

Creamy Salmon Broccoli Pasta: A Nutritious Comfort Bowl

This Creamy Salmon Broccoli Pasta offers a delightful blend of flavors while providing heart-healthy omega-3s, perfect for dinner.
Print Recipe Pin Recipe
Prep Time 10 minutes mins
Cook Time 20 minutes mins
Total Time 30 minutes mins
Servings: 4 bowls
Course: Dinner
Cuisine: Italian
Calories: 600
Ingredients Equipment Method Nutrition Notes

Ingredients
  

For the Pasta
  • 8 ounces penne pasta substitute with whole wheat or gluten-free pasta for added fiber
For the Sauce
  • 1 cup heavy cream swap with half-and-half or Greek yogurt for a lighter option
  • 1/2 cup Parmesan cheese nutritional yeast is a great dairy-free substitute
For the Protein
  • 2 fillets salmon fillet wild-caught salmon is recommended for the best flavor
For the Veggies
  • 1 head broccoli can be substituted with other veggies like bell peppers or peas
For Cooking
  • 2 tablespoons olive oil butter can work for a different flavor profile
  • 1 teaspoon garlic powder adjust the amount to taste
  • to taste salt important seasoning that elevates the dish
  • to taste pepper important seasoning that elevates the dish

Equipment

  • Large pot
  • Large skillet
  • measuring cups
  • Measuring Spoons
  • Cutting Board
  • Chef’s Knife

Method
 

Step-by-Step Instructions
  1. Start by measuring out the penne pasta, roughly 8 ounces, and set it aside. Chop one head of fresh broccoli into bite-sized florets, and flake 2 cooked salmon fillets into chunky pieces. Gather your other essentials, including olive oil, heavy cream, Parmesan cheese, garlic powder, salt, and pepper.
  2. In a large pot, bring salted water to a vigorous boil over high heat. Carefully add the penne pasta and cook it according to package directions, usually around 8 to 10 minutes, until al dente. Stir occasionally to prevent sticking, then drain the pasta and reserve about ½ cup of cooking water for later use.
  3. In a large skillet, heat 2 tablespoons of olive oil over medium heat until shimmering. Add the chopped broccoli and sauté it for about 4-5 minutes until the florets are bright green and slightly tender but still crisp. Once done, remove the broccoli and set it aside in a bowl.
  4. In the same skillet, add the flaked salmon, seasoning it with garlic powder, salt, and pepper. Cook for about 4-5 minutes, gently stirring to warm the salmon through and slightly crisp the edges.
  5. Return the cooked penne pasta and broccoli to the skillet with the salmon. Pour in 1 cup of heavy cream and stir to combine everything thoroughly over low heat. Allow the mixture to simmer for about 2-3 minutes until it begins to thicken.
  6. If the sauce is too thick, gradually stir in the reserved pasta water, a few tablespoons at a time, until you reach your desired creaminess.
  7. Once combined and heated through, remove the skillet from heat. Serve the Creamy Salmon Broccoli Pasta in wide bowls, garnishing with freshly grated Parmesan cheese and chopped herbs, like parsley.

Nutrition

Serving: 1bowlCalories: 600kcalCarbohydrates: 50gProtein: 30gFat: 30gSaturated Fat: 15gPolyunsaturated Fat: 7gMonounsaturated Fat: 12gCholesterol: 80mgSodium: 600mgPotassium: 800mgFiber: 5gSugar: 3gVitamin A: 500IUVitamin C: 80mgCalcium: 200mgIron: 2mg

Notes

For the best flavor and nutrition, use fresh ingredients. Adjust seasonings to taste and feel free to add extra veggies if desired.

Tried this recipe?

Let us know how it was!

Creamy Broccoli and Chicken Penne: Comfort in Every Bite

April 19, 2026 by Grace Snow Leave a Comment

The clock was ticking, and I could feel the familiar tug of the evening rush. This is when I discovered my ultimate secret: a 30-minute Creamy Broccoli and Chicken Penne that turns any hectic weeknight into a cozy dining experience. With each forkful, your taste buds will dance in delight as tender penne pasta, juicy chicken, and vibrant broccoli come together in a rich, creamy sauce. Not only is it a quick dinner solution, but it's also incredibly customizable—swap in shrimp, turkey, or whatever veggies you have on hand! Plus, by choosing lighter alternatives to the sauce, like Greek yogurt, you can enjoy a healthier twist without sacrificing taste. So why not trade that delivery box for something made with love? Curious to see how this comforting dish comes together?

Why is this dish a weeknight hero?

Simplicity: Whip up this dish in just 30 minutes, making it the perfect solution for busy weeknights.
Customizable: Easily swap chicken for shrimp or turkey and add any veggies you love, like cauliflower or spinach.
Healthier Twist: Use Greek yogurt in place of heavy cream for a lighter meal that still feels indulgent.
Crowd-Pleaser: Kids and adults alike will adore the creamy blend of flavors—it's comfort food at its finest!
Versatile Pairings: Serve alongside garlic bread or a fresh salad, creating a balanced meal that satisfies.
Why settle for fast food when you can create a dish that's not only delicious but also made from scratch? This Creamy Broccoli and Chicken Penne is here to rescue your evenings!

Creamy Broccoli and Chicken Penne Ingredients

For the Pasta

  • Penne Pasta – the sturdy base of this dish, cooks to al dente for the best texture.
  • Broccoli Florets – vibrant and crunch; feel free to swap with cauliflower or spinach for a change.

For the Protein

  • Boneless, Skinless Chicken Breast – the primary protein source; can be easily substituted with turkey or shrimp for a delightful twist.

For the Sauce

  • Olive Oil – essential for sautéing, giving a flavorful foundation.
  • Garlic (minced) – adds aromatic depth; adjust quantity based on your preference for intensity.
  • Heavy Cream – brings a luxurious creaminess; swap with Greek yogurt for a healthier version without losing the decadent feel.
  • Grated Parmesan Cheese – enriches the sauce with a savory touch; for a dairy-free option, use nutritional yeast.
  • Salt – enhances all the flavors; fine-tune to your taste.
  • Pepper – adds a hint of warmth; feel free to adjust!
  • Italian Seasoning (optional) – beautifully elevates the flavor with a blend of herbs.

For Garnish

  • Fresh Parsley (chopped) – the final touch for freshness and a pop of color.

With these ingredients, you're on your way to creating a comforting and delicious Creamy Broccoli and Chicken Penne that the whole family will love!

Step‑by‑Step Instructions for Creamy Broccoli and Chicken Penne

Step 1: Boil Pasta and Broccoli
In a large pot, bring salted water to a rolling boil over high heat. Add the penne pasta and cook for 8-10 minutes, stirring occasionally until al dente. Three minutes before the penne is done, add the broccoli florets to the pot. Once cooked, drain the pasta and broccoli, then set aside, ensuring the vibrant green broccoli remains intact.

Step 2: Sauté Chicken
In a large skillet, heat 2 tablespoons of olive oil over medium heat until shimmering. Season the boneless, skinless chicken breast with salt and pepper, then add it to the skillet. Cook for about 6-7 minutes on each side, until the chicken is golden brown and cooked through. Once done, transfer the chicken to a cutting board to rest, then slice it into bite-sized pieces.

Step 3: Sauté Garlic
In the same skillet, reduce the heat to low and add the minced garlic, using the residual oil to maximize flavor. Sauté for about 30 seconds, stirring frequently, until fragrant but not browned. This aromatic base will enhance the creamy sauce for your Chicken Penne, providing a rich foundation for the dish.

Step 4: Create Creamy Sauce
Pour in the heavy cream, stirring continuously as it heats. Allow the mixture to simmer gently for 2-3 minutes, letting the flavors meld together. Gradually stir in the grated Parmesan cheese until it melts completely, creating a smooth, creamy texture. Season the sauce with additional salt, pepper, and optional Italian seasoning for a delightful depth of flavor.

Step 5: Combine Ingredients
Return the drained penne and broccoli to the skillet, ensuring they are well coated in the creamy sauce. Gently mix in the sliced chicken, folding everything together to evenly distribute the ingredients. Stir for another 1-2 minutes over low heat until warmed through, transforming your ingredients into a comforting Creamy Broccoli and Chicken Penne.

Step 6: Serve and Garnish
Serve the creamy penne in bowls or plates, garnishing with freshly chopped parsley for a pop of color. The comforting warmth of this Creamy Broccoli and Chicken Penne will envelop you with every forkful. Enjoy your homemade dish with a side of garlic bread or a fresh salad to complete this delightful meal!

What to Serve with Creamy Broccoli and Chicken Penne

Creating the perfect meal involves harmonizing flavors, textures, and vibrant colors that elevate your dining experience.

  • Garlic Bread: This warm, buttery delight is perfect for soaking up the creamy sauce, making each bite a joy.
  • Mixed Green Salad: A refreshing salad with crisp greens, cucumber, and a tangy vinaigrette balances the richness of the penne.
  • Roasted Vegetables: Seasoned seasonal veggies add a crispy texture and depth, perfect for added nutrients and flavor.
  • Steamed Asparagus: Tender asparagus complements the dish beautifully with its light crunch, enhancing the overall presentation.
  • Lemon Sorbet: A light and refreshing dessert to cleanse the palate after the hearty meal, making it feel complete.
  • Sparkling Water or Lemonade: Quench your thirst with a bubbly drink that cleanses the palate and adds a celebratory touch.
  • Wine Pairing: A light Pinot Grigio harmonizes beautifully with the creamy sauce, enhancing the dinner experience subtly.
  • Dessert Option: Finish with a slice of cheesecake or a fruit tart to sweeten the evening, creating a delightful contrast to the savory dish.

With these pairings, your Creamy Broccoli and Chicken Penne will shine and leave everyone satisfied!

How to Store and Freeze Creamy Broccoli and Chicken Penne

Fridge: Store leftovers in an airtight container for up to 3 days. It's best to redo some of the creaminess by adding a splash of broth or cream when reheating.

Freezer: Freeze in a tightly sealed container for up to 2 months. To defrost, transfer to the fridge overnight before reheating gently on the stove.

Reheating: When reheating, aim for low heat on the stove. Stir in a bit of liquid to maintain the creamy consistency, making the Creamy Broccoli and Chicken Penne just as inviting as when it was freshly made.

Portion Control: Consider portioning leftovers into individual containers for easy grab-and-go meals during busy days.

Expert Tips for Creamy Broccoli and Chicken Penne

  • Sautéing Chicken: Avoid overcrowding the skillet to ensure even cooking and a beautiful golden crust on your chicken.

  • Thicker Sauce: If you prefer a thicker sauce, let it simmer longer or consider adding a cornstarch slurry to achieve that desired consistency.

  • Reheating Leftovers: When reheating, use low heat and add a splash of cream or broth to keep the sauce creamy and prevent it from separating.

  • Adding Zest: For a burst of freshness, incorporate lemon zest into the sauce. It beautifully brightens the flavors of your Creamy Broccoli and Chicken Penne!

  • Seasoning with Care: Taste as you go! Adjust salt and pepper to ensure a perfectly balanced flavor that enhances all ingredients without overwhelming them.

Creamy Broccoli and Chicken Penne Variations

Feel free to let your imagination run wild while customizing this dish! Each twist brings a new flavor and excitement to the table.

  • Veggie Swap: Replace broccoli with cauliflower or bell peppers for a different flavor profile that still pops with color.
  • Seafood Delight: Swap chicken for shrimp for a sweet, delicate twist; just sauté them for a shorter time until they turn pink.
  • Meat Lovers: Add diced ham or crispy bacon for an indulgent touch that complements the creaminess beautifully.
  • Healthy Option: Replace heavy cream with Greek yogurt for a lighter sauce that still feels rich and indulgent.
  • Dairy-Free: Use plant-based cream and nutritional yeast for a vegan-friendly version that doesn’t skimp on flavor.
  • Herbal Boost: Stir in fresh herbs like basil or thyme at the end for an aromatic enhancement that brightens each bite.
  • Spicy Kick: Add red pepper flakes for a hint of heat that can elevate the dish to new levels of excitement.
  • Zesty Twist: Introduce a squeeze of lemon juice or lemon zest to enhance the dish’s freshness, perfectly balancing the creaminess.

For more delightful dinner inspirations, try pairing this with Crock Pot Chicken for an easy alternative or explore the flavors in Honey Garlic Chicken for a sweet and savory experience!

Make Ahead Options

These Creamy Broccoli and Chicken Penne are perfect for meal prep enthusiasts! You can cook the penne and broccoli up to 24 hours in advance, storing them separately in the refrigerator to maintain their texture. The chicken can be sautéed and sliced ahead of time, and it will keep well for up to 3 days when stored in an airtight container. To maintain the sauce's creamy consistency, prepare the sauce just before serving; simply reheat in a skillet, adding a splash of cream if needed. When you're ready to enjoy this comforting dish, mix in the prepped pasta, chicken, and broccoli, and you'll have a delightful meal ready in minutes!

Creamy Broccoli and Chicken Penne Recipe FAQs

What kind of broccoli is best for this recipe?
Absolutely! Fresh broccoli florets are ideal for this dish as they add vibrant color and a satisfying crunch. When selecting broccoli, look for firm, bright green heads without dark spots or yellowing. If you can't find fresh, frozen broccoli works too; just be sure to thaw it thoroughly before adding it to the dish.

How should I store leftovers?
It's super easy! Store any leftovers in an airtight container in the fridge for up to 3 days. To keep the creamy texture intact when reheating, I recommend adding a splash of broth or cream which will help maintain that rich consistency and prevent the sauce from separating.

Can I freeze Creamy Broccoli and Chicken Penne?
Yes, you can freeze it! Just transfer the prepared dish to a securely sealed container and freeze for up to 2 months. When you're ready to enjoy it again, allow it to defrost in the refrigerator overnight. For reheating, a gentle warming on the stove with a little addition of broth or cream is key to reviving its creamy goodness.

What do I do if my sauce is too thick?
Very! If you find the sauce thickening up too much, simply add a little warm broth or milk while stirring until it reaches your desired consistency. Simmer for a minute or two on low heat to meld the flavors together. Don't forget to taste and adjust seasoning as needed!

Is this recipe suitable for kids or those with allergies?
Of course! It's a family-friendly dish that can be customized. If you have concerns about allergies, feel free to omit the Parmesan cheese or replace it with a dairy-free alternative, like nutritional yeast. For younger family members, slicing the chicken and breaking down the broccoli into smaller pieces can be a fun touch that makes it easier to eat!

What can I substitute for chicken if I want a different protein?
You have plenty of options! Shrimp and turkey are wonderful alternatives, and even diced ham or bacon can add a delightful twist. Just adjust your cooking times accordingly—shrimp cooks quickly, so add it to the skillet just as you start sautéing the garlic for optimal tenderness!

null

Creamy Broccoli and Chicken Penne: Comfort in Every Bite

Discover this 30-minute Creamy Broccoli and Chicken Penne, a cozy dinner solution that is quick, customizable, and a crowd-pleaser.
Print Recipe Pin Recipe
Prep Time 10 minutes mins
Cook Time 20 minutes mins
Total Time 30 minutes mins
Servings: 4 servings
Course: Dinner
Cuisine: Italian
Calories: 450
Ingredients Equipment Method Nutrition Notes

Ingredients
  

For the Pasta
  • 8 ounces Penne Pasta Cooks to al dente
  • 2 cups Broccoli Florets Can substitute with cauliflower or spinach
For the Protein
  • 1 pound Boneless, Skinless Chicken Breast Can substitute with turkey or shrimp
For the Sauce
  • 2 tablespoons Olive Oil For sautéing
  • 3 cloves Garlic Minced
  • 1 cup Heavy Cream Can substitute with Greek yogurt
  • 1/2 cup Grated Parmesan Cheese For a dairy-free option, use nutritional yeast
  • to taste Salt
  • to taste Pepper
  • 1 teaspoon Italian Seasoning Optional
For Garnish
  • 1/4 cup Fresh Parsley Chopped

Equipment

  • Large pot
  • Large skillet
  • Cutting Board

Method
 

Step‑by‑Step Instructions
  1. In a large pot, bring salted water to a rolling boil over high heat. Add the penne pasta and cook for 8-10 minutes, stirring occasionally until al dente. Three minutes before the penne is done, add the broccoli florets to the pot. Once cooked, drain the pasta and broccoli, then set aside.
  2. In a large skillet, heat 2 tablespoons of olive oil over medium heat. Season the boneless, skinless chicken breast with salt and pepper, then add it to the skillet. Cook for about 6-7 minutes on each side, until golden brown and cooked through. Transfer the chicken to a cutting board to rest, then slice into bite-sized pieces.
  3. In the same skillet, reduce the heat to low and add the minced garlic. Sauté for about 30 seconds until fragrant but not browned.
  4. Pour in the heavy cream, stirring continuously as it heats. Allow to simmer gently for 2-3 minutes. Gradually stir in the grated Parmesan cheese until it melts completely. Season with additional salt, pepper, and optional Italian seasoning.
  5. Return the drained penne and broccoli to the skillet, mixing well with the creamy sauce. Gently fold in the sliced chicken. Stir for another 1-2 minutes over low heat until warmed through.
  6. Serve the creamy penne in bowls or plates, garnishing with freshly chopped parsley.

Nutrition

Serving: 1bowlCalories: 450kcalCarbohydrates: 55gProtein: 30gFat: 18gSaturated Fat: 10gPolyunsaturated Fat: 1.5gMonounsaturated Fat: 5gCholesterol: 85mgSodium: 600mgPotassium: 600mgFiber: 3gSugar: 5gVitamin A: 600IUVitamin C: 60mgCalcium: 200mgIron: 2mg

Notes

Consider using Greek yogurt for a lighter sauce. Adjust seasoning as desired.

Tried this recipe?

Let us know how it was!

Lemon Ricotta Pasta with Broccoli: A Creamy Weeknight Delight

April 19, 2026 by Grace Snow Leave a Comment

In just 20 minutes, I discovered a delicious weeknight hero: Lemon Ricotta Pasta with Broccoli! The creamy ricotta sauce, combined with the vibrant zest of fresh lemon and the crispness of tender broccoli, makes this one-pot meal an absolute winner. Not only is it a quick dinner solution perfect for busy nights, but it’s also incredibly adaptable—easily customize it with chicken, shrimp, or your favorite veggies like spinach or asparagus. This recipe is not just a time-saver; it brings a burst of flavor and nutrition to the table, transforming ordinary pasta into an extraordinary experience. Are you ready to elevate your pasta game and impress your loved ones with this delightful dish? Let’s dive in!

Why is this pasta recipe a must-try?

Rapid Preparation: Ready in just 20 minutes, this Lemon Ricotta Pasta with Broccoli is the answer to busy weeknight dinners.

Creamy & Flavorful: The rich ricotta sauce combines beautifully with bright lemon zest, creating a vibrant flavor punch that you'll crave.

Adaptable Ingredients: Feel free to customize with proteins like chicken or shrimp, or toss in seasonal vegetables to fit your taste.

One-Pot Wonder: Simplify clean-up with this one-pot meal—everything cooks together for an effortless culinary experience.

Family Favorite: Its appealing flavors and textures make it a crowd-pleaser that everyone will enjoy, perfect for introducing homemade meals.

Explore more ideas like this by checking out our recipes for Lemon Chicken Soup or Cauliflower Pasta Ready for versatility!

Lemon Ricotta Pasta Ingredients

For the Pasta
• Dry rigatoni – A hearty pasta base, but feel free to use any pasta shape you prefer.
• Broccoli florets – This adds nutrition and crunch; fresh or frozen works well here.

For the Sauce
• Whole-milk ricotta cheese – Creates that creamy, luscious sauce; swap for part-skim or cottage cheese for a lighter option.
• Grated Parmesan cheese – Adds rich, cheesy flavor; consider using nutritional yeast for a dairy-free alternative.
• Lemon zest and juice (1 Tbsp zest + 3 Tbsp juice) – Brightens the dish with acidity; increase zest for a stronger lemon kick.

Seasoning & Spice
• Chili flakes – A touch of heat to elevate the flavor; adjust to taste or leave out for a milder dish.
• Kosher salt & black pepper – Essential for seasoning; try using sea salt for a different texture.

Optional Protein
• Chicken or shrimp – Boosts the dish with protein; tofu can serve as a great vegetarian swap.

This Lemon Ricotta Pasta with Broccoli is not just a dream on a plate, it's a fast and customizable feast!

Step‑by‑Step Instructions for Lemon Ricotta Pasta with Broccoli

Step 1: Boil the Pasta
Begin by bringing a large pot of salted water to a rolling boil over high heat. Once boiling, add the dry rigatoni and cook for about 3-4 minutes, stirring occasionally. You'll want the pasta to be slightly undercooked, as it will continue cooking when combined with the broccoli. Watch for the pasta to become just tender, but not mushy.

Step 2: Add the Broccoli
Carefully add the broccoli florets to the pot, allowing them to cook with the pasta for an additional 2-3 minutes. This timing will ensure both the rigatoni and broccoli reach the perfect al dente texture. The vibrant green color of the broccoli will signal that they're cooked just right; be sure to keep an eye on them!

Step 3: Reserve Pasta Water
Before draining the pot, use a measuring cup to reserve about 1 cup of the starchy pasta cooking water. This will be crucial for achieving the creamy sauce later on. Once you’ve reserved the water, drain the pasta and broccoli together in a colander, shaking off any excess liquid to keep the dish from becoming watery.

Step 4: Combine in the Pot
Return the drained pasta and broccoli to the same pot, but make sure to turn off the heat. This is where you'll create the luscious Lemon Ricotta Pasta with Broccoli. The residual warmth will help melt the cheese and integrate all the flavors beautifully.

Step 5: Add the Creamy Sauce Ingredients
In the pot, stir in the whole-milk ricotta, grated Parmesan cheese, lemon zest, lemon juice, and chili flakes. Gradually add in about ½ cup of the reserved pasta water, mixing everything together until it reaches a creamy consistency. If needed, you can add more pasta water to achieve your desired sauce thickness.

Step 6: Integrate Optional Protein
If you are opting to add chicken or shrimp, incorporate them into the pasta mixture at this point. Toss everything together gently until the added protein is warmed through, ensuring you don't overcook it. The creamy ricotta sauce coats everything beautifully, making this dish a delightful one-pot meal.

Step 7: Serve and Garnish
Finally, divide the Lemon Ricotta Pasta with Broccoli into bowls, and garnish with extra grated Parmesan and a sprinkle of cracked black pepper. This will add an extra layer of flavor and a lovely visual appeal. The creamy texture combined with the bright flavors makes for a gorgeous presentation.

Variations & Substitutions for Lemon Ricotta Pasta

Feel free to make this dish your own with easy swaps and tasty additions that will delight your palate!

  • Dairy-Free: Replace ricotta and Parmesan with cashew cream and nutritional yeast for a creamy, dairy-free option.
  • Extra Protein: Add grilled chicken or shrimp for a hearty twist; it complements the creamy sauce beautifully.
  • Vegetable Medley: Toss in sun-dried tomatoes or sautéed artichokes along with broccoli for a burst of Mediterranean flavors. Let your creativity shine!
  • Pasta Shape: Try using whole wheat or gluten-free pasta like farfalle or penne to suit your dietary preferences while keeping it delicious.
  • Spicy Kick: Mix in chopped jalapeños or switch to spicy chili flakes to turn up the heat. A little spice can add a surprisingly delightful zing!
  • Herbal Boost: Add fresh herbs like basil or parsley for an aromatic twist; they elevate the freshness of the dish, bringing it to a new level.
  • Zesty Spin: Increase the lemon zest and juice for an extra zing—more brightness will really awaken your taste buds. Who doesn’t love a tart kick?
  • Crispy Topping: Sprinkle toasted breadcrumbs or crushed nuts over your pasta before serving for added crunch and texture.

As you explore these variations, check out our delightful Herby Ricotta Stuffed peppers or enjoy a bowl of Seafood Pasta Savory for even more culinary inspiration!

Expert Tips for Lemon Ricotta Pasta

  • Reserve Pasta Water: Always save at least 1 cup of the starchy pasta water before draining. This helps achieve the perfect sauce consistency for your Lemon Ricotta Pasta.

  • Cook Timing: Be careful not to overcook the rigatoni; aim for al dente as it will cook further when mixed with the broccoli and sauce.

  • Add Proteins Last: If incorporating chicken or shrimp, add them after mixing the sauce to prevent overcooking and maintain tenderness.

  • Use Fresh Ingredients: Opt for fresh lemon juice and zest for that vibrant flavor. Fresh broccoli florets also provide better texture compared to frozen.

  • Experiment with Veggies: Feel free to customize your dish with other vegetables like asparagus or spinach, making your Lemon Ricotta Pasta even more delightful.

Make Ahead Options

These Lemon Ricotta Pasta with Broccoli are perfect for busy weeknights when you need a time-saving meal prep solution! You can prepare the pasta and broccoli up to 24 hours in advance. Simply cook the rigatoni until just al dente, add the broccoli for the last few minutes, and then cool and refrigerate them together in an airtight container. For the sauce, mix the ricotta, Parmesan, lemon zest, and juice, and store it separately in the fridge; this will keep it fresh and creamy. When ready to serve, simply combine the prepped ingredients in a pot, add a splash of reserved pasta water, and heat gently until warmed through for that delightful, fresh taste!

What to Serve with Lemon Ricotta Pasta with Broccoli

Elevate your dining experience by pairing this creamy pasta with delightful sides and drinks that complement its flavors beautifully.

  • Garlic Bread: The crunchy, buttery goodness of garlic bread balances the creamy texture, offering a perfect dip-and-savor experience with every bite.

  • Arugula Salad: A fresh arugula salad tossed with a light vinaigrette adds a peppery kick and crispness that contrasts wonderfully with the pasta’s richness.

  • Grilled Lemon Chicken: Juicy grilled lemon chicken takes the meal up a notch, adding a zesty protein that harmonizes with the lemon in the pasta.

  • Roasted Asparagus: Tender roasted asparagus not only enhances the plate visually but also provides a smoky flavor and satisfying crunch.

  • Sangria: A chilled glass of sangria, bursting with citrus and berry flavors, pairs delightfully with the lemony notes of the pasta, creating a refreshing drink option.

  • Tiramisu: Finish your meal on a sweet note with a light tiramisu; its creamy layers and coffee essence create a perfect balance after the savory pasta.

How to Store and Freeze Lemon Ricotta Pasta

Fridge: Store leftover Lemon Ricotta Pasta in an airtight container for up to 4 days. Reheat gently on the stovetop, adding a splash of water for moisture if needed.

Freezer: This pasta can be frozen for up to 3 months. Place it in a freezer-safe container, leaving room for expansion, and thaw in the refrigerator before reheating.

Reheating: For best results, reheat in a pot over low heat, stirring occasionally, and add a little reserved pasta water to refresh the creamy sauce.

Airtight Guidance: Always ensure your container is airtight to prevent freezer burn and maintain the pasta's delicious flavors.

Lemon Ricotta Pasta with Broccoli Recipe FAQs

How do I select the best broccoli for this recipe?
Absolutely! Look for fresh broccoli florets that are bright green without any dark spots or yellowing. The florets should be tightly packed and firm to the touch. If you're short on time, frozen broccoli florets are a great alternative that still provide nutrition and texture to your Lemon Ricotta Pasta.

What’s the best way to store leftover Lemon Ricotta Pasta?
You can store leftover Lemon Ricotta Pasta in an airtight container in the refrigerator for up to 4 days. Make sure to reheat it gently to preserve the creaminess. Just add a splash of water to moisten it if needed!

Can I freeze Lemon Ricotta Pasta, and if so, how?
Very! To freeze your Lemon Ricotta Pasta, place it in a freezer-safe container, ensuring there’s some space for expansion. It can be kept in the freezer for up to 3 months. When you’re ready to enjoy it, thaw it in the refrigerator overnight and reheat on the stovetop with a splash of reserved pasta water for the best texture.

What should I do if my pasta sauce is too thick?
If your pasta sauce turns out too thick, don’t worry! Simply add reserved pasta water a little at a time while stirring over low heat until you reach your desired consistency. This starchy water is the secret to creamy perfection in your Lemon Ricotta Pasta.

Are there any allergies I should be aware of with this dish?
Absolutely! This recipe contains dairy ingredients, primarily ricotta and Parmesan cheese, which may not be suitable for those with lactose intolerance or dairy allergies. You can substitute with plant-based alternatives like cashew cheese or vegan ricotta for a delicious dairy-free option.

Can I customize this Lemon Ricotta Pasta recipe?
Very! This dish is wonderfully adaptable. Feel free to add your choice of proteins like chicken or shrimp for a heartier meal, or switch up the veggies with sun-dried tomatoes, asparagus, or spinach. The more, the merrier!

Lemon Ricotta Pasta with Broccoli

Lemon Ricotta Pasta with Broccoli: A Creamy Weeknight Delight

This Lemon Ricotta Pasta with Broccoli is a delicious and quick weeknight meal that combines creamy ricotta sauce, fresh lemon zest, and tender broccoli.
Print Recipe Pin Recipe
Prep Time 10 minutes mins
Cook Time 10 minutes mins
Total Time 20 minutes mins
Servings: 4 servings
Course: Dinner
Cuisine: Italian
Calories: 450
Ingredients Equipment Method Nutrition Notes

Ingredients
  

For the Pasta
  • 12 oz Dry rigatoni Feel free to use any pasta shape
  • 2 cups Broccoli florets Fresh or frozen works well
For the Sauce
  • 15 oz Whole-milk ricotta cheese Swap for part-skim or cottage cheese for a lighter option
  • 1/2 cup Grated Parmesan cheese Consider using nutritional yeast for a dairy-free alternative
  • 1 Tbsp Lemon zest Increase zest for a stronger lemon kick
  • 3 Tbsp Lemon juice
Seasoning & Spice
  • 1/4 tsp Chili flakes Adjust to taste or leave out for a milder dish
  • 1 tsp Kosher salt
  • 1/2 tsp Black pepper
Optional Protein
  • 1 cup Chicken or shrimp Tofu can serve as a great vegetarian swap

Equipment

  • Large pot
  • Colander
  • Measuring cup

Method
 

Step-by-Step Instructions
  1. Begin by bringing a large pot of salted water to a rolling boil over high heat. Once boiling, add the dry rigatoni and cook for about 3-4 minutes, stirring occasionally.
  2. Carefully add the broccoli florets to the pot, allowing them to cook with the pasta for an additional 2-3 minutes.
  3. Before draining the pot, use a measuring cup to reserve about 1 cup of the starchy pasta cooking water.
  4. Return the drained pasta and broccoli to the same pot, but make sure to turn off the heat.
  5. In the pot, stir in the whole-milk ricotta, grated Parmesan cheese, lemon zest, lemon juice, and chili flakes. Gradually add in about ½ cup of the reserved pasta water.
  6. If you are opting to add chicken or shrimp, incorporate them into the pasta mixture at this point.
  7. Finally, divide the Lemon Ricotta Pasta with Broccoli into bowls, and garnish with extra grated Parmesan and a sprinkle of cracked black pepper.

Nutrition

Serving: 1servingCalories: 450kcalCarbohydrates: 55gProtein: 20gFat: 15gSaturated Fat: 8gPolyunsaturated Fat: 0.5gMonounsaturated Fat: 4gCholesterol: 50mgSodium: 600mgPotassium: 300mgFiber: 4gSugar: 2gVitamin A: 500IUVitamin C: 60mgCalcium: 300mgIron: 2mg

Notes

Reserve at least 1 cup of pasta water for optimal sauce consistency. Customize with seasonal vegetables as desired.

Tried this recipe?

Let us know how it was!

Delicious Italian Broccoli Pasta You’ll Love Making Tonight

April 19, 2026 by Grace Snow Leave a Comment

The aroma of sizzling garlic wafts through the kitchen as I whip up a dish that dances with color and flavor—Italian Broccoli Pasta. This quick and easy recipe not only comforts the soul but also packs a nutritious punch, making it an unbeatable option for anyone looking to swap out fast food for something wholesome. Picture tender pasta intermingled with crisp-tender broccoli, each bite brimming with the richness of olive oil. Its adaptability means you can easily transform it into a main course or a delightful side for your next family gathering, ensuring everyone leaves the table satisfied. Curious how a few simple ingredients can create such a vibrant meal? Let’s dive in!

What makes this pasta dish special?

Quick Preparation: Get a wholesome meal on the table in under 30 minutes—perfect for busy weeknights.
Nutrient-Rich: Packed with vitamins from broccoli, this recipe is a guilt-free indulgence.
Versatile Options: Easily switch up the ingredients to suit your tastes; add protein or different veggies like spinach or bell peppers for variety.
Flavorful Simplicity: The robust taste of garlic and olive oil enhances each bite, making meals delicious without the fuss.
Crowd-Pleasing Appeal: An ideal dish for family gatherings, ensuring everyone from kids to adults enjoys a hearty meal.

Italian Broccoli Pasta Ingredients

• Get ready to whip up a vibrant dish!

For the Pasta

  • Pasta – Use your favorite type; whole wheat or gluten-free are great alternatives.

For the Vegetables

  • Broccoli – Fresh or frozen, it brings essential nutrients and earthy flavor.
  • Garlic – The fragrant hero; adjust to taste for a boost of flavor.

For Cooking

  • Olive Oil – A heart-healthy fat that adds richness; swap with avocado oil if desired.
  • Red Pepper Flakes – Optional for a bit of heat; add more for spice lovers!

For Topping

  • Parmesan Cheese – Optional but deliciously enriches the dish; nutritional yeast works for a vegan option.
  • Fresh Herbs (e.g., parsley or basil) – Add for a burst of freshness; use whatever you have on hand.

Step‑by‑Step Instructions for Italian Broccoli Pasta

Step 1: Cook the Pasta
Begin by bringing a large pot of salted water to a rolling boil over high heat. Once boiling, add your favorite pasta, stirring occasionally for even cooking. Cook until al dente, usually about 8-10 minutes, then reserve a cup of the starchy pasta water and drain the rest. It's key for achieving the creamy consistency in your Italian Broccoli Pasta, so set it aside as you move on.

Step 2: Sauté the Garlic
In a large skillet, heat 2-3 tablespoons of olive oil over medium heat. Once hot, add minced garlic and sauté for 1-2 minutes until fragrant and golden, being careful not to burn it. The oil will infuse with garlic flavor, creating a delicious base for your dish. Watch for a golden hue to signal it's time for the next step.

Step 3: Add the Broccoli
Next, toss in the broccoli florets, stirring to coat them in the garlicky oil. Sauté for about 5-7 minutes until the broccoli is tender yet still vibrant, retaining a bit of crunch. If using frozen broccoli, allow a few extra minutes for cooking. This step brings a lovely texture that pairs perfectly with the pasta.

Step 4: Combine Pasta and Broccoli
Carefully add the drained pasta into the skillet with the sautéed broccoli and garlic. Stir everything together gently, incorporating a bit of the reserved pasta water to help the ingredients meld seamlessly. You want a pleasingly creamy texture, so add water gradually until you reach your desired consistency for the Italian Broccoli Pasta.

Step 5: Season to Perfection
Now, season your pasta dish with red pepper flakes, salt, and freshly ground black pepper to taste. Toss everything together until well mixed, allowing the spices to distribute evenly throughout the dish. This seasoning step enhances the overall flavor, making every bite delightfully savory and comforting.

Step 6: Serve and Garnish
To finish, serve the Italian Broccoli Pasta hot, topped with freshly grated Parmesan cheese and a sprinkle of chopped fresh herbs like parsley or basil. This final garnish not only adds a touch of color but also a burst of freshness. Enjoy the vibrant flavors and comforting aromas as you dig into this wholesome, home-cooked meal!

Expert Tips for Cooking Italian Broccoli Pasta

  • Perfectly Cooked Broccoli: Avoid overcooking; aim for vibrant green and firm texture. This enhances both flavor and nutrition in your Italian Broccoli Pasta.

  • Reserve Pasta Water: Don’t forget to save some starchy pasta water! It helps achieve a creamy sauce that binds the ingredients beautifully without being soupy.

  • Adjust Garlic Levels: Modify the amount of garlic based on your preference. More garlic amplifies flavor, while less gives a milder taste.

  • Pasta Shape Matters: Try different pasta shapes! Each delivers a unique bite and presentation—short pasta like penne or farfalle holds sauce differently than long spaghetti.

  • Customize the Heat: If you enjoy spice, experiment with red pepper flakes. Start with a little, taste, and add more to tailor it to your preference for the Italian Broccoli Pasta.

Storage Tips for Italian Broccoli Pasta

Room Temperature: Serve leftovers promptly, as this dish is best enjoyed fresh. However, if needed, it can sit at room temperature for no more than 2 hours.

Fridge: Store any leftover Italian Broccoli Pasta in an airtight container in the fridge for up to 3 days. This keeps the flavors intact and prevents spoilage.

Freezer: For longer storage, freeze the pasta in a freezer-safe container for up to 2 months. Ensure it’s tightly sealed to avoid freezer burn.

Reheating: When ready to enjoy, reheat gently in the microwave or on the stovetop, adding a splash of reserved pasta water to bring back its creamy texture.

Make Ahead Options

These Italian Broccoli Pasta is perfect for meal prep! You can chop the broccoli and mince the garlic up to 24 hours in advance, storing them in airtight containers in the refrigerator to maintain their freshness. Additionally, you can cook the pasta ahead of time, just be sure to toss it with a drizzle of olive oil to prevent sticking. When you're ready to serve, simply sauté the garlic and broccoli, add the pre-cooked pasta, and finish with reserved pasta water for that creamy texture. This way, you’ll enjoy a delicious home-cooked meal with minimal effort on busy nights!

What to Serve with Italian Broccoli Pasta

Imagine a delightful dinner spread that perfectly complements the flavors of vibrant pasta and nutritious vegetables, creating a memorable meal experience.

  • Garlic Bread: The buttery, crispy surface adds a satisfying crunch that pairs beautifully with the creamy pasta. Dip it into any remaining olive oil for an extra kick!

  • Mixed Green Salad: A fresh salad with lemon vinaigrette brings a bright tanginess, balancing the richness of the pasta. Add tomatoes and cucumbers for diverse textures and added nutrients.

  • Roasted Vegetables: Oven-roasted veggies like bell peppers and zucchini introduce sweetness and charred flavors, rounding out the meal while keeping it wholesome and colorful.

  • Chickpea Fritters: Add protein and crunch with these crispy bites. Their savory flavor complements the pasta, making the meal even heartier.

  • White Wine: A chilled glass of Pinot Grigio enhances the dish with crisp acidity, perfectly contrasting the richness while offering a refreshing sip with each bite.

  • Lemon Sorbet: For dessert, a light lemon sorbet cleanses the palate, leaving a refreshing finish after the savory flavors of your Italian Broccoli Pasta.

Italian Broccoli Pasta Variations

Feel free to create your own culinary masterpiece with these delightful tweaks for the Italian Broccoli Pasta!

  • Vegetable Boost: Add colorful veggies like bell peppers or zucchini to amp up the nutrients and flavor.

  • Protein Power: Toss in cooked chicken, shrimp, or canned chickpeas for a hearty protein kick that transforms this dish into a full meal.

  • Cheesy Twists: Experiment with different cheeses such as goat cheese or feta; they’ll lend a tangy sweetness that pairs beautifully with the broccoli.

  • Herb Infusion: Mix in fresh herbs like basil, thyme, or even a sprinkle of oregano for a delightful aromatic burst.

  • Zesty Upgrade: Squeeze some fresh lemon juice over the dish for a refreshing zing; it brightens the entire flavor profile wonderfully.

  • Nutty Delight: Sprinkle toasted pine nuts or walnuts over the finished dish to add a crunchy texture and an earthy richness.

  • Spice Level: Craving more heat? Include a pinch more of red pepper flakes or some crushed black pepper for an exciting zing.

  • Creative Pasta: Change things up with Cauliflower Pasta Ready for a low-carb option, or use Skillet Pasta Sun for an extra burst of flavor.

Whether you're in the mood for something different or simply want to use up leftovers, these variations will keep your dinners exciting!

Italian Broccoli Pasta Recipe FAQs

How do I choose the best broccoli for this recipe?
Absolutely! When selecting broccoli, look for bright green florets with tightly closed buds. Avoid any with dark spots or yellowing, as they may be past their prime. Fresh broccoli will give your Italian Broccoli Pasta a vibrant flavor and texture. If using frozen, ensure there are no freezer burn marks.

How should I store leftover Italian Broccoli Pasta?
I recommend transferring any leftover Italian Broccoli Pasta to an airtight container and refrigerating it. It will stay fresh for up to 3 days. Make sure to reheat gently, preferably adding a splash of reserved pasta water to keep the dish creamy.

Can I freeze Italian Broccoli Pasta? How do I do it?
Certainly! Freeze your Italian Broccoli Pasta by placing it in a freezer-safe container, ensuring it's tightly sealed to prevent freezer burn. It can be frozen for up to 2 months. When you’re ready to enjoy, let it thaw overnight in the refrigerator, then reheat on the stove or in the microwave, adding a little reserved pasta water as needed.

What if my broccoli turns mushy while cooking?
Very! It’s crucial not to overcook the broccoli; keep an eye on it as it should be sautéed just until tender yet still firm, about 5-7 minutes. If it does become mushy, don’t worry! You can still incorporate it, but it will alter the texture of your Italian Broccoli Pasta. Next time, reduce the cooking time for better results.

Are there any dietary considerations I should know?
Yes! If you're cooking for those with lactose intolerance or following a vegan diet, you can substitute Parmesan cheese with nutritional yeast. Additionally, always check for any allergy concerns related to ingredients like garlic or gluten in the pasta, especially if cooking for guests.

Italian Broccoli Pasta

Delicious Italian Broccoli Pasta You’ll Love Making Tonight

A vibrant Italian Broccoli Pasta that is both quick and nutritious, perfect for satisfying meals.
Print Recipe Pin Recipe
Prep Time 10 minutes mins
Cook Time 20 minutes mins
Total Time 30 minutes mins
Servings: 4 servings
Course: Dinner
Cuisine: Italian
Calories: 350
Ingredients Equipment Method Nutrition Notes

Ingredients
  

Pasta
  • 8 oz Pasta Use your favorite type; whole wheat or gluten-free are great alternatives.
Vegetables
  • 2 cups Broccoli Fresh or frozen.
  • 3 cloves Garlic Minced; adjust to taste.
Cooking Ingredients
  • 2-3 tablespoons Olive Oil Heart-healthy fat; can swap with avocado oil.
  • 1/4 teaspoon Red Pepper Flakes Optional for heat.
Toppings
  • 1/2 cup Parmesan Cheese Optional.
  • Fresh Herbs (e.g., parsley or basil) Add for freshness.

Equipment

  • Large pot
  • Skillet
  • measuring cups
  • Measuring Spoons
  • Knife
  • Cutting Board

Method
 

Step-by-Step Instructions
  1. Begin by bringing a large pot of salted water to a rolling boil over high heat. Once boiling, add your favorite pasta, stirring occasionally for even cooking. Cook until al dente, usually about 8-10 minutes, then reserve a cup of the starchy pasta water and drain the rest.
  2. In a large skillet, heat 2-3 tablespoons of olive oil over medium heat. Once hot, add minced garlic and sauté for 1-2 minutes until fragrant and golden.
  3. Toss in the broccoli florets, stirring to coat them in the garlicky oil. Sauté for about 5-7 minutes until the broccoli is tender yet still vibrant.
  4. Carefully add the drained pasta into the skillet with the sautéed broccoli and garlic. Stir everything together gently, incorporating a bit of the reserved pasta water to help the ingredients meld seamlessly.
  5. Season your pasta dish with red pepper flakes, salt, and freshly ground black pepper to taste. Toss everything together until well mixed.
  6. Serve the Italian Broccoli Pasta hot, topped with freshly grated Parmesan cheese and a sprinkle of chopped fresh herbs.

Nutrition

Serving: 1servingCalories: 350kcalCarbohydrates: 50gProtein: 12gFat: 10gSaturated Fat: 2gPolyunsaturated Fat: 1gMonounsaturated Fat: 6gCholesterol: 5mgSodium: 300mgPotassium: 400mgFiber: 6gSugar: 2gVitamin A: 500IUVitamin C: 50mgCalcium: 150mgIron: 2mg

Notes

Enjoy the vibrant flavors and comforting aromas as you dig into this wholesome, home-cooked meal!

Tried this recipe?

Let us know how it was!

Ham and Broccoli Pasta Casserole: Comfort Food Bliss

April 19, 2026 by Grace Snow Leave a Comment

In the midst of a bustling weekday morning, I found myself pondering a question we all face: what’s for dinner? Then it hit me—a warm, creamy Ham and Broccoli Pasta Casserole! This delightful dish effortlessly combines tender broccoli, savory ham, and hearty pasta in a cheesy embrace that feels like a hug after a long day. With just a bit of prep, this family-friendly casserole transforms into a quick weeknight dinner that’s as customizable as it is comforting. Whether you’re looking for a dish that pleases picky eaters or a recipe that can easily adapt to fit multiple tastes, this one delivers. So, what twists will you add to make this dish your own? Let’s dive into the deliciousness!

Why Is This Casserole a Must-Try?

Comforting, delicious meal: The Ham and Broccoli Pasta Casserole brings classic comfort food vibes to your dinner table. Customizable to perfection: Feel free to swap in your favorite vegetables or cheeses for a unique twist. Quick to prepare: With just a bit of pre-cooking, you can have this hearty dish ready in no time. Plus, it’s perfect for busy weeknights! Family-friendly: Even picky eaters will find something to love in this flavorful casserole. For more family-friendly recipes, don’t miss our Cornbread Breakfast Casserole or Sweet Potato Casserole.

Ham and Broccoli Pasta Casserole Ingredients

For the Casserole
• Pasta – Any sturdy pasta shape like penne or rotini works best; avoid thin pastas like spaghetti for this dish.
• Broccoli florets – Fresh or frozen, both add a nourishing touch; just remember to thaw and drain frozen broccoli.
• Cooked Ham – This savory protein brings flavor; for a vegetarian option, simply omit it or replace with sautéed mushrooms or bell peppers.
• Cream of Mushroom Soup – The creamy base for our casserole; feel free to swap with cream of chicken or celery soup for a different flavor.
• Milk – Essential for thinning the sauce and adding creaminess; you can use any type of milk or heavy cream for a richer texture.
• Shredded Cheddar Cheese – Melts beautifully and adds a comforting flavor; try Monterey Jack for a fun variation.
• Butter – A touch for enhancing the richness of the dish.
• Breadcrumbs – Give a delightful crunch when sprinkled on top; for an alternative, crush potato chips or skip the topping altogether.
• Onion powder – Infuses savory depth; adjustable based on personal preference.
• Garlic powder – Elevates the flavor; use fresh garlic if you prefer a bolder taste.
• Salt and Pepper – These essentials are key for bringing all the flavors together.

Get ready to create a delicious Ham and Broccoli Pasta Casserole that your family will love!

Step‑by‑Step Instructions for Ham and Broccoli Pasta Casserole

Step 1: Preheat and Prepare
Begin by preheating your oven to 350°F (175°C) and greasing a 9x13-inch baking dish with butter or cooking spray. This ensures that your Ham and Broccoli Pasta Casserole won't stick during baking. Set aside the prepared dish while you focus on cooking your pasta and broccoli.

Step 2: Cook the Pasta
In a large pot, bring salted water to a rolling boil and add your chosen pasta, cooking it until it reaches al dente, about 8–10 minutes. Drain the pasta and quickly rinse it under cold water to stop the cooking process. This step keeps your pasta firm and ready to soak up the delicious flavors in the casserole.

Step 3: Prepare the Broccoli
While the pasta is cooking, in a separate pot, steam or boil the broccoli florets for about 3-5 minutes until tender but still bright green. Drain and set aside, allowing excess water to escape. The broccoli adds nutrition and a lovely color to your Ham and Broccoli Pasta Casserole, so you'll want it perfectly cooked.

Step 4: Make the Sauce Base
In a large mixing bowl, combine the cream of mushroom soup, milk, and melted butter, whisking until smooth and creamy. This forms the luscious base of your casserole. As you mix, ensure there are no lumps, making for a velvety texture throughout the ham and broccoli pasta dish.

Step 5: Combine Ingredients
Next, incorporate the cooked ham, steamed broccoli, drained pasta, onion powder, garlic powder, salt, and pepper into the sauce mixture. Stir gently until everything is well combined and evenly coated. This step is where the magic happens, blending all the flavors together in your Ham and Broccoli Pasta Casserole.

Step 6: Add Cheese
Fold in the shredded cheddar cheese, reserving about a cup for the topping. This cheese will melt beautifully during baking, creating a rich, creamy texture. Mixing it well ensures every bite of your casserole is filled with cheesy goodness that your family will adore.

Step 7: Assemble the Casserole
Pour the entire mixture into the prepared baking dish, spreading it evenly with a spatula. Sprinkle the reserved cheddar cheese evenly over the top for a deliciously cheesy crust. This will create a beautiful golden layer as it bakes, adding both flavor and aesthetic appeal to your ham and broccoli pasta casserole.

Step 8: Add Topping
For an extra crunch, mix breadcrumbs with a splash of melted butter in a small bowl, and sprinkle this over the cheese layer. This optional step enhances the texture of your casserole, giving it a delightful crispy topping. It adds a fun twist to your comforting dish that everyone will love.

Step 9: Bake
Place the baking dish in your preheated oven and bake for 25-30 minutes, or until the casserole is bubbly and the top is golden brown. Keep an eye on it during the last few minutes to achieve that perfect color. The aroma that fills your kitchen will be irresistible as it cooks!

Step 10: Cool and Serve
Once baked, remove your Ham and Broccoli Pasta Casserole from the oven and allow it to rest for 5-10 minutes before serving. This cooling period helps the casserole set, making it easier to cut and serve. Dish out generous portions and savor the comforting flavors with your loved ones!

Make Ahead Options

These Ham and Broccoli Pasta Casserole preparations make busy weeknights a breeze! You can assemble the casserole up to 24 hours in advance; just refrigerate it covered to keep it fresh. Prepare and combine the pasta, vegetables, ham, and sauce, then cover it tightly. For the best results, sprinkle the cheese on top just before baking to maintain its delicious meltiness. When you’re ready to serve, preheat your oven and bake straight from the fridge, adding an extra 5-10 minutes to the baking time if needed. With this make-ahead option, you’ll enjoy a comforting, homemade meal with minimal evening stress!

What to Serve with Ham and Broccoli Pasta Casserole

The perfect accompaniment can elevate your Ham and Broccoli Pasta Casserole into a delightful dining experience.

  • Garden Salad: A crisp, fresh salad adds a bright contrast, enhancing the hearty flavors of the casserole. Toss with a light vinaigrette for a refreshing bite.
  • Garlic Bread: The buttery, garlicky bread pairs beautifully, perfect for soaking up the creamy sauce. It’s deliciously comforting alongside the casserole.
  • Roasted Vegetables: Seasoned vegetables, caramelized to perfection, offer a lovely mix of textures and flavors, rounding out your meal.
  • Steamed Green Beans: Their tenderness and vibrant color complement the casserole, adding both nutrition and aesthetic appeal to the plate.
  • Mango Chutney: A hint of sweetness from chutney brings a unique burst of flavor, contrasting nicely with the savory casserole.
  • Chilled White Wine: A crisp Sauvignon Blanc or a light Pinot Grigio pairs well, enhancing the meal while refreshing your palate.
  • Chocolate Chip Cookies: For dessert, warm, gooey cookies provide a sweet finish to a comforting dinner. The nostalgia of cookies complements the homey vibe of the meal.
  • Homemade Apple Crisp: This warm dessert brings a delightful balance to the savory casserole and is perfect for cozy family gatherings.

Expert Tips for Ham and Broccoli Pasta Casserole

Cooking Pasta: Avoid overcooking your pasta; it should be al dente, as it will continue to cook in the oven.

Broccoli Prep: If using frozen broccoli, make sure to thaw and drain it thoroughly to prevent excess moisture in the casserole.

Creaminess Check: If the mixture appears too dry, add more milk or cream before baking to ensure a rich texture in your ham and broccoli pasta casserole.

Topping Alternatives: Feel free to skip the breadcrumbs if you prefer a cheese-only topping; you can also use crushed potato chips for a crunchier twist!

Reheating Leftovers: For best results, cover leftovers with foil and reheat in a 350°F oven for 20-30 minutes, keeping it moist and delicious.

Ham and Broccoli Pasta Casserole Variations

Feel free to make this dish uniquely yours by trying out these enticing variations!

  • Vegetarian Delight: Omit the ham and replace it with sautéed bell peppers and mushrooms for a hearty, veggie-packed dish. It still brings that comforting vibe and loads of nutrients!

  • Cheese Swap: Substitute cheddar with mozzarella or Gouda for a different flavor profile. Each cheese adds its own special touch, creating a rich, melty experience that everyone will appreciate.

  • Different Pasta Shapes: Experiment with fusilli or shells instead of penne to add visual appeal and excitement to each forkful. Each shape holds the sauce differently, transforming your casserole in fun ways!

  • Creamy Alternative: For a twist on the sauce, use a homemade white sauce or a creamy vegetable soup instead of cream of mushroom. It’ll elevate the dish, making it feel even more gourmet.

  • Extra Crunch: Mix in toasted panko breadcrumbs or sprinkle crushed potato chips on top for an added layer of texture. Everyone loves that satisfying crunch!

  • Spicy Kick: If you like a bit of heat, add a dash of red pepper flakes or diced jalapeños to the mix. It’ll warm you up and keep things exciting at dinner time!

  • Herbal Boost: Incorporate fresh herbs like thyme or basil for a burst of freshness. The contrast of flavors will enhance the overall taste and aroma of your casserole!

  • Seafood Variation: For a seafood-inspired twist, blend in cooked shrimp or crab with the ham. The ocean's bounty mixes beautifully with the creaminess of the casserole; perfect for a special occasion!

With all these options, you can customize your Ham and Broccoli Pasta Casserole for whatever mood strikes! For more comforting recipes, check out our cozy Spicy Miso Casserole and delightful Seafood Pasta. Happy cooking!

How to Store and Freeze Ham and Broccoli Pasta Casserole

Fridge: Store leftovers in an airtight container for up to 3 days. Make sure to cool it beforehand to retain moisture and flavor.

Freezer: For longer storage, freeze the casserole before baking. Wrap it tightly in plastic wrap and aluminum foil for up to 2 months. Simply thaw overnight in the fridge before baking.

Reheating: When ready to enjoy, cover the casserole with foil and reheat in a 350°F (175°C) oven for 20-30 minutes, ensuring it stays moist and delicious.

Make-Ahead Tip: You can assemble the Ham and Broccoli Pasta Casserole ahead of time and keep it in the fridge for up to 24 hours before baking.

Ham and Broccoli Pasta Casserole Recipe FAQs

How do I choose the right broccoli for this casserole?
Absolutely! When selecting broccoli, look for florets that are bright green and firm. Steer clear of any that show dark spots all over, as this indicates they may be turning. Fresh broccoli works beautifully, but if you’re short on time, you can conveniently use frozen broccoli—just make sure to thaw and drain it well to avoid extra moisture in your casserole.

How long can I store leftover casserole in the fridge?
Very! You can store your Ham and Broccoli Pasta Casserole in an airtight container in the fridge for up to 3 days. Just remember to allow it to cool to room temperature before sealing it up; this helps retain its delicious flavors and moisture!

Can I freeze Ham and Broccoli Pasta Casserole?
Yes, you can! To freeze before baking, wrap the assembled casserole tightly in plastic wrap, then in aluminum foil to ensure it stays fresh for up to 2 months. When you’re ready to cook it, simply thaw it overnight in the fridge. Bake it as per the instructions (adding an extra 5-10 minutes if it's still cool from the fridge) for a fabulous dinner any night!

What can I do if the casserole seems dry before baking?
No worries at all! If your mixture looks a bit dry, just add more milk or cream to the bowl—about ¼ cup should do the trick. Stir it in gently to ensure everything is well combined. This will boost the creaminess, making sure your casserole is rich and delicious when baked.

Are there any dietary considerations with this casserole?
Certainly! This recipe is easily adaptable for different dietary needs. For a vegetarian option, skip the ham and replace it with sautéed mushrooms, bell peppers, or even lentils for added protein. Always check if your guests have allergies to any included ingredients like dairy or gluten, and consider using substitutes such as dairy-free cheese or gluten-free pasta if needed.

Ham and Broccoli Pasta Casserole

Ham and Broccoli Pasta Casserole: Comfort Food Bliss

This Ham and Broccoli Pasta Casserole is a comforting and family-friendly dinner perfect for busy weeknights.
Print Recipe Pin Recipe
Prep Time 15 minutes mins
Cook Time 30 minutes mins
Cooling Time 10 minutes mins
Total Time 55 minutes mins
Servings: 6 servings
Course: Dinner
Cuisine: American
Calories: 350
Ingredients Equipment Method Nutrition Notes

Ingredients
  

For the Casserole
  • 2 cups Pasta (penne or rotini) Avoid thin pastas like spaghetti.
  • 2 cups Broccoli florets Fresh or frozen, thaw and drain frozen.
  • 2 cups Cooked Ham Can substitute with sautéed mushrooms or bell peppers for vegetarian option.
  • 1 can Cream of Mushroom Soup Can substitute with cream of chicken or celery soup.
  • 1 cup Milk Any type of milk or heavy cream.
  • 2 cups Shredded Cheddar Cheese Can substitute with Monterey Jack.
  • 2 tablespoons Butter
  • 1 cup Breadcrumbs Can substitute with crushed potato chips.
  • 1 teaspoon Onion powder
  • 1 teaspoon Garlic powder Use fresh garlic for a bolder taste.
  • to taste Salt
  • to taste Pepper

Equipment

  • 9x13-inch baking dish
  • Large pot
  • Mixing Bowl
  • Spatula

Method
 

Step‑by‑Step Instructions
  1. Preheat your oven to 350°F (175°C) and grease a 9x13-inch baking dish with butter.
  2. In a large pot, bring salted water to a rolling boil and add your pasta, cooking it until al dente, about 8-10 minutes.
  3. Steam or boil the broccoli florets for about 3-5 minutes until tender but still bright green.
  4. In a large mixing bowl, combine the cream of mushroom soup, milk, and melted butter, whisking until smooth.
  5. Incorporate the cooked ham, steamed broccoli, drained pasta, onion powder, garlic powder, salt, and pepper into the sauce mixture. Stir gently until well combined.
  6. Fold in the shredded cheddar cheese, reserving about a cup for topping.
  7. Pour the mixture into the prepared baking dish and spread evenly. Sprinkle the reserved cheddar cheese on top.
  8. Mix breadcrumbs with melted butter and sprinkle over the cheese layer.
  9. Bake for 25-30 minutes until the casserole is bubbly and the top is golden brown.
  10. Allow the casserole to rest for 5-10 minutes before serving.

Nutrition

Serving: 1cupCalories: 350kcalCarbohydrates: 40gProtein: 20gFat: 15gSaturated Fat: 8gPolyunsaturated Fat: 1gMonounsaturated Fat: 5gCholesterol: 40mgSodium: 800mgPotassium: 300mgFiber: 3gSugar: 2gVitamin A: 500IUVitamin C: 30mgCalcium: 200mgIron: 2mg

Notes

Avoid overcooking pasta. Use fresh broccoli if possible, and feel free to adjust seasonings to taste.

Tried this recipe?

Let us know how it was!
  • « Previous Page
  • 1
  • …
  • 20
  • 21
  • 22
  • 23
  • 24
  • …
  • 87
  • Next Page »

Welcome!

Hi, I’m Grace, a Sydney-based home cook with a passion for bold flavors and trending ingredients. Whether you’re a busy beginner or a seasoned foodie, you’ll find dishes here that are fresh, fun, and full of flavor.

More about me

Popular Recipes

  • One Pot Keto Tuna Casserole
    One Pot Keto Tuna Casserole: Creamy Comfort in Minutes
  • Ultimate Jalapeno Popper Chicken Salad
    Ultimate Jalapeno Popper Chicken Salad That'll Wow Your Tastebuds
  • Green Chile Cheese Dip
    Mouthwatering Green Chile Cheese Dip for Cozy Gatherings
  • Easy Chimichurri Sauce
    Fresh and Zesty Easy Chimichurri Sauce in Just Minutes

Footer

↑ back to top

About

  • Privacy Policy
  • Disclaimer
  • Terms & Conditions

Newsletter

  • Sign Up! for emails and updates

Contact

  • About me
  • Contact me

Copyright © 2025 TastyTrendIngredients