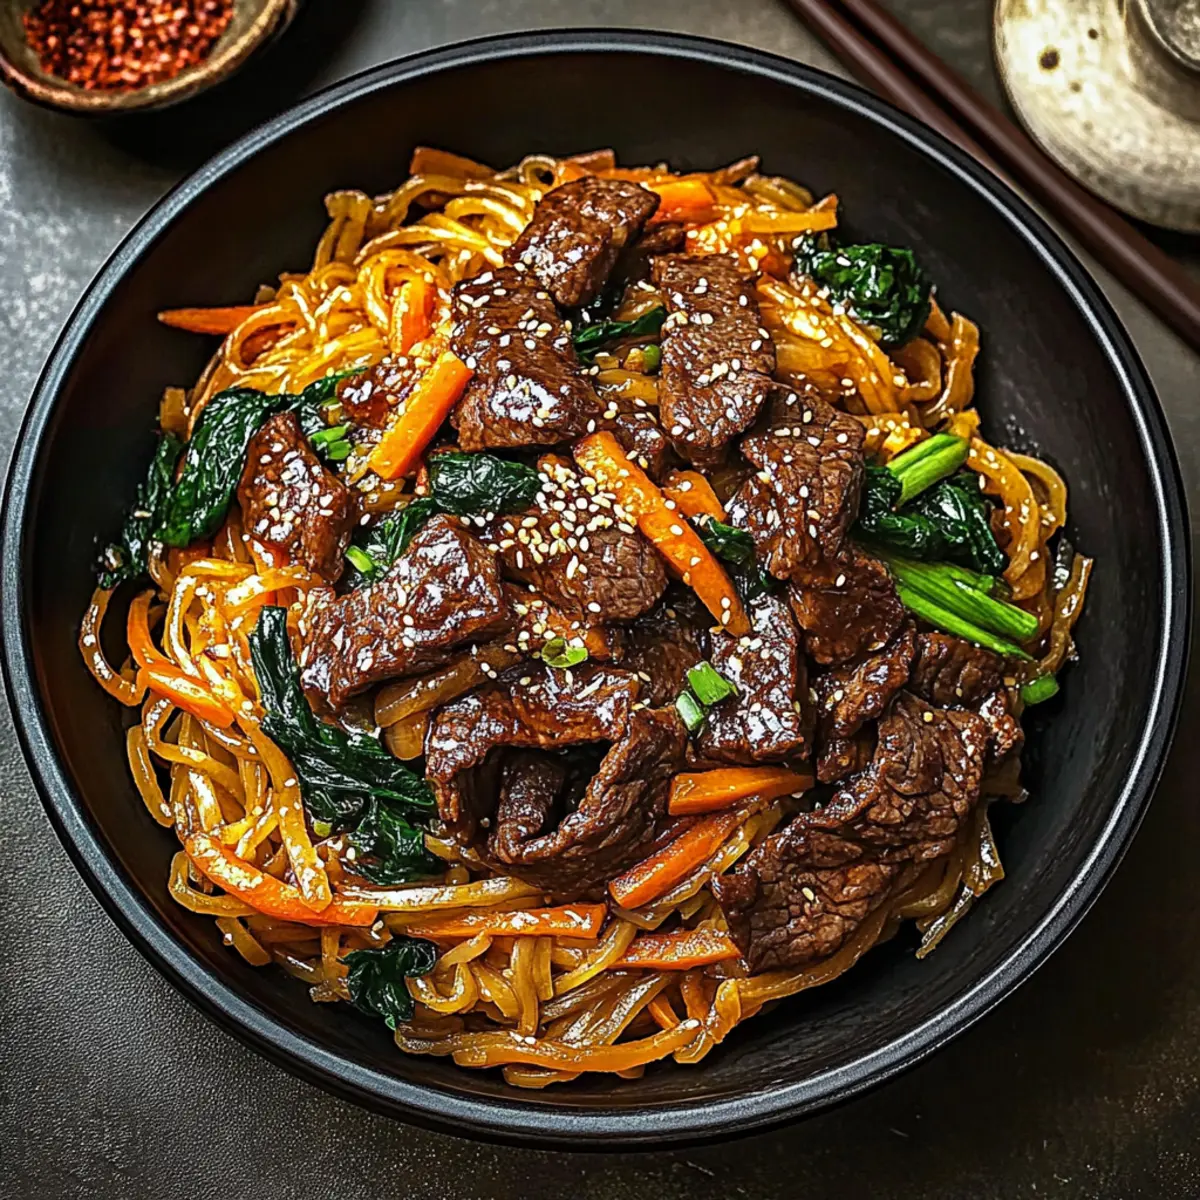
As I stirred the pot, an incredible aroma filled the kitchen, reminiscent of the comfort food my grandmother used to make—Smothered Chicken and Rice. This creamy delight effortlessly combines tender chicken, a luscious sauce, and fluffy rice into one satisfying dish that feels like a warm hug on a plate. Perfect for those busy weeknights, this 30-minute meal adapts easily to pantry staples and personal preferences, making it not just a recipe, but a versatile culinary canvas. Whether you’re in the mood for a cozy night at home or impressing guests at your next gathering, this dish never disappoints. Isn’t it a joy to find meals that bring people together? Let’s dive into how to create this irresistible homemade classic!
Why is Smothered Chicken and Rice a Must-Try?
Satisfying Comfort: Smothered Chicken and Rice delivers that perfect home-cooked experience, comforting both body and soul.
Quick and Easy: At just 30 minutes, this recipe is your go-to for busy weeknights, allowing for effortless meal prep.
Versatile Ingredients: Feel free to customize by incorporating pantry staples like frozen veggies or using leftover rotisserie chicken for a speedy dinner option.
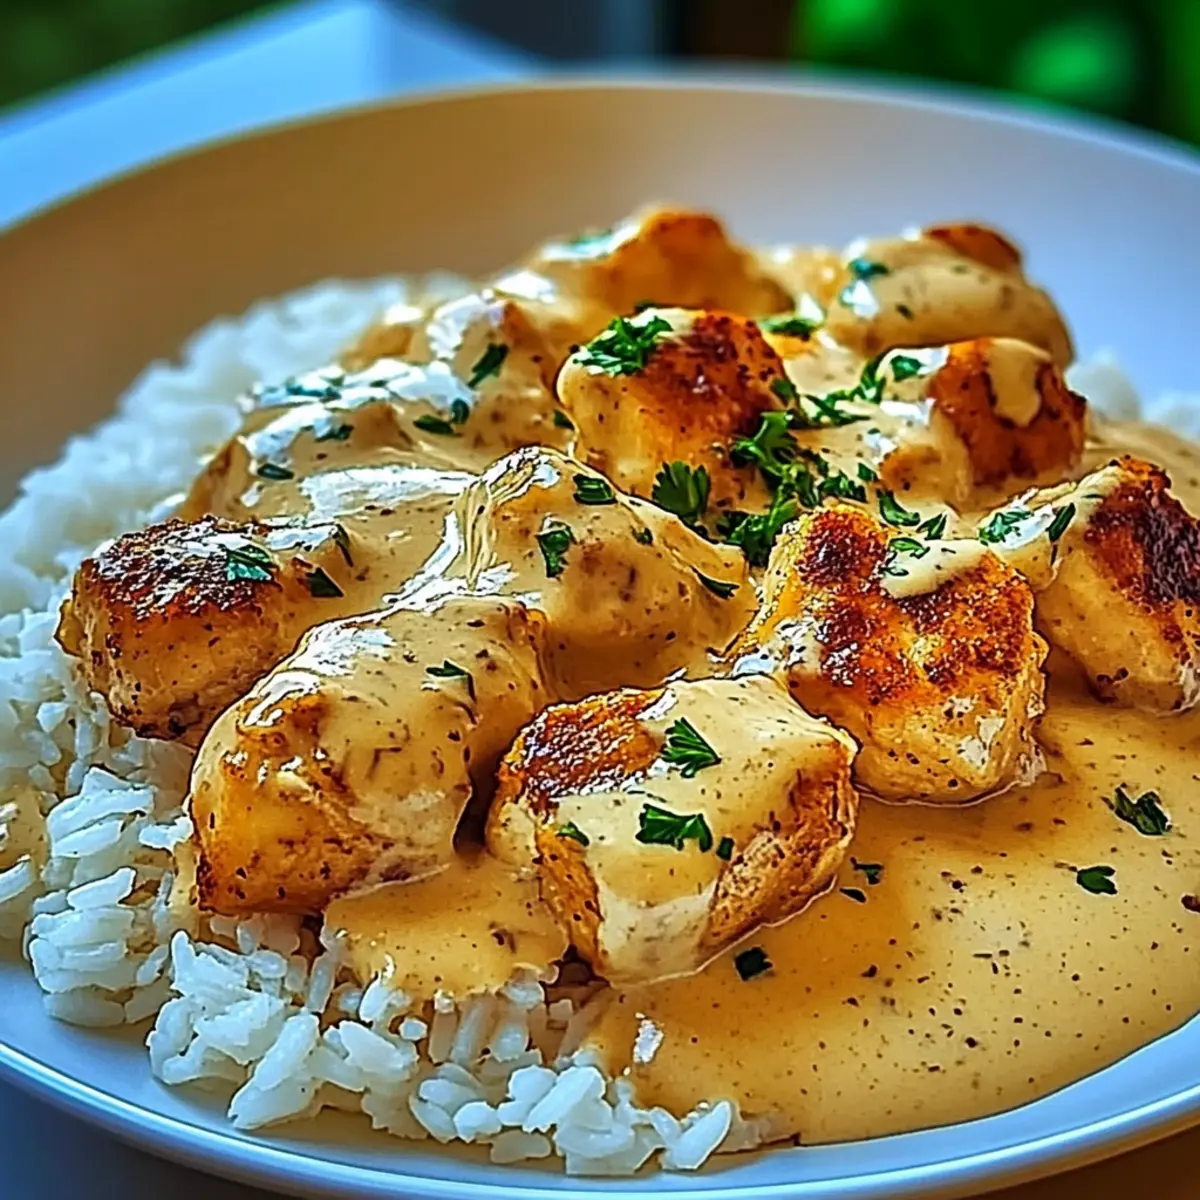
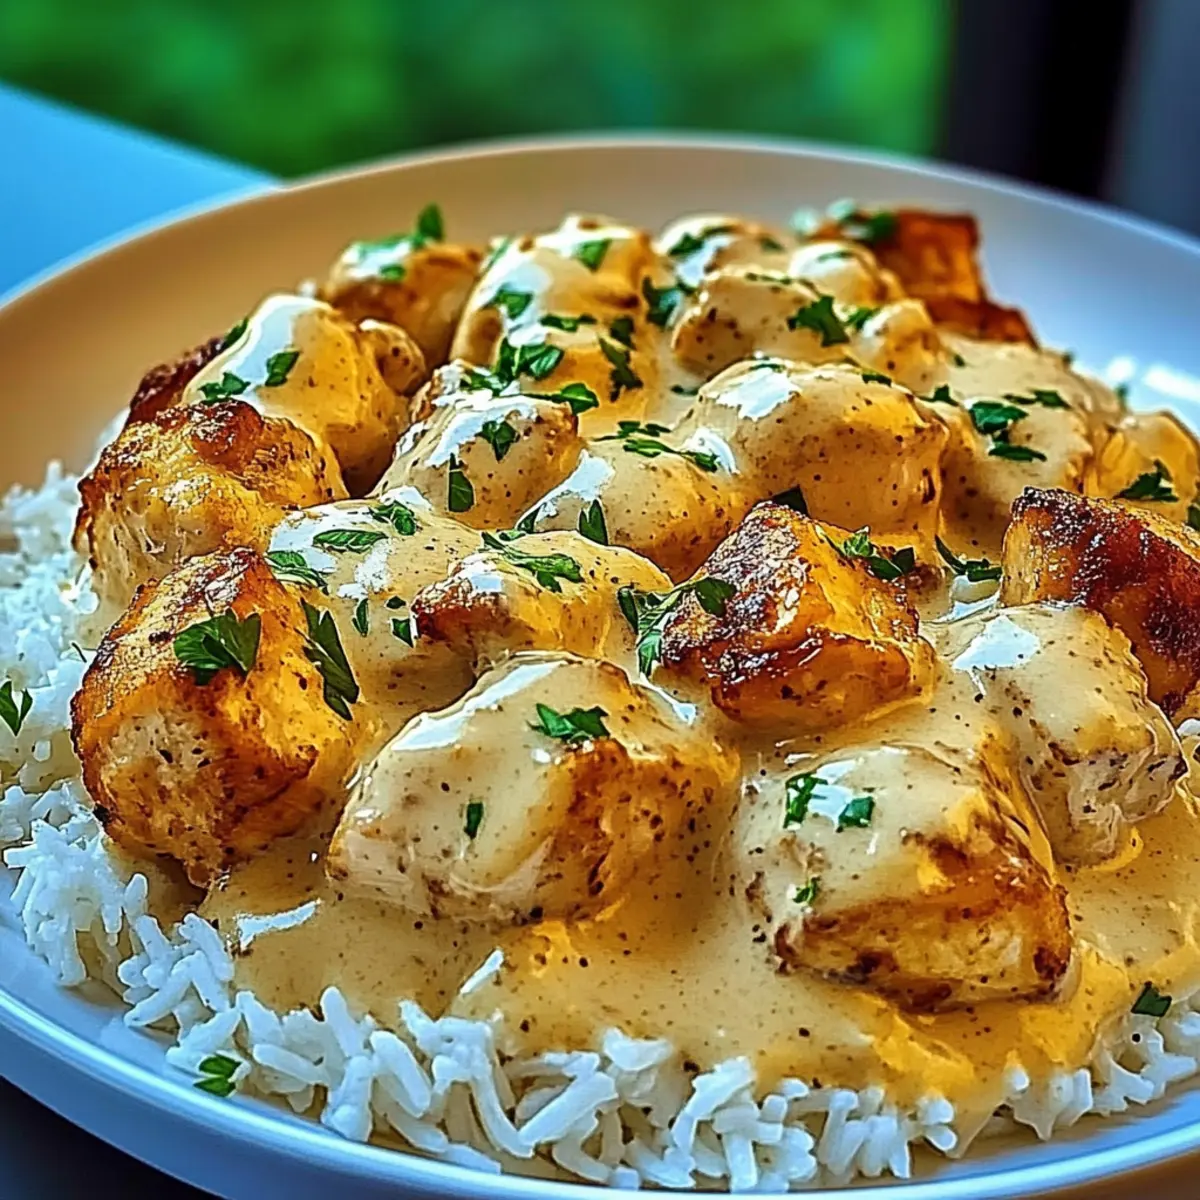
Creamy Goodness: The rich, velvety sauce envelops the chicken, creating a satisfying richness that complements fluffy rice beautifully.
Family-Friendly: This dish is perfect for both kids and adults alike, making it a hit at the dinner table, similar to the comfort of Chicken Dumplings Cozy or Lime Chicken Rice.
Make-Ahead Meal: Leftovers store wonderfully, allowing you to enjoy this scrumptious dish for days, or serve it as a crowd-pleaser at gatherings!
Smothered Chicken and Rice Ingredients
For the Chicken
• Chicken Breasts or Thighs – Tender protein base; choose boneless for quick cooking or bone-in for richer flavor.
For the Creamy Sauce
• Heavy Cream (1 cup) – Provides richness and a creamy texture; substitute with coconut milk for a dairy-free option.
• Chicken Broth (1 cup) – Adds depth of flavor; using low-sodium helps control saltiness.
• Butter (2 tablespoons) – Enhances flavor for sautéing; can be replaced with oil for a lighter fare.
• All-Purpose Flour (2 tablespoons) – Thickens the sauce; swap for gluten-free blend if a gluten-free version is desired.
• Paprika (1 teaspoon) – Adds warmth and color; smoked paprika gives a deeper flavor profile.
• Italian Herbs (1 teaspoon) – Elevates flavor; fresh herbs like thyme or rosemary can be substituted.
• Salt and Black Pepper – Essential seasoning; adjust based on personal taste preferences.
For Aromatics
• Onion (1 small, finely chopped) – Infuses dish with sweetness and depth.
• Garlic (2 cloves, minced) – Adds a robust flavor; fresh garlic is preferred over powdered versions.
For Serving
• Rice (1 cup) – Acts as a starchy base to absorb the sauce; alternatives include jasmine or brown rice.
• Fresh Parsley (for garnish) – Adds a pop of color and fresh flavor; optional but recommended.
Embrace this Smothered Chicken and Rice dish that’s not just a meal, but a celebration of comfort and adaptability!*
Step‑by‑Step Instructions for Smothered Chicken and Rice
Step 1: Prepare the Chicken
Begin by cutting the chicken into bite-sized pieces and seasoning them generously with salt, pepper, and paprika. This step ensures that your Smothered Chicken and Rice is flavorful from the start. Heat a large skillet over medium heat and melt 2 tablespoons of butter, allowing it to foam slightly.
Step 2: Sear the Chicken
Add the seasoned chicken pieces to the hot skillet in a single layer, making sure not to overcrowd the pan. Sear for about 5-7 minutes until the chicken is golden brown, turning occasionally. Once well-browned and cooked through, remove the chicken from the skillet and set it aside on a plate.
Step 3: Sauté Onions and Garlic
In the same skillet, add the finely chopped onion, sautéing for about 3-4 minutes until it becomes translucent and tender. The leftover chicken bits will add extra flavor to the onions. Stir in the minced garlic and cook for an additional 30 seconds until fragrant, being careful not to let it burn.
Step 4: Create the Sauce
Sprinkle 2 tablespoons of flour over the sautéed onions and garlic, stirring continuously to combine. Gradually whisk in 1 cup of chicken broth, followed by 1 cup of heavy cream, to create a smooth sauce. Keep whisking and cooking over medium heat until the sauce thickens and bubbles, about 4-5 minutes.
Step 5: Combine Chicken and Sauce
Return the seared chicken to the skillet, ensuring each piece is coated in the creamy sauce. Lower the heat to simmer gently for an additional 5-7 minutes, allowing the flavors to meld and the chicken to heat through. Stir occasionally until everything is warmed and bubbling.
Step 6: Cook the Rice
While the chicken simmers, prepare 1 cup of rice according to the package instructions. Use the preferred method, whether it be boiling or steaming. Once cooked, remove from heat and fluff the rice with a fork, creating a light, airy texture that will pair beautifully with the creamy chicken.
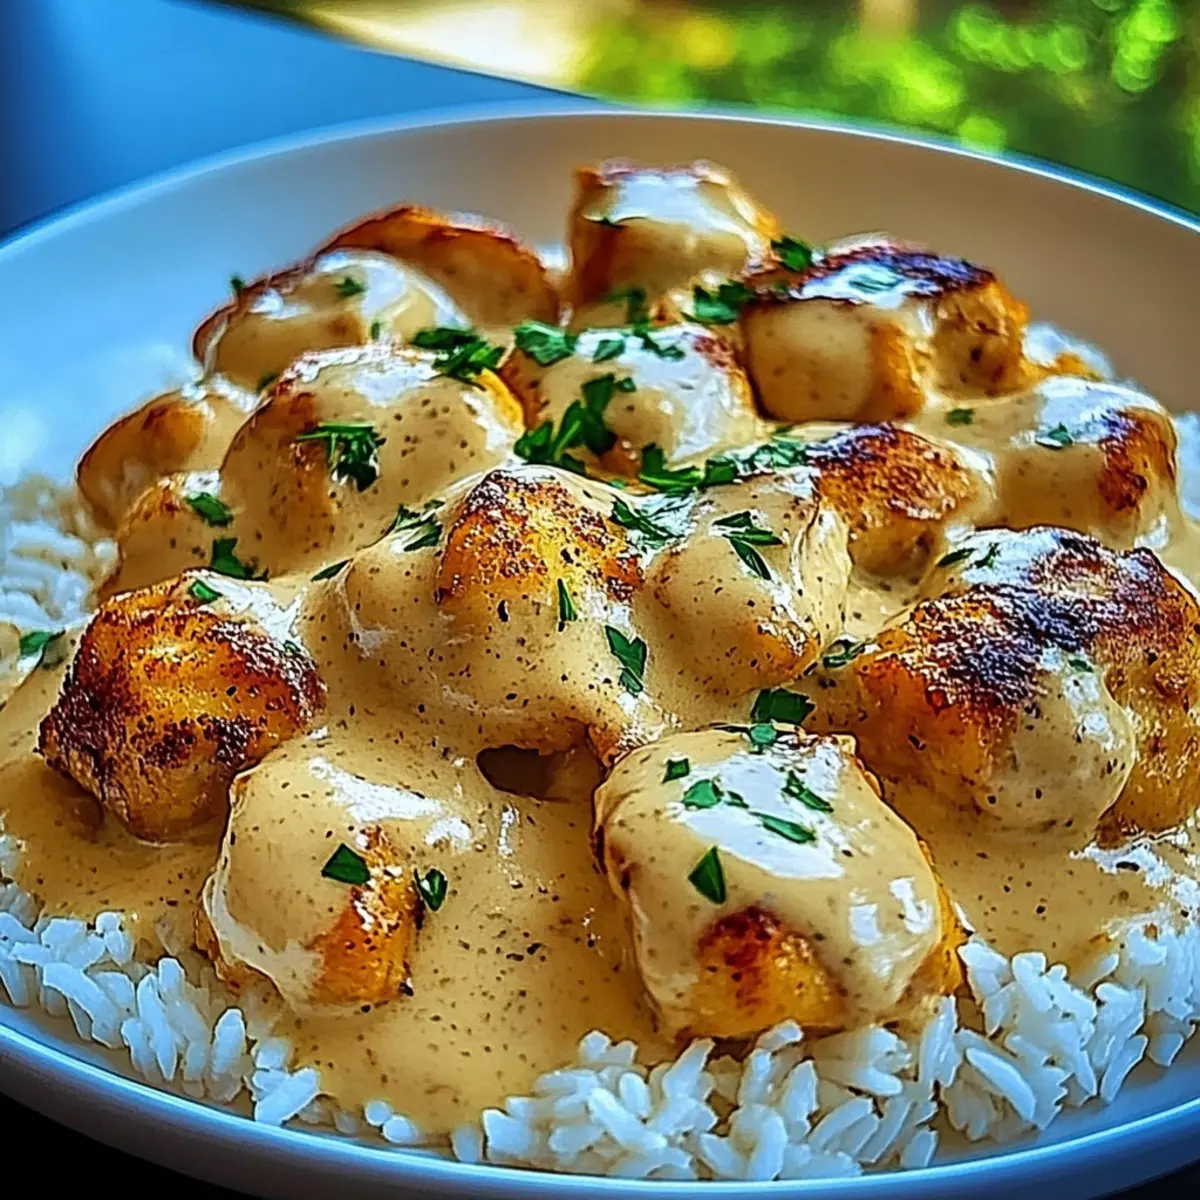
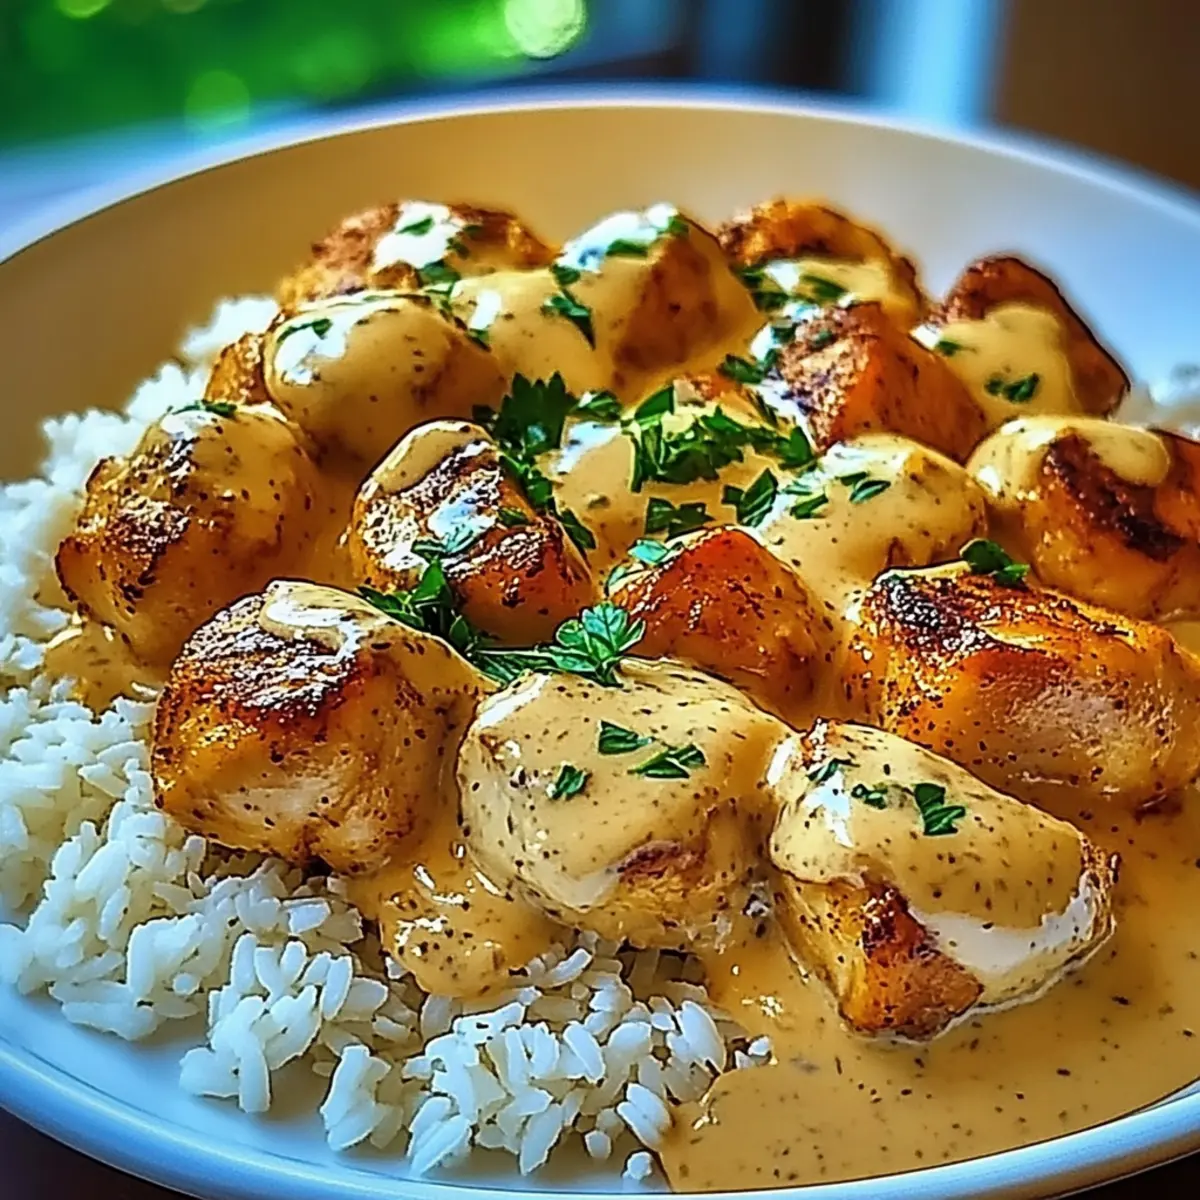
Step 7: Serve and Garnish
To serve, spoon a generous portion of the fluffy rice onto each plate and ladle the creamy Smothered Chicken over the top. For a pop of color and fresh flavor, sprinkle chopped fresh parsley as a garnish. Enjoy this delightful dish, perfect for any comforting meal occasion!
What to Serve with Smothered Chicken and Rice
As you savor the creamy delight of this dish, consider these irresistible pairings that will elevate your meal to new heights.
- Garlic Bread: The buttery, garlicky flavor complements the rich sauce while providing a crunchy texture that’s perfect for dipping.
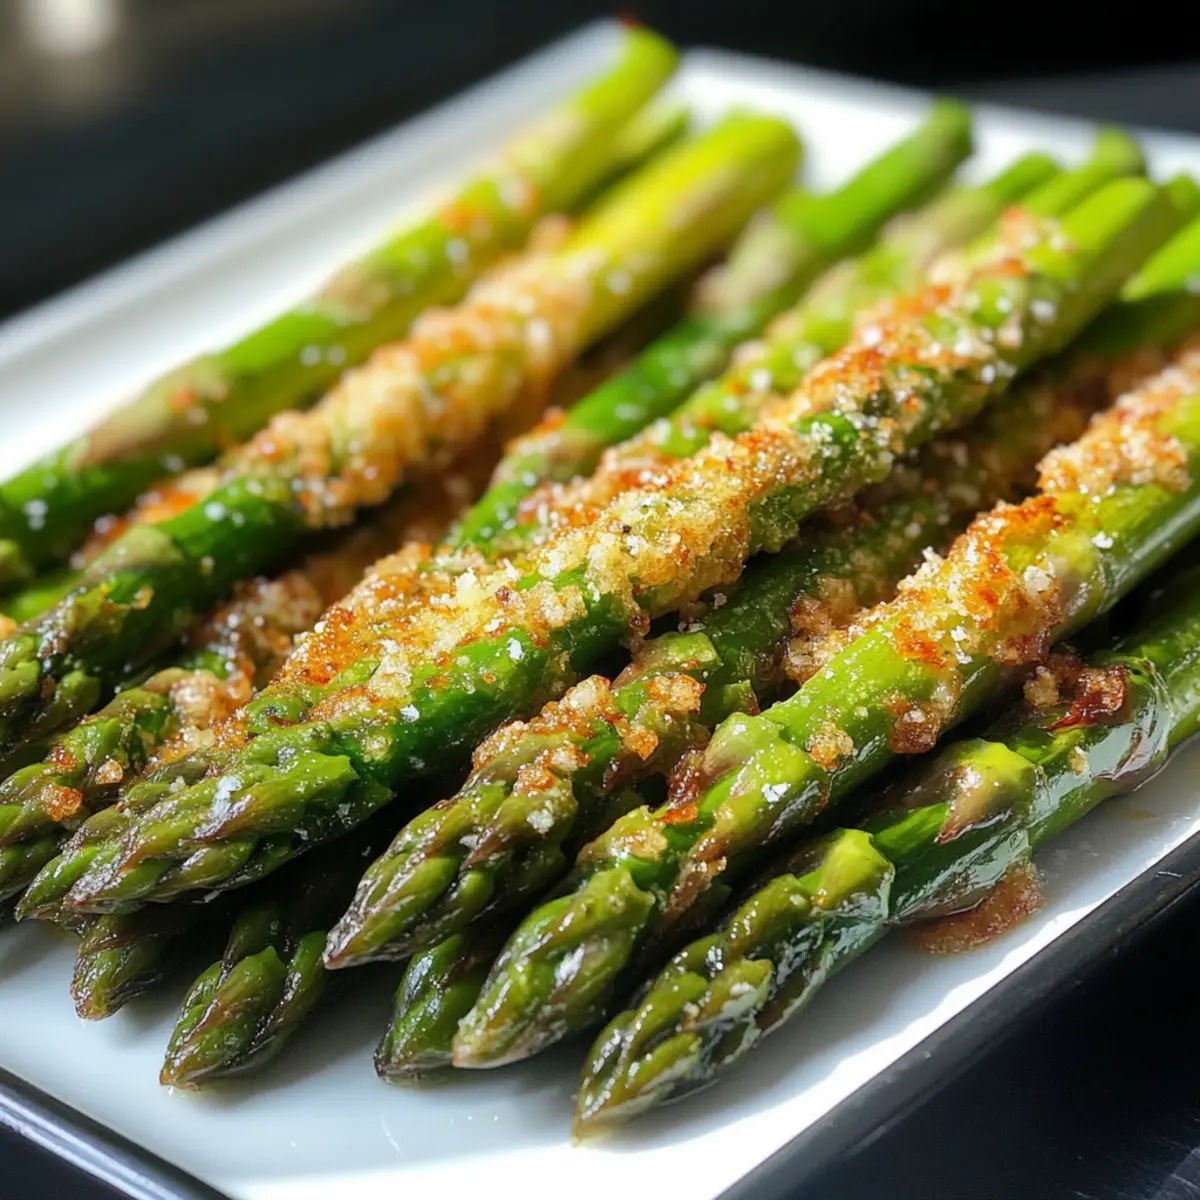
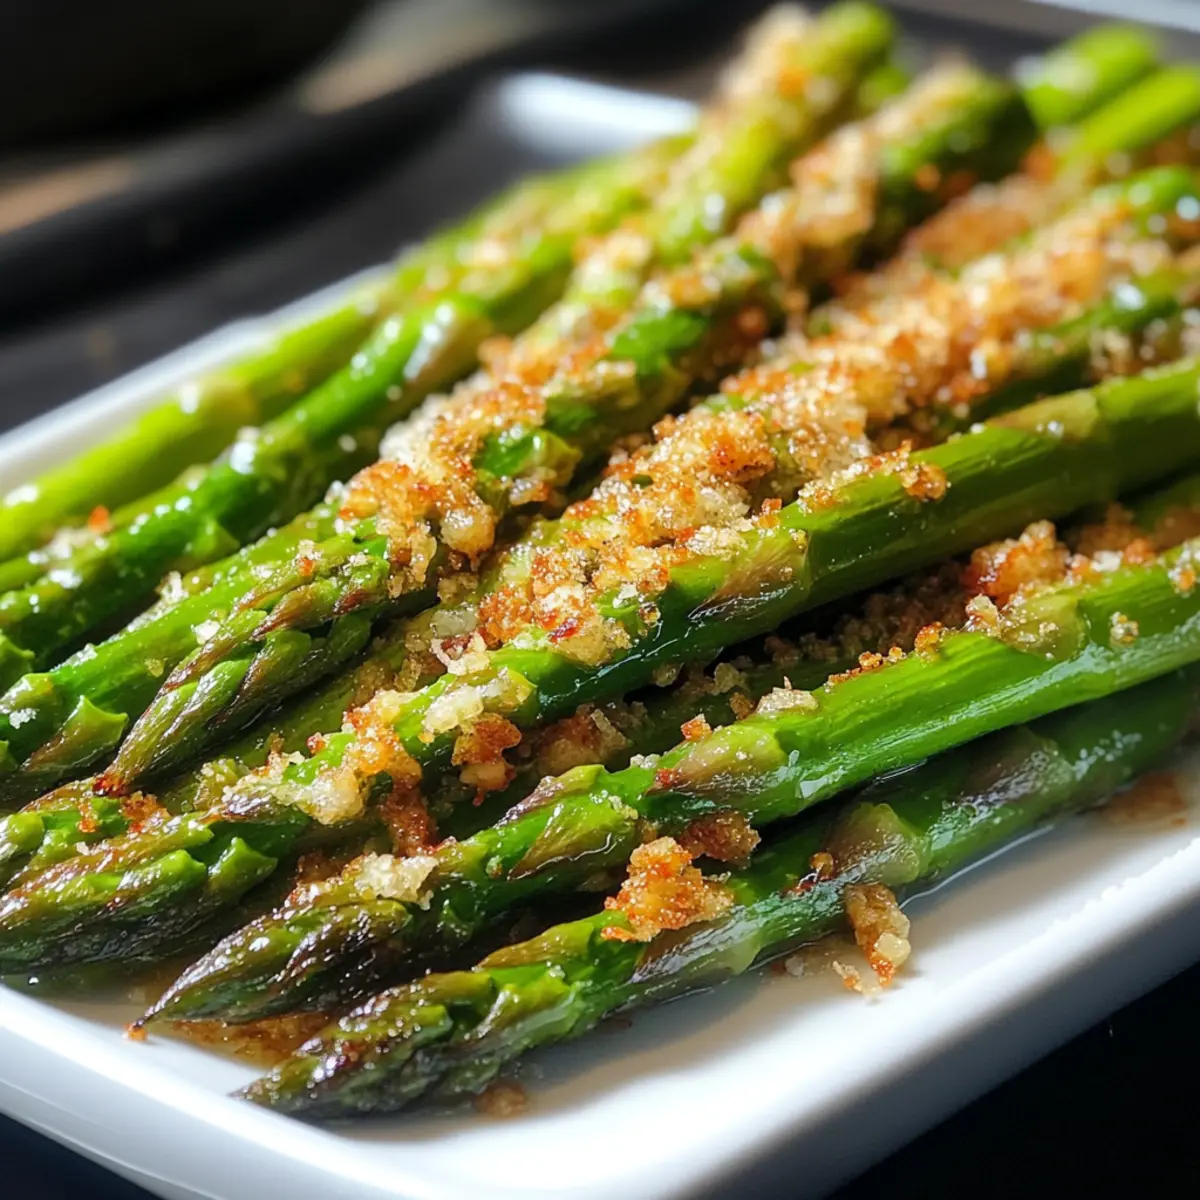
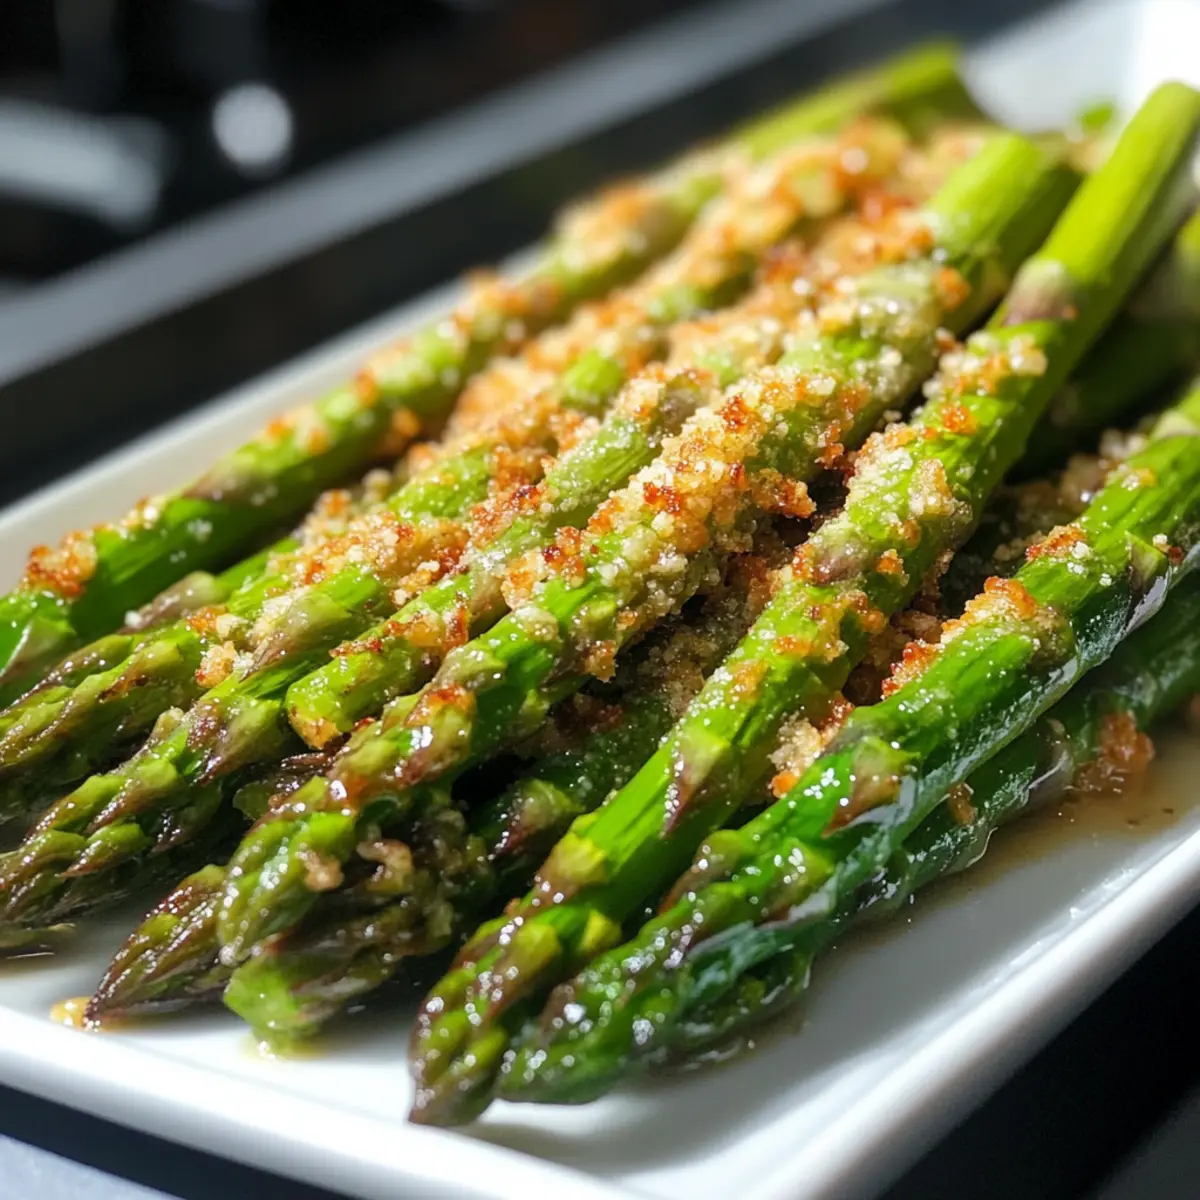
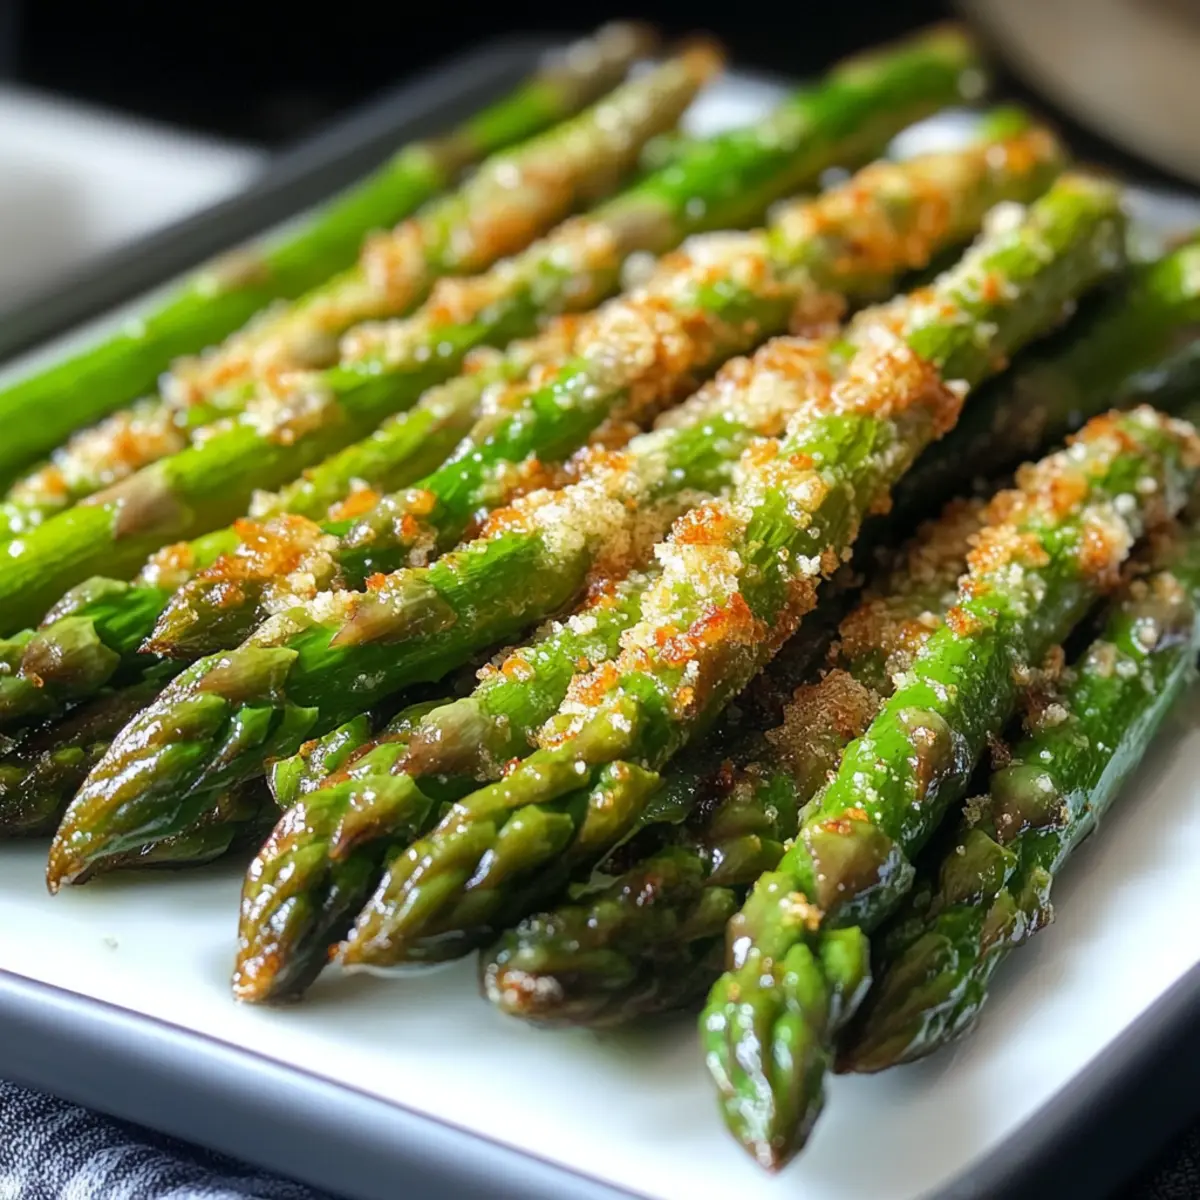
- Roasted Asparagus: This vibrant vegetable adds a touch of elegance and its slight bitterness balances the creamy chicken beautifully.
- Crisp Garden Salad: A light salad with mixed greens and tangy vinaigrette refreshes the palate, making each bite of chicken and rice even more delightful.
- Creamy Mashed Potatoes: For an extra comfort food experience, serve alongside buttery mashed potatoes to soak up that luscious sauce.
- Steamed Broccoli: Tender broccoli brings a pop of color and nutrients, enhancing the meal's overall health and flavor profile.
- Iced Sweet Tea: Refresh with a chilled glass of sweet tea, which provides a delightful contrast to the warm, hearty flavors of the dish.
- Homemade Coleslaw: The crunch and acidity of coleslaw add a wonderful texture and balance to the richness, making each bite more exciting.
- Fruit Sorbet for Dessert: End your meal on a light note with fruity sorbet that cleanses the palate after the creamy richness of your dinner.
Expert Tips for Smothered Chicken and Rice
Smooth Sauce: Ensure a creamy texture by whisking continuously while adding broth and cream to prevent any lumps from forming.
Perfect Seasoning: Don’t shy away from seasoning your chicken well; it’s vital for enhancing flavors throughout the entire dish.
Cooking Time: Adjust cooking time if using bone-in chicken, as it may require more time to cook through compared to boneless pieces.
Prevent Thickness: If your sauce has thickened too much, simply whisk in a bit more chicken broth or milk to achieve your desired consistency.
Add Veggies: Incorporate frozen or fresh veggies, such as peas or spinach, into the dish for added nutrition and a pop of color.
Leftover Magic: Store leftovers of Smothered Chicken and Rice in an airtight container in the refrigerator for up to 3 days, perfect for quick meals!
How to Store and Freeze Smothered Chicken and Rice
Fridge: Store leftover Smothered Chicken and Rice in an airtight container for up to 3 days. Make sure it cools completely before sealing to maintain freshness.
Freezer: For longer storage, freeze in airtight containers or freezer bags for up to 3 months. Divide into portions for easy meal prep!
Reheating: Reheat gently in the microwave or on the stovetop over low heat. Add a splash of chicken broth or cream to restore creaminess, preventing the sauce from thickening too much.
Make-Ahead Tips: Prepare Smothered Chicken and Rice in advance and store it in the fridge or freezer for a busy weeknight dinner that’s ready to go!
Make Ahead Options
Preparing Smothered Chicken and Rice ahead of time is a brilliant way to save precious minutes on busy weeknights! You can marinate and sauté the chicken pieces, then allow them to cool before storing them in the fridge for up to 24 hours. The creamy sauce can also be made and refrigerated the night before, just be sure to cover it tightly to maintain its rich flavor. When you're ready to serve, simply reheat the chicken and sauce in a skillet on low heat until warmed through, and cook fresh rice as instructed. This method ensures your meal is just as delicious, with optimal texture and taste, allowing you to enjoy comforting homemade food with minimal effort and time.
Smothered Chicken and Rice Variations
Feel free to explore these exciting twists and substitutions to personalize your Smothered Chicken and Rice experience!
-
Rotisserie Chicken: Opt for a store-bought rotisserie chicken to save time. Just shred and mix it into the sauce for a quick meal. Perfect for those nights when you need dinner on the table fast!
-
Veggie Boost: Add nutrient-rich vegetables like spinach, mushrooms, or peas to the dish. This will not only enhance the flavor but also increase the nutritional value, making it a colorful centerpiece on your table.
-
Creamy Alternatives: If you’re looking for a lighter option, swap heavy cream with coconut milk for a delightful twist. This will give a slight sweetness while keeping the creaminess intact, elevating your dish to a tropical paradise!
-
Gluten-Free Option: Use a certified gluten-free flour for thickening the sauce. You can also try cornstarch mixed with water for a quick and easy alternative. It’s an effortless way to cater to gluten-sensitive guests without sacrificing flavor.
-
Flavor Additions: Spice it up by incorporating a tablespoon of Dijon mustard or a splash of white wine into the creamy sauce. This will enhance complexity and offer a delicious depth of flavor that keeps everyone guessing.
-
Mashed Potato Switch: Instead of serving over rice, give creamy mashed potatoes a try. The creamy textures blend beautifully, creating an ultimate comfort dish that’ll be a hit with family and friends alike!
-
Herb Variations: Experiment with different herbs to complement your dish, such as fresh basil or dill. Each herb brings its unique voice, transforming the flavors to perfectly suit your food preferences.
-
Spicy Kick: For those who crave heat, consider adding a pinch of cayenne pepper or red pepper flakes to the sauce. This subtle kick will set your Smothered Chicken and Rice apart and add an exciting dimension for your taste buds!
Feel free to check out my delightful variations like Chicken Dumplings Cozy for more comforting meals or try out the flavorful One Pot Rice dish for another quick, satisfying option!
Smothered Chicken and Rice Recipe FAQs
What kind of chicken should I use for Smothered Chicken and Rice?
Absolutely! You can use either chicken breasts or thighs. Boneless chicken breasts cook faster and are easier to slice, while bone-in thighs provide a richer flavor and moisture. It’s all about your preference for texture and taste!
How do I store leftovers of Smothered Chicken and Rice?
Store any leftover Smothered Chicken and Rice in an airtight container in the refrigerator. It will stay fresh for up to 3 days. Ensure it cools completely before sealing to maintain its delightful creaminess.
Can I freeze Smothered Chicken and Rice?
Very much! To freeze, let the dish cool completely, then transfer it into airtight containers or freezer bags. It can be stored in the freezer for up to 3 months. For best results, portion it out so you can grab just what you need for a quick meal later!
How can I reheat the Smothered Chicken and Rice without losing its creaminess?
To reheat, gently place it in the microwave or on the stovetop over low heat. If the sauce has thickened too much, add a splash of chicken broth or cream to restore its luscious texture. Stir well while heating until it’s warmed through and creamy again, about 5-10 minutes.
Are there any dietary considerations I should be aware of?
If you have dietary restrictions, feel free to customize! Use gluten-free flour for a gluten-free option. For a dairy-free version, substitute the heavy cream with coconut milk. Just remember to check any other ingredients you plan to add for allergens.
What if my sauce becomes too thick when making this recipe?
No worries! If your sauce thickens more than you'd like, simply whisk in a bit more chicken broth or milk, a little at a time, until it reaches your desired consistency. This should only take a couple of minutes and will make your sauce delightfully creamy again!
Heavenly Smothered Chicken and Rice in Just 30 Minutes
Ingredients
Equipment
Method
- Cut the chicken into bite-sized pieces and season with salt, pepper, and paprika. Melt butter in a skillet over medium heat.
- Sear the chicken in a single layer for 5-7 minutes until golden brown. Remove and set aside.
- Sauté chopped onion for 3-4 minutes until translucent. Add minced garlic and cook for 30 seconds.
- Sprinkle flour over onions and garlic, stir, then whisk in chicken broth and heavy cream. Cook until sauce thickens, about 4-5 minutes.
- Return the chicken to the skillet, coat with the sauce, and simmer for 5-7 minutes to meld flavors.
- Prepare rice according to package instructions. Fluff when done.
- Serve rice on plates topped with the creamy chicken and sprinkle with parsley.