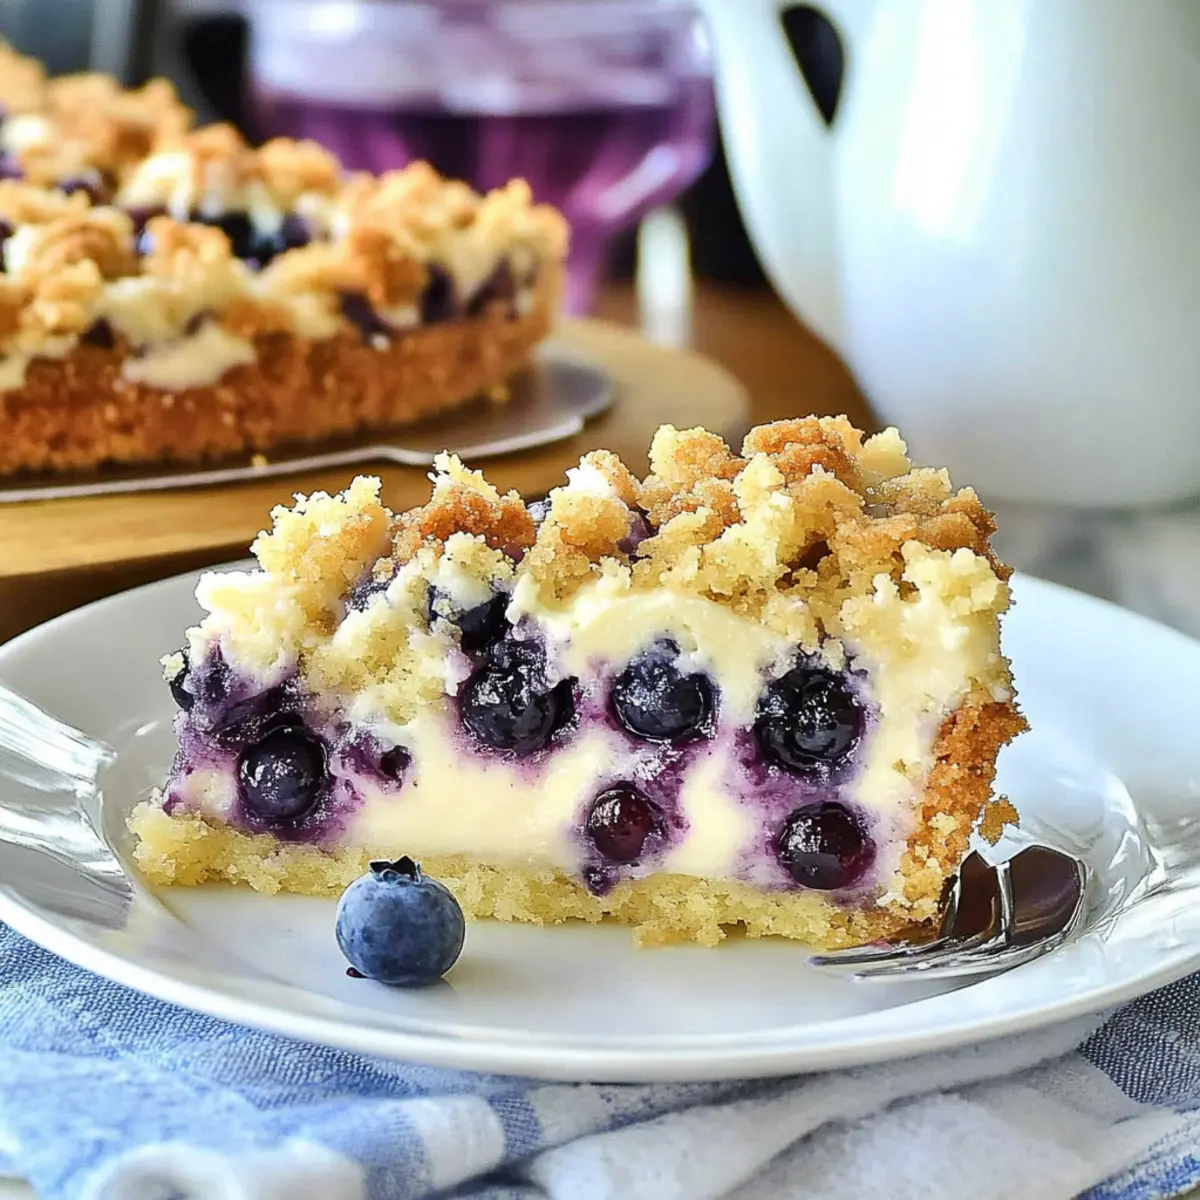
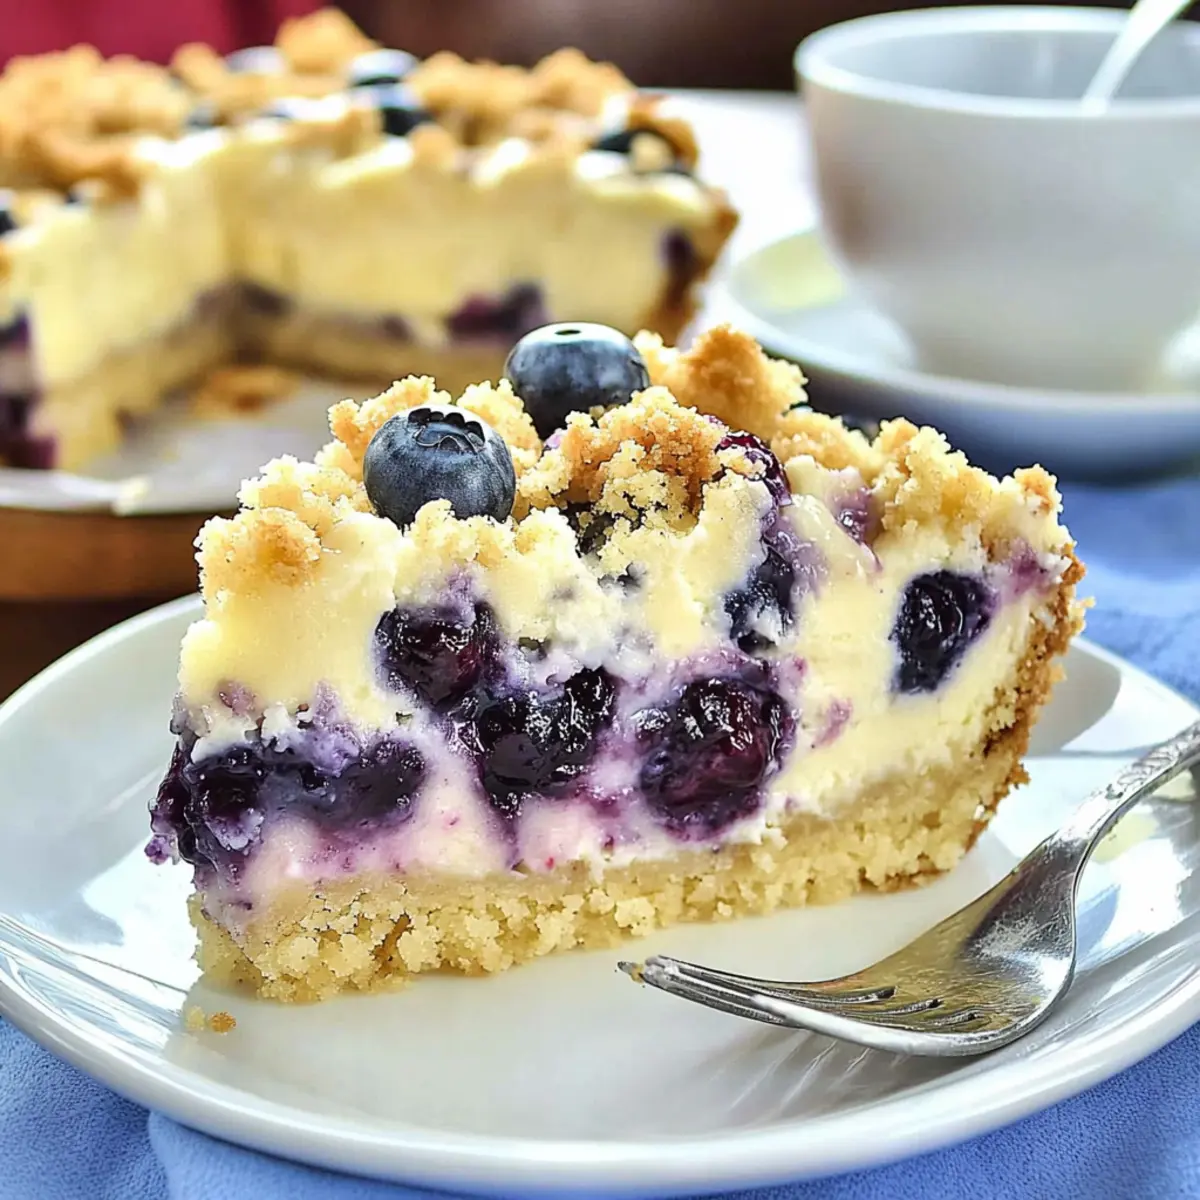
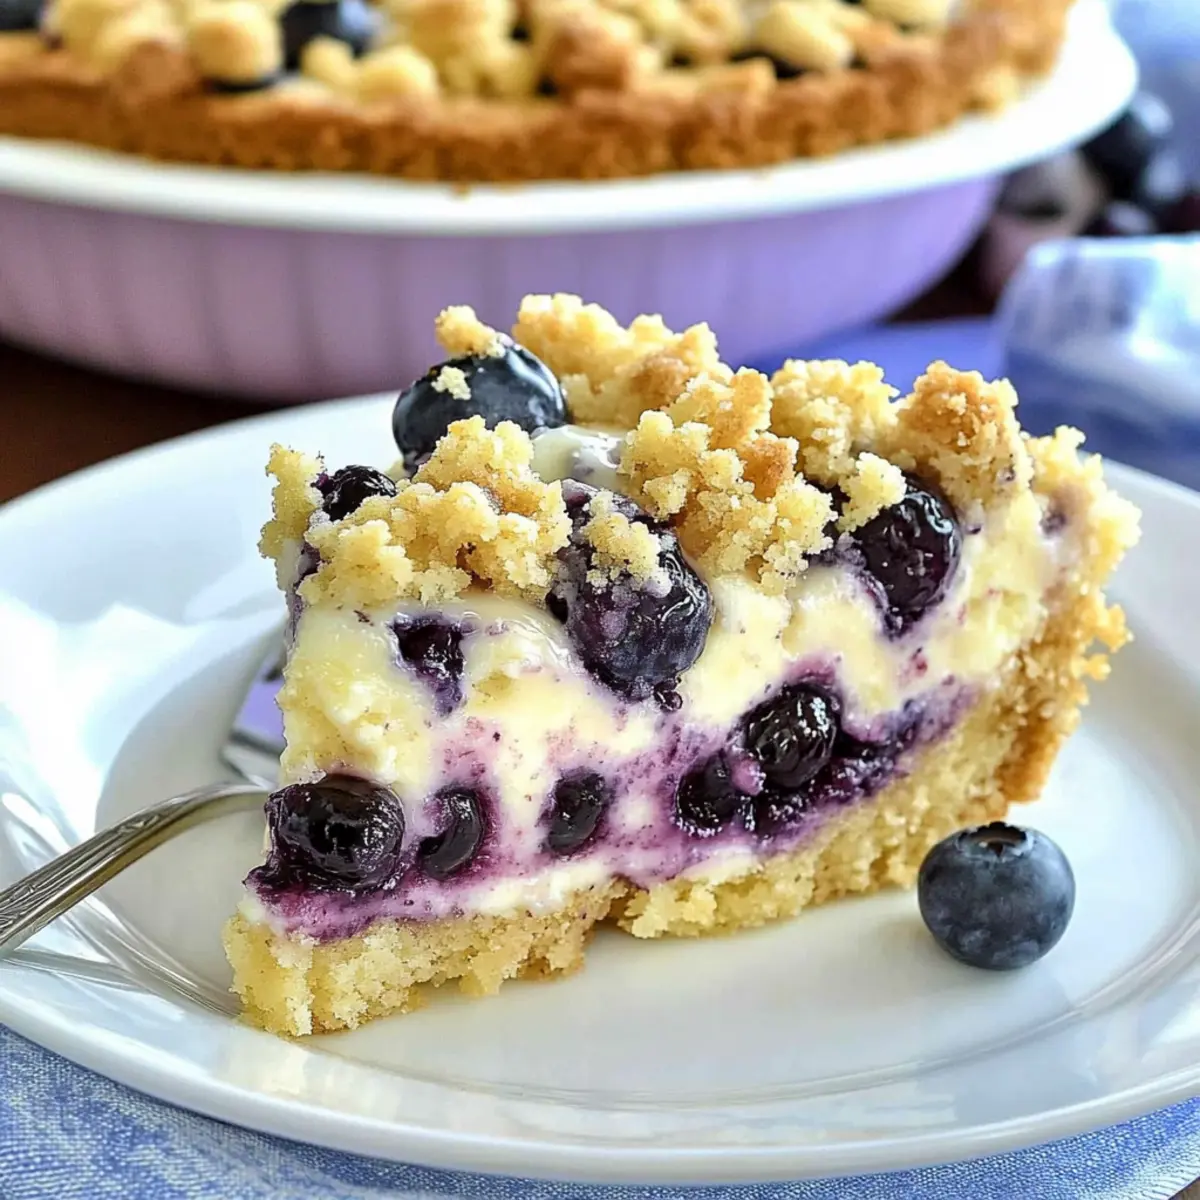
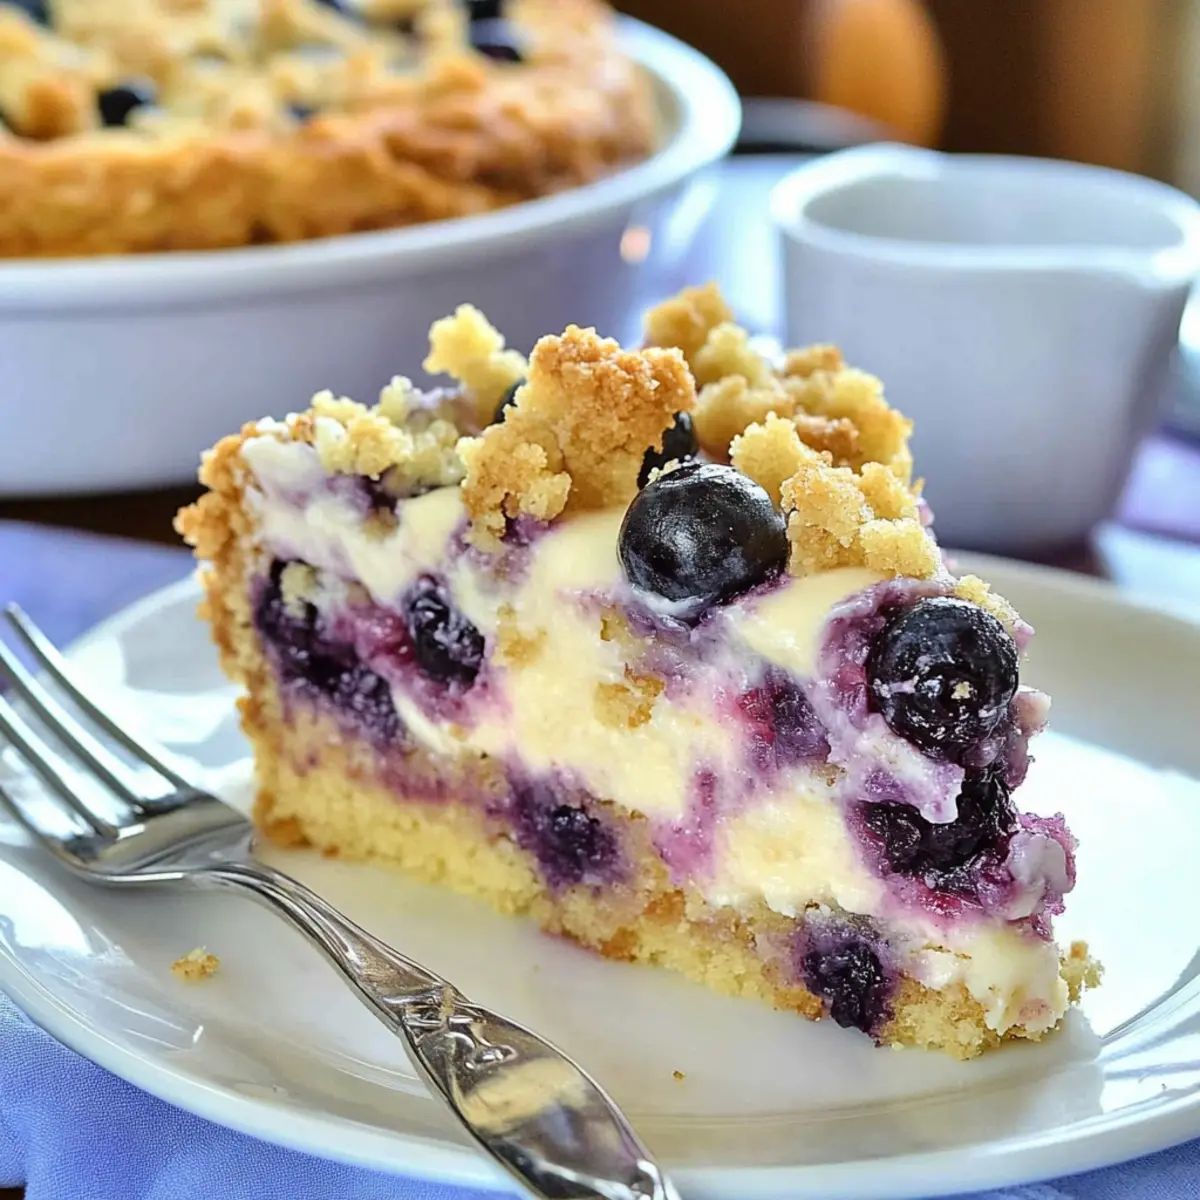
As I stood in my kitchen, the intoxicating scent of sweet blueberries began to waft through the air, whisking me away to sun-drenched summer days spent picking fresh fruit. That’s when I decided it was time to create something special: the Blueberry Cheesecake Crumb Cake. This easy dessert recipe brings together the creamy goodness of cheesecake with the delightful texture of crumb cake, all topped with a perfect sprinkle of crumbly topping. Not only is this recipe a showstopper for gatherings, but it also comes together quickly, making it an ideal weeknight treat for those of us who crave homemade goodness without sacrificing time. Trust me, once you take a bite, you might just find yourself dreaming of your next bake! Ready to dive into a slice of happiness?
Why is this cake so irresistible?
Versatile and Adaptable: This Blueberry Cheesecake Crumb Cake can easily be transformed by swapping blueberries for your favorite fruits like cherries or raspberries. Quick to Prepare: With simple ingredients and a straightforward method, you can enjoy homemade bliss in no time. Perfect for Any Occasion: Whether it's for brunch, a dinner party, or a cozy night in, this cake is always a crowd-pleaser. Texture Explosion: The combination of creamy cheesecake and buttery crumb cake creates a delightful contrast that's impossible to resist. And if you loved this treat, you might also want to try my delicious Chocolate Pudding Cake or the delightful German Chocolate Poke Cake!
Blueberry Cheesecake Crumb Cake Ingredients
Indulge your baking senses with these essential components!
For the Crumb Topping
- Flour – Provides structure; opt for all-purpose flour for the best consistency.
- Baking Powder – This leavening agent ensures your crumb cake rises beautifully.
- Salt – A pinch enhances the overall flavor of the cake.
- Butter – Use cold, cubed unsalted butter for that perfect crumbly texture.
- Light Brown Sugar – Adds moisture and a subtle, toffee-like flavor to the topping.
- Sugar – Sweetens this delightful mix for a balanced sweetness.
For the Cheesecake Layer
- Eggs – Ensure to use large eggs to bind the ingredients and create that luscious cheesecake structure.
- Mascarpone Cheese – Creates a rich, creamy texture; you can substitute with double cream cheese if needed.
- Cream Cheese – Adds extra creaminess; can be replaced with mascarpone for a different spin.
- Caster Sugar – Finer sugar mixes smoothly into the cheesecake; regular granulated sugar will work too.
- Corn Starch – Stabilizes the filling; optional if you prefer a lighter texture.
- Vanilla – Enhances flavor; extract is preferred for its aromatic quality.
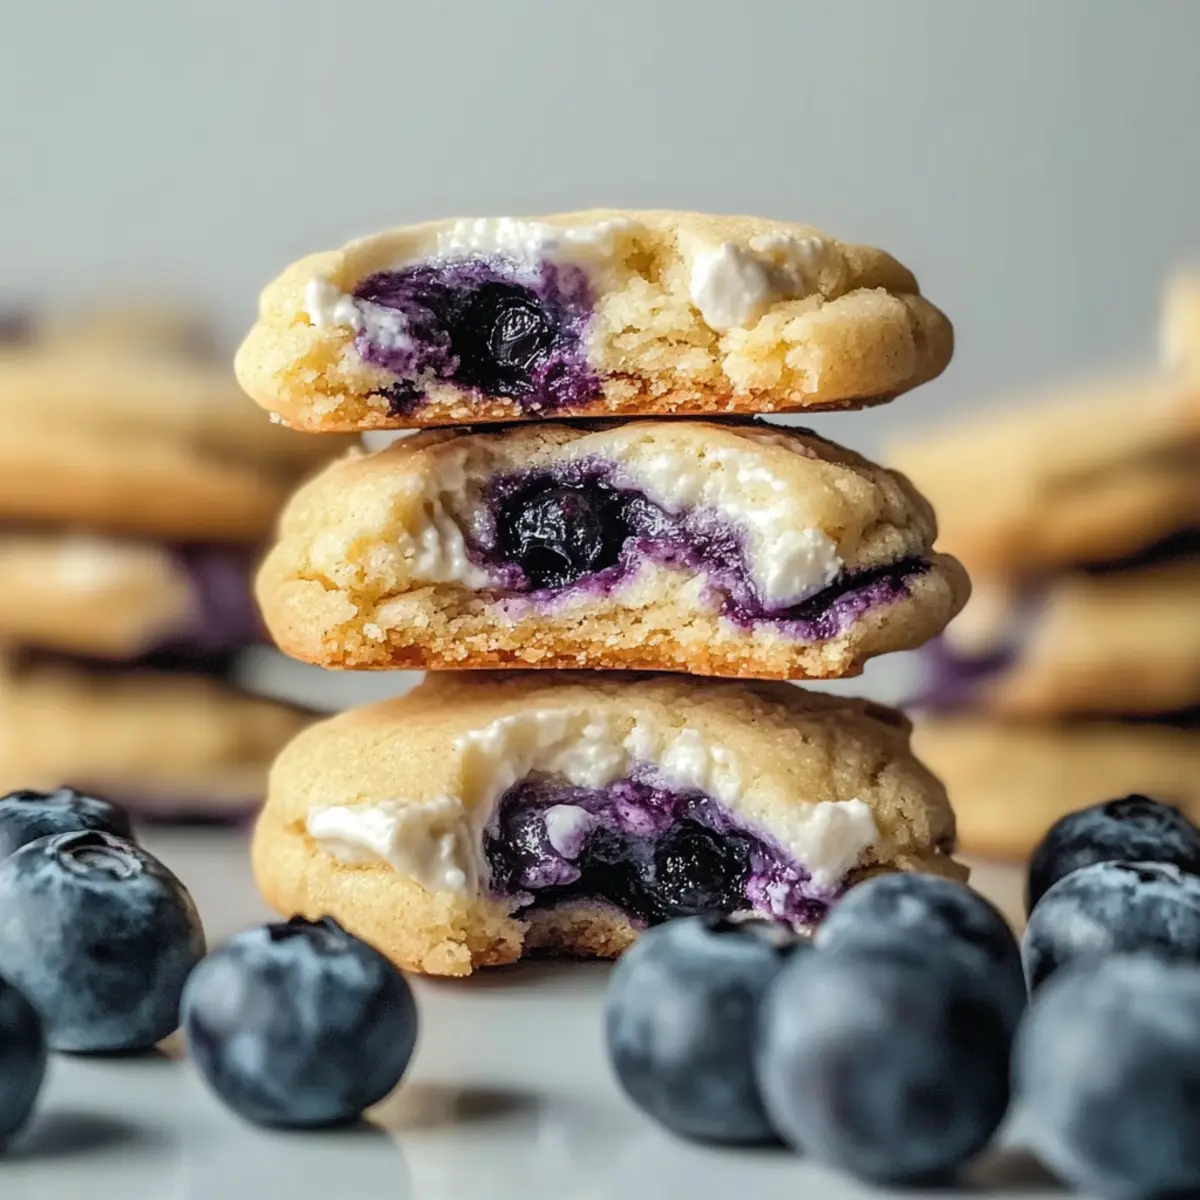
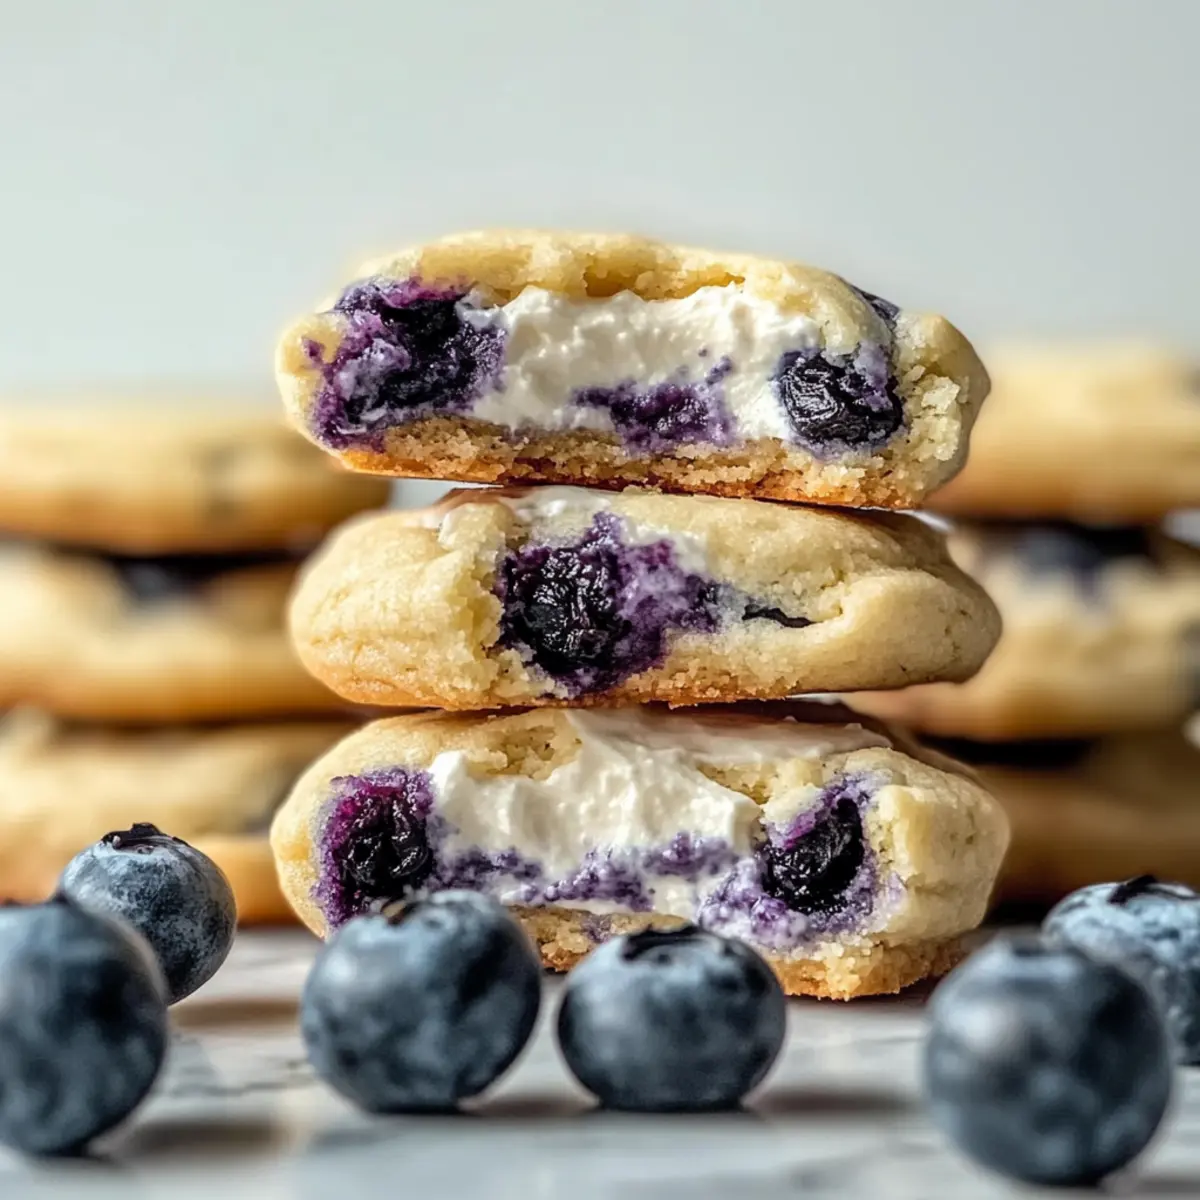
- Blueberries – The star ingredient for this Blueberry Cheesecake Crumb Cake, fresh or frozen works beautifully.
For the Glaze
- Powdered Sugar – Combine with milk to create a smooth, drizzling glaze that elevates this cake to irresistible heights.
These delightful ingredients come together for a dessert that’s sure to impress and satisfy your cravings!
Step‑by‑Step Instructions for Blueberry Cheesecake Crumb Cake
Step 1: Preheat the Oven
Begin by preheating your oven to 350°F (175°C). While it heats, prepare a 9-inch springform pan by greasing it lightly and lining the bottom with parchment paper. This will prevent sticking and make removing the Blueberry Cheesecake Crumb Cake much easier once baked. Set the pan aside as you move on to the next step.
Step 2: Prepare the Crumb Topping
In a large mixing bowl, combine the all-purpose flour, baking powder, salt, light brown sugar, and regular sugar. Using a pastry cutter or your fingers, cut in the cold, cubed butter until the mixture resembles coarse crumbs, about the size of peas. This crumb topping is essential for that perfect texture. Reserve about 1 cup of this mixture for the topping later.
Step 3: Make the Crust
To the remaining crumb mixture, add eggs and vanilla extract, mixing until just combined. The dough should be slightly sticky. Press 2/3 of this mixture firmly into the bottom of the prepared springform pan to create a sturdy crust. Ensure it’s evenly spread, as this will hold the luscious cheesecake layer in place. Refrigerate the crust while you prepare the cheesecake filling.
Step 4: Create the Cheesecake Filling
In another bowl, whisk together the mascarpone cheese, cream cheese, vanilla extract, caster sugar, and corn starch until smooth. Then, add the eggs one at a time, mixing gently to combine after each addition. Be careful not to overmix; a few lumps are fine. This creamy mixture is the heart of your Blueberry Cheesecake Crumb Cake.
Step 5: Layer the Cheesecake
After the crust has chilled, pour half of the cheesecake filling over the crust in the pan. Spread it evenly with a spatula. Next, sprinkle a generous layer of fresh or frozen blueberries over the cheesecake mixture. Pour in the remaining cheesecake filling over the blueberries, smoothing it out gently to ensure an even layer.
Step 6: Add the Crumb Topping
Take the reserved crumb mixture and crumble it over the top of the cheesecake layer, ensuring all areas are covered. For added flavor and texture, sprinkle additional blueberries on top of the crumb topping. This not only enhances the visual appeal but also adds extra bursts of flavor to each slice of your Blueberry Cheesecake Crumb Cake.
Step 7: Bake the Cake
Carefully place the springform pan in the preheated oven and bake for 65-75 minutes. The cake is done when it turns golden brown, and a toothpick inserted into the center comes out clean, or with a few moist crumbs. If the top starts to brown too quickly, lightly cover it with aluminum foil to prevent burning.
Step 8: Cool and Glaze
Once baked, remove the Blueberry Cheesecake Crumb Cake from the oven and allow it to cool in the pan for about 15 minutes. Then, carefully release the sides of the springform pan. For an elegant finish, whisk together powdered sugar and a little milk to create a drizzling consistency. Once the cake is fully cooled, glaze it generously to enhance both flavor and presentation.
Step 9: Serve and Enjoy
After glazing, let the cake set for at least 30 minutes before slicing. You can serve it warm or chilled, paired with a dollop of whipped cream or a scoop of vanilla ice cream for that extra indulgence. Relish each delightful bite of your homemade Blueberry Cheesecake Crumb Cake!
Expert Tips for Blueberry Cheesecake Crumb Cake
-
Room Temperature Ingredients: Ensure your ingredients, especially the cream cheese and eggs, are at room temperature to achieve a smooth, creamy filling for your Blueberry Cheesecake Crumb Cake.
-
Avoid Overmixing: Be cautious not to overmix the cheesecake filling; mix just until smooth to prevent unwanted air bubbles that can cause cracks.
-
Frozen Blueberries: If you’re using frozen blueberries, there’s no need to thaw them. They can go directly into the batter, keeping your cake extra moist.
-
Check for Doneness: Aim for a slight jiggle in the center of your cheesecake when baking. It will set as it cools, so don’t wait for it to firm up completely in the oven.
-
Cooling Time: Allow the cake to cool in the pan for at least 15 minutes before removing the springform. This helps maintain its shape and prevents cracking.
Blueberry Cheesecake Crumb Cake Variations
Feel free to get creative and customize your Blueberry Cheesecake Crumb Cake to suit your taste!
-
Berry Bliss: Swap out blueberries for raspberries or cherries for a fruity twist. Each fruit brings a unique flavor that can brighten the cake's profile.
-
Gluten-Free Delight: Use a gluten-free flour blend instead of all-purpose flour. It allows everyone to enjoy this treat, no matter their dietary needs!
-
Nutty Crunch: Add a handful of chopped walnuts or pecans into the crumb topping for an extra layer of texture and flavor. The nuttiness beautifully contrasts the creamy cheesecake.
-
Lemon Zing: Mix in some lemon zest into your cheesecake filling for a bright, zesty flavor that elevates the taste profile. It adds a refreshing touch perfect for summertime.
-
Chocolate Swirl: Marble in some melted dark chocolate to the cheesecake filling for a rich, chocolaty experience. Each bite will reveal delightful chocolate pools throughout the cake!
-
Spicy Kick: Incorporate a pinch of cinnamon or nutmeg into the crumb topping for a warm, aromatic spice that enhances the cozy feel of this dessert. The warmth of the spices pairs wonderfully with the sweet blueberries.
-
Vanilla Bean Dream: Use vanilla bean paste instead of regular vanilla extract for a more intense vanilla flavor. You’ll create a luxurious depth that makes the cheesecake layer even more decadent.
For those who love to experiment, this cake offers endless possibilities! You might also enjoy my tempting Ice Cream Cake for a refreshing treat or explore a classic Chocolate Pudding Cake for another indulgent dessert experience.
What to Serve with Blueberry Cheesecake Crumb Cake
Elevate your dessert experience with these delightful accompaniments that complement every luscious bite.
-
Whipped Cream: Light and airy, it adds a creamy touch that enhances the cake's richness. A dollop on each slice takes this dessert to new heights.
-
Vanilla Ice Cream: The cold and creamy texture contrasts beautifully with the warm cake, delivering a satisfying balance of flavors and temperatures for a truly indulgent experience.
-
Fresh Berries: A side of mixed fresh berries brightens the plate, adding a burst of color and a tangy freshness that pairs perfectly with the sweet blueberry cheesecake.
-
Coffee or Espresso: The deep, rich flavors of coffee complement the dessert wonderfully, balancing the sweetness while providing an extra layer of warmth and comfort.
-
Chocolate Sauce: Drizzling a rich chocolate sauce over your slice creates an enticing fusion of flavors, adding a touch of decadence that chocolate lovers will adore.
-
Lemon Zest: A sprinkle of fresh lemon zest on top brightens the cake with zippy notes, cutting through the creaminess while enhancing the blueberry flavor.
-
Mint Leaves: Garnishing with fresh mint leaves not only beautifies the presentation but adds a refreshing aroma that uplifts each bite of the crumb cake.
-
Sparkling Water or Lemonade: For a refreshing beverage option, fizzy sparkling water or homemade lemonade provides a bubbly counterpoint to the creamy texture of the cheesecake, making it perfect for warm-weather gatherings.
-
Almond Biscotti: Crunchy almond biscotti on the side offers a delightful texture contrast, perfect for dipping and enhancing your dessert experience with a nutty flavor.
How to Store and Freeze Blueberry Cheesecake Crumb Cake
Fridge: Store the Blueberry Cheesecake Crumb Cake in an airtight container in the refrigerator for up to 5 days. This helps maintain its moist texture and flavor.
Freezer: For longer storage, freeze the cake in a tightly wrapped portion or individual slices for up to 3 months. Make sure to wrap it well in plastic wrap and foil to prevent freezer burn.
Thawing: When ready to enjoy, thaw the cake in the refrigerator overnight. Reheat individual slices in the microwave for 15-20 seconds for a warm treat, or enjoy chilled!
Make-Ahead Tip: This cake can be made a day ahead for enhanced flavor since it sets beautifully overnight in the fridge.
Make Ahead Options
Planning ahead with this Blueberry Cheesecake Crumb Cake is a wonderful time-saver for busy weeknights and gatherings! You can prepare the crumb topping and crust up to 24 hours in advance. Simply store the crumb mixture in an airtight container in the refrigerator, and remember to refrigerate the crust in the springform pan. As for the cheesecake filling, it can be made up to 3 days ahead and stored in the refrigerator until you're ready to assemble. When you're ready to bake, layer the filling in the crust, top with the reserved crumb mixture, and toss it in the oven. This way, you ensure that your dessert remains just as delicious and fresh while saving you precious time!
Blueberry Cheesecake Crumb Cake Recipe FAQs
How do I choose the perfect blueberries for this recipe?
Absolutely! When selecting blueberries, look for plump, firm berries with a vibrant color. They should have a slight bloom on their surface, which is a natural protective coating. Avoid any with dark spots or signs of mushiness, as this indicates overripeness. If using frozen blueberries, no need to thaw them; just toss them right into the mix for a fresh burst of flavor!
How should I store the Blueberry Cheesecake Crumb Cake?
To keep your delicious Blueberry Cheesecake Crumb Cake fresh, store it in an airtight container in the refrigerator. It'll stay good for up to 5 days, loading it with flavor. If you want to enjoy it later, you can freeze it for up to 3 months. Just be sure to wrap it tightly in plastic wrap followed by aluminum foil to prevent freezer burn.
Can I freeze Blueberry Cheesecake Crumb Cake?
Yes, you can! To freeze, slice the cake first, as it's easier to thaw individual pieces. Wrap each slice in plastic wrap, then place them in a freezer bag or airtight container. Thaw in the refrigerator overnight when you're ready to indulge again. If you like it warm, you can briefly microwave each slice for 15-20 seconds.
What do I do if my cheesecake filling is too runny?
If your filling is runny, it could be due to overmixing or using ingredients that weren’t at room temperature. To troubleshoot, make sure you only mix until smooth. You can also try adding a bit more cornstarch to help stabilize it. If you find yourself in a pinch, cooking the cheesecake mixture gently on the stovetop over low heat can help thicken it slightly. Just be sure to cool it before using it in the cake!
Is this Blueberry Cheesecake Crumb Cake suitable for people with allergies?
While this cake is a delightful treat, it's important to note that it contains common allergens such as eggs, dairy (cream cheese and mascarpone), and gluten (all-purpose flour). If you’re baking for someone with specific dietary restrictions, consider substituting gluten-free flour blends and dairy-free cream cheese alternatives. Always check labels to ensure they're safe for those with allergies.
What should I serve with the Blueberry Cheesecake Crumb Cake?
Very! Serve it warm or chilled with a dollop of whipped cream or a scoop of vanilla ice cream for an indulgent treat. You can also pair it with a dusting of powdered sugar or a drizzle of caramel sauce for extra sweetness.
Blueberry Cheesecake Crumb Cake: Irresistible Homemade Delight
Ingredients
Equipment
Method
- Preheat your oven to 350°F (175°C) and prepare a 9-inch springform pan by greasing it lightly and lining the bottom with parchment paper.
- In a large mixing bowl, combine the all-purpose flour, baking powder, salt, light brown sugar, and granulated sugar. Cut in the cold, cubed butter until the mixture resembles coarse crumbs.
- To the remaining crumb mixture, add eggs and vanilla extract, mixing until just combined. Press 2/3 of this mixture firmly into the bottom of the prepared springform pan to create a sturdy crust.
- In another bowl, whisk together the mascarpone cheese, cream cheese, vanilla extract, caster sugar, and corn starch until smooth. Add eggs one at a time, mixing gently.
- Pour half of the cheesecake filling over the crust, sprinkle blueberries, and pour the remaining cheesecake filling over it.
- Crumble the reserved mixture over the top, and sprinkle more blueberries if desired.
- Bake for 65-75 minutes until golden brown and a toothpick comes out clean.
- Allow the cake to cool in the pan for 15 minutes, then remove the springform. Whisk together powdered sugar and milk for the glaze and drizzle over the cooled cake.
- Let the cake set for 30 minutes before slicing, and serve with whipped cream or vanilla ice cream.