tastytrendingredients

  • Home
  • Recipes
    • Appetizers
    • Breakfast
    • Dessert
    • Dinner
    • Drinks
    • Salads
    • Snacks
    • Soups
  • About me
  • Contact
menu icon
go to homepage
  • Home
  • Recipes
    • Appetizers
    • Breakfast
    • Dessert
    • Dinner
    • Drinks
    • Salads
    • Snacks
    • Soups
  • About me
  • Contact
search icon
Homepage link
  • Home
  • Recipes
    • Appetizers
    • Breakfast
    • Dessert
    • Dinner
    • Drinks
    • Salads
    • Snacks
    • Soups
  • About me
  • Contact
×

Delightful Hawaiian Mini Guava Cakes for a Tropical Treat

February 25, 2026 by Grace Snow Leave a Comment

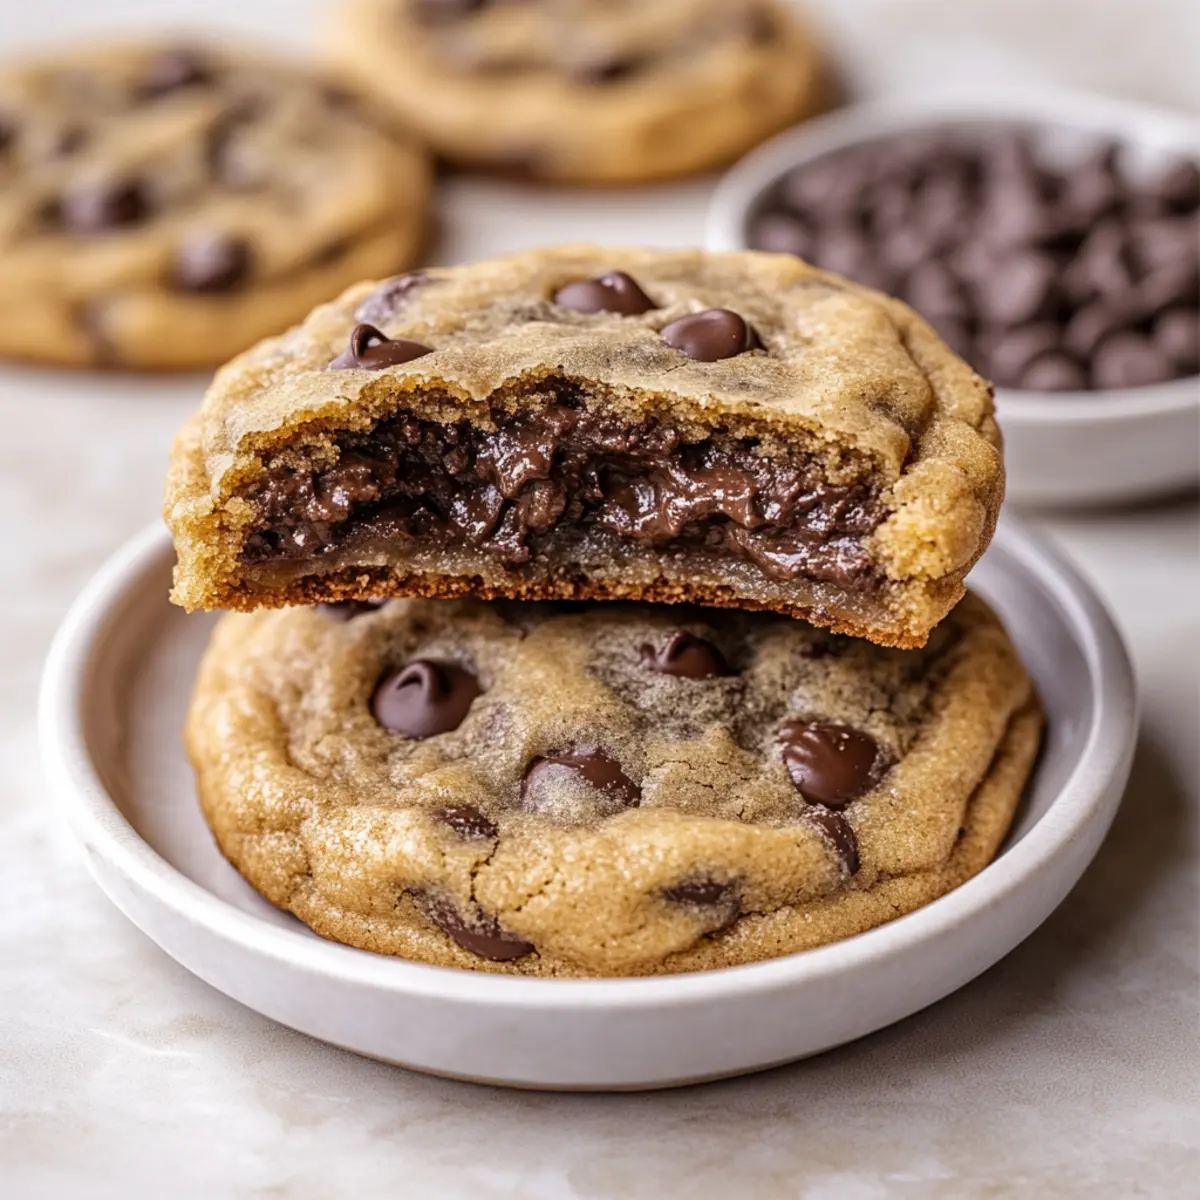
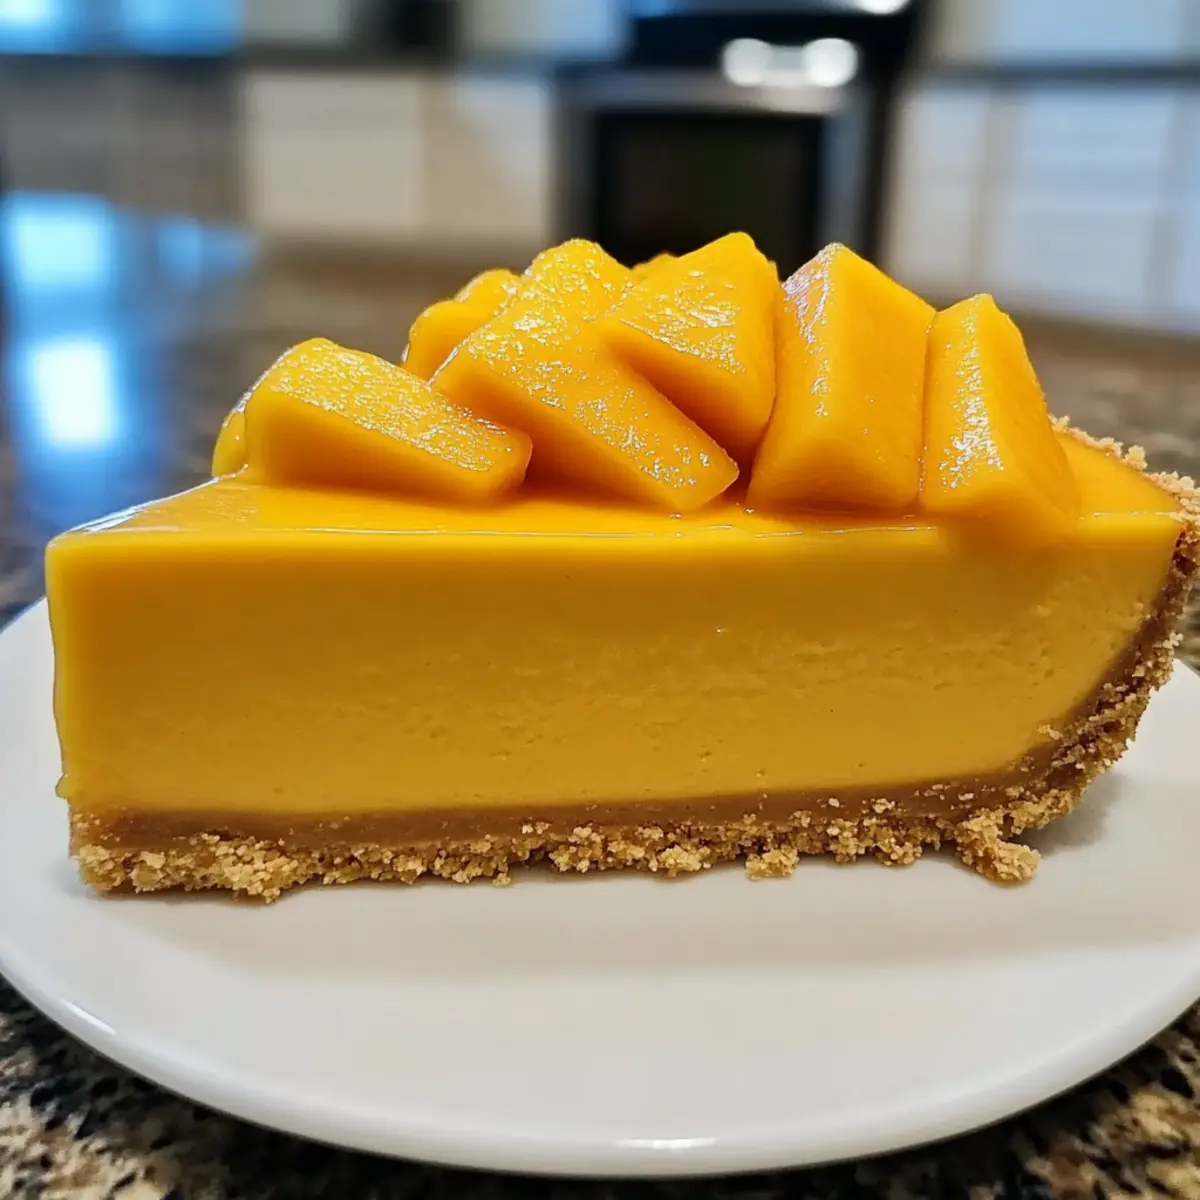
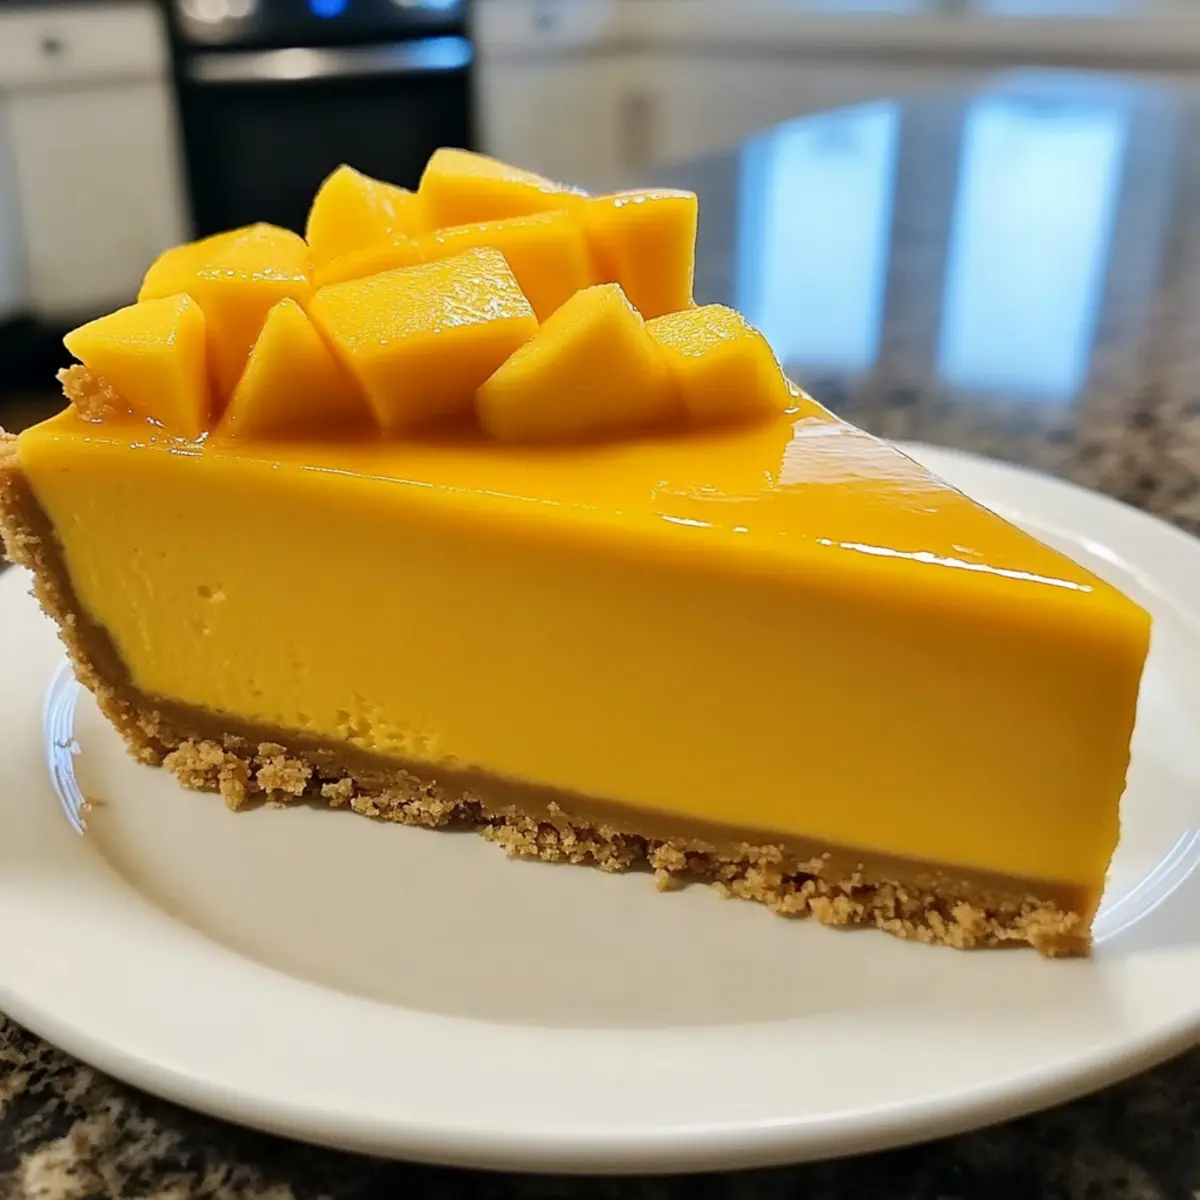
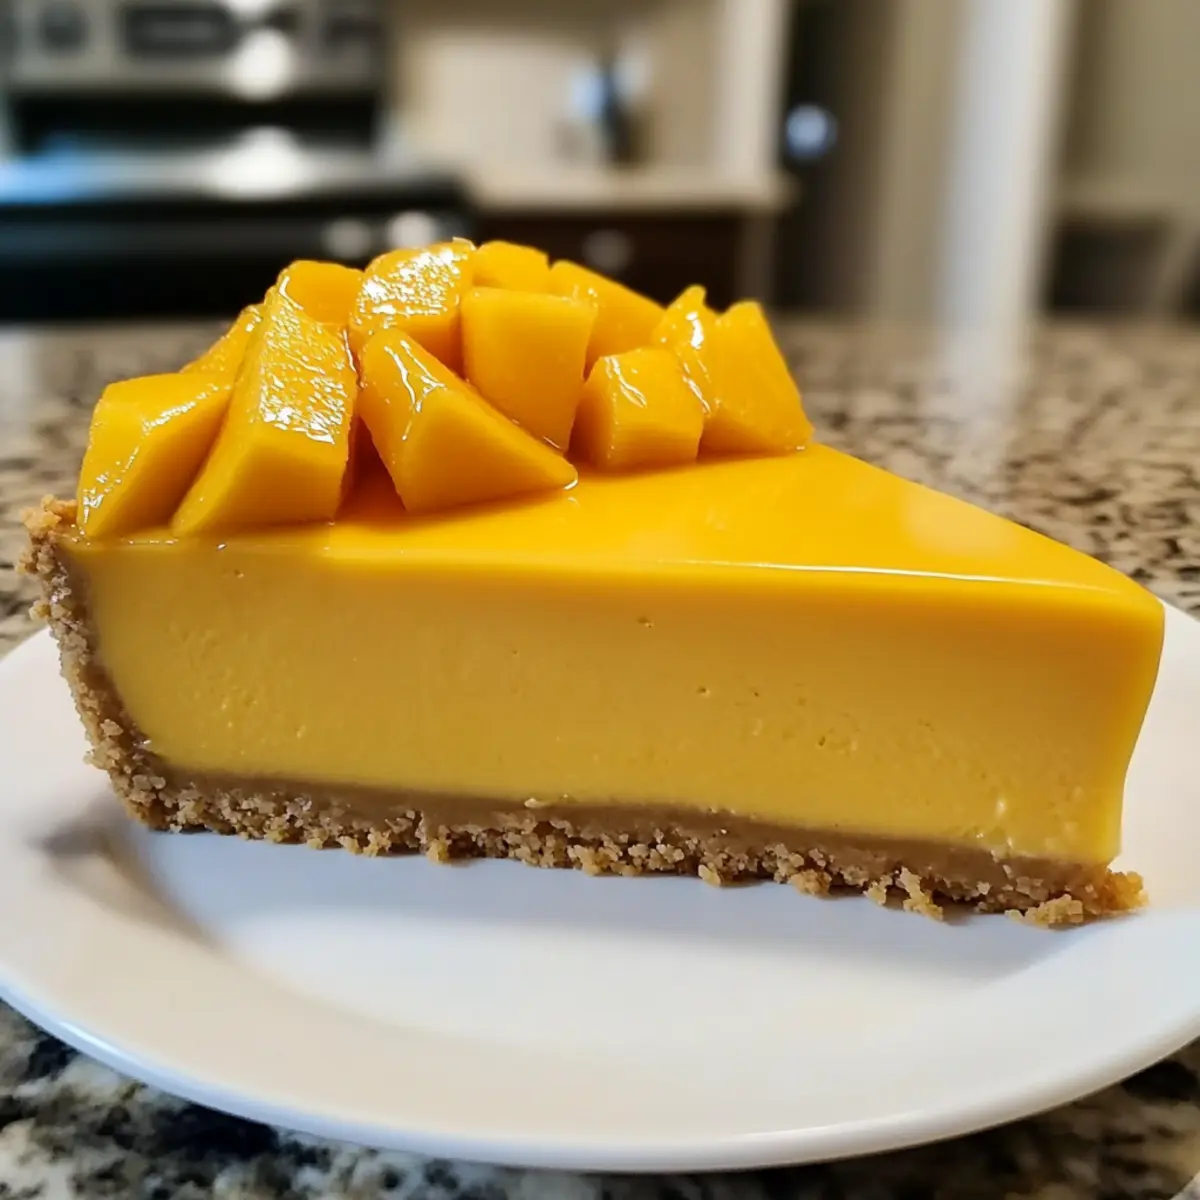
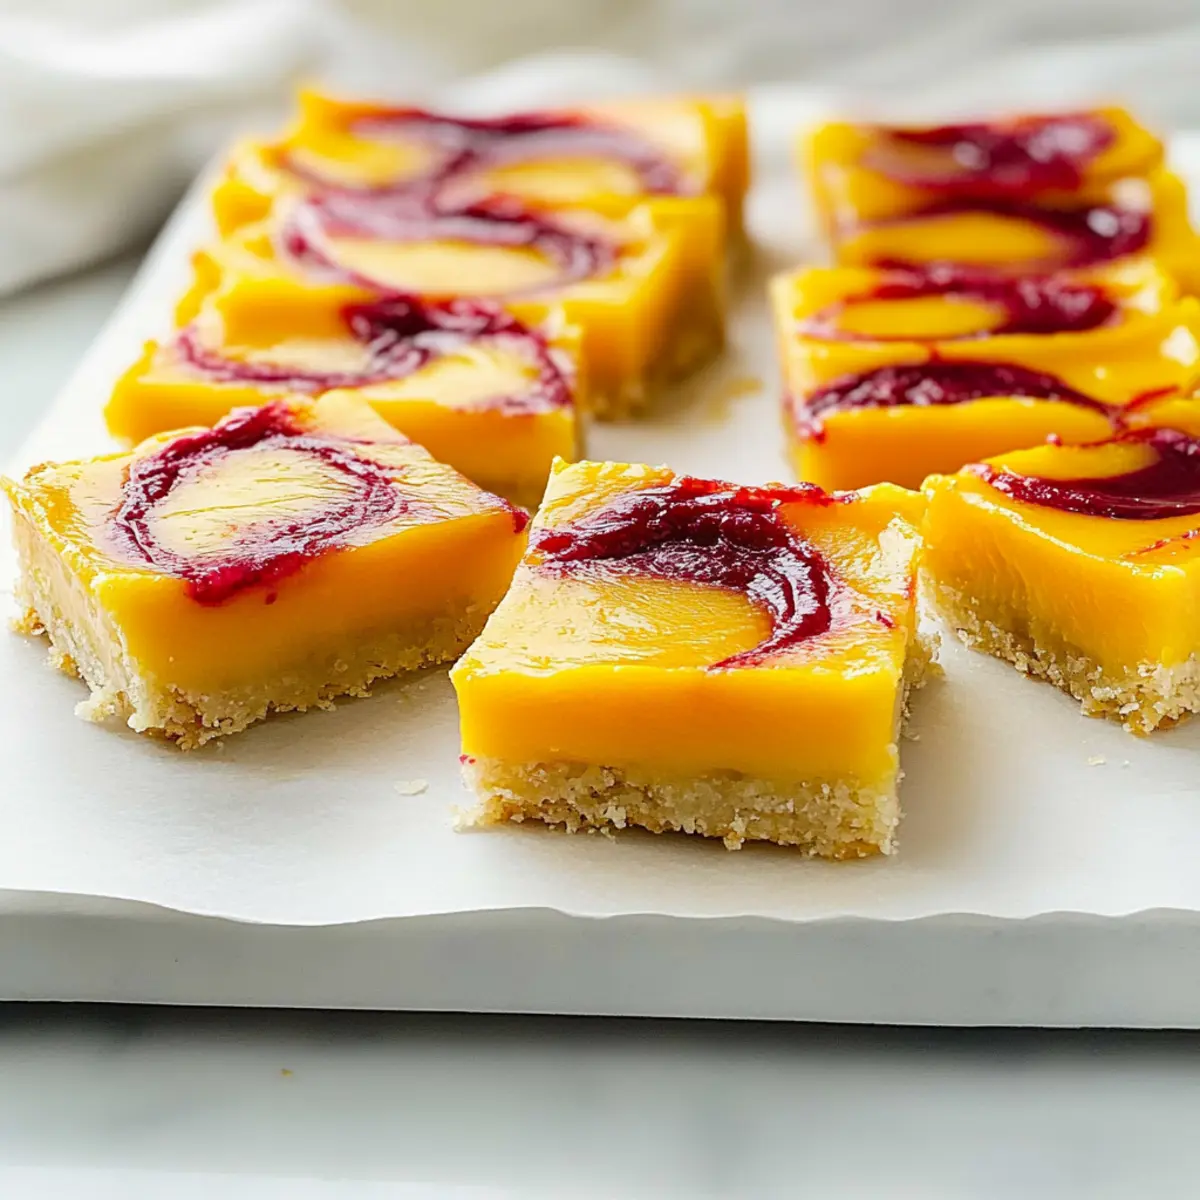
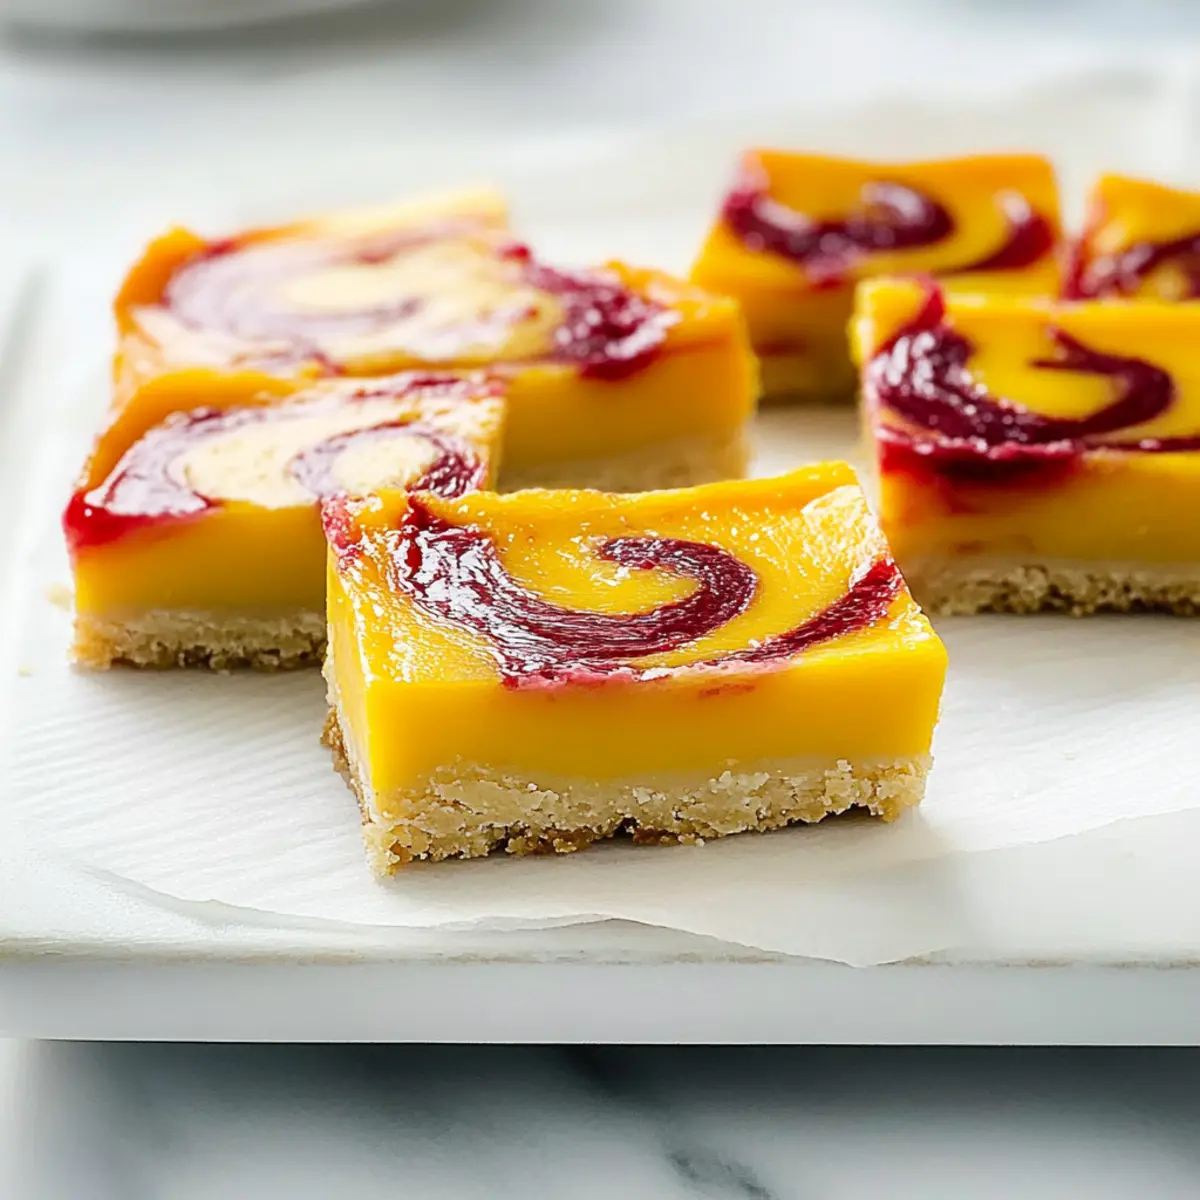
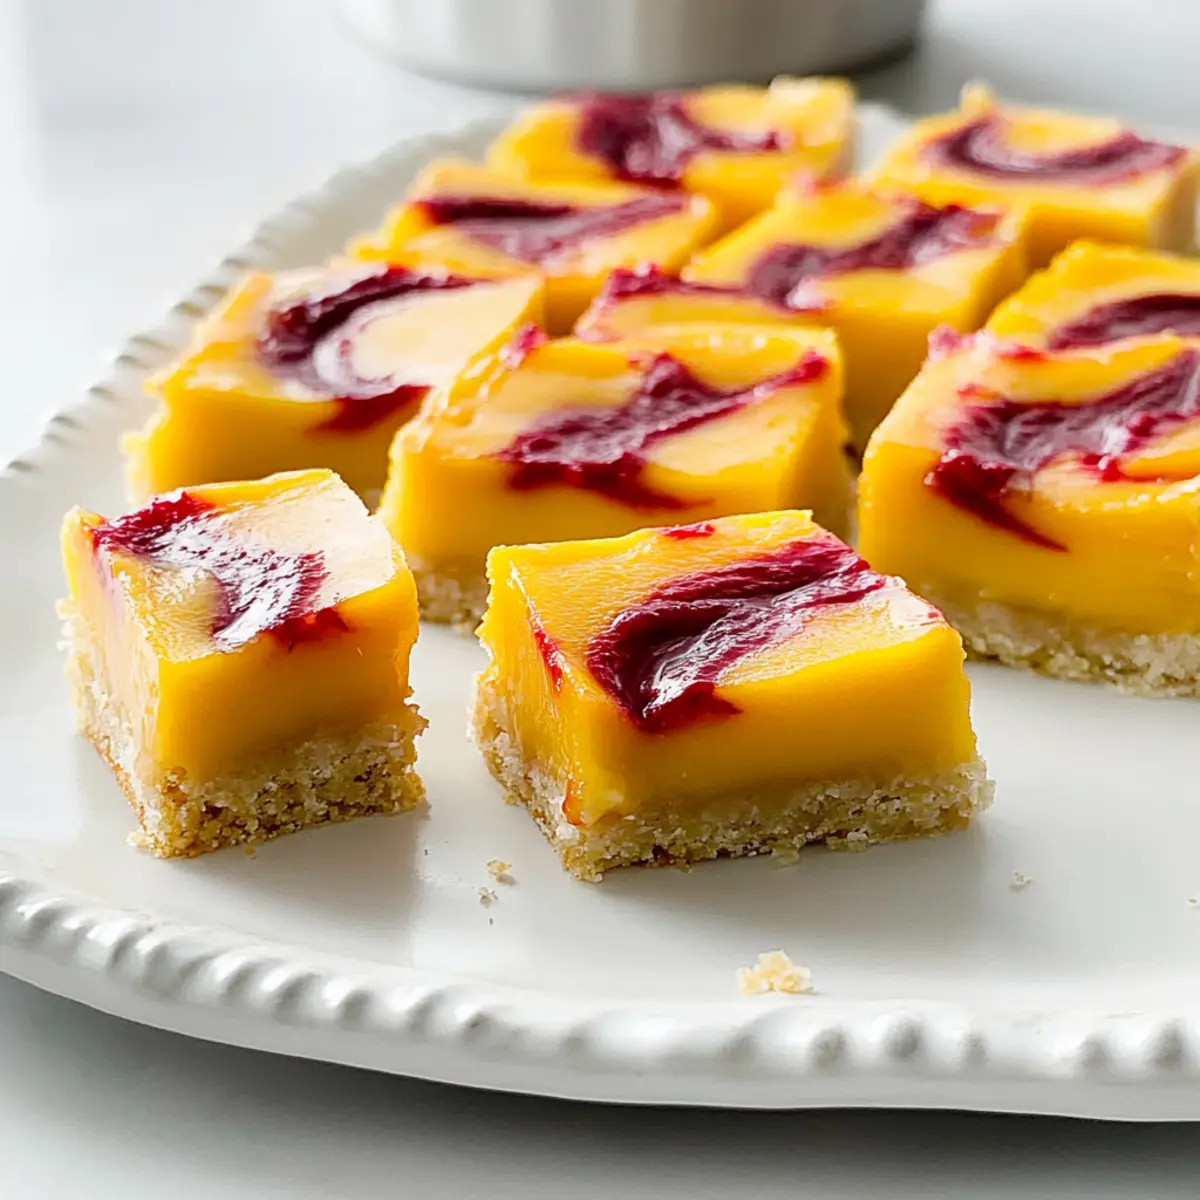
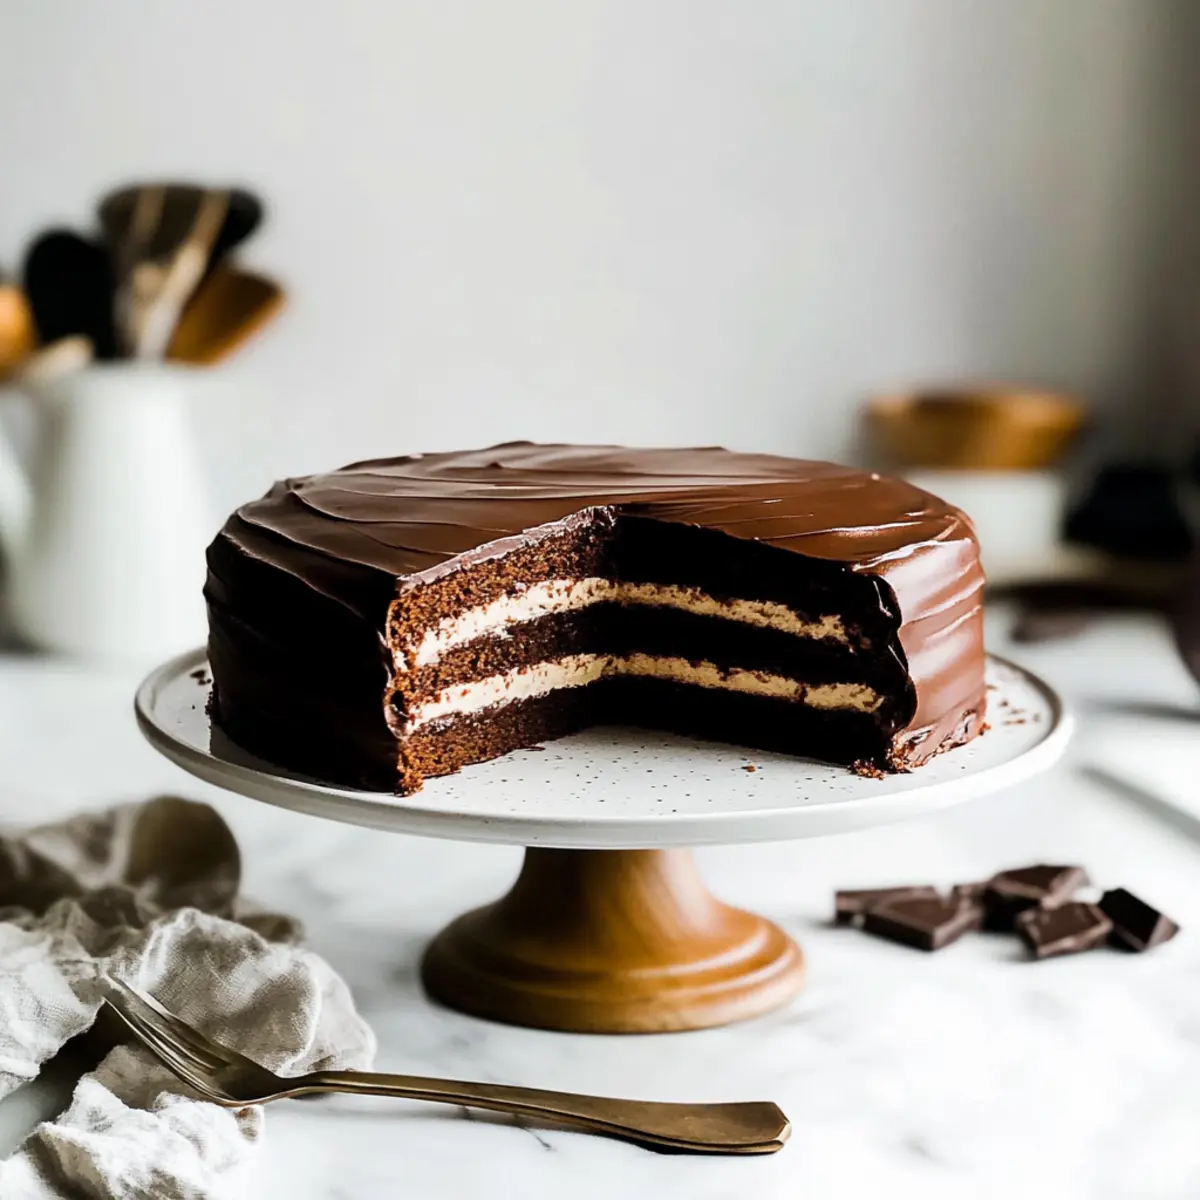
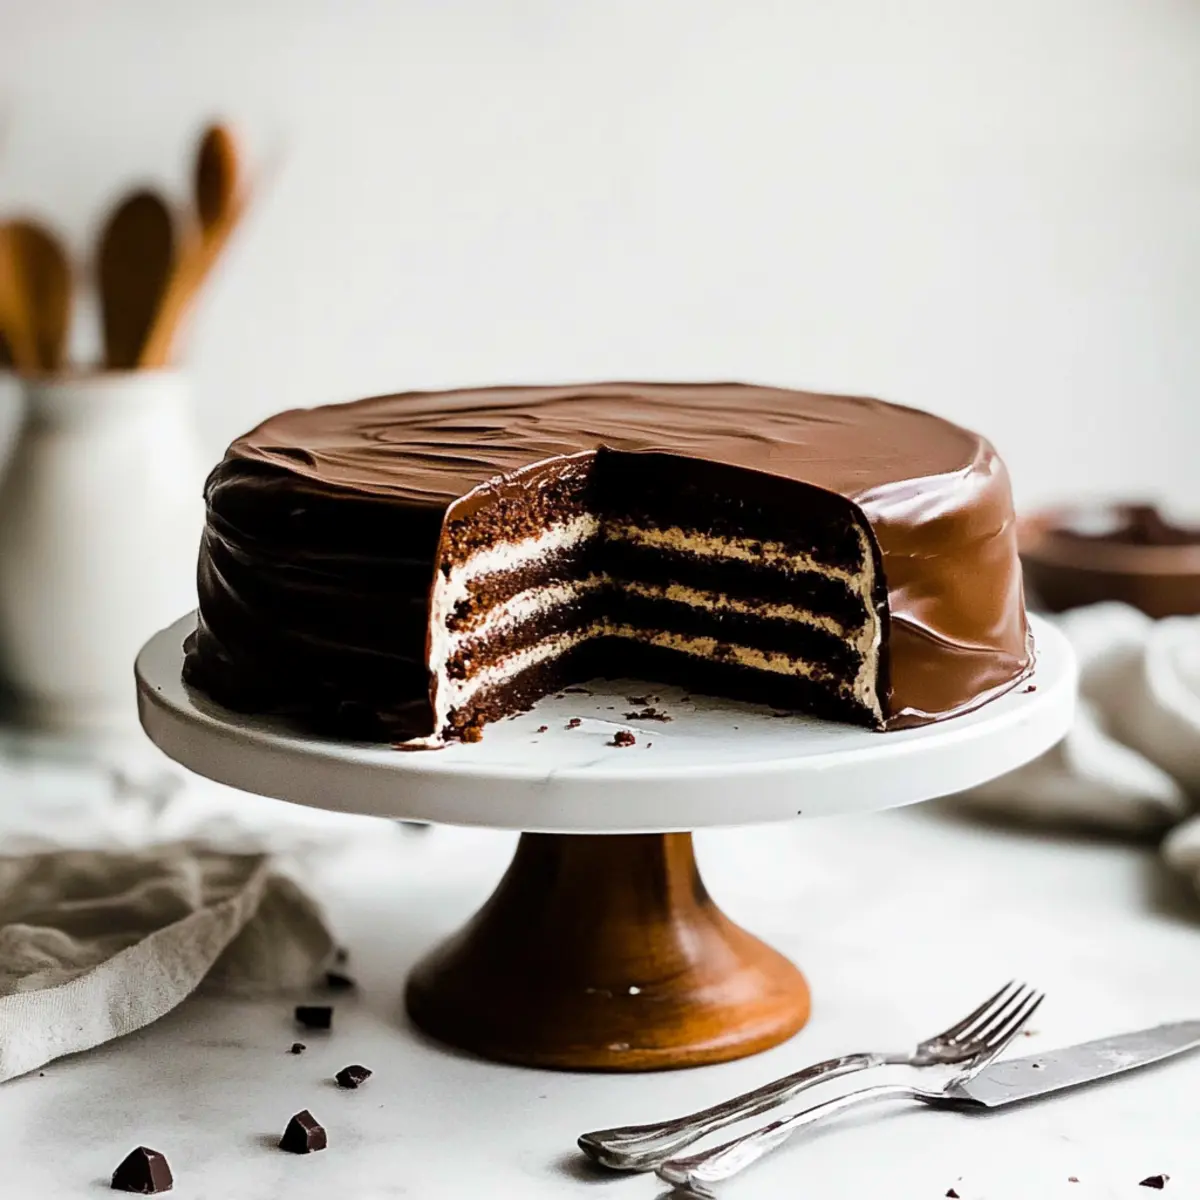
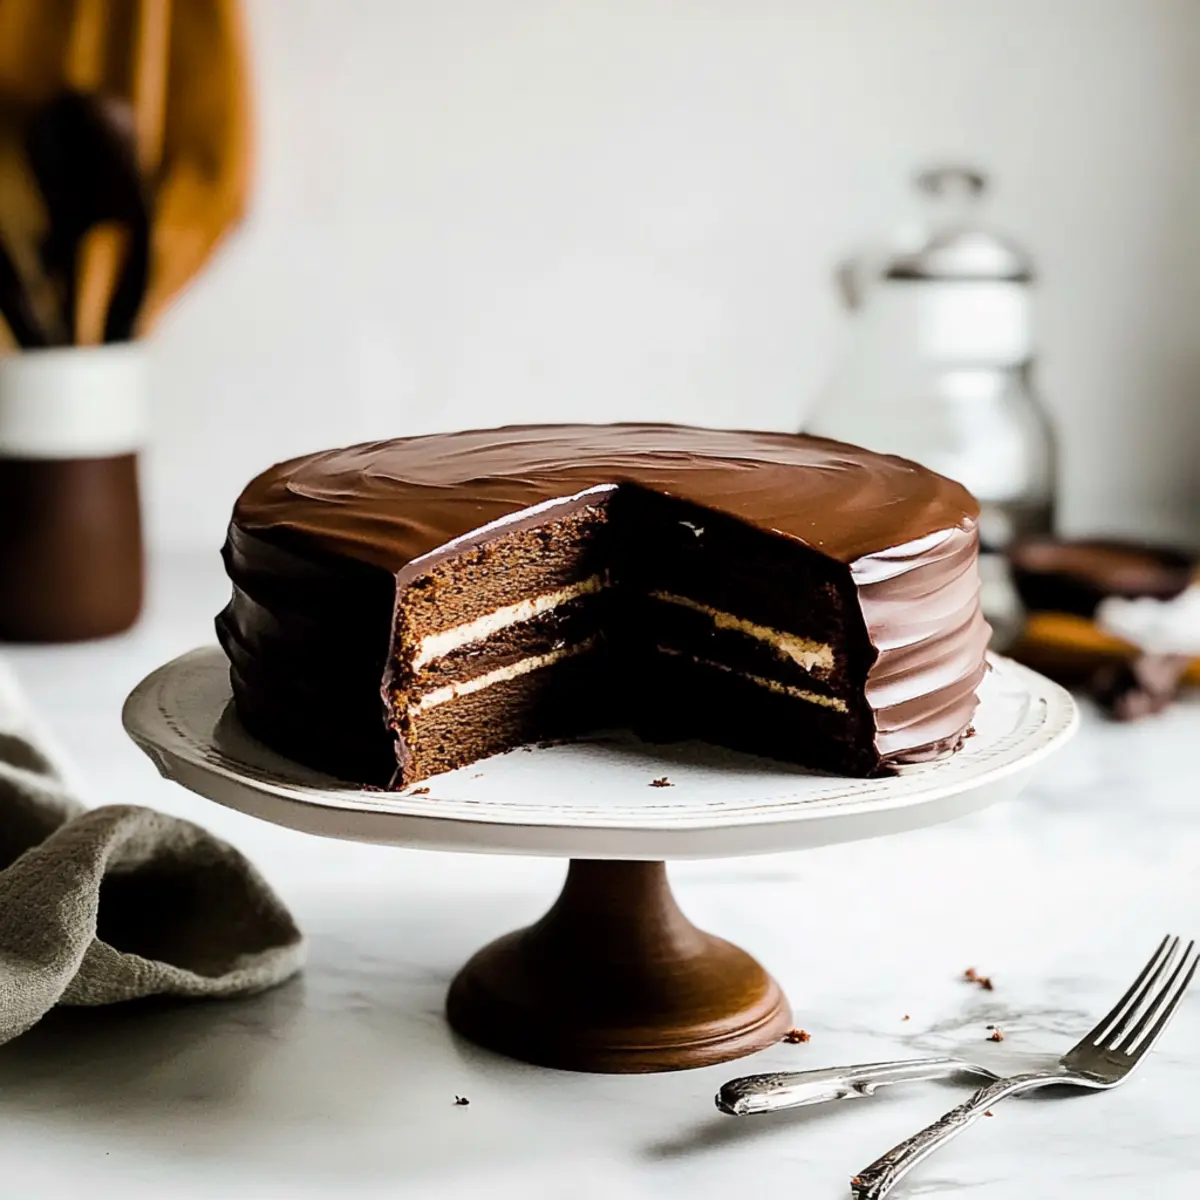
“Can you smell that?” I overheard someone remarking at a backyard barbecue, where the scent of something sweet and tropical lingered in the air. That’s the magic of Hawaiian Mini Guava Cakes! These delightful little treats are more than just desserts; they capture a taste of paradise right in your own kitchen. With their light, moist texture and a creamy topping that feels like a vacation for your palate, they’re effortlessly simple to whip up. Perfect for any gathering—from casual family meals to lively parties—this tropical dessert is a crowd-pleaser and can easily be made gluten-free with the right cake mix. Got some fresh guava on hand? Let’s dive in and bring a slice of the islands to our homes! What flavor combinations do you think would be a must-try with this sweet treat?

Why Are Hawaiian Mini Guava Cakes Irresistible?

Tropical Bliss: Each cake is a mini vacation on your plate, bursting with the exotic sweetness of guava.
Effortless Assembly: With simple ingredients and straightforward steps, even beginners will shine in the kitchen.
Versatile Delight: Feel free to experiment with different cake flavors or a hint of coconut for a unique twist!
Crowd-Pleasing Treat: Ideal for everything from family dinners to festive gatherings, they’ll have everyone coming back for seconds.
Gluten-Free Option: Use a gluten-free cake mix to cater to all your guests, without compromising on flavor! Why not serve these alongside Mini Tropical Pavlovas for an exciting dessert spread?

Hawaiian Mini Guava Cake Ingredients

For the Cake
• Strawberry Cake Mix – This provides a sweet and vibrant base; feel free to swap for vanilla or coconut for a different flavor experience.
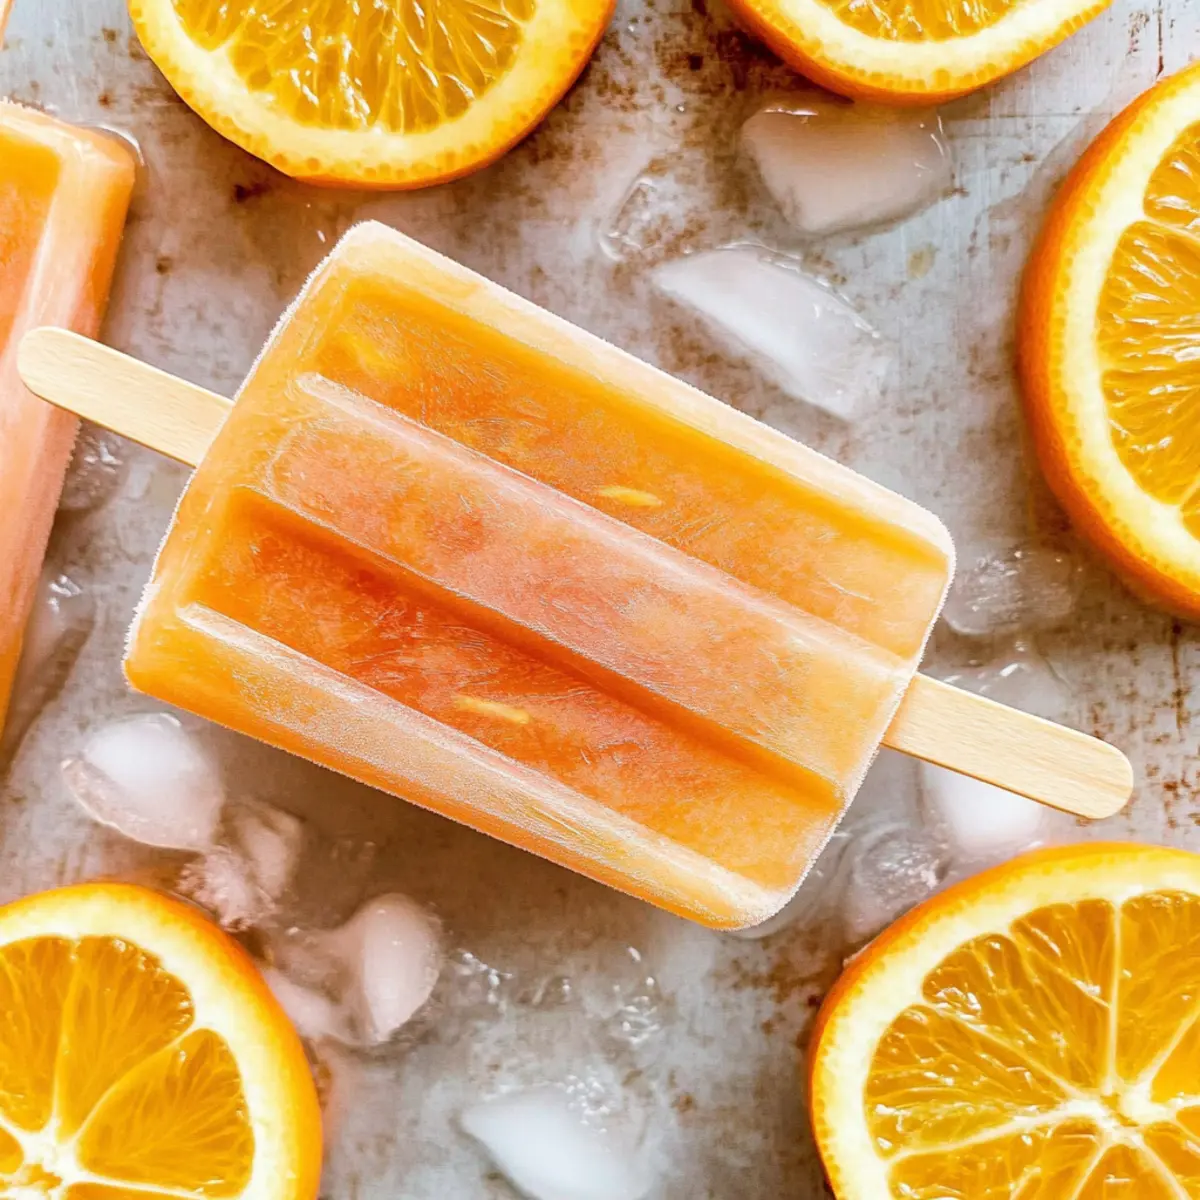
• Guava Nectar/Juice – This is crucial for that tropical taste; fresh guava can also be used if pureed and strained.
• Eggs (3, room temperature) – They bind the ingredients and add moisture; using eggs at room temperature promotes better mixing.
• Coconut Oil (1/3 cup, liquid) – Adds a hint of coconut and moisture; can be swapped with vegetable or canola oil if preferred.

For the Cream Topping
• Cream Cheese (6 oz, softened) – This lends richness and creates a creamy texture; remember to let it soften fully for easier mixing.
• Cool Whip (6 oz, thawed) – Provides a light, airy texture; you can substitute this with freshly whipped cream if you like.
• Sugar (1/4 cup) – Sweetens the cream topping; adjust the amount to suit your sweetness preference.
• Vanilla Extract (1 teaspoon) – Enhances flavors beautifully; using pure vanilla will give you the best results.

For the Glaze
• Sugar (1/2 cup for glaze) – Sweetens and balances the flavors in the glaze; consider using less if you prefer a less sweet finish.
• Cornstarch (1/4 cup) – Thickens the glaze; be sure you mix it well with water to avoid clumps.
• Water (3 tablespoons) – Used in combination with cornstarch to create that glossy glaze; stir thoroughly to combine.

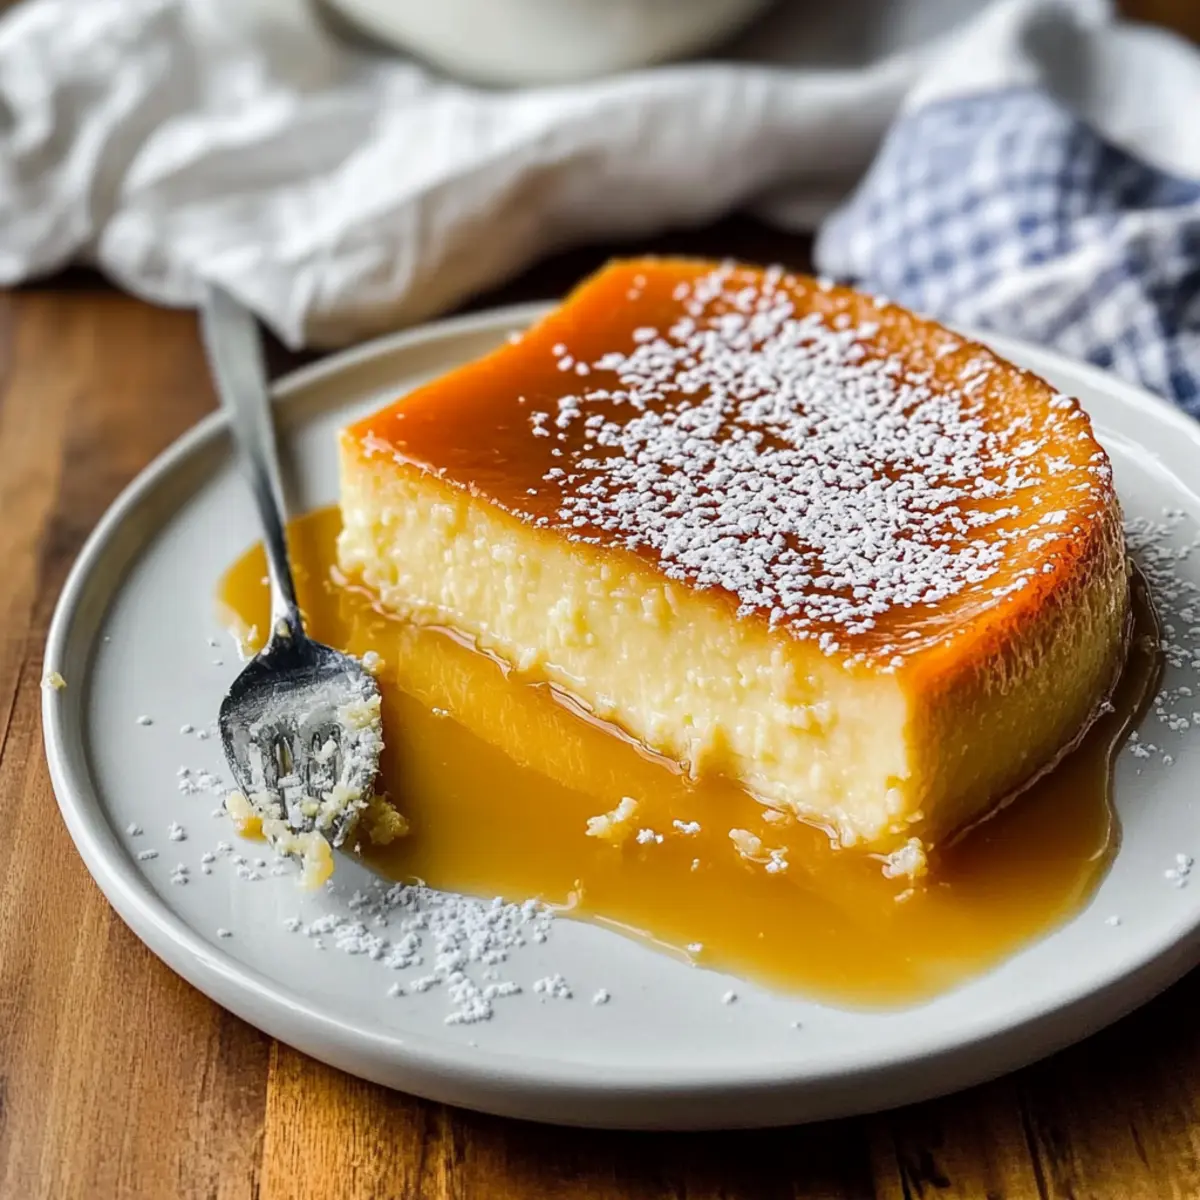
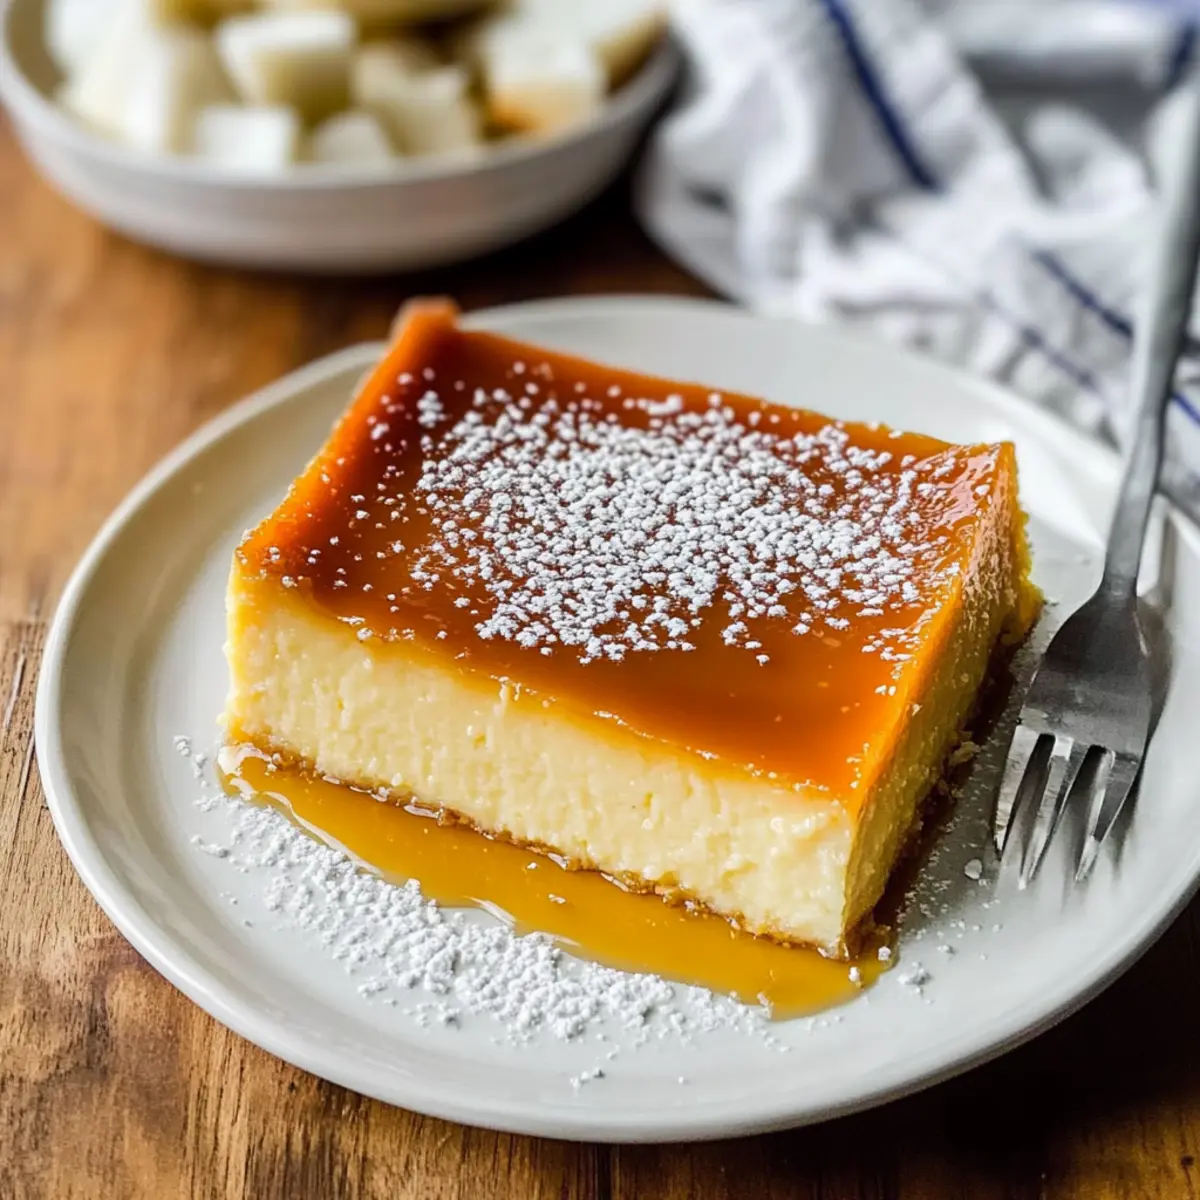
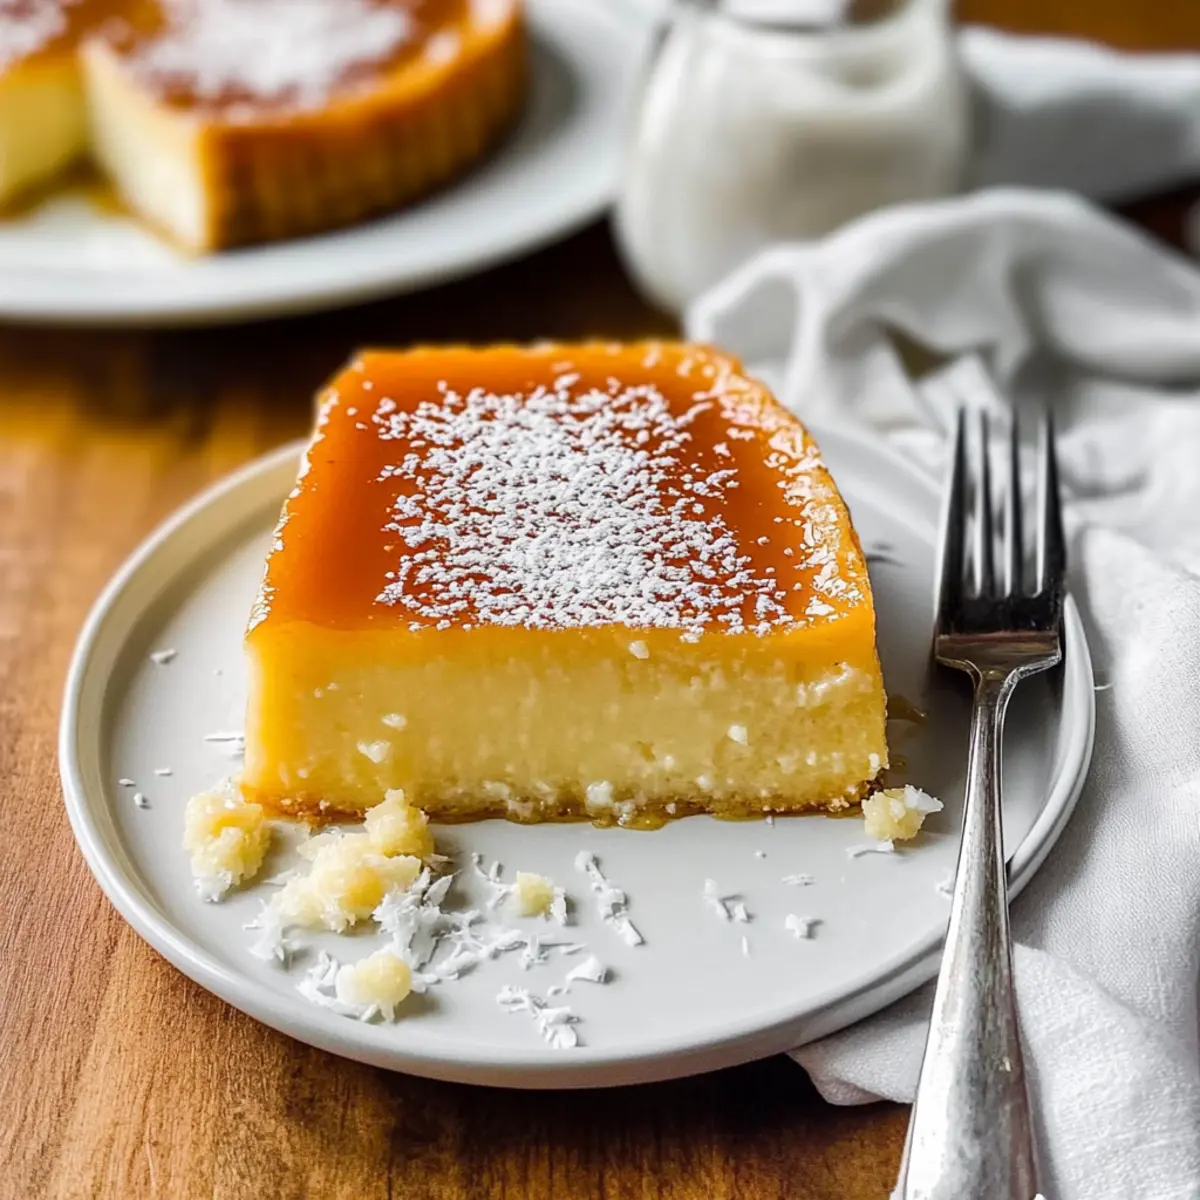
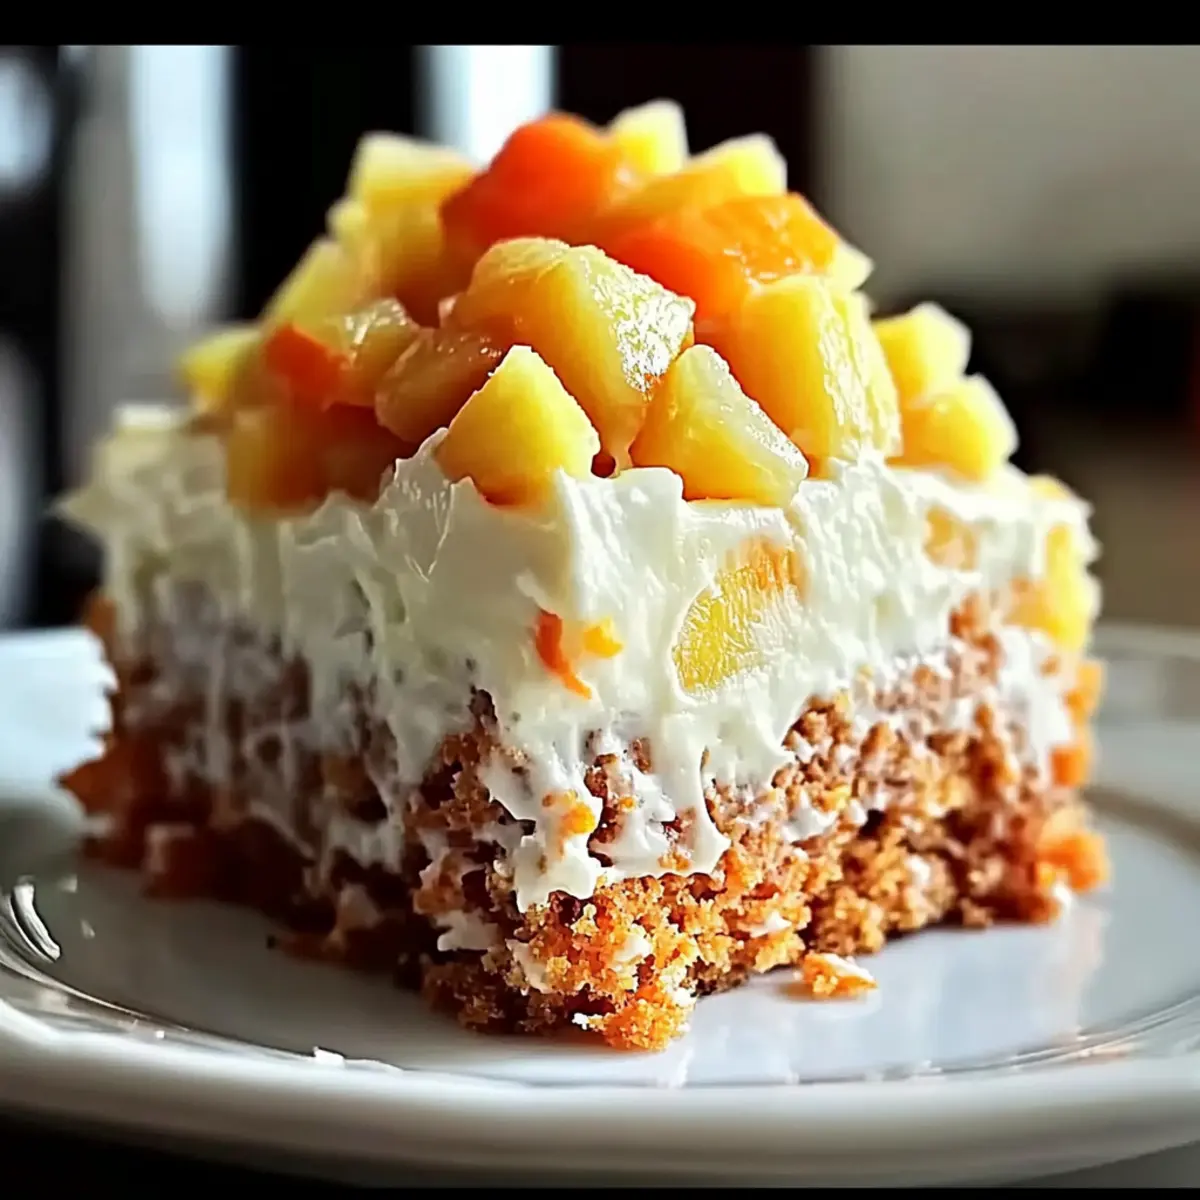
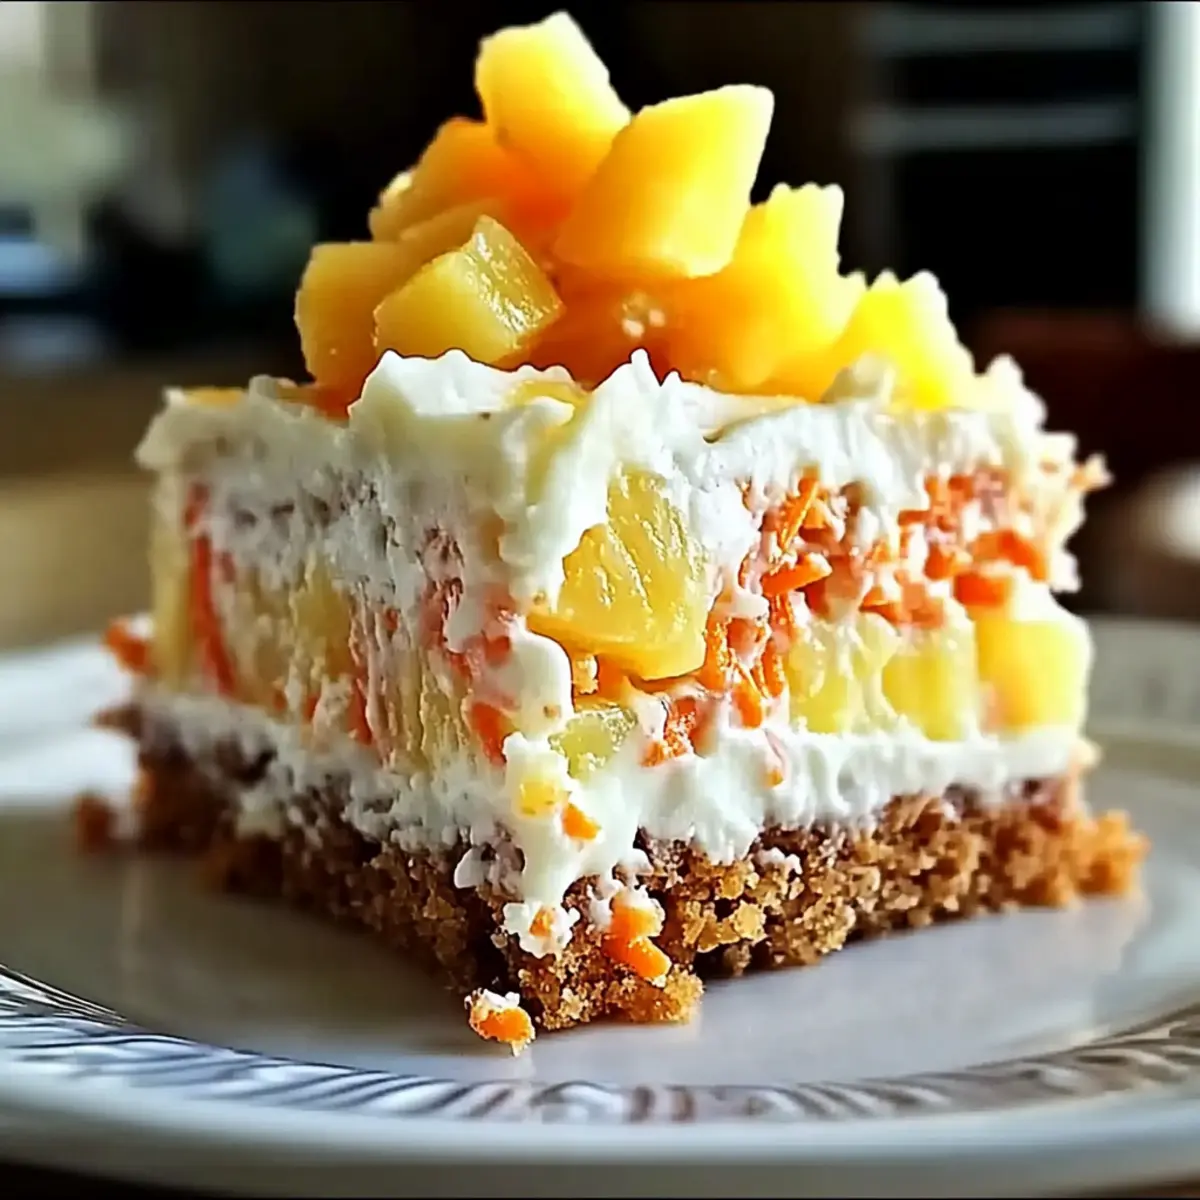
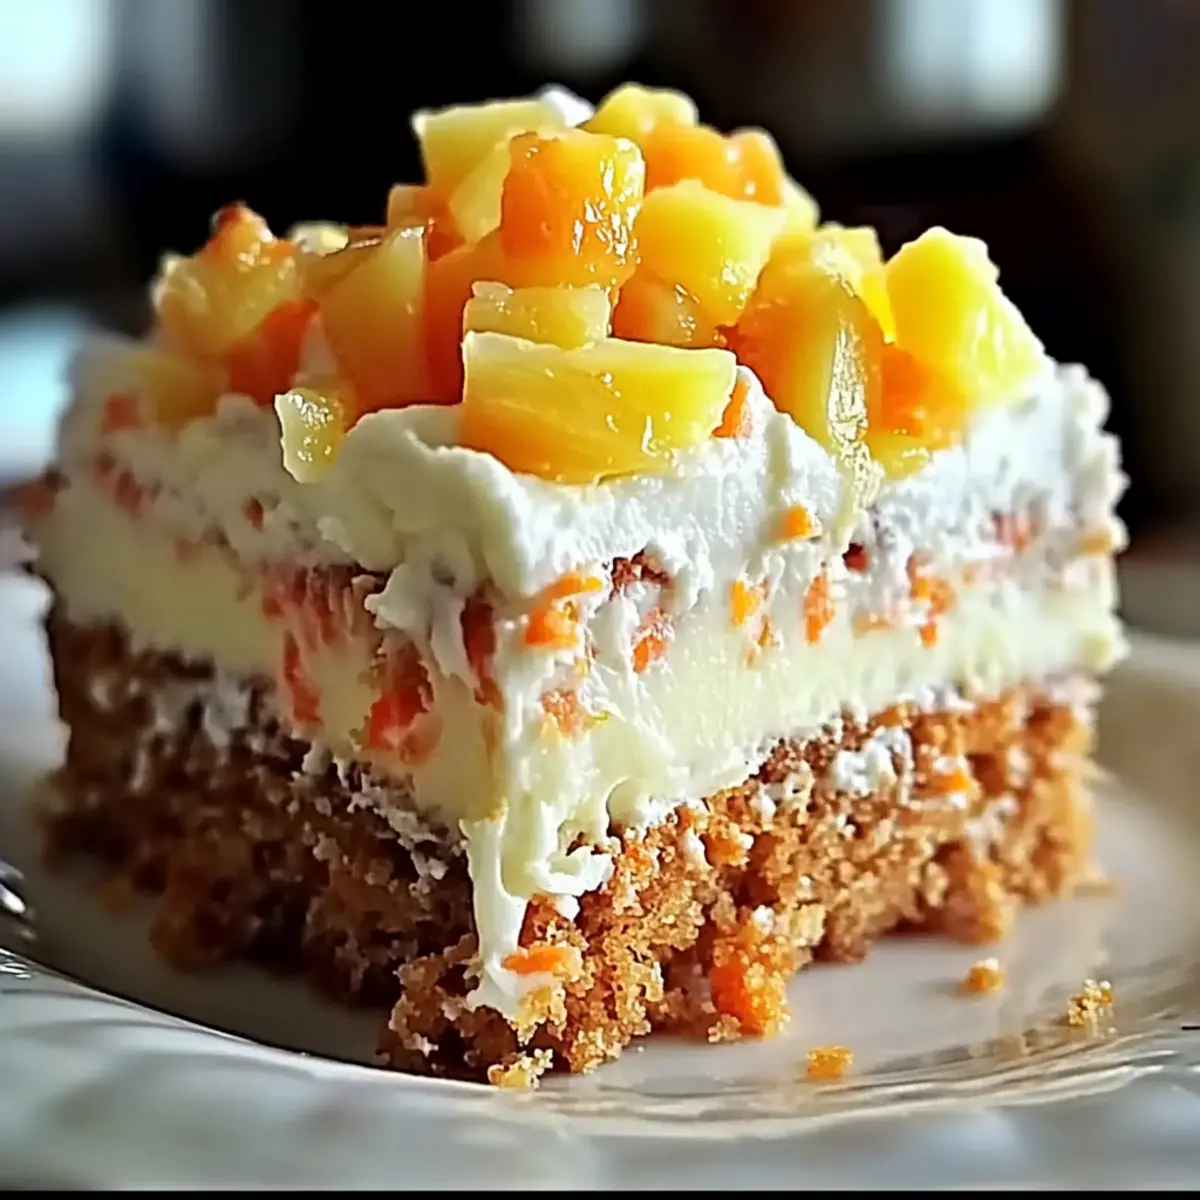
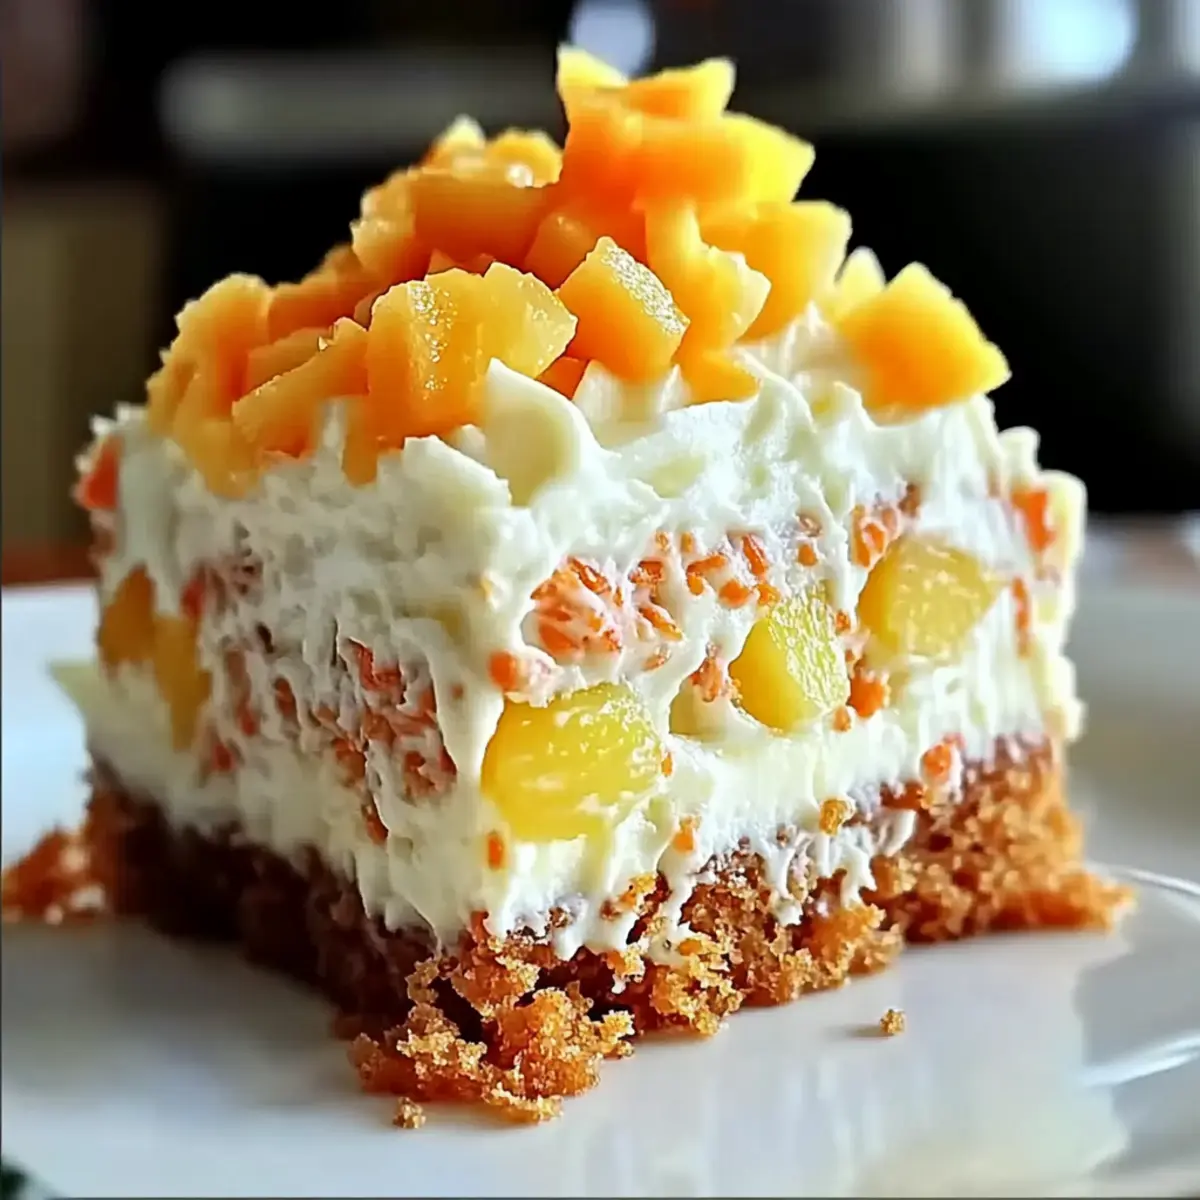
These Hawaiian Mini Guava Cakes are wonderfully simple yet pack a deliciously tropical punch that can easily steal the show at any gathering!

Step‑by‑Step Instructions for Hawaiian Mini Guava Cakes

Step 1: Preheat and Prepare
Begin by preheating your oven to 350°F (175°C). While the oven warms, line a cupcake pan with paper liners to prevent the mini cakes from sticking. This allows for easy removal after baking, helping to keep the Hawaiian Mini Guava Cakes intact and looking great.

Step 2: Mix the Batter
In a large mixing bowl, combine the strawberry cake mix, guava juice, room temperature eggs, and melted coconut oil. Using a handheld mixer, blend on low for 30 seconds to combine the ingredients, then increase to medium speed and mix for 2 minutes until the batter is smooth and slightly fluffy. This ensures all the flavors meld together perfectly.

Step 3: Fill the Liners
Carefully fill each cupcake liner about one-third full with the batter. This allows room for the cakes to rise without overflowing. Once filled, place the pan in the preheated oven and bake for 19-22 minutes, or until the tops are light golden and a toothpick inserted in the center comes out clean.

Step 4: Cool the Cakes
After baking, remove the cupcake pan from the oven and let it cool in the pan for about 5 minutes. Then, transfer the mini cakes to a wire rack to cool completely. This step is essential for the texture of the Hawaiian Mini Guava Cakes, allowing them to firm up before adding the creamy topping.

Step 5: Prepare the Glaze
For the guava glaze, combine guava juice and sugar in a saucepan over medium heat. Bring to a gentle boil. In a separate bowl, mix cornstarch with water to create a slurry, then whisk this mixture into the boiling juices. Cook for an additional minute until the glaze thickens, then set aside to cool.

Step 6: Make the Cream Topping
In a mixing bowl, beat the softened cream cheese with an electric mixer until fluffy, approximately 2-3 minutes. Gradually add sugar and vanilla extract, mixing until fully incorporated. Gently fold in the thawed Cool Whip until the mixture is smooth and creamy. This topping will add richness to the Hawaiian Mini Guava Cakes.

Step 7: Assemble the Cakes
Once the mini cakes have completely cooled, spread a generous layer of the cream cheese mixture over the top of each cake. Ensure the layer is even for a delightful presentation. After topping, place the cakes in the refrigerator to set for about 30 minutes, providing a firmer texture for serving.

Step 8: Add the Glaze
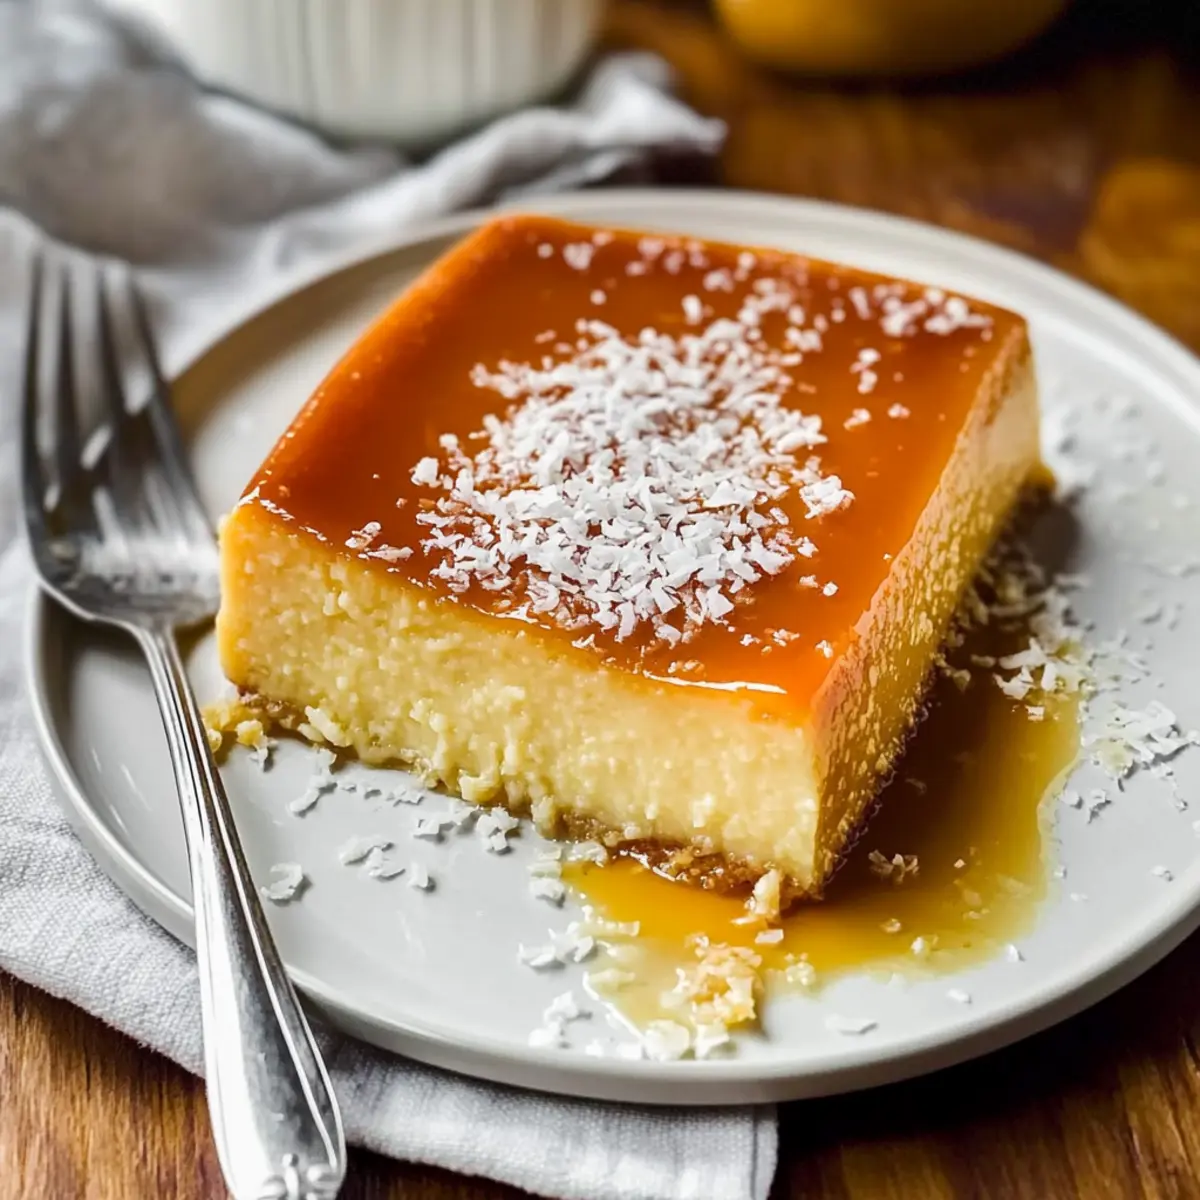
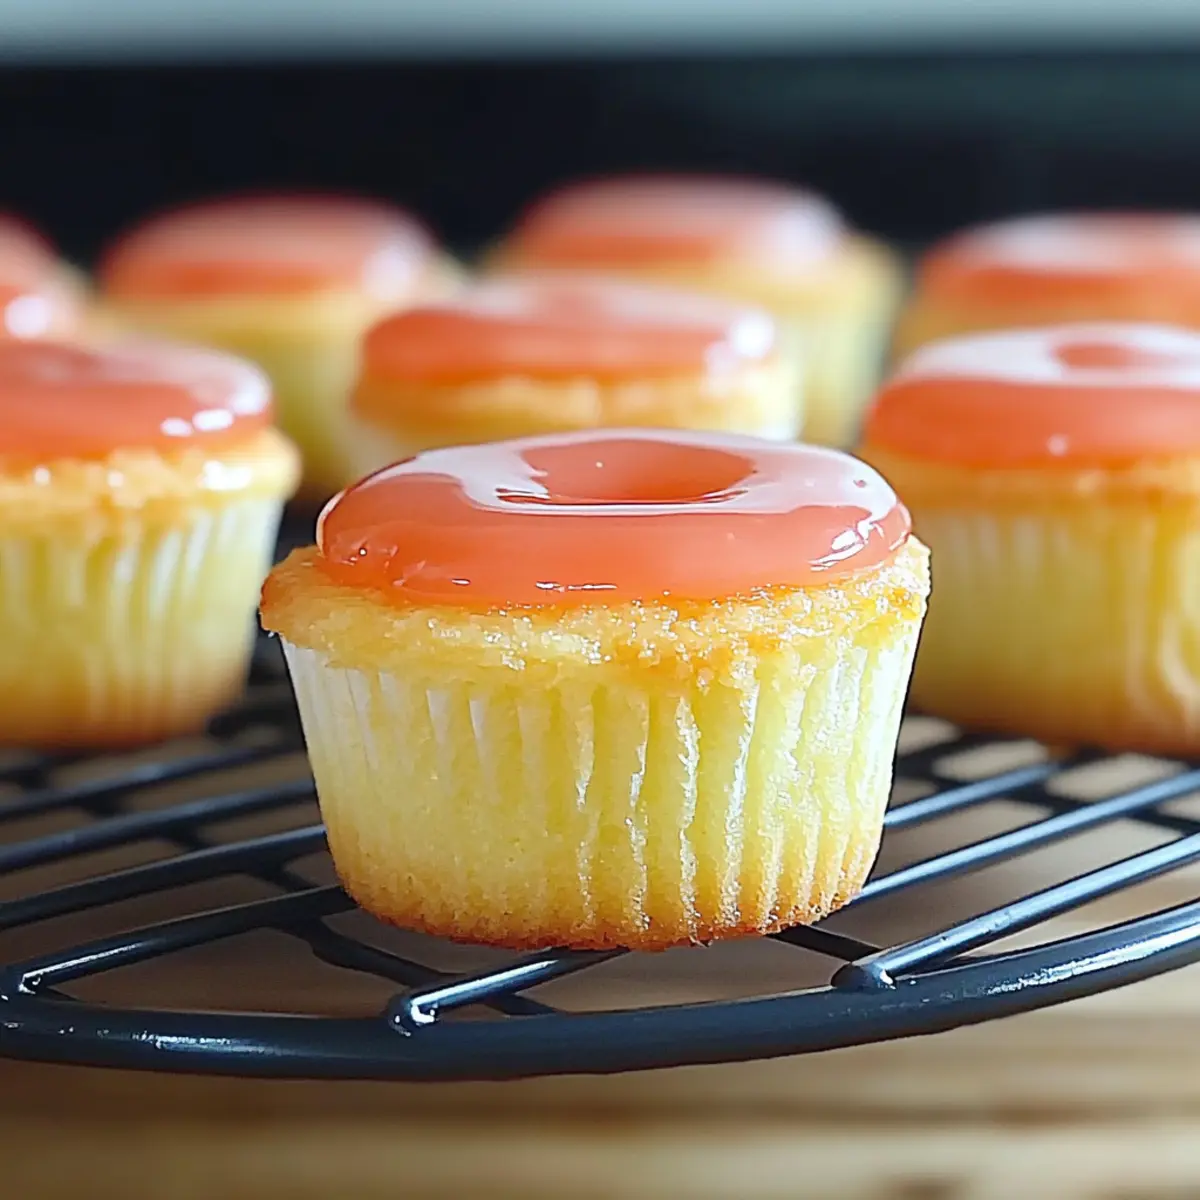
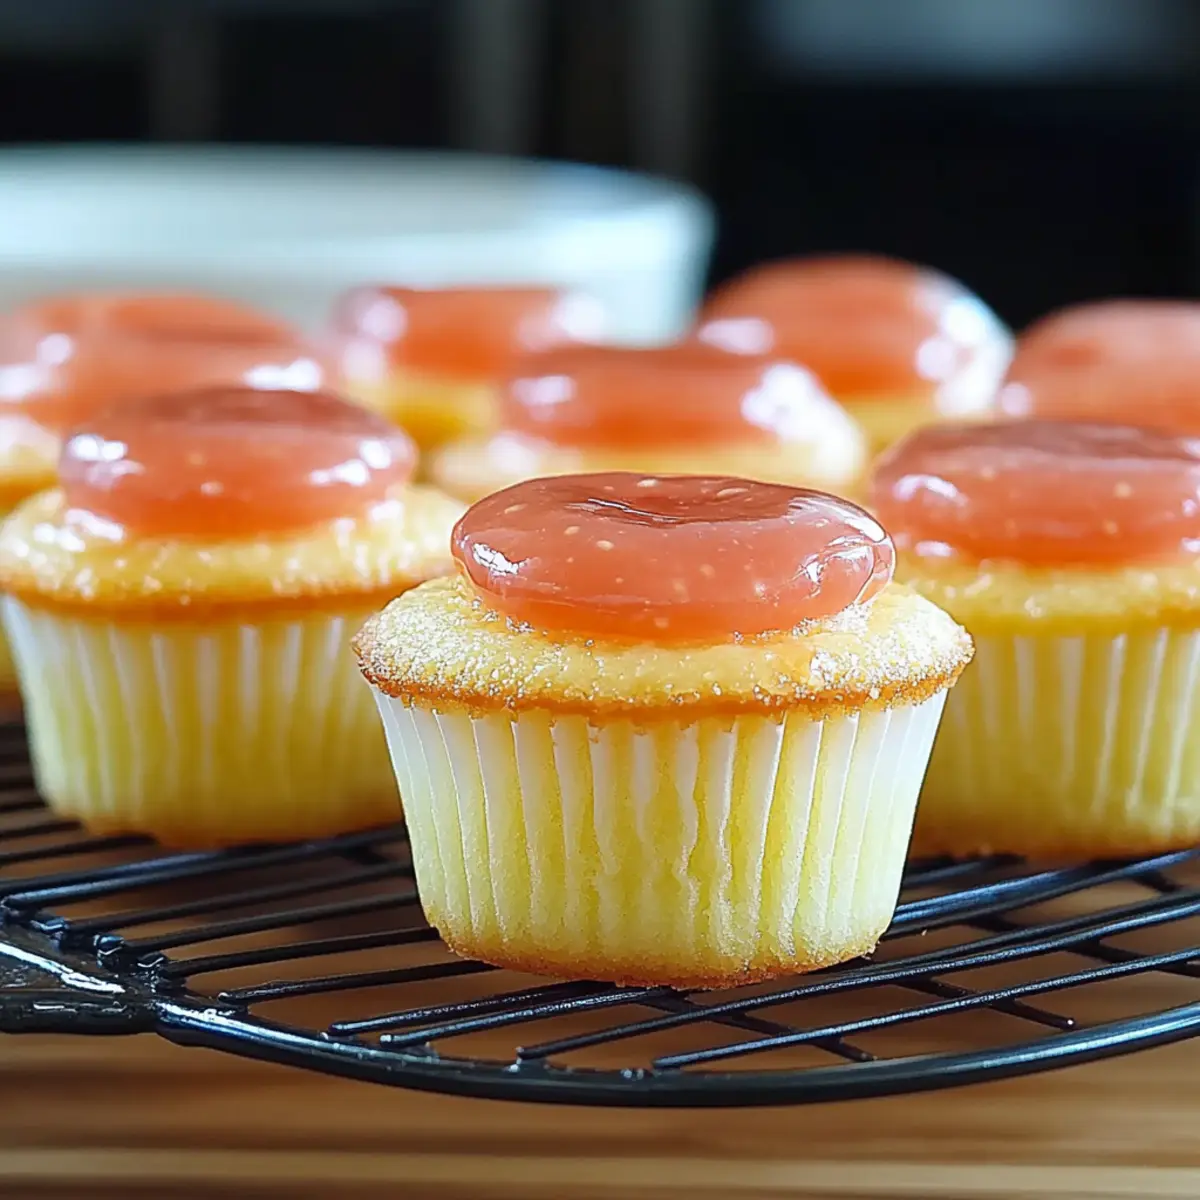
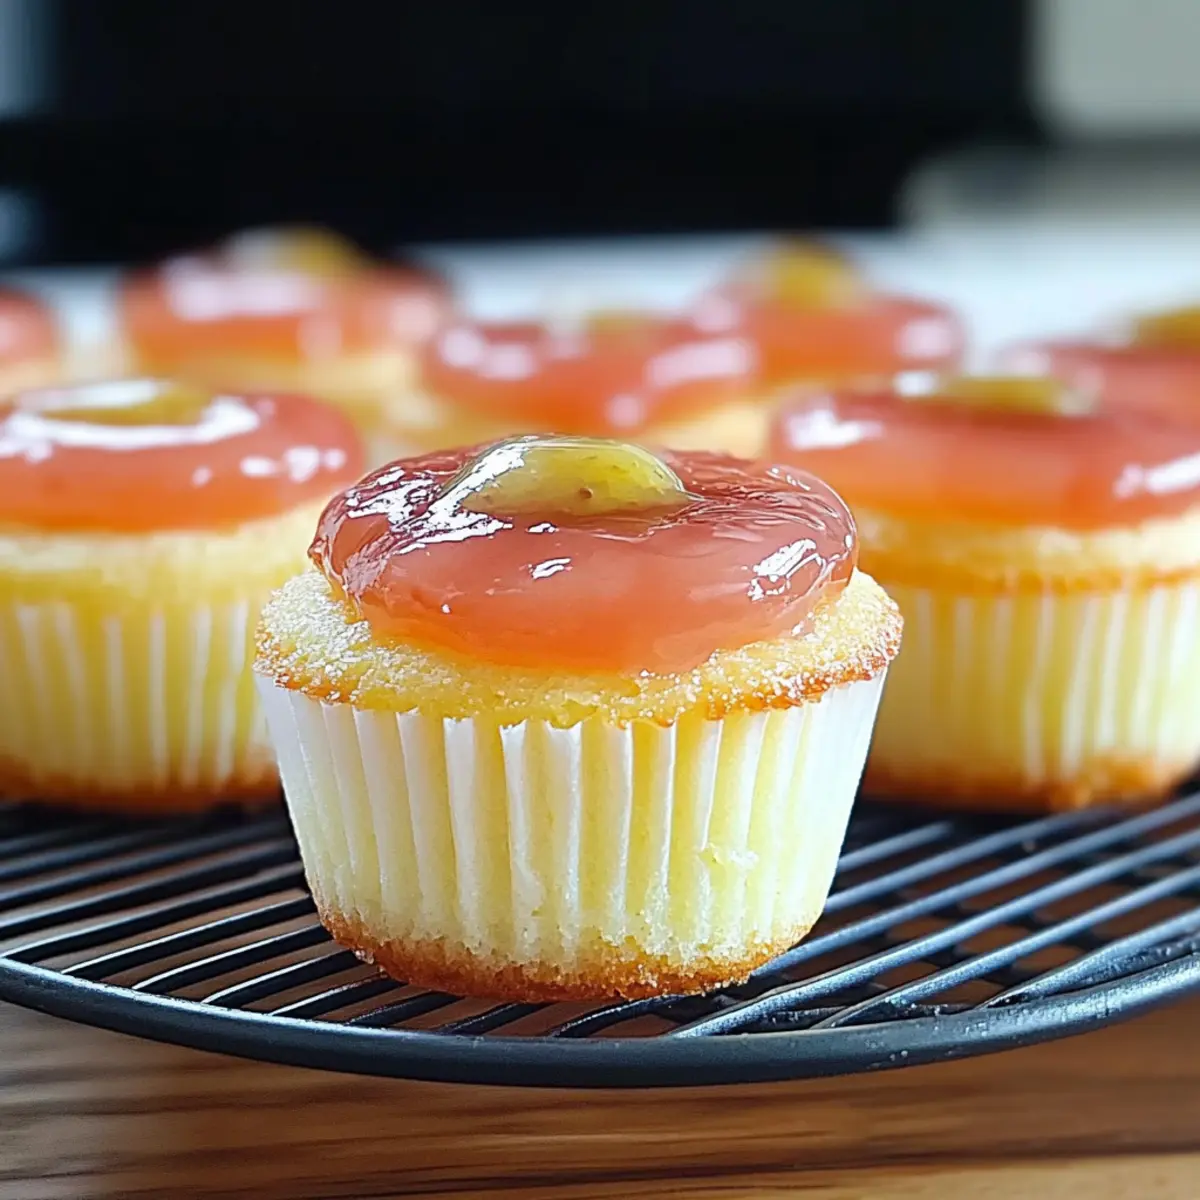
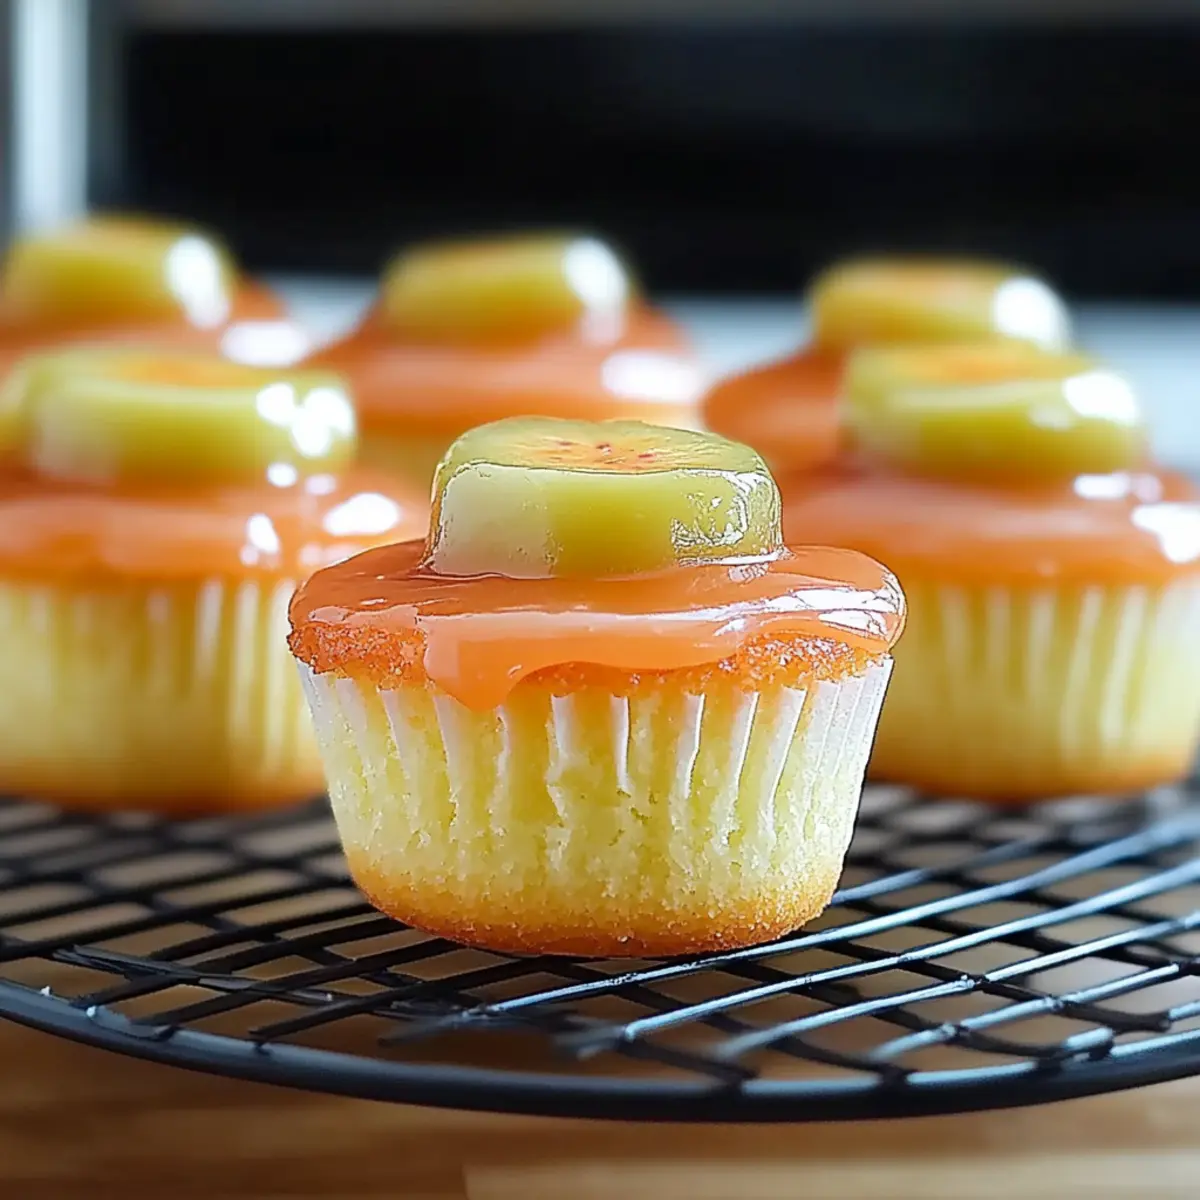
Finally, drizzle the cooled guava glaze over each mini cake, allowing the glossy finish to enhance their tropical charm. You can serve the Hawaiian Mini Guava Cakes immediately or keep them chilled in the refrigerator for later. The beautiful glaze makes these treats irresistible and ready for any occasion!

What to Serve with Hawaiian Mini Guava Cakes

Elevate your dessert experience by pairing these delightful treats with complementary dishes that enhance their tropical flavors.

  • Coconut Macaroons: These chewy coconut confections provide a sweet contrast with a delightful texture that matches the lightness of the cakes. Their rich flavor brings a tropical vibe to your dessert table.

  • Fresh Fruit Salad: A mix of pineapple, mango, and kiwi brightens the palate, balancing the sweetness of the mini cakes. This fresh element adds a refreshing crunch and enhances the overall tropical theme.

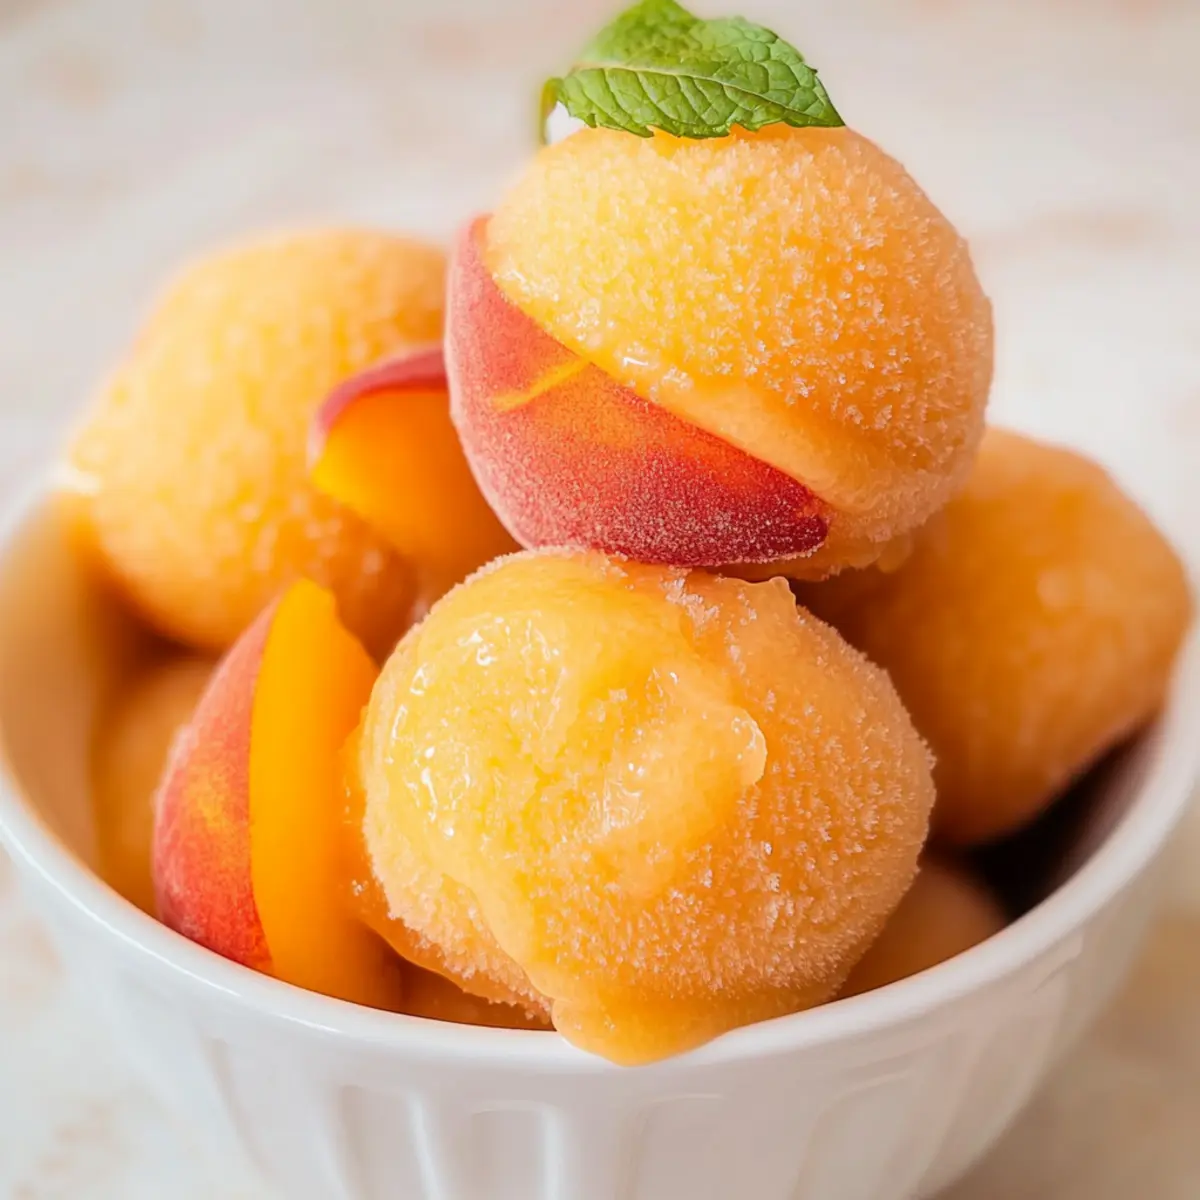
  • Mango Sorbet: Cool and creamy, this sorbet offers a refreshing finish after indulging in the guava cakes. The mango flavor harmonizes perfectly, creating a tropical symphony that transports you to a sunny beach.

  • Pineapple Upside-Down Cake: This classic dessert echoes tropical flavors with its caramelized pineapple and rich cake base. The nostalgic taste pairs beautifully with the lightness of the Hawaiian Mini Guava Cakes, creating a well-rounded dessert spread.

  • Mint Limeade: A refreshing beverage with zesty lime and fresh mint to cleanse the palate. This drink complements the sweetness of the cakes while keeping the tropical theme alive.

  • Whipped Cream Topping: Serve an extra dollop of lightly sweetened whipped cream alongside each mini cake for those who crave a creamy touch. It rounds out the dessert with its airy texture and adds a subtle sweetness.

  • Coconut Cream Pie: The rich, creamy filling and flaky crust of this pie will contrast nicely with the guava cakes, providing a delightful texture variety. Each bite will offer a taste of paradise.

  • Hibiscus Iced Tea: A floral and slightly tangy drink that pairs wonderfully with the tropical notes of the mini cakes. It’s a unique choice that adds a vibrant color to your gathering.

These pairings ensure your Hawaiian Mini Guava Cakes shine even brighter at your next gathering!

Expert Tips for Perfect Hawaiian Mini Guava Cakes

  • Room Temperature Ingredients: Make sure your eggs and cream cheese are at room temperature. This helps achieve a smoother batter and cream topping.

  • Don't Overfill Liners: Fill the cupcake liners only about one-third full; this allows the Hawaiian Mini Guava Cakes to rise without spilling over.

  • Cooling Time: Allow the cakes to cool completely on a wire rack before adding the cream topping. This prevents the cream from melting and ensures a nice presentation.

  • Glaze Thickness: Ensure your cornstarch and water mixture is well-combined before adding it to the boiling glaze. This avoids clumps and ensures a silky finish.

  • Chill Before Serving: After you’ve topped the mini cakes, refrigerate them for at least 30 minutes before serving. This helps the flavors meld and the topping set for a perfect bite!

How to Store and Freeze Hawaiian Mini Guava Cakes

Fridge: Store leftover Hawaiian Mini Guava Cakes in an airtight container for up to 3-4 days. This keeps them moist and fresh for your next tropical treat.

Freezer: To freeze, ensure the cakes are completely cooled. Wrap each cake securely in plastic wrap and place them in a zip-top freezer bag for up to 2 months.

Thawing: When ready to enjoy, remove from the freezer and let them thaw in the fridge overnight. This way, they'll maintain their delightful texture.

Reheating: If you prefer them warm, briefly microwave for about 10-15 seconds. Just make sure to keep an eye on them to prevent drying out!

Hawaiian Mini Guava Cakes Variations

Feel free to let your creativity flow with these delightful twists on Hawaiian Mini Guava Cakes!

  • Gluten-Free: Use a gluten-free cake mix for a tropical treat that caters to all dietary needs, maintaining that perfect flavor punch.
  • Coconut Delight: Add shredded coconut to the batter for added texture and a more pronounced coconut flavor. It brings the tropics even closer to home!
  • Fruity Surprise: Incorporate diced fresh pineapple or mango into the batter to enhance the tropical vibe and provide extra juiciness.
  • Sweetened Sour: Opt for cream cheese sweetened with honey or maple syrup instead of sugar for a natural sweetness and lovely depth of flavor.
  • Spicy Kick: Add a pinch of cayenne or chili powder to the glaze for a surprising yet delightful spicy flavor that complements the sweetness of the guava.
  • Nutty Crunch: Fold in finely chopped macadamia nuts for an irresistible crunch; a perfect nod to Hawaiian flavors.
  • Elegant Presentation: Top with sliced fresh fruit or edible flowers before serving for that eye-catching aesthetic, turning your cakes into a stunning centerpiece.
  • Rich Chocolate: Swirl in melted chocolate into the cream topping for a decadent chocolate-gauva experience that will leave your guests enchanted. Why not elevate this dessert alongside some scrumptious Ricotta Protein Pancakes for a brunch spread that’s sure to impress?

Explore these variations to create your own tropical masterpiece, and share your delicious creations with friends and family!

Make Ahead Options

These Hawaiian Mini Guava Cakes are a fantastic choice for meal prep, making your busy weeknights a breeze! You can prepare the cake base up to 24 hours in advance; simply bake and allow them to cool completely before storing them in an airtight container in the refrigerator. For the creamy topping, prepare it a day ahead as well and keep it chilled until you’re ready to spread it on. The guava glaze can also be made ahead and stored in the fridge for up to 3 days. When it’s time to serve, just assemble by topping each mini cake with the cream mixture and drizzling with the glaze. This way, you'll have flavorful tropical treats ready to impress your family and friends with minimal last-minute effort!

Hawaiian Mini Guava Cakes Recipe FAQs

What should I look for when selecting guava juice?
When selecting guava juice, look for 100% juice options without added sugars or preservatives. Fresh guava is a wonderful alternative; just puree it, strain to remove seeds, and use it in the same quantity as the juice for an extra fresh flavor.

How should I store leftover Hawaiian Mini Guava Cakes?
Store leftover Hawaiian Mini Guava Cakes in an airtight container in the refrigerator for 3-4 days. This will keep them moist and delicious. If you wish to extend their shelf life, consider freezing them instead.

Can I freeze Hawaiian Mini Guava Cakes?
Absolutely! To freeze, allow the cakes to cool completely. Wrap each cake tightly in plastic wrap, then place in a zip-top freezer bag, and store for up to 2 months. When ready to enjoy, simply thaw in the fridge overnight. For a warm treat, microwave briefly for 10-15 seconds.

What are some common troubleshooting tips for this recipe?
If your Hawaiian Mini Guava Cakes are too dry, make sure not to overbake them; check for doneness around the 19-minute mark. If they come out flat, it could be that you overfilled the liners, so stick to filling them one-third full next time!

Is there a gluten-free option for Hawaiian Mini Guava Cakes?
Yes! You can easily make them gluten-free by opting for a gluten-free cake mix instead of regular cake mix. Just ensure that all other ingredients, such as guava juice, are also gluten-free to keep this sweet treat safe for those with sensitivities.

Can I use something other than Cool Whip for the cream topping?
Certainly! If you prefer a fresher taste, feel free to substitute Cool Whip with freshly whipped cream. Just whip heavy cream until soft peaks form, then gently fold in sweetened cream cheese for a delightful homemade topping.

Hawaiian Mini Guava Cakes

Delightful Hawaiian Mini Guava Cakes for a Tropical Treat

These Hawaiian Mini Guava Cakes are sweet, tropical desserts that burst with flavor and are perfect for any gathering.
Print Recipe Pin Recipe
Prep Time 30 minutes mins
Cook Time 22 minutes mins
Cooling Time 30 minutes mins
Total Time 1 hour hr 22 minutes mins
Servings: 12 cakes
Course: Dessert
Cuisine: Hawaiian
Calories: 150
Ingredients Equipment Method Nutrition Notes

Ingredients
  

For the Cake
  • 1 box Strawberry Cake Mix can substitute with vanilla or coconut
  • 1 cup Guava Nectar/Juice or fresh guava, pureed and strained
  • 3 large Eggs room temperature
  • 1/3 cup Coconut Oil liquid; or substitute with vegetable or canola oil
For the Cream Topping
  • 6 oz Cream Cheese softened
  • 6 oz Cool Whip thawed; can substitute with freshly whipped cream
  • 1/4 cup Sugar adjust to taste
  • 1 tsp Vanilla Extract pure vanilla recommended
For the Glaze
  • 1/2 cup Sugar for glaze
  • 1/4 cup Cornstarch
  • 3 tbsp Water

Equipment

  • Cupcake pan
  • Mixing Bowl
  • Electric mixer
  • Saucepan
  • wire rack

Method
 

Step-by-Step Instructions
  1. Preheat your oven to 350°F (175°C) and line a cupcake pan with paper liners.
  2. In a large mixing bowl, combine the strawberry cake mix, guava juice, eggs, and melted coconut oil. Mix until smooth.
  3. Fill each cupcake liner about one-third full with the batter and bake for 19-22 minutes.
  4. Let the cakes cool in the pan for 5 minutes, then transfer to a wire rack to cool completely.
  5. For the glaze, combine guava juice and sugar in a saucepan; bring to a boil. Mix cornstarch with water, then add to the boiling mixture.
  6. In another bowl, beat cream cheese until fluffy, add sugar and vanilla, then fold in Cool Whip.
  7. Once cooled, spread the cream cheese topping over each cake, and refrigerate for 30 minutes.
  8. Drizzle the cooled guava glaze over each mini cake before serving.

Nutrition

Serving: 1cakeCalories: 150kcalCarbohydrates: 25gProtein: 2gFat: 5gSaturated Fat: 3gMonounsaturated Fat: 1gCholesterol: 40mgSodium: 200mgPotassium: 60mgSugar: 15gVitamin A: 200IUVitamin C: 2mgCalcium: 30mgIron: 0.5mg

Notes

Remember to use room temperature ingredients for a smoother batter and topping. Allow cakes to cool completely before adding the topping.

Tried this recipe?

Let us know how it was!

French Antilles Coconut Flan: Creamy Tropical Bliss Awaits

February 25, 2026 by Grace Snow Leave a Comment

As the warm tropical breeze dances through my kitchen, the sweet scent of coconuts fills the air, transporting me to the vibrant shores of the French Antilles. This French Antilles Coconut Flan, or Flan Coco, is my go-to dessert when I crave something light and refreshing. With its luscious layers of creamy coconut flan topped by a delightful crispy shredded coconut crust, it’s truly a slice of paradise on a plate. Plus, this gluten-free gem is not just delicious; it’s a make-ahead masterpiece that ensures you spend less time in the kitchen and more time enjoying your company. So, are you ready to whisk up a tropical escape right in your home?

Why is Coconut Flan So Irresistible?

Creamy Dreaminess: The rich coconut milk creates a velvety flan that melts in your mouth, offering a truly indulgent experience.

Tropical Escape: Each bite transports you to the sunny French Antilles, making it perfect for warm-weather gatherings or a cozy night in.

Make-Ahead Marvel: This dessert can be made a day in advance, giving you the freedom to enjoy your time without the rush.

Gluten-Free Delight: A dessert that everyone can enjoy, ensuring no one is left out at your table. For more gluten-free options, check out my Coconutty Beans Greens for a satisfying meal!

Versatile Variations: Feel free to customize with rum or fresh grated coconut, making it your own unique creation. It pairs beautifully with toasted coconut flakes, similar to my favorite Cherry Clafoutis French dessert!

French Antilles Coconut Flan Ingredients

For the Flan
• Sweetened Condensed Milk – Adds sweetness and creaminess; use a standard can (14oz/400ml).
• Coconut Milk – Provides a rich coconut flavor; opt for full-fat (1¼ cup / 300ml) for the best results.
• Large Eggs – Acts as a binder to create the flan's creamy texture.
• Vanilla Extract – Enhances flavor; can be substituted with the seeds from half a vanilla bean.
• Unsweetened Shredded Coconut – Adds texture and depth; remember to reserve some for garnish.

For the Caramel
• Sugar – Used to create a delicious, sweet syrup base; you'll need ½ cup (100g) for that perfect caramel layer.

This French Antilles Coconut Flan is not just a dessert; it's a sweet journey to a tropical paradise that you can create at home!

Step‑by‑Step Instructions for French Antilles Coconut Flan

Step 1: Prepare Caramel
In a saucepan, heat ½ cup of sugar over medium heat, allowing it to melt undisturbed until it turns golden and bubbly—this should take about 5-7 minutes. Once it reaches a deep amber color, quickly pour the caramel into an ungreased loaf pan, tilting to evenly coat the bottom. Set aside to harden while you prepare the flan mixture.

Step 2: Mix Flan Ingredients
In a large mixing bowl, whisk together one can of sweetened condensed milk, 1¼ cups of full-fat coconut milk, three large eggs, and 1 teaspoon of vanilla extract. Stir in ½ cup of unsweetened shredded coconut until well combined, creating a smooth and creamy mixture. This blend will give your French Antilles Coconut Flan its luscious texture.

Step 3: Bake in Water Bath
Carefully transfer the flan mixture into the prepared loaf pan over the cooled caramel. To bake, place the loaf pan into a larger baking dish. Fill the outer dish with hot water until it reaches halfway up the sides of the loaf pan. Bake at 350°F (180°C) for approximately 50-55 minutes, or until the top is golden and firm to the touch.

Step 4: Cool and Chill
Once baked, remove the flan from the oven and allow it to cool to room temperature for about 30 minutes. After it has cooled, cover it with plastic wrap and refrigerate for at least 3 hours, or ideally, overnight. This chilling time allows the French Antilles Coconut Flan to set fully, ensuring perfect slices.

Step 5: Unmold and Serve
To serve your delightful Coconut Flan, dip the bottom of the loaf pan in warm water for about 10 seconds to loosen the flan. Invert the pan onto a serving plate; tap gently to release. Garnish with the reserved shredded coconut, and watch as the caramel cascades over the smooth flan, creating a beautiful presentation that’s sure to impress!

What to Serve with French Antilles Coconut Flan

As you savor the creamy tropical notes of this flan, let’s create an unforgettable experience with delightful side dishes and beverages.

  • Tropical Fruit Salad: Bursting with fresh mango, pineapple, and passion fruit, this salad adds vibrant colors and flavors that complement the flan's richness. The juiciness of the fruit balances the creamy texture beautifully.

  • Toasted Coconut Ice Cream: A scoop of this creamy delight enhances the coconut experience while its coolness contrasts perfectly with the warmth of the flan. It's like a tropical vacation in each spoonful!

  • Citrus Sorbet: A refreshing, zesty sorbet helps cleanse the palate after indulging in the flan's sweet richness. Lemon or lime flavors add a bright touch that creates a harmonious balance with the dessert.

  • Lightly Sweetened Iced Tea: Brew some hibiscus or green tea and serve chilled for a colorful drink that echoes the flan's tropical essence. It’s a refreshing choice that completes a warm-weather meal without overpowering your dessert.

  • Caramelized Pineapple: Sautéing pineapple slices in brown sugar caramelizes their natural sugars, echoing the flan's caramel notes while adding a juicy, tangy twist. Serve warm on the side for an extra layer of flavor.

  • Chocolate Covered Espresso Beans: For an unexpected crunch and the perfect blend of sweetness and bitterness, these make for a delightful post-flan treat that pairs well with coffee. It’s an exciting finish to a tropical feast!

  • Coconut Chia Pudding: Easy to make ahead, this light and nutritious pudding can act as a small bite for anyone wanting another coconut experience. Its texture and taste will delight coconut lovers.

  • Complementary Coffee: A cup of freshly brewed coffee, perhaps with a hint of coconut milk, pairs beautifully with flan, providing a rich contrast and stimulating finish to your meal.

With these pairing options, your French Antilles Coconut Flan is bound to be the star of a memorable culinary experience!

Make Ahead Options

If you're looking to simplify your meal planning, this French Antilles Coconut Flan is your perfect make-ahead dessert! You can prepare the flan up to 24 hours in advance, allowing the flavors to marry beautifully. After baking, let it cool to room temperature, then cover it tightly with plastic wrap and refrigerate. This not only keeps it fresh but ensures that the flan sets perfectly. When you're ready to serve, just unmold and garnish with reserved shredded coconut for that stunning look. Trust me, it will taste just as delicious, providing the perfect tropical treat with minimal last-minute work. Enjoy your free time while impressing your guests!

Expert Tips for French Antilles Coconut Flan

• Caramel Clarity: Avoid stirring the sugar while it melts. Gently shake the pan instead to prevent crystallization and achieve a smooth caramel base.

• Flan Firmness: Check for firmness—your flan should feel set in the center. If it's wobbly, bake for a few extra minutes to avoid undercooking.

• Chill Time: Patience is key; allow the flan to chill for at least 4 hours or overnight for the best texture and flavor.

• Moisture Balance: Ensure the water bath maintains a steady level during baking. Too little can lead to dry flan, while too much may dilute your caramel.

• Presentation Tips: Use warm water to help release the flan easily from the pan. This ensures a beautiful, intact presentation when serving your French Antilles Coconut Flan.

How to Store and Freeze French Antilles Coconut Flan

Refrigerator: Store the flan in an airtight container in the fridge for up to 3 days. This maintains its creamy texture and rich flavors while ensuring it’s ready whenever you need a sweet treat.

Freezer: For longer storage, wrap the flan tightly in plastic wrap, then in aluminum foil. It can be frozen for up to 2 months. Thaw in the refrigerator overnight before serving.

Reheating: Gently warm individual slices in the microwave for 15-20 seconds if you prefer a warm dessert. Alternatively, enjoy it chilled for a refreshing taste of tropical bliss.

Make-Ahead Tip: The French Antilles Coconut Flan is an excellent make-ahead dessert, allowing you to prepare it a day in advance for any gathering, creating less stress on the day of serving.

French Antilles Coconut Flan Variations

Feel free to put your own spin on this delightful dessert to make it even more special!

  • Richer Flavor: Substitute coconut milk with coconut cream for an ultra-creamy texture and richer taste.
  • Adult Twist: Add a splash of dark rum into the flan mixture for a fragrant and flavorful kick.
  • Fresh Coconut: Swap out the shredded coconut for fresh grated coconut to enhance the texture and coconut essence.
  • Nutty Addition: Mix in a handful of toasted almonds or macadamia nuts for a crunchy surprise in each bite.
  • Vanilla Bean Upgrade: Use the seeds from half a vanilla bean instead of extract for a more luxurious flavor profile.
  • Chocolate Drizzle: Drizzle melted dark chocolate over the flan before serving to create a decadent treat that’s sure to impress.
  • Fruit Fusion: Top with fresh tropical fruits like mango or pineapple for a refreshing burst of flavor that brightens up the dish.
  • Spiced Delight: Incorporate a pinch of cinnamon or nutmeg into the flan mixture for a warm, aromatic note.

And don't forget, if you're looking for more delicious options, try pairing your Coconut Flan with my Coconutty Beans Greens for a complete tropical experience or serve alongside my exquisite Cherry Clafoutis French for dessert!

French Antilles Coconut Flan Recipe FAQs

What ripe ingredients should I pick for French Antilles Coconut Flan?
Absolutely! For the best flavor and texture, always choose high-quality coconut milk—look for full-fat varieties with no added preservatives. If you're using fresh coconuts or shredded coconut, opt for moist, plump pieces without dark spots. They should smell sweet and fragrant.

How should I store leftovers of French Antilles Coconut Flan?
You can store the flan in an airtight container in the refrigerator for up to 3 days. This keeps the creamy texture and rich flavors intact. It’s a great make-ahead dessert, allowing you to whip it up a day before your gathering!

Can I freeze French Antilles Coconut Flan?
Yes, you can! Wrap the flan tightly in plastic wrap, then seal it with aluminum foil. It can be frozen for up to 2 months. When you’re ready to enjoy, simply thaw it in the refrigerator overnight before serving. This way, you'll retain the delightful texture and flavor of this tropical treat.

What should I do if my flan doesn’t set properly?
No worries, it happens! If you find that your flan is wobbly or not set, you can return it to the oven for an additional 5-10 minutes. Make sure that the center feels firm to the touch. Check on it every few minutes to avoid overbaking. The water bath is also crucial; ensure it holds a steady level during baking for even cooking.

Is this French Antilles Coconut Flan suitable for those with dietary restrictions?
Certainly! This dessert is naturally gluten-free, making it perfect for gluten-sensitive guests. If you’re concerned about allergies, always double-check the labels on your ingredients, particularly the sweetened condensed milk and shredded coconut. Additionally, for less sweetness, you can reduce the volume of condensed milk to suit your taste or dietary needs.

Can I modify the ingredients in French Antilles Coconut Flan?
Very much! Feel free to substitute coconut milk with coconut cream for an even richer flan. You can also add a splash of rum or use fresh grated coconut for enhanced flavor and texture. Customize it to your heart's content, and it may even become your personal twist!

French Antilles Coconut Flan

French Antilles Coconut Flan: Creamy Tropical Bliss Awaits

This French Antilles Coconut Flan, a creamy dessert that captures tropical bliss, is a gluten-free delight perfect for gatherings.
Print Recipe Pin Recipe
Prep Time 15 minutes mins
Cook Time 55 minutes mins
Chilling Time 3 hours hrs
Total Time 4 hours hrs 10 minutes mins
Servings: 8 slices
Course: Dessert
Cuisine: French Antilles
Calories: 250
Ingredients Equipment Method Nutrition Notes

Ingredients
  

For the Flan
  • 1 can (14oz) Sweetened Condensed Milk Adds sweetness and creaminess
  • 1 1/4 cups Coconut Milk Use full-fat for best results
  • 3 large Eggs Acts as a binder
  • 1 teaspoon Vanilla Extract Enhances flavor; substitute with vanilla bean seeds
  • 1/2 cup Unsweetened Shredded Coconut Reserve some for garnish
For the Caramel
  • 1/2 cup Sugar Used to create caramel

Equipment

  • Loaf pan
  • Saucepan
  • Mixing Bowl
  • Baking Dish

Method
 

Step‑by‑Step Instructions
  1. In a saucepan, heat ½ cup of sugar over medium heat until it melts and turns golden, about 5-7 minutes. Pour into an ungreased loaf pan and let harden.
  2. Whisk together sweetened condensed milk, coconut milk, eggs, and vanilla extract in a large bowl. Stir in shredded coconut until combined.
  3. Transfer the flan mixture into the loaf pan over the cooled caramel. Bake in a water bath at 350°F (180°C) for 50-55 minutes.
  4. Let the flan cool for about 30 minutes, then refrigerate for at least 3 hours or ideally overnight.
  5. To serve, dip the loaf pan in warm water for 10 seconds, invert onto a plate, and garnish with reserved shredded coconut.

Nutrition

Serving: 1sliceCalories: 250kcalCarbohydrates: 35gProtein: 4gFat: 12gSaturated Fat: 10gCholesterol: 80mgSodium: 90mgPotassium: 140mgFiber: 1gSugar: 25gVitamin A: 500IUCalcium: 150mgIron: 0.5mg

Notes

This dessert is gluten-free and can be made a day in advance for convenience. Enhance with variations like rum or fresh grated coconut.

Tried this recipe?

Let us know how it was!

Moist Pineapple Carrot Cream Cake for Tropical Bliss

February 25, 2026 by Grace Snow Leave a Comment

As the warm, tropical breeze dances through the palms, I can’t help but smile thinking about the delight of baking a Hawaiian Pineapple Carrot Cream Cake. This easy-to-make dessert showcases the perfect marriage of sweet, juicy pineapple and freshly grated carrots, creating a moist cake that feels like a bite of paradise. What I love most about this recipe is its beginner-friendly nature—anyone can master this cake while impressing friends and family alike. Plus, it’s versatile enough to be transformed into cupcakes for that special gathering! Are you ready to devour a slice of sunshine? Let’s get baking!

Why is this cake a crowd-pleaser?

Moisture is key! The combination of crushed pineapple and freshly grated carrots guarantees a wonderfully moist cake that melts in your mouth.

Effortless to prepare—perfect for beginner bakers looking to make a delicious dessert without stress.

Versatile transformation from a luscious layer cake to delightful cupcakes means this recipe can fit any occasion seamlessly.

Tropical bliss radiates from each bite, making it a delightful surprise at parties or family gatherings, just like our Peaches Cream Cookies.

Serious WOW-factor with its beautiful presentation and delicious cream cheese frosting that everyone loves. This cake is sure to be a new favorite!

Pineapple Carrot Cream Cake Ingredients

• Dive into this tropical delight with essential ingredients that make each slice unforgettable!

For the Cake

  • All-Purpose Flour – Provides structure; ensure sifting to aerate for a lighter cake.
  • Baking Soda – Helps the cake rise; don't substitute with baking powder.
  • Baking Powder – Works with baking soda for leavening; ensure it's fresh for best results.
  • Ground Cinnamon – Adds warmth and spice flavor; can substitute with nutmeg for a different spice profile.
  • Salt – Enhances flavor; essential for balancing sweetness—do not omit.
  • Fresh Carrots – Main ingredient, adds moisture and sweetness; use freshly grated for best texture.
  • Crushed Pineapple – Adds tropical sweetness and moisture; use canned but drain well to avoid excess liquid.
  • Eggs – Provides richness and binds the ingredients; room temperature eggs yield better emulsion.
  • Vegetable Oil – Keeps the cake moist; can use melted coconut oil for a tropical flavor.

For the Frosting

  • Cream Cheese – Adds tanginess to the frosting; can replace with mascarpone for a different taste.
  • Powdered Sugar – Sweetens and thickens the frosting; adjust quantity based on desired sweetness.

Step‑by‑Step Instructions for Pineapple Carrot Cream Cake

Step 1: Preheat the Oven
Begin by preheating your oven to 350°F (175°C). Prepare two 9-inch round cake pans by greasing them with butter or oil, then dusting with flour to prevent sticking. Alternatively, you can line the bottoms with parchment paper for easier release. This ensures your Pineapple Carrot Cream Cake will bake evenly and smoothly without any hassle during serving.

Step 2: Mix the Dry Ingredients
In a large mixing bowl, whisk together the all-purpose flour, baking soda, baking powder, ground cinnamon, and salt until combined. This dry blend should be aerated and homogeneous, creating a fluffy base for your cake. Set the mixture aside, allowing the baking agents to mingle while you prepare the wet ingredients for the Pineapple Carrot Cream Cake.

Step 3: Combine the Wet Ingredients
In another large bowl, combine the freshly grated carrots, drained crushed pineapple, room-temperature eggs, and vegetable oil. Mix these ingredients well using a spatula or whisk until fully integrated. This vibrant mixture adds moisture and sweetness to your cake while ensuring the flavors infuse beautifully, making each bite a tropical delight.

Step 4: Combine Wet and Dry Ingredients
Slowly add the dry ingredient mixture to the wet ingredients, gently stirring until just combined. Be careful not to overmix, as this can lead to a denser cake texture. Your batter should remain slightly lumpy, creating a light and fluffy crumb in your Pineapple Carrot Cream Cake once baked—this is the key to moisture and tenderness!

Step 5: Bake the Cakes
Evenly pour the batter into the prepared cake pans, smoothing the tops with a spatula. Place them in the preheated oven and bake for 25-30 minutes, or until a toothpick inserted into the center comes out clean. Keep an eye on the cakes as they bake, and look for a golden-brown color on the tops to signal they are ready.

Step 6: Cool the Cakes
Once baked, remove the cakes from the oven and allow them to cool in the pans for about 10 minutes. This helps them set before transferring to a wire rack. Gently run a knife around the edges to loosen if needed, then flip them out carefully to prevent breakage. Allow the cakes to cool completely on the rack while you prepare the frosting.

Step 7: Prepare the Cream Cheese Frosting
In a mixing bowl, combine the chilled cream cheese and powdered sugar. Using a hand mixer or stand mixer, beat them together until smooth and creamy, about 3-4 minutes. The frosting should be light and fluffy, ready to generously spread over your cooled cakes, adding a tangy contrast to the sweet, tropical flavors of the Pineapple Carrot Cream Cake.

Step 8: Frost the Cake and Serve
Once the cakes are fully cooled, place one layer on a serving plate and spread a generous amount of cream cheese frosting on top. Gently place the second layer on top and frost the entire cake, smoothing the frosting for a beautiful finish. Slice, serve, and enjoy your delightful Pineapple Carrot Cream Cake with friends and family for a truly tropical treat!

What to Serve with Pineapple Carrot Cream Cake

Imagine the sweet aroma of fresh pineapples and warm spices mingling in your kitchen as you create the perfect meal alongside this tropical delight.

  • Tropical Fruit Salad: A colorful medley of fresh fruits balances the cake's sweetness while adding a refreshing crunch.

  • Vanilla Ice Cream: Creamy vanilla ice cream complements the rich cream cheese frosting, creating an indulgent dessert experience.

  • Coconut Whipped Cream: Light and airy, this topping enhances the tropical vibes while keeping things light and fluffy.

  • Spiced Honey Glazed Carrots: Roasting carrots with honey and spices echoes the cake's flavors, providing a warm side dish that delights the palate.

  • Ginger Lemonade: A zesty twist on a classic drink, this refreshing beverage pairs beautifully with the tropical notes of the cake.

  • Chocolate Dipped Pineapple: For a decadent dessert platter, these treats enhance the cake’s pineapple notes while providing a contrast in texture.

  • Pineapple Coconut Smoothie: Blend this vibrant drink with coconut milk for a creamy, flavorful sip that ties seamlessly into the cake's tropical theme.

Let your imagination run wild and enjoy these delightful pairings that will elevate your Pineapple Carrot Cream Cake experience!

How to Store and Freeze Pineapple Carrot Cream Cake

Fridge: Store leftover cake in an airtight container in the refrigerator for up to 5 days to keep it fresh and moist.

Freezer: For longer storage, wrap the cake tightly in plastic wrap, then foil, and freeze for up to 3 months. This keeps the flavors locked in!

Thawing: When ready to enjoy, remove the cake from the freezer and let it thaw in the fridge overnight. Frost the cake after it's completely defrosted for the best texture.

Reheating: If you'd like to warm up individual slices, you can microwave them for about 10-15 seconds. Enjoy your Pineapple Carrot Cream Cake with a little extra cream cheese frosting for a delightful treat!

Make Ahead Options

These Hawaiian Pineapple Carrot Cream Cakes are perfect for meal prep enthusiasts! You can prepare the batter up to 24 hours in advance by mixing the wet and dry ingredients, then refrigerate it to maintain freshness. To prevent browning from the carrots, tightly cover the bowl with plastic wrap or a lid. Additionally, the cakes can be baked and cooled up to 3 days ahead of time; simply wrap each cake layer in plastic wrap and seal in an airtight container. When ready to serve, frost them with the cream cheese frosting—just whip it until smooth if it has been chilled. This way, you’ll enjoy a delightful, moist Pineapple Carrot Cream Cake with minimal effort!

Pineapple Carrot Cream Cake Variations

Feel free to customize your tropical masterpiece with these delightful twists and substitutions!

  • Vegan Version: Use flaxseed meal mixed with water instead of eggs, and choose a plant-based cream cheese for frosting.
    For a vibrant, vegan-friendly cake, this twist is perfect, allowing everyone to enjoy a slice.

  • Gluten-Free: Swap all-purpose flour with a gluten-free blend, ensuring your baking soda and powder are gluten-free.
    This way, your cake can still shine, delivering that moist texture without compromising flavor.

  • Coconut Twist: Add shredded coconut to the batter for extra tropical flavor and texture.
    This delightful enhancement brings a touch of island paradise to each bite, especially when combined with coconut oil.

  • Pineapple Coconut Layer Cake: Bake in three layers and incorporate a layer of coconut cream in between.
    It's like a mini vacation on your plate, light and airy, making it a stunning centerpiece for gatherings.

  • Spicy Kick: Add a pinch of cayenne pepper to the dry ingredients for a surprising heat.
    This unexpected twist creates a delicious contrast to the sweetness, perfect for adventurous palates.

  • Cupcakes: Transform the batter into cupcakes, baking for 18-20 minutes instead of in cake pans.
    These cute, portable treats are perfect for parties and picnics, letting everyone enjoy a bite of paradise!

  • Chocolate Drizzle: Melt dark chocolate and drizzle over the frosted cake for a decadent finish.
    This sweet addition enhances both flavor and presentation, making your Pineapple Carrot Cream Cake the talk of the town.

  • Serving Suggestion: Pair with a scoop of vanilla ice cream or a dollop of whipped cream for an extra creamy delight.
    A light, refreshing addition that provides the perfect cooling balance to the tropical flavors, making every bite a true treat!

Feel free to explore these delightful options as you whip up this delightful cake. And if you're in the mood for more tropical sweetness, don’t forget to check out the irresistible Vegan Cacao Cream or our decadent Chocolate Pudding Cake!

Expert Tips for Baking Pineapple Carrot Cream Cake

  • Avoid Overmixing: Mix your batter just until combined to prevent a dense cake. This helps maintain the moist texture of the Pineapple Carrot Cream Cake.

  • Room Temperature Eggs: Make sure your eggs are at room temperature for better emulsion. This will result in a fluffier cake, elevating the tropical flavors.

  • Drain the Pineapple: Always drain the crushed pineapple thoroughly before adding it to the batter. Excess liquid can make the cake soggy, detracting from its deliciousness.

  • Sift Your Flour: Sifting your all-purpose flour aerates it, leading to a lighter texture. Don’t skip this step for the best results with your cake.

  • Chill Your Frosting: Allow your cream cheese frosting to chill for about 15 minutes before spreading. This makes it easier to apply and helps create a smooth finish.

Pineapple Carrot Cream Cake Recipe FAQs

How do I choose the right pineapples for this cake?
Absolutely! When selecting crushed pineapple, I recommend opting for canned varieties as they are more convenient and consistent in sweetness. Look for cans labeled "in juice" rather than "in syrup" to avoid unnecessary added sugars. Drain well before adding to your mix to prevent excess moisture, which could lead to a soggy cake.

How should I store the leftover Pineapple Carrot Cream Cake?
Store your leftover cake in an airtight container in the refrigerator for up to 5 days. If you want to enjoy it later, it's best to freeze it. Wrap the cooled cake tightly in plastic wrap, followed by aluminum foil, to maintain optimal moisture and flavor, and freeze for up to 3 months.

Can I freeze Pineapple Carrot Cream Cake?
Yes, indeed! To freeze your cake, ensure it’s completely cooled. Wrap individual slices or the whole cake in plastic wrap, then place it in a freezer-safe bag or container. This prevents freezer burn. When you're ready to enjoy, simply let it thaw in the fridge overnight, then frost it just before serving for the best texture.

What do I do if my cake sinks in the middle?
Very common! If your Hawaiian Pineapple Carrot Cream Cake sinks in the center, it may be due to overmixing the batter or not baking it long enough. To avoid this, mix your ingredients just until combined and test for doneness with a toothpick. It should come out clean when gently inserted in the center!

Is this cake suitable for those with dietary restrictions?
For sure! If you have dietary concerns, there are easy adaptations. To make it vegan, substitute eggs with flaxseed meal (1 tablespoon flaxseed meal + 3 tablespoons water = 1 egg) and use plant-based cream cheese for the frosting. Also, make sure to confirm all your other ingredients, especially the flour and baking powder, are certified gluten-free if necessary.

Can I turn this cake into cupcakes?
Absolutely! Transforming this delightful Pineapple Carrot Cream Cake into cupcakes is a breeze. Simply pour the batter into a lined muffin tin, filling each cup about two-thirds full. Bake for 18-20 minutes, or until a toothpick inserted comes out clean. They’ll make adorable and portable treats for any occasion!

Pineapple Carrot Cream Cake

Moist Pineapple Carrot Cream Cake for Tropical Bliss

Indulge in the tropical flavors of Pineapple Carrot Cream Cake, a moist and delightful dessert perfect for any occasion.
Print Recipe Pin Recipe
Prep Time 30 minutes mins
Cook Time 30 minutes mins
Cooling Time 10 minutes mins
Total Time 1 hour hr 10 minutes mins
Servings: 10 slices
Course: Dessert
Cuisine: Hawaiian
Calories: 350
Ingredients Equipment Method Nutrition Notes

Ingredients
  

For the Cake
  • 2 cups All-Purpose Flour Ensure sifting to aerate for a lighter cake.
  • 1 teaspoon Baking Soda Helps the cake rise; don't substitute with baking powder.
  • 1 teaspoon Baking Powder Ensure it's fresh for best results.
  • 1 teaspoon Ground Cinnamon Can substitute with nutmeg for a different spice profile.
  • 1/2 teaspoon Salt Essential for balancing sweetness—do not omit.
  • 2 cups Fresh Carrots Use freshly grated for best texture.
  • 1 cup Crushed Pineapple Use canned but drain well to avoid excess liquid.
  • 3 large Eggs Room temperature eggs yield better emulsion.
  • 1 cup Vegetable Oil Can use melted coconut oil for a tropical flavor.
For the Frosting
  • 8 ounces Cream Cheese Can replace with mascarpone for a different taste.
  • 2 cups Powdered Sugar Adjust quantity based on desired sweetness.

Equipment

  • Mixing bowls
  • hand mixer
  • measuring cups
  • Measuring Spoons
  • Spatula
  • 9-inch Round Cake Pans

Method
 

Step-by-Step Instructions for Pineapple Carrot Cream Cake
  1. Preheat your oven to 350°F (175°C). Prepare two 9-inch round cake pans by greasing them with butter or oil, then dusting with flour.
  2. In a large mixing bowl, whisk together the all-purpose flour, baking soda, baking powder, ground cinnamon, and salt until combined.
  3. In another bowl, combine the freshly grated carrots, drained crushed pineapple, room-temperature eggs, and vegetable oil. Mix well.
  4. Slowly add the dry ingredients to the wet ingredients, stirring until just combined.
  5. Evenly pour the batter into the prepared cake pans and bake for 25-30 minutes until a toothpick inserted in the center comes out clean.
  6. Remove the cakes from the oven and allow to cool in the pans for about 10 minutes before transferring to a wire rack.
  7. In a mixing bowl, combine the chilled cream cheese and powdered sugar. Beat until smooth and creamy.
  8. Once the cakes are cooled, spread frosting on the first layer, place the second layer on top, and frost the entire cake.

Nutrition

Serving: 1sliceCalories: 350kcalCarbohydrates: 55gProtein: 3gFat: 14gSaturated Fat: 4gPolyunsaturated Fat: 0.5gMonounsaturated Fat: 8gCholesterol: 50mgSodium: 280mgPotassium: 180mgFiber: 1gSugar: 30gVitamin A: 1800IUVitamin C: 5mgCalcium: 40mgIron: 0.5mg

Notes

Ensure to drain the crushed pineapple thoroughly before adding it to the batter to avoid excess moisture.

Tried this recipe?

Let us know how it was!

Decadent Brownie-Stuffed Chocolate Chip Cookies to Indulge In

February 25, 2026 by Grace Snow Leave a Comment

It’s that moment when you open the oven door, and the warm, buttery aroma of baking cookies wraps around you like a cozy blanket. Today, I’m excited to share my recipe for Brownie-Stuffed Chocolate Chip Cookies, a perfect blend of nostalgia and indulgence that will make your sweet tooth sing. With just one bite, you'll experience the delightful contrast of a soft, golden cookie embracing a fudgy brownie center, creating a truly unforgettable treat. Whether you're a seasoned chef or a beginner, this recipe is an effortless triumph that requires minimal prep time and offers the ultimate crowd-pleaser for any gathering. So, who’s ready to elevate their dessert game and take a trip down sweet memory lane with me? Let's dive into this delicious adventure together!

Why are These Cookies a Must-Try?

Irresistible Flavor: The combination of chocolate chip cookies and fudgy brownies creates an explosion of taste that satisfies every sweet craving.

Effortless Indulgence: You'll whip these together in no time, making them perfect for busy days or spontaneous cravings.

Crowd-Pleaser: Whether at a party or a bake sale, these cookies win over everyone’s heart – and taste buds!

Customizable Delight: Feel free to add your favorite nuts or drizzles to personalize each batch; try adding walnuts for crunch, or topping with a sprinkle of sea salt.

Perfect for Sharing: These decadent treats make lovely gifts – pair with a scoop of vanilla ice cream for ultimate enjoyment and to impress friends and family!

As you embark on this baking adventure, keep in mind similar delights like Matcha Cookies Soft or Thumbprint Cookies Melt. Happy baking!

Brownie-Stuffed Chocolate Chip Cookies Ingredients

For the Cookie Dough
• All-purpose flour – Provides structure; can be substituted with gluten-free flour for a gluten-free option.
• Baking soda – Acts as a leavening agent; make sure it’s fresh for the best rise.
• Salt – Enhances the flavor of the cookies; try sea salt for a gourmet touch.
• Unsalted butter – Adds richness and moisture; consider coconut oil for a dairy-free version.
• Brown sugar – Gives sweetness and chewiness; can be swapped with white sugar for a lighter flavor.
• Granulated sugar – For sweetness and texture; coconut sugar can be a healthier alternative.
• Eggs – Serves as a binding agent; use flax eggs for a vegan option.
• Vanilla extract – Provides flavor; opt for pure vanilla extract for the best taste.
• Chocolate chips – Adds flavor and texture; substitute with white chocolate or butterscotch chips for variety.

For the Brownie Center
• Brownies (prepared) – Creates a fudgy center; use homemade or store-bought brownies based on your taste preference.

These Brownie-Stuffed Chocolate Chip Cookies are sure to become a new favorite! Enjoy diving into this delightful recipe and savoring every indulgent bite.

Step‑by‑Step Instructions for Brownie-Stuffed Chocolate Chip Cookies

Step 1: Preheat the Oven
Begin by preheating your oven to 350°F (175°C). This ensures that your Brownie-Stuffed Chocolate Chip Cookies bake evenly and achieve that golden-brown hue. While the oven is heating, take a moment to gather all your ingredients and equipment, including mixing bowls, a whisk, and a baking sheet lined with parchment paper.

Step 2: Mix the Dry Ingredients
In a medium bowl, whisk together the all-purpose flour, baking soda, and salt until well combined. This step is crucial as it helps to evenly distribute the leavening agent and the salt, enhancing the flavor of your cookies. Set this mixture aside while you work on the wet ingredients to ensure a smooth cookie dough later on.

Step 3: Cream the Sugars and Butter
In a large mixing bowl, cream together the unsalted butter, brown sugar, and granulated sugar using an electric mixer on medium speed until the mixture becomes light and fluffy, about 2-3 minutes. The creamy texture signifies that the sugars are well incorporated, which is key for the rich taste of your Brownie-Stuffed Chocolate Chip Cookies.

Step 4: Incorporate Eggs and Vanilla
Add the eggs and vanilla extract to the creamed butter and sugars. Mix until everything is combined and smooth, about 1-2 minutes. This mixture will create a beautiful, rich base for your cookies, ensuring they are both chewy and soft. Make sure to scrape down the sides of the bowl as needed to incorporate all the ingredients.

Step 5: Combine Wet and Dry Ingredients
Gradually add the dry ingredient mixture into the wet mixture, mixing until just incorporated. Be careful not to overmix; you want to maintain a light texture in your Brownie-Stuffed Chocolate Chip Cookies. The dough should come together nicely, forming a cohesive mass that holds its shape.

Step 6: Form the Cookie Dough
Scoop tablespoon-sized portions of the cookie dough and flatten each scoop slightly in your palm. Place a small piece of brownie in the center of each dough portion, then carefully fold the dough over the brownie, sealing it inside. This creates a delightful surprise in each cookie, ensuring that fudgy goodness awaits with every bite.

Step 7: Arrange on Baking Sheet
Place the stuffed cookies onto the prepared baking sheet, spacing them about 2 inches apart to allow for spreading. You should see beautiful, round dough balls ready to be baked. If you like, you can sprinkle a few extra chocolate chips on top for an added chocolatey touch before baking.

Step 8: Bake the Cookies
Bake in the preheated oven for 12-15 minutes, or until the edges are golden and the centers appear slightly underbaked. This will help maintain a gooey brownie center surrounded by soft cookie dough. Trust your nose—the delightful aroma will fill your kitchen, signaling they are almost done.

Step 9: Cool and Enjoy
Once baked, let the cookies cool on the baking sheet for 5 minutes before transferring them to a wire rack to cool completely. This cooling period allows the cookies to firm up while still retaining a soft, warm interior. Enjoy these Brownie-Stuffed Chocolate Chip Cookies warm, perhaps with a scoop of ice cream for an indulgent treat!

Make Ahead Options

These Brownie-Stuffed Chocolate Chip Cookies are a dream for busy home cooks looking to save time! You can prepare the cookie dough and chill it in the refrigerator for up to 24 hours to help enhance the flavors. Simply scoop and stuff the cookies, then cover and refrigerate until ready to bake. Additionally, you can prepare the brownie centers in advance; just ensure they are chilled before using them in the cookies to maintain their shape. When you’re ready to enjoy these decadent treats, bake them straight from the fridge for about 12-15 minutes. This way, you'll have gooey, indulgent cookies in no time!

What to Serve with Brownie-Stuffed Chocolate Chip Cookies

Indulging in these cookies is just the beginning; elevate your dessert experience by pairing them with these delightful companions.

  • Vanilla Ice Cream: The classic pairing that adds a creamy, cold contrast to the warm, gooey cookies. A scoop of vanilla ice cream will enhance every rich, chocolatey bite.

  • Fresh Berries: Bright, tart berries like raspberries or strawberries offer a refreshing balance to the decadent sweetness of the cookies, creating a delightful mix of flavors.

  • Milkshake: A luscious chocolate or vanilla milkshake serves as a dreamy beverage counterpart, making each mouthful of cookie even more satisfying and indulgent.

  • Chocolate Ganache: Drizzling a rich chocolate ganache over each cookie turns an already indulgent treat into a true extravagance. The silky texture perfectly complements the chewy cookie and brownie layers.

  • Almond Milk: For a lighter beverage option, chilled almond milk adds a subtle nutty flavor that pairs beautifully with the chocolate without overpowering it.

  • Coffee: A warm cup of coffee or espresso brings out the deep flavors of the brownies and enhances the sweet notes of the cookies, making it a perfect adult treat.

  • Caramel Sauce: Drizzling warm caramel sauce on top elevates your dessert into indulgent territory, adding a rich sweetness and a touch of decadence.

These pairings are designed to bring texture, flavor, and warmth into your dessert experience, making each moment even more special.

Expert Tips for Brownie-Stuffed Chocolate Chip Cookies

Chill the Brownies: Ensure your brownies are chilled before stuffing them into the cookie dough. This helps keep their shape during baking.

Mind the Bake Time: Avoid over-baking; cookies should remain soft in the center for the ideal texture. Trust your instincts—slightly underbaked is better!

Use Parchment Paper: Line your baking sheet with parchment paper to prevent sticking and promote even baking for all your Brownie-Stuffed Chocolate Chip Cookies.

Portion Control: Scoop tablespoon-sized amounts for even baking and consistency; larger portions may not cook through evenly.

Experiment with Mix-Ins: Don’t hesitate to customize! Add nuts or flavored extracts to the dough for a unique twist that complements the brownie filling.

Brownie-Stuffed Chocolate Chip Cookies Variations

Feel free to let your creativity shine with these delicious twists on the classic recipe!

  • Nuts: Add chopped walnuts or pecans to the brownie filling for a delightful crunch that contrasts with the softness of the cookies. It’s a wonderful way to elevate the texture!

  • Flavored Extracts: Experiment with a few drops of almond or hazelnut extract in the cookie dough. This will introduce an unexpected depth of flavor that adds an exciting kick to each bite.

  • Ice Cream Sandwich: Once the cookies are baked and cooled, sandwich a scoop of your favorite ice cream between two cookies. Imagine the bliss when you bite into a soft cookie surrounding creamy ice cream!

  • Chocolate Ganache Drizzle: After baking, drizzle warm chocolate ganache over the cookies for an extra layer of indulgence. The chocolatey richness will take these treats to dizzying heights!

  • Sea Salt Finish: Sprinkle a pinch of sea salt on the top of each cookie before baking. This simple step brings out the sweetness and enhances the overall flavor profile, making each morsel even more tempting.

  • Spicy Kick: Add a dash of cinnamon or cayenne pepper to the cookie dough for a surprising flavor twist that blends beautifully with chocolate. It’s a fun way to wake up your taste buds!

  • Swirled Brownies: Instead of cubes, swirl brownie batter into the cookie dough for a marbled effect. This stunning presentation is both eye-catching and scrumptious!

Feel inspired by these variations? You might also love the delicious flavor profiles found in Eggnog Cookies Soft or the classic charm of German Chocolate Poke. Enjoy experimenting!

How to Store and Freeze Brownie-Stuffed Chocolate Chip Cookies

Room Temperature: Store cookies in an airtight container at room temperature for up to 5 days to maintain their softness and flavor.

Fridge: For longer freshness, you can refrigerate the cookies in an airtight container for up to 1 week, though they may lose some of their original texture.

Freezer: These delightful Brownie-Stuffed Chocolate Chip Cookies can be frozen for up to 3 months. Place them in a single layer in a freezer-safe bag, separating layers with parchment paper.

Reheating: To enjoy warm cookies, reheat frozen cookies in a 350°F (175°C) oven for about 10 minutes, or until warmed through.

Brownie-Stuffed Chocolate Chip Cookies Recipe FAQs

How do I choose the right brownies for the filling?
I recommend using brownies that are fudgy and rich for the best experience! You can use homemade brownies or store-bought ones; just make sure they are chilled before cutting them into small pieces. This helps maintain their shape when stuffing into the cookie dough.

How should I store leftover cookies?
Store your Brownie-Stuffed Chocolate Chip Cookies in an airtight container at room temperature for up to 5 days. If you prefer to keep them even longer, you can refrigerate them for up to a week, but note that they may lose a bit of their original softness.

Can I freeze these cookies?
Absolutely! These cookies can be frozen for up to 3 months. Here’s how: Place them in a single layer on a baking sheet, freeze until solid, then transfer to a freezer-safe bag, separating layers with parchment paper. When you're ready to enjoy them, reheat in a preheated oven at 350°F (175°C) for about 10 minutes.

What if my cookie dough is too sticky?
If you find your cookie dough is too sticky to handle, you can refrigerate it for about 30 minutes to help firm it up. If it's still challenging, try adding a little extra flour, a tablespoon at a time, until the dough is workable.

Are these cookies safe for those with allergies?
These Brownie-Stuffed Chocolate Chip Cookies contain common allergens like gluten, dairy, and eggs. For those with dietary restrictions, you can use gluten-free flour, coconut oil for a dairy-free option, and flax eggs for a vegan version. Always check ingredient labels to avoid any specific allergens.

What do I do if the cookies spread too much while baking?
If your cookies spread excessively, it may be due to warm butter in the dough or too much moisture. Try chilling the cookie dough for 30 minutes before baking to help them maintain their shape. Additionally, ensure that you are using the correct measurements for your ingredients.

Brownie-Stuffed Chocolate Chip Cookies

Decadent Brownie-Stuffed Chocolate Chip Cookies to Indulge In

These Brownie-Stuffed Chocolate Chip Cookies combine rich flavors that will satisfy every sweet craving.
Print Recipe Pin Recipe
Prep Time 15 minutes mins
Cook Time 15 minutes mins
Cooling Time 5 minutes mins
Total Time 35 minutes mins
Servings: 12 cookies
Course: Dessert
Cuisine: American
Calories: 250
Ingredients Equipment Method Nutrition Notes

Ingredients
  

For the Cookie Dough
  • 2 cups all-purpose flour can be substituted with gluten-free flour
  • 1 teaspoon baking soda make sure it’s fresh
  • 0.5 teaspoon salt try sea salt for a gourmet touch
  • 0.75 cup unsalted butter consider coconut oil for a dairy-free version
  • 0.5 cup brown sugar can be swapped with white sugar
  • 0.5 cup granulated sugar coconut sugar can be a healthier alternative
  • 2 large eggs use flax eggs for a vegan option
  • 1 teaspoon vanilla extract opt for pure vanilla extract
  • 1 cup chocolate chips substitute with white chocolate or butterscotch chips for variety
For the Brownie Center
  • 2 cups brownies (prepared) use homemade or store-bought

Equipment

  • Mixing bowls
  • Whisk
  • Baking Sheet
  • Parchment Paper
  • Electric mixer

Method
 

Step-by-Step Instructions
  1. Preheat your oven to 350°F (175°C).
  2. In a medium bowl, whisk together the all-purpose flour, baking soda, and salt until well combined.
  3. In a large mixing bowl, cream together the unsalted butter, brown sugar, and granulated sugar using an electric mixer until light and fluffy.
  4. Add the eggs and vanilla extract to the creamed mixture and mix until combined and smooth.
  5. Gradually add the dry ingredient mixture into the wet mixture, mixing until just incorporated.
  6. Scoop tablespoon-sized portions of the cookie dough, flatten each scoop slightly, place a small piece of brownie in the center, and fold the dough over the brownie.
  7. Place the stuffed cookies onto the prepared baking sheet, spacing them about 2 inches apart.
  8. Bake in the preheated oven for 12-15 minutes, or until the edges are golden and the centers are slightly underbaked.
  9. Let the cookies cool on the baking sheet for 5 minutes before transferring them to a wire rack to cool completely.

Nutrition

Serving: 1cookieCalories: 250kcalCarbohydrates: 30gProtein: 3gFat: 12gSaturated Fat: 7gPolyunsaturated Fat: 1gMonounsaturated Fat: 4gCholesterol: 30mgSodium: 150mgPotassium: 100mgFiber: 1gSugar: 15gVitamin A: 200IUCalcium: 30mgIron: 1mg

Notes

Chill the brownies before stuffing, avoid over-baking, and use parchment paper for even baking.

Tried this recipe?

Let us know how it was!

Heavenly No-Bake Mango Cheesecake You’ll Want to Make Now

February 25, 2026 by Grace Snow Leave a Comment

In the hustle of daily life, finding time to create a delightful dessert can feel like a mini crisis. Luckily, my No-Bake Mango Cheesecake swoops in as the perfect solution—refreshingly simple yet stunningly creamy! With just 20 minutes of prep time, you can impress your loved ones while enjoying the luscious taste of fresh mangoes combined with a smooth cheesecake filling. Plus, this recipe is not only vegetarian but also offers gluten-free options, making it a versatile treat for everyone at your table. So, what are you waiting for? Let’s dive into this no-bake wonder that will have you savoring summer flavors in every bite! Are you ready to sweeten up your next gathering?

Why is This Cheesecake Simply Irresistible?

Quick and Easy: This No-Bake Mango Cheesecake requires just 20 minutes of prep, perfect for those busy days when you're craving something sweet.

Refreshing and Light: The combination of fresh mango and airy whipped cream delivers a tropical taste that's both satisfying and light, leaving you feeling guilt-free.

Versatile Customization: Easily tailor this recipe by swapping mango for other fruits like strawberries or passionfruit, ensuring it delights any palate.

Crowd-Pleasing Delight: Whether for a family dinner or a summer gathering, this cheesecake is a guaranteed hit that will impress guests of all ages.

Bake-Free Pleasure: Enjoy a luscious dessert without the hassle of the oven—perfect for hot days or last-minute get-togethers!

No-Bake Mango Cheesecake Ingredients

For the Crust
• Graham Cracker Crumbs – Provides a crunchy base for the cheesecake; substitute with gluten-free graham crackers for a gluten-free option.
• Melted Butter – Binds the crust together for rich flavor; can replace with coconut oil for a dairy-free version.

For the Filling
• Cream Cheese – Gives the cheesecake its creamy texture; Greek yogurt can be used as a lighter alternative, though it will alter the richness.
• Powdered Sugar – Adds sweetness to balance the tanginess of the cream cheese; adjust based on personal sweetness preference.
• Mango Puree – Key flavor component; fresh or frozen mango can be used, ensuring frozen mango is thawed and blended smoothly.
• Vanilla Extract – Enhances the overall flavor profile and rounds out the taste.
• Heavy Cream – Whipped to stiff peaks to create a light, airy texture in the filling.

This No-Bake Mango Cheesecake is not just a delightful dessert but also a fantastic way to enjoy fresh flavors with ease!

Step‑by‑Step Instructions for No-Bake Mango Cheesecake

Step 1: Prepare the Crust
Begin by preheating your oven to 350°F (175°C) if you decide to toast the crust for extra flavor. In a bowl, combine graham cracker crumbs with melted butter until fully moistened, resembling wet sand. Firmly press the mixture into the bottom of a springform pan, ensuring an even thickness. This will create a solid base for your No-Bake Mango Cheesecake.

Step 2: Make the Filling
In a separate mixing bowl, beat the softened cream cheese and powdered sugar together using an electric mixer on medium speed. Continue mixing until the mixture is smooth and creamy, about 2-3 minutes. Gradually mix in the mango puree and vanilla extract until well combined, creating a vibrant and flavorful filling for your cheesecake.

Step 3: Whip the Cream
In a chilled bowl, use a whisk or electric mixer to whip the heavy cream until stiff peaks form, about 3-5 minutes. The cream should hold its shape when the beaters are lifted. Then, gently fold the whipped cream into the mango mixture, being careful not to deflate the airy texture. This step is crucial for achieving that light, fluffy feel in your No-Bake Mango Cheesecake.

Step 4: Combine Layers
Pour the luscious mango filling over the chilled crust in the springform pan, spreading it evenly with a spatula. Make sure to smooth the top for an appealing finish. Tap the pan gently against the counter to release any air bubbles that may have formed, ensuring a beautiful final presentation for your cheesecake.

Step 5: Chill
Cover the springform pan with plastic wrap and place it in the refrigerator. Allow the No-Bake Mango Cheesecake to chill for at least 4 hours, but overnight is best for optimal texture and flavor. The longer it sits, the better the flavors meld together, resulting in a creamy delight.

Step 6: Finish and Serve
Once set, carefully remove the sides of the springform pan to reveal your stunning cheesecake. Garnish with fresh mango slices on top for an inviting presentation. Slice with a sharp knife and serve chilled, delighting your family and friends with this exquisite No-Bake Mango Cheesecake.

Expert Tips for No-Bake Mango Cheesecake

  • Whip Wisely: Ensure your heavy cream is whipped to stiff peaks for a light, airy texture. Over-whipping can lead to grainy cream, while under-whipping may leave the cheesecake flat.

  • Springform Advantage: Always use a springform pan for easy release. If you use a regular dish, be cautious when slicing to avoid ruining the cheesecake's shape.

  • Perfect Mango Puree: For the best flavor, make sure to thoroughly thaw frozen mango before blending. This ensures a smooth consistency and vibrant taste in your No-Bake Mango Cheesecake.

  • Chill Thoroughly: Allow the cheesecake to chill for at least 4 hours—overnight is even better! This helps the flavors meld and results in a creamier texture.

  • Sugar to Taste: Adjust the powdered sugar according to your sweetness preference. Every mango varies in sweetness, so sample and adjust accordingly for a perfect balance.

Make Ahead Options

Preparing this No-Bake Mango Cheesecake ahead of time is a fantastic way to save time and ensure you have a delicious dessert ready for any occasion! You can make the crust up to 24 hours in advance and store it covered at room temperature to maintain its crunch. Similarly, the filling can be prepped and mixed up to 3 days in advance; just keep it in an airtight container in the refrigerator. When it's time to assemble, simply pour the filling over the prepared crust and refrigerate for at least 4 hours or, preferably, overnight to let the flavors meld beautifully. This make-ahead approach not only cuts your day-of prep time in half but ensures your No-Bake Mango Cheesecake is just as delightful when served!

What to Serve with No-Bake Mango Cheesecake?

Imagine the vibrant flavors and creamy texture of your dessert paired perfectly with delightful accompaniments that enhance this tropical treat!

  • Fresh Berries: The tartness of strawberries, raspberries, or blueberries contrasts beautifully with the sweetness of the cheesecake, adding a burst of freshness. These bright colors also enhance the visual appeal of your dessert table.

  • Coconut Whipped Cream: The subtle coconut flavor complements the mango, creating a tropical paradise on your plate. A dollop of this creamy topping elevates each bite to blissful indulgence.

  • Mint Leaves: A sprinkle of fresh mint leaves adds a refreshing burst that cuts through the richness of the cheesecake, providing a vibrant color contrast and aromatic notes.

  • Lemon Sorbet: This chilled treat offers a refreshing acidity that balances the creamy sweetness of the cheesecake, creating a light, refreshing experience after each bite. The sorbet's bright flavor is a perfect palate cleanser.

  • Mango Sauce Drizzle: Enhance the mango flavor by drizzling a homemade mango sauce over the cheesecake slices for added moisture and a pop of color. This simple addition exudes elegance and amplifies the tropical essence.

  • Iced Tea or Sparkling Water: Serve your cheesecake with a glass of cold iced tea or sparkling water for a refreshing and light beverage option. Consider infusing the water with lime or citrus for added zest.

How to Store and Freeze No-Bake Mango Cheesecake

Fridge: Keep your No-Bake Mango Cheesecake covered in the refrigerator, where it will stay fresh for up to 5 days. Enjoy the refreshing flavors even after a few days!

Freezer: For longer storage, slice the cheesecake and wrap individual pieces tightly in plastic wrap, then place them in an airtight container. It can be frozen for up to 2 months.

Thawing: To enjoy frozen slices, simply transfer them to the fridge and let them thaw overnight. It’s the perfect way to have a sweet treat on hand anytime!

Make-Ahead Tip: This dessert can be prepared a day in advance to allow the flavors to meld, ensuring effortless serving when you're ready to impress your guests.

No-Bake Mango Cheesecake Variations

Feel free to explore these delightful twists on the classic recipe—each offers a unique twist that engages the senses!

  • Berry Bliss: Swap mango puree for a berry blend like strawberries or blueberries for a tart and sweet flavor. Imagine vibrant colors—each bite bursting with summer freshness.

  • Coconut Crunch: Replace some cream cheese with coconut cream for a tropical vibe. This adds rich creaminess while enhancing the tropical experience, transporting you to a sandy beach.

  • Chocolate Drizzle: Melt dark chocolate and drizzle over the cheesecake before serving. The rich chocolate contrasts beautifully with the bright mango, creating a dessert that's irresistibly indulgent.

  • Nutty Base: Substitute graham cracker crumbs with crushed almonds or pecans for a nutty crust. This adds a crunchy texture and depth of flavor that pairs wonderfully with the creamy filling.

  • Spiced Sensation: Add a pinch of cinnamon or nutmeg to the mango filling for a warm, aromatic twist. It adds a surprising depth that makes each bite even more intriguing.

  • Dairy-Free Delight: Use dairy-free cream cheese and coconut whipped cream for a vegan-friendly version. This keeps the creamy texture while ensuring everyone can enjoy a slice.

  • Heat It Up: Add finely chopped jalapeños to the filling for a spicy kick. The heat pairs surprisingly well with the sweetness of the mango, creating a thrilling flavor contrast!

  • Zesty Lime: Incorporate fresh lime zest into the filling for a citrusy brightness that enhances the mango flavor. This adds a refreshing burst, making the cheesecake even more unforgettable.

For more tempting ideas, consider exploring how to incorporate seasonal fruits or check out my guide on creating a simple graham cracker crust to elevate your cheesecake base!

No-Bake Mango Cheesecake Recipe FAQs

What type of mango should I use for the cheesecake?
Absolutely! You can use either fresh or frozen mango for your No-Bake Mango Cheesecake. If using fresh mango, ensure it's ripe—look for a slight give when gently pressed. For frozen mango, thaw it completely and blend until smooth for the best flavor and texture.

How long can I store the No-Bake Mango Cheesecake in the refrigerator?
Very! Your cheesecake will stay fresh in the fridge for up to 5 days when covered. Just make sure to wrap it tightly or place it in an airtight container to prevent it from absorbing other odors.

Can I freeze my No-Bake Mango Cheesecake?
Yes! To freeze, slice the cheesecake first and wrap each piece tightly in plastic wrap. Then, store them in an airtight container. It can remain frozen for up to 2 months! Just remember to thaw it in the refrigerator overnight for the best results.

What should I do if my cream doesn't whip to stiff peaks?
If your heavy cream isn't whipping to stiff peaks, check that it’s very cold and your bowl and whisk are clean. You can also add a bit of powdered sugar to help stabilize it. Whip for an additional minute or two until peaks form—remember, patience is key for that perfect texture!

Are there any allergy concerns with the No-Bake Mango Cheesecake?
Definitely! This recipe contains dairy from cream cheese and heavy cream, so it's not suitable for those with lactose intolerance or dairy allergies. You can easily substitute with dairy-free cream cheese and coconut cream for a vegan-friendly version, making it accessible for different diets.

How can I enhance the flavor of my No-Bake Mango Cheesecake?
To elevate flavors, consider adding a splash of lime juice or zest to the mango filling; it beautifully complements the creaminess of the cheesecake. You can also experiment with different fruit purees or a hint of coconut extract for a tropical twist!

No-Bake Mango Cheesecake

Heavenly No-Bake Mango Cheesecake You’ll Want to Make Now

This No-Bake Mango Cheesecake is a creamy dessert that's refreshingly simple, perfect for impressing loved ones with summer flavors.
Print Recipe Pin Recipe
Prep Time 20 minutes mins
Chill Time 4 hours hrs
Total Time 4 hours hrs 20 minutes mins
Servings: 8 slices
Course: Dessert
Cuisine: International
Calories: 300
Ingredients Equipment Method Nutrition Notes

Ingredients
  

Crust
  • 1 cup Graham Cracker Crumbs Gluten-free option available.
  • 6 tablespoons Melted Butter Can substitute with coconut oil for dairy-free.
Filling
  • 8 ounces Cream Cheese Can substitute with Greek yogurt for a lighter version.
  • 1/2 cup Powdered Sugar Adjust based on sweetness preference.
  • 1 cup Mango Puree Fresh or frozen mango, thawed and blended.
  • 1 teaspoon Vanilla Extract
  • 1 cup Heavy Cream Whipped to stiff peaks.

Equipment

  • Springform pan
  • Mixing bowls
  • Electric mixer
  • Whisk

Method
 

Preparation
  1. Begin by preheating your oven to 350°F (175°C) if toasting the crust. Mix graham cracker crumbs and melted butter until moistened, press into the springform pan.
  2. In a mixing bowl, beat cream cheese and powdered sugar on medium speed until smooth. Gradually mix in mango puree and vanilla extract until well combined.
  3. Whip heavy cream in a chilled bowl until stiff peaks form. Gently fold whipped cream into the mango mixture.
  4. Pour the mango filling over the chilled crust, smooth the top, and tap the pan to release air bubbles.
  5. Cover the springform pan with plastic wrap and chill for at least 4 hours, preferably overnight.
  6. Remove the sides of the springform pan and garnish with fresh mango slices before serving.

Nutrition

Serving: 1sliceCalories: 300kcalCarbohydrates: 35gProtein: 3gFat: 18gSaturated Fat: 10gPolyunsaturated Fat: 1gMonounsaturated Fat: 4gCholesterol: 45mgSodium: 200mgPotassium: 180mgFiber: 1gSugar: 20gVitamin A: 500IUVitamin C: 15mgCalcium: 60mgIron: 1mg

Notes

Allow the cheesecake to chill thoroughly to achieve the best texture and flavor. Adjust sweetness based on personal preference for the powdered sugar.

Tried this recipe?

Let us know how it was!

Raspberry Mango Bars: A Tropical Treat You Can't Resist

February 25, 2026 by Grace Snow Leave a Comment

As I opened the fridge, the scent of ripe mangoes and tart raspberries wafted toward me, igniting my creativity. That's when the thought struck: why not bring these vibrant flavors together in a delightful tropical dessert? Enter my Raspberry Mango Bars with Buttery Shortbread Crust! This easy-to-slice treat is not just a feast for the eyes; it boasts a perfectly firm texture thanks to gelatin and a harmonious blend of sweet and tart notes. With a buttery, crisp shortbread base that cradles silky mango curd and a striking swirl of raspberry jam, these bars are sure to be a hit at your next gathering. Plus, they’re fantastic for prepping ahead of time—just slice and serve whenever you’re ready. Who's it going to be for first, you or your loved ones?

Why You’ll Love Raspberry Mango Bars

Bright, Tropical Flavors: The combination of ripe mango and tart raspberry creates a refreshing and uplifting taste that’s perfect for any occasion.

Easy Preparation: With simple ingredients and straightforward steps, you’ll experience baking with ease, even if you’re not an expert in the kitchen.

Perfectly Portable: These bars are easy to slice and serve, making them ideal for picnics, potlucks, or family gatherings—crowd-pleasers everyone will adore!

Make Ahead Magic: They can be prepared in advance and stored for days, ensuring you have a delicious dessert ready whenever the craving strikes.

Versatile Variation Ideas: Customize your treats with options like Passion Fruit Mango Bars or Raspberry Mango Meringue Bars, helping you explore new flavor adventures.

Get ready to indulge in this deliciously whipping up a batch today! If you’re looking for more delightful tropical desserts, check out our other recipes for more inspiration.

Raspberry Mango Bars Ingredients

For the Crust

  • All-Purpose Flour – Provides structure and helps create a firm base for the bars.
  • Powdered Sugar – Adds sweetness to the crust without a gritty texture.
  • Salt – Enhances flavor and balances sweetness.
  • Butter (Cold, Cut into Pieces) – Essential for a crumbly, buttery shortbread texture; use margarine as a substitution for dairy-free options.
  • Egg Yolk – Acts as a binding agent for the crust, providing richness.
  • Heavy Cream – Adds moisture and contributes to the shortbread's tenderness.
  • Vanilla Extract – Infuses flavor into the crust, enhancing the overall taste.

For the Mango Curd

  • Unflavored Gelatin Powder – Ensures the mango curd sets nicely without being runny; crucial for achieving clean slices of Raspberry Mango Bars.
  • Cold Water – Used to bloom gelatin, activating its thickening properties.
  • Butter (Softened) – Adds creaminess and improves the texture of the mango curd.
  • Granulated Sugar – Sweetens the curd, ensuring a pleasant balance with the tart raspberry.
  • Egg Yolks – Provide richness and help in thickening the curd.
  • Mango Puree – Key flavor component; use ripe mangoes for the best results.
  • Fresh Lemon Juice – Adds acidity, brightening the flavor profile of the curd.

For the Topping

  • Raspberry Jam – Provides tartness and color contrast in the bars; can be swapped with passion fruit jam for a delightful variation.

With these ingredients, you're well on your way to creating a vibrant, delicious treat that’s sure to impress! Happy baking!

Step‑by‑Step Instructions for Raspberry Mango Bars

Step 1: Prepare the Crust
Begin by preheating your oven to 350°F (175°C). Line a 9x9-inch baking dish with parchment paper, leaving some overhang. In a food processor, combine all-purpose flour, powdered sugar, and salt until well mixed. Add cold butter in pieces, pulsing until the mixture resembles coarse sand. Mix egg yolk, cream, and vanilla together, then add it to the processor and pulse until the dough is crumbly. Press the dough firmly into the pan, prick with a fork, and freeze for 20-30 minutes.

Step 2: Bake the Crust
Once chilled, line the crust with foil, fill with weights, and bake for 15 minutes. Carefully remove the weights and foil, then return the crust to the oven, baking for an additional 20 minutes or until golden brown. Keep an eye on it to ensure it doesn’t over-bake. Once it’s nicely golden, remove from the oven and let it cool completely before adding the filling.

Step 3: Prepare the Mango Curd
While the crust cools, bloom the gelatin powder by sprinkling it over cold water in a shallow dish and setting it aside. Prepare a double boiler by simmering water in a saucepan and placing a heat-safe bowl on top. In that bowl, cream softened butter and granulated sugar until fluffy, then add egg yolks, mango puree, salt, and fresh lemon juice. Stir continuously over simmering water for about 15-25 minutes until the mixture thickens enough to coat the back of a spoon.

Step 4: Incorporate Gelatin into Curd
Carefully warm the bloomed gelatin in the microwave for about 5-10 seconds until just melted, ensuring it doesn’t get too hot. Stir the gelatin into the thickened mango curd until fully incorporated. This step is crucial for ensuring the curd of your Raspberry Mango Bars sets properly without being runny. Strain the mixture through a fine mesh sieve into a clean bowl for a smooth texture.

Step 5: Assemble the Bars
Spread the luscious mango curd evenly over the cooled shortbread crust. Make sure it fills the pan without spilling over the edges. This silky layer serves as the heart of the Raspberry Mango Bars, so smooth it out to ensure an even surface.

Step 6: Add Raspberry Swirl
Warm the raspberry jam slightly in the microwave for about 10-15 seconds to loosen it. Drop spoonfuls of the warm jam over the mango curd, then use a knife to gently swirl the jam into the curd for a marbled effect. This not only adds a vibrant color but enhances the flavor profile of your bars.

Step 7: Chill to Set
Place the assembled bars in the refrigerator and allow them to set for 4 to 6 hours or overnight, if possible. This chilling time is essential for the filling to firm up properly, ensuring perfect slices when served. The vibrant colors and flavors will meld beautifully during this time, making it well worth the wait.

Step 8: Serve the Bars
To serve, run a warm knife around the edges of the dish to loosen the bars. Carefully lift them out using the parchment overhang. Slice into squares, dipping the knife in hot water between cuts for clean edges. These Raspberry Mango Bars are now ready to bring tropical delight to your next gathering!

Expert Tips for Raspberry Mango Bars

• Keep Butter Cold: Ensure your butter is cold when making the crust for perfectly flaky and tender shortbread.

• Bloom Gelatin Properly: Always bloom gelatin in cold water for effective thickening; this prevents any lumps in the smooth mango curd.

• Use Ripe Mangoes: Choose ripe, juicy mangoes for the mango puree to achieve the best flavor in your Raspberry Mango Bars.

• Chill for Success: Allow adequate refrigeration time for the bars to set properly; this ensures clean slices and a lovely presentation.

• Avoid Over-Baking: Keep an eye on the crust while baking; over-baking can lead to a dry texture, affecting the overall experience.

Make Ahead Options

These Raspberry Mango Bars are perfect for busy home cooks looking to save time during the week! You can prepare the buttery shortbread crust and the silky mango curd up to 24 hours in advance. Simply bake the crust and allow it to cool completely before spreading the mango curd on top. Once assembled, refrigerate the bars for at least 4 to 6 hours or overnight to set properly. If you're planning to make them earlier, you can store the cooked crust and mango curd separately in airtight containers in the refrigerator for up to 3 days. Just remember to swirl the raspberry jam right before serving to keep the flavors fresh and vibrant. Enjoy these delicious treats with minimal effort on busy days!

Raspberry Mango Bars Variations

Feel free to get creative with your Raspberry Mango Bars and explore delightful new flavors and textures!

  • Passion Fruit Mango Bars: Substitute raspberry jam with passion fruit curd and add toasted coconut for a fun, tropical twist.

  • Raspberry Mango Meringue Bars: Top your bars with a light, fluffy meringue, gently toasted for added sweetness and a beautiful finish.

  • Vegan Version: Use a flax egg and coconut oil in place of butter and eggs, ensuring a delightful treat everyone can enjoy.

  • Gluten-Free Adaptation: Substitute all-purpose flour with a 1:1 gluten-free baking blend for a delicious gluten-free option.

  • Chocolate Drizzle: Melt dark chocolate and drape it on top of the set bars for a decadent chocolatey finish that pairs wonderfully with the tropical flavors.

  • Spicy Mango Twist: Add a pinch of cayenne pepper or chopped jalapeño to the mango curd for a surprising kick of heat that complements the sweetness.

  • Yogurt Swirl: Replace half of the raspberry jam top with a yogurt layer for a creamy, tangy contrast that enhances the bars' flavor.

  • Nutty Crust: Mix in crushed almonds or hazelnuts to the shortbread crust for a delightful crunch and a hint of nutty flavor.

Feel free to indulge in these variations and discover a new favorite with every batch! For more dessert ideas, check out our tropical-inspired treats and other wonderful easy dessert recipes that will satisfy your sweet tooth!

How to Store and Freeze Raspberry Mango Bars

Refrigerator: Keep the bars in an airtight container for up to 5 days. This will maintain their freshness and delightful texture.

Freezer: For longer storage, freeze individual Raspberry Mango Bars on a baking sheet. Once solid, transfer to a container lined with parchment and keep for up to 3 months.

Thawing: To enjoy from the freezer, let the bars thaw in the fridge overnight before serving, allowing the flavors to fully develop.

Serving Tips: For best results, slice while slightly chilled, as this helps ensure clean, beautiful edges for your tropical dessert!

What to Serve with Raspberry Mango Bars

Elevate your dessert experience with delightful pairings that complement the tropical flavors of these luscious bars.

  • Coconut Whipped Cream: A dollop of this light, fluffy cream adds a hint of paradise and enhances the tropical vibes.
  • Fresh Fruit Salad: A medley of strawberries, kiwi, and pineapple brings a refreshing contrast, enhancing the vibrant flavors of the bars.
  • Iced Green Tea: The herbal notes of this drink balance the sweetness, offering a soothing contrast that will refresh your palate.
  • Thick Greek Yogurt: A scoop brings creaminess and tang, perfectly pairing with the sweetness of the bars for a balanced bite.
  • Vanilla Ice Cream: Rich and creamy, this classic dessert complements the tangy notes of the mango bars while providing a cool contrast.
  • Chocolate Drizzle: A light drizzle of dark chocolate sauce adds a decadent twist, creating a beautifully rich taste with every combination.

Imagine serving these Raspberry Mango Bars alongside fresh fruit salad and a scoop of creamy vanilla ice cream for a truly unforgettable tropical feast!

Raspberry Mango Bars Recipe FAQs

What kind of mangoes should I use for the mango puree?
Absolutely! For the best flavor in your Raspberry Mango Bars, use ripe, juicy mangoes like Ataulfo or Haden. Look for mangoes that yield slightly to gentle pressure and have a sweet fragrance. Avoid overly soft or blemished mangoes, as they can affect the taste and texture of your dessert.

How should I store the Raspberry Mango Bars?
Very! Store your Raspberry Mango Bars in an airtight container in the refrigerator for up to 5 days. This keeps them moist and delicious! If you're not planning to finish them in that time, consider freezing for longer storage.

Can I freeze Raspberry Mango Bars?
Absolutely! To freeze, place each bar on a baking sheet and freeze until firm. Once solid, transfer them to an airtight container layered with parchment paper to prevent sticking. They can be stored in the freezer for up to 3 months. When ready to enjoy, simply thaw them in the fridge overnight.

What should I do if my mango curd doesn't set properly?
If your mango curd doesn't set, it may be because the gelatin wasn't bloomed properly or not mixed well enough. First, ensure you're using unflavored gelatin and that it's bloomed in cold water. If you suspect the curd isn't thick enough, return it to a double boiler and cook it gently while stirring until thickened, then add bloomed gelatin again for a firmer consistency.

Are there any allergies I should consider with this recipe?
For sure! This Raspberry Mango Bars recipe contains common allergens such as dairy (butter, cream), eggs, and gluten. If you or your guests have dietary restrictions, consider substitutions like dairy-free margarine for the butter, and use a gluten-free flour blend. Always check labels for any hidden allergens.

Can I make variations of the bars?
Of course! You can switch things up by using passion fruit jam instead of raspberry for Passion Fruit Mango Bars or topping them with a light meringue for Raspberry Mango Meringue Bars. Customize to delight your taste buds and impress your guests!

Raspberry Mango Bars

Raspberry Mango Bars: A Tropical Treat You Can't Resist

Indulge in delightful Raspberry Mango Bars featuring a buttery shortbread crust and silky mango curd, perfect for any occasion.
Print Recipe Pin Recipe
Prep Time 30 minutes mins
Cook Time 35 minutes mins
Chilling Time 6 hours hrs
Total Time 12 hours hrs 5 minutes mins
Servings: 9 bars
Course: Dessert
Cuisine: Tropical
Calories: 250
Ingredients Equipment Method Nutrition Notes

Ingredients
  

For the Crust
  • 1 cup All-Purpose Flour Provides structure and helps create a firm base for the bars.
  • 1/4 cup Powdered Sugar Adds sweetness to the crust without a gritty texture.
  • 1/4 teaspoon Salt Enhances flavor and balances sweetness.
  • 1/2 cup Butter (Cold, Cut into Pieces) Essential for a crumbly, buttery shortbread texture.
  • 1 large Egg Yolk Acts as a binding agent for the crust.
  • 2 tablespoons Heavy Cream Adds moisture and contributes to the shortbread's tenderness.
  • 1 teaspoon Vanilla Extract Infuses flavor into the crust.
For the Mango Curd
  • 1 tablespoon Unflavored Gelatin Powder Ensures the mango curd sets nicely.
  • 3 tablespoons Cold Water Used to bloom gelatin.
  • 1/2 cup Butter (Softened) Adds creaminess to the mango curd.
  • 1/2 cup Granulated Sugar Sweetens the curd.
  • 3 large Egg Yolks Provide richness for the curd.
  • 1 cup Mango Puree Key flavor component.
  • 2 tablespoons Fresh Lemon Juice Adds acidity to the curd.
For the Topping
  • 1/2 cup Raspberry Jam Provides tartness and color contrast.

Equipment

  • Oven
  • Food Processor
  • 9x9-inch baking dish
  • Double Boiler
  • Shallow dish

Method
 

Preparation Steps
  1. Preheat your oven to 350°F (175°C) and line a 9x9-inch baking dish with parchment paper.
  2. Combine all-purpose flour, powdered sugar, and salt in a food processor. Add cold butter, pulsing until mixed. Incorporate egg yolk, cream, and vanilla, then pulse until crumbly.
  3. Press the dough into the pan, prick with a fork, and freeze for 20-30 minutes.
  4. Bake the crust with foil and weights for 15 minutes, then remove and bake for another 20 minutes until golden. Cool completely.
  5. Bloom gelatin in cold water. In a double boiler, cream softened butter and granulated sugar, then add egg yolks, mango puree, salt, and lemon juice. Stir until thickened.
  6. Warm bloomed gelatin in the microwave until melted, then stir into the mango curd and strain into a bowl.
  7. Spread mango curd over the cooled crust evenly.
  8. Warm raspberry jam slightly and swirl it into the curd with a knife.
  9. Chill the bars in the refrigerator for 4 to 6 hours or overnight to set.
  10. Run a warm knife around the edges to loosen, lift out using parchment, and slice into squares.

Nutrition

Serving: 1barCalories: 250kcalCarbohydrates: 35gProtein: 2gFat: 12gSaturated Fat: 7gMonounsaturated Fat: 5gCholesterol: 40mgSodium: 50mgPotassium: 150mgFiber: 1gSugar: 15gVitamin A: 10IUVitamin C: 15mgCalcium: 2mgIron: 4mg

Notes

Keep butter cold for the crust, bloom gelatin properly, and use ripe mangoes for the best flavor.

Tried this recipe?

Let us know how it was!

Decadent Chocolate Crepe Cake That Will Blow Your Mind

February 24, 2026 by Grace Snow Leave a Comment

As I stood in my kitchen, the sweet aroma of melting chocolate filled the air—a reminder that some of life’s simple pleasures come from preparing something truly special. I want to share with you the joy of crafting an Impressive Chocolate Crepe Cake, a dessert that transforms ordinary moments into unforgettable memories. This show-stopping cake features layers of delicate, paper-thin crepes interlaced with rich whipped chocolate cream, all finished off with a glossy chocolate ganache. Not only is it a delightful no-bake treat that’s bound to impress friends and family, but it's also surprisingly simple to whip up, even for those just starting their baking journey. Plus, with gluten-free and vegan adaptations available, everyone can indulge in this luxurious dessert. Are you ready to embrace the magic of crepes? Let's dive in!

Why is this Chocolate Crepe Cake special?

Indulging in Luxurious Layers: Each bite of this Chocolate Crepe Cake offers a heavenly experience, with delicate crepes flawlessly layered with fluffy chocolate cream.

Perfectly Adaptable: Whether you're hosting a dinner party or enjoying a cozy night in, this cake can effortlessly transform to suit gluten-free or vegan needs, catering to all preferences.

No-Bake Delight: Forget about turning on the oven! This cake is exceptionally easy to prepare, making it a fantastic choice for last-minute dessert cravings.

Crowd-Pleasing Presentation: Its stunning aesthetics will have your guests snapping photos before sinking into its rich, melt-in-your-mouth texture.

Make Ahead Magic: Prepare your crepes and even the ganache days in advance, allowing flavors to meld so you can enjoy time with your loved ones.

Dive into a world of chocolatey bliss and delight your taste buds with this unforgettable dessert!

Chocolate Crepe Cake Ingredients

For the Crepes

  • 4 large eggs – Provide structure and richness; no substitution recommended for best results.
  • 800 ml full-fat milk – Ensures creamy texture; can use any milk, but dairy alternatives will change flavor.
  • 80 g sugar (granulated or caster) – Adds sweetness; substitute with coconut sugar for a lower GI option.
  • 305 g plain/all-purpose flour – Gives structure to crepes; for gluten-free, swap with gluten-free flour blend.
  • ½ teaspoon salt – Enhances flavor; omit if making a dessert without salt.
  • 25 g melted butter or sunflower oil (plus extra for cooking) – Adds moisture; substitute with vegetable oil or coconut oil for a dairy-free version.

For the Whipped Chocolate Cream

  • 625 ml double cream – Essential for making whipped chocolate cream; heavy cream can be used as a substitute.
  • 120 g icing sugar – Sweetens the whipped cream; powdered sugar is essential for smooth texture, so no direct substitutes recommended.
  • 60 g cocoa powder – Provides rich chocolate flavor; use Dutch-processed cocoa for a deeper taste.

For the Ganache

  • 250 g dark chocolate (min 70% cocoa solids), finely chopped – Base for ganache, adding richness; use semi-sweet chocolate for a sweeter flavor.
  • 250 ml double cream (for ganache) – Required for the ganache; heavy cream can serve as a substitute.

As you gather these ingredients, envision the delightful layers of your Chocolate Crepe Cake coming together, ready to create sweet memories for you and your loved ones!

Step‑by‑Step Instructions for Chocolate Crepe Cake

Step 1: Make Crepe Batter
In a blender, combine 4 large eggs, 800 ml full-fat milk, 80 g sugar, 305 g flour, and ½ teaspoon salt. Blend until the mixture is smooth and well combined. Let the batter rest for at least 1 hour at room temperature, or refrigerate it overnight to enhance the crepes' texture. This wait time is essential for achieving perfectly soft and pliable crepes.

Step 2: Cook Crepes
Heat a non-stick frying pan over medium-low heat and lightly grease it with butter or oil. Pour in a small ladleful of the crepe batter, swirling it to cover the pan's surface evenly. Cook for about 2 minutes on the first side until the edges lift, then flip and cook for another 30 seconds until golden. Repeat this process until all batter is used, stacking crepes on a plate.

Step 3: Whip Chocolate Cream
In a mixing bowl, whip 625 ml double cream using an electric mixer until soft peaks form. Gradually add 120 g icing sugar and 60 g cocoa powder, gently folding them in until completely incorporated. The cream should be rich and fluffy. Cover the bowl with plastic wrap and refrigerate the chocolate cream until ready to use, keeping its texture silky.

Step 4: Prepare Chocolate Ganache
In a small saucepan, heat 250 ml double cream over medium heat until it is hot but not boiling. Remove from heat and pour it over 250 g finely chopped dark chocolate in a bowl. Allow the mixture to sit for a couple of minutes before stirring until smooth and glossy. Let the ganache cool slightly as you prepare for assembly.

Step 5: Assemble Cake
To assemble your Chocolate Crepe Cake, lay the first crepe on a serving plate. Spread a thin layer of whipped chocolate cream evenly over it, then place the next crepe on top. Repeat this process, adding whipped cream between each crepe, until all are stacked. Leave the top crepe blank and place the assembled cake in the refrigerator to chill for 1 hour.

Step 6: Final Touch
After chilling, take your cake out of the refrigerator and slowly pour the slightly cooled chocolate ganache over the top, allowing it to flow down the sides. Return the cake to the fridge to set the ganache for a bit before slicing. This indulgent Chocolate Crepe Cake will be ready to serve, showcasing its rich layers and glossy finish!

Chocolate Crepe Cake Variations & Substitutions

Feel free to get creative and customize your Chocolate Crepe Cake with these fun twists and substitutions!

  • Gluten-Free: Replace all-purpose flour with a gluten-free flour blend for the crepes, ensuring everyone can enjoy this treat without worry. The flavor remains rich and delicious.

  • Vegan: Swap eggs for a flaxseed meal mixture or a commercial egg replacer. Use plant-based milk, vegan butter, and a dairy-free whipped cream substitute to create a vegan-friendly version bursting with flavor.

  • Nutty Delight: For an indulgent touch, layer some hazelnut spread between the crepes instead of whipped chocolate cream. This Nutella-inspired version offers a scrumptious twist that chocolate lovers will adore!

  • Berry Bliss: Add layers of fresh berries or berry compote between the crepes for a fruity variation that balances the rich chocolate. The burst of berry flavor pairs beautifully with the creamy filling.

  • Experiment with Flours: Try using buckwheat flour as a healthy alternative for a unique earthy taste that adds depth to your crepes. This option is particularly delightful for a wholesome twist.

  • Chili Chocolate Kick: Add a pinch of cayenne pepper or chili powder to your whipped chocolate cream for a spicy kick that contrasts beautifully with the rich chocolate flavors. Your taste buds will thank you!

  • Salted Caramel Twist: Drizzle salted caramel sauce between layers for an irresistible combination that enhances the sweetness and adds a luxurious touch. Who can resist that caramel goodness?

Each of these variations opens the door to a world of flavor possibilities, ensuring your Chocolate Crepe Cake is a delightful and personalized experience for any occasion. Don’t forget to check out our Chocolate Pudding Cake for another chocolaty treat that will leave everyone wanting more!

What to Serve with Chocolate Crepe Cake?

Indulging in the rich, silky layers of your Chocolate Crepe Cake opens up a world of delightful pairing possibilities to create a full, decadent meal.

  • Fresh Berries: Juicy strawberries or raspberries add a bright, tangy contrast that elevates the chocolate flavor beautifully.
  • Vanilla Ice Cream: A scoop of creamy vanilla ice cream offers a smooth, rich complement to the cake’s texture. The contrast of cold and warm is simply delightful.
  • Espresso: A shot of robust espresso cuts through the sweetness of the cake, balancing flavors while enhancing the chocolate.
  • Whipped Coconut Cream: For a dairy-free twist, serve with whipped coconut cream, providing a light, tropical flavor that pairs perfectly.
  • Chocolate Sauce Drizzle: Enhance the chocolate experience with a drizzle of warm chocolate sauce over the top for an extra layer of decadence.
  • Mint Leaves: Fresh mint sprigs add a refreshing brightness, both visually and in taste, making each bite feel lighter.
  • Chilled Sparkling Wine: A glass of bubbly sparkling wine adds a festive touch, with its effervescence enhancing the richness of the cake.
  • Nutty Biscotti: Crunchy nutty biscotti offers a satisfying contrast with texture while echoing the rich flavors of chocolate.
  • Lemon Tart: A slice of tangy lemon tart creates a refreshing counterpoint, cleansing the palate between bites of your decadent cake.
  • Hazelnut Coffee: A cup of hazelnut-flavored coffee introduces nutty notes that harmonize beautifully with the cake's chocolate profile.

These pairing ideas not only enhance the experience of your Chocolate Crepe Cake but also turn dessert into a memorable occasion to cherish with family and friends!

Make Ahead Options

Preparing your Chocolate Crepe Cake in advance is a fantastic time-saver for busy weeknights or upcoming celebrations! You can make the crepe batter and refrigerate it up to 24 hours ahead, allowing the flavors to meld beautifully. The cooked crepes can be stacked and stored in an airtight container, ensuring their softness remains intact. Additionally, the chocolate ganache can be prepared up to 3 days in advance; simply keep it covered in the fridge. When you're ready to serve, layer the crepes with whipped chocolate cream as directed, chill for 1 hour to set, and then pour the ganache over for that perfect, glossy finish. Enjoy the convenience without sacrificing flavor!

Expert Tips for Chocolate Crepe Cake

  • Rest the Batter: Allow your crepe batter to rest for at least 1 hour or overnight. This helps to achieve softer and more flexible crepes for your Chocolate Crepe Cake.

  • Proper Heat Control: Maintain a medium-low heat on your frying pan. Too high a heat can burn the crepes, while too low can cause them to cook unevenly.

  • Uniform Cream Layers: For a tidy presentation, spread a consistent amount of whipped chocolate cream between the layers. Use a measuring scoop for precision.

  • Ganache Application: Allow your ganache to cool slightly before pouring over the cake. This prevents it from sliding off and ensures an irresistible glossy finish.

  • Use Fresh Ingredients: Ensure your eggs and cream are fresh for the best flavor. Using high-quality dark chocolate also enhances the richness of your Chocolate Crepe Cake.

  • Warm Slicing: If your cake is initially firm, warm the knife slightly with hot water before slicing. This will create clean, neat edges for a beautiful presentation.

Storage Tips for Chocolate Crepe Cake

Fridge: Store your assembled Chocolate Crepe Cake in an airtight container or tightly wrapped in plastic wrap for up to 3 days.

Freezer: You can freeze individual crepes for up to 2 months. Layer them between parchment paper to prevent sticking, and thaw in the fridge before assembly.

Reheating: If you prefer to enjoy your cake at room temperature, let it sit for about 30 minutes after removing it from the fridge. Avoid reheating in the microwave, as it can affect the texture of both crepes and cream.

Make-Ahead: Prepare the crepes and ganache up to 2 days in advance. Assemble the cake on the day you plan to serve for the best freshness.

Chocolate Crepe Cake Recipe FAQs

What type of milk is best for my Chocolate Crepe Cake?
Using full-fat milk is recommended for a creamy texture that enhances the richness of the crepes. However, any milk can be utilized, including dairy alternatives like almond or oat milk. Just keep in mind that dairy alternatives may slightly alter the flavor, so choose based on your personal preference.

How long can I store the assembled Chocolate Crepe Cake in the fridge?
Your assembled Chocolate Crepe Cake can be stored in the fridge for up to 3 days. Make sure to keep it in an airtight container or wrapped tightly with plastic wrap to maintain freshness and prevent it from absorbing any odors.

Can I freeze Chocolate Crepe Cake?
Absolutely! While it's best enjoyed fresh, you can freeze individual crepes (without the cream) for up to 2 months. To do this, layer them with parchment paper to prevent sticking, place in an airtight container, and thaw in the fridge before assembly. The whipped cream filling is not suitable for freezing, so consider preparing the cake fresh once defrosted.

What should I do if my crepes are sticking to the pan?
To prevent sticking, ensure your non-stick frying pan is well-heated before pouring in the batter. Lightly grease the pan with butter or oil, but don’t overload it, as excess grease can affect texture. If you encounter stuck crepes, try gently loosening the edges with a spatula and letting them cook a little longer to develop a better golden color.

Can I make a gluten-free version of Chocolate Crepe Cake?
Very much! To adapt the recipe for a gluten-free diet, simply substitute the all-purpose flour with a gluten-free flour blend. Ensure that the other ingredients, such as baking powder, are also gluten-free. The result should still offer the delightful texture and taste of the traditional recipe.

Are there any considerations for allergies when making Chocolate Crepe Cake?
Yes, depending on your guests, it's essential to be mindful of common allergens. For a dairy-free option, use plant-based milk and substitute double cream with vegan whipping cream. Always check the labels on your chocolate and other processed ingredients to avoid hidden allergens.

Chocolate Crepe Cake

Decadent Chocolate Crepe Cake That Will Blow Your Mind

Delight in the layers of this Chocolate Crepe Cake, featuring crepes and whipped chocolate cream for an unforgettable dessert.
Print Recipe Pin Recipe
Prep Time 1 hour hr
Cook Time 30 minutes mins
Chilling Time 1 hour hr
Total Time 2 hours hrs 30 minutes mins
Servings: 8 slices
Course: Dessert
Cuisine: French
Calories: 400
Ingredients Equipment Method Nutrition Notes

Ingredients
  

For the Crepes
  • 4 large eggs Provide structure and richness; no substitution recommended for best results.
  • 800 ml full-fat milk Ensures creamy texture; can use any milk, but dairy alternatives will change flavor.
  • 80 g sugar (granulated or caster) Adds sweetness; substitute with coconut sugar for a lower GI option.
  • 305 g plain/all-purpose flour Gives structure to crepes; for gluten-free, swap with gluten-free flour blend.
  • 0.5 teaspoon salt Enhances flavor; omit if making a dessert without salt.
  • 25 g melted butter or sunflower oil Adds moisture; substitute with vegetable oil or coconut oil for a dairy-free version.
For the Whipped Chocolate Cream
  • 625 ml double cream Essential for making whipped chocolate cream; heavy cream can be used as a substitute.
  • 120 g icing sugar Sweetens the whipped cream; powdered sugar is essential for smooth texture, so no direct substitutes recommended.
  • 60 g cocoa powder Provides rich chocolate flavor; use Dutch-processed cocoa for a deeper taste.
For the Ganache
  • 250 g dark chocolate (min 70% cocoa solids), finely chopped Base for ganache, adding richness; use semi-sweet chocolate for a sweeter flavor.
  • 250 ml double cream Required for the ganache; heavy cream can serve as a substitute.

Equipment

  • Blender
  • Non-stick frying pan
  • Mixing Bowl
  • Electric mixer
  • small saucepan
  • serving plate

Method
 

Step-by-Step Instructions for Chocolate Crepe Cake
  1. In a blender, combine 4 large eggs, 800 ml full-fat milk, 80 g sugar, 305 g flour, and ½ teaspoon salt. Blend until smooth and let rest for at least 1 hour.
  2. Heat a non-stick frying pan over medium-low heat and lightly grease it. Pour in a small ladleful of crepe batter, cook for 2 minutes on the first side, flip, and cook for another 30 seconds.
  3. In a mixing bowl, whip 625 ml double cream until soft peaks form. Gradually add 120 g icing sugar and 60 g cocoa powder, folding until fully incorporated.
  4. In a small saucepan, heat 250 ml double cream until hot, remove from heat, and pour over 250 g dark chocolate. Stir until smooth and let cool slightly.
  5. Layer the first crepe on a serving plate, spread a layer of whipped chocolate cream over it, and repeat with remaining crepes. Chill for 1 hour.
  6. After chilling, pour the cooled ganache over the top of the cake, return to fridge to set before slicing. Serve and enjoy!

Nutrition

Serving: 1sliceCalories: 400kcalCarbohydrates: 38gProtein: 5gFat: 28gSaturated Fat: 17gPolyunsaturated Fat: 1gMonounsaturated Fat: 6gCholesterol: 90mgSodium: 120mgPotassium: 200mgFiber: 2gSugar: 25gVitamin A: 500IUCalcium: 200mgIron: 2mg

Notes

Allow your crepe batter to rest for at least 1 hour or overnight. Maintain medium-low heat while cooking crepes for the best results.

Tried this recipe?

Let us know how it was!

Perfect Peach Sorbet: A Refreshing Vegan Treat You'll Love

February 23, 2026 by Grace Snow Leave a Comment

Standing in my kitchen on a sweltering summer day, I couldn't help but search for relief. As I opened the fridge, the sight of sun-kissed peaches caught my eye, shimmering with promise. That's when the idea hit me: a Perfect Peach Sorbet, refreshingly simple yet bursting with flavor. This utterly delightful vegan treat is a celebration of fresh, wholesome ingredients that are sure to cool you down when the heat is on. Not only is it a breeze to whip up, but it’s also completely plant-based and gluten-free, making it a guilt-free dessert option for everyone to enjoy. So, are you ready to experience the joy of making your own sorbet? Let’s dive into this deliciously refreshing recipe together!

Why is Peach Sorbet a Perfect Choice?

Refreshing, This Perfect Peach Sorbet is the ultimate way to beat the heat! It's the ideal blend of sweet and tangy, featuring creamy texture that melts in your mouth.

Easy to Prepare: You only need a few simple ingredients—no fancy equipment required! Just blend, freeze, and enjoy.

Healthy Indulgence: At about 162 calories per serving, it’s a guilt-free treat that doesn’t compromise on flavor.

Versatile Flavors: Feel free to experiment! Swap peaches for other fruits or add a splash of coconut milk for a richer taste.

Crowd-Pleasing Delight: Perfect for gatherings, this sorbet will impress both friends and family, ensuring everyone leaves with a smile.

If you're in the mood for something equally delightful, try making Maple Roasted Sweet or the beautifully fresh Peaches Cream Cookies. These dishes are sure to satisfy any sweet or savory cravings!

Perfect Peach Sorbet Ingredients

• To create your delicious Perfect Peach Sorbet, gather these simple ingredients!

For the Sorbet Base
• Peaches – Fresh or frozen; choose ripe peaches for the sweetest flavor.
• Granulated White Cane Sugar – Balances natural tartness; feel free to use maple syrup for a different sweetness.
• Cold Water – Ensures a smooth consistency; helps dissolve the sugar faster.
• Lemon Juice – Adds tanginess and prevents browning; substitute with lime juice for a zesty twist.

Enjoy making this vegan and gluten-free treat that’s bursting with flavor!

Step‑by‑Step Instructions for Perfect Peach Sorbet

Step 1: Prepare the Ingredients
Start by gathering your ingredients: ripe peaches, granulated sugar, cold water, and fresh lemon juice. If you're using fresh peaches, wash them well, slice them in half, and remove the pits. For a smooth texture, peel the peaches, then chop them into smaller pieces, perfect for blending, while ensuring everything is fresh and sweet for your Perfect Peach Sorbet.

Step 2: Blend the Mixture
In a blender or food processor, combine the chopped peaches, sugar, cold water, and lemon juice. Blend on high speed for about 1-2 minutes, or until the mixture is completely smooth and silky. Keep an eye on the texture—there should be no chunks left. This blending is crucial for achieving the creamy consistency that makes the Perfect Peach Sorbet so delightful.

Step 3: Transfer to a Freezer-Safe Container
Once your mixture is smooth, carefully pour it into a freezer-safe container, such as a metal loaf pan. Spread it evenly for faster freezing, and if desired, cover it with a lid or cling film to prevent ice crystals from forming. This container will be your sorbet's new home as it transforms into a refreshing frozen treat.

Step 4: Freeze the Sorbet
Place the container in the freezer and allow the mixture to freeze for at least 4 hours. For optimal results, you can check the sorbet after about 3 hours—it should look firm and not slushy. Enjoy this waiting time knowing your Perfect Peach Sorbet is on its way to being the star of your summer dessert spread!

Step 5: Thaw Slightly Before Serving
When you're ready to serve, take the Perfect Peach Sorbet out of the freezer and let it sit at room temperature for about 5 minutes. This slight thawing will make it easier to scoop. Use a warm ice cream scoop or spoon for the best results, ensuring every scoop is a smooth and delightful mouthful of peachy goodness, ready to savor.

Perfect Peach Sorbet Variations & Substitutions

Feel free to get creative with your Perfect Peach Sorbet by trying out these delicious variations that cater to your unique taste buds!

  • Mango Twist: Substitute peaches with ripe mangoes for a tropical flair that’s just as sweet and luscious.
  • Berry Bliss: Combine peaches with berries, such as strawberries or blueberries, for a bursting mixed flavor that’s vibrant and colorful.
  • Coconut Cream: Add a splash of coconut milk for an irresistibly creamy texture and a hint of tropical coconut flavor.
  • Herbal Zest: Toss in fresh mint leaves while blending for a refreshing herbal touch that elevates the sorbet's brightness.
  • Citrus Surprise: Replace lemon juice with lime juice or even add a splash of orange juice for a citrusy zing that enhances every bite.
  • Spicy Kick: For a daring twist, mix in a hint of cayenne pepper or chili powder to add a subtle heat that complements the sweetness.
  • Nutty Delight: Top your sorbet with toasted coconut flakes or chopped almonds for added crunch and texture with each scoop.

If you loved making this Perfect Peach Sorbet, you might also enjoy the seasonal delight of Peaches Cream Cookies or the savory goodness of Fish Taco Bowls!

Make Ahead Options

These Perfect Peach Sorbet are a fantastic choice for meal prep enthusiasts! You can prep the sorbet mixture up to 24 hours in advance by blending the peaches, sugar, cold water, and lemon juice. Just pour the mixture into a freezer-safe container and allow it to freeze. For best results, cover the container with a lid or cling film to prevent ice crystals, ensuring your sorbet remains just as delicious later. When you're ready to serve, simply take it out of the freezer and thaw for about 5 minutes before scooping. This way, you'll have a refreshing treat ready for those busy weeknights or spontaneous gatherings!

Expert Tips for Perfect Peach Sorbet

• Choose Ripe Peaches: Select peaches that are fragrant and slightly soft to the touch. These will provide the best sweetness and flavor for your perfect peach sorbet.

• Adjust the Sweetness: If you prefer less sweetness, reduce the sugar amount! Start with half the recommended sugar and taste the mixture before freezing.

• Blend Thoroughly: Ensure your mixture is completely smooth to avoid any chunks in the sorbet. Proper blending is key for achieving that silky texture in your perfect peach sorbet.

• Freeze Properly: Use a shallow container for faster freezing and a smoother result. If using a deeper container, you may need extra time for it to solidify.

• Allow to Thaw Slightly: For the best scooping experience, let the sorbet sit out for about 5 minutes before serving. This helps achieve that creamy consistency everyone loves!

How to Store and Freeze Perfect Peach Sorbet

Fridge: Store any leftover sorbet in an airtight container in the fridge for up to 3 days. However, for optimal texture, it's best kept frozen.

Freezer: The Perfect Peach Sorbet can be frozen in a tightly sealed container for up to 3 months. Just ensure it's covered to prevent ice crystals from forming.

Reheating: Not applicable for sorbet! Simply scoop and enjoy straight from the freezer. If it's too hard, let it sit at room temperature for 5 minutes to soften before scooping.

Serving Suggestions: For the best experience, serve the sorbet the same day it's made, but no need to worry about leftovers—storing it properly will keep it refreshing and delightful!

What to Serve with Perfect Peach Sorbet?

Picture yourself on a warm evening, savoring each refreshing bite of your peach sorbet. Elevate this delightful experience by pairing it with these irresistible options.

  • Light Fruit Salad: A medley of fresh berries and citrus complements the sorbet’s sweetness with vibrant flavors and crunchy textures. It adds a refreshing, juicy burst that enhances your dessert.

  • Coconut Macaroons: These chewy, lightly sweet treats echo the tropical vibes and provide a lovely contrast to the smoothness of your sorbet. They take you on a sweet vacation with every bite!

  • Minty Iced Tea: Quench your thirst with a tall glass of mint iced tea, offering a cooling, herbal note that harmonizes beautifully with the peach flavor. This pairing refreshes you from head to toe.

  • Almond Biscotti: Crunchy and nutty, this delightful treat offers a wonderful textural contrast to the soft sorbet. Dip them in the sorbet for an indulgent combination!

  • Dark Chocolate Shavings: Sprinkle a few shavings on top of the sorbet. The rich bitterness of dark chocolate enhances the sweetness and fruity notes perfectly. It's a match made in dessert heaven!

  • Lemon Sorbet: Keep things light and zesty with this tart companion, creating a delicious sorbet duo that playfully contrasts and balances each other. Experience layers of refreshing flavors.

Each of these pairings enhances the joy of enjoying your Perfect Peach Sorbet, making your dessert experience just that much more delightful!

Perfect Peach Sorbet Recipe FAQs

How do I choose the best peaches for my sorbet?
Absolutely! To select the best peaches, look for ones that are fragrant and slightly soft to the touch. A ripe peach will have a beautiful color, free from any dark spots or blemishes. If you're opting for fresh peaches, they should be in season for the most flavor; typically, the summer months yield the sweetest ones.

How long can I store the Perfect Peach Sorbet?
You can store your Perfect Peach Sorbet in a tightly sealed container in the freezer for up to 3 months. To prevent ice crystals from forming, it’s important to cover the container well. If you have any leftovers, they can be kept in the refrigerator for up to 3 days, but the texture will be best if kept frozen.

What is the best way to freeze the sorbet?
To freeze your Perfect Peach Sorbet effectively, pour the blended mixture into a shallow, freezer-safe container. This allows for quicker freezing, usually taking about 4 hours to set. If you’re using a deeper container, it might take longer, so check the texture after about 3 hours. Once it’s firm, cover it well to maintain that fresh flavor!

Can I use other fruits for making sorbet?
Very much! You can easily experiment by swapping peaches for other fruits like ripe mangoes, strawberries, or even berries for different flavor profiles. Just keep in mind that you may need to adjust the sweetness based on the fruit’s natural flavor. For a creamier texture, you can add a splash of coconut milk while blending!

Is this recipe suitable for people with allergies?
Yes! The Perfect Peach Sorbet is entirely plant-based and vegan, making it a great option for those with dairy allergies. However, if you have a particular sensitivities or allergies to any ingredients (like sugar), feel free to substitute with alternatives! Always double-check your specific dietary needs based on your health considerations.

Perfect Peach Sorbet

Perfect Peach Sorbet: A Refreshing Vegan Treat You'll Love

Discover the delightful Perfect Peach Sorbet, a refreshing vegan treat guaranteed to cool you down!
Print Recipe Pin Recipe
Prep Time 15 minutes mins
Freezing Time 4 hours hrs
Total Time 4 hours hrs 15 minutes mins
Servings: 4 servings
Course: Dessert
Cuisine: Gluten-Free, Vegan
Calories: 162
Ingredients Equipment Method Nutrition Notes

Ingredients
  

Sorbet Base
  • 4 cups Peaches Fresh or frozen; ripe for sweetness.
  • 3/4 cup Granulated White Cane Sugar Can substitute with maple syrup.
  • 1/2 cup Cold Water Ensures smooth consistency.
  • 2 tablespoons Lemon Juice Prevents browning; lime juice can be used.

Equipment

  • Blender
  • Freezer-Safe Container

Method
 

Step-by-Step Instructions
  1. Start by gathering your ingredients: ripe peaches, granulated sugar, cold water, and fresh lemon juice. Wash the peaches, slice in half, and remove pits. For smooth texture, peel and chop into smaller pieces.
  2. In a blender, combine chopped peaches, sugar, cold water, and lemon juice. Blend on high for 1-2 minutes until smooth and silky, ensuring no chunks remain.
  3. Pour the smooth mixture into a freezer-safe container, spread evenly for faster freezing, and cover to prevent ice crystals.
  4. Freeze for at least 4 hours. Check after 3 hours; it should be firm and not slushy.
  5. Before serving, let sorbet sit at room temperature for 5 minutes to thaw slightly for easy scooping.

Nutrition

Serving: 1cupCalories: 162kcalCarbohydrates: 41gProtein: 1gSodium: 1mgPotassium: 250mgFiber: 2gSugar: 31gVitamin A: 10IUVitamin C: 15mgCalcium: 1mgIron: 2mg

Notes

For best results, serve the sorbet on the same day it's made. If stored, enjoy within 3 months for optimal quality.

Tried this recipe?

Let us know how it was!

Creamy Rose Pistachio Ice Cream for a Luxurious Treat

February 23, 2026 by Grace Snow Leave a Comment

The first spoonful of this Rose Pistachio Ice Cream is like a cool breeze on a hot summer day—exotic, refreshing, and utterly delightful. As a passionate home chef, I constantly seek out new ways to elevate my dessert game, and this luxurious treat does just that. Featuring the silky creaminess of whipped cream, the gentle floral notes of rose water, and the satisfying crunch of roasted pistachios, this ice cream is a delightful twist on traditional flavors that will leave your guests in awe. Not only does it promise a sophisticated touch to your dessert table, but it also requires minimal prep time, allowing you to focus on the fun of entertaining. Plus, it’s vegetarian-friendly, making it a wonderful option for gatherings with diverse dietary preferences. Are you curious about how to whip up this enchanting dessert? Let’s dive in!

Why is Rose Pistachio Ice Cream Unique?

Luxurious Experience: This Rose Pistachio Ice Cream transforms ordinary dessert into a lavish treat that feels gourmet.

Exotic Flavor: The aromatic rose water combines seamlessly with the nutty pistachios, creating a truly unique flavor profile that tantalizes your taste buds.

Quick and Easy: With just a few simple steps, you can whip up this delight in no time—ideal for those last-minute summer gatherings!

Crowd-Pleasing Appeal: Say goodbye to boring ice cream! This rich and creamy dessert will impress your guests and keep them coming back for more.

Versatile Choices: Feel free to experiment with various nuts or even add a splash of citrus for a refreshing twist. Pair it with other treats like Peaches Cream Cookies to elevate your dessert game!

Rose Pistachio Ice Cream Ingredients

For the Cream Base
• Cream – provides richness and smooth texture; use full-fat cream for the best results.
• Sugar – sweetens the mix; adjust according to personal preference, particularly if you prefer a less sweet Rose Pistachio Ice Cream.

For the Flavoring
• Rose Water – adds a floral aroma; use sparingly to avoid overpowering the delicate flavors.
• Pistachios – introduces nuttiness and crunch; opt for unsalted, roasted pistachios for optimal flavor.

Optional Ingredients
• Condensed Milk – if using a no-churn method, it acts as a sweetener and stabilizer for that creamy texture.

Feel free to gather these ingredients and prepare to embrace a luscious dessert experience!

Step‑by‑Step Instructions for Rose Pistachio Ice Cream

Step 1: Whip the Cream
In a large mixing bowl, pour in the full-fat cream and sprinkle in your sugar. Using a hand mixer or stand mixer, whip the mixture on medium speed until soft peaks form, which should take about 3-5 minutes. You'll know it's ready when the cream holds its shape but still has a smooth texture, creating a luscious base for your Rose Pistachio Ice Cream.

Step 2: Fold in Flavors
With gentle care, drizzle in the rose water and add the crushed roasted pistachios to the whipped cream. Using a spatula, fold the mixture carefully until the rose water and pistachios are evenly distributed, ensuring every scoop of the Rose Pistachio Ice Cream will have that delicate floral flavor and the delightful crunch of nuts!

Step 3: Churn the Mixture
Transfer the creamy mixture into the bowl of your ice cream maker. Following the manufacturer's instructions, churn the mixture for about 25-30 minutes until it thickens and reaches a soft-serve consistency. This step is crucial to achieving that luxurious texture the Rose Pistachio Ice Cream is known for—look for it to be creamy but still pourable.

Step 4: Freeze for Firmness
Once churned, pour the ice cream into a sealed container, smoothing the top with a spatula. Place it in your freezer and allow it to set for at least 4 hours, or until it's firm enough to scoop. This freezing process will solidify the flavors and textures, transforming your mixture into a dreamy Rose Pistachio Ice Cream.

Step 5: Serve with Style
When you're ready to serve your delightful Rose Pistachio Ice Cream, let it sit at room temperature for about 5-10 minutes to soften slightly—a great way to enhance scoopability! Use an ice cream scoop to serve this exquisite dessert, and consider garnishing with a sprinkle of crushed pistachios for an elegant touch.

Make Ahead Options

For busy home cooks, this Rose Pistachio Ice Cream is a wonderful recipe to prep in advance! You can whip the cream and sugar together and fold in the rose water and crushed pistachios up to 24 hours ahead, storing the mixture in the refrigerator (in a covered container) to maintain its freshness. Simply churn the mixture when you’re ready—this ensures maximum flavor without losing that luxurious texture. After churning, the ice cream can be transferred to a sealed container and frozen for up to 2 weeks for optimal taste and quality. When it’s time to serve, allow the ice cream to sit at room temperature for about 5-10 minutes before scooping, ensuring that every bite is just as delightful as the first!

How to Store and Freeze Rose Pistachio Ice Cream

Fridge: Keep your homemade Rose Pistachio Ice Cream in the refrigerator for about 30 minutes before serving to soften slightly for easy scooping.

Freezer: Store the ice cream in an airtight container in the freezer for up to 2 weeks for optimal flavor and texture. Be mindful that ice crystals may form if kept longer.

Serving: When ready to enjoy, let the ice cream sit at room temperature for about 5-10 minutes to attain a creamy scoopable consistency before serving.

Reheating: There's no need to reheat this luxurious dessert, but if it freezes too hard, the brief warming ensures that each scoop remains a delight!

Expert Tips for Rose Pistachio Ice Cream

• Chill Your Tools: Ensure the ice cream maker's bowl is thoroughly chilled. This helps achieve the smooth and creamy texture you desire in your Rose Pistachio Ice Cream.

• Sweetness Balance: Taste the mixture before freezing. Adjust sugar levels according to your preference for a customized sweetness that suits your palate.

• Rose Water Precision: Use rose water sparingly; a little goes a long way. Overdoing it can lead to an overpowering flavor that masks the delicate notes of pistachio.

• Presentation Matters: For a beautiful finish, top your scoops with crushed pistachios and a drizzle of rose syrup. This adds an elegant touch to your dessert table.

• Storage Tips: Store leftover Rose Pistachio Ice Cream in an airtight container to maintain freshness for up to two weeks, but be aware of ice crystals forming if kept too long.

Rose Pistachio Ice Cream Variations

Feel free to make this Rose Pistachio Ice Cream your own with these delightful tweaks and swaps!

  • Nutty Swaps: Replace pistachios with almonds or hazelnuts to explore different nut flavors while maintaining that crunchy texture. Imagine a lovely almond-infused delight that brings another level of richness!

  • Citrus Twist: Adding a splash of lemon juice or zest brightens up the ice cream with a refreshing citrus note, pairing beautifully with the floral rose. The contrast can create a truly delightful harmony of flavors.

  • Infusion Options: Experiment with spices like cardamom or a hint of cinnamon to incorporate warm, aromatic undertones into your ice cream. This adds depth and a tantalizing warmth you won't want to miss.

  • Vegan-Friendly: For a dairy-free version, swap cream with coconut cream and adjust milk to maintain creaminess. The tropical notes of coconut combined with rose will find a lovely mix!

  • Chocoholics Unite: Stir in some dark chocolate chips or a swirl of chocolate sauce for an indulgent chocolate-rose experience. Chocolate pairs beautifully with the nutty pistachios for a delightful treat.

  • Frozen Treats Galore: Try making Rose Pistachio Ice Cream popsicles by pouring the mixture into molds and freezing. These fun treats are perfect for warm days and delightful for kids and adults alike.

  • Layered Cakes: Consider using this luxurious ice cream as a layer in an ice cream cake! Combine with a simple cake base and freeze for a refreshing multi-layer dessert, perfect for gatherings. For ideas, check out this Ice Cream Cake recipe.

  • Elegant Desserts: Serve with a drizzle of rose syrup and a sprinkle of crushed nuts over other desserts—like alongside Peaches Cream Cookies. This simple addition takes your dessert to new heights!

Each variation opens the door to new culinary adventures, so don't hesitate to get creative!

What to Serve with Rose Pistachio Ice Cream

Indulging in a bowl of silky Rose Pistachio Ice Cream can transport you to a fragrant garden, but pairing it with complementary sides takes your dessert experience to the next level!

  • Creamy Mashed Potatoes: These buttery, smooth potatoes offer a comforting contrast to the ice cream's rich and airy texture. Perfect for rounding out a delightful meal.

  • Honey Yogurt: A drizzle of honey yogurt creates a sweet, tart pairing that harmonizes with the floral notes of the ice cream, enhancing its exotic charm.

  • Fresh Berries: Juicy strawberries or raspberries add a vibrant, refreshing element that balances the sweet creaminess of Rose Pistachio Ice Cream beautifully.

  • Cardamom Cookies: Ambient spices in these crispy cookies complement the rose's floral notes, creating a delectable balance that excites the palate.

  • Mint Tea: Sipping on cool mint tea refreshes the senses, making it a perfect drink to accompany this luxurious dessert and cleanse the palate.

  • Baklava Bites: The nutty layers of baklava pair wonderfully with the pistachios in the ice cream, adding a delightful crunch and satisfying sweetness to your dessert table.

  • Coconut Macaroons: These chewy coconut treats introduce a tropical touch, enhancing the ice cream's indulgent experience while providing textural variety.

  • Almond Cake: Light and fluffy almond cake offers a nutty flavor that beautifully marries with the ice cream, creating a memorable dessert moment.

  • Rose Lemonade: A refreshing glass of rose lemonade echoes the delicate rose flavor, creating a delightful and cohesive theme for your gathering.

Rose Pistachio Ice Cream Recipe FAQs

How do I choose the best pistachios?
Absolutely! Look for unsalted, roasted pistachios with a vibrant green color and no dark spots. Fresh pistachios will have a pleasant nutty aroma and taste. If you can, buy them in bulk for the best flavor and texture in your Rose Pistachio Ice Cream.

What’s the best way to store leftover ice cream?
To keep your Rose Pistachio Ice Cream fresh, store it in an airtight container and place it in the freezer. It will maintain optimal flavor and texture for up to 2 weeks. Just remember to press a piece of parchment paper against the surface before sealing it. This helps prevent ice crystals from forming!

Can I freeze the Rose Pistachio Ice Cream for longer?
Yes, you can freeze it for up to 3 months, but consume it sooner for the best experience. If you're storing it long-term, ensure it's in a tightly sealed container. When ready to enjoy, let it soften for about 10-15 minutes at room temperature for perfect scoopability.

What if my ice cream is too hard to scoop?
No worries! If your Rose Pistachio Ice Cream turns out too hard, simply allow it to sit at room temperature for about 5-10 minutes before serving. This will help it soften. If it still doesn’t scoop easily, you can also run your ice cream scoop under warm water for a few seconds to make serving easier.

Is this dessert safe for those with nut allergies?
While this delightful Rose Pistachio Ice Cream is vegetarian-friendly, it does contain nuts. If you’re serving guests with nut allergies, consider substituting the pistachios with a nut-free alternative like sunflower seeds or simply omit them entirely. The ice cream will still retain its luxurious flavor with the addition of rose water!

Can I make this ice cream dairy-free?
Absolutely! Swap the full-fat cream with coconut cream or any dairy-free cream alternative. Adjust the sweetness as necessary since some alternatives can vary in sweetness. This way, you can enjoy the same indulgent Rose Pistachio Ice Cream, perfectly suited for vegan or lactose-intolerant individuals!

Rose Pistachio Ice Cream

Creamy Rose Pistachio Ice Cream for a Luxurious Treat

Discover the exotic and delightful flavors of Rose Pistachio Ice Cream, a perfect treat for summer gatherings.
Print Recipe Pin Recipe
Prep Time 5 minutes mins
Cook Time 30 minutes mins
Freezing Time 4 hours hrs
Total Time 4 hours hrs 35 minutes mins
Servings: 6 servings
Course: Dessert
Cuisine: Global
Calories: 250
Ingredients Equipment Method Nutrition Notes

Ingredients
  

Cream Base
  • 2 cups full-fat cream provides richness and smooth texture
  • 3/4 cup sugar adjust according to personal preference
Flavoring
  • 2 tablespoons rose water use sparingly
  • 1 cup unsalted roasted pistachios introduces nuttiness and crunch
Optional Ingredients
  • 1 can condensed milk acts as sweetener and stabilizer for no-churn method

Equipment

  • Ice cream maker
  • Mixing Bowl
  • Spatula

Method
 

Step-by-Step Instructions
  1. In a large mixing bowl, whip the full-fat cream and sugar until soft peaks form (3-5 minutes).
  2. Fold in the rose water and crushed roasted pistachios until evenly distributed.
  3. Churn the mixture in an ice cream maker for 25-30 minutes until thickened.
  4. Transfer to a sealed container and freeze for at least 4 hours until firm.
  5. Let sit at room temperature for 5-10 minutes before serving; garnish with crushed pistachios if desired.

Nutrition

Serving: 1scoopCalories: 250kcalCarbohydrates: 28gProtein: 4gFat: 14gSaturated Fat: 8gPolyunsaturated Fat: 1gMonounsaturated Fat: 5gCholesterol: 45mgSodium: 30mgPotassium: 150mgFiber: 1gSugar: 20gVitamin A: 500IUCalcium: 100mgIron: 1mg

Notes

Serve with a drizzle of rose syrup and a sprinkle of crushed pistachios for an elegant touch.

Tried this recipe?

Let us know how it was!

Homemade Orange Popsicles That Are Bursting with Flavor

February 23, 2026 by Grace Snow Leave a Comment

The first lick of summer couldn't feel sweeter than when you dive into a homemade popsicle on a hot day. That's why I'm thrilled to share my recipe for Homemade Orange Popsicles—simple, healthy, and bursting with that sunshine-filled flavor we crave. Whipping these up takes only about 15 minutes (plus a little waiting time), making them an easy go-to for anyone looking to refresh their afternoon or satisfy a sweet tooth without the guilt. With options to eliminate added sugars, these treats celebrate the natural sweetness of fresh oranges, giving you a delicious way to stay cool. Now, who’s ready to beat the heat with a tropical twist?

Why Love Homemade Orange Popsicles?

Freshness You Can Taste: Each popsicle is crafted with freshly squeezed orange juice, ensuring a vibrant flavor that no store-bought option can match.
Healthy Indulgence: With options for no added sugar, you can enjoy a guilt-free treat that’s tasty and good for you.
Versatile and Fun: Feel free to mix in unexpected flavors like coconut or other fruits for a personalized twist!
Quick and Easy: Ready in just 15 minutes (plus freezing), these popsicles fit perfectly into busy lifestyles, just like my Homemade Hot Chocolate.
Family-Friendly Appeal: Perfect for kids and adults alike, they’re a great way to indulge without the heaviness of fast food.
Ideal for Summer Gatherings: Serve them at parties or family get-togethers as a refreshing treat that everyone will love!

Homemade Orange Popsicles Ingredients

For the Popsicles
• Fresh Orange Juice – Use fresh-squeezed for optimal taste and brightness in your homemade orange popsicles.
• Granulated Sugar – Enhances sweetness; adjust to taste or substitute with honey or agave for a healthier option.
• Zest of 1 Orange – Adds aromatic oils and boosts the orange flavor for a richer experience.
• Lemon Juice – Optional; adds a tartness that beautifully balances the sweetness of the oranges.

Step‑by‑Step Instructions for Homemade Orange Popsicles

Step 1: Juicing the Oranges
Start by juicing 6-8 fresh oranges, aiming for about 2 cups of juice. Cut the oranges in half and use a citrus juicer to extract the juice, ensuring you remove any seeds. The bright, vibrant orange juice is the star ingredient for your Homemade Orange Popsicles, providing a fresh and tangy flavor that is hard to beat.

Step 2: Mixing the Ingredients
In a blender, combine the fresh orange juice with granulated sugar (or your preferred sweetener) and the zest of one orange. Blend until the sugar is fully dissolved—this should only take about 30 seconds. If you opt to add the lemon juice for a touch of tartness, now's the time! This mixture will create a beautifully aromatic base for your popsicles.

Step 3: Filling the Molds
Once your mixture is ready, carefully pour it into popsicle molds. Fill each mold, leaving a small space at the top to allow for expansion as they freeze. This step is crucial for achieving that perfect popsicle shape, so take your time. You should see the bright orange color fill the molds, creating a delightful preview of the refreshing treat to come.

Step 4: Freezing the Popsicles
Insert popsicle sticks into each mold, making sure they stand upright, and place the molds in the freezer. Allow the popsicles to freeze for at least 4-6 hours, or until they are completely solid. Check them periodically; they should feel firm to the touch. This patience will reward you with a cold treat that’s perfect for any hot day!

Step 5: Unmolding the Popsicles
To release your Homemade Orange Popsicles, run warm water over the outside of the molds for a few seconds. This will help loosen the popsicles. Gently pull out each popsicle; they should slide out smoothly if properly frozen. Enjoy their vibrant color and refreshing texture as you take your first bite!

How to Store and Freeze Homemade Orange Popsicles

  • Fridge: Store popsicles in an airtight container in the fridge for up to 3 days, but they may lose their icy texture.

  • Freezer: Keep your Homemade Orange Popsicles in the freezer in a sealed container for up to 2 weeks to maintain their freshness and flavor.

  • Unmolding Tip: If you make a batch and have leftovers, run the molds under warm water to easily release any popsicles that are still in the molds before storing.

  • Reheating: Enjoy popsicles straight from the freezer; no reheating necessary! Just let them sit for a minute if they feel too hard to bite into.

Homemade Orange Popsicles Variations

Feel free to let your imagination run wild with these delightful twists to make your popsicles even more fantastic!

  • Creamy Coconut: Add a splash of coconut milk to the orange juice blend for a rich, tropical flavor that feels like a vacation in every bite. The creaminess takes popsicles from simple to sublime!

  • Tropical Twist: Mix in pineapple or mango juice for a refreshing taste of the tropics. This fruity combination elevates the flavor profile, creating a sunny treat that’s perfect for summer gatherings.

  • Berry Burst: Toss in some blended berries like strawberries or raspberries for a pop of color and flavor. The sweet tartness pairs beautifully with the orange, making each lick a delicious surprise.

  • Spicy Kick: Add a pinch of cayenne or a dash of finely chopped jalapeño for those who like a little heat. This unexpected twist transforms your orange popsicles into a bold dessert, igniting your taste buds.

  • Zesty Citrus Mix: Substitute fresh orange juice with a blend of grapefruit and lime juices for a tangy edge. The mix will dance on your palate, offering a delightful variation for citrus lovers.

  • Honey Drizzle: Swap out granulated sugar in the mix for honey or maple syrup. This not only makes for a healthier option but also adds a beautiful hint of floral sweetness that enhances the overall flavor.

  • Nutty Flavor: Stir in some almond or peanut butter for a creamy texture and nutty taste. It creates a decadent popsicle that pairs surprisingly well with the vibrant orange flavor.

  • Herb Infusion: Crush some fresh mint or basil leaves and mix into your orange juice blend. This fragrant addition will provide a refreshing twist that’s both sophisticated and refreshing, perfect for garden parties!

While you’re exploring these variations, don’t forget to check out my Shakshuka Savor Bold for another vibrant recipe that showcases fresh flavors! Keep your summer heat-busting adventures going with these delightful twists on Homemade Orange Popsicles.

What to Serve with Homemade Orange Popsicles

Cool down your summer gatherings with these vibrant, refreshing popsicles, perfectly complemented by delicious sides and sips.

  • Fresh Fruit Salad: A colorful medley of seasonal fruits enhances the refreshing experience, balancing sweet and tart notes that pair perfectly with popsicles.
  • Coconut Whipped Cream: This light, fluffy topping adds a creamy, tropical twist, making each bite of popsicle feel like an indulgent treat.
  • Yogurt Parfait: Layer yogurt with granola and fresh berries for a satisfying, balanced snack that contrasts the icy popsicles while offering a creamy texture.
  • Minty Lemonade: This zesty beverage brightens up the meal while keeping the refreshing vibe intact, complementing the citrus notes in the popsicles.
  • Chocolate Sauce: Drizzle a bit of rich and velvety chocolate sauce on the popsicles for a sweet contrast, offering a deliciously indulgent surprise.
  • Tropical Smoothie: Blend up a smoothie with bananas, mangoes, and coconut milk to create a creamy, refreshing drink that pairs beautifully with the popsicles.
  • Granola Bars: Crunchy, nutty granola bars add a satisfying texture and energy boost, making them perfect companions for your homemade treats.
  • Chia Seed Pudding: This healthy, creamy dessert can be prepared in advance, providing a nutty, slightly sweet treat that pairs wonderfully with cold popsicles.
  • Iced Green Tea: A lightly sweetened iced green tea enhances the experience, offering a fragrant, refreshing sip that complements the bright orange flavors.

Make Ahead Options

These Homemade Orange Popsicles are perfect for meal prep enthusiasts! You can prepare the orange juice mixture and pour it into molds up to 24 hours in advance, allowing for easy assembly whenever you're ready to freeze. To maintain the freshest taste, be sure to use freshly squeezed juice and keep the mixture in the refrigerator until you're ready to fill the molds. When it's time to freeze, simply insert sticks and freeze for at least 4-6 hours until solid. With these make-ahead tips, you’ll have a refreshing snack waiting for you on busy weeknights—just as delicious and satisfying as if you made them fresh that day!

Expert Tips for Homemade Orange Popsicles

• Juicing Perfection: Use fresh oranges for the best flavor; avoid bottled juice as it lacks the vibrant taste of homemade orange popsicles.

• Sugar Alternatives: If you prefer no added sugar, let ripe oranges do the sweetening! Just remember, sweetness varies with fruit ripeness.

• Mixing Smoothly: Blend until all sugar is dissolved to prevent graininess; a smooth mixture is key for a delightful popsicle texture.

• Popsicle Mold Space: Don’t overfill your molds! Leave a little room for expansion during freezing to ensure perfect popsicle shapes.

• Easy Release Tip: If popsicles are hard to remove, run mold under warm water slightly longer for an effortless release; no broken popsicles here!

Homemade Orange Popsicles Recipe FAQs

What type of oranges should I use for the best flavor?
Absolutely! For the most vibrant flavor, use freshly squeezed orange juice from ripe, juicy oranges like navel or Valencia oranges. These varieties are sweeter and have a pleasant tang, enhancing your Homemade Orange Popsicles.

How long can I store Homemade Orange Popsicles in the freezer?
You can keep your Homemade Orange Popsicles in the freezer for up to 2 weeks. Ensure they're in a sealed container to prevent freezer burn, preserving their fresh flavor and texture for those warm day cravings!

Can I freeze leftover popsicles, and how do I do it?
Yes, of course! To freeze, allow your popsicles to set fully before running warm water over the outside of the molds to release them. Then, place the popsicles in an airtight container and keep them flat in your freezer, ensuring they are spaced apart to avoid sticking together.

What if my popsicles are too hard to eat?
This can happen if they freeze too long! If your Homemade Orange Popsicles feel overly hard, simply let them sit at room temperature for 1 to 2 minutes before trying to enjoy. Alternatively, running warm water over the mold can help soften them enough for easy eating.

Are these popsicles safe for children with allergies?
Definitely! These popsicles are simply made from natural ingredients like fresh orange juice and optional sweeteners, making them a healthier choice. However, always consider any specific allergies, especially if using sweeteners like honey, which shouldn’t be given to children under one year old.

Can I use other fruits to make variations of my popsicles?
Very much so! You can mix in pureed fruits like berries, mango, or pineapple for a tropical twist. Just keep the ratio similar to the orange juice to maintain a smooth consistency. Feel free to get creative with combinations to find your family's favorite!

Homemade Orange Popsicles

Homemade Orange Popsicles That Are Bursting with Flavor

Enjoy these Homemade Orange Popsicles that are simple, healthy, and bursting with flavor, perfect for beating the heat.
Print Recipe Pin Recipe
Prep Time 15 minutes mins
Freezing Time 5 hours hrs
Total Time 5 hours hrs 15 minutes mins
Servings: 6 popsicles
Course: Dessert
Cuisine: American
Calories: 80
Ingredients Equipment Method Nutrition Notes

Ingredients
  

For the Popsicles
  • 2 cups Fresh Orange Juice Use fresh-squeezed for optimal taste
  • 1/4 cup Granulated Sugar Adjust to taste or substitute with honey or agave
  • 1 whole Zest of Orange Adds aromatic oils for a richer experience
  • 2 tablespoons Lemon Juice Optional; adds tartness that balances sweetness

Equipment

  • citrus juicer
  • Blender
  • Popsicle molds

Method
 

Step-by-Step Instructions for Homemade Orange Popsicles
  1. Juicing the Oranges: Start by juicing 6-8 fresh oranges, aiming for about 2 cups of juice. Cut the oranges in half and use a citrus juicer to extract the juice, ensuring you remove any seeds.
  2. Mixing the Ingredients: In a blender, combine the fresh orange juice with granulated sugar (or your preferred sweetener) and the zest of one orange. Blend until the sugar is fully dissolved.
  3. Filling the Molds: Carefully pour the mixture into popsicle molds, filling each mold and leaving a small space at the top for expansion as they freeze.
  4. Freezing the Popsicles: Insert popsicle sticks into each mold and place the molds in the freezer. Allow the popsicles to freeze for at least 4-6 hours, or until solid.
  5. Unmolding the Popsicles: Run warm water over the molds for a few seconds to loosen the popsicles and gently pull them out.

Nutrition

Serving: 1popsicleCalories: 80kcalCarbohydrates: 20gPotassium: 180mgFiber: 1gSugar: 15gVitamin A: 5IUVitamin C: 100mgCalcium: 1mgIron: 1mg

Notes

Use fresh oranges for the best flavor and avoid overfilling the molds to ensure perfect popsicle shapes.

Tried this recipe?

Let us know how it was!
  • « Previous Page
  • 1
  • …
  • 15
  • 16
  • 17
  • 18
  • 19
  • …
  • 62
  • Next Page »

Welcome!

Hi, I’m Grace, a Sydney-based home cook with a passion for bold flavors and trending ingredients. Whether you’re a busy beginner or a seasoned foodie, you’ll find dishes here that are fresh, fun, and full of flavor.

More about me

Popular Recipes

  • One Pot Keto Tuna Casserole
    One Pot Keto Tuna Casserole: Creamy Comfort in Minutes
  • Ultimate Jalapeno Popper Chicken Salad
    Ultimate Jalapeno Popper Chicken Salad That'll Wow Your Tastebuds
  • Green Chile Cheese Dip
    Mouthwatering Green Chile Cheese Dip for Cozy Gatherings
  • Easy Chimichurri Sauce
    Fresh and Zesty Easy Chimichurri Sauce in Just Minutes

Footer

↑ back to top

About

  • Privacy Policy
  • Disclaimer
  • Terms & Conditions

Newsletter

  • Sign Up! for emails and updates

Contact

  • About me
  • Contact me

Copyright © 2025 TastyTrendIngredients