tastytrendingredients

  • Home
  • Recipes
    • Appetizers
    • Breakfast
    • Dessert
    • Dinner
    • Drinks
    • Salads
    • Snacks
    • Soups
  • About me
  • Contact
menu icon
go to homepage
  • Home
  • Recipes
    • Appetizers
    • Breakfast
    • Dessert
    • Dinner
    • Drinks
    • Salads
    • Snacks
    • Soups
  • About me
  • Contact
search icon
Homepage link
  • Home
  • Recipes
    • Appetizers
    • Breakfast
    • Dessert
    • Dinner
    • Drinks
    • Salads
    • Snacks
    • Soups
  • About me
  • Contact
×

Decadent Butter Pecan Praline Poke Cake to Impress Your Guests

March 25, 2026 by Grace Snow Leave a Comment

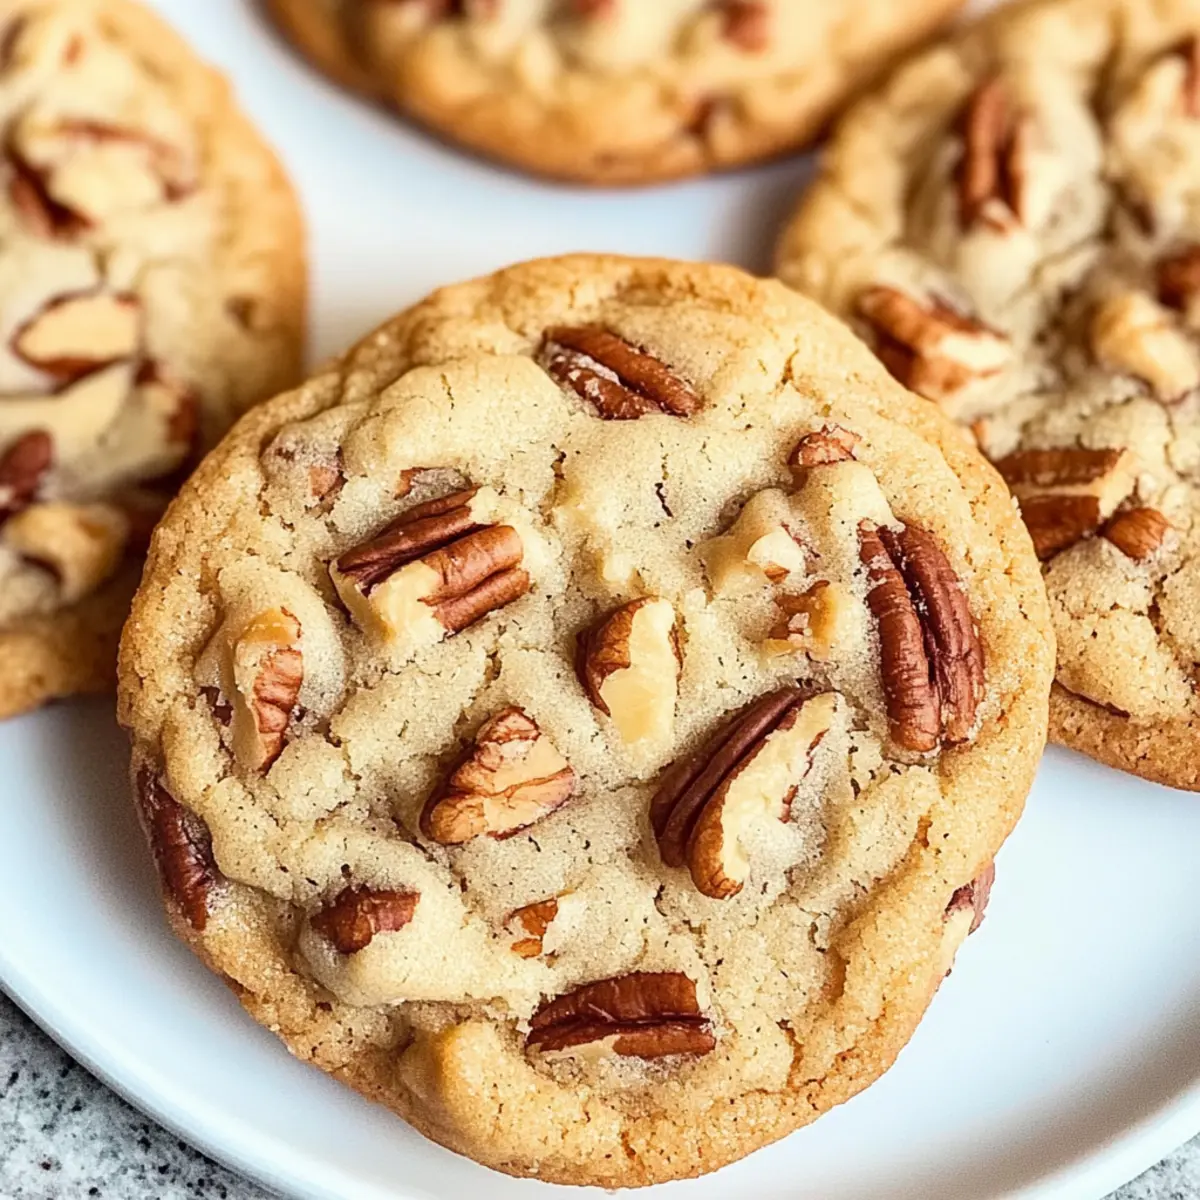
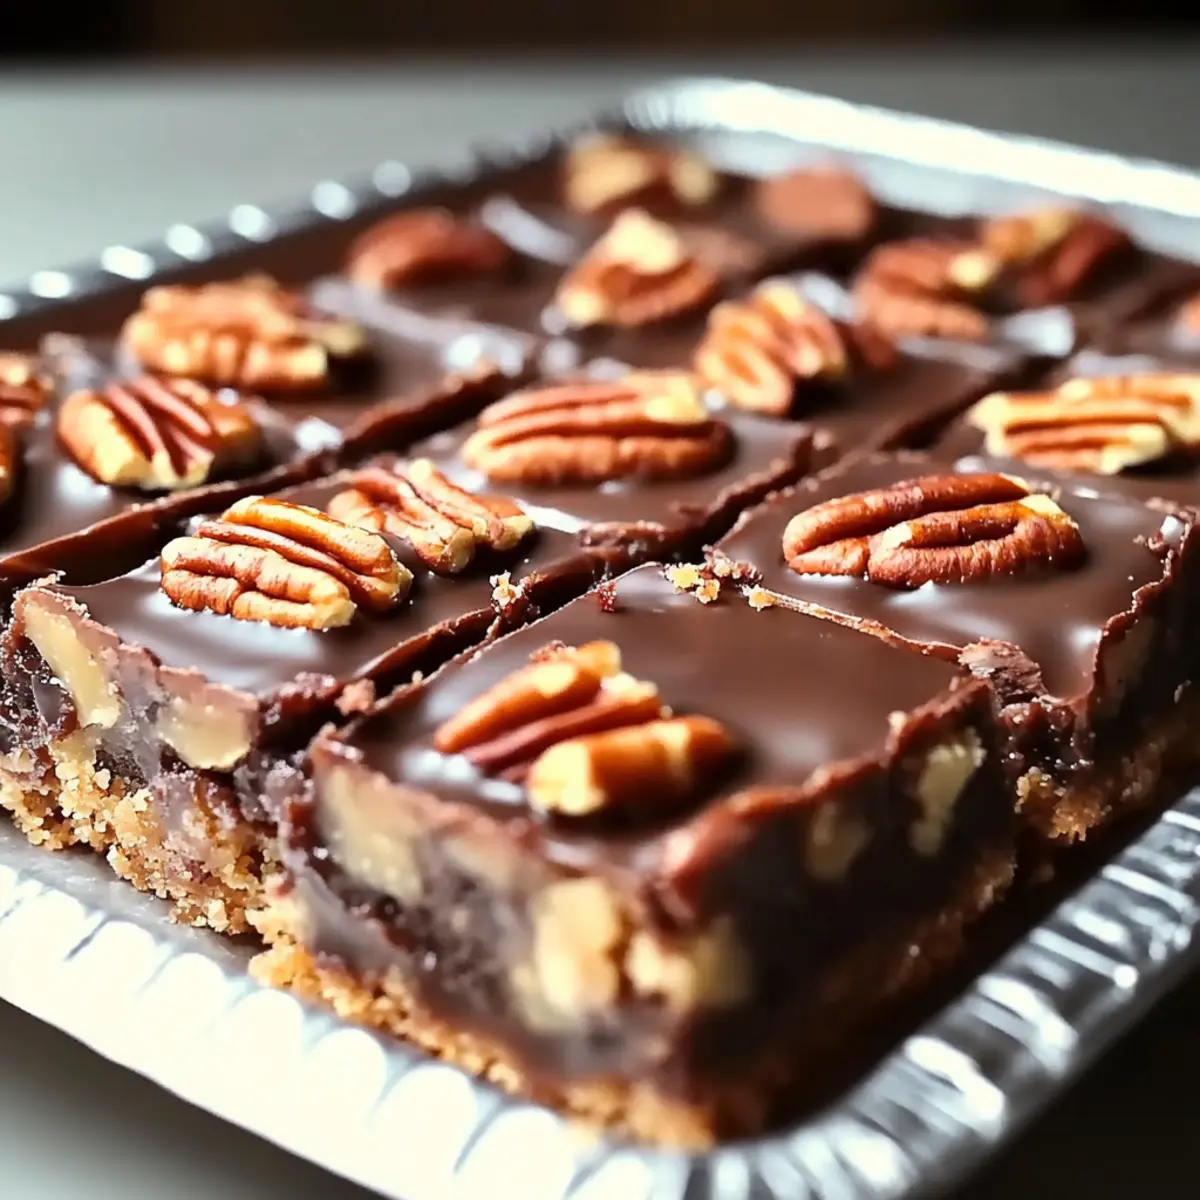
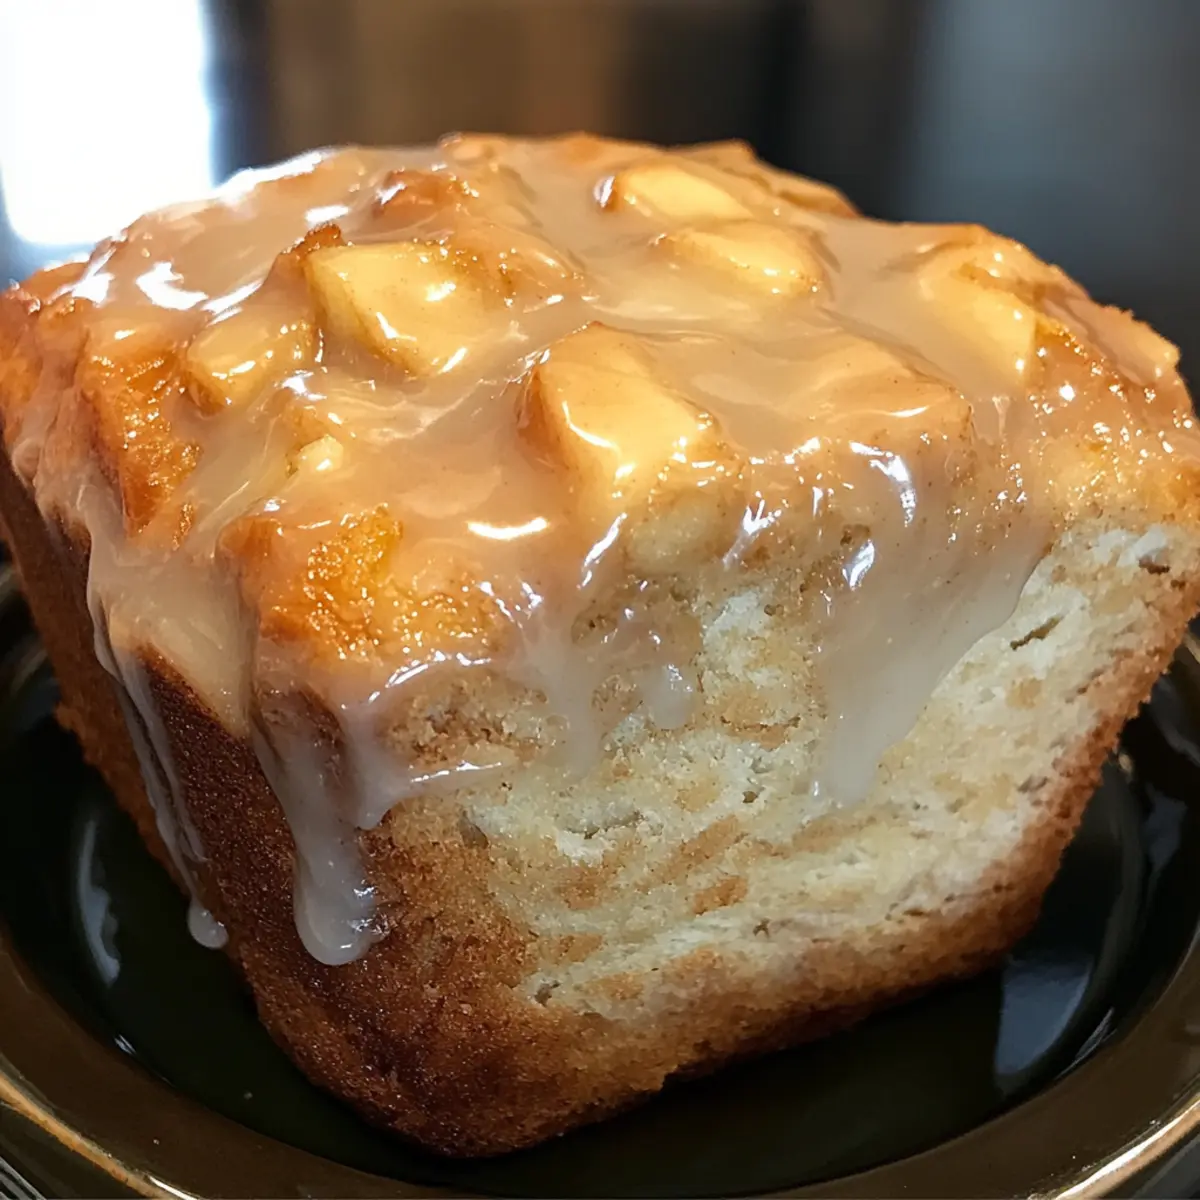
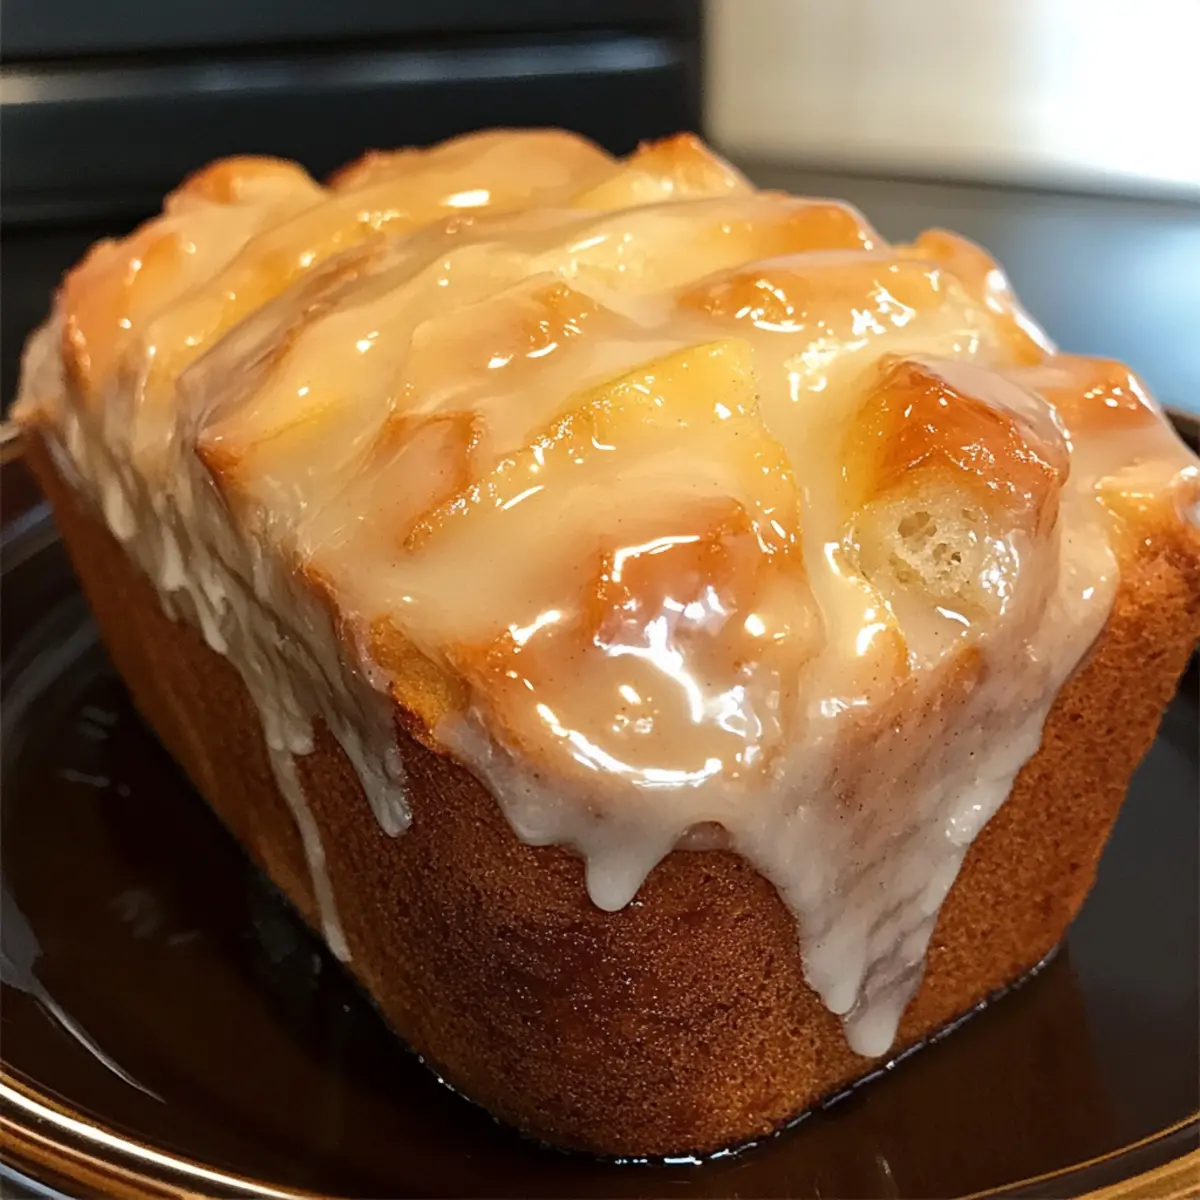
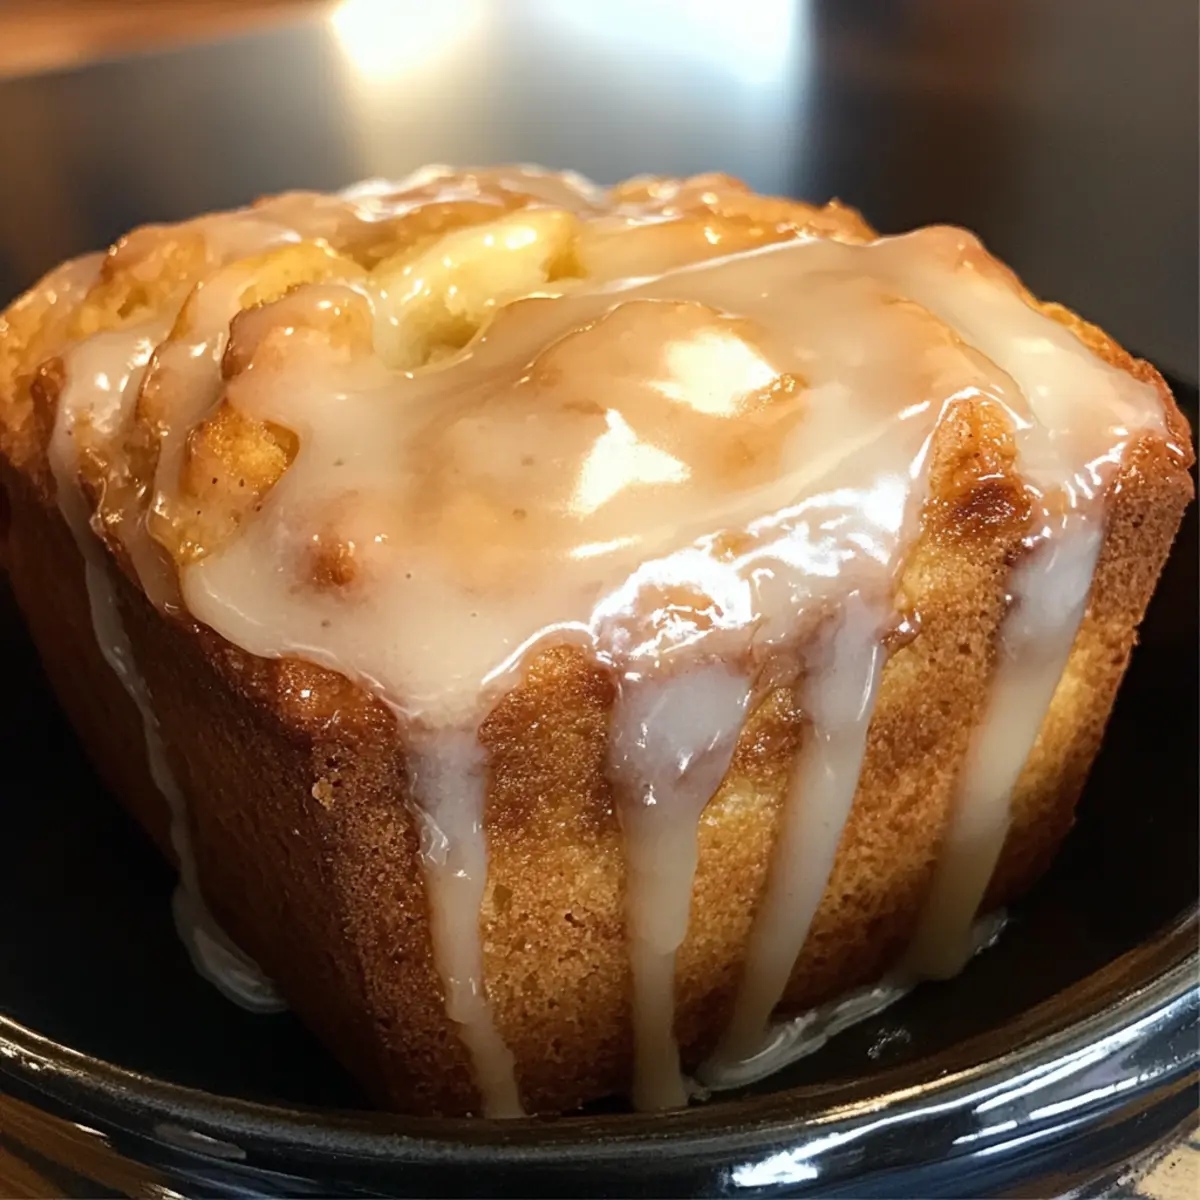
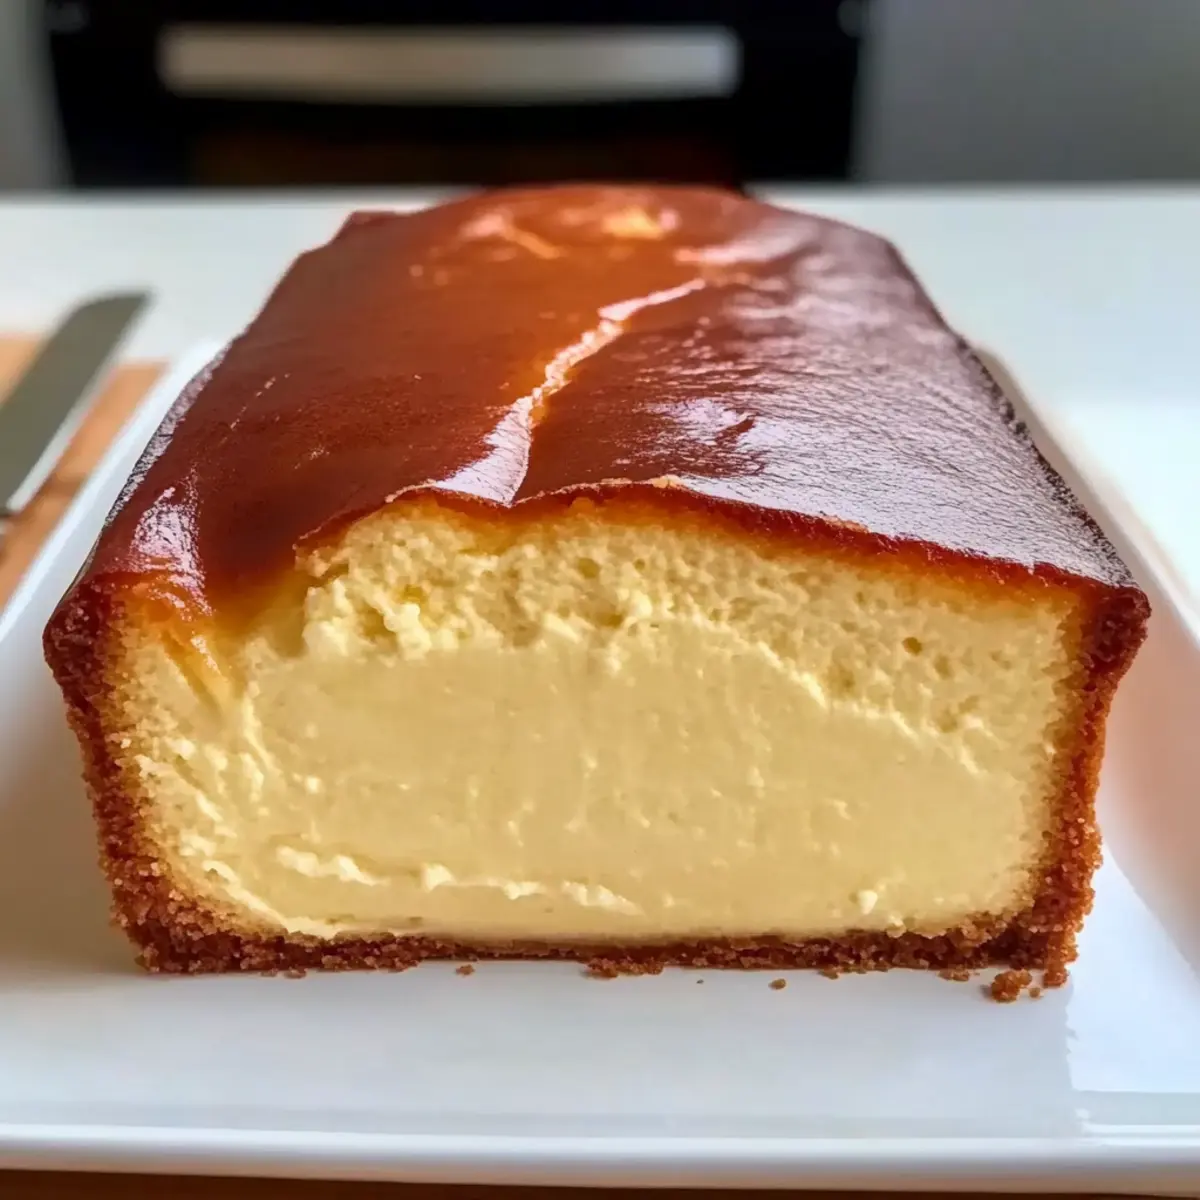
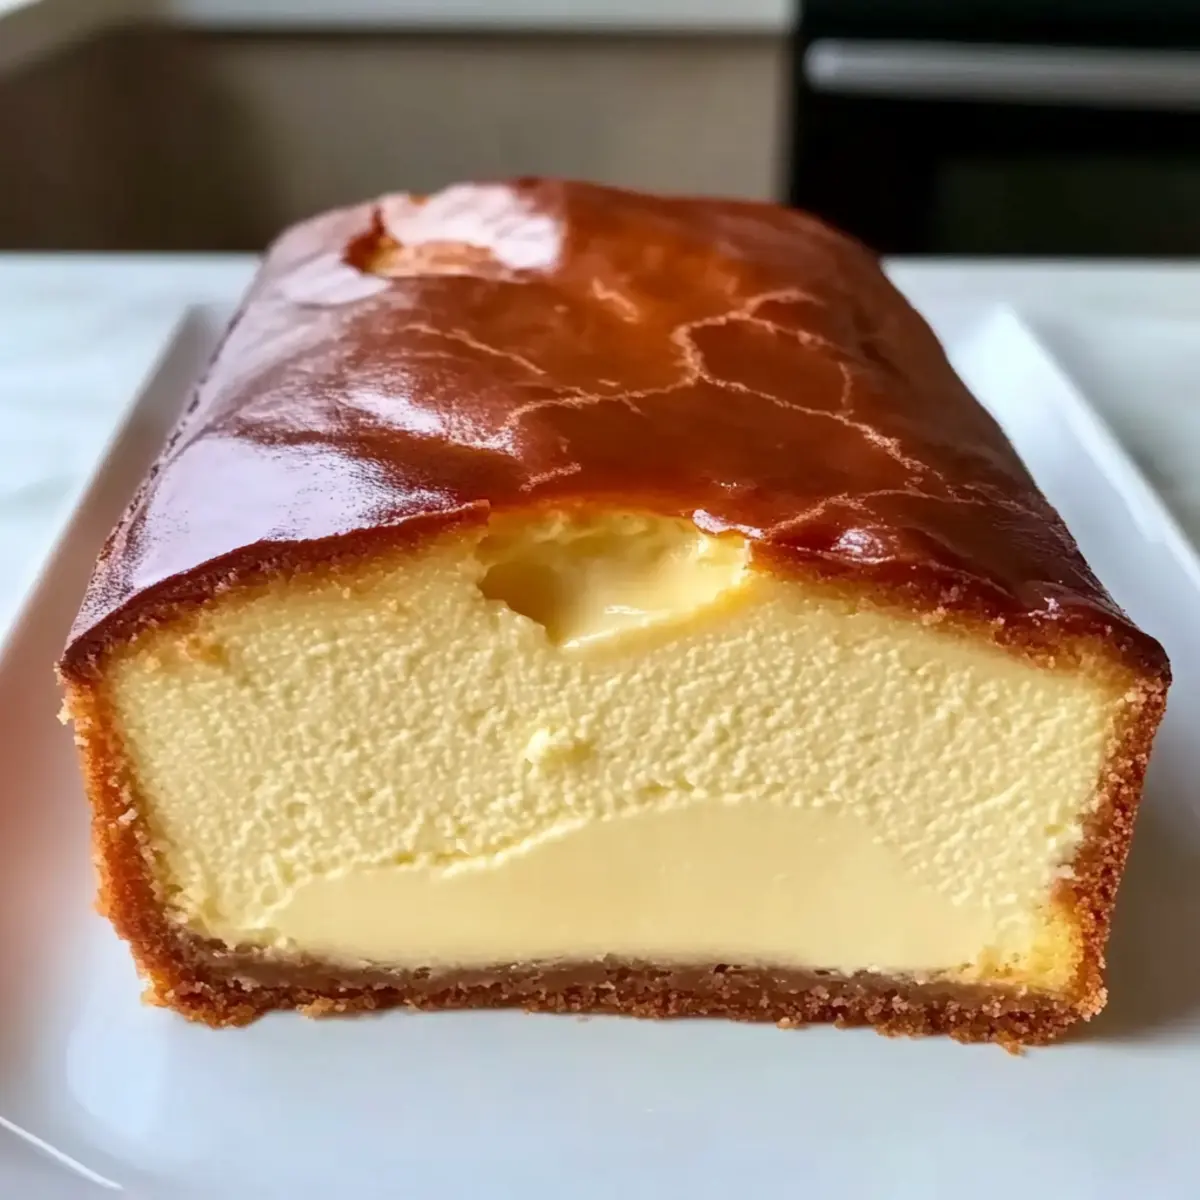
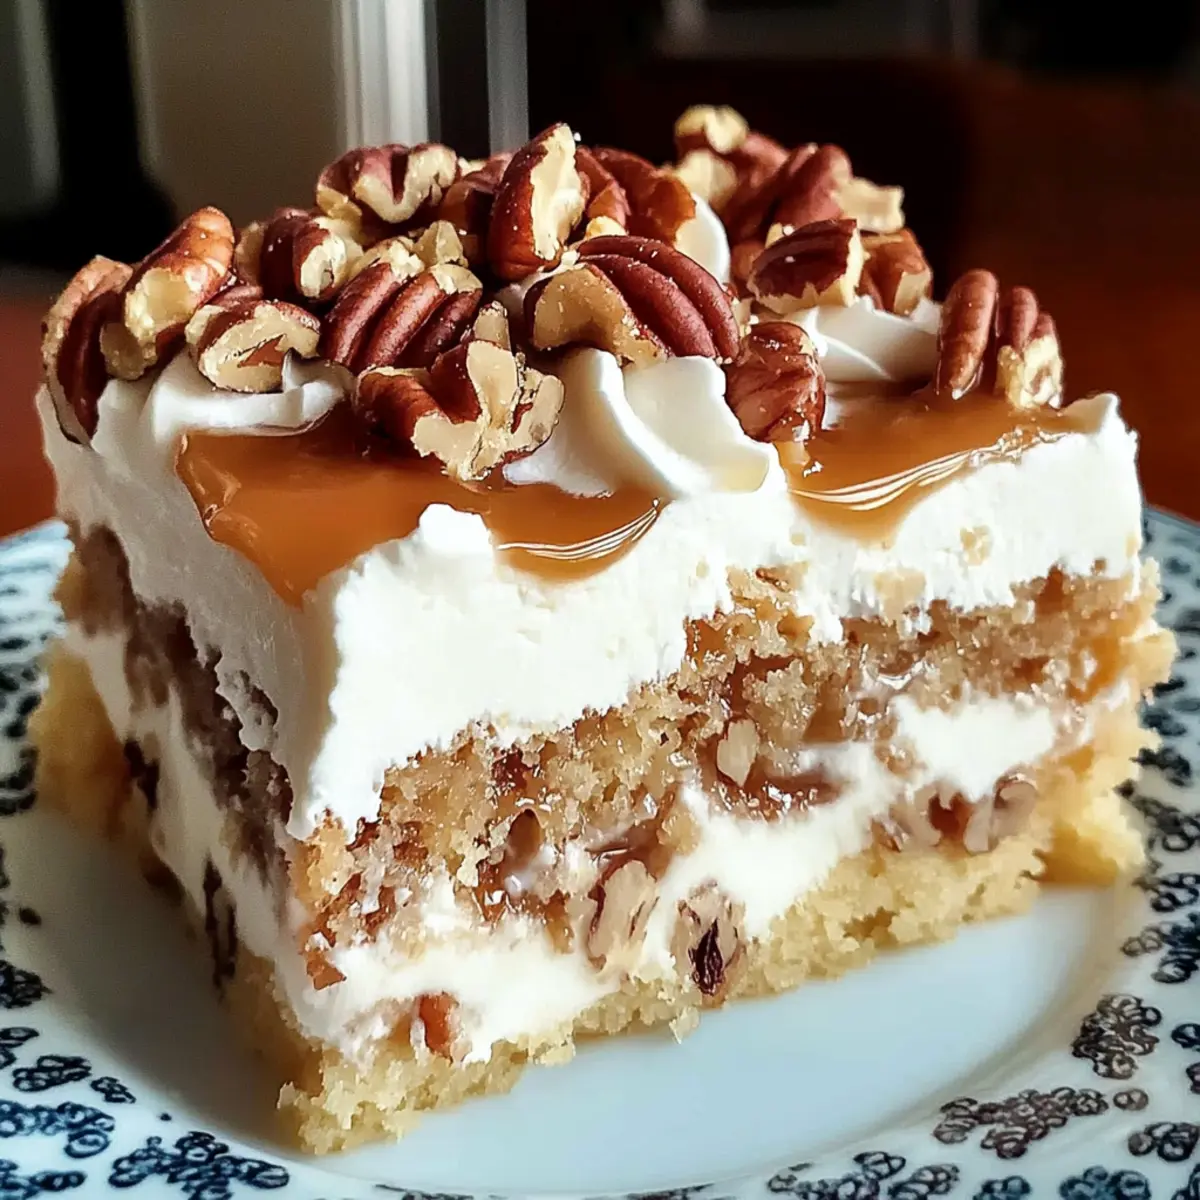
There’s something so enchanting about the way a house fills with the aroma of freshly baked cake, isn’t there? This Moist Butter Pecan Praline Poke Cake blends the warmth of caramel with the crunch of toasted pecans in a way that feels like a cozy hug for your taste buds. Ideal for special gatherings, this easy-to-make dessert is sure to impress your family and friends, giving you the chance to shine as a home chef without the fuss. Picture the moist layers soaked in rich praline sauce and capped with fluffy whipped cream—a beautiful contrast of texture and flavor. Plus, it can be made ahead of time, making serving a breeze! Who wouldn’t want to dive into a slice of this delightful indulgence? So, are you ready to bring a little sweetness into your kitchen?

Why is this cake a must-try?

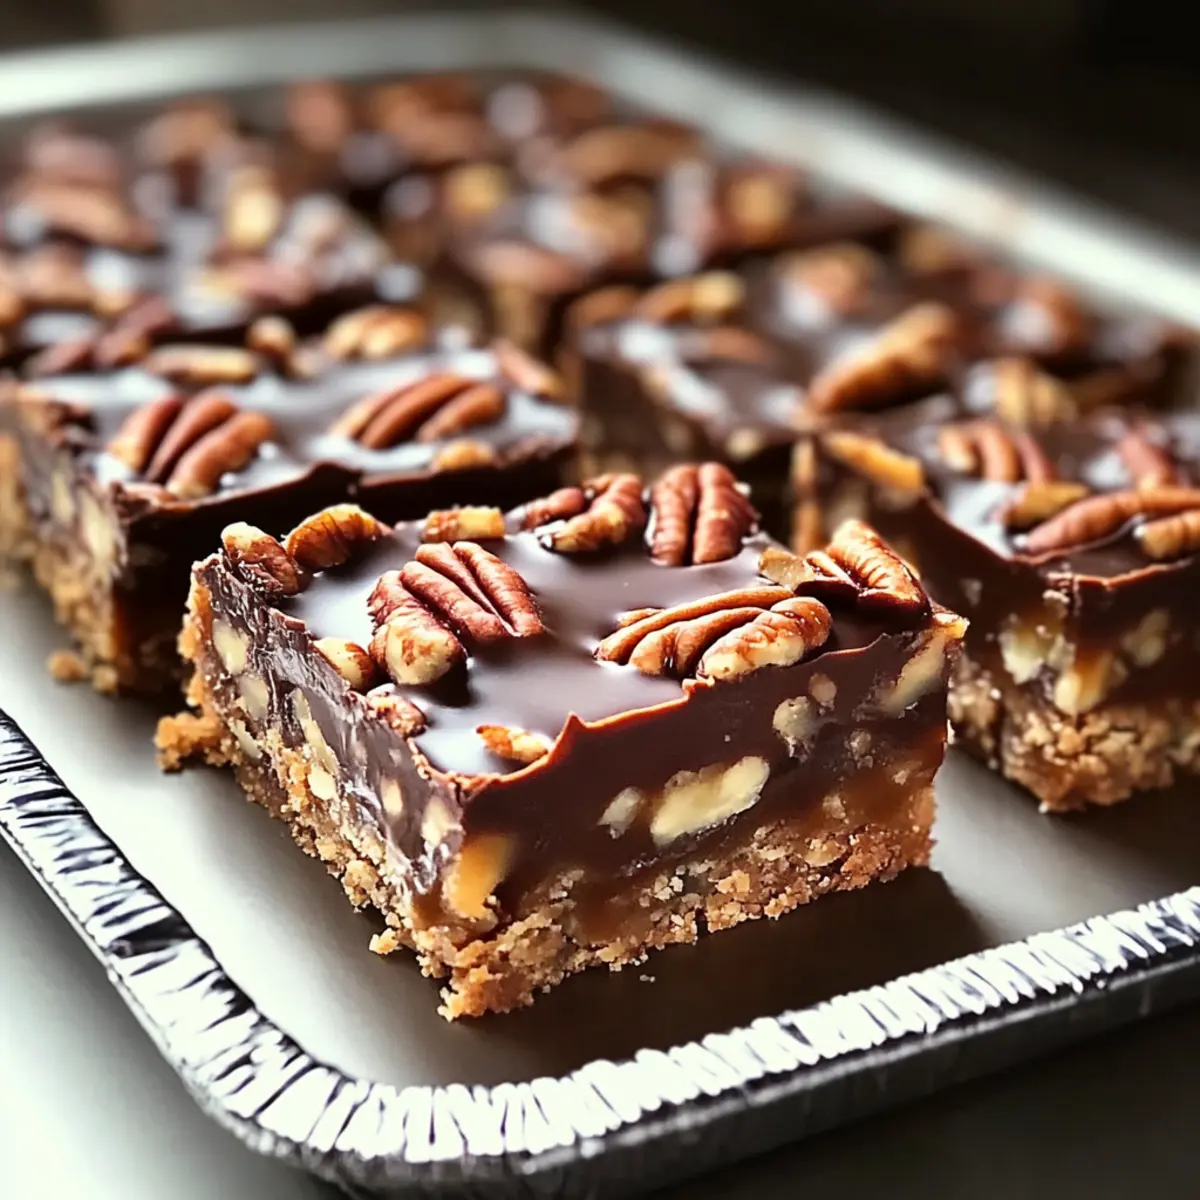
Decadent Flavors: This Butter Pecan Praline Poke Cake delivers an irresistible blend of caramel and toasted pecans, making each bite a delightful experience.

Effortless Preparation: With simple ingredients and straightforward steps, you can whip this up without any baking stress. Perfect for home cooks of all levels!

Make-Ahead Magic: Prepare in advance so you can focus on your guests. It’s best after chilling, meaning flavors deepen beautifully.

Texture Contrast: The balance of moist cake, gooey sauce, and fluffy whipped cream creates a symphony of delightful bites.

Crowd-Pleasing Appeal: Ideal for special occasions, this cake is sure to impress at gatherings, making everyone coming back for seconds.

Whether you’re hosting a dinner party or simply treating yourself, this cake promises to be a showstopper. You’ll also love our Crockpot Butter Chicken for a complete meal experience!

Butter Pecan Praline Poke Cake Ingredients

• Here's everything you need to create this indulgent treat!

For the Cake

  • Butter Pecan Cake Mix – The base of the cake; a homemade mix can elevate your flavors.
  • Eggs – Provides essential structure; use room temperature eggs for best results.
  • Oil – Ensures moisture and tenderness; unsweetened applesauce is a great lighter substitute.
  • Milk – Adds moisture and richness; almond milk works well for a dairy-free option.

For the Toppings

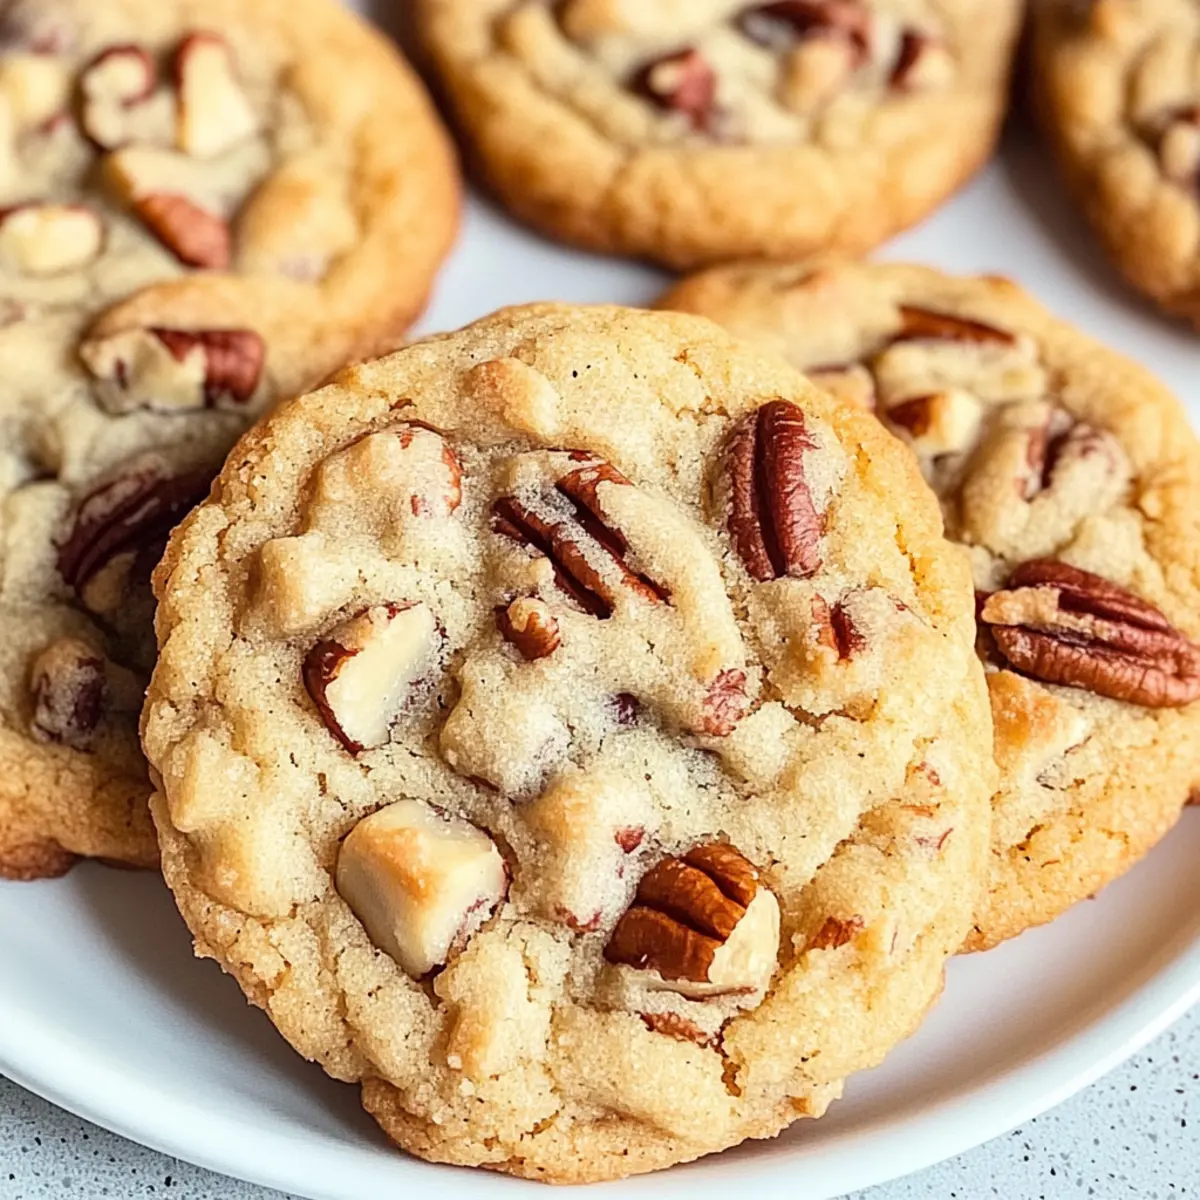
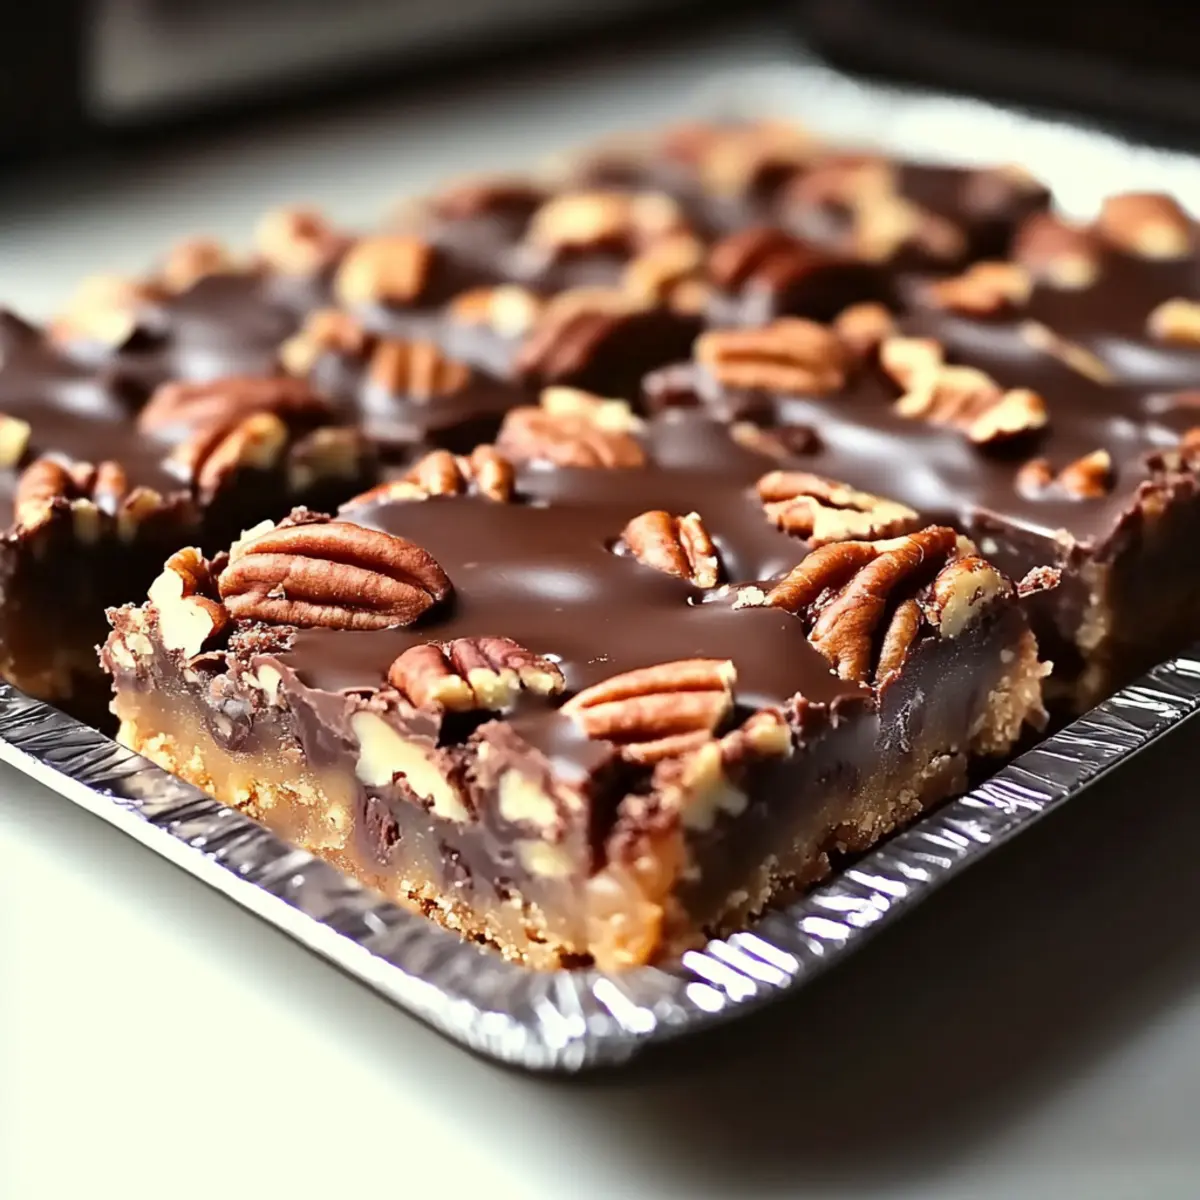
  • Pecans – Offers a crunchy texture and enhances the butter pecan flavor; use toasted pecans for an extra boost.
  • Heavy Cream – Essential for that fluffy homemade whipped cream; keep it chilled for optimal whipping.
  • Powdered Sugar – Sweetens the whipped cream beautifully; granulated sugar can substitute but might not dissolve as smoothly.

For the Praline Sauce

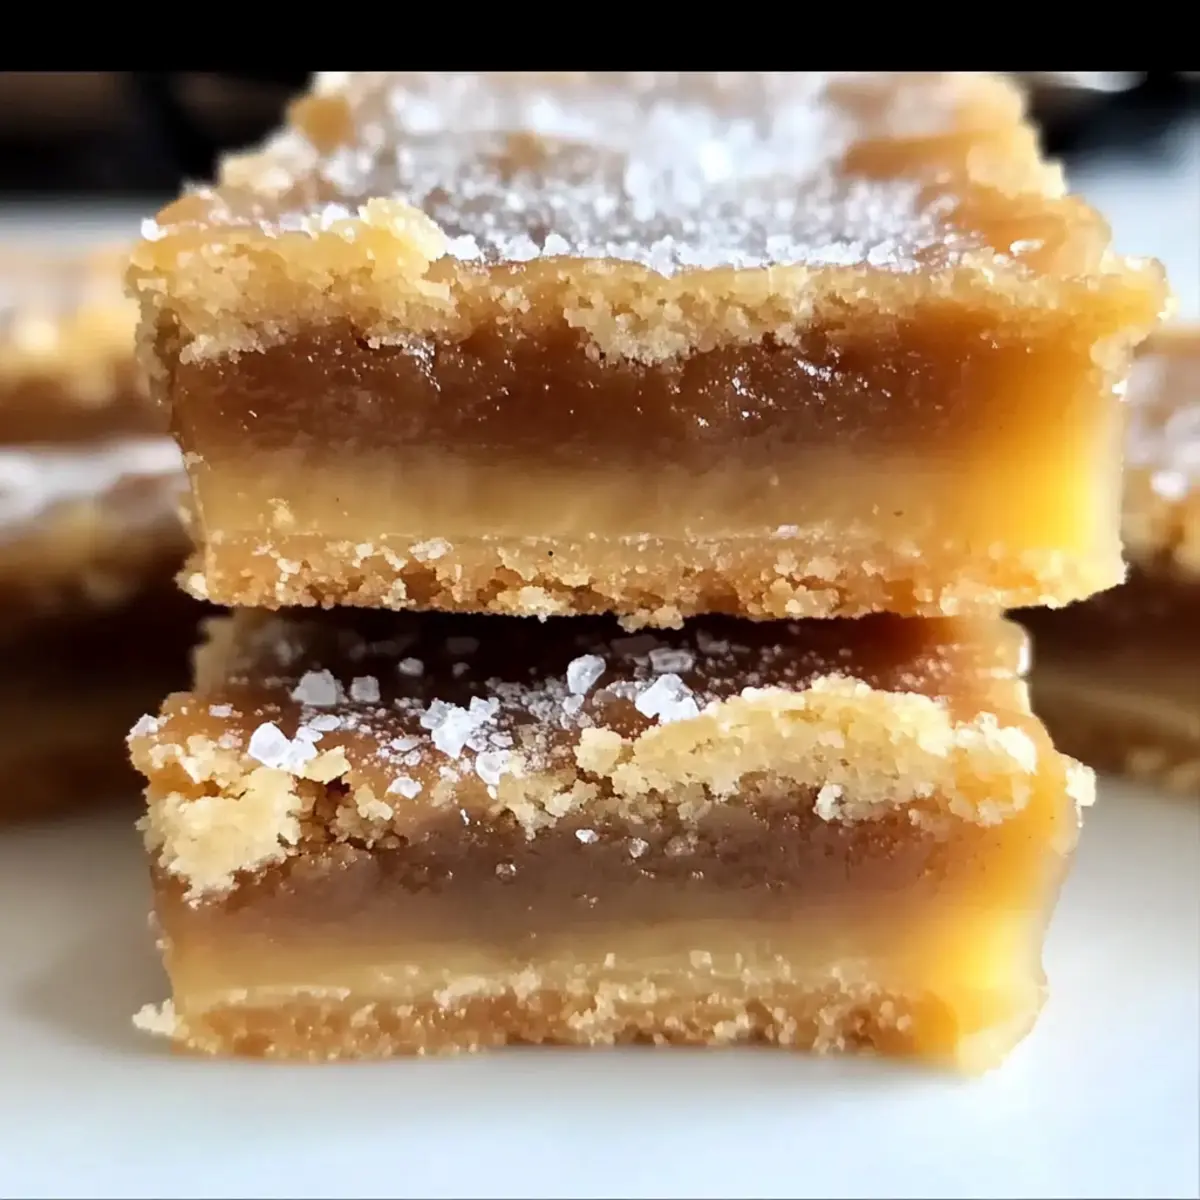
  • Brown Sugar – Creates a rich base; dark brown sugar adds deeper caramel notes.
  • Butter – Contributes to the sauce's richness; choose unsalted for control over the sweetness.
  • Cream – Integrates all the ingredients for a luscious praline sauce; heavy cream is best for creaminess.

With these ingredients for your Butter Pecan Praline Poke Cake in hand, you're ready to embark on a baking journey that leads to pure deliciousness! Enjoy the anticipation as you create a dessert that tantalizes taste buds and sparks joy.

Step‑by‑Step Instructions for Butter Pecan Praline Poke Cake

Step 1: Prepare Cake Mix
Begin by preheating your oven to 350°F (175°C). In a large mixing bowl, combine the butter pecan cake mix, room temperature eggs, oil, and milk. Stir until the mixture is smooth and well-blended, ensuring there are no lumps. Pour the batter into a greased 9x13-inch baking pan and bake for 30-35 minutes, or until a toothpick inserted into the center comes out clean.

Step 2: Make Praline Sauce
While the cake is baking, prepare the praline sauce. In a saucepan over medium heat, combine brown sugar, butter, and cream. Stir continuously until the sugar dissolves and the mixture begins to thicken, approximately 5-7 minutes. Once it reaches a rich, syrupy consistency, remove from heat and allow it to cool slightly.

Step 3: Poke the Cake
After the cake has finished baking, remove it from the oven and let it cool in the pan for about 10-15 minutes. Using the end of a wooden spoon, poke holes all over the top of the cake, creating space for the praline sauce to seep in. Pour the warm praline sauce evenly over the cake, ensuring it fills the holes and covers the surface generously.

Step 4: Chill the Cake
Once the cake is fully covered in praline sauce, place it in the refrigerator to chill for at least 2 hours. This resting time allows the flavors to meld beautifully and ensures the cake absorbs the delicious sauce. Trust the process, as this step is crucial for a moist Butter Pecan Praline Poke Cake.

Step 5: Prepare Whipped Cream
As the cake chills, turn your attention to the homemade whipped cream. In a mixing bowl, pour in the chilled heavy cream and add powdered sugar. Using an electric mixer, whip on high speed until soft peaks form, which usually takes about 3-5 minutes. The whipped cream should be light and fluffy, perfect for topping the cake.

Step 6: Garnish and Serve
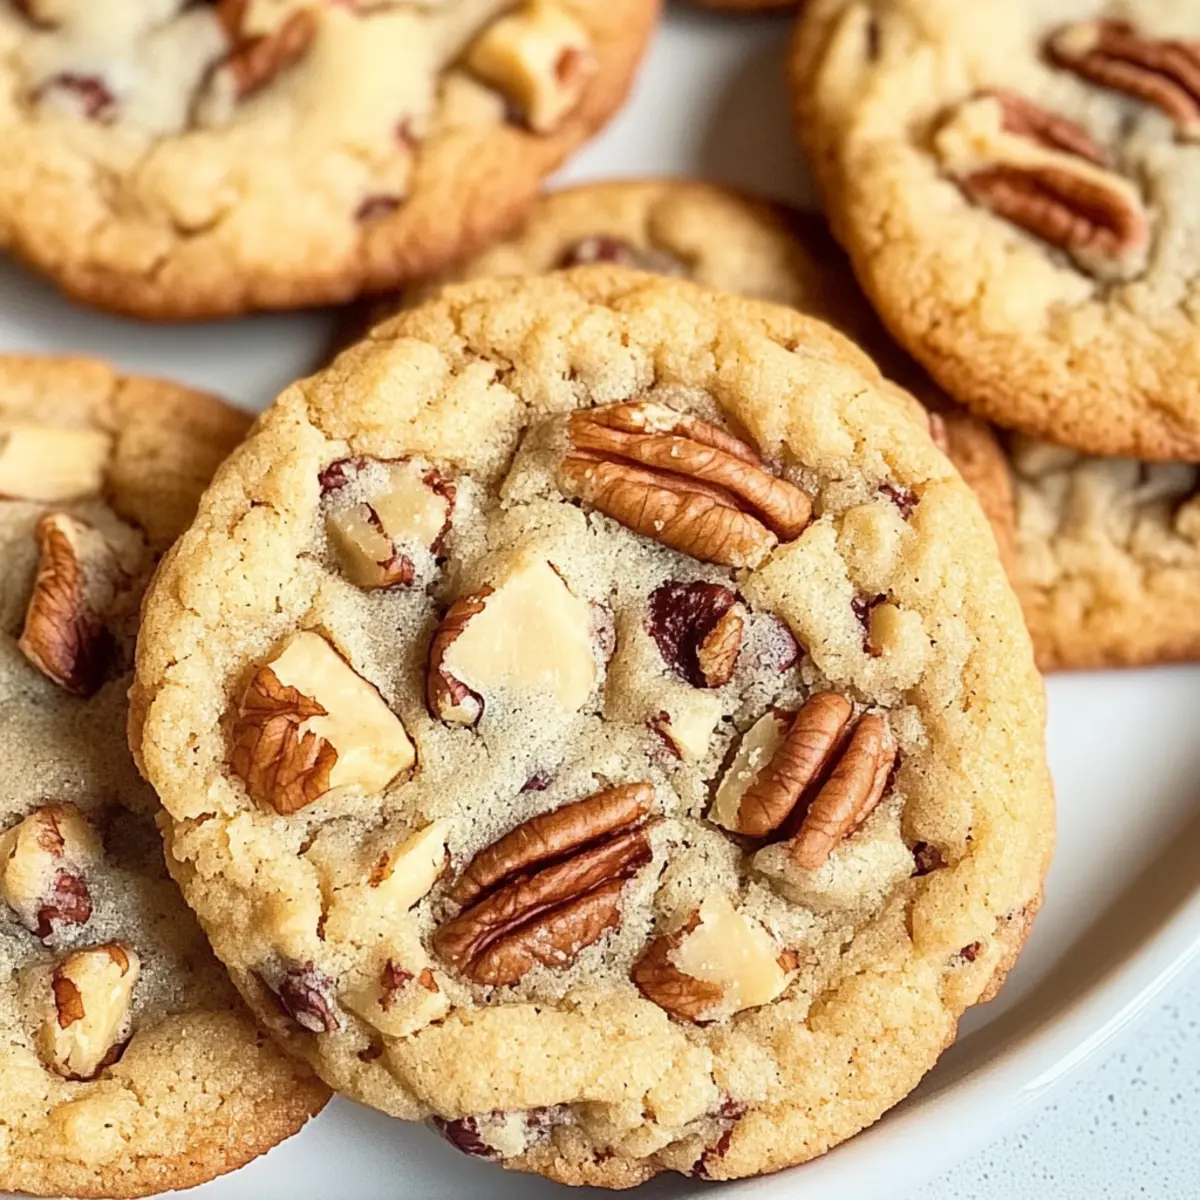
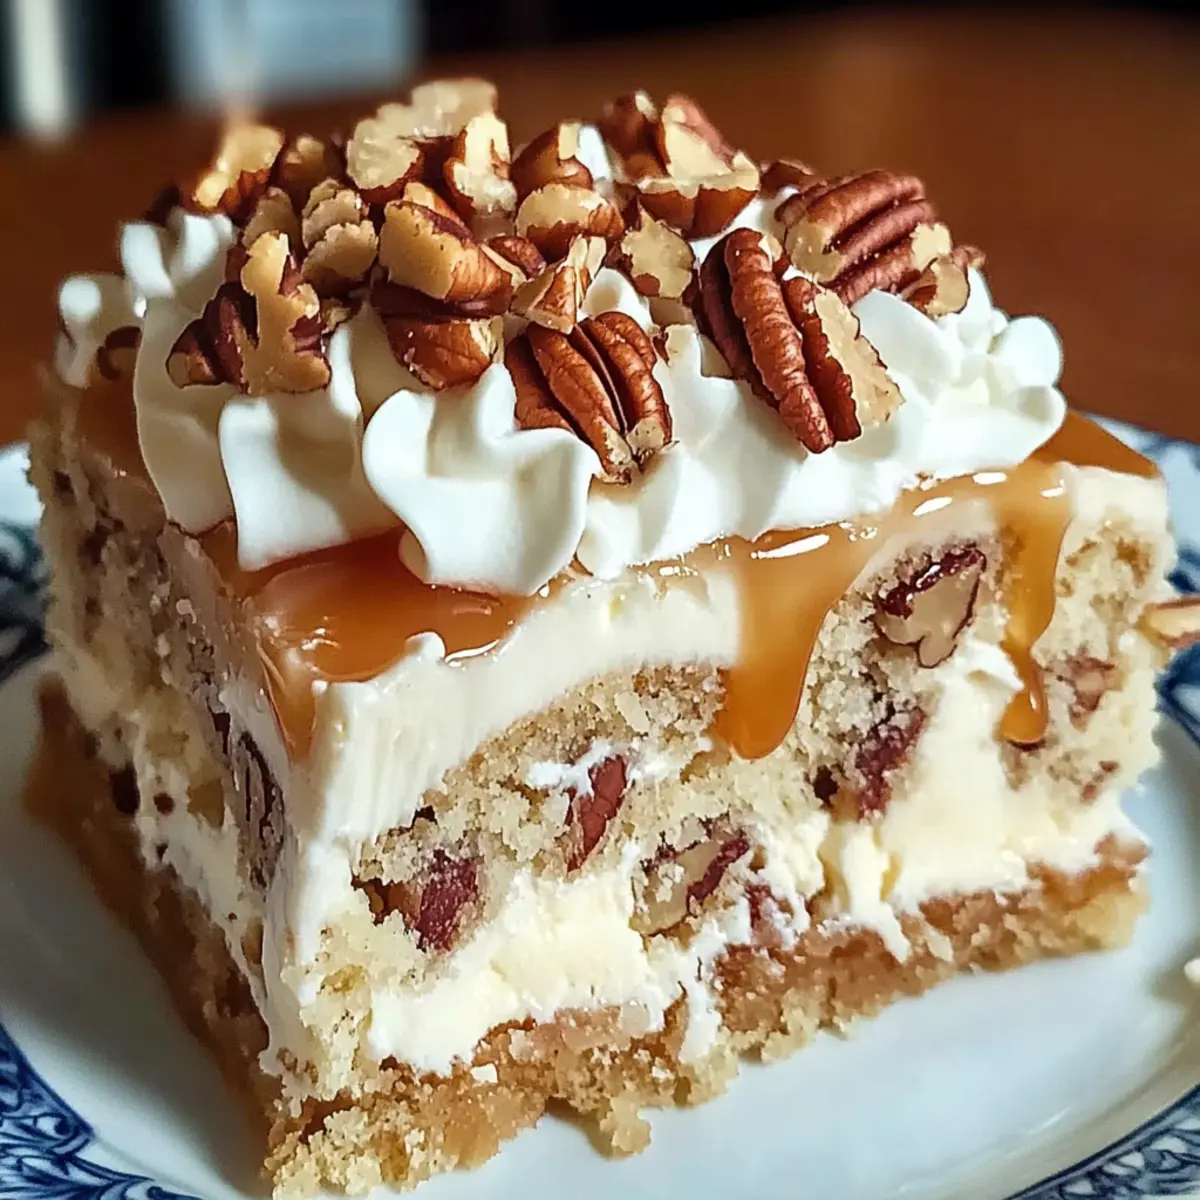
Once the cake is chilled and the whipped cream is ready, take the cake out of the refrigerator. Spread the whipped cream evenly over the top, creating a luscious blanket. Finally, sprinkle toasted pecans over the whipped cream for an added crunch and beautiful presentation. Your Butter Pecan Praline Poke Cake is now ready to impress!

What to Serve with Butter Pecan Praline Poke Cake

The perfect meal brings people together, and this delightful dessert can brighten any gathering.

  • Creamy Vanilla Ice Cream: A scoop of vanilla ice cream adds a cool, creamy contrast that complements the rich flavors wonderfully. It's an indulgent pairing that enhances each bite.
  • Fresh Berry Salad: A medley of tart berries will provide a refreshing balance to the sweet richness of the poke cake, offering vibrant color and a burst of flavor.
  • Coffee or Espresso: The warm, bold notes of coffee or a shot of rich espresso elevate the dessert experience, underscoring the caramel tones beautifully.
  • Chocolate Ganache Drizzle: Drizzling warm chocolate ganache over each slice adds an extra layer of indulgence and decadence, turning this dessert into a chocoholic’s dream come true.
  • Pecan Pie Milkshake: Whip up a pecan pie milkshake for an indulgent drink. The flavors blend seamlessly, making each sip nostalgic and satisfying.
  • Buttery Biscuit Crumble: Serve with a sprinkle of buttery biscuit crumble for texture contrast—each bite will offer warmth and a homey crunch.
  • Whipped Coffee: If you're looking to keep the caffeine theme going, a whipped coffee (Dalgona) is a trendy, frothy option that pairs surprisingly well with the cake’s sweetness.
  • Chai-Spiced Hot Chocolate: For a twist, serve a chai-spiced hot chocolate. Its warm spices will echo the cake’s flavors while providing a comforting drink option.
  • Toasted Coconut Flakes: Sprinkle toasted coconut on top for an exotic touch, adding flavor and texture that enhances the poke cake’s nutty essence.
  • Maple Pecan Tarte: A slice of maple pecan tarte layered with flavors similar to the poke cake will create delightful synergy at the dessert table.

Butter Pecan Praline Poke Cake Variations

Feel free to make this delicious cake your own with these creative twists that invite delightful personalization.

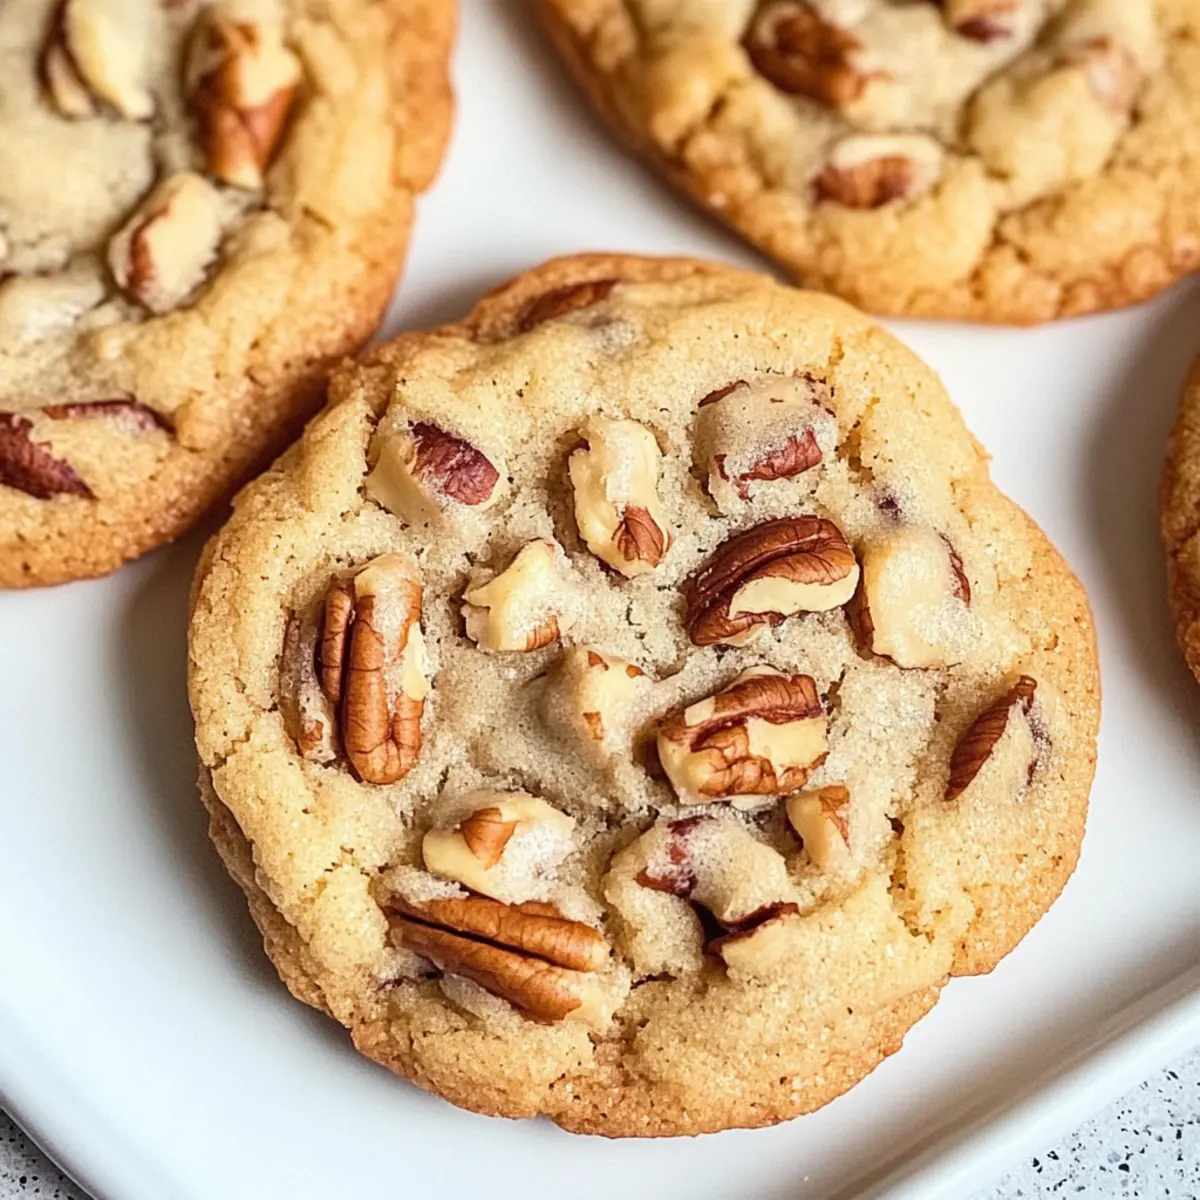
  • Nut Swap: Substitute pecans with walnuts for a different texture and flavor that’s equally crunchy and delicious.
    You'll still enjoy that delightful, nutty essence that makes this cake so enjoyable!

  • Chocolate Indulgence: Add cocoa powder to the cake mix or use a chocolate cake base for an exciting twist.
    It’s a brilliant fusion of flavors that will leave chocolate lovers begging for more.

  • Creamy Ganache Drizzle: After adding the whipped cream, drizzle chocolate ganache over the top for an extra touch of decadence.
    The richness of the ganache complements the cake's sweetness beautifully.

  • Fruit Infusion: Add sliced bananas or berries between the cake and whipped cream layer for a fruity surprise.
    It’s a refreshing contrast that brightens each bite while enhancing the moistness!

  • Spice It Up: Incorporate a sprinkle of cinnamon or nutmeg into the batter for a warm, spicy note that elevates the dessert.
    This twist gives a cozy, comforting sensation, perfect for chilly evenings.

  • Caramel Love: Replace the praline sauce with butterscotch or caramel sauce for a different sweet dimension.
    It creates a glaze that ties the whole cake together with a delightful sweetness.

  • Dairy-Free Delight: Use almond or coconut milk instead of regular milk, and opt for a dairy-free whipped topping to cater to lactose-intolerant friends.
    This way, everyone can indulge in that heavenly cake.

Ready to dive into these scrumptious alternatives? Whatever you choose, don't miss out on pairing a slice with a scoop of vanilla ice cream for a truly unforgettable treat!

Make Ahead Options

These Butter Pecan Praline Poke Cakes are ideal for busy weeknights and can be prepared up to 24 hours in advance. To prep ahead, you can bake the cake and poke the holes, allowing it to cool before covering it with praline sauce. Once you've poured the sauce, refrigerate the cake for at least 2 hours before topping it with whipped cream—this chilling period enhances flavor absorption. When you’re ready to serve, whip the cream and spread it over the chilled cake, then garnish with toasted pecans. By prepping in advance, you’ll ensure your dessert is just as delicious and stress-free for your gathering!

Expert Tips for the Best Butter Pecan Praline Poke Cake

  • Use Room Temperature Eggs: Bringing eggs to room temperature helps them incorporate better, leading to a more even texture in your cake.

  • Don’t Rush the Praline Sauce: Allow the mixture to thicken properly over medium heat for a rich, syrupy result. Rushing this step can compromise flavor.

  • Poke Holes Gently: Use the end of a wooden spoon carefully to avoid breaking apart the cake; this helps the praline sauce seep into every bite without crumbling.

  • Chill Thoroughly: For the best soaking effect, allow the cake to chill for at least 2 hours. This aids in achieving that moist Butter Pecan Praline Poke Cake you crave.

  • Whip Cream Just Right: Stop whipping once soft peaks form. Overwhipping can lead to a grainy texture, while underwhipping won’t provide the lightness needed.

How to Store and Freeze Butter Pecan Praline Poke Cake

Fridge: Store the cake in an airtight container or cover it with plastic wrap to keep it moist. It will stay fresh for up to 5 days.

Freezer: To freeze, cut the cake into individual slices and wrap each piece tightly in plastic wrap, then foil. It'll last for up to 3 months in the freezer.

Thawing: When you're ready to enjoy a slice, simply transfer it to the fridge for a few hours or overnight to thaw gently, preserving its delicious texture.

Reheating: If you prefer warm cake, microwave a slice for about 15-20 seconds until just heated. Be careful not to overheat, as it can dry out the cake.

Butter Pecan Praline Poke Cake Recipe FAQs

What type of pecans should I use?
For the best flavor and texture, I recommend using toasted pecans. Toasting enhances their natural oils and brings out a richer nutty flavor that beautifully contrasts with the sweetness of the cake and praline sauce.

How should I store the Butter Pecan Praline Poke Cake?
Store your poke cake in an airtight container or cover it tightly with plastic wrap. It should stay fresh in the refrigerator for up to 5 days, maintaining its delightful moisture.

Can I freeze Butter Pecan Praline Poke Cake?
Absolutely! To freeze, cut the cake into individual slices and wrap each slice tightly in plastic wrap, followed by aluminum foil. This will keep it fresh for up to 3 months. When ready to enjoy, simply transfer the desired number of slices to the refrigerator to thaw overnight; this helps preserve its moistness.

What if my whipped cream doesn’t whip up properly?
If your whipped cream isn’t forming soft peaks, make sure your heavy cream is very cold! I often chill both the mixing bowl and beaters for about 15 minutes before whipping. If you've over-whipped and it becomes grainy, you can reduce the mixture again by gently folding in a fresh splash of cold cream.

Can I substitute ingredients for dietary reasons?
Yes! If you’re looking for a lighter option, replace the oil with unsweetened applesauce. For a dairy-free version, you can use almond milk instead of regular milk and a non-dairy whipped topping in place of heavy cream. This way, everyone can enjoy the decadence of this Butter Pecan Praline Poke Cake!

Butter Pecan Praline Poke Cake

Decadent Butter Pecan Praline Poke Cake to Impress Your Guests

This Butter Pecan Praline Poke Cake blends caramel and toasted pecans for a delightful dessert experience.
Print Recipe Pin Recipe
Prep Time 15 minutes mins
Cook Time 35 minutes mins
Chilling Time 2 hours hrs
Total Time 2 hours hrs 50 minutes mins
Servings: 12 slices
Course: Dessert
Cuisine: American
Calories: 350
Ingredients Equipment Method Nutrition Notes

Ingredients
  

For the Cake
  • 1 box Butter Pecan Cake Mix A homemade mix can elevate your flavors.
  • 3 large Eggs Use room temperature eggs for best results.
  • 1/2 cup Oil Unsweetened applesauce can be a lighter substitute.
  • 1 cup Milk Almond milk works well for a dairy-free option.
For the Toppings
  • 1 cup Pecans Use toasted pecans for an extra boost.
  • 1 cup Heavy Cream Keep it chilled for optimal whipping.
  • 1/4 cup Powdered Sugar Granulated sugar can substitute but might not dissolve as smoothly.
For the Praline Sauce
  • 1 cup Brown Sugar Dark brown sugar adds deeper caramel notes.
  • 1/2 cup Butter Choose unsalted for control over sweetness.
  • 1/2 cup Cream Heavy cream is best for creaminess.

Equipment

  • Mixing Bowl
  • Saucepan
  • Electric mixer
  • Baking pan

Method
 

Preparation Steps
  1. Preheat your oven to 350°F (175°C). In a large mixing bowl, combine the butter pecan cake mix, room temperature eggs, oil, and milk. Stir until smooth.
  2. Pour the batter into a greased 9x13-inch baking pan and bake for 30-35 minutes, or until a toothpick comes out clean.
  3. While the cake is baking, prepare the praline sauce by combining brown sugar, butter, and cream in a saucepan over medium heat.
  4. Stir continuously until the sugar dissolves and the mixture thickens, about 5-7 minutes. Cool slightly after reaching syrupy consistency.
  5. Let the cake cool for 10-15 minutes, then poke holes all over the top using a wooden spoon. Pour warm praline sauce over the cake.
  6. Refrigerate the cake for at least 2 hours to absorb the praline sauce.
  7. To make whipped cream, mix chilled heavy cream and powdered sugar with an electric mixer on high until soft peaks form.
  8. Spread the whipped cream over the chilled cake and sprinkle toasted pecans on top for garnish.

Nutrition

Serving: 1sliceCalories: 350kcalCarbohydrates: 45gProtein: 4gFat: 18gSaturated Fat: 10gPolyunsaturated Fat: 3gMonounsaturated Fat: 3gCholesterol: 80mgSodium: 300mgPotassium: 150mgFiber: 1gSugar: 25gVitamin A: 500IUCalcium: 100mgIron: 1mg

Notes

For best results, use room temperature eggs and chill the cake before serving.

Tried this recipe?

Let us know how it was!

Irresistibly Soft Butter Pecan Cookies for Cozy Moments

March 22, 2026 by Grace Snow Leave a Comment

The sweet aroma of freshly baked cookies wafting through my kitchen always takes me back to cozy family gatherings during the holidays. When it comes to festive treats, nothing beats the irresistible charm of Soft and Chewy Butter Pecan Cookies. This delightful recipe marries rich, buttery goodness with the satisfying crunch of toasted pecans, creating a perfect bite that warms the heart. Plus, the best part? These cookies come together quickly using simple pantry staples, making them an easy go-to for unexpected guests or last-minute holiday baking. Whether you're serving them at a Christmas party or enjoying a quiet evening with family, these cookies are sure to be a hit. What fun twist will you put on your batch today—maybe some chocolate chips or a sprinkle of cinnamon?

Why Are These Cookies a Must-Bake?

Irresistible Flavor: Butter Pecan Cookies boast a delightful blend of rich butter and crunchy nuts that create a festive taste your family will love.

Quick and Easy: With only a few simple steps, you'll have these treats out of the oven in no time—perfect for last-minute cravings!

Versatile Treats: Feel free to switch it up! Add chocolate chips or try different nuts like walnuts for a new twist.

Crowd-Pleasing Delight: Whether for holidays or cozy family nights, these cookies will be the star of any gathering, sure to please everyone.

Warm and Cozy Vibes: Enjoy them fresh out of the oven with a scoop of vanilla ice cream, and experience a warm hug in cookie form!

Butter Pecan Cookies Ingredients

• Gather your pantry staples for this delightful recipe!

For the Cookies

  • Unsalted Butter – adds richness and moisture, choose this for better flavor control.
  • Granulated Sugar – provides sweetness while contributing to a crispy edge.
  • Brown Sugar – infuses moisture and depth of flavor, creating that chewy texture we all love.
  • Eggs – essential for structure and helping the cookies rise perfectly.
  • Vanilla Extract – enhances the flavor complexity of these Butter Pecan Cookies.
  • All-Purpose Flour – the foundation of the cookie; feel free to swap with gluten-free flour if desired.
  • Cornstarch – key for keeping the cookies soft and chewy; add a bit more for ultimate softness.
  • Cinnamon Powder – a warm spice that can be omitted if you prefer a more neutral flavor.
  • Baking Soda & Baking Powder – the leavening agents that ensure your cookies rise just right.
  • Chopped Pecans – brings a delightful crunch and nutty essence; walnuts or almonds make great substitutes.
  • Optional Toffee Bits – add a delicious flavor boost with a touch of caramel notes.

Step‑by‑Step Instructions for Butter Pecan Cookies

Step 1: Preheat the Oven
Begin by preheating your oven to 350°F (175°C) and lining two baking sheets with parchment paper. This prep step ensures your Butter Pecan Cookies bake evenly and won’t stick to the pan. While the oven warms up, gather your ingredients for easy access, which makes the entire baking process smoother and more enjoyable.

Step 2: Cream the Butters and Sugars
In a large mixing bowl, combine the melted unsalted butter, granulated sugar, and brown sugar. Using a hand mixer or a whisk, beat these ingredients together until the mixture becomes light and fluffy—about 2 to 3 minutes. This step introduces air into the mixture, setting the foundation for the soft texture of your cookies.

Step 3: Add Eggs and Vanilla
Next, mix in one large egg and one teaspoon of vanilla extract to the butter-sugar blend. Beat until smooth and fully incorporated, which should take about a minute. The egg adds moisture and helps bind the ingredients together, while the vanilla extracts enhance the overall flavor of these delightful Butter Pecan Cookies.

Step 4: Combine Dry Ingredients
Gradually incorporate the all-purpose flour, cornstarch, baking soda, baking powder, and cinnamon into the wet ingredients. Stir gently using a spatula or wooden spoon until just combined. Be careful not to overmix, as this could affect the cookie's texture. Your dough should appear slightly sticky but well-blended.

Step 5: Fold in Pecans and Optional Add-ins
Gently fold in the chopped pecans—ensure they are evenly distributed throughout the dough. If desired, you can also add optional toffee bits for an extra layer of flavor. This step brings in crunch and richness, making your Butter Pecan Cookies irresistible, so ensure every bite is filled with nuts.

Step 6: Chill the Dough
Cover the cookie dough with plastic wrap and chill it in the refrigerator for 30 to 45 minutes. Chilling the dough is crucial for preventing the cookies from spreading too much during baking, helping maintain their soft and chewy texture. Meanwhile, you can clean up your workspace and get ready for the next steps!

Step 7: Scoop the Cookie Dough
Once chilled, use a medium cookie scoop to portion the dough into balls, about 1.5 inches in diameter. For an added touch of sweetness, roll each ball in granulated sugar before placing them on the prepared baking sheets, spacing them about two inches apart to allow for expansion during baking.

Step 8: Bake the Cookies
Slide the baking sheets into the preheated oven and bake the cookies for 11 to 14 minutes. Watch for the edges to turn golden brown while the centers remain slightly soft. This contrast in texture is what makes Butter Pecan Cookies so delightful, so keep an eye on them to avoid overbaking.

Step 9: Cooling Time
Once baked, remove the cookies from the oven and let them cool on the baking sheet for about 5 minutes. This allows them to set properly before transferring them to a wire rack to cool completely. The warm, buttery aroma will fill your kitchen, making it hard to resist sneaking a taste!

What to Serve with Soft and Chewy Butter Pecan Cookies

The rich buttery aroma of fresh cookies fills the air, creating the perfect opportunity for delightful meal pairings that will sweep everyone off their feet.

  • Vanilla Ice Cream: A scoop of creamy vanilla melting over warm cookies creates a heavenly dessert experience—perfect sweetness and texture!
  • Hot Chocolate: Indulge in a warm cup of chocolate, its richness balancing the buttery notes of your cookies, crafting a cozy treat.
  • Spiced Chai Tea: The spiced warmth of chai perfectly complements the nutty flavors of butter pecan, kicking your snack time up a notch.
  • Caramel Drizzle: Add a luscious drizzle of caramel over these cookies to enhance their decadence and create a jaw-dropping dessert moment!
  • Fresh Fruit Salad: A vibrant bowl of fresh fruits introduces a refreshing contrast, balancing the richness of the cookies with bright, juicy notes.
  • Coffee or Espresso: The bold flavors of coffee elevate the cookie experience; a sip between bites enhances both flavors beautifully.
  • Pumpkin Pie: Embrace the season and serve these cookies alongside a slice of pumpkin pie for a nostalgic holiday-inspired dessert platter.
  • Chocolate Milk: A cold glass of chocolate milk brings a childhood nostalgia to the table, pairing delightfully with the crunchy pecans in every bite.

Make Ahead Options

These Butter Pecan Cookies are perfect for meal prep enthusiasts! You can prepare the cookie dough up to 24 hours in advance, allowing the flavors to meld beautifully. Simply follow the recipe up to the chilling step, cover the dough tightly with plastic wrap, and refrigerate it. If you’re looking to prep even further ahead, you can freeze the dough balls for up to 3 months—just scoop them into balls and freeze on a baking sheet before transferring to an airtight container. When you're ready to bake, there’s no need to thaw; simply add a couple of extra minutes to the baking time for freshly baked cookies that are just as delicious!

How to Store and Freeze Butter Pecan Cookies

Room Temperature: Store the cookies in an airtight container at room temperature for up to 1 week to keep them soft and chewy.

Fridge: If you prefer a cooler treat, Butter Pecan Cookies can be stored in the fridge for up to 2 weeks, but they may lose some softness.

Freezer: For longer storage, freeze the cookies in a single layer on a baking sheet, then transfer to a freezer-friendly bag for up to 3 months; they’ll taste just as delightful when thawed.

Reheating: To enjoy your Butter Pecan Cookies warm again, simply pop them in the microwave for 10-15 seconds, or bake at 350°F (175°C) for a few minutes.

Expert Tips for Butter Pecan Cookies

Warm Butter: Make sure your butter is melted and warm but not hot; this helps achieve the right texture.

Chill the Dough: Always chill the dough for 30-45 minutes. This prevents excessive spreading and keeps your cookies soft and chewy.

Don’t Overmix: Mix until just combined to maintain a light and airy texture in your Butter Pecan Cookies.

Oven Calibration: Use an oven thermometer to ensure your baking temperature is accurate; this leads to perfectly baked cookies every time.

Precise Measurements: Measure your ingredients accurately to prevent misproportioned cookies that can alter texture and taste.

Butter Pecan Cookies Variations & Substitutions

Customize your Butter Pecan Cookies to delight your taste buds and impress your family!

  • Nutty Alternatives: Substitute pecans with walnuts or almonds for a different nutty flavor that still brings that satisfying crunch.

  • Chocolate Indulgence: Add chocolate chips or butterscotch chips for a rich, sweet twist. The chocolate melts beautifully, creating pockets of gooeyness in each bite.

  • Toffee Crunch: Incorporate toffee bits for an extra level of sweetness and chewy texture, creating a delightful contrast with the crisp edges.

  • Spice It Up: Experiment with warm spices like nutmeg or ginger to enhance the complexity of flavors. A dash of nutmeg adds that cozy holiday aroma we all love.

  • Dairy-Free Delight: Use coconut oil or a dairy-free butter alternative for a buttery flavor without the milk. Your cookies will still remain soft and delicious!

  • Gluten-Free Option: Substitute all-purpose flour with gluten-free flour blend for a gluten-free version that everyone can enjoy at gatherings.

  • Flavor Infusion: Infuse your batter with citrus zest, like orange or lemon, for a refreshing twist that brightens the overall taste experience.

  • Heat it Up: For those who enjoy a kick, add a pinch of cayenne pepper or chili powder to your dough. This unexpected heat complements the sweetness in a unique way.

Feel free to explore these variations and make your Butter Pecan Cookies uniquely yours! Pair them with a comforting dessert like warm vanilla ice cream or even delectable Matcha Cookies Soft for a delightful dessert spread.

Butter Pecan Cookies Recipe FAQs

What type of pecans should I use?
Absolutely! Use raw or lightly toasted pecans for the best flavor. Toasting enhances their nutty aroma and gives a delightful crunch. You can also substitute them with walnuts or almonds if you prefer a different nutty taste.

How should I store Butter Pecan Cookies?
To keep your cookies soft and chewy, store them in an airtight container at room temperature for up to 1 week. If you live in a more humid area or want them to last longer, the fridge is a good option for up to 2 weeks, though they might lose slight softness.

Can I freeze Butter Pecan Cookies?
Yes! To freeze, first place the cookies in a single layer on a baking sheet and freeze for about 1 hour. Once firm, transfer them to a freezer-safe bag. They’ll maintain their delicious flavor for up to 3 months. When you’re ready to enjoy, simply thaw or reheat them in the microwave for a quick delight.

What if my cookie dough is too sticky?
Very! If your dough is too sticky to handle, it might be due to using too much butter or not enough flour. Add a little extra flour, a tablespoon at a time, until it reaches a workable consistency. Make sure your butter is melted and not too hot; it should be warm to the touch for the best results.

How can I make these cookies gluten-free?
If you want to enjoy Butter Pecan Cookies without gluten, swap out the all-purpose flour for a 1:1 gluten-free flour blend. It’s a fantastic way to include everyone in the cookie fun! Make sure to check the other ingredients for gluten, especially any mixes or additives.

Are Butter Pecan Cookies safe for pets?
No, these cookies aren’t suitable for pets. Ingredients like sugar and pecans can be harmful to dogs and cats. It’s best to enjoy them yourself or share pet-safe treats with your furry friends!

Butter Pecan Cookies

Irresistibly Soft Butter Pecan Cookies for Cozy Moments

These Butter Pecan Cookies are soft, chewy, and a delightful treat for any gathering.
Print Recipe Pin Recipe
Prep Time 15 minutes mins
Cook Time 12 minutes mins
Chill Time 45 minutes mins
Total Time 1 hour hr 12 minutes mins
Servings: 24 cookies
Course: Dessert
Cuisine: American
Calories: 150
Ingredients Equipment Method Nutrition Notes

Ingredients
  

For the Cookies
  • 1 cup Unsalted Butter melted
  • 3/4 cup Granulated Sugar
  • 3/4 cup Brown Sugar packed
  • 1 large Egg
  • 1 teaspoon Vanilla Extract
  • 2 cups All-Purpose Flour
  • 2 tablespoons Cornstarch
  • 1/2 teaspoon Cinnamon Powder optional
  • 1 teaspoon Baking Soda
  • 1 teaspoon Baking Powder
  • 1 cup Chopped Pecans toasted
  • 1/2 cup Optional Toffee Bits

Equipment

  • Mixing Bowl
  • hand mixer
  • Cookie Scoop
  • Baking Sheets
  • Parchment Paper

Method
 

Step-by-Step Instructions for Butter Pecan Cookies
  1. Preheat your oven to 350°F (175°C) and line two baking sheets with parchment paper.
  2. In a large mixing bowl, combine the melted unsalted butter, granulated sugar, and brown sugar. Beat until light and fluffy, about 2 to 3 minutes.
  3. Mix in one large egg and one teaspoon of vanilla extract until smooth, about a minute.
  4. Gradually incorporate the all-purpose flour, cornstarch, baking soda, baking powder, and cinnamon. Stir until just combined.
  5. Fold in the chopped pecans and optional toffee bits.
  6. Cover the dough with plastic wrap and chill in the refrigerator for 30 to 45 minutes.
  7. Use a medium cookie scoop to portion the dough into balls, about 1.5 inches in diameter. Optionally roll in granulated sugar.
  8. Bake for 11 to 14 minutes until the edges are golden brown and centers are soft.
  9. Let cool on the baking sheet for about 5 minutes before transferring to a wire rack.

Nutrition

Serving: 1cookieCalories: 150kcalCarbohydrates: 21gProtein: 2gFat: 7gSaturated Fat: 4gPolyunsaturated Fat: 1gMonounsaturated Fat: 2gCholesterol: 20mgSodium: 80mgPotassium: 50mgFiber: 1gSugar: 10gVitamin A: 100IUCalcium: 20mgIron: 0.5mg

Notes

Enjoy these cookies fresh out of the oven, ideally with a scoop of vanilla ice cream.

Tried this recipe?

Let us know how it was!

Decadent Turtle Bars: Indulge in Sweet Gooey Perfection

March 22, 2026 by Grace Snow Leave a Comment

The moment I first pulled a pan of Easy Turtle Bars from the oven, the sweet aroma of caramel and chocolate enveloped my kitchen, whisking me back to countless family gatherings centered around homemade desserts. These decadent Turtle Bars, with their rich layering of buttery shortbread, gooey caramel, and creamy chocolate, are not just a treat; they're a celebration of comfort, joy, and togetherness. One of the best parts about this recipe is its quick prep time; within minutes, you can have these crowd-pleasers ready to dazzle friends and family alike. Perfect for those occasions when you want a sweet indulgence without the fuss, these bars can also be made ahead of time, allowing you to enjoy the moments that truly matter. Curious about how to make these delightful treats? Let’s dive in!

Why are Decadent Turtle Bars a Must-Try?

Irresistible Flavor: The harmonious blend of chocolate, caramel, and pecans creates a taste sensation that's hard to resist.

Quick and Easy: With a simple step-by-step process, you'll be enjoying these bars in no time, making them perfect for last-minute gatherings.

Make-Ahead Delight: Prepare them in advance—they taste even better after a day in the fridge!

Crowd-Pleaser: These bars are sure to impress your guests, whether it's a family gathering or a potluck. Pair them with vanilla ice cream for an extra delicious experience.

For more indulgent treats, check out Pumpkin Brownies Decadent or consider making some Vegan Sushi Indulge for a unique twist!

Decadent Turtle Bars Ingredients

For the Crust
• Cold Butter – Ensures a buttery, crisp shortbread base; using unsalted butter helps control sweetness.
• All-Purpose Flour – Provides the structure necessary for a solid crust; you can use gluten-free flour for a gluten-free option.
• Granulated Sugar – Sweetens the crust and caramel layer; consider using coconut sugar for a deeper flavor.

For the Caramel Layer
• Unsalted Butter – Adds richness to the caramel layer; substitute with dairy-free butter for a vegan version.
• Heavy Cream – Creates a smooth texture in the caramel; coconut cream can replace it for a dairy-free option.
• Toasted Pecans – Introduces delightful crunch; swap in walnuts if preferred.

For the Topping
• Chocolate Chips – Use semi-sweet or milk chocolate for a velvety finish; dark chocolate can offer a bolder taste.
• Sea Salt (Optional) – Enhances flavor; a sprinkle can provide a sweet and salty contrast to the caramel.
• Extra Pecans (Optional) – Add these for decoration and extra crunch, elevating the experience of these decadent Turtle Bars.

Step‑by‑Step Instructions for Decadent Turtle Bars

Step 1: Preheat Your Oven
Begin by preheating your oven to 350°F (175°C). This ensures that your oven is ready for baking the crust to a lovely golden hue. While the oven warms up, gather your baking dish, preferably a 9x13-inch one, and line it with parchment paper, allowing for some overhang on the sides for easy removal later.

Step 2: Make the Shortbread Crust
In a large mixing bowl, combine cold butter, all-purpose flour, and granulated sugar. Use a pastry cutter or your fingers to mix until crumbly and resembles coarse sand. Press this mixture firmly into the bottom of your lined baking dish, ensuring an even layer. Bake for 15-18 minutes, or until the edges are lightly golden and slightly firm to the touch.

Step 3: Prepare the Gooey Caramel
While the crust is baking, prepare the caramel layer. In a medium saucepan, combine unsalted butter and granulated sugar over medium heat. Stir constantly until the mixture melts and starts bubbling, around 5 minutes. Gradually whisk in the heavy cream, cooking for an additional 2-3 minutes until smooth and thickened; then fold in the toasted pecans for a delightful crunch.

Step 4: Spread the Caramel Layer
Once your crust is baked, carefully remove it from the oven. Pour the warm caramel mixture evenly over your pre-baked crust, using a spatula to ensure full coverage. Return the dish to the oven and bake for an extra 10-12 minutes, or until the caramel begins to bubble slightly around the edges, indicating it's set.

Step 5: Add the Chocolate Topping
After removing the caramel-topped crust from the oven, allow it to cool for about 10 minutes. Next, place your chocolate chips in a microwave-safe bowl and heat them in 30-second intervals, stirring until melted and smooth. Pour the melted chocolate over the warm caramel layer and use a spatula to spread it evenly, creating a lovely glossy finish.

Step 6: Cool and Set
Let your decadent Turtle Bars cool at room temperature for at least 1 hour. To cut them into perfect squares, it’s best to refrigerate them for an additional 30 minutes; this makes slicing neater. Once cooled and set, lift the bars out of the dish using the parchment overhang, and slice them into squares to serve.

Make Ahead Options

These Decadent Turtle Bars are perfect for busy home cooks looking to save time during the week! You can prepare the shortbread crust and caramel layer up to 24 hours in advance. Simply make the crust, bake it, and prepare the caramel mixture, then allow it to cool before layering it over the crust. Once assembled, refrigerate the bars until you're ready to melt and spread the chocolate topping; this keeps everything fresh and delicious. For added convenience, you can also freeze the bars for up to 3 months; just thaw them in the refrigerator overnight before serving. Rest assured, they'll be just as irresistible when you finish them!

How to Store and Freeze Decadent Turtle Bars

Room Temperature: Keep your Turtle Bars in an airtight container at room temperature for up to 5 days; this helps maintain their delightful gooeyness.

Refrigerator: For longer freshness, store them in the fridge for up to 2 weeks; the flavors will deepen and improve over time, making each bite even more indulgent.

Freezer: Individual bars can be frozen for up to 3 months. Wrap each bar tightly in plastic wrap and then place them in a zip-top bag. Thaw at room temperature before serving for the best texture.

Reheating: If you prefer them warm, gently heat in the microwave for 10-15 seconds; this will make the chocolate a little melty again, enhancing the decadent experience.

Expert Tips for Decadent Turtle Bars

  • Keep It Cold: Always use cold butter for the crust to ensure it stays flaky and crumbly. Room temperature butter may lead to a dense base.

  • Stir Constantly: While preparing the caramel, stir continuously to prevent burning. If it starts to turn too dark too quickly, lower the heat immediately.

  • Cool Before Cutting: Let the bars cool completely at room temperature before refrigerating for clean cuts. This will help you achieve a smooth edge.

  • Customize with Toppings: Feel free to sprinkle some sea salt or additional nuts on the chocolate topping for enhanced flavor. It’s a delightful twist for your decadent Turtle Bars!

  • Add Texture Variations: Consider integrating toasted coconut or swapping nuts to create your unique flavor profile in these bars. Don't shy away from experimenting!

What to Serve with Easy Turtle Bars

A delightful assortment of sides can elevate your dessert experience, transforming simple indulgence into a memorable occasion.

  • Vanilla Ice Cream: The creamy, cool texture beautifully contrasts the rich, gooey nature of the Turtle Bars, enhancing each bite. Imagine the sweet melting into the warm bars—pure bliss!

  • Whipped Cream: A dollop of airy whipped cream adds a light touch to the richness of the bars, bringing a sense of freshness that perfectly balances the flavors.

  • Chocolate Sauce: Drizzling warm chocolate sauce over the bars creates an extra layer of decadence, amplifying that indulgent experience in every mouthful.

  • Fresh Berries: Juicy strawberries or tart raspberries provide a burst of freshness that cuts through the sweetness, offering a delightful flavor contrast.

  • Coffee: A rich, bold cup of freshly brewed coffee complements the sweet, chocolatey goodness, creating a warm, cozy vibe that rounds out your dessert plate.

  • Nutty Caramel Sauce: Extra caramel sauce can enhance the dessert substantially. Pour it over the bars and feel the harmony of flavors explode!

  • Toasted Coconut Flakes: Adding a sprinkle of toasted coconut introduces a beautiful texture and a tropical twist, making each bite even more exciting.

  • Milk: A classic pairing, a tall glass of cold milk balances the sweetness and creates a cozy, nostalgic experience.

  • Chocolate-Covered Pretzels: The salty crunchiness from pretzels dipped in chocolate makes for a delightful snack alongside the decadently sweet Turtle Bars.

Delight in the perfect combo of textures and flavors as you celebrate the simple joy of sharing homemade desserts!

Decadent Turtle Bars Variations

Customize your Turtle Bars to delight your taste buds even more with these fun twists!

  • Nut-Free: Substitute pecans with seeds like pumpkin or sunflower for a delightful crunch without the nuts. These changes will bring a whole new vibe to your bars.

  • Gluten-Free: Swap out all-purpose flour for a gluten-free blend or almond flour to make these treats accessible for everyone. The textures might differ, but the taste will still shine!

  • Vegan Delight: Use coconut cream, dairy-free butter, and dark chocolate to create a rich and creamy vegan version. Don't be surprised if everyone's raving about how indulgent they are!

  • Espresso Twist: Add a tablespoon of instant espresso powder to the chocolate layer for a caffeinated kick that elevates the chocolate flavor. This twist adds depth without overpowering the classic sweetness!

  • Caramel-Drizzled Bliss: Instead of spreading the chocolate over the caramel, consider drizzling warm caramel on top of the chocolate once set for an extra layer of sweetness. Let's be honest, can you ever have too much caramel?

  • Tropical Vibes: Mix in some toasted coconut into the caramel layer and top with chocolate-covered macadamia nuts. This variation transforms your Turtle Bars into a tropical vacation treat!

  • S'mores Edition: Incorporate mini marshmallows and crushed graham crackers into the crust for a s'mores-inspired twist. The nostalgic flavors will have everyone reminiscing about camping nights around the fire.

  • Spicy Kick: Sprinkle in a pinch of cayenne pepper or chili powder to the caramel for a surprising kick. The spicy-sweet combo makes for an exciting character in each bite!

For additional inspiring flavors, consider making some German Chocolate Poke or try your hand at crafting delicious Vegan Sushi Indulge for a unique culinary adventure!

Decadent Turtle Bars Recipe FAQs

How do I choose the right butter for the crust?
Absolutely! For the best results, use cold unsalted butter in your crust. This helps achieve a flaky and crumbly texture, while unsalted butter gives you more control over the sweetness of your bars. If you're looking for a dairy-free option, dairy-free butter works well, too!

What’s the best way to store leftover Turtle Bars?
You can store your decadent Turtle Bars in an airtight container at room temperature for up to 5 days. If you want them to last longer, I recommend refrigerating them for up to 2 weeks. The flavors actually deepen and improve over time, making them even more delicious!

Can I freeze Turtle Bars, and if so, how?
Certainly! To freeze individual bars, wrap each one tightly in plastic wrap and then place them in a zip-top bag. They can be frozen for up to 3 months. When you're ready to enjoy them, just thaw at room temperature for the best texture. If you prefer them warm, pop them in the microwave for about 10-15 seconds!

What should I do if my caramel burns while cooking?
Very good question! If your caramel starts to darken too quickly or if it appears to burn, immediately reduce the heat and keep stirring. If it has burned to a point where it’s not salvageable, it’s best to start over—caramel can be fickle! Keeping the heat medium and stirring constantly will help ensure it stays smooth and bubbly without burning.

Are there any dietary considerations for making these bars?
Absolutely! If you or your guests have nut allergies, you can substitute toasted pecans with sunflower seeds or omit the nuts entirely. For a vegan version, use dairy-free butter and coconut cream in place of heavy cream. Always double-check labels for allergies, especially with chocolate chips!

Can I add additional toppings to my Turtle Bars?
Yes, the more the merrier! You can enhance the flavor by adding a sprinkle of sea salt over the chocolate topping, or even using a mix of chocolate types—dark chocolate with a hint of espresso can elevate the flavor profile. Feel free to experiment with additional garnishes, like toasted coconut or extra nuts, to customize your decadent Turtle Bars!

Decadent Turtle Bars

Decadent Turtle Bars: Indulge in Sweet Gooey Perfection

These Decadent Turtle Bars feature a luscious blend of caramel, chocolate, and pecans for a sweet treat that's perfect for gatherings.
Print Recipe Pin Recipe
Prep Time 15 minutes mins
Cook Time 30 minutes mins
Cooling Time 1 hour hr
Total Time 1 hour hr 45 minutes mins
Servings: 12 bars
Course: Dessert
Cuisine: American
Calories: 250
Ingredients Equipment Method Nutrition Notes

Ingredients
  

For the Crust
  • 1 cup Cold Butter unsalted preferred for sweetness control
  • 2 cups All-Purpose Flour gluten-free option available
  • 1/2 cup Granulated Sugar coconut sugar can be used for deeper flavor
For the Caramel Layer
  • 1/2 cup Unsalted Butter dairy-free option available
  • 1 cup Heavy Cream coconut cream can replace for dairy-free option
  • 1 cup Toasted Pecans substitute with walnuts if preferred
For the Topping
  • 1 cup Chocolate Chips semi-sweet or milk chocolate
  • 1/2 teaspoon Sea Salt optional for enhanced flavor
  • 1/2 cup Extra Pecans optional for decoration and crunch

Equipment

  • 9x13-inch baking dish
  • Medium saucepan
  • Mixing Bowl
  • Spatula
  • Microwave-safe bowl

Method
 

Step-by-Step Instructions
  1. Preheat your oven to 350°F (175°C). Line a 9x13-inch baking dish with parchment paper.
  2. Combine cold butter, all-purpose flour, and granulated sugar in a large mixing bowl. Mix until crumbly. Press mixture into the bottom of the baking dish and bake for 15-18 minutes.
  3. In a medium saucepan, combine unsalted butter and granulated sugar over medium heat. Stir until melted. Gradually whisk in heavy cream and fold in the toasted pecans. Cook for 2-3 minutes until smooth.
  4. Pour the caramel mixture over the pre-baked crust and return to the oven. Bake for an additional 10-12 minutes until caramel is bubbly.
  5. Allow to cool for 10 minutes. Melt chocolate chips in a microwave-safe bowl in 30-second intervals, then pour over the caramel layer.
  6. Let the Turtle Bars cool at room temperature for at least 1 hour before cutting. Refrigerate for an additional 30 minutes for neat slicing.

Nutrition

Serving: 1barCalories: 250kcalCarbohydrates: 30gProtein: 3gFat: 15gSaturated Fat: 7gPolyunsaturated Fat: 2gMonounsaturated Fat: 5gCholesterol: 30mgSodium: 100mgPotassium: 120mgFiber: 1gSugar: 18gVitamin A: 400IUCalcium: 30mgIron: 1mg

Notes

For best results, use cold butter for a flaky crust and store bars in an airtight container at room temperature for up to 5 days or refrigerate for 2 weeks.

Tried this recipe?

Let us know how it was!

Decadent Salted Caramel Butter Bars You Can't Resist

March 22, 2026 by Grace Snow Leave a Comment

As I unwrapped that first salty caramel candy, a wave of nostalgia hit me—those sweet, sticky bites from childhood that seemed to hold the magic of homemade love. Now, I've transformed that memory into these Irresistible Salted Caramel Butter Bars, where a buttery shortbread crust cradles a gooey caramel layer, all topped with a sprinkle of flaky sea salt. The best part? They’re not just easy to make, but also incredibly versatile, inviting you to explore gluten-free options or even add your favorite nuts for an exciting crunch. Perfect for gatherings or a cozy afternoon snack, these bars will have your guests asking for seconds. So, are you ready to indulge in this delightful treat that balances richness and comfort in every bite?

What Makes These Bars Irresistible?

Decadent Flavor: Each bite bursts with a rich, buttery taste complemented by gooey caramel and a hint of flaky sea salt.

Easy to Make: This recipe requires minimal baking skills and uses everyday ingredients, making it a perfect choice for both beginner and seasoned bakers.

Versatile Options: You can easily substitute regular flour with a gluten-free blend for those with dietary needs, or toss in some nuts for added crunch.

Crowd-Pleasing Delight: Perfect for gatherings, these bars are sure to impress your friends and family, much like my Crockpot Butter Chicken impresses dinner guests.

Quick to Prepare: With a total baking time of under an hour, you can whip these up in no time and have a delicious dessert ready in a flash.

Memorable Treat: The combination of flavors and textures creates a nostalgic experience that reminds you of cherished homemade goodies, perfect for any occasion.

Salted Caramel Butter Bars Ingredients

For the Crust

  • Butter – use room temperature for a rich, creamy texture.
  • Granulated Sugar – sweetens the crust and adds essential structure.
  • Powdered Sugar – creates a smooth texture in the dough for perfect bars.
  • Vanilla Extract – enhances the flavor with a warm, inviting note.
  • All-Purpose Flour – for the base structure; can swap with a gluten-free blend.

For the Filling

  • Salted Caramel Candies – crucial for that gooey, indulgent center; store-bought caramel sauce works too.
  • Heavy Cream – combines with the caramel to create a smooth, pourable consistency; no substitutions suggested.

For the Topping

  • Flaky Sea Salt – a sprinkle adds the perfect finishing touch, balancing sweetness.
  • Remaining Dough – crumbled over the caramel; keep it light for a delightful crunch.

Step‑by‑Step Instructions for Salted Caramel Butter Bars

Step 1: Preheat the Oven
Begin by preheating your oven to 325°F (165°C). While it heats, grab a 9×13-inch baking pan and line it with parchment paper, allowing some overhang for easy removal later. This step ensures your Salted Caramel Butter Bars bake evenly and don’t stick to the pan.

Step 2: Make the Dough
In a mixing bowl, beat together softened butter, granulated sugar, and powdered sugar until the mixture is light and fluffy, about 3 to 4 minutes. Then, stir in the vanilla extract to enhance the flavor. The result should be a creamy, delightful dough that feels rich and inviting as you prepare it for your bars.

Step 3: Add the Flour
Gradually incorporate the all-purpose flour into the creamed mixture, mixing until a thick dough forms. This step is crucial for achieving the perfect buttery crust for your Salted Caramel Butter Bars. You may need to switch to a spatula to fully combine the flour, ensuring no dry pockets remain.

Step 4: Bake the Crust
Press about two-thirds of the dough firmly into the bottom of your prepared pan, creating an even layer. Bake in the preheated oven for 20 minutes or until the crust is lightly golden around the edges. This initial baking will give your bars a solid base, ready to hold the luscious caramel layer.

Step 5: Prepare the Caramel Filling
While the crust bakes, place the salted caramel candies and heavy cream in a saucepan over medium-low heat. Stir constantly as they melt together, which should take about 5 to 7 minutes. You want a smooth, homogenous caramel sauce without any lumps, perfect for pouring over your crust.

Step 6: Pour the Caramel
Once the caramel is smooth and creamy, carefully pour it over the baked crust while it’s still warm. Use a spatula to spread it evenly, ensuring every corner is covered. To enhance the flavors, sprinkle a generous amount of flaky sea salt over the warm caramel, creating that irresistible salty-sweet contrast.

Step 7: Crumble the Remaining Dough
Take the remaining dough and crumbled it over the caramel layer without pressing it down. This will allow for a delightful crumble on top once baked. Make sure to distribute it evenly, as this will create a beautiful texture for the topping on your Salted Caramel Butter Bars.

Step 8: Final Bake
Return the pan to the oven and bake for an additional 25 to 30 minutes. You’re looking for a golden topping that feels set but has a slight jiggle in the middle. This step ensures the bars will hold together beautifully when sliced and have that perfect blend of soft and slightly crunchy textures.

Step 9: Cool and Slice
Once baked, remove the pan from the oven and let it cool completely at room temperature. For cleaner cuts, chill the bars in the refrigerator for at least an hour before slicing them into squares. This resting time allows the caramel to firm up, making your Salted Caramel Butter Bars easier to serve and more enjoyable to eat.

Make Ahead Options

These Salted Caramel Butter Bars are perfect for busy weeknights and can be prepared in advance to save you valuable time! You can make the shortbread crust up to 24 hours ahead; simply press it into the pan, bake, and let it cool completely before covering it tightly with plastic wrap. For the filling, prepare the caramel sauce and refrigerate it for up to 3 days; when ready to assemble, gently reheat it to pour over the crust. After crumbling the remaining dough on top, bake the bars as directed. This way, you’ll have scrumptious, homemade bars ready to impress your family and friends, offering that delightful homemade touch without the last-minute rush!

Salted Caramel Butter Bars Variations

Feel free to get creative and customize these delicious bars to suit your taste buds and dietary needs!

  • Gluten-Free: Substitute all-purpose flour with a 1:1 gluten-free blend for a delightful alternative. This way, everyone can enjoy the magic of these bars!

  • Nutty Crunch: Toss in some chopped pecans or walnuts to the dough for a delightful crunch that complements the soft caramel beautifully. The nutty flavors bring an exciting contrast to each bite.

  • Chocolate Drizzle: Melt dark or milk chocolate and drizzle it over the cooled bars for an extra layer of indulgence. This chocolatey addition elevates the dessert experience to new heights!

  • Spiced Up: Add a pinch of cinnamon or nutmeg to the crust for a warm, spiced flavor that pairs wonderfully with the caramel. It gives a cozy, inviting touch to your bars.

  • Salt Variations: Experiment with flavored sea salts, like smoked or garlic salt, for a unique twist that adds depth and intrigue. These unexpected notes will surprise your taste buds with every bite.

  • Fruit Fusion: Layer thinly sliced apples or pears over the crust before adding the caramel for a fruity boost. The sweetness of the fruit contrasts nicely with the rich caramel, bringing brightness to your bars.

  • Peanut Butter Swirl: Incorporate a swirl of creamy peanut butter into the caramel before pouring it over the crust for a sweet and savory flavor combination. It’s a delicious way to mix things up!

For more delightful recipes, try my Crockpot Butter Chicken or check out these quick variations that can help inspire your home-cooking adventures!

How to Store and Freeze Salted Caramel Butter Bars

  • Room Temperature: Keep your Salted Caramel Butter Bars in an airtight container at room temperature for up to 3 days. They’re perfect for a quick sweet fix during the day!

  • Fridge: For a longer shelf life, store them in the refrigerator for up to a week. Be sure to wrap them well to prevent drying out.

  • Freezer: If you want to keep these delicious bars for longer, freeze them for up to 2 months. Wrap them tightly in plastic wrap and then in aluminum foil. Thaw at room temperature when ready to enjoy!

  • Reheating: For a warm treat, lightly reheat individual bars in the microwave for about 10-15 seconds. Enjoy them gooey and fresh!

Expert Tips for Salted Caramel Butter Bars

  • Room Temperature Butter: Ensure your butter is at room temperature for a creamy, well-combined dough. Cold butter may lead to uneven texture.

  • Avoid Overbaking: To keep your bars soft and chewy, watch the baking time closely. They should be lightly golden, not dark.

  • Melting Caramel: Melt salted caramel candies slowly and stir constantly to prevent scorching. This creates a smooth filling that enhances flavor.

  • Sprinkle While Warm: Add sea salt to the warm caramel immediately after pouring it over the crust for optimal flavor penetration.

  • Chill Before Cutting: For clean edges and perfect squares, chill the bars in the fridge before slicing. Patience pays off with presentation!

What to Serve with Salted Caramel Butter Bars

Indulging in these decadent bars creates an opportunity for a delightful meal experience that goes beyond dessert.

  • Classic Vanilla Ice Cream: A scoop of creamy vanilla ice cream beautifully contrasts the warm, gooey caramel, creating a decadent dessert duo. The cold creaminess balances the rich sweetness.

  • Fresh Berries: Strawberries or raspberries introduce a burst of tartness, enhancing the flavors in each bite while adding freshness to your dessert plate. They create a vibrant color contrast as well.

  • Coffee: A warm cup of brewed coffee provides a bitter depth that perfectly cuts through the sweetness of your bars, making it an ideal pairing for an afternoon treat.

  • Chai Latte: The spicy notes of chai complement the caramel beautifully, offering warmth and an exotic twist to the sweet indulgence. Pairing is like wrapping yourself in a cozy blanket!

  • Nutty Granola: Sprinkling some nutty granola on top brings an unexpected crunch while mirroring the richness of the bars. Its texture adds interest, elevating your dessert presentation.

  • Chocolate Drizzle: A light drizzle of melted chocolate emphasizes the dessert's richness and adds another layer of flavor that is hard to resist. It's an easy way to impress guests!

  • Shiraz Wine: A glass of Shiraz reds with fruity notes matches the sweetness while amplifying the experience, making it a great choice for gatherings and celebrations.

  • Salted Caramel Sauce: Serve a side of warm salted caramel sauce for those who crave an extra drizzle of decadence on their bars, amplifying that sweet-salty flavor even more!

Salted Caramel Butter Bars Recipe FAQs

What type of butter should I use for the dough?
Absolutely, use room temperature unsalted butter for your Salted Caramel Butter Bars. This will allow you to cream the butter easily with the sugars, creating a rich and fluffy dough. Cold butter can lead to a denser texture, so let your butter sit out for about 30 minutes before you start baking.

How should I store the Salted Caramel Butter Bars?
For the best enjoyment, store your Salted Caramel Butter Bars in an airtight container at room temperature for up to 3 days. If you'd like them to last longer, refrigerate them for up to a week. Make sure to wrap them well to keep them from drying out!

Can I freeze Salted Caramel Butter Bars?
Yes! These bars are fantastic for freezing. Wrap them tightly in plastic wrap, followed by aluminum foil to protect them from freezer burn. You can freeze them for up to 2 months. When you're ready to enjoy, simply let them thaw at room temperature for about an hour or until they reach your desired temperature.

What should I do if my caramel filling is grainy?
If your caramel filling ends up grainy, don’t worry! Return it to low heat, stirring continuously until it melts and becomes smooth again; this usually takes about 2-3 minutes. You can add a tiny splash of heavy cream to help with the smoothing process. Always ensure you're melting it gently to avoid this issue in the first place.

Are there any dietary considerations for this recipe?
Certainly! If you're looking to make these bars gluten-free, you can substitute the all-purpose flour with a 1:1 gluten-free blend. Additionally, please note that the Salted Caramel Butter Bars contain dairy, so if there are lactose sensitivities or allergies, consider using lactose-free butter and checking the labels on your caramel candies for any dairy ingredients.

What can I do to make my bars chewy?
For those wonderfully chewy Salted Caramel Butter Bars, be sure not to overbake them! Aim for a lightly golden top as you pull them from the oven, as they will continue to firm up while cooling. Additionally, chilling before slicing helps maintain that chewy texture, making every bite a delightful experience.

Salted Caramel Butter Bars

Decadent Salted Caramel Butter Bars You Can't Resist

Indulge in Salted Caramel Butter Bars—rich, buttery bars with gooey caramel and sea salt.
Print Recipe Pin Recipe
Prep Time 15 minutes mins
Cook Time 50 minutes mins
Cooling Time 1 hour hr
Total Time 2 hours hrs 5 minutes mins
Servings: 12 bars
Course: Dessert
Cuisine: American
Calories: 250
Ingredients Equipment Method Nutrition Notes

Ingredients
  

Crust
  • 1 cup Butter room temperature
  • 1/2 cup Granulated Sugar
  • 1/4 cup Powdered Sugar
  • 1 teaspoon Vanilla Extract
  • 2 cups All-Purpose Flour can substitute with gluten-free blend
Filling
  • 14 ounces Salted Caramel Candies or store-bought caramel sauce
  • 1/2 cup Heavy Cream
Topping
  • 1 teaspoon Flaky Sea Salt for sprinkling
  • remaining Remaining Dough crumbled

Equipment

  • 9x13-inch baking pan
  • Mixing Bowl
  • Spatula
  • Saucepan
  • Parchment Paper

Method
 

Preparation Steps
  1. Preheat your oven to 325°F (165°C) and line a 9×13-inch baking pan with parchment paper.
  2. In a mixing bowl, beat together softened butter, granulated sugar, and powdered sugar until light and fluffy, about 3 to 4 minutes. Stir in the vanilla extract.
  3. Gradually incorporate the all-purpose flour into the mixture, mixing until a thick dough forms.
  4. Press about two-thirds of the dough into the bottom of the prepared pan and bake for 20 minutes.
  5. In a saucepan, melt the salted caramel candies with heavy cream over medium-low heat, stirring constantly for 5 to 7 minutes until smooth.
  6. Pour the caramel over the baked crust and sprinkle with flaky sea salt.
  7. Crumble the remaining dough over the caramel layer without pressing it down.
  8. Bake for an additional 25 to 30 minutes until the topping is golden.
  9. Let cool completely at room temperature, then chill in the refrigerator for at least an hour before slicing.

Nutrition

Serving: 1barCalories: 250kcalCarbohydrates: 35gProtein: 2gFat: 12gSaturated Fat: 7gMonounsaturated Fat: 3gCholesterol: 30mgSodium: 150mgPotassium: 50mgFiber: 1gSugar: 20gVitamin A: 5IUCalcium: 2mgIron: 4mg

Notes

For best results, use room temperature butter and avoid overbaking the crust. Chill before cutting for cleaner slices.

Tried this recipe?

Let us know how it was!

Blueberry Lemon Pie Bars – Your New Summer Sweet Fix

March 19, 2026 by Grace Snow Leave a Comment

As I stood in the kitchen, a hint of summer wafted through the air—sunshine, sweet berries, and a tickle of tart lemon zest. That's when I decided to whip up a batch of Blueberry Lemon Pie Bars, where the vibrancy of fresh blueberries meets the refreshing punch of lemon. These bars are not just any dessert; they are a delightful combination of creamy cheesecake filling perched atop a buttery shortbread crust, making them an effortless crowd-pleaser for picnics or birthdays. Quick to prepare and made with simple ingredients, they offer the perfect balance of sweet and tart, inviting you to enjoy a slice of summer any day of the week. Are you ready to create a dessert that everyone will rave about? Let’s get started!

Why are these Blueberry Lemon Pie Bars irresistible?

Crave-Worthy: The combination of sweet blueberries and tangy lemon creates a dessert that tantalizes the taste buds.
Effortless Preparation: With just a few simple steps, you can whip up these delicious bars without any fuss.
Versatile Options: Feel free to swap blueberries for raspberries or blackberries for a fresh twist on this classic treat!
Perfect for Sharing: These bars are a hit at summer gatherings, ensuring you’ll be the star of any picnic or birthday party.
Refreshing Texture: The creamy cheesecake filling paired with a crumbly crust offers a delightful contrast that keeps you coming back for more.
Add an unforgettable touch to your summer dessert lineup by exploring other recipes like Spinach Pie Deliciously or Lemon Chicken Soup for balanced delights!

Blueberry Lemon Pie Bars Ingredients

Get ready to gather your essentials!

For the Crust
• Butter – unsalted for optimal control over salt levels; it adds richness and flakiness.
• All-purpose Flour – provides structure; feel free to use gluten-free flour as a substitute.
• Granulated Sugar – sweetens the base; you can adjust according to taste preferences.

For the Filling
• Cream Cheese – at room temperature for a smooth texture; it’s crucial for that creamy cheesecake essence.
• Granulated Sugar – sweetens the filling; tweak to your desired level of sweetness.
• Lemon Zest – essential for that vibrant, zesty flavor; don’t skip it!
• Lemon Juice – freshly squeezed for maximum tartness that balances the sweetness.
• Eggs – binds the filling together; can be replaced with flax eggs for a vegan alternative.
• Blueberries – the star of the show! Fresh blueberries are best, but you can use frozen without thawing.

With these ingredients at your side, the adventure towards crafting your delightful Blueberry Lemon Pie Bars begins!

Step‑by‑Step Instructions for Blueberry Lemon Pie Bars

Step 1: Preheat the Oven
Begin by preheating your oven to 350ºF (177ºC). This optimal temperature ensures that the crust bakes evenly and sets up perfectly while you prepare the filling. Make sure your oven rack is in the center position for consistent heat distribution, letting the excitement of baking Blueberry Lemon Pie Bars fill your kitchen with delightful aromas.

Step 2: Prepare the Baking Pan
Line an 8"x8" or 9"x9" baking pan with aluminum foil, allowing some overhang on the edges. This will facilitate easy removal of your Blueberry Lemon Pie Bars once they’re baked and cooled. Grease the foil lightly with cooking spray or butter to prevent sticking and to ensure a smooth lifting process.

Step 3: Make the Crust
In a mixing bowl, combine melted unsalted butter, all-purpose flour, and granulated sugar until the mixture resembles coarse crumbs. Using a spatula or your fingers, press this mixture evenly and firmly into the bottom of the prepared baking pan. Aim for a smooth, compact layer that will serve as the delectable base for your bars.

Step 4: Bake the Crust
Place the crust in the preheated oven and bake for 10 to 12 minutes until it turns slightly golden around the edges. Keep an eye on it to avoid overbaking. Once baked, remove the crust from the oven and let it cool in the pan while you prepare the creamy lemon cheesecake filling for the Blueberry Lemon Pie Bars.

Step 5: Prepare the Filling
In a large mixing bowl, beat the room temperature cream cheese and sugar together until smooth and creamy. Next, gradually add the freshly squeezed lemon juice and lemon zest, mixing until fully incorporated. Finally, add the eggs one at a time, blending gently until the mixture is smooth and luscious, ready to swirl in the fresh blueberries.

Step 6: Fold in Blueberries
Gently fold in the fresh blueberries into the cream cheese mixture. Be careful not to overmix; you want to maintain the integrity of the berries throughout the filling. This step is crucial as the blueberries will add natural sweetness when baked, creating that burst of flavor in every Blueberry Lemon Pie Bar.

Step 7: Bake the Filling
Pour the blueberry-laden filling over the cooled crust, spreading it evenly with a spatula. Return the pan to the oven and bake for 25 to 30 minutes, or until the edges appear set and the center jiggles slightly—this indicates a perfect creamy texture is developing within your bars.

Step 8: Cool and Cut
Once baked, remove the Blueberry Lemon Pie Bars from the oven and allow them to cool completely in the pan on a wire rack. This cooling step is essential for proper cutting; once cool, lift the bars out using the foil overhang and place them on a cutting board. Cut into squares and serve to friends or family to savor the taste of summer!

Expert Tips for Blueberry Lemon Pie Bars

• Room Temperature Ingredients: Ensure cream cheese and eggs are at room temperature to achieve a smooth filling without lumps.

• Gentle Folding: When incorporating blueberries into the filling, fold gently to avoid breaking them and losing their delightful texture.

• Watch Your Baking Time: Avoid overbaking; the center should slightly jiggle but appear mostly set. This keeps your bars creamy and delicious.

• Cooling is Key: Allow the bars to cool completely in the pan for easier cutting; this helps maintain their shape while serving.

• Serve with Style: Elevate your Blueberry Lemon Pie Bars by serving them chilled with a dollop of whipped cream or a scoop of vanilla ice cream on the side.

What to Serve with Blueberry Lemon Pie Bars

As the sun sets and the laughter of friends fills the air, how wonderful it is to pair your delightful dessert with complementing sides!

  • Vanilla Ice Cream: A classic pairing, the creamy sweetness of vanilla ice cream balances the tangy lemon, creating a heavenly combination that's hard to resist. Scoop a generous helping atop the warm bars for an indulgent dessert experience.

  • Fresh Fruit Salad: A vibrant medley of summer fruits not only adds color to your table but also enhances the refreshing aspect of the pie bars, with juicy fruits echoing the blueberry flavors while providing a light and zesty contrast.

  • Lemonade: Refreshingly tart lemonade enhances the lemony notes of your dessert, making it perfect for hot summer days. Serve it in frosty glasses, and your gathering will feel like a sunny picnic!

  • Whipped Cream: A dollop of freshly whipped cream on top of each bar adds a fluffy element that tempers the creaminess, making each bite a delightful contrast of textures with a silky finish.

  • Sparkling Water: For a low-calorie beverage option, opt for sparkling water with lemon slices. This effervescent drink cleanses the palate and complements the dessert's bright flavors while keeping things light and refreshing.

  • Chocolate Drizzle: A light drizzle of dark chocolate over the top adds a rich, satisfying layer that contrasts beautifully with the sweet and tart flavor profile of the Blueberry Lemon Pie Bars, making it a delightful twist that chocolate lovers will adore.

These delightful pairings will not only elevate your Blueberry Lemon Pie Bars but also create a memorable dining experience full of flavor and joy!

Make Ahead Options

These Blueberry Lemon Pie Bars are perfect for meal prep enthusiasts seeking time-saving solutions! You can prepare the crust and filling separately up to 24 hours in advance, storing them in airtight containers in the refrigerator. Make sure the crust is completely cooled before wrapping it tightly to maintain its texture. When you're ready to enjoy the bars, simply pour the filling over the crust and bake as directed. For optimal quality, allow the bars to cool completely after baking, then refrigerate again for a refreshing treat for up to 3 days. Just slice, serve, and delight in the same deliciousness without the last-minute rush!

Blueberry Lemon Pie Bars Variations

Get ready to unleash your creativity and customize these delicious bars to your taste!

  • Berry Swap: Replace blueberries with raspberries or blackberries for a delightful twist. Each berry brings a unique flavor, making every batch a delightful surprise.

  • Crumb Topping: Add a crumbly topping made from flour, butter, and sugar on top before baking to elevate the texture. This rustic addition will give your bars extra crunch and a comforting touch.

  • Zesty Kick: Incorporate some lime or orange zest along with the lemon zest for a citrusy explosion. These flavors harmonize beautifully, enhancing the freshness.

  • Gluten-Free: Use a gluten-free flour blend for the crust and filling to make this dessert suitable for gluten-sensitive individuals. Everyone deserves a slice of these heavenly treats!

  • Vegan Delight: Substitute cream cheese with a vegan cream cheese and replace eggs with flax eggs. You can enjoy the same luscious texture with a plant-based twist.

  • Chocolate Drizzle: Drizzle melted dark chocolate over the cooled bars for a rich, decadent finish. The chocolate pairs perfectly with the fruity flavors, giving your dessert an indulgent flair.

  • Nuts for Texture: Toss in some crushed nuts such as walnuts or pecans in the crust for added texture and flavor. Nuts not only add crunch but also a lovely depth to the taste.

  • Spicy Warmth: Sprinkle some cinnamon or nutmeg into the filling for a cozy warmth. These spices enhance the overall flavor profile and evoke a sense of comfort.

Feel free to experiment with these ideas! And if you’re looking for more delicious dessert inspiration, check out these recipes for Lemon Ricotta Protein pancakes and Tamale Pie Hearty options that are sure to delight. Happy baking!

How to Store and Freeze Blueberry Lemon Pie Bars

Refrigerator: Store the bars in an airtight container for up to 4-5 days, using parchment paper between layers to prevent sticking and keep them fresh.

Freezer: Wrap the Blueberry Lemon Pie Bars tightly in plastic wrap or aluminum foil, and freeze for up to 2 months. Thaw them in the refrigerator overnight before serving for the best texture.

Room Temperature: For best flavor and texture, serve the bars chilled or at room temperature, but don’t leave them out for more than 2 hours during warm weather.

Reheating: If desired, gently warm individual bars in the microwave for about 10-15 seconds to enjoy a cozy, soft treat.

Blueberry Lemon Pie Bars Recipe FAQs

How do I choose the best blueberries for my Blueberry Lemon Pie Bars?
Absolutely! When selecting blueberries, look for plump, firm berries with a deep blue color. Avoid any that have dark spots or appear shriveled, as they may be overripe. Fresh blueberries provide the best flavor and texture, but frozen berries can also work well without thawing.

How should I store my Blueberry Lemon Pie Bars?
To keep your bars fresh, store them in an airtight container in the refrigerator for up to 4-5 days. I recommend placing parchment paper between layers to prevent them from sticking. If storing at room temperature, ensure they are not left out for more than 2 hours, especially in warm weather.

Can I freeze Blueberry Lemon Pie Bars?
Absolutely! To freeze, wrap each bar tightly in plastic wrap or aluminum foil. They can be stored in the freezer for up to 2 months. When you're ready to enjoy them, simply thaw in the refrigerator overnight for the best texture before serving!

What if my cheesecake filling comes out lumpy?
If you notice lumps in your filling, it could be due to using cold cream cheese. To avoid this, always ensure that your cream cheese and eggs are at room temperature before mixing. If lumps persist, you might want to blend the mixture more to smooth it out, but do this gently to retain the airiness.

Are these Blueberry Lemon Pie Bars suitable for those with dietary restrictions?
Yes! For a gluten-free option, you can substitute all-purpose flour with a gluten-free flour blend. If someone is vegan, replace the eggs with flax eggs (1 tablespoon of ground flaxseed mixed with 2.5 tablespoons of water for each egg) and use a vegan cream cheese alternative. Just ensure to check all ingredient labels for potential allergens!

How long can I keep the leftovers, and what's the best way to reheat them?
You can keep the bars in the refrigerator for around 4-5 days. If you want to enjoy them slightly warm, pop an individual bar in the microwave for about 10-15 seconds. This will give them a cozy, soft texture, making them oh-so-delicious again!

Blueberry Lemon Pie Bars

Blueberry Lemon Pie Bars – Your New Summer Sweet Fix

Delight in these Blueberry Lemon Pie Bars, a perfect blend of sweet and tart flavors, ideal for summer gatherings.
Print Recipe Pin Recipe
Prep Time 20 minutes mins
Cook Time 40 minutes mins
Cooling Time 30 minutes mins
Total Time 1 hour hr 30 minutes mins
Servings: 9 bars
Course: Dessert
Cuisine: American
Calories: 250
Ingredients Equipment Method Nutrition Notes

Ingredients
  

For the Crust
  • 1 cup unsalted butter melted
  • 2 cups all-purpose flour
  • 0.5 cup granulated sugar
For the Filling
  • 8 oz cream cheese at room temperature
  • 0.75 cup granulated sugar adjust to taste
  • 1 tablespoon lemon zest fresh
  • 0.5 cup lemon juice freshly squeezed
  • 2 large eggs at room temperature
  • 2 cups blueberries fresh or frozen

Equipment

  • Baking pan
  • Mixing Bowl
  • Spatula

Method
 

Preparation Steps
  1. Preheat your oven to 350ºF (177ºC).
  2. Line an 8"x8" or 9"x9" baking pan with aluminum foil, grease lightly.
  3. In a mixing bowl, combine melted butter, flour, and sugar until crumbly. Press into the baking pan.
  4. Bake the crust for 10 to 12 minutes until lightly golden, then cool.
  5. Beat cream cheese and sugar until smooth. Add lemon juice and zest, mixing well. Add eggs one at a time.
  6. Gently fold in blueberries into the filling mixture.
  7. Pour the filling over the cooled crust and bake for 25 to 30 minutes until the edges are set.
  8. Cool completely in the pan on a wire rack, then lift out and cut into squares.

Nutrition

Serving: 1barCalories: 250kcalCarbohydrates: 30gProtein: 3gFat: 13gSaturated Fat: 8gMonounsaturated Fat: 3gCholesterol: 50mgSodium: 150mgPotassium: 120mgFiber: 1gSugar: 15gVitamin A: 500IUVitamin C: 5mgCalcium: 40mgIron: 1mg

Notes

Serve chilled or at room temperature, optionally topped with whipped cream or vanilla ice cream.

Tried this recipe?

Let us know how it was!

Irresistible Cotton Candy Cheesecake - Easy No-Bake Magic

March 19, 2026 by Grace Snow Leave a Comment

“Isn’t it funny how a single dessert can transport you right back to your childhood?” That whimsical thrill is exactly what you’ll experience with this Cotton Candy Cheesecake! This easy no-bake party dessert combines the nostalgia of summertime fairs with the creamy richness of cheesecake, making it the ultimate crowd-pleaser for birthdays, summer picnics, or casual get-togethers. Plus, it takes minimal time to prepare, freeing you up to enjoy the fun with your friends and family. In just a few simple steps, you’ll be mesmerized by vibrant swirls of pastel pink and blue that not only look stunning but are sure to delight children and adults alike. Are you ready to whisk up a slice of this dreamy delight?

Why is This Cheesecake So Irresistible?

Playful Presentation: The vibrant pink and blue swirls make this cheesecake a visual delight, perfect for all ages.
No-Bake Convenience: Enjoy the ease of assembling this dessert without turning on your oven, saving you time and energy.
Nostalgic Flavor: With the unique taste of cotton candy, this cheesecake brings back memories of fun fairs and summer festivities.
Endless Customization: Feel free to experiment with flavors or toppings to suit your taste, making it versatile for any occasion.
Perfect for Gatherings: This dessert is sure to impress guests at parties, offering a slice of nostalgia that everyone will adore.

Cotton Candy Cheesecake Ingredients

For the Crust
• Crushed Graham Crackers/Vanilla Wafer Cookies – This forms a delightful, sturdy base and can be substituted with gluten-free options for those with dietary restrictions.
• Unsalted Butter – Essential for binding the crust together; feel free to swap in margarine or coconut oil for a dairy-free twist.
• Granulated Sugar – Adds the perfect touch of sweetness; consider using brown sugar for a richer flavor profile.

For the Filling
• Cream Cheese – The heart of your cheesecake, lending it a creamy texture; low-fat cream cheese works for a lighter version.
• Granulated Sugar (Filling) – Sweetens the cheesecake mixture beautifully; a sugar alternative can also be used here if necessary.
• Vanilla Extract – Enhances overall flavor depth; almond extract provides a lovely variation if you’re feeling adventurous.
• Cotton Candy Flavoring – This is your key ingredient for that signature taste; find it as “fairy floss” or extract and adjust to your liking!
• Gel Food Coloring (Pink and Blue) – Perfect for achieving those whimsical pastel swirls; natural food coloring alternatives can be used for a healthier option.
• Whipped Topping/Whipped Cream – Lightens up the filling and adds creaminess; try non-dairy whipped topping to keep it vegan-friendly.

For the Toppings
• Optional Extra Whipped Topping – A dollop on top makes for a charming presentation.
• Cotton Candy Pieces – Use these to add a fun flair and embrace the cotton candy theme!
• Sprinkles – A sprinkle of color and joy, perfect for decoration.

Step‑by‑Step Instructions for Cotton Candy Cheesecake

Step 1: Prepare the Crust
In a mixing bowl, combine crushed graham crackers (or vanilla wafer cookies), melted butter, and granulated sugar until well mixed. Press this mixture firmly into the bottom of a springform pan, ensuring an even layer. Refrigerate the crust for about 15 minutes until it sets and firms up, creating a solid foundation for your dreamy Cotton Candy Cheesecake.

Step 2: Make the Filling
Using an electric mixer, beat the softened cream cheese and granulated sugar in a large bowl until smooth and creamy, approximately 2-3 minutes. Add in the vanilla extract and cotton candy flavoring, blending until fully incorporated. Gently fold in whipped topping to achieve a fluffy consistency, making sure not to deflate the mixture.

Step 3: Color and Layer
Divide the cheesecake filling evenly into two separate bowls. Add a few drops of pink gel food coloring to one bowl and blue gel food coloring to the other, stirring gently until you achieve your desired pastel shades. Spoon dollops of each colored filling over the prepared crust, alternating between the pink and blue to create a visually appealing marbled effect.

Step 4: Chill
Once your layers are in place, cover the springform pan with plastic wrap or a lid. Refrigerate the Cotton Candy Cheesecake for at least 4 hours, allowing it to set fully. For a quicker option, you can place it in the freezer for about 1-2 hours, ensuring it firm up without losing its delightful textures.

Step 5: Decorate and Serve
After chilling, carefully remove the cheesecake from the springform pan. Top with additional whipped topping, sprinkle cotton candy pieces, and add fun sprinkles for an extra festive touch. Slice into wedges and serve chilled for a treat that captures the whimsical spirit of cotton candy in every bite!

Make Ahead Options

These Cotton Candy Cheesecakes are a dream for busy home cooks looking to save time! You can prepare the crust and filling up to 24 hours in advance. Just make the crust by combining crushed graham crackers, melted butter, and sugar, then firm it up in the springform pan. For the filling, mix the cream cheese, sugar, and flavoring, then store it in an airtight container in the refrigerator. When ready to assemble, simply color the filling and layer it over the crust, followed by a brief chilling period to set. This way, you can enjoy a whimsical dessert with minimal effort right before serving, just as delicious as if made fresh!

How to Store and Freeze Cotton Candy Cheesecake

Fridge: Store your Cotton Candy Cheesecake in an airtight container in the refrigerator for up to 3 days to maintain its freshness and creamy texture.

Freezer: If you want to keep it longer, wrap the cheesecake tightly in plastic wrap and aluminum foil, storing it in the freezer for up to 1 month. Thaw overnight in the fridge before serving.

Reheating: To enjoy, simply slice your cheesecake and let it sit at room temperature for 10-15 minutes before indulging to return the flavors to their creamy best.

Make-Ahead Tip: This dessert is perfect for preparing in advance. Make it a day ahead of your gathering and refrigerate until you're ready to serve, ensuring maximum convenience!

Expert Tips for Cotton Candy Cheesecake

Softened Cream Cheese: Make sure your cream cheese is at room temperature to mix easily and achieve a smooth filling without lumps.

No Real Cotton Candy: For the filling, avoid using actual cotton candy as it dissolves. Reserve it solely as a fun topping to maintain texture.

Chill Time Matters: Allow the cheesecake to chill longer than 4 hours if possible—overnight works wonders for a firmer and more flavorful Cotton Candy Cheesecake.

Coloring Caution: Start with small amounts of gel food coloring; you can always add more to get your desired pastel hues without oversaturating.

Sturdy Crust: Ensure the graham cracker crust is compactly pressed into the pan so it holds together when slicing and serving.

Flavor Alternatives: Experiment with other flavorings, like strawberry or bubblegum, for a twist on your Cotton Candy Cheesecake, maintaining that sweet nostalgic feel.

Cotton Candy Cheesecake Variations

Get ready to sprinkle some fun into your cotton candy cheesecake by exploring these delightful twists!

  • Flavor Alternatives: Swap out the cotton candy flavoring for bubblegum or strawberry to elevate the sweetness. Each option introduces an exciting spin on the original taste, perfect for creative gatherings.

  • Chocolate Cookie Crust: Try a no-bake chocolate cookie crust instead of a traditional graham cracker base for a richer flavor profile. This swap adds a delightful depth that pairs wonderfully with the cheesecake's sweetness.

  • Fruit Swirls: Integrate fruit purees like raspberry or blueberry into the filling for added color and natural sweetness. This variation brings a refreshing element, making each bite a burst of flavor that brightens up the dish.

  • Nutty Crunch: Add chopped nuts like almonds or pecans into the crust for an unexpected crunch. The nutty flavor will complement the sweetness beautifully, enhancing both texture and taste.

  • Dairy-Free Delight: Use non-dairy cream cheese and vegan whipped topping for a fully plant-based version. This substitution allows everyone to enjoy a slice of nostalgia without compromising dietary preferences.

  • Added Zing: Incorporate lemon or lime zest into the filling for a zesty lift. This tangy addition contrasts the sweetness, making each bite a refreshing experience that dances on your palate, delightful!

  • Marshmallow Topping: For a gooey treat, spread mini marshmallows on top after chilling, then briefly toast them for a deliciously caramelized effect. This adds both a fun texture and a delightful twist, reminding you of campfire treats.

  • Heat it Up: If you like a hint of spice, sprinkle in a pinch of cinnamon or nutmeg to the filling. This unexpected warmth enhances the sweetness and provides a comforting backdrop, perfect for cozy gatherings.

Feel free to get creative with your cotton candy cheesecake! These variations can transform this delightful dessert into a personalized masterpiece fit for any celebration, making the experience even more enjoyable.

What to Serve with Cotton Candy Cheesecake

Create a delightful dessert spread that captivates the whimsy of your Cotton Candy Cheesecake and tantalizes the senses.

  • Fresh Fruit Salad: A medley of vibrant, juicy fruits adds a refreshing contrast to the sweet creaminess of the cheesecake.

  • Chocolate Drizzle: A rich chocolate sauce enhances the flavors, adding a decadent twist that adults will love alongside the childlike delight of cotton candy.

  • Mini Pretzels: The salty, crunchy texture provides a perfect balance to the sweet, smooth cheesecake, making for an exciting flavor contrast.

  • Sparkling Lemonade: The fizzy and citrusy notes of sparkling lemonade pair perfectly with the cheesecake, invigorating the palate and inviting fun!

  • Cotton Candy Skewers: Elevate the theme with whimsical cotton candy skewers; their sweetness echoes the cheesecake's flavor and adds a festive vibe.

  • Rainbow Sprinkles: Bright and colorful, rainbow sprinkles on the side invite guests to add their own fun element to the dessert.

  • Vanilla Ice Cream: A scoop of vanilla ice cream provides a creamy counterpart to the cheesecake's texture, amplifying the indulgence in each bite.

  • Strawberry Sauce: Drizzling fresh strawberry sauce adds a fruity burst that complements the cotton candy flavor beautifully and enhances presentation.

Cotton Candy Cheesecake Recipe FAQs

What type of ingredients should I select for the best flavor?
Absolutely! For the richest and creamiest Cotton Candy Cheesecake, choose high-quality cream cheese that’s been softened. Look for ingredients like pure vanilla extract and high-quality cotton candy flavoring to enhance that nostalgic taste. Fresh, vibrant gel food coloring should also be selected to make those beautiful pastel swirls pop!

How should I store leftover cheesecake, and how long will it last?
You can store your Cotton Candy Cheesecake in an airtight container in the refrigerator for up to 3 days. This helps it maintain its rich flavor and creamy texture. Just be sure to keep it covered to protect it from absorbing any strong odors from the fridge.

Can I freeze the cheesecake, and how is it best done?
Absolutely! To freeze your Cotton Candy Cheesecake, wrap it tightly in plastic wrap, ensuring no air can get in, then cover it with aluminum foil. It will keep well for up to 1 month. When you're ready to enjoy it, simply transfer it to the refrigerator and let it thaw overnight. This method helps retain its delightful creaminess while preserving flavor.

What can I do if my cheesecake doesn't set properly?
If your cheesecake doesn't set as intended, there could be a couple of reasons. First, it might need more chilling time; try storing it overnight for a firmer texture. If you used too much whipped topping, it may not have enough cream cheese to stabilize the filling. Next time, follow the recipe’s proportions closely to ensure just the right balance for perfect results.

Are there any dietary considerations for allergies or pets?
Very! If you or your guests have dairy allergies, use lactose-free cream cheese and non-dairy whipped topping. Always check ingredient labels for allergens, especially in flavorings and colorings. Additionally, keep any leftover cheesecake away from pets, particularly those derived from dairy, which can upset their stomachs.

Cotton Candy Cheesecake

Irresistible Cotton Candy Cheesecake - Easy No-Bake Magic

This Cotton Candy Cheesecake is a nostalgic no-bake dessert that combines delightful flavors and vibrant colors to captivate both children and adults.
Print Recipe Pin Recipe
Prep Time 20 minutes mins
Chill Time 4 hours hrs
Total Time 4 hours hrs 20 minutes mins
Servings: 8 slices
Course: Dessert
Calories: 320
Ingredients Equipment Method Nutrition Notes

Ingredients
  

For the Crust
  • 1.5 cups crushed graham crackers can substitute with gluten-free options
  • 0.5 cups unsalted butter melted
  • 0.25 cups granulated sugar
For the Filling
  • 16 oz cream cheese softened
  • 0.5 cups granulated sugar for filling
  • 1 teaspoon vanilla extract
  • 1 teaspoon cotton candy flavoring adjust to taste
  • 4 drops gel food coloring (pink)
  • 4 drops gel food coloring (blue)
  • 2 cups whipped topping or whipped cream
For the Toppings
  • 1 cup optional extra whipped topping
  • 1 cup cotton candy pieces
  • 0.5 cups sprinkles

Equipment

  • Springform pan
  • Mixing Bowl
  • Electric mixer

Method
 

Step-by-Step Instructions for Cotton Candy Cheesecake
  1. Combine crushed graham crackers, melted butter, and granulated sugar until mixed. Press into the bottom of a springform pan and refrigerate for 15 minutes.
  2. Beat softened cream cheese and granulated sugar in a large bowl until smooth. Add vanilla extract and cotton candy flavoring, then fold in whipped topping.
  3. Divide the filling into two bowls. Add pink gel food coloring to one and blue to the other. Spoon dollops over the crust, alternating colors.
  4. Cover and refrigerate for at least 4 hours or freeze for 1-2 hours until set.
  5. Remove cheesecake from the pan, top with whipped topping, cotton candy pieces, and sprinkles. Slice and serve.

Nutrition

Serving: 1sliceCalories: 320kcalCarbohydrates: 40gProtein: 4gFat: 15gSaturated Fat: 9gPolyunsaturated Fat: 0.5gMonounsaturated Fat: 4gCholesterol: 45mgSodium: 200mgPotassium: 120mgFiber: 1gSugar: 25gVitamin A: 500IUCalcium: 50mgIron: 1mg

Notes

Ensure cream cheese is softened for easy mixing and avoid using real cotton candy in the filling to maintain texture. Chill longer if possible.

Tried this recipe?

Let us know how it was!

Light and Dreamy Easy Lemon Mousse for Effortless Delight

March 19, 2026 by Grace Snow Leave a Comment

As I stood in my kitchen, the sun streaming through the window, a delightful memory washed over me—the first time I tasted a perfectly made lemon mousse. The light, airy texture and zesty brightness of the citrus put a smile on my face, and I knew I had to recreate that experience at home. This Easy Lemon Mousse is the answer! With just a handful of simple ingredients and no baking required, this gluten-free treat is not only a crowd-pleaser but also a breeze to whip up, making it perfect for any occasion or simply as a sweet escape after a long day. Ready to impress your family and friends with this refreshing no-bake dessert that melts in your mouth? Let’s dive into the steps to bring this cheerful lemon delight to life!

What Makes This Mousse So Irresistible?

Fresh, Zesty Flavor: The use of freshly squeezed lemons guarantees a tartness that is simply refreshing.

No Baking Required: Say goodbye to complicated techniques; this no-bake recipe makes dessert a joy to prepare.

Light and Airy Texture: With heavy cream and whipped egg whites, the mousse achieves a cloud-like consistency that delights with every bite.

Versatile and Crowd-Friendly: Top it with berries or serve it solo, and watch it disappear at any gathering. It’s an instant hit!

Quick to Make: Just a few simple steps and minimal prep time let you whip up this treat whenever a sweet craving strikes.

Perfect for Any Occasion: Whether it’s a family dinner or a last-minute gathering, this Easy Lemon Mousse will bring smiles and satisfied sighs.

Easy Lemon Mousse Ingredients

For the Mousse

  • Lemons – Freshly zest and juice for vibrant flavor; you can substitute with limes or oranges for a twist!
  • Granulated Sugar – Adds necessary sweetness to balance the lemons' tartness; feel free to reduce or swap with alternative sweeteners as needed.
  • Heavy Cream – This creates the rich and airy texture of the mousse; make sure it’s fresh for the best results.
  • Egg Whites – Essential for fluffiness; whip them until they form stiff peaks for that perfect texture.

For Serving

  • Fresh Berries – Optional, but they add a delightful burst of flavor and color to your mousse.
  • Lemon Zest – A sprinkle on top enhances the visual appeal and gives an extra zesty kick!

Each ingredient in this Easy Lemon Mousse plays a crucial role in crafting a light, refreshing dessert that will surely impress guests and family alike!

Step‑by‑Step Instructions for Easy Lemon Mousse

Step 1: Prepare the Lemons
Start by zesting two medium lemons to gather about 2 teaspoons of zest, which will provide a burst of flavor. Then, juice the lemons until you have half a cup of fresh lemon juice. Set both the zest and juice aside, as they will be essential in creating the zesty base for your Easy Lemon Mousse.

Step 2: Whip Cream
In a large mixing bowl, pour in 1 cup of heavy cream. Using an electric mixer, whip the cream on medium speed until soft peaks begin to form, which should take about 3-5 minutes. The goal is to achieve a smooth and airy texture, perfect for that melt-in-your-mouth consistency of the mousse.

Step 3: Whip Egg Whites
In a separate clean bowl, combine 2 egg whites with 1/2 cup of granulated sugar. Using the electric mixer again, whip the mixture on high speed until stiff peaks develop, which will take about 4-6 minutes. This step is crucial to ensure your Easy Lemon Mousse has that light, fluffy texture, so be sure to check for peaks that hold their shape.

Step 4: Combine Ingredients
Carefully take the lemon zest and juice, and fold them gently into the whipped cream using a spatula. Be sure to combine thoroughly yet gently, so as to retain the airy texture of the cream. Once the lemon mixture is incorporated, slowly fold in the whipped egg whites until no white streaks remain, ensuring a light and creamy mousse.

Step 5: Chill
Transfer your beautifully mixed Easy Lemon Mousse into serving dishes or a large bowl. Cover with plastic wrap and chill in the refrigerator for at least four hours, but preferably overnight, to allow the flavors to meld and the mousse to set properly. The chilling step is key to achieving that firm, delightful consistency.

Step 6: Serve
After the chilling period, your Easy Lemon Mousse will be ready to serve. Optionally, garnish each serving with a sprinkle of lemon zest or top with fresh berries to elevate the presentation. Enjoy this refreshing dessert as a delightful finale to any meal or as a sweet treat on its own!

What to Serve with Easy Lemon Mousse

Elevate your dessert experience with delightful pairings that complete your Easy Lemon Mousse!

  • Basil Infused Lemonade: A refreshing drink that mirrors the mousse's citrus flavor while adding a herbal twist.
  • Shortbread Cookies: Their buttery crunch provides a contrasting texture to the light and airy mousse, creating a delightful balance.
  • Fresh Berries: Strawberries or raspberries add a splash of color and a juicy burst of flavor that perfectly complements the lemony sweetness.
  • Coconut Whipped Cream: This rich topping enhances the mousse's creaminess while adding a tropical flair to every bite.
  • Almond Biscotti: Crunchy and nutty, biscotti make for a lovely dipping treat, offering a satisfying texture alongside the mousse's softness.
  • Sparkling Wine: A bubbly, crisp sparkling rosé pairs beautifully, providing a festive feel that enhances the dessert's refreshing nature.
  • Chocolate Strawberries: The sweetness of chocolate-dipped strawberries creates an indulgent contrast and an elegant finish to your meal.
  • Honeydew Melon Salad: Fresh melon adds a light sweetness and watery crunch, providing a gentle contrast to the intense lemon flavor.
  • Mint Tea: A piping hot cup of mint tea offers soothing notes that balance the zesty lemon, perfect for evening indulgence.

How to Store and Freeze Easy Lemon Mousse

Fridge: Store your Easy Lemon Mousse in an airtight container in the refrigerator for up to 3 days. For the best taste and texture, enjoy it within 24 hours.

Freezer: Although it's best fresh, you can freeze the mousse. Transfer it to a freezer-safe container and freeze for up to 2 months. To serve, thaw in the fridge overnight.

Reheating: Reheating isn't necessary for mousse, but if it's too firm after freezing, let it sit at room temperature for a few minutes to soften before serving.

Serving Fresh: For the best flavor experience, always serve the mousse cold and garnish with fresh berries or lemon zest right before enjoying.

Easy Lemon Mousse Variations & Substitutions

Feel free to get creative with your Easy Lemon Mousse—after all, delicious desserts deserve a personal touch!

  • Lime Twist: Swap lemons for freshly squeezed limes for a tropical zing that’s equally refreshing.
    Lime brings a unique brightness that can elevate this mousse to a whole new level, giving your dessert a delightful twist.

  • Coconut Cream: Substitute heavy cream with coconut cream for a dairy-free option that adds a rich flavor.
    This variation makes for a luscious, tropical mousse that pairs perfectly with toasted coconut flakes on top.

  • Sweetener Swap: Use honey or maple syrup instead of granulated sugar for a natural sweetness.
    Just remember, honey is sweeter, so adjust the quantity to keep that zesty balance within reach.

  • Berry Bliss: Add a swirl of berry puree to the mousse before chilling for a pop of color and flavor.
    Fresh strawberries or raspberries create a delightful contrast and make your mousse visually stunning and tasty!

  • Mint Infusion: Add finely chopped fresh mint with the lemon ingredients for an unexpected flavor burst.
    The combination of citrus and mint is refreshing and perfect for summer gatherings or festive occasions!

  • Chocolate Zest: Drizzle melted dark chocolate over the mousse just before serving for an indulgent touch.
    This dessert marries bright lemon with rich chocolate, creating a sophisticated flavor combination that’ll wow your guests.

  • Frozen Delight: Freeze individual portions of the mousse for a refreshing summer treat on hot days.
    These frozen bites are a fun and elegant way to enjoy your Easy Lemon Mousse on the go!

  • Nutty Crunch: Top your mousse with crushed nuts or granola for added texture and a nutty flavor contrast.
    This added crunch not only enhances the mousse but also invites impressive flavor layers to each spoonful.

Delight in experimenting with these variations or try pairing your mousse with a refreshing Lemon Chicken Soup or a lighter main like Spatchcock Chicken. Each twist can turn your lemony delight into an unforgettable centerpiece!

Expert Tips for Easy Lemon Mousse

Fresh Lemons Only: Use only fresh lemons for the zingy flavor that makes this Easy Lemon Mousse unforgettable. Avoid bottled juices for the best result.

Don’t Overwhip: Be careful not to overwhip the cream. Stop when soft peaks form; this retains the lightness essential for a fluffy mousse.

Fold Gently: When combining the whipped cream and egg whites, fold carefully. This keeps air in the mixture, maintaining that dreamy texture.

Chill Well: Proper chilling is crucial. Allow at least four hours, and overnight is even better, to let the mousse set perfectly.

Taste Test: Before chilling, taste the mixture. Adjust the sugar to suit your preference for sweetness and tartness for the most balanced flavor.

Make Ahead Options

These Easy Lemon Mousse desserts are perfect for busy home cooks! You can prepare the mousse up to 24 hours in advance by following the first four steps of the recipe—prepare the lemons, whip the cream, whip the egg whites, and combine the ingredients. Once mixed, transfer the mousse to serving dishes and cover with plastic wrap, then refrigerate it. This ensures it sets properly while the flavors meld beautifully. For optimal quality, consume the mousse within up to 3 days for the best texture and taste. When ready to serve, simply garnish with lemon zest or fresh berries, and enjoy a delightful, crowd-pleasing dessert with minimal effort!

Easy Lemon Mousse Recipe FAQs

How do I choose the best lemons for my mousse?
Absolutely! Look for lemons that are firm and heavy for their size, with a vibrant yellow color and a smooth skin. Avoid any that have dark spots or a dull appearance, as these can indicate overripeness or spoilage. Fresh organic lemons are often more flavorful, giving your mousse that perfect zingy taste.

How should I store my Easy Lemon Mousse?
I recommend storing your Easy Lemon Mousse in an airtight container in the refrigerator, where it will stay fresh for up to 3 days. For the best flavor and texture, try to enjoy it within 24 hours of making it. Chilling also helps maintain its light, airy consistency, so make sure it's well-covered!

Can I freeze Easy Lemon Mousse?
Yes! You can freeze your Easy Lemon Mousse. To do this, transfer the mousse into a freezer-safe container, ensuring it’s tightly sealed. It can be frozen for up to 2 months. When you're ready to enjoy it, simply thaw it in the refrigerator overnight. If it feels too firm after thawing, let it sit at room temperature for about 10-15 minutes to soften before serving.

What should I do if my mousse doesn't set properly?
If your Easy Lemon Mousse isn’t setting as expected, there could be a couple of reasons. Ensure that you whipped the egg whites to stiff peaks and that the cream reached soft peaks—both are crucial for the mousse's light texture. If this happens, you can try returning the mixture to the bowl and gently folding in more whipped cream or whipped egg whites, then chill again.

Is Easy Lemon Mousse suitable for those with dietary restrictions, like allergies?
Very! The Easy Lemon Mousse is gluten-free, making it a great choice for those with gluten sensitivities. However, if you're considering other dietary restrictions, be aware of egg allergies. For a vegan version, you can experiment with aquafaba (the liquid from canned chickpeas) as a substitute for egg whites, following the same whipping instructions to achieve that airy consistency. Always check ingredient labels if you're sensitive to other allergens.

Can I change the flavor of the mousse?
Absolutely! While this recipe focuses on lemon, you can easily switch things up by using other citrus fruits like limes or oranges. Just be sure to adjust the amount of sugar to balance the acidity. Additionally, adding a splash of vanilla extract or a hint of almond extract can create a unique twist on the classic lemon flavor. Enjoy experimenting!

Easy Lemon Mousse

Light and Dreamy Easy Lemon Mousse for Effortless Delight

This Easy Lemon Mousse is a delightful gluten-free dessert that is light, airy, and requires no baking.
Print Recipe Pin Recipe
Prep Time 15 minutes mins
Chilling Time 4 hours hrs
Total Time 4 hours hrs 15 minutes mins
Servings: 4 servings
Course: Dessert
Cuisine: American
Calories: 210
Ingredients Equipment Method Nutrition Notes

Ingredients
  

For the Mousse
  • 2 medium lemons freshly zest and juice
  • 1/2 cup granulated sugar sweetness to balance tartness
  • 1 cup heavy cream fresh for best results
  • 2 large egg whites whipped to stiff peaks
For Serving
  • fresh berries optional
  • lemon zest for garnish

Equipment

  • Mixing Bowl
  • Electric mixer
  • Spatula

Method
 

Step-by-Step Instructions for Easy Lemon Mousse
  1. Start by zesting two medium lemons to gather about 2 teaspoons of zest. Juice the lemons until you have half a cup of juice. Set aside.
  2. In a large bowl, whip 1 cup of heavy cream on medium speed until soft peaks form (about 3-5 minutes).
  3. In a separate bowl, combine 2 egg whites with 1/2 cup of sugar and whip on high speed until stiff peaks develop (4-6 minutes).
  4. Fold the lemon zest and juice into the whipped cream. Gently fold in the whipped egg whites until no streaks remain.
  5. Transfer the mousse to serving dishes. Cover and chill in the refrigerator for at least four hours, preferably overnight.
  6. Serve chilled, optionally garnished with lemon zest or fresh berries.

Nutrition

Serving: 1servingCalories: 210kcalCarbohydrates: 20gProtein: 2gFat: 14gSaturated Fat: 8gCholesterol: 50mgSodium: 30mgPotassium: 160mgSugar: 16gVitamin A: 300IUVitamin C: 25mgCalcium: 50mgIron: 0.6mg

Notes

For best results, use fresh lemons and ensure not to overwhip the cream.

Tried this recipe?

Let us know how it was!

Mint Chocolate Cheesecake That Will Wow Your Guests

March 19, 2026 by Grace Snow Leave a Comment

As the aroma of freshly baked cookies wafts through my kitchen, I can't help but feel a rush of joy. Today, I'm diving into the comforting world of a Mint Chocolate Cheesecake that’s not only a feast for your taste buds but also a visual delight for your gatherings. With its crunchy Oreo crust and a velvety mint-infused filling, this cake marries the rich decadence of chocolate with a refreshing burst of mint. Perfect for celebrations or a cozy night in, it’s easy to whip up ahead of time, leaving you with more moments to savor with loved ones. Plus, it’s a gluten-free option that everyone can enjoy! Are you ready to elevate your dessert game? Let’s get mixing!

Why is Mint Chocolate Cheesecake so loved?

Irresistible Flavor: The delightful blend of mint and chocolate offers a refreshing take on traditional desserts, making it perfect for parties or family gatherings.

Easily Customizable: You can swap out regular Oreos for mint-flavored ones or add a splash of Irish cream to the ganache for a boozy twist!

Make-Ahead Marvel: This cheesecake can be prepped in advance and stored, allowing you to focus on enjoying your time with guests.

Crowd Pleaser: With its stunning appearance and creamy texture, this dessert is sure to impress everyone at any event—perfect for St. Patrick’s Day or any celebration!

Gluten-Free Option: Simply use gluten-free Oreos, ensuring everyone can indulge in this delicious treat without worries. You can also check out my Homemade Hot Chocolate for a warm drink pairing!

Mint Chocolate Cheesecake Ingredients

• Perfect for that creamy dessert!

For the Crust

  • 30 Oreo cookies – Provides the base crust; substitute with gluten-free Oreos for a gluten-free version.
  • 1/4 cup unsalted butter, melted – Binds the cookie crust together beautifully.

For the Cheesecake Filling

  • 32 ounces cream cheese – The main filling that gives the cheesecake its rich texture; ensure it’s at room temperature for smooth mixing.
  • 1 cup granulated sugar – Adds just the right amount of sweetness.
  • 2/3 cup sour cream – Contributes creaminess and tangy balance; bring to room temperature for better blending.
  • 2 teaspoons vanilla extract – Enhances the overall flavor profile.
  • 1 1/2 teaspoons mint or peppermint extract – Provides a refreshing mint flavor; use mint extract for a traditional taste.
  • 1/4 teaspoon salt – Balances the sweetness and deepens the flavors.
  • 4 large eggs – Provides structure; be sure they’re at room temperature for even mixing.
  • Several drops of green food coloring – Optional for visual appeal; adjust according to your desired shade.
  • 1 cup finely chopped Andes mints – Adds a delightful texture and extra minty flavor.

For the Ganache

  • 1 cup chocolate chips – The rich base for the ganache, giving that deep chocolate flavor.
  • 3/4 cup heavy cream – Creates a smooth ganache; can replace with Irish cream for an added twist.
  • Pinch of salt – Enhances the chocolate flavor beautifully.

For the Whipped Cream Topping

  • 3/4 cup heavy cream – Whipped until stiff peaks form for a fluffy topping.
  • 2 tablespoons confectioners' sugar – Sweetens the whipped cream perfectly.
  • 1/4 teaspoon mint or peppermint extract – Enhances the minty flavor in the topping.
  • 2 to 3 drops green food coloring – Optional for a fun aesthetic appeal.

For Garnish

  • Andes Chocolate Mints or Oreos – Optional, for a beautiful visual enhancement on top!

This Mint Chocolate Cheesecake promises to be a star at your next gathering!

Step‑by‑Step Instructions for Mint Chocolate Cheesecake

Step 1: Make the crust
Preheat your oven to 350°F (175°C). Crush the 30 Oreo cookies into fine crumbs using a food processor or a rolling pin. Combine the crumbs with 1/4 cup melted unsalted butter until well blended. Press this mixture firmly into the bottom of a 9-inch springform pan to form an even crust. Bake for 10 minutes, then reduce the temperature to 325°F (163°C) to prepare for the cheesecake filling.

Step 2: Prepare cheesecake filling
In a large mixing bowl, beat 32 ounces of room-temperature cream cheese and 1 cup granulated sugar with an electric mixer until smooth and creamy. Gradually mix in 2/3 cup sour cream, 2 teaspoons vanilla extract, 1 1/2 teaspoons mint extract, and 1/4 teaspoon salt. Incorporate 4 large eggs one at a time, ensuring each is fully blended before adding the next to create a silky mint chocolate cheesecake batter.

Step 3: Fold in additional ingredients
Gently fold in several drops of green food coloring to achieve your desired shade of mint and add 1 cup finely chopped Andes mints for a delightful crunch. Take your time to ensure the mixture remains light and airy by avoiding over-mixing. This step is crucial for maintaining the cheesecake's creamy texture while still incorporating those delectable mint bits.

Step 4: Prepare the pan
To prevent water from seeping into the cheesecake during baking, wrap the springform pan tightly in aluminum foil. If you prefer to use a water bath, place a larger roasting pan in your oven to hold hot water. This method helps create a gentle baking environment, ensuring your mint chocolate cheesecake bakes evenly—so your cheesecake comes out perfectly smooth and luscious.

Step 5: Bake cheesecake
Pour the filling into the prepared crust and carefully place the springform pan inside the larger roasting pan. Fill the outer pan with hot water until it's about halfway up the sides of the springform pan. Bake in the oven for 70 minutes, until the edges are set but the center still slightly jiggles. Turn off the oven and leave the cheesecake inside for 30 minutes to cool gradually, then refrigerate for at least 4 hours or overnight.

Step 6: Make ganache
In a small saucepan over medium heat, combine 1 cup chocolate chips and 3/4 cup heavy cream, stirring until melted and smooth. Once your mint chocolate cheesecake has cooled completely, pour the ganache over the top, spreading it evenly. Let the ganache set in the refrigerator for about 30 minutes, which will give it a luxurious finish while enhancing the dessert’s rich chocolate flavor.

Step 7: Make and add whipped cream
In a mixing bowl, whip 3/4 cup of heavy cream with 2 tablespoons of confectioners’ sugar and 1/4 teaspoon of mint extract until stiff peaks form. Once the cheesecake is chilled and the ganache has set, pipe or spread the whipped cream generously over the top. Feel free to decorate with additional chopped Andes mints or Oreo pieces for a beautiful and festive finishing touch on your Mint Chocolate Cheesecake.

Make Ahead Options

These Mint Chocolate Cheesecakes are perfect for meal prep enthusiasts! You can make the crust by combining crushed Oreos with melted butter and pressing it into the springform pan up to 24 hours in advance—just keep it covered to prevent drying out. The cheesecake filling can also be prepared and poured into the crust up to 3 days ahead of baking; simply refrigerate it tightly wrapped. When ready to serve, bake the cheesecake, chill overnight, and then finish with the ganache and whipped cream. This makes for a stunning dessert that’s just as delicious as if you made it all at once, allowing you to enjoy more time with your loved ones!

Expert Tips for Mint Chocolate Cheesecake

  • Room Temperature Matters: Ensure all dairy ingredients, especially cream cheese and sour cream, are at room temperature for a smooth, lump-free batter.

  • Gentle Mixing: Avoid overmixing after adding the eggs. This helps prevent cracks in your mint chocolate cheesecake, ensuring a beautifully smooth surface.

  • Chill Time: Don't rush the chilling process! Allow your cheesecake to cool in the oven for 30 minutes and refrigerate for at least 4 hours or overnight for the best texture.

  • Bain-Marie Technique: If using a water bath, ensure the foil is tightly wrapped around the springform pan to prevent water from leaking in, keeping your cheesecake safe and intact.

  • Flavor Variations: Experiment by adding crushed mint candies directly into the cheesecake for extra texture, or use flavored Oreos for a delightful twist on the traditional crust.

  • Avoid Condensation: During chilling, gently blot any moisture on the surface to prevent condensation from forming, which can ruin the presentation of your mint chocolate cheesecake.

What to Serve with Mint Chocolate Cheesecake

When it comes to enjoying your slice of mint chocolate bliss, pairing it with the right dishes will elevate your dessert experience!

  • Fresh Berries: The tartness of strawberries or raspberries beautifully cuts through the richness of the cheesecake while adding a vibrant splash of color to your plate.

  • Whipped Cream: A dollop of lightly sweetened whipped cream enhances the indulgence of the cheesecake, creating a creamy harmony.

  • Chocolate Sauce: Drizzling warm chocolate sauce over each slice adds an extra layer of decadence that complements the minty and chocolatey flavors perfectly.

  • Espresso or Coffee: The bold notes of espresso pair beautifully with the mint chocolate, providing a delightful contrast that complements the dessert’s sweetness.

  • Mint Tea: For a refreshing beverage option, serve steaming mint tea alongside, which brightens up the flavors and adds a cozy finish to your meal.

  • Chocolate Mint Cookies: Treat your guests to some homemade chocolate mint cookies as a fun accompaniment that echoes the flavors of the cheesecake in a delightful way.

  • Minty Mojito: For a celebratory twist, a minty mojito makes for a refreshing cocktail option that mirrors the minty freshness of the cheesecake while offering a light and bubbly touch.

Each of these pairings invites flavors to dance on your palate, making every bite of your Mint Chocolate Cheesecake an unforgettable experience!

How to Store and Freeze Mint Chocolate Cheesecake

Fridge: Store your Mint Chocolate Cheesecake in an airtight container in the refrigerator for up to 5 days, ensuring its creamy texture and flavors stay intact.

Freezer: If you need to keep it longer, you can freeze it without the whipped cream topping for up to 3 months. Wrap it tightly in plastic wrap and then aluminum foil for best results.

Reheating: To enjoy, thaw the cheesecake overnight in the fridge and then serve it chilled. The flavors will remain divine, ready to impress your guests once again!

Make-Ahead Marvel: This cheesecake can be made ahead of time, allowing you to plan your celebrations stress-free while still serving an indulgent dessert everyone will love.

Mint Chocolate Cheesecake Variations

Feel free to let your creativity shine as you customize this delightful dessert with these tasty twists!

  • Mint-Flavored Oreos: Swap regular Oreos for mint-flavored ones to enhance the minty goodness throughout the crust.

  • Irish Cream Delight: Replace heavy cream in the ganache and whipped topping with Irish cream for a luscious, boozy flavor twist. Your guests will love this unexpected variation!

  • Crushed Mint Candies: Fold in crushed mint candies into the cheesecake batter for added texture and a delightful crunch. The added layers of flavor make each bite a surprise.

  • Dark Chocolate Chips: Use dark chocolate chips in the ganache for a richer, deeper chocolate flavor that's perfect for chocolate lovers.

  • Fruit Burst: Add fresh raspberries or strawberries on top of the whipped cream for a pop of color and a sweet, fruity contrast which beautifully complements the chocolate-mint combo.

  • Nutty Crunch: Sprinkle crushed nuts, like walnuts or pecans, on top before serving to add a delightful crunch and nutty flavor that elevates the cheesecake experience.

  • Spicy Heat: Add a pinch of cayenne pepper or chili powder to the ganache for a surprising touch of heat that pairs interestingly with the chocolate and mint.

  • Cold Chocolate Mint Frappe: Pair slices with a glass of my Homemade Hot Chocolate for a warming drink that complements the cheesecake's cool mintiness.

These variations not only give you new ways to enjoy the Mint Chocolate Cheesecake but also make for exciting conversation starters at your next gathering!

Mint Chocolate Cheesecake Recipe FAQs

What types of Oreos should I use for the crust?
You can absolutely use classic Oreo cookies for your crust. If you're aiming for a gluten-free version, opt for gluten-free Oreos instead. For an extra minty flavor, try using mint-flavored Oreos!

How should I store my Mint Chocolate Cheesecake?
To keep your cheesecake fresh, store it in an airtight container in the refrigerator for up to 5 days. This way, the creamy texture and flavors will remain delightful for your next indulgence.

Can I freeze Mint Chocolate Cheesecake?
Yes! You can freeze your cheesecake for up to 3 months. Make sure to wrap it tightly in plastic wrap, followed by aluminum foil to prevent freezer burn. When ready to enjoy, thaw it in the refrigerator overnight for best results.

What if my cheesecake cracks while baking?
Don’t worry! Cracks can happen, but they can be minimized by gently mixing your batter and avoiding overmixing the eggs. Also, using the bain-marie (water bath) technique can help create the moist baking environment your cheesecake craves, keeping its surface smooth and beautiful.

Can I make this cheesecake without using eggs?
Absolutely! You can try incorporating a combination of silken tofu or flaxseed meal with water as an egg replacement. For optimal results, it’s key to adjust your baking duration and watch the texture closely.

Is Mint Chocolate Cheesecake safe for pets?
It’s important to note that chocolate is toxic to pets, so keep this delicious dessert safely out of their reach. Always be cautious about sharing human food with furry friends!

Mint Chocolate Cheesecake

Mint Chocolate Cheesecake That Will Wow Your Guests

A decadent Mint Chocolate Cheesecake, perfect for celebrations, combining a crunchy Oreo crust with a creamy mint-infused filling.
Print Recipe Pin Recipe
Prep Time 30 minutes mins
Cook Time 1 hour hr 10 minutes mins
Chilling Time 4 hours hrs
Total Time 5 hours hrs 40 minutes mins
Servings: 12 slices
Course: Dessert
Cuisine: American
Calories: 450
Ingredients Equipment Method Nutrition Notes

Ingredients
  

For the Crust
  • 30 cookies Oreo Substitute with gluten-free Oreos for a gluten-free version.
  • 1/4 cup unsalted butter, melted Binds the cookie crust together beautifully.
For the Cheesecake Filling
  • 32 ounces cream cheese Ensure it’s at room temperature for smooth mixing.
  • 1 cup granulated sugar Adds just the right amount of sweetness.
  • 2/3 cup sour cream Bring to room temperature for better blending.
  • 2 teaspoons vanilla extract Enhances the overall flavor profile.
  • 1 1/2 teaspoons mint or peppermint extract Provides a refreshing mint flavor.
  • 1/4 teaspoon salt Balances the sweetness and deepens the flavors.
  • 4 large eggs Ensure they’re at room temperature for even mixing.
  • Several drops green food coloring Optional for visual appeal.
  • 1 cup finely chopped Andes mints Adds a delightful texture and extra minty flavor.
For the Ganache
  • 1 cup chocolate chips Gives a deep chocolate flavor.
  • 3/4 cup heavy cream Creates a smooth ganache.
  • Pinch salt Enhances the chocolate flavor.
For the Whipped Cream Topping
  • 3/4 cup heavy cream Whipped until stiff peaks form.
  • 2 tablespoons confectioners' sugar Sweetens the whipped cream.
  • 1/4 teaspoon mint or peppermint extract Enhances the minty flavor in the topping.
  • 2 to 3 drops green food coloring Optional for a fun aesthetic appeal.
For Garnish
  • Andes Chocolate Mints or Oreos Optional, for visual enhancement on top.

Equipment

  • 9-inch springform pan
  • Mixer
  • Food Processor
  • Mixing bowls
  • Saucepan

Method
 

Step‑by‑Step Instructions
  1. Preheat your oven to 350°F (175°C). Crush the Oreo cookies into fine crumbs. Combine the crumbs with melted unsalted butter and press into the bottom of a springform pan. Bake for 10 minutes, then reduce temperature to 325°F (163°C).
  2. In a large mixing bowl, beat room-temperature cream cheese and granulated sugar until smooth. Gradually mix in sour cream, vanilla extract, mint extract, and salt. Incorporate eggs one at a time, mixing until well combined.
  3. Gently fold in green food coloring and chopped Andes mints. Ensure you don't over-mix to maintain a light and airy texture.
  4. Wrap the springform pan tightly in aluminum foil and place in a roasting pan for a water bath. Bake for 70 minutes until edges are set but the center jiggles slightly. Turn off oven, leave cheesecake inside for 30 minutes, then refrigerate for at least 4 hours.
  5. In a saucepan, combine chocolate chips and heavy cream over medium heat until melted and smooth. Pour ganache over chilled cheesecake and let set for 30 minutes in the refrigerator.
  6. Whip heavy cream with confectioners' sugar and mint extract until stiff peaks form. Spread or pipe whipped cream over the cheesecake. Optionally, decorate with additional Andes mints or Oreo pieces.

Nutrition

Serving: 1sliceCalories: 450kcalCarbohydrates: 38gProtein: 6gFat: 32gSaturated Fat: 18gPolyunsaturated Fat: 0.5gMonounsaturated Fat: 10gCholesterol: 150mgSodium: 300mgPotassium: 200mgFiber: 1gSugar: 30gVitamin A: 800IUCalcium: 90mgIron: 1mg

Notes

Allow sufficient chilling time for optimal texture. Be cautious with mixing to prevent cracks in the cheesecake.

Tried this recipe?

Let us know how it was!

Heavenly Glazed Apple Bread That Fluffs Up in Your Machine

March 18, 2026 by Grace Snow Leave a Comment

The moment the warm, sweet scent of cinnamon and apples wafts through your kitchen, you'll realize you've stumbled upon something special. My Best Ever Glazed Apple Cinnamon Bread, made effortlessly in a bread machine, transforms ordinary ingredients into a masterpiece that feels like a warm hug in loaf form. Not only is this recipe a delightful way to introduce homemade goodness to your family, but it also offers a quick prep time that makes it perfect for anyone with a busy schedule. With its soft, fluffy texture complemented by a glossy glaze, this bread is sure to impress whether served as a snack, dessert, or even breakfast. Are you ready to discover the joy of baking with me? Let's dive into this delicious recipe!

Why is Glazed Apple Bread a Must-Make?

Irresistible Aroma: The sweet scent of cinnamon and apples fills your home, creating a cozy atmosphere—perfect for family gatherings.

Quick and Easy: In just a few simple steps, you can achieve bakery-quality results, making this an excellent choice for busy days.

Crowd-Pleasing Delight: Whether as a snack or dessert, this glazed apple bread is sure to delight family and friends.

Customizable Options: Feel free to add nuts or dried fruits to cater to your taste preferences or dietary needs.

Therapeutic Baking: The process of making this bread is delightful and stress-relieving, making it a wonderful way to unwind after a long day.

Serve it warm with a pat of butter or alongside a scoop of vanilla ice cream for an unforgettable treat! Don’t forget to check out Cheesy Garlic Bread for another heartwarming recipe.

Glazed Apple Bread Ingredients

• Discover the delightful components that make this recipe a must-try!

For the Bread

  • Warm Milk – Adds moisture and activates yeast; you can substitute with almond milk for a dairy-free version.
  • Melted Butter – Enhances flavor and texture; feel free to replace it with olive oil for a lighter option.
  • All-Purpose Flour – Provides structure; swapping in whole wheat flour creates a healthier loaf.
  • Red Delicious Apples (diced and peeled) – Adds natural sweetness and flavor; for a tart twist, try Granny Smith apples.
  • Sugar – Sweetens the bread; consider reducing the amount for a less sugary treat or using honey for a natural alternative.
  • Cinnamon – Infuses warmth and spice; bump up the quantity for a more pronounced cinnamon flavor.
  • Salt – Balances the sweetness and enhances all the flavors.
  • Bread Machine Yeast – Crucial for rising; ensure it's fresh to prevent the loaf from being dense.

For the Glaze

  • Icing Sugar – The main ingredient for a smooth glaze; powdered erythritol is a great low-calorie alternative.
  • Additional Milk (for glaze) – Adjust to achieve the desired drizzling consistency.

Crafting this glazed apple bread will bring warmth and joy to your kitchen, enhancing those sweet moments with family. Enjoy the wonderful journey of baking!

Step‑by‑Step Instructions for Glazed Apple Cinnamon Bread

Step 1: Prepare the Apples
Begin by peeling and dicing your Red Delicious apples, then toss them in a bowl with 1 tablespoon of sugar. Let this mixture sit for 30 minutes. The sugar will draw out the natural juices from the apples, enhancing their flavor and preventing them from sinking during the baking process in your glazed apple cinnamon bread.

Step 2: Combine the Ingredients
In your bread machine, pour in 1 cup of warm milk followed by ¼ cup of melted butter. Next, add 3 cups of all-purpose flour, ½ cup of sugar, 2 teaspoons of cinnamon, 1 teaspoon of salt, and 2 teaspoons of bread machine yeast. Ensure you add the ingredients in the order recommended by your machine to promote even mixing and rising.

Step 3: Add the Apple Mixture
Once the bread machine has mixed the initial ingredients together, gently fold in the prepared apple mixture. This step is crucial to incorporate the dicing apples evenly throughout the dough. Ensure that the apples are mixed well into the batter, which will blend wonderfully with the cinnamon and create delightful bites of fruit in each slice.

Step 4: Select the Cycle
Set your bread machine to the white bread setting for a 1.5 lb loaf. This setting is perfect for achieving that soft, fluffy texture characteristic of homemade glazed apple cinnamon bread. Start the machine and let it work its magic, which typically takes about 2 to 3 hours, depending on your model.

Step 5: Cool the Bread
Once the baking cycle is complete, carefully remove the bread pan from the machine—it will be hot! Allow your bread to cool in the pan for about 10 minutes, then transfer it to a cooling rack. Let it cool completely for at least 15 minutes, which helps preserve its soft texture and makes slicing easier.

Step 6: Make the Glaze
While the bread cools, prepare the glaze by mixing 1 cup of icing sugar with 2 tablespoons of additional milk and 1 tablespoon of melted butter in a bowl. Whisk until smooth and adjust the thickness by adding more milk if necessary. You want it pourable but not too runny; a nice drizzle over the bread brings it all together.

Step 7: Glaze the Bread
Once the loaf has cooled, drizzle the prepared glaze generously over the top of the cooled bread. Let the glaze set for about 20 minutes, which enhances the presentation and adds a lovely shine to your glazed apple cinnamon bread. After resting, slice and serve this delicious bread to your family with pride!

Glazed Apple Bread Variations

Get ready to elevate your baking experience with these exciting twists on your glazed apple bread!

  • Nut Additions: Try adding walnuts or pecans for a delightful crunch; the nuts complement the softness of the bread perfectly.

  • Dried Fruits: For added sweetness and texture, substitute some apples with dried cranberries or raisins—this will surprise your palate with new flavor notes.

  • Cinnamon Bump: If you love spice, increase the cinnamon by another teaspoon or two. It’s a great way to enhance that warm aroma that fills your kitchen.

  • Herbal Infusion: Add a touch of fresh rosemary to the dough for a surprising herby flavor that pairs beautifully with the sweetness of apples.

  • Zesty Surprise: Zest some lemon or orange into the batter! The citrus will brighten the flavors, adding an uplifting zing that harmonizes with the apples beautifully.

  • Gluten-Free Option: Use a gluten-free flour blend to make this bread suitable for a gluten-sensitive crowd. Ensure to add a binding agent like xanthan gum for best results!

  • Spiced Sugar Glaze: Play with the glaze by mixing in a pinch of nutmeg or cardamom—it creates a wonderful flavor depth that will enchant your senses.

  • Vegan Swap: Opt for plant-based milk and an egg substitute like applesauce or flaxseed meals in place of butter for a vegan-friendly version without losing the fluffy texture.

The possibilities are endless, and each variation takes this classic recipe to new heights! If you're looking for more delightful recipes, why not explore Cornbread Breakfast Casserole for a savory twist next?

Make Ahead Options

This Glazed Apple Cinnamon Bread is perfect for meal prep and can be prepped ahead to save precious time during busy weeknights! You can dice and sugar the apples up to 24 hours in advance; just refrigerate them in an airtight container to maintain their flavor and prevent browning. Additionally, you can combine the dry ingredients (flour, sugar, cinnamon, and salt) and store them in a sealed bag for up to 3 days. When you're ready to bake, simply add the warm milk, melted butter, and yeast to your bread machine along with your prepped components, select the cycle, and enjoy the same delicious results as if you made it fresh that day!

What to Serve with Glazed Apple Cinnamon Bread?

Treat your family to a complete meal experience by pairing delightful sides with this warm, inviting bread.

  • Creamy Mashed Potatoes: A classic side that contrasts the sweetness, perfect for a balanced meal on chilly evenings.
  • Fresh Green Salad: A crisp salad with a zesty vinaigrette provides refreshing brightness against the rich flavors of the bread.

Indulge in the harmony of textures and tastes that can elevate your dining experience.

  • Honey Butter: Spread this sweet, creamy butter on warm slices. It complements the cinnamon flavors beautifully and enhances every bite.
  • Warm Vanilla Ice Cream: A scoop of this creamy delight drizzled with caramel elevates your glazed apple bread to a decadent dessert.

Culinary creativity can make every mealtime special and memorable.

  • Apple Cider: Sipping on this spiced drink embodies the flavors of the bread perfectly, warming your heart as the seasons change.
  • Hedgehog Mushrooms: Sautéed with garlic and herbs, these mushrooms bring an earthy note that wonderfully contrasts the sweet apple flavors.

Discover these pairings and enjoy the cozy celebration of flavors!

Expert Tips for Glazed Apple Bread

  • Fresh Yeast Check: Ensure your bread machine yeast is fresh and active to avoid dense bread. Expired yeast will not rise properly.

  • Dough Consistency: Monitor the dough during mixing; it should be slightly sticky but not wet. Add flour or water gradually to achieve the right texture.

  • Apple Preparation: Let the diced apples sit in sugar for 30 minutes before adding them to your mix. This enhances their flavor and keeps them from sinking.

  • Glaze Thickness: Adjust the milk in your glaze for a perfect drizzle. A thicker glaze clings more, while a thinner one creates a lovely cascade.

  • Flavor Variations: Don't hesitate to experiment with spices or mix-ins. Adding nuts or dried fruits can create interesting textures and tastes in your glazed apple bread.

How to Store and Freeze Glazed Apple Bread

Room Temperature: Store the glazed apple bread in an airtight container at room temperature for up to 3 days to maintain its freshness and flavor.

Fridge: If you prefer to keep it longer, refrigerate the bread in an airtight container for up to 5 days, though this may slightly affect its texture.

Freezer: For extended storage, wrap the bread tightly in plastic wrap and foil, then freeze for up to 3 months. Thaw overnight in the fridge before serving.

Reheating: To enjoy your glazed apple bread warm, slice and heat in the microwave for 15-20 seconds, or toast lightly to restore its delightful texture.

Glazed Apple Bread Recipe FAQs

How do I choose the right apples for the glazed apple bread?
Absolutely! For a sweet flavor, Red Delicious apples are fantastic, but using Granny Smith can give a nice tart contrast. Look for apples that are firm and free of dark spots to ensure freshness.

What is the best way to store glazed apple bread?
To keep your glazed apple bread fresh, store it in an airtight container at room temperature for up to 3 days. If you need it to last a bit longer, you can refrigerate it for up to 5 days, although the texture might change slightly.

Can I freeze glazed apple bread?
Yes, you can freeze your glazed apple bread! Wrap it tightly in plastic wrap and then foil to protect it from freezer burn. It will stay good for up to 3 months. When you’re ready to enjoy it, thaw it overnight in the fridge before serving.

What if my bread didn't rise properly?
If your glazed apple bread didn't rise, it might be due to old yeast. Always check that your bread machine yeast is fresh and active before using. If the dough looks too dry or wet during mixing, adjust with small amounts of water or flour until you reach a slightly sticky consistency.

Can I make this recipe dairy-free?
Very much so! Simply substitute warm milk with almond milk or any other plant-based milk. For the melted butter, try using olive oil or coconut oil for a dairy-free alternative. This keeps all those delicious flavors intact while catering to dietary preferences!

Is this glazed apple bread safe for pets?
For humans, this glazed apple bread is delightful, but it’s best to avoid sharing it with pets. Ingredients like sugar and butter are not healthy for dogs or cats, and some spices may be harmful. When baking, it's wise to keep their treats separate.

Glazed Apple Bread

Heavenly Glazed Apple Bread That Fluffs Up in Your Machine

This Glazed Apple Bread is a delightful dessert that combines the warm aromas of cinnamon and apples, creating a fluffy treat perfect for any occasion.
Print Recipe Pin Recipe
Prep Time 30 minutes mins
Cook Time 2 hours hrs
Cooling Time 25 minutes mins
Total Time 2 hours hrs 55 minutes mins
Servings: 10 slices
Course: Dessert
Cuisine: American
Calories: 210
Ingredients Equipment Method Nutrition Notes

Ingredients
  

For the Bread
  • 1 cup Warm Milk can substitute with almond milk
  • 1/4 cup Melted Butter can substitute with olive oil
  • 3 cups All-Purpose Flour can substitute with whole wheat flour
  • 2 cups Red Delicious Apples (diced and peeled) or use Granny Smith apples for tartness
  • 1/2 cup Sugar can reduce for less sweetness or use honey
  • 2 teaspoons Cinnamon increase for stronger flavor
  • 1 teaspoon Salt
  • 2 teaspoons Bread Machine Yeast ensure it's fresh
For the Glaze
  • 1 cup Icing Sugar can substitute with powdered erythritol
  • 2 tablespoons Additional Milk to adjust glaze consistency

Equipment

  • Bread Machine

Method
 

Step-by-Step Instructions for Glazed Apple Cinnamon Bread
  1. Prepare the Apples: Peel and dice your Red Delicious apples, then toss them in a bowl with 1 tablespoon of sugar. Let this mixture sit for 30 minutes.
  2. Combine the Ingredients: In your bread machine, pour in warm milk followed by melted butter. Next, add flour, sugar, cinnamon, salt, and yeast in the order recommended by your machine.
  3. Add the Apple Mixture: Once the bread machine has mixed the initial ingredients, gently fold in the prepared apple mixture.
  4. Select the Cycle: Set your bread machine to the white bread setting for a 1.5 lb loaf.
  5. Cool the Bread: After baking, remove the bread pan and let it cool in the pan for 10 minutes, then transfer to a rack for at least 15 minutes.
  6. Make the Glaze: In a bowl, whisk icing sugar with additional milk and melted butter until smooth. Adjust thickness as needed.
  7. Glaze the Bread: Drizzle the glaze over the cooled bread and let it set for about 20 minutes before slicing.

Nutrition

Serving: 1sliceCalories: 210kcalCarbohydrates: 30gProtein: 3gFat: 10gSaturated Fat: 6gPolyunsaturated Fat: 1gMonounsaturated Fat: 3gCholesterol: 30mgSodium: 150mgPotassium: 120mgFiber: 1gSugar: 5gVitamin A: 300IUVitamin C: 1mgCalcium: 30mgIron: 0.5mg

Notes

Store the bread in an airtight container at room temperature for up to 3 days or refrigerate for up to 5 days. Freeze for up to 3 months.

Tried this recipe?

Let us know how it was!

Creamy Loaf Pan Basque Cheesecake for Easy Indulgence

March 18, 2026 by Grace Snow Leave a Comment

As the aroma of something delightful fills the kitchen, I can't help but feel a rush of excitement—today, I’m sharing my version of the Easy Loaf Pan Basque Cheesecake. This creamy, crustless delight is not just a dessert; it’s a celebration of richness and simplicity that fits perfectly into our busy lives. Great for small households or casual gatherings, it guarantees satisfaction with its irresistibly caramelized top and luscious, custard-like interior. Plus, it's a breeze to prepare, making it ideal for those hectic weeknights when homemade food is still a priority. Why settle for takeout when you can indulge in this rustic gem? Are you ready to elevate your dessert game?

Why is Basque Cheesecake so irresistible?

Creamy Texture: This Loaf Pan Basque Cheesecake boasts an ultra-creamy, custard-like interior that practically melts in your mouth, offering a rich dessert experience.

Easy Preparation: With straightforward instructions and minimal ingredients, anyone can whip up this delightful treat quickly, perfect for busy weeknights or spontaneous gatherings.

Versatile Options: Whether you're gluten-free or want to infuse unique flavors, this recipe allows for easy adaptations, like using almond flour or adding citrus zest for a refreshing twist.

Crowd-Pleaser: Its lusciousness and rustic charm are sure to impress friends and family alike, making it a fantastic centerpiece for any occasion.

Storage Friendly: This cheesecake can be stored up to 5 days in the fridge, or frozen for three months, ensuring you can enjoy it at your leisure! Pair it with fresh berries for a delightful finish. Why not try making Panna Cotta Sweet for another easy dessert?

Loaf Pan Basque Cheesecake Ingredients

For the Cheesecake
• Cream Cheese – Provides a creamy base that defines the cheesecake's luscious texture; opt for full-fat for the best richness.
• Sugar – Sweetens the cheesecake; adjust granulated sugar to personal taste for a delightful balance of sweetness.
• Eggs – Acts as a binder for structure; make sure they are at room temperature for optimal incorporation.
• Vanilla Extract – Enhances flavor; consider using pure vanilla for a deeper, more romantic undertone.
• Salt – Balances the sweetness beautifully; a pinch is all you need to elevate the flavors.
• Flour (optional) – This recipe implies it can be made flourless; if you choose to include it, all-purpose flour works best.

Serving Suggestions
• Fresh Berries – Adds a vibrant, fruity contrast that complements the richness of the Loaf Pan Basque Cheesecake beautifully.
• Light Fruit Compote – A sweet and refreshing topping that enhances every bite while keeping it light and airy.

Embrace the comforting flavors of this Loaf Pan Basque Cheesecake, perfect for any occasion!

Step‑by‑Step Instructions for Loaf Pan Basque Cheesecake

Step 1: Preheat Oven
Set your oven to 400°F (200°C) to prepare for baking the Loaf Pan Basque Cheesecake. This high temperature is essential for achieving that signature caramelized top while maintaining a creamy interior. Once the oven reaches temperature, you’re all set to create something delicious!

Step 2: Prepare Batter
In a large mixing bowl, beat 16 ounces of room-temperature cream cheese with an electric mixer until smooth and creamy. Gradually add 3/4 cup of granulated sugar and continue mixing until well combined, ensuring there are no lumps. The result should be a silky batter that invites you to dive in.

Step 3: Incorporate Eggs
Now, add in 3 large eggs, one at a time, mixing gently after each addition until just incorporated. This step is crucial for the cheesecake structure, helping it rise beautifully while keeping it rich and custardy. Avoid overmixing to ensure the texture remains light.

Step 4: Flavor Additions
Next, stir in 1 teaspoon of pure vanilla extract and a pinch of salt to elevate the flavors of your Loaf Pan Basque Cheesecake. If you’re choosing to use flour, add in 2 tablespoons of all-purpose flour at this stage and mix until just combined, keeping the batter smooth.

Step 5: Bake
Pour the creamy batter into a parchment-lined loaf pan, spreading it evenly. Bake in your preheated oven for about 25–30 minutes, or until the top is a deep caramel brown and slightly puffed. The edges should remain a bit jiggly while the center firms up, signaling that it’s perfectly baked.

Step 6: Cooling
Once out of the oven, allow the cheesecake to cool at room temperature for about an hour. This cooling period gives it a chance to settle before you refrigerate it. Afterward, cover it and place it in the fridge for at least 4 hours or overnight to enhance its creamy texture before serving.

Loaf Pan Basque Cheesecake Variations

Feel free to get creative with this recipe and tailor it to your tastes or dietary needs!

  • Gluten-Free: Substitute the flour with almond or coconut flour for a delicious flourless version.

  • Chocolate Lovers: Add 1/2 cup of chocolate chunks or chips into the batter for a rich twist on this classic dessert. Imagine how the silky chocolate melds with the creamy cheesecake!

  • Zesty Citrus: Stir in a tablespoon of lemon or orange zest for a refreshing burst of flavor that brightens each bite.

  • Berry Bliss: Top your cheesecake with a mixed berry compote for a sweet-tart contrast against the creamy richness. It’s a perfect match for those luscious flavors!

  • Nutty Delight: Fold in 1/2 cup of crushed nuts, like walnuts or pecans, into the batter to add delightful crunch and flavor.

  • Spiced Pumpkin: In the fall, consider adding 1/2 cup of pumpkin puree and a dash of cinnamon for a seasonal twist. This warm flavor note invites snug autumn vibes into your kitchen.

  • Rich Vanilla: Swap in a tablespoon of vanilla bean paste in place of extract for an even more luxurious aroma and visually appealing little specks.

Wouldn’t it be a treat to try this Loaf Pan Basque Cheesecake with a scoop of your favorite ice cream on the side? Alternatively, pair it with Ricotta Protein Pancakes for a delightful brunch!

How to Store and Freeze Loaf Pan Basque Cheesecake

Fridge: Store leftover cheesecake in an airtight container in the refrigerator for up to 5 days. Its flavors will develop, making each slice even more delicious.

Freezer: If you want to enjoy this creamy delight later, freeze the cheesecake for up to 3 months. Make sure it cools completely and is wrapped tightly in plastic wrap or foil.

Thawing: To enjoy, simply transfer the frozen cheesecake to the fridge and let it thaw overnight before serving.

Reheating: There's no need to reheat; this Loaf Pan Basque Cheesecake is perfect enjoyed chilled or at room temperature!

What to Serve with Easy Loaf Pan Basque Cheesecake

Delight in creating a memorable meal by pairing this rich and creamy dessert with irresistible sides and beverages.

  • Fresh Berries: Juicy strawberries, blueberries, or raspberries provide a bright contrast to the cheesecake's richness, enhancing every luscious bite.

  • Light Fruit Compote: A sweet mix of seasonal fruits simmered down creates a refreshing topping that lightens the dessert while adding a layer of flavor.

  • Whipped Cream: Light and airy, a dollop of freshly whipped cream adds a delightful texture that perfectly balances the cheesecake's creamy custard.

  • Espresso or Coffee: A robust cup of coffee or a shot of espresso complements the flavors, cutting through the richness while elevating the dessert experience.

  • Chocolate Sauce: Drizzling a warm, velvety chocolate sauce over your cheesecake adds a decadent touch that chocolate lovers will adore.

  • Caramel Drizzle: A sweet caramel glaze enhances the cheesecake’s natural flavors, accentuating its caramelized top for an indulgent treat.

  • Savory Nuts: Salted roasted almonds or hazelnuts provide a crunchy contrast that offsets the cheesecake's creaminess, adding delightful texture.

  • Dessert Wine: A glass of sweet dessert wine or a light Moscato brings out the flavors in the cheesecake, creating a perfect end to your meal.

Elevate your dessert game by pairing your Easy Loaf Pan Basque Cheesecake with these delightful options for a truly memorable experience!

Expert Tips for Loaf Pan Basque Cheesecake

Perfect Temperature: Ensure your cream cheese is at room temperature. This helps in achieving a smooth batter without lumps for the creamy Loaf Pan Basque Cheesecake.

Don't Overmix: Mix the eggs gently into the batter. Overmixing can lead to air bubbles, causing the cheesecake to crack during baking.

Watch the Bake Time: Keep an eye on the baking time. The cheesecake should have a deeply caramelized top but remain slightly jiggly in the center, indicating it’s still creamy.

Cool Gradually: Allow the cheesecake to cool at room temperature before refrigerating. This step is vital for achieving the right texture and flavor balance.

Chill Before Serving: Waiting for at least four hours (or overnight) in the fridge enhances the versatile flavors of your Loaf Pan Basque Cheesecake, making it a more delightful treat.

Experiment with Flavors: Don’t hesitate to add mix-ins or flavored extracts to match your taste. It's an easy way to elevate your Loaf Pan Basque Cheesecake effortlessly!

Make Ahead Options

These Easy Loaf Pan Basque Cheesecakes are a fantastic choice for meal prep! You can prepare the cheesecake batter up to 24 hours in advance; just store it in an airtight container in the refrigerator. Additionally, once baked, the cheesecake can be refrigerated for up to 5 days or frozen for up to 3 months. To maintain its creamy texture and rich flavor, ensure it cools completely at room temperature before refrigerating or freezing. When you're ready to serve, simply thaw it overnight in the fridge if frozen, and enjoy the same delicious taste with minimal effort! Taking these steps makes indulging in homemade desserts more accessible during busy weekdays.

Loaf Pan Basque Cheesecake Recipe FAQs

What type of cream cheese should I use?
Absolutely, I recommend using full-fat cream cheese for the best richness and creamy texture in your Loaf Pan Basque Cheesecake. This gives you that irresistible mouthfeel and a rich flavor that defines a classic cheesecake.

How should I store leftover cheesecake?
To keep your cheesecake fresh, store it in an airtight container in the refrigerator for up to 5 days. This helps maintain its creamy texture while allowing the flavors to develop even further. Just remember to tightly seal it to avoid any unwanted odors from your fridge.

Can I freeze Loaf Pan Basque Cheesecake?
Very! You can freeze your cheesecake for up to 3 months. Start by letting it cool completely. Then, wrap it tightly in plastic wrap and aluminum foil to prevent freezer burn. When you're ready to enjoy, simply transfer it to the refrigerator to thaw overnight. This way, you can indulge in this rich dessert whenever the craving strikes!

What can I do if my cheesecake cracks while baking?
Don’t worry; cracking can happen! If your Loaf Pan Basque Cheesecake cracks during baking, it’s usually due to overmixing or baking at too high a temperature. To prevent this, be gentle when incorporating the eggs and keep a close watch on the baking time. Ideally, the edges should be set, while the center should remain slightly jiggly for that creamy texture we all love.

Are there any dietary considerations for this recipe?
Absolutely! If you have dietary restrictions, you can make this cheesecake gluten-free by omitting the flour altogether or substituting it with almond or coconut flour. Additionally, ensure your sugar is suitable for your dietary needs; options like coconut sugar can also work for a different flavor profile. Always check for any allergies related to the ingredients you use.

Can I adapt the flavors in this cheesecake?
Yes, indeed! The beauty of this Loaf Pan Basque Cheesecake is its versatility. You can infuse it with different flavors by adding extracts like almond or citrus, or even folding in chocolate chunks for a richer twist. Feel free to get creative with the ingredients while keeping that luscious base intact!

Loaf Pan Basque Cheesecake

Creamy Loaf Pan Basque Cheesecake for Easy Indulgence

This Loaf Pan Basque Cheesecake is a creamy, crustless delight, perfect for small households or gatherings, offering an irresistibly caramelized top and luscious interior.
Print Recipe Pin Recipe
Prep Time 10 minutes mins
Cook Time 30 minutes mins
Cooling Time 1 hour hr
Total Time 1 hour hr 40 minutes mins
Servings: 8 slices
Course: Dessert
Cuisine: Spanish
Calories: 350
Ingredients Equipment Method Nutrition Notes

Ingredients
  

For the Cheesecake
  • 16 ounces cream cheese room temperature
  • 3/4 cup granulated sugar adjust to taste
  • 3 large eggs room temperature
  • 1 teaspoon pure vanilla extract use pure for best flavor
  • 1 pinch salt to elevate flavors
  • 2 tablespoons all-purpose flour optional
Serving Suggestions
  • fresh berries for topping
  • light fruit compote for topping

Equipment

  • Loaf pan
  • Electric mixer
  • Mixing Bowl
  • Parchment Paper

Method
 

Step‑by‑Step Instructions
  1. Preheat your oven to 400°F (200°C).
  2. In a mixing bowl, beat the cream cheese with an electric mixer until smooth. Add sugar gradually and mix until well combined.
  3. Incorporate eggs one at a time, mixing gently after each addition.
  4. Stir in vanilla extract and salt. If using, add flour and mix until just combined.
  5. Pour the batter into a parchment-lined loaf pan and bake for 25-30 minutes.
  6. Allow the cheesecake to cool at room temperature for about an hour before refrigerating for at least 4 hours or overnight.

Nutrition

Serving: 1sliceCalories: 350kcalCarbohydrates: 28gProtein: 6gFat: 25gSaturated Fat: 15gPolyunsaturated Fat: 1gMonounsaturated Fat: 4gCholesterol: 80mgSodium: 210mgPotassium: 130mgSugar: 20gVitamin A: 10IUCalcium: 4mgIron: 2mg

Notes

This cheesecake can be stored in the fridge for up to 5 days or frozen for 3 months. Thaw in the fridge overnight before serving.

Tried this recipe?

Let us know how it was!
  • « Previous Page
  • 1
  • …
  • 11
  • 12
  • 13
  • 14
  • 15
  • …
  • 62
  • Next Page »

Welcome!

Hi, I’m Grace, a Sydney-based home cook with a passion for bold flavors and trending ingredients. Whether you’re a busy beginner or a seasoned foodie, you’ll find dishes here that are fresh, fun, and full of flavor.

More about me

Popular Recipes

  • One Pot Keto Tuna Casserole
    One Pot Keto Tuna Casserole: Creamy Comfort in Minutes
  • Ultimate Jalapeno Popper Chicken Salad
    Ultimate Jalapeno Popper Chicken Salad That'll Wow Your Tastebuds
  • Green Chile Cheese Dip
    Mouthwatering Green Chile Cheese Dip for Cozy Gatherings
  • Easy Chimichurri Sauce
    Fresh and Zesty Easy Chimichurri Sauce in Just Minutes

Footer

↑ back to top

About

  • Privacy Policy
  • Disclaimer
  • Terms & Conditions

Newsletter

  • Sign Up! for emails and updates

Contact

  • About me
  • Contact me

Copyright © 2025 TastyTrendIngredients