tastytrendingredients

  • Home
  • Recipes
    • Appetizers
    • Breakfast
    • Dessert
    • Dinner
    • Drinks
    • Salads
    • Snacks
    • Soups
  • About me
  • Contact
menu icon
go to homepage
  • Home
  • Recipes
    • Appetizers
    • Breakfast
    • Dessert
    • Dinner
    • Drinks
    • Salads
    • Snacks
    • Soups
  • About me
  • Contact
search icon
Homepage link
  • Home
  • Recipes
    • Appetizers
    • Breakfast
    • Dessert
    • Dinner
    • Drinks
    • Salads
    • Snacks
    • Soups
  • About me
  • Contact
×

Lemon Raspberry Swirl Bars for a Bright, Sweet Treat

April 4, 2026 by Grace Snow Leave a Comment

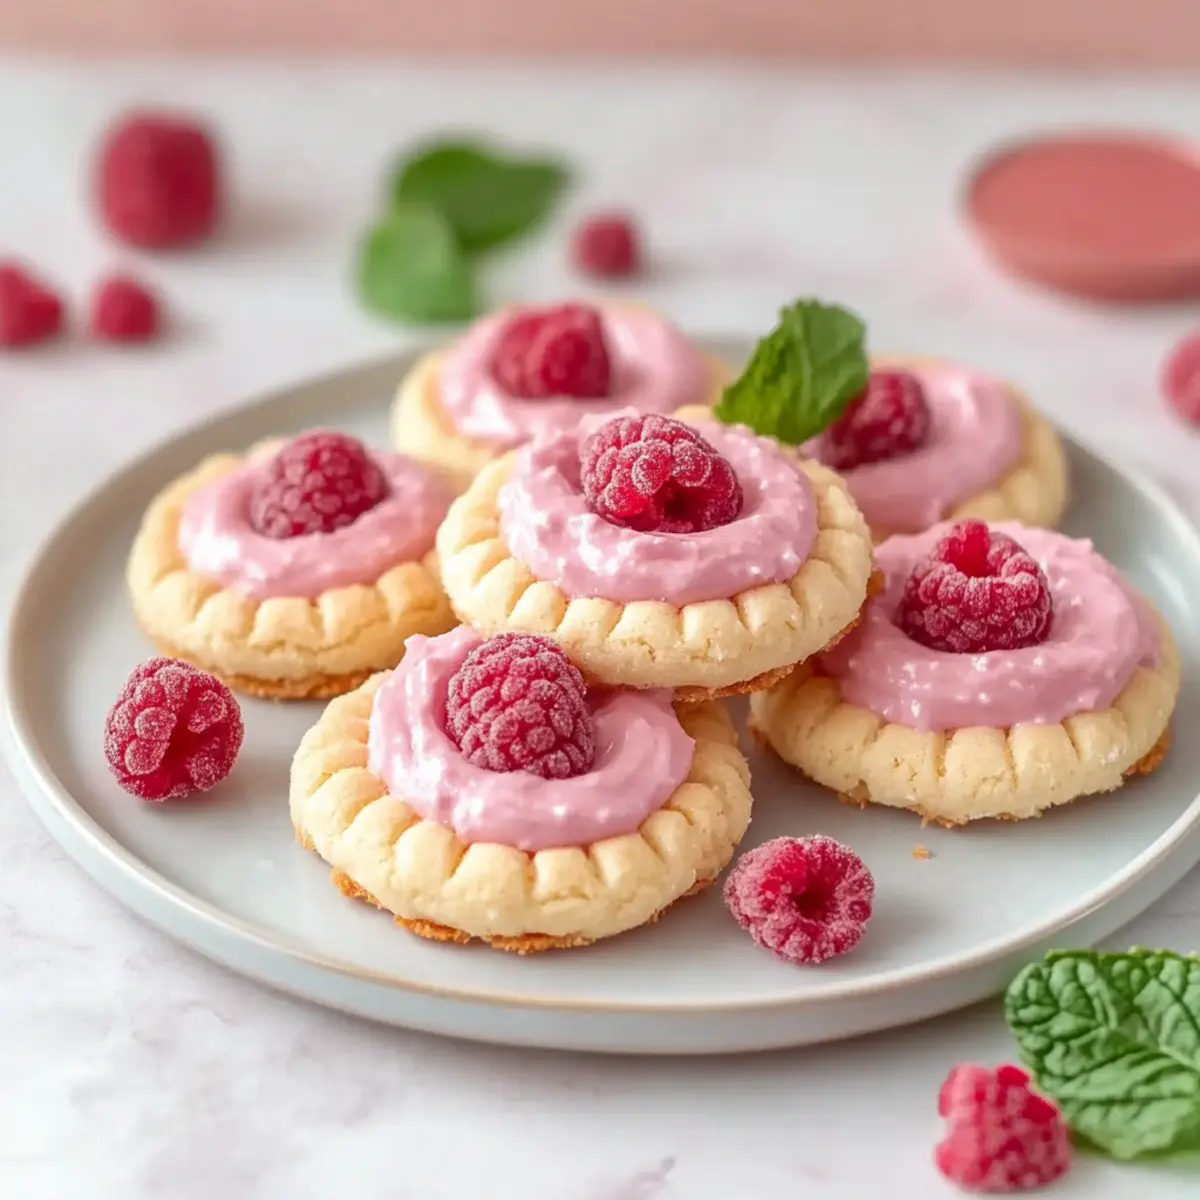
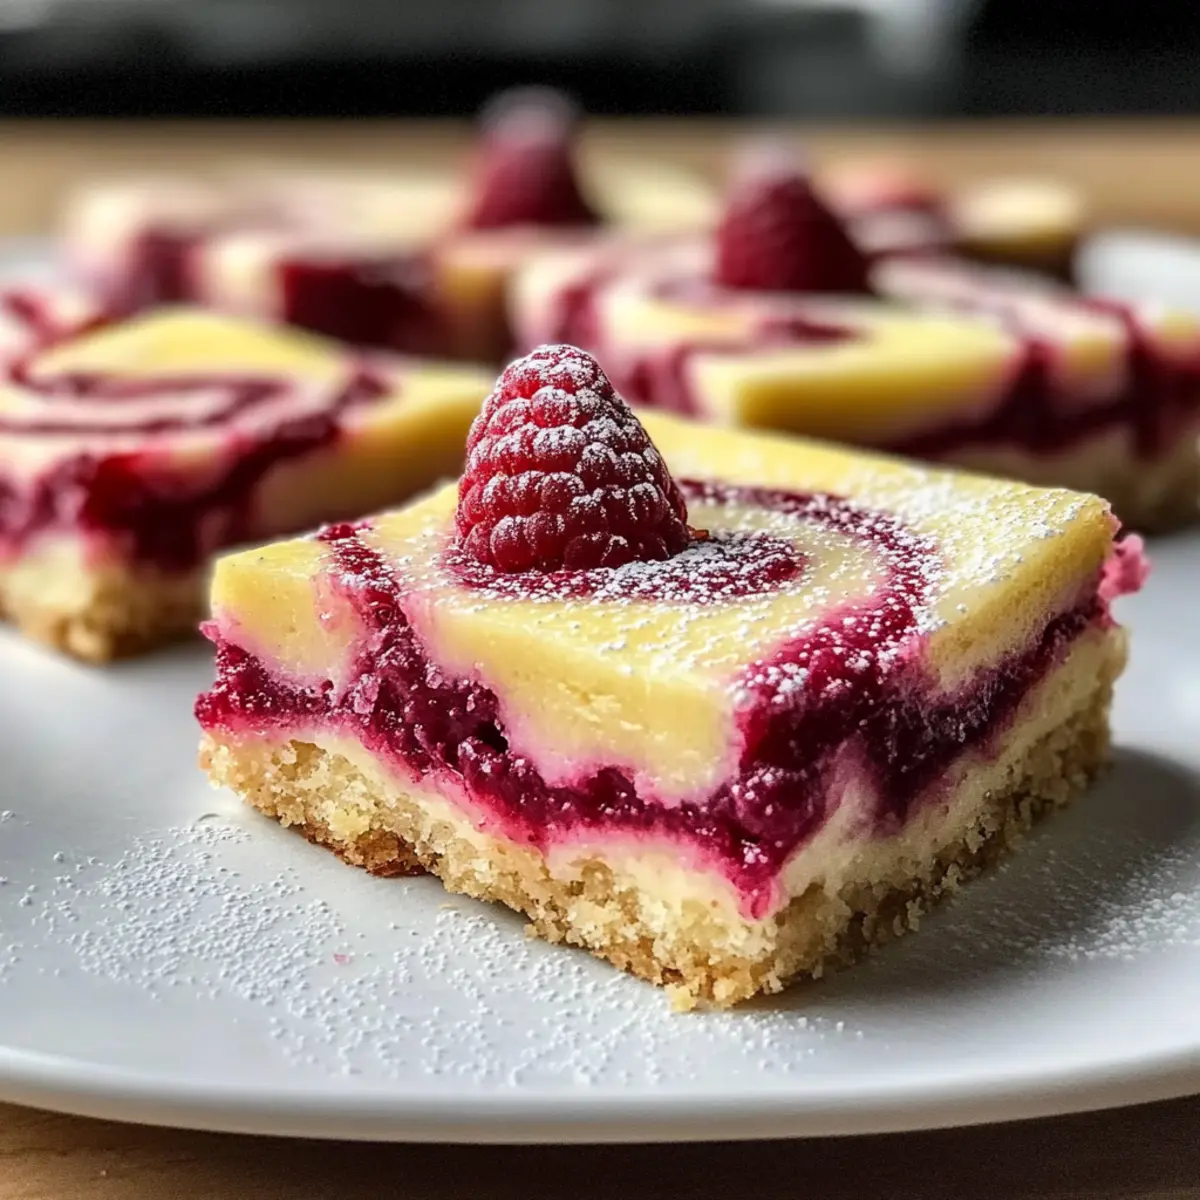
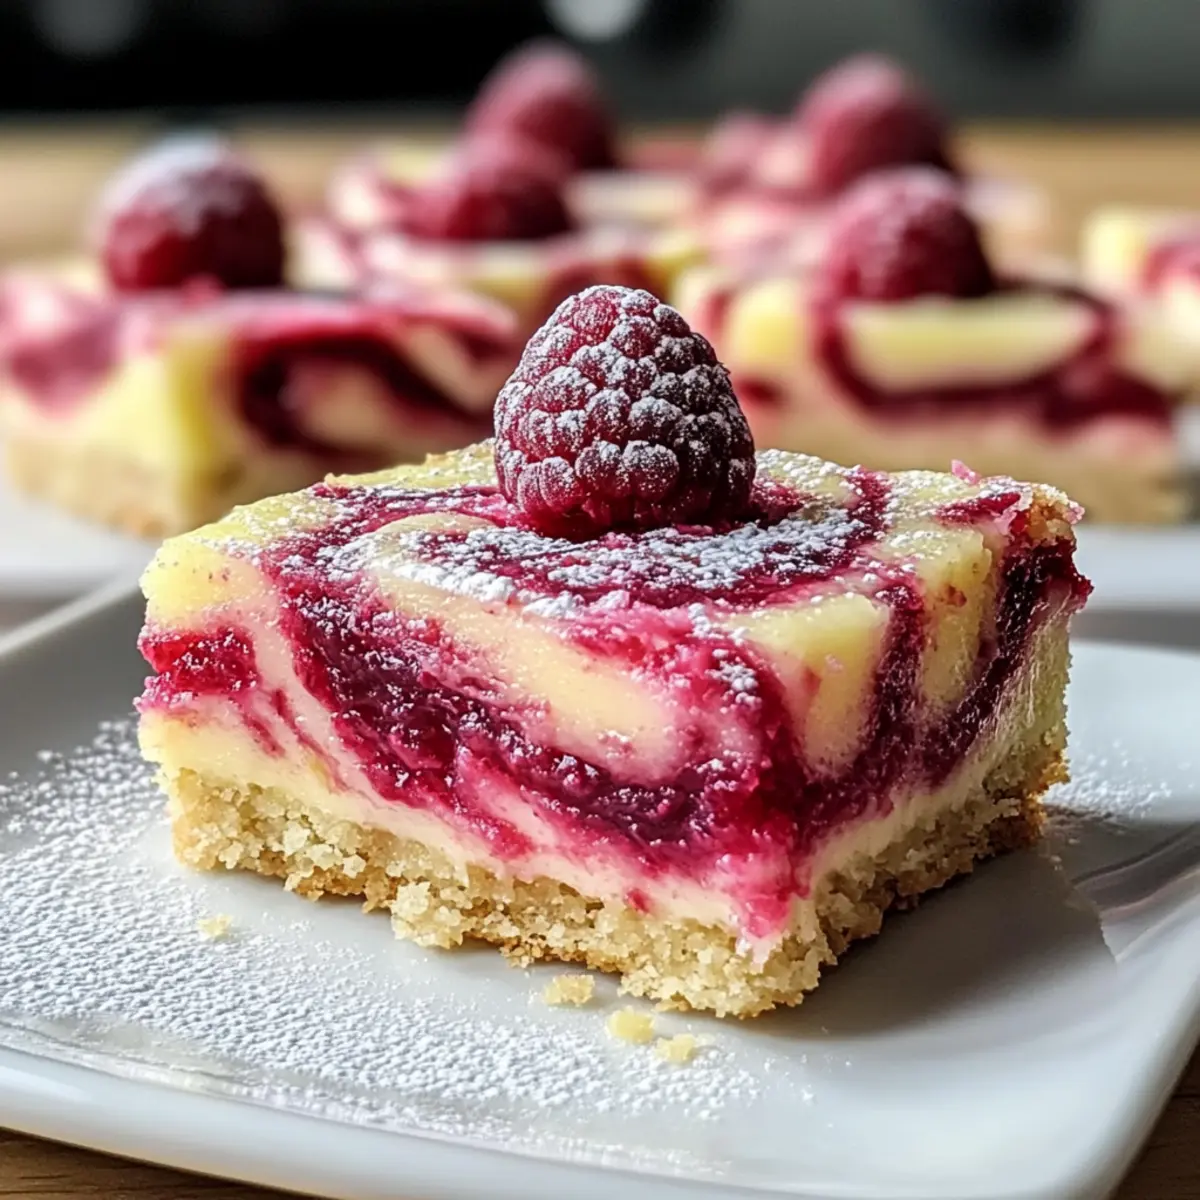
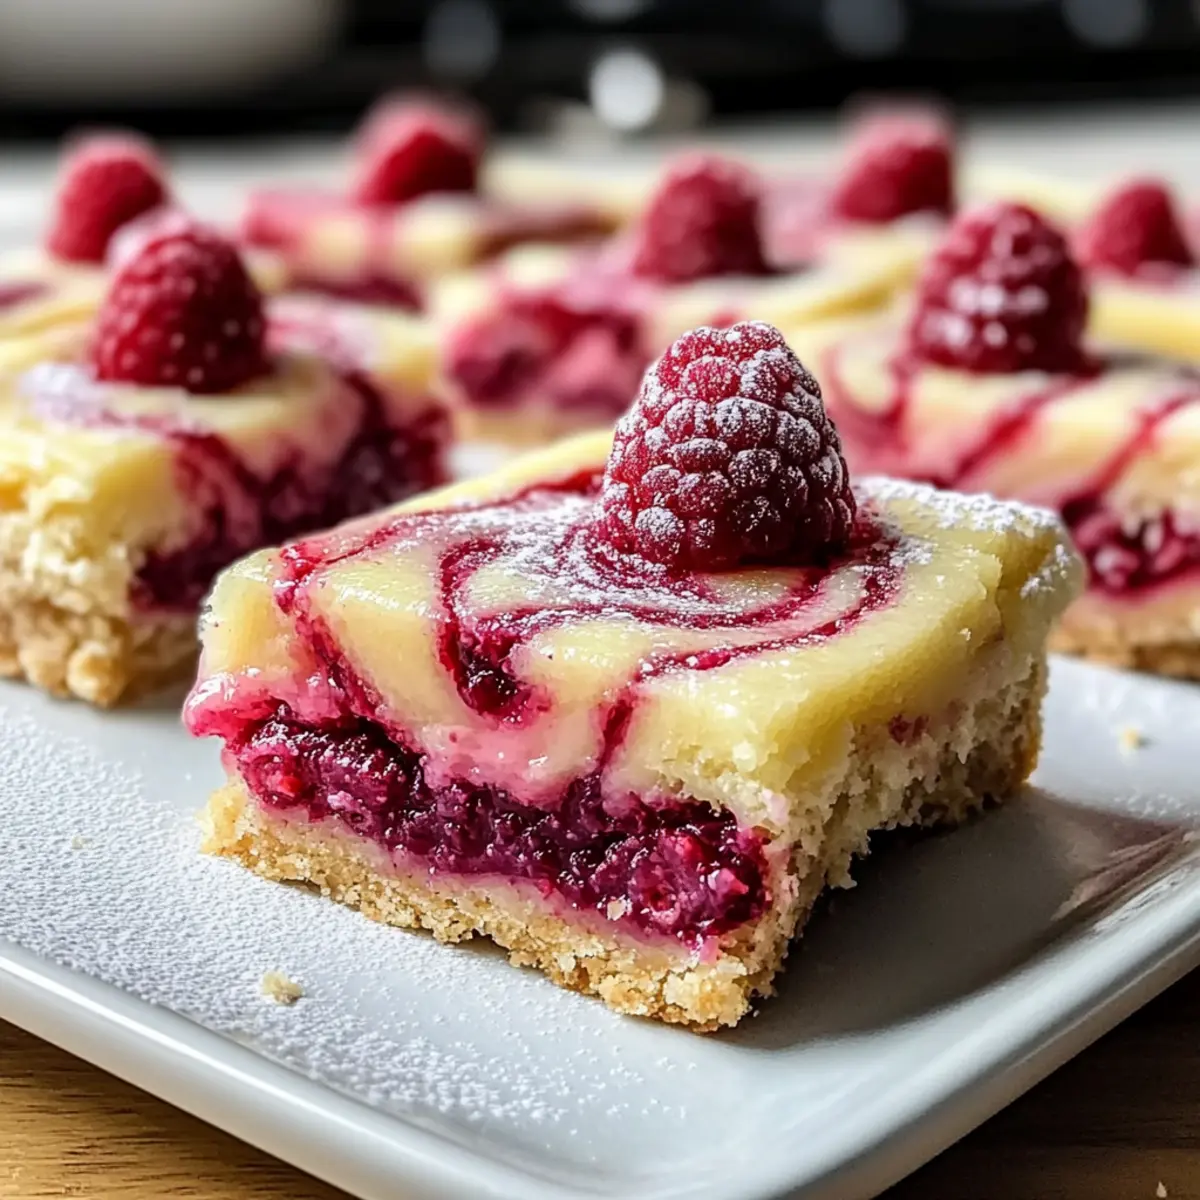
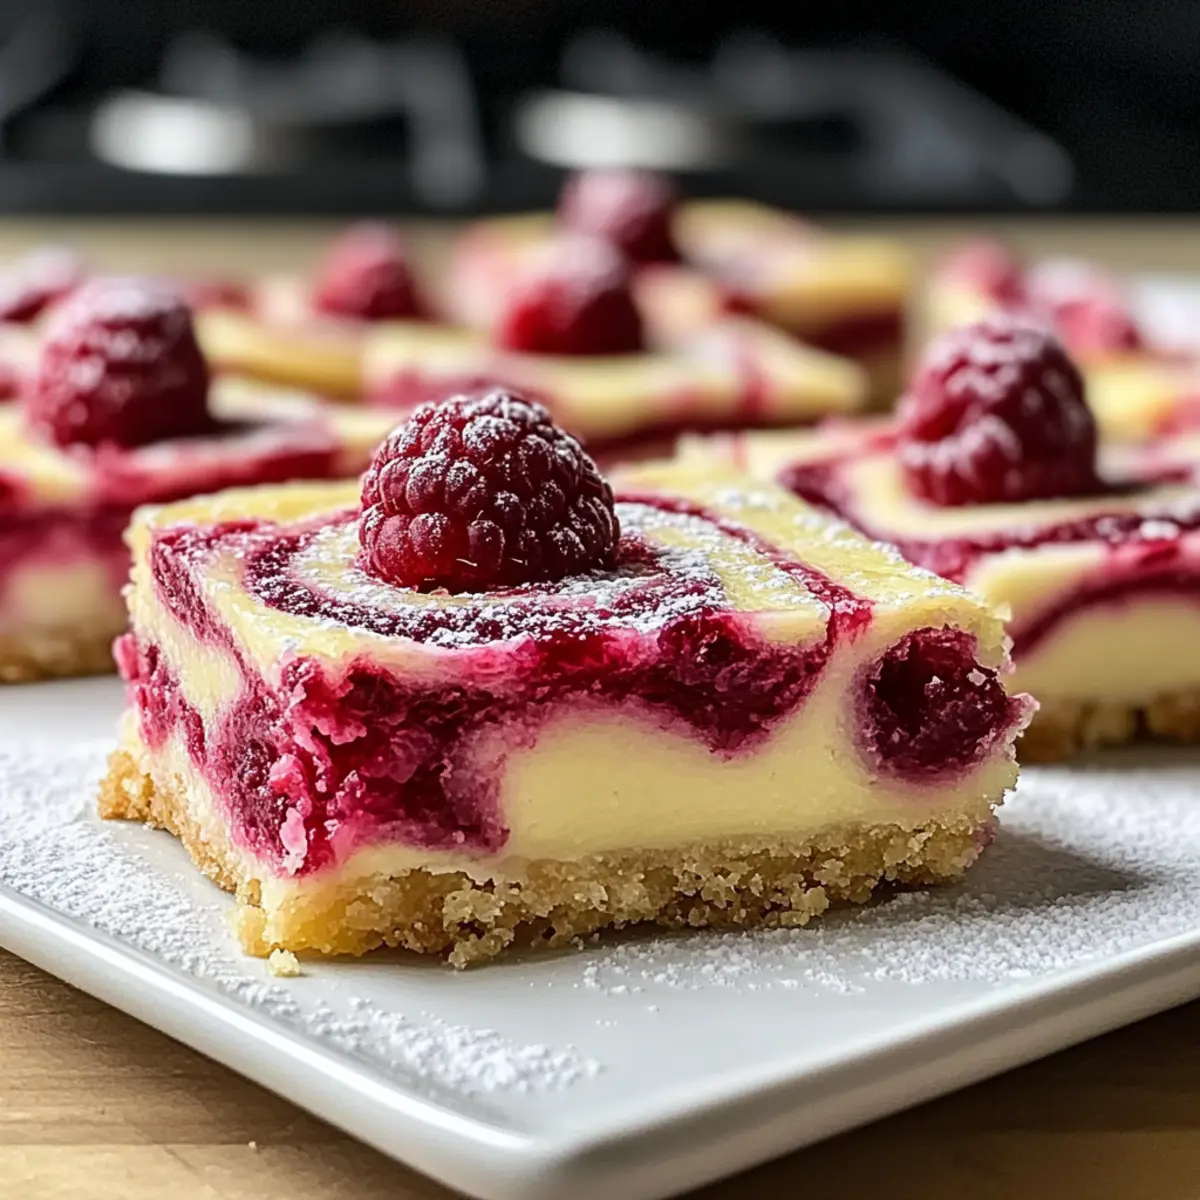
The first time I combined fresh lemons and raspberries in my kitchen, it felt like a sudden burst of sunshine on a cloudy day. The result? Irresistible Lemon Raspberry Swirl Bars that quickly became a favorite in our home! Ideal for those busy weeknights or spontaneous gatherings, these quick and easy desserts feature a vibrant mix of sweet and tangy flavors, making them a delightful treat any time of year. With just a handful of fresh ingredients and minimal preparation, this recipe not only caters to gluten-free enthusiasts but also doubles as a perfect make-ahead option. So, why not brighten up your dessert table with this refreshing twist? Are you ready to swirl some magic into your baking?

Why Choose Lemon Raspberry Swirl Bars?

Unique Flavor Combination: Delightfully tart lemons wonderfully balance with sweet raspberries, creating a flavor profile that will awaken your taste buds.

Effortless Preparation: Simple and quick, this recipe requires just a handful of fresh ingredients, making it perfect for busy weeknights or last-minute gatherings.

Gluten-Free Option: Flexible enough for everyone, easily substitute all-purpose flour with a gluten-free blend to accommodate dietary preferences.

Make-Ahead Convenience: Prep these bars one or two days in advance to save time and enjoy a refreshing treat on demand! Perfect for picnics or casual get-togethers, they're bound to impress.

Whether you're in the mood for a quick dessert or searching for a show-stopping dish, these bars are sure to please. If you love bright flavors, check out these Lemon Ricotta Protein pancakes or a soothing Lemon Chicken Soup to complement your meal!

Lemon Raspberry Swirl Bars Ingredients

For the Batter
• All-purpose flour – Provides structure. Substitution: Use a gluten-free flour blend for a gluten-free version.
• Granulated sugar – Adds sweetness and balances the tartness of the lemon and raspberries.
• Salt – Enhances the overall flavor.
• Unsalted butter (melted) – Adds richness and moisture to the batter.
• Large egg – Binds the ingredients and helps with leavening.
• Vanilla extract – Adds depth of flavor.

For the Fruit Mixture
• Fresh raspberries (or frozen, thawed) – Provides the signature fruity flavor. Note: Ensure thawed raspberries are drained to avoid excess moisture.
• Fresh lemon juice – Offers tartness and brightens the overall flavor. Substitution: Lime juice can be used for a different zing.
• Lemon zest – Adds a concentrated lemon flavor and aroma.

For the Finishing Touch
• Powdered sugar – Used for dusting the top for a finishing touch.

These Lemon Raspberry Swirl Bars are a delightful treat that'll brighten up any occasion!

Step‑by‑Step Instructions for Lemon Raspberry Swirl Bars

Step 1: Preheat and Prepare
Preheat your oven to 350°F (175°C) while you prepare an 8×8-inch baking dish. Grease the dish lightly with butter or line it with parchment paper, ensuring the paper overhangs the edges. This will make it easier to lift out your delicious Lemon Raspberry Swirl Bars later.

Step 2: Mix the Batter
In a medium bowl, combine the all-purpose flour, granulated sugar, and salt. Stir in the melted butter, followed by the large egg and vanilla extract, mixing until the batter is smooth and well combined. This batter will serve as the cozy base for your tangy swirl, so ensure it's lump-free!

Step 3: Spread the Batter
Transfer the prepared batter into the greased or lined baking dish. Use a spatula to spread it evenly across the bottom, making sure the layer is smooth and consistent. This step is vital for an even bake and will help achieve that lovely texture in your Lemon Raspberry Swirl Bars.

Step 4: Prepare the Raspberry Mixture
In a separate bowl, mash the fresh raspberries gently with a fork until slightly chunky. Mix in the fresh lemon juice and lemon zest, creating a vibrant fruit mixture that will add a burst of flavor to your bars. This tangy filling will beautifully complement the sweet batter.

Step 5: Create the Swirl Effect
Drop spoonfuls of the raspberry mixture over the top of the batter, using a spoon or spatula. With a knife, gently swirl the raspberry mixture into the batter to create a marbled effect. Be careful not to overmix—just a few swirls will give your Lemon Raspberry Swirl Bars a stunning look and flavor.

Step 6: Bake to Perfection
Place the baking dish in the preheated oven and bake for 25-30 minutes. Keep an eye on the edges—they should turn golden brown. To check for doneness, insert a toothpick into the center; it should come out clean with a few moist crumbs. This means your bars are perfectly baked!

Step 7: Cool and Dust
Once out of the oven, let the bars cool in the pan for about 10 minutes. Carefully transfer them to a wire rack to cool completely. Before serving, dust the top with powdered sugar for a sweet finishing touch, enhancing the vibrant colors of your Lemon Raspberry Swirl Bars.

Make Ahead Options

These Lemon Raspberry Swirl Bars are a fantastic make-ahead dessert that can save you precious time during busy weeks or last-minute gatherings! You can prepare the batter and fruit mixture up to 24 hours in advance; simply cover and refrigerate them separately to maintain their freshness and texture. When you're ready to bake, just spread the batter in the dish, swirl in the raspberry mixture, and pop it in the oven as directed. Don't worry—the bars will be just as delicious and vibrant as if you made them fresh! Enjoy having this delightful treat ready to serve whenever the mood strikes!

Expert Tips for Lemon Raspberry Swirl Bars

  • Ingredient Prep: Ensure all ingredients are at room temperature for the best texture. Cold butter or eggs can affect the baking results of your Lemon Raspberry Swirl Bars.

  • Swirl Technique: Be gentle when swirling the raspberry mixture into the batter. Overmixing can lead to a muddy appearance and a loss of distinct flavor stripes.

  • Baking Watch: Keep a close eye on the bars during baking. They should be golden at the edges—an overbaked batch can become dry and lose texture.

  • Cool Completely: Let the bars cool fully on a wire rack before cutting. This helps them set and makes for cleaner, neater slices.

  • Storage Tips: Store leftover bars in an airtight container at room temperature for up to three days or refrigerate for an extra week. They freeze well too!

  • Customize Flavors: Don’t hesitate to experiment with different fruits, such as blackberries or blueberries. Just remember to adjust the sweetness if needed, to enhance your Lemon Raspberry Swirl Bars.

Storage Tips for Lemon Raspberry Swirl Bars

Room Temperature: Keep the bars in an airtight container at room temperature for up to 3 days, allowing the sweet and tangy flavors to mingle beautifully.

Fridge: For longer freshness, store in the refrigerator for up to 1 week. Make sure they are well-covered to prevent drying out.

Freezer: Freeze the Lemon Raspberry Swirl Bars for up to 3 months. Wrap them in plastic wrap and place in a freezer-safe container to preserve their delicious taste.

Reheating: Enjoy chilled or let them come to room temperature. To refresh, microwave for a few seconds or serve with a dollop of whipped cream for extra indulgence!

Lemon Raspberry Swirl Bars Variations

Feel free to get creative and make these delightful bars your own with these fun twists!

  • Gluten-Free: Swap all-purpose flour with a gluten-free flour blend for a delightful version that everyone can enjoy. You won’t lose any flavor!

  • Berry Blend: Mix in a combination of berries, such as blueberries and blackberries, for a mixed berry twist—each bite is a surprise!

  • Extra Zesty: Add an additional tablespoon of lemon zest to amp up the citrus flavor. This will bring out even more brightness in every heavenly morsel.

  • Sweet Option: Use honey or agave syrup instead of granulated sugar for a natural sweetener that adds a touch of caramel flavor.

  • Nutty Crunch: Incorporate chopped nuts, such as almonds or walnuts, into the batter for added texture and a satisfying crunch.

  • Fruity Swirl: Replace raspberries with fruit preserves like strawberry jam for an enchanting twist that gives your bars an elegant flair.

  • Coconut Infusion: Mix in shredded coconut or coconut flour for a tropical flavor twist that pairs beautifully with the lemon.

  • Spicy Kick: Add a pinch of cayenne pepper or ground ginger to the batter for a delightful hint of warmth that contrasts wonderfully with the sweetness.

These Lemon Raspberry Swirl Bars are so versatile and easy to customize! Enjoy them as a refreshing treat, and if you're in a lemony mood, you might also love these Lemon Ricotta Protein pancakes or a comforting Lemon Chicken Soup. Happy baking!

What to Serve with Lemon Raspberry Swirl Bars

Bringing a vibrant burst of flavor to your dessert table can set the mood for any gathering.

  • Whipped Cream: Light and airy, a dollop of whipped cream enhances the fruity flavors, creating a heavenly experience with each bite.

  • Fresh Berries: A medley of mixed berries on the side not only adds color but also complements the tangy notes beautifully.

  • Lemon Sorbet: This refreshing scoop is a delightful contrast to the bars, elevating the citrusy zing for a refreshing summer dessert.

  • Shortbread Cookies: The buttery crunch of shortbread cookies adds a delightful texture, pairing perfectly with the chewy swirl of the bars.

  • Iced Tea or Lemonade: A chilled glass of sweetened iced tea or homemade lemonade brings a refreshing zest that marries well with the dessert's tartness.

  • Vanilla Ice Cream: Indulge in creaminess! The rich vanilla ice cream juxtaposes the tangy lemon raspberry, making it an irresistible combination.

  • Chocolate Drizzle: A hint of dark chocolate drizzle on top could be a great way to introduce a new flavor element and deepen the enjoyment of the bars' sweetness.

  • Nutty Granola: Sprinkling some homemade granola on top while serving not only adds texture but brings a nutty flavor that balances the sweets nicely.

  • Mint Leaves: Fresh mint leaves on the plate offer a bright pop of color and a refreshing taste that complements lemon’s zestful nature.

Each pairing is designed to elevate the delightful experience of Lemon Raspberry Swirl Bars, ensuring your dessert is anything but ordinary!

Lemon Raspberry Swirl Bars Recipe FAQs

How do I choose the ripeness of raspberries?
Absolutely! When selecting fresh raspberries, look for berries that are vibrant in color, plump, and free of dark spots or mold. A good visual cue is that they should have a slight bounce when gently pressed. If you opt for frozen raspberries, ensure they’re thawed and carefully drained to avoid excess moisture in your Lemon Raspberry Swirl Bars.

What are the best methods for storing Lemon Raspberry Swirl Bars?
You can store your Lemon Raspberry Swirl Bars in an airtight container at room temperature for up to 3 days, allowing the flavors to meld beautifully. For even longer freshness, refrigerate them for about a week. Just make sure they are covered well to prevent drying out—nobody wants a dry dessert!

Can I freeze Lemon Raspberry Swirl Bars, and if so, how?
Very! To freeze your bars, first cut them into individual squares. Wrap each piece tightly in plastic wrap to prevent freezer burn, then place them in a freezer-safe container or bag. They can last up to 3 months in the freezer. When you want to enjoy them, simply thaw in the refrigerator or bring to room temperature for a delightful treat whenever you're ready!

What if my bars didn’t set properly?
No worries! If your Lemon Raspberry Swirl Bars didn’t set, there might be a couple of reasons. First, ensure that you allowed them to bake long enough for the edges to turn golden and a toothpick comes out clean. If they still seem too soft after cooling, they may need more time in the oven. Next time, consider checking the baking time as every oven can vary a bit. An ideal bake will yield soft, chewy bars.

Are there any allergens I should be aware of with this recipe?
Absolutely! This recipe contains gluten from all-purpose flour and dairy from the butter. For a gluten-free option, simply substitute the all-purpose flour with a certified gluten-free blend. If someone has a dairy allergy, you can use a dairy-free butter substitute, ensuring the recipe maintains its delicious flavor while accommodating dietary needs.

Can these bars be made ahead of time?
Yes! You can absolutely prepare your Lemon Raspberry Swirl Bars one or two days in advance. Just bake, cool, and store them in an airtight container. They hold their flavor and texture beautifully, making them a wonderful option for when you're planning a gathering or picnic. Just remember to dust them with powdered sugar just before serving for that fresh pop!

Lemon Raspberry Swirl Bars

Lemon Raspberry Swirl Bars for a Bright, Sweet Treat

Irresistible Lemon Raspberry Swirl Bars, a perfect blend of sweet and tangy flavors, ideal for any gathering.
Print Recipe Pin Recipe
Prep Time 20 minutes mins
Cook Time 30 minutes mins
Cooling Time 10 minutes mins
Total Time 1 hour hr
Servings: 9 bars
Course: Dessert
Cuisine: American
Calories: 200
Ingredients Equipment Method Nutrition Notes

Ingredients
  

For the Batter
  • 1 cup All-purpose flour Substitution: Use a gluten-free flour blend for a gluten-free version.
  • 1/2 cup Granulated sugar
  • 1/4 teaspoon Salt
  • 1/2 cup Unsalted butter (melted)
  • 1 large Egg
  • 1 teaspoon Vanilla extract
For the Fruit Mixture
  • 1 cup Fresh raspberries (or frozen, thawed) Ensure thawed raspberries are drained to avoid excess moisture.
  • 1/4 cup Fresh lemon juice Substitution: Lime juice can be used for a different zing.
  • 1 tablespoon Lemon zest
For the Finishing Touch
  • powdered cup Powdered sugar Used for dusting the top for a finishing touch.

Equipment

  • 8x8-inch baking dish
  • Mixing bowls
  • Spatula
  • wire rack

Method
 

Step-by-Step Instructions for Lemon Raspberry Swirl Bars
  1. Preheat your oven to 350°F (175°C) while preparing an 8×8-inch baking dish. Grease lightly with butter or line with parchment paper.
  2. In a medium bowl, combine the all-purpose flour, granulated sugar, and salt. Stir in the melted butter, followed by the large egg and vanilla extract until smooth.
  3. Transfer the prepared batter into the greased or lined baking dish and spread evenly across the bottom.
  4. In a separate bowl, mash the fresh raspberries gently with a fork until slightly chunky. Mix in the fresh lemon juice and lemon zest.
  5. Drop spoonfuls of the raspberry mixture over the top of the batter and swirl gently with a knife.
  6. Place the baking dish in the preheated oven and bake for 25-30 minutes until the edges are golden brown.
  7. Let the bars cool in the pan for about 10 minutes before transferring to a wire rack to cool completely. Dust with powdered sugar before serving.

Nutrition

Serving: 1barCalories: 200kcalCarbohydrates: 28gProtein: 2gFat: 10gSaturated Fat: 6gPolyunsaturated Fat: 1gMonounsaturated Fat: 3gCholesterol: 40mgSodium: 150mgPotassium: 60mgFiber: 1gSugar: 12gVitamin A: 300IUVitamin C: 5mgCalcium: 20mgIron: 1mg

Notes

Ensure all ingredients are at room temperature for the best texture. Store leftover bars in an airtight container at room temperature for up to 3 days or refrigerate for 1 week. Freeze for up to 3 months.

Tried this recipe?

Let us know how it was!

Chewy M&M Bunny Cookies Perfect for Your Easter Celebration

April 3, 2026 by Grace Snow Leave a Comment

As I watched the flowers bloom outside my kitchen window, I felt a burst of inspiration to bake something that captures the joy of spring. Enter these delightful M&M Bunny Cookies—a soft and chewy treat that brings festive flair to any Easter gathering. Their charming pastel milk chocolate M&Ms not only add a colorful crunch but also make each cookie resemble a cheerful bunny face. What's more, this easy homemade recipe can be whipped up in less than 30 minutes, ensuring you have plenty of time to enjoy the season. Perfect for sharing with friends or tucking into treat bags for little ones, these cookies will surely become a seasonal favorite. Are you ready to mix up some fun in the kitchen?

Why Are M&M Bunny Cookies a Must-Make?

Festively Fun: These M&M Bunny Cookies not only taste fantastic, but they also bring a playful vibe to any gathering with their adorable bunny faces.

Quick and Easy: Ready in under 30 minutes, they’re perfect for those spontaneous baking adventures or when you're short on time.

Versatile Delight: Swap in different candies or flavored extracts to match your taste, making each batch uniquely yours—try mixing in walnuts or pecans for a delightful crunch!

Perfect for Sharing: These cookies are a hit at Easter brunch and make charming additions to treat bags for kids, delighting everyone with their sweetness.

Holiday Spirit: The vibrant pastel M&Ms encapsulate the joy of spring, making them not just a treat, but a celebration of the season—ideal alongside other delightful sweets like Eggnog Cookies Soft or Peaches Cream Cookies.

M&M Bunny Cookies Ingredients

• A delightful treat for Easter!

For the Cookie Dough

  • All-Purpose Flour – Provides structure; can be swapped with gluten-free flour for a lighter option.
  • Baking Powder – Essential for leavening, ensuring your cookies rise beautifully.
  • Baking Soda – Enhances browning and gives a chewy edge.
  • Salt – Balances sweetness and enhances flavor.
  • Butter – Offers rich flavor and moisture; remember to use unsalted for better control.
  • Granulated Sugar – Adds sweetness and assists with cookie spreading.
  • Brown Sugar – Contributes moisture and a deeper flavor; both light and dark can be used.
  • Large Egg – Binds and adds moisture; be sure it’s at room temperature for the best texture.
  • Vanilla Extract – Infuses warmth and depth into your cookies.

For the Festive Touch

  • Milk Chocolate Pastel M&Ms – Perfect for sweetness and decoration; consider substituting with other candies for variety!

Step‑by‑Step Instructions for M&M Bunny Cookies

Step 1: Preheat and Prepare
Begin by preheating your oven to 350°F (175°C) and lining a baking sheet with parchment paper. This prepares your baking surface, ensuring the M&M Bunny Cookies don’t stick and bake evenly. While the oven heats up, gather your mixing bowls and measuring tools to streamline your cookie-making process.

Step 2: Mix Dry Ingredients
In a medium bowl, whisk together 2 ½ cups of all-purpose flour, 1 teaspoon of baking powder, ½ teaspoon of baking soda, and ½ teaspoon of salt. This essential step not only combines the leavening agents but also ensures even distribution throughout your cookie dough. Set the bowl aside once all the dry ingredients are well blended.

Step 3: Cream Butter and Sugars
In a large mixing bowl, use an electric mixer to cream together ½ cup of softened unsalted butter, ½ cup of granulated sugar, and ½ cup of brown sugar until the mixture is smooth and fluffy, about 2-3 minutes. The sugars will dissolve into the butter, creating a rich base for your M&M Bunny Cookies and enhancing their delightful texture.

Step 4: Add Egg and Vanilla
Next, incorporate 1 large room-temperature egg and 1 teaspoon of vanilla extract into the creamed mixture. Beat together until fully combined, ensuring a smooth and homogeneous batter forms. This step adds moisture and flavor, making your cookies irresistibly soft and chewy.

Step 5: Combine Wet and Dry Ingredients
Gradually add the dry mixture to the wet ingredients, stirring gently with a spatula until just incorporated. Be careful not to overmix, as this can result in tougher cookies. The dough should look slightly crumbly but hold together when pressed—this is the ideal consistency for your M&M Bunny Cookies.

Step 6: Scoop and Place Dough
Using a cookie scoop, portion out 2-3 tablespoons of dough and roll it into balls. Place them 2-3 inches apart on the prepared baking sheet to allow room for spreading during baking. This spacing is essential to prevent your cookies from merging together, ensuring each M&M Bunny Cookie retains its charming shape.

Step 7: Bake the Cookies
Bake the cookies in the preheated oven for 10-12 minutes, or until the edges are lightly golden brown and the centers appear soft. The cookies will continue to cook slightly even after being removed from the oven, so keep a close eye on them to achieve that perfect chewy texture.

Step 8: Decorate While Warm
As soon as you pull the cookies from the oven, promptly press 9 pastel milk chocolate M&Ms into the center of each warm cookie. This not only adds a festive touch resembling bunny faces but also ensures the candy adheres perfectly as the cookies cool down.

Step 9: Cool and Serve
Allow the M&M Bunny Cookies to cool on the baking sheet for about 5 minutes before transferring them to a wire rack. This step lets them set and firm up while the residual heat continues to enhance their chewy goodness. Once completely cooled, they are ready to be enjoyed or shared with family and friends!

How to Store and Freeze M&M Bunny Cookies

Room Temperature: Keep M&M Bunny Cookies in an airtight container at room temperature for up to 4 days to maintain their soft and chewy texture.

Fridge: If you prefer even longer freshness, you can refrigerate the cookies for up to a week, but be sure to separate layers with parchment paper to prevent sticking.

Freezer: For longer storage, freeze the cookies in a single layer on a baking sheet before transferring to a zip-top freezer bag. They can be frozen for up to 2 months.

Reheating: To enjoy warm cookies, simply microwave them for about 10-15 seconds or pop them in a preheated oven at 350°F for a few minutes until warmed through!

Expert Tips for M&M Bunny Cookies

• Uniform Sizes: Ensure your cookie dough balls are evenly sized to promote even baking. Use a 1½-inch scooper for the best results.

• Don’t Overmix: When combining wet and dry ingredients, mix gently until just incorporated. Overmixing can lead to tough cookies.

• Warm Decoration: Add M&Ms immediately after baking while the cookies are still warm to ensure they stick well and create that adorable bunny face.

• Cooling Time: Remove cookies from the oven when the edges are golden but the centers look soft. They will continue to firm up as they cool.

• Storage Tip: Keep your M&M Bunny Cookies in an airtight container at room temperature for up to 4 days, maintaining their delightful texture.

These expert tips will help you make the best M&M Bunny Cookies for your Easter celebrations!

M&M Bunny Cookies Variations & Substitutions

Feel free to get creative with these delightful M&M Bunny Cookies and add your own twist!

  • Gluten-Free: Use a gluten-free all-purpose flour blend to make these cookies suitable for gluten-sensitive diets. They will still turn out soft and chewy!

  • Nutty Delight: Incorporate finely chopped nuts, such as pecans or walnuts, into the dough for a delightful crunch. The added texture complements the chewy cookies perfectly.

  • Colorful Candies: Swap out the pastel M&Ms for other seasonal candies like jelly beans or chocolate eggs to match your festive theme. This variation makes your cookies visually stunning and versatile!

  • Dairy-Free: Substitute unsalted butter with coconut oil or vegan butter to create a deliciously dairy-free version that doesn’t compromise on flavor.

  • Chocolate Variation: Mix in dark chocolate chips or chunks to enhance the chocolate flavor and add a rich twist. Dark chocolate complements the sweetness of the cookies beautifully.

  • Flavor Boost: Experiment with different extracts, such as almond or orange, to give a new flavor profile to your cookies. This simple tweak can elevate them to a whole new level.

  • Add Dried Fruit: Toss in some dried cranberries or cherries for a tangy burst of flavor and chewiness. The fruit adds a lovely contrast to the sweetness of the cookies.

  • Spicy Kick: Add a pinch of cinnamon or even a dash of cayenne pepper to the dough for a surprising and delightful warmth in every bite. It’s a charming way to spice things up!

These ideas will not only help you personalize your M&M Bunny Cookies, but they will also ensure that there’s always something new and exciting to bake. Consider pairing these with other festive treats like Thumbprint Cookies Melt or Mexican Wedding Cookies for a cookie platter that truly shines during the holiday season!

Make Ahead Options

These M&M Bunny Cookies are perfect for meal prep, allowing you to enjoy the festive flavors without the last-minute rush. You can prepare the cookie dough up to 48 hours in advance by mixing all the ingredients, then wrapping the dough tightly in plastic wrap and refrigerating it. Alternatively, you can form the cookie balls, arrange them on a baking sheet, and freeze for up to 2 months—just remember to separate them to prevent sticking. When you're ready to bake, simply preheat your oven and place the frozen dough directly on the baking sheet, adding an extra minute or two to the baking time. This way, you’ll still get those soft and chewy M&M Bunny Cookies just as delicious as if they were freshly made!

What to Serve with M&M Bunny Cookies?

When celebrating Easter, your table deserves a medley of vibrant dishes that elevate the joy of this festive occasion.

  • Fresh Fruit Salad: Bright, juicy fruits add a refreshing contrast to the sweetness of the cookies. Think strawberries, blueberries, and cherries to capture the essence of spring.

  • Fluffy Vanilla Ice Cream: A scoop of creamy vanilla ice cream beside a warm cookie creates a delightful texture contrast and indulgent flavor. It's a classic pairing that kids and adults will adore!

  • Chocolate Milk: This nostalgic drink perfectly complements the chewy M&M Bunny Cookies, enhancing the chocolate experience and delighting the little ones.

  • Colorful Vegetable Platter: Serve with a side of crisp, fresh veggies and a light dip. This adds a healthy option while beautifully contrasting the sweetness of the cookies.

  • Easter Themed Cupcakes: Serve alongside playful cupcakes decorated with pastel frosting to create a cohesive, cheerful theme across your dessert table.

  • Sparkling Lemonade: The zesty brightness of sparkling lemonade pairs fantastically with the rich flavors of the cookies, refreshing every bite with a touch of citrusy fizz.

With these delightful options, you're sure to craft a celebration that’s as memorable as the M&M Bunny Cookies themselves!

M&M Bunny Cookies Recipe FAQs

How do I choose the best M&Ms for my cookies?
Absolutely! For the best flavor and visual appeal, I recommend using milk chocolate pastel M&Ms, as they offer a delightful crunch and vibrant colors. Make sure the M&Ms are fresh, checking for any dark spots which might indicate staleness. If you're feeling adventurous, you can explore seasonal M&M flavors or even substitute them with other candies like Reese's Pieces or chopped chocolate for a fun twist!

How should I store M&M Bunny Cookies?
To keep your M&M Bunny Cookies fresh and chewy, place them in an airtight container at room temperature for up to 4 days. If you want to preserve them longer, refrigerate them in an airtight container for up to a week, ensuring to layer them with parchment paper to prevent sticking.

Can I freeze M&M Bunny Cookies?
Yes, absolutely! To freeze your M&M Bunny Cookies, first allow them to cool completely. Then, lay them out in a single layer on a baking sheet and freeze them for about 1-2 hours until solid. Once frozen, transfer the cookies to a zip-top freezer bag, removing any excess air, and they can be stored for up to 2 months. When you're ready to enjoy, simply thaw at room temperature or microwave for a few seconds for that fresh-baked warm feel!

What if my cookie dough is too soft?
Great question! If your dough ends up too soft, it's possible that the butter was too warm or not enough flour was added. To handle this, I suggest chilling the mixing bowl and cookie dough in the refrigerator for 15-30 minutes. This firming up will make it easier to scoop and shape the cookies without compromising their chewy texture.

Are M&M Bunny Cookies safe for my pets?
With all the sweetness and chocolate involved, it's important to note that M&M Bunny Cookies are not safe for pets, especially dogs and cats. Chocolate can be toxic to them. If you’re looking for a pet-friendly treat, consider baking a batch specifically for your furry friends using dog-safe ingredients!

What if I have allergies to some ingredients?
Very! If you're concerned about allergies, there are plenty of substitutions. For a gluten-free option, swap the all-purpose flour for a gluten-free blend. Also, you can use dairy-free butter and egg substitutes like flaxseed meal mixed with water. It's a delicious kitchen adventure to customize your M&M Bunny Cookies while keeping everyone safe!

M&M Bunny Cookies

Chewy M&M Bunny Cookies Perfect for Your Easter Celebration

Delight in these M&M Bunny Cookies, a soft and chewy treat perfect for Easter celebrations.
Print Recipe Pin Recipe
Prep Time 15 minutes mins
Cook Time 12 minutes mins
Cooling Time 5 minutes mins
Total Time 30 minutes mins
Servings: 12 cookies
Course: Dessert
Calories: 150
Ingredients Equipment Method Nutrition Notes

Ingredients
  

For the Cookie Dough
  • 2.5 cups All-Purpose Flour Can be swapped with gluten-free flour for a lighter option.
  • 1 teaspoon Baking Powder Essential for leavening.
  • 0.5 teaspoon Baking Soda Enhances browning and gives a chewy edge.
  • 0.5 teaspoon Salt Balances sweetness.
  • 0.5 cups Unsalted Butter Use room temperature for best texture.
  • 0.5 cups Granulated Sugar Adds sweetness.
  • 0.5 cups Brown Sugar Contributes moisture and flavor.
  • 1 large Egg Use at room temperature.
  • 1 teaspoon Vanilla Extract
For the Festive Touch
  • 9 pieces Milk Chocolate Pastel M&Ms Or substitute with other candies.

Equipment

  • Mixing bowls
  • Electric mixer
  • Baking Sheet
  • Parchment Paper
  • Cookie Scoop

Method
 

Step-by-Step Instructions
  1. Preheat your oven to 350°F (175°C) and line a baking sheet with parchment paper.
  2. Whisk together the flour, baking powder, baking soda, and salt in a medium bowl.
  3. Cream the softened butter, granulated sugar, and brown sugar together until smooth and fluffy.
  4. Add the egg and vanilla extract to the creamed mixture and beat until fully combined.
  5. Gradually add the dry mixture to the wet ingredients, stirring gently until just incorporated.
  6. Scoop out portion sizes of dough and roll into balls, placing them on the baking sheet.
  7. Bake the cookies for 10-12 minutes until the edges are lightly golden.
  8. Press 9 pastel M&Ms into each warm cookie.
  9. Let the cookies cool on the baking sheet for about 5 minutes before transferring to a wire rack.

Nutrition

Serving: 1cookieCalories: 150kcalCarbohydrates: 22gProtein: 2gFat: 7gSaturated Fat: 4gMonounsaturated Fat: 2.5gCholesterol: 30mgSodium: 80mgPotassium: 50mgSugar: 10gVitamin A: 200IUCalcium: 10mgIron: 0.5mg

Notes

For uniform sizes, use a 1½-inch scooper for the best results. Store in an airtight container at room temperature for up to 4 days.

Tried this recipe?

Let us know how it was!

Pistachio and Blackberry Olive Oil Cake: A Sweet Surprise

April 3, 2026 by Grace Snow Leave a Comment

While wandering through a charming little farmers' market, the vibrant colors of fresh blackberries caught my eye, igniting a spark of inspiration. It’s amazing how a simple fruit can elevate a dish to new heights! That’s how I stumbled upon the idea for my Pistachio and Blackberry Olive Oil Cake—a beautifully moist and indulgent dessert that harmoniously blends nutty pistachios with the sweet-tart zing of blackberries, all thanks to the magic of olive oil. The bonus? It’s not only a delightful centerpiece for any gathering but also a heartwarming comfort treat that’s easy to prepare and perfect for sharing. Whether you're a seasoned home chef or someone who simply loves creating cozy moments around the table, this cake is sure to impress. Curious about how to bring this stunning dessert to life in your own kitchen? Let’s dive in!

Why is this cake a must-try?

Unforgettable Flavor Combination: The blend of nutty pistachios and sweet-tart blackberries creates a taste that is both unique and delightful.

Moisture and Tenderness: Thanks to olive oil, this cake remains moist and tender, ensuring each bite melts in your mouth—just like our popular Chocolate Pudding Cake.

Easy to Make: With straightforward instructions, anyone can whip up this dessert, making it perfect for both novice bakers and seasoned chefs alike.

Versatility: Enjoy it as a charming dessert for gatherings or simply as a comforting indulgence at home. You could even serve it with a scoop of vanilla bean ice cream for an extra treat!

Visual Appeal: Its vibrant colors and inviting presentation will be the star of your dessert table, leaving guests amazed and asking for seconds.

Pistachio and Blackberry Olive Oil Cake Ingredients

For the Cake

  • Ground Pistachios – Adds a nutty flavor and crunchy texture; substitute with ground almonds for a different profile.
  • Sugar – Balances the tartness of blackberries; coconut sugar can be used for a lower glycemic option.
  • All-Purpose Flour – Provides structure to the cake; replace with a gluten-free flour blend for a gluten-free version.
  • Baking Powder – Helps the cake rise; ensure it's fresh for optimal fluffiness.
  • Salt – Enhances flavors and balances sweetness.
  • Milk (with vinegar/lemon juice) – Acts as a buttermilk substitute for moisture; use plant-based milk for a vegan option.
  • Olive Oil – Ensures moistness and adds a fruity undertone; extra virgin is recommended for the best flavor.
  • Vanilla Extract – Adds warmth and enhances overall flavor.
  • Almond Extract – Complements the pistachios; it can be omitted if desired.
  • Blackberry Preserves – Provides sweetness and fruity flavor; can substitute with raspberry preserves.

For the Frosting

  • Butter – Adds richness; vegan butter can be substituted for a dairy-free version.
  • Powdered Sugar – Provides sweetness and a smooth texture in the frosting.
  • Dried Thyme – Adds a subtle herbal note; optional, or use rosemary for a twist.

This delightful Pistachio and Blackberry Olive Oil Cake is a perfect showcase of flavors and textures, making it an instant favorite for gatherings or a sweet weeknight treat!

Step‑by‑Step Instructions for Pistachio and Blackberry Olive Oil Cake

Step 1: Preheat and Prepare Pans
Begin by preheating your oven to 350°F (175°C). While waiting for it to reach temperature, grease two 6- or 7-inch round cake pans with butter or non-stick spray, then lightly dust them with flour. This method ensures your Pistachio and Blackberry Olive Oil Cake releases easily after baking and maintains its beautiful shape.

Step 2: Create Buttermilk
In a small bowl, combine milk with vinegar or lemon juice and allow it to sit for about 5 minutes. This quick process will transform your milk into homemade buttermilk, which imparts moisture and tenderness to the cake. Look for a slightly thickened texture and a tangy aroma before moving on to the next step.

Step 3: Grind Pistachios and Sugar
Using a food processor, pulse the ground pistachios and sugar together until finely ground and well combined, about 30 seconds. This mixture forms the flavorful base of your Pistachio and Blackberry Olive Oil Cake. Make sure to stop and scrape down the sides as needed to achieve an even consistency that will blend seamlessly with your other ingredients.

Step 4: Whisk Dry Ingredients
In a large bowl, whisk together the all-purpose flour, baking powder, and salt until thoroughly combined. This step is essential for ensuring that the leavening agent is evenly distributed, providing the perfect lift for your cake. A light dusting of flour will enhance the cake's texture, ensuring each bite is as delightful as the last.

Step 5: Combine Wet Ingredients
In another mixing bowl, whisk the buttermilk mixture with olive oil, vanilla extract, and almond extract (if using). Blend together until smooth and well mixed, which takes about 1 minute. The olive oil adds moistness while enhancing the flavors, creating a rich foundation for your Pistachio and Blackberry Olive Oil Cake's delectable layers.

Step 6: Combine Wet and Dry Ingredients
Gently fold the wet ingredients into the dry ingredients using a rubber spatula until just incorporated. Avoid overmixing; it’s perfectly fine if a few lumps remain. This technique helps maintain a light and airy texture in your cake. Watching the batter come together is the fun part, as it transforms into a smooth, colorful mix featuring the nutty pistachios.

Step 7: Bake the Cake Layers
Carefully divide the batter evenly between the prepared pans, aiming for approximately 425 grams per pan. Transfer them into the preheated oven and bake for 25-30 minutes. Keep an eye on them and perform the toothpick test; when a toothpick comes out clean, your Pistachio and Blackberry Olive Oil Cake is ready to be removed from the oven.

Step 8: Cool Cakes Properly
Once baked, remove the cakes from the oven and allow them to cool in their pans for about 10 minutes. Carefully run a knife around the edges to loosen them, then turn them out onto a wire rack to cool completely. For the best flavor development, wrap them and refrigerate overnight before frosting.

Step 9: Prepare the Frosting
In a mixing bowl, beat softened butter with blackberry preserves until creamy. Gradually add in powdered sugar, vanilla extract, and dried thyme if desired, whipping the mixture until fluffy and light. This delicious frosting will provide a sweet contrast to the nuttiness of the Pistachio and Blackberry Olive Oil Cake, tying the flavors together beautifully.

Step 10: Assemble and Frost the Cake
If necessary, use a serrated knife to level the top of each cake layer for even stacking. Spread a layer of frosting between the cooled cake layers and top with more frosting. Dip into your artistic side by garnishing with fresh blackberries and chopped pistachios, creating a stunning presentation that truly showcases your Pistachio and Blackberry Olive Oil Cake masterpiece.

Make Ahead Options

These Pistachio and Blackberry Olive Oil Cakes are perfect for busy home cooks looking to save time! You can prepare the cake layers up to 24 hours in advance; simply bake, cool, and wrap them tightly in plastic wrap before refrigerating. The flavors will deepen overnight, enhancing the cake's moisture. Additionally, feel free to whip up the frosting ahead of time and store it in an airtight container in the fridge for up to 3 days. When you're ready to serve, just frost the chilled cake layers and garnish with fresh blackberries and chopped pistachios for a stunning presentation. With these make-ahead tips, you'll enjoy effortless serving while still delighting your loved ones with the deliciousness of this Pistachio and Blackberry Olive Oil Cake!

Pistachio and Blackberry Olive Oil Cake Variations

Feel free to let your creativity shine as you personalize this delightful cake with different ingredients and flavors that cater to your taste buds!

  • Nut-Free: Swap ground pistachios for sunflower seed flour to create a nut-free version. This will still yield a delightful and fluffy cake.

  • Vegan Delight: Use a plant-based milk and replace butter with coconut cream in the frosting for a vegan adaptation. Your cake will remain rich and satisfying!

  • Bold Citrus Twist: Add 1 tablespoon of lemon or orange zest in your batter for a zesty pop. This addition brightens the flavors and adds an extra layer of freshness.

  • Berry Fusion: Try using strawberry preserves instead of blackberry for a sweet twist, or even mix a few types of berries like raspberries and blueberries for a beautiful medley.

  • Herbaceous Infusion: Enhance your frosting with a handful of finely chopped fresh basil or mint for an herbal kick. This unexpected combination will surprise and wow your guests!

  • Layered Indulgence: Create mini layer cakes by using small cake pans, icing each layer with frosting and fresh fruits. They’ll make charming individual desserts!

  • Spicy Kick: Add a pinch of cayenne or chili powder to your batter for a surprising hint of heat. The combination of spice with sweet blackberries will offer a unique flavor experience!

For a delicious complement, consider serving this cake with glazed fruit or alongside our popular Ice Cream Cake for an impressive dessert spread.

Expert Tips for Pistachio and Blackberry Olive Oil Cake

  • Chill for Flavor: Allow your cake layers to cool and chill overnight. This step enhances flavors and ensures a moist texture in your Pistachio and Blackberry Olive Oil Cake.
  • Mix with Care: Be gentle when combining wet and dry ingredients to avoid overmixing, which can lead to a dense cake. A few lumps are perfectly fine!
  • Level with Precision: Use a serrated knife to level the tops of the baked cake layers. This ensures an even stack and creates a beautiful finished product.
  • Room Temperature Butter: For the best frosting texture, make sure your butter is at room temperature before whipping. This will give your frosting a fluffy consistency.
  • Flavor Variations: Don’t hesitate to experiment by adding citrus zest or different fruit preserves. This can customize your Pistachio and Blackberry Olive Oil Cake to your taste!

What to Serve with Pistachio and Blackberry Olive Oil Cake

Elevate your dessert experience by pairing this charming cake with complementary delights that enhance its delightful flavors.

  • Whipped Cream: A dollop of lightly sweetened whipped cream adds a creamy, airy contrast to the cake's crumb, enhancing the overall indulgence.

  • Vanilla Bean Ice Cream: The rich, smooth texture of vanilla bean ice cream beautifully balances the nutty richness of the cake, making every bite feel luxurious.

  • Fresh Berry Salad: A vibrant mix of seasonal berries brings a refreshing tartness that harmonizes with the sweet-tart blackberry frosting, creating a refreshing burst of flavor.

  • Coffee or Espresso: The robust notes of coffee or espresso elevate the cake's flavors, creating a perfect pairing that warms the soul and invites lingering after-dinner conversations.

  • Lemon Zest Drizzle: A simple drizzle of lemon zest-infused glaze can brighten the cake, bringing a zesty kick that complements the sweetness of the blackberries.

  • Toasted Nuts: Sprinkle some toasted pistachios on top to accentuate the nutty flavor in the cake while adding delightful crunch and texture.

  • Dark Chocolate Shavings: For chocolate lovers, a scattering of dark chocolate shavings on the frosting enhances decadence, creating a luxurious finish to your dessert presentation.

  • Herbal Tea: Pairing a warm herbal tea can cleanse the palate after indulgence, highlighting the cake's subtle herbal notes—from thyme to rosemary—that may linger in the taste.

How to Store and Freeze Pistachio and Blackberry Olive Oil Cake

Fridge: Store leftover cake covered in plastic wrap or an airtight container in the fridge for up to 4 days to maintain freshness and flavor.

Freezer: Freeze cake layers by wrapping them individually in plastic wrap, then placing in a freezer-safe bag for up to 2 months. Thaw overnight in the fridge before serving.

Reheating: If desired, warm slices in the microwave for 10-15 seconds to enhance the aroma and moistness of your Pistachio and Blackberry Olive Oil Cake.

Frosting Storage: Store any leftover frosting in the fridge in an airtight container for up to 5 days. Rewhip before using for the best texture.

Pistachio and Blackberry Olive Oil Cake Recipe FAQs

What is the best way to select ripe blackberries for this recipe?
Absolutely! Look for blackberries that are plump, shiny, and deep purple or black in color. Avoid any that have dark spots all over or appear mushy. Fresh, ripe blackberries will provide that delightful tartness that complements your Pistachio and Blackberry Olive Oil Cake perfectly.

How should I store the leftover cake?
To maintain freshness, store your leftover Pistachio and Blackberry Olive Oil Cake covered in plastic wrap or an airtight container in the fridge for up to 4 days. This method keeps it moist and preserves its vibrant flavor, so you can enjoy a slice whenever the craving strikes!

Can I freeze the cake layers for later use?
Yes, you can! Wrap each cooled cake layer individually in plastic wrap, then place them in a freezer-safe bag for up to 2 months. When you're ready to enjoy, thaw the layers overnight in the fridge. For an extra treat, warm the slices in the microwave for 10-15 seconds to enhance their aroma and moisture!

What should I do if my cake sinks in the middle?
If your Pistachio and Blackberry Olive Oil Cake sinks in the middle, it may be due to overmixing or not baking long enough. To prevent this, take care when combining wet and dry ingredients—mix just until combined, and check for doneness with a toothpick by inserting it in the center. When it comes out clean, your cake is ready!

Is this cake suitable for those with nut allergies?
Unfortunately, this cake contains pistachios and almond extract, making it unsuitable for individuals with nut allergies. However, you can create a nut-free version by substituting ground sunflower seeds for the pistachios and omitting the almond extract. Just remember that this will alter the cake's flavor and texture slightly.

What can I use instead of olive oil in this recipe?
While olive oil is key for moistness and its pleasant flavor, you can substitute it with a light vegetable oil or melted coconut oil if preferred. Make sure to use a neutral flavor oil to keep the cake's intended taste profile intact.

Pistachio and Blackberry Olive Oil Cake

Pistachio and Blackberry Olive Oil Cake: A Sweet Surprise

This Pistachio and Blackberry Olive Oil Cake combines nutty pistachios with sweet-tart blackberries for an unforgettable dessert experience.
Print Recipe Pin Recipe
Prep Time 20 minutes mins
Cook Time 30 minutes mins
Cooling Time 10 minutes mins
Total Time 1 hour hr
Servings: 8 slices
Course: Dessert
Cuisine: American
Calories: 320
Ingredients Equipment Method Nutrition Notes

Ingredients
  

For the Cake
  • 1 cup Ground Pistachios Substitute with ground almonds for a different profile.
  • 1 cup Sugar Coconut sugar can be used for a lower glycemic option.
  • 1 cup All-Purpose Flour Replace with a gluten-free flour blend for a gluten-free version.
  • 1 tbsp Baking Powder Ensure it's fresh for optimal fluffiness.
  • 1/2 tsp Salt Enhances flavors and balances sweetness.
  • 1 cup Milk Achieve buttermilk consistency with vinegar or lemon juice.
  • 1/2 cup Olive Oil Extra virgin is recommended for the best flavor.
  • 1 tsp Vanilla Extract Enhances overall flavor.
  • 1/2 tsp Almond Extract Can be omitted if desired.
  • 1/4 cup Blackberry Preserves Can substitute with raspberry preserves.
For the Frosting
  • 1/2 cup Butter Vegan butter can be substituted for a dairy-free version.
  • 2 cups Powdered Sugar
  • 1 tsp Dried Thyme Optional, or use rosemary for a twist.

Equipment

  • Oven
  • Mixing bowls
  • Food Processor
  • rubber spatula
  • Cake Pans
  • wire rack

Method
 

Step-by-Step Instructions
  1. Preheat your oven to 350°F (175°C) and prepare two cake pans by greasing them and lightly dusting with flour.
  2. Combine milk with vinegar or lemon juice in a small bowl and let sit for 5 minutes to create buttermilk.
  3. In a food processor, pulse ground pistachios and sugar together until finely ground, about 30 seconds.
  4. Whisk together all-purpose flour, baking powder, and salt in a large bowl.
  5. In another bowl, whisk the buttermilk mixture with olive oil, vanilla extract, and almond extract until smooth.
  6. Gently fold the wet ingredients into the dry ingredients until just incorporated.
  7. Divide the batter evenly between the prepared pans and bake for 25-30 minutes, performing the toothpick test for doneness.
  8. Remove the cakes from the oven and allow to cool in the pans for 10 minutes before transferring to a wire rack.
  9. In a mixing bowl, beat softened butter with blackberry preserves, then gradually add powdered sugar and thyme until fluffy.
  10. Level the tops of the cake layers if necessary, frost in between layers and on top, and garnish with blackberries and pistachios.

Nutrition

Serving: 1sliceCalories: 320kcalCarbohydrates: 45gProtein: 4gFat: 14gSaturated Fat: 5gPolyunsaturated Fat: 2gMonounsaturated Fat: 6gCholesterol: 20mgSodium: 200mgPotassium: 180mgFiber: 2gSugar: 20gVitamin A: 300IUVitamin C: 5mgCalcium: 80mgIron: 1mg

Notes

Allow cake layers to cool and chill overnight for better flavor. Be gentle with the batter to avoid dense texture.

Tried this recipe?

Let us know how it was!

Valentine Ganache Cookies: Sweet Indulgence for Loved Ones

April 3, 2026 by Grace Snow Leave a Comment

As the sweet aroma of chocolate cookies wafts through my kitchen, I'm reminded of those cherished moments when I first started baking for loved ones. These Valentine Ganache Cookies offer a delightful twist in both flavor and appearance, featuring soft, fudgy chocolate and a playful pink raspberry dough. Not only are they easy to make, but they’re also a customizable treat that’s perfect for any romantic occasion or cozy gathering. Each cookie is a treasure, filled with creamy ganache that promises to steal hearts with every bite. So, are you ready to indulge in this delightful dessert that combines creativity with a sprinkle of love?

Why Will You Adore These Cookies?

Decadent Flavor: These Valentine Ganache Cookies combine rich chocolate and vibrant raspberry, creating a flavor explosion that’s incredibly satisfying. Customizable Delight: You can easily tailor the colors and fillings for any occasion, keeping your treats unique and fun! Effortless Baking: With straightforward steps and minimal fuss, you’ll be whipping these up in no time. Crowd Pleaser: Perfect for sharing, these cookies are sure to impress your loved ones—whether it’s a romantic dinner or a cozy family gathering. Gorgeous Presentation: Their stunning hues and elegant ganache filling make them a feast for the eyes—just like a classic Thumbprint Cookie but with a delightful twist!

Valentine Ganache Cookies Ingredients

For the Chocolate Cookie Dough

  • Unsalted Butter – Provides richness and moisture; can substitute with margarine for dairy-free.
  • Granulated Sugar – Adds sweetness and moisture; no substitutions recommended for sugar content.
  • Brown Sugar – Enhances chewiness and adds a caramel note.
  • Egg – Binds ingredients and adds moisture; a flax egg can be used as a vegan alternative.
  • Vanilla Extract – Adds depth of flavor; use pure vanilla for the best taste.
  • All-Purpose Flour – Provides structure; can substitute with gluten-free flour blend.
  • Unsweetened Cocoa Powder – Offers chocolate flavor and color; Dutch-processed cocoa for a milder taste.
  • Baking Soda – A leavening agent to help cookies rise.
  • Salt – Enhances flavor; essential in all baked goods.
  • Espresso Powder – Optional; amplifies the chocolate flavor in these Valentine Ganache Cookies.

For the Pink/Raspberry Cookie Dough

  • Unsalted Butter – Rich base similar to the chocolate dough for a delicious experience.
  • Granulated Sugar – Sweetness without the flavor variations; perfect for balancing flavors.
  • Brown Sugar – Ensures a soft texture that melts in your mouth.
  • Egg – For binding and moisture; helps the dough hold together.
  • Vanilla Extract – Flavor enhancer; use pure for the best outcome.
  • All-Purpose Flour – Structure-building ingredient; vital for cookie consistency.
  • Baking Soda – Provides the right texture and rise for your cookies.
  • Freeze-dried Raspberry Powder or Pink Food Coloring – Imparts both flavor and color; cocoa powder could substitute for a chocolate-raspberry combo.

For the Ganache Filling

  • Heavy Cream – The rich base for ganache that creates a smooth mouthfeel.
  • Dark or White Chocolate Chips – Provides smooth sweetness; chocolate bars can be used if chopped finely.
  • Butter – Optional; makes ganache silkier and richer.

For the Toppings (Optional)

  • Freeze-dried Raspberries – Adds crunch and color to your cookies.
  • Chocolate Squares – Decorative and flavorful, enhancing visual appeal.
  • Heart Sprinkles – A festive touch that adds charm.
  • Melted White Chocolate – For drizzling elegance and extra sweetness on top.

Step‑by‑Step Instructions for Valentine Ganache Cookies

Step 1: Prepare the Doughs
Start by creaming together 1 cup of unsalted butter and the sugars in separate bowls for the chocolate and pink raspberry doughs. Beat in an egg and a splash of pure vanilla extract to each mixture. Gradually mix in the dry ingredients specific to each flavor. Once combined, chill both doughs in the refrigerator for 30 minutes to firm them up, making them easier to handle.

Step 2: Form Cookies
Preheat your oven to 350°F (175°C) while you scoop the chilled dough into uniform balls—about one tablespoon each. Place the balls on a parchment-lined baking sheet, remembering to create a small indentation in the center of each to hold the ganache later. Bake for 10-12 minutes until the edges are set and the tops look slightly puffy. After baking, re-press the centers gently to maintain the indentation.

Step 3: Make the Ganache
In a small saucepan, heat ½ cup of heavy cream over medium heat until it simmers gently. Remove from heat and pour the hot cream over 1 cup of chopped dark or white chocolate chips in a mixing bowl. Let it sit for a minute, then stir until smooth and glossy. This filling will be rich and delicious, perfectly complementing your Valentine Ganache Cookies.

Step 4: Fill and Decorate
Ensure the cookies have cooled completely on a wire rack before filling them with ganache. Use a spoon or piping bag to fill each center with a generous amount of ganache. After filling, feel free to get creative by decorating your cookies with toppings such as freeze-dried raspberries, heart sprinkles, or a drizzle of melted white chocolate for that extra festive flair.

Step 5: Set and Serve
Let the ganache set at room temperature, or chill the cookies for a few minutes to firm up the filling. This will ensure the ganache stays in place when you handle them. Once set, your Valentine Ganache Cookies are ready to be served, spreading joy and sweetness at any occasion. They’re perfect for sharing or savoring all to yourself!

Valentine Ganache Cookies Variations

Feel free to get creative and adapt your Valentine Ganache Cookies to suit your taste buds and special occasions!

  • Nut-Free: Use sunbutter or pumpkin seed butter in place of nut-based spreads for a nut-free delight. These alternatives will keep your cookies deliciously creamy, without any nutty flavor.

  • Gluten-Free: Swap all-purpose flour with a 1:1 gluten-free flour blend for a gluten-free version. Your cookies will still maintain that soft and chewy goodness everyone loves!

  • Dairy-Free: Replace butter with coconut oil and use dairy-free chocolate for a luscious dairy-free option. The subtle coconut flavor adds an intriguing twist to the overall taste.

  • Extra Zing: Add a teaspoon of orange zest to the pink raspberry dough for a citrus boost. This bright note enhances the berry flavor beautifully—just like a delightful sunny day!

  • Flavor Variations: Experiment with flavored extracts like almond or coconut instead of vanilla. Each extract brings its unique flair, making these cookies a personal reflection of your tastes.

  • Berry Bonanza: Fold fresh raspberries or diced strawberries into the pink dough for an explosion of fruitiness. The juicy berries add a fun burst of flavor and a lovely homey feel.

  • Decadent Drizzle: Top with a rich chocolate or white chocolate drizzle after the ganache has set. It adds a stunning visual element and an extra sweetness—perfect for those who love a little indulgence.

  • Crushed Cookie Garnish: Crumble up your leftover cookie pieces as a whimsical topping on the ganache. It adds texture and a delightful mini crunch to each bite, reminiscent of classic Thumbprint Cookies Melt.

Let your imagination soar with these delightful variations, and enjoy creating your perfect batch of Valentine Ganache Cookies!

Expert Tips for Valentine Ganache Cookies

  • Quality Ingredients: Use high-quality chocolate for the ganache, as it truly makes a difference in flavor and richness in your Valentine Ganache Cookies.

  • Chill Doughs: Don’t skip the chilling step! Allowing the doughs to chill for 30 minutes makes them easier to work with and helps in achieving the perfect chewy texture.

  • Indentation Technique: Create a deep enough indentation in the cookie centers to hold the ganache, ensuring each bite is filled with smooth goodness.

  • Cooling Time: Allow cookies to cool completely before filling to prevent the warm ganache from melting and running out, keeping your Valentine Ganache Cookies beautifully presented.

  • Customize Flavors: Experiment with different flavored extracts in the dough, like almond or peppermint, for a unique twist tailored to your and your loved ones’ tastes!

How to Store and Freeze Valentine Ganache Cookies

Room Temperature: Keep your Valentine Ganache Cookies in an airtight container for up to 3 days at room temperature. This keeps them soft and fresh for indulging later.

Fridge: If you'd like to extend their life, store them in the fridge for up to one week. Make sure they’re in a sealed container to prevent them from absorbing odors.

Freezer: For longer storage, freeze the cookies in a single layer on a baking sheet. Once frozen, transfer them to an airtight container, where they can last up to 3 months while retaining their deliciousness.

Reheating: To enjoy warm cookies again, simply microwave them for about 10-15 seconds. This will gently warm them, bringing back that melt-in-your-mouth experience!

What to Serve with Valentine Ganache Cookies

The perfect indulgence for a sweet occasion, these cookies invite delightful pairings that enhance every bite.

  • Creamy Hot Chocolate: A classic pairing that brings warmth and richness, complementing the cookies' flavors beautifully.

  • Fresh Berries: The tartness of strawberries or raspberries works well against the sweet, chocolatey goodness of the cookies, adding a refreshing touch.

  • Vanilla Ice Cream: The creamy texture and cool temperature make this a delightful contrast, enhancing the indulgence with each spoonful.

  • Specialty Coffee: A smooth espresso or cappuccino elevates your dessert experience, offering a delightful balance of flavors.

  • Sweet Wine: A glass of rosé or sweet dessert wine pairs surprisingly well, enhancing the fruity notes of the raspberry cookie dough.

  • Chocolate-Covered Strawberries: For a touch of elegance, these not only echo the flavors but also create a romantic presentation that's perfect for the occasion.

  • Decorative Dessert Platter: Arrange your cookies with assorted chocolates, truffles, and colorful sprinkles for a whimsical and inviting display sure to impress guests.

  • Warm Apple Crisp: The comforting flavors of warm spiced apples create a delicious contrast, suggesting a cozy gathering atmosphere while enjoying.

Make Ahead Options

These Valentine Ganache Cookies are ideal for meal prep, allowing you to enjoy the sweet moments without the stress! You can prepare both cookie doughs up to 24 hours in advance by mixing and chilling them in your fridge (this helps maintain freshness). The ganache filling can also be made ahead and stored in an airtight container for up to 3 days—just reheat gently if it becomes too firm. When you’re ready to bake, scoop, form the cookie shapes, and bake as directed. Filling them with ganache and decorating right before serving ensures that every bite is just as delightful as when first made, making these cookies a surefire hit!

Valentine Ganache Cookies Recipe FAQs

What type of chocolate should I use for the ganache?
Absolutely! Using high-quality chocolate—either dark or white—makes a significant difference in your ganache's richness and flavor. For the best results, opt for chocolate with at least 60% cocoa content if you’re using dark chocolate, as it will provide a more robust flavor.

How do I know when my cookies are done baking?
Very! Your cookies are baked perfectly when the edges are set and the tops appear slightly puffy. They will firm up as they cool on the baking sheet. Remember to create the indentation for the ganache center while they’re still warm!

Can I store these cookies in the fridge?
Absolutely! You can store your Valentine Ganache Cookies in an airtight container in the fridge for up to 1 week. Just make sure the container is well-sealed to prevent them from absorbing any odors.

How do I freeze my Valentine Ganache Cookies?
The more the merrier! To freeze, place your cookies in a single layer on a baking sheet first to prevent sticking. Once they are solid (about 1-2 hours), transfer them to an airtight container. They will stay fresh for up to 3 months! Just remember to thaw them in the fridge before enjoying your sweet treats!

Can I replace the egg with a vegan alternative?
Very! You can absolutely use a flax egg as a substitute. To make one, combine 1 tablespoon of ground flaxseed with 3 tablespoons of water. Let it sit for about 5-10 minutes until it thickens. This will work well in both the chocolate and pink doughs!

Are these cookies safe for pets?
No, these Valentine Ganache Cookies contain chocolate, which is toxic to dogs and many other pets. Always keep these delicious treats out of reach of your furry friends to ensure their safety!

Valentine Ganache Cookies

Valentine Ganache Cookies: Sweet Indulgence for Loved Ones

Indulge in Valentine Ganache Cookies, a delightful treat combining rich chocolate, vibrant raspberry, and creamy ganache.
Print Recipe Pin Recipe
Prep Time 30 minutes mins
Cook Time 12 minutes mins
Chilling Time 30 minutes mins
Total Time 1 hour hr 12 minutes mins
Servings: 24 cookies
Course: Dessert
Cuisine: American
Calories: 150
Ingredients Equipment Method Nutrition Notes

Ingredients
  

For the Chocolate Cookie Dough
  • 1 cup unsalted butter Provides richness and moisture; can substitute with margarine for dairy-free.
  • 1 cup granulated sugar Adds sweetness and moisture; no substitutions recommended for sugar content.
  • 1/2 cup brown sugar Enhances chewiness and adds a caramel note.
  • 1 large egg Binds ingredients and adds moisture; a flax egg can be used as a vegan alternative.
  • 1 teaspoon vanilla extract Adds depth of flavor; use pure vanilla for the best taste.
  • 2 cups all-purpose flour Provides structure; can substitute with gluten-free flour blend.
  • 3/4 cup unsweetened cocoa powder Offers chocolate flavor and color; Dutch-processed cocoa for a milder taste.
  • 1 teaspoon baking soda A leavening agent to help cookies rise.
  • 1/2 teaspoon salt Enhances flavor; essential in all baked goods.
  • 1 teaspoon espresso powder Optional; amplifies the chocolate flavor.
For the Pink/Raspberry Cookie Dough
  • 1 cup unsalted butter Rich base similar to the chocolate dough for a delicious experience.
  • 3/4 cup granulated sugar Sweetness without flavor variations; perfect for balancing flavors.
  • 1/2 cup brown sugar Ensures a soft texture that melts in your mouth.
  • 1 large egg For binding and moisture; helps the dough hold together.
  • 1 teaspoon vanilla extract Flavor enhancer; use pure for the best outcome.
  • 2 cups all-purpose flour Structure-building ingredient; vital for cookie consistency.
  • 1 teaspoon baking soda Provides the right texture and rise.
  • 1/4 cup freeze-dried raspberry powder or pink food coloring Imparts both flavor and color.
For the Ganache Filling
  • 1/2 cup heavy cream The rich base for ganache that creates a smooth mouthfeel.
  • 1 cup dark or white chocolate chips Provides smooth sweetness; chocolate bars can be used if chopped finely.
  • 2 tablespoons butter Optional; makes ganache silkier and richer.
For the Toppings (Optional)
  • 1/4 cup freeze-dried raspberries Adds crunch and color.
  • 1/4 cup chocolate squares Decorative and flavorful.
  • 1/4 cup heart sprinkles A festive touch that adds charm.
  • 1/4 cup melted white chocolate For drizzling elegance and extra sweetness.

Equipment

  • Mixing bowls
  • Baking Sheet
  • Parchment Paper
  • Saucepan
  • wire rack
  • spoon or piping bag

Method
 

Step-by-Step Instructions for Valentine Ganache Cookies
  1. Start by creaming together 1 cup of unsalted butter and the sugars in separate bowls for the chocolate and pink raspberry doughs. Beat in an egg and a splash of pure vanilla extract to each mixture. Gradually mix in the dry ingredients specific to each flavor. Once combined, chill both doughs in the refrigerator for 30 minutes to firm them up, making them easier to handle.
  2. Preheat your oven to 350°F (175°C) while you scoop the chilled dough into uniform balls—about one tablespoon each. Place the balls on a parchment-lined baking sheet, remembering to create a small indentation in the center of each to hold the ganache later. Bake for 10-12 minutes until the edges are set and the tops look slightly puffy. After baking, re-press the centers gently to maintain the indentation.
  3. In a small saucepan, heat ½ cup of heavy cream over medium heat until it simmers gently. Remove from heat and pour the hot cream over 1 cup of chopped dark or white chocolate chips in a mixing bowl. Let it sit for a minute, then stir until smooth and glossy.
  4. Ensure the cookies have cooled completely on a wire rack before filling them with ganache. Use a spoon or piping bag to fill each center with a generous amount of ganache. After filling, feel free to get creative by decorating your cookies with toppings such as freeze-dried raspberries, heart sprinkles, or a drizzle of melted white chocolate.
  5. Let the ganache set at room temperature, or chill the cookies for a few minutes to firm up the filling. Once set, your Valentine Ganache Cookies are ready to be served.

Nutrition

Serving: 1cookieCalories: 150kcalCarbohydrates: 18gProtein: 2gFat: 8gSaturated Fat: 5gPolyunsaturated Fat: 0.5gMonounsaturated Fat: 1.5gCholesterol: 20mgSodium: 80mgPotassium: 50mgFiber: 1gSugar: 10gVitamin A: 5IUCalcium: 30mgIron: 1mg

Notes

Allow cookies to cool completely before filling to prevent the warm ganache from melting and running out. Use high-quality chocolate for the ganache for the best flavor.

Tried this recipe?

Let us know how it was!

Delicious Puff Pastry Easter Nests for a Sweet Celebration

April 2, 2026 by Grace Snow Leave a Comment

Have you ever tasted a cookie so satisfying that it instantly lifts your spirits? These 4-Ingredient Crispy Chocolate Oat Cookies do just that. With only four simple ingredients, you can whip up a delightful treat that balances crunch and chewiness, all while being gluten-free and quick to prepare. Imagine your kitchen filled with the comforting aroma of baked oats and chocolate—a perfect pick-me-up during a busy day! Not only do these cookies cater to a health-conscious lifestyle, but they’re also incredibly versatile; feel free to experiment with different nut butters or even add a sprinkle of cinnamon for a unique twist. Ready to dive in and create your own batch of joy? Let’s get started!

Why are these cookies so special?

Simplicity: With just four ingredients, these cookies are perfect for busy bakers craving a homemade treat without the hassle.

Versatile: Feel free to switch up nut butters or add spices; the possibilities are endless!

Healthier Choice: Made with gluten-free oats and healthy fats, enjoy a guilt-free indulgence without compromising on taste.

Quick to Make: Whip them up in under 30 minutes, making them an ideal treat for spontaneous cravings.

Crowd-Pleasing: These cookies are guaranteed to impress everyone, whether you’re serving them at a gathering or enjoying them solo with a warm cup of tea!

4-Ingredient Crispy Chocolate Oat Cookie Ingredients

• Get ready to indulge your sweet tooth!

For the Cookies

  • Oats – They form a hearty base, giving the cookies their delightful crunch; make sure to use gluten-free oats if necessary.
  • Peanut Butter (or almond butter) – This creamy ingredient binds everything together and infuses a nutty flavor; swap it for sunflower seed butter for a nut-free treat!
  • Maple Syrup – It adds a touch of natural sweetness and moisture; for a non-vegan option, honey works well too, but be cautious with dietary preferences.
  • Dark Chocolate Chips – These little gems provide melty chocolate goodness; to keep the cookies vegan, choose dairy-free chocolate chips.

For Serving

  • Almond Milk – A chilled glass pairs beautifully with the cookies, enhancing the chocolate experience.
  • Coffee – A warm cup complements the sweetness, making for a perfect afternoon delight.

Step‑by‑Step Instructions for 4-Ingredient Crispy Chocolate Oat Cookies

Step 1: Preheat the Oven
Begin by preheating your oven to 350°F (175°C). This step is essential to ensure that your 4-Ingredient Crispy Chocolate Oat Cookies bake evenly and achieve that delightful golden-brown exterior. While the oven heats, gather your mixing bowl and baking sheet lined with parchment paper, setting the stage for cookie creation!

Step 2: Combine the Ingredients
In a large mixing bowl, add oats, peanut butter, and maple syrup. Stir the mixture vigorously until well-combined, making sure it has a sticky consistency but isn’t overly wet. You want it to hold its shape well when baked. Enjoy the satisfying texture as the ingredients come together, setting a sweet foundation for your cookies.

Step 3: Add the Chocolate Chips
Gently fold in the dark chocolate chips into the mixture, ensuring they are evenly distributed throughout. Be cautious not to overstir, as you want those delightful chocolate morsels to stay intact. This step infuses the cookies with luscious pockets of melted chocolate, enhancing the overall flavor of your delicious 4-Ingredient Crispy Chocolate Oat Cookies.

Step 4: Scoop and Shape the Cookies
Using a spoon or cookie scoop, portion out tablespoon-sized dollops of the mixture onto your prepared baking sheet. Make sure to leave space between each dollop, as the cookies will spread while baking. Admire how the chocolate chips peek through the oat mixture, making for an inviting appearance that’s just a hint of what’s to come.

Step 5: Bake to Perfection
Carefully place the baking sheet in the preheated oven and let them bake for 10-12 minutes. Watch closely for a lightly golden color around the edges, indicating the cookies are done. They will firm up as they cool, so keep an eye out to avoid overbaking. The delightful aroma of baked oats and chocolate will fill your kitchen!

Step 6: Cooling Time
Once baked, remove the cookies from the oven and allow them to cool on the baking sheet for a few minutes. This rest period is crucial as it helps them firm up and makes transferring easier. After cooling slightly, gently lift them onto a wire rack to cool completely, so they maintain that delightful crispy-chewy texture.

Step 7: Serve and Enjoy
Your 4-Ingredient Crispy Chocolate Oat Cookies are now ready to be enjoyed! Serve them alongside a cold glass of almond milk or a cozy cup of coffee for a perfect treat any time of day. Savor the rich flavors and the delightful crunch as these cookies surely bring a smile to your face.

Storage Tips for 4-Ingredient Crispy Chocolate Oat Cookies

Room Temperature: Store the cookies in an airtight container at room temperature for up to 1 week to keep them fresh and delicious.

Fridge: If you'd like to extend their shelf life, place the cookies in the fridge, where they’ll remain fresh for up to 2 weeks. Just bring them to room temperature before enjoying!

Freezer: For longer storage, freeze the cookies in a single layer in a freezer-safe container for up to 3 months. Thaw them at room temperature or warm them in the oven for a few minutes.

Reheating: To refresh the cookies, place them in a preheated oven at 350°F (175°C) for 5-7 minutes, restoring that lovely crispiness while enjoying the rich flavors of your 4-Ingredient Crispy Chocolate Oat Cookies!

What to Serve with 4-Ingredient Crispy Chocolate Oat Cookies

Imagine a cozy afternoon where the aroma of freshly baked cookies fills your kitchen, and you're searching for the perfect complements to elevate your sweet treat experience.

  • Almond Milk: A chilled glass enhances the rich chocolate flavor, balancing the sweetness and offering a refreshing sip with every bite.

  • Coffee: The warmth and bitterness of coffee pairs wonderfully with the sweetness of the cookies, making it a delightful afternoon pick-me-up.

  • Fresh Berries: Juicy strawberries or blueberries provide a fresh, tangy contrast to the rich cookies, adding a burst of color and flavor.

  • Coconut Whipped Cream: A dollop adds a creamy texture and tropical flair, perfect for those who crave a little indulgence alongside their cookies.

  • Vanilla Ice Cream: Serve your cookies warm with a scoop of creamy vanilla ice cream; the melting vanilla enhances the cookie's flavors beautifully.

  • Dark Chocolate Drizzle: A light drizzling of melted dark chocolate elevates the cookies to gourmet status, creating a decadent finish.

  • Nutty Granola: Crumble some nutty granola on top for an added crunchy texture, enhancing the oats and making every bite even more satisfying.

These pairing ideas not only complement your 4-Ingredient Crispy Chocolate Oat Cookies but also create a delightful spread that everyone will love!

Expert Tips for 4-Ingredient Crispy Chocolate Oat Cookies

Packed Oats: Make sure the oats are tightly packed in your measuring cup to achieve the perfect cookie texture.

Avoid Overbaking: Keep a close eye while baking; the cookies will continue to firm up after cooling. Remove them while they're slightly underbaked for a chewy center.

Chill Your Dough: If you prefer denser cookies, chilling the dough for about 15 minutes before baking can add to their texture and flavor.

Flavor Add-ins: For extra flair, consider adding a pinch of sea salt on top before baking or mixing in dried fruits like cranberries for a fun twist.

Watch the Baking Sheet: If you're using a darker baking tray, check the cookies a minute or two earlier as they may bake faster.

Storage Tips: To maintain their freshness, store the cookies in an airtight container at room temperature for up to a week. Enjoy your 4-Ingredient Crispy Chocolate Oat Cookies!

Make Ahead Options

These 4-Ingredient Crispy Chocolate Oat Cookies are perfect for meal prep, allowing you to savor delicious homemade treats even on the busiest days! You can prepare the cookie mixture up to 24 hours in advance by combining the oats, peanut butter, and maple syrup, then refrigerating it in an airtight container to maintain freshness. It's best to fold in the dark chocolate chips just before baking to keep them intact and melty. When you're ready to bake, simply scoop the chilled mixture onto a parchment-lined baking sheet and pop them into the oven, enjoying freshly baked cookies with minimal effort. With this strategy, you'll always have a delectable dessert ready to go!

Variations & Substitutions for 4-Ingredient Crispy Chocolate Oat Cookies

Feel free to let your creativity shine by customizing these delightful cookies with exciting twists and substitutions!

  • Nut-Free: Swap peanut butter for sunflower seed butter to create a nut-free delight suitable for school lunches and gatherings.
  • Sweetener Options: Replace maple syrup with agave or honey for a different natural sweetness; just keep in mind honey is not vegan!
  • Flavorful Spices: Add a dash of cinnamon or nutmeg to the cookie mix for a warm, comforting flavor you’ll love.
  • Fruity Addition: Toss in some dried fruits like cranberries or raisins to introduce a chewy texture and burst of sweetness.
  • Coconut Inspiration: Sprinkle shredded coconut into the mix for a tropical twist that will elevate the flavor and texture.
  • Texture Play: For richer crunch, consider folding in some chopped nuts or seeds like walnuts or pumpkin seeds for an extra layer of texture.
  • Chocolate Variants: Substitute dark chocolate chips with white chocolate or butterscotch chips for a unique sweetness that still melts perfectly.
  • Spicy Kick: If you like a bit of heat, try adding a pinch of cayenne pepper to the mixture for a surprising flavor boost contrast with the sweetness.

Remember, these cookies are a canvas; don’t hesitate to mix and match your favorite flavors! Whether you pair them with a refreshing glass of almond milk or enjoy them alongside a rich cup of coffee, your experiments will surely lead to delightful results!

4-Ingredient Crispy Chocolate Oat Cookies Recipe FAQs

What type of oats should I use for these cookies?
Absolutely! You can use rolled oats or quick oats to create your 4-Ingredient Crispy Chocolate Oat Cookies. If you're looking for a gluten-free option, be sure to choose gluten-free oats, which will provide the same delightful crunch without any gluten.

How should I store the cookies after baking?
To keep your cookies fresh, store them in an airtight container at room temperature for up to 1 week. If you want them to last longer, pop them in the fridge, where they’ll stay good for about 2 weeks. Just make sure to bring them back to room temperature before indulging!

Can I freeze the cookies, and if so, how?
Yes, you can! To freeze your 4-Ingredient Crispy Chocolate Oat Cookies, arrange them in a single layer on a baking sheet and freeze for about 1 to 2 hours until firm. Once they’ve hardened, transfer them to a freezer-safe container or zip-top bag, where they can last for up to 3 months. Thaw them at room temperature or warm them up in the oven for a few minutes when you’re ready to enjoy.

Why are my cookies too dry or crumbly?
If your cookies are turning out dry, make sure that your peanut butter is creamy and that you’re measuring out the oats properly—packing them too tightly can alter the texture. If you’d like chewier cookies, try mixing in a bit more maple syrup or peanut butter to add extra moisture!

Are these cookies suitable for kids or those with nut allergies?
Definitely! For a nut-free alternative, simply substitute peanut butter with sunflower seed butter. This change keeps the recipe delicious while making it safe for children or anyone with nut allergies. Just be cautious with gluten-free requirements and always check ingredient labels!

What other variations can I try?
Get creative! You can replace almond butter or include spices like cinnamon for a unique twist. Additionally, consider throwing in dried fruits like cranberries or raisins for an extra burst of flavor and texture in your 4-Ingredient Crispy Chocolate Oat Cookies!

Puff Pastry Easter Nests

Delicious Puff Pastry Easter Nests for a Sweet Celebration

Delight in these Puff Pastry Easter Nests, a perfect sweet treat for your celebration!
Print Recipe Pin Recipe
Prep Time 15 minutes mins
Cook Time 12 minutes mins
Cooling Time 5 minutes mins
Total Time 32 minutes mins
Servings: 12 cookies
Course: Dessert
Cuisine: American
Calories: 130
Ingredients Equipment Method Nutrition Notes

Ingredients
  

For the Cookies
  • 2 cups Gluten-Free Oats
  • 1 cup Peanut Butter or almond butter
  • 1/2 cup Maple Syrup or honey for non-vegan option
  • 1 cup Dark Chocolate Chips or dairy-free chocolate chips for vegan
For Serving
  • 1 glass Almond Milk
  • 1 cup Coffee

Equipment

  • Oven
  • Mixing Bowl
  • Baking Sheet
  • Parchment Paper

Method
 

Step-by-Step Instructions
  1. Preheat your oven to 350°F (175°C).
  2. In a large mixing bowl, add oats, peanut butter, and maple syrup. Stir until well-combined.
  3. Gently fold in the dark chocolate chips into the mixture.
  4. Scoop tablespoon-sized dollops of the mixture onto a prepared baking sheet.
  5. Bake for 10-12 minutes until lightly golden around the edges.
  6. Allow the cookies to cool on the baking sheet for a few minutes, then transfer to a wire rack.
  7. Serve alongside a glass of almond milk or a cup of coffee.

Nutrition

Serving: 1cookieCalories: 130kcalCarbohydrates: 18gProtein: 3gFat: 6gSaturated Fat: 1gPolyunsaturated Fat: 1gMonounsaturated Fat: 4gSodium: 60mgPotassium: 100mgFiber: 2gSugar: 5gCalcium: 20mgIron: 0.5mg

Notes

Cookies can be stored in an airtight container for up to a week, or in the fridge for two weeks.

Tried this recipe?

Let us know how it was!

Delicious Strawberry Shortbread Cookies for Any Celebration

March 31, 2026 by Grace Snow Leave a Comment

As I stood in my kitchen, the sweet aroma of freshly baked cookies wafted through the air, instantly transporting me to a sunny afternoon spent baking with loved ones. These Irresistible Strawberry Shortbread Cookies have quickly become my go-to dessert for any occasion. With their melt-in-your-mouth texture and delightful heart shape, they're not just a treat; they also bring joy to every gathering. Made with freeze-dried strawberries, they deliver a bold strawberry flavor without the unwanted moisture—perfect for impressing guests or simply indulging your sweet tooth. Plus, they come together in a flash, making them an ideal choice for unexpected visitors or holiday celebrations. Curious about how to create these delightful morsels? Let’s dive into the recipe!

Why Are These Cookies So Irresistible?

Easy to Make: The straightforward process means even beginner bakers can whip these up effortlessly.

Lush Strawberry Glaze: The glaze not only enhances appearance but also packs a flavor punch, making each bite even more delightful.

Versatile Flavor Options: Want to switch things up? Try variations like the Raspberry Swirl for a twist on this classic recipe.

Perfect for Gifting: Shaped like hearts, these cookies make lovely gifts for loved ones on special occasions.

Minimal Prep Time: They come together quickly, ideal for unexpectedly delightful moments or festive gatherings.

Whether you're indulging yourself or impressing guests, these cookies are guaranteed to be a hit!

Strawberry Shortbread Cookies Ingredients

For the Cookie Dough
• Salted Butter – This adds richness and softness; make sure it’s softened for easy mixing.
• Powdered Sugar – Contributes sweetness and a fine texture; you can use granulated sugar, but the texture will change.
• Freeze-Dried Strawberries – Essential for that intense strawberry flavor without moisture; a must for classic Strawberry Shortbread Cookies.
• Vanilla Extract – Enhances the overall flavor; opt for pure vanilla for the best taste.
• All-Purpose Flour – Forms the foundation of the cookie; be careful not to overmix to keep them tender.
• Milk – Adds moisture to the dough; substitute with non-dairy milk for a vegan option.

For the Glaze
• Additional Powdered Sugar – Needed for sweetness and the glaze's texture; adjust based on your desired consistency.
• Milk – Use to achieve a spreadable glaze; non-dairy alternatives can also work well.
• Vanilla Extract – Adds extra flavor to the glaze; pair with the cookie for harmonious taste.
• Freeze-Dried Strawberries – For a punch of color and flavor in your glaze; reserve some from the dough preparation.

These delightful ingredients come together to create a cookie that not only tastes fantastic but looks beautiful too!

Step‑by‑Step Instructions for Irresistible Strawberry Shortbread Heart Cookies

Step 1: Prepare Strawberry Powder
Begin by processing the freeze-dried strawberries in a blender or food processor until they become mostly powdered, leaving some larger pieces for the glaze. This strawberry powder will be the key to infusing your Strawberry Shortbread Cookies with intense flavor while keeping the dough light and airy. Set aside the powder for the cookie dough and the reserved pieces for the glaze.

Step 2: Cream Butter and Sugar
In a large mixing bowl, combine the softened salted butter and powdered sugar. Using an electric mixer, beat on medium speed until the mixture is smooth and creamy, which should take about 2-3 minutes. Be careful not to incorporate too much air, as you want a dense, buttery dough for your heart-shaped cookies.

Step 3: Flavor Dough
Add in the vanilla extract and milk, followed by the prepared strawberry powder. Mix gently until all ingredients are well combined, which will create a beautiful, fragrant dough full of strawberry essence. Ensure there are no dry patches of flour—your dough should be cohesive and ready for the next step.

Step 4: Rest Dough
Shape the dough into a disk and wrap it tightly in plastic wrap. Refrigerate for about 15 minutes to help firm it up, enabling better handling and sharper edges when you cut your heart shapes. This brief chilling period is essential for perfect Strawberry Shortbread Heart Cookies.

Step 5: Roll and Cut
Once the dough is chilled, lightly flour your work surface and roll it out to about 1/4 inch thickness. Use a heart-shaped cookie cutter to cut out your cookies, then carefully transfer them to parchment-lined baking sheets, ensuring they are evenly spaced. These shapes will bake beautifully, maintaining their form while baking.

Step 6: Bake
Preheat your oven to 325°F (160°C) and bake the cookies for 13-15 minutes or until they’re just set, with pale edges and a slight golden hue. Keep a close eye during the last few minutes to avoid overbaking. Your irresistible Strawberry Shortbread Cookies should look delicate and inviting once finished!

Step 7: Glaze
While the cookies cool completely, prepare the glaze by mixing the additional powdered sugar, milk, vanilla extract, and reserved strawberry pieces in a bowl. Adjust the milk amount until the glaze reaches a spreadable consistency. Once your cookies are cool, generously spread the glaze over the tops, allowing them to drip and set, creating a delightful, glossy finish.

What to Serve with Irresistible Strawberry Shortbread Heart Cookies

With a crisp, buttery bite and a glossy strawberry glaze, your heart-shaped delights will shine like stars at your next gathering.

  • Whipped Cream: A dollop of airy whipped cream adds a light, fluffy texture that complements the cookies’ buttery richness.

  • Fresh Strawberries: Serve alongside sliced strawberries to amplify their sweet, fruity flavor; freshness adds a perfect contrast.

  • Vanilla Ice Cream: The creamy coldness of vanilla ice cream pairs beautifully, creating a delightful melt-in-your-mouth experience with every bite.

  • Rosemary Citrus Spritzer: This refreshing drink, balancing aromatic rosemary with zesty citrus, enhances the cookie’s flavor without overpowering it.

  • Chocolate Dipping Sauce: A warm chocolate sauce provides a decadent touch, inviting everyone to dip their cookies for added lusciousness.

  • Milk: Classic and comforting, a glass of milk perfectly balances the sweetness and offers a nostalgic touch to your dessert experience.

  • Tea or Herbal Infusions: A fragrant cup of chamomile or Earl Grey elevates the experience, making it a lovely pairing for afternoon tea gatherings.

  • Coconut Cream: For a tropical twist, serve a scoop of coconut cream—the creaminess contrasts beautifully with the fruit flavor in the cookies.

Storage Tips for Strawberry Shortbread Cookies

  • Room Temperature: Store the cookies in an airtight container at room temperature for up to 1 week to maintain their delightful texture and flavor.

  • Fridge: If your kitchen tends to be warm, you can refrigerate the cookies for an extended freshness; they’ll last up to 2 weeks but may lose some crispness.

  • Freezer: These Strawberry Shortbread Cookies can be frozen for up to 3 months! Layer them with parchment paper in an airtight container to prevent sticking.

  • Reheating: To enjoy them warm, pop the cookies in a preheated oven at 300°F for about 5-10 minutes. This helps restore that perfect, fresh-baked taste!

Strawberry Shortbread Cookies Variations

Feel free to let your creativity shine by adapting these cookies to match your taste preferences or dietary needs!

  • Raspberry Twist: Replace freeze-dried strawberries with raspberries for a deliciously tart treat that pairs beautifully with the sweet glaze.

  • Lemon Zest: Add a teaspoon of lemon zest to the dough for a bright and zesty flavor that complements the sweetness of the cookies.

  • Lavender Infusion: Incorporate a teaspoon of dried culinary lavender into the dough for a delightful floral note, transforming your cookies into an elegant treat.

  • Chocolate Drizzle: After glazing, drizzle melted dark chocolate over the cookies for an irresistible chocolate-covered twist that adds richness to your delightful hearts.

  • Vegan Version: Swap the butter for coconut oil and use non-dairy milk to create a vegan-friendly cookie without compromising flavor or texture.

  • Spicy Kick: Enhance the flavor profile by adding a pinch of cayenne or a sprinkle of cinnamon to the dough for a warm and spicy surprise in each bite.

  • Almond Extract: Substitute the vanilla extract for almond extract for a delicious nutty undertone that beautifully complements the fruity notes.

  • Chewy and Crunchy: Mix in a handful of chopped nuts, like walnuts or pecans, to add crunch and a delightful texture twist, making every bite even more satisfying.

For more variety, consider trying these delightful Raspberry Swirl cookies or the cheerful Peaches Cream Cookies, which can inspire you to create an exciting dessert selection! Enjoy experimenting!

Expert Tips for Strawberry Shortbread Cookies

  • Chill the Dough: Keep the dough chilled to prevent spreading and maintain those gorgeous heart shapes, ensuring your Strawberry Shortbread Cookies come out perfectly defined.

  • Don’t Overmix: Mix just until combined to avoid tough cookies; overmixing develops the gluten in flour, leading to a denser texture than desired.

  • Precision Baking: Monitor your cookies closely in the oven to avoid overbaking; they should remain pale with just lightly golden edges, ensuring they stay tender.

  • Parchment Paper: Always use parchment paper on your baking sheets to prevent sticking and distortion when transferring the cookies.

  • Alternate Flavors: Feel free to experiment with other freeze-dried fruits for a unique twist; try bananas or mangoes for a fun variation and to keep things exciting!

Make Ahead Options

These Strawberry Shortbread Cookies are perfect for busy home cooks looking to save time during the week! You can prepare the cookie dough up to 24 hours in advance by shaping it into a disk, wrapping it tightly in plastic wrap, and refrigerating it. This keeps the flavors fresh and the dough firm for easy cutting. Additionally, baked cookies can be stored in an airtight container at room temperature for up to one week—just remember to glaze them shortly before serving to maintain their delightful appearance. When you're ready to enjoy, simply bake the chilled dough as directed and add the glaze after cooling for irresistibly fresh and delicious cookies!

Strawberry Shortbread Cookies Recipe FAQs

What type of strawberries should I use for the best flavor?
Absolutely! For the strongest and most vibrant strawberry flavor in your cookies, it's recommended to use freeze-dried strawberries. They deliver an intense taste without adding moisture, allowing your Strawberry Shortbread Cookies to maintain that perfect tender texture.

How should I store my baked Strawberry Shortbread Cookies?
Store your delicious Strawberry Shortbread Cookies in an airtight container at room temperature for up to one week. If your home is warm, consider refrigerating them for up to two weeks, though this may slightly alter their crispness. Just bring them back to room temperature before serving for best results!

Can I freeze the Cookie Dough?
Certainly! Freezing the cookie dough is a fantastic way to enjoy freshly baked cookies any time you want. To do this, after preparing and shaping the cookie dough, wrap individual dough pieces tightly in plastic wrap or place them in a freezer-safe bag. They can be frozen for up to 3 months. When you're ready to bake, simply thaw the dough in the fridge overnight, then roll, cut, and bake as instructed!

What if my dough is too crumbly to roll out?
If you find your dough is too crumbly, don't worry! This can happen if the butter wasn't softened enough or if too much flour was added. To remedy this, add a teaspoon of milk at a time while mixing until the dough comes together. Alternatively, let it sit at room temperature for a few minutes to soften a little before attempting to roll it out again.

Are there any dietary restrictions I should know about?
Yes, if you're catering to dietary restrictions, these Strawberry Shortbread Cookies can easily be made vegan by substituting the salted butter with a dairy-free alternative and using non-dairy milk. Also, make sure your powdered sugar is free from bone char if you're strictly vegan. Always check product labels if allergies are a concern!

How long can I keep my Strawberry Shortbread Cookies in the freezer?
Perfect question! You can store your Strawberry Shortbread Cookies in the freezer for up to 3 months. Ensure they are layered with parchment paper in an airtight container to prevent sticking. When you're ready to enjoy, just thaw them in the fridge or at room temperature before serving. Enjoy the delightful taste of these cookies anytime!

Strawberry Shortbread Cookies

Delicious Strawberry Shortbread Cookies for Any Celebration

These irresistible Strawberry Shortbread Cookies are perfect for any celebration with their delightful heart shape and burst of strawberry flavor.
Print Recipe Pin Recipe
Prep Time 15 minutes mins
Cook Time 15 minutes mins
Chilling Time 15 minutes mins
Total Time 45 minutes mins
Servings: 24 cookies
Course: Dessert
Cuisine: American
Calories: 120
Ingredients Equipment Method Nutrition Notes

Ingredients
  

For the Cookie Dough
  • 1 cup Salted Butter softened
  • 3/4 cup Powdered Sugar
  • 1 cup Freeze-Dried Strawberries processed
  • 1 teaspoon Vanilla Extract preferably pure
  • 2 cups All-Purpose Flour use carefully
  • 2 tablespoons Milk or non-dairy substitute
For the Glaze
  • 1 cup Additional Powdered Sugar adjust for consistency
  • 2 tablespoons Milk or non-dairy alternative
  • 1 teaspoon Vanilla Extract
  • 1/2 cup Freeze-Dried Strawberries reserved for glaze

Equipment

  • Blender
  • Mixing Bowl
  • Electric mixer
  • Heart-Shaped Cookie Cutter
  • Baking Sheets

Method
 

Step‑by‑Step Instructions
  1. Prepare Strawberry Powder: Process the freeze-dried strawberries in a blender until mostly powdered, set aside for dough and glaze.
  2. Cream Butter and Sugar: In a mixing bowl, beat softened butter and powdered sugar until smooth and creamy.
  3. Flavor Dough: Add vanilla extract and milk, then mix in strawberry powder until combined.
  4. Rest Dough: Shape dough into a disk, wrap in plastic, and refrigerate for 15 minutes.
  5. Roll and Cut: Roll dough to 1/4 inch thick, cut shapes, and transfer to baking sheets.
  6. Bake: Preheat oven to 325°F and bake cookies for 13-15 minutes until just set.
  7. Glaze: Mix remaining ingredients for glaze and spread over cooled cookies.

Nutrition

Serving: 1cookieCalories: 120kcalCarbohydrates: 15gProtein: 1gFat: 7gSaturated Fat: 4gPolyunsaturated Fat: 0.5gMonounsaturated Fat: 2.5gCholesterol: 30mgSodium: 30mgPotassium: 20mgSugar: 6gVitamin A: 250IUCalcium: 10mgIron: 0.5mg

Notes

Store in an airtight container for up to 1 week at room temperature. Can be refrigerated for 2 weeks or frozen for 3 months.

Tried this recipe?

Let us know how it was!

Delicious Fresh Raspberry Cream Cookies Recipe to Swoon Over

March 31, 2026 by Grace Snow Leave a Comment

The first bite of these Delightfully Airy Fresh Raspberry Cream Cookies transported me to a sun-dappled picnic, where laughter mingles with the sweet aroma of spring blossoms. With their crisp cookie exterior and a heart of creamy, raspberry goodness, they serve not just as a dessert, but as a delightful experience perfect for any joyous celebration. Whipping up these cookies is a breeze—they’re quick to make and a wonderful centerpiece for gatherings like Mother’s Day or Valentine’s. Plus, the vibrant pop of fresh raspberries adds a touch of elegance that will impress your guests. Curious to see how to make these scrumptious treats that capture the spirit of the season? Let’s dive in!

Why Are These Cookies So Irresistible?

Simplicity at Its Best: You don’t need to be a master baker to whip these up. The straightforward process is perfect for anyone craving homemade goodness.

Bursting with Flavor: Fresh raspberries create a vibrant, tangy filling that complements the sweet cookie base beautifully.

Perfect Spring Treat: These cookies are ideal for festive occasions—think brunches and celebrations where fresh flavors shine.

Versatile Variations: Feeling adventurous? Swap in different berries or add lemon zest to customize your cookie experience, making every batch unique.

Crowd Pleaser: With their gorgeous presentation, these cookies are sure to wow your family and friends—check out our Thumbprint Cookies Melt for another delightful treat to impress!

Delicious Fresh Raspberry Cream Cookies Recipe

• Making these delightful cookies begins with a few simple ingredients.

For the Cookie Base

  • Unsalted Butter – Essential for richness; ensure it's at room temperature for easy creaming.
  • Powdered Sugar – Adds sweetness and ensures a smooth texture; do not substitute with granulated sugar.
  • All-Purpose Flour – Provides the structure of the cookies; can swap with gluten-free flour for a gluten-free option.
  • Almond Extract – Infuses a warm flavor depth; vanilla extract can work in its place but will alter the taste slightly.

For the Cream Filling

  • Heavy Cream – Creates a luscious filling; for best results, no substitutes are recommended.
  • Fresh Raspberries – Brings vibrant flavor and color; using frozen ones can lead to a softer filling but works in a pinch.

With these ingredients, you're all set to create your Delicious Fresh Raspberry Cream Cookies Recipe that’ll have your loved ones asking for seconds!

Step‑by‑Step Instructions for Delicious Fresh Raspberry Cream Cookies Recipe

Step 1: Prepare the Cookie Dough
Preheat your oven to 350°F (175°C) and line two baking sheets with parchment paper. In a large mixing bowl, cream together 1 cup of unsalted butter and 1 cup of powdered sugar with an electric mixer until the mixture is light and fluffy, about 3–4 minutes. Gradually add 2 cups of all-purpose flour and 1 teaspoon of almond extract, mixing until a soft, cohesive dough forms.

Step 2: Shape and Bake
Using a small cookie scoop or your hands, form small balls of dough (about 1 inch in diameter) and place them on the prepared baking sheets, spaced about 2 inches apart. Flatten each ball slightly with the bottom of a glass to create a thicker cookie. Bake in the preheated oven for 12–15 minutes or until the edges are lightly golden, then remove them and let cool completely on a wire rack.

Step 3: Make the Raspberry Cream Filling
While the cookies are cooling, prepare the creamy raspberry filling. In a clean mixing bowl, beat 1 cup of heavy cream and 1 cup of powdered sugar with an electric mixer until soft peaks form, about 4–5 minutes. Gently fold in ½ cup of mashed fresh raspberries, ensuring the filling retains a lovely pink color and fruity texture without overmixing.

Step 4: Assemble Cookies
Once the cookies have completely cooled, it’s time to assemble your Delicious Fresh Raspberry Cream Cookies. Take one cookie, spread a generous tablespoon of the raspberry cream filling on its flat side, and top it with another cookie to form a sandwich. Repeat this with the remaining cookies and filling, creating a delightful stack of treats ready to be enjoyed.

Make Ahead Options

These Delicious Fresh Raspberry Cream Cookies are perfect for meal prep, ensuring that your dessert game is strong even on the busiest of days! You can prepare the cookie base up to 24 hours in advance; simply bake the cookies, allow them to cool completely, and store them in an airtight container at room temperature. For the raspberry cream filling, you can make it up to 3 days in advance, refrigerating it in a sealed container to maintain its freshness and creamy texture. When you’re ready to serve, just assemble the cookies by spreading the filling between them—bringing a delightful homemade treat to your table with minimal effort and maximum flavor!

Delicious Fresh Raspberry Cream Cookies Variations

Feel free to explore these enticing twists that will make your cookies truly your own!

  • Berry Blend: Swap out fresh raspberries for a mix of berries like strawberries and blueberries for a colorful flavor explosion.
  • Gluten-Free: Use a gluten-free flour blend instead of all-purpose flour to cater to gluten-sensitive friends without sacrificing texture.
  • Citrus Zing: Add a zest of lemon or orange to the cream filling to brighten up the flavor profile and complement the berries.
  • Nutty Note: Incorporate finely chopped almonds or walnuts into the cookie dough for a satisfying crunch and added richness.
  • Spiced Up: Infuse cinnamon or nutmeg into the cookie base for a warm, aromatic touch that pairs beautifully with the raspberry cream.

A delightful alternative could be crafting cookies using our Matcha Cookies Soft recipe for those who appreciate a unique flavor experience. Offer your loved ones multiple choices they'll enjoy!

  • Dairy-Free Delight: Substitute heavy cream with coconut cream and use dairy-free butter to create a vegan version that doesn't skimp on flavor.
  • Decadent Chocolate: Add cocoa powder to half the batter to create a chocolate cookie variation, then sandwich with the raspberry cream for a luscious contrast.
  • Fruity Surprise: Fold in some finely chopped mint or basil into the cream for an unexpected refreshing twist.

All these variations, whether you feel like keeping it classic or getting adventurous, will lend your Delicious Fresh Raspberry Cream Cookies a fresh angle sure to delight!

Expert Tips for Delicious Fresh Raspberry Cream Cookies Recipe

  • Room Temperature Butter: Ensure your unsalted butter is at room temperature for easy creaming with the powdered sugar. This creates a light, airy texture in your cookies.

  • Don’t Overmix: When combining the flour and other ingredients, avoid overmixing the dough. A soft, well-mixed dough ensures your cookies remain light and fluffy.

  • Cool Before Filling: Allow the cookies to cool completely before adding the raspberry cream filling. This prevents the filling from melting and ensures your cookies hold their shape.

  • Gently Fold Filling: When incorporating the fresh raspberries into the cream, gently fold them in to maintain a lovely texture and prevent discoloration.

  • Use Fresh Raspberries: Opt for fresh raspberries for the best flavor and vibrant color in your filling. While frozen can be used, the texture won't be the same.

  • Storage Tips: Store any leftover cookies in an airtight container in the fridge for up to 3 days. Enjoy them chilled for a refreshing treat!

What to Serve with Delightfully Airy Fresh Raspberry Cream Cookies

These delightful cookies are perfect for turning any meal into a festive occasion, adding a touch of elegance and flavor.

  • Creamy Mashed Potatoes: Their velvety texture complements the light, fruity cookies, offering a comforting contrast to the sweet treat.
  • Savory Spinach Salad: A fresh salad with crunchy nuts and tangy vinaigrette provides a refreshing balance to the sweetness of the raspberry cookies.
  • Lemonade Sparkler: The tangy fizz of lemonade enhances the bright raspberry flavors and refreshes the palate in between bites.
  • Chocolate-Covered Strawberries: These decadent delights add romance and a fruity twist, echoing the raspberry theme beautifully.
  • Vanilla Ice Cream: A scoop of creamy vanilla ice cream pairs wonderfully, making a luscious dessert duo that feels indulgent.
  • Fruit Tart: A light and colorful fruit tart brings an elegant finish to the meal and will appeal to fruit lovers.
  • Rosemary-Infused Biscotti: The nutty, herbal flavors of biscotti provide a crunchy element, creating a delightful textural contrast.
  • Earl Grey Tea: The floral notes in Earl Grey enhance the delicate flavor of the cookies, making it the perfect afternoon pairing.
  • Pistachio Gelato: A scoop of this nutty gelato complements the cookies with its creamy, sweet, and salty flavors.

With these pairings, your table will be a feast for both the eyes and the palate, perfect for welcoming guests with warmth and taste!

How to Store and Freeze Delicious Fresh Raspberry Cream Cookies

  • Room Temperature: Keep cookies in an airtight container to maintain freshness for up to 3 days. This allows them to stay soft while highlighting the delightful raspberry flavors.

  • Fridge: For longer life, store in the fridge in an airtight container for up to 5 days. This helps preserve the raspberry cream filling, keeping it cool and refreshing.

  • Freezer: Freeze unfilled cookies in a single layer for up to 2 months. When ready to enjoy, thaw at room temperature and assemble with fresh raspberry cream filling before serving.

  • Reheating: If you prefer warm cookies, gently warm filled cookies in the microwave for 10-15 seconds before savoring. Enjoy your Delicious Fresh Raspberry Cream Cookies freshened up!

Delicious Fresh Raspberry Cream Cookies Recipe FAQs

How do I choose ripe raspberries for this recipe?
Absolutely! Look for raspberries that are vibrant in color, with no dark spots or mold. They should be firm to the touch and have a sweet aroma. For the best results, I recommend using fresh raspberries for a burst of flavor but frozen can work in a pinch—just know they might yield a softer filling.

What is the best way to store leftover cookies?
To keep your cookies fresh, store them in an airtight container at room temperature for up to 3 days. For longer storage, pop them in the fridge where they can last for about 5 days. Just ensure they’re sealed well to maintain that lovely raspberry cream filling!

Can I freeze my raspberry cream cookies?
Certainly! To freeze, lay the unfilled cookies on a baking sheet in a single layer and place them in the freezer until firm, about 1–2 hours. Once frozen, transfer them to an airtight container or freezer bag for up to 2 months. When you’re ready to indulge, simply thaw at room temperature and fill them with the cream.

What should I do if my cookie dough is too sticky?
If your dough is sticky, don’t worry! It’s likely because your butter wasn’t fully creamed or the dough is too warm. You can chill the dough in the refrigerator for about 30 minutes to firm it up. This can help it hold its shape better during baking.

Can I make these cookies gluten-free?
Absolutely! You can use a 1:1 gluten-free flour blend as a substitute for all-purpose flour. Just make sure it contains xanthan gum for proper texture. Additionally, for a dairy-free option, try using coconut cream instead of heavy cream in the filling.

Are these cookies suitable for packing in lunchboxes?
Very! Once assembled, these cookies hold up well. Just ensure they are stored in an airtight container to prevent them from getting squished. They make for a delightful treat in any lunchbox, sure to bring a smile!

Delicious Fresh Raspberry Cream Cookies Recipe

Delicious Fresh Raspberry Cream Cookies Recipe to Swoon Over

Delicious Fresh Raspberry Cream Cookies Recipe that feature a crisp exterior with creamy raspberry filling, perfect for any occasion.
Print Recipe Pin Recipe
Prep Time 20 minutes mins
Cook Time 15 minutes mins
Cooling Time 30 minutes mins
Total Time 1 hour hr 5 minutes mins
Servings: 12 cookies
Course: Dessert
Cuisine: American
Calories: 160
Ingredients Equipment Method Nutrition Notes

Ingredients
  

For the Cookie Base
  • 1 cup unsalted butter at room temperature
  • 1 cup powdered sugar
  • 2 cups all-purpose flour can swap with gluten-free flour
  • 1 teaspoon almond extract vanilla can be used instead
For the Cream Filling
  • 1 cup heavy cream no substitutes recommended
  • 0.5 cup fresh raspberries mashed
  • 1 cup powdered sugar

Equipment

  • Electric mixer
  • Baking Sheets
  • Parchment Paper
  • Mixing bowls
  • Cookie Scoop

Method
 

Step-by-Step Instructions
  1. Preheat your oven to 350°F (175°C) and line two baking sheets with parchment paper.
  2. In a large mixing bowl, cream together 1 cup of unsalted butter and 1 cup of powdered sugar until light and fluffy.
  3. Gradually add 2 cups of all-purpose flour and 1 teaspoon of almond extract, mixing until a soft dough forms.
  4. Form small balls of dough (about 1 inch) and place them on baking sheets, spaced 2 inches apart. Flatten slightly.
  5. Bake for 12–15 minutes or until the edges are lightly golden. Cool completely.
  6. In a clean mixing bowl, beat 1 cup of heavy cream and 1 cup of powdered sugar until soft peaks form.
  7. Gently fold in ½ cup of mashed fresh raspberries.
  8. Spread a tablespoon of raspberry cream filling on one cooled cookie and top with another cookie to form a sandwich.

Nutrition

Serving: 1cookieCalories: 160kcalCarbohydrates: 22gProtein: 1gFat: 8gSaturated Fat: 5gMonounsaturated Fat: 3gCholesterol: 25mgSodium: 50mgPotassium: 50mgSugar: 10gVitamin A: 300IUVitamin C: 3mgCalcium: 10mgIron: 0.5mg

Notes

Store cookies in an airtight container for up to 3 days at room temperature. These cookies can be frozen unfilled for up to 2 months.

Tried this recipe?

Let us know how it was!

Daisy Cookies Filled with Lemon Curd for a Bright Spring Treat

March 31, 2026 by Grace Snow Leave a Comment

As I watched the first blossoms of spring emerge, I felt inspired by their playful charm and vibrant colors. It was then that I decided to try making these delightful Daisy Cookies filled with Lemon Curd, and let me tell you, they turned out to be the perfect sweet-tangy treat for any occasion! These cookies boast a soft texture that melts away in your mouth, while the luscious lemon curd filling adds a refreshing burst of flavor. Besides being easy to make, they’re a wonderful way to impress family and friends during gatherings or simply brighten up an afternoon snack. Looking for a fun twist? You can even swap the lemon curd for orange curd or your favorite jam! Are you ready to create your own floral masterpiece?

Why Are These Daisy Cookies So Special?

Whimsical Design: These charming daisy cookies are not only fun to make but also visually stunning, making them a perfect centerpiece for any occasion.

Bright and Tangy Filling: The homemade lemon curd adds a zesty punch, balancing perfectly with the sweet cookie base for a delightful flavor experience.

Versatile Options: Feel free to swap in orange curd or your favorite jam for a personalized twist that keeps things exciting!

Crowd-Pleasing Treat: Whether for tea parties or spring celebrations, these cookies are sure to impress friends and family alike with their delightful look and taste.

Quick and Simple: With easy-to-follow steps, you'll create these melt-in-your-mouth delights in no time, making them an effortless addition to any event.

For similar spring treats, don’t miss out on my Eggnog Cookies Soft or Thumbprint Cookies Melt!

Daisy Cookies Filled with Lemon Curd Ingredients

For the Cookie Dough
• Unsalted Butter (220g) – Ensure it's at room temperature for easy creaming and a rich flavor.
• Granulated Sugar (200g) – This sweetener provides the perfect sweetness balance; feel free to reduce if desired.
• Lemon Zest (from 1 Lemon) – Use fresh zest to amplify the delightful lemon flavor within the cookies.
• Eggs (2) – Essential for binding the ingredients and ensuring a moist, tender texture.
• Baking Powder (1 tsp) – This ingredient is key for making your cookies light and airy.
• All-Purpose Flour (360g) – The backbone of your cookie's structure; swap with gluten-free flour for a gluten-free option.
• Salt (1 pinch) – Enhances the flavor of the cookies; a crucial step even in sweet recipes.

For the Lemon Curd Filling
• Lemon Curd – Adds a tangy and creamy filling, making these daisy cookies a delightful spring treat; consider substituting with orange curd or jam for variety.

For the Icing
• Icing Sugar (2 tbsp) – Dust the tops of your cookies for a touch of sweetness and a beautiful finish.

Step‑by‑Step Instructions for Daisy Cookies filled with Lemon Curd

Step 1: Prepare Lemon Curd
Begin by making the lemon curd a day in advance for the best flavor. In a saucepan, combine fresh lemon juice, sugar, and eggs over medium heat, stirring constantly for about 10-12 minutes until it thickens and coats the back of a spoon. Remove from heat, stir in butter until melted, and let cool. Transfer to a container and chill for at least 4 hours or overnight.

Step 2: Mix Cookie Dough
In a mixing bowl, combine granulated sugar and the zest of one lemon. Cream together the softened unsalted butter with the sugar mixture until light and fluffy, about 3-4 minutes. Beat in the eggs one at a time, ensuring each is fully incorporated. Gradually add all-purpose flour, baking powder, and a pinch of salt, mixing until just combined to form a dough.

Step 3: Chill Dough
Once your cookie dough is mixed, shape it into a log or bun and wrap it tightly in plastic wrap. Place the wrapped dough in the freezer for about 10 minutes to firm up. This will help make it easier to roll out later, ensuring those beautiful daisy cookies filled with lemon curd maintain their shape while baking.

Step 4: Shape Cookies
After chilling, preheat your oven to 360°F (180°C) and line two baking sheets with parchment paper. Roll out the dough on a lightly floured surface to about ¼ inch thickness. Use a flower-shaped cutter to cut out the cookies, and a smaller cutter to make centers in half of them. This will create lovely daisy shapes ready for filling.

Step 5: Bake
Transfer the cookies to the prepared baking sheets, spacing them about an inch apart. Bake in the preheated oven for 10-12 minutes, or until they are lightly golden around the edges. Keep an eye on them as they bake; you want them to have a soft, tender texture that’s slightly firm to the touch.

Step 6: Cool and Assemble
Remove the daisy cookies from the oven and allow them to cool on the baking sheets for a few minutes before transferring them to a wire rack. Once cool, dust the tops of the cookies with icing sugar. Pipe or spoon the chilled lemon curd onto the bottom of half the cookies, sandwiching with the other halves to create delightful daisy cookies filled with lemon curd.

Daisy Cookies Filled with Lemon Curd Variations

Feel free to explore different twists for your daisy cookies filled with lemon curd—let your creativity shine through!

  • Orange Curd: Swap lemon curd for orange curd to enjoy a zesty citrus twist that's equally delightful.
    Imagine a burst of sweet orange flavor in every bite, perfect for those sunny spring days!

  • Fruit Jam: Substitute lemon curd with your favorite jam, like raspberry or apricot, for a sweet and fruity alternative.
    Each cookie takes on a whole new personality with this simple change—how fun is that?

  • Gluten-Free Flour: Replace all-purpose flour with a certified gluten-free blend to accommodate dietary preferences.
    Baking can be inclusive, ensuring everyone enjoys these scrumptious cookies without compromise.

  • Almond Extract: Enhance the flavor by adding a few drops of almond extract to the cookie dough for a nutty profile.
    This small addition creates a beautifully aromatic cookie that will have everyone asking for more.

  • Coconut Flakes: Mix in unsweetened coconut flakes into the dough for a delightful chewy texture and tropical flair.
    With each bite, you'll get that lovely coconut hint that beautifully complements the tangy filling.

  • Spice it Up: Try adding a pinch of cardamom or cinnamon in the dough for a warm and fragrant twist.
    These spices add an enticing depth, turning your cookies into an exotic treat that surprises and delights.

  • Lemon Zest Boost: For extra lemony flavor, increase the lemon zest in the dough, intensifying that vibrant, tangy explosion.
    This twist takes your daisy cookies to a whole new level, making them irresistibly zesty and refreshing!

  • Nut Butter Filling: Get creative with a nut butter filling, like creamy almond or cashew butter, for a richer experience.
    Pairing chocolate ganache with nut butter lends a decadence that's simply too tempting to resist.

If you're eager for even more delicious variations, check out the light and indulgent Lemon Ricotta Protein pancakes or the delightful flavors of Mexican Wedding Cookies!

What to Serve with Daisy Cookies Filled with Lemon Curd

These charming daisy cookies filled with lemon curd create a bright, joyful experience that pairs wonderfully with delightful accompaniments.

  • Fresh Berries: Their juicy sweetness complements the tangy lemon curd, adding a refreshing burst to each bite.

  • Vanilla Ice Cream: Creamy and rich, it enhances the cookies' delicate flavor while providing a delightful contrast in texture.

  • Herbal Tea: A calming chamomile or refreshing mint tea brings out the cookies' floral notes, making for a cozy afternoon treat.

  • Lemonade Spritzers: Sparkling lemonade adds a zesty effervescence, perfectly complementing the cookies' sweet-tangy profile.

  • Shortbread Cookies: Pairing these daisy cookies with buttery shortbread will offer a delightful variety of flavors and textures, pleasing any guest.

  • Fruit Salad: A medley of seasonal fruits brightens the table and offers a light palate cleanser between bites of rich lemon curd.

  • Scones with Clotted Cream: These provide a delightful British twist, with the creamy clotted cream balancing the tanginess of the lemon curd.

  • Sparkling Wine: A glass of bubbly adds a celebratory touch, bringing an air of sweetness and a spark that pairs beautifully with the cookies.

  • Chocolate-Covered Almonds: Their crunch and rich cocoa flavor create an exciting contrast to the soft, delicate cookies.

  • Cheese Platter: Include creamy cheeses for an unexpected savory note, highlighting the cookies' sweetness while offering a delightful snack option.

Make Ahead Options

These Daisy Cookies filled with Lemon Curd are perfect for busy home cooks looking to save time! You can prepare the lemon curd up to 3 days in advance; simply make it, cool, and store it in an airtight container in the fridge. The cookie dough can also be prepared and refrigerated for up to 24 hours, or even frozen for up to 3 months. To maintain the best quality, wrap the dough tightly in plastic wrap. When you’re ready to bake, just roll out the dough, shape the cookies, and bake as directed. With these make-ahead options, you’ll enjoy delightful daisy cookies filled with lemon curd with minimal effort!

Expert Tips for Daisy Cookies

• Butter Consistency: Ensure your unsalted butter is soft but not melted. This will help achieve a light, fluffy texture in your cookies.

• Precise Cutting: Use a sharp cutter for clean edges and make sure to reserve the cookie tops with holes to avoid mismatched halves when assembling your daisy cookies filled with lemon curd.

• Chill to Firm: Don't skip chilling the dough! It makes rolling out the cookies easier and helps them hold their lovely shapes during baking.

• Perfect Baking Time: Keep an eye on your cookies as they bake. Remove them when they’re lightly golden at the edges but still soft in the center for that perfect melt-in-your-mouth texture.

• Storage Wisdom: After assembling, store the filled cookies in the fridge but consume them within a week for the best texture and flavor experience.

Storage Tips for Daisy Cookies filled with Lemon Curd

Room Temperature: Store unfrosted cookies at room temperature in an airtight container for up to 3 days to maintain their soft texture.

Fridge: Once filled, keep the daisy cookies in the fridge for no more than a week. This will help preserve the delicious lemon curd filling while keeping the cookies fresh.

Freezer: For longer storage, freeze unfilled cookies in a single layer on a baking sheet, then transfer to an airtight container. They can last up to 3 months and be filled when ready to serve.

Reheating: If desired, let frozen cookies sit at room temperature for about 10 minutes before enjoying, or warm them gently in the oven for a few minutes to restore their delightful softness.

Daisy Cookies Filled with Lemon Curd Recipe FAQs

How do I select the best lemons for the lemon curd?
Absolutely! When choosing lemons, opt for ones that are bright yellow with a smooth skin, as this indicates freshness. Avoid lemons with dark spots or wrinkles, as they may be overripe. Firmness is also key; they should yield slightly to pressure, indicating juiciness.

What’s the best way to store leftover daisy cookies filled with lemon curd?
Very! Keep the filled cookies in an airtight container in the fridge. They’re best enjoyed within a week for optimal freshness and taste. If you have unfrosted cookies, you can store them at room temperature for up to 3 days.

Can I freeze daisy cookies filled with lemon curd?
Absolutely! To freeze your daisy cookies, first, place the unfilled cookies in a single layer on a baking sheet and freeze until solid, about 1-2 hours. Once frozen, transfer them to an airtight container, where they can last up to 3 months. When ready to enjoy, fill them with lemon curd after thawing to maintain the best texture.

What if my lemon curd is too runny?
No problem! If your lemon curd turns out runny, you can thicken it by returning it to a saucepan. Heat it over low heat while stirring constantly until it thickens further, usually around 5-10 minutes. Be sure to stir continuously to avoid scrambling the eggs! Once thickened, let it cool completely before using.

Can these cookies be made gluten-free?
Very much! For a gluten-free version of these daisy cookies filled with lemon curd, simply swap the all-purpose flour for a gluten-free flour blend. Many brands work well in this recipe, so feel free to experiment with your favorite blend. The results should still yield deliciously soft, tangy cookies!

Is it safe to share these cookies with my dog?
While the daisy cookies filled with lemon curd are delightful for humans, I recommend avoiding sharing them with dogs. The sugar and lemon juice in the curd might upset their stomachs. If you want a dog-friendly treat, consider making a special recipe just for them!

Daisy Cookies filled with Lemon Curd

Daisy Cookies Filled with Lemon Curd for a Sweet Spring Treat

Daisy Cookies filled with Lemon Curd are a delightful springtime treat that offers a soft texture with a refreshing burst of flavor.
Print Recipe Pin Recipe
Prep Time 30 minutes mins
Cook Time 12 minutes mins
Chilling Time 10 minutes mins
Total Time 52 minutes mins
Servings: 12 cookies
Course: Dessert
Cuisine: American
Calories: 150
Ingredients Equipment Method Nutrition Notes

Ingredients
  

For the Cookie Dough
  • 220 g Unsalted Butter Ensure it's at room temperature for easy creaming and a rich flavor.
  • 200 g Granulated Sugar This sweetener provides the perfect sweetness balance.
  • 1 Lemon Lemon Zest Use fresh zest to amplify the delightful lemon flavor.
  • 2 Eggs Essential for binding the ingredients.
  • 1 tsp Baking Powder Key for making your cookies light and airy.
  • 360 g All-Purpose Flour Swap with gluten-free flour for a gluten-free option.
  • 1 pinch Salt Enhances the flavor of the cookies.
For the Lemon Curd Filling
  • Lemon Curd Adds a tangy creamy filling.
For the Icing
  • 2 tbsp Icing Sugar Dust the tops of your cookies for a touch of sweetness.

Equipment

  • Mixing Bowl
  • Saucepan
  • Baking Sheets
  • Parchment Paper
  • Flower-Shaped Cutter
  • wire rack

Method
 

Step-by-Step Instructions
  1. Prepare the lemon curd a day in advance. In a saucepan, combine fresh lemon juice, sugar, and eggs over medium heat, stirring constantly for 10-12 minutes until thickened. Remove from heat, stir in butter until melted, and chill for at least 4 hours or overnight.
  2. In a mixing bowl, cream together the unsalted butter and granulated sugar until light and fluffy, about 3-4 minutes. Beat in the eggs one at a time, then gradually add all-purpose flour, baking powder, and salt to form a dough.
  3. Shape the cookie dough into a log, wrap in plastic wrap, and freeze for about 10 minutes.
  4. Preheat your oven to 360°F (180°C) and line two baking sheets with parchment paper. Roll out the dough to about ¼ inch thickness, cut out flower shapes, and make centers in half the cookies.
  5. Transfer cookies to baking sheets, spacing them apart. Bake for 10-12 minutes until lightly golden. Remove and let cool.
  6. Dust cooled cookies with icing sugar. Pipe or spoon lemon curd onto half the cookies and sandwich them with the other halves.

Nutrition

Serving: 1cookieCalories: 150kcalCarbohydrates: 20gProtein: 2gFat: 7gSaturated Fat: 4gPolyunsaturated Fat: 0.5gMonounsaturated Fat: 2gCholesterol: 35mgSodium: 100mgPotassium: 50mgFiber: 0.5gSugar: 10gVitamin A: 200IUVitamin C: 1mgCalcium: 20mgIron: 0.5mg

Notes

Store unfrosted cookies at room temperature for up to 3 days. After filling, keep in the fridge for no more than a week. Freeze unfilled cookies for up to 3 months.

Tried this recipe?

Let us know how it was!

Delicious Daisy Cookies Filled with Luscious Lemon Curd

March 31, 2026 by Grace Snow Leave a Comment

There’s nothing quite like the smell of freshly baked cookies wafting through the kitchen, but when those cookies are filled with vibrant lemon curd, the experience reaches a whole new level. Today, I’m excited to share my recipe for Daisy Cookies filled with Lemon Curd, where buttery perfection meets a zesty surprise. These delightful treats are not only a crowd-pleaser but also incredibly quick to prepare, making them a go-to for any occasion. Imagine serving these bright gems at your next gathering or just enjoying them as a sweet pick-me-up during a busy week. They’re perfect for those who crave a little homemade happiness while keeping life simple. Are you ready to bring a splash of sunshine into your baking routine?

Why are these cookies so irresistible?

Flavorful Surprise: Each bite reveals a burst of zesty lemon curd that beautifully complements the buttery cookie.

Easy Prep: With straightforward steps, this recipe is perfect for bakers of all skill levels, ensuring you can whip up a batch anytime.

Crowd Favorite: These cookies are a guaranteed hit at any gathering, reminiscent of a sunny picnic, making them ideal for celebrations.

Versatile Treat: Enjoy them on their own or with a cup of tea, and consider pairing them with other favorites like Eggnog Cookies Soft for a delightful dessert spread!

Time-Saving: Ready in under 30 minutes, you'll find they’re the perfect solution for last-minute cravings or spontaneous get-togethers.

Bake these delightful cookies and bring some sunshine to your day!

Daisy Cookies Filled with Lemon Curd Ingredients

For the Cookies

  • All-purpose flour – this forms the base of your cookies, giving them that classic texture.
  • Unsalted butter – a key ingredient that adds richness and helps create a tender crumb.
  • Granulated sugar – sweetens the cookies and contributes to their delightful color.
  • Eggs – helps bind the dough and adds moisture, ensuring your cookies are soft.
  • Vanilla extract – infuses a warm, inviting flavor complementing the lemon curd filling.
  • Baking powder – gives the cookies a light texture and helps them rise.
  • Salt – enhances all the flavors and balances the sweetness of the cookies.

For the Lemon Curd Filling

  • Fresh lemon juice – delivers the zesty punch that makes these cookies shine, so don’t skip this!
  • Lemon zest – intensifies the lemon flavor for a vibrant and aromatic filling.
  • Granulated sugar – balances the tartness of the lemon for a perfect sweet-and-sour combo.
  • Egg yolks – these create a rich, creamy texture in your lemon curd, making it luscious and delightful.
  • Butter – adds a beautiful shine and smoothness to your lemon curd perfection.

Now that you have the Daisy Cookies filled with Lemon Curd ingredients down, it’s time to bring out your inner baker! Together, we’ll create these delicious delights that are sure to brighten your day.

Step‑by‑Step Instructions for Daisy Cookies filled with Lemon Curd

Step 1: Prepare Lemon Curd
Begin by making your lemon curd, as it needs to chill for at least 4 hours or overnight. Whisk together fresh lemon juice, lemon zest, granulated sugar, egg yolks, and butter in a saucepan over medium heat. Stir continuously until the mixture thickens and coats the back of a spoon, roughly 10-15 minutes. Once thick, transfer the curd to a bowl, cover, and refrigerate until completely cool.

Step 2: Mix Ingredients
In a large mixing bowl, combine granulated sugar and lemon zest. Rub them together with your fingers until fragrant. Next, add softened unsalted butter and cream them together using a hand mixer on medium speed until light and fluffy, around 2-3 minutes. This step ensures a rich base for your Daisy Cookies filled with Lemon Curd, showcasing that delightful buttery flavor.

Step 3: Add Eggs
Incorporate the eggs one at a time into the butter-sugar mixture, beating well after each addition. This helps to create a light and airy texture in your dough. Continue to mix for another minute until fully combined and smooth. The batter should be creamy and well blended, indicating it's ready for the next step toward your delicious Daisy Cookies.

Step 4: Combine Dry Ingredients
Gradually sift in the all-purpose flour, baking powder, and a pinch of salt into the wet mixture. Mix gently with a spatula until just combined—be careful not to overmix. A soft dough will form, which is essential for the melt-in-your-mouth texture of your cookies. Once ready, it’s time to move on to chilling the dough.

Step 5: Chill Dough
Shape the dough into a log or bun and wrap it tightly in parchment paper. Place it in the freezer for about 10 minutes to firm up. This chilling step prevents the cookies from spreading too much while baking. When you remove it from the freezer, it should hold its shape, and you will be ready to cut out your delightful Daisy Cookies.

Step 6: Cut Cookies
Roll out the chilled dough on a floured surface to about ¼ inch thickness. Using a flower-shaped cookie cutter, carefully cut out the cookies. For half of the cookie shapes, use a smaller cutter to remove the center, creating a lovely daisy effect. This clever technique will allow the vibrant lemon curd filling to peek through, adding charm to your Daisy Cookies.

Step 7: Bake
Arrange your cut cookies on a parchment-lined baking tray, ensuring they have enough space to spread. Preheat your oven to 360°F (180°C), and bake the cookies for 10-12 minutes or until the edges are lightly golden. Keep an eye on them—once they begin to brown, they’re ready. Allow the cookies to cool on the tray for a few minutes before transferring them to a wire rack.

Step 8: Assemble
Once the cookies are completely cool, take the cookies without a center and dust the tops lightly with icing sugar. This step adds an elegant touch while balancing the sweetness. Spoon or pipe the chilled lemon curd onto the solid cookie bases and gently sandwich them with the sugared tops. Your Daisy Cookies filled with Lemon Curd are now beautifully assembled and ready to brighten anyone's day!

Make Ahead Options

These Daisy Cookies filled with Lemon Curd are a fantastic choice for meal prep, perfect for those busy weeks when you still want a taste of homemade goodness! You can prepare the lemon curd up to three days in advance; simply allow it to cool completely before storing in an airtight container in the refrigerator. The cookie dough can also be made ahead—shape it into a log and freeze it for up to 1 month. When you’re ready to bake, just slice the desired number of cookies and proceed with the rest of the recipe, ensuring the cookies are just as delightful and fresh as if made the same day. This way, you’ll have quick access to a delicious treat whenever the craving strikes!

Variations & Substitutions

Feel free to get creative and make this recipe your own with these fun twists!

  • Citrus Swap: Opt for orange curd instead of lemon for a vibrant, sweet alternative. This twist will give your cookies a bright flavor that dances on your palate.

  • Jam Delight: Substitute lemon curd with your favorite fruit jam, like raspberry or apricot, for a delightful change. The sweet and tart combination will surely be a hit with fruit lovers!

  • Gluten-Free: Use a gluten-free flour blend to make these cookies suitable for those with dietary restrictions. They’ll still be soft, buttery, and just as delicious!

  • Flavor Boost: Add vanilla or almond extract to the cookie dough for an extra layer of flavor. Just a teaspoon can elevate the taste and aroma beautifully.

  • Nutty Addition: Mix in some finely chopped nuts, such as almonds or walnuts, for added texture and a nutty crunch. This element can bring harmony to the sweetness of the cookie.

  • Spice It Up: Add a pinch of cinnamon or cardamom to the dough for a warm, aromatic twist. These spices perfectly complement the sweet lemon curd filling.

  • Chocolate Drizzle: For a decadent touch, drizzle melted chocolate on top of the assembled cookies. The combination of lemon and chocolate creates a unique and indulgent dessert.

  • Mini Cookie Sandwiches: Instead of full-sized cookies, cut the dough into smaller rounds for mini cookie sandwiches. They’re perfect for bite-sized treats during gatherings or tea time!

By incorporating any of these variations, you can tailor the Daisy Cookies filled with Lemon Curd to fit your family's tastes and dietary needs. Enjoy exploring the delicious possibilities!

What to Serve with Delightful Daisy Cookies Filled with Silky Lemon Curd

Elevate your experience with these sweet gems by pairing them with delightful complements that enhance their zesty charm.

  • Fresh Fruit Salad: A medley of seasonal fruits brings vibrant colors and refreshing sweetness, balancing the tang of the cookies perfectly.
  • Herbal Tea Selection: Sipping on fragrant herbal teas, like chamomile or mint, invites a cozy touch to your afternoon treat, enhancing the citrus notes.
  • Creamy Vanilla Ice Cream: The rich creaminess of vanilla ice cream contrasts beautifully with the tangy lemon filling, creating a dessert that feels indulgent.
  • Sparkling Lemonade: A glass of fizzy lemonade echoes the cookie’s flavor while cooling you off on warm days, making your tea time delightful.
  • Chocolate Dipping Sauce: A warm chocolate dip offers a decadent twist, creating an unexpected and delightful pairing with the cookies' bright flavor.
  • Shortbread Cookies: Serving alongside buttery shortbread adds another layer of texture and flavor, enhancing the overall cookie experience.

Indulge in the sweet, tangy dance of flavors, and feel free to mix and match these pairings for a truly satisfying experience!

Expert Tips for Creating Daisy Cookies

  • Chill Your Dough: Ensure you chill the dough for at least 10 minutes before cutting, which helps the cookies maintain their shape while baking.

  • Use Fresh Ingredients: Fresh lemon juice and zest elevate the flavor of your lemon curd, making your Daisy Cookies filled with Lemon Curd truly exceptional.

  • Sift Dry Ingredients: Sifting the flour, baking powder, and salt helps to avoid clumps and ensures a smooth cookie dough for a lighter texture.

  • Egg Temperature Matters: Use room temperature eggs for a better emulsion in your batter; this leads to a tender cookie texture that melts in your mouth.

  • Don’t Skip Dusting: Dusting the tops with icing sugar before filling prevents the sugar from clumping, ensuring a clean presentation and a pleasant sweetness.

How to Store and Freeze Daisy Cookies

Fridge: Store your Daisy Cookies filled with Lemon Curd in an airtight container for up to 1 week to keep them fresh and prevent them from drying out.

Freezer: For longer storage, freeze the assembled cookies in a single layer, then transfer to an airtight container for up to 3 months. Thaw before serving.

Reheating: If you'd like to enjoy them warm, briefly place the cookies in a preheated oven at 350°F (175°C) for about 3-5 minutes to revive their freshness.

Daisy Cookies Filled with Lemon Curd Recipe FAQs

What type of lemons are best for making lemon curd?
Absolutely fresh, juicy lemons are ideal for making your lemon curd! Look for lemons that are bright yellow, firm to the touch, and heavy for their size. Avoid lemons with dark spots or wrinkled skin, as this indicates ripeness has passed.

How should I store my Daisy Cookies filled with Lemon Curd?
To keep your cookies fresh, store them in an airtight container in the fridge for up to 1 week. It's best to layer them with parchment paper to prevent sticking. If you notice any moisture, the cookies may become softer, so ensure they are cool before storing.

Can I freeze these cookies, and if so, how?
Certainly! Freeze the assembled Daisy Cookies in a single layer on a baking tray until solid. Then, transfer them into an airtight container or a freezer bag for up to 3 months. When you’re ready to enjoy them, thaw in the fridge or at room temperature for a couple of hours. For an added treat, pop them in a preheated oven at 350°F (175°C) for about 3-5 minutes to warm them up!

What should I do if my cookies spread too much while baking?
If you find your cookies spreading too much, try chilling the dough for longer—30 minutes in the freezer should do the trick! Make sure your butter is softened, not melted, as melted butter can lead to flat cookies. Additionally, ensure you are using the correct flour measurement—too little flour can also cause spreading.

Are these cookies suitable for those with gluten intolerance?
Absolutely! You can make this delightful recipe gluten-free by substituting all-purpose flour with a gluten-free flour mix. Just check that the mix includes a binding agent like xanthan gum for the best results. Everyone will love these Daisy Cookies filled with Lemon Curd, regardless of their dietary restrictions!

Can my pets eat any of the ingredients in these cookies?
No, it’s best to keep these cookies away from pets. Ingredients like butter and sugar can upset their stomachs, and lemon juice may be harmful to them in larger quantities. Always stick to pet-safe treats if you want to share something special with your furry friends!

Delicious Daisy Cookies Filled with Luscious Lemon Curd

Enjoy these delightful Daisy Cookies filled with Lemon Curd, combining a buttery cookie with a zesty lemon filling for an irresistible treat.
Print Recipe
Prep Time 15 minutes mins
Cook Time 12 minutes mins
Chilling Time 10 minutes mins
Total Time 37 minutes mins
Servings: 12 cookies
Course: Dessert
Cuisine: American
Calories: 150
Ingredients Equipment Method Nutrition Notes

Ingredients
  

For the Cookies
  • 2 1/2 cups all-purpose flour
  • 1 cup unsalted butter (softened)
  • 1 cup granulated sugar
  • 2 large eggs
  • 1 teaspoon vanilla extract
  • 2 teaspoons baking powder
  • 1/4 teaspoon salt
For the Lemon Curd Filling
  • 1/2 cup fresh lemon juice
  • 2 tablespoons lemon zest
  • 1/2 cup granulated sugar
  • 4 large egg yolks
  • 1/4 cup butter

Equipment

  • Saucepan
  • Mixing Bowl
  • hand mixer
  • Cookie cutter
  • Baking tray
  • Parchment Paper

Method
 

Step-by-Step Instructions
  1. Prepare Lemon Curd: Whisk together fresh lemon juice, lemon zest, granulated sugar, egg yolks, and butter in a saucepan over medium heat. Stir continuously until thickened, about 10-15 minutes. Refrigerate until cool.
  2. Mix Ingredients: In a bowl, combine granulated sugar and lemon zest, then rub together. Add softened butter and cream until light and fluffy for 2-3 minutes.
  3. Add Eggs: Incorporate the eggs one at a time into the mixture, beating well after each addition until smooth.
  4. Combine Dry Ingredients: Sift in flour, baking powder, and salt. Mix gently until just combined to form a soft dough.
  5. Chill Dough: Shape the dough into a log, wrap in parchment, and freeze for about 10 minutes.
  6. Cut Cookies: Roll out chilled dough to ¼ inch thickness, cut out cookies, and use a smaller cutter for half to create a daisy effect.
  7. Bake: Preheat oven to 360°F (180°C) and bake cookies for 10-12 minutes until edges are golden. Cool on tray for a few minutes.
  8. Assemble: Dust the tops with icing sugar, fill with lemon curd, and sandwich with sugared tops.

Nutrition

Serving: 1cookieCalories: 150kcalCarbohydrates: 20gProtein: 2gFat: 7gSaturated Fat: 4gPolyunsaturated Fat: 0.5gMonounsaturated Fat: 2.5gCholesterol: 50mgSodium: 40mgPotassium: 80mgSugar: 8gVitamin A: 200IUVitamin C: 2mgCalcium: 10mgIron: 0.5mg

Notes

Store in an airtight container for up to 1 week. Freezing instructions available for longer storage.

Tried this recipe?

Let us know how it was!

Delightful Soft Buttercream Bunny Cookies for Spring Fun

March 30, 2026 by Grace Snow Leave a Comment

Spring is here, and with it comes the delightful opportunity to whip up a batch of Soft Buttercream Bunny Cookies! These charming treats are not only tender with a hint of almond and lemon but also incredibly easy to make, making them perfect for those lively holiday gatherings. Whether you're looking for a fun project to tackle with the kids or a sweet addition to your Easter celebrations, this recipe promises to be a hit. Plus, there's no fuss with complicated decorating—just simple, kid-friendly fun that results in irresistibly cute cookies. Curious how to bring these adorable bunnies to life in your kitchen? Let’s hop into the recipe!

Why Are These Cookies So Irresistible?

Delightful flavors: The tender base of these bunny cookies, combined with almond and lemon, creates a mouthwatering flavor that will have everyone asking for seconds.

Kid-friendly: Perfect for baking with little ones, this simple recipe allows for creativity without the stress of complicated techniques.

Quick and easy: With minimal ingredients and straightforward steps, you’ll have these sweet treats ready in no time for any spring gathering or Easter celebration.

Great for sharing: Their adorable shape and vibrant frosting make them a charming contribution to brunches, picnics, or neighborhood bake sales.

Customizable: Feel free to swap out flavors, like using orange zest instead of lemon, or try out unique shapes with your favorite cookie cutters. For more delicious cookie ideas, check out my Matcha Cookies Soft and Eggnog Cookies Soft recipes!

Soft Buttercream Bunny Cookies Ingredients

For the Cookie Dough
• Unsalted Butter – Provides richness and flavor; using European-style butter enhances the taste.
• Shortening – Helps maintain texture and prevents cookies from spreading too much during baking.
• Sugar – Adds sweetness and contributes to the browning and structure of the cookies.
• Egg – Acts as a binder, contributing moisture and fluffiness when at room temperature.
• Vanilla Extract & Almond Essence – Enhance the flavor; almond adds a sophisticated twist to the cookie.
• All-Purpose Flour – Provides structure; King Arthur flour is recommended for the best results.
• Corn Starch – Contributes to a tender texture by reducing gluten formation.
• Baking Powder – Leavens the cookies, making them light and fluffy.
• Lemon Zest – Adds a refreshing citrus note that delightful enhances the flavor of the cookies.

For the Buttercream Frosting
• Powdered Sugar – Creates the frosting; always sift before use to ensure a smooth texture.
• Milk – Adjusts the consistency of the frosting to make it spreadable.

For Decorating
• Sugar Sprinkles & Black Sugar Pearls – Use these colorful decorations to add festive flair to your bunny cookies.

These Soft Buttercream Bunny Cookies provide an adorable and delicious way to celebrate springtime festivities. Happy baking!

Step‑by‑Step Instructions for Soft Buttercream Bunny Cookies

Step 1: Prep Oven & Dry Ingredients
Preheat your oven to 325°F (163°C). In a large mixing bowl, sift together the all-purpose flour, corn starch, baking powder, and lemon zest until well combined. This step ensures your dry ingredients are evenly mixed, which is crucial for achieving the perfect texture in your Soft Buttercream Bunny Cookies.

Step 2: Cream Butter Mixture
In another mixing bowl, beat together the unsalted butter and shortening with sugar using an electric mixer on medium speed for 3-4 minutes. Aim for a light and fluffy consistency, as this step will incorporate air into your dough, giving your cookies a tender texture. The mixture should be pale in color when done.

Step 3: Combine Wet Ingredients
Add one room-temperature egg, along with the vanilla extract and almond essence, to the creamed butter mixture. Beat the ingredients together until everything is smooth and well combined, ensuring that each flavor blends into the Soft Buttercream Bunny Cookies dough beautifully.

Step 4: Mix Dry into Wet
Gradually add the sifted dry ingredients into the wet mixture, mixing on low speed until just combined. Be careful not to overmix; the dough should come together without any dry patches. This careful blending ensures your cookies remain soft and tender, just as they should be.

Step 5: Chill the Dough
If your cookie dough feels too soft or sticky to handle, wrap it in plastic wrap and chill it in the refrigerator for 15-20 minutes. Chilling the Soft Buttercream Bunny Cookies dough helps it firm up, making it easier to roll and cut into the adorable bunny shapes without sticking.

Step 6: Roll and Cut
On a lightly floured surface, roll out the chilled dough to about 1/4-inch thickness. Use bunny-shaped cookie cutters to cut out the cookies carefully. As you cut, rearrange the dough scraps by kneading it lightly and rolling it out again to maximize the number of bunnies you can create.

Step 7: Bake
Place the cut-out cookies onto parchment-lined baking sheets, leaving a little space between each one. Bake them in your preheated oven for 9-10 minutes, or until the edges are set but not browned. Keep an eye on them; you want them to look soft and barely golden for that perfect cookie texture.

Step 8: Cool
Allow the cookies to cool on the baking sheets for about 5 minutes before transferring them to wire racks. This brief resting period helps them firm up a bit more, ensuring your Soft Buttercream Bunny Cookies hold their shape while they cool completely.

Step 9: Make Frosting
In a medium bowl, beat together softened butter and sifted powdered sugar until smooth. Gradually add in a splash of vanilla extract and a few tablespoons of milk to adjust the consistency until creamy and spreadable. This delicious buttercream frosting will top your bunnies perfectly.

Step 10: Decorate
Once the cookies are fully cool, pipe the buttercream frosting onto each bunny cookie, allowing your creativity to shine. Top with colorful sugar sprinkles and black sugar pearls for an added festive flair. Let the decorated cookies sit until the frosting sets before serving or storing to ensure they look just as delightful as they taste.

Soft Buttercream Bunny Cookies Variations

Feel free to add your unique twist to these delightful cookies and tailor them to your taste buds!

  • Citrus Twist: Substitute lemon zest with orange zest for a sweeter, decadent citrus flavor. The brightness will awaken your senses in every bite!

  • Maple Flavor: Swap out almond essence for maple syrup to create a warm, cozy flavor experience. Imagine the sweet aroma wafting through your kitchen!

  • Chocolate Bunny: Mix in 1/2 cup of mini chocolate chips into the dough for a rich chocolate surprise in each cookie. Who can resist that chocolaty goodness?

  • Nutty Delight: Add finely chopped nuts such as walnuts or pecans for extra crunch. These little bites of texture will bring delightful contrast to the soft cookie.

  • Gluten-Free Option: Use gluten-free all-purpose flour instead of regular flour to cater to dietary needs without sacrificing texture. You'll still enjoy every nibble!

  • Fruity Flair: Fold in dried fruits like cranberries or cherries for a chewy surprise in each bite. This fruity addition offers a lovely balance to the sweetness!

  • Spice It Up: Sprinkle a touch of cinnamon or nutmeg into the dough for a warm spice twist. This cozy combination is perfect for spring gatherings.

  • Fun Shapes: Use different cookie cutters to create a variety of shapes like chicks or flowers. Kids will love the creativity and excitement of these festive cookies!

Looking for more cookie inspiration? Check out my delightful Thumbprint Cookies Melt or the sweet Mexican Wedding Cookies recipes for your next baking adventure!

Expert Tips for Soft Buttercream Bunny Cookies

• Don’t Overmix: After adding dry ingredients, mix gently to prevent the dough from becoming tough. The aim is to keep your cookies soft and tender.

• Proper Chilling: If the dough feels too soft, chilling it for 15-20 minutes is essential to roll it without sticking or losing shape.

• Cool Completely: Ensure cookies are fully cool before frosting. This prevents the buttercream from melting and ensures a beautiful finish.

• Watch Baking Time: Baking time can vary. Observe closely for edges that are set but not browned; this ensures soft, fluffy Soft Buttercream Bunny Cookies.

• Creative Shapes: Use different cookie cutters for a variety of shapes, enhancing the fun of your festive baking while keeping the flavor intact.

Make Ahead Options

These Soft Buttercream Bunny Cookies are a great candidate for make-ahead magic, perfect for busy home cooks! You can prepare the cookie dough up to 24 hours in advance and keep it wrapped in plastic wrap in the refrigerator to maintain freshness. Alternatively, the shaped, unbaked cookies can be frozen for up to 3 months; simply place them on a parchment-lined baking sheet, freeze them until solid, then transfer to a zip-top bag. When ready to bake, no need to thaw, just pop them in the oven! To finish, bake as directed and prepare the frosting just before serving for that fresh, delightful taste. Your friends and family will love that these treats are just as scrumptious, even when prepped ahead!

What to Serve with Soft Buttercream Bunny Cookies?

Pair these charming cookies with delightful accompaniments that enhance their sweetness and bring your spring celebration to life.

  • Fresh Berries: Juicy strawberries and raspberries contrast beautifully with the sweet cookies, adding a refreshing burst of flavor.
  • Vanilla Ice Cream: Serve with a scoop of creamy vanilla ice cream for a delectable dessert combo that's hard to resist.
  • Hot Chocolate: A warm cup of rich hot chocolate pairs wonderfully, creating a cozy treat that's perfect for springtime gatherings.
  • Milk: Classic and simple, a glass of chilled milk perfectly balances the sweetness of your cookies and brings out their buttery flavor.
  • Lemonade: For a refreshing touch, serve these cookies with tangy lemonade, enhancing the lemon notes in the cookies and brightening your table.
  • Coffee: A cup of freshly brewed coffee provides a delightful contrast to the soft sweetness of the cookies, ideal for adult gatherings.
  • Cheese Platter: Add a touch of sophistication with a cheese platter featuring creamy cheeses alongside your bunny cookies, offering a savory contrast.
  • Mini Fruit Tarts: Create a bite-sized dessert display with mini fruit tarts, complementing the cookies with a mix of textures and flavors.
  • Carrot Cake: As a nod to the Easter theme, serve slices of moist carrot cake alongside for a festive dessert table.

Storage Tips for Soft Buttercream Bunny Cookies

Airtight Container: Store decorated cookies in an airtight container at room temperature for up to 5 days to keep them fresh and soft.

Refrigeration: If you live in a warm climate, it’s best to refrigerate the cookies for up to a week to prevent melting or spoilage.

Freezing: Unfrosted Soft Buttercream Bunny Cookies can be frozen for up to 3 months. Allow them to cool completely, then store in a freezer-safe bag or container.

Reheating: To enjoy your frozen cookies later, thaw them at room temperature. Consider frosting them just before serving for the best taste and presentation.

Soft Buttercream Bunny Cookies Recipe FAQs

What type of butter is best for the cookie dough?
Using unsalted butter is recommended for this recipe, as it provides richness and flavor without the added salt. For an elevated taste, opt for European-style butter, which typically contains a higher fat content and results in an even more delicious cookie.

How should I store my decorated cookies?
Store your decorated Soft Buttercream Bunny Cookies in an airtight container at room temperature for up to 5 days. If you live in a warm kitchen, consider refrigerating them to maintain freshness and prevent melting. Simply place them in the fridge for up to a week without compromising their delightful taste!

Can I freeze unfrosted cookies? How do I do that?
Absolutely! Unfrosted cookies can be frozen for up to 3 months. Allow them to cool completely after baking, then wrap each cookie tightly in plastic wrap or place them in a freezer-safe bag. When you’re ready to enjoy them, simply thaw them at room temperature before frosting for the best results.

Why do my cookies spread too much during baking?
If your cookies are spreading excessively, check a couple of factors: Ensure your shortening and butter are at the right temperature; they should be cool but not hard. Additionally, make sure you’ve properly chilled the dough if it feels too soft. This little tip helps maintain the lovely bunny shapes you’ve cut!

Can my pets eat these cookies?
It's best to keep these Soft Buttercream Bunny Cookies away from your pets. Ingredients like sugar and frosting can be harmful to them. Always store your treats out of reach, ensuring your furry friends stick to their own treats instead!

Are there any allergy considerations with this recipe?
Yes, this recipe contains common allergens like eggs, dairy, and wheat. For those with gluten sensitivities, consider using a gluten-free all-purpose flour. Be cautious about the use of any flavor extracts, as some may contain allergens. Always check labels to ensure safety for anyone with known allergies.

Soft Buttercream Bunny Cookies

Delightful Soft Buttercream Bunny Cookies for Spring Fun

These Soft Buttercream Bunny Cookies are sweet, tender, and perfect for spring celebrations.
Print Recipe Pin Recipe
Prep Time 30 minutes mins
Cook Time 10 minutes mins
Chilling Time 20 minutes mins
Total Time 1 hour hr
Servings: 24 cookies
Course: Dessert
Cuisine: American
Calories: 150
Ingredients Equipment Method Nutrition Notes

Ingredients
  

For the Cookie Dough
  • 1 cup Unsalted Butter European-style for better flavor
  • 1/2 cup Shortening
  • 1 cup Sugar
  • 1 large Egg room temperature
  • 1 teaspoon Vanilla Extract
  • 1 teaspoon Almond Essence
  • 3 cups All-Purpose Flour King Arthur flour recommended
  • 1 cup Corn Starch
  • 1 teaspoon Baking Powder
  • 1 tablespoon Lemon Zest
For the Buttercream Frosting
  • 4 cups Powdered Sugar sifted
  • 2 tablespoons Milk adjust for consistency
For Decorating
  • 1 cup Sugar Sprinkles
  • 1/4 cup Black Sugar Pearls

Equipment

  • Mixing bowls
  • Electric mixer
  • Baking Sheets
  • Parchment Paper
  • Cookie Cutters

Method
 

Step-by-Step Instructions for Soft Buttercream Bunny Cookies
  1. Preheat your oven to 325°F (163°C). In a large mixing bowl, sift together the all-purpose flour, corn starch, baking powder, and lemon zest until well combined.
  2. In another mixing bowl, beat together the unsalted butter and shortening with sugar using an electric mixer on medium speed for 3-4 minutes until light and fluffy.
  3. Add one room-temperature egg, along with the vanilla extract and almond essence, to the creamed butter mixture and beat until smooth.
  4. Gradually add the sifted dry ingredients into the wet mixture, mixing on low speed until just combined.
  5. If your cookie dough feels too soft, wrap it in plastic wrap and chill it in the refrigerator for 15-20 minutes.
  6. On a lightly floured surface, roll out the chilled dough to about 1/4-inch thickness and use bunny-shaped cookie cutters to cut out the cookies.
  7. Place the cut-out cookies onto parchment-lined baking sheets and bake for 9-10 minutes.
  8. Allow the cookies to cool on the baking sheets for about 5 minutes before transferring them to wire racks.
  9. In a medium bowl, beat together softened butter and sifted powdered sugar until smooth, then gradually add vanilla extract and milk.
  10. Once the cookies are fully cool, pipe the buttercream frosting onto each bunny cookie and decorate with sugar sprinkles and black sugar pearls.

Nutrition

Serving: 1cookieCalories: 150kcalCarbohydrates: 20gProtein: 1gFat: 7gSaturated Fat: 4gPolyunsaturated Fat: 0.5gMonounsaturated Fat: 2gCholesterol: 20mgSodium: 80mgPotassium: 40mgSugar: 10gVitamin A: 200IUVitamin C: 1mgCalcium: 10mgIron: 0.5mg

Notes

Ensure cookies cool completely before frosting to prevent melting of the buttercream.

Tried this recipe?

Let us know how it was!
  • « Previous Page
  • 1
  • …
  • 9
  • 10
  • 11
  • 12
  • 13
  • …
  • 62
  • Next Page »

Welcome!

Hi, I’m Grace, a Sydney-based home cook with a passion for bold flavors and trending ingredients. Whether you’re a busy beginner or a seasoned foodie, you’ll find dishes here that are fresh, fun, and full of flavor.

More about me

Popular Recipes

  • One Pot Keto Tuna Casserole
    One Pot Keto Tuna Casserole: Creamy Comfort in Minutes
  • Ultimate Jalapeno Popper Chicken Salad
    Ultimate Jalapeno Popper Chicken Salad That'll Wow Your Tastebuds
  • Green Chile Cheese Dip
    Mouthwatering Green Chile Cheese Dip for Cozy Gatherings
  • Easy Chimichurri Sauce
    Fresh and Zesty Easy Chimichurri Sauce in Just Minutes

Footer

↑ back to top

About

  • Privacy Policy
  • Disclaimer
  • Terms & Conditions

Newsletter

  • Sign Up! for emails and updates

Contact

  • About me
  • Contact me

Copyright © 2025 TastyTrendIngredients