As I stood over the stove, the enticing aroma of sautéed mushrooms filled my kitchen, igniting a sense of nostalgia for cozy gatherings filled with laughter and warmth. This Cheesy Stuffed Mushroom Dip is my twist on a beloved classic, blending umami-rich flavors with a creamy texture that's perfect for scooping. Not only is this easy appetizer a guaranteed crowd-pleaser, but it also brings a touch of comfort that transforms any gathering into a heartfelt occasion. Whether you're hosting a game night or enjoying a quiet evening in, this warm dip pairs wonderfully with toasted bread or fresh veggies. Are you ready to elevate your appetizer game and impress your guests with this delightful dish? Let’s dive in!
Why is this Stuffed Mushroom Dip irresistible?
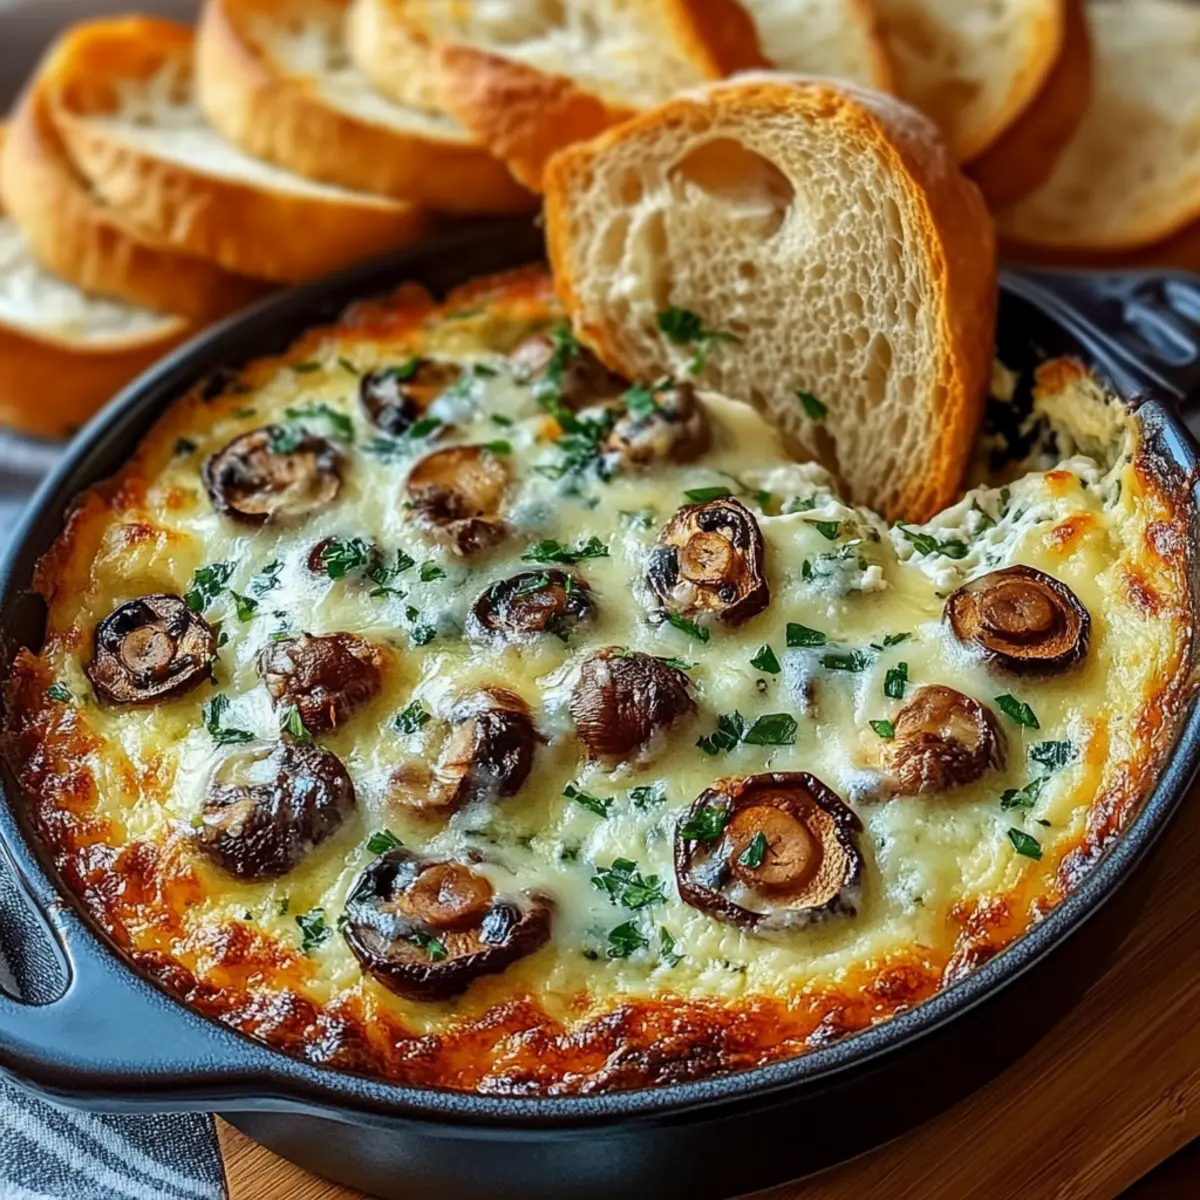
Deliciously creamy and packed with flavor, this Stuffed Mushroom Dip combines sautéed mushrooms and rich cheeses for a mouthwatering experience. Effortlessly simple, even beginner cooks can whip this up in no time, making it a perfect go-to recipe. Crowd-pleaser, it’s ideal for gatherings, bringing everyone together over a shared love for comfort food. Whether served with toasted baguette slices or fresh veggies, this dip shines as a versatile appetizer. Don’t forget to check out our delicious Grilled Mushrooms Savory for more mushroom goodness!
Stuffed Mushroom Dip Ingredients
• Here’s what you need to create this delightful dip!
For the Dip
- Olive Oil or Butter – Perfect for sautéing mushrooms; olive oil adds a fruity touch, while butter offers rich flavor.
- Mushrooms (8 ounces, sliced) – The star of this dip; use fresh for the best taste and texture.
- Garlic (2 cloves, minced) – Adds aromatic depth to the dip; fresh garlic is a must for optimal flavor.
- Cream Cheese (8 ounces, softened) – This creamy base is essential for that luscious dip consistency; mascarpone can be a fun substitute.
- Sour Cream (1/2 cup) – Provides a tangy kick; Greek yogurt is a lighter option if you prefer.
- Mozzarella Cheese (1 cup, divided) – For a gooey texture; consider Fontina or Gruyère for an exciting flavor twist.
- Parmesan Cheese (1/4 cup, grated) – Offers a nuanced flavor; freshly grated works best for melting.
- Salt (1/2 teaspoon) – Enhances the overall flavor; adjust according to your taste preferences.
- Black Pepper (1/4 teaspoon) – Adds a mild heat; freshly cracked ensures the best flavor.
- Fresh Thyme or Parsley (1 teaspoon, chopped) – A great herb for garnish; chives or oregano can also add their unique flair.
Dive into this delightful Stuffed Mushroom Dip adventure and prepare for an unforgettable taste experience!
Step‑by‑Step Instructions for Stuffed Mushroom Dip
Step 1: Sauté the Mushrooms
Heat 2 tablespoons of olive oil or butter in a large skillet over medium heat. Once hot, add 8 ounces of sliced mushrooms, allowing them to brown and soften for about 8-10 minutes. Stir occasionally until they are tender and have released their moisture, enhancing their rich flavor and aroma.
Step 2: Add Garlic
Stir in 2 minced garlic cloves and cook for an additional minute, until fragrant. Keep the heat on medium and ensure the garlic doesn’t burn, as it can turn bitter. This step adds an aromatic depth that beautifully complements the sautéed mushrooms in your Stuffed Mushroom Dip.
Step 3: Incorporate Creamy Ingredients
Reduce the heat to low and add 8 ounces of softened cream cheese along with ½ cup of sour cream to the skillet. Stir gently until both ingredients melt and combine seamlessly, creating a luscious and creamy base for your dip. The mixture should be smooth with no lumps remaining.
Step 4: Mix in Cheeses
To the creamy mixture, add ½ cup of shredded mozzarella and ¼ cup of grated Parmesan cheese. Stir until the cheeses are fully melted and melded into the dip, creating a gooey texture. This rich combination amplifies the flavor profile, making your Stuffed Mushroom Dip extra delightful.
Step 5: Prepare for Baking
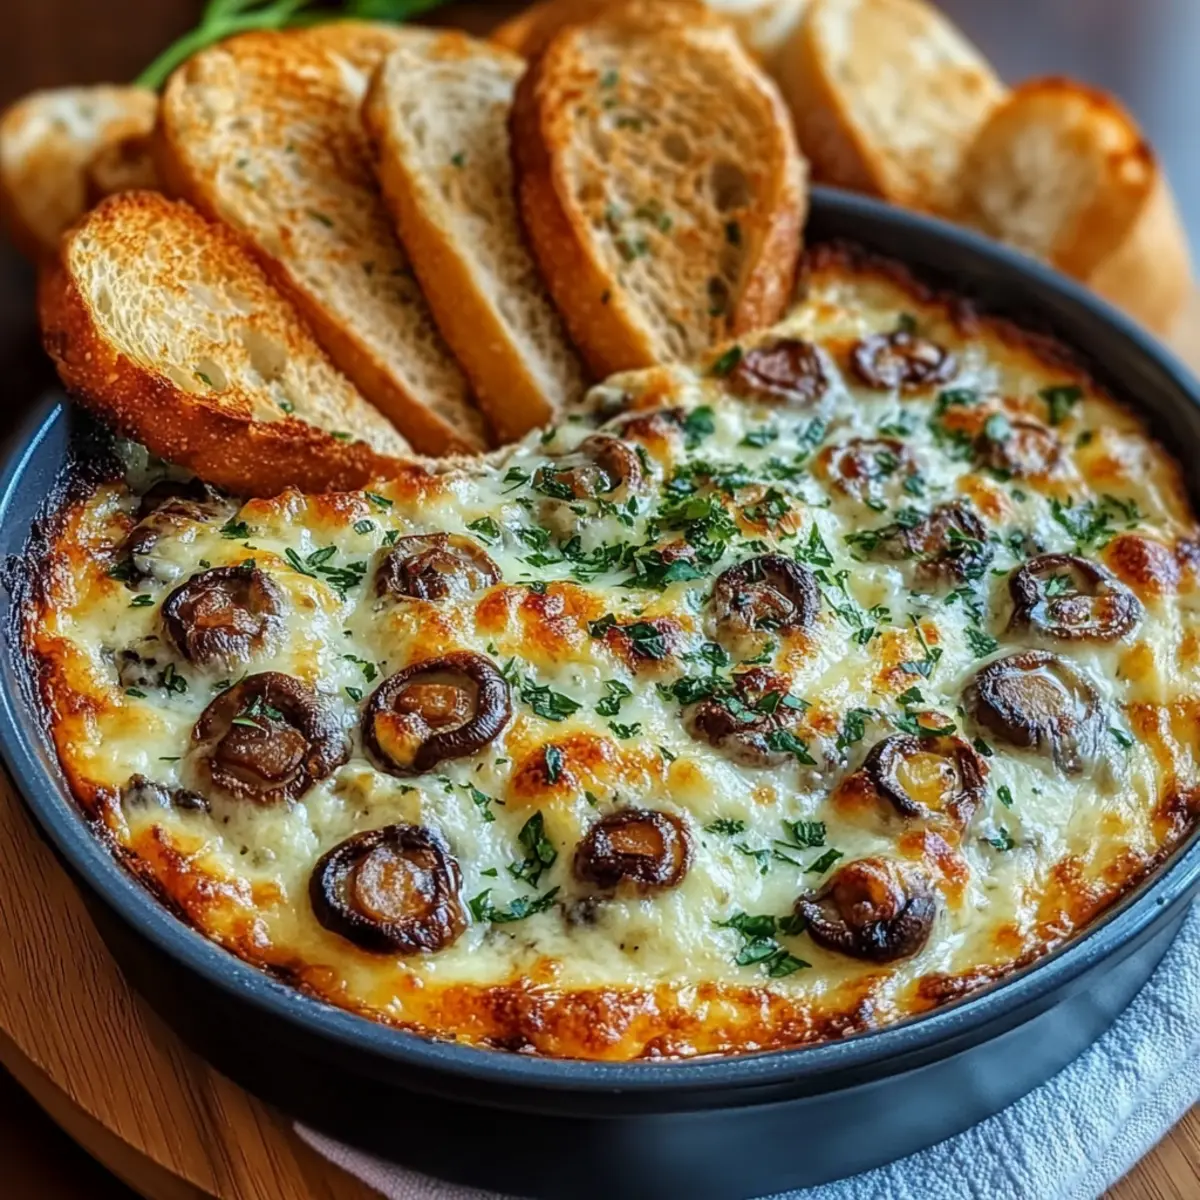
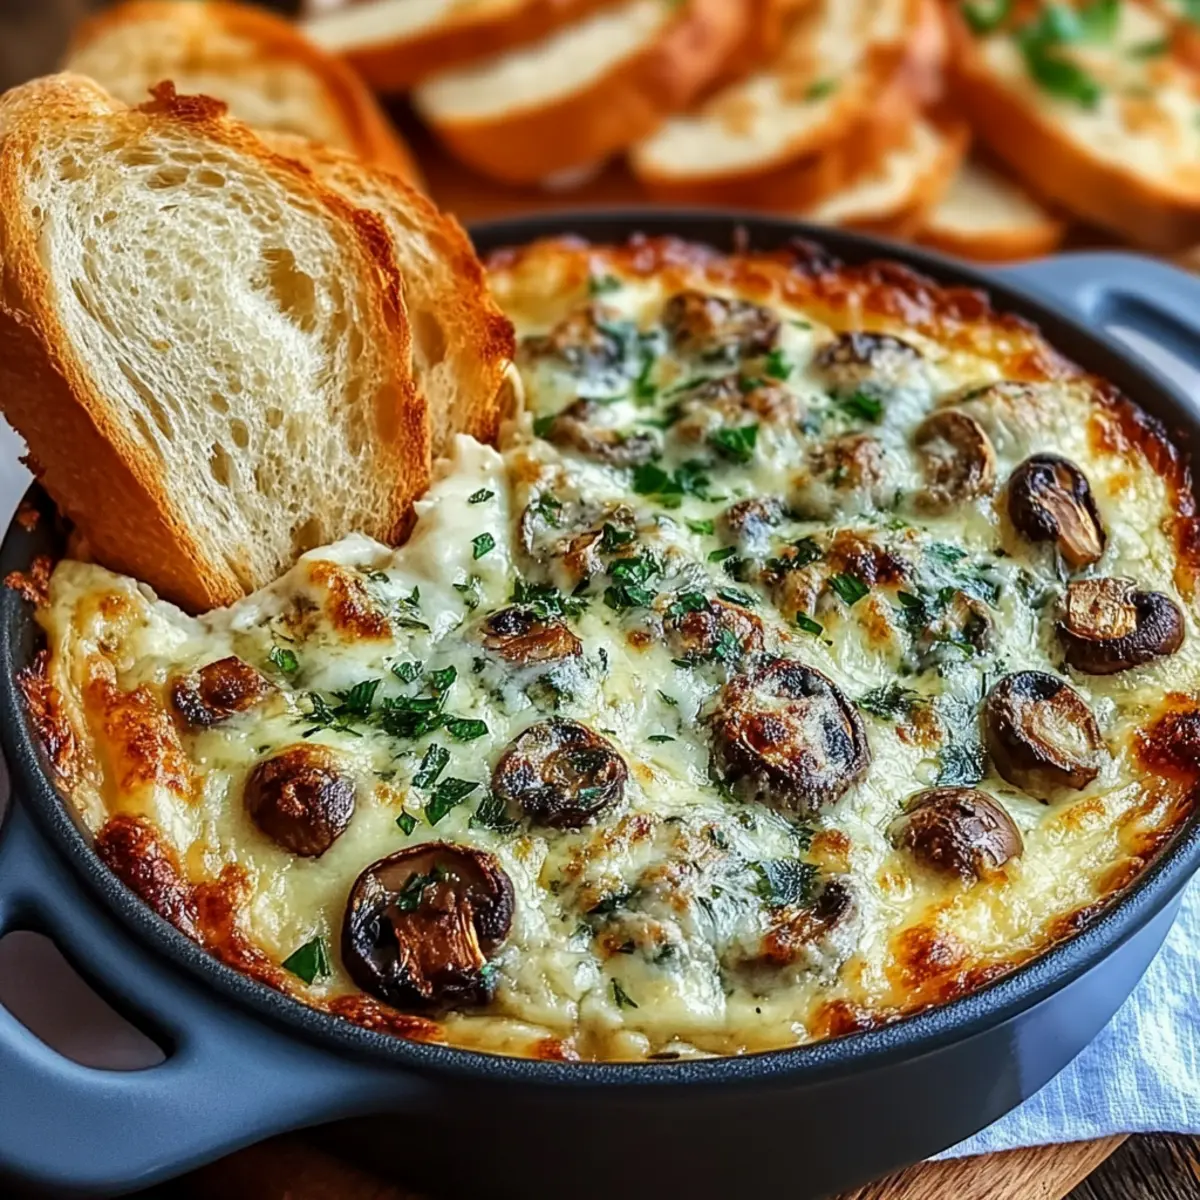
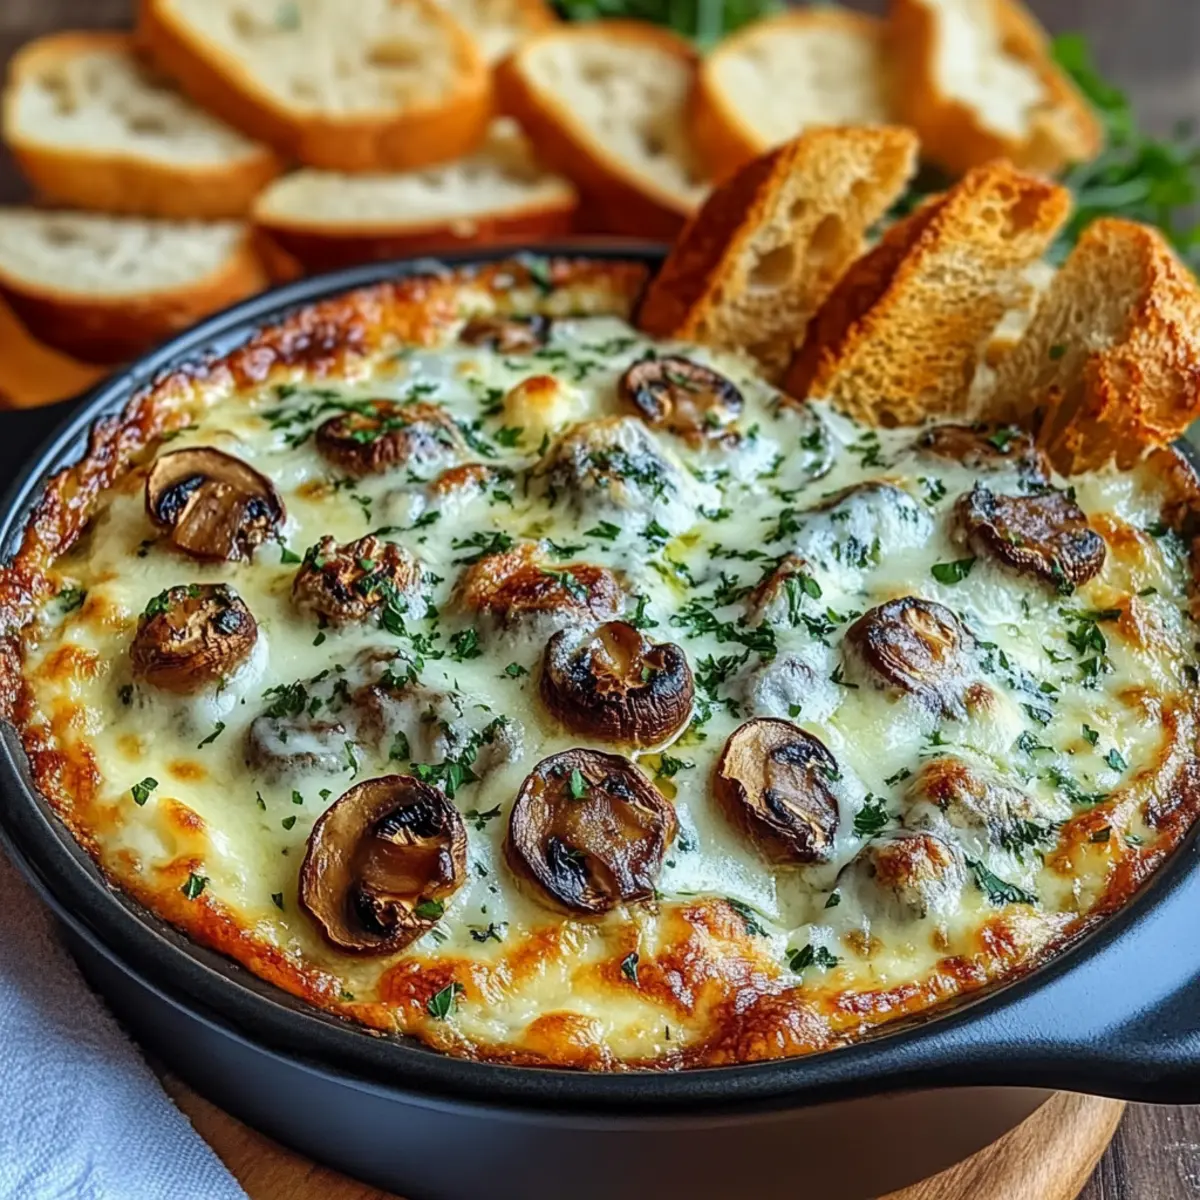
Transfer the dip mixture into a greased baking dish or keep it in your skillet if oven-safe. Sprinkle the remaining ½ cup of mozzarella cheese evenly on top, creating a cheesy layer that will melt and bubble into a golden crust when baked.
Step 6: Bake Until Golden
Preheat your oven to 375°F (190°C) and place the dip in the oven for 15-20 minutes. Bake until the dip is piping hot, bubbly, and golden on top. Keep an eye on it to avoid burning; you want that gooey, inviting appearance that pulls everyone in.
Step 7: Garnish and Serve
Once out of the oven, sprinkle with freshly chopped thyme or parsley for a burst of color and flavor. Serve your warm Stuffed Mushroom Dip immediately with toasted baguette slices, crackers, or fresh vegetable sticks, allowing everyone to enjoy this comforting and scrumptious appetizer!
Expert Tips for Stuffed Mushroom Dip
-
Sautéing Technique: Ensure you sauté the mushrooms over medium heat; too high can burn them, resulting in a bitter flavor in your Stuffed Mushroom Dip.
-
Cream Cheese Softness: Always use softened cream cheese; it combines smoothly into the dip. Take it out of the fridge about 30 minutes before starting.
-
Flavor Boost: For an extra kick, consider adding a splash of white wine while sautéing the mushrooms; it enhances the umami flavor wonderfully.
-
Cheese Variety: Don’t hesitate to mix cheese types! A blend of cheeses, like gouda or sharp cheddar, can elevate the taste of your Stuffed Mushroom Dip.
-
Serving Temperature: Serve the dip immediately after baking for the best texture and flavor, as it’s best enjoyed warm and bubbly.
Make Ahead Options
These Cheesy Stuffed Mushroom Dips are perfect for busy cooks who want to save time without sacrificing flavor! You can prepare the dip up to 24 hours in advance by following the recipe instructions until the baking step. Just cover the bowl with plastic wrap and refrigerate it. To maintain its creamy texture and avoid browning, ensure it is well-sealed. When you're ready to serve, simply preheat your oven to 375°F and bake the dip for 15-20 minutes until it’s bubbly and golden. You’ll have a delicious appetizer that’s just as delightful as if it were freshly made!
Storage Tips for Stuffed Mushroom Dip
Fridge: Store leftover Stuffed Mushroom Dip in an airtight container for up to 3 days. Make sure it's completely cooled before sealing to prevent moisture build-up.
Reheating: To reheat, place in the microwave until warm, or bake in the oven at 350°F (175°C) for 10-15 minutes, until heated through and bubbly.
Freezer: Freezing is not recommended due to potential separation of cheeses upon thawing. Instead, enjoy fresh for optimal flavor and texture.
Make-Ahead: Prepare the dip up to the baking step, refrigerate, and bake when ready to serve for easy entertaining!
Stuffed Mushroom Dip Variations & Substitutions
Explore the comforting world of customization with this delightful dish! Let your creativity shine by adding your personal touch to the flavor profile.
- Dairy-Free: Replace cream cheese and sour cream with cashew cream and coconut yogurt for a tasty vegan twist. These alternatives will keep the dip creamy and delicious!
- Extra Cheesy: Add a mix of sharp white cheddar and Gruyère to boost flavor complexity. The result is an unforgettable cheese lover's dream!
- Vegetarian Protein: Stir in a cup of cooked spinach or chopped artichoke hearts for added texture and nutrition, transforming your dip into a nourishing option that's still indulgent.
- Taco-Inspired: Incorporate taco seasoning and diced jalapeños for a zesty kick. Serve with tortilla chips instead of crackers for a fun twist on flavors!
- Hearty Additions: Mix in crispy bacon or crumbled sausage for a meaty version that will satisfy heartier appetites. The smoky flavor pairs beautifully with the rich cheeses!
- Gluten-Free: Swap out traditional crackers for gluten-free options or serve with sliced veggies for dipping. Consider using Grilled Mushrooms Savory on the side for more mushroom goodness!
- Mediterranean Flair: Add olives or sun-dried tomatoes for an aromatic surprise. This spin creates a bright, fresh flavor that dances on the palate!
- Layered Experience: Bake the dip in a pita pocket or serve atop toasted bread for an exciting twist. This not only elevates presentation but also provides delicious dippable vehicles.
Let these variations inspire you as you craft a Stuffed Mushroom Dip that reflects your unique tastes!
What to Serve with Stuffed Mushroom Dip
Create the perfect spread alongside this creamy delight to impress your guests with a delightful meal experience.
-
Toasted Baguette Slices: Simple yet classic, these slices provide a crunchy base that contrasts beautifully with the creamy dip.
-
Pita Chips: Their crisp texture and subtle flavor make them an excellent vehicle for the rich Stuffed Mushroom Dip, inviting every scoop.
-
Fresh Vegetable Sticks: Crisp celery, carrots, and bell peppers add a refreshing and healthy touch, balancing the richness of the dip.
-
Cheesy Garlic Bread: Elevate your appetizer platter with slices of warm, cheesy garlic bread, adding an irresistible aroma and flavor to every bite.
-
Savory Spinach Salad: A light salad with fresh greens, toasted walnuts, and a tangy dressing makes a delightful counterpoint to the creamy dip.
-
Red Wine: A glass of fruity red wine enhances the earthy flavors of the mushrooms, turning your gathering into a cozy celebration.
For a touch of sweetness after enjoying this hearty dip, why not end on a high note with chocolate mousse? Its creaminess pairs just right with the savory notes of the Stuffed Mushroom Dip.
Stuffed Mushroom Dip Recipe FAQs
How do I select the best mushrooms for the Stuffed Mushroom Dip?
To achieve the best flavor and texture in your Stuffed Mushroom Dip, opt for fresh mushrooms that are firm and have a smooth surface. Avoid mushrooms with dark spots all over, as they may be past their prime. If possible, choose baby bella or cremini mushrooms for an earthier taste, but white button mushrooms will work just fine!
What are the best storage methods for leftover Stuffed Mushroom Dip?
Store leftover Stuffed Mushroom Dip in an airtight container in the refrigerator for up to 3 days. Make sure to allow it to cool completely before sealing to avoid moisture build-up. When you're ready to enjoy it again, simply reheat in the microwave or bake at 350°F for about 10-15 minutes until warm and bubbly.
Can I freeze Stuffed Mushroom Dip?
Freezing is not recommended for the Stuffed Mushroom Dip due to the potential for the cheese to separate upon thawing, which can alter the dip's texture. It's best enjoyed fresh! However, you can prepare the dip up to the baking step, refrigerate it, and bake when you're ready to serve it to save time.
What dietary considerations should I keep in mind while making Stuffed Mushroom Dip?
If you're making this dip for guests with dietary restrictions, consider using gluten-free crackers for serving, or opt for fresh vegetables like celery or bell pepper sticks. For those with dairy allergies, you can substitute the cream cheese and sour cream with vegan alternatives. Be sure to double-check the ingredient labels for any allergens.
What should I do if my Stuffed Mushroom Dip doesn’t melt smoothly?
If your dip seems to be clumping rather than melting smoothly, it may be due to the cream cheese being too cold when added. Always ensure your cream cheese is softened prior to mixing. If it still does not combine well, try gradually adding a splash of milk or cream while stirring to help achieve a smoother texture.
How can I enhance the flavor of my Stuffed Mushroom Dip?
To elevate the flavors of your Stuffed Mushroom Dip, consider adding a splash of white wine while sautéing the mushrooms for an extra depth of flavor. Alternatively, experimenting with different cheese combinations, like sharp cheddar or Gruyère instead of mozzarella, can bring a delightful twist to this classic dip.
Decadent Stuffed Mushroom Dip that Everyone Will Love
Ingredients
Equipment
Method
- Heat 2 tablespoons of olive oil or butter in a large skillet over medium heat. Add 8 ounces of sliced mushrooms and sauté for about 8-10 minutes until browned and softened.
- Stir in 2 minced garlic cloves and cook for an additional minute until fragrant, ensuring garlic doesn’t burn.
- Reduce heat to low and add 8 ounces of softened cream cheese and 1/2 cup of sour cream. Stir until smooth and combined.
- Add 1/2 cup of shredded mozzarella and 1/4 cup of grated Parmesan cheese to the mixture, stirring until fully melted.
- Transfer the dip to a greased baking dish and sprinkle the remaining 1/2 cup of mozzarella cheese on top.
- Preheat the oven to 375°F (190°C) and bake the dip for 15-20 minutes until bubbly and golden.
- Garnish with freshly chopped thyme or parsley and serve warm with toasted baguette slices, crackers, or fresh veggies.