tastytrendingredients

  • Home
  • Recipes
    • Appetizers
    • Breakfast
    • Dessert
    • Dinner
    • Drinks
    • Salads
    • Snacks
    • Soups
  • About me
  • Contact
menu icon
go to homepage
  • Home
  • Recipes
    • Appetizers
    • Breakfast
    • Dessert
    • Dinner
    • Drinks
    • Salads
    • Snacks
    • Soups
  • About me
  • Contact
search icon
Homepage link
  • Home
  • Recipes
    • Appetizers
    • Breakfast
    • Dessert
    • Dinner
    • Drinks
    • Salads
    • Snacks
    • Soups
  • About me
  • Contact
×

Savory Chicken Tsukune: Irresistible Japanese Meatballs

September 20, 2025 by Grace Snow Leave a Comment

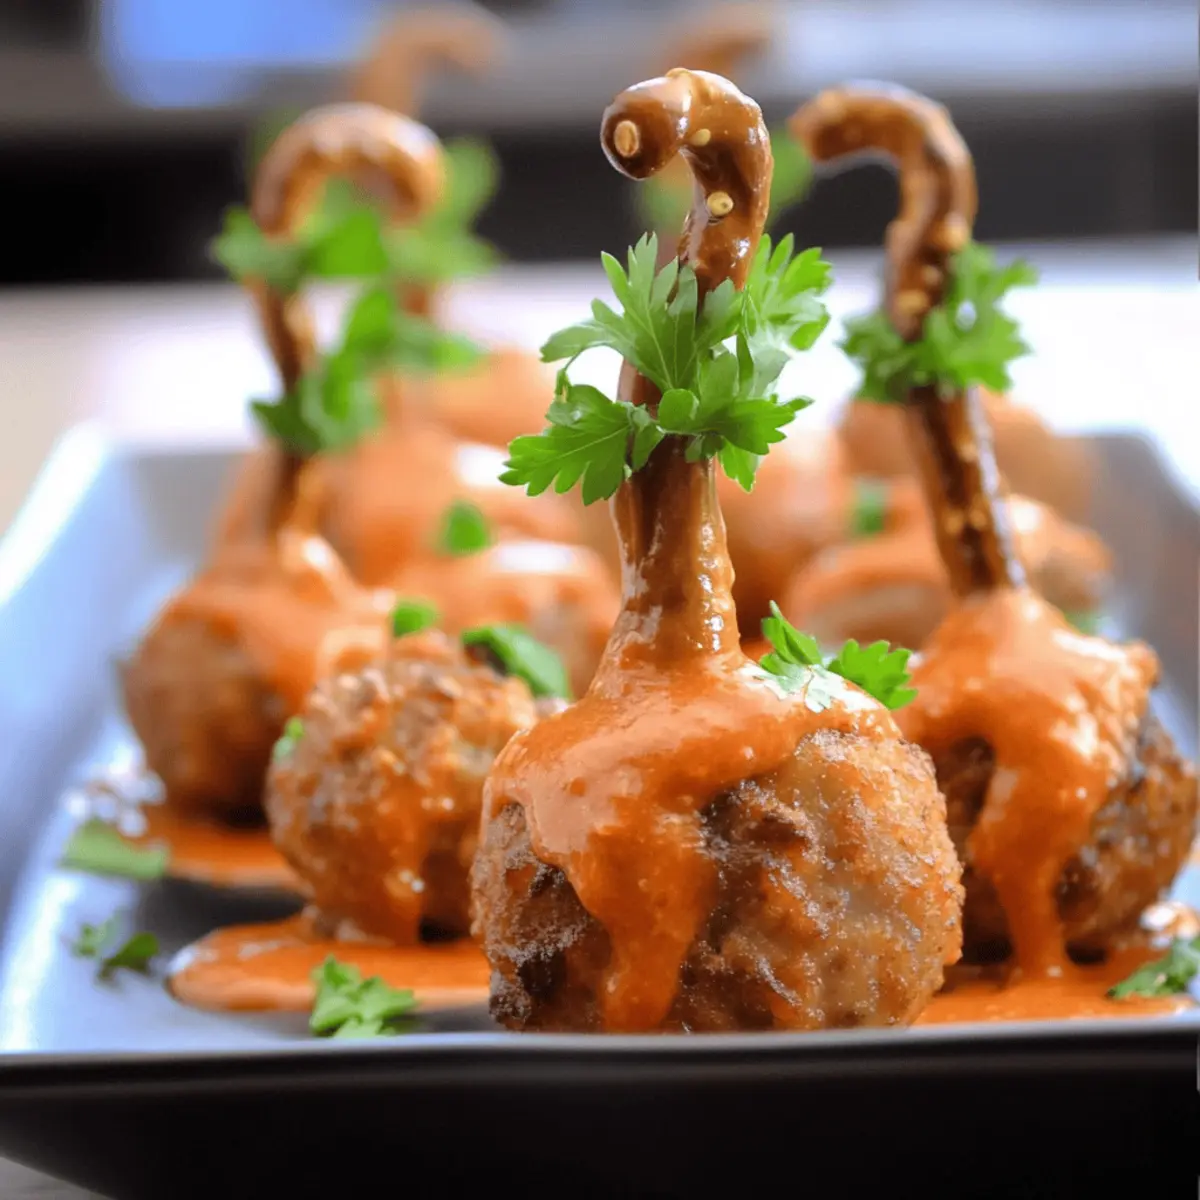
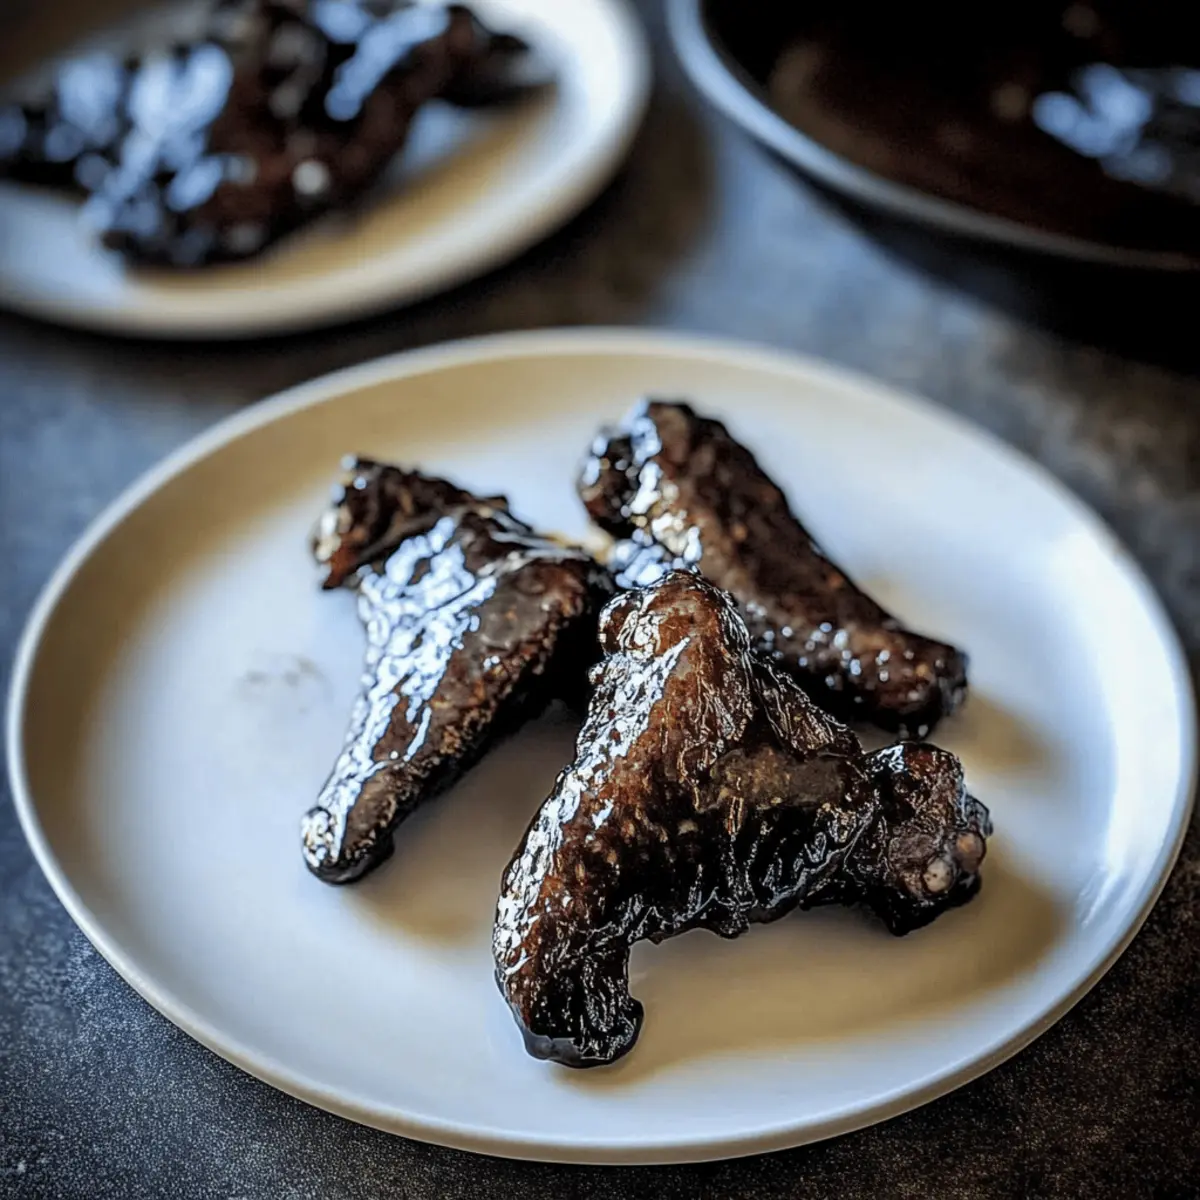
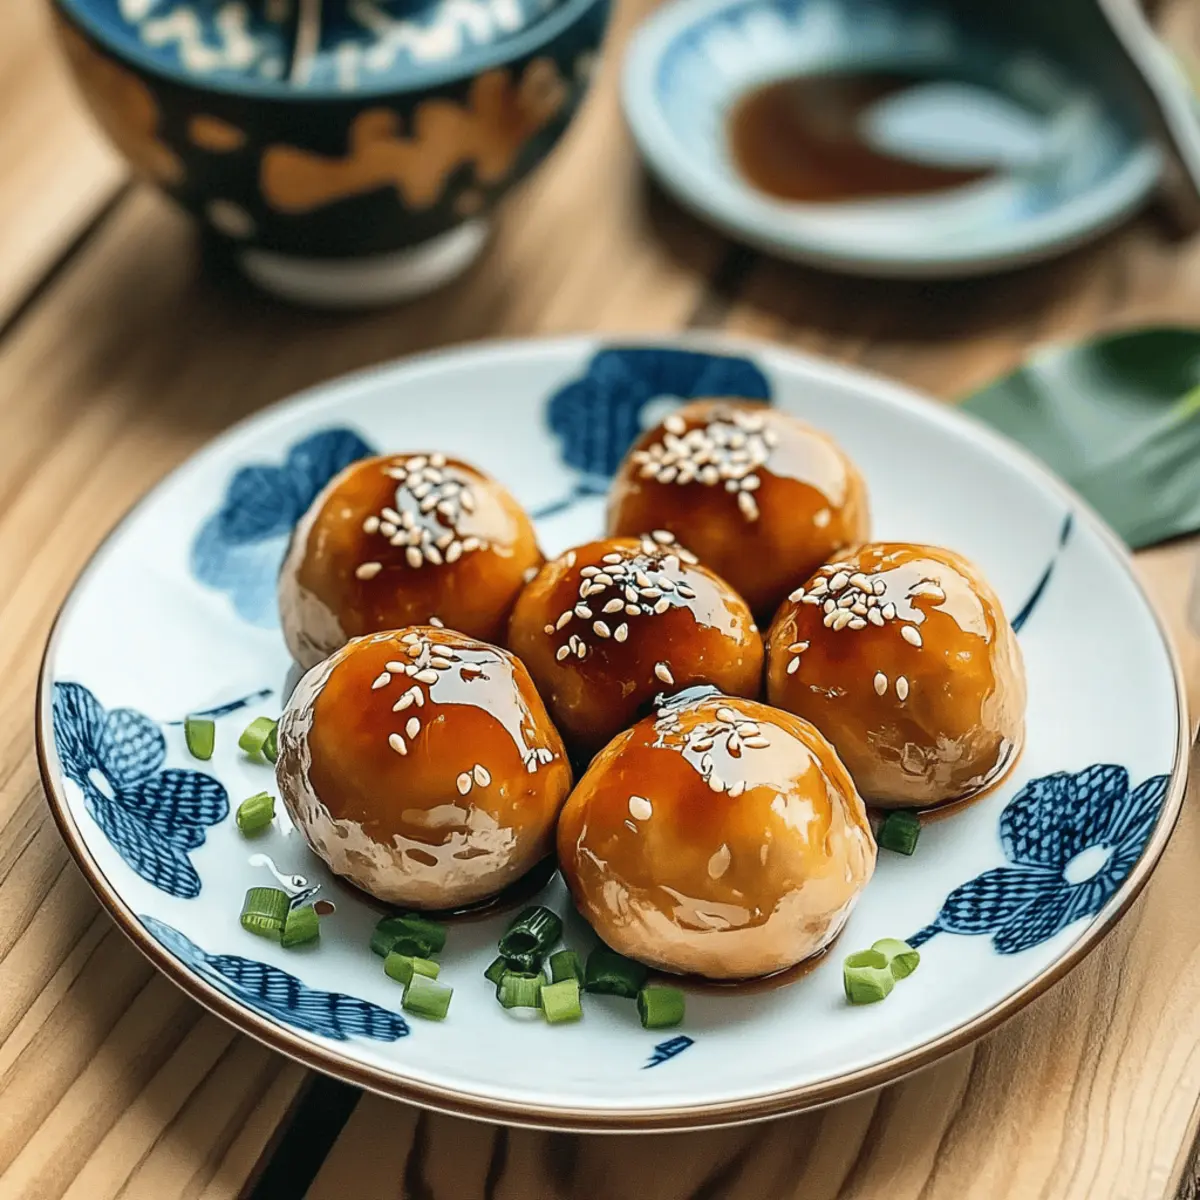
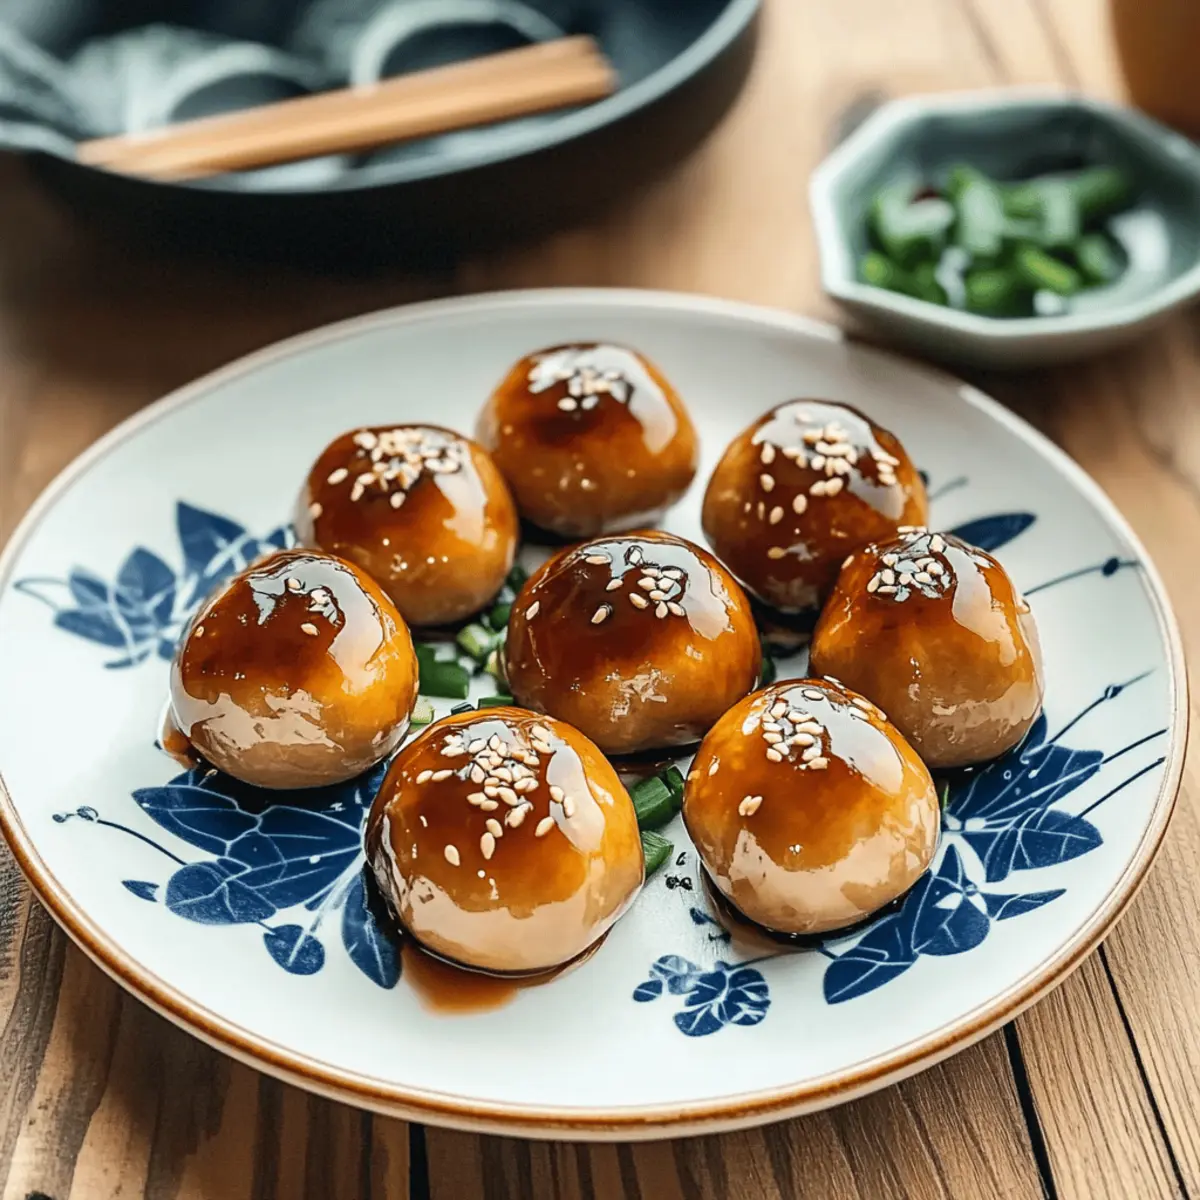
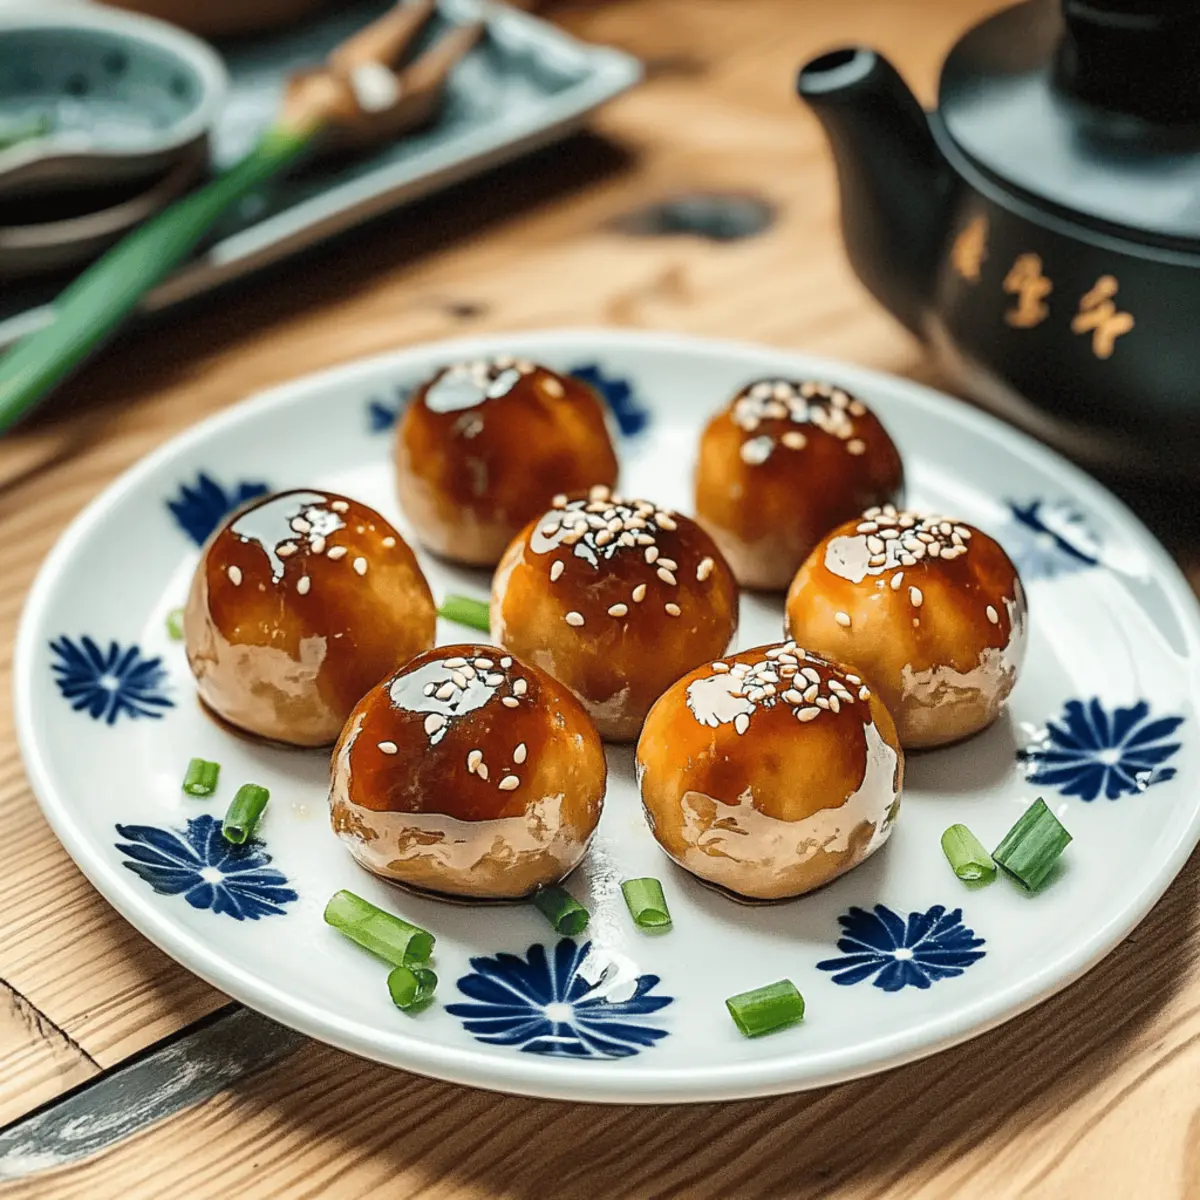
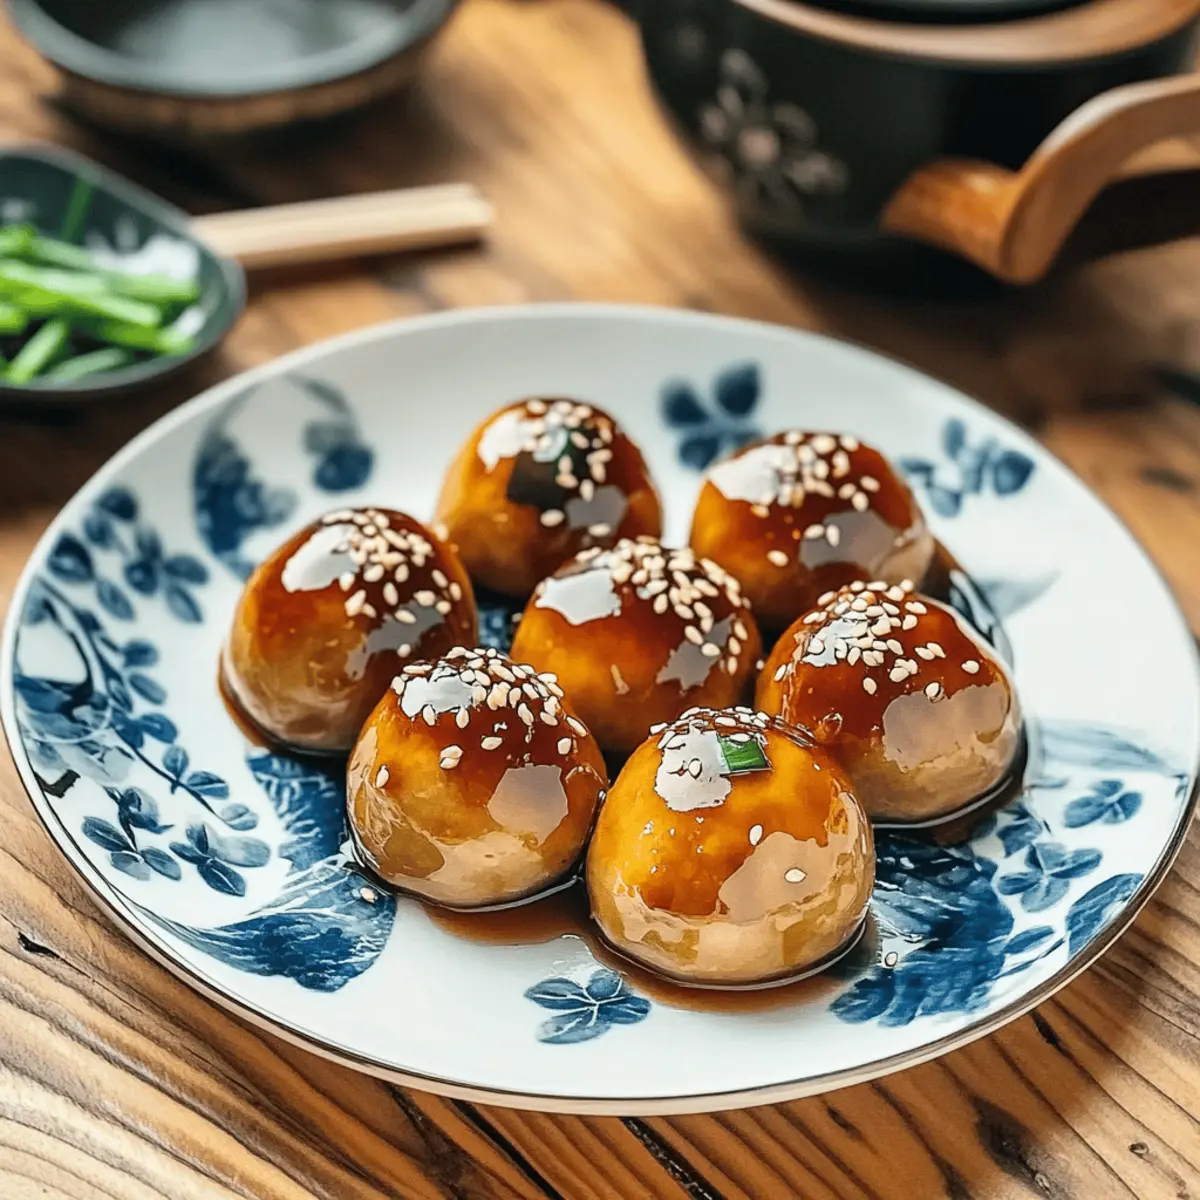
As I walked through the bustling streets of Tokyo, the tantalizing aroma of grilled meatballs wafted through the air, instantly sparking my curiosity. That warm, savory scent belongs to none other than Chicken Tsukune, the beloved Japanese glazed meatballs that blend spice and comfort in every bite. These tender, juicy morsels are a delight to prepare and serve, making them perfect for appetizers or even a light meal. With a quick prep time, you can easily whip up these delicious nuggets of flavor to impress friends and family—or simply to satisfy that craving for something truly special. Best of all, they come with gluten-free options and can be made with various meats to suit your taste. Ready to enjoy a taste of Japan without leaving your kitchen? Let’s dive into this flavorful Chicken Tsukune recipe!

What makes Chicken Tsukune a must-try?

Irresistible Flavor: The combination of ginger and shiso gives these meatballs a unique twist that dances on your taste buds.

Quick and Easy: With a simple prep time, you can whip up these delectable nuggets in no time, perfect for unexpected guests or a cozy night in.

Versatile Options: Feel free to experiment using other meats like turkey or pork, accommodating any dietary preferences you may have.

Perfect for Sharing: Serve them skewered as an appetizer or with rice in a bento box, making them ideal for hosting or family meals.

Crowd-Pleaser: Whether you’re on your own or entertaining friends, these Chicken Tsukune will surely impress and satisfy everyone at the table.

Chicken Tsukune Ingredients

For the Meatballs
• Grated Onion – Adds moisture and sweetness; make sure to drain to avoid sogginess.
• Ground Chicken – Provides the main protein component; you can use chicken breast or thigh.
• Perilla Leaves (Shiso) – Introduces a unique herby flavor; substitute with basil or mint for a different taste.
• Japanese Mayonnaise – Adds creaminess; you can replace it with regular mayonnaise if unavailable.
• Ginger – Gives warmth and zest; freshly grated is recommended for the best flavor.
• Yellow Miso Paste – Adds depth and umami; can be replaced with soy sauce for a gluten-free option.
• Chinese-Style Chicken Bouillon Powder – Enhances flavor; alternate with vegetable broth for a milder taste.
• Potato Starch (Katakuriko) – Binds the mixture and gives structure; you can use tapioca starch as a substitute.
• Ground Black Pepper – For seasoning; adjust to taste for desired spice level.
• Cooking Oil – For frying; canola or vegetable oil works as alternatives.
• Bamboo Skewers (optional) – For presentation; omit if not using skewers.
• Pasteurized Egg Yolk (optional) – Adds richness for dipping; serve as a condiment on the side.

For the Sauce
• Soy Sauce – The base for the savory glaze; mix with mirin and sugar for a sweet balance.
• Mirin – Adds a touch of sweetness; it harmonizes beautifully with the soy sauce.
• Red Wine – Deepens the flavor of the sauce; you can use cooking sake as a substitution.
• Sugar – Balances the sauce's umami; adjust according to your sweetness preference.

Step‑by‑Step Instructions for Chicken Tsukune

Step 1: Prepare Ingredients
Start by grating the onion and draining it thoroughly to avoid a soggy mixture. Set it aside in a bowl. Next, gather all other ingredients including ground chicken, perilla leaves, mayonnaise, ginger, miso, bouillon powder, potato starch, and black pepper. This step will ensure a smooth mixing process later.

Step 2: Mix Ingredients
In a large mixing bowl, combine the drained onion with the ground chicken, chopped perilla leaves, mayonnaise, freshly grated ginger, yellow miso paste, chicken bouillon powder, potato starch, and ground black pepper. Using your hands or a spatula, mix the ingredients until well combined and slightly sticky, which helps the Chicken Tsukune hold its shape during cooking.

Step 3: Shape Meatballs
Divide the mixture into five equal portions. With your hands, shape each portion into elongated meatballs or balls, making sure they are uniform in size. For easy handling, consider using baking parchment underneath while shaping. This will help prevent sticking and ensure neat presentation when cooking your delectable Chicken Tsukune.

Step 4: Cook Meatballs
Heat a non-stick skillet over medium heat and add a splash of cooking oil. Once the oil is shimmering, carefully place the shaped Chicken Tsukune into the skillet. Cook for about 2-3 minutes on each side until they achieve a golden brown color. Ensure they are cooked through and juicy by checking for a firm texture.

Step 5: Make Sauce
As the Chicken Tsukune cooks, prepare the glaze: in a small bowl, whisk together soy sauce, mirin, red wine, and sugar until sugar dissolves. Once the meatballs are browned and cooked through, pour the sauce into the skillet. Gently stir to coat the meatballs evenly, letting the sauce thicken slightly for 1-2 minutes over low heat.

Step 6: Skewer and Serve
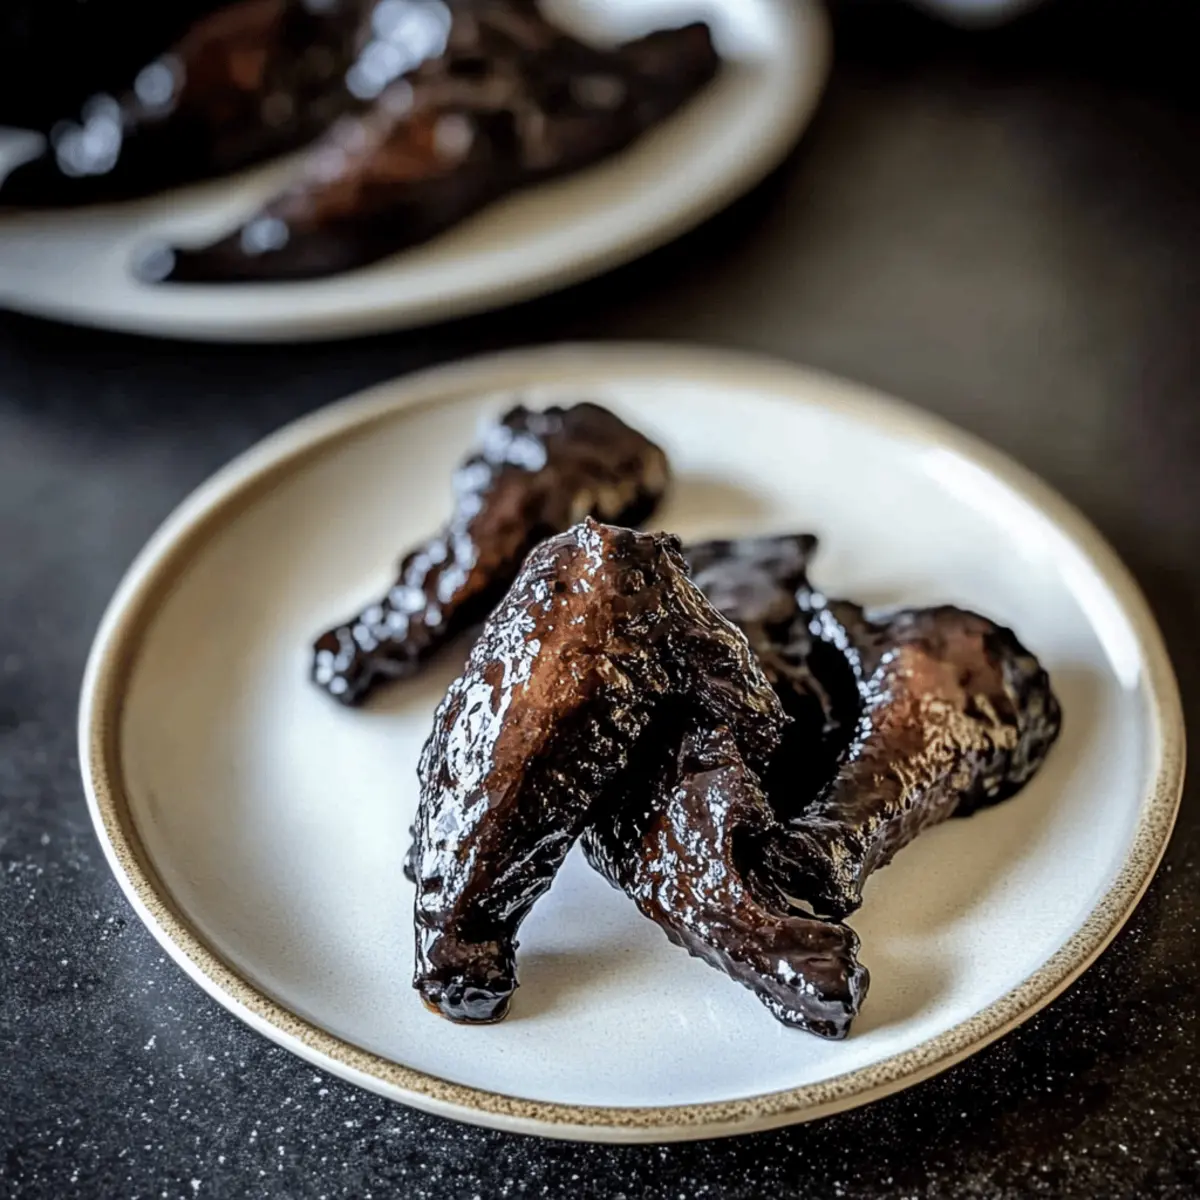
For a beautiful presentation, optionally skewer the Chicken Tsukune using bamboo skewers. Sprinkle some toasted sesame seeds and finely chopped spring onion on top for added flavor and contrast. Serve your delicious Chicken Tsukune with a side of raw egg yolk for dipping, offering rich and creamy indulgence that perfectly complements the savory meatballs.

Make Ahead Options

These Chicken Tsukune are perfect for busy weeknights and meal prep enthusiasts! You can mix and shape the meatballs up to 24 hours in advance; simply store them in an airtight container in the refrigerator to maintain their moisture and flavor. Additionally, the sauce can be prepared up to 3 days ahead—just keep it in a sealed jar in the fridge. When you're ready to serve, heat the meatballs in a skillet over medium heat and add the sauce, allowing the flavors to meld for a few minutes. This way, you’ll have the delightful taste of Chicken Tsukune on your table with minimal effort, making your meal planning a breeze!

Chicken Tsukune Variations & Substitutions

Feel free to explore and make this Chicken Tsukune recipe your own with delightful twists and substitutions!

  • Turkey Option: Substitute ground chicken with ground turkey for a leaner meatball that still delivers on flavor.
  • Pork or Beef: Use ground pork or beef instead; just adjust seasonings to complement the meat's natural taste.
  • Herb Swap: Sprinkle in your choice of herbs like cilantro or parsley instead of perilla leaves for a refreshing flavor alteration.
  • Gluten-Free Alternative: Replace yellow miso with gluten-free soy sauce and ensure your cooking oil and mayonnaise are also gluten-free.
  • Egg-Free: Omit the pasteurized egg yolk for dipping; you can enjoy these meatballs without it or serve with a delicious dipping sauce instead.
  • Spicy Kick: Add a dash of chili flakes or sriracha to the mixture for an exciting heat level that packs a punch.

If you'd like to try something different yet equally delightful, you might enjoy my Chipotle Lime Chicken and Rice or Honey Garlic Chicken, both fantastic in their own right! Enjoy the freedom to mix and match, enhancing these juicy meatballs to best suit your family's tastes.

What to Serve with Chicken Tsukune

Transform your Chicken Tsukune into an unforgettable meal with these delightful side dishes that perfectly complement their flavors.

  • Steamed Rice: A classic pairing, fluffy white rice absorbs the savory glaze and balances the dish, creating a satisfying meal.

  • Japanese Pickles: Add a refreshing crunch to your meal with tangy pickles that enhance the overall taste experience while adding vibrant color to your plate.

  • Miso Soup: This comforting soup offers a warm and umami-rich flavor that pairs beautifully with the savory notes of the Chicken Tsukune, creating a cozy dining experience.

  • Cabbage Salad: Crisp cabbage lightly dressed in sesame vinaigrette brings a refreshing, crunchy contrast to the tender meatballs, cutting through their richness.

  • Sake or Beer: A chilled glass of sake or a light beer provides a perfect drink to accompany your Chicken Tsukune, enhancing the meal's cultural essence.

  • Chilled Edamame: Lightly salted and served warm, these nutrient-packed pods are a wonderful, protein-rich snack that complements the flavors of the meatballs and adds a fun texture to your meal.

  • Fruit Salad: A lightly sweetened fruit salad with juicy melons or citrus not only refreshes the palate but also offers a delightful contrast to the savory dish.

  • Matcha Green Tea: To finish your meal, a cup of warm matcha green tea adds a calming touch, its earthy flavor harmonizing beautifully with the Chicken Tsukune’s profile.

Expert Tips for Chicken Tsukune

  • Drain Onion Thoroughly: Make sure to remove all moisture from the grated onion to avoid a soggy mixture that won't hold its shape.

  • Use Cold Ingredients: Keeping your ground chicken and other ingredients cool helps the Chicken Tsukune maintain a tender texture during cooking.

  • Monitor Cooking Temperature: Use medium heat to prevent the glaze from burning; reduce the heat if you see smoke or smell burning.

  • Consistent Sizing: Shape meatballs of uniform size to ensure even cooking; larger pieces may take longer to cook thoroughly.

  • Experiment with Seasonings: Customize your Chicken Tsukune by adjusting the seasonings or using different meats to suit your taste preferences.

How to Store and Freeze Chicken Tsukune

Fridge: Store leftovers in an airtight container in the refrigerator for up to 3 days. Make sure they're completely cooled before sealing to avoid moisture buildup.

Freezer: To freeze Chicken Tsukune, place the cooled meatballs in a single layer on a baking sheet, freeze until firm, then transfer to a freezer bag for up to 1 month.

Reheating: Thaw frozen Chicken Tsukune in the fridge overnight. Reheat in a skillet over medium heat with a splash of water, or microwave on medium until heated through, ensuring they stay juicy.

Wrapping: For best results, wrap individual meatballs in plastic wrap before freezing, or layer them with parchment paper to prevent sticking.

Chicken Tsukune Recipe FAQs

What type of ground chicken is best for Chicken Tsukune?
Absolutely! You can use either chicken breast or thighs for your Chicken Tsukune. While breast meat is lean and has a milder taste, chicken thighs offer more juiciness and rich flavor, making them an excellent choice if you want tender, flavorful meatballs.

How should I store leftover Chicken Tsukune?
To keep your delicious Chicken Tsukune fresh, store leftovers in an airtight container in the refrigerator for up to 3 days. Make sure they are completely cooled before sealing the container to prevent any moisture from building up, which can make them soggy.

Can I freeze Chicken Tsukune for later?
Very! To freeze Chicken Tsukune, start by placing the cooled meatballs in a single layer on a baking sheet. Freeze them until they're firm, usually about 1-2 hours, and then transfer them to a freezer bag or airtight container. They can be stored in the freezer for up to 1 month. When you’re ready to eat, simply thaw them in the fridge overnight before reheating.

What should I do if my Chicken Tsukune mixture is too wet?
If your mixture seems too wet, don't worry! Simply add a bit more potato starch or a handful of breadcrumbs to help bind everything together. Make sure to mix thoroughly to incorporate the additional ingredients evenly. If the grated onion is too juicy, you might want to consider draining it even more or using less onion in your next batch.

Can I use a different type of meat for Chicken Tsukune?
Absolutely! While ground chicken is traditional, you can definitely switch it up and use ground turkey, pork, or even beef. Adjust the seasonings and cooking times according to the meat's unique flavors and textures to ensure each version of your Chicken Tsukune is delicious and tailored to your preferences.

Is this recipe gluten-free?
Yes! This Chicken Tsukune recipe can easily be made gluten-free by substituting the yellow miso paste with gluten-free soy sauce. Additionally, ensure that any cooking sauces or condiments you use, such as the Japanese mayonnaise, are also gluten-free, and you can enjoy these tasty meatballs worry-free!

Chicken Tsukune

Savory Chicken Tsukune: Irresistible Japanese Meatballs

Delight in these Chicken Tsukune, Japanese glazed meatballs that mix savory flavors and spices, perfect for appetizers or light meals.
Print Recipe Pin Recipe
Prep Time 15 minutes mins
Cook Time 10 minutes mins
Total Time 25 minutes mins
Servings: 4 meatballs
Course: Appetizers
Cuisine: Japanese
Calories: 120
Ingredients Equipment Method Nutrition Notes

Ingredients
  

For the Meatballs
  • 1 cup Grated Onion Make sure to drain to avoid sogginess.
  • 1 pound Ground Chicken You can use chicken breast or thigh.
  • 5 leaves Perilla Leaves (Shiso) Substitute with basil or mint for a different taste.
  • 2 tablespoons Japanese Mayonnaise You can replace it with regular mayonnaise if unavailable.
  • 1 tablespoon Ginger Freshly grated is recommended for the best flavor.
  • 1 tablespoon Yellow Miso Paste Can be replaced with soy sauce for a gluten-free option.
  • 1 teaspoon Chinese-Style Chicken Bouillon Powder Alternate with vegetable broth for a milder taste.
  • 2 tablespoons Potato Starch (Katakuriko) You can use tapioca starch as a substitute.
  • 1 teaspoon Ground Black Pepper Adjust to taste for desired spice level.
  • 2 tablespoons Cooking Oil Canola or vegetable oil works as alternatives.
  • 6 pieces Bamboo Skewers Omit if not using skewers.
  • 1 each Pasteurized Egg Yolk Serve as a condiment on the side.
For the Sauce
  • 2 tablespoons Soy Sauce Mix with mirin and sugar for a sweet balance.
  • 1 tablespoon Mirin It harmonizes beautifully with the soy sauce.
  • 1 tablespoon Red Wine You can use cooking sake as a substitution.
  • 1 tablespoon Sugar Adjust according to your sweetness preference.

Equipment

  • Skillet
  • Bowl
  • Spatula

Method
 

Step‑by‑Step Instructions for Chicken Tsukune
  1. Start by grating the onion and draining it thoroughly to avoid a soggy mixture. Set it aside in a bowl.
  2. In a large mixing bowl, combine the drained onion with the ground chicken, chopped perilla leaves, mayonnaise, freshly grated ginger, yellow miso paste, chicken bouillon powder, potato starch, and ground black pepper. Mix until well combined and slightly sticky.
  3. Divide the mixture into five equal portions and shape each portion into elongated meatballs or balls.
  4. Heat a non-stick skillet over medium heat and add a splash of cooking oil. Place the shaped Chicken Tsukune into the skillet and cook for about 2-3 minutes on each side until golden brown.
  5. Prepare the glaze by whisking together soy sauce, mirin, red wine, and sugar. Once the meatballs are browned, pour the sauce into the skillet and gently stir to coat the meatballs.
  6. Optionally skewer the Chicken Tsukune using bamboo skewers and serve with a side of raw egg yolk for dipping.

Nutrition

Serving: 1meatballCalories: 120kcalCarbohydrates: 5gProtein: 10gFat: 7gSaturated Fat: 2gPolyunsaturated Fat: 1gMonounsaturated Fat: 4gCholesterol: 40mgSodium: 300mgPotassium: 150mgSugar: 1gVitamin A: 100IUVitamin C: 2mgCalcium: 10mgIron: 1mg

Notes

Ensure to drain the onion thoroughly and use cold ingredients for the best texture.

Tried this recipe?

Let us know how it was!

Savory Buffalo Meatball Pumpkins That Steal the Show

September 19, 2025 by Grace Snow Leave a Comment

The crisp autumn air is filled with the aroma of seasonal delights, and I can’t help but dive into the spirit of Halloween with these whimsical Buffalo Meatball Pumpkins. Picture tender meatballs dressed in a mild buffalo sauce, artfully perched on pretzel stems and topped with fresh parsley leaves to resemble adorable little pumpkins. This delightful appetizer not only captures the essence of fall gatherings but also brings the perfect blend of fun and flavor to your table. Plus, they’re gluten-free and can be prepped in no time, making them a stress-free hit for parties or cozy nights in. So, are you ready to add a playful twist to your autumn celebrations? Let’s get cooking!

Why Are Buffalo Meatball Pumpkins a Must-Try?

Festive Presentation: These adorable appetizers mimic pumpkins, making them the perfect whimsical addition to your Halloween spread.

Flavor Burst: The balance of mild buffalo sauce and juicy meatballs creates a savory delight that keeps guests coming back for more.

Super Quick Prep: With pre-cooked gluten-free meatballs and easy assembly, you can whip these up in no time—ideal for busy hosts!

Versatile Ingredients: Substitute with your favorite meatball varieties or sauces for a twist—imagine Buffalo Tofu Caesar as an alternative!

Crowd Pleaser: With their bite-sized charm, these meatballs are sure to impress both kids and adults alike—perfect for family gatherings and holiday parties!

Buffalo Meatball Pumpkins Ingredients

For the Meatballs
• Daily Chef - Casa di Bertacchi meatballs – These gluten-free, pre-cooked meatballs save time and add a delicious flavor to your Buffalo Meatball Pumpkins.

For the Sauce
• Butter – Adds richness to the sauce; use olive oil for a lighter alternative.
• Buffalo sauce – The key flavor element; mild buffalo sauce gives just the right amount of heat for everyone to enjoy.
• Pumpkin puree – Introduces a subtle sweetness and festive flair; can be swapped for additional buffalo sauce for more kick.
• Ranch dressing – Adds a creamy texture that complements the heat; feel free to use homemade ranch or swap with blue cheese dressing for a stronger flavor.

For the Assembly
• Pretzel rods – Acting as adorable pumpkin stems; broken to size, they add a whimsical touch. Braided pretzels or pretzel sticks can also be substituted.
• Fresh parsley or cilantro – Adds a pop of color and mimics leaves on your pumpkins; any fresh herb can work beautifully here.

These charming Buffalo Meatball Pumpkins are not just a feast for the eyes but also a delightful bite that will enchant your guests this autumn!

Step‑by‑Step Instructions for Buffalo Meatball Pumpkins

Step 1: Heat the Meatballs
Begin by placing 2.5 pounds of Daily Chef - Casa di Bertacchi gluten-free meatballs into a slow cooker. Cover and set the cooker to high heat, letting the meatballs warm through for about 3 to 3.5 hours. You’ll know they’re ready when they’re steaming and hot, making them perfect for the Buffalo Meatball Pumpkins assembly.

Step 2: Prepare the Buffalo Sauce
While the meatballs are heating, melt ⅓ cup of butter in a medium skillet over low heat. Once melted, stir in ½ cup of mild buffalo sauce, followed by ¼ cup of pumpkin puree and 2 tablespoons of ranch dressing. Mix thoroughly for about 3–5 minutes until you achieve a smooth and well-combined sauce that’s packed with flavor.

Step 3: Coat the Meatballs
Once the meatballs are heated through, carefully pour the prepared buffalo sauce over them in the slow cooker. Gently stir the meatballs to ensure they are evenly coated with the flavorful sauce. Allow them to sit for an additional 10–15 minutes on low heat for the sauce to meld beautifully into the Buffalo Meatball Pumpkins.

Step 4: Assemble the Pumpkins
Using tongs, transfer the sauced meatballs onto a serving tray, placing them apart for easy handling. Break the ends off the pretzel rods to create stems, then insert them into the top of each meatball. If necessary, make a small hole in the meatball to secure the pretzel stems, giving a charming pumpkin appearance.

Step 5: Garnish
To complete your delightful Buffalo Meatball Pumpkins, add a piece of fresh parsley or cilantro on top of each meatball to resemble leaves. This final touch not only adds a pop of color but also enhances the festive presentation. Serve with extra ranch dressing on the side for dipping, and watch them disappear at your gathering!

Expert Tips for Buffalo Meatball Pumpkins

  • Keep It Covered: Always cover the slow cooker while heating to maintain temperature, ensuring that the meatballs stay warm and flavorful.

  • Adjust Spiciness: Customize your buffalo sauce's heat level by varying the amount of buffalo sauce and butter; it's easy to make it more or less spicy based on your guests' preferences.

  • Secure Pretzel Stems: Make sure the pretzel rods are firmly inserted into the meatballs. If they seem loose, consider making a small hole for a snug fit to prevent them from tipping over.

  • Storage Savvy: Store any leftover Buffalo Meatball Pumpkins in an airtight container for up to 3-4 days in the refrigerator or freeze them for a quick snack later—just reheat before serving!

  • Ingredient Flexibility: Don't hesitate to swap out the meatballs or sauces to fit your taste. Vegetarian or turkey meatballs can offer a delicious twist, making this recipe adaptable for everyone.

What to Serve With Buffalo Meatball Pumpkins?

The perfect pairing elevates your festive spread and brings out the best in these whimsical Buffalo Meatball Pumpkins.

  • Crispy Veggie Platter: A colorful medley of fresh veggies complements the saucy meatballs, providing crunch and a refreshing contrast.

  • Creamy Blue Cheese Dip: This tangy dip is the classic pairing for buffalo flavors, adding a rich creaminess that balances the heat nicely.

  • Garlic Breadsticks: Soft, buttery breadsticks have that comforting warmth and are perfect for soaking up any leftover buffalo sauce.

  • Sweet Potato Wedges: Baked sweet potato wedges offer a delightful sweetness and soft texture, balancing the savory punch of the meatballs.

  • Sparkling Apple Cider: A refreshing drink that brings a festive touch! Its fruity sparkle enhances the autumnal vibe without overpowering the meal.

  • Pumpkin Spice Brownies: Cap off the evening with fudgy brownies infused with pumpkin spice, tying the seasonal theme together deliciously.

With these delightful additions, your Buffalo Meatball Pumpkins will shine even brighter at your next gathering!

How to Store and Freeze Buffalo Meatball Pumpkins

Fridge: Store leftover Buffalo Meatball Pumpkins in an airtight container for up to 3-4 days. Make sure they are completely cooled to maintain freshness.

Freezer: For longer storage, these delightful meatballs can be frozen for up to 3-4 weeks. Place them in a single layer on a baking sheet until frozen, then transfer to a freezer-safe bag.

Reheating: To reheat, thaw the meatballs overnight in the fridge and warm in the oven at 350°F (175°C) for about 20-25 minutes, or until heated through.

Assembly Tip: For best results, add pretzel stems and parsley leaves just before serving to keep them looking fresh and festive!

Make Ahead Options

These Buffalo Meatball Pumpkins are an excellent choice for busy hosts looking to save time! You can prepare the meatballs and buffalo sauce up to 24 hours in advance. Simply heat the meatballs and mix them with the buffalo sauce, then refrigerate in an airtight container. To maintain quality, ensure the meatballs are cooled completely before covering. When you're ready to serve, reheat the mixture in a slow cooker on low for about 30 minutes until warmed through. Assemble the pumpkins just before serving by adding the pretzel stems and garnishing with parsley for that delightful presentation. With this make-ahead strategy, you can enjoy stress-free entertaining while ensuring your guests savor every bite of these charming Buffalo Meatball Pumpkins!

Buffalo Meatball Pumpkins Variations & Substitutions

Customize your Buffalo Meatball Pumpkins with these delightful variations, making them uniquely yours to savor!

  • Vegetarian Option: Swap meatballs for plant-based or lentil meatballs to create a hearty alternative that even non-meat eaters will love.
  • Turkey Twist: Use ground turkey meatballs for a lighter protein choice without sacrificing flavor—they pair beautifully with the buffalo sauce!
  • Flavor Variety: Experiment with sauces like teriyaki or barbecue for a non-buffalo twist that brings a completely different taste to the table.
  • Cheesy Surprise: Add a cube of cheese in the center of each meatball before cooking, offering a gooey surprise with every bite.
  • Herb Alternatives: Instead of parsley, try using fresh basil or chives for a unique aromatic touch that adds a different aroma and flavor.
  • Spice It Up: Add a pinch of cayenne pepper or hot sauce to the buffalo sauce for those who crave a little extra heat—just make sure to taste and adjust to your liking!
  • Sauce Swap: For a creamy option, replace buffalo sauce with a yogurt-based sauce for a milder flavor profile that still satisfies.
  • Dress It Up: Serve these adorable pumpkins with a side of homemade ranch or blue cheese dip to elevate their creamy enjoyment, making every bite even more delightful!

Feel free to embrace your creativity amidst the flavors and textures! Your Buffalo Meatball Pumpkins can take on many forms, which makes them all the more memorable at your next gathering, just like a delicious Buffalo Tofu Caesar you might enjoy!

Buffalo Meatball Pumpkins Recipe FAQs

Are there specific meatballs that work best for this recipe?
Absolutely! I recommend using Daily Chef - Casa di Bertacchi meatballs since they are gluten-free and pre-cooked, making preparations super convenient. However, feel free to substitute them with any frozen Italian-style meatballs or turkey meatballs if you prefer a lighter option.

How should I store any leftover Buffalo Meatball Pumpkins?
Store leftover Buffalo Meatball Pumpkins in an airtight container in the refrigerator for up to 3-4 days. Ensure they are completely cooled before storing to maintain freshness. It’s a quick snack option!

Can I freeze Buffalo Meatball Pumpkins?
Yes! You can freeze these charming meatballs for up to 3-4 weeks. To do so, place them in a single layer on a baking sheet until they’re frozen solid, then transfer them to a freezer-safe bag. This method prevents them from sticking together and makes reheating a breeze.

How can I customize the spice level of the buffalo sauce?
Very! You can easily adjust the spice by varying the amount of buffalo sauce and butter used in the recipe. If you like it milder, stick with the mild buffalo sauce. For a kick, you might add more buffalo sauce or even a dash of hot sauce!

What if I have dietary restrictions regarding the ingredients?
Not a problem! This recipe is highly adaptable. You can use vegetarian meatballs for a meat-free version or swap ranch dressing with a dairy-free alternative. Additionally, you can choose gluten-free pretzels to ensure all guests can enjoy this festive treat.

When is the best time to add the pretzel stems and garnishes?
To maintain their freshness and appearance, add the pretzel stems and parsley leaves just before serving. This way, they will stay crispy and vibrant, enhancing the festive look of your Buffalo Meatball Pumpkins!

Buffalo Meatball Pumpkins

Savory Buffalo Meatball Pumpkins That Steal the Show

Delightful Buffalo Meatball Pumpkins are whimsical appetizers perfect for autumn gatherings, combining savory flavors with a festive presentation.
Print Recipe Pin Recipe
Prep Time 15 minutes mins
Cook Time 3 hours hrs 30 minutes mins
Assembly Time 15 minutes mins
Total Time 4 hours hrs
Servings: 12 pumpkins
Course: Appetizers
Cuisine: American
Calories: 150
Ingredients Equipment Method Nutrition Notes

Ingredients
  

For the Meatballs
  • 2.5 pounds Daily Chef - Casa di Bertacchi meatballs gluten-free, pre-cooked
For the Sauce
  • ⅓ cup Butter can substitute with olive oil
  • ½ cup Buffalo sauce mild
  • ¼ cup Pumpkin puree can substitute with more buffalo sauce
  • 2 tablespoons Ranch dressing or blue cheese for stronger flavor
For the Assembly
  • 12 pieces Pretzel rods broken to size for stems
  • 1 bunch Fresh parsley or cilantro for garnish

Equipment

  • Slow Cooker
  • Skillet
  • Tongs

Method
 

Steps
  1. Heat the meatballs by placing 2.5 pounds of gluten-free meatballs into a slow cooker, cover and set to high for 3 to 3.5 hours.
  2. Prepare the buffalo sauce by melting ⅓ cup of butter in a skillet over low heat, then stir in ½ cup of buffalo sauce, ¼ cup pumpkin puree, and 2 tablespoons of ranch dressing. Mix until smooth.
  3. Once meatballs are heated, pour the buffalo sauce over them and stir gently, letting them sit on low heat for 10–15 minutes.
  4. Assemble by transferring the sauced meatballs onto a tray, inserting broken pretzel ends for stems.
  5. Garnish each meatball with fresh parsley or cilantro to mimic leaves.

Nutrition

Serving: 1pumpkinCalories: 150kcalCarbohydrates: 5gProtein: 10gFat: 10gSaturated Fat: 4gPolyunsaturated Fat: 1gMonounsaturated Fat: 4gCholesterol: 35mgSodium: 500mgPotassium: 150mgFiber: 1gSugar: 1gVitamin A: 400IUVitamin C: 2mgCalcium: 50mgIron: 1mg

Notes

Enjoy these playful Buffalo Meatball Pumpkins as a fun appetizer. They are quick to make and sure to please both kids and adults alike.

Tried this recipe?

Let us know how it was!

Creepy Halloween Chicken Parmesan Sliders for Spooktacular Fun

September 19, 2025 by Grace Snow Leave a Comment

As I unwrapped the spooky charm of Halloween, the kitchen filled with tantalizing aromas that promised to thrill. Halloween Chicken Parmesan Sliders bring a playful twist to my usual recipes, combining crispy chicken tenders, melty mozzarella, and zesty marinara sauce into bite-sized delights. This appetizer is a breeze to prepare—perfect for a gathering or a cozy family dinner. Not only do these sliders satisfy cravings, but they also provide a fun and creative outlet for culinary expression. Decked out with monster eyes and cheesy smiles, they’re sure to become a hit at your Halloween festivities. Ready to embark on a cooking adventure that will enchant your guests? Let’s dive in!

Why Are These Sliders So Fun?

Playful Presentation: Get into the Halloween spirit with sliders designed to thrill! Each cheesy bite features delicious monster eyes, enticing kids and adults alike.

Flavorful Layers: The crispy chicken and zesty marinara meld perfectly for a classic taste with a spooky twist.

Quick & Easy: Assembling these sliders is a breeze, making them an ideal appetizer for busy hosts.

Customizable: Experiment with variations like bacon cheddar BBQ sliders or spicy buffalo options, ensuring every guest leaves satisfied.

Crowd-Pleasing Appeal: These sliders are bound to grab attention and create smiles at your Halloween bash, leaving everyone excited for another bite!

Halloween Chicken Parmesan Sliders Ingredients

Get ready to create some spooktacular sliders with these essential ingredients!

For the Sliders

  • Frozen Chicken Tenders – The main protein source for a satisfying bite; swap for grilled chicken or turkey tenders if desired.
  • Slider Buns – A soft base for your sliders; small rolls like whole grain or gluten-free bun options work beautifully.
  • Mozzarella Cheese – The melty favorite that adds flavor; try provolone or cheddar for a fun twist, especially when carving into monster shapes!
  • Marinara Sauce – Provides moisture and zest; for a sweeter touch, consider BBQ sauce instead.

For the Monster Decorations

  • Green Olives (stuffed with pimento) – These make adorable monster eyes; black olives or cherry tomatoes are great substitutes if you prefer.

Step‑by‑Step Instructions for Halloween Chicken Parmesan Sliders

Step 1: Prepare the Chicken Tenders
Begin by preheating your oven to the temperature specified on the chicken tenders package, usually around 400°F (200°C). Arrange the frozen chicken tenders in a single layer on a baking sheet. Bake for 18–22 minutes, flipping halfway through, until they are golden-brown and crispy, ensuring that they reach an internal temperature of 165°F (74°C) for safe consumption.

Step 2: Carve the Cheese
While the chicken is baking, take your mozzarella cheese and carefully slice it into thin pieces. With a pairing knife, shape the slices to resemble playful monster teeth—think jagged edges for a spooky effect! Keep them ready to add an exciting touch to your Halloween Chicken Parmesan Sliders. Set aside these carved cheese pieces on a plate.

Step 3: Prepare the Monster Eyes
Grab your green olives and toothpicks to create monster eyes for your sliders. Skewer one green olive on each toothpick, making two olive eyes for each slider. This step adds a fun and festive element to your Halloween Chicken Parmesan Sliders, making them as delightful to look at as they are to eat. Set these aside for assembly.

Step 4: Heat the Marinara Sauce
In a small saucepan, pour in your marinara sauce and place it over medium heat. Stir gently while allowing it to come to a gentle simmer, approximately 5 minutes. You'll know it’s ready when the sauce begins to bubble lightly. This warming step enhances the flavors and ensures your sliders are served warm and gooey.

Step 5: Assemble the Sliders
Now it’s time to assemble your Halloween Chicken Parmesan Sliders! Take a slider bun and spread about 1 tablespoon of warm marinara sauce on the bottom half. Place a hot, crispy chicken tender on top, and if you desire extra sauce, drizzle some more over the chicken before adding your cleverly carved mozzarella pieces to mimic monster teeth.

Step 6: Cap and Decorate the Sliders
Finish your sliders by placing the top bun over the assembled ingredients. For the final playful touch, take the toothpick with two olive eyes and insert it into the top bun, securing it firmly to create a whimsical monster appearance. Your Halloween Chicken Parmesan Sliders are now ready to impress at your gathering!

Step 7: Serve and Enjoy
Serve these delicious sliders immediately while they’re warm and the cheese is melting. The combination of crispy chicken, tangy marinara, and playful presentation will have everyone clamoring for more. These Halloween Chicken Parmesan Sliders are perfect as an appetizer or a fun dinner option that will delight your guests!

What to Serve with Halloween Chicken Parmesan Sliders

Get ready to enjoy a delicious spread that perfectly complements your spooky sliders and sets the scene for your Halloween gathering!

  • Crispy Sweet Potato Fries: Their natural sweetness contrasts nicely with the savory sliders. Add a sprinkle of cinnamon for a seasonal twist!

  • Garlic Bread Sticks: Cheesy, buttery goodness provides a satisfying side and echoes the mozzarella in your sliders for a cohesive flavor profile.

  • Stuffed Mini Peppers: These colorful bites bring a fresh crunch and a hint of spice, balancing the crispy texture of the sliders in a delightful way.

  • Pumpkin Soup: Creamy and warm, a bowl of pumpkin soup adds a festive touch to your meal, inviting guests to warm up before the main event.

  • Green Salad with Vinaigrette: A light, refreshing salad brightens the plate, offering a balance to the richness of your sliders.

  • Apple Cider: This sweet, tangy beverage adds fall flavor and pairs beautifully with the savory notes of your chicken sliders.

  • Spooky Dessert Platter: Think bat-shaped cookies or monster cupcakes! A playful dessert spread ensures your Halloween theme continues through to sweet treats.

  • Spiked Hot Chocolate: Rich and comforting, this drink is perfect for adult guests looking to indulge and adds a delightful element to the evening's festivities.

Make Ahead Options

These Halloween Chicken Parmesan Sliders are perfect for meal prep, allowing you to streamline your entertaining! You can carve the mozzarella cheese and prepare the olive monster eyes up to 3 days in advance—simply store them in airtight containers in the refrigerator to keep them fresh. Additionally, you can bake the chicken tenders up to 24 hours ahead and reheat them in the oven just before assembling. When you’re ready to serve, warm the marinara sauce for a few minutes until simmering, then assemble the sliders, placing the chicken, cheese, and olives atop the buns for a fun finish. This prep will save you time while ensuring your Halloween Chicken Parmesan Sliders are just as delicious and visually appealing!

How to Store and Freeze Halloween Chicken Parmesan Sliders

Fridge: Store leftover sliders in an airtight container for up to 1 day to maintain freshness. Reheat in the oven to restore their crispy texture.

Freezer: For longer storage, freeze assembled sliders before baking. Wrap each slider tightly in plastic wrap and store in a freezer-safe bag for up to 2 months.

Reheating: When ready to enjoy, bake frozen sliders at 375°F (190°C) for about 20-25 minutes, or until fully heated through. They’re delicious either way, but try to consume within 3 days of baking for the best taste with your Halloween Chicken Parmesan Sliders!

Halloween Chicken Parmesan Sliders Variations

Feel free to get creative and personalize these sliders to suit your taste and dietary preferences!

  • Bacon Cheddar BBQ: Swap chicken for crispy bacon and top with melted cheddar and BBQ sauce for a smoky, savory twist. This combination is rich and mouthwatering, perfect for any gathering.

  • Buffalo Chicken: Replace the marinara with buffalo sauce and use blue cheese crumbles instead of mozzarella for a spicy kick. If you love heat, add sliced jalapeños to intensify the flavor!

  • Vegan Version: Use plant-based chicken slices and dairy-free cheese. Treat them the same way, ensuring a delightful, cruelty-free option for everyone to enjoy.

  • Whole Grain Buns: For a healthier touch, choose whole grain slider buns. They’re just as soft and delicious while adding fiber to your meal. Your waistline will thank you!

  • Garlic Parmesan Twist: Mix minced garlic with the melted butter that you brush over your buns before baking for extra flavor. This will create an aromatic crust that complements the cheesy gooeyness of the sliders beautifully.

  • Stuffed Sliders: Add a layer of spinach and ricotta cheese beneath the chicken for a delightful surprise. It not only enhances the taste but also layers in nutrients for a well-rounded snack.

  • Extra Veggies: Consider adding roasted red peppers or sautéed mushrooms to elevate the flavors while sneaking in some veggies. These enhance the visual appeal and offer a taste explosion in every bite.

  • Chili Heat: Include pickled jalapeños or a drizzle of hot sauce to give a spicy bite. This heat level is sure to excite those who enjoy fiery flavors, making every slider a mini adventure.

These playful variations ensure your Halloween celebration filled with treats caters to all palates. Just like the joy found in Crock Pot Chicken or the zing of Chipotle Lime Chicken, the possibilities are limited only by your imagination. Enjoy your culinary journey!

Expert Tips for Halloween Chicken Parmesan Sliders

  • Cheese Carving: Start carving your mozzarella well in advance, up to 3-4 days before your gathering. This way, you'll save time during assembly and ensure your monster teeth are ready.

  • Chicken Substitution: If you don’t have frozen chicken tenders, grilled chicken or turkey tenders work beautifully too. Just ensure they're cooked thoroughly for the best flavor.

  • Build Flavor: Don’t skimp on the marinara sauce! A good layer not only adds flavor but also keeps the sliders moist. Heat it gently to really bring out the taste.

  • Alternative Toppings: While green olives are perfect for monster eyes, feel free to experiment with black olives or cherry tomatoes to match your party's theme or preferences.

  • Keep Warm: These Halloween Chicken Parmesan Sliders are best when served immediately. If you're preparing for a crowd, keep the assembly neat and reheat the chicken briefly to maintain that crispy texture before serving!

Halloween Chicken Parmesan Sliders Recipe FAQs

What type of chicken tenders should I use for the sliders?
Absolutely! Frozen chicken tenders are perfect for convenience and great taste. However, if you prefer a healthier option, feel free to substitute with grilled chicken or turkey tenders. Just ensure that whichever option you choose is cooked to an internal temperature of 165°F (74°C) for safe consumption.

How should I store leftover Halloween Chicken Parmesan Sliders?
Leftover sliders can be stored in an airtight container in the refrigerator for up to 1 day. To reheat, I recommend placing them in the oven at 350°F (175°C) for about 10-15 minutes to regain that delightful crispy texture. Avoid microwaving them if you want to keep the buns from getting soggy!

Can I freeze these sliders for later use?
Yes! You can absolutely freeze assembled sliders before baking. To do this, wrap each slider tightly in plastic wrap and place them in a freezer-safe bag. They can be stored for up to 2 months. When you’re ready to bake, just preheat your oven to 375°F (190°C) and bake the frozen sliders for about 20-25 minutes until heated through.

What if I have dietary restrictions concerning the ingredients?
Very! You can easily customize these sliders to suit dietary needs. For gluten-free options, look for gluten-free slider buns. If someone is lactose intolerant, consider using lactose-free cheese or non-dairy cheese alternatives. And always double-check ingredients for allergens, especially with marinara sauce and olives.

What should I do if my cheese doesn’t hold its shape when carving?
If you're finding it tough to carve your mozzarella into monster teeth, try chilling the cheese in the refrigerator for about 30 minutes before slicing. This will firm up the cheese and make it easier to carve. Don’t lose heart, if it crumbles, just use it as a cheesy topping—it's still delicious!

Halloween Chicken Parmesan Sliders

Creepy Halloween Chicken Parmesan Sliders for Spooktacular Fun

Delightful Halloween Chicken Parmesan Sliders with crispy chicken, melty cheese, and zesty marinara for a fun appetizer.
Print Recipe Pin Recipe
Prep Time 20 minutes mins
Cook Time 22 minutes mins
Total Time 42 minutes mins
Servings: 6 sliders
Course: Appetizers
Cuisine: Halloween
Calories: 300
Ingredients Equipment Method Nutrition Notes

Ingredients
  

For the Sliders
  • 12 oz Frozen Chicken Tenders or grilled chicken/turkey tenders
  • 6 pieces Slider Buns whole grain or gluten-free options
  • 8 oz Mozzarella Cheese or provolone/cheddar
  • 1 cup Marinara Sauce or BBQ sauce for sweetness
For the Monster Decorations
  • 6 pieces Green Olives (stuffed with pimento) or black olives/cherry tomatoes

Equipment

  • Oven
  • Baking Sheet
  • small saucepan
  • toothpicks

Method
 

Step-by-Step Instructions
  1. Preheat the oven to 400°F (200°C). Arrange frozen chicken tenders in a single layer on a baking sheet and bake for 18-22 minutes until golden-brown.
  2. While the chicken is baking, slice mozzarella cheese into thin pieces and carve them into shapes resembling monster teeth.
  3. Skewer green olives on toothpicks to create monster eyes for the sliders.
  4. In a small saucepan, heat marinara sauce over medium heat, stirring gently until it simmers, about 5 minutes.
  5. Assemble sliders by spreading marinara sauce on the bottom half of the bun, adding chicken tender, and topping with carved cheese pieces.
  6. Cap the sliders with the top bun and insert the toothpick with olive eyes to create a monster appearance.
  7. Serve immediately while warm, ensuring the combination of crispy chicken and melted cheese delights your guests.

Nutrition

Serving: 1sliderCalories: 300kcalCarbohydrates: 30gProtein: 20gFat: 15gSaturated Fat: 7gCholesterol: 60mgSodium: 500mgPotassium: 300mgFiber: 2gSugar: 3gVitamin A: 10IUVitamin C: 15mgCalcium: 20mgIron: 6mg

Notes

For best results, prepare the cheese 3-4 days in advance and store in the refrigerator. Serve sliders immediately for optimal freshness.

Tried this recipe?

Let us know how it was!

Delicious Halloween Jack Skellington Ricotta Olive Tarts to Wow Guests

September 19, 2025 by Grace Snow Leave a Comment

As the leaves turn and the chilling winds whisper, Halloween becomes a canvas for creativity in the kitchen. This year, I decided to blend whimsy with flavor by crafting these delightful Halloween Jack Skellington Ricotta Olive Tarts. With their flaky, gluten-free crust and savory ricotta filling sprinkled with briny olives and vibrant sun-dried tomatoes, these little delights are not just eye-catching; they’re a wonderful way to elevate your Halloween gathering. Plus, they’re quick to whip up and perfect for impressing your guests, young and old alike. Ready to put a spooky twist on your appetizer table? Let’s dive into this enchanting recipe!

Why Will You Love These Tarts?

Uniqueness: These Halloween Jack Skellington Ricotta Olive Tarts are an exciting spin on traditional appetizers, making them a standout at any gathering.
Quick Prep: With minimal fuss and straightforward steps, you can whip these tarts together in about an hour, leaving you more time to enjoy the festivities.
Crowd-Pleasing Appeal: Beautifully presented with playful Jack Skellington faces, they are sure to earn compliments from guests of all ages.
Versatile Flavor: The combination of creamy ricotta and briny olives creates a savory symphony that pairs perfectly with a crisp salad or as a part of a larger Halloween spread.
Diet-Friendly: Being gluten-free means you can cater to those with dietary restrictions without sacrificing taste. For another delightful treat, check out these Lemon Ricotta Protein pancakes!

Ingredients for Halloween Jack Skellington Ricotta Olive Tarts

For the Crust
• Sweet Rice Flour – Essential for providing the structure in a gluten-free crust.
• Millet Flour – Adds a nutty aroma; substitute with almond flour for a different flavor.
• Gluten-Free Oat Flour – Contributes to a tender texture; you can make this at home by grinding oats.
• Tapioca Flour (or Corn Starch) – Binds the crust together; potato starch works as a substitute.
• Kosher Salt – Enhances overall flavor in both the crust and filling.
• Cold Unsalted Butter – Creates richness; keeping it cold is key to a flaky crust.
• Ice Water – Helps bind the crust mixture without warming the butter; adjust to achieve desired consistency.

For the Filling
• Black Olives – Briny and flavorful, making them a key ingredient in the filling; green olives can be used for a milder taste.
• Julienned Sun-Dried Tomatoes – Impart a tangy sweetness; jarred in oil is recommended for best flavor.
• Fresh Thyme Leaves – Adds aromatic freshness; you may use dried thyme but in lesser quantity.
• Freshly Grated Parmesan Cheese – Offers a creamy aspect; swap for feta cheese if desired.
• Ricotta Cheese – The creamy base of the filling, giving it a rich texture.
• Greek Yogurt – Provides lightness and tang; sour cream can serve as an alternative.
• Egg Whites – Acts as a binder in the filling; for a vegan twist, substitute with flax eggs or a commercial egg replacer.
• Garlic (minced) – Adds depth to the flavor; adjust to your taste preference.

Step‑by‑Step Instructions for Halloween Jack Skellington Ricotta Olive Tarts

Step 1: Prepare the Crust
In a large mixing bowl, whisk together sweet rice flour, millet flour, oat flour, tapioca flour, and kosher salt until well combined. Cut in cold unsalted butter using a pastry cutter or your fingers until the mixture resembles pea-sized crumbs. Gradually add ice water, one tablespoon at a time, until the dough holds together. Shape it into a disk, wrap in plastic wrap, and chill in the refrigerator for 30 minutes.

Step 2: Preheat Oven
While the dough chills, preheat your oven to 400°F (200°C). This temperature will ensure your Halloween Jack Skellington Ricotta Olive Tarts bake evenly and achieve that golden, flaky crust. Make sure your oven is fully heated before baking the tarts to guarantee the best texture.

Step 3: Roll Out Dough
Once the dough has chilled, lightly flour a clean surface and roll it out to about 1/8 inch thick using a rolling pin. Cut out circles to fit your mini tart pans, gently pressing the dough into the bottom and sides. Ensure there are no cracks or holes, as you want to create a secure vessel for your savory filling.

Step 4: Prepare Filling
Slice some black olives for decorating, and chop the rest into small pieces. In each prepared crust, layer the chopped olives, julienned sun-dried tomatoes, fresh thyme leaves, and a sprinkle of freshly grated Parmesan cheese. This colorful combination will not only taste delicious but also make your tarts visually appealing.

Step 5: Mix Ricotta Filling
In a separate bowl, whisk together ricotta cheese, Greek yogurt, egg whites, minced garlic, and a pinch of salt until the mixture is smooth and creamy. This mixture will serve as the base of your filling, creating a rich, satisfying layer inside your Halloween Jack Skellington Ricotta Olive Tarts.

Step 6: Assemble Tarts
Carefully fill each tart with the ricotta mixture, being sure not to overfill. For a spooky touch, arrange whole olives as Jack Skellington's eyes and use sliced olives to craft his mouth. This playful presentation will bring a festive spirit to your appetizer table as you prepare for Halloween.

Step 7: Bake
Place the assembled tarts in the preheated oven and bake for 20-25 minutes, or until the filling is set and the crust turns a light golden brown. Keep an eye on them, checking for doneness early; the tarts should be puffed and slightly firm in the center when done.

Step 8: Serve Warm
Once baked, remove the tarts from the oven and let them cool slightly before serving. These delightful Halloween Jack Skellington Ricotta Olive Tarts are best enjoyed warm, but you can also reheat them at 400°F for 7 minutes if serving later. Gather your friends and family to savor these festive treats!

Expert Tips for Halloween Jack Skellington Ricotta Olive Tarts

  • Chill the Butter: Keep your unsalted butter cold to ensure a flaky crust; warm butter will lead to tough pastry.
  • Use Parchment Paper: Roll out dough between sheets of parchment to prevent sticking and make cleanup easier.
  • Uniform Size: Ensure tart shells are even in size for consistent baking; uneven shells may bake differently, affecting texture.
  • Avoid Overfilling: Fill each tart just below the edge to prevent spilling over during baking; it keeps your tarts neat and presentable.
  • Check Doneness Early: Ovens vary, so start checking tarts a few minutes early to avoid overcooking the filling, keeping it creamy.
  • Serve Fresh: These Halloween Jack Skellington Ricotta Olive Tarts taste best warm; reheat gently to preserve texture if serving later.

What to Serve with Halloween Jack Skellington Ricotta Olive Tarts

As you prepare to enchant your guests with these whimsical tarts, consider adding complementary dishes that will elevate your Halloween gathering.

  • Crisp Green Salad: A refreshing mix of greens with a light vinaigrette balances the rich flavors of the tarts. The crunch provides a delightful contrast to their creamy texture.

  • Garlic Herb Breadsticks: These warm, buttery sticks offer a cozy touch while enhancing the garlic notes in the tarts. Their savory flavor also makes them a favorite for dipping in extra filling.

  • Roasted Vegetable Platter: Vibrant veggies like bell peppers, zucchini, and carrots not only add color but their sweetness perfectly complements the briny olives. This colorful presentation is sure to impress!

  • Pumpkin Soup: Silky and smooth, this seasonal favorite warms the palate and adds a comforting touch to your spooky spread. Its pumpkin flavor harmoniously ties in with the Halloween theme.

  • Sweet Potato Fries: Crispy and slightly sweet, these fries offer a satisfying crunch that contrasts delightfully with the tarts. Serve them with a spicy aioli for an extra kick!

  • Apple Cider: This seasonal drink enhances the autumnal vibe, with its sweet and tart blend offering a refreshing counterpoint to the savory tarts.

  • Chocolate Mousse: Finish off your meal with decadence! This creamy dessert brings a rich sweetness that rounds out the flavors beautifully, making your celebration memorable.

Halloween Jack Skellington Ricotta Olive Tarts Variations

Feel free to get creative and make these delightful tarts your own with some exciting variations!

  • Cheesy Twist: Substitute the ricotta with goat cheese for a tangy flavor that adds a delightful zip. The creamy consistency remains, while the taste offers a new layer of charm.

  • Vegetable Medley: Add colorful veggies like bell peppers or spinach into the filling for a burst of nutrition and flavor. This not only enhances taste but also gives a fresh look to your tarts!

  • Larger Tarts: Instead of mini tarts, mold the dough into a single, larger tart to serve as a stunning centerpiece. Perfect for gatherings, this option allows everyone to slice their own piece.

  • Herb Variation: Swap fresh thyme for fresh basil or parsley to brighten the filling with a herby twist. Each herb brings its own personality, creating a different vibe for your tarts.

  • Vegan Option: Use a dairy-free ricotta or cashew cream in place of ricotta, along with flax eggs to bind. This keeps the savory appeal while accommodating vegan diets.

  • Spiced Up: If you enjoy a kick of heat, add crushed red pepper flakes or diced jalapeños to the filling for a zesty experience. It’ll bring a flavorful punch that spice lovers will adore!

  • Sweet Encounter: Try adding a hint of sweetness by mixing in a teaspoon of honey or agave syrup with the ricotta mixture, creating an intriguing contrast with the savory olives. This unexpected twist will surprise your guests!

  • Complete the Platter: Pair these tarts with delightful additions like my Herby Ricotta Stuffed peppers for a cohesive and impressive appetizer spread that’ll make your Halloween gathering truly unforgettable.

How to Store and Freeze Halloween Jack Skellington Ricotta Olive Tarts

Fridge: Store leftover tarts in an airtight container in the refrigerator for up to 3 days. For best quality, reheat before serving to regain their warm, flaky texture.

Freezer: You can freeze the unbaked tarts for up to 2 months. Assemble them and place them in a freezer-safe container. Bake from frozen, adding a few extra minutes to the baking time.

Reheating: To reheat already baked tarts, preheat your oven to 400°F (200°C) and warm them for about 7 minutes until heated through, keeping the crust crispy.

Prep Ahead: The crust can be made a day ahead and stored in the fridge, while the filling can be prepared a few hours before baking, making it easy to whip up these Halloween Jack Skellington Ricotta Olive Tarts on short notice.

Make Ahead Options

These Halloween Jack Skellington Ricotta Olive Tarts are perfect for meal prep, allowing you to enjoy stress-free entertaining! You can prepare the crust up to 24 hours in advance; simply roll it out, shape it into mini tart pans, and refrigerate. For the filling, mix the ricotta, yogurt, egg whites, garlic, and seasonings up to 3 days ahead and store in an airtight container in the fridge to keep it fresh and creamy. When you're ready to serve, just fill the pre-baked crust with the prepared filling and create those playful Jack Skellington faces before baking. This way, you’ll have delicious tarts ready to impress your guests with minimal last-minute effort!

Halloween Jack Skellington Ricotta Olive Tarts Recipe FAQs

What kind of flour should I use for the crust to ensure it's gluten-free?
For a gluten-free crust in your Halloween Jack Skellington Ricotta Olive Tarts, I recommend using a combination of sweet rice flour, millet flour, and gluten-free oat flour. These flours work together to give your crust the perfect texture. If you need a substitute, almond flour can be a great alternative, offering a unique nutty flavor.

How should I store leftover tarts and how long do they last?
Absolutely! Store any leftover tarts in an airtight container in the refrigerator for up to 3 days. To maintain their delightful flaky texture, it's best to reheat them in the oven at 400°F for about 7 minutes before serving again.

Can I freeze these tarts? If so, how do I do it properly?
Yes, you can freeze the unbaked tarts! Assemble the tarts and place them in a single layer in a freezer-safe container or a baking sheet lined with parchment paper. They can be frozen for up to 2 months. When you're ready to bake, just pop them in the oven from frozen, adding an extra few minutes to the baking time to ensure they're cooked through.

What if I notice my crust is too crumbly? How can I fix that?
If your crust comes out too crumbly, it might not have enough moisture. Next time, try adding a little extra ice water, one teaspoon at a time, while mixing until the dough holds together better. Be sure to keep the butter cold, as it’s crucial for creating that perfect flaky crust!

Are there any dietary considerations I should keep in mind?
These Halloween Jack Skellington Ricotta Olive Tarts are gluten-free, making them suitable for those with gluten sensitivities. If you have dairy allergies, you can substitute ricotta with a dairy-free alternative, and use flax eggs instead of egg whites for a vegan option. If you’re serving to children or pets, be cautious of the olives, as they can be high in sodium.

Halloween Jack Skellington Ricotta Olive Tarts

Delicious Halloween Jack Skellington Ricotta Olive Tarts

A whimsical blend of flavors, these Halloween Jack Skellington Ricotta Olive Tarts are perfect for gatherings.
Print Recipe Pin Recipe
Prep Time 30 minutes mins
Cook Time 25 minutes mins
Chilling Time 30 minutes mins
Total Time 1 hour hr 25 minutes mins
Servings: 12 tarts
Course: Appetizers
Cuisine: American
Calories: 150
Ingredients Equipment Method Nutrition Notes

Ingredients
  

For the Crust
  • 1 cup Sweet Rice Flour Essential for providing structure in a gluten-free crust.
  • 1/2 cup Millet Flour Adds a nutty aroma; substitute with almond flour for a different flavor.
  • 1/2 cup Gluten-Free Oat Flour Contributes to a tender texture; can be made at home by grinding oats.
  • 1/4 cup Tapioca Flour Binds the crust together; potato starch works as a substitute.
  • 1 tsp Kosher Salt Enhances overall flavor in both the crust and filling.
  • 1/2 cup Cold Unsalted Butter Creates richness; keeping it cold is key to a flaky crust.
  • 3-5 tbsp Ice Water Helps bind the crust mixture without warming the butter.
For the Filling
  • 1 cup Black Olives Briny and flavorful, making them a key ingredient.
  • 1/2 cup Julienned Sun-Dried Tomatoes Imparts a tangy sweetness; jarred in oil is recommended.
  • 1 tbsp Fresh Thyme Leaves Adds aromatic freshness; dried thyme can be used in lesser quantity.
  • 1/2 cup Freshly Grated Parmesan Cheese Offers a creamy aspect; swap for feta cheese if desired.
  • 1 cup Ricotta Cheese The creamy base of the filling.
  • 1/2 cup Greek Yogurt Provides lightness and tang; sour cream can be a substitute.
  • 2 each Egg Whites Acts as a binder in the filling.
  • 1 clove Garlic Minced, adds depth to the flavor.

Equipment

  • Mixing Bowl
  • Pastry cutter
  • Rolling Pin
  • mini tart pans
  • Oven

Method
 

Preparation Steps
  1. In a large mixing bowl, whisk together sweet rice flour, millet flour, oat flour, tapioca flour, and kosher salt until well combined. Cut in cold unsalted butter until the mixture resembles pea-sized crumbs.
  2. Gradually add ice water, one tablespoon at a time, until the dough holds together. Shape into a disk, wrap in plastic wrap, and chill in the refrigerator for 30 minutes.
  3. Preheat your oven to 400°F (200°C) while the dough chills.
  4. Roll out the chilled dough to about 1/8 inch thick and cut out circles to fit your mini tart pans.
  5. Layer chopped olives, julienned sun-dried tomatoes, fresh thyme leaves, and sprinkle Parmesan cheese in each prepared crust.
  6. In a separate bowl, whisk together ricotta cheese, Greek yogurt, egg whites, minced garlic, and a pinch of salt until smooth.
  7. Fill each tart with the ricotta mixture and arrange whole olives as Jack Skellington's eyes.
  8. Bake for 20-25 minutes, until the filling is set and the crust turns light golden brown.
  9. Let cool slightly before serving these delightful tarts warm.

Nutrition

Serving: 1tartCalories: 150kcalCarbohydrates: 20gProtein: 6gFat: 6gSaturated Fat: 3gPolyunsaturated Fat: 1gMonounsaturated Fat: 2gCholesterol: 20mgSodium: 200mgPotassium: 200mgFiber: 1gSugar: 1gVitamin A: 500IUVitamin C: 1mgCalcium: 150mgIron: 1mg

Notes

These tarts are best enjoyed warm, and can be reheated if necessary. Store leftovers in an airtight container in the fridge for up to 3 days.

Tried this recipe?

Let us know how it was!

Halloween Temari Sushi: Fun, Easy, and Spooky Finger Food

September 19, 2025 by Grace Snow Leave a Comment

As I was rummaging through my pantry, I stumbled upon a pack of sushi rice that sparked an idea—Halloween Temari Sushi! These delightful, bite-sized sushi balls are the ultimate finger food for your spooky celebrations. Not only are they fun and easy to make, using just cling wrap for shaping, but they also offer a clever way to bring healthier snacks to the table without sacrificing flavor. The combination of smoked salmon and fresh veggies creates a vibrant dish that’s as visually appealing as it is delicious. You can even customize them with playful decorations to match your Halloween vibe! Curious about how to put your own spin on these adorable sushi treats? Let’s dive in!

Why Try Halloween Temari Sushi?

Easy to make: Using just cling wrap, these sushi balls require minimal skills, making them perfect for busy home cooks!
Visually stunning: The vibrant colors and playful designs will steal the show at any Halloween party, impressing both kids and adults alike.
Healthier option: Swap out traditional snacks for these guilt-free delights, each approximately 115 calories.
Customizable: Feel free to substitute ingredients like smoked salmon with crab or avocado for a different twist—your imagination is the limit!
Perfect for gatherings: These finger foods are easy to grab and enjoy, making them a fantastic choice for potlucks and festive celebrations.
Looking for more creative ideas? Check out Vegan Sushi Indulge for additional fun options!

Halloween Temari Sushi Ingredients

For the Sushi Rice

  • Uncooked sushi rice – Use short-grain rice for the perfect sticky texture that holds the sushi balls together.
  • Konbu dashi powder or kelp piece – Adds umami flavor essential for authentic sushi; vegetable broth is a suitable alternative.
  • Rice vinegar – Season your rice with this tangy ingredient to create that classic sushi flavor.
  • Sugar – A little sweetness helps balance the vinegar’s acidity; granulated or castor sugar works wonderfully.
  • Salt – Just a pinch enhances the overall flavor of your sushi.

For the Fillings

  • Smoked salmon – Rich in flavor and perfect for festive decorating; try crab meat or avocado for a delicious alternative.
  • Egg – Fried and cut into fun shapes for added protein and visual appeal; consider a pre-made egg sheet for convenience.
  • Cucumber – Offers a refreshing crunch; remember to slice thinly for easy assembly.
  • Radish – Adds color and crunch to your sushi balls; daikon or carrots can be used as substitutes.

For Toppings and Decorations

  • Fish roe – Enhances flavor and looks great as a decorative topping; feel free to omit if allergies are a concern or you prefer a simpler dish.
  • Nori sheets – Cut into fun shapes to create spooky faces for Halloween-themed sushi.

Let your creativity shine while making these Halloween Temari Sushi! You’ll not only be serving up an appealing dish, but also treating your guests to an exciting taste experience.

Step‑by‑Step Instructions for Halloween Temari Sushi

Step 1: Cook the Sushi Rice
Rinse 1 cup of uncooked sushi rice under cold water until the water runs clear to remove excess starch. In a rice cooker, combine the rice with 1 cup of water and 1 teaspoon of konbu dashi powder, then cook on the sushi setting. Once the rice is done, let it steam for an additional 10 minutes for optimal texture.

Step 2: Prepare Sushi Vinegar
While the rice is steaming, combine 2 tablespoons of rice vinegar, 1 tablespoon of sugar, and 1/2 teaspoon of salt in a small saucepan. Heat gently over medium-low until dissolved, without boiling. Once the sugar and salt dissolve completely, remove from heat and set aside to cool.

Step 3: Mix Sushi Rice with Vinegar
After the sushi rice has steamed, transfer it to a large mixing bowl. Gently fold in the prepared sushi vinegar using a wooden spatula to ensure the grains remain intact. Allow the rice to cool to room temperature, about 15-20 minutes, which is key for shaping your Halloween Temari Sushi.

Step 4: Prepare Decorations
While the rice cools, cut nori sheets into fun shapes like eyes or mouths for Halloween faces. Next, heat a small non-stick pan over medium and lightly oil it before pouring in beaten eggs. Cook until set, about 2-3 minutes, then cut the egg into shapes with cookie cutters for additional decoration.

Step 5: Assemble the Sushi Balls
Lay a piece of cling wrap on a flat surface. Place a slice of smoked salmon, cucumber, or your chosen filling on the plastic. Scoop a small handful of sushi rice (about 2 tablespoons) on top of the filling, then gather the corners of the cling wrap and gently twist to mold it into a round ball shape.

Step 6: Form the Sushi and Release
Release the pressure on the cling wrap while gently pulling it away to reveal the ball, then set it on a serving platter. Repeat this process until you have assembled all your Halloween Temari Sushi, ensuring they remain bite-sized and visually appealing.

Step 7: Decorate with Nori and Roe
Now it's time to add the Halloween flair! Use the prepared nori cutouts to create spooky faces on each sushi ball. For an extra touch, sprinkle fish roe on top of some balls for a burst of flavor and a festive appeal.

Step 8: Serve and Enjoy
Present your beautiful Halloween Temari Sushi on a decorative platter alongside small bowls of soy sauce, mayonnaise, and optional wasabi. These delightful finger foods are perfect for sharing and add an exciting twist to your Halloween festivities.

Expert Tips for Halloween Temari Sushi

  • Cling Wrap Magic: Use cling wrap to shape your rice balls easily—this minimizes mess and ensures uniform sizes for your Halloween Temari Sushi.
  • Nori Precision: Cut nori carefully into small shapes for clear details; consider using scissors for better control over your Halloween-themed designs.
  • Cook Rice Perfectly: Avoid mushy rice by rinsing thoroughly and letting it steam properly after cooking to achieve the perfect texture for shaping.
  • Topping Choices: Experiment with various colorful toppings; using different vegetables can enhance both the visual appeal and nutrition of your sushi.
  • Chill Before Serving: Allow the sushi to cool to room temperature before serving; this enhances flavors and makes them more enjoyable to eat.

What to Serve with Halloween Temari Sushi

Elevate your festive spread with delightful pairings that complement these adorable sushi balls, making your Halloween gathering memorable.

  • Soy Sauce: A classic accompaniment, adding a savory depth that enhances the delightful flavors of the sushi.

  • Pickled Ginger: The zesty bite of pickled ginger cleanses the palate between bites, balancing the rich taste of smoked salmon and other fillings.

  • Edamame: These lightly salted pods provide a nutritious crunch and a textural contrast, bringing a fun, hands-on element to your serving platter.

  • Japanese Salad: A light, crisp salad dressed in sesame vinaigrette offers a refreshing counterpoint to the sushi’s richness, making each bite exciting.

  • Spicy Mayo: For those who crave a kick, drizzle or serve a side of spicy mayo; its creaminess beautifully complements the sushi’s flavor profile.

  • Green Tea: This warm beverage is a soothing addition to your meal, providing a gentle, earthy flavor that enhances the overall dining experience.

  • Pumpkin Soup: A cozy, seasonal starter like spiced pumpkin soup ties in the Halloween theme and adds warmth to your feast.

  • Halloween-themed Dessert: End the night on a sweet note with spooky-themed treats, like ghost-shaped cookies or pumpkin spice cupcakes, to delight your guests.

Halloween Temari Sushi Variations

Feel free to let your creativity shine by customizing these delicious sushi treats! Each twist adds a unique flair to your Halloween party spread.

  • Vegetarian Delight: Replace smoked salmon with diced avocado or a mix of colorful bell peppers for a fresh, veggie-packed flavor.
  • Crab Substitute: Opt for lump crab meat instead of salmon for a different taste while keeping the festive feel intact. The sweetness of the crab can perfectly complement the sushi vinegar!
  • Dairy-Free Twist: Use a vegan cream cheese spread in place of mayonnaise for decoration, adding a creamy texture while keeping it plant-based.
  • Spicy Kick: If you love heat, add a dollop of sriracha in the center before sealing the sushi rice for an exciting surprise in every bite!
  • Eggless Version: Skip the fried egg altogether, or use a store-bought egg sheet for a more straightforward assembly—perfect for a quick fix.
  • Flavorful Mayonnaise: Mix wasabi into store-bought mayo and use it for decorating your sushi; this will add a zesty flavor that packs a punch.
  • Seasonal Themes: Try using pumpkin-shaped nori cutouts for faces or bat silhouettes to delight your guests during Halloween festivities.
  • Crunchy Elements: Incorporate finely chopped nuts or crispy onions as a topping for an added crunch and a delightful texture contrast.

Looking for even more variations? Don’t forget to check out Vegan Sushi Indulge for fresh ideas that elevate your sushi experience!

Make Ahead Options

These Halloween Temari Sushi are a fantastic choice for busy home cooks who want to save time during party preparations! You can prepare the sushi rice and the sushi vinegar up to 24 hours in advance. Simply cook the rice, mix it with the vinegar, and let it cool before storing it in an airtight container in the fridge. Additionally, cut your decorative nori and egg shapes ahead of time—these can be kept in the fridge for up to 3 days in a sealed bag. When you're ready to assemble, just scoop the rice (which stays just as delicious) over your fillings, shape into balls, and apply the nori decorations. This simple prep will help you enjoy a stress-free cooking experience and sweeten the celebration!

Storage Tips for Halloween Temari Sushi

  • Fridge: Store your Halloween Temari Sushi in an airtight container for up to 1 day. This helps maintain their freshness and prevent them from drying out.
  • Freezer: While it's best enjoyed fresh, you can freeze the sushi balls for up to 1 month. Wrap each ball in cling wrap securely, then place them in a freezer-safe bag.
  • Thawing: To enjoy frozen Halloween Temari Sushi, transfer them to the fridge for several hours before serving. Avoid microwaving them, as it may alter the texture.
  • Serving Fresh: For the best experience, serve the sushi as close to preparation time as possible. This ensures you enjoy the delightful combination of flavors and textures in each bite.

Halloween Temari Sushi Recipe FAQs

How do I select the right sushi rice?
Absolutely! For the best results, choose short-grain sushi rice, which provides that lovely sticky texture essential for shaping your Halloween Temari Sushi. Look for rice specifically labeled as sushi rice; it will yield the best texture and flavor when cooked.

How should I store leftover Halloween Temari Sushi?
You’ll want to keep any leftovers fresh! Store your Halloween Temari Sushi in an airtight container in the fridge for up to 1 day. This will help maintain their moisture and vibrancy. If you plan to keep them longer, I recommend following the freezing instructions.

Can I freeze Halloween Temari Sushi?
Yes, you can freeze these delightful sushi balls! To do so, wrap each sushi ball securely in cling wrap, ensuring they are well-protected from freezer burn. Place them in a freezer-safe bag, and they will keep for up to 1 month. When you’re ready to enjoy them, move them to the refrigerator for a few hours to thaw. This gentle thawing process helps preserve the textures and flavors.

What if I have allergies or dietary restrictions?
Very! To make your Halloween Temari Sushi safer for everyone, consider ingredient substitutions. For example, if you’re allergic to fish, you can use avocado or cucumber as a filling instead of smoked salmon. Always double-check packaged ingredients for allergy information, particularly for fish roe.

How do I troubleshoot mushy sushi rice?
If you find your sushi rice a bit too mushy, it likely wasn’t rinsed well before cooking. Make sure to rinse it under cold running water until the water runs clear to remove excess starch. Also, cooking it in a rice cooker can help you achieve the perfect texture; let it steam for an extra 10 minutes after cooking to allow the grains to firm up a bit.

Can children help in making Halloween Temari Sushi?
Absolutely! Making Halloween Temari Sushi can be a fun family activity! Kids can help with placing fillings onto the cling wrap and decorating with nori faces. Just supervise them with the parts that require cooking to ensure safety. This can create an enjoyable and engaging cooking experience for everyone involved!

Halloween Temari Sushi

Halloween Temari Sushi: Fun, Easy, and Spooky Finger Food

Halloween Temari Sushi offers a fun and healthy finger food option for your spooky celebrations.
Print Recipe Pin Recipe
Prep Time 30 minutes mins
Cook Time 15 minutes mins
Cooling Time 20 minutes mins
Total Time 1 hour hr 5 minutes mins
Servings: 12 bites
Course: Appetizers
Cuisine: Japanese
Calories: 115
Ingredients Equipment Method Nutrition Notes

Ingredients
  

For the Sushi Rice
  • 1 cup uncooked sushi rice Use short-grain rice for sticky texture.
  • 1 teaspoon konbu dashi powder Or a kelp piece for umami.
  • 2 tablespoons rice vinegar Seasoning for sushi.
  • 1 tablespoon sugar Granulated or castor.
  • 1/2 teaspoon salt Enhances flavor.
For the Fillings
  • 4 ounces smoked salmon Rich in flavor, also substitute with crab or avocado.
  • 1 large egg Fried and cut into shapes for decoration.
  • 1 medium cucumber Sliced thin for assembly.
  • 1 medium radish Adds crunch and color, substitute with daikon or carrots.
For Toppings and Decorations
  • 2 tablespoons fish roe Optional topping.
  • 2 sheets nori Cut into shapes for decoration.

Equipment

  • Rice cooker
  • small saucepan
  • Non-Stick Pan
  • Wooden spatula

Method
 

Step‑by‑Step Instructions for Halloween Temari Sushi
  1. Rinse uncooked sushi rice under cold water until clear. Cook with water and konbu dashi powder.
  2. Combine rice vinegar, sugar, and salt in a saucepan; heat to dissolve.
  3. Fold the sushi vinegar into the cooked rice and let it cool.
  4. Cut nori into fun shapes for decorations and prepare the egg in a non-stick pan.
  5. Assemble sushi balls by layering filling and rice on cling wrap.
  6. Release the sushi ball from the cling wrap and place on a platter.
  7. Decorate with nori cutouts and sprinkle fish roe if desired.
  8. Serve with soy sauce, mayonnaise, and optional wasabi.

Nutrition

Serving: 1biteCalories: 115kcalCarbohydrates: 20gProtein: 4gFat: 2gSaturated Fat: 0.5gPolyunsaturated Fat: 0.5gCholesterol: 25mgSodium: 200mgPotassium: 100mgFiber: 1gSugar: 1gVitamin C: 2mgCalcium: 10mgIron: 0.5mg

Notes

Use cling wrap to shape sushi balls for consistent sizing. Experiment with toppings for visual and nutritional variety.

Tried this recipe?

Let us know how it was!

Delicious Vampire Hearts on Toast for a Spooky Feast

September 19, 2025 by Grace Snow Leave a Comment

As I rummaged through my pantry searching for Halloween inspiration, a spooky idea struck me: why not create a dish that’s both playful and nutritious? Enter Vampire Hearts on Toast, a delightfully eerie appetizer that pairs sweet dried figs with earthy beets, all elegantly served on gluten-free toast. This whimsical treat is not only a feast for the eyes—it's also quick to prepare and fully customizable with various toppings to match your Halloween theme. Whether you're hosting a gathering or craving a fun snack, these vegan delights are sure to impress your guests and make meal prep feel like a Halloween adventure. Curious how to whip up these enchanting bites? Let’s get started!

Why Make Vampire Hearts on Toast?

Uniquely Spooky: These Vampire Hearts on Toast are a fantastic fusion of flavors, offering a striking visual that will captivate your guests.

Quick Prep: With straightforward steps, you can whip up this appetizer in no time—perfect for last-minute gatherings!

Customizable: Use different toppings, like herb-infused cream cheese or various dried fruits, to make each serving your own.

Health-Conscious: Made with wholesome ingredients, they provide a guilt-free indulgence packed with fiber and natural sweetness. Pair them with a refreshing drink or serve alongside Parmesan Artichoke Hearts for a delightful feast.

Impressive Presentation: Your guests will adore these beautifully arranged bites; serve them on a festive platter adorned with edible glitter for added charm!

Vampire Hearts on Toast Ingredients

For the Hearts
• Dried Black Mission Figs – These provide a rich sweetness and chewy texture; substitute with prunes if needed.
• Beet – Adds an earthy flavor and vibrant color; opt for fresh beets for a firmer bite or canned beets for convenience.
• Rice Paper Wrappers – Essential for holding the fig and beet together; if these aren't available, thin cucumber slices make a refreshing alternative.
• Maple Syrup – Enhances sweetness and adds shine; agave syrup can serve as a great alternative for similar results.

For the Base
• Plant-Based Cream Cheese – Perfect for spreading on toast, adding creaminess; feel free to choose your favorite flavor such as herbed or plain.
• Gluten-Free Bread (Toast) – Serves as the hearty base; pick your favorite variety, just ensure it's toasted for that satisfying crunch!

For the Drizzle
• Beet Juice – Used to create a beautiful beet syrup; can be omitted if not available, but adds a lovely elegant touch to your Vampire Hearts.

These Vampire Hearts on Toast are not only a delicious spooky treat but also a captivating centerpiece for any Halloween gathering!

Step‑by‑Step Instructions for Vampire Hearts on Toast

Step 1: Prepare the Figs
Begin by selecting your dried black mission figs, pinching off the hard base to ready them for wrapping. Take thin slices of beet and carefully wrap each fig snugly, ensuring the beet covers the entire fig to maintain moisture while cooking.

Step 2: Wrap with Rice Paper
Moisten the rice paper wrappers until they become pliable, then carefully wrap each beet-and-fig bundle, ensuring that it is tightly secured. For an alternative, thin cucumber slices can be used, but rice paper will provide a crisp texture once baked.

Step 3: Secure the Wraps
Using small skewers, secure each wrapped fig in place. This will help hold the beautiful Vampire Hearts on toast together while they cook, ensuring they maintain their shape and complete the spooky presentation.

Step 4: Drizzle with Maple Syrup
Place the secured Vampire Hearts on a baking sheet lined with parchment paper. Drizzle them lightly with maple syrup to enhance their sweetness and create a beautiful glaze. This step not only adds flavor but also encourages a lovely caramelization during cooking.

Step 5: Air Fry the Hearts
Preheat your air fryer to 350°F (175°C). Carefully place the Vampire Hearts in the fryer basket and air fry for about 4 to 6 minutes, watching closely for the rice paper to become crisp and the beets to soften slightly. A light golden color will signal they are ready.

Step 6: Prepare the Toast
While the Vampire Hearts are air frying, toast your gluten-free bread until it reaches a delightful crispiness. This toasted base will hold the creaminess of the plant-based cream cheese and provide a satisfying crunch in every bite.

Step 7: Assemble the Toasts
Once the Vampire Hearts are done, allow them to cool for a minute. Spread a generous layer of plant-based cream cheese onto each piece of toast, and then artfully place the Vampire Hearts on top, ensuring they shine with that delicious glazed look.

Step 8: Drizzle with Beet Syrup
For a final touch, drizzle the assembled Vampire Hearts on toast with beet syrup, made from the beet juice and maple syrup mixture. This adds a beautiful color contrast and a hint of earthy sweetness that complements the dish perfectly.

Step 9: Serve Creatively
Arrange your Vampire Hearts on a festive platter and consider adding decorative touches, like edible glitter or colorful party picks. Present them at your Halloween gathering, and watch as your guests eagerly dig into this spooktacular appetizer!

How to Store and Freeze Vampire Hearts on Toast

Fridge: Store any leftover Vampire Hearts in an airtight container for up to 3 days. To maintain crispiness, reheat briefly in the air fryer before serving.

Freezer: If you've prepared a batch in advance, freeze the unassembled Vampire Hearts (wrapped but uncooked) in a single layer on a baking tray, then transfer them to a freezer-safe bag for up to 2 months.

Thawing: To use frozen Vampire Hearts, thaw them in the fridge overnight before air frying them according to the instructions. This will ensure they cook evenly.

Make-Ahead Tip: Prepping the ingredients early can save time; assemble and store the Vampire Hearts in the fridge, ready to air fry just before your gathering!

Make Ahead Options

These Vampire Hearts on Toast are perfect for meal prep, allowing you to enjoy spooky treats without the last-minute rush! You can prepare the figs wrapped in beet slices and rice paper up to 24 hours in advance; simply store them in an airtight container in the fridge to maintain freshness. Additionally, you can whip up the beet syrup in advance and store it separately for up to 3 days—this way, the flavors deepen over time. When you're ready to serve, just air fry the Vampire Hearts as directed and toast your gluten-free bread. This method ensures each bite is just as delicious as if you made them freshly on the day!

Vampire Hearts on Toast Variations

Feel free to get creative and customize these delightful Vampire Hearts on Toast for your Halloween festivities!

  • Fruit Swap: Replace black mission figs with other dried fruits like apricots or soft dates for a unique flavor profile. Each bite carries the spirit of Halloween but with a fruity twist!

  • Cream Cheese Infusion: Experiment with flavored plant-based cream cheeses, adding herbs or spices to elevate the taste. Maybe go for a savory garlic spread or a zesty jalapeño cream to surprise your taste buds!

  • Sweet Beet Glaze: Enhance the beet syrup with spices like cinnamon or nutmeg; it brings a warm, seasonal vibe perfect for fall festivities. A touch of warmth adds a cozy element to these spooky treats.

  • Nutty Crunch: Sprinkle chopped nuts like walnuts or pecans on top for added texture and an unexpected crunch. This twist will have your guests wondering what the secret ingredient is!

  • Gluten-Free Options: If gluten-free bread isn’t available, try serving on rice cakes or sweet potato slices for a delicious and unique base. They hold up well and provide a healthy alternative.

  • Spicy Kick: Add a hint of heat to your cream cheese with sriracha or red pepper flakes for those who love a little spice in their life. It's a daring flavor twist that brings excitement to the table.

  • Herbal Garnish: Fresh herbs like basil or chives can beautifully finish off your Vampire Hearts, adding a pop of color and freshness. Herbs will elevate both the taste and the visuals; it’s a win-win!

For even more inspiration, consider pairing these Vampire Hearts with some delightful Parmesan Artichoke Hearts on the side. Their savory goodness complements the festive flair of your Halloween spread!

What to Serve with Vampire Hearts on Toast?

Create a delightful Halloween spread that perfectly complements these spooky treats!

  • Crispy Roasted Brussels Sprouts: The slight bitterness of Brussels sprouts contrasts beautifully with the sweetness of the Vampire Hearts, adding depth to your meal.

  • Pumpkin Soup: A warm, creamy pumpkin soup brings a cozy element to your gathering, enhancing the fall theme and soothing the senses.

  • Herbed Quinoa Salad: This fresh salad adds a light and zesty note, with herbs that brighten the palate and balance the richness of the creamy cheese.

  • Spiced Apple Cider: A warm drink that evokes the essence of fall, pairing perfectly with the sweet and savory flavor profile of the Vampire Hearts.

  • Chocolate Avocado Mousse: For dessert, this indulgently creamy treat provides a rich texture, while its health-conscious ingredients keep the meal light.

  • Hummus with Veggie Sticks: A refreshing option, the crunchy veggies paired with flavorful hummus serve as an energizing nibble between bites of the Vampire Hearts.

  • Ginger Beer: This fizzy drink with a hint of spice adds an exciting contrast and a touch of sass to your spooky Halloween feast.

  • Caramelized Sweet Potatoes: Their natural sweetness and softness blend beautifully with the flavors of the Vampire Hearts, creating a satisfying and delightful taste experience.

  • Vegan Cheese Platter: A selection of artisanal vegan cheese varieties will impress guests while offering a delicious counterpoint to the hearts on toast.

Expert Tips for Vampire Hearts on Toast

• Wrap Tight: Ensure that the rice paper wraps tightly around the figs and beets so they don’t fall apart during cooking.

• Watch the Air Fry: Air fry in small batches for even crisping; overcrowding can lead to uneven cooking and soggy results.

• Prep Ahead: Make the beet syrup in advance and store it in the fridge, enhancing the flavors and saving time on serving day.

• Experiment with Toppings: Feel free to swap out the cream cheese for different flavored varieties or even a spicy option to kick it up a notch!

• Plating Matters: Elevate the presentation by garnishing with fresh herbs or edible flowers, because a beautiful plate makes the Vampire Hearts even more enticing.

Vampire Hearts on Toast Recipe FAQs

How do I choose the best figs for my Vampire Hearts on Toast?
When selecting dried black mission figs, look for ones that are plump, moist, and free from dark spots. Avoid figs with a hard or overly dried exterior as they can affect the texture. If you can’t find black mission figs, prunes work as a great alternative due to their similar sweetness and chewiness.

How should I store leftover Vampire Hearts on Toast?
Store any leftover Vampire Hearts in an airtight container in the refrigerator for up to 3 days. To retain their crunch, reheat them briefly in an air fryer at 350°F until warmed through, which should take about 2-3 minutes.

Can I freeze Vampire Hearts on Toast?
Absolutely! If you want to make a batch in advance, assemble the Vampire Hearts (wrapped but uncooked) and freeze them in a single layer on a baking tray. Once frozen, transfer them to a freezer-safe bag where they will last for up to 2 months. To cook, just thaw in the fridge overnight before air frying as per the instructions.

How do I troubleshoot if my wraps tear during preparation?
If your rice paper tears, it might be due to being too dry or too wet. I recommend lightly moistening the edges for better pliability before wrapping. If it’s too wet, let it sit for a few seconds to let excess moisture evaporate. If you do encounter tears, a small piece of rice paper can patch it up, or use thin cucumber slices as a quick substitute for wrapping.

Are Vampire Hearts on Toast suitable for people with allergies?
Yes! These Vampire Hearts are naturally vegan and gluten-free, which makes them a fantastic choice for various dietary restrictions. However, always double-check the labels on your ingredients, especially for items like plant-based cream cheese, to ensure there are no unexpected allergens. For those with nut allergies, be cautious about certain cream cheese varieties.

How can I add additional flavors to my Vampire Hearts on Toast?
You can easily customize the taste by using flavored plant-based cream cheeses, such as herb-infused or spiced options. Additionally, consider drizzling a blend of maple syrup with spices like cinnamon or ginger to enhance their seasonal flavors. The more the merrier, so feel free to experiment with toppings!

Vampire Hearts on Toast

Delicious Vampire Hearts on Toast for a Spooky Feast

These Vampire Hearts on Toast are a playful and nutritious Halloween appetizer featuring sweet figs and earthy beets.
Print Recipe Pin Recipe
Prep Time 15 minutes mins
Cook Time 6 minutes mins
Total Time 21 minutes mins
Servings: 4 toasts
Course: Appetizers
Cuisine: Vegan
Calories: 200
Ingredients Equipment Method Nutrition Notes

Ingredients
  

For the Hearts
  • 12 pieces Dried Black Mission Figs Substitute with prunes if needed.
  • 1 medium Beet Opt for fresh beets for a firmer bite or canned beets for convenience.
  • 4 sheets Rice Paper Wrappers Thin cucumber slices can be used as an alternative.
  • 2 tablespoons Maple Syrup Agave syrup can serve as a great alternative.
For the Base
  • 8 ounces Plant-Based Cream Cheese Choose your favorite flavor such as herbed or plain.
  • 4 slices Gluten-Free Bread (Toast) Ensure it's toasted for that satisfying crunch!
For the Drizzle
  • 2 tablespoons Beet Juice Can be omitted if not available.

Equipment

  • Air fryer
  • Baking Sheet
  • Skewers

Method
 

Step-by-Step Instructions
  1. Prepare the Figs: Begin by selecting your dried black mission figs, pinching off the hard base to ready them for wrapping. Take thin slices of beet and carefully wrap each fig snugly, ensuring the beet covers the entire fig to maintain moisture while cooking.
  2. Wrap with Rice Paper: Moisten the rice paper wrappers until they become pliable, then carefully wrap each beet-and-fig bundle, ensuring that it is tightly secured.
  3. Secure the Wraps: Using small skewers, secure each wrapped fig in place.
  4. Drizzle with Maple Syrup: Place the secured Vampire Hearts on a baking sheet lined with parchment paper. Drizzle them lightly with maple syrup.
  5. Air Fry the Hearts: Preheat your air fryer to 350°F (175°C). Carefully place the Vampire Hearts in the fryer basket and air fry for about 4 to 6 minutes.
  6. Prepare the Toast: While the Vampire Hearts are air frying, toast your gluten-free bread until it reaches a delightful crispiness.
  7. Assemble the Toasts: Once the Vampire Hearts are done, allow them to cool for a minute. Spread a generous layer of plant-based cream cheese onto each piece of toast.
  8. Drizzle with Beet Syrup: For a final touch, drizzle the assembled Vampire Hearts on toast with beet syrup.
  9. Serve Creatively: Arrange your Vampire Hearts on a festive platter.

Nutrition

Serving: 1toastCalories: 200kcalCarbohydrates: 30gProtein: 3gFat: 7gSaturated Fat: 1gPolyunsaturated Fat: 0.5gMonounsaturated Fat: 4gSodium: 140mgPotassium: 250mgFiber: 4gSugar: 10gVitamin A: 5IUVitamin C: 6mgCalcium: 3mgIron: 5mg

Notes

Ensure tight wraps around the figs and beets to prevent falling apart. Air fry in small batches for even cooking. Consider prepping ingredients in advance for quicker assembly.

Tried this recipe?

Let us know how it was!

Spooky Sweet and Sour 'Bat' Wings Perfect for Halloween Fun

September 18, 2025 by Grace Snow Leave a Comment

The eerie glow of Halloween is right around the corner, and what better way to celebrate than with a dish that has both a twist and a fright? Meet my irresistibly spooky Sweet and Sour 'Bat' Wings, a fun combination of tangy and sweet that will leave your guests delightfully surprised. These wings, baked to crispy perfection, not only stand out with their unique black hue but also serve as a delicious centerstage for any Halloween gathering. Plus, they’re incredibly easy to whip up, making them a fantastic option for last-minute party planning. Whether you choose to keep them mild or turn up the heat with a spicy variation, these sticky wings are bound to be a hit! Are you ready to add a little magic to your Halloween menu?

Why are these wings a Halloween must-try?

Spooky Fun: Transform your Halloween gathering with these eye-catching wings that bring a playful twist to your appetizer spread.

Sweet and Tangy Delight: The balanced flavor profile offers a delightful contrast that keeps everyone coming back for more.

Easy Preparation: Thanks to simple steps, these wings can seamlessly fit into your busy schedule, perfect for those last-minute plans.

Crowd-Pleaser: They’re not just tasty; their unique presentation garners compliments and sparks conversations at any party.

Versatile Variations: Want to kick up the heat? Add hot sauce to cater to all taste preferences while enjoying pizza on the side with a warm dip like those in our Coconutty Beans and Greens Stew and Smoky Sweet Potatoes.

Bring the spooky spirit to life with these Sweet and Sour 'Bat' Wings that everyone will be raving about!

Sweet and Sour 'Bat' Wings Ingredients

For the Marinade

  • Pineapple Juice – Adds a sweet and tangy flavor; substitute apple juice if allergic.
  • Brown Sugar – Enhances sweetness and caramelization during baking.
  • Tomato Sauce – Provides a savory base; essential for the rich taste.
  • Worcestershire Sauce – Boosts umami depth in the marinade mix.
  • Hot Sauce (optional) – Introduces a spicy kick; adjust to match your spice preference.
  • Black Food Coloring – Creates that eerie black hue for your 'bat' wings; it's crucial for the spooky effect.

For the Wings

  • Whole Chicken Wings – The stars of the dish; ensure you use whole wings for a great presentation.
  • Honey – Adds a sticky and sweet finish when glazed over the wings.
  • Apple Cider Vinegar – Balances the sweetness of honey with a touch of acidity for flavor depth.

These Sweet and Sour 'Bat' Wings will be the show-stopper at your Halloween celebration!

Step‑by‑Step Instructions for Sweet and Sour 'Bat' Wings

Step 1: Prepare the Marinade
In a large mixing bowl, combine 1 cup of pineapple juice, 1/2 cup of brown sugar, 1/2 cup of tomato sauce, 2 tablespoons of Worcestershire sauce, and a few drops of black food coloring. Whisk the mixture until the sugar dissolves completely, creating a glossy marinade. The blended ingredients should have a rich aroma with a hint of sweetness. Set it aside while you marinate the chicken wings.

Step 2: Marinate Chicken
Add the whole chicken wings to the marinade, ensuring each wing is thoroughly coated. Toss them gently to ensure an even covering, then cover the bowl with plastic wrap. Refrigerate for at least 6 hours or ideally overnight to enhance the flavor and achieve the unique black hue for your Sweet and Sour 'Bat' Wings.

Step 3: Preheat Oven
Preheat your oven to 400°F (200°C). While the oven heats, line two baking sheets with parchment paper to prevent sticking and make cleanup easier. This temperature is perfect for achieving crispy wings. You’ll know the oven is ready when you can feel the heat radiating against your hand.

Step 4: Bake Wings
Arrange the marinated wings in a single layer on the prepared baking sheets, spacing them a little apart for even baking. Slide them into the oven and bake for 30 minutes until the skin appears crispy and slightly caramelized. You can check on them after 20 minutes for even cooking and to encourage that beautiful glossy finish.

Step 5: Glaze Wings
In a small bowl, mix 1/4 cup of honey with 2 tablespoons of apple cider vinegar until well blended. After baking, carefully remove the wings from the oven and brush this glaze generously over each wing. Return them to the oven for an additional 10 minutes. This will create a sticky sweet layer that enhances their delicious flavor.

Step 6: Serve
Once the wings are perfectly glazed, take them out of the oven and let them cool for a few minutes. Arrange the Sweet and Sour 'Bat' Wings on a spooky serving platter for Halloween, ensuring they are prominently displayed. You can garnish with some fresh herbs if desired for an appealing touch. Get ready for some impressed guests at your gathering!

What to Serve with Sweet and Sour 'Bat' Wings?

Elevate your Halloween feast by pairing these spooky wings with delightful sides that complement their sweet and sour charm.

  • Creamy Coleslaw: This crunchy and refreshing slaw balances the wings' richness, adding a vibrant crunch to every bite.
  • Garlic Breadsticks: Soft and buttery breadsticks provide a comforting touch, perfect for soaking up extra sauce.
  • Roasted Pumpkin Wedges: Slightly sweet, these caramelized pumpkin pieces enhance the autumnal vibe of your dinner.
  • Spicy Corn on the Cob: A touch of heat from chili butter elevates the inviting sweetness of the wings, creating a fun flavor duo.
  • Stuffed Bell Peppers: Colorful and hearty, these peppers bring a savory satisfaction, making them an excellent companion on the plate.
  • Apple Cider Sangria: A fruity and festive drink infused with fall flavors, perfect for toasting with friends at your Halloween gathering.
  • Chocolate Spider Cupcakes: End your meal on a spooky note with these decadent treats that will delight both kids and adults.
  • Crispy Sweet Potato Fries: These offer a delightful crunch and natural sweetness, pairing wonderfully with the sticky wings for an exciting contrast.

How to Store and Freeze Sweet and Sour 'Bat' Wings

Fridge: Store leftover Sweet and Sour 'Bat' Wings in an airtight container for up to 3 days. Ensure they are fully cooled before sealing to maintain their crispy texture.

Freezer: For longer storage, freeze the wings in a single layer on a baking sheet before transferring them to a freezer-safe bag. They can be kept for up to 3 months.

Reheating (Oven): Preheat your oven to 375°F (190°C). Place the wings on a baking sheet and reheat for about 15-20 minutes or until heated through to regain their crispy finish.

Make-Ahead Tip: If you're preparing for a party, consider making the wings a day in advance. Once cooked, refrigerate them and simply reheat in the oven for a quick and easy appetizer!

Expert Tips for Sweet and Sour 'Bat' Wings

  • Marinate Properly: For the best flavor and a deep black color, marinate the wings for at least 12 hours; overnight is even better.

  • Avoid Stains: Use a plastic or glass bowl when mixing in the black food coloring to prevent any lingering stains on surfaces.

  • Baste Generously: During the last 10 minutes of baking, make sure to apply the honey glaze thoroughly for that sticky finish that makes these wings irresistible.

  • Watch the Color: Be cautious with the black food coloring—start with a few drops; it's easier to add more if needed than to fix an overly dark hue.

  • Make Ahead: Prepare the wings a day in advance by marinating them, then just bake them right before your Halloween party for fresh and hot Sweet and Sour 'Bat' Wings.

Sweet and Sour 'Bat' Wings Variations

Feel free to get creative with these Sweet and Sour 'Bat' Wings to suit your taste and dietary needs!

  • Spicy Twist: Increase the hot sauce to your marinade for a fiery kick that will tantalize those who enjoy bold flavors.
    A touch of heat adds an exciting depth that transforms the classic flavor profile into something uniquely thrilling!

  • Natural Color: Replace the black food coloring with activated charcoal for a wholesome alternative.
    It not only achieves the same spooky aesthetic but also adds a healthful boost to your dish!

  • Crispy Option: Use pre-cooked wings for a quick fix, but note that they may not absorb as much flavor.
    While this shortcut saves time, marinated raw wings truly deliver the special essence of your Sweet and Sour 'Bat' Wings.

  • Vegetarian Version: Swap chicken wings for cauliflower florets for a plant-based twist.
    Just be sure to adjust the baking time to achieve that desired crispiness while keeping all the flavor intact!

  • Tropical Fusion: Substitute pineapple juice with mango juice for a tropical sweetness that brightens the dish.
    This twist makes your wings a delightful, fruity surprise that adds a new layer of yumminess!

  • Herbal Infusion: Mix in some fresh herbs such as cilantro or basil into the glaze for a hint of freshness.
    These vibrant notes perfectly complement the sticky, sweet-and-sour profile, elevating your wings to a new culinary adventure.

  • Serve with Dips: Pair these wings with a tangy yogurt dip or a spicy ranch dressing for extra flavor.
    The creamy texture and zesty taste serve as the ideal complement, creating a delightful combination with each bite.

Looking for more inspiration? Try serving these wings alongside delicious sides like our Maple Roasted Sweet Potatoes with Pecans or a creamy dip for the perfect Halloween feast. Enjoy customizing your Sweet and Sour 'Bat' Wings!

Make Ahead Options

These Sweet and Sour 'Bat' Wings are perfect for meal prep, allowing you to save time and enjoy less stress during your Halloween festivities! You can marinate the chicken wings up to 24 hours in advance; just store them covered in the fridge to infuse flavors and achieve that iconic black hue. If you're looking to save even more time, consider preparing the entire marinade a few days ahead and refrigerate it. When it’s time to bake, simply follow the cooking instructions, and you'll have these spooky wings ready to impress your guests. By preparing ahead, you can enjoy delicious, restaurant-quality results that are just as tasty as if made fresh!

Sweet and Sour 'Bat' Wings Recipe FAQs

What type of pineapple juice should I use?
You can use either fresh, canned, or bottled pineapple juice for your Sweet and Sour 'Bat' Wings. Just ensure there are no added sugars if you're keeping it healthy. If you're allergic to pineapple, feel free to substitute with apple juice or mango juice for a similar sweet and tangy effect.

How should I store leftover 'Bat' Wings?
Store leftover Sweet and Sour 'Bat' Wings in an airtight container in the fridge for up to 3 days. Make sure they have fully cooled before sealing to ensure they maintain their crispy texture. If you plan to keep them longer, consider freezing.

Can I freeze these wings?
Absolutely! To freeze your Sweet and Sour 'Bat' Wings, after they have cooled, arrange them in a single layer on a baking sheet and place this in the freezer. Once they’re firm (after about 1-2 hours), transfer them to a freezer-safe bag or container. They can be stored for up to 3 months. When you're ready to enjoy, simply reheat them according to the instructions.

What should I do if my wings didn’t turn out crispy?
If your wings aren't crispy, try adjusting the baking time and temperature. Make sure to bake them in a single layer, and avoid overcrowding the baking sheet. Additionally, ensure they are fully marinated; the longer the marinade, the more flavor and better texture. Next time, consider broiling them for a few minutes at the end to help crisp them up even more!

Are the ingredients safe for my pets?
While the Sweet and Sour 'Bat' Wings are delicious for humans, be cautious! Ingredients like garlic in Worcestershire sauce can be harmful to pets. It's best to keep these wings reserved for human enjoyment. For a pet-friendly treat, consider setting aside some plain, cooked chicken wings without any seasoning!

Can I adjust the spice level?
Very! If you prefer a spicier version, simply increase the amount of hot sauce in the marinade. Start with a tablespoon and taste the marinade before adding more. After all, customizing flavor is half the fun in cooking, so feel free to adapt it to suit your taste preferences!

These Sweet and Sour 'Bat' Wings are sure to wow your Halloween guests, and hopefully, these FAQs will assist you in making the perfect spooky dish!

Sweet and Sour 'Bat' Wings

Spooky Sweet and Sour 'Bat' Wings Perfect for Halloween Fun

Delight your guests with these Sweet and Sour 'Bat' Wings, a fun Halloween twist on a traditional dish.
Print Recipe Pin Recipe
Prep Time 15 minutes mins
Cook Time 40 minutes mins
Marinating Time 6 hours hrs
Total Time 6 hours hrs 55 minutes mins
Servings: 6 wings
Course: Appetizers
Cuisine: American
Calories: 250
Ingredients Equipment Method Nutrition Notes

Ingredients
  

For the Marinade
  • 1 cup Pineapple Juice Substitute apple juice if allergic.
  • 1/2 cup Brown Sugar Enhances sweetness and caramelization.
  • 1/2 cup Tomato Sauce Provides a savory base.
  • 2 tablespoons Worcestershire Sauce Boosts umami depth.
  • few drops Black Food Coloring Crucial for the spooky effect.
  • to taste Hot Sauce Add to match your spice preference.
For the Wings
  • 2 pounds Whole Chicken Wings Ensure you use whole wings for great presentation.
  • 1/4 cup Honey Adds a sticky and sweet finish.
  • 2 tablespoons Apple Cider Vinegar Balances the sweetness of honey.

Equipment

  • Mixing Bowl
  • Baking Sheets
  • Parchment Paper
  • Whisk
  • Brush

Method
 

Step-by-Step Instructions
  1. In a large mixing bowl, combine pineapple juice, brown sugar, tomato sauce, Worcestershire sauce, and black food coloring. Whisk until the sugar dissolves completely.
  2. Add the whole chicken wings to the marinade, ensuring each wing is thoroughly coated. Cover the bowl with plastic wrap and refrigerate for at least 6 hours or overnight.
  3. Preheat your oven to 400°F (200°C) and line two baking sheets with parchment paper.
  4. Arrange the marinated wings in a single layer on the baking sheets and bake for 30 minutes.
  5. Mix honey with apple cider vinegar. Brush the glaze over each wing and return to the oven for an additional 10 minutes.
  6. Once glazed, let the wings cool slightly before serving on a spooky platter.

Nutrition

Serving: 3wingsCalories: 250kcalCarbohydrates: 20gProtein: 15gFat: 12gSaturated Fat: 3gPolyunsaturated Fat: 1gMonounsaturated Fat: 7gCholesterol: 80mgSodium: 550mgPotassium: 160mgSugar: 10gVitamin A: 5IUVitamin C: 2mgCalcium: 1mgIron: 4mg

Notes

For the best flavor, marinate wings overnight. Store in an airtight container for up to 3 days. For longer storage, freeze for up to 3 months.

Tried this recipe?

Let us know how it was!

Heavenly Butternut Hummus with Feta & Pomegranates Delight

September 14, 2025 by Grace Snow Leave a Comment

As I settled into a cozy autumn afternoon, the enchanting aroma of roasting butternut squash wrapped around me like a warm hug. Best known for its creamy texture and subtly sweet flavor, butternut squash takes a delightful twist in this Butternut Hummus with Feta & Pomegranates. This festive appetizer isn’t just a treat for the taste buds; it’s also a quick and healthy solution that fits perfectly into your Thanksgiving spread or any holiday gathering. With its combination of earthiness and sweetness, this dip is bound to be a crowd-pleaser while being gluten-free and vegetarian. Imagine serving it up alongside crispy pita chips or fresh veggies, inviting everyone to savor the joy of homemade goodness. Are you ready to bring the flavors of fall to your table?

Why is Butternut Hummus a Must-Try?

Vibrant, Seasonal Flavor: This butternut hummus captures the essence of fall with its sweet and smoky profile, making it a standout dish for any gathering.

Quick & Easy: In just a few simple steps, you can whip up this creamy delight, saving you precious time in the kitchen.

Healthy Choice: Packed with nutrients and fiber, this hummus not only pleases your palate but supports your healthy eating goals.

Versatile Serving Options: Pair it perfectly with crispy pita chips or colorful veggies, catering to a variety of tastes and dietary preferences.

Crowd-Pleaser: With its stunning presentation, topped with pomegranate arils and feta, it's sure to impress your guests at Thanksgiving or any festive occasion!

For more flavorful inspiration, check out this delicious Skillet Pasta Feta or try some Sweet Potatoes Black for a delightful twist!

Butternut Hummus Ingredients

For the Hummus

  • Cubed Butternut Squash – The star of this dish, providing a creamy texture and natural sweetness; acorn squash is a great substitute if needed.
  • Garlic Cloves – Adds depth of flavor; roasting them makes them sweet and mellow.
  • Cooked Chickpeas – Essential for creaminess and protein; they give traditional hummus its rich texture.
  • Tahini – Introduces nuttiness and richness; sunflower seed butter can be used for a nut-free version.
  • Fresh Lemon Juice – Brightens the flavors; always opt for fresh juice for the best taste.
  • Cumin & Coriander – Provide warmth and earthiness, enhancing the overall flavor profile.
  • Cayenne Pepper – Gives just a hint of heat; feel free to adjust according to your spicy preference.
  • Sea Salt – Essential for enhancing all flavors; use more for garnishing if needed.
  • Extra-Virgin Olive Oil – Adds richness and helps to create a smooth blend; a good quality oil makes a difference.

For the Garnish

  • Pomegranate Arils – These add bursts of sweetness and color; dried cranberries can be a tasty substitute.
  • Feta Cheese – Offers a creamy, salty touch; omit or replace with a vegan alternative for a dairy-free option.
  • Chopped Parsley & Microgreens (optional) – Add freshness and a vibrant pop of color for serving.

This Butternut Hummus with Feta & Pomegranates is a delightful way to bring seasonal flavors to your table!

Step‑by‑Step Instructions for Butternut Hummus with Feta & Pomegranates

Step 1: Preheat the Oven
Begin by preheating your oven to 400°F (200°C). While the oven warms, grab a baking sheet and line it with parchment paper. This will not only make clean-up easier but also help the butternut squash roast evenly, ensuring it gets beautifully caramelized and tender.

Step 2: Prepare the Squash and Garlic
Toss the cubed butternut squash with a drizzle of extra-virgin olive oil, sea salt, and freshly ground black pepper on the prepared baking sheet. For a flavor boost, take whole garlic cloves, wrap them in aluminum foil with a splash of olive oil, and place them on the sheet alongside the squash. This step adds deep, savory notes to your Butternut Hummus.

Step 3: Roast the Vegetables
Roast the butternut squash and garlic in the preheated oven for about 20-25 minutes, or until the squash is tender and slightly golden. You’ll know it’s ready when a fork easily pierces the squash. Once finished, remove the baking sheet from the oven and let the vegetables cool slightly—this will help maintain the creaminess of the hummus.

Step 4: Blend the Hummus
In a food processor, combine the cooled butternut squash, roasted garlic (squeeze out the cloves), cooked chickpeas, tahini, fresh lemon juice, cumin, coriander, and sea salt. Pulse together until the mixture is smooth and creamy, scraping down the sides as necessary. This is where the magic of flavors begins for your Butternut Hummus with Feta & Pomegranates!

Step 5: Adjust the Consistency
With the food processor running, slowly drizzle in more olive oil while blending. This step enhances the rich texture, and if the hummus is too thick, add a tablespoon of cold water at a time until you reach your desired consistency. The end result should be velvety and luscious, inviting everyone to dip in.

Step 6: Serve and Garnish
Transfer your beautifully blended Butternut Hummus to a serving bowl. For a gorgeous finish, top it with vibrant pomegranate arils, crumbled feta cheese, a sprinkle of fresh parsley, and a drizzle of olive oil for added flair. This presentation will not only wow your guests but also showcase the lovely fall colors.

Step 7: Pair It Up
Serve your Butternut Hummus with an assortment of toasted pita chips, crunchy vegetable sticks, or artisan crackers. This versatile dip is perfect for sharing, whether at a festive holiday gathering or a relaxing afternoon snack. Enjoy the delightful flavors and the warmth of homemade hospitality in every bite!

What to Serve with Creamy Butternut Squash Hummus with Feta & Pomegranates

Indulge in the warmth of fall flavors by crafting a complete meal around this vibrant hummus, perfect for gatherings or cozy nights in.

  • Toasted Pita Chips: The crispy texture and mild flavor of toasted pita chips make them a perfect companion, inviting you to savor every creamy bite.

  • Fresh Veggie Sticks: Crunchy carrots, celery, and bell peppers add a refreshing contrast, providing a wholesome, colorful platter alongside the rich hummus.

  • Artisan Crackers: The unique flavors of artisan crackers enhance the overall experience, offering delightful crunch and a gourmet touch to your spread.

  • Olive Tapenade: A touch of savory olive tapenade adds a briny layer of flavor that wonderfully complements the sweetness of the butternut squash.

  • Quinoa Salad: A light quinoa salad with lemon and herbs brings a wholesome element to your meal, further enhancing the dish's fresh and vibrant character.

  • Crispy Roasted Brussels Sprouts: The caramelized edges of roasted Brussels sprouts mesh beautifully with the creamy hummus, providing both a bitter and sweet harmony.

  • Chardonnay or Sparkling Water: A crisp chardonnay or bubbly sparkling water will elevate your meal, cleansing your palate with each sip while accentuating the flavors of this dish.

  • Mini Apple Tarts: For a sweet touch, serve up mini apple tarts for dessert, embracing the warmth of fall and ending your meal on a delightful note.

How to Store and Freeze Butternut Hummus with Feta & Pomegranates

Fridge: Store your Butternut Hummus in an airtight container for up to 5 days. Keep it covered to preserve freshness and prevent it from absorbing any odors.

Freezer: For longer storage, freeze the hummus in an airtight container or heavy-duty freezer bag for up to 3 months. Thaw overnight in the fridge before serving.

Airtight Tips: If freezing, leave some space in the container for expansion as the hummus freezes. Allow it to come to room temperature before stirring.

Reheating: While this hummus is typically enjoyed cold, you can gently warm it in the microwave or on the stovetop. Add a splash of olive oil or water to achieve desired consistency.

Make Ahead Options

These Butternut Hummus with Feta & Pomegranates are perfect for meal prep, making your holiday entertaining a breeze! You can roast the butternut squash and garlic up to 24 hours in advance; simply store them in the refrigerator to keep them fresh and flavorful. Additionally, the hummus itself can be blended and refrigerated for up to 3 days—just make sure to cover it tightly to prevent browning. When it’s time to serve, simply re-garnish with pomegranate arils and feta for that inviting touch. This way, you’ll have a delightful dip ready for your guests with minimal effort on the day of your gathering!

Butternut Hummus Variations & Substitutions

Customize your butternut hummus to suit your taste preferences and dietary needs! Let your culinary creativity flow with these delightful options.

  • Spicy Kick: Increase the cayenne pepper for more heat or add a sprinkle of smoked paprika for a smoky flavor twist.
  • Roasted Red Pepper: Swap out some of the butternut squash for roasted red peppers to add a vibrant depth of flavor.
  • Nut-Free: Replace tahini with sunflower seed butter to create a nut-free version of the hummus without sacrificing creaminess.
  • Sweet Surprise: Fold in a teaspoon of maple syrup or honey for an unexpected hint of sweetness that contrasts beautifully with the savory flavors.
  • Creamy Avocado: Blend in half a ripe avocado for even more creaminess and a touch of healthy fats that will make your hummus extra luscious.
  • Herb Infusion: Experiment with fresh herbs like basil or dill added to the mix before blending for an aromatic twist on the classic flavor.
  • Vegan Delight: Omit feta for a fully vegan option or use a delicious vegan cheese alternative if you want that creamy, tangy touch.
  • Boosted Protein: Add a scoop of Greek yogurt or plant-based yogurt for added protein and a creamier texture that enhances the richness.

As you explore these variations, you might also enjoy trying out some of my other favorite recipes, like this flavorful Tagliatelle Asparagus Peas or zesty Pan Fried Mayo. Enjoy the adventure of creating a hummus that's uniquely yours!

Expert Tips for Butternut Hummus

  • Tender Squash is Key: Ensure the butternut squash is perfectly tender when roasted. Adjust roasting time as needed for creamier hummus.

  • Quality Olive Oil Matters: Use high-quality extra-virgin olive oil for the best flavor. It elevates the richness of your Butternut Hummus with Feta & Pomegranates.

  • Blend Smoothly: For the silkiest texture, use a powerful blender like a Vitamix. This helps achieve that luxurious creaminess you desire.

  • Taste as You Go: Adjust seasonings gradually. Taste your hummus as you blend to ensure the right balance of flavors and spice.

  • Prep Ahead: Roast the butternut squash and garlic a day ahead. Store them in the fridge, making your assembly quick and easy on serving day.

Butternut Hummus with Feta & Pomegranates Recipe FAQs

How do I choose ripe butternut squash?
Absolutely! Look for butternut squash that feels heavy for its size, with a hard, smooth skin and no dark spots or soft areas. A deep, even tan color is a great indicator of ripeness!

What are the best storage methods for Butternut Hummus?
You can store your Butternut Hummus in an airtight container in the refrigerator for up to 5 days. Make sure to keep it covered to maintain freshness and prevent it from absorbing odors. I often make a big batch and enjoy it throughout the week!

Can I freeze Butternut Hummus with Feta & Pomegranates?
Yes, indeed! You can freeze this hummus in either an airtight container or a heavy-duty zipper bag for up to 3 months. To freeze, leave a bit of room for expansion and thaw overnight in the fridge before serving. If it's slightly thick after thawing, blend in a splash of olive oil or water for that creamy texture!

What should I do if my hummus turns out too thick?
Very much! If your hummus is thick, simply add water, one tablespoon at a time, while blending until you achieve the desired consistency. Using a high-powered blender may give you that velvety smoothness you’re after.

Are there any dietary considerations for this recipe?
For sure! This Butternut Hummus is vegetarian and gluten-free, making it suitable for many dietary needs. To make it vegan, simply omit the feta or replace it with a plant-based alternative. Plus, it's a healthy choice packed with fiber and antioxidants!

Can I modify the recipe for different flavors?
The more the merrier! You can customize this dish by adding roasted red peppers for a sweet twist or increasing the cayenne pepper for heat. If you’re feeling adventurous, even a drizzle of balsamic glaze can elevate the flavor and presentation!

Butternut Hummus with Feta & Pomegranates

Heavenly Butternut Hummus with Feta & Pomegranates Delight

A creamy and flavorful Butternut Hummus with Feta & Pomegranates, perfect for festive gatherings and healthy snacking.
Print Recipe Pin Recipe
Prep Time 10 minutes mins
Cook Time 25 minutes mins
Total Time 35 minutes mins
Servings: 6 servings
Course: Appetizers
Cuisine: Mediterranean
Calories: 200
Ingredients Equipment Method Nutrition Notes

Ingredients
  

For the Hummus
  • 1 medium Butternut Squash cubed
  • 3 cloves Garlic whole
  • 1 cup Cooked Chickpeas
  • 1/4 cup Tahini
  • 2 tablespoons Fresh Lemon Juice preferably fresh
  • 1 teaspoon Cumin
  • 1 teaspoon Coriander
  • 1/4 teaspoon Cayenne Pepper adjust to taste
  • 1/2 teaspoon Sea Salt to taste
  • 2 tablespoons Extra-Virgin Olive Oil plus more for consistency
For the Garnish
  • 1/2 cup Pomegranate Arils
  • 1/2 cup Feta Cheese crumbled
  • Chopped Parsley optional
  • Microgreens optional

Equipment

  • Oven
  • Baking Sheet
  • Parchment Paper
  • Food Processor

Method
 

Step-by-Step Instructions
  1. Preheat your oven to 400°F (200°C). Line a baking sheet with parchment paper.
  2. Toss cubed butternut squash with olive oil, sea salt, and black pepper on the baking sheet. Wrap garlic cloves in foil with some olive oil and add to the sheet.
  3. Roast butternut squash and garlic for 20-25 minutes, until tender and golden. Allow to cool slightly.
  4. In a food processor, combine the cooled squash, roasted garlic (squeeze out the cloves), chickpeas, tahini, lemon juice, cumin, coriander, and salt. Blend until smooth.
  5. While blending, drizzle in more olive oil to adjust the consistency. If too thick, add water gradually.
  6. Transfer the hummus to a serving bowl and top with pomegranate arils, feta, parsley, and olive oil.
  7. Serve with pita chips, vegetable sticks, or crackers.

Nutrition

Serving: 1cupCalories: 200kcalCarbohydrates: 30gProtein: 5gFat: 9gSaturated Fat: 1gPolyunsaturated Fat: 1gMonounsaturated Fat: 7gSodium: 200mgPotassium: 300mgFiber: 6gSugar: 3gVitamin A: 5000IUVitamin C: 20mgCalcium: 50mgIron: 2mg

Notes

Store in an airtight container for up to 5 days in the fridge; can be frozen for up to 3 months.

Tried this recipe?

Let us know how it was!

Creamy Butternut Hummus with Feta & Pomegranates Delight

September 11, 2025 by Grace Snow Leave a Comment

As I scooped up a vibrant spoonful of this Butternut Squash Hummus with Feta and Pomegranates, the autumn colors danced delightfully on my plate, promising a burst of flavor in every bite. This creamy dip perfectly marries the sweet, earthy notes of roasted butternut squash with the tangy richness of feta cheese and pops of juicy pomegranates. It’s the ideal crowd-pleaser for holiday gatherings, offering a quick and easy way to impress your guests without spending all day in the kitchen. Not only is this hummus a stunning centerpiece, but it’s also vegetarian, gluten-free, and can be easily tailored for vegan diets by omitting the feta. Are you ready to elevate your snack game with this festive twist on a classic favorite?

Why is This Hummus a Must-Try?

Uniquely Delicious: This Butternut Squash Hummus blends sweet roasted squash with tangy feta for a harmony of flavors that’s both delightful and unexpected.

Customizable: Adjust the recipe to fit your preferences, whether you want it vegan by omitting the feta or spicing it up with extra cayenne.

Quick & Easy: Whip it up in just 30 minutes, making it an effortless party starter or healthy snack option.

Festive Appeal: The vibrant colors and textures create an eye-catching presentation that will wow your guests, perfect for holiday gatherings.

Healthy Indulgence: Packed with nutrients, this dip is not only tasty but fits into gluten-free and vegetarian diets, making it a guilt-free treat!

Whether you're looking for a crowd-pleasing appetizer for Thanksgiving or just a delicious snack, this hummus won’t disappoint. For more exciting flavors, check out my recipes for Sweet Potatoes Black or Fried Shrimp Cabbage.

Butternut Hummus with Feta Ingredients

For the Hummus Base

  • 1 cup cubed butternut squash – Adds sweetness and creaminess; substitute with acorn squash if needed.
  • 1 large or 2 medium garlic cloves – Provides aromatic depth; use roasted garlic for a milder flavor.
  • 1½ cups cooked chickpeas – Main protein source; gives texture and can be swapped for canned chickpeas for convenience.
  • ¼ cup tahini – Adds creaminess and nutty flavor; can substitute with sunflower seed butter for a nut-free option.
  • 3 tablespoons fresh lemon juice – Balances flavors with acidity; fresh juice is preferred for the best brightness.
  • ½ teaspoon cumin – Adds warmth and earthiness; substitute with smoked paprika for a different flavor profile.
  • ½ teaspoon coriander – Enhances the dish with a citrusy spice; can be omitted if unavailable.
  • ½ teaspoon cayenne – Provides heat; adjust according to your spice tolerance and omit for a milder version.
  • ½ teaspoon sea salt – Enhances overall flavor; adjust to your taste.
  • ¼ cup extra-virgin olive oil – Adds richness and aids in blending; opt for high-quality oil for the best flavor.
  • ¼ cup water – Helps achieve smooth consistency; add as needed.
  • Freshly ground black pepper – For seasoning to taste.

For Topping & Serving

  • ¼ cup pomegranate arils – Adds sweetness and a burst of color to the hummus.
  • ¼ cup feta cheese – Provides a creamy, salty contrast; use vegan cheese for a non-dairy option.
  • 2 tablespoons chopped parsley – Adds freshness and vibrant color.
  • 2 tablespoons microgreens (optional) – Perfect for an extra garnish and nutrient boost.
  • Drizzle of olive oil – For added richness and flavor enhancement.
  • Pita, crackers, and/or veggies – Delicious options for serving and dipping into the hummus.

This tasty Butternut Hummus with Feta & Pomegranates is sure to be a hit!

Step‑by‑Step Instructions for Creamy Butternut Hummus with Feta & Pomegranates

Step 1: Preheat the Oven
Begin by preheating your oven to 400°F (200°C). While the oven warms up, line a baking sheet with parchment paper, ensuring an easy cleanup later. This step sets the foundation for roasting the butternut squash and garlic, bringing out their natural sweetness and enhancing the flavors for your Creamy Butternut Hummus.

Step 2: Prepare the Cubed Squash
In a large mixing bowl, toss the 1 cup of cubed butternut squash with a drizzle of extra-virgin olive oil, sea salt, and freshly ground black pepper until evenly coated. Spread the seasoned squash onto the prepared baking sheet. Also, wrap the garlic cloves in foil, adding a splash of olive oil and a pinch of salt, before placing them next to the squash on the same sheet.

Step 3: Roast to Tenderness
Place the baking sheet in the preheated oven and roast the butternut squash and garlic for 20-25 minutes, or until the squash is tender and slightly caramelized. Stir halfway through to ensure even cooking. The irresistible aroma will fill your kitchen, signaling it’s almost time to blend everything into a luscious hummus.

Step 4: Cool Before Blending
Once the squash and garlic are done roasting, remove them from the oven and let them cool slightly for about 5 minutes. This cooling period is essential to avoid overheating your food processor. When cool enough to handle, squeeze the garlic cloves out of their skins and set aside, ready to mix into your hummus.

Step 5: Blend Hummus Ingredients
In a food processor, combine the roasted butternut squash, garlic, 1½ cups of cooked chickpeas, ¼ cup of tahini, 3 tablespoons of fresh lemon juice, ½ teaspoon of cumin, ½ teaspoon of coriander, ½ teaspoon of cayenne, and ½ teaspoon of sea salt. Pulse the mixture until it starts to break down, creating a harmonious blend of flavors for your Butternut Hummus with Feta & Pomegranates.

Step 6: Adjust Texture and Flavor
While blending, gradually drizzle in the ¼ cup of extra-virgin olive oil, achieving a creamy consistency. If the mixture is too thick, add up to ¼ cup of water in small increments, blending until you reach your desired smoothness. Taste your hummus, adjusting seasoning as necessary to ensure it’s perfectly balanced.

Step 7: Transfer and Top
Once your hummus reaches a luxurious, creamy texture, transfer it to a serving bowl. To elevate your Creamy Butternut Hummus, artistically top it with ¼ cup of pomegranate arils, crumbled feta cheese, 2 tablespoons of chopped parsley, and microgreens if desired. Drizzle with a touch of olive oil for that finishing touch of richness.

Step 8: Serve and Enjoy
Pair your festive hummus with an array of pita, crackers, or fresh veggies for a delightful appetizer. Gather family and friends around this inviting dish, knowing that each scoop of your Butternut Hummus with Feta & Pomegranates is brimming with flavor and healthy goodness, perfect for sharing during holiday gatherings or casual get-togethers.

How to Store and Freeze Butternut Hummus

Fridge: Store your Butternut Hummus with Feta & Pomegranates in an airtight container for up to 5 days. To maintain freshness, cover the surface with a light drizzle of olive oil before sealing.

Freezer: You can freeze the hummus for up to 3 months. Portion it into freezer-safe containers, leaving space for expansion. Thaw in the fridge overnight when ready to enjoy.

Reheating: For the best texture, gently reheat the hummus in a microwave or on the stovetop, adding a splash of water if needed to loosen it up.

Serving Tip: Always top with fresh pomegranate arils and feta after thawing for the best flavor and presentation!

Butternut Hummus with Feta Variations

Feel free to personalize this Butternut Squash Hummus with Feta and Pomegranates to suit your taste or dietary preferences, transforming it into your signature dish.

  • Vegan Option: Omit feta entirely and substitute with nutritional yeast for a cheesy flavor without the dairy. The result is a creamy, guilt-free delight.

  • Nut-Free: Swap tahini for sunflower seed butter or pumpkin seed puree to keep it nut-free while maintaining a rich and smooth texture. It's a fantastic way to cater to allergies!

  • Spicy Kick: Increase the cayenne to a full teaspoon or add diced jalapeños for a heat that’ll warm up your gatherings! A little goes a long way, making each dip unforgettable.

  • Texture Twist: For added crunch, mix in coarsely chopped walnuts or toasted pine nuts as a topping. This provides a fantastic contrast to the creamy base.

  • Herb Infusion: Mix in fresh herbs such as basil, dill, or mint into the hummus for an herbaceous kick. This will elevate the flavor profile and add vibrancy.

  • Sweet Contrast: Drizzle a swirl of honey or maple syrup over the hummus for a sweet undertone that pairs beautifully with the saltiness of feta.

  • Smooth Alternative: Replace butternut squash with roasted carrots for a different, equally delicious taste that still imparts a lovely sweetness to the hummus.

Looking for more irresistible flavor ideas? Try the rich and savory recipe for Skillet Pasta Feta or the vibrant Tagliatelle Asparagus Peas. Let your creativity soar!

What to Serve with Creamy Butternut Hummus with Feta and Pomegranates

Enhance your culinary experience with delightful pairings for this creamy, autumn-inspired dip.

  • Crunchy Pita Chips: Their crispy texture perfectly contrasts the smooth hummus, making every bite satisfying and delightful.

  • Fresh Veggie Platter: Colorful carrots, cucumbers, and bell peppers add a refreshing crunch that complements the hummus' rich flavors.

  • Savory Olive Tapenade: The briny notes of olive tapenade elevate the dish's taste, adding a Mediterranean flair that beautifully pairs with the sweet hummus.

  • Roasted or Toasted Nuts: A sprinkle of toasted pine nuts or walnuts brings a nutty crunch, enriching the overall flavor profile with added depth.

  • Crispy Crackers: Choose whole grain or seed-based crackers for a wholesome crunch that enhances the creamy texture of the hummus.

  • Herbed Focaccia: The soft, fragrant bread pairs flawlessly, perfect for scooping up the hummus while adding its own unique flavor to the mix.

  • Sweet Spiced Apple Slices: For an unexpected pairing, serve thin apple slices sprinkled with cinnamon—this contrast of sweet and savory brings new dimensions to the dish.

  • Sparkling Water or Herbal Tea: Refreshing beverages like sparkling water with lemon or a soothing herbal tea can cleanse the palate and enhance the overall experience.

  • Chocolate-Dipped Strawberries: To end on a sweet note, these berries will provide a luscious finish, balancing the savory flavors of the hummus beautifully.

Expert Tips for Butternut Hummus

  • Smoother Texture: Blend in a high-powered food processor to achieve a velvety finish. Ensure everything is well-combined for a delightful Butternut Hummus with Feta & Pomegranates.

  • Roasting Tip: Roast your butternut squash and garlic until slightly caramelized. This intensifies sweetness and flavors, creating a richer hummus.

  • Ingredient Substitutions: Don’t hesitate to swap ingredients like tahini for sunflower seed butter if needed. It’s all about customizing the hummus to your taste.

  • Adjusting Spice Levels: Start with a mild amount of cayenne if you're unsure about heat. You can always add more for an extra kick in your hummus!

  • Make-Ahead Option: Prepare your hummus a day in advance to enhance flavors. Just save the toppings until you’re ready to serve for a fresh presentation.

Make Ahead Options

This Creamy Butternut Hummus with Feta and Pomegranates is perfect for busy home cooks looking to streamline their meal prep! You can roast the butternut squash and garlic up to 24 hours in advance, allowing their flavors to deepen. Simply store them in an airtight container in the refrigerator. Additionally, the hummus can be prepared up to 3 days ahead; just blend all the ingredients and keep it refrigerated. To maintain its creamy texture, add a little water while blending if it thickens. When ready to serve, top it with pomegranate arils and feta just before gathering around the table, ensuring that the vibrant colors and flavors shine through for your guests!

Butternut Hummus with Feta and Pomegranates Recipe FAQs

What is the best way to select ripe butternut squash?
Absolutely! Look for butternut squash that feels heavy for its size, with a smooth, tan skin free from dark spots or blemishes. The stem should be a corky texture, indicating it was harvested at the right time. If you see any soft spots, that’s a sign it might be overripe.

How long can I store Butternut Hummus in the fridge?
Very! You can keep your Butternut Hummus with Feta & Pomegranates in an airtight container for up to 5 days. To keep it fresh longer, drizzle a little olive oil over the top before sealing the container. This will help maintain its creamy texture.

Can I freeze Butternut Hummus, and how?
Absolutely! You can freeze this delicious hummus for up to 3 months. Simply portion it into freezer-safe containers, making sure to leave some space for expansion. When you're ready to enjoy it, thaw it in the fridge overnight. To revive its creamy texture after freezing, gently reheat it and stir in a splash of water if needed.

What should I do if the hummus turns out too thick?
Not a problem! If your hummus is thicker than you’d like, simply add a little more water or olive oil, one tablespoon at a time, while blending until it reaches your desired consistency. Remember, it’s all about achieving that velvety, smooth texture.

Are there any dietary considerations for this recipe?
Absolutely! This hummus is a great vegetarian option and can be easily made vegan by omitting the feta cheese. Additionally, the ingredients used are gluten-free. Always ensure that your tahini is free of nuts if you’re serving it to someone with a nut allergy.

Can I use canned chickpeas for this recipe?
Very! Canned chickpeas are a convenient option that will work beautifully in this recipe. Just be sure to rinse and drain them before use to remove excess sodium and enhance the hummus's flavor!

Butternut Hummus with Feta & Pomegranates

Creamy Butternut Hummus with Feta & Pomegranates Delight

This Butternut Hummus with Feta & Pomegranates blends roasted squash and feta for a flavorful dip, perfect for gatherings.
Print Recipe Pin Recipe
Prep Time 10 minutes mins
Cook Time 25 minutes mins
Cooling Time 5 minutes mins
Total Time 40 minutes mins
Servings: 6 servings
Course: Appetizers
Cuisine: Mediterranean
Calories: 220
Ingredients Equipment Method Nutrition Notes

Ingredients
  

For the Hummus Base
  • 1 cup cubed butternut squash Adds sweetness and creaminess; substitute with acorn squash if needed.
  • 1 large or 2 medium garlic cloves Provides aromatic depth; use roasted garlic for a milder flavor.
  • 1.5 cups cooked chickpeas Main protein source; gives texture and can be swapped for canned chickpeas for convenience.
  • 0.25 cup tahini Adds creaminess and nutty flavor; can substitute with sunflower seed butter for a nut-free option.
  • 3 tablespoons fresh lemon juice Balances flavors with acidity; fresh juice is preferred for the best brightness.
  • 0.5 teaspoon cumin Adds warmth and earthiness; substitute with smoked paprika for a different flavor profile.
  • 0.5 teaspoon coriander Enhances the dish with a citrusy spice; can be omitted if unavailable.
  • 0.5 teaspoon cayenne Provides heat; adjust according to your spice tolerance and omit for a milder version.
  • 0.5 teaspoon sea salt Enhances overall flavor; adjust to your taste.
  • 0.25 cup extra-virgin olive oil Adds richness and aids in blending; opt for high-quality oil for the best flavor.
  • 0.25 cup water Helps achieve smooth consistency; add as needed.
  • freshly ground black pepper For seasoning to taste.
For Topping & Serving
  • 0.25 cup pomegranate arils Adds sweetness and a burst of color to the hummus.
  • 0.25 cup feta cheese Provides a creamy, salty contrast; use vegan cheese for a non-dairy option.
  • 2 tablespoons chopped parsley Adds freshness and vibrant color.
  • 2 tablespoons microgreens Optional garnish for an extra nutrient boost.
  • drizzle of olive oil For added richness and flavor enhancement.
  • pita, crackers, and/or veggies Delicious options for serving and dipping into the hummus.

Equipment

  • Oven
  • Food Processor
  • Mixing Bowl
  • Baking Sheet
  • Parchment Paper
  • Foil

Method
 

Step-by-Step Instructions
  1. Preheat your oven to 400°F (200°C) and line a baking sheet with parchment paper.
  2. Toss the cubed butternut squash with olive oil, sea salt, and black pepper. Spread it on the baking sheet and wrap the garlic cloves in foil with olive oil and salt.
  3. Roast the squash and garlic for 20-25 minutes until tender and slightly caramelized.
  4. Let the roasted squash and garlic cool for about 5 minutes, then squeeze the garlic out of its skins.
  5. In a food processor, blend the roasted squash, garlic, chickpeas, tahini, lemon juice, cumin, coriander, cayenne, and sea salt until smooth.
  6. While blending, drizzle in olive oil to achieve a creamy consistency and adjust with water if too thick.
  7. Transfer hummus to a bowl and top with pomegranate arils, feta cheese, parsley, microgreens, and a drizzle of olive oil.
  8. Serve with pita, crackers, or veggies and enjoy!

Nutrition

Serving: 1cupCalories: 220kcalCarbohydrates: 30gProtein: 7gFat: 10gSaturated Fat: 2gPolyunsaturated Fat: 2gMonounsaturated Fat: 6gCholesterol: 5mgSodium: 400mgPotassium: 600mgFiber: 8gSugar: 2gVitamin A: 160IUVitamin C: 30mgCalcium: 8mgIron: 10mg

Notes

This hummus can be made a day in advance to enhance flavors. Save toppings until serving.

Tried this recipe?

Let us know how it was!

Butternut Hummus with Feta & Pomegranates: A Festive Delight

September 11, 2025 by Grace Snow Leave a Comment

As the leaves turn crisp and the air fills with warmth from family gatherings, I find myself drawn to comforting dips that bring health and flavor to the table. This Creamy Butternut Squash Hummus with Feta and Pomegranates is a delightful way to celebrate the season’s bounty. Rich in vitamins and antioxidants, it not only provides a nourishing option for those looking to cut down on fast food but also doubles as a stunning centerpiece for your holiday spread. With its vibrant colors and unexpected sweetness, it's a crowd-pleaser that's both quick to prepare and endlessly adaptable. Whether you’re hosting a festive soirée or simply want to treat yourself to something special, this hummus invites you to dip into something new. Ready to give it a try?

Why is Butternut Hummus So Irresistible?

Creamy, velvety texture that spreads effortlessly on pita or veggies makes this hummus a joy to share. Rich, savory notes from roasted squash and tangy feta create a perfect balance. Colorful pomegranate arils not only brighten the dish but also add a delightful crunch. Quick to make, this recipe fits effortlessly into your hectic schedule while impressing guests. Versatile and customizable, swap feta for a vegan cheese or add spices for your unique twist. It's the ultimate crowd-pleaser for any holiday gathering!

Butternut Hummus with Feta Ingredients

Get ready to whip up a dish that will have everyone asking for the recipe!

For the Hummus

  • 1 cup cubed butternut squash – Adds natural sweetness and creaminess; substitute with acorn squash if needed.
  • 1 large or 2 medium garlic cloves – Provides aromatic depth; use roasted garlic for a milder, sweeter flavor.
  • 1½ cups cooked chickpeas – Main protein source for texture; canned chickpeas are a quick and convenient option.
  • ¼ cup tahini – Adds a rich creaminess and nutty flavor; can substitute with sunflower seed butter for a nut-free version.
  • 3 tablespoons fresh lemon juice – Brightens the flavors; fresh juice is preferred for the best taste.
  • ½ teaspoon cumin – Infuses warmth and earthiness; substitute with smoked paprika for an alternative flavor profile.
  • ½ teaspoon coriander – Adds a refreshing citrusy spice; can be omitted if not available.
  • ½ teaspoon cayenne – Provides a kick of heat; adjust based on preference or omit for a milder dip.
  • ½ teaspoon sea salt – Enhances overall taste; adjust to your liking.
  • ¼ cup extra-virgin olive oil – Improves richness and helps in blending; choose high-quality oil for the best flavor.
  • ¼ cup water – Helps achieve desired consistency; add as needed for creaminess.
  • Freshly ground black pepper – For seasoning; adjust according to preference.

For Topping & Serving

  • ¼ cup pomegranate arils – Adds a juicy sweetness and vibrant color.
  • ¼ cup feta cheese – Provides a salty, creamy contrast; use vegan cheese for a non-dairy option.
  • 2 tablespoons chopped parsley – Brings freshness and color to the presentation.
  • 2 tablespoons microgreens (optional) – For an extra pop of garnish and added nutrients.
  • Drizzle of olive oil – Enhances richness; use for finishing touches.
  • Pita, crackers, and/or assorted veggies – For serving; perfect for dipping into the hummus.

This Butternut Hummus with Feta & Pomegranates is not only healthy but a visual delight that will elevate your holiday gatherings!

Step‑by‑Step Instructions for Butternut Hummus with Feta & Pomegranates

Step 1: Preheat the Oven
Begin by preheating your oven to 400°F (200°C). While the oven heats, line a baking sheet with parchment paper to prevent sticking. This will ensure your butternut squash roasts evenly, developing that sweet flavor we all love. A hot oven will make the squash perfectly tender and caramelized.

Step 2: Prepare the Butternut Squash
In a large mixing bowl, toss the cubed butternut squash with extra-virgin olive oil, sea salt, and freshly ground black pepper. Ensure each piece is well-coated for optimal roasting. Place the seasoned squash on the prepared baking sheet, spreading it out evenly. Wrapping the garlic cloves in aluminum foil with a drizzle of olive oil and salt will keep them fragrant and delicious.

Step 3: Roast the Vegetables
Slide the baking sheet into the preheated oven and roast for 20-25 minutes. Keep an eye on the squash; it should be tender and lightly golden when done. After about 15 minutes, give the squash a gentle stir to ensure even caramelization. The garlic should be soft and aromatic, adding depth to your butternut hummus.

Step 4: Cool and Blend
Once roasted, remove the baking sheet from the oven and let the butternut squash and garlic cool for a few minutes. Transfer them into a food processor along with the cooked chickpeas, tahini, fresh lemon juice, cumin, coriander, cayenne, and sea salt. This blend of ingredients will create the base for your luscious Butternut Hummus with Feta & Pomegranates.

Step 5: Achieve Creamy Consistency
Blend the mixture on high speed, drizzling in the extra-virgin olive oil gradually. This technique helps emulsify the ingredients, yielding a wonderfully creamy texture. If the hummus is too thick, add water a tablespoon at a time until you reach your desired consistency. Taste the mixture and adjust the seasoning if needed, adding more salt or lemon juice for brightness.

Step 6: Transfer and Garnish
Once smooth and creamy, transfer the butternut hummus to a serving bowl. For a festive touch, top the hummus with the vibrant pomegranate arils, crumbled feta cheese, and a sprinkle of chopped parsley. Drizzle with a bit of olive oil for added richness, making your dish not only tasty but visually stunning.

Step 7: Serve with Delight
Pair your Butternut Hummus with Feta & Pomegranates with pita bread, crackers, or fresh veggies for dipping. Arrange everything on a beautiful serving platter to showcase your creation. This dip is perfect for holiday gatherings or a cozy night in, inviting everyone to enjoy the warm, inviting flavors you've lovingly crafted.

How to Store and Freeze Butternut Hummus

Fridge: Store your butternut hummus in an airtight container for up to 5 days. Be sure to give it a good stir before serving, as it may thicken over time.

Freezer: For longer storage, freeze the hummus in a freezer-safe container for up to 3 months. Leave some space at the top for expansion, and thaw overnight in the fridge when ready to enjoy.

Reheating: If frozen, allow the hummus to thaw in the fridge. You can gently warm it in the microwave or on the stovetop, adding a splash of water or olive oil to regain creaminess.

Serving Tips: When ready to serve your butternut hummus with feta & pomegranates, freshen it up by topping with pomegranate arils and a drizzle of olive oil for a beautiful presentation.

Butternut Hummus with Feta Variations

Embrace the joy of creativity in the kitchen by customizing your butternut hummus to match your taste and dietary needs!

  • Vegan Option: Omit the feta and replace it with a sprinkle of nutritional yeast for a cheesy flavor without dairy.
  • Nut-Free: Swap tahini with sunflower seed butter for that creamy texture without nuts; perfect for allergy-friendly gatherings.
  • Heat Lovers: Increase cayenne pepper for a spicy kick or add some finely chopped jalapeños while blending.
  • Flavor Boost: Mix in herbs like fresh basil or rosemary to give a fragrant twist to your hummus.
  • Dairy-Free: Use silken tofu instead of feta for creaminess without the dairy while maintaining its richness.
  • Smoky Flavor: Infuse your hummus with a dash of smoked paprika for a delightful depth of flavor that pairs beautifully with the sweet squash.
  • Different Squash: Substitute butternut squash with roasted acorn squash or sweet potatoes for seasonal variety in taste and texture.
  • Creamy Indulgence: For a luxuriously smooth texture, add a splash of coconut milk during blending; this makes it incredibly rich and silky.

As you explore these variations, consider pairing your butternut hummus with homemade Skillet Pasta Feta or Buffalo Tofu Caesar. Whether you're looking for something fun and casual or elegant for special gatherings, your creative dips can take center stage!

Expert Tips for Butternut Hummus

  • Choose Quality Ingredients: Fresh butternut squash and high-quality tahini will elevate the flavors. Don’t skimp on the olive oil for a richer taste.

  • Perfect Roasting: Roasting brings out the sweetness in the squash. Ensure all cubes are evenly coated in olive oil, salt, and pepper for perfect caramelization.

  • Emulsify Gradually: When blending the hummus, add the olive oil gradually for a smoother texture. This helps create that creamy consistency everyone will crave.

  • Taste as You Go: Always taste the hummus before serving. Adjust the lemon juice and salt to ensure a delightful balance of flavors that makes your butternut hummus with feta & pomegranates truly shine.

  • Make Ahead: To save time, prepare the hummus a day in advance. Just add the toppings right before serving to keep them fresh and vibrant.

Make Ahead Options

This Butternut Squash Hummus with Feta and Pomegranates is a fantastic option for meal prep! You can prepare the hummus itself up to 3 days in advance; simply store it in an airtight container in the refrigerator. To maintain its creamy texture, add the olive oil gradually when blending and consider a splash of water if it thickens. You can also roast the butternut squash and garlic 24 hours ahead and refrigerate them, keeping their flavors fresh. Just before serving, mix everything together and top with the pomegranate arils and feta to ensure the dish remains vibrant and visually appealing. Enjoy the time-saving benefits while impressing your guests with this delicious dip!

What to Serve with Butternut Hummus with Feta & Pomegranates

Looking to create a delightful spread that will elevate your gathering and tantalize your taste buds?

  • Pita Chips: These crispy, golden bites provide a satisfying crunch that complements the smooth and creamy texture of the hummus beautifully.

  • Fresh Veggie Platter: Crisp cucumbers, sweet bell peppers, and crunchy carrots add freshness and color, making every bite a balanced delight!

  • Spiced Roasted Chickpeas: Crunchy and slightly seasoned, they mirror the chickpeas in the hummus, adding an extra layer of flavor while keeping things healthy.

  • Olive Tapenade: This briny, savory spread creates a wonderful textural contrast and brings a burst of Mediterranean flavor that pairs wonderfully with the sweetness of butternut squash.

  • Quinoa Salad: A light, refreshing quinoa salad full of herbs and citrus can serve as a perfect side, complementing the hummus while offering a nutritious boost.

  • Red Wine: A bottle of smooth red wine brings sophistication to your meal, enhancing the earthy flavors of the hummus and making the evening even more special.

Let your creativity run wild with these pairings, as each addition will create a delightful, shared culinary experience that guests will fondly remember.

Butternut Hummus with Feta and Pomegranates Recipe FAQs

What type of butternut squash should I use?
Absolutely! Choose a firm, heavy butternut squash with a smooth, tan skin. Avoid any with dark spots or blemishes. If butternut isn't available, acorn squash is a great substitute for a similar sweetness and texture.

How should I store leftover hummus?
Very! Store your butternut hummus in an airtight container in the fridge. It will stay fresh for up to 5 days. I recommend stirring it before serving, as it may thicken a bit over time.

Can I freeze butternut hummus?
Of course! To freeze, portion the hummus into a freezer-safe container, leaving some space at the top for expansion. It will keep well for up to 3 months. When you're ready to enjoy it, thaw it overnight in the fridge, and consider adding a splash of olive oil or water while blending to restore creaminess.

What should I do if my hummus is too thick?
No worries! If your butternut hummus is too thick, simply add water or olive oil slowly while blending until you reach your desired consistency. This can make a big difference in smoothing it out – just a tablespoon at a time!

Are there any dietary considerations?
Yes! This recipe can easily accommodate dietary preferences. To make it vegan, simply omit the feta. For nut allergies, consider substituting tahini with sunflower seed butter. Always double-check ingredient labels, especially for processed items like chickpeas and tahini, to ensure they are allergy-friendly.

How long can I keep my mixed ingredients before blending?
If you’re short on time, you can roast your butternut squash and garlic up to a day in advance. Just allow them to cool completely and store them in the refrigerator until you’re ready to blend everything together, which keeps your prep efficient!

Butternut Hummus with Feta & Pomegranates

Butternut Hummus with Feta & Pomegranates: A Festive Delight

Butternut Hummus with Feta & Pomegranates is a creamy, healthy dip perfect for holiday gatherings.
Print Recipe Pin Recipe
Prep Time 15 minutes mins
Cook Time 25 minutes mins
Cooling Time 5 minutes mins
Total Time 45 minutes mins
Servings: 6 servings
Course: Appetizers
Cuisine: Mediterranean
Calories: 220
Ingredients Equipment Method Nutrition Notes

Ingredients
  

For the Hummus
  • 1 cup cubed butternut squash Adds natural sweetness and creaminess; substitute with acorn squash if needed.
  • 1 large or 2 medium garlic cloves Provides aromatic depth; use roasted garlic for a milder, sweeter flavor.
  • 1.5 cups cooked chickpeas Main protein source for texture; canned chickpeas are a quick and convenient option.
  • 0.25 cup tahini Adds a rich creaminess and nutty flavor; can substitute with sunflower seed butter for a nut-free version.
  • 3 tablespoons fresh lemon juice Brightens the flavors; fresh juice is preferred for the best taste.
  • 0.5 teaspoon cumin Infuses warmth and earthiness; substitute with smoked paprika for an alternative flavor profile.
  • 0.5 teaspoon coriander Adds a refreshing citrusy spice; can be omitted if not available.
  • 0.5 teaspoon cayenne Provides a kick of heat; adjust based on preference or omit for a milder dip.
  • 0.5 teaspoon sea salt Enhances overall taste; adjust to your liking.
  • 0.25 cup extra-virgin olive oil Improves richness and helps in blending; choose high-quality oil for the best flavor.
  • 0.25 cup water Helps achieve desired consistency; add as needed for creaminess.
  • Freshly ground black pepper For seasoning; adjust according to preference.
For Topping & Serving
  • 0.25 cup pomegranate arils Adds a juicy sweetness and vibrant color.
  • 0.25 cup feta cheese Provides a salty, creamy contrast; use vegan cheese for a non-dairy option.
  • 2 tablespoons chopped parsley Brings freshness and color to the presentation.
  • 2 tablespoons microgreens For an extra pop of garnish and added nutrients.
  • Drizzle of olive oil Enhances richness; use for finishing touches.
  • Pita, crackers, and/or assorted veggies For serving; perfect for dipping into the hummus.

Equipment

  • Oven
  • Baking Sheet
  • Parchment Paper
  • Food Processor
  • Mixing Bowl

Method
 

Preparation Steps
  1. Preheat your oven to 400°F (200°C) and line a baking sheet with parchment paper.
  2. Toss the cubed butternut squash with extra-virgin olive oil, sea salt, and freshly ground black pepper. Place the seasoned squash on the prepared baking sheet.
  3. Roast for 20-25 minutes, stirring halfway through. The squash should be tender and lightly golden.
  4. After roasting, let the butternut squash and garlic cool for a few minutes, then transfer them to a food processor with chickpeas, tahini, lemon juice, cumin, coriander, cayenne, and sea salt.
  5. Blend the mixture on high speed, adding extra-virgin olive oil gradually until creamy. Adjust consistency with water as needed.
  6. Transfer the hummus to a serving bowl, topping with pomegranate arils, crumbled feta, and parsley. Drizzle with olive oil.
  7. Serve with pita bread, crackers, or fresh veggies for dipping.

Nutrition

Serving: 1cupCalories: 220kcalCarbohydrates: 30gProtein: 8gFat: 10gSaturated Fat: 2gPolyunsaturated Fat: 2gMonounsaturated Fat: 6gCholesterol: 5mgSodium: 350mgPotassium: 600mgFiber: 8gSugar: 4gVitamin A: 3000IUVitamin C: 15mgCalcium: 70mgIron: 2mg

Notes

Make a day in advance for best flavor and freshness. Stir well before serving.

Tried this recipe?

Let us know how it was!
  • « Previous Page
  • 1
  • …
  • 12
  • 13
  • 14
  • 15
  • 16
  • Next Page »

Welcome!

Hi, I’m Grace, a Sydney-based home cook with a passion for bold flavors and trending ingredients. Whether you’re a busy beginner or a seasoned foodie, you’ll find dishes here that are fresh, fun, and full of flavor.

More about me

Popular Recipes

  • One Pot Keto Tuna Casserole
    One Pot Keto Tuna Casserole: Creamy Comfort in Minutes
  • Ultimate Jalapeno Popper Chicken Salad
    Ultimate Jalapeno Popper Chicken Salad That'll Wow Your Tastebuds
  • Green Chile Cheese Dip
    Mouthwatering Green Chile Cheese Dip for Cozy Gatherings
  • Easy Chimichurri Sauce
    Fresh and Zesty Easy Chimichurri Sauce in Just Minutes

Footer

↑ back to top

About

  • Privacy Policy
  • Disclaimer
  • Terms & Conditions

Newsletter

  • Sign Up! for emails and updates

Contact

  • About me
  • Contact me

Copyright © 2025 TastyTrendIngredients