tastytrendingredients

  • Home
  • Recipes
    • Appetizers
    • Breakfast
    • Dessert
    • Dinner
    • Drinks
    • Salads
    • Snacks
    • Soups
  • About me
  • Contact me
menu icon
go to homepage
  • Home
  • Recipes
    • Appetizers
    • Breakfast
    • Dessert
    • Dinner
    • Drinks
    • Salads
    • Snacks
    • Soups
  • About me
  • Contact me
search icon
Homepage link
  • Home
  • Recipes
    • Appetizers
    • Breakfast
    • Dessert
    • Dinner
    • Drinks
    • Salads
    • Snacks
    • Soups
  • About me
  • Contact me
×

Delicious Banana Oatmeal Bars: Healthy & Customizable Treats

November 24, 2025 by Grace Snow Leave a Comment

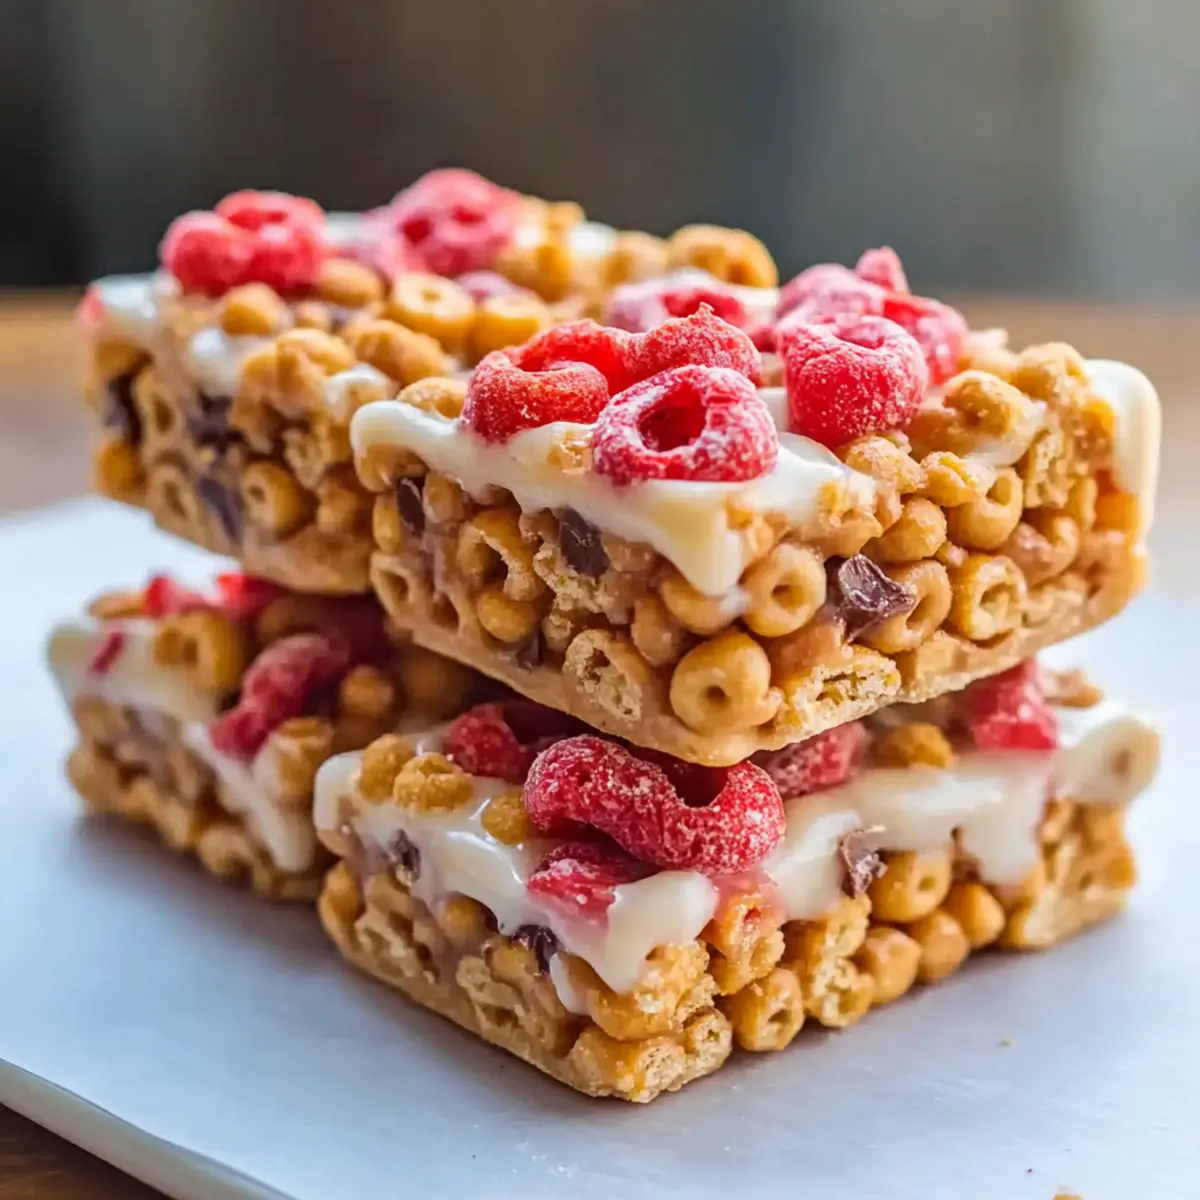
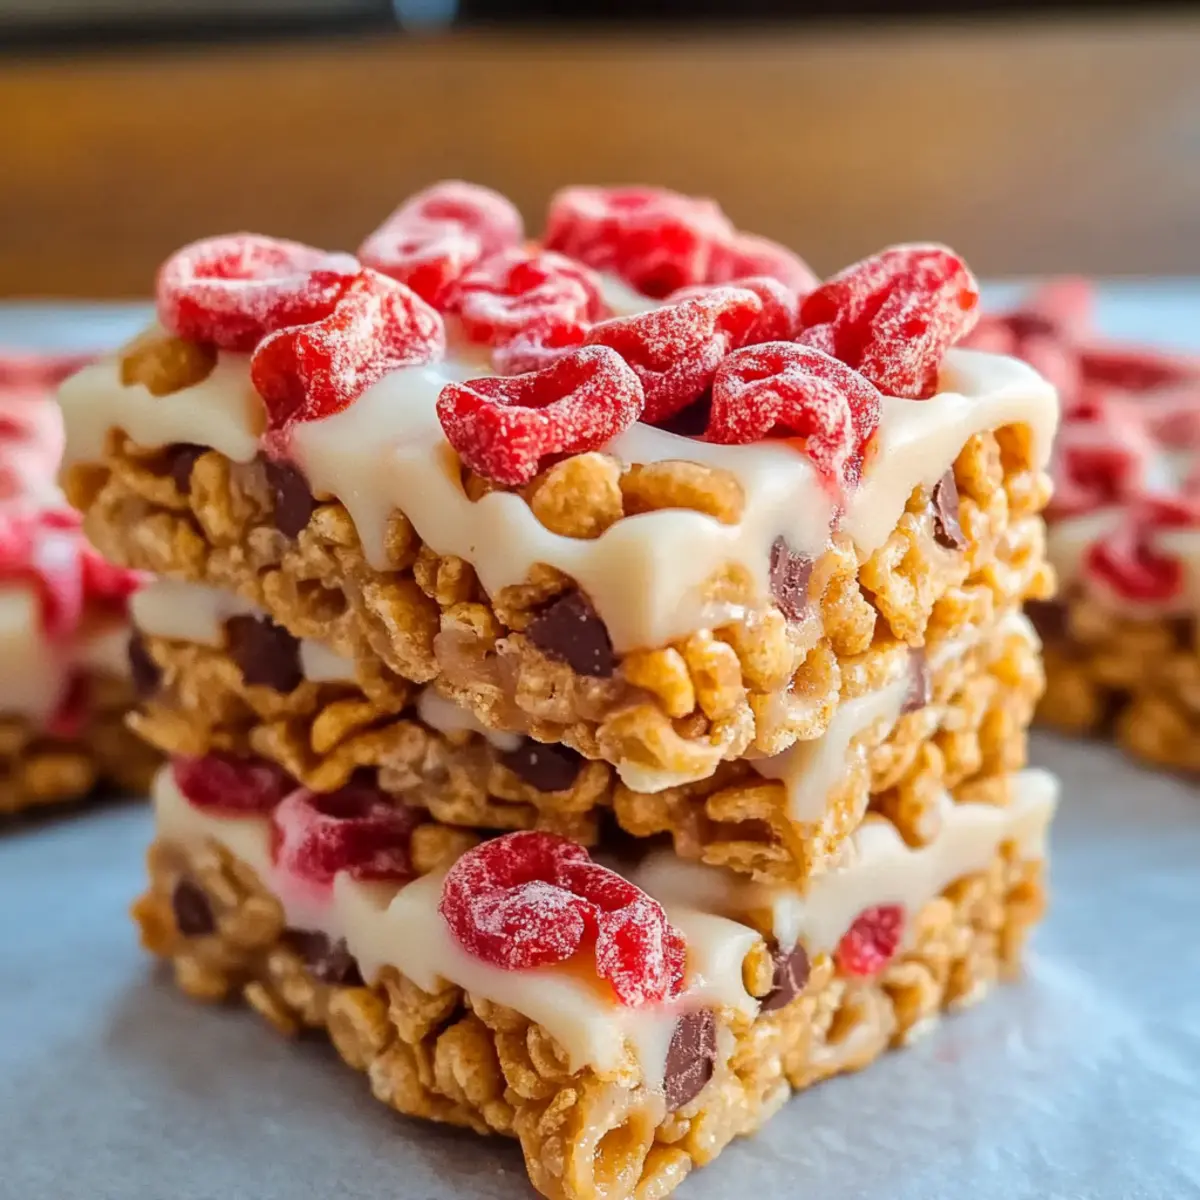
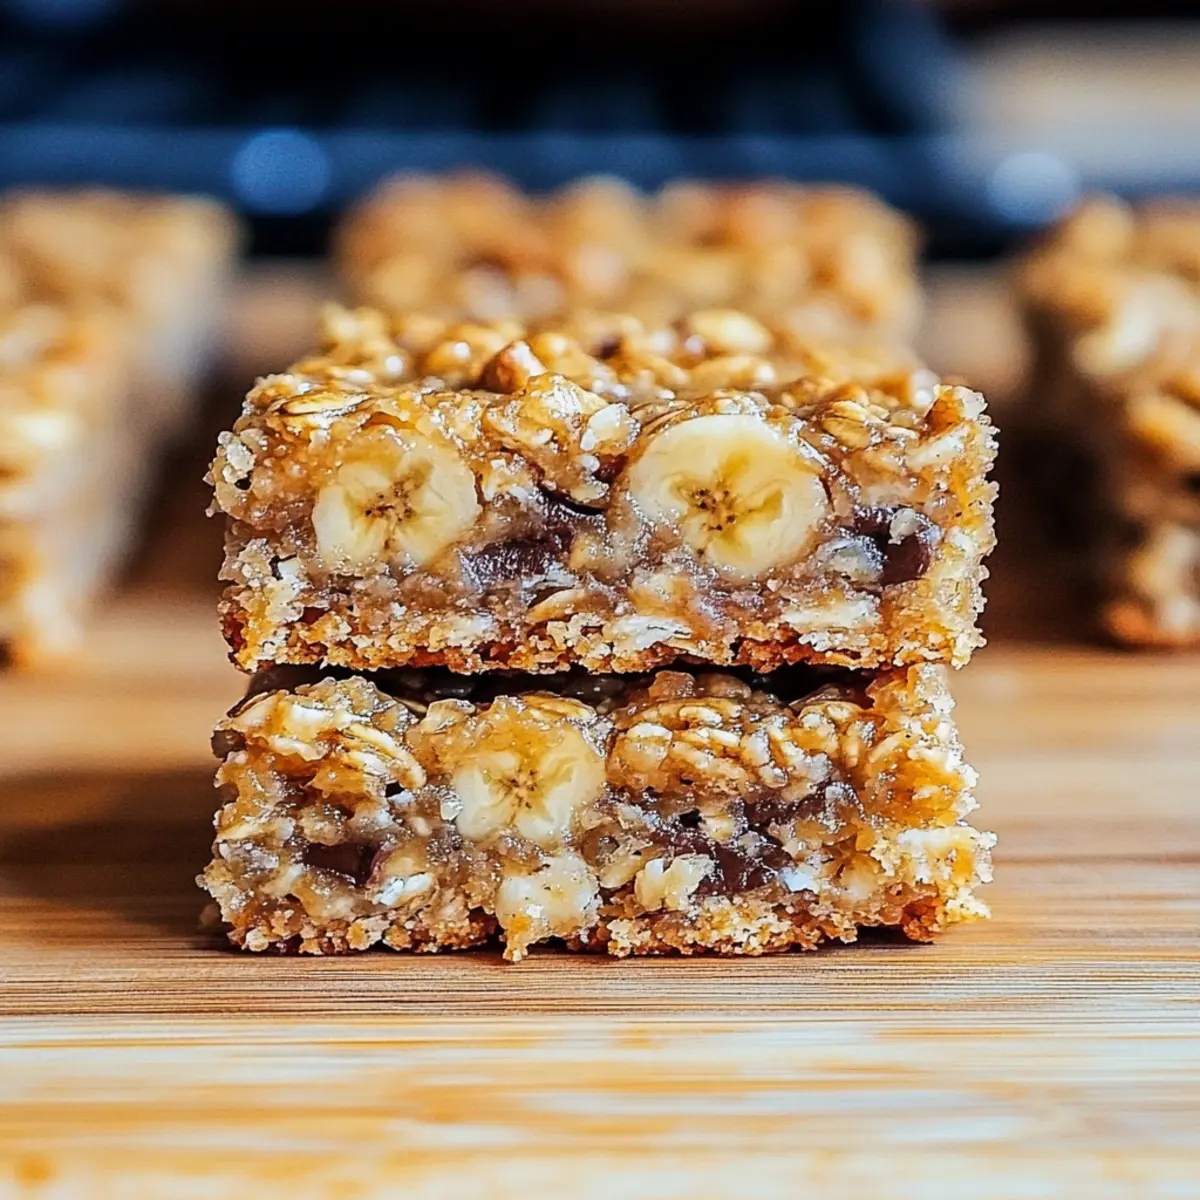
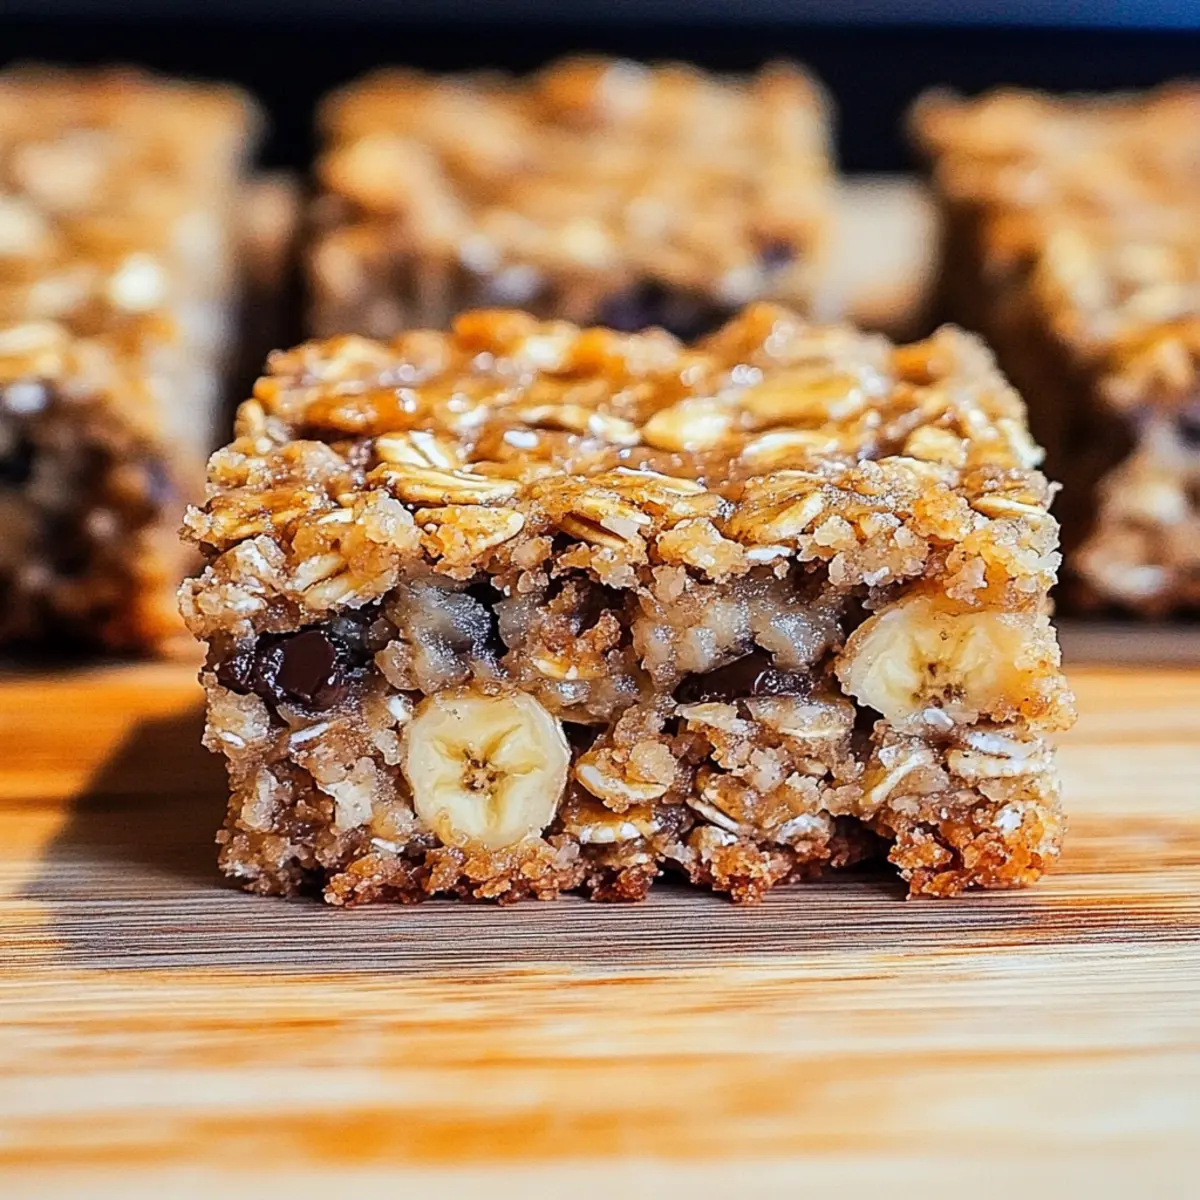
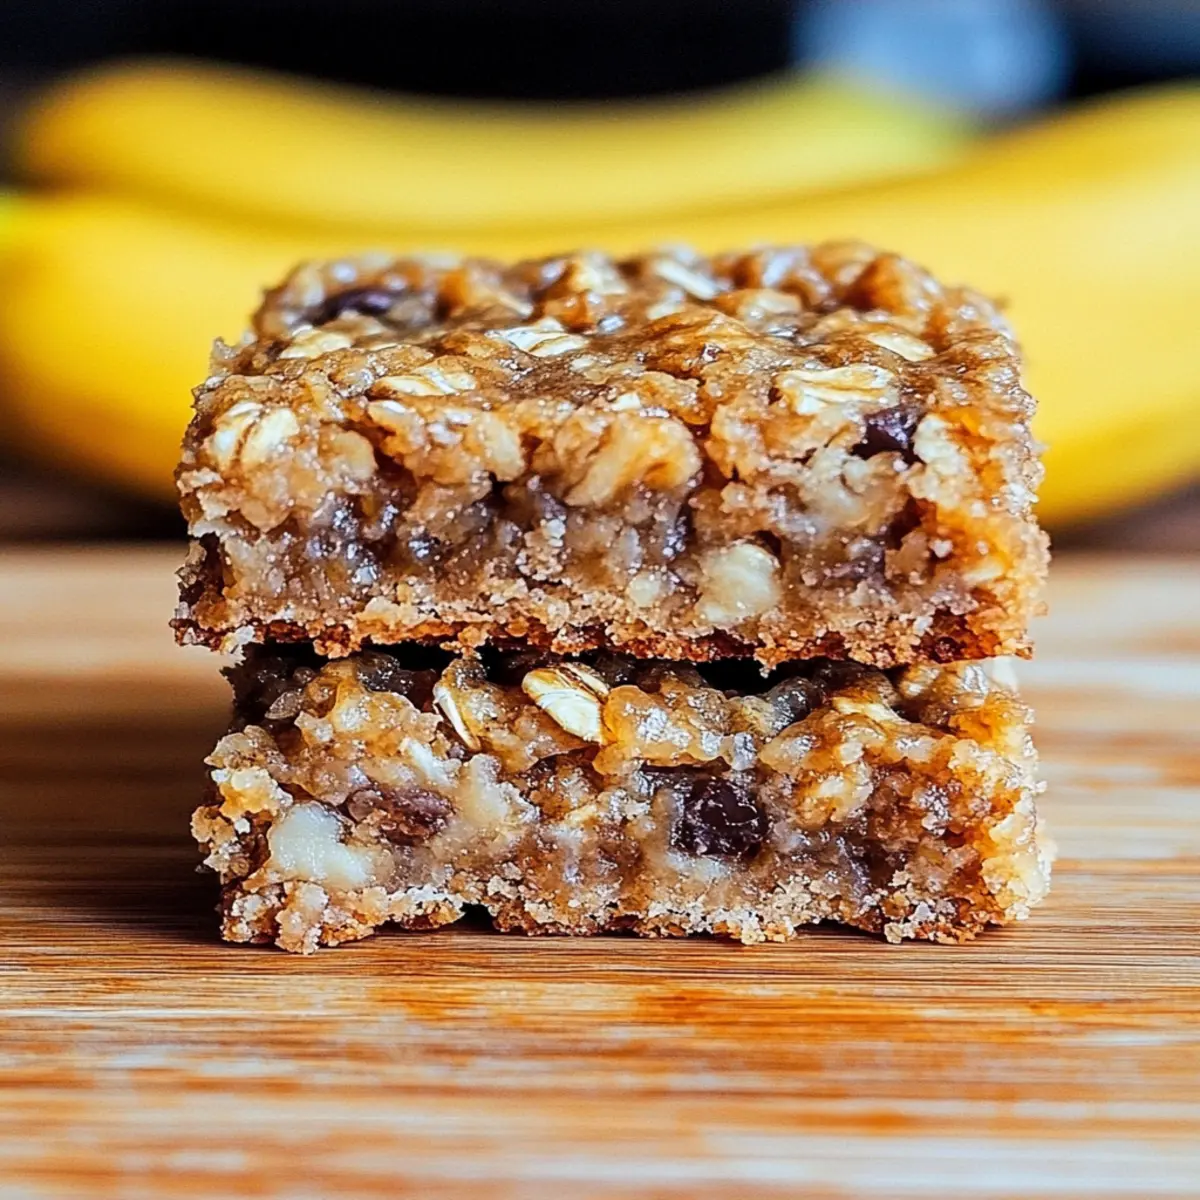
The aroma of freshly baked goods has this magical ability to transport me to my childhood kitchen, filled with laughter and warmth. Today, I'm excited to share my go-to recipe for Banana Oatmeal Bars, a delightful blend of gooey ripeness and hearty oats that brings that same comfort home. These bars aren’t just easy to whip up—they’re a wholesome, healthy snack that can satisfy cravings without the guilt. They’re incredibly versatile, allowing you to customize them with chocolate chips, nuts, or spices to create your own unique version. Whether you're in need of a quick breakfast or a mid-afternoon energy boost, these bars are here to rescue your day. What flavor twist will you add to yours?

Why Will You Love These Bars?

Nutrient-Packed Goodness: Each bite is filled with wholesome ingredients, making these bars a perfect choice for health-conscious snackers.
Customizable Creations: You can easily tailor these bars with your favorite mix-ins like chocolate chips or nuts, allowing you to create a new flavor profile every time.
Quick and Easy: With just a few simple steps, you'll have a delicious treat ready in no time, making it an ideal recipe for busy days.
Bursting with Flavor: The combination of ripe bananas and hearty oats delivers a sweet, chewy experience that satisfies any craving.
Perfect for Any Time: Whether you enjoy them as a quick breakfast, a snack post-workout, or a sweet treat, these bars will fit seamlessly into your day.

Banana Oatmeal Bars Ingredients

• Discover the essentials for creating delectable Banana Oatmeal Bars.

For the Batter

  • Ripe Bananas – Sweetness and moisture; ensure they are overripe for maximum flavor.
  • Rolled Oats – Structure and fiber; use certified gluten-free oats for a gluten-free version.
  • Honey or Maple Syrup – Natural sweetener; substitute with agave syrup for a vegan option.
  • Eggs – Binding agent; can be replaced with flaxseed meal mixed with water for a vegan twist.
  • Baking Powder – Leavening agent for lightness; ensure it's fresh to achieve the right rise.
  • Vanilla Extract – Flavor enhancer; optional but it significantly boosts the overall taste.

Optional Mix-Ins

  • Chocolate Chips – Add for a sweet, indulgent treat; use dark chocolate for a richer flavor.
  • Nuts – Introduce a crunchy texture; walnuts or almonds work beautifully.
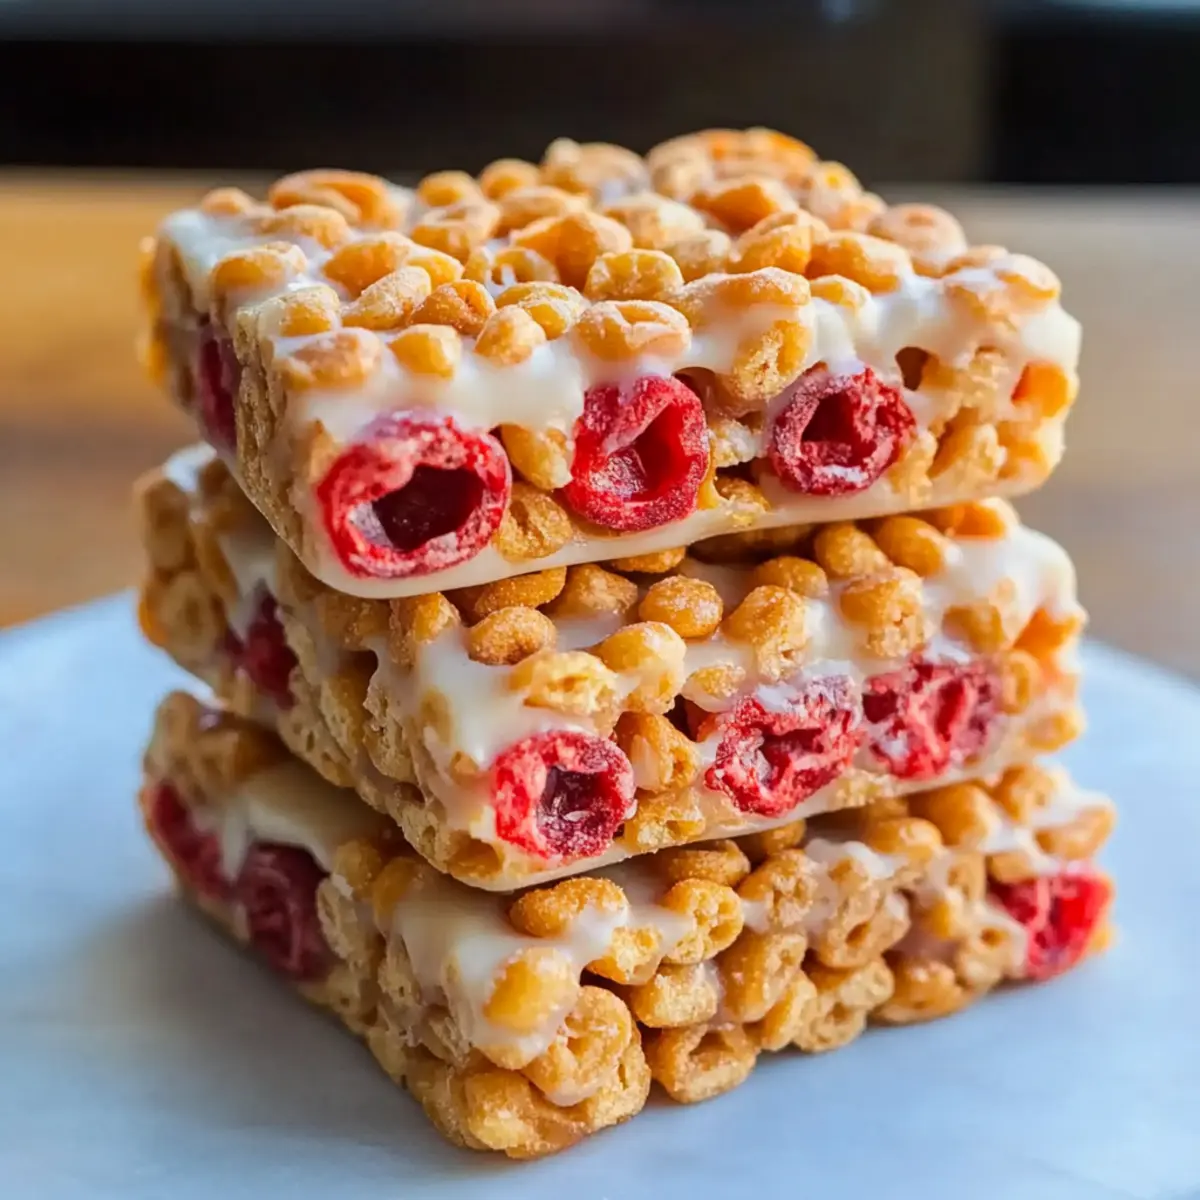
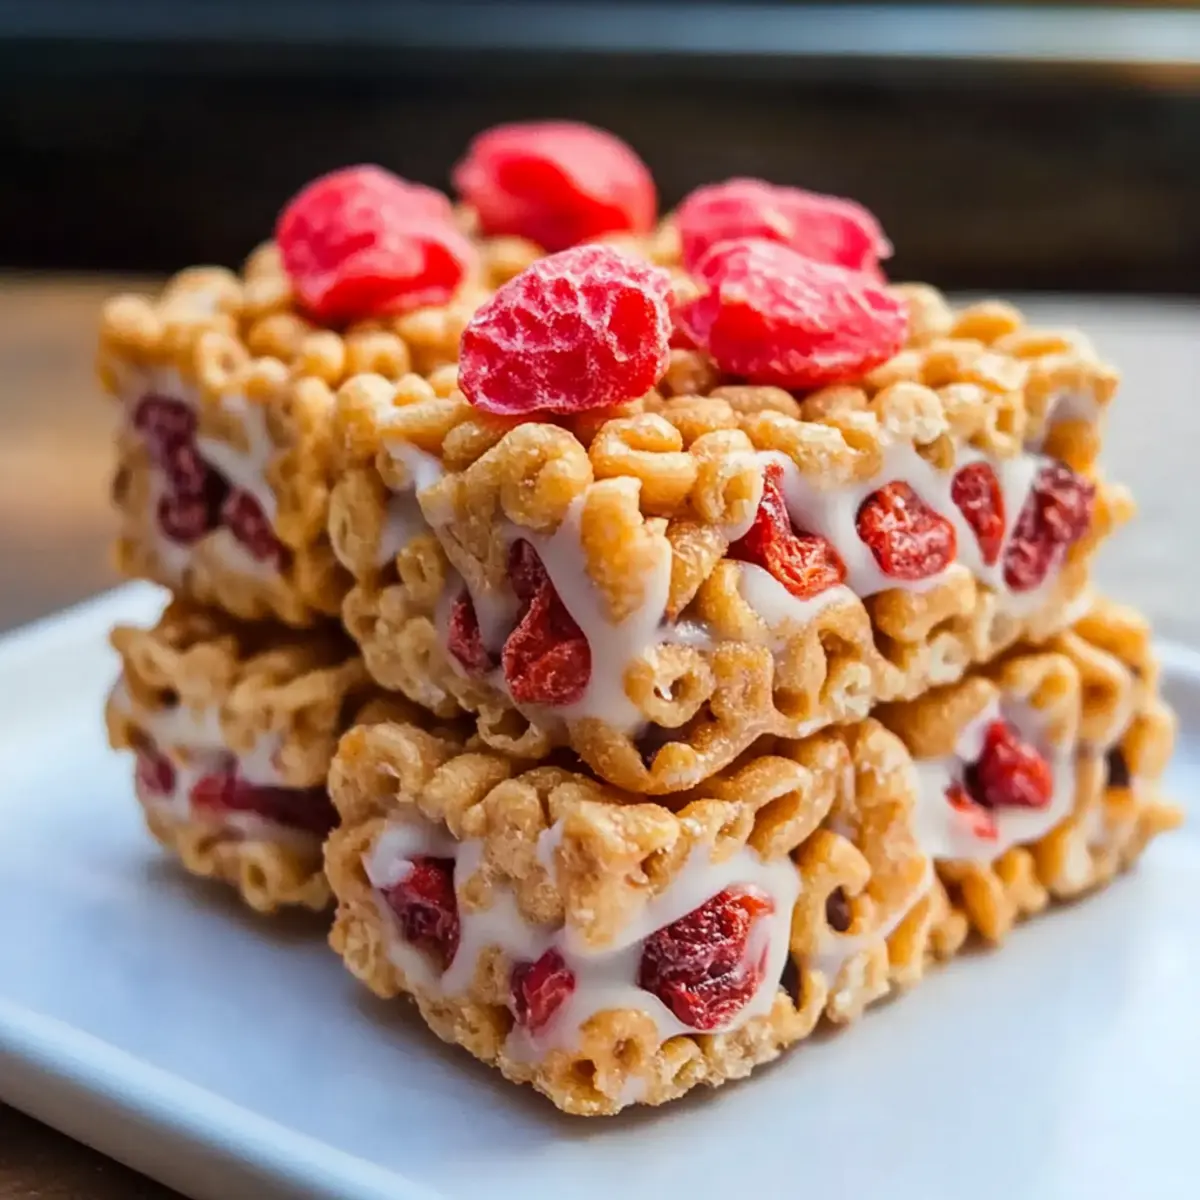
  • Dried Fruits – Incorporate cranberries or raisins for a sweet and chewy surprise.
  • Spices – Sprinkle in cinnamon or nutmeg for a warm, comforting twist.

Step‑by‑Step Instructions for Banana Oatmeal Bars

Step 1: Preheat the Oven
Begin by preheating your oven to 350°F (175°C) to ensure it's at the perfect temperature for baking. This step is crucial for achieving the beautifully golden and aromatic Banana Oatmeal Bars you’re aiming for. While the oven warms up, gather your ingredients to prepare for mixing.

Step 2: Mash the Bananas
In a medium-sized mixing bowl, take your ripe bananas and mash them with a fork until they reach a smooth consistency. Aim for a creamy texture with no large lumps, as this will help distribute the sweetness evenly throughout the bars. This step generally takes about 2-3 minutes.

Step 3: Combine Ingredients
Add the rolled oats, honey (or maple syrup), eggs, baking powder, and vanilla extract to the mashed bananas. Using a spatula or wooden spoon, mix everything together until fully incorporated. You should see a thick batter forming, which is a good sign that your Banana Oatmeal Bars will have a lovely chewy texture.

Step 4: Prepare the Baking Dish
Take an 8x8-inch baking dish and grease it lightly with cooking spray or line it with parchment paper for easy removal. This will ensure your bars come out flawlessly and don’t stick to the sides. Once done, set the dish aside while you prepare the batter for baking.

Step 5: Bake the Mixture
Pour the banana oat mixture into the prepared baking dish, spreading it evenly with your spatula. Place it in the preheated oven and bake for 25-30 minutes, or until the top is golden brown, and a toothpick inserted in the center comes out clean. The delightful aroma should fill your kitchen during this time.

Step 6: Cool and Cut the Bars
Once baked, remove the dish from the oven and let the Banana Oatmeal Bars cool in the pan for at least 10 minutes. This cooling time will help them set up properly, making them easier to cut. Once cooled, slice into squares and serve for a nutritious snack or breakfast option.

Banana Oatmeal Bars: Customization Ideas

Feel free to let your creativity shine as you customize these delicious bars with delightful flavors and textures!

  • Dairy-Free: Substitute honey with maple syrup for a completely vegan experience, adding a rich sweetness without any animal products.
  • Nut-Free: Use sunflower seed butter in place of peanut or almond butter to accommodate nut allergies without sacrificing flavor.
  • Extra Crunch: Mix in crispy rice cereal or granola for an added texture that contrasts beautifully with the chewy bars. The crunch will make every bite exciting!
  • Zesty Twist: Add a teaspoon of lemon or orange zest to the batter for a refreshing citrus touch that brightens the overall flavor. It’s a refreshing twist that enhances the sweetness.
  • Chocolate Delight: Fold in dark chocolate or cacao nibs to satisfy your sweet tooth and make every bite feel indulgent. Just imagine the melty goodness with each chewy bite!
  • Spicy Flavor: Sprinkle ground ginger or a pinch of chili powder for an unexpected kick that pairs surprisingly well with the sweetness of bananas.
  • Fruity Fusion: Incorporate diced fresh apples or pears to enhance the bar's moisture and introduce additional layers of flavor. These additions can take your bars to the next level, making it versatile for any craving!
  • Protein-Packed: Mix in a scoop of protein powder or chia seeds for a protein boost that turns these bars into an energizing snack—perfect post-workout fuel!

No matter how you choose to customize, each variation offers a deliciously unique twist! And if you're looking for fun breakfast recipes, you might also enjoy checking out my Breakfast Banana Split for an extra treat!

Helpful Tricks for Banana Oatmeal Bars

  • Ingredient Temperature: Ensure your eggs are at room temperature; this helps create a smoother batter and better texture.
  • Mixing Method: Avoid overmixing once the wet and dry ingredients combine, as this can lead to tough bars instead of the chewy texture you desire.
  • Storage Solutions: Store your Banana Oatmeal Bars in an airtight container to keep them fresh, but allow them to cool completely first to avoid sogginess.
  • Baking Dish Choice: For a thinner bar, use a larger baking dish; for thicker bars, stick with the 8x8-inch size. Adjust baking time accordingly!
  • Taste Testing: Before baking, taste your batter—if you'd like it sweeter, add a touch more honey or maple syrup to suit your palate!

How to Store and Freeze Banana Oatmeal Bars

Room Temperature: Keep these bars in an airtight container at room temperature for up to 3 days, ensuring they remain fresh and chewy.

Fridge: For extended freshness, store in the refrigerator for up to a week. Just make sure they are well wrapped to prevent drying out.

Freezer: Freeze individual bars in plastic wrap and then place in a freezer-safe bag for up to 3 months, allowing for a quick grab-and-go snack anytime.

Reheating: When ready to enjoy, thaw at room temperature or microwave for 15-20 seconds to regain that warm, comforting texture of your Banana Oatmeal Bars.

Make Ahead Options

These Banana Oatmeal Bars are a fantastic option for meal prep enthusiasts looking to save time during busy weeks! You can mix the batter up to 24 hours in advance; simply cover it tightly and refrigerate it to keep the ingredients fresh. If you prefer, you can also bake the bars and store them for up to 3 days at room temperature or refrigerate for up to a week. To maintain their chewy texture and prevent them from drying out, make sure to use an airtight container for storage. When you’re ready to enjoy, simply cut the bars into squares and grab them for a quick, nutritious snack or breakfast on the go!

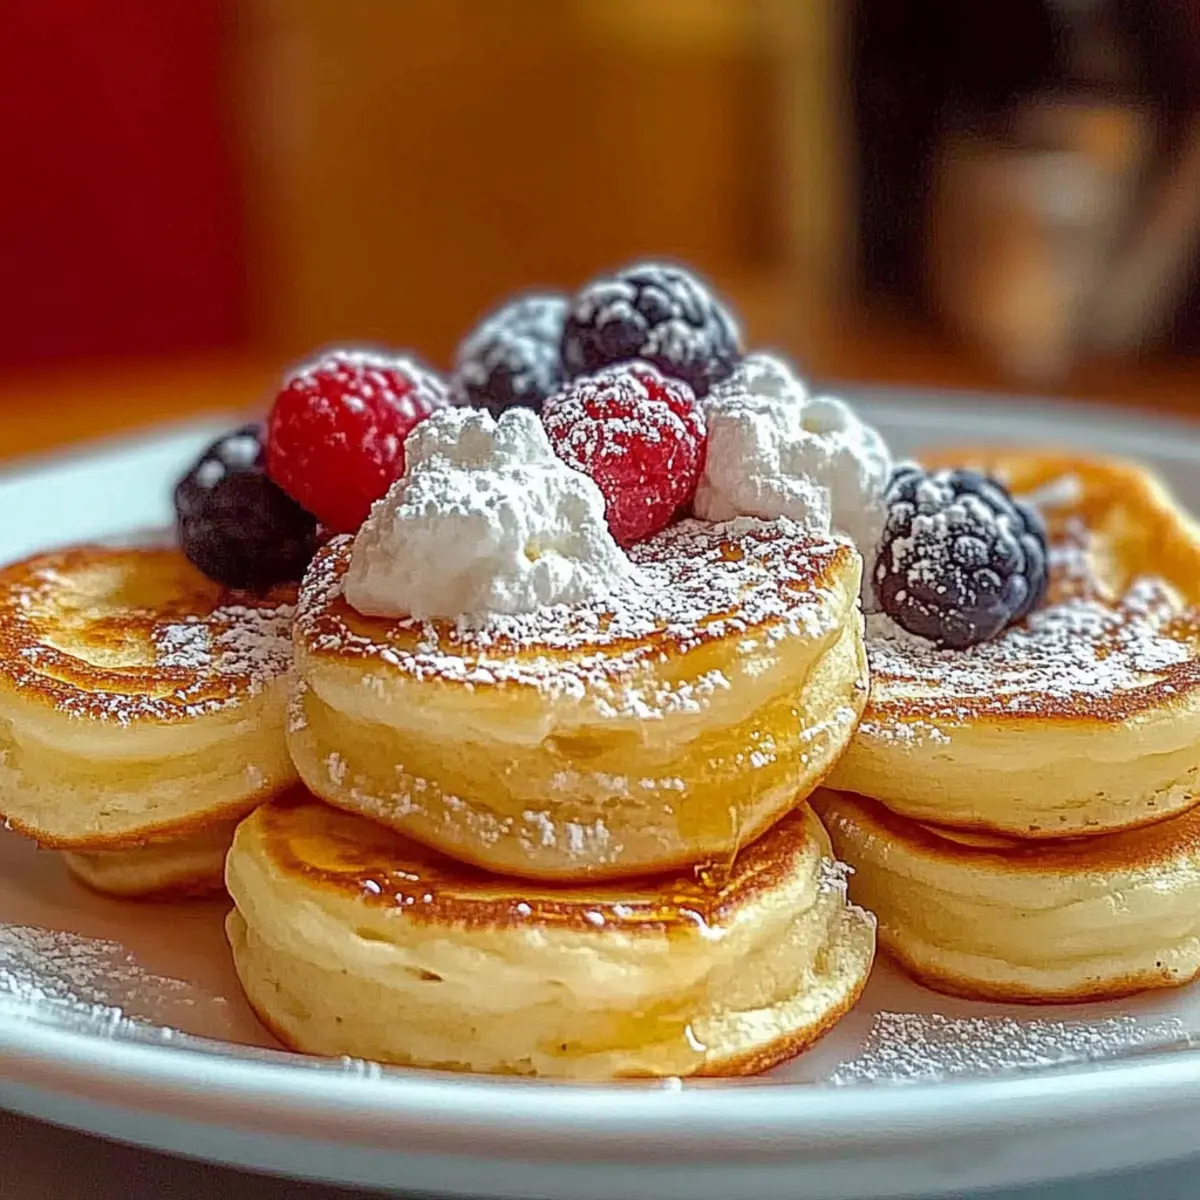
What to Serve with Irresistible Banana Oatmeal Bars

Imagine a nourishing spread of flavors that perfectly complements your gooey bars, inviting you to a wholesome experience.

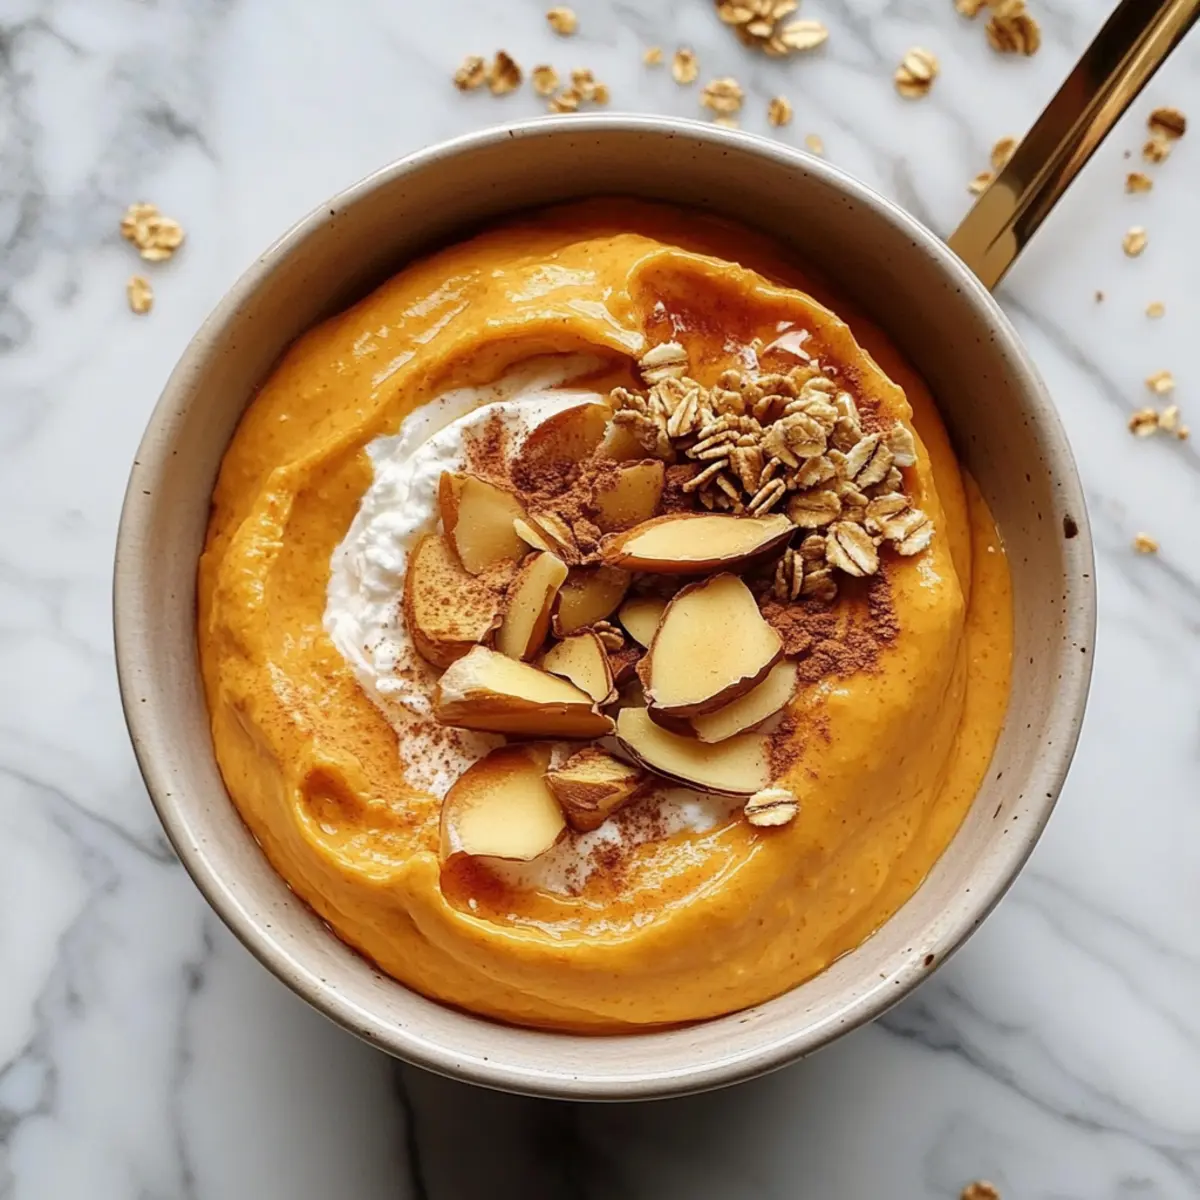
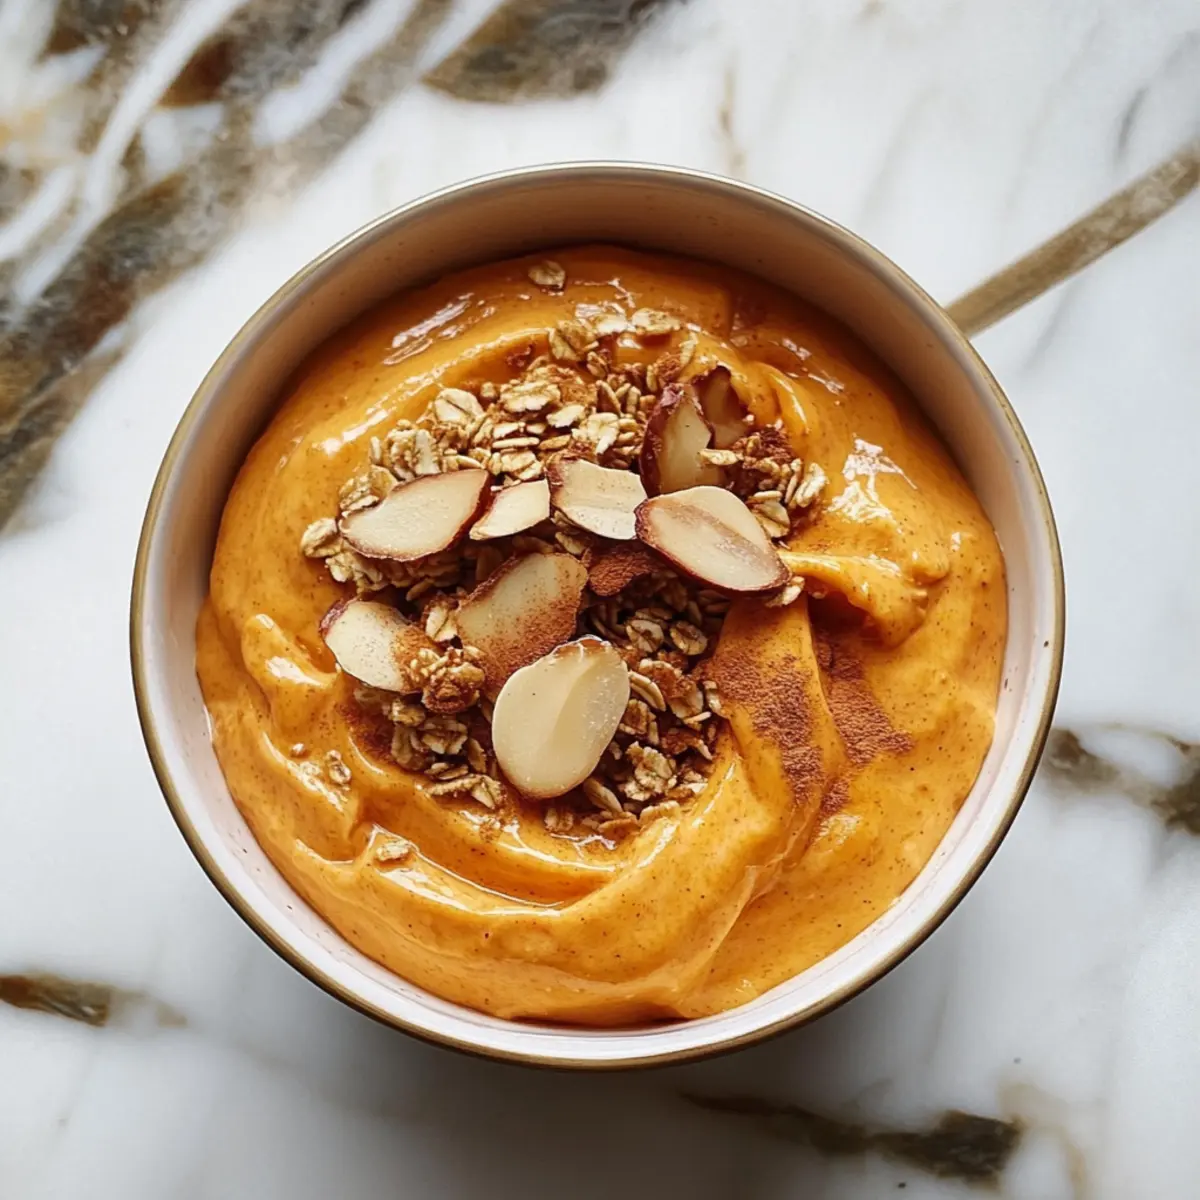
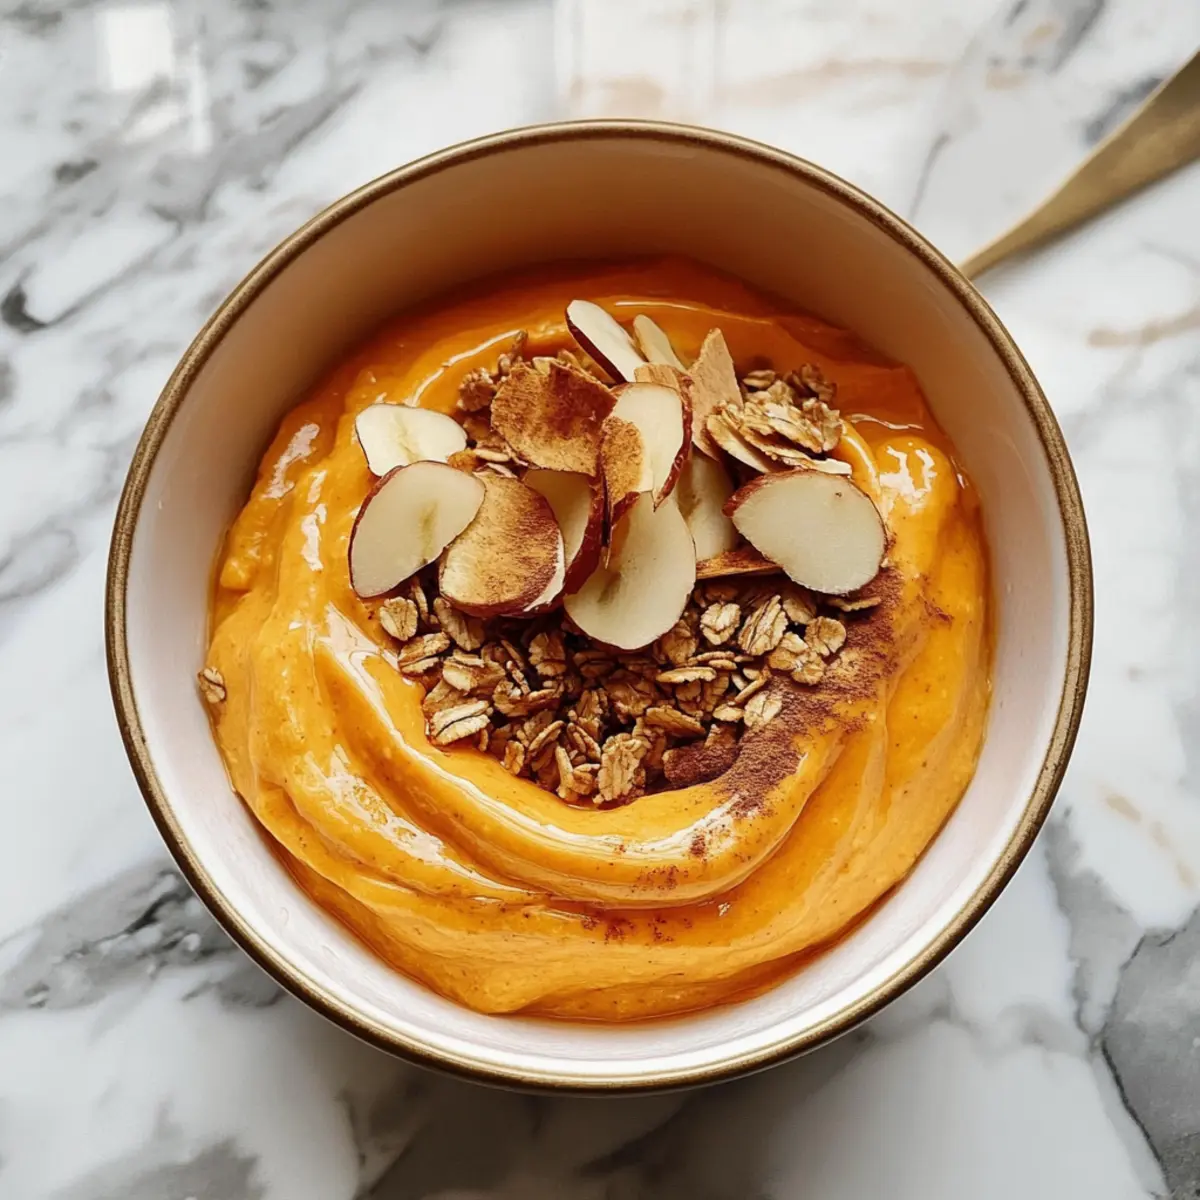
  • Greek Yogurt: A dollop of creamy Greek yogurt adds a tangy contrast and extra protein, elevating your snack to a fulfilling meal.
  • Fresh Berries: The burst of sweet-tart berries like strawberries or blueberries brightens the palate, enhancing the natural sweetness of your bars.
  • Nut Butter Drizzle: A drizzle of almond or peanut butter adds a rich, nutty flavor and a delightful creaminess that pairs beautifully with the soft texture.
  • Nutty Granola: The crunchy texture of granola not only adds a satisfying contrast but also enhances the wholesome vibe of your Banana Oatmeal Bars.
  • Banana Smoothie: Whip up a banana smoothie with almond milk and spinach for a refreshing drink that echoes the star ingredient of your bars. This tasty pairing leaves you feeling energized and happy.
  • Homemade Chia Seed Pudding: For a light but filling side, chia seed pudding adds a unique texture and makes your meal feel more gourmet, with added nutrients to boot.
  • Herbal Tea: A warm cup of herbal tea can enhance the cozy vibe of enjoying your bars, making it a comforting way to wind down after a long day.
  • Dark Chocolate Square: For a sweet finish, a piece of dark chocolate offers a decadent contrast to the chewy bars, satisfying any lingering cravings.
  • Almond Milk Latte: Pair your bars with an almond milk latte for a creamy and energizing boost, perfect for elevating your snack time experience.

Banana Oatmeal Bars Recipe FAQs

What kind of bananas should I use?
Absolutely! For the best flavor and moisture, make sure to choose overripe bananas with plenty of brown spots. The sweeter the bananas, the more delicious your Banana Oatmeal Bars will be!

How should I store the bars?
Store your Banana Oatmeal Bars in an airtight container at room temperature for up to 3 days. If you want them to last longer, placing them in the refrigerator can extend their freshness for up to a week. Just ensure they're well-wrapped to keep them from drying out.

Can I freeze the Banana Oatmeal Bars?
Yes! For longer storage, you can freeze your bars. Wrap each bar individually in plastic wrap and then place them in a freezer-safe bag. They can be frozen for up to 3 months. When you’re ready to enjoy them, just thaw at room temperature or pop them in the microwave for about 15-20 seconds for that fresh-baked taste.

What if my bars turn out dry or crumbly?
Very! If your bars are dry, it might be due to overbaking or not enough moisture from the bananas. Make sure you bake until they are just golden brown and firm but still soft to the touch. If you find they could use more moisture, consider adding an extra mashed banana into the batter next time!

Are these bars suitable for dietary restrictions?
Definitely! These Banana Oatmeal Bars can be made gluten-free by using certified gluten-free oats. For a vegan option, simply substitute the eggs with 1 tablespoon of flaxseed meal mixed with 2.5 tablespoons of water, letting it sit for a few minutes to thicken before adding to your mixture. Always double-check for any specific allergies related to your chosen mix-ins.

Can I add extra ingredients to my bars?
The more the merrier! Customize your bars with nuts, chocolate chips, or even spices like cinnamon or nutmeg. Don’t hesitate to experiment with dried fruits like cranberries or raisins for a sweet twist—they’ll enhance the flavor and nutritional value of your snacks!

Banana Oatmeal Bars

Delicious Banana Oatmeal Bars: Healthy & Customizable Treats

These Banana Oatmeal Bars are nutrient-packed and customizable treats perfect for a healthy snack.
Print Recipe Pin Recipe
Prep Time 10 minutes mins
Cook Time 30 minutes mins
Cooling Time 10 minutes mins
Total Time 50 minutes mins
Servings: 16 bars
Course: Snacks
Cuisine: American
Calories: 150
Ingredients Equipment Method Nutrition Notes

Ingredients
  

For the Batter
  • 3 medium ripe bananas overripe for maximum flavor
  • 2 cups rolled oats use certified gluten-free oats for gluten-free version
  • 1/2 cup honey or maple syrup substitute with agave syrup for a vegan option
  • 2 large eggs can be replaced with flaxseed meal mixed with water for a vegan twist
  • 1 teaspoon baking powder ensure it's fresh for the right rise
  • 1 teaspoon vanilla extract optional but boosts flavor
Optional Mix-Ins
  • 1/2 cup chocolate chips dark chocolate for richer flavor
  • 1/2 cup nuts walnuts or almonds work beautifully
  • 1/2 cup dried fruits cranberries or raisins for chewy surprise
  • 1 teaspoon spices cinnamon or nutmeg for warmth

Equipment

  • Mixing Bowl
  • Spatula
  • Baking Dish
  • Fork

Method
 

Step-by-Step Instructions
  1. Preheat your oven to 350°F (175°C).
  2. Mash the bananas in a mixing bowl until smooth.
  3. Combine the oats, honey (or maple syrup), eggs, baking powder, and vanilla extract with the mashed bananas.
  4. Prepare an 8x8-inch baking dish by greasing it or lining it with parchment paper.
  5. Pour the mixture into the prepared dish and bake for 25-30 minutes until golden brown.
  6. Let the bars cool in the pan for at least 10 minutes before slicing and serving.

Nutrition

Serving: 1barCalories: 150kcalCarbohydrates: 30gProtein: 3gFat: 2gCholesterol: 20mgSodium: 60mgPotassium: 150mgFiber: 3gSugar: 8gVitamin A: 2IUVitamin C: 5mgCalcium: 2mgIron: 4mg

Notes

Ensure eggs are at room temperature and avoid overmixing to maintain texture. Store in an airtight container to keep them fresh.

Tried this recipe?

Let us know how it was!

Delicious Cereal Bars: Quick, Easy, and Family-Friendly Snacks

November 24, 2025 by Grace Snow Leave a Comment

Amidst the chaos of busy mornings, a little triumph can feel monumental. That’s exactly what these 3-Ingredient Easy Cereal Bars bring to the table: a homemade solution for healthy snacking that’s ready in just five minutes! These nutritious bars are perfect for anyone seeking a quick breakfast or kid-friendly treat—no more reaching for the packaged snacks that leave you feeling unsatisfied. With their chewy texture and endless flavor combinations, from rich chocolate to delightful cookie dough, there's something to please every family member. Plus, they’re wonderfully customizable, vegetarian-friendly, and can even be made vegan. Are you ready to transform your snacking routine into something wholesome and delicious?

Why are Cereal Bars a Must-Try?

Quick and Easy: These cereal bars require just three ingredients, making them perfect for anyone short on time.

Kid-Friendly: Packed with flavor, they're a hit with children and adults alike!

Customizable: Enjoy endless flavor possibilities—try chocolate, cookie dough, or strawberry!

Healthy Alternative: Ditch the processed snacks and indulge in a homemade option that’s both nutritious and satisfying.

Make-Ahead Convenience: Prepare a batch in advance and store them for a quick breakfast or snack on busy days.

Transform your snacking experience today and discover more about the health benefits of these delightful cereal bars!

Cereal Bars Ingredients

For the Base

  • Cereal of Choice – Choose cereals like Cheerios or Rice Krispies for ideal crunch and structure.
  • Nut Butter (Peanut, Almond, or Cashew) – Acts as a binding agent and adds a rich, creamy texture.
  • Sweetener (Agave, Honey, or Brown Rice Syrup) – Adds sweetness and helps hold the bars together.

For Optional Enhancements

  • Salt (optional) – Enhances the flavors and adds a touch of balance to the sweetness.
  • Protein Powder (optional) – Boosts the nutritional value, making your cereal bars even healthier.

Keep these ingredients in mind, and you're on your way to making delicious cereal bars that everyone will love!

Step‑by‑Step Instructions for 3-Ingredient Easy Cereal Bars

Step 1: Prepare the Pan
Start by lining an 8-inch square pan with parchment or wax paper, allowing some excess to hang over the edges for easy removal later. If you plan to make a larger batch, use a 9x13-inch pan and double the recipe. This step is important as it prevents the cereal bars from sticking to the pan and aids in cut portions.

Step 2: Warm the Nut Butter
If your chosen nut butter is too thick or hard to mix smoothly, place it in a microwave-safe bowl and heat it in the microwave for 15 to 20 seconds. Stir gently to achieve a creamy consistency. This warming ensures an easier blend with the other ingredients, providing that perfect binding for your cereal bars.

Step 3: Mix the Ingredients
In a large mixing bowl, combine your favorite cereal, the warmed nut butter, your choice of sweetener, and optional salt and protein powder. Stir vigorously with a wooden spoon or a spatula until everything is well incorporated, and you see a uniform mixture that should stick together easily when pressed.

Step 4: Transfer to Pan
Carefully pour the cereal mixture into the lined pan. Using a second sheet of parchment paper, press down firmly to compact the mixture, ensuring it's tightly packed into the corners. This pressing step is crucial; it prevents the bars from crumbling and creates a chewy texture that’s both satisfying and delicious.

Step 5: Chill to Set
Place the pan in the freezer and chill for about 30 minutes, or until the mixture is firm enough to hold its shape when cut. This chilling process helps the sweetener and nut butter to solidify, locking in that chewy consistency that makes these cereal bars so enjoyable.

Step 6: Slice and Store
Once the bars have set, remove them from the pan using the overhanging parchment paper. Use a sharp knife to slice them into desired bar sizes. Store your homemade cereal bars either in an airtight container at room temperature, in the refrigerator, or freeze them for longer-lasting goodness.

Cereal Bars: Delicious Variations Await

Explore the delightful possibilities these easy cereal bars offer to elevate your snacking game while enjoying their chewy goodness.

  • Chocolate Twist: Mix in cocoa powder and a dash of vanilla extract, and top with melted chocolate for a chocolate lover's dream.
  • Peanut Butter Bliss: Use creamy peanut butter for a smooth texture, or go crunchy for an extra bite! The earthiness brings out a rich flavor.
  • Cookie Dough Delight: Replace nut butter with cashew butter and fold in mini chocolate chips. It delivers that nostalgic cookie dough flavor everyone adores.
  • Berry Burst: Stir in freeze-dried strawberries or blueberries for a fruity twist and a splash of color that brightens your snack time.
  • Nut-Free Version: Substitute sunflower seed butter for any nut butters, making these bars safe and delish for allergy concerns.
  • Marshmallow Magic: Fold in mini marshmallows before setting in the pan for an extra chewy, kid-friendly surprise!
  • Protein Power: Add a scoop of your favorite protein powder for an extra nutritional boost while keeping that delightful chew intact.
  • Spicy Kick: For an adventurous twist, add a sprinkle of cinnamon or a pinch of cayenne to ignite your taste buds with a hint of warmth.

Feel free to mix and match these variations to create your signature cereal bar recipe! If you enjoy experimenting, you might also like trying out some mini chocolate chips or even some dried fruit for a new flavor experience. Happy snacking!

What to Serve with Easy Cereal Bars?

These delightful, chewy bars make a perfect centerpiece for a wholesome breakfast or snack, inviting a savory spread to complement their sweetness.

  • Fresh Fruit Salad: Bright, juicy fruit adds a refreshing burst, balancing the cereal bars' sweetness with vibrant flavors and textures.

  • Greek Yogurt Parfait: Creamy yogurt mixed with berries and granola provides a rich contrast, elevating your snack or breakfast with protein and crunch.

  • Nutty Trail Mix: Combine nuts, seeds, or dried fruit for a savory crunch. This snack keeps the wholesome vibe strong while adding satisfying textures.

  • Smoothie: Blend fruits and greens for a refreshing drink that pairs beautifully with the bars. The creamy texture amplifies the experience while adding nutrients.

  • Nut Butter Dip: Serve with almond or peanut butter as a dip, enhancing the bars' flavors and delivering an extra protein punch for a healthy treat.

  • Chocolate Milkshake: Indulge in a creamy chocolate shake, offering a nostalgic touch that makes the wholesome bars even more enjoyable for your family.

  • Spiced Chai Tea: A warm cup of spiced chai creates a cozy pairing. The aromatic flavors harmonize with the bars, making snack time a soothing ritual.

  • Honey Drizzle: A drizzle of honey over the bars enhances sweetness, providing a beautiful finish that's both visually appealing and deliciously satisfying.

  • Coconut Water: Offering hydration, coconut water adds a tropical twist, refreshing your palate and complementing the nutty flavors of the cereal bars.

How to Store and Freeze Cereal Bars

Room Temperature: Store the cereal bars in an airtight container at room temperature for up to 3 days for optimal freshness.

Fridge: For an extended shelf life, keep the bars in the refrigerator, where they'll stay fresh for up to one week.

Freezer: Place the sliced cereal bars in a freezer-safe container, separated by parchment paper, for up to 3 months. Simply thaw at room temperature when ready to enjoy.

Reheating: If you prefer a warm snack, microwave the bars for 10-15 seconds for a delightful, chewy treat.

Expert Tips for Cereal Bars

  • Press Firmly: It's essential to press the cereal mixture down very firmly in the pan, as this prevents the bars from crumbling apart when cut.

  • Storage Wisdom: For the freshest taste, keep your cereal bars in the refrigerator. They can also be frozen for long-term storage.

  • Experiment Freely: Don’t be afraid to explore different cereals or add-ins, like mini chocolate chips or dried fruits. This is a great way to customize your cereal bars to suit various tastes!

  • Warm Up the Nut Butter: If your nut butter is too thick, warming it slightly helps to blend it better with the other ingredients, ensuring a smoother final product.

  • Adjust Sweetness: Taste your mix before pressing into the pan; if you enjoy a sweeter bar, feel free to add a bit more sweetener to make those cereal bars just right for you.

Make Ahead Options

These Easy Cereal Bars are a fantastic option for meal prep enthusiasts! You can mix the ingredients and press the mixture into the pan up to 24 hours in advance, storing it tightly covered in the refrigerator. Just remember to wrap it well to maintain that incredible chewy texture and prevent any unwanted drying out. When you’re ready to enjoy your cereal bars, simply chill them in the freezer for about 30 minutes to firm them up before slicing. This way, you’ll have delicious, homemade snacks on hand that are just as delightful as freshly made, saving you precious time on busy mornings or after-school cravings!

Cereal Bars Recipe FAQs

What type of cereal should I use?
Absolutely! It's best to choose small flake cereals like Cheerios, Rice Krispies, or other puffed cereals to give your bars the ideal structure and crunch. You can even opt for gluten-free or vegan brands if you want to cater to specific dietary needs.

How should I store cereal bars for freshness?
For optimal freshness, store your cereal bars in an airtight container at room temperature for up to 3 days. If you want them to last longer, keep them in the refrigerator for up to one week. Just make sure they are covered to prevent them from drying out.

Can I freeze cereal bars, and if so, how?
Yes, you can! To freeze your cereal bars, place the sliced bars in a freezer-safe container, separating them with parchment paper to prevent sticking. They can be frozen for up to 3 months. When you're ready to enjoy, just thaw at room temperature for a few minutes or microwave for 10-15 seconds for that delicious chewy texture.

What if the cereal bars are falling apart?
Don’t worry, it happens! If your bars crumble, it's usually because the mixture wasn't pressed down firmly enough in the pan or was too dry. Next time, make sure to press the mixture very firmly and consider adding a bit more nut butter or sweetener to help bind everything together. If they do fall apart, you could even serve them as a granola topping for yogurt or ice cream!

Are cereal bars safe for young children and pets?
Yes, these cereal bars are generally kid-friendly! Just keep in mind any specific allergies your children may have—like nuts or gluten. For pets, it’s best to avoid giving them cereal bars, especially if they contain nut butters or sweeteners like xylitol, which can be harmful to dogs. Always consult with a vet to ensure safety.

Can I make these cereal bars vegan?
Very much so! To keep your cereal bars vegan, simply choose plant-based nut butters (like almond or sunflower seed) and use agave or brown rice syrup instead of honey. This way, you can enjoy the same delicious and nutritious treat without any animal products!

Cereal Bars

Delicious Cereal Bars: Quick, Easy, and Family-Friendly Snacks

Wholesome 3-Ingredient Easy Cereal Bars are perfect for quick breakfasts and healthy snacks.
Print Recipe Pin Recipe
Prep Time 5 minutes mins
Chill Time 30 minutes mins
Total Time 35 minutes mins
Servings: 8 bars
Course: Snacks
Calories: 150
Ingredients Equipment Method Nutrition Notes

Ingredients
  

For the Base
  • 3 cups Cereal of Choice Choose cereals like Cheerios or Rice Krispies for ideal crunch and structure.
  • 1 cup Nut Butter (Peanut, Almond, or Cashew) Acts as a binding agent and adds a rich, creamy texture.
  • 1/2 cup Sweetener (Agave, Honey, or Brown Rice Syrup) Adds sweetness and helps hold the bars together.
Optional Enhancements
  • 1/4 teaspoon Salt Optional, enhances flavors.
  • 1/2 cup Protein Powder Optional, boosts nutritional value.

Equipment

  • 8-inch square pan
  • Microwave
  • Mixing Bowl
  • Wooden spoon or spatula
  • Parchment Paper

Method
 

Step-by-Step Instructions
  1. Prepare the pan by lining an 8-inch square pan with parchment or wax paper, allowing some excess to hang over the edges.
  2. Warm the nut butter in a microwave-safe bowl for 15 to 20 seconds if too thick, then stir to achieve a creamy consistency.
  3. In a large mixing bowl, combine your cereal, warmed nut butter, sweetener, optional salt, and protein powder. Stir until well incorporated.
  4. Transfer the mixture to the lined pan, pressing down firmly with a second sheet of parchment paper to compact it tightly.
  5. Chill in the freezer for about 30 minutes, or until firm enough to hold its shape when cut.
  6. Remove from pan using overhanging parchment, slice into desired sizes, and store as preferred.

Nutrition

Serving: 1barCalories: 150kcalCarbohydrates: 20gProtein: 4gFat: 7gSaturated Fat: 1gMonounsaturated Fat: 6gSodium: 50mgPotassium: 120mgFiber: 2gSugar: 8gCalcium: 2mgIron: 4mg

Notes

Press the mixture down firmly to prevent crumbling. These bars are customizable with various cereals or add-ins.

Tried this recipe?

Let us know how it was!

Wholesome Blueberry Cottage Cheese Breakfast Bake to Energize Mornings

November 24, 2025 by Grace Snow Leave a Comment

There’s nothing quite like waking up to the aroma of something warm and delicious wafting through the house. That’s why I’m thrilled to share my Easy High-Protein Blueberry Cottage Cheese Breakfast Bake with you. This recipe is a perfect solution for busy mornings, packing over 20 grams of protein per serving while remaining irresistibly delightful and satisfying. Made with creamy cottage cheese, sweet blueberries, and hearty oats, this bake can be prepared in advance and simply popped in the oven while you go about your morning routine. Imagine having a nutritious breakfast on the table without the hassle of cooking from scratch! Plus, this dish makes an excellent meal prep option, ensuring you and your loved ones can kick off the day on a healthy note. Ready to dive into a breakfast that feels like a warm hug? Let's get started!

Why is this breakfast bake a must-try?

Deliciously Creamy: The blend of creamy cottage cheese and sweet blueberries creates a rich, satisfying bite that will leave you craving more.

High-Protein Boost: With over 20 grams of protein per serving, this recipe is an excellent choice for fueling your morning activities and curbing hunger.

Make-Ahead Friendly: Prepare it the night before and pop it in the oven in the morning, making breakfast less hectic and more enjoyable!

Versatile Ingredients: Feel free to swap in different fruits like raspberries or even diced apples for a fun twist!

Crowd-Pleasing: It’s perfect for the family table; who can resist a warm, bubbly bake that smells amazing? Try it alongside a Breakfast Banana Split for an exciting morning feast!

Blueberry Cottage Cheese Breakfast Bake Ingredients

For the Bake

  • Low-Fat Cottage Cheese – Adds creaminess and protein; for a richer texture, consider using full-fat.
  • Large Eggs – Provides structure and moisture; essential for the bake's integrity.
  • Honey or Maple Syrup – Sweetens the dish; you can use agave syrup for a vegan alternative.
  • Vanilla Extract – Enhances flavor; crucial for bringing out the best in this blueberry bake.
  • Ground Cinnamon – Offers warmth and spice; feel free to experiment with nutmeg for a twist.
  • Salt – Balances sweetness and enhances flavors; don't skip this ingredient for the best taste.
  • Rolled Oats – Provides texture and fiber; use certified gluten-free oats for a gluten-free option.
  • Almond Milk – Adds moisture; feel free to swap for any milk of choice, dairy or non-dairy.
  • Fresh or Frozen Blueberries – Key ingredient for natural sweetness and antioxidants; substitute with raspberries if desired.
  • Chopped Nuts (optional) – Adds crunch and healthy fats; walnuts or pecans complement the recipe beautifully.
  • Chia Seeds (optional) – Boosts nutrition with added fiber; omit if not available.

Step‑by‑Step Instructions for Blueberry Cottage Cheese Breakfast Bake

Step 1: Preheat and Prepare
Begin by preheating your oven to 350°F (175°C). While the oven warms, grease a 9x9-inch baking dish with butter to prevent sticking. This will ensure your Blueberry Cottage Cheese Breakfast Bake slides out easily after baking, giving you that perfect slice to serve.

Step 2: Whisk the Wet Ingredients
In a large mixing bowl, whisk together low-fat cottage cheese, large eggs, honey or maple syrup, vanilla extract, ground cinnamon, and a pinch of salt until smooth. This step creates the creamy base for your breakfast bake. Aim for a uniform consistency, ensuring everything is well combined before moving on to the dry ingredients.

Step 3: Combine with Oats and Milk
Next, stir in the rolled oats and almond milk into the mixture, blending thoroughly. Let this sit for about 5 minutes, allowing the oats to absorb the liquid slightly. This helps create that delightful texture and ensures the flavors meld perfectly in your Blueberry Cottage Cheese Breakfast Bake.

Step 4: Fold in the Blueberries
Gently fold in the blueberries, taking care not to burst them. If using nuts or chia seeds, add them at this stage as well for added texture and nutrition. The blueberries will provide sweet bursts of flavor throughout the bake, making every bite a delightful experience.

Step 5: Pour and Spread
Pour the mixture into the prepared baking dish, spreading it evenly with a spatula. This ensures that the bake cooks uniformly, giving you that lovely golden crust on top. Make sure the blueberries are distributed throughout for optimal flavor in every serving of your breakfast bake.

Step 6: Bake to Perfection
Place the dish in the preheated oven and bake for 40–45 minutes, or until the top is golden brown and a toothpick inserted in the center comes out clean. The wonderful aroma of your Blueberry Cottage Cheese Breakfast Bake will fill your kitchen, promising a delicious treat once it’s ready!

Step 7: Cool and Serve
After baking, allow the dish to cool for about 5–10 minutes. This cooling time helps firm up the bake so it’s easier to cut and serve. Enjoy it warm, perhaps paired with a dollop of Greek yogurt or a drizzle of maple syrup for an extra touch of indulgence.

Expert Tips for Blueberry Cottage Cheese Breakfast Bake

  • Room Temperature Cheese: Let cottage cheese sit at room temperature for 30 minutes before mixing for a smoother batter that blends well into your Blueberry Cottage Cheese Breakfast Bake.

  • Immersion Blend Magic: For an ultra-creamy texture, use an immersion blender to mix your wet ingredients. This technique can make a noticeable difference in the consistency of your bake.

  • Avoid Overmixing: When folding in blueberries, be gentle to avoid bursting them. This keeps the berries intact, ensuring delightful pops of sweetness in every bite of your Blueberry Cottage Cheese Breakfast Bake.

  • Storage Solutions: Store leftovers in the refrigerator for up to 4 days. Consider cutting into individual portions for quick and easy access during busy mornings.

  • Garnish for Greatness: Enhance your serving with a dollop of Greek yogurt, a sprinkle of nuts, or a drizzle of honey for added flavor and nutritional benefits.

What to Serve with Blueberry Cottage Cheese Breakfast Bake

Start your day with a breakfast experience that tantalizes your taste buds and warms your heart.

  • Creamy Greek Yogurt: A dollop of Greek yogurt on top adds a luscious creaminess and boosts protein content.
  • Fresh Berry Medley: A mix of our favorite seasonal berries enhances the dish's fruity flavor and provides a burst of freshness.
  • Maple Syrup Drizzle: Drizzle a bit of pure maple syrup for a touch of sweetness; it pairs perfectly with the oats and blueberries.
  • Crunchy Granola: Sprinkle some granola on top for extra texture and a delightful crunch, making it feel like a wholesome breakfast bowl.
  • Nutty Trail Mix: Serve with a side of your favorite trail mix; the healthy fats will keep you fueled throughout the morning.
  • Chia Seed Pudding: Complement it with chia seed pudding filled with vanilla; it creates a lovely contrast in texture.
  • Smoothies: A refreshing fruit smoothie can round out the meal, offering more vitamins and a delicious sip to chase every bite.
  • Herbal Tea or Coffee: Pair with a soothing herbal tea or a warm cup of coffee; the warmth enhances the comforting morning vibe.
  • Cinnamon-Spiced Apples: Serve warm cinnamon-spiced apples as a side dish for a cozy feel that complements the bake beautifully.

Make Ahead Options

These Easy High-Protein Blueberry Cottage Cheese Breakfast Bake options are perfect for busy mornings! You can prepare the entire mixture up to 24 hours in advance by combining the cottage cheese, eggs, sweetener, and oats in a bowl. Simply cover it tightly with plastic wrap and refrigerate. When you're ready to bake, gently fold in the blueberries just before pouring the mixture into the baking dish, ensuring they stay intact for delicious bursts of flavor. Baking straight from the fridge will keep the bake's texture just right and ensure it remains just as delicious. Enjoy a nutritious breakfast with minimal effort on your busiest days!

How to Store and Freeze Blueberry Cottage Cheese Breakfast Bake

Fridge: Store any leftovers in an airtight container in the refrigerator for up to 4 days. This keeps the Blueberry Cottage Cheese Breakfast Bake fresh and ready to enjoy on busy mornings.

Freezer: For longer storage, freeze the baked dish in individual portions. Wrap each piece tightly in plastic wrap and then in aluminum foil for added protection. It can last for up to 3 months in the freezer.

Reheating: To reheat, simply thaw in the refrigerator overnight if frozen, then warm in the microwave or oven until heated through. A quick microwave method takes about 1-2 minutes, depending on your portion size.

Make-Ahead Tips: You can prepare the mixture and store it covered in the fridge overnight before baking in the morning. This way, your Blueberry Cottage Cheese Breakfast Bake will be a breeze to make!

Blueberry Cottage Cheese Breakfast Bake Variations

Feel free to get creative and customize your breakfast bake just the way you like it!

  • Fruit Swap: Try using raspberries or diced apples instead of blueberries for a fresh twist. Each fruit brings its own unique flavor and sweetness to the mix.

  • Nut-Free Option: Omit the chopped nuts entirely for a nut-free version or swap in sunflower seeds for added crunch without the allergens. Your breakfast will still be hearty and satisfying!

  • Savory Surprise: Experiment by replacing the sweet elements with herbs and cheese for a savory breakfast bake. Think crumbled feta and spinach, a delightful change from the usual sweet flavors.

  • Gluten-Free Twist: Use certified gluten-free oats to make this recipe gluten-free. This small adjustment ensures everyone can enjoy this wholesome dish.

  • Vegan Version: Swap the eggs with a flaxseed or chia egg and the cottage cheese with a plant-based alternative like silken tofu or non-dairy yogurt for a vegan delight. It’s still protein-packed and delicious!

  • Extra Spices: Boost the warmth by adding nutmeg or pumpkin spice to the mixture for a cozy autumn feel that’s perfect any time of year.

  • Creamy Upgrade: For an even richer texture, consider blending in a scoop of Greek yogurt into the wet ingredients. This not only enhances creaminess but also amps up the protein even more.

  • Heat It Up: If you like a bit of a kick, sprinkle in some cayenne or red pepper flakes for a surprising twist that beautifully contrasts the sweetness of the dish.

Once you try these variations, you might just find a new family favorite! Pair your Blueberry Cottage Cheese Breakfast Bake with a comforting side of Cornbread Breakfast Casserole or some delightful Breakfast Egg Muffins for an added breakfast feast. Enjoy experimenting!

Blueberry Cottage Cheese Breakfast Bake Recipe FAQs

What should I look for when selecting blueberries?
Absolutely! When choosing blueberries, opt for plump, firm berries that are deep blue in color. Avoid those with dark spots or wrinkles, as these indicators suggest overripeness. Fresh blueberries should have a silvery bloom on their surface, indicating freshness. If you're using frozen blueberries, make sure they are unsweetened for the best flavor!

How should I store leftovers of the Blueberry Cottage Cheese Breakfast Bake?
You can keep your Blueberry Cottage Cheese Breakfast Bake in an airtight container in the fridge for up to 4 days. This method helps maintain its delicious flavor while keeping it fresh for the next couple of mornings. To serve, simply reheat it in the microwave for a quick and convenient breakfast.

Can I freeze the Blueberry Cottage Cheese Breakfast Bake?
Very! To freeze, cut the bake into individual portions for easy handling. Wrap each piece tightly in plastic wrap, followed by aluminum foil for added protection against freezer burn. It can stay fresh in the freezer for up to 3 months. When you're ready to enjoy, thaw overnight in the refrigerator and reheat in the microwave or oven until warmed through—perfect for those busy mornings!

What if my bake turns out too dry?
If your Blueberry Cottage Cheese Breakfast Bake ends up too dry, it might be due to overbaking, which can happen if the timer is missed or the oven runs hot. To troubleshoot, next time, start checking for doneness a few minutes earlier and consider covering it with foil during the end of baking to retain moisture. Also, adding an extra splash of almond milk can help maintain that lovely creamy texture.

Is this breakfast bake suitable for those with dairy allergies?
For dairy-sensitive individuals, this Blueberry Cottage Cheese Breakfast Bake can be adapted easily! Substitute low-fat cottage cheese with a dairy-free alternative, such as cashew or almond-based cheese. Make sure the other ingredients you choose, like milk, are also suitable for your dietary needs, ensuring a delightful, allergy-friendly breakfast experience!

Blueberry Cottage Cheese Breakfast Bake

Wholesome Blueberry Cottage Cheese Breakfast Bake to Energize Mornings

A delicious Blueberry Cottage Cheese Breakfast Bake that’s high in protein and perfect for busy mornings.
Print Recipe Pin Recipe
Prep Time 10 minutes mins
Cook Time 45 minutes mins
Cooling Time 10 minutes mins
Total Time 1 hour hr 5 minutes mins
Servings: 6 slices
Course: Breakfast
Cuisine: American
Calories: 210
Ingredients Equipment Method Nutrition Notes

Ingredients
  

For the Bake
  • 2 cups Low-Fat Cottage Cheese Use full-fat for a richer texture.
  • 3 large Eggs Provides structure and moisture.
  • 1/4 cup Honey or Maple Syrup Agave syrup can be used as a vegan alternative.
  • 1 teaspoon Vanilla Extract Enhances flavor.
  • 1 teaspoon Ground Cinnamon Feel free to experiment with nutmeg.
  • 1/4 teaspoon Salt Balances sweetness.
  • 2 cups Rolled Oats Use certified gluten-free oats for a gluten-free option.
  • 1 cup Almond Milk Can be substituted with any milk of choice.
  • 2 cups Fresh or Frozen Blueberries Substitute with raspberries if desired.
  • 1/2 cup Chopped Nuts Optional, walnuts or pecans work well.
  • 2 tablespoons Chia Seeds Optional, boosts nutrition.

Equipment

  • Oven
  • Mixing Bowl
  • Baking Dish
  • Spatula

Method
 

Step-by-Step Instructions
  1. Preheat your oven to 350°F (175°C) and grease a 9x9-inch baking dish with butter.
  2. In a large mixing bowl, whisk together cottage cheese, eggs, honey or maple syrup, vanilla extract, cinnamon, and salt until smooth.
  3. Stir in rolled oats and almond milk, blending thoroughly, and let sit for about 5 minutes.
  4. Gently fold in blueberries and optional nuts or chia seeds.
  5. Pour the mixture into the prepared baking dish, distributing evenly.
  6. Bake for 40–45 minutes until golden brown and a toothpick comes out clean.
  7. Allow to cool for about 5–10 minutes before serving.

Nutrition

Serving: 1sliceCalories: 210kcalCarbohydrates: 30gProtein: 20gFat: 4gSaturated Fat: 1gPolyunsaturated Fat: 1gMonounsaturated Fat: 2gCholesterol: 70mgSodium: 150mgPotassium: 300mgFiber: 5gSugar: 8gVitamin A: 500IUVitamin C: 5mgCalcium: 150mgIron: 1mg

Notes

Store leftovers in the refrigerator for up to 4 days or freeze for up to 3 months. Reheat in the microwave or oven.

Tried this recipe?

Let us know how it was!

Easy Sweet Potato Egg Casserole for Busy Mornings

November 24, 2025 by Grace Snow Leave a Comment

As I poured that golden egg mixture over the sautéed sweet potatoes and savory sausage, a wave of anticipation washed over me. This Easy Sweet Potato Egg Casserole is more than just a breakfast option; it's a symphony of flavors and textures that transforms busy mornings into something special. The comforting sweetness of roasted sweet potatoes paired with protein-rich eggs creates a nutritious and filling meal that can be prepped the night before, ensuring a warm, delightful start to your day. Plus, it’s easily reheatable, making it a fantastic choice for those hectic weekdays when time is of the essence. Curious about how this casserole can elevate your mornings? Let’s dive into the recipe!

Why is this casserole a breakfast game-changer?

Versatile: This Easy Sweet Potato Egg Casserole is perfect for any palate, allowing you to swap in your favorite ingredients like different cheeses or vegetables. Meal Prep-Friendly: Assemble it the night before for a hassle-free morning; just pop it in the oven! Nutrient-Rich: Packed with protein and vitamins, it’s a wholesome start to your day. Crowd-Pleaser: Great for family brunches or gatherings—everyone will want a slice! Plus, consider pairing it with a fresh fruit salad for extra brightness on your plate.

Easy Sweet Potato Egg Casserole Ingredients

For the Casserole
• Sweet Potatoes – the star ingredient providing natural sweetness and nutrients; Garnet or Jewel varieties work best.
• Onion – adds savory depth and enhances the overall flavor profile of the casserole.
• Green Pepper – brings a refreshing crunch and vibrant color; can be substituted with any bell pepper you prefer.
• Garlic – infuses aromatic flavor, elevating the dish to a delightful experience.
• Turkey Sausage – offers hearty protein; feel free to swap with chicken sausage or a plant-based option for versatility.
• Eggs – the binding agent that holds this Easy Sweet Potato Egg Casserole together, ensuring a satisfying texture.
• Milk – adds creaminess and moisture; can be replaced with non-dairy milk for a lighter alternative.
• Fresh Thyme – contributes an aromatic touch; dried thyme can be used if fresh isn’t available.
• Shredded Cheese – a melty topping that adds richness; cheddar or Monterey Jack are popular choices.

Step‑by‑Step Instructions for Easy Sweet Potato Egg Casserole

Step 1: Preheat the Oven
Begin your delicious journey by preheating your oven to 350°F (175°C). This temperature is perfect for cooking the casserole evenly, ensuring that the sweet potatoes and egg mixture come together beautifully. While the oven heats, you can prepare your casserole dish for an effortless baking experience.

Step 2: Prepare the Casserole Dish
Grease a 9×13-inch casserole dish generously with your favorite cooking oil or non-stick spray. This step is crucial for preventing the Easy Sweet Potato Egg Casserole from sticking, allowing for easy serving later. Set aside this prepared dish while you move on to the flavorful filling.

Step 3: Sauté the Vegetables
In a Dutch oven, heat a tablespoon of avocado oil over medium heat. Add chopped onion, green pepper, and sweet potato cubes, stirring occasionally for about 8-9 minutes until they soften. The sweet potatoes should be tender but not falling apart. In the last minute, stir in minced garlic, allowing its aromatic flavor to bloom before removing the pot from heat.

Step 4: Layer the Vegetables in the Dish
Spread the sautéed vegetable mixture evenly in the prepared casserole dish, creating a vibrant and colorful base for your Easy Sweet Potato Egg Casserole. The combination of sweet, savory, and aromatic ingredients will form a delightful foundation. This is a moment to appreciate the fragrant blend you've created.

Step 5: Cook the Turkey Sausage
Return to your Dutch oven and add the turkey sausage, breaking it into small pieces as it cooks over medium heat. Stir until the sausage is fully cooked and no longer pink, which usually takes about 5-7 minutes. Once done, mix this savory sausage into the vegetable layer in the casserole dish, ensuring even distribution.

Step 6: Prepare the Egg Mixture
In a mixing bowl, whisk together eggs, milk, fresh thyme, salt, pepper, and shredded cheese until the mixture is smooth and well-combined. This creamy egg base is key to holding the layers together in your Easy Sweet Potato Egg Casserole. Make sure to incorporate the cheese thoroughly for maximum flavor.

Step 7: Combine and Pour
Pour the egg mixture over the sausage and vegetable layer in the casserole dish. Gently stir with a spatula to distribute the egg mixture evenly, ensuring every bite of your casserole will be packed with flavor. The colors and textures should blend beautifully, promising a hearty breakfast.

Step 8: Bake the Casserole
Place the filled casserole dish into your preheated oven. Bake for 40-45 minutes, or until the center is firm and a light golden color appears on top. If the surface browns too quickly, cover it loosely with aluminum foil to prevent overcooking. This time is crucial for achieving that perfect fluffy texture in your Easy Sweet Potato Egg Casserole.

Step 9: Rest Before Serving
Once baked, remove the casserole from the oven and let it cool for 15 minutes before slicing. This cooling period helps the casserole set, making it easier to serve and maintain its shape. The enticing aroma will fill your kitchen, making the wait all the more worthwhile!

Storage Tips for Easy Sweet Potato Egg Casserole

  • Fridge: Store leftover casserole in an airtight container for up to 4 days. Make sure it’s fully cooled before sealing to maintain freshness.
  • Freezer: For longer storage, freeze individual portions wrapped tightly in plastic wrap and then in aluminum foil for up to 3 months. This way, you can enjoy your Easy Sweet Potato Egg Casserole anytime!
  • Reheating: To reheat, thaw overnight in the fridge if frozen. Warm individual portions in the microwave for about 1-2 minutes, or heat in the oven at 350°F (175°C) until warmed through.
  • Refrigerator Storage: Remember to keep the casserole covered to prevent it from absorbing other fridge odors, keeping it delicious for longer.

Easy Sweet Potato Egg Variations

Feel free to get creative and make this casserole your own with these fun twists!

  • Pork Sausage: Substitute turkey sausage for pork sausage for a richer flavor that adds heartiness.

  • Dairy-Free: Use non-dairy milk and dairy-free cheese for a vegan-friendly version while keeping that creamy texture.

  • Spinach Addition: Fold in fresh spinach before baking; it wilt perfectly, adding nutrients and a pop of color!

  • Zucchini: Swap in diced zucchini for the green pepper for a tender bite and extra veggies in your morning meal.

  • Herb Twist: Experiment with fresh basil or dill for a herbal flair that brightens the classic flavor profile.

  • Spicy Kick: Add diced jalapeños or a dash of red pepper flakes to the egg batter for a spicy surprise in each bite.

  • Cheese Variety: Change up the cheese! Try feta or pepper jack for different flavors that enhance the overall dish.

  • Roasted Peppers: Incorporate roasted sweet or red peppers for a smoky depth that complements the sweet potatoes beautifully.

If you're in the mood for more comforting dishes, you might enjoy exploring our Sweet Potato Casserole or sampling the delightful Smoky Sweet Potatoes. Each option offers a unique flavor experience that's sure to please!

Expert Tips for Easy Sweet Potato Egg Casserole

  • Even Cubes: Cut sweet potatoes into uniform ½ inch cubes to ensure they cook evenly. This helps avoid undercooked or mushy spots in the casserole.
  • Sauté Wisely: Avoid overcrowding the pan when sautéing vegetables; this prevents steaming and allows them to caramelize for deeper flavor.
  • Drain Sausage Fat: Drain excess liquid from the cooked turkey sausage to keep your casserole from becoming watery. A dry base helps the casserole maintain its structure.
  • Rest Before Serving: Let the casserole sit for 15 minutes after baking. This allows it to set properly, making it easier to slice and serve without falling apart.
  • Extra Creaminess: Consider topping your casserole with sliced avocado after baking for added creaminess and a fresh touch!

Make Ahead Options

These Easy Sweet Potato Egg Casseroles are a fantastic choice for meal prep! You can assemble the entire casserole up to 24 hours in advance by preparing the sweet potatoes, sausage, and vegetable mixture, then layering everything in the dish. Before baking, tightly cover it with plastic wrap or foil and refrigerate. To maintain quality, let it sit at room temperature for 15 minutes before popping it into the preheated oven. When you’re ready to serve, simply bake as directed until it’s golden and firm. With this prep method, you’ll turn busy mornings into a breeze, enjoying a warm, delicious breakfast without the stress!

What to Serve with Easy Sweet Potato Egg Casserole

Brighten your breakfast table and turn your Easy Sweet Potato Egg Casserole into a well-rounded feast with these delicious pairings.

  • Fresh Fruit Salad: Juicy and vibrant, a medley of seasonal fruits adds a refreshing contrast that complements the casserole's rich flavors perfectly. It’s a light, energizing side!

  • Warm Croissants: Flaky and buttery croissants pair beautifully, offering a different texture that elevates your breakfast experience to a delightful bakery-style brunch.

  • Simple Green Salad: A crisp salad with a zesty vinaigrette adds a wholesome crunch to your meal, balancing the richness of the casserole and enhancing its heartiness.

  • Herbed Yogurt Dip: A cool and creamy yogurt dip flavored with fresh herbs brings a tangy brightness that contrasts nicely with the sweet potatoes, making each bite a little more exciting.

  • Oven-Roasted Asparagus: Tender asparagus drizzled with olive oil and seasoning brings an earthy green element, providing a delightful chew that is light yet satisfying.

  • Coffee or Herbal Tea: A warm mug of your favorite coffee enhances the comforting morning vibe, while herbal tea offers a calming balance, perfect for a peaceful breakfast moment.

Consider these delightful accompaniments to make your Easy Sweet Potato Egg Casserole the star of a revitalizing breakfast experience!

Easy Sweet Potato Egg Casserole Recipe FAQs

What kind of sweet potatoes should I use?
Absolutely! For the best flavor and texture in your Easy Sweet Potato Egg Casserole, I recommend using Garnet or Jewel sweet potatoes. They provide a natural sweetness and creamy texture that's perfect for this dish.

How should I store leftovers?
Very! Store your leftover Easy Sweet Potato Egg Casserole in an airtight container in the refrigerator for up to 4 days. Make sure it has completely cooled before sealing it up to keep it fresh and delicious.

Can I freeze the casserole?
Absolutely! To freeze, cut the cooled casserole into individual portions and wrap them tightly in plastic wrap followed by aluminum foil. This will help to prevent freezer burn. You can store these portions in the freezer for up to 3 months. When you're ready to enjoy, simply thaw overnight in the fridge, and reheat in the microwave or oven until heated through!

What if my casserole comes out too watery?
If your Easy Sweet Potato Egg Casserole turns out watery, it’s likely due to excess moisture from the turkey sausage or sweet potatoes. To troubleshoot, make sure that you drain any fat from the sausage before mixing it with the vegetables. Additionally, cutting the sweet potatoes into uniform ½ inch cubes will help them cook evenly and not release too much moisture during baking.

Is this recipe suitable for those with dietary restrictions?
Absolutely! You can easily customize your Easy Sweet Potato Egg Casserole to accommodate various dietary preferences. For instance, opt for plant-based sausage if you're looking for a meat-free option and substitute regular milk with non-dairy alternatives like almond or oat milk. Just be sure to check for any allergies with the specific ingredients you choose!

How can I prepare this casserole in advance?
Very! You can assemble your Easy Sweet Potato Egg Casserole the night before by prepping all the ingredients and layering them in the casserole dish. Cover it tightly and store it in the fridge. In the morning, just let it sit at room temperature for about 15 minutes before popping it in the oven for a hassle-free breakfast!

Easy Sweet Potato Egg

Easy Sweet Potato Egg Casserole for Busy Mornings

This Easy Sweet Potato Egg Casserole combines roasted sweet potatoes and protein-rich eggs for a nutritious breakfast option.
Print Recipe Pin Recipe
Prep Time 15 minutes mins
Cook Time 45 minutes mins
Cooling Time 15 minutes mins
Total Time 1 hour hr 15 minutes mins
Servings: 6 slices
Course: Breakfast
Cuisine: American
Calories: 250
Ingredients Equipment Method Nutrition Notes

Ingredients
  

For the Casserole
  • 2 cups cubed sweet potatoes Garnet or Jewel varieties work best
  • 1 medium onion chopped
  • 1 cup green pepper chopped; can substitute with any bell pepper
  • 2 cloves garlic minced
  • 1 lb turkey sausage can be swapped with chicken sausage or plant-based option
  • 6 eggs
  • 1 cup milk can be replaced with non-dairy milk
  • 1 tbsp fresh thyme can use dried thyme if fresh is unavailable
  • 1 cup shredded cheese cheddar or Monterey Jack

Equipment

  • Dutch oven
  • 9x13-inch casserole dish
  • Mixing Bowl

Method
 

Step‑by‑Step Instructions for Easy Sweet Potato Egg Casserole
  1. Preheat the oven to 350°F (175°C).
  2. Grease a 9×13-inch casserole dish with cooking oil or non-stick spray.
  3. In a Dutch oven, heat a tablespoon of avocado oil over medium heat and sauté onion, green pepper, and sweet potato cubes for about 8-9 minutes. Stir in minced garlic in the last minute.
  4. Spread the sautéed vegetable mixture evenly in the prepared casserole dish.
  5. Cook the turkey sausage in the Dutch oven until fully cooked, about 5-7 minutes, then mix into the vegetable layer in the casserole dish.
  6. In a mixing bowl, whisk together eggs, milk, fresh thyme, salt, pepper, and shredded cheese until smooth.
  7. Pour the egg mixture over the sausage and vegetable layer in the casserole dish and gently stir to combine.
  8. Bake for 40-45 minutes until the center is firm and golden on top. Cover loosely with aluminum foil if browning too quickly.
  9. Let the casserole cool for 15 minutes before slicing.

Nutrition

Serving: 1sliceCalories: 250kcalCarbohydrates: 20gProtein: 15gFat: 10gSaturated Fat: 4gPolyunsaturated Fat: 0.5gMonounsaturated Fat: 3gCholesterol: 180mgSodium: 500mgPotassium: 400mgFiber: 3gSugar: 5gVitamin A: 4000IUVitamin C: 30mgCalcium: 150mgIron: 2mg

Notes

Slice and serve paired with a fresh fruit salad for added brightness.

Tried this recipe?

Let us know how it was!

Creamy Pumpkin Whipped Cottage Cheese Breakfast Bowl Bliss

November 24, 2025 by Grace Snow Leave a Comment

On a chilly autumn morning, I often find myself craving something cozy and comforting to kick-start my day. Enter the Pumpkin Whipped Cottage Cheese Breakfast Bowl! This delightful combination of creamy cottage cheese and velvety pumpkin puree, kissed with warm spices, is not only a breeze to whip up in just five minutes but also packs a protein punch to keep you fueled. Perfect for those who are looking to break free from the fast-food routine, this healthy breakfast option is a creamy indulgence that evokes the flavors of fall without any guilt. Who says mornings can’t be deliciously easy? Ready to transform your breakfast game? Let’s dive into this fall-inspired treat!

Why is this breakfast bowl so great?

Simplicity at Its Best: This Pumpkin Whipped Cottage Cheese Breakfast Bowl comes together in just five minutes, making it a quick win for busy mornings!

Creamy Delight: The blend of cottage cheese and pumpkin creates a luscious, velvety texture that feels indulgent while being healthy.

Protein Power: With approximately 21 grams of protein per serving, it’s a great way to kick-start your day and keep you satisfied until lunch.

Seasonal Flavors: Enjoy the delightful taste of fall with comforting spices like cinnamon, making every spoonful feel like a cozy hug.

Versatile Toppings: Top it with granola, nuts, or fresh fruits for a personal touch—whichever way you choose, it’s sure to impress! If you're in the mood for other healthy breakfasts, try the Breakfast Egg Muffins or enjoy a sweet treat with Pumpkin Brownies Decadent.

Pumpkin Whipped Cottage Cheese Breakfast Bowl Ingredients

For the Whipped Base

  • Cottage Cheese – Provides creaminess and protein; for a tangy twist, substitute with Greek yogurt.
  • Pumpkin Puree – Adds natural sweetness and a smooth texture; ensure it's pure pumpkin without added sugar.
  • Honey – Sweetens the dish beautifully; feel free to swap with maple syrup for a vegan alternative.
  • Cinnamon – Infuses warm, comforting flavor; consider using pumpkin pie spice for an extra seasonal kick.
  • Vanilla Extract – Adds a lovely aromatic sweetness; omit for a more straightforward taste.

For the Crunch

  • Granola – Introduces crunch and additional texture; substitute with nuts or seeds for a gluten-free option.

This Pumpkin Whipped Cottage Cheese Breakfast Bowl is not just delicious; it's a high-protein, creamy, and seasonal breakfast you're sure to adore!

Step‑by‑Step Instructions for Pumpkin Whipped Cottage Cheese Breakfast Bowl

Step 1: Blend the Base Ingredients
In a high-speed blender, combine 1 cup of cottage cheese, ½ cup of pumpkin puree, 1 tablespoon of honey, ½ teaspoon of cinnamon, and ¼ teaspoon of vanilla extract. Blend on high for 30-45 seconds until the mixture is thick and creamy. If needed, stop to scrape down the sides to ensure everything is well combined. You’ll want a smooth, luscious consistency for your Pumpkin Whipped Cottage Cheese Breakfast Bowl.

Step 2: Prepare for Serving
Once blended, take a moment to taste the mixture. Adjust the sweetness with more honey if preferred, then transfer the whipped pumpkin blend into serving bowls. Use a spoon to evenly portion the thick, creamy texture, creating a delightful base for your toppings. The vibrant orange color paired with the creamy white will make for an inviting breakfast display.

Step 3: Add the Crunch
To make your Pumpkin Whipped Cottage Cheese Breakfast Bowl even more delightful, sprinkle each bowl with approximately ¼ cup of granola just before serving. This crunchy topping contrasts beautifully with the smooth whipped base, adding texture and flavor. Feel free to mix and match your granola varieties to keep your breakfast exciting and tailored to your taste.

Step 4: Store Leftovers
If you have any leftovers, store them in an airtight container in the refrigerator for up to 3 days. Make sure to keep the granola separate until you're ready to enjoy another serving to maintain its crispness. When ready to serve again, give the mixture a good stir to bring back its creamy texture, and enjoy this wholesome Pumpkin Whipped Cottage Cheese Breakfast Bowl fresh!

Pumpkin Whipped Cottage Cheese Breakfast Bowl Variations

Feel free to mix things up with these delightful variations that cater to your taste buds!

  • Greek Yogurt Swap: Substitute cottage cheese with Greek yogurt for a tangy twist that adds creaminess and protein.

  • Spice It Up: Experiment with different spices like nutmeg or ginger for an exciting flavor profile that elevates your bowl.

  • Fruity Fun: Add fresh fruits such as banana slices or berries on top for a burst of freshness that complements the creamy base beautifully.

  • Nutty Crunch: Instead of granola, sprinkle your favorite chopped nuts or seeds for an extra crunch and a boost in healthy fats.

  • Vegan Delight: Use maple syrup instead of honey and coconut yogurt in place of cottage cheese for a delicious vegan version.

  • Oatmeal Inspiration: Mix in some cooked oatmeal for additional texture and heartiness, making it even more filling for your morning.

  • Go Savory: For a savory twist, omit the sweeteners and spices, and top with sliced avocado, cherry tomatoes, or a sprinkle of feta cheese.

  • Mix and Match: Combine various toppings from nuts to seeds to make it your very own signature breakfast bowl. The more, the merrier!

There's truly no limit to how you can make this pumpkin whipped cottage cheese breakfast bowl perfect for you! For more inspiration, try the hearty Breakfast Banana Split or go for the wholesome Acai Bowl Nutritious.

How to Store and Freeze Pumpkin Whipped Cottage Cheese Breakfast Bowl

Fridge: Store any leftovers in an airtight container for up to 3 days. Stir the mixture well before serving again to restore its creamy consistency.

Room Temperature: Best enjoyed fresh, but if necessary, you can leave it at room temperature for up to 2 hours before refrigeration.

Freezer: It’s not recommended to freeze this Pumpkin Whipped Cottage Cheese Breakfast Bowl, as freezing alters its creamy texture and flavor.

Reheating: If serving again after refrigeration, simply stir and enjoy cold for a refreshing treat, as reheating may affect the texture.

What to Serve with Pumpkin Whipped Cottage Cheese Breakfast Bowl

Elevate your cozy morning with some delightful pairings that enhance this creamy breakfast experience.

  • Spiced Apple Slices: Sweet, crisp apples sprinkled with cinnamon bring a fresh crunch to your pumpkin bowl.

  • Warm Oatmeal: A creamy bowl of oatmeal provides a filling base, creating a comforting contrast to the fluffy whipped cottage cheese.

  • Toasted Whole Grain Bread: Enjoy the nutty flavors and crunchy texture of toasted bread, perfect for dipping into the pumpkin goodness.

  • Maple Syrup Drizzle: A light drizzle of maple syrup adds sweetness and warmth, echoing the fall flavors perfectly.

  • Chia Pudding: A side of chia pudding offers a creamy, nutritious complement, packed with fiber and protein for sustained energy.

  • Herbal Tea: A cup of soothing herbal tea balances the richness of your breakfast bowl while providing a calming start to the day.

These pairings not only complete your meal but also add layers of texture and flavor that make every bite a celebration of fall!

Make Ahead Options

This Pumpkin Whipped Cottage Cheese Breakfast Bowl is perfect for busy mornings, allowing you to prep in advance and save time. You can blend the creamy base (1 cup of cottage cheese, ½ cup of pumpkin puree, 1 tablespoon of honey, ½ teaspoon of cinnamon, and ¼ teaspoon of vanilla extract) up to 24 hours ahead. Store it in an airtight container in the refrigerator to maintain its luscious texture. When you're ready to serve, simply give the mixture a good stir, spoon it into bowls, and top with granola right before serving to keep that delightful crunch. With these simple make-ahead steps, enjoy a wholesome breakfast that feels gourmet without the fuss!

Expert Tips for Pumpkin Whipped Cottage Cheese Breakfast Bowl

  • Whip Thoroughly: Ensure a super smooth texture by blending the ingredients thoroughly. A high-speed blender works best to achieve that indulgent creaminess.

  • Taste Test: Always taste the mixture before serving. Adjust sweetness with more honey or maple syrup to match your personal preference.

  • DIY Granola: Consider making your own granola for a healthier option. This way, you can control the sweetness and add your favorite nuts and seeds.

  • Skip the Freezer: Avoid freezing leftovers, as it can change the creamy texture of your Pumpkin Whipped Cottage Cheese Breakfast Bowl. Always refrigerate in an airtight container.

  • Spice It Up: Experiment with spices like nutmeg or ginger to add warmth and depth to your dish, making breakfast even more exciting!

  • Serve Fresh: For the best experience, prepare and serve the bowl just before eating to enjoy the delightful contrast between the creamy base and crunchy toppings.

Pumpkin Whipped Cottage Cheese Breakfast Bowl Recipe FAQs

What kind of pumpkin puree should I use?
Absolutely! It’s best to use canned pumpkin puree or freshly cooked pumpkin without any added sugars. This keeps your Pumpkin Whipped Cottage Cheese Breakfast Bowl healthy and lets the natural sweetness shine through.

How long can I store leftovers?
Store any leftovers in an airtight container in the fridge for up to 3 days. Just give it a good stir before enjoying, and it will be just as creamy and delicious as when you first made it!

Can I freeze the Pumpkin Whipped Cottage Cheese Breakfast Bowl?
I wouldn't recommend freezing this dish, as it alters the creamy texture that makes it so delightful. Instead, enjoy it fresh or store it in the fridge for a few days!

What if the mixture is too thick?
If you find your Pumpkin Whipped Cottage Cheese Breakfast Bowl mixture turns out thicker than expected, simply stir in a little splash of milk or dairy-free alternative to achieve your desired consistency. Blend again for about 10 seconds if needed!

Is it safe for those with dairy allergies?
For those with dairy allergies, substitute cottage cheese with a dairy-free yogurt alternative, like coconut or almond yogurt. It won't be quite the same, but it still offers a delicious, creamy texture! Always check the ingredients to ensure they're allergy-friendly.

What if I want to add extra flavors or toppings?
The more the merrier! You can spice it up with a dash of nutmeg or add fresh fruits like berries or banana slices for a burst of flavor. Feel free to customize your bowl with your favorite granola or seeds for added crunch!

Pumpkin Whipped Cottage Cheese Breakfast Bowl

Creamy Pumpkin Whipped Cottage Cheese Breakfast Bowl Bliss

Enjoy a cozy Pumpkin Whipped Cottage Cheese Breakfast Bowl packed with protein and warm spices for a delightful start to your day.
Print Recipe Pin Recipe
Prep Time 5 minutes mins
Total Time 5 minutes mins
Servings: 2 bowls
Course: Breakfast
Cuisine: American
Calories: 250
Ingredients Equipment Method Nutrition Notes

Ingredients
  

For the Whipped Base
  • 1 cup Cottage Cheese For a tangy twist, substitute with Greek yogurt.
  • 1/2 cup Pumpkin Puree Ensure it's pure pumpkin without added sugar.
  • 1 tablespoon Honey Feel free to swap with maple syrup for a vegan alternative.
  • 1/2 teaspoon Cinnamon Consider using pumpkin pie spice for an extra seasonal kick.
  • 1/4 teaspoon Vanilla Extract Omit for a more straightforward taste.
For the Crunch
  • 1/4 cup Granola Substitute with nuts or seeds for a gluten-free option.

Equipment

  • High-speed blender

Method
 

Step-by-Step Instructions
  1. Blend the Base Ingredients: In a high-speed blender, combine 1 cup of cottage cheese, ½ cup of pumpkin puree, 1 tablespoon of honey, ½ teaspoon of cinnamon, and ¼ teaspoon of vanilla extract. Blend on high for 30-45 seconds until the mixture is thick and creamy.
  2. Prepare for Serving: Taste the mixture and adjust sweetness if preferred. Transfer to serving bowls, creating a delightful base for your toppings.
  3. Add the Crunch: Sprinkle each bowl with approximately ¼ cup of granola just before serving.
  4. Store Leftovers: Store in an airtight container for up to 3 days. Keep granola separate until ready to enjoy again.

Nutrition

Serving: 1bowlCalories: 250kcalCarbohydrates: 30gProtein: 21gFat: 6gSaturated Fat: 3gPolyunsaturated Fat: 1gMonounsaturated Fat: 2gCholesterol: 15mgSodium: 200mgPotassium: 300mgFiber: 4gSugar: 8gVitamin A: 4500IUVitamin C: 2mgCalcium: 150mgIron: 1mg

Notes

For the best experience, prepare and serve just before eating to enjoy the creamy base and crunchy toppings.

Tried this recipe?

Let us know how it was!

Mini German Pancakes Recipe: Fluffy Bites of Morning Joy

November 24, 2025 by Grace Snow Leave a Comment

Stepping into my kitchen on a busy Sunday morning, the aroma of melting butter and eggs wafting through the air instantly lifts my spirits. I can’t wait to share my beloved Mini German Pancakes Recipe with you—a delightful twist on traditional breakfast fare that’s both quick and deceptively simple. These fluffy bite-sized treats are perfect for lazy brunches or hectic weekdays, plus they’re fully customizable to suit any palate. Picture a golden brown pancake that’s light and airy, with a tender bite—ideal for topping with fresh fruits, maple syrup, or even a sprinkle of cinnamon for that extra punch. Want to make it gluten-free? No problem! With endless variations, these pancakes will quickly become your go-to breakfast delight. Curious to dive in? Let’s get cooking!

Why are Mini German Pancakes Special?

Fluffy Texture: Each pancake puffs up beautifully in the oven, creating a light and airy bite that’s a joy to savor.

Versatile Toppings: Cut down the morning chaos—these pancakes are just waiting for your favorite toppings, from fresh fruits to whipped cream.

Quick and Easy: With a simple blend of ingredients, you can whip up this delightful breakfast in no time, perfect for busy mornings!

Customizable Options: Whether you prefer gluten-free alternatives or want to mix in spices like cinnamon for a warming touch, the options are endless.

Crowd-Pleasing Delight: Ideal for family brunches or gatherings, everyone loves these adorable pancakes that bring smiles to the table!

Mini German Pancakes Recipe Ingredients

For the Batter

  • All-purpose flour – Provides structure for the pancakes; can substitute with whole wheat flour for a healthier version.
  • Milk – Adds moisture and richness; use almond milk for a dairy-free alternative.
  • Large eggs – Binds the ingredients and adds richness; room temperature eggs yield better consistency.
  • Sugar – Adds sweetness to the batter; can reduce quantity or substitute with honey or agave nectar.
  • Vanilla extract – Enhances flavor with a sweet aroma; almond extract can be used for variation.
  • Salt – Balances flavors; essential for enhancing taste in baked goods.
  • Butter – Adds richness and prevents sticking; use coconut oil for a dairy-free option.

For Serving

  • Maple syrup – Drizzle over pancakes for that classic touch.
  • Fresh fruits – Top with berries or sliced bananas for a refreshing contrast.
  • Powdered sugar – Dust lightly for an elegant finish that enhances sweetness.
  • Whipped cream – Indulge with a dollop for extra creaminess and flavor.

With this Mini German Pancakes Recipe, you can customize flavors and toppings to suit your taste, turning every breakfast into a delightful adventure!

Step‑by‑Step Instructions for Mini German Pancakes Recipe

Step 1: Preheat the Oven
Start by preheating your oven to 400°F (200°C). While the oven is heating, place a muffin tin inside to warm up. This step is crucial, as a hot muffin tin will help the Mini German Pancakes puff up beautifully. Allow about 10 minutes for the oven to reach the desired temperature.

Step 2: Blend the Batter
In a blender, add the all-purpose flour, milk, large eggs, sugar, vanilla extract, and salt. Blend everything together until the mixture is smooth and well combined; this should take about 30 seconds. Your batter should be thick yet pourable, creating a luscious base for your Mini German Pancakes.

Step 3: Prepare the Muffin Tin
Once the oven has preheated, carefully remove the hot muffin tin with oven mitts to avoid burns. Add ½ tablespoon of butter to each muffin cup, letting it melt completely. The melted butter will not only add richness but also prevent the pancakes from sticking, ensuring a perfect release when they're done baking.

Step 4: Fill the Muffin Cups
Pour the batter into each prepared muffin cup, filling them about ¾ full. This will leave enough room for the Mini German Pancakes to puff up while baking. You should hear a gentle sizzle as the batter hits the hot butter, assuring you that you're on the right track to making these delightful treats.

Step 5: Bake the Pancakes
Place the muffin tin back in the oven and bake the Mini German Pancakes for 15-20 minutes. You'll know they are done when they have puffed up beautifully and turned a lovely golden brown. Keep an eye on them to prevent over-baking, as the texture should be airy and light.

Step 6: Serve Warm
Once baked, remove the muffin tin from the oven and allow the Mini German Pancakes to cool slightly before gently removing them. Serve these delicious bites warm, topped with your favorite ingredients like maple syrup, fresh fruits, or a sprinkle of powdered sugar for that perfect finishing touch!

Make Ahead Options

These Mini German Pancakes are perfect for meal prep enthusiasts! You can prepare the batter up to 24 hours in advance, storing it in an airtight container in the refrigerator. This allows the flavors to meld beautifully while saving you precious time on busy mornings. Additionally, you can bake the pancakes ahead and store them in the fridge for up to 3 days; simply reheat them in the oven for a few minutes before serving to ensure they retain their delightful fluffiness. To maintain quality, avoid overmixing the batter and let the pancakes cool before refrigerating. With a little prep, you'll have these fluffy breakfast delights ready to go whenever you need them!

How to Store and Freeze Mini German Pancakes

Fridge: Store leftover Mini German Pancakes in an airtight container for up to 3 days. Reheat them in the microwave or pop them in the toaster for a quick breakfast.

Freezer: For longer storage, freeze pancakes in a single layer on a baking sheet until firm, then transfer to an airtight container. They can last up to 3 months, perfect for easy breakfasts!

Reheating: To enjoy frozen Mini German Pancakes, simply microwave for 30-60 seconds, or reheat in the oven at 350°F (175°C) for about 10 minutes. Serve with your favorite toppings for a delightful treat!

Expert Tips for Mini German Pancakes

Preheat Properly: Ensure your oven is fully preheated before baking. This helps the pancakes puff up beautifully and achieve that signature airy texture.

Use Room Temperature Ingredients: Take eggs and milk out beforehand. Room temperature ingredients blend more smoothly, creating a better batter for your Mini German Pancakes.

Don’t Overmix: Blend the batter just until smooth. Overmixing can lead to dense pancakes instead of the fluffy, light texture we crave.

Creative Toppings: Experiment with toppings for variety! Fresh berries, yogurt, or a drizzle of chocolate syrup can elevate your Mini German Pancakes to new heights.

Watch the Baking Time: Keep an eye on your pancakes as they bake. Remove them once they turn golden brown to avoid dryness or a chewy texture.

What to Serve with Mini German Pancakes Recipe

The perfect meal is all about harmonizing flavors and textures, and these Mini German Pancakes are no exception!

  • Crispy Bacon: The salty crunch of bacon contrasts beautifully with the fluffy sweetness of the pancakes, creating a delightful balance on your plate. Pairing these two breakfast staples will make your meal irresistible.

  • Fresh Berries: Strawberries, blueberries, or raspberries add a burst of juicy freshness that brightens each bite. Their natural sweetness complements the pancakes perfectly while adding a lovely pop of color.

  • Maple Syrup: A classic pairing, the rich and golden syrup drizzled over the pancakes enhances their flavor and adds a comforting sweetness. It's a simple yet delightful addition that's hard to resist!

  • Whipped Cream: Light and airy whipped cream adds an indulgent touch to your pancakes, elevating them to even greater heights of deliciousness. It’s an excellent choice for brunch gatherings or special occasions!

  • Yogurt Parfait: Layer creamy yogurt with fruits and granola alongside the pancakes for a satisfying contrast in texture and a well-rounded breakfast. This adds nutritious elements while keeping everything light.

  • Honey Drizzle: Replace syrup with a drizzle of honey for a floral sweetness that pairs wonderfully with the vanilla essence of the pancakes. It’s a delightful twist that adds complexity to your breakfast.

  • Powdered Sugar: A light dusting of powdered sugar not only adds sweetness but also gives a rustic, comforting charm to your pancakes. It's the perfect finishing touch for an elegant presentation.

  • Hot Cocoa or Coffee: For a warm drink, serve a cup of rich hot cocoa or freshly brewed coffee alongside your pancakes. The warmth and flavor complement the sweetness of the pancakes while creating a cozy breakfast atmosphere.

Mini German Pancakes Recipe Variations

Feel free to put your own spin on this delightful recipe and customize the flavors to your heart's content!

  • Gluten-Free: Swap all-purpose flour with a gluten-free flour blend to enjoy a lighter pancake guilt-free.

  • Dairy-Free: Use almond milk or any plant-based milk in place of dairy milk for a creamy, lactose-free breakfast.

  • Sweet Enhancements: Add cinnamon or nutmeg to the batter for a warm, cozy flavor that complements your favorite toppings beautifully.

  • Nutty Twist: Stir in some chopped nuts like almonds or walnuts to the batter for added crunch and flavor; they pair wonderfully with maple syrup.

  • Fruitful Addition: Mash in ripe bananas or fold in blueberries for a fruity surprise that brings freshness to every bite.

  • Indulgent Treat: Top with caramel sauce or drizzle chocolate syrup over the mini pancakes for a decadent morning delight that satisfies your sweet tooth.

  • Whipped Cream Wonder: Serve these fluffy pancakes with a generous dollop of whipped cream alongside fresh fruits for a truly indulgent brunch experience.

As you embark on this culinary adventure, don’t hesitate to explore and create your own favorites. After all, breakfast should be a canvas for your imagination! If you're curious for more inspiration, check out these delicious Ricotta Protein Pancakes or consider serving these alongside a flavorful German Potato Salad for a brunch platter that impresses.

Mini German Pancakes Recipe FAQs

How do I know if my ingredients are ripe or fresh?
Absolutely! For the best Mini German Pancakes, ensure your eggs are fresh and are not past their expiration date. Choose milk that is still within its sell-by date and has no off-smells. All-purpose flour should be free of insects, and you’ll definitely want to avoid any dark spots or clumps. If you’re using fruits for toppings, look for firm, brightly colored berries or bananas with minimal brown spots for optimal flavor.

What are the best storage methods for leftover Mini German Pancakes?
Very! You can store your leftover Mini German Pancakes in an airtight container in the fridge for up to 3 days. Be sure to let them cool completely before sealing them, so they remain soft and don’t become soggy. For couples or families, this is a fantastic way to stretch breakfast across several days!

Can I freeze Mini German Pancakes? If so, how?
Of course! Freezing your Mini German Pancakes means you can enjoy this delightful breakfast anytime. First, lay the pancakes in a single layer on a baking sheet and park them in the freezer until firm, usually about 30 minutes. Then, transfer them to an airtight container or a resealable freezer bag, separating layers with parchment paper to prevent sticking. They can last up to 3 months. When you’re ready to enjoy them, reheat in the microwave for 30-60 seconds, or pop them into a preheated oven at 350°F (175°C) for about 10 minutes.

What should I do if my Mini German Pancakes don’t puff up?
Ah, no worries! If they didn’t puff up, it might be due to insufficient preheating or the batter being overmixed. Make sure you preheat your oven and muffin tin thoroughly—around 10 minutes at 400°F (200°C) is ideal. If your batter was mixed too much, try blending it only until smooth next time. And double-check your oven’s temperature. If it’s lower than expected, your pancakes might not rise as they should.

Can people with gluten intolerance enjoy these Mini German Pancakes?
Yes, indeed! You can still enjoy Mini German Pancakes with a simple swap. Use a gluten-free all-purpose flour blend instead of regular flour. Make sure the blend you choose contains xanthan gum, which helps replicate the texture of traditional flour. This way, everyone can delight in these fluffy bites without worry!

What are some allergy considerations for this recipe?
Certainly! The main ingredients to watch out for include dairy and eggs, as those are common allergens. If you’re cooking for someone with these allergies, I recommend using almond milk in place of regular milk and flax eggs as an egg substitute (1 tablespoon ground flaxseed mixed with 3 tablespoons of water equals 1 egg). Be sure to check all packaging for hidden allergens, especially when it comes to baking powder or vanilla extract.

Mini German Pancakes Recipe

Mini German Pancakes Recipe: Fluffy Bites of Morning Joy

Delightful Mini German Pancakes Recipe offers fluffy, bite-sized treats perfect for any breakfast occasion.
Print Recipe Pin Recipe
Prep Time 10 minutes mins
Cook Time 20 minutes mins
Total Time 30 minutes mins
Servings: 4 pancakes
Course: Breakfast
Cuisine: German
Calories: 120
Ingredients Equipment Method Nutrition Notes

Ingredients
  

For the Batter
  • 1 cup all-purpose flour can substitute with whole wheat flour
  • 1 cup milk use almond milk for dairy-free option
  • 3 large eggs room temperature
  • 2 tablespoons sugar can reduce or substitute with honey
  • 1 teaspoon vanilla extract almond extract can be used for variation
  • 1/4 teaspoon salt
  • 1/2 tablespoon butter can use coconut oil for dairy-free option
For Serving
  • 1 cup maple syrup
  • 1 cup fresh fruits such as berries or bananas
  • 1 cup powdered sugar for dusting
  • 1 cup whipped cream for topping

Equipment

  • Muffin tin
  • Blender

Method
 

Step-by-Step Instructions
  1. Preheat your oven to 400°F (200°C). Place a muffin tin inside to warm up for about 10 minutes.
  2. In a blender, blend together all-purpose flour, milk, eggs, sugar, vanilla extract, and salt until smooth, about 30 seconds.
  3. Remove the hot muffin tin and add ½ tablespoon of butter to each muffin cup, letting it melt completely.
  4. Pour the batter into each muffin cup, filling them about ¾ full.
  5. Bake for 15-20 minutes until puffy and golden brown.
  6. Allow to cool slightly before gently removing and serve warm with toppings.

Nutrition

Serving: 1pancakeCalories: 120kcalCarbohydrates: 14gProtein: 3gFat: 6gSaturated Fat: 4gPolyunsaturated Fat: 0.5gMonounsaturated Fat: 2gCholesterol: 80mgSodium: 150mgPotassium: 100mgFiber: 0.5gSugar: 3gVitamin A: 300IUCalcium: 100mgIron: 1mg

Notes

Customize flavors and toppings for an adventurous breakfast experience.

Tried this recipe?

Let us know how it was!

Apple Yogurt Pancakes: Fluffy, Fruity Breakfast Bliss

November 24, 2025 by Grace Snow Leave a Comment

A delightful aroma wafted through my kitchen, instantly transporting me to cherished breakfasts of the past. These Apple Yogurt Pancakes are my go-to recipe for a quick and easy morning meal that never fails to bring a smile. With the natural sweetness from grated apples and the creaminess of yogurt, they are not only light and fluffy but also packed with nutrition. Whipping up these pancakes takes just minutes, allowing you to savor a delicious breakfast without the fuss. Plus, they are perfect for those busy weekdays or leisurely weekends alike. You can easily customize them with your favorite toppings or add-ins! Are you ready to transform your mornings with these scrumptious pancakes?

Why Are Apple Yogurt Pancakes So Amazing?

Fluffy Texture: These pancakes offer an irresistibly light and airy bite, thanks to the perfect balance of yogurt and grated apples.

Quick & Easy: In just a few steps, you can whip up a delicious breakfast that’s ready in under 30 minutes.

Nutritious: Packed with protein from yogurt and fiber from apples, you’ll feel good about starting your day with this wholesome meal.

Customizable: Feel free to experiment with different fruits or spices; try adding chopped nuts or raisins for an extra crunch.

Family Favorite: Perfect for kids and adults alike, these pancakes will have everyone reaching for seconds during breakfast!

If you enjoy fruit-packed breakfasts, why not also check out my Ricotta Protein Pancakes for another delightful option?

Apple Yogurt Pancakes Ingredients

• Get ready to create magic in your kitchen with these wholesome ingredients!

For the Batter

  • All-purpose flour – Provides structure to the pancakes; substitute with whole wheat flour for added fiber.
  • Plain yogurt (Greek or regular) – Adds moisture and richness; use non-dairy yogurt alternatives for a vegan option.
  • Milk – Helps to hydrate the batter; substitute with almond milk or any other non-dairy milk as needed.
  • Grated apple – Infuses natural sweetness and flavor; opt for sweet varieties like Fuji or Honeycrisp for the best results.
  • Large egg – Binds the ingredients together for a thicker batter; can replace with a flax egg for a vegan option.
  • Sugar – Enhances sweetness; reduce or omit if desired, especially if using sweet apples.
  • Baking powder – Provides leavening for light and fluffy pancakes; ensure it’s fresh for best results.
  • Ground cinnamon – Adds a warm, aromatic flavor; can substitute with nutmeg for different flavor nuances.
  • Salt – Balances sweetness and enhances flavors.
  • Vegetable oil – Used for moisture in the batter and frying; can use melted coconut oil for a different taste.

Optional Add-ins

  • Chopped nuts or raisins – Adds texture and additional flavor; a great way to boost nutrition and crunch in your Apple Yogurt Pancakes!

Step‑by‑Step Instructions for Apple Yogurt Pancakes

Step 1: Prepare Dry Ingredients
In a large bowl, whisk together 1 cup of all-purpose flour, 2 teaspoons of baking powder, 1 teaspoon of ground cinnamon, and a pinch of salt until they are well combined. This dry mixture lays the foundation for the fluffy texture of your Apple Yogurt Pancakes, so ensure there are no lumps before moving on.

Step 2: Mix Wet Ingredients
In a separate bowl, combine 1 cup of plain yogurt, 1/2 cup of milk, 1 large egg, 2 tablespoons of sugar, and 2 tablespoons of vegetable oil. Stir these ingredients together until smooth, ensuring everything is well incorporated. This mixture adds richness and moisture to your pancake batter, setting the stage for delightful flavor.

Step 3: Combine Grated Apple
Add 1 cup of finely grated apple to the wet mixture, gently folding it in with a spatula. The grated apple not only provides natural sweetness to your Apple Yogurt Pancakes but also enhances the delightful fruity flavor. Be careful not to overmix; you want to keep some of the airiness in the batter.

Step 4: Combine Mixtures
Slowly pour the wet ingredients into the dry ingredients, gently mixing with a spatula until just combined. Aim for a slightly lumpy texture, as overmixing can lead to dense pancakes. The batter will be thick with chunks of apple, creating a deliciously hearty consistency for your Apple Yogurt Pancakes.

Step 5: Heat the Pan
Preheat your non-stick skillet or griddle over medium heat for about 5 minutes, lightly greasing it with a bit of vegetable oil. The skillet should be hot but not smoking; a drop of water should sizzle and evaporate quickly. This ensures your pancakes cook evenly and develop a lovely golden brown hue.

Step 6: Cook Pancakes
Pour 1/4 cup of batter onto the heated skillet for each pancake. Cook them until bubbles form on the surface, usually around 2-3 minutes. When the edges appear set and you notice a slight browning, it's time to flip them over for that perfect golden finish.

Step 7: Flip
Carefully flip each pancake using a spatula and cook for another 2-3 minutes until they are golden brown on the other side. Be patient and watch for the bounce-back spring when lightly pressed to ensure they are fully cooked and fluffy throughout, delivering the delightful texture you desire.

Step 8: Keep Warm
As you finish cooking the remaining batter, transfer the cooked pancakes to a plate and cover them with a kitchen towel to keep them warm. This way, they will stay cozy and deliciously fluffy, ready to be served to your family or enjoyed with your favorite toppings when all the Apple Yogurt Pancakes are ready!

Expert Tips for Apple Yogurt Pancakes

  • Don’t Overmix: A few lumps are okay! Overmixing can lead to dense pancakes; gentle folding keeps them light and fluffy.

  • Check the Heat: If your pancakes brown too quickly, lower the skillet temperature. This way, they'll cook evenly without burning.

  • Use Fresh Baking Powder: Ensure your baking powder is fresh to achieve maximum fluffiness in your Apple Yogurt Pancakes; stale baking powder won't rise well.

  • Grate Apples Finely: The finer the grated apple, the more evenly distributed the sweetness throughout the batter. This makes each bite delightful!

  • Experiment with Flavors: Try adding different spices like nutmeg or cardamom for a unique twist on flavor. Your family will enjoy discovering new favorites!

Apple Yogurt Pancakes Variations & Substitutions

Feel free to let your creativity shine by customizing your Apple Yogurt Pancakes—with flavors and textures that tantalize your taste buds!

  • Dairy-Free: Use almond or oat milk and non-dairy yogurt for a delicious vegan twist that’s just as creamy.
  • Flavored Yogurt: Swap plain yogurt for vanilla or cinnamon yogurt for an extra layer of flavor that enhances the sweetness.
  • Whole Wheat Flour: Substitute all-purpose flour with whole wheat flour for a heartier, fiber-filled pancake that’s equally delightful.
  • Add Spice: Incorporate ground nutmeg or cardamom alongside the cinnamon for a warm aromatic kick and a cozy breakfast vibe.
  • Nutty Delight: Fold in a handful of chopped walnuts or pecans for a crunchy texture and added nutrition, making each bite a little more exciting.
  • Fruity Twists: Mix in blueberries or bananas in addition to the grated apples for a burst of color and flavor, elevating your pancakes to new heights!
  • Sweetener Alternative: Try replacing sugar with maple syrup or honey for a natural sweetness that pairs perfectly with the apples.
  • Gluten-Free: Use a gluten-free flour blend to cater to dietary needs without sacrificing taste, allowing everyone to enjoy this fabulous breakfast.

And if you're eager for more flavorful breakfast options, my delightful recipe for Chicken Salad Apples will surely satisfy your craving! Happy cooking!

What to Serve with Apple Yogurt Pancakes

Enhance your morning delight with these complementary flavors that perfectly highlight the fruity goodness of Apple Yogurt Pancakes.

  • Crispy Bacon: The savory crunch of bacon beautifully contrasts the sweetness of pancakes, creating a perfect savory-sweet harmony.

  • Maple Syrup Drizzle: A classic choice, the rich, caramel-like flavor of maple syrup adds an indulgent touch to your fluffy pancakes.

  • Fresh Berries: Bright, juicy berries like strawberries or blueberries provide a refreshing tartness that balances the pancake’s sweetness beautifully.

  • Whipped Cream: Light and airy whipped cream transforms your pancakes into a decadent dish, perfect for special occasions or weekend brunches.

  • Yogurt Parfait: Serve alongside a yogurt parfait layered with fruits and granola for a delightful textural contrast that enhances your meal experience.

  • Fresh Fruit Salad: A zesty fruit salad adds a vibrant splash of color, refreshing your palate between bites of the rich pancakes.

  • Chai Tea: Spice up your breakfast experience with a warm cup of chai, whose cinnamon notes harmonize wonderfully with the pancakes’ flavor.

Each pairing creates a unique twist, turning a simple breakfast into a memorable feast that invites everyone to the table!

How to Store and Freeze Apple Yogurt Pancakes

Fridge: Store leftover pancakes in an airtight container in the fridge for up to 2 days. Reheat in the microwave or on a skillet for a warm breakfast delight.

Freezer: Freeze pancakes in a single layer on a baking sheet, then transfer them to a zip-top bag for up to 1 month. They make for a quick and easy breakfast option!

Reheating: When ready to enjoy, reheat frozen pancakes in the microwave for 30 seconds to 1 minute, or toast them for a crispy finish.

Keep Fresh: If you have extra batter, it’s best to cook all of it and store the pancakes, as the batter may not hold up well after a night in the fridge.

Make Ahead Options

These Apple Yogurt Pancakes are a fantastic choice for meal prep! You can mix the dry ingredients (1 cup of flour, 2 teaspoons of baking powder, 1 teaspoon of cinnamon, and a pinch of salt) and store them in an airtight container for up to 3 days. The wet ingredients, including 1 cup of yogurt, 1/2 cup of milk, 1 egg, 2 tablespoons of sugar, and 2 tablespoons of vegetable oil, can be whisked together and kept in the fridge for up to 24 hours. Just remember to grate your apples fresh right before cooking to keep them from browning. When you're ready to serve, simply combine the wet and dry mix, cook, and enjoy a delicious breakfast with minimal effort—perfect for busy mornings!

Apple Yogurt Pancakes Recipe FAQs

How do I choose the right apples for my pancakes?
Absolutely! For the best results, select sweet varieties like Fuji or Honeycrisp. They provide the perfect balance of sweetness and flavor to your pancakes. If you prefer a tart flavor, Granny Smith can add a delightful contrast, but remember to adjust the sugar accordingly!

How should I store leftover Apple Yogurt Pancakes?
Store your leftover pancakes in an airtight container in the refrigerator for up to 2 days. To reheat, simply pop them in the microwave for about 30 seconds or warm them in a skillet for that freshly made taste.

Can I freeze Apple Yogurt Pancakes?
Yes, you can! To freeze, place cooked pancakes in a single layer on a baking sheet and let them cool completely. Once cooled, transfer them to a zip-top bag, separating layers with parchment paper, and store in the freezer for up to 1 month.

What’s the best way to reheat frozen pancakes?
For the best results, reheat your frozen pancakes by placing them in the microwave for 30 seconds to 1 minute. Alternatively, you can toast them in a toaster for a crispy finish. Remember, they’ll be ready in a jiffy, making breakfast a breeze!

Can I make these pancakes gluten-free?
Very! Substitute the all-purpose flour with a 1:1 gluten-free flour blend. Ensure your other ingredients, such as baking powder and yogurt, are gluten-free as well. This way, you can enjoy delicious Apple Yogurt Pancakes without any worries!

Are there any dietary considerations for pets or allergies?
Absolutely! While the pancakes are safe for human consumption, avoid sharing them with pets, especially due to ingredients like milk and eggs that can upset their stomachs. If anyone in your home has allergies, consider using non-dairy yogurt and nut-free options, like apple sauce, as a substitute for additional flavor!

Apple Yogurt Pancakes

Apple Yogurt Pancakes: Fluffy, Fruity Breakfast Bliss

These Apple Yogurt Pancakes are a quick, fluffy breakfast recipe with natural sweetness and nutrition.
Print Recipe Pin Recipe
Prep Time 10 minutes mins
Cook Time 20 minutes mins
Total Time 30 minutes mins
Servings: 4 pancakes
Course: Breakfast
Cuisine: American
Calories: 150
Ingredients Equipment Method Nutrition Notes

Ingredients
  

For the Batter
  • 1 cup all-purpose flour Substitute with whole wheat flour for added fiber.
  • 1 cup plain yogurt Greek or regular, non-dairy alternatives for vegan.
  • 1/2 cup milk Almond milk or other non-dairy milk as needed.
  • 1 cup grated apple Opt for sweet varieties like Fuji or Honeycrisp.
  • 1 large egg Can replace with a flax egg for vegan option.
  • 2 tablespoons sugar Reduce or omit if using sweet apples.
  • 2 teaspoons baking powder Ensure it’s fresh for best results.
  • 1 teaspoon ground cinnamon Can substitute with nutmeg.
  • 1 teaspoon salt Balances sweetness and enhances flavors.
  • 2 tablespoons vegetable oil Can use melted coconut oil for different taste.
Optional Add-ins
  • chopped nuts or raisins Adds texture and additional flavor.

Equipment

  • Mixing bowls
  • Whisk
  • non-stick skillet

Method
 

Instructions
  1. In a large bowl, whisk together flour, baking powder, cinnamon, and salt until well combined.
  2. In a separate bowl, combine yogurt, milk, egg, sugar, and vegetable oil. Stir until smooth.
  3. Add grated apple to the wet mixture and gently fold it in with a spatula.
  4. Slowly pour the wet ingredients into the dry ingredients, gently mixing until just combined.
  5. Preheat your non-stick skillet over medium heat and lightly grease with vegetable oil.
  6. Pour 1/4 cup of batter onto the skillet for each pancake and cook until bubbles form on the surface.
  7. Carefully flip each pancake and cook for another 2-3 minutes until golden brown.
  8. Transfer cooked pancakes to a plate and cover with a kitchen towel to keep warm.

Nutrition

Serving: 1pancakeCalories: 150kcalCarbohydrates: 24gProtein: 4gFat: 4gSaturated Fat: 1gCholesterol: 20mgSodium: 150mgPotassium: 150mgFiber: 2gSugar: 5gVitamin A: 150IUVitamin C: 2mgCalcium: 50mgIron: 1mg

Notes

Experiment with different fruits or spices for additional flavors. These pancakes can easily be customized to suit your taste.

Tried this recipe?

Let us know how it was!

Cozy Chicken Tortellini Soup for Chilly Nights

November 23, 2025 by Grace Snow Leave a Comment

As the chilly evenings settle in, I often find myself craving a bowl of something soul-warming. Enter my Easy Chicken Tortellini Soup! This delightful concoction marries tender pieces of chicken with creamy cheese-filled tortellini in a rich, savory broth that wraps you in comfort. Not only does this recipe come together in a flash—perfect for those busy weeknights—but it also creates a hearty meal that the whole family will adore. With the flexibility to swap in your favorite veggies or gluten-free pasta, this soup can easily cater to any dietary preferences. Care to dive into the cozy richness of this recipe and explore all its delicious variations?

Why Is This Soup So Irresistible?

Comforting, there's nothing like a warm bowl of Chicken Tortellini Soup to chase away the chill. Quick preparation means you'll spend less time cooking and more time enjoying deliciousness. Versatile and easy to customize, swap in your favorite vegetables or gluten-free pasta without missing a beat. Crowd-pleasing appeal guarantees smiles around the dinner table, while the rich, wholesome flavors make it a memorable dish. For a perfect pairing, try it with some crusty bread or a fresh green salad!

Chicken Tortellini Soup Ingredients

Here’s everything you need to create the ultimate cozy meal!

For the Soup

  • Chicken – Provides protein and heartiness; shredded rotisserie chicken can be used for convenience.
  • Tortellini – Acts as the main carbohydrate source, adding a creamy texture; substitute with ravioli or orzo if desired.
  • Broth – The base of the soup that imparts rich flavor; opt for low-sodium for a healthier version.
  • Onion – Adds flavor and sweetness; sauté until golden to enhance its taste.
  • Carrots – Brings natural sweetness and nutrition; chop into small pieces for even cooking.
  • Celery – Adds a crunch and depth of flavor; don't skip this for a classic taste.

For Seasoning

  • Herbs (e.g., thyme, parsley) – Offers aromatic qualities; fresh herbs are preferred when available for a vibrant flavor.
  • Red pepper flakes (optional) – For a hint of heat; adjust to taste based on your spice preference.

Optional Toppings

  • Fresh parsley – Use for garnishing to add a pop of color and freshness to your bowl.

Dive into a world of comfort with this Chicken Tortellini Soup; the perfect quick meal on chilly nights!

Step‑by‑Step Instructions for Chicken Tortellini Soup

Step 1: Sauté the Aromatics
In a large pot over medium heat, add a drizzle of olive oil and heat for about 1 minute. Toss in finely diced onions, carrots, and celery, stirring occasionally for 5–7 minutes until the veggies become tender and fragrant. This flavorful base sets the stage for a delicious Chicken Tortellini Soup.

Step 2: Add the Chicken
Once the vegetables are softened, introduce bite-sized pieces of cooked chicken to the pot. Continue to cook for 3–5 minutes, stirring occasionally, until the chicken heats through and is no longer pink. This step ensures that the flavors meld nicely, making your Chicken Tortellini Soup heartier and more satisfying.

Step 3: Pour in the Broth
Pour in 6 to 8 cups of low-sodium chicken broth, stirring gently to combine. Increase the heat to bring the mixture to a gentle simmer, about 5 minutes. Watch for small bubbles rising to the surface, indicating it's hot enough for the next step. This broth will serve as the flavorful foundation of your cozy soup.

Step 4: Cook the Tortellini
Once the soup is simmering, add the tortellini, which should cook for about 5–7 minutes or until they float to the top and are tender. Stir occasionally to prevent sticking, and keep an eye on your Chicken Tortellini Soup for that delightful al dente texture in the pasta.

Step 5: Season and Garnish
After the tortellini are cooked, season with fresh herbs like thyme and parsley, along with red pepper flakes if desired; stir to incorporate the flavors. Taste and adjust the seasonings as needed, allowing the aromatic essence to enhance your Chicken Tortellini Soup further.

Step 6: Serve and Enjoy
Ladle the steaming Chicken Tortellini Soup into bowls, garnishing with fresh parsley for a burst of color and freshness. Serve hot, preferably with crusty bread or a crisp salad on the side to elevate your cozy meal experience.

Make Ahead Options

These Chicken Tortellini Soup preparations are perfect for busy weeknights! You can chop the vegetables and cook the chicken, storing them in airtight containers up to 3 days in advance. To maintain their deliciousness, refrigerate them separately and add them to the pot right before you pour in the broth to prevent sogginess. The tortellini should be added fresh during cooking for the best texture. When ready to enjoy your comforting soup, simply heat the broth, combine it with the prepped ingredients, and simmer until warmed through. This way, you’ll have a warm, hearty meal with minimal effort, just as satisfying as if it were made from scratch on the spot!

What to Serve with Easy Chicken Tortellini Soup?

As you savor each spoonful of your creamy Chicken Tortellini Soup, consider these delightful pairings that will elevate your cozy meal experience.

  • Crusty Bread:
    Nothing complements a warm bowl of soup better than a slice of crusty bread. It’s perfect for soaking up every last drop of the flavorful broth.

  • Simple Green Salad:
    A fresh salad adds a crisp contrast to the creamy soup. Toss in mixed greens, cherry tomatoes, and a light vinaigrette for a refreshing balance.

  • Garlic Butter Breadsticks:
    Soft, buttery breadsticks with a hint of garlic make for a wonderful side. They bring a delightful chewiness that pairs harmoniously with the soup's richness.

  • Parmesan Crisps:
    These crispy cheese bites add a savory crunch that perfectly complements the creamy tortellini. An excellent appetizer or snack to nibble on as you enjoy your soup.

  • Steamed Broccoli:
    Adding steamed broccoli introduces a nutritious green element to your meal. Its slight bitterness contrasts beautifully with the soup's creamy taste.

  • Herbed Rice:
    A light herb-infused rice can be a lovely side dish to soak up the soup’s broth, creating a full and satisfying meal that warms your heart.

  • Red Wine:
    Consider a glass of smooth red wine to sip alongside this dish. The wine's richness enhances the comforting flavors, making your dining experience even more enjoyable.

  • Chocolate Chip Cookies:
    End your meal on a sweet note with warm, gooey chocolate chip cookies. They contrast the soup’s warmth with comforting sweetness, creating a cozy dining experience.

Each of these pairings enhances the cozy essence of your Easy Chicken Tortellini Soup, ensuring your dinner is not just a meal but a delightful experience!

Chicken Tortellini Soup Variations

Feel free to get creative and tailor your Chicken Tortellini Soup to suit your taste buds!

  • Spicy Kick: Add diced jalapeño during the vegetable sautéing phase for an added layer of warmth. This small twist can elevate your soup into a delightful, spicy experience.

  • Healthier Option: Substitute regular tortellini with whole grain or gluten-free pasta. Your meal remains comforting, but you'll enjoy lighter, wholesome ingredients.

  • Veggie Boost: Toss in nutrient-dense spinach or kale for a pop of color and extra vitamins. These greens just soften beautifully, enhancing both texture and nutrition.

  • Creamy Twist: Stir in a splash of heavy cream or a dollop of cream cheese for a luscious, creamy finish. Your soup will elevate to a cozy bowl of decadence that feels like a warm hug in a dish.

  • Herb Variations: Experiment with fresh basil, dill, or oregano for a vibrant flavor twist. Each herb brings its unique aroma, creating a delightful medley of tastes in your soup.

  • Umami Boost: Add a spoonful of miso paste for an umami punch that enriches the broth's depth. The savory profile will make your Chicken Tortellini Soup even more irresistible!

  • Zesty Lemon: Squeeze fresh lemon juice before serving to brighten and refresh the overall flavors. That zesty note is a wonderful surprise against the rich broth and cheesy tortellini.

If you're looking for more cozy flavors, don't miss trying out our Honey Garlic Chicken or whip up a warming Crock Pot Chicken for another hearty family meal!

How to Store and Freeze Chicken Tortellini Soup

Fridge: Store in an airtight container for up to 3 days. Reheat gently on the stove to maintain the soup's creamy texture, adding fresh tortellini if desired.

Freezer: Soup can be frozen for up to 3 months. Avoid adding tortellini before freezing to prevent mushiness; stir in fresh tortellini during reheating for the best results.

Reheating: For optimal flavor, reheat the soup on the stovetop over medium heat until warmed through. Add a splash of broth if the soup has thickened during storage.

Serving Tips: Pair with crusty bread or a fresh salad when ready to serve, ensuring a comforting, nourishing experience with your Chicken Tortellini Soup.

Expert Tips for Chicken Tortellini Soup

  • Browning Vegetables: Enhance flavor by properly browning your onions, carrots, and celery before adding chicken; it adds a rich, savory base to the soup.

  • Using Frozen Tortellini: If you opt for frozen tortellini, add them during the last 8-10 minutes of simmering to ensure they’re cooked perfectly without losing texture.

  • Freezing Tips: To avoid mushy tortellini when reheating, freeze the soup base without the tortellini. Simply add fresh tortellini while reheating for a perfect meal.

  • Fresh vs. Dried Herbs: Whenever possible, use fresh herbs like parsley and thyme to bring brightness to your Chicken Tortellini Soup; dried herbs can be used in a pinch but won’t pack the same punch.

  • Adjusting Spice Levels: If you enjoy heat, incorporate diced jalapeño or cayenne during sautéing; start with a small amount and adjust to your spice preference for a flavorful kick.

Chicken Tortellini Soup Recipe FAQs

What type of chicken is best for this soup?
I recommend using shredded rotisserie chicken for convenience and flavor! It cooks quickly and adds a delicious savory element to your Chicken Tortellini Soup. If you have leftover cooked chicken at home, feel free to use that instead!

How long can I store Chicken Tortellini Soup in the fridge?
You can store your Chicken Tortellini Soup in an airtight container in the refrigerator for up to 3 days. To reheat, gently warm it on the stove, adding fresh tortellini if desired to keep them from becoming mushy.

Can I freeze Chicken Tortellini Soup?
Absolutely! You can freeze the soup for up to 3 months. To do this, omit the tortellini before freezing. Simply pour the soup base into an airtight container and store it in the freezer. When you're ready to enjoy it, reheat on the stove and stir in fresh tortellini during the last 5-7 minutes of cooking.

What should I do if my soup is too thick?
If your Chicken Tortellini Soup has thickened significantly during storage or cooking, you can simply add a splash of broth or water while reheating. Stir it in gradually until you reach your desired consistency. This will help bring back the creamy texture that makes it so comforting!

Is there a way to make this soup gluten-free?
Yes! For a gluten-free option, substitute the regular tortellini with gluten-free pasta or pick tortellini made from alternative flours. Just be sure to adjust the cooking time according to the pasta you choose, as gluten-free varieties may require different cooking times.

Can pets have any of the ingredients in Chicken Tortellini Soup?
While some ingredients like cooked chicken and carrots can be safe for pets, it's best to avoid giving them soup that contains onions or garlic. These can be harmful to dogs and cats. Always consult your veterinarian before sharing any human food with your furry friends!

Chicken Tortellini Soup

Cozy Chicken Tortellini Soup for Chilly Nights

This Chicken Tortellini Soup is a comforting, quick meal perfect for chilly nights.
Print Recipe Pin Recipe
Prep Time 10 minutes mins
Cook Time 30 minutes mins
Total Time 40 minutes mins
Servings: 4 bowls
Course: Soups
Cuisine: Italian
Calories: 350
Ingredients Equipment Method Nutrition Notes

Ingredients
  

For the Soup
  • 2 cups cooked chicken shredded rotisserie chicken works well
  • 1 package tortellini substitute with ravioli or orzo if desired
  • 6-8 cups low-sodium chicken broth opt for low-sodium for a healthier version
  • 1 medium onion finely diced
  • 2 medium carrots chopped
  • 2 stalks celery chopped
For Seasoning
  • 1 tablespoon fresh herbs (e.g., thyme, parsley) preferably fresh
  • 1 teaspoon red pepper flakes optional
Optional Toppings
  • 2 tablespoons fresh parsley for garnishing

Equipment

  • Large pot

Method
 

Step-by-Step Instructions for Chicken Tortellini Soup
  1. In a large pot over medium heat, add a drizzle of olive oil and heat for about 1 minute. Toss in finely diced onions, carrots, and celery, stirring occasionally for 5–7 minutes until the veggies become tender and fragrant.
  2. Introduce bite-sized pieces of cooked chicken to the pot and cook for 3–5 minutes, stirring occasionally, until the chicken heats through.
  3. Pour in 6 to 8 cups of low-sodium chicken broth, stirring gently, and increase to a gentle simmer for about 5 minutes.
  4. Once simmering, add the tortellini and cook for about 5–7 minutes, or until they float and are tender.
  5. After the tortellini are cooked, season with fresh herbs and red pepper flakes if desired, stirring to incorporate.
  6. Ladle the soup into bowls, garnishing with fresh parsley before serving.

Nutrition

Serving: 1bowlCalories: 350kcalCarbohydrates: 38gProtein: 25gFat: 10gSaturated Fat: 3gPolyunsaturated Fat: 1gMonounsaturated Fat: 5gCholesterol: 70mgSodium: 600mgPotassium: 800mgFiber: 4gSugar: 3gVitamin A: 500IUVitamin C: 5mgCalcium: 150mgIron: 2mg

Notes

For optimal storage, refrigerate in an airtight container for up to 3 days. Freeze for up to 3 months without tortellini to prevent mushiness.

Tried this recipe?

Let us know how it was!

Delicious Mediterranean Chicken Salad for a Healthy Boost

November 23, 2025 by Grace Snow Leave a Comment

As I savored the last bite of a sun-soaked Mediterranean getaway, I knew I needed that burst of flavor back in my kitchen. Enter my Mediterranean Chicken Salad with Greek Yogurt Dressing—a vibrant blend that captures the essence of coastal dining right at your table. This quick and healthy dish harmonizes tender chicken, tangy feta, and a colorful array of crunchy vegetables, all while keeping prep time minimal. Whether you're in need of a satisfying lunch or a crowd-pleasing dish for your next gathering, this salad is a delightful way to add a refreshing twist to your meal routine. Curious about how to whip up this flavorful masterpiece? Let’s dive into the recipe!

Why is this salad a must-try?

Fresh Ingredients: Packed with colorful veggies and lean protein, this salad bursts with nutrition and vibrant flavors.

Versatile Options: Easily customize by adding nuts or dried fruits to suit your preferences or dietary needs.

Quick Prep Time: A complete meal in under 30 minutes, making it perfect for busy weeknights.

Make-Ahead Goodness: Prep this salad in advance and store it for a healthy grab-and-go option throughout the week—best enjoyed within a few days.

Whether you're enjoying it solo or sharing it with friends at a gathering, this Mediterranean Chicken Salad will surely impress. For more delightful recipes, take a peek at my Chicken Salad with Apples for a sweet twist or explore the smoky flavors in my Chipotle Lime Chicken and Rice.

Mediterranean Chicken Salad Ingredients

For the Chicken Salad
• Cooked Boneless Skinless Chicken Breast – The main protein source; you can quickly substitute with rotisserie or canned chicken for convenience.
• Reduced Fat Feta Cheese – Adds creaminess and a tangy flavor; goat cheese works well if you want a richer taste.
• Celery, diced – Provides a satisfying crunch and freshness; feel free to toss in bell peppers for a colorful twist.
• Persian Cucumbers, diced – Offers a mild flavor and crisp texture; regular cucumbers can be used after seeding for similar results.
• Roasted Red Peppers, diced – Adds sweetness and depth; jarred or homemade are both good options.
• Black Olives, diced – Infuses a briny flavor; switching to green olives will give it a different yet delightful taste.
• Red Onions, diced – Delivers sharpness and bite; try using sweet onions for a mellower flavor.

For the Dressing
• Nonfat Greek Yogurt – Acts as the healthy base; sour cream can substitute for added creaminess, if desired.
• Reduced Fat Mayonnaise – Adds richness; you can omit for a lighter dressing or boost the yogurt instead.
• Fresh Dill, chopped – Infuses freshness with a herby note; dried dill can be used, but keep in mind it will be less potent.
• Fresh Parsley, chopped – Elevates the overall flavor; cilantro can provide an interesting twist if you prefer.
• Lemon Juice – Brightens the salad; feel free to swap with lime juice for a unique citrus flavor.
• Onion Powder, Salt, Pepper, Celery Seed – Seasoning that enhances the overall flavor; adjust these to cater to your taste preferences.

This Mediterranean Chicken Salad not only looks appealing but also delivers a delicious taste with every bite. Get ready to enjoy a dish that’s not just healthy, but a true feast for the senses!

Step-by-Step Instructions for Mediterranean Chicken Salad

Step 1: Make the Dressing
In a medium bowl, combine 1 cup of nonfat Greek yogurt with 2 tablespoons of reduced fat mayonnaise, fresh dill, and parsley. Squeeze in the juice of one lemon, then sprinkle in onion powder, salt, pepper, and celery seed. Whisk the mixture for about 2-3 minutes until it’s smooth and creamy, ensuring all ingredients are well integrated.

Step 2: Prepare the Chicken and Vegetables
Next, add 2 cups of shredded cooked boneless skinless chicken breast to the bowl with the dressing. Incorporate 1 cup of diced reduced fat feta cheese, 1 cup of diced celery, and 1 cup of diced Persian cucumbers. Also, fold in ½ cup of diced roasted red peppers, ½ cup of diced black olives, and ½ cup of diced red onions. Mix everything carefully until the chicken and veggies are evenly coated with the dressing.

Step 3: Adjust Seasoning
Taste your Mediterranean Chicken Salad mix and adjust the seasoning as needed. If you prefer more tang, you can add a splash of vinegar or more lemon juice. For extra crunch, consider adding more diced celery or a sprinkle of black pepper. Making sure each bite is flavorful is key to this vibrant salad’s appeal.

Step 4: Chill the Salad
Cover your mixing bowl with plastic wrap or transfer the salad into an airtight container. Refrigerate it for at least one hour, allowing the flavors of the Mediterranean Chicken Salad to meld beautifully. This chilling time also enhances the overall freshness and taste, so be patient!

Step 5: Serve and Enjoy
After chilling, stir the salad gently to redistribute the dressing before serving. Enjoy it on a bed of mixed greens, in a warm pita, or alongside whole-grain crackers for a satisfying meal. Remember, this vibrant Mediterranean Chicken Salad will stay fresh for 3-4 days in the fridge, making it perfect for meal prep!

Mediterranean Chicken Salad Variations

Feel free to get creative and customize your Mediterranean Chicken Salad with these exciting twists and substitutes!

  • Dairy-Free: Use cashew cream instead of yogurt and nutritional yeast for a cheesy flavor without the dairy.

  • Crunchy Add-ins: Toss in chopped walnuts or slivered almonds for an extra crunch and nutty flavor.

  • Fruit Fusion: Incorporate dried cranberries or apricots for a hint of sweetness that complements the savory elements.

  • Herb Variations: Swap fresh parsley for basil or mint for a unique aromatic profile that brightens the salad.

  • Spicy Kick: Add chopped jalapeños or a dash of red pepper flakes to bring heat to each bite.

  • Whole Grains: Serve the salad on a bed of quinoa or brown rice for added fiber and substance.

  • Zesty Citrus: Opt for lime juice instead of lemon for a refreshing twist with a slightly different tang.

  • Mediterranean Feast: Pair with my Crock Pot Chicken Stew for a hearty, comforting meal alongside this zesty salad.

With these variations, your Mediterranean Chicken Salad can transform into something fresh and new each time you make it!

Make Ahead Options

These Mediterranean Chicken Salad ingredients are perfect for meal prep! You can prepare the dressing, combining Greek yogurt, reduced-fat mayonnaise, dill, parsley, lemon juice, and seasonings, up to 24 hours in advance; this allows flavors to deepen. Additionally, chop the vegetables and store them in an airtight container in the fridge for up to 3 days. When you're ready to serve, simply mix the prepped chicken, feta, and roasted red peppers into the dressing, add the chilled veggies, and enjoy a fresh salad that tastes just as delicious as when you made it; this saves you time and effort on busy weeknights!

What to Serve with Mediterranean Chicken Salad

Elevate your meal experience by pairing this bright, flavorful salad with delicious sides that enhance its fresh, zesty profile.

  • Whole Grain Pita Bread: Soft and chewy, it’s perfect for scooping up the salad and adds a hearty touch to your meal.

  • Quinoa Tabbouleh: This herby salad complements the Mediterranean flavors while adding a delightful crunch and refreshing twist to your plate.

  • Grilled Vegetables: Smoky, charred vegetables like zucchini, bell peppers, and eggplant contribute a savory contrast and extra nutrients.

  • Crispy Roasted Potatoes: These golden bites offer a satisfying crunch and a hearty base that pairs beautifully with the lighter salad.

  • Lemonade Iced Tea: A refreshing drink that balances the tanginess of the salad, making each bite feel like a sun-kissed escape.

  • Greek Yogurt Dip with Veggies: The creamy dip is a fantastic accompaniment, perfect for dipping fresh veggies like carrots and cucumbers.

Each of these delightful pairings will usher your Mediterranean Chicken Salad into a full-fledged feast, leaving all your taste buds cheering for more!

Expert Tips for Mediterranean Chicken Salad

• Chicken Cooking: Always poach your chicken gently to retain moisture. Avoid overcooking, which can result in dryness.

• Chilling Magic: Letting the Mediterranean Chicken Salad chill for at least an hour helps the flavors meld beautifully. Don’t rush this step!

• Freshness Matters: Consume the salad within 3-4 days for the best taste and freshness. Store in an airtight container for optimal quality.

• Creative Variations: Feel free to add nuts or dried fruits to elevate the flavor and texture. It keeps the salad exciting with every bite!

• Seasoning Balance: Adjust your seasoning after mixing; some brands of feta can be saltier than others. Taste and tweak as needed for perfect balance.

Storage Tips for Mediterranean Chicken Salad

Fridge: Store the salad in an airtight container for up to 3-4 days to maintain freshness and flavor.

Make-Ahead: Prepping this Mediterranean Chicken Salad in advance allows for quick meals throughout the week. Just keep it chilled until ready to serve.

Freezer: Avoid freezing the whole salad; it's best to freeze only plain cooked chicken. Mix fresh ingredients later for optimal texture and taste.

Reheating: This salad is best served cold. If you prefer it warm, gently warm the chicken separately before mixing it into the salad.

Mediterranean Chicken Salad Recipe FAQs

What should I look for when selecting chicken for the salad?
Absolutely! When choosing chicken, opt for boneless skinless breasts that are plump and free from any dark spots. If you're using rotisserie chicken for convenience, look for one that's moist and flavorful.

How should I store leftovers, and how long will they last?
Very! Store any leftover Mediterranean Chicken Salad in an airtight container in the fridge for up to 3-4 days. If the salad contains any ingredients that can spoil quickly, like cucumbers or yogurt, be sure to consume it sooner for the best flavor and freshness.

Can I freeze Mediterranean Chicken Salad?
Not really! It's best to avoid freezing the entire salad since the textures will not hold up after thawing, especially the Greek yogurt and veggies. If you're preparing ahead, consider freezing only plain cooked chicken, which can be thawed and combined with fresh ingredients later for optimal taste and texture.

What if I have leftovers that I want to use later?
To get the most from your leftovers, keep the salad components separate. Store the chicken mixed with only non-perishable ingredients in the freezer. Then, let it thaw in the fridge overnight and combine it with fresh veggies and dressing just before serving, ensuring a delightful meal with every bite!

Are there any dietary considerations for this salad?
Absolutely! For those with dietary restrictions, consider swapping the Greek yogurt for a dairy-free alternative like almond or coconut yogurt. If you have nut allergies, double-check any optional ingredients like nuts or dried fruits. Always read labels to ensure they meet your dietary needs.

Is this salad suitable for meal prep?
Indeed! This Mediterranean Chicken Salad is perfect for meal prep. You can prepare it in advance and store it for healthy grab-and-go lunches during the week. Just remember, for the best quality and freshness, consume it within 3-4 days, and keep it in an airtight container.

Mediterranean Chicken Salad

Delicious Mediterranean Chicken Salad for a Healthy Boost

This Mediterranean Chicken Salad is a vibrant blend of tender chicken, tangy feta, and crunchy vegetables, perfect for a healthy meal.
Print Recipe Pin Recipe
Prep Time 30 minutes mins
Chilling Time 1 hour hr
Total Time 1 hour hr 30 minutes mins
Servings: 4 cups
Course: Salads
Cuisine: Mediterranean
Calories: 350
Ingredients Equipment Method Nutrition Notes

Ingredients
  

For the Chicken Salad
  • 2 cups shredded cooked boneless skinless chicken breast can substitute with rotisserie or canned chicken
  • 1 cup reduced fat feta cheese goat cheese can be used for a richer taste
  • 1 cup diced celery can also add bell peppers
  • 1 cup diced Persian cucumbers regular cucumbers can be used if seeded
  • ½ cup diced roasted red peppers jarred or homemade are both good
  • ½ cup diced black olives green olives can be used for a different taste
  • ½ cup diced red onions sweet onions can be used for a mellower flavor
For the Dressing
  • 1 cup nonfat Greek yogurt sour cream can be substituted
  • 2 tablespoons reduced fat mayonnaise can omit for a lighter dressing
  • 2 tablespoons fresh dill, chopped dried dill can be used but is less potent
  • 2 tablespoons fresh parsley, chopped cilantro can be used for a different flavor
  • 1 tablespoon lemon juice lime juice can be substituted
  • to taste onion powder for seasoning
  • to taste salt for seasoning
  • to taste pepper for seasoning
  • to taste celery seed for seasoning

Equipment

  • medium bowl
  • Whisk
  • Airtight Container

Method
 

Step-by-Step Instructions
  1. In a medium bowl, combine nonfat Greek yogurt with reduced fat mayonnaise, fresh dill, and parsley. Squeeze in the juice of one lemon, add onion powder, salt, pepper, and celery seed. Whisk for about 2-3 minutes until smooth.
  2. Add shredded chicken, feta cheese, diced celery, and diced cucumbers to the dressing. Fold in roasted red peppers, black olives, and red onions. Mix until coated.
  3. Taste and adjust seasoning as needed. Consider adding vinegar or more lemon juice if you like tang, or extra celery for crunch.
  4. Cover the bowl or transfer to an airtight container. Refrigerate for at least one hour to meld flavors.
  5. After chilling, stir gently before serving on mixed greens, in pita, or with whole-grain crackers.

Nutrition

Serving: 1cupCalories: 350kcalCarbohydrates: 15gProtein: 30gFat: 20gSaturated Fat: 5gPolyunsaturated Fat: 1gMonounsaturated Fat: 12gCholesterol: 85mgSodium: 600mgPotassium: 800mgFiber: 3gSugar: 3gVitamin A: 10IUVitamin C: 30mgCalcium: 15mgIron: 8mg

Notes

This salad is best consumed within 3-4 days stored in an airtight container for optimal freshness.

Tried this recipe?

Let us know how it was!

Delicious Thai Chicken Lettuce Wraps for a Quick Healthy Bite

November 23, 2025 by Grace Snow Leave a Comment

As the aroma of sizzling garlic and ginger fills the kitchen, I find myself transported to the bustling streets of Thailand, where every bite dances on the palate. These Thai Chicken Lettuce Wraps are not just a quick and delicious meal; they also offer the unbeatable benefits of being high in protein and naturally low in carbs. With a mere 15 minutes of prep time, you can whip up a plate of these fresh, flavorful wraps that are sure to impress both friends and family. The combination of savory ground chicken, aromatic spices, and crisp vegetables enveloped in tender lettuce leaves creates a satisfying snack or light meal that brings a healthy twist to your dinner table. Curious how you can bring this Thai delight to your kitchen? Let’s dive into the recipe!

Why Are Thai Chicken Lettuce Wraps a Must-Try?

Bursting with flavor, these wraps are a delightful fusion of savory ground chicken, aromatic spices, and fresh vegetables all wrapped in crispy lettuce. Healthy and quick, they come together in just 15 minutes, making them perfect for busy weeknights. Customizable options allow you to easily swap ingredients, like using ground turkey for a lighter dish or adding extra veggies for crunch. Plus, they’re gluten-free, letting you cater to dietary preferences effortlessly. Serve them as a vibrant appetizer or a satisfying snack – your family and friends will love this fresh take on Thai cuisine!

Thai Chicken Lettuce Wraps Ingredients

  • For the Filling

  • Sesame Oil – Adds depth and richness; feel free to use olive oil if preferred.

  • Onion – Provides sweetness and texture; yellow or white onions work best.

  • Garlic – Enhances flavor with a fresh kick; use minced garlic for maximum potency.

  • Ginger – Brings warmth and spice; fresh minced ginger is recommended.

  • Ground Chicken – The main protein source; try ground turkey for a lighter option.

  • Tamari (or Soy Sauce) – Adds umami and saltiness; opt for coconut aminos for gluten-free.

  • Thai Sweet Red Chili Sauce – Offers sweetness and a hint of heat; be sure to choose quality brands.

  • Lime Juice – Brightens the dish with acidity; always use fresh lime juice for the best flavor.

  • Maple Syrup (or Honey) – Adds a touch of sweetness; substitute with agave if keeping it vegan.

  • Cashews – Provide crunch and flavor; raw or roasted/salted cashews work wonderfully.

  • Scallions – Add freshness and color; fresh, chopped scallions are ideal.

  • Cilantro – Offers bright herbal notes; omit if you’re not a fan of the flavor.

  • Carrots – Contribute sweetness and crunch; shredded or julienned carrots are recommended.

  • For Assembly

  • Butter Lettuce – The best option for sturdy wrapping; you can replace it with large leaf lettuce varieties.

  • Sesame Seeds – Use for garnish to add a nutty flavor; this ingredient is optional.

These Thai Chicken Lettuce Wraps ingredients are your gateway to creating a mouthwatering, healthy dish that’s perfect for any occasion!

Step‑by‑Step Instructions for Thai Chicken Lettuce Wraps

Step 1: Make the Pan Sauce
Heat 1 tablespoon of sesame oil in a skillet over medium-high heat. Add diced onion and sauté for about 2–3 minutes until it becomes translucent and fragrant. Next, stir in minced garlic and fresh ginger, cooking for another 2 minutes until the garlic is golden and aromatic, filling your kitchen with delightful scents.

Step 2: Cook Ground Chicken
Introduce 1 pound of ground chicken to the skillet, breaking it apart gently with a wooden spoon. Season it with salt and pepper, and cook for 3–4 minutes. Keep stirring until the chicken turns golden brown with no pink remaining; this ensures it's cooked through for the perfect filling for your Thai Chicken Lettuce Wraps.

Step 3: Prepare the Thai Chili Sauce
In a mixing bowl, combine 3 tablespoons of Tamari (or soy sauce), 2 tablespoons of Thai sweet red chili sauce, the juice of 1 lime, and 1 tablespoon of maple syrup. Whisk the ingredients together until thoroughly blended. This vibrant sauce will add a tangy sweetness that elevates the ground chicken.

Step 4: Combine Chicken and Sauce
Add chopped cashews to the chicken in the skillet and pour in the prepared sauce mixture. Mix well to coat the chicken, then reduce the heat to low and simmer for an additional 2 minutes, allowing the flavors to meld together beautifully while keeping the chicken tender.

Step 5: Finalize the Mixture
Remove the skillet from the heat and fold in 1 cup of shredded carrots, ¼ cup of chopped scallions, and ¼ cup of chopped cilantro. Toss gently until everything is evenly combined, ensuring a deliciously colorful and flavorful filling for your Thai Chicken Lettuce Wraps.

Step 6: Assemble Lettuce Wraps
Take individual butter lettuce leaves and spoon the flavorful chicken mixture into each leaf. Drizzle with any remaining pan sauce and sprinkle with sesame seeds for an added crunch. The fresh, crisp leaves will perfectly wrap around the savory filling, creating mouthwatering Thai Chicken Lettuce Wraps ready to serve!

Make Ahead Options

These Thai Chicken Lettuce Wraps are perfect for meal prep enthusiasts! You can prepare the chicken filling up to 3 days in advance. To do this, simply cook the ground chicken mixture and then let it cool before transferring it to an airtight container; refrigerate to maintain freshness. To prevent the lettuce from wilting, store the butter lettuce leaves separately in a sealed bag with a damp paper towel. When you're ready to serve, simply reheat the chicken filling on the stovetop until warmed through, assemble in the lettuce leaves, and drizzle with extra sauce if desired. This way, you’ll have delicious, healthy wraps ready with minimal effort, making your busy weeknights a breeze!

Expert Tips for Thai Chicken Lettuce Wraps

  • Quality Ingredients Matter: Use fresh, high-quality ingredients like freshly minced garlic and ginger to elevate the flavor of your Thai chicken lettuce wraps significantly.
  • Don’t Overcook the Chicken: Ensure the ground chicken is golden and cooked through but remains juicy. Overcooking can lead to dry filling.
  • Adjust the Sauce: Taste your sauce before adding to the chicken; balance sweetness and saltiness to your liking. Too much sauce can overpower the other flavors.
  • Perfect the Wrap: Choose the right leaves—opt for sturdy butter lettuce to hold the filling well, ensuring a delightful crunch in every bite.
  • Make It Your Own: Experiment with additional veggies or different proteins. Incorporate bell peppers, mushrooms, or try tofu for a vegetarian twist!

Storage Tips for Thai Chicken Lettuce Wraps

  • Fridge: Store any leftover Thai Chicken Lettuce Wraps in an airtight container for up to 2 days. This helps preserve the flavors and prevents spoilage.
  • Freezer: While not recommended for the assembled wraps, you can freeze the ground chicken filling in an airtight container for up to 3 months. Thaw in the fridge before using.
  • Reheating: To reheat the filling, warm it gently in a skillet over low heat until heated through. Assemble fresh wraps with lettuce just before serving for maximum crunch!
  • Assembly Note: For the best texture, assemble your Thai Chicken Lettuce Wraps just before enjoying, as the lettuce may wilt and lose its crispness if stored too long.

Thai Chicken Lettuce Wraps Variations

Feel free to get creative with these wraps and make them your own with these delightful twists!

  • Ground Turkey: Swap ground chicken for ground turkey for a lighter option without sacrificing flavor.
  • Vegetarian Delight: Use a plant-based protein or crumbled tofu for a vegetarian twist that still packs a protein punch.
  • Crunchy Veggie Medley: Add extra vegetables like diced bell peppers or mushrooms for a heartier filling that offers a delicious crunch.
  • Spice It Up: Sprinkle in some chili flakes or add fresh Thai chilies to the chicken mixture for a fiery kick that spice lovers will adore.
  • Nut-Free: Skip the cashews and replace them with sunflower seeds for a crunchy texture without the nuts—perfect for allergy considerations.
  • Fresh Herb Variation: Swap cilantro with fresh basil or mint for a garden-fresh, aromatic experience that can completely change the flavor profile.
  • Sauce Twist: Drizzle with peanut sauce instead of the chili sauce for a nutty, creamy addition that complements the overall dish beautifully.
  • Zesty Citrus: Add a splash of orange juice to the mixture for a bright, zesty flavor that elevates your wraps and brings a fresh twist on tradition.

For more delicious chicken recipes, check out my Honey Garlic Chicken Thighs or explore the vibrant flavors of Chipotle Lime Chicken and Rice. Enjoy your cooking adventure!

What to Serve with Thai Chicken Lettuce Wraps

As you savor the delightful burst of flavors from your wraps, consider these delicious pairings to elevate your meal to the next level.

  • Coconut Rice: The subtle sweetness and creamy texture of coconut rice provide a perfect balance to the savory chicken filling. Serve it alongside to soak up any extra sauce.

  • Fresh Mango Salad: A refreshing mango salad adds a sweet and tangy crunch, complementing the savory flavor of the wraps. Toss in some lime juice and chili for a zesty kick.

  • Thai Peanut Sauce: Drizzling Thai peanut sauce over the wraps introduces nutty flavors and creaminess that enhance the overall dining experience. It's an irresistible dip that everyone will love!

  • Grilled Vegetables: Charred veggies like bell peppers and zucchini bring a smoky dimension to your meal. Their rich texture pairs perfectly with the tender chicken filling in the wraps.

  • Cucumber Salad: This light, crisp cucumber salad provides a refreshing crunch and acidity, balancing the savory aspect of the dish. Add a splash of rice vinegar for zest.

  • Thai Iced Tea: Sweet and creamy, this popular beverage is a delightful way to cleanse your palate between bites, enhancing the overall experience of your meal.

  • Mochi Ice Cream: For dessert, consider serving refreshing mochi ice cream. The chewy texture and delicate flavors create a delightful end to a truly satisfying meal!

  • Spring Rolls: Fresh vegetable spring rolls serve as an excellent starter, introducing bright flavors and textures to build excitement before diving into your Thai chicken lettuce wraps.

Thai Chicken Lettuce Wraps Recipe FAQs

How do I select the best lettuce for Thai Chicken Lettuce Wraps?
Absolutely! For the best results, choose butter lettuce. It has sturdy, flexible leaves that easily cradle the filling without tearing. Look for vibrant green leaves free of dark spots or blemishes for optimal freshness, ensuring a satisfying crunch. If butter lettuce isn't available, you can substitute with romaine or iceberg lettuce for a similarly crisp texture.

What’s the best way to store leftover Thai Chicken Lettuce Wraps?
To keep your leftovers fresh, store any unused chicken filling in an airtight container in the refrigerator. It will stay good for up to 2 days. I recommend keeping the lettuce separate to maintain its crispness, as once assembled, the wraps can get soggy. Just assemble them fresh when you're ready to eat!

Can I freeze the filling for the Thai Chicken Lettuce Wraps?
Yes, you can! To freeze the filling, allow it to cool completely before transferring it to an airtight container or a zip-top freezer bag. It can be frozen for up to 3 months. For the best results, thaw the filling overnight in the refrigerator and then reheat it gently in a skillet before serving, ensuring a quick meal that retains its flavors.

What should I do if the filling is too salty?
If you find that the filling for your Thai Chicken Lettuce Wraps is too salty, don't panic! First, you can balance the flavor by adding a touch more lime juice or maple syrup to cut the saltiness. Alternatively, try incorporating additional cooked ground chicken or veggies to dilute the salt concentration. Mixing in shredded carrots or extra cashews can also help absorb some saltiness, leading to a deliciously satisfying dish.

Are there any allergies I should consider with this recipe?
Indeed! If you or your guests have allergies, make sure to double-check labels on sauces like Tamari or soy sauce, as they may contain wheat or gluten. For a gluten-free option, coconut aminos are a wonderful substitute. Additionally, if there are nut allergies, you can skip the cashews or replace them with sunflower seeds for added crunch without the risk!

Can I make this recipe vegan or vegetarian?
Very! You can easily adapt the Thai Chicken Lettuce Wraps to be vegan or vegetarian. Simply substitute the ground chicken with a plant-based protein such as crumbled tofu, tempeh, or even lentils. For added flavor, sauté these alternatives in the same spices as the chicken to keep that authentic taste. This way, everyone can enjoy a delicious, healthy wrap!

Thai Chicken Lettuce Wraps

Delicious Thai Chicken Lettuce Wraps for a Quick Healthy Bite

These Thai Chicken Lettuce Wraps are a healthy, quick, and delicious meal bursting with flavor and high in protein.
Print Recipe Pin Recipe
Prep Time 15 minutes mins
Cook Time 10 minutes mins
Total Time 25 minutes mins
Servings: 4 wraps
Course: Appetizers
Cuisine: Thai
Calories: 250
Ingredients Equipment Method Nutrition Notes

Ingredients
  

For the Filling
  • 1 tablespoon sesame oil Adds depth and richness; feel free to use olive oil if preferred.
  • 1 medium onion Provides sweetness and texture; yellow or white onions work best.
  • 3 cloves garlic Enhances flavor with a fresh kick; use minced garlic for maximum potency.
  • 1 tablespoon ginger Brings warmth and spice; fresh minced ginger is recommended.
  • 1 pound ground chicken The main protein source; try ground turkey for a lighter option.
  • 3 tablespoons Tamari (or soy sauce) Adds umami and saltiness; opt for coconut aminos for gluten-free.
  • 2 tablespoons Thai sweet red chili sauce Offers sweetness and a hint of heat; be sure to choose quality brands.
  • 1 tablespoon lime juice Brightens the dish with acidity; always use fresh lime juice for the best flavor.
  • 1 tablespoon maple syrup (or honey) Adds a touch of sweetness; substitute with agave if keeping it vegan.
  • 1 cup cashews Provide crunch and flavor; raw or roasted/salted cashews work wonderfully.
  • ¼ cup scallions Add freshness and color; fresh, chopped scallions are ideal.
  • ¼ cup cilantro Offers bright herbal notes; omit if you’re not a fan of the flavor.
  • 1 cup carrots Contribute sweetness and crunch; shredded or julienned carrots are recommended.
For Assembly
  • 1 head butter lettuce The best option for sturdy wrapping; you can replace it with large leaf lettuce varieties.
  • sesame seeds Use for garnish to add a nutty flavor; this ingredient is optional.

Equipment

  • Skillet

Method
 

Step-by-Step Instructions
  1. Heat 1 tablespoon of sesame oil in a skillet over medium-high heat. Add diced onion and sauté for about 2–3 minutes until it becomes translucent and fragrant.
  2. Stir in minced garlic and fresh ginger, cooking for another 2 minutes until the garlic is golden and aromatic.
  3. Introduce 1 pound of ground chicken to the skillet, breaking it apart gently. Season with salt and pepper, and cook for 3–4 minutes.
  4. Add chopped cashews to the chicken in the skillet and pour in the prepared sauce mixture. Mix well to coat the chicken.
  5. Remove from heat and fold in 1 cup of shredded carrots, ¼ cup of chopped scallions, and ¼ cup of chopped cilantro.
  6. Take individual butter lettuce leaves and spoon the flavorful chicken mixture into each leaf. Drizzle with remaining pan sauce and sprinkle with sesame seeds.

Nutrition

Serving: 1wrapsCalories: 250kcalCarbohydrates: 14gProtein: 24gFat: 12gSaturated Fat: 2gPolyunsaturated Fat: 3gMonounsaturated Fat: 7gCholesterol: 85mgSodium: 600mgPotassium: 400mgFiber: 3gSugar: 5gVitamin A: 500IUVitamin C: 15mgCalcium: 50mgIron: 2mg

Notes

Assemble your Thai Chicken Lettuce Wraps just before enjoying for maximum crunch and freshness.

Tried this recipe?

Let us know how it was!
  • « Previous Page
  • 1
  • …
  • 97
  • 98
  • 99
  • 100
  • 101
  • …
  • 180
  • Next Page »

Welcome!

Hi, I’m Grace, a Sydney-based home cook with a passion for bold flavors and trending ingredients. Whether you’re a busy beginner or a seasoned foodie, you’ll find dishes here that are fresh, fun, and full of flavor.

More about me

Popular Recipes

  • Butter Pecan Cookies
    Irresistibly Soft Butter Pecan Cookies for Cozy Moments
  • Decadent Turtle Bars
    Decadent Turtle Bars: Indulge in Sweet Gooey Perfection
  • Salted Caramel Butter Bars
    Decadent Salted Caramel Butter Bars You Can't Resist
  • Easy Italian Pasta Salad
    Easy Italian Pasta Salad: A Summer Delight to Share

Footer

↑ back to top

About

  • Privacy Policy
  • Disclaimer
  • Terms & Conditions

Newsletter

  • Sign Up! for emails and updates

Contact

  • About me
  • Contact me

Copyright © 2025 TastyTrendIngredients