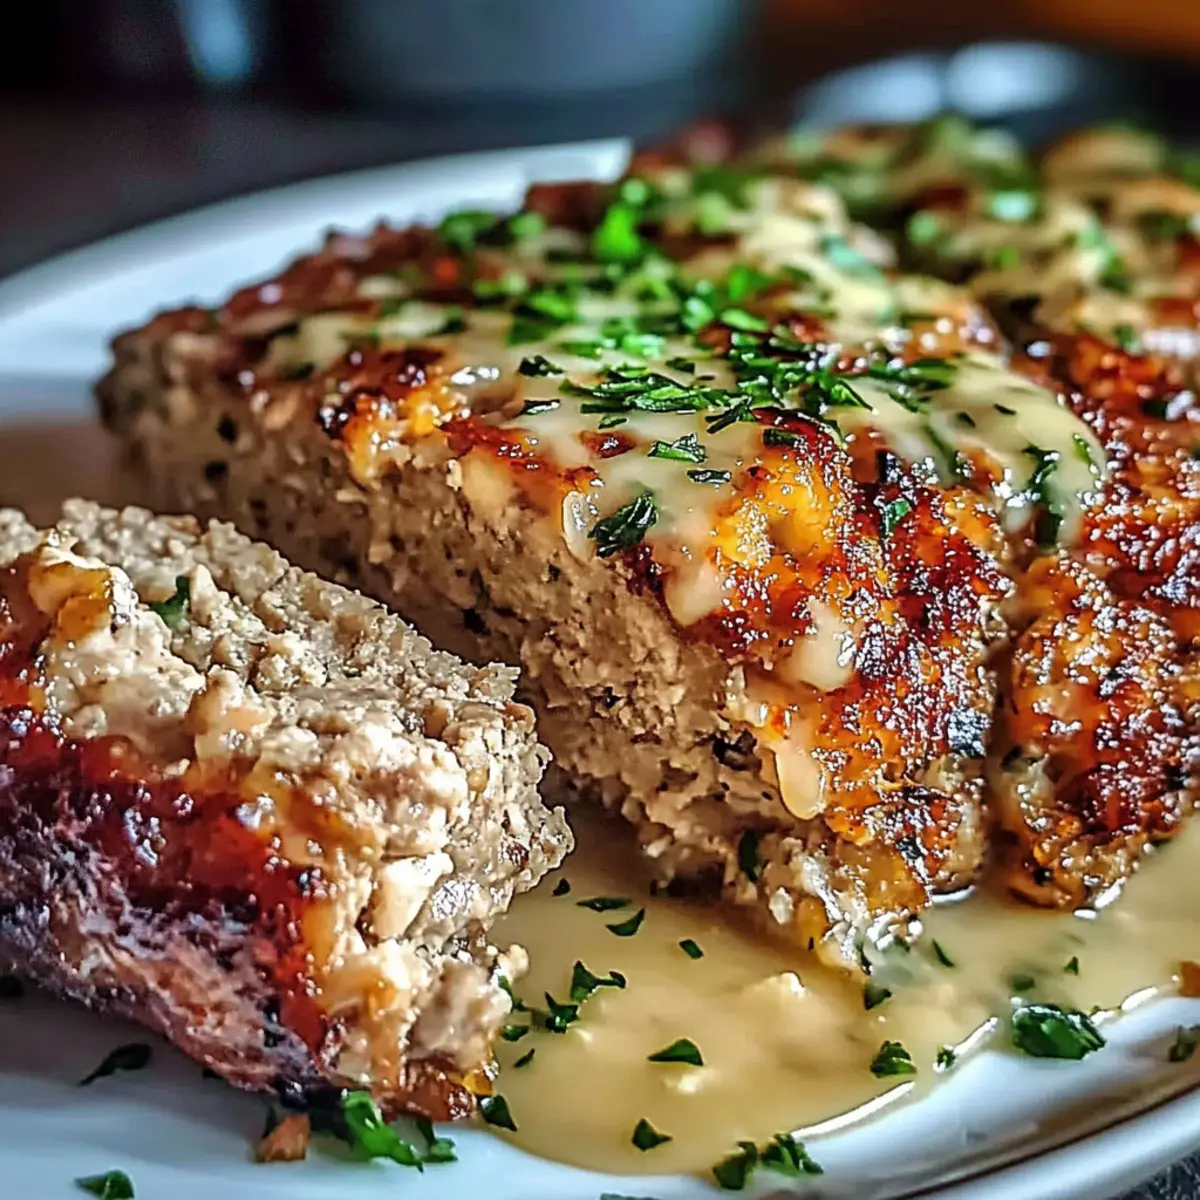
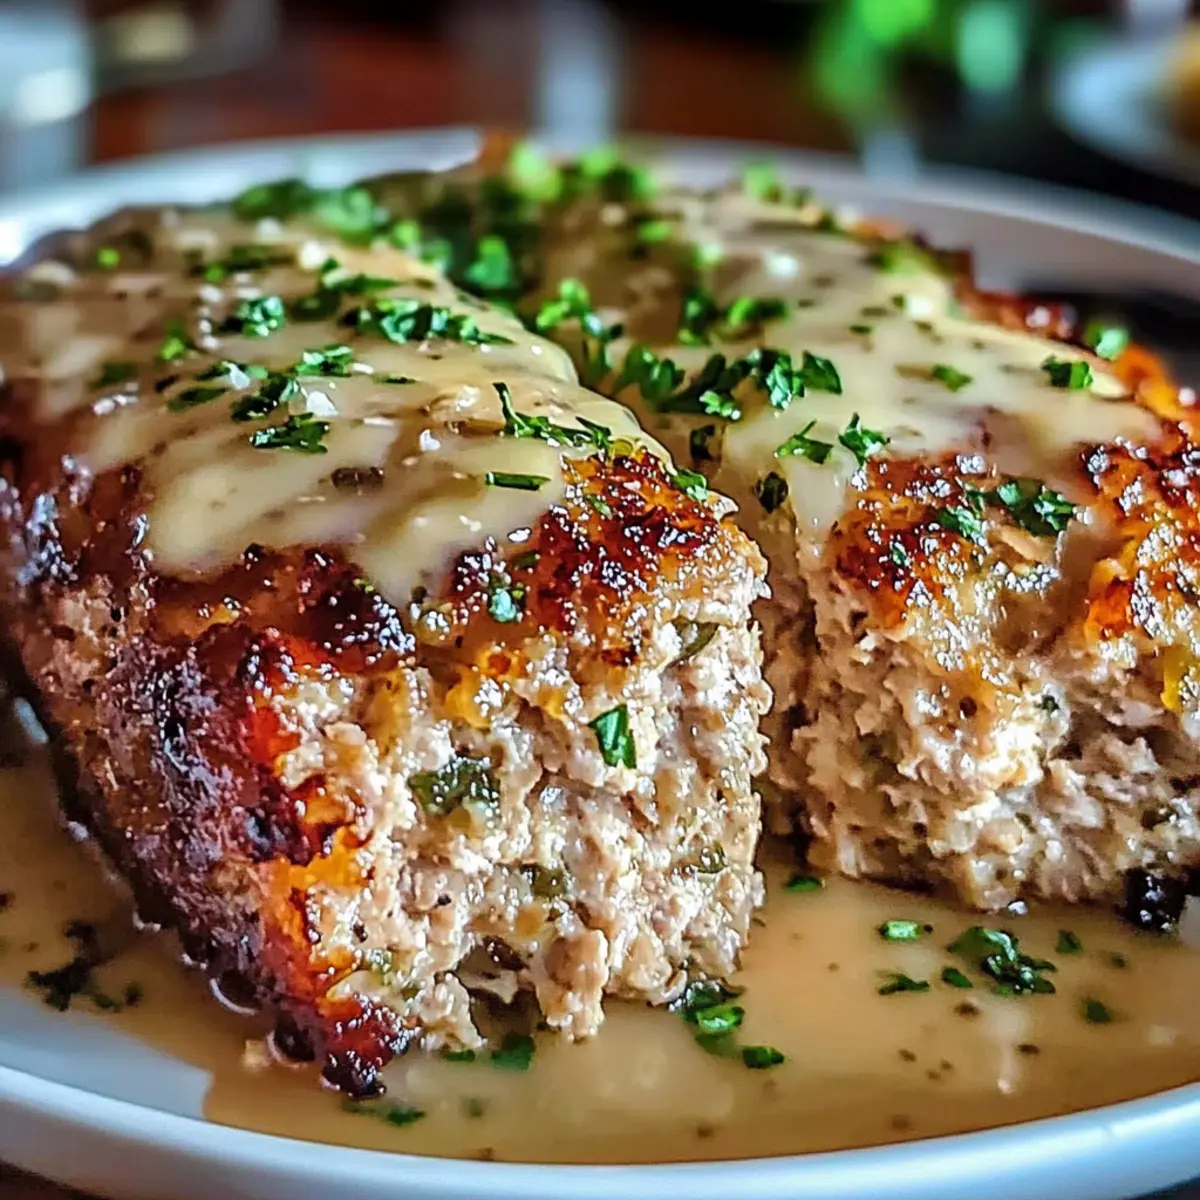
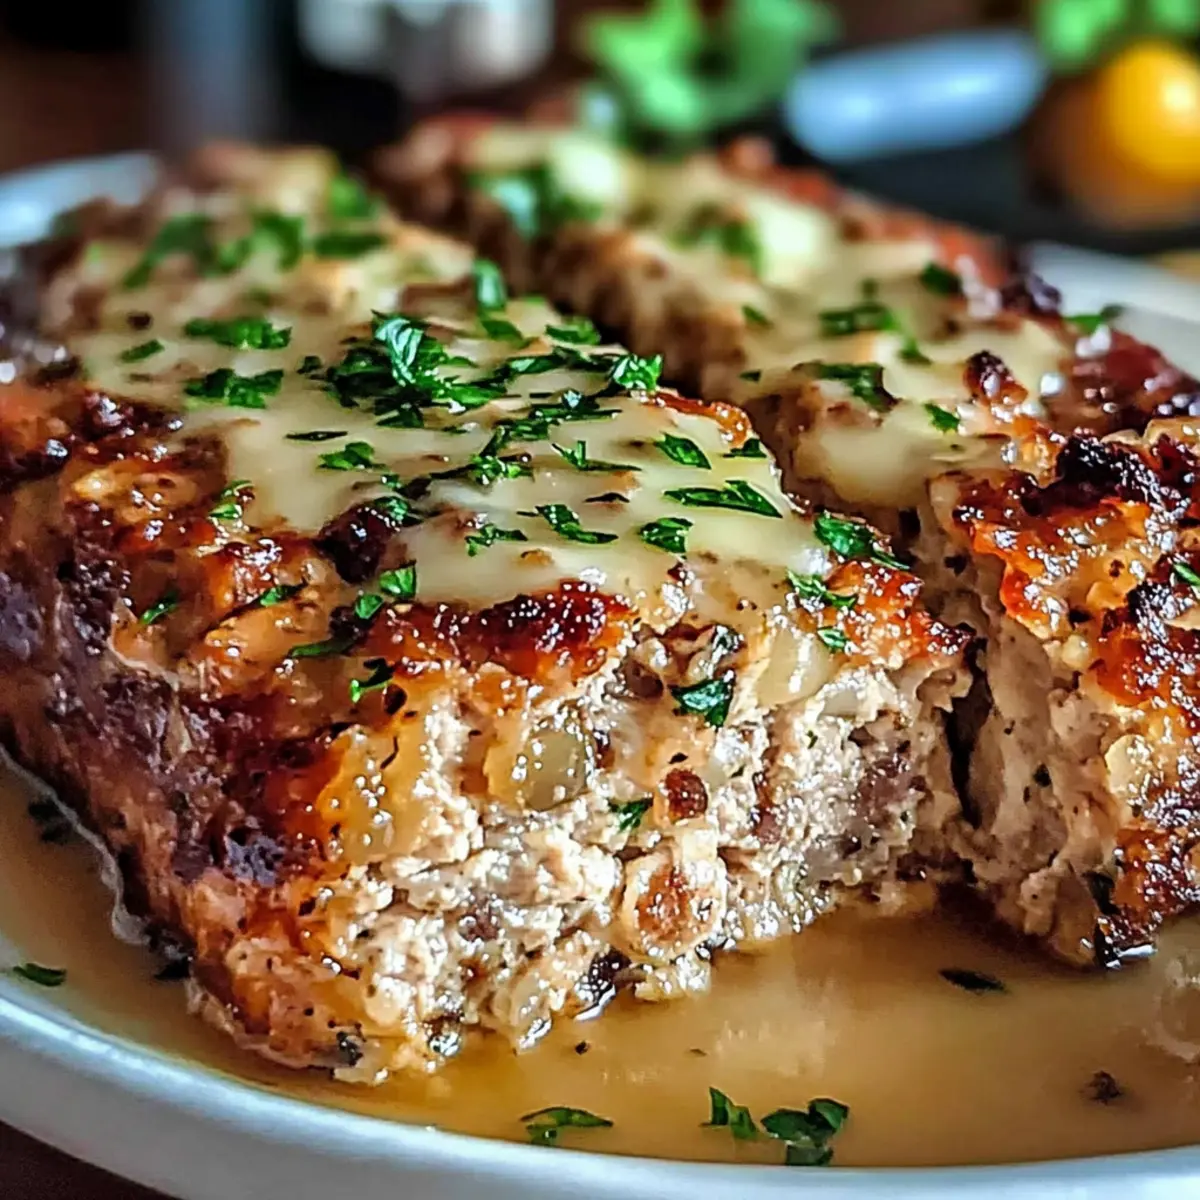
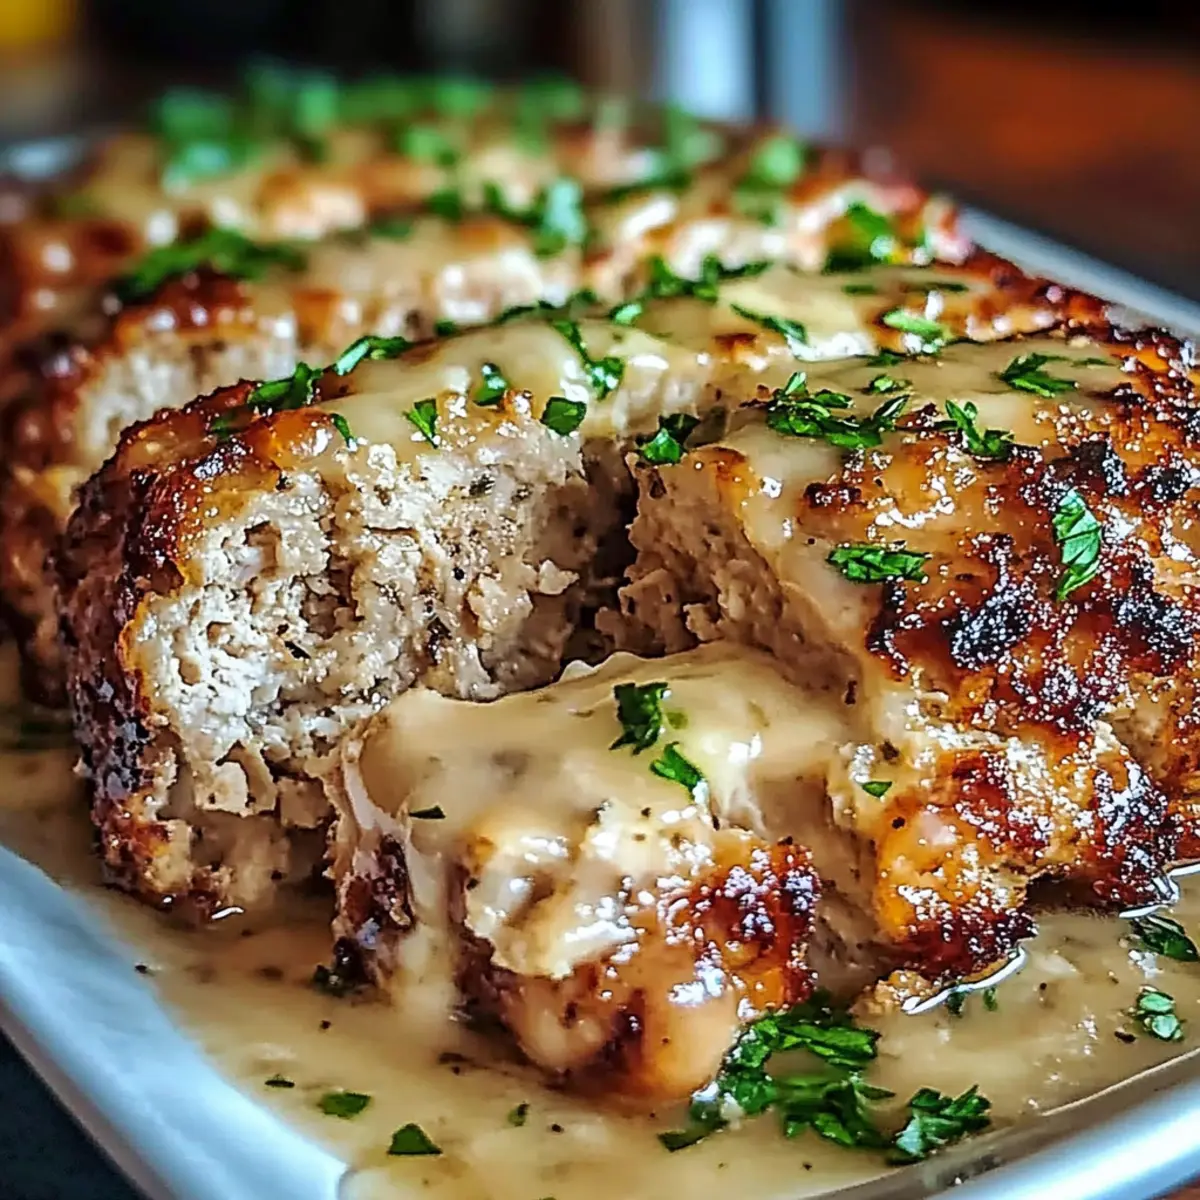
tastytrendingredients

  • Home
  • Recipes
    • Appetizers
    • Breakfast
    • Dessert
    • Dinner
    • Drinks
    • Salads
    • Snacks
    • Soups
  • About me
  • Contact me
menu icon
go to homepage
  • Home
  • Recipes
    • Appetizers
    • Breakfast
    • Dessert
    • Dinner
    • Drinks
    • Salads
    • Snacks
    • Soups
  • About me
  • Contact me
search icon
Homepage link
  • Home
  • Recipes
    • Appetizers
    • Breakfast
    • Dessert
    • Dinner
    • Drinks
    • Salads
    • Snacks
    • Soups
  • About me
  • Contact me
×

Comforting Chicken Pot Pie Casserole for Busy Weeknights

January 2, 2026 by Grace Snow Leave a Comment

In a whirlwind of pots and pans, the air fills with the comforting aroma of home-cooked goodness, just like a scene from a cherished family dinner. Today, I’m excited to share my Hearty Chicken Pot Pie Casserole, a dish that captures the essence of nostalgia without the fuss of pastry-making. This recipe is perfect for those busy weeknights when you crave something warm and satisfying. Not only is it a family-friendly option that pleases even the pickiest eaters, but you’ll love that it's quick and easy to pull together. Picture vibrant veggies, tender chicken, and creamy sauce all nestled beneath a golden, flaky biscuit topping—it's like bringing a hug from your kitchen to the dinner table. Are you ready to wander into the world of cozy comfort food? Let’s get started!

Why is this Chicken Pot Pie Casserole a must-try?

Quick and Easy: This recipe simplifies your dinner routine with effortless prep and minimal cooking time.

Irresistible Flavor: A rich, creamy sauce infused with tender chicken and vibrant veggies ensures every bite is bursting with taste.

Family-Friendly: Whether dealing with picky eaters or hungry teens, this comforting dish pleases everyone around the table.

Hearty Satisfaction: With egg noodles and biscuits baked to perfection, you’ll get that delightfully filling sensation without all the fuss.

Versatile Options: Want to switch things up? Substitute turkey for leftover magic or use fresh veggies for added flavor!

This Chicken Pot Pie Casserole is not just a meal; it's an experience that invites everyone to gather and enjoy. Ready to make a delicious memory?

Chicken Pot Pie Casserole Ingredients

For the Casserole

  • Egg Noodles – Provides structure and bulk to the casserole; use medium egg noodles and undercook them by 2 minutes to prevent mushiness.
  • Cream of Chicken Soup – Adds a rich, savory base; can be substituted with homemade or lower sodium options for a healthier choice.
  • Cream of Mushroom Soup – Offers additional creaminess and flavor depth; try cream of celery if you’re looking for an alternative.
  • Chunk Chicken Breast – The main protein source; canned or rotisserie chicken works well, around 2-3 cups is needed for the dish.
  • Frozen Mixed Vegetables – Contributes color and nutrition; ensure they are thawed and drained to avoid excess moisture in the casserole.
  • Chicken Broth – Enhances the flavor and moisture; opt for low-sodium broth for a healthier option.
  • Shredded Cheddar Cheese – Adds creaminess and a cheesy flavor; any melting cheese like Monterey Jack can serve as a delicious substitute.
  • Sour Cream – Provides tanginess and a smooth texture; make sure to mix well to prevent any lumps.
  • Garlic Powder, Salt, Black Pepper – Essential seasonings for enhancing the overall flavor profile; feel free to adjust these to your taste.

For the Biscuit Topping

  • Biscuits – Serve as a complementary side; opt for Pillsbury Grands for convenience or your favorite homemade biscuit recipe.

This Chicken Pot Pie Casserole is a delightful nod to comfort food, packed with wholesome ingredients that bring warmth to your dining table.

Step‑by‑Step Instructions for Chicken Pot Pie Casserole

Step 1: Cook the Noodles
Begin by boiling a large pot of water over high heat. Once the water is at a rolling boil, add the medium egg noodles and cook them according to the package instructions until just al dente, about 6-8 minutes. Drain the noodles and return them to the pot, ready for mixing with the creamy filling.

Step 2: Combine Ingredients
In the same pot with the noodles, add the cream of chicken soup and cream of mushroom soup, stirring until smooth. Next, incorporate the chunked chicken breast, thawed mixed vegetables, chicken broth, shredded cheddar cheese, and sour cream. Season the mixture with garlic powder, salt, and pepper to taste. Mix thoroughly until all ingredients are evenly combined.

Step 3: Heat the Mixture
Place the pot over medium heat and allow the chicken pot pie casserole filling to heat through. Stir occasionally for about 15-20 minutes until the mixture is hot and the cheese has melted completely. You’re looking for a bubbly consistency, signaling that it’s ready for the next step.

Step 4: Prepare for Baking
While the filling is heating, preheat your oven to 375°F (190°C). Once the casserole filling is bubbling, transfer it into a greased casserole dish. Smooth the top with a spatula to ensure even distribution, preparing it for the biscuit topping that will bake to golden perfection.

Step 5: Add Biscuit Topping
Take your favorite biscuits, such as Pillsbury Grands, and place them on top of the casserole filling with a little space in between, allowing them room to expand as they bake. This creates a delicious, flaky topping for your Chicken Pot Pie Casserole, enhancing the comforting vibe of this family-friendly dish.

Step 6: Bake to Perfection
Carefully place the casserole in the preheated oven and bake for 25-30 minutes. Keep an eye on the biscuits; they should rise and turn golden brown. The casserole will bubble around the edges, indicating that it’s ready to be taken out for serving.

Step 7: Rest Before Serving
Once baked, remove the casserole from the oven and let it rest for 10-15 minutes. This resting time allows the filling to thicken slightly, making it easier to serve and enjoy. The delightful aroma of the Chicken Pot Pie Casserole will entice your family to gather around the table, ready to dig in!

Expert Tips for Chicken Pot Pie Casserole

  • Noodle Preparation: Undercook your noodles slightly to avoid mushiness during baking; aim for 6 minutes instead of the full time.
  • Vegetable Treatment: Always thaw and drain frozen vegetables thoroughly to prevent a watery casserole that can ruin texture.
  • Sour Cream Mixing: Mix sour cream well with the other wet ingredients to avoid any lumps, ensuring a creamy consistency throughout.
  • Resting Time: Let the casserole sit for 10-15 minutes after baking to allow the rich filling to thicken for cleaner servings.
  • Reheating: For best results, when reheating leftovers, cover and warm at 350°F for even heating and to maintain creaminess of the Chicken Pot Pie Casserole.

What to Serve with Chicken Pot Pie Casserole

As the aroma of the Chicken Pot Pie Casserole wafts through your home, imagine a spread that complements its hearty warmth and cozy flavors.

  • Steamed Green Beans: Freshly steamed green beans add a delightful crunch and vibrant color, enhancing the casserole's comforting essence. A squeeze of lemon over the beans elevates the dish, offering a zesty balance.

  • Simple Side Salad: A crisp salad with mixed greens, cucumber, and cherry tomatoes brings freshness to the table, cutting through the richness of the casserole. Drizzle with a light vinaigrette for a refreshing contrast.

  • Creamy Mashed Potatoes: Soft and buttery mashed potatoes provide an extra layer of comfort. The creamy texture pairs beautifully with the casserole for a satisfying meal that warms the soul.

  • Cheesy Garlic Bread: This indulgent pairing adds a crispy texture and rich flavor that complements the creamy filling. Toasted with fresh herbs, it’s perfect for scooping up every last bit of the casserole.

  • Cornbread Muffins: Sweet, warm cornbread muffins add a delightful hint of sweetness and a soft, crumbly texture. They are perfect for soaking up the creamy sauce from the casserole.

  • Fruit Crisp Dessert: For a sweet finish, consider a warm fruit crisp topped with vanilla ice cream. The warm, fruity flavors beautifully balance out the savory comfort of the casserole, creating a well-rounded meal.

  • Chilled White Wine: A glass of chilled Sauvignon Blanc enhances the meal's flavors while providing a refreshing touch that perfectly complements the casserole's richness.

  • Lemonade or Iced Tea: A glass of lemonade or sweet iced tea feels like summer on your table, providing a sweet and slightly tangy contrast that pairs nicely with the hearty dish.

These pairings transform your Chicken Pot Pie Casserole into a complete, delightful family meal, perfect for any gathering. Enjoy the feast!

Make Ahead Options

This Chicken Pot Pie Casserole is perfect for meal prep, allowing you to enjoy its cozy flavors without the rush on busy weeknights! You can assemble the filling and store it in the refrigerator for up to 3 days; just be sure to keep it well-covered to maintain freshness. If you prefer, prepare the filling and freeze it for up to 3 months. When you’re ready to enjoy it, simply thaw overnight in the fridge and reheat on the stove until warm, then transfer to a baking dish, top with biscuits, and bake as directed. This make-ahead approach ensures that your casserole is just as delicious when serving, saving you valuable time while still delivering that comforting home-cooked experience.

Chicken Pot Pie Casserole Variations

Feel free to make this recipe your own with tasty spins and substitutes that will delight your family's palate!

  • Turkey Swap: Replace chicken with leftover turkey for a post-holiday twist that brings new life to your leftovers. It’s a delicious way to use what you have and create a heartwarming dish.

  • Fresh Veggies: Opt for seasonal fresh vegetables instead of frozen ones for brighter flavors and added nutrition. Think broccoli, carrots, and peas for a colorful and vibrant addition!

  • Ranch Flavor: Swap out the garlic powder for ranch seasoning to introduce a tangy kick to the dish. This ensures a burst of flavor in every bite and can entice even the pickiest eaters.

  • Lower-Calorie Option: Use Greek yogurt instead of sour cream to cut calories without sacrificing creaminess. This swap keeps your casserole rich while boosting protein—perfect for those mindful of their health.

  • Dairy-Free Delight: Replace cream of chicken and mushroom soups with coconut milk and a homemade roux for a dairy-free version. This ensures everyone at the table can dig in without restriction.

  • Cheesy Boost: Mix in a blend of your favorite cheeses, like mozzarella and gouda, instead of just cheddar for a creamier and more indulgent experience. It's like hosting a cheese party right in your casserole!

  • Spicy Kick: Want some heat? Add diced jalapeños or red pepper flakes to the filling for an exciting burst of flavor. This twist is perfect for those who enjoy a little fire in their meals.

  • Herb Infusion: Fresh herbs like thyme or parsley can replace standard seasonings to uplift the dish's flavor profile. A sprinkle of herbs brings freshness that makes this comforting casserole sing.

These variations give you the freedom to tailor your Chicken Pot Pie Casserole to your liking! If you’re craving more chicken options, check out Crock Pot Chicken or explore the flavors of Chicken Adobo Again for more inspiration. Cooking should be fun, so let your taste buds lead the way!

How to Store and Freeze Chicken Pot Pie Casserole

Fridge: Store leftovers in an airtight container for up to 4 days. The flavors actually improve overnight, making it a tasty option for meal prep.

Freezer: You can freeze Chicken Pot Pie Casserole for up to 3 months. Just make sure it's cooled completely before transferring to an airtight container.

Reheating: To reheat, thaw in the fridge overnight, then cover and warm in the oven at 350°F for about 25-30 minutes until heated through.

Covering: Always cover your casserole with plastic wrap or foil to prevent freezer burn and maintain the casserole’s delicious flavor.

Chicken Pot Pie Casserole Recipe FAQs

What type of egg noodles should I use for this casserole?
I recommend using medium egg noodles in this Chicken Pot Pie Casserole to provide the right structure and bulk. Undercook them by about 2 minutes, allowing for perfect texture after baking.

How long can I store leftovers in the fridge?
You can store leftover Chicken Pot Pie Casserole in an airtight container for up to 4 days. The flavors actually improve overnight, making it a great option for make-ahead meals.

Can I freeze Chicken Pot Pie Casserole?
Absolutely! You can freeze Chicken Pot Pie Casserole for up to 3 months. Make sure it’s completely cooled and then place it in an airtight container. When you’re ready to enjoy it again, thaw it overnight in the fridge before reheating.

What should I do if my casserole is too watery?
This can happen if you don't drain the frozen vegetables properly. Always thaw and drain those before mixing into your casserole. If it still seems watery, let it bake a bit longer uncovered to allow some of the moisture to evaporate.

Are there any dietary considerations with this recipe?
It's always wise to check for food allergies, especially since this dish contains dairy (cheese and sour cream). For gluten-free options, consider using gluten-free egg noodles and ensure any canned soups used are also gluten-free.

How do I keep my biscuit topping from getting soggy?
To prevent a soggy biscuit topping, ensure your casserole filling isn’t too wet before adding the biscuits on top. Also, try to use a quality biscuit product that bakes well, like Pillsbury Grands, and place them with a little space between them to allow steam to escape.

Chicken Pot Pie Casserole

Comforting Chicken Pot Pie Casserole for Busy Weeknights

This Chicken Pot Pie Casserole combines tender chicken, vibrant veggies, and a creamy sauce topped with biscuits, making it perfect for busy weeknights.
Print Recipe Pin Recipe
Prep Time 20 minutes mins
Cook Time 30 minutes mins
Resting Time 15 minutes mins
Total Time 1 hour hr 5 minutes mins
Servings: 6 servings
Course: Dinner
Cuisine: American
Calories: 350
Ingredients Equipment Method Nutrition Notes

Ingredients
  

For the Casserole
  • 8 ounces medium egg noodles undercook by 2 minutes
  • 1 can cream of chicken soup can substitute with lower sodium or homemade options
  • 1 can cream of mushroom soup alternatively use cream of celery
  • 2-3 cups chunk chicken breast canned or rotisserie chicken
  • 2 cups frozen mixed vegetables thawed and drained
  • 1 cup chicken broth opt for low-sodium for a healthier option
  • 1 cup shredded cheddar cheese or any melting cheese like Monterey Jack
  • 1/2 cup sour cream mix well to prevent lumps
  • 1 teaspoon garlic powder
  • 1 teaspoon salt to taste
  • 1 teaspoon black pepper to taste
For the Biscuit Topping
  • 1 pack biscuits Pillsbury Grands or your favorite recipe

Equipment

  • Large pot
  • casserole dish

Method
 

Step‑by‑Step Instructions
  1. Begin by boiling a large pot of water over high heat. Add the medium egg noodles and cook until just al dente, about 6-8 minutes. Drain and return to the pot.
  2. In the same pot, add the cream of chicken soup and cream of mushroom soup, stirring until smooth. Add chicken breast, mixed vegetables, chicken broth, cheddar cheese, and sour cream. Season with garlic powder, salt, and pepper. Mix thoroughly.
  3. Place over medium heat and allow filling to heat through, stirring occasionally for 15-20 minutes until hot and cheese is melted.
  4. Preheat your oven to 375°F (190°C). Transfer filling into a greased casserole dish and smooth the top.
  5. Place biscuits on top of the casserole filling with space in between for expansion as they bake.
  6. Bake in the preheated oven for 25-30 minutes until biscuits rise and turn golden brown, with bubbling around the edges.
  7. Remove from oven and let rest for 10-15 minutes before serving.

Nutrition

Serving: 1servingCalories: 350kcalCarbohydrates: 40gProtein: 20gFat: 15gSaturated Fat: 7gPolyunsaturated Fat: 0.5gMonounsaturated Fat: 0.5gCholesterol: 50mgSodium: 900mgPotassium: 500mgFiber: 3gSugar: 2gVitamin A: 600IUVitamin C: 10mgCalcium: 200mgIron: 1mg

Notes

This Chicken Pot Pie Casserole is ideal for meal prep and leftovers; flavors improve overnight.

Tried this recipe?

Let us know how it was!

Crispy Chinese Peanut Butter Chicken You'll Love at Home

January 2, 2026 by Grace Snow Leave a Comment

"Would you believe me if I said that a simple dinner could evoke fond memories of bustling buffet nights with family and friends? In my kitchen, I often find myself craving that perfect crunch, and this Chinese Peanut Butter Chicken recipe satisfies that nostalgia like no other. Imagine crispy chicken thighs bathed in a creamy peanut sauce that's both sweet and savory, all whipped up in just 30 minutes. Not only is this dish a fantastic twist on a beloved classic, but it also makes for an impressive main course that’s sure to impress—whether it's a casual weeknight dinner or a grand gathering. Are you ready to dive into your new favorite comfort food? Let’s get started!"

Why will you adore this dish?

Flavor Explosion: Each bite of Chinese Peanut Butter Chicken combines crispy, juicy chicken with a rich, creamy peanut sauce that’s both sweet and savory.

Quick and Easy: Whip this up in just 30 minutes—perfect for busy weeknights when you crave something comforting yet impressive.

Crowd-Pleaser: Whether you're hosting friends or enjoying a family dinner, this dish is bound to be a hit everyone will love.

Versatile Options: Feel free to substitute chicken thighs with leaner breasts or even add colorful veggies for a modern twist. Pair it with steamed rice or my delicious Honey Garlic Chicken for a full spread.

Nostalgic Treat: Recreate the magic of buffet dining at home. This dish brings back memories of those delightful family dinners without the hassle of restaurant queues!

Chinese Peanut Butter Chicken Ingredients

For the Sauce

  • Peanut Butter – Provides creamy texture and flavor; opt for processed (like Jif) for the best consistency.
  • Sweetened Condensed Milk – Adds essential sweetness and thickness; don’t just swap for sugar, as results will vary.
  • Soy Sauce – Brings umami and saltiness to the sauce, balancing the overall flavor.
  • Water – Used to thin the sauce for a perfect creamy consistency; add gradually to avoid over-thinning.

For the Chicken

  • Boneless Chicken Thighs – Chosen for their juiciness; flatten to ensure even cooking and that perfect bite.
  • Eggs – Create an egg wash, helping the breadcrumbs stick beautifully to the chicken.
  • All-Purpose Flour – Thickens the egg wash; a vital component for breadcrumb adherence and crispiness.
  • Salt – A simple ingredient that enhances the overall flavor of the dish.
  • Panko Breadcrumbs – Excellent for a light, crispy texture; can use regular breadcrumbs in a pinch.

By following this ingredient list, you're one step closer to making your cravings for Chinese Peanut Butter Chicken a reality!

Step‑by‑Step Instructions for Chinese Peanut Butter Chicken

Step 1: Prepare Sauce
In a medium mixing bowl, combine 1 cup of peanut butter, 1/4 cup of sweetened condensed milk, 2 tablespoons of soy sauce, and 1/4 cup of water. Stir this mixture vigorously until it achieves a creamy, smooth consistency. If it's too thick for your liking, add a bit more water slowly until you reach the desired thickness. Set this luscious peanut sauce aside for later use.

Step 2: Prepare Chicken
Take 1.5 pounds of boneless chicken thighs and place them on a cutting board. Using a meat mallet, gently flatten each thigh to about ½-inch thickness; this helps ensure even cooking and a tender bite. Once flattened, season the chicken lightly with salt to enhance its flavor. This step is crucial for the perfect Chinese Peanut Butter Chicken.

Step 3: Make Egg Wash
In a separate bowl, whisk together 2 eggs, 1/4 cup of all-purpose flour, and a pinch of salt. Add 1 tablespoon of the prepared peanut butter sauce to this mixture to help with adhesion. Aim for a smooth consistency, which will create the ideal coating for the chicken. This egg wash ensures that your panko breadcrumbs will stick beautifully.

Step 4: Dredge Chicken
Take each piece of the prepared chicken and first dip it into the egg wash, ensuring it’s completely coated. Next, transfer the chicken into a plate filled with panko breadcrumbs, pressing gently to ensure the breadcrumbs adhere well. You’re aiming for a nice, crispy coating that will give your Chinese Peanut Butter Chicken its signature crunch.

Step 5: Fry Chicken
In a deep frying pan or Dutch oven, heat vegetable oil to 350°F (175°C). Carefully place the breaded chicken pieces in the hot oil, frying them in batches for about 2-3 minutes on each side, or until they turn a beautiful golden brown. Use a slotted spoon to remove the chicken and let it drain on a wire rack, allowing excess oil to drip away.

Step 6: Serve
Once all the chicken is cooked, slice the crispy pieces into bite-sized portions. Arrange them on a serving plate and generously drizzle the creamy peanut sauce over the top. For a perfect finishing touch, feel free to garnish with chopped green onions or sesame seeds if desired. Dive into this delightful Chinese Peanut Butter Chicken that’s sure to bring smiles to your table!

Expert Tips for Chinese Peanut Butter Chicken

  • Perfect Temperature: Ensure your oil is heated to 350°F for crispy chicken. Oil that's too cool can lead to greasy, soggy results.

  • Thick Sauce Fix: If your peanut sauce ends up too thick, simply whisk in additional water gradually to get that desired creamy consistency.

  • Smooth Egg Wash: For an even coat on the chicken, make sure your egg wash is lump-free. This prevents breadcrumbs from falling off during frying.

  • Batch Frying: Fry the chicken in small batches to maintain oil temperature and ensure even cooking, resulting in perfectly crispy Chinese Peanut Butter Chicken every time.

  • Storage Tips: Keep leftover chicken and sauce separate in the fridge to maintain crispiness; reheat separately to preserve texture.

  • Veggie Boost: Feel free to add colorful bell peppers or snap peas to the dish for extra flavor and nutrition while giving it a modern twist.

Variations & Substitutions

Get ready to tailor your Chinese Peanut Butter Chicken masterpiece to suit your taste buds and dietary needs!

  • Dairy-Free: Swap sweetened condensed milk with a coconut cream alternative for a luscious, dairy-free sauce.
  • Nut-Free: Replace peanut butter with sunbutter or almond butter for a delicious nut-free option that still packs flavor.
  • Vegetable Boost: Add bell peppers and snap peas into the frying mix for a colorful, nutritious twist that enhances the dish.
  • Spicy Kick: Add a teaspoon of sriracha or chili paste to the peanut sauce for a fiery upgrade that tantalizes the palate.
  • Air Fryer Alternative: Use an air fryer for a healthier version by lightly spraying breaded chicken before cooking until crispy and golden.
  • Gluten-Free: Ensure you use gluten-free soy sauce and certified gluten-free panko breadcrumbs for a safe dining delight.
  • Baked Version: Bake the breaded chicken in a preheated oven at 400°F for 20-25 minutes instead of frying for a lighter take.

Not only will these variations keep your meals exciting, but they also allow the adaptability that home-cooked comfort food truly deserves. Enjoy exploring the possibilities, and if you’re in the mood for something different, check out my delectable Crockpot Butter Chicken or the colorful Chipotle Lime Chicken and Rice for more culinary adventures!

How to Store and Freeze Chinese Peanut Butter Chicken

Fridge: Store leftover chicken and peanut sauce separately in airtight containers for up to 3 days to maintain their textures and flavors.

Freezer: For longer storage, freeze cooked chicken in a single layer on a baking sheet until solid, then transfer to a zip-top bag for up to 2 months.

Reheating: Reheat chicken in a preheated oven at 350°F for about 10-15 minutes or until heated through, adding a splash of water to the sauce to keep it creamy.

Thawing: When ready to enjoy, thaw chicken overnight in the fridge; then reheat as directed for your delicious Chinese Peanut Butter Chicken experience.

Make Ahead Options

These Chinese Peanut Butter Chicken bites are perfect for busy meal prep enthusiasts! You can prepare the sauce (peanut butter, sweetened condensed milk, soy sauce, and water) up to 3 days in advance; simply refrigerate it in an airtight container. Additionally, you can flatten and season the chicken thighs, then store them covered in the fridge for up to 24 hours before cooking to keep them tender. When you're ready to enjoy your dish, dredge the chicken in the egg wash and panko, then fry as instructed for that just-fried taste that remains just as delicious! This way, you save precious time while ensuring a flavorful meal with minimal effort.

What to Serve with Chinese Peanut Butter Chicken

Elevate your dining experience with these delightful pairings that complement the scrumptious flavors of your meal.

  • Steamed Rice: The fluffy texture of steamed rice absorbs the rich peanut sauce, making each bite more satisfying and delicious.

  • Stir-Fried Vegetables: A colorful medley of bell peppers, snap peas, and carrots adds a fresh crunch, enhancing the dish's vibrant appeal and nutritional value.

  • Garlic Green Beans: These tender beans bring a fragrant, savory note that perfectly balances the sweetness of the peanut sauce while adding a delightful crunch.

  • Crispy Egg Rolls: The flaky texture and savory filling of egg rolls offer a satisfying contrast to the crispy chicken and creamy sauce—just like at your favorite buffet!

  • Chilled Cucumber Salad: This refreshing side, dressed in a tangy vinaigrette, provides a crunchy, cooling effect that brightens the overall meal.

  • Fruit Smoothie: A light smoothie with banana and mango can act as a sweet counterbalance to the savory chicken, refreshing your palate between bites.

These pairings promise a full symphony of flavors, textures, and colors that will transport you to the essence of buffet dining right in your own home!

Chinese Peanut Butter Chicken Recipe FAQs

What type of peanut butter is best to use?
Absolutely! For this recipe, I recommend using processed peanut butter, like Jif, as it provides a smooth and creamy texture that blends beautifully into the sauce. Avoid natural varieties where oil separates, as they can produce a thicker, less cohesive sauce.

How should I store leftover Chinese Peanut Butter Chicken?
You can store leftover chicken and peanut sauce separately in airtight containers in the fridge for up to 3 days. This method helps maintain their individual textures and prevents the chicken from becoming soggy. When you’re ready to enjoy it again, simply reheat in the microwave or skillet, adding a splash of water to the sauce if necessary to maintain creaminess.

Can I freeze Chinese Peanut Butter Chicken?
Yes, you can! To freeze, place the cooked chicken in a single layer on a baking sheet until solid, then transfer to a zip-top bag for up to 2 months. This helps prevent pieces from sticking together. When you’re ready to eat, thaw the chicken overnight in the fridge, then reheat in a preheated oven at 350°F for about 10-15 minutes until heated through.

Is this dish suitable for those with dietary restrictions?
Very! If you're looking for a gluten-free option, just make sure to use gluten-free panko breadcrumbs and soy sauce. Additionally, this dish can be adjusted to fit a variety of diets—feel free to substitute chicken thighs with lean chicken breasts or even include colorful veggies like bell peppers or snap peas for added nutrition and flavor.

What should I do if my peanut sauce turns out too thick?
If you find your peanut sauce is too thick, don’t worry! Simply whisk in additional water gradually until you achieve your desired creamy consistency. Start with a tablespoon at a time, stirring until it blends smoothly. This way, you ensure that the sauce remains luxurious without losing its delightful peanut flavor.

Chinese Peanut Butter Chicken

Crispy Chinese Peanut Butter Chicken You'll Love at Home

Enjoy this Crispy Chinese Peanut Butter Chicken recipe that combines crispy chicken with a creamy peanut sauce in just 30 minutes.
Print Recipe Pin Recipe
Prep Time 15 minutes mins
Cook Time 15 minutes mins
Total Time 30 minutes mins
Servings: 4 servings
Course: Dinner
Cuisine: Chinese
Calories: 500
Ingredients Equipment Method Nutrition Notes

Ingredients
  

For the Sauce
  • 1 cup peanut butter opt for processed (like Jif) for the best consistency
  • 1/4 cup sweetened condensed milk adds essential sweetness and thickness
  • 2 tablespoons soy sauce brings umami and saltiness to the sauce
  • 1/4 cup water used to thin the sauce for a perfect creamy consistency
For the Chicken
  • 1.5 pounds boneless chicken thighs flatten to ensure even cooking
  • 2 large eggs create an egg wash
  • 1/4 cup all-purpose flour thickens the egg wash
  • 1 teaspoon salt enhances the overall flavor
  • 1 cup panko breadcrumbs excellent for a light, crispy texture

Equipment

  • Mixing Bowl
  • frying pan
  • Meat Mallet
  • Whisk
  • slotted spoon
  • wire rack

Method
 

Step‑by‑Step Instructions
  1. In a medium mixing bowl, combine peanut butter, sweetened condensed milk, soy sauce, and water. Stir until creamy, then set aside.
  2. Take boneless chicken thighs and flatten each to about ½-inch thickness, then season with salt.
  3. In a separate bowl, whisk together eggs, flour, salt, and 1 tablespoon of the peanut butter sauce until smooth.
  4. Dip each chicken piece in the egg wash, then coat with panko breadcrumbs, pressing gently to adhere.
  5. Heat vegetable oil to 350°F (175°C). Fry chicken pieces in batches for 2-3 minutes each side until golden brown, then drain on a wire rack.
  6. Slice the crispy chicken, drizzle with peanut sauce, and garnish with green onions or sesame seeds.

Nutrition

Serving: 1servingCalories: 500kcalCarbohydrates: 30gProtein: 30gFat: 25gSaturated Fat: 5gPolyunsaturated Fat: 10gMonounsaturated Fat: 10gCholesterol: 150mgSodium: 800mgPotassium: 600mgFiber: 2gSugar: 8gVitamin A: 200IUVitamin C: 2mgCalcium: 50mgIron: 2mg

Notes

Store leftover chicken and sauce separately in the fridge for up to 3 days. Reheat the chicken in the oven at 350°F for optimal crispiness.

Tried this recipe?

Let us know how it was!

Homemade Popcorn Chicken: Crispy Joy for Everyone

January 2, 2026 by Grace Snow Leave a Comment

The unmistakable sound of crunching echoed through the kitchen as I pulled the golden-brown bites from the oil—yes, it's time for crispy homemade popcorn chicken! This dish takes me back to carefree days spent sharing laughter and snacks with friends at the mall. Not only is this recipe a true crowd-pleaser, but it’s also a fantastic way to create a memorable family meal or a fun snack for gatherings. With just a handful of ingredients and an easy-to-follow method, you'll have tender, juicy chicken pieces that everyone, from kids to adults, will adore. Ready to whip up a batch of nostalgia? Let’s dive in!

Why Is Homemade Popcorn Chicken a Must-Try?

Comforting Crunch: Every bite of this popcorn chicken offers a nostalgic crunch, reminiscent of your favorite fast-food treats—but way better!

Kid-Friendly: Perfect for family dinners or as snacks for the little ones, it's a guaranteed hit for picky eaters.

Simple Ingredients: With just a few pantry staples, you can create something extraordinary without breaking a sweat.

Versatile Serving Options: Enjoy it plain, drizzle with ranch, or spice things up with buffalo sauce—the possibilities are endless!

Crowd Pleaser: From family gatherings to game nights, this dish brings everyone together, sparking joy and delicious memories.

Feeling adventurous? Try pairing it with a fresh salad or even a side of mac and cheese! Whether you're reminiscing or trying it for the first time, this crispy homemade popcorn chicken is sure to deliver.

Homemade Popcorn Chicken Ingredients

• Get ready to create something delicious!

For the Chicken

  • Boneless Skinless Chicken Breasts – Cut into 1-inch pieces for even cooking and juicy bites.
  • Buttermilk – Marinates the chicken for moisture and tenderness; use milk mixed with lemon juice as a substitute if needed.

For the Coating

  • All-Purpose Flour – Provides the perfect base coating to create that iconic crunch.
  • Salt – Enhances flavor; adjust based on your taste preference.
  • Garlic Powder – Adds a savory kick; onion powder makes a nice substitution for a milder taste.
  • Panko Breadcrumbs – Creates an ultra-crispy texture that elevates the experience; standard breadcrumbs can work if needed.

For Frying

  • Vegetable or Canola Oil – Essential for frying; make sure you have enough for deep frying to ensure even cooking.

Embrace the joy of homemade popcorn chicken with these simple ingredients, and let the crispy magic happen in your kitchen!

Step‑by‑Step Instructions for Homemade Popcorn Chicken

Step 1: Prep Chicken
Begin by cutting the boneless skinless chicken breasts into 1-inch pieces, ensuring they're even for consistent cooking. Pat the chicken pieces dry with paper towels to remove excess moisture, which helps the coating adhere better. This preparation ensures that your homemade popcorn chicken remains crispy and juicy once it is fried.

Step 2: Mix Coatings
In a shallow bowl, combine the all-purpose flour, salt, and garlic powder, whisking until well blended. Prepare two more bowls: one with buttermilk for marinating the chicken and another with panko breadcrumbs for that ultra-crispy coating. This setup allows for a seamless dredging process, making it easier to coat the chicken pieces later.

Step 3: Dredge Chicken
Take each chicken piece and first coat it generously in the seasoned flour, shaking off any excess. Then dip the floured chicken into the buttermilk, letting any extra drip off before pressing it firmly into the panko breadcrumbs. This three-step dredging method ensures your homemade popcorn chicken gets a delightful, crispy exterior.

Step 4: Heat Oil
In a heavy pot, pour in enough vegetable or canola oil for deep frying and heat it to 350°F (175°C). Using a thermometer will help you achieve the right temperature, which is crucial for perfect frying. Once the oil shimmers, it’s ready for the chicken pieces, ensuring a crispy, golden finish.

Step 5: Fry Chicken
Carefully add the coated chicken pieces to the hot oil in batches, taking care not to overcrowd the pot. Fry each batch for 2 to 3 minutes, turning them occasionally until they turn a beautiful golden brown and are cooked through. This will develop that signature crunchy texture of your homemade popcorn chicken.

Step 6: Drain and Serve
Once fried, remove the chicken using a slotted spoon and drain them on paper towels to absorb excess oil. While they’re still warm, sprinkle with a pinch of extra salt to enhance the flavor. Serve your crispy homemade popcorn chicken immediately, paired with your favorite dipping sauces for a delightful treat!

Expert Tips for Homemade Popcorn Chicken

  • Stay Crisp: Keep fried chicken warm in a 200°F (93°C) oven while completing batches to maintain that delightful crispy texture.

  • Perfectly Seasoned: Taste a piece of chicken before serving; if it needs more flavor, sprinkle with extra salt right after frying.

  • Avoid Sogginess: When reheating leftovers, use an air fryer or oven to restore crispiness instead of microwaving, which can make the coating soggy.

  • Oil Temperature: Use a thermometer to ensure the oil is between 350°F to 375°F (175°C to 190°C) for optimal frying results and to prevent greasy chicken.

  • Flavor Variations: Don’t hesitate to experiment with spices in the flour mix or try different dipping sauces to elevate your homemade popcorn chicken experience!

Make Ahead Options

These crispy homemade popcorn chicken pieces are perfect for meal prep! You can marinate the chicken in buttermilk and season it with salt and garlic powder up to 24 hours in advance, allowing the flavors to deepen and the chicken to stay tender. Additionally, you can coat the chicken in flour and panko breadcrumbs ahead of time and store it in the refrigerator for up to 3 days. Just be sure to keep the coated chicken in an airtight container to maintain its crispiness. When you're ready to fry, simply heat your oil and cook the chicken straight from the fridge for a quick meal that’s just as delicious as if made fresh!

How to Store and Freeze Homemade Popcorn Chicken

Fridge: Store leftover popcorn chicken in an airtight container for up to 2 days. To keep them crispy, allow them to cool completely before sealing.

Freezer: For longer storage, freeze the popcorn chicken after frying. Place them in a single layer on a baking sheet until frozen, then transfer to a freezer bag for up to 3 months.

Reheating: When ready to enjoy your homemade popcorn chicken, reheat in an air fryer or oven at 375°F (190°C) for about 10 minutes to restore crispiness. Avoid microwaving to prevent sogginess.

Thawing: If frozen, thaw the chicken overnight in the fridge before reheating to ensure even warming and a delightful crunch when served.

Homemade Popcorn Chicken Variations & Substitutions

Explore fun twists and substitutes to make this popcorn chicken even more delightful for everyone!

  • Baked Version: Bake at 400°F for 15-20 minutes; flip them halfway for golden perfection, though crunch may slightly differ.
    Baking can offer a lighter alternative while still delivering a satisfying experience—great for those mindful of frying.

  • Spicy Buffalo Twist: Toss your fried chicken pieces in buffalo sauce after frying for a zesty kick.
    Pairing this with ranch or blue cheese dressing brings a contrast of flavor that'll leave your taste buds dancing!

  • Gluten-Free Option: Use chickpea flour and gluten-free breadcrumbs as substitutes for a safe option for those with gluten sensitivities.
    Not only is it healthier, but it can also offer a unique and delicious crunch that everyone will love.

  • Parmesan & Herb Blitz: Mix grated Parmesan and Italian herbs into your flour coating for an added flavor dimension.
    This twist elevates your popcorn chicken to a gourmet level, perfect for those special occasions or weekend feasts.

  • Honey Mustard Glaze: Drizzle a sweet honey mustard sauce over the chicken right before serving for a flavorful twist.
    This sweet and tangy combo marries perfectly with the crispy bites—a guaranteed crowd-pleaser!

  • Air Fryer Method: Use an air fryer for a healthier alternative to frying while still achieving crispiness.
    It's a fantastic choice for busy weeknights when you crave that irresistible crunch without the extra oil.

  • Vegetarian Style: Swap chicken with cauliflower florets coated in the same seasoning and breading for a veggie alternative.
    This plant-based version keeps all the familiar textures and flavors, making it a great option for meatless meals!

  • Dipping Sauce Variety: Experiment with different dipping sauces, such as spicy sriracha mayo or sweet and sour sauce, to elevate your chicken experience.
    The right sauce can turn every bite into a new flavor adventure, great for gatherings and dipping fun!

These variations offer a world of options, ensuring your homemade popcorn chicken remains a beloved staple on your table! Plus, if you're looking for more inspiration, check out these fantastic recipes for Chicken Dumplings Cozy or Honey Garlic Chicken.

What to Serve with Crispy Homemade Popcorn Chicken?

Enjoy your homemade popcorn chicken with delightful sides that elevate this comforting dish and create a memorable meal experience!

  • Creamy Mac and Cheese: This classic side offers a rich, cheesy flavor that pairs perfectly with the crunchy chicken, creating a satisfying contrast. Kids and adults alike can’t resist a scoop of creamy goodness alongside their crispy bites.

  • Fresh Garden Salad: A bright, colorful salad filled with crisp lettuce, cherry tomatoes, and cucumbers brings freshness to the table. The zesty dressing adds a refreshing balance to the savory chicken.

  • Sweet Potato Fries: Crispy on the outside and fluffy on the inside, sweet potato fries add a hint of sweetness that complements the savory popcorn chicken beautifully. Dip them together for a taste sensation!

  • Honey Mustard Dipping Sauce: Whisk together honey and mustard for an irresistible dipping option. This sweet and tangy sauce enhances the salty crunch of the chicken, making each bite even more flavorful.

  • Coleslaw: A tangy, crunchy coleslaw brings texture and brightness, making it an excellent contrast to the warm, crispy chicken. The coolness of the slaw also refreshes the palate, ensuring a well-rounded meal.

  • Sparkling Lemonade: A bubbly, refreshing drink like sparkling lemonade pairs wonderfully with your crispy homemade popcorn chicken. Its citrusy notes cleanse the palate, balancing the richness of the chicken.

Consider these pairings to craft a deliciously satisfying meal that everyone will rave about!

Homemade Popcorn Chicken Recipe FAQs

How do I choose the right chicken for my popcorn chicken?
Absolutely! When selecting boneless skinless chicken breasts, look for those that are firm to the touch and free from dark spots, which indicate spoilage. Fresh chicken should have a light pink color and smell neutral. If possible, buy from a reputable source, and aim to use chicken that has been locally sourced for the best flavor and quality.

How should I store leftover popcorn chicken?
After enjoying your crispy homemade popcorn chicken, store any leftovers in an airtight container in the refrigerator. They will stay fresh for up to 2 days. Make sure to let the chicken cool completely before sealing the container to maintain that delightful crunch. If you have more leftovers, consider freezing them to extend their shelf life!

Can I freeze homemade popcorn chicken?
Very! To freeze your popcorn chicken, first, let them cool to room temperature. Then, arrange them in a single layer on a baking sheet for about 1-2 hours until they are frozen solid. After that, transfer the chicken pieces to a freezer-safe bag, sealing out as much air as possible. Your homemade popcorn chicken will keep well for up to 3 months. When you're ready to enjoy them again, just thaw overnight in the fridge and then reheat!

What’s the best way to reheat leftover popcorn chicken?
For the best results, reheat your leftover popcorn chicken in an air fryer or regular oven. Preheat to 375°F (190°C) and place the chicken in a single layer on an oven-safe tray. Heat for about 10 minutes, flipping halfway through, until they are crispy again. Avoid microwaving as it can make the coating soggy. If you need a quicker option, just pop them in the air fryer for about 5-7 minutes for perfect results!

What should I do if my coating isn’t crispy?
Don't worry, it's a common hiccup! If your coating didn't turn out crispy, several factors could be at play. Ensure your oil is hot enough before frying—aim for 350°F (175°C) to achieve that perfect crunch. If the coating is too thick or you skipped the buttermilk, it may not adhere properly. Next time, try adjusting your dredging technique or even adding a bit of cornstarch to your flour mix for extra crispiness. You’ve got this!

Homemade Popcorn Chicken

Homemade Popcorn Chicken: Crispy Joy for Everyone

Enjoy this homemade popcorn chicken, a crispy crowd-pleaser perfect for family meals and snacks.
Print Recipe Pin Recipe
Prep Time 20 minutes mins
Cook Time 15 minutes mins
Total Time 35 minutes mins
Servings: 4 servings
Course: Snacks
Cuisine: American
Calories: 350
Ingredients Equipment Method Nutrition Notes

Ingredients
  

For the Chicken
  • 2 pounds Boneless Skinless Chicken Breasts Cut into 1-inch pieces
  • 1 cup Buttermilk Or milk mixed with lemon juice
For the Coating
  • 1 cup All-Purpose Flour Base coating for crunch
  • 1 teaspoon Salt Adjust to taste
  • 1 teaspoon Garlic Powder Or substitute with onion powder
  • 1 cup Panko Breadcrumbs For ultra-crispy texture
For Frying
  • 4 cups Vegetable or Canola Oil For deep frying

Equipment

  • Heavy pot
  • shallow bowls
  • slotted spoon
  • Thermometer

Method
 

Preparation
  1. Cut the chicken into 1-inch pieces and pat dry with paper towels.
  2. In a bowl, combine flour, salt, and garlic powder, then prepare bowls with buttermilk and panko.
  3. Dredge the chicken in flour, then dip in buttermilk, and coat with panko breadcrumbs.
  4. Heat oil in a pot to 350°F (175°C) for frying.
  5. Fry chicken in batches for 2 to 3 minutes until golden brown.
  6. Drain on paper towels and sprinkle with salt before serving.

Nutrition

Serving: 4piecesCalories: 350kcalCarbohydrates: 20gProtein: 25gFat: 15gSaturated Fat: 3gPolyunsaturated Fat: 1gMonounsaturated Fat: 9gCholesterol: 70mgSodium: 600mgPotassium: 500mgFiber: 1gSugar: 1gVitamin A: 200IUCalcium: 50mgIron: 1mg

Notes

Serve with dipping sauces such as ranch or buffalo sauce for added flavor.

Tried this recipe?

Let us know how it was!

Crispy Chinese Chicken On A Stick: Your New Favorite Snack

January 2, 2026 by Grace Snow Leave a Comment

As I flipped through my favorite cookbook, a craving hit me like a wave—a vision of crispy Chinese Chicken On A Stick, golden and tantalizing. Inspired by the vibrant buffets where these skewers are a staple, I couldn't help but recreate the joy in my own kitchen. This recipe showcases juicy boneless chicken thighs nestled in a light, crunchy layer, enhanced by the aromatic notes of five-spice. Not only is it quick to whip up, but it’s also an irresistible crowd-pleaser perfect for any gathering. Imagine satisfying your fast-food cravings with a homemade version that's completely from scratch! Are you ready to savor the deliciousness that awaits?

Why You'll Crave This Chicken?

Incredible Flavor: Each bite bursts with the aromatic warmth of five-spice, elevating traditional flavors to a whole new level.
Quick and Easy: With simple prep and cooking times, this dish can go from your kitchen to the table in under an hour.
Customizable: Want a twist? Try swapping five-spice for teriyaki or char siu for an exciting flavor adventure! You could also use Honey Garlic Chicken for an even sweeter touch.
Perfect for Any Occasion: Whether it’s a game day party or a cozy family dinner, these skewers will impress guests and satisfy cravings.
Healthier Alternative: Ditch the takeout and create this cozy dish at home, giving you control over the ingredients and flavors.
Get ready to enjoy crispy, juicy Chicken On A Stick, a delight for both your taste buds and your cooking skills!

Chinese Chicken On A Stick Ingredients

For the Marinade
• Boneless Chicken Thighs – Keeps the dish juicy and full of flavor; you can substitute with chicken breast for a leaner option.
• Oyster Sauce – Provides a rich umami depth; if you don't have it, soy sauce mixed with a touch of fish sauce works well.
• Soy Sauce – Adds essential saltiness and savory notes; use tamari for a gluten-free alternative.
• Hoisin Sauce – A sweet and tangy enhancer that gives complexity; mix soy sauce with sugar for a quick substitute.
• Water – Balances the flavors and consistency of the marinade.
• Chinese Five-Spice Powder – The star of your marinade, infusing warmth and depth; feel free to make your own blend using star anise, fennel seeds, cinnamon, nutmeg, and clove.
• Garlic Powder – Constantly enhances the savoriness; fresh garlic can be used as well, but adjust according to your taste.
• Baking Soda – A little goes a long way in tenderizing the chicken; remember to limit it to just ¼ teaspoon to avoid a soapy taste.
• Sugar – Balances and enriches the whole flavor profile; honey or coconut sugar can be delightful alternatives.

For the Coating
• Cornstarch – Essential for creating that iconic crispy coating when fried; arrowroot powder is a great gluten-free substitute.

Step‑by‑Step Instructions for Crispy Five-Spice Chinese Chicken On A Stick

Step 1: Prepare the Marinade
In a medium bowl, combine the boneless chicken thighs with oyster sauce, soy sauce, hoisin sauce, water, Chinese five-spice powder, garlic powder, baking soda, and sugar. Massage the chicken for about 30 seconds until each piece is thoroughly coated and the marinade is well blended. This step is crucial for infusing flavor into your chicken for the Chinese Chicken On A Stick.

Step 2: Marinate the Chicken
Cover the bowl with plastic wrap and refrigerate the marinated chicken for a minimum of 1 hour, although letting it sit for 4 hours or even up to 48 hours will deepen the flavors and tenderize the meat further. The longer you marinate, the more aromatic and juicy your chicken will become, which is key for achieving that sought-after taste.

Step 3: Coat the Chicken
After the marinating time, remove the chicken from the fridge and add cornstarch to the mixture. Ensure that every piece of chicken is evenly coated in cornstarch, which will allow for that desirable crisp when frying. This coating step is essential for achieving the perfect texture in your crispy Chinese Chicken On A Stick.

Step 4: Skewer the Chicken
Take bamboo skewers and carefully thread the coated chicken pieces onto them, ensuring they are evenly spaced. If necessary, trim the edges of the skewers to fit your frying pot or air fryer. This method not only makes for easier cooking but also creates a delightful presentation for serving your chicken on a stick.

Step 5: Heat the Oil
In a deep frying pot, heat oil to 350°F (175°C). Use a thermometer for accuracy, as this temperature is ideal for frying the chicken to a golden perfection. Make sure to have a wire rack nearby to drain excess oil after frying, which will keep your crispy Chinese Chicken On A Stick light and crunchy.

Step 6: Fry the Skewers
Carefully lower 3-4 skewers into the hot oil, ensuring not to overcrowd the pan. Fry them for about 2-3 minutes or until they achieve a beautiful golden brown color. The chicken should be properly cooked through and the coating should be delightfully crispy, which is what makes this dish so irresistible.

Step 7: Drain and Serve
Once cooked, remove the skewers from the oil and let them drain on a wire rack for a minute. This allows excess oil to drip away, keeping your Chinese Chicken On A Stick crispy. Serve hot, maybe with dipping sauces or alongside rice, and get ready for compliments from your family and friends!

Expert Tips for Chinese Chicken On A Stick

  • Marinate Wisely: The longer you marinate, the more flavorful and tender the chicken will become. Aim for at least 4 hours for the best results.
  • Check for Doneness: Use a meat thermometer to ensure your chicken reaches an internal temperature of 165°F to avoid any risk of undercooking.
  • Oil Temperature: Maintain the oil temperature at 350°F for perfectly crispy chicken. If the oil is too hot, the coating may burn before the chicken is cooked.
  • Avoid Overcrowding: Fry in small batches to ensure the chicken cooks evenly and maintains a crispy exterior. This is key for achieving your desired texture in Chinese Chicken On A Stick.
  • Serve Fresh: For optimal taste, serve your skewers immediately after frying. Reheat gently if necessary to preserve crunchiness.

Make Ahead Options

These Crispy Chinese Chicken On A Stick are perfect for meal prep, allowing you to enjoy restaurant-quality flavors with minimal day-of effort! You can marinate the chicken thighs up to 48 hours in advance to intensify the flavor; just cover them tightly with plastic wrap in the refrigerator. For a speedy finishing touch, skewer and coat the chicken with cornstarch, then when you’re ready to serve, simply fry them up for 2-3 minutes until golden brown. This method ensures that every bite remains just as delicious and crispy as if they were made fresh, making weeknight dinners or last-minute entertaining a breeze!

What to Serve with Crispy Five-Spice Chinese Chicken On A Stick?

Get ready to elevate your meal experience with vibrant sides that harmonize beautifully with your crispy treat!

  • Fragrant Jasmine Rice: Perfectly fluffy with a subtle aroma, jasmine rice soaks up the flavors, making every bite irresistible.

  • Quick Asian Slaw: A crunchy, refreshing salad with a zesty dressing brings balance to the richness of the chicken, adding a delightful contrast.

  • Savory Fried Rice: Packed with peas, carrots, and a hint of soy, this hearty dish perfectly complements the flavor profile of the chicken while enhancing the buffet vibe.

  • Spicy Szechuan Noodles: With a kick and a touch of sweetness, these noodles provide a wonderful depth of flavor that plays nicely off the five-spice seasoning.

  • Garlic Broccoli Stir-Fry: Tender-crisp broccoli with garlic adds a nutritious element and a pop of color to your plate, creating an enticing visual feast.

  • Chilled Cucumber Salad: Cool, crunchy cucumber dressed in rice vinegar offers a lovely, refreshing contrast against the crispy chicken, enhancing every bite.

  • Mango Sticky Rice: As a sweet finish, this dessert wraps up the meal beautifully; the creamy coconut complements the savory spice of the chicken perfectly.

  • Iced Green Tea: Refreshing and slightly earthy, a chilled glass of green tea cleanses the palate while complementing the meal's dynamic flavors.

Chinese Chicken On A Stick Variations

Feel free to get creative with this recipe and personalize it to match your taste buds!

  • Teriyaki Twist: Swap five-spice powder for teriyaki sauce in the marinade for a sweet and savory profile. This change brings an entirely new flavor that complements the chicken beautifully.
  • Char Siu Style: Substitute the marinade with char siu sauce for a delightful BBQ-esque flavor. This variation promises a sticky glaze that’s both sweet and aromatic, reminiscent of traditional Chinese BBQ.
  • Vegetable Skewers: Add bell peppers, zucchini, or cherry tomatoes to the skewers for a nutritious and colorful twist. It's a great way to boost the health factor and add some crunch alongside the tender chicken.
  • Spicy Heat: Amp up the marinade with some red pepper flakes or sriracha for an extra kick. The heat can really complement the sweetness from the hoisin, elevating your Chicken On A Stick to a new level.
  • Curry Infusion: Mix in some curry powder or paste with the marinade for a unique fusion twist. This will offer a remarkable depth of flavor that will surprise your palate.
  • Honey Garlic Variation: For an extra layer of sweetness, incorporate honey into the marinade alongside minced garlic. You could even try this with Honey Garlic Chicken for a sweeter alternative.
  • Lemon Zest Brightness: Add a splash of lemon juice and some grated zest to the marinade for a zesty, fresh flavor that lightens up the dish. It offers a refreshing contrast to the richness of the chicken.
  • Gluten-Free Option: Ensure all sauces used are gluten-free, replacing soy sauce with tamari and hoisin with compliant alternatives for everyone to enjoy without worry.

Each variation is a chance to explore bold flavors, so feel free to mix and match these ideas to discover your favorite combination! Enjoy your cooking adventure!

How to Store and Freeze Chinese Chicken On A Stick

Fridge: Store leftover cooked Chinese Chicken On A Stick in an airtight container for up to 3 days. This keeps the chicken moist while preventing it from absorbing excess odors.

Freezer: For longer storage, freeze the cooked skewers in a freezer-safe bag for up to 2 months. Ensure they're separated with parchment paper to prevent sticking together.

Reheating: To reheat, place the thawed chicken in an oven at 375°F (190°C) for about 10-15 minutes, or air fry at 350°F (175°C) for 5-7 minutes until crispy and heated through.

Making Ahead: Marinate the chicken up to 48 hours in advance; it will deepen the flavors wonderfully, making your meal prep a breeze!

Crispy Five-Spice Chinese Chicken On A Stick Recipe FAQs

How do I choose the best chicken thighs for this recipe?
Absolutely! Look for boneless chicken thighs that are firm and slightly moist with a rich color. Avoid any that have dark spots or an unpleasant smell. Freshness is key for achieving the best flavor in your Chinese Chicken On A Stick.

How should I store leftover Chinese Chicken On A Stick?
You can store leftover cooked skewers in an airtight container in the fridge for up to 3 days. Make sure they are completely cooled first to maintain texture. This way, you'll have delicious leftovers ready for a quick snack or meal!

Can I freeze my Chinese Chicken On A Stick?
Yes, you can! To freeze, place cooked skewers in a freezer-safe bag, ensuring they are separated by parchment paper to prevent sticking. They can be kept for up to 2 months. When you're ready to enjoy them again, simply thaw and reheat for a quick meal.

What if my chicken isn’t getting crispy when I fry it?
If your chicken isn’t crisping up, it might be due to the oil temperature. Ensure your oil is heated to 350°F (175°C) before frying. Also, avoid overcrowding the pan, as this can lower the oil temperature and result in soggy chicken. Fry in small batches for the crispiest results!

Are there any dietary considerations I should keep in mind?
Definitely! If you have guests with dietary restrictions, you can easily adapt this recipe. For gluten-free diets, use tamari instead of soy sauce and cornstarch instead of flour. Always check that your sauces are also gluten-free, and feel free to adjust ingredients based on allergies or preferences.

Can I prepare the marinade ahead of time?
Very! You can marinate the chicken up to 48 hours in advance. Just cover it well and store it in the refrigerator. The longer it marinates, the more flavors develop, making your Chinese Chicken On A Stick even more delicious when you're ready to cook!

Chinese Chicken On A Stick

Crispy Chinese Chicken On A Stick: Your New Favorite Snack

Experience the irresistible crispy Chinese Chicken On A Stick, a perfect crowd-pleaser for any occasion.
Print Recipe Pin Recipe
Prep Time 15 minutes mins
Cook Time 15 minutes mins
Marinating Time 4 hours hrs
Total Time 4 hours hrs 30 minutes mins
Servings: 4 skewers
Course: Appetizers
Cuisine: Chinese
Calories: 250
Ingredients Equipment Method Nutrition Notes

Ingredients
  

For the Marinade
  • 1 pound Boneless Chicken Thighs Substitute with chicken breast for a leaner option.
  • 2 tablespoons Oyster Sauce Soy sauce mixed with a touch of fish sauce can be used.
  • 2 tablespoons Soy Sauce Tamari for gluten-free.
  • 2 tablespoons Hoisin Sauce Soy sauce mixed with sugar for substitute.
  • 1 tablespoon Water
  • 1 tablespoon Chinese Five-Spice Powder Can make your own blend.
  • 1 teaspoon Garlic Powder Fresh garlic can be substituted.
  • 0.25 teaspoon Baking Soda Limit to avoid soapy taste.
  • 1 tablespoon Sugar Honey or coconut sugar as alternatives.
For the Coating
  • 1 cup Cornstarch Arrowroot powder is a gluten-free substitute.

Equipment

  • Bamboo skewers
  • deep frying pot
  • Meat Thermometer

Method
 

Step‑by‑Step Instructions for Crispy Five-Spice Chinese Chicken On A Stick
  1. In a medium bowl, combine boneless chicken thighs with oyster sauce, soy sauce, hoisin sauce, water, five-spice powder, garlic powder, baking soda, and sugar. Massage for about 30 seconds until coated.
  2. Cover and refrigerate the marinated chicken for at least 1 hour, up to 48 hours for deeper flavors.
  3. Remove chicken from the fridge and add cornstarch, ensuring each piece is evenly coated.
  4. Thread coated chicken pieces onto bamboo skewers, ensuring they are evenly spaced.
  5. Heat oil in a deep frying pot to 350°F (175°C).
  6. Carefully lower skewers into hot oil, frying for 2-3 minutes until golden brown.
  7. Drain skewers on a wire rack for a minute before serving hot.

Nutrition

Serving: 1skewerCalories: 250kcalCarbohydrates: 18gProtein: 20gFat: 12gSaturated Fat: 2gPolyunsaturated Fat: 0.5gMonounsaturated Fat: 3gCholesterol: 80mgSodium: 900mgPotassium: 300mgFiber: 1gSugar: 4gCalcium: 50mgIron: 1.5mg

Notes

For best results, marinate chicken for at least 4 hours and serve fresh after frying.

Tried this recipe?

Let us know how it was!

Decadent French-Inspired Chicken Pot Pie for Cozy Evenings

January 2, 2026 by Grace Snow Leave a Comment

As I whisked the creamy filling for my French-Inspired Chicken Pot Pie, I couldn’t help but feel like I was transported to a cozy Parisian bistro. This dish marries the heartwarming essence of comfort food with a touch of French flair, thanks to the elegant additions of white wine and fresh tarragon. Perfect for a bustling weeknight dinner or a special gathering, this recipe takes mere minutes to prepare without sacrificing flavor or sophistication. Shrouded in flaky, golden puff pastry, your family and friends are bound to enjoy this delightful twist on a classic pot pie. Ready to elevate your meal with a dash of French elegance? Let’s dive into this delicious journey together!

Why is this Chicken Pot Pie Irresistible?

Comforting Elegance: This French-Inspired Chicken Pot Pie transforms a humble classic into an elegant dish that impresses without the fuss.

Quick Prep Time: With rotisserie chicken and store-bought puff pastry, this recipe requires minimal effort, making it perfect for busy weeknights.

Flavor Explosion: The blend of white wine and tarragon brings a sophisticated twist, enriching every bite with depth and zest that will have everyone asking for seconds!

Versatile Ingredients: Feel free to substitute chicken with turkey or incorporate seasonal veggies like spinach for a unique spin. You can even try it crustless for a healthier option!

Family-Friendly: This dish appeals to all ages, making it a surefire hit at family gatherings or dinner parties. Pair it with a light salad or crusty bread for a complete experience.

Elevate your dinner routine and explore more comfort options, like our Crock Pot Chicken or Honey Garlic Chicken.

French-Inspired Chicken Pot Pie Ingredients

  • For the Filling

  • Shallots – Adds a gentle flavor and sweetness. Substitute with onions if unavailable.

  • Carrots – Provides sweetness and texture. Use fresh or frozen, if preferred.

  • Celery – Offers crunch and aromatic depth.

  • Butter – Essential for making the roux. Ensure it's unsalted for better flavor control.

  • Flour – Used for thickening the sauce. All-purpose flour is recommended.

  • White Wine – Enhances flavor and adds acidity; a dry French white wine works best.

  • Tarragon – Infuses the dish with a refined herbal note; fresh tarragon is preferred.

  • Chicken Stock – Forms the base of the sauce; low-sodium stock is best to control saltiness.

  • Heavy Cream – Adds richness and creaminess. Substitute with half-and-half for a lighter option.

  • Rotisserie Chicken – Saves time; shred into pieces for the filling.

  • Frozen Peas – Sweetens the filling and adds color. Fresh peas can also be used.

  • Parsley – Garnish for freshness; can substitute with chives for a different flavor.

  • For the Crust

  • Puff Pastry – Forms the crust; store-bought is recommended for ease.

This French-Inspired Chicken Pot Pie combines comforting flavors with a gourmet twist, ensuring that each bite takes you on a delightful culinary journey.

Step‑by‑Step Instructions for French-Inspired Chicken Pot Pie

Step 1: Sauté Vegetables
In a large skillet over medium heat, melt 2 tablespoons of unsalted butter. Add 1 cup of chopped shallots, carrots, and celery, cooking for about 5 minutes until the vegetables are tender and fragrant. Stir occasionally to prevent burning, allowing their vibrant colors to develop—a perfect base for your French-Inspired Chicken Pot Pie.

Step 2: Prepare Roux
Sprinkle in 1/4 cup of all-purpose flour, whisking continuously for about 1-2 minutes until you have a light, golden roux. Then, pour in 1/2 cup of dry white wine along with 1 tablespoon of fresh tarragon. Whisk until completely incorporated, releasing those delightful aromas that elevate the flavor profile of your pot pie.

Step 3: Make Sauce
Gradually add 2 cups of low-sodium chicken stock to the mixture while whisking steadily. Keep cooking for 5-7 minutes until the sauce thickens and bubbles gently. Once the desired consistency is reached, stir in 1/2 cup of heavy cream and let it simmer for an additional 10 minutes—this creamy perfection will enrich your filling for the French-Inspired Chicken Pot Pie.

Step 4: Combine Filling
Remove the skillet from the heat and fold in 2 cups of shredded rotisserie chicken, 1 cup of frozen peas, and a handful of chopped parsley for freshness. Taste your filling and adjust the seasoning with salt if necessary, ensuring a flavorful mix that will delight everyone around the table.

Step 5: Assemble Pie
Preheat your oven to 400°F (200°C). On a lightly floured surface, roll out 1 sheet of thawed puff pastry, ensuring it's large enough to cover your baking dish. Spoon the creamy filling into the dish, then lay the pastry over the top, sealing the edges. Cut a few slits in the pastry to allow steam to escape, then brush the surface with a beaten egg for a glossy finish.

Step 6: Bake
Place the assembled French-Inspired Chicken Pot Pie in the preheated oven and bake for 25-30 minutes or until the pastry is golden brown and puffed. Keep an eye on it, enjoying the enticing aroma wafting through your kitchen, signaling that dinner is just moments away. Let it cool for 10 minutes before serving to allow the filling to set perfectly.

Make Ahead Options

These French-Inspired Chicken Pot Pies are perfect for meal prep enthusiasts! You can prepare the filling up to 3 days in advance, allowing all those wonderful flavors to meld together. Simply sauté the vegetables, make the creamy sauce, and mix in your chicken and peas. Once cooled, store the filling in an airtight container in the refrigerator to maintain its quality. The puff pastry can be rolled out and placed over the filling just before baking. When it’s time to serve, simply assemble the pie, brush with egg, and bake as directed for a comforting meal that's just as delicious as when made fresh!

Expert Tips for French-Inspired Chicken Pot Pie

  • Quality Wine Matters: Use a good-quality dry white wine for deglazing as it enhances the overall flavor of the filling. Poor wine can lead to a subpar taste.

  • Watch the Roux: Don’t overcook the roux; it should be a light golden color to avoid a burnt taste. Stir constantly to achieve the right consistency.

  • Cool Before Cutting: Let the pot pie rest for about 10 minutes after baking. This allows the filling to set and prevents a soupy disaster when slicing.

  • Season as You Go: Always taste your filling before sealing the pie. Adjust salt as needed to ensure a well-seasoned French-Inspired Chicken Pot Pie.

  • Puff Pastry Prep: Thaw your puff pastry completely before use; this ensures a flaky and beautifully risen crust when baked.

What to Serve with French-Inspired Chicken Pot Pie

Elevate your dining experience with delightful accompaniments that balance the richness of this comforting masterpiece.

  • Mixed Greens Salad: A light salad with a zesty vinaigrette provides a refreshing contrast to the creamy pie, cleansing the palate with every bite.
  • Garlic Bread: The crusty, buttery texture of garlic bread absorbs any leftover sauce, adding a cozy element to your meal that everyone will adore.
  • Roasted Vegetables: Seasonal roasted veggies, like Brussels sprouts or carrots, add a hearty texture and earthy flavors that complement the pot pie beautifully.
  • Creamy Mashed Potatoes: Silky, buttery mashed potatoes create a rich base, perfect for enjoying alongside and soaking up all that delicious filling.
  • Savory Bread Pudding: This dish introduces a unique twist with herbs and cheese, mirroring the flavors of the pot pie while offering a different texture.
  • Crisp White Wine: A glass of chilled Sauvignon Blanc enhances the flavors in the pot pie, its bright acidity cutting through the richness for a balanced sip.
  • Apple Crisp: For dessert, a warm apple crisp brings out the sweetness without being overly heavy, rounding off a cozy meal with a comforting finish.

Storage Tips for French-Inspired Chicken Pot Pie

Fridge: Store leftover French-Inspired Chicken Pot Pie in an airtight container for up to 3 days. Let it cool before sealing to maintain freshness.

Freezer: For longer storage, wrap the pie tightly in plastic wrap and then in aluminum foil. It can be frozen for up to 3 months without compromising flavor.

Reheating: To reheat, thaw overnight in the refrigerator if frozen, then bake at 350°F (175°C) for about 20-25 minutes until heated through and the crust is crispy.

Cooling: Allow the pie to cool for 10 minutes after baking before refrigerating or freezing to maintain the filling's structure and flavor.

Variations & Substitutions for French-Inspired Chicken Pot Pie

Feel free to explore these delightful variations to make this dish truly your own!

  • Turkey Swap: Replace chicken with diced turkey for a delicious post-holiday meal. This is a wonderful way to use leftovers creatively!

  • Vegetable Medley: Add seasonal vegetables like mushrooms or spinach for a burst of freshness and color. It not only enhances flavor but adds nutrition too!

  • Phyllo Crust: For a lighter twist, use phyllo dough instead of puff pastry. This gives a flaky texture while cutting down on calories. Just be sure to layer it properly!

  • Add Heat: Incorporate a pinch of red pepper flakes or a splash of hot sauce for those who enjoy some heat. A little spice can elevate the entire dish!

  • Herb Infusion: Experiment with different herbs like thyme or rosemary for a unique flavor profile that can change the whole vibe of the pie. Each option brings its personality to the dish.

  • Dairy-Free Version: Swap heavy cream for coconut milk or almond milk to create a dairy-free option. This still keeps the richness while catering to dietary needs.

  • Crustless Delight: Skip the pastry altogether and bake the filling in a greased dish for a crustless version. It's a hearty, comforting meal without the extra calories!

Consider pairing this with a light salad or our delectable Crock Pot Chicken for a complete dining experience. Enjoy the journey of flavors!

French-Inspired Chicken Pot Pie Recipe FAQs

What kind of shallots should I use for this recipe?
You can use any variety of shallots, as they all have a mild flavor perfect for this dish. If you're unable to find shallots, yellow onions serve as a great substitute, providing similar sweetness and depth without compromising flavor.

How should I store leftovers of the French-Inspired Chicken Pot Pie?
To keep your pot pie fresh, store it in an airtight container in the refrigerator for up to 3 days. Make sure it cools completely before sealing to maintain its delightful texture and flavor.

Can I freeze the French-Inspired Chicken Pot Pie?
Absolutely! Wrap the pie tightly in plastic wrap followed by aluminum foil to prevent freezer burn, and it can be stored in the freezer for up to 3 months. When ready to enjoy, thaw it in the refrigerator overnight, then reheat at 350°F (175°C) for about 20-25 minutes until warmed through.

What should I do if my filling is too runny?
If you find your filling too runny, continue to simmer it on low heat. You can also thicken it by adding a cornstarch slurry (1 tablespoon of cornstarch mixed with 2 tablespoons of cold water) while stirring until you reach the desired consistency. This should only take a few minutes!

Is this dish safe for my dog to eat?
While some ingredients like chicken and carrots can be safe for dogs, avoid giving them the filling rich in cream, onions, or seasonings. Without those components, small amounts of plain, shredded chicken can make a tasty treat!

Can I use phyllo dough instead of puff pastry for a healthier option?
Yes, you can switch puff pastry for phyllo dough to create a lighter version of the French-Inspired Chicken Pot Pie. Layer several sheets of phyllo, brushing each with a bit of olive oil, before assembling over your filling for a crispy, flaky alternative.

French-Inspired Chicken Pot Pie

Decadent French-Inspired Chicken Pot Pie for Cozy Evenings

This French-Inspired Chicken Pot Pie marries comfort with elegance, featuring rich flavors and flaky pastry for a delightful dinner.
Print Recipe Pin Recipe
Prep Time 15 minutes mins
Cook Time 30 minutes mins
Cooling Time 10 minutes mins
Total Time 55 minutes mins
Servings: 6 pieces
Course: Dinner
Cuisine: French
Calories: 400
Ingredients Equipment Method Nutrition Notes

Ingredients
  

For the Filling
  • 2 tablespoons unsalted butter for sautéing
  • 1 cup shallots chopped
  • 1 cup carrots chopped
  • 1 cup celery chopped
  • 1/4 cup all-purpose flour for thickening
  • 1/2 cup dry white wine a dry French white wine works best
  • 1 tablespoon fresh tarragon chopped
  • 2 cups low-sodium chicken stock for sauce base
  • 1/2 cup heavy cream can substitute with half-and-half
  • 2 cups shredded rotisserie chicken for filling
  • 1 cup frozen peas or fresh peas
  • a handful fresh parsley chopped
For the Crust
  • 1 sheet puff pastry store-bought recommended

Equipment

  • Skillet
  • Baking Dish
  • Oven
  • Whisk
  • Knife
  • Cutting Board

Method
 

Step-by-Step Instructions
  1. In a large skillet over medium heat, melt 2 tablespoons of unsalted butter. Add 1 cup of chopped shallots, carrots, and celery, cooking for about 5 minutes until the vegetables are tender and fragrant.
  2. Sprinkle in 1/4 cup of all-purpose flour, whisking continuously for about 1-2 minutes until you have a light, golden roux. Then, pour in 1/2 cup of dry white wine along with 1 tablespoon of fresh tarragon.
  3. Gradually add 2 cups of low-sodium chicken stock to the mixture while whisking steadily. Keep cooking for 5-7 minutes until the sauce thickens and bubbles gently.
  4. Remove the skillet from the heat and fold in 2 cups of shredded rotisserie chicken, 1 cup of frozen peas, and a handful of chopped parsley for freshness.
  5. Preheat your oven to 400°F (200°C). On a lightly floured surface, roll out 1 sheet of thawed puff pastry. Spoon the creamy filling into the dish, then lay the pastry over the top, sealing the edges.
  6. Place the assembled French-Inspired Chicken Pot Pie in the preheated oven and bake for 25-30 minutes or until the pastry is golden brown and puffed.
  7. Let it cool for 10 minutes before serving to allow the filling to set perfectly.

Nutrition

Serving: 1pieceCalories: 400kcalCarbohydrates: 30gProtein: 25gFat: 22gSaturated Fat: 10gPolyunsaturated Fat: 1gMonounsaturated Fat: 7gCholesterol: 75mgSodium: 600mgPotassium: 500mgFiber: 3gSugar: 2gVitamin A: 1500IUVitamin C: 12mgCalcium: 50mgIron: 2mg

Notes

Thaw your puff pastry completely before use; this ensures a flaky and beautifully risen crust when baked.

Tried this recipe?

Let us know how it was!

Divine Vegan Lemon Cheesecake That's a Breeze to Make

January 1, 2026 by Grace Snow Leave a Comment

As I flipped through old recipe notebooks, I stumbled upon a forgotten gem—a creamy, refreshing no-bake masterpiece that whisked me away to sunlit summers. Enter my Easy Vegan Lemon Cheesecake Bars, a delightful treat that’s sure to brighten any gathering! The combination of luscious lemon filling and a crunchy cookie crust creates a dessert that feels indulgent yet is effortlessly simple to whip up. These bars are not just a crowd-pleaser; they’re also a thoughtful choice for anyone craving plant-based delights. They’re eggless, dairy-free, and adaptable for gluten-free diets, making them an invitation for everyone at the table to dig in. Ready to bring a slice of sunshine into your kitchen? Let’s get started on this refreshing treat!

Why is this Vegan Lemon Cheesecake irresistible?

Simplicity: The no-bake nature means you can create this gorgeous dessert without turning on the oven, saving time and energy.

Fresh Flavor: The zesty lemon filling paired with homemade lemon curd offers a refreshing burst of flavor that screams summer!

Versatile: You can easily swap ingredients, like using coconut yogurt instead of vegan Greek-style yogurt, ensuring it fits your tastes and dietary needs.

Crowd-Pleasing: Perfect for gatherings, this dessert appeals to vegans and non-vegans alike, making it a delightful addition to any table.

Quick and Easy: With only a few simple steps, you’ll have a beautiful dessert ready in no time. Need more vegan inspiration? Check out these Vegan Cacao Nib treats or refreshing Lemon Ricotta Protein pancakes for your next brunch!

Vegan Lemon Cheesecake Ingredients

For the Crust
• Vegan Cookies – The base for the crust, providing sweetness and texture; feel free to substitute with gluten-free cookies if desired.
• Unsalted Vegan Butter – This acts as a binding agent for the crust; block-style gives better consistency.
• Sea Salt – Enhances the flavor, amplifying the deliciousness of the crust.

For the Filling
• Cashews – Contributes ultimate creaminess to the filling; for best results, soak ahead of time or quick-soak in boiled water.
• Vegan Cream Cheese – The primary ingredient lending richness and creaminess; opt for brands you enjoy!
• Vegan Greek-Style Yogurt – Adds tangy flavor and creaminess; substitute with vegan sour cream or thick coconut yogurt if needed.
• Vanilla Extract – Provides depth and warmth to the flavor profile of the filling.
• Agave Syrup or Maple Syrup – Use this natural sweetener to balance the tartness of the lemon.

For the Topping
• Homemade Lemon Curd – A delightful, tangy addition that pairs beautifully with the vegan lemon cheesecake and elevates the overall taste experience!

Step‑by‑Step Instructions for Vegan Lemon Cheesecake

Step 1: Prepare the Lemon Curd
Start by making your homemade lemon curd, which should be chilled for up to 2 days before assembling the Vegan Lemon Cheesecake. Combine fresh lemon juice, zest, and sweetener in a saucepan over medium heat. Stir constantly until thickened, about 10 minutes. Transfer to a bowl, covering with plastic wrap to prevent a skin from forming, and refrigerate until needed.

Step 2: Soak the Cashews
For a dreamy, creamy filling, soak 1 cup of raw cashews in water for at least 4 hours. If you're short on time, pour boiling water over the cashews and let them sit for 30 minutes. Drain and rinse thoroughly to remove any bitterness. This essential step ensures your Vegan Lemon Cheesecake achieves that luscious texture.

Step 3: Make the Crust
In a food processor, crush 2 cups of vegan cookies and a pinch of sea salt until they resemble fine crumbs. Gradually add ½ cup of melted unsalted vegan butter, pulsing until combined and the mixture sticks together. Press this mixture firmly into the bottom of a lined 9-inch loaf pan to form an even crust. Refrigerate for about 15-20 minutes to set.

Step 4: Prepare the Filling
Place the soaked cashews, cooled lemon curd, 8 ounces of vegan cream cheese, ½ cup of vegan Greek-style yogurt, 1 teaspoon of vanilla extract, and ½ cup of agave syrup into the food processor. Blend on high speed until completely smooth and creamy, scraping down the sides as necessary. Once mixed, pour the filling over the chilled crust in the loaf pan.

Step 5: Chill to Set
Cover and refrigerate your Vegan Lemon Cheesecake for a minimum of 6 hours, although overnight is preferred for optimal firmness. This step is crucial for achieving the perfect texture. Once set, the cheesecake will be firm enough to hold its shape when sliced, making it ideal for serving.

Step 6: Top with Lemon Curd
Warm the remaining lemon curd you prepared earlier until it's easily spreadable; this should take just a minute in the microwave or on low heat. Carefully spread the lemon curd over the top of the set cheesecake, making it look smooth and glossy. Return the cheesecake to the refrigerator for an additional hour to allow everything to meld beautifully.

Step 7: Serve
Slice your Vegan Lemon Cheesecake Bars using a hot, wet knife for clean edges. You can garnish with fresh berries or mint leaves for an elegant touch. These bars can be stored in the fridge for up to 5 days or frozen for later indulgence. Enjoy a slice of sunshine with each bite!

Storage Tips for Vegan Lemon Cheesecake

Fridge: Store your Vegan Lemon Cheesecake bars in an airtight container for up to 5 days; they’ll retain their delicious flavor and texture, perfect for spontaneous cravings.

Freezer: For longer storage, wrap individual bars in plastic wrap, then place them in a freezer-safe container. They can be frozen for up to a month—just thaw at room temperature before enjoying!

Serving: When ready to serve, let the frozen bars sit out for about 15-30 minutes for the best texture; this way, they’ll soften slightly for an irresistible bite.

Reheating: If you have leftover cheesecake, there's no need to reheat it! Enjoy it cold for a refreshing treat that maintains its creamy consistency.

Expert Tips for Vegan Lemon Cheesecake

Creamy Cashews: Ensure cashews are adequately soaked to yield a creamy texture in your filling—this is essential for the perfect Vegan Lemon Cheesecake!

Parchment Paper: Line your pan with parchment paper for easy removal of the cheesecake; it makes slicing and serving a breeze.

Refrigeration Time: For the best results, allow your cheesecake to chill overnight—this helps it to set properly and enhances the flavor.

Warm Your Knife: Use a hot, wet knife to cut your cheesecake bars for clean edges; wiping the knife between cuts prevents messy slices.

Flavor Variations: Feel free to experiment with different types of nut butters or sweeteners to customize your Vegan Lemon Cheesecake to your taste!

Make Ahead Options

These Easy Vegan Lemon Cheesecake Bars are perfect for busy weeknights or gatherings! You can prepare the lemon curd up to 2 days in advance and store it in the refrigerator, ensuring a zesty kick when ready to serve. Additionally, soak the cashews for the filling ahead of time or even up to 4 hours in advance; if short on time, a quick-boil soak for 30 minutes works wonders. To maintain the cheesecake's creamy texture, refrigerate it for at least 6 hours (preferably overnight) to allow it to set properly. When you're ready to enjoy, simply spread the lemon curd on top and slice using a hot, wet knife for that perfect finish. You’ll have a delightful dessert that feels fresh and vibrant, saving you precious time in the kitchen!

Vegan Lemon Cheesecake Variations & Substitutions

Don't be afraid to get creative with your vegan lemon cheesecake—there are plenty of delicious options to tailor it to your taste!

  • Fruit Curds: Swap lemon curd for lime or mango curd for a tropical twist. Each fruit adds its unique brightness to the cheesecake, making every bite a new experience.

  • Nut Swap: Prefer a different flavor? Use almonds or macadamia nuts in place of cashews. Each nut will infuse a distinct richness, offering a delightful contrast to the lemon’s zing.

  • Whole-Food Crust: Try a date-coconut-almond crust for a more nutritious alternative. This wholesome foundation adds texture and natural sweetness, pairing beautifully with the creamy filling.

  • Spiced Up: For an extra kick, add a pinch of cinnamon or nutmeg to the filling. These spices will warm up the flavor profile, giving your cheesecake a cozy vibe perfect for cool evenings.

  • Chocolate Drizzle: A decadent twist can come from a vegan chocolate drizzle on top. This luscious addition turns your lemon cheesecake into an irresistible treat for chocolate lovers.

  • Sweetener Alternatives: If you prefer a different sweetener, use coconut sugar or stevia instead of agave syrup or maple syrup. Adjust the amount to your taste, finding the right balance of sweetness.

  • Nut-Free Option: For a nut-free version, replace cashews with silken tofu blended until smooth. This swap maintains the creamy texture while being accessible for those with nut allergies.

  • Flavor Infusions: Consider adding a splash of coconut milk for a richer flavor, or even a few drops of lemon extract for an intensified lemony aroma that’ll have everyone craving more.

These variations not only enhance the flavor but also ensure there's something for everyone to enjoy. And if you're looking for other delicious plant-based recipes, be sure to check out my delightful Vegan Cacao Nib treats or refreshing Lemon Ricotta Protein pancakes perfect for brunch!

What to Serve with Easy Vegan Lemon Cheesecake Bars

Elevate your dessert experience by pairing these luscious bars with delightful accompaniments that will make your taste buds dance!

  • Fresh Berries: The sweetness and tartness of strawberries or blueberries create a beautiful contrast, enhancing the cheesecake's flavors. A handful of vibrant berries adds a gorgeous pop of color to your plate.

  • Mint Leaves: A sprig of fresh mint lends a refreshing touch that balances the tangy lemon notes, making each bite feel extra special. Light and aromatic, it elevates your presentation beautifully.

  • Coconut Whipped Cream: This fluffy, dairy-free topping adds a rich creaminess that complements the zesty filling, creating an indulgent yet light dessert. It's an elegant touch that feels indulgent but is easy to whip up!

  • Iced Herbal Tea: A chilled glass of herbal tea like chamomile or mint provides a refreshing contrast to the sweetness of the cheesecake, making for a delightful palate cleanser. It’s perfect for sipping on a sunny afternoon.

  • Lemon Sorbet: For a citrus lovers’ dream, serve a scoop of lemon sorbet alongside your cheesecake. The icy treat amplifies the zingy flavors while providing a refreshing, cool sensation.

  • Crushed Pistachios: Sprinkle crushed pistachios for an unexpected crunch and a nutty flavor that enhances the texture of the dessert. This adds an elegant crunch that balances the creaminess of the cheesecake.

  • Sparkling Water with Lime: This refreshing drink serves as a light accompaniment that cleanses the palate without overwhelming the taste of your cheesecake. Enjoy the bubbly fizz alongside every decadent bite!

  • Chocolate Drizzle: A drizzle of melted dairy-free chocolate on top adds a sweet and slightly bitter touch, enhancing the dessert while keeping it beautifully elegant. Chocolate and lemon make an irresistible pairing!

With these delightful pairings, you’re set to create an unforgettable dessert experience for everyone around your table!

Easy No-Bake Vegan Lemon Cheesecake Recipe FAQs

How do I choose ripe lemons for this recipe?
Absolutely! When selecting lemons, look for ones that are bright yellow and heavy for their size. Avoid any with dark spots or wrinkles, as this may indicate they are past their prime. Fresh lemons will yield the juiciest and most flavorful results for your cheesecake.

What's the best way to store Vegan Lemon Cheesecake bars?
Very simple! Once fully set, store your Vegan Lemon Cheesecake bars in an airtight container in the refrigerator for up to 5 days. If you're planning on making them ahead, I often make them 1-2 days in advance, and they keep wonderfully while maintaining their creamy texture.

Can I freeze these cheesecake bars?
Absolutely! For longer storage, wrap each individual Vegan Lemon Cheesecake bar in plastic wrap and then place them in a freezer-safe container. They can be frozen for up to 1 month. When you're ready to enjoy, simply let them thaw at room temperature for about 15-30 minutes before serving for the perfect bite!

What if my filling isn't smooth after blending?
No worries! If your filling isn’t as creamy as you'd hoped, it may be due to the cashews not being soaked long enough. Make sure to soak the cashews for at least 4 hours or quick-soak in boiled water for 30 minutes. Blend again, adding a splash of lemon juice or water to help achieve that desired smooth consistency.

Are there any dietary considerations I should be aware of?
Great question! This recipe is vegan, dairy-free, and eggless, making it suitable for a variety of diets. If you’re serving guests with allergies, be sure to check the labels on your vegan cream cheese and yogurt as some brands might include allergens like soy or nuts. Additionally, if you opt for a gluten-free cookie base, make sure all ingredients are certified gluten-free as well.

Can I make variations of this recipe?
Very much so! Feel free to experiment with different fruits for curds—think lime or mango for a tropical twist! You can also swap out the cashews for other nuts like almonds for a different flavor profile. This versatility makes it a fun recipe to adjust according to your preferences!

Vegan Lemon Cheesecake

Divine Vegan Lemon Cheesecake That's a Breeze to Make

This Vegan Lemon Cheesecake is a refreshing, no-bake delight that's creamy and crowd-pleasing!
Print Recipe Pin Recipe
Prep Time 30 minutes mins
Chill Time 7 hours hrs
Total Time 7 hours hrs 30 minutes mins
Servings: 12 bars
Course: Dessert
Cuisine: Vegan
Calories: 250
Ingredients Equipment Method Nutrition Notes

Ingredients
  

Crust
  • 2 cups Vegan Cookies Gluten-free cookies can be substituted.
  • 1/2 cup Unsalted Vegan Butter Must be melted.
  • 1 pinch Sea Salt
Filling
  • 1 cup Cashews Soaked in water for at least 4 hours or quick-soaked in boiling water.
  • 8 ounces Vegan Cream Cheese Choose a brand you enjoy.
  • 1/2 cup Vegan Greek-Style Yogurt Can be substituted with vegan sour cream or thick coconut yogurt.
  • 1 teaspoon Vanilla Extract
  • 1/2 cup Agave Syrup or Maple Syrup Acts as natural sweetener.
Topping
  • 1 batch Homemade Lemon Curd Chilled and ready to use.

Equipment

  • Food Processor
  • 9-inch Loaf Pan
  • Microwave

Method
 

Preparation Steps
  1. Prepare the Lemon Curd by combining lemon juice, zest, and sweetener in a saucepan over medium heat. Stir until thickened, about 10 minutes. Refrigerate until needed.
  2. Soak the cashews in water for at least 4 hours or quick-soak in boiling water for 30 minutes. Drain and rinse.
  3. Crush the vegan cookies and sea salt in a food processor. Add melted vegan butter and pulse until combined. Press into a lined 9-inch loaf pan and refrigerate for 15-20 minutes.
  4. In a food processor, blend soaked cashews, cooled lemon curd, vegan cream cheese, vegan yogurt, vanilla extract, and agave syrup until smooth. Pour over the crust.
  5. Cover and refrigerate for at least 6 hours or preferably overnight to set.
  6. Warm the remaining lemon curd and spread over the set cheesecake. Refrigerate for an additional hour.
  7. Slice using a hot, wet knife and serve with fresh berries or mint leaves.

Nutrition

Serving: 1barCalories: 250kcalCarbohydrates: 30gProtein: 4gFat: 12gSaturated Fat: 4gPolyunsaturated Fat: 0.5gMonounsaturated Fat: 5gSodium: 150mgPotassium: 200mgFiber: 2gSugar: 12gVitamin C: 15mgCalcium: 2mgIron: 6mg

Notes

Store in an airtight container in the fridge for up to 5 days or freeze for later. Allow frozen bars to sit out for 15-30 minutes before serving.

Tried this recipe?

Let us know how it was!

Easy Keto Cheesecake Fluff: Indulge Guilt-Free Today!

January 1, 2026 by Grace Snow Leave a Comment

The moment I whipped together the ingredients for this Easy Keto Cheesecake Fluff, I couldn't believe how effortlessly the flavors came together. This delightful no-bake dessert is perfect for anyone following a low-carb lifestyle, allowing you to indulge without the guilt of traditional sweets. With quick prep and a light, airy texture that melts in your mouth, it’s sure to be a hit at any gathering or simply as a comforting treat at home. Imagine serving it in pretty little cups, garnished with fresh berries and a sprinkle of zest—pure bliss! Are you ready to treat yourself to this easy, satisfying dessert?

Why is this cheesecake fluff a must-try?

Indulgent Pleasure: This Easy Keto Cheesecake Fluff offers a rich, creamy treat without the carbs, perfectly satisfying those cheesecake cravings.
Quick & No-Bake: With minimal prep time and no baking required, you can whip this up last minute for unexpected guests.
Versatile Flavors: Customize it with different extracts or mix in your favorite fruits, just like adding berries to your Breakfast Egg Muffins.
Effortlessly Light: The whipped cream creates a fluffy texture that feels like a cloud of flavor in every bite.
Crowd-Pleasing: Whether at a cozy dinner or a festive gathering, this dessert is sure to impress. You might even find it the perfect pairing for slice of Ice Cream Cake!

Easy Keto Cheesecake Fluff Ingredients

For the Cream Base

  • Cream Cheese – Provides a rich, creamy base for the fluff; make sure it’s softened for easy mixing.
  • Powdered Erythritol – Acts as a perfect low-carb sweetener; adjust the amount based on your sweetness preference.
  • Vanilla Extract – Adds delightful depth and flavor to the cheesecake mixture; use pure extract for better taste.
  • Lemon Juice – Enhances the tangy flavor profile, making it reminiscent of traditional cheesecakes.

For the Whipped Cream

  • Heavy Cream – Whipped to soft or stiff peaks, this is crucial for achieving the light, fluffy texture of your Easy Keto Cheesecake Fluff.

Optional Mix-ins

  • Fresh Berries – Raspberries, strawberries, or blueberries add a pop of color and a burst of flavor when garnishing.
  • Almond Extract – Substitute this for vanilla to create a slightly different, nutty flavor profile.
  • Cocoa Powder – For a chocolatey twist, mix in cocoa powder for a delicious chocolate cheesecake variation.

Get ready to indulge guilt-free in this delicious Easy Keto Cheesecake Fluff!

Step‑by‑Step Instructions for Easy Keto Cheesecake Fluff

Step 1: Beat the Cream Cheese
In a large mixing bowl, use an electric mixer to beat the softened cream cheese until smooth and creamy, about 2-3 minutes. Ensure there are no lumps, as this will create a lovely base for your Easy Keto Cheesecake Fluff. The consistency should be velvety and spreadable, making it easier to incorporate the other ingredients.

Step 2: Add the Sweeteners and Flavor
Gradually mix in powdered erythritol, vanilla extract, and lemon juice into the cream cheese mixture. Continue beating for another 2-3 minutes until the mixture is fluffy and well combined. The sweetness and hint of tartness from the lemon will enhance the overall flavor, making sure you enjoy every bite of your keto dessert.

Step 3: Whip the Heavy Cream
In a separate bowl, pour in the heavy cream and whip using an electric mixer until stiff peaks form, around 3-5 minutes. This step is crucial for achieving that light and airy texture in your Easy Keto Cheesecake Fluff. The cream should hold its shape when you lift the whisk, indicating it’s ready to be folded into the cream cheese mixture.

Step 4: Fold in the Whipped Cream
Gently fold the whipped cream into the cheesecake mixture using a rubber spatula. Be cautious not to deflate the whipped cream; use a gentle, sweeping motion to combine the two mixtures until no white streaks remain. This technique helps maintain the fluffy consistency that makes your Easy Keto Cheesecake Fluff irresistibly light.

Step 5: Chill the Fluff
Transfer the combined mixture into individual serving dishes or a larger bowl, smoothing the top with a spatula. Cover with plastic wrap and refrigerate for at least 30 minutes. Chilling not only enhances the flavor but also helps the fluff to set, ensuring that each bite is deliciously cool and creamy.

Step 6: Serve and Garnish
Once chilled, remove the Easy Keto Cheesecake Fluff from the refrigerator. Garnish with fresh berries or a dusting of powdered erythritol for a decorative touch. Serve immediately and watch your guests enjoy this delightful low-carb dessert that’s perfect for any occasion, from casual weeknight treats to festive gatherings.

What to Serve with Easy Keto Cheesecake Fluff

Indulge in a delightful spread that complements the light, creamy texture of this no-bake dessert, ensuring a satisfying meal.

  • Fresh Berries: A vibrant mix of raspberries, strawberries, and blueberries that adds a burst of flavor and complements the cheesecake’s sweetness.
  • Coffee or Tea: A warm cup enhances the dessert experience, adding depth and balance to the creamy fluff, ideal for cozy catch-ups.
  • Almond Flour Cookies: These low-carb treats bring a satisfying crunch to each bite, creating a perfect textural contrast to the fluff’s creaminess.
  • Whipped Coconut Cream: For an extra luscious experience, top your cheesecake fluff with a dollop of this light alternative, making it even more decadent.
  • Chocolate Shavings: Dark chocolate sprinkles can add a hint of richness, transforming your dessert into a gourmet delight that diners will remember.
  • Sugar-Free Lemonade: A refreshing drink that perfectly cuts through the sweetness and ties together the flavors in this delightful meal.
  • Pecan Pie Bites: Serve these low-carb bites alongside for a sweet surprise that offers a crunchy, nutty twist, elevating the dessert spread.

Expert Tips for Easy Keto Cheesecake Fluff

  • Use Softened Cream Cheese: Ensure your cream cheese is at room temperature for easy mixing, preventing lumps in your Easy Keto Cheesecake Fluff.
  • Gentle Folding Technique: Carefully fold the whipped cream into the mixture to keep it light and fluffy; aggressive stirring can deflate the texture.
  • Taste and Adjust Sweetness: Before serving, taste your fluff and adjust the sweetness of erythritol according to your preference—everyone has different sweet spots!
  • Plenty of Chill Time: Don’t rush the chilling process; letting it sit for at least 30 minutes improves the flavor and texture remarkably.
  • Creative Variations: Experiment with extracts or mix-ins like cocoa powder or coffee for a delicious twist on the classic Easy Keto Cheesecake Fluff.

Make Ahead Options

These Easy Keto Cheesecake Fluff desserts are perfect for meal prep enthusiasts looking to save time during busy weeks! You can prepare the entire cheesecake fluff mixture up to 24 hours in advance and store it in an airtight container in the refrigerator. Just remember to gently re-fold the mixture before serving—this will help maintain that luscious, airy texture. Additionally, you can whip the heavy cream and mix it with the cream cheese base ahead of time, but avoid adding any garnishes until just before serving to keep them fresh. With these prep tips, you’ll have a delightful, no-bake dessert ready to impress your family at a moment's notice, all while enjoying that guilt-free keto goodness!

Easy Keto Cheesecake Fluff Variations

Feel free to experiment and make this Easy Keto Cheesecake Fluff your own! Let your creativity shine as you explore new flavors and textures.

  • Almond Extract: Swap vanilla with almond extract for a nutty flavor that adds a delightful twist to your fluff.

  • Chocolatey Indulgence: Mix in cocoa powder for a rich chocolate cheesecake variation—perfect for chocolate lovers!

  • Mocha Magic: Add instant coffee to the mixture for a delicious mocha flavor that keeps your taste buds dancing.

  • Berry Bliss: Fold in fresh berries like blueberries or strawberries for an added burst of flavor and a pop of color.

  • Nutty Crunch: Top with chopped nuts, like pecans or walnuts, for a delightful crunchy finish against the creamy texture.

  • Coconut Delight: Add unsweetened shredded coconut to the mix for a tropical vibe that pairs beautifully with the creaminess.

  • Layered Delight: Layer the fluff with your favorite low-carb dessert, like a slice of Blue Cheese Pizza for a decadent experience.

  • Refreshing Citrus: Mix in a bit of orange or lime zest to brighten the flavors, creating a refreshing citrus twist for your dessert.

Whichever way you choose to customize, this Easy Keto Cheesecake Fluff will remain a delightful treat for your taste buds! Enjoy it as a perfect ending to a lovely meal or snack on it during the week—like a fun experience straight out of making Vegan Cacao Cream!

How to Store and Freeze Easy Keto Cheesecake Fluff

Fridge: Store your Easy Keto Cheesecake Fluff in an airtight container in the refrigerator for up to 1 week. This will keep it fresh and maintain the delicious creamy texture.

Freezer: If you want to enjoy it later, you can freeze the fluff for up to 3 months. Just make sure to use a freezer-safe container, leaving some space for expansion.

Thawing: To thaw, place it in the refrigerator overnight. Once thawed, give it a gentle stir; the texture should remain fluffy and inviting!

Reheating: There's no need to reheat this no-bake dessert. Serve it chilled straight from the fridge or after thawing for the best experience!

Easy Keto Cheesecake Fluff Recipe FAQs

What type of cream cheese should I use for the best results?
Absolutely! Opt for full-fat cream cheese, as it provides a rich, creamy base that contributes to the indulgent flavor and texture. Ensure it's softened to room temperature for the easiest mixing—this prevents any lumps and helps achieve a smooth consistency.

How long can I store my Easy Keto Cheesecake Fluff in the refrigerator?
You can store your Easy Keto Cheesecake Fluff in an airtight container in the refrigerator for up to 1 week. Just make sure it’s well-covered to maintain its freshness and creamy texture. If you're planning on serving it later, it's a perfect make-ahead dessert!

Can I freeze the Easy Keto Cheesecake Fluff?
Yes, you can freeze it for up to 3 months! To freeze, place it in a freezer-safe container, leaving space for expansion. When you’re ready to enjoy, transfer it to the refrigerator overnight to thaw. Gently stir before serving to revive that fluffy texture.

What can I do if my whipped cream doesn’t form stiff peaks?
Very! First, make sure your heavy cream is cold; this aids in whipping. If it still doesn’t hold peaks, don’t panic! You can try whipping it a little longer, or you can add a teaspoon of cornstarch to stabilize it for better results.

Are there any dietary considerations I should keep in mind?
Definitely! This Easy Keto Cheesecake Fluff is low-carb and perfect for those on a ketogenic diet. However, if you have friends with allergies, be aware that cream cheese and heavy cream may not be suitable for lactose-intolerant individuals. Using coconut cream as a dairy alternative can create a delightful variation too!

How can I enhance the flavor profile further?
For added taste, consider mixing in ingredients like cocoa powder for a chocolate version or almond extract instead of vanilla for a nutty twist. I often like to garnish with a sprinkle of lemon zest or fresh berries for a refreshing touch—it's like giving your cheesecake fluff an extra hug!

Easy Keto Cheesecake Fluff

Easy Keto Cheesecake Fluff: Indulge Guilt-Free Today!

Easy Keto Cheesecake Fluff is a delightful no-bake dessert perfect for low-carb lifestyles, providing a rich, creamy treat without the guilt.
Print Recipe Pin Recipe
Prep Time 15 minutes mins
Chill Time 30 minutes mins
Total Time 45 minutes mins
Servings: 4 cups
Course: Dessert
Calories: 250
Ingredients Equipment Method Nutrition Notes

Ingredients
  

For the Cream Base
  • 8 oz Cream Cheese softened
  • 1/2 cup Powdered Erythritol adjust to taste
  • 1 tsp Vanilla Extract use pure for best flavor
  • 1 tbsp Lemon Juice
For the Whipped Cream
  • 1 cup Heavy Cream whipped to soft or stiff peaks
Optional Mix-ins
  • 1/2 cup Fresh Berries for garnishing
  • 1 tsp Almond Extract optional substitute for vanilla
  • 2 tbsp Cocoa Powder for chocolate variation

Equipment

  • Electric mixer
  • Mixing bowls
  • rubber spatula
  • Serving dishes

Method
 

Step-by-Step Instructions
  1. In a large mixing bowl, beat the softened cream cheese until smooth and creamy, about 2-3 minutes.
  2. Gradually mix in powdered erythritol, vanilla extract, and lemon juice into the cream cheese mixture. Continue beating for another 2-3 minutes until fluffy.
  3. In a separate bowl, whip the heavy cream until stiff peaks form, around 3-5 minutes.
  4. Gently fold the whipped cream into the cheesecake mixture using a rubber spatula.
  5. Transfer the combined mixture into serving dishes, cover with plastic wrap, and refrigerate for at least 30 minutes.
  6. Once chilled, garnish with fresh berries or powdered erythritol and serve.

Nutrition

Serving: 1cupCalories: 250kcalCarbohydrates: 8gProtein: 3gFat: 25gSaturated Fat: 15gCholesterol: 90mgSodium: 150mgPotassium: 120mgSugar: 1gVitamin A: 500IUVitamin C: 1mgCalcium: 40mg

Notes

For best results, ensure the cream cheese is softened and allow plenty of chill time before serving.

Tried this recipe?

Let us know how it was!

Mini Key Lime Cheesecakes: Refreshing Bites of Bliss

January 1, 2026 by Grace Snow Leave a Comment

As I savored the last bite of a rich and creamy dessert on a sun-soaked afternoon, I couldn’t help but crave a lighter, zestier twist. Enter Mini Key Lime Cheesecakes with Greek Yogurt—my answer to the indulgent cravings that come with every gathering. These delightful, single-serve desserts bring the refreshing tang of key limes to life while swapping out traditional ingredients for a healthier spin. Crafted with just seven easy-to-find ingredients, they’re not only gluten-free but also a breeze to whip up, making them perfect for any occasion, from casual picnics to elegant dinners. Picture your guests raving over these charming mini cheesecakes that are as impressive as they are simple to make! Ready to take your dessert game to the next level? Let’s dive in!

Why are Mini Key Lime Cheesecakes irresistible?

Simplicity at its finest: With only seven ingredients, crafting these delightful cheesecakes is a breeze, even for novice bakers.

Lighter alternative: By using Greek yogurt, you're indulging without the guilt, enjoying all the creamy goodness with a healthier twist.

Refreshing zing: The tartness of key lime paired with the sweet crust creates a perfect balance that will tickle your taste buds.

Versatility: Whether for a summer gathering or an intimate dinner, these mini delights fit every occasion, leaving guests craving more!

Make-ahead convenience: Chilling them overnight enhances their flavors and makes them a fantastic time-saver. Pair them with a dollop of Greek yogurt or even try variations like Fiesta Lime Chicken with Avocado for a complete meal experience!

Mini Key Lime Cheesecakes Ingredients

Here’s everything you need to create these delectable mini cheesecakes!

For the Crust

  • Graham Cracker Crumbs – Provides a deliciously crunchy base; consider using gluten-free options for a healthier spin.
  • Butter or Ghee – Acts as a binding agent for the crust; ghee can be a great dairy-free alternative.

For the Filling

  • Cream Cheese – Gives the cheesecake its rich and creamy texture; choose low-fat or full-fat based on your dietary goals.
  • Plain Greek Yogurt – Adds a tangy flavor and enhances the overall texture of the cheesecakes; aim for 2% or whole milk for best results.
  • Sugar – Sweetens the filling perfectly; feel free to swap with low-calorie sweeteners like Swerve for a sugar-free rinse.
  • Egg – Provides structure to the cheesecake; make sure it’s at room temperature for easy mixing.
  • Egg White – Lightens the texture of the cheesecake; if not available, it’s okay to omit.
  • Lime Juice – Infuses a refreshing tartness; opt for freshly squeezed juice for the best flavor.
  • Lime Zest – Amplifies the zesty lime flavor; adjust the amount based on your preference for intensity.

Enjoy these Mini Key Lime Cheesecakes as a delightful treat that brings both pleasure and a healthier alternative to your dessert table!

Step‑by‑Step Instructions for Mini Key Lime Cheesecakes

Step 1: Preheat the Oven
Begin by preheating your oven to 325°F (163°C). While the oven heats, line a 12-cup muffin tin with foil liners. To ensure easy removal later, lightly spray the liners with a non-stick cooking spray. This preparation sets you up for the perfect foundation for your delightful Mini Key Lime Cheesecakes.

Step 2: Prepare the Crust
In a food processor, pulse the graham crackers into fine crumbs. Melt the butter or ghee and combine it with the crumbs until they’re well mixed and resemble wet sand. Evenly distribute this mixture among the muffin liners, pressing down firmly with a measuring cup or your fingers to create a compact crust. Bake these for 8–10 minutes until lightly golden and aromatic, then let them cool slightly.

Step 3: Make the Filling
In a large mixing bowl, use an electric mixer to beat the softened cream cheese until it’s light and fluffy, about 2 minutes. Gradually add in the Greek yogurt and sugar, mixing until smooth. Add the room-temperature egg, egg white, fresh lime juice, and lime zest, blending until just combined. Taking care not to overmix ensures your Mini Key Lime Cheesecakes have a light texture.

Step 4: Bake the Cheesecakes
Carefully spoon the creamy filling over the pre-baked crusts, filling each liner about three-quarters full. Place the muffin tin into the preheated oven and bake for 15–20 minutes. The edges should be set while the centers jiggle slightly—this indicates they’re perfectly done. Remove them from the oven and allow them to cool in the pan for about 10 minutes.

Step 5: Cool & Chill
After cooling for a bit, transfer the Mini Key Lime Cheesecakes to a wire rack to reach room temperature. Once they’ve cooled, place them in the refrigerator and chill for at least 2 hours, allowing the flavors to meld beautifully and the texture to firm up. Patience here makes for a delightful dessert experience.

How to Store and Freeze Mini Key Lime Cheesecakes

Fridge: Keep your Mini Key Lime Cheesecakes in an airtight container in the refrigerator for up to 3 days. This helps maintain their creamy texture and refreshing flavor.

Freezer: For longer storage, freeze individual cheesecakes by wrapping each one tightly in plastic wrap, then placing them in a freezer-safe bag. They can last up to 2 months.

Thawing: To enjoy a frozen Mini Key Lime Cheesecake, transfer it to the fridge to thaw overnight before serving for optimal texture and taste.

Serving After Storage: If desired, freshen up your cheesecakes by topping them with a dollop of Greek yogurt or freshly grated lime zest before serving!

Tips for the Best Mini Key Lime Cheesecakes

  • Room Temperature Ingredients: Ensure all your ingredients, especially cream cheese and eggs, are at room temperature to achieve a smooth, clump-free filling.

  • Don’t Overmix: Once you add the eggs to the mixture, mix just until combined to avoid a dense texture. Overmixing can lead to heavy cheesecakes.

  • Foil Liners: Using foil liners not only makes for easy removal but also adds a polished presentation to your Mini Key Lime Cheesecakes without the need for extra plating.

  • Chill Time Matters: Allow your cheesecakes to chill for at least 2 hours after baking. They will firm up beautifully and develop a richer flavor profile during this time.

  • Testing for Doneness: Look for edges that are set but with a slightly jiggly center; this ensures a perfectly creamy texture once set in the refrigerator.

  • Flavorful Add-Ins: Don’t hesitate to add a touch more lime zest or a hint of coconut for an unexpected twist. Adjust according to your taste for delightful variations!

Mini Key Lime Cheesecakes Variations & Substitutions

Feel free to get creative and customize these delightful Mini Key Lime Cheesecakes to fit your taste buds!

  • Lemon Twist: Swap lime juice and zest for lemon to create a bright, citrusy alternative that still shines.

  • Coconut Cream: Fold in half a cup of light coconut cream into the filling for a creamy, tropical twist that complements the lime perfectly.

  • Dairy-Free: Use cashew cream and coconut yogurt instead of cream cheese and Greek yogurt for a delicious vegan version.

  • No-Bake Option: Skip the baking step by chilling the cheesecake mixture in the muffin liners for a cool, refreshing treat perfect for hot days.

  • Fruit-Infused: Add a layer of blended berries—like blueberries or raspberries—underneath the cheesecake filling for a splash of color and flavor.

  • Chocolate Crust: Replace graham cracker crumbs with crushed chocolate cookies for a delightful chocolatey addition that pairs well with the tartness.

  • Heat it Up: Add finely chopped jalapeño to the filling for an unexpected kick that elevates these cheesecakes to a new level of flavor.

  • Serve with a Twist: Pair your cheesecakes with a side of Mini Tropical Pavlovas for a delightful dessert platter.

With these variations, you can always keep dessert exciting while enjoying the delicious taste of fresh Mini Key Lime Cheesecakes!

Make Ahead Options

These Mini Key Lime Cheesecakes are perfect for meal prep enthusiasts! You can prepare the crust and filling up to 24 hours in advance. For optimal quality, make the graham cracker crust, and once cooled, store it in an airtight container in the refrigerator. Likewise, prepare the filling but keep it separate until you're ready to bake. When you're set to serve, simply spoon the filling over the crusts and bake as instructed. Chilling them overnight enhances their flavors, ensuring they remain just as delicious when enjoyed the next day. These make-ahead tips will make your busy weeknights a breeze!

What to Serve with Mini Key Lime Cheesecakes

Picture yourself hosting a delightful gathering, where sweet treats echo the laughter of friends and family under the sun.

  • Fresh Berries: Juicy strawberries or blueberries balance the creamy tang, adding a pop of color and freshness to each bite.

  • Coconut Whipped Cream: Light and airy, this dreamy topping complements the cheesecakes while enhancing the tropical vibes of your dessert.

  • Herb-Infused Iced Tea: A refreshing blend with hints of mint or basil can cleanse the palate beautifully between each indulgent cheesecake.

  • Lime Sorbet: A zesty pairing that echoes the key lime flavor of the cheesecakes while providing a cooling, summery contrast.

  • Chocolate Dipped Nuts: Crunchy and sweet, these add a delightful texture to your dessert spread, perfect for those who enjoy a touch of decadence.

  • Spiced Pineapple Salsa: For a tropical twist, serve a light salsa with ripe pineapple, cilantro, and lime juice to enhance all the flavors on your table.

Embrace these pairings to create a vibrant and memorable dessert experience that will leave everyone longing for seconds!

Mini Key Lime Cheesecakes Recipe FAQs

What type of limes should I use for my Mini Key Lime Cheesecakes?
Absolutely, the best option is to use Key limes for their distinct tart flavor. They are smaller and have a more aromatic zest compared to regular limes, providing that authentic taste in your cheesecakes. If you can't find Key limes, Persian limes are a fine substitute, but keep in mind the flavor might be slightly less tangy.

How should I store my Mini Key Lime Cheesecakes?
To keep your cheesecakes fresh, store them in an airtight container in the refrigerator for up to 3 days. If you need to make them ahead, they can be prepared a day in advance. Just ensure they’re well-covered to avoid any absorption of odors from other foods.

Can I freeze Mini Key Lime Cheesecakes? How do I do it?
Yes, you can absolutely freeze your cheesecakes! Follow these steps:

  1. Allow the cheesecakes to cool completely in the fridge.
  2. Wrap each cheesecake individually in plastic wrap to prevent freezer burn.
  3. Place the wrapped cheesecakes into a freezer-safe bag or container.
    They can be frozen for up to 2 months. When you’re ready to enjoy, simply transfer them to the refrigerator for overnight thawing.

What if my cheesecakes are bubbling or cracking during baking?
Don't worry! A jiggly center is actually a good sign, meaning they’ll set nicely in the fridge. If you see bubbling or cracks, it might mean they were baked a bit too long or the oven’s temperature was slightly high. Ensure to bake them until the edges are firm, yet the centers remain slightly soft. Using a water bath during baking can also help maintain moisture and prevent cracking.

Can I make these Mini Key Lime Cheesecakes dairy-free?
Certainly! You can easily convert this recipe to be dairy-free. Substitute the cream cheese with a dairy-free cream cheese alternative and use coconut yogurt in place of Greek yogurt. The texture might change slightly, but it will still offer a creamy result with that lovely key lime flavor.

Are these cheesecakes safe for pets or allergies?
While the Mini Key Lime Cheesecakes are delicious for human enjoyment, it’s important to keep them away from pets as ingredients like cream cheese and sugar aren’t ideal for them. If you're preparing these for someone with allergies, check for any specific dietary restrictions, especially regarding dairy or eggs, and consider suitable substitutes as necessary.

Mini Key Lime Cheesecakes

Mini Key Lime Cheesecakes: Refreshing Bites of Bliss

These Mini Key Lime Cheesecakes are a healthier dessert option that satisfies cravings while being gluten-free and easy to make.
Print Recipe Pin Recipe
Prep Time 20 minutes mins
Cook Time 20 minutes mins
Chilling Time 2 hours hrs
Total Time 2 hours hrs 40 minutes mins
Servings: 12 cheesecakes
Course: Dessert
Cuisine: American
Calories: 160
Ingredients Equipment Method Nutrition Notes

Ingredients
  

For the Crust
  • 1 cup Graham Cracker Crumbs Consider using gluten-free options.
  • 4 tablespoons Butter or Ghee Ghee can be a dairy-free alternative.
For the Filling
  • 8 ounces Cream Cheese Choose low-fat or full-fat based on dietary goals.
  • 1 cup Plain Greek Yogurt Aim for 2% or whole milk.
  • 1/2 cup Sugar Can swap with low-calorie sweeteners like Swerve.
  • 1 large Egg Room temperature for easier mixing.
  • 1 large Egg White Omit if not available.
  • 1/2 cup Lime Juice Preferably freshly squeezed.
  • 1 tablespoon Lime Zest Adjust amount based on taste preference.

Equipment

  • Oven
  • Muffin tin
  • Food Processor
  • Electric mixer
  • Mixing Bowl
  • measuring cups
  • Measuring Spoons

Method
 

Preparation
  1. Preheat your oven to 325°F (163°C) and line a 12-cup muffin tin with foil liners, spraying them lightly with non-stick spray.
  2. In a food processor, pulse graham crackers into fine crumbs. Melt butter or ghee and combine with crumbs to create a wet sand texture. Press this mixture into the muffin liners.
  3. Bake the crusts for 8–10 minutes until lightly golden, then let cool.
  4. In a mixing bowl, beat cream cheese until fluffy. Gradually add Greek yogurt and sugar, mixing until smooth. Add egg, egg white, lime juice, and lime zest, blending until just combined.
  5. Spoon filling over the baked crusts, filling each about three-quarters full. Bake for 15–20 minutes until edges are set and centers jiggle slightly.
  6. Cool in the pan for 10 minutes, then transfer to a wire rack to cool completely. Chill in the refrigerator for at least 2 hours before serving.

Nutrition

Serving: 1cheesecakeCalories: 160kcalCarbohydrates: 20gProtein: 4gFat: 7gSaturated Fat: 4gMonounsaturated Fat: 3gCholesterol: 30mgSodium: 150mgPotassium: 60mgFiber: 1gSugar: 10gVitamin A: 200IUVitamin C: 1mgCalcium: 50mgIron: 0.5mg

Notes

Ensure all ingredients are at room temperature for a smooth filling. Don't overmix after adding the eggs to prevent a dense texture.

Tried this recipe?

Let us know how it was!

Creamy Vegan Mango Cheesecake That Melts in Your Mouth

January 1, 2026 by Grace Snow Leave a Comment

As I poured the bright, golden-hued mango curd over my newly set Vegan Mango Cheesecake, I could almost hear the tropical waves crashing in the distance. This delightful dessert captures the essence of summer with its creamy, no-bake filling nestled on a crunchy cookie crust that you won’t believe is vegan! Whether you’re hosting a gathering or simply craving something sweet, this Vegan Mango Cheesecake promises to impress without the fuss. It’s not only a breeze to prepare but also offers a refreshing, guilt-free indulgence that everyone will adore, regardless of dietary preferences. Ready to whip up this slice of paradise? Let's dive into this delicious journey!

Why is Vegan Mango Cheesecake So Irresistible?

Creamy, Dreamy Texture: This cheesecake's luscious filling melts in your mouth, offering a delightful balance of creaminess and freshness. Perfect for anyone looking to indulge without dairy!

Easy No-Bake Preparation: With minimal effort, you can whip up this no-bake dessert that doesn't require turning on the oven, making it a perfect choice for hot summer days.

Refreshing Tropical Flavor: The vibrant mango curd and fresh mango topping bring a burst of tropical sweetness, elevating your dessert game and making it an instant crowd-pleaser.

Versatile and Customizable: Feel free to experiment with different crust options or add your favorite spices for a personal touch—perfect for accommodating everyone at your table!

Whether you're enjoying it at a summer gathering or just treating yourself, this Vegan Mango Cheesecake is a must-try. Pair it with a refreshing drink or take a look at other recipes like my Vegan Cacao Nib for a delightful dessert spread!

Vegan Mango Cheesecake Ingredients

• Indulge in this refreshing dessert with a few simple ingredients!

For the Crust
• Vegan Cookies (200g) – Use digestives for a classic feel; substitute with gluten-free cookies if needed.
• Unsalted Vegan Butter (80g) – Binds the crust ingredients together; opt for block-style vegan butter for best results.
• Sea Salt (¼ tsp) – Enhances the flavor of the crust.
• Ground Ginger (½ tsp, optional) – Adds warmth and depth to the crust's flavor; omit if desired.

For the Filling
• Cashews (200g, soaked) – Primary component providing creaminess; quick-soak in boiled water for 30 minutes if not pre-soaked.
• Vegan Cream Cheese (500g) – Central to the filling’s texture; choose a thick brand to ensure proper setting.
• Vegan Greek-Style Yogurt (120g) – Contributes to the filling's silky texture; can substitute with firm silken tofu or coconut yogurt if unavailable.
• Vanilla Extract (1 tsp) – Enhances the overall flavor profile.
• Lime Zest (1 tsp, optional) – Adds brightness and balances sweetness; omit if preferred.

For the Topping
• Vegan Mango Curd – Adds a rich tropical flavor and color; can be prepped up to 2 days in advance.
• Fresh Mango (1, diced, for decoration) – Provides a vibrant topping and enhances the tropical theme.

Dive into these ingredients and get ready for a delicious Vegan Mango Cheesecake that everyone will love!

Step‑by‑Step Instructions for Vegan Mango Cheesecake

Step 1: Prepare Mango Curd
Begin by making the vegan mango curd, which can be done up to two days in advance for convenience. In a saucepan over medium heat, combine mango puree with your chosen sweetener and thicken it until glossy and vibrant, stirring continuously for about 10 minutes. Once ready, refrigerate the curd in an airtight container until cool and set.

Step 2: Soak Cashews
Prepare the cashews for the filling by soaking them in water for at least four hours or quick-soaking in boiling water for just 30 minutes. After soaking, thoroughly rinse and drain the cashews. This step is crucial for ensuring your Vegan Mango Cheesecake has that wonderfully creamy texture.

Step 3: Prepare Crust
In a food processor, blitz the vegan cookies, unsalted vegan butter, sea salt, and optional ground ginger until the mixture resembles fine crumbs. Firmly press this mixture into the base of a lined 7.5 or 8-inch springform pan, ensuring it is evenly distributed. Refrigerate the crust for about 30 minutes to help it firm up.

Step 4: Make Filling
In a high-speed blender, combine the soaked cashews, half of the prepared vegan mango curd, vegan cream cheese, vegan Greek-style yogurt, vanilla extract, and lime zest. Blend until completely smooth and creamy, about 2-3 minutes. Pour this luscious filling into the chilled crust, spreading it evenly, and refrigerate for at least 8 hours or preferably overnight to allow it to set firmly.

Step 5: Add Topping
Once the filling has set beautifully, gently warm the remaining mango curd over a double boiler until it becomes spreadable. Carefully pour the curd over the cheesecake, using the back of a spoon to create swirls and even coverage if desired. Place it back into the fridge for about an hour to allow the topping to firm up.

Step 6: Decorate
To finish off your vegan mango cheesecake, remove the springform pan without damaging the edges. Carefully peel away the parchment paper from the crust. Now, adorn the cheesecake with fresh diced mango chunks and mint leaves for a delightful touch, enhancing both the presentation and flavor profile of this tropical treat.

Variations & Substitutions for Vegan Mango Cheesecake

Feel free to be creative and add your own twist to this delightful dessert!

  • Gluten-Free Crust: Use gluten-free cookies like almond or coconut for an equally tasty crust that everyone can enjoy.
    Now you can share this tropical delight without worrying about gluten intolerance!

  • Nuts-Free Option: Instead of cashews, use soaked sunflower seeds for the filling to achieve creaminess without nuts.
    This tweak ensures those with nut allergies can still partake in this irresistible treat.

  • Different Fruit: Swap mango for equally beautiful fruits like passion fruit or blueberries to change up flavors yet maintain a tropical vibe.
    Each fruit brings its own personality, inviting new adventures in every bite!

  • Added Spice: Incorporate spices such as cinnamon, nutmeg, or cardamom to the crust for a warm, aromatic flavor that brings depth.
    This subtle twist elevates the dessert to a whole new level while still keeping it refreshing.

  • Creamy Tofu Substitute: Use firm silken tofu mixed with a bit of lemon juice instead of vegan cream cheese for a lighter, protein-packed filling.
    You won’t sacrifice taste, and it provides a fun textural element that's sure to surprise your guests!

  • Coconut Whipped Topping: Instead of mango curd for the topping, make a coconut whipped cream for a rich, creamy addition.
    It's a decadent touch that not only tastes amazing but looks beautiful too!

  • Chocolate Lovers: Add melted dark chocolate to half the mango curd for a luscious chocolate swirl that adds richness and intrigue.
    For those who can’t resist the combination of chocolate and mango, this is an absolute game-changer!

  • Opt for Citrus Zing: Substitute lime zest with lemon or orange zest for a fresher, citrus twist that brightens the overall flavor.
    These small shifts can reenergize this classic and offer a pleasant surprise to your senses.

Embrace these variations to make this vegan mango cheesecake your own! If you're looking for more delightful plant-based recipes, you might also enjoy trying out my Vegan Sushi Indulge or whip up a comforting Blackberry Crisp for a refreshing dessert spread.

How to Store and Freeze Vegan Mango Cheesecake

Fridge: Keep the Vegan Mango Cheesecake in an airtight container for up to 5 days. This ensures it stays fresh and maintains its creamy texture.

Freezer: You can freeze slices of the cheesecake for up to 3 months. Wrap each slice tightly in plastic wrap to prevent freezer burn, then place in a freezer-safe container.

Thawing: When ready to enjoy, remove the cheesecake from the freezer and let it thaw at room temperature for about 1 hour before serving. This restores the dessert's lovely texture.

Reheating: There's no need to reheat; simply serve chilled directly from the fridge or after thawing for the best taste experience!

Expert Tips for Vegan Mango Cheesecake

  • Soak Cashews Well: Ensure cashews are fully soaked to achieve that creamy texture; quick-soaking may suffice but isn't ideal for the best results.

  • Quality Cream Cheese: Choose a thick brand of vegan cream cheese to ensure the filling sets nicely and provides a rich flavor in your Vegan Mango Cheesecake.

  • Chill Time Matters: Allow ample time for the cheesecake to set; overnight refrigeration is recommended for the best texture and flavor integration.

  • Topping Techniques: When adding the mango curd topping, gently warm it first to make spreading easier; swirl for an aesthetic finish or keep it smooth!

  • Crust Alternatives: Experiment with different types of vegan or gluten-free cookies for the crust to personalize the flavor profile and cater to dietary preferences.

What to Serve with Vegan Mango Cheesecake

As your delicious vegan mango cheesecake chills to perfection, let’s explore some delightful pairings that will elevate your dessert experience.

  • Refreshing Coconut Water: This hydrating beverage perfectly complements the tropical flavors, enhancing the summery vibe of the cheesecake.

  • Mint-Infused Iced Tea: A light, herbal drink that provides an aromatic counterpoint to the richness of the cheesecake, creating a balanced refreshment.

  • Crispy Tropical Fruit Salad: A medley of fresh fruits like pineapple, kiwi, and berries brings a zingy contrast and additional freshness, keeping the palate bright.

  • Chilled Sparkling Lemonade: The zesty sparkle of this drink will cleanse the palate, making every cheesecake bite feel refreshing and exciting.

  • Creamy Coconut Whipped Topping: Adding a dollop of this light, airy topping gives an added richness and a delightful coconut flavor that pairs beautifully with mango.

  • Dark Chocolate Drizzle: A gourmet touch that adds a delightful contrast with its bittersweet richness, creating a luxurious dessert experience.

  • Almond Biscotti: Offering a wonderful crunch, this cookie adds texture and nutty flavors that enhance the overall dessert tasting experience.

  • Coconut Sorbet: This dairy-free alternative is not only refreshing but its creamy coconut texture mirrors that of the cheesecake, making for a harmonious dessert duo.

Make Ahead Options

These Vegan Mango Cheesecake preparations are perfect for busy home cooks looking to save time without sacrificing flavor! You can whip up the vegan mango curd up to 2 days in advance and store it in an airtight container in the refrigerator, ensuring it stays fresh and vibrant. Additionally, the crust can be prepared and refrigerated for 24 hours before assembling. When you're ready to enjoy, simply blend the soaked cashews and other filling ingredients, pour the mixture into the prepared crust, and let it set in the fridge for at least 8 hours or preferably overnight. This way, you'll have a luscious and creamy Vegan Mango Cheesecake ready to impress friends and family with minimal effort!

Vegan Mango Cheesecake Recipe FAQs

How do I select ripe mangoes for the curd?
Absolutely! When choosing mangoes, look for those that are slightly soft to the touch and have a sweet aroma; this indicates ripeness. The skin should be free of dark spots or blemishes. If you're unsure, opt for a mango that has a vibrant yellow or orange hue.

What’s the best way to store leftover Vegan Mango Cheesecake?
To keep your cheesecake fresh, store it in an airtight container in the refrigerator for up to 5 days. This prevents it from absorbing any other odors and helps maintain its delightful creamy texture.

Can I freeze slices of Vegan Mango Cheesecake?
Absolutely! To freeze, wrap each slice tightly in plastic wrap and place them in a freezer-safe container. The cheesecake can be kept in the freezer for up to 3 months. When you're ready to enjoy a slice, simply thaw it at room temperature for about an hour before serving.

What if my cashews aren’t blending smoothly?
If you find that your cashews aren’t blending into a smooth cream, it's likely they weren't soaked long enough. I recommend soaking them for at least 4 hours. For a quick fix, you can soak them in boiling water for 30 minutes. Rinse and drain thoroughly before blending for optimal creaminess.

Are there any common allergies I should be aware of?
Yes, while this Vegan Mango Cheesecake is plant-based, it does contain cashews which are a common allergen. If you're serving individuals with nut allergies, consider substituting cashews with silken tofu or a firm coconut yogurt. Always check ingredient labels if using pre-made items to ensure they meet dietary restrictions.

Can pets enjoy this Vegan Mango Cheesecake?
Generally, this cheesecake is not suitable for pets. The main ingredient of cashews can be problematic in large amounts for animals, and ingredients like vanilla extract could also be harmful. It's best to treat your furry friends with specifically designed pet-friendly treats instead!

Vegan Mango Cheesecake

Creamy Vegan Mango Cheesecake That Melts in Your Mouth

This Vegan Mango Cheesecake features a creamy, no-bake filling and a crunchy cookie crust, perfect for summer gatherings.
Print Recipe Pin Recipe
Prep Time 30 minutes mins
Cook Time 10 minutes mins
Chill Time 8 hours hrs
Total Time 8 hours hrs 40 minutes mins
Servings: 8 slices
Course: Dessert
Cuisine: Vegan
Calories: 300
Ingredients Equipment Method Nutrition Notes

Ingredients
  

For the Crust
  • 200 g Vegan Cookies Use digestives for a classic feel; substitute with gluten-free cookies if needed.
  • 80 g Unsalted Vegan Butter Opt for block-style vegan butter for best results.
  • 0.25 tsp Sea Salt Enhances the flavor of the crust.
  • 0.5 tsp Ground Ginger Optional, adds warmth and depth.
For the Filling
  • 200 g Cashews Soaked; quick-soak in boiled water for 30 minutes if not pre-soaked.
  • 500 g Vegan Cream Cheese Choose a thick brand to ensure proper setting.
  • 120 g Vegan Greek-Style Yogurt Can substitute with firm silken tofu or coconut yogurt.
  • 1 tsp Vanilla Extract Enhances the overall flavor profile.
  • 1 tsp Lime Zest Optional, adds brightness.
For the Topping
  • Vegan Mango Curd Can be prepped up to 2 days in advance.
  • 1 Fresh Mango Diced, for decoration.

Equipment

  • Food Processor
  • High-speed blender
  • Springform pan
  • Saucepan

Method
 

Step‑by‑Step Instructions
  1. Prepare the vegan mango curd by combining mango puree with your sweetener over medium heat, stirring until thickened for about 10 minutes. Refrigerate until cool.
  2. Soak cashews for at least 4 hours or quick-soak in boiling water for 30 minutes. Rinse and drain after soaking.
  3. In a food processor, blitz the vegan cookies, unsalted vegan butter, sea salt, and ground ginger until fine crumbs. Press into a lined springform pan and refrigerate for 30 minutes.
  4. Blend soaked cashews, half of the mango curd, vegan cream cheese, vegan Greek yogurt, vanilla extract, and lime zest until smooth. Pour into the crust and refrigerate for at least 8 hours.
  5. Warm the remaining mango curd over a double boiler until spreadable, then pour it over the cheesecake. Refrigerate for an hour.
  6. Remove the springform pan and peel away parchment. Decorate with fresh diced mango and mint leaves.

Nutrition

Serving: 1sliceCalories: 300kcalCarbohydrates: 35gProtein: 5gFat: 15gSaturated Fat: 6gPolyunsaturated Fat: 2gMonounsaturated Fat: 7gSodium: 200mgPotassium: 150mgFiber: 2gSugar: 18gVitamin A: 5IUVitamin C: 10mgCalcium: 2mgIron: 4mg

Notes

Allow ample time for proper setting and consider using alternative crust ingredients to fit dietary needs.

Tried this recipe?

Let us know how it was!

Delightful Marshmallow Whip Cheesecake with No-Bake Ease

January 1, 2026 by Grace Snow Leave a Comment

It's a warm summer evening, and laughter fills the air as friends gather in my kitchen, their eyes lighting up at the sight of my latest creation. This No-Bake Marshmallow Whip Cheesecake is the star of the night, combining the whimsical sweetness of marshmallow fluff with the creamy richness of cheesecake, all resting on a buttery graham cracker crust. Not only is it incredibly easy to whip up—perfect for those busy days—but it also stands as a go-to crowd-pleaser for any occasion. Best of all, you can customize it with your favorite toppings or make it ahead of time. Whether it's for a backyard barbecue or a cozy family dinner, this dessert offers a delightful way to share sweet moments. Ready to dive into this fluffy delight? Let’s get started!

Why is this cheesecake a must-try?

Effortless Preparation: This no-bake cheesecake requires minimal effort, making it perfect for busy weeknights or surprise gatherings.

Decadent Flavor: The creaminess of cream cheese combined with marshmallow fluff creates a rich, sugary treat that tantalizes the taste buds.

Versatile Toppings: Customize your cheesecake with delightful toppings like fresh fruit or chocolate drizzle for a personal touch.

Make-Ahead Magic: You can easily prepare this the day before, allowing the flavors to meld and making your life easier on the day of your event.

Crowd Favorite: Whether at a casual family meal or a summer picnic, this cheesecake is sure to impress and satisfy every sweet tooth, leaving everyone asking for seconds!

Marshmallow Whip Cheesecake Ingredients

For the Crust
• Graham Cracker Crumbs – The buttery base that holds your cheesecake together; for a twist, try using crushed Oreos.
• Sugar – Adds sweetness to the crust; you can substitute with a low-calorie sweetener if desired.
• Butter (melted) – Binds the crust beautifully; opt for unsalted butter for the best flavor balance.

For the Filling
• Cream Cheese – The heart of the cheesecake, lending creaminess; be sure it's at room temperature for a smooth mix.
• Marshmallow Fluff – Infuses that light, sweet flavor; alternatively, whipped cream can tone down the sweetness.
• Vanilla Extract – Elevates the overall taste; always use pure vanilla for the most delightful aroma.
• Whipped Topping (or whipped cream) – Adds airiness to the filling; homemade whipped cream delivers unmatched freshness.

Optional Toppings
• Fresh Fruits – Strawberries, blueberries, or raspberries add a refreshing burst of flavor and a beautiful presentation.
• Chocolate Drizzle – A decadent touch that complements the marshmallow sweetness; melted chocolate works like a charm.
• Mini Marshmallows – Fun, playful, and perfect for topping; they lend a nostalgic feel to your cheesecake.

This Marshmallow Whip Cheesecake is not just a treat; it’s the perfect blend of flavors and textures that will leave you and your loved ones asking for more!

Step‑by‑Step Instructions for Marshmallow Whip Cheesecake

Step 1: Prepare the Crust
In a medium bowl, combine graham cracker crumbs and sugar. Pour in the melted butter and mix until it resembles wet sand. Firmly press this mixture into the bottom of a 9-inch springform pan to create an even layer. Chill the crust in the refrigerator for at least 30 minutes to help it set before adding the filling.

Step 2: Make the Filling
In a large mixing bowl, beat the cream cheese with an electric mixer on medium speed until smooth and creamy, about 2 minutes. Gradually add the marshmallow fluff and vanilla extract, mixing until well combined. The filling should be light and fluffy; don’t rush it, as this helps achieve the perfect Marshmallow Whip Cheesecake texture.

Step 3: Fold in Whipped Topping
Gently fold in the whipped topping using a spatula or wooden spoon until just combined. Be careful not to overmix, as you want to retain the airiness in the filling. The mixture should be light and airy, showcasing the delightful blend of marshmallow and cream cheese.

Step 4: Assemble Cheesecake
Spread the fluffy cheesecake filling evenly over the chilled graham cracker crust. Use a spatula to smooth the top, ensuring it looks inviting. Cover the cheesecake with plastic wrap and refrigerate for at least 4 hours, but overnight is best for optimal flavor melding and stability.

Step 5: Serve with Toppings
Before slicing, arrange your favorite toppings on the cheesecake, such as fresh strawberries, mini marshmallows, or a drizzle of chocolate sauce for added flair. Carefully release the springform ring and slice the cheesecake into generous pieces. Serve chilled and enjoy the delightful flavors of your homemade Marshmallow Whip Cheesecake!

Make Ahead Options

Making this delicious Marshmallow Whip Cheesecake ahead of time is a great way to save precious moments on busy days! You can prepare the graham cracker crust up to 3 days in advance, simply keep it wrapped tightly in plastic wrap in the refrigerator. Additionally, the cheesecake filling can also be mixed and refrigerated for up to 24 hours before assembly. Just remember to let it come to room temperature before folding in the whipped topping to maintain its fluffiness. When you're ready to serve, spread the filling over the chilled crust, refrigerate for at least 4 hours, or preferably overnight, for the best flavor. This not only ensures a stress-free serving experience but also allows the flavors to meld beautifully, making your Marshmallow Whip Cheesecake just as delightful as when freshly made!

Storage Tips for Marshmallow Whip Cheesecake

Fridge: Store your cheesecake covered with plastic wrap or in an airtight container for up to 3 days to maintain its creamy texture and freshness.

Freezer: Wrap the cheesecake tightly in plastic wrap and foil to prevent freezer burn, and it can be frozen for up to 1 month. Thaw in the refrigerator overnight before serving.

Reheating: This cheesecake is served chilled, so there's no need for reheating. Just add your desired toppings before slicing and serving cold.

Serving Suggestions: To enhance your experience, pair the cheesecake with fresh fruits or a drizzle of chocolate sauce just before serving.

What to Serve with Creamy No-Bake Marshmallow Whip Cheesecake

Indulging in a slice of this heavenly cheesecake opens up a world of delightful pairings that elevate your dessert experience.

  • Fresh Berries: Their juicy sweetness adds a refreshing contrast to the creamy cheesecake, creating a vibrant, colorful plate.
  • Chocolate Sauce: A luscious drizzle brings richness and decadence that perfectly complements the fluffy marshmallow layers.
  • Whipped Cream: A dollop of freshly made whipped cream enhances the cheesecake’s airy texture and adds a classic touch.
  • Mint Leaves: A few fresh mint leaves not only brighten the dish visually but also provide a fragrant burst that balances sweetness.
  • Caramel Drizzle: The warmth of caramel harmonizes beautifully with marshmallow fluff, turning each bite into a heavenly treat.
  • Coffee: A cup of fresh-brewed coffee adds a lovely bitter contrast, making it the ultimate partner for this sweet cheesecake.
  • Almonds: Chopped, toasted almonds introduce a delightful crunch, enriching the dessert's texture and flavors beautifully.
  • Coconut Flakes: Lightly toasted coconut flakes add tropical notes, enhancing the whimsy of this delightful cheesecake.

Expert Tips for the Best Marshmallow Whip Cheesecake

  • Room Temperature Cream Cheese: Ensure your cream cheese is at room temperature. This prevents lumps and helps create a silky smooth filling.

  • Chill for Flavor: Refrigerate the cheesecake overnight if possible. This allows the flavors to develop fully, making every bite more delicious.

  • Gentle Folding: When adding whipped topping, fold gently to retain airiness. Overmixing can deflate the light texture of your Marshmallow Whip Cheesecake.

  • Crust Setting: Properly chill the crust for at least 30 minutes before adding the filling. This ensures it sets well and provides a sturdy base.

  • Customization Choices: Don’t hesitate to experiment with toppings. Fresh fruits, chocolate drizzles, or even crushed nuts can elevate your cheesecake to new heights!

Marshmallow Whip Cheesecake Variations

Feel free to explore and make this cheesecake uniquely yours with these delightful twists!

  • Dairy-Free: Use coconut cream instead of cream cheese for a rich and creamy filling that's entirely dairy-free.
    It's a great option for those with dairy sensitivities, and the coconut adds a subtle tropical flair.

  • Chocolate Lovers: Incorporate cocoa powder into the cream cheese filling for a decadent chocolate marshmallow cheesecake.
    If you love the richness of chocolate, this variation will satisfy your cravings beautifully.

  • Fruit-Infused: Add a layer of fresh fruit puree, like strawberry or mango, between the crust and filling.
    This fruity layer elevates the cheesecake's freshness and adds a delightful pop of color.

  • Nutty Crust: Replace graham cracker crumbs with crushed nuts like almonds or pecans for a gluten-free and crunchy crust.
    This adds a wonderfully hearty texture that complements the creamy filling perfectly.

  • Spicy Kick: Incorporate a pinch of cinnamon or ginger into the cream cheese mixture for a warm, spiced flavor.
    It's a simple way to add a comforting twist, making your dessert more memorable.

  • Mini Cheesecakes: Use a muffin tin lined with cupcake liners for adorable mini versions, perfect for parties or portion control.
    These bite-sized delights are always a hit and make serving so much easier!

  • Swirls of Flavor: Swirl in some Nutella or raspberry jam before chilling to create beautiful marbled patterns.
    The visual appeal adds an impressive touch, making your dessert as stunning as it is delicious.

  • Homemade Whipped Cream: Instead of store-bought whipped topping, make your own for a fresher taste and customizable sweetness.
    It's a simple way to enhance the overall flavor of your cheesecake and impress your friends.

For even more inspiration, try adding delightful toppings like caramel drizzle or fresh berries to elevate your cheesecake experience!

Marshmallow Whip Cheesecake Recipe FAQs

How do I choose the right marshmallow fluff?
When selecting marshmallow fluff, look for a product that has a smooth texture and a well-balanced sweetness. Check the expiration date to ensure maximum freshness. If you want a lower-sugar alternative, you can opt for sugar-free marshmallow cream, which can be found in most grocery stores.

How should I store the cheesecake?
To keep your Marshmallow Whip Cheesecake fresh, wrap it tightly in plastic wrap or store it in an airtight container in the fridge for up to 3 days. If you need more time, you can freeze it by tightly wrapping it in plastic wrap and then foil for up to 1 month. Thaw it in the refrigerator overnight before enjoying.

Can I freeze the cheesecake? How?
Absolutely! To freeze your cheesecake, first, allow it to chill completely in the fridge. Then, wrap it tightly in plastic wrap followed by aluminum foil to prevent freezer burn. Label it with the date and pop it in the freezer. When you’re ready to enjoy it, just transfer it to the fridge for an overnight thaw.

What do I do if the filling is lumpy?
If your cream cheese filling turns out lumpy, it’s likely because the cream cheese wasn’t at room temperature. To remedy this, place the lumpy filling back in a mixing bowl and beat it for a minute or two with an electric mixer until smooth. If you encounter lumps, don’t hesitate to give it a good stir as it will help incorporate the ingredients better.

Is this cheesecake suitable for people with allergies?
Be cautious if anyone has allergies, as this recipe contains dairy (from cream cheese and whipped topping) and may contain gluten (from graham crackers). For a gluten-free option, use gluten-free graham crackers or or even a nut-based crust. Additionally, if you're making it for someone with lactose intolerance, you can use lactose-free cream cheese and whipped topping as substitutes.

What are some variations I can try?
The beauty of the Marshmallow Whip Cheesecake is its versatility! You can add lemon zest for a zesty twist or swirl in some raspberry jam for a fruity kick. If you prefer mini cheesecakes, use a muffin tin with cupcake liners for personalized servings. The more the merrier with toppings! Enjoy experimenting!

Marshmallow Whip Cheesecake

Delightful Marshmallow Whip Cheesecake with No-Bake Ease

A delightful Marshmallow Whip Cheesecake that is creamy, sweet, and perfect for any occasion with no baking required.
Print Recipe Pin Recipe
Prep Time 30 minutes mins
Chilling Time 4 hours hrs
Total Time 4 hours hrs 30 minutes mins
Servings: 8 slices
Course: Dessert
Calories: 320
Ingredients Equipment Method Nutrition Notes

Ingredients
  

For the Crust
  • 1 cup Graham Cracker Crumbs or crushed Oreos for a twist
  • 2 tablespoons Sugar or low-calorie sweetener
  • 6 tablespoons Butter melted, preferably unsalted
For the Filling
  • 8 ounces Cream Cheese at room temperature
  • 1 cup Marshmallow Fluff or whipped cream to tone down sweetness
  • 1 teaspoon Vanilla Extract use pure vanilla
  • 2 cups Whipped Topping or homemade whipped cream
Optional Toppings
  • 1 cup Fresh Fruits like strawberries, blueberries, or raspberries
  • 1 cup Chocolate Drizzle melted chocolate
  • 1 cup Mini Marshmallows

Equipment

  • 9-inch springform pan
  • Mixing Bowl
  • Electric mixer

Method
 

Preparation Steps
  1. In a medium bowl, combine graham cracker crumbs and sugar. Pour in the melted butter and mix until it resembles wet sand. Firmly press this mixture into the bottom of a 9-inch springform pan to create an even layer. Chill the crust for at least 30 minutes.
  2. In a large mixing bowl, beat the cream cheese with an electric mixer on medium speed until smooth and creamy, about 2 minutes. Gradually add the marshmallow fluff and vanilla extract, mixing until well combined.
  3. Gently fold in the whipped topping until just combined to retain airiness.
  4. Spread the cheesecake filling over the chilled crust, smoothing the top. Cover with plastic wrap and refrigerate for at least 4 hours or overnight.
  5. Before serving, add your favorite toppings such as fresh fruits or chocolate drizzle. Slice and serve chilled.

Nutrition

Serving: 1sliceCalories: 320kcalCarbohydrates: 45gProtein: 4gFat: 15gSaturated Fat: 9gPolyunsaturated Fat: 0.5gMonounsaturated Fat: 3.5gCholesterol: 40mgSodium: 230mgPotassium: 120mgFiber: 1gSugar: 25gVitamin A: 400IUCalcium: 60mgIron: 0.5mg

Notes

Chill the cheesecake overnight for better flavor development. Be gentle while folding in whipped topping to keep the airy texture.

Tried this recipe?

Let us know how it was!
  • « Previous Page
  • 1
  • …
  • 97
  • 98
  • 99
  • 100
  • 101
  • …
  • 217
  • Next Page »

Welcome!

Hi, I’m Grace, a Sydney-based home cook with a passion for bold flavors and trending ingredients. Whether you’re a busy beginner or a seasoned foodie, you’ll find dishes here that are fresh, fun, and full of flavor.

More about me

Popular Recipes

  • Chocolate Cake Pops
    Delicious Chocolate Cake Pops That Wow Every Dessert Lover
  • Caribbean-Style Beef Stew with Rice
    Caribbean-Style Beef Stew with Rice That Warms Your Soul
  • Healthy Crockpot Beef Stew
    Healthy Crockpot Beef Stew for Cozy Weeknight Dinners
  • Crispy Chicken Tacos
    Crispy Chicken Tacos for the Perfect Taco Tuesday Night

Footer

↑ back to top

About

  • Privacy Policy
  • Disclaimer
  • Terms & Conditions

Newsletter

  • Sign Up! for emails and updates

Contact

  • About me
  • Contact me

Copyright © 2025 TastyTrendIngredients