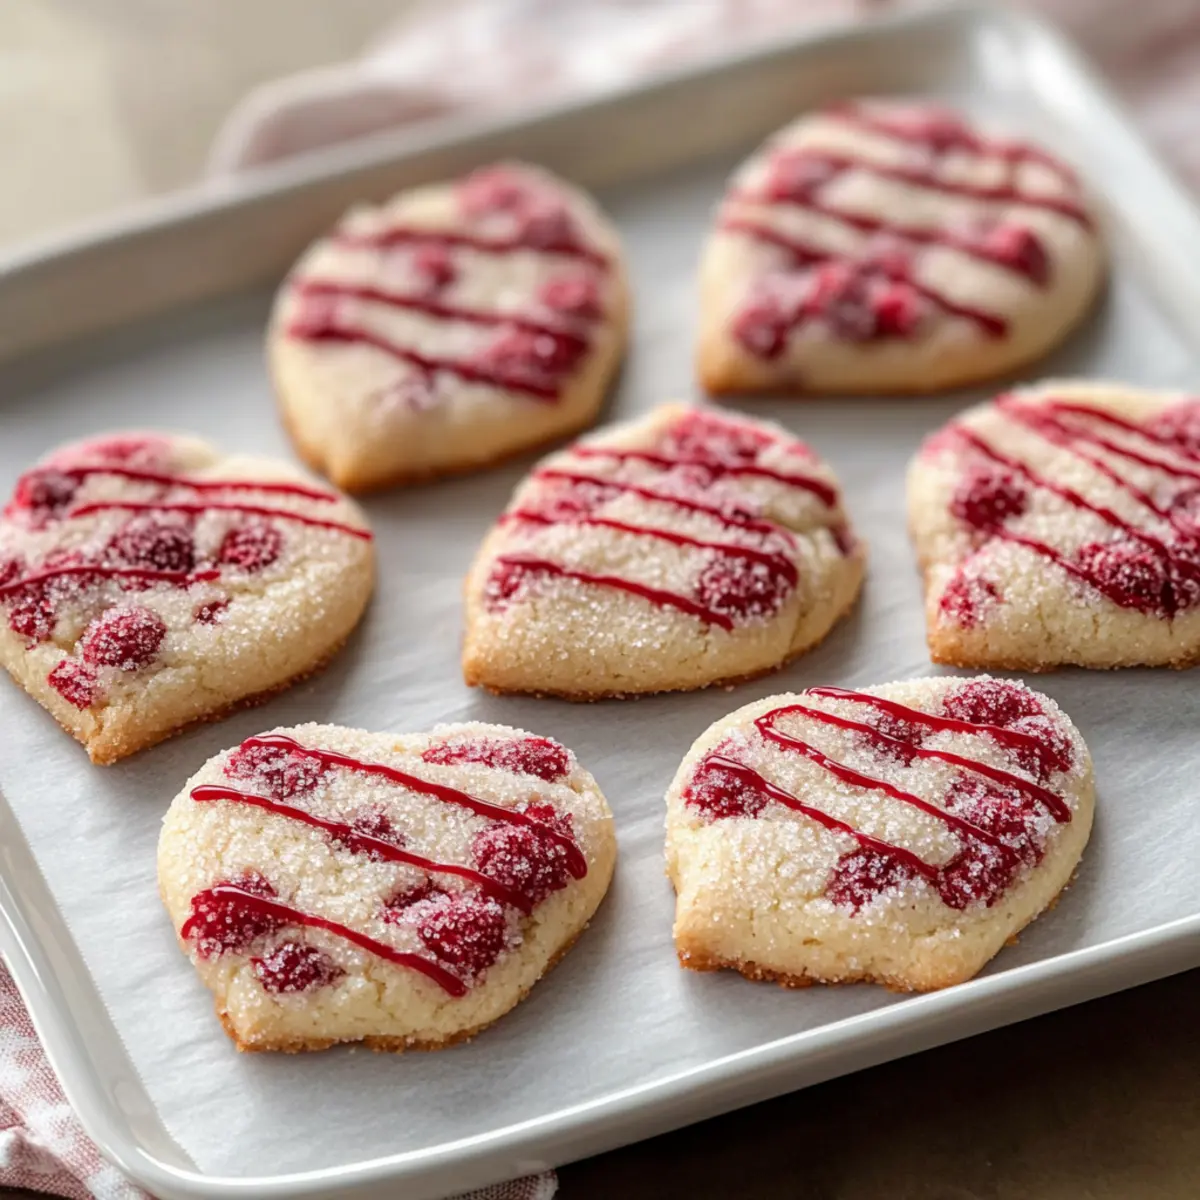
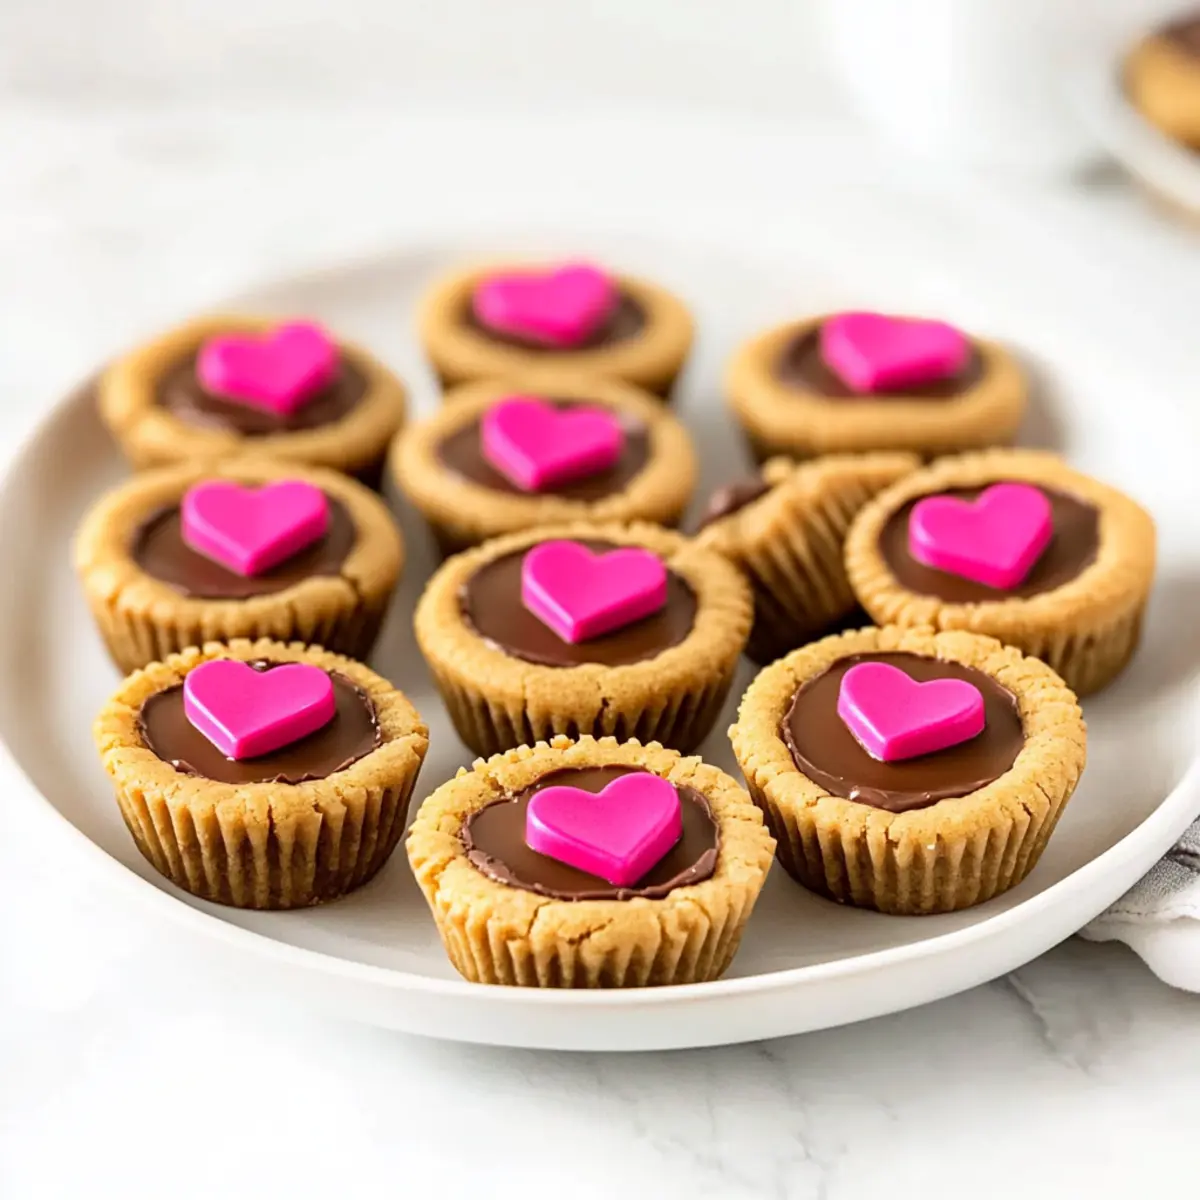
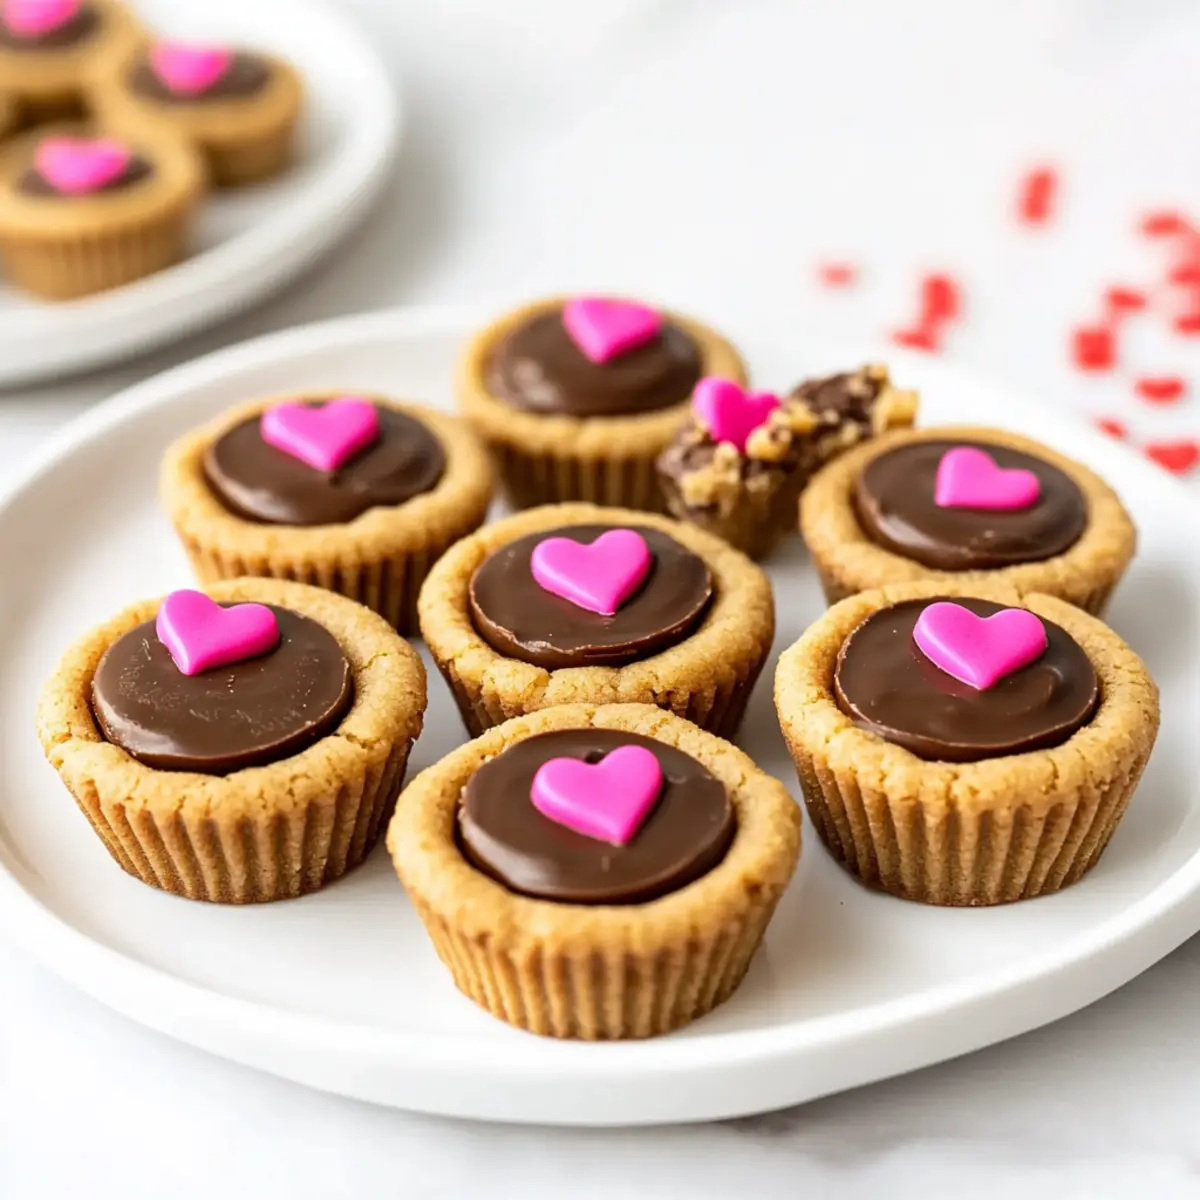
tastytrendingredients

  • Home
  • Recipes
    • Appetizers
    • Breakfast
    • Dessert
    • Dinner
    • Drinks
    • Salads
    • Snacks
    • Soups
  • About me
  • Contact me
menu icon
go to homepage
  • Home
  • Recipes
    • Appetizers
    • Breakfast
    • Dessert
    • Dinner
    • Drinks
    • Salads
    • Snacks
    • Soups
  • About me
  • Contact me
search icon
Homepage link
  • Home
  • Recipes
    • Appetizers
    • Breakfast
    • Dessert
    • Dinner
    • Drinks
    • Salads
    • Snacks
    • Soups
  • About me
  • Contact me
×

Decadent White Chocolate Raspberry Swirl Cheesecake Delight

January 1, 2026 by Grace Snow Leave a Comment

The kitchen is alive with the enticing aroma of creamy cheesecake, and I can't help but revel in the thrill of creating a true showstopper: White Chocolate Raspberry Swirl Cheesecake. With its buttery graham cracker crust and vibrant raspberry swirls, this dessert not only pleases the eyes but also delights the palate. Perfect as a make-ahead treat, it allows you to impress your guests at gatherings while keeping your sanity intact. Plus, the silky texture and rich flavors of white chocolate make it irresistibly decadent, ensuring that even the last slice will be sought after. Curious how to achieve this slice of heaven? Let’s dive into the details!

Why is This Cheesecake a Must-Try?

Decadent flavors collide in every bite, as the rich combination of white chocolate and tart raspberry creates a flavor explosion that’s utterly irresistible. Visually stunning, the beautiful swirls of raspberry not only enhance aesthetics but also offer a delightful contrast to the creamy filling. Make-ahead convenience allows you to prepare this dessert in advance, making it perfect for gatherings or celebrations. Versatile variations mean you can easily swap in different fruits or toppings for a personalized touch. Lastly, crowd appeal is guaranteed – this cheesecake is sure to impress family and friends, leaving everyone asking for seconds!

White Chocolate Raspberry Swirl Cheesecake Ingredients

For the Raspberry Sauce
• Frozen Raspberries – Provides a tartness and vibrant color to the cheesecake; feel free to use fresh raspberries if available.
• Water – Essential for cooking the raspberry sauce and dissolving the sugar effectively.
• Sugar – Sweetens the raspberry sauce; you can use alternative sweeteners if you prefer.
• Cornstarch – Thickens the raspberry sauce; arrowroot powder can work as a great substitute.

For the Crust
• Graham Cracker Crumbs – Forms the luscious crust; opt for gluten-free crumbs for a gluten-free version.
• Butter – Binds the crust ingredients together; coconut oil is a good substitute for a dairy-free option.

For the Filling
• White Chocolate Chips – Adds a depth of richness and creaminess to the filling; consider dark chocolate for a different flavor.
• Half and Half – Ensures your filling is beautifully creamy; a milk and cream mixture can also suffice.
• Cream Cheese – The key player providing texture and richness in this cheesecake; light cream cheese can lighten the recipe slightly.
• Sugar (additional) – Balances the flavors of the cheesecake.
• Flour – Stabilizes the filling; gluten-free flour is a viable alternative.
• Eggs – Provide necessary structure; if needed, egg substitutes can be selected but may alter the texture.
• Vanilla Extract – Enhances the filling's flavor; swap in other extracts like almond for a unique twist.

Optional Toppings
• Whipped Cream – Adds a delightful lightness when served on top; consider a dollop for extra indulgence.
• Additional Raspberry Sauce – Drizzle on top for presentation and added flavor; it beautifully complements the cheesecake’s taste.

Now that you have all the ingredients for this stunning White Chocolate Raspberry Swirl Cheesecake, you're one step closer to creating a dessert that will wow everyone at your next gathering!

Step‑by‑Step Instructions for White Chocolate Raspberry Swirl Cheesecake

Step 1: Prepare the Crust
Begin by preheating your oven to 325°F (163°C). In a mixing bowl, combine graham cracker crumbs and melted butter until well blended. Press this mixture firmly into the bottom of a greased 9-inch springform pan, creating an even layer. Bake the crust for about 10 minutes until lightly golden, then remove it and set aside to cool while you prepare the filling.

Step 2: Cook the Raspberry Sauce
In a saucepan, combine the frozen raspberries, sugar, cornstarch, and water, stirring gently. Bring the mixture to a boil over medium heat, allowing it to thicken and bubble for about 5-7 minutes. Once thickened, strain the sauce through a fine sieve to remove seeds, achieving a smooth consistency. Let this raspberry sauce cool while you work on the cheesecake filling.

Step 3: Melt the White Chocolate
Place your white chocolate chips in a heatproof bowl and combine them with the half and half. Set the bowl over a saucepan of simmering water, stirring frequently until fully melted and smooth. Alternatively, you can melt the mixture gently in the microwave in 20-second intervals. Once melted, set the bowl aside to cool slightly as you prepare the cheesecake batter.

Step 4: Make the Cheesecake Batter
In a large mixing bowl, beat the cream cheese and sugar together until light and fluffy, around 3-4 minutes. Gradually add in the flour, mixing until just combined. Then, incorporate the eggs one at a time, ensuring each is fully mixed in before adding the next. Finally, pour in the cooled melted white chocolate and vanilla extract, blending until the batter is smooth.

Step 5: Combine the Mixtures
Pour the creamy cheesecake batter into the cooled crust, spreading it evenly. Next, take your prepared raspberry sauce and drizzle it over the top of the cheesecake in a swirling pattern. Use a knife or a toothpick to gently swirl the sauce into the cheesecake batter, creating a beautiful marbled effect without overmixing.

Step 6: Bake the Cheesecake
Carefully place the springform pan in the oven, ensuring it is situated on a baking sheet to catch any drips. Bake the cheesecake for 55 to 60 minutes until the edges are set but the center still has a slight jiggle. Once done, turn off the oven and crack the oven door, allowing the cheesecake to cool gradually for about an hour.

Step 7: Chill Before Serving
After cooling, remove the cheesecake from the oven and let it reach room temperature. Once cooled, cover the cheesecake and refrigerate for at least 8 hours, or overnight for best results. This chilling time allows the flavors to meld beautifully, giving you that decadent white chocolate raspberry swirl cheesecake you’ve been dreaming of.

What to Serve with White Chocolate Raspberry Swirl Cheesecake

Indulge in the sweetness of this dessert by pairing it with complementary flavors and textures for a truly delightful experience.

  • Whipped Cream: A dollop of fluffy whipped cream adds lightness and richness, enhancing the cheesecake's creamy texture.
  • Fresh Berries: Serve with fresh raspberries or strawberries for a burst of vibrant color and tartness that complements the cheesecake beautifully.
  • Chocolate Sauce: Drizzling warm chocolate sauce over each slice introduces a rich contrast that makes every bite even more decadent.
  • Mint Leaves: Fresh mint leaves act as a refreshing garnish, bringing a hint of crispness that brightens the overall dessert experience.
  • Coffee or Espresso: Sip on a cup of coffee or a rich espresso to balance the sweetness and enhance the cheesecake’s flavors.
  • Ice Cream: A scoop of vanilla or raspberry ice cream on the side creates a delightful blend of temperatures and smoothness.
  • Fruit Sorbet: A refreshing fruit sorbet complements the richness of the cheesecake while cleansing the palate between bites.
  • Almond Biscotti: For added crunch and nutty flavor, serve with almond biscotti that provides a delightful textural contrast.
  • Moscato or Champagne: Pairing this dessert with a sweet Moscato or bubbly champagne elevates the celebration and accentuates the cheesecake's fruity notes.

Enjoy experimenting with these pairings to find the perfect harmony for your White Chocolate Raspberry Swirl Cheesecake!

Variations on White Chocolate Raspberry Swirl Cheesecake

Customize this delightful dessert to match your cravings and dietary needs!

  • Berry Alternatives: Swap frozen raspberries for strawberries, blueberries, or mixed berries for a different flavor profile. Each berry provides a unique twist on the classic sparkling taste.

  • Chocolate Ganache: Add a luscious layer of chocolate ganache on top for an extra decadent treat. This addition elevates your cheesecake to new heights, making it even more appealing for chocolate lovers.

  • Citrus Zest: Incorporate lemon or orange zest into the filling for a refreshing citrus flair. The bright, sunny notes contrast beautifully with the creamy textures and rich flavors.

  • Nut-Based Crust: Replace graham cracker crumbs with crushed nuts or almond meal for a gluten-free crust option. This adds a nutty crunch that complements the overall flavor beautifully.

  • Dairy-Free Version: Use dairy-free cream cheese and coconut cream in place of traditional cream cheese and half and half for a dairy-free treat. It’s indulgent yet suitable for those avoiding dairy!

  • Swirled Flavor Variants: Mix in a hint of almond or mint extract for a surprising twist. A touch of these extracts can transform the flavor profile without overpowering the main ingredients.

  • Heat it Up: Add some crushed red pepper flakes or a dash of cayenne to the raspberry sauce for a spicy kick. This unexpected element will tantalize your taste buds and keep everyone guessing.

  • Decadent Toppings: Consider topping with shaved white chocolate or toasted coconut for an elegant finish. These additions bring both visual appeal and flavor, making your cheesecake even more tempting.

Feel free to experiment with these variations, just like you might do with recipes like German Chocolate Poke or Tuscan White Bean! The possibilities are endless, and the joy of baking lies in personal expression. Enjoy!

Make Ahead Options

This Decadent White Chocolate Raspberry Swirl Cheesecake is a fantastic option for meal prep enthusiasts looking to save time during busy weeks. You can prepare the crust and the raspberry sauce up to 3 days in advance; simply store them separately in airtight containers in the refrigerator. To maintain the crust's crispness, wait until just before serving to assemble the cheesecake. When you’re ready to enjoy the cheesecake, combine the filling and bake. Chill it for a minimum of 8 hours (or overnight) to allow the flavors to develop. With these make-ahead tips, you’ll have a show-stopping dessert ready with minimal last-minute effort!

How to Store and Freeze White Chocolate Raspberry Swirl Cheesecake

Fridge: Keep your cheesecake in an airtight container in the refrigerator for up to 5 days. This storage method maintains its creamy texture and flavors beautifully.

Freezer: For long-term storage, wrap individual slices or the whole cheesecake tightly in plastic wrap and then aluminum foil. It can be frozen for up to 2 months.

Reheating: Thaw the cheesecake overnight in the fridge before serving. For individual slices, you can leave them at room temperature for about 30 minutes to regain their creamy goodness.

Make-Ahead: This White Chocolate Raspberry Swirl Cheesecake is perfect for making ahead of time. Prepare it up to 2 days in advance and store it in the fridge until ready to serve.

Expert Tips for White Chocolate Raspberry Swirl Cheesecake

  • Room Temperature Ingredients: Ensure all ingredients are at room temperature before mixing to achieve a smoother, creamier texture in your cheesecake batter.

  • Mix with Care: Avoid overmixing after adding the eggs. Gentle mixing prevents air bubbles that can cause cracks in your beautiful White Chocolate Raspberry Swirl Cheesecake.

  • Use a Water Bath: Baking your cheesecake in a water bath helps regulate the temperature and adds moisture, resulting in a creamier consistency without cracks.

  • Cool Gradually: After baking, cool your cheesecake in the oven with the door ajar for an hour. This gentle cooling helps prevent sudden temperature changes that can lead to cracks.

  • Chill for Flavor: Allow the cheesecake to chill in the refrigerator for at least 8 hours, ideally overnight. This enhances the flavors, making every bite even more delightful!

White Chocolate Raspberry Swirl Cheesecake Recipe FAQs

How do I select ripe raspberries for the sauce?
Absolutely! When choosing raspberries, look for ones that are plump and vibrant in color, with no dark spots or signs of mold. Ripe raspberries should have a sweet aroma and feel slightly firm yet yield to gentle pressure.

How should I store leftover cheesecake?
Very! Store any leftover White Chocolate Raspberry Swirl Cheesecake in an airtight container in the refrigerator for up to 5 days. This will keep it fresh and maintain its creamy texture, allowing you to enjoy it later.

Can I freeze White Chocolate Raspberry Swirl Cheesecake?
Of course! To freeze, wrap the cheesecake tightly in plastic wrap, then in aluminum foil to prevent freezer burn. You can freeze it for up to 2 months. When ready to enjoy, thaw it overnight in the refrigerator for the best texture.

What should I do if my cheesecake cracks while baking?
Don’t worry—this happens to the best of us! To prevent cracking, make sure to bake at the right temperature and avoid overmixing after adding the eggs. If it cracks despite your best efforts, you can cover it with whipped cream or a ganache to hide those imperfections beautifully!

Are there any dietary considerations I should keep in mind?
Absolutely! This cheesecake contains gluten and dairy, so if you have any allergies or dietary restrictions, consider using gluten-free graham cracker crumbs and plant-based cream cheese. If you have a gluten sensitivity, gluten-free flour can also be used to maintain its luscious texture.

White Chocolate Raspberry Swirl Cheesecake

Decadent White Chocolate Raspberry Swirl Cheesecake Delight

Indulge in this White Chocolate Raspberry Swirl Cheesecake, a mesmerizing dessert with vibrant swirls and rich flavors.
Print Recipe Pin Recipe
Prep Time 30 minutes mins
Cook Time 1 hour hr
Chilling Time 8 hours hrs
Total Time 9 hours hrs 30 minutes mins
Servings: 12 slices
Course: Dessert
Cuisine: American
Calories: 450
Ingredients Equipment Method Nutrition Notes

Ingredients
  

Raspberry Sauce
  • 2 cups Frozen Raspberries Fresh raspberries can be used if available.
  • 1 cup Water Essential for cooking the raspberry sauce.
  • 1/2 cup Sugar Alternative sweeteners can be used.
  • 2 tablespoons Cornstarch Arrowroot powder can be a substitute.
Crust
  • 1 1/2 cups Graham Cracker Crumbs Opt for gluten-free crumbs for a gluten-free version.
  • 1/2 cup Butter Coconut oil is a good substitute for dairy-free option.
Filling
  • 1 cup White Chocolate Chips Dark chocolate can be used for a different flavor.
  • 1/2 cup Half and Half A milk and cream mixture can suffice.
  • 16 ounces Cream Cheese Light cream cheese can be used.
  • 1 cup Sugar Balances the flavors.
  • 1/4 cup Flour Gluten-free flour is a viable alternative.
  • 3 large Eggs Egg substitutes can be used if needed.
  • 1 teaspoon Vanilla Extract Other extracts like almond can be swapped.
Optional Toppings
  • 1 cup Whipped Cream Adds lightness when served.
  • 1/2 cup Additional Raspberry Sauce For drizzle on top.

Equipment

  • Oven
  • Springform pan
  • Mixing Bowl
  • Saucepan
  • fine sieve
  • Heatproof bowl

Method
 

Preparation Steps
  1. Preheat your oven to 325°F (163°C). In a mixing bowl, combine graham cracker crumbs and melted butter until well blended. Press into a greased 9-inch springform pan and bake for about 10 minutes until golden.
  2. In a saucepan, combine frozen raspberries, sugar, cornstarch, and water, stirring gently. Bring to a boil over medium heat for 5-7 minutes until thickened. Strain to remove seeds and let cool.
  3. Melt white chocolate chips with half and half in a heatproof bowl over simmering water, stirring frequently until smooth. Alternatively, microwave in 20-second intervals until melted and cool slightly.
  4. In a large mixing bowl, beat cream cheese and sugar until light and fluffy. Gradually add flour, mixing until just combined, then incorporate eggs one at a time. Finally, stir in melted white chocolate and vanilla until smooth.
  5. Pour the cheesecake batter into the cooled crust and drizzle prepared raspberry sauce over the top. Use a knife to gently swirl the sauce into the batter.
  6. Bake the cheesecake for 55-60 minutes until edges are set but the center jiggles slightly. Turn off the oven, crack the door, and allow the cheesecake to cool gradually for an hour.
  7. Remove cheesecake and let it reach room temperature. Cover and refrigerate for at least 8 hours, or overnight for best results.

Nutrition

Serving: 1sliceCalories: 450kcalCarbohydrates: 40gProtein: 6gFat: 30gSaturated Fat: 18gMonounsaturated Fat: 8gTrans Fat: 1gCholesterol: 80mgSodium: 250mgPotassium: 150mgFiber: 1gSugar: 25gVitamin A: 800IUVitamin C: 5mgCalcium: 100mgIron: 1mg

Notes

Ensure all ingredients are at room temperature before mixing for best texture. Avoid overmixing after adding eggs, and consider a water bath for baking for creamier texture and no cracks.

Tried this recipe?

Let us know how it was!

Decadent Basque Burnt Cheesecake That Everyone Will Love

January 1, 2026 by Grace Snow Leave a Comment

As I stood in my kitchen, the intoxicating aroma of vanilla and caramelized sugar wafted through the air, creating an unshakeable sense of anticipation. Today, I’m thrilled to share my quick and easy recipe for a gluten-free Basque Burnt Cheesecake that combines luscious creaminess with a delightful charred top. This dessert is perfect for those who crave a homemade treat but don't have the time to spend hours baking. With just 40 minutes of prep, it defies traditional cheesecake norms by forgoing a crust, allowing its rich flavors to shine. Whether enjoyed as a cozy family dessert or served at your next gathering, it’s sure to impress and satisfy. Ready to dive into this deliciously unique dessert? Let’s get baking!

Why is Basque Burnt Cheesecake a Must-Try?

Decadent, this gluten-free cheesecake is a feast for the senses with its rich, creamy texture and beautifully caramelized top that elevates any occasion. Quick preparation ensures you can whip it up in just 40 minutes, perfect for busy days. Unique flavor profile offers a delightful twist, combining creaminess with a hint of char, leaving you craving another slice. Versatile serving options allow it to shine on its own or paired with fresh berries or a drizzle of caramel sauce. It's a showstopper that’s sure to impress family and friends while being a fun and approachable baking project for beginners!

Basque Burnt Cheesecake Ingredients

Get ready to create something unforgettable!

  • For the Batter
  • Cream Cheese (13.5 oz / 380 g) – Provides the creamy base; ensure it is softened for easy mixing.
  • Castor Sugar (1/2 cup / 100 g) – Adds sweetness; regular granulated sugar can be used in a pinch, but results may vary in texture.
  • Salt (1/8 tsp) – Enhances flavor balance; sea salt is a good alternative for a more refined taste.
  • Vanilla Paste/Extract (1/2 tsp) – Adds aromatic flavor depth; use pure extract for the best quality.
  • Eggs (3) – Acts as a binder and enriches the texture; ensure they are at room temperature for better incorporation.
  • Cornstarch (2 tbsp / 15 g) – Provides lightness and structure; can be substituted with cake flour if necessary.
  • Heavy Whipping Cream (5/6 cup / 200 ml) – Contributes to the creaminess and richness; do not use non-dairy substitutes as they will affect consistency.

Enjoy this Basque Burnt Cheesecake made effortlessly with these simple and delightful ingredients!

Step‑by‑Step Instructions for Easy Gluten-Free Basque Burnt Cheesecake

Step 1: Preheat the Oven
Begin by preheating your oven to a sizzling 445°F (230°C). While the oven is warming up, line a 6-inch round cake pan with parchment paper, ensuring the paper extends above the rim to catch the cheesecake’s deliciously bubbly edges. This preparation sets the stage for your Basque Burnt Cheesecake to bake evenly.

Step 2: Cream the Cheese
In a large mixing bowl, take the softened cream cheese and use a spatula to whip it until completely smooth and free of lumps. This should take about 2–3 minutes, achieving a creamy consistency. It’s important to reach this stage before adding other ingredients, ensuring your Basque Burnt Cheesecake has that luxurious texture.

Step 3: Add Sugar and Flavorings
Gradually mix in the castor sugar, salt, and vanilla paste/extract to the whipped cream cheese. Continue whisking until all ingredients are well combined, which should take another 2–3 minutes. You’ll start to notice a lovely sheen forming on the surface of the mixture, signaling that it’s time for the next flavorful additions.

Step 4: Incorporate the Eggs
Crack each egg into the mixture one at a time, whisking thoroughly after each addition. This step is crucial as it blends the eggs into the batter, which binds and enriches it. Aim for a smooth texture without any visible egg streaks, taking about 5 minutes to achieve that perfect creamy consistency in your cheesecake mixture.

Step 5: Sift in the Cornstarch
Carefully sift the cornstarch over the creamy batter and gently whisk until just combined. Avoid overmixing at this stage to keep the batter light and airy, which is essential for the successful outcome of your Basque Burnt Cheesecake. You’re creating a luscious mix full of flavor and texture.

Step 6: Add Heavy Cream
Pour in the heavy whipping cream, stirring it in with a spatula until fully incorporated. This will take about 2 minutes and will give your Basque Burnt Cheesecake its richness. You should see a silky batter come together, ready to transform into a delightful dessert in the oven.

Step 7: Prepare for Baking
Gently pour the prepared cheesecake batter into the lined cake pan. Tap the pan against the counter a few times to release any trapped air bubbles. This step is essential for achieving the desirable smooth surface and even texture in your baked cheesecake, setting the foundation for a perfect bake.

Step 8: Bake the Cheesecake
Place the pan in your preheated oven and bake for approximately 25 minutes. Keep an eye on it during the last few minutes, as the top should be deeply caramelized and dark golden brown while the center remains slightly jiggly. This contrast is key to creating the signature look and texture of a Basque Burnt Cheesecake.

Step 9: Cool and Set
Once out of the oven, allow the cheesecake to cool at room temperature for at least 1 hour. After cooling, transfer it to the refrigerator to chill uncovered for at least 4 hours. This step helps the cheesecake set beautifully, enhancing its creamy texture, a perfect ending to your baking adventure.

Step 10: Serve and Enjoy
Before serving, let the cheesecake sit at room temperature for about 30 minutes for that velvety melt-in-your-mouth experience. With its striking contrast and rich flavor, your Easy Gluten-Free Basque Burnt Cheesecake is now ready to impress friends and family, bringing joy and satisfaction to any gathering!

What to Serve with Easy Gluten-Free Basque Burnt Cheesecake

Elevate your Basque Burnt Cheesecake experience by pairing it with delightful accompaniments that complement its rich flavors and creamy texture.

  • Fresh Berries: Juicy strawberries or raspberries add a refreshing contrast, enhancing the cheesecake’s sweetness with their fruity brightness.
  • Caramel Sauce: A warm drizzle of caramel creates an indulgent touch, beautifully balancing the cheesecake's richness with a sweet, buttery flavor.
  • Whipped Cream: Light and airy, a dollop of freshly whipped cream provides a delightful texture contrast while amplifying the dessert's creaminess.
  • Chocolate Ganache: For chocolate lovers, a smooth chocolate ganache makes everything richer, transforming each bite into an indulgent experience.
  • Espresso: A shot of espresso or a cup of rich coffee brings out the cheesecake's flavors while offering a warm, comforting contrast to the dessert's sweetness.
  • Nuts: Chopped hazelnuts or almonds add a delightful crunch, offering a textural contrast that pairs beautifully with the creamy cheesecake.
  • Citrus Zest: A sprinkle of lemon or orange zest brightens the dish, providing a refreshing zing that complements the cheesecake's decadence.
  • Ice Cream: A scoop of vanilla bean ice cream serves as a cool counterpart, enhancing the dessert experience while adding a creamy frozen element.
  • Mint Leaves: Fresh mint leaves not only add a pop of color but also lend a refreshing herbaceous note that lightens each decadent bite.

Storage Tips for Basque Burnt Cheesecake

Fridge: Store your cheesecake in the refrigerator for up to 3 days. Make sure it's covered with plastic wrap or in an airtight container to maintain moisture and freshness.

Freezer: You can freeze slices of Basque Burnt Cheesecake for up to 2 months. Wrap each slice tightly in plastic wrap, then place in a zip-top freezer bag.

Reheating: When ready to enjoy, allow the cheesecake to thaw overnight in the fridge. For a warm serving, place it at room temperature for about 30 minutes before serving.

Serving: This dessert is best served slightly chilled or at room temperature to enjoy its creamy texture fully.

Basque Burnt Cheesecake Variations

Feel free to unleash your creativity and customize this Basque Burnt Cheesecake so that it’s perfectly suited to your taste!

  • Sour Cream: Substitute a small portion of cream cheese with sour cream for a tangier flavor profile. This twist adds a fun zing that brightens the cheesecake.

  • Lemon Zest: Infuse the batter with lemon zest for a refreshing contrast. The citrus notes will evoke a lovely brightness, making each slice feel like a sunny day.

  • Chocolate Drizzle: Top the cheesecake with melted dark chocolate for a rich finish. A delightful drizzle elevates the presentation and provides a decadent twist.

  • Nutty Crust: For added texture, create a nut-themed crust by using crushed almonds or walnuts mixed with a touch of butter. This addition provides a satisfying crunch beneath the creamy filling.

  • Spicy Heat: Add a pinch of cayenne pepper or a dash of cinnamon to the batter for an unexpected kick. This unique flavor twist may become a new favorite flavor combination!

  • Fruit Puree: Swirl in a berry puree before baking for a beautiful marbled effect. The fruity flavor complements the cheesecake's richness, enhancing its overall impact.

  • Caramelized Sugar Top: For a twist on the signature burnt top, sprinkle a thin layer of sugar before the last few minutes of baking. Blowtorch it for a dramatic caramel finish, blending crunch and creaminess.

  • Flavored Liqueurs: Experiment with a splash of your favorite flavored liqueur in the batter, such as orange or coffee. These infusions can take your cheesecake on an exciting flavor journey.

Feel free to explore these variations, and remember, the best part about baking is making each creation uniquely yours! If you're curious about different flavor profiles, try adding a bit of lemon zest for a bright twist or consider how a chocolate drizzle can elevate your dessert experience. Happy baking!

Expert Tips for Basque Burnt Cheesecake

• Avoid Overmixing: Prevent excessive air by mixing the batter just until combined. This will help maintain the cheesecake’s desired texture.

• Check Baking Time: If you're using a larger pan, adjust the baking time to ensure the cheesecake cooks thoroughly without burning on top.

• Serve Warm: For a gooier texture, serve your Basque Burnt Cheesecake at room temperature rather than straight from the fridge.

• Parchment Properly: Make sure the parchment paper hangs over the sides of the pan. This will prevent sticking and allow for easy removal after baking.

• Chill Thoroughly: Allow the cheesecake to set in the refrigerator for at least 4 hours before serving. This enhances the flavor and gives it the right consistency.

• Flavor Twist: Experiment by adding a teaspoon of lemon zest to the batter for a refreshing twist to your Basque Burnt Cheesecake.

Make Ahead Options

These Easy Gluten-Free Basque Burnt Cheesecake options are a game changer for busy cooks! You can prepare the cheesecake batter up to 24 hours in advance; simply follow all the steps until the baking stage, then cover the mixing bowl with plastic wrap and refrigerate it. To maintain its silky texture, whisk it lightly before pouring it into the prepared pan. If you're ready to bake, pour the chilled mixture into the lined pan and bake as directed. Once baked, this cheesecake can be refrigerated for up to 3 days before serving. Just remember to let it sit at room temperature for about 30 minutes before indulging to ensure it's just as delicious as when freshly made!

Basque Burnt Cheesecake Recipe FAQs

What type of cream cheese should I use?
Absolutely! For the best results, use full-fat cream cheese that's been softened to room temperature. This ensures easy blending and a smooth texture in your Basque Burnt Cheesecake. If you can find it, go for block cream cheese instead of spreadable varieties.

How long can I store the cheesecake, and what's the best way?
You can refrigerate your Basque Burnt Cheesecake for up to 3 days. Store it in an airtight container or cover it with plastic wrap to keep it moist and fresh. If you notice any dark spots on the surface, that's perfectly normal—just rethink your toppings if worried about presentation!

Can I freeze the cheesecake, and if so, how?
Very! To freeze, wrap each slice tightly in plastic wrap and place them in a zip-top freezer bag. Be sure to label the bag with the date! Your cheesecake will last up to 2 months in the freezer. When you’re ready to enjoy, let it thaw in the fridge overnight and sit at room temperature for about 30 minutes for the best texture.

What should I do if the cheesecake cracks while baking?
Don’t worry—common! To avoid cracks in your Basque Burnt Cheesecake, make sure to monitor your oven's temperature and avoid overmixing the batter. If cracks occur, consider topping the cheesecake with fresh berries or a drizzle of caramel sauce for a delicious distraction.

Are there any dietary considerations I should be aware of?
Definitely! If you or your guests have dietary restrictions like gluten intolerance, rest assured that this Basque Burnt Cheesecake is gluten-free as written. However, ensure to check all ingredient labels, especially the cornstarch and vanilla extract, for hidden gluten. Enjoy it safely and deliciously!

Can I substitute any ingredients for dietary reasons?
You can! Swap out some cream cheese for sour cream for a tangier flavor. If you're looking for a lighter option, consider using low-fat cream cheese, though it may alter the texture slightly. Be adventurous; you can incorporate flavored liqueurs or natural extracts to give your cheesecake a unique twist.

Basque Burnt Cheesecake

Decadent Basque Burnt Cheesecake That Everyone Will Love

This gluten-free Basque Burnt Cheesecake is a creamy delight with a charred top, perfect for any occasion.
Print Recipe Pin Recipe
Prep Time 40 minutes mins
Cook Time 25 minutes mins
Cooling Time 4 hours hrs
Total Time 5 hours hrs 5 minutes mins
Servings: 8 slices
Course: Dessert
Cuisine: Basque
Calories: 350
Ingredients Equipment Method Nutrition Notes

Ingredients
  

For the Batter
  • 380 g Cream Cheese Ensure it is softened for easy mixing.
  • 100 g Castor Sugar Regular granulated sugar can be used in a pinch.
  • 0.125 tsp Salt Sea salt is a good alternative for a refined taste.
  • 0.5 tsp Vanilla Paste/Extract Use pure extract for the best quality.
  • 3 pcs Eggs Ensure they are at room temperature.
  • 15 g Cornstarch Can be substituted with cake flour if necessary.
  • 200 ml Heavy Whipping Cream Do not use non-dairy substitutes.

Equipment

  • 6-inch round cake pan
  • Mixing Bowl
  • Spatula
  • Whisk

Method
 

Baking Steps
  1. Preheat your oven to 445°F (230°C) and line a 6-inch round cake pan with parchment paper.
  2. In a mixing bowl, whip the softened cream cheese until completely smooth, about 2-3 minutes.
  3. Gradually mix in the castor sugar, salt, and vanilla paste/extract until combined, another 2-3 minutes.
  4. Crack in each egg one at a time, whisking thoroughly after each addition until smooth.
  5. Sift the cornstarch over the mixture and gently whisk until just combined.
  6. Pour in the heavy cream and stir until fully incorporated, about 2 minutes.
  7. Pour the cheesecake batter into the lined pan and tap it against the counter to release air bubbles.
  8. Bake in the preheated oven for approximately 25 minutes until the top is caramelized but the center jiggles.
  9. Allow the cheesecake to cool at room temperature for 1 hour, then chill in the refrigerator for at least 4 hours.
  10. Before serving, let it sit at room temperature for about 30 minutes.

Nutrition

Serving: 1sliceCalories: 350kcalCarbohydrates: 25gProtein: 6gFat: 30gSaturated Fat: 18gPolyunsaturated Fat: 1gMonounsaturated Fat: 8gCholesterol: 120mgSodium: 150mgPotassium: 150mgSugar: 20gVitamin A: 500IUCalcium: 100mgIron: 1mg

Notes

Serve warm for a gooey texture. Experiment with lemon zest for a refreshing twist.

Tried this recipe?

Let us know how it was!

Mulberry & Earl Grey Cheesecake: A Fancy Treat for You

January 1, 2026 by Grace Snow Leave a Comment

Feeling a bit adventurous in the kitchen? Let me introduce you to a delightful dessert that bridges the gap between everyday comfort and elegant indulgence: Mulberry & Earl Grey Cheesecake. This sophisticated creation marries the warm, aromatic notes of Earl Grey tea with the vibrant sweetness of mulberries, crafting an experience that's as charming as it is delicious. Not only is this cheesecake a striking centerpiece for special gatherings, but it also comes with an option for gluten-free crust—making it an inclusive treat for everyone. As you whip up this smooth and creamy dessert, you might just find that it's the perfect antidote to a hectic day or a sweet surprise for your loved ones. Curious about how to make this delectable dessert come to life? Let’s dive in!

Why is this cheesecake so special?

Uniqueness: The Mulberry & Earl Grey Cheesecake is a festive blend that elevates the traditional cheesecake with a luxurious twist featuring fragrant tea and tart berries.
Versatility: You can easily swap out mulberries for blackberries or blueberries, catering to your taste!
Gluten-Free Option: With a simple substitute, your gluten-sensitive friends can enjoy this gourmet dessert too.
Time-Saving Delight: Prep and bake in under two hours, making it easy to impress guests without exhausting yourself!
Showstopper Presentation: The vibrant mulberry sauce on a creamy cheesecake will surely be a stunning centerpiece at your next gathering. Pair this delightful dessert with some afternoon tea for an unforgettable experience!

Mulberry & Earl Grey Cheesecake Ingredients

For the Crust

  • Graham Cracker Crumbs – Gives backbone and a delightful crunch; consider gluten-free options for a celiac-friendly crust.
  • Unsalted Butter (6 tbsp) – Provides richness and binds the crust; coconut oil works well for a dairy-free substitute.
  • Granulated Sugar (3 tbsp) – Sweetens the crust; feel free to adjust based on your personal taste preference.

For the Filling

  • Full-Fat Cream Cheese (3 blocks) – The star ingredient for a rich and creamy texture; ensure it’s softened to prevent lumps.
  • Sour Cream (1 cup) – Adds tang and creaminess; Greek yogurt can be a perfect stand-in if desired.
  • Heavy Cream (½ cup) – Contributes to that smooth richness; coconut cream is an excellent dairy-free alternative.
  • Earl Grey Tea Bags (3) – Infuses warm, aromatic flavor into the cheesecake; chamomile can be used for a milder taste.
  • Whole Milk (½ cup) – Aids in creating a smooth batter; try almond or oat milk for a dairy-free option.
  • Large Eggs (2) – Helps set the cheesecake; allow them to reach room temperature for better mixing.

For the Topping

  • Fresh or Frozen Mulberries (1½ cups) – Bright, sweet-tart flavor for a beautiful topping; blackberries or blueberries are great substitutes.
  • Granulated Sugar for Sauce (2 tbsp) – Enhances the topping's sweetness; adjust according to the fruit's tartness.
  • Lemon Juice (2 tsp) – Brightens the sauce and balances flavors; no substitutes recommended.
  • Cornstarch (1 tsp) + Water (1 tbsp) – Thickens the mulberry sauce for a luscious finish; no alternative needed.

With these fresh and delightful ingredients, you'll soon be whipping up your own Mulberry & Earl Grey Cheesecake that’s perfect for any occasion!

Step‑by‑Step Instructions for Mulberry & Earl Grey Cheesecake

Step 1: Brew Earl Grey Milk
In a small saucepan, heat ½ cup of whole milk over medium heat until hot but not boiling. Once warmed, steep 3 Earl Grey tea bags in the milk for 10 minutes, allowing the flavors to infuse. After steeping, remove the tea bags and let the mixture cool to room temperature while you prepare the crust.

Step 2: Prepare Crust
In a mixing bowl, combine graham cracker crumbs, 6 tablespoons of melted unsalted butter, and 3 tablespoons of granulated sugar. Mix until the crumbs are evenly coated and the texture resembles wet sand. Press this mixture firmly into the bottom of a lined 9-inch springform pan, then chill in the refrigerator for 20 minutes to set.

Step 3: Make Filling
In a large mixing bowl, use an electric mixer to beat 3 blocks of softened cream cheese until smooth and creamy. Gradually add in ½ cup of granulated sugar, 1 cup of sour cream, and ½ cup of heavy cream, mixing until well combined. Slowly pour in the cooled Earl Grey milk, mixing until fully incorporated before adding 2 room-temperature eggs one at a time, blending just until combined.

Step 4: Bake
Pour the cheesecake filling into the chilled crust, smoothing the top with a spatula. Gently tap the pan on the counter to release any air bubbles. Place the springform pan into a larger baking dish and pour hot water into the dish, creating a water bath. Bake in a preheated oven at 325°F for about 50 minutes, until the edges are set but the center remains slightly jiggly.

Step 5: Cool Cheesecake
Once baked, turn off the oven and crack the door open, letting the cheesecake cool in the oven for 1 hour. This gentle cooling will help prevent cracks. Afterward, remove the cheesecake from the oven and water bath, then refrigerate for at least 4 hours or overnight to fully set before adding the topping.

Step 6: Prepare Sauce
In a medium saucepan over medium heat, combine 1½ cups of fresh or frozen mulberries, 2 tablespoons of granulated sugar, and 2 teaspoons of lemon juice. Cook until the mixture begins to bubble, stirring occasionally. Once bubbling, mix 1 teaspoon of cornstarch with 1 tablespoon of water to create a slurry, then stir it into the sauce, cooking for an additional 2-3 minutes until thickened.

Step 7: Serve
When ready to serve, release the sides of the springform pan and remove the cheesecake. Generously spoon the mulberry sauce on top of the chilled cheesecake just before serving, allowing the vibrant berries to enhance the cake’s elegance. Slice into portions and enjoy this delightful Mulberry & Earl Grey Cheesecake!

Make Ahead Options

Making the Mulberry & Earl Grey Cheesecake ahead of time is a brilliant way to save precious moments on the day of your special gathering! You can bake the cheesecake up to 24 hours in advance; just make sure to let it cool completely before refrigerating. The mulberry sauce can be prepared ahead as well and will stay delicious in the fridge for up to 3 days. When you're ready to serve, simply spoon the chilled sauce over the cheesecake for a delightful presentation. This method not only helps maintain the cake's creamy texture and flavor but also allows you to enjoy a stress-free dessert experience!

Expert Tips for Mulberry & Earl Grey Cheesecake

  • Perfectly Softened Cream Cheese: Ensure your cream cheese is at room temperature before mixing. This helps achieve a silky, lump-free filling for your cheesecake.
  • Brew with Intent: Steep the Earl Grey tea bags in hot milk for a rich flavor. Do this ahead of time and let it cool for maximum infusion.
  • Water Bath Magic: Always use a water bath while baking to keep your cheesecake moist and prevent unsightly cracks on the surface.
  • Cooling Caution: Allow the cheesecake to cool slowly in the oven with the door ajar to avoid condensation, which can lead to a soggy crust.
  • Mulberry Sauce Sweetness: Adjust the sugar for the mulberry sauce based on the tartness of the berries. For sweeter mulberries, reduce the sugar for a balanced topping.
  • Chill Time Matters: Be patient! Chill the cheesecake for at least 4 hours before serving to ensure it sets properly and maximizes flavor in your Mulberry & Earl Grey Cheesecake.

What to Serve with Mulberry & Earl Grey Cheesecake

Savor the moment and complete your dessert experience with these delightful pairings that enhance the elegant flavors of your cheesecake.

  • Creamy Mashed Potatoes: The buttery, smooth texture makes for a comforting contrast to the sweet-tart cheesecake. They serve as a wonderful side if you're making this dessert after a lovely dinner.

  • Fresh Fruit Salad: A medley of ripe, juicy fruits adds a refreshing balance; think citrus and berries to elevate the fruity note of the cheesecake. This complements the rich flavors perfectly.

  • Earl Grey Tea: Enhance the tea flavor with a warm cup of Earl Grey. The citrusy notes in the tea will harmonize beautifully with the cheesecake's essence.

  • Decadent Chocolate Ganache: A simple ganache drizzle over slices adds a silky and rich touch that contrasts delightfully with the tartness of the mulberries. Pair it with a nice espresso for a balanced treat.

  • Vanilla Ice Cream: Creamy and cool, it offers a delightful temperature and flavor contrast that brightens the rich dessert. The vanilla enhances the overall sweetness without overpowering it.

  • Sparkling Wine: A crisp, bubbly beverage can cleanse the palate and uplift the dessert's elegant ambiance. Perfect for toasting special occasions!

  • Citrus Tart: Adding a small slice of a tangy lemon or lime tart introduces a zesty brightness to your dessert spread that'll leave guests wanting more.

  • Herb-Infused Water: Serve a refreshing drink with mint or basil; it cleanses the palate and adds a fresh note between bites, enhancing the flavors of the cheesecake.

Be sure to mix and match some of these delightful pairings to create an unforgettable dessert experience!

Mulberry & Earl Grey Cheesecake Variations

Feel inspired to make this cheesecake uniquely yours? Let’s explore some delightful twists and substitutions that can elevate your baking experience!

  • Berry Swap: Replace mulberries with fresh blackberries or blueberries for a different flavor while keeping the fruity essence.
  • Herbal Twist: Swap Earl Grey tea for chamomile or a berry-infused herbal tea to create a milder cheesecake with a beautiful flavor profile.
  • Dairy-Free Delight: Use coconut cream instead of heavy cream and vegan cream cheese to make this a lovely dairy-free version without sacrificing creaminess.
  • Sugary Sensation: Consider reducing the granulated sugar in the filling for a less sweet cheesecake, allowing the natural flavors of the mulberries to shine.
  • Nutty Crunch: Add crushed nuts like pecans or walnuts to the crust for an added crunch and nutty flavor that complements the smooth filling beautifully.
  • Chocolate Indulgence: Incorporate cocoa powder into the cheesecake batter for a rich chocolatey twist that pairs wonderfully with the Earl Grey.
  • Spicy Warmth: Add a pinch of ginger or cinnamon spice to the filling for a warm and cozy flavor that brings a delightful seasonal touch.
  • Vibrant Garnish: Top your cheesecake with a mix of seasonal berries or edible flowers for a stunning presentation that will impress your guests.

Feel free to serve this cheesecake alongside your favorite cup of afternoon tea or a scoop of vanilla ice cream for an elevated dessert experience!

Storage Tips for Mulberry & Earl Grey Cheesecake

Room Temperature: Allow the cheesecake to sit at room temperature for up to 2 hours before serving; longer can risk spoilage.

Fridge: Store leftover cheesecake in an airtight container in the fridge for up to 5 days. This keeps the creamy texture intact while preventing odors from other foods.

Freezer: Freeze slices of cheesecake wrapped individually in plastic wrap, then in foil, for up to 3 months. Thaw in the fridge overnight before indulging.

Reheating: If you want to serve it warm, gently reheat individual slices in the microwave for about 10-15 seconds, then top with fresh mulberry sauce for a delightful treat!

Mulberry & Earl Grey Cheesecake Recipe FAQs

How do I select ripe mulberries?
Look for shiny, plump mulberries that are deep purple or black, indicating ripeness. If they have dark spots all over or feel mushy, they may be overripe. Fresh mulberries should be firm and sweet-tasting!

What is the best way to store leftover cheesecake?
To store leftover Mulberry & Earl Grey Cheesecake, place it in an airtight container in the fridge. It will stay fresh for up to 5 days. Just remember to cover the top with plastic wrap to maintain that delicious creamy texture!

Can I freeze the cheesecake and the mulberry sauce?
Absolutely! You can freeze individual slices of the cheesecake wrapped in plastic wrap and foil for up to 3 months. For the mulberry sauce, store it in an airtight container in the freezer for up to 2 months. Thaw both in the refrigerator overnight before serving.

Why did my cheesecake crack during baking?
Cracks in cheesecakes often occur due to rapid temperature changes. To prevent this, always use a water bath while baking, which helps provide a gentle heat. Moreover, letting the cheesecake cool gradually in the oven with the door slightly ajar is key to avoiding unsightly cracks.

Are there any allergy considerations for this recipe?
Yes! This cheesecakes includes dairy (cream cheese, sour cream, heavy cream, and butter), which may pose a risk for those with lactose intolerance or milk allergies. For gluten sensitivity, ensure to use gluten-free graham crackers for the crust and consider dairy-free substitutes like coconut cream or yogurt if needed.

Can I make this cheesecake gluten-free?
Absolutely! To make your Mulberry & Earl Grey Cheesecake gluten-free, simply substitute regular graham cracker crumbs with gluten-free graham crackers. You won’t lose any of the delightful flavor or texture while making it accessible for those who avoid gluten!

Mulberry & Earl Grey Cheesecake

Mulberry & Earl Grey Cheesecake: A Fancy Treat for You

Delight in the rich blend of Mulberry & Earl Grey Cheesecake, a dessert that combines the aromatic elegance of Earl Grey tea with the sweetness of mulberries.
Print Recipe Pin Recipe
Prep Time 1 hour hr
Cook Time 50 minutes mins
Cooling Time 1 hour hr
Total Time 2 hours hrs 50 minutes mins
Servings: 8 slices
Course: Dessert
Cuisine: American
Calories: 350
Ingredients Equipment Method Nutrition Notes

Ingredients
  

For the Crust
  • 1 cup Graham Cracker Crumbs Consider gluten-free options
  • 6 tbsp Unsalted Butter Melted; coconut oil works as a dairy-free substitute
  • 3 tbsp Granulated Sugar Adjust based on personal taste
For the Filling
  • 3 blocks Full-Fat Cream Cheese Ensure it's softened
  • 1 cup Sour Cream Greek yogurt can be a perfect substitute
  • ½ cup Heavy Cream Coconut cream is an excellent dairy-free alternative
  • 3 bags Earl Grey Tea Infuses flavor into the cheesecake
  • ½ cup Whole Milk Almond or oat milk can be used
  • 2 large Eggs Room temperature for better mixing
For the Topping
  • 1½ cups Fresh or Frozen Mulberries Blackberries or blueberries can be substituted
  • 2 tbsp Granulated Sugar for Sauce Adjust based on the fruit's tartness
  • 2 tsp Lemon Juice No substitutes recommended
  • 1 tsp Cornstarch Used to thicken the sauce
  • 1 tbsp Water

Equipment

  • 9-inch springform pan
  • Saucepan
  • Mixing Bowl
  • Electric mixer

Method
 

Cheesecake Preparation
  1. In a small saucepan, heat ½ cup of whole milk until hot but not boiling. Steep 3 Earl Grey tea bags for 10 minutes, then remove and cool.
  2. In a mixing bowl, mix graham cracker crumbs, melted unsalted butter, and granulated sugar. Press into the bottom of a lined 9-inch springform pan, chill for 20 minutes.
  3. In a large bowl, beat softened cream cheese until smooth. Gradually add sugar, sour cream, and heavy cream, mixing well. Pour in cooled Earl Grey milk and beat in 2 room-temperature eggs.
  4. Pour the filling into the chilled crust and smooth the top. Bake at 325°F for about 50 minutes until edges are set but center jiggles.
  5. Turn off the oven and crack the door open, allowing cheesecake to cool for 1 hour. Refrigerate for at least 4 hours before adding topping.
  6. In a saucepan, combine mulberries, sugar, and lemon juice. Cook until bubbling. Mix cornstarch with water and stir into the sauce to thicken.
  7. Release the cheesecake from the pan, spoon mulberry sauce on top before serving, slice and enjoy.

Nutrition

Serving: 1sliceCalories: 350kcalCarbohydrates: 40gProtein: 6gFat: 20gSaturated Fat: 12gPolyunsaturated Fat: 1gMonounsaturated Fat: 7gCholesterol: 80mgSodium: 200mgPotassium: 150mgFiber: 1gSugar: 25gVitamin A: 500IUVitamin C: 10mgCalcium: 100mgIron: 1mg

Notes

Allow the cheesecake to cool slowly in the oven with the door ajar to prevent condensation and soggy crust. For sweeter mulberries, reduce the sugar in the sauce.

Tried this recipe?

Let us know how it was!

Blueberry Crumble Cheesecake: Your New Favorite Dessert Delight

January 1, 2026 by Grace Snow Leave a Comment

Have you ever taken a bite of dessert that made you feel like you were wrapped in a warm, comforting hug? That’s exactly how I feel about this Blueberry Crumble Cheesecake. It beautifully marries the luscious creaminess of cheesecake with the vibrant pop of juicy blueberries and a delightful crunchy topping. Not only is this recipe an absolute showstopper for any gathering, but it's also surprisingly easy to whip up, making it perfect for those busy weekdays when you crave something sweet. Whether you’re serving it at a special event or treating yourself after a long day, this cheesecake is sure to impress. Are you ready to dive into a world of creamy, fruity bliss? Let’s get baking!

Why Is This Cheesecake a Must-Try?

Ease of Preparation: You don’t need to be a master chef to create this delightful dessert; it’s designed for all skill levels!

Decadent Flavor: With rich cream cheese, fresh blueberries, and a hint of sweetness, every bite is a taste sensation you won’t forget.

Versatile Ingredients: Whether you're a fan of blueberries or want to experiment with other fruits, this recipe allows for substitutions to match your cravings.

Crowd-Pleasing Appeal: Perfect for gatherings and special occasions, this Blueberry Crumble Cheesecake always garners rave reviews!

Texture Contrast: The creamy cheesecake paired with the crunchy crumble and juicy berries offers an enticing combination that’s simply irresistible.

Make it your go-to dessert and discover why everyone falls in love with this delicious twist on a classic favorite!

Blueberry Crumble Cheesecake Ingredients

• Dive into making this delightful dessert with essential ingredients that harmonize perfectly.

For the Crust

  • Digestive or Graham Crackers – Provides texture and sweetness; swap with gluten-free cookies for a GF version.
  • Granulated Sugar – Sweetens the crust while helping to macerate the blueberries; reduce for a lighter sweetness.
  • Butter – Binds crust ingredients together; coconut oil is a great dairy-free substitute.

For the Blueberry Mixture

  • Fresh Blueberries – Adds natural sweetness and vibrant color; feel free to replace with peaches or pears for a fun twist.
  • All-Purpose Flour – Gives structure to the topping; for gluten-free, use almond or coconut flour.

For the Crumble Topping

  • Dark Brown Sugar – Infuses richness and moisture into the crumble; light brown sugar works just as well.
  • All-Purpose Flour – Again, provides structure—gluten-free options are available if needed.
  • Butter – Helps achieve a delightful crumble texture when blended with sugars and flour.

For the Cheesecake Filling

  • Full Fat Cream Cheese – Essential for that creamy cheesecake texture; low-fat cream cheese can be used but may alter texture.
  • Sour Cream – Adds tanginess and creaminess; Greek yogurt is an excellent alternative.
  • Cornstarch – Stabilizes the cheesecake to prevent cracking; no substitutes recommended for best results.
  • Vanilla Extract – Elevates the overall flavor; opt for pure vanilla for the finest taste.
  • Large Eggs – Act as emulsifiers for a smooth filling; consider egg substitutes for vegan options.

Let’s gather our ingredients and get ready to create a stunning Blueberry Crumble Cheesecake that will steal the show at any gathering!

Step‑by‑Step Instructions for Blueberry Crumble Cheesecake

Step 1: Prepare the Crust
Preheat your oven to 160ºC (325ºF). In a food processor, blend the digestive or graham crackers with granulated sugar until fine. Pour in melted butter and pulse until mixed. Press this mixture evenly into the bottom of a lined springform pan, creating a firm crust. Bake for 10 minutes or until lightly golden. Let it cool completely while preparing the filling.

Step 2: Prepare the Blueberry Mixture
In a medium bowl, combine fresh blueberries, a sprinkle of sugar, all-purpose flour, and a splash of lemon juice. Gently toss the mixture until the blueberries are well-coated. Set this vibrant blueberry mixture aside to let the flavors meld while you focus on the crumble and cheesecake filling.

Step 3: Prepare the Crumble Topping
In a separate mixing bowl, combine all-purpose flour and dark brown sugar, stirring to mix thoroughly. Melt some butter and pour it into the dry ingredients, then use your fingers to blend until the mixture resembles coarse crumbs. Set the crumble aside as you move on to creating the cheesecake filling—a key element of the Blueberry Crumble Cheesecake.

Step 4: Make the Cheesecake Filling
In a large bowl, beat the full-fat cream cheese and granulated sugar until the mixture is smooth and creamy. In another bowl, mix sour cream and cornstarch together until combined. Gradually add this to the cream cheese, beating well between each addition, then blend in the eggs one at a time. Finally, stir in the vanilla extract, ensuring everything is well incorporated.

Step 5: Assemble the Cheesecake
Pour the creamy cheesecake filling into the cooled crust, spreading it evenly. Layer the blueberry mixture over the top, and gently press it down with a spatula to help it sink into the filling. Finally, sprinkle the prepared crumble topping generously over the blueberries, creating a delightful contrast for your Blueberry Crumble Cheesecake.

Step 6: Bake the Cheesecake
Set your springform pan in a large baking dish and create a water bath by adding hot water to the dish until it reaches halfway up the sides of the pan. Bake for 1 hour and 20-30 minutes, or until the center jiggles slightly when shaken. This gentle baking helps prevent cracking, ensuring a decadent final product.

Step 7: Cool and Chill
Once baked, turn off the oven and leave the cheesecake inside with the door slightly ajar for 1 hour. This cooling method reduces the risk of cracks. Afterward, allow it to cool to room temperature for another hour, and then refrigerate the cheesecake for at least 6 hours or overnight. A proper chill ensures the best texture and flavor before serving your Blueberry Crumble Cheesecake.

What to Serve with Blueberry Crumble Cheesecake?

Treat yourself to a delightful spread that perfectly complements the rich, creamy cheesecake and zesty blueberries.

  • Whipped Cream: A light dollop of freshly whipped cream adds an airy touch that balances the cheesecake's richness. It's a simple yet elegant addition that feels indulgent.

  • Vanilla Ice Cream: Serve alongside a scoop of velvety vanilla ice cream for a classic, comforting pairing that enhances each luscious bite. The cold ice cream against the warm crumble creates a dreamy experience.

  • Fresh Berries Salad: A bright mix of strawberries, raspberries, and blueberries adds freshness and bursts of flavor that cut through the cheesecake's sweetness, making each bite a refreshing delight.

  • Coffee or Espresso: A steaming cup of rich coffee or a shot of espresso beautifully enhances the flavors while providing a satisfying contrast that makes this dessert an elevated end to your meal.

  • Chocolate Drizzle: For the chocolate lovers, a drizzle of dark chocolate across each slice adds a luxurious layer of flavor that perfectly complements the sweet and tart notes of the cheesecake.

  • Citrus Zest Garnish: A sprinkle of lemon or lime zest over the top adds a bright pop of flavor and color while elevating the overall taste of the dessert.

Each suggestion beautifully enhances the indulgence of the Blueberry Crumble Cheesecake, turning a delightful treat into a memorable feast!

Blueberry Crumble Cheesecake Variations

Feel free to let your imagination run wild with this recipe and make it truly your own!

  • Fruit Swap: Replace blueberries with your choice of ripe peaches, juicy raspberries, or sweet strawberries for a fruity twist.

  • Nutty Crunch: Add chopped walnuts or almonds to the crumble topping for an extra layer of texture and flavor. The nutty aroma will elevate your cheesecake experience!

  • Dairy-Free Delight: Use coconut cream and almond milk cream cheese for a delicious dairy-free option. It maintains the creaminess while being completely plant-based.

  • Zesty Lemon: A touch of lemon zest in the cheesecake filling enhances its flavor beautifully, bringing a bright, citrusy balance to the dessert. It’s like sunshine on a plate!

  • Chocolate Drizzle: Drizzle melted dark chocolate over the cheesecake before serving for a luxurious chocolate twist. It pairs wonderfully with the blueberries' tanginess, creating a decadent treat.

  • Spicy Cinnamon: Sprinkle a dash of cinnamon or nutmeg into the crumble for a warm, spicy flavor note. This adds a cozy touch that feels like home!

  • Vegan Alternative: Use silken tofu blended until smooth in place of cream cheese, and aquafaba for the eggs, creating a delightful vegan version that everyone will enjoy.

  • Gluten-Free Version: Substitute all-purpose flour for almond flour or gluten-free flour blend, as well as using gluten-free cookies for the crust. This way, no one misses out on this scrumptious dessert!

By incorporating these variations, your Blueberry Crumble Cheesecake will cater to a wider audience, ensuring every guest leaves with a smile. And if you're feeling particularly adventurous, consider whipping up a lovely pairing by making some homemade whipped cream or a berry compote to serve alongside!

How to Store and Freeze Blueberry Crumble Cheesecake

Fridge: Store your Blueberry Crumble Cheesecake covered in an airtight container in the refrigerator for up to 5 days for optimal freshness and flavor.

Freezer: If you want to keep it longer, wrap individual slices or the whole cheesecake tightly in plastic wrap and then aluminum foil. It can be frozen for up to 3 months.

Thawing: To enjoy your frozen cheesecake, transfer it to the fridge for 6–8 hours or overnight to thaw gradually. This helps maintain its creamy texture.

Reheating: If preferred, you can enjoy it chilled or at room temperature. Avoid reheating in the microwave, as it can alter the texture.

Expert Tips for Blueberry Crumble Cheesecake

  • Finer Crust: Use a food processor for a finer crust that holds together better. This avoids crumbling when slicing your Blueberry Crumble Cheesecake.

  • Water Bath Best Practice: Ensure the springform pan is tightly wrapped in foil to prevent water from seeping in during baking. This keeps your cheesecake creamy and prevents cracks.

  • Baking Time Variability: Ovens can have different heat levels, so start checking your cheesecake a few minutes before the suggested baking time. Look for a slight jiggle in the center.

  • Chill Properly: Allow at least 6 hours of chilling time after baking. This essential step helps the cheesecake set perfectly and enhances its rich flavor.

  • Flavor Substitutions: Feel free to experiment with flavored extracts like almond or lemon, or try substituting blueberries with other fruits for a unique twist on this classic dessert.

Make Ahead Options

These Blueberry Crumble Cheesecake preparations are perfect for busy home cooks looking to save time! You can prepare the crust, blueberry mixture, and crumble topping up to 24 hours in advance. Simply make each component and store them separately in airtight containers in the refrigerator to maintain their fresh flavors. When you're ready to finish, assemble the cheesecake by pouring the cheesecake filling into the pre-baked crust, layering with the prepared blueberries, and topping with the crumble. Bake as directed, and enjoy a delightful dessert that’s just as delicious as if made fresh the same day!

Blueberry Crumble Cheesecake Recipe FAQs

How do I select the best blueberries for my cheesecake?
Absolutely! When choosing fresh blueberries, look for ones that are plump, firm, and have a deep blue color. Avoid berries with dark spots or wrinkles, as they may be overripe or beginning to spoil. If you can, buy organic blueberries to avoid pesticides, and always wash them gently before using to maintain their integrity.

How should I store my Blueberry Crumble Cheesecake for freshness?
To keep your cheesecake fresh, store it in an airtight container in the refrigerator. It will remain delicious for up to 5 days. If you want to enjoy it later, consider covering it in plastic wrap and foil before placing it in the fridge to minimize any absorption of other flavors.

Can I freeze my Blueberry Crumble Cheesecake? What are the best practices?
Yes, you can! To freeze your Blueberry Crumble Cheesecake, wrap individual slices or the entire cheesecake tightly in plastic wrap and then in aluminum foil to protect it from freezer burn. It can be stored in the freezer for up to 3 months. When you’re ready to enjoy it, allow it to thaw in the refrigerator for 6-8 hours or overnight for the best texture.

Why did my cheesecake crack, and how can I prevent this?
Oh no! Cracking can happen for a few reasons, including sudden temperature changes or overbaking. To help prevent cracking, always use a water bath when baking your cheesecake—make sure to seal your springform pan well to keep moisture out. Also, bake it at a lower temperature and check for doneness earlier to ensure a slight jiggle in the center when it's finished baking.

Is this cheesecake suitable for people with dietary restrictions?
Yes! If you have dietary concerns, it's easy to customize this Blueberry Crumble Cheesecake. You can substitute the cream cheese with a dairy-free alternative, sour cream with Greek yogurt, and eggs can be replaced with flaxseed or applesauce for a vegan version. If gluten is a concern, swap the graham crackers and flour for gluten-free options. Always check labels for potential allergens!

How long should I let the cheesecake cool before serving?
After baking, allow your cheesecake to cool in the oven with the door ajar for about 1 hour. Then, let it rest at room temperature for an additional hour before refrigerating it for at least 6 hours or overnight. This cooling process helps to firm up the cheesecake and enhances its texture, making each slice a creamy delight!

Blueberry Crumble Cheesecake

Blueberry Crumble Cheesecake: Your New Favorite Dessert Delight

Experience the delightful combination of creamy cheesecake, juicy blueberries, and a crunchy crumble in this Blueberry Crumble Cheesecake.
Print Recipe Pin Recipe
Prep Time 30 minutes mins
Cook Time 1 hour hr 20 minutes mins
Cooling Time 8 hours hrs
Total Time 9 hours hrs 50 minutes mins
Servings: 8 slices
Course: Dessert
Cuisine: American
Calories: 350
Ingredients Equipment Method Nutrition Notes

Ingredients
  

Crust
  • 200 grams Digestive or Graham Crackers Swap with gluten-free cookies for a GF version.
  • 50 grams Granulated Sugar Reduce for a lighter sweetness.
  • 100 grams Butter Coconut oil is a great dairy-free substitute.
Blueberry Mixture
  • 400 grams Fresh Blueberries Feel free to replace with peaches or pears.
  • 30 grams All-Purpose Flour Use almond or coconut flour for gluten-free.
Crumble Topping
  • 100 grams Dark Brown Sugar Light brown sugar works just as well.
  • 60 grams All-Purpose Flour Gluten-free options available.
  • 80 grams Butter
Cheesecake Filling
  • 500 grams Full Fat Cream Cheese Low-fat may alter texture.
  • 240 grams Sour Cream Greek yogurt is an excellent alternative.
  • 30 grams Cornstarch No substitutes recommended.
  • 1 teaspoon Vanilla Extract Opt for pure vanilla.
  • 3 large Large Eggs Consider egg substitutes for vegan options.

Equipment

  • Food Processor
  • Springform pan
  • Mixing bowls
  • Oven

Method
 

Preparation Steps
  1. Preheat your oven to 160ºC (325ºF). Blend digestive or graham crackers with granulated sugar until fine. Mix in melted butter and press into a springform pan. Bake for 10 minutes and let cool.
  2. In a bowl, combine blueberries, sugar, flour, and lemon juice. Toss gently until coated.
  3. Mix flour and dark brown sugar in a separate bowl. Melt butter, add to dry ingredients, and blend until crumbly.
  4. Beat cream cheese and sugar until smooth. Mix sour cream and cornstarch, then blend into cream cheese. Add eggs one at a time, then stir in vanilla.
  5. Pour cheesecake filling into the cooled crust. Layer the blueberry mixture on top and press down gently. Sprinkle with crumble topping.
  6. Create a water bath by placing the springform in a larger baking dish with hot water. Bake for 80-90 minutes until center jiggles slightly.
  7. Cool cheesecake in the oven with the door ajar for 1 hour, then at room temperature for an additional hour, and refrigerate for at least 6 hours.

Nutrition

Serving: 1sliceCalories: 350kcalCarbohydrates: 40gProtein: 6gFat: 20gSaturated Fat: 10gCholesterol: 90mgSodium: 200mgPotassium: 150mgFiber: 2gSugar: 25gVitamin A: 500IUVitamin C: 5mgCalcium: 80mgIron: 1mg

Notes

Use a food processor for a finer crust and be sure to wrap the pan in foil during baking to prevent water seepage. Allow at least 6 hours of chilling for the best texture.

Tried this recipe?

Let us know how it was!

Fluffy Japanese Cheesecake You Can't Resist Making Today

January 1, 2026 by Grace Snow Leave a Comment

As I stood in my kitchen, the sweet aroma of melting cream cheese reminded me of the joy that comes with creating something truly special. This Fluffy Japanese Cotton Cheesecake, renowned for its light and airy texture, is a delightful escape from the heaviness of traditional desserts. With its unique meringue structure, this cheesecake offers two incredible benefits: it’s quick to whip up for a weekend gathering and can easily adapt to be gluten-free, satisfying everyone at the table. Each slice is a melt-in-your-mouth experience, culminating in a gentle sweetness that refreshes the palate. Are you ready to bring a touch of Japanese café charm into your home?

Why is Japanese Cheesecake a Must-Try?

Light and Fluffy: This recipe transforms your dessert game with an airy texture that’s unlike any other cheesecake.

Easy to Make: You’ll be surprised at how simple the steps are—even novice bakers can impress friends and family!

Versatile Adaptations: Feel free to explore gluten-free options or experiment with flavors like almond or orange zest to personalize your experience.

Crowd-Pleasing Delight: The mild sweetness and delicate creaminess create an irresistible treat that will leave everyone asking for seconds.

Perfect for Any Occasion: Whether it’s a cozy gathering or a special celebration, this cheesecake adds an elegant touch to your table.

Dive into this delightful recipe and savor the experience of making a stunning Japanese cheesecake at home!

Japanese Cheesecake Ingredients

• Prepare to create the fluffiest Japanese cheesecake with these essential ingredients.

For the Batter

  • Eggs (6 large, separated) – Provides structure and acts as leavening when whipped into meringue, ensuring a light texture.
  • Cream Cheese (8 ounces, preferably softened) – The main flavor component that lends richness and creaminess, making it essential for a delicious cheesecake.
  • Heavy Cream (¼ cup) or Full Fat Milk – Adds moisture and richness; using cream enhances the creaminess of the cheesecake.
  • Unsalted Butter (4 tablespoons, cut into smaller pieces) – Adds richness and flavor, be sure it’s softened for easy incorporation into the batter.
  • Cake Flour (½ cup, fluffed, spooned, and leveled) – Provides the light structure and tenderness that’s characteristic of a fluffy Japanese cheesecake; substitute with all-purpose flour if needed by adjusting cornstarch proportions.
  • Lemon Zest (1 tablespoon, about 1 lemon, optional) – Adds brightness and enhances flavor; use freshly zested lemon for the best results.
  • Vanilla Extract (1½ teaspoons, optional) – Contributes an aromatic flavor, and pure extract will give you the optimal taste experience.
  • Granulated Sugar (⅓ cup) – Sweetens the batter to create a gentle sweetness in every bite; adjust to your personal taste.
  • Lemon Juice (2 teaspoons, about ⅓ of a lemon) – Stabilizes egg whites and adds needed acidity for balance; fresh juice is preferred for better flavor.

For Optional Toppings

  • Powdered Sugar – Ideal for dusting to add a delicate sweetness.
  • Apricot Jam – Great for glazing when warmed slightly; it adds a delightful sheen and flavor.
  • Berries – Use fresh berries for garnish to complement the cheesecake beautifully.
  • Sweetened Whipped Cream – A luscious serving option that enhances each slice of cheesecake.

With these ingredients ready, you're one step closer to indulging in a slice of exquisite Japanese cheesecake!

Step‑by‑Step Instructions for Japanese Cheesecake

Step 1: Preheat the Oven
Begin by preheating your oven to 300°F (150°C). While it heats, line an 8x3 inch round cake pan with parchment paper, ensuring the edges are covered for easy release. Prepare a 9x9 inch baking pan to hold the water bath that will keep the cheesecake moist during baking.

Step 2: Create the Creamy Base
In a heatproof bowl, combine 8 ounces of softened cream cheese, 4 tablespoons of cut-up unsalted butter, and ¼ cup of heavy cream. Place the bowl over a pot of simmering water, stirring continuously until smooth and creamy. Remove the bowl from heat and let it cool slightly before moving on to the next step.

Step 3: Mix in the Egg Yolks
Once your creamy mixture has cooled a bit, whisk in the 6 separated egg yolks until thoroughly combined. Gradually sift in ½ cup of cake flour, whisking until there are no lumps. To enhance the flavor, mix in 1 tablespoon of freshly zested lemon and 1½ teaspoons of vanilla extract, creating a fragrant batter that's ready for lifting.

Step 4: Whip the Egg Whites
In a separate clean bowl, whip the 6 egg whites along with 2 teaspoons of lemon juice until they become frothy. Gradually sprinkle in ⅓ cup of granulated sugar, continuing to beat until soft peaks form. Keep whipping until you reach medium-soft peaks, ensuring your meringue is stable and glossy for the light texture of your Japanese Cheesecake.

Step 5: Fold the Meringue into the Base
Gently fold in one-third of the whipped meringue into the cream cheese mixture using a spatula. This process lightens the batter, making it easier to incorporate the remaining meringue. Repeat this gentle folding method twice more until all the meringue is combined, ensuring a fluffy batter perfect for baking a delightful Japanese cheesecake.

Step 6: Prepare for Baking
Pour the creamy cheesecake batter into the prepared cake pan, smoothing the top for even baking. Gently tap the pan on the counter to release any air bubbles trapped in the batter. Carefully place this pan into your 9x9 inch water-filled baking pan to create a bain-marie, essential for a creamy and moist Japanese cheesecake.

Step 7: Bake the Cheesecake
Slide the water-bathed cheesecake into the preheated oven and bake for about 80-90 minutes. You'll know it's done when it turns a lovely golden brown and a skewer inserted into the center comes out clean. Keep a close eye out after the first hour to avoid overbaking, ensuring your cheesecake remains fluffy and light.

Step 8: Cool the Cheesecake
Once baked to perfection, carefully remove the cheesecake from the oven and allow it to cool in the pan for at least 15 minutes. Gently run a knife around the edges to loosen it before flipping it out onto a cooling rack. This step is crucial for preserving the delicate structure of your Japanese cheesecake.

Step 9: Serve Your Delight
Your Japanese cheesecake can be enjoyed warm or chilled, depending on your preference. For an elegant finish, dust it lightly with powdered sugar, glaze with warm apricot jam, or serve with a dollop of sweetened whipped cream. Each slice offers a delightful and airy experience, showcasing the unique charm of this fluffy dessert.

How to Store and Freeze Japanese Cheesecake

Fridge: Store your leftover Japanese cheesecake in an airtight container for up to 4 days to maintain its fluffy texture and freshness.

Freezer: For longer storage, wrap slices tightly in plastic wrap or aluminum foil, then place them in an airtight container. It can be frozen for up to 2 months.

Thawing: To enjoy the frozen cheesecake, simply transfer it to the fridge a few hours before serving, allowing it to thaw gently overnight.

Reheating: If you’d like to enjoy it warm, heat individual slices in the microwave for about 10-15 seconds until just warmed through, ensuring not to overheat.

What to Serve with Fluffy Japanese Cotton Cheesecake

Indulging in this light and airy dessert inspires the perfect meal pairing to complement its exquisite flavors and textures.

  • Fresh Berries: A medley of strawberries, blueberries, and raspberries not only adds vibrant color but also introduces a refreshing tartness that balances the cheesecake's sweetness.

  • Lemon Sorbet: This icy treat enhances the citrus notes of the cheesecake, delivering a delightful burst of flavor that brightens every bite.

  • Matcha Green Tea: Served hot or iced, this earthy beverage offers a sophisticated flavor that pairs beautifully with the mild sweetness of the cheesecake, bringing a touch of Japanese tradition to your dessert experience.

  • Coffee or Espresso: Rich coffee adds depth to the fluffy dessert. The bitterness of a freshly brewed cup beautifully contrasts the creamy texture, creating a delightful sensory experience.

  • Crushed Almonds: Sprinkling some roasted or crushed almonds on top brings a nutty crunch, enhancing the cheesecake while adding contrasting textures between the creamy filling and crunchy toppings.

  • Sweetened Whipped Cream: This velvety topping softens the palate and adds another layer of creaminess without overpowering the delicate cheesecake flavors. A dollop truly elevates the dessert to a new level.

  • Caramel Sauce: A light drizzle of homemade or store-bought caramel adds a sweet richness that complements the light and fluffy cheesecake, making it irresistible.

  • Iced Green Tea: Refreshing and slightly bitter, iced green tea refreshes the palate, making it a perfect complement to the rich creaminess of the Japanese cheesecake.

  • Apricot Glaze: For a beautiful finishing touch, warm apricot jam brushed on top adds a glossy sheen and a hint of fruitiness that mirrors the flavors within the cake.

Pairing these delightful options with your Fluffy Japanese Cotton Cheesecake will create a memorable dining experience that everyone will love!

Expert Tips for Japanese Cheesecake

  • Room Temperature Ingredients: Ensure your cream cheese and eggs are at room temperature before starting. This helps create a smooth batter without lumps.

  • Whip Wisely: When whipping egg whites, avoid any fat or yolk contamination. Make sure your bowl is impeccably clean to achieve perfect meringue peaks.

  • Gentle Folding: When incorporating the meringue into the cream cheese mixture, use a gentle folding technique. Avoid overmixing to maintain that fluffy texture of your Japanese cheesecake.

  • Check Water Bath Levels: Ensure the water in the bain-marie is filled adequately during baking. Too little water can lead to dryness and uneven cooking, so keep an eye on it!

  • Cooling Caution: After baking, allow the cheesecake to cool gradually. Rapid temperature changes can cause cracking or shrinking, compromising its beautiful structure.

  • Serving Suggestions: Take your presentation up a notch by serving slices with a side of fresh berries or a drizzle of apricot jam for added elegance and flavor.

Japanese Cheesecake Variations & Substitutions

Feel free to play with this recipe to suit your taste and dietary needs—let your creativity shine!

  • Gluten-Free: Swap all-purpose flour with a gluten-free baking blend, adjusting with cornstarch as previously mentioned to achieve that perfect texture. It’s delightful and inclusive!
  • Dairy-Free: Use dairy-free cream cheese and coconut or almond milk to create a delicious version for those with lactose sensitivities. The flavor remains surprisingly rich!
  • Flavor Infusion: Experiment with different extracts like almond or maple for an exciting twist. Each one adds a unique depth to your cheesecake—think of the possibilities!
  • Extra Citrus: Boost the brightness by adding additional lemon juice or zest, or try orange zest for a refreshing citrus kick. Citrus lovers will delight in this zesty upgrade!
  • Chocolate Lovers: Fold in melted dark chocolate or cocoa powder into the batter for a decadent chocolate version. It adds a delightful richness that can be utterly irresistible!
  • Herbal Notes: Incorporate finely chopped herbs like rosemary or basil into the batter for an unexpected and delicious savory cheesecake option. It’s a culinary adventure waiting to happen!
  • Fruity Burst: Add pureed berries or figs into the batter for a natural sweetness and beautiful color. Each slice becomes a delightful surprise filled with fruity goodness!
  • Spicy Heat: For those who enjoy some heat, mix in a pinch of cayenne pepper or chili powder to create a sweet and spicy twist. Your guests will be asking for your secret ingredient!

For even more inspirations, consider checking out our recipe for delightful whipped cream or how to make a scrumptious mixed berry compote to complement your cheesecake perfectly!

Make Ahead Options

These Fluffy Japanese Cotton Cheesecakes are perfect for meal prep! You can prepare the cream cheese batter up to 24 hours in advance by mixing all the base ingredients, then store it in an airtight container in the refrigerator to maintain its quality. Additionally, the meringue can be whipped and refrigerated for up to 6 hours separately; just give it a gentle rewhip before folding it into the batter to restore its fluffiness. When you’re ready to bake, simply combine the prepared meringue with the chilled batter, pour it into the pan, and proceed with the baking steps. Enjoy the convenience of a delightful homemade dessert with minimal effort on the day you serve it!

Japanese Cheesecake Recipe FAQs

How do I choose the right eggs for my cheesecake?
Absolutely! For the fluffiest Japanese cheesecake, use large eggs that are fresh. Look for eggs with clean, uncracked shells and a consistent weight. Fresh eggs contribute to better meringue stability, which is essential for achieving that airy texture.

What is the best way to store leftover Japanese cheesecake?
Store your leftover Japanese cheesecake in an airtight container in the fridge for up to 4 days. Ensure it's well-covered to prevent it from absorbing other odors. If you'd like to keep it longer, freezing is a great option too!

Can I freeze Japanese cheesecake? How?
Very! To freeze your Japanese cheesecake, first, wrap individual slices tightly in plastic wrap, then place them in an airtight container. This method protects against freezer burn and preserves texture. It can be frozen for up to 2 months!

What if my meringue doesn't reach the right consistency?
If your meringue isn’t forming soft or medium peaks, make sure your mixing bowl is clean and dry. Any grease can prevent egg whites from whipping up properly. If you notice it’s still too runny, try whipping a bit longer, but be careful not to overbeat it to avoid graininess.

Are there any dietary considerations for pets or allergies?
Yes! This Japanese cheesecake contains dairy and eggs, which may not be suitable for pets such as dogs or cats. For allergens, if you have a gluten sensitivity, you can adapt the recipe using gluten-free flour as suggested. Always check your ingredients and consult with allergists if you have concerns!

Japanese Cheesecake

Fluffy Japanese Cheesecake You Can't Resist Making Today

This Japanese Cheesecake delivers a light and fluffy texture, perfect for any occasion and easy to make.
Print Recipe Pin Recipe
Prep Time 30 minutes mins
Cook Time 1 hour hr 30 minutes mins
Cooling Time 15 minutes mins
Total Time 2 hours hrs 15 minutes mins
Servings: 8 slices
Course: Dessert
Cuisine: Japanese
Calories: 200
Ingredients Equipment Method Nutrition Notes

Ingredients
  

For the Batter
  • 6 large Eggs, separated Provides structure and acts as leavening when whipped.
  • 8 ounces Cream Cheese, preferably softened The main flavor component of the cheesecake.
  • 0.25 cup Heavy Cream or Full Fat Milk Adds moisture and richness.
  • 4 tablespoons Unsalted Butter, cut into smaller pieces Adds richness and flavor.
  • 0.5 cup Cake Flour, fluffed, spooned, and leveled Provides light structure and tenderness.
  • 1 tablespoon Lemon Zest, optional Enhances flavor and brightness.
  • 1.5 teaspoons Vanilla Extract, optional Contributes aromatic flavor.
  • 0.33 cup Granulated Sugar Sweetens the batter.
  • 2 teaspoons Lemon Juice Stabilizes egg whites and adds acidity.
For Optional Toppings
  • Powdered Sugar Ideal for dusting.
  • Apricot Jam Great for glazing when warmed.
  • Berries Fresh berries for garnish.
  • Sweetened Whipped Cream Enhances each slice.

Equipment

  • 8x3 inch round cake pan
  • 9x9-inch baking pan
  • Heatproof bowl
  • Whisk
  • Spatula

Method
 

Step-by-Step Instructions
  1. Preheat your oven to 300°F (150°C) and line an 8x3 inch round cake pan with parchment paper. Prepare a 9x9 inch baking pan for the water bath.
  2. In a heatproof bowl, combine 8 ounces of softened cream cheese, 4 tablespoons of butter, and ¼ cup of heavy cream. Heat until smooth and creamy.
  3. Whisk in 6 egg yolks until combined, then sift in ½ cup of cake flour. Mix in 1 tablespoon of lemon zest and 1.5 teaspoons of vanilla extract.
  4. Whip 6 egg whites with 2 teaspoons of lemon juice until frothy, gradually adding ⅓ cup of sugar until soft peaks form.
  5. Gently fold one-third of the meringue into the cream cheese mixture, then repeat twice more until fully combined.
  6. Pour the batter into the prepared cake pan, smooth the top, and tap to release air bubbles. Place in the water-filled baking pan.
  7. Bake for 80-90 minutes until golden brown and a skewer comes out clean. Check after an hour to avoid overbaking.
  8. Allow the cheesecake to cool in the pan for at least 15 minutes. Run a knife around the edges before flipping onto a cooling rack.
  9. Serve warm or chilled, dusted with powdered sugar, glazed with apricot jam, or with sweetened whipped cream.

Nutrition

Serving: 1sliceCalories: 200kcalCarbohydrates: 18gProtein: 3gFat: 12gSaturated Fat: 7gMonounsaturated Fat: 5gCholesterol: 110mgSodium: 200mgPotassium: 100mgSugar: 8gVitamin A: 400IUVitamin C: 1mgCalcium: 50mgIron: 0.5mg

Notes

Use room temperature ingredients for a smooth batter. Avoid overmixing to maintain fluffy texture.

Tried this recipe?

Let us know how it was!

Irresistible Cheesecake Recipe: Creamy, Cracked-Free Delight

January 1, 2026 by Grace Snow Leave a Comment

The scent of vanilla wafting through the kitchen always brings me back to my childhood, where every gathering was marked by the unmistakable delight of my grandma’s classic cheesecake. Today, I’m thrilled to share my Best No-Crack Classic Cheesecake Recipe that captures that essence without the hassle of a water bath. This creamy marvel is a crowd-pleaser, perfect for birthdays, holidays, or even a cozy night in. With a buttery graham cracker crust and a smooth texture that melts in your mouth, this cheesecake offers the comfort of homemade with every slice. Best of all, it's surprisingly simple to master, making it an ideal choice for both novice and seasoned bakers alike. Are you ready to treat yourself and your loved ones to this delightful classic? Let’s dive in!

Why is this cheesecake recipe a must-try?

Irresistible flavor: The rich blend of creamy cheese and tangy sour cream creates a luscious taste that keeps everyone wanting more.
Effortless approach: No need for a tricky water bath—this recipe ensures a smooth, crack-free finish every time.
Versatile toppings: Elevate your cheesecake with fresh fruits, chocolate ganache, or caramel sauce for a delightful twist.
Quick prep time: With straightforward steps, you can whip up this masterpiece in no time, making it perfect for unexpected guests!
Crowd-pleaser: Ideal for any occasion, from casual dinners to birthday celebrations—your friends and family will be raving about it! Experience this delightful cheesecake alongside other classics like Spatchcock Chicken or Chicken Adobo to complete your meal.

Cheesecake Recipe Ingredients

For the Crust
• Graham Cracker Crumbs – This forms the base of your crust; you can easily make this at home or grab it from the store.
• Granulated Sugar – Sweetens the crust and filling; feel free to adjust based on your sweetness preference.
• Melted Butter – Binds the crumbs together; using unsalted butter allows better control over the saltiness.

For the Filling
• Cream Cheese – The star of the show, giving your cheesecake its signature creamy texture; ensure it's at room temperature for easy mixing.
• Sour Cream – Adds a delightful tanginess to the batter; Greek yogurt can be a lighter substitute if desired.
• Vanilla Extract – Enhances flavor; opt for pure extract for a richer taste profile.
• Large Eggs – Provide structure and stability to your filling; they should also be at room temperature for optimal blending.

Optional Toppings
• Fresh Fruits – Strawberries, blueberries, or raspberries bring a refreshing contrast to the creamy cheesecake.
• Chocolate Ganache – For chocolate lovers, this adds a rich and decadent layer of flavor without overshadowing the cheesecake base.
• Caramel Sauce – A delightful drizzle imparts warmth and sweetness, taking your cheesecake experience to the next level.

Whether you’re preparing a classic cheesecake recipe for a special occasion or an everyday dessert, these ingredients ensure a delectable outcome that will impress family and friends alike!

Step‑by‑Step Instructions for Best No-Crack Classic Cheesecake Recipe

Step 1: Preheat the Oven
Begin by preheating your oven to 350°F (175°C) to ensure a hot environment for baking. While the oven warms up, grab your 9-inch springform pan and lightly grease it with butter or cooking spray. This will help release your cheesecake effortlessly when it’s time to serve, ensuring a beautiful presentation with every slice.

Step 2: Make the Crust
In a mixing bowl, combine the graham cracker crumbs and granulated sugar, then drizzle in the melted butter. Mix until the crumbs are fully coated and resemble wet sand. Press this mixture firmly into the bottom of the prepared springform pan, creating an even layer. Bake the crust in the preheated oven for 7 minutes until it's lightly golden and fragrant, setting the foundation for your cheesecake.

Step 3: Prepare the Filling
While the crust bakes, start preparing your cheesecake filling. In a large mixing bowl, beat the room-temperature cream cheese for about 30 seconds until smooth and creamy. Gradually add in the granulated sugar, sour cream, and vanilla extract, mixing on medium speed until everything is fully incorporated and the mixture is completely smooth without lumps.

Step 4: Add Eggs Slowly
Crack the large eggs into a separate bowl and whisk them lightly. Reduce the mixer speed to low, then slowly add the eggs one at a time to the cream cheese mixture. This gradual incorporation prevents any air bubbles, helping to create a smooth cheesecake filling. Mix until just combined—overmixing can lead to cracks during baking.

Step 5: Remove Air Bubbles
After mixing, gently tap the bowl against the countertop for 30 to 45 seconds. This helps to release any trapped air bubbles in your cheesecake batter, which can create imperfections while baking. Take a moment to admire the creamy consistency of your filling—it should be luscious and glossy.

Step 6: Bake the Cheesecake
Pour the cheesecake filling evenly over your pre-baked crust in the springform pan. Place it in the oven and bake at 325°F (160°C) for 30 minutes. After this initial time, reduce the temperature to 250°F (120°C) and continue baking for another 45 minutes, until the center is set but still slightly wobbly, ensuring a creamy texture.

Step 7: Cool Gradually
Once baking is complete, turn off your oven and crack the door open slightly, allowing the cheesecake to cool inside for 30 minutes. This gradual cooling helps prevent cracks. Afterward, carefully transfer the cheesecake to the counter and let it cool completely for about 1 hour. Once cooled, refrigerate it for at least 6 hours or overnight for the best flavor.

Storage Tips for Cheesecake Recipe

  • Fridge: Keep your cheesecake covered in the refrigerator for up to 1 week. This helps maintain its creamy texture and flavor while preventing it from absorbing unwanted odors.

  • Freezer: You can freeze cheesecake for up to 3 months. Wrap it tightly in plastic wrap followed by aluminum foil to protect it from freezer burn and preserve its freshness.

  • Thawing: To enjoy frozen cheesecake, transfer it to the fridge and allow it to thaw overnight. This keeps it creamy and delicious, just like when it was freshly made.

  • Reheating: There’s no need to reheat cheesecake; enjoy it chilled straight from the fridge for the best texture and taste.

What to Serve with Best No-Crack Classic Cheesecake?

Indulging in a slice of creamy cheesecake brings to mind a world of delightful pairings that enhance its rich flavor.

  • Fresh Berries: Juicy strawberries, blueberries, or raspberries add a vibrant burst of color and a refreshing tartness that perfectly balances the cheesecake’s sweetness.

  • Whipped Cream: Light and fluffy, whipped cream provides a luscious touch that complements the dense texture of the cheesecake while adding extra richness to every bite.

  • Chocolate Ganache: This decadent chocolate layer drizzled on top elevates the dessert experience, offering a deep, rich flavor that pairs beautifully with the cheesecake’s creamy profile.

  • Caramel Sauce: The warm sweetness of caramel adds an inviting contrast to the tangy cheesecake, creating a sublime taste that feels indulgent yet comforting.

  • Coffee: A steaming cup of coffee or espresso enhances the flavors, creating a harmonious blend that is like a warm hug in a cup, making your dessert experience even more memorable.

  • Mint Leaves: Fresh mint adds a fragrant and refreshing element that brightens the palate, offering a lovely contrast to the cheesecake’s richness, making each bite feel light and invigorating.

  • Cheese Platter: A selection of cheeses, such as tangy goat cheese or creamy brie, can create an interesting savory contrast to the sweetness of the cheesecake, inviting an exploration of flavors.

  • Sparkling Wine: A bubbly glass of prosecco or champagne adds an elegant touch to your dessert table, providing a refreshing effervescence that brightens the rich taste of the cheesecake, making it perfect for celebrations.

Every delicious bite becomes an experience with these delightful pairings, ensuring that your cheesecake adventure is nothing short of extraordinary!

Make Ahead Options

These Classic Cheesecake Recipe components are perfect for meal prep, saving you time and hassle during busy weeks! You can prepare the crust up to 3 days in advance by baking it and storing it in an airtight container at room temperature. For the filling, mix all ingredients (except the eggs) and refrigerate it for up to 24 hours before baking; this enhances the flavors. When you’re ready to bake, simply whisk the eggs into the chilled filling, pour over the prepared crust, and bake as directed. This approach guarantees that your cheesecake remains just as delicious while cutting down on the workload when it’s time to serve!

Cheesecake Recipe Variations & Substitutions

Unleash your creativity with this cheesecake recipe by exploring exciting variations and substitutions that will tantalize your taste buds!

  • Thicker Crust: Increase graham cracker crumbs and melted butter to 1.75 cups and 6 tablespoons for extra crunch.

  • Gluten-Free Option: Swap graham cracker crumbs for ground almonds or gluten-free cookie crumbs to cater to dietary needs.

  • No-Bake Alternative: For a cool twist, try a no-bake version using cream cheese, whipped cream, and a biscuit base—perfect for warm days!

  • Fruit-Filled Surprise: Swirl in fruit preserves like raspberry or blueberry into the batter before baking for a delightful fruity variation.

  • Chocolate Lovers: Add melted chocolate to the cream cheese mixture for a decadent chocolate cheesecake experience—an indulgent treat!

  • Citrus Zest: Incorporate lemon or orange zest into the filling for a fresh, zesty kick that brightens up the creamy texture.

  • Nutty Crunch: Fold in chopped nuts, like pecans or walnuts, into the filling or sprinkle on top after baking for added texture and flavor.

  • Dairy-Free Twist: Substitute cream cheese with a dairy-free alternative and use coconut cream for a creamy, plant-based cheesecake option.

This cheesecake offers wonderful possibilities to make it your own, just like other delightful recipes such as Spatchcock Chicken or Chicken Adobo, ensuring every meal is a delicious adventure!

Expert Tips for Cheesecake Recipe

  • Room Temperature Ingredients: Ensure cream cheese and eggs are at room temperature to achieve a smooth, lump-free mixture for your cheesecake recipe.

  • Gentle Mixing: Mix ingredients gently to avoid incorporating too much air, which can lead to cracks in your cheesecake.

  • Accurate Oven Temperature: Use an oven thermometer to make sure your oven is at the correct temperature for even baking and a perfect set.

  • Cooling Process: Allow the cheesecake to cool gradually in the oven with the door slightly ajar. This helps prevent sudden temperature changes that can cause cracks.

  • Wrap for Freshness: If you have leftovers, wrap the cheesecake tightly in plastic wrap before refrigerating to prevent it from absorbing any unwanted odors.

  • Experiment with Flavors: Don’t hesitate to add flavor extracts or citrus zest for a personal touch to your cheesecake recipe, making it uniquely yours!

Classic Cheesecake Recipe FAQs

What type of graham crackers should I use for the crust?
Absolutely! You can use either store-bought graham cracker crumbs or crush whole graham crackers yourself. If you prefer a gluten-free option, look for gluten-free graham crackers, which will give you the same delicious base without compromising flavor!

How should I store leftovers?
After cooling, cover your cheesecake tightly with plastic wrap and store it in the refrigerator. It will stay fresh for about 1 week. If you're saving some for later, keep it in an airtight container to prevent any odors from affecting its taste.

Can I freeze cheesecake and how do I do it?
Yes, you can freeze your cheesecake for up to 3 months! First, allow it to cool completely. Then, wrap it tightly in plastic wrap, followed by aluminum foil to avoid freezer burn. When you're ready to enjoy it, simply transfer it to the refrigerator to thaw overnight.

What if my cheesecake has cracks?
Very! Cracks can happen. To minimize this in the future, mix your ingredients gently to prevent incorporating too much air. Also, cooling it gradually inside the oven after baking can help avoid sudden temperature changes that cause cracks. If it does crack, don’t worry! You can cover it with fruit toppings or chocolate ganache—delicious hiding spots!

Can I make this cheesecake gluten-free?
Absolutely! To create a gluten-free version, substitute regular graham crackers with gluten-free graham or cookie crumbs for the crust. For the filling, all the other ingredients used are naturally gluten-free, so you’re good to go! Always double-check your labels to ensure they are certified gluten-free.

What’s the best way to ensure my cheesecake sets properly?
To ensure a perfect set, keep your oven temperature accurate using an oven thermometer. Bake at the correct temperatures specified, and don’t skip the gradual cooling step after baking. With these steps, you can achieve a smooth, dense, and delectable cheesecake without worries!

Cheesecake Recipe

Irresistible Cheesecake Recipe: Creamy, Cracked-Free Delight

Discover the best cheesecake recipe that is creamy and crack-free, perfect for any dessert occasion, showcasing the delightful flavors of cheesecake.
Print Recipe Pin Recipe
Prep Time 15 minutes mins
Cook Time 1 hour hr 22 minutes mins
Cooling Time 6 hours hrs
Total Time 7 hours hrs 37 minutes mins
Servings: 8 slices
Course: Dessert
Calories: 320
Ingredients Equipment Method Nutrition Notes

Ingredients
  

For the Crust
  • 1 cup Graham Cracker Crumbs You can easily make this at home or grab it from the store.
  • 2 tablespoons Granulated Sugar Adjust based on your sweetness preference.
  • 5 tablespoons Melted Butter Using unsalted butter allows better control over the saltiness.
For the Filling
  • 24 ounces Cream Cheese Ensure it's at room temperature for easy mixing.
  • 1 cup Sour Cream Greek yogurt can be a lighter substitute if desired.
  • 1 tablespoon Vanilla Extract Opt for pure extract for a richer taste profile.
  • 3 large Eggs Should be at room temperature for optimal blending.
Optional Toppings
  • Fresh Fruits Strawberries, blueberries, or raspberries.
  • Chocolate Ganache Adds a rich layer of flavor.
  • Caramel Sauce A delightful drizzle for added sweetness.

Equipment

  • 9-inch springform pan
  • Mixing Bowl
  • Electric mixer

Method
 

Step-by-Step Instructions
  1. Preheat your oven to 350°F (175°C) and grease your springform pan.
  2. Combine graham cracker crumbs and sugar, then add melted butter and mix until coated. Press into the pan and bake for 7 minutes.
  3. Beat cream cheese until smooth, then add sugar, sour cream, and vanilla, mixing until smooth.
  4. Whisk eggs separately, then add one at a time to the mixture at low speed. Mix until just combined.
  5. Gently tap the bowl against the countertop to release air bubbles.
  6. Pour the filling over the crust and bake at 325°F (160°C) for 30 minutes, then at 250°F (120°C) for 45 minutes.
  7. Turn off the oven and crack the door open, allowing to cool for 30 minutes. Transfer to counter and cool for 1 hour, then refrigerate for at least 6 hours or overnight.

Nutrition

Serving: 1sliceCalories: 320kcalCarbohydrates: 28gProtein: 5gFat: 22gSaturated Fat: 13gPolyunsaturated Fat: 1gMonounsaturated Fat: 7gTrans Fat: 0.5gCholesterol: 95mgSodium: 300mgPotassium: 140mgSugar: 18gVitamin A: 10IUCalcium: 6mgIron: 2mg

Notes

Ensure all ingredients are at room temperature for a smoother batter. Wrap tightly in plastic wrap for leftovers.

Tried this recipe?

Let us know how it was!

Creamy Crack Corn Dip Recipe You’ll Love for Any Party

December 30, 2025 by Grace Snow Leave a Comment

At a recent gathering, I overheard a friend raving about a dip that vanished faster than the chips it was served with. That dip was none other than my Crack Corn Dip—a creamy corn dip that has become my go-to appetizer for any occasion. It’s not just a crowd-pleaser; this dish comes together in a mere ten minutes, making it the perfect solution for those last-minute parties or a cozy night in. Bursting with sweet corn, zesty spices, and a luscious creaminess, it’s the ultimate way to elevate your appetizers. Plus, you can make it ahead of time, allowing the flavors to meld beautifully overnight. So, are you ready to impress your guests and yourself? Let’s dive into this irresistible recipe!

Why is this Crack Corn Dip a must-try?

Quick and Easy: This recipe allows you to whip up a delightful appetizer in just ten minutes, making it ideal for unexpected guests or last-minute plans.

Creamy and Flavorful: The combination of cream cheese and sour cream creates a rich, creamy base, while the addition of sweet corn and zesty spices adds layers of flavor.

Crowd-Pleaser: Perfect for parties, gatherings, or a cozy night in, this dip disappears quickly—your friends and family will be coming back for seconds!

Versatile and Customizable: Whether you want to spice it up with jalapeños or keep it classic, the options are endless. It’s also delicious served with tortilla chips, crackers, or fresh veggies.

Make-Ahead Marvel: Prepare this dip a day in advance to let the flavors meld, ensuring a tasty treat that’s ready when you are. Pair it with other enjoyable snacks like Cheesy Corn Fritters for a fantastic spread!

Crack Corn Dip Ingredients

For the Dip

  • Southwest Corn (2 cans, 15.25 oz each) – Provides sweetness and texture; you can substitute with regular sweet corn plus ¼ cup roasted bell peppers if needed.
  • Rotel Diced Tomatoes and Green Chilies (10 oz) – Adds a flavorful and slightly spicy kick; be sure to drain them well to avoid excess liquid.
  • Shredded Cheddar Cheese (2 cups) – Contributes creaminess and rich flavor; feel free to use a lower-fat cheese if you're looking for a lighter option.
  • Diced Green Onions (8) – Enhances freshness and adds a mild onion flavor; you can adjust the amount to your taste.
  • Cream Cheese (8 oz, softened) – Creates the creamy base of the dip; allowing it to soften will make mixing easier.
  • Sour Cream (1 cup) – Adds tanginess and creaminess; Greek yogurt is a great substitute if you're aiming for a lighter version.
  • Black Pepper (1 tsp) – Provides seasoning; adjust based on your flavor preferences.
  • Garlic Powder (½ tsp) & Salt (½ tsp) – Enhances overall flavor; a pinch more of salt can elevate the dip's taste.
  • Chopped Cilantro (⅓ cup) – Adds freshness and a slight herbal note; feel free to omit if you're not a fan of herbs.

Enjoy the creamy goodness of this Crack Corn Dip at your next event!

Step‑by‑Step Instructions for Crack Corn Dip

Step 1: Mix the Base Ingredients
In a large mixing bowl, combine the softened cream cheese and sour cream. Use an electric mixer on medium speed for about 2 minutes until the mixture is smooth and creamy with no lumps. This creamy base will provide the perfect foundation for your Crack Corn Dip, ensuring every bite is rich and decadent.

Step 2: Add the Corn and Spices
Next, drain and rinse the two cans of Southwest corn and add them to the bowl. Stir in the Rotel diced tomatoes and green chilies, ensuring they are well drained to avoid excess moisture. Then, sprinkle in the black pepper, garlic powder, and salt, mixing thoroughly for about 1-2 minutes until combined. The sweetness of the corn pairs beautifully with the spices, giving your dip a vibrant flavor.

Step 3: Incorporate Cheese and Onions
Now, fold in the shredded cheddar cheese and diced green onions, using a spatula to incorporate them evenly into the mixture. Make sure the cheese is distributed throughout the Crack Corn Dip for that luscious, cheesy texture. This step should take about 1-2 minutes, and you’ll want the mixture to be thick yet creamy.

Step 4: Chill for Flavor Development
Cover the bowl with plastic wrap or transfer the dip to an airtight container, then refrigerate for at least 2 hours, though overnight is best. This chilling process allows the flavors of the Crack Corn Dip to meld together, enhancing the overall taste and creating a more enjoyable experience for your guests.

Step 5: Serve the Dip
Once chilled, give the dip a gentle stir before transferring it to a serving bowl. Garnish with additional chopped cilantro for a touch of color and freshness. Pair your delicious Crack Corn Dip with tortilla chips for the perfect crunch, or serve it with crackers and fresh veggie sticks for a wholesome option.

What to Serve with Crack Corn Dip

Imagine a festive gathering where laughter fills the air, and flavors mingle in harmony—let's elevate your next celebration!

  • Tortilla Chips: Perfect for dipping, they bring a satisfying crunch that complements the creamy dip beautifully.

  • Fresh Veggie Platter: Crisp cucumbers, bell peppers, and carrots add refreshing contrast; their crunchiness balances the rich, creamy texture of the dip.

  • Pita Bread Wedges: Soft, warm pita makes for a delightful alternative that soaks up the dip's flavors beautifully. Each bite is a new adventure!

  • Cheesy Corn Fritters: For a fun, thematic pairing, serve these tasty bites alongside the dip for an irresistible corn bonanza.

  • Sangria: A chilled glass of fruity sangria brightens the palate and adds a festive touch, making it perfect for warm days.

  • Guacamole: This creamy avocado dip adds another layer of richness, and its fresh zing pairs well with the sweetness of the corn.

  • Stuffed Jalapeños: For spice lovers, these savory bites will heat things up, creating a delicious contrast with the cheesy dip.

  • Mexican Street Corn Salad: This vibrant salad adds fresh flavors and textures that beautifully complement the richness of the Crack Corn Dip.

How to Store and Freeze Crack Corn Dip

Fridge: Store leftover Crack Corn Dip in an airtight container for up to 4 days. Keeping it sealed helps maintain its creamy texture and fresh flavors.

Freezer: Freeze Crack Corn Dip in a freezer-safe container for up to 2 months. When ready to enjoy, thaw overnight in the refrigerator and stir well before serving.

Reheating: If you prefer to serve it warm, reheat in the microwave in short intervals (30 seconds), stirring in between until warm throughout.

Make-Ahead Tip: This dip can be prepared a day in advance for the best flavors. Simply make it, refrigerate, and then serve it chilled or warmed up the next day.

Expert Tips for Crack Corn Dip

  • Drain Well: Ensure the corn and tomatoes are thoroughly drained to avoid a watery dip. Excess moisture can dilute the flavors and make the texture less creamy.

  • Flavor Boost: For an extra kick, consider adding diced jalapeños or green chilies. This small change elevates your Crack Corn Dip to a spicy delight!

  • Cheese Choice: While cheddar is a classic, try using a Mexican-blend cheese for added complexity and a delightful twist on flavor.

  • Perfect Creaminess: Allow your cream cheese to soften at room temperature before mixing. This ensures a smooth, lump-free base that's easy to work with.

  • Chill Time: Don’t skip the chilling step! Refrigerating for at least 2 hours enhances flavor melding and truly makes the Crack Corn Dip irresistible.

  • Serving Suggestions: For a fun twist, serve with various dipping options—think crunchy veggies, pretzels, or roasted pita bread for a delicious alternative.

Crack Corn Dip Variations & Substitutions

Feel free to get creative with your dip and make it uniquely yours with these delightful variations!

  • Spicy Kick: Add diced jalapeños or canned green chilies to pump up the heat!

  • Veggie Twist: Substitute black beans for corn for a different texture and a fiber boost.

  • Cheese Blend: Swap shredded cheddar for a Mexican-blend cheese to deepen the flavor profile.

  • Herb Flavor: Experiment by adding fresh chives or parsley instead of cilantro for a twist on the herbal element.

  • Creamy Alternative: For a lighter option, replace sour cream with Greek yogurt and enjoy the same creamy texture with fewer calories.

  • Roasted Sweetness: Use roasted corn instead of canned corn for a deeper, caramelized flavor that enhances that sweet corn goodness.

  • Topping Delight: Consider topping your dip with just-baked tortilla strips for a bit of crunch, adding a delightful contrast to the creamy base.

  • Sweet Balance: Add a touch of honey or maple syrup for a sweet contrast that will have everyone asking for your secret ingredient.

Let your creativity shine and remember, this easy-making dip pairs wonderfully with Roasted Corn Fried tacos or a cozy bowl of Smoky Sweet Corn soup! Enjoy your cooking journey!

Make Ahead Options

These delightful Crack Corn Dip components are perfect for meal prep, saving you precious time on busy days! You can mix all the ingredients and refrigerate the dip up to 24 hours before serving, allowing the flavors to meld beautifully. To maintain texture and taste, be sure to cover the bowl tightly with plastic wrap or transfer it to an airtight container. If you’re serving leftovers, stir in a spoonful of fresh sour cream before enjoying, as this helps restore creaminess. When you’re ready to impress your guests, simply give the dip a quick stir, and serve it chilled with your favorite tortilla chips for a hassle-free appetizer!

Crack Corn Dip Recipe FAQs

How do I select the best corn for this dip?
Absolutely! Look for Southwest corn with a vibrant yellow color and no dark spots or blemishes on the can—this is a sign of freshness. If fresh sweet corn is in season, feel free to use 3-4 ears instead; just make sure to cook and cut it off the cob before adding it to the dip.

How should I store leftover Crack Corn Dip?
Store any leftover dip in an airtight container in the refrigerator. It will keep well for up to 4 days. To maintain the flavors, try not to leave it out at room temperature for more than 2 hours during serving.

Can I freeze Crack Corn Dip?
Yes, you can! Transfer the dip into a freezer-safe container, ensuring it's sealed tightly. It can be frozen for up to 2 months. When you're ready to enjoy it, just thaw overnight in the fridge. Once thawed, stir well and serve cold or warm it in the microwave.

What if my Crack Corn Dip turns out too runny?
If your dip appears too watery, the most likely culprit is excess moisture from the corn or tomatoes. To fix it, try adding more softened cream cheese or a bit of sour cream to thicken it up. Additionally, draining the corn and tomatoes thoroughly before mixing is crucial; you can pat them dry with a paper towel too.

Is this dip safe for people with dairy allergies?
Unfortunately, this recipe contains dairy products like cream cheese and sour cream. If you're cooking for someone with dairy allergies, consider substituting these ingredients with dairy-free alternatives. Cream cheese can be swapped with cashew cream or a store-bought vegan cream cheese, and sour cream can be replaced with a dairy-free yogurt.

Can I make this dip a day ahead?
Very! In fact, making this dip a day in advance is encouraged! By refrigerating it overnight, the flavors meld together beautifully, resulting in an even tastier dip. Just ensure to mix it again before serving to bring back that creamy texture.

Crack Corn Dip

Creamy Crack Corn Dip Recipe You’ll Love for Any Party

Crack Corn Dip is a creamy, flavorful appetizer perfect for any gathering, ready in just 10 minutes.
Print Recipe Pin Recipe
Prep Time 10 minutes mins
Chill Time 2 hours hrs
Total Time 2 hours hrs 10 minutes mins
Servings: 8 servings
Course: Appetizers
Calories: 210
Ingredients Equipment Method Nutrition Notes

Ingredients
  

For the Dip
  • 2 cans Southwest Corn (15.25 oz each) Or substitute with regular sweet corn plus ¼ cup roasted bell peppers.
  • 10 oz Rotel Diced Tomatoes and Green Chilies Drain well to avoid excess liquid.
  • 2 cups Shredded Cheddar Cheese Use lower-fat cheese for a lighter option.
  • 8 Diced Green Onions Adjust amount to taste.
  • 8 oz Cream Cheese Softened for easier mixing.
  • 1 cup Sour Cream Greek yogurt can be a substitute.
  • 1 tsp Black Pepper Adjust based on flavor preference.
  • ½ tsp Garlic Powder
  • ½ tsp Salt A pinch more can elevate flavor.
  • ⅓ cup Chopped Cilantro Omit if not a fan of herbs.

Equipment

  • Mixing Bowl
  • Electric mixer

Method
 

Step-by-Step Instructions
  1. In a large mixing bowl, combine softened cream cheese and sour cream. Mix on medium speed for about 2 minutes until smooth and creamy.
  2. Drain and rinse the cans of Southwest corn and add to the bowl. Stir in the well-drained Rotel diced tomatoes and green chilies. Sprinkle in black pepper, garlic powder, and salt, mixing for 1-2 minutes.
  3. Fold in the shredded cheddar cheese and diced green onions using a spatula to ensure even distribution.
  4. Cover with plastic wrap or transfer to an airtight container and refrigerate for at least 2 hours, preferably overnight.
  5. Before serving, give the dip a gentle stir and garnish with additional chopped cilantro. Serve with tortilla chips or fresh veggie sticks.

Nutrition

Serving: 1cupCalories: 210kcalCarbohydrates: 15gProtein: 5gFat: 15gSaturated Fat: 8gCholesterol: 35mgSodium: 560mgPotassium: 200mgFiber: 2gSugar: 3gVitamin A: 500IUVitamin C: 8mgCalcium: 150mgIron: 1mg

Notes

Prepare a day in advance for best flavor. Can be stored in fridge for up to 4 days; freezes for 2 months.

Tried this recipe?

Let us know how it was!

Irresistibly Cheesy Spinach and Artichoke Dip Recipe

December 30, 2025 by Grace Snow Leave a Comment

As I stood in my kitchen, the aroma of earthy oats mingled with the sweetness of melting chocolate, instantly transporting me to my favorite childhood baking memories. That’s the magic of these 4-Ingredient Crispy Chocolate Oat Cookies! With just four simple ingredients, they come together in no time, making them the perfect solution for an impromptu sweet craving or a delightful treat to share with friends. Not only are they quick to whip up, but they’re also gluten-free, catering to those who are looking for a healthier indulgence without sacrificing flavor. Each crunchy bite is a testament to how uncomplicated ingredients can create something truly special. So, are you ready to embark on a new cookie adventure? Let’s dive into this easy recipe!

Why Are Crispy Chocolate Oat Cookies So Special?

Simplicity at its best: With just four wholesome ingredients, making these cookies is a breeze—no elaborate techniques required!

Healthier indulgence: Enjoy the satisfaction of gluten-free treats without compromise; these cookies keep your cravings in check while being guilt-free.

Versatile options: Feel free to customize! Swap peanut butter for sunflower seed butter or add in some crunchy nuts to make these cookies uniquely yours.

Quick and easy: Perfect for those busy days when time is tight, simply mix, scoop, and bake in under 15 minutes!

Crowd-pleaser: Whether it’s a snack for yourself or a delightful treat for friends, these cookies are sure to impress. Why not pair them with a big glass of milk or some tasty Parmesan Artichoke Hearts for a fun snack spread?

Crispy Chocolate Oat Cookie Ingredients

• Delight in the simplicity of these four ingredients that make your cookie dreams come true!

For the Batter

  • Oats – The soul of the cookie; ensure you use certified gluten-free oats for a perfect gluten-free delight.
  • Peanut Butter – Offers a creamy binding; substitute with almond butter for a similar effect or use sunflower seed butter for a nut-free alternative.
  • Honey or Maple Syrup – Natural sweetness that brings everything together; agave syrup works as a vegan alternative if you prefer it.
  • Chocolate Chips – For that chocolatey explosion; opt for dark chocolate chips for a richer flavor or carob chips for a unique twist.

Step‑by‑Step Instructions for 4-Ingredient Crispy Chocolate Oat Cookies

Step 1: Preheat the Oven
Begin by preheating your oven to 350°F (175°C). While it warms up, take a baking sheet and line it with parchment paper for easy cleanup and to prevent sticking. This simple preparation ensures your cookies will bake evenly and come out perfectly crispy.

Step 2: Mix the Base
In a large mixing bowl, combine the oats and peanut butter. Use a sturdy spoon or spatula to mix thoroughly until the oats are fully coated and the mixture is well blended. This is the foundation of your Crispy Chocolate Oat Cookies, providing both texture and flavor.

Step 3: Add Sweetness
Next, stir in your choice of honey or maple syrup. Mix well until the ingredients come together into a sticky, cohesive dough. The added sweetness balances the nutty flavor of the peanut butter, making every cookie delightful.

Step 4: Incorporate Chocolate Chips
Now, fold in the chocolate chips until they are evenly distributed throughout the mixture. This step is essential to ensure that each bite is filled with melted chocolate goodness, enhancing the cookie’s flavor and creating that irresistible indulgence everyone loves.

Step 5: Scoop the Cookies
Using a tablespoon or cookie scoop, portion out the dough onto your prepared baking sheet. Space them about 2 inches apart to allow for spreading while baking. This is where your homemade cookies begin to take shape and promise a satisfying crunch.

Step 6: Flatten the Cookies
Gently flatten each scoop of dough with the back of a fork to create a slight indentation. This helps them cook evenly and achieve that desired crispy edge. You're now just moments away from enjoying your delicious creation!

Step 7: Bake to Perfection
Place the baking sheet in the preheated oven and bake the cookies for 10-12 minutes. Keep an eye on them; they should turn golden brown at the edges while staying slightly soft in the center. This contrast is what makes your Crispy Chocolate Oat Cookies so wonderfully enjoyable.

Step 8: Cooling Time
Once baked, remove the tray from the oven and let the cookies cool on the sheet for about 5 minutes. This step is crucial as it allows them to firm up without becoming overly crispy. After cooling, transfer the cookies to a wire rack to cool completely.

Expert Tips for Perfect Cookies

  • Smooth Peanut Butter: Ensure your peanut butter is smooth to create a uniform texture. Crunchy varieties can lead to uneven cookies.

  • Check Baking Time: Keep an eye on the oven; cookies should be golden brown on the edges but softer in the center. This balance makes your crispy chocolate oat cookies truly delightful.

  • Cool Gradually: Allow cookies to cool for 5 minutes on the baking sheet before transferring them to a wire rack. This helps them firm up without losing their chewy center.

  • Customize Add-ins: Feel free to add chopped nuts or dried fruit to the dough for extra flavor and texture. Just remember not to overwhelm the core recipe!

  • Storage Solutions: Store your cookies in an airtight container at room temperature for up to a week. This keeps them fresh and ready to enjoy anytime.

Crispy Chocolate Oat Cookies Variations

Feel free to let your creativity shine as you personalize these delectable cookies with exciting twists and substitutions!

  • Nut-Free: Swap peanut butter for sunflower seed butter to keep these treats nut-free, perfect for school lunches or gatherings.
  • Vegan Delight: Use agave syrup instead of honey or maple syrup for a completely vegan version that still satisfies your sweet tooth.
  • Texture Boost: Add in some chopped nuts like walnuts or pecans for a delightful crunch that perfectly complements the soft cookie.
  • Fruity Twist: Mix in dried fruits, such as cranberries or apricots, to introduce a subtle chewiness and a burst of flavor that’s simply irresistible.
  • Sweetener Switch: Try coconut sugar as an alternative sweetener for a caramel-like flavor that adds depth to your cookies, making them truly unique.
  • Spiced Up: Incorporate a sprinkle of cinnamon or a dash of vanilla extract to elevate the flavor profile, inviting warmth and comfort with every bite.
  • Carob Chips: Consider using carob chips instead of chocolate for an alternative that provides a different sweetness and gentle earthiness.
  • Extra Crunchy: For a more granola-inspired experience, fold in crisped rice for that extra crunch with each delightful chew, making these cookies even more special.

These variations offer endless opportunities to customize your cookies just the way you like them! For a complementary treat, why not try your hand at some delightful Coconutty Beans Greens for a satisfying meal alongside your sweet bites?

Make Ahead Options

These 4-Ingredient Crispy Chocolate Oat Cookies are perfect for busy home cooks looking to save time during hectic weeknights! You can mix the dry ingredients (oats and chocolate chips) and the wet ingredients (peanut butter and honey or maple syrup) up to 24 hours in advance. Simply refrigerate each separately to maintain freshness. When you’re ready to bake, combine them, scoop onto a baking sheet, and flatten each cookie as directed. To ensure that your cookies remain just as delicious, avoid forming them until you're ready to bake. Enjoy the convenience of having your dough prepped ahead of time, allowing you to whip up these tasty treats without the wait!

What to Serve with Crispy Chocolate Oat Cookies?

As the sweet aroma of freshly baked cookies fills your home, you'll want the perfect accompaniments that elevate this delightful treat into a full experience.

  • Milkshake: A rich, creamy milkshake enhances the sweetness of the cookies while offering a luscious contrast in texture. It’s a classic pairing that evokes comforting memories.

  • Fresh Fruit Skewers: Brighten your plate with colorful fruit skewers. Their juiciness balances the crispy texture of the cookies, bringing freshness and a touch of healthiness to your indulgence.

  • Vanilla Ice Cream: The classic combination of warm cookies with cold ice cream never fails! Dive into a scoop of creamy vanilla against the crispy chocolate oat cookie for a delectably blissful treat.

  • Coffee or Tea: A steaming cup of coffee or herbal tea complements the rich chocolate flavor wonderfully. The warmth and complexities of your drink enhance the cookies’ appeal, making every bite just a bit more special.

  • Yogurt Parfait: Layer yogurt with fresh berries and a sprinkle of cookie crumbles for a delightful parfait. It mixes textures beautifully while adding a refreshing element to your dessert experience.

  • Chocolate Dipping Sauce: Elevate your cookie game with a velvety chocolate dipping sauce. It adds an extra layer of chocolatey goodness, perfect for those who like a decadent twist!

Storage Tips for Crispy Chocolate Oat Cookies

  • Room Temperature: Keep the cookies in an airtight container at room temperature for up to a week. This ensures they stay fresh and retain their delightful crunch.

  • Fridge: If you prefer your cookies chilled, store them in the fridge in an airtight container for up to 10 days. Just note, they may lose some crunchiness.

  • Freezer: For longer storage, freeze the cookies for up to 3 months. Place them in a single layer on a baking sheet until frozen, then transfer to a freezer-safe bag, ensuring they are well-wrapped.

  • Reheating: To enjoy your cookies warm, simply pop them in the microwave for about 10-15 seconds. This will refresh their chewy center and melt the chocolate chips for a delicious treat anytime!

Crispy Chocolate Oat Cookies Recipe FAQs

What kind of oats should I use?
Absolutely! It's best to use certified gluten-free oats for this recipe to ensure that your Crispy Chocolate Oat Cookies remain gluten-free. Regular oats may be cross-contaminated with gluten, so opting for certified ones guarantees a safe and delicious treat for everyone.

How should I store the cookies, and how long do they last?
I recommend storing your cookies in an airtight container at room temperature for up to a week. If you’d like them to last longer, you can place them in the fridge for up to 10 days, although they may lose some crunchiness over time. For freezing, these cookies can be stored for up to 3 months. Just lay them flat on a baking sheet until frozen, then transfer them to a freezer-safe bag.

Can I freeze the cookies? If so, how?
Certainly! To freeze your Crispy Chocolate Oat Cookies, first let them cool completely after baking. Then, place them in a single layer on a baking sheet and put them in the freezer until frozen solid—this typically takes about 1-2 hours. Once frozen, transfer them to a freezer-safe bag, squeezing out as much air as possible. You can enjoy them later by reheating in the microwave for 10-15 seconds for that warm, freshly-baked feel!

What if my cookies are too soft or crumbly?
If you find your cookies are too soft, it may be due to underbaking. Make sure to bake them until the edges are golden brown while the centers remain slightly soft. If they crumble, check if you’ve measured your peanut butter accurately; too much peanut butter can create an overly wet mixture. Next time, consider adding an extra tablespoon of oats to thicken the batter.

Are there any common allergies I should be aware of?
Definitely! Since this recipe features peanut butter, be cautious of anyone with nut allergies. A great alternative is using sunflower seed butter, which provides a similar texture and taste without the allergens. Additionally, if you choose to use honey or maple syrup, make sure your guests are not allergic to those, as well!

Can I customize the ingredients?
Very much! You can swap the peanut butter for almond butter or sunflower seed butter for nut-free cookies. Additionally, feel free to add chopped nuts, dried fruits, or even vary the type of chocolate chips used. The more the merrier when it comes to personalizing your crispy cookies!

Spinach and Artichoke Dip Recipe

Irresistibly Cheesy Spinach and Artichoke Dip Recipe

This Spinach and Artichoke Dip Recipe is a crowd-pleasing appetizer, combining creamy cheese with savory spinach and artichoke.
Print Recipe Pin Recipe
Prep Time 10 minutes mins
Cook Time 20 minutes mins
Cooling Time 5 minutes mins
Total Time 35 minutes mins
Servings: 6 people
Course: Appetizers
Cuisine: American
Calories: 200
Ingredients Equipment Method Nutrition Notes

Ingredients
  

Ingredients for Spinach and Artichoke Dip
  • 1 cup Cream Cheese Softened
  • 1 cup Sour Cream
  • 1 cup Mozzarella Cheese Shredded
  • 1 cup Spinach Chopped, fresh or frozen
  • 1 cup Artichoke Hearts Drained and chopped
  • 1 teaspoon Garlic Powder
  • 1/2 teaspoon Salt
  • 1/2 teaspoon Black Pepper

Equipment

  • Mixing Bowl
  • Baking Dish
  • Oven

Method
 

Preparation Instructions
  1. Preheat your oven to 350°F (175°C).
  2. In a mixing bowl, blend together cream cheese and sour cream until smooth.
  3. Add in mozzarella cheese, spinach, artichoke hearts, garlic powder, salt, and pepper; mix well.
  4. Transfer the mixture to a baking dish and spread it evenly.
  5. Bake for 20 minutes or until hot and bubbly.
  6. Let cool for 5 minutes before serving.

Nutrition

Serving: 1cupCalories: 200kcalCarbohydrates: 10gProtein: 8gFat: 15gSaturated Fat: 8gPolyunsaturated Fat: 1gMonounsaturated Fat: 5gCholesterol: 40mgSodium: 600mgPotassium: 200mgFiber: 2gSugar: 2gVitamin A: 500IUVitamin C: 2mgCalcium: 150mgIron: 1mg

Notes

Serve with tortilla chips, pita bread, or fresh vegetables for dipping.

Tried this recipe?

Let us know how it was!

Delicious Cookie Dough Dip That's Safe to Eat and So Easy!

December 30, 2025 by Grace Snow Leave a Comment

In a world where dessert dips reign supreme, this Cookie Dough Dip stands out as a fun, nostalgic twist on a classic favorite. Whipping up this creamy delight is not only a breeze—taking less than five minutes—but you can also savor it without the worry of raw eggs. Perfect for gatherings or simply indulging on movie night, this dip brings joy to the table with its playful sweetness and smooth texture. Imagine diving into a snack that lets you enjoy cookie dough without the fuss of baking. Whether you’re serving it with graham crackers or fresh fruit, it’s a guaranteed crowd-pleaser. Curious about how to make this irresistible treat? Let’s dive into the recipe!

Why is Cookie Dough Dip a Must Try?

Quick and Easy: This delightful dip comes together in under five minutes, making it a fantastic choice for a last-minute treat.

No Raw Eggs: Enjoy the classic cookie dough flavor without any worries about raw eggs or flour—perfect for the whole family!

Creamy and Smooth: The rich texture mimics fluffy cheesecake, enhanced by mini chocolate chips for those delightful bursts of sweetness.

Versatile Dipping: Pair it with graham crackers, fruit slices, or even pretzels for a fun, interactive dessert experience that everyone will love.

Make-Ahead Friendly: You can whip it up in advance and let the flavors meld, allowing for an even tastier dip at your next gathering.

With these easy attributes, you can also explore other creamy delights like Matcha Cookies Soft or try something festive with Eggnog Cookies Soft. Enjoy!

Cookie Dough Dip Ingredients

• Whip up this delightful Cookie Dough Dip in no time!

For the Dip

  • Cream Cheese – Provides a creamy base for the dip; ensure it's at room temperature to avoid lumps.
  • Butter – Adds richness and flavor; use unsalted to control the salt content.
  • Brown Sugar – Sweetens the dip and adds a hint of caramel flavor; light or dark can be used based on preference.
  • Vanilla Extract – Enhances the flavor, giving that classic cookie dough taste.
  • Mini Chocolate Chips – Adds texture and sweetness; can substitute with dark chocolate chips for a richer flavor.

Enjoy this easy Cookie Dough Dip with your favorite dippers!

Step‑by‑Step Instructions for Cookie Dough Dip

Step 1: Soften the Ingredients
Begin by ensuring your cream cheese and butter are at room temperature—this is essential for a smooth consistency. Let them sit out for about 30 minutes before starting. You should be able to press the cream cheese with your thumb, creating a slight indent without any resistance. This will guarantee that your Cookie Dough Dip is creamy and lump-free.

Step 2: Mix Base Ingredients
In a mixing bowl, combine the softened cream cheese and butter using a hand mixer or a sturdy whisk. Mix on medium speed for 1-2 minutes until the mixture is smooth and fluffy, with no lumps remaining. This step is crucial for achieving the rich, creamy texture characteristic of the Cookie Dough Dip that everyone will love!

Step 3: Add Sweetness and Flavor
Next, gradually incorporate the brown sugar and vanilla extract into the creamy mixture. Continue mixing on low speed for another minute or two, ensuring everything is well blended and smooth. As you mix, the ingredients will meld together, creating a deliciously sweet and aromatic base for your dip that captures that classic cookie dough flavor.

Step 4: Stir in Chocolate Chips
Once the mixture is uniformly blended, fold in the mini chocolate chips using a spatula. Stir gently until the chocolate chips are evenly distributed throughout the dip. This step not only adds delightful bursts of sweetness but also gives that authentic cookie dough experience, making your Cookie Dough Dip even more irresistible.

Step 5: Chill and Set
Transfer the finished Cookie Dough Dip into a serving dish. For best flavor, cover it with plastic wrap and refrigerate for at least 30 minutes. Chilling allows the flavors to meld beautifully, creating a richer, more enjoyable dip. While you can serve it right away, giving it some time to chill will elevate your tasting experience.

Step 6: Serve and Enjoy
When ready to serve, take the dip out of the refrigerator. You can garnish it with more mini chocolate chips if desired for a fancy touch. Serve your delicious Cookie Dough Dip with graham crackers, sliced fruits, or pretzels for a delightful dipping experience that’s sure to impress your guests or family!

What to Serve with Cookie Dough Dip?

Indulge your senses and sweeten your gatherings by crafting a dessert experience that perfectly complements this creamy delight.

  • Graham Crackers: Their crunchy texture offers a delightful contrast to the smooth dip, enhancing every scoop. Simple, yet effective for dipping!

  • Fresh Fruit Slices: Apples or strawberries add a refreshing, juicy element that cuts through the richness, making each bite perfectly balanced.

  • Pretzels: The salty crunch of pretzels creates a fun contrast, elevating the dip experience with a sweet and salty harmony that everyone will enjoy.

  • Mini Cookies: Bite-sized treats enhance the cookie dough vibe. Dip them in for an extra explosion of cookie flavor, without baking a thing!

  • Chocolate Drizzles: Drizzling melted chocolate on top not only adds elegance but intensifies the chocolatey goodness, creating a sight to behold and a taste to cherish.

  • Ice Cream Cups: Scooping this dip onto creamy vanilla ice cream brings a rich indulgence. A warm dessert experience that feels like a cozy hug!

  • Milk or Coffee: Pair with a glass of milk or a warm cup of coffee for the ultimate comfort beverage duo. They balance out the sweetness beautifully and satisfyingly.

  • Marshmallows: Toast them slightly for a campfire-inspired treat! Dunking them in Cookie Dough Dip takes the nostalgic flavor combination to another level.

Your Cookie Dough Dip will shine even brighter with these delicious sides, transforming your snack time into a joyous occasion.

Cookie Dough Dip Variations

Feel free to let your creativity shine by customizing this delicious dip to suit your taste buds!

  • Salted Caramel: Add a pinch of sea salt to the mixture for a salted caramel flavor that pairs beautifully with the sweetness.

  • Nutty Bliss: Substitute half of the chocolate chips with crushed nuts for a delightful crunch. Walnuts or pecans work wonderfully to elevate the texture.

  • Thinner Consistency: Incorporate a splash of milk to achieve a thinner dip that's perfect for drizzling over fruit or pretzels.

  • Flavored Extracts: Swap vanilla extract for almond or hazelnut extract, giving the dip an unexpected and exciting twist that’s sure to surprise!

  • Seasonal Spices: Stir in a pinch of cinnamon or nutmeg for a cozy, warm flavor reminiscent of holiday baking. Perfect for autumn gatherings!

  • Mix of Chocolates: Experiment with a combination of dark and white chocolate chips for richer depths of flavor. Your taste buds will thank you for the variety!

  • Drier Option: If you prefer a less creamy dip, reduce the amount of cream cheese slightly. This will keep the delicious flavor while making the dip a bit firmer.

For more delicious inspirations, you might enjoy Matcha Cookies Soft or try the festive flavors of Eggnog Cookies Soft. Happy dipping!

Make Ahead Options

This Cookie Dough Dip is ideal for meal prep, saving you precious time during busy weeknights or gatherings! You can prepare the entire dip up to 24 hours in advance—just follow the instructions through Step 5, then cover it tightly with plastic wrap and refrigerate. This allows the flavors to meld for a richer taste. For best results, serve the dip within a week. When you’re ready to indulge, simply remove it from the fridge, give it a quick stir, and you’re all set for a delightful treat that’s just as creamy and delicious as when it was freshly made. Enjoy hassle-free entertaining!

Storage Tips for Cookie Dough Dip

Fridge: Store any leftover Cookie Dough Dip in an airtight container in the refrigerator for up to 1 week. Flavors improve after a day of chilling, making it even tastier!

Freezer: If you want to keep it longer, you can freeze the dip in an airtight container for up to 3 months. Thaw it in the fridge overnight before serving.

Reheating: This dip is best served cold or at room temperature, so there's no need to reheat. Just give it a gentle stir after chilling.

Serving Freshness: If serving a crowd, consider making a double batch; it’s quick to prepare, and your guests will love having extra!

Expert Tips for Cookie Dough Dip

  • Soft Ingredients: Ensure cream cheese and butter are softened to room temperature to avoid lumps in your Cookie Dough Dip. Check doneness by pressing with your thumb.

  • Proper Mixing: Use a hand mixer or whisk on medium speed to blend the cream cheese and butter until completely smooth. No lumps means a creamier dip!

  • Gradual Additions: Add brown sugar and vanilla extract slowly while mixing. This helps incorporate air for a delightful, fluffy texture.

  • Chill Time: Chill the dip for at least 30 minutes before serving. This step allows flavors to meld, enhancing the overall taste of your Cookie Dough Dip.

  • Serving Suggestions: Pair with graham crackers, fruit slices, or pretzels. These add texture and make for an enjoyable, interactive dessert experience!

Cookie Dough Dip Recipe FAQs

What type of cream cheese should I use for the Cookie Dough Dip?
Absolutely! I recommend using full-fat cream cheese for its rich texture and flavor, but if you're looking for a lighter option, low-fat cream cheese can work too. Just ensure that whichever you choose, it's at room temperature to avoid lumps in your dip.

How should I store leftover Cookie Dough Dip?
You can store any leftover Cookie Dough Dip in an airtight container in the refrigerator for up to 1 week. The flavors actually improve after a day of chilling, so if you can wait, it's even tastier the next day!

Can I freeze Cookie Dough Dip?
Yes, you can freeze it! To do this, place the dip in an airtight container, making sure to press down any excess air, and freeze for up to 3 months. When you're ready to enjoy it again, simply thaw it in the refrigerator overnight before serving. It’s as easy as that!

What do I do if my dip is too thick?
If you find that your Cookie Dough Dip is too thick after mixing, don't worry! You can easily adjust its consistency by adding a splash of milk—start with a tablespoon, stir it in, and if you want it thinner, continue adding little by little until you reach your desired texture.

Is this Cookie Dough Dip safe for kids?
Very! One of the best parts about this dip is that it's free from raw eggs and flour, making it a much safer option for children. As always, if there's any concern regarding allergies, double-check the ingredient labels before serving.

Can I change the chocolate chips for nuts in the Cookie Dough Dip?
Absolutely! If you want to mix things up, feel free to substitute half of the mini chocolate chips with crushed nuts. This not only adds a delightful crunch but also gives an extra layer of flavor to your dip. Enjoy the creativity in your cooking!

Cookie Dough Dip

Delicious Cookie Dough Dip That's Safe to Eat and So Easy!

This Cookie Dough Dip is a fun and safe way to enjoy cookie dough, perfect for gatherings and easy to make in under five minutes.
Print Recipe Pin Recipe
Prep Time 5 minutes mins
Chill Time 30 minutes mins
Total Time 35 minutes mins
Servings: 8 servings
Course: Dessert
Calories: 200
Ingredients Equipment Method Nutrition Notes

Ingredients
  

For the Dip
  • 8 oz Cream Cheese room temperature
  • 1/2 cup Butter unsalted
  • 1/2 cup Brown Sugar light or dark
  • 1 teaspoon Vanilla Extract
  • 1/2 cup Mini Chocolate Chips or dark chocolate chips

Equipment

  • Mixing Bowl
  • hand mixer
  • Spatula

Method
 

Step-by-Step Instructions
  1. Soften the Ingredients: Ensure cream cheese and butter are at room temperature for a smooth consistency.
  2. Mix Base Ingredients: Combine softened cream cheese and butter, mixing until smooth and fluffy.
  3. Add Sweetness and Flavor: Gradually incorporate brown sugar and vanilla, mixing until well blended.
  4. Stir in Chocolate Chips: Fold mini chocolate chips into the mixture until evenly distributed.
  5. Chill and Set: Transfer to a serving dish, cover, and refrigerate for at least 30 minutes.
  6. Serve and Enjoy: Garnish with more chocolate chips and serve with dippers like graham crackers or fruits.

Nutrition

Serving: 1servingCalories: 200kcalCarbohydrates: 15gProtein: 2gFat: 15gSaturated Fat: 9gPolyunsaturated Fat: 1gMonounsaturated Fat: 5gCholesterol: 40mgSodium: 150mgPotassium: 40mgSugar: 10gVitamin A: 400IUCalcium: 50mgIron: 0.5mg

Notes

For best flavor, chill for 30 minutes before serving. This dip can be paired with graham crackers, fruits, or pretzels.

Tried this recipe?

Let us know how it was!

Slow Cooker Taco Dip: The Ultimate Game Day Treat!

December 30, 2025 by Grace Snow Leave a Comment

The enticing aroma of savory spices wafts through the air as I revisit a cherished gathering moment, where friends gathered around a bubbling pot of Loaded Slow Cooker Taco Dip. This irresistible recipe is truly a game-changer for any social event, combining the hearty goodness of ground beef, creamy nacho cheese, and a medley of zesty toppings. Not only is this slow cooker taco dip a seamless option for parties, but it's also a low-fuss delight that can be prepared ahead of time, giving you the freedom to enjoy the festivities without being tied to the kitchen. With its rich, flavorsome profile that's bound to steal the spotlight, you’ll witness this dish disappearing in a flash. Ready to dig in? Let’s get started!

Why Is This Taco Dip So Addictive?

Unbelievable Ease: This Loaded Slow Cooker Taco Dip can be prepped in no time, letting you focus on having fun with your guests instead of slaving in the kitchen.

Flavor Explosion: Each bite is overflowing with rich ground beef, savory nacho cheese, and zesty taco seasoning, creating a combination that'll leave your taste buds dancing with joy.

Crowd-Pleasing Favorite: Perfect for any gathering, it's guaranteed to create smiles as it quickly vanishes from the table.

Versatility Galore: Feel free to customize! Swap ground beef for turkey or make it vegetarian by using beans and mushrooms.

Serve It Up: Ideal with tortilla chips, crusty bread, or veggie sticks—this dip is a hit any way you serve it!

Looking for more amazing taco ideas? Check out these Fish Taco Bowls and Shrimp Tacos Zesty for inspiration.

Slow Cooker Taco Dip Ingredients

For the Dip

  • White Onion – Adds sweetness and flavor; you can swap for red onion if preferred.
  • Ground Beef – Provides a hearty base; ground turkey, pork, or chicken work as excellent alternatives.
  • Taco Seasoning – Offers authentic taco flavors; homemade mixes with cumin, chili powder, and garlic powder are great substitutes.
  • Pepperoncini Juice – Adds tanginess; use vinegar for a similar zesty kick if needed.
  • Refried Beans – Contributes creaminess and texture; kidney or black beans can easily replace them.
  • Nacho Cheese – Brings in the creamy element; try cheddar cheese or cream cheese for a different taste.
  • Fiesta Corn – Provides a touch of sweetness and crunch; regular canned corn works just as well.
  • Tomatoes and Green Chiles – Add moisture and mild heat; fresh diced tomatoes can be a fresh alternative.
  • Pickled Jalapenos – Gives a spicy kick; substitute with fresh jalapenos for more heat, or omit for a milder dip.
  • Pepperoncini – Enhances texture and flavor; can be left out if desiring a less intense taste.
  • Mayonnaise – Adds extra creaminess; Greek yogurt or sour cream are suitable substitutes.
  • Taco Sauce – Elevates the overall flavor profile; using salsa is a delightful alternative.
  • Dried Chipotle Peppers – Introduces smokiness; simply omit for those who prefer a gentler flavor.
  • Cilantro – Adds a fresh garnish; sprinkle just before serving to keep it vibrant.

Serving Suggestions

  • Tortilla Chips – Perfect for dipping and adding crunch.
  • Crusty Baguette Slices – A delightful option for those who prefer bread.
  • Vegetable Sticks – Freshness meets deliciousness for a healthy crunch.

This slow cooker taco dip is bound to be the star of your next gathering!

Step‑by‑Step Instructions for Slow Cooker Taco Dip

Step 1: Sauté Onions
Begin by heating a skillet over medium-high heat. Add the chopped white onion and sauté for about 5 minutes, or until the onions become soft and translucent, releasing a sweet aroma. This step lays the flavorful foundation for your Loaded Slow Cooker Taco Dip.

Step 2: Brown the Beef
Next, introduce the ground beef to the skillet, breaking it into smaller pieces with a spatula. Cook for approximately 5 minutes until the beef is evenly browned and no longer pink, ensuring a hearty base for the dip. Drain any excess fat to keep the dip creamy and rich.

Step 3: Season
With the beef perfectly browned, stir in the taco seasoning and pepperoncini juice, allowing the spices to coat the meat evenly. Cook for an additional minute to let the flavors meld, then remove the skillet from heat. Your ingredients are now ready for a delicious assembly in the slow cooker.

Step 4: Layer Ingredients
Prepare your slow cooker by spraying the interior with non-stick cooking spray. Start by spreading a layer of refried beans at the bottom, followed by a generous layer of nacho cheese. Finally, spread the seasoned beef mixture evenly over the cheese, creating a flavorful base for your Slow Cooker Taco Dip.

Step 5: Combine Toppings
In a mixing bowl, combine the fiesta corn, diced tomatoes and green chiles, pickled jalapeños, diced pepperoncini, mayonnaise, and taco sauce. Stir until all ingredients are well incorporated. Carefully spread this zesty topping mixture over the beef layer in the slow cooker, ensuring even coverage for a delicious final result.

Step 6: Cook the Dip
Sprinkle dried chipotle peppers over the top for a hint of smokiness. Cover the slow cooker and cook on low for 4 hours or on high for 2 hours. The dip is ready when it's bubbling and the cheese is melted, filling your kitchen with mouthwatering aromas.

Step 7: Garnish and Serve
Once cooked, remove the chipotle peppers and discard them. Sprinkle fresh cilantro over the dip for a pop of color and flavor just before serving. Enjoy your warm and inviting Slow Cooker Taco Dip with tortilla chips, allowing everyone to scoop up various layers of deliciousness that are sure to impress at any gathering!

Expert Tips for Slow Cooker Taco Dip

  • Grease Well: Always use non-stick spray in your slow cooker to prevent your delicious dip from sticking to the bottom, ensuring easy scooping.

  • Taste Test: Adjust spice levels to your liking! Start with mild seasoning, then gradually add more if needed to perfect your slow cooker taco dip.

  • Stay Warm: If your dip finishes cooking before you're ready to serve, keep it on a warm setting. Add a splash of milk if it thickens while waiting.

  • Layer Wisely: Make sure to layer your ingredients properly for even cooking and flavor distribution, allowing every scoop to be equally delicious!

  • Fresh Garnish: Add cilantro just before serving for a vibrant touch—this boosts freshness and visual appeal, enhancing the overall experience.

Make Ahead Options

These Loaded Slow Cooker Taco Dip is perfect for busy home cooks wanting to streamline their meal prep! You can prepare the ground beef mixture and layer it in the slow cooker up to 24 hours in advance—just store it covered in the refrigerator. To maintain its delicious quality, ensure it's tightly sealed to prevent moisture loss. When you’re ready to serve, simply plug in your slow cooker and set it to cook for 2 hours on high or 4 hours on low, adding the pepperoncini and cilantro just before diving in. By prepping ahead, you’ll have more time to enjoy the party with your guests while still delivering a crowd-pleasing favorite!

How to Store and Freeze Slow Cooker Taco Dip

Fridge: Store leftovers in an airtight container for up to 4 days. Reheat in the microwave or on the stove over low heat, adding a splash of milk if needed.

Freezer: If you have excess dip, freeze it in a tightly sealed container or freezer bag for up to 1 month. Thaw in the fridge overnight before reheating.

Reheating: For best results, reheat the dip slowly on the stove or in the microwave, stirring occasionally. This keeps it creamy and delicious for your next gathering!

Serving Tip: Renowned for its flavor, this slow cooker taco dip can easily be doubled for larger parties or game day events.

Slow Cooker Taco Dip Variations

Invite your culinary creativity to shine as you explore delightful twists on this beloved dip that promise to tantalize your taste buds!

  • Vegetarian Version: Swap the ground beef for thickly sliced portobella mushrooms or a medley of beans like black beans and pinto beans for a hearty, satisfying alternative. This addition not only keeps the dish filling but also introduces diverse textures!

  • Cheese Swap: Use cream cheese for a rich, tangy twist, or experiment with a combination of cheddar, mozzarella, and pepper jack for added flavor complexity. The result will be a deep, creamy delight worth savoring!

  • Spicy Upgrade: Turn up the heat by adding diced chipotle in adobo sauce or some finely chopped habaneros. This will give your dip an exciting kick, perfect for spice lovers!

  • Gluten-Free Delight: Ensure the dip is gluten-free by selecting specific brands of taco seasoning and corn chips that meet gluten-free requirements. Now, everyone can indulge without worries!

  • Creamy Alternative: Replace mayonnaise with avocado or Greek yogurt for a lighter yet equally creamy texture. The flavors meld beautifully, offering a fresh taste that will leave you craving more.

  • Savory Pesto Twist: Mixing in a tablespoon of your favorite pesto can add a unique herby flavor profile that complements the taco seasoning remarkably well. This unexpected twist will surely surprise your guests!

  • Smoky Flavor: Enhance the smoky notes by swapping dried chipotle peppers with smoked paprika and a splash of liquid smoke. This quick change gives an astonishing depth to the dip's flavor.

  • Flavorful Add-ins: Consider tossing in some diced green bell peppers or olives for added crunch and flavor. These ingredients not only enhance the dip but also make it more colorful and appealing.

For additional taco inspiration, don’t miss out on making scrumptious Fish Taco Bowls or these flavorful Shrimp Tacos Zesty. Happy cooking!

What to Serve with Loaded Slow Cooker Taco Dip?

Embrace a festive atmosphere by pairing bold flavors and rich textures that truly complement this delicious dip.

  • Tortilla Chips: The classic choice! Their crunchiness contrasts perfectly with the creamy dip, making each scoop a delightful experience.

  • Crusty Baguette Slices: A warm, chewy bread option that adds a rustic touch and soaks up the savory goodness, perfect for bread lovers.

  • Vegetable Sticks: Crisp and refreshing, serve with an assortment of carrot, celery, and bell pepper sticks for a healthy, colorful contrast.

  • Guacamole: Creamy and rich, this avocado dip complements the zesty flavors of your taco dip while adding a cooling element.

  • Salsa: A tangy tomato salsa brightens up the richness of the taco dip, often leaving guests wanting more of this flavor-packed pairing.

  • Margaritas: Add a festive drink to the mix! The tartness of margaritas pairs wonderfully with the savory and spicy notes of your taco dip, elevating your gathering.

Consider mixing and matching different elements to create a vibrant spread that will have everyone coming back for seconds!

Slow Cooker Taco Dip Recipe FAQs

How do I choose ripe ingredients for the Slow Cooker Taco Dip?
Absolutely! When selecting ingredients, look for firm, bright tomatoes without dark spots. For onions, choose those that feel heavy and are free from soft spots. Ground beef should be fresh with a bright red color, while cheese should be within its expiration date for the best flavor and creaminess.

How should I store leftovers of Slow Cooker Taco Dip?
Store any leftovers in an airtight container in the refrigerator. They will stay fresh for up to 4 days. When you're ready to enjoy it again, simply reheat the dip on the stove over low heat or in the microwave, adding a splash of milk to maintain its creamy texture.

Can I freeze Slow Cooker Taco Dip?
Yes! If you have extra dip, it can be frozen for up to 1 month. To freeze, pour the cooled dip into a freezer-safe container or bag, ensuring as much air as possible is removed. When it's time to enjoy again, thaw it in the fridge overnight and reheat slowly for the best results.

What should I do if my taco dip turns out too thick?
If your dip thickens while cooking or when reheating, just stir in a little milk or broth gradually. This will smooth it out and restore its creamy consistency. Also, if you find it too spicy, adding a dollop of sour cream or Greek yogurt can help balance the heat.

Is this Slow Cooker Taco Dip safe for everyone to eat?
Yes, it’s quite versatile! However, be mindful of any allergies—particularly with dairy or spices. For those with dietary restrictions, you can easily make substitutions like using ground turkey, and omit the jalapeños for a milder flavor. Always ensure to inform guests of the ingredients used to prevent any allergic reactions.

How long can I keep the cooked taco dip in the refrigerator?
You can safely enjoy the cooked dip stored in the refrigerator for up to 4 days. Make sure it remains in an airtight container to maintain freshness. If you want to prolong its life for future gatherings, opt for freezing it as described above!

Slow Cooker Taco Dip

Slow Cooker Taco Dip: The Ultimate Game Day Treat!

Experience the essence of gatherings with this Slow Cooker Taco Dip, featuring ground beef, creamy nacho cheese, and zesty toppings – a must-have for game day!
Print Recipe Pin Recipe
Prep Time 10 minutes mins
Cook Time 4 hours hrs
Total Time 4 hours hrs 10 minutes mins
Servings: 8 servings
Course: Appetizers
Cuisine: Mexican
Calories: 250
Ingredients Equipment Method Nutrition Notes

Ingredients
  

For the Dip
  • 1 medium White Onion Can swap for red onion
  • 1 lb Ground Beef Substitute with ground turkey, pork, or chicken
  • 1 packet Taco Seasoning Homemade mixes can be used
  • 1/4 cup Pepperoncini Juice Vinegar can be used as a substitute
  • 1 can Refried Beans Replace with kidney or black beans
  • 2 cups Nacho Cheese Cheddar or cream cheese can be alternatives
  • 1 cup Fiesta Corn Regular canned corn works too
  • 1 can Tomatoes and Green Chiles Fresh diced tomatoes can be used
  • 1/2 cup Pickled Jalapenos Sub with fresh jalapenos or omit
  • 1/4 cup Pepperoncini Can omit for less intensity
  • 1/4 cup Mayonnaise Greek yogurt or sour cream can substitute
  • 1/2 cup Taco Sauce Salsa is a good alternative
  • 1 tsp Dried Chipotle Peppers Omit for a milder flavor
  • 1/4 cup Cilantro Add fresh just before serving
Serving Suggestions
  • 1 bag Tortilla Chips Perfect for dipping
  • 1 loaf Crusty Baguette A delightful option for those who prefer bread
  • 1 cup Vegetable Sticks Freshness for a healthy crunch

Equipment

  • Slow Cooker
  • Skillet
  • Mixing Bowl

Method
 

Step-by-Step Instructions
  1. Begin by heating a skillet over medium-high heat. Add the chopped white onion and sauté for about 5 minutes until soft and translucent.
  2. Introduce the ground beef to the skillet. Cook for approximately 5 minutes until evenly browned. Drain any excess fat.
  3. Stir in the taco seasoning and pepperoncini juice, allowing the spices to coat the meat. Cook for an additional minute then remove from heat.
  4. Prepare your slow cooker by spraying with non-stick spray. Layer refried beans, followed by nacho cheese, and then the seasoned beef mixture.
  5. In a mixing bowl, combine fiesta corn, diced tomatoes and green chiles, pickled jalapenos, diced pepperoncini, mayonnaise, and taco sauce. Spread over the beef layer in the slow cooker.
  6. Sprinkle dried chipotle peppers on top, cover, and cook on low for 4 hours or high for 2 hours.
  7. Remove chipotle peppers before serving. Garnish with fresh cilantro and enjoy with tortilla chips.

Nutrition

Serving: 1cupCalories: 250kcalCarbohydrates: 15gProtein: 15gFat: 15gSaturated Fat: 7gPolyunsaturated Fat: 2gMonounsaturated Fat: 4gCholesterol: 40mgSodium: 800mgPotassium: 350mgFiber: 3gSugar: 2gVitamin A: 10IUVitamin C: 15mgCalcium: 15mgIron: 6mg

Notes

Use non-stick spray in your slow cooker to prevent sticking. Taste test and adjust spices as desired.

Tried this recipe?

Let us know how it was!
  • « Previous Page
  • 1
  • …
  • 98
  • 99
  • 100
  • 101
  • 102
  • …
  • 217
  • Next Page »

Welcome!

Hi, I’m Grace, a Sydney-based home cook with a passion for bold flavors and trending ingredients. Whether you’re a busy beginner or a seasoned foodie, you’ll find dishes here that are fresh, fun, and full of flavor.

More about me

Popular Recipes

  • Chocolate Cake Pops
    Delicious Chocolate Cake Pops That Wow Every Dessert Lover
  • Caribbean-Style Beef Stew with Rice
    Caribbean-Style Beef Stew with Rice That Warms Your Soul
  • Healthy Crockpot Beef Stew
    Healthy Crockpot Beef Stew for Cozy Weeknight Dinners
  • Crispy Chicken Tacos
    Crispy Chicken Tacos for the Perfect Taco Tuesday Night

Footer

↑ back to top

About

  • Privacy Policy
  • Disclaimer
  • Terms & Conditions

Newsletter

  • Sign Up! for emails and updates

Contact

  • About me
  • Contact me

Copyright © 2025 TastyTrendIngredients