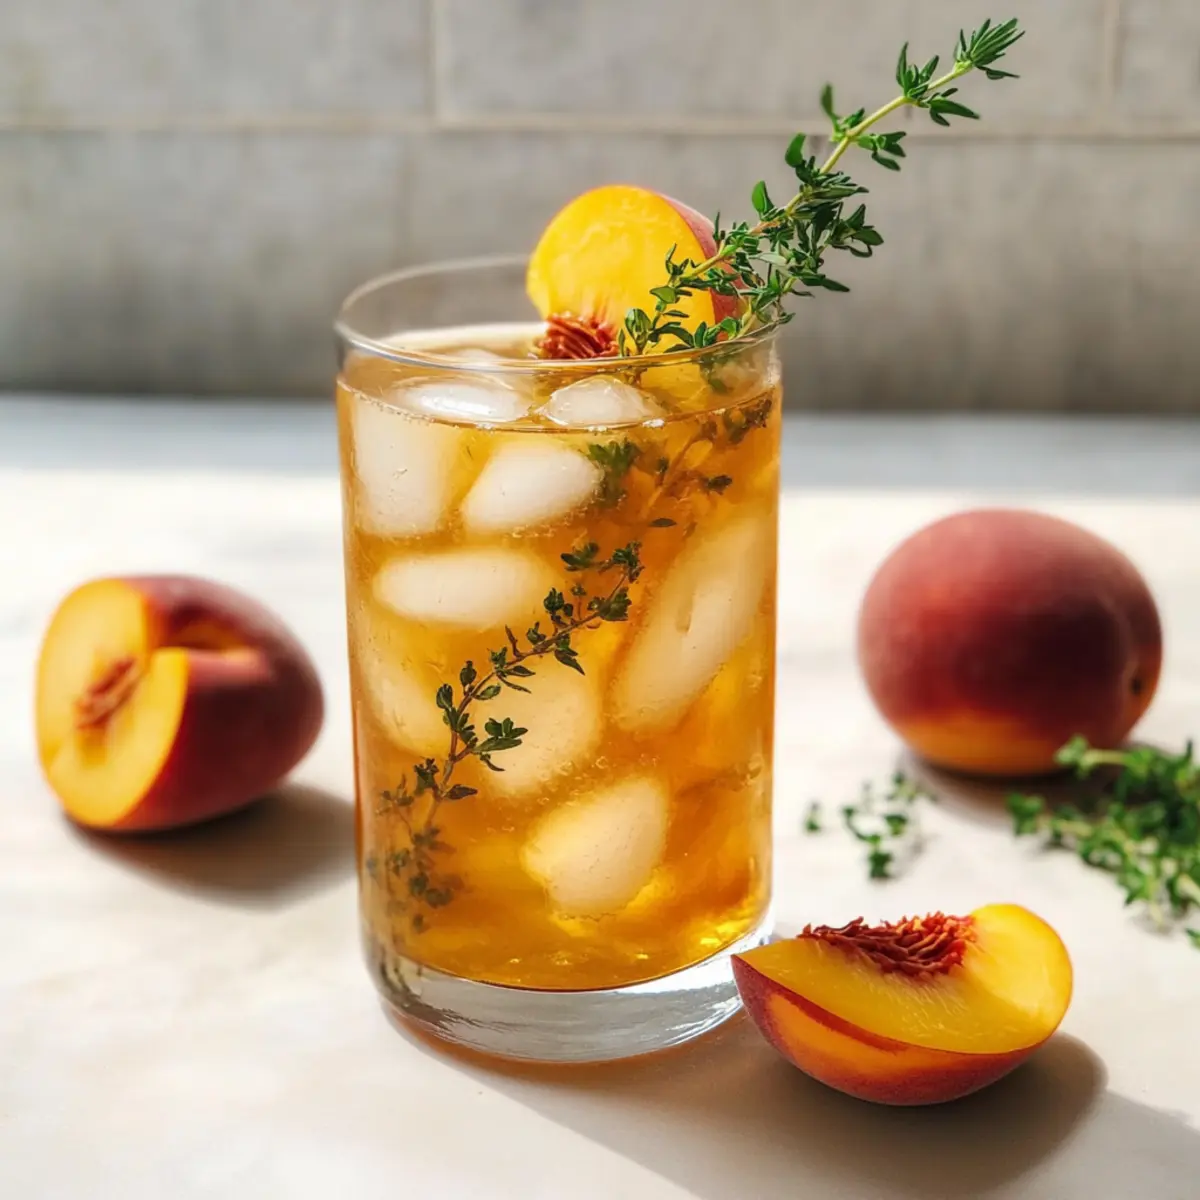
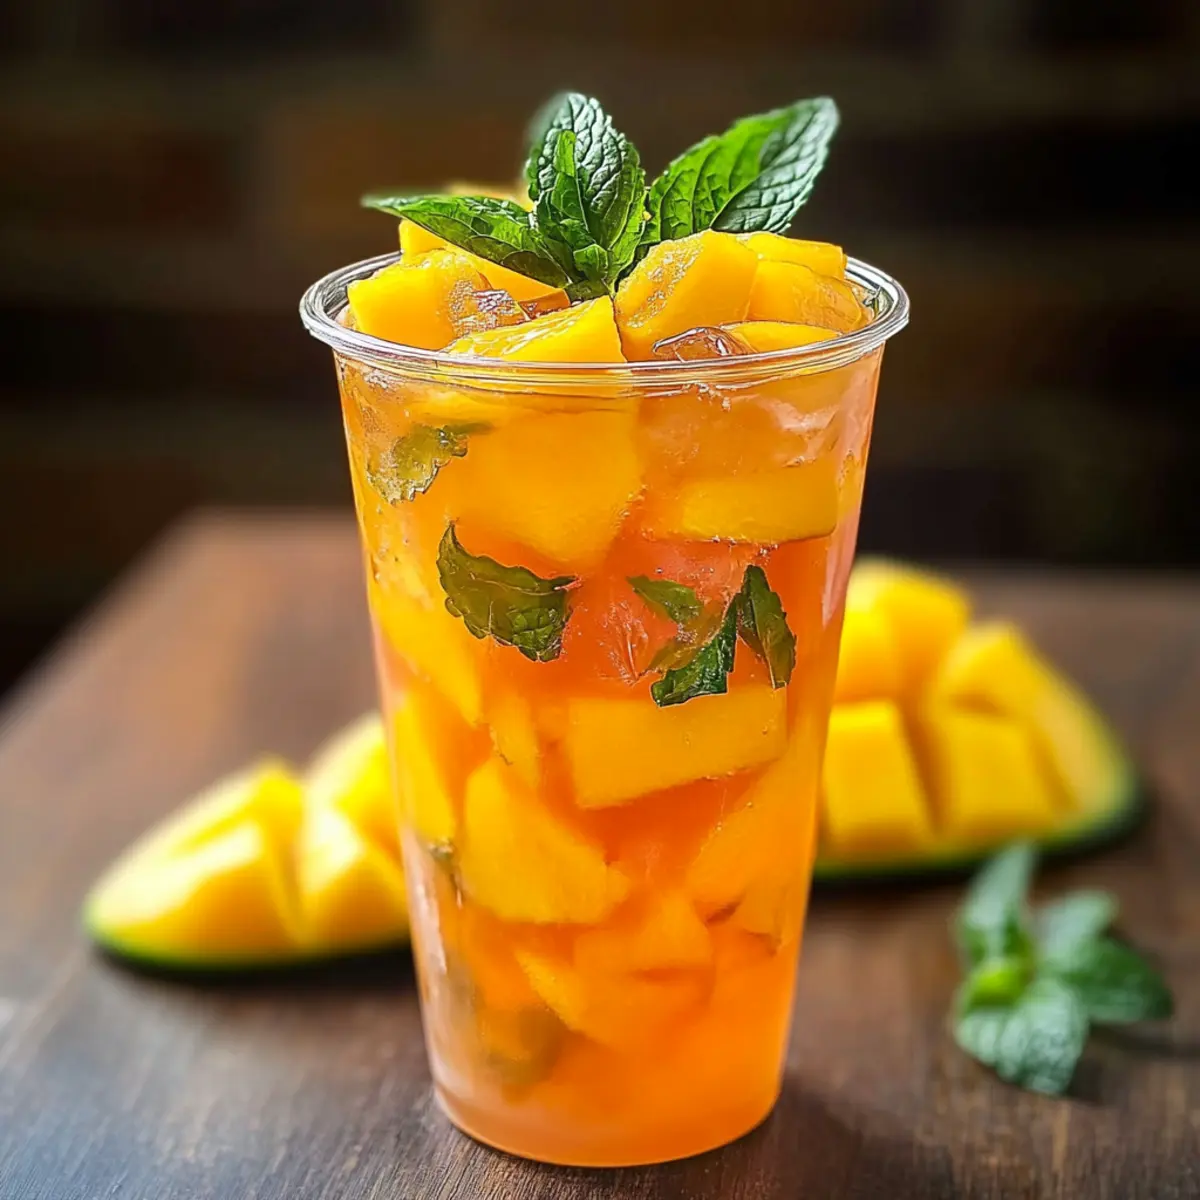
tastytrendingredients

  • Home
  • Recipes
    • Appetizers
    • Breakfast
    • Dessert
    • Dinner
    • Drinks
    • Salads
    • Snacks
    • Soups
  • About me
  • Contact me
menu icon
go to homepage
  • Home
  • Recipes
    • Appetizers
    • Breakfast
    • Dessert
    • Dinner
    • Drinks
    • Salads
    • Snacks
    • Soups
  • About me
  • Contact me
search icon
Homepage link
  • Home
  • Recipes
    • Appetizers
    • Breakfast
    • Dessert
    • Dinner
    • Drinks
    • Salads
    • Snacks
    • Soups
  • About me
  • Contact me
×

Easter Carrot Cheeseball: A Creamy Delight for Every Gathering

March 11, 2026 by Grace Snow Leave a Comment

As I strolled through the vibrant farmer's market, the burst of colors from fresh produce instantly lifted my spirits. Among the springtime delights, the idea for an Easter Carrot Cheeseball sparked in my mind—a playful, festive appetizer that perfectly embodies the season. This fun twist on a classic cheeseball isn’t just about looks; it’s creamy, savory, and utterly delicious. Plus, it comes together quickly, making it an ideal choice for busy home chefs during the holiday rush. What really seals the deal is its versatility—it’s suitable for any gathering and can easily be tailored to suit different tastes. Whether you’re serving it at an Easter brunch or a casual get-together, your guests will adore its whimsical design and delightful crunch. Ready to impress your friends with a standout dish that’s as fun to make as it is to eat? Let’s dive into this tasty creation together!

Why is this cheeseball a must-try?

Fun Presentation: This playful Easter Carrot Cheeseball is not just tasty—its charming carrot shape is sure to be the conversation starter at any gathering.

Crowd-Pleasing Flavor: The combination of creamy cheese, savory bacon, and zesty green onions creates a mouthwatering delight the whole family will love.

Quick & Easy: With simple ingredients and straightforward steps, you’ll have a spectacular appetizer ready in no time.

Customizable: Make it your own! This recipe can easily be adapted with different cheeses or spice levels for a personalized touch—a great way to experiment in the kitchen!

Versatile for Any Season: While it's perfect for Easter, this cheeseball works wonderfully at year-round celebrations too; simply shape it differently for any occasion.

Get ready to impress your guests with this unique, delicious treat! For serving ideas, check out my Serving Suggestions.

Easter Carrot Cheeseball Ingredients

For the Cheeseball

  • Cream Cheese – This creamy base gives the cheeseball its rich texture; use full-fat for the best flavor.
  • Finely Shredded Cheddar Cheese – Provides the delightful “carrot” appearance and adds a savory kick; shred from a block for superior texture.
  • Sliced Green Onion – Adds a fresh, mild onion flavor; roughly 3 green onions will yield about ½ cup.
  • Bacon Bits or Crumbles – Introduces a savory, salty element to the mix; feel free to use either store-bought or freshly cooked.
  • Everything Bagel Seasoning – Enhances the flavor profile with its unique blend of seasonings; indispensable for a taste boost!
  • Worcestershire Sauce – Adds depth and umami to the cheeseball, enhancing every bite.
  • Fresh Curly Parsley – This vibrant herb garnishes the cheeseball and represents the leaves of your playful carrot creation.

For Serving

  • Variety of Crackers – Pair with options like Triscuits, Club crackers, or pretzels for delightful crunch.
  • Vegetable Sticks – Add freshness with carrot, celery, and cucumber slices for dipping—perfect for a well-rounded presentation.

Ready to create your own fun and festive Easter Carrot Cheeseball? Let’s get cooking!

Step‑by‑Step Instructions for Easter Carrot Cheeseball

Step 1: Mix Cream Cheese and Cheddar
Begin by taking your softened cream cheese and placing it in a large mixing bowl. With a spatula or hand mixer, blend in 1 cup of finely shredded cheddar cheese until the mixture is smooth and free of lumps, about 2-3 minutes. You’ll know it's ready when it has a creamy texture and the cheddar is fully integrated into the cream cheese base.

Step 2: Add Remaining Ingredients
Next, add the sliced green onion, bacon bits, everything bagel seasoning, and Worcestershire sauce to the cheese mixture. Stir thoroughly with your spatula until all ingredients are evenly distributed, taking about 1-2 minutes. This step is crucial as it allows the savory flavors to meld, creating a delicious blend that enhances the Easter Carrot Cheeseball's overall taste.

Step 3: Shape Cheeseball
Once mixed, transfer the cheese mixture onto a sheet of plastic wrap laid on your countertop. Shape the mixture into a tapered carrot form—wide at the top and narrow at the bottom—using your hands. Wrap the shaped carrot delicately in the plastic wrap and refrigerate for at least 1 hour, or up to 24 hours, allowing the flavors to develop while firming up the cheeseball.

Step 4: Decorate
After refrigerating, take the cheeseball out and carefully unwrap it. Place the carrot-shaped cheeseball on a serving platter. Insert fresh curly parsley stems into the wide end for garnish, mimicking the carrot's leaves. Finally, cover the entire surface with the remaining shredded cheddar cheese, gently pressing it into place for a delightful finish.

Step 5: Serve
To complete your Easter Carrot Cheeseball, arrange an assortment of colorful crackers and crunchy vegetable sticks, such as carrots, celery, and cucumber, around the platter. This presentation adds variety and enhances the festive theme, ensuring it's not only a tasty treat but also a beautiful centerpiece for your gathering.

Tips for the Best Easter Carrot Cheeseball

  • Soften Cream Cheese: Make sure the cream cheese is well-softened before mixing to achieve a smooth and creamy texture; microwave for 30-40 seconds if needed.

  • Use Fresh Ingredients: Opt for fresh green onions and parsley, as they add vibrant flavor and visual appeal to your Easter Carrot Cheeseball, enhancing both taste and presentation.

  • Shred Your Cheddar: Always shred cheese from a block rather than using pre-packaged versions; this ensures a fresh taste and better melting properties in your cheeseball.

  • Chill for Flavor: Let the cheeseball chill for at least an hour or overnight in the fridge; this allows the flavors to meld beautifully, creating a more delicious appetizer.

  • Customize Your Garnish: Feel free to explore different garnishes and shape options; creating a unique version of the Easter Carrot Cheeseball lets you add personal touches and surprises for your guests!

Make Ahead Options

Preparing the Easter Carrot Cheeseball in advance is a fantastic way to save time and ensure your gathering is stress-free! You can make the cheeseball mixture up to 24 hours ahead, allowing the flavors to meld beautifully. Simply follow the first three steps of the recipe: mix the ingredients, shape the cheeseball, and wrap it tightly in plastic wrap before refrigerating. When you’re ready to serve, simply unwrap, decorate with parsley, and cover with the remaining cheddar cheese. For best results, store it in the refrigerator to maintain its creamy texture and vibrant appearance. Your guests will enjoy a delightful appetizer that's just as delicious as if it were freshly made!

Easter Carrot Cheeseball Variations

Unleash your creativity and tailor the Easter Carrot Cheeseball to perfectly suit your taste buds!

  • Non-Carrot Shape: Opt for a standard ball shape for a year-round appetizer that's just as inviting.
  • Spicy Option: For those who crave heat, add a pinch of cayenne pepper or chili powder to elevate the flavor.
  • Cheese Variants: Swap out cheddar for cream cheese or pepper jack for a creamy twist packed with extra flavor.
  • Herbed Delight: Increase freshness by mixing in finely chopped basil or dill; this brings a garden-fresh taste.
  • Nutty Crunch: Fold in finely chopped pecans or walnuts for a crunchy texture that complements the cheeseball's creaminess.
  • Plant-Based Version: Use a dairy-free cream cheese and omit bacon for a vegan-friendly alternative that everyone can enjoy.
  • Sweet Surprise: For a unique twist, add a tablespoon of honey or maple syrup for a touch of sweetness against the savory flavors.
  • Smoky Flavor: Incorporate smoked paprika or chipotle powder for an intriguing smoky depth that pairs perfectly with cheese.

Feel free to mix and match these ideas to create your perfect cheeseball masterpiece! For serving ideas, check out my Serving Suggestions or explore more variations for your appetizers!

What to Serve with Easter Carrot Cheeseball?

Picture a vibrant platter filled with delightful accompaniments that create a harmonious feast alongside your fun Easter appetizer.

  • Crackers Selection: A mix of hearty and light crackers offers varied textures and ensures every bite of the cheeseball is perfectly paired.

  • Fresh Vegetable Sticks: Crisp carrot, cucumber, and celery sticks provide a refreshing crunch, complementing the creamy cheeseball beautifully while adding color to your spread.

  • Fruit Platter: Sweet fruits like strawberry slices or apple wedges offer a delightful contrast that balances the savory flavors of the cheeseball, enticing the palate.

  • Cheese Board: An assortment of cheeses alongside your carrot cheeseball adds depth; the variety not only elevates the appetizer but creates an eye-catching display.

  • Dip Options: Serve with a tangy yogurt or ranch dip for added flavor and creaminess, inviting guests to experiment with different combinations.

  • Sparkling Water: A frothy, fizzy drink refreshes between bites, keeping the vibe lively and encouraging delightful conversations around your gathering.

  • Chocolate Treats: For dessert, consider mini chocolate eggs or mousse cups that provide a touch of sweetness to round out your feast perfectly.

How to Store and Freeze Easter Carrot Cheeseball

Fridge: Store the cheeseball wrapped tightly in plastic wrap or in an airtight container in the refrigerator. It will stay fresh for up to 3-4 days, perfect for enjoying those delicious leftovers.

Freezer: For longer storage, you can freeze the cheeseball before decorating. Wrap it well in plastic wrap and aluminum foil, and it will stay good for up to 2 months. Thaw in the fridge overnight before serving.

Reheating: This cheeseball is best served chilled and should not be heated, as it can compromise its creamy texture and festive appearance.

Make-Ahead Tip: Preparing your Easter Carrot Cheeseball a day in advance not only enhances the flavors but also allows for a stress-free gathering when it’s time to entertain!

Easter Carrot Cheeseball Recipe FAQs

What kind of cream cheese should I use?
Absolutely, I recommend using full-fat cream cheese for the best flavor and texture in your Easter Carrot Cheeseball. Light or reduced-fat options tend to be too watery and may not blend well, leading to a lumpy mix.

How should I store leftovers?
You can store any leftover cheeseball tightly wrapped in plastic wrap or in an airtight container in the refrigerator for up to 3-4 days. Just make sure it's sealed well to keep its creamy texture and flavors intact.

Can I freeze the cheeseball?
Yes, you can freeze your Easter Carrot Cheeseball before decorating it! Simply wrap it tightly in plastic wrap and then in aluminum foil to prevent freezer burn. It will keep well for up to 2 months. When you're ready to serve, thaw it in the fridge overnight and then proceed with the decoration.

What if my cheeseball is too soft?
If your mixture seems too soft to hold its shape while forming the cheeseball, you can refrigerate it for an additional 30 minutes to 1 hour to help firm it up. Alternatively, adding a small amount of extra shredded cheese can also help firm the mixture without compromising the flavor.

Is this recipe suitable for vegetarians?
Yes, the Easter Carrot Cheeseball is vegetarian-friendly! However, if you have vegetarian guests, consider using plant-based bacon bits as a substitute for traditional bacon to ensure everyone can enjoy it. Always double-check the bacon crumbles for any hidden animal products if needed.

How can I customize the flavor?
The beauty of the Easter Carrot Cheeseball lies in its versatility! You can swap out cheddar for a different type of cheese like cream cheese or pepper jack for a spicy kick. Additionally, adding ingredients like diced jalapeños or herbs can easily impart a personalized touch to suit different palates.

Easter Carrot Cheeseball

Easter Carrot Cheeseball: A Creamy Delight for Every Gathering

Easter Carrot Cheeseball is a creamy, savory, and delicious appetizer perfect for gatherings.
Print Recipe Pin Recipe
Prep Time 15 minutes mins
Refrigeration Time 1 hour hr
Total Time 1 hour hr 15 minutes mins
Servings: 8 servings
Course: Appetizers
Cuisine: American
Calories: 200
Ingredients Equipment Method Nutrition Notes

Ingredients
  

For the Cheeseball
  • 8 oz Cream Cheese Softened
  • 1 cup Finely Shredded Cheddar Cheese For texture and flavor
  • ½ cup Sliced Green Onion About 3 green onions
  • ½ cup Bacon Bits or Crumbles Store-bought or freshly cooked
  • 1 tbsp Everything Bagel Seasoning For flavor enhancement
  • 1 tbsp Worcestershire Sauce Adds umami
  • ¼ cup Fresh Curly Parsley For garnish
For Serving
  • 1 pkg Variety of Crackers Triscuits, Club crackers, or pretzels
  • 1 cup Vegetable Sticks Carrot, celery, and cucumber slices

Equipment

  • Mixing Bowl
  • Spatula
  • plastic wrap

Method
 

Preparation Steps
  1. Mix cream cheese and shredded cheddar until smooth.
  2. Add green onion, bacon bits, bagel seasoning, and Worcestershire sauce. Stir thoroughly.
  3. Shape the mixture into a carrot form and refrigerate for at least 1 hour.
  4. Unwrap the cheeseball, decorate with parsley, and cover with remaining cheddar.
  5. Serve with an assortment of crackers and vegetable sticks.

Nutrition

Serving: 1servingCalories: 200kcalCarbohydrates: 6gProtein: 8gFat: 18gSaturated Fat: 10gPolyunsaturated Fat: 1gMonounsaturated Fat: 6gCholesterol: 40mgSodium: 350mgPotassium: 140mgFiber: 1gSugar: 1gVitamin A: 500IUVitamin C: 5mgCalcium: 150mgIron: 1mg

Notes

Best when served chilled; can be made ahead of time for stress-free entertaining.

Tried this recipe?

Let us know how it was!

Delicious Matcha Overnight Oats for a Energizing Morning Boost

March 11, 2026 by Grace Snow Leave a Comment

As I stood in my kitchen, searching for something to invigorate both my body and mind, the vibrant green of matcha caught my eye. It’s incredible how a simple blend of Matcha Overnight Oats can transform breakfast into a moment of pure delight. This easy, make-ahead dish not only satisfies your hunger but also offers a gentle caffeine kick that helps keep your focus sharp throughout the morning. Plus, with its creamy texture and nutrient-rich ingredients, it’s gluten-free, vegetarian, and can be whipped up vegan-friendly in no time. Whether you’re rushing out the door or savoring a quiet moment at home, these energizing oats are a perfect companion. Curious about how to elevate your mornings for the week ahead? Let’s dive in!

Why Choose Matcha Overnight Oats?

Nutritious Excellence: Packed with fiber, protein, and healthy fats, these oats are a powerhouse breakfast that energizes your day.

Make-Ahead Delight: Prepare them the night before and awake to a delicious, hassle-free meal ready for you.

Customizable Flavor: Add your favorite toppings like fresh fruits or nut butters, or even make a twist by substituting with Matcha Baked Doughnuts for a unique treat!

Gentle Energy Boost: The matcha provides a lovely caffeine kick that'll keep you focused without jitters.

Gluten-Free & Vegan-Friendly: Easily tailored for various dietary needs, making it inclusive for all.

Give your mornings a refreshing upgrade with these tasty and visually appealing matcha overnight oats!

Matcha Overnight Oats Ingredients

For the Oats

  • Rolled Oats – Base of the recipe, providing structure and fiber. Use certified gluten-free oats for a gluten-free version.
  • Chia Seeds – Adds thickness and provides omega-3 fatty acids. Can substitute with flax seeds.
  • Matcha Powder – Provides flavor and caffeine while offering a rich source of antioxidants. Look for high-quality, ceremonial-grade matcha for optimal flavor.
  • Cinnamon – Offers warmth and spice. Can be replaced with nutmeg for a different flavor profile.
  • Salt – Enhances flavor and balances sweetness.

For the Creaminess

  • Plain Greek Yogurt – Adds creaminess and protein. For a vegan option, substitute with plain vegan Greek-style yogurt; be aware of reduced protein content.
  • Unsweetened Milk – Liquid base that hydrates the oats. Any plant-based milk can be used, such as almond, soy, or oat milk.

For Flavor

  • Vanilla Extract – Provides aromatic sweetness.
  • Maple Syrup or Honey – Natural sweetener. Adjust quantity based on desired sweetness.

Optional Toppings

  • Fresh Fruits – Boosts flavor and adds vibrant color.
  • Nut Butters – Adds richness and healthy fats.
  • Seeds or Cacao Nibs – For added crunch and texture.

Elevate your breakfast experience with these Matcha Overnight Oats, a delicious way to start your day!

Step‑by‑Step Instructions for Matcha Overnight Oats

Step 1: Combine Dry Ingredients
In a mixing bowl, add 1 cup of rolled oats, 2 tablespoons of chia seeds, 1 teaspoon of matcha powder, ½ teaspoon of cinnamon, and a pinch of salt. Using a whisk or fork, mix these dry ingredients together until they are well combined and evenly distributed, ensuring that the vibrant green of the matcha is visible throughout.

Step 2: Add Wet Ingredients
Now, incorporate the wet ingredients by adding 1 cup of plain Greek yogurt, 1 cup of unsweetened milk, 1 teaspoon of vanilla extract, and 2 tablespoons of maple syrup or honey into the dry mixture. Stir with a spoon or spatula for about 30 seconds until everything is smoothly blended, with no obvious lumps of matcha powder remaining in your creamy oat mixture.

Step 3: Transfer to Containers
Carefully pour or scoop the matcha overnight oats mixture into individual jars or airtight containers. Fill each jar, leaving a small space at the top to allow for expansion. Securely cover the jars with lids, ensuring they are airtight to maintain moisture as they chill and thicken.

Step 4: Refrigerate
Place the covered jars in the refrigerator for at least 2 hours, though overnight is best. This allows the oats and chia seeds to absorb the liquid fully, leading to a thick, creamy texture. You'll know they're ready when the oats appear plump and the mixture has thickened beautifully.

Step 5: Serve with Toppings
When you're ready to enjoy your matcha overnight oats, remove them from the fridge and give them a good stir to reintroduce any settled ingredients. Top with your favorite fresh fruits, nut butters, or seeds for added flavor and texture. The vibrant green will brighten up your morning and energize your day!

What to Serve with Energizing Matcha Overnight Oats?

Delight in a breakfast experience that transcends the ordinary, leaving your taste buds dancing with joy.

  • Creamy Greek Yogurt: A dollop on top adds a luscious texture and extra protein to keep you satisfied longer.
  • Fresh Berries: Their burst of natural sweetness provides a vibrant contrast to the earthy matcha flavor, enhancing every bite.
  • Nut Butters: A swirl of almond or peanut butter introduces a nutty richness and healthy fats that elevate both taste and nutrition.
  • Chopped Nuts: Crunchy almonds or walnuts offer a lovely contrast, making each spoonful a delightful mix of textures.
  • Banana Slices: Adding sliced banana brings creaminess and a touch of natural sweetness, complementing the matcha beautifully.
  • Honey Drizzle: For those who love a sweeter touch, a drizzle of honey brings an inviting warmth that harmonizes with the oats.
  • Coconut Flakes: Toasted coconut adds a tropical flair, providing a chewy texture that plays well with the soft oats.
  • Mint Leaves: A sprinkle of fresh mint gives a refreshing lift, making your breakfast feel light and invigorating.
  • Iced Matcha Latte: For those who want to double down on the matcha experience, pair your oats with a chilled matcha latte for a refreshing drink.
  • Fruit Smoothie: A berry or green smoothie will harmonize perfectly with the flavors in your bowl, adding an extra boost of nutrients.

Matcha Overnight Oats Variations

Feel free to get creative and make these matcha overnight oats uniquely yours!

  • Coconut Milk: Swap almond milk for coconut milk to achieve a rich, creamy texture with a tropical twist. The sweetness of coconut pairs beautifully with matcha.

  • Dairy-Free Delight: Substitute plain Greek yogurt with a plain vegan Greek-style yogurt for a dairy-free option. This makes the dish accessible for those avoiding dairy.

  • Fruit Fusion: Add toppings like banana slices, berries, or a sprinkle of dried fruit for bursts of natural sweetness and flavor. A spoonful of almond butter also enhances the creamy consistency.

  • Nutmeg Twist: Replace cinnamon with nutmeg for a warm, aromatic flavor. The nutty undertones beautifully complement the earthiness of matcha.

  • Honey Lovers: Use honey instead of maple syrup for sweetness, depending on your preference. Honey adds a distinct flavor that can pleasantly alter the overall taste.

  • Crunch Factor: Sprinkle in some nuts or seeds as toppings for extra crunch. Try chia seeds, hemp hearts, or even crushed walnuts for a delightful textural contrast.

  • Spicy Heat: For a little kick, add a pinch of cayenne pepper or ginger powder into the mix. This unexpected spice can elevate your breakfast experience to a whole new level.

  • Chocolate Infusion: Mix in a tablespoon of cocoa powder or add some cacao nibs for a chocolatey twist. If you adore chocolate, this variation perfectly complements the matcha! For more chocolate inspirations, check out these Matcha Baked Doughnuts.

With these variations, you can keep your mornings exciting and delicious! Make them your own, and enjoy the journey of flavors in each bowl.

Expert Tips for Matcha Overnight Oats

  • Mix Thoroughly: Ensure all dry ingredients are well-blended to avoid clumps of matcha. A uniform mix is key for flavor.

  • Taste Test: Don’t hesitate to taste the mixture before refrigerating. Adjust the sweetness with maple syrup or honey based on your preferences.

  • Proper Storage: Store leftovers in an airtight container; they’re best enjoyed within 4-5 days for optimal freshness.

  • Creative Toppings: Add variety with different toppings like banana slices, nuts, or seeds. This can elevate your matcha overnight oats to new exciting flavors!

  • Prep Ahead: Make a batch on Sunday for an easy grab-and-go breakfast throughout the week. Just stir and enjoy!

Make Ahead Options

These Matcha Overnight Oats are perfect for busy home cooks seeking to streamline their breakfast routine! You can prepare the oats up to 3 days in advance, allowing for an easy grab-and-go meal on hectic mornings. Simply mix the dry ingredients (rolled oats, chia seeds, matcha powder, cinnamon, and salt), and then combine with the wet ingredients (Greek yogurt, milk, vanilla, and maple syrup) before transferring them into jars or airtight containers. To maintain their creamy texture and vibrant flavor, store your jars in the fridge until you’re ready to enjoy them. When serving, give the oats a good stir, then add your favorite toppings, and you’ll have a nutritious breakfast that’s just as delicious as if you made it that morning!

How to Store and Freeze Matcha Overnight Oats

Fridge: Store your matcha overnight oats in an airtight container in the fridge for up to 4-5 days to maintain freshness and flavor.

Make-Ahead: Prepare individual servings in jars for easy grab-and-go breakfasts throughout the week, ensuring each jar is tightly sealed.

Freezer: For longer storage, freeze portions in airtight containers for up to 2 months. Thaw overnight in the fridge before enjoying.

Reheating: If preferred warm, gently heat in the microwave for 30-60 seconds, stirring well to ensure even warmth before serving.

Matcha Overnight Oats Recipe FAQs

What type of oats should I use for matcha overnight oats?
I recommend using rolled oats for the best texture, as they provide a nice chew while absorbing the liquid. If you need a gluten-free version, make sure to choose certified gluten-free rolled oats. Avoid instant oats, as they can become mushy and may not deliver the desired consistency.

How do I store matcha overnight oats?
Store your matcha overnight oats in an airtight container in the refrigerator for up to 4-5 days. Just be sure to cover them tightly to maintain freshness. If you've prepared them in jars, they make for easy grab-and-go breakfasts all week long. I like to make a batch on Sundays for handy meals during busy mornings!

Can I freeze matcha overnight oats?
Absolutely! You can freeze matcha overnight oats for up to 2 months. To do this, portion them out into airtight containers or freezer bags, making sure to leave some space at the top for expansion. When you're ready to enjoy, simply thaw them overnight in the fridge. If you prefer them warm, you can gently reheat them in the microwave for 30-60 seconds.

What if my matcha overnight oats are too thick?
If you find your oats are too thick after refrigeration, don’t worry! Simply add a splash of milk (dairy or plant-based) and stir until you reach your desired consistency. This is a common occurrence; different oats and ingredients can absorb varying amounts of liquid.

Are matcha overnight oats safe for pets?
While matcha is generally safe in small amounts for dogs, it’s best to avoid sharing matcha overnight oats with pets, as the ingredients like yogurt and sweeteners may not be suitable for them. Always check with a veterinarian if unsure about specific ingredients, and tailor your recipe to keep it safe for your furry friends.

How can I make this recipe vegan?
To make your matcha overnight oats vegan, simply substitute the plain Greek yogurt with a plant-based yogurt alternative, such as coconut or almond yogurt. Ensure any sweeteners you use, like honey, are swapped out for maple syrup or agave nectar, both of which are vegan-friendly options. Enjoy your energizing breakfast!

Matcha Overnight Oats

Delicious Matcha Overnight Oats for a Energizing Morning Boost

Matcha Overnight Oats are a nutritious, make-ahead breakfast that energizes your morning with creamy texture and flavor.
Print Recipe Pin Recipe
Prep Time 10 minutes mins
Refrigeration Time 2 hours hrs
Total Time 2 hours hrs 10 minutes mins
Servings: 2 jars
Course: Breakfast
Cuisine: Healthy
Calories: 350
Ingredients Equipment Method Nutrition Notes

Ingredients
  

For the Oats
  • 1 cup Rolled Oats Use certified gluten-free oats for a gluten-free version.
  • 2 tablespoons Chia Seeds Can substitute with flax seeds.
  • 1 teaspoon Matcha Powder Look for high-quality, ceremonial-grade matcha for optimal flavor.
  • ½ teaspoon Cinnamon Can be replaced with nutmeg for a different flavor profile.
  • Salt Enhances flavor and balances sweetness.
For the Creaminess
  • 1 cup Plain Greek Yogurt For a vegan option, substitute with plain vegan Greek-style yogurt.
  • 1 cup Unsweetened Milk Any plant-based milk can be used, such as almond, soy, or oat milk.
For Flavor
  • 1 teaspoon Vanilla Extract
  • 2 tablespoons Maple Syrup or Honey Adjust quantity based on desired sweetness.
Optional Toppings
  • Fresh Fruits Boosts flavor and adds vibrant color.
  • Nut Butters Adds richness and healthy fats.
  • Seeds or Cacao Nibs For added crunch and texture.

Equipment

  • Mixing Bowl
  • Whisk
  • Spatula
  • Airtight containers

Method
 

Step-by-Step Instructions for Matcha Overnight Oats
  1. In a mixing bowl, add rolled oats, chia seeds, matcha powder, cinnamon, and a pinch of salt. Mix well.
  2. Incorporate Greek yogurt, unsweetened milk, vanilla extract, and maple syrup into the dry mixture. Stir until smooth.
  3. Pour the mixture into individual jars, leaving some space at the top. Cover tightly.
  4. Refrigerate for at least 2 hours, preferably overnight, so the oats absorb liquid and thicken.
  5. Stir the oats before serving and top with your favorite fruits, nut butters, or seeds.

Nutrition

Serving: 1jarCalories: 350kcalCarbohydrates: 50gProtein: 14gFat: 8gSaturated Fat: 2gPolyunsaturated Fat: 1gMonounsaturated Fat: 4gCholesterol: 10mgSodium: 150mgPotassium: 350mgFiber: 10gSugar: 8gVitamin A: 300IUVitamin C: 1mgCalcium: 200mgIron: 2mg

Notes

Store leftovers in an airtight container; best enjoyed within 4-5 days for optimal freshness.

Tried this recipe?

Let us know how it was!

Crispy Broccoli Cheese Patties You'll Love in Every Bite

March 11, 2026 by Grace Snow Leave a Comment

As I watched my kids turn their noses up at yet another dinner of plain veggies, I realized it was time for a change. Enter these delightful Broccoli Cheese Patties that save the day with their vibrant flavors! Made in just 35 minutes, they make for an easy, nutritious snack or appetizer that both adults and little ones adore. The crispy outsides and creamy, cheesy centers strike the perfect balance, ensuring every bite is a satisfying delight. Plus, these versatile patties can easily be customized to fit gluten-free diets or packed with your favorite herbs and spices. Who wouldn’t want to turn veggies into a family-favorite dish? Ready to impress everyone at home with this quick meal? Let’s dive into the recipe!

Why are these patties a must-try?

Satisfying, Crunchy Texture: The golden crust offers an irresistible crunch that contrasts beautifully with the warm, cheesy centers.
Super Quick: Made in just 35 minutes, these patties fit perfectly into your busy schedule.
Nutrient-Packed: Rich in fiber and protein, they are a healthy choice for snacks or meals.
Customizable: Tailor the recipe with add-ins like herbs or spices, or make it gluten-free with simple swaps. Plus, serve them with your favorite sauces like ranch or yogurt-based dips for extra flavor! You can explore more ideas like Potato Blue Cheese to keep your meals exciting.

Broccoli Cheese Patties Ingredients

For the Patties
• Broccoli – a vibrant green base loaded with vitamins; can be swapped for other vegetables for added variety.
• Cheese (Cheddar or alternatives) – enhances creaminess and flavor; consider mozzarella, gouda, or feta for a twist.
• Eggs – act as a binder, ensuring that your patties hold together beautifully.
• Breadcrumbs – adds structure and gives a delightful crunch; use gluten-free breadcrumbs for a gluten-free option or try almond flour instead.
• Spices (optional) – elevate flavor profiles; customize with your favorites to make these broccoli cheese patties uniquely yours.

Step‑by‑Step Instructions for Broccoli Cheese Patties

Step 1: Prep Broccoli
Begin by chopping a head of fresh broccoli into small florets. Steam the broccoli for about 5-7 minutes or until tender, making sure it retains a vibrant green color. Once cooked, allow it to cool slightly before mashing it lightly with a fork. This will help release some moisture and make it easier to mix with the other ingredients for your Broccoli Cheese Patties.

Step 2: Mix Ingredients
In a large mixing bowl, combine the cooled, chopped broccoli with shredded cheese of your choice, two beaten eggs, and breadcrumbs. If desired, add spices and herbs to elevate the flavor profile. Mix all the ingredients thoroughly for about 2-3 minutes, ensuring everything is evenly distributed. This step is crucial to create a cohesive mixture that holds together when forming the patties.

Step 3: Form Patties
With clean hands, scoop out portions of the broccoli mixture and shape them into uniformly sized patties, roughly 1 inch thick. Ensure each patty is compact, which will help prevent them from falling apart while cooking. Arrange the shaped patties on a plate or baking sheet lined with parchment paper, ready for cooking.

Step 4: Cooking Options
For frying, heat a skillet over medium heat and add a few tablespoons of oil. Once hot, carefully place the formed patties into the skillet, cooking them for 4-5 minutes on each side until they are golden brown and crispy. Alternatively, for baking, preheat your oven to 375°F (190°C) and arrange the patties on a greased baking sheet. Bake for about 20 minutes, flipping halfway through, until they achieve a nice golden color.

Step 5: Serve
Once cooked, remove your delicious Broccoli Cheese Patties from the skillet or oven and allow them to cool for a minute. Serve them warm with your favorite dipping sauces, such as ranch or yogurt-based sauces, to enhance the flavor experience. These patties make a delightful snack or appetizer, perfect for impressing family and friends.

Make Ahead Options

These Broccoli Cheese Patties are perfect for meal prep enthusiasts! You can prepare the broccoli mixture up to 24 hours in advance. Simply steam and chop the broccoli, then combine it with cheese, eggs, and breadcrumbs in a bowl. Cover the mixture tightly and refrigerate it; this will help the flavors meld. You can also form the patties and refrigerate them for up to 3 days before cooking for easy weeknight meals. When ready to serve, simply cook them as directed—either frying or baking—and enjoy just as delicious as fresh. This means busy evenings can still feel relaxed and satisfying!

Expert Tips for Broccoli Cheese Patties

• Fresh Broccoli Matters: Using fresh broccoli leads to a better flavor and texture in your patties. Avoid overcooking it to keep vibrant color and nutrients.

• Don’t Skip the Binding: Adding sufficient eggs and cheese is crucial; this ensures your broccoli cheese patties hold together well while cooking.

• Compact Formation: Shape each patty firmly; lightly press them to avoid falling apart during frying or baking. Perfectly compact patties are the secret to great texture.

• Customize Wisely: Feel free to experiment with spices, but avoid overpowering flavors that may detract from the yummy broccoli cheese combination.

• Storage Tips: For meal prep, store uncooked patties in the fridge for up to a day or freeze them for months, allowing you to enjoy these delicious broccoli cheese patties whenever you please!

What to Serve with Broccoli Cheese Patties

These delightful fritters are the perfect base for building a colorful, satisfying meal that everyone will love!

  • Crispy Sweet Potato Fries: The sweetness contrasts beautifully, lending a delightful crunch that pairs well with cheesy flavors.

  • Garlic Aioli: A creamy, garlicky dipping sauce enhances the flavor experience, making each bite even more enjoyable.

  • Fresh Green Salad: A light, zesty salad with mixed greens and a citrus vinaigrette balances the warmth of the patties while adding freshness. A vibrant salad can also keep your meal light and energetic.

  • Roasted Veggies: Oven-roasted seasonal vegetables add an earthy flavor that complements the patties, creating a colorful and nutritious plate.

  • Quinoa Pilaf: This nutty, protein-packed side provides an excellent textural contrast and complements the patties beautifully, rounding out your meal.

  • Chilled Yogurt Dip: A cooling yogurt dip mixed with cucumber and mint can lighten the meal, offering a refreshing complement to the warm patties. Ideal for a laid-back snack!

  • Sparkling Lemonade: A bubbly, refreshing drink brings a nice tartness that brightens the overall flavor profile, making your meal a celebration!

Broccoli Cheese Patties Variations

Feel free to get creative and customize your patties to fit your family's taste buds!

  • Cheesy Boost: Add extra cheese for a melt-in-your-mouth experience. Mixing in a blend of cheeses like mozzarella and gouda can elevate the flavor.
  • Herbed Delight: Toss in fresh herbs like parsley, dill, or basil for a garden-fresh note. This vibrant addition brightens the flavor and adds a delightful aroma.
  • Gluten-Free Option: Swap out regular breadcrumbs for gluten-free alternatives or almond flour, ensuring everyone can enjoy this snack!
  • Spicy Kick: Add a pinch of red pepper flakes or chopped jalapeños to spice things up. Just be cautious—small amounts can go a long way!
  • Veggie Medley: Incorporate finely diced carrots or bell peppers for added color and nutrition. This twist not only enhances texture but also gives an extra crunch.
  • Savory Twist: Mix in cooked bacon bits or ham for a heartier patty. The savory meat pairs wonderfully with the cheesy broccoli.
  • Baked Variation: Experiment with baking these patties atop a layer of marinara sauce for a delicious fusion dish. The sauce adds moisture and extra flavor to every bite.
  • Mini Bites: Shape smaller patties for bite-sized appetizers or snacks. Perfect for parties, these bite-sized versions are just as delicious and easy to enjoy!

Don’t forget to serve these patties with tasty dips! A side of creamy aioli or a zesty yogurt-based sauce can elevate the flavor. You might also enjoy experimenting with recipes like Jello Salad Cottage for a nostalgic side dish or consider the delightful Potato Blue Cheese for a scrumptious pairing.

How to Store and Freeze Broccoli Cheese Patties

Fridge: Store cooked broccoli cheese patties in an airtight container in the fridge for up to 3 days. Reheat in a skillet or microwave for a quick and tasty snack.

Freezer: For longer storage, freeze uncooked patties on a baking sheet until firm, then transfer to a freezer bag. They’ll last for up to 2 months! No need to thaw—just cook from frozen, adding a few extra minutes to your cooking time.

Reheating: To reheat, bake previously cooked patties in a preheated oven at 375°F (190°C) for about 10-15 minutes until heated through and crispy. Enjoy your delicious broccoli cheese patties whenever you crave a tasty snack!

Broccoli Cheese Patties Recipe FAQs

How do I choose the best broccoli for this recipe?
Absolutely! When selecting broccoli, look for firm, vibrant green florets with no dark spots or yellowing, which indicate freshness. The stalks should be crisp and not limp. If you find broccoli with tight buds, that's an excellent choice!

How should I store leftover broccoli cheese patties?
Very! You can store cooked broccoli cheese patties in an airtight container in the fridge for up to 3 days. Make sure they are completely cooled before sealing to prevent moisture buildup. When ready to enjoy, reheat in a skillet over medium heat or in the microwave for a quick snack!

Can I freeze broccoli cheese patties?
Certainly! To freeze, lay uncooked patties in a single layer on a baking sheet and freeze until firm, usually about 1-2 hours. Once solid, transfer them to a freezer bag, labeling with a date. They can be stored for up to 3 months. For cooking, you can take them directly from the freezer; just add a few extra minutes to your cooking time!

What if my patties fall apart while cooking?
I recommend ensuring that your mixture is well-combined and the patties are firmly shaped. If they do fall apart, try adding a bit more breadcrumb or another egg to help bind everything together. Also, let the mixture rest for about 10-15 minutes before cooking, which can help with binding!

Are broccoli cheese patties suitable for those with gluten allergies?
Yes, absolutely! For a gluten-free version, you can easily swap regular breadcrumbs for gluten-free breadcrumbs or even use almond flour. Just check the labels to ensure they meet your dietary needs. Enjoy these delicious patties without worrying about gluten!

Do these patties make a good snack for kids and pets?
Definitely! While broccoli cheese patties are a great way to sneak in veggies for kids, it's important to note that cheese is not advisable for pets. So, enjoy sharing them with the family but keep them out of reach from furry friends!

Broccoli Cheese Patties

Crispy Broccoli Cheese Patties You'll Love in Every Bite

Enjoy these Broccoli Cheese Patties, a healthy and tasty snack that's perfect for both kids and adults.
Print Recipe Pin Recipe
Prep Time 10 minutes mins
Cook Time 25 minutes mins
Total Time 35 minutes mins
Servings: 4 patties
Course: Snacks
Cuisine: American
Calories: 150
Ingredients Equipment Method Nutrition Notes

Ingredients
  

For the Patties
  • 1 head Broccoli chopped into small florets
  • 1 cup Cheese (Cheddar or alternatives) shredded
  • 2 large Eggs beaten
  • 1 cup Breadcrumbs use gluten-free for a gluten-free option
  • to taste Spices (optional) customize with your favorites

Equipment

  • Skillet
  • Oven
  • Mixing Bowl

Method
 

Step‑by‑Step Instructions for Broccoli Cheese Patties
  1. Begin by chopping a head of fresh broccoli into small florets. Steam the broccoli for about 5-7 minutes or until tender.
  2. In a large mixing bowl, combine the cooled, chopped broccoli with shredded cheese, two beaten eggs, and breadcrumbs. Mix thoroughly for about 2-3 minutes.
  3. Shape the broccoli mixture into uniformly sized patties, roughly 1 inch thick.
  4. For frying, heat a skillet over medium heat and add oil. Cook the patties for 4-5 minutes on each side until golden brown. For baking, preheat oven to 375°F (190°C) and arrange on a greased baking sheet. Bake for 20 minutes, flipping halfway through.
  5. Remove the patties from the skillet or oven, allow to cool for a minute, and serve warm with your favorite dipping sauces.

Nutrition

Serving: 1pattyCalories: 150kcalCarbohydrates: 10gProtein: 6gFat: 8gSaturated Fat: 4gPolyunsaturated Fat: 1gMonounsaturated Fat: 2gCholesterol: 50mgSodium: 200mgPotassium: 300mgFiber: 2gSugar: 1gVitamin A: 500IUVitamin C: 60mgCalcium: 200mgIron: 1mg

Notes

Store uncooked patties in the fridge for up to a day, or freeze for longer storage. Reheat in the oven for crispy results.

Tried this recipe?

Let us know how it was!

Lemon Curd Overnight Oats: A Bright and Creamy Breakfast Treat

March 11, 2026 by Grace Snow Leave a Comment

Bright, creamy, and oh-so-refreshing—these Lemon Curd Overnight Oats are my new favorite way to kickstart the day! When I first combined sweet-tart lemon curd with hearty oats, I knew I’d stumbled upon something special. Not only do they provide a burst of citrusy flavor, but they’re also incredibly easy to whip up the night before, making them perfect for anyone needing a fast yet nutritious breakfast solution. Plus, with options for gluten-free and vegan adaptations, everyone can enjoy this delightful treat. So, are you ready to elevate your morning routine with a touch of sunshine?

Why Choose Lemon Curd Overnight Oats?

Simplicity: This recipe requires minimal effort, allowing busy mornings to start with an easy, nourishing meal.

Citrusy Delight: The bright and creamy lemon curd infuses every bite with refreshing flavor, waking up your taste buds!

Versatile Options: Whether you prefer dairy or non-dairy, gluten-free or traditional, this recipe can be easily adapted to fit your dietary needs.

Meal Prep Friendly: Make a batch ahead of time and enjoy delicious breakfasts throughout the week—perfect for those on the go!

Crowd-Pleaser: Impress family and friends with this unique twist on overnight oats; it’s a delightful way to surprise anyone looking for a fun breakfast option.

Feeling inspired? Pair it with a Lemon Chicken Soup for a refreshing meal or indulge in Lemon Ricotta Protein pancakes for a complete citrus experience!

Lemon Curd Overnight Oats Ingredients

Here’s everything you need to create these delightful Lemon Curd Overnight Oats!

For the Oats Mixture
• Rolled Oats – The foundation of the dish; opt for gluten-free oats for a gluten-free version.
• Milk – Adds creaminess; choose between dairy or a non-dairy alternative like almond milk.
• Greek Yogurt – Provides protein and creamy texture; swap with coconut yogurt for a dairy-free option.
• Chia Seeds – Thickens the oats and adds fiber; no direct substitute needed, but you can add more for extra thickness.
• Honey or Maple Syrup – Sweetens the mixture; feel free to adjust according to your preference.
• Vanilla Extract – Enhances the flavor; ensure it’s pure for the best taste.

For the Lemon Curd
• Large Egg – Gives richness to the lemon curd; essential for the creamy texture.
• Fresh Lemon Juice – Brings brightness and tartness to the curd; fresh is always best!
• Lemon Zest – Intensifies the lemon flavor and aroma; don’t skip this for that extra zing!
• Sugar – Sweetens the curd; alternative sweeteners like honey can also be used.
• Butter – Adds richness; vegan butter is a great substitute for a plant-based version.

For Toppings
• Granola – Adds crunch and texture; sprinkle generously on top for a delightful contrast.
• Extra Lemon Zest – Boosts flavor and visual appeal; a little zest goes a long way.
• Honey or Maple Syrup – Drizzle over the top for added sweetness before serving.

With these ingredients, you're well on your way to creating the most delicious Lemon Curd Overnight Oats!

Step‑by‑Step Instructions for Lemon Curd Overnight Oats

Step 1: Make the Lemon Curd
In a small saucepan, combine 1 large egg, 1/2 cup fresh lemon juice, 1 tablespoon lemon zest, and 1/2 cup sugar. Cook over low heat, whisking constantly for about 5 minutes, until the mixture thickens and coats the back of a spoon. Remove from heat, stir in 4 tablespoons of butter until melted, and let it cool completely before using.

Step 2: Prepare Oats Mixture
In a medium mixing bowl, combine 1 cup rolled oats, 1 cup milk (dairy or non-dairy), 1/2 cup Greek yogurt, 2 tablespoons chia seeds, 2 tablespoons honey or maple syrup, and 1 teaspoon vanilla extract. Stir well until all ingredients are fully combined, creating a creamy base. This mixture will soak up the flavors and thicken overnight.

Step 3: Layer Ingredients
Grab a mason jar or any airtight container. Spoon half of the oats mixture into the bottom, followed by a generous layer of the prepared lemon curd. Then, top with the remaining oats mixture, ensuring even distribution. This beautiful layering not only looks appealing but also helps meld the flavors together perfectly as they chill.

Step 4: Refrigerate
Seal the mason jar tightly and place it in the refrigerator. Allow the Lemon Curd Overnight Oats to chill for at least 4 hours, or ideally overnight. This waiting time allows the oats to absorb the liquid, increasing their creaminess and flavor. It’s the perfect make-ahead breakfast solution for your busy mornings.

Step 5: Serve
When you're ready to enjoy your Lemon Curd Overnight Oats, take them out of the fridge. Top with a sprinkle of granola for a delightful crunch, an additional sprinkle of lemon zest for burst, and a drizzle of honey or maple syrup for extra sweetness. Mix it all together and savor this creamy breakfast treat!

Expert Tips for Lemon Curd Overnight Oats

  • Extra Curds: Make additional lemon curd to keep in the fridge for a week. It’s delicious on toast or paired with yogurt!
  • Thickness Adjustment: If you prefer thicker oats, reduce the milk or increase the chia seeds for a satisfying, pudding-like texture.
  • Sweetness Control: Taste your mixture before refrigerating and adjust with more honey or maple syrup based on your preference.
  • Chilling Time: Always chill the Lemon Curd Overnight Oats for at least 4 hours—overnight is ideal to develop the best flavor and texture.
  • Topping Ideas: Experiment by topping with different fruits, nuts, or seeds for added flavor and nutrition when serving.

Lemon Curd Overnight Oats Variations

Feel free to get creative with these Lemon Curd Overnight Oats and tailor them to your taste buds!

  • Gluten-Free: Use certified gluten-free oats to enjoy a safe and scrumptious breakfast experience.

  • Vegan: Swap Greek yogurt for coconut yogurt and butter for vegan butter, making this delight plant-based.

  • Flavor Boost: Mix in a teaspoon of poppy seeds for a delightful crunch and a hint of nutty flavor.

  • Coconut Twist: Replace half the milk with coconut milk for a tropical flair that beautifully complements the lemon.

  • Berry Burst: Layer in fresh berries, like blueberries or raspberries, to add a burst of sweetness and color.

  • Nutty Crunch: Top with chopped nuts like almonds or walnuts for added texture and healthy fats.

  • Maple Variation: Use maple syrup instead of honey for a deeper, richer sweetness that pairs wonderfully with lemon.

  • Extra Creamy: For a luxurious texture, stir in an extra spoonful of Greek yogurt to make it even creamier.

Want more lemony goodness? Try these delightful options—like a comforting Lemon Chicken Soup or start your day right with a delightful stack of Lemon Ricotta Protein pancakes!

Make Ahead Options

These Lemon Curd Overnight Oats are a fantastic meal prep solution for busy mornings! You can prepare the oats mixture (rolled oats, milk, Greek yogurt, chia seeds, honey, and vanilla) up to 3 days in advance and store it in the refrigerator in an airtight container. Additionally, the lemon curd can be made and refrigerated for about one week before serving. To ensure the oats remain creamy and delicious, keep them sealed to avoid browning and drying out. When you're ready to serve, simply layer the lemon curd with the prepped oats and garnish with granola, lemon zest, and a drizzle of honey for a bright and refreshing breakfast treat that saves you time and effort!

How to Store and Freeze Lemon Curd Overnight Oats

Fridge: Store your Lemon Curd Overnight Oats in an airtight container for up to 5 days. This makes them perfect for meal prep and quick breakfasts.

Freezer: While not recommended for freezing the assembled oats, you can freeze any leftover lemon curd in a separate airtight container for up to 3 months. Thaw in the fridge before using.

Reheating: If you prefer warm oats, microwave the oats for about 1 minute and stir before enjoying. Add a splash of milk to restore creaminess if needed.

Separation: It's normal for the oats to thicken and absorb liquid over time; simply stir before serving to refresh the texture!

What to Serve with Lemon Curd Overnight Oats

Brighten your morning routine with these delightful pairings that enhance your Lemon Curd Overnight Oats experience!

  • Fresh Fruits: Juicy berries or sliced bananas add a delightful sweetness and freshness, complementing the tangy lemon curd perfectly. They not only bring vibrant colors but also add a nutritious punch to your breakfast.

  • Greek Yogurt Parfait: Layer your oats with creamy Greek yogurt for extra protein and richness. This combination creates a luscious texture, making each spoonful a dream!

  • Nutty Granola: A sprinkle of your favorite granola offers a satisfying crunch and nutty flavor, enhancing the creamy oats while adding an interesting texture.

  • Coconut Chia Pudding: The velvety richness of coconut chia pudding is a tropical twist that pairs beautifully with lemon. It adds an extra layer of creaminess and tropical delight to every bite!

  • Herbal Tea: A refreshing cup of chamomile or mint tea brings balance to the citrus notes of your dish while providing a calming start to your day.

  • Citrus Smoothie: Blend up a zesty citrus smoothie with oranges and spinach to harmonize with the lemon flavor, offering a refreshing, nutrient-packed drink alongside your oats.

  • Lemon Infused Water: Serve your oats with lemon-infused water for a light and refreshing drink. The citrusy water not only hydrates but also complements the lemon curd deliciously.

Lemon Curd Overnight Oats Recipe FAQs

How do I select the perfect lemons for the curd?
Absolutely! Look for lemons that are firm, bright yellow, and free of dark spots or blemishes. A good lemon will feel heavy for its size, indicating plenty of juice. Freshness is key here for that vibrant citrus flavor!

How should I store leftover Lemon Curd Overnight Oats?
You can store your Lemon Curd Overnight Oats in an airtight container in the refrigerator for up to 5 days. This method makes it super convenient for meal prep, allowing you to enjoy a tasty and nutritious breakfast throughout the week without any hassle!

Can I freeze my Lemon Curd Overnight Oats?
While it's best not to freeze the assembled oats (as they can become mushy), you can freeze any leftover lemon curd. Place the lemon curd in a separate airtight container and store it in the freezer for up to 3 months. When ready to use, simply thaw it in the refrigerator overnight. Then, mix it into your oats for that lovely brightness!

What can I do if my overnight oats are too thick?
If you find your Lemon Curd Overnight Oats are thicker than desired, don’t fret! Just add a splash of milk—dairy or non-dairy—until you achieve your preferred consistency. Stir well, and they’ll be creamy and luscious again in no time.

Are there any dietary considerations I should keep in mind?
Very good question! For those with allergies, be cautious of the egg in the lemon curd; consider using a plant-based egg substitute if you're going vegan. Additionally, ensure that any sweeteners used are suitable for your dietary preferences, such as maple syrup for vegans. Always check labels for allergens if you're sharing with children or guests!

What toppings can I add to my Lemon Curd Overnight Oats?
The more the merrier! I often recommend topping with granola for that crunch, extra lemon zest for a flavor boost, and a drizzle of honey or maple syrup to enhance sweetness. You can also add fresh fruits like berries or sliced bananas for added nutrition and taste. Experiment with your favorites!

Lemon Curd Overnight Oats

Lemon Curd Overnight Oats: A Bright and Creamy Breakfast Treat

Lemon Curd Overnight Oats are a refreshing breakfast treat that combines creamy oats with tangy lemon curd, perfect for busy mornings.
Print Recipe Pin Recipe
Prep Time 15 minutes mins
Cook Time 5 minutes mins
Chilling Time 4 hours hrs
Total Time 4 hours hrs 20 minutes mins
Servings: 2 bowls
Course: Breakfast
Cuisine: American
Calories: 350
Ingredients Equipment Method Nutrition Notes

Ingredients
  

For the Oats Mixture
  • 1 cup Rolled Oats use gluten-free for gluten-free option
  • 1 cup Milk dairy or non-dairy alternative
  • 1/2 cup Greek Yogurt substitute with coconut yogurt for dairy-free
  • 2 tablespoons Chia Seeds
  • 2 tablespoons Honey or Maple Syrup adjust according to preference
  • 1 teaspoon Vanilla Extract use pure for the best flavor
For the Lemon Curd
  • 1 large Egg
  • 1/2 cup Fresh Lemon Juice fresh is always best
  • 1 tablespoon Lemon Zest for extra flavor
  • 1/2 cup Sugar or use alternative sweeteners like honey
  • 4 tablespoons Butter use vegan butter for a plant-based option
For Toppings
  • 1/4 cup Granola sprinkle generously on top
  • 1 tablespoon Extra Lemon Zest
  • 1 tablespoon Honey or Maple Syrup to drizzle before serving

Equipment

  • small saucepan
  • medium mixing bowl
  • Mason jar or airtight container

Method
 

Steps
  1. In a small saucepan, combine 1 large egg, 1/2 cup fresh lemon juice, 1 tablespoon lemon zest, and 1/2 cup sugar. Cook over low heat, whisking constantly for about 5 minutes, until the mixture thickens and coats the back of a spoon. Remove from heat, stir in 4 tablespoons of butter until melted, and let it cool completely before using.
  2. In a medium mixing bowl, combine 1 cup rolled oats, 1 cup milk, 1/2 cup Greek yogurt, 2 tablespoons chia seeds, 2 tablespoons honey or maple syrup, and 1 teaspoon vanilla extract. Stir well until all ingredients are fully combined, creating a creamy base.
  3. Grab a mason jar or any airtight container. Spoon half of the oats mixture into the bottom, followed by a generous layer of the prepared lemon curd. Then, top with the remaining oats mixture.
  4. Seal the mason jar tightly and place it in the refrigerator. Allow the Lemon Curd Overnight Oats to chill for at least 4 hours, or ideally overnight.
  5. When ready to enjoy, take them out of the fridge. Top with granola, extra lemon zest, and a drizzle of honey or maple syrup. Mix and savor!

Nutrition

Serving: 1bowlCalories: 350kcalCarbohydrates: 50gProtein: 10gFat: 12gSaturated Fat: 7gMonounsaturated Fat: 2gCholesterol: 90mgSodium: 150mgPotassium: 300mgFiber: 5gSugar: 15gVitamin A: 500IUVitamin C: 10mgCalcium: 200mgIron: 2mg

Notes

Make additional lemon curd to keep in the fridge for a week. Adjust ingredients to preference for desired thickness and sweetness.

Tried this recipe?

Let us know how it was!

Delicious Mocha Coffee Overnight Oats for Energizing Mornings

March 11, 2026 by Grace Snow Leave a Comment

As I poured my first cup of coffee this morning, the realization hit me: I needed something quick, energizing, and delicious to kickstart my day. That's when I remembered the magic of Mocha Coffee Overnight Oats. This recipe is a lifesaver for busy mornings, providing a satisfying blend of oats, rich cocoa, and that essential caffeine boost. Preparing these overnight oats is a breeze, requiring minimal effort while delivering a healthy breakfast that feels downright indulgent. Imagine diving into a creamy jar of mocha goodness with every spoonful, making mornings something to look forward to instead of dread. Ready to whip up a batch and discover your new favorite breakfast?

Why Are Mocha Coffee Overnight Oats Amazing?

Quick Prep: With minimal steps involved, you’ll have breakfast ready in no time. Just mix, refrigerate, and enjoy!
Energizing Kick: The delightful balance of coffee provides the caffeine boost you need for a productive day.
Indulgent Flavor: Rich cocoa and creamy milk create a luxurious taste that feels like a treat.
Healthy Fusion: Packed with fiber and protein, these oats keep you full and energized until lunchtime.
Make-Ahead Magic: Prepare a few jars at once for convenient breakfasts throughout the week. Discover other quick recipes like Vegan Sushi to keep your mornings diverse!

Mocha Coffee Overnight Oats Ingredients

For the Oats Base
• Rolled Oats – These create the perfect texture for overnight soaking, providing fiber and fullness.
• Coffee – Use brewed or cold brew for a smooth flavor; the coffee kick adds an energizing boost.
• Cocoa Powder – Choose Dutch-process cocoa for a deeper chocolate flavor that enhances the mocha experience.

For Creaminess
• Milk (or non-dairy milk) – Oat milk gives a wonderful creaminess, while almond milk is a lighter alternative.
• Greek Yogurt (optional) – This adds extra protein and creaminess; swap for non-dairy yogurt if preferred.

For Sweetness
• Sweetener (e.g., honey, maple syrup) – A drizzle enhances the flavor without overpowering the oats; adjust to your taste.

For Extra Texture
• Chia Seeds (optional) – These boost fiber and create a delightful pudding-like consistency; flax seeds are a great alternative.

Prepare to indulge in these delightful Mocha Coffee Overnight Oats, a quick and energizing breakfast choice that you can enjoy any day of the week!

Step‑by‑Step Instructions for Mocha Coffee Overnight Oats

Step 1: Combine Dry Ingredients
In a large mixing bowl, add 1 cup of rolled oats, 2 tablespoons of cocoa powder, and any optional chia seeds. Stir these dry ingredients together thoroughly until well blended, ensuring there are no clumps. This is the essential first step to create the delectable base for your Mocha Coffee Overnight Oats.

Step 2: Add Coffee
Pour in 1 cup of freshly brewed coffee or cold brew into the dry mixture. Use a whisk or fork to incorporate the coffee gradually, ensuring the oats soak up the rich flavor. This will enhance the mocha experience, making it not just nutritious but also that perfect energizing breakfast.

Step 3: Stir in Wet Ingredients
Next, add 1 cup of milk (or your choice of non-dairy milk) to the mixture. Mix it well until all the ingredients are combined, creating a creamy consistency. If you're using Greek yogurt for added creaminess, fold about ½ cup of it into the mixture at this stage for a luxurious texture.

Step 4: Sweeten it Up
Now, drizzle in your preferred sweetener, such as honey or maple syrup, adjusting to your taste. Stir everything together to ensure the sweetener is evenly distributed. You should see a smooth, luscious batter resembling a delightful chocolate-coffee blend, ready for chilling.

Step 5: Portion and Seal
Divide the mixture into jars or airtight containers, filling them about three-quarters full. Seal each container tightly to lock in freshness, which is essential for achieving the perfect texture for your Mocha Coffee Overnight Oats. These delightful jars are ideal for quick breakfast grabs in the morning.

Step 6: Refrigerate Overnight
Place the sealed jars in the refrigerator for at least 4 hours, or preferably overnight. This chilling time allows the oats to absorb all the flavors and liquids, resulting in a creamy and ready-to-eat breakfast by morning. The anticipation of a delicious, healthy start to your day builds as they soak.

Step 7: Serve and Enjoy
In the morning, take the jars out of the refrigerator and give the oats a good stir. You can enjoy them chilled directly from the jar or warm them in the microwave for about 30 seconds for a cozy breakfast experience. Top with your favorite fruits or nuts to make your Mocha Coffee Overnight Oats even more delightful!

What to Serve with Mocha Coffee Overnight Oats

Elevate your breakfast experience with these delightful pairing suggestions that complement the rich flavors of your mocha coffee overnight oats.

  • Creamy Greek Yogurt: A dollop on top adds a rich creaminess and enhances the protein content, making your breakfast even more satisfying.

  • Fresh Berries: Strawberries, blueberries, or raspberries provide a burst of freshness and a natural sweetness, perfectly balancing the chocolate coffee flavors.

  • Chopped Nuts: Almonds or walnuts add a delightful crunch and healthy fats, enhancing both texture and nutrition in your meal.

  • Banana Slices: Soft, sweet banana slices introduce a lovely creaminess and additional fiber that pairs beautifully with the mocha oats.

  • Nut Butter Drizzle: A spoonful of almond or peanut butter can amp up the richness and provide a satisfying healthy fat source.

  • Dark Chocolate Shavings: Sprinkle a few chocolate curls on top for an indulgent touch that’s perfect for chocolate lovers looking for a morning treat.

  • Smoothie: Serve with a fruity smoothie to add a refreshing and nutritious drink that balances the richness of the oats.

  • Herbal Tea: A fragrant herbal tea, like peppermint or chamomile, can be a soothing complement to your energizing mocha coffee breakfast.

  • Coconut Flakes: Toasted coconut flakes sprinkle a tropical twist, adding chewiness and sweetness alongside the mocha tones.

These pairings not only enhance the flavor of your mocha coffee overnight oats but also create a well-rounded breakfast that’s both nourishing and indulgent.

Mocha Coffee Overnight Oats Variations

Feel free to play around with these overnight oats to match your taste buds and dietary needs!

  • Dairy-Free: Substitute regular milk with almond or oat milk for a creamy, non-dairy delight. This makes it accessible for vegan diets while keeping the recipe deliciously smooth.

  • Sweetener Swap: Use stevia or agave syrup instead of honey or maple syrup to reduce sugar. Adjust according to your sweetness preference for guilt-free indulgence.

  • Flavor Boost: Experiment with flavored coffee, like hazelnut or vanilla, to introduce exciting new taste profiles. Each morning can be a unique coffee adventure!

  • Dark Chocolate Lovers: For an extra indulgent taste, swap regular cocoa powder for dark chocolate cocoa. This will enhance the richness and give you that deep chocolate flavor.

  • Nutty Addition: Stir in a tablespoon of nut butter (like almond or peanut) for added creaminess and protein. It brings a delightful richness, making your oats even more satisfying.

  • Extra Crunch: Top your oats with granola or crushed nuts in the morning for added texture and a delightful crunch. This improves the overall mouthfeel while keeping the breakfast wholesome.

  • Fruit Facelift: Add fresh or dried fruits such as bananas or berries before serving for a burst of flavor and added nutrients. They not only brighten up your dish but also enhance the moisture and taste.

  • Chia Seed Substitution: If you're not a fan of chia seeds, flax seeds make a great alternative. They provide similar benefits and contribute to the delicious, pudding-like texture.

Explore various flavor options that adapt to your lifestyle and preferences, making each bowl of Mocha Coffee Overnight Oats an exciting treat!

How to Store and Freeze Mocha Coffee Overnight Oats

Fridge: Store your mocha coffee overnight oats in airtight containers in the refrigerator for up to 3 days. This ensures they stay fresh and retain their creamy texture.

Freezer: If you want to keep them longer, freeze the jars for up to 2 months. Just be sure to leave some space at the top of each container, as the oats will expand while freezing.

Thawing: When ready to enjoy, transfer the jar to the fridge to thaw overnight or microwave for a quick 1-2 minutes until warmed.

Serving: Give the oats a good stir before serving, and consider adding fresh toppings like fruits or nuts to enhance flavor and texture.

Make Ahead Options

These Mocha Coffee Overnight Oats are a fantastic meal prep solution for busy mornings, allowing you to save precious time during the week! You can prepare the oats mixture up to 3 days ahead, ensuring a creamy, flavorful breakfast is ready whenever you are. To do this, simply follow the recipe instructions up to the point of sealing the jars, and then store them in the refrigerator. This will allow the oats to soak up the rich coffee and cocoa flavors. When you're ready to enjoy, simply stir well and, if desired, heat the jars in the microwave for about 30 seconds for a cozy breakfast experience. These oats will still taste just as delicious, making them the ideal make-ahead option!

Expert Tips for Mocha Coffee Overnight Oats

  • Mixing Order Matters: Start by blending the dry ingredients first. This prevents clumping and ensures a smooth consistency in your Mocha Coffee Overnight Oats.

  • Adjust to Your Taste: Experiment with the sweetness levels by testing different sweeteners. This can dramatically change the flavor profile based on your choice of coffee and cocoa.

  • Choosing Your Coffee: The type of coffee can impact your oats' flavor. Try cold brew for a smoother finish or a stronger brew for an energizing kick.

  • Perfect Soaking Time: Always allow the oats to soak overnight. This is crucial for achieving that creamy texture we all love; 4 hours is the minimum for good absorption.

  • Upgrade Your Toppings: Consider adding fresh fruits, nuts, or seeds in the morning. They not only enhance texture but also provide added nutrients to your Mocha Coffee Overnight Oats.

Mocha Coffee Overnight Oats Recipe FAQs

How do I select the best oats for this recipe?
Absolutely! For the best results, use rolled oats as they soak up liquids beautifully and maintain a perfect texture. Avoid instant oats since they can become mushy too quickly, which won't give you that delightful chewiness that makes overnight oats so enjoyable.

How long can I store Mocha Coffee Overnight Oats in the fridge?
You can store them in the refrigerator for up to 3 days in airtight containers. This makes them a fantastic meal prep option, allowing you to prepare several servings at once for busy mornings ahead!

Can I freeze Mocha Coffee Overnight Oats?
Yes, you can! To freeze, simply divide the mixture into jars, leaving some space at the top for the oats to expand as they freeze. They can be stored in the freezer for up to 2 months. When you're ready to enjoy, transfer the jar to the fridge to thaw overnight or microwave for 1-2 minutes to warm them up.

What should I do if my oats are too thick after refrigerating?
Very! If your oats turn out thicker than you'd like, simply add a splash of milk or your favorite non-dairy option and stir well until you reach your desired consistency. This is especially helpful if you’ve added extra ingredients like Greek yogurt which can thicken the mixture.

Are Mocha Coffee Overnight Oats suitable for someone with nut allergies?
Absolutely! If you have nut allergies, just switch out any nut-based milks (like almond milk) for oat milk, coconut milk, or another alternative that suits your dietary needs. Just confirm that all the ingredients, especially sweeteners and any optional toppings, are nut-free as well.

Can I customize the sweetness of Mocha Coffee Overnight Oats?
For sure! The sweetness level depends on your personal taste and the type of coffee you use. Start with a small amount of sweetener, such as honey or maple syrup, and adjust until you find that delightful balance between rich chocolate and satisfying sweetness that you love. Enjoy experimenting!

Mocha Coffee Overnight Oats

Delicious Mocha Coffee Overnight Oats for Energizing Mornings

Discover the quick, energizing, and delicious Mocha Coffee Overnight Oats for busy mornings.
Print Recipe Pin Recipe
Prep Time 15 minutes mins
Chilling Time 4 hours hrs
Total Time 4 hours hrs 15 minutes mins
Servings: 2 jars
Course: Breakfast
Cuisine: American
Calories: 350
Ingredients Equipment Method Nutrition Notes

Ingredients
  

For the Oats Base
  • 1 cup rolled oats
  • 1 cup brewed coffee or cold brew
  • 2 tablespoons cocoa powder Dutch-process recommended
For Creaminess
  • 1 cup milk or non-dairy milk
  • 0.5 cup Greek yogurt optional, substitute with non-dairy yogurt if desired
For Sweetness
  • to taste tablespoons sweetener e.g., honey or maple syrup
For Extra Texture
  • 2 tablespoons chia seeds optional, flax seeds can be used as substitution

Equipment

  • Mixing Bowl
  • Whisk
  • jars or airtight containers

Method
 

Step-by-Step Instructions
  1. In a large mixing bowl, add 1 cup of rolled oats, 2 tablespoons of cocoa powder, and any optional chia seeds. Stir the dry ingredients together until well blended.
  2. Pour in 1 cup of freshly brewed coffee into the dry mixture. Use a whisk or fork to incorporate the coffee gradually.
  3. Next, add 1 cup of milk to the mixture. Mix until all ingredients are combined. If using Greek yogurt, fold in 0.5 cup at this stage.
  4. Drizzle in your preferred sweetener, stirring to ensure even distribution.
  5. Divide the mixture into jars, filling them about three-quarters full. Seal each container tightly.
  6. Place the sealed jars in the refrigerator for at least 4 hours or overnight.
  7. In the morning, stir the oats and enjoy chilled or warmed in the microwave.

Nutrition

Serving: 1jarCalories: 350kcalCarbohydrates: 50gProtein: 12gFat: 10gSaturated Fat: 3gPolyunsaturated Fat: 2gMonounsaturated Fat: 5gCholesterol: 5mgSodium: 150mgPotassium: 300mgFiber: 8gSugar: 10gVitamin A: 100IUVitamin C: 2mgCalcium: 150mgIron: 2mg

Notes

Mixing dry ingredients first prevents clumping. Adjust sweetness and explore different coffee types for flavor variation. Allow oats to soak overnight for best texture.

Tried this recipe?

Let us know how it was!

Zesty Jalapeno Popper Cheese Ball Recipe for Low Carb Fun

March 11, 2026 by Grace Snow Leave a Comment

The spicy aroma of jalapeños always brings a certain excitement to any gathering. When it comes to appetizers, this Low Carb Jalapeño Popper Cheese Ball truly steals the spotlight—trust me, your friends and family will be asking for seconds! With a creamy texture that beautifully melds rich cream cheese, zesty jalapeños, and crispy bacon, this easy-to-make treat is the ultimate way to indulge without straying from your keto goals. Perfect for holiday feasts or casual get-togethers, it’s not only a low-carb delight but also an effortless showstopper that pairs wonderfully with fresh veggie dippers. Ready to elevate your next appetizer spread? Let's dive into the delicious details of this Jalapeño Popper Cheese Ball Recipe!

Why is this Jalapeño Popper Cheese Ball a Must-Try?

Creamy Bliss: This cheese ball is packed with velvety cream cheese and tangy sour cream, ensuring a smooth, delectable texture that makes each bite unforgettable.

Spicy Kick: Infused with fresh jalapeños, it offers just the right amount of heat to awaken your taste buds without overwhelming them.

Crowd-Pleaser: Perfect for parties, this appetizer will have everyone talking and coming back for more—trust me, a cheese ball like this is hard to resist!

Low-Carb Indulgence: Adhering to your keto routine? No problem! This recipe keeps the carb count low while delivering maximum flavor, making it a fitting addition to your low-carb lifestyle.

Versatile Pairings: Serve it alongside crunchy fresh veggies or with some low-carb crackers to create the ultimate grazing experience. For more creative dips, check out our Potato Blue Cheese for a change of pace!

Jalapeño Popper Cheese Ball Ingredients

For the Cheese Ball

  • Cream Cheese – the base for creaminess; swap with Neufchatel for a lighter option.
  • Sour Cream – introduces tanginess and lightens the mix; plain Greek yogurt works as a substitute.
  • Garlic Powder – enhances the cheese ball's flavor; using fresh minced garlic adds an extra punch.
  • Jalapeños – provides that signature heat; use just one for a milder kick.
  • Shredded Sharp Cheddar – adds depth to the flavor; medium cheddar can tone it down for a gentler taste.
  • Cooked Bacon – imparts a delicious smoky element; turkey bacon or omitting it altogether fits a vegetarian diet.
  • Salt/Pepper – essential to elevate flavor; adjust cautiously due to the saltiness from cheese and bacon.

For the Coating

  • Cooked Bacon – finely chopped for a crispy exterior that complements the creamy center.
  • Jalapeño – finely chopped to amp up the heat in the coating.
  • Shredded Cheddar Cheese – for an added layer of flavor on the outside.
  • Green Onions – brings a fresh crunch; feel free to use scallions for a milder taste.
  • Pecans – adds a nutty crunch; you can swap these for walnuts or leave them out entirely.

This Jalapeño Popper Cheese Ball Recipe is bound to become a hit at your next gathering!

Step‑by‑Step Instructions for Jalapeno Popper Cheese Ball Recipe

Step 1: Combine the Base
In a mixing bowl, blend 8 ounces of softened cream cheese and 1/2 cup of sour cream using a hand mixer. Beat on medium speed for about 2-3 minutes until the mixture is smooth and fluffy, signaling it's ready when the texture is creamy without lumps. This forms the delicious base of your Jalapeno Popper Cheese Ball.

Step 2: Mix the Flavors
Next, add 1 teaspoon of garlic powder, 2 finely chopped jalapeños (seeds removed for less heat if desired), 1 cup of shredded sharp cheddar, 1/2 cup of cooked bacon bits, and salt and pepper to taste. Stir gently with a spatula until all the ingredients are evenly incorporated, aiming for a consistent mixture filled with creamy goodness and vibrant colors.

Step 3: Form the Cheese Ball
Lay out a large piece of plastic wrap and scoop the cheese mixture onto it. Use the wrap to shape the cheese into a ball, smoothing the outside as you go for an even appearance. Tightly wrap the cheese ball in the plastic wrap and refrigerate it for at least 1 hour, allowing it to firm up and meld the flavors together beautifully.

Step 4: Prepare Coating Ingredients
While the cheese ball is chilling, prepare your coating by mixing 1/2 cup of finely chopped cooked bacon, 1 jalapeño (finely chopped), 1/2 cup of shredded cheddar cheese, 1/4 cup of chopped green onions, and 1/4 cup of chopped pecans. Spread these ingredients evenly on a flat surface, ensuring a colorful and flavorful coating ready to add texture to your Jalapeno Popper Cheese Ball.

Step 5: Coat the Cheese Ball
Once the cheese ball has set, unwrap it from the plastic wrap carefully. Roll the cheese ball in the coating mixture, pressing gently to ensure that it sticks well to the surface. Pay special attention to cover all sides, creating a mouthwatering, textured exterior that enhances the flavors of your decadent Jalapeno Popper Cheese Ball.

Step 6: Serve and Enjoy
Transfer the coated cheese ball to a serving platter and allow it to sit at room temperature for about 10 minutes before serving. This step enhances its creaminess for delicious dipping. Pair your Jalapeno Popper Cheese Ball with low-carb dippers like celery sticks or pork rinds for a delightful appetizer that guests will love!

Storage Tips for Jalapeno Popper Cheese Ball Recipe

Refrigerator: Keep your Jalapeno Popper Cheese Ball wrapped tightly in plastic wrap or an airtight container for up to 5 days. This helps preserve its creamy texture and flavor.

Freezer: You can also freeze the cheese ball for up to 2 months. Wrap it well in plastic wrap, followed by aluminum foil. Thaw it in the fridge overnight before serving.

Serving Temperature: Allow the cheese ball to sit at room temperature for about 10 minutes before serving. This enhances its creaminess and makes for easier dipping.

Reheating: For best results, avoid reheating. This recipe is best served cold or at room temperature to enjoy the vibrant flavors of the jalapeños and cheese!

Make Ahead Options

These Jalapeño Popper Cheese Balls are perfect for make ahead meal prep! You can prepare the cheese ball mixture up to 24 hours in advance. Simply complete steps 1 through 3, then wrap it tightly in plastic wrap and store it in the refrigerator to maintain its freshness and flavor. For the coating, you can also chop the bacon and other ingredients up to 3 days ahead; just keep them in an airtight container to preserve their crunch. When you're ready to serve, simply roll the chilled cheese ball in the coating mixture, let it sit at room temperature for 10 minutes, and you'll have a delicious appetizer that’s just as flavorful as if it were made fresh!

What to Serve with Jalapeño Popper Cheese Ball Recipe

Elevate your appetizer game with delightful pairings that complement the creamy, spicy goodness of this cheese ball.

  • Crunchy Veggie Sticks: Fresh celery, carrots, or bell peppers provide a crisp contrast, enhancing the savory flavors with a refreshing bite.

  • Low-Carb Crackers: Serve with your favorite low-carb crackers for the perfect dippable experience. Their crunch pairs beautifully with the creamy cheese ball.

  • Savory Bacon-Wrapped Jalapeños: Amplify the flavor fiesta by adding these spicy bites! They add another layer of smokiness and a delightful crunch.

  • Creamy Guacamole: The fresh creaminess of guacamole balances the heat of the cheese ball beautifully. A luscious addition to every dip!

  • Zesty Salsa: Brighten up your spread with a tangy salsa! It brings a fresh burst that complements the cheesiness perfectly.

  • Sparkling Water with Lime: Refresh your palate with a bubbly drink. The zesty lime ties together the savory elements while keeping it light.

  • Chilled White Wine: A crisp Sauvignon Blanc would pair nicely, accentuating the cheese ball’s flavors and adding a touch of elegance.

  • Decadent Dark Chocolate: For dessert, switch things up with a small piece of dark chocolate. The richness adds a surprising finish to the meal.

These pairings provide a delightful balance of flavors and textures, making your Jalapeño Popper Cheese Ball the star of the show!

Expert Tips for Jalapeno Popper Cheese Ball

  • Soften Cream Cheese: Ensure your cream cheese is at room temperature; this guarantees a smooth and cohesive mixture for your Jalapeño Popper Cheese Ball.
  • Adjust the Heat: Start with fewer jalapeños—taste as you go! It's easy to add more, but hard to take the spice away.
  • Use Fresh Ingredients: Opt for fresh garlic over garlic powder for a more vibrant flavor in your cheese ball.
  • Tight Wrap for Shape: When forming the ball, use plastic wrap to shape tightly; this helps maintain its beautiful form while chilling.
  • Watch the Salt: Given the saltiness of bacon and cheese, add salt gradually to avoid over-seasoning; taste as you go!
  • Chill for Flavor: Refrigerate the cheese ball for at least an hour; chilling allows flavors to meld beautifully, enhancing your Jalapeño Popper Cheese Ball experience.

Jalapeño Popper Cheese Ball Recipe Variations

Feel free to unleash your creativity with these delicious twists that will elevate your cheese ball to new heights!

  • Spicy Twist: Add chopped pickled jalapeños or a dash of hot sauce for an extra kick that spice lovers will adore. Feel the heat swirl through every bite!

  • Herbed Delight: Incorporate fresh herbs like chives or cilantro to complement the creaminess with vibrant flavors. A sprinkle of herbs will take this appetizer to a whole new level!

  • Creamy Cheese Combo: Mix in creamy feta with your cheddar for a zesty twist. The tanginess of feta beautifully balances the flavors, creating a delightful taste experience.

  • Vegan Option: Omit the bacon entirely or swap it out for crumbled tofu. This alternative still provides texture while keeping the dish animal-product free. It's a crowd-pleaser that everyone will enjoy!

  • Smoky Flavor: Try using smoked cheddar or adding a dash of smoked paprika to capture that irresistible smoky vibe. The depth it brings to the cheese ball will leave your guests raving!

  • Nutty Crunch: Swap pecans for walnuts or sunflower seeds to add a different crunch to the coating. This change introduces a delightful variation in texture with each bite.

  • Flavorful Addition: Experiment by folding in diced sun-dried tomatoes for bursts of sweetness. They add a lovely contrast to the spicy jalapeños!

For more flavor inspirations, consider layering your cheese ball with a delicious topping by trying out our lovely Spatchcock Chicken or serve it alongside savory bites like Chicken Adobo Again. The options are endless!

Jalapeño Popper Cheese Ball Recipe FAQs

How do I choose ripe jalapeños for this recipe?
Absolutely! Look for jalapeños that are firm and glossy, with no dark spots or wrinkles. Ideally, they should be a vibrant green color. If you prefer a milder flavor, smaller jalapeños tend to be less spicy. Remember, if you spot dark streaks, they may be bruised, so select the freshest ones for your cheese ball!

What’s the best way to store the Jalapeño Popper Cheese Ball?
Very! Store your Jalapeño Popper Cheese Ball wrapped tightly in plastic wrap or in an airtight container in the refrigerator for up to 5 days. This helps retain its creamy texture and flavor. Just make sure it's sealed well, as it can pick up odors from other foods!

Can I freeze the Jalapeño Popper Cheese Ball?
Indeed! You can freeze your cheese ball for up to 2 months. First, wrap it tightly in plastic wrap, then add an extra layer of aluminum foil to prevent freezer burn. When you’re ready to enjoy, simply thaw it in the fridge overnight before serving; this method helps it maintain its wonderful texture.

What if my cheese ball is too soft?
No worries! If your cheese ball turns out too soft, it could be due to insufficient chilling. Refrigerate it for an additional hour to help it firm up. If it still seems too loose, consider adding more shredded cheese or bacon bits to enhance the structure and flavor.

Are there any dietary considerations for this cheese ball recipe?
Absolutely! This Jalapeño Popper Cheese Ball is low-carb and keto-friendly, making it perfect for those following a ketogenic lifestyle. If you have vegetarian guests, you can easily omit the bacon or replace it with crumbled tofu. Be cautious of allergies—ensure there's no cross-contamination if you’re serving those with food sensitivities.

How long can I prepare this cheese ball in advance?
Very! You can prepare your Jalapeño Popper Cheese Ball a day in advance. Just wrap it tightly and store it in the refrigerator before serving. This not only saves time on the event day but also allows the flavors to meld beautifully, enhancing your appetizer experience!

Jalapeno Popper Cheese Ball Recipe

Zesty Jalapeno Popper Cheese Ball Recipe for Low Carb Fun

This Jalapeno Popper Cheese Ball is a low carb delight perfect for gatherings, blending spice and creamy flavors for a standout appetizer.
Print Recipe Pin Recipe
Prep Time 20 minutes mins
Chilling Time 1 hour hr
Total Time 1 hour hr 20 minutes mins
Servings: 8 servings
Course: Appetizers
Cuisine: American
Calories: 150
Ingredients Equipment Method Nutrition Notes

Ingredients
  

For the Cheese Ball
  • 8 ounces Cream Cheese softened
  • 1/2 cup Sour Cream can substitute with plain Greek yogurt
  • 1 teaspoon Garlic Powder or fresh minced garlic
  • 2 Jalapeños finely chopped; adjust for spice level
  • 1 cup Shredded Sharp Cheddar or medium cheddar for a milder taste
  • 1/2 cup Cooked Bacon can substitute with turkey bacon
  • Salt to taste
  • Pepper to taste
For the Coating
  • 1/2 cup Cooked Bacon finely chopped
  • 1 Jalapeño finely chopped
  • 1/2 cup Shredded Cheddar Cheese
  • 1/4 cup Chopped Green Onions or scallions
  • 1/4 cup Chopped Pecans or walnuts, optional

Equipment

  • Mixing Bowl
  • hand mixer
  • plastic wrap

Method
 

Preparation Steps
  1. In a mixing bowl, blend 8 ounces of softened cream cheese and 1/2 cup of sour cream using a hand mixer for 2-3 minutes until smooth.
  2. Add 1 teaspoon of garlic powder, 2 finely chopped jalapeños, 1 cup of shredded sharp cheddar, 1/2 cup of cooked bacon bits, and salt and pepper to taste. Mix gently until combined.
  3. Shape the mixture into a ball using plastic wrap and refrigerate for at least 1 hour.
  4. For the coating, mix 1/2 cup of finely chopped cooked bacon, 1 finely chopped jalapeño, 1/2 cup of shredded cheddar cheese, 1/4 cup of chopped green onions, and 1/4 cup of chopped pecans.
  5. Unwrap the cheese ball and roll it in the coating mixture until well coated.
  6. Allow the cheese ball to sit at room temperature for about 10 minutes before serving.

Nutrition

Serving: 1servingCalories: 150kcalCarbohydrates: 3gProtein: 8gFat: 12gSaturated Fat: 6gPolyunsaturated Fat: 1gMonounsaturated Fat: 5gCholesterol: 30mgSodium: 300mgPotassium: 100mgFiber: 1gSugar: 1gVitamin A: 500IUVitamin C: 2mgCalcium: 200mgIron: 1mg

Notes

Ensure cream cheese is softened for best mixing results. Adjust jalapeño quantity to control heat level. Refrigerate for a firm texture before serving.

Tried this recipe?

Let us know how it was!

Chai Spiced Overnight Oats for a Cozy Morning Boost

March 11, 2026 by Grace Snow Leave a Comment

As I sat with my morning coffee, I overheard a friend exclaim, “Breakfast needs to be more than just a quick fix!” That got me thinking; we often overlook the joy of a hearty, homemade meal to kickstart our day. Enter my Chai Spiced Overnight Oats—a delightful blend of cozy chai flavors and smooth oats that makes breakfast not only delicious but also practical. These oats are a dream for meal prep enthusiasts and health-conscious eaters alike, offering a high-fiber, gluten-free start to your morning that can be made in just minutes. No endless cooking or messy dishes here! Just creamy, spiced goodness waiting for you in the fridge. Ready to transform your breakfast routine with this easy recipe? Let’s embark on this flavorful journey together!

Why choose Chai Spiced Overnight Oats?

Deliciously Unique: The warm chai spices elevate your morning routine, delivering cozy flavors that set this recipe apart from mundane breakfasts.
Effortless Prep: With a quick mix and chill, you can save time in the morning and enjoy a nourishing meal ready when you wake up.
High-Fiber Goodness: Packed with nutritional benefits, these oats are rich in fiber, promoting digestion and keeping you fuller for longer.
Versatile Toppings: Customize your bowl with various toppings like fruits, nut butters, or crunchy granola, making each serving feel fresh and exciting.
Meal Prep Hero: Perfect for busy schedules, this recipe can be made days in advance, ensuring a healthy breakfast is always at your fingertips. Don’t forget to try out variations like Eggnog Cookies for added seasonal flair!

Chai Spiced Overnight Oats Ingredients

• Get ready for a cozy breakfast!

For the Oats

  • Rolled Oats – Use rolled oats (not quick oats) for best texture and fiber content.
  • Chia Seeds – Adds thickness and a boost of omega-3; can be substituted with flaxseeds if desired.
  • Chai Spice – Infuses your oats with warm flavors like cinnamon and cardamom; start with 1/2 tsp per serving and adjust to taste.
  • Plain Greek Yogurt – For creaminess and protein; substitute with dairy-free yogurt for a vegan option.
  • Milk of Choice – Hydrates the oats; use any milk (dairy, almond, oat, etc.) based on your preference.
  • Pure Maple Syrup – Sweetens the mixture naturally; feel free to use honey or agave syrup as alternatives.

Optional Toppings

  • Nut Butter – Elevates flavor and adds protein for a satisfying finish.
  • Granola – Provides a delightful crunch and extra fiber to your oats.
  • Sliced Banana, Apple, or Pear – Adds natural sweetness and a fresh touch to your bowl.

These Chai Spiced Overnight Oats are not just easy to whip up; they're packed with vibrant flavors and nutrients that will set your day off right!

Step‑by‑Step Instructions for Chai Spiced Overnight Oats

Step 1: Mix Dry Ingredients
In a large mixing bowl, combine rolled oats, chia seeds, and chai spice. Use a whisk to ensure all ingredients blend evenly, creating a fragrant base for your Chai Spiced Overnight Oats. This step takes only a couple of minutes, setting the stage for the creamy texture to come.

Step 2: Add Wet Ingredients
Next, stir in the plain Greek yogurt, your choice of milk, and pure maple syrup. Mix thoroughly until the ingredients are well combined and form a smooth, creamy mixture. Allow the enticing aroma of chai spices to fill your kitchen as you blend these wholesome ingredients together.

Step 3: Portion the Mixture
Carefully divide the oat mixture into three airtight containers or mason jars. Use a spatula to scrape every last bit from the bowl, ensuring each container has an equal amount of this delightful blend. This step sets up your easy breakfasts for the upcoming days, providing a quick grab-and-go meal.

Step 4: Chill in the Refrigerator
Seal the containers tightly and refrigerate them for at least 4 hours, though overnight is ideal for optimal thickness and flavor infusion. As they chill, the chia seeds will expand, creating a delightful texture that perfectly complements the oats.

Step 5: Serve and Enjoy
In the morning, remove your Chai Spiced Overnight Oats from the refrigerator. Top with your favorite additions, like nut butter, fresh fruit, or granola, to add flavor and crunch. The oats should be thick and creamy, ready to offer you a nutritious start to your day!

How to Store and Freeze Chai Spiced Overnight Oats

Fridge: Store in airtight containers for up to 4 days to maintain freshness and flavor. The oats will continue to thicken, making for a creamy breakfast that’s ready to enjoy.

Freezer: For longer storage, freeze the oats in individual portions for up to 3 months. Thaw in the refrigerator overnight before serving.

Reheating: If desired, reheat in the microwave for about 30-45 seconds until warm. Stir well after heating to ensure even temperature; enjoy your delicious Chai Spiced Overnight Oats!

Make-Ahead: Perfect for meal prep, you can easily whip up a batch in advance and have ready-to-eat breakfasts for busy mornings!

Chai Spiced Overnight Oats Variations

Feel free to make this recipe your own with these delightful twists and swaps that add a personal touch to your morning oats!

  • Fruit-Infused: Blend in mashed bananas or pureed strawberries for a naturally sweet touch. These fruits not only enhance flavor but also bring a pop of color to your breakfast!

  • Nutty Delight: Replace chia seeds with almond or peanut butter for a protein boost and nutty richness. The creaminess of nut butter perfectly complements the chai spices, creating a satisfyingly indulgent treat.

  • Spice It Up: Add a pinch of cayenne or black pepper for a surprising kick that takes your oats to the next level. The warmth from the spice merges beautifully with the chai flavors.

  • Creamy Coconut: Substitute regular milk with coconut milk for a tropical vibe. Coconut adds a rich, creamy texture that pairs beautifully with the chai spices for a refreshing twist on your breakfast routine.

  • Matcha Magic: For a unique flavor combination, whisk in a teaspoon of matcha powder along with the chai spice. This addition not only brings vibrant color but also loads of antioxidants to your morning boost!

  • Chocolate Chai: Mix in cocoa powder for a decadent twist and turn your breakfast into a dessert-like experience. Chocolate and chai are a match made in heaven, bringing warmth and joy to your morning!

  • Vegan Version: Use coconut yogurt and almond milk to make these overnight oats vegan-friendly. They remain deliciously creamy while providing all the nutrition you need.

If you're feeling adventurous, don't forget to try out these Chai Spiced Overnight Oats with toppings like fresh berries or a sprinkle of granola, similar to the comforting flavors found in my Eggnog Cookies. Enjoy the journey of flavor!

Expert Tips for Chai Spiced Overnight Oats

  • Flavor Adjustment: Start with 1/2 tsp of chai spice per serving. Gradually increase to find your perfect balance without overwhelming your palate.
  • Chill Time: For best texture and flavor, let your chai spiced overnight oats sit in the fridge for at least 8 hours. This allows the oats to absorb the liquids fully.
  • Mix and Match: Customize your oats with different toppings like fresh fruits or nut butters for added nutrition and to prevent monotony in flavor.
  • Storage Savvy: These oats are best consumed within 4 days; store them in airtight containers to maintain freshness and flavor.
  • Oats Type Matter: Always opt for rolled oats instead of quick oats for a creamy, satisfying texture that holds up beautifully overnight.

What to Serve with Chai Spiced Overnight Oats

As you embark on your delightful morning journey, think about these complementary dishes that elevate your breakfast experience.

  • Fresh Fruit Salad: A vibrant mix of juicy berries, bananas, and citrus adds a refreshing contrast that brightens each bite. The natural sweetness and acidity perfectly balance the spiced oats.

  • Crunchy Granola: Add some homemade or store-bought granola on top for an indulgent crunch. The chewy texture pairs beautifully with the creamy oats, creating a satisfying mouthfeel.

  • Nut Butter Bliss: A dollop of almond or peanut butter swirled into your oats introduces rich protein and healthy fats. This creamy addition boosts flavor while making each serving even more filling.

  • Creamy Yogurt Parfait: Serve with a side of Greek yogurt layered with honey and nuts. The tanginess of the yogurt enhances the warm chai spice, while the nuts add delightful crunch.

  • Herbal Tea or Chai Latte: A steaming cup of herbal tea or a spiced chai latte brings the flavors full circle. Sip your drink alongside the oats for a warm, soothing breakfast experience that feels like a cozy hug.

  • Cinnamon Toast: Simple yet classic, a slice of cinnamon toast on the side can resonate with the chai spices, providing a sweet and crunchy element that complements every spoonful of oats.

Each of these pairings enhances the overall breakfast experience while ensuring you start your day on a deliciously nutritious note!

Make Ahead Options

These Chai Spiced Overnight Oats are a meal prep superstar, allowing you to simplify your mornings! You can prepare the oat mixture up to 3 days in advance, making them perfect for busy weeks. To do this, simply combine rolled oats, chia seeds, chai spice, Greek yogurt, milk, and maple syrup as directed, then divide the mixture into airtight containers. Storing them properly in the fridge will keep them fresh and delicious. Just remember to add your desired toppings, like nut butter or sliced fruits, right before serving to maintain their crunch and flavor. With this make-ahead approach, you’ll enjoy a nutritious breakfast with minimal effort!

Chai Spiced Overnight Oats Recipe FAQs

What type of oats should I use for Chai Spiced Overnight Oats?
Absolutely, for the best texture and nutritional benefits, it's essential to use rolled oats. Quick oats may become too mushy overnight and won't give you the delightful chewiness that rolled oats provide.

How long do Chai Spiced Overnight Oats last in the fridge?
Your oats will keep well in the fridge for up to 4 days when stored in airtight containers. As they sit, they may thicken even more, resulting in a wonderfully creamy texture—a great reason to enjoy them within that timeframe!

Can I freeze Chai Spiced Overnight Oats?
Yes, you can freeze your prepared oats! Portion them into airtight containers and store them for up to 3 months. To enjoy, simply transfer the oats to the refrigerator the night before and allow them to thaw overnight. If you prefer a warm breakfast, microwave for 30 to 45 seconds until heated through.

What toppings work best for Chai Spiced Overnight Oats?
The more the merrier! You can elevate your oats with numerous toppings. I love adding sliced bananas or apples for sweetness, a dollop of nut butter for creaminess, or a crunchy granola topping for added texture. Experiment and find what makes your bowl perfect!

Can I adjust the sweetness of my Chai Spiced Overnight Oats?
Certainly! Start with the recommended amount of pure maple syrup, then taste it. You can always add a little more to suit your sweet tooth, or if you prefer a less sweet option, simply reduce the syrup. Honey or agave syrup can also be great alternatives!

Are Chai Spiced Overnight Oats suitable for those with nut allergies?
Yes, absolutely! If you're accommodating nut allergies, simply skip any nut-based toppings such as nut butters or granola. Instead, try adding seeds like pumpkin or sunflower seeds, or some fresh fruits, which would complement the chai flavors beautifully!

Chai Spiced Overnight Oats

Chai Spiced Overnight Oats for a Cozy Morning Boost

A delightful blend of cozy chai flavors and smooth oats, perfect for a healthy breakfast. Enjoy high-fiber, gluten-free goodness with Chai Spiced Overnight Oats!
Print Recipe Pin Recipe
Prep Time 10 minutes mins
Chill Time 4 hours hrs
Total Time 4 hours hrs 10 minutes mins
Servings: 3 servings
Course: Breakfast
Cuisine: American
Calories: 350
Ingredients Equipment Method Nutrition Notes

Ingredients
  

For the Oats
  • 1 cup Rolled Oats Use rolled oats (not quick oats) for best texture and fiber content.
  • 2 tablespoons Chia Seeds Adds thickness and a boost of omega-3; can be substituted with flaxseeds if desired.
  • 1/2 teaspoon Chai Spice Infuses your oats with warm flavors like cinnamon and cardamom; adjust to taste.
  • 1 cup Plain Greek Yogurt For creaminess and protein; substitute with dairy-free yogurt for a vegan option.
  • 1 cup Milk of Choice Use any milk (dairy, almond, oat, etc.) based on your preference.
  • 2 tablespoons Pure Maple Syrup Sweetens the mixture naturally; feel free to use honey or agave syrup as alternatives.
Optional Toppings
  • 2 tablespoons Nut Butter Elevates flavor and adds protein for a satisfying finish.
  • 1/4 cup Granola Provides a delightful crunch and extra fiber to your oats.
  • 1 medium Sliced Banana Adds natural sweetness and a fresh touch to your bowl.

Equipment

  • Mixing Bowl
  • Spatula
  • Airtight containers or mason jars

Method
 

Step-by-Step Instructions
  1. In a large mixing bowl, combine rolled oats, chia seeds, and chai spice. Use a whisk to ensure all ingredients blend evenly.
  2. Stir in the plain Greek yogurt, your choice of milk, and pure maple syrup. Mix thoroughly until combined.
  3. Divide the oat mixture into three airtight containers or mason jars.
  4. Seal the containers tightly and refrigerate for at least 4 hours, though overnight is ideal.
  5. In the morning, remove from the refrigerator. Top with nut butter, fresh fruit, or granola.

Nutrition

Serving: 1servingCalories: 350kcalCarbohydrates: 50gProtein: 12gFat: 10gSaturated Fat: 2gPolyunsaturated Fat: 1gMonounsaturated Fat: 1gCholesterol: 5mgSodium: 75mgPotassium: 300mgFiber: 10gSugar: 8gVitamin A: 200IUVitamin C: 1mgCalcium: 150mgIron: 2mg

Notes

These oats are best consumed within 4 days; store in airtight containers to maintain freshness and flavor.

Tried this recipe?

Let us know how it was!

Wholesome Cinnamon Roll Overnight Oats for Busy Mornings

March 11, 2026 by Grace Snow Leave a Comment

Every time I take a spoonful of these Cinnamon Roll Overnight Oats, I’m transported to a cozy kitchen, where the scent of cinnamon and sugar fills the air. This easy and wholesome recipe captures that beloved flavor in a healthy, quick breakfast format that even the busiest mornings can accommodate. With just 10 minutes of prep time, you can craft a creamy and sweet treat that’s both indulgent and nutritious. Not only does this dish save you from the clutches of fast food, but it also makes meal prep a breeze—perfect for those hectic weekdays. Curious about how something so delicious can also be good for you? Let's dive into this fantastic recipe!

Why Will You Love Cinnamon Roll Overnight Oats?

Deliciously Healthy: You’re savoring the irresistible flavors of cinnamon rolls without the guilt. These oats are a wholesome way to start your day.
Quick Prep Time: In just 10 minutes, you can whip up enough to fuel your mornings for days, saving you precious time.
Versatile Options: Whether you prefer traditional dairy or plant-based alternatives, this recipe is adaptable to your dietary needs.
Crowd-Pleasing Flavor: The cozy aroma and sweet taste make these overnight oats a hit, even with picky eaters. Pair them with fresh fruit or a cup of coffee for a complete breakfast experience! Try variations like our Delicious Cinnamon Roll Overnight Oats for a delightful twist.

Cinnamon Roll Overnight Oats Ingredients

• Dive into the fluffy goodness of these oats!

For the Base

  • Rolled Oats – The cornerstone of your dish, delivering essential fiber and texture; steel-cut oats can be used for a chewier bite but require more soak time.
  • Milk (dairy or non-dairy) – Adds creaminess while keeping your oats moist; use almond or oat milk for a delightful vegan option.
  • Chia Seeds – Provides thickness and a boost of omega-3 fatty acids; optional but great for nutritional benefits.

For the Flavor

  • Cinnamon – The star of the show, giving that warm, nostalgic cinnamon roll taste; adjust according to your preference or swap for pumpkin pie spice for a seasonal twist.
  • Vanilla Extract – Enhances overall sweetness and aroma; an easy substitute is almond extract for a nutty flavor profile.

For Sweetness

  • Maple Syrup or Honey – Natural sweeteners that mimic the delicious icing of cinnamon rolls; agave syrup works beautifully as a vegan alternative.

Optional Creaminess

  • Cream Cheese or Yogurt – Adds a rich creaminess akin to frosting; opt for dairy-free yogurt to keep it plant-based.

Feel free to get creative with additional toppings, and enjoy this wholesome treat that truly embodies the essence of Cinnamon Roll Overnight Oats!

Step‑by‑Step Instructions for Cinnamon Roll Overnight Oats

Step 1: Mix the Base
In a medium bowl, combine rolled oats, your choice of milk, chia seeds, ground cinnamon, vanilla extract, and your selected sweetener. Use a whisk or spoon to mix until all ingredients are well incorporated, and you have a uniform mixture. This step takes about 3 minutes and sets the foundation for your delicious Cinnamon Roll Overnight Oats.

Step 2: Portion the Mixture
Carefully divide the blended mixture into individual jars or containers, filling each about three-quarters full to allow for expansion. This not only helps with convenient meal prep but also makes for an appealing presentation. You can use 4 to 5 small jars, and this step should take around 2 minutes.

Step 3: Chill Overnight
Once your jars are filled, place them in the refrigerator. Allow the oats to chill and soak up the flavors for at least 4 hours, but overnight is best. During this time, the oats will absorb moisture and create a creamy consistency. Keep an eye on them; this step ensures your Cinnamon Roll Overnight Oats will be perfectly thick and delicious.

Step 4: Stir Before Serving
When you're ready to enjoy, remove the jars from the refrigerator and give each one a good stir to redistribute the mixture. If the oats have thickened too much, add a splash of milk to reach your desired consistency. This revitalization step rejuvenates your Cinnamon Roll Overnight Oats, making them creamy and delightful.

Step 5: Add Toppings
Finally, customize your meal by topping the oats with your favorite add-ins, such as fruits, nuts, or a dollop of yogurt for extra creaminess. This is your chance to personalize the flavors and textures, making each serving unique and enjoyable. Take a moment to savor the aroma; your Cinnamon Roll Overnight Oats are now ready to be devoured!

How to Store and Freeze Cinnamon Roll Overnight Oats

Fridge: Store your Cinnamon Roll Overnight Oats in an airtight container for up to 5 days. This keeps them fresh and ready for quick breakfasts throughout the week.

Freezer: For longer storage, freeze individual portions in freezer-safe containers for up to 3 months. Thaw in the fridge overnight before serving.

Reheating: If you prefer warm oats, heat in the microwave for 30–60 seconds after thawing, adding a splash of milk to restore the creamy texture.

Make-Ahead: Prepare multiple jars at once for hassle-free mornings during busy weeks. Just grab and go!

Expert Tips for Cinnamon Roll Overnight Oats

  • Thorough Stirring: Always stir well before eating. The oats can thicken overnight, and a good mix ensures a creamy texture.
  • Make Ahead: Prepare multiple jars at once! They'll stay fresh in the fridge for up to 5 days, making your breakfast routine seamless.
  • Adjust Sweetness: Taste the mixture before refrigerating and adjust the sweetness with maple syrup or honey to match your preference.
  • Topping Ideas: Get creative with toppings! Chopped nuts, fresh fruits, or even a scoop of yogurt can elevate your Cinnamon Roll Overnight Oats.
  • Use High-Quality Ingredients: Opt for pure vanilla extract and high-quality cinnamon for the best flavor. They truly make a difference in your oats!

Cinnamon Roll Overnight Oats Variations

Feel free to explore and customize these delicious Cinnamon Roll Overnight Oats to match your taste and dietary preferences!

  • Dairy-Free: Substitute any milk with almond or coconut milk for a vegan-friendly option that still delivers creaminess.

  • Flavor Boost: Add a scoop of vanilla or chocolate protein powder for a hearty breakfast that powers you through the day. It’s an easy way to enhance their nutritional value!

  • Sweetness Options: Swap maple syrup for honey or agave syrup, depending on your sweetness preference. Experiment with these to find your ideal level of sweetness!

  • Spice Twist: Swap out cinnamon for pumpkin pie spice to create a festive autumn-inspired version of your oats. This will bring warmth and depth to the flavor!

  • Nutty Crunch: Top your oats with chopped walnuts or pecans for added texture and healthy fats. A little crunch complements the creamy oats beautifully.

  • Fruity Goodness: Mix in fresh fruit, such as diced apples or bananas, before chilling to infuse your oats with natural sweetness and flavor.

  • Creamy Frosting: Stir in a tablespoon of cream cheese or Greek yogurt for an ultra-creamy texture reminiscent of frosting, further indulging your cinnamon roll craving.

  • Heat It Up: For a spicy kick, add a pinch of cayenne or nutmeg to the mix. This little twist can take the flavor profile to a whole new level!

With these variations, you can keep your breakfasts exciting while enjoying the comforting flavors of Cinnamon Roll Overnight Oats. Don't forget to check out Delicious Cinnamon Roll Overnight Oats for more inspiration!

Make Ahead Options

These Cinnamon Roll Overnight Oats are an ideal choice for meal prep enthusiasts looking to streamline their busy mornings! You can prepare the mixture of rolled oats, milk, chia seeds, cinnamon, vanilla extract, and sweetener up to 24 hours in advance by storing them in jars or containers in the refrigerator. This means your delicious breakfast is ready and waiting for you when you wake up! Just be sure to give the oats a good stir before serving, and if they have thickened too much overnight, simply add a splash of milk for a creamy consistency. With this simple prep, you’ll save time and enjoy a cozy, flavorful breakfast every morning!

What to Serve with Cinnamon Roll Overnight Oats

Elevate your breakfast experience by pairing these creamy, indulgent oats with delightful complements that add variety and nutrition.

  • Fresh Berries: Juicy strawberries or blueberries add a burst of color and a touch of sweetness that enhances the creamy oats.
  • Greek Yogurt: A dollop of tangy yogurt heightens creaminess and provides added protein for a satisfying start to your day.
  • Crunchy Granola: A sprinkle of granola introduces a delightful crunch, contrasting the creamy texture and making every bite exciting.
  • Sliced Bananas: Naturally sweet bananas bring a fruitiness that harmonizes wonderfully with the cinnamon flavor, making it even more comforting.
  • Nut Butter Swirl: A spoonful of almond or peanut butter not only adds richness but also boosts healthy fats, keeping you fuller longer.
  • Cinnamon Coffee: Enjoy a cozy cup of cinnamon-infused coffee beside your oats for a drink that echoes the flavors in your meal.
  • Coconut Chips: Tossing on some toasted coconut chips provides a tropical twist, adding both flavor and an appealing texture.
  • Chia Pudding: For extra nutrition, serve a scoop of chia pudding on the side; the nutty flavor beautifully complements the oats.

Cinnamon Roll Overnight Oats Recipe FAQs

How do I choose the right oats for my Cinnamon Roll Overnight Oats?
Absolutely! For this recipe, I recommend using rolled oats as they provide the perfect texture and absorb moisture well. If you prefer a chewier bite, you can substitute with steel-cut oats, but remember, you'll need to increase the soak time to allow those hearty oats to absorb enough liquid.

How should I store my Cinnamon Roll Overnight Oats?
Very simply! Store your Cinnamon Roll Overnight Oats in an airtight container in the fridge for up to 5 days. This keeps them fresh and ready for a quick breakfast during busy weekdays. Just grab a jar and you're good to go!

Can I freeze Cinnamon Roll Overnight Oats?
Certainly! To freeze, portion the oats into freezer-safe containers. They can last up to 3 months in the freezer. When you're ready to enjoy, transfer a jar to the fridge to thaw overnight. If you prefer to eat them warm, heat in the microwave for 30–60 seconds, adding a splash of milk if needed for a creamy texture.

What if my oats become too thick after refrigeration?
No worries! If you find your oats have thickened too much overnight, simply give them a good stir to break up any clumps. You can add a splash of your choice of milk to reach your desired consistency. This step is crucial to keep your breakfast enjoyable!

Are there any dietary considerations for Cinnamon Roll Overnight Oats?
Definitely! If you're concerned about dietary restrictions, this recipe is very versatile. For a vegan option, use almond or oat milk and substitute honey with agave syrup. Be mindful of any allergies by checking the ingredients, especially for additions like nuts or yogurt, which can be omitted or modified as needed.

Can pets eat Cinnamon Roll Overnight Oats?
Be cautious! While rolled oats are generally safe for pets in small amounts, be sure to avoid any sweeteners like maple syrup or honey. Also, cinnamon is safe for dogs in moderation, but it's best to consult your veterinarian if you're unsure.

Cinnamon Roll Overnight Oats

Wholesome Cinnamon Roll Overnight Oats for Busy Mornings

Enjoy the delicious flavors of Cinnamon Roll Overnight Oats, a healthy and quick breakfast option perfect for busy mornings.
Print Recipe Pin Recipe
Prep Time 10 minutes mins
Chill Time 4 hours hrs
Total Time 4 hours hrs 10 minutes mins
Servings: 4 jars
Course: Breakfast
Cuisine: American
Calories: 250
Ingredients Equipment Method Nutrition Notes

Ingredients
  

For the Base
  • 1 cup Rolled Oats Use steel-cut oats for a chewier bite
  • 1 cup Milk Dairy or non-dairy options available
  • 2 tablespoons Chia Seeds Optional but recommended for thickness
For the Flavor
  • 1 teaspoon Cinnamon Adjust as per taste
  • 1 teaspoon Vanilla Extract Substitute with almond extract if desired
For Sweetness
  • 2 tablespoons Maple Syrup or Honey Agave syrup works as a vegan alternative
Optional Creaminess
  • 2 tablespoons Cream Cheese or Yogurt Use dairy-free yogurt for a plant-based option

Equipment

  • medium bowl
  • Whisk or spoon
  • Jars or containers

Method
 

Step-by-Step Instructions
  1. In a medium bowl, combine rolled oats, your choice of milk, chia seeds, ground cinnamon, vanilla extract, and your selected sweetener. Mix until well incorporated.
  2. Carefully divide the mixture into individual jars, filling each about three-quarters full.
  3. Place jars in the refrigerator and allow to chill for at least 4 hours, preferably overnight.
  4. Remove jars from the refrigerator and stir to redistribute the mixture. Add a splash of milk if too thick.
  5. Top with your favorite add-ins such as fruits, nuts, or yogurt before serving.

Nutrition

Serving: 1jarCalories: 250kcalCarbohydrates: 40gProtein: 8gFat: 9gSaturated Fat: 3gPolyunsaturated Fat: 1gMonounsaturated Fat: 3gSodium: 150mgPotassium: 200mgFiber: 6gSugar: 6gCalcium: 10mgIron: 8mg

Notes

Prepare multiple jars at once for hassle-free breakfasts throughout the week. Customize toppings to match your taste preferences.

Tried this recipe?

Let us know how it was!

Indulge in Brownie Batter Overnight Oats for a Sweet Morning Boost

March 11, 2026 by Grace Snow Leave a Comment

As I stood in my kitchen with a half-empty jar of cocoa powder and a craving for something sweet, inspiration struck! What if I could enjoy the rich, indulgent flavor of brownie batter for breakfast? Enter my Rich Chocolate Brownie Batter Overnight Oats! This delightful concoction combines creamy Greek yogurt and rolled oats, creating a thick and satisfying meal that keeps you energized throughout the morning. Gluten-free and high in protein, these no-bake oats are not just a time-saver—they’re also a delicious way to kick off your day with a touch of sweetness. Plus, you can whip them up the night before for an effortless, decadent breakfast that’ll have everyone asking for seconds. Ready to transform your mornings into something extraordinary? Let’s dive in!

Why Choose Brownie Batter Overnight Oats?

Decadent Delight: Indulge your sweet tooth responsibly with these creamy oats that mimic your favorite brownie batter.

Effortless Preparation: No baking is required! Just mix, refrigerate, and enjoy—perfect for busy mornings.

Healthy Twist: Packed with protein and fiber, they sustain you all morning without the guilt.

Customizable Fun: Top with fresh fruit, nut butter, or more chocolate chips to suit your cravings. For other delightful alternatives, check out my Pumpkin Brownies Decadent recipe!

Gluten-Free Goodness: This recipe fits seamlessly into a gluten-free diet, making it inclusive for all.

Make Ahead Magic: Prepare these oats in advance—up to four days ahead—ensuring a sweet surprise awaits in your fridge!

Brownie Batter Overnight Oats Ingredients

For the Oats Mixture

  • Rolled Oats – They form the hearty base for your oats and provide a chewy texture; substitute quick oats for a softer bite if desired.
  • Chia Seeds – These little powerhouses add thickness and nutritional value with fiber and omega-3s; you can skip them for a thinner consistency, but remember to reduce the milk if you do.
  • Cocoa Powder (unsweetened) – Essential for that rich brownie flavor; choose Dutch-process for a smoother chocolate touch.
  • Maple Syrup – This natural sweetener brings a delightful touch of sweetness; feel free to swap in honey or agave syrup if you'd like.
  • Plain Greek Yogurt – Adds creaminess and a protein boost to your oats; regular yogurt or a dairy-free version works just as well for a lighter option.
  • Milk (any kind; almond preferred) – Helps hydrate the oats for that perfect creamy consistency; use any dairy or non-dairy milk that suits your taste.
  • Vanilla Extract – Elevates the overall flavor profile; it’s best to keep it for maximum taste.
  • Salt (pinch) – A tiny pinch balances the sweetness and enhances flavors beautifully.
  • Optional Chocolate Chips – For added sweetness and fun texture; mix in your favorite type of chocolate, whether dark or semi-sweet.

For Toppings

  • Optional Toppings (peanut butter drizzle, extra chocolate chips) – These give you the chance to customize each serving and add even more delicious flavor.

Enjoy indulging in your Brownie Batter Overnight Oats, guilt-free and full of joy!

Step‑by‑Step Instructions for Brownie Batter Overnight Oats

Step 1: Mix Dry Ingredients
In a medium mixing bowl, combine rolled oats, chia seeds, and unsweetened cocoa powder. Stir these ingredients thoroughly until they are evenly blended, creating a rich, chocolate base. This initial mix sets the foundation for your Brownie Batter Overnight Oats, so make sure there are no dry clumps remaining.

Step 2: Incorporate Wet Ingredients
Next, add the plain Greek yogurt and maple syrup to the bowl with the dry ingredients. Using a spatula, blend everything together until fully incorporated and smooth. The mixture should be thick but uniform, with the sweet and creamy flavors beginning to shine through.

Step 3: Add Milk and Season
Pour in your choice of milk, along with the vanilla extract and a pinch of salt. Mix again until the oats are well-hydrated and the consistency is creamy and smooth. This step ensures that your Brownie Batter Overnight Oats achieve that indulgent texture reminiscent of actual brownie batter.

Step 4: Fold in Chocolate Chips
If you're using optional chocolate chips, gently fold them into the mixture, making sure they’re evenly distributed throughout. This adds delightful pockets of sweetness and texture to your Brownie Batter Overnight Oats. Transfer the complete mixture into jars or storage containers for convenience.

Step 5: Chill Overnight
Cover the jars or container with lids and refrigerate overnight for at least 6-8 hours. During this time, the flavors will meld beautifully, and the oats will absorb the moisture, turning creamy and rich. In the morning, the anticipation of a chocolatey breakfast will be well worth the wait!

Step 6: Final Touches and Serve
In the morning, take the jars out of the refrigerator and give the oats a good stir. The mixture might thicken, so feel free to add a splash of milk to loosen it up to your desired consistency. Top with your favorite toppings such as a drizzle of peanut butter or extra chocolate chips, then indulge in your delicious Brownie Batter Overnight Oats!

Make Ahead Options

These Brownie Batter Overnight Oats are a meal prep dream come true! You can mix and refrigerate the oats mixture up to 4 days in advance, ensuring a delicious chocolatey breakfast is always on hand. Simply combine rolled oats, chia seeds, cocoa powder, Greek yogurt, maple syrup, milk, vanilla, a pinch of salt, and optional chocolate chips in a jar. Seal tightly and refrigerate overnight (or for up to 24 hours) to let the flavors meld. For the best quality, stir in a splash of milk before serving to achieve that perfect creamy texture again. With minimal effort, you'll have a decadent breakfast ready to help you navigate those busy mornings effortlessly!

Expert Tips for Brownie Batter Overnight Oats

  • Mix Thoroughly: Ensure all ingredients are well integrated to avoid dry clumps of cocoa or oats that could detract from the smooth, brownie batter experience.

  • Jars Ahead of Time: Prepare multiple jars in advance (up to 4 days) for effortless mornings. Just stir in extra milk before enjoying for the best texture!

  • Mind the Microwave: If you prefer your oats warm, heat in short bursts (30–45 seconds) to keep the creamy texture intact without overcooking.

  • Texture Adjustments: If you desire a thinner mixture, opt for less chia seeds or more milk. Be mindful; this can affect the overall richness of your Brownie Batter Overnight Oats.

  • Flavor Customization: Experiment with toppings! Adding fresh fruit, different nut butters, or varying the sweetness can elevate your oats to new levels of indulgence.

Brownie Batter Overnight Oats Variations

Get ready to personalize your Brownie Batter Overnight Oats with these delightful twists that can take your breakfast to the next level!

  • Dairy-Free Delight: Substitute Greek yogurt with coconut yogurt for a creamy, dairy-free alternative that adds a tropical flair.

  • Nutty Flavor Boost: Stir in a tablespoon of almond or peanut butter for an extra layer of richness and a protein punch. The nutty flavor compliments the chocolate beautifully!

  • Sweetness Switch: Adjust the maple syrup to your liking or try dates for a naturally sweet alternative. Using dates adds a caramel-like depth to your oats.

  • Fruit Fusion: Top off your oats with fresh berries or sliced bananas for a burst of natural sweetness and color. The freshness balances the chocolatey goodness perfectly.

  • Additional Crunch: Add a handful of nuts or granola on top to introduce a satisfying crunch that contrasts beautifully with the creamy oats. It’s like a little surprise in every bite!

  • Chocolate Dream: Pour in some chocolate almond milk instead of regular milk for an even richer chocolate flavor. This adds an extra layer of decadence to your breakfast!

  • Chili Kick: For a spicy twist, sprinkle in some cinnamon or cayenne pepper. A hint of heat can intensify the chocolate flavor and awaken your taste buds!

  • Layered Indulgence: For a fun presentation, layer the oats with mascarpone or ricotta cheese. This addition enhances creaminess and sophistication—perfect for a brunch spread!

Feel free to mix and match these ideas to craft your perfect bowl of Brownie Batter Overnight Oats. For more chocolatey inspirations, check out my Pumpkin Brownies Decadent recipe and explore a world of flavors!

How to Store and Freeze Brownie Batter Overnight Oats

Fridge: Store your Brownie Batter Overnight Oats in airtight containers for up to 4 days to maintain freshness and flavor.

Freezer: If you want to keep them longer, you can freeze the oats for up to 3 months. Thaw them in the fridge overnight before enjoying.

Reheating: For a warm treat, microwave cold oats in short increments of 30–45 seconds, stirring occasionally to maintain a creamy consistency.

Mixing: Stir well before serving to rehydrate any thickened oats, and feel free to add a splash of milk if needed for a smoother texture.

What to Serve with Brownie Batter Overnight Oats?

Transform your mornings into a comforting feast with delightful pairings that enhance the rich flavors of your chocolatey oats.

  • Fresh Berries: Their tartness adds a refreshing contrast to the sweet chocolate, brightening up every spoonful. Just imagine luscious strawberries or blueberries dancing on top!

  • Banana Slices: Creamy and naturally sweet, bananas harmonize beautifully with the brownie flavor, making every bite feel indulgent yet wholesome.

  • Nut Butter Drizzle: A drizzle of almond or peanut butter infuses a nutty richness, enhancing the creamy texture while adding a protein boost for energy.

  • Coconut Flakes: Toasted coconut adds a delightful crunch and tropical flair, creating a wonderful contrast against the soft oats.

  • Crunchy Granola: A sprinkle of granola on top provides a satisfying crunch with each creamy spoonful, helping to keep your breakfast exciting and filling.

  • Coffee: A warm cup of coffee pairs perfectly with the sweet, chocolaty notes of the oats, elevating your entire breakfast experience to new heights.

Consider these pairings not just as accompaniments, but as delicious companions that ensure your Brownie Batter Overnight Oats become your new morning ritual!

Brownie Batter Overnight Oats Recipe FAQs

How do I choose ripe ingredients for my Brownie Batter Overnight Oats?
Absolutely! When it comes to ripe ingredients, especially bananas or any fruit toppings, look for soft, blemish-free fruits to enhance the flavor. For yogurt, choose plain Greek yogurt that’s fresh and has a creamy texture. If you’re using chocolate chips, make sure they haven’t surpassed their recommended expiration date for the best taste.

How should I store Brownie Batter Overnight Oats?
Great question! Store your Brownie Batter Overnight Oats in airtight containers in the refrigerator for up to 4 days. This keeps them fresh and flavorful. If you’ve prepared multiple jars, simply grab one each morning for a quick breakfast!

Can I freeze Brownie Batter Overnight Oats?
Yes, you can! If you want a longer-lasting treat, freeze your oats in a freezer-safe container for up to 3 months. When ready to enjoy, transfer them to the fridge to thaw overnight. For best results, stir the mixture well after thawing and feel free to add a splash of milk to achieve your desired consistency.

What should I do if my oats seem too thick after refrigeration?
No worries! It’s very common for overnight oats to thicken up in the fridge. Simply stir in a bit of extra milk—just a tablespoon at a time—until you reach the desired creamy consistency. If you like them warm, heat them in short bursts of 30–45 seconds in the microwave, stirring in between to maintain that wonderful texture.

Are there any dietary considerations for Brownie Batter Overnight Oats?
Absolutely! This recipe is gluten-free if you ensure your oats are certified gluten-free. Additionally, you can easily make it dairy-free by substituting Greek yogurt with a plant-based yogurt and using almond, soy, or oat milk. If allergies are a concern, double-check the labels of ingredients like chocolate chips or any sweeteners you choose. Always feel free to adjust the recipe based on your dietary needs!

Brownie Batter Overnight Oats

Indulge in Brownie Batter Overnight Oats for a Sweet Morning Boost

Enjoy a delicious breakfast with Brownie Batter Overnight Oats, combining Greek yogurt and rolled oats for a sweet morning boost.
Print Recipe Pin Recipe
Prep Time 15 minutes mins
Chilling Time 8 hours hrs
Total Time 8 hours hrs 15 minutes mins
Servings: 2 jars
Course: Breakfast
Calories: 350
Ingredients Equipment Method Nutrition Notes

Ingredients
  

For the Oats Mixture
  • 1 cup Rolled Oats You can substitute quick oats for a softer bite.
  • 2 tablespoons Chia Seeds These add thickness; may skip for thinner consistency.
  • 1/3 cup Cocoa Powder (unsweetened) Use Dutch-process for smoother chocolate.
  • 3 tablespoons Maple Syrup Feel free to swap for honey or agave syrup.
  • 1 cup Plain Greek Yogurt Regular yogurt or dairy-free version can be used.
  • 1 cup Milk (any kind; almond preferred) Any dairy or non-dairy milk can be used.
  • 1 teaspoon Vanilla Extract Best to keep for maximum flavor.
  • a pinch Salt Balances sweetness.
  • 1/3 cup Optional Chocolate Chips Mix in your favorite type of chocolate.
For Toppings
  • Optional Toppings (peanut butter drizzle, extra chocolate chips) Customize each serving.

Equipment

  • medium mixing bowl
  • Spatula
  • jars or storage containers

Method
 

Step-by-Step Instructions for Brownie Batter Overnight Oats
  1. In a medium mixing bowl, combine rolled oats, chia seeds, and unsweetened cocoa powder. Stir until evenly blended.
  2. Add the plain Greek yogurt and maple syrup. Blend until fully incorporated and smooth.
  3. Pour in your choice of milk, vanilla extract, and a pinch of salt. Mix until well-hydrated and creamy.
  4. If using chocolate chips, gently fold them in. Transfer mixture into jars or storage containers.
  5. Cover jars and refrigerate overnight for at least 6-8 hours.
  6. In the morning, stir oats and add milk if needed for consistency. Top with desired toppings and enjoy.

Nutrition

Serving: 1jarCalories: 350kcalCarbohydrates: 50gProtein: 15gFat: 10gSaturated Fat: 3gPolyunsaturated Fat: 1gMonounsaturated Fat: 5gCholesterol: 5mgSodium: 150mgPotassium: 350mgFiber: 8gSugar: 12gVitamin A: 300IUVitamin C: 1mgCalcium: 200mgIron: 3mg

Notes

Store in airtight containers for up to 4 days in the fridge or freeze for up to 3 months.

Tried this recipe?

Let us know how it was!

Delicious Easy Flatbread Recipe in Just 25 Minutes

March 11, 2026 by Grace Snow Leave a Comment

As I stood in my kitchen the other day, I realized something magical about making bread: it doesn't have to be complicated! Enter the Easy No-Yeast Flatbread Recipe—a delightful revelation that turns the daunting task of bread-making into a 25-minute joyride. This flatbread boasts a soft texture with perfectly crisp edges, making it the perfect canvas for your favorite dips or a cozy accompaniment to soups. Not only is it incredibly quick to whip up, but there's even a gluten-free option to cater to varying dietary preferences. With this simple recipe in your arsenal, say goodbye to fast food and hello to wholesome homemade goodness! Curious to find out how you can elevate your meals with this versatile flatbread? Let's dive in!

Why Is This Flatbread Recipe Amazing?

Simplicity: This Easy Flatbread Recipe requires no yeast, meaning you can skip the long rising times usually associated with bread-making.

Quick & Easy: In just 25 minutes, you can enjoy freshly made flatbread from scratch—a perfect solution for busy weeknights or spontaneous gathering.

Perfectly Pliable: The combination of baking powder and the right technique creates a soft and pliable texture, ideal for wrapping your favorite fillings or serving with soups.

Gluten-Free Option: You can easily make this recipe gluten-free by swapping in gluten-free flour, ensuring everyone at the table can enjoy it.

Versatile Base: Use it as a canvas for countless toppings or dips. Pair it with hummus or soups like Chicken Adobo Again for a delightful meal!

Crowd-Pleaser: Whether it's a family dinner or a casual get-together, this flatbread is sure to impress and satisfy your guests, leaving fast food behind for good.

Easy Flatbread Recipe Ingredients

For the Flatbread
• All-Purpose Flour – Provides structure and texture for the flatbread; can substitute with gluten-free flour, adjusting moisture accordingly.
• Baking Powder – Acts as a leavening agent for softness; essential for the rising effect in this no-yeast recipe.
• Salt – Enhances flavor and is crucial for taste; do not omit.
• Olive Oil – Adds moisture and richness; can substitute with vegetable oil if preferred.
• Ice Water – Binds the ingredients and helps form dough; use chilled water for best results.
• Oil for Cooking – Prevents sticking while frying; olive or vegetable oil is recommended.

Optional Toppings
• Garlic Powder – Adds a delicious savory touch; brush on post-cooking for extra flavor.
• Olive Oil – A drizzle can enhance richness; great to combine with garlic powder for a tasty coating.
• Parsley – Provides freshness and a pop of color; sprinkle on before serving for visual appeal.

Step‑by‑Step Instructions for Easy Flatbread Recipe

Step 1: Combine the Dry Ingredients
In a mixing bowl, whisk together 2 cups of all-purpose flour, 1 tablespoon of baking powder, and 1 teaspoon of salt until well combined. This initial mixture is crucial for your Easy Flatbread Recipe, providing the structure and flavor. Properly blending these dry ingredients ensures an even rise when cooked.

Step 2: Mix in the Wet Ingredients
Gradually stir in 1 tablespoon of olive oil and 3/4 cup of ice water into the dry mixture using a wooden spoon. Continue mixing until a moist, shaggy dough forms; adjust with a bit more flour or water if necessary. The dough should be wet yet manageable to create that perfect pliable texture.

Step 3: Rest the Dough
Cover the dough with a clean kitchen towel and let it rest for 10 minutes at room temperature. This brief resting period helps relax the gluten, making the dough easier to roll out and perfect for your Easy Flatbread Recipe. It's a great time to prepare your cooking surface and skillet.

Step 4: Shape the Dough
Turn the rested dough onto a lightly floured surface and divide it into 10 to 12 equal pieces. Roll each piece into a ball and then flatten it with your hands. Use a rolling pin to roll each piece into a circle about ¼ inch thick. The uniform thickness ensures even cooking and a soft texture.

Step 5: Heat the Skillet
Preheat a non-stick skillet over medium heat and add a drizzle of oil to coat the bottom. You want to achieve a hot skillet that provides a nice sizzle when cooking your Easy Flatbread. Proper heat ensures the edges turn golden brown while the center remains soft and pliable.

Step 6: Cook the Flatbreads
Carefully place one rolled flatbread in the hot skillet and cook for about 2 to 3 minutes on one side, or until you see bubbles forming. Flip to the other side and cook for an additional 2 to 3 minutes until both sides are golden brown and puffed. Keep an eye on the temperature to avoid burning.

Step 7: Optional Toppings and Serving
Once cooked, transfer the flatbreads to a plate and, if desired, brush them with melted garlic butter or sprinkle with parsley for added flavor. This final touch enhances your Easy Flatbread Recipe, making it a delicious companion for dips, stews, or as a wrap for your favorite fillings.

Storage Tips for Easy Flatbread Recipe

Room Temperature: Store cooked flatbread at room temperature for up to 2 days in a sealed container to maintain freshness.

Fridge: If you need to keep it longer, refrigerate the flatbread in an airtight container for up to 3 days. This helps retain its softness.

Freezer: For longer storage, freeze flatbreads wrapped in foil or plastic wrap for up to 1 month. Thaw at room temperature or heat in a skillet before serving.

Reheating: To enjoy leftovers, reheat flatbreads in a skillet over low heat for about 1-2 minutes on each side, so they regain their flexible texture.

Expert Tips for Easy Flatbread

• Proper Dough Texture: Ensure the dough is moist but not sticky—add flour gradually if too wet. This balance is key for your Easy Flatbread Recipe.

• Control the Heat: Cook over medium heat; too high will lead to burnt edges while leaving the center undercooked.

• Resting Time Matters: Allowing the dough to rest for 10 minutes is crucial for achieving the right texture—don't skip this step!

• Uniform Thickness: Roll each piece to about ¼ inch thick for even cooking and flexibility when wrapping.

• Experiment with Flavors: Feel free to add herbs or spices to the dough for additional flavor—your Easy Flatbread can be as creative as you!

What to Serve with Easy No-Yeast Flatbread

Create a feast that delights the senses and warms the heart with these perfect pairings!

  • Hummus: A smooth, savory dip bursting with flavor, hummus complements the flatbread's texture beautifully, perfect for scooping.
  • Tomato Basil Soup: The rich, zesty taste of this classic soup creates a wonderful contrast with the soft flatbread, making it a comforting meal.
  • Greek Salad: Crisp vegetables and tangy feta cheese provide a refreshing crunch that enhances the flatbread, adding a vibrant element to your dining experience.
  • Spiced Chickpeas: Serve these crispy spiced chickpeas as a crunchy topping, providing an exciting texture that pairs perfectly with the soft flatbread.
  • Tzatziki Sauce: This cool, creamy yogurt sauce adds a refreshing zing and pairs wonderfully for delicious dipping or spreading.
  • Garlic Butter: Brushing your flatbread with garlic butter elevates its flavor and adds a fragrant touch, perfect for dipping or savoring on its own.
  • Grilled Vegetables: Smoky, charred veggies add depth and complement the warm, soft flatbread, creating a wholesome and filling combination.
  • Sweet Chili Sauce: Add a touch of sweetness and heat with this vibrant sauce, making for a delightful dipping experience that will tantalize your taste buds.
  • Crispy Fried Chicken: For a heartier meal, serve alongside golden fried chicken, where the flatbread becomes the perfect vessel for tender, flavorful bites.

Make Ahead Options

These Easy Flatbread Recipe preparations are a lifesaver for busy home cooks looking to save time during the week! You can prepare the flatbread dough up to 3 days in advance by storing it tightly wrapped in the refrigerator. This allows you to enjoy fresh, warm flatbreads on demand. When you're ready to cook, simply take the dough out, let it come to room temperature for about 30 minutes, and then shape and cook as directed. Alternatively, you can also cook the flatbreads ahead of time and freeze them for up to one month. To reheat, just warm them in a skillet over medium heat until heated through—ensuring you experience just as delicious results without any fuss!

Easy Flatbread Recipe Variations

Feel free to make this delicious Easy Flatbread Recipe your own with these fun and flavorful twists!

  • Herb-Infused: Add fresh or dried herbs like rosemary or thyme to the dough for an aromatic flavor lift. Your flatbread will not only taste fantastic but also smell divine while cooking.

  • Garlic Lovers: Mix garlic powder directly into the dough. This flavorful variation will satisfy all the garlic aficionados at your table.

  • Spiced Up: Incorporate a pinch of cayenne or chili powder for a subtle heat that makes each bite exciting. Just the right kick can transform your flatbread experience!

  • Sweet Twist: After cooking, brush your flatbread with melted butter mixed with cinnamon and sugar. Serve alongside fruit or yogurt for a delightful treat.

  • Cheesy Delight: Fold in shredded cheese into the dough, such as feta or mozzarella, for a cheesy-version. This adds a nice melty surprise when you tear it apart!

  • Vegetable Puree: Mix in some spinach or beet puree into the dough for a colorful, nutrient-packed twist. Not only does it look great, but it also adds a wonderful depth of flavor.

  • Mix and Match Toppings: Try topping your flatbread with a scoop of your favorite dips, like hummus or tzatziki, or use it in place of the traditional crust in a creative pizza, fitting it perfectly with your baked favorites like Spatchcock Chicken or Breakfast Egg Muffins.

With these variations, you can enjoy a fresh take on your Easy Flatbread Recipe every time you make it!

Easy Flatbread Recipe FAQs

How do I choose the right flour for this flatbread recipe?
Absolutely! For the best texture, I recommend using all-purpose flour. However, if you need a gluten-free option, you can substitute it with a gluten-free flour blend. Just be sure to adjust the moisture accordingly, as gluten-free flours can absorb water differently.

What is the best way to store leftover flatbread?
You can store cooked flatbreads at room temperature for up to 2 days in a sealed container. If you want to keep them longer, refrigerate them in an airtight container for up to 3 days. For longer storage, wrap them in foil or plastic wrap and freeze for up to 1 month. Just warm them in a skillet before serving, and they’ll be good as new!

Can I freeze the flatbread?
Yes, you can! After cooking and cooling the flatbread, wrap each piece individually in foil or plastic wrap. Place them in a freezer-safe bag or container for up to 1 month. To defrost, simply leave them at room temperature or heat them in a skillet for a couple of minutes to enjoy that freshly made texture again.

What should I do if the dough is too sticky?
If you find the dough is sticky after mixing, don’t worry! Start by gradually adding more flour, a tablespoon at a time, until the dough is moist but manageable. Alternatively, if it feels too dry, add a splash more of ice water, mixing well until you achieve a pliable consistency that's easy to work with.

Can I add herbs or spices to the flatbread for added flavor?
Very! Feel free to be creative and enhance your flatbread by mixing in chopped herbs or spices into the dough while combining the dry ingredients. Options like dried oregano or garlic powder can elevate the flavor, making your Easy Flatbread a standout addition to any meal!

Is this recipe suitable for pets or people with allergies?
It's important to note that this Easy Flatbread contains gluten (unless using gluten-free flour) and may not be suitable for those with gluten allergies. Always check the specific ingredients you use, especially if preparing them for others with dietary restrictions or allergies, including pets! For a healthier approach, try using whole grain flour or adjust toppings accordingly.

Easy Flatbread Recipe

Delicious Easy Flatbread Recipe in Just 25 Minutes

Enjoy this Easy Flatbread Recipe that transforms bread-making into a quick and delicious treat.
Print Recipe Pin Recipe
Prep Time 10 minutes mins
Cook Time 15 minutes mins
Resting Time 10 minutes mins
Total Time 25 minutes mins
Servings: 10 pieces
Course: Snacks
Cuisine: Global
Calories: 120
Ingredients Equipment Method Nutrition Notes

Ingredients
  

For the Flatbread
  • 2 cups All-Purpose Flour Can substitute with gluten-free flour.
  • 1 tablespoon Baking Powder Essential for the rising effect.
  • 1 teaspoon Salt Enhances flavor.
  • 1 tablespoon Olive Oil Can substitute with vegetable oil.
  • 3/4 cup Ice Water Use chilled for best results.
  • 1 tablespoon Oil for Cooking Use olive or vegetable oil.
Optional Toppings
  • 1 teaspoon Garlic Powder Brush on post-cooking for extra flavor.
  • Olive Oil A drizzle can enhance richness.
  • 1 tablespoon Parsley Sprinkle on before serving.

Equipment

  • Mixing Bowl
  • Wooden spoon
  • Rolling Pin
  • non-stick skillet

Method
 

Main Steps
  1. In a mixing bowl, whisk together 2 cups of all-purpose flour, 1 tablespoon of baking powder, and 1 teaspoon of salt until well combined.
  2. Gradually stir in 1 tablespoon of olive oil and 3/4 cup of ice water into the dry mixture using a wooden spoon.
  3. Cover the dough with a clean kitchen towel and let it rest for 10 minutes at room temperature.
  4. Turn the rested dough onto a lightly floured surface and divide it into 10 to 12 equal pieces.
  5. Preheat a non-stick skillet over medium heat and add a drizzle of oil to coat the bottom.
  6. Carefully place one rolled flatbread in the hot skillet and cook for about 2 to 3 minutes on one side.
  7. Once cooked, transfer the flatbreads to a plate and, if desired, brush them with melted garlic butter or sprinkle with parsley.

Nutrition

Serving: 1pieceCalories: 120kcalCarbohydrates: 20gProtein: 3gFat: 4gSaturated Fat: 0.5gPolyunsaturated Fat: 1gMonounsaturated Fat: 2gSodium: 200mgPotassium: 50mgFiber: 1gCalcium: 1mgIron: 5mg

Notes

Store cooked flatbread at room temperature for up to 2 days. Refrigerate for up to 3 days, or freeze for longer storage.

Tried this recipe?

Let us know how it was!
  • « Previous Page
  • 1
  • …
  • 43
  • 44
  • 45
  • 46
  • 47
  • …
  • 216
  • Next Page »

Welcome!

Hi, I’m Grace, a Sydney-based home cook with a passion for bold flavors and trending ingredients. Whether you’re a busy beginner or a seasoned foodie, you’ll find dishes here that are fresh, fun, and full of flavor.

More about me

Popular Recipes

  • Chocolate Cake Pops
    Delightful Chocolate Cake Pops for Your Sweet Cravings
  • Cottage Cheese Banana Bread
    Cottage Cheese Banana Bread: Moist, Protein-Packed Delight
  • Flourless Oat Waffles
    Flourless Oat Waffles for a Quick, Healthy Breakfast Boost
  • Cinnamon Waffles
    Fluffy Cinnamon Waffles with Dreamy Whipped Cream Bliss

Footer

↑ back to top

About

  • Privacy Policy
  • Disclaimer
  • Terms & Conditions

Newsletter

  • Sign Up! for emails and updates

Contact

  • About me
  • Contact me

Copyright © 2025 TastyTrendIngredients