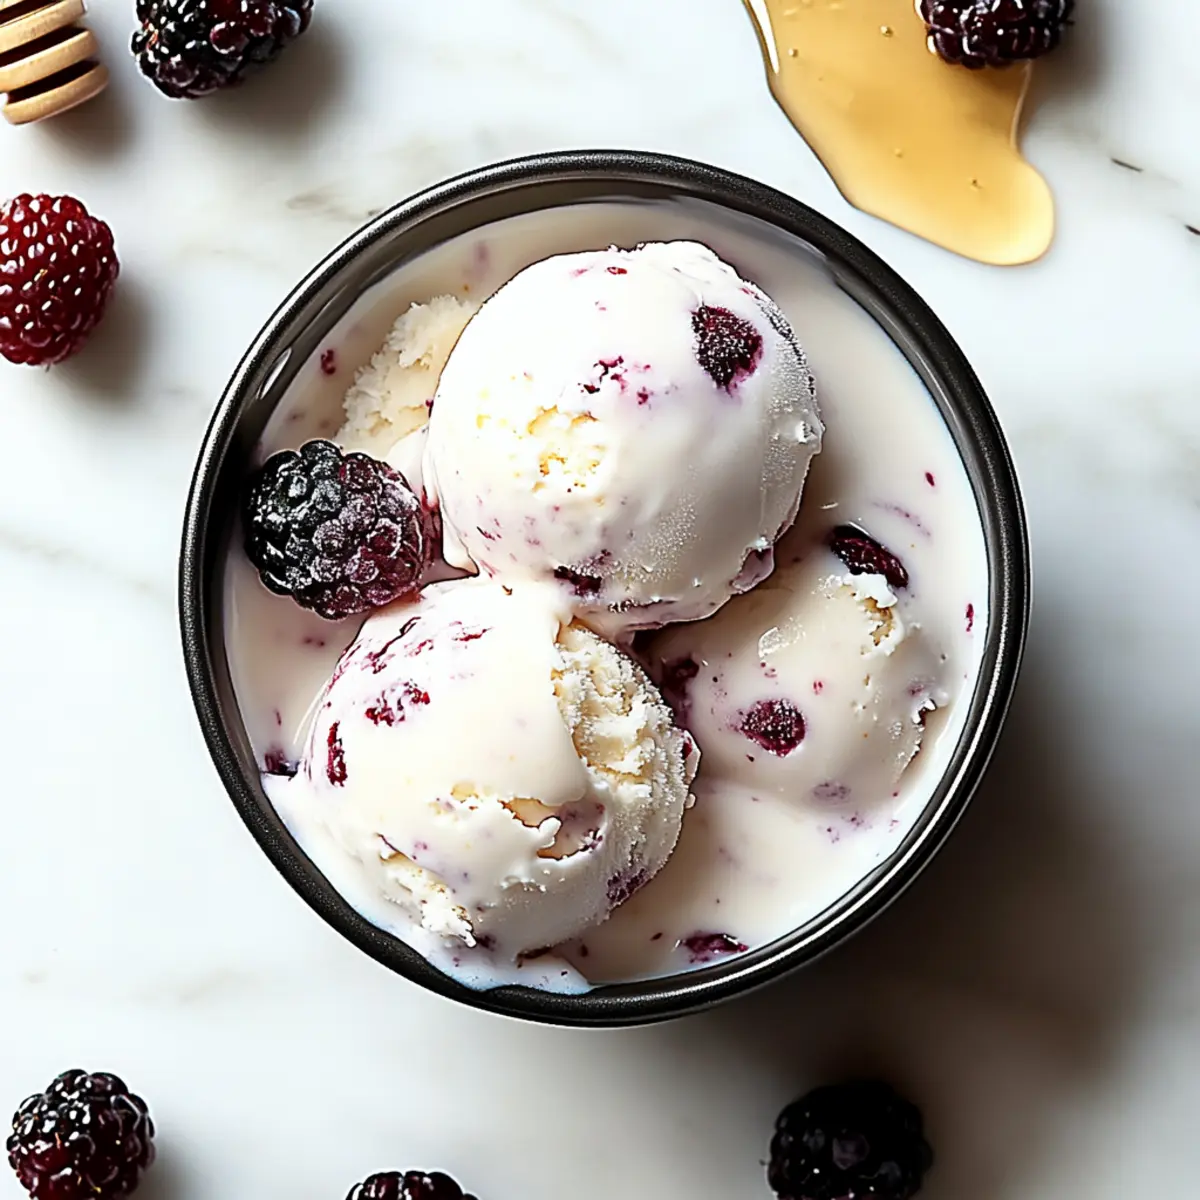
tastytrendingredients

  • Home
  • Recipes
    • Appetizers
    • Breakfast
    • Dessert
    • Dinner
    • Drinks
    • Salads
    • Snacks
    • Soups
  • About me
  • Contact me
menu icon
go to homepage
  • Home
  • Recipes
    • Appetizers
    • Breakfast
    • Dessert
    • Dinner
    • Drinks
    • Salads
    • Snacks
    • Soups
  • About me
  • Contact me
search icon
Homepage link
  • Home
  • Recipes
    • Appetizers
    • Breakfast
    • Dessert
    • Dinner
    • Drinks
    • Salads
    • Snacks
    • Soups
  • About me
  • Contact me
×

Creamy Blueberry Cheesecake Overnight Oats for a Sweet Wake-Up

March 11, 2026 by Grace Snow Leave a Comment

The aroma of blueberry fields wafts through my memory as I recall lazy Sunday mornings spent savoring sweet treats. This is why I’m so excited to share my recipe for Blueberry Cheesecake Overnight Oats—a delightful way to transform your breakfast routine into a dessert-inspired affair! These oats blend the rich, creamy texture of cheesecake with nutritious ingredients like whole rolled oats and chia seeds, topped with vibrant blueberries. Not only are they incredibly quick to prepare, but they also make for an energizing meal that you can easily grab on busy mornings. Plus, they’re gluten-free with simple substitutions available for a vegan twist! Ready to indulge without the guilt? Let’s dive into this deliciously easy recipe that will have you waking up eager to enjoy breakfast!

Why Are Overnight Oats So Popular?

Deliciously Indulgent: These Blueberry Cheesecake Overnight Oats taste like dessert for breakfast, combining the creamy richness of cheesecake with wholesome ingredients.

Quick & Easy: Just mix, layer, and refrigerate! Perfect for those busy mornings when you need a breakfast that’s ready when you are.

Meal Prep Friendly: Prepare a batch for the week! Enjoy them fresh each day by making these oats up to 4 days in advance, so breakfast is hassle-free.

Nutrient-Rich: Packed with fiber and protein, these overnight oats provide a balanced meal that keeps you energized. Plus, check out our nutritional notes for a healthy start!

Customizable: Make them your own by adding various toppings or swapping in your favorite fruits. This recipe is your canvas for a delightful morning treat!

Blueberry Cheesecake Overnight Oats Ingredients

Get ready to create a delightful breakfast!

For the Oats Base

  • Whole Rolled Oats – Provides structure and heartiness; use gluten-free oats for a gluten-free variant.
  • Chia Seeds – Adds fiber and helps thicken the oats.
  • Cream Cheese – Delivers a rich, creamy texture reminiscent of cheesecake; substitute with dairy-free cream cheese for a vegan option.
  • Greek Yogurt – Offers creaminess and protein; any type of yogurt, including dairy-free, works well.
  • Maple Syrup – Acts as a natural sweetener; adjust to your taste preference.
  • Vanilla Extract – Enhances flavor and aroma.
  • Almond Milk – Liquid base that hydrates oats; feel free to use any variety of milk, including dairy or plant-based.

For the Blueberry Layer

  • Blueberries – Adds natural sweetness and antioxidants; fresh or frozen blueberries work beautifully in this recipe.

Step‑by‑Step Instructions for Blueberry Cheesecake Overnight Oats

Step 1: Mix Ingredients
In a large mixing bowl, combine whole rolled oats, chia seeds, cream cheese, Greek yogurt, maple syrup, almond milk, and vanilla extract. Using a whisk, mix vigorously for about 2-3 minutes until the blend is creamy and smooth. Ensure there are no lumps of cream cheese left, as the smooth consistency is key to the deliciousness of your Blueberry Cheesecake Overnight Oats.

Step 2: Prepare Blueberries
If you're using frozen blueberries, place them in a microwave-safe bowl and heat for 30 seconds to thaw. Once softened, mash the blueberries with a fork until they resemble a jam-like consistency. Set the mixture aside, allowing it to cool slightly, so it can be layered smoothly over the oats later.

Step 3: Layer Oats
Evenly distribute the creamy oat mixture into five jars or containers. For a beautiful presentation, you can either layer the mashed blueberries on top of the oats or gently swirl them in to create a marbled effect. Both methods will enhance the flavor profile of the Blueberry Cheesecake Overnight Oats!

Step 4: Refrigerate
Seal each jar with a lid or cover with plastic wrap, then place the jars in the refrigerator. Allow the oats to soak for at least 4 hours, but preferably overnight. This soaking time is essential for attaining the perfect creamy texture and allowing the flavors to meld together beautifully.

Step 5: Serve
Once your oats have soaked and thickened, take them out of the refrigerator. Add your favorite toppings, such as additional blueberries or a sprinkle of granola for crunch. You can enjoy the Blueberry Cheesecake Overnight Oats cold straight from the jar, or warm them in the microwave for about 30 seconds for a cozy touch.

Blueberry Cheesecake Overnight Oats Variations

Feel free to make this recipe your own and enjoy delightful twists on these tasty oats!

  • Nut-Free: Substitute creamy almond milk with oat or coconut milk for a nut-free option.
    Try different plant-based milks to see which suits you best; it opens up a world of flavor while keeping you allergen-friendly!

  • Vegan-Friendly: Use dairy-free cream cheese and yogurt to create a completely plant-based dish.
    You won't sacrifice creaminess; this twist ensures everyone can indulge in this luscious breakfast!

  • Extra Protein: Add a scoop of your favorite protein powder to the oat mix for a protein-packed version.
    This is perfect for those aiming to start their day with a little extra energy boost while enjoying the cheesecake flavor!

  • Flavor Infusion: Try swapping out vanilla extract for almond extract to give your oats a nutty taste.
    It adds a delightful twist that enhances the sweetness of the blueberries and brings a whole new vibe to your breakfast ritual!

  • Crunchy Topping: Incorporate a handful of granola or crushed nuts on top before serving for added texture.
    That satisfying crunch alongside the creamy oats makes every bite an exciting experience, ensuring you savor the moment!

  • Berry Medley: Mix it up and add other berries like strawberries or raspberries for a colorful, fruity explosion.
    Combining different fruits provides a variety of flavors, making breakfast an adventure each day—delight in the taste of summer year-round!

  • Spice It Up: Sprinkle in a dash of cinnamon or nutmeg for a cozy warmth.
    The spices bolster the creamy, dreamy oatmeal and create an inviting aroma that makes breakfast feel like a hug!

  • Maple Twist: Swap maple syrup with honey or agave syrup for a different sweetening experience.
    This change brings out unique flavors depending on what you prefer, allowing you to play with sweetness while enjoying your oats!

For more scrumptious variations, you might also enjoy reading about our delightful Flavor Boosts for Breakfast and Nutritious Add-Ins!

How to Store and Freeze Blueberry Cheesecake Overnight Oats

Fridge: Keep your Blueberry Cheesecake Overnight Oats in airtight containers, where they will last up to 4 days. If they become too thick, stir in a splash of milk before enjoying.

Freezer: For longer storage, these oats can be frozen in a freezer-safe container for up to 1 month. Thaw them overnight in the refrigerator before eating for the best texture.

Assembly: If you plan on freezing, layer your oats and blueberries in separate containers to maintain freshness and prevent sogginess.

Reheating: To serve cold, simply grab your jar from the fridge. If you enjoy them warm, heat for about 30 seconds in the microwave, stirring gently before enjoying!

Expert Tips for Blueberry Cheesecake Overnight Oats

  • Soak Time Matters: Ensure you allow the oats to soak for at least 4 hours, preferably overnight, to achieve the creamy texture reminiscent of cheesecake.

  • Sweetness Balance: Tailor the amount of maple syrup used according to your taste. Start with less, as the blueberries add natural sweetness!

  • Store Smartly: Keep leftovers in airtight containers for up to 4 days. If they thicken too much, simply stir in a splash of milk before serving.

  • Vegan Substitutions: For a vegan version of Blueberry Cheesecake Overnight Oats, opt for dairy-free cream cheese and yogurt to maintain that delightful creaminess without dairy.

  • Muffling Mess: When mixing, be sure to whisk vigorously to avoid lumps in the cream cheese, ensuring a smooth, creamy final product that everyone will enjoy.

Make Ahead Options

These Blueberry Cheesecake Overnight Oats are perfect for meal prep enthusiasts! You can prepare the creamy oat mixture and layer the mashed blueberries up to 4 days in advance. Simply mix all the ingredients together, then distribute them into jars. Seal with lids and refrigerate right away to maintain their freshness. As the oats soak in the refrigerator, they'll absorb the flavors and achieve that delightful creamy texture. When you’re ready to serve, just add any desired toppings and enjoy them cold right from the jar or warm them in the microwave for about 30 seconds for a cozy breakfast treat. This simple prep saves you time on busy mornings!

What to Serve with Blueberry Cheesecake Overnight Oats

Imagine waking up to a breakfast that feels indulgent and satisfying—let's build a delightful meal around these delicious oats!

  • Creamy Yogurt Parfait: Top your oats with a dollop of Greek yogurt for an extra creamy texture and a boost of protein to kickstart your day.

  • Toasty Almonds: Add a sprinkle of toasted almonds for a crunchy contrast that pairs beautifully with the creamy oats and sweet blueberries.

  • Fresh Fruit Salad: Serve alongside a vibrant fruit salad for a refreshing burst of flavor, adding variety and nutrition to your breakfast.

  • Sweet Granola: A crunchy granola topping brings sweetness and an irresistible texture, making each bite even more delightful!

  • Spiced Chai Latte: Enjoy a warm spiced chai latte to balance the sweetness of the oats while adding comforting spices to your morning routine.

  • Maple-Drizzled Pancakes: If you’re feeling adventurous, serve with mini pancakes drizzled in maple syrup for a breakfast feast that satisfies every craving.

Transform your breakfast routine into a morning celebration with these thoughtful pairings!

Blueberry Cheesecake Overnight Oats Recipe FAQs

What type of oats should I use for this recipe?
It’s best to use whole rolled oats for the perfect texture in your Blueberry Cheesecake Overnight Oats. If you require a gluten-free option, be sure to choose certified gluten-free oats to suit your dietary needs.

How long can I store Blueberry Cheesecake Overnight Oats?
These oats can be stored in airtight containers in the refrigerator for up to 4 days. If they thicken too much, simply stir in a splash of milk before serving to bring back that creamy consistency!

Can I freeze Blueberry Cheesecake Overnight Oats?
Absolutely! You can freeze your Blueberry Cheesecake Overnight Oats in a freezer-safe container for up to 1 month. To enjoy them, thaw in the refrigerator overnight before serving. For the best results, layer the oats and blueberries in separate containers to maintain texture.

What should I do if my oats are lumpy after mixing?
If you notice lumps in your mixture, don’t worry! Just continue whisking vigorously until everything is well combined, aiming for a smooth consistency. If lumps persist, you can give the mixture a quick blend using an immersion blender for that indulgent creamy texture.

Can I make this recipe vegan?
Yes! For a vegan version of Blueberry Cheesecake Overnight Oats, simply swap out the cream cheese and Greek yogurt with your favorite dairy-free alternatives. This will still give you that delightful creaminess while keeping it plant-based.

Blueberry Cheesecake Overnight Oats

Creamy Blueberry Cheesecake Overnight Oats for a Sweet Wake-Up

Delight in these Blueberry Cheesecake Overnight Oats, a creamy and nutritious breakfast dessert.
Print Recipe Pin Recipe
Prep Time 10 minutes mins
Refrigeration Time 4 hours hrs
Total Time 4 hours hrs 10 minutes mins
Servings: 5 jars
Course: Breakfast
Cuisine: American
Calories: 300
Ingredients Equipment Method Nutrition Notes

Ingredients
  

Oats Base
  • 1 cup Whole Rolled Oats Use gluten-free oats for a gluten-free variant.
  • 2 tablespoons Chia Seeds
  • 4 ounces Cream Cheese Substitute with dairy-free cream cheese for a vegan option.
  • 1 cup Greek Yogurt Any type of yogurt, including dairy-free, works well.
  • 2 tablespoons Maple Syrup Adjust to your taste preference.
  • 1 teaspoon Vanilla Extract
  • 1 cup Almond Milk Feel free to use any variety of milk.
Blueberry Layer
  • 1 cup Blueberries Fresh or frozen blueberries work well.

Equipment

  • Mixing Bowl
  • Whisk
  • Microwave-safe bowl
  • Jars or containers

Method
 

Preparation
  1. In a large mixing bowl, combine whole rolled oats, chia seeds, cream cheese, Greek yogurt, maple syrup, almond milk, and vanilla extract. Using a whisk, mix vigorously for about 2-3 minutes until the blend is creamy and smooth.
  2. If using frozen blueberries, place them in a microwave-safe bowl and heat for 30 seconds to thaw. Mash the blueberries until they resemble a jam-like consistency.
  3. Evenly distribute the creamy oat mixture into five jars or containers. Layer or swirl the mashed blueberries on top.
  4. Seal each jar or cover and place them in the refrigerator. Allow the oats to soak for at least 4 hours, preferably overnight.
  5. Once soaked, serve with additional blueberries or granola. Enjoy cold or warm in the microwave for 30 seconds.

Nutrition

Serving: 1jarCalories: 300kcalCarbohydrates: 45gProtein: 10gFat: 10gSaturated Fat: 5gPolyunsaturated Fat: 0.5gMonounsaturated Fat: 4gCholesterol: 15mgSodium: 150mgPotassium: 300mgFiber: 6gSugar: 10gVitamin A: 200IUVitamin C: 5mgCalcium: 200mgIron: 1.5mg

Notes

Ensure to soak overnight for the best texture. Adjust sweetness to taste and store leftovers in airtight containers for up to 4 days.

Tried this recipe?

Let us know how it was!

Carrot Cake Overnight Oats for a Sweet, Healthy Start

March 11, 2026 by Grace Snow Leave a Comment

As I stood in my kitchen, the sweet aroma of spices wafting through the air, I was instantly transported back to my favorite childhood treats. These 10-Ingredient Carrot Cake Overnight Oats combine all the delightful flavors of classic carrot cake into a nutritious breakfast that'll have you grinning from ear to ear. Not only are they gluten-free and vegan, but they also require just a few minutes of prep the night before, making weekday breakfasts a breeze. With the morning rush, who wouldn’t want to savor a healthy meal that tastes like dessert? Plus, they keep you energized throughout the day, leaving you feeling great about your choices. Curious about how to whip up this delicious spin on a breakfast classic? Let’s dive into the recipe!

Why Choose Carrot Cake Overnight Oats?

Versatile: With simple substitutions like swapping oat milk for almond milk, you can easily tailor this recipe to fit your dietary needs.

Quick Prep: Combining ingredients takes only minutes, making these oats a fabulous option for busy mornings. Just prepare them the night before and breakfast is ready when you are!

Nutritious & Satisfying: Packed with fiber and healthy fats, this dish keeps you full and energized without the guilt. Each jar is a wholesome treat that fuels your day.

Sweet, Comforting Flavor: Enjoy the warm, nostalgic taste of carrot cake while nourishing your body. The unique blend of spices and sweetness makes breakfast feel indulgent!

Crowd-Pleaser: Perfect for family breakfasts or brunch with friends, these oats are sure to impress. They even work well as a make-ahead snack for any time of day!

Ready to indulge in a perfect morning treat? You’ll adore how these Carrot Cake Overnight Oats can make your mornings sweeter and healthier!

Carrot Cake Overnight Oats Ingredients

For the Base
• Rolled Oats – your main ingredient providing texture and fiber.
• Chia Seeds – adds thickness and healthy omega-3 fatty acids; substitute with ground flaxseed if needed.
• Oat Milk – serves as the liquid base; adjust for thickness or swap with almond milk for a nutty flavor.

For Flavor and Sweetness
• Ground Cinnamon – brings in the warm sweetness; feel free to substitute with pumpkin pie spice.
• Nutmeg – enhances the flavor profile; optional if you prefer a simpler taste.
• Salt – just a pinch enhances sweetness; keep it light at ⅛ teaspoon.
• Maple Syrup – a natural sweetener that pairs beautifully with carrots; substitute with agave syrup for a different sweetness.

For Creaminess
• Vegan Cream Cheese – adds creaminess and tang, reminiscent of classic carrot cake; plain vegan yogurt is a lighter alternative.
• Vanilla Bean Paste – adds aromatic sweetness; you can use vanilla extract instead for easier access.

For Nutrition
• Peeled & Grated Carrots – essential for the carrot cake flavor and nutrition; fresh or pre-packaged grated carrots work perfectly.

Now that you have your ingredients lined up, let’s get ready to create this delightful Carrot Cake Overnight Oats recipe that will elevate your breakfast game!

Step‑by‑Step Instructions for Carrot Cake Overnight Oats

Step 1: Whisk the Dry Ingredients
In a mixing bowl, combine 1 cup of rolled oats, 2 tablespoons of chia seeds, 1 teaspoon of ground cinnamon, a pinch of nutmeg (if using), and ⅛ teaspoon of salt. Whisk these ingredients together for about 30 seconds until they are well mixed. The dry ingredients should be evenly distributed, giving a warm and inviting aroma reminiscent of carrot cake spices.

Step 2: Incorporate the Wet Ingredients
Next, pour in 1 cup of oat milk and add 2 tablespoons of maple syrup, 2 tablespoons of vegan cream cheese, 1 teaspoon of vanilla bean paste, and 1 cup of peeled and grated carrots to the bowl. Use a spatula to gently fold these wet ingredients into the dry mixture, ensuring there are no clumps of cream cheese remaining. Stir until you achieve a thick, consistent batter that reflects the essence of delicious Carrot Cake Overnight Oats.

Step 3: Jar It Up
Once your mixture is combined, divide it evenly between two glass jars or airtight containers. Make sure to pack the mixture down gently to minimize air pockets. Seal the jars tightly with their lids, and ensure they are snugly closed to keep the flavors intact overnight. This step is essential to set the oats and blend the flavors.

Step 4: Chill Overnight
Place the sealed jars in the refrigerator and allow them to chill for at least 6 hours, preferably overnight. As they sit, the oats will absorb the liquid, softening and thickening into a delightful texture. By morning, the Carrot Cake Overnight Oats will be ready, having transformed into a creamy, flavorful breakfast treat that you can’t wait to enjoy.

Step 5: Add Toppings and Serve
In the morning, take the jars out of the fridge and give the oats a gentle stir. Add your favorite toppings like a dollop of plant-based yogurt, a sprinkle of crushed pecans, or even a drizzle of maple syrup for extra sweetness. Serve them cold for a refreshing breakfast that captures all the warmth of classic carrot cake flavors in each spoonful.

Expert Tips for Carrot Cake Overnight Oats

  • Mix Thoroughly: Ensure you break up any clumps of vegan cream cheese. A smooth mixture helps the oats achieve the perfect creamy texture.

  • Customize Ingredients: Feel free to swap ingredients like oat milk for almond milk. Adjust based on your taste preferences or dietary needs to enjoy your Carrot Cake Overnight Oats fully!

  • Storage Basics: Store in the fridge and consume within 3 days for the best flavor and texture. The oats are great as a make-ahead option for a busy week ahead.

  • Avoid Freezing: Freezing may alter the texture of your oats, so enjoy them fresh or within the specified storage time to maintain that delightful creaminess.

  • Experiment with Toppings: Top with fresh fruit, a drizzle of nut butter, or even a sprinkle of toasted coconut to elevate the flavors and nutrition of your breakfast treat.

Carrot Cake Overnight Oats Variations

Feel free to put your own twist on these delicious oats and make them uniquely yours!

  • Nut-Free: Omit walnuts entirely and replace with sunflower seeds for a safe, nut-free option. Enjoy the crunch without worry!
  • Fruit Boost: Toss in 1/2 a mashed banana for extra creaminess and natural sweetness. It adds a fantastic flavor twist that's simply divine!
  • Spiced Up: Add a pinch of ginger or cardamom for an exciting depth of flavor that transforms your breakfast into a fragrant experience.
  • Berry Bliss: Stir in a handful of fresh or frozen blueberries or raspberries before serving. Their tartness beautifully complements the sweetness of the oats!
  • Chocolate-Lover's Dream: Swirl in a spoonful of cocoa powder or dark chocolate chips for a cozy, indulgent dessert vibe in your morning meal. It’s a treat you won’t forget!
  • Creamy Coconut: Substitute oat milk with coconut milk and add shredded coconut on top for a tropical twist that feels like a vacation in a jar.
  • Healthy Crunch: Sprinkle some granola on top before serving for an extra crunch that tempts your taste buds. It turns breakfast into a delightful textural experience!
  • Sweet and Spicy: Infuse with a dash of cayenne pepper or chili flakes for a hint of heat alongside the sweetness. It’s an adventurous breakfast that packs a punch!

Now, if you're looking for even more inspiration, consider pairing your enchanting oats with a cup of rich Chocolate Pudding Cake for a delightful dessert. Or explore the delicious layers of an Ice Cream Cake for a lavish treat after your wholesome breakfast!

Make Ahead Options

These Carrot Cake Overnight Oats are a lifesaver for busy mornings! You can prepare the entire mixture up to 24 hours in advance, making them perfect for meal prep. Simply follow the recipe instructions up to Step 3 and divide the mixture into airtight jars. Seal and refrigerate overnight (or for at least 6 hours) to allow the flavors to meld. To maintain quality, ensure the jars are tightly sealed to prevent air exposure, which keeps the oats fresh and creamy. When you’re ready to enjoy, just give the jars a quick stir, add your favorite toppings, and look forward to a breakfast that tastes indulgent yet wholesome!

How to Store and Freeze Carrot Cake Overnight Oats

Fridge: Store the Carrot Cake Overnight Oats in a sealed container in the fridge for up to 3 days. This ensures they retain their delightful flavor and creamy texture.

Freezer: Avoid freezing your overnight oats, as the texture may change upon thawing, resulting in a less enjoyable experience.

Reheating: These oats are best enjoyed cold right out of the fridge. If you prefer them warm, heat gently in a microwave, adding a splash of oat milk if needed to restore creaminess.

Air-tight Storage: Use airtight containers to prevent moisture and maintain freshness for your overnight oats, ensuring they remain a delicious start to your day.

What to Serve with Carrot Cake Overnight Oats?

Transform your breakfast into a feast with these delightful pairings that complement the sweet and spicy flavors of carrot cake!

  • Fresh Fruit: The brightness of seasonal berries or sliced bananas adds a refreshing contrast while enhancing the overall nutritional content. Their juicy textures harmonize beautifully with the creamy oats.

  • Nuts & Seeds: A sprinkle of toasted walnuts or pecans provides a satisfying crunch that balances the creaminess, delivering that comforting, nutty flavor reminiscent of traditional carrot cake.

  • Nut Butter Drizzle: A smooth drizzle of almond or peanut butter adds depth and protein, creating a rich, indulgent feel that enhances the sweet, spiced oats.

  • Plant-Based Yogurt: A dollop of vanilla coconut yogurt atop your oats introduces a cool, creamy element that amplifies the dessert-like nature of the Carrot Cake Overnight Oats.

  • Maple Syrup: A touch of pure maple syrup as a topping enhances the sweetness while echoing the flavors of the dish, making each bite feel like a delightful indulgence.

  • Herbal Tea or Coffee: Sip on a warm cup of chai or your favorite brew alongside your oats, inviting aromatic spices and warmth to complement your breakfast experience.

Carrot Cake Overnight Oats Recipe FAQs

How do I choose ripe carrots for my overnight oats?
Absolutely! When selecting carrots, look for ones that are firm and vibrant in color. Avoid any that are limp or have dark spots or blemishes. Fresh carrots will have a sweet, earthy aroma, enhancing the overall flavor of your Carrot Cake Overnight Oats.

What is the best way to store Carrot Cake Overnight Oats?
Very! Store your Carrot Cake Overnight Oats in an airtight container in the fridge for up to 3 days. This ensures they stay fresh and maintain their creamy texture. Just make sure the lid is tightly sealed to keep out moisture and odors.

Can I freeze Carrot Cake Overnight Oats?
I recommend avoiding freezing your overnight oats. While technically possible, freezing can alter the texture of the oats and creaminess of the vegan cream cheese, resulting in an unappealing consistency when thawed. Instead, savor them fresh within the 3-day window for the best flavor and texture.

What should I do if my overnight oats are too thick?
Not an issue! If your Carrot Cake Overnight Oats end up thicker than you’d like, simply stir in a splash of oat milk in the morning to achieve your desired consistency. This will help rehydrate and soften the mixture for a perfect spoonful straight from the jar.

Are these overnight oats suitable for those with nut allergies?
Yes, they can be! The Carrot Cake Overnight Oats are naturally nut-free when using oat milk as the liquid base. If you add nuts like walnuts or pecans as toppings, simply choose your favorite alternatives or omit them to keep the recipe safe for your dietary needs.

Can I customize the sweetness in my overnight oats?
Absolutely! You can easily adjust the sweetness by adding more or less maple syrup based on your taste preferences. If you prefer a different sweetener, agave syrup or even a banana puree can also offer delightful alternatives for flavor customization.

Carrot Cake Overnight Oats

Carrot Cake Overnight Oats for a Sweet, Healthy Start

These Carrot Cake Overnight Oats are a nutritious breakfast that tastes like dessert, gluten-free and vegan.
Print Recipe Pin Recipe
Prep Time 10 minutes mins
Chill Time 6 hours hrs
Total Time 6 hours hrs 10 minutes mins
Servings: 2 jars
Course: Breakfast
Cuisine: Vegan
Calories: 350
Ingredients Equipment Method Nutrition Notes

Ingredients
  

For the Base
  • 1 cup Rolled Oats
  • 2 tablespoons Chia Seeds can substitute with ground flaxseed
  • 1 cup Oat Milk can substitute with almond milk
For Flavor and Sweetness
  • 1 teaspoon Ground Cinnamon can substitute with pumpkin pie spice
  • 1 pinch Nutmeg optional
  • ⅛ teaspoon Salt enhances sweetness
  • 2 tablespoons Maple Syrup can substitute with agave syrup
For Creaminess
  • 2 tablespoons Vegan Cream Cheese or use plain vegan yogurt
  • 1 teaspoon Vanilla Bean Paste can use vanilla extract instead
For Nutrition
  • 1 cup Peeled & Grated Carrots

Equipment

  • Mixing Bowl
  • Whisk
  • Spatula
  • glass jars or airtight containers

Method
 

Step-by-Step Instructions
  1. In a mixing bowl, combine 1 cup of rolled oats, 2 tablespoons of chia seeds, 1 teaspoon of ground cinnamon, a pinch of nutmeg (if using), and ⅛ teaspoon of salt. Whisk these ingredients together for about 30 seconds until they are well mixed.
  2. Pour in 1 cup of oat milk and add 2 tablespoons of maple syrup, 2 tablespoons of vegan cream cheese, 1 teaspoon of vanilla bean paste, and 1 cup of peeled and grated carrots to the bowl. Gently fold these wet ingredients into the dry mixture until you achieve a thick, consistent batter.
  3. Divide the mixture evenly between two glass jars or airtight containers, packing gently to minimize air pockets. Seal the jars tightly with their lids.
  4. Place the sealed jars in the refrigerator and allow them to chill for at least 6 hours, preferably overnight.
  5. In the morning, take the jars out of the fridge, stir, and add your favorite toppings like plant-based yogurt, crushed pecans, or a drizzle of maple syrup. Serve them cold.

Nutrition

Serving: 1jarCalories: 350kcalCarbohydrates: 50gProtein: 9gFat: 12gSaturated Fat: 2gPolyunsaturated Fat: 2gMonounsaturated Fat: 6gSodium: 150mgPotassium: 300mgFiber: 8gSugar: 10gVitamin A: 6000IUVitamin C: 2mgCalcium: 200mgIron: 2mg

Notes

Store in the fridge and consume within 3 days for the best flavor and texture. Avoid freezing to maintain texture.

Tried this recipe?

Let us know how it was!

Hot Honey Pepperoni Ricotta Pizza: Your New Summer Favorite

March 11, 2026 by Grace Snow Leave a Comment

As the sun sets on a warm summer evening, the smell of something incredible wafts through the air—it's not just any pizza; it's the Hot Honey Pepperoni Ricotta Pizza. With spicy pepperoni and velvety ricotta marrying together under a luscious drizzle of sweet hot honey, this homemade pizza promises a sensational burst of flavors in every bite. What I love most about this recipe is its effortless assembly and quick cook time, making it a perfect choice for impromptu gatherings or cozy nights in. Plus, it's a guaranteed crowd-pleaser, leaving everyone craving a second slice! Are you ready to elevate your pizza game and impress your friends and family this summer?

Why is this pizza a game-changer?

Flavor Explosion: This Hot Honey Pepperoni Ricotta Pizza delivers a perfect balance of sweet, spicy, and savory that tantalizes your taste buds.

Quick and Easy: You can whip it up in no time, making it ideal for last-minute summer cookouts or casual dinners.

Versatile Toppings: Feel free to mix and match toppings! Swap pepperoni for vegetables or try different cheeses like feta for a unique twist. Check out my recipe for Herby Ricotta Stuffed Peppers to inspire your creativity.

Perfect for Sharing: This pizza is not only satisfying but it’s also a crowd-pleaser, great for any gathering or family night.

Gourmet Experience: Elevate your pizza game and create a gourmet experience right at home with minimal effort, reminiscent of pizzeria favorites!

Get ready for a flavor-packed summer!

Hot Honey Pepperoni Ricotta Pizza Ingredients

For the Dough
• Pizza Dough – Use store-bought for convenience or make your own for a personal touch.

For the Sauce
• Tomato Sauce – Adds moisture and tang; feel free to swap it with pesto for a different flavor profile.

For the Cheese
• Mozzarella Cheese – Provides that melty goodness; consider using provolone or vegan cheese as a substitute.
• Ricotta Cheese – Adds a creamy texture; cottage cheese works too, just dollop it instead of spreading.

For the Toppings
• Pepperoni – Brings a spicy crunch; replace with sliced bell peppers for a vegetarian option.
• Hot Honey – The secret ingredient that adds sweetness and heat; you can make your own by infusing honey with chili flakes.
• Fresh Basil – Offers a delightful aroma; highly recommended for an extra layer of flavor.
• Red Pepper Flakes – Sprinkle for added heat; simply omit if you prefer a milder taste.

Enjoy making your Hot Honey Pepperoni Ricotta Pizza, where every bite is a delicious adventure!

Step‑by‑Step Instructions for Hot Honey Pepperoni Ricotta Pizza

Step 1: Preheat the Oven
Begin by preheating your oven to 500°F (260°C), placing a pizza stone or a baking sheet inside to heat for 30 minutes. This ensures a crispy crust for your Hot Honey Pepperoni Ricotta Pizza. While you wait, take in the anticipation of deliciousness to come as the oven warms up.

Step 2: Prepare the Dough
On a floured surface, roll out your pizza dough into a 12-inch round. Aim for an even thickness for a uniform bake, and create a slight border around the edges. This base will hold all those yummy toppings and provide a sturdy foundation for your flavorful pizza.

Step 3: Add Tomato Sauce
Spread a generous amount of tomato sauce over your rolled-out dough, leaving about a ½-inch border around the edges. Ensure an even layer, as this will keep the dough moist and flavorful without overwhelming the toppings. This layer adds the perfect tangy contrast to your Hot Honey Pepperoni Ricotta Pizza.

Step 4: Layer the Cheese
Next, sprinkle mozzarella cheese evenly across the sauce, covering it well for that melty goodness. Then, strategically place slices of pepperoni atop the cheese, ensuring they are evenly distributed. This arrangement allows the flavors to meld beautifully as you layer on dollops of creamy ricotta in the next step.

Step 5: Add Ricotta
Now, take your ricotta cheese and dollop it around the pizza, avoiding a complete spread to maintain its creamy texture. The ricotta's richness will create a delightful contrast to the spiciness of the pepperoni. This combination is what truly makes your Hot Honey Pepperoni Ricotta Pizza shine!

Step 6: Bake the Pizza
Carefully transfer your assembled pizza onto the preheated stone or baking sheet. Bake for 8–12 minutes, watching closely for the crust to turn golden brown and the cheese to bubble. The enticing aromas filling your kitchen will signal that your delicious pizza is nearly ready.

Step 7: Drizzle with Hot Honey
Once your pizza is golden and bubbling, remove it from the oven and immediately drizzle hot honey over the top. This step is crucial, as it elevates the flavors, balancing the savory and spicy elements with its sweet kick. The hot honey is what makes the Hot Honey Pepperoni Ricotta Pizza a standout!

Step 8: Garnish and Serve
Finish your pizza by topping it with fresh basil and a sprinkle of red pepper flakes if you want an extra kick. Slice into pieces and serve warm, allowing everyone to enjoy the delightful combination of flavors. This pizza is now ready to impress at your summer gatherings!

Expert Tips for Hot Honey Pepperoni Ricotta Pizza

• Preheat Properly: Ensure your oven is fully preheated with a pizza stone or baking sheet for the crispiest crust.

• Dollop the Ricotta: Avoid spreading ricotta; dollop it around the pizza to maintain its creamy texture and elevate each bite.

• Generous with Hot Honey: Drizzle a generous amount of hot honey after baking; it’s the star ingredient that beautifully ties all flavors together.

• Use a Pizza Peel: A pizza peel makes transferring your pizza to and from the oven easier, preventing any messy mishaps during cooking.

• Experiment with Toppings: Don’t hesitate to mix up toppings! The Hot Honey Pepperoni Ricotta Pizza is versatile—swap ingredients to suit your taste.

Storage Tips for Hot Honey Pepperoni Ricotta Pizza

Fridge: Store leftover pizza in an airtight container in the refrigerator for up to 3 days. This keeps it fresh while maintaining flavor.

Freezer: If you need to freeze your Hot Honey Pepperoni Ricotta Pizza, wrap it tightly in plastic wrap and aluminum foil. It can be frozen for up to 2 months.

Reheating: To restore crispiness, reheat individual slices in a preheated oven at 375°F (190°C) for about 10 minutes. This method helps keep the crust crunchy.

Avoid Moisture: Make sure the pizza is completely cooled before storing. Any moisture can lead to sogginess, diminishing that delightful taste!

Make Ahead Options

These Hot Honey Pepperoni Ricotta Pizza components are perfect for meal prep, saving you time on busy weeknights! You can prepare the pizza dough and toppings up to 24 hours in advance. Simply roll out the dough and store it in an airtight container in the refrigerator to prevent drying out. For the toppings, chop the pepperoni and prepare ricotta, storing them separately to maintain freshness. When you’re ready to bake, spread the sauce on the dough, layer the toppings, and bake as instructed. This way, you can enjoy a delicious homemade pizza with minimal effort and maximum flavor, keeping your evenings stress-free and delightful!

Hot Honey Pepperoni Ricotta Pizza Variations

Feel free to let your creativity run wild with these fun and delicious twists on this delightful pizza!

  • Gluten-Free: Use gluten-free pizza dough or a cauliflower crust for a lighter option. This makes it accessible for everyone to enjoy!
  • Vegetarian: Replace pepperoni with a colorful assortment of vegetables like bell peppers, onions, or mushrooms. Add a touch of brightness and flavor!
  • Spicy Kick: Add jalapeños or banana peppers for an extra spicy zing. Perfect for those who love a little more heat on their plate!
  • Herbed Twist: Mix fresh herbs like thyme and oregano into your ricotta for an aromatic flavor boost. You’ll enjoy a delightful herbaceous note with every bite.
  • Different Cheeses: Swap mozzarella for provolone, gouda, or even blue cheese for a unique flavor profile. Imagine the tanginess of blue cheese mingling with the sweet hot honey!
  • Barbecue Style: Replace the tomato sauce with barbecue sauce and add diced chicken for a BBQ chicken-inspired pizza. It’s a delicious change of pace! You can also try my recipe for Honey BBQ Chicken for more BBQ inspiration.
  • Sweet Twist: Top your pizza with thinly sliced figs or pears along with the ricotta for a sweet and savory combination. Each bite will be a delightful surprise!
  • Asian Influence: Drizzle with soy sauce or teriyaki sauce before serving for a flavor-packed pizza with an Asian flair. The sweet and salty accents complement the hot honey beautifully!

These variations will surely elevate your pizza experience to new heights. Enjoy experimenting!

What to Serve with Hot Honey Pepperoni Ricotta Pizza

As you prepare to savor this delicious pizza, consider these delightful pairings that will create a beautifully complete meal experience.

  • Fresh Green Salad: A crisp salad with mixed greens and a tangy vinaigrette lightens the meal, balancing the pizza's richness perfectly.
  • Garlic Bread: Warm, buttery garlic bread offers a comforting crunch that complements the soft, creamy pizza textures beautifully. A perfect precursor to the main event!
  • Grilled Vegetables: The smoky flavors of grilled zucchini, bell peppers, and eggplant add a refreshing contrast, enhancing the overall flavor profile of the meal.
  • Crispy Potato Wedges: Seasoned potato wedges provide a flavorful crunch. Their hearty nature makes them a satisfying addition alongside your pizza.
  • Red Wine: A light-bodied red wine like Pinot Noir pairs excellently, cutting through the richness of ricotta while enhancing the sweet heat of the hot honey.
  • Lemonade: Refreshing homemade lemonade balances the pizza's spicy notes with its citrusy sweetness— offering a delightful, thirst-quenching companion!
  • Panna Cotta: For dessert, consider a light panna cotta infused with vanilla. Its smooth creaminess stands in sweet contrast to the spicy pizza, providing a well-rounded finish to your meal.
  • Fruit Salad: A vibrant mix of seasonal fruits with a hint of mint offers a refreshing, sweet ending. The colors and flavors will brighten your dining table as well!
  • Craft Beer: A hoppy IPA complements the spicy pepperoni, enhancing the flavor while cleansing the palate after each cheesy bite.
  • Chocolate Mousse: For a rich dessert, a light and airy chocolate mousse provides a decadent yet refreshing end after your satisfying pizza.

Hot Honey Pepperoni Ricotta Pizza Recipe FAQs

How do I choose the right ripeness for my ingredients?
Absolutely! For this pizza, select fresh ingredients to enhance the flavor. Choose ripe tomatoes for your sauce and creamy ricotta without any excess moisture. When picking basil, look for vibrant green leaves with no dark spots. For the pepperoni, opt for quality slices that are firm and free of any discoloration.

How do I store leftover Hot Honey Pepperoni Ricotta Pizza?
You can store leftover pizza in an airtight container in the refrigerator for up to 3 days. This keeps it fresh while maintaining its delicious flavor. Just make sure to let the pizza cool down completely before sealing it away. You’ll love how it stays tasty!

Can I freeze Hot Honey Pepperoni Ricotta Pizza?
Certainly! To freeze, wrap the pizza tightly in plastic wrap and then in aluminum foil to prevent freezer burn. It can be frozen for up to 2 months. When you're ready to enjoy it again, just thaw in the fridge overnight before reheating, and enjoy that crispy crust!

What if my pizza doesn’t cook evenly?
If your pizza doesn’t cook evenly, it may be due to insufficient preheating. Ensure your pizza stone or baking sheet is preheated for a full 30 minutes before baking. Also, remember not to overload your pizza with toppings, as this can make it soggy. Stick to moderate amounts for the best results!

Are there any dietary considerations for this pizza?
Very! For a vegetarian option, you can easily swap the pepperoni for a variety of colorful veggies like bell peppers or mushrooms. If you're concerned about allergies, ensure your cheese, dough, and sauce are free from allergens, like nuts or gluten, depending on your needs. You can find gluten-free pizza dough at most grocery stores!

Hot Honey Pepperoni Ricotta Pizza

Hot Honey Pepperoni Ricotta Pizza

Experience a flavor explosion with the Hot Honey Pepperoni Ricotta Pizza, the perfect summer delight.
Print Recipe Pin Recipe
Prep Time 15 minutes mins
Cook Time 12 minutes mins
Total Time 27 minutes mins
Servings: 4 slices
Course: Dinner
Cuisine: Italian
Calories: 300
Ingredients Equipment Method Nutrition Notes

Ingredients
  

Dough
  • 1 lb Pizza Dough Store-bought or homemade
Sauce
  • 1 cup Tomato Sauce Or substitute with pesto
Cheese
  • 1 cup Mozzarella Cheese Or use provolone or vegan cheese
  • 1/2 cup Ricotta Cheese Can substitute with cottage cheese
Toppings
  • 1 cup Pepperoni Or substitute with sliced bell peppers
  • 1/4 cup Hot Honey Can make by infusing honey with chili flakes
  • 1 cup Fresh Basil Highly recommended for extra flavor
  • 1 tsp Red Pepper Flakes Omit if you prefer a milder taste

Equipment

  • Oven
  • Pizza stone
  • Baking Sheet
  • Rolling Pin
  • Pizza Peel

Method
 

Preparation Steps
  1. Preheat your oven to 500°F (260°C) with a pizza stone or baking sheet inside for 30 minutes.
  2. Roll out your pizza dough into a 12-inch round on a floured surface.
  3. Spread a generous amount of tomato sauce over the dough, leaving about a ½-inch border.
  4. Sprinkle mozzarella cheese evenly over the sauce, then add pepperoni slices.
  5. Dollop ricotta cheese around the pizza.
  6. Transfer the pizza to the preheated stone or baking sheet and bake for 8–12 minutes.
  7. Drizzle hot honey over the pizza once it’s baked.
  8. Garnish with fresh basil and red pepper flakes, slice, and serve.

Nutrition

Serving: 1sliceCalories: 300kcalCarbohydrates: 30gProtein: 15gFat: 12gSaturated Fat: 5gPolyunsaturated Fat: 1gMonounsaturated Fat: 4gCholesterol: 30mgSodium: 600mgPotassium: 200mgFiber: 2gSugar: 4gVitamin A: 500IUVitamin C: 2mgCalcium: 200mgIron: 1mg

Notes

Allow the pizza to cool before storing if you have leftovers. It can be stored in the fridge for 3 days or frozen for up to 2 months.

Tried this recipe?

Let us know how it was!

BBQ Chicken Flatbread Pizza: Quick, Flavorful Family Delight

March 8, 2026 by Grace Snow Leave a Comment

As I pulled my BBQ Chicken Flatbread Pizza from the oven, the enticing aroma of smoky BBQ mingled with bubbling cheese filled my kitchen like a warm embrace. This quick and flavorful dish is not only a delightful treat but also a lifesaver for busy weeknights, ready in just 22 minutes! Made with crispy flatbread, tender BBQ chicken, and customizable toppings, it’s a family-friendly meal that even the pickiest eaters will love. What's more, this recipe is a fantastic gluten-free option for those conscious of their dietary needs. Ready to dig into a satisfying slice of homemade comfort? Let’s get cooking!

Why is BBQ Chicken Flatbread Pizza a winner?

Quick Cooking: In just 22 minutes, you can serve up a delicious meal that caters to even the busiest schedules.

Family-Friendly: This recipe is a hit with both kids and adults, making it perfect for family dinners or gatherings.

Customizable: With endless topping options, everyone can build their perfect pizza! Add veggies, swap proteins, or even experiment with different cheeses.

Healthy Choices: Utilizing gluten-free flatbread and whole grains can make this dish a nutritious option for health-conscious families.

Flavor Explosion: The combination of smoky BBQ sauce, melted cheese, and crispy flatbread delivers an unforgettable flavor that rivals your favorite takeout.

Want more ideas? Check out our recipes for Honey BBQ Chicken or Crock Pot Chicken for more delicious options!

BBQ Chicken Flatbread Pizza Ingredients

• Perfect mix for a tasty meal!

For the Flatbread Base

  • Gluten-Free Flatbread – Use gluten-free options to cater to dietary needs without sacrificing taste.

For the Chicken Topping

  • Shredded Chicken – Main protein source; rotisserie chicken makes it quick and easy.
  • BBQ Sauce – Adds that smoky, tangy flavor; go for your favorite store-bought or homemade blend.

For Baking

  • Olive Oil – Brush the flatbread to achieve a crispy, golden crust.

For the Cheese

  • Shredded Mozzarella Cheese – Melts perfectly for a gooey texture; low-fat alternatives can reduce calories.

For Extra Flavor

  • Red Onion – Adds a satisfying crunch and sharp taste, elevating overall flavor.
  • Fresh Cilantro – Optional but fresh; it adds a pop of color and brightens the dish.

Feel free to mix and match these ingredients to make your own perfect BBQ Chicken Flatbread Pizza!

Step‑by‑Step Instructions for BBQ Chicken Flatbread Pizza

Step 1: Preheat the Oven
Begin by preheating your oven to 400°F (200°C). This step is crucial for achieving a perfectly crispy and golden flatbread base for your BBQ Chicken Flatbread Pizza. Allow the oven to reach the desired temperature while you prepare the rest of your ingredients.

Step 2: Combine Chicken & BBQ Sauce
In a mixing bowl, take your shredded chicken and generously coat it with your favorite BBQ sauce. Stir until the chicken is fully covered, ensuring every bite will be packed with flavor. This will take about 2-3 minutes.

Step 3: Prepare Flatbreads
Spread out your gluten-free flatbreads on a baking sheet, ensuring they have enough space between each one. With a brush or your fingers, lightly coat the surface of each flatbread with olive oil, which will help achieve a crispy texture during baking.

Step 4: Assemble Pizza
Now it’s time to assemble your BBQ Chicken Flatbread Pizza! Evenly distribute the BBQ chicken mixture over each flatbread, followed by a generous sprinkle of shredded mozzarella cheese. Finish by adding slices of red onion for an extra crunch and flavor in every bite.

Step 5: Bake
Carefully place the baking sheet in the preheated oven. Bake for 10-12 minutes, or until the cheese is bubbling and golden, and the edges of the flatbread are nicely crispy. Keep an eye on them during the last few minutes to prevent overbaking.

Step 6: Garnish & Serve
Once out of the oven, let the BBQ Chicken Flatbread Pizza cool for a minute. For a fresh touch, sprinkle with chopped cilantro. Slice into portions and serve hot. Your delicious, homemade comfort meal is ready to be enjoyed by the whole family!

Expert Tips for BBQ Chicken Flatbread Pizza

• Preheat Your Oven: Always make sure your oven is fully preheated at 400°F (200°C) to avoid a soggy flatbread base.

• Watch the Baking Time: Keep an eye on your pizza as it bakes; the last few minutes are crucial to achieving that perfect golden brown color without burning.

• Use Quality BBQ Sauce: A flavorful BBQ sauce enhances the overall taste of your BBQ Chicken Flatbread Pizza. Don't skimp on quality!

• Experiment with Toppings: Feel free to get creative with additional toppings like bell peppers, jalapeños, or even pineapple for a sweet contrast.

• Storage Savvy: If you have leftovers, store them in an airtight container in the fridge for up to 3 days. Reheat in the oven to maintain crispiness.

BBQ Chicken Flatbread Pizza Variations

Inviting your taste buds to explore flavors, this BBQ Chicken Flatbread Pizza is a wonderful canvas for creativity!

  • Vegetarian: Swap shredded chicken for black beans or grilled vegetables to create a heartwarming meatless option.
  • Spicy Twist: Add jalapeños or a sprinkle of red pepper flakes for those who crave an extra kick in their pizza experience.
  • Cheesy Delight: Experiment with different cheeses like sharp cheddar or creamy goat cheese for a unique flavor profile.
  • Herb Infusion: Toss in fresh basil or oregano with the cilantro for an aromatic twist that elevates every bite.
  • BBQ Sauce Alternatives: Try different sauces like honey mustard or chipotle for a smoky and sweet variation, adding depth to your dish.
  • Crunchy Veggies: Load your pizza with fresh spinach or diced bell peppers, giving it a nutritious boost and vibrant color.
  • Flatbread Alternatives: Switch to a cauliflower crust or whole grain flatbread for a health-conscious approach without sacrificing taste.
  • Fusion Flavors: Combine BBQ chicken with an Asian flair by adding sliced green onions and a drizzle of teriyaki sauce!

Ready to explore more recipes? Pair this pizza with refreshing options like Honey Garlic Chicken or delicious Chipotle Lime Chicken and Rice for a delightful spread!

Make Ahead Options

Preparing BBQ Chicken Flatbread Pizza in advance is a total lifesaver for busy weeknights! You can prepare the BBQ chicken mixture up to 24 hours in advance; simply mix shredded chicken with BBQ sauce and store it in an airtight container in the refrigerator. The flatbreads can also be brushed with olive oil and stored in a separate container. When you're ready to cook, just assemble the flatbreads with the prepped chicken, sprinkle with mozzarella and red onions, then bake as usual for 10-12 minutes. This method ensures your pizza comes out just as delicious, saving you time while still delivering that fresh, homemade taste your family loves!

How to Store and Freeze BBQ Chicken Flatbread Pizza

Fridge: Store leftovers in an airtight container for up to 3 days. Make sure to let the pizza cool completely before sealing to maintain texture.

Freezer: For longer storage, wrap the BBQ Chicken Flatbread Pizza tightly in plastic wrap followed by aluminum foil. It will keep well for up to three months.

Reheating: When ready to enjoy again, bake in a preheated oven at 350°F (175°C) for about 10-15 minutes to restore its crispy texture and melt the cheese.

Serving Suggestion: Add fresh toppings or a drizzle of warm BBQ sauce upon reheating to refresh the flavor of your leftover BBQ Chicken Flatbread Pizza.

What to Serve with BBQ Chicken Flatbread Pizza

Enhance your meal experience with delightful sides that complement the warm, smoky flavors of your BBQ Chicken Flatbread Pizza.

  • Crispy Sweet Potato Fries: Their natural sweetness and crunch create a lovely contrast to the savory pizza, making every bite memorable. Dip them in a zesty aioli for an extra flavor boost.

  • Garden Fresh Salad: A crisp salad full of mixed greens, cherry tomatoes, and a tangy vinaigrette adds a refreshing brightness that perfectly balances the richness of the pizza. The crunch of the veggies keeps the meal light and enjoyable.

  • Grilled Corn on the Cob: Smoky, charred corn brushed with lime butter brings a sweet, juicy flavor to your plate. It's perfect for summer BBQ vibes and is always a crowd-pleaser.

  • Garlic Breadsticks: Soft and buttery with a hint of garlic, these breadsticks provide that comforting, chewy texture that pairs beautifully with the BBQ Chicken Flatbread Pizza.

  • Roasted Veggies: A medley of seasonal roasted vegetables, like bell peppers and zucchini, not only adds color to your meal but also offers a healthy dose of nutrients. Their earthy warmth complements the bold flavors of the pizza.

  • Iced Tea or Lemonade: Refreshing and light, a glass of sweet iced tea or homemade lemonade offers a perfect cooling balance to the smoky richness of your pizza. Both drinks are family-friendly and easy to prepare!

BBQ Chicken Flatbread Pizza Recipe FAQs

How do I choose the right flatbread?
Absolutely! When selecting flatbread, look for options that are soft and pliable without dark spots all over, which indicates staleness. Gluten-free flatbreads are widely available and can be found in most grocery stores. I recommend checking the ingredient list for whole grains to enhance the nutritional value while maintaining that desirable texture.

What is the best way to store leftover BBQ Chicken Flatbread Pizza?
Leftovers can be stored in the fridge for up to 3 days. To do this, allow your pizza to cool completely, then place it in an airtight container or wrap it tightly in plastic wrap. This will help retain its flavor and texture. For longer storage, consider freezing it.

How can I freeze BBQ Chicken Flatbread Pizza properly?
Absolutely! To freeze your BBQ Chicken Flatbread Pizza, start by allowing it to cool completely. Wrap individual slices tightly in plastic wrap, then follow with aluminum foil to prevent freezer burn. This method allows you to enjoy the pizza for up to three months. Whenever you're ready to eat, simply reheat in a preheated oven at 350°F (175°C) for 10-15 minutes until the cheese is melty again.

What should I do if my flatbread is soggy after baking?
Very! Soggy flatbread might occur if the oven isn’t preheated properly or if too much BBQ sauce is used. To avoid this, make sure your oven reaches 400°F (200°C) before baking. If using a lot of sauce, consider draining some excess sauce from the chicken mixture to keep the texture crispy. Finally, keeping an eye on the baking time will help avoid overbaking or underbaking.

Can I make this BBQ Chicken Flatbread Pizza vegetarian?
Absolutely! For a delicious vegetarian version, swap the shredded chicken for grilled veggies or marinated tofu. You can also add toppings like bell peppers, mushrooms, or zucchini for an exciting flavor twist. Just ensure that your BBQ sauce is vegetarian-friendly, as some brands may contain meat-based ingredients.

Is BBQ Chicken Flatbread Pizza safe for my gluten-sensitive family members?
Yes! By using gluten-free flatbread and ensuring all other ingredients (like BBQ sauce and cheese) are gluten-free, you can create a delicious meal that caters to gluten-sensitive eaters. However, always double-check ingredient labels to ensure they are gluten-free. Your family can enjoy this comforting dish without worry!

BBQ Chicken Flatbread Pizza

BBQ Chicken Flatbread Pizza: Quick, Flavorful Family Delight

This BBQ Chicken Flatbread Pizza is a quick and flavorful family delight that caters to busy weeknights.
Print Recipe Pin Recipe
Prep Time 10 minutes mins
Cook Time 12 minutes mins
Total Time 22 minutes mins
Servings: 4 slices
Course: Dinner
Cuisine: American
Calories: 350
Ingredients Equipment Method Nutrition Notes

Ingredients
  

For the Flatbread Base
  • 2 pieces Gluten-Free Flatbread Use gluten-free options to cater to dietary needs without sacrificing taste.
For the Chicken Topping
  • 2 cups Shredded Chicken Rotisserie chicken makes it quick and easy.
  • 1/2 cup BBQ Sauce Adds smoky, tangy flavor.
For Baking
  • 1 tablespoon Olive Oil Brush the flatbread to achieve a crispy, golden crust.
For the Cheese
  • 1 cup Shredded Mozzarella Cheese Melts perfectly for a gooey texture.
For Extra Flavor
  • 1/4 cup Red Onion Adds crunch and sharp taste.
  • 1/4 cup Fresh Cilantro Optional but adds color.

Equipment

  • Oven
  • Baking Sheet
  • Mixing Bowl

Method
 

Step‑by‑Step Instructions
  1. Preheat your oven to 400°F (200°C).
  2. In a mixing bowl, take shredded chicken and coat it with BBQ sauce. Stir until fully covered.
  3. Spread out flatbreads on a baking sheet and lightly coat each with olive oil.
  4. Assemble the pizza by distributing BBQ chicken mixture over flatbreads, adding mozzarella cheese, and slices of red onion.
  5. Bake for 10-12 minutes until cheese is bubbly and flatbread is crispy.
  6. Let cool for a minute, garnish with cilantro, slice, and serve hot.

Nutrition

Serving: 1sliceCalories: 350kcalCarbohydrates: 35gProtein: 25gFat: 15gSaturated Fat: 7gPolyunsaturated Fat: 1gMonounsaturated Fat: 7gCholesterol: 70mgSodium: 800mgPotassium: 400mgFiber: 2gSugar: 5gVitamin A: 200IUVitamin C: 3mgCalcium: 200mgIron: 2mg

Notes

Feel free to mix and match ingredients to create your perfect BBQ Chicken Flatbread Pizza.

Tried this recipe?

Let us know how it was!

Decadent White Mushroom Pizza for Cozy Nights In

March 8, 2026 by Grace Snow Leave a Comment

As I pulled my latest creation from the oven, the warm aroma of garlic and sautéed mushrooms filled the kitchen—a comforting hug on a chilly evening. This Creamy White Pizza with Garlic Herb Mushrooms brings together the melty goodness of mozzarella and ricotta, creating an indulgent yet quick meal that will have everyone reaching for seconds. Whether you're hosting a casual get-together or enjoying a cozy night in, this vegetarian delight offers the perfect balance of flavors and textures that make it a true crowd-pleaser. Plus, it’s a fantastic way to elevate your homemade pizza game without breaking a sweat! Ready to discover how to whip up this scrumptious dish? Let’s dive in!

Why is this White Mushroom Pizza a must-try?

Simplicity at Its Best: Not only is this recipe quick to whip up, but it also uses everyday ingredients you likely already have in your kitchen.

Rich, Savory Flavor: The combination of garlic, cremini mushrooms, and two cheeses gives each bite an umami explosion that you won’t forget!

Perfect for Any Occasion: Serve this pizza for casual dinners or special gatherings—it's sure to impress family and friends alike.

Comforting and Satisfying: With its gooey mozzarella and creamy ricotta, this pizza provides a comforting experience, reminiscent of a cozy meal in your favorite Italian restaurant.

Versatile at Heart: Feel free to mix in sautéed spinach or swap cheeses for more variety. For an extra treat, serve it alongside a simple salad or some garlic knots to elevate your meal!

White Mushroom Pizza Ingredients

• Get ready to enjoy this cozy delight!

For the Pizza Base

  • Olive Oil – Adds flavor and helps crisp the crust. Can use any neutral oil.
  • Pizza Dough (1 pound) – The foundation of your pizza; can be homemade or store-bought. Whole wheat dough is a healthier option.
  • Yellow Cornmeal – Sprinkled on the baking surface to prevent sticking and create a crunchy bottom. Flour works as a substitute if needed.

For the Toppings

  • Unsalted Butter – Provides richness and enhances the flavor of sautéed garlic and mushrooms. Use additional olive oil for a dairy-free alternative.
  • Garlic (minced) – Adds aromatic depth; fresh garlic ensures the best flavor.
  • Cremini Mushrooms (thinly sliced) – The main topping; they offer a delicious umami flavor. Substitute with button mushrooms or shiitake if preferred.
  • Dried Thyme and Oregano – Give a lovely herbal note to the mushroom mix; fresh herbs can be used for three times the amount.
  • Kosher Salt and Freshly Ground Black Pepper – Essential for enhancing overall flavor; adjust to taste.

For the Cheese Layer

  • Wisconsin Fresh Mozzarella Cheese (8 ounces) – Melty cheese topping for that gooey texture. Any fresh mozzarella will work too.
  • Wisconsin Ricotta Cheese (1 cup) – Creamy dollops that provide a luscious texture; cottage cheese can be a lower-fat substitute.

Add these ingredients to your shopping list for a delightful White Mushroom Pizza that’s sure to impress!

Step‑by‑Step Instructions for Creamy White Pizza with Garlic Herb Mushrooms

Step 1: Preheat and Prepare the Baking Surface
Start by preheating your oven to 450°F (232°C) to ensure a hot environment for your Creamy White Pizza. While the oven heats, generously grease a baking sheet or pizza pan with olive oil, ensuring an even coating that will help create a crispy crust. Sprinkle yellow cornmeal on the surface to prevent sticking and add a delightful crunch to the bottom of the pizza.

Step 2: Sauté the Aromatics and Mushrooms
In a large skillet, melt 2 tablespoons of unsalted butter over medium heat. Once it’s bubbling, add 3 cloves of minced garlic and sauté for about 1-2 minutes until fragrant. Next, toss in 8 ounces of thinly sliced cremini mushrooms, 1 teaspoon of dried thyme, and 1 teaspoon of dried oregano. Season with kosher salt and freshly ground black pepper. Cook for 5-6 minutes, stirring occasionally until the mushrooms soften and take on a lovely golden brown color.

Step 3: Roll Out the Pizza Dough
On a clean, cornmeal-dusted surface, take your 1-pound pizza dough and roll it out into a 12-inch round. Use a rolling pin to achieve a uniform thickness, keeping an eye on the edges for evenness. If the dough resists stretching, let it rest for a few minutes. Prepare for the grand assembly of your delicious White Mushroom Pizza by ensuring it retains a nicely shaped round form.

Step 4: Assemble the Pizza
Carefully transfer your rolled-out dough to the prepared baking pan. Begin layering your toppings by evenly spreading 8 ounces of fresh mozzarella cheese across the surface, followed by generous dollops of 1 cup of ricotta cheese. Finally, evenly distribute the sautéed mushroom mixture on top, ensuring each slice will be bursting with flavor.

Step 5: Bake the Pizza
Place the assembled pizza into your preheated oven and bake for 15-20 minutes. Keep an eye on it as it bakes; you're looking for a golden brown crust and bubbling, melted cheeses. The tantalizing aroma of your White Mushroom Pizza wafting through the kitchen will surely whet your appetite as you await the finishing touches.

Step 6: Serve and Enjoy
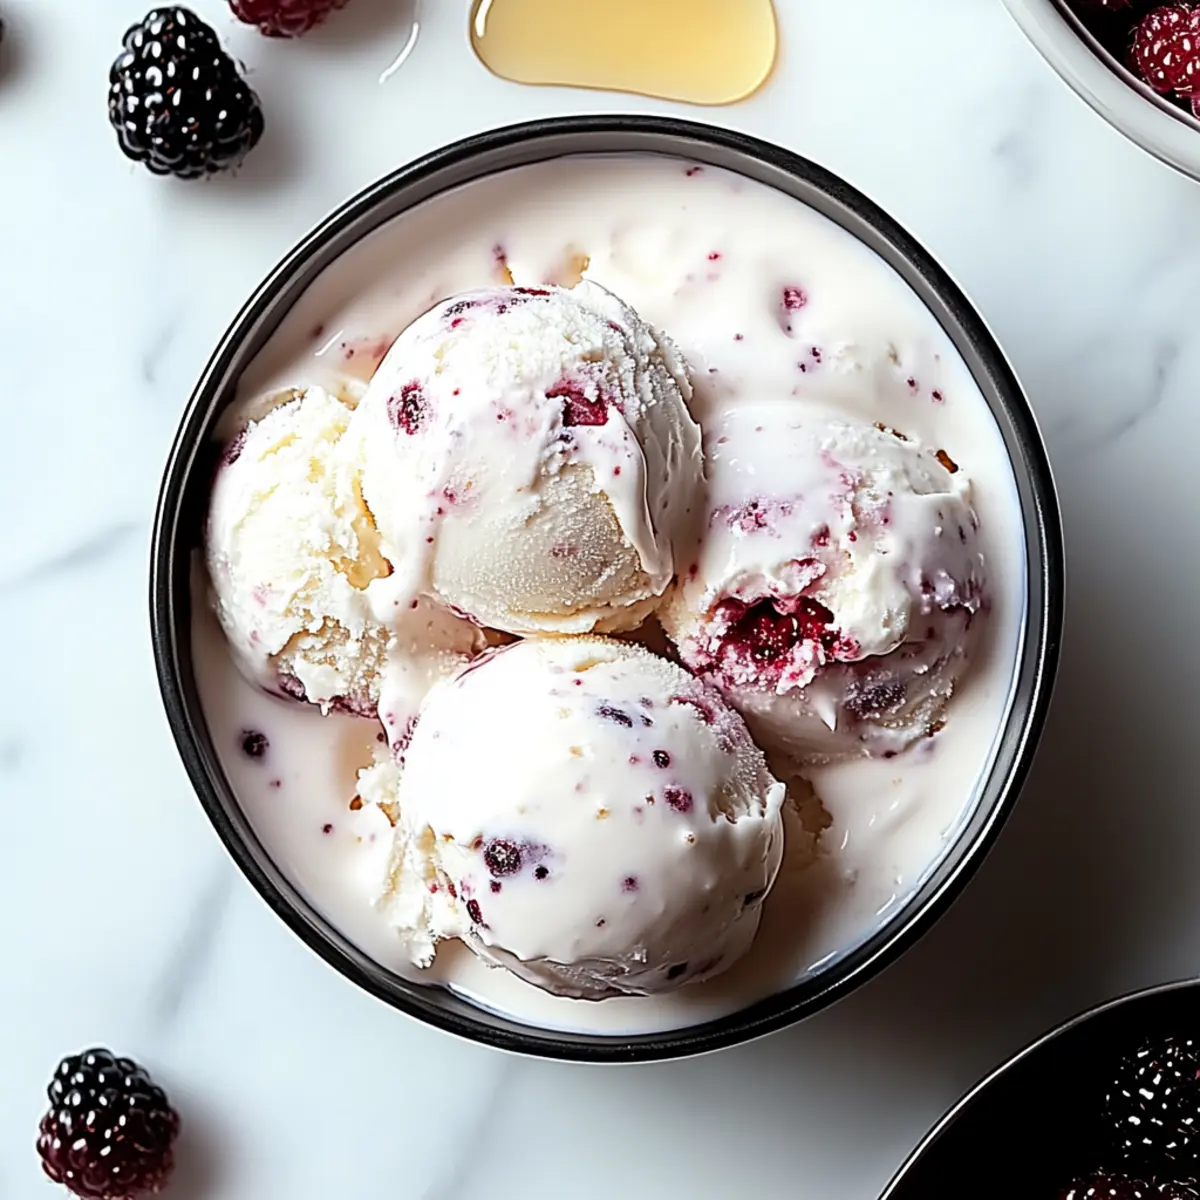
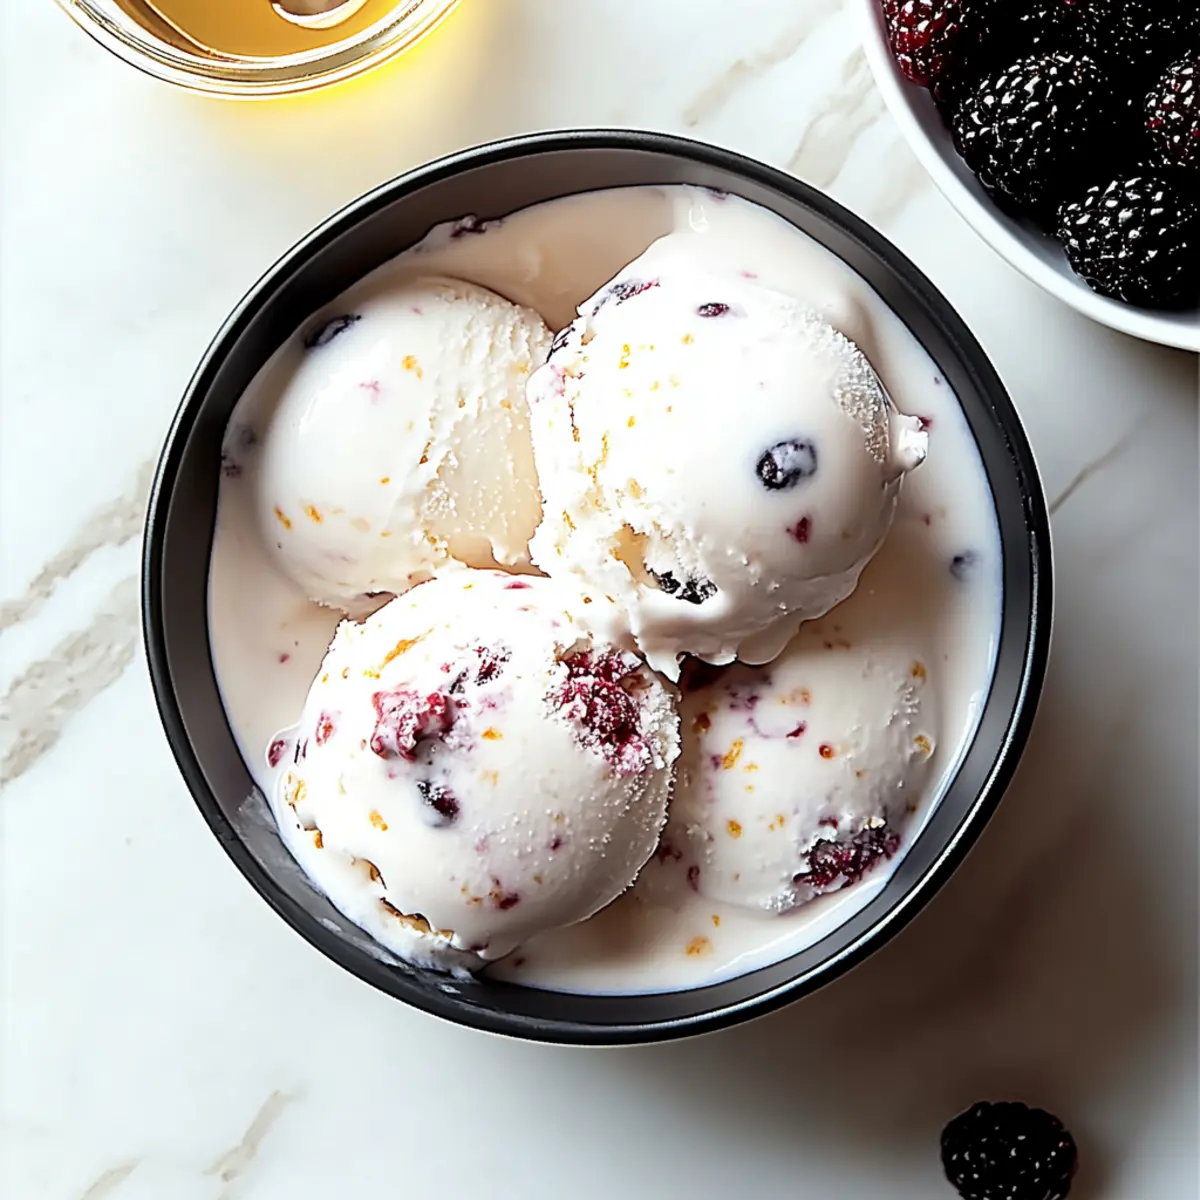
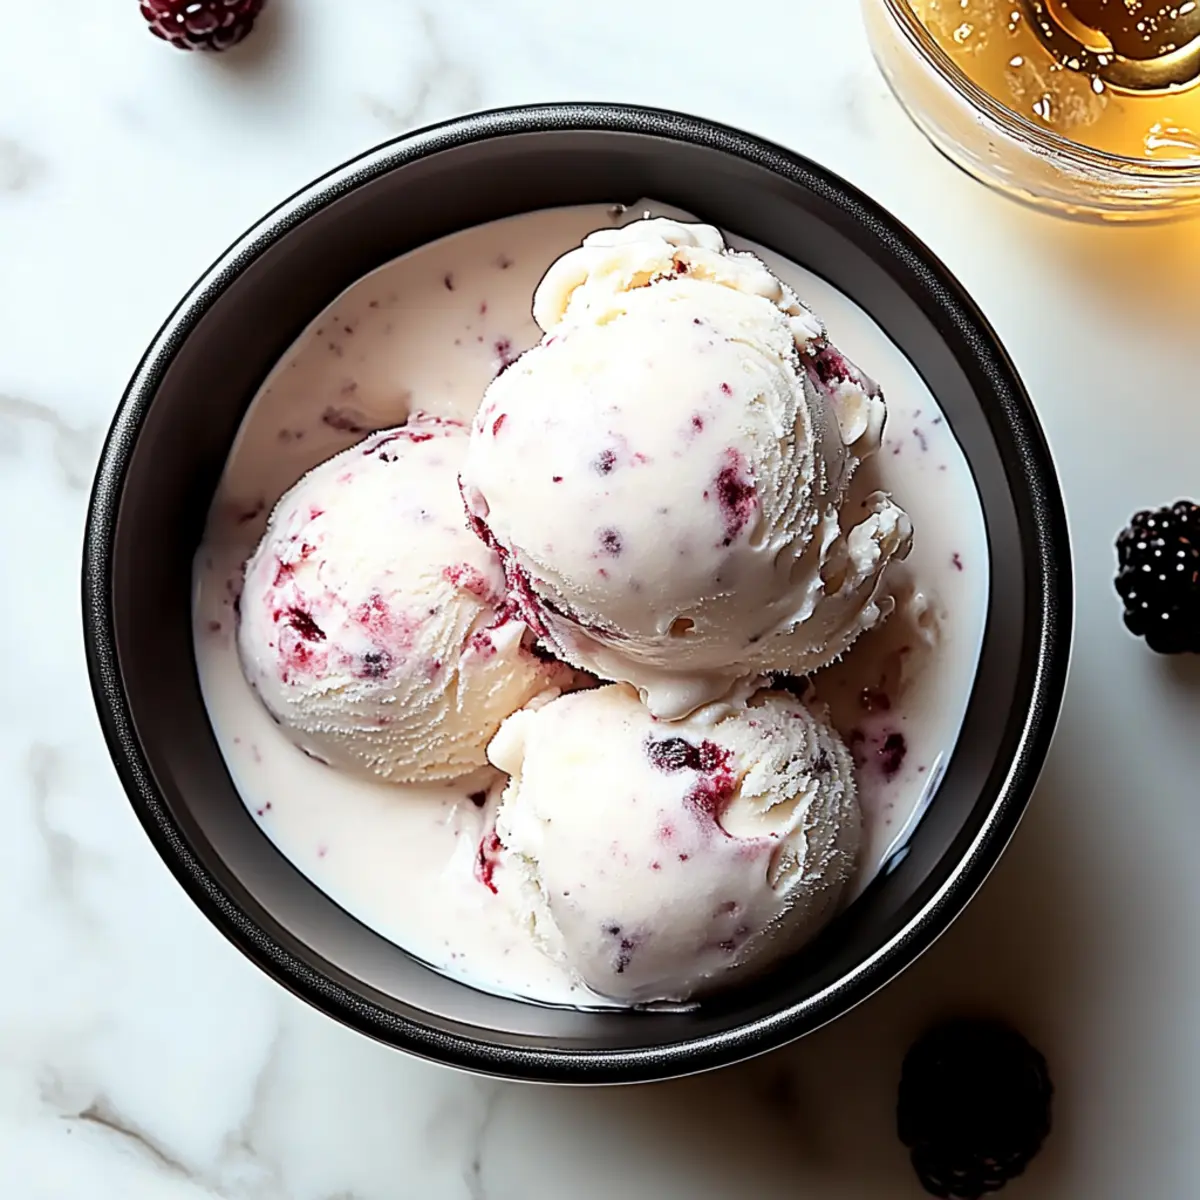
Once your pizza is baked to perfection, remove it from the oven and let it cool for a minute. Cut the Creamy White Pizza into slices, savoring the gooey mozzarella and creamy ricotta atop the flavorful mushrooms. Serve it hot and enjoy this delightful dish with family or friends, relishing every bite of comfort food joy!

How to Store and Freeze White Mushroom Pizza

Fridge: Store leftovers in an airtight container for up to 3 days. Reheat in the oven at 350°F until warmed through to maintain the pizza's texture.

Freezer: Wrap slices tightly in plastic wrap or foil, then place in a freezer-safe container for up to 2 months. Thaw in the fridge before reheating.

Reheating: For the best taste and texture, reheat in the oven rather than the microwave. Bake at 350°F for about 10-15 minutes until heated.

Freshness Tip: For optimal flavor, consume your White Mushroom Pizza within a few days, and avoid letting it sit out for more than 2 hours to ensure food safety.

Expert Tips for White Mushroom Pizza

  • Mushroom Prep: Ensure mushrooms are well-dried: Pat them dry with paper towels to avoid excess moisture that can make your pizza soggy.

  • Dough Handling: Be gentle with the dough: If it resists stretching, let it rest for a few minutes before rolling to prevent tearing.

  • Flavor Boost: Add greens: Consider mixing sautéed spinach or arugula into the mushroom mixture for added nutrition and flavor.

  • Cheese Variations: Experiment with cheeses: Swap in different cheeses like goat or fontina for unique tastes and textures in your White Mushroom Pizza.

  • Oven Check: Keep an eye on baking time: Ovens can vary, so start checking around 15 minutes to ensure a perfectly golden crust.

Make Ahead Options

These Creamy White Pizza with Garlic Herb Mushrooms are perfect for meal prep enthusiasts! To save time on busy weeknights, you can sauté the mushrooms and prepare the cheese mixture up to 24 hours in advance. Simply store the mushroom mix in an airtight container in the refrigerator until you're ready to assemble the pizza. You can also roll out the dough in advance, just wrap it well to prevent it from drying out. When you're ready to enjoy your White Mushroom Pizza, preheat the oven, assemble with the cheese and mushroom mixture, and bake for 15-20 minutes. This way, you’ll have a delicious homemade pizza that’s ready to delight your family with minimal effort!

What to Serve with Creamy White Pizza with Garlic Herb Mushrooms

Elevate your pizza night by pairing this comforting dish with complementary sides and drinks that enhance its delicious flavors.

  • Simple Side Salad: A light, refreshing salad with mixed greens and a tangy vinaigrette balances the rich, cheesy pizza. The crispness of fresh vegetables adds a contrast that brightens every bite.

  • Garlic Knots: Soft, buttery garlic knots are perfect for sopping up any leftover cheese or sauce, making your meal feel indulgent and complete while keeping it cozy.

  • Roasted Vegetables: Roasted seasonal veggies offer a savory depth that harmonizes with the pizza's creamy texture and earthy mushroom flavor. The delightful caramelization enhances the overall experience.

  • Chilled White Wine: A glass of chilled Sauvignon Blanc pairs beautifully, enhancing the creamy cheese's richness while providing a refreshing, crisp counterpoint to the dish's warmth.

  • Herbed Olive Oil Dip: Serve a small dish of herbed olive oil for dipping your crusts. This simple addition brings an extra layer of flavor and encourages everyone to enjoy every last bite!

  • Chocolate Mousse: For dessert, a light and airy chocolate mousse provides a perfect sweet closure to your meal, with its creamy texture resonating well after the savory pizza.

  • Sparkling Water with Lemon: Quench your thirst with sparkling water adorned with a twist of lemon. Its effervescence refreshes the palate, making it a delightful addition to a cozy dinner table.

White Mushroom Pizza Variations

Feel free to customize this delicious recipe! Let your creativity shine as you explore exciting twists and substitutions for your pizza.

  • Meat Lover's Delight: Add cooked sausage or prosciutto on top for a savory protein boost that complements the rich cheeses beautifully.

  • Fresh Greens: Incorporate sautéed spinach or arugula for a burst of color and a fresh, earthy flavor that brightens each bite.

  • Cheese Swap: Try using goat cheese or fontina instead of mozzarella and ricotta for a unique flavor profile that surprises and delights.

  • Spicy Kick: Sprinkle red pepper flakes or drizzle with hot honey just before serving to introduce a delightful heat that elevates the take on comfort food.

  • Nutty Touch: Add crushed walnuts or pine nuts on top for extra crunch and a nutty flavor that contrasts beautifully with the creamy cheeses.

  • Herbaceous Twist: Fresh basil or thyme added on top just before serving can amplify the aroma, giving a pop of freshness that complements the rich flavors.

  • Veggie Heaven: Mix in roasted bell peppers or zucchini with your mushrooms; it adds flavor and nutrition, making the pizza even more wholesome.

  • Gourmet Touch: Drizzle a bit of truffle oil over the finished pizza for a luxurious finishing touch that elevates the overall flavor experience.

For more ideas on mixing flavors, try pairing this with sautéed greens or additional herbs, and don't forget to enjoy on the side with some of those delectable garlic knots that would make your meal complete!

White Mushroom Pizza Recipe FAQs

What type of mushrooms should I use for this pizza?
Absolutely! Cremini mushrooms are a fantastic choice as they offer a rich umami flavor. However, if they're not available, feel free to use button mushrooms or shiitake mushrooms for a slightly different taste profile.

How should I store leftovers of my White Mushroom Pizza?
Very simple! Just place any leftover slices in an airtight container and store them in the refrigerator for up to 3 days. To reheat, pop them in the oven at 350°F (175°C) until warmed through for a deliciously crispy crust.

Can I freeze this White Mushroom Pizza?
Yes, you can! Wrap individual slices tightly in plastic wrap or foil and store them in a freezer-safe container. It’s good for up to 2 months. When you're ready to enjoy it again, let it thaw in the refrigerator overnight, and reheat in the oven for the best results.

What’s the best way to avoid a soggy pizza?
To prevent sogginess, make sure to dry the sautéed mushrooms well before adding them to the pizza. Pat them down with paper towels to remove excess moisture. Additionally, preheating your oven adequately and using a cornmeal dusting on the baking surface helps keep that crust crispy!

Are there any dietary considerations I should keep in mind?
If you have dietary restrictions, this White Mushroom Pizza is vegetarian. For a dairy-free option, swap the butter with olive oil and use dairy-free cheese alternatives. Be mindful of any specific allergies related to mushrooms or dairy products and adjust accordingly.

White Mushroom Pizza

Decadent White Mushroom Pizza for Cozy Nights In

This White Mushroom Pizza is a creamy, comforting dish perfect for cozy nights, blending garlic, mushrooms, and two cheeses into a delicious pizza experience.
Print Recipe Pin Recipe
Prep Time 15 minutes mins
Cook Time 20 minutes mins
Total Time 35 minutes mins
Servings: 4 slices
Course: Dinner
Cuisine: Italian
Calories: 300
Ingredients Equipment Method Nutrition Notes

Ingredients
  

For the Pizza Base
  • 1 tablespoon Olive Oil Adds flavor and helps crisp the crust.
  • 1 pound Pizza Dough Can be homemade or store-bought.
  • 1 tablespoon Yellow Cornmeal Sprinkled to prevent sticking.
For the Toppings
  • 2 tablespoons Unsalted Butter Provides richness.
  • 3 cloves Garlic Minced; adds aromatic depth.
  • 8 ounces Cremini Mushrooms Thinly sliced; the main topping.
  • 1 teaspoon Dried Thyme Herbal note to the mixture.
  • 1 teaspoon Dried Oregano Herbal note to the mixture.
  • Kosher Salt Adjust to taste.
  • Freshly Ground Black Pepper Adjust to taste.
For the Cheese Layer
  • 8 ounces Wisconsin Fresh Mozzarella Cheese Melty cheese topping.
  • 1 cup Wisconsin Ricotta Cheese Creamy dollops.

Equipment

  • Oven
  • Baking Sheet
  • Large skillet
  • Rolling Pin

Method
 

Step-by-Step Instructions
  1. Preheat your oven to 450°F (232°C) and grease a baking sheet or pizza pan with olive oil. Sprinkle yellow cornmeal on the surface.
  2. Melt unsalted butter in a skillet over medium heat. Add garlic and sauté for 1-2 minutes. Stir in sliced mushrooms, thyme, oregano, salt, and pepper. Cook for 5-6 minutes until mushrooms are tender.
  3. Roll out the pizza dough on a cornmeal-dusted surface to a 12-inch round.
  4. Transfer the rolled-out dough to the prepared baking pan. Spread mozzarella cheese, followed by dollops of ricotta. Top with the sautéed mushroom mixture.
  5. Bake in the oven for 15-20 minutes until the crust is golden brown and cheese is bubbling.
  6. Remove, cool for a minute, slice, and serve hot.

Nutrition

Serving: 1sliceCalories: 300kcalCarbohydrates: 35gProtein: 12gFat: 15gSaturated Fat: 8gPolyunsaturated Fat: 1gMonounsaturated Fat: 6gCholesterol: 30mgSodium: 600mgPotassium: 400mgFiber: 2gSugar: 2gVitamin A: 15IUVitamin C: 4mgCalcium: 20mgIron: 10mg

Notes

For the best flavor, ensure mushrooms are well-dried and consider adding greens for additional nutrition.

Tried this recipe?

Let us know how it was!

Savor Homemade Vegetarian Detroit-Style Pizza Tonight

March 8, 2026 by Grace Snow Leave a Comment

As I was flipping through old recipe cards, I stumbled upon a gem that whisked me back to cozy evenings filled with laughter and the irresistible aroma of baking dough. This Homemade Vegetarian Detroit-style Pizza with Crispy Cheese Edges is my go-to comfort food, perfect for those nights when you crave something hearty yet wholesome. With its thick, airy crust and tantalizing frico effect around the edges, it's a delightful departure from standard pizzas. Not only is this recipe impressively simple to whip up, but it also promises hearty satisfaction without any guilt. Whether you’re entertaining friends or just treating yourself, this pizza is bound to elevate your pizza night experience. Are you ready to dive into cheesy bliss?

Why is this pizza a must-try?

Easy and Fun: Making your own Homemade Vegetarian Detroit-style Pizza is an enjoyable experience for the whole family. This straightforward recipe is great for both novice cooks and seasoned chefs eager for a creative twist on pizza night.

Crowd-Pleasing Flavor: The crispy cheese edges combined with rich toppings create a flavor explosion that everyone will love, making it a star at any gathering.

Versatile Toppings: You can personalize your pizza with finger-licking veggies or swap out cheese varieties to suit your taste. Why not try it with a side of Shakshuka Savor Bold for a heartier meal?

Quick Prep Time: With just a few simple steps, you can have a delicious homemade pizza on the table in no time. It’s a fantastic option for busy weeknights or spontaneous get-togethers.

Great Leftovers: Don’t worry if you have extra; this pizza stores beautifully! Just reheat it in the oven for that fresh-out-of-the-oven taste. Make sure to also check out my Homemade Hot Chocolate recipe to pair with your pizza for the ultimate cozy night!

Homemade Vegetarian Detroit-Style Pizza Ingredients

For the Dough
• Lukewarm Water – Hydrates the dough and activates the yeast; use warm water (not hot) for optimal yeast activation.
• Sugar – Helps activate the yeast and adds a slight sweetness; you can substitute with honey or maple syrup.
• Active Dry Yeast – Leavens the dough to create a fluffy crust; instant yeast can be used directly with dry ingredients.
• All-Purpose Flour – Provides structure to the dough; for a chewier texture, consider using bread flour.
• Salt – Enhances flavor and strengthens gluten in the dough; no substitutions are recommended.
• Olive Oil – Coats the pan and contributes to a crispy crust; other oils like vegetable or canola can be used if necessary.

For the Toppings
• Pizza Sauce – Adds moisture and flavor to the pizza; homemade sauce or store-bought options can work well.
• Cubed Cheese (Colby Jack, Monterey Jack, or mild cheddar) – Creates the crispy cheese edges; any melty cheese can be a delight.
• Shredded Mozzarella Cheese – For topping and added creaminess; low-moisture mozzarella is ideal for this homemade vegetarian Detroit-style pizza.
• Roma Tomatoes – Adds freshness and moisture on top; any tomatoes can be used, but consider lightly cooking juicy varieties for best results.
• Black Pepper – Adds seasoning; adjust to taste for a flavor boost.

With these ingredients, you’ll be well on your way to creating a pizza that brings the warmth of homemade comfort to your table!

Step‑by‑Step Instructions for Homemade Vegetarian Detroit-style Pizza

Step 1: Make the Dough
In a small bowl, dissolve sugar in 1 ½ cups of lukewarm water, then sprinkle in 2 ¼ teaspoons of active dry yeast. Allow it to bloom for about 10 minutes until frothy. In a large mixing bowl, combine 4 cups of all-purpose flour and 1 teaspoon of salt, then pour in the yeast mixture. Stir until a shaggy dough forms, then knead on a floured surface for 6–8 minutes until smooth.

Step 2: Prepare the Pan
Generously coat a 9×13-inch non-stick metal pan with 2 tablespoons of olive oil, ensuring the entire surface is well-oiled. This will help achieve that essential crispy crust on your Homemade Vegetarian Detroit-style Pizza. The pan should glisten — this is your secret weapon for achieving those delicious cheese edges.

Step 3: Rise the Dough
Transfer the kneaded dough to the prepared pan, turning it to coat in oil. Gently press the dough out to fill the pan, then cover it with plastic wrap or a clean kitchen towel. Let the dough rise in a warm place for about 2 hours, or until it has doubled in size and fills the pan completely. Look for it to puff up beautifully!

Step 4: Preheat the Oven
About 30 minutes before baking, preheat your oven to a hot 450–475°F. This high temperature is crucial for creating that perfect crispy base and melty cheese, so don't skip this step. Your oven should be nice and toasty when it's time to bake your Homemade Vegetarian Detroit-style Pizza.

Step 5: Prepare the Toppings
Once the dough has risen, gently press it with your fingertips once more to evenly distribute it in the pan. Spread around 1 cup of pizza sauce over the surface of the dough, leaving a border for that frico effect. Then, sprinkle 2 cups of cubed cheese (such as Colby Jack or Monterey Jack) evenly, followed by 1 ½ cups of shredded mozzarella cheese for added creaminess.

Step 6: Bake the Pizza
Layer thinly sliced Roma tomatoes on top of the cheese and season with black pepper to taste. Place the pan into the preheated oven and bake for 17–20 minutes, watching for the cheese to melt and turn a lovely golden brown. The edges should look crisp and inviting — this is the moment to savor!

Step 7: Cool and Serve
Once the pizza is baked to perfection, carefully remove it from the oven and let it cool for a few minutes. This sets the cheese and makes slicing easier. Gently lift the pizza from the pan, slice it into squares, and serve. Get ready for everyone to revel in the delightful flavors of your Homemade Vegetarian Detroit-style Pizza!

Variations & Substitutions for Homemade Vegetarian Detroit-Style Pizza

Feel free to get creative and make this pizza your own with these tempting alternatives and flavorful swaps!

  • Gluten-Free: Use a gluten-free pizza dough mix to cater to dietary needs while still enjoying a delicious pizza night. Trust me, it can taste just as delightful!

  • Spicy Kick: Add sliced jalapeños or a sprinkle of red pepper flakes to the sauce for a hot twist. Your taste buds will thank you for the added zing!

  • Herbed Crust: Incorporate dried oregano or Italian seasoning into the dough for an extra flavor dimension. The aroma will make your kitchen feel like an Italian pizzeria.

  • Vegetable Medley: Top your pizza with sautéed bell peppers, onions, and spinach for a vibrant vegetable boost. This is a perfect way to sneak in some greens without sacrificing flavor!

  • Creamy Twist: Swap mozzarella for a blend of ricotta and goat cheese for some tangy creaminess. This variation offers a fun, creamy mouthfeel that’s hard to resist!

  • BBQ Sauce Base: Try using barbecue sauce as the base instead of pizza sauce to create a smoky flavor profile. This pairing works remarkably well with sweet onions and hearty veggies.

  • Nutritional Boost: Add a sprinkle of nutritional yeast on top of the cheese before baking for a cheesy flavor while also adding nutrition. It's an easy way to make your pizza even better for you!

  • Cheese Swap: Experiment with different cheese varieties like gouda or feta for unique flavors that will elevate your pizza. Just remember to choose cheeses that melt well, like mozzarella.

Whichever variations you choose, keep those cooking adventures going strong! And if you're looking for a fun side, why not pair it with some delectable Blue Cheese Pizza bites or enjoy a cozy mug of Homemade Hot Chocolate? It’s all about making it a night to remember!

Expert Tips for Homemade Vegetarian Detroit-style Pizza

  • Oil Generously: Ensure ample oil in the pan for that essential crispy crust. The oil not only prevents sticking but also enhances the flavor.

  • Avoid Sogginess: If using watery toppings, such as fresh tomatoes, lightly cook or slice them thin to prevent sogginess on your homemade vegetarian Detroit-style pizza.

  • Dough Techniques: For better flavor and a sturdier crust, consider a longer dough rise — even overnight in the fridge can enhance the taste.

  • Choose the Right Pan: Avoid using glass pans for baking. Metal pans create better cheese edges and prevent sogginess, essential for that delightful frico effect.

  • Keep an Eye on the Cheese: Monitor cheese browning closely towards the end of baking. Perfectly melted and golden cheese means a savory pizza experience.

Make Ahead Options

These Homemade Vegetarian Detroit-style Pizzas are perfect for busy home cooks looking to save time! You can prepare the dough up to 24 hours in advance by following the initial steps and then refrigerating it until you're ready to bake. Simply let it rise in the pan, covered, to maintain moisture and prevent drying out. Additionally, you can chop your toppings and store them in airtight containers for up to 3 days in the fridge. When it's time to enjoy your pizza, just assemble the prepared dough with sauce and toppings, then pop it into a preheated oven for a fresh and fulfilling meal with minimal effort. Your family will enjoy delicious, homemade pizza without the last-minute stress!

How to Store and Freeze Homemade Vegetarian Detroit-Style Pizza

Fridge: Store leftovers in an airtight container or wrap tightly in foil; they will keep for up to 3 days.

Freezer: Wrap individual slices in plastic wrap, then foil, for optimal freshness; they can be frozen for up to 3 months.

Reheating: To reheat, place slices in a preheated oven at 375°F for about 10–15 minutes or use an air fryer for 5–7 minutes to maintain crispy edges.

Make-Ahead Tips: You can prepare the dough ahead of time and refrigerate it for up to 2 days or freeze it for longer storage for your homemade vegetarian Detroit-style pizza adventure.

What to Serve with Vegetarian Detroit-Style Pizza

As you prepare to delight your taste buds with a slice of this cheesy masterpiece, consider these delicious companions that will elevate your meal experience even further.

  • Fresh Garden Salad: A crisp, vibrant salad adds a refreshing crunch, balancing the richness of the pizza beautifully. Toss in some cherry tomatoes and a zesty vinaigrette for a burst of flavor.

  • Garlic Knots: These savory bites, brushed with garlic and olive oil, are perfect for dipping into marinara sauce. Their soft texture complements the crispy edges of the pizza delightfully.

  • Roasted Vegetables: Seasoned seasonal veggies like zucchini, bell peppers, and red onions roasted to perfection bring a pop of color and flavor that melds wonderfully with your pizza.

  • Homemade Pesto Dip: Drizzle some vibrant pesto on the side for a lovely herbal contrast. It adds a delicious, creamy element that takes the pizza dining experience to a whole new level.

  • Fruit Salad: A sweet, juicy fruit salad can cut through the hearty flavors for a light finish, making it an inviting palate cleanser.

  • Craft Beer: Pair your pizza with a refreshing light craft beer to enhance the flavors of the pizza, creating a delightful harmony on your palate.

  • Chocolate Chip Cookies: End your meal on a sweet note with warm, gooey chocolate chip cookies that offer a nostalgic comfort, perfect for savoring with a glass of cold milk.

Homemade Vegetarian Detroit-Style Pizza Recipe FAQs

How do I choose ripened ingredients?
Absolutely! For the best flavors, select fresh, ripe Roma tomatoes with a firm texture and vibrant color. Look for tomatoes that are slightly fragrant and free of dark spots or blemishes. When it comes to cheese, opt for blocks instead of pre-shredded varieties, which often contain anti-caking agents that can compromise texture during baking.

What’s the best way to store leftover pizza?
Very good question! For leftovers, store your Homemade Vegetarian Detroit-style Pizza in an airtight container or tightly wrapped in foil in the fridge, where it will stay fresh for up to 3 days. If you're feeling ambitious, you can also wrap individual slices in plastic wrap followed by foil and freeze them for up to 3 months.

Can I freeze the pizza dough?
Absolutely! To freeze your pizza dough, shape it into a ball after kneading, then lightly oil it and wrap it tightly in plastic wrap followed by aluminum foil. This keeps it fresh for up to 3 months. When you’re ready to use it, simply move it to the fridge to thaw overnight and then let it rise for about an hour at room temperature before stretching it out in the pan.

What should I do if the crust isn’t crispy?
If you find that the crust isn't crispy, check your oil levels in the pan before baking, ensuring you've used enough to coat the surface thoroughly. Consider letting the dough rise for a longer period to develop a better crust texture. Additionally, make sure your oven is preheated to the right temperature — a hot oven (450–475°F) is key for achieving that delightful crispiness.

Are there any dietary considerations for this recipe?
Great question! This Homemade Vegetarian Detroit-style Pizza can easily accommodate various dietary preferences. For gluten-free options, use a gluten-free all-purpose flour blend. If dairy is a concern, feel free to substitute with vegan cheese or explore plant-based sauce alternatives. Just be cautious with toppings, as certain veggies or sauces might not suit all dietary restrictions. Always check labels if you’re concerned about allergies!

Homemade Vegetarian Detroit-style Pizza

Savor Homemade Vegetarian Detroit-Style Pizza Tonight

Enjoy this Homemade Vegetarian Detroit-style Pizza with Crispy Cheese Edges for a comforting and hearty meal.
Print Recipe Pin Recipe
Prep Time 30 minutes mins
Cook Time 20 minutes mins
Rising Time 2 hours hrs
Total Time 2 hours hrs 50 minutes mins
Servings: 8 slices
Course: Dinner
Cuisine: Italian
Calories: 300
Ingredients Equipment Method Nutrition Notes

Ingredients
  

Dough Ingredients
  • 1.5 cups Lukewarm Water Hydrates the dough and activates the yeast.
  • 1 tablespoon Sugar Helps activate the yeast and adds sweetness.
  • 2.25 teaspoons Active Dry Yeast Leavens the dough for a fluffy crust.
  • 4 cups All-Purpose Flour Provides structure; can use bread flour for chewier texture.
  • 1 teaspoon Salt Enhances flavor and strengthens gluten.
  • 2 tablespoons Olive Oil Coats the pan for a crispy crust.
Topping Ingredients
  • 1 cup Pizza Sauce Adds moisture and flavor.
  • 2 cups Cubed Cheese (Colby Jack, Monterey Jack, or mild cheddar) Creates crispy cheese edges.
  • 1.5 cups Shredded Mozzarella Cheese For topping and added creaminess.
  • 2 large Roma Tomatoes Adds freshness; consider cooking for best results.
  • Black Pepper Adjust to taste for added flavor.

Equipment

  • 9x13-inch non-stick metal pan
  • Mixing bowls
  • plastic wrap
  • measuring cups
  • Measuring Spoons

Method
 

Dough Preparation
  1. In a small bowl, dissolve sugar in lukewarm water. Sprinkle in active dry yeast and let it bloom for 10 minutes.
  2. In a large bowl, combine flour and salt, then stir in the yeast mixture to form a shaggy dough.
  3. Knead the dough on a floured surface for 6–8 minutes until smooth.
Pan Preparation
  1. Generously coat a 9x13-inch non-stick pan with olive oil.
Dough Rising
  1. Transfer the dough to the pan, coating it in oil. Press to fill the pan, then cover and let rise for about 2 hours.
Oven Preheating
  1. Preheat the oven to 450-475°F about 30 minutes before baking.
Topping Preparation
  1. Once risen, press the dough and spread pizza sauce, then sprinkle cubed and shredded cheese on top.
Baking
  1. Layer sliced Roma tomatoes on top, season with black pepper, and bake for 17-20 minutes until cheese is golden brown.
Cooling and Serving
  1. Remove from oven, let cool for a few minutes, slice, and serve.

Nutrition

Serving: 1sliceCalories: 300kcalCarbohydrates: 35gProtein: 12gFat: 12gSaturated Fat: 5gPolyunsaturated Fat: 1gMonounsaturated Fat: 4gCholesterol: 20mgSodium: 600mgPotassium: 200mgFiber: 2gSugar: 2gVitamin A: 200IUVitamin C: 5mgCalcium: 250mgIron: 2mg

Notes

Store leftovers in an airtight container for up to 3 days or freeze slices for longer storage. Reheat in a preheated oven at 375°F for 10-15 minutes to maintain crispiness.

Tried this recipe?

Let us know how it was!

Crispy White Pizza with Ricotta and Asiago: A Cheese Lover's Dream

March 8, 2026 by Grace Snow Leave a Comment

The moment I pulled the crispy white pizza from the oven, the intoxicating aroma of melting cheese filled my kitchen, turning it into a cozy pizzeria. This isn’t just any pizza; it's a heavenly creation topped with creamy ricotta and nutty asiago that unveils a whole new world of flavor. Whether you're a devoted cheese lover or simply looking to elevate your homemade pizza game, this Crispy White Pizza with Ricotta and Asiago is a must-try. It offers a delightful twist on traditional pizza, perfect for any occasion—quick to prepare for a weeknight dinner yet impressive enough to share at gatherings. Plus, it’s a versatile treat that pairs beautifully with a fresh salad or a glass of your favorite wine. Are you ready to indulge in this cheesy delight? Let’s get started!

Why is this white pizza irresistible?

Simplicity at its finest: With just a few key ingredients, making this crispy white pizza is a breeze, perfect for busy weeknights. Rich, Creamy Flavor: The harmonious blend of ricotta, asiago, fontina, and mozzarella creates an explosion of taste that cheese lovers simply can't resist. Versatile Options: Feel free to customize with toppings like roasted garlic or spinach for added pizzazz—your pizza, your rules! Crowd-Pleaser: This dish is sure to impress friends and family, making it the star of your next gathering. Quick to Prepare: In under 30 minutes, you can serve a gourmet experience right from your home oven. Pair it with a light salad or a glass of white wine for a complete meal that feels special!

Crispy White Pizza Ingredients

• Simple yet divine, perfect for homemade delight!

For the Dough

  • Pizza Dough – Store-bought or homemade is recommended for convenience and freshness.

For the Cheeses

  • Fontina Cheese (½ cup, grated) – Provides a creamy richness; can substitute with Gruyère for a nuttier flavor.
  • Fresh Mozzarella (4-5 slices, torn) – Adds moisture and softness; use buffalo mozzarella for a more pronounced flavor.
  • Asiago Cheese (½ cup, grated) – Introduces sharpness and depth; Fontinella cheese can be an excellent alternative.
  • Ricotta Cheese (½ cup) – Offers creaminess and texture; mascarpone will provide a sweeter flavor option.
  • Romano Cheese – Adds a salty kick; Parmesan can serve as a substitute.

For the Toppings

  • Fresh Basil – For garnish and enhanced flavor; arugula can be substituted for a peppery note.
  • Crushed Red Pepper – Optional for a bit of heat; adjust according to your taste preferences.

For Flavoring

  • Extra Virgin Olive Oil – Enhances flavor and helps to brown the cheese; consider truffle oil for a gourmet twist.
  • Kosher Salt – Essential for seasoning; sea salt is a viable alternative.
  • Ground Black Pepper – For seasoning; white pepper can be used for a more subtle flavor.

Step‑by‑Step Instructions for Crispy White Pizza with Ricotta and Asiago

Step 1: Preheat the Oven
Begin by preheating your oven to a sizzling 500°F (260°C) and place a pizza stone inside to heat for approximately 20 minutes. This high temperature ensures that your Crispy White Pizza with Ricotta and Asiago will have a perfectly golden and crunchy crust. Make sure your pizza stone is well-preheated to achieve that irresistible crunch.

Step 2: Prepare the Pizza Peel
While the oven is heating, sprinkle your pizza peel generously with cornmeal. This step prevents the dough from sticking, allowing for a smooth transfer to the pizza stone later. A well-prepared peel is essential for ensuring your Crispy White Pizza slides onto the stone effortlessly, paving the way for a beautiful bake.

Step 3: Roll Out the Dough
On a lightly floured surface, take your pizza dough and roll it out into a 13-inch diameter circle. Aim for an even thickness for consistent cooking. As you stretch and shape the dough, let your creativity shine—this is where the magic of homemade pizza begins!

Step 4: Transfer the Dough
Carefully lift the rolled-out dough and transfer it to the prepared pizza peel. Ensure that the dough sits evenly on the peel, making slight adjustments as necessary to maintain its round shape. This step is crucial for a seamless and hassle-free transition to the oven, paving the way for your delicious Crispy White Pizza.

Step 5: Add the Cheeses
Sprinkle the grated fontina and asiago cheeses evenly over the surface of the dough. Next, place the torn pieces of fresh mozzarella across the pizza, followed by dollops of ricotta. As the cheeses melt and mingle in the oven, they will create a luscious, gooey layer atop your memorable Crispy White Pizza with Ricotta and Asiago.

Step 6: Season and Drizzle
Drizzle extra virgin olive oil over the assembled pizzas, ensuring even coverage. Then, sprinkle kosher salt, freshly ground black pepper, and grated Romano cheese on top to enhance the overall flavor profile. This seasoning step is vital to bringing out the rich and creamy goodness of the cheeses in your white pizza.

Step 7: Bake to Perfection
Carefully slide the loaded pizza from the peel onto the preheated pizza stone. Bake for about 10 minutes or until the crust is golden brown and the cheese is bubbly and slightly charred. This is the moment when your Crispy White Pizza with Ricotta and Asiago transforms into a tantalizing masterpiece ready to be savored!

Step 8: Broil for Extra Char
If you desire a touch of extra char and depth in flavor, turn on the broiler for an additional 1-2 minutes. Keep a close eye during this final touch, ensuring the cheeses melt beautifully without burning. This method enhances the overall texture of your pizza, creating a delightful contrast between crispy crust and creamy cheese layers.

Expert Tips for Crispy White Pizza

  • Preheat Properly: Make sure your pizza stone is thoroughly preheated to 500°F for that crispy white pizza crust. A complete heat-up prevents sogginess.
  • Dust Generously: Don’t skimp on the cornmeal on your pizza peel; a generous sprinkle will help the pizza slide off smoothly into the oven.
  • Cheese Balance: Layer cheeses evenly for a delightful blend of textures. Avoid clumping to ensure every bite of your Crispy White Pizza has that perfect cheesy goodness.
  • Watch the Bake: Keep an eye on your pizza as it bakes to avoid overcooking. If the cheese is bubbling but the crust isn’t golden, you might need to adjust the baking time.
  • Add Fresh Herbs After Baking: For a burst of flavor, sprinkle fresh basil or arugula on top right after pulling your pizza from the oven, enhancing the dish's aroma and taste.
  • Experiment with Substitutes: Don’t hesitate to try different cheese or topping varieties. Personalizing your pizza beyond the basic recipe will elevate your cooking experience.

How to Store and Freeze Crispy White Pizza

  • Fridge: Store leftover slices in an airtight container in the refrigerator for up to 4 days. This helps maintain the pizza's flavors and texture while keeping it fresh.
  • Freezer: For longer storage, wrap individual slices tightly in plastic wrap and then place them in a freezer-safe bag. They can be frozen for up to 2 months.
  • Reheating: To enjoy, reheat frozen slices directly from the freezer in a preheated oven at 375°F (190°C) for about 15-20 minutes, or until heated through. This ensures your Crispy White Pizza with Ricotta and Asiago retains its delightful crunch.
  • Room Temperature: Avoid leaving the pizza out at room temperature for more than 2 hours, as this can compromise freshness and safety.

Make Ahead Options

These Crispy White Pizza with Ricotta and Asiago are perfect for busy weeknights! You can prepare the pizza dough up to 24 hours in advance and refrigerate it, which helps develop a deeper flavor. Additionally, you can pre-assemble the cheese toppings (fontina, mozzarella, asiago, and ricotta) and store them in an airtight container in the fridge for up to 3 days. To maintain quality, keep the seasoned cheese separate from the dough to prevent sogginess. When you're ready to cook, simply roll out the dough, add the cheeses, and bake your pizza on a preheated pizza stone for about 10 minutes. This way, you'll enjoy a deliciously crispy pizza with minimal effort, saving you time while still delighting your taste buds!

Crispy White Pizza Variations

Feel free to explore these delightful twists that let you personalize your pizza experience!

  • Dairy-Free: Substitute all cheeses with vegan cheese options like cashew cream or almond-based cheeses for a non-dairy delight.
  • Gluten-Free: Use a gluten-free pizza dough to cater to dietary restrictions without sacrificing flavor or texture. It can be just as crispy and delicious!
  • Spicy Kick: Add crushed red pepper flakes directly onto your cheese layer or incorporate spicy pepperoni for an enticing heat that dances on your palate.
  • Herb Infusion: Explore fresh herb toppings such as thyme or oregano to amplify aroma and flavor, elevating your pizza to a fragrant feast.
  • Mushroom Medley: Layer sautéed mushrooms on top of the cheese for an earthy richness. Try a mix of shiitake, cremini, and portobello for a decadent flavor profile.
  • Caramelized Onions: Sweet, caramelized onions add a gourmet touch; they partner perfectly with the cheese, creating a delightful contrast. A little sweetness balances the savory elements beautifully.
  • Asian Twist: Drizzle with a bit of sesame oil and top with fresh cilantro or green onions after baking for an unexpected but tasty fusion experience.
  • Roasted Veggies: Enhance texture and health with roasted zucchini, bell peppers, or asparagus. This brings a colorful crunch and nutrition to each slice.

These variations are just a starting point; enhance your crispy white pizza with these delightful changes. You might even find a new family favorite! Don't forget to check out Tuscan White Bean for another comfort food option, or whip up some Lemon Ricotta Protein pancakes for brunch the next morning!

What to Serve with Crispy White Pizza with Ricotta and Asiago

Create a delightful meal by pairing this cheesy indulgence with complementary sides and drinks that elevate your dining experience.

  • Arugula Salad: Fresh arugula tossed with lemon vinaigrette adds brightness and a peppery bite that balances the richness of the pizza.
  • Garlic Breadsticks: Crispy, buttery breadsticks create a comforting side, perfect for dipping into any remaining melted cheese or olive oil.
  • Roasted Vegetables: Seasonal vegetables like zucchini and bell peppers offer a delicious contrast in texture and flavor, enhancing your meal's healthy aspect.
  • Fruit Salad: A refreshing mix of seasonal fruits will cleanse the palate and bring a touch of sweetness to your pizza gathering.
  • Light White Wine: A crisp Sauvignon Blanc complements the creamy cheeses, making each bite even more enjoyable and enhancing your mealtime experience.
  • Lemonade Spritzer: A fizzy lemonade combined with fresh mint offers a refreshing palate cleanser that pairs wonderfully with the rich flavors of the pizza.
  • Chocolate Mousse: For dessert, a light chocolate mousse is the perfect sweet finish, offering indulgent cocoa flavor without overwhelming the senses.
  • Pesto Dipping Sauce: Serving a side of basil pesto introduces an herby, zesty element that beautifully contrasts with the creamy cheeses.
  • Charcuterie Board: A small assortment of cured meats, olives, and pickles can enhance the savory experience and create a fun, shareable dining atmosphere.
  • Grilled Lemon Slices: Grilling lemon slices adds a smoky touch that brightens your pizza flavors; squeeze over each slice for a zesty kick.

Crispy White Pizza with Ricotta and Asiago Recipe FAQs

What kind of pizza dough should I use?
Absolutely! You can use either store-bought or homemade pizza dough, depending on your preference and time. If you're in a rush, a quality store-bought option works well. However, for the best flavor and texture, I encourage you to try making your own dough—it's simpler than you might think!

How do I store leftover crispy white pizza?
To preserve your delicious leftovers, store them in an airtight container in the refrigerator. They’ll stay fresh for up to 4 days! When you're ready to enjoy them again, reheat in a preheated oven at 375°F (190°C) for about 10-15 minutes for the best results.

Can I freeze the crispy white pizza?
Yes! Freezing is a great option if you want to save some for later. Wrap individual slices tightly in plastic wrap and then place them in a freezer-safe bag. Your pizza can last up to 2 months in the freezer. When you’re ready to eat, reheat directly from frozen in a preheated oven at 375°F (190°C) for about 15-20 minutes.

What should I do if my pizza dough sticks to the peel?
Oh no! If you find your dough is sticking, don’t worry! Make sure you’re using enough cornmeal on the pizza peel; it acts as a barrier to prevent sticking. If it's already on the peel and not moving, you can gently lift the edges with a spatula and sprinkle additional cornmeal beneath. This will help loosen it up for a smooth transfer to the oven.

Is this dish suitable for vegetarians?
Yes, definitely! This Crispy White Pizza with Ricotta and Asiago is a fantastic vegetarian option, rich in flavor and texture thanks to the blend of cheeses. However, always be mindful of the dairy ingredients if you’re considering lactose intolerance or allergies. Feel free to experiment with non-dairy cheese alternatives to make it suitable for various dietary needs.

How can I tell when my pizza is done baking?
Great question! You’ll know your pizza is done when the crust is a golden brown and the cheese is bubbly and slightly charred. This usually takes about 10 minutes at a high temperature. If you want even more of that delightful char, you can broil it for an additional 1-2 minutes—just keep an eye on it to avoid burning!

Crispy White Pizza with Ricotta and Asiago

Crispy White Pizza with Ricotta and Asiago: A Cheese Lover's Dream

Crispy White Pizza with Ricotta and Asiago is a delightful twist on traditional pizza, exploding with rich, creamy flavors that appeal to any cheese lover.
Print Recipe Pin Recipe
Prep Time 10 minutes mins
Cook Time 10 minutes mins
Oven Preheating Time 20 minutes mins
Total Time 40 minutes mins
Servings: 4 slices
Course: Dinner
Cuisine: Italian
Calories: 350
Ingredients Equipment Method Nutrition Notes

Ingredients
  

For the Dough
  • 1 ball Pizza Dough Store-bought or homemade is recommended for convenience.
For the Cheeses
  • 0.5 cups Fontina Cheese, grated Can substitute with Gruyère for a nuttier flavor.
  • 4-5 slices Fresh Mozzarella, torn Use buffalo mozzarella for a more pronounced flavor.
  • 0.5 cups Asiago Cheese, grated Fontinella cheese can be an excellent alternative.
  • 0.5 cups Ricotta Cheese Mascarpone will provide a sweeter flavor option.
  • 1 cup Romano Cheese Parmesan can serve as a substitute.
For the Toppings
  • 1 handful Fresh Basil For garnish; arugula can be substituted.
  • 1 teaspoon Crushed Red Pepper Optional; adjust according to your taste preferences.
For Flavoring
  • 2 tablespoons Extra Virgin Olive Oil Consider truffle oil for a gourmet twist.
  • 1 teaspoon Kosher Salt Sea salt is a viable alternative.
  • 1 teaspoon Ground Black Pepper White pepper can be used for a more subtle flavor.

Equipment

  • Oven
  • Pizza stone
  • Pizza Peel
  • Rolling Pin

Method
 

Preparation Steps
  1. Preheat your oven to a sizzling 500°F (260°C) and place a pizza stone inside to heat for approximately 20 minutes.
    Crispy White Pizza with Ricotta and Asiago
  2. Sprinkle your pizza peel generously with cornmeal to prevent the dough from sticking.
    Crispy White Pizza with Ricotta and Asiago
  3. On a lightly floured surface, roll out your pizza dough into a 13-inch diameter circle.
    Crispy White Pizza with Ricotta and Asiago
  4. Transfer the rolled-out dough to the prepared pizza peel, ensuring it sits evenly.
    Crispy White Pizza with Ricotta and Asiago
  5. Sprinkle the grated fontina and asiago cheeses over the surface of the dough, followed by fresh mozzarella and dollops of ricotta.
    Crispy White Pizza with Ricotta and Asiago
  6. Drizzle extra virgin olive oil, sprinkle kosher salt, ground black pepper, and grated Romano cheese on top.
    Crispy White Pizza with Ricotta and Asiago
  7. Slide the loaded pizza from the peel onto the preheated pizza stone and bake for about 10 minutes or until crust is golden brown and cheese is bubbly.
    Crispy White Pizza with Ricotta and Asiago
  8. For extra char, turn on the broiler for an additional 1-2 minutes, watching carefully to avoid burning.
    Crispy White Pizza with Ricotta and Asiago

Nutrition

Serving: 1sliceCalories: 350kcalCarbohydrates: 40gProtein: 18gFat: 16gSaturated Fat: 10gPolyunsaturated Fat: 1gMonounsaturated Fat: 4gCholesterol: 50mgSodium: 800mgPotassium: 250mgFiber: 3gSugar: 2gVitamin A: 200IUVitamin C: 1mgCalcium: 300mgIron: 2mg

Notes

Store leftover pizza in an airtight container in the fridge for up to 4 days. Can be frozen for up to 2 months.

Tried this recipe?

Let us know how it was!

Sausage Feta Honey Pizza: A Sweet Twist on Classic Flavors

March 8, 2026 by Grace Snow Leave a Comment

Picture a cozy night in, the aroma of spicy Italian sausage and sweet honey wafting through your kitchen, wrapping you in warmth and comfort. That's exactly what you'll get with my Sausage Feta Honey Pizza, a delightful culinary adventure that transforms pizza night into a gourmet experience. This recipe not only promises an effortless preparation process—perfect for busy weeknights—but also invites creativity with its customizable toppings and vegetarian-friendly options. The combination of creamy feta and a drizzle of honey balances the savory notes, making every bite truly satisfying. Are you ready to elevate your pizza game and impress your taste buds? Let’s dive into this delicious recipe together!

Why is this pizza a must-try?

Flavor Explosion: The Sausage Feta Honey Pizza is a delightful blend of sweet and savory, with creamy feta enriching every bite.

Customizable Delight: Feel free to play around with toppings to suit your taste; from spicy chorizo to vibrant veggies, the possibilities are endless!

Easy Prep: This hassle-free recipe is perfect for a weeknight dinner or hosting friends. It comes together quickly, making it stress-free and fun to prepare.

Hearty and Satisfying: Each slice promises to fill you with warmth and comfort, putting a gourmet twist on pizza night that everyone will love.

Crowd Pleaser: Whether you're feeding the family or having friends over, this dish will surely impress. Serve it alongside a fresh salad or some Honey Garlic Chicken for a complete meal!

Sausage Feta Honey Pizza Ingredients

For the Dough
• All-purpose flour – provides the structure for the pizza dough; consider using whole wheat for a healthier option.
• Sugar – activates the yeast and enhances browning; can be replaced with honey for a more natural sweetener.
• Salt – enhances flavor and strengthens the dough structure; it's essential for taste but don’t overdo it.
• Active dry yeast – causes the dough to rise, making it fluffy; ensure it is fresh or use instant yeast similarly.
• Warm water – hydrates the dough and activates the yeast (optimal temperature: 105-115°F). Too hot can kill the yeast, while too cold won’t activate it.
• Olive oil – adds richness to the dough and promotes browning; use extra virgin for the best flavor.

For the Toppings
• Italian sausage – provides a flavorful, savory base; can substitute with chorizo or omit for a vegetarian option.
• Red onion – adds sweetness and depth of flavor; yellow or white onion can be used instead.
• Garlic – offers aromatic flavor; fresh is preferred, but garlic powder works in a pinch.
• Feta cheese – contributes a creamy, tangy flavor; goat cheese or ricotta serve as good alternatives.
• Honey – drizzled on top for a sweet balance; maple syrup can substitute for a different sweet flavor.
• Fresh basil leaves – introduces freshness and aroma; other herbs like oregano or thyme can also be used.
• Red pepper flakes (optional) – adds heat; omit for a milder flavor.

Seasoning
• Salt and pepper – important for seasoning; adjust to taste.

Enjoy your culinary journey with this Sausage Feta Honey Pizza, and let your creativity shine with various toppings!

Step‑by‑Step Instructions for Sausage Feta Honey Pizza

Step 1: Activate the Yeast
In a small bowl, combine sugar and warm water (105-115°F), stirring until dissolved. Sprinkle the active dry yeast over the surface and allow it to sit for 5-10 minutes until frothy. This activation ensures your pizza dough rises beautifully in the baking process, leading to that delightful Sausage Feta Honey Pizza texture.

Step 2: Make the Dough
In a large mixing bowl, combine the activated yeast mixture with olive oil, salt, and gradually add the all-purpose flour. Stir until a shaggy dough forms. This process helps incorporate ingredients effectively, giving you a solid base for your pizza. Once combined, you'll be ready to knead!

Step 3: Knead the Dough
Lightly flour a clean surface and turn out the shaggy dough. Knead the dough for 8-10 minutes, or until it becomes smooth and elastic. You’ll know it’s ready when it springs back gently when pressed. This step is crucial for developing gluten, resulting in a satisfying crust for your Sausage Feta Honey Pizza.

Step 4: Let the Dough Rise
Grease a clean bowl with a bit of olive oil and place the kneaded dough inside, turning it once to coat. Cover with a kitchen towel and let it rise in a warm spot for 1-1.5 hours, or until it has doubled in size. This rising process allows the yeast to work its magic, creating that airy texture.

Step 5: Prepare the Filling
In a skillet over medium heat, cook the Italian sausage until browned, breaking it apart with a spatula—about 5-7 minutes. Afterward, drain any excess grease, then add chopped red onions. Sauté until softened, followed by adding minced garlic for 1-2 minutes until fragrant. This filling adds rich flavor to your Sausage Feta Honey Pizza.

Step 6: Cool the Filling
Remove the skillet from the heat and season the sausage mixture with salt and pepper to taste. Allow it to cool slightly while you preheat your oven to 450°F (232°C). This cooling ensures you won’t disrupt the dough during assembly and keeps the flavors well-balanced for the Sausage Feta Honey Pizza.

Step 7: Shape the Dough
Once risen, punch down the dough and divide it into two equal portions. On a floured surface, roll out one portion into a 12-inch circle. Transfer it onto a prepared baking sheet or a pizza stone for optimal heat distribution. This shaping is essential to provide a strong base for your toppings to shine.

Step 8: Assemble the Pizza
Brush the rolled-out dough lightly with olive oil to prevent sogginess. Evenly spread the cooled sausage mixture and sprinkle crumbled feta cheese over the top. The combination of flavors will start to meld together beautifully as it bakes, making for a delicious Sausage Feta Honey Pizza.

Step 9: Bake the Pizza
Place the assembled pizza in the preheated oven and bake for 12-15 minutes, or until the crust is golden brown and the cheese is bubbling. Keep an eye on it to achieve that perfect doneness, as ovens can vary. This critical step transforms your creations into the masterpiece that is Sausage Feta Honey Pizza.

Step 10: Finish with Honey and Basil
Once baked, remove the pizza from the oven and immediately drizzle it with honey, allowing it to slightly seep into the warm toppings. Sprinkle with fresh basil leaves for a burst of flavor and aroma. This final touch elevates the overall profile of your Sausage Feta Honey Pizza to gourmet status.

Step 11: Slice and Serve
Allow the pizza to cool for a few minutes before slicing it into wedges. This resting period helps the flavors settle and makes it easier to cut. Serve warm alongside a fresh salad or your favorite dipping sauce for a complete meal that everyone will enjoy!

Make Ahead Options

Preparing your Sausage Feta Honey Pizza ahead of time is a fantastic way to save precious minutes on busy weeknights! You can make the pizza dough and store it in the refrigerator for up to 3 days; just wrap it tightly in plastic wrap to maintain its moisture and prevent it from drying out. The filling, a savory blend of sausage and sautéed onions, can also be prepped in advance and refrigerated for up to 2 days. When you're ready to bake, simply roll out the dough, spread the cooled filling, add the feta, and bake as instructed. You'll enjoy a delightful homemade pizza with minimal effort after a long day!

Expert Tips for Sausage Feta Honey Pizza

• Fresh Yeast Matters: Always ensure your yeast is fresh for proper dough rise; a frothy mixture indicates it's ready to work its magic.

• Avoid Soggy Crust: Brush your dough with olive oil before adding toppings, which helps prevent sogginess and ensures a crispy Sausage Feta Honey Pizza.

• Watch the Cooking Time: Ovens can vary, so keep a close eye while your pizza bakes. Look for a golden crust and bubbling cheese for the best results.

• Creative Toppings: Feel free to mix and match toppings! Consider adding roasted vegetables or different cheeses to personalize your Sausage Feta Honey Pizza.

• Serving Suggestions: Allow the pizza to cool slightly before slicing; this keeps the toppings intact, making each slice visually appealing and delicious.

What to Serve with Sausage Feta Honey Pizza

Imagine a warm, inviting table filled with delightful dishes that complement the rich flavors of your homemade pizza.

  • Fresh Arugula Salad: A light, peppery salad with a lemon vinaigrette balances the savory notes of the pizza.

  • Garlic Breadsticks: Crunchy and warm, these breadsticks offer a comforting side that pairs perfectly with the rich toppings.

  • Roasted Vegetables: Sweet, caramelized veggies add depth and color, enhancing the overall meal experience.

  • Italian Antipasto Platter: A medley of cured meats, cheeses, and olives creates a flavorful starter that sets the stage for your pizza.

  • Chilled White Wine: A crisp Sauvignon Blanc or Pinot Grigio refreshes the palate while complementing the savory and sweet elements of the pizza.

  • Homemade Tiramisu: End the meal with this creamy, coffee-infused dessert, offering a decadent finale to your pizza night.

Pairing these delightful sides with your Sausage Feta Honey Pizza will transform a simple meal into a memorable dining experience. Enjoy!

Sausage Feta Honey Pizza Variations

Feel free to put your own spin on the delightful flavors of this recipe and elevate your pizza night!

  • Vegetarian Delight: Swap out Italian sausage for roasted vegetables like bell peppers and zucchini for a fresh, garden-inspired twist. You'll still achieve that satisfying heartiness without losing flavor!

  • Cheese Lovers: Instead of feta, try using creamy goat cheese or even ricotta for a different texture and taste sensation. Both options add a unique flavor profile sure to please cheese enthusiasts.

  • Crunchy Greens: Add peppery arugula or baby spinach on top after baking to bring in a slight crispness and fresh green note to contrast the savory toppings beautifully.

  • Sweet and Spicy: For a kick of heat, sprinkle some jalapeños along with the honey drizzle. This creates an exciting combination of sweet and fiery flavors that keeps your taste buds dancing!

  • Herb Infusion: Instead of just basil, consider blending in fresh oregano or thyme for an aromatic twist that enriches the pizza's depth and elevates your culinary experience.

  • BBQ Twist: Replace honey with your favorite BBQ sauce and enhance your topping game with pulled chicken. This version transforms your pizza into a smoky, sweet delight!

  • Balsamic Glaze: Drizzle balsamic reduction over the finished pizza for an elegant touch that adds a tangy sweetness to every bite, making it restaurant-worthy right at home.

Try these variations however you like and feel free to mix and match! You might also enjoy serving this alongside some Skillet Pasta Feta to create a complete, satisfying meal that is sure to impress.

How to Store and Freeze Sausage Feta Honey Pizza

Room Temperature: Store leftover pizza at room temperature in an airtight container for up to 2 days to maintain flavor and texture without drying out.

Fridge: For longer storage, keep the Sausage Feta Honey Pizza in the fridge for up to 3 days. Wrap it tightly in plastic wrap or aluminum foil to avoid moisture loss.

Freezer: If you want to save it for later, freeze the pizza after slicing it. Wrap each piece in plastic wrap followed by aluminum foil for up to 2 months.

Reheating: Reheat slices in the oven at 350°F (175°C) for about 10-15 minutes, or until warmed through. This keeps the crust crispy while melting the cheese again beautifully.

Sausage Feta Honey Pizza Recipe FAQs

How do I select the right ingredients for my Sausage Feta Honey Pizza?
Absolutely! When choosing your ingredients, opt for fresh, high-quality Italian sausage and ripe red onions for the best flavors. For the feta cheese, look for a creamy texture and a tangy aroma. The honey should be pure and natural for the sweetest finish, complementing the savory elements beautifully.

What is the best way to store leftover Sausage Feta Honey Pizza?
You can keep your leftover pizza at room temperature in an airtight container for up to 2 days. However, for longer storage, I recommend refrigerating it for up to 3 days—just wrap it tightly in plastic wrap or aluminum foil to keep it fresh and avoid moisture loss.

Can I freeze my Sausage Feta Honey Pizza? How?
Of course! To freeze your Sausage Feta Honey Pizza, slice it first and wrap each piece in plastic wrap, followed by aluminum foil. This will protect it from freezer burn. You can keep it in the freezer for up to 2 months. When you're ready to enjoy it, simply reheat the slices in the oven at 350°F (175°C) for about 10-15 minutes, which helps keep the crust crispy.

What are some common issues when making pizza dough, and how can I avoid them?
Often, dough issues arise from the yeast. Make sure your yeast is fresh; if it’s old, it won’t froth properly. Also, ensure your warm water is between 105-115°F to activate the yeast but not kill it. If the dough doesn’t rise, it may need more time—be patient! Kneading thoroughly for 8-10 minutes develops the gluten, creating the right texture.

Are there any dietary considerations for the Sausage Feta Honey Pizza?
Very much so! For a vegetarian-friendly option, simply omit the sausage and add extra roasted vegetables. If you have dietary restrictions, be sure to check for gluten in the flour or lactose in the cheese, and feel free to explore alternative ingredients like gluten-free flour and vegan cheese to cater to everyone's needs.

Sausage Feta Honey Pizza

Sausage Feta Honey Pizza: A Sweet Twist on Classic Flavors

Experience a flavor explosion with Sausage Feta Honey Pizza, blending savory sausage, creamy feta, and sweet honey for a memorable dinner.
Print Recipe Pin Recipe
Prep Time 15 minutes mins
Cook Time 15 minutes mins
Rising Time 1 hour hr 30 minutes mins
Total Time 2 hours hrs
Servings: 8 slices
Course: Dinner
Cuisine: Italian
Calories: 300
Ingredients Equipment Method Nutrition Notes

Ingredients
  

For the Dough
  • 2 cups all-purpose flour consider using whole wheat for a healthier option
  • 1 tablespoon sugar can be replaced with honey
  • 1 teaspoon salt essential for taste
  • 2 teaspoons active dry yeast ensure it is fresh
  • 1 cup warm water optimal temperature: 105-115°F
  • 2 tablespoons olive oil use extra virgin for the best flavor
For the Toppings
  • 1 pound Italian sausage can substitute with chorizo or omit for vegetarian
  • 1 medium red onion yellow or white onion can be used instead
  • 2 cloves garlic fresh is preferred
  • 1 cup feta cheese goat cheese or ricotta serve as good alternatives
  • 2 tablespoons honey maple syrup can substitute
  • 1 cup fresh basil leaves other herbs like oregano can also be used
  • 1 teaspoon red pepper flakes optional for heat
Seasoning
  • to taste salt for seasoning
  • to taste pepper for seasoning

Equipment

  • Baking Sheet
  • Mixing Bowl
  • Skillet
  • Rolling Pin
  • Kitchen Towel

Method
 

Step‑by‑Step Instructions
  1. In a small bowl, combine sugar and warm water, stirring until dissolved. Sprinkle the active dry yeast over the surface and allow it to sit for 5-10 minutes until frothy.
  2. In a large mixing bowl, combine the activated yeast mixture with olive oil, salt, and gradually add the all-purpose flour. Stir until a shaggy dough forms.
  3. Lightly flour a clean surface and turn out the shaggy dough. Knead the dough for 8-10 minutes, or until it becomes smooth and elastic.
  4. Grease a clean bowl with a bit of olive oil and place the kneaded dough inside. Cover with a kitchen towel and let it rise in a warm spot for 1-1.5 hours.
  5. In a skillet over medium heat, cook the Italian sausage until browned. Add chopped red onions and sauté until softened, then add minced garlic for 1-2 minutes.
  6. Remove the skillet from the heat and season the sausage mixture with salt and pepper to taste. Allow it to cool slightly.
  7. Once risen, punch down the dough and divide it into two equal portions. Roll out one portion into a 12-inch circle.
  8. Brush the rolled-out dough lightly with olive oil. Spread the cooled sausage mixture and sprinkle crumbled feta cheese over the top.
  9. Place the assembled pizza in the preheated oven and bake for 12-15 minutes, or until the crust is golden brown and the cheese is bubbling.
  10. Once baked, remove the pizza from the oven and immediately drizzle it with honey. Sprinkle with fresh basil leaves.
  11. Allow the pizza to cool for a few minutes before slicing it into wedges.

Nutrition

Serving: 1sliceCalories: 300kcalCarbohydrates: 35gProtein: 12gFat: 12gSaturated Fat: 4gPolyunsaturated Fat: 1gMonounsaturated Fat: 6gCholesterol: 30mgSodium: 600mgPotassium: 200mgFiber: 2gSugar: 4gVitamin A: 500IUVitamin C: 3mgCalcium: 150mgIron: 2mg

Notes

Experiment with different toppings like roasted vegetables or various cheeses. Serve alongside a fresh salad for a complete meal.

Tried this recipe?

Let us know how it was!

Creamy White Garlic Pizza Sauce: Elevate Your Pizzas Today

March 8, 2026 by Grace Snow Leave a Comment

The aroma of sautéed garlic filled my kitchen, and just like that, I was transported to an Italian trattoria. This creamy White Garlic Pizza Sauce is a game-changer for your pizza nights, transforming a simple dish into a rich, flavorful experience. Ready in just 30 minutes, this quick and easy recipe not only saves you from the fast-food trap but also lets you customize garlic intensity and add a dash of heat, making it perfect for any palate. Imagine the delight of family and friends as you serve pizzas topped with this velvety sauce—it's the kind of comfort food that brings everyone together. Are you ready to elevate your homemade pizza game? Let's dive into the details!

Why Is This Sauce a Must-Try?

Creamy Texture: The rich blend of heavy cream and Parmesan creates a velvety sauce that enhances your favorite pizza or pasta.

Quick Preparation: With just 30 minutes required, you can whip up this sauce in no time, making it a fantastic option for those busy weeknights.

Versatile Flavor: Customize the garlic intensity and spice level to match your taste, whether you're a garlic lover or just want a hint of heat.

Crowd-Pleasing Appeal: Impress friends and family with this indulgent sauce that guarantees rave reviews at your next gathering or pizza night.

Make-It-Your-Own: Easily swap in fresh herbs or cheese to create unique flavor profiles; try pairing it with Cheesy Garlic Bread for a truly delightful meal.

  1. Ingredients
    • • White Garlic Pizza Sauce Ingredients

  2. For the Sauce

  • Heavy cream – Provides richness and creaminess to the sauce; can substitute half with whole milk for a lighter version.
  • Garlic, minced – Offers robust flavor essential to the sauce; fresh garlic is recommended for best results.
  • Olive oil – Used for sautéing garlic and providing a base flavor; other oils can be used, but olive oil is preferred.
  • All-purpose flour – Thickens the sauce to the desired consistency; add an extra tablespoon for a creamier sauce if needed.
  • Salt – Enhances overall flavor; no substitutions necessary.
  • Black pepper – Adds a mild heat and flavor depth; use freshly ground for the best taste.
  • Dried oregano – Provides classic Italian herb flavor; substitute with dried basil if desired.
  • Dried basil – Complements the flavor profile alongside oregano; fresh basil can be used but adjust quantity.
  • Red pepper flakes (optional) – Adds spiciness to the sauce; adjust the quantity based on your heat preference.
  • Parmesan cheese, grated – Adds a salty, nutty flavor and creaminess to the sauce; Pecorino Romano can be a substitute for a sharper taste.

This delightful White Garlic Pizza Sauce is ready to transform your homemade meals into extraordinary creations!

Step‑by‑Step Instructions for White Garlic Pizza Sauce

Step 1: Prepare Garlic Base
Heat 2 tablespoons of olive oil in a medium saucepan over medium heat. Once the oil shimmers, add 4 minced garlic cloves and sauté for 1–2 minutes, stirring frequently until the garlic is fragrant and lightly golden. Be careful not to let it brown too much, as it can become bitter.

Step 2: Make Roux
Sprinkle 2 tablespoons of all-purpose flour over the sautéed garlic, stirring constantly for about 1 minute. This forms a roux that will help thicken your White Garlic Pizza Sauce. Ensure there are no lumps, and cook until the mixture is lightly golden, releasing a nutty aroma.

Step 3: Add Cream and Spices
Gradually whisk in 1 cup of heavy cream, ensuring a smooth mixture without any lumps. Then, add 1/2 teaspoon of salt, 1/4 teaspoon of freshly ground black pepper, 1 teaspoon of dried oregano, and 1 teaspoon of dried basil for that classic Italian flavor. If you like some heat, add a pinch of red pepper flakes at this stage.

Step 4: Thicken Sauce
Continue to cook the sauce over medium heat, whisking continuously for about 5–7 minutes, until it thickens to your desired consistency. You’ll know it’s ready when the sauce coats the back of a spoon and has a creamy texture that invites you to taste.

Step 5: Incorporate Cheese
Remove the saucepan from heat and stir in 1 cup of grated Parmesan cheese until it melts completely and integrates into the sauce. This will enrich the flavor of your White Garlic Pizza Sauce and enhance its creamy texture.

Step 6: Cool and Use
Allow the sauce to cool slightly for about 5 minutes before spreading it on your pizza dough. The cooling period will help it thicken a bit more and make it easier to work with. This delicious White Garlic Pizza Sauce is now ready to elevate your pizzas effortlessly!

What to Serve with Creamy White Garlic Pizza Sauce

Picture a home-cooked meal where every bite is a comforting burst of flavor, inviting friends and family to the table.

  • Crispy Garlic Bread: The buttery crunch of this bread pairs beautifully with the creamy sauce, perfect for dipping.
    Enjoy a side of garlic bread with this sauce—imagine the aroma wafting through your kitchen as you pull it fresh from the oven.

  • Fresh Arugula Salad: A peppery, vibrant salad adds a crisp contrast to the velvety sauce.
    Toss together arugula, cherry tomatoes, and a light vinaigrette for a refreshing crunch that complements your creamy pizza.

  • Roasted Vegetables: Caramelized veggies introduce earthy flavors and textures that enhance the dish.
    Oven-roasting carrots, zucchini, and bell peppers brings out their natural sweetness, making them an irresistible sidekick to the sauce.

  • Homemade Pizza Dough: Elevate your pizza game by crafting your own dough.
    A buttery, warm crust provides the ideal foundation for spreading that deliciously rich garlic sauce.

  • Classic Caesar Salad: Crisp romaine, tart dressing, and croutons create a classic pairing.
    The bold flavors of a Caesar salad balance the creaminess, providing a refreshing palate cleanser each time.

  • Wine Pairing: A chilled Sauvignon Blanc can brighten the meal with its zesty notes.
    Sip on a glass while enjoying your pizza—this harmonious pairing enhances the overall dining experience.

  • Lemon Sorbet: This light, refreshing dessert cleanses the palate post-meal.
    The citrusy brightness of sorbet contrasts with the sauce’s richness, leaving you with a satisfying finish.

White Garlic Pizza Sauce Variations

Feel free to play with this sauce to suit your preferences; the possibilities are almost endless!

  • Butter Swap: Replace olive oil with butter for a richer, creamier flavor. This adds a delightful depth to your sauce.

  • Fresh Herbs: For a garden-fresh taste, use fresh herbs like thyme, rosemary, or parsley instead of dried ones. They can invigorate the sauce with vibrant flavors.

  • Cheesy Addition: Mix in some shredded mozzarella cheese for extra cheesiness. It will melt beautifully and create a gooey texture.

  • Almond Milk: For a lighter option, substitute heavy cream with almond milk. You’ll get a creamy sauce that’s dairy-free and still delicious.

  • Lemon Zest: Add a hint of brightness by incorporating a teaspoon of lemon zest. It’s an unexpected twist that freshens up the flavor profile.

  • Spicier Kick: Want some heat? Increase the amount of red pepper flakes or add sliced jalapeños for a fiery version. This can turn your pizza night into an exciting adventure!

  • Shrimp Pairing: For a unique twist, try mixing in cooked shrimp with the sauce. This pairs perfectly if you’re inspired to create gourmet pizzas—perhaps with some spinach or artichokes.

Try some of these variations next time you make your Cheesy Garlic Bread or serve it alongside Honey Garlic Chicken to elevate your meal even further!

How to Store and Freeze White Garlic Pizza Sauce

Fridge: Store unused White Garlic Pizza Sauce in an airtight container for up to 4 days. Ensure it cools to room temperature before sealing to maintain freshness.

Freezer: For longer storage, freeze the sauce in a freezer-safe container for up to 2 months. Leave some space at the top for expansion as it freezes.

Reheating: When ready to use, thaw the sauce in the refrigerator overnight and reheat gently on low heat, stirring frequently to combine any separated ingredients.

Make-Ahead Tip: This creamy sauce can be prepared ahead of time, making it a convenient option for busy meal planning. Just remember to stir while reheating!

Make Ahead Options

Want to save time on busy weeknights? This creamy White Garlic Pizza Sauce is perfect for meal prep! You can prepare the entire sauce up to 3 days in advance. Simply follow the recipe through to incorporating the cheese, then let the sauce cool. After cooling, transfer it to an airtight container and refrigerate. To maintain quality, make sure to press plastic wrap directly onto the surface of the sauce before sealing your container, which will prevent any unwanted air contact. When you're ready to use it, just reheat gently on the stove over low heat, stirring until smooth, and you'll enjoy delicious pizza sauce just as fresh as the day you made it!

Expert Tips for White Garlic Pizza Sauce

  • Garlic Selection: Use fresh garlic cloves for a more vibrant flavor; if you must substitute, use garlic powder sparingly to avoid overpowering the sauce.

  • Roux Consistency: Ensure you stir the flour into the garlic thoroughly to avoid lumps in your White Garlic Pizza Sauce; cook it just long enough to eliminate the raw taste.

  • Custom Creaminess: Adjust the thickness by modifying the cooking time or adding more flour; a longer simmer yields a richer sauce perfect for thick crust pizzas.

  • Spice it Up: Feel free to enhance the heat by increasing red pepper flakes; remember to taste as you go for a balanced flavor.

  • Storage Secrets: Store any leftovers in an airtight container in the fridge for up to 4 days; reheat gently on low heat and stir well before use.

White Garlic Pizza Sauce Recipe FAQs

How do I select the best garlic for this sauce?
Absolutely! For the best flavor, use fresh garlic cloves that are firm and free of any dark spots. Avoid garlic that feels soft or has started to sprout, as it can have a bitter taste. If you're looking for convenience, you can use pre-minced garlic in a pinch, but the fresh stuff really shines in this creamy sauce.

How do I store leftover White Garlic Pizza Sauce?
Very simple! Store any unused White Garlic Pizza Sauce in an airtight container in the fridge for up to 4 days. Make sure the sauce cools to room temperature before sealing it to preserve its creamy texture and flavor. When you’re ready to use it again, gently reheat on low heat, stirring to maintain that luscious consistency.

Can I freeze White Garlic Pizza Sauce?
Absolutely! You can freeze your White Garlic Pizza Sauce in an airtight, freezer-safe container for up to 2 months. Leave some space at the top of the container when sealing, as the sauce may expand when frozen. To use, simply thaw in the fridge overnight, then reheat gently on the stove, stirring frequently to combine any potentially separated ingredients.

What if my sauce is too thick?
If you find your sauce is thicker than you'd like, simply whisk in a little more heavy cream or whole milk over low heat until you reach your desired consistency. If the sauce seems too thin after adding liquid, let it simmer a bit longer to thicken. Taste-testing along the way ensures the flavor remains just right!

Are there any dietary considerations for this recipe?
This recipe is vegetarian, but it does contain dairy ingredients which may not be suitable for those with lactose intolerance or dairy allergies. For a dairy-free alternative, try using a creamy plant-based milk and nutritional yeast for flavor, adjusting the other ingredients as necessary. Always consider personal dietary needs and preferences when adapting the recipe.

Can I customize the spice level of the sauce?
Very much so! You can easily adjust the heat level of your White Garlic Pizza Sauce by varying the amount of red pepper flakes you add. For a milder sauce, start with a pinch and increase according to your preference. If you love heat, don’t hesitate to double the amount or even experiment with other spices like cayenne pepper!

White Garlic Pizza Sauce

Creamy White Garlic Pizza Sauce

This creamy White Garlic Pizza Sauce enhances your pizza with rich flavors and is ready in just 30 minutes.
Print Recipe Pin Recipe
Prep Time 10 minutes mins
Cook Time 20 minutes mins
Cooling Time 5 minutes mins
Total Time 30 minutes mins
Servings: 2 cups
Course: Uncategorized
Cuisine: Italian
Calories: 320
Ingredients Equipment Method Nutrition Notes

Ingredients
  

For the Sauce
  • 1 cup Heavy cream Can substitute half with whole milk for a lighter version.
  • 4 cloves Garlic, minced Fresh garlic is recommended for best results.
  • 2 tablespoons Olive oil Preferred for sautéing garlic.
  • 2 tablespoons All-purpose flour Add an extra tablespoon for a creamier sauce if needed.
  • 0.5 teaspoon Salt No substitutions necessary.
  • 0.25 teaspoon Black pepper Use freshly ground for best taste.
  • 1 teaspoon Dried oregano Substitute with dried basil if desired.
  • 1 teaspoon Dried basil Fresh can be used but adjust quantity.
  • 1 pinch Red pepper flakes (optional) Adjust based on your heat preference.
  • 1 cup Parmesan cheese, grated Pecorino Romano can be a substitute.

Equipment

  • Medium saucepan

Method
 

Step-by-Step Instructions
  1. Heat 2 tablespoons of olive oil in a medium saucepan over medium heat. Once the oil shimmers, add 4 minced garlic cloves and sauté for 1–2 minutes until fragrant.
  2. Sprinkle 2 tablespoons of all-purpose flour over the sautéed garlic, stirring constantly for about 1 minute to form a roux.
  3. Gradually whisk in 1 cup of heavy cream, ensuring a smooth mixture without lumps. Add 0.5 teaspoon of salt, 0.25 teaspoon of freshly ground black pepper, 1 teaspoon of dried oregano, and 1 teaspoon of dried basil.
  4. Continue to cook over medium heat, whisking for about 5–7 minutes until thickened.
  5. Remove from heat and stir in 1 cup of grated Parmesan cheese.
  6. Allow to cool slightly for about 5 minutes before using.

Nutrition

Serving: 1cupCalories: 320kcalCarbohydrates: 8gProtein: 8gFat: 30gSaturated Fat: 18gMonounsaturated Fat: 12gCholesterol: 80mgSodium: 500mgPotassium: 150mgSugar: 1gVitamin A: 150IUCalcium: 300mg

Notes

This creamy sauce can be prepared ahead of time. Store in an airtight container in the fridge for up to 4 days.

Tried this recipe?

Let us know how it was!

Homemade Sheet Pan Pizza: Easy, Fun, and Totally Customizable

March 8, 2026 by Grace Snow Leave a Comment

As I stood in my kitchen, a delightful aroma wafted through the air, instantly transporting me to my favorite pizzeria. Nothing beats the joyful anticipation of gathering friends or family around for a slice of homemade joy! This Homemade Sheet Pan Pizza is a perfect option for those busy weeknights when you crave comfort food but don’t want the hassle of takeout. With its quick prep time and endless topping possibilities, it invites everyone to create their own unique combination. Whether you opt for traditional or gluten-free dough, this pizza recipe makes it easy to please even the pickiest eaters at the table. So, are you ready to unleash your inner pizza maestro and explore that crispy, cheesy perfection together?

Why is Homemade Sheet Pan Pizza a Must-Try?

Customization, it’s your pizza, your way! With countless topping options, everyone can savor their favorite flavors. Ease of preparation means family members, big and small, can join in on the fun. Time-saving, this dish comes together quick for those busy nights. Don’t forget, gluten-free alternatives make it accessible to all! Finally, sharing smiles around the table as the delicious aroma fills the room creates a joyful atmosphere reminiscent of pizzerias. Pair it with a refreshing side salad or even a rich Homemade Hot Chocolate for a delightful meal experience!

Homemade Sheet Pan Pizza Ingredients

For the Dough

  • Pizza Dough – The foundation of your Homemade Sheet Pan Pizza; use store-bought for convenience or gluten-free dough for dietary needs.

For the Sauce

  • Tomato Sauce – Adds a rich tangy flavor; try marinara, roasted garlic, or white sauce for a twist.

For the Cheese

  • Mozzarella Cheese – Known for its excellent melting quality; mix with provolone or vegan cheese for dairy-free options.

For the Toppings

  • Varied Toppings – Customize your pizza personality with options like bell peppers, mushrooms, or sausage; change it up with your favorite vegetables or proteins.

For the Finish

  • Olive Oil – Gives the crust a crisp texture and enhances flavor; use a neutral oil or cooking spray for a lighter finish.
  • Herbs & Seasonings – Elevate the flavor profile; fresh basil and oregano work beautifully, but dried herbs can be substituted as needed.

Each ingredient plays a vital role in crafting that perfect Homemade Sheet Pan Pizza you’ll want to share with loved ones!

Step‑by‑Step Instructions for Homemade Sheet Pan Pizza

Step 1: Preheat and Prep
Begin by preheating your oven to 425°F (220°C). While the oven heats, grab a rimmed baking sheet and lightly grease it with olive oil to ensure your Homemade Sheet Pan Pizza has a perfectly crisp crust. Make sure the oil evenly coats the surface, which will help achieve those delightful golden edges!

Step 2: Shape the Dough
Next, take your pizza dough and place it on a lightly floured surface. Using a rolling pin or your hands, stretch or roll the dough to fit the rimmed baking sheet. Aim for an even thickness across the entire surface, about half an inch. This will ensure your Homemade Sheet Pan Pizza has a chewy center and beautiful crispy edges!

Step 3: Add Tomato Sauce
Once your dough is shaped, carefully spread a generous layer of tomato sauce over the surface, leaving about a half-inch border around the edges for crust. Use the back of a spoon to create a smooth and even layer. This will infuse flavor into your Homemade Sheet Pan Pizza and give it that saucy goodness everyone loves.

Step 4: Sprinkle the Cheese
Now, it’s time to add the cheese! Evenly sprinkle a generous layer of mozzarella cheese over the sauced dough. This layer will melt beautifully as it bakes, creating that mouthwatering gooeyness. Feel free to mix in some provolone or a dairy-free alternative if you’re experimenting with flavors for your Homemade Sheet Pan Pizza.

Step 5: Layer on the Toppings
With the cheese in place, it’s time to get creative! Add your favorite toppings in a single layer over the cheese. Whether it’s bell peppers, mushrooms, or pepperoni, spread them out evenly to avoid overloading any part of your Homemade Sheet Pan Pizza, which can lead to sogginess.

Step 6: Bake to Perfection
Carefully place the sheet pan in your preheated oven and bake for 20-25 minutes. Keep an eye on it; you want the cheese to be bubbly and the edges of the crust to turn a lovely golden brown. If you like it extra crispy, switch on the broiler for the last 1-2 minutes for that perfect finish.

Step 7: Cool and Garnish
Once your Homemade Sheet Pan Pizza is out of the oven, allow it to cool for about 3-5 minutes. This resting time makes it easier to slice without losing those delicious toppings. Add a sprinkle of fresh herbs like basil or oregano and a drizzle of olive oil for an aromatic finish before cutting into squares and serving!

Homemade Sheet Pan Pizza Variations

Feel free to let your culinary creativity shine when making your pizza! From topping swaps to dough twists, the possibilities are endless.

  • Gluten-Free Dough: Opt for a gluten-free pizza crust to make this recipe celiac-friendly. You’ll still enjoy that crispy base without compromising taste!

  • Sauce Swaps: Replace traditional tomato sauce with pesto or a creamy white sauce for a refreshing twist. Each option brings a unique flavor profile to elevate your pizza experience.

  • Cheese Blends: Mix mozzarella with gouda or cheddar for a richer taste. The depth of flavor from different cheeses adds that gourmet touch.

  • Veggie-Packed: Load up on seasonal vegetables like zucchini or spinach instead of meats for a delightful vegetarian option. It's a delicious way to incorporate more veggies into your meal!

  • Spicy Kick: Sprinkle red pepper flakes on top or use spicy sausage for an added kick. This variation satisfies those who crave a little heat in their bite!

  • Herb Infusion: Incorporate fresh herbs like thyme or rosemary into your dough for an aromatic flavor bomb. It’s like taking your pizza to a whole new dimension!

  • Cauliflower Crust: Use a cauliflower crust for a healthier, low-carb option that doesn't skimp on flavor. It’s a fun way to enjoy pizza guilt-free!

  • Homemade Hot Sauce: If you love a spicy bite, serve with a drizzle of homemade hot sauce for an added zing. This personal touch completes your Homemade Sheet Pan Pizza experience.

Explore these variations to make your Homemade Sheet Pan Pizza completely yours! Each change can create an exciting new flavor, just like when you enjoy Pan Fried Shrimp with a fresh twist or craft a delightful Blue Cheese Pizza to surprise your palate. Happy cooking!

Expert Tips for Homemade Sheet Pan Pizza

  • Avoid Soggy Crust: Don’t overload your pizza with toppings; too many can lead to a soggy crust. Less is more for your Homemade Sheet Pan Pizza!

  • Even Dough Thickness: Make sure your dough is evenly stretched across the pan. This will ensure consistent cooking and prevent uneven textures.

  • Experiment with Sauces: Try different sauces, like pesto or white sauce, to elevate your Homemade Sheet Pan Pizza. Each variation offers a new flavor experience!

  • Optimal Cheese Mix: For the best melting quality, mix mozzarella with provolone or a dairy-free cheese option. This adds depth to your pizza's flavor profile.

  • Watch the Baking Time: Keep an eye on your pizza as it bakes. Every oven is different, and you want perfectly bubbly cheese without burning those beautiful edges!

What to Serve with Homemade Sheet Pan Pizza?

Gather around the table and indulge in a delicious family meal that invites everyone to dig in!

  • Fresh Garden Salad: A light, crisp salad adds a refreshing contrast to the warm, cheesy pizza, balancing out the meal perfectly. Toss together mixed greens, cherry tomatoes, and a zesty vinaigrette for extra brightness.

  • Garlic Breadsticks: The buttery, garlicky goodness of breadsticks is a classic sidekick to pizza. They can be dipped in marinara sauce, making for an extra tasty treat that enhances your meal.

  • Roasted Vegetables: Sweet roasted veggies like bell peppers and zucchini make a delightful side that complements the flavors of the pizza while adding a healthy touch. Their caramelized sweetness is simply irresistible!

  • Antipasto Platter: Create a vibrant antipasto platter with cured meats, cheeses, olives, and pickled vegetables. It’s a fun and interactive addition to the table that encourages everyone to nibble while awaiting their pizza.

  • Fruit Salad: A colorful medley of fresh fruits adds a refreshing note and a natural sweetness, providing a perfect contrast to the savory pizza. It lightens the overall meal, making it feel more balanced.

  • Craft Soda or Lemonade: Pair your pizza with homemade craft sodas or freshly squeezed lemonade for a refreshing drink that complements the flavors. The fizz or tang can elevate the meal experience to a whole new level.

By combining these delicious sides with your Homemade Sheet Pan Pizza, you'll create a memorable dining experience that’ll have everyone asking for seconds!

Storage Tips for Homemade Sheet Pan Pizza

  • Room Temperature: Let your Homemade Sheet Pan Pizza cool completely before slicing and storing. It’s best enjoyed fresh, but can sit out for up to 2 hours if covered.

  • Fridge: Store leftover pizza in an airtight container in the refrigerator for up to 3–4 days. This helps maintain flavor and freshness while preventing dryness.

  • Freezer: For longer storage, wrap slices individually in plastic wrap, then place them in a freezer-safe bag. Your Homemade Sheet Pan Pizza can last up to 2 months in the freezer!

  • Reheating: Reheat pizza in the oven at 375°F (190°C) for about 10-15 minutes until warmed through. This method keeps the crust crispy and the cheese melted perfectly.

Make Ahead Options

These Homemade Sheet Pan Pizza assemblies are perfect for busy weeknights and meal prep enthusiasts! You can prepare the pizza dough and toppings up to 24 hours in advance, so they’re ready for baking when you need them. To do this, shape the dough and place it on a greased sheet pan but hold off on adding the sauce and toppings until you're ready to bake. Cover it tightly with plastic wrap to maintain the dough's moistness and prevent it from drying out. When it's time to serve, simply spread on your tomato sauce, sprinkle the cheese, layer on your favorite toppings, and bake at 425°F (220°C) for 20-25 minutes. You’ll enjoy delicious, homemade pizza with minimal effort!

Homemade Sheet Pan Pizza Recipe FAQs

What type of pizza dough is best for Homemade Sheet Pan Pizza?
Absolutely! The best pizza dough for your Homemade Sheet Pan Pizza can be either store-bought for convenience or homemade if you’re feeling adventurous. For dietary needs, gluten-free dough options are widely available and work beautifully with this recipe. Just ensure it’s well-kneaded to create that chewy texture we love!

How should I store leftovers from my Homemade Sheet Pan Pizza?
To properly store your leftover Homemade Sheet Pan Pizza, allow it to cool completely before slicing. Place the slices in an airtight container and refrigerate for up to 3–4 days. This helps maintain the flavors and prevents the crust from drying out. For optimal taste, I recommend reheating in the oven rather than the microwave!

Can I freeze my Homemade Sheet Pan Pizza?
Yes, you can freeze your Homemade Sheet Pan Pizza! Start by cooling it completely and then wrap each slice tightly in plastic wrap. Place those in a freezer-safe bag to protect against freezer burn. Your pizza can last up to 2 months in the freezer! When you’re ready to enjoy it again, reheat straight from the freezer at 375°F (190°C) for about 15-20 minutes.

What should I do if my pizza crust turns out soggy?
If your crust ends up soggy, don’t worry; this is a common issue! This typically occurs when too many toppings are added or if the dough isn’t stretched evenly. To avoid it, stick to a single layer of toppings and make sure the dough is uniformly thick across the pan. Baking it longer or adjusting the temperature can also help achieve that crispy finish on your Homemade Sheet Pan Pizza.

Are there any dietary considerations for my Homemade Sheet Pan Pizza?
Very! If you or your guests have dietary restrictions, this recipe is highly customizable. You can opt for gluten-free dough, dairy-free cheese alternatives, and load up on your choice of vegetables for a healthier option. Just be sure to check labels for hidden allergens if you’re catering to someone with food sensitivities. Enjoy guilt-free pizza nights with these simple adjustments!

Homemade Sheet Pan Pizza

Homemade Sheet Pan Pizza: Easy, Fun, and Totally Customizable

Enjoy a delicious Homemade Sheet Pan Pizza, customizable with endless toppings, perfect for busy weeknights.
Print Recipe Pin Recipe
Prep Time 15 minutes mins
Cook Time 25 minutes mins
Cooling Time 5 minutes mins
Total Time 45 minutes mins
Servings: 8 slices
Course: Dinner
Cuisine: Italian
Calories: 300
Ingredients Equipment Method Nutrition Notes

Ingredients
  

For the Dough
  • 1 batch Pizza Dough Store-bought or gluten-free
For the Sauce
  • 1 cup Tomato Sauce Marinara, roasted garlic, or white sauce
For the Cheese
  • 2 cups Mozzarella Cheese Mix with provolone or vegan cheese if desired
For the Toppings
  • 1 cup Varied Toppings Bell peppers, mushrooms, or sausage
For the Finish
  • 2 tablespoons Olive Oil For greasing and enhancing flavor
  • 1 teaspoon Herbs & Seasonings Fresh basil and oregano recommended

Equipment

  • Oven
  • Rimmed Baking Sheet
  • Rolling Pin

Method
 

Step-by-Step Instructions
  1. Preheat your oven to 425°F (220°C). Grease a rimmed baking sheet with olive oil.
  2. Place the pizza dough on a floured surface and stretch or roll it to fit the baking sheet.
  3. Spread a layer of tomato sauce over the dough, leaving a half-inch border.
  4. Sprinkle mozzarella cheese evenly over the sauce.
  5. Add your favorite toppings in a single layer over the cheese.
  6. Bake for 20-25 minutes, until the cheese is bubbly and the edges are golden brown.
  7. Allow to cool for 3-5 minutes before slicing. Garnish with fresh herbs and a drizzle of olive oil.

Nutrition

Serving: 1sliceCalories: 300kcalCarbohydrates: 36gProtein: 12gFat: 12gSaturated Fat: 6gPolyunsaturated Fat: 2gMonounsaturated Fat: 4gCholesterol: 30mgSodium: 600mgPotassium: 240mgFiber: 2gSugar: 3gVitamin A: 400IUVitamin C: 2mgCalcium: 200mgIron: 1.5mg

Notes

Avoid overloading with toppings to prevent soggy crust. Experiment with different sauces for unique flavors.

Tried this recipe?

Let us know how it was!
  • « Previous Page
  • 1
  • …
  • 44
  • 45
  • 46
  • 47
  • 48
  • …
  • 216
  • Next Page »

Welcome!

Hi, I’m Grace, a Sydney-based home cook with a passion for bold flavors and trending ingredients. Whether you’re a busy beginner or a seasoned foodie, you’ll find dishes here that are fresh, fun, and full of flavor.

More about me

Popular Recipes

  • Chocolate Cake Pops
    Delightful Chocolate Cake Pops for Your Sweet Cravings
  • Cottage Cheese Banana Bread
    Cottage Cheese Banana Bread: Moist, Protein-Packed Delight
  • Flourless Oat Waffles
    Flourless Oat Waffles for a Quick, Healthy Breakfast Boost
  • Cinnamon Waffles
    Fluffy Cinnamon Waffles with Dreamy Whipped Cream Bliss

Footer

↑ back to top

About

  • Privacy Policy
  • Disclaimer
  • Terms & Conditions

Newsletter

  • Sign Up! for emails and updates

Contact

  • About me
  • Contact me

Copyright © 2025 TastyTrendIngredients