What if I told you that taco night could be exciting, customizable, and ready in less than 30 minutes? Enter my Quick and Easy Taco Bowl, a vibrant dish that hits all the right notes. This recipe features a hearty blend of seasoned ground beef, fluffy brown rice, and crisp veggies, making it perfect for busy weeknights or casual family dinners. The best part? You can easily adapt it for gluten-free, vegetarian, or low-carb diets, ensuring everyone at the table is satisfied. With endless topping options, this bowl brings a fun twist to traditional Tex-Mex flavors, allowing you to create a meal that feels personalized and comforting. Are you ready to discover how to turn your kitchen into a taco fiesta?
Why make a Taco Bowl tonight?
Versatility at its Best: This Quick and Easy Taco Bowl can be customized for various diets, offering options from gluten-free to vegetarian.
Flavor Explosion: The vibrant mix of seasoned ground beef, fresh veggies, and zesty pico de gallo delivers a satisfying taste that pleases everyone.
Speedy Preparation: Ready in under 30 minutes, you can easily whip up this meal on busy weeknights without sacrificing flavor or quality.
Interactive Dining Experience: With a buffet-style assembly, each family member can personalize their bowl, making dinner fun and engaging.
Nutrient-Rich Ingredients: Packed with protein, fiber, and healthy fats, this dish is a wholesome choice for a nourishing dinner alternative to fast food.
Try pairing your bowl with an Acai Bowl Nutritious for a refreshing dessert option after your meal!
Quick and Easy Taco Bowl Ingredients
For the Bowl Base
• Ground Beef – Classic taco filling, seasoned to perfection; substitute with ground turkey or plant-based crumbles for a leaner option.
• Brown Rice – Hearty base adding fiber and nuttiness; switch to cauliflower rice for low-carb alternatives.
For the Toppings
• Romaine Lettuce – Adds crunch and freshness; use iceberg lettuce for a milder taste.
• Black Beans – Source of plant-based protein; remember to drain and rinse for optimal texture.
• Shredded Cheddar Cheese – Melts beautifully over your bowl; opt for dairy-free cheese for a vegan option.
• Avocado – Provides creaminess and healthy fats; dice just before serving to keep it fresh.
• Pico de Gallo – Bright and zesty topping that adds a burst of flavor; feel free to use store-bought for convenience.
• Sour Cream – Adds creaminess and tang; Greek yogurt makes a healthier alternative.
• Fresh Cilantro – Enhances flavors and provides a fresh garnish; parsley works well if cilantro isn't preferred.
For the Seasoning
• Taco Seasoning – Essential for flavoring the beef; consider homemade spices for customization.
With these vibrant ingredients in hand, you're well on your way to creating a delightful Quick and Easy Taco Bowl that everyone will love!
Step‑by‑Step Instructions for Quick and Easy Taco Bowl
Step 1: Brown the Beef
In a large skillet over medium-high heat, add your ground beef and cook for 5–7 minutes, breaking it apart with a spatula until it's browned and no longer pink. Make sure to drain any excess fat, leaving behind just enough to retain flavor. The seasoned meat will be the hearty base of your Quick and Easy Taco Bowl.
Step 2: Season and Simmer
Stir in your taco seasoning along with 1/4 cup of water, and let it simmer for about 5 minutes. Stir occasionally to ensure even coverage of the seasoning, and keep an eye out for a thickened sauce that clings to the beef. This step is essential to develop the vibrant flavors that make your Quick and Easy Taco Bowl so delicious.
Step 3: Prepare the Rice
While the beef is simmering, cook your brown rice according to package instructions, which usually takes about 20 minutes. Alternatively, warm up leftover rice in a microwave-safe bowl for 1–2 minutes. The fluffy texture of the rice is a perfect contrast to the seasoned beef and fresh toppings in your taco bowl.
Step 4: Chop the Veggies
As your rice cooks, take a moment to chop your romaine lettuce into bite-sized pieces and set it aside in a bowl. Dice your avocado just before assembly to keep it fresh and vibrant. The crunch of the lettuce and the creaminess of the avocado will add great textures to your Quick and Easy Taco Bowl.
Step 5: Heat the Beans
Drain and rinse your black beans, then place them in a saucepan over medium heat for about 3–5 minutes until warm. For an added flavor boost, consider lightly seasoning the beans with a pinch of salt or cumin. This step brings protein into your bowl, making it both satisfying and nutritious.
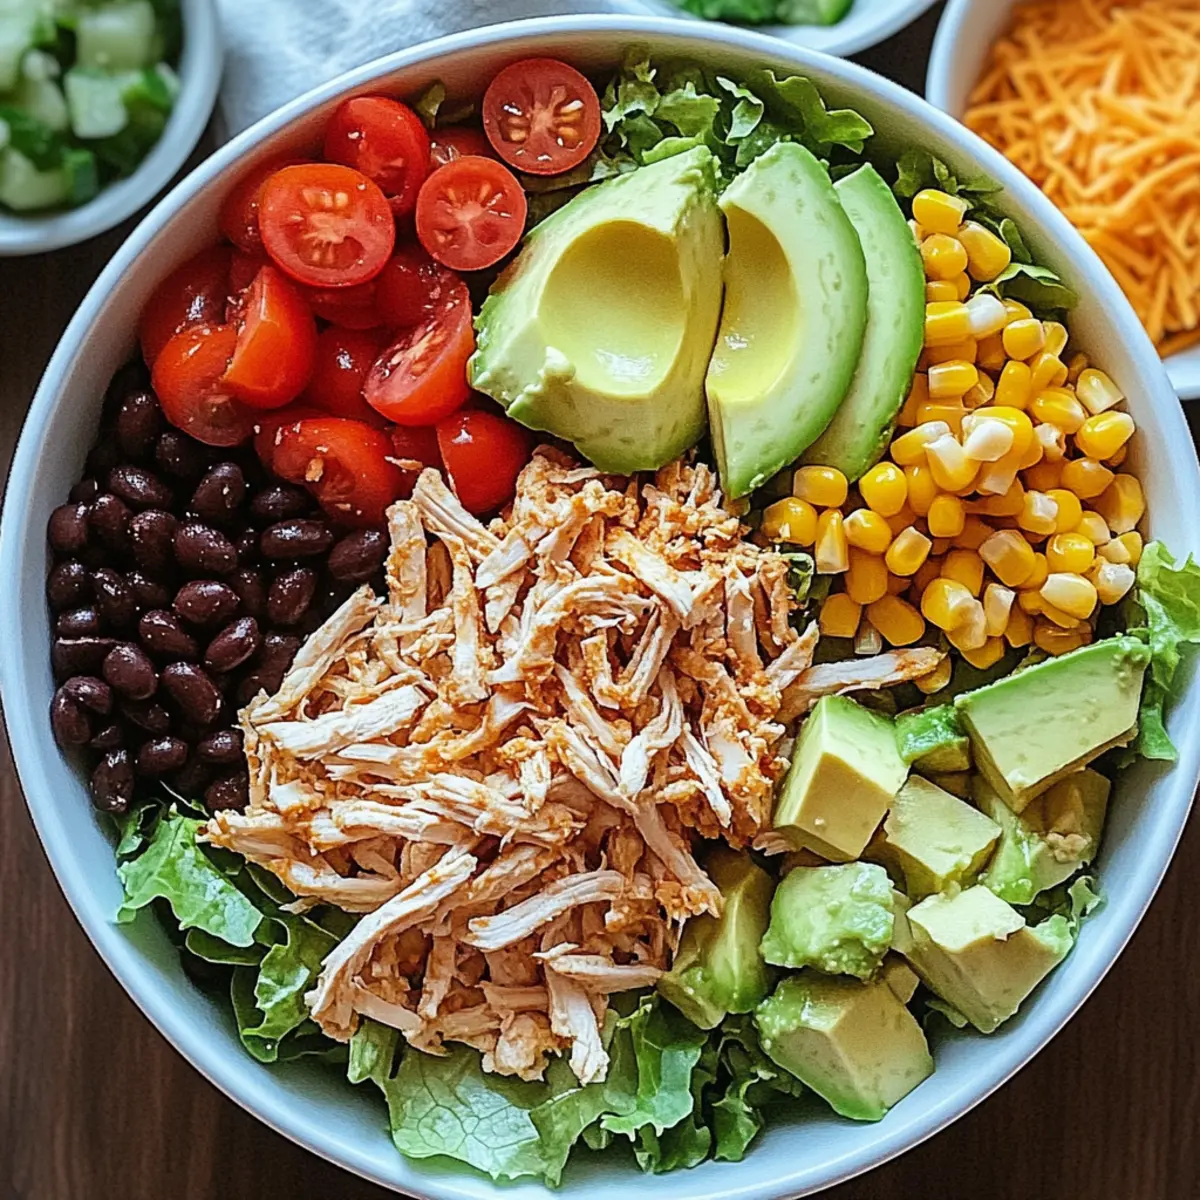
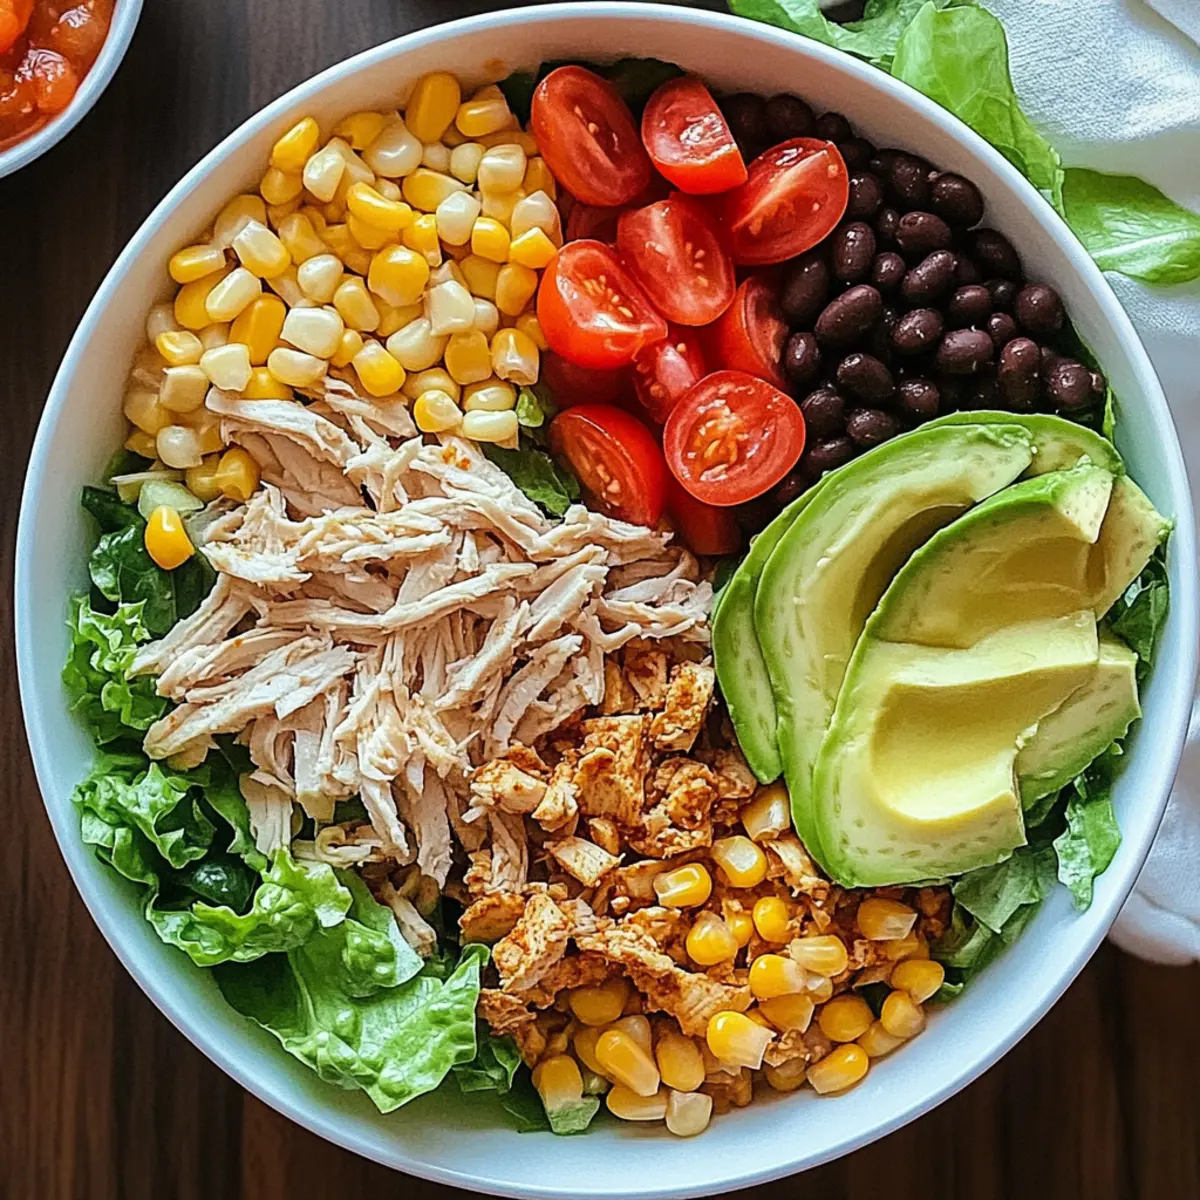
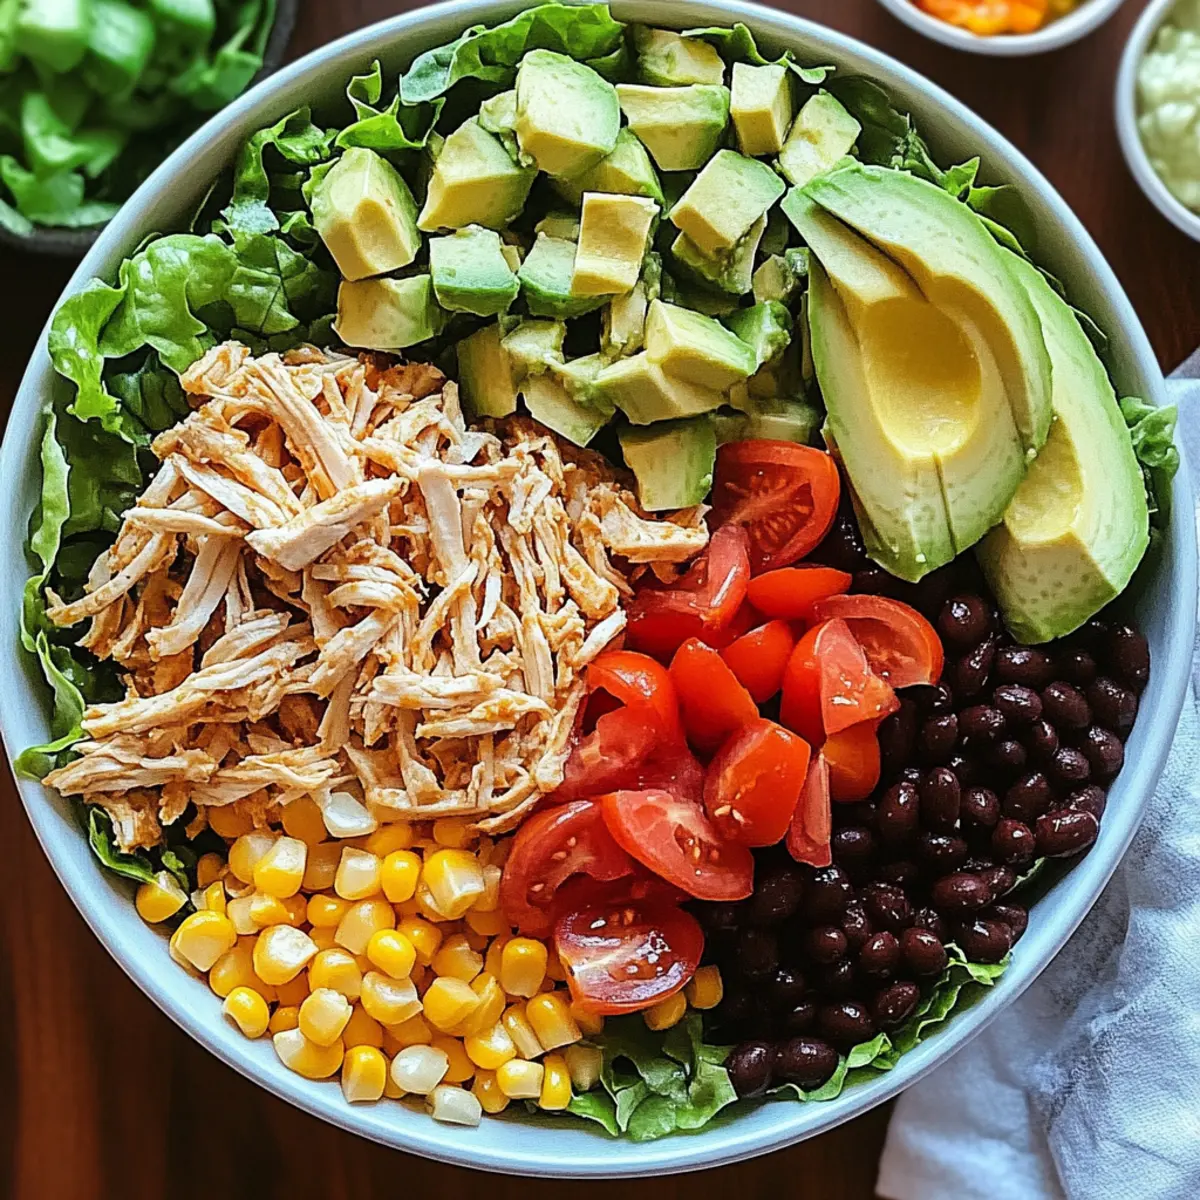
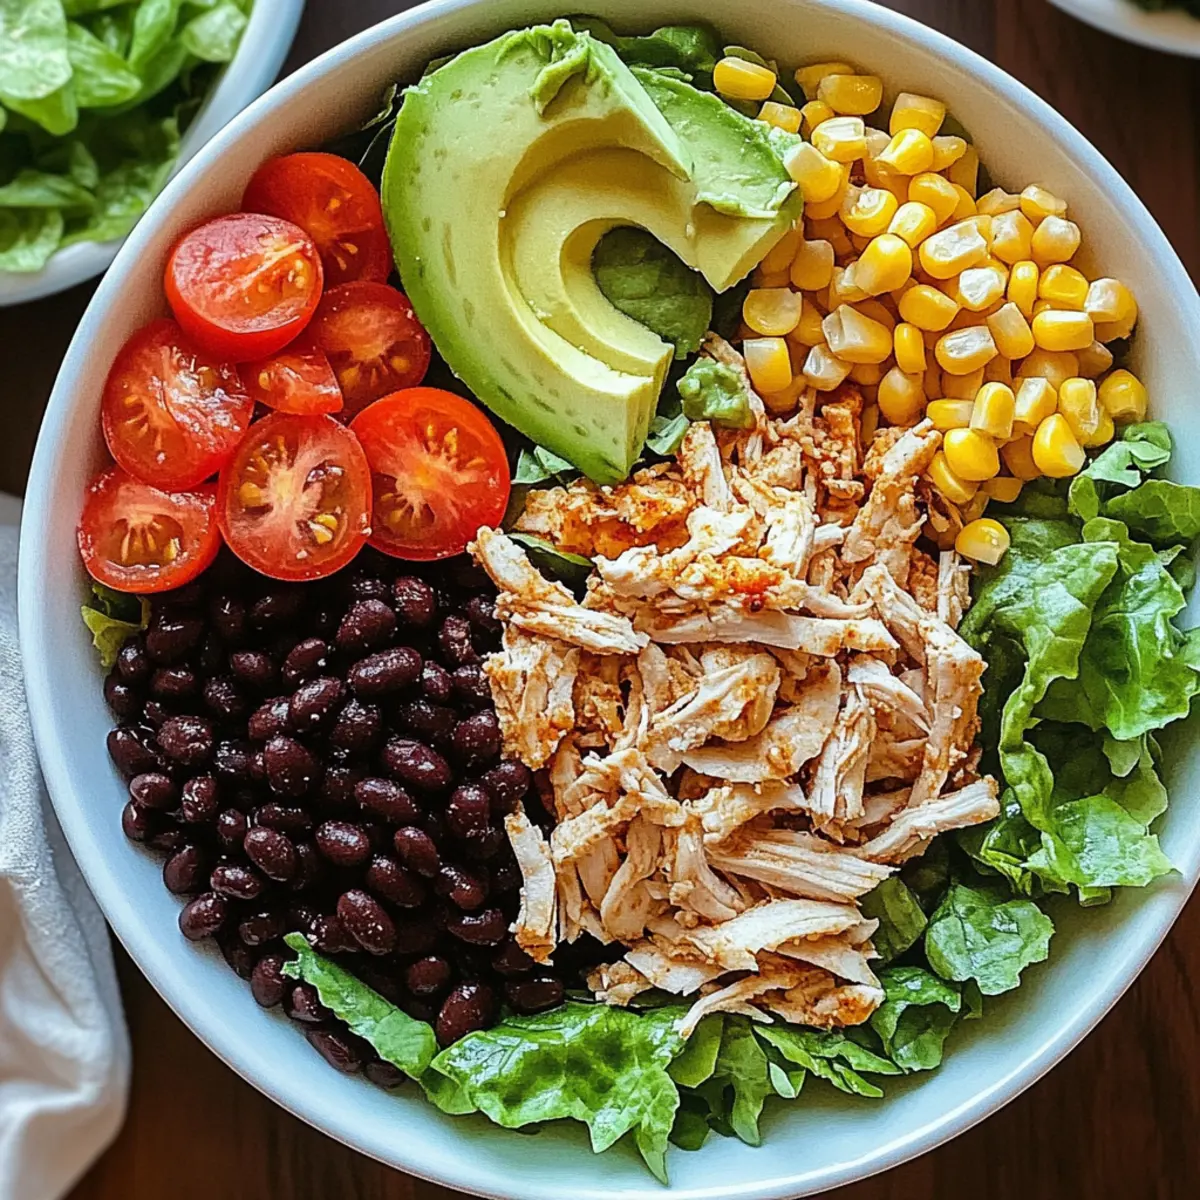
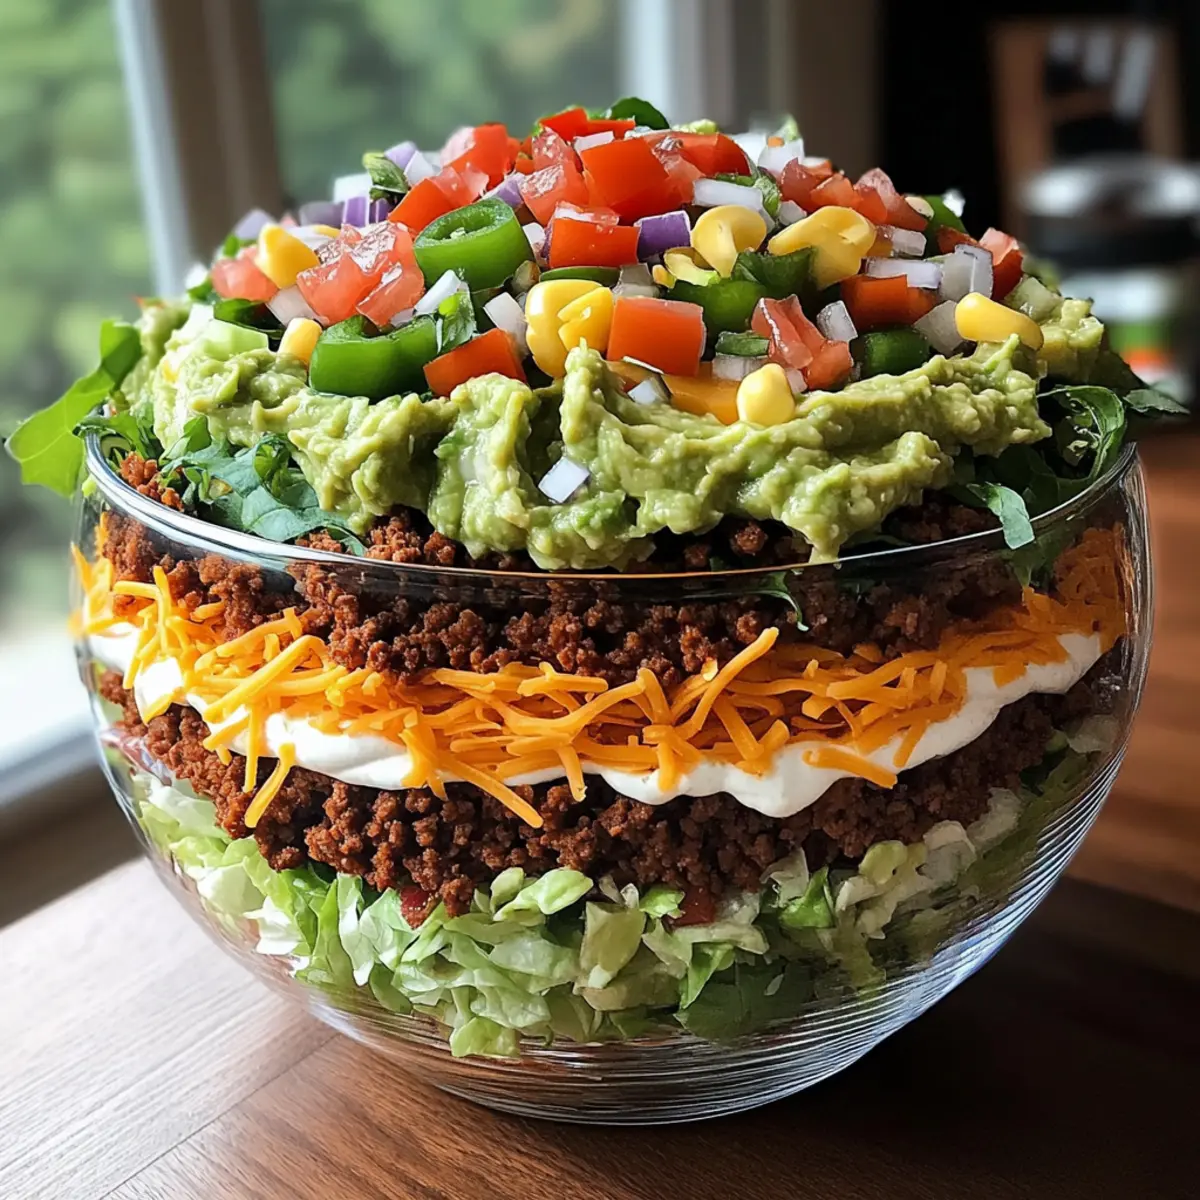
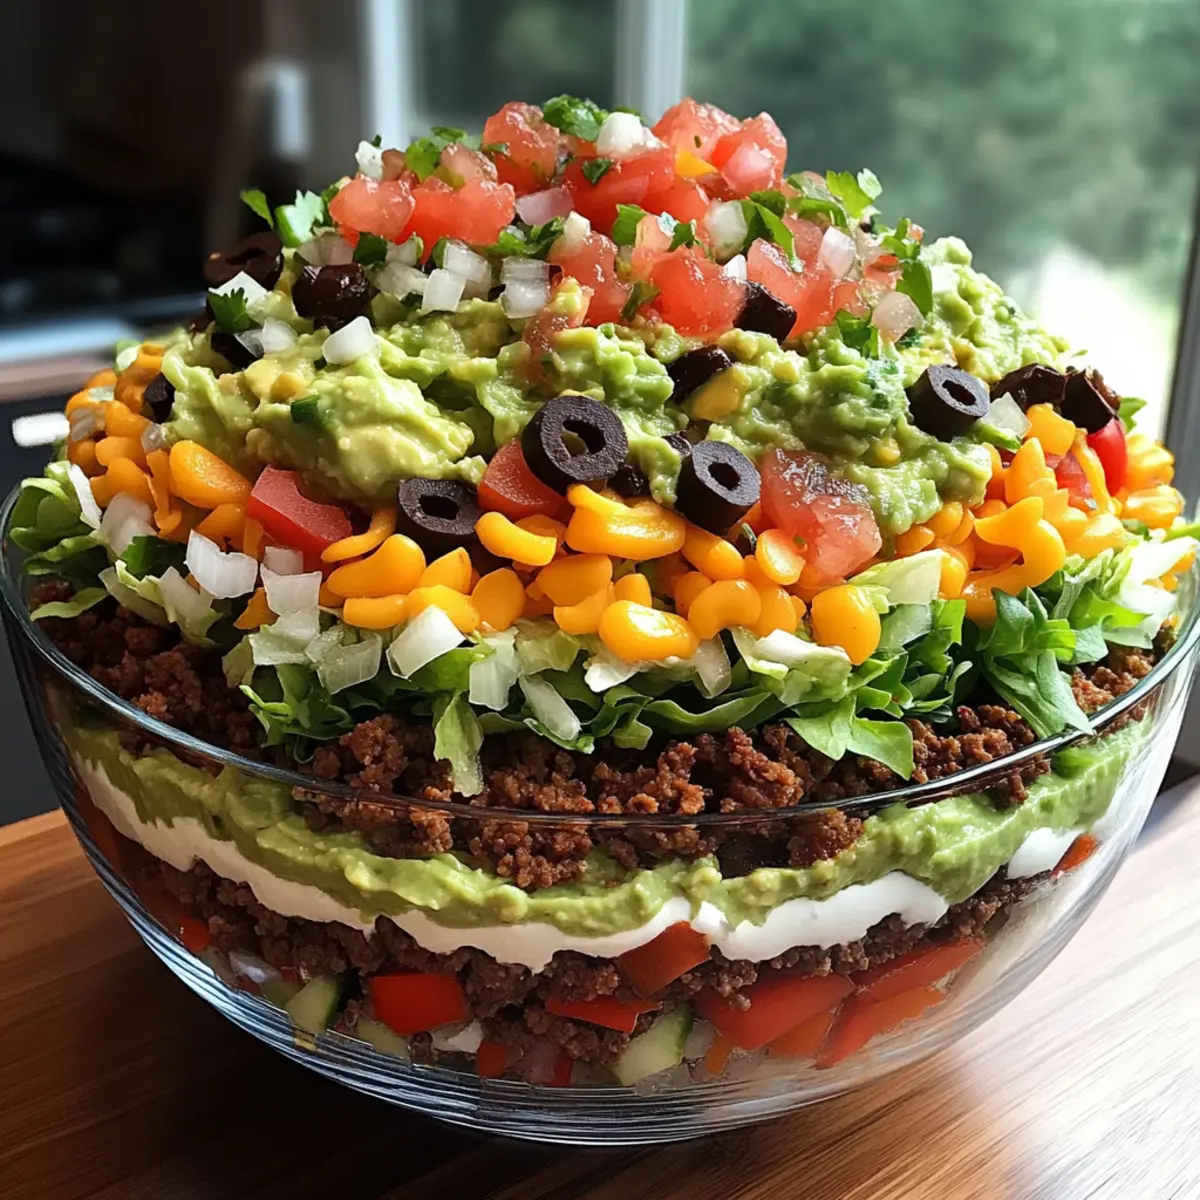
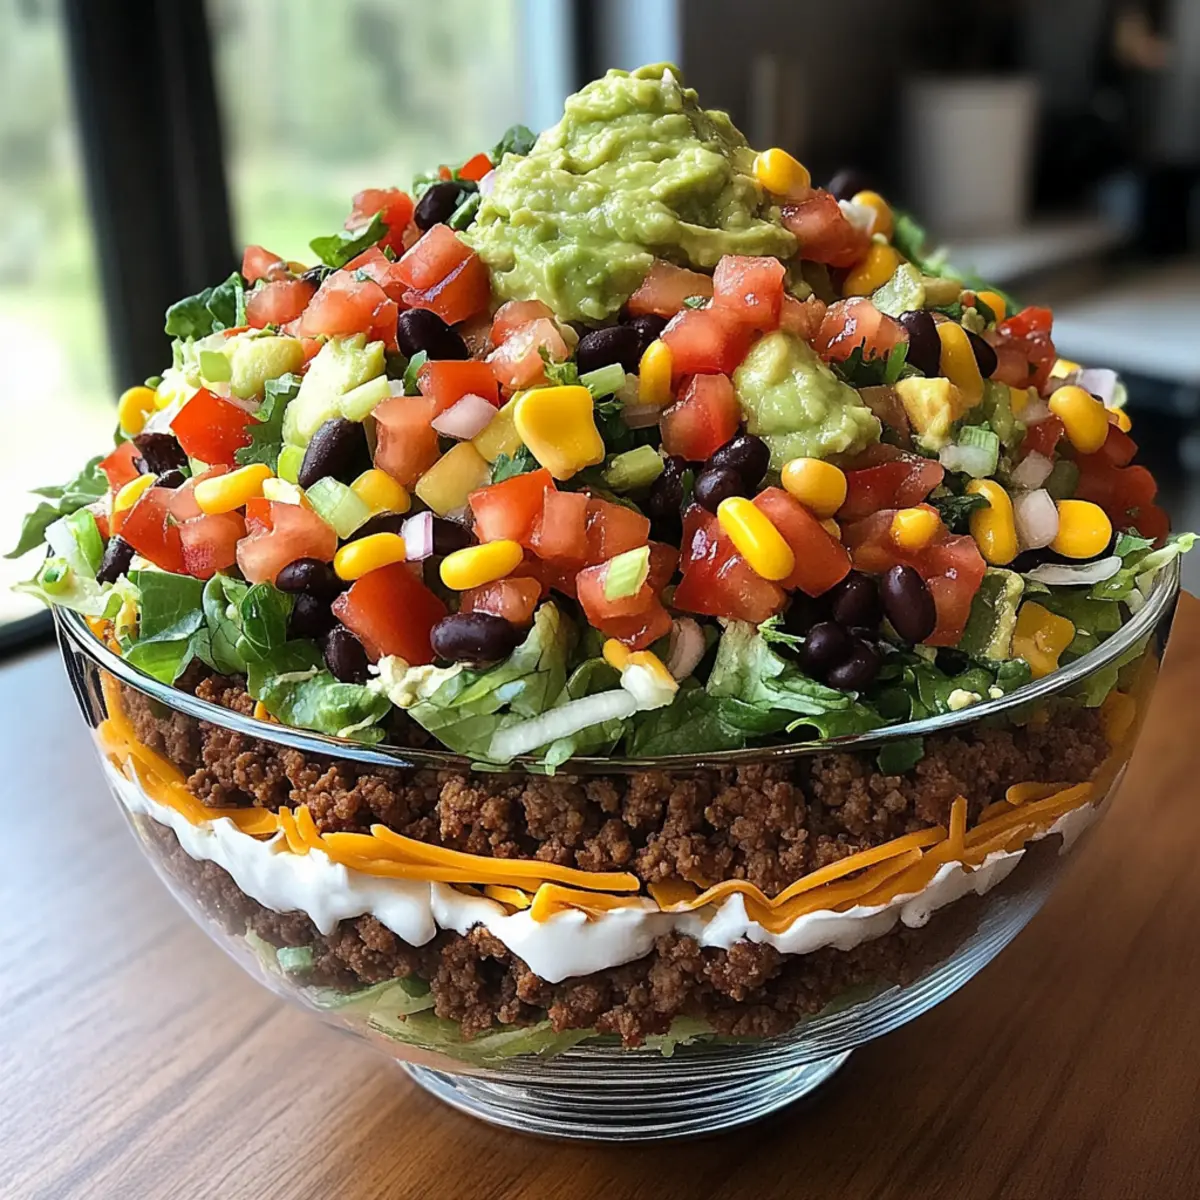
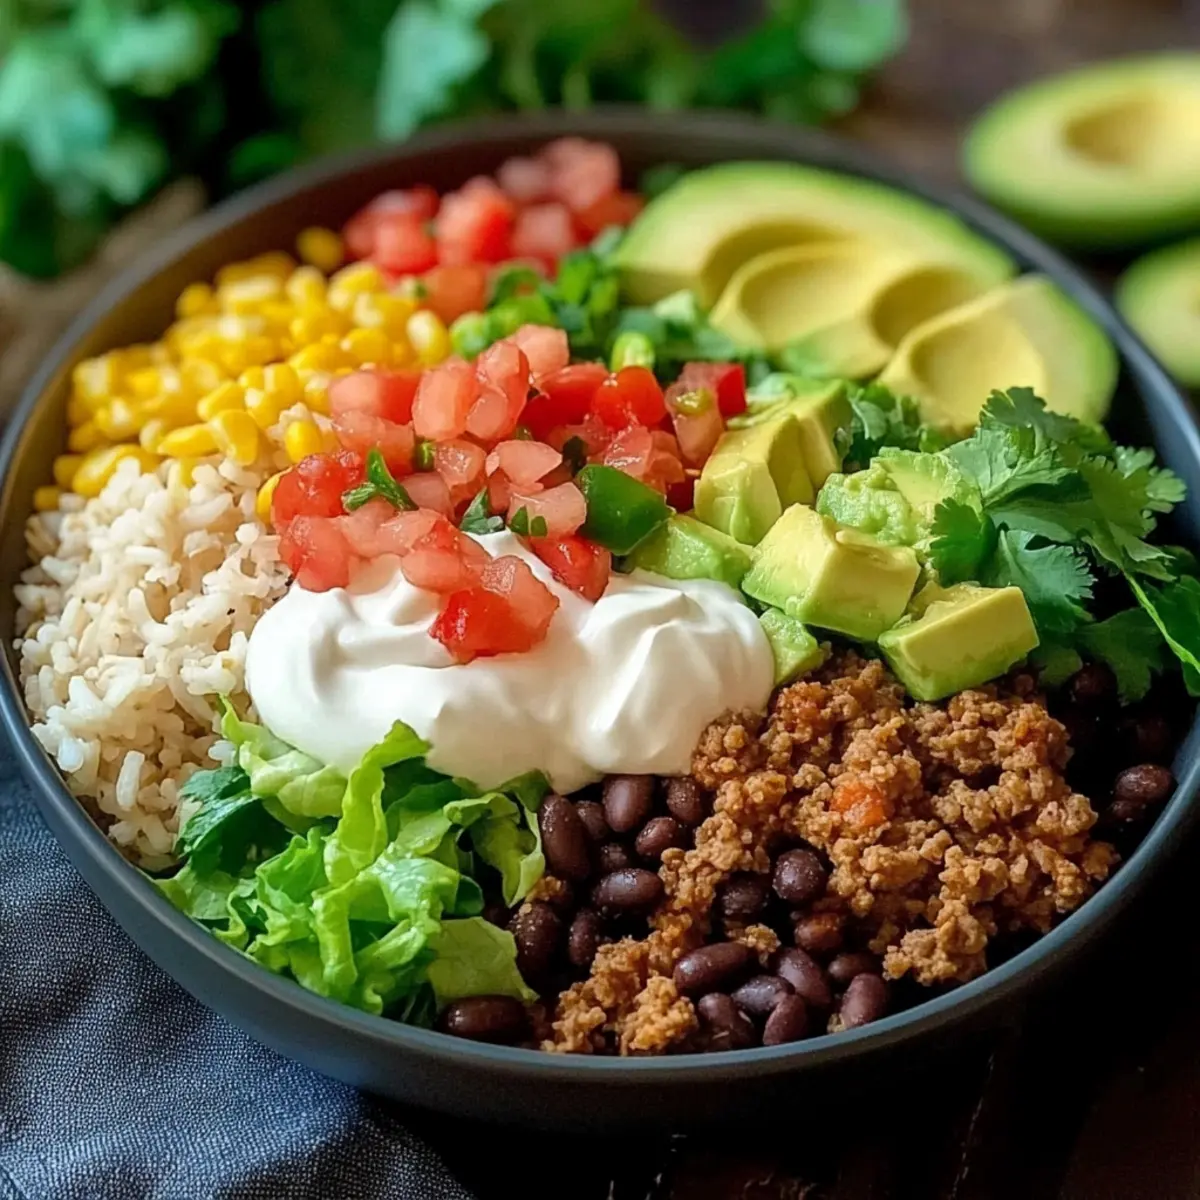
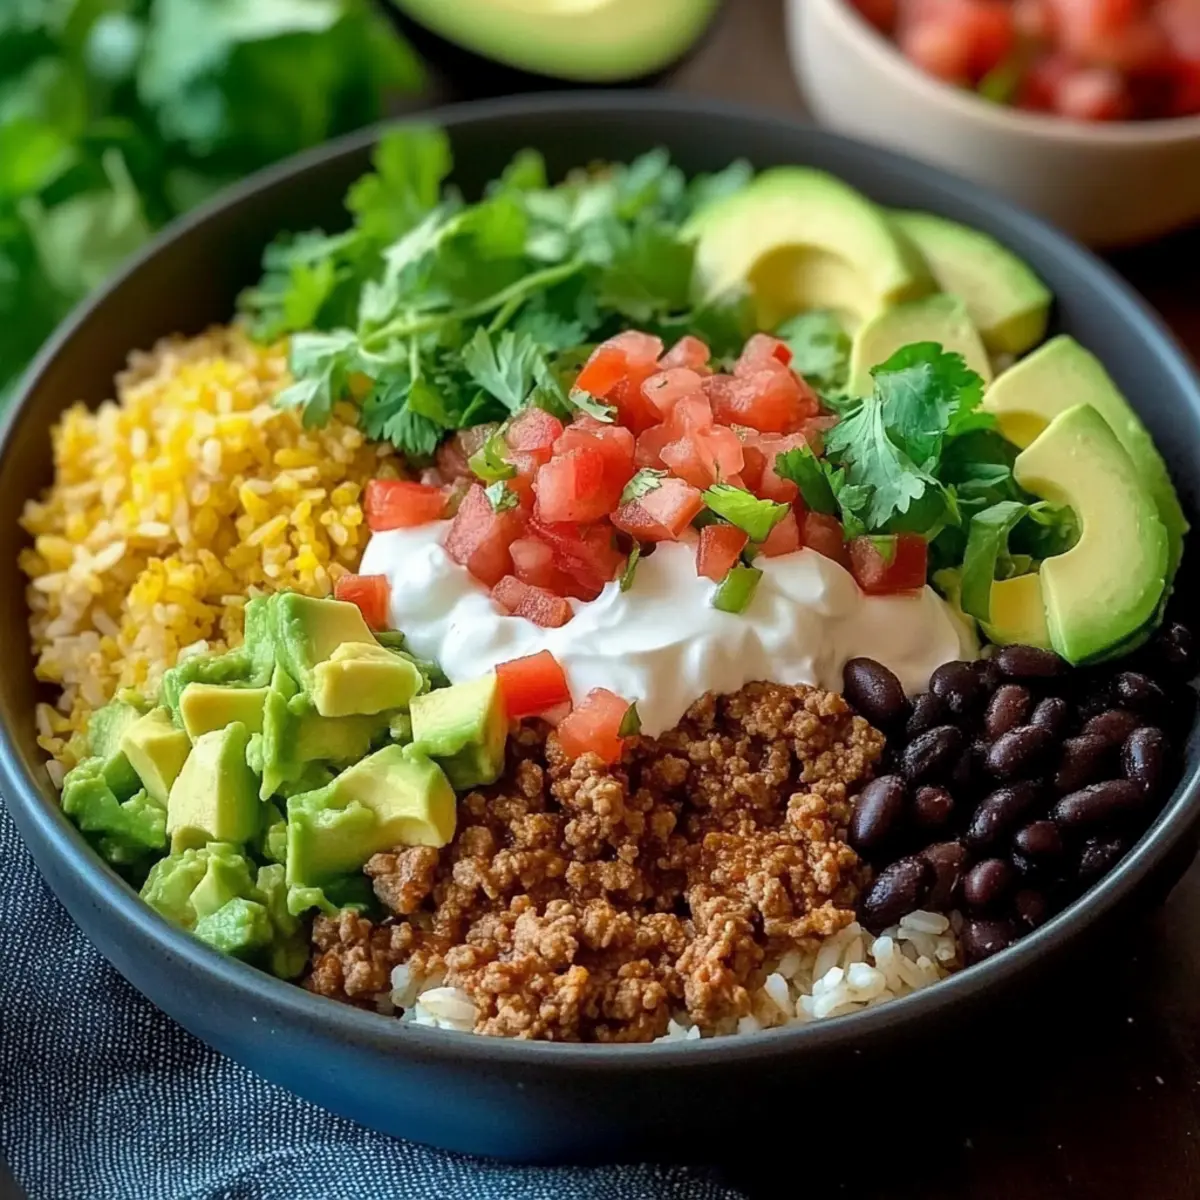
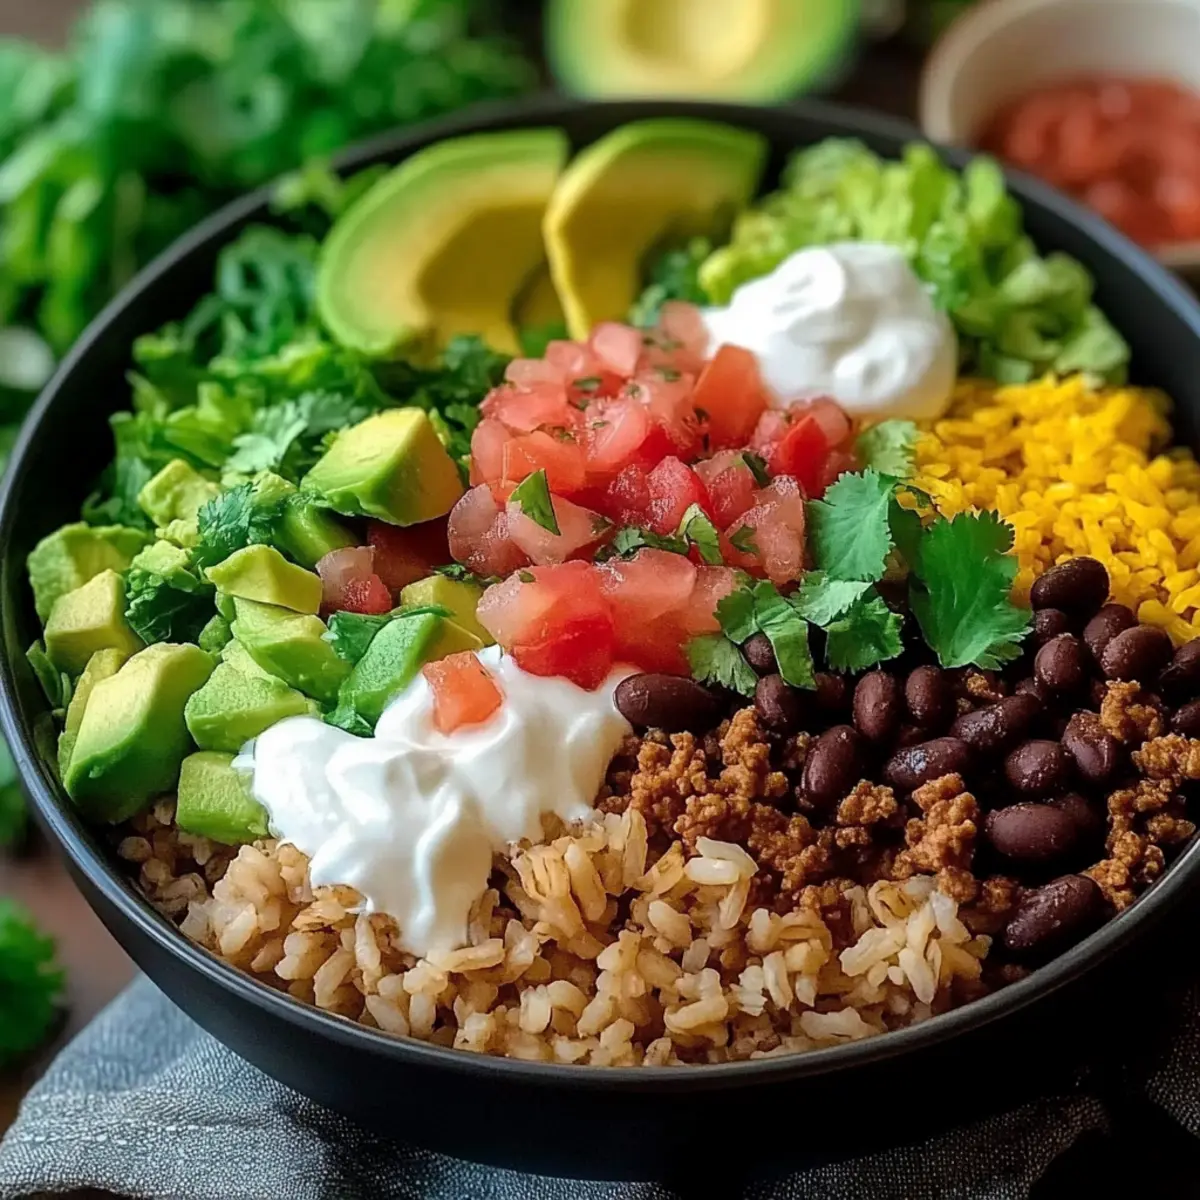
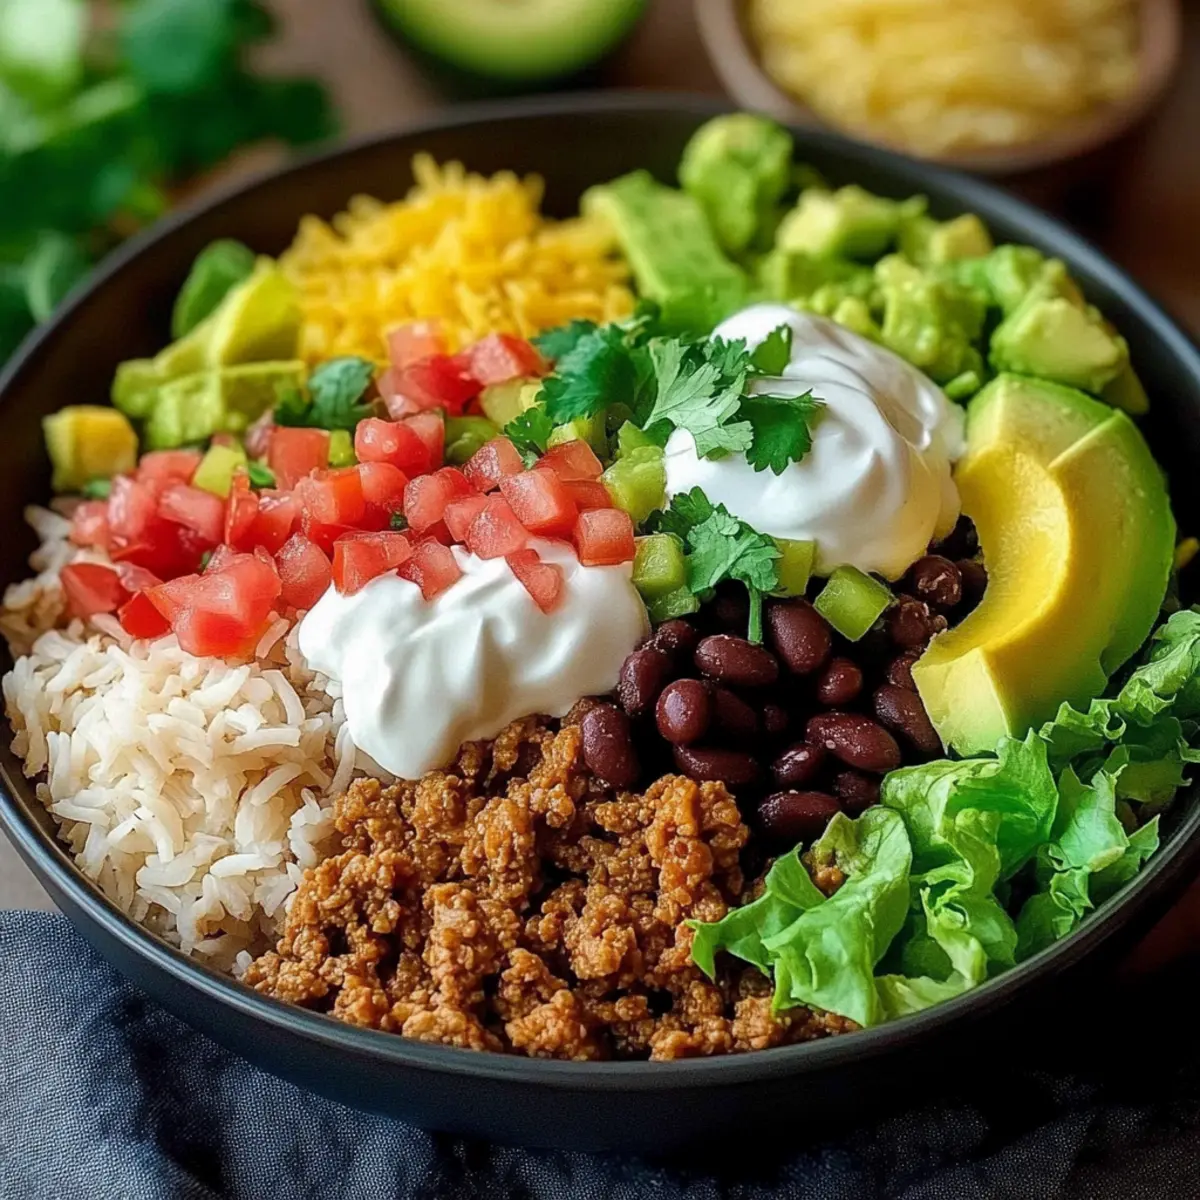
Step 6: Assemble the Bowls
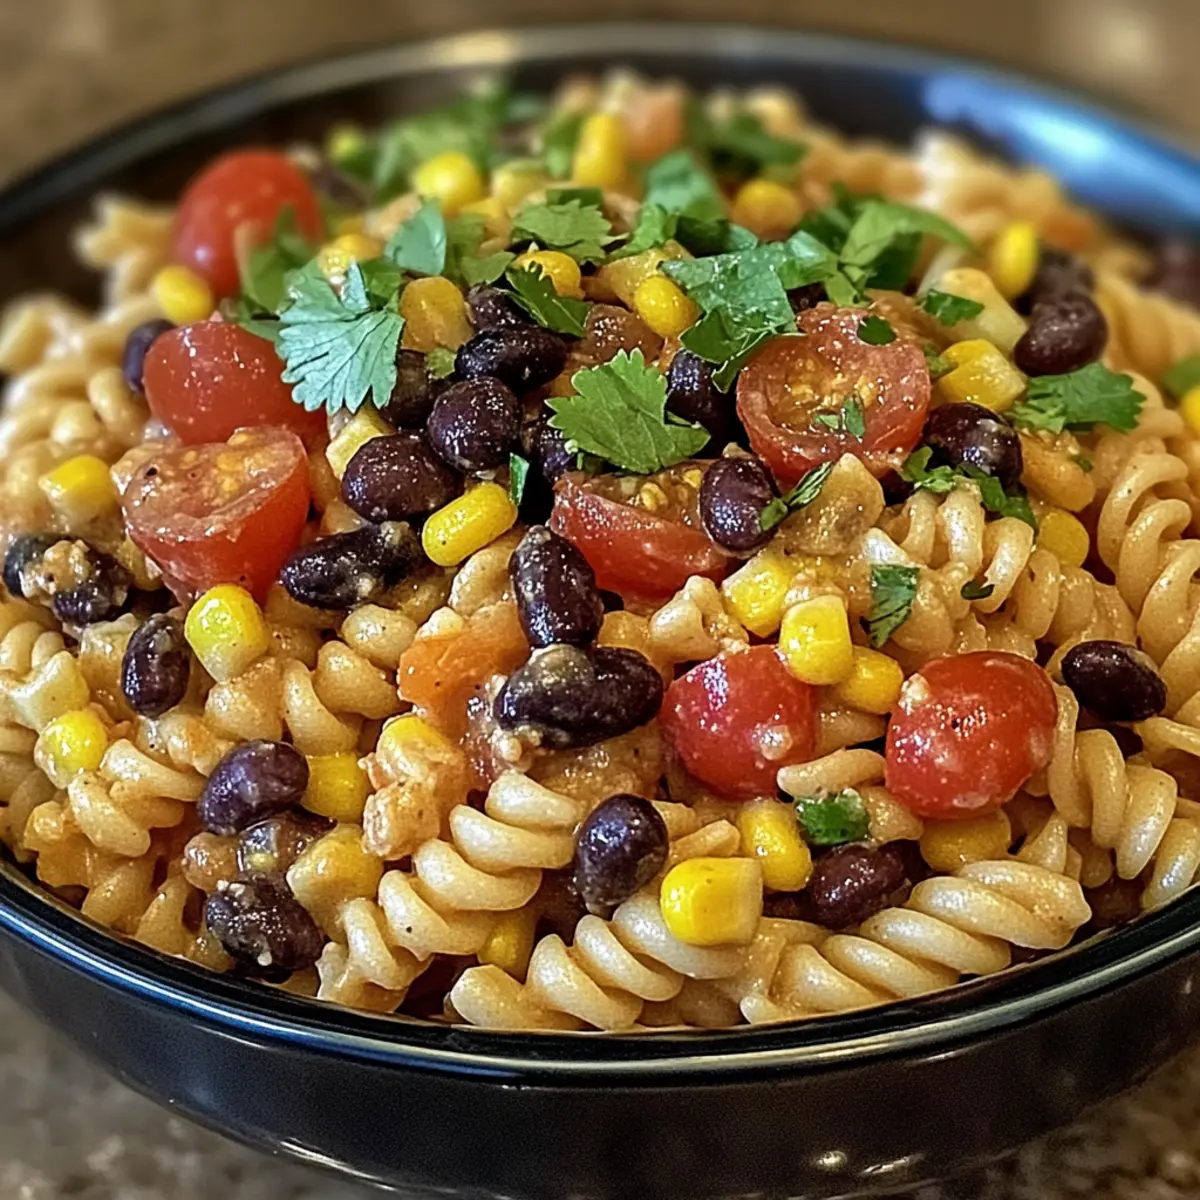
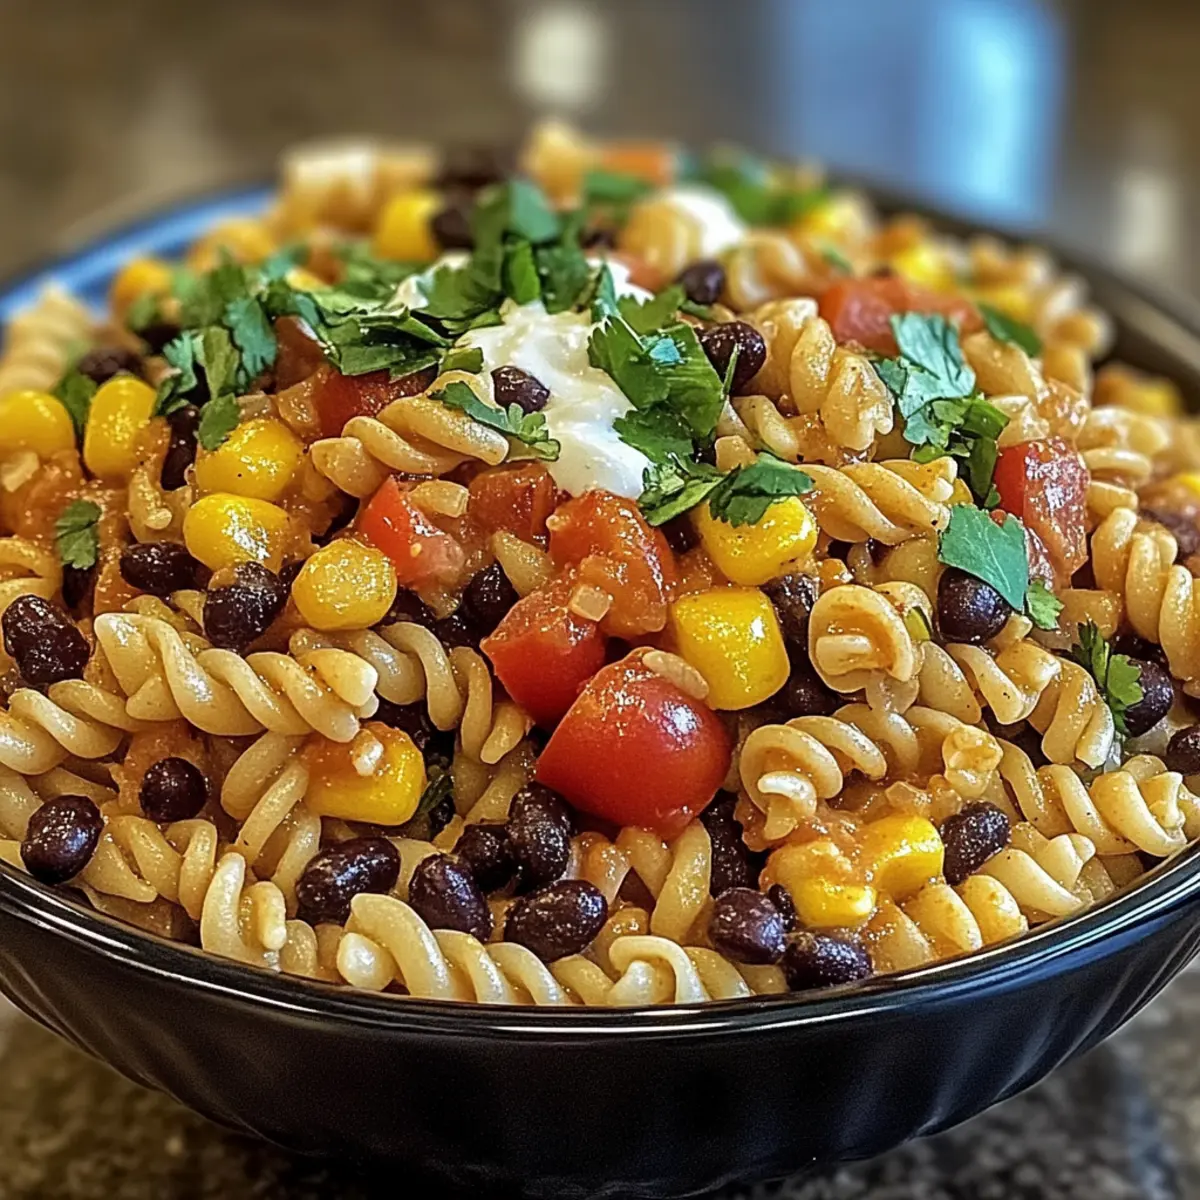
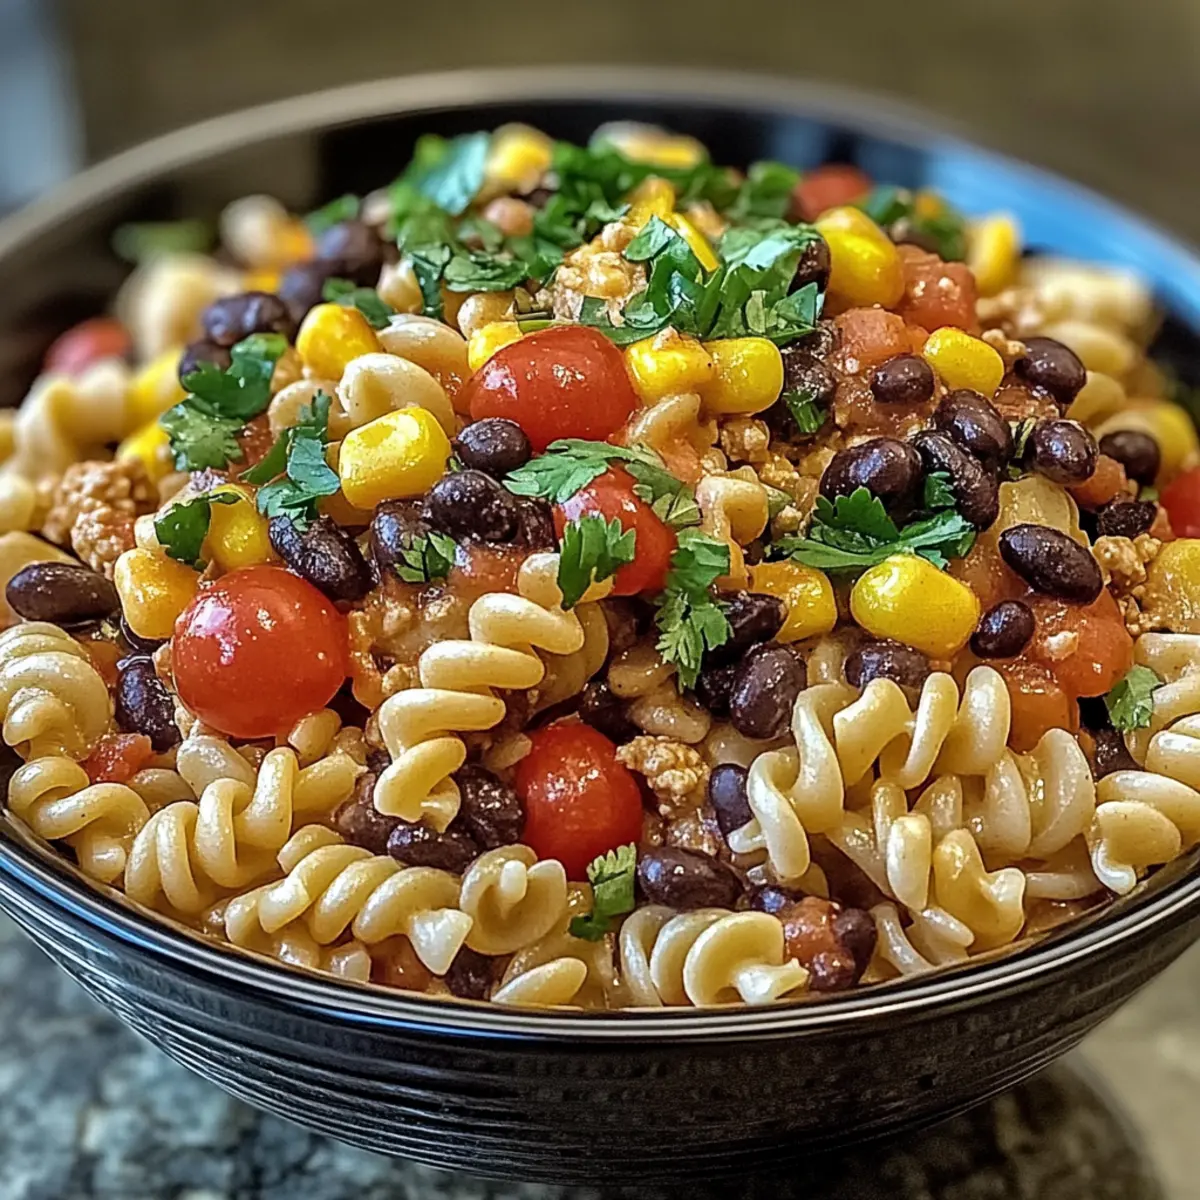
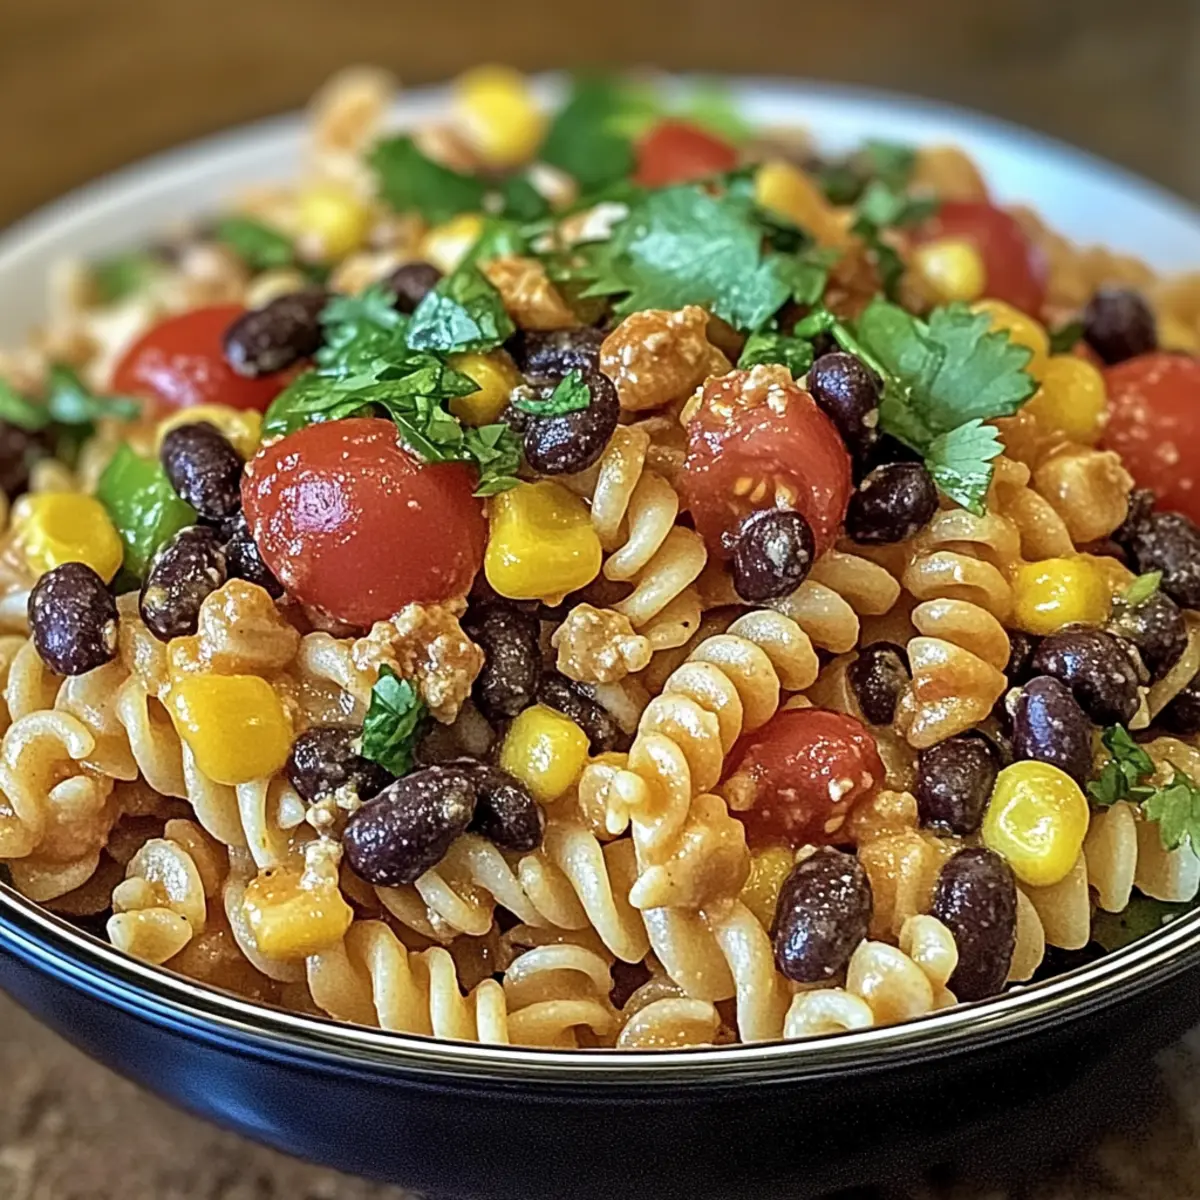
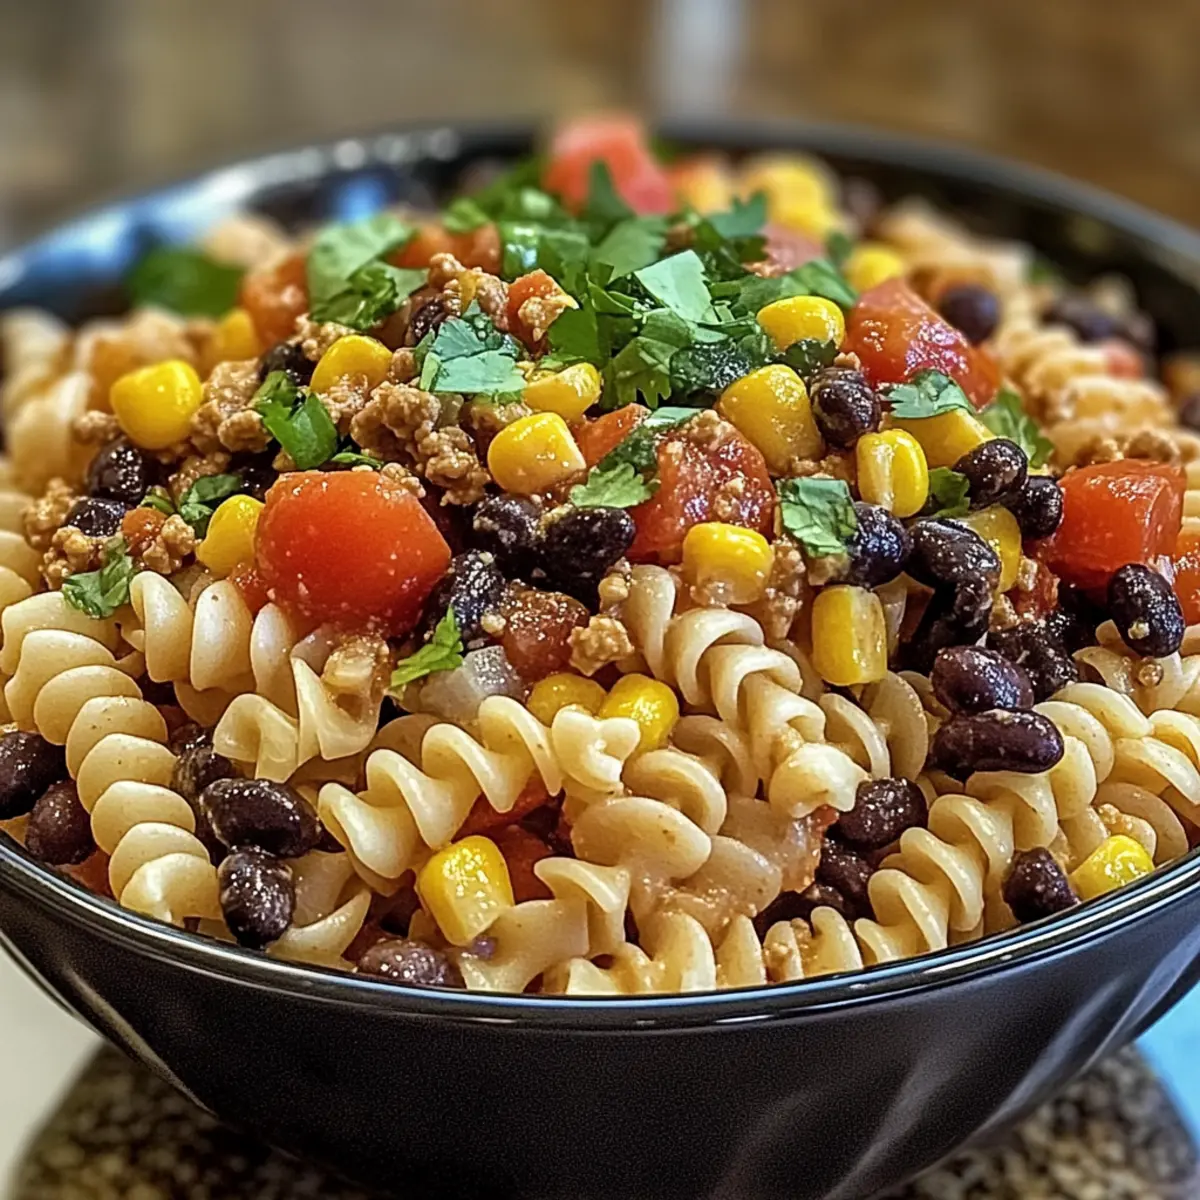
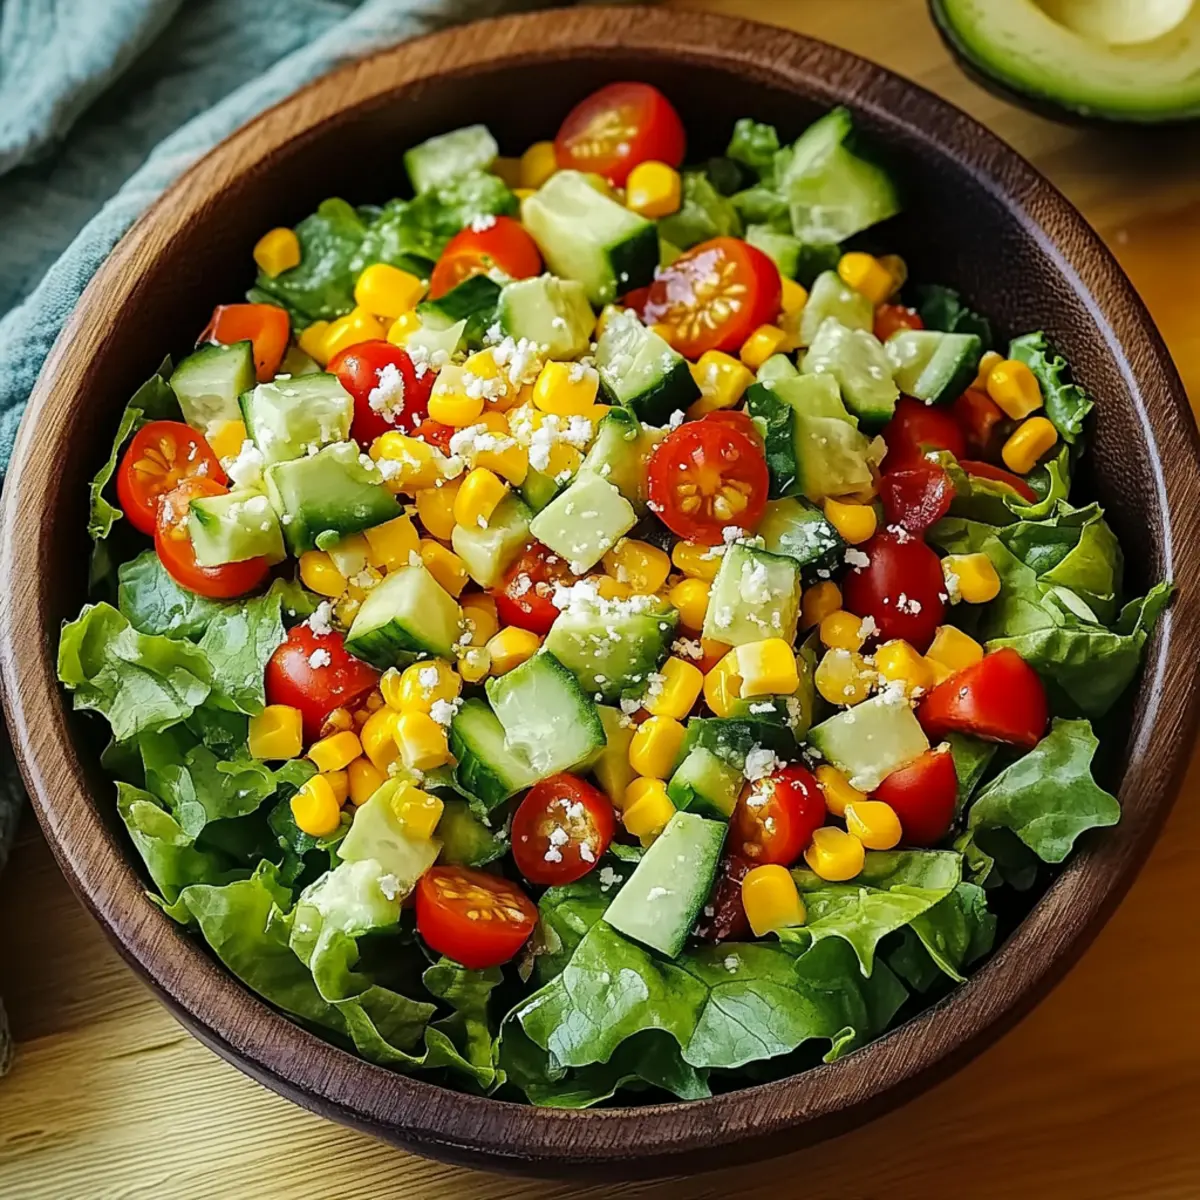
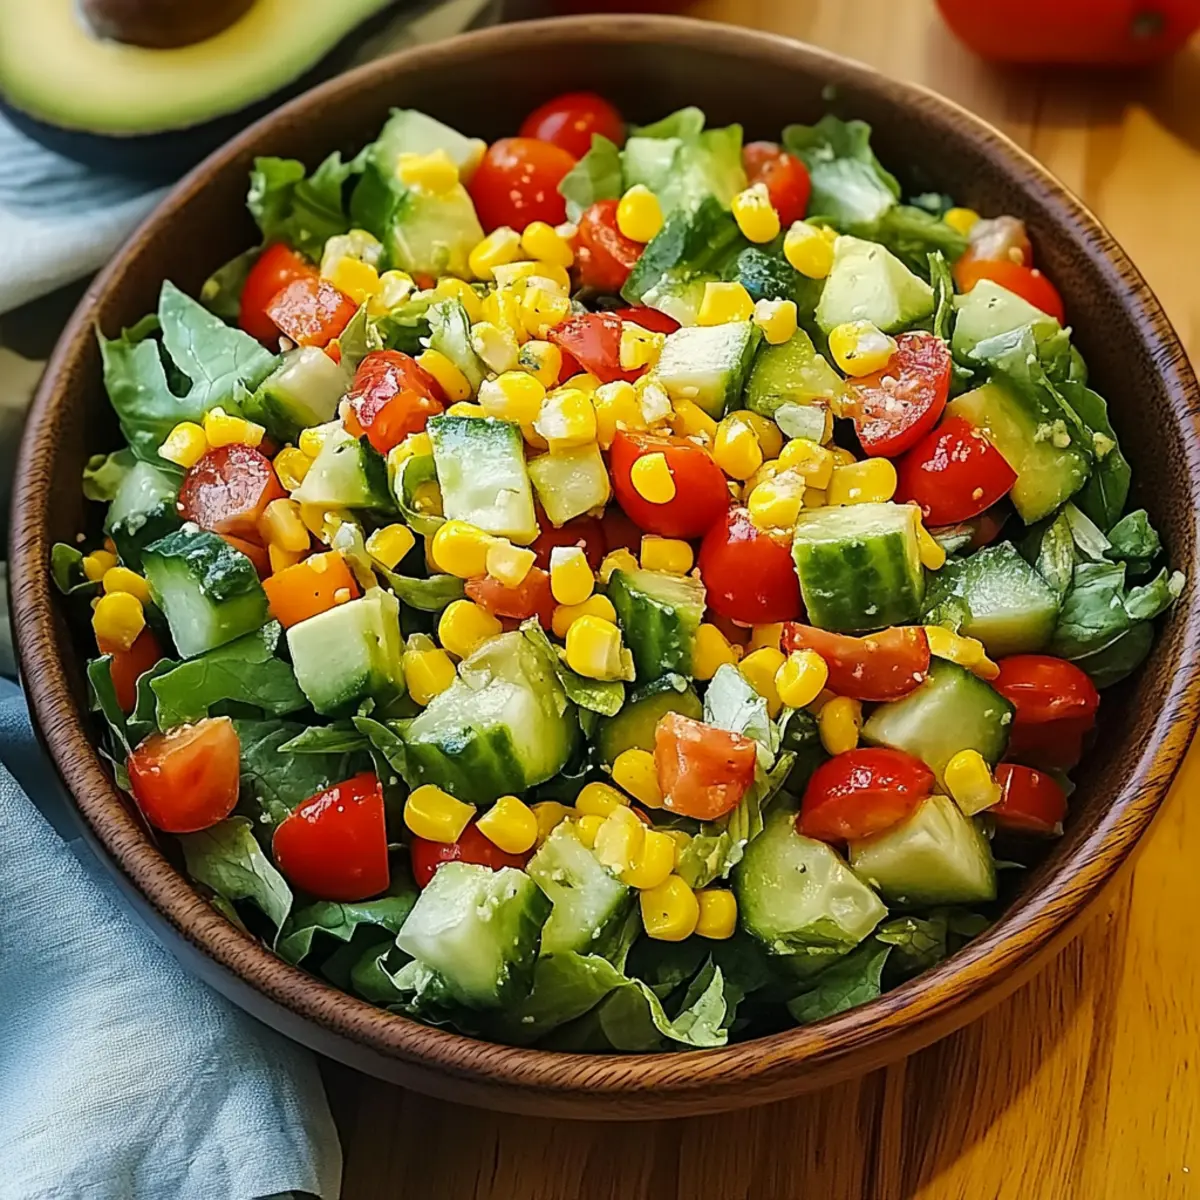
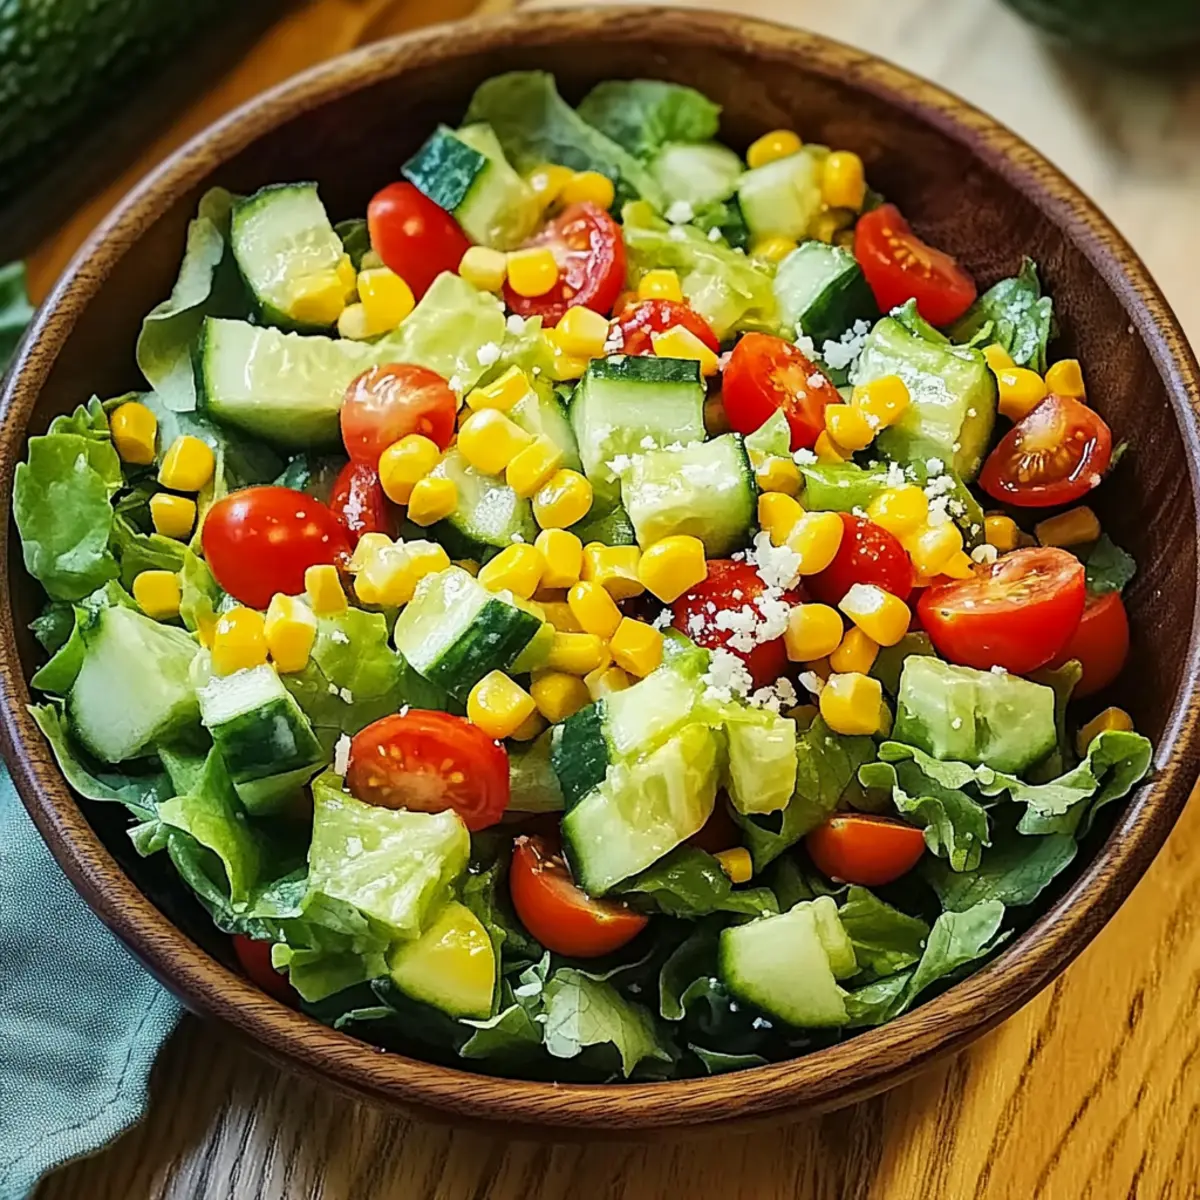
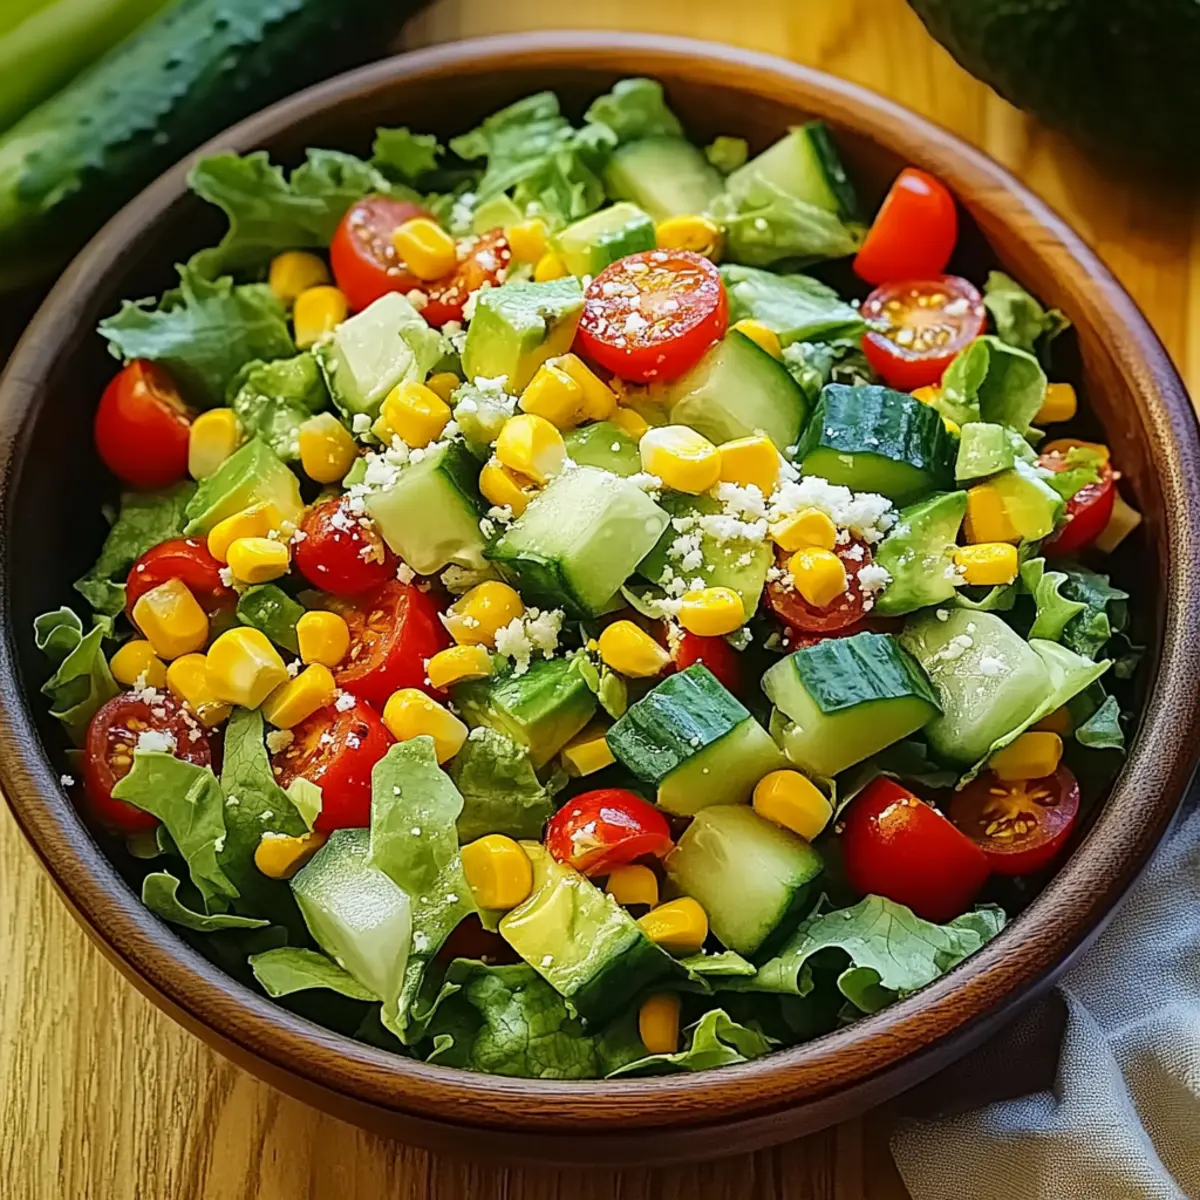
Now, it's time to build your Quick and Easy Taco Bowl! Start by layering the fluffy brown rice and crisp lettuce as the base in serving bowls. The bright base will set the stage for the hearty and vibrant ingredients that follow.
Step 7: Add the Toppings
Top your rice and lettuce with the seasoned ground beef and warm black beans. Sprinkle generous amounts of shredded cheddar cheese over the top, allowing it to melt slightly from the warmth below. Add pico de gallo for a fresh burst of flavor, followed by diced avocado and a dollop of sour cream to enrich the bowl.
Step 8: Finish and Serve
As a final touch, garnish your taco bowls with fresh cilantro and a squeeze of lime juice to brighten the flavors. If desired, you can also add crunchy tortilla strips or hot sauce for an extra kick. Enjoy this customizable Quick and Easy Taco Bowl with your family, savoring both the delicious flavors and the fun of building your own meals!
What to Serve with Quick and Easy Taco Bowl
Elevate your taco night with these delicious pairings that add extra flavor, texture, and joy to your meal.
-
Creamy Guacamole: A fresh, creamy dip made with ripe avocados, lime, and cilantro that adds a buttery richness to the bowl.
-
Spicy Corn Salsa: A zesty mix of corn, jalapeños, and bell peppers providing a delightful crunch that complements the warm fillings perfectly.
-
Crispy Tortilla Chips: Golden and crunchy, these chips are perfect for scooping up any leftover toppings while adding a satisfying crunch.
-
Chilled Mexican Street Corn Salad: A refreshing, tangy side that brings a burst of sweetness and creamy texture, enhancing your taco experience.
-
Zesty Lime Rice: Fluffy rice infused with lime juice and zest brightens your meal, providing a fresh contrast to the savory taco bowl.
-
Fiesta Black Bean Salad: This colorful blend of black beans, tomatoes, and bell peppers adds protein and fiber, creating a wholesome sidekick.
-
Coconut Lemonade: A sweet, tangy drink that balances the tacos' savory flavors, offering a refreshing sip between bites.
-
Homemade Churros: Don’t forget dessert! These warm, sugary treats are a delightful way to round out a fun and flavorful meal.
How to Store and Freeze Quick and Easy Taco Bowl
Fridge: Keep cooked beef and rice in airtight containers for up to 4 days. This helps maintain their flavors and textures, making mealtime easy throughout the week.
Freezer: Store any leftover beef and rice in freezer-safe containers for up to 3 months. Thaw in the fridge overnight before reheating for a quick meal.
Toppings Storage: For optimal freshness, store toppings like lettuce, avocado, and pico de gallo separately in the fridge. Use them within 1–2 days for best quality in your Quick and Easy Taco Bowl.
Reheating: To reheat, warm the beef and rice in the microwave, stirring occasionally until hot. Add fresh toppings right before serving for an enjoyable experience!
Expert Tips for Quick and Easy Taco Bowl
-
Prep Ahead: Prepare ingredients in advance, like chopping veggies and cooking the beef, to save time on busy nights.
-
Stay Fresh: Always dice your avocado just before serving to avoid browning and maintain that creamy texture in your Quick and Easy Taco Bowl.
-
Perfect Seasoning: Avoid over-seasoning your beef by tasting as you go; remember, you can always add more taco seasoning, but you can’t take it away!
-
Mix It Up: Feel free to experiment by substituting ingredients that your family prefers. Using cauliflower rice is a great way to make it low-carb!
-
Serving Suggestions: Make it fun! Serve ingredients buffet-style so everyone can build their Quick and Easy Taco Bowl to their liking.
-
Leftover Love: Store extra ingredients separately in airtight containers. This way, you can enjoy your taco bowl components for up to four days!
Make Ahead Options
These Quick and Easy Taco Bowls are perfect for meal prep enthusiasts! You can prepare the seasoned ground beef and brown rice up to 3 days in advance, storing them separately in airtight containers in the refrigerator to maintain their quality. If you're planning to serve them later, simply reheat the beef and rice in the microwave or on the stovetop before assembly. While you can chop romaine lettuce and prepare pico de gallo ahead of time, it’s best to store them separately and assemble the bowls just before serving. This way, your meal retains its fresh crunch and vibrant flavors, ensuring your taco night is just as delicious as the first time!
Quick and Easy Taco Bowl Variations
Feel free to unleash your creativity and make this dish your own with these exciting substitutions!
- Dairy-Free: Swap shredded cheddar cheese for dairy-free cheese to keep it vegan-friendly. You won't miss a beat in flavor!
- Low-Carb Delight: Use cauliflower rice instead of brown rice for a light yet satisfying base, perfect for a keto-friendly meal. Enjoy the texture without the carbs!
- Vegetarian Option: Replace ground beef with seasoned black beans or roasted sweet potatoes for a hearty but meatless alternative. This twist is packed with flavor and nutrition!
- Spicy Kick: Add sliced jalapeños or a drizzle of hot sauce on top for an extra burst of heat. It's a surefire way to elevate the flavor profile!
- Crunch Factor: Toss in some crushed tortilla chips or roasted corn to add a delightful crunch to your bowl. Your tacos will become a texture extravaganza!
- Fresh Salad Twist: Turn this bowl into a refreshing rice salad by cooling all ingredients before assembly and mixing with lime juice. Perfect for warm weather dining!
Looking for more delicious spins on your favorite meals? Check out these delightful recipes like Fish Taco Bowls or Taco Spaghetti Cheesy for more culinary inspiration!
Quick and Easy Taco Bowl Recipe FAQs
How do I choose the right ground beef?
Absolutely! Look for lean ground beef, around 80% lean, which has enough fat to keep the meat moist and flavorful. Check for a bright red color without any dark spots or an off smell, indicating freshness. If you're leaning toward healthier options, ground turkey or even plant-based crumbles work wonderfully as substitutes.
How should I store the leftover taco bowl ingredients?
Very! After cooking, store the beef and rice separately in airtight containers in the fridge for up to 4 days. Keep fresh toppings like avocado, lettuce, and pico de gallo in separate containers as well to maintain their quality. This makes assembling your Quick and Easy Taco Bowl a breeze on busy nights!
Can I freeze the cooked beef and rice?
For sure! Place your leftover cooked beef and rice in freezer-safe containers. They can last up to 3 months in the freezer. When you're ready to enjoy them again, simply thaw them overnight in the fridge and reheat in the microwave, ensuring you're stirring occasionally for even warming.
What can I do if the taco seasoning is too spicy?
Oh no! If your Quick and Easy Taco Bowl ends up spicier than you'd like, consider adding a spoonful of sour cream or Greek yogurt to balance the heat. You can also mix in a little more cooked rice to dilute the flavor. Lastly, adding a sprinkle of sugar or honey can mitigate spiciness.
Is this recipe suitable for vegetarians or those with allergies?
Absolutely! To cater to vegetarians, swap the meat for roasted sweet potatoes or seasoned black beans. If watching for allergens, be mindful of your cheese choice and opt for dairy-free options, and ensure canned beans are gluten-free. With these adjustments, everyone can enjoy a delicious serving!
How do I prevent my avocado from browning?
I often recommend dicing the avocado just before serving your Quick and Easy Taco Bowl. To go the extra mile, sprinkle some lime juice over the cut avocado; the acid helps to prevent browning and keeps it looking fresh. This way, your taco bowl stays vibrant and appealing!
Savor the Flavor: Quick and Easy Taco Bowl That's Customizable
Ingredients
Equipment
Method
- In a large skillet over medium-high heat, add your ground beef and cook for 5–7 minutes, breaking it apart with a spatula until it's browned and no longer pink. Drain any excess fat.
- Stir in your taco seasoning along with 1/4 cup of water, and let it simmer for about 5 minutes.
- Cook your brown rice according to package instructions, which usually takes about 20 minutes.
- Chop your romaine lettuce into bite-sized pieces and set it aside in a bowl. Dice your avocado just before assembly.
- Drain and rinse your black beans, then place them in a saucepan over medium heat for about 3–5 minutes until warm.
- Layer the fluffy brown rice and crisp lettuce in serving bowls.
- Top your rice and lettuce with the seasoned ground beef and warm black beans. Sprinkle cheddar cheese, add pico de gallo, diced avocado, and sour cream.
- Garnish with fresh cilantro and a squeeze of lime juice.