tastytrendingredients

  • Home
  • Recipes
    • Appetizers
    • Breakfast
    • Dessert
    • Dinner
    • Drinks
    • Salads
    • Snacks
    • Soups
  • About me
  • Contact me
menu icon
go to homepage
  • Home
  • Recipes
    • Appetizers
    • Breakfast
    • Dessert
    • Dinner
    • Drinks
    • Salads
    • Snacks
    • Soups
  • About me
  • Contact me
search icon
Homepage link
  • Home
  • Recipes
    • Appetizers
    • Breakfast
    • Dessert
    • Dinner
    • Drinks
    • Salads
    • Snacks
    • Soups
  • About me
  • Contact me
×

Savory Potsticker Noodle Bowl: A Quick Family Favorite

January 25, 2026 by Grace Snow Leave a Comment

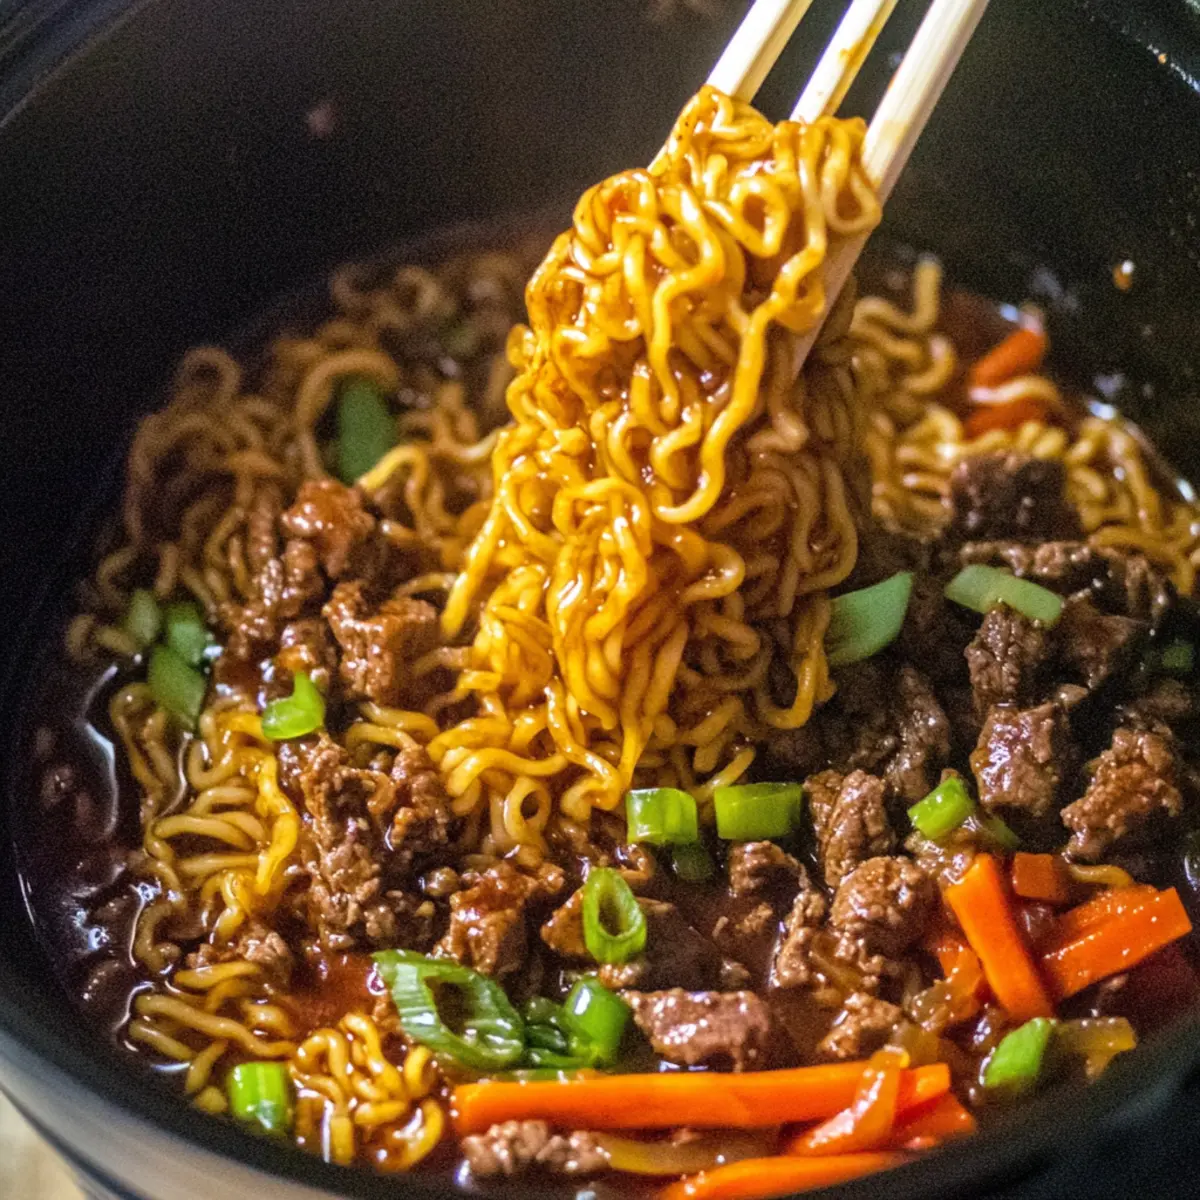
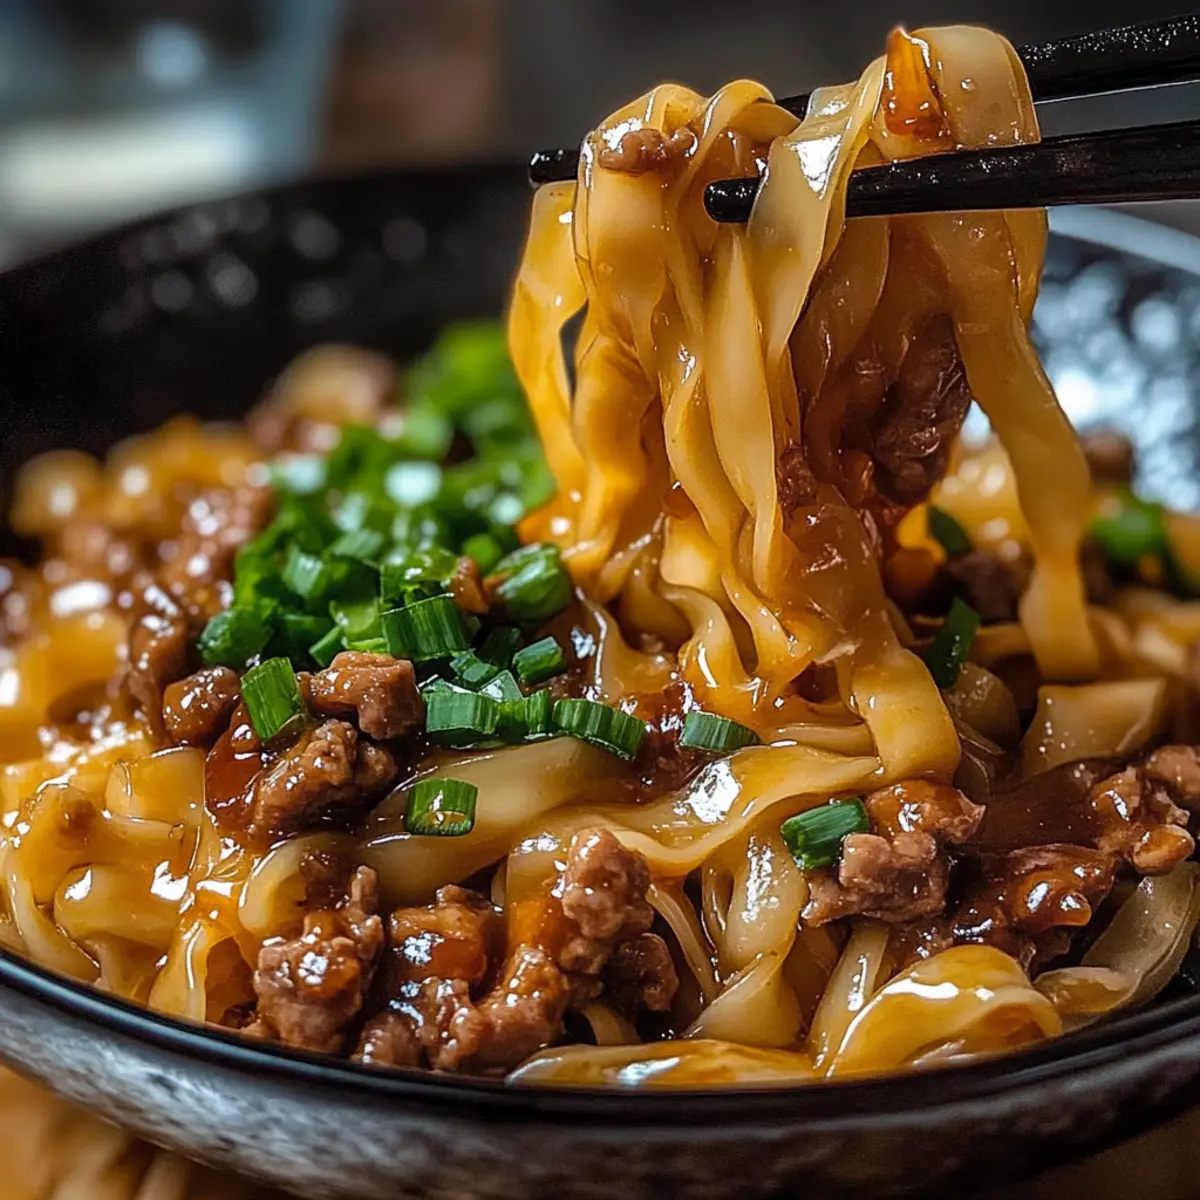
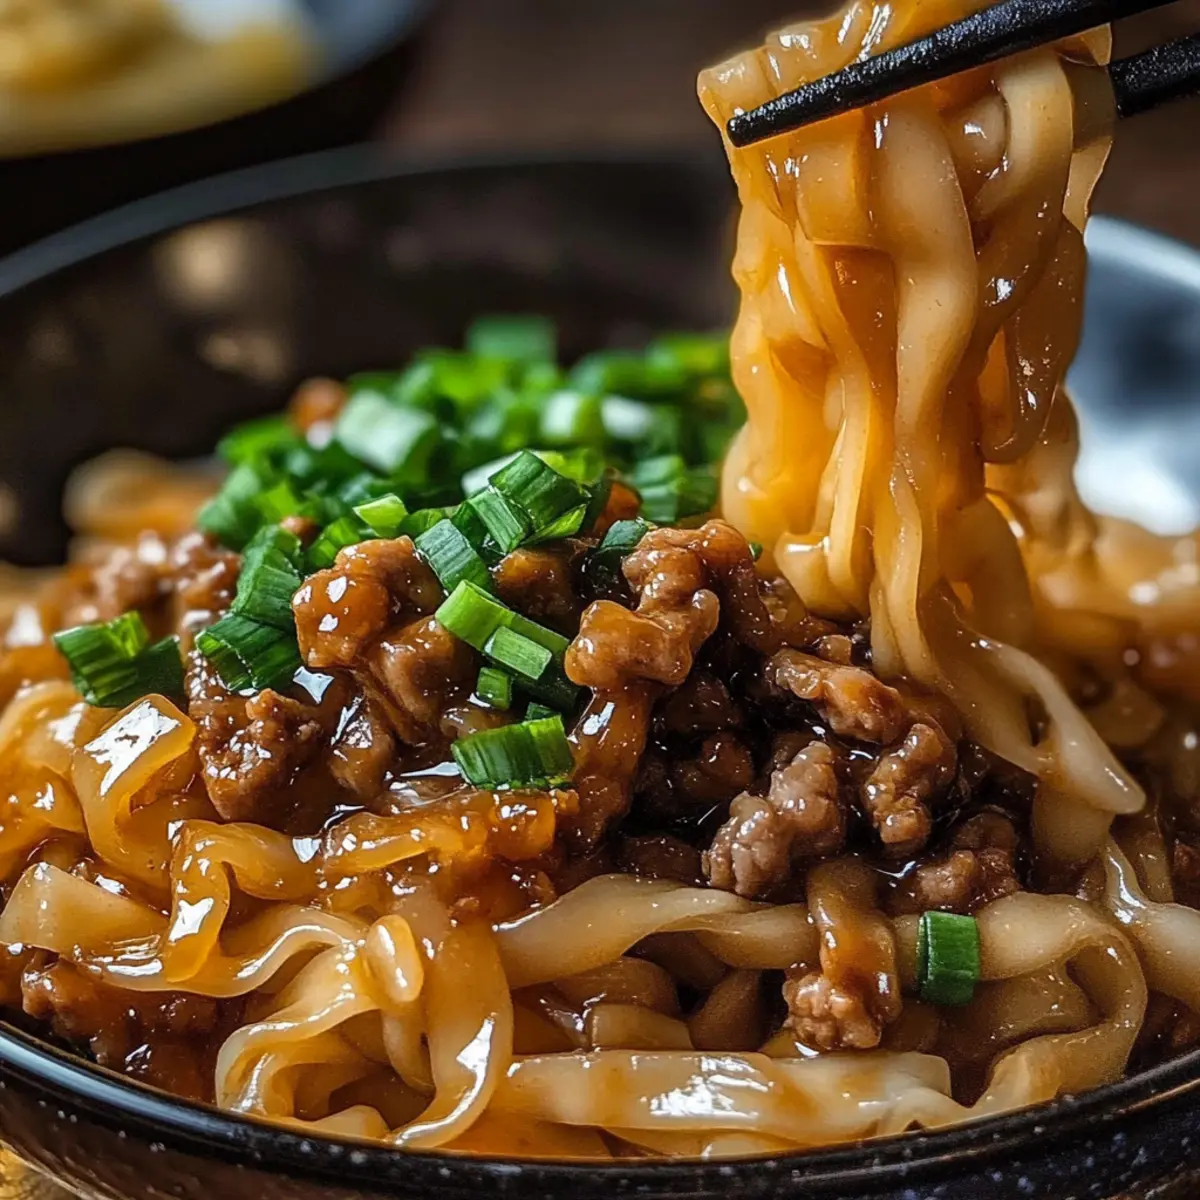
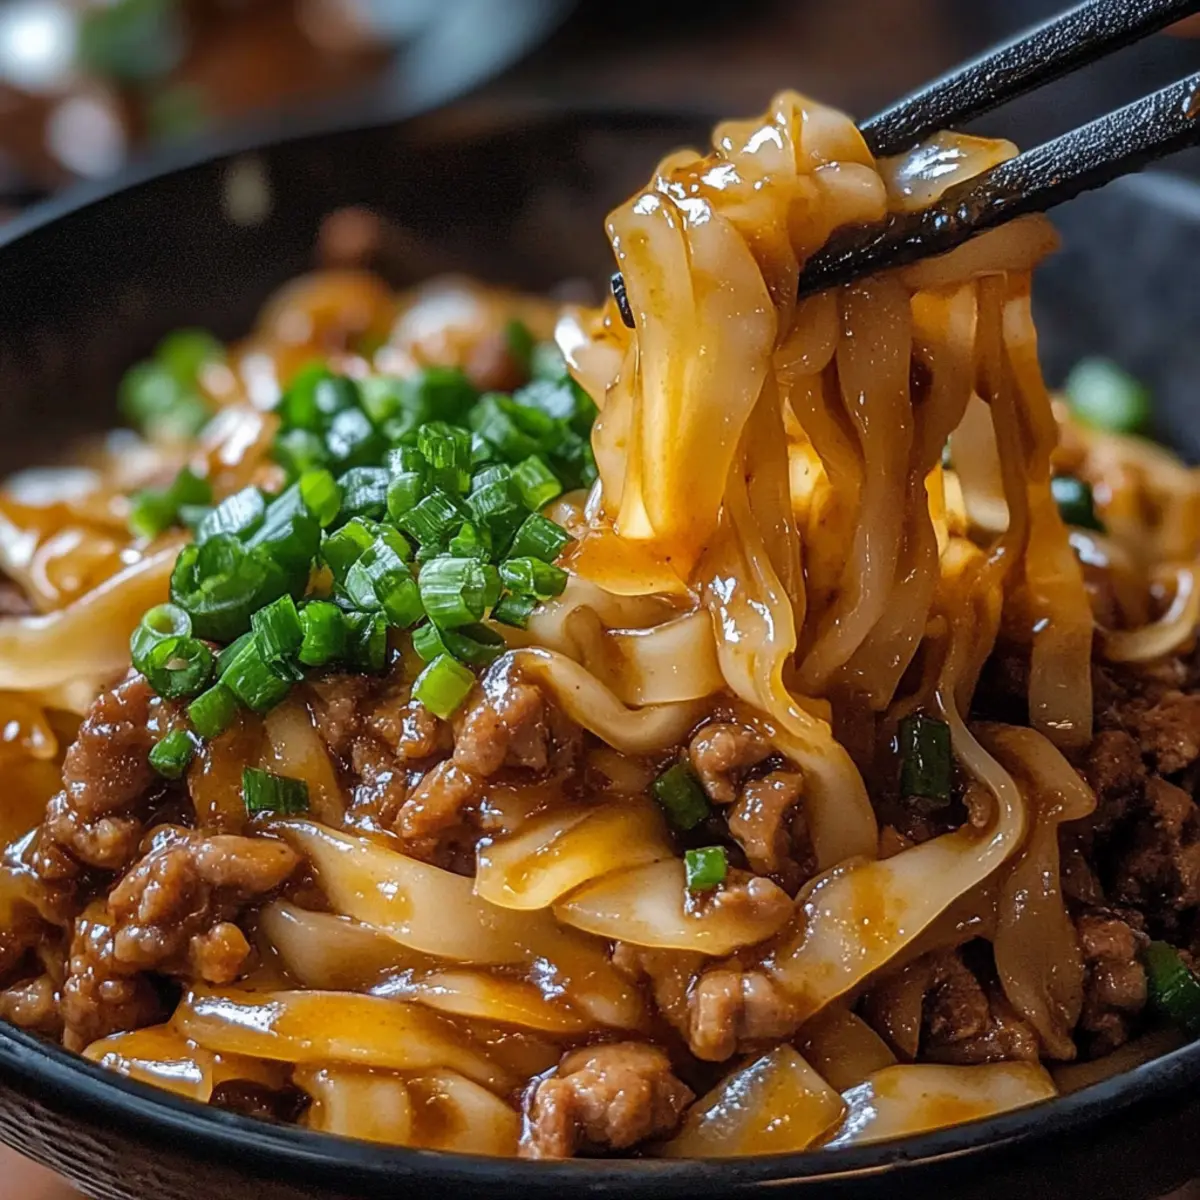
As I scoured my fridge one evening, searching for a meal that could whisk my family away from the routine of takeout, I stumbled upon the perfect solution: a Quick and Easy Pork Potsticker Noodle Bowl. This recipe captures all the savory delight of classic potstickers but skips the fuss of wrappers and frying. In just 30 minutes, you can create a customizable, one-skillet dinner that’s not only family-friendly but also satisfying for any palate. With chewy Lo Mein noodles, juicy ground pork, and a robust sauce, each bite is a comforting embrace that warms the soul. Craving something a little different? I’ll share variations to inspire your creativity in the kitchen. So, what flavors will you explore in your potsticker adventure?

Why Will You Love This Recipe?

Simplicity at Its Best: This Potsticker Noodle Bowl comes together in just 30 minutes, making it a perfect weeknight meal that beats the takeout rush.

Customizable Delights: With various protein options like ground chicken or tofu, and the flexibility to add extra veggies, it caters to all tastes and dietary needs.

One-Skillet Wonder: Say goodbye to messy cleanup! This recipe keeps everything in one skillet, allowing you to savor every moment of cooking.

Crisp and Comforting: The combination of chewy noodles with crunchy cabbage creates an exciting texture contrast that’s irresistible.

Family-Friendly Appeal: Bursting with flavor, even picky eaters will enjoy this meal. Pair it with a side of steamed edamame or consider serving it alongside Potstickers for a complete feast!

Potsticker Noodle Bowl Ingredients

For the Noodles
• Lo Mein Noodles – These wide noodles provide the best chewy base; substitute with spaghetti or udon if needed.

For the Filling
• Ground Pork – Juicy and flavorful, cooks quickly; feel free to swap for ground chicken, turkey, or tofu for lighter options.
• Coleslaw Mix – Adds crunch and color; fresh shredded cabbage works well, around 4 cups if preferred.

For the Sauce
• Low-Sodium Chicken Broth – Essential for sauce moisture and depth; use homemade for extra flavor!
• Mirin – Sweetens the sauce beautifully; if unavailable, mix rice vinegar and sugar (1 tsp) as a substitute.
• Dark Soy Sauce – Contributes umami and color; regular soy sauce can work in a pinch but may lack depth.
• Minced Garlic & Grated Ginger – Aromatics that boost flavor complexity; fresh is always best!
• Sesame Oil – Introduces a nutty flavor; use it sparingly for a delightful finish.
• Sriracha – Optional for heat; adjust to your spice preference for a kick!

For Cooking
• Peanut Oil – Ideal for sautéing the pork; can be replaced with vegetable or canola oil if needed.
• Green Onions – Brightens the dish with fresh flavor; use some for cooking and save the rest for garnishing.

Step‑by‑Step Instructions for Potsticker Noodle Bowl

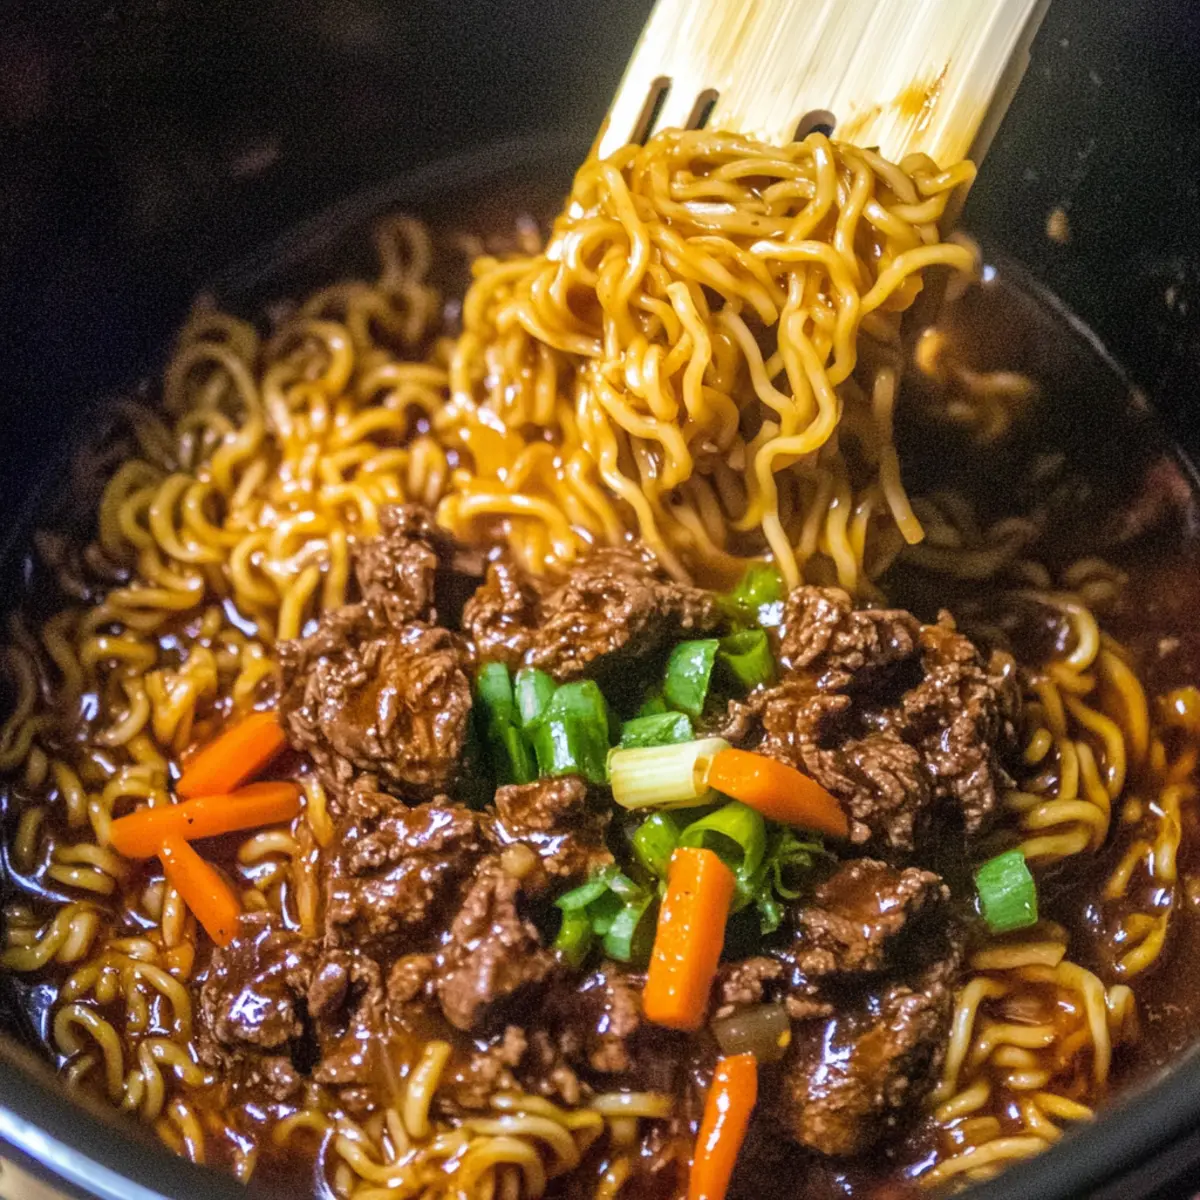
Step 1: Cook Noodles
Begin by bringing a large pot of water to a boil. Add the Lo Mein noodles and cook according to package instructions until al dente, about 4–6 minutes. Once cooked, drain and rinse the noodles under cold water to stop the cooking process. Set the noodles aside in a large mixing bowl to keep them from sticking together as you prepare the rest of your savory potsticker noodle bowl.

Step 2: Sauté Pork
In a large skillet, heat 2 tablespoons of peanut oil over medium-high heat until shimmering. Add the ground pork and ¼ cup of the green onions, breaking the meat apart with a spatula. Cook, stirring occasionally, until the pork is browned and fully cooked through, about 5–6 minutes. As the pork sizzles, its delicious aroma will fill your kitchen, building excitement for your potsticker noodle bowl.

Step 3: Make Sauce
While the pork is cooking, whisk together the sauce ingredients in a mixing bowl. Combine 1 cup of low-sodium chicken broth, 2 tablespoons of mirin, 3 tablespoons of dark soy sauce, minced garlic, grated ginger, 1 teaspoon of sesame oil, and optional sriracha to taste. This comforting blend adds depth and complexity to the potsticker noodle bowl. Set the sauce aside for easy assembly in the next step.

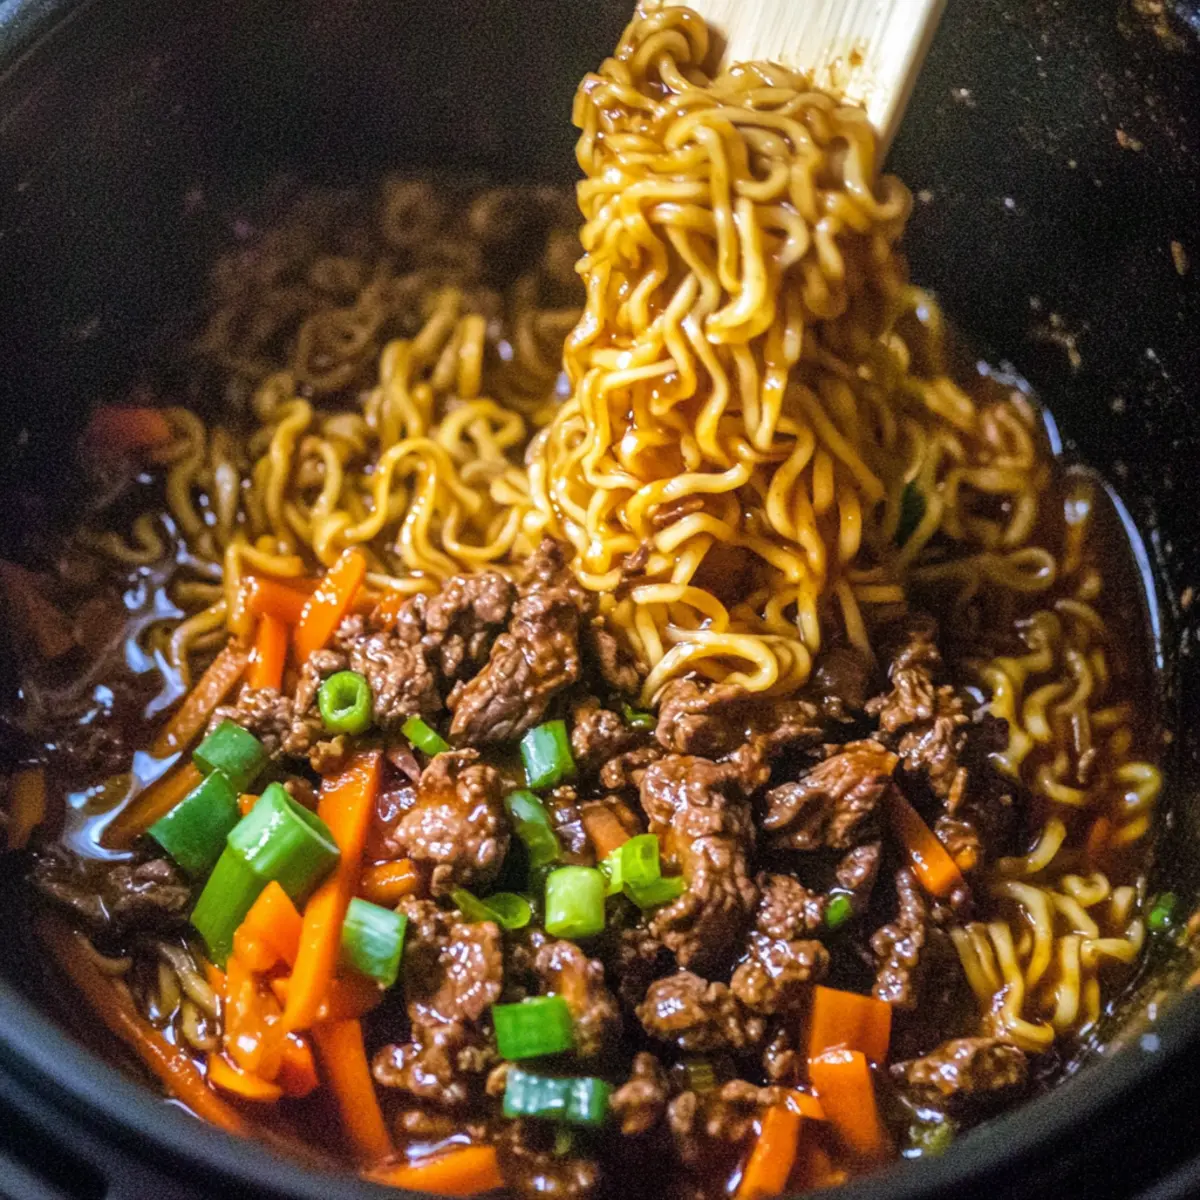
Step 4: Combine Ingredients
Reduce the heat to medium. Carefully add the cooked noodles, coleslaw mix, and prepared sauce to the skillet with the sautéed pork. Using tongs, gently toss the ingredients together until the noodles are evenly coated with the sauce and the cabbage begins to soften, which should take about 2 minutes. The mix of flavors and textures will evoke the nostalgic taste of potstickers cooked in a bowl.
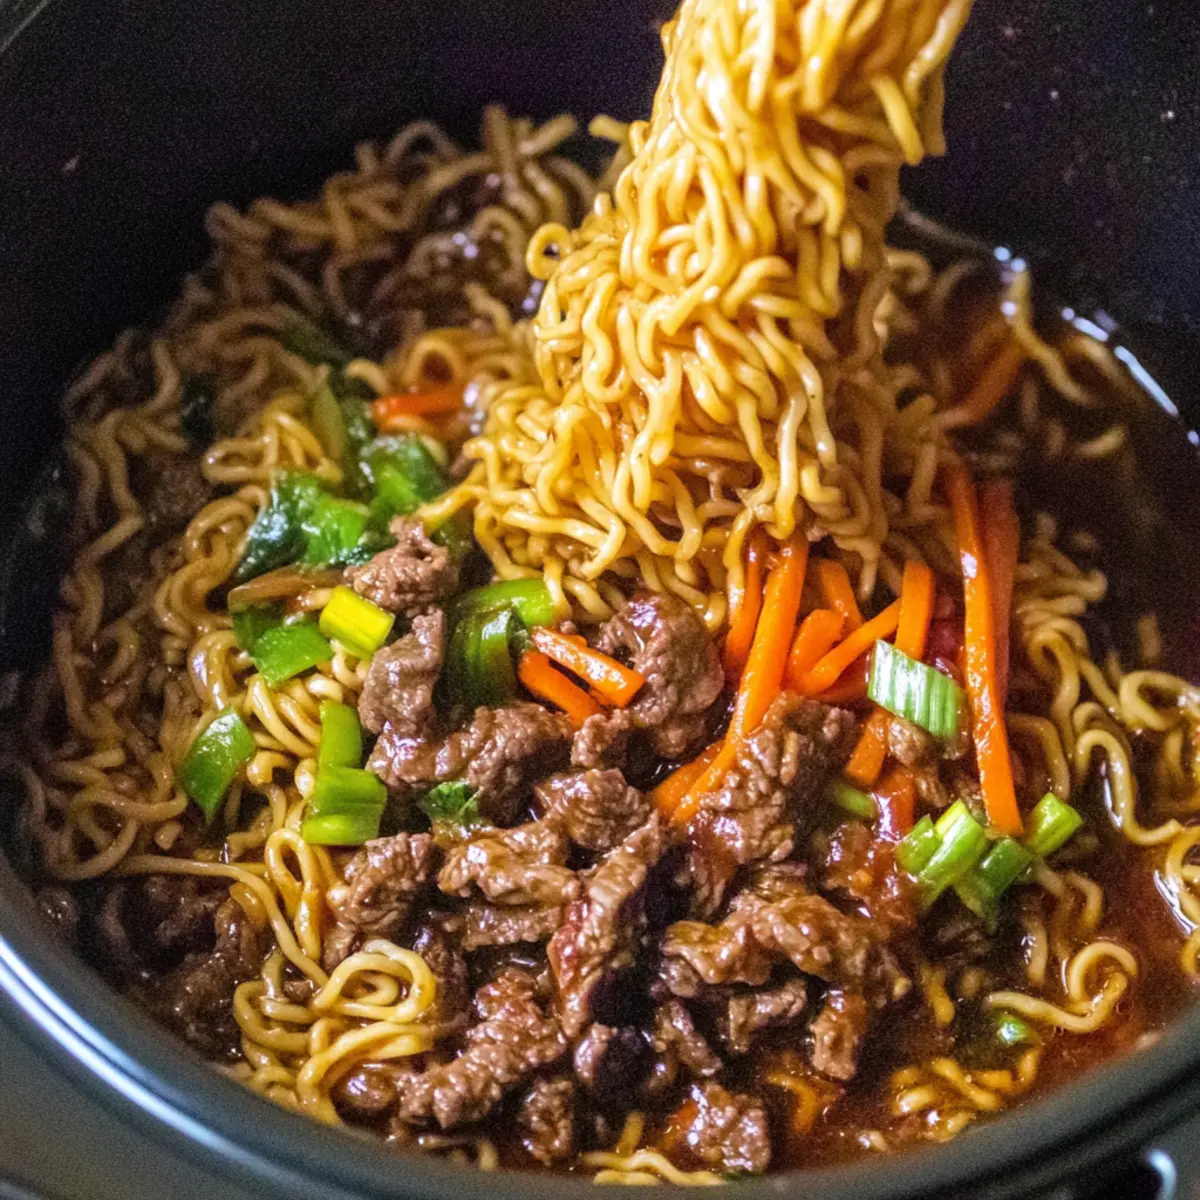
Step 5: Finish Dish
Continue to cook the potsticker noodle bowl for an additional 2–3 minutes, stirring frequently until everything is heated through and well-combined. The cabbage should remain slightly crunchy, providing a lovely contrast to the chewy noodles. Once finished, remove the skillet from heat and sprinkle the remaining sliced green onions over the top for a fresh garnish before serving your delicious dish.

Make Ahead Options

These Potsticker Noodle Bowls are an excellent choice for meal prep, allowing you to enjoy a savory dish on busy weeknights! You can prepare the sauce and sauté the ground pork up to 3 days in advance. Store the sauce and cooked pork separately in airtight containers in the refrigerator to maintain freshness. The noodles can be cooked and refrigerated for up to 24 hours; just toss them lightly in a bit of oil to prevent sticking. When you're ready to serve, simply reheat the pork and sauce in a skillet, add the noodles and coleslaw mix, and toss everything together over medium heat for a delicious meal that's just as comforting and flavorful as when first made!

Storage Tips for Potsticker Noodle Bowl

Fridge: Store any leftover potsticker noodle bowl in an airtight container for up to 4 days. This keeps the flavors intact while ensuring freshness.

Reheating: To reheat, warm in a skillet over medium heat with a splash of broth or water. This helps restore the sauce's consistency and flavor.

Freezer: Freezing is not recommended, as the texture of the noodles and cabbage may degrade upon thawing. For best quality, enjoy your potsticker noodle bowl fresh!

What to Serve with Potsticker Noodle Bowl

Elevate your dining experience by pairing the vibrant flavors of your noodle bowl with these delightful accompaniments.

  • Steamed Edamame: A splash of salt on these tender pods brings a delightful contrast, enhancing the overall meal's experience. Their slight earthiness complements the rich flavors of the noodle bowl.
  • Cucumber Salad: Crisp cucumbers drizzled with a tangy vinaigrette offer a refreshing bite, cutting through the savory richness of the plate, creating balance with every forkful.
  • Jasmine Green Tea: A warm cup of jasmine tea with its floral aroma pairs beautifully, lightening each mouthful and relaxing the senses.
  • Potstickers: Dive deeper into the theme with these delightful dumplings. Their crispy exterior and savory filling mirror the noodle bowl and add an indulgent touch.
  • Pickled Vegetables: A side of tangy, pickled veggies adds a pop of flavor and crunch, making each bite even more exciting and vibrant.
  • Garlic Chili Oil: A drizzle of this spicy condiment can kick up the heat if desired, bringing an additional layer of flavor that melds perfectly with the dish's core.
  • Mango Sticky Rice: For a sweet finish, this dessert adds a delightful tropical note to your meal, contrasting beautifully with the savory elements of the potsticker noodle bowl.
  • Roasted Broccoli: Roasting brings out a deep, savory flavor in broccoli, making it a nutritious complement that enhances the textures in your main dish.

Potsticker Noodle Bowl Variations

Dive into a world of flavors and textures by customizing your potsticker noodle bowl! Your kitchen creativity can shine through with these delightful options.

  • Protein Swaps: Replace ground pork with ground chicken, turkey, or tofu for a lighter twist. Each option brings its unique flavor while keeping the dish hearty.
  • Veggie Add-Ins: Incorporate vibrant bell peppers, snap peas, or mushrooms for a crunchy pop of nutrition. These additions can transform your bowl into a veggie lover's paradise.
  • Low-Carb Option: Swap out noodles for spiralized zucchini or shirataki noodles to enjoy a guilt-free meal. It’s a perfect way to savor all the flavors without the carbs.
  • Spice It Up: Adjust the heat by adding more sriracha or chili crisp, depending on your spice level preference. Play with the flavors and find your perfect kick!
  • Gluten-Free Delight: Use gluten-free noodles like rice noodles for a safe, satisfying alternative. You'll still enjoy that delightful chew without worry.
  • Herb Boost: Fresh herbs like cilantro or Thai basil can add an aromatic finish to your dish. A sprinkle of fresh herbs brings brightness and life to your potsticker noodle bowl.
  • Flavorful Stocks: Experiment with vegetable or mushrooms broth instead of chicken broth for a rich vegan option. The umami depth will impress even the non-vegans at your table.
  • Asian-Inspired Collage: Serve the bowl with sides such as Gochujang Sesame Noodles or Pitaya Smoothie Bowl for a complete theme that will delight your family!

Expert Tips for the Best Potsticker Noodle Bowl

  • Cook Noodles Al Dente: Ensure your noodles are slightly firm to avoid mushiness when combined with the other ingredients. This keeps the texture just right in the potsticker noodle bowl.

  • Prep Your Sauce Early: Whisk together your sauce ingredients in advance. This not only saves time but also enhances the depth of flavor in your dish.

  • Add Veggies Wisely: If you're incorporating extra vegetables, add them with the noodles to allow them to soften slightly, but retain their crunch, enhancing the overall texture of the potsticker noodle bowl.

  • Finish with Green Onions: Reserve some green onions for garnishing after cooking. The fresh flavor adds an extra layer of brightness to the dish—never skip this step!

  • Store Leftovers Correctly: Keep any leftover potsticker noodle bowl in an airtight container in the fridge for up to 4 days. Reheat gently to maintain flavor and texture.

Potsticker Noodle Bowl Recipe FAQs

What type of noodles should I use for the Potsticker Noodle Bowl?
I recommend wide Lo Mein noodles for the best texture, but you can substitute with spaghetti or udon noodles if needed. Each noodle brings its unique flavor and texture, so feel free to get creative!

How do I store leftovers of the Potsticker Noodle Bowl?
Store any leftovers in an airtight container in the fridge for up to 4 days. This will keep the dish fresh and allow you to enjoy it later. When reheating, add a splash of broth or water in a skillet over medium heat to revive the sauce's consistency.

Can I freeze the Potsticker Noodle Bowl?
Freezing is not recommended for this dish, as the texture of the noodles and cabbage may degrade upon thawing. For the best quality, enjoy your Potsticker Noodle Bowl fresh! If you're looking to prepare ahead, consider making the sauce separately and storing it in the fridge.

What can I substitute for ground pork in the Potsticker Noodle Bowl?
Absolutely! You can use ground chicken, turkey, or even tofu for a lighter, meat-free version. Each alternative offers a distinct flavor profile and keeps the dish exciting! Just be mindful of the cooking times to ensure everything is fully cooked.

How do I know when the noodles are cooked perfectly?
Cook your Lo Mein noodles until they are al dente, resulting in a slightly firm texture that won't become mushy when tossed with the other ingredients. Typically, this means cooking them for about 4–6 minutes in boiling water. Always follow the package instructions for the best results!

Can I add more vegetables to the Potsticker Noodle Bowl?
Very! Feel free to incorporate vegetables like bell peppers, snap peas, or mushrooms into your bowl for added nutrition and texture. Just sauté them with the pork or toss them in along with the noodles to allow them to soften without losing their crunch.

Potsticker Noodle Bowl

Savory Potsticker Noodle Bowl: A Quick Family Favorite

Enjoy a flavorful Potsticker Noodle Bowl that’s quick to make, customizable, and perfect for the family.
Print Recipe Pin Recipe
Prep Time 10 minutes mins
Cook Time 20 minutes mins
Total Time 30 minutes mins
Servings: 4 bowls
Course: Dinner
Cuisine: Asian
Calories: 520
Ingredients Equipment Method Nutrition Notes

Ingredients
  

For the Noodles
  • 8 ounces Lo Mein Noodles Substitute with spaghetti or udon if needed.
For the Filling
  • 1 pound Ground Pork Can swap for ground chicken, turkey, or tofu.
  • 4 cups Coleslaw Mix Fresh shredded cabbage works well.
For the Sauce
  • 1 cup Low-Sodium Chicken Broth Use homemade for extra flavor.
  • 2 tablespoons Mirin Mix rice vinegar and 1 tsp sugar if needed.
  • 3 tablespoons Dark Soy Sauce Regular soy sauce can be substituted.
  • 2 cloves Minced Garlic Use fresh for best flavor.
  • 1 tablespoon Grated Ginger Use fresh for best flavor.
  • 1 teaspoon Sesame Oil Use sparingly for a nutty flavor.
  • to taste Sriracha Optional for added heat.
For Cooking
  • 2 tablespoons Peanut Oil Can be replaced with vegetable or canola oil.
  • 4 stalks Green Onions Reserve some for garnishing.

Equipment

  • Large pot
  • Large skillet
  • Mixing Bowl
  • Spatula
  • Tongs

Method
 

Cooking Steps
  1. Bring a large pot of water to a boil. Add the Lo Mein noodles and cook according to package instructions until al dente, about 4–6 minutes. Drain and rinse under cold water, set aside.
  2. In a large skillet, heat peanut oil over medium-high heat. Add ground pork and ¼ cup of green onions. Cook until pork is browned and fully cooked, about 5–6 minutes.
  3. Whisk together sauce ingredients in a bowl: chicken broth, mirin, dark soy sauce, minced garlic, grated ginger, sesame oil, and sriracha to taste. Set aside.
  4. Reduce heat to medium. Add cooked noodles, coleslaw mix, and sauce to the skillet with pork. Toss gently until noodles are coated and cabbage softens, about 2 minutes.
  5. Cook for an additional 2–3 minutes until heated through. Garnish with remaining green onions before serving.

Nutrition

Serving: 1bowlCalories: 520kcalCarbohydrates: 45gProtein: 22gFat: 25gSaturated Fat: 4gPolyunsaturated Fat: 8gMonounsaturated Fat: 10gCholesterol: 70mgSodium: 800mgPotassium: 450mgFiber: 3gSugar: 4gVitamin A: 20IUVitamin C: 15mgCalcium: 40mgIron: 2mg

Notes

Store leftovers in an airtight container in the fridge for up to 4 days. Reheat gently to maintain flavor and texture.

Tried this recipe?

Let us know how it was!

Cheesy Bowtie Pasta: A Comforting Cajun Cream Delight

January 25, 2026 by Grace Snow Leave a Comment

As I stirred the pot, the comforting aroma of Cajun spices began to swirl, wrapping around my kitchen like a warm hug. This Cheesy Bowtie Pasta with Savory Cajun Ground Beef in Garlic Cream is more than just a meal; it’s a celebration of flavors that turn an ordinary weeknight into something special. Packed with protein and bursting with rich, creamy goodness, this recipe is perfect for anyone looking to swap takeout for a homemade delight without spending hours in the kitchen. In under 40 minutes, you'll be savoring every cheesy bite while enjoying the satisfaction of a delicious, crowd-pleasing dinner. Curious to discover how to whip up this comforting dish? Let’s dive in!

Why is Cheesy Bowtie Pasta the Ultimate Comfort Food?

Irresistible Flavor: The combination of Cajun spices and creamy cheese creates a rich and bold flavor that will leave your taste buds dancing.

Quick & Easy: In just under 40 minutes, you can transform simple ingredients into a delightful meal, making it perfect for busy weeknights.

Family-Friendly: With its creamy texture and cheesy goodness, this dish is sure to please even the pickiest eaters at your table.

Versatile Options: Feel free to swap in your favorite pasta shapes or experiment with different cheeses for a personalized touch. And if you’re also looking for other creative pasta ideas, check out Cauliflower Pasta Ready or Seafood Pasta Savory.

Perfectly Balanced: This dish beautifully combines protein, carbs, and comfort, making it a filling option for dinner or meal prep.

Cheesy Bowtie Pasta Ingredients

• For the Pasta

  • Bowtie Pasta (12 ounces) – The primary base that gives a lovely texture; feel free to swap for penne or rotini if needed.

• For the Protein

  • Ground Beef (1 pound) – Adds richness and protein; opt for lean ground beef to minimize greasiness.

• For the Seasoning

  • Cajun Seasoning (1 tablespoon) – Infuses that smoky, spicy flavor; adjust based on your heat preference for this Cheesy Bowtie Pasta.

• For the Sauce

  • Garlic (4 cloves, minced) – Imparts amazing aroma and flavor; always use fresh for the best results.
  • Butter (2 tablespoons) – Provides creaminess to the sauce; you can use olive oil for a lighter version.
  • Heavy Cream (1½ cups) – The heart of the creamy sauce; half-and-half can be a lighter alternative.

• For the Cheese

  • Shredded Cheddar Cheese (1 cup) – Delivers melty goodness; consider mixing in a blend of cheeses for extra flavor.
  • Grated Parmesan Cheese (½ cup) – Adds depth and a hint of saltiness to the sauce.

• For Flavor Enhancement

  • Fine Sea Salt (½ teaspoon) – Elevates all the flavors; adjust to taste based on your preference.
  • Black Pepper (½ teaspoon) – Offers a subtle kick; freshly ground adds the best flavor.

• For Garnish

  • Chopped Fresh Parsley (2 tablespoons) – Adds a pop of color and freshness, brightening up the dish.

Step‑by‑Step Instructions for Cheesy Bowtie Pasta

Step 1: Cook the Pasta
Begin by bringing a large pot of salted water to a rolling boil. Once boiling, add the bowtie pasta and cook according to package instructions until al dente, typically about 10-12 minutes. Before draining, carefully reserve ½ cup of the pasta water to help adjust the sauce later. Drain the pasta in a colander and set it aside.

Step 2: Brown the Ground Beef
In a large skillet over medium heat, add the ground beef and cook for about 5-7 minutes, breaking it apart with a spatula as it cooks. Once the beef is browned and no longer pink, stir in the Cajun seasoning, cooking for an additional 2 minutes until the spices are fragrant and well incorporated. Transfer the beef to a plate and set aside.

Step 3: Sauté the Garlic
Using the same skillet, melt 2 tablespoons of butter over medium heat. Once the butter is bubbling, add the minced garlic and sauté for about 30-60 seconds until fragrant, being careful not to let it burn. This step infuses the dish with an irresistible aroma, setting the stage for the creamy sauce that will follow.

Step 4: Create the Cream Sauce
Pour in 1½ cups of heavy cream into the skillet, reducing the heat to low. Allow the cream to simmer gently for about 3-4 minutes, stirring occasionally, until it starts to thicken slightly. Keep an eye on the sauce as it bubbles—this is your opportunity to create a rich, creamy base for your Cheesy Bowtie Pasta.

Step 5: Add the Cheeses
Once the cream has thickened, stir in 1 cup of shredded cheddar cheese and ½ cup of grated Parmesan cheese. Keep stirring for about 2-3 minutes until the cheese is completely melted and the sauce is smooth. Season the mixture with fine sea salt and black pepper to taste, enhancing the flavor profile of your creamy creation.

Step 6: Combine Ingredients
Return the cooked ground beef back into the skillet, followed by the drained bowtie pasta. Gently toss everything together, ensuring the pasta is well-coated in the luscious garlic cream sauce. If the sauce feels too thick, gradually stir in the reserved pasta water until you reach your desired consistency.

Step 7: Serve and Garnish
Once everything is nicely mixed, remove the skillet from heat. Scoop the Cheesy Bowtie Pasta onto plates and garnish with chopped fresh parsley for a touch of color and freshness. Serve immediately while hot, enjoying the comforting flavors and creamy textures that elevate this dish to a family favorite.

Cheesy Bowtie Pasta: Creative Variations

Feel free to explore these delightful twists that not only enhance flavor but also cater to various dietary needs.

  • Pasta Shapes: Experiment with penne or rotini for a different texture—each shape holds the sauce uniquely, making every bite exciting.

  • Ground Turkey: Swap ground beef for turkey to lighten things up while keeping the dish hearty and satisfying. You'll find it just as flavorful!

  • Vegetarian Delight: For a vegetarian option, replace meat with sautéed mushrooms and spinach—the umami from mushrooms offers a delicious earthy flavor.

  • Cheese Variations: Mix up the cheeses by using pepper jack or gouda for a unique twist, adding a spicy kick or a smoky depth.

  • Sneaky Veggies: Toss in some finely chopped bell peppers or zucchini while sautéing the garlic for added nutrition and vibrant color.

  • Extra Heat: If you crave some spice, add a pinch of cayenne pepper or crushed red pepper flakes to the sauce—perfect for those who like to turn up the heat!

  • Cream Alternatives: Consider using coconut milk for a dairy-free option, giving the dish a subtle sweetness while keeping it creamy and luscious.

For more creative twists, you might enjoy the comforting flavors of Cheesy Zucchini Bake or the unique textures in Skillet Pasta Sun.

Storage Tips for Cheesy Bowtie Pasta

  • Refrigerator: Store leftovers in an airtight container for up to 3 days. Ensure the container is sealed to maintain freshness and prevent odors from other foods.

  • Freezer: For longer storage, freeze the Cheesy Bowtie Pasta in an airtight container or freezer bags for up to 2 months. Be sure to label with the date for easy tracking.

  • Reheating: When reheating, use the stove over low heat, adding a splash of cream or milk to revive the sauce’s creaminess. Make sure to stir occasionally for even heating.

  • Thawing: If frozen, transfer to the fridge 24 hours before reheating to allow for a safe thaw. Reheat only what you'll enjoy to prevent leftovers from being refrozen.

Make Ahead Options

These Cheesy Bowtie Pasta with Savory Cajun Ground Beef in Garlic Cream are perfect for meal prep! You can cook the pasta and brown the ground beef up to 24 hours in advance. Simply store them separately in airtight containers in the refrigerator to maintain their texture and prevent mushiness. Additionally, you can prepare the creamy sauce (without the cheese) and refrigerate it for up to 3 days. When ready to serve, reheat the sauce gently on low heat, stirring in the cheeses until melted, then combine with the pasta and beef, adding a splash of reserved pasta water if needed. This way, you'll enjoy all the comfort of this delicious dish without the last-minute rush, making weeknight dinners a breeze!

Expert Tips for Cheesy Bowtie Pasta

  • Lean Beef Choice: Opt for lean ground beef to avoid a greasy sauce, ensuring your Cheesy Bowtie Pasta remains rich and creamy without excess fat.

  • Customize Spice Level: Adjust Cajun seasoning based on your heat preference. Start with less if you're unsure to keep it family-friendly.

  • Pasta Water Magic: Don’t forget to reserve that pasta water! It's key for adjusting your sauce's consistency, helping it cling beautifully to the pasta.

  • Fresh Ingredients Rule: Using fresh garlic instead of powdered elevates the flavor significantly, bringing out the dish's savory heartiness.

  • Mix It Up: Feel free to experiment with different cheese blends, like pepper jack for a spicy kick or mozzarella for extra stretchiness.

  • Add Veggie Goodness: Incorporate spinach or bell peppers into the mix for added nutrition and vibrant color.

What to Serve with Cheesy Bowtie Pasta?

Treat your family to a delightful dining experience by pairing your dish with some mouthwatering sides that complement the robust flavors of this creamy, Cajun-inspired masterpiece.

  • Garlic Bread: The warm, crunchy exterior and soft, buttery center make garlic bread perfect for soaking up the rich sauce, ensuring every last bit is savored.

  • Caesar Salad: Crisp romaine and tangy dressing provide a refreshing contrast to the creamy pasta, adding a beautiful, crunchy texture to your meal.

  • Oven-Roasted Vegetables: Colorful veggies like bell peppers, zucchini, and carrots bring a hint of sweetness, balancing the savory spices in the Cheesy Bowtie Pasta beautifully.

  • Cajun-Style Corn on the Cob: The sweet, juicy corn with a hint of smokiness pairs wonderfully with the dish, enhancing the Cajun flavors and adding a fun, interactive element to dining.

  • Crispy Brussels Sprouts: Their slight bitterness and caramelized exterior offer an exciting flavor aspect that complements the rich, creamy sauce.

  • Sweet Tea: This refreshing drink's sweetness provides an enjoyable contrast to the savory richness of the pasta, making each bite even more satisfying.

  • Chocolate Mousse: For dessert, a light and airy chocolate mousse brings a tantalizing finish, allowing the meal to end on a sweet note that lingers in delightful memory.

Cheesy Bowtie Pasta Recipe FAQs

What type of pasta should I use for Cheesy Bowtie Pasta?
For this delightful dish, bowtie pasta is recommended as it offers a lovely texture and effectively holds the creamy sauce. If you're in a pinch or simply prefer a different shape, penne or rotini will also work beautifully, ensuring you still enjoy that comforting cheesy bite.

How long can I store leftovers of Cheesy Bowtie Pasta?
You can store leftovers in an airtight container in the refrigerator for up to 3 days. This helps maintain freshness and flavor. When you're ready to enjoy it again, simply reheat on the stove over low heat, adding a splash of cream or milk if needed to bring back the sauce's luscious texture.

Can I freeze Cheesy Bowtie Pasta?
Absolutely! To freeze your Cheesy Bowtie Pasta, allow it to cool completely, then transfer it to an airtight container or freezer bags. You can freeze it for up to 2 months. Be sure to label with the date for easy tracking. When you’re ready to enjoy, thaw slowly in the refrigerator for 24 hours before reheating.

What should I do if my sauce is too thick?
If you find your sauce is thicker than you'd like, simply add some of the reserved pasta water a little at a time until you reach your desired consistency. The starchy pasta water not only thins the sauce but also helps it cling to the pasta, ensuring every bite is packed with flavor.

Are there any dietary considerations I should be aware of for Cheesy Bowtie Pasta?
Yes, if you’re cooking for someone with allergies, be mindful of the dairy in this recipe, like the heavy cream and cheeses, which could affect those who are lactose intolerant. You can consider using dairy-free cream alternatives and cheeses for a healthier version. If you have pets around, it’s best to keep human food, especially those with spices and dairy, away from them.

How do I know if my ground beef is lean enough for a healthier dish?
For a leaner option, aim to choose ground beef with a fat percentage of 10% or less. At the grocery store, look for labels like "90% lean" or "extra lean." This will help ensure you enjoy a creamy sauce without the excess greasiness that can come from fattier cuts.

Cheesy Bowtie Pasta

Cheesy Bowtie Pasta: A Comforting Cajun Cream Delight

This Cheesy Bowtie Pasta features savory Cajun ground beef in a garlic cream sauce, making it a delightful comfort dish perfect for weeknights.
Print Recipe Pin Recipe
Prep Time 10 minutes mins
Cook Time 30 minutes mins
Total Time 40 minutes mins
Servings: 4 servings
Course: Dinner
Cuisine: Cajun
Calories: 600
Ingredients Equipment Method Nutrition Notes

Ingredients
  

For the Pasta
  • 12 ounces Bowtie Pasta Feel free to swap for penne or rotini if needed.
For the Protein
  • 1 pound Ground Beef Opt for lean ground beef to minimize greasiness.
For the Seasoning
  • 1 tablespoon Cajun Seasoning Adjust based on your heat preference.
For the Sauce
  • 4 cloves Garlic Minced, use fresh for best results.
  • 2 tablespoons Butter You can use olive oil for a lighter version.
  • 1.5 cups Heavy Cream Half-and-half can be a lighter alternative.
For the Cheese
  • 1 cup Shredded Cheddar Cheese Consider mixing in a blend of cheeses for extra flavor.
  • 0.5 cup Grated Parmesan Cheese Adds depth and a hint of saltiness to the sauce.
For Flavor Enhancement
  • 0.5 teaspoon Fine Sea Salt Adjust to taste based on your preference.
  • 0.5 teaspoon Black Pepper Freshly ground adds the best flavor.
For Garnish
  • 2 tablespoons Chopped Fresh Parsley Adds a pop of color and freshness.

Equipment

  • Large pot
  • Large skillet
  • Colander

Method
 

Step‑by‑Step Instructions
  1. Cook the Pasta: Bring a large pot of salted water to a boil. Add the bowtie pasta and cook until al dente, about 10-12 minutes. Reserve ½ cup of pasta water, drain, and set aside.
  2. Brown the Ground Beef: In a skillet, cook the ground beef over medium heat for 5-7 minutes. Stir in Cajun seasoning and cook for an additional 2 minutes. Set aside.
  3. Sauté the Garlic: Melt butter in the skillet, add minced garlic, and sauté for 30-60 seconds until fragrant.
  4. Create the Cream Sauce: Add heavy cream, simmer for 3-4 minutes stirring occasionally until thickened.
  5. Add the Cheeses: Stir in cheddar and Parmesan cheeses until melted and smooth. Season with salt and pepper.
  6. Combine Ingredients: Return the beef to the skillet, add the pasta, and gently toss together. Adjust sauce consistency with reserved pasta water.
  7. Serve and Garnish: Remove from heat, scoop onto plates, and garnish with parsley. Serve immediately.

Nutrition

Serving: 1servingCalories: 600kcalCarbohydrates: 60gProtein: 30gFat: 30gSaturated Fat: 15gPolyunsaturated Fat: 2gMonounsaturated Fat: 10gCholesterol: 90mgSodium: 800mgPotassium: 700mgFiber: 3gSugar: 5gVitamin A: 500IUVitamin C: 2mgCalcium: 300mgIron: 2mg

Notes

For best results, use fresh ingredients and adjust spices to your preference. Experiment with different cheese blends for added flavor.

Tried this recipe?

Let us know how it was!

Savory Braised Meatballs in Red Wine Gravy for Cozy Nights

January 25, 2026 by Grace Snow Leave a Comment

The kitchen filled with the aroma of slow-simmering meatballs is truly magical. That's how I feel every time I whip up a batch of my Braised Meatballs in Red Wine Gravy. This comforting dish transforms simple ingredients into a heartwarming Italian delight, perfect for cozy family dinners or impressing friends during a gathering. The succulent meatballs are enveloped in a velvety gravy that not only elevates their flavor but also creates a dish that’s incredibly easy to pull together. With quick prep time and a crowd-pleasing reputation, this recipe is bound to become a weeknight favorite. Ready to dive into a culinary experience that warms not just your heart but your home? Let’s get started!

Why Are These Meatballs So Irresistible?

Comforting Warmth: There’s something magical about the aroma of tender meatballs simmering in rich gravy, making your home feel inviting.
Flavor Explosion: The combination of red wine and tomato paste creates a depth of flavor that elevates your dinner game.
Quick Prep: With simple steps, you can have a cozy meal on the table in no time, perfect for busy weeknights.
Versatile Enjoyment: Pair these meatballs over pasta, polenta, or even in a sandwich for a delightful twist.
Crowd-Pleasing: Their luscious sauce and tender texture guarantee they'll be a hit at any gathering, leaving your guests asking for the recipe!
Embrace the warmth of comfort food with these Braised Meatballs in Red Wine Gravy, turning everyday meals into something extraordinary!

Braised Meatballs in Red Wine Gravy Ingredients

• Discover the essential components for a comforting classic!

For the Meatballs

  • Ground Beef – The main protein source; swap with turkey or pork for a unique twist.
  • Breadcrumbs – These help bind the meatballs; for a gluten-free option, use gluten-free breadcrumbs.
  • Grated Parmesan Cheese – Adds a delightful depth of flavor; Pecorino Romano brings a sharper taste if preferred.
  • Onion (chopped) – Provides sweetness and aroma; shallots work well for a milder profile.
  • Garlic (minced) – Enhances the overall flavor; garlic powder can stand in if fresh isn’t on hand.
  • Salt and Pepper – Essential seasonings; adjust to match your personal taste.

For the Gravy

  • Olive Oil – Perfect for browning meatballs and sautéing vegetables; vegetable oil can be a suitable substitute.
  • Red Wine – Creates the sauce's rich flavor; opt for a dry red wine or substitute with grape juice for a non-alcoholic version.
  • Beef Broth – Adds liquid and enriches the gravy; chicken broth is a good alternative.
  • Tomato Paste – Provides a sweet and umami kick; crushed tomatoes can be an emergency substitute.
  • Fresh Herbs (e.g., basil, thyme) – Optional for added aroma and flavor; dry herbs work in a pinch.

Elevate your cooking experience with these Braised Meatballs in Red Wine Gravy ingredients, inviting you to create a dish that fills your home with warmth and joy!

Step‑by‑Step Instructions for Braised Meatballs in Red Wine Gravy

Step 1: Preheat Oven
Begin by preheating your oven to 375°F (190°C). This step ensures that the environment is ready to cook the meatballs to perfection. A properly heated oven will help achieve that delightful, golden exterior while keeping the inside tender and juicy.

Step 2: Prepare Meatball Mixture
In a large mixing bowl, combine ground beef, breadcrumbs, grated Parmesan, chopped onion, minced garlic, salt, and pepper. Use your hands to mix until the ingredients are evenly combined, but be careful not to overwork the mixture. This forms the base of your mouthwatering Braised Meatballs in Red Wine Gravy.

Step 3: Form Meatballs
Take portions of the mixture and roll them into golf ball-sized meatballs, about 1 to 1.5 inches in diameter. Place each meatball on a parchment-lined baking sheet, ensuring they’re evenly spaced apart. This will allow the meatballs to brown evenly when you cook them later.

Step 4: Brown Meatballs
Heat a generous drizzle of olive oil in a large skillet over medium heat. Once the oil is glistening, add the meatballs carefully and sear them for about 5 minutes, turning occasionally until they're nicely golden on all sides. This step locks in the flavors and juices of your meatballs, enhancing the final dish.

Step 5: Make Gravy
With the meatballs set aside, use the same skillet to make the gravy. Add a bit more olive oil if needed and sauté chopped onion over medium heat until it becomes translucent, about 3-4 minutes. Stir in minced garlic and tomato paste, cooking for an additional minute until fragrant, creating a rich base for your gravy.

Step 6: Add Wine and Broth
Pour in a cup of red wine and a cup of beef broth to the skillet, stirring well while scraping the bottom to deglaze the pan. This incorporates all the wonderful bits left from browning the meatballs. Allow the mixture to simmer for a few moments, letting the wine reduce slightly and intensify the flavors.

Step 7: Simmer
Return the browned meatballs back into the skillet, making sure they’re submerged in the sauce. Cover the skillet and reduce the heat to low, allowing the meatballs to simmer gently for about 30 minutes. This slow cooking melds the flavors beautifully and ensures the meatballs are perfectly cooked through.

Step 8: Serve
Once the meatballs are tender and the gravy is rich and flavorful, it's time to serve! Plate the succulent meatballs and generously drizzle them with the luscious red wine gravy. Pair them with your choice of creamy polenta, pasta, or crusty bread to soak up every delicious drop.

Expert Tips for Braised Meatballs

  • Sear for Flavor: Thoroughly brown your meatballs for optimal flavor. This helps lock in juices and enhance the richness of your Braised Meatballs in Red Wine Gravy.

  • Deglaze the Pan: Use both wine and broth to deglaze the skillet after browning. This lifts all those tasty bits stuck to the pan, adding depth to your gravy.

  • Allow to Chill: If preparing in advance, chill the dish after cooking. This makes slicing and portioning the meatballs easier when serving later.

  • Avoid Overcrowding: When browning meatballs, ensure they have space in the skillet. Overcrowding can steam them instead of browning, resulting in less tender meatballs.

  • Customize Seasoning: Adjust salt and pepper according to your taste preferences. Each palate is different, so make these meatballs your own!

Braised Meatballs in Red Wine Gravy Variations

Feel free to explore and customize your Braised Meatballs in Red Wine Gravy to suit your tastebuds and dietary needs!

  • Paleo-Friendly: Use ground turkey or chicken and almond flour instead of breadcrumbs for a lighter, low-carb option.
    A touch of zesty lemon juice can brighten the flavors, balancing out the richness of the gravy.

  • Vegetarian: Swap meatballs for hearty lentil or mushroom-based substitutes.
    A rich vegetable broth can replace the beef broth, allowing for a delicious yet meat-free dish that everyone will love.

  • Spicy Kick: Add crushed red pepper flakes to the gravy for a gentle heat that enhances the overall flavor.
    This twist brings an exciting kick, making your comforting dish even more vibrant and dynamic.

  • Creamier Gravy: Stir in a splash of heavy cream or coconut milk at the end of cooking for a luxurious texture.
    The creaminess will mellow the acidity of the red wine, offering a comforting balance to your meatballs.

  • Herb Infusion: Incorporate fresh herbs like oregano or rosemary into the meat mixture for extra aroma.
    The herbs will deepen the flavor profile, creating an explosion of taste while leaning into that beloved Italian essence.

  • Swap the Sauce: Try a homemade marinara sauce instead of the red wine gravy for a classic spaghetti and meatballs feel.
    This option drenches your tender meatballs in a tomato-based sauce that truly embodies comfort food.

  • Cheesy Delight: Mix in shredded mozzarella or fontina cheese into the meatball mixture for a gooey surprise.
    Each bite will have a delightful cheesy pull, adding another layer of comfort reminiscent of beloved Italian dishes.

Explore these variations, and create your unique twist on these comforting Braised Meatballs in Red Wine Gravy. Cooking is all about personalization, so have fun experimenting in your kitchen!

What to Serve with Braised Meatballs in Red Wine Gravy

Elevate your cozy dinner experience by pairing these tender meatballs with delightful sides that enhance their rich flavors.

  • Creamy Polenta: The smooth, buttery texture of polenta perfectly complements the rich gravy, creating a delightful contrast.

  • Fresh Green Salad: A crisp salad with vinaigrette adds brightness and refreshes the palate, balancing the hearty meatballs beautifully.

  • Crusty Bread: Warm, crusty bread is essential for sopping up every bit of the luscious gravy, making each bite irresistible.

  • Garlic Mashed Potatoes: These velvety potatoes provide a comforting base, absorbing the savory sauce while adding a pop of flavor.

  • Roasted Vegetables: Seasonal roasted veggies offer a delightful crunch and sweetness, enriching the meal with vibrant colors and flavors.

  • Red Wine: Pair your meal with a complementary glass of red wine to echo the flavors in the gravy and enhance the dining experience.

Each side brings its own flair, ensuring a comforting, harmonious meal your loved ones will remember fondly.

Storage Tips for Braised Meatballs in Red Wine Gravy

Fridge: Store leftovers in an airtight container for up to 3 days to keep them fresh and flavorful.

Freezer: For longer storage, freeze Braised Meatballs in Red Wine Gravy in an airtight container for up to 3 months, ensuring the gravy fully covers the meatballs to prevent freezer burn.

Reheating: To reheat, thaw overnight in the fridge, then gently warm on the stove over low heat, adding a splash of broth if necessary to maintain moisture.

Chilling: After cooking, chill the dish before storing. This makes it easier to handle when portioning out the meatballs later.

Make Ahead Options

These Braised Meatballs in Red Wine Gravy are fantastic for busy weeknights! You can prepare the meatball mixture and form the meatballs up to 24 hours in advance. Simply refrigerate them on a parchment-lined baking sheet, covered tightly with plastic wrap to prevent any drying out. You can also make the gravy and store it separately for up to 3 days in the fridge. When you're ready to serve, reheat the gravy gently on the stove while adding the meatballs, simmering for about 10–15 minutes until heated through. This way, you’ll enjoy the deliciousness with minimal effort, allowing you to savor quality family time around the dinner table!

Braised Meatballs in Red Wine Gravy Recipe FAQs

How do I choose the best ground beef for meatballs?
Absolutely! When selecting ground beef, look for an 80/20 lean-to-fat ratio. This balance ensures that your meatballs are juicy yet firm. Freshness is key, so check for bright red color and avoid any packs with dark spots or a sour smell.

How long can I store leftover Braised Meatballs in Red Wine Gravy?
You can store your leftover Braised Meatballs in an airtight container in the refrigerator for up to 3 days. Just make sure to let them cool before sealing to retain their delicious flavors.

Can I freeze the meatballs for later use?
Very! To freeze, allow the meatballs to cool completely after cooking. Then, place them in a single layer on a baking sheet and freeze until firm. Once frozen, transfer them to an airtight container or freezer bag, ensuring the gravy fully covers the meatballs. They can be frozen for up to 3 months.

What if my meatballs are too dry?
If you find your meatballs are too dry after cooking, don’t worry! Next time, consider adding a bit more fat, like olive oil or even a splash of broth to the meat mixture. Ensure you don’t overbake them, as this can also lead to dryness.

Are there any allergies I need to consider with this recipe?
Indeed! This recipe contains common allergens such as dairy (Parmesan cheese) and gluten (breadcrumbs). For a dairy-free version, you can substitute with nutritional yeast or omit the cheese entirely. To make it gluten-free, use gluten-free breadcrumbs. Always check labels and consult with your guests if you’re serving a crowd.

What is the best way to reheat frozen meatballs?
To reheat frozen Braised Meatballs in Red Wine Gravy, thaw them overnight in the fridge. Then, gently warm them on the stove over low heat for about 10-15 minutes. Adding a splash of beef broth while reheating helps retain moisture and flavor. Enjoy your comforting meal!

Braised Meatballs in Red Wine Gravy

Savory Braised Meatballs in Red Wine Gravy for Cozy Nights

This Braised Meatballs in Red Wine Gravy recipe transforms simple ingredients into a heartwarming Italian delight.
Print Recipe Pin Recipe
Prep Time 15 minutes mins
Cook Time 45 minutes mins
Simmering Time 30 minutes mins
Total Time 1 hour hr 30 minutes mins
Servings: 6 meatballs
Course: Dinner
Cuisine: Italian
Calories: 250
Ingredients Equipment Method Nutrition Notes

Ingredients
  

For the Meatballs
  • 1 pound Ground Beef Can swap with turkey or pork for a unique twist.
  • 1 cup Breadcrumbs Use gluten-free breadcrumbs for gluten-free option.
  • 1/2 cup Grated Parmesan Cheese Pecorino Romano can be used.
  • 1 medium Onion (chopped) Shallots can be used for milder flavor.
  • 2 cloves Garlic (minced) Garlic powder can substitute fresh if unavailable.
  • 1 teaspoon Salt
  • 1 teaspoon Pepper
For the Gravy
  • 2 tablespoons Olive Oil Vegetable oil can be used as a substitute.
  • 1 cup Red Wine Opt for dry red wine or grape juice for non-alcoholic.
  • 1 cup Beef Broth Chicken broth is a good alternative.
  • 2 tablespoons Tomato Paste Crushed tomatoes can be an emergency substitute.
  • 1 tablespoon Fresh Herbs (e.g., basil, thyme) Dry herbs work when fresh is unavailable.

Equipment

  • large mixing bowl
  • Skillet
  • Baking Sheet
  • Parchment Paper

Method
 

Cooking Steps
  1. Preheat your oven to 375°F (190°C).
  2. In a large mixing bowl, combine ground beef, breadcrumbs, grated Parmesan, chopped onion, minced garlic, salt, and pepper until evenly mixed.
  3. Roll the mixture into golf ball-sized meatballs, about 1 to 1.5 inches in diameter, and place on a parchment-lined baking sheet.
  4. Heat olive oil in a large skillet over medium heat and brown the meatballs for about 5 minutes, turning occasionally.
  5. In the same skillet, sauté chopped onion until translucent, then add minced garlic and tomato paste, cooking for an additional minute.
  6. Pour in red wine and beef broth, stirring well and scraping the bottom to deglaze the pan.
  7. Return the browned meatballs to the skillet and cover, reducing the heat to low, allowing them to simmer for about 30 minutes.
  8. Serve the meatballs with their gravy, pairing with creamy polenta, pasta, or crusty bread.

Nutrition

Serving: 1meatballCalories: 250kcalCarbohydrates: 15gProtein: 20gFat: 15gSaturated Fat: 5gPolyunsaturated Fat: 2gMonounsaturated Fat: 8gCholesterol: 60mgSodium: 500mgPotassium: 300mgFiber: 1gSugar: 1gVitamin A: 150IUVitamin C: 3mgCalcium: 100mgIron: 2mg

Notes

Chill the dish after cooking for easier handling when portioning later.

Tried this recipe?

Let us know how it was!

Hawaiian Huli Huli Chicken: A Sweet & Tangy Grilled Delight

January 25, 2026 by Grace Snow Leave a Comment

As I stood by the grill, the sweet aroma of caramelizing chicken wafted through the air, reminding me that summer is all about vibrant flavors and unforgettable gatherings. Enter Hawaiian Huli Huli Chicken, a dish that beautifully balances the delightful sweetness of pineapple with the savory depth of soy sauce. This succulent chicken is not only packed with a punch of flavor but also incredibly easy to whip up, making it perfect for both busy weeknights and laid-back weekend BBQs. With just a handful of ingredients, you can create a mouthwatering meal that will impress family and friends alike! Are you ready to experience the taste of the islands right in your backyard?

Why is Hawaiian Huli Huli Chicken Amazing?

Flavor Explosion: The sweet and savory marinade creates a unique taste experience that transports your taste buds to Hawaii.

Effortless Prep: With just a few minutes of prep time and an easy marinating process, you’ll unlock a world of flavor without breaking a sweat.

Versatile Dish: Perfect for BBQs, weeknight dinners, or meal prep; this chicken pairs beautifully with dishes like Honey Garlic Chicken Thighs and tropical salads.

Impress Guests: Your friends and family will be thrilled with this exotic, tender chicken that looks as amazing as it tastes.

Easy to Customize: Experiment with flavors by adding mango or peach juice to the marinade for a fruity twist or throw in some chili flakes for added heat!

Hawaiian Huli Huli Chicken Ingredients

For the Chicken
• Chicken Thighs – The juiciest option, perfect for grilling; can substitute with chicken breasts if necessary.

For the Marinade
• Soy Sauce – Offers essential saltiness and umami; switch to tamari for a gluten-free option.
• Brown Sugar – Creates a caramelized, sweet flavor while grilling; try coconut sugar for a healthier alternative.
• Pineapple Juice – Adds tropical sweetness and helps tenderize the chicken; opt for fresh juice for a brighter taste.
• Ketchup – Provides thickness and tang to the marinade; substitute with tomato paste for a richer flavor.
• Vegetable Oil – Ensures moisture and helps the marinade stick; can use olive oil or melted coconut oil as alternatives.
• Ginger (minced) – Delivers a zesty note to the marinade; ground ginger works too, but use less as it's stronger.
• Garlic (minced) – Boosts flavor with its aromatic essence; garlic powder is a fine substitute, just reduce the amount.
• Rice Vinegar – Balances sweetness with acidity; white vinegar can serve as an alternative.
• Black Pepper – Adds mild heat and enhances overall flavor; switch to white pepper for a subtler spice.

For Garnish
• Green Onion – Adds a splash of color and mild flavor; chopped parsley can be used if green onions are unavailable.
• Sesame Seeds (optional) – Provides a delightful crunch; feel free to omit if not on hand.

With these Hawaiian Huli Huli Chicken ingredients, you’ll be well on your way to creating a tropical feast that dazzles the senses!

Step‑by‑Step Instructions for Hawaiian Huli Huli Chicken

Step 1: Prepare Marinade
In a large mixing bowl, combine soy sauce, brown sugar, pineapple juice, ketchup, vegetable oil, minced ginger, minced garlic, rice vinegar, and black pepper. Whisk together until the mixture is smooth and well-blended, creating a beautifully fragrant marinade that will infuse your Hawaiian Huli Huli Chicken with flavor.

Step 2: Marinate Chicken
Place your chicken thighs in a resealable plastic bag or a large dish. Pour the marinade over the chicken, ensuring that every piece is well-coated. Seal the bag or cover the dish and refrigerate for at least 1 hour. For maximum flavor, let the chicken marinate overnight, allowing the tangy and sweet flavors to meld beautifully.

Step 3: Preheat Grill
About 15 minutes before you’re ready to grill, preheat your grill to medium-high heat, around 400°F (200°C). This temperature is perfect for achieving that lovely char on the chicken without burning it. Ensure the grill grates are clean and lightly oiled to prevent sticking as you prepare to cook your Hawaiian Huli Huli Chicken.

Step 4: Remove Chicken
Once marinated, take the chicken thighs out of the refrigerator. Allow any excess marinade to drip off as you prepare the chicken for grilling. This step is important to prevent flare-ups and to achieve that caramelized, crispy exterior.

Step 5: Grill Chicken
Place the chicken thighs skin side down on the grill. Grill for 6-8 minutes, and avoid flipping too often to allow for nice grill marks to form. Once you notice the edges turning golden and the meat releases easily from the grill, flip the chicken and cook the other side for another 6-8 minutes until it reaches an internal temperature of 165°F (75°C).

Step 6: Baste (Optional)
During the last few minutes of grilling, brush your Hawaiian Huli Huli Chicken with some of the reserved marinade for added flavor. This will enhance the sweetness and make the exterior even more delicious and sticky. Just be sure to use marinade that hasn’t been in contact with raw chicken.

Step 7: Rest Chicken
Once grilled to perfection, remove the chicken from the grill and transfer it to a clean plate. Let it rest for about 5 minutes to allow the juices to redistribute, keeping your Hawaiian Huli Huli Chicken moist and tender when sliced.

Step 8: Garnish & Serve
After resting, slice the chicken into pieces and arrange it on a serving platter. Garnish with chopped green onions and sesame seeds for a pop of color and flavor. Now your Hawaiian Huli Huli Chicken is ready to impress your family and friends with its tropical taste and juicy texture!

What to Serve with Hawaiian Huli Huli Chicken

Transform your meal into a tropical feast with these delightful pairings.

  • Creamy Coconut Rice: This fluffy rice infused with coconut milk adds a rich creaminess that complements the sweet and savory chicken. A perfect match for soaking up all that delicious marinade!

  • Grilled Pineapple Skewers: The caramelized sweetness from grilled pineapple enhances the tropical vibe of the dish. Plus, the juicy fruit brings a refreshing contrast to the savory chicken.

  • Tropical Salad: A vibrant mix of mango, avocado, and greens creates a burst of freshness and color, balancing the dish's richness. Toss in a light lime vinaigrette for added zing!

  • Garlic Butter Broccoli: The tender florets tossed in garlicky butter provide a crunchy texture and a savory edge, making it an ideal side that complements the flavors of Huli Huli chicken beautifully.

  • Coleslaw: A crunchy, tangy coleslaw offers a refreshing contrast to the dish while adding a delightful crunch. The combination of sweetness and acidity makes each bite refreshing!

  • Mango Smoothie: This sweet and creamy drink blends perfectly with the Hawaiian theme, bringing together tropical fruits for a refreshing complement. It's like sunshine in a glass!

Elevate your dining experience with these flavorful sides that will have your taste buds dancing with joy.

How to Store and Freeze Hawaiian Huli Huli Chicken

Fridge: Store leftover Hawaiian Huli Huli Chicken in an airtight container for up to 3 days. Make sure to let it cool before sealing to maintain freshness.

Freezer: For longer storage, freeze the chicken in a tightly sealed container or freezer bag for up to 3 months. Label with the date for easy tracking.

Reheating: Thaw frozen chicken overnight in the fridge, then reheat using a skillet or microwave until fully warmed through, reaching at least 165°F (75°C).

Marinade Storage: If you have any leftover marinade, it can be refrigerated for up to a week but should not be reused on raw chicken.

Expert Tips for Hawaiian Huli Huli Chicken

  • Perfect Temperature: Use a meat thermometer to ensure your chicken reaches an internal temperature of 165°F (75°C), preventing undercooking and ensuring safety.

  • Marination Time: For a flavor-packed experience, marinate your chicken overnight. This allows the Hawaiian Huli Huli Chicken to absorb all those delicious sweet and tangy flavors.

  • Avoid Flare-ups: Let excess marinade drip off before grilling to reduce flare-ups. This helps achieve that beautiful caramelization without burning the chicken.

  • Basting Wisely: If you choose to baste your chicken with reserved marinade, ensure it hasn't touched raw chicken to avoid cross-contamination and for a safe, flavorful finish.

  • Resting Is Key: Allow the grilled chicken to rest for five minutes before slicing. This extra step allows the juices to redistribute, ensuring every bite of your Hawaiian Huli Huli Chicken is tender and juicy!

Make Ahead Options

Hawaiian Huli Huli Chicken is perfect for meal prep enthusiasts looking to save time on busy weeknights! You can prepare the marinade up to 24 hours in advance; simply mix all the marinade ingredients and store them in an airtight container in the refrigerator. Additionally, marinate the chicken thighs in the mixture for at least 1 hour or preferably overnight to allow the flavors to intensify. When you're ready to grill, just remove the chicken from the marinade and proceed with cooking. This prep-ahead method ensures your chicken retains its juicy flavor and tenderness, making it just as delicious as if you made it fresh!

Hawaiian Huli Huli Chicken Variations

Feel free to customize your Hawaiian Huli Huli Chicken with these delightful twists that spark joy and flavor!

  • Healthier Option: Use skinless chicken breasts instead of thighs for a lighter version without sacrificing flavor.
  • Spicy Kick: Add a splash of sriracha or a sprinkle of chili flakes to the marinade for an exciting heat that balances the sweetness.
  • Fruity Twist: Replace pineapple juice with mango or peach juice for a tropical taste that enhances the overall fruitiness.
  • Smoky Flavor: Incorporate smoked paprika into the marinade for an extra layer of depth and a hint of barbecue smokiness.
  • Herb Infusion: Mix in chopped fresh herbs like cilantro or basil for a burst of freshness and an herbal aroma that complements the chicken beautifully.
  • Citrus Zing: Squeeze some lime or lemon juice over the chicken right before serving for a zesty finish that brightens the dish.
  • Sweet & Savory Duo: Introduce a tablespoon of hoisin sauce into the marinade for a rich, sweet, and tangy flavor profile reminiscent of Asian cuisine.
  • Marinade Swap: Experiment with using coconut aminos instead of soy sauce for a soy-free version with a slightly sweeter and mellower taste.

These variations will keep your Huli Huli Chicken exciting and ensure it suits the moods and preferences of your guests. For more tropical inspiration, consider pairing it with a light salad or alongside some Honey BBQ Chicken Rice for a delightful feast!

Hawaiian Huli Huli Chicken Recipe FAQs

What is the best way to select ripe pineapples for the marinade?
Absolutely! When choosing a pineapple for your Hawaiian Huli Huli Chicken marinade, look for one with a sweet aroma at the base and a slightly soft feel. The color should be golden-yellow. Avoid pineapples with dark spots or an overly firm exterior, as these could indicate under ripeness.

How should I store leftover Hawaiian Huli Huli Chicken?
Very! Store your leftover chicken in an airtight container in the refrigerator for up to 3 days. Be sure to let it cool before sealing to maintain its moisture and flavor. This way, you can enjoy a delicious meal even on the busiest days!

Can I freeze Hawaiian Huli Huli Chicken, and if so, how?
Absolutely! To freeze, place the grilled chicken in a tightly sealed freezer bag or container, ensuring to remove excess air to prevent freezer burn. It can be stored for up to 3 months. When you're ready to eat, thaw it overnight in the fridge, then reheat gently in a skillet or microwave until warmed through.

What if my chicken burns while grilling?
Don't worry! If your Hawaiian Huli Huli Chicken starts to burn, move it to a cooler part of the grill to allow it to cook evenly without further charring. Reduce the grill's heat and monitor closely. Ideally, aim for that perfect golden-brown color and an internal temperature of 165°F (75°C).

Is this recipe suitable for people with soy allergies?
Yes! If you or anyone you’re serving has a soy allergy, feel free to substitute soy sauce with coconut aminos or tamari, which is a gluten-free alternative. This will still give you that wonderful umami flavor while keeping your Hawaiian Huli Huli Chicken allergy-friendly.

Can I use skinless chicken breasts instead of thighs?
Absolutely! While I recommend chicken thighs for their moistness, using skinless chicken breasts is a great alternative for a healthier dish. Just keep in mind they may cook faster, so be sure to monitor the grilling time closely to avoid dryness!

Hawaiian Huli Huli Chicken

Hawaiian Huli Huli Chicken: A Sweet & Tangy Grilled Delight

Try this Hawaiian Huli Huli Chicken recipe for a deliciously sweet and tangy grilled dish that will transport your taste buds to Hawaii.
Print Recipe Pin Recipe
Prep Time 15 minutes mins
Cook Time 16 minutes mins
Resting Time 5 minutes mins
Total Time 36 minutes mins
Servings: 4 pieces
Course: Dinner
Cuisine: Hawaiian
Calories: 350
Ingredients Equipment Method Nutrition Notes

Ingredients
  

For the Chicken
  • 1.5 lbs Chicken Thighs Can substitute with chicken breasts if necessary.
For the Marinade
  • 1/2 cup Soy Sauce Switch to tamari for a gluten-free option.
  • 1/2 cup Brown Sugar Try coconut sugar for a healthier alternative.
  • 1/2 cup Pineapple Juice Opt for fresh juice for a brighter taste.
  • 1/4 cup Ketchup Substitute with tomato paste for richer flavor.
  • 1/4 cup Vegetable Oil Can use olive oil or melted coconut oil.
  • 1 tbsp Ginger (minced) Ground ginger works too.
  • 3 cloves Garlic (minced) Garlic powder is a fine substitute.
  • 2 tbsp Rice Vinegar White vinegar can serve as an alternative.
  • 1/2 tsp Black Pepper Switch to white pepper for a subtler spice.
For Garnish
  • 2 tbsp Green Onion Chopped parsley can be used if unavailable.
  • 1 tbsp Sesame Seeds (optional) Feel free to omit if not on hand.

Equipment

  • Grill
  • Mixing Bowl
  • Resealable plastic bag

Method
 

Step‑By‑Step Instructions
  1. In a large mixing bowl, combine soy sauce, brown sugar, pineapple juice, ketchup, vegetable oil, minced ginger, minced garlic, rice vinegar, and black pepper. Whisk together until smooth.
  2. Place chicken thighs in a resealable plastic bag or a large dish. Pour the marinade over the chicken, ensuring every piece is well-coated. Seal the bag or cover the dish and refrigerate for at least 1 hour.
  3. Preheat your grill to medium-high heat, around 400°F (200°C). Clean and lightly oil the grill grates to prevent sticking.
  4. Take the marinated chicken thighs out of the fridge, allowing excess marinade to drip off.
  5. Place the chicken thighs skin side down on the grill. Grill for 6-8 minutes before flipping. Cook the other side for another 6-8 minutes until the internal temperature reaches 165°F (75°C).
  6. Brush the chicken with reserved marinade during the last few minutes of grilling for added flavor.
  7. Remove the chicken from the grill and let it rest for about 5 minutes to allow juices to redistribute.
  8. Slice the chicken into pieces and garnish with chopped green onions and sesame seeds before serving.

Nutrition

Serving: 1pieceCalories: 350kcalCarbohydrates: 25gProtein: 28gFat: 15gSaturated Fat: 3gPolyunsaturated Fat: 2gMonounsaturated Fat: 9gCholesterol: 120mgSodium: 800mgPotassium: 450mgFiber: 1gSugar: 9gVitamin A: 500IUVitamin C: 5mgCalcium: 20mgIron: 1mg

Notes

For maximum flavor, marinate the chicken overnight. Store leftovers in an airtight container for up to 3 days.

Tried this recipe?

Let us know how it was!

Savor the Flavors of Persian Shish Andaz Tonight

January 25, 2026 by Grace Snow Leave a Comment

As the tantalizing aroma of spices wafts through the kitchen, my heart races with the excitement that only the promise of a hearty dinner can bring. Today, I'm sharing my version of Persian Shish Andaz—an experience that marries succulent lamb or beef with the vibrant depths of pomegranate molasses and aromatic herbs. This dish isn't just a meal; it’s a flavorful celebration of Persian cuisine that effortlessly transforms your dinner table into a culinary gathering. With its ease of preparation and the ability to impress both family and friends, it’s perfect for those nights when you long for homemade comfort without the fuss. Are you ready to embark on this delicious journey with me?

Why Is Persian Shish Andaz Unique?

Irresistible Flavor: The tangy sweetness of pomegranate molasses combined with fragrant spices creates a taste explosion that leaves everyone coming back for seconds.
Culinary Adventure: This dish invites you to explore Persian cuisine, offering a delightful twist to your usual dinner routines.
Easy Preparation: With straightforward steps, even novice cooks can recreate this hearty meal without stress.
Versatile Protein Options: Whether you choose lamb or beef, the adaptable nature of this recipe allows for personalization to suit your taste.
Perfect for Gatherings: Impress your guests with this crowd-pleaser that embodies warm hospitality, making it ideal for family gatherings and celebrations like Shishito Peppers on the side.
Comforting Aromas: As it simmers, your kitchen will fill with incredible aromas, setting the stage for an enjoyable dining experience that feels both sophisticated and cozy.

Persian Shish Andaz Ingredients

• Discover the essential flavors of Persian cuisine.

For the Meat
– Lamb or Beef (1 kg) – Main protein source; traditionally, lamb is used for its rich flavor, but beef is a great alternative.

For the Base
– Vegetable Oil (2 tablespoons) – Ideal for sautéing onions; canola or olive oil works well.
– Onions (2 large, thinly sliced) – Essential for creating a flavor-packed caramelized base.
– Garlic (4 cloves, minced) – Adds aromatic depth; avoid browning to keep flavors bright.

For the Spices
– Ground Turmeric (1 teaspoon) – Delivers earthy flavor and vibrant color; no substitutes.
– Ground Cinnamon (1 teaspoon) – Enhances warmth and complexity; nutmeg can stand in if needed.
– Ground Cumin (1 teaspoon) – A key player for savory depth; don’t substitute.
– Ground Coriander (1/2 teaspoon) – Contributes a hint of citrus; feel free to omit if unavailable.
– Salt (1 teaspoon) – Crucial for enhancing taste; adjust according to preference.
– Black Pepper (1/2 teaspoon) – Adds a gentle heat; fresh ground will elevate the dish.

For the Sauce
– Pomegranate Molasses (2 tablespoons) – Brings a tangy sweetness, pivotal for achieving the dish’s unique flavor; balsamic glaze can be a substitute if needed.
– Lemon Juice (1/4 cup) – Brightens and balances flavors; lime juice is a fine alternative.
– Chicken or Beef Stock (1/2 cup) – Adds richness; can use water if you're in a pinch.

For the Freshness
– Fresh Parsley (1/4 cup, chopped) – Adds a refreshing kick; cilantro is a good swap for a different flavor profile.
– Fresh Mint (1/4 cup, chopped) – Brightens the dish beautifully; optional but recommended for authenticity.

For Serving
– Steamed Rice or Flatbread (for serving) – Classic accompaniments; consider serving with saffron rice for a grand touch.

Step‑by‑Step Instructions for Persian Shish Andaz

Step 1: Marinate the Meat
In a large bowl, combine the lamb or beef with ground turmeric, cinnamon, cumin, coriander, salt, and black pepper. Mix well until the meat is evenly coated with the spices. Cover the bowl and let it marinate for 30 minutes to 1 hour in the refrigerator, allowing the flavors to meld beautifully.

Step 2: Caramelize the Onions
Heat a tablespoon of vegetable oil in a large skillet over medium heat. Add the sliced onions and sauté them for about 10 minutes, stirring occasionally until they're golden brown and caramelized. This step is crucial for building the rich flavor base of your Persian Shish Andaz.

Step 3: Add the Garlic
Once the onions are caramelized, add the minced garlic to the skillet and sauté for an additional 1-2 minutes. Stir frequently without letting the garlic brown, as it should release its sweet aroma and add depth to the dish without turning bitter.

Step 4: Sear the Meat
Raise the heat to medium-high, and add the marinated meat to the skillet. Allow it to brown on all sides for about 5-7 minutes without stirring too much, which helps develop a delicious crust and locks in moisture, ensuring a tender finish for your Persian Shish Andaz.

Step 5: Mix in the Sauces
With the meat seared, pour in the pomegranate molasses and lemon juice, stirring gently to combine everything. Let it cook for about 2 minutes, allowing the tangy sweetness of the molasses to caramelize slightly and infuse the meat with flavor.

Step 6: Simmer to Perfection
Pour in the chicken or beef stock, then cover the skillet with a lid. Reduce the heat to low and let it simmer for 1 to 1.5 hours, stirring occasionally until the meat becomes tender and infused with the rich, aromatic sauce typical of Persian Shish Andaz.

Step 7: Finish with Fresh Herbs
Just before serving, stir in the freshly chopped parsley and mint. These vibrant herbs not only enhance the flavor profile but also add a beautiful freshness to the dish, elevating the overall experience of your Persian Shish Andaz.

Step 8: Serve and Enjoy
Serve the Persian Shish Andaz hot over a bed of steamed rice or with warm flatbread. Garnish with additional herbs for a vibrant touch. This hearty dish promises to impress family and friends alike, making any meal a special occasion.

Persian Shish Andaz Variations & Substitutions

Feel free to get creative with your Persian Shish Andaz and tailor it to your unique taste buds!

  • Beef Swap: Use beef instead of lamb for a different flavor profile that’s equally delicious.

  • Vegetable Boost: Add bell peppers or carrots during the simmering step to introduce extra nutrients and vibrant textures.

  • Herb Variations: Fresh dill makes a delightful substitute for mint, giving a unique twist to the traditional dish.

  • Spicy Kick: For those who enjoy heat, add crushed red pepper flakes or diced jalapeños to generate a bold, fiery flavor.

  • Citrus Zest: Incorporate lemon or orange zest along with your lemon juice for an added layer of brightness and depth.

  • Nutty Flavor: Drizzle some tahini on top before serving for a creamy, nutty richness that beautifully complements the dish.

  • Whole Grains: Swap traditional rice with farro or quinoa for a hearty, nutty alternative that adds texture and health benefits.

  • Serving Style: Instead of flatbread, serve the dish in lettuce wraps for a fresh, light presentation that’s perfect for gatherings.

For more delicious ideas, be sure to explore our recipe for Crusted Steak Shishito to pair beautifully with your Persian Shish Andaz! Enjoy your culinary adventure!

Make Ahead Options

These Persian Shish Andaz are perfect for busy weeknights and meal prep enthusiasts! You can marinate the meat up to 24 hours ahead, allowing the spices to deeply penetrate for maximum flavor. Simply mix the lamb or beef with the spices, cover, and refrigerate. The caramelized onions can also be prepared in advance and stored in the fridge for up to 3 days; just reheat them before adding the garlic and searing the meat. When ready to serve, follow the remaining steps starting from adding the meat, and you’ll enjoy a delectable dish just as delicious as if made fresh. Prep wisely to savor quality family dinners without the last-minute rush!

Expert Tips for Persian Shish Andaz

• Marination Time: Allow the meat to marinate for at least 30 minutes to fully absorb the spices, ensuring a flavorful Persian Shish Andaz.

• Searing Technique: When searing the meat, let it sit undisturbed for great caramelization. This forms a delicious crust, enhancing flavor and moisture.

• Avoid Burnt Garlic: To keep the dish aromatic, add garlic after the onions have caramelized to prevent it from burning and turning bitter.

• Simmer Gently: Keep the heat low during the simmering phase; this results in tender meat and allows the flavors to meld beautifully.

• Fresh Herbs Finish: Stir in freshly chopped parsley and mint right before serving to brighten the dish, enhancing its appeal and authenticity.

• Versatile Proteins: Feel free to swap lamb with beef for different flavor nuances, personalizing your Persian Shish Andaz to your preference.

How to Store and Freeze Persian Shish Andaz

Fridge: Cool completely before refrigerating in airtight containers. This hearty Persian Shish Andaz can be stored for up to 3-4 days.

Freezer: For longer preservation, divide the dish into portions and freeze in airtight bags or containers. Enjoy within 3 months for optimal flavor.

Reheating: Thaw overnight in the fridge before reheating. Gently warm in a skillet over low heat or microwave until heated through, ensuring the meat remains moist.

What to Serve with Persian Shish Andaz

Elevate your dining experience with perfect accompaniments that complement every savory bite of this delightful dish.

  • Steamed Basmati Rice: Fluffy and fragrant, this classic pairing absorbs the rich sauce beautifully, balancing the flavors perfectly.

  • Grilled Vegetables: A mix of seasonal veggies adds a smoky char that complements the tenderness of the meat, enhancing the overall meal experience.

  • Fresh Persian Salad: With crisp cucumbers, juicy tomatoes, and a squeeze of lemon, this refreshing salad cuts through the richness of the shish andaz.

  • Yogurt Sauce: A cool, tangy yogurt dip with herbs provides a delightful contrast to the warm spices, making every bite truly enjoyable.

  • Saffron Rice Pilaf: Infused with delicate saffron and toasted nuts, this elegant rice dish serves as a fragrant base that enriches the flavors of the shish andaz.

  • Pita or Flatbread: Soft and warm bread invites you to scoop up the luscious sauce and meat, creating a fun and interactive dining experience.

  • Minted Lemonade: This refreshing beverage, combining vibrant mint and zesty lemon, keeps the meal light and invigorating, perfect alongside hearty dishes.

  • Baklava: Finish on a sweet note with this rich, flaky pastry, which delivers a honeyed decadence that beautifully contrasts the savory elements of the meal.

Persian Shish Andaz Recipe FAQs

What type of meat is best for Persian Shish Andaz?
Absolutely! Traditionally, lamb is used for its rich flavor, but beef is a fantastic alternative if you prefer it. The key is to use meat that has a bit of fat for extra tenderness and moisture.

How should I store leftover Persian Shish Andaz?
Very! After your feast, allow your Persian Shish Andaz to cool completely before refrigerating it in airtight containers. It can last for up to 3-4 days in the fridge—perfect for those delicious next-day lunches!

Can I freeze Persian Shish Andaz?
Absolutely! To freeze, portion the dish into airtight containers or freezer bags. Make sure to label them with the date. For best quality, it’s ideal to consume the frozen dish within 3 months. When you're ready to enjoy it, thaw in the refrigerator overnight and gently reheat.

What if my meat turns out tough?
Oh no! If your meat is tough, it might not have simmered long enough. Make sure to keep the heat low when simmering and to cover the pot; this creates steam that helps tenderize the meat. If needed, let it cook a bit longer—just keep checking in until it’s fork-tender.

Can I use a vegetarian option for this dish?
Very! While the traditional recipe features meat, you can replace it with hearty vegetables like eggplant or mushrooms to create a vegetarian version. Just ensure to adjust the cooking times accordingly, as veggies usually require less time to become tender.

Is Persian Shish Andaz safe for my pets?
Excellent question! It’s best to keep this dish away from pets due to ingredients like onions and garlic, which can be harmful to them. Always double-check ingredients if sharing your culinary creations with furry friends!

Persian Shish Andaz

Savor the Flavors of Persian Shish Andaz Tonight

Experience the tantalizing tastes of Persian Shish Andaz, a flavorful celebration of succulent lamb or beef cooked with aromatic herbs and pomegranate molasses.
Print Recipe Pin Recipe
Prep Time 30 minutes mins
Cook Time 1 hour hr 30 minutes mins
Total Time 2 hours hrs
Servings: 4 servings
Course: Dinner
Cuisine: Persian
Calories: 450
Ingredients Equipment Method Nutrition Notes

Ingredients
  

For the Meat
  • 1 kg Lamb or Beef Traditionally, lamb is used for its rich flavor.
For the Base
  • 2 tablespoons Vegetable Oil Canola or olive oil works well.
  • 2 large Onions Thinly sliced.
  • 4 cloves Garlic Minced.
For the Spices
  • 1 teaspoon Ground Turmeric Delivers earthy flavor.
  • 1 teaspoon Ground Cinnamon Enhances warmth and complexity.
  • 1 teaspoon Ground Cumin A key player for savory depth.
  • 1/2 teaspoon Ground Coriander Contributes a hint of citrus.
  • 1 teaspoon Salt Adjust according to preference.
  • 1/2 teaspoon Black Pepper Fresh ground will elevate the dish.
For the Sauce
  • 2 tablespoons Pomegranate Molasses Brings tangy sweetness.
  • 1/4 cup Lemon Juice Brightens and balances flavors.
  • 1/2 cup Chicken or Beef Stock Adds richness.
For the Freshness
  • 1/4 cup Fresh Parsley Chopped.
  • 1/4 cup Fresh Mint Chopped.
For Serving
  • Steamed Rice or Flatbread Classic accompaniments.

Equipment

  • large bowl
  • Skillet
  • Measuring Spoons
  • Cutting Board
  • Knife

Method
 

Step-by-Step Instructions
  1. In a large bowl, combine the lamb or beef with ground turmeric, cinnamon, cumin, coriander, salt, and black pepper. Mix well until evenly coated. Cover and let marinate for 30 minutes to 1 hour in the refrigerator.
  2. Heat a tablespoon of vegetable oil in a skillet over medium heat. Add the sliced onions and sauté for about 10 minutes until golden brown and caramelized.
  3. Add the minced garlic to the skillet and sauté for an additional 1-2 minutes without letting it brown.
  4. Raise the heat to medium-high, and add the marinated meat to the skillet. Allow it to brown on all sides for about 5-7 minutes.
  5. Pour in the pomegranate molasses and lemon juice, stirring gently to combine. Let it cook for about 2 minutes.
  6. Pour in the chicken or beef stock, then cover and reduce heat to low. Let it simmer for 1 to 1.5 hours.
  7. Just before serving, stir in the freshly chopped parsley and mint.
  8. Serve hot over a bed of steamed rice or with warm flatbread.

Nutrition

Serving: 1plateCalories: 450kcalCarbohydrates: 30gProtein: 35gFat: 20gSaturated Fat: 8gPolyunsaturated Fat: 3gMonounsaturated Fat: 7gCholesterol: 110mgSodium: 700mgPotassium: 800mgFiber: 3gSugar: 5gVitamin A: 10IUVitamin C: 15mgCalcium: 3mgIron: 15mg

Notes

Allow the meat to marinate for at least 30 minutes for best flavor. Searing the meat undisturbed helps create a delicious crust.

Tried this recipe?

Let us know how it was!

Bobby Flay’s Goulash: A Cozy Comfort Food Classic

January 25, 2026 by Grace Snow Leave a Comment

Imagine a chilly evening where the scent of savory beef and aromatic spices dances through the air—welcome to my kitchen, where Bobby Flay’s Goulash is simmering away! This delightful comfort food is more than just a warm meal; it’s a celebration of hearty flavors that bring families together around the table. Packed with tender beef and a colorful medley of vegetables, this dish is customizable to suit your taste. Plus, it's a quick and satisfying option that guarantees smiles at any gathering. Whether you’re looking to impress guests or simply enjoy a cozy night in, this Goulash promises to deliver both warmth and nostalgia. Curious to discover how to whip up this inviting bowl of goodness? Let’s dive in!

What makes this goulash so comforting?

Heartwarming Quality: This dish evokes memories of family gatherings, bringing a sense of togetherness.
Versatile Base: Customize it with your favorite veggies or spices for a personal touch.
Hearty Ingredients: Packed with protein-rich beef and vibrant vegetables, it’s incredibly filling.
Time-Saving: Ready in under an hour, it’s perfect for a quick weeknight dinner.
Crowd-Pleasing: Expect rave reviews from family and friends—everyone loves a good goulash!
Dig into this delicious comfort food and pair it with some homemade crusty bread for a satisfying meal!

Bobby Flay’s Goulash Ingredients

For the Meat
• Beef – Adds protein and rich flavor; substitute with ground turkey for a leaner option.

For the Vegetables
• Onion – Adds sweetness and aromatics; shallots may be used as an alternative.
• Bell Peppers – Offers crunch and sweetness; any color works, and zucchinis can be added for variation.
• Carrots – Provide sweetness and texture; frozen mixed vegetables can be a handy shortcut.

For the Sauce
• Paprika – Provides depth and vibrant color; use smoked paprika for a more intense flavor.
• Cumin – Contributes warmth and earthiness; omit if sensitive to strong spices.
• Garlic – Boosts flavor; garlic powder can be used in a pinch.
• Tomato Sauce – Brings moisture and acidity to balance flavors; substitute with crushed tomatoes for a chunkier texture.
• Beef Broth – Enhances depth of flavor; vegetable broth works for a lighter version.

Say goodbye to fast food and hello to the comforting embrace of Bobby Flay’s Goulash!

Step‑by‑Step Instructions for Bobby Flay’s Goulash

Step 1: Prep Ingredients
Start by dicing 1 large onion, 1-2 bell peppers, and 2-3 carrots into small, even pieces. This will ensure they cook evenly and provide a balanced texture in Bobby Flay’s Goulash. Gather all your vegetables and set them aside in bowls for easy access while cooking, as this will help streamline the cooking process.

Step 2: Brown the Beef
In a large pot or Dutch oven, heat 2 tablespoons of oil over medium-high heat. Once the oil shimmers, add 1 pound of ground beef and cook it, breaking it apart with a spatula, until browned, about 5-7 minutes. Drain any excess fat from the pot—this helps keep Bobby Flay’s Goulash from becoming too greasy.

Step 3: Sauté Vegetables
Add the prepped onions, bell peppers, and carrots to the pot with the browned beef. Cook them together for about 5 minutes, stirring occasionally. You’ll want the vegetables to soften and turn slightly translucent, adding flavor and texture to the goulash. This step lays the foundation for the rich taste to come.

Step 4: Spice It Up
Stir in 2 cloves of minced garlic, 2 teaspoons of paprika, and 1 teaspoon of cumin. Continue to cook for another 1-2 minutes, allowing the spices to become fragrant. The aroma will fill your kitchen, hinting at the delicious Bobby Flay’s Goulash that’s on its way, enhancing the overall dish with warmth and depth.

Step 5: Build Base
Slowly pour in 1 can of tomato sauce and 2 cups of beef broth, stirring to combine all the flavors thoroughly. Turn up the heat until the mixture begins to simmer. You'll see bubbles forming as it heats up, creating a rich and flavorful base for Bobby Flay’s Goulash.

Step 6: Simmer
Once the pot reaches a gentle simmer, reduce the heat to low and let the goulash cook uncovered for 30-45 minutes. Stir occasionally to prevent sticking. As it simmers, the flavors will meld beautifully, and the sauce will thicken, giving you that hearty consistency that makes goulash so comforting.

Step 7: Season
After the simmering time, taste the goulash and adjust the seasoning to your liking—add salt, pepper, or even a splash of hot sauce for a kick. This final step is crucial in perfecting Bobby Flay’s Goulash, ensuring each bowl is as delicious as possible before serving.

Expert Tips for Bobby Flay’s Goulash

  • Brown Smartly: Ensure the beef is nicely browned for maximum flavor. Skipping this step can lead to a bland goulash.

  • Simmer to Thicken: Adjust your simmering time to achieve your preferred thickness; longer cooking yields a richer sauce.

  • Balance Vegetables: Avoid crowding the pot with too many vegetables, as this can dilute flavors and lead to uneven cooking.

  • Season Last: Always taste and adjust seasoning after simmering. You might need a dash of salt or herbs to elevate Bobby Flay’s Goulash.

  • Customize Wisely: Feel free to swap in your favorite veggies, but be cautious with spices like cumin; a little goes a long way!

What to Serve with Bobby Flay's Goulash

Cozy up your dining experience with delightful sides that harmonize beautifully with this comforting dish.

  • Creamy Mashed Potatoes: The perfect base for soaking up the rich sauce, offering a smooth and indulgent texture that pairs wonderfully.

  • Crusty French Bread: Dip into the hearty goulash, bringing a satisfying crunch along with each delightful bite. Freshly baked bread enhances the whole meal experience!

  • Steamed Green Beans: Their crispness adds a refreshing contrast to the savory richness of the goulash, making for a delightful balance.

  • Simple Side Salad: A vibrant mix of greens with a light vinaigrette brings brightness, complementing the warm, savory flavors of the goulash.

  • Sautéed Corn: Sweet buttery kernels provide a pop of sweetness, adding delightful bursts of flavor alongside each comforting bite.

  • Red Wine: A glass of robust red wine elevates the meal, echoing the savory notes of the goulash while deepening the flavors of your dinner.

Include these thoughtful pairings to turn your meal into a heartwarming feast that your family will cherish!

Bobby Flay’s Goulash Variations

Feel free to make this goulash truly yours by adding your favorite twists and swaps!

  • Veggie Boost: Incorporate fresh spinach or kale for added nutrition and color. Simply stir them in during the last few minutes of simmering for a vibrant finish. This not only elevates the dish but also gives you extra vitamins without losing that comforting essence!

  • Spicy Kick: Add a teaspoon of cayenne pepper or crushed red pepper flakes if you like it hot. This delivers a delightful heat that complements the savory flavors, making each bite exciting.

  • Creamy Twist: Stir in a splash of heavy cream or a dollop of sour cream for a rich, creamy texture. This balances the spices beautifully, creating a velvety consistency that will have everyone asking for seconds!

  • Pasta Perfection: Serve the goulash over cooked pasta instead of enjoying it as a standalone dish. Choose your favorite shape, like macaroni or shells, and soak up all that delicious sauce!

  • Grain Alternative: Try serving it over quinoa or brown rice for a wholesome base. These alternatives not only boost the nutritional value but also add a delightful nuttiness to the meal—perfect for those looking for whole grain options.

  • Herb Infusion: Add fresh herbs like parsley or basil right before serving. This adds a bright, aromatic finish that enhances the overall presentation and flavor profile. Don’t underestimate the power of fresh herbs to elevate your dishes!

  • Chunky Tomato Upgrade: For a rustic touch, swap the tomato sauce with diced or crushed tomatoes. This will create a chunkier texture, infusing your goulash with delightful tomato bursts in every bite.

  • Smoky Flavor: Incorporate a few drops of liquid smoke for a BBQ-inspired twist. This adds depth and a hint of smokiness that’s both comforting and unique, reminding you of summer cookouts!

Whichever variation you choose, remember that Bobby Flay's goulash is all about comfort, flavor, and adaptability. For additional serving ideas, consider pairing it with a loaf of crusty bread to soak up those flavorful juices!

How to Store and Freeze Bobby Flay’s Goulash

Fridge: Keep leftovers in an airtight container for up to 3 days. Make sure to cool the goulash to room temperature before sealing to maintain freshness.

Freezer: Store in a freezer-safe container for up to 3 months. Divide goulash into portions for easy reheating later; simply thaw in the fridge overnight before warming.

Reheating: Reheat on the stove over low heat, stirring occasionally, until warmed through. You can add a splash of broth to restore moisture if it thickens too much during storage.

Room Temperature: If left out, serve the goulash within 2 hours to ensure food safety before transferring to the fridge. Enjoy the comforting flavors of Bobby Flay’s Goulash in your next meal!

Make Ahead Options

Bobby Flay’s Goulash is perfect for meal prep, allowing you to enjoy a hearty meal even on your busiest days! You can chop the onions, bell peppers, and carrots up to 24 hours in advance; just refrigerate them in an airtight container to keep everything fresh. Additionally, you can brown the beef and sauté the vegetables beforehand, storing them in the fridge for up to 3 days. When you're ready to serve, simply combine the beef and vegetables in a pot, add the spices, tomato sauce, and beef broth, and simmer for about 15-20 minutes until heated through. This way, you’ll enjoy just as delicious goulash with minimal effort!

Bobby Flay’s Goulash Recipe FAQs

How do I select the best beef for goulash?
Absolutely! Look for ground beef that is 80% lean; it offers the right balance of flavor and moisture. If you prefer a leaner option, ground turkey is a fantastic substitute. Always check for a bright red color, as darker beef indicates age. Freshness is key!

How should I store Bobby Flay’s Goulash?
Very simply! Once cooled, transfer the goulash to an airtight container. It will stay fresh in the fridge for up to 3 days. Make sure to let it cool to room temperature before sealing to retain its delicious flavor.

Can I freeze goulash for later use?
Absolutely! To freeze Bobby Flay’s Goulash, let it cool completely before dividing it into portion-sized containers. It can be stored in the freezer for up to 3 months. Thaw overnight in the refrigerator before reheating, so it's ready to enjoy at a moment's notice!

What should I do if my goulash turns out too thick?
No worries! If your goulash is thicker than desired, simply stir in a bit of beef broth or water while reheating. Start with a small amount—about 1/4 cup—and gradually mix until you reach your preferred consistency. It's all about that perfect harmony of flavors!

Is there a way to customize this goulash for dietary restrictions?
Indeed! For those sensitive to strong spices, you can omit cumin without losing too much flavor. If you're cooking for vegetarians, consider using plant-based proteins and vegetable broth instead. Just be aware of allergies to certain vegetables and adjust accordingly. The more the merrier!

How long can I keep goulash at room temperature?
It's best to serve Bobby Flay’s Goulash within 2 hours if left out. Beyond that timeframe, it's important to refrigerate to ensure food safety. After all, we want you to enjoy every delicious bite without worries!

Bobby Flay’s Goulash

Bobby Flay’s Goulash: A Cozy Comfort Food Classic

Bobby Flay’s Goulash is a comforting, hearty dish that brings families together with its rich flavors.
Print Recipe Pin Recipe
Prep Time 15 minutes mins
Cook Time 45 minutes mins
Total Time 1 hour hr
Servings: 4 servings
Course: Dinner
Cuisine: American
Calories: 350
Ingredients Equipment Method Nutrition Notes

Ingredients
  

For the Meat
  • 1 pound ground beef substitute with ground turkey for a leaner option
For the Vegetables
  • 1 large onion adds sweetness and aromatics; shallots may be used as an alternative
  • 1-2 bell peppers any color works; zucchinis can be added for variation
  • 2-3 carrots provide sweetness and texture; frozen mixed vegetables can be a handy shortcut
For the Sauce
  • 2 cloves garlic boosts flavor; garlic powder can be used in a pinch
  • 2 teaspoons paprika use smoked paprika for a more intense flavor
  • 1 teaspoon cumin omit if sensitive to strong spices
  • 1 can tomato sauce substitute with crushed tomatoes for a chunkier texture
  • 2 cups beef broth vegetable broth works for a lighter version

Equipment

  • Large pot or Dutch oven

Method
 

Step-by-Step Instructions
  1. Start by dicing 1 large onion, 1-2 bell peppers, and 2-3 carrots into small, even pieces.
  2. In a large pot or Dutch oven, heat 2 tablespoons of oil over medium-high heat. Add 1 pound of ground beef and cook until browned, about 5-7 minutes.
  3. Add the prepped onions, bell peppers, and carrots to the pot with the browned beef. Cook for about 5 minutes, stirring occasionally.
  4. Stir in 2 cloves of minced garlic, 2 teaspoons of paprika, and 1 teaspoon of cumin. Cook for another 1-2 minutes.
  5. Pour in 1 can of tomato sauce and 2 cups of beef broth, stirring to combine. Turn up the heat until it simmers.
  6. Once simmering, reduce heat to low and let cook uncovered for 30-45 minutes, stirring occasionally.
  7. Taste and adjust seasoning as needed before serving.

Nutrition

Serving: 1servingCalories: 350kcalCarbohydrates: 30gProtein: 25gFat: 15gSaturated Fat: 5gPolyunsaturated Fat: 1gMonounsaturated Fat: 8gCholesterol: 70mgSodium: 700mgPotassium: 800mgFiber: 5gSugar: 6gVitamin A: 2000IUVitamin C: 30mgCalcium: 40mgIron: 4mg

Notes

Pair with some homemade crusty bread for a satisfying meal. Adjust simmering time to achieve preferred thickness.

Tried this recipe?

Let us know how it was!

Irresistible Red Lobster Biscuit Chicken Pot Pie Delight

January 25, 2026 by Grace Snow Leave a Comment

As I stood in my kitchen one chilly evening, the comforting aroma of garlic and butter wafted through the air, instantly transporting me back to family dinners filled with laughter and warmth. That’s when I decided to recreate a dish that marries the cozy essence of homemade cooking with a delightful twist: the Red Lobster Biscuit Chicken Pot Pie. This delectable recipe brings together tender chicken, vibrant vegetables, and a creamy sauce, all sheltering under a golden, flaky biscuit topping inspired by those beloved biscuits. Not only does it make for an effortless weeknight meal, but it also beats the fast-food routine and impresses family and friends, leaving them craving more. Who could resist a comforting, hearty pot pie that’s quick to prepare and equally enjoyable for momentous gatherings? Curious how to whip up this satisfying dish? Let’s dive into the recipe!

Why is This Pot Pie a Must-Try?

Comforting and Hearty: This dish combines tender chicken and a creamy sauce, paired with mixed vegetables, resulting in a meal that hugs your taste buds.
Signature Biscuit Topping: The Red Lobster-style biscuits create a flaky, buttery crown that elevates the pot pie, offering a delightful twist on a classic.
Easy Prep: With simple steps and minimal cleanup, you’ll be enjoying this homemade goodness in no time, making it perfect for busy weeknights.
Customizable Offerings: Whether you're looking for gluten-free or plant-based options, this recipe adapts effortlessly to suit every dietary need—try it as vegan chicken pot pie or use your favorite seasonal veggies!
Crowd-Pleasing Appeal: Perfect for family gatherings, it's sure to impress everyone from kids to adults, transforming any meal into a cozy occasion. Experience comfort food bliss with every savory bite!

Red Lobster Biscuit Chicken Pot Pie Ingredients

For the Filling
• 3 cups cooked chicken, diced – This is the main protein; rotisserie chicken works wonderfully for convenience.
• 1 cup frozen mixed vegetables – Adds nutrition and vibrant color; feel free to swap in your favorites!
• 1 cup cream of chicken soup – This ingredient provides that rich and creamy texture we crave.
• 1 teaspoon garlic powder – Don't skip this—it enhances the flavor beautifully! Use in both the filling and biscuit topping.
• 1 teaspoon onion powder – Adds a depth of flavor to the filling.
• ½ cup chicken broth – Helps to adjust the consistency of the filling; customize with low-sodium broth if preferred.

For the Biscuit Topping
• 2 ½ cups all-purpose flour – The cornerstone of the biscuits; gluten-free flour can be used for a tasty alternative.
• 1 tablespoon baking powder – Key for making the biscuits rise to fluffy perfection!
• 1 teaspoon salt – Enhances the overall flavor of the topping.
• ½ cup unsalted butter, cold and cubed – Cold butter is essential for creating those flaky biscuits you’ll love.
• 1 cup shredded cheddar cheese – Adds that irresistible cheesy flavor you associate with Red Lobster biscuits.
• ¾ cup milk – This binds the biscuit mixture; try low-fat or dairy-free options if needed.

Remember, each ingredient plays a big role in making this Red Lobster Biscuit Chicken Pot Pie a comforting dish that’s sure to be cherished by family and friends!

Step‑by‑Step Instructions for Red Lobster Biscuit Chicken Pot Pie

Step 1: Preheat the Oven
Begin by preheating your oven to 375°F (190°C). This temperature is crucial for achieving the perfect flaky biscuits and bubbling filling. As the oven warms up, gather your ingredients, preparing yourself for a delightful cooking experience that’s reminiscent of a warm family kitchen.

Step 2: Prepare the Filling
In a large mixing bowl, combine 3 cups of diced cooked chicken, 1 cup of frozen mixed vegetables, and 1 cup of cream of chicken soup. Add in 1 teaspoon of garlic powder, 1 teaspoon of onion powder, salt, pepper, and ½ cup of chicken broth. Mix everything thoroughly until well combined. The mixture should look creamy and hearty, perfect for our Red Lobster Biscuit Chicken Pot Pie.

Step 3: Transfer the Filling
Once your filling is ready, transfer it evenly into a greased casserole or pie dish. Make sure to spread the mixture out evenly to ensure every bite is filled with that savory goodness. A 9x13-inch dish works wonderfully for this recipe, allowing ample space for the biscuit topping to rise beautifully.

Step 4: Make the Biscuit Dough
In a separate bowl, whisk together 2 ½ cups of all-purpose flour, 1 tablespoon of baking powder, and 1 teaspoon of salt. Next, use a pastry cutter or your fingers to cut in ½ cup of cold, cubed unsalted butter until the mixture resembles coarse crumbs. The cold butter is key for flaky biscuits, so keep it chilled while you work.

Step 5: Add Cheese and Liquid
To the flour mixture, add 1 cup of shredded cheddar cheese and 1 teaspoon of garlic powder, mixing gently with a spatula. Gradually pour in ¾ cup of milk, mixing until just combined; be careful not to overmix as we want our biscuits light and fluffy. The dough should be slightly sticky but workable.

Step 6: Top the Filling
Using a spoon, drop large spoonfuls of the biscuit dough over the chicken filling. Aim to cover the filling as much as possible without pressing it down. The uneven tops will create delightful textures when baked, adding visual appeal to your Red Lobster Biscuit Chicken Pot Pie.

Step 7: Bake the Pot Pie
Place the assembled pot pie in your preheated oven and bake for about 30 minutes. Keep an eye on it—the biscuits should turn golden brown and the filling should be bubbly. This is where the magic happens, transforming the dish into a comforting culinary masterpiece.

Step 8: Cool and Serve
Once the biscuits are perfectly browned, remove the pot pie from the oven and let it cool for a few minutes. This rest period allows the filling to firm up slightly, making it easier to serve. Slice into portions and enjoy your comforting Red Lobster Biscuit Chicken Pot Pie filled with love and nostalgia.

Expert Tips for Red Lobster Biscuit Chicken Pot Pie

  • Mixing Matters: Avoid overmixing the biscuit dough, as this can lead to toughness rather than the desired tenderness.
  • Perfectly Creamy: To ensure the filling isn’t runny, cook it a bit longer to allow the sauce to thicken properly before baking.
  • Resting is Key: Let the pot pie rest for a few minutes post-baking; this helps the filling set and makes serving easier.
  • Chill Your Butter: Always use cold butter in the biscuit dough to achieve those wonderfully flaky layers in your biscuits.
  • Storage Savvy: If preparing ahead, store the filling and biscuit dough separately to maintain texture, making your Red Lobster Biscuit Chicken Pot Pie even more delightful when you’re ready to bake!

What to Serve with Red Lobster Biscuit Chicken Pot Pie?

A comforting pot pie deserves sides that elevate the meal and tantalize your taste buds!

  • Simple Side Salad: A fresh mix of greens, cucumbers, and cherry tomatoes tossed in a light vinaigrette adds crispness and balances the rich flavors of the pot pie.

  • Garlic Bread: The warm, buttery aroma of garlic bread paired with your pot pie enhances the meal, inviting you to soak up every bit of that creamy filling.

  • Roasted Vegetables: Seasonal roasted veggies bring vibrant colors and earthy flavors that perfectly complement the comforting creaminess of your dish.

  • Sweet Potato Mash: This slightly sweet and creamy side contrasts beautifully with the savory pot pie, creating a well-rounded, satisfying meal.

  • Coleslaw: A crunchy, tangy coleslaw adds a refreshing bite to your pot pie experience, enhancing the overall texture and taste.

  • Sparkling Lemonade: A fizzy, citrusy drink cleanses the palate between bites, offering a bright contrast to the hearty richness of the pot pie.

  • Chocolate Chip Cookies: Round off your dinner with warm, gooey cookies that play off the pot pie's comforting essence, delighting your sweet tooth.

  • Apple Pie: A classic dessert that ties the meal together, the warm, spiced apple filling offers a delightful harmony of flavors with your pot pie.

Make Ahead Options

These Red Lobster Biscuit Chicken Pot Pies are perfect for meal prep enthusiasts seeking to save time during busy weeknights! You can make the filling up to 3 days in advance, storing it in an airtight container in the refrigerator to keep it fresh. Additionally, you can prepare the biscuit dough and refrigerate it for up to 24 hours as well. When you’re ready to serve, simply pour the chilled filling into your casserole dish, drop the biscuit dough on top, and bake as directed. This way, you'll enjoy just as delicious results with minimal effort, all while impressing your family with a hearty and comforting meal!

Storage Tips for Red Lobster Biscuit Chicken Pot Pie

Fridge: Store any leftover pot pie in an airtight container for up to 3-4 days. Make sure to cool it completely before sealing to maintain freshness.

Freezer: If you're looking to freeze this delightful dish, assemble it but do not bake. Wrap tightly in plastic wrap and foil for up to 2 months. Thaw overnight in the fridge before baking for best results.

Reheating: To reheat, place the pot pie in a preheated oven at 350°F (175°C) for 20-25 minutes or until heated through, ensuring the biscuit topping retains its fabulous texture.

Make-Ahead Tips: You can prepare the filling and biscuit dough separately, storing them in the fridge for up to 2 days in advance. Just combine and bake whenever you’re ready to enjoy your Red Lobster Biscuit Chicken Pot Pie!

Red Lobster Biscuit Chicken Pot Pie Variations

Feel free to embrace your creativity and customize this recipe to suit your tastes and dietary needs!

  • Plant-Based Option: Substitute the chicken with tofu, tempeh, or chickpeas for a hearty, plant-based twist. This can still deliver that comforting flavor you're after.

  • Gluten-Free Delight: Use gluten-free flour and a dairy-free cream of chicken soup to make this dish suitable for gluten-sensitive or vegan diets. It's comforting without the gluten!

  • Cheesy Upgrade: Elevate the biscuit topping by adding extra cheddar cheese into the dough. A little more cheese never hurts, right?

  • Seasonal Veggies: Swap out the frozen mixed veggies for fresh, in-season produce like asparagus or zucchini. Fresh ingredients bring a lovely visual and flavor boost.

  • Spicy Kick: If you enjoy a bit of heat, toss in a pinch of red pepper flakes or diced jalapeños into the chicken filling. This will add a delightful and unexpected zing!

  • Creamy Variation: For an even creamier filling, fold in some cream cheese or sour cream just before baking. The richness will make every bite extra indulgent.

  • Herb Infusion: Add fresh herbs such as thyme or rosemary to the filling for added aroma and flavor. It transforms simple ingredients into something gourmet.

Feel free to explore these variations or create your own unique versions. You might also enjoy trying this concept with other recipes like Crock Pot Chicken or Honey Garlic Chicken for more culinary inspiration!

Red Lobster Biscuit Chicken Pot Pie Recipe FAQs

How do I choose the right chicken for this recipe?
Absolutely! For the best flavor and convenience, I recommend using rotisserie chicken as it’s already cooked and seasoned. This saves time and provides a tender, juicy texture. If you're cooking the chicken yourself, poached or baked chicken thighs are excellent options due to their moisture.

How long can I store the pot pie in the refrigerator?
You can store any leftover pot pie in an airtight container for up to 3-4 days. Just make sure it has cooled completely before sealing it up; this helps preserve its delightful textures and flavors.

Can I freeze the Red Lobster Biscuit Chicken Pot Pie?
Yes, indeed! To freeze, assemble the pot pie but do not bake it. Wrap it tightly in plastic wrap followed by foil to prevent freezer burn, and it can be frozen for up to 2 months. Thaw it overnight in the fridge before baking for the best results, and you’ll have a comforting meal ready to go!

What if the biscuit topping turns out tough?
Very! If your biscuit topping ends up tough, it’s likely due to overmixing the dough. Aim to mix just until combined, leaving it slightly sticky. For an airy biscuit, always use cold butter and avoid pressing the dough down onto the filling. Remember, tender care is key!

Are there any dietary considerations for this recipe?
Absolutely, this recipe can be made gluten-free by substituting all-purpose flour with a gluten-free blend designed for baking. For dairy-free options, try plant-based milk and cheese—both provide lovely flavors and textures. Also, if you want a plant-based version, swapping chicken with tofu, tempeh, or chickpeas works beautifully!

How can I spice it up?
If you’re looking to enhance the flavors even more, consider adding some fresh herbs like thyme or rosemary to the filling! A sprinkle of cayenne pepper or paprika can also give it a little kick. Feel free to personalize the recipe with your favorite spices!

Red Lobster Biscuit Chicken Pot Pie

Irresistible Red Lobster Biscuit Chicken Pot Pie Delight

This Red Lobster Biscuit Chicken Pot Pie combines tender chicken, vibrant vegetables, and a creamy sauce, all under a flaky biscuit topping, making it a perfect weeknight meal.
Print Recipe Pin Recipe
Prep Time 20 minutes mins
Cook Time 30 minutes mins
Cooling Time 10 minutes mins
Total Time 1 hour hr
Servings: 6 slices
Course: Dinner
Cuisine: American
Calories: 420
Ingredients Equipment Method Nutrition Notes

Ingredients
  

For the Filling
  • 3 cups cooked chicken, diced Rotisserie chicken works wonderfully for convenience.
  • 1 cup frozen mixed vegetables Feel free to swap in your favorites!
  • 1 cup cream of chicken soup Provides a rich and creamy texture.
  • 1 teaspoon garlic powder Enhances the flavor beautifully!
  • 1 teaspoon onion powder Adds depth of flavor.
  • ½ cup chicken broth Customize with low-sodium if preferred.
For the Biscuit Topping
  • 2 ½ cups all-purpose flour Gluten-free flour can be used as an alternative.
  • 1 tablespoon baking powder Key for making the biscuits rise.
  • 1 teaspoon salt Enhances overall flavor.
  • ½ cup unsalted butter, cold and cubed Cold butter is essential for flaky biscuits.
  • 1 cup shredded cheddar cheese Adds an irresistible cheesy flavor.
  • ¾ cup milk Low-fat or dairy-free options can be used.

Equipment

  • Casserole or pie dish
  • Mixing bowls
  • Whisk
  • Spatula
  • Pastry cutter

Method
 

Step-by-Step Instructions
  1. Preheat your oven to 375°F (190°C).
  2. In a large mixing bowl, combine chicken, mixed vegetables, cream of chicken soup, garlic powder, onion powder, and chicken broth. Mix well until combined.
  3. Transfer the filling into a greased casserole or pie dish, spreading evenly.
  4. In a separate bowl, whisk together flour, baking powder, and salt. Cut in cold butter until it resembles coarse crumbs.
  5. Add cheese and garlic powder to the flour mixture, then gradually pour in milk while mixing gently.
  6. Drop spoonfuls of biscuit dough over the filling, covering it as much as possible.
  7. Bake for about 30 minutes, until biscuits are golden brown and filling is bubbly.
  8. Let the pot pie cool for a few minutes before serving.

Nutrition

Serving: 1sliceCalories: 420kcalCarbohydrates: 35gProtein: 22gFat: 24gSaturated Fat: 12gPolyunsaturated Fat: 2gMonounsaturated Fat: 8gCholesterol: 75mgSodium: 880mgPotassium: 360mgFiber: 2gSugar: 3gVitamin A: 600IUVitamin C: 5mgCalcium: 250mgIron: 2mg

Notes

This Red Lobster Biscuit Chicken Pot Pie is customizable for gluten-free or plant-based diets. Perfect for gatherings or a cozy meal at home.

Tried this recipe?

Let us know how it was!

Savory Cheeseburger Meatloaf with Cheddar and Bacon Bliss

January 25, 2026 by Grace Snow Leave a Comment

“Did you hear? They’ve combined cheeseburgers and meatloaf!” That little tidbit of conversation sparked my imagination, leading me to create the ultimate comfort food fusion: Cheeseburger Meatloaf. This delicious twist merges the classic heartiness of meatloaf with the beloved flavors of a cheeseburger, featuring juicy ground beef, sharp cheddar cheese, and crispy bacon—all topped off with a sweet ketchup glaze that adds a perfect finishing touch. It's a delightful solution for those busy weeknights when you crave something special without the fuss. This recipe not only satisfies your comfort food craving but also brings a fun, unique element to your dinner table, making it a sure hit for gatherings or family meals. Curious how to whip up this mouthwatering dish? Let’s dive into the joys of making Cheeseburger Meatloaf!

Why is Cheeseburger Meatloaf so irresistible?

Flavor Fusion: This dish beautifully marries the best of both worlds—meatloaf’s hearty comfort and the savory goodness of a cheeseburger, making it a must-try for home cooks.
Easy Preparation: Whipping up this delicious meal is a breeze, requiring minimal effort and time, perfect for busy weeknights.
Crowd-Pleaser: Whether served at a family dinner or a potluck, this meatloaf will be a hit, bringing smiles to every plate.
Customizable Delight: Feel free to experiment with add-ins like your favorite veggies or cheeses for a personalized touch—add jalapeños for heat or switch up the cheese for new flavors!
Satisfying Texture: With a gooey cheese center and crispy bacon, each slice offers a delightful contrast that's sure to please your taste buds. This Cheeseburger Meatloaf is a meal everyone will talk about!

Cheeseburger Meatloaf Ingredients

For the Meatloaf

  • Ground Beef – Provides the primary texture and protein base; opt for lean ground beef for a healthier option.
  • Cheddar Cheese – Adds sharpness and richness; substitute with mozzarella for a milder flavor.
  • Bacon – Enhances flavor and contributes to a moist texture; turkey bacon can be a lighter alternative.
  • Egg – Acts as a binder to hold everything together; use flaxseed meal as a vegan alternative.
  • Onion – Provides aromatic depth; shallots or green onions are great substitutes for a milder taste.
  • Garlic – Adds savory notes; garlic powder works well if fresh isn't available.

For the Binding

  • Breadcrumbs – Helps bind the meatloaf; choose panko for extra crunch or oats for a gluten-free option.

For the Glaze

  • Ketchup – Adds sweetness and acidity to the topping; barbecue sauce or a homemade glaze can be used as alternatives.

This delicious Cheeseburger Meatloaf blends rich flavors into an easy, satisfying meal the whole family will love!

Step‑by‑Step Instructions for Cheeseburger Meatloaf

Step 1: Preheat the Oven
Begin by preheating your oven to 350°F (175°C). This ensures that your Cheeseburger Meatloaf will cook evenly and thoroughly. While the oven warms up, gather your ingredients and prepare a greased baking dish, ready to cradle this mouthwatering meatloaf.

Step 2: Mix the Ingredients
In a large mixing bowl, combine the ground beef, breadcrumbs, chopped onions, minced garlic, egg, and half of the sharp cheddar cheese. Use your hands or a spoon to mix everything until well incorporated, being careful not to overwork the meat, as you want your meatloaf to remain tender and moist.

Step 3: Shape the Meatloaf
Transfer the well-mixed meat mixture into the greased baking dish. Shape it into a loaf form, making sure it’s compact and even. This step is important for even cooking and to help your Cheeseburger Meatloaf hold its shape while baking, so use your hands to mold it gently.

Step 4: Prepare the Ketchup Glaze
In a small bowl, mix together the remaining cheddar cheese with ketchup. This luscious glaze will add a sweet and tangy topping to your meatloaf. Once combined, spread the ketchup mixture evenly over the top of the shaped meatloaf, allowing it to drizzle down the sides for added flavor.

Step 5: Bake to Perfection
Place the baking dish in your preheated oven and bake for approximately 60 to 75 minutes. Keep an eye on the meatloaf as it cooks, and you’ll know it’s done when the internal temperature reaches 160°F (70°C) and the glaze is bubbling and lightly caramelized.

Step 6: Let it Rest
Once baked, remove the Cheeseburger Meatloaf from the oven and let it rest for at least 10 minutes. This crucial step helps the juices redistribute, ensuring every slice is moist and flavorful. You'll find this brief wait will lead to a beautifully crafted meal, ready to be sliced and served.

Expert Tips for Cheeseburger Meatloaf

  • Mixing Matters: Ensure even mixing of all ingredients to avoid dry spots in your Cheeseburger Meatloaf. A well-combined mixture leads to a tender loaf.

  • Don’t Overwork: Handle the meat mixture gently—overworking it can result in a dense texture. Just combine ingredients until they're mixed, then stop.

  • Use a Meat Thermometer: For perfect doneness, use a meat thermometer to check the internal temperature. It should reach 160°F (70°C) for a safe and juicy meatloaf.

  • Rest Before Slicing: Allow the meatloaf to rest for at least 10 minutes after baking. This gives it time to set up, making slicing easier and retaining moisture.

  • Experiment with Add-Ins: Feel free to mix in extras like diced peppers or different cheeses to customize your Cheeseburger Meatloaf to your family's tastes.

What to Serve with Cheeseburger Meatloaf

A comforting and heartwarming cheeseburger meatloaf deserves delightful sides that elevate the whole dining experience.

  • Creamy Mashed Potatoes: The buttery, creamy texture of mashed potatoes beautifully complements the rich meatloaf, soaking up every flavorful bite. Add a sprinkle of chives for a fresh touch!

  • Simple Garden Salad: A crisp garden salad adds a refreshing crunch, balancing the savory richness of the meatloaf. Tossed with a zesty vinaigrette, it enhances the meal’s appeal.

  • Roasted Brussels Sprouts: Crispy, caramelized Brussels sprouts bring a subtle earthiness that pairs well with the savory notes of the meatloaf. Drizzle with balsamic for extra flavor.

  • Macaroni and Cheese: What’s better than cheese with cheese? Creamy, cheesy macaroni is the ultimate comfort food companion, delighting cheese lovers at your table.

  • Sautéed Green Beans: Bright green beans sautéed with garlic provide a fresh pop of color and flavor. They add just the right amount of crunch to each bite!

  • Sweet Potato Fries: The sweetness of roasted or fried sweet potatoes contrasts wonderfully with the savory notes of the meatloaf, creating a delicious blend of flavors.

  • Cornbread Muffins: Soft cornbread muffins are a delightful, slightly sweet addition that complements the heartiness of the meatloaf while adding a cozy touch to your meal.

  • Iced Tea or Lemonade: Quench your thirst with a tall glass of freshly brewed iced tea or lemonade. Both drinks offer a refreshing finish to the rich flavors on your plate.

  • Chocolate Cake: For dessert, a slice of moist chocolate cake is sure to satisfy your sweet tooth after the savory goodness of cheeseburger meatloaf!

Make Ahead Options

These Cheeseburger Meatloaf is a fantastic meal prep option for busy home cooks! You can mix all of the ingredients and shape the meatloaf up to 24 hours in advance, storing it covered in the refrigerator to let the flavors meld. The ketchup glaze can also be prepared ahead and refrigerated in a separate container. When you're ready to enjoy, simply preheat your oven and place the meatloaf in the oven without needing to worry about the prep work during your busy evening. Bake as directed until it reaches an internal temperature of 160°F (70°C). This way, you’ll have a delicious and satisfying dinner with less fuss and more family time!

How to Store and Freeze Cheeseburger Meatloaf

Fridge: Store leftovers in an airtight container for up to 3 days. Make sure it's completely cooled before sealing to maintain freshness.

Freezer: For longer storage, wrap slices tightly in plastic wrap or aluminum foil, then place in a freezer-safe bag. Cheeseburger Meatloaf can be frozen for up to 3 months.

Reheating: Reheat individual slices in the microwave for about 1-2 minutes or in the oven at 350°F (175°C) for 10-15 minutes until warmed through. This helps retain the loaf's moisture and flavor.

Cheeseburger Meatloaf Variations

Feel free to play with this recipe and make it your own, enhancing flavors and textures that excite your taste buds!

  • Spicy Kick: Add diced jalapeños or a splash of hot sauce to the meat mixture for an extra kick that complements the rich flavors beautifully.
  • Veggie Boost: Stir in grated carrots or bell peppers for added nutrients and a subtle sweetness that brightens up the savory meatloaf.
  • Gluten-Free: Swap standard breadcrumbs with gluten-free panko or oats to make this hearty dish suitable for those with dietary restrictions.
  • Cheese Variety: Experiment with pepper jack for a zesty twist, or Swiss cheese for a milder taste that melts gorgeously within the meatloaf.
  • BBQ Glaze: Replace the ketchup glaze with a smoky barbecue sauce for a richer flavor profile that’ll impress your guests at any gathering.
  • Turkey Alternative: For a lighter version, use ground turkey instead of beef—just be cautious of moisture levels to keep the meatloaf moist and flavorful.
  • Herb Infusion: Mix in chopped fresh herbs like parsley or thyme to elevate the aroma and freshness of each slice, making each bite feel like a garden delight.
  • Sweet Addition: Brush the meatloaf with a touch of honey or maple syrup before baking for a sweet, caramelized crust that contrasts beautifully with savory elements.

Each variation is a great way to add your personal touch to this delightful Cheeseburger Meatloaf! From texture changes to flavor enhancements, let your imagination run wild and create a dish your family will cherish.

Cheeseburger Meatloaf Recipe FAQs

How do I choose the right ground beef for my Cheeseburger Meatloaf?
Absolutely! I recommend opting for lean ground beef (around 80% lean) for a balance of flavor and fat. This selection prevents your meatloaf from being too greasy while still retaining moisture. Look for beef that is bright red with minimal dark spots; that's a good sign of freshness!

What’s the best way to store leftover Cheeseburger Meatloaf?
Very good question! Once it has cooled completely, transfer your leftover Cheeseburger Meatloaf into an airtight container to keep it fresh. It can be safely stored in the refrigerator for up to 3 days. Just make sure there's no excess moisture trapped inside, as it can lead to sogginess.

Can Cheeseburger Meatloaf be frozen, and if so, how?
Yes, you can freeze it! To do this, let the meatloaf cool completely after baking. Then, wrap each slice tightly in plastic wrap or aluminum foil, and place them in a freezer-safe bag. You can freeze it for up to 3 months. When you're ready to enjoy it, thaw in the refrigerator overnight, then reheat in the microwave or oven.

What should I do if my Cheeseburger Meatloaf falls apart while slicing?
If your meatloaf doesn't hold together, there are a couple of things you can check next time. Make sure you've properly combined all the ingredients without overworking the meat—this keeps it tender. Also, letting the meatloaf rest for at least 10 minutes after baking allows the juices to settle, helping it maintain its shape during slicing.

Are there any allergy considerations I should be aware of with this recipe?
Absolutely! This Cheeseburger Meatloaf contains common allergens like beef (for those with dietary restrictions), eggs, and dairy from the cheese. If you're preparing this for someone with allergies, consider substitutions—like ground turkey or plant-based meat alternatives and flaxseed meal instead of eggs. Always double-check for individual allergies accordingly!

What other ingredients could I use to modify the flavor of my Cheeseburger Meatloaf?
You have so many options! If you want to add a spicier kick, mix in some diced jalapeños or a few dashes of hot sauce. For added flavor, you could also try various cheeses, like pepper jack for some heat or even Swiss for a different twist. Don't hesitate to play with the ingredients for your perfect blend!

Cheeseburger Meatloaf

Savory Cheeseburger Meatloaf with Cheddar and Bacon Bliss

This Cheeseburger Meatloaf combines hearty meatloaf with the classic flavors of a cheeseburger, featuring ground beef, cheddar, and bacon.
Print Recipe Pin Recipe
Prep Time 15 minutes mins
Cook Time 1 hour hr 10 minutes mins
Resting Time 10 minutes mins
Total Time 1 hour hr 35 minutes mins
Servings: 6 slices
Course: Dinner
Calories: 320
Ingredients Equipment Method Nutrition Notes

Ingredients
  

For the Meatloaf
  • 1 pound Ground Beef Opt for lean ground beef for a healthier option.
  • 1 cup Cheddar Cheese Substitute with mozzarella for a milder flavor.
  • 4 slices Bacon Turkey bacon can be a lighter alternative.
  • 1 medium Egg Use flaxseed meal as a vegan alternative.
  • 1 small Onion Shallots or green onions are great substitutions.
  • 2 cloves Garlic Garlic powder works well if fresh isn't available.
For the Binding
  • 1 cup Breadcrumbs Choose panko for extra crunch or oats for a gluten-free option.
For the Glaze
  • 1/2 cup Ketchup Barbecue sauce or a homemade glaze can be used.

Equipment

  • Mixing Bowl
  • Baking Dish

Method
 

Step-by-Step Instructions for Cheeseburger Meatloaf
  1. Preheat your oven to 350°F (175°C). Prepare a greased baking dish.
  2. In a large mixing bowl, combine ground beef, breadcrumbs, onions, garlic, egg, and half of the cheddar cheese. Mix until well incorporated.
  3. Transfer the meat mixture into the greased baking dish and shape it into a loaf.
  4. In a small bowl, mix the remaining cheddar cheese with ketchup and spread it over the top of the meatloaf.
  5. Bake for approximately 60 to 75 minutes until the internal temperature reaches 160°F (70°C).
  6. Let the meatloaf rest for at least 10 minutes before slicing.

Nutrition

Serving: 1sliceCalories: 320kcalCarbohydrates: 20gProtein: 25gFat: 18gSaturated Fat: 7gPolyunsaturated Fat: 2gMonounsaturated Fat: 9gTrans Fat: 1gCholesterol: 90mgSodium: 600mgPotassium: 500mgFiber: 1gSugar: 5gVitamin A: 300IUVitamin C: 2mgCalcium: 200mgIron: 3mg

Notes

For perfect doneness, use a meat thermometer and allow resting for better moisture retention.

Tried this recipe?

Let us know how it was!

Savory Slow Cooker Beef Ramen Noodles for Cozy Nights

January 25, 2026 by Grace Snow Leave a Comment

The aroma of savory broth filled the kitchen as I stirred in the last ingredients of my Easy Slow Cooker Beef Ramen Noodles, and I couldn’t help but smile. This delightful dish blends tender ground beef with a rich, flavorful broth, making it the ultimate comfort food. With just 15 minutes of prep time, it’s a budget-friendly recipe that transforms ordinary dinner nights into something special that the whole family can enjoy. Plus, the slow cooker does all the work, giving you more time to relax or help the kids with homework. A bowl of this warm, satisfying ramen not only brightens the dinner table but also warms the heart. What toppings will you choose to personalize your perfect bowl?

Why Choose Slow Cooker Beef Ramen Noodles?

Comforting, Hearty Meal: You'll love how this dish warms not just your stomach but your soul, with tender beef and rich broth.

Budget-Friendly: Perfect for families, this recipe keeps both taste and expenses in check.

Quick Prep Time: With just 15 minutes to prep, it’s an easy addition to your busy weeknight dinners.

Endless Customization: Throw in your favorite veggies or proteins, like ground turkey from our Gochujang Sesame Noodles recipe.

Slow Cooker Magic: Set it and forget it—allow the slow cooker to do all the hard work while you relax.

Kid-Approved: Its familiar flavors and fun toppings (think soft-boiled eggs or extra scallions!) make this meal a hit with the little ones, ensuring no complaints at dinner time!

Embrace the cozy flavors of this ramen and transform your dinner rotation.

Slow Cooker Beef Ramen Noodles Ingredients

• With these hearty ingredients, your dish is just moments away from being a cozy delight!

For the Beef and Broth

  • Ground Beef – provides a rich, hearty flavor, but can be swapped for lean turkey if desired.
  • Low Sodium Soy Sauce – infuses umami and a savory depth essential for flavor; tamari makes it gluten-free.
  • Brown Sugar – balances the soy sauce's saltiness with a hint of sweetness; adjust based on preference.
  • Chicken Stock – the flavorful base of the broth; vegetable stock works beautifully for a veggie alternative.

For the Vegetables

  • Matchstick Carrots – add crunch and sweetness; pre-cut options save time!
  • Red Bell Pepper – offers a juicy sweetness; feel free to mix in yellow or green peppers for variety.
  • Scallions – provide a fresh flavor and bright color; use as a garnish for an extra pop.
  • Garlic Cloves – essential for depth; minced for easy blending into the broth.

For the Noodles

  • Ramen Noodles – the dish's heart; make sure to discard any seasoning packets that come with them!

For Garnish

  • Sesame Seeds (optional) – sprinkle for added nuttiness and texture, enhancing your ramen experience.

Get ready to enjoy your scrumptious Slow Cooker Beef Ramen Noodles, perfect for cozy nights!

Step‑by‑Step Instructions for Slow Cooker Beef Ramen Noodles

Step 1: Brown the Ground Beef
In a large skillet over medium heat, add the ground beef. Cook for about 5–7 minutes, stirring until the beef is browned and cooked through. Drain any excess fat to keep the dish lean and flavorful. This step enhances the flavor of your Slow Cooker Beef Ramen Noodles by caramelizing the meat.

Step 2: Transfer to Slow Cooker
Carefully transfer the browned ground beef into your slow cooker. Spread it evenly across the bottom. This ensures that the flavors distribute evenly as the beef simmers in the savory broth. Now, you’re ready to build the delicious base for your broth and noodles.

Step 3: Add Fresh Vegetables
Add the matchstick carrots, sliced red bell pepper, and chopped scallions to the slow cooker. These fresh vegetables bring sweetness and crunch to the dish. Stir gently to combine all the ingredients while you prepare the aromatic broth that will elevate your Slow Cooker Beef Ramen Noodles.

Step 4: Whisk the Broth Ingredients
In a medium bowl, whisk together minced garlic, low sodium soy sauce, brown sugar, and chicken stock until fully blended. This savory mixture will form the delicious broth. The aroma will be irresistible, and it's about to transform your ingredients into a cozy, flavorful meal.

Step 5: Combine Everything
Pour the broth mixture over the beef and vegetables in the slow cooker. Stir everything together gently, ensuring all ingredients are coated in the flavorful broth. As cooking begins, these combined flavors will meld beautifully, creating the essence of your Slow Cooker Beef Ramen Noodles.

Step 6: Slow Cook to Perfection
Cover the slow cooker with its lid and set it to cook on low for 4–6 hours. This slow cooking allows the flavors to meld and the vegetables to soften. The broth will develop a rich, savory depth, promising comfort and warmth in every bowl of ramen.

Step 7: Add Ramen Noodles
About 30 minutes before serving, add the dry ramen noodles to the slow cooker. Stir them occasionally to ensure even cooking and prevent sticking. This final addition transforms your broth into a fulfilling dish, completing your Slow Cooker Beef Ramen Noodles.

Step 8: Serve and Garnish
Once the noodles are tender and heated through, it's time to serve. Ladle the hearty beef and broth mixture into bowls. Garnish with additional chopped scallions and sesame seeds for a delightful crunch and flavor. Your warm, inviting Slow Cooker Beef Ramen Noodles are now ready to enjoy!

How to Store and Freeze Slow Cooker Beef Ramen Noodles

  • Fridge: Store any leftovers in an airtight container for up to 4 days. Ensure the dish cools to room temperature before sealing to maximize freshness.

  • Freezer: If desired, freeze the ramen noodles without the broth for up to 3 months, as noodles can become mushy when thawed; reheat on the stovetop with fresh broth.

  • Reheating: When ready to enjoy, reheat the broth and noodles on the stovetop or in the microwave, stirring occasionally to prevent sticking. Adjust with a splash of broth or water to maintain consistency.

  • Portioning: For easy meals, consider portioning out servings before refrigerating or freezing, allowing for quick reheats of your Slow Cooker Beef Ramen Noodles whenever cravings strike!

Expert Tips for Slow Cooker Beef Ramen Noodles

  • Browning Benefits: Enhance flavor by browning the ground beef before the slow cooker step; this caramelization creates a richer taste.

  • Customizable Veggies: Don't hesitate to swap in your favorite vegetables; mushrooms or bok choy make excellent additions to your Slow Cooker Beef Ramen Noodles.

  • Noodle Timing: To avoid mushy noodles, add ramen about 30 minutes before serving, stirring occasionally for even cooking.

  • Taste Balance: Adjust the brown sugar based on your taste preference; reducing it can lead to a less sweet dish while still maintaining flavor.

  • Stock Options: For a vegetarian version, simply replace the chicken stock with vegetable stock, maintaining the same great flavor profile.

Make Ahead Options

These Easy Slow Cooker Beef Ramen Noodles are perfect for meal prep enthusiasts! You can brown the ground beef and combine it with the vegetables and broth mixture up to 24 hours in advance, then store it in an airtight container in the refrigerator. To maintain quality, ensure the broth is well-seasoned and the vegetables are fresh. When you’re ready to serve, simply transfer the prepped mixture to your slow cooker and set it to cook on low for 4-6 hours. About 30 minutes before serving, add the dry ramen noodles, stirring occasionally for even cooking, so you can enjoy this comforting dish with minimal effort on busy nights!

What to Serve with Easy Slow Cooker Beef Ramen Noodles

Creating a delightful dining experience is simple when you have the right accompaniments to elevate your meal.

  • Steamed Broccoli: This vibrant green veggie adds a slight crunch and nutrients, balancing the hearty ramen for a wholesome meal.

  • Crispy Egg Rolls: A fun, crispy addition that combines well with the soft noodles, creating a satisfying textural contrast. You can make them vegetarian or filled with shrimp for variety.

  • Sweet and Sour Coleslaw: A refreshing salad that brings a sweet tang to your table, cutting through the savory flavors of the ramen and adding a delightful crunch.

  • Spicy Kimchi: For a zingy punch, serve a side of kimchi that enhances the ramen’s flavor profile with its bold spices and probiotics.

  • Soft-Boiled Eggs: Topping your ramen with these creamy delights elevates the dish to new heights, adding richness and a luxurious finish.

  • Chilled Sake or Green Tea: Pair your meal with a glass of chilled sake or freshly brewed green tea; both complement the savory depth of the broth beautifully and enhance the dining experience.

Variations & Substitutions for Slow Cooker Beef Ramen Noodles

Feel free to explore these delightful variations that will elevate your home-cooked ramen experience!

  • Lean Option: Substitute ground beef with lean ground turkey or chicken for a lighter dish that’s equally comforting.

  • Vegetarian Delight: Swap in tofu or tempeh instead of beef, ensuring to season it well for a hearty, meatless meal.

  • Add Heat: Incorporate a splash of sriracha or toss in red pepper flakes while cooking for a spicy kick.

  • Mushroom Medley: Add sliced shiitake or button mushrooms for an earthy flavor boost and lovely texture contrast in your ramen.

  • Noodle Alternatives: Experiment with rice noodles or zucchini noodles for a gluten-free or low-carb twist on your classic ramen.

  • Deeper Flavors: Stir in miso paste alongside the broth ingredients for a richer, umami-packed profile.

  • Savory Broth Swap: Replace chicken stock with beef broth or a homemade vegetable stock for an intensified savory experience—a perfect match for any meat substitute!

  • Veggie Boost: Toss in additional veggies like bok choy or snap peas for extra color, crunch, and nutrients.

By customizing your Slow Cooker Beef Ramen Noodles, you'll discover countless delightful combinations that your family will love. Enjoy the comforts of homemade meals—perhaps alongside some tasty Chicken Teriyaki Noodles or even some delicious Ground Beef Enchiladas for a flavorful week!

Slow Cooker Beef Ramen Noodles Recipe FAQs

How do I choose the right ground beef?
Absolutely! When selecting ground beef for your Slow Cooker Beef Ramen Noodles, look for lean ground beef (at least 80% lean) to reduce excess fat. Ground beef should be bright red, indicating freshness, and avoid any packages with dark spots or excessive liquid. If you're looking for a lighter option, lean ground turkey or chicken can work beautifully as substitutes.

How long can I store leftovers in the fridge?
Great question! You can store any leftovers of your delicious Slow Cooker Beef Ramen Noodles in an airtight container in the fridge for up to 4 days. To maintain freshness, make sure the dish cools to room temperature before sealing. Simply reheat on the stovetop or microwave when you're ready to enjoy again!

Can I freeze Slow Cooker Beef Ramen Noodles?
Very much so! To freeze, I recommend storing the ramen noodles separately from the broth. This prevents sogginess. You can freeze the broth with the beef and veggies for up to 3 months. When you’re ready to enjoy, thaw the broth in the refrigerator overnight, then reheat on the stovetop, adding fresh uncooked ramen noodles during the last cooking phase for the best texture.

What should I do if my noodles become mushy?
If your noodles end up mushy, don’t worry; it happens to the best of us! To prevent this in the future, add the ramen noodles about 30 minutes before serving. Stir them occasionally to ensure even cooking. If they do become mushy, you can try removing them from the broth and adding fresh noodles or serve them over cooked rice for a delicious twist.

Are there any dietary considerations for this recipe?
Of course! This recipe is super customizable. If you have allergies to soy, you can use tamari as a gluten-free option or coconut aminos as a soy-free alternative. For a vegetarian version, substitute ground beef with tofu or tempeh and use vegetable broth. Always double-check any additional toppings or sides for potential allergens to ensure everyone's safety!

Slow Cooker Beef Ramen Noodles

Savory Slow Cooker Beef Ramen Noodles for Cozy Nights

A comforting bowl of Slow Cooker Beef Ramen Noodles with tender ground beef and rich broth.
Print Recipe Pin Recipe
Prep Time 15 minutes mins
Cook Time 6 hours hrs
Total Time 6 hours hrs 15 minutes mins
Servings: 6 bowls
Course: Dinner
Cuisine: Japanese
Calories: 400
Ingredients Equipment Method Nutrition Notes

Ingredients
  

For the Beef and Broth
  • 1 pound Ground Beef can substitute with lean turkey
  • 1/2 cup Low Sodium Soy Sauce or tamari for gluten-free
  • 2 tablespoons Brown Sugar adjust based on preference
  • 4 cups Chicken Stock use vegetable stock for a vegetarian version
For the Vegetables
  • 2 cups Matchstick Carrots pre-cut options save time
  • 1 large Red Bell Pepper can mix in yellow or green peppers
  • 1/2 cup Scallions use as garnish
  • 3 cloves Garlic Cloves minced
For the Noodles
  • 4 packs Ramen Noodles discard any seasoning packets
For Garnish
  • 1 tablespoon Sesame Seeds optional

Equipment

  • Slow Cooker
  • Large skillet
  • medium bowl

Method
 

Directions
  1. Brown the ground beef in a large skillet over medium heat for about 5–7 minutes until fully cooked. Drain excess fat.
  2. Transfer the browned ground beef to the slow cooker, spreading it evenly across the bottom.
  3. Add matchstick carrots, sliced red bell pepper, and chopped scallions to the slow cooker and stir to combine.
  4. In a medium bowl, whisk together minced garlic, low sodium soy sauce, brown sugar, and chicken stock.
  5. Pour the broth mixture over the beef and vegetables in the slow cooker, stirring gently.
  6. Cover and cook on low for 4–6 hours until flavors meld and vegetables soften.
  7. About 30 minutes before serving, add ramen noodles to the slow cooker, stirring occasionally.
  8. Once noodles are tender, serve in bowls, garnished with extra scallions and sesame seeds.

Nutrition

Serving: 1bowlCalories: 400kcalCarbohydrates: 45gProtein: 25gFat: 15gSaturated Fat: 6gPolyunsaturated Fat: 2gMonounsaturated Fat: 5gCholesterol: 70mgSodium: 800mgPotassium: 600mgFiber: 3gSugar: 4gVitamin A: 800IUVitamin C: 30mgCalcium: 30mgIron: 2mg

Notes

Customize the vegetables based on your favorites. For less sweet ramen, adjust brown sugar amount.

Tried this recipe?

Let us know how it was!

Savory Stuffed Italian Meatloaf Packed with Cheesy Goodness

January 25, 2026 by Grace Snow Leave a Comment

There’s something enchanting about the first time you slice into a stuffed Italian meatloaf, revealing layers of melted cheese and savory goodness within. This dish isn’t just a recipe; it’s a home-cooked hug that brings warmth to your dinner table, perfect for those hectic weeknights. My ultimate stuffed Italian meatloaf combines hearty ground beef, aromatic herbs, and gooey mozzarella—all rolled into a comforting masterpiece. Not only is it a crowd-pleaser that will impress your family and friends, but its easy prep makes it accessible even for the busiest home chefs. Imagine the aroma filling your kitchen as it bakes, urging everyone to gather ‘round for a plate of this delicious comfort food. Want to discover the secret to making your own? Let's dive into this delightful recipe!

Why is This Meatloaf a Game-Changer?

Flavor Explosion: The combination of seasoned ground beef and melted mozzarella creates a mouthwatering experience that delights the taste buds.

Easy Preparation: This recipe simplifies meatloaf-making, making it perfect for those busy weeknights. You’ll find that combining simple ingredients brings a satisfying result without hassle.

Comfort Food Classic: With its gooey center and crispy outside, this stuffed Italian meatloaf is sure to remind you of home cooking, making it a wonderful dish to share.

Crowd-Pleasing Appeal: Whether it’s a family dinner or a gathering with friends, this meatloaf is bound to impress and become a favorite at the table. If you enjoy comforting meals like this, you might also love Herby Ricotta Stuffed peppers!

Budget-Friendly: Utilizing basic ingredients makes this recipe not only delicious but also easy on the wallet, perfect for those cooking at home!

Stuffed Italian Meatloaf Ingredients

For the Meatloaf
• Ground Beef – The star protein for this stuffed Italian meatloaf, giving it rich flavor; consider a beef-pork blend for extra depth.
• Breadcrumbs – Helps bind the meatloaf while keeping it moist; gluten-free breadcrumbs are great for a gluten-free option!
• Parmesan Cheese – Infuses a nutty flavor and richness; Pecorino Romano can be used as a tasty substitute.
• Fresh Parsley – Adds a burst of freshness; if you have dried parsley, use a smaller amount for convenience.
• Fresh Basil – Enhances those classic Italian flavors; dried basil works too, but use just one-third of the amount.
• Onion – Sweetens when sautéed, contributing to the overall flavor; try using shallots for a milder taste.
• Garlic – Brings depth and aroma to your dish; adjust the amount based on your garlic love!
• Eggs – Act as a binder, holding all those delicious ingredients together; for a vegan alternative, flaxseed meal or a chia egg will work wonders.
• Marinara Sauce – Adds moisture and flavor; both homemade and store-bought versions are fantastic!
• Italian Seasoning – The secret to that authentic Italian taste; if you're out, mixing fresh oregano and thyme is a perfect substitute.
• Salt and Pepper – Essential for flavor enhancement; adjust to taste based on your dietary preferences.

For the Cheesy Center
• Mozzarella Cheese – Oozes into the center when baked, creating a delightful gooeyness; swap it out for provolone if you're feeling adventurous.
• Optional Slices of Pepperoni or Prosciutto – Adds an extra layer of richness and flavor; feel free to omit them for a lighter touch.

Dive into this hearty stuffed Italian meatloaf, and prepare to fall in love with the melty cheese and savory goodness!

Step‑by‑Step Instructions for Stuffed Italian Meatloaf

Step 1: Preheat the Oven
Begin by preheating your oven to 350°F (175°C). While it heats, line a baking sheet with parchment paper or lightly spray it with cooking spray to prevent sticking. This crucial step ensures that your stuffed Italian meatloaf bakes evenly, giving it that perfect crispy exterior.

Step 2: Sauté Aromatics
In a skillet over medium heat, add a splash of olive oil, then toss in chopped onions and minced garlic. Sauté for about 5 minutes until the onions turn translucent and aromatic. This step enhances the flavor base for your meatloaf, making it irresistible when baked.

Step 3: Mix Ingredients
In a large mixing bowl, combine ground beef, breadcrumbs, freshly grated Parmesan cheese, and the sautéed onion and garlic. Add chopped parsley, basil, eggs, marinara sauce, Italian seasoning, salt, and pepper. Mix gently until just combined, being careful not to overmix; you want a tender stuffed Italian meatloaf.

Step 4: Shape the Meatloaf
On a sheet of parchment paper, form the meat mixture into a rectangle about 1 inch thick. Make sure it's evenly shaped, which will help ensure even cooking and allow for an easy rolling process. This step is key to creating the beautiful layered effect of your meatloaf.

Step 5: Add Filling
Spread shredded mozzarella cheese and optional slices of pepperoni or prosciutto across the center of the meat rectangle. This cheesy goodness will melt as the stuffed Italian meatloaf cooks, creating a delicious surprise inside. Ensure the filling is well-distributed for maximum flavor in every bite.

Step 6: Roll the Meatloaf
Using the parchment paper as a guide, carefully roll the meat mixture tightly, enclosing the fillings as you go. Make sure to keep it snug without squishing the filling out. This rolling technique creates the beautiful spiraled interior of your stuffed Italian meatloaf, so take your time here.

Step 7: Transfer
Once rolled, place the meatloaf seam-side down on the prepared baking sheet. This helps keep the shape and ensures that the delicious contents stay inside as it bakes. Position it so there's a little space around it for even heat distribution.

Step 8: Top and Bake
Pour a generous layer of marinara sauce over the top of the meatloaf, evenly covering it. Bake in the preheated oven for about 60 minutes or until the internal temperature reaches 160°F (70°C). You'll know it's done when the edges are browned and the sauce is bubbling.

Step 9: Resting Time
After removing the stuffed Italian meatloaf from the oven, let it rest for 15-20 minutes. This resting period allows the juices to redistribute within the meatloaf. If you slice too soon, those flavorful juices could run out, leaving you with a drier dish.

Stuffed Italian Meatloaf Variations

Customize your stuffed Italian meatloaf with these delightful twists that will tantalize your taste buds and elevate your dinner experience!

  • Lean Alternative: Swap ground turkey or chicken for a lighter and healthier option while still packing that comforting flavor.

  • Cheese Variety: Experiment with different cheese melds, like sharp cheddar or creamy gouda, to change the flavor profile and add a new dimension to the filling.

  • Veggie Boost: Incorporate finely chopped bell peppers or spinach into the meat mixture for added nutrition and vibrant color that everyone will love.

  • Herb Swap: Try substituting fresh herbs such as sage or thyme for parsley and basil, which will wonderfully alter the aroma and taste of your meatloaf.

  • Spicy Kick: Add some crushed red pepper flakes or diced jalapeños for an exciting heat that jazzes up every slice. If you're craving an even bigger flavor, consider mixing in spicy Italian sausage!

  • Sauce Switch: Top your meatloaf with barbecue sauce or a zesty marinara for a brand-new twist that provides a unique layering of taste. Both options bring their own charm to the dish!

  • Stuffed Variation: For a delightful surprise, tuck in slices of provolone and sun-dried tomatoes right within the meat mixture, creating a savory pocket of gooey joy.

  • Bread Swap: For those who prefer a crustier exterior, use crushed croutons or even seasoned panko breadcrumbs in place of traditional breadcrumbs for extra texture.

Explore these variations as you perfect your homemade masterpiece; each adjustment will make your stuffed Italian meatloaf uniquely yours! For more inspiration, check out the delightful flavors in Herby Ricotta Stuffed peppers that effortlessly combine freshness and comfort!

What to Serve with Stuffed Italian Meatloaf

There’s nothing quite like completing a cozy dinner with the perfect sides that enhance your savory meatloaf experience.

  • Garlic Bread: The crispy, buttery slices are perfect for mopping up the marinara sauce, adding a crunchy texture that complements the meatloaf beautifully.

  • Classic Caesar Salad: Crisp romaine lettuce with creamy dressing and crunchy croutons adds a refreshing bite and balances the richness of the meatloaf.

  • Roasted Vegetables: A medley of carrots, zucchini, and bell peppers, seasoned and caramelized, brings vibrant colors and earthy flavors to your dinner plate.

  • Creamy Mashed Potatoes: The smooth, buttery potatoes create a comforting side that provides a delightful contrast to the meatloaf's crispy exterior.

  • Italian Green Beans: Sautéed green beans with garlic and olive oil add a pop of flavor and freshness that elevate the meal to new heights.

  • Balsamic Glazed Brussels Sprouts: The sweet and tangy glaze enhances these roasted sprouts, making them a satisfying complement that appeals to veggie lovers.

  • Red Wine: A glass of medium-bodied red wine, like Chianti, perfectly pairs with the rich flavors of the meatloaf, enhancing your cozy dining experience.

Imagine gathering your loved ones around the table, each slice of stuffed Italian meatloaf paired with your favorite side, creating a symphony of flavors that brings warmth to your family meals.

How to Store and Freeze Stuffed Italian Meatloaf

Fridge: Store leftover stuffed Italian meatloaf in an airtight container for up to 3 days. This keeps it fresh and ready to enjoy at a moment's notice.

Freezer: If you want to keep it longer, wrap the meatloaf tightly in plastic wrap or aluminum foil, then place it in a freezer-safe bag. It can be frozen for up to 3 months.

Reheating: For the best flavor, reheat slices in the oven at 350°F (175°C) for about 15-20 minutes until warmed through. This will help retain the moisture and texture.

Thawing: To enjoy your frozen stuffed Italian meatloaf, thaw it overnight in the refrigerator before reheating. This ensures even warming and helps it maintain its delicious flavor!

Make Ahead Options

These stuffed Italian meatloaf creations are perfect for meal prep enthusiasts looking to save time during busy weeknights! You can prepare the meatloaf mixture (up to 24 hours) in advance by combining all the ingredients, then form and roll the meatloaf, storing it tightly wrapped in plastic wrap in the refrigerator. This not only simplifies your cooking process but also allows the flavors to meld beautifully. When you're ready to bake, simply transfer it to the baking sheet, top with marinara sauce, and pop it into the oven—your dinner will emerge just as delicious as if you’d made it fresh! Enjoy the extra time you’ll have, knowing that a hearty meal awaits you!

Expert Tips for Stuffed Italian Meatloaf

Avoid Overmixing: Mixing too vigorously can make your stuffed Italian meatloaf dense. Gently combine the ingredients for a tender texture.

Let It Rest: Allow the meatloaf to rest after baking. This step helps retain moisture and enhances the flavor profile.

Use a Meat Thermometer: For perfect results, check the internal temperature. Cooking to 160°F (70°C) ensures a juicy, safe-to-eat meatloaf.

Layer Cheese Evenly: Distributing the mozzarella cheese throughout the filling not only ensures gooey goodness but also enhances every bite.

Experiment with Aromatics: Don't hesitate to play with different herbs or spices to customize the flavor of your stuffed Italian meatloaf, making it truly unique!

Stuffed Italian Meatloaf Recipe FAQs

How do I choose the right ground beef for stuffed Italian meatloaf?
Absolutely! For the best flavor, opt for ground beef that is 80/20 (80% lean and 20% fat) as this will keep your meatloaf juicy and tender. If you prefer a little more depth, you can also use a beef-pork blend which adds a lovely richness to the dish.

What’s the best way to store leftover stuffed Italian meatloaf?
Very simple! After cooling, store the leftovers in an airtight container and keep them in the refrigerator for up to 3 days. This method preserves the flavors and moisture of your delicious meatloaf.

Can I freeze stuffed Italian meatloaf? If so, how?
Absolutely! To freeze your stuffed Italian meatloaf, first, allow it to cool completely. Then, wrap it tightly in plastic wrap or aluminum foil, and place it in a freezer-safe bag. It can stay fresh for up to 3 months. When you're ready to enjoy it, thaw it overnight in the refrigerator before reheating.

What if my meatloaf turns out too dry?
Oh no! If your stuffed Italian meatloaf ends up dry, it could be due to overbaking or overmixing. For next time, be sure to bake it just until the internal temperature reaches 160°F (70°C) and mix gently to keep it tender. You might also consider adding a bit more marinara sauce into the mixture for extra moisture!

Is stuffed Italian meatloaf suitable for kids?
Very much so! Stuffed Italian meatloaf is generally kid-approved due to its cheesy center and familiar flavors. However, you may want to adjust the seasoning or spices if you're cooking for younger palates, and feel free to leave out any optional ingredients like pepperoni or prosciutto if desired.

What dietary considerations should I keep in mind when making this recipe?
Absolutely! For a gluten-free version, just swap regular breadcrumbs for gluten-free ones. If you’re looking for a vegan alternative, you can use a mixture of vegetables, beans, or lentils in place of ground beef, and a flaxseed meal or chia egg as a binder. Adjust cheese choices or omit them entirely for a lighter version!

Stuffed Italian Meatloaf

Savory Stuffed Italian Meatloaf Packed with Cheesy Goodness

Discover the secret behind Stuffed Italian Meatloaf, a comforting dish filled with gooey mozzarella and savory ingredients.
Print Recipe Pin Recipe
Prep Time 20 minutes mins
Cook Time 1 hour hr
Resting Time 20 minutes mins
Total Time 1 hour hr 40 minutes mins
Servings: 6 slices
Course: Dinner
Cuisine: Italian
Calories: 350
Ingredients Equipment Method Nutrition Notes

Ingredients
  

For the Meatloaf
  • 2 lbs Ground Beef Consider a beef-pork blend for extra depth.
  • 1 cup Breadcrumbs Gluten-free breadcrumbs work for gluten-free option.
  • 1/2 cup Parmesan Cheese Pecorino Romano can be used as a substitute.
  • 1/4 cup Fresh Parsley
  • 1/4 cup Fresh Basil Use one-third the amount if using dried.
  • 1 medium Onion Shallots can be used for a milder taste.
  • 3 cloves Garlic Adjust based on your garlic love.
  • 2 large Eggs Flaxseed meal or a chia egg can be used for a vegan alternative.
  • 1 cup Marinara Sauce Homemade or store-bought versions are great.
  • 1 tbsp Italian Seasoning Mix fresh oregano and thyme as a substitute.
  • to taste Salt
  • to taste Pepper
For the Cheesy Center
  • 1 cup Mozzarella Cheese Provolone can be used as an alternative.
  • optional Slices of Pepperoni or Prosciutto Omit for a lighter touch.

Equipment

  • Oven
  • Skillet
  • Mixing Bowl
  • Baking Sheet
  • Parchment Paper

Method
 

Instructions
  1. Preheat the oven to 350°F (175°C) and line a baking sheet with parchment paper.
  2. In a skillet over medium heat, add olive oil and sauté chopped onions and minced garlic for about 5 minutes until translucent.
  3. In a large mixing bowl, combine ground beef, breadcrumbs, Parmesan cheese, and sautéed onion and garlic. Add parsley, basil, eggs, marinara sauce, Italian seasoning, salt, and pepper. Mix gently.
  4. Shape the mixture into a rectangle about 1 inch thick on parchment paper.
  5. Spread mozzarella cheese and optional slices of pepperoni or prosciutto across the center.
  6. Roll the meat mixture tightly using the parchment paper, encasing the fillings.
  7. Place the rolled meatloaf seam-side down on the prepared baking sheet.
  8. Pour marinara sauce over the top and bake for about 60 minutes or until the internal temperature reaches 160°F (70°C).
  9. Let the meatloaf rest for 15-20 minutes before slicing.

Nutrition

Serving: 1sliceCalories: 350kcalCarbohydrates: 20gProtein: 25gFat: 18gSaturated Fat: 8gPolyunsaturated Fat: 2gMonounsaturated Fat: 7gCholesterol: 100mgSodium: 800mgPotassium: 450mgFiber: 2gSugar: 3gVitamin A: 500IUVitamin C: 2mgCalcium: 150mgIron: 3mg

Notes

Gently mix ingredients to avoid a dense texture. Use a meat thermometer for perfect results.

Tried this recipe?

Let us know how it was!
  • « Previous Page
  • 1
  • …
  • 39
  • 40
  • 41
  • 42
  • 43
  • …
  • 179
  • Next Page »

Welcome!

Hi, I’m Grace, a Sydney-based home cook with a passion for bold flavors and trending ingredients. Whether you’re a busy beginner or a seasoned foodie, you’ll find dishes here that are fresh, fun, and full of flavor.

More about me

Popular Recipes

  • Cheesy Chicken Garlic Bread Sandwich
    Cheesy Chicken Garlic Bread Sandwich for Cozy Family Moments
  • Easy Chicken Ranch Wraps
    Easy Chicken Ranch Wraps: Quick, Creamy & Totally Satisfying
  • Chicken Caesar Sandwiches
    Delicious Chicken Caesar Sandwiches for Quick Comfort Food
  • best Cuban sandwich
    The Best Cuban Sandwich You’ll Want Every Weeknight!

Footer

↑ back to top

About

  • Privacy Policy
  • Disclaimer
  • Terms & Conditions

Newsletter

  • Sign Up! for emails and updates

Contact

  • About me
  • Contact me

Copyright © 2025 TastyTrendIngredients