tastytrendingredients

  • Home
  • Recipes
    • Appetizers
    • Breakfast
    • Dessert
    • Dinner
    • Drinks
    • Salads
    • Snacks
    • Soups
  • About me
  • Contact
menu icon
go to homepage
  • Home
  • Recipes
    • Appetizers
    • Breakfast
    • Dessert
    • Dinner
    • Drinks
    • Salads
    • Snacks
    • Soups
  • About me
  • Contact
search icon
Homepage link
  • Home
  • Recipes
    • Appetizers
    • Breakfast
    • Dessert
    • Dinner
    • Drinks
    • Salads
    • Snacks
    • Soups
  • About me
  • Contact
×

Hearty Philly Cheese Steak Soup: Comfort in Every Spoonful

October 30, 2025 by Grace Snow Leave a Comment

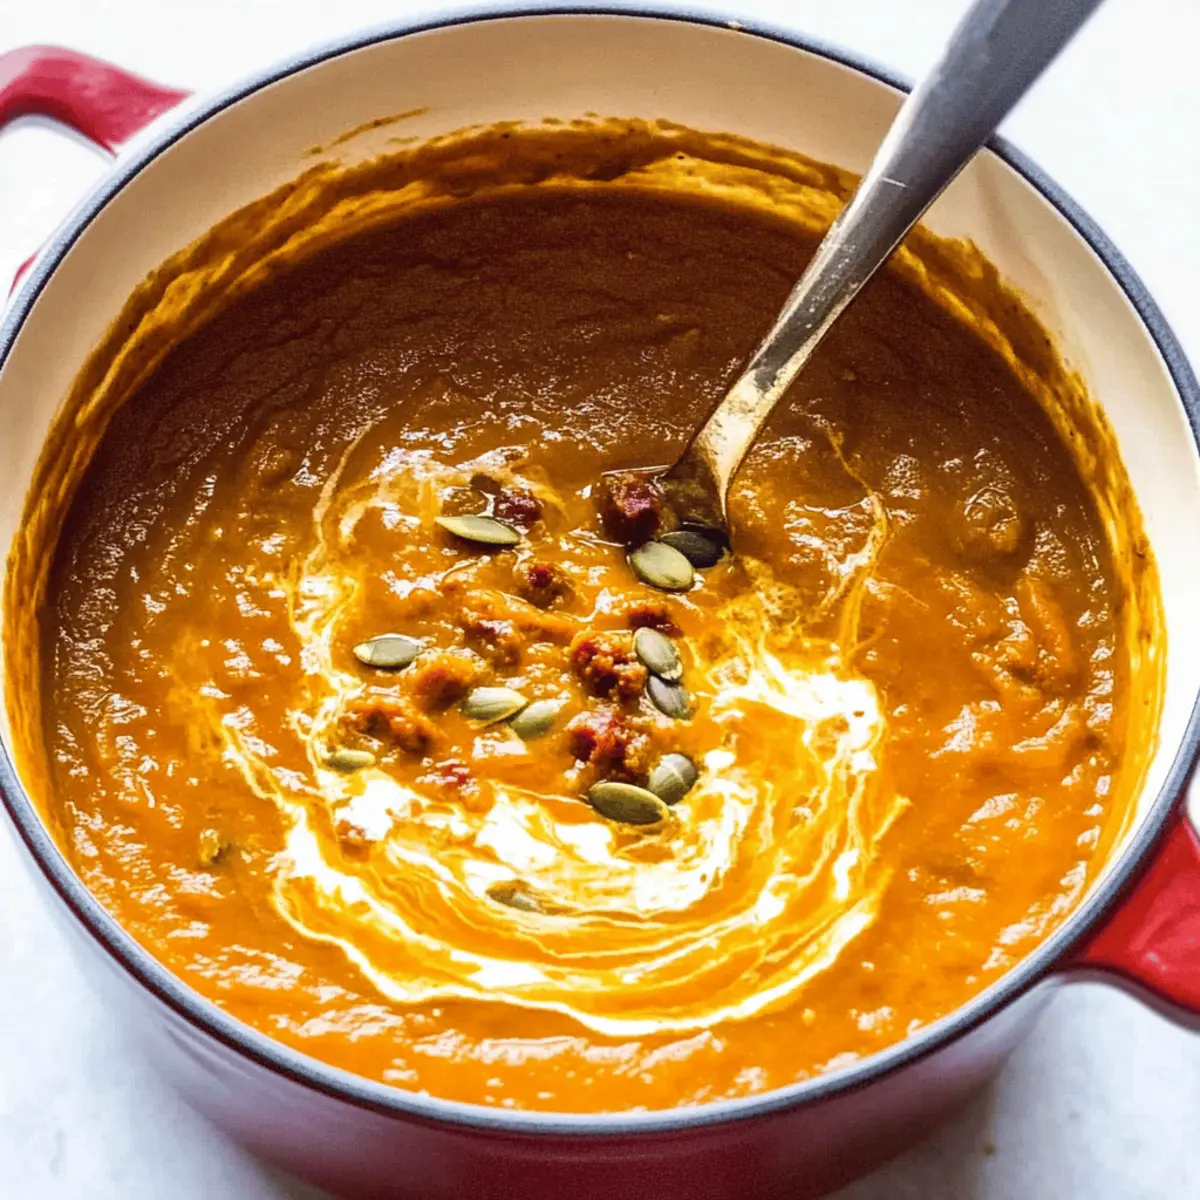
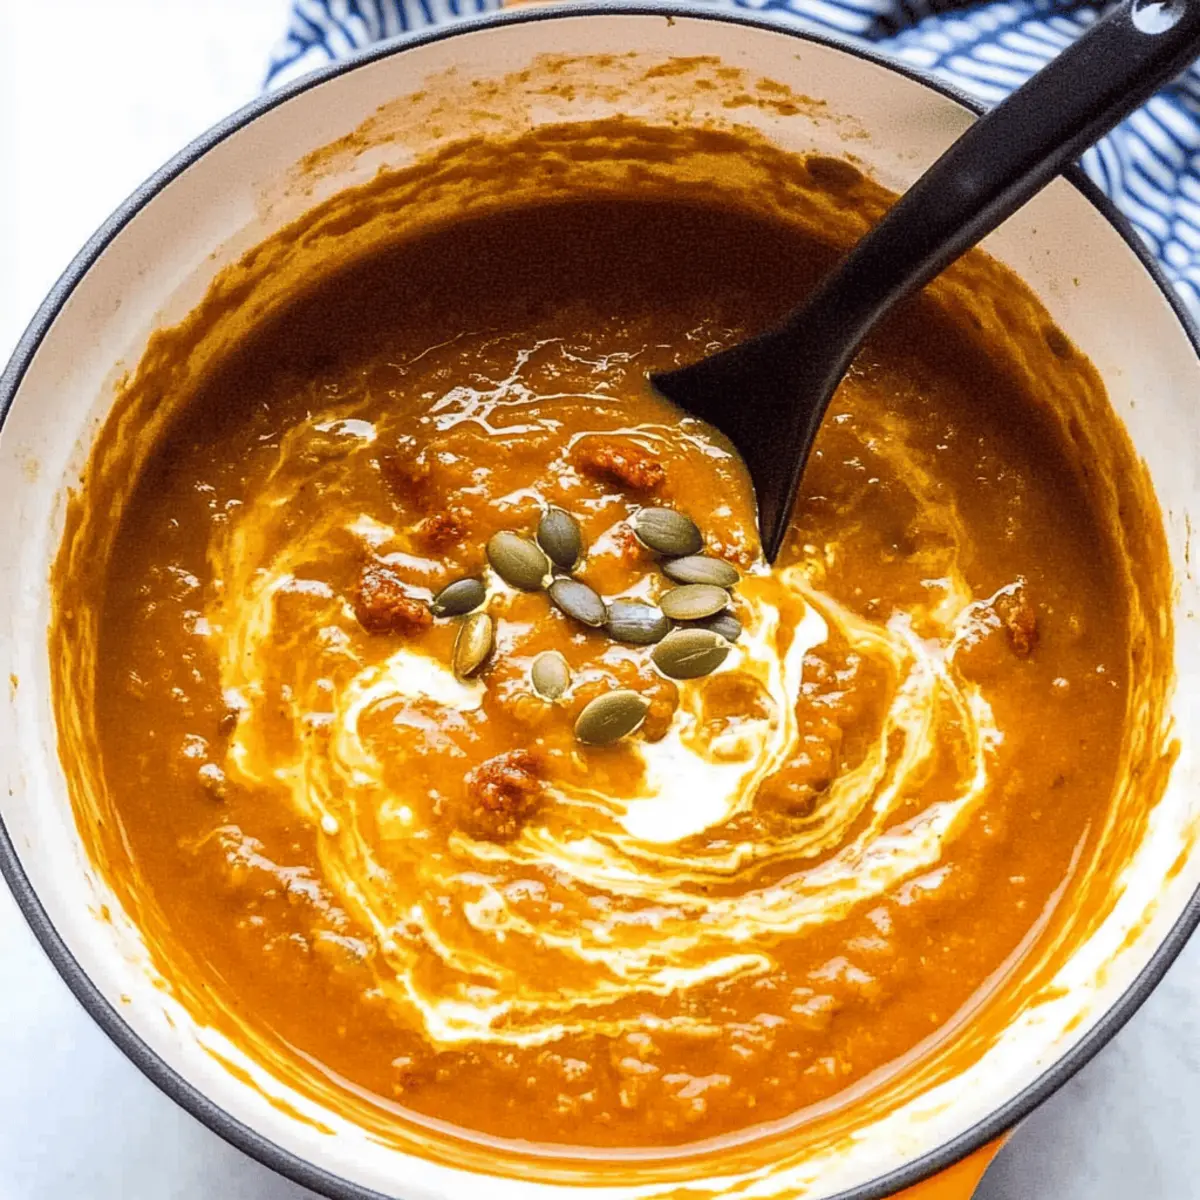
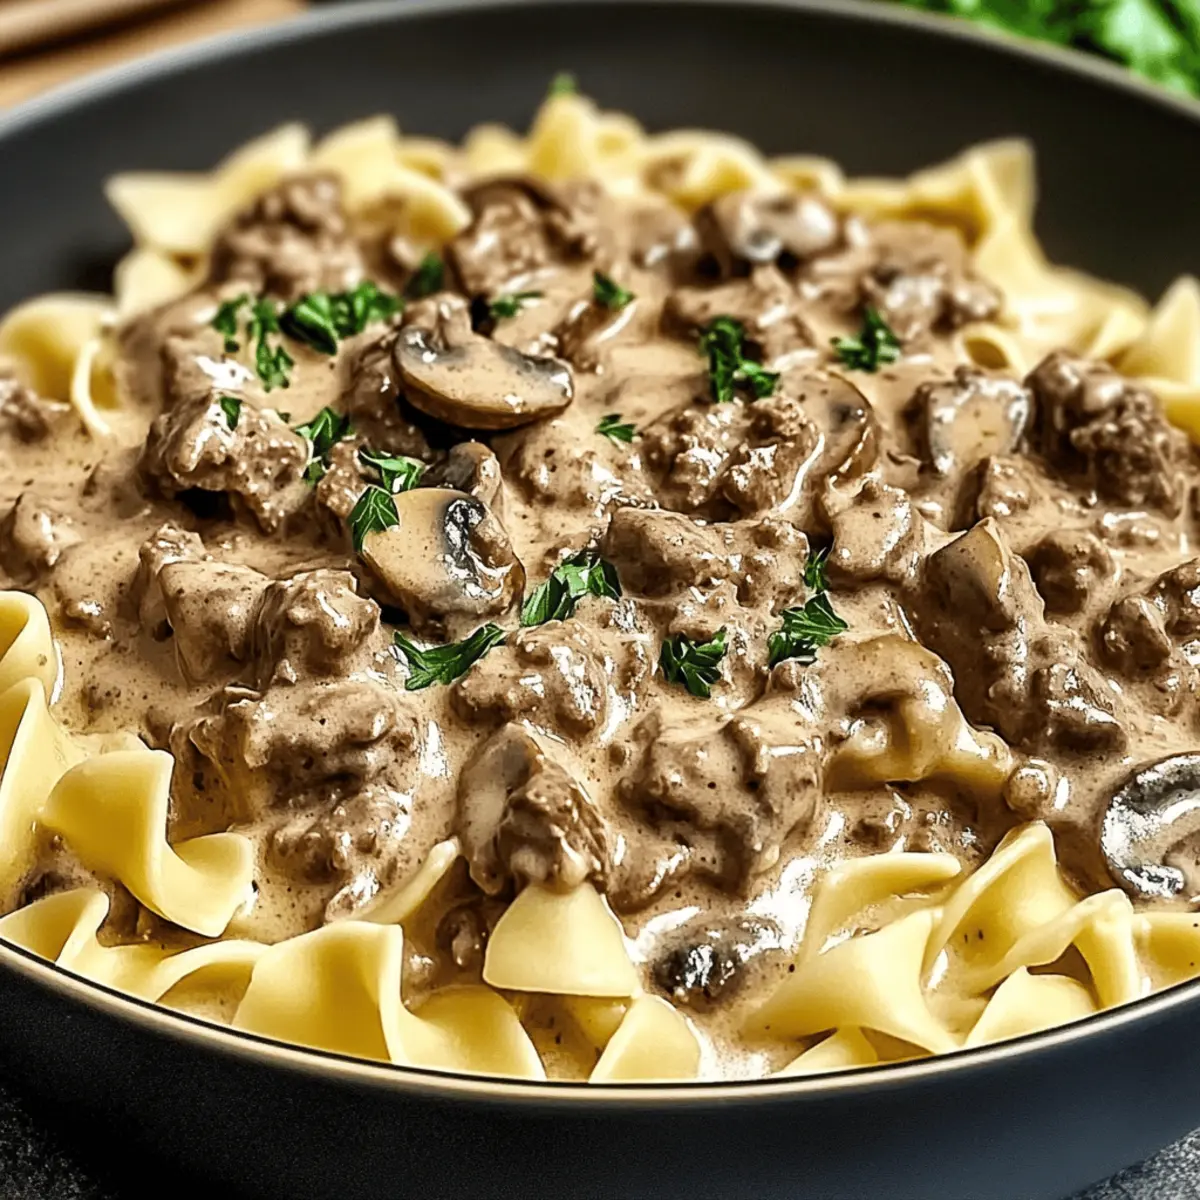
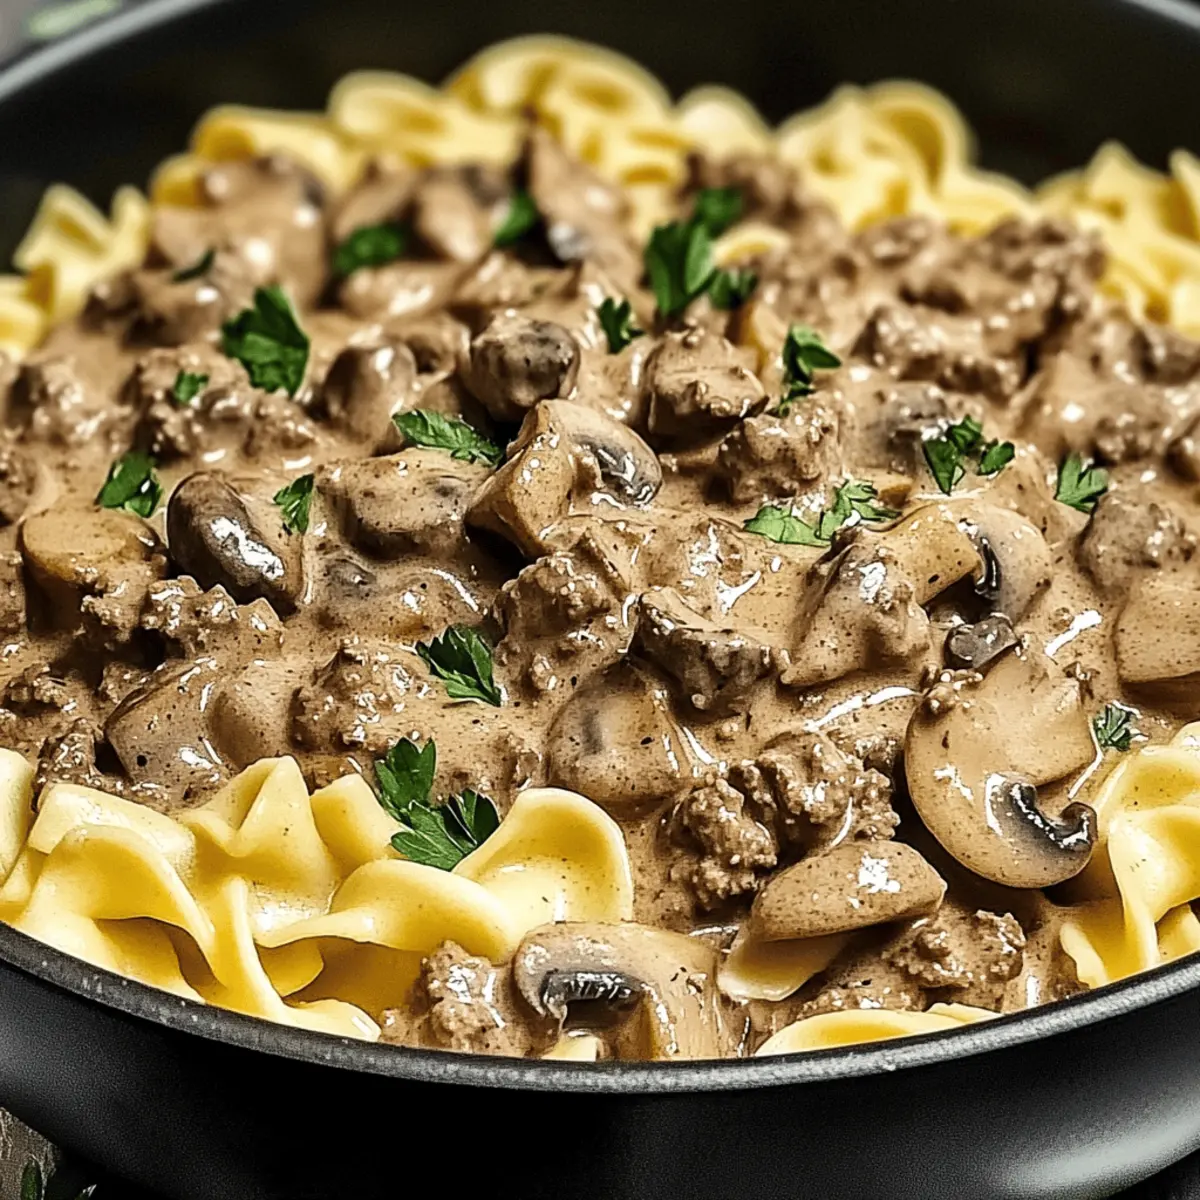
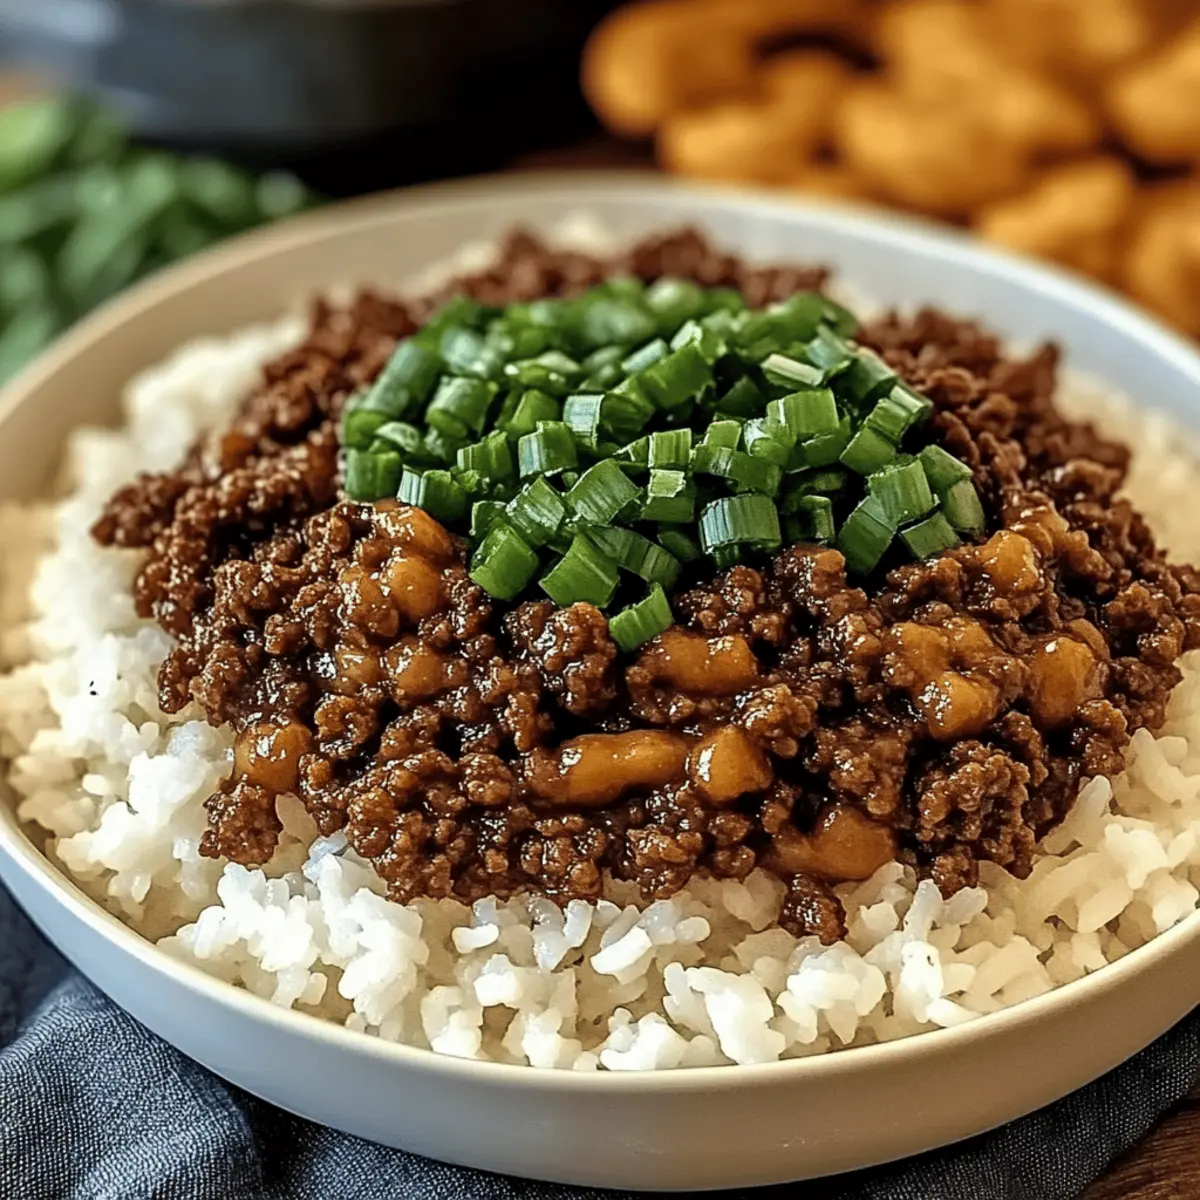
As the aroma of sizzling beef fills the kitchen, I can’t help but feel a rush of comfort that only a hearty bowl of Creamy Philly Cheese Steak Soup can bring. This savory sensation beautifully marries the classic flavors of the beloved cheesesteak into an easy-to-make soup that’s perfect for those chilly evenings. With tender beef, velvety provolone, and bright vegetables, this dish not only warms the soul but is also quick to prepare—making it ideal for busy weeknights or casual gatherings with friends and family. Plus, it offers versatile substitutions for your dietary needs, ensuring everyone can indulge in this cozy treat. Curious to see how you can make this creamy delight sing with your own twist? Let’s dive in!

Why is This Soup a Must-Try?

Comforting Warmth: Each bowl of this Philly Cheese Steak Soup envelops you with rich flavors and a creamy texture that feels like a warm hug on a cold day.

Versatile Ingredients: With simple swaps like ribeye for sirloin or vegetable broth for a lighter option, you can easily customize this dish to suit your preferences.

Family-Friendliness: Perfect for families, this recipe can bring everyone together for a cozy meal. Consider pairing it with some crusty bread or a refreshing side salad like Santa Soup Savory for a complete dining experience!

Time-Saving Delight: Whipping up this hearty soup can be done in under 30 minutes, making it an ideal choice for those busy weeknights when you want something nourishing without spending hours in the kitchen.

Nutritional Balance: Each serving packs a punch with 35 grams of protein, offering a hearty and satisfying meal that helps keep your energy up while staying mindful of health. Enjoy comfort food without the guilt!

Philly Cheese Steak Soup Ingredients

For the Soup Base
• Beef Sirloin – The primary protein source, giving depth and flavor; ribeye or flank steak can substitute for a richer bite.
• Olive Oil – Used for sautéing, adding richness; can be replaced with butter for a different flavor profile.
• Onion – Brings sweetness and depth; shallots work well as a milder alternative.
• Green Bell Pepper – Offers crunch and color, packed with vitamin C; feel free to swap in red or yellow peppers for a sweeter taste.
• Garlic – Enhances the overall flavor with its aromatic quality; minced garlic or garlic powder can be used if needed.

For the Creamy Finish
• Beef Broth – The base providing umami richness; a lighter option would be using vegetable broth.
• Heavy Cream – Creates a smooth, velvety texture; substitute with half-and-half or whole milk to cut down on fat.
• Provolone Cheese – Melts beautifully into the soup for a creamy finish; try mozzarella or mild cheddar for a different cheese twist.

Seasonings
• Salt – Essential for enhancing flavors; season to taste.
• Pepper – Adds necessary spice; fresh cracked pepper elevates this comfort dish even more.

Now that you have all the ingredients ready, it’s time to create a bowl of warmth and comfort with this Philly Cheese Steak Soup!

Step‑by‑Step Instructions for Philly Cheese Steak Soup

Step 1: Sear the Beef
In a large pot, heat 2 tablespoons of olive oil over medium heat. Once shimmering, add 1 pound of sliced beef sirloin and sear until browned, about 5-7 minutes. Ensure the beef is well-coated with oil for even cooking. Remove the beef from the pot and set it aside on a plate, allowing the flavors to develop in the fond left behind.

Step 2: Sauté the Vegetables
In the same pot, add the chopped onion and green bell pepper, stirring to combine. Sauté for 3-5 minutes until the vegetables are tender and the onion is translucent. Add 2 cloves of minced garlic, cooking for an additional minute until fragrant. This step builds the foundation of flavor for your Philly Cheese Steak Soup.

Step 3: Combine Ingredients
Return the seared beef to the pot with the sautéed vegetables. Pour in 4 cups of beef broth, scraping up any browned bits from the bottom of the pot for extra flavor. Bring the mixture to a simmer over medium heat, letting it cook for 15 minutes. This simmering time allows the ingredients to meld beautifully, creating a hearty soup base.

Step 4: Add Cream and Cheese
Lower the heat and stir in 1 cup of heavy cream, combined with 1 cup of shredded provolone cheese. Stir gently until the cheese is melted and incorporated into the soup, about 5 minutes. The mixture should be creamy and smooth, showcasing the rich comfort of the Philly Cheese Steak Soup.

Step 5: Season to Taste
Taste the soup and add salt and pepper as needed to enhance the flavors. If desired, sprinkle in some crushed red pepper flakes for a bit of heat. Once seasoned, allow the soup to heat through for another 2-3 minutes over low heat. This final touch ensures your flavorful Philly Cheese Steak Soup is ready to be enjoyed.

Make Ahead Options

Preparing your Philly Cheese Steak Soup in advance is a fantastic option for busy weeknights! You can chop the vegetables (onion, bell pepper, and garlic) and store them in an airtight container in the refrigerator for up to 3 days. Additionally, you can slice the beef sirloin and season it, keeping it in the fridge overnight to infuse flavors. When you’re ready to cook, simply sauté the prepped veggies, add the beef and broth, and then stir in the cream and cheese—everything comes together seamlessly! This meal prep not only saves you time but ensures that your soup is just as delicious, allowing you to enjoy a cozy dish without the hassle.

Expert Tips for Philly Cheese Steak Soup

  • Choose Quality Meat: Use good-quality beef sirloin for a tender and flavorful soup; tough cuts will alter the texture negatively.
  • Avoid Overcooking: Take care not to overcook the vegetables; aim for tender yet crisp bell peppers to add great texture to your Philly Cheese Steak Soup.
  • Whisking Cream: When adding heavy cream, whisk it gently into the soup to prevent curdling and ensure a smooth consistency throughout.
  • Herb Garnish: Fresh herbs like parsley or chives sprinkled on top not only enhance the presentation but also add a fresh flavor contrast.
  • Thickening Tip: For a thicker soup, consider using a cornstarch slurry; add it gradually and stir until reaching your desired consistency.
  • Taste as You Go: Make sure to regularly taste and adjust seasoning while cooking; this helps you create the perfect balance of flavors in your soup.

How to Store and Freeze Philly Cheese Steak Soup

Fridge: Store your Philly Cheese Steak Soup in an airtight container for up to 3 days. Allow it to cool completely before sealing to maintain freshness.

Freezer: Since the soup contains cream, it's not recommended to freeze it as it may separate upon thawing. Instead, enjoy freshly made or refrigerated portions for the best taste.

Reheating: When you're ready to enjoy leftovers, gently reheat the soup on the stove over low heat until warmed through. Stir occasionally to maintain the creamy texture.

Make-Ahead Tip: If you want to prep in advance, consider making the soup up to the point of adding cream and cheese; add these right before serving for optimal creaminess.

Variations & Substitutions for Philly Cheese Steak Soup

Feel free to explore these delightful twists to make your Philly Cheese Steak Soup uniquely yours!

  • Ribeye Alternative: Opt for ribeye for even richer flavor and tenderness. Its marbling adds an indulgent quality that’s simply irresistible.

  • Vegetarian Delight: Swap the beef for sautéed mushrooms and use vegetable broth. This creates a savory option that nourishes without meat.

  • Lighter Option: Replace heavy cream with half-and-half for a lighter texture without sacrificing creaminess. Your soup will still be just as indulgent!

  • Gluten-Free Goodness: Ensure your beef broth is gluten-free and serve with gluten-free bread for a comforting meal that everyone can enjoy.

  • Cheese Swap: Use mozzarella or even a sprinkle of blue cheese for a bold twist. The different cheeses can dramatically change the flavor profile of your soup!

  • Extra Veggies: Want to sneak in more nutrition? Toss in some spinach or kale towards the end for added color and health benefits.

  • Kick It Up a Notch: Add crushed red pepper flakes or a dash of hot sauce for some exciting heat! It elevates the whole experience and is perfect for spice lovers.

  • Potato Boost: For an even heartier soup, add diced potatoes while simmering. They’ll create a thicker, more filling base that comforts on a chilly day.

As you enhance your soup, consider pairing it with a side of Potato Blue Cheese or a refreshing bowl of Asparagus Soup Healthy for a balanced experience that's sure to delight your family and friends!

What to Serve with Creamy Philly Cheese Steak Soup

Serve this delightful soup along with complementary dishes for a complete, heartwarming meal.

  • Crusty Bread: Perfect for dipping, fresh-baked bread will absorb the rich broth and enhance the meal’s comforting feel.

  • Mixed Green Salad: A light salad with a tangy vinaigrette balances the creamy soup, providing freshness and crunch. It's a delightful contrast to the warmth of the soup.

  • Garlic Parmesan Breadsticks: These cheesy, buttery sticks add a savory touch, making each bite even more indulgent. They are ideal for mopping up the soup!

  • Roasted Vegetables: Opt for seasonal veggies like carrots and brussels sprouts, tossed in olive oil and roasted to perfection. Their earthy flavor will add depth next to the soup.

  • Cheesy Cauliflower Rice: This low-carb side is creamy and absorbs flavors beautifully; it pairs well with the hearty meatiness of the soup.

  • Sparkling Water with Lemon: For a refreshing beverage, try sparkling water with a splash of lemon juice. Its brightness cuts through the richness of the soup perfectly.

Combining these elements will not only create a delightful dining experience but will also keep your belly happy and content on cooler nights!

Philly Cheese Steak Soup Recipe FAQs

What type of beef is best for Philly Cheese Steak Soup?
Absolutely! I recommend using beef sirloin for a tender and flavorful base. If you want to try something a little richer, ribeye or flank steak can also bring delightful juiciness to your soup. Make sure the beef is well-marbled for the most flavor!

How do I store leftovers of the Philly Cheese Steak Soup?
You can store your Philly Cheese Steak Soup in an airtight container in the fridge for up to 3 days. Let the soup cool completely before sealing it, as this helps maintain freshness. When you’re ready to enjoy a warm bowl again, simply reheat it gently on the stove over low heat.

Can I freeze Philly Cheese Steak Soup?
I typically advise against freezing this soup due to the heavy cream. Freezing can cause the cream to separate and change texture when thawed. Instead, enjoy the soup freshly made or refrigerate any leftovers.

What if my soup is too thick?
If your soup turns out thicker than desired, you can thin it out by adding a little more beef broth or water. Start with 1/4 cup and stir it into the soup until you reach your desired consistency. Just be sure to reheat it gently so the flavors blend well.

Is this recipe suitable for gluten-free diets?
Yes, it can be made gluten-free! Just ensure that the beef broth you use is certified gluten-free and serve it with gluten-free bread if you're looking for a perfect pairing. Additionally, always double-check ingredients to avoid any hidden gluten sources.

How do I know when the vegetables are perfectly cooked?
You’ll want the vegetables to be tender but still have a slight crunch. Sauté the onions and bell peppers for about 3-5 minutes until the onions are translucent—this way, they preserve their flavor and texture while complementing the rich broth of your Philly Cheese Steak Soup!

Philly Cheese Steak Soup

Hearty Philly Cheese Steak Soup: Comfort in Every Spoonful

Experience comforting warmth with this Philly Cheese Steak Soup, a hearty and creamy dish perfect for chilly evenings.
Print Recipe Pin Recipe
Prep Time 10 minutes mins
Cook Time 20 minutes mins
Total Time 30 minutes mins
Servings: 6 bowls
Course: Soups
Cuisine: American
Calories: 450
Ingredients Equipment Method Nutrition Notes

Ingredients
  

For the Soup Base
  • 1 lb Beef Sirloin or ribeye/flank steak for richer taste
  • 2 tbsp Olive Oil can substitute with butter
  • 1 medium Onion or shallots for a milder flavor
  • 1 medium Green Bell Pepper can substitute with red or yellow peppers
  • 2 cloves Garlic minced
For the Creamy Finish
  • 4 cups Beef Broth or vegetable broth for a lighter option
  • 1 cup Heavy Cream can substitute with half-and-half or whole milk
  • 1 cup Provolone Cheese or mozzarella/mild cheddar
Seasonings
  • to taste Salt
  • to taste Pepper fresh cracked preferred

Equipment

  • Large pot

Method
 

Step-by-Step Instructions
  1. In a large pot, heat 2 tablespoons of olive oil over medium heat. Add the sliced beef sirloin and sear until browned for 5-7 minutes. Remove beef and set aside.
  2. In the same pot, add the chopped onion and green bell pepper. Sauté for 3-5 minutes until tender, add 2 cloves of minced garlic, and cook for an additional minute.
  3. Return the seared beef to the pot and pour in 4 cups of beef broth. Bring to a simmer over medium heat and cook for 15 minutes.
  4. Lower the heat, stir in 1 cup of heavy cream and 1 cup of shredded provolone cheese until melted.
  5. Taste the soup and add salt and pepper as needed. Heat through for another 2-3 minutes before serving.

Nutrition

Serving: 1bowlCalories: 450kcalCarbohydrates: 10gProtein: 35gFat: 30gSaturated Fat: 15gCholesterol: 100mgSodium: 900mgPotassium: 800mgFiber: 1gSugar: 2gVitamin A: 500IUVitamin C: 60mgCalcium: 200mgIron: 3mg

Notes

Pairs beautifully with crusty bread or a side salad. For a thicker consistency, consider using a cornstarch slurry.

Tried this recipe?

Let us know how it was!

Hearty Dublin Coddle: A Warm Hug in a Bowl

October 30, 2025 by Grace Snow Leave a Comment

If there’s one dish that feels like a warm hug on a chilly evening, it’s Dublin Coddle. This traditional Irish dish is a delightful one-pot meal, rich with the smoky essence of sausages and bacon, complemented by tender potatoes and sweet onions. As winter settles in or festive gatherings arise, nothing beats the comfort of a hearty Dublin Coddle to bring friends and family together. Not only is it easy to prepare, but its filling nature makes it a go-to for cozy nights in. Plus, the recipe offers plenty of room for creativity; from swapping in different sausages to adding your favorite vegetables like leeks or parsnips, you can truly make it your own. Curious to dive into the flavors of Ireland? Let’s get cooking!

Why is Dublin Coddle So Irresistible?

Simplicity: With just a few ingredients, this one-pot meal is as easy to make as it is enjoyable. Perfect for both novice cooks and seasoned chefs!

Heartwarming Flavor: The combination of smoky bacon and savory sausages creates a rich taste that warms you up from the inside out, making it an ideal recipe for chilly evenings.

Versatile: Swap out ingredients to customize your dish—try different types of sausages or add seasonal vegetables like parsnips for a personal touch that keeps mealtime exciting.

Nostalgic Comfort: Dublin Coddle is steeped in Irish history and brings a touch of tradition to your table, offering a hearty dish cherished by many families for generations.

Make-Ahead Marvel: This dish keeps beautifully in the fridge, and its flavors only deepen with time, making it a perfect dish for meal prep. Just reheat and enjoy!

Dublin Coddle Ingredients

For the Stew
• Irish Sausages – Primary protein that adds richness and flavor to the broth; substitute with beef or chicken sausages for variation.
• Smoked Bacon – Provides essential smokiness and depth; use unsmoked bacon if a milder taste is desired.
• Onions – Adds sweetness and aromatics to the dish; yellow onions are recommended, while shallots offer a sweeter profile.
• Potatoes – The main carbohydrate that absorbs flavors from the broth; opt for waxy potatoes for creaminess, avoiding starchy varieties.
• Carrots (optional) – Adds sweetness and texture; can be replaced with parsnips for an earthy flavor.

For the Broth
• Beer or White Wine (optional) – Enhances the broth's depth for even more richness; non-alcoholic beer can be used for a similar effect.
• Salt and Pepper – Essential for seasoning; adjust based on the saltiness of bacon and sausages.

Step‑by‑Step Instructions for Dublin Coddle

Step 1: Prepare the Ingredients
Begin by slicing the Irish sausages and smoked bacon into bite-sized pieces, roughly 1-inch thick. Chop the onions and peel the potatoes before cutting them into evenly sized chunks. If using, slice the carrots as well. Gather all your ingredients together, ensuring everything is prepped for a smooth cooking process.

Step 2: Layer the Pot
In a large pot or Dutch oven, layer the sliced sausages, bacon, onions, and potatoes. If you’re adding carrots or any other vegetables, include them now for extra flavor and texture. Arrange everything in the pot so that the ingredients are well-distributed and ready to soak up the savory broth as they cook.

Step 3: Add the Broth
Pour enough water or broth into the pot to cover the layered ingredients by at least an inch. For a richer flavor profile, you can optionally add beer or white wine at this stage. Gently stir the mixture to combine everything, but be careful not to break the potatoes as you want them to maintain their integrity while cooking.

Step 4: Season the Dish
Sprinkle a generous amount of salt and pepper over the contents of the pot, adjusting according to your taste preference. Remember that the bacon and sausages provide saltiness, so keep that in mind as you season. Stir lightly to incorporate the seasoning, ensuring every layer has the opportunity to absorb the flavors.

Step 5: Bring to a Simmer
Set the pot over medium heat and bring the mixture to a gentle simmer. Once bubbles begin to rise, reduce the heat to low and cover the pot with a lid. Allow the Dublin Coddle to simmer gently for about one hour, occasionally checking to ensure it doesn’t boil, as you want a steady, soothing simmer for optimal flavor melding.

Step 6: Check for Doneness
After an hour, carefully lift the lid and check the potatoes with a fork; they should be tender but firm enough to hold their shape. If everything is cooked through, give it a gentle stir, ensuring no ingredients have stuck to the bottom. Taste the broth and adjust the seasoning if necessary for a perfect blend of flavors.

Step 7: Serve the Coddle
Once done, ladle the hearty Dublin Coddle into bowls, ensuring each serving has a mix of sausage, bacon, and potatoes. Pair this comforting dish with thick slices of Irish soda bread or crusty brown bread for a perfect complement that soaks up the flavorful broth. Enjoy this traditional Irish meal warm and cozy!

Make Ahead Options

Dublin Coddle is a fantastic choice for meal prep enthusiasts, allowing you to savor its rich flavors without a last-minute rush! You can slice the sausages, bacon, onions, and potatoes up to 24 hours in advance; simply store them in an airtight container in the refrigerator to maintain their freshness. If you'd like, you can also layer the ingredients in your pot and refrigerate them overnight, ensuring they’re ready to simmer when you need them. When it's time to cook, just add the broth and seasonings, then bring to a simmer. This way, you’ll have a comforting, delicious Dublin Coddle ready with minimal effort on busy weeknights!

Dublin Coddle Variations & Substitutions

Embrace your creativity with these delightful twists on the classic Dublin Coddle, perfect for personalizing your dish!

  • Sausage Swap: Try chicken or turkey sausage for a lighter flavor that still delivers on heartiness. Or, for a vegetarian option, use plant-based sausages to enjoy this comfort dish without meat.

  • Veggie Boost: Adding leeks or celery introduces fresh flavors. They bring a subtle crunch and enhance the dish's aromatic profile, creating an even deeper connection to the earthiness of a traditional Irish meal.

  • Root Veggies: Replace carrots with parsnips or sweet potatoes for a touch of sweetness and extra texture. These veggies complement the smoky flavors beautifully while offering a delightful twist.

  • Heat It Up: Add a pinch of red pepper flakes or diced jalapeños for a spicy kick. This brings an exciting depth of flavor that warms you from the inside out, perfect for those who love a zesty surprise.

  • Beer Boost: While the traditional recipe may include beer, consider using a dark stout for richer flavor. It enhances the broth's complexity, providing a luxurious mouthfeel that echoes Irish heritage.

  • Fresh Herbs: Stir in freshly chopped parsley or thyme at the end to brighten up the dish. This not only adds color but also creates a fragrant aroma that elevates each serving to new heights.

  • Mushroom Medley: Incorporate sliced mushrooms for an umami boost. They bring an earthy richness and pair wonderfully with the sausages, making every bite more satisfying.

  • Savory Spice: Sprinkle in some mustard powder or smoked paprika for added depth. These spices infuse the dish with warmth and personality without overpowering the classic flavors.

So go ahead, let your imagination run wild while crafting your perfect bowl of Dublin Coddle! The traditional Irish charm awaits, and with each variation, you’re sure to bring a cozy piece of Ireland into your home. If you're thinking about adding more delightful sides or drink pairings, check out our suggestions like Irish Soda Bread or classic Irish stouts.

Expert Tips for Dublin Coddle

  • Simmer Long Enough: Let your Dublin Coddle simmer for a full hour; this allows the flavors to meld beautifully, creating that deep, hearty taste.

  • Gentle Stirring: Stir gently to avoid breaking the potatoes. You want them tender yet intact to absorb the rich broth.

  • Season to Taste: Taste your broth before serving; adjust salt and pepper based on the saltiness of your sausages and bacon for the best flavor.

  • Veggie Variations: Feel free to add leeks or parsnips for a twist on this comforting dish. Just remember to cut them uniform for even cooking.

  • Make Ahead: This dish tastes even better the next day! Prepare it in advance and let the flavors develop overnight for a truly satisfying meal.

What to Serve with Dublin Coddle

Nothing pairs better with the cozy warmth of this traditional Irish dish than simple, hearty sides that elevate the meal.

  • Irish Soda Bread: Thick slices of this soda bread are perfect for soaking up the savory broth, adding a delightful texture to every bite.

  • Steamed Greens: Lightly steamed greens like cabbage or kale bring a fresh, vibrant contrast to the rich flavors, balancing the heaviness of the stew with a burst of color.

  • Mashed Potatoes: Creamy, buttery mashed potatoes create a comforting duo with Dublin Coddle, ensuring every spoonful is a cozy experience.

  • Apple Cider: A glass of crisp, slightly sweet apple cider enhances the flavors of the dish, providing a refreshing, fruity note that complements the savory elements beautifully.

  • Colcannon: This traditional Irish dish of mashed potatoes with cabbage brings a hint of familiarity and complements the coddle's hearty essence perfectly.

  • Parsnip Chips: Crispy, roasted parsnip chips offer a light crunch and a mildly sweet flavor that contrast nicely with the soft textures of the coddle.

  • Chocolate Guinness Cake: To finish, a slice of rich chocolate Guinness cake offers a decadent, luxurious end to the meal that celebrates Irish flavors.

  • Irish Coffee: A warm glass of Irish coffee rounds out the experience, blending robust flavors with the perfect touch of sweetness and creaminess.

How to Store and Freeze Dublin Coddle

Fridge: Store leftover Dublin Coddle in an airtight container for up to 3 days. Allow it to cool completely before sealing to retain flavor and texture.

Freezer: For longer storage, freeze the coddle in freezer-safe containers or bags for up to 3 months. Remember to portion it for easy reheating later!

Reheating: Thaw overnight in the fridge if frozen, then reheat gently on the stove over low heat until warmed through. Add a splash of broth if needed to keep it moist.

Reviving Flavor: Re-season with a touch of salt and pepper after reheating, as flavors may mellow during storage. Enjoy this comforting dish just as delicious as the first serving!

Dublin Coddle Recipe FAQs

How do I choose the best sausages for Dublin Coddle?
When selecting sausages for your Dublin Coddle, go for traditional Irish sausages for the most authentic flavor. Look for plump, fresh sausages without dark spots. If you prefer alternatives, beef or chicken sausages also work well, but keep in mind that they will change the dish's classic taste.

What is the best way to store leftover Dublin Coddle?
To store leftover Dublin Coddle, transfer it to an airtight container and refrigerate it. It should remain fresh for up to 3 days. Make sure to let it cool completely before sealing to maintain its flavors and texture. Reheating it on the stovetop is best to retain its hearty consistency.

Can I freeze Dublin Coddle? If so, how?
Absolutely! You can freeze Dublin Coddle for up to 3 months. To freeze, let the dish cool entirely, then portion it into freezer-safe containers or bags. Make sure to leave some space at the top of the bags for expansion. To reheat, thaw overnight in the fridge and warm gently in a pot, adding a splash of broth if needed.

What can I do if my potatoes disintegrate during cooking?
To avoid potatoes breaking down during cooking, choose waxy varieties, as they hold their shape better. If you've already experienced disintegration, don’t worry! You can salvage it by gently stirring the mixture and allowing it to cook for a shorter time, ensuring a more cohesive dish.

Is Dublin Coddle suitable for people with dietary restrictions?
Dublin Coddle can be easily adapted for various diets. For gluten-free options, use gluten-free sausages and check the broth ingredients. For those avoiding pork, turkey or chicken sausages work well. If cooking for pets, it’s best to avoid shared plates due to seasonings like salt and pepper that can be harmful to animals.

How can I enhance the flavors in my Dublin Coddle?
You can enhance the flavors by adding a splash of beer or white wine to the broth; this enhances richness beautifully. Also, tossing in extra seasoning or spices like mustard or fresh herbs can give your Coddle a delightful twist. After cooking, taste and adjust the seasoning, as flavors can mellow out overnight!

Dublin Coddle

Hearty Dublin Coddle: A Warm Hug in a Bowl

Dublin Coddle is a comforting traditional Irish dish, perfect for cozy nights, filled with smoky sausages, bacon, potatoes, and onions.
Print Recipe Pin Recipe
Prep Time 15 minutes mins
Cook Time 1 hour hr
Total Time 1 hour hr 15 minutes mins
Servings: 4 bowls
Course: Dinner
Cuisine: Irish
Calories: 450
Ingredients Equipment Method Nutrition Notes

Ingredients
  

For the Stew
  • 4 links Irish Sausages or beef/chicken sausages for variation
  • 200 grams Smoked Bacon or unsmoked for milder taste
  • 2 medium Onions yellow onions recommended
  • 4 medium Potatoes waxy potatoes preferred
  • 2 medium Carrots optional; can replace with parsnips
For the Broth
  • 1 cup Beer or White Wine optional; can use non-alcoholic beer
  • to taste Salt adjust according to bacon and sausage saltiness
  • to taste Pepper adjust as needed

Equipment

  • Large pot or Dutch oven

Method
 

Preparation Steps
  1. Slice the Irish sausages and smoked bacon into bite-sized pieces, roughly 1-inch thick.
  2. Chop the onions and peel the potatoes before cutting them into evenly sized chunks.
  3. If using, slice the carrots as well and gather all your ingredients.
  4. In a large pot, layer the sausages, bacon, onions, and potatoes.
  5. If adding carrots or other vegetables, include them now.
  6. Pour enough water or broth to cover the ingredients by at least an inch.
  7. Optionally add beer or white wine for richer flavor.
  8. Stir gently, being careful not to break the potatoes.
  9. Sprinkle salt and pepper over the pot, adjusting to taste.
  10. Bring to a gentle simmer over medium heat.
  11. Once simmering, reduce heat to low, cover, and simmer for about one hour.
  12. Check for tenderness of potatoes with a fork; they should hold their shape.
  13. Ladle into bowls and serve with soda or crusty brown bread.

Nutrition

Serving: 1bowlCalories: 450kcalCarbohydrates: 40gProtein: 25gFat: 20gSaturated Fat: 7gPolyunsaturated Fat: 1gMonounsaturated Fat: 12gCholesterol: 80mgSodium: 900mgPotassium: 800mgFiber: 5gSugar: 2gVitamin A: 500IUVitamin C: 15mgCalcium: 40mgIron: 3mg

Notes

This dish tastes even better the next day; prepare in advance for deeper flavors.

Tried this recipe?

Let us know how it was!

Creamy German Goulash: Cozy Comfort for Cold Nights

October 30, 2025 by Grace Snow Leave a Comment

As the first gusts of autumn chill the air, I find myself craving the kind of home-cooked magic that warms both body and soul. This is where my beloved Creamy German Goulash steps in, a hearty comfort food that effortlessly delivers rich flavors and a loving embrace on chilly evenings. Imagine tender chunks of beef swimming in a luscious, paprika-spiced sauce, all brought together with a swirl of velvety cream. What I appreciate most about this dish is not just its comforting warmth but also its surprising ease of preparation—perfect for both seasoned cooks and those just getting started. Whether you're a long-time devotee of satisfying meals or just looking for a delicious way to shake off the fast-food routine, this goulash is sure to become a cherished go-to. Are you ready to dive into a bowl of cozy goodness?

Why Choose Creamy German Goulash?

Comforting Warmth: This goulash serves as a delicious hug on cold nights, bringing together tender beef and creamy sauce.

Flavor Explosion: Rich paprika and aromatic spices make each bite a delightful experience that keeps you coming back for more.

Easy to Make: With simple ingredients and straightforward steps, anyone can whip up this masterpiece, whether you're an experienced chef or a novice.

Versatile Options: Not feeling meat? Consider mushrooms for a vegetarian twist without sacrificing flavor.

Crowd-Pleasing Appeal: Perfect for family gatherings or cozy dinners with friends, this dish is sure to impress and satisfy.

Effortlessly Delicious: Just let it simmer and transform into a hearty meal that encapsulates everything you love about homemade cooking. Try serving it with fluffy noodles or a side of crusty bread for a complete experience!

Creamy German Goulash Ingredients

For the Goulash
• Beef chuck (2 lbs) – A hearty, flavorful protein that becomes tender when simmered; for a vegetarian twist, substitute with seitan.
• Onions (2 large, chopped) – Adds sweetness and depth to the dish; opting for yellow onions works beautifully.
• Olive oil (2 tbsp) – Ideal for browning meat; vegetable oil can serve as a suitable replacement.
• Sweet paprika (2 tbsp) – The cornerstone spice that defines flavor; Hungarian paprika can enhance authenticity.
• Smoked paprika (1 tbsp) – Infuses a wonderful smoky aroma to the dish.
• Caraway seeds (1 tsp) – Adds a unique, slightly sweet flavor profile; could be omitted if unavailable.
• Marjoram (1/2 tsp) – Introduces delicate herbal notes; thyme is an excellent alternative.
• Cayenne pepper (1/4 tsp, optional) – Kick up the heat according to your preference!
• Garlic (4 cloves, minced) – Essential for aromatic depth and savory flavor.
• Tomato paste (1 tbsp) – Thickens the sauce and adds rich umami notes.
• Beef broth (1 cup) – Contributes moisture and robust flavor; use vegetable broth for a vegetarian version.
• Dry red wine (1 cup, optional) – Deepens the flavor but can be replaced with additional broth if preferred.
• Diced tomatoes (1 [14.5 oz] can, undrained) – Introduces a pop of acidity and texture.
• Red bell pepper (1, chopped) – Offers sweetness and vibrant color; can use other varieties for variety.
• Yellow bell pepper (1, chopped) – Adds more sweetness; feel free to mix colors for a beautiful presentation.
• Potatoes (1 lb, peeled and cubed) – Thick and hearty, these absorb all the wonderful flavors.
• Sour cream (1 cup) – Ensures creaminess; Greek yogurt provides a great substitute.
• All-purpose flour (2 tbsp) – Aids in thickening the goulash's sauce.
• Salt and freshly ground black pepper – Key seasonings to enhance flavors; adjust to taste.
• Fresh parsley (for garnish) – Gives a fresh touch for visual appeal.
• Noodles or Spätzle (optional for serving) – Perfect for soaking up the luscious sauce, pairing beautifully with the goulash.

This Creamy German Goulash is truly a delightful exploration of comfort food that you'll want to savor and share!

Step‑by‑Step Instructions for Creamy German Goulash

Step 1: Prepare the Beef
Begin by patting the beef chuck cubes dry with paper towels, which helps them brown better. Season the cubes generously with salt and freshly ground black pepper. In a large Dutch oven, heat 2 tablespoons of olive oil over medium-high heat until shimmering. Working in batches, add the beef cubes and brown them for about 2-3 minutes on each side until a deep golden color forms. Remove the browned beef from the pot and set aside.

Step 2: Sauté the Onions
In the same Dutch oven, add the chopped onions and sauté them for about 5-7 minutes. Stir frequently until they become soft and translucent. This step builds the aromatic base for your Creamy German Goulash. As the onions cook, scrape up any browned bits from the bottom of the pot to enhance the flavors in your dish.

Step 3: Add Aromatics and Spices
Once the onions are softened, add the minced garlic, sweet paprika, smoked paprika, caraway seeds, marjoram, and cayenne pepper. Stir constantly for about 1 minute, allowing the spices to bloom and release their fragrant aromas. This step transforms your goulash into a flavorful embrace filled with rich spices, setting the stage for the creamy sauce to come.

Step 4: Incorporate Tomato Paste
Stir in the tomato paste and cook for another minute, mixing thoroughly with the aromatic onion and spice mixture. The tomato paste adds depth to the sauce and a touch of sweetness that balances perfectly with the other spices. Continue to cook until it darkens slightly, ensuring it melds well with the other ingredients, intensifying the flavor of your Creamy German Goulash.

Step 5: Deglaze with Broth and Wine
Pour in the beef broth and dry red wine, if using, and use a wooden spoon to scrape any remaining browned bits from the pot. Bring the mixture to a gentle simmer, ensuring all flavors combine beautifully. This step creates a base for your goulash, uplifting the tender beef with a rich, comforting sauce that will envelop each bite.

Step 6: Add the Beef and Vegetables
Return the browned beef cubes to the Dutch oven, along with the undrained diced tomatoes, and both chopped red and yellow bell peppers. Stir to combine everything evenly. Bring the mixture back to a simmer before reducing the heat to low. Cover the pot and let it simmer for 2-3 hours. The long cooking time ensures the beef becomes tender and infused with the comforting flavors of the Creamy German Goulash.

Step 7: Incorporate Potatoes
After simmering, add the peeled and cubed potatoes into the pot. Stir gently so they are evenly distributed within the goulash. Cover the pot again and continue to let it simmer for an additional 30-45 minutes or until the potatoes become fork-tender. This step not only adds heartiness to the dish but also absorbs all the wonderful flavors surrounding them.

Step 8: Add Cream and Flour Mixture
In a small bowl, combine the sour cream with all-purpose flour, creating a smooth paste. Temper this mixture by gradually adding a ladleful of the hot broth from the pot, stirring constantly. This prevents the sour cream from curdling. Once tempered, stir the mixture back into the goulash, allowing it to simmer for an additional 5-10 minutes without boiling. This step adds that essential creamy texture, making your Creamy German Goulash truly dreamy.

Step 9: Final Seasoning and Serve
Taste the goulash and adjust seasoning with more salt and pepper if needed. Once satisfied, remove from heat. Serve the Creamy German Goulash hot, optionally garnished with fresh parsley for a burst of color and freshness. Traditionally, it pairs beautifully with noodles or Spätzle, perfect for soaking up that luscious sauce. Enjoy a warm, cozy bowl filled with love!

Expert Tips for Creamy German Goulash

  • Don’t Rush Browning: Ensure not to overcrowd the pot when browning beef; this allows for a proper sear, enhancing the overall flavor of your Creamy German Goulash.

  • Monitor Liquid Levels: During simmering, check the liquid level frequently. If it looks too dry, add more broth to prevent burning and ensure a luscious sauce consistency.

  • Temper the Cream: Always temper the sour cream mixture with hot broth before adding it to the goulash. This step prevents curdling and maintains that creamy texture.

  • Season Wisely: Before serving, taste and adjust seasoning. Each ingredient plays a role in flavor, so balancing salt and pepper makes all the difference for your final dish.

  • Storage Smarts: If you have leftovers, store them in the refrigerator for up to 3 days. Reheat gently, adding broth as needed to keep the sauce from thickening too much.

What to Serve with Creamy German Goulash?

As you nestle into a bowl of this cozy delight, consider adding side dishes that enhance the goulash's rich flavors for a delightful complete meal.

  • Fluffy Noodles: These tender strands soak up the luscious sauce, making every bite a blissful indulgence that beautifully complements the goulash.

  • Spätzle: This traditional German egg noodle is the perfect vehicle for your goulash’s creamy goodness, offering a delightful chew and satisfying texture.

  • Crusty Bread: A hearty slice of sourdough or a rustic baguette provides the ideal crunch to scoop up the rich goulash, rounding out your dish beautifully.

  • Green Salad: A crisp salad with a tangy vinaigrette adds freshness and brightness, balancing the rich, creamy flavors with a refreshing contrast.

  • Roasted Root Vegetables: Caramelized carrots and parsnips enhance the comforting aspect of the meal while offering earthy flavors that pair wonderfully with the robust goulash.

  • Pickled Cucumber Salad: The tangy crunch cuts through the richness of the goulash, adding a zesty, refreshing element that awakens the palate.

  • Beer or Mulled Wine: A robust lager or a warm cup of mulled wine can further elevate the meal, complementing the hearty flavors of the goulash beautifully.

  • Apple Strudel: For dessert, this classic sweet treat with its flaky crust and cinnamon-spiced apples provides a delightful finish to your satisfying meal.

Creamy German Goulash Variations

Feel free to customize your goulash to match your tastes and dietary needs with these delightful twists!

  • Vegetarian: Swap beef for hearty mushrooms or seitan to create a satisfying meat-free version.
  • Extra Veggies: Toss in diced carrots or peas for added nutrition and a pop of color.
  • Spicy Kick: Add more cayenne pepper or crushed red pepper flakes to heat things up.
  • Herb Infusion: Use fresh thyme in place of marjoram to infuse more earthiness into your goulash.
  • Creamy Twist: For a tangier flavor, replace sour cream with crème fraîche or rich Greek yogurt.
  • Wine-Free: Omit the dry red wine and increase the broth for a lighter, family-friendly version.
  • Sweet Touch: A touch of brown sugar can bring gentle sweetness that balances the spices beautifully.
  • Serving Suggestion: Over a bed of fluffy noodles or Spaetzle to soak up that luscious sauce.

Whichever variations you choose, your Creamy German Goulash will still deliver a heartwarming experience that’s perfect for those chilly nights!

Storage Tips for Creamy German Goulash

Fridge: Store leftover Creamy German Goulash in an airtight container for up to 3 days. Allow it to cool completely before sealing to maintain freshness.

Freezer: For longer storage, freeze your goulash in freezer-safe containers or bags for up to 3 months. Make sure to leave some space for expansion as it freezes.

Reheating: When ready to enjoy leftovers, reheat gently on the stove over low heat, adding a splash of broth to loosen the sauce if it has thickened.

Thawing: If frozen, thaw your Creamy German Goulash in the fridge overnight before reheating for the best texture and flavor.

Make Ahead Options

These Creamy German Goulash preparations are a lifesaver for busy weeknights! You can chop the onions, bell peppers, and potatoes up to 24 hours in advance and store them in airtight containers in the refrigerator. Additionally, you can brown the beef and combine it with the spices and tomato paste, letting the flavors meld overnight for a richer taste. When you’re ready to enjoy your goulash, simply sauté the prepped veggies, add the pre-mixed beef mixture, pour in the broth and wine, then let it simmer. Finish by adding the flour and sour cream mixture, and you'll have a comforting meal that tastes just as delicious as if you made it fresh!

Creamy German Goulash Recipe FAQs

How do I choose the right beef for goulash?
For the best results, select beef chuck, as it’s both flavorful and becomes tender with slow cooking. Look for well-marbled cuts, as the fat enhances richness. If you’re opting for a vegetarian version, seitan or mushrooms make great alternatives that maintain a hearty, satisfying texture.

What is the best way to store leftover goulash?
To keep your Creamy German Goulash fresh, store it in an airtight container in the refrigerator for up to 3 days. Allow it to cool completely before sealing. The flavors often deepen after a day in the fridge, making it even more delicious.

Can I freeze Creamy German Goulash?
Absolutely! You can freeze your goulash in freezer-safe containers for up to 3 months. Make sure to leave some space at the top of the container for expansion. When you’re ready to enjoy it, thaw it in the fridge overnight before reheating gently on the stove, adding broth to loosen the sauce if it thickens too much during freezing.

What should I do if my goulash is too thick?
If you find your Creamy German Goulash has become too thick during cooking, you can easily adjust the consistency. Add a splash of beef or vegetable broth while stirring until you reach your desired thickness. Remember to taste and adjust seasoning afterward, as adding liquid may dilute the flavors slightly.

Are there any dietary considerations for this dish?
Yes, if you have dietary restrictions, be sure to check the ingredients used. You can substitute sour cream with Greek yogurt for a healthier option, and if you're avoiding gluten, use a gluten-free flour in the cream mixture. Additionally, for those with allergies, ensure there are no cross-contaminants with the ingredients, especially when using packaged items like broth and noodles.

What’s the best way to reheat the goulash?
Reheat leftover Creamy German Goulash gently on the stove over low heat. Stir occasionally and add a splash of broth or water to loosen the sauce if needed, ensuring that it warms evenly without boiling, which can affect the texture of the cream. Enjoy your cozy meal again with newfound warmth!

Creamy German Goulash

Creamy German Goulash: Cozy Comfort for Cold Nights

Creamy German Goulash is a hearty comfort food with tender beef in a paprika-spiced sauce, perfect for cold nights.
Print Recipe Pin Recipe
Prep Time 30 minutes mins
Cook Time 3 hours hrs
Total Time 3 hours hrs 30 minutes mins
Servings: 6 servings
Course: Dinner
Cuisine: German
Calories: 450
Ingredients Equipment Method Nutrition Notes

Ingredients
  

For the Goulash
  • 2 lbs Beef chuck A hearty, flavorful protein that becomes tender when simmered; substitute with seitan for vegetarian.
  • 2 large Onions, chopped Opt for yellow onions for best results.
  • 2 tbsp Olive oil Ideal for browning meat; vegetable oil can substitute.
  • 2 tbsp Sweet paprika Cornerstone spice that defines flavor; Hungarian paprika enhances authenticity.
  • 1 tbsp Smoked paprika Infuses a wonderful smoky aroma.
  • 1 tsp Caraway seeds Adds a unique, slightly sweet flavor; can be omitted if unavailable.
  • 1/2 tsp Marjoram Introduces delicate herbal notes; thyme is an alternative.
  • 1/4 tsp Cayenne pepper Optional; adjust to taste.
  • 4 cloves Garlic, minced Essential for aromatic depth and savory flavor.
  • 1 tbsp Tomato paste Thickens the sauce and adds rich umami notes.
  • 1 cup Beef broth Contributes moisture and robust flavor; use vegetable broth for a vegetarian version.
  • 1 cup Dry red wine Optional; deepens the flavor.
  • 1 can (14.5 oz) Diced tomatoes, undrained Introduces acidity and texture.
  • 1 Red bell pepper, chopped Offers sweetness and vibrant color.
  • 1 Yellow bell pepper, chopped Adds sweetness; feel free to mix colors.
  • 1 lb Potatoes, peeled and cubed Thick and hearty, absorbs flavors.
  • 1 cup Sour cream Ensures creaminess; Greek yogurt is a good substitute.
  • 2 tbsp All-purpose flour Aids in thickening the sauce.
  • Salt and freshly ground black pepper Key seasonings to enhance flavors.
  • Fresh parsley For garnish and visual appeal.
  • Noodles or Spätzle Optional for serving; perfect for soaking up the sauce.

Equipment

  • Dutch oven

Method
 

Step-by-Step Instructions
  1. Pat the beef chuck cubes dry with paper towels, season with salt and pepper, and brown in a large Dutch oven with olive oil for 2-3 minutes on each side.
  2. Sauté the chopped onions in the same pot for 5-7 minutes until soft and translucent, scraping up browned bits.
  3. Add minced garlic, sweet paprika, smoked paprika, caraway seeds, marjoram, and cayenne pepper, and stir for 1 minute to release aromas.
  4. Stir in the tomato paste and cook for another minute until it darkens slightly.
  5. Pour in the beef broth and dry red wine, scrape browned bits, and bring to a gentle simmer.
  6. Return the browned beef, diced tomatoes, and chopped bell peppers to the pot, return to a simmer, then cover and let simmer for 2-3 hours.
  7. Add potatoes to the pot, stir gently, cover, and simmer for an additional 30-45 minutes until fork-tender.
  8. Combine sour cream and flour in a bowl, temper with hot broth, then stir back into the goulash and simmer for 5-10 minutes without boiling.
  9. Taste and adjust seasoning, then serve hot, optionally garnished with fresh parsley, alongside noodles or Spätzle.

Nutrition

Serving: 1bowlCalories: 450kcalCarbohydrates: 35gProtein: 30gFat: 20gSaturated Fat: 8gPolyunsaturated Fat: 2gMonounsaturated Fat: 10gCholesterol: 80mgSodium: 600mgPotassium: 950mgFiber: 5gSugar: 4gVitamin A: 800IUVitamin C: 25mgCalcium: 50mgIron: 4mg

Notes

Store leftovers in the refrigerator for up to 3 days or freeze for up to 3 months. Reheat gently, adding broth if needed.

Tried this recipe?

Let us know how it was!

Cozy Up with Spicy Chorizo Pumpkin Soup This Fall

October 30, 2025 by Grace Snow Leave a Comment

As the autumn leaves crunch beneath my feet and the air turns crisp, I can’t help but crave something warm and comforting. Enter my creamy spicy chorizo pumpkin soup—a perfect blend of savory chorizo, sweet pumpkin puree, and a zing of chipotle peppers that will fill your kitchen with inviting aromas. This hearty dish not only warms your soul but can be ready in just 25 minutes, making it a delightful option for busy weeknights. Plus, it’s so versatile! You can easily swap the chorizo for tofu or turkey sausage for a vegetarian or lighter meal twist. Curious how to whip up this comforting fall favorite? Let’s dive in!

Why is This Soup So Special?

Rich, Flavor-Packed Ingredients: This spicy chorizo pumpkin soup features a mouthwatering blend of savory chorizo and creamy pumpkin puree for a luxurious taste experience.

Quick and Easy: Whipping up this comforting dish takes only 25 minutes, perfect for busy weeknights when you crave a homemade meal.

Versatile Options: You can easily adapt this recipe with pork, beef, or tofu chorizo, allowing everyone to enjoy it, regardless of dietary preferences.

Perfect for Fall: With its warm flavors and vibrant colors, it captures the essence of autumn, making it the ideal companion for chilly evenings.

Crowd-Pleaser: Serve this delicious soup at your next gathering or cozy dinner, and watch it disappear faster than you can say "comfort food"! Pair with some fresh bread or sprinkle with roasted pumpkin seeds for that extra layer of flavor.

Spicy Chorizo Pumpkin Soup Ingredients

• Here’s everything you need to create this delicious soup in no time!

For the Soup Base

  • Chorizo – Provides a spicy, savory flavor that forms the hearty backbone of this soup; consider tofu chorizo for a vegetarian option.
  • Onion – Adds sweetness and depth; finely chop for even cooking to enhance the flavors.
  • Garlic – Enhances the aroma and overall flavor profile; freshly minced garlic is always best!
  • Cumin – Offers warmth and an earthy note; this spice adds depth, so adjust according to your taste.
  • Salt – Essential for flavor enhancement; remember to taste and adjust as needed.
  • Black Pepper – Adds mild heat and earthiness; increase the amount for an extra kick!
  • Broth (Chicken or Beef) – Acts as the soup’s base liquid; vegetable broth works well for a vegetarian version.
  • Chipotle Peppers – Imparts a delicious smokiness and spice; use according to your desired heat level.
  • Pumpkin Puree – The star ingredient that creates a creamy texture and sweet flavor; ensure you use pure pumpkin puree—not pie filling.
  • Cream – Adds richness to the soup; substitute with coconut cream or half-and-half for a lighter option.

Optional Garnish

  • Roasted Pumpkin Seeds – Add a delightful crunch and nutty flavor as a topping; they also look lovely for presentation!
  • Chopped Green Onions – Adds freshness and vibrant color to your hearty dish; sprinkle on top before serving.

Step‑by‑Step Instructions for Spicy Chorizo Pumpkin Soup

Step 1: Cook Chorizo
In a heavy-bottom pot over medium heat, add the chorizo, letting it simmer for about 5 minutes. Stir frequently until the chorizo is fully cooked and has released its flavorful oils, becoming nicely browned. Once cooked, drain any excess fat from the pot for a less greasy foundation.

Step 2: Sauté Onions
Next, incorporate the finely chopped onion into the pot with the cooked chorizo. Sauté for about 3-4 minutes, stirring occasionally, until the onions become soft, translucent, and fragrant. This step builds a fragrant base for your spicy chorizo pumpkin soup, enhancing its overall depth of flavor.

Step 3: Add Garlic and Spices
Now, add the freshly minced garlic along with the cumin, salt, and black pepper to the pot. Sauté everything together for an additional minute until the garlic becomes fragrant. The aromatic layers of spices and garlic will lift the flavor profile of the soup, creating a warm foundation for the next ingredients.

Step 4: Combine Ingredients
Pour in the broth (chicken or vegetable) and then add the pumpkin puree along with the chipotle peppers. Stir well to combine all ingredients fully, ensuring the pumpkin puree is smoothly blended into the mixture. The vibrant colors at this stage provide a delightful visual cue for the delicious spicy chorizo pumpkin soup you’re preparing.

Step 5: Simmer the Soup
Bring the mixture to a gentle simmer over medium-low heat, allowing it to cook for about 10 minutes. Avoid boiling; instead, let it bubble gently to meld the flavors beautifully. As time passes, a wonderful aroma will fill your kitchen, signaling that your soup is developing rich layers of taste.

Step 6: Add Cream
After simmering, stir in the cream, mixing well until it's fully incorporated into the soup. This final addition brings a luscious creaminess to your spicy chorizo pumpkin soup, making it comforting and smooth. Allow the soup to heat through for a couple of minutes, then turn off the heat.

Step 7: Serve with Garnishes
Ladle the soup into warm bowls and garnish with roasted pumpkin seeds and chopped green onions for added texture and brightness. The contrasting colors and textures enhance both the presentation and the flavor of your hearty creation. Enjoy this comforting dish as a perfect warm embrace on a chilly day!

What to Serve with Spicy Chorizo Pumpkin Soup

As you savor each spoonful of this creamy, rich soup, consider these delectable pairings that will create a cozy, heartwarming meal.

  • Crusty Artisan Bread: Perfect for dipping, this fresh and crusty bread enhances the soup's rich flavors while adding satisfying texture.

  • Garlic Breadsticks: These warm, buttery delights have a hint of garlic that'll complement the spicy notes from the soup, making each bite irresistible.

  • Mixed Green Salad: A light, refreshing salad with a tangy vinaigrette balances the soup's warmth, adding a crisp contrast that brightens your meal.

  • Cheesy Quesadillas: Serve with melty cheese and fresh herbs, these quesadillas will add a delightful cheesy indulgence that pairs beautifully with the soup’s spice.

  • Sour Cream or Greek Yogurt: A dollop of either brings a cooling creaminess that counteracts the heat, creating a perfect harmony with the soup's savory depth.

  • Craft Beer or Cider: A slightly hoppy beer or a refreshing cider not only cleanses the palate but also complements the flavors in the spicy chorizo pumpkin soup.

  • Pumpkin Spice Muffins: For a sweet finish, these warm treats echo the soup's pumpkin flavor, providing a comforting end to your autumn-inspired meal!

  • Chocolates or Brownies: Rich, fudgy brownies or spiced chocolates can add an indulgent dessert note, rounding out the cozy vibes of this comforting meal.

Make Ahead Options

Preparing this spicy chorizo pumpkin soup in advance is a game-changer for busy weeknights! You can chop the onions and mince the garlic up to 24 hours in advance, storing them in an airtight container in the refrigerator to maintain their freshness. You can also cook the chorizo and combine it with the spices and pumpkin puree up to 3 days ahead; simply refrigerate and reheat gently when ready to finish the soup. When you’re ready to serve, stir in the cream and let it heat through for a quick and comforting meal with minimum effort. By following these prep steps, you'll enjoy the same delicious flavors without a last-minute rush!

Variations & Substitutions for Spicy Chorizo Pumpkin Soup

Feel free to play around with this recipe and customize it to suit your tastes and dietary needs!

  • Tofu Chorizo: Swap chorizo for tofu chorizo for a wholesome vegetarian option. The flavors will still shine bright!
  • Turkey Sausage: Use lean turkey sausage instead of chorizo for a lighter, yet still flavorful version. It's a perfect alternative without losing that savory kick.
  • Sweet Potatoes: Replace pumpkin with sweet potatoes for a slightly sweeter twist. Roasting them beforehand enhances their natural sugars, creating a delightful depth.
  • Coconut Cream: Substitute heavy cream with coconut cream for a dairy-free, tropical flavor. It will add a new richness that perfectly complements the spices.
  • Spice Level: For a milder flavor, reduce the amount of chipotle peppers or substitute with sweet bell peppers. Adjust according to your family’s taste preferences.
  • Herb Infusion: Experiment with adding herbs like thyme or cilantro for a fresh contrast. They provide a burst of brightness and an aromatic layer that livens up the soup.
  • Broth Alternatives: Swap chicken or beef broth with vegetable broth to keep it vegetarian-friendly while still maintaining a robust flavor.
  • Finish with Lime: Squeeze fresh lime juice just before serving to add acidity and balance the soup's richness. It elevates the flavors beautifully, giving each bite a fresh zing.

With these variations, your spicy chorizo pumpkin soup can evolve with your mood and dietary needs. If you’re looking for something else to warm up your kitchen, why not try a comforting bowl of Asparagus Soup Healthy or indulge in some Pumpkin Brownies Decadent? Happy cooking!

Expert Tips for Spicy Chorizo Pumpkin Soup

  • Drain Chorizo Fat: Properly drain excess fat from the chorizo to keep the soup light and flavors balanced. Too much fat can overpower the dish.
  • Quality Pumpkin: Opt for high-quality pumpkin puree for the best taste. If using fresh pumpkin, roast it until tender, then blend until smooth.
  • Adjust Spice Levels: Modify the number of chipotle peppers based on your spice preference. Consider adding sweet bell peppers for a milder flavor.
  • Sautéing Technique: Cook the onions until they're translucent and fragrant—this builds a strong flavor base for your spicy chorizo pumpkin soup. Don’t rush this step!
  • Storage Tips: Store leftover soup in an airtight container for up to three days. Reheat gently on the stove to maintain texture and flavor.
  • Garnish Variety: Experiment with different garnishes such as croutons, feta cheese, or fresh herbs to elevate the soup and attract all taste buds!

How to Store and Freeze Spicy Chorizo Pumpkin Soup

Fridge: Store leftover spicy chorizo pumpkin soup in an airtight container for up to 3 days. This ensures freshness while retaining the delicious flavors.

Freezer: For longer storage, freeze the soup in a freezer-safe container for up to 3 months. Leave some space to allow for expansion as it freezes.

Reheating: When ready to enjoy, thaw in the fridge overnight and reheat gently on the stove over low heat, stirring occasionally until warmed through.

Enjoying Later: If you’ve made a large batch, store in smaller portions to conveniently enjoy this comforting soup at your leisure!

Spicy Chorizo Pumpkin Soup Recipe FAQs

What type of chorizo should I use for this soup?
Absolutely! You can use traditional pork or beef chorizo for a robust flavor, or swap it out for tofu chorizo if you prefer a vegetarian option. The choice you make will slightly alter the flavor profile but will still result in a delicious soup!

How long can I store leftovers of this soup?
Store your spicy chorizo pumpkin soup in an airtight container in the refrigerator for up to 3 days. This allows the flavors to continue melding together while keeping your soup fresh and tasty!

Can I freeze Spicy Chorizo Pumpkin Soup?
Yes, you can freeze this soup! Pour it into freezer-safe containers, leaving a little space for expansion, and it will last for up to 3 months in the freezer. When you're ready to enjoy it, thaw it overnight in the fridge before reheating gently on the stove.

What should I do if the soup turns out too spicy?
Very! If your soup ends up spicier than you anticipated, stir in a bit more cream to help mellow the heat. You can also dilute it with additional broth or water, and add extra pumpkin puree to restore texture while reducing the spice.

How can I make this soup dairy-free?
To achieve a creamy, dairy-free version of this spicy chorizo pumpkin soup, simply substitute the cream with coconut cream or a dairy-free milk alternative like almond or oat milk. This will provide that luxurious texture without the dairy!

What’s the best way to prepare homemade pumpkin puree for this soup?
Certainly! If you want to make your own pumpkin puree, start by selecting a sugar pumpkin. Cut it in half, remove the seeds, and roast the halves face down in a baking dish at 350°F (175°C) for about 45-60 minutes or until tender. Once cooled, scoop out the flesh and blend it until smooth. Use this puree in your soup for a fresh flavor that shines through!

Spicy Chorizo Pumpkin Soup Recipe FAQs

Spicy chorizo pumpkin soup

Cozy Up with Spicy Chorizo Pumpkin Soup This Fall

Warm up this autumn with a delicious Spicy Chorizo Pumpkin Soup made with savory chorizo, creamy pumpkin puree, and chipotle peppers.
Print Recipe Pin Recipe
Prep Time 10 minutes mins
Cook Time 15 minutes mins
Total Time 25 minutes mins
Servings: 4 bowls
Course: Soups
Cuisine: American
Calories: 350
Ingredients Equipment Method Nutrition Notes

Ingredients
  

For the Soup Base
  • 1 lb Chorizo or tofu chorizo for a vegetarian option
  • 1 medium Onion finely chopped
  • 3 cloves Garlic freshly minced
  • 1 tsp Cumin
  • 1 tsp Salt adjust to taste
  • 1/2 tsp Black Pepper adjust to taste
  • 4 cups Broth (Chicken or Vegetable)
  • 1 can Chipotle Peppers use according to desired heat level
  • 2 cups Pumpkin Puree not pie filling
  • 1 cup Cream or coconut cream for a lighter option
Optional Garnish
  • 1/2 cup Roasted Pumpkin Seeds
  • 1/4 cup Chopped Green Onions

Equipment

  • heavy-bottom pot

Method
 

Step-by-Step Instructions for Spicy Chorizo Pumpkin Soup
  1. In a heavy-bottom pot over medium heat, add the chorizo, simmer for about 5 minutes until browned. Drain excess fat.
  2. Add the finely chopped onion to the pot with the cooked chorizo. Sauté for about 3-4 minutes until soft and translucent.
  3. Add the minced garlic, cumin, salt, and black pepper. Sauté for another minute until garlic is fragrant.
  4. Pour in the broth and add pumpkin puree along with chipotle peppers. Stir to combine everything smoothly.
  5. Bring to a gentle simmer over medium-low heat for about 10 minutes to meld flavors.
  6. Stir in the cream, mix well, and heat through for a couple of minutes. Turn off heat.
  7. Ladle into bowls and garnish with roasted pumpkin seeds and chopped green onions before serving.

Nutrition

Serving: 1bowlCalories: 350kcalCarbohydrates: 25gProtein: 15gFat: 20gSaturated Fat: 10gPolyunsaturated Fat: 2gMonounsaturated Fat: 7gCholesterol: 60mgSodium: 800mgPotassium: 700mgFiber: 5gSugar: 5gVitamin A: 5000IUVitamin C: 10mgCalcium: 80mgIron: 3mg

Notes

Store leftovers in an airtight container for up to 3 days. Freezing is possible for up to 3 months.

Tried this recipe?

Let us know how it was!

Broccoli Chicken Divan Casserole That's Pure Comfort Bliss

October 29, 2025 by Grace Snow Leave a Comment

As I whisk together all the ingredients for this Broccoli Chicken Divan Casserole, I can’t help but smile at the thought of cozy evenings ahead. This comforting dish effortlessly blends tender chicken and vibrant broccoli in a creamy, cheesy sauce that warms the heart. On those busy weeknights when time is of the essence, this recipe shines with its quick prep time and the flexibility to customize ingredients to fit your family’s preferences. Whether you’re using leftover chicken, going gluten-free, or even exploring vegetarian options, there's a version for everyone at the table. So, how will you make this delicious dish your own? Let’s dive into the recipe!

Why is Broccoli Chicken Divan Casserole a Must-Try?

Comfort Food at its finest: This Broccoli Chicken Divan Casserole brings warmth and familiarity, making it perfect for family dinners.

Quick and Easy: With minimal prep time, you can have a hearty meal on the table in no time, ideal for busy weeknights.

Versatile Ingredients: Tailor this recipe to your tastes with suggestions like substituting chicken for chickpeas or using gluten-free breadcrumbs.

Flavorful Layers: Enjoy a delightful blend of cheesy goodness and vibrant veggies that everyone will love.

Crowd-Pleasing: It's a sure-fire hit with both kids and adults, perfect for gatherings or cozy nights in.

Try pairing it with a crisp side salad or crusty bread for a satisfying meal. Don't forget to check out other great chicken recipes like Honey Garlic Chicken Thighs or Crock Pot Chicken Stew for more culinary inspiration!

Broccoli Chicken Divan Casserole Ingredients

Whether you're using leftovers or fresh ingredients, prepping for this delicious dish is a breeze.

For the Casserole

  • Cooked Chicken – Use leftover or rotisserie chicken for convenience.
  • Broccoli Florets – Fresh broccoli adds color and nutrition; cauliflower can be a fun substitute.
  • Mayonnaise – Creates a creamy base, but Greek yogurt is a lighter option.
  • Sour Cream – Enhances richness; you can swap it for full-fat yogurt if needed.
  • Grated Parmesan – Infuses flavor; Romano or Pecorino cheese are great alternatives.
  • Lemon Juice – Brightens the dish beautifully; there’s no effective substitute for this ingredient.
  • Dijon Mustard – Adds a tangy kick; yellow mustard is an option but will change the flavor profile.
  • Garlic Powder & Onion Powder – Essential for seasoning; feel free to use fresh if you prefer.
  • Salt & Pepper – Basic seasoning for balance; adjust amounts to taste.
  • Shredded Cheddar Cheese – Provides a gooey topping experience; consider dairy-free cheese for a different option.
  • Breadcrumbs – Adds a delightful crunch; gluten-free breadcrumbs can maintain the dish's integrity.
  • Extra Shredded Cheddar Cheese – For an even cheesier crust, but can be excluded for a lighter dish.

Step‑by‑Step Instructions for Broccoli Chicken Divan Casserole

Step 1: Prepare Ingredients
Begin by gathering all your ingredients for the Broccoli Chicken Divan Casserole. If your chicken isn’t cooked yet, you can poach or roast it before shredding into bite-sized pieces. Meanwhile, bring a pot of water to a boil and blanch the broccoli florets for 2-3 minutes until they turn bright green, then immediately transfer them to a bowl of ice water to halt the cooking process.

Step 2: Make Sauce
In a large mixing bowl, combine mayonnaise, sour cream, grated Parmesan, lemon juice, and Dijon mustard. Use a whisk to blend these ingredients until your sauce is creamy and smooth, ensuring there are no lumps. Sprinkle in the garlic powder, onion powder, salt, and pepper to taste, mixing well to incorporate all the flavors.

Step 3: Assemble Casserole
Preheat your oven to 350°F (175°C). Grease a 9x13 inch baking dish with cooking spray or butter to prevent sticking. Start layering the casserole by placing the shredded chicken evenly at the bottom of the dish. Next, gently arrange the blanched broccoli florets on top of the chicken, preparing a solid base for your creamy sauce.

Step 4: Pour Sauce and Add Toppings
Carefully pour your prepared sauce over the layers in the baking dish, making sure to cover the chicken and broccoli evenly. This will create a luscious, creamy texture throughout the casserole. Then, sprinkle the shredded cheddar cheese and breadcrumbs generously over the top to create a delicious, crunchy crust that will enhance the flavor of the Broccoli Chicken Divan Casserole.

Step 5: Bake and Serve
Place the assembled casserole in the preheated oven and bake for 25–30 minutes. You’ll know it’s done when the cheese is melted, bubbly, and slightly golden on top. Once out of the oven, let it rest for 5-10 minutes to allow the flavors to meld. Serve warm, garnishing as desired, for a beautiful presentation that is sure to please everyone at your table.

Make Ahead Options

Preparing this Broccoli Chicken Divan Casserole ahead of time is a smart move for busy home cooks! You can easily assemble the casserole up to 24 hours in advance; simply layer the chicken, broccoli, and sauce in a greased baking dish, then cover tightly and refrigerate. This allows the flavors to meld beautifully. To maintain quality, keep the breadcrumbs and cheese separate until just before baking. When you're ready to serve, preheat your oven and sprinkle on the toppings before baking at 350°F (175°C) for 25–30 minutes until bubbly and golden. This effortless planning saves time and ensures your casserole is just as delicious!

Expert Tips for Broccoli Chicken Divan Casserole

Prep Ahead: Prepare the ingredients ahead of time to streamline your cooking process, allowing for quick assembly.

Smooth Sauce: Whisk the sauce well to avoid clumps; a smooth sauce ensures even flavor throughout the Broccoli Chicken Divan Casserole.

Layer Wisely: Place chicken at the bottom and broccoli on top to ensure the best texture and flavor blending when baked.

Customize Wisely: Explore ingredient substitutions but keep balance in mind; avoid dramatic shifts that might compromise the dish's core flavors.

Crispy Topping: For an extra crispy topping, consider broiling for the last few minutes of baking, but watch closely to prevent burning.

Rest Before Serving: Let the casserole sit for 5-10 minutes after baking; this helps the flavors meld together and makes for easier serving.

Broccoli Chicken Divan Casserole Variations

Feel free to personalize this Broccoli Chicken Divan Casserole to make it fit your taste buds and dietary preferences!

  • Gluten-Free: Replace regular breadcrumbs with gluten-free breadcrumbs to keep it light and delicious.
  • Vegetarian: Swap out chicken for cooked chickpeas or diced tofu for a hearty plant-based alternative.
  • Add Spinach: Toss in some fresh or frozen spinach to boost nutrition and flavor; it pairs wonderfully with the creamy sauce.
  • Spicy Option: For those who crave heat, stir in cayenne pepper or red pepper flakes; it adds a lovely kick without overpowering the dish.
  • Cheesy Upgrade: Mix in additional delicious cheeses like Gouda or Pepper Jack to enhance the flavor even further; cheese lovers will rejoice!
  • Seasonal Vegetables: Get creative with the seasons; zucchini or asparagus can be tasty alternatives that brighten up the casserole.
  • Creamy Dream: Experiment with different creamy bases like sour cream mixed with cream cheese for a richer texture.
  • Nutty Finish: Add slivered almonds or pine nuts on top before baking for an unexpected crunch and lovely nutty flavor.

These variations allow you to enjoy the comfort of your favorite casserole while customizing it to suit everyone’s cravings! If you’re looking for more choices, consider trying out Honey Bbq Chicken or Chipotle Lime Chicken and Rice for exciting flavor profiles.

What to Serve with Broccoli Chicken Divan Casserole

Comfort and flavor are just a dash away when you explore delightful side dishes that elevate your meal.

  • Garlic Bread: The warm, toasted flavors of garlic bread create a delightful contrast to the creamy casserole, perfect for sopping up the sauce.

  • Mixed Green Salad: A refreshing salad, drizzled with a zesty vinaigrette, balances the richness of the casserole and adds a pop of color and texture.

  • Steamed Rice: Fluffy white or brown rice absorbs the sauce beautifully, making every bite a comforting experience. It's a classic pairing that adds heartiness.

  • Roasted Vegetables: Seasonal roasted vegetables bring caramelized sweetness and a crispy texture that harmonizes with the creamy dish, providing a well-rounded plate.

  • Cheesy Garlic Mashed Potatoes: Creamy and rich, these mashed potatoes mirror the flavors of the casserole while providing a different texture that everyone loves.

  • Cranberry Sauce: A dollop of tangy cranberry sauce offers a surprising twist, cutting through the richness with its vibrant acidity, perfect for achieving that contrast.

  • Chardonnay or Sauvignon Blanc: Pair your meal with a crisp white wine, which can elevate the flavors and cleanse your palate between the rich bites.

These sides not only complement the Broccoli Chicken Divan Casserole but also encourage hearty conversations around the dinner table. Enjoy your family meal made complete!

How to Store and Freeze Broccoli Chicken Divan Casserole

  • Room Temperature: Allow the casserole to cool completely before storing at room temperature for no longer than 2 hours to prevent bacteria growth.

  • Fridge: Store leftover Broccoli Chicken Divan Casserole in an airtight container in the refrigerator for up to 3 days; reheat portions in the microwave or oven until heated through.

  • Freezer: For longer storage, cover the casserole tightly with plastic wrap and aluminum foil; it can be frozen for up to 2 months. Thaw overnight in the fridge before reheating.

  • Reheating: To reheat, place the casserole in a 350°F (175°C) oven until it’s hot and bubbly, about 25-30 minutes; cover with foil if the top browns too quickly.

Broccoli Chicken Divan Casserole Recipe FAQs

What kind of chicken is best for Broccoli Chicken Divan Casserole?
Absolutely! Using leftover or rotisserie chicken is ideal for this recipe, as it saves time and adds great flavor. If you need to cook chicken, poaching or roasting it before shredding will work wonderfully too.

How do I store leftover Broccoli Chicken Divan Casserole?
Very! Allow the casserole to cool completely before transferring it to an airtight container. In the refrigerator, it will keep for up to 3 days. You can easily reheat portions in the microwave or a preheated oven until heated through.

Can I freeze Broccoli Chicken Divan Casserole?
Of course! To freeze, cover the assembled casserole tightly with plastic wrap and aluminum foil. It can be stored in the freezer for up to 2 months. When you’re ready to enjoy it again, thaw it overnight in the fridge before reheating.

What should I do if my sauce is too thick?
Not a problem! If your sauce thickens too much, simply add a splash of milk or chicken broth until it reaches your desired consistency. Whisk thoroughly to incorporate the liquid evenly. It usually helps achieve a smooth texture that’s perfect for this casserole.

Are there any dietary considerations for this dish?
Definitely! This Broccoli Chicken Divan Casserole can easily be made gluten-free by using gluten-free breadcrumbs. For a vegetarian option, swapping chicken for chickpeas or tofu will give you a hearty alternative without compromising taste.

How can I customize the ingredients?
The more the merrier! This recipe is super versatile. You can mix in spinach for added nutrition, use different cheeses like Gouda or Pepper Jack for flavor, or add spices like cayenne pepper if you enjoy some heat. Feel free to explore and make this dish your own!

Broccoli Chicken Divan Casserole

Broccoli Chicken Divan Casserole That's Pure Comfort Bliss

This Broccoli Chicken Divan Casserole blends tender chicken and vibrant broccoli in a creamy, cheesy sauce, making it a must-try comfort food.
Print Recipe Pin Recipe
Prep Time 15 minutes mins
Cook Time 30 minutes mins
Resting Time 10 minutes mins
Total Time 55 minutes mins
Servings: 6 servings
Course: Dinner
Cuisine: American
Calories: 400
Ingredients Equipment Method Nutrition Notes

Ingredients
  

For the Casserole
  • 4 cups Cooked Chicken Use leftover or rotisserie chicken
  • 4 cups Broccoli Florets Fresh broccoli adds color and nutrition
  • 1 cup Mayonnaise Creates a creamy base
  • 1 cup Sour Cream Enhances richness; can swap for full-fat yogurt
  • 1 cup Grated Parmesan Infuses flavor; Romano or Pecorino are alternatives
  • 2 tablespoons Lemon Juice Brightens the dish beautifully
  • 1 tablespoon Dijon Mustard Adds a tangy kick
  • 1 teaspoon Garlic Powder Essential for seasoning
  • 1 teaspoon Onion Powder Essential for seasoning
  • 1 teaspoon Salt Basic seasoning for balance
  • 1 teaspoon Pepper Basic seasoning for balance
  • 2 cups Shredded Cheddar Cheese Provides a gooey topping experience
  • 1 cup Breadcrumbs Adds a delightful crunch
  • 1 cup Extra Shredded Cheddar Cheese For an even cheesier crust

Equipment

  • 9x13-inch baking dish
  • Mixing Bowl
  • Whisk
  • pot

Method
 

Step-by-Step Instructions
  1. Gather all your ingredients. If your chicken isn’t cooked, poach or roast before shredding into bite-sized pieces. Blanch broccoli florets in boiling water for 2-3 minutes, then transfer to ice water.
  2. In a mixing bowl, combine mayonnaise, sour cream, grated Parmesan, lemon juice, and Dijon mustard. Whisk until creamy and smooth, then add garlic powder, onion powder, salt, and pepper to taste.
  3. Preheat your oven to 350°F (175°C). Grease a 9x13 inch baking dish. Layer shredded chicken at the bottom, followed by the blanched broccoli.
  4. Pour the prepared sauce over the chicken and broccoli, ensuring even coverage. Sprinkle shredded cheddar cheese and breadcrumbs on top.
  5. Bake in the preheated oven for 25-30 minutes until the cheese is melted and bubbly. Let it rest for 5-10 minutes before serving.

Nutrition

Serving: 1servingCalories: 400kcalCarbohydrates: 30gProtein: 25gFat: 24gSaturated Fat: 12gPolyunsaturated Fat: 2gMonounsaturated Fat: 8gCholesterol: 85mgSodium: 700mgPotassium: 600mgFiber: 3gSugar: 4gVitamin A: 800IUVitamin C: 90mgCalcium: 400mgIron: 2mg

Notes

Customize ingredient substitutions but ensure balance in flavors. Serve with a side salad or crusty bread for a complete meal.

Tried this recipe?

Let us know how it was!

Creamy Ground Beef Stroganoff That'll Bring You Comfort

October 29, 2025 by Grace Snow Leave a Comment

The rich, savory aroma of sautéed onions and beef can transport me back to cozy family dinners, where laughter mingled with the delicious scent of a homemade meal. That's exactly the magic of this Creamy Ground Beef Stroganoff with Egg Noodles. It's not just dinner; it's comfort food at its finest, ready in under 30 minutes. This dish is perfect for hectic weeknights yet impressive enough for a family gathering, offering a hearty meal that accommodates appetites of all kinds. If you're looking for warmth wrapped in a creamy sauce, this adaptable recipe can also cater to dietary preferences—whether by swapping in ground turkey or mushrooms for a vegetarian option. Will you be trying this delightful classic for dinner tonight?

What Makes This Stroganoff So Special?

Comforting Experience: The rich and creamy sauce envelops each tender piece of beef, creating a dish that is truly heartwarming.

Quick Preparation: Ready in under 30 minutes, this recipe is perfect for those busy weeknights when you crave something delicious without the fuss!

Adaptable for Everyone: You can easily swap ground beef for ground turkey or mushrooms, making it a versatile choice for various dietary needs.

Perfectly Paired: Serve with garlic bread to soak up the sauce, or add steamed broccoli for a nutritious touch.

Family-Friendly Delight: This creamy stroganoff is sure to please everyone at the table, even the pickiest of eaters!

Creamy Ground Beef Stroganoff Ingredients

• Let’s dive into the delicious components of this comforting dish!

For the Stroganoff

  • Ground Beef – The heart and soul of this dish, offering a robust, savory flavor; feel free to substitute with ground turkey for a lighter twist.
  • Onion – Adds a touch of sweetness and depth; diced yellow onion works best to enhance the overall taste.
  • Mushrooms – Earthy and rich, they elevate the flavor profile; opt for cremini or button mushrooms, sautéing them for added goodness.
  • Sour Cream – This creates that signature creamy, tangy sauce; swap for Greek yogurt if you’re aiming for a healthier alternative.
  • Beef Broth – Provides moisture and flavor, forming the base of the sauce; vegetable broth is a great substitute for a vegetarian option.
  • Egg Noodles – The perfect vessel for the luscious sauce; consider gluten-free pasta if you have dietary sensitivities.
  • Fresh Parsley – An optional garnish that brightens the dish and adds a pop of color.

Embrace the joy of cooking with this Creamy Ground Beef Stroganoff, guaranteed to become a family favorite!

Step‑by‑Step Instructions for Creamy Ground Beef Stroganoff

Step 1: Brown the Beef
In a large skillet, heat a tablespoon of oil over medium heat. Add 1 pound of ground beef, breaking it apart with a spatula. Cook for 5–7 minutes, stirring occasionally until the beef is browned and no longer pink, with a lovely sizzle and rich aroma filling your kitchen. Once browned, drain any excess fat, being careful not to lose the flavorful bits stuck to the pan.

Step 2: Sauté Onion and Mushrooms
Reduce the heat to medium-low and add a diced yellow onion to the skillet. Sauté for about 2–3 minutes until the onion becomes translucent and aromatic. Next, add 8 ounces of sliced mushrooms, continuing to cook for another 4–5 minutes until they are tender and have released their moisture. This combination creates a beautiful flavor base for your Creamy Ground Beef Stroganoff.

Step 3: Prepare the Sauce
Lower the heat further to prevent curdling while gently stirring in 1 cup of sour cream and 1 cup of beef broth. Allow the mixture to simmer for 3–4 minutes, stirring occasionally until everything is well combined and heated through. The sauce should be smooth and luscious, enveloping the beef and vegetables with a creamy richness, perfect for spooning over noodles.

Step 4: Combine with Noodles
While the sauce simmers, bring a pot of salted water to boil and cook 8 ounces of egg noodles according to package instructions. Drain the noodles once al dente, then add them directly to the skillet with the creamy stroganoff sauce. Gently toss everything together, ensuring the noodles are well coated and infused with the delicious flavors of your dish.

Step 5: Serve It Up
Once everything is combined and heated through, it’s time to serve your Creamy Ground Beef Stroganoff! Plate the luscious noodles topped with the rich beef and mushroom sauce. Optionally, garnish with fresh parsley for a touch of color and added freshness. This dish is now ready to bring comfort and joy to your dinner table!

Creamy Ground Beef Stroganoff Variations

Feel free to explore these twists to make this comforting dish uniquely yours and cater to various preferences!

  • Ground Turkey: Substitute ground beef with ground turkey for a leaner meal without sacrificing flavor.
  • Vegetarian Delight: Use mushrooms in place of beef to create a hearty vegetarian version, perfect for satisfying meatless cravings.
  • Gluten-Free Option: Swap traditional egg noodles with gluten-free pasta to keep it enjoyable for those with gluten sensitivities.
  • Extra Creamy: For a richer texture, add an additional dollop of sour cream or a splash of heavy cream into the sauce.
  • Herbed Twist: Elevate the flavor by adding fresh herbs like thyme or parsley during the cooking process for an aromatic boost.
  • Spicy Kick: Stir in a teaspoon of red pepper flakes or a dash of hot sauce to add a bit of heat and excitement to your dish.
  • Cheesy Version: Sprinkle in some shredded cheese, such as Parmesan or cheddar, into the sauce for a delightful cheesy twist.
  • Serve with Style: Pair this stroganoff with garlic bread or a light mixed greens salad to round out your meal and enhance dining experience.

If you ever want to explore more comforting recipes, why not check out my Ground Beef Enchiladas or Avocado Egg Salad? Each dish brings a unique flavor journey to your table!

Expert Tips for Creamy Ground Beef Stroganoff

  • Cook in Batches: Cooking the beef in batches prevents overcrowding in the skillet, ensuring even browning and a savory flavor in your Creamy Ground Beef Stroganoff.

  • Stir Gently: When adding sour cream, stir gently over low heat to avoid curdling, maintaining that silky texture in your sauce.

  • Enhance Flavor: For an aromatic twist, sauté minced garlic with the onions or add fresh thyme; these small touches can elevate your dish impressively.

  • Adjust Consistency: If the sauce becomes too thick, add warm beef broth a little at a time until achieving your desired creamy consistency.

  • Mind the Noodles: Avoid overcooking the egg noodles; they should be al dente, as they'll continue to absorb the sauce after mixing with the stroganoff.

What to Serve with Creamy Ground Beef Stroganoff

Indulge in the full experience of your comforting meal by adding these delightful pairings that elevate every bite.

  • Garlic Bread: Perfect for soaking up that rich sauce, garlic bread brings a crunchy texture that contrasts beautifully with creamy stroganoff. Just imagine the flavor explosion!

  • Steamed Broccoli: This vibrant green side adds freshness and nutrition, complementing the rich and savory elements of the stroganoff. An easy way to incorporate veggies!

  • Mixed Greens Salad: A light and refreshing salad featuring crisp greens is the ideal accompaniment to balance the creamy indulgence of your dish. Drizzle with your favorite vinaigrette for an added zing.

  • Roasted Carrots: Their natural sweetness, combined with a slight caramelization, pairs wonderfully with the savory flavors of the stroganoff, creating a delightful mix of tastes.

  • Mashed Potatoes: Creamy, buttery mashed potatoes offer an extra level of comfort and can be the perfect canvas for the rich sauce to embrace. What’s not to love?

  • Red Wine: A glass of robust red wine, such as a Cabernet Sauvignon, enhances the meal’s richness and provides a sophisticated touch, making your dinner feel luxurious.

  • Apple Crisp: End your meal on a sweet note with a warm apple crisp, adding a touch of seasonal fruitiness that contrasts nicely with the savory stroganoff.

Embrace these pairings to truly enjoy the warmth and comfort of your Creamy Ground Beef Stroganoff, turning dinner into a cherished family experience.

How to Store and Freeze Creamy Ground Beef Stroganoff

  • Fridge: Store leftovers in an airtight container for up to 3 days, ensuring they maintain optimal freshness and flavor.

  • Freezer: For longer storage, place the stroganoff in a freezer-safe container or bag for up to 3 months. Thaw in the fridge overnight before reheating.

  • Reheating: Reheat gently on the stovetop over low heat, adding a splash of beef broth for creaminess. Stir frequently to prevent sticking and ensure even warming.

  • Separated Storage: If you prefer to freeze, consider storing the sauce and cooked noodles separately. This helps retain the best texture upon reheating.

Make Ahead Options

Preparing your Creamy Ground Beef Stroganoff in advance is a fantastic way to save time on busy weeknights! You can cook the ground beef, onions, and mushrooms up to 24 hours ahead. Once sautéed, let the mixture cool, then refrigerate it in an airtight container. The sauce can also be prepared and stored, simply adding sour cream and beef broth just before reheating to maintain its creamy texture. When you're ready to enjoy your stroganoff, cook the egg noodles according to package instructions, combine everything in a skillet, and heat through for a comfort food classic that’s just as delicious as if it were made fresh!

Creamy Ground Beef Stroganoff Recipe FAQs

How do I choose the right ground beef?
Absolutely! When selecting ground beef for your Creamy Ground Beef Stroganoff, look for lean ground beef with a fat content of around 80/20 or 85/15. This gives you a perfect balance of flavor without being overly greasy. Also, ensure the beef is bright red with minimal dark spots or discoloration; any dark spots could indicate it’s past its prime.

What’s the best way to store leftovers?
Very simply, store your leftover Creamy Ground Beef Stroganoff in an airtight container in the fridge for up to 3 days. Just make sure it has completely cooled down before sealing it. This helps retain the flavors and texture. When ready to eat, simply reheat over low heat on the stovetop, stirring occasionally.

Can I freeze this dish?
Absolutely! You can freeze Creamy Ground Beef Stroganoff for up to 3 months. For best results, store the stroganoff in a freezer-safe container, ensuring it’s tightly sealed to prevent freezer burn. When you're ready to enjoy it again, thaw in the fridge overnight, then reheat gently on the stovetop. Adding a splash of broth will help restore the creamy consistency.

What should I do if my sauce curdles?
Oh no, curdled sauce can be a bit disheartening! If you find your sour cream sauce has curdled, don’t panic. Start by lowering the heat to prevent further cooking. You can try adding a tablespoon of warm beef broth to the curdled sauce while stirring gently. If the texture is still off, blend the sauce in a blender for a smoother finish. To avoid this issue in the first place, always stir in the sour cream over low heat.

Is this recipe suitable for gluten-free diets?
Yes, you can easily adapt this Creamy Ground Beef Stroganoff for gluten-sensitive diets! Simply replace regular egg noodles with gluten-free pasta alternatives, which are widely available. Always check the labels to ensure they meet your specific dietary needs. Enjoy the comfort without compromise!

What alternatives can I use for the beef?
If you’re looking for alternatives, using ground turkey or a combination of hearty mushrooms (like cremini) is a delicious way to cater to different dietary needs. For a vegetarian option, sauté the mushrooms first to create a deep, rich flavor profile. You’ll have a satisfying dish without sacrificing taste!

Creamy Ground Beef Stroganoff

Creamy Ground Beef Stroganoff That'll Bring You Comfort

Creamy Ground Beef Stroganoff is the ultimate comforting dish, ready in under 30 minutes.
Print Recipe Pin Recipe
Prep Time 10 minutes mins
Cook Time 20 minutes mins
Total Time 30 minutes mins
Servings: 4 servings
Course: Dinner
Cuisine: American
Calories: 450
Ingredients Equipment Method Nutrition Notes

Ingredients
  

For the Stroganoff
  • 1 pound ground beef or ground turkey
  • 1 medium yellow onion diced
  • 8 ounces mushrooms sliced, cremini or button
  • 1 cup sour cream or Greek yogurt
  • 1 cup beef broth or vegetable broth for vegetarian option
  • 8 ounces egg noodles or gluten-free pasta
  • to taste fresh parsley optional for garnish

Equipment

  • Large skillet
  • pot
  • Spatula

Method
 

Step-by-Step Instructions for Creamy Ground Beef Stroganoff
  1. In a large skillet, heat a tablespoon of oil over medium heat. Add 1 pound of ground beef, breaking it apart with a spatula. Cook for 5–7 minutes until browned. Drain excess fat.
  2. Reduce heat to medium-low and add a diced yellow onion. Sauté for about 2–3 minutes until translucent. Add 8 ounces of sliced mushrooms, cooking for 4–5 minutes more.
  3. Lower the heat and stir in 1 cup of sour cream and 1 cup of beef broth. Allow to simmer for 3–4 minutes, stirring occasionally until smooth.
  4. Cook 8 ounces of egg noodles in salted water. Drain once al dente and add to the skillet with stroganoff sauce, tossing gently to combine.
  5. Plate the noodles topped with the beef and mushroom sauce. Garnish with fresh parsley, if desired.

Nutrition

Serving: 1servingCalories: 450kcalCarbohydrates: 45gProtein: 30gFat: 20gSaturated Fat: 10gPolyunsaturated Fat: 1gMonounsaturated Fat: 8gCholesterol: 90mgSodium: 600mgPotassium: 650mgFiber: 2gSugar: 3gVitamin A: 500IUVitamin C: 5mgCalcium: 50mgIron: 3mg

Notes

For storage, keep leftovers in an airtight container for up to 3 days. Thaw frozen stroganoff in the fridge overnight.

Tried this recipe?

Let us know how it was!

Creamy Pumpkin Cheesecake Dip: Perfect for Halloween Fun

October 28, 2025 by Grace Snow Leave a Comment

As the crisp autumn air fills the room, the delightful scent of pumpkin spice begins to weave its magic. One afternoon, while searching for the perfect Halloween treat, I stumbled upon this incredible No-Bake Pumpkin Cheesecake Dip that instantly stole my heart. This creamy, dreamy dessert not only offers a quick and hassle-free way to indulge those fall cravings, but it also serves up a playful presentation with its chocolate cookie "dirt" topping—perfect for impressing friends and family at gatherings. Imagine the joy on their faces as they dig into this fun twist on cheesecake without having to turn on the oven! Are you ready to create a showstopper that's as delightful to make as it is to eat?

Why is this Pumpkin Cheesecake Dip a Must-Try?

Simplicity at its Best: No need to bake or fuss—just mix and enjoy!

Crowd-Pleasing Treat: It's a fun and interactive dessert—perfect for Halloween gatherings.

Rich, Creamy Flavor: The luscious cream cheese and pumpkin blend create a decadent dip everyone will love.

Versatile Pairings: Serve with slices of fresh apples, pretzels, or graham crackers for a delightful treat. You can also enjoy it alongside a warm glass of pumpkin spice latte for that cozy autumn vibe.

Playful Presentation: With its chocolate cookie "dirt" topping, it looks amazing and is sure to be a hit at any party.

So why not take a moment to bask in the deliciousness of this delightful dip? You deserve a break from fast food and a taste of home with every bite!

Pumpkin Cheesecake Dip Ingredients

For the Dip

  • Cream Cheese – Provides a rich, creamy texture; let it soften for easy mixing.
  • Pumpkin Puree – Adds seasonal sweetness; opt for pure pumpkin to control spices.
  • Powdered Sugar – Sweetens the dip; maple syrup can be a great natural substitute.
  • Vanilla Extract – Enhances flavor; using pure vanilla yields the best results.

For the Topping

  • Chocolate Cookies (e.g., Oreos) – Creates the "dirt" look; graham crackers can provide a different texture.
  • Gummy Worms (optional) – Adds a fun, spooky touch for Halloween.

Indulge in this delightful Pumpkin Cheesecake Dip, where each ingredient works in harmony to create a dessert that’s as delicious as it is fun!

Step‑by‑Step Instructions for No-Bake Pumpkin Cheesecake Dip

Step 1: Beat the Cream Cheese
In a large mixing bowl, beat 8 ounces of softened cream cheese with an electric mixer on medium speed for about 2 minutes until it’s smooth and creamy. The texture should be free of lumps, resembling a luscious frosting. Make sure your cream cheese is at room temperature for the best results, as this will create a wonderfully fluffy base for your Pumpkin Cheesecake Dip.

Step 2: Mix in Pumpkin and Sweetness
Add 1 cup of pumpkin puree, 1 cup of powdered sugar, and 1 teaspoon of vanilla extract to the bowl. Continue mixing on low speed for about 2-3 minutes until all ingredients are combined evenly and the dip is velvety smooth. The vibrant orange hue of the pumpkin will meld perfectly with the creaminess, making your dip both delicious and visually appealing.

Step 3: Transfer and Smooth the Mixture
Carefully transfer the creamy pumpkin dip into your favorite serving bowl. Use a spatula to smooth the top for an elegant presentation. This step enhances the creamy texture and helps in showcasing the delightful layers you’ll be adding soon. The rich color will draw everyone’s attention, inviting them to dig in!

Step 4: Prepare the "Dirt" Topping
While your Pumpkin Cheesecake Dip is chilling, crush about 10 chocolate cookies (such as Oreos) into fine crumbs. You can achieve this using a food processor for about 30 seconds or place the cookies in a resealable bag and crush them with a rolling pin. The texture should resemble fine dirt, giving a playful look to your dessert.

Step 5: Add the Crumbled Cookies
Evenly sprinkle the crushed cookie mixture over the top of your prepared Pumpkin Cheesecake Dip, making it look like a delightful layer of dirt. This crumbled topping adds a fun, Halloween-inspired touch that contrasts beautifully with the creamy dip. If desired, gently place a few gummy worms on top for an extra spooky decoration.

Step 6: Chill or Serve Immediately
You can serve the Pumpkin Cheesecake Dip right away, or for a firmer texture, chill it in the refrigerator for about 30 minutes. Be sure to add the crumbled cookie topping just before serving to keep it fresh and crunchy. This simple step makes your dip even more enticing, especially when shared with friends and family during your Halloween gatherings.

Pumpkin Cheesecake Dip Variations

Feel free to get creative with this delightful dip and customize it to your taste!

  • Greek Yogurt: Swap cream cheese for Greek yogurt to lighten the dip while keeping it creamy and tangy. It's a refreshing twist that's equally delicious!

  • Pumpkin Spice Boost: Add a teaspoon of pumpkin pie spice for extra autumn flavor. The warming spices will elevate the comforting essence of this indulgent treat.

  • Gingersnap Crust: Use crushed gingersnap cookies instead of chocolate cookies for a spicy, flavorful alternative. This swap adds a fun zing that truly stands out.

  • Vegan Version: For a vegan-friendly option, substitute dairy-free cream cheese and sweeten with maple syrup. You’ll enjoy a creamy dip that suits everyone's dietary needs.

  • Nutty Crunch: Toss in some finely chopped pecans or walnuts atop your dip for a delightful crunch. It adds a fabulous texture and nutty flavor that complements the creaminess.

  • Chocolate Drizzle: Drizzle melted chocolate over the top for an indulgent finish. This simple addition takes the dessert to another level, making it even more irresistible!

  • Cinnamon Sugar Dusting: Sprinkle a mix of cinnamon and sugar on top for a sweet and aromatic finish. It adds a delightful touch that pairs perfectly with the pumpkin flavor.

For more inspiration, you might also want to check out these delicious options: Pumpkin Brownies Decadent or the indulgent Pumpkin Cinnamon Roll recipes. They're perfect for your autumn gatherings!

Expert Tips for Pumpkin Cheesecake Dip

Room Temperature Cream Cheese: Ensure your cream cheese is softened to room temperature for the smoothest texture and easy mixing in your Pumpkin Cheesecake Dip.

Avoid Overmixing: Once you add powdered sugar, mix just until combined; overmixing can lead to a runny dip.

Customize Sweetness: If your dip is too sweet, balance with a dash of salt or a bit more pumpkin puree for a more complex flavor.

Crush Cookies Carefully: Aim for fine crumbs when preparing the "dirt" topping; larger chunks can disrupt the creamy texture underneath.

Chill for Best Results: Let the dip chill for at least 30 minutes before serving for a firmer texture that’s easier to scoop.

Add Fun Toppings: Don’t hesitate to get creative—try different cookie toppings or add seasonal candies for a personal touch!

How to Store and Freeze Pumpkin Cheesecake Dip

Refrigerator: Store leftovers in an airtight container for up to 3 days. This keeps the Pumpkin Cheesecake Dip fresh and creamy, ready for a quick snack.

Freezer: Although not ideal, you can freeze the dip for up to 1 month. Thaw it overnight in the fridge before serving, and consider re-mixing to restore its creamy texture.

Topping Storage: Keep the crumbled chocolate cookies separate until you’re ready to serve. This helps retain their crunchiness and enhances the dip's presentation.

Make-Ahead Tip: Prepare the dip a day in advance for convenience. Just remember to add the cookie topping right before serving for that fresh, delightful crunch!

Make Ahead Options

This No-Bake Pumpkin Cheesecake Dip is not just a crowd-pleaser, but also a fantastic option for meal prep! You can prepare the dip up to 24 hours in advance, mixing the cream cheese, pumpkin puree, powdered sugar, and vanilla extract together, and refrigerating it in an airtight container. The cookie topping can be crushed and stored separately (to maintain its crunch) for up to 3 days. When you're ready to serve, simply sprinkle the crumbled cookies on top and add any gummy worms for that fun Halloween touch. By prepping ahead, you’ll save valuable time and still impress your guests with a dessert that’s just as delicious as when freshly made!

What to Serve with No-Bake Pumpkin Cheesecake Dip

Create the perfect fall gathering with these delightful pairings that complement the rich flavors of your dip.

  • Fresh Apple Slices: They add a refreshing crunch that cuts through the creaminess, making for a well-rounded treat.
  • Graham Crackers: Their mild sweetness and crispy texture provide a classic contrast to the pumpkin dip's richness.
  • Pretzels: The salty finish offers a delightful balance to the sweet pumpkin cheesecake dip, creating a perfect sweet-salty combo. Try pairing both for a fun grazing platter!
  • Vanilla Wafer Cookies: These cookies add a light, buttery flavor that beautifully enhances the dip's creamy texture, creating an irresistible duo.
  • Spiced Chai: A warm cup of spiced chai enhances the cozy, autumn vibe while pairing beautifully with the pumpkin flavors.
  • Pumpkin Spice Latte: Enjoy this seasonal favorite alongside your dip; its comforting warmth and spice echo the dip’s flavors, making for a delightful treat.
  • Caramel Sauce: Drizzling a bit of caramel over the dip adds an indulgent touch, heightening the sweetness and flavor profile.
  • Chocolate-Covered Pretzels: Offering a sweet twist on traditional pretzels, they bring a crunchy chocolate finish to each bite, enhancing the overall experience.
  • Whipped Cream: A dollop on top of the dip adds a light and airy texture, creating a beautiful contrast with the dense creaminess of the dip.
  • Gummy Worms: Not just for decoration, they add a fun and playful element that truly embraces the Halloween spirit!

Pumpkin Cheesecake Dip Recipe FAQs

How can I tell if my pumpkin puree is fresh?
Absolutely! When selecting pumpkin puree, look for a vibrant orange color with a smooth consistency. If you notice any dark spots, unusual odors, or separation of liquid, it's best to avoid using it. Using pure pumpkin puree will ensure your dip is flavorful and falls in line with our seasonal treat.

How should I store leftovers of the Pumpkin Cheesecake Dip?
You can store leftovers in an airtight container in the refrigerator for up to 3 days. Make sure to keep the dip tightly sealed to maintain its creamy texture. If you have extra crumbled cookie topping, store that separately to keep it crunchy until you’re ready to serve.

Can I freeze Pumpkin Cheesecake Dip?
Very! You can freeze the dip for up to 1 month if you find you have leftovers. To do this, place the dip in a freezer-safe container, leaving a little space at the top for expansion. When you're ready to enjoy it, thaw it in the refrigerator overnight and mix it gently to restore its creamy texture. Just remember, the cookie topping should be added fresh right before serving!

What can I do if my dip turns out too runny?
If your Pumpkin Cheesecake Dip is a bit runny, don't worry! Simply chill it in the refrigerator for about 30 minutes. This will help firm it up. Alternatively, you can gradually add more powdered sugar or a little bit of cream cheese until you achieve your desired consistency. Mixing it gently will maintain that lovely creaminess!

Is this Pumpkin Cheesecake Dip suitable for people with allergies?
Yes! If you're making this dip for guests with dietary restrictions, there are plenty of substitutions. Use dairy-free cream cheese for a vegan option or Greek yogurt for a lighter dip. Make sure to check the labels of any ingredients you use, especially for potential allergens like gluten in the cookies.

What are some fun variations of the Pumpkin Cheesecake Dip?
The more the merrier! You can swap out crushed chocolate cookies with gingersnap cookies for a different flavor profile. Adding pumpkin pie spice to the mixture enhances that autumnal taste, while a sprinkle of sea salt can balance the sweetness beautifully. Don't hesitate to get creative and explore new toppings for added fun!

Pumpkin Cheesecake Dip

Creamy Pumpkin Cheesecake Dip: Perfect for Halloween Fun

This Pumpkin Cheesecake Dip is a creamy, no-bake treat that's perfect for Halloween gatherings and will impress your friends and family.
Print Recipe Pin Recipe
Prep Time 15 minutes mins
Chilling Time 30 minutes mins
Total Time 45 minutes mins
Servings: 8 servings
Course: Dessert
Cuisine: American
Calories: 210
Ingredients Equipment Method Nutrition Notes

Ingredients
  

For the Dip
  • 8 ounces Cream Cheese Softened for easy mixing.
  • 1 cup Pumpkin Puree Opt for pure pumpkin to control spices.
  • 1 cup Powdered Sugar Maple syrup can be a natural substitute.
  • 1 teaspoon Vanilla Extract Using pure vanilla yields the best results.
For the Topping
  • 10 cookies Chocolate Cookies (e.g., Oreos) Creates the 'dirt' look; graham crackers can offer a different texture.
  • Gummy Worms Optional, for a fun, spooky touch.

Equipment

  • Electric mixer
  • Mixing Bowl
  • Spatula
  • Food Processor

Method
 

Step-by-Step Instructions
  1. In a large mixing bowl, beat 8 ounces of softened cream cheese with an electric mixer on medium speed for about 2 minutes until it’s smooth and creamy.
  2. Add 1 cup of pumpkin puree, 1 cup of powdered sugar, and 1 teaspoon of vanilla extract to the bowl. Continue mixing on low speed for about 2-3 minutes until all ingredients are combined evenly.
  3. Carefully transfer the creamy pumpkin dip into your favorite serving bowl and smooth the top with a spatula.
  4. Crush about 10 chocolate cookies into fine crumbs, using a food processor or a rolling pin.
  5. Evenly sprinkle the crushed cookie mixture over the top of the prepared Pumpkin Cheesecake Dip.
  6. Serve immediately or chill in the refrigerator for about 30 minutes for a firmer texture.

Nutrition

Serving: 1servingCalories: 210kcalCarbohydrates: 25gProtein: 2gFat: 10gSaturated Fat: 6gCholesterol: 30mgSodium: 150mgPotassium: 100mgFiber: 1gSugar: 18gVitamin A: 420IUVitamin C: 1mgCalcium: 20mg

Notes

Make the dip a day in advance for convenience, but add the crumbled topping just before serving for freshness.

Tried this recipe?

Let us know how it was!

Irresistible Irish Rarebit: Your New Favorite Comfort Food

October 28, 2025 by Grace Snow Leave a Comment

As I stood in my kitchen, the aroma of melting cheese started to swirl around me, evoking memories of cozy afternoons spent indulging in comforting meals. Today, I’m excited to share my take on Irish Rarebit, an irresistible twist on the classic cheese-on-toast dish. This delightful recipe combines rich Irish cheddar with zesty mustard and crunchy gherkins, creating a quick meal that’s perfect for light lunches or as a warming appetizer. Not only is it a crowd-pleaser that embraces the art of simplicity, but it’s also incredibly versatile; you can easily customize it to suit your taste. Whether you’re treating yourself on a cozy night in or celebrating St. Patrick’s Day with friends, this plate of creamy goodness is bound to bring smiles. Ready to elevate your cheese game? Let’s dive into making this scrumptious Irish Rarebit together!

Why Is Irish Rarebit So Irresistible?

Comforting: This dish offers a warm, cheesy embrace, perfect for those chilly evenings when you crave a taste of home.
Quick to Make: With minimal prep and cook time, this recipe can be ready in a flash, making it ideal for busy weeknights or spontaneous gatherings.
Customizable: Feel free to experiment with toppings and variations; add crispy bacon or switch cheeses for a unique flavor twist.
Crowd-Pleasing: Serve it at your next get-together or special occasion, and watch as your guests relish every last bite! Enhance it with a side salad for a balanced meal or keep it simple as a delightful snack. Trust me, this is a dish you won’t soon forget!

Irish Rarebit Ingredients

For the Cheese Sauce
• Irish Cheddar – Gives a sharp and rich flavor; consider using mature cheddar for a similar taste.
• Mustard – Adds a nice heat and acidity; you can try Dijon or wholegrain mustard based on what you like.
• Gherkins – Provides crunch and tang; dill pickles can be a great substitute or you can omit them for milder flavor.

For the Base
• Bread – Serves as the foundation; opt for whole-grain for added fiber and nutrients.
• Butter (optional) – Enhances the richness of the dish; switch to olive oil for a healthier alternative if desired.

Feel free to customize these ingredients to create a unique version of Irish Rarebit that suits your palate!

Step‑by‑Step Instructions for Irish Rarebit

Step 1: Prepare the Cheese Sauce
Start by melting 2 tablespoons of butter in a medium saucepan over low heat. Once melted, whisk in 1 tablespoon of your chosen mustard until well combined. Gradually add 1 cup of grated Irish cheddar, stirring continuously for about 3-4 minutes until the cheese completely melts into a creamy sauce. Remove from heat once you have a smooth mixture, which should be gooey and luscious.

Step 2: Add Gherkins
Next, chop about 2-3 gherkins into small pieces and stir them into the cheese sauce. This will introduce a delightful crunch and tanginess to the Irish Rarebit. Give the mixture a good stir to ensure the gherkins are evenly distributed, enhancing the flavor profile. Set the sauce aside while you prepare the bread.

Step 3: Toast the Bread
While the cheese sauce cools slightly, preheat your oven's broiler. Take 2-4 slices of whole-grain bread and lightly toast them in a toaster or under the broiler for 2-3 minutes. The goal is to achieve a golden brown hue on both sides of the bread, providing a sturdy base for the creamy cheese sauce that will follow.

Step 4: Assemble the Toast
Once the bread is toasted, place the slices on a baking sheet lined with parchment paper. Carefully spoon the cheesy mixture over each slice, making sure to thoroughly cover them for that delicious cheesy experience. Don’t be shy with the sauce—it’s the star of the show and should look indulgent and appetizing.

Step 5: Broil
Slide the baking sheet under the broiler and cook for 1-2 minutes. Keep a close eye on the bread, as the cheese should bubble up and develop a golden crust. Remove the Irish Rarebit from the oven when the cheese is beautifully golden and bubbly, perfect for enjoying soon after!

Step 6: Serve
Allow the Irish Rarebit to cool for just a minute before serving. Optionally, garnish with freshly chopped herbs such as parsley or chives for an extra touch of flavor and color. You can pair it with a simple green salad or extra pickles on the side to balance the richness, and enjoy!

What to Serve with Irish Rarebit

Elevate your dining experience with delightful side dishes that complement the irresistible warmth of this cheesy comfort food.

  • Simple Green Salad: A fresh, crisp salad with light vinaigrette provides a refreshing contrast to the richness of the rarebit.
  • Crispy Fried Potatoes: Golden, fluffy fries add a satisfying crunch, making an indulgent pairing that enhances the cozy feel of your meal.
  • Pickled Vegetables: Bright, tangy pickles or a medley of pickled veggies cut through the creaminess, giving a delightful pop of flavor.
  • Roasted Brussels Sprouts: Seasoned and caramelized, these veggies add a savory note, balancing the richness of the cheese beautifully.
  • Tomato Soup: A classic pairing, this warming soup provides both comfort and a dose of acidity that complements the savory toast.
  • Guinness Stout: For a perfect drink pairing, enjoy the deep flavors of Guinness, enhancing the experience with hints of malt and cream.

These side options not only create a full meal, but they also invite your family and friends to gather around the table, sharing laughter and warmth over mouthwatering bites!

Expert Tips for Irish Rarebit

• Perfect Timing: Watch the broiling closely—it's easy to overcook! The cheese should be bubbly but not burnt for the best Irish Rarebit experience.

• Cheese Matters: Use finely grated Irish cheddar for a smoother melting sauce. This prevents clumping and ensures each bite is creamy.

• Sauce Variability: Don't hesitate to tweak the cheese sauce! Adding a splash of Guinness gives extra depth of flavor—perfect for a festive twist.

• Bread Choice: Choose sturdier bread, like whole-grain, to hold the weight of the rich cheese. Avoid soft white bread, which can get soggy.

• Batch Prep: Make the cheese sauce in advance, refrigerate, and reheat for quick assembly. This way, a delicious Irish Rarebit is always just moments away!

• Texture Balance: Add crunch by serving with a salad or fried onions as a topping, enhancing the creamy goodness with satisfying textures.

Make Ahead Options

These Irish Rarebit sandwiches are perfect for meal prep enthusiasts! You can prepare the cheese sauce up to 3 days in advance; simply follow the instructions to melt the butter, whisk in the mustard, and add the grated Irish cheddar, then allow it to cool before storing it in an airtight container in the refrigerator. As you prepare to serve, toast your bread as directed, reheat the cheese sauce on low until warm, then assemble and broil for just a couple of minutes. This way, you'll enjoy the same rich, creamy goodness without the last-minute rush, making your mealtime as delightful as it is effortless!

Storage Tips for Irish Rarebit

Fridge: Store any leftover Irish Rarebit in an airtight container for up to 3 days. Reheat in the oven to restore that inviting cheesiness.

Freezer: You can freeze the cheese sauce separately for up to 2 months. Thaw in the fridge overnight and reheat gently before serving over fresh toast.

Toast Storage: Avoid storing assembled rarebit with the toast, as the bread will become soggy. Instead, keep it separate until ready to enjoy!

Reheating: For best results, reheat under the broiler for about 1-2 minutes until bubbly and golden, just like the first time!

Irish Rarebit Variations & Substitutions

Feel free to get creative with your Irish Rarebit and make it your own with these delicious options!

  • Cheese Swap: Use Gruyère or smoked cheese for a deeper flavor that adds an exciting twist to the classic dish.

  • Bacon Lover: Crumble crispy cooked bacon into the cheese sauce for a savory, smoky flavor that will delight meat lovers.

  • Vegetarian Delight: Replace gherkins with caramelized onions for a naturally sweet counterpart that complements the richness of the cheese.

  • Heat It Up: Add a pinch of red pepper flakes or jalapeños for a spicy kick, perfect for those who enjoy a bit of heat in their comfort food.

  • Herbaceous Boost: Incorporate fresh herbs like thyme or rosemary into the cheese sauce for a fresh aroma and taste that elevates this simple dish.

  • Creamier Texture: Mix in a splash of heavy cream or sour cream to the cheese sauce before broiling for an extra luscious finish.

  • Whole Grain Upgrade: Opt for multigrain or sourdough bread instead of whole-grain to enhance flavors and add a chewy texture that balances the creaminess.

  • Try Guinness: Add a dash of Guinness to the cheese sauce for an authentic Irish flavor that gives a delightful depth to your Rarebit experience.

Discovering variations is part of the joy of cooking! If you want more ideas, check out these tasty alternatives or side dishes to create the perfect meal to remember. Enjoy your cooking adventure!

Irish Rarebit Recipe FAQs

What type of bread is best for Irish Rarebit?
I recommend using whole-grain bread for its sturdiness and added fiber, which perfectly supports the rich cheese topping. Avoid soft white bread, as it tends to become soggy under the creamy sauce.

How should I store leftover Irish Rarebit?
Store any leftover Irish Rarebit in an airtight container in the fridge for up to 3 days. If you want to preserve that delightfully cheesy texture, reheat it in the oven. Just be patient and allow the cheese to warm up slowly; it’ll be worth the wait!

Can I freeze the cheese sauce for later use?
Absolutely! You can freeze the cheese sauce separately for up to 2 months. Simply place it in an airtight container, and when you’re ready to enjoy it, thaw it in the fridge overnight. When reheating, do so gently on the stovetop until it's warmed through and creamy again.

What if my cheese sauce is too thick?
If you find your cheese sauce is thicker than desired, don’t worry! Just add a splash of milk or cream while reheating to thin it out. Stir continuously until you achieve that luscious and smooth texture again.

Can I modify the ingredients for dietary restrictions?
Very! This recipe is quite flexible. For a vegetarian option, it's perfect as is, but if you're dairy-free, you can experiment with plant-based cheese alternatives. Just ensure you adjust the cooking times and methods as needed for the best results.

What kind of cheese can I use instead of Irish cheddar?
If you’re looking to switch it up, try using Gruyère for a nutty flavor or smoked cheese for a twist of richness. Each variety will bring a unique depth to your Irish Rarebit while keeping it comforting and delicious. Enjoy experimenting!

Irish Rarebit

Irresistible Irish Rarebit: Your New Favorite Comfort Food

Discover this quick and comforting Irish Rarebit recipe that combines rich cheese and tangy gherkins for an irresistible snack.
Print Recipe Pin Recipe
Prep Time 10 minutes mins
Cook Time 10 minutes mins
Cooling Time 5 minutes mins
Total Time 25 minutes mins
Servings: 4 slices
Course: Snacks
Cuisine: Irish
Calories: 250
Ingredients Equipment Method Nutrition Notes

Ingredients
  

For the Cheese Sauce
  • 1 cup Irish Cheddar grated
  • 1 tablespoon Mustard Dijon or wholegrain
  • 2-3 pieces Gherkins chopped
  • 2 tablespoons Butter optional
For the Base
  • 2-4 slices Whole-grain Bread for better fiber content

Equipment

  • Medium saucepan
  • toaster or broiler
  • Baking Sheet

Method
 

Step‑by‑Step Instructions for Irish Rarebit
  1. Melt butter in a saucepan, whisk in mustard, and add cheese, stirring until melted.
  2. Chop gherkins, stir into the cheese sauce.
  3. Toast the bread until golden brown.
  4. Spoon cheese mixture over toasted bread on a baking sheet.
  5. Broil until cheese bubbles and turns golden.
  6. Serve warm, optionally garnished with herbs.

Nutrition

Serving: 1sliceCalories: 250kcalCarbohydrates: 30gProtein: 10gFat: 12gSaturated Fat: 6gPolyunsaturated Fat: 1gMonounsaturated Fat: 4gCholesterol: 30mgSodium: 500mgPotassium: 250mgFiber: 3gSugar: 2gVitamin A: 250IUVitamin C: 1mgCalcium: 250mgIron: 1mg

Notes

Customize your rarebit with additional toppings like crispy bacon. Serve with a salad for a balanced meal.

Tried this recipe?

Let us know how it was!

Savory Korean Ground Beef Bowl That's Ready in 30 Minutes

October 28, 2025 by Grace Snow Leave a Comment

It’s that moment in the evening when the kitchen starts to fill with the delicious fragrance of something hearty simmering on the stove, and I can’t help but smile. Today, I’m excited to share my Quick & Flavorful Korean Ground Beef Bowl, a dish that transforms a busy weeknight into a culinary delight. In just 30 minutes, you’ll have a satisfying meal packed with tender ground beef, savory sauce, and fresh vegetables that your whole family will adore. This recipe not only caters to your cravings but also offers the freedom to customize it with your favorite veggies or even spice it up to your liking. Ready to bring a touch of Korean comfort food to your home table? Let’s see how this delightful dish comes together!

Why is this Korean Bowl a Must-Try?

Quick Preparation: This meal comes together in just 30 minutes, so you can whip it up even on the busiest nights.

Endless Customization: With the option to include your favorite vegetables like bell peppers or snap peas, every bowl can be unique to your family’s tastes.

Delicious Fusion of Flavors: The blend of savory ground beef with sweet brown sugar and umami-rich soy sauce creates a taste that’s simply irresistible.

Family-Friendly Appeal: Not only is this dish satisfying, but it’s also a fun way to introduce kids to different flavors while keeping it familiar.

Healthy Options: Swap in ground turkey or cauliflower rice for a lighter take, making it adaptable for various dietary preferences, much like my popular Fish Taco Bowls.

Delve into this recipe and treat yourself to a bowl that's big on flavor yet quick on time!

Korean Ground Beef Bowl Ingredients

• Ready to create your own delicious Korean Ground Beef Bowl? Here's what you'll need:

For the Beef Mixture

  • Ground Beef – A hearty protein base; choose lean ground beef or substitute with ground turkey for a lighter option.
  • Soy Sauce – Provides essential umami flavor; opt for low-sodium to keep it healthier.
  • Brown Sugar – Balances the savory notes with sweetness; honey works as a great alternative if desired.
  • Garlic – Infuses aromatic flavor; freshly minced garlic is recommended for maximum taste.
  • Ginger – Adds warmth and a touch of spice; fresh ginger is best, but ground ginger can work in a pinch.
  • Sesame Oil – Gives a nutty richness to the dish; olive oil can be a suitable substitute if needed.

For the Vegetables

  • Green Onions – Brightens up the dish with freshness; chop just before adding for the best flavor.
  • Vegetables (e.g., bell peppers, broccoli) – Customize your bowl with any of your favorite veggies; pre-chop for speed and convenience.

For Serving

  • Rice – The perfect base for your bowl; options include white, brown, or cauliflower rice to fit dietary needs.
  • Sesame Seeds – A crunchy garnish for added texture; sprinkle on top before serving for a delightful finish.

Prepare these ingredients, and you’ll be halfway to a comforting Korean Ground Beef Bowl that your family will love!

Step‑by‑Step Instructions for Korean Ground Beef Bowl

Step 1: Prepare the Ingredients
Begin by gathering all your ingredients for the Korean Ground Beef Bowl. Chop your preferred vegetables, like bell peppers or broccoli, and mince the garlic and ginger finely. This prep will streamline your cooking process and ensure that everything is ready for the skillet. You’ll want to have everything within easy reach to make this dish even quicker to prepare.

Step 2: Cook the Ground Beef
In a large skillet, heat 1 tablespoon of sesame oil over medium-high heat. Once the oil is shimmering, add the ground beef, breaking it apart with a spatula. Cook for 5-7 minutes, stirring occasionally, until the beef is nicely browned and cooked through. The meat should be fully opaque with no pink remaining, providing a hearty base for your flavorful bowl.

Step 3: Sauté Aromatics
Reduce the heat to medium and stir in the minced garlic and ginger to the browned beef. Sauté these aromatics for about 1-2 minutes, allowing them to become fragrant and infuse their flavor into the meat. You'll know they're ready when your kitchen fills with a delicious aroma, setting the stage for the next flavorful steps.

Step 4: Add Sauces
Pour in ¼ cup of soy sauce and sprinkle 1 tablespoon of brown sugar over the beef mixture. Mix well to ensure the beef is evenly coated in the sauce. Allow these ingredients to simmer for 2-3 minutes, stirring occasionally. This will help the flavors meld together while the sauce thickens slightly, creating a savory glaze.

Step 5: Incorporate the Vegetables
Next, fold in the chopped vegetables of your choice, cooking them alongside the beef for an additional 3-5 minutes. The goal is to achieve tender yet crisp vegetables. Keep stirring until the colors brighten, and they soften slightly but retain their fresh crunch—this adds both nutrition and visual appeal to your Korean Ground Beef Bowl.

Step 6: Cook the Rice
While the beef and vegetables are cooking, prepare your rice according to the package instructions. Use white, brown, or cauliflower rice as your base. This will take roughly 10-15 minutes, depending on your choice. Once cooked, fluff the rice with a fork and set aside, ensuring that it’s ready to soak up all the delicious flavors of the beef mixture.

Step 7: Assemble the Bowls
To serve, spoon a generous portion of the fluffy rice into bowls, topping it with the savory Korean ground beef mixture and its vegetables. For a visually appealing finish, garnish each bowl with a sprinkle of sesame seeds and a handful of chopped green onions. This final touch not only enhances the flavor but also elevates the dish for a delightful presentation.

What to Serve with Quick & Flavorful Korean Ground Beef Bowl

Every bite of this vibrant dish deserves the perfect companion to elevate your meal experience!

  • Steamed Broccoli: Its bright green color and tender crunch provide a nutritious balance to the savory beef bowl. A touch of lemon juice adds brightness to every bite.

  • Kimchi: This traditional fermented side adds tangy heat and probiotics, enhancing the meal's flavors while introducing a classic Korean element. Pair it with the beef bowl for an authentic experience.

  • Cucumber Salad: Refreshing and crunchy, a light cucumber salad drizzled with sesame dressing complements the richness of the beef, breaking up heavier flavors with bright acidity.

  • Sesame Rice Balls: These fluffy, seasoned rice balls are perfect for scooping up beef and veggies. Their delightful texture adds a playful element to each serving, making every bite fun.

  • Pickled Carrots: Sweet and tangy pickled carrots offer crunchy contrast and vibrancy. They balance the savory notes of the Korean Ground Beef Bowl while adding a splash of color to your plate.

  • Miso Soup: A warm, umami-rich miso soup serves as a cozy beverage choice alongside your meal. The gentle flavors and warmth soothe the spirit, making for a comforting experience.

  • Chilled Soba Noodles: Light yet satisfying, chilled soba noodles tossed with a touch of soy sauce and sesame oil offer a refreshing contrast. They play beautifully with the hearty ground beef providing a textural lift to your meal.

  • Fruit Salad: A light, sweet fruit salad offers a refreshing finish to this hearty dish. Select seasonal fruits to surprise your taste buds and cleanse your palate after the flavorful bowl.

  • Chardonnay: A crisp glass of Chardonnay harmonizes beautifully with the savory elements of the beef dish, enhancing the overall dining experience with its refreshing notes.

Expert Tips for the Best Korean Ground Beef Bowl

  • Prep Ahead: Chop veggies and mince garlic in advance to save precious minutes during cooking. This makes preparing your Korean Ground Beef Bowl even quicker and more enjoyable!

  • Lean Options: Opt for lean ground beef, or switch to ground turkey or chicken for a healthier alternative. This keeps the dish nutritious without sacrificing flavor.

  • Customize Veggies: Feel free to mix and match your favorite vegetables based on availability or seasonality. Broccoli, carrots, and snap peas add color and nutrition to your Korean Ground Beef Bowl.

  • Taste Test: As you add soy sauce and brown sugar, taste the mixture to adjust sweetness and saltiness according to your preference—this encourages a personal touch to the dish!

  • Rice Choices: Experiment with different types of rice, such as brown or cauliflower rice, to cater to diverse dietary needs, keeping your family meal flavorful and adaptable.

Make Ahead Options

These Korean Ground Beef Bowls are perfect for meal prep enthusiasts! You can prepare the ground beef mixture up to 3 days in advance, storing it in an airtight container in the refrigerator to maintain freshness. Chop your favorite vegetables and refrigerate them separately, as this helps keep them crisp until ready to cook. For best results, reheat the beef mixture gently in a skillet before serving. Just add the prepped vegetables during reheating, and you’ll still achieve that vibrant, crunchy texture. This method saves precious time on busy nights while ensuring that your family enjoys delicious, homemade meals that are just as flavorful as when freshly made!

Storage Tips for Korean Ground Beef Bowl

  • Fridge: Store leftovers in an airtight container for up to 3 days. Reheat gently in the microwave or on the stove until warmed through to enjoy that delicious flavor again.

  • Freezer: The beef mixture can be frozen for up to 3 months. Thaw overnight in the fridge before reheating for a quick meal on a hectic day.

  • Serving Suggestions: When reheating, consider adding a splash of soy sauce or a dash of fresh ginger to freshen up the flavors in your Korean Ground Beef Bowl.

  • Vegetable Prep: If adding fresh veggies from the fridge, toss them in right before serving to keep them crisp and vibrant, enhancing your meal's presentation and taste!

Variations & Substitutions for Korean Ground Beef Bowl

Customize your Korean Ground Beef Bowl to suit your taste buds and pantry staples!

  • Lean Meat: Swap out ground beef for ground turkey or chicken for a lighter option with fewer calories. This change keeps the dish hearty while catering to health-conscious eaters.

  • Vegetable Medley: Use whatever veggies you have on hand—think snap peas, zucchini, or shredded carrots! The beauty of this recipe lies in its flexibility; you can experiment with in-season produce to brighten your meal.

  • Rice Alternatives: If you're avoiding grains, serve the beef mixture in lettuce wraps or over cauliflower rice for a low-carb delight. Cauliflower rice provides the same texture while sneaking in extra veggies.

  • Spice It Up: For those who love a little heat, add red pepper flakes or sriracha to your sauce. A pinch of spice enhances the overall flavor and gives it a vibrant kick.

  • Sweetness Adjustments: If you prefer less sweetness, reduce or completely omit the brown sugar. You might try a dash of liquid stevia or a splash of pineapple juice for a subtle sweetness without the sugar spike.

  • Sesame Oil Swap: In case you’re out of sesame oil, olive oil will do the trick. While it might alter the flavor slightly, it still delivers a deliciously rich experience.

  • Soy Sauce Options: Make it gluten-free by using tamari sauce or coconut aminos. Both alternatives provide the necessary umami without the gluten, making this bowl accessible to those with dietary restrictions.

  • Flavor Enhancements: Incorporate fresh herbs like cilantro or basil as a topping, adding a refreshing twist and depth of flavor. It's a simple tweak that elevates the dish beautifully.

Feel free to explore, create, and make this recipe uniquely yours! And if you’re looking for more quick recipes, check out the flavors of my Ground Beef Enchiladas or energize your mornings with an Acai Bowl Nutritious.

Korean Ground Beef Bowl Recipe FAQs

What type of ground beef should I use for this recipe?
I recommend using lean ground beef for a hearty base, but you can also swap it for ground turkey or chicken if you prefer a lighter option. Look for ground beef that’s around 85% lean to ensure it remains flavorful without excessive grease.

How should I store leftovers from the Korean Ground Beef Bowl?
Store any leftovers in an airtight container and keep them in the refrigerator for up to 3 days. When you’re ready to reheat, gently warm it in the microwave or on the stovetop to retain that delicious flavor. A splash of soy sauce can help revive the taste!

Can I freeze the Korean Ground Beef Bowl mixture?
Absolutely! The beef mixture can be frozen for up to 3 months. To freeze, let it cool completely, then transfer it to a freezer-safe bag or container. Ensure you remove excess air to prevent freezer burn. When it’s time to enjoy, simply thaw it overnight in the refrigerator before reheating.

What vegetables can I use in my beef bowl?
Feel free to customize your bowl with various vegetables! Popular choices include bell peppers, broccoli, snap peas, or even shredded carrots. Just make sure to chop them into similar sizes for even cooking. Pre-chopping them can save time on busy evenings!

Are there any dietary considerations for this recipe?
Yes, for gluten-free options, choose a gluten-free soy sauce. Additionally, if you’re preparing this meal for children or anyone with allergies, always check for any allergic reactions to specific ingredients, especially with soy and sesame. This makes it suitable and safe for the entire family!

Korean Ground Beef Bowl

Savory Korean Ground Beef Bowl That's Ready in 30 Minutes

Enjoy a delicious Korean Ground Beef Bowl that's quick to prepare and customizable with fresh vegetables.
Print Recipe Pin Recipe
Prep Time 10 minutes mins
Cook Time 20 minutes mins
Total Time 30 minutes mins
Servings: 4 bowls
Course: Dinner
Cuisine: Korean
Calories: 450
Ingredients Equipment Method Nutrition Notes

Ingredients
  

For the Beef Mixture
  • 1 pound ground beef or ground turkey for a lighter option
  • 1/4 cup soy sauce low-sodium recommended
  • 1 tablespoon brown sugar or honey as an alternative
  • 3 cloves garlic freshly minced
  • 1 tablespoon fresh ginger or ground ginger in a pinch
  • 1 tablespoon sesame oil olive oil can be a substitute
For the Vegetables
  • 2 stalks green onions chopped just before adding
  • 2 cups mixed vegetables bell peppers, broccoli, or your choice
For Serving
  • 2 cups rice white, brown, or cauliflower rice
  • 2 tablespoons sesame seeds for garnish

Equipment

  • Large skillet

Method
 

Step‑by‑Step Instructions
  1. Gather all ingredients. Chop vegetables and mince garlic and ginger.
  2. Heat sesame oil in a large skillet over medium-high heat. Add ground beef, cooking for 5-7 minutes until browned.
  3. Reduce heat to medium. Add garlic and ginger, sauté for 1-2 minutes.
  4. Pour in soy sauce and sprinkle brown sugar over beef. Stir and simmer for 2-3 minutes.
  5. Add chopped vegetables and cook for an additional 3-5 minutes.
  6. Prepare rice according to package instructions.
  7. Assemble bowls with rice topped with beef mixture and garnish with sesame seeds and green onions.

Nutrition

Serving: 1bowlCalories: 450kcalCarbohydrates: 40gProtein: 30gFat: 20gSaturated Fat: 5gPolyunsaturated Fat: 2gMonounsaturated Fat: 10gCholesterol: 80mgSodium: 800mgPotassium: 600mgFiber: 3gSugar: 5gVitamin A: 500IUVitamin C: 30mgCalcium: 30mgIron: 3mg

Notes

Customize with your favorite vegetables and adjust seasoning to taste.

Tried this recipe?

Let us know how it was!

Creamy Pumpkin Tiramisu You’ll Crave This Fall

October 28, 2025 by Grace Snow Leave a Comment

As the crisp air settles in and leaves start their colorful dance, my thoughts inevitably drift to delightful fall desserts. This season, I can’t get enough of my Easy No-Bake Creamy Pumpkin Tiramisu. With layers of rich mascarpone blended with warm pumpkin spices and dainty ladyfingers soaked in espresso, this dessert beautifully captures the essence of autumn. Not only is it a breeze to whip up—perfect for busy evenings—but it’s also a crowd-pleaser, making it ideal for holiday gatherings or cozy nights at home. You can indulge without ever turning on the oven! Curious about how to create this velvety, spiced wonder yourself? Let’s dive into the delicious details!

Why is Creamy Pumpkin Tiramisu a Must-Try?

Irresistible flavor: This Easy No-Bake Creamy Pumpkin Tiramisu boasts a delightful blend of spiced pumpkin and rich mascarpone that makes every bite memorable.

Quick and simple: With just a few straightforward steps, you can whip up this luscious dessert without any baking—perfect for busy schedules.

Fall favorite: Its seasonal flavors make it a standout choice for festive gatherings. Everyone will be asking for seconds!

Customizable options: Want to cater to different diets? Easily make it vegan or add chocolate for a twist.

Serves a crowd: With generous layers, it’s designed for sharing, ensuring your guests feel welcomed and satisfied.

Have you tried something similar? Pair it with a scoop of vanilla ice cream or consider serving this alongside my Pumpkin Cinnamon Roll for a delightful dessert spread!

Creamy Pumpkin Tiramisu Ingredients

• Gather these ingredients to make this delightful dessert!

For the Cream Layer

  • Mascarpone Cheese (15.87 oz) – The creamy base providing richness; select a high-quality brand for the best texture.
  • Pumpkin Puree (1/2 cup) – Infuses warm, seasonal flavor; ensure it’s pure puree, not pie filling.
  • Granulated Sugar (2/3 cup) – Sweetens the cream; reduce if using sweetened whipped cream.
  • Brown Sugar (1/3 cup) – Adds depth of flavor; can be swapped with coconut sugar for a twist.
  • Pumpkin Pie Spice (2 teaspoons) – Provides warmth and comfort; mix your own with cinnamon, nutmeg, and ginger if needed.
  • Kosher Salt (1/4 teaspoon) – Balances sweetness; fine sea salt works in a pinch.
  • Heavy Cream (2 cups, cold) – Creates a light, fluffy texture; try whipped coconut cream for a dairy-free option.

For the Ladyfinger Layer

  • Ladyfingers (28 pieces) – Builds the structure and offers a light sponge; homemade or sponge cake can also be used as a substitute.
  • Espresso or Strong Coffee (2 cups, cooled) – Soaks the ladyfingers for added flavor; cold brew works well if brewed strong.

For the Garnish

  • Cocoa Powder – Used for dusting the dessert before serving, adds a rich visual contrast.

Now you’re ready to make your Creamy Pumpkin Tiramisu and treat your taste buds to fall’s essence!

Step‑by‑Step Instructions for Easy Creamy Pumpkin Tiramisu

Step 1: Brew Coffee
Start by brewing 2 cups of strong espresso or coffee. Allow it to cool to room temperature, which should take about 15-20 minutes. This cooling step is essential to avoid sogging the ladyfingers. Once cooled, pour the coffee into a shallow dish.

Step 2: Make Cream
In a large mixing bowl, combine 15.87 oz of mascarpone cheese, 2/3 cup of granulated sugar, 1/3 cup of brown sugar, 1/4 teaspoon of kosher salt, and 2 teaspoons of pumpkin pie spice. Beat the mixture until it's smooth and creamy. Gradually blend in 1/2 cup of pumpkin puree, followed by 2 cups of cold heavy cream, whipping for about 3-4 minutes until you achieve a thick, mousse-like texture.

Step 3: Layer 1
Take your cooled coffee and quickly dip the ladyfingers, one at a time, for just 1-2 seconds to soak. Arrange them in a single layer at the bottom of a 13x9 inch dish, creating a sturdy base for your Easy Creamy Pumpkin Tiramisu. The ladyfingers should be soft but still hold their shape for the best texture.

Step 4: Cream Layer 1
Spoon half of the creamy pumpkin mixture over the first layer of coffee-soaked ladyfingers. Use a spatula to spread it evenly, ensuring every corner is covered. This creamy layer adds a delicious, rich contrast to the base, enriching the overall flavor of your tiramisu.

Step 5: Layer 2
Repeat the dipping process with another batch of ladyfingers, soaking them briefly in the cooled coffee. Arrange this new layer of ladyfingers on top of the first cream layer, ensuring they are placed closely together for good structure. The overlap will help to create a delightful balance in your Easy Creamy Pumpkin Tiramisu.

Step 6: Top
Spread the remaining creamy pumpkin mixture over the second layer of ladyfingers. Smooth the top layer with a spatula, making it as even and beautiful as possible. This final layer will be the star of your dessert, providing a luscious finish that welcomes guests in for a taste.

Step 7: Chill
Cover your assembled Creamy Pumpkin Tiramisu with plastic wrap or a lid. Refrigerate it for at least 4 hours, or ideally overnight, to allow the flavors to meld together. Chilling also helps the dessert set up properly, making it easier to slice and serve later.

Step 8: Finish & Serve
Before serving, dust the top of your Easy Creamy Pumpkin Tiramisu with cocoa powder for an elegant finishing touch. Optionally, you can sprinkle a little ground cinnamon on top for added warmth and spice. Slice it into squares, and get ready to impress your friends and family!

How to Store and Freeze Creamy Pumpkin Tiramisu

  • Fridge: Store your Creamy Pumpkin Tiramisu covered in the refrigerator for up to 3 days. This keeps it fresh and preserves the layers' texture.
  • Freezer: For longer storage, you can freeze the tiramisu for up to 2 months. Wrap it tightly in plastic wrap and foil to prevent freezer burn.
  • Thawing: When ready to enjoy, thaw your frozen Creamy Pumpkin Tiramisu in the fridge overnight. Avoid microwaving, as it can alter the creamy texture.
  • Serving After Freezing: Dust with cocoa powder just before serving for a fresh touch, as the garnish may not hold up during freezing.

What to Serve With Easy Creamy Pumpkin Tiramisu

Pairing a sweet and delightful dessert like this Easy Creamy Pumpkin Tiramisu can elevate your meal to a whole new level of comfort and joy.

  • Spiced Apple Cider: The warmth of spiced apple cider enhances the fall flavors, bringing cozy memories to the table.

  • Vanilla Ice Cream: A scoop of creamy vanilla ice cream adds a rich, smooth contrast to the fluffy tiramisu, creating a delightful melt-in-your-mouth experience.

  • Ginger Cookies: Crunchy ginger cookies add a satisfying texture while their spicy sweetness complements the pumpkin flavors beautifully.

  • Pecan Pie: This classic dessert pairs perfectly with the tiramisu, offering a nutty contrast that enhances the autumn vibe of your gathering.

  • Maple Whipped Cream: Adding a dollop of maple-flavored whipped cream brings a sweet, creamy touch that complements the pumpkin and spice tones beautifully.

  • Chocolate Espresso Martinis: For a sophisticated drink pairing, these cocktails elevate the coffee notes in your tiramisu while giving your guests a delightful indulgence.

  • Nutty Fall Salad: A fresh salad with toasted nuts, seasonal greens, and a light vinaigrette provides a crunchy balance to the creamy texture of the tiramisu.

  • Pumpkin Spice Latte: Serve alongside this iconic beverage to enhance the cozy ambiance and keep the pumpkin love alive.

  • Dark Chocolate Covered Almonds: The bitterness of dark chocolate paired with crunchy almonds adds an elegant touch to the dessert while complementing the sweet flavors of the tiramisu with a sophisticated twist.

Each of these pairings offers a unique twist, enhancing your Easy Creamy Pumpkin Tiramisu experience and making your gatherings unforgettable!

Expert Tips for Creamy Pumpkin Tiramisu

  • Quality Ingredients: Use high-quality mascarpone and pure pumpkin puree to enhance the flavor and texture, ensuring your Creamy Pumpkin Tiramisu stands out.
  • Coffee Cooling: Make sure the brewed coffee is fully cooled before dipping the ladyfingers. This prevents them from becoming too soggy, keeping the layers distinct.
  • Quick Dipping: Only dip ladyfingers for 1-2 seconds in coffee to maintain their structural integrity. Soaking too long can result in mushy layers.
  • Chill Time: For the best flavor, refrigerate your tiramisu for at least 4 hours but ideally overnight to allow the flavors to meld perfectly.
  • Layering Magic: Ensure that the layers of cream and ladyfingers are even and well-distributed; this balance creates a delightful texture in every bite.

Make Ahead Options

These Easy Creamy Pumpkin Tiramisu layers are perfect for meal prep enthusiasts! You can prepare the mascarpone cream and soak the ladyfingers up to 24 hours in advance for a quick, stress-free dessert. Just whip together the mascarpone, pumpkin puree, and spices, then layer with the coffee-soaked ladyfingers in your dish. Before serving, allow the tiramisu to chill in the refrigerator for at least 4 hours (or overnight) to ensure rich flavors meld together beautifully. For the best texture, cover it tightly with plastic wrap to prevent drying out. When it’s time to serve, simply dust with cocoa powder and enjoy this luscious fall treat with minimal effort!

Creamy Pumpkin Tiramisu Customizations

Feel free to personalize your Easy Creamy Pumpkin Tiramisu with these delightful variations that will only enhance your fall dessert experience!

  • Dairy-Free: Substitute heavy cream with whipped coconut cream for a creamy, rich alternative that fits any dairy-free diet. Your dessert will still maintain its luxurious texture!

  • Nutty Addition: Include 1/2 cup of toasted pecans or walnuts folded into the cream. This adds a satisfying crunch that contrasts beautifully with the smoothness of the mascarpone.

  • Chocolate Flavor: For a richer twist, fold in mini chocolate chips into the mascarpone mixture. Chocolate meets pumpkin is a dynamic duo that always pleases the palate.

  • Vegan Version: Easily turn this treat into a vegan delight by using coconut whipped cream and a vegan cream cheese alternative. Enjoy the same creamy goodness without any animal products!

  • Spicy Kick: Infuse a bit of heat by adding a pinch of cayenne or chili powder. This unexpected twist brings a delightful warmth to the classic pumpkin flavors.

  • Flavor Swap: Instead of pumpkin puree, try using sweet potato or butternut squash. Each swap brings its unique sweet earthiness, allowing you to switch up the flavor while still staying within the fall spirit.

  • Crunchy Topping: Sprinkle crushed gingersnaps or graham crackers on top before serving for an additional texture layer and a lovely crunch along with the softness.

Looking to extend your pumpkin cravings? You might find joy in my recipe for Pumpkin Brownies Decadent or perhaps treat yourself to some lovely Pumpkin Cinnamon Roll delights!

Creamy Pumpkin Tiramisu Recipe FAQs

How do I select the best pumpkin puree for my Creamy Pumpkin Tiramisu?
Absolutely! When choosing pumpkin puree, opt for 100% pure pumpkin without added sugars or spices. Look for labels that specifically state "pure pumpkin" on the can to ensure you're getting the real deal, as some products labeled "pumpkin" may contain fillers or additives.

How should I store my Creamy Pumpkin Tiramisu?
Store your Creamy Pumpkin Tiramisu covered in the refrigerator for up to 3 days. Make sure it’s tightly wrapped with plastic wrap or kept in an airtight container to maintain its layers' texture and flavor. If you want to keep it longer, consider freezing!

Can I freeze my Creamy Pumpkin Tiramisu?
Very much! You can freeze your Creamy Pumpkin Tiramisu for up to 2 months. Just wrap it tightly in plastic wrap and then in foil to prevent freezer burn. When you’re ready to enjoy, thaw it in the fridge overnight; avoid using the microwave, as it alters the creamy texture.

What if my ladyfingers become too soggy?
No worries! If you find your ladyfingers have become too soggy, it might be due to soaking them for too long in the coffee. Aim for a quick dip, just 1-2 seconds, to maintain their texture. If they’re overly soft, consider using a bit less coffee for the next batch or adjusting your dipping time.

Can I make a vegan version of the Creamy Pumpkin Tiramisu?
Absolutely! To make a vegan version, there are delightful alternatives. Use coconut whipped cream in place of heavy cream and a vegan cream cheese substitute for the mascarpone. Look for plant-based options that provide a similar creamy texture while ensuring a delicious pumpkin flavor!

What should I do with my Creamy Pumpkin Tiramisu leftovers?
After enjoying your delicious dessert, if you have any leftovers, keep them in the refrigerator properly covered for up to 3 days. Remember, the flavors improve with time, so your next serving may taste even better as the layers meld together!

Creamy Pumpkin Tiramisu

Creamy Pumpkin Tiramisu You’ll Crave This Fall

Indulge in this Easy No-Bake Creamy Pumpkin Tiramisu, a delightful dessert filled with warm spices and rich mascarpone, perfect for fall gatherings.
Print Recipe Pin Recipe
Prep Time 30 minutes mins
Chill Time 4 hours hrs
Total Time 4 hours hrs 30 minutes mins
Servings: 10 slices
Course: Dessert
Cuisine: Italian
Calories: 340
Ingredients Equipment Method Nutrition Notes

Ingredients
  

For the Cream Layer
  • 15.87 oz Mascarpone Cheese Select a high-quality brand for the best texture.
  • 1/2 cup Pumpkin Puree Ensure it’s pure puree, not pie filling.
  • 2/3 cup Granulated Sugar Reduce if using sweetened whipped cream.
  • 1/3 cup Brown Sugar Can be swapped with coconut sugar for a twist.
  • 2 teaspoons Pumpkin Pie Spice Mix your own with cinnamon, nutmeg, and ginger if needed.
  • 1/4 teaspoon Kosher Salt Fine sea salt works in a pinch.
  • 2 cups Heavy Cream Try whipped coconut cream for a dairy-free option.
For the Ladyfinger Layer
  • 28 pieces Ladyfingers Homemade or sponge cake can also be used as a substitute.
  • 2 cups Espresso or Strong Coffee Cold brew works well if brewed strong.
For the Garnish
  • Cocoa Powder Used for dusting the dessert before serving.

Equipment

  • Mixing Bowl
  • 13x9 inch dish
  • Shallow dish

Method
 

Step-by-Step Instructions
  1. Brew 2 cups of strong espresso or coffee and allow it to cool to room temperature for about 15-20 minutes.
  2. In a large mixing bowl, combine mascarpone cheese, granulated sugar, brown sugar, kosher salt, and pumpkin pie spice. Beat until smooth and creamy, then blend in pumpkin puree and heavy cream for 3-4 minutes until thick.
  3. Dip ladyfingers in cooled coffee for 1-2 seconds and arrange them in a single layer in a 13x9 inch dish.
  4. Spread half of the creamy pumpkin mixture over the first layer of coffee-soaked ladyfingers evenly.
  5. Repeat the dipping process and place another batch of ladyfingers on top of the first cream layer closely together.
  6. Spread the remaining creamy pumpkin mixture over the second layer of ladyfingers evenly.
  7. Cover with plastic wrap and refrigerate for at least 4 hours or ideally overnight to set.
  8. Before serving, dust with cocoa powder and slice into squares.

Nutrition

Serving: 1sliceCalories: 340kcalCarbohydrates: 40gProtein: 4gFat: 18gSaturated Fat: 10gPolyunsaturated Fat: 0.5gMonounsaturated Fat: 6gCholesterol: 75mgSodium: 90mgPotassium: 150mgFiber: 1gSugar: 20gVitamin A: 15IUVitamin C: 2mgCalcium: 6mgIron: 4mg

Notes

For the best flavor, refrigerate overnight. Use high-quality ingredients for best results.

Tried this recipe?

Let us know how it was!
  • « Previous Page
  • 1
  • …
  • 177
  • 178
  • 179
  • 180
  • 181
  • …
  • 244
  • Next Page »

Welcome!

Hi, I’m Grace, a Sydney-based home cook with a passion for bold flavors and trending ingredients. Whether you’re a busy beginner or a seasoned foodie, you’ll find dishes here that are fresh, fun, and full of flavor.

More about me

Popular Recipes

  • Delicious Keto Philly Cheesesteak Bowls You’ll Crave Daily
  • twice baked potato casserole
    Indulge in This Creamy Twice Baked Potato Casserole Delight
  • Red Potato Casserole
    Irresistible Red Potato Casserole with Crunchy Topping
  • Cowboy Potato Casserole
    Comforting Cowboy Potato Casserole for Cozy Nights

Footer

↑ back to top

About

  • Privacy Policy
  • Disclaimer
  • Terms & Conditions

Newsletter

  • Sign Up! for emails and updates

Contact

  • About me
  • Contact me

Copyright © 2025 TastyTrendIngredients