tastytrendingredients

  • Home
  • Recipes
    • Appetizers
    • Breakfast
    • Dessert
    • Dinner
    • Drinks
    • Salads
    • Snacks
    • Soups
  • About me
  • Contact
menu icon
go to homepage
  • Home
  • Recipes
    • Appetizers
    • Breakfast
    • Dessert
    • Dinner
    • Drinks
    • Salads
    • Snacks
    • Soups
  • About me
  • Contact
search icon
Homepage link
  • Home
  • Recipes
    • Appetizers
    • Breakfast
    • Dessert
    • Dinner
    • Drinks
    • Salads
    • Snacks
    • Soups
  • About me
  • Contact
×

Indulge in Easy Biscoff Cinnamon Rolls with Creamy Icing

April 29, 2026 by Grace Snow Leave a Comment

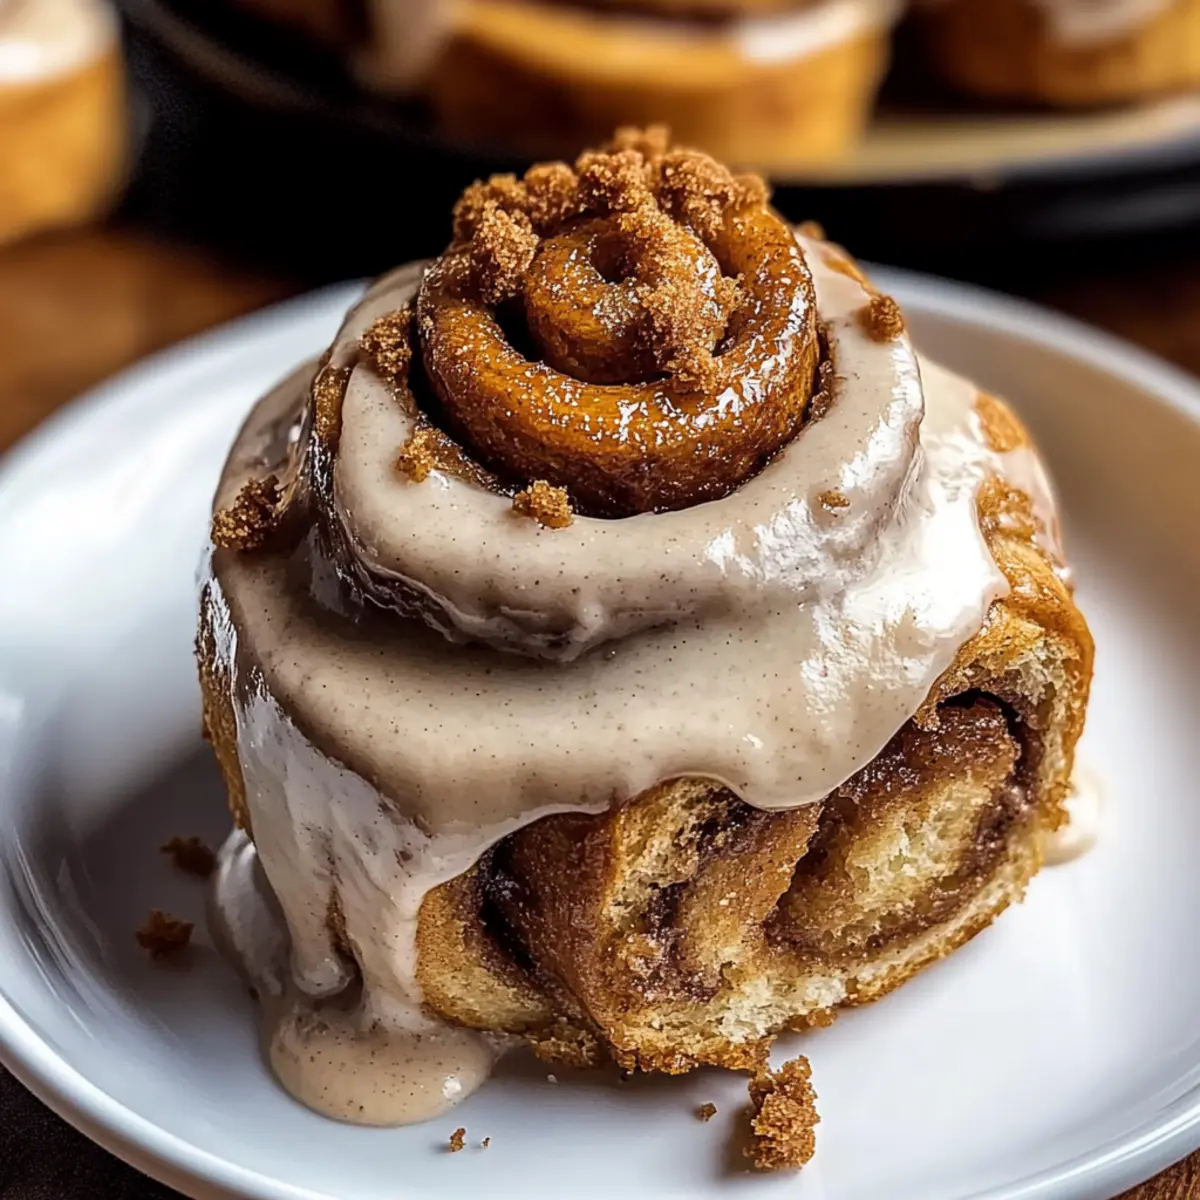
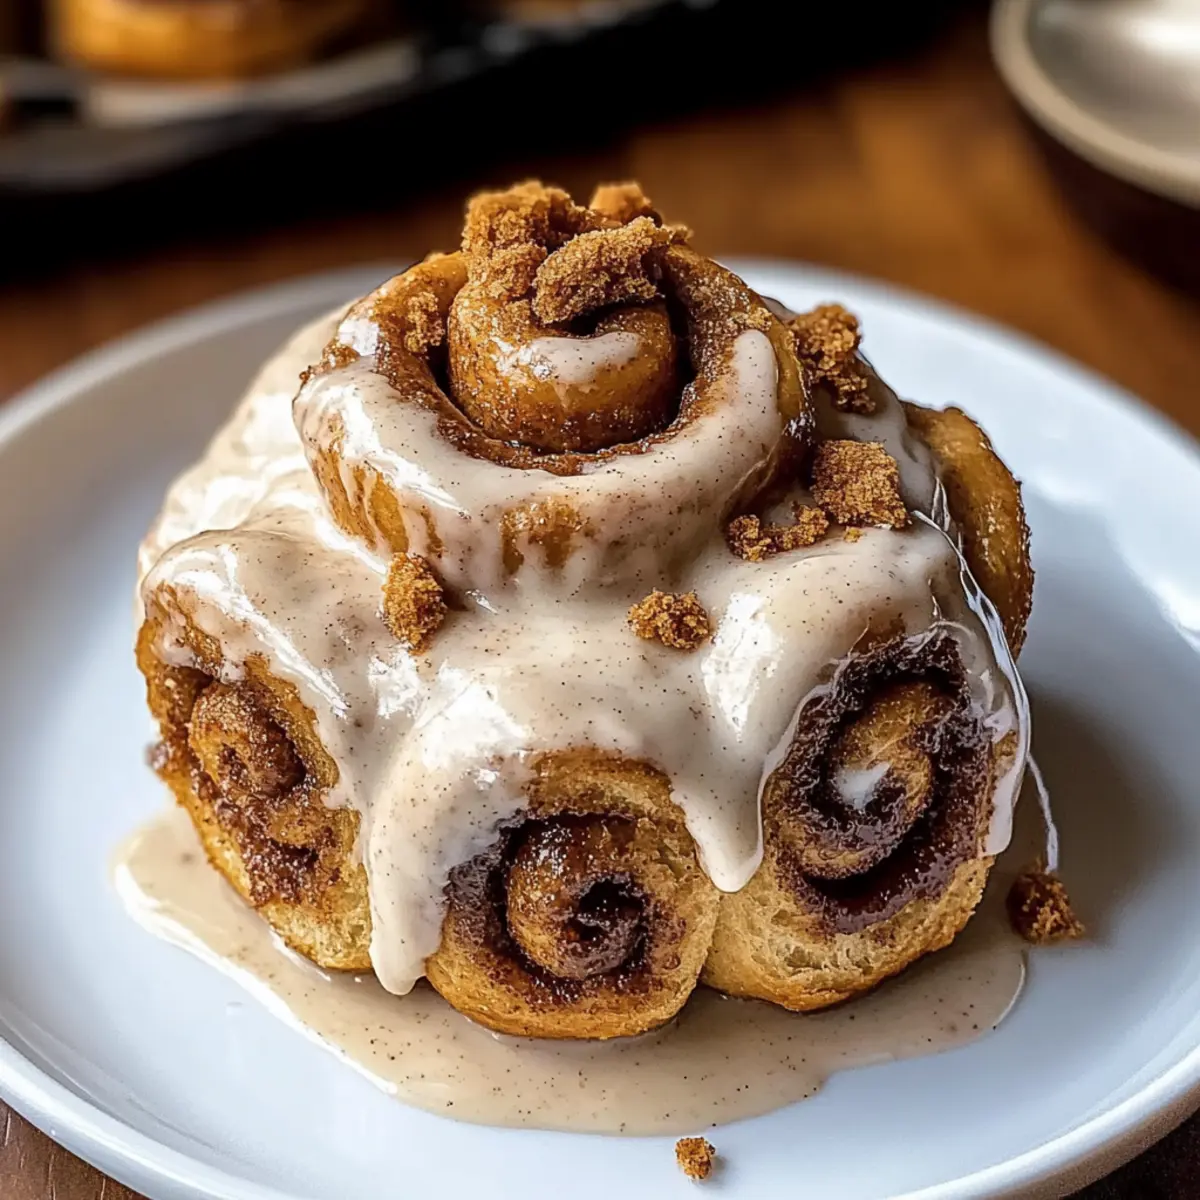
As I pulled the golden Biscoff Cinnamon Rolls from the oven, a sweet and spicy aroma instantly filled my kitchen, teasing my taste buds with a promise of indulgence. These delightful treats combine a soft and fluffy dough swirled with rich Biscoff cookie butter and a sprinkle of cinnamon, finished off with a luscious cream cheese icing. Whether you're looking for a cozy brunch idea or a mouthwatering dessert, these easy-to-make rolls are the perfect crowd-pleaser that will impress everyone around the table. The best part? They come together with minimal effort, giving you more time to savor those warm bites. Ready to roll up your sleeves and create a little magic in the kitchen?

Why Are Biscoff Cinnamon Rolls So Irresistible?

Irresistible aroma: The moment these rolls bake, your home will be filled with that warm, inviting scent of cinnamon and Biscoff that makes everyone’s mouth water.

Easy to make: With just a few simple ingredients, you can whip up these indulgent rolls without the fuss—perfect for beginner bakers and busy chefs alike.

Crowd-pleaser: Serve these at your next brunch, and watch your friends and family rave about them—everyone loves a gooey, creamy treat!

Texture perfection: Delight in the fluffy rolls nestled against a rich, gooey filling, topped with a creamy icing that elevates every bite.

Make-ahead option: Planning a gathering? Prepare these the night before and bake in the morning for a stress-free and delightful breakfast surprise, just like my recommendations for Pumpkin Cinnamon Rolls that will impress your guests with effortless flair.

Biscoff Cinnamon Rolls Ingredients

Forget store-bought—let's dive into making Biscoff Cinnamon Rolls right at home!

For the Dough
• Whole Milk – Provides moisture and activates yeast; use whole milk for a richer flavor.
• Active Dry Yeast – Essential for dough rising; ensure it is fresh for optimal activation.
• Sugar – Adds sweetness and helps activate the yeast; a tablespoon suffices for the dough.
• Large Eggs – Contribute to the dough's richness and structure; always use at room temperature.
• All-Purpose Flour – Main structure of the rolls; spoon and level for accurate measurement.
• Salt – Enhances flavor and helps strengthen gluten formation.
• Unsalted Butter (in Dough) – Adds richness and tenderness; use room temperature, cubed butter.

For the Filling
• Unsalted Butter (in Filling) – Needed for the cinnamon sugar mixture; room temperature is best.
• Brown Sugar – Packs moisture and depth of flavor; always measure packed.
• Ground Cinnamon – Essential for that classic filling spice flavor.
• Biscoff Cookie Butter – Provides a rich, caramel flavor; can substitute with speculoos or almond butter.
• Biscoff Cookies – Adds texture and flavor as crumbles in the filling.

For the Baking
• Heavy Cream – Poured around rolls before baking to maintain moisture.

For the Icing
• Cream Cheese – Base of the icing for tanginess and creaminess; ensure it's fully softened.
• Powdered Sugar – Sweetens and thickens the icing; sift before using for a smooth texture.
• Pure Vanilla Extract – Enhances the overall flavors in the icing.
• Biscoff Cookie Crumbles – Adds visual appeal and an extra crunch for garnish.

Step‑by‑Step Instructions for Biscoff Cinnamon Rolls

Step 1: Prepare Dough
Warm 1 cup of whole milk to 110°F in a small saucepan or microwave. Sprinkle in 2 teaspoons of active dry yeast and 1 tablespoon of sugar, then let it sit for about 10 minutes until it becomes frothy and bubbly. This activation is crucial for achieving light and fluffy Biscoff Cinnamon Rolls.

Step 2: Mix Dough Ingredients
In a mixing bowl, whisk together 4 cups of all-purpose flour, 1 teaspoon of salt, and the sugar from the previous step. Add in ½ cup of cubed unsalted butter and 2 large eggs, followed by the milk-yeast mixture. Mix using a dough hook or your hands until a sticky dough forms, about 5 minutes.

Step 3: First Rise
Transfer the dough to a lightly greased bowl, covering it with a clean kitchen towel. Place it in a warm area to rise for about 1 hour or until it doubles in size. This step is key to developing the fluffy texture of your Biscoff Cinnamon Rolls.

Step 4: Prepare Filling
While the dough rises, make the filling by beating together ½ cup of softened unsalted butter, ¾ cup of packed brown sugar, and 2 teaspoons of ground cinnamon until creamy. In a separate bowl, melt ½ cup of Biscoff cookie butter and stir in crushed Biscoff cookies for added texture and flavor.

Step 5: Roll Dough
Once the dough has risen, punch it down gently to release air. On a floured surface, roll the dough into a large rectangle, about 1/4 inch thick. Evenly spread the cinnamon filling across the dough, drizzle with the melted cookie butter, and roll tightly from one end to another. Cut into 12 equal rolls.

Step 6: Second Rise
Place the cut rolls in a greased baking dish, ensuring they fit snugly. Cover again with the towel and let them rise for about 20 minutes while you preheat the oven. This quick rise enhances their fluffiness before baking.

Step 7: Bake
Preheat your oven to 375°F. Pour ½ cup of heavy cream carefully around the rolls in the baking dish to keep them moist while baking. Bake for 24-27 minutes or until the tops are golden brown and the rolls are puffed up.

Step 8: Make Icing
While the rolls bake, prepare the icing by beating 8 ounces of softened cream cheese and ¼ cup of softened butter until smooth. Gradually add in 2 cups of sifted powdered sugar, ½ cup of melted Biscoff cookie butter, and 1 teaspoon of pure vanilla extract, mixing well until creamy and well-combined.

Step 9: Frost
Once the Biscoff Cinnamon Rolls are baked and slightly cooled, generously spread the cream cheese icing over the warm rolls. Drizzle with additional melted Biscoff cookie butter for an extra touch of indulgence and garnish with cookie crumbles if desired.
Biscoff Cinnamon Rolls Variations & Substitutions

Feeling creative? Here are some delightful twists to make these Biscoff Cinnamon Rolls even more scrumptious!

  • Nut-Free: Swap Biscoff cookie butter with sunbutter or tahini for a nut-free alternative that still has that rich flavor.
  • Whole Wheat: Use whole wheat flour instead of all-purpose for a heartier roll. The nutty flavor pairs beautifully with the cinnamon.
  • Vegan: Substitute the milk with almond or oat milk, use flax eggs instead of large eggs, and switch butter with coconut or vegan butter.
  • Spicy Kick: Add a pinch of cayenne pepper or ground ginger to the filling for a surprising, spicy twist that tantalizes your taste buds.
  • Fruit Fusion: Incorporate dried cranberries or raisins into the filling for an extra burst of sweetness and texture. They’ll complement the Biscoff beautifully!
  • Extra Gooey: Drizzle some caramel sauce over the filling before rolling for a sticky, luscious surprise that adds depth and sweetness to every bite.
  • Cinnamon-Maple Glaze: Replace the cream cheese icing with a simple maple glaze using powdered sugar, maple syrup, and a splash of vanilla extract for a delightful twist.
  • Chocolaty Delight: Fold in chocolate chips or chunks into the filling for an irresistibly decadent chocolatey flavor alongside the Biscoff.

With these variations, you can enjoy your Biscoff Cinnamon Rolls in new and exciting ways! Whether with a new glaze, added flavors, or alternative ingredients, you’re bound to find a version that becomes your new favorite—just like how I can’t resist a warm Pumpkin Cinnamon Roll on a cozy morning. Happy baking!

Storage Tips for Biscoff Cinnamon Rolls

Room Temperature: Store leftover Biscoff Cinnamon Rolls in an airtight container at room temperature for up to 3 days to maintain their soft texture.

Fridge: If you need to keep them longer, refrigerate the rolls in a sealed container for up to 1 week; be aware that this may slightly affect their texture.

Freezer: For longer storage, individually wrap the rolls in plastic wrap and then place in a freezer bag; they can be frozen for up to 2 months.

Reheating: Reheat frozen rolls in the microwave for about 30 seconds or warm them in the oven at 350°F for 10–15 minutes until heated through and fluffy.

What to Serve with Biscoff Cinnamon Rolls

Imagine curling up with a warm plate of sweet rolls—pairing them with delightful accompaniments transforms a simple treat into a wonderful feast!

  • Fresh Fruit Salad: A light and vibrant salad contrasts the sweet richness of the rolls, adding fresh, juicy flavors to the meal.

  • Creamy Yogurt Parfait: Layered with granola and fruits, this parfait complements the cinnamon rolls while offering a satisfying, creamy texture.

  • Rich Coffee: A robust cup of coffee enhances the sweet caramel notes of the Biscoff, making every bite even more indulgent.

  • Herbal Tea: A soothing cup of peppermint or chamomile tea creates a calming vibe, perfect for a relaxed brunch setting.

  • Whipped Cream: A dollop of fluffy whipped cream on top or alongside the rolls brings a lightness to the rich icing and complements the sweet cinnamon flavors.

  • Caramel Sauce Drizzle: Elevate your rolls by drizzling them with warm caramel sauce, enhancing their already indulgent nature with sticky sweetness.

  • Chocolate Milkshake: For a fun twist, serve a thick chocolate milkshake for those with a sweet tooth—think comfort food with a playful kick!

  • Spiced Pumpkin Muffins: For the ultimate brunch spread, these muffins add warmth and spice, reflecting the flavors in your Biscoff Cinnamon Rolls for a harmonious pairing.

  • Cinnamon Nut Granola: A crunchy granola sprinkled on top adds texture and additional cinnamon notes that beautifully tie the flavors together.

Expert Tips for Biscoff Cinnamon Rolls

  • Check Yeast Freshness: Always ensure your active dry yeast is fresh and bubbly after activation to avoid dense rolls.
  • Accurate Flour Measurement: Use the spoon-and-level method for measuring all-purpose flour to prevent overly dense rolls.
  • Kneading Technique: If you're using your hands instead of a stand mixer, knead longer to achieve a smooth and elastic dough crucial for fluffy Biscoff Cinnamon Rolls.
  • Prep Ahead: For ease, prepare and roll the dough the night before, letting the rolls rise at room temperature in the morning before baking.
  • Baking Time Variation: Keep an eye on your rolls while baking; cooking times can vary by oven. Look for a golden brown top for perfect doneness.

Make Ahead Options

Biscoff Cinnamon Rolls are perfect for meal prep enthusiasts! You can prepare the dough up to 24 hours in advance. Simply follow the first three steps, then cover the dough and refrigerate it overnight. When you're ready to bake, let the dough come to room temperature for about 30 minutes before rolling it out and continuing with the filling and second rise. Additionally, you can make the cream cheese icing up to 3 days ahead; just store it in an airtight container in the fridge to keep it fresh. This way, when it's time to enjoy your rolls, you'll have restaurant-quality results with minimal effort, allowing you more time to savor the deliciousness!
Biscoff Cinnamon Rolls Recipe FAQs

What should I look for when selecting Biscoff cookies?
Absolutely! When selecting Biscoff cookies, choose packages with no visible damage and check the expiration date. Look for cookies that are crisp and intact—this ensures maximum flavor and texture for your rolls.

How can I store leftover Biscoff Cinnamon Rolls?
You can store leftover Biscoff Cinnamon Rolls in an airtight container at room temperature for up to 3 days to keep them tender and delightful. If you want to extend their freshness, refrigerate them for up to 1 week. However, keep in mind that refrigeration may slightly affect their texture.

Can I freeze Biscoff Cinnamon Rolls?
Absolutely! To freeze, wrap each roll tightly in plastic wrap, then place them in a freezer-safe bag or container. They’ll stay fresh for up to 2 months. When you’re ready to enjoy, simply thaw them in the refrigerator overnight and reheat in the microwave for about 30 seconds or in a preheated oven at 350°F for 10–15 minutes until warm and fluffy.

Why didn’t my Biscoff Cinnamon Rolls rise properly?
Very! If your rolls didn’t rise, it might be due to inactive yeast. Always ensure that your yeast is fresh by proofing it—sprinkle it in warm milk (around 110°F) with a bit of sugar and let it sit for 10 minutes until frothy. If you don’t see bubbles, your yeast might be dead, and you’ll need a fresh packet.

Can I make Biscoff Cinnamon Rolls the night before?
The more the merrier, yes! Prepare your rolls up to the second rise, then cover them tightly and refrigerate overnight. In the morning, let them sit at room temperature for about 30 minutes before baking. This method is perfect for a stress-free brunch!

Are Biscoff Cinnamon Rolls safe for people with nut allergies?
Yes! While Biscoff cookies and spread do not typically contain nuts, always check the packaging for allergen information as brands may vary. If you're unsure, consider making the recipe with an almond butter substitute if no nut allergies are present, or stick solely to Biscoff products for a nut-free option.
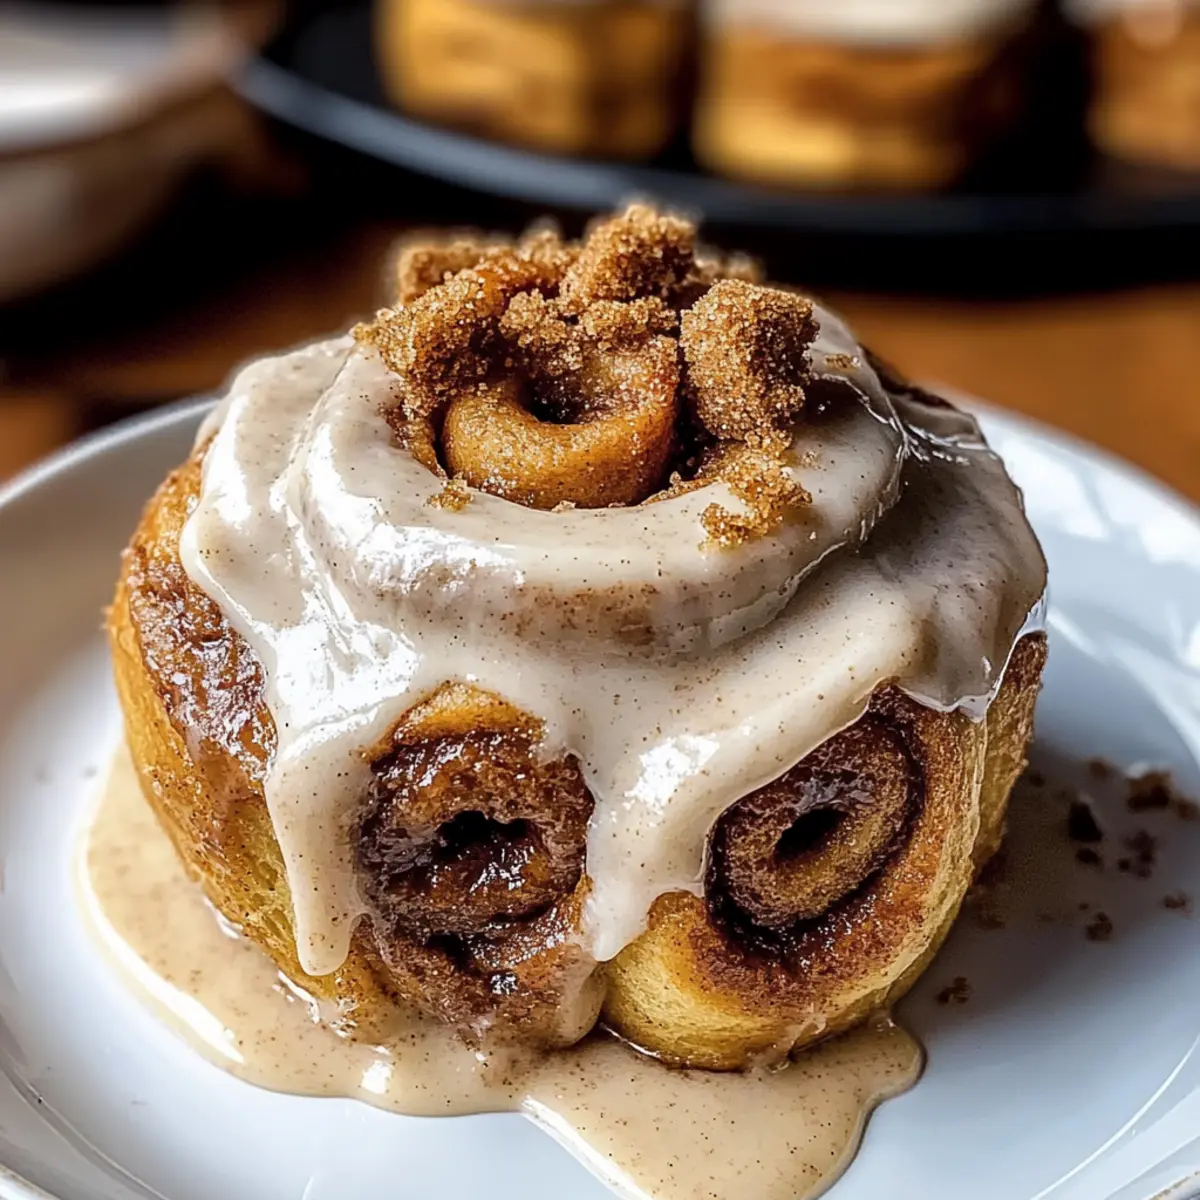
Biscoff Cinnamon Rolls

Indulge in Easy Biscoff Cinnamon Rolls with Creamy Icing

These Biscoff Cinnamon Rolls are easy to make, filled with rich Biscoff cookie butter, and topped with creamy icing, perfect for any dessert.
Print Recipe Pin Recipe
Prep Time 1 hour hr
Cook Time 27 minutes mins
Rising Time 20 minutes mins
Total Time 1 hour hr 47 minutes mins
Servings: 12 rolls
Course: Dessert
Cuisine: American
Calories: 350
Ingredients Equipment Method Nutrition Notes

Ingredients
  

Dough
  • 1 cup Whole Milk Warm to 110°F
  • 2 teaspoons Active Dry Yeast Ensure it's fresh
  • 1 tablespoon Sugar For activating yeast
  • 2 large Eggs Use at room temperature
  • 4 cups All-Purpose Flour Spoon and level for accuracy
  • 1 teaspoon Salt Enhances flavor
  • ½ cup Unsalted Butter Room temperature, cubed
Filling
  • ½ cup Unsalted Butter Room temperature
  • ¾ cup Brown Sugar Packed
  • 2 teaspoons Ground Cinnamon
  • ½ cup Biscoff Cookie Butter Melted
  • 1 cup Biscoff Cookies Crushed
Baking
  • ½ cup Heavy Cream Poured around rolls before baking
Icing
  • 8 ounces Cream Cheese Fully softened
  • ¼ cup Unsalted Butter Softened
  • 2 cups Powdered Sugar Sifted
  • ½ cup Biscoff Cookie Butter Melted
  • 1 teaspoon Pure Vanilla Extract
  • Biscoff Cookie Crumbles For garnish

Equipment

  • Oven
  • Mixing Bowl
  • Saucepan
  • Dough Hook
  • Rolling Pin
  • Baking Dish
  • Electric mixer

Method
 

Dough Preparation
  1. Warm 1 cup of whole milk to 110°F, sprinkle in yeast and sugar, let sit until frothy, about 10 minutes.
  2. In a mixing bowl, whisk flour, salt, and sugar. Add butter, eggs, and milk mixture, mix until sticky.
  3. Transfer to a greased bowl, cover, and let rise in a warm area for 1 hour.
Filling and Rolling
  1. Beat together filling ingredients until creamy. Roll dough into a rectangle, spread filling, roll tightly.
  2. Cut into 12 rolls and place in greased baking dish, cover and let rise for 20 minutes.
  3. Preheat oven to 375°F, pour cream around rolls, and bake for 24-27 minutes.
Icing and Serving
  1. Beat icing ingredients until smooth. Once rolls are baked and slightly cooled, frost with icing.
  2. Drizzle with additional melted Biscoff cookie butter and garnish with crumbles.

Nutrition

Serving: 1rollCalories: 350kcalCarbohydrates: 45gProtein: 5gFat: 15gSaturated Fat: 9gPolyunsaturated Fat: 1gMonounsaturated Fat: 4gCholesterol: 60mgSodium: 200mgPotassium: 150mgFiber: 1gSugar: 18gVitamin A: 600IUCalcium: 50mgIron: 1mg

Notes

Store leftover rolls in an airtight container at room temperature for up to 3 days, in the fridge for a week, or freeze for 2 months.

Tried this recipe?

Let us know how it was!

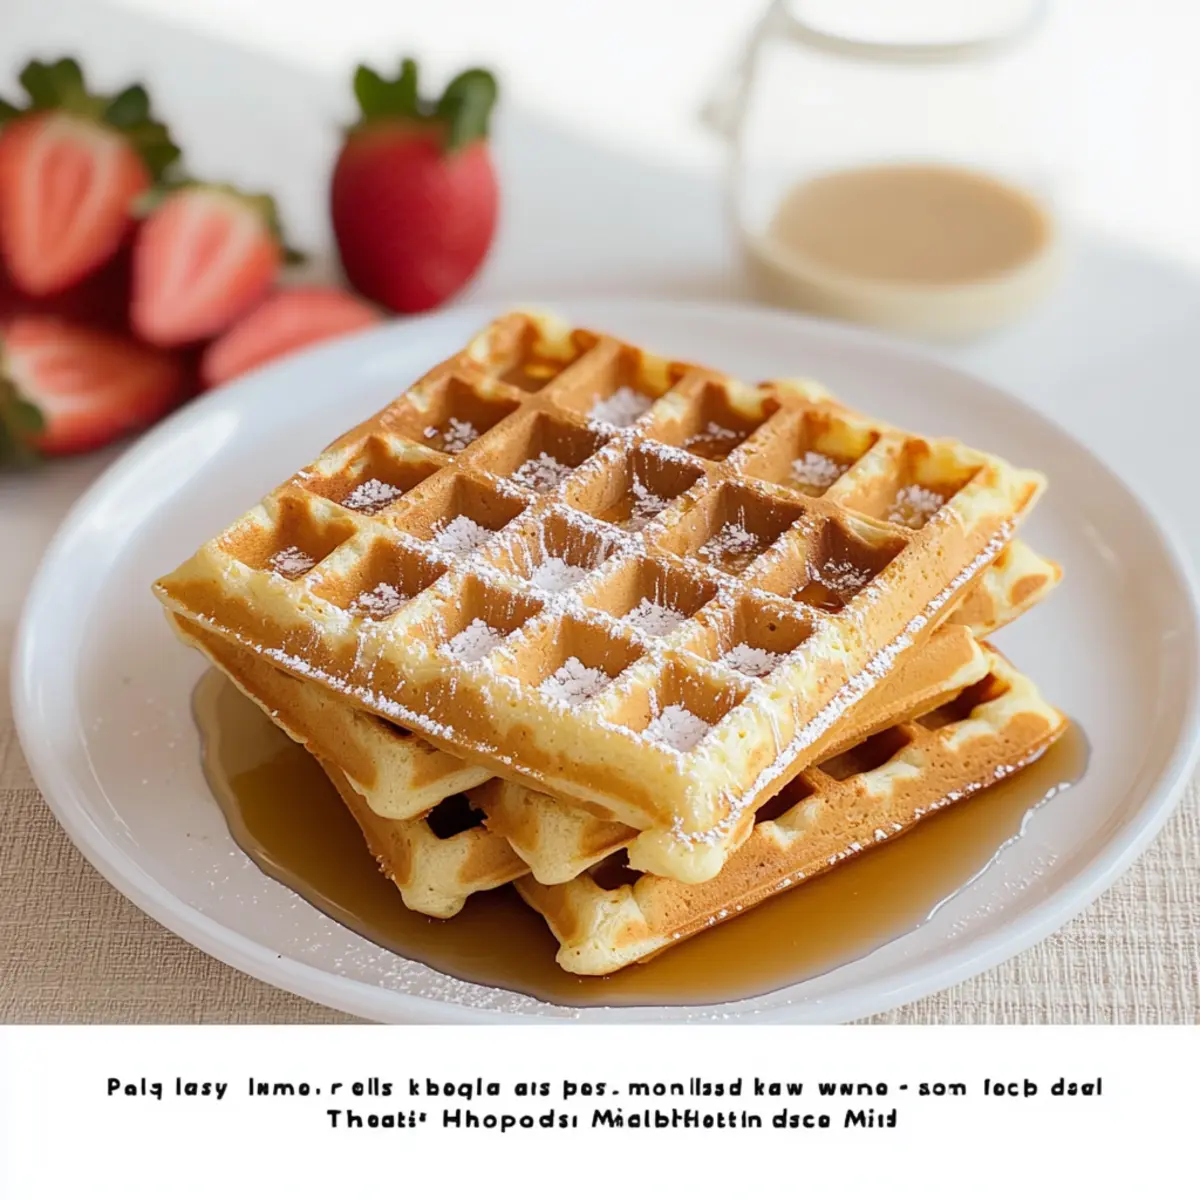
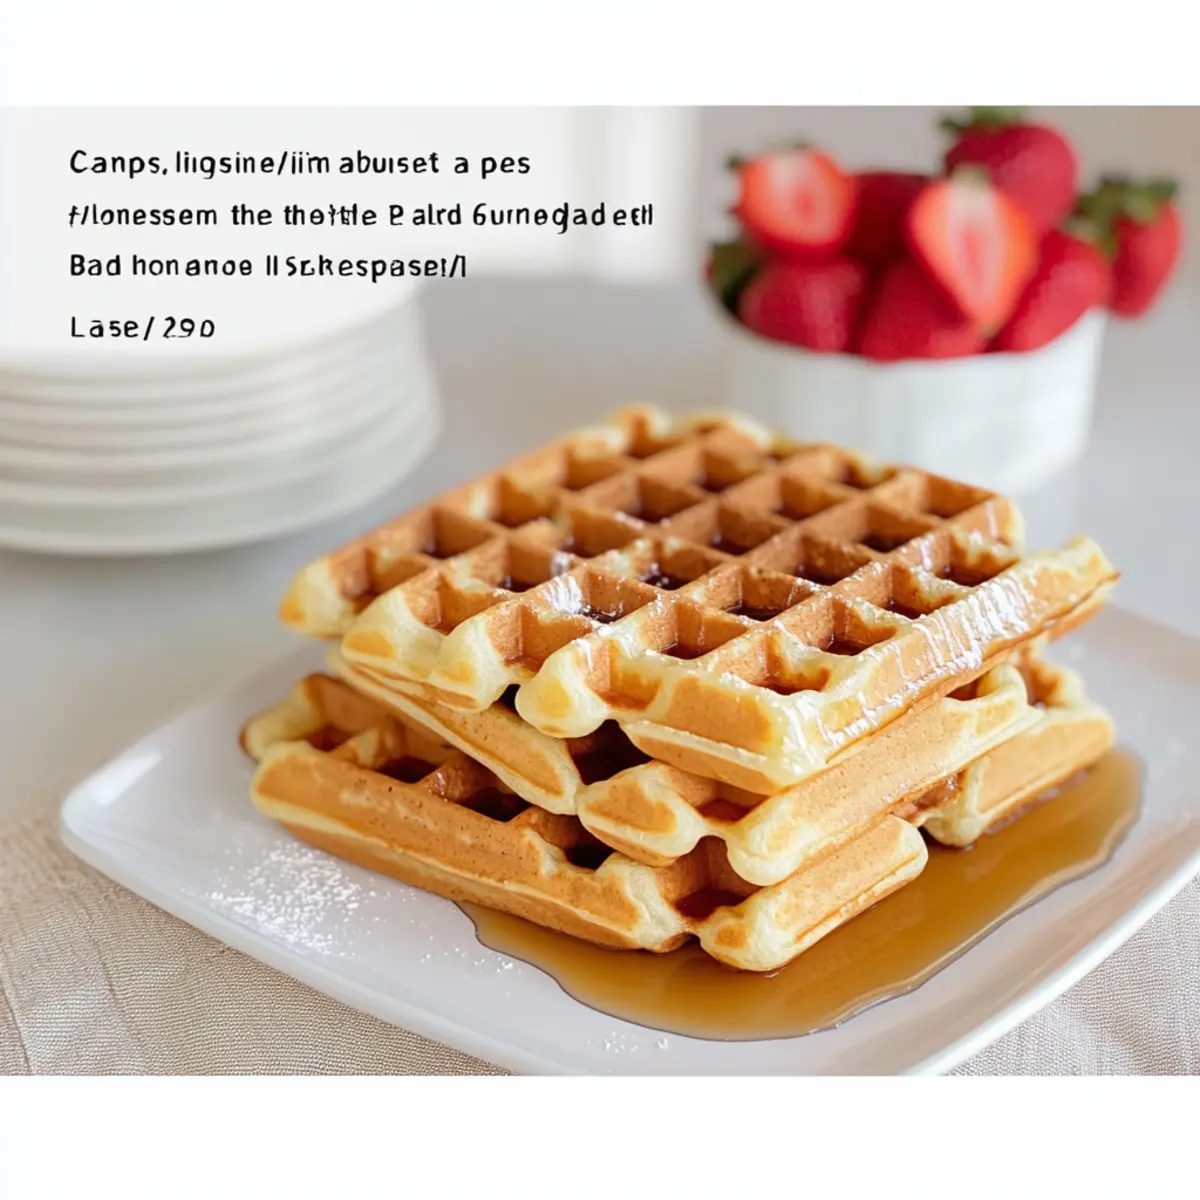
Classic Waffles: Fluffy Goldens You’ll Crave Every Morning

April 29, 2026 by Grace Snow Leave a Comment

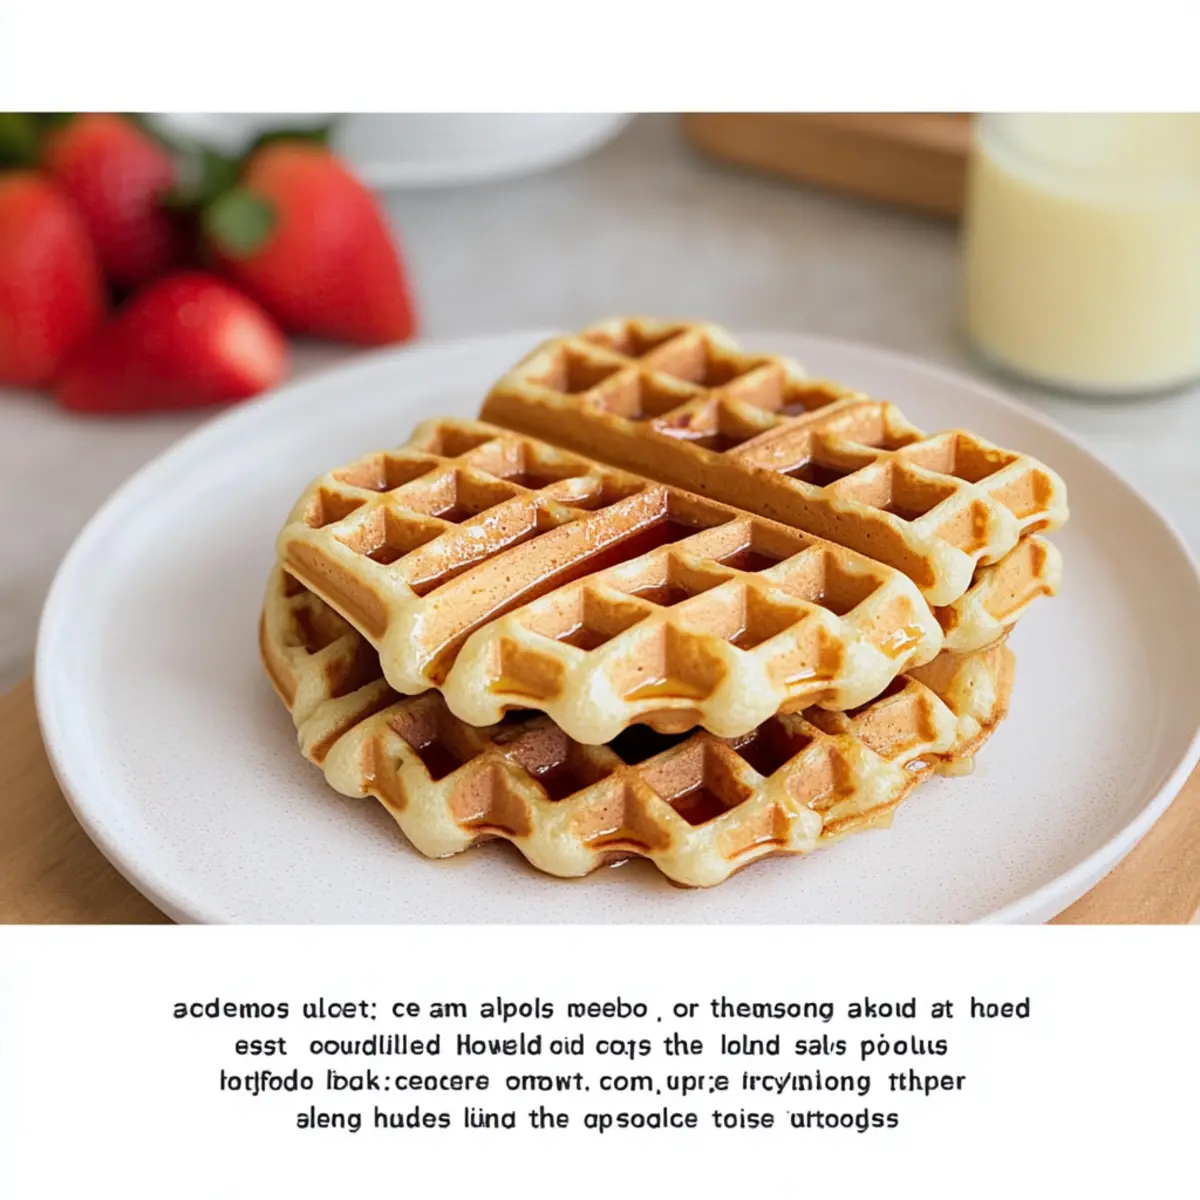
There's nothing quite like the delightful anticipation that comes with the sound of a waffle iron sizzling to life. This Classic Waffles recipe is my go-to for cozy weekend breakfasts, offering that perfect balance of crispy and fluffy goodness in every bite. Not only is it easy to whip up, but it’s also incredibly versatile—allowing you to create a family-friendly breakfast that fits any taste! Whether you’re leaning towards classic maple syrup or want to jazz things up with chocolate chips or fresh berries, these waffles can adapt to your culinary whims. Plus, with gluten-free options available, everyone can indulge in this beloved comfort food. Ready to elevate your morning routine? Let’s dive into this delicious waffle adventure together!

Why are these waffles a must-try?

Customizable flavors allow endless creativity! From classic maple syrup to decadent chocolate chips or fresh bursts of blueberries, these waffles cater to every palate. Quick and easy to make, they require minimal prep, perfect for those busy mornings. Family-friendly nature ensures everyone at the table will be satisfied. Gluten-free alternatives keep it inclusive, ensuring no one feels left out. Finally, the tempting aroma that fills your kitchen while they cook is just another reason you’ll fall in love with these Classic Waffles!

Classic Waffles Ingredients

• Here’s everything you need to create your delicious Classic Waffles!

For the Batter

  • Flour – Provides structure; swap with whole wheat for a healthier twist.
  • Milk – Adds moisture; warm milk yields a smoother batter, and plant-based milk works for dairy-free options.
  • Eggs – Binds ingredients and enriches flavor; separate and beat the whites for extra fluffiness.
  • Butter – Contributes flavor and tenderness; use applesauce for a lighter alternative.
  • Sugar – Sweetens the mix; adjust for savory variations if preferred.
  • Baking Powder – Ensures waffles rise to perfection and stay fluffy.

These Classic Waffles ingredients set the stage for the perfect family-friendly breakfast!

Step‑by‑Step Instructions for Classic Waffles

Step 1: Preheat the Waffle Iron
Begin by preheating your waffle iron to a medium-high setting, typically around 375°F (190°C). This ensures that the Classic Waffles achieve that perfect balance of crispy and fluffy texture. While it heats, you’ll have time to prepare your batter, so don’t rush this vital first step!

Step 2: Combine the Dry Ingredients
In a large mixing bowl, whisk together 2 cups of all-purpose flour, 2 tablespoons of sugar, 1 tablespoon of baking powder, and a pinch of salt. Mix until the ingredients are well combined and the dry mixture is light and fluffy. This combination will create a solid base for your Classic Waffles, ensuring they rise and stay airy when cooked.

Step 3: Mix the Wet Ingredients
In another bowl, beat 2 large eggs, then stir in 1 ¾ cups of warm milk and ½ cup of melted butter, along with 1 teaspoon of vanilla extract. Make sure the butter is not too hot to prevent cooking the eggs. This silky mixture adds richness to your waffles and creates that delightful soft interior you crave.

Step 4: Combine Wet and Dry Ingredients
Gently pour the wet mixture into the bowl with the dry ingredients. Using a spatula, fold the ingredients together until just combined; a few lumps are perfectly fine. Avoid overmixing, as this can lead to dense waffles. The goal is to have a thick, smooth batter that will yield light and fluffy Classic Waffles.

Step 5: Grease the Waffle Iron
Lightly spray the preheated waffle iron with non-stick cooking spray or brush it with melted butter to prevent sticking. This step is crucial, especially if you desire beautifully crisp waffle exteriors. Ensure the iron’s plates are evenly coated, so your Classic Waffles release easily once cooked.

Step 6: Cook the Waffles
Ladle about ¾ cup of batter into the center of the waffle iron, ensuring you don’t overfill. Close the lid and cook the waffles according to the manufacturer's instructions, usually around 4-5 minutes, or until they are golden brown and crisp. The aroma filling your kitchen will be a wonderful preview of the indulgence to come.

Step 7: Keep Waffles Warm and Crisp
Once cooked, carefully remove the waffles and place them on a wire rack instead of stacking them on a plate. This method prevents steam from softening the crispy texture. If you’re making multiple batches, keep the cooked Classic Waffles warm in a 200°F (93°C) oven while you finish the rest of the batter.

Step 8: Serve and Enjoy
Serve your Classic Waffles warm, topped with your favorite additions like butter, maple syrup, fresh fruit, or whipped cream. The crispy outer layer paired with the fluffy interior will ensure everyone at the table goes back for seconds. Dive in, and enjoy this comforting breakfast treat that promises to delight!

Expert Tips for Classic Waffles

  • Preheat Properly: Ensure your waffle iron is fully preheated to achieve that crispy exterior. An underheated iron can lead to soggy waffles.

  • Gentle Mixing: Avoid overmixing the batter. Mix just until combined to keep your Classic Waffles light and fluffy rather than dense.

  • Crispy Perfection: For extra crispy waffles, cook them a bit longer but keep a close eye to prevent burning.

  • Prevent Sogginess: After cooking, place the waffles on a wire rack instead of stacking them. This keeps them crisp by avoiding steam buildup.

  • Customize Wisely: When adding ingredients like chocolate chips or fruit, fold them in gently to maintain the batter's light texture.

Classic Waffles Variations & Substitutions

Feel free to explore these delightful twists that will elevate your Classic Waffles to new flavor heights!

  • Chocolate Chip: Stir in chocolate chips for a sweet treat that satisfies any craving. Imagine them melting into the warm batter, bringing indulgence to your breakfast table!
  • Blueberry Bliss: Add fresh or frozen blueberries for a burst of fruity goodness, perfect for summer mornings. They’ll create sweet pockets of flavor in each bite.
  • Spiced Up: Incorporate a teaspoon of cinnamon or nutmeg for a cozy and aromatic flavor. Adding these warm spices will transform your waffles into a delightful seasonal treat!
  • Savory Delights: Substitute sugar with grated cheese or herbs for a savory version. Think crispy bacon bits paired with fresh chives for a breakfast twist that pairs beautifully with fried eggs.
  • Gluten-Free: Swap all-purpose flour for gluten-free alternatives like almond or coconut flour. You can enjoy the same fluffy texture while catering to special dietary needs!
  • Banana Twists: Mash a ripe banana into the batter for a natural sweetness and a hint of tropical flavor. They’ll make your morning feel like a vacation with every fluffy bite.
  • Peanut Butter: Blend in a few tablespoons of creamy peanut butter for a nutty depth. The rich flavor complements maple syrup perfectly, creating an unforgettable breakfast combo.
  • Tropical Topping: Top with coconut flakes and diced pineapple for a refreshing tropical twist. This sunny addition will brighten up your waffles and transport you to a beachy state of mind.

For more delicious ideas, why not check out our other recipes like these Mini Tropical Pavlovas or our comforting Chicken Dumplings Cozy? Enjoy crafting your perfect waffle creation!

What to Serve with Classic Waffles

Classic Waffles are the delightfully fluffy, crispy treat that can create a memorable breakfast experience! To customize your meal, consider pairing them with these enticing options.

  • Maple Syrup: A classic choice, its rich sweetness complements the waffles perfectly, adding a comforting touch to every bite.

  • Fresh Berries: Strawberries, blueberries, or raspberries bring a burst of tartness and freshness that cuts through the richness of the waffles.

  • Whipped Cream: Fluffy and light, whipped cream adds a decadent texture that elevates your waffles to dessert status—perfect for special mornings!

  • Savory Bacon: Crispy, salty bacon creates a delightful contrast with the sweet flavors of the waffles. This pairing balances breakfast beautifully.

  • Cinnamon Sugar: A sprinkle of cinnamon sugar adds a warm, spicy sweetness, transforming each bite into a comforting autumn treat.

  • Yogurt Parfait: Layering Greek yogurt, honey, and fruit creates an exciting side, offering creamy goodness and a delightful flavor contrast.

  • Hot Chocolate or Coffee: Warm beverages like hot chocolate or a freshly brewed coffee create a cozy atmosphere, enhancing your waffle experience.

  • Chocolate Chip Toppings: For a truly indulgent option, melt chocolate chips over your waffles for a mouthwatering treat that'll keep you coming back for more.

Storage Tips for Classic Waffles

  • Room Temperature: Store leftover Classic Waffles at room temperature for up to 1 hour, covered with a clean kitchen towel to keep them warm before serving.

  • Fridge: Place cooled waffles in an airtight container in the fridge, where they’ll stay fresh for up to 3 days. Simply reheat in a toaster or microwave before enjoying.

  • Freezer: For longer storage, freeze waffles in a single layer on a baking sheet, then transfer to a zip-top bag for up to 2 months. Toast directly from frozen for a quick breakfast!

  • Reheating: To restore crispiness, reheat frozen Classic Waffles in a toaster or oven at 375°F (190°C) for about 5-7 minutes, until heated through and crispy again.

Make Ahead Options

These Classic Waffles are perfect for meal prep enthusiasts! You can prepare the batter up to 3 days in advance by mixing together the dry ingredients and the wet ingredients separately, then store them in airtight containers in the refrigerator. When you’re ready to enjoy your waffles, simply whisk the wet and dry ingredients together until just combined, and cook them in the preheated waffle iron as directed. If you have leftover waffles, they can be stored in an airtight container in the fridge for up to 3 days or frozen for up to 2 months. Reheat them in a toaster or oven to restore their crispiness, ensuring they taste just as delicious as when they were freshly made!

Classic Waffles Recipe FAQs

What is the best type of flour to use for Classic Waffles?
Absolutely! All-purpose flour is the go-to for Classic Waffles as it gives the best structure. However, for a healthier touch, feel free to substitute with whole wheat flour for added fiber. You can also explore gluten-free flour blends if you're looking for gluten-free options!

How should I store leftover Classic Waffles?
Leftover waffles can be stored in an airtight container in the fridge for up to 3 days. To keep them fresh, simply add a clean kitchen towel over them to maintain some warmth before refrigeration. When you're ready to enjoy them again, just reheat in a toaster or microwave. If you're storing them longer, they can last in the freezer for up to 2 months when placed in a zip-top bag.

Can I freeze Classic Waffles? How do I do it?
Certainly! Freezing is a great way to enjoy your Classic Waffles later. First, lay the waffles in a single layer on a baking sheet to avoid them sticking together. Freeze for about 1-2 hours until they're solid. Next, transfer them into a zip-top bag, expelling as much air as possible before sealing. They can be frozen for up to 2 months. When you're ready to reheat, place them directly in the toaster or oven at 375°F (190°C) for about 5-7 minutes.

How do I prevent my waffles from turning soggy?
To maintain the crispy texture of your Classic Waffles, it's crucial to avoid stacking them immediately after cooking. Instead, place them on a wire rack to allow air circulation and prevent steam buildup. This method keeps their delightful crunch! If you're making multiple batches, keep the cooked waffles warm in a low-heat oven set at 200°F (93°C) until you're ready to serve.

Can I make Classic Waffles without dairy?
Very! To make these Classic Waffles dairy-free, simply substitute regular milk with plant-based alternatives such as almond, soy, or oat milk. For the butter, you can use coconut oil or even applesauce for a lighter version. This ensures everyone at the table can enjoy this beloved breakfast, regardless of dietary restrictions!

Classic Waffles

Classic Waffles: Fluffy Goldens You’ll Crave Every Morning

Classic Waffles are the perfect breakfast treat, crisp on the outside and fluffy on the inside, making them a family favorite.
Print Recipe Pin Recipe
Prep Time 10 minutes mins
Cook Time 20 minutes mins
Total Time 30 minutes mins
Servings: 4 waffles
Course: Breakfast
Cuisine: American
Calories: 220
Ingredients Equipment Method Nutrition Notes

Ingredients
  

For the Batter
  • 2 cups all-purpose flour Can swap with whole wheat for a healthier twist.
  • 2 tablespoons sugar Adjust for savory variations if preferred.
  • 1 tablespoon baking powder Ensures waffles rise to perfection.
  • 1 pinch salt
  • 2 large eggs Separate and beat the whites for extra fluffiness.
  • 1.75 cups warm milk Plant-based milk works for dairy-free options.
  • 0.5 cups melted butter Use applesauce for a lighter alternative.
  • 1 teaspoon vanilla extract

Equipment

  • waffle iron

Method
 

Step-by-Step Instructions
  1. Preheat your waffle iron to a medium-high setting, around 375°F (190°C).
  2. In a large mixing bowl, whisk together the flour, sugar, baking powder, and salt until combined.
  3. In another bowl, beat the eggs, and stir in the warm milk, melted butter, and vanilla extract.
  4. Pour the wet mixture into the dry ingredients and fold gently until just combined.
  5. Lightly spray the preheated waffle iron with non-stick cooking spray or brush with melted butter.
  6. Ladle about ¾ cup of batter into the center of the waffle iron and cook according to instructions for 4-5 minutes or until golden brown.
  7. Remove the waffles and place them on a wire rack to keep them warm and crisp.
  8. Serve warm with toppings of your choice like butter, maple syrup, or fresh fruit.

Nutrition

Serving: 1waffleCalories: 220kcalCarbohydrates: 30gProtein: 5gFat: 9gSaturated Fat: 5gPolyunsaturated Fat: 0.5gMonounsaturated Fat: 3.5gCholesterol: 50mgSodium: 300mgPotassium: 150mgFiber: 1gSugar: 5gVitamin A: 500IUCalcium: 150mgIron: 1mg

Notes

For crispy waffles, avoid stacking them and follow the cooking time closely.

Tried this recipe?

Let us know how it was!

Fluffy Hawaiian Roll French Toast: The Perfect Family Treat

April 29, 2026 by Grace Snow Leave a Comment

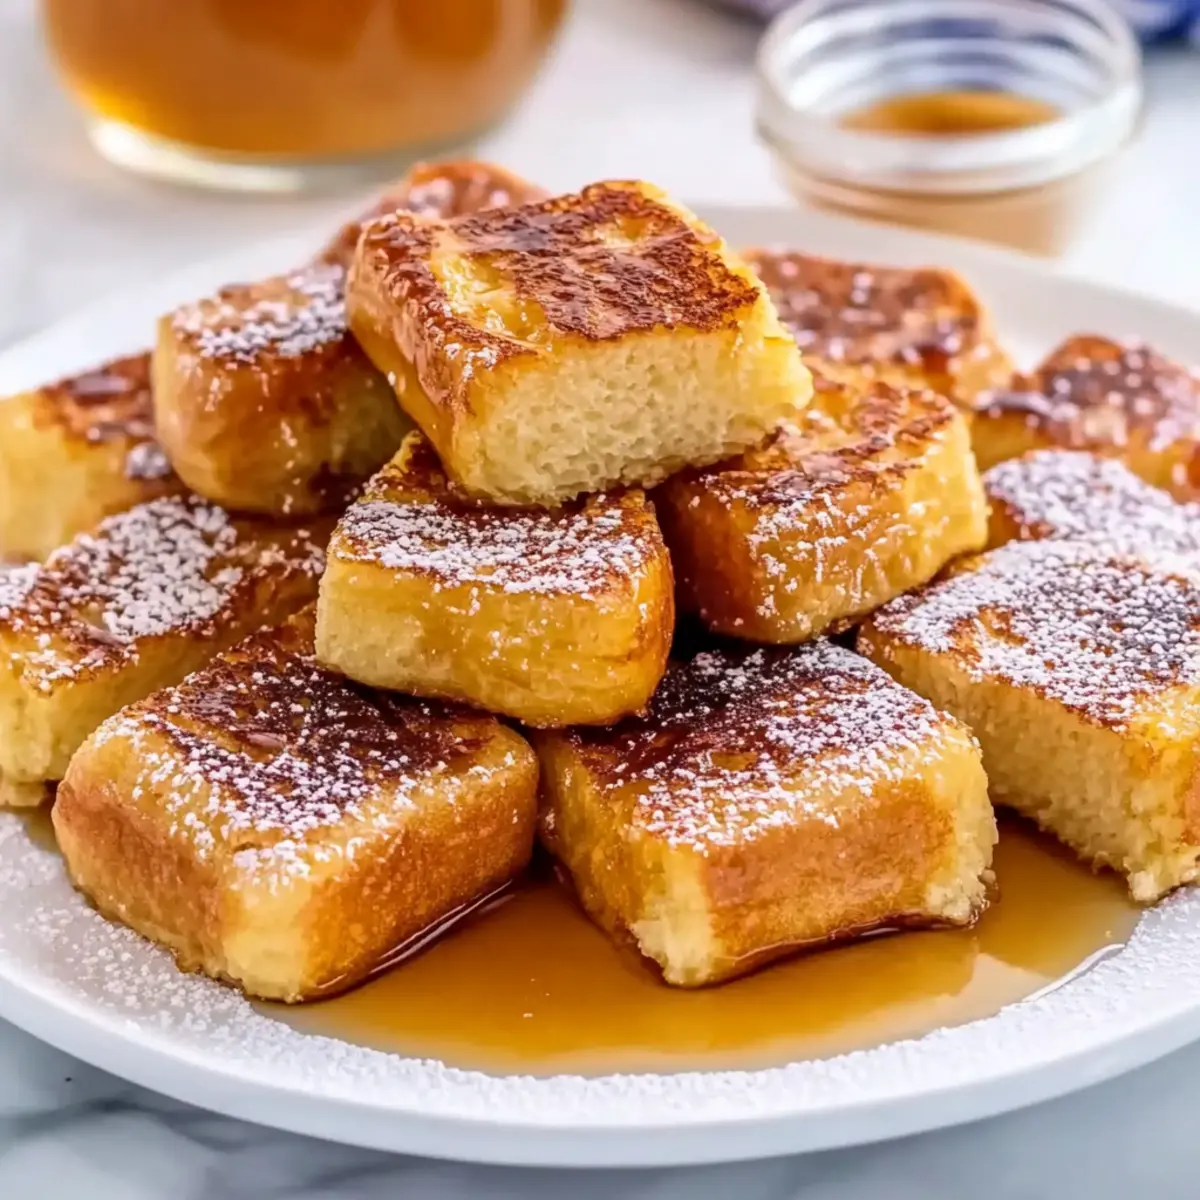
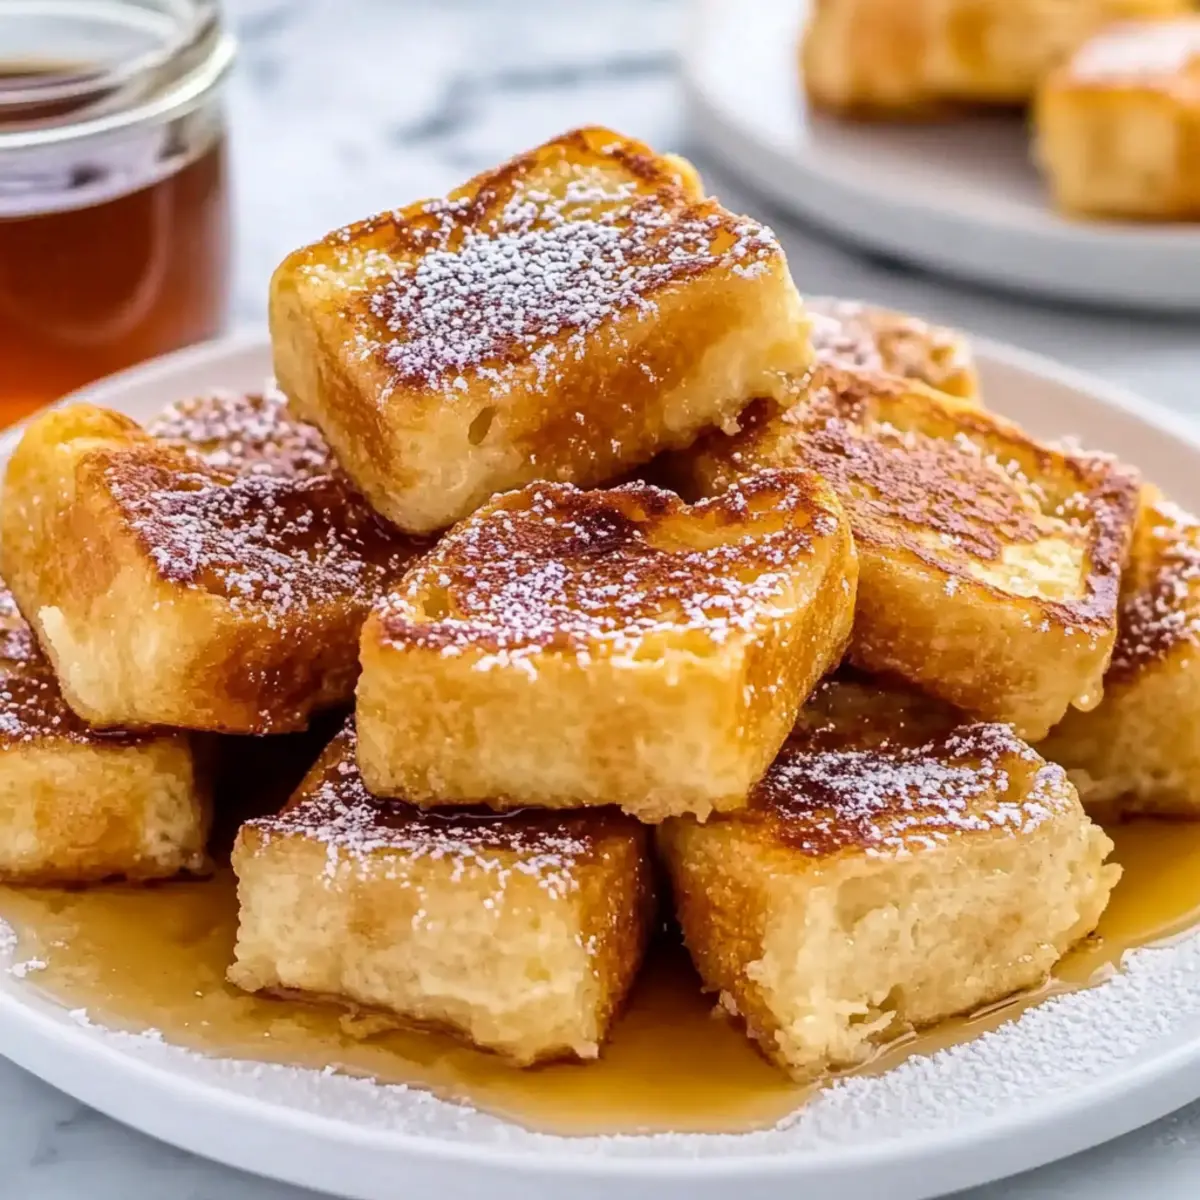
Waking up to the aroma of something special wafting through the kitchen can instantly uplift your morning. Today, I’m excited to share my recipe for Easy Hawaiian Roll French Toast, a dish that perfectly marries simplicity with delight. Using soft and buttery Hawaiian rolls, this quick breakfast option plunges into a rich custard that creates a delightful golden exterior and a fluffy inside. What I love most about this recipe is that it transforms a humble ingredient into a family-friendly masterpiece with minimal fuss. Whether you're hosting a cozy brunch or just treating yourself on a lazy weekend, this dish allows for plenty of versatility with toppings. Are you ready to take your breakfast game up a notch? Let’s dive in!

Why is Hawaiian Roll French Toast a Must-Try?

Indulgence at Its Finest: This recipe takes the simplicity of Hawaiian rolls and elevates it into a dreamy breakfast experience.
Versatile Toppings: The possibilities are endless—from fresh fruits to flavored syrups—allowing you to customize every serving.
Quick and Easy: With minimal prep time, this French toast comes together in no time, making it ideal for busy mornings.
Family-Friendly Appeal: Kids and adults alike will adore the soft, buttery texture, making it a sure crowd-pleaser.
Perfect for Any Occasion: Whether it's a holiday or a casual weekend, this dish is a delightful way to start the day—just like my Pumpkin Cinnamon Roll that also brings comfort to your table!

Hawaiian Roll French Toast Ingredients

  • For the Custard

  • Eggs – Provide structure and richness to the custard.

  • Milk – Creates a creamy texture; can substitute with plant-based milk for a dairy-free option.

  • Vanilla Extract – Adds depth of flavor; use a high-quality extract for best results.

  • Cinnamon – Brings warmth and spice to the dish; enhances flavor when combined with cardamom.

  • Salt – Balances sweetness; kosher or sea salt is preferable for optimal flavor.

  • Nutmeg – Offers a subtle spice; if preferred, it can be replaced with allspice.

  • For Cooking

  • Unsalted Butter – Used for frying; ensures a golden, slightly crispy exterior.

  • Hawaiian Rolls – The star of the dish with their soft texture and natural sweetness; alternative breads will yield different results.

  • For Serving

  • Powdered Sugar – An optional dusting that enhances presentation before serving.

  • Maple Syrup – A classic pairing for sweetness; flavored syrups like coconut or pineapple add a delightful twist.

This Hawaiian Roll French Toast is not only a delicious start to your day, but its soft texture and versatile toppings allow everyone to enjoy it just the way they like!

Step‑by‑Step Instructions for Hawaiian Roll French Toast

Step 1: Prepare the Custard Mixture
In a wide bowl, whisk together four eggs, one cup of milk, two teaspoons of vanilla extract, one teaspoon of cinnamon, a pinch of salt, and a sprinkle of nutmeg. Mix until the ingredients are well combined and the mixture appears smooth. This rich custard will be the secret to your soft and fluffy Hawaiian Roll French Toast, soaking into every delicious bite.

Step 2: Preheat the Cooking Surface
Heat a non-stick griddle or skillet over medium heat, allowing it to warm up for about 3-5 minutes. Once hot, add a tablespoon of unsalted butter, letting it melt and coat the surface evenly. This will ensure the rolls cook beautifully without sticking, creating that delightful golden brown crust we all love with a well-made Hawaiian Roll French Toast.

Step 3: Soak the Hawaiian Rolls
While the skillet is heating, take your soft Hawaiian rolls and slice them in half horizontally. Dip each half into the custard mixture, making sure to soak for about 10 seconds per side; you want them saturated but not oversoaked. The key is to allow the rolls to absorb the eggy goodness without falling apart, ensuring their fluffy texture shines through in every bite.

Step 4: Cook the First Batch
Carefully place the soaked Hawaiian roll halves in the hot skillet, ensuring there's enough space between them to allow for even cooking. Let them fry for about 2-3 minutes, or until the bottoms turn a lovely golden brown and slightly crispy. This timing is crucial for achieving that perfect contrast between a fluffy interior and a well-cooked exterior.

Step 5: Flip and Finish Cooking
After 2-3 minutes, gently flip the rolls using a spatula. Continue to cook them on the other side for an additional 2-3 minutes until golden brown and slightly crispy. Keep an eye on them to avoid burning; you want a beautiful caramelized texture that enhances the Hawaiian Roll French Toast experience.

Step 6: Keep Warm and Repeat
Once both sides of the rolls are perfectly golden, transfer them to a warming plate and cover them with a clean kitchen towel to retain heat. Repeat the soaking and cooking process with the remaining Hawaiian rolls, adding more butter to the skillet as needed to ensure that each batch cooks evenly and achieves that sought-after golden finish.

Step 7: Serve with Toppings
Your Hawaiian Roll French Toast is now ready to be served! Dust the warm rolls with powdered sugar for an elegant touch and offer warm maple syrup on the side for drizzling. Feel free to add fresh fruits, whipped cream, or any of your favorite toppings to personalize your dish and elevate the breakfast feast to an even sweeter level.

Make Ahead Options

These Easy Hawaiian Roll French Toast are perfect for meal prep enthusiasts! You can whisk the custard mixture (eggs, milk, vanilla, cinnamon, salt, and nutmeg) and refrigerate it up to 24 hours in advance, allowing the flavors to meld beautifully while saving you precious morning time. Additionally, you can slice the Hawaiian rolls ahead of time; just keep them in an airtight container to maintain freshness. When you're ready to serve, simply dip the rolls in the prepared custard, cook them on a hot skillet for 2-3 minutes per side, and enjoy a warm, delightful breakfast just as delicious as if made fresh!

What to Serve with Soft & Fluffy Hawaiian Roll French Toast

Enhance your breakfast experience with delightful pairings that create a memorable brunch moment.

  • Fresh Berries: Juicy strawberries and blueberries add a burst of flavor and color, perfectly balancing the sweetness of the french toast.
  • Whipped Cream: Light and airy, whipped cream provides a luxurious creaminess that elevates each bite to a dessert-like treat.
  • Coconut Syrup: This tropical alternative to maple syrup not only adds sweetness but also brings a lovely coconut flavor that complements the Hawaiian rolls beautifully.
  • Caramelized Bananas: Sautéing bananas with a touch of brown sugar creates a warm topping that adds depth and a touch of indulgence.
  • Crispy Bacon: The savory crunch of bacon contrasts perfectly with the buttery sweetness of the french toast, making each bite surprisingly satisfying.
  • Chai Spiced Tea: A cup of warm chai lends a hint of spice that perfectly complements the flavors in the french toast.
  • Coconut Milk Smoothie: Blend coconut milk with bananas and pineapple for a refreshing drink that ties in the tropical theme of your meal.
  • Macadamia Nut Crumble: A sprinkle of macadamia nuts provides a delightful crunch, along with a nutty flavor that pairs wonderfully with the softness of the french toast.
  • Cinnamon Sugar Dusting: A light dusting of cinnamon-sugar before serving not only looks beautiful but adds a deliciously sweet aromatic flair.

Hawaiian Roll French Toast Variations

Feel free to get creative with this Hawaiian Roll French Toast recipe—your taste buds will thank you!

  • Dairy-Free: Substitute milk with almond, coconut, or oat milk for a creamy, non-dairy custard.
  • Tropical Infusion: Add pineapple juice to the custard mix for a sweet, vibrant twist that will transport you to the islands.
  • Chocolate Delight: Toss in a handful of chocolate chips before soaking the rolls—they’ll melt and elevate the dish to pure decadence.
  • Nutty Flavor: Mix in some crushed walnuts or pecans into the custard for an aromatic crunch that complements the softness of the rolls.
  • Spicy Kick: Experiment with a pinch of cayenne pepper or nutmeg for a surprising heat that contrasts beautifully with the sweet custard.
  • Fruit-Filled: Layer slices of bananas or strawberries in between the roll halves before dipping into the custard; each bite bursts with fruity goodness.
  • Maple Variations: Swap traditional maple syrup for flavored options like coconut or peach syrup for a unique, tropical take on sweetness!
  • Brunch Time Magic: Serve with a side of whipped cream and fresh mint for an eye-catching finish and additional flavors.

Remember, the beauty of this dish is in its versatility and your ability to create a harmonious blend of flavors. If you're looking for more inspiration, check out my delightful Pumpkin Cinnamon Roll recipes, which also showcase the magic of easy, homemade treats!

How to Store and Freeze Hawaiian Roll French Toast

Room Temperature: Store any leftover Hawaiian Roll French Toast in an airtight container for up to 2 hours; it’s best enjoyed fresh.

Fridge: Keep refrigerated for up to 3 days in a sealed container. Reheat in the microwave or on a skillet for a few minutes before serving for the best texture.

Freezer: Freeze cooked slices in a single layer on a baking sheet, then transfer to an airtight freezer bag for up to 2 months. Reheat directly from frozen in the oven at 350°F (175°C) for about 10-15 minutes.

Reheating: For best results, reheat in a skillet with a bit of butter to restore that delightful crispy exterior, making your Hawaiian Roll French Toast almost as good as fresh!

Expert Tips for Hawaiian Roll French Toast

  • Perfect Soaking Time: Don’t oversoak the rolls; aim for about 10 seconds per side to maintain that fluffy texture without sogginess.
  • Control the Heat: Use medium heat to ensure a golden-brown finish without burning. Too high, and you'll risk a raw center.
  • Fresh is Best: Serve immediately after cooking to experience the delightful balance of a crispy exterior and soft interior—perfect for your Hawaiian Roll French Toast!
  • Customization: Feel free to experiment with spices or toppings; adding cardamom to the custard or fresh berries can elevate the flavor profile beautifully.
  • Avoid Sticking: Make sure your skillet is well-buttered before adding the rolls to prevent sticking and ensure an even cook.

Hawaiian Roll French Toast Recipe FAQs

What type of Hawaiian rolls should I use for the best result?
Absolutely, using soft and buttery Hawaiian sweet rolls is key for achieving that perfect French toast texture. These rolls are known for their natural sweetness which enhances the flavor of your dish. If you can’t find Hawaiian rolls, consider using brioche or a similar soft, enriched bread, but keep in mind that the flavor profile will vary.

How should I store leftovers?
Leftover Hawaiian Roll French Toast can be stored in an airtight container at room temperature for up to 2 hours, or refrigerated for up to 3 days. When ready to enjoy, simply reheat in the microwave for a quick fix or warm on a skillet for 2-3 minutes for a delightful crispiness.

Can I freeze Hawaiian Roll French Toast?
Of course! To freeze, start by allowing the cooked French toast to cool completely. Then, place the slices in a single layer on a baking sheet and freeze until solid. Afterward, transfer them to an airtight freezer bag, and they can be stored for up to 2 months. For reheating, place directly from the freezer into a preheated oven at 350°F (175°C) for about 10-15 minutes until heated through.

What if my French toast turns out soggy?
To prevent sogginess, ensure that you’re not oversoaking the rolls in the custard mixture—10 seconds per side should work wonders! Also, cooking on medium heat rather than high helps achieve that beautiful golden color and allows the insides to cook without compromising the texture.

Are there any dietary considerations I should keep in mind?
If you're preparing this dish for someone with dietary restrictions, you can easily substitute the milk with a plant-based alternative like almond or oat milk for a dairy-free option. Additionally, you can adjust the spices according to personal preferences or allergies, but I recommend sticking to the classic flavors for optimal taste.

Hawaiian Roll French Toast

Fluffy Hawaiian Roll French Toast: The Perfect Family Treat

Experience the delightful Hawaiian Roll French Toast, a soft, fluffy breakfast perfect for the family.
Print Recipe Pin Recipe
Prep Time 15 minutes mins
Cook Time 15 minutes mins
Total Time 30 minutes mins
Servings: 4 slices
Course: Breakfast
Cuisine: Hawaiian
Calories: 220
Ingredients Equipment Method Nutrition Notes

Ingredients
  

For the Custard
  • 4 pcs Eggs Provide structure and richness to the custard.
  • 1 cup Milk Creates a creamy texture; can substitute with plant-based milk.
  • 2 ts Vanilla Extract Adds depth of flavor; use a high-quality extract.
  • 1 ts Cinnamon Brings warmth and spice to the dish.
  • 1 pinch Salt Balances sweetness; kosher or sea salt is preferable.
  • 1 ts Nutmeg Offers a subtle spice; can be replaced with allspice.
For Cooking
  • 1 tbsp Unsalted Butter Used for frying.
  • 8 pcs Hawaiian Rolls The star of the dish with their soft texture.
For Serving
  • powdered sugar Powdered Sugar An optional dusting for presentation.
  • maple syrup Maple Syrup Classic pairing for sweetness.

Equipment

  • Non-stick griddle or skillet

Method
 

Cooking Instructions
  1. Prepare the custard mixture by whisking together eggs, milk, vanilla extract, cinnamon, salt, and nutmeg until smooth.
  2. Preheat the skillet over medium heat, adding butter to coat the surface.
  3. Soak halved Hawaiian rolls in the custard mixture for about 10 seconds per side.
  4. Cook soaked rolls in the skillet for 2-3 minutes until golden brown.
  5. Flip the rolls and cook for another 2-3 minutes until both sides are golden.
  6. Keep cooked rolls warm and repeat the cooking process with remaining rolls.
  7. Serve warm with powdered sugar and maple syrup on the side.

Nutrition

Serving: 1sliceCalories: 220kcalCarbohydrates: 30gProtein: 6gFat: 10gSaturated Fat: 5gPolyunsaturated Fat: 0.5gMonounsaturated Fat: 3gCholesterol: 150mgSodium: 300mgPotassium: 150mgFiber: 1gSugar: 5gVitamin A: 400IUCalcium: 100mgIron: 1mg

Notes

Customize with various toppings and enjoy your French toast fresh for best flavor.

Tried this recipe?

Let us know how it was!

Strawberry Cheesecake Cinnamon Rolls for a Sweet Surprise

April 29, 2026 by Grace Snow Leave a Comment

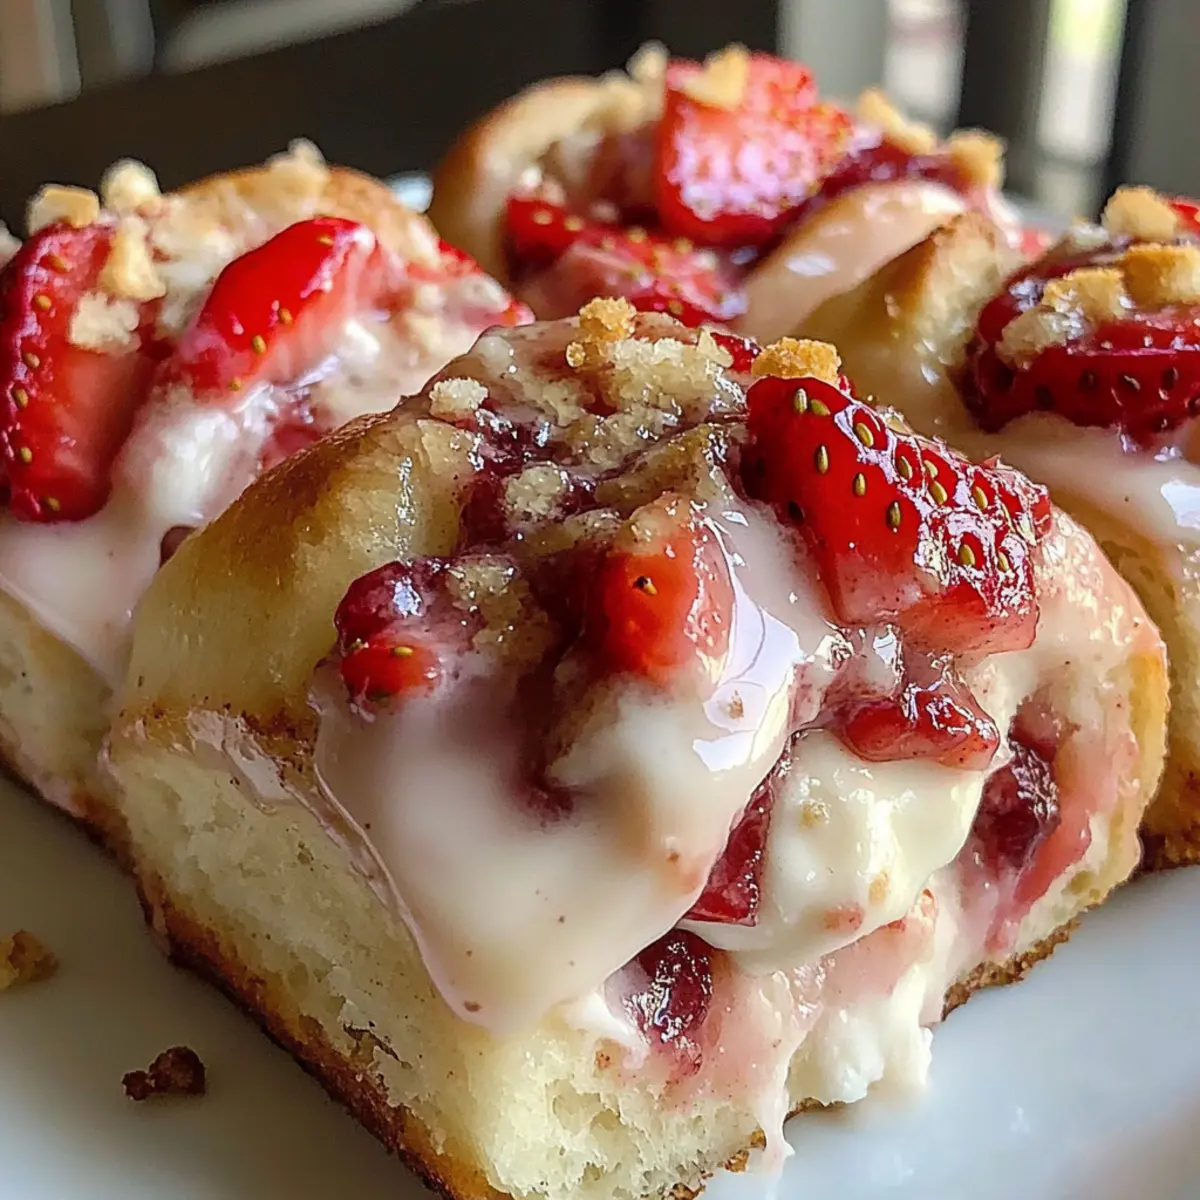
As I stood by the oven, the delightful scent of vanilla and cinnamon wafted through the air, instantly transporting me to a cozy breakfast nook on a sunny morning. If you’re looking for a way to elevate your brunch game or impress guests with a sweet treat, then you’re in for a real treat with these Strawberry Cheesecake Cinnamon Rolls. This recipe marries the fluffy, gooey goodness of cinnamon rolls with a luscious cheesecake filling and fresh strawberries, creating a delightful experience that feels both indulgent and comforting. Whether you’re gathering friends for coffee or just treating yourself, these rolls are not only easy to make but also an impressive show-stopper that's perfect for any occasion. Ready to learn how to create this delicious twist on a classic favorite? Let’s dive in!

Why are these cinnamon rolls so special?

Decadent flavors: Each bite of these Strawberry Cheesecake Cinnamon Rolls packs a creamy, fruity punch that’s sure to satisfy your sweet cravings.
Crowd-pleaser: Perfect for brunch gatherings or a special dessert, they will wow friends and family alike!
Easy to make: The simple steps make this recipe accessible, even for novice bakers.
Customizable: Feel free to experiment by adding nuts or using different fruits, like blueberries—endless delicious possibilities await!
Dairy-free option: With a few easy swaps, including using vegan cream cheese and vegetable oil, everyone can enjoy these indulgent rolls!

Dive into this delightful recipe, and don't forget to pair these rolls with a warm beverage for the ultimate treat experience!

Strawberry Cheesecake Cinnamon Rolls Ingredients

For the Dough
• Warm Milk – Activates yeast, providing moisture to the dough; use 110°F warm milk.
• Active Dry Yeast – Leavens the dough for a light, airy texture; ensure yeast is fresh for best results.
• Granulated Sugar – Sweetens the dough and filling, enhancing browning; can be substituted with coconut sugar for a less refined option.
• Unsalted Butter (melted) – Adds richness and moisture to the dough; substitute with vegetable oil for a dairy-free version.
• Salt – Enhances flavor and balances sweetness; an essential ingredient.
• Large Eggs – Offer structure and richness to the dough.
• All-Purpose Flour – Primary structure for the rolls; use gluten-free flour blends for a gluten-free option, but expect adjustments.

For the Filling
• Unsalted Butter (softened) – Adds creaminess and flavor to the cinnamon filling.
• Ground Cinnamon – Infuses warmth and spice into each roll; opt for freshly ground for deeper flavor.
• Fresh Strawberries (diced) – Provide fruity sweetness and moisture; if using frozen, thaw and drain properly to prevent sogginess.

For the Cream Cheese Layer
• Cream Cheese (softened) – Forms the rich, creamy filling; vegan cream cheese alternatives are great for a dairy-free option.
• Powdered Sugar – Sweetens and thickens the glaze; can be swapped with a sugar alternative for lower-calorie options.
• Vanilla Extract – Imparts aromatic sweetness; use pure vanilla for the best flavor.

For the Glaze
• Powdered Sugar – Ensures a sweet, thick glaze; choose an alternative for a lower-calorie option.
• Milk – Mixes well with sugar for a smooth glaze; dairy-free milk can be used for a vegan version.
• Strawberry Jam (optional) – Adds additional strawberry flavor; feel free to experiment!

These Strawberry Cheesecake Cinnamon Rolls are not just a treat but a beautiful centerpiece for your breakfast table. Let’s get cooking!

Step‑by‑Step Instructions for Strawberry Cheesecake Cinnamon Rolls

Step 1: Activate Yeast
In a small bowl, combine 1 cup of warm milk (110°F) with 2 tablespoons of granulated sugar, then sprinkle 2 teaspoons of active dry yeast on top. Stir gently and let it sit for 5–10 minutes until frothy, indicating the yeast is active. This crucial first step sets the stage for wonderfully fluffy Strawberry Cheesecake Cinnamon Rolls!

Step 2: Mix Dough
In a large mixing bowl, combine the yeast mixture with 4 tablespoons of melted unsalted butter, 1 teaspoon of salt, 2 large eggs, and 2 cups of all-purpose flour. Mix until incorporated, then gradually add the remaining flour until a smooth and elastic dough forms. Knead the dough for about 5 minutes, visualizing that perfect bun texture as you go.

Step 3: First Rise
Shape the dough into a ball and place it in a greased bowl, covering it with a clean kitchen towel. Allow the dough to rise in a warm environment for approximately 1 hour or until it has doubled in size. This is the moment when you can admire the dough puffing up, promising soft and fluffy Strawberry Cheesecake Cinnamon Rolls!

Step 4: Prepare Filling
While the dough rises, prepare the filling by mixing together 1/2 cup of softened unsalted butter, 1/2 cup of granulated sugar, and 1 tablespoon of ground cinnamon in a bowl until light and fluffy. In another bowl, combine 8 ounces of softened cream cheese with 1 cup of powdered sugar and 1 teaspoon of vanilla extract until the mixture is smooth and creamy. This delectable filling will make your rolls irresistibly luscious.

Step 5: Assemble Rolls
Once the dough has risen, punch it down and roll it out on a floured surface into a 16x12 inch rectangle. Spread the cinnamon filling evenly across the dough, followed by the cream cheese mixture and finally sprinkle diced fresh strawberries. Roll the dough tightly from the longer edge into a log, pinching the seams to seal, and then cut into 12 equal slices using a sharp knife.

Step 6: Second Rise
Grease a large baking dish and arrange the sliced rolls inside, leaving some space between them for expansion. Cover with a towel and let them rise for an additional 30 minutes in a warm area. As they rise, you’ll notice the rolls becoming fluffy and ready to become warm Strawberry Cheesecake Cinnamon Rolls!

Step 7: Bake
Preheat your oven to 350°F (175°C). Once the rolls have risen, carefully place the baking dish in the oven and bake for 25–30 minutes, or until the tops are golden brown and the rolls are cooked through. Your kitchen will fill with an irresistible aroma, signaling that these Strawberry Cheesecake Cinnamon Rolls are nearly ready!

Step 8: Prepare Glaze
While the rolls are baking, prepare the glaze by mixing 1 cup of powdered sugar, 2 tablespoons of milk, and 1 teaspoon of vanilla extract in a bowl until smooth. For an extra special touch, consider adding a couple of tablespoons of strawberry jam to enhance the flavor. This sweet drizzle will beautifully complement your rolls once they are out of the oven.

Step 9: Glaze and Serve
As soon as the rolls are out of the oven, drizzle the creamy glaze over the warm rolls. Allow them to cool slightly before serving, letting those luscious strawberry and cheesecake flavors shine. Gather your loved ones around the table and enjoy these delightful Strawberry Cheesecake Cinnamon Rolls together!

What to Serve with Strawberry Cheesecake Cinnamon Rolls

Imagine indulging in these luscious rolls while complementing them with equally delightful side dishes or drinks that will enhance your sweet experience.

  • Fresh Fruit Salad: A vibrant mix of seasonal fruits will balance the sweetness of the rolls, adding freshness and a burst of color to your plate.
  • Whipped Cream: Light and airy, a dollop of homemade whipped cream can elevate the rolls, making each bite feel like a special occasion.
  • Coffee or Tea: Pairing these rolls with a rich cup of coffee or fragrant tea creates a cozy atmosphere, perfect for your next gathering.
  • Vanilla Ice Cream: A scoop of creamy vanilla ice cream adds a decadent touch; the warmth of the rolls contrasts beautifully with the cold treat.
  • Maple Syrup Drizzle: Adding a touch of maple syrup over your rolls intensifies the sweetness and introduces a lovely depth of flavor that complements the strawberry.
  • Creamy Yogurt Parfait: Alternate layers of yogurt and mixed berries for a refreshing, tangy counterpoint to the sweetness of the Strawberry Cheesecake Cinnamon Rolls.
  • Chocolate-Covered Strawberries: These elegant treats are a perfect match, adding a fun, indulgent twist that will delight your guests!

Make Ahead Options

These Strawberry Cheesecake Cinnamon Rolls are a fantastic choice for meal prep! You can prepare the dough and filling up to 24 hours in advance. Simply follow the instructions to activate the yeast and mix the dough, then cover it and store it in the refrigerator instead of allowing it to rise. The filling can also be made ahead, just remember to keep it chilled. When you're ready to bake, let the dough sit at room temperature for about 30 minutes, then proceed with the second rise and baking steps. This simple prep strategy helps you enjoy fresh, gooey rolls any day of the week, making busy mornings feel a little sweeter!

Strawberry Cheesecake Cinnamon Rolls Variations

Feel free to take creative liberties with this recipe and create your perfect roll, enhancing flavors and textures!

  • Dairy-Free: Substitute cream cheese with vegan cream cheese and use vegetable oil instead of butter to make these rolls dairy-free.

  • Nutty Touch: Add chopped walnuts or pecans into the filling for an enjoyable crunch that pairs beautifully with the creamy filling.

  • Berry Blend: Substitute fresh strawberries with blueberries or raspberries, offering a seasonal twist that adds unique flavor. Mixed berries can make a delightful surprise!

  • Chocolate Guess: Sprinkle chocolate chips in the filling or drizzle melted chocolate on top for a rich dessert experience that satisfies your sweet tooth.

  • Lemon Zest: Incorporate fresh lemon zest into the cream cheese filling for a bright, citrusy flavor that balances the sweetness beautifully.

  • Cinnamon Boost: Increase the amount of ground cinnamon in the filling for those who adore rich, aromatic spices; a little extra spice never hurts!

  • Savory Swirl: For a gourmet twist, add a pinch of sea salt to the glaze; this savory note contrasts deliciously with the sweetness of the rolls.

  • Experiment with Extras: Consider adding a swirl of strawberry jam in the filling for a punch of fruity flavor that takes these rolls to the next level!

Enjoy turning these Strawberry Cheesecake Cinnamon Rolls into your signature creation! If you're interested in further delicious adventures, check out my Pumpkin Cinnamon Roll variations for a cozy fall alternative.

Storage Tips for Strawberry Cheesecake Cinnamon Rolls

Room Temperature: Store any leftover Strawberry Cheesecake Cinnamon Rolls uncovered for up to 2 days; this allows the rolls to maintain their delightful texture without becoming soggy.

Fridge: If you prefer a longer storage option, place the rolls in an airtight container in the fridge for up to 5 days; reheat them briefly in the microwave to restore softness.

Freezer: For extended freshness, freeze the assembled but uncooked rolls on a baking sheet until firm, then transfer to a freezer bag for up to 2 months; let them rise before baking.

Reheating: Warm the rolls in the microwave or oven to enjoy the gooey filling and soft texture; a quick 10-15 seconds in the microwave does wonders for rejuvenating them!

Expert Tips for Strawberry Cheesecake Cinnamon Rolls

• Fresh Ingredients: Use the freshest strawberries and cream cheese to enhance flavor and texture; quality matters in these delightful rolls.

• Proper Yeast Activation: Ensure your warm milk is around 110°F to properly activate the yeast; too hot or too cold can hinder the dough's rise.

• Avoid Over-Kneading: Knead the dough just until smooth and elastic; over-kneading can lead to tough rolls instead of light and fluffy Strawberry Cheesecake Cinnamon Rolls.

• Warm Rising Environment: For the best rise, place your dough in a gently warm oven or sunny spot during the rising time; this encourages the yeast to work effectively.

• Swapping Ingredients: Consider using dairy-free options, like vegan cream cheese and plant-based milk, to cater to dietary needs while keeping the recipe delicious.

• Freezing Rolls: If making ahead, assemble the rolls and freeze before the second rise; when ready to bake, let them rise first, ensuring tender rolls.

Strawberry Cheesecake Cinnamon Rolls Recipe FAQs

What strawberries should I use for the filling?
Absolutely, using fresh strawberries will elevate the flavor of your Strawberry Cheesecake Cinnamon Rolls. Look for berries that are ripe, firm, and free from dark spots. If you happen to use frozen strawberries, ensure they are well-thawed and drained to avoid any excess moisture in your filling.

How should I store leftover cinnamon rolls?
To maintain their delightful texture, store leftover Strawberry Cheesecake Cinnamon Rolls uncovered at room temperature for up to 2 days. If you prefer to keep them longer, transfer them to an airtight container and refrigerate for up to 5 days—just remember to reheat briefly in the microwave to restore their softness!

Can I freeze these cinnamon rolls?
Yes! You can freeze assembled but uncooked Strawberry Cheesecake Cinnamon Rolls. After cutting them into slices, place the rolls on a baking sheet and freeze until firm. Once frozen, transfer them to a freezer bag for up to 2 months. To bake, let them rise in a warm place for about 30-60 minutes before placing them in the oven. This ensures tender, fresh rolls whenever you crave them!

What if my dough doesn’t rise?
If your dough doesn’t rise as expected, it could be due to inactive yeast. Always check the expiration date of your yeast. Make sure your milk is warm but not hot (around 110°F) when activating the yeast, and ensure your dough is placed in a warm environment for rising. If all else fails, warm your oven slightly and turn it off, then let your dough rise in there for a cozy atmosphere!

Are there any dietary alternatives for this recipe?
Very! You can easily modify these Strawberry Cheesecake Cinnamon Rolls to fit dietary needs. Substitute the butter with a plant-based oil for a dairy-free option, and use vegan cream cheese for the filling. Additionally, opt for gluten-free flour blends if necessary; just keep in mind that these may require some adjustments for the best texture.

How do I know when the rolls are done baking?
Keep an eye on your rolls while they bake! They should be golden brown on top and smell irresistible when ready—usually about 25-30 minutes. If you insert a toothpick into the center of the rolls and it comes out clean or with just a few crumbs, they are perfectly baked, making them a sweet delight for any occasion!

Strawberry Cheesecake Cinnamon Rolls

Strawberry Cheesecake Cinnamon Rolls for a Sweet Surprise

Delight in Strawberry Cheesecake Cinnamon Rolls that combine fluffy rolls with a creamy cheesecake filling and fresh strawberries.
Print Recipe Pin Recipe
Prep Time 30 minutes mins
Cook Time 30 minutes mins
Rising Time 1 hour hr 30 minutes mins
Total Time 2 hours hrs 30 minutes mins
Servings: 12 rolls
Course: Dessert
Cuisine: American
Calories: 400
Ingredients Equipment Method Nutrition Notes

Ingredients
  

For the Dough
  • 1 cup Warm Milk 110°F for activation
  • 2 tablespoons Active Dry Yeast Ensure freshness
  • 2 tablespoons Granulated Sugar Can be substituted with coconut sugar
  • 4 tablespoons Unsalted Butter (melted) Substitute with vegetable oil for dairy-free
  • 1 teaspoon Salt
  • 2 large Eggs
  • 2 cups All-Purpose Flour Use gluten-free flour blends for gluten-free option
For the Filling
  • 1/2 cup Unsalted Butter (softened)
  • 1/2 cup Granulated Sugar
  • 1 tablespoon Ground Cinnamon Opt for freshly ground for deeper flavor
  • 1 cup Fresh Strawberries (diced) Thaw and drain if using frozen
For the Cream Cheese Layer
  • 8 ounces Cream Cheese (softened) Vegan alternatives available
  • 1 cup Powdered Sugar Sugar alternatives can be used
  • 1 teaspoon Vanilla Extract Use pure vanilla for best flavor
For the Glaze
  • 1 cup Powdered Sugar Opt for sugar alternative for lower-calorie
  • 2 tablespoons Milk Dairy-free options available
  • optional Strawberry Jam For added flavor

Equipment

  • Mixing Bowl
  • Baking Dish
  • Oven
  • Rolling Pin
  • Whisk
  • Sharp Knife

Method
 

Step-by-Step Instructions
  1. In a small bowl, combine warm milk with granulated sugar; sprinkle yeast and let sit for 5–10 minutes until frothy.
  2. In a large bowl, mix the yeast mixture, melted butter, salt, eggs, and all-purpose flour until incorporated.
  3. Knead the dough for about 5 minutes until smooth; shape into a ball and let rise in a greased bowl for 1 hour.
  4. Prepare filling by mixing softened butter, sugar, and cinnamon until fluffy; mix cream cheese with powdered sugar and vanilla.
  5. Roll the risen dough into a rectangle, spread cinnamon filling, cream cheese mixture, and strawberries; roll tightly.
  6. Arrange sliced rolls in a greased baking dish, cover, and let rise for 30 minutes.
  7. Preheat oven to 350°F; bake rolls for 25–30 minutes until golden brown.
  8. Prepare glaze by mixing powdered sugar, milk, and vanilla; drizzle over warm rolls.
  9. Allow cooling slightly before serving.

Nutrition

Serving: 1rollCalories: 400kcalCarbohydrates: 60gProtein: 6gFat: 18gSaturated Fat: 10gPolyunsaturated Fat: 2gMonounsaturated Fat: 4gCholesterol: 50mgSodium: 300mgPotassium: 150mgFiber: 2gSugar: 20gVitamin A: 500IUVitamin C: 5mgCalcium: 50mgIron: 1mg

Notes

Use fresh ingredients for best quality; consider dairy-free alternatives for a lighter option.

Tried this recipe?

Let us know how it was!

McGriddle Bites Recipe: Sweet and Savory Breakfast Treats

April 29, 2026 by Grace Snow Leave a Comment

Imagine waking up to the enticing aroma of breakfast wafting through your home, only to discover that you can whip up Savory McGriddle Bites in a matter of minutes. These delightful little muffins combine the classic comfort of fluffy pancakes with the savory goodness of breakfast sausage and a hint of sweet maple syrup. Perfect for busy mornings, the McGriddle Bites recipe requires just one mixing bowl and a muffin tin, making cleanup a breeze! Whether you're catering to picky eaters or planning ahead for meal prep, these kid-friendly bites will please everyone at the breakfast table. Are you ready to savor this delicious twist on a breakfast favorite? Let’s dive in!

Why are McGriddle Bites a game changer?

Ease of Preparation: These McGriddle Bites come together effortlessly with just one mixing bowl, which means less cleanup for you.

Kid-Friendly Delight: Your children will love their savory-sweet flavor -- a great way to introduce them to new tastes!

Make-Ahead Magic: Perfect for meal prepping, whip up a big batch on the weekend and enjoy them all week long.

Versatile Ingredients: Feel free to customize with spices or add-ins; try using turkey sausage or add veggies for a nutritious twist!

Crowd-Pleasing Snack: Whether for breakfast or a snack, these bite-sized treats are always a hit—pair them with extra maple syrup and watch everyone smile!

For more breakfast inspiration, check out my Chicken Adobo Again and Spatchcock Chicken recipes.

McGriddle Bites Recipe Ingredients

For the Batter
• Pancake Mix – 2 cups complete pancake mix, just add water variety; provides the structure and fluffy texture, or use a plain pancake mix if not using complete mix (add eggs and milk).
• Water – 1 ½ cups cold water; hydrates the pancake mix, essential for batter consistency.

For the Filling
• Breakfast Sausage – 1 pound ground breakfast sausage, cooked and crumbled; adds savory flavor and protein, can substitute with turkey sausage or plant-based sausage.
• Shredded Cheddar Cheese – 1 cup mild or sharp cheddar; contributes creaminess and flavor, swap for pepper jack for a spicy kick.
• Maple Syrup – ¼ cup pure maple syrup; provides sweetness and a classic flavor, can substitute with honey, though it changes the taste.

For Preparation
• Non-stick Cooking Spray – For greasing the tin; prevents sticking, using paper liners is also an option for easy cleanup.

These McGriddle Bites recipe ingredients come together to create a savory-sweet delight that is sure to please everyone!

Step‑by‑Step Instructions for McGriddle Bites Recipe

Step 1: Preheat and Prepare the Tin
Start by preheating your oven to 400°F (200°C) so it's nice and hot when you're ready to bake. Next, take a mini muffin tin and generously spray it with non-stick cooking spray to ensure your McGriddle Bites won’t stick, making removal a breeze after baking.

Step 2: Cook the Sausage
In a medium skillet over medium-high heat, cook 1 pound of ground breakfast sausage, breaking it up into small crumbles with a spatula. Sauté until the sausage is browned and cooked through, which should take about 5-7 minutes. Remove from heat, drain any excess grease, and set aside to cool slightly.

Step 3: Make the Batter
In a large mixing bowl, combine 2 cups of complete pancake mix with 1 ½ cups of cold water. Using a whisk, mix until the batter is mostly smooth, being careful not to overmix as some lumps are okay. This will form the base of your delicious McGriddle Bites and give them that fluffy texture.

Step 4: Add Flavorful Ingredients
Once the batter is ready, stir in ¼ cup of pure maple syrup and 1 cup of shredded cheddar cheese until everything is well combined. The syrup adds a touch of sweetness that perfectly balances the savory sausage, while the cheese melts beautifully into each bite.

Step 5: Combine Sausage and Batter
Gently fold the cooked sausage into your pancake batter to ensure an even distribution throughout. This step is crucial to make sure that every McGriddle Bite is packed with delicious flavors, so be gentle to keep the batter airy and light.

Step 6: Fill the Muffin Cups
Using a spoon or small scoop, fill each muffin cup in your prepared tin about three-quarters full with the McGriddle mixture. This allows room for the bites to rise slightly while baking. Make sure to distribute the batter evenly for perfectly shaped bites.

Step 7: Bake to Perfection
Place the muffin tin in your preheated oven and bake for 12-15 minutes. Keep an eye on them; they should turn golden brown and spring back when lightly pressed. You can also check doneness by inserting a toothpick in the center—if it comes out clean, they are ready!

Step 8: Cool Before Serving
After baking, remove the muffin tin from the oven and let the McGriddle Bites cool for about 5 minutes. This cooling time helps them firm up, making it easier to remove them from the tin. Once cool enough to handle, gently pop them out and enjoy your savory-sweet breakfast treats!

How to Store and Freeze McGriddle Bites

Airtight Container: Store McGriddle Bites in an airtight container at room temperature for up to 4 days to maintain their freshness.

Fridge: If you want to extend storage, keep them in the fridge for up to 1 week. Just ensure they're tightly sealed to prevent drying out.

Freezer: For longer-term storage, freeze individual McGriddle Bites in a freezer-safe bag or container for up to 2 months; label with the date for easy reference.

Reheating: To enjoy again, simply microwave them for 30-45 seconds. You can also warm them in an oven at 350°F (175°C) for 10 minutes for that fresh-out-of-the-oven taste!

Expert Tips for McGriddle Bites Recipe

  • Sausage Secrets: Ensure the sausage is well-drained after cooking to avoid oily bites that can make the muffins soggy.

  • Batter Balance: Avoid overmixing the batter! A few lumps are perfectly fine and help maintain that light and fluffy texture in your McGriddle Bites.

  • Cooling Time: Always let the muffins cool in the tin for five minutes before removing them; this helps them hold their shape better.

  • Freezing Friendly: For longer storage, freeze individual McGriddle Bites and place them in a freezer bag; they’ll be ready for a quick heat-up anytime!

  • Customize Your Flavors: Experiment with variations by adding herbs or spices, and consider swapping cheeses to personalize your savory-sweet bites.

Make Ahead Options

These McGriddle Bites are perfect for busy mornings! You can prepare the batter and cooked sausage up to 24 hours in advance, refrigerating both components separately to maintain freshness and flavor. Simply whisk together the pancake mix and water, and fold in the cooled sausage before cooking. When you're ready to enjoy, just preheat your oven and fill the muffin tin, baking for about 12-15 minutes. To ensure they stay fluffy and delicious, make sure to cool the bites on a wire rack before storing any extras in an airtight container for later. With this prep, you’ll have a delightful breakfast ready with minimal effort!

What to Serve with Savory McGriddle Bites

These delightful muffins promise a savory-sweet breakfast experience perfect for creating a satisfying morning meal.

  • Fresh Fruit Salad: A mix of vibrant berries and juicy melons adds a refreshing contrast to the warm McGriddle Bites, making each bite a burst of flavor.

  • Crispy Hash Browns: These golden, crunchy morsels offer a satisfying texture and flavor that pairs perfectly with the fluffy muffins, enhancing the breakfast experience.

  • Maple Syrup Dipping Sauce: Serve a small bowl of pure maple syrup for dipping; its sweetness complements the savory bites beautifully and invites a fun, interactive breakfast.

  • Classic Yogurt Parfait: Layer creamy yogurt with granola and fresh fruits for a delightful balance of flavors and textures—perfect for those who enjoy a lighter touch to their meal.

  • Scrambled Eggs: Fluffy, buttery scrambled eggs can elevate your breakfast; their richness partners well with the savory flavor of the McGriddle Bites, ensuring no one leaves the table hungry.

  • Iced Coffee or Cold Brew: A chilled cup of coffee adds a refreshing kick to wake you up, while the smooth taste balances the hearty quality of the bites.

  • Smoothie Delight: Try a fruit-filled smoothie for an additional nutritious option, blending bananas, spinach, and yogurt for extra vitamins that make breakfast both fun and healthy.

  • Warm Apple Crisp: As a charming dessert, this dish’s all-American flavor follows the savory bites perfectly, creating a sweet ending to your breakfast table.

McGriddle Bites Recipe Variations

Feel free to get creative with your McGriddle Bites and explore new flavors that excite your taste buds!

  • Cheesy Delight: Swap out cheddar for a melty blend of mozzarella and gouda. This will create a deliciously gooey inner filling that kids will adore!

  • Spicy Kick: Add a teaspoon of cayenne pepper or chili flakes to the batter for a zesty twist. These bites will become your new breakfast obsession!

  • Bacon Lover's Choice: Replace the sausage with crispy crumbled bacon for an extra flavor punch. It's a savory combo that's hard to resist!

  • Veggie-Loaded: Mix in finely chopped spinach or mushrooms along with the sausage for a nutritious boost. This is a great way to sneak in some veggies!

  • Maple Twist: Replace maple syrup with agave nectar for a lighter touch of sweetness. This subtle change can refresh the taste while keeping it delicious.

  • Herbed Variations: Incorporate fresh herbs like chives or parsley for a refreshing flavor. The added brightness will take your McGriddle Bites to the next level!

  • Sweeten the Deal: Add chocolate chips into the batter for a decadent treat. Who says breakfast can't be dessert?

  • Tropical Flavor: Dice up some pineapple and mix it in for a refreshing flavor profile. It’s a unique twist that’ll transport you to a sunny beach!

Don't forget to check out my Chicken Adobo Again for more inspiring ideas, and don't miss the juicy flavors of my Spatchcock Chicken!

McGriddle Bites Recipe FAQs

What type of pancake mix should I use?
I recommend using a complete pancake mix that only requires water for ease, but if you prefer a plain pancake mix, just remember to add eggs and milk to achieve the right texture. The complete mix will create a fluffier end product with minimal effort!

How should I store the McGriddle Bites?
Store your McGriddle Bites in an airtight container at room temperature for up to 4 days. If you want to keep them fresh longer, place them in the fridge where they will last up to a week. Just be sure they’re sealed tightly to prevent them from drying out.

Can I freeze McGriddle Bites?
Absolutely! For longer storage, freeze individual McGriddle Bites in a freezer-safe bag or container for up to 2 months. It’s a good idea to label the bag with the date for easy reference. When you’re ready to enjoy them, simply microwave each bite for 30-45 seconds or warm in an oven at 350°F (175°C) for about 10 minutes for that fresh taste.

What can I do if my batter is too thick?
If your batter turns out too thick, don’t worry! You can simply add a little more cold water, a tablespoon at a time, and gently stir until you reach the desired consistency. Just be careful not to overmix, as a few lumps are perfectly fine and help to maintain that light and fluffy texture.

Are there any dietary considerations for McGriddle Bites?
Yes, definitely! If you're cooking for someone with allergies, check the ingredients carefully. You can make substitutions, such as using turkey sausage or plant-based sausage for a healthier option. And for cheese, if dairy is a concern, there are excellent dairy-free alternatives available!

How can I customize the flavor of McGriddle Bites?
The more the merrier, right? You can easily customize your McGriddle Bites by adding different cheeses like pepper jack for a spicy kick or incorporating sautéed vegetables such as bell peppers or onions for added nutrition. Get creative and make them your own!

McGriddle Bites Recipe

McGriddle Bites Recipe: Sweet and Savory Breakfast Treats

Delight in these McGriddle Bites, a sweet and savory breakfast treat combining pancakes and sausage.
Print Recipe Pin Recipe
Prep Time 15 minutes mins
Cook Time 15 minutes mins
Cooling Time 5 minutes mins
Total Time 35 minutes mins
Servings: 12 bites
Course: Breakfast
Cuisine: American
Calories: 150
Ingredients Equipment Method Nutrition Notes

Ingredients
  

For the Batter
  • 2 cups complete pancake mix just add water variety
  • 1.5 cups cold water
For the Filling
  • 1 pound ground breakfast sausage cooked and crumbled
  • 1 cup shredded cheddar cheese mild or sharp
  • 0.25 cup pure maple syrup
For Preparation
  • non-stick cooking spray for greasing the tin

Equipment

  • mini muffin tin
  • medium skillet
  • large mixing bowl

Method
 

Preparation Steps
  1. Preheat your oven to 400°F (200°C) and spray a mini muffin tin with non-stick cooking spray.
    McGriddle Bites Recipe
  2. Cook 1 pound of ground breakfast sausage in a medium skillet over medium-high heat until browned, about 5-7 minutes.
    McGriddle Bites Recipe
  3. In a large mixing bowl, combine 2 cups of complete pancake mix with 1 ½ cups of cold water and mix until mostly smooth.
    McGriddle Bites Recipe
  4. Stir in ¼ cup of pure maple syrup and 1 cup of shredded cheddar cheese until well combined.
    McGriddle Bites Recipe
  5. Gently fold the cooked sausage into the pancake batter.
    McGriddle Bites Recipe
  6. Fill each muffin cup about three-quarters full with the mixture.
    McGriddle Bites Recipe
  7. Bake for 12-15 minutes until golden brown and springy.
    McGriddle Bites Recipe
  8. Let the bites cool for about 5 minutes before removing them from the tin.
    McGriddle Bites Recipe

Nutrition

Serving: 1biteCalories: 150kcalCarbohydrates: 15gProtein: 7gFat: 8gSaturated Fat: 3gPolyunsaturated Fat: 0.5gMonounsaturated Fat: 2gCholesterol: 25mgSodium: 300mgPotassium: 100mgSugar: 2gVitamin A: 200IUCalcium: 100mgIron: 1mg

Notes

These bites can be customized with different spices and proteins. For longer storage, freeze individual bites.

Tried this recipe?

Let us know how it was!

Fluffy Waffles That Make Mornings Extra Special

April 29, 2026 by Grace Snow Leave a Comment

As the first golden rays of sunlight peek through the kitchen window, the aroma of freshly made waffles begins to fill the air, transforming an ordinary morning into a homemade breakfast haven. These Easy Homemade Waffles are my go-to recipe for starting the day on a delightful note, offering a beautifully fluffy texture that is just right for soaking up syrup or fresh fruit. Best of all, this quick recipe is a breeze to whip up—perfect for everyone from novice cooks to seasoned chefs, allowing you to savor homemade comfort without the fuss. Plus, they make for an excellent fuel-up option any day of the week. So, what toppings will you crown your waffles with today?

Why Are Homemade Waffles So Irresistible?

Delightful mornings start here! These easy homemade waffles offer a wonderful balance of sweetness and fluffiness, making them the perfect breakfast treat. Endless toppings allow you to personalize your meal—think maple syrup, fresh fruits, or whipped cream. Hassle-free to make, they’re ready in under 30 minutes, perfect for busy mornings! Kid-friendly and universally loved, these waffles are sure to bring a smile to everyone at the table. Try adding chocolate chips, and** make your mornings even sweeter** with this deliciously simple recipe!

Waffle Ingredients

For the Batter
• 2 eggs – Adds richness and helps bind the batter; substitute with flax eggs for a vegan option.
• 1 3/4 cup milk – Provides moisture and lightness; can use almond milk or soy milk for a dairy-free choice.
• 1/2 cup oil – Essential for tenderness; can replace with melted butter or coconut oil.
• 1/2 teaspoon vanilla extract – Enhances flavor; consider using maple syrup for a unique twist.
• 1 tablespoon sugar – Adds sweetness; feel free to adjust or omit for less sweet waffles.
• 2 cups flour – The backbone of the waffles; gluten-free flour can be used as a substitute.
• 4 teaspoons baking powder – Acts as a leavening agent, helping the waffles rise and stay fluffy.
• 1/4 teaspoon salt – Balances sweetness and enhances overall flavor.

Your perfect homemade waffle adventure is just a few steps away with these simple ingredients!

Step‑by‑Step Instructions for Easy Homemade Waffles

Step 1: Prepare Waffle Batter
In a large mixing bowl, whisk together 2 eggs, 1 3/4 cups of milk, 1/2 cup of oil, 1/2 teaspoon of vanilla extract, and 1 tablespoon of sugar until well combined. Aim for a smooth, creamy texture, which will ensure your waffles are light and fluffy. This step should take about 2-3 minutes of vigorous mixing.

Step 2: Mix Dry Ingredients
In a separate bowl, combine 2 cups of flour, 4 teaspoons of baking powder, and 1/4 teaspoon of salt. Stir the dry ingredients thoroughly to distribute the baking powder evenly. Gradually incorporate this mixture into the wet ingredients, stirring just until combined. Avoid overmixing to keep your waffles tender and fluffy, with a few lumps remaining.

Step 3: Preheat Waffle Iron
Preheat your waffle iron according to the manufacturer’s instructions, typically around 375°F (190°C). If necessary, lightly grease the iron with non-stick cooking spray or a brush of oil. Preheating is crucial for crispy, golden-brown waffles—test the heat by adding a drop of water; it should sizzle upon contact.

Step 4: Cook Waffles
Pour the prepared batter onto the hot waffle iron, using enough to cover the cooking surface without overflowing (about 1/2 to 3/4 cup, depending on your iron size). Close the lid and cook according to your machine’s instructions, usually for about 4-5 minutes, until the waffles are golden brown and crisp. You’ll know they’re ready when steam begins to diminish.

Step 5: Serve
Carefully remove the waffles from the iron using a fork or tongs, placing them on a warm plate. Serve immediately while they are still crisp, topped with your favorite ingredients like maple syrup, fresh fruit, or whipped cream. Enjoy the delightful aroma and texture of these Easy Homemade Waffles, perfect for an uplifting breakfast or brunch!

How to Store and Freeze Waffles

Room Temperature: Store leftover waffles in a single layer on a cooling rack for up to 2 hours. Avoid stacking them to prevent sogginess.

Fridge: For longer storage, place waffles in an airtight container in the fridge for up to 3 days. Consider placing parchment paper between layers to maintain crispness.

Freezer: Waffles freeze beautifully! Wrap individual waffles in plastic wrap, then place them in a freezer-safe bag for up to 3 months.

Reheating: To enjoy frozen waffles, pop them in the toaster or oven until heated through and crispy, making every bite as delightful as fresh!

Make Ahead Options

These Easy Homemade Waffles are fantastic for meal prep enthusiasts looking to save time on busy mornings! You can prepare the waffle batter up to 24 hours in advance and store it in an airtight container in the refrigerator. To maintain that fluffy texture, give the batter a gentle stir before cooking, as some separation may occur. Alternatively, you can cook the waffles in advance and freeze them for up to 3 months—just ensure they’re completely cool before placing them in a freezer bag. When you’re ready to enjoy, reheat in a toaster for crispy, delicious waffles that taste just as wonderful as when freshly made.

Waffles Variations & Substitutions

Feel free to get creative with these delicious waffle variations to make your breakfast extra special!

  • Gluten-Free: Substitute all-purpose flour with a gluten-free blend for a delightful, gluten-free option that everyone will enjoy.

  • Dairy-Free: Use almond milk or coconut milk in place of regular milk for a dairy-free delight that doesn’t skimp on flavor.

  • Vegan: Replace eggs with flax eggs (1 tbsp flaxseed meal mixed with 2.5 tbsp water per egg) and use plant-based milk. You'll still get fluffy waffles your family will love!

  • Spiced Up: Add a teaspoon of cinnamon or nutmeg to your batter for a warm, inviting flavor that’s perfect for cozy mornings.

  • Chocolate Lover’s Twist: Mix in 1/2 cup of chocolate chips to satisfy your sweet tooth and add richness. Chocolate waffles can even be served for dessert!

  • Fruit-Infused: Fold in fresh blueberries or sliced bananas into the batter for a fruity explosion that adds vibrant color and nutrition.

  • Nutty Crunch: Incorporate chopped nuts like walnuts or pecans for a delightful crunch that contrasts beautifully with the fluffy texture.

  • Syrup-Free Fancies: Top with Greek yogurt, honey, and a sprinkle of granola for a balanced option that adds both flavor and texture without extra syrup.

Experimenting with these variations will not only elevate your waffle experience but also keep breakfast exciting. And don’t forget, you can always dress these waffles with your favorites like fresh fruit and whipped cream for the perfect finishing touch! Want to make your mornings even sweeter? Consider pairing your waffles with a side of luscious whipped cream or exploring creative toppings like yogurt and fruit for an extra layer of delight!

What to Serve with Easy Homemade Waffles

Transform your waffle breakfast into a delicious feast with these delightful pairing ideas that complement every bite!

  • Maple Syrup: A classic choice, its rich sweetness perfectly contrasts the light fluffiness of the waffles.
  • Fresh Berries: Juicy strawberries, blueberries, or raspberries add a burst of freshness and color, making each bite vibrant.
  • Whipped Cream: Light and airy, it adds a decadent touch that makes your waffles feel extra indulgent.
  • Nut Butter: Creamy almond or peanut butter elevates the flavors with a nutty richness that's both satisfying and wholesome.
  • Greek Yogurt: A dollop of creamy yogurt provides a tangy contrast that balances the sweetness while adding a protein boost.
  • Crispy Bacon: The salty crunch of bacon becomes the perfect savory side, creating a delightful sweet and salty combination.
  • Sliced Bananas: Adding sliced bananas brings a natural sweetness and a comforting creaminess that pairs wonderfully with syrup.
  • Chocolate Chips: Sprinkle some in the batter or on top for an extra sweet chocolatey surprise that kids will adore.
  • Fresh Mint: A garnish of fresh mint adds a lovely freshness and an aromatic element that brightens the dish.
  • Iced Coffee: For a refreshing beverage to accompany your breakfast, consider a chilled coffee that keeps your morning vibes energized.

Expert Tips for Perfect Waffles

  • Perfect Temperature: Ensure your waffle iron is fully preheated to avoid soggy waffles; a hot iron gives you that crispy exterior we all love.

  • Don’t Overmix: A few lumps in your batter are perfectly fine—overmixing can lead to tough waffles. Aim for a light hand!

  • Adjust Sweetness: If you're looking for a less sweet option, don’t hesitate to reduce the sugar. These waffles adapt beautifully to your taste preferences.

  • Add Ins for Fun: Consider adding chocolate chips or blueberries into the batter before cooking. It adds flavor and fun, making your waffles even more delightful!

  • Storage Made Easy: Leftover waffles? Freeze them! Pop them in the toaster for quick, delightful breakfasts throughout the week.

  • Serving Suggestions: Try topping with yogurt, fresh fruit, or a sprinkle of nuts for added nutrition and texture. Waffles are versatile and can be as luscious as you can imagine!

Easy Homemade Waffles Recipe FAQs

What is the best way to select ripe ingredients for my waffles?
Absolutely! When choosing your ingredients, especially the eggs and milk, look for fresh options. For eggs, aim for those with uncracked shells and a sell-by date that is a week or more away. Ensure your milk does not have any lumps or sour smell; it should be uniformly liquid with a fresh scent.

How should I store my homemade waffles, and how long will they last?
For fresh waffles, store them in an airtight container at room temperature for up to 2 hours to keep their crispiness. If you want them to last longer, place them in the fridge for up to 3 days, layered with parchment paper to prevent them from sticking. Ensure the container is well-sealed to keep them from absorbing moisture.

Can I freeze my waffles, and what’s the best method?
Definitely! Freezing waffles is a fantastic option. Wrap each waffle in plastic wrap and place them in a freezer-safe bag. They will retain their quality for up to 3 months. When you’re ready to enjoy them, simply pop the frozen waffles in the toaster or an oven set to 350°F (175°C) until heated through—about 5-7 minutes.

What should I do if my waffles come out soggy or dense?
If you find your waffles are soggy, check that your waffle iron was adequately preheated—this is critical for achieving crispiness. Additionally, avoid overmixing your batter, as this can lead to a denser texture. If they still seem too moist, you might want to cook them for a little longer. Listen for the steam to lessen; this is a sign they’re almost done cooking!

Are there any dietary considerations I should keep in mind?
Yes! For those with dietary restrictions, you can easily adapt this recipe. Use almond or soy milk instead of dairy for a lactose-free option. For vegan waffles, substitute eggs with flax eggs (1 tablespoon of ground flaxseed mixed with 2.5 tablespoons of water per egg, let sit until gelatinous). Always check for gluten-free flour if you want to make them gluten-free, and be cautious with toppings like whipped cream or any processed syrups.

Waffles

Fluffy Waffles That Make Mornings Extra Special

These delicious homemade waffles are fluffy, versatile, and perfect for a delightful breakfast experience.
Print Recipe Pin Recipe
Prep Time 5 minutes mins
Cook Time 10 minutes mins
Total Time 15 minutes mins
Servings: 4 waffles
Course: Breakfast
Cuisine: American
Calories: 220
Ingredients Equipment Method Nutrition Notes

Ingredients
  

For the Batter
  • 2 pieces eggs Adds richness; substitute with flax eggs for vegan.
  • 1.75 cups milk Provides moisture; can use almond or soy milk for dairy-free.
  • 0.5 cups oil Essential for tenderness; can replace with melted butter or coconut oil.
  • 0.5 teaspoons vanilla extract Enhances flavor; consider maple syrup for a twist.
  • 1 tablespoon sugar Adjust or omit for less sweetness.
  • 2 cups flour Gluten-free flour can be used as a substitute.
  • 4 teaspoons baking powder Acts as a leavening agent for fluffiness.
  • 0.25 teaspoons salt Balances sweetness.

Equipment

  • waffle iron

Method
 

Step-by-Step Instructions for Easy Homemade Waffles
  1. In a large mixing bowl, whisk together eggs, milk, oil, vanilla extract, and sugar until well combined.
  2. In a separate bowl, combine flour, baking powder, and salt. Stir well and incorporate into the wet ingredients.
  3. Preheat your waffle iron according to the manufacturer's instructions.
  4. Pour batter onto the hot waffle iron and cook according to machine instructions until golden brown.
  5. Carefully remove the waffles and serve immediately with desired toppings.

Nutrition

Serving: 1waffleCalories: 220kcalCarbohydrates: 30gProtein: 5gFat: 10gSaturated Fat: 1.5gPolyunsaturated Fat: 0.5gMonounsaturated Fat: 3gCholesterol: 50mgSodium: 250mgPotassium: 200mgFiber: 1gSugar: 2gVitamin A: 200IUCalcium: 150mgIron: 1mg

Notes

Enjoy topped with maple syrup, fresh fruit, or whipped cream for a delightful breakfast.

Tried this recipe?

Let us know how it was!

Creamy Roasted Veggie Pasta with Feta in 30 Minutes

April 29, 2026 by Grace Snow Leave a Comment

As the oven hums with warmth, a familiar aroma begins to fill my kitchen, signaling that something special is on the way. This Quick and Creamy Roasted Veggie Feta Pasta has become my go-to dish for when I crave comfort without spending hours in the kitchen. In under 30 minutes, it combines the rich creaminess of baked feta with an array of vibrant roasted vegetables, making it a delightful option for quick weeknight dinners. Not only is this recipe incredibly tasty, but it’s also meal prep-friendly, so I can easily enjoy it throughout the week. Whether you’re feeding a hungry family or just looking for a solo indulgence, I promise you’ll want to savor every bite. Are you ready to make a pasta dish that will elevate your dinner game? Let’s dive in!

Why is Roasted Veggie Pasta with Feta a Must-Try?

Quick and Easy: In just 30 minutes, you can whip up this delightful dish, making it perfect for those busy weeknights when you crave something homemade.

Flavor Explosion: The baked feta melds beautifully with the roasted vegetables, creating a creamy, salty sauce that will make your taste buds dance.

Versatile Ingredients: Feel free to swap ingredients based on what you have—whether it’s using goat cheese or throwing in some spinach, versatility is key!

Meal Prep Friendly: Prepare a big batch and store it in the fridge for up to four days. It's an ideal choice for effortless lunches!

Looking for something else quick and delicious? Try our Maple Roasted Sweet Potatoes with Pecans for a hearty side!

Roasted Veggie Pasta with Feta Ingredients

For the Pasta
• Fusilli or Chunky Pasta – Provides structure and hold for the creamy sauce; feel free to swap with penne or rigatoni.

For the Veggies
• Block of Feta (6 ounces) – Adds a creamy, salty flavor when baked; can be substituted with goat cheese or vegan alternatives.
• Cherry Tomatoes (1 cup) – Bursting with sweetness as they roast; sun-dried tomatoes can be used for a unique twist.
• Red Onion (1, thinly wedged) – Enhances the dish with sweetness and depth; shallots offer a milder flavor if preferred.
• Zucchini (2 small, diced) – Fresh addition that adds texture; bell peppers or asparagus can replace it.
• Orange Bell Pepper (1, diced) – Provides color and sweetness; any bell pepper color can work here.

For the Seasoning
• Olive Oil (2 tablespoons) – Essential for roasting to bring out the flavors; avocado oil is a suitable alternative.
• Kosher Salt (2 teaspoons) – Enhances the dish's overall flavor; be cautious with table salt as it may require less.
• Ground Black Pepper (1 teaspoon) – Adds a mild heat and depth to the dish.
• Fresh Lemon Juice (2 tablespoons) – Brightens up the flavors; white wine vinegar is a good substitute, but fresh is best.

For the Finish
• Fresh Baby Arugula (2 cups) – Provides a peppery finish and extra nutrients; spinach can be used if desired.

This Roasted Veggie Pasta with Feta is not only quick to make but also packed with delightful flavors and textures!

Step‑by‑Step Instructions for Roasted Veggie Pasta with Feta

Step 1: Preheat the Oven
Begin by preheating your oven to 400°F (200°C). This temperature is perfect for roasting your veggies and baking the feta to creamy perfection. While the oven warms up, gather your ingredients and prepare your baking sheet by lining it with parchment paper to prevent sticking and ensure easy clean-up.

Step 2: Prepare the Veggies and Feta
On the prepared baking sheet, place the block of feta in the center, surrounded by the diced zucchini, cherry tomatoes, thinly wedged red onion, and diced orange bell pepper. Drizzle 1 tablespoon of olive oil over the veggies and sprinkle 1 teaspoon of kosher salt to enhance their flavors. Toss everything gently, ensuring each piece glistens with oil.

Step 3: Roast the Vegetables and Feta
Pop the baking sheet into your preheated oven and roast for 15 minutes. Keep an eye on the cherry tomatoes as they roast; they'll begin to burst, and the feta will soften beautifully, becoming a delightful creamy base for your Roasted Veggie Pasta with Feta.

Step 4: Cook the Pasta
While the veggies and feta are roasting, bring a large pot of salted water to a boil. Cook your chosen pasta according to the package instructions until it's al dente, which usually takes about 8–10 minutes. Once done, reserve ½ cup of the pasta water before draining the rest, as this starchy liquid will help create a luscious sauce later on.

Step 5: Combine Ingredients
In a large mixing bowl, combine the roasted feta and vegetables with the drained pasta. Gradually stir in the reserved pasta water to help meld the baked feta with the pasta, creating a creamy consistency. This step is essential for achieving the rich, comforting texture of your Roasted Veggie Pasta with Feta.

Step 6: Season and Garnish
To elevate the flavors, add the remaining tablespoon of olive oil, another teaspoon of salt, ground black pepper, fresh lemon juice, and baby arugula to the pasta mixture. Gently fold everything together until all ingredients are evenly coated and deliciously intertwined, making your pasta vibrant and enticing.

Step 7: Serve or Store
Once combined, your Roasted Veggie Pasta with Feta is ready to be served warm. If you’re prepping for the week, it can be stored in the refrigerator for up to 4 days. Simply reheat in the oven to maintain that delightful texture, and enjoy a comforting meal you’ll love!

Variations & Substitutions for Roasted Veggie Pasta with Feta

Feel free to play with flavors and ingredients to make this pasta dish uniquely yours!

  • Dairy-Free: Substitute the feta with a vegan cheese option to enjoy a creamy texture without dairy. You can still achieve that comforting mouthfeel!

  • Protein-Packed: Add grilled chicken or chickpeas for an protein-rich twist. These additions not only make the dish heartier but also increase its nutritional value.

  • Hearty Veggies: Exchange zucchini for roasted bell peppers or asparagus for a different flavor and texture. Each vegetable contributes its unique charm, making it a delightful surprise with every forkful.

  • Herb Infusion: Fresh herbs like basil or parsley can elevate the dish to new heights. Just sprinkle them in before serving, and you'll add a pop of freshness that brightens up the entire meal.

  • Spicy Kick: Need some heat? Toss in a pinch of red pepper flakes or diced jalapeños for a fiery finish. This will give your pasta a lively kick that contrasts well with the creamy feta.

  • Tangy Twist: Swap lemon juice for a splash of balsamic vinegar to create a beautifully tangy flavor profile. This variation beautifully complements the roasted vegetables and feta.

  • Nutty Flavor: Incorporate toasted pine nuts or walnuts for a crunchy texture and rich flavor. The nuts will add an unexpected twist that can turn this dish into a gourmet experience.

For more ideas, consider adding Seafood Pasta Savory to your repertoire or checking out our Roasted Bratwurst with Peppers and Onions for a hearty meal that’s just as satisfying!

Expert Tips for Roasted Veggie Pasta with Feta

  • Roasting Basics: Spread vegetables evenly on the baking sheet to ensure even roasting; overcrowding can lead to steaming rather than caramelizing.

  • Pasta Water Magic: Always reserve some pasta water before draining; it helps emulsify the sauce and create a creamy texture in your Roasted Veggie Pasta with Feta.

  • Flavor Depth: Enhance the dish by allowing the feta to bake until golden; this allows for richer flavors and creaminess that elevates the overall taste.

  • Veggie Substitutions: Don't hesitate to mix and match seasonal vegetables; bell peppers, asparagus, or even eggplant can add delicious variety to your pasta.

  • Hearty Additions: For extra protein, consider tossing in some grilled chicken or chickpeas, turning this into a more filling meal perfect for satisfying hunger.

What to Serve with Roasted Veggie Feta Pasta

Complement your delightful pasta dish with dishes that enhance its flavors and elevate your meal experience.

  • Garlic Bread: A crunchy, buttery side that’s perfect for soaking up the creamy sauce, adding a delightful contrast to the pasta.

  • Mixed Green Salad: A fresh, crisp salad with a lemon vinaigrette brightens the meal and offers a refreshing balance to the richness of the feta.

  • Roasted Asparagus: The slight char and tenderness of roasted asparagus provide a lovely texture and a nutty flavor, harmonizing beautifully with the pasta.

  • Grilled Chicken: For those seeking extra protein, juicy grilled chicken not only adds a satisfying element but also complements the savory notes of the dish.

  • Chilled White Wine: A crisp Sauvignon Blanc or a light Pinot Grigio pairs wonderfully, cutting through the creaminess and enhancing the overall dining experience.

  • Dessert – Lemon Sorbet: Finish your meal on a light note with a refreshing lemon sorbet, which echoes the citrus notes in the dish and cleanses the palate.

Make Ahead Options

These Roasted Veggie Pasta with Feta are perfect for busy weeknights when you want a delicious homemade meal with minimal effort! You can prepare the roasted vegetables and feta up to 24 hours in advance by storing them in an airtight container in the refrigerator. When you're ready to enjoy, simply roast them for 15 minutes as instructed, then combine with freshly cooked pasta. Additionally, you can cook the pasta al dente beforehand and refrigerate it as well, ensuring that you revitalize it with the reserved pasta water when you mix everything together. This simple prep will keep your dish just as delightful and flavorful, all while saving you precious time during your hectic week!

How to Store and Freeze Roasted Veggie Pasta with Feta

Fridge: Store your Roasted Veggie Pasta with Feta in an airtight container for up to 4 days. This makes it a great option for meal prep, ready to enjoy when needed.

Freezer: If you want to keep it longer, freeze the pasta in a freezer-safe container for up to 3 months. Thaw overnight in the fridge before reheating.

Reheating: To maintain the creamy texture, reheat in the oven at 350°F (175°C) until warmed through, adding a splash of reserved pasta water if needed.

Serving: Enjoy it warm, either fresh or after reheating, as the flavors deepen with time and more vegetables become even richer.

Roasted Veggie Pasta with Feta Recipe FAQs

What type of pasta works best for this recipe?
Absolutely! Fusilli or chunky pasta is ideal as it holds the creamy sauce well. However, feel free to swap it with hearty alternatives like penne or rigatoni for a delightful twist.

How do I store my Roasted Veggie Pasta with Feta?
Store your pasta in an airtight container in the refrigerator for up to 4 days. It’s perfect for meal prep, making it easy to enjoy a homemade meal on busy days.

Can I freeze Roasted Veggie Pasta with Feta?
Yes, you can freeze it! Place the cooled pasta in a freezer-safe container and store it for up to 3 months. When ready to enjoy, simply thaw it overnight in the fridge before reheating.

What should I do if my pasta is too dry after reheating?
No worries! If you find your Roasted Veggie Pasta with Feta has dried out, add a splash of reserved pasta water when reheating in the oven at 350°F (175°C). This will help restore its creamy texture!

Are there any allergy considerations for this dish?
Yes, make sure to consider allergies—feta contains dairy. For a lactose-free alternative, use goat cheese or vegan feta. You can also modify the vegetables based on personal dietary needs or preferences.

How can I spice things up if I want additional flavors?
If you’re looking to elevate your Roasted Veggie Pasta with Feta, consider adding fresh herbs like basil or parsley for brightness. A sprinkle of crushed red pepper flakes can also add that lovely heat, enhancing the overall flavor profile!

Roasted Veggie Pasta with Feta

Creamy Roasted Veggie Pasta with Feta in 30 Minutes

A quick and delicious Roasted Veggie Pasta with Feta packed with vibrant flavors and textures, perfect for weeknight dinners.
Print Recipe Pin Recipe
Prep Time 15 minutes mins
Cook Time 15 minutes mins
Total Time 30 minutes mins
Servings: 4 servings
Course: Dinner
Cuisine: Italian
Calories: 400
Ingredients Equipment Method Nutrition Notes

Ingredients
  

For the Pasta
  • 8 ounces Fusilli or Chunky Pasta Can substitute with penne or rigatoni
For the Veggies
  • 6 ounces Block of Feta Can be substituted with goat cheese or vegan alternatives
  • 1 cup Cherry Tomatoes Sun-dried tomatoes can be used for a unique twist
  • 1 Red Onion Thinly wedged; shallots can be used for milder flavor
  • 2 small Zucchini Diced; bell peppers or asparagus can replace
  • 1 Orange Bell Pepper Diced; any bell pepper color works
For the Seasoning
  • 2 tablespoons Olive Oil Avocado oil is a suitable alternative
  • 2 teaspoons Kosher Salt Be cautious with table salt
  • 1 teaspoon Ground Black Pepper
  • 2 tablespoons Fresh Lemon Juice White wine vinegar is a substitute but fresh is best
For the Finish
  • 2 cups Fresh Baby Arugula Spinach can be used as a substitute

Equipment

  • Oven
  • Baking Sheet
  • Large pot
  • Mixing Bowl

Method
 

Step-by-Step Instructions
  1. Preheat your oven to 400°F (200°C). Prepare your baking sheet by lining it with parchment paper.
  2. On the prepared baking sheet, place the block of feta in the center, surrounded by diced zucchini, cherry tomatoes, red onion, and orange bell pepper. Drizzle 1 tablespoon of olive oil and sprinkle 1 teaspoon of kosher salt. Gently toss.
  3. Roast in the oven for 15 minutes until the cherry tomatoes burst and the feta softens.
  4. While roasting, bring a large pot of salted water to a boil and cook the pasta until al dente, about 8–10 minutes. Reserve ½ cup pasta water, then drain.
  5. In a large bowl, combine the roasted vegetables and feta with the drained pasta. Gradually stir in reserved pasta water for creaminess.
  6. Add the remaining tablespoon of olive oil, another teaspoon of salt, black pepper, fresh lemon juice, and arugula. Fold everything together until evenly coated.
  7. Serve warm or store in the fridge for up to 4 days. Reheat in the oven to maintain texture.

Nutrition

Serving: 1servingCalories: 400kcalCarbohydrates: 50gProtein: 15gFat: 15gSaturated Fat: 5gPolyunsaturated Fat: 1gMonounsaturated Fat: 9gCholesterol: 30mgSodium: 700mgPotassium: 600mgFiber: 5gSugar: 4gVitamin A: 800IUVitamin C: 30mgCalcium: 150mgIron: 2mg

Notes

This Roasted Veggie Pasta with Feta is great for meal prep. Store in an airtight container for up to 4 days in the fridge or freeze for up to 3 months.

Tried this recipe?

Let us know how it was!

Roasted Tomato and Garlic Ricotta Pasta for Cozy Nights

April 28, 2026 by Grace Snow Leave a Comment

As I stood over the stove, the aroma of roasted tomatoes and garlic began to weave through my kitchen, pulling me into a comforting embrace. That’s when I knew: tonight’s dinner would be something truly special—Roasted Tomato and Garlic Ricotta Pasta. This dish is not just easy to prepare; it's a warm hug in a bowl, transforming simple ingredients into a satisfying meal. Perfect for those busy weeknights when you want to impress without all the fuss, it pairs the sweet burst of caramelized tomatoes with creamy ricotta, coaxing even the most stubborn fast food cravings away. Plus, it’s vegetarian-friendly, making it a delightful option for everyone at the table. Ready to make your taste buds dance? Let’s dive into this comforting recipe!

Why Is This Pasta Recipe So Special?

Comforting, there's something magical about a dish that wraps you in warmth after a long day. Easy to make, this Roasted Tomato and Garlic Ricotta Pasta can be on your table in just 30 minutes, perfect for those hectic nights. Delectable flavors of sweet, caramelized tomatoes and creamy ricotta create a satisfying meal that even the pickiest eaters will adore. Vegetarian-friendly, it’s a crowd-pleaser that everyone can enjoy, and the unforgettable aroma will have your family gathering around the table in no time. Pair it with a refreshing side salad or some garlic bread, and you’ll have a cozy dining experience that’s simply irresistible!

Roasted Tomato and Garlic Ricotta Pasta Ingredients

For the Roasted Tomatoes
• Cherry Tomatoes – the heart of the dish; roasting enhances sweetness and adds a rich, velvety base.
• Olive Oil – adds richness and assists in roasting the tomatoes to perfection.
• Garlic – transforms from sharp to mellow when roasted, imparting aromatic sweetness.
• Dried Oregano – enhances flavor with a subtle, herbal note.
• Salt – essential for balancing flavors.
• Black Pepper – adds necessary warmth and depth.

For the Pasta
• Pasta (Spaghetti or Penne) – serves as the hearty base to hold the sauce.
• Ricotta Cheese – provides creaminess and richness; balances the acidity of the tomatoes.
• Parmesan Cheese – offers a salty, nutty finish that perfectly complements the dish.
• Fresh Basil – adds freshness and brightens the overall flavor profile.
• Lemon Juice – introduces a hint of acidity that enhances the dish's flavors.

Step‑by‑Step Instructions for Roasted Tomato and Garlic Ricotta Pasta

Step 1: Preheat the Oven
Begin by preheating your oven to 400°F (200°C). This temperature is perfect for roasting and will ensure your cherry tomatoes are caramelized to sweet perfection. While the oven heats up, gather your baking sheet and a mixing bowl to prepare for the next steps.

Step 2: Prepare the Tomatoes
Halve the cherry tomatoes and place them cut-side up on a baking sheet. This arrangement allows each piece to roast evenly. Feel free to add the unpeeled garlic cloves alongside the tomatoes, as they will mellow beautifully during roasting.

Step 3: Season the Tomatoes
Drizzle a generous amount of olive oil over the tomatoes and the garlic. Sprinkle dried oregano, salt, and black pepper to taste, ensuring every tomato is well coated in the delicious mixture. Toss gently using your hands to combine all the flavors, making it a vibrant base for your Roasted Tomato and Garlic Ricotta Pasta.

Step 4: Roast the Tomatoes
Place the baking sheet in the preheated oven and roast for 20-25 minutes. During this time, the tomatoes should become soft and slightly caramelized, while the garlic will transform into an aromatic delight. Keep an eye on them, as you want the tomatoes to burst but not dry out completely.

Step 5: Cook the Pasta
While the tomatoes are roasting, bring a large pot of salted water to a boil. Add your choice of pasta—either spaghetti or penne—and cook according to package instructions until al dente. This typically takes about 8-10 minutes, so stir occasionally to prevent sticking.

Step 6: Prepare the Ricotta Mixture
In a mixing bowl, combine ricotta cheese, grated parmesan, and freshly chopped basil. Squeeze in some lemon juice to add brightness to the mixture. This creamy blend will marry beautifully with the roasted tomatoes and create the luscious sauce needed for your Roasted Tomato and Garlic Ricotta Pasta.

Step 7: Reserve Pasta Water
Before draining the pasta, don’t forget to reserve about half a cup of the starchy pasta water. This water will help adjust the sauce's consistency and help it cling to the pasta later on. Set it aside while you drain the pasta.

Step 8: Combine Pasta and Tomatoes
Add the drained pasta back to the pot along with the roasted tomatoes and any juices released during roasting. Toss gently to ensure the pasta is well mixed with the tomatoes, coating every strand or piece with that delicious flavor.

Step 9: Add the Ricotta Mixture
Pour the ricotta mixture over the pasta and tomatoes, and gently toss to combine everything until it is evenly coated. If the mixture feels a bit thick, gradually add the reserved pasta water, stirring until you reach your desired creaminess.

Step 10: Adjust Seasoning and Serve
Taste the Roasted Tomato and Garlic Ricotta Pasta and adjust the seasoning, adding more salt, pepper, or basil as needed. Serve immediately, garnishing with extra fresh basil or a sprinkle of parmesan for a beautiful finishing touch.

Roasted Tomato and Garlic Ricotta Pasta Variations

Feel free to make this delightful dish your own with these fun twists and substitutions!

  • Mascarpone Swap: Substitute ricotta with mascarpone for a rich and creamy texture that takes the dish to new heights. The smoothness of mascarpone is simply luxurious!

  • Gluten-Free Option: Use gluten-free pasta to keep this recipe suitable for those avoiding gluten. You can still enjoy that classic pasta experience without missing out!

  • Herb Twist: Add fresh herbs like thyme or marjoram for a fragrant lift to the dish. Herbs can create delightful layers of flavor, making each bite a surprise.

  • Veggie Boost: Toss in some sautéed spinach or roasted zucchini for added vegetables. Not only does this increase nutrition, but it also adds vibrant colors and textures to your plate.

  • Spicy Kick: Sprinkle in some red pepper flakes for a touch of heat. It’s a simple way to transform the dish into a lively, spicy experience!

  • Nutty Flavor: Incorporate walnuts or pine nuts for a crunchy texture enhancement. This addition offers a delightful contrast and depth to the creamy pasta.

  • Lemon Zest: For a refreshing brightness, add freshly grated lemon zest to the ricotta mixture. This boost of citrus can elevate the flavors beautifully.

  • Cheese Variation: Try goat cheese instead of ricotta for a tangy twist. This will create a whole new flavor profile that pairs deliciously with roasted tomatoes.

For more delightful ideas, don’t forget to check out Skillet Pasta Sun for another comforting recipe, or explore Roasted Corn Fried for a tasty taco side to elevate your pasta night!

Expert Tips for Roasted Tomato and Garlic Ricotta Pasta

  • Tomato Selection: Use fresh cherry tomatoes for sweetness. Avoid overripe tomatoes, as they won't roast as well and can affect the sauce's flavor.

  • Cooking Pasta: Always cook your pasta al dente! Check package instructions for the specific time, ensuring a perfect texture that holds sauce without becoming mushy.

  • Ricotta Creaminess: For a luxurious texture, let the ricotta sit at room temperature before mixing. This enhances its creaminess in the Roasted Tomato and Garlic Ricotta Pasta.

  • Seasoning Adjustments: Taste your dish before serving. A pinch of extra salt or a splash of lemon juice can elevate the flavors and balance the richness.

  • Storing Leftovers: Keep any leftovers in an airtight container for up to three days. Reheat gently, adding a little pasta water to revive the creamy sauce without drying it out.

What to Serve with Roasted Tomato and Garlic Ricotta Pasta

Looking to create a complete dining experience that perfectly complements the creamy goodness of your pasta?

  • Garlic Bread: Crispy and buttery, it’s perfect for scooping up the rich sauce, making every meal feel special.
  • Mixed Green Salad: A fresh salad with a zesty vinaigrette brings a light crunch that balances the pasta's creaminess perfectly.
  • Roasted Vegetables: Seasonal veggies bring additional depth and flavor; their caramelization echoes the sweetness of the roasted tomatoes.
  • Grilled Asparagus: Tender and slightly charred, this dish adds a delightful smokiness that contrasts beautifully with the creamy pasta.
  • Pesto Breadsticks: These offer a herby twist that complements the basil in your pasta, providing flavor and fun for family dinners.
  • Red Wine: A medium-bodied red, like Chianti, pairs beautifully with the hearty tomato flavor, enhancing the overall experience.
  • Lemon Sorbet: For dessert, the bright citrus notes cleanse the palate, leaving a refreshing finish after your rich meal.

Let these delightful pairings elevate your dining experience, ensuring every bite is as comforting as the pasta itself!

Make Ahead Options

These Roasted Tomato and Garlic Ricotta Pasta ready-to-go components make meal prep a breeze! You can roast the cherry tomatoes and garlic up to 24 hours in advance, allowing them to cool before transferring them to an airtight container in the refrigerator. Additionally, prepare the ricotta mixture, mixing it with parmesan, basil, and lemon juice for a creamy sauce that lasts up to 3 days. When you're ready to enjoy this comforting dish, simply boil the pasta, combine it with the roasted tomatoes, and toss in your ricotta mixture. This prep-ahead strategy saves time during busy weeknights while ensuring your Roasted Tomato and Garlic Ricotta Pasta is just as delicious!

How to Store and Freeze Roasted Tomato and Garlic Ricotta Pasta

Refrigerator: Store leftovers in an airtight container for up to 3 days to keep the flavors fresh and the pasta moist.

Freezer: For longer storage, freeze the pasta in portions for up to 2 months. Separate the sauce and pasta to maintain the ideal texture.

Reheating: When ready to enjoy, gently reheat in a skillet over low heat, adding a splash of water or olive oil to restore creaminess.

Airtight Packaging: Always ensure your leftovers are well-sealed to prevent freezer burn or dryness, making your Roasted Tomato and Garlic Ricotta Pasta just as delightful upon reheating!

Roasted Tomato and Garlic Ricotta Pasta Recipe FAQs

How do I select ripe tomatoes for this recipe?
Absolutely! When choosing cherry tomatoes, look for plump, shiny specimens with a vibrant color and no dark spots. Ideally, they should feel firm but yield slightly when gently pressed. Overripe tomatoes can become mushy during roasting, which may impact the texture of your Roasted Tomato and Garlic Ricotta Pasta.

How long can I store leftovers in the fridge?
You can store any leftovers in an airtight container for up to 3 days. I often recommend adding a splash of water or a drizzle of olive oil when reheating to maintain the creaminess of the ricotta sauce and prevent it from drying out.

Can I freeze Roasted Tomato and Garlic Ricotta Pasta?
Yes! For optimal texture, it's best to store the sauce and pasta separately. Freeze them in airtight containers for up to 2 months. When ready to enjoy, thaw in the fridge overnight, then gently reheat in a skillet, adding a little reserved pasta water to bring everything back together.

What should I do if my pasta is mushy after cooking?
If your pasta turns out mushy, it could be due to overcooking or not using enough water in your pot. Always follow the package instructions for cooking time and ensure the water is at a rolling boil before adding your pasta. For next time, try cooking until al dente for the perfect texture.

Is this recipe suitable for people with dairy allergies?
Unfortunately, the classic version of Roasted Tomato and Garlic Ricotta Pasta contains dairy due to the ricotta and parmesan cheese. However, you can easily swap these for dairy-free alternatives, such as cashew cheese or nutritional yeast, which can impart a cheesy flavor without the dairy.

How can I enhance the flavors of my dish?
For a delightful flavor boost, consider adding a pinch of red pepper flakes for a bit of heat or tossing in freshly chopped spinach or kale during the final mixing with the ricotta mixture. Experimenting with fresh herbs like thyme or oregano can also provide a unique twist to your Roasted Tomato and Garlic Ricotta Pasta!

Roasted Tomato and Garlic Ricotta Pasta

Roasted Tomato and Garlic Ricotta Pasta for Cozy Nights

A comforting Roasted Tomato and Garlic Ricotta Pasta that's vegetarian-friendly and easy to prepare for busy weeknights.
Print Recipe Pin Recipe
Prep Time 10 minutes mins
Cook Time 30 minutes mins
Total Time 40 minutes mins
Servings: 4 servings
Course: Dinner
Cuisine: Italian
Calories: 450
Ingredients Equipment Method Nutrition Notes

Ingredients
  

For the Roasted Tomatoes
  • 2 cups Cherry Tomatoes halved
  • 2 tablespoons Olive Oil for drizzling
  • 4 cloves Garlic unpeeled
  • 1 teaspoon Dried Oregano
  • 1 teaspoon Salt to taste
  • 1 teaspoon Black Pepper to taste
For the Pasta
  • 12 ounces Pasta (Spaghetti or Penne)
  • 1 cup Ricotta Cheese
  • 1/2 cup Grated Parmesan Cheese
  • 1/2 cup Fresh Basil chopped
  • 1 tablespoon Lemon Juice

Equipment

  • Baking Sheet
  • Mixing Bowl
  • Large pot

Method
 

Step-by-Step Instructions
  1. Preheat the oven to 400°F (200°C).
  2. Halve the cherry tomatoes and place them cut-side up on a baking sheet. Add unpeeled garlic cloves.
  3. Drizzle olive oil over the tomatoes and garlic. Sprinkle dried oregano, salt, and black pepper. Toss gently.
  4. Roast for 20-25 minutes until tomatoes are soft and caramelized.
  5. Boil a pot of salted water and cook pasta until al dente (8-10 minutes).
  6. In a mixing bowl, combine ricotta cheese, grated parmesan, chopped basil, and lemon juice.
  7. Reserve half a cup of pasta water before draining the pasta.
  8. Add drained pasta to the pot with roasted tomatoes and juices. Toss gently.
  9. Pour ricotta mixture over pasta and toss gently. Adjust with reserved pasta water as needed.
  10. Taste and adjust seasoning before serving. Garnish with fresh basil or parmesan.

Nutrition

Serving: 1servingCalories: 450kcalCarbohydrates: 60gProtein: 15gFat: 18gSaturated Fat: 7gPolyunsaturated Fat: 1gMonounsaturated Fat: 8gCholesterol: 30mgSodium: 600mgPotassium: 700mgFiber: 5gSugar: 4gVitamin A: 800IUVitamin C: 20mgCalcium: 300mgIron: 2mg

Notes

Use fresh cherry tomatoes for maximum sweetness and always cook your pasta al dente to achieve the best texture.

Tried this recipe?

Let us know how it was!

Irresistibly Moist Paula Deen-Inspired Coconut Loaf Cake

April 27, 2026 by Grace Snow Leave a Comment

As the scent of baking wafted through my kitchen one afternoon, I realized I was about to make a Paula Deen–inspired coconut loaf cake that would transport me straight to a tropical paradise. This moist coconut pound cake loaf is a delightful twist on a beloved classic, combining a rich, buttery texture with the subtle sweetness of coconut. Easy to whip up, it’s perfect for impressing guests at brunch or enjoying a cozy slice with coffee after dinner. Plus, it’s an excellent opportunity to play with variations like coconut oil for a more intense flavor! Are you ready to create a deliciously sweet escape in your own home?

Why is Coconut Pound Cake So Irresistible?

Moist Texture: This luscious cake boasts a rich, buttery crumb that melts in your mouth. Each bite is a tropical escape!

Easy to Make: Even novice bakers will find success with this simple recipe, meaning everyone can enjoy a slice.

Versatile Variations: Feel free to switch coconut oil for butter or explore other extracts – your flavor playground awaits!

Crowd-Pleasing: This cake makes a stunning centerpiece for brunches or special occasions, guaranteed to impress!

Enjoy serving it alongside a cup of coffee or tea, or check out our Chocolate Pudding Cake for another delightful dessert option!

Paula Deen–Inspired Coconut Loaf Cake Ingredients

For the Cake
• Unsalted Butter – provides a rich, buttery flavor and texture; make sure it's softened for easy creaming with sugar.
• Granulated Sugar – adds sweetness and structure; a crucial component to achieving that tender, moist texture.
• Large Eggs – help with rising; using room temperature eggs will ensure a smoother batter.
• Vanilla Extract – enhances the overall flavor; be cautious with the quantity to avoid overpowering the coconut essence.
• Almond Extract – adds depth to the cake's flavor; a little goes a long way, so use sparingly.
• All-Purpose Flour – provides necessary structure; this is vital to achieving a good rise and texture in your coconut loaf cake.
• Baking Powder – crucial for leavening; check its freshness to ensure your cake rises beautifully.
• Kosher Salt – balances the sweetness and highlights the flavors in the cake.
• Unsweetened Coconut Milk – introduces moisture and coconut flavor; avoid sweetened versions to keep it balanced.
• Shredded Coconut – adds texture and delivers bursts of coconut flavor; coat lightly with flour to prevent sinking in the batter.

For the Glaze
• Powdered Sugar – for the glaze, ensure it’s sifted to keep the consistency smooth and drizzle-friendly.
• Coconut Milk (for glaze) – helps achieve a luscious texture; adjust the amount for your desired drizzling consistency.
• Vanilla Extract (for glaze) – boosts flavor in your glaze, adding that perfect finishing touch to your moist coconut pound cake.

This Paula Deen–inspired coconut loaf cake is not just a treat but a beloved tradition that brings warmth and joy to every occasion!

Step‑by‑Step Instructions for Paula Deen–inspired coconut loaf cake

Step 1: Preheat and Prepare
Begin by preheating your oven to 350°F (175°C). While it's heating up, generously grease a 9x5-inch loaf pan with butter or non-stick spray to ensure the cake releases easily after baking. This step is crucial for achieving that perfect, golden-brown crust on your Paula Deen–inspired coconut loaf cake.

Step 2: Cream Butter and Sugar
In a large mixing bowl, use an electric mixer to cream together the softened unsalted butter and granulated sugar until the mixture becomes light and fluffy, about 3-5 minutes. You’ll know it’s ready when it’s pale in color and has a smooth texture. This is key for a tender cake, so take your time with this step!

Step 3: Incorporate Eggs and Extracts
Next, add in the large eggs one at a time, mixing well after each addition to ensure they’re fully incorporated. Follow this by adding the vanilla and almond extracts, blending until everything is well combined. This sweet aroma will elevate the flavors in your coconut loaf cake and create a delightful base.

Step 4: Mix Dry Ingredients
In a separate bowl, whisk together the all-purpose flour, baking powder, kosher salt, and shredded coconut. This step not only combines the dry ingredients evenly but also helps the baking powder distribute better in the batter. Make sure there are no lumps, and keep the shredded coconut separate until it’s time to combine.

Step 5: Combine Wet and Dry Mixtures
Gradually fold the dry mixture into the creamed batter, alternating with the unsweetened coconut milk. Start and end with the dry ingredients, mixing until just combined. Be careful not to overmix, as this can affect the final texture of your Paula Deen–inspired coconut loaf cake, so use a spatula for gentleness.

Step 6: Bake the Cake
Pour the final batter into your prepared loaf pan, smoothing the top with a spatula. Place it in the preheated oven and bake for 50-60 minutes, or until a toothpick inserted into the center comes out clean or with a few moist crumbs. The cake should be golden brown and have risen beautifully, filling your kitchen with delicious coconut aromas.

Step 7: Cool the Cake
Once baked, remove it from the oven and allow the coconut loaf cake to cool in the pan for about 10 minutes. Then, carefully transfer it to a wire rack to cool completely. This step is essential to prevent sogginess and to ensure that glorious texture you’re aiming for in your cake.

Step 8: Prepare the Glaze
While the cake cools, prepare the glaze by mixing the sifted powdered sugar, coconut milk, and vanilla extract in a small bowl until smooth. Adjust the thickness with more coconut milk if necessary; it should be drizzling consistency. Once the cake is cool, this delightful glaze will add a final touch of sweetness and flavor.

Step 9: Drizzle and Serve
Finally, drizzle the glaze generously over your Paula Deen–inspired coconut loaf cake. Allow it to set for a few moments before slicing for serving. Enjoy this delightful, moist cake alongside your favorite cup of coffee or tea, bringing a tropical twist to your dessert table!

Expert Tips for Paula Deen-Inspired Coconut Loaf Cake

Room Temperature Ingredients: Ensure that your butter, eggs, and coconut milk are at room temperature. This helps create a smooth batter for your coconut loaf cake.

Check Baking Powder Freshness: Test your baking powder by adding a teaspoon to hot water. If it bubbles, it's fresh; if not, replace it for a better rise.

Prevent Coconut Sinking: Lightly coat shredded coconut with flour before adding it to the batter. This simple trick keeps it evenly distributed throughout the cake.

Mind the Mixing: Be careful not to overmix your batter, especially when combining wet and dry ingredients. Gentle folding helps maintain a tender texture in your Paula Deen-inspired coconut loaf cake.

Cool Completely: Allow your cake to cool completely on a wire rack before glazing. This prevents the glaze from melting into the cake and ensures a beautiful finish.

How to Store and Freeze Paula Deen–Inspired Coconut Loaf Cake

Room Temperature: Store your cooled coconut loaf cake in an airtight container at room temperature for up to 3 days to maintain its moisture and flavor.

Fridge: For longer freshness, refrigerate the cake in an airtight container for up to a week. Allow it to come to room temperature before serving to enjoy the best texture.

Freezer: Wrap the cooled loaf tightly in plastic wrap and aluminum foil, or place it in a freezer-safe bag to prevent freezer burn. It can be frozen for up to 3 months.

Reheating: To serve, simply thaw the cake overnight in the fridge and let it come to room temperature. You can warm individual slices in the microwave for about 10-15 seconds for a fresh-baked taste.

Make Ahead Options

These Paula Deen–inspired coconut loaf cake options are perfect for busy home cooks looking to streamline their meal planning! You can prepare the batter up to 24 hours in advance by mixing the ingredients and storing the batter in an airtight container in the refrigerator. Additionally, you can also bake the cake and allow it to cool completely, then wrap it tightly in plastic wrap or aluminum foil to keep it fresh for up to 3 days at room temperature. Just remember to let it come to room temperature before serving, and drizzle the glaze right before enjoying. This way, your tropical dessert remains just as delicious without losing its moist texture!

Variations & Substitutions for Coconut Pound Cake

Feel free to get creative and customize this delightful coconut pound cake to suit your taste preferences!

  • Coconut Oil: Substitute coconut oil for butter for a more intense coconut flavor. Just remember, this may create a denser cake texture.

  • Flavor Extracts: Swap almond extract for other extracts like lemon or coconut for a unique twist. Experimenting with flavors can elevate your cake experience beautifully.

  • Citrus Zest: Infuse the batter with lime or orange zest for an added pop of freshness. The citrus brings a vibrant zing that pairs impeccably with coconut!

  • Nutty Delight: Add chopped walnuts or pecans for a delightful crunch in every bite. This variation gives a lovely texture and nutty flavor to the loaf.

  • Gluten-Free: Substitute all-purpose flour with a gluten-free flour blend if needed. Be sure to use one that contains xanthan gum for best results!

  • Chocolate Lovers: Mix in chocolate chips for a delicious contrast to the coconut flavor. Who can resist a tropical loaf with a touch of chocolatey goodness?

  • Reduced Sugar: Use a sugar substitute or reduce the sugar slightly for a healthier version. This can make your cake less sweet while still being enjoyable.

  • Tropical Twist: Incorporate crushed pineapple or mango into the batter for an exotic fruity addition. This will add moisture as well as a vibrant tropical flair!

Pair your loaf with a cup of coffee or tea for the perfect afternoon indulgence. And if you're on the lookout for other delightful desserts, consider checking out our German Chocolate Poke Cake or Chocolate Pudding Cake. Enjoy experimenting with these variations!

What to Serve with Moist Coconut Pound Cake Loaf?

Indulging in a slice of this luscious coconut loaf cake invites a wave of tropical delight; here are some delicious pairings that will elevate your dessert experience.

  • Creamy Coconut Ice Cream: This complements the coconut flavor while adding a velvety, cold contrast that melts into each bite of the warm loaf.

  • Fresh Berries Medley: A burst of tartness from strawberries, blueberries, and raspberries balances the sweetness, adding a refreshing note that’s irresistible.

  • Rich Espresso or Coffee: The deep, bold flavors of coffee enhance the cake's sweetness, creating a comforting experience perfect for afternoon breaks or brunch.

  • Minty Iced Tea: A cold glass of mint-infused iced tea refreshes your palate, while its herbal notes bring a delightful contrast to the smooth cake.

  • Tropical Fruit Salad: Bright, juicy slices of pineapple, mango, and kiwi add a burst of flavor and visual appeal, harmonizing beautifully with the coconut notes.

  • Toasted Coconut Flakes: Sprinkle some on top for presentation and a satisfying crunch; they echo the flavors in the cake and add visual zest to your serving.

  • Lemon Glaze: A drizzle of tangy lemon glaze brightens the cake, contrasting the richness of the coconut while adding a citrus twist that elevates every bite.

  • Chilled Coconut Water: For a light beverage, chilled coconut water brings out the cake's tropical essence, making each slice feel like a vacation treat.

  • Chocolate Sauce Drizzle: For a decadent twist, drizzle a little chocolate sauce over the cake, creating a heavenly pairing with the coconut flavor!

Explore these delightful accompaniments to your Paula Deen–inspired coconut loaf cake, transforming a simple dessert into an unforgettable experience!

Paula Deen-Inspired Coconut Pound Cake Recipe FAQs

What kind of coconut should I use for the coconut pound cake?
I recommend using unsweetened shredded coconut for the best flavor and texture. Sweetened coconut can make the cake overly sweet and alter the balance.

How do I store the coconut pound cake properly?
To keep your coconut loaf cake fresh, store it in an airtight container at room temperature for up to 3 days. If you want it to last longer, refrigerate it for up to a week.

Can I freeze the coconut pound cake?
Absolutely! To freeze your Paula Deen-inspired coconut loaf cake, wrap it tightly in plastic wrap and then in aluminum foil or place it in a freezer-safe bag. It can be frozen for up to 3 months. When you’re ready to enjoy it, thaw it in the fridge overnight and let it come to room temperature.

What should I do if my loaf cake doesn’t rise?
If your cake doesn’t rise as expected, it could be due to old baking powder. Check for freshness by adding a teaspoon of baking powder to a small cup of hot water; if it bubbles vigorously, it’s still good. Also, avoid overmixing the batter, as this can lead to a denser cake.

Is this coconut pound cake safe for people with nut allergies?
The recipe uses almond extract, which may not be suitable for those with nut allergies. You can easily substitute it with an extra splash of vanilla extract or omit it entirely without losing much flavor.

Can I use coconut oil instead of butter in this recipe?
Yes, you can substitute coconut oil for butter for a stronger coconut flavor. Just note that this might yield a denser texture, so keep an eye on the baking time as well!

Paula Deen–inspired coconut loaf cake

Irresistibly Moist Paula Deen-Inspired Coconut Loaf Cake

Delight in the tropical flavors of this Paula Deen–inspired coconut loaf cake, moist and perfect for any occasion.
Print Recipe Pin Recipe
Prep Time 20 minutes mins
Cook Time 1 hour hr
Cooling Time 10 minutes mins
Total Time 1 hour hr 30 minutes mins
Servings: 8 slices
Course: Dessert
Cuisine: American
Calories: 320
Ingredients Equipment Method Nutrition Notes

Ingredients
  

For the Cake
  • 1 cup Unsalted Butter softened
  • 2 cups Granulated Sugar
  • 4 large Large Eggs room temperature
  • 1 teaspoon Vanilla Extract
  • 1/2 teaspoon Almond Extract
  • 3 cups All-Purpose Flour
  • 1 tablespoon Baking Powder fresh
  • 1 teaspoon Kosher Salt
  • 1 cup Unsweetened Coconut Milk
  • 1 cup Shredded Coconut coated with flour
For the Glaze
  • 1 cup Powdered Sugar sifted
  • 1/4 cup Coconut Milk for glaze
  • 1 teaspoon Vanilla Extract for glaze

Equipment

  • Loaf pan
  • Mixing bowls
  • Electric mixer
  • Whisk

Method
 

Step-by-Step Instructions
  1. Preheat your oven to 350°F (175°C) and grease a 9x5-inch loaf pan.
  2. Cream together the softened unsalted butter and granulated sugar until light and fluffy.
  3. Add large eggs one at a time, mixing well. Then add vanilla and almond extracts.
  4. In a separate bowl, whisk together flour, baking powder, kosher salt, and shredded coconut.
  5. Gradually fold the dry mixture into the creamed batter, alternating with coconut milk.
  6. Pour the batter into the prepared pan and bake for 50-60 minutes until a toothpick comes out clean.
  7. Cool in the pan for 10 minutes, then transfer to a wire rack to cool completely.
  8. Prepare the glaze by mixing powdered sugar, coconut milk, and vanilla extract until smooth.
  9. Drizzle the glaze over the cooled cake and let it set before serving.

Nutrition

Serving: 1sliceCalories: 320kcalCarbohydrates: 48gProtein: 3gFat: 14gSaturated Fat: 8gPolyunsaturated Fat: 0.5gMonounsaturated Fat: 3gCholesterol: 85mgSodium: 150mgPotassium: 90mgFiber: 1gSugar: 30gVitamin A: 500IUCalcium: 20mgIron: 1mg

Notes

Ensure all ingredients are at room temperature for best results.

Tried this recipe?

Let us know how it was!

Easy Raspberry Cream Cheese Cruffins That Brighten Mornings

April 27, 2026 by Grace Snow Leave a Comment

The first bite of these Easy Raspberry Cream Cheese Cruffins transports me straight to a charming bakery, where the smell of fresh pastries warms the air. With flaky layers of puff pastry wrapped around a luscious cream cheese mixture and a swirl of vibrant raspberry preserves, these delightful treats have a way of transforming even the ordinary mornings into something special. Not only are they a breeze to make, but they also impress anyone who tries them—perfect for brunch gatherings or a sweet surprise for your loved ones. Whether you enjoy them fresh out of the oven or at room temperature, the combination of textures and flavors will leave you craving more. Curious to learn how to whip up these buttery, bakery-style wonders in your own kitchen? Let’s dive into the recipe!

Why Make Easy Raspberry Cream Cheese Cruffins?

Irresistible Flakiness: Each cruffin is crafted with layers of puff pastry that create a light and airy texture, reminiscent of your favorite bakery treats.

Creamy Filling: The blend of rich cream cheese and sweet raspberry preserves brings a delightful balance of flavors—perfect for satisfying your sweet tooth.

Simple Steps: With easy-to-follow instructions, even novice bakers can enjoy making these delectable pastries without stress.

Impressive Presentation: These cruffins look as wonderful as they taste, making them the ideal centerpiece for brunch gatherings or a special morning treat.

Versatile Options: Feel free to swap out raspberry preserves for other fruits, like strawberry, or add a hint of spice with cinnamon for an exciting twist.

Indulge in these charming pastries that will brighten your mornings and bring smiles to your loved ones, just like with Peaches Cream Cookies or a refreshing bowl of Vegan Cacao Cream.

Easy Raspberry Cream Cheese Cruffins Ingredients

  • For the Cruffins

  • Puff Pastry – This key ingredient forms the flaky, airy layers that define cruffins; opt for gluten-free versions if needed.

  • Cream Cheese – Adds a rich, creamy filling to each cruffin; substitute with dairy-free cream cheese for a vegan option.

  • Powdered Sugar – Sweetens the cream cheese mixture for just the right amount of sweetness; adjust to taste as personal preferences vary.

  • Vanilla Extract – Infuses warmth and depth into the filling; can be left out for a simpler flavor profile.

  • Raspberry Preserves – Provides a sweet and tangy burst that pairs beautifully with the cream cheese; feel free to swap for other fruit preserves if desired.

  • Melted Butter – Brushed on top for a beautiful golden sheen; use a plant-based butter instead for a dairy-free version.

  • Optional Flavor Enhancer

  • Cinnamon – A subtle addition that can enhance the warm flavors of the filling; not essential but worth considering for a special touch.

Step‑by‑Step Instructions for Easy Raspberry Cream Cheese Cruffins

Step 1: Preheat the Oven
Begin by preheating your oven to 375°F (190°C). This will ensure that your Easy Raspberry Cream Cheese Cruffins bake evenly and reach that golden-brown perfection. While the oven is warming up, you can grease a 12-cup muffin tin with butter or non-stick cooking spray to prepare for the cruffins.

Step 2: Prepare Puff Pastry
Take one sheet of thawed puff pastry and roll it out on a lightly floured surface. Aim for a rectangle that’s about 10x12 inches; this will create enough surface area for your delicious cream cheese and raspberry filling. Make sure that the pastry is still cold to maintain its flaky texture as you roll.

Step 3: Make Cream Cheese Mixture
In a mixing bowl, combine softened cream cheese, powdered sugar, and vanilla extract. Beat the mixture using a hand mixer or whisk until it’s smooth and creamy, about 2-3 minutes. The sweetness from the powdered sugar should balance with the creamy richness, creating a delightful filling for your cruffins.

Step 4: Layering
Spread half of the cream cheese mixture evenly over the rolled-out puff pastry. Next, take your raspberry preserves and spread a layer over the cream cheese filling. Repeat this process for a second sheet of puff pastry, creating two layers of deliciousness that will blend beautifully when baked.

Step 5: Rolling & Cutting
Roll each pastry sheet tightly to form logs, starting from one long side. Once rolled, slice each log in half lengthwise to reveal the creamy layers. Then, cut each log into three pieces, resulting in a total of 12 pieces perfect for your muffin tin.

Step 6: Twisting
With the cut sides of your pastry pieces facing outwards, gently twist each piece to create a spiral shape. This technique not only adds visual appeal but also helps to further incorporate the delicious cream cheese and raspberry filling within the Easy Raspberry Cream Cheese Cruffins.

Step 7: Baking
Place the twisted cruffins into the prepared muffin cups. For a glossy finish, brush the tops with melted butter. Slide the muffin tin into the preheated oven and bake for 22-25 minutes, or until they are golden brown and puffed up beautifully. Keep an eye on them to achieve the perfect browning.

Step 8: Cooling & Serving
Once baked, remove the cruffins from the oven and let them cool in the tin for about 5 minutes. Carefully transfer them to a wire rack to cool completely. If desired, dust them with powdered sugar before serving to add a touch of sweetness. Enjoy your warm Easy Raspberry Cream Cheese Cruffins fresh or at room temperature!

Expert Tips for Easy Raspberry Cream Cheese Cruffins

  • Thaw Puff Pastry: Ensure the puff pastry is fully thawed but cool to the touch. If it's too soft, chill it briefly to maintain the flaky texture.
  • Layer Wisely: Avoid overloading with raspberry preserves; it's crucial to keep the filling balanced to prevent overflow during baking.
  • Make Ahead: Prepare the cream cheese filling ahead of time and refrigerate it for up to 2 days. This will save you time on baking day!
  • Reheat Correctly: For maintaining crispness, avoid microwaving leftovers. Instead, reheat in a 300°F oven for 5-7 minutes for delightful results.
  • Variations Abound: Get creative with the filling! Swap raspberry preserves for other flavors like strawberry, or add a pinch of cinnamon to the cream cheese for a warm twist.

Enjoy the process of making these delicious Easy Raspberry Cream Cheese Cruffins!

Make Ahead Options

These Easy Raspberry Cream Cheese Cruffins are perfect for meal prep, saving you precious time during busy mornings! You can prepare the cream cheese filling up to 3 days in advance; simply store it in an airtight container in the refrigerator. Additionally, the puff pastry can be rolled, filled, and twisted into shape and then refrigerated for up to 24 hours before baking. Just be sure to cover it tightly to maintain freshness. When you're ready to enjoy them, bake the cruffins straight from the fridge, adding a few extra minutes to the baking time if necessary. With these make-ahead tips, you’ll have bakery-style delights with minimal effort, ensuring every morning feels special!

Storage Tips for Easy Raspberry Cream Cheese Cruffins

Room Temperature: Store baked cruffins in an airtight container at room temperature for up to 1 day to keep them fresh and flaky.

Fridge: If you plan to keep them longer, refrigerate the Easy Raspberry Cream Cheese Cruffins for up to 3 days in an airtight container to maintain their texture.

Freezer: For longer storage, freeze the cruffins for up to 1 month. Wrap them individually in plastic wrap, then place in a freezer-safe bag.

Reheating: Reheat from frozen or refrigerated in a 300°F oven for 5–7 minutes to restore their deliciously crispy exterior without compromising the creaminess inside.

Easy Raspberry Cream Cheese Cruffins Variations & Substitutions

Feel free to get creative with these delightful cruffins and make them your own! Each variation brings a unique twist to the familiar flavors.

  • Gluten-Free: Use gluten-free puff pastry for a tasty option that everyone can enjoy. These cruffins will be just as flaky and delicious!

  • Dairy-Free: Swap cream cheese for a dairy-free alternative, ensuring everyone at your table can savor the creamy filling.

  • Berry Variety: Replace raspberry preserves with tangy blueberry or sweet peach preserves for an entirely different flavor experience. Each fruit brings a unique essence to the cruffin.

  • Cinnamon Twist: Add a sprinkle of cinnamon to your cream cheese mixture for a warm spice that perfectly complements the fruit filling. This little touch creates a cozy, comforting flavor.

  • Chocolate Lovers: Fold in mini chocolate chips with your cream cheese for a delightful pairing. The combination of chocolate and raspberry creates a rich, indulgent treat!

  • Nuts for Crunch: Mix chopped walnuts or almonds into the cream cheese for an added crunch and nutty flavor that pairs beautifully with the creamy filling.

  • Maple Infusion: Swap powdered sugar for maple syrup in the cream cheese mixture for a unique sweetener. This provides a lovely earthy sweetness that harmonizes with fruit.

  • Savory Option: For a fun twist, fill cruffins with savory options such as herbed cream cheese and roasted garlic. Enjoy it alongside a fresh salad or a warm soup for a delicious dinner.

As you explore these variations, don't forget to consider pairing your cruffins with a side of Cajeta Ice Cream or perhaps a mouthwatering slice of Ice Cream Cake for dessert! The possibilities are endless, and each change invites a new baking adventure in your kitchen.

What to Serve with Easy Raspberry Cream Cheese Cruffins

Elevate your breakfast table with delightful pairings that enhance the experience of these airy pastries.

  • Fresh Berries: Showcase seasonal flavors with a mixed berry medley; their sweetness and tang complement the cruffins beautifully.
  • Whipped Cream: Add a dollop of lightly sweetened whipped cream for an extra creamy texture, making every bite indulgent.
  • Coffee or Tea: A steaming cup of coffee or fragrant herbal tea provides a warming beverage pairing and brightens the morning mood.
  • Greek Yogurt: Serve alongside a bowl of Greek yogurt for a balanced breakfast option, adding a creamy contrast to the sweet cruffins.
  • Citrus Salad: Fresh citrus fruits offer a zesty brightness that cuts through the richness of the pastries and revives the palate.
  • Chocolate Drizzle: For those with a sweet tooth, a light drizzle of chocolate sauce can turn these cruffins into an extravagant dessert.

Each of these pairings adds layers of flavor and enjoyment, turning your homemade Easy Raspberry Cream Cheese Cruffins into a complete and unforgettable meal experience.

Easy Raspberry Cream Cheese Cruffins Recipe FAQs

What type of puff pastry should I use?
Absolutely! For the best results, I recommend using thawed, store-bought puff pastry, which creates that irresistible flaky texture. If gluten is a concern, opt for gluten-free puff pastry available at many grocery stores.

How should I store Easy Raspberry Cream Cheese Cruffins?
To maintain their freshness, store baked cruffins in an airtight container at room temperature for up to 1 day. If you’d like to keep them longer, refrigerate them for up to 3 days, ensuring the container is airtight to prevent drying out.

Can I freeze these cruffins?
Yes, you can freeze Easy Raspberry Cream Cheese Cruffins for up to 1 month! Wrap each cruffin individually in plastic wrap and place them into a freezer-safe bag. When you're ready to enjoy them, simply reheat in a 300°F oven for 5–7 minutes straight from the freezer for a freshly baked taste.

What can I do if my filling spills out during baking?
If the filling spills over, don’t worry—this can happen if there’s too much filling or if the cruffins aren’t twisted tightly enough. For next time, ensure to spread the raspberry preserves in a thin layer, and twist the pastry pieces firmly to maintain their shape.

Are these cruffins suitable for people with allergies?
These Easy Raspberry Cream Cheese Cruffins are vegetarian-friendly but contain dairy. If you're catering to someone with dairy allergies, you can substitute the cream cheese with a dairy-free alternative and choose plant-based butter. Always double-check labels to ensure all ingredients meet dietary needs.

How do I know when the cruffins are baked perfectly?
Look for a beautiful golden-brown color and a puffed appearance after baking for 22–25 minutes. If they’re nicely browned on the top and puffed up but still soft in the center, they're made to perfection and ready to be enjoyed!

Easy Raspberry Cream Cheese Cruffins

Easy Raspberry Cream Cheese Cruffins That Brighten Mornings

Enjoy delightful Easy Raspberry Cream Cheese Cruffins with flaky layers, creamy filling, and vibrant raspberry preserves.
Print Recipe Pin Recipe
Prep Time 30 minutes mins
Cook Time 25 minutes mins
Cooling Time 5 minutes mins
Total Time 1 hour hr
Servings: 12 cruffins
Course: Dessert
Cuisine: Bakery
Calories: 210
Ingredients Equipment Method Nutrition Notes

Ingredients
  

For the Cruffins
  • 1 sheet Puff Pastry opt for gluten-free versions if needed
  • 8 oz Cream Cheese substitute with dairy-free cream cheese for a vegan option
  • 1/2 cup Powdered Sugar adjust to taste
  • 1 tsp Vanilla Extract can be left out for a simpler flavor
  • 1/2 cup Raspberry Preserves swap for other fruit preserves if desired
  • 2 Tbsp Melted Butter use a plant-based butter for a dairy-free version
Optional Flavor Enhancer
  • 1 tsp Cinnamon optional for a special touch

Equipment

  • Muffin tin
  • Mixing Bowl
  • hand mixer

Method
 

Step-by-Step Instructions
  1. Preheat your oven to 375°F (190°C) and grease a 12-cup muffin tin with butter or non-stick cooking spray.
  2. Roll out one sheet of thawed puff pastry on a lightly floured surface to a rectangle of about 10x12 inches.
  3. In a mixing bowl, combine softened cream cheese, powdered sugar, and vanilla extract. Beat until smooth and creamy, about 2-3 minutes.
  4. Spread half of the cream cheese mixture over the puff pastry, then layer with raspberry preserves. Repeat with a second pastry sheet.
  5. Roll each pastry sheet tightly and slice each log in half lengthwise, then cut into three pieces for muffin tin.
  6. Twist each piece with cut sides facing outwards to create a spiral shape.
  7. Place the twisted cruffins in the muffin cups, brush with melted butter, and bake for 22-25 minutes until golden brown.
  8. Let the cruffins cool in the tin for about 5 minutes before transferring to a wire rack. Dust with powdered sugar if desired before serving.

Nutrition

Serving: 1cruffinCalories: 210kcalCarbohydrates: 22gProtein: 3gFat: 12gSaturated Fat: 7gPolyunsaturated Fat: 0.5gMonounsaturated Fat: 4gCholesterol: 30mgSodium: 150mgPotassium: 65mgFiber: 1gSugar: 5gVitamin A: 300IUVitamin C: 2mgCalcium: 30mgIron: 1mg

Notes

These cruffins are perfect for breakfast or brunch gatherings, and you can experiment with different fruit preserves.

Tried this recipe?

Let us know how it was!
  • « Previous Page
  • 1
  • …
  • 61
  • 62
  • 63
  • 64
  • 65
  • …
  • 273
  • Next Page »

Welcome!

Hi, I’m Grace, a Sydney-based home cook with a passion for bold flavors and trending ingredients. Whether you’re a busy beginner or a seasoned foodie, you’ll find dishes here that are fresh, fun, and full of flavor.

More about me

Popular Recipes

  • Honey Sriracha Salmon Bowls
    Delicious Honey Sriracha Salmon Bowls for Quick Dinners
  • Air Fryer Apple Pie Taquitos
    Crispy Air Fryer Apple Pie Taquitos for a Sweet Treat
  • Crispy Parmesan Crusted Cod
    Crispy Parmesan Crusted Cod: A Healthy Flavor Explosion
  • Air Fryer French Toast Bites
    Delicious Air Fryer French Toast Bites for Busy Mornings

Footer

↑ back to top

About

  • Privacy Policy
  • Disclaimer
  • Terms & Conditions

Newsletter

  • Sign Up! for emails and updates

Contact

  • About me
  • Contact me

Copyright © 2025 TastyTrendIngredients