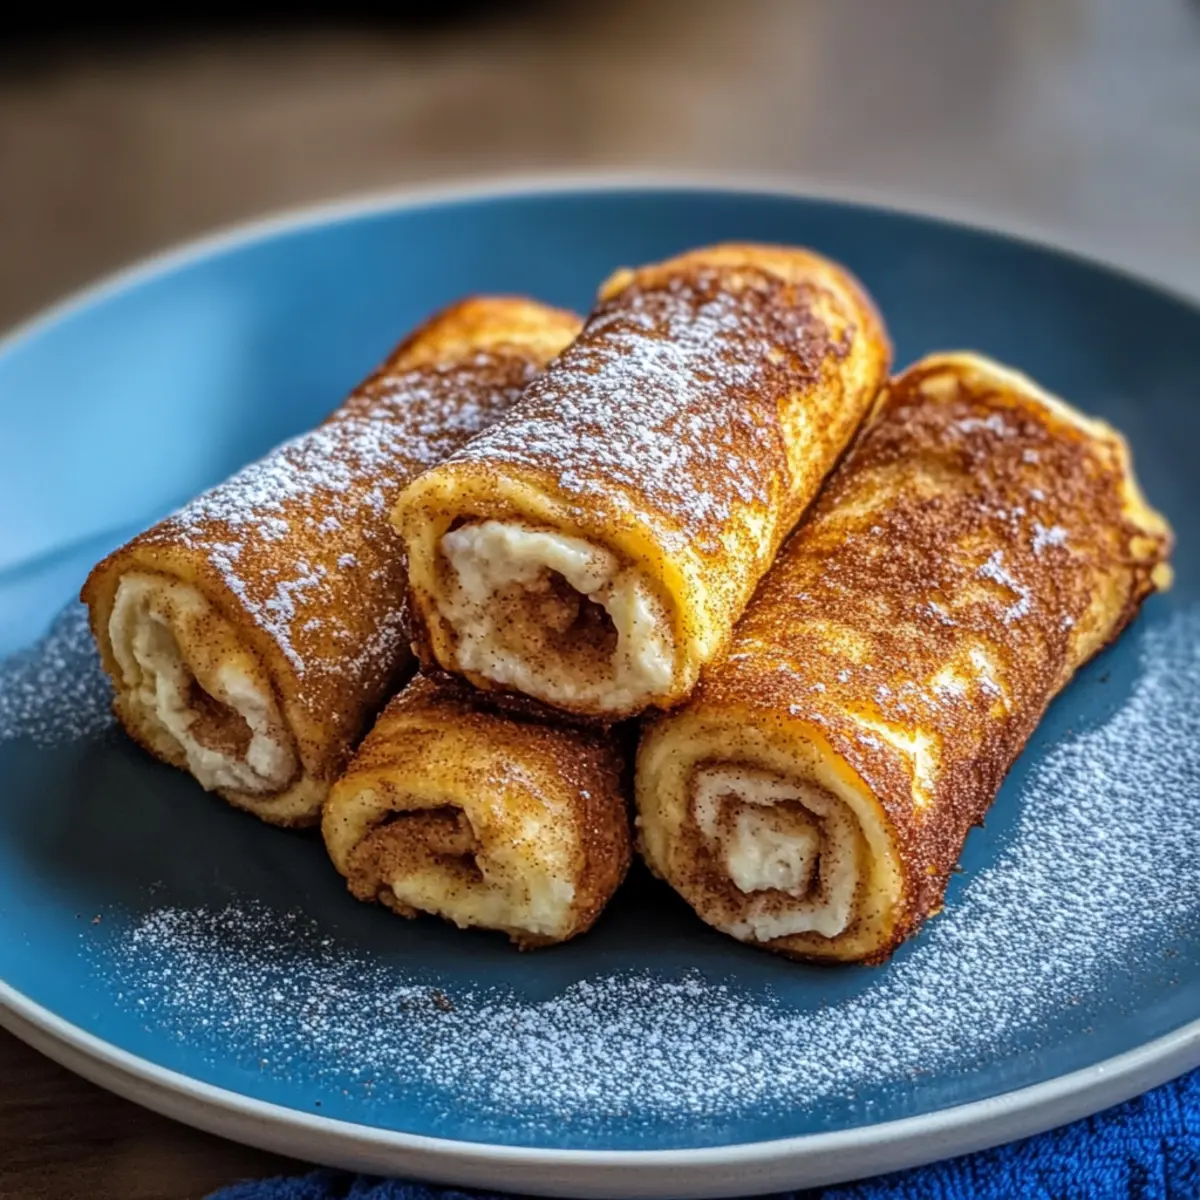
tastytrendingredients

  • Home
  • Recipes
    • Appetizers
    • Breakfast
    • Dessert
    • Dinner
    • Drinks
    • Salads
    • Snacks
    • Soups
  • About me
  • Contact me
menu icon
go to homepage
  • Home
  • Recipes
    • Appetizers
    • Breakfast
    • Dessert
    • Dinner
    • Drinks
    • Salads
    • Snacks
    • Soups
  • About me
  • Contact me
search icon
Homepage link
  • Home
  • Recipes
    • Appetizers
    • Breakfast
    • Dessert
    • Dinner
    • Drinks
    • Salads
    • Snacks
    • Soups
  • About me
  • Contact me
×

Delight Your Taste Buds with Heavenly London Fog Cake

February 20, 2026 by Grace Snow Leave a Comment

There's something magical about the aroma of Earl Grey tea mingling with fragrant lavender—it transports me to a quaint café on a rainy afternoon in London. Today, I'm excited to share with you my recipe for a Heavenly London Fog Cake, a delightful treat that brings the essence of cozy afternoons right into your kitchen. This cake is not only luxuriously soft but also incredibly versatile, making it perfect for anyone seeking a gluten-free or vegan option without sacrificing flavor. The moist layers, infused with a sweet lavender milk soak, deliver a slice of pure comfort, while the elegant lavender cream cheese frosting adds a beautiful finishing touch. Whether you're looking to wow your guests or treat yourself after a long day, this cake is bound to become a beloved staple in your baking repertoire. Ready to uncover the secret behind this enchanting dessert? Let’s dive in!

Why is this London Fog Cake special?

Irresistible Flavor: The enchanting blend of Earl Grey and lavender infuses this cake with unique, aromatic notes that will captivate your taste buds.

Versatile Recipe: With options for gluten-free and vegan variations, everyone can enjoy a slice of this delight.

Effortlessly Elegant: The stunning cream cheese frosting not only adds a pop of color but also complements the cake's rich flavors perfectly.

Time-Saving Treat: This recipe is straightforward, making it easy to whip up for last-minute gatherings or cozy afternoons at home.

Perfect for Any Occasion: Whether you're hosting a tea party or celebrating a special occasion, this Heavenly London Fog Cake is guaranteed to impress. Pair it with a cup of Earl Grey tea or lavender lemonade for the ultimate experience!

Heavenly London Fog Cake Ingredients

For the Cake
• Earl Grey Tea (2 tsp) – Provides a robust tea flavor; switch it out for chai or jasmine tea for a delightful twist.
• Culinary Lavender (2 tbsp) – Adds floral notes to the cake and frosting; omit for a refreshing citrus zest instead.
• All-Purpose Flour (2 cups) – Forms the main structure of the cake; be sure to measure accurately to avoid a dense texture—substitute with gluten-free flour as needed.
• Baking Powder (2 tsp) – Ensures a lovely rise; check it's fresh for the best results.
• Baking Soda (1 tsp) – A key player for leavening.
• Salt (1 tsp) – Enhances the overall flavor, elevating the cake's taste.
• Unsalted Butter (1 cup) – Creates a rich, moist experience; substitute vegan butter for a dairy-free option.
• Granulated Sugar (1.5 cups) – Sweetens the cake; adjust the amount based on your preference for sweetness.
• Eggs (4 large) – Binds ingredients and adds structure; swap with flaxseed meal or chia for a vegan version.
• Vanilla Bean Paste (2 tsp) – Enhances the cake's richness; you can use vanilla extract as an alternative.
• Buttermilk (1 cup) – Contributes moisture and tanginess; replace with non-dairy milk mixed with vinegar to make it dairy-free.
• Whole Milk (1 cup) – Utilized in soaking—adds extra moisture; try a non-dairy milk instead.
• Sweetened Condensed Milk (1 cup) – For soaking; provides creaminess; ensure a dairy-free version if needed.

For the Frosting
• Cream Cheese (8 oz) – The base of the frosting, making it rich and creamy; substitute with dairy-free cream cheese for a vegan option.
• Powdered Sugar (2 cups) – Sweetens and thickens the frosting; adjust for your desired level of sweetness.
• Vanilla Extract (1 tsp) – Optional flavor enhancer to uplift the frosting's taste.
• Purple Food Coloring (1 drop) – Optional for added aesthetic appeal, creating a stunning visual on the cake.

Experience this Heavenly London Fog Cake and let its comforting elegance shine during any occasion!

Step‑by‑Step Instructions for Heavenly London Fog Cake

Step 1: Preheat the Oven and Prepare the Pan
Begin by preheating your oven to 350°F (175°C). While it heats, grab a 9×9 inch metal baking pan and grease it lightly with butter or cooking spray. This ensures your Heavenly London Fog Cake won't stick, allowing it to rise perfectly and come out easily.

Step 2: Process the Earl Grey Tea and Lavender
Using a spice grinder or food processor, combine 2 teaspoons of Earl Grey tea and 2 tablespoons of culinary lavender. Pulse until finely ground and aromatic, taking about 1–2 minutes. This fragrant blend will infuse your cake with the enchanting essence of the London fog.

Step 3: Mix the Dry Ingredients
In a large mixing bowl, whisk together 2 cups of all-purpose flour, the processed tea and lavender mixture, 2 teaspoons of baking powder, 1 teaspoon of baking soda, and 1 teaspoon of salt. Ensure these ingredients are evenly combined, as they’ll provide the structure and rich flavor for your cake.

Step 4: Cream Butter and Sugar
In another bowl, beat 1 cup of unsalted butter and 1.5 cups of granulated sugar using a hand mixer or stand mixer. Mix on medium speed until the mixture is light and fluffy, which should take about 2 minutes. This step builds a beautiful base for your Heavenly London Fog Cake.

Step 5: Add Egg and Vanilla
Beat in 4 large eggs, one at a time, ensuring each is fully combined before adding the next. Add 2 teaspoons of vanilla bean paste (or extract) and mix until smooth. This enriches the mixture and creates a delightful flavor profile, laying the groundwork for your cake.

Step 6: Combine Wet and Dry Mixtures
Gradually blend in 1 cup of buttermilk into the butter and egg mixture. Then, slowly add the dry ingredient mixture, mixing on low speed until everything is just combined and creamy. Be careful not to overmix; you want your cake to remain light and airy for that perfect texture.

Step 7: Bake the Cake
Pour the batter into the prepared baking pan, smoothing the top with a spatula. Bake in the preheated oven for 38 to 44 minutes, or until a toothpick inserted into the center comes out clean. The cake should be lightly golden on the edges and spring back when touched.

Step 8: Cool the Cake
Once baked, allow the cake to cool in the pan for about 30 minutes. Then, carefully transfer it to a wire rack to cool completely. This step is crucial for achieving the moist texture that defines your Heavenly London Fog Cake.

Step 9: Prepare the Milk Soak
In a small saucepan, gently heat 1 cup of whole milk, along with another teaspoon of Earl Grey and 1 tablespoon of lavender. Simmer for about 15 minutes, allowing the flavors to steep. Once fragrant, remove from heat and mix in 1 cup of sweetened condensed milk and 1 teaspoon of vanilla extract.

Step 10: Make the Frosting
To create the lavender cream cheese frosting, beat 8 oz of cold cream cheese in a mixing bowl until fluffy. Gradually incorporate 2 cups of powdered sugar and remaining lavender until fully combined. Add 1 teaspoon of vanilla extract, mixing until smooth and creamy, ready to spread on your cake.

Step 11: Soak the Cake
Using a toothpick or skewer, poke holes evenly across the cake's surface. Pour the fragrant milk soak generously over the cake, allowing it to seep into the holes. This soaking process adds moisture and enhances the flavor, contributing to the indulgent experience of your Heavenly London Fog Cake.

Step 12: Frost and Serve
After the cake has absorbed the soak, frost it generously with the lavender cream cheese frosting. Smooth the top and edges evenly with a spatula. Finally, slice your beautiful creation into 16 portions, serve, and watch as everyone enjoys this delightful treat!

Heavenly London Fog Cake Variations

Feel free to get creative with this delightful cake and make it your own—each twist adds a unique touch!

  • Gluten-Free: Substitute all-purpose flour with a gluten-free flour blend to accommodate dietary needs.

  • Vegan: Use plant-based butter, non-dairy milk, and replace eggs with flaxseed meal or chia seeds for a delicious vegan version.

  • Chai Infusion: Replace Earl Grey tea with chai tea for a cozy, spiced flavor that warms the soul. The rich spices will be a comforting surprise!

  • Fruity Addition: Fold in fresh berries like raspberries or blueberries into the batter. Their natural sweetness and burst of flavor will brighten each slice!

  • Citrus Glaze: Drizzle a tangy citrus glaze over the frosting for an extra zing. Combine powdered sugar with fresh lemon or orange juice for a refreshing finish.

  • Nutty Crunch: Add chopped walnuts or almonds into the batter for a delightful crunch. This texture contrast pairs beautifully with the moistness of the cake.

  • Lavender Omission: If you're not a fan of floral notes, simply omit the culinary lavender and replace it with a tablespoon of lemon zest for a bright and zesty profile.

  • Double Delight: Layer this cake with a creamy chocolate ganache in between the cake layers for a chocolate twist that perfectly complements the Earl Grey.

Looking for more sweet inspiration? Check out my delightful [Chocolate Pudding Cake](https://tastytrendingredients.com/chocolate-pudding-cake/) or the stunning [Ice Cream Cake](https://tastytrendingredients.com/ice-cream-cake/) for wonderful variations that will satisfy your sweet cravings!

How to Store and Freeze Heavenly London Fog Cake

Fridge: Store in an airtight container for up to 3 days to maintain freshness and flavor. This method keeps the cake moist and delicious, ready for any snack attack!

Freezer: Wrap individual slices tightly in plastic wrap or place in a freezer-safe bag. They can be frozen for up to 2 months without losing their enchanting flavor of Earl Grey and lavender.

Reheating: Thaw slices overnight in the fridge, then warm in the microwave for about 10-15 seconds before serving. This will bring back that delightful softness and flavorful essence you love.

Expert Tips for Heavenly London Fog Cake

  • Ingredient Temperature: Ensure all ingredients are at room temperature before starting. This helps create a uniform batter and enhances the cake's texture.

  • Flour Measurement: Use a spoon to aerate your all-purpose flour before measuring it. This prevents dense cakes, ensuring your Heavenly London Fog Cake remains airy and light.

  • Soaking Time: Allow the cake to soak in the milk mixture for at least 30 minutes for optimal moisture. This step is essential for achieving that decadent, tres leches-like texture.

  • Mixing Tips: Avoid overmixing your batter after adding the dry ingredients. Gentle mixing creates a fluffier cake, whereas overmixing can lead to a dense result.

  • Frosting Consistency: For the perfect lavender cream cheese frosting, ensure your cream cheese is cold. This aids in achieving a smooth and spreadable frosting that won’t melt or run.

Make Ahead Options

Preparing your Heavenly London Fog Cake ahead of time is a fantastic time-saver for busy home cooks! You can mix the dry ingredients and store them in an airtight container for up to 3 days. Additionally, the cake itself can be baked in advance and refrigerated for up to 24 hours; just make sure it’s completely cooled before wrapping it tightly to maintain moisture. The milk soak can also be prepared ahead; simply refrigerate it until you’re ready to assemble. When it’s time to serve, just soak the cake, frost it, and enjoy a wonderfully moist and flavorful dessert that’s just as delicious as if made fresh!

What to Serve with Heavenly London Fog Cake

Imagine pairing this delicate cake with delightful side dishes and beverages that will elevate your dessert experience to new heights.

  • Earl Grey Tea: The aromatic tea echoes the flavors in the cake, creating a comforting and harmonious pairing.
  • Lavender Lemonade: A refreshing drink that complements the floral notes of the cake while adding a zesty twist, ensuring a delightful contrast to the sweetness.
  • Fresh Berries: Strawberries, blueberries, or raspberries add a juicy burst of flavor, enhancing the cake's elegant presentation and providing a lovely texture.
  • Whipped Cream: Light and airy, freshly whipped cream adds a creamy touch that balances the cake's moist richness, offering a delightful mouthfeel with each bite.
  • Chocolate Ganache: Drizzling warm chocolate ganache over your cake invokes a touch of decadence, creating an indulgent combination of flavors that chocolate lovers will adore.
  • Almond Croissant: For a slice of delightful luxury, serve this cake alongside an almond croissant, adding a bit of flair reminiscent of a charming café setting.
  • Sparkling Water with Mint: A simple, refreshing beverage that cleanses the palate and brings an invigorating herbal note to the meal.
  • Honeyed Yogurt: A dollop of honeyed yogurt is a rich, creamy counterpart that enhances the cake's floral sweetness while introducing a tangy element.

Heavenly London Fog Cake Recipe FAQs

How do I select the right Earl Grey tea for this cake?
Absolutely! Choose a high-quality loose-leaf Earl Grey or tea bags that have a strong aroma. This will ensure that the flavor shines through in your Heavenly London Fog Cake. If you enjoy a different flavor profile, try chai or jasmine tea as delicious alternatives!

What’s the best way to store leftover London Fog Cake?
I recommend storing your cake in an airtight container at room temperature for up to 3 days. If you prefer to keep it fresher for longer, you can refrigerate it, but remember that it might be slightly denser. To maintain optimal moisture, cover it well before placing it in the fridge.

Can I freeze the Heavenly London Fog Cake, and how?
Yes, you absolutely can freeze this cake! Wrap individual slices tightly in plastic wrap or place them in a freezer-safe bag. Be sure to squeeze out as much air as possible to prevent freezer burn. Your cake will stay delicious for up to 2 months! Thaw slices overnight in the fridge and warm them briefly in the microwave for 10-15 seconds to revive that fluffy texture.

What should I do if my cake doesn’t rise properly?
Very common! If your cake doesn’t rise, it's usually due to expired baking powder or baking soda. Always check expiration dates and make sure to store these leavening agents in a cool, dry place. Also, avoid overmixing your batter after adding the flour, as this can lead to a dense cake instead of a light, fluffy one.

Is this London Fog Cake safe for my family with allergies?
Good question! This recipe contains common allergens like eggs and dairy, but you can easily adapt it for dietary needs. Substitute eggs with flaxseed meal or chia seeds for a vegan version, and use dairy-free butter, cream cheese, and non-dairy milk. Just make sure to check the labels of all your ingredients to avoid any unintended allergens!

How long should I let the cake soak in the milk mixture?
For the best results, I recommend letting your Heavenly London Fog Cake soak in the milk mixture for at least 30 minutes. This allows the cake to absorb all that flavorful lavender and Earl Grey goodness, resulting in a beautifully moist and decadent dessert that everyone will love!

Heavenly London Fog Cake

Heavenly London Fog Cake

Delight in the aromatic blend of Earl Grey tea and lavender with this Heavenly London Fog Cake, perfect for any baking occasion.
Print Recipe Pin Recipe
Prep Time 30 minutes mins
Cook Time 44 minutes mins
Cooling Time 30 minutes mins
Total Time 1 hour hr 44 minutes mins
Servings: 16 slices
Course: Dessert
Cuisine: British
Calories: 320
Ingredients Equipment Method Nutrition Notes

Ingredients
  

For the Cake
  • 2 tsp Earl Grey Tea Provides a robust tea flavor
  • 2 tbsp Culinary Lavender Adds floral notes to the cake and frosting
  • 2 cups All-Purpose Flour Forms the main structure of the cake
  • 2 tsp Baking Powder Ensures a lovely rise
  • 1 tsp Baking Soda A key player for leavening
  • 1 tsp Salt Enhances the overall flavor
  • 1 cup Unsalted Butter Creates a rich, moist experience
  • 1.5 cups Granulated Sugar Sweetens the cake
  • 4 large Eggs Binds ingredients and adds structure
  • 2 tsp Vanilla Bean Paste Enhances the cake's richness
  • 1 cup Buttermilk Contributes moisture and tanginess
  • 1 cup Whole Milk Utilized in soaking
  • 1 cup Sweetened Condensed Milk For soaking; provides creaminess
For the Frosting
  • 8 oz Cream Cheese The base of the frosting
  • 2 cups Powdered Sugar Sweetens and thickens the frosting
  • 1 tsp Vanilla Extract Optional flavor enhancer
  • 1 drop Purple Food Coloring Optional for aesthetic appeal

Equipment

  • 9x9 inch metal baking pan
  • Mixing bowls
  • Hand mixer or stand mixer
  • spice grinder or food processor
  • Whisk
  • Spatula
  • wire rack
  • small saucepan

Method
 

Preparation
  1. Preheat your oven to 350°F (175°C) and grease a 9×9 inch metal baking pan.
  2. Process 2 teaspoons of Earl Grey tea and 2 tablespoons of culinary lavender until finely ground.
  3. In a large mixing bowl, whisk together 2 cups of all-purpose flour, the processed tea and lavender, baking powder, baking soda, and salt.
  4. In another bowl, beat 1 cup of unsalted butter and 1.5 cups of granulated sugar until light and fluffy.
  5. Add 4 large eggs one at a time, mixing in 2 teaspoons of vanilla bean paste.
  6. Blend in 1 cup of buttermilk, then gradually add the dry ingredients, mixing until just combined.
  7. Pour the batter into the prepared pan and bake for 38 to 44 minutes.
  8. Allow the cake to cool in the pan for about 30 minutes before transferring to a wire rack.
Soaking and Frosting
  1. Prepare the milk soak by heating 1 cup of whole milk with 1 teaspoon of Earl Grey and 1 tablespoon of lavender for 15 minutes.
  2. Mix in 1 cup of sweetened condensed milk and 1 teaspoon of vanilla extract.
  3. Poke holes in the cooled cake, then pour the milk soak over it.
  4. To make the frosting, beat 8 oz of cream cheese until fluffy and gradually incorporate 2 cups of powdered sugar and remaining lavender.
  5. Frost the soaked cake generously and slice into 16 portions.

Nutrition

Serving: 1sliceCalories: 320kcalCarbohydrates: 45gProtein: 4gFat: 15gSaturated Fat: 9gPolyunsaturated Fat: 1gMonounsaturated Fat: 4gCholesterol: 70mgSodium: 250mgPotassium: 180mgFiber: 1gSugar: 25gVitamin A: 500IUCalcium: 100mgIron: 1mg

Notes

Allow at least 30 minutes for soaking for optimal moisture. Ensure all ingredients are at room temperature for the best texture.

Tried this recipe?

Let us know how it was!

Delicious Blood Orange Black Sesame Crumb Cake in Minutes

February 20, 2026 by Grace Snow Leave a Comment

As I turned the corner into my kitchen, the zesty aroma of blood oranges mingling with the earthy notes of black sesame sent my senses into a delighted whirl. This Blood Orange Black Sesame Crumb Cake has become my go-to recipe, effortlessly combining a tender crumb with a crunchy streusel that will leave you reaching for another slice. Perfect for busy days, this simple cake comes together quickly, whether you're looking for an afternoon pick-me-up or a delightful dessert. Best of all, it's a versatile treat; swap in your favorite citrus for a twist that keeps things exciting. Curious about how you can brighten up your next baking session? Let's dive into this delicious recipe!

Why is This Cake a Game-Changer?

Simple Preparation: This Blood Orange Black Sesame Crumb Cake requires minimal effort, making it ideal for weeknight baking.

Zingy Citrus Flavor: The blood oranges infuse a vibrant and refreshing taste that wakes up your palate, especially when paired with the nuttiness of black sesame.

Versatile Options: Adapt this recipe easily by swapping the blood oranges for other citrus fruits like lemons or grapefruits.

Perfect for Any Occasion: Whether it’s a casual afternoon snack or a dessert for guests, it’s sure to impress and please.

Make-Ahead Convenience: This cake stores beautifully, allowing you to prepare it in advance for busy days or surprise visits, just like my favorite Ice Cream Cake.

Treat yourself and loved ones to a delightful slice, and brighten up your baking repertoire!

Blood Orange Black Sesame Crumb Cake Ingredients

For the Cake
• Blood Oranges – Provides zest and juice for flavor; can substitute with lemons, grapefruits, or bergamot for different citrus profiles.
• Sour Cream – Adds moisture and tenderness to the cake; Greek yogurt can be used as an alternative.
• All-Purpose Flour – Forms the structure of the cake; can be substituted with gluten-free flour if needed.
• Granulated Sugar – Sweetness balances the tang of the blood orange; use coconut sugar for a lower glycemic option.
• Baking Powder – Helps the cake rise and achieve a light texture; ensure it's fresh for best results.
• Unsalted Butter – Provides richness and moisture; can substitute with margarine or a vegan butter alternative.
• Eggs – Help retain moisture and act as a binder; for a vegan version, use flax eggs or apple sauce.

For the Streusel Topping
• Black Sesame Seeds – Adds unique flavor and texture; can be replaced with poppy seeds or omitted if unavailable.
• All-Purpose Flour – Used for the streusel texture; ensures a crumbly topping to complement the cake.
• Unsalted Butter – Creates the rich and crumbly struesel; use an alternative for a vegan version if needed.

Indulge in this Blood Orange Black Sesame Crumb Cake, where classic flavors meet delightful textures!

Step‑by‑Step Instructions for Blood Orange Black Sesame Crumb Cake

Step 1: Preheat and Prepare
Begin by preheating your oven to 350°F (175°C). While the oven warms up, grease and line a loaf pan with parchment paper, ensuring it hangs over the edges for easy removal later. This preparation step is crucial for getting your Blood Orange Black Sesame Crumb Cake baked evenly without sticking.

Step 2: Mix Wet Ingredients
In a mixing bowl, combine granulated sugar and unsalted butter. Beat on medium speed until the mixture is light and fluffy, about 3-4 minutes. Add the eggs one at a time, mixing well after each addition. Next, stir in the sour cream and the zest of blood oranges, allowing their fresh aroma to fill your kitchen.

Step 3: Combine Dry Ingredients
In a separate bowl, whisk together the all-purpose flour and baking powder until well combined. Gradually incorporate this dry mixture into the wet ingredients using a spatula, folding gently until just combined. Be careful not to overmix, as this step ensures a tender crumb in your Blood Orange Black Sesame Crumb Cake.

Step 4: Prepare Streusel
To make the streusel topping, mix together black sesame seeds, all-purpose flour, and melted butter in a small bowl. Use your fingers or a fork to blend until the mixture resembles coarse crumbs. Set this aside; it will add a delightful crunch on top of your cake after baking, creating a beautiful contrast with the moist crumb.

Step 5: Assemble and Bake
Pour the batter into the prepared loaf pan, spreading it evenly with a spatula. Generously sprinkle the black sesame streusel over the top, creating a lovely crunch. Place the pan in your preheated oven and bake for 50-60 minutes, or until the top is golden brown and a toothpick inserted into the center comes out clean.

Step 6: Cool and Serve
Once baked, remove the Blood Orange Black Sesame Crumb Cake from the oven. Allow it to cool in the pan for about 10 minutes before carefully transferring it to a wire rack to cool completely. This helps to set the crumb structure while ensuring you can slice neat pieces later on.

What to Serve with Blood Orange Black Sesame Crumb Cake

Elevate your baking experience by pairing this cake with delightful accompaniments that enhance its vibrant flavors and textures.

  • Creamy Greek Yogurt: A dollop adds tang and creaminess, perfectly balancing the zesty sweetness of the cake.

  • Fresh Berries: Strawberries, blueberries, or raspberries add a burst of freshness and a colorful contrast on your plate.

  • Herbal Tea: A fragrant cup complements the zesty notes of the cake, making it a delightful afternoon pick-me-up.

  • Vanilla Ice Cream: The decadence of vanilla ice cream brings a rich, creamy element, creating a luxurious dessert experience.

  • Citrus Salad: A light, refreshing salad of mixed citrus fruits brings a bright counterpoint to this crumb cake’s intense flavors.

  • Toasted Nuts: Chopped almonds or walnuts add a crunchy texture that pairs beautifully with the moist crumb of the cake.

  • Espresso: The boldness of coffee enhances the cake’s flavor while the slight bitterness balances the sweetness.

  • Lemonade: A chilled glass provides a refreshing drink option that syncs nicely with the citrus notes of the cake.

  • Dark Chocolate Drizzle: A simple drizzle of melted dark chocolate adds an indulgent twist that enhances the overall dessert experience.

  • Peach or Apricot Jam: Spread on the side for an extra touch of sweetness; the fruit flavor melds beautifully with the cake's citrus notes.

Make Ahead Options

These Blood Orange Black Sesame Crumb Cakes are perfect for meal prep lovers! You can prepare the batter and refrigerate it for up to 24 hours in advance, keeping all the delightful flavors intact. Simply mix the wet and dry ingredients separately, then combine them right before baking to ensure a fresh, fluffy cake. You can also make the streusel topping ahead of time and store it in an airtight container in the refrigerator for up to 3 days. When you're ready to bake, just pour the batter into your prepared pan, sprinkle on the topping, and bake as instructed for a cake that’s just as delicious as if you made it from scratch that day. Enjoy the convenience of homemade goodness during your busy week!

Expert Tips for Blood Orange Black Sesame Crumb Cake

  • Mix Ingredients Gently: Overmixing can lead to a dense cake. Fold the wet and dry ingredients just until combined for a tender crumb.

  • Zest with Care: Use the finest part of the grater to ensure your blood orange zest is fresh and aromatic, enhancing the cake's flavor.

  • Streusel Texture: Make sure the struesel achieves a crumbly texture before adding it to the cake. It should hold together yet remain light for the perfect crunch.

  • Essential Cooling Time: Allow the cake to cool adequately before slicing to prevent crumbs. Warm cake can crumble easily, ruining your beautiful slices.

  • Adaptable Flavors: Don’t hesitate to switch up the citrus! Experiment with lemons or grapefruits to create your unique twist on the blood orange black sesame crumb cake.

Blood Orange Black Sesame Crumb Cake Variations

Feel free to personalize this delightful cake and make it truly your own while enjoying its vibrant flavors!

  • Lemon Zest: Swap blood oranges for fresh lemons for a zesty, vibrant cake that brightens your day. The tartness pairs beautifully with the nutty streusel.

  • Gluten-Free Option: Replace all-purpose flour with a gluten-free blend to accommodate dietary needs. Just make sure to check the blend’s measurements for the best results.

  • Cream Cheese Swirl: Add dollops of cream cheese batter in the cake for a rich, creamy texture. A delightful surprise that’s reminiscent of cheesecake in every bite!

  • Nutty Crunch: Toss in some chopped walnuts or pecans to the streusel for an added layer of crunch. The nuts add a wonderful depth of flavor and texture to every slice.

  • Spice It Up: Incorporate a dash of ground cinnamon or cardamom into the batter for a warm, aromatic twist. This adds a cozy feeling, perfect for chilly days.

  • Citrus Mix-Up: Combine blood oranges with grapefruits for a more complex and refreshing flavor profile. It’s a vibrant twist that will keep everyone guessing!

  • Chocolate Drizzle: Drizzle melted dark chocolate over the cooled cake for a touch of decadence. This contrast of flavors will elevate your cake to a whole new level of indulgence.

Explore vibrant variations while enjoying this cake, much like how you can with my favorite Chocolate Pudding Cake. We're talking endless delicious possibilities!

Storage Tips for Blood Orange Black Sesame Crumb Cake

Room Temperature: Store the cake tightly wrapped in plastic wrap or an airtight container for up to 3 days to maintain moisture and freshness.

Fridge: If you want to extend the life of your Blood Orange Black Sesame Crumb Cake, keep it in the refrigerator for up to a week, ensuring it is well-wrapped to prevent drying out.

Freezer: For longer storage, slice the cake and wrap individual pieces in plastic wrap, then place them in a freezer-safe bag. It can be frozen for up to a month; thaw overnight in the fridge before enjoying!

Reheating: To enjoy your cake warm, simply pop a slice in the microwave for about 10-15 seconds or until heated through, enhancing those delightful citrus flavors.

Blood Orange Black Sesame Crumb Cake Recipe FAQs

What should I look for when selecting blood oranges?
Absolutely! When choosing blood oranges, look for fruit that feels heavy for its size and has a firm texture. The skin should be smooth and vibrant, with no dark spots all over, which indicates freshness. A few bruises are okay, but avoid any soft or shriveled ones.

How can I store Blood Orange Black Sesame Crumb Cake, and for how long?
You can store your Blood Orange Black Sesame Crumb Cake at room temperature, tightly wrapped in plastic wrap or an airtight container, for up to 3 days. For extended freshness, refrigerate it for up to a week. Just ensure it's securely wrapped to keep moisture in!

Can I freeze the Blood Orange Black Sesame Crumb Cake?
Very much so! To freeze, first slice the cake into individual pieces and wrap each slice tightly in plastic wrap. Then, place the wrapped slices in a freezer-safe bag. It can be frozen for up to a month. When you're ready to enjoy, simply thaw overnight in the fridge and indulge!

What should I do if my crumb cake is dense or doesn't rise?
If your Blood Orange Black Sesame Crumb Cake turns out dense, it might be due to overmixing the batter. Mix the wet and dry ingredients just until combined for a light texture. Also, ensure your baking powder is fresh, as expired leavening agents can hinder the cake from rising adequately. If it still doesn't rise, check the oven temperature to ensure it’s calibrated correctly.

Can I make this recipe allergy-friendly or vegan?
Absolutely! To create a vegan version of the Blood Orange Black Sesame Crumb Cake, you can substitute the eggs with flax eggs (1 tablespoon of ground flaxseed mixed with 2.5 tablespoons of water for each egg) or applesauce. For dairy-free options, use unsweetened almond or coconut yogurt instead of sour cream and opt for a plant-based butter alternative. This way, everyone can enjoy this delightful treat!

Is there any special consideration for feeding this cake to pets?
Definitely! While the ingredients in this cake are safe for humans, it’s best to keep it away from pets. Particularly, the sugar content and citrus can upset their stomachs, so stick to dog- or cat-friendly treats for your furry friends!

Blood Orange Black Sesame Crumb Cake

Delicious Blood Orange Black Sesame Crumb Cake in Minutes

This Blood Orange Black Sesame Crumb Cake combines zesty citrus and nutty flavors, creating a delightful dessert perfect for any occasion.
Print Recipe Pin Recipe
Prep Time 15 minutes mins
Cook Time 1 hour hr
Cooling Time 10 minutes mins
Total Time 1 hour hr 25 minutes mins
Servings: 8 slices
Course: Dessert
Cuisine: American
Calories: 220
Ingredients Equipment Method Nutrition Notes

Ingredients
  

For the Cake
  • 3 medium Blood Oranges Zest and juice needed
  • 1 cup Sour Cream Can substitute with Greek yogurt
  • 2 cups All-Purpose Flour Can substitute with gluten-free flour
  • 1 cup Granulated Sugar Use coconut sugar for lower glycemic option
  • 2 teaspoons Baking Powder Ensure it's fresh
  • 1/2 cup Unsalted Butter Can substitute with margarine or vegan butter
  • 3 large Eggs For a vegan version, use flax eggs or apple sauce
For the Streusel Topping
  • 1/4 cup Black Sesame Seeds Can be replaced with poppy seeds
  • 1/2 cup All-Purpose Flour Used for streusel texture
  • 1/4 cup Unsalted Butter Use an alternative for vegan version

Equipment

  • Loaf pan
  • Mixing Bowl
  • Whisk
  • Spatula
  • measuring cups
  • Measuring Spoons

Method
 

Step‑by‑Step Instructions
  1. Preheat your oven to 350°F (175°C) and prepare a loaf pan with grease and parchment paper.
  2. In a mixing bowl, beat together granulated sugar and unsalted butter until light and fluffy. Add eggs one at a time, mixing well. Stir in sour cream and zest of blood oranges.
  3. In a separate bowl, whisk together all-purpose flour and baking powder. Gradually fold this into the wet mixture until just combined.
  4. For the streusel, mix black sesame seeds, all-purpose flour, and melted butter until it resembles coarse crumbs.
  5. Pour the batter into the prepared loaf pan and sprinkle streusel topping on top. Bake for 50-60 minutes until golden brown.
  6. Allow the cake to cool in the pan for about 10 minutes before transferring it to a wire rack to cool completely.

Nutrition

Serving: 1sliceCalories: 220kcalCarbohydrates: 30gProtein: 3gFat: 10gSaturated Fat: 6gPolyunsaturated Fat: 1gMonounsaturated Fat: 3gCholesterol: 45mgSodium: 150mgPotassium: 120mgFiber: 1gSugar: 15gVitamin A: 550IUVitamin C: 30mgCalcium: 60mgIron: 1.2mg

Notes

This cake can be stored for up to 3 days at room temperature or in the fridge for up to a week. It can also be frozen for up to a month.

Tried this recipe?

Let us know how it was!

Delicious Neapolitan Cake: A Sweet Slice of Joy

February 19, 2026 by Grace Snow Leave a Comment

As I watched the vibrant layers of my freshly baked Neapolitan Cake emerge from the oven, I couldn't help but feel a thrill of excitement. The delightful combination of chocolate, strawberry, and vanilla offers a nostalgic nod to those classic ice cream days, bringing a splash of joy to any dining table. This easy-to-make cake not only impresses guests with its stunning presentation, but it also boasts quick preparation, making it perfect for busy weeknights and spontaneous gatherings. Each slice presents a beautiful array that is bound to bring smiles and sweet moments to your family and friends. Are you ready to indulge in this homemade delight that’s equal parts comforting and celebratory?

Why is Neapolitan Cake a must-try?

Visually Stunning: The trio of vibrant layers makes it an eye-catching centerpiece for any occasion.
Nostalgic Flavors: Enjoy the classic combination of chocolate, strawberry, and vanilla, reminiscent of ice cream treats from childhood.
Quick Preparation: Perfect for busy schedules, this cake comes together in no time without compromising flavor.
Crowd-Pleasing: It's ideal for gatherings, ensuring everyone will find their favorite flavor in each slice.
Versatile Enjoyment: Serve it as a festive dessert or a cozy after-dinner treat; it's perfect for any occasion! If you're looking for more delicious dessert ideas, check out my recipes for Ice Cream Cake and Chocolate Pudding Cake.

Neapolitan Cake Ingredients

For the Cake Base
• All-Purpose Flour – Provides structure to the cake; you can substitute with cake flour for a lighter texture.
• Cocoa Powder – Adds a rich chocolate flavor; opt for unsweetened cocoa for the best results.
• Granulated Sugar – Sweetens the cake and improves texture; brown sugar can be used for a deeper flavor.
• Baking Powder – Ensures the cake rises; make sure it's fresh for perfect lifting.
• Salt – Balances the flavors; it's essential for the overall taste.
• Eggs – Adds moisture and stability; for a vegan option, flax eggs will work as a substitute.
• Whole Milk – Contributes to moisture and richness; buttermilk can replace it for a tangy twist.
• Vanilla Extract – Enhances overall flavor; pure extract is recommended for the best taste.

For the Flavored Layers
• Melted Chocolate – Used for the chocolate layer; dark or semi-sweet chocolate creates the best depth.
• Pureed Strawberries – Provides a light, fruity flavor for that luscious strawberry layer; both fresh and frozen strawberries are suitable.

For the Frosting
• Cream Cheese Frosting – Perfect for layering and decorating; adjust sweetness by changing the amount of powdered sugar used.

This Neapolitan Cake is a delightful mix of flavors and colors, making it a favorite for both kids and adults alike!

Step‑by‑Step Instructions for Neapolitan Cake

Step 1: Preheat Oven
Begin by preheating your oven to 350°F (175°C). While the oven heats up, prepare three round cake pans by greasing them generously or lining the bottoms with parchment paper. This will ensure that your Neapolitan Cake layers release easily once baked, setting the stage for a seamless assembly.

Step 2: Mix Dry Ingredients
In a large mixing bowl, whisk together 2 cups of all-purpose flour, 1 cup of granulated sugar, 1/2 cup of cocoa powder, 2 teaspoons of baking powder, and a pinch of salt until everything is evenly combined. This dry mixture is essential for building the fluffy texture of your cake, so make sure there are no lumps and it appears light and airy.

Step 3: Combine Wet Ingredients
In a separate bowl, crack open 3 large eggs and whisk them together with 1 cup of whole milk and 1 teaspoon of vanilla extract until the mixture is smooth and fully blended. This harmonious combination of wet ingredients adds moisture and flavor to your Neapolitan Cake, ensuring each layer is delightfully rich.

Step 4: Combine Mixtures
Gradually pour the wet ingredients into the bowl of dry ingredients, mixing gently with a spatula or whisk. Aim for a few gentle strokes to combine them until just blended. Avoid overmixing to keep your cake light and fluffy; the batter should be smooth and slightly thick while maintaining a little airiness.

Step 5: Flavor Batters
Divide the combined batter evenly into three separate bowls. In one bowl, stir in melted chocolate for the chocolate layer, mixing until fully incorporated. To another, add pureed strawberries for a fresh and fruity flavor, and keep the third bowl as is for the classic vanilla layer. Each bowl should reflect its respective flavor.

Step 6: Bake
Pour each flavored batter into the prepared cake pans, ensuring an even distribution across the layers. Place them in the preheated oven and bake for 25-30 minutes, or until the cakes spring back when lightly pressed and a toothpick inserted into the center comes out clean. Your Neapolitan Cake layers should rise beautifully!

Step 7: Cool Cakes
Once baked, remove the pans from the oven and let them cool for about 10 minutes. Afterward, carefully transfer the cakes onto wire racks to cool completely. This step is crucial as fully cooled layers ensure sturdy stacking and prevent melting the frosting when you assemble your cake.

Step 8: Layer and Frost
When the cakes are completely cool, take one layer and place it on a serving plate. Generously spread a layer of cream cheese frosting on top before adding the second flavored cake layer. Repeat this process with frosting between each layer and on top for a beautifully finished Neapolitan Cake. Enjoy the delightful, colorful layers that await!

How to Store and Freeze Neapolitan Cake

Fridge: Store the Neapolitan Cake in an airtight container for up to 3 days. This helps keep its flavors fresh while preventing it from drying out.

Freezer: For longer storage, freeze individual slices wrapped tightly in plastic wrap, then place in a freezer bag. It can last for up to 2 months.

Thawing: To enjoy frozen slices, thaw in the fridge overnight before indulging in your deliciously layered treat.

Reheating: If you prefer your Neapolitan Cake warm, gently microwave individual slices for 10-15 seconds until slightly heated through.

Make Ahead Options

These Neapolitan Cake layers are perfect for meal prep, allowing you to indulge without the last-minute rush! You can bake the cake layers up to 24 hours in advance; simply allow them to cool completely before wrapping them tightly in plastic wrap to prevent drying out. The cream cheese frosting can also be made ahead and stored in the fridge for up to 3 days. When you're ready to serve, assemble the layers by spreading frosting in between and on top, giving a quick beat to the frosting if it’s a bit stiff from refrigeration. This way, your Neapolitan Cake remains just as delicious, ensuring you have a delightful dessert ready to impress!

What to Serve with Neapolitan Cake

Each delightful bite of this colorful masterpiece invites you to create a complete meal experience that resonates with joy and flavor.

  • Fresh Berries: The natural sweetness and acidity of strawberries, raspberries, or blueberries enhance the fruity notes in the cake, creating a refreshing contrast.
  • Vanilla Ice Cream: A scoop of creamy vanilla ice cream adds a luscious, melty counterpart to each slice, reminiscent of the classic ice cream flavors in the cake.
  • Chocolate Ganache: Drizzling warm chocolate ganache over the top brings an extra indulgence that chocolate lovers will adore, emphasizing the rich chocolate layer.
  • Whipped Cream: Light and airy whipped cream elevates the dessert to new heights, adding an inviting texture while balancing the sweetness perfectly.
  • Coffee or Espresso: A hot cup of coffee or a shot of espresso serves as a lovely palate cleanser, complementing the cake's flavors while enhancing the chocolate richness.
  • Mint Chutney: A surprising pairing of mint chutney offers a refreshing zing that contrasts wonderfully with the cake's sweetness, awakening your taste buds.
  • Sparkling Water: Serve chilled sparkling water with a slice to cleanse the palate and balance the richness, making it a versatile option for all tastes.
  • Chocolate Covered Pretzels: For a delightful crunch, these sweet and salty bites provide an interesting texture, making for a simple yet satisfying pairing.

Neapolitan Cake Variations & Substitutions

Feel free to get creative with this Neapolitan Cake and make it uniquely yours with these delicious alternatives!

  • Mini Neapolitan Cakes: Use smaller cake pans or muffin tins for individual-sized treats, perfect for parties or lunchboxes. These tiny cakes will be a hit with kids and adults alike!

  • Frosting Variations: Swap cream cheese frosting for whipped cream or a smooth buttercream for a different flavor experience. The lighter options will add a fluffy texture that's heavenly!

  • Flavor Infusions: Boost the vanilla layer with lemon zest for a zesty twist. This brightens up the flavor and takes your cake to a whole new level of delicious.

  • Alternative Milk Options: Use almond milk, oat milk, or coconut milk to make it dairy-free while still retaining that moist texture. Enjoy a delightful twist on this classic cake!

  • Gluten-Free Option: Substitute all-purpose flour with gluten-free flour blend. Just make sure it contains xanthan gum, as it needs a bind for an airy cake.

  • Berry Medley: Instead of pureed strawberries, mix in blueberries or raspberries for the fruity layer for a colorful and vibrant cake. Each bite will burst with flavor and freshness!

  • Layered Ice Cream Cake: Transform this recipe into an ice cream cake by sandwiching layers of ice cream between the cake layers. If you love a cold treat, this twist is perfect on a hot day.

For a touch of inspiration, you might also enjoy making a Chocolate Pudding Cake or a delicious Ice Cream Cake for your next gathering!

Expert Tips for Neapolitan Cake

• Use Room Temperature Ingredients: Make sure all ingredients, including eggs and milk, are at room temperature. This helps to create a smoother batter and ensures your Neapolitan Cake rises nicely.

• Avoid Overmixing: When combining wet and dry ingredients, mix just until incorporated. Overmixing can lead to a dense cake rather than the fluffy texture you desire.

• Double Check Doneness: Use a toothpick or cake tester in the center of each layer. If it comes out clean or with a few moist crumbs, your Neapolitan Cake is ready to come out of the oven!

• Chill Before Frosting: Allow your cake layers to cool completely on wire racks before frosting. This prevents the frosting from melting and helps it to hold its shape.

• Storage Tips: Keep leftovers in an airtight container in the fridge for up to three days, or freeze individual slices for a sweet treat later on.

Neapolitan Cake Recipe FAQs

What is the best way to select ripe strawberries for the Neapolitan Cake?
Absolutely! Look for strawberries that are bright red with a natural shine. Avoid those with dark spots or dull skin, which may indicate overripeness. When squeezed gently, they should feel firm yet slightly soft, signaling juiciness. I often choose strawberries that are in season for the best flavor!

How should I store the Neapolitan Cake once it’s baked?
To keep your cake at its best, store it in an airtight container in the fridge for up to 3 days. Be sure to stack layers with parchment in between if you want to avoid smudging the frosting.

Can I freeze leftover slices of Neapolitan Cake?
Yes, you can! To freeze, wrap individual slices tightly in plastic wrap, then place them in a freezer-safe bag. They will remain fresh for up to 3 months. When you're ready to enjoy, just thaw them in the fridge overnight for the best consistency.

What if my cake layers are too dry?
If your Neapolitan Cake turns out dry, it might be due to overbaking. Always start checking for doneness at 25 minutes. Make sure your toothpick comes out with a few moist crumbs instead of completely clean. If it’s already baked, you can drizzle a simple syrup over the layers to add moisture back in.

Is there a way to make this Neapolitan Cake vegan?
Very much so! To make a vegan Neapolitan Cake, substitute 3 flax eggs (1 tablespoon of ground flaxseed mixed with 2.5 tablespoons of water per egg) for regular eggs. Additionally, use plant-based milk, and opt for dairy-free cream cheese for the frosting.

How can I make sure my frosting doesn’t melt?
To prevent your cream cheese frosting from melting, make sure all your cake layers are completely cool before applying it. If it’s a warm day, you can refrigerate the frosted cake for about 15-20 minutes before serving to help it set.

Neapolitan Cake

Delicious Neapolitan Cake: A Sweet Slice of Joy

Indulge in a delicious Neapolitan Cake, a nostalgic blend of chocolate, strawberry, and vanilla for any occasion.
Print Recipe Pin Recipe
Prep Time 30 minutes mins
Cook Time 30 minutes mins
Cooling Time 10 minutes mins
Total Time 1 hour hr 10 minutes mins
Servings: 8 slices
Course: Dessert
Cuisine: Italian
Calories: 350
Ingredients Equipment Method Nutrition Notes

Ingredients
  

For the Cake Base
  • 2 cups All-Purpose Flour Can substitute with cake flour for a lighter texture.
  • 1 cup Granulated Sugar Brown sugar can be used for deeper flavor.
  • 0.5 cups Cocoa Powder Opt for unsweetened cocoa for the best results.
  • 2 teaspoons Baking Powder Ensure it’s fresh for perfect lifting.
  • 1 pinch Salt Essential for balancing flavors.
  • 3 large Eggs Flax eggs can be used for a vegan option.
  • 1 cup Whole Milk Buttermilk can be used for a tangy twist.
  • 1 teaspoon Vanilla Extract Pure extract is recommended.
For the Flavored Layers
  • 0.5 cups Melted Chocolate Dark or semi-sweet chocolate recommended.
  • 1 cup Pureed Strawberries Fresh or frozen strawberries are suitable.
For the Frosting
  • 2 cups Cream Cheese Frosting Adjust sweetness by changing powdered sugar.

Equipment

  • Oven
  • Mixing bowls
  • Cake Pans
  • Whisk
  • Spatula
  • wire rack

Method
 

Step-by-Step Instructions for Neapolitan Cake
  1. Preheat oven to 350°F (175°C) and prepare three round cake pans by greasing or lining with parchment paper.
  2. In a large bowl, whisk together flour, sugar, cocoa powder, baking powder, and salt.
  3. In another bowl, whisk eggs, milk, and vanilla until smooth.
  4. Gradually combine wet and dry ingredients, mixing gently.
  5. Divide batter into three bowls, flavor one with melted chocolate, another with pureed strawberries, and leave the third plain.
  6. Pour flavored batters into prepared pans and bake for 25-30 minutes.
  7. Remove from oven and cool for 10 minutes, then transfer to wire racks to cool completely.
  8. Layer and frost with cream cheese frosting between each cake layer.

Nutrition

Serving: 1sliceCalories: 350kcalCarbohydrates: 50gProtein: 5gFat: 15gSaturated Fat: 8gCholesterol: 50mgSodium: 200mgPotassium: 150mgFiber: 2gSugar: 25gVitamin A: 500IUVitamin C: 2mgCalcium: 50mgIron: 1mg

Notes

Use room temperature ingredients for best results. Avoid overmixing to prevent a dense cake. Ensure cake layers cool completely before frosting.

Tried this recipe?

Let us know how it was!

Delicious Pizza Grilled Cheese – Your New Favorite Comfort Meal

February 19, 2026 by Grace Snow Leave a Comment

There I was, standing in my kitchen, debating between takeout and something homemade when a genius idea sparked: why not combine my favorite comfort foods into one irresistible creation? Enter the Pizza Grilled Cheese! This quick meal brings together crispy, golden-buttered bread, gooey mozzarella, and zesty marinara sauce, delivering a pizza experience without the hassle of dough-making. Not only is it ready in just 10 minutes, but it also allows for endless customization with toppings that cater to everyone in the family, making it a perfect kid-friendly option. Whether you serve it for a cozy dinner or a satisfying late-night snack, this recipe is a delightful way to whip up something truly special. Curious to learn how to master this delicious dish? Let’s dive in!

Why is Pizza Grilled Cheese a Must-Try?

Irresistible Combination: Imagine the crispy satisfaction of grilled cheese combined with the savory goodness of pizza. This recipe marries the best of both worlds in a single bite!

Quick and Easy: With just 10 minutes of prep and cook time, you can enjoy a homemade meal that’s perfect for busy nights or lazy weekends.

Endless Customization: Personalize your Pizza Grilled Cheese with toppings everyone loves. Substitute traditional turkey pepperoni with veggies or a blend of cheeses for a unique twist!

Family-Friendly Appeal: Kids and adults alike will adore this delicious comfort food. Serve it with a side of Grilled Mushrooms Savory for a complete meal!

Satisfying Texture: You’ll bite into a crispy crust, melty cheese, and a burst of flavorful marinara that makes every mouthful enjoyable.

Pizza Grilled Cheese Ingredients

For the Sandwich

• Bread – Use your favorite type, such as sourdough or whole wheat, for a delicious base; it's where the magic begins!
• Butter – This adds richness and helps create a golden, crispy texture; you can swap it for olive oil for a lighter option.
• Marinara or Pizza Sauce – The secret to that classic pizza flavor; opt for homemade or a high-quality store-bought version.
• Shredded Mozzarella Cheese – The main star for that gooey, melty goodness; feel free to mix in provolone for extra flavor!
• Grated Parmesan Cheese – A sprinkle of salty notes enhances the dish; substitute with nutritional yeast for a vegan alternative.
• Turkey Pepperoni – A lean choice that maintains the essence of pizza; or go vegetarian with toppings like bell peppers or olives.
• Garlic Powder – A dash brings aromatic flavor; fresh garlic can elevate the profile even further!
• Italian Seasoning – A blend of herbs that amps up the flavor; replace it with oregano or basil if preferred.
• Chopped Fresh Basil (optional) – Brightens up the sandwich with freshness and color; you can skip it if you like.

Cooking Tips

• For perfect texture, maintain medium-low heat while grilling to avoid burnt bread.
• Thinly slice toppings to ensure even cooking and keep your sandwich from getting soggy.
• Pre-cooking veggies keeps moisture in check and enhances flavor.
• For crispy leftovers, reheat them in an oven or skillet rather than the microwave.

Your journey to crafting the ultimate Pizza Grilled Cheese starts here! Enjoy exploring the endless possibilities with this comfort food classic.

Step‑by‑Step Instructions for Pizza Grilled Cheese

Step 1: Prep the Bread
Start by buttering one side of each bread slice generously to ensure a crispy texture. Sprinkle garlic powder and Italian seasoning over the buttered side for added flavor. This simple step is crucial for creating a savory base that complements the Pizza Grilled Cheese experience.

Step 2: Assemble the Sandwich
Place two slices of bread, buttered side down, on a clean surface. Spread a generous layer of marinara sauce on the inside of each slice. Layer the shredded mozzarella cheese, followed by turkey pepperoni or your preferred toppings. Top with another slice of bread, this time with the buttered side facing up, ready for grilling.

Step 3: Heat the Skillet
Preheat a skillet over medium-low heat for about 2 minutes, ensuring it’s the right temperature to grill without burning. This gradual heating allows for even cooking and achieves that perfect golden-brown crust on your Pizza Grilled Cheese. A non-stick skillet is ideal for easy flipping.

Step 4: Cook the Sandwich
Carefully place the assembled sandwich in the hot skillet and grill for approximately 3-4 minutes. Press it gently with a spatula to promote even browning. Keep an eye on the color; it should turn golden and crispy while the cheese starts melting, filling the kitchen with an irresistible aroma.

Step 5: Flip and Finish Cooking
Once the first side is nicely browned, flip the sandwich carefully using your spatula. Cook for an additional 3-4 minutes until the second side is golden and the cheese is thoroughly melted. Look for a perfect balance between crispy exterior and gooey interior for your ideal Pizza Grilled Cheese!

Step 6: Serve and Enjoy
Remove the sandwich from the skillet and let it cool slightly before slicing in half to reveal the deliciously melted cheese inside. Garnish with fresh basil for a pop of color and serve with extra marinara sauce for dipping. Now, your Pizza Grilled Cheese is ready to delight everyone at the table!

How to Store and Freeze Pizza Grilled Cheese

Fridge: Wrap cooled sandwiches in foil or an airtight container for storage. They will stay fresh in the fridge for up to 3 days.

Freezer: For longer storage, individually wrap cooked sandwiches in plastic wrap and then foil. They can be frozen for up to 1 month, keeping their flavors intact.

Reheating: When ready to enjoy, reheat in an oven at 350°F (175°C) for about 10-15 minutes, or in a skillet over medium-low heat, ensuring the crust stays crispy while the cheesy goodness melts.

Make-Ahead Tip: Assemble sandwiches but do not cook them; store in the fridge for up to a day before grilling to enjoy a quick meal anytime!

Pizza Grilled Cheese Variations & Substitutions

Feel free to let your culinary creativity shine and customize this delightful recipe to suit your taste!

  • Cheese Blend: Mix mozzarella with provolone or gouda for a richer flavor and a beautifully melty texture.
  • Bread Options: Swap traditional bread for a ciabatta roll or a large whole grain tortilla for a unique twist.
  • Heat Level: Add sliced jalapeños or pepper jack cheese to spice things up, giving each bite a fiery kick!
  • Veggie Delight: Replace turkey pepperoni with grilled veggies like zucchini, mushrooms, or even Grilled Mushrooms Savory for a fresh take.
  • Mini Dippers: Cut sandwiches into strips for easy dipping into marinara sauce, creating a fun appetizer for family game night.
  • Low-Carb Alternative: Try cauliflower bread or even portobello mushrooms as a carb-conscious substitute while keeping lots of flavor.
  • Flavor Boosters: Incorporate sun-dried tomatoes or roasted red peppers to introduce a Mediterranean flair to your grilled cheese.
  • Gourmet Touch: Drizzle with balsamic reduction after cooking to elevate your Pizza Grilled Cheese with a touch of sweetness and depth.

With these variations, you can easily make this Pizza Grilled Cheese your family's new favorite comfort meal!

Make Ahead Options

These Pizza Grilled Cheese sandwiches are perfect for meal prep enthusiasts! You can assemble the sandwiches up to 24 hours in advance by buttering the bread, adding marinara, cheese, and toppings. Simply wrap them tightly in plastic wrap or foil to prevent drying out in the refrigerator. When you're ready to enjoy your delicious Pizza Grilled Cheese, heat a skillet over medium-low and grill for 3-4 minutes on each side until golden and crispy, ensuring the cheese melts perfectly. This simple make-ahead option saves time and delivers just as delicious results when it's time to serve!

What to Serve with Pizza Grilled Cheese

Transform your tasty creation into a complete meal that will impress everyone around the table.

  • Crisp Mixed Greens: A light salad adds freshness and texture, balancing the richness of the grilled cheese beautifully.

  • Garlic Bread Sticks: Pair this cheesy delight with crispy, buttery garlic breadsticks for a comforting, pizza-inspired accompaniment that fans will love.

  • Zesty Marinara Dip: A side of zesty marinara for dipping enhances the pizza flavors and brings an extra layer of delight to each bite.

  • Roasted Vegetables: Serve alongside colorful roasted veggies for a nutritious touch that harmonizes with the sandwich’s cheesy goodness.

  • Sweet Potato Fries: The crispy, sweet exterior of sweet potato fries provides a satisfying contrast to the gooey Pizza Grilled Cheese.

  • Chilled Lemonade: A refreshing glass of lemonade cuts through the richness, offering the perfect balance to your cozy meal.

  • Chocolate Chip Cookies: End on a sweet note! Classic cookies add a delightful finish to your comfort food feast, creating a complete homemade experience.

Expert Tips for Pizza Grilled Cheese

  • Choose the Right Bread: Opt for sturdy bread that can hold up to the toppings. Sourdough or whole wheat is ideal, while thin bread might lead to a soggy sandwich.

  • Layer Wisely: Avoid overcrowding your sandwich with toppings. Too many ingredients can prevent proper melting and might make the Pizza Grilled Cheese hard to handle.

  • Monitor the Heat: Maintaining medium-low heat is key for even cooking. Too high, and you risk burning the bread before the cheese melts.

  • Pre-cook Veggies: If adding vegetables, such as bell peppers or onions, sauté them beforehand. This step reduces moisture and enhances their flavor.

  • Reheat with Care: For leftover Pizza Grilled Cheese, avoid microwaving. Instead, reheat in a skillet or oven to retain that crispy texture you love!

  • Experiment with Cheese: Don't hesitate to mix cheeses! Combining mozzarella with provolone or pepper jack can elevate the flavor of your Pizza Grilled Cheese.

Pizza Grilled Cheese Recipe FAQs

What type of bread is best for Pizza Grilled Cheese?
Absolutely! For a perfect Pizza Grilled Cheese, I recommend using sturdy bread like sourdough or whole wheat. These varieties provide the necessary structure to hold up against the fillings and prevent sogginess. If you're feeling adventurous, ciabatta or even a large tortilla wrap can add a fun twist as well!

How should I store leftover Pizza Grilled Cheese?
Very easy! Wrap your cooled Pizza Grilled Cheese sandwiches in foil or place them in an airtight container. They can stay fresh in the fridge for up to 3 days. Just make sure they're completely cooled beforehand to maintain their texture!

Can I freeze Pizza Grilled Cheese?
Yes, you can! For freezing, wrap each cooked sandwich individually in plastic wrap and then in foil to prevent freezer burn. This way, you can store them for up to 1 month. When you want to enjoy them again, simply reheat in the oven at 350°F (175°C) for about 10-15 minutes or in a skillet over medium-low heat.

What if my Pizza Grilled Cheese is too soggy?
Great question! The key to a crispy Pizza Grilled Cheese is ensuring your toppings, especially vegetables, are cut thinly and pre-cooked to minimize moisture. Also, avoid adding too many ingredients, as overcrowding can prevent proper melting and lead to sogginess. If you find your bread getting damp, just pop the sandwich back on the skillet for a minute or two to help crisp it back up!

Are there any dietary considerations for Pizza Grilled Cheese?
Absolutely! You can easily customize this recipe to meet various dietary needs. For a vegan option, simply substitute the cheese with your favorite kind of dairy-free cheese and omit the butter, using olive oil instead. If you have allergies, keep an eye on ingredients like marinara sauce from the store as they can contain hidden allergens, or opt for a homemade version to control what goes into your meal.

How can I customize my Pizza Grilled Cheese toppings?
The more the merrier! You can mix and match toppings based on your preferences. Instead of turkey pepperoni, consider using veggies like bell peppers, mushrooms, or olives for a vegetarian option. Adding jalapeños or spicy pepper jack cheese is also a great way to add some heat if your taste buds crave it!

Pizza Grilled Cheese

Delicious Pizza Grilled Cheese – Your New Favorite Comfort Meal

This Pizza Grilled Cheese brings crispy bread, gooey mozzarella, and zesty marinara together for a delightful quick meal.
Print Recipe Pin Recipe
Prep Time 5 minutes mins
Cook Time 5 minutes mins
Total Time 10 minutes mins
Servings: 2 sandwiches
Course: Snacks
Cuisine: American
Calories: 450
Ingredients Equipment Method Nutrition Notes

Ingredients
  

For the Sandwich
  • 4 slices Bread Sourdough or whole wheat recommended.
  • 2 tablespoons Butter Can substitute with olive oil.
  • 1/4 cup Marinara or Pizza Sauce Homemade or high-quality store-bought.
  • 1 cup Shredded Mozzarella Cheese Mix with provolone for extra flavor.
  • 2 tablespoons Grated Parmesan Cheese Substitute with nutritional yeast for vegan.
  • 1/4 cup Turkey Pepperoni Can be replaced with vegetables if preferred.
  • 1 teaspoon Garlic Powder Fresh garlic elevates flavor.
  • 1 teaspoon Italian Seasoning Can be replaced with oregano or basil.
  • 1/4 cup Chopped Fresh Basil Optional for garnish.

Equipment

  • Skillet

Method
 

Step-by-Step Instructions for Pizza Grilled Cheese
  1. Butter one side of each bread slice and sprinkle with garlic powder and Italian seasoning for flavor.
  2. Assemble the sandwich with buttered sides facing out, layering marinara, mozzarella, pepperoni, and top with another slice of bread.
  3. Preheat a skillet over medium-low heat for 2 minutes.
  4. Grill the sandwich for 3-4 minutes, pressing gently until golden and crispy.
  5. Flip the sandwich and cook for another 3-4 minutes until golden and cheese is melted.
  6. Serve with fresh basil and extra marinara for dipping.

Nutrition

Serving: 1sandwichCalories: 450kcalCarbohydrates: 40gProtein: 20gFat: 25gSaturated Fat: 12gPolyunsaturated Fat: 2gMonounsaturated Fat: 10gCholesterol: 50mgSodium: 800mgPotassium: 250mgFiber: 3gSugar: 2gVitamin A: 15IUVitamin C: 2mgCalcium: 25mgIron: 10mg

Notes

Experiment with different cheese blends and toppings for unique variations.

Tried this recipe?

Let us know how it was!

Cozy Up With Authentic Irish Apple Cake That's Pure Joy

February 19, 2026 by Grace Snow Leave a Comment

As the leaves turn golden and the crisp autumn air sweeps in, there's nothing quite like the scent of freshly baked goods wafting from the kitchen. This is where my Authentic Irish Apple Cake comes into play, with its delightful blend of tart Granny Smith apples enveloped in a moist, spiced cake. It’s a simple dessert that's perfect for cozy gatherings or a quiet afternoon treat! One of the best things about this cake is how effortlessly it brightens up a chilly day, and paired with a creamy custard sauce, it transforms into a comforting indulgence. Plus, it’s a fantastic way to showcase seasonal apples while honing your baking skills. Curious to uncover the secrets behind this warm slice of Irish tradition? Let’s dive in!

Why is this cake a must-bake?

Unforgettable Flavor: The combination of tart apples and warm cinnamon creates a delightful balance that's hard to resist.

Homestyle Comfort: Each bite evokes the feeling of cozy afternoons spent at home, perfect for sharing with family and friends.

Versatile Serving Options: Whether enjoyed warm with custard or chilled with ice cream, this cake adapts to any occasion, making it a crowd-pleaser.

Simple and Straightforward: Even if you're new to baking, this recipe requires only basic skills and embraces forgiving ingredients.

Autumn Delight: With seasonal apple varieties like Honeycrisp or Bramley, you're bound to discover new flavor dimensions with every bake, elevating your fall gatherings.

Perfect for Celebrations: Pair it with a cup of tea or coffee, and you’ll have a comforting dessert fit for any celebration, just like my Chocolate Pudding Cake or German Chocolate Poke Cake!

Authentic Irish Apple Cake Ingredients

• For the Cake

  • Unsalted Butter – Adds richness and moisture; can substitute with margarine for a dairy-free option.
  • Granulated Sugar – Provides sweetness and lovely browning; brown sugar can deepen the flavor.
  • Large Eggs – Acts as a binder and helps the cake rise; no substitutes recommended for best results.
  • Whole Milk or Cream – Contributes to the cake’s tenderness; feel free to use almond milk for a non-dairy version.
  • All-Purpose Flour – Gives the cake its structure; gluten-free flour blends work for a gluten-free option.
  • Baking Powder – This leavening agent is essential for the perfect rise.
  • Cinnamon – Introduces a warm spice; nutmeg can be a wonderful complement.
  • Salt – Enhances the flavor balance and rounds out the sweetness.

• For the Apples

  • Granny Smith Apples – Their tartness beautifully contrasts the sweetness of the cake; try substituting with Honeycrisp or Bramley apples for a unique twist.

• For the Streusel Topping

  • Old Fashioned Rolled Oats – Adds texture; quick oats can be used but the texture may differ.
  • Confectioner’s Sugar – Perfect for dusting and adds an aesthetic appeal.

• For the Custard Sauce

  • Egg Yolks, Sugar, Whole Milk, Vanilla – These create a creamy topping; using store-bought custard can save time.

Embrace the joy of homemade desserts this season with this Authentic Irish Apple Cake—it’s a hug in cake form, waiting to be savored!

Step‑by‑Step Instructions for Authentic Irish Apple Cake

Step 1: Preheat the Oven
Preheat your oven to 350°F (175°C) and grease a 9-inch springform pan for easy release later. This step is crucial as a properly heated oven will help the cake rise evenly. Ensure your pan is well-greased to prevent sticking, setting the stage for a beautifully baked Authentic Irish Apple Cake.

Step 2: Prepare the Custard Sauce
In a small saucepan, heat 2 cups of whole milk over medium heat until it just begins to simmer. While it warms, whisk together 4 egg yolks and 1/2 cup sugar until creamy. Gradually temper the yolks by incorporating the hot milk, then return the mixture to the stove. Cook on low heat, stirring constantly, until it thickens slightly, about 5 minutes. Strain it through a sieve and chill while you make the cake.

Step 3: Make the Streusel Topping
In a mixing bowl, combine 1 cup of all-purpose flour, 1/3 cup of sugar, and 1 cup of old-fashioned rolled oats. Cut in 1/2 cup of cold, unsalted butter until the mixture resembles coarse crumbs. This streusel will add a delightful crunch to your Authentic Irish Apple Cake. Once ready, chill the mixture in the refrigerator while you prepare the cake batter.

Step 4: Prepare the Cake Batter
In a large bowl, cream together 1 cup of softened unsalted butter and 1 cup of granulated sugar until light and fluffy—this should take about 4-5 minutes. Add in 3 large eggs, one at a time, mixing well after each addition. Then, combine the dry ingredients which include 2 cups of all-purpose flour, 1 teaspoon of baking powder, 1 teaspoon of cinnamon, and 1/4 teaspoon of salt. Gradually add this to the butter mixture, alternating with 1 cup of whole milk.

Step 5: Assemble the Cake
Pour the cake batter evenly into the prepared 9-inch springform pan. Peel and slice 3-4 Granny Smith apples, fanning them out on top of the batter for a lovely presentation. Sprinkle your chilled streusel topping generously over the apples, ensuring even coverage. This assembly not only looks appealing but also adds fantastic textures to the Authentic Irish Apple Cake.

Step 6: Bake the Cake
Place the pan in the preheated oven and bake for 50-60 minutes, until the cake is golden brown and a toothpick inserted into the center comes out clean. The aroma of baking apples and spices will fill your kitchen, creating an enticing atmosphere. Keep an eye on it towards the end of the baking time to prevent over-browning.

Step 7: Cool and Serve
Once baked, remove the cake from the oven and allow it to cool in the pan for about 15 minutes before carefully releasing the sides of the springform pan. Dust the top with confectioners' sugar for that final touch of sweetness. Serve your Authentic Irish Apple Cake while warm, alongside the chilled custard sauce for a delightful dessert experience.

How to Store and Freeze Authentic Irish Apple Cake

Room Temperature: Store leftover cake covered at room temperature for up to 3 days for optimal freshness. This keeps the crumb moist and delicious.

Fridge: If you need to store it longer, wrap the cake tightly and refrigerate for up to a week, which helps maintain flavor and texture.

Freezer: For longer storage, freeze slices of the cake in an airtight container for up to 2 months. Thaw in the fridge overnight before serving.

Reheating: To enjoy the cake warm, reheat individual slices in the microwave for about 15-20 seconds or in a preheated oven at 350°F (175°C) for 10-15 minutes. Pair with custard for a comforting treat!

Expert Tips for Authentic Irish Apple Cake

• Cold Ingredients: Ensure your butter and other ingredients are cold for a crumbly streusel. This prevents it from becoming too wet.

• Custard Care: Cook your custard slowly and stir constantly to avoid curdling. A gentle hand ensures a silky finish.

• Apple Preparation: To prevent browning, toss your sliced apples in lemon juice if preparing them ahead of time. This maintains freshness.

• Springform Pan Use: Opt for a springform pan for easy release. This helps maintain the cake's structure when serving.

• Texture Variation: Experiment with different apple varieties, like Honeycrisp or Bramley, for unique flavors in your Authentic Irish Apple Cake.

Authentic Irish Apple Cake Variations

Feel free to let your creativity shine and customize this delightful cake according to your taste and preferences!

  • Different Apples: Experiment with Honeycrisp or Bramley apples for unique flavor profiles. Each variety offers its distinct sweetness and tartness, making every bake a new adventure.

  • Nutty Streusel: Swap out the oats in the streusel for walnuts or pecans for an added crunch. The nutty flavor brings a delightful twist and complements the apples beautifully.

  • Gluten-Free Option: Use a gluten-free flour blend in place of all-purpose flour to make this cake gluten-free without sacrificing taste.

  • Spice It Up: Add a pinch of nutmeg or allspice to the cake batter for a deeper, more complex flavor profile. These warm spices enhance the cozy autumn vibe of the cake.

  • Creamy Contrast: Serve with a dollop of whipped cream or vanilla ice cream for a brighter dessert experience. The contrasting temperatures create an indulgent moment.

  • Fruity Add-Ins: Toss in a handful of raisins or dried cranberries into the batter for a chewy texture and bursts of sweetness. They complement the apples wonderfully and add a savory surprise.

  • Vegan Twist: Replace butter with coconut oil and eggs with flax eggs or mashed banana for a vegan-friendly adaptation. It’s a delicious way to make a beloved dessert inclusive.

  • Caramel Drizzle: Drizzle some caramel sauce over the finished cake for an indulgent treat. The sweet, rich flavor elevates your cake into a luxurious dessert.

Looking for other delightful options? You might also enjoy trying my Ice Cream Cake or indulging in the rich flavors of a Chocolate Pudding Cake, perfect companions to your cozy baking adventures!

What to Serve with Authentic Irish Apple Cake

As you savor each bite of this delightful cake, elevate your dessert experience by considering these perfect pairings.

  • Custard Sauce: Creamy and rich, it amplifies the warm spices and tart apples, creating a luscious combination.

  • Freshly Brewed Coffee: The bold flavors and aromatic profile balance the sweetness of the cake beautifully, making every slice more enjoyable.

  • Whipped Cream: Light and fluffy, a dollop of whipped cream adds a delightful texture that contrasts with the moist cake.

  • Vanilla Ice Cream: The cold creaminess melts alongside the warm cake, enhancing the spiced flavors for an indulgent treat.

  • Caramel Drizzle: Sweet and buttery, a drizzle of caramel elevates the cake's earthy notes, offering a touch of decadence.

  • Tea: A classic choice—choose an Earl Grey or chai; both complement the cake’s warming spices beautifully, while enhancing the cozy atmosphere of your gathering.

  • Spiced Cider: Warm spiced cider echoes the cake’s cinnamon, making it a perfect companion for chilly fall evenings.

  • Cheese Plate: Sharp cheddar or tangy goat cheese provides a delightful contrast, balancing the sweet flavors of the cake with zest and richness.

With these suggestions, you’re all set to create a comforting and memorable dessert experience that celebrates the irresistible charm of this Authentic Irish Apple Cake!

Make Ahead Options

These Authentic Irish Apple Cakes are perfect for busy home cooks looking to save time! You can prepare the cake batter and store it in the refrigerator for up to 24 hours in advance, ensuring it's ready when you need it. Additionally, the streusel topping can be mixed and chilled for up to 3 days to enhance texture. Just remember to slice and toss your Granny Smith apples in lemon juice (to prevent browning) if you're prepping them ahead of time. When you’re ready to bake, simply layer the apples on top of the batter, sprinkle the streusel, and pop it in the oven for a fresh, delicious dessert that's just as delightful, even after making it ahead!

Authentic Irish Apple Cake Recipe FAQs

What type of apples should I use for the best flavor?
For the best results in your Authentic Irish Apple Cake, I highly recommend using Granny Smith apples. Their tartness beautifully contrasts the sweetness of the cake. If you're feeling adventurous, you can also experiment with Honeycrisp or Bramley apples for delightful variations in flavor and texture!

How should I store leftover apple cake?
You can store any leftover cake covered at room temperature for up to 3 days. If you want to extend its freshness, wrap the cake tightly in plastic wrap and refrigerate for up to a week. This helps maintain its delicious flavor and texture!

Can I freeze Authentic Irish Apple Cake?
Absolutely! To freeze, slice the cake into individual pieces and place them in an airtight container or zip-top freezer bag, separating layers with parchment paper if needed. It can be stored in the freezer for up to 2 months. When you're ready to enjoy it, simply thaw the slices in the refrigerator overnight and reheat as desired.

What should I do if my custard sauce curdles?
If your custard sauce curdles, don’t worry! To fix it, you can pass it through a sieve to remove the curds. For future attempts, remember to cook the custard over low heat while constantly stirring; this will help maintain a smooth texture. If it's too thick, simply whisk in a bit of warm milk until you reach the desired consistency.

Can I substitute ingredients in the recipe for dietary restrictions?
Yes, this recipe is quite flexible! If you’re looking for a dairy-free option, you can substitute unsalted butter with margarine and use almond milk instead of whole milk. For a gluten-free version, swap out the all-purpose flour for a gluten-free flour blend. Just remember that these substitutions may slightly alter the flavor and texture of the cake.

How can I determine when the cake is done baking?
To check if your Authentic Irish Apple Cake is done, insert a toothpick into the center of the cake. If it comes out clean or with just a few moist crumbs attached, it’s ready! Additionally, you should notice a lovely golden-brown color on top and a slight spring when you gently press the surface.

Authentic Irish Apple Cake

Cozy Up With Authentic Irish Apple Cake That's Pure Joy

Delight in the comforting flavors of Authentic Irish Apple Cake, a perfect dessert for autumn gatherings.
Print Recipe Pin Recipe
Prep Time 30 minutes mins
Cook Time 1 hour hr
Cooling Time 15 minutes mins
Total Time 1 hour hr 45 minutes mins
Servings: 8 slices
Course: Dessert
Cuisine: Irish
Calories: 350
Ingredients Equipment Method Nutrition Notes

Ingredients
  

For the Cake
  • 1 cup Unsalted Butter Softened
  • 1 cup Granulated Sugar
  • 3 Large Eggs At room temperature
  • 1 cup Whole Milk Or cream
  • 2 cups All-Purpose Flour
  • 1 teaspoon Baking Powder
  • 1 teaspoon Cinnamon
  • 1/4 teaspoon Salt
For the Apples
  • 3-4 Granny Smith Apples Peeled and sliced
For the Streusel Topping
  • 1 cup Old Fashioned Rolled Oats
  • 1/3 cup Sugar
  • 1 cup All-Purpose Flour
  • 1/2 cup Unsalted Butter Cold, cut into pieces
For the Custard Sauce
  • 4 Egg Yolks
  • 1/2 cup Sugar
  • 2 cups Whole Milk
  • 1 teaspoon Vanilla Extract

Equipment

  • 9-inch springform pan
  • Mixing bowls
  • Whisk
  • Saucepan
  • sieve

Method
 

Preparation
  1. Preheat your oven to 350°F (175°C) and grease a 9-inch springform pan.
  2. In a small saucepan, heat 2 cups of whole milk over medium heat.
  3. Whisk together 4 egg yolks and 1/2 cup sugar until creamy.
  4. Combine in saucepan and cook on low heat until slightly thickened, about 5 minutes.
  5. Chill while you make the cake.
Making the Streusel Topping
  1. In a mixing bowl, combine 1 cup of flour, 1/3 cup of sugar, and 1 cup of oats.
  2. Cut in 1/2 cup of cold butter until the mixture resembles coarse crumbs.
  3. Chill in the refrigerator.
Baking the Cake
  1. Cream together 1 cup of softened butter and 1 cup of sugar until light and fluffy.
  2. Add in 3 large eggs, one at a time, mixing well after each.
  3. Combine dry ingredients and add to the butter mixture, alternating with 1 cup of milk.
  4. Pour into prepared pan, top with sliced apples, and sprinkle with streusel.
  5. Bake for 50-60 minutes until golden brown and a toothpick comes out clean.
Serving
  1. Allow the cake to cool for 15 minutes before removing from the springform pan.
  2. Dust with confectioners' sugar and serve with custard sauce.

Nutrition

Serving: 1sliceCalories: 350kcalCarbohydrates: 46gProtein: 5gFat: 16gSaturated Fat: 10gPolyunsaturated Fat: 1gMonounsaturated Fat: 4gCholesterol: 120mgSodium: 200mgPotassium: 150mgFiber: 2gSugar: 20gVitamin A: 500IUVitamin C: 6mgCalcium: 80mgIron: 1mg

Notes

Experiment with different apple varieties like Honeycrisp or Bramley for unique flavors.

Tried this recipe?

Let us know how it was!

Crispy Traditional Irish Boxty: Perfect Breakfast Bliss

February 19, 2026 by Grace Snow Leave a Comment

The kitchen filled with the warm, comforting aroma of frying potatoes, transporting me back to my grandmother's kitchen in Ireland. This Traditional Irish Boxty recipe is a cherished gem, bringing together grated and mashed potatoes to create a delightful pancake that's both crispy on the outside and fluffy on the inside. Not only is it quick to whip up, perfect for breakfast or as a cozy side dish, but it also celebrates the beauty of home-cooked meals using simple ingredients. Whether you’re hosting a brunch or craving a hearty snack, these little potato pancakes carry a slice of Irish history and hospitality. Curious about how to achieve that ideal balance of crunch and softness? Let’s dive in!

Why is Boxty so beloved?

Crispy Delight: The texture of these pancakes strikes an unbeatable balance—crispy on the outside and fluffy within, making them a true breakfast treat.

Quick and Easy: With simple ingredients and straightforward steps, you can whip up these Traditional Irish Boxty without spending hours in the kitchen.

Versatile Serving Options: Enjoy them with a dollop of sour cream, or serve alongside eggs for a filling meal. They perfectly complement savory dishes like fish or Irish stew as well.

Healthy and Hearty: Made primarily with potatoes, these pancakes offer a comforting, vegetarian option that satisfies.

Cultural Comfort: Enjoying boxty is not just eating; it’s a shared cultural experience steeped in Irish history, perfect for gathering around the table. Curious about storage? Check out my tips on meal prep and keeping them fresh for later!

Traditional Irish Boxty Ingredients

Unlock the secrets to creating these delightful potato pancakes with these essential ingredients!

For the Batter

  • Potatoes – The heart of the dish; choose starchy varieties like Russet or Yukon Gold for the best texture.
  • Gluten-Free Flour Blend – This acts as a binder; regular flour can be used but may change the texture slightly.
  • Milk – Helps achieve a smooth batter; be cautious with amounts to keep it from becoming too runny.
  • Egg (1) – Essential for binding the mixture, ensuring the pancakes hold together when cooking.
  • Salt – Enhances flavor; adjust to your personal taste preference.
  • Oil or Butter – The key to achieving that perfect, crispy exterior when frying the pancakes.

Enjoy making your Traditional Irish Boxty with these simple yet effective ingredients!

Step‑by‑Step Instructions for Traditional Irish Boxty

Step 1: Prepare Potatoes
Start by peeling and washing your starchy potatoes like Russet or Yukon Gold. Grate half of the potatoes using a box grater or food processor until fine; then, mash the other half until smooth in a large bowl. This combination creates the unique texture of Traditional Irish Boxty, balancing fluffiness with crispy elements.

Step 2: Mix Ingredients
In the bowl containing your mashed potatoes, add the grated potatoes, gluten-free flour blend, a splash of milk, the egg, and a sprinkle of salt. Stir everything together until you achieve a cohesive batter; adjust with more milk if necessary to ensure a thick, yet spreadable consistency.

Step 3: Heat Pan
Place a large frying pan over medium heat and add a couple of tablespoons of oil or butter. Allow the fat to heat up for about 2 minutes until shimmering; this will help you achieve a beautifully crispy exterior on the Boxty. You want the temperature just right to ensure even cooking.

Step 4: Cook Pancakes
Spoon about a quarter cup of the batter into the hot pan for each pancake. Gently flatten the batter with the back of a spatula to about half an inch thick. Cook them for 3-4 minutes until golden brown and crispy on one side, then carefully flip using a spatula and cook for another 3-4 minutes on the other side.

Step 5: Serve Warm
Once your Traditional Irish Boxty is cooked to a crispy golden perfection, transfer the pancakes to a plate lined with paper towels to absorb any excess oil. Serve warm immediately, or keep them on low heat in the oven while cooking the remaining batter. Enjoy each bite with your favorite toppings!

Make Ahead Options

Traditional Irish Boxty is a fantastic recipe for meal prep enthusiasts! You can prepare the batter up to 24 hours in advance by combining the grated and mashed potatoes, gluten-free flour blend, milk, egg, and salt, then refrigerating the mixture. To maintain the quality and prevent browning, cover the bowl tightly with plastic wrap. When you’re ready to serve, simply heat a frying pan, add oil or butter, and cook the pancakes for about 3-4 minutes on each side until golden and crispy. This way, you’ll enjoy freshly cooked boxty with minimal effort on busy mornings!

Traditional Irish Boxty Customizations

Feel free to add your personal touch to these delightful pancakes—let your creativity shine through each unique variation!

  • Dairy-Free: Substitute milk with almond or oat milk for a lactose-free version that still packs a fantastic flavor.

  • Gluten-Free: Use a gluten-free all-purpose flour blend instead of regular flour for a completely gluten-free boxty that everyone can enjoy.

  • Herbed Delight: Add fresh herbs like chives or parsley to the batter for a fresh flavor boost, perfect for brightening up your breakfast table.

  • Spicy Kick: Spice things up by mixing in a dash of cayenne pepper or paprika, elevating the traditional flavor profile to something exciting.

  • Cheesy Addition: Fold in shredded cheese like cheddar or feta into the batter for a savory twist that melts beautifully while cooking.

  • Veggie Boost: Incorporate finely chopped vegetables such as bell peppers, spinach, or zucchini for a colorful and nutritious addition to your boxty.

  • Onion Variation: Sauté some onions until golden brown and mix them into the batter for an added layer of sweetness and depth.

  • Sweet Twist: For a dessert version, swap some of the potato with finely grated apples or zucchini, add cinnamon, and serve with maple syrup or yogurt.

Feel free to explore these options, and don’t forget to check out my tips for meal prep and keeping them fresh. Every pancake can tell a different story on your plate!

How to Store and Freeze Traditional Irish Boxty

Fridge: Store leftovers in an airtight container for up to 2 days. Reheat in a skillet over medium heat for a few minutes until warm and crispy again.

Freezer: Wrap individual pancakes in plastic wrap and then place them in a freezer bag for up to 2 months. Thaw in the refrigerator overnight before reheating.

Reheating: For best results, reheat frozen or refrigerated pancakes in a skillet with a little oil or butter to regain crispiness. Alternatively, use an oven at 350°F (175°C) for about 10-15 minutes.

Helpful Tricks for Traditional Irish Boxty

  • Correct Potato Prep: Avoid excess moisture by not over-squeezing grated potatoes. This prevents soggy pancakes and ensures ideal crispiness.

  • Fresh Mashed Potatoes: For the best texture, always use freshly mashed potatoes. Instant potatoes can work, but they should be thick to maintain structure.

  • Pan Temperature: Ensure the frying pan is adequately heated before adding the batter. An under-heated pan can lead to uneven cooking and a less crispy surface.

  • Cooking Technique: Don't overcrowd the pan—give each pancake enough space to cook evenly. This helps achieve that desired golden-brown exterior for your Traditional Irish Boxty.

  • Baking Alternative: If you prefer less oil, try baking at 375°F (190°C) for 15-20 minutes, flipping halfway for uniform cooking and crispiness.

What to Serve with Traditional Irish Boxty

Enjoying your Irish Boxty makes a lovely foundation for a cozy, inviting meal that warms the heart and delights the senses.

  • Creamy Sour Cream: A dollop of sour cream adds creamy tanginess that beautifully balances the crispy texture of the boxty.

  • Savory Smoked Salmon: The rich, smoky flavors of salmon paired with the fluffy pancakes create a satisfying, elegant brunch option.

  • Perfectly Scrambled Eggs: Fluffy scrambled eggs offer a protein-packed complement, making for a hearty breakfast that feels indulgent yet wholesome.

  • Baked Beans: Sweet and savory baked beans enhance the traditional vibe, bringing in a warm, comforting flavor that pairs well with the pancakes.

  • Zesty Salsa: A fresh tomato salsa introduces bright acidity and chunky texture, elevating each bite with a refreshing zing and a vibrant twist.

  • Crispy Bacon Strips: The salty crunch of bacon adds a savory contrast, creating a classic Irish breakfast ensemble that’s utterly irresistible.

  • Herbed Garden Salad: A light garden salad with fresh herbs cuts through the richness of the pancakes, adding a crunchy, fresh element to your meal.

  • Rich Irish Stew: For a heartier combination, serve the boxty alongside a bowl of traditional Irish stew; the pancakes help soak up the delicious gravy.

  • Chilled Cider: A crisp, cold cider refreshes the palate while echoing the rustic charm of an Irish pub, completing a delightful dining experience.

  • Decadent Apple Crisp: For dessert, a warm apple crisp brings a sweet finish, with its cinnamon-spiced flavor harmonizing perfectly with the potato pancakes.

Traditional Irish Boxty Recipe FAQs

How do I choose the right potatoes for Boxty?
Absolutely! For the best results, it's essential to use starchy potatoes like Russet or Yukon Gold. These varieties are ideal because they provide a crispy exterior while keeping the inside fluffy. If you pick waxy potatoes, you may end up with a pancake that’s too dense or gummy.

How should I store leftover Boxty?
To keep your leftover Traditional Irish Boxty fresh, place them in an airtight container in the refrigerator for up to 2 days. When you’re ready to enjoy them again, simply reheat them in a skillet over medium heat for a few minutes until they're warm and crispy again. This method ensures you retain that delightful crispy texture!

Can I freeze Traditional Irish Boxty?
Yes, you can! To freeze, lay individual pancakes on a plate lined with parchment paper, then wrap each tightly in plastic wrap. Place the wrapped pancakes in a freezer bag for up to 2 months. When you're ready to eat, thaw them overnight in the refrigerator and reheat in a skillet for best results. You’ll be amazed at how well they hold up!

What can I do if my Boxty turns out soggy?
If your Traditional Irish Boxty ends up soggy, it might be due to excess moisture in the grated potatoes. To troubleshoot, make sure you gently squeeze out any liquid from the grated potatoes before mixing them into the batter. Additionally, ensure your frying pan is hot enough before adding the batter, as a cooler pan can lead to steam rather than crispiness.

Are there any dietary considerations with Boxty?
Definitely! Traditional Irish Boxty can easily be made vegetarian by using vegetable oil instead of butter for frying. Additionally, to make it gluten-free, simply use a gluten-free flour blend. Always check the labels to avoid cross-contamination if you or someone you're serving has food allergies. Happy cooking!

Traditional Irish Boxty

Crispy Traditional Irish Boxty: Perfect Breakfast Bliss

This Traditional Irish Boxty recipe is a cherished gem, combining grated and mashed potatoes for a delightful pancake that's crispy and fluffy.
Print Recipe Pin Recipe
Prep Time 15 minutes mins
Cook Time 15 minutes mins
Total Time 30 minutes mins
Servings: 4 pancakes
Course: Breakfast
Cuisine: Irish
Calories: 180
Ingredients Equipment Method Nutrition Notes

Ingredients
  

For the Batter
  • 2 cups starchy potatoes (like Russet or Yukon Gold) peeled and grated
  • 1 cup gluten-free flour blend acts as a binder
  • 1/2 cup milk adjust to maintain batter consistency
  • 1 large egg for binding
  • 1 teaspoon salt to taste
  • 2 tablespoons oil or butter for frying

Equipment

  • frying pan
  • Box grater
  • large bowl
  • Spatula

Method
 

Cooking Directions
  1. Peel and wash the starchy potatoes. Grate half of them and mash the other half until smooth.
  2. In a bowl, combine mashed potatoes, grated potatoes, gluten-free flour, milk, egg, and salt. Stir until cohesive.
  3. Heat a frying pan over medium heat with oil or butter for about 2 minutes.
  4. Spoon about a quarter cup of batter into the pan for each pancake. Flatten to half an inch thick and cook for 3-4 minutes until golden, then flip.
  5. Cook the other side for another 3-4 minutes. Transfer to a plate lined with paper towels, serve warm.

Nutrition

Serving: 1pancakeCalories: 180kcalCarbohydrates: 30gProtein: 4gFat: 6gSaturated Fat: 2gPolyunsaturated Fat: 1gMonounsaturated Fat: 2gCholesterol: 60mgSodium: 300mgPotassium: 450mgFiber: 3gSugar: 1gVitamin A: 200IUVitamin C: 10mgCalcium: 30mgIron: 1mg

Notes

Use freshly mashed potatoes and avoid excess moisture. Bake at 375°F for a healthier option if preferred.

Tried this recipe?

Let us know how it was!

Delicious Irish Potato Pie with Bacon for Cozy Comfort Food

February 19, 2026 by Grace Snow Leave a Comment

As I stood in my kitchen, the comforting aroma of sizzling bacon mingled with the earthy scent of onions, awakening memories of cherished family gatherings. This Savory Irish Potato Pie is my go-to recipe for St. Patrick’s Day, transforming humble ingredients into a cozy, show-stopping dish. Stuffed with layers of creamy potatoes, crunchy onions, and crispy bacon, this pie not only makes for a delightful main course but is also incredibly make-ahead-friendly—perfect for those busy celebrations. Whether you’re looking to impress guests or simply enjoy a comforting meal at home, this Irish Potato Pie hits all the right notes. Are you ready to create a warm, delicious masterpiece that will surely leave everyone asking for seconds?

Why is this Irish Potato Pie special?

Comforting, Homey Flavor: This Irish Potato Pie combines crispy bacon and creamy potatoes for a dish that warms the soul.

Make-Ahead Marvel: Prepare it in advance and store it for stress-free entertaining, making your St. Patrick’s Day celebrations a breeze!

Versatile Serving Options: Enjoy it as a stand-alone meal or a hearty side at brunches, pairing perfectly with a fresh green salad or even warm Irish soda bread.

Visual Feast: The golden, flaky crust and layered filling create an eye-catching centerpiece, sure to impress your guests!

Crowd-Pleaser: Its rich ingredients and satisfying texture will have everyone coming back for more, making it an instant favorite—especially after a busy week! Dive into this comforting dish that brings everyone together around the table.

Irish Potato Pie Ingredients

• Get ready to create a comforting dish that everyone will love!

For the Crust

  • Frozen Puff Pastry – The base of the pie providing a crispy texture; homemade pie crust can be used for a heartier feel.

For the Filling

  • Butter – Adds richness and flavor; consider using unsalted butter for more control over saltiness.
  • Thick-Cut Bacon – Introduces savory flavor and a satisfying crunch; substitute with cooked sausage or omit for a vegetarian option.
  • Potatoes – (Russet or Yukon Gold) Form the hearty base of the filling; use a mandolin slicer for even thickness.
  • Onion – Adds sweetness and depth to the filling; shallots can be used for a milder taste.
  • Fresh Dill – Enhances the flavor profile of the dish; dried dill can be used, but reduce the quantity.
  • Heavy Cream – Provides creaminess; half-and-half can be substituted for a lighter version.
  • Salt and Pepper – Essential for seasoning; adjust according to your taste preferences.

For Garnish

  • Chive or Scallion – Adds a refreshing touch of color and flavor to finish your Irish Potato Pie beautifully.

This Irish Potato Pie is bound to become a cherished recipe in your home, perfect for cozy gatherings!

Step‑by‑Step Instructions for Irish Potato Pie

Step 1: Preheat the Oven
Begin by preheating your oven to 350°F (175°C). This temperature ensures that your Irish Potato Pie bakes evenly, resulting in a golden, crispy crust. While the oven warms up, gather your ingredients and prepare the puff pastry, making sure it's thawed and ready for rolling.

Step 2: Prepare the Puff Pastry
Roll out the thawed puff pastry and gently press it into an 8 or 9-inch tart pan, carefully crimping the edges to create a decorative border. Place the lined tart pan in the refrigerator to chill while you prepare the delicious filling. This keeps the pastry crisp once baked, preventing a soggy bottom.

Step 3: Cook the Bacon
In a large skillet, melt 2 tablespoons of butter over medium-high heat. Once bubbling, add the thick-cut bacon and sauté until it’s crispy, which should take about 5–7 minutes. Stir often to ensure even cooking, and savor the rich aroma as it fills your kitchen. Once crisp, transfer the bacon to a plate lined with paper towels to drain.

Step 4: Sauté Onions and Potatoes
In the same skillet, add the sliced onions, cooking them in the flavorful bacon grease for about 2–3 minutes or until they turn soft and translucent. Next, add the mandolin-sliced potatoes and fresh dill, seasoning generously with salt and pepper. Stir occasionally for another 3–5 minutes, ensuring the potatoes remain slightly crisp as you mix everything together.

Step 5: Assemble the Filling
Carefully transfer the warm potato mixture into the chilled puff pastry crust, spreading it evenly with a spatula. Drizzle the heavy cream over the mixture, allowing it to seep through the layers. This creamy addition enhances the richness of the Irish Potato Pie, creating a luscious filling that's hard to resist.

Step 6: Bake the Pie
Place the assembled Irish Potato Pie in the preheated oven and bake for 35–45 minutes. Keep an eye on it; the pie is ready when the crust is a beautiful golden color and the potatoes are fork-tender. Allow the tantalizing aroma to fill your home as it bakes.

Step 7: Let It Rest and Garnish
Once baked to perfection, remove the Irish Potato Pie from the oven and let it rest for about 10 minutes. This resting time allows the filling to set slightly, making it easier to slice. Before serving, sprinkle the top with chopped chives or scallions for an extra touch of color and freshness.

How to Store and Freeze Irish Potato Pie

Fridge: Store your Irish Potato Pie in an airtight container in the fridge for up to 4-5 days. This keeps it fresh and ready for quick reheating.

Freezer: For longer storage, freeze the pie for up to 6 months. Wrap it tightly in plastic wrap and aluminum foil to prevent freezer burn.

Reheating: To reheat, thaw the pie overnight in the fridge, then warm it in a preheated oven at 350°F for about 20-25 minutes until heated through.

Make-Ahead: If you want to prepare in advance, assemble your Irish Potato Pie and freeze it unbaked. Bake straight from frozen, adding about 10-15 minutes to the cooking time.

Irish Potato Pie Variations & Substitutions

Feel free to adapt this recipe to suit your tastes and dietary needs—let your creativity shine!

  • Cheesy Delight: Add shredded cheese like Gruyère or cheddar to the filling for an indulgent twist!

  • Herb Swap: Replace fresh dill with rosemary or thyme to explore new flavor profiles that complement the dish.

  • Vegetarian Version: Omit the bacon entirely and use sautéed mushrooms or smoked turkey for a savory alternative.

  • Spicy Kick: Add a pinch of cayenne or crushed red pepper flakes to the filling for a delightful heat that balances the creamy layers.

  • Extra Veggies: Incorporate sautéed spinach or kale into the filling for added nutrition and vibrant color.

  • Creamy Twist: For a lighter option, substitute heavy cream with half-and-half or a non-dairy milk like almond or oat milk.

  • Sweet Element: Consider adding caramelized onions for a touch of sweetness that beautifully contrasts with the savory elements.

If you're looking for more delightful potato recipes, check out my Smoky Sweet Potatoes for a flavorful side dish or try my Potato and Blue Cheese Pizza for a delicious twist!

What to Serve with Irish Potato Pie

Imagine the enticing aroma of your Irish Potato Pie pervading the kitchen as you prepare the perfect side dishes to enhance this comforting masterpiece.

  • Fresh Green Salad: A vibrant salad with mixed greens, cucumbers, and a tangy vinaigrette balances the richness of the pie, adding refreshing crunch.
  • Roasted Root Vegetables: Carrots and parsnips, roasted until caramelized, bring earthy sweetness that pairs beautifully with the savory pie layers.
  • Irish Soda Bread: Soft and slightly tangy, this classic bread offers a heartwarming touch and is perfect for mopping up any creamy filling left on your plate.

Delve into these pairings for a complete meal that speaks to tradition while pleasing modern palates. Each bite harmonizes with the pie, turning an ordinary meal into an extraordinary experience.

  • Steamed Asparagus: Bright and flavorful, steamed asparagus brings a touch of elegance to your table while complementing the pie’s rich filling.
  • Colcannon: This Irish classic mashed potato dish with cabbage adds a hearty touch, echoing the comforting flavors of your potato pie.
  • Herb-Infused Cream Sauce: A drizzle of creamy sauce with fresh herbs elevates each slice, enhancing the layers of flavors in the pie.

Pairing these delightful sides will not only enhance your dining experience but also create cherished memories around the table filled with laughter and love.

Expert Tips for Irish Potato Pie

  • Thin Slices Needed: Ensure potatoes are peeled and sliced thin for the best texture—thick slices may lead to uneven cooking.

  • Bacon Timing: Don't overcook the bacon before adding onions; it should remain crisp for texture in your Irish Potato Pie.

  • Crust Check: Always confirm your crust is crimped properly to prevent any overflow during baking—this helps maintain a tidy presentation.

  • Chill Before Baking: Refrigerating the assembled pie before baking aids in achieving a flakier pastry, keeping it crispy.

  • Add Cheese: For a richer flavor, try mixing in shredded cheese like Gruyère or cheddar into the filling—it's a delightful twist!

Make Ahead Options

These delicious Irish Potato Pies are perfect for busy cooks looking to save time! You can prepare the filling (potatoes, onions, bacon, and cream) up to 24 hours in advance by cooking everything as instructed, letting it cool, and then storing it in an airtight container in the refrigerator. As a result, the flavors will deepen overnight. The puff pastry can also be rolled out and kept in the fridge, ensuring it's ready when you are. When you're ready to bake, simply fill the prepared crust with the prepped mixture, bake as directed, and enjoy a comforting meal that feels freshly made with minimal effort!

Irish Potato Pie Recipe FAQs

What type of potatoes are best for this pie?
Absolutely! For the Irish Potato Pie, I recommend using Russet or Yukon Gold potatoes. These varieties become wonderfully creamy when baked and hold their shape well. If possible, use a mandolin slicer to achieve even, thin slices, which will help ensure the potatoes cook uniformly.

How should I store leftover Irish Potato Pie?
Very! Store your Irish Potato Pie in an airtight container in the fridge for up to 4-5 days. This keeps it fresh and flavorful for those delightful leftovers. When ready to enjoy, you can simply reheat it in the oven for a few minutes until warmed through.

Can I freeze Irish Potato Pie?
Absolutely! You can freeze the pie for up to 6 months. Be sure to wrap it tightly in plastic wrap and then in aluminum foil to prevent freezer burn. For the best results, freeze it unbaked so you can bake it fresh later. If you choose this option, just add about 10-15 minutes to the baking time when cooking from frozen.

What if my crust is getting too brown while baking?
No worries! If you notice your crust turning too brown before the pie is fully cooked, you can cover the edges with strips of aluminum foil. This will protect the crust while allowing the filling to finish cooking, so you get that perfect golden pie without risking a burnt crust.

Is this pie suitable for vegetarians?
Absolutely! You can easily make this Irish Potato Pie vegetarian by omitting the bacon. For added flavor, consider substituting it with cooked sausage or even smoked turkey if you want to maintain a savory profile. Fresh herbs and a generous sprinkle of cheese are great ways to enhance the taste too!

Can my dog eat this pie?
While the ingredients are generally safe, it’s important to be cautious. Potatoes and herbs like dill are fine for dogs in moderation, but rich ingredients like butter, heavy cream, and bacon can upset their stomachs. Always consult your vet before sharing any human food with your furry friends!

Irish Potato Pie

Delicious Irish Potato Pie with Bacon for Cozy Comfort Food

This Irish Potato Pie combines crispy bacon and creamy potatoes for a comforting dish perfect for St. Patrick’s Day celebrations.
Print Recipe Pin Recipe
Prep Time 30 minutes mins
Cook Time 40 minutes mins
Resting Time 10 minutes mins
Total Time 1 hour hr 20 minutes mins
Servings: 8 slices
Course: Dinner
Cuisine: Irish
Calories: 320
Ingredients Equipment Method Nutrition Notes

Ingredients
  

For the Crust
  • 1 package Frozen Puff Pastry Homemade pie crust can be used for a heartier feel.
For the Filling
  • 2 tablespoons Butter Consider using unsalted butter for more control over saltiness.
  • 5 strips Thick-Cut Bacon Can substitute with cooked sausage or omit for a vegetarian option.
  • 4 cups Potatoes Russet or Yukon Gold, sliced thin.
  • 1 cup Onion Shallots can be used for a milder taste.
  • 2 tablespoons Fresh Dill Dried dill can be used, but reduce the quantity.
  • 1 cup Heavy Cream Half-and-half can be substituted for a lighter version.
  • 1 teaspoon Salt Adjust according to taste preferences.
  • 1 teaspoon Pepper Adjust according to taste preferences.
For Garnish
  • 2 tablespoons Chives or Scallions Adds color and flavor.

Equipment

  • Large skillet
  • 8 or 9-inch tart pan
  • mandolin slicer
  • Oven

Method
 

Step-by-Step Instructions
  1. Preheat your oven to 350°F (175°C). Gather your ingredients and prepare the puff pastry.
  2. Roll out the thawed puff pastry and press it into the tart pan. Chill in the refrigerator.
  3. Melt 2 tablespoons of butter in a large skillet. Cook the bacon until crispy, about 5–7 minutes.
  4. Sauté sliced onions in the same skillet for 2–3 minutes, then add potatoes and fresh dill.
  5. Transfer the potato mixture into the crust, drizzle heavy cream on top.
  6. Bake for 35–45 minutes until the crust is golden and potatoes are fork-tender.
  7. Let the pie rest for 10 minutes, then garnish with chopped chives or scallions.

Nutrition

Serving: 1sliceCalories: 320kcalCarbohydrates: 30gProtein: 8gFat: 20gSaturated Fat: 10gPolyunsaturated Fat: 1gMonounsaturated Fat: 5gCholesterol: 50mgSodium: 600mgPotassium: 500mgFiber: 3gSugar: 1gVitamin A: 300IUVitamin C: 15mgCalcium: 40mgIron: 2mg

Notes

This pie can be prepared in advance and stored. It is perfect for cozy gatherings and impressive enough for guests.

Tried this recipe?

Let us know how it was!

Hearty Irish Stew with Mashed Potatoes for Cozy Nights

February 19, 2026 by Grace Snow Leave a Comment

Standing in my kitchen, the tantalizing aroma of simmering meat and vegetables transports me straight to the heart of Ireland. This Traditional Irish Stew with Creamy Mashed Potatoes captures the spirit of comfort food, perfect for cozy dinners at home or sharing with loved ones. With tender chunks of beef or lamb melding with a colorful array of vegetables, each bite is a hearty embrace. Not only is this stew a filling meal that warms the soul, but it's also wonderfully adaptable—you can easily swap the lamb for beef based on what's in your pantry, making this a budget-friendly option without sacrificing flavor. As the rich broth thickens and the flavors deepen with each stirring, I can't help but wonder: how will you make this classic dish your own?

Why Is This Irish Stew a Must-Try?

Comforting Warmth: This Irish Stew with Mashed Potatoes is the ultimate comfort food, embracing you with every spoonful.

Hearty & Filling: With tender beef (or lamb) simmered alongside vibrant vegetables, it provides a satisfying meal perfect for chilly evenings.

Affordable & Adaptable: Easily swap lamb for beef, making it accessible without compromising that rich flavor profile we all crave. Try adding frozen peas for a fresh pop of color!

Easy Preparation: Simplistic enough for beginners yet delicious enough to impress seasoned chefs, this recipe streamlines the cooking process.

Nutrient-Rich: Each serving packs a punch with approximately 59g of protein, ensuring everyone leaves the table full and happy.

Ready to elevate your dinner game? Pair this stew with some warm Irish Soda Bread for an unbeatable meal experience!

Irish Stew With Mashed Potatoes Ingredients

For the Stew

  • Olive Oil – Adds richness and helps in browning the meat.
  • Beef Stew Meat or Lamb (3 pounds) – Main protein source, bringing hearty flavor; substitute beef if lamb is unavailable.
  • All-Purpose Flour (¼ cup) – Thickens the stew and adds body.
  • Sea Salt (2 teaspoons) – Enhances flavor and balances the dish.
  • Black Pepper (1 teaspoon) – Adds mild heat and depth to the flavor.
  • Garlic Powder (1 teaspoon) – Provides a savory base flavor that enhances the meat.
  • Onion Powder (1 teaspoon) – Adds sweetness and depth for a rounded taste.
  • Fresh Rosemary (2 teaspoons) – Offers aromatic herbal notes; fresh herbs are preferred, but dried can be used as a substitute.
  • Dried Thyme (1 teaspoon) – Adds earthy flavor that complements the stew.
  • Beef Broth (4 cups) – The stew's liquid base, enriching the overall taste.
  • Carrots (5 each) – Adds sweetness and texture; cut into chunks for heartiness.
  • Frozen Peas (1 cup) – Stirred in at the end for a burst of color and sweetness.
  • Bay Leaves (2 each) – Infuses the stew with aromatic flavor for depth.

For the Mashed Potatoes

  • Potatoes (2 pounds) – Choose Yukon Gold for a creamy texture.
  • Salted Butter (½ cup) – Ensures the mashed potatoes are rich and creamy.
  • Whole Milk or Cream (½ cup) – Adds smoothness to your mash; use cream for extra decadence.
  • Salt (to taste) – Enhances the flavor of the potatoes.
  • Black Pepper (to taste) – Adds a slight kick and enhances the overall taste profile.

This Irish Stew with Mashed Potatoes will surely warm your heart and fill your belly with every spoonful!

Step‑by‑Step Instructions for Irish Stew With Mashed Potatoes

Step 1: Heat the Oil
Begin by heating 2 tablespoons of olive oil in a large Dutch oven over medium-high heat. Allow the oil to shimmer slightly, indicating it’s hot enough for cooking. This step is crucial as it helps in browning the meat properly for your hearty Irish stew.

Step 2: Prepare the Meat
In a large zip-top bag, season the 3 pounds of beef stew meat (or lamb) with ¼ cup of all-purpose flour, 2 teaspoons of sea salt, 1 teaspoon of black pepper, 1 teaspoon of garlic powder, 1 teaspoon of onion powder, 2 teaspoons of fresh rosemary, and 1 teaspoon of dried thyme. Toss the bag gently to coat the meat evenly, then carefully add it to the hot Dutch oven, searing until brown on all sides—about 5-7 minutes.

Step 3: Add the Broth
Once the meat is well-browned, slowly pour in 4 cups of beef broth while stirring constantly to combine the flavors. As the broth heats, you’ll notice the sizzling sound—this is your stew beginning to come together. This step enhances the deep flavors, setting the stage for a rich base in your Irish stew.

Step 4: Incorporate the Vegetables
Next, add 5 chopped carrots and 2 bay leaves into the pot. Stir gently to mix the ingredients, then increase the heat until the stew reaches a gentle boil. The vibrant colors of the carrots will become a delightful sight, signaling that your dish is moving along beautifully.

Step 5: Simmer the Stew
Once boiling, reduce the heat to medium-low and cover the pot. Allow the stew to simmer for about 45 minutes, stirring occasionally. The long, slow cooking will tenderize the meat and meld the flavors, creating the comforting essence of this Irish stew.

Step 6: Add Final Touches
Five minutes before serving, stir in 1 cup of frozen peas to add a pop of color and sweetness. Don’t forget to remove the bay leaves at this stage; they’ve done their job of infusing flavor. The stew should be thick and fragrant, enticing you as it nears completion.

Step 7: Prepare the Mashed Potatoes
While the stew simmers, peel and chop 2 pounds of potatoes, then boil them in salted water for about 15-20 minutes until fork-tender. Drain the water and return the potatoes to the pot, mashing them with ½ cup of salted butter and ½ cup of whole milk or cream. The goal is a creamy, smooth texture that pairs perfectly with the hearty Irish stew.

Step 8: Serve and Enjoy
Spoon the rich Irish stew into bowls, ensuring each one is brimming with tender meat and vibrant vegetables. Serve with a generous helping of your creamy mashed potatoes, allowing for a delightful combination of flavors. This comforting meal is perfect for cozy nights or sharing with loved ones.

Make Ahead Options

This Irish Stew with Mashed Potatoes is an excellent choice for meal prep, saving you precious time on busy nights! You can prepare the stew base up to 24 hours in advance; simply sear the meat, add the broth and vegetables, and refrigerate before simmering. To maintain the dish’s quality, store it in an airtight container to prevent any spoilage. When you're ready to serve, just reheat the stew in a pot, let it simmer until heated through, and stir in the frozen peas as it warms. Prepare the mashed potatoes fresh, or make them up to 3 days ahead; just reheat with a splash of milk to bring back their creamy goodness. This way, you’ll enjoy a comforting, hearty meal with minimal effort!

What to Serve with Irish Stew With Mashed Potatoes

Transform your comforting Irish stew into a complete meal with delightful pairings that echo its hearty essence.

  • Warm Irish Soda Bread: This classic accompaniment is perfect for soaking up the rich broth, bringing a touch of tradition to the table. Freshly baked, it offers a soft, tender texture that complements the stew beautifully.

  • Steamed Green Beans: Bright, tender green beans add a fresh crunch and vibrant color. Their slight bitterness balances the stew's rich flavors, creating a delightful contrast on your plate.

  • Colcannon: Swap out the standard mashed potatoes for this Irish classic made with mashed potatoes and cabbage. Its creamy texture will elevate your meal, while the cabbage adds a unique flavor twist.

  • Garlic Butter Roasted Mushrooms: These savory bites bring an earthy depth to your dinner. Their succulent, juicy texture infuses each forkful with umami, enhancing the overall experience.

  • Cheesy Cauliflower Bake: A creamy, cheesy side that melds wonderfully with the robust stew. Its rich flavor and creamy texture offer a delightful harmony that pleases the palate.

  • Crisp Salad with Vinaigrette: A light, refreshing salad balances the hearty stew with its crisp textures and bright, tangy notes. Toss in some crunchy cucumbers and ripe tomatoes for a refreshing uplift.

  • Rich Irish Cream Liqueur: End your meal with a touch of sweetness. This sumptuous drink enhances the comforting experience of your dinner and pairs beautifully with the rich flavors of the stew.

With these pairings, your Irish Stew With Mashed Potatoes promises not just a meal, but a warm, heartfelt gathering around the table.

How to Store and Freeze Irish Stew With Mashed Potatoes

Fridge: Store leftovers in an airtight container for up to 4 days. Allow the stew to cool completely before sealing to maintain freshness.

Freezer: This hearty Irish stew freezes beautifully. Portion it into freezer-safe containers and store for up to 3 months. Make sure it's properly sealed to prevent freezer burn.

Thawing: When ready to enjoy, thaw overnight in the fridge, then reheat gently on the stove or in the microwave until hot throughout.

Reheating: Stir the stew while reheating to ensure even warmth. Add a splash of broth if it appears too thick after freezing, creating that comforting texture again.

Irish Stew With Mashed Potatoes Variations

Feel free to get creative with this classic dish and make it your own!

  • Colcannon Style:
    Swap traditional mashed potatoes for colcannon mash, mixing in cabbage or kale for a delightful twist.

  • Vegetable Boost:
    Toss in extra root vegetables like parsnips or turnips for added nutrition and texture. This makes the stew even heartier!

  • Spicy Kick:
    Add a pinch of red pepper flakes or diced jalapeños to the stew while simmering for a bright, spicy flavor that elevates the dish.

  • Creamy Upgrade:
    For richer mashed potatoes, use half-and-half instead of milk for added creaminess. A touch of garlic in the mash adds even more flavor.

  • Herb Infusion:
    Try adding fresh thyme and parsley right before serving to brighten the stew's flavors and add a fresh touch.

  • Smoky Flavor:
    Incorporate smoked paprika to give the stew a warm, smoky depth. It pairs wonderfully with the rich meat and vegetables.

  • Bean Addition:
    For a protein boost, mix in some canned white beans like cannellini or great northern beans during the last 10 minutes of cooking.

  • Creole Kick:
    Infuse your Irish stew with a splash of Worcestershire sauce and a few dashes of hot sauce for a zesty twist on this traditional favorite.

With these variations, the hearty flavors of Smoky Sweet Potatoes or a comforting Pot Chicken Stew could inspire additional ideas. Each twist adds a unique flair to your cozy nights!

Expert Tips for Irish Stew With Mashed Potatoes

Sear the Meat Well: Ensure you brown the beef stew meat (or lamb) thoroughly before adding the broth. This step builds a rich flavor base for the stew.

Gradual Thickening: If your stew appears too thin after cooking, slowly add instant mashed potato flakes until you reach your desired thickness for your Irish Stew with Mashed Potatoes.

Use Fresh Herbs: Fresh rosemary and thyme provide better flavor than dried. If using dried, reduce the amount to prevent overpowering the dish.

Don’t Skimp on Simmering: Allow the stew to simmer for the full 45 minutes. This patiently develops the flavors, resulting in a truly comforting experience.

Experiment with Vegetables: Feel free to add extra veggies like potatoes or parsnips for additional nutrition and texture in your stew.

Irish Stew With Mashed Potatoes Recipe FAQs

What kind of meat is best for Irish stew?
I recommend using beef stew meat or lamb, both of which bring that hearty flavor essential to Irish stew. If lamb is unavailable or too pricey, beef works just as well, ensuring you don’t sacrifice taste.

How should I store leftovers of Irish stew?
Store your Irish stew in an airtight container in the refrigerator for up to 4 days. Allow the stew to cool completely before sealing it to preserve its flavors and prevent spoilage.

Can I freeze Irish stew?
Absolutely! This dish freezes beautifully. Let it cool entirely, then portion it into freezer-safe containers. It can last for up to 3 months in the freezer. When you’re ready to enjoy it, thaw in the refrigerator overnight and reheat gently on the stove.

How can I thicken my Irish stew if it's too thin?
If your stew turns out thinner than desired, you can gradually add instant mashed potato flakes, stirring continuously until you reach your preferred thickness. This little trick not only thickens the stew but also enhances the comforting texture!

Are there dietary considerations I should keep in mind?
When preparing Irish stew, be aware of dietary restrictions. For those with gluten sensitivities, substitute all-purpose flour with a gluten-free option. Additionally, if you’re using fresh herbs or spices, ensure that there are no allergens present; fresh ingredients often have the purest forms but can hold potential for allergies.

How do I know if the vegetables in my stew are fresh enough?
Choose vegetables that are firm and vibrant! For instance, carrots should be crisp and not have dark spots all over, while onions should feel heavy for their size. If they have soft spots or an unpleasant odor, it’s best to pass on those. Brightly colored veggies not only add flavor but also a wholesome look to your Irish stew!

Irish Stew With Mashed Potatoes

Hearty Irish Stew with Mashed Potatoes for Cozy Nights

This hearty Irish stew with mashed potatoes is the ultimate comfort food, perfect for cozy nights.
Print Recipe Pin Recipe
Prep Time 20 minutes mins
Cook Time 45 minutes mins
Total Time 1 hour hr 5 minutes mins
Servings: 6 servings
Course: Dinner
Cuisine: Irish
Calories: 450
Ingredients Equipment Method Nutrition Notes

Ingredients
  

For the Stew
  • 2 tablespoons Olive Oil Adds richness and helps in browning the meat.
  • 3 pounds Beef Stew Meat or Lamb Main protein source.
  • 0.25 cup All-Purpose Flour Thickens the stew.
  • 2 teaspoons Sea Salt Enhances flavor.
  • 1 teaspoon Black Pepper Adds mild heat.
  • 1 teaspoon Garlic Powder Provides a savory flavor.
  • 1 teaspoon Onion Powder Adds sweetness.
  • 2 teaspoons Fresh Rosemary Offers aromatic notes.
  • 1 teaspoon Dried Thyme Adds earthy flavor.
  • 4 cups Beef Broth Liquid base for the stew.
  • 5 each Carrots Cut into chunks.
  • 1 cup Frozen Peas Adds color and sweetness.
  • 2 each Bay Leaves Infuses flavor.
For the Mashed Potatoes
  • 2 pounds Potatoes Yukon Gold preferred.
  • 0.5 cup Salted Butter Ensures creaminess.
  • 0.5 cup Whole Milk or Cream Adds smoothness.
  • to taste Salt Enhances flavor.
  • to taste Black Pepper Adds slight kick.

Equipment

  • Dutch oven

Method
 

Step-by-Step Instructions
  1. Heat 2 tablespoons of olive oil in a large Dutch oven over medium-high heat until shimmering.
  2. Season 3 pounds of beef stew meat (or lamb) with flour, salt, pepper, garlic powder, onion powder, rosemary, and thyme. Toss to coat, then sear in the Dutch oven until brown on all sides.
  3. Pour in 4 cups of beef broth and stir to combine.
  4. Add 5 chopped carrots and 2 bay leaves. Stir and bring to a gentle boil.
  5. Reduce heat to medium-low, cover, and let simmer for about 45 minutes, stirring occasionally.
  6. Five minutes before serving, stir in 1 cup of frozen peas and remove bay leaves.
  7. Peel and chop 2 pounds of potatoes, boil them in salted water until fork-tender. Drain and mash with butter and milk or cream.
  8. Serve the stew with a generous helping of creamy mashed potatoes.

Nutrition

Serving: 1bowlCalories: 450kcalCarbohydrates: 45gProtein: 59gFat: 20gSaturated Fat: 10gPolyunsaturated Fat: 1gMonounsaturated Fat: 6gCholesterol: 70mgSodium: 900mgPotassium: 800mgFiber: 5gSugar: 4gVitamin A: 500IUVitamin C: 15mgCalcium: 50mgIron: 3mg

Notes

This stew can be paired with warm Irish Soda Bread for a complete meal experience.

Tried this recipe?

Let us know how it was!

Savory German Potato Cake: Your New Comfort Food Craving

February 19, 2026 by Grace Snow Leave a Comment

As I stood in the kitchen, the familiar sounds of sizzling onions and the enticing aroma of bacon wafted through the air, instantly transporting me back to family gatherings filled with laughter and love. Today, I’m excited to share my take on Savory German Potato Cake, or Potthucke, a wonderful dish that's both comforting and budget-friendly. This recipe is a delightful canvas for creativity, allowing you to customize it with different add-ins according to your taste or dietary needs—whether you're going vegetarian, vegan, or simply trying to sneak in some extra veggies. Not only does this savory cake make a perfect main course, but it also holds up beautifully in the fridge or freezer, making it a lifesaver for busy weeknight dinners. Are you ready to create a little piece of culinary nostalgia that’s sure to impress your loved ones? Let’s dive in!

Why is this German Potato Cake special?

Comforting and Familiar: This Savory German Potato Cake is like a warm hug on a plate, evoking cherished memories of home-cooked meals with family and friends.

Versatile Options: Whether you're craving a hearty bacon-filled loaf or a lighter vegetarian version, this recipe adapts beautifully to suit all tastes.

Budget-Friendly: Super affordable ingredients make this dish not only delicious but also easy on the wallet, perfect for families or anyone looking to save.

Time-Saving: With straightforward steps and minimal prep, you can have this comforting dish ready to enjoy in less than an hour.

Nutrient-Rich: Packed with potatoes, veggies, and the option for lean protein, you’re feeding both the soul and body. Combine it with a fresh side salad or applesauce for a complete meal, just like we do with German Potato Salad.

Savory German Potato Cake Ingredients

• Discover what makes a truly comforting dish with these simple ingredients!

For the Base

  • Russet Potatoes – Foundation ingredient providing fluffiness; substitute with Yukon Gold for added creaminess.
  • Cream – Adds moisture and richness; replace with milk or any dairy-free alternative for a lighter option.
  • Eggs – Essential for binding the loaf; for vegan options, use flaxseed meal (1 tbsp flaxseed meal + 2.5 tbsp water).

For Flavor

  • Bacon – Adds savory richness; can be swapped with vegetarian options or omitted for a meat-free version.
  • Onions – Contributes a sweet, caramelized flavor; try red onions for a sharper taste.
  • Salt – Enhances flavors; adjust to personal taste for a perfect balance.
  • Black Pepper – Infuses subtle warmth; freshly ground provides the best flavor.
  • Thyme – Adds herbal depth; substitute with rosemary if desired.
  • Nutmeg – Provides aromatic warmth; freshly grated is preferred for a robust flavor.

Optional Add-Ins

  • Diced Smoked Sausage – Adds heartiness and extra flavor.
  • Grated Zucchini or Carrots – Increases nutrition and moisture content, making it lighter.

This Savory German Potato Cake is an adaptable dish that's sure to bring warmth and comfort to your kitchen!

Step‑by‑Step Instructions for Savory German Potato Cake

Step 1: Prep Oven and Pan
Begin by preheating your oven to 375°F (190°C). While it warms, prepare a 9-by-5-inch loaf pan by greasing it well and lining the bottom with parchment paper, ensuring easy removal of your Savory German Potato Cake afterward.

Step 2: Boil Potatoes
Peel and chop half of the russet potatoes into small chunks, and place them in a large pot of salted water. Bring to a boil, then reduce to a simmer, cooking for 20-25 minutes until tender. Once cooked, drain the potatoes and mash them until smooth for the base of your cake.

Step 3: Cook Bacon
In a skillet over medium heat, add diced bacon and cook for about 5 minutes, stirring occasionally until crispy. Once done, use a slotted spoon to transfer the bacon to a plate lined with paper towels to drain excess grease, retaining a bit of the fat in the skillet for the onions.

Step 4: Sauté Onions
In the same skillet with the remaining bacon fat, add the diced onions and sauté on medium heat for about 5-8 minutes. Stir frequently until the onions are translucent and slightly caramelized, then remove from heat and allow them to cool slightly.

Step 5: Grate Remaining Potatoes
Using the remaining russet potatoes, coarsely grate them with a box grater or food processor. After grating, place the potato shreds in a clean dish towel and wring out excess moisture to avoid a soggy Savory German Potato Cake; the drier, the better.

Step 6: Combine Ingredients
In a large mixing bowl, combine the mashed potatoes, grated potatoes, crispy bacon, sautéed onions, cream, eggs, salt, black pepper, thyme, and nutmeg. Mix everything together until the ingredients are evenly blended and form a cohesive mixture, ensuring every bite is flavorful.

Step 7: Bake
Transfer the potato mixture into the prepared loaf pan, smoothing the top with a spatula. Place the pan in the oven and bake for 50-60 minutes, or until the top is golden brown and a toothpick inserted into the center comes out clean. Your Savory German Potato Cake will be beautifully set.

Step 8: Cool
Once baked, remove the loaf pan from the oven and let the Savory German Potato Cake cool in the pan for about 30 minutes. This cooling period will help the cake firm up for easier slicing. For an extra touch, consider pan-searing the slices in butter before serving for a crispy finish.

Storage Tips for Savory German Potato Cake

  • Room Temperature: The Savory German Potato Cake can be left out for up to 2 hours; after that, it's best to refrigerate for freshness.

  • Refrigerate: Store in an airtight container for up to 3 days; reheat slices on a skillet with a bit of butter to crisp them up nicely before serving.

  • Freezing: Wrap cooled slices tightly in plastic wrap and store in a freezer bag for up to 3 months. Thaw in the fridge overnight, then reheat in a skillet for delightful results.

  • Reheating: For an indulgent twist, pan-sear frozen or refrigerated slices in butter for extra flavor and crispness before enjoying!

Variations & Substitutions for Savory German Potato Cake

Customize your Savory German Potato Cake to suit your taste buds and dietary needs, making every bite uniquely yours!

  • Bacon Replacement: Swap the bacon for diced smoked sausage or sautéed mushrooms to explore different savory flavors.
  • Vegetarian Delight: Omit bacon entirely and load it up with colorful bell peppers or mushrooms for a fresh take while keeping that comforting vibe.
  • Vegan Adaptation: Use flaxseed meal mixed with water in place of eggs to ensure your cake binds beautifully without using animal products.
  • Extra Creaminess: Opt for Yukon Gold potatoes instead of russet for a richer, more buttery texture in your cake.
  • Crunch Factor: Mix in some breadcrumbs or crushed crackers to give your cake a delightful crunch, enhancing its texture.
  • Spicy Kick: Add a dash of cayenne pepper or red pepper flakes for an exciting warming heat that contrasts wonderfully with the other flavors.
  • Nutmeg Punch: For an elevated depth of flavor, add freshly grated nutmeg into the mix—it truly transforms the taste experience!
  • Vegetable Boost: Incorporate grated zucchini or carrots to sneak in extra nutrition while keeping your dish moist and delicious.

Feel free to mix and match these variations based on what you have on hand or your preferences, just like we often do when preparing our family favorites, such as German Chocolate Poke Cake. Make it your own!

Make Ahead Options

Preparing the Savory German Potato Cake ahead of time is a fantastic way to save precious minutes during busy weeknights! You can boil and mash the russet potatoes up to 24 hours in advance, storing them in an airtight container in the refrigerator to maintain freshness. Additionally, you can cook the bacon and sauté the onions the day before, ensuring they stay flavorful. When you're ready to serve, simply mix all the prepped ingredients together and bake as directed. For optimal taste, try to bake the cake within 3 days for the best texture. Just remember to let the cake cool completely before sealing it for storage—this helps keep it from becoming soggy and ensures that your Savory German Potato Cake remains just as delicious as the day it was made!

Expert Tips for Savory German Potato Cake

  • Moisture Control: Ensure to drain both the boiled and grated potatoes thoroughly; excess moisture can lead to a soggy Savory German Potato Cake.

  • Cooling Time: Let the cake cool in the pan for at least 30 minutes before slicing for clean, perfect pieces that hold their shape.

  • Nutmeg Freshness: For a more aromatic flavor, try using freshly grated nutmeg; it adds depth and warmth that's truly delightful.

  • Bacon Crispiness: Keep a close eye on the bacon while cooking; it can burn quickly, which would alter the flavor of your cake.

  • Customizable Add-Ins: Don't hesitate to experiment with different vegetables or proteins based on your taste or dietary needs—this cake welcomes creativity!

What to Serve with Savory German Potato Cake

The perfect dish deserves equally delightful companions to create a heartwarming meal that embraces your senses.

  • Applesauce: This traditional pairing brings a sweet-tart contrast, cutting through the richness of the potato cake and elevating every bite.
  • Fresh Side Salad: A crisp garden salad with vinaigrette adds refreshing acidity and crunch, balancing the hearty flavors of the dish.
  • Steamed Broccoli: Tender, bright broccoli provides a vibrant pop of color and a healthy boost, complementing the savory notes beautifully.
  • Caramelized Brussels Sprouts: The sweet, nutty essence of these caramelized sprouts offers a lovely texture contrast, enhancing the heartiness of your potato cake.
  • German Beer: A smooth, light lager or wheat beer enhances the traditional vibe and pairs well with the savory richness.
  • Sour Cream or Greek Yogurt: A dollop of creamy goodness provides a tangy finish that complements the flavors, adding a delightful touch of richness.
  • Roasted Carrots: Sweet and earthy, roasted carrots bring additional layers of flavor and a tender bite that pairs wonderfully with the cake.
  • Lemonade or Iced Tea: A refreshing beverage like lemonade or iced tea adds a zesty touch to your meal, cleansing the palate delightfully.

Savory German Potato Cake Recipe FAQs

What kind of potatoes should I use for this Savory German Potato Cake?
Absolutely! I recommend using Russet potatoes as they provide a fluffy texture. However, for a creamier result, you can substitute them with Yukon Gold potatoes, which are equally delicious and lend a different flavor profile.

How should I store the Savory German Potato Cake?
You can store the Savory German Potato Cake in an airtight container in the refrigerator for up to 3 days. Make sure to reheat slices on a skillet with a little butter for optimal crispiness, giving a delightful reintroduction of those mouthwatering flavors.

Can I freeze the Savory German Potato Cake?
Very! To freeze, let the cake cool completely, then wrap slices tightly in plastic wrap and place them in a freezer bag. It can be stored for up to 3 months. To reheat, thaw slices in the fridge overnight and pan-sear them in butter for a golden, crispy finish—your taste buds will thank you!

What if my Savory German Potato Cake turns out soggy?
No worries! If the texture isn't right, check that you’ve thoroughly drained the excess moisture from both the boiled and grated potatoes. Next time, consider squeezing the grated potatoes in a clean dish towel after grating to eliminate any extra liquid, ensuring a perfectly fluffy outcome.

Are there any allergy concerns with this recipe?
Absolutely! This Savory German Potato Cake can be made gluten-free by ensuring all ingredients, particularly the cream and any add-ins, are certified gluten-free. For dairy allergies, substitute cream with a non-dairy alternative like almond milk or coconut cream. If you're preparing for pets, keep in mind that onions should never be given to dogs or cats, so feel free to omit them.

Savory German Potato Cake

Savory German Potato Cake: Your New Comfort Food Craving

Savory German Potato Cake is a comforting dish that brings nostalgia and warmth to family meals.
Print Recipe Pin Recipe
Prep Time 15 minutes mins
Cook Time 1 hour hr
Cooling Time 30 minutes mins
Total Time 1 hour hr 45 minutes mins
Servings: 8 slices
Course: Dinner
Cuisine: German
Calories: 250
Ingredients Equipment Method Nutrition Notes

Ingredients
  

For the Base
  • 2 lbs Russet Potatoes or Yukon Gold
  • 1 cup Cream or dairy-free alternative
  • 2 large Eggs or 1 tbsp flaxseed meal + 2.5 tbsp water for vegan
For Flavor
  • 6 oz Bacon or omit for vegetarian
  • 1 medium Onion or use red onions
  • 1 tsp Salt
  • 1 tsp Black Pepper freshly ground
  • 1 tsp Thyme or use rosemary
  • 1/4 tsp Nutmeg freshly grated preferred
Optional Add-Ins
  • 1 cup Diced Smoked Sausage
  • 1 cup Grated Zucchini or Carrots for added nutrition

Equipment

  • Loaf pan
  • Skillet
  • pot
  • Box grater
  • Mixing Bowl

Method
 

Directions
  1. Preheat your oven to 375°F (190°C) and prepare a 9-by-5-inch loaf pan by greasing it and lining the bottom with parchment paper.
  2. Peel and chop half of the russet potatoes into small chunks and boil in salted water for 20-25 minutes until tender.
  3. Drain the potatoes and mash them until smooth.
  4. In a skillet, cook diced bacon until crispy, about 5 minutes.
  5. Sauté diced onions in the remaining bacon fat for 5-8 minutes until caramelized.
  6. Coarsely grate the remaining russet potatoes and wring out excess moisture.
  7. Combine mashed potatoes, grated potatoes, bacon, onions, cream, eggs, salt, black pepper, thyme, and nutmeg in a mixing bowl and mix well.
  8. Transfer the mixture to the prepared loaf pan and bake for 50-60 minutes until the top is golden brown.
  9. Cool the cake in the pan for 30 minutes before slicing.

Nutrition

Serving: 1sliceCalories: 250kcalCarbohydrates: 30gProtein: 8gFat: 12gSaturated Fat: 7gPolyunsaturated Fat: 1gMonounsaturated Fat: 3gCholesterol: 70mgSodium: 400mgPotassium: 600mgFiber: 3gSugar: 1gVitamin A: 350IUVitamin C: 20mgCalcium: 50mgIron: 1.5mg

Notes

Experiment with different veggies or proteins according to your dietary needs for a personalized touch.

Tried this recipe?

Let us know how it was!

Irresistibly Good Stuffed Celery with Creamy Bacon Delight

February 19, 2026 by Grace Snow Leave a Comment

“Is there anything better than a crunchy snack that doubles as a delightful conversation starter?” I often ponder this as I prepare my favorite appetizer: Outrageously Good Stuffed Celery. This dish thrives on simplicity and flavor, showcasing crisp celery sticks stuffed with a creamy blend of cream cheese, crispy bacon, and fresh herbs. The best part? This make-ahead treat is not just a crowd-pleaser but also keto-friendly, making it a guilt-free indulgence for all your gatherings. With just 15 minutes of prep time, you're on your way to impressing friends and family while making your kitchen a vibrant hub of tasty creations. So why settle for store-bought when you can create these eye-catching bites that are sure to have everyone asking for the recipe? Let’s dive into how to elevate your snack game!

Why is Stuffed Celery a Game Changer?

Crispy, Crunchy Goodness: The satisfying texture of fresh celery elevates this dish, making it a standout appetizer.

Flavor Explosion: Cream cheese, crispy bacon, and herbs create a rich taste that delights your palate.

Keto-Friendly Delight: Perfect for those watching carbs without sacrificing flavor—every bite is guilt-free!

Make-Ahead Convenience: Prep your filling in advance, and enjoy stress-free entertaining. Just fill the celery right before serving!

Versatile for Any Occasion: Whether it’s a festive gathering or a casual get-together, these bites are a fantastic addition.

Inspired by Tradition: This recipe adds a modern twist to a classic Southern favorite, ensuring it's not just tasty but also memorable. For a fresh take, try some Herby Ricotta Stuffed options too!

Good Stuffed Celery Ingredients

For the Filling
• Cream Cheese – Provides a creamy base that binds all flavors together; must be softened for easy mixing.
• Bacon – Adds a savory, salty flavor that complements the filling; ensure it is cooked and chopped.
• Cheddar Cheese – Brings additional richness and flavor to the mix; grate for convenience.
• Fresh Parsley – For a pop of color and freshness; can substitute with cilantro or dill if preferred.
• Fresh Chives – Adds a mild onion flavor; green onions can also be used as a substitute.
• Salt – Enhances the overall flavors; adjust according to your taste preference.
• Fresh Cracked Pepper – Contributes subtle heat and depth; customize to your preferred spice level.
• Hot Sauce – Delivers a slight kick to the filling; optional based on your spice tolerance.

For the Celery
• Celery Sticks – The essential crunchy vessel for your filling; choose washed and dried stalks for best results.

Garnishes
• Chopped Chives and Bacon – Top with these for extra flavor and visual appeal if desired, adding more to the irresistible nature of these Good Stuffed Celery bites!

Step‑by‑Step Instructions for Outrageously Good Stuffed Celery

Step 1: Prep the Celery
Begin by washing and drying your celery stalks thoroughly. Using a sharp knife, cut each stalk in half to create equal segments, setting these aside in a single layer. Aim for roughly three to four inches long for easy handling. This will create a crisp and inviting vessel for your Good Stuffed Celery.

Step 2: Whip the Cream Cheese
In a mixing bowl, place your softened cream cheese. Using a hand mixer or a food processor, beat the cream cheese on medium speed until it becomes smooth and creamy, approximately 1-2 minutes. Ensure it is fully blended without any lumps for the best consistency in your Good Stuffed Celery filling.

Step 3: Combine Filling Ingredients
Next, add the cooked and chopped bacon, grated cheddar cheese, fresh parsley, chives, salt, fresh cracked pepper, and optional hot sauce to the whipped cream cheese. Mix thoroughly on low until all ingredients are evenly distributed, forming a rich and flavorful filling. This will make your filling for the Outrageously Good Stuffed Celery truly delightful.

Step 4: Fill the Celery Halves
Using a small spoon or a piping bag, carefully fill each celery half with the creamy mixture, ensuring you pack it in generously. If using a piping bag, you can create a neat presentation. Fill until the mixture slightly overflows for an inviting look. Aim to have your filled celery ready within about 10 minutes for optimal freshness.

Step 5: Garnish and Serve
For an extra touch of flavor and visual appeal, sprinkle additional chopped chives and a few bacon bits on top of the filled celery. Serve your Good Stuffed Celery immediately for the best texture, with a platter for easy sharing. If preparing in advance, consider filling the celery just a couple of hours before serving to maintain that irresistible crunch.

What to Serve with Outrageously Good Stuffed Celery

Creating a delightful appetizer spread can transform any gathering into a memorable feast that engages all the senses.

  • Creamy Tomato Soup: This classic pairing offers a warm contrast to the crispness of stuffed celery, inviting comforting flavors to your table.
  • Savory Cheese Platter: Include a variety of cheeses to complement the creaminess of your stuffed celery, allowing each bite to surprise the palate.
  • Crispy Baked Parmesan Chips: These add an extra crunch and cheesy flavor that beautifully contrasts with the creamy filling, enhancing the overall texture experience.

Imagine serving these alongside a fresh garden salad; the vibrant colors and textures will create a picturesque plate that everyone will appreciate.

  • Charcuterie Board: Offer an assortment of meats and pickles, balancing the richness of your stuffed celery with savory and tangy elements, perfect for socializing.
  • Berry-Infused Cocktails: Refreshing drinks like these pair wonderfully, their fruity notes brightening up the rich flavors in the stuffed celery.
  • Chocolate-Dipped Strawberries: End your meal with a sweet indulgence that adds a playful twist, leaving your guests with a lasting impression.

Each pairing enhances the taste and experience of your good stuffed celery, ensuring a delightful time for everyone at the table!

Make Ahead Options

These Outrageously Good Stuffed Celery bites are perfect for busy home cooks looking to save time! You can prepare the creamy filling with cream cheese, bacon, and herbs up to 3 days in advance. Simply mix all the filling ingredients and store it in an airtight container in the refrigerator. Make sure to keep the celery sticks whole until you're ready to serve. For optimal freshness, fill the celery halves just a few hours before serving. This way, the celery remains crisp and the filling just as delicious. By prepping ahead, you’ll be ready to shine at your next gathering with minimal effort!

How to Store and Freeze Good Stuffed Celery

Fridge: Store filled celery in an airtight container for up to 3 days. Keep them separated if possible to maintain crispness.

Make-Ahead Filling: You can prepare the creamy filling up to 3 days in advance and refrigerate it. Just ensure it’s well-covered to prevent drying out.

Freezer: While it's best to enjoy Good Stuffed Celery fresh, you can freeze the filling for up to a month. Thaw in the fridge overnight before using.

Reheating: If you're reheating the filling, do so gently in the microwave or on the stove. Fill the celery just before serving for optimal texture.

Good Stuffed Celery Variations

Customize your Good Stuffed Celery to match your tastes and occasion with these exciting ideas!

  • Greek Yogurt Swap: Substitute cream cheese with Greek yogurt for a lighter and tangy filling. It's a refreshing twist that still delivers richness.

  • Feta Flavor Boost: Use crumbled feta cheese instead of cheddar for a tangy flavor that pairs beautifully with the bacon. This will enhance the savory goodness of each bite.

  • Pepper Jack Kick: For those who crave heat, swap cheddar with pepper jack cheese to add a zesty flair that spices things up. Just be warned—these may disappear quickly!

  • Veggie Add-in: Mix in diced bell peppers or olives for additional texture and a pop of color. It’s a delightful way to sneak in some extra veggies!

  • Herb Mix: Experiment with different herbs, such as dill or cilantro, to give the filling a fresh, vibrant twist. The choice of herbs can truly personalize your dish.

  • Bacon Alternative: Try diced cooked turkey bacon or smoked salmon for a unique take that accommodates varying flavor preferences. Both options provide that savory essence!

  • Nutty Addition: Add crushed walnuts or pecans for a crunchy texture that brings an unexpected twist of flavor. Nuts can elevate the overall experience of your Good Stuffed Celery!

  • Save Some Time: If you’re looking to streamline your prep, check out other quick recipes like Herby Ricotta Stuffed options. They can give you great ideas for speedy prep!

Expert Tips for Good Stuffed Celery

  • Prep Ahead: Make your filling up to two days in advance and store it separately to save time on busy days. Just fill the celery right before serving.

  • Keep It Crisp: For optimal freshness, fill the celery just a few hours before your gathering to maintain that satisfying crunch in your Good Stuffed Celery.

  • Soften Cream Cheese: Always ensure your cream cheese is fully softened to avoid lumps in the mixture. This creates a smooth, creamy filling that’s a delight to eat.

  • Customize the Heat: Adjust the amount of hot sauce to suit your spice tolerance—start with a little and add more if desired for your perfect balance in flavor.

  • Experiment with Cheeses: Don’t hesitate to switch up the cheeses! Feta or pepper jack can offer an exciting twist to the classic stuffed celery experience.

Outrageously Good Stuffed Celery Recipe FAQs

What type of celery should I use?
Choose fresh, washed, and dried celery stalks that are firm and crisp. Look for vibrant green color without dark spots, as these indicate age. Stalks that are about three to four inches long work best for stuffing and easy handling.

How should I store leftover stuffed celery?
Store any filled celery in an airtight container in the fridge for up to 3 days. To maintain the crispness, try keeping the filling and celery separated until just before serving. This way, you avoid soggy celery!

Can I freeze the filling for the Good Stuffed Celery?
Absolutely! You can freeze the cream cheese filling for up to a month. Allow it to cool completely, then place it in an airtight container or freezer bag. When you’re ready to use it, just thaw it overnight in the refrigerator, and then fill your celery right before serving.

What if my cream cheese is lumpy?
If you find your cream cheese has lumps, it's likely not softened enough. Allow it to sit at room temperature for about 20-30 minutes, then whip it again until smooth. Additionally, using a food processor can help achieve that creamy consistency you want for your stuffing!

Are there any dietary considerations for stuffed celery?
Yes, this recipe is keto-friendly, making it a great choice for those watching their carbohydrate intake. However, if you’re cooking for guests with specific allergies, be mindful of the bacon and dairy ingredients. You can swap cream cheese for Greek yogurt for a lighter version and use turkey bacon or meat alternatives for a healthier option.

Can I make these stuffed celery bites in advance?
Definitely! You can prepare the creamy filling up to 3 days in advance and refrigerate it. I often make it a day before a party to save time. Just remember to fill the celery sticks a couple of hours before serving to keep them crispy and fresh!

Good Stuffed Celery

Irresistibly Good Stuffed Celery with Creamy Bacon Delight

Enjoy delicious Good Stuffed Celery, a crunchy snack packed with creamy goodness perfect for gatherings.
Print Recipe Pin Recipe
Prep Time 15 minutes mins
Total Time 15 minutes mins
Servings: 8 bites
Course: Appetizers
Cuisine: Southern
Calories: 120
Ingredients Equipment Method Nutrition Notes

Ingredients
  

For the Filling
  • 8 oz Cream Cheese must be softened for easy mixing
  • 6 strip Bacon cooked and chopped
  • 1 cup Cheddar Cheese grated for convenience
  • 1 cup Fresh Parsley can substitute with cilantro or dill
  • 1/4 cup Fresh Chives green onions can also be used
  • 1/2 tsp Salt adjust according to taste
  • 1/4 tsp Fresh Cracked Pepper customize to your preferred spice level
  • 1 tsp Hot Sauce optional based on spice tolerance
For the Celery
  • 8 stalk Celery Sticks washed and dried
Garnishes
  • 2 tbsp Chopped Chives for extra flavor if desired
  • 2 tbsp Bacon bits for extra flavor

Equipment

  • Mixing Bowl
  • hand mixer
  • Sharp Knife
  • piping bag

Method
 

Step-by-Step Instructions
  1. Begin by washing and drying your celery stalks thoroughly. Using a sharp knife, cut each stalk in half to create equal segments.
  2. In a mixing bowl, place your softened cream cheese. Beat the cream cheese on medium speed until it becomes smooth and creamy, approximately 1-2 minutes.
  3. Add the cooked and chopped bacon, grated cheddar cheese, fresh parsley, chives, salt, fresh cracked pepper, and optional hot sauce to the whipped cream cheese. Mix thoroughly.
  4. Using a small spoon or a piping bag, carefully fill each celery half with the creamy mixture, ensuring you pack it in generously.
  5. Sprinkle additional chopped chives and bacon bits on top of the filled celery. Serve immediately for the best texture.

Nutrition

Serving: 1biteCalories: 120kcalCarbohydrates: 4gProtein: 5gFat: 10gSaturated Fat: 5gPolyunsaturated Fat: 1gMonounsaturated Fat: 4gCholesterol: 20mgSodium: 250mgPotassium: 150mgFiber: 1gSugar: 1gVitamin A: 500IUVitamin C: 3mgCalcium: 100mgIron: 0.5mg

Notes

Make your filling up to two days in advance and store it separately. Fill the celery just a few hours before your gathering.

Tried this recipe?

Let us know how it was!
  • « Previous Page
  • 1
  • …
  • 37
  • 38
  • 39
  • 40
  • 41
  • …
  • 200
  • Next Page »

Welcome!

Hi, I’m Grace, a Sydney-based home cook with a passion for bold flavors and trending ingredients. Whether you’re a busy beginner or a seasoned foodie, you’ll find dishes here that are fresh, fun, and full of flavor.

More about me

Popular Recipes

  • Deli-Style Italian Grinder Salad
    Deli-Style Italian Grinder Salad: A Fresh Twist on Flavor
  • Quick and Easy Taco Bowl
    Savor the Flavor: Quick and Easy Taco Bowl That's Customizable
  • Taco Salad Bowls With Shredded Chicken
    Delicious Taco Salad Bowls With Shredded Chicken in 15 Minutes
  • Seven-Layer Taco Salad
    Savory Seven-Layer Taco Salad for Flavorful Gatherings

Footer

↑ back to top

About

  • Privacy Policy
  • Disclaimer
  • Terms & Conditions

Newsletter

  • Sign Up! for emails and updates

Contact

  • About me
  • Contact me

Copyright © 2025 TastyTrendIngredients