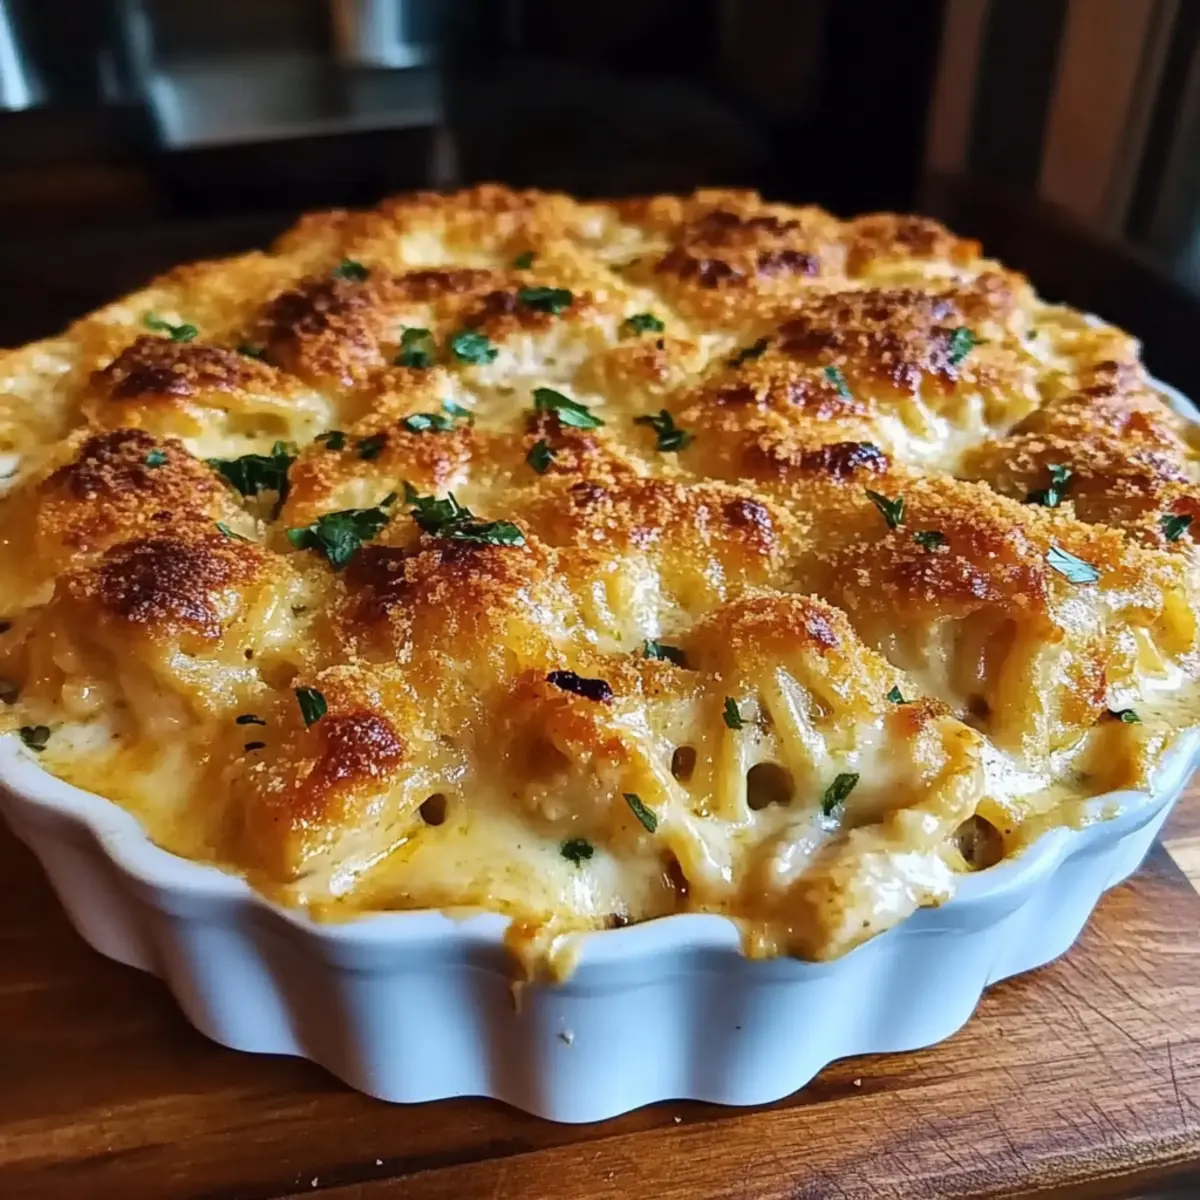
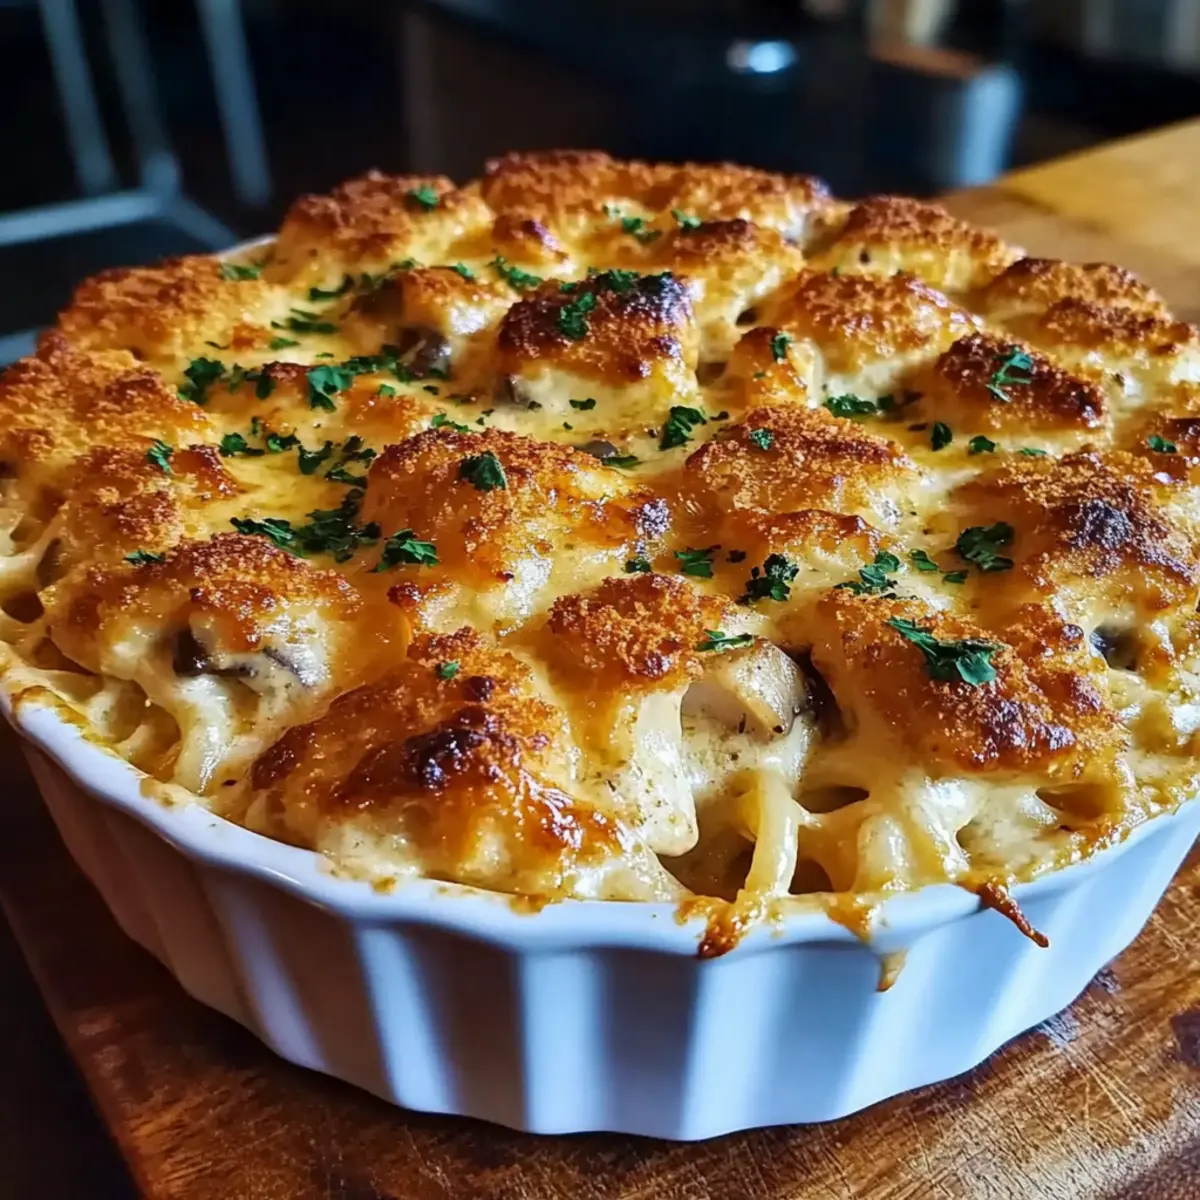
tastytrendingredients

  • Home
  • Recipes
    • Appetizers
    • Breakfast
    • Dessert
    • Dinner
    • Drinks
    • Salads
    • Snacks
    • Soups
  • About me
  • Contact me
menu icon
go to homepage
  • Home
  • Recipes
    • Appetizers
    • Breakfast
    • Dessert
    • Dinner
    • Drinks
    • Salads
    • Snacks
    • Soups
  • About me
  • Contact me
search icon
Homepage link
  • Home
  • Recipes
    • Appetizers
    • Breakfast
    • Dessert
    • Dinner
    • Drinks
    • Salads
    • Snacks
    • Soups
  • About me
  • Contact me
×

Creamy Avocado Egg Salad that's Healthy and Satisfying

August 12, 2025 by Grace Snow Leave a Comment

The rich, buttery flavor of ripe avocados always transports me to sun-drenched gardens, where fresh ingredients take center stage. Today, we're diving into a healthier twist on a beloved classic: Creamy Avocado Egg Salad. This vibrant dish seamlessly combines wholesome hard-boiled eggs and creamy avocados, offering a delightful blend of textures and tastes that's not only nutritious but also incredibly satisfying. Perfect for those busy weekdays, this recipe comes together in minutes and makes for a versatile meal, whether you're serving it on crunchy toast, crisp lettuce wraps, or as a refreshing main salad. If you're on a quest for quick, healthy meals that don't compromise on flavor, this Avocado Egg Salad might just become your new favorite. What will you pair it with first—toast or lettuce wraps?

Why is Avocado Egg Salad So Popular?

Creamy, Rich Flavor: The luscious avocado elevates traditional egg salad, replacing mayo with a healthier option.

Quick and Easy: This recipe comes together in just minutes, making it ideal for busy weekdays or last-minute meals.

Nutritious Choice: Packed with proteins and healthy fats, it fits perfectly into keto, low-carb, and gluten-free diets.

Versatile Serving Options: Whether you're enjoying it on whole grain toast, in refreshing lettuce wraps, or as a salad, it adapts beautifully to your needs.

Crowd-Pleaser: Perfect for picnics or gatherings, everyone will appreciate this delightful twist on a classic.

This Avocado Egg Salad is not just delicious; it’s a vibrant addition to your meal prep. If you're looking for a robust breakfast idea, check out Breakfast Egg Muffins, or for a unique breakfast experience, try Turkish Eggs Discover.

Avocado Egg Salad Ingredients

• Dive into the essential components that make this dish a creamy delight!

For the Salad

  • Avocado – Provides creaminess and healthy fats; opt for ripe avocados for the best texture.
  • Hard-Boiled Eggs – Primary protein source and structure of the salad; ensure they're cooked well for optimal results.
  • Red Onion – Adds a sharp, savory flavor; substitute with green onions for a milder taste.
  • Greek Yogurt – Binds the salad while enhancing creaminess; a lighter alternative to traditional mayonnaise.
  • Chives – Adds a subtle onion flavor and freshness; substitute with scallions if chives are unavailable.
  • Fresh Parsley – Contributes color and herbal notes; swap for cilantro for a zesty twist.
  • Lemon Juice – Brightens flavors and prevents avocado oxidation; vinegar can be used as an alternative.
  • Kosher Salt and Ground Black Pepper – To taste, enhancing the overall flavor of the Avocado Egg Salad.

For Serving (Optional)

  • Lettuce Leaves – For serving, providing crunch and a fresh taste in your meal prep or quick lunches.

Step‑by‑Step Instructions for Creamy Avocado Egg Salad

Step 1: Prepare the Ingredients
Begin by gathering your ingredients. Hard boil 4 large eggs in a pot of boiling water for 9-12 minutes, then plunge them into an ice bath for 5 minutes to cool before peeling. While the eggs are cooling, slice 1 ripe avocado in half, remove the pit, and scoop the flesh into a mixing bowl. Add the juice of half a lemon to prevent browning.

Step 2: Chop the Eggs and Vegetables
Once the eggs are cooled and peeled, chop them into bite-sized pieces using a sharp chef’s knife. Finely dice about ¼ cup of red onion and chop 2 tablespoons of fresh parsley and 1 tablespoon of chives. Incorporate the diced eggs, red onion, parsley, and chives into the bowl with the avocado, creating a vibrant medley of colors and textures.

Step 3: Mix the Salad
To enhance the creamy texture of the Avocado Egg Salad, add 3 tablespoons of Greek yogurt or mayonnaise to the bowl. Season with salt and freshly ground black pepper to taste. Gently stir the mixture with a fork or spatula, being careful not to over-mash the avocado. Aim for a well-combined yet chunky salad, allowing the ingredients to shine.

Step 4: Adjust the Flavors
Taste the salad and adjust the flavors as needed. If you prefer more acidity, feel free to add another squeeze of lemon juice or a splash of vinegar for extra brightness. Mix again to ensure any additional ingredients are evenly distributed, creating a harmonious blend of flavors in your Avocado Egg Salad.

Step 5: Serve the Salad
Now that your Creamy Avocado Egg Salad is ready, it's time to serve! You can enjoy it immediately on toasted whole grain bread, or stuff it into crisp lettuce leaves for a fresh wrap. Alternatively, serve it over a bed of mixed greens for a nutritious salad. Garnish with extra chives or parsley if desired and enjoy your delicious creation!

How to Store and Freeze Avocado Egg Salad

  • Fridge: Store the Avocado Egg Salad in an airtight container for up to 2 days. Be mindful that avocado can brown quickly, so consume it as soon as possible for the best flavor.
  • Room Temperature: Avoid leaving the salad out for more than 2 hours, especially on warm days, to prevent spoilage.
  • Freezer: Freezing is not recommended for this salad, as the texture of avocados will change significantly upon thawing.
  • Reheating: This dish is best served cold, so no reheating is necessary. Just give it a gentle stir before serving if it has been refrigerated.

Make Ahead Options

These Creamy Avocado Egg Salad bites are perfect for meal prep enthusiasts! You can prepare the hard-boiled eggs and chop the vegetables (red onion, chives, and parsley) up to 3 days in advance, storing them in airtight containers in the refrigerator. For the avocado, it's best to mix it fresh with lemon juice right before serving to maintain that vibrant color and creamy texture. When you’re ready to enjoy your salad, simply combine the prepped ingredients with the avocado and Greek yogurt or mayonnaise for a quick, delicious meal. This way, you’ll have a wholesome, satisfying dish ready in minutes, perfect for those busy weeknights!

Avocado Egg Salad Variations & Substitutions

Discover how fun and easy it is to make this mouthwatering Avocado Egg Salad your own!

  • Crunchy Celery: Add finely diced celery for an extra crunch in every bite. It perfectly complements the creaminess of the avocado.

  • Bell Pepper Boost: Mix in diced bell peppers for a splash of color and a sweet, crisp flavor that brightens the dish.

  • Greek Yogurt Twist: Swap the mayonnaise for Greek yogurt to lighten up the salad even more while adding a tangy twist.

  • Spice It Up: Sprinkle in a pinch of smoked paprika or cayenne pepper for a subtle heat that elevates your salad experience.

  • Herb Swaps: Try replacing parsley with fresh basil or cilantro for a refreshing change that offers a whole new flavor profile.

  • Nutritional Yeast Addition: For a cheesy flavor without the dairy, stir in a tablespoon of nutritional yeast, perfect for those who are plant-based.

  • Healthy Avocado Conversion: Use smashed avocado in place of the diced for a more cohesive, creamy texture that's equally satisfying.

  • Garnish Options: Top off your salad with sliced radishes or cherry tomatoes for added crunch and a pop of color alongside your lettuce wraps or toast.

Feel free to get creative! Pair this versatile salad with other delightful options like Breakfast Egg Muffins or explore unique flavors with Turkish Eggs Discover. The possibilities are endless!

What to Serve with Creamy Avocado Egg Salad

Elevate your dining experience with delightful pairings that enhance the creamy, vibrant flavors of this wholesome salad.

  • Tartly Sliced Tomatoes: Fresh, juicy tomatoes add a burst of acidity to balance the creaminess, making each bite refreshingly bright.
  • Crunchy Whole Grain Toast: The toasty, hearty texture of whole grain bread complements the smooth avocado, creating a satisfying contrast. Serve it open-faced for a delightful brunch option.
  • Crisp Cucumber Sticks: These crunchy, hydrating bites provide a refreshing, cool element that beautifully contrasts the richness of the egg salad.
  • Mixed Green Salad: A simple green salad with a light vinaigrette rounds out the meal, providing additional freshness and texture to your plate.
  • Savory Sweet Potato Fries: Baked sweet potato fries offer a delicious, sweet crunch that pairs perfectly with the richness of the avocado egg salad.
  • Lemonade Spritzer: Quench your thirst with a refreshing lemonade spritzer, its zesty notes enhancing the flavors of the salad while adding a pop of brightness.
  • Bubbly Sparkling Water: Pair with a splash of citrus for a fun, fizzy drink that cleanses the palate between bites. This lighter option ensures the focus remains on the salad’s delicious flavors.
  • Chocolate Avocado Mousse: Finish with a luscious dessert that echoes the avocado theme, offering a creamy yet guilt-free indulgence everyone will love!

Expert Tips for Avocado Egg Salad

  • Choose Ripe Avocados: Ensure your avocados are ripe for the best creamy texture. Firm avocados can lead to a chunky salad.

  • Perfectly Boil Eggs: Follow a reliable method for hard-boiling eggs; overcooking can create a green ring around the yolk, affecting flavor.

  • Gentle Mixing: When combining ingredients, gently fold them together to maintain chunks of avocado and avoid a mushy salad.

  • Freshness Matters: Serve the Avocado Egg Salad right away for the best flavor. If storing, keep it airtight to minimize oxidation, but consume within 1-2 days.

  • Experiment with Herbs: Add fresh herbs like dill or basil for a unique twist. This can elevate your avocado egg salad and personalize the dish to your liking.

Avocado Egg Salad Recipe FAQs

What type of avocado should I use for my Avocado Egg Salad?
Opt for ripe avocados when making your salad, as they provide the best creamy texture. Look for avocados that yield slightly to gentle pressure, indicating they are ready to be mashed and mixed. Avoid those with dark spots all over or that feel overly soft, as they may be overripe.

How should I store leftover Avocado Egg Salad, and how long does it last?
Store any leftover Avocado Egg Salad in an airtight container in the refrigerator for up to 2 days. Due to the avocado's tendency to brown quickly, it's best to consume it as soon as possible for maximum freshness and flavor. Cover the top with plastic wrap pressed directly against the salad to minimize air contact and oxidation.

Can I freeze Avocado Egg Salad?
Freezing is not recommended for this salad as the texture of avocados changes significantly once thawed, becoming mushy and unappetizing. If you want to prepare ahead, make the salad without the avocado and eggs, then add them fresh when you're ready to serve.

What if my eggs are overcooked?
If your hard-boiled eggs come out overcooked, resulting in a green ring around the yolk, the eggs will still be safe to eat. However, to prevent the green tint, cut down on cooking time. Aim for 9-12 minutes of boiling and immediately cool them in an ice bath for 5 minutes post-cooking. This method helps achieve perfectly cooked eggs.

Are there any dietary considerations I should keep in mind?
Absolutely! If you're catering to those with specific dietary needs, this Avocado Egg Salad is gluten-free and suitable for keto diets, making it a healthy choice for many. However, be cautious with ingredients like Greek yogurt or mayonnaise if anyone has dairy allergies. For a dairy-free version, consider using a plant-based yogurt alternative.

How can I enhance the flavor of my Avocado Egg Salad?
To elevate the flavor, experiment with herbs and spices! Adding fresh dill or a sprinkle of paprika can introduce delightful notes to the salad. You might also consider incorporating diced celery or bell peppers for an added crunch and flavor burst. Taste as you mix and adjust the seasonings to create a blend that suits your palate.

Avocado Egg Salad

Creamy Avocado Egg Salad that's Healthy and Satisfying

This Avocado Egg Salad is a creamy, nutritious twist on a classic, perfect for quick meals.
Print Recipe Pin Recipe
Prep Time 15 minutes mins
Cook Time 12 minutes mins
Cooling Time 5 minutes mins
Total Time 32 minutes mins
Servings: 4 servings
Course: Salads
Cuisine: American
Calories: 250
Ingredients Equipment Method Nutrition Notes

Ingredients
  

For the Salad
  • 2 large ripe avocados Provides creaminess and healthy fats.
  • 4 large hard-boiled eggs Primary protein source.
  • 0.25 cup red onion Adds sharp flavor.
  • 3 tablespoons Greek yogurt A lighter alternative to mayo.
  • 1 tablespoon chives Adds onion flavor.
  • 2 tablespoons fresh parsley Contributes color and herb notes.
  • 0.5 tablespoon lemon juice Prevents oxidation.
  • to taste kosher salt
  • to taste ground black pepper
For Serving (Optional)
  • 4 leaves lettuce For serving.

Equipment

  • pot
  • Mixing Bowl
  • Chef’s Knife
  • Fork or Spatula

Method
 

Step-by-Step Instructions
  1. Begin by gathering your ingredients. Hard boil the eggs in a pot of boiling water for 9-12 minutes.
  2. While the eggs are cooling, slice the avocado in half, remove the pit, and scoop the flesh into a mixing bowl. Add lemon juice.
  3. Chop the cooled eggs and dice the red onion, parsley, and chives. Combine with avocado.
  4. Add Greek yogurt, salt, and pepper to the mixture and stir gently.
  5. Taste and adjust flavors with lemon juice or vinegar as needed. Serve on toast or lettuce wraps.

Nutrition

Serving: 1servingCalories: 250kcalCarbohydrates: 15gProtein: 10gFat: 20gSaturated Fat: 3gPolyunsaturated Fat: 2gMonounsaturated Fat: 15gCholesterol: 200mgSodium: 150mgPotassium: 500mgFiber: 5gSugar: 2gVitamin A: 500IUVitamin C: 10mgCalcium: 50mgIron: 1mg

Notes

Serve immediately for the best flavor. If storing, keep it airtight and consume within 1-2 days.

Tried this recipe?

Let us know how it was!

Delicious Breakfast Banana Split to Energize Your Mornings

August 11, 2025 by Grace Snow Leave a Comment

Rushing through breakfast can often feel like a mini crisis, but it doesn’t have to be! Let me introduce you to my vibrant Breakfast Banana Split, a delicious twist on a familiar favorite that’s perfect for those hectic mornings. This recipe not only takes just 5 minutes to whip together, but it's also a healthy and satisfying start to your day. With creamy Greek yogurt, colorful berries, and a sprinkle of crunchy nuts, it’s a delightful way to fuel your body and please your taste buds. Whether you’re looking to upgrade your breakfast routine or find a fun way to serve the family, this dish checks all the boxes! Ready to transform mornings into something magical?

Why is this Breakfast Banana Split a winner?

Quick and Easy: Prepare this delicious breakfast in just 5 minutes, making it a perfect solution for busy mornings.
Nutrient-Rich: Packed with protein and vitamins from Greek yogurt and fresh berries, it's a nutrition powerhouse.
Customizable: Whether you’re vegan or nut-free, swap ingredients to suit your dietary needs without losing flavor.
Fun Presentation: The playful arrangement turns a simple breakfast into an eye-catching dish that excites everyone at the table.
Crowd-Pleaser: Ideal for both kids and adults, this unique spin on breakfast guarantees satisfied smiles all around! Try it alongside a comforting Cornbread Breakfast Casserole for a delightful family brunch!

Breakfast Banana Split Ingredients

Ready to whip up your very own Breakfast Banana Split? Let’s gather the essentials!

For the Base

  • Banana – Adds natural sweetness and serves as the base; choose ripe bananas for the best flavor.
  • Greek Yogurt – Provides creaminess and protein; feel free to substitute with dairy-free yogurt for a vegan option.

For the Toppings

  • Berries – A mix of strawberries, raspberries, blackberries, and blueberries adds vibrant color and antioxidants; seasonal fruits work beautifully too.
  • Nuts/Granola – Offers crunch and additional protein; select your favorite nuts or opt for gluten-free granola for a fitting topping.

For Optional Flavor

  • Drizzle – Honey, maple syrup, or nut butter adds extra flavor; just a light drizzle keeps it healthy while enhancing taste.

Enjoy this delightful Breakfast Banana Split as you kickstart your day with a bowl of colorful goodness!

Step‑by‑Step Instructions for Breakfast Banana Split

Step 1: Prepare the Banana
Begin by selecting two ripe bananas that are firm yet slightly soft to the touch. Carefully slice each banana in half lengthwise using a sharp knife, ensuring the pieces stay intact. Place each banana half cut-side up on a colorful plate, creating a vibrant base for your Breakfast Banana Split.

Step 2: Spoon on the Yogurt
Take about one cup of creamy Greek yogurt and generously spoon it over each banana half. Aim for an even spread, covering the cut surface fully to create a luscious layer. The yogurt should be smooth and enticing, with a dollop that cascades slightly over the edges, ready to hold the toppings securely in place.

Step 3: Add the Berries
Next, wash and prepare a mix of your favorite berries—strawberries, blueberries, raspberries, and blackberries work splendidly. Scatter these vibrant fruits artfully over the yogurt, allowing their colors to pop against the white background. Aim for an even distribution, letting some berries tumble over the edges for a playful presentation on your Breakfast Banana Split.

Step 4: Sprinkle the Crunch
Now it's time to add some texture! Grab a handful of your favorite chopped nuts or gluten-free granola and sprinkle it on top of the berries. Ensure an even layer that adds satisfying crunch and additional protein to each bite. The nuts should gleam with freshness, completing the visual appeal of your delicious Breakfast Banana Split.

Step 5: Optional Drizzle for Flavor
For an extra touch of sweetness, consider a light drizzle of honey, pure maple syrup, or a nut butter of your choice over the finished dish. Use a small spoon to control the amount and create a beautiful presentation. This glaze will enhance the overall flavor while keeping the dish healthy, adding that finishing touch to your Breakfast Banana Split.

Step 6: Serve Immediately
Your Breakfast Banana Split is now ready to enjoy! Serve the dish right away to fully appreciate the delightful combination of textures and flavors. The vibrant colors and inviting aroma will certainly excite your family or guests, making this a cheerful start to anyone's morning.

Breakfast Banana Split Variations

Feel free to unleash your creativity and personalize your Breakfast Banana Split with these delightful options!

  • Dairy-Free: Swap Greek yogurt for coconut yogurt for a deliciously creamy vegan alternative. This adds a tropical twist to your breakfast, enhancing the flavor profile with the distinct taste of coconut.

  • Nut-Free: Remove nuts and use sunflower seeds or pumpkin seeds instead, providing a crunchy texture without the allergens. This keeps the dish safe for those with nut allergies while still being satisfying.

  • Flavor Twists: Experiment with different flavored yogurts, like vanilla or honey, to elevate your dish even more. A touch of cinnamon or nutmeg can add a warm spice that complements the fruits beautifully.

  • Tropical Delight: Incorporate sliced kiwi and pineapple for a fun tropical version. You'll be transported to a sunny island with each bite while enjoying a refreshing medley of flavors.

  • Extra Crunch: Mix in toasted coconut flakes along with your nuts or granola for an added layer of crunch. It's a fantastic way to add texture and a subtle sweetness!

  • Berry Bonanza: Use a variety of seasonal fruits like peach slices or pomegranate seeds to brighten up your breakfast even more. This twist not only adds flavor but also provides a colorful presentation.

  • Chocolate Lover: Drizzle some melted dark chocolate over the top for an indulgent treat that feels like dessert. It transforms your Breakfast Banana Split into a delightful dessert without sacrificing health.

  • Spicy Kick: Add a pinch of cayenne pepper or chili powder on top for an unexpected spicy twist. This tantalizing addition will awaken your taste buds and add excitement to your breakfast!

By exploring these variations, your Breakfast Banana Split can become a new adventure every morning. Pair it with a side of hearty Cornbread Breakfast Casserole for a perfect brunch spread that the whole family will love!

Expert Tips for Breakfast Banana Split

  • Choose the Right Banana: Use bananas that are ripe but firm to avoid mushiness; this ensures a sturdy base for your Breakfast Banana Split.
  • Yogurt Variations: Don't hesitate to mix it up with flavored Greek yogurt; it can add an exciting twist to the traditional taste.
  • Colorful Berries: Incorporate a variety of berries for added antioxidants and vibrant presentation; fresh is best, but frozen can work too!
  • Keep It Crunchy: When adding nuts or granola, sprinkle just before serving to maintain their delightful crunch in your Breakfast Banana Split.
  • Prep Ahead: Slice your bananas and pre-portion yogurt the night before to make morning assembly a breeze!
  • Experiment with Drizzles: Try different sweeteners like agave or even a sprinkle of cinnamon to change the flavor profile without compromising health.

What to Serve with Breakfast Banana Split

A vibrant breakfast like this deserves some perfect companions to create a delightful morning feast.

  • Crunchy Granola: Provides an extra layer of texture and flavor, elevating the breakfast experience without overpowering the banana split.
  • Greek Yogurt Parfait: Just as creamy and nutritious, this parfait offers a different fruit combination, making an excellent side option for kids or adults.
  • Smoothie Bowl: A refreshing blend of fruits and spinach can complement the sweetness of the banana split, adding a hydrating element to breakfast.
  • Oatmeal with Fresh Fruits: Warm and hearty, oatmeal adds a cozy touch to the table while introducing additional fiber and flavor with flavored toppings.
  • Herbal Tea: A tranquil cup of chamomile or mint tea can balance the sweetness and invigorate your morning with soothing flavors.
  • Cinnamon Toast: Crunchy and sweet, a slice of cinnamon toast provides a delightful contrast, perfect for those who crave a bit more indulgence.
  • Fruit Salad: A refreshing mix of seasonal fruits can brighten the plate, introducing more flavors and colors to your breakfast spread.
  • Freshly Squeezed Juice: A glass of orange or berry juice complements the dish beautifully, enhancing the fruity notes while adding a refreshing zing.

How to Store and Freeze Breakfast Banana Split

Fridge: Store any leftover assembled Breakfast Banana Split in an airtight container, covered, for up to 1 day; however, it's best enjoyed fresh to maintain texture.

Banana: If you have leftover components, slice bananas and store separately in an airtight container at room temperature for up to 1 day; limit exposure to minimize browning.

Yogurt and Toppings: Keep Greek yogurt in the fridge for up to 5 days; store berries and toppings separately to preserve freshness and crunch, adding them just before serving.

Reheating: While not typically reheated, if you've prepped components, assemble your Breakfast Banana Split quickly in the morning for a refreshing start to your day!

Make Ahead Options

These Breakfast Banana Splits are a fantastic choice for meal prep enthusiasts! You can slice the bananas and prepare your yogurt mixture up to 24 hours in advance, storing them separately in airtight containers in the refrigerator to maintain freshness. As for the berries, wash and portion them up to 3 days ahead—this way, they’ll be ready to brighten your morning routine without any hassle. When you’re ready to serve, simply assemble by layering the yogurt on the banana halves, adding the berries, and sprinkling with chopped nuts or granola for that perfect crunch. This makes your busy mornings effortless while still enjoying a nutritious and delightful breakfast!

Breakfast Banana Split Recipe FAQs

What kind of bananas should I use for the Breakfast Banana Split?
Choose ripe bananas that are firm yet slightly soft to the touch. They should have a vibrant yellow color without any dark spots that indicate overripeness. Ripe bananas enhance the natural sweetness and flavor of your Breakfast Banana Split while providing a sturdy base.

How long can I store leftover Breakfast Banana Split?
If you have leftover assembled Breakfast Banana Split, store it in an airtight container in the refrigerator for up to 1 day. It's best enjoyed fresh to maintain the delightful textures of the banana, yogurt, and toppings.

Can I freeze the components of the Breakfast Banana Split?
Absolutely! For freezing, you can slice the banana and store it in an airtight container, although it's best to consume it fresh. The yogurt can be frozen for up to 3 months. When ready to use, thaw the yogurt overnight in the refrigerator. However, remember to assemble the Breakfast Banana Split with fresh toppings after thawing to retain the crunch.

What if my granola or nuts get soggy in the Breakfast Banana Split?
To prevent sogginess, I recommend adding nuts or granola just before serving the Breakfast Banana Split. This ensures they stay crunchy and provide a delightful texture contrast to the creamy yogurt and soft banana.

Are there any dietary considerations for the Breakfast Banana Split?
Yes, if you or someone in your family has allergies, you can customize the Breakfast Banana Split. Switch to dairy-free yogurt for vegan diets and omit nuts if there are nut allergies. Enjoy a variety of fruits that suit your allergies while still packing in all the nutrition!

How can I achieve the best presentation for my Breakfast Banana Split?
To create a stunning presentation, use colorful plates and arrange the sliced bananas gracefully. Layer the yogurt generously and scatter the berries artfully, allowing some to spill over the sides. Lastly, topping it off with a sprinkle of nuts or granola will create an inviting visual feast that’s perfect for family mornings or brunch gatherings.

Breakfast Banana Split

Delicious Breakfast Banana Split to Energize Your Mornings

A vibrant Breakfast Banana Split, a delicious twist on a classic that energizes your mornings.
Print Recipe Pin Recipe
Prep Time 5 minutes mins
Total Time 5 minutes mins
Servings: 2 servings
Course: Breakfast
Calories: 350
Ingredients Equipment Method Nutrition Notes

Ingredients
  

For the Base
  • 2 pieces Ripe Bananas Adds natural sweetness; choose ripe bananas.
  • 1 cup Greek Yogurt Provides creaminess and protein; use dairy-free for vegan.
For the Toppings
  • 1 cup Mixed Berries Strawberries, raspberries, blackberries, blueberries; seasonal fruits work well.
  • 1/4 cup Nuts or Granola Select your favorite nuts or gluten-free granola.
For Optional Flavor
  • 1 tablespoon Drizzle of Honey or Maple Syrup Adds extra flavor; use lightly.

Equipment

  • Knife
  • Plate
  • Spoon

Method
 

Step-by-Step Instructions
  1. Begin by selecting two ripe bananas that are firm yet slightly soft. Slice each banana in half lengthwise and place cut-side up on a plate.
    Breakfast Banana Split
  2. Spoon about one cup of Greek yogurt over each banana half, covering the cut surface fully.
    Breakfast Banana Split
  3. Wash and prepare a mix of berries and scatter them artfully over the yogurt.
    Breakfast Banana Split
  4. Sprinkle a handful of chopped nuts or gluten-free granola on top of the berries.
    Breakfast Banana Split
  5. Consider a light drizzle of honey or maple syrup over the dish for extra sweetness.
    Breakfast Banana Split
  6. Serve the Breakfast Banana Split immediately to appreciate the textures and flavors.
    Breakfast Banana Split

Nutrition

Serving: 1servingCalories: 350kcalCarbohydrates: 55gProtein: 10gFat: 10gSaturated Fat: 2gPolyunsaturated Fat: 2gMonounsaturated Fat: 6gCholesterol: 5mgSodium: 100mgPotassium: 600mgFiber: 5gSugar: 20gVitamin A: 500IUVitamin C: 30mgCalcium: 150mgIron: 1mg

Notes

Enjoy fresh, best served immediately. You can prep ingredients the night before for easy assembly in the morning.

Tried this recipe?

Let us know how it was!

Savor the Bold Flavors of Homemade Shakshuka Today

August 11, 2025 by Grace Snow Leave a Comment

As the aroma of sizzling onions and garlic fills my kitchen, I can’t help but feel transported to a sun-drenched market in North Africa. Classic shakshuka—a vibrant medley of gently poached eggs nestled in a tangy tomato sauce—offers not just a delightful breakfast but a celebration of flavors that can brighten any meal. What I love most about this dish is how quick it comes together, making it perfect for busy mornings or unexpected brunch guests. Within just 30 minutes, you'll have a beautifully comforting meal that’s not only vegetarian but also easily made gluten-free with a side of warm pita. Are you ready to elevate your breakfast game with this irresistible shakshuka recipe? Let’s dive in!

Why is Shakshuka a Breakfast Delight?

Vibrant, Colorful Dish: The stunning reds and greens make shakshuka a feast for the eyes, ensuring it’s as appealing as it is delicious.

Quick & Easy Preparation: In just 30 minutes, you can create this flavorful dish, making it perfect for busy mornings or last-minute brunch invites.

Customizable for Everyone: From adding your favorite veggies like spinach to swapping in tofu for a vegan option, shakshuka adapts to any taste or dietary need.

Heartwarming Comfort Food: The combination of poached eggs and spicy tomato sauce delivers a cozy feeling that can brighten any meal!

Perfect for Sharing: Serve it right from the pan with warm pita or crusty bread, allowing everyone to dig in and enjoy together. You might also want to check out these delightful Serving Suggestions to elevate your dining experience!

Shakshuka Ingredients

For the Sauce

  • Olive Oil – Adds richness and helps sauté the vegetables; avocado oil can be a lighter alternative.
  • Medium Onion – Provides the aromatic base for the sauce; shallots offer a milder flavor if preferred.
  • Red Bell Pepper – Adds sweetness and color; green bell pepper or zucchini works in a pinch.
  • Garlic Cloves – Enhances flavor depth; garlic powder serves as a good substitute if fresh isn't on hand.
  • Paprika – Contributes a delicious smokiness; try smoked paprika for an extra flavor kick.
  • Cumin – Offers an earthy depth; coriander can add a unique twist instead.

For the Tomatoes

  • Whole Peeled Tomatoes (28-ounce can) – Forms the sauce base; diced fresh tomatoes or crushed tomatoes make great substitutes.
  • Chili Powder – Adds mild heat and complexity; adjust to taste or swap with cayenne for a spicier version.

For the Eggs

  • Large Eggs (6) – The star protein of the dish; tofu makes a fantastic vegan substitute.

For Seasoning

  • Salt and Pepper – Essential for seasoning to taste; using sea salt elevates the flavor.

For the Garnish

  • Fresh Cilantro & Parsley – Brightens the dish with freshness; basil or mint can also be delightful alternatives.

This vibrant shakshuka is not just visually appealing; its assortment of ingredients ensures a deliciously savory experience every time!

Step‑by‑Step Instructions for Shakshuka

Step 1: Heat the Oil
Begin by heating 2 tablespoons of olive oil in a large sauté pan over medium heat. Watch for the oil to shimmer, indicating it's ready. This will serve as the base for your flavorful shakshuka, bringing warmth and richness to the dish.

Step 2: Sauté the Vegetables
Add one diced medium onion and one diced red bell pepper to the pan. Sauté these aromatic vegetables for about 5 minutes, stirring occasionally until the onion becomes translucent and softens, filling your kitchen with a delightful fragrance.

Step 3: Add Garlic and Spices
Next, stir in 3 chopped garlic cloves along with 1 teaspoon of paprika and 1 teaspoon of cumin. Cook for an additional minute, ensuring the garlic doesn’t burn. This will intensify the flavors of your shakshuka, making the aromas even more irresistible.

Step 4: Create the Sauce
Pour in a 28-ounce can of whole peeled tomatoes, breaking them apart with a spoon as you mix. Season with salt and pepper to taste, then let the sauce simmer over medium-low heat for about 10 minutes, letting the colors deepen and the sauce thicken.

Step 5: Incorporate the Eggs
Using a spoon, create small wells in the sauce and carefully crack 6 large eggs into each well. Cover the pan and cook for 5-8 minutes, allowing the eggs to poach until the whites are set but the yolks remain runny. Keep an eye on them to achieve your preferred doneness.

Step 6: Garnish and Serve
Remove the pan from the heat and sprinkle with chopped fresh cilantro and parsley for a burst of freshness. This final touch elevates your homemade shakshuka. Serve hot right from the pan with warm pita bread or crusty sourdough to soak up the delicious sauce.

What to Serve with Classic Shakshuka

Nothing elevates a rich dish like shakshuka better than complementary flavors and textures that create a memorable meal experience.

  • Warm Pita Bread: Soft and pillowy, perfect for dipping into the vibrant sauce, enhancing each savory bite. You can’t go wrong with warm, fresh pita basking in the shakshuka’s flavors.

  • Greek Yogurt: A creamy and tangy addition that balances the spiciness of the dish while adding a cool finish. Dollop it on top to bring a refreshing contrast to every bite.

  • Crispy Roasted Potatoes: Golden and crunchy, these potatoes provide a delightful contrast to the tender eggs and sauce. Their hearty nature makes them an ideal sidekick.

  • Mixed Green Salad: A refreshing mix of greens, cucumber, and a light vinaigrette brings lovely brightness and crunch, balancing the richness of shakshuka perfectly. A salad will make you feel nourished and light!

  • Feta Cheese: Crumbled on top, this salty, creamy cheese enhances every spoonful of shakshuka. Its tanginess mingles exquisitely with the vibrant tomato sauce.

  • Chickpea Salad: A protein-packed option that complements the shakshuka’s robust flavors with its nutty and earthy notes. Toss together with lemon juice and herbs for a vibrant side.

  • Minted Lemonade: A refreshing beverage that cuts through the richness and elevates the whole meal experience. The minty notes tie beautifully with the Mediterranean flair of shakshuka.

  • Baklava: For a sweet finish, this rich pastry drizzled with honey and nuts provides a delightful contrast to the savory flavors of the shakshuka. It’s a decadent way to wrap up your meal!

Shakshuka Variations & Substitutions

Feel free to let your creativity shine with these delightful variations—each twist is a world of flavor waiting to be explored!

  • Green Shakshuka: Swap out the tomatoes for a blend of greens like spinach, kale, and herbs for a fresh, vibrant take.
  • Orange Shakshuka: Use roasted butternut squash or pumpkin puree, adding a touch of sweetness to the classic dish. It’s comforting and perfect for fall!
  • Dairy-Free: Substitute regular eggs with silken tofu for a vegan option; simply crumble it into wells and let it warm through.
  • Smoky Flavor: Try using smoked paprika instead of regular paprika for an extra layer of flavor that enhances the sauce's depth.
  • Vegetable-Packed: Toss in seasonal vegetables like roasted eggplant or sautéed mushrooms for additional texture and nutrition. The heartiness makes each bite even more satisfying!
  • Spicy Kick: Add a diced jalapeño or red pepper flakes for an extra punch, perfect for those who enjoy some heat in their meals.
  • Herb Twist: Swap cilantro for fresh dill or mint, bringing a whole new aromatic profile to your shakshuka. It’s an unexpected yet delightful surprise!
  • Nutritious Boost: Stir in a handful of cooked quinoa or lentils to make this dish even more filling and nutritious—ideal for a wholesome brunch!

Whatever your tastes, this shakshuka is a canvas for culinary creativity that can adapt to your mood! You might love these tasty Serving Suggestions to complement your homemade creation.

Make Ahead Options

These classic shakshuka are perfect for meal prep enthusiasts! You can prep the tomato sauce base up to 3 days in advance. Simply sauté the onions, bell peppers, garlic, and spices as instructed, then add the canned tomatoes. Let it cool, then refrigerate the sauce in an airtight container. When you're ready to serve, simply heat the sauce in a pan, create wells for the eggs, and poach them as directed. To maintain the dish's quality, avoid adding the eggs until just before serving, ensuring they'll be perfectly cooked and rich in flavor. With these make ahead options, a satisfying shakshuka is just moments away!

How to Store and Freeze Shakshuka

Fridge: Store leftover shakshuka in an airtight container in the refrigerator for up to 3 days. If possible, keep the eggs separate if reheating for better texture.

Freezer: You can freeze the tomato sauce base without eggs for up to 3 months. Thaw overnight in the fridge and reheat on the stovetop, adding fresh poached eggs before serving.

Reheating: Gently reheat shaksuka on low heat. If storing with eggs, add a splash of water to ensure the eggs remain moist and prevent them from drying out during reheating.

Making Ahead: Prepare the sauce ahead of time for a quick assembly during busy mornings. Just add the eggs right before serving for freshly poached perfection!

Expert Tips for Shakshuka

  • Perfect Pan Choice: Use a stainless steel pan to prevent reactions between the acidic tomatoes and the cookware, ensuring a clean taste.

  • Egg Cook Time: For softer egg yolks, keep the lid on while cooking. If you prefer firmer eggs, adjust the cooking time accordingly and remove the lid.

  • Use Fresh Tomatoes: If opting for fresh tomatoes, plan on using about 10-12. Remember, they'll need extra time to break down into the sauce!

  • Flavor Boost: Consider adding crumbled feta or goat cheese for a creamy, tangy twist that pairs beautifully with the shakshuka sauce.

  • Make it Your Own: Don't hesitate to add your favorite vegetables—like spinach or mushrooms—into the mix to customize your shakshuka to suit your taste!

  • Extra Serving Options: Warm pita or crusty bread are great for dipping; serve alongside for an interactive dining experience!

Shakshuka Recipe FAQs

How do I choose ripe tomatoes for shakshuka?
Absolutely! Look for tomatoes that are firm but slightly yielding to pressure, with a vibrant red color. If they have dark spots or blemishes all over, they are likely overripe. For the best flavor, summer tomatoes are ideal, but you can also use high-quality canned whole peeled tomatoes if fresh ones aren't available.

What’s the best way to store leftover shakshuka?
Very good question! To store leftover shakshuka, place it in an airtight container in the refrigerator for up to 3 days. It’s best to keep the eggs separate if you plan to reheat, as this helps maintain the texture of the yolks.

Can I freeze shakshuka for later?
Certainly! Freeze the tomato sauce base without the eggs in an airtight container for up to 3 months. When you’re ready to enjoy it, simply thaw in the refrigerator overnight. Reheat on the stovetop, and add fresh poached eggs just before serving for that perfect texture!

What if my shakshuka sauce is too watery?
No worries! If you find your shakshuka sauce too watery, let it simmer uncovered for a few more minutes over medium heat to allow the excess liquid to evaporate. You can also add a teaspoon of tomato paste, stirring it in for extra thickness and concentrated flavor.

Is there a way to make shakshuka dairy-free?
Absolutely! Simply replace the eggs with extra-firm tofu crumbled into the sauce to keep it vegan. You won’t miss the eggs’ richness, and the tofu will soak up all the delicious flavors of the shakshuka!

What should I consider for allergies or dietary restrictions?
Very important! If you’re catering to someone with allergies, ensure you use gluten-free pita if serving it on the side. Additionally, if making it dairy-free, omit cheeses like feta or goat cheese, substituting with a non-dairy option if desired. This dish is wonderfully adaptable to various dietary needs!

Shakshuka

Savor the Bold Flavors of Homemade Shakshuka Today

Shakshuka is a vibrant breakfast dish with poached eggs in a tangy tomato sauce, perfect for quick meals.
Print Recipe Pin Recipe
Prep Time 10 minutes mins
Cook Time 20 minutes mins
Total Time 30 minutes mins
Servings: 4 servings
Course: Breakfast
Cuisine: Mediterranean, North African
Calories: 250
Ingredients Equipment Method Nutrition Notes

Ingredients
  

For the Sauce
  • 2 tablespoons Olive Oil or avocado oil for a lighter option
  • 1 medium Onion diced
  • 1 medium Red Bell Pepper diced
  • 3 cloves Garlic chopped
  • 1 teaspoon Paprika or smoked paprika for extra flavor
  • 1 teaspoon Cumin or coriander for a twist
For the Tomatoes
  • 28 ounces Whole Peeled Tomatoes canned
  • 1 teaspoon Chili Powder to taste
For the Eggs
  • 6 large Eggs or tofu for a vegan option
For Seasoning
  • Salt to taste
  • Pepper to taste
For the Garnish
  • Fresh Cilantro chopped
  • Fresh Parsley chopped

Equipment

  • large sauté pan

Method
 

Step‑by‑Step Instructions
  1. Heat 2 tablespoons of olive oil in a large sauté pan over medium heat.
  2. Add one diced medium onion and one diced red bell pepper to the pan and sauté for about 5 minutes.
  3. Stir in 3 chopped garlic cloves, 1 teaspoon of paprika, and 1 teaspoon of cumin. Cook for an additional minute.
  4. Pour in a 28-ounce can of whole peeled tomatoes, season with salt and pepper, and simmer for 10 minutes.
  5. Create wells in the sauce and crack 6 large eggs into each well. Cover and cook for 5-8 minutes.
  6. Remove from heat, garnish with fresh cilantro and parsley, and serve hot with pita or crusty bread.

Nutrition

Serving: 1servingCalories: 250kcalCarbohydrates: 20gProtein: 12gFat: 15gSaturated Fat: 3gPolyunsaturated Fat: 1gMonounsaturated Fat: 9gCholesterol: 210mgSodium: 800mgPotassium: 500mgFiber: 5gSugar: 8gVitamin A: 500IUVitamin C: 30mgCalcium: 60mgIron: 2mg

Notes

Shakshuka is highly customizable; add your favorite veggies or spices to make it your own.

Tried this recipe?

Let us know how it was!

Savory Breakfast Egg Muffins for Easy Morning Bliss

August 11, 2025 by Grace Snow Leave a Comment

There’s something magical about those early morning hours, especially when they unfold with the tantalizing aroma of fresh food wafting through the kitchen. These Customizable Low-Carb Breakfast Egg Muffins are my go-to way to kick-start the day, blending the simplicity of eggs with endless flavor possibilities. Whether you’re craving Broccoli, Bacon & Cheddar, Italian Sausage, Kale & Parmesan, or Spinach, Tomato & Goat Cheese, each muffin is packed with protein and nutrients, making them oh-so-healthy for busy mornings without the guilt. And the best part? They can be prepped ahead of time, and each batch freezes beautifully, so you can grab a nutritious breakfast in a pinch. Curious to see how easily you can whip these together? Let’s dive right into the recipe!

Why Are These Egg Muffins a Must-Try?

Versatile Flavor: With options like Broccoli, Bacon & Cheddar or Spinach, Tomato & Goat Cheese, there's a flavor here for everyone.

Quick Prep Time: Ready in just 20-25 minutes, these muffins are ideal for busy mornings.

Meal Prep Winner: Make a batch ahead of time and store in the fridge or freezer for easy grab-and-go breakfasts.

Healthy and Hearty: Low-carb and protein-packed, each muffin keeps you full and satisfied.

Customizable Ingredients: Tailor fillings to your preferences—swap veggies, proteins, or cheese to fit any dietary needs.

Explore other delicious, make-ahead options like our Cornbread Breakfast Casserole to keep your mornings exciting!

Breakfast Egg Muffin Ingredients

For the Egg Base

  • Large Eggs – The foundation for these Breakfast Egg Muffins, providing structure and protein. Substitution: Can substitute with egg whites for a lower cholesterol option.
  • Kosher Salt & Black Pepper – Enhances flavor; adjust to your taste preference.

For the Broccoli, Bacon & Cheddar Variation

  • Broccoli Florets – Adds vibrant color and essential nutrients. Substitution: Use cauliflower for a different texture.
  • Bacon – Introduces a savory, crispy element. Substitution: Swap for turkey bacon to make it leaner.
  • Grated Cheddar Cheese – Provides rich flavor and creaminess. Substitution: Dairy-free cheese works well for a dairy-free choice.
  • Chives – Fresh herb that enhances flavor with a mild onion twist. Note: Green onions or scallions can be used in place.

For the Italian Sausage, Kale & Parmesan Variation

  • Italian Sausage – Brings hearty, satisfying flavor. Substitution: Plant-based sausage works perfectly for vegetarian options.
  • Shallot – Offers a sweet onion taste that complements the other ingredients. Substitution: Yellow onions can be used if shallots are unavailable.
  • Kale Leaves – A superfood that adds nutrients and a pop of color. Substitution: Spinach is a great alternative.

For the Spinach, Tomato & Goat Cheese Variation

  • Grape Tomatoes – Add juiciness and a hint of sweetness. Substitution: Cherry tomatoes can also be used.
  • Baby Spinach – Adds bright color and essential vitamins. Substitution: You can use Swiss chard for a different taste.
  • Green Onion – Provides a crunchy bite; optional for those who may want a milder flavor. Note: Can be omitted if desired.
  • Goat Cheese – Contributes creaminess and tanginess to every bite. Substitution: Feta cheese can work as a suitable alternative.

These versatile Breakfast Egg Muffins allow for endless customizations, ensuring that you can craft a breakfast that delights your taste buds while ticking all the nutrition boxes!

Step‑by‑Step Instructions for Breakfast Egg Muffins

Step 1: Prep Egg Base
Begin by preheating your oven to 350°F (175°C) and greasing a muffin tin with non-stick spray. In a large mixing bowl or measuring cup, whisk together the large eggs with kosher salt and black pepper until the mixture is fluffy and well-blended, about 1-2 minutes.

Step 2: Prepare Fillings
For the Broccoli, Bacon & Cheddar variation, cook the bacon in a skillet over medium heat until crispy, then drain on paper towels. Next, steam the broccoli florets until tender, roughly 3-4 minutes, and chop them into small pieces. For the other variations, cook the Italian sausage with shallots and kale, or roughly chop spinach and halve grape tomatoes for the Spinach, Tomato & Goat Cheese version, preparing each filling as per your chosen flavor.

Step 3: Assemble Muffins
Carefully distribute your prepared filling ingredients into the greased muffin cups, using about 1-2 tablespoons of each filling based on your preference. Once filled, pour the egg mixture over the fillings until each cup is about 90% full, ensuring that the ingredients are submerged but still visible.

Step 4: Bake
Place the muffin tin in the preheated oven and bake for 20-25 minutes, or until the egg muffins are set in the middle and slightly golden on the edges. Check for doneness by inserting a toothpick; it should come out clean when the muffins are ready.

Step 5: Cool and Remove
Once baked, remove the muffin tin from the oven and let the Breakfast Egg Muffins cool for about 5 minutes. To release them easily, run a knife around the edges of each muffin, then gently lift them out using a fork or your fingers. Enjoy warm, or let cool completely for meal prep storage!

Expert Tips for Breakfast Egg Muffins

  • Don’t Overbake: Keep a close eye on your muffins; overbaking can lead to dryness. Check them at 20 minutes for the perfect fluffiness.

  • Grease Properly: Use a non-stick spray or oil in your muffin tin to prevent sticking, ensuring an easy release every time.

  • Customize Creatively: Mix and match your favorite proteins and veggies. Getting creative with ingredients can result in delightful new flavors—don’t be afraid to try out various combinations!

  • Mix Evenly: Make sure the egg mixture gets distributed evenly among the fillings for consistent cooking and flavor in every single bite of your Breakfast Egg Muffins.

  • Storage Solutions: If you plan on making a big batch, allow them to cool completely before storing in an airtight container in the fridge for up to 5 days or freezing them for quick breakfasts later on.

How to Store and Freeze Breakfast Egg Muffins

Fridge: Store your Breakfast Egg Muffins in an airtight container in the fridge for up to 5 days. This keeps them fresh and ready for busy mornings.

Freezer: For long-term storage, freeze the muffins in a single layer on a baking sheet, then transfer to a freezer-safe bag. They can be stored for up to a month without losing flavor!

Reheating: To reheat, simply microwave a muffin for about 30-60 seconds or until warmed through. You can also bake them in a preheated oven at 350°F (175°C) for around 10-15 minutes.

Wrap for Freshness: For best results, wrap individual muffins in plastic wrap before freezing to prevent freezer burn and maintain their delightful taste.

Make Ahead Options

These Breakfast Egg Muffins are a fantastic choice for meal prep enthusiasts! You can prepare the fillings for your muffins up to 3 days in advance, simply chop your chosen vegetables and proteins, and store them in airtight containers in the fridge to keep them fresh. The egg mixture can also be whisked and refrigerated for up to 24 hours without losing its fluffy texture. When you're ready to enjoy your muffins, just fill your muffin cups with the prepped ingredients, pour in the egg mixture, and bake as directed. This approach saves you time in the mornings while ensuring your Breakfast Egg Muffins are just as delicious!

What to Serve with Customizable Low-Carb Egg Muffins?

Elevate your breakfast experience with delightful pairings that complement these fluffy, savory muffins.

  • Fresh Fruit Salad: A medley of seasonal fruits adds a refreshing sweetness, balancing the rich flavors of the egg muffins. The vibrant colors and varied textures create a delightful start to your day.

  • Avocado Toast: Creamy avocado on whole-grain bread provides healthy fats and pairs beautifully with the protein-packed muffins. The smooth texture enhances each bite, making it a satisfying combination.

  • Mixed Green Salad: A light salad dressed with lemon vinaigrette brings a crunchy, refreshing contrast, enhancing the savory notes of the muffins. Plus, it adds a burst of color to your breakfast table.

  • Yogurt Parfait: Creamy yogurt layered with granola and berries introduces a sweet, tangy element that complements the muffins perfectly. The crunchy granola adds a delightful texture, making each spoonful enjoyable.

  • Herbed Tomato Slices: Sliced tomatoes sprinkled with fresh herbs provide a light, juicy side that enhances the flavors of the muffins. This simple addition contributes a refreshing element to your meal.

  • Coffee or Herbal Tea: A warm beverage like freshly brewed coffee or calming herbal tea rounds out the breakfast experience. The rich or soothing flavors complement the savory egg muffins splendidly.

  • Smoothie: A fruity or green smoothie can add a nutritious boost to your breakfast while keeping it filling. Blend in your favorite ingredients for a refreshing, hydrating drink that pairs wonderfully with the muffins.

Indulge in these delicious accompaniments to turn your breakfast egg muffins into a hearty, well-rounded meal!

Breakfast Egg Muffins Variations & Substitutions

Feel free to take these delicious egg muffins and make them your own with these fun and tasty variations!

  • Vegetarian: Swap out meats for cooked lentils or chickpeas for a hearty vegetarian option. These not only add protein but also give a lovely texture and nutrition boost.

  • Dairy-Free: Use almond or coconut milk instead of traditional milk and opt for dairy-free cheese. It'll still be creamy, making it perfect for those avoiding dairy, without losing flavor.

  • Spicy Kick: Add diced jalapeños or a sprinkle of red pepper flakes for a spicy twist. If you enjoy heat, this will elevate your muffins to a whole new level.

  • Herb-Infused: Incorporate fresh herbs like basil, dill, or cilantro for an aromatic touch. Fresh herbs brighten up flavors and make your egg muffins feel even more gourmet.

  • Breakfast Sausage: Substitute Italian sausage with turkey or chicken sausage for a leaner protein option. This not only cuts down on calories but also adds a different dimension of flavor.

  • Mixed Veggies: Replace or mix the primary vegetables with whatever you have on hand, like zucchini, bell peppers, or mushrooms. Versatile and fresh, it's a fantastic way to clear out your fridge!

  • Savory Spice: Try adding spices such as turmeric or smoked paprika for depth of flavor. Just a pinch can transform your muffins and make them unforgettable.

For more breakfast inspiration, don't forget to check out our delightful Cornbread Breakfast Casserole recipes that pack flavor and can be tailored to numerous tastes!

Breakfast Egg Muffins Recipe FAQs

How do I select the best ingredients for my egg muffins?
When choosing vegetables, look for bright colors and firm textures. For example, broccoli should be vibrant green and free of dark spots. When it comes to cheese, opt for freshly grated varieties as they melt better compared to pre-shredded options, which often contain anti-caking agents.

How should I store my Breakfast Egg Muffins?
After preparing your muffins, allow them to cool completely before placing them into an airtight container. In the fridge, they’ll stay fresh for up to 5 days. If you choose to freeze, do so by wrapping each muffin in plastic wrap and placing them in a freezer-safe bag, where they can last for up to a month.

Can I freeze my Breakfast Egg Muffins?
Absolutely! To freeze your muffins, first, let them cool completely. Next, arrange them in a single layer on a baking sheet to freeze for about 1-2 hours. Once solid, transfer them to a freezer-safe bag or container. They’ll retain their deliciousness for up to 3 months, making breakfast quick and easy!

What if my egg muffins are sticking to the pan?
To prevent sticking, ensure you thoroughly grease your muffin tin with non-stick spray or a light coat of oil before adding your ingredients. If they do stick, run a butter knife around the edges after baking and gently lift them out with a fork. If possible, consider using silicone muffin cups for easy removal next time.

Are these Breakfast Egg Muffins safe for people with allergies?
While the base recipe is quite versatile, be cautious of allergens like dairy and gluten. You can make these muffins dairy-free by using plant-based cheese alternatives and gluten-free options when needed. Always check ingredient labels to ensure they fit your dietary requirements or those of your family.

How can I adjust the egg muffins for my dog's diet?
If you're considering sharing these muffins with your furry friend, feel free to omit any ingredient that’s not dog-safe, such as certain cheeses, onions, and meats. Use plain eggs and veggies like spinach or carrots, ensuring they’re cooked and chopped into small pieces for easy chewing. However, always consult your vet for any specific dietary needs for pets.

Breakfast Egg Muffins

Savory Breakfast Egg Muffins for Easy Morning Bliss

These Breakfast Egg Muffins are customizable, nutritious, and perfect for busy mornings.
Print Recipe Pin Recipe
Prep Time 10 minutes mins
Cook Time 25 minutes mins
Cooling Time 5 minutes mins
Total Time 40 minutes mins
Servings: 12 muffins
Course: Breakfast
Cuisine: American
Calories: 150
Ingredients Equipment Method Nutrition Notes

Ingredients
  

For the Egg Base
  • 12 large eggs Can substitute with egg whites for a lower cholesterol option.
  • 1 teaspoon kosher salt
  • 1 teaspoon black pepper
For the Broccoli, Bacon & Cheddar Variation
  • 1 cup broccoli florets Can substitute with cauliflower.
  • 6 slices bacon Can substitute with turkey bacon.
  • 1 cup grated cheddar cheese Dairy-free cheese works for dairy-free option.
  • 1 tablespoon chives Can substitute with green onions or scallions.
For the Italian Sausage, Kale & Parmesan Variation
  • 1 pound Italian sausage Plant-based sausage for vegetarian option.
  • 1 medium shallot Can substitute with yellow onions.
  • 1 cup kale leaves Can substitute with spinach.
For the Spinach, Tomato & Goat Cheese Variation
  • 1 cup grape tomatoes Can substitute with cherry tomatoes.
  • 2 cups baby spinach Can substitute with Swiss chard.
  • 1 green onion green onion Can be omitted.
  • 1 cup goat cheese Can substitute with feta cheese.

Equipment

  • Muffin tin
  • Mixing Bowl
  • Skillet
  • Whisk

Method
 

Step-by-Step Instructions for Breakfast Egg Muffins
  1. Preheat your oven to 350°F (175°C) and grease a muffin tin with non-stick spray. Whisk together the large eggs with kosher salt and black pepper until fluffy, about 1-2 minutes.
  2. For the Broccoli, Bacon & Cheddar variation, cook the bacon until crispy, draining on paper towels. Steam the broccoli until tender, roughly 3-4 minutes. Prepare the Italian sausage with shallots and kale, or chop spinach and halve grape tomatoes for the Spinach version.
  3. Distribute the filling ingredients into the greased muffin cups, using about 1-2 tablespoons of each filling. Pour the egg mixture over until each cup is about 90% full.
  4. Bake for 20-25 minutes, or until the muffins are set and golden. Check for doneness with a toothpick.
  5. Let cool for about 5 minutes, run a knife around the edges, and gently lift them out. Enjoy warm or cool completely for meal prep.

Nutrition

Serving: 1muffinCalories: 150kcalCarbohydrates: 3gProtein: 10gFat: 10gSaturated Fat: 4gPolyunsaturated Fat: 1gMonounsaturated Fat: 2gCholesterol: 150mgSodium: 300mgPotassium: 200mgFiber: 1gSugar: 1gVitamin A: 500IUVitamin C: 15mgCalcium: 100mgIron: 2mg

Notes

These muffins can be stored in the fridge for up to 5 days or frozen for a month. Reheat in the microwave or oven for best results.

Tried this recipe?

Let us know how it was!

Delicious Acai Bowl: Nutritious and Customizable Bliss

August 11, 2025 by Grace Snow Leave a Comment

With each vibrant spoonful of this Customizable Antioxidant-Rich Acai Bowl, I’m transported to a sun-kissed beach, feeling the tropical breeze on my skin. The beauty of this smoothie bowl lies in its simplicity: you can whip it up in just minutes, making it the perfect go-to for a refreshing breakfast or a snack that fuels your day. Packed with antioxidants and creamy goodness, this recipe invites you to explore endless topping possibilities—whether you’re in the mood for crunchy granola, luscious fruits, or a drizzle of honey, there’s a combination that will suit every craving. Plus, it’s entirely vegan-friendly, making it a guilt-free indulgence. Curious to see how your custom creation will turn out? Let’s dive in!

Why is the Acai Bowl a Must-Try?

Health Benefits: Each bite of this acai bowl delivers a powerhouse of antioxidants and essential vitamins, helping to boost your immune system.
Quick and Easy: In just a few minutes, you can create a delicious and nutritious meal, perfect for busy mornings or post-workout fuel.
Customizable: With a variety of toppings like chia seeds, mixed fruits, and coconut flakes, you can tailor each bowl to suit your taste and nutritional needs.
Vegan-Friendly: This recipe uses plant-based ingredients, so everyone can enjoy it without compromise.
Crowd-Pleaser: Impress family and friends with a visually stunning and delicious dish that’s perfect for any occasion! The delightful colors and flavors will keep them coming back for more.

Acai Bowl Ingredients

For the Base

  • Frozen Unsweetened Acai Packets – This is the star ingredient, providing that rich color and signature flavor; use 2 packets for a beautifully creamy texture.
  • Frozen Mixed Berries – Sweetens the mix and adds variety; feel free to swap with any frozen fruit you love.
  • Banana – Essential for a smooth base; ensure it's frozen for the best thickness.
  • Milk (or plant-based alternative) – Blends everything together beautifully; almond milk or coconut milk work wonders here.
  • Almond Butter – Adds creaminess and healthy fats; you can easily substitute it with peanut butter or sunflower seed butter for different flavors.

For the Toppings

  • Bee Pollen – A nutritional boost that enhances the health benefits of your acai bowl.
  • Chia Seeds – Provides a delightful crunch and a dose of fiber.
  • Coconut Flakes – Sweet and chewy, these add a tropical vibe to your bowl.
  • Mixed Berries – Perfect for enhancing both flavor and visual appeal; mix and match according to your preference.
  • Hemp Seeds – A crunchy, nutrient-dense addition that packs a healthy punch.
  • Cacao Nibs – Add a bit of chocolatey goodness if you’re craving something indulgent; these are perfect for a sweet crunch.

Step‑by‑Step Instructions for Customizable Antioxidant-Rich Acai Bowl

Step 1: Blend the Base
Start by gathering your blender, and add 2 frozen unsweetened acai packets, 1 cup of frozen mixed berries, 1 frozen banana, ½ cup of milk (or a plant-based alternative), and 2 tablespoons of almond butter. Blend on high for about 30-60 seconds, using a tamper if needed, until the mixture is smooth and thick resembling soft-serve ice cream.

Step 2: Prepare Serving Bowls
While your acai base blends, grab your favorite bowls. You want something shallow enough to showcase the colorful toppings you’ll add. Consider pre-chilling your bowls in the fridge if you prefer your acai bowl icy and fresh. Set them aside, ready for that gorgeous blend.

Step 3: Pour and Plate
Once blended to a velvety consistency, pour the acai bowl base into your prepared bowls, filling them about three-quarters full. This will leave space for the delightful toppings you'll add next. Take a moment to appreciate the vibrant purples and pinks of your acai mixture—it's as pleasing to the eye as it is nutritious!

Step 4: Add Your Toppings
Now comes the fun part: customizing your acai bowl! Top with a variety of fresh fruits like sliced bananas, strawberries, or blueberries. Sprinkle over chia seeds, coconut flakes, and hemp seeds to add texture. Feel free to get creative with drizzles of almond butter or honey for extra flavor.

Step 5: Serve and Enjoy
Once your toppings are beautifully arranged, serve your acai bowls immediately for optimal freshness. Each bowl is a canvas of color and flavor, ready to be enjoyed. Grab a spoon and dive into your delightful creation—every bite is a refreshing and nutrient-packed experience!

How to Store and Freeze Acai Bowl

Fridge: Store any leftover acai bowl in an airtight container for up to 2 days. However, note that the creamy texture may change slightly as the flavors meld.

Freezer: For longer storage, pour the acai mixture into a freezer-safe container or ice cube trays, and freeze for up to 1 month. Thaw overnight in the fridge before consuming.

Reheating: If frozen, you may need to blend the thawed mixture again to restore the smooth consistency before serving.

Make-Ahead Tips: To enjoy a quick, nutritious breakfast, prepare the acai base in advance and freeze it. Just thaw overnight for a delicious acai bowl in the morning!

What to Serve with Customizable Antioxidant-Rich Acai Bowl

Enjoy your acai bowl experience by pairing it with delightful sides and drinks that enhance its refreshing flavors.

  • Granola Parfaits: Layered with yogurt and fruit, these create a satisfying crunch that complements the creamy acai.
  • Coconut Yogurt: This adds a luscious, tropical twist and offers a dairy-free alternative that enhances the dish.
  • Fresh Tropical Fruit Salad: A burst of seasonal fruits brightens up the bowl while bringing a refreshing, juicy contrast.
  • Chia Pudding: Rich in nutrients and fiber, this creates an enjoyable contrast in texture while keeping things health-conscious.
  • Baked Sweet Potato Fries: These crispy delights provide a sweet-savory contrast, making each bite more interesting.
  • Matcha Green Tea: The earthy tones of matcha offer a calming balance to the sweetness of the acai bowl, perfect for a midday treat.
  • Almond Milk Smoothie: Whip up a smoothie with almond milk and spinach—an extra serving of nutrition that pairs beautifully.
  • Nutty Energy Balls: Offering a protein-packed snack, these can punctuate the meal with an indulgent sweetness.

Expert Tips for the Best Acai Bowl

  • Frozen Together: Use all frozen fruits: This enhances creaminess and thick texture, making your acai bowl delightful and indulgent.

  • Tamper Trick: Utilize a tamper: If your blender has one, use it to push the mixture down for an even blend without adding more liquid.

  • Sugar Savvy: Watch fruit quantities: While fruit is healthy, too many can add excess natural sugars; balance is key for a nutritious acai bowl.

  • Make-Ahead Magic: Prepare in advance: Blend and freeze the acai base ahead of time for a quick breakfast option; thaw overnight for best results.

  • Topping Options: Explore diverse toppings: From nuts to dried fruits, the more variety you incorporate, the more exciting your acai bowl will be!

Make Ahead Options

These Acai Bowls are perfect for busy home cooks looking to save time! You can prepare your acai bowl base up to 24 hours in advance by blending the acai packets, frozen mixed berries, banana, milk, and almond butter together and storing the mixture in an airtight container in the freezer. To maintain quality, ensure your mixture is well-sealed to prevent freezer burn. When you're ready to enjoy your bowl, simply thaw it overnight in the refrigerator. In the morning, pour the mixture into your bowls and add your desired toppings for a fresh and hassle-free breakfast. This way, you get the delightful flavors and creamy texture of your acai bowl without the morning rush!

Acai Bowl Variations to Try

Feeling adventurous in the kitchen? Let your creativity shine as you customize your acai bowl with these delicious variations.

  • Nut-Free: Swap almond butter for sunbutter to keep it nut-free, offering a similar creamy texture.
  • Tropical Twist: Add frozen mango instead of mixed berries to infuse your bowl with a sunny tropical flair. It creates a vibrant and refreshing taste!
  • Dark Chocolate Delight: Sprinkle cacao nibs or dark chocolate shavings over your toppings for a rich, indulgent dip into sweet satisfaction.
  • Protein-Packed: Mix in a scoop of your favorite protein powder to the base for an energizing boost that makes it perfect for post-workout recovery.
  • Honey Drizzle: Elevate your bowl with a drizzle of honey or agave syrup to add natural sweetness that perfectly contrasts the tartness of the acai.
  • Spicy Kick: Stir in a pinch of cayenne or chili powder for those who like to spice things up; it pairs surprisingly well with the sweetness!
  • Green Goodness: Blend in a handful of spinach or kale with your base, enriching your acai bowl without altering the delightful flavor. A nourishing way to sneak in greens!
  • Baked Crunch: Crumble some toasted granola over the top for an extra crunchy texture, ensuring every bite delivers a delightful crunch.

Feel free to indulge your creativity as you explore the topping options and make this acai bowl your own!

Acai Bowl Recipe FAQs

How do I select ripe bananas for my acai bowl?
Absolutely! When choosing bananas, look for ones that are firm with a vibrant yellow color and slight speckles. Avoid any with dark spots all over, as these may be overripe. For the best results in your acai bowl, freeze them once ripe; this guarantees a creamy texture when blended.

How should I store any leftover acai bowl?
Very simply! Store any leftover acai bowl in an airtight container in the fridge for up to 2 days. Just keep in mind that the creamy texture may change as the flavors meld together. If you want a more refreshing option, consider using it as a smoothie base!

Can I freeze my acai bowl mixture?
Of course! To freeze the acai mixture, pour it into a freezer-safe container or ice cube trays, and freeze for up to 1 month. When you're ready to enjoy, simply thaw it in the fridge overnight. Afterwards, blend again for that smooth, creamy texture before serving. It's a great make-ahead option for busy mornings!

What should I do if my acai bowl is too thick?
No worries, this happens! If your mixture turns out thicker than you'd like, try adding a splash of your chosen milk or plant-based alternative and blend again. If you're using frozen ingredients, they can often make the blend thicker, so adding a bit of liquid can help achieve that perfect consistency.

Are acai bowls safe for all dietary needs?
Absolutely! This acai bowl recipe is vegan-friendly, making it suitable for a wide range of dietary preferences. If you have allergies, you might want to avoid nuts by substituting almond butter with sunflower seed butter. Always make sure to check the ingredient labels for any hidden allergens!

What toppings can I use for my acai bowl?
The more the merrier! Get creative with toppings like fresh fruits, granola, almond slices, or coconut flakes. You can also add superfoods like chia seeds or hemp seeds for an extra nutritional boost. The combinations are endless, allowing you to craft a bowl that’s uniquely yours!

Acai Bowl

Delicious Acai Bowl: Nutritious and Customizable Bliss

This Acai Bowl is a refreshing and customizable breakfast option, packed with antioxidants and made from delicious, plant-based ingredients.
Print Recipe Pin Recipe
Prep Time 5 minutes mins
Total Time 5 minutes mins
Servings: 2 bowls
Course: Breakfast
Cuisine: Vegan
Calories: 350
Ingredients Equipment Method Nutrition Notes

Ingredients
  

For the Base
  • 2 packets Frozen Unsweetened Acai Packets Provides rich color and flavor.
  • 1 cup Frozen Mixed Berries Feel free to swap with other frozen fruits.
  • 1 each Banana Ensure it's frozen for best thickness.
  • ½ cup Milk (or plant-based alternative) Almond or coconut milk work well.
  • 2 tablespoons Almond Butter Can be substituted with peanut butter.
For the Toppings
  • 1 tablespoon Bee Pollen Enhances nutritional benefits.
  • 2 tablespoons Chia Seeds
  • ¼ cup Coconut Flakes
  • ½ cup Mixed Berries Mix and match as desired.
  • 2 tablespoons Hemp Seeds
  • 2 tablespoons Cacao Nibs For a chocolatey crunch.

Equipment

  • Blender

Method
 

Step-by-Step Instructions
  1. Blend the Base: Add 2 frozen acai packets, 1 cup frozen mixed berries, 1 frozen banana, ½ cup milk, and 2 tablespoons almond butter to a blender. Blend until smooth and thick.
  2. Prepare Serving Bowls: Grab shallow bowls to showcase the toppings. Optionally pre-chill for a refreshing experience.
  3. Pour and Plate: Pour the blended acai base into the bowls, filling them about three-quarters full.
  4. Add Your Toppings: Customize with fresh fruits, chia seeds, coconut flakes, and hemp seeds. Drizzle with almond butter or honey for extra flavor.
  5. Serve and Enjoy: Serve immediately for optimal freshness and enjoy your nutritious creation.

Nutrition

Serving: 1bowlCalories: 350kcalCarbohydrates: 45gProtein: 8gFat: 15gSaturated Fat: 2gPolyunsaturated Fat: 4gMonounsaturated Fat: 8gSodium: 25mgPotassium: 450mgFiber: 8gSugar: 15gVitamin A: 10IUVitamin C: 30mgCalcium: 15mgIron: 10mg

Notes

For the best texture, use all frozen fruits and consider preparing the acai base in advance and freezing it.

Tried this recipe?

Let us know how it was!

Discover Flavorful Turkish Eggs for an Epic Brunch Delight

August 11, 2025 by Grace Snow Leave a Comment

As I savored my first bite of Turkish Eggs, I was transported to a charming café in the heart of Istanbul, where the aroma of spices dances in the air. This dish, also known as Çılbır, features a creamy yogurt base topped with perfectly poached eggs, all drizzled with a luscious spiced butter sauce. In just 20 minutes, you can whip up this high-protein, gluten-free brunch delight that packs a punch of Mediterranean flavors. The best part? It's not only quick to prepare, but it’s a stunning dish that’s sure to impress your loved ones or treat yourself to a well-deserved indulgence. Curious about how to bring this vibrant dish to your table? Join me as we dive into the world of Turkish Eggs!

Why are Turkish Eggs a must-try?

Simplicity, this delightful recipe comes together in just 20 minutes, perfect for busy mornings or leisurely brunches. Rich Flavor abounds with a creamy yogurt base, perfectly poached eggs, and a spiced butter sauce that brings a fragrant kick. Nutrient-packed, this dish is high in protein and gluten-free, making it a guilt-free brunch option. Crowd-pleaser, it's visually stunning and guaranteed to impress family and friends. Versatile, feel free to add sautéed greens or swap spices to make it your own! For an extra level of indulgence, serve with crusty bread to soak up every last bit of that lovely sauce.

Turkish Eggs Ingredients

• Bring the Mediterranean flavors to your kitchen with this vibrant dish!

  • For the Yogurt Base

  • Greek yogurt – Provides creaminess and tang; substitute with regular or dairy-free yogurt for a lighter version.

  • Garlic (1 finely grated clove) – Adds a pungent, aromatic flavor to the yogurt; fresh garlic is preferred for the best taste.

  • Kosher salt and ground black pepper – Enhances overall flavors; adjust to your personal taste.

  • For the Poached Eggs

  • Large eggs (4) – The star of the dish, poached to silky perfection; for a vegan option, consider using a chickpea-based egg substitute.

  • White vinegar (1 tablespoon) – Helps the egg whites coagulate during poaching; apple cider vinegar can be used as an alternative.

  • For the Spiced Butter Sauce

  • Unsalted butter (4 tablespoons) – Provides richness and flavor; substitute with olive oil for a dairy-free option.

  • Aleppo pepper (2 teaspoons) – Offers a mild heat and unique flavor; swap with smoked paprika for a different flavor profile if unavailable.

  • Paprika (1 teaspoon) – Adds depth and color to the sauce; use sweet or smoked paprika depending on your preference.

  • For Garnishing

  • Chopped fresh herbs (dill, parsley, mint, etc.) – Enhances the dish's freshness and aroma; use any available herbs to garnish.

Step‑by‑Step Instructions for Turkish Eggs

Step 1: Prepare the Garlicky Yogurt
In a small bowl, combine the Greek yogurt, finely grated garlic, kosher salt, and ground black pepper. Stir everything together until the mixture is smooth and well-blended. This creamy base will add a delightful tanginess to your Turkish Eggs, so set it aside while you prepare the rest of the dish.

Step 2: Make the Spiced Butter Sauce
In a small pan over medium-low heat, melt the unsalted butter until it’s frothy but not browned, which will take about 2-3 minutes. Next, add the Aleppo pepper and paprika, stirring for 1 minute until fragrant. Be careful not to let the spices burn. Once ready, remove the pan from heat and set aside to let the flavors meld.

Step 3: Prepare the Eggs
Crack each of the large eggs into a strainer set over a bowl, allowing the excess egg whites to drain off for about 1-2 minutes. This step is crucial for achieving the perfect poached texture. Afterward, gently transfer each egg to individual ramekins, ready for poaching.

Step 4: Poach the Eggs
Bring a medium-sized pot of water to a gentle simmer over medium heat, then add the white vinegar to help the egg whites firm up. Lower the heat to maintain a steady simmer and carefully lower the ramekins with eggs into the water, poaching them for about 3 minutes. The whites should be set while the yolks remain runny, perfect for your Turkish Eggs.

Step 5: Assemble the Dish
Once poached, carefully remove the eggs with a slotted spoon and place them on paper towels to drain any excess water. On a serving plate, spread a generous layer of the garlicky yogurt. Top it with the poached eggs, drizzle the spiced butter sauce over everything, and finish with a sprinkle of your favorite chopped fresh herbs for a burst of color and freshness.

Turkish Eggs Variations & Substitutions

Feel free to get creative with your Turkish Eggs and explore new flavors that excite your taste buds!

  • Dairy-Free: Use coconut yogurt or any plant-based yogurt instead of Greek yogurt for a vegan-friendly option. This keeps the dish creamy without dairy.

  • Veggie Boost: Top the dish with sautéed kale or roasted bell peppers for a beautiful color contrast and added nutrition. These veggies perfectly complement the creamy base.

  • Spicy Kick: Swap the Aleppo pepper with a dash of cayenne or red chili flakes for an extra layer of heat. Just a pinch can elevate the overall flavor!

  • Herb Variation: Experiment with fresh basil or cilantro instead of the traditional dill and parsley for a unique aromatics twist. This can offer a fresh, vibrant taste to the dish.

  • Add Cheese: Crumble some feta or goat cheese over the top for a tangy richness that elevates each bite. The creamy essence melds seamlessly with the yogurt and eggs.

  • Savory Crust: Serve with toasted pita chips or crusty sourdough to add a delightful crunch. This provides a satisfying texture contrast to the creamy yogurt and runny eggs.

  • Egg Alternatives: For a vegan experience, try a chickpea scramble instead of poached eggs. It’s a fantastic, protein-packed substitute that still brings the dish together.

  • Make it Zesty: Add a squeeze of lemon juice before serving for a refreshing brightness that balances the richness of the yogurt and butter sauce. A simple addition that makes a big difference!

For more delicious ideas, you might want to check out how to make spiced chickpea dishes or explore my take on Mediterranean-style breakfast recipes. Happy cooking!

What to Serve with Creamy Turkish Eggs with Spiced Butter Sauce

Imagine a vibrant table filled with dishes that harmoniously complement the rich and creamy Turkish Eggs, enhancing your brunch experience.

  • Crusty Sourdough Bread: Perfect for soaking up the garlicky yogurt and spiced butter sauce, adding a delightful crunch to your meal. A slice of toasted sourdough adds warmth and heartiness.

  • Simple Green Salad: A light mix of greens, cucumbers, and cherry tomatoes dressed in a lemon vinaigrette balances the richness of the eggs, offering a refreshing contrast.

  • Roasted Vegetables: Caramelized bell peppers, zucchini, and eggplant bring natural sweetness and depth, pairing beautifully with the flavors of the yogurt and butter sauce.

  • Feta Cheese Crumbles: The salty tang of crumbled feta enhances the dish's Mediterranean vibe, adding creaminess and a flavor punch that complements the eggs perfectly.

  • Fresh Fruit Platter: Bright, seasonal fruits like berries, oranges, or melons provide a sweet, juicy contrast that refreshes the palate after that rich egg dish.

  • Turkish Tea: A warm cup of traditional Turkish tea brings an aromatic close to your brunch experience, with its delicate notes perfectly balancing the meal's flavors.

  • Spiced Chickpeas: Crunchy, roasted chickpeas seasoned with cumin or paprika offer a tasty protein boost and crunchy texture, making it a fun addition to your savory brunch spread.

  • Thick Yogurt Parfait: Layer Greek yogurt with honey and granola for a delightful and nutritious dessert that complements the brunch, providing a touch of sweetness.

How to Store and Freeze Turkish Eggs

Fridge: Store leftover Turkish Eggs in an airtight container for up to 3 days. Keep the poached eggs and yogurt mixture separate to retain freshness.

Freezer: It is not recommended to freeze Turkish Eggs, as the creamy yogurt and poached eggs may not maintain their quality once thawed.

Reheating: Gently reheat leftover poached eggs in warm water for about 5 minutes to restore their texture. Serve with freshly drizzled spiced butter sauce.

Make-Ahead Tips: The yogurt mixture can be prepared ahead and stored in the fridge for up to 2 days. Assemble the dish just before serving for the best flavor and presentation.

Make Ahead Options

Preparing Turkish Eggs ahead of time is a fantastic way to save precious minutes during busy mornings! You can assemble the garlicky yogurt and store it in the refrigerator for up to 3 days without losing flavor. Additionally, poach the eggs in advance and immerse them in a bowl of cold water; they will stay fresh for up to 2 days. When it's time to serve, simply reheat the poached eggs gently in warm water for a few minutes to regain their silky texture. With these make-ahead options, your Turkish Eggs will be just as delicious and ready to impress in no time!

Expert Tips for Turkish Eggs

  • Quality Yogurt: Use full-fat Greek yogurt for a creamier texture. Low-fat versions can lack flavor, affecting the overall dish.

  • Egg Poaching: Maintain a gentle simmer, not a rolling boil, to prevent the eggs from breaking apart. Perfect poaching ensures luscious runny yolks in your Turkish Eggs.

  • Customize Spices: Feel free to adjust Aleppo pepper and paprika levels according to your spice preference. Start low if you're unsure and build up for a personalized kick.

  • Fresh Herbs: Choose any combination of fresh herbs for your garnish. They not only add flavor but also enhance presentation, making your Turkish Eggs visually stunning.

  • Resting Eggs: If making ahead, store cooked poached eggs in cold water in the fridge. They’ll remain perfect for up to two days, ready to be warmed before serving.

  • Serving Suggestion: Pair with crusty bread to soak up the garlicky yogurt and spiced butter sauce, enhancing the entire flavor experience.

Turkish Eggs Recipe FAQs

What type of Greek yogurt should I use for Turkish Eggs?
Absolutely! I recommend using full-fat Greek yogurt for a rich and creamy texture that complements the dish beautifully. If you're looking for a lighter version, regular yogurt or a dairy-free option like coconut yogurt will work, but be mindful that the flavor may vary slightly.

How long can I store leftover Turkish Eggs?
You can store leftover Turkish Eggs in an airtight container in the fridge for up to 3 days. To keep them fresh, it’s best to separate the poached eggs from the yogurt mixture. This way, the yogurt stays creamy, and the eggs maintain their texture.

Can I freeze cooked Turkish Eggs?
Very! Unfortunately, freezing Turkish Eggs is not recommended. The creamy yogurt and poached eggs don’t handle freezing well and may lose their delicious texture when thawed. Instead, prep the yogurt mixture ahead and poach the eggs fresh for best results!

What’s the best way to reheat leftover poached eggs?
To gently reheat your poached eggs, fill a small pot with warm water and place the eggs in for about 5 minutes. This will help restore their delightful, runny yolks without cooking them further. Drizzle freshly made spiced butter sauce over them for an extra touch!

How can I make Turkish Eggs pet-friendly?
If you’d like to share a little with your furry friend, you could set aside a small quantity of plain yogurt without any added salt, garlic, or spices for them. Avoid the eggs altogether as they can be a bit rich for pets and focus on nutritious, pet-safe ingredients.

What should I do if my poached eggs break during cooking?
Don’t worry, this happens to the best of us! If your eggs break, you can create a delicious egg drop soup by letting the broken egg whites gently cook in the simmering water for a few moments longer. Alternatively, you can simply try again, ensuring the water is at a gentle simmer and perhaps adding a splash more vinegar to help with coagulation. Happy cooking!

Turkish Eggs

Discover Flavorful Turkish Eggs for an Epic Brunch Delight

Turkish Eggs, also known as Çılbır, are a creamy yogurt dish topped with poached eggs and spiced butter, making a delightful brunch.
Print Recipe Pin Recipe
Prep Time 20 minutes mins
Cook Time 10 minutes mins
Total Time 30 minutes mins
Servings: 4 servings
Course: Breakfast
Cuisine: Turkish
Calories: 300
Ingredients Equipment Method Nutrition Notes

Ingredients
  

For the Yogurt Base
  • 2 cups Greek yogurt or dairy-free yogurt
  • 1 clove Garlic finely grated
  • to taste Kosher salt
  • to taste Ground black pepper
For the Poached Eggs
  • 4 Large eggs or chickpea-based egg substitute
  • 1 tablespoon White vinegar or apple cider vinegar
For the Spiced Butter Sauce
  • 4 tablespoons Unsalted butter or olive oil
  • 2 teaspoons Aleppo pepper or smoked paprika
  • 1 teaspoon Paprika sweet or smoked
For Garnishing
  • to taste Chopped fresh herbs such as dill, parsley, mint

Equipment

  • small bowl
  • small pan
  • pot
  • strainer
  • ramekins
  • slotted spoon
  • serving plate

Method
 

Step-by-Step Instructions for Turkish Eggs
  1. Prepare the Garlicky Yogurt: In a small bowl, combine the Greek yogurt, finely grated garlic, kosher salt, and ground black pepper. Stir everything together until smooth.
  2. Make the Spiced Butter Sauce: In a small pan over medium-low heat, melt the unsalted butter until frothy. Add Aleppo pepper and paprika, stirring until fragrant.
  3. Prepare the Eggs: Crack each egg into a strainer set over a bowl to drain excess whites for 1-2 minutes.
  4. Poach the Eggs: Bring a pot of water to a gentle simmer, add white vinegar, and carefully lower the ramekins with eggs into the water, poaching for about 3 minutes.
  5. Assemble the Dish: Remove poached eggs with a slotted spoon, place on paper towels, spread garlicky yogurt on a plate, top with eggs, drizzle spiced butter sauce, and garnish with fresh herbs.

Nutrition

Serving: 1servingCalories: 300kcalCarbohydrates: 5gProtein: 14gFat: 25gSaturated Fat: 15gPolyunsaturated Fat: 2gMonounsaturated Fat: 7gCholesterol: 370mgSodium: 600mgPotassium: 200mgSugar: 3gVitamin A: 500IUVitamin C: 2mgCalcium: 150mgIron: 1mg

Notes

Quality yogurt and gentle simmering are crucial for perfect texture. Customize spices and use any fresh herbs for garnish. Serve with crusty bread.

Tried this recipe?

Let us know how it was!

Lemon Ricotta Protein Pancakes for a Zesty Breakfast Boost

August 11, 2025 by Grace Snow Leave a Comment

As I flipped the first pancake of the morning, a bright burst of zesty lemon filled the kitchen, wrapping us in its cheerful embrace. If you’re like me and often crave a breakfast that feels both indulgent and energizing, these Lemon Ricotta Protein Pancakes are just what you need. Naturally high in protein and gluten-free, this versatile recipe not only satisfies your taste buds but also brings a wholesome twist to your morning routine. With their soft, fluffy texture and a delightful hint of citrus, these pancakes are perfect for both busy weekdays and leisurely brunches. Plus, you can easily customize the ingredients to suit your dietary needs or whatever you have on hand. Ready to elevate your breakfast game? Let’s dive in!

Why Are These Pancakes a Game Changer?

High-Protein Power: Packed with protein from ricotta, these pancakes are a filling way to kickstart your day.
Gluten-Free Goodness: Made with almond and coconut flour, they cater to gluten-free diets without compromising on taste.
Versatile Ingredient Options: Easily swap ingredients to suit your dietary needs or pantry staples, ensuring they're always within reach.
Perfectly Fluffy Every Time: Thanks to clever mixing techniques and the right balance of ingredients, say goodbye to dense pancakes!
Meal Prep Friendly: Make a batch ahead of time to enjoy quick breakfasts that still pack a nutritious punch. These Lemon Ricotta Protein Pancakes will quickly turn into your go-to for brunch or a weekday treat!

Lemon Ricotta Protein Pancake Ingredients

• Gather these ingredients for a delightful breakfast experience!

For the Pancakes

  • Almond Flour – Provides a gluten-free base; substitute with coconut flour for a different texture.
  • Tapioca Flour – Contributes to a light and airy pancake; can be swapped with arrowroot powder.
  • Coconut Flour – Absorbs moisture and adds fiber; omit or increase almond flour if you skip it.
  • Baking Soda – Helps the pancakes rise for that fluffy texture we all adore!
  • Kosher Salt – A pinch enhances all the flavors beautifully.
  • Ricotta Cheese – Increases moisture and packs in protein; cottage cheese is a great substitute.
  • Eggs – Provide structure and lightness; for a vegan option, try a flax egg (1 tbsp ground flaxseed + 2.5 tbsp water).
  • Lemon Zest – Infuses the pancakes with a refreshing citrus aroma; be generous!
  • Vanilla Extract – Adds depth of flavor to your pancakes; can be omitted if desired.
  • Honey or Maple Syrup – Sweetens naturally; sugar alternatives like monk fruit work well too!

Step‑by‑Step Instructions for Lemon Ricotta Protein Pancakes

Step 1: Combine Dry Ingredients
In a large mixing bowl, whisk together almond flour, tapioca flour, coconut flour, baking soda, and a pinch of kosher salt until well blended. This step is crucial to ensure an even distribution of ingredients, leading to perfectly fluffy Lemon Ricotta Protein Pancakes. Aim for a uniform sandy texture, and set the bowl aside while you prepare the wet ingredients.

Step 2: Mix Wet Ingredients
In a separate bowl, add the creamy ricotta cheese and crack in the eggs. Whisk vigorously to combine until smooth, then incorporate the zesty lemon zest, vanilla extract, and your choice of honey or maple syrup. The mixture should be rich and creamy, introducing delightful flavors that will elevate your pancakes.

Step 3: Combine Mixtures
Carefully fold the wet ingredients into the dry mixture using a spatula until just combined. Be careful not to overmix; a few lumps are perfectly fine for achieving that light and airy texture in your Lemon Ricotta Protein Pancakes. Let the batter rest for about 5 minutes for better fluffiness while you prepare to cook.

Step 4: Cook Pancakes
Preheat a skillet or griddle over medium heat and grease it lightly with butter. Once hot, spoon approximately 1/4 cup of batter for each pancake onto the skillet. Cook for 2-3 minutes, watching for bubbles to form on the surface, signaling it’s time to flip. Flip the pancakes and cook for an additional 1-2 minutes, or until golden brown on both sides.

Step 5: Serve and Enjoy
Once cooked, transfer the pancakes onto a warm plate and serve immediately. Add maple syrup, a dollop of Greek yogurt, or a sprinkle of additional lemon zest to enhance the flavor of your Lemon Ricotta Protein Pancakes. Enjoy them warm to fully appreciate their fluffy texture and refreshing taste!

Make Ahead Options

These Lemon Ricotta Protein Pancakes are ideal for busy home cooks looking to save time during hectic mornings! You can prepare the batter up to 24 hours in advance by mixing all the dry ingredients and wet ingredients separately and refrigerating them. For even easier prep, cook a batch and store the pancakes in the fridge for up to 3 days or freeze them for up to 3 months. To maintain their fluffy texture, stack the pancakes with parchment paper between each layer in an airtight container or Ziplock bag. When you're ready to serve, simply reheat them in the microwave or toaster until warm, and enjoy a delicious, protein-packed breakfast with minimal effort!

Storage Tips for Lemon Ricotta Protein Pancakes

Room Temperature: Store leftover pancakes on the counter in an airtight container for up to 2 hours if they are still warm. For longer storage, refrigerate them.

Fridge: Keep pancakes in a tightly sealed container in the fridge for up to 3-4 days. They can be reheated in the microwave or briefly toasted for a fresh taste.

Freezer: For longer-term storage, freeze pancakes by placing them in a single layer on a baking sheet first, then transfer to a freezer bag or container for up to 3 months.

Reheating: When ready to enjoy, simply reheat in the microwave or toaster. This ensures that your Lemon Ricotta Protein Pancakes remain soft and delicious!

Lemon Ricotta Protein Pancakes Variations

Feel free to customize each bite of these delicious pancakes to perfectly suit your taste and nutritional needs!

  • Dairy-Free: Substitute ricotta cheese with silken tofu for a vegan-friendly option that still retains creaminess.
  • Sugar-Free: Opt for a sugar alternative like erythritol to sweeten without added calories.
  • Flavor Burst: Add a teaspoon of almond extract for a delightful twist on the classic flavor.
  • Spiced Up: Incorporate a pinch of cinnamon or nutmeg into the dry ingredients for a warm, cozy touch.
  • Citrus Swap: Try substituting lemon zest with orange or lime zest for a different refreshing flavor altogether.
  • Nutty Delight: Fold in chopped nuts or seeds into the pancake batter for added crunch and texture.
  • Fruit Infusion: Mix in fresh blueberries or sliced bananas for a fruity explosion that complements the zesty pancakes beautifully.
  • Savory Twist: Go savory by adding some sautéed spinach and feta cheese into the batter for a delicious brunch option that’s packed with protein.

With these variations, you can transform your Lemon Ricotta Protein Pancakes into an array of flavorful delights. Don't hesitate to explore new toppings or sides alongside the pancakes, like drizzling with homemade raspberry sauce or serving with a fresh fruit salad for a colorful, healthy breakfast!

What to Serve with Lemon Ricotta Protein Pancakes

As you savor each bite of fluffy perfection, consider how delightful these pancakes can be with complementary flavors and textures.

  • Fresh Berries: Bright and juicy, berries add a burst of natural sweetness and a refreshing contrast to the rich pancakes. Their vibrant colors also make your plate pop!
  • Greek Yogurt: Creamy and tangy, a dollop of Greek yogurt enhances the protein content and adds a luscious texture that perfectly balances the pancake's fluffiness.
  • Honey Drizzle: A light drizzle of honey brings an additional layer of sweetness, beautifully tying together the zesty lemon with rich flavors without overpowering the dish.
  • Crispy Bacon: The salty crunch of bacon offers a delightful contrast to the soft, sweet pancakes. The richness pairs well with the lemon, making each bite a treat.
  • Nut Butter: Smooth almond or peanut butter adds healthy fats and a hint of nuttiness, creating a savory-sweet combination that’s irresistibly good.
  • Chilled Sparkling Water: For a refreshing drink, nothing beats chilled sparkling water with a slice of lemon. It cleanses the palate and elevates the brunch experience.

As you explore these pairings, you’ll create a sensational breakfast spread that turns your Lemon Ricotta Protein Pancakes into a delightful meal everyone will come back for!

Expert Tips for Lemon Ricotta Protein Pancakes

  • Do Not Overmix: Overmixing the batter can lead to dense pancakes; mix just until combined for the best results.

  • Heat Matters: Be sure your skillet is preheated; pancakes will cook more evenly and puff up beautifully if the pan is hot.

  • Cooking Sprays: Instead of butter, consider using a non-stick spray for cooking; this offers an easy release and can make cleaning up simpler.

  • Fluffy Texture: Let the batter rest for a few minutes before cooking; this allows the almond flour to absorb moisture, resulting in fluffier Lemon Ricotta Protein Pancakes.

  • Storage Savvy: Leftover pancakes can be refrigerated for up to 3-4 days or frozen for quick breakfasts later; reheat in the microwave or toaster for best results.

Lemon Ricotta Protein Pancakes Recipe FAQs

What type of almond flour should I use?
You’ll want to use finely ground almond flour for the best texture in your Lemon Ricotta Protein Pancakes. This allows for a light and fluffy pancake. If you find almond flour too coarse, consider using blanched almond flour, as it is usually finer and blends better.

How should I store leftover pancakes?
Leftover Lemon Ricotta Protein Pancakes can be refrigerated in an airtight container for up to 3-4 days. To maintain their fluffiness, I recommend placing a piece of parchment paper between layers if you're stacking them. For longer storage, you can freeze them; just follow the instructions below!

Can I freeze these pancakes?
Absolutely! To freeze Lemon Ricotta Protein Pancakes, first, lay them out in a single layer on a baking sheet and place them in the freezer until firm, which usually takes about 2 hours. Once they're frozen, transfer them to a freezer bag or airtight container; they can be stored for up to 3 months. Just remember to label the container with the date.

What should I do if my batter is too thick or too thin?
If your pancake batter is too thick, you can add a splash of milk (dairy or non-dairy) to achieve your desired consistency. Start with 1 tablespoon at a time until it loosens up to your liking. Conversely, if your batter is too thin, you can sprinkle in a little more almond flour a tablespoon at a time, stirring gently until you reach the perfect thickness; be careful not to overmix!

Can I make these pancakes vegan?
Yes! To make Lemon Ricotta Protein Pancakes vegan, substitute the eggs with a flax egg—mix 1 tablespoon of ground flaxseed with 2.5 tablespoons of water, let it sit for about 5 minutes until it thickens, then use it in place of each egg. Additionally, you may want to replace the ricotta cheese with a plant-based alternative, like silken tofu blended until smooth.

Are there any allergen considerations with this recipe?
While these pancakes are gluten-free, be mindful of allergies to nuts if using almond flour. For nut-free alternatives, consider using sunflower seed flour or a gluten-free all-purpose blend. Always double-check labels for any allergens, especially if you are serving guests with dietary restrictions!

Lemon Ricotta Protein Pancakes

Lemon Ricotta Protein Pancakes for a Zesty Breakfast Boost

These Lemon Ricotta Protein Pancakes are a zesty, protein-packed breakfast option that is gluten-free and easily customizable.
Print Recipe Pin Recipe
Prep Time 10 minutes mins
Cook Time 15 minutes mins
Resting Time 5 minutes mins
Total Time 30 minutes mins
Servings: 4 pancakes
Course: Breakfast
Calories: 150
Ingredients Equipment Method Nutrition Notes

Ingredients
  

Pancake Ingredients
  • 1 cup Almond Flour Provides a gluten-free base
  • 1/4 cup Tapioca Flour Contributes to a light and airy pancake
  • 1/4 cup Coconut Flour Absorbs moisture and adds fiber
  • 1 teaspoon Baking Soda Helps the pancakes rise
  • 1/4 teaspoon Kosher Salt Enhances flavors
  • 1 cup Ricotta Cheese Increases moisture and protein
  • 2 large Eggs Provides structure
  • 1 tablespoon Lemon Zest Infuses pancakes with citrus aroma
  • 1 teaspoon Vanilla Extract Adds depth of flavor
  • 2 tablespoons Honey or Maple Syrup Sweetens naturally

Equipment

  • Mixing Bowl
  • Whisk
  • Spatula
  • Skillet
  • measuring cups

Method
 

Cooking Instructions
  1. In a large mixing bowl, whisk together almond flour, tapioca flour, coconut flour, baking soda, and kosher salt until well blended.
  2. In a separate bowl, whisk together ricotta cheese and eggs until smooth, then add lemon zest, vanilla extract, and honey or maple syrup.
  3. Fold the wet ingredients into the dry mixture gently until just combined; let the batter rest for 5 minutes.
  4. Preheat skillet over medium heat, add a little butter, and pour 1/4 cup of batter for each pancake. Cook for 2-3 minutes, then flip and cook until golden brown.
  5. Serve warm with maple syrup, Greek yogurt, or additional lemon zest.

Nutrition

Serving: 1pancakeCalories: 150kcalCarbohydrates: 12gProtein: 8gFat: 9gSaturated Fat: 3gPolyunsaturated Fat: 1gMonounsaturated Fat: 4gCholesterol: 70mgSodium: 100mgPotassium: 150mgFiber: 2gSugar: 3gVitamin A: 200IUVitamin C: 1mgCalcium: 150mgIron: 1mg

Notes

Do not overmix the batter for fluffier pancakes. Store leftovers in the fridge or freezer for later.

Tried this recipe?

Let us know how it was!

Delicious Pitaya Smoothie Bowl for a Refreshing Boost

August 11, 2025 by Grace Snow Leave a Comment

Every time I take a sip of this vibrant pitaya smoothie bowl, I’m instantly transported to a sun-soaked beach, where the colorful fruits dance with the waves in the distance. Knowing that it's packed with nutrients makes it even more satisfying. This refreshing pitaya smoothie bowl is not just a feast for the eyes; it’s a nutrient-dense superhero that can easily jazz up your morning routine or serve as a satisfying afternoon snack. With just a handful of ingredients like frozen pitaya, banana, and mixed berries, its quick preparation means you can whip it up even on the busiest mornings. Trust me, blending your way to health has never been this delicious! Ready to dive into this tropical delight? Let’s make some magic happen!

Why is the Pitaya Smoothie Bowl Special?

Vibrant Colors: The pitaya's stunning pink hue will brighten up your breakfast table, making it a feast for the eyes.

Nutrient-Packed: With its blend of fruits, this bowl is rich in antioxidants and essential vitamins, giving you a healthy boost to start your day.

Quick Prep: In just a few minutes, you can prepare this refreshing treat, perfect for hectic mornings or busy afternoons.

Versatile Toppings: Customize your smoothie bowl with various toppings like nuts or fruits, allowing you to get creative every time.

Crowd-Pleaser: Whether it’s for a family brunch or a solo snack, this pitaya smoothie bowl is sure to impress anyone looking for a deliciously healthy option. Enjoy it alone or pair it with something tasty like granola recipes for an even heartier meal!

Pitaya Smoothie Bowl Ingredients

For the Smoothie Base
• Frozen Pitaya Cubes – The key ingredient that brings vibrant color and a unique flavor to your pitaya smoothie bowl.
• Frozen Banana – This adds a creamy texture and natural sweetness essential for your smoothie.
• Frozen Mixed Berries – Packed with antioxidants, these enhance the flavor and provide additional nutrients.
• Coconut Water or Almond Milk – Choose coconut water for hydration or almond milk for a nutty twist; both will help blend the ingredients smoothly.

For Toppings
• Fresh Fruit – Sliced fruits like kiwi or strawberries not only enhance the look but also add extra vitamins.
• Nuts and Seeds – Almonds or chia seeds add crunch and healthy fats, making your pitaya smoothie bowl more filling.
• Coconut Flakes – Sprinkle on top for a tropical flair and added texture.
• Nut Butters – A dollop of almond or peanut butter can elevate the flavor and boost protein content.

Feel free to mix and match toppings to create your perfect pitaya smoothie bowl while enjoying the nutritious benefits this delightful dish has to offer!

Step‑by‑Step Instructions for Pitaya Smoothie Bowl

Step 1: Blend Base
In a high-powered blender, combine 1 cup of frozen pitaya cubes, 1 frozen banana, and 1 cup of frozen mixed berries. Pour in ½ to 1 cup of coconut water or almond milk to create a smooth blend. Start blending on high for about 30 seconds to one minute. Use a tamper if necessary to push down the ingredients until you achieve a thick, creamy texture and vibrant color.

Step 2: Check Consistency
Once blended, pause the blender and check the consistency of your pitaya smoothie bowl. If it's too thick for your liking, gradually add more coconut water or almond milk, blending again for an additional 15 seconds. Ideal consistency is thick enough to hold toppings while still being smooth and spoonable. Adjust to your taste preferences and blend for just a few more seconds if needed.

Step 3: Pour and Serve
Carefully pour the blended pitaya smoothie into a bowl, using a spatula to scrape down the sides of the blender if necessary. Aim to fill your bowl halfway to leave space for toppings. The beautiful pink hue should stand out, making it visually appealing. Take a moment to admire the vibrant color before adding your desired toppings.

Step 4: Add Toppings
Now comes the fun part! Customize your pitaya smoothie bowl with your choice of fresh fruit, nuts, seeds, or coconut flakes. Slice some kiwi or strawberries for added color and vitamins, and sprinkle a handful of almonds or chia seeds for crunch. Consider drizzling a bit of nut butter on top for extra flavor and protein.

Step 5: Enjoy Immediately
Once your toppings are in place, grab a spoon and dive into your delicious pitaya smoothie bowl! This refreshing treat is best enjoyed immediately to maintain its creamy texture and vibrant flavors. Relish every bite, knowing you’ve prepared a nutrient-dense dish that's both satisfying and healthy!

Expert Tips for Making the Perfect Pitaya Smoothie Bowl

• Frozen Fruit Focus: Ensure your fruits are fully frozen to achieve a creamy consistency in your pitaya smoothie bowl. Fresh fruit won’t yield the same texture.

• Liquid Limitation: Start with less liquid and gradually add more as needed. Too much liquid will thin your smoothie and compromise its thickness.

• Prepping Ahead: Prepare your smoothie base in advance and freeze it in portions. Thaw and stir the base before serving for an easy, quick snack.

• Taste Testing: Don’t be shy! Blend and taste as you go to adjust sweetness or thickness. You can always add a little honey or maple syrup for extra sweetness.

• Scoop and Serve: Serve the smoothie bowl right after making it to enjoy its vibrant colors and creamy texture at their best.

What to Serve with Pitaya Smoothie Bowl?

Bringing together a wholesome meal with vibrant flavors is as easy as pairing your delightful bowl with complementary dishes.

  • Granola Parfait: This crunchy treat adds a satisfying crunch and nutty flavor, enhancing the smoothie’s creaminess for a delightful contrast.

  • Coconut Yogurt: A scoop of creamy coconut yogurt on the side will amplify your tropical experience while providing additional probiotics for gut health.

  • Chia Seed Pudding: The texture of this creamy pudding perfectly balances the smoothness of the pitaya bowl, while also boosting fiber and omega-3s.

  • Avocado Toast: The rich creaminess of avocado toast adds healthy fats and is a filling addition that makes your breakfast feel more complete.

  • Fresh Citrus Salad: Bright, zesty flavors from a citrus salad can awaken your taste buds and add a refreshing element that complements the smoothie bowl’s sweetness.

  • Sparkling Lemonade: Pairing the smoothie bowl with a glass of sparkling lemonade offers a refreshing sip, balancing the smoothie’s flavors with a hint of tanginess.

  • Dark Chocolate Chips: Sprinkling a few dark chocolate chips on top provides a touch of indulgence while enhancing the healthiness with a dose of antioxidants.

  • Banana Oat Muffins: These soft muffins add a hearty, comforting element that makes for a wholesome brunch option alongside your smoothie bowl.

  • Fruit Skewers: Light and playful, a rainbow of fresh fruit skewers offers a delightful, interactive side perfect for a festive brunch or snack time.

Pitaya Smoothie Bowl Variations

Feel free to play around with this recipe and make it your own—your taste buds will thank you!

  • Fruit Swap: Try using frozen mango or pineapple instead of bananas for a tropical twist. Each fruit brings a unique sweetness that brightens the flavor profile.
  • Green Booster: Incorporate a handful of spinach or kale for an extra nutrient boost without altering the taste much. Your smoothie will remain vibrant and green, loaded with health benefits!
  • Nutty Flavor: Add a spoonful of nut butter, like almond or peanut, for creaminess and protein. The nutty flavor enhances your smoothie bowl while making it even more satisfying.
  • Creamy Texture: Use Greek yogurt as your base for added creaminess and tang. This substitution makes your smoothie bowl thicker, providing a delightful and hearty texture!
  • Coconut Milk Upgrade: Swap out coconut water for full-fat coconut milk for a richer, creamier base. This will elevate your pitaya smoothie bowl to dessert status.
  • Chia Pudding Layer: Try adding a layer of chia pudding on top of your smoothie base for added nutrition and a fun texture contrast. It’s an excellent way to introduce more fiber to your meal.
  • Heat it Up: For a spicy kick, sprinkle a pinch of cayenne pepper or ginger powder into the blend. This unexpected twist brings warmth and depth to your smoothie bowl.
  • Flavor Infusions: Blend in a few drops of vanilla extract or almond extract for an aromatic flavor boost. These subtle enhancements create layers of deliciousness that are sure to impress!

Be sure to check out my hearty granola recipes for a crunchy side to complement your delightful pitaya smoothie bowl!

How to Store and Freeze Pitaya Smoothie Bowl

Fridge: Store any leftover pitaya smoothie bowl in an airtight container in the fridge for up to 2 days. Give it a good stir before enjoying it again.

Freezer: If you want to prep ahead, freeze the smoothie base in individual portions for up to 3 months. Thaw in the fridge overnight before serving and mix well.

Reheating: Avoid reheating the smoothie bowl, as it’s best enjoyed cold. Simply blend any separated ingredients back together after thawing.

Toppings: For the best texture and flavor, add toppings like fresh fruit and nuts just before serving, rather than storing them mixed in.

Make Ahead Options

These refreshing Pitaya Smoothie Bowls are perfect for meal prep lovers! You can prepare the smoothie base by blending together the frozen pitaya, banana, and mixed berries up to 24 hours in advance. Simply store the mixture in an airtight container and refrigerate it. To maintain the creamy texture, avoid adding too much liquid at this stage. When you’re ready to serve, just give it a quick blend to revive its thick consistency, then pour it into a bowl and add your favorite toppings. This way, you’ll have a vibrant, nutrient-dense breakfast or snack ready to enjoy with minimal effort, keeping your mornings hassle-free!

Pitaya Smoothie Bowl Recipe FAQs

How do I select ripe pitaya for my smoothie bowl?
Absolutely! When choosing pitaya (dragon fruit), look for ones with vibrant skin and no dark spots. The fruit should yield slightly to gentle pressure, indicating ripeness. If you find a fruit with many dark spots or shriveling, it’s best to pass on it, as it may be overripe.

How should I store leftover pitaya smoothie bowl?
Very! You can keep any leftover pitaya smoothie bowl in an airtight container in the fridge for up to 2 days. Just remember to give it a good stir before enjoying it again to mix any separated ingredients back together.

Can I freeze the pitaya smoothie bowl for later?
Absolutely! You can freeze the smoothie base in individual portions for up to 3 months. Just pour your blended smoothie into ice cube trays or freezer-safe bags. Thaw in the fridge overnight before serving and mix well. It's best enjoyed chilled!

What can I do if my smoothie is too thick or too thin?
No worries! If your pitaya smoothie bowl is too thick, simply add a little more coconut water or almond milk – blend for another 15 seconds until you reach your desired consistency. If it’s too thin, a quick fix is just to add more frozen fruit, blending until smooth again. Always taste and adjust according to your preferences!

Are there any allergens in this recipe I should be aware of?
Definitely! This pitaya smoothie bowl is gluten-free and vegetarian, making it a healthy option for most diets. However, if you're allergic to nuts, be cautious with toppings like almond butter or nuts. Feel free to substitute with allergy-safe alternatives like sunflower seed butter or omit them entirely. Enjoy safely!

Pitaya Smoothie Bowl

Delicious Pitaya Smoothie Bowl for a Refreshing Boost

Enjoy a nutrient-packed pitaya smoothie bowl for a refreshing boost to start your day.
Print Recipe Pin Recipe
Prep Time 10 minutes mins
Total Time 10 minutes mins
Servings: 2 bowls
Course: Breakfast
Cuisine: Tropical
Calories: 220
Ingredients Equipment Method Nutrition Notes

Ingredients
  

Smoothie Base
  • 1 cup Frozen Pitaya Cubes Key ingredient for color and flavor
  • 1 unit Frozen Banana Adds creaminess and sweetness
  • 1 cup Frozen Mixed Berries Packed with antioxidants
  • ½ to 1 cup Coconut Water or Almond Milk Choose for blending
Toppings
  • 1 unit Fresh Fruit (e.g., Kiwi or Strawberries) Enhances vitamins and appearance
  • ¼ cup Nuts and Seeds (e.g., Almonds or Chia Seeds) Adds healthy fats and crunch
  • 2 tablespoons Coconut Flakes For tropical flair
  • 2 tablespoons Nut Butters (e.g., Almond or Peanut) Boosts flavor and protein

Equipment

  • High-powered blender

Method
 

Step-by-Step Instructions
  1. In a high-powered blender, combine frozen pitaya cubes, frozen banana, and frozen mixed berries. Pour in coconut water or almond milk to create a smooth blend. Blend on high for about 30 seconds to 1 minute.
  2. Check the consistency and add more coconut water or almond milk if too thick. Blend for an additional 15 seconds.
  3. Pour the blended pitaya smoothie into a bowl, leaving space for toppings. Admire the vibrant color.
  4. Customize your bowl with fresh fruits, nuts, seeds, or coconut flakes as toppings.
  5. Enjoy immediately for best texture and flavor!

Nutrition

Serving: 1bowlCalories: 220kcalCarbohydrates: 40gProtein: 4gFat: 7gSaturated Fat: 3gPolyunsaturated Fat: 1gMonounsaturated Fat: 3gSodium: 50mgPotassium: 300mgFiber: 6gSugar: 20gVitamin A: 100IUVitamin C: 30mgCalcium: 50mgIron: 1mg

Notes

Best enjoyed fresh. Store leftovers in an airtight container in the fridge for up to 2 days or freeze for longer storage.

Tried this recipe?

Let us know how it was!

Hearty Tamale Pie: Your New Favorite Comfort Food Delight

August 9, 2025 by Grace Snow Leave a Comment

As the cool breeze sweeps through the kitchen, the smell of something hearty begins to fill the air—it’s time for a warm embrace of flavor with my Easy Tex-Mex Tamale Pie! This delightful comfort food combines a savory chili layer with a fluffy cornbread topping, making it a standout weeknight dinner that the whole family will love. The best part? It’s quick to prepare and uses budget-friendly ingredients, so you can whip up this delicious dish without breaking the bank. Whether you’re looking for a cozy meal to fend off the evening chill or just need a crowd-pleaser that’s effortless to make, this tamale pie is sure to become a go-to favorite. Ready to dive into the tastiest Tex-Mex creation? Let's get cooking!

Why is Tamale Pie a Must-Try?

Comforting Warmth: This hearty dish delivers a cozy experience perfect for chilly evenings.
Budget-Friendly: Using affordable ingredients, it won’t strain your wallet—ideal for families!
Quick Preparation: With just 30 minutes in the oven, you can serve a delicious meal without spending hours in the kitchen.
Crowd-Pleasing Flavor: A savory chili base combined with a fluffy cornbread topping makes it a hit at the dinner table.
Versatile Options: Customize your tamale pie by adding different proteins or beans based on your preference or dietary needs.

This recipe will soon be a cherished favorite that you can rotate into your meal plan alongside quick dinners like sheet pan chicken or vegetable stir-fry.

Tamale Pie Ingredients

For the Chili Base

  • Vegetable Oil – Adds richness and helps sauté vegetables; substitute with canola oil or olive oil.
  • Green Bell Pepper – Provides flavor and texture; be sure to remove seeds and ribs.
  • Onions – Essential for a flavorful base; shallots can be used for a sweeter twist.
  • Chili Powder – Adds heat and depth; you can increase the amount for a spicier kick.
  • Tomato Paste – Thickens the chili and enhances flavor; double-concentrated is ideal for richer taste.
  • Chicken Bouillon Paste – Amplifies savory notes; low-sodium broth is a great alternative.
  • Garlic Powder – Imparts robust flavor; fresh garlic is a lovely substitute for a bold touch.
  • Kosher Salt – Enhances overall dish flavors; adjust according to personal taste.
  • Dried Oregano – Provides an herbal note; fresh oregano works beautifully if available.
  • Ground Cumin – Contributes earthiness; try smoked cumin for an intriguing flavor twist.
  • Ground Beef – Forms the chili's protein foundation; leaner options like ground turkey or pork can be used.
  • Pinto Beans – Adds protein and texture; don't hesitate to swap in black or kidney beans.

For the Cornbread Topping

  • All-Purpose Flour – Provides structure for the cornbread; gluten-free flour is a great alternative.
  • Cornmeal – The core ingredient for texture; a fine or medium grind works best.
  • Sugar – Balances flavors in cornbread; you can reduce or omit if preferred.
  • Baking Powder – Serves as the leavening agent; always ensure it's fresh for optimal rise.
  • Egg – Binds the cornbread ingredients; a flaxseed meal or commercial egg replacer can be used for a vegan option.
  • Sour Cream – Introduces moisture and tang; plain yogurt is a good substitute.
  • Unsalted Butter – Adds richness; oil can be substituted for a dairy-free version.
  • Extra-Sharp Cheddar Cheese – Provides flavor and richness; shredding your own cheese enhances texture.

Whether you're preparing this delightful Tamale Pie for your family or sharing it with friends, it's bound to fill your home with warmth and happiness. Enjoy every bite!

Step‑by‑Step Instructions for Easy Tex-Mex Tamale Pie

Step 1: Sauté Vegetables
In a large skillet, heat 2 tablespoons of vegetable oil over medium heat. Add the diced green bell pepper and chopped onions, cooking until they soften and become translucent, about 8–10 minutes. Stir occasionally to prevent sticking and to allow the vegetables to release their fragrant aroma, creating a savory base for your tamale pie.

Step 2: Cook Chili Base
Next, stir in 2 tablespoons of chili powder, 2 tablespoons of tomato paste, and 1 tablespoon of chicken bouillon paste, mixing well. Add 1 cup of water along with garlic powder, salt, oregano, and cumin. Allow this mixture to simmer for about 5–8 minutes, watching closely as it deepens in color and develops a rich, inviting aroma that will form the heart of your tamale pie.

Step 3: Add Meat
Now, introduce 1 pound of ground beef to the skillet, breaking it up with a wooden spoon. Cook until the meat is browned and no longer pink, approximately 4 minutes. Be sure to stir frequently for even cooking, ensuring that all the ingredients meld together beautifully to create a hearty chili layer for your tamale pie.

Step 4: Incorporate Beans
After the meat is cooked, stir in 1 can of rinsed pinto beans. Reduce the heat to low and let the mixture simmer gently for another 8–10 minutes. This simmering process allows the flavors to blend together, enhancing the chili's depth and texture, while you prepare the cornbread topping for your delightful tamale pie.

Step 5: Prepare Cornbread Batter
Preheat your oven to 375°F (190°C). In a mixing bowl, combine 1 cup of all-purpose flour, 1 cup of cornmeal, sugar, and baking powder. In a separate bowl, whisk together the egg, sour cream, and melted butter, then gradually fold these wet ingredients into the dry mix until just combined. This will create a thick batter ready to top your tamale pie.

Step 6: Assemble
Once the chili base is simmering, carefully dollop the cornbread batter over the hot chili mixture in your skillet. Use a spatula to spread it evenly, ensuring the chili is mostly covered by the cornbread batter. This layering will create a delightful contrast between the savory chili and the fluffy cornbread topping in your tamale pie.

Step 7: Bake
Transfer the skillet to the preheated oven and bake for 25–30 minutes, or until the cornbread is set and a lovely golden brown on top. Keep an eye on it, as the edges will crisp slightly, signifying that your tamale pie is nearing perfection.

Step 8: Cool & Serve
Once baked, remove the skillet from the oven and allow it to cool for a few minutes. This cooling period helps the layers set, making serving easier. Slice into portions, revealing the inviting layers of chili and cornbread, and enjoy your hearty and satisfying tamale pie with garnishes like sour cream or guacamole!

Expert Tips for Tamale Pie

  • Choose the Right Skillet: Make sure to use an oven-safe skillet to skip the hassle of transferring your chili mixture. If your skillet isn’t oven-safe, use a baking dish instead.

  • Shred Your Cheese: For optimal melting and flavor, shred extra-sharp cheddar cheese yourself. Pre-shredded cheese often contains additives that can affect texture.

  • Adjust to Taste: Don’t be afraid to tweak the chili seasonings! Add more salt, chili powder, or cumin according to your preferences for the perfect tamale pie.

  • Prevent Soggy Cornbread: Avoid overmixing the cornbread batter to keep it light and fluffy. A little lumpiness is perfectly fine!

  • Be Mindful of Freezing: If you plan to freeze, leave the cornbread topping unbaked and add it fresh right before serving. This keeps your tamale pie from becoming soggy upon reheating.

Tamale Pie Variations & Substitutions

Get ready to customize your Tamale Pie with fun twists and flavor enhancements that will make your cooking experience even more exciting!

  • Dairy-Free: Substitute sour cream with coconut yogurt for a creamy texture without the dairy. This adds a delightful hint of sweetness that complements the savory chili!

  • Meat Options: Swap ground beef for ground turkey or chicken to lighten the dish. Both options maintain the dish's comforting essence while offering a leaner protein.

  • Bean Varieties: Try using black beans or kidney beans for a different texture and flavor. These beans will not only add depth but also provide a beautiful color contrast!

  • Spicy Kick: Increase the chili powder for a hotter taste, or add chopped jalapeños for an extra kick. This will enhance your tamale pie's flavor and bring a warming heat to your meal.

  • Vegetable Boost: Toss in diced tomatoes or corn for added nutrition and sweetness. These vibrant additions will make your tamale pie even heartier and more colorful.

  • Gluten-Free: Substitute all-purpose flour with a gluten-free blend to make this dish suitable for gluten sensitivities. The flavors will remain just as satisfying!

  • Cornmeal Alternatives: Use masa harina instead of cornmeal for a truly authentic texture that will elevate your Tamale Pie to another level of deliciousness.

  • Herb Infusion: Fresh cilantro or chopped green onions added just before serving can brighten up the dish beautifully. The freshness will enhance the overall experience, making each bite refreshing!

Feel free to explore these exciting variations, and don’t forget to serve your Tamale Pie with a dollop of sour cream or guacamole on top. For easy side dishes, a simple green salad or some homemade cornbread would perfectly round out your meal. Enjoy!

How to Store and Freeze Tamale Pie

Fridge: Keep leftover tamale pie in an airtight container in the refrigerator for up to 3 days. This will preserve the flavors while keeping it convenient for quick reheating.

Freezer: For longer storage, freeze tamale pie before baking. Wrap tightly in plastic wrap, then foil—this method helps prevent freezer burn. It can be stored for up to 3 months.

Reheating: To reheat, bake frozen tamale pie directly from the freezer at 375°F (190°C) for about 45–50 minutes, or until heated through. You can also thaw it overnight in the fridge for quicker reheating.

Make-Ahead Tip: Tamale pie can also be prepared a day ahead and stored in the fridge before baking, making it an easy choice for a busy night.

Make Ahead Options

Preparing this Easy Tex-Mex Tamale Pie ahead of time can save you valuable minutes during busy weeknights! You can make the chili base up to 24 hours in advance; simply store it in an airtight container in the refrigerator to maintain its rich flavors. Additionally, the cornbread batter can be mixed ahead and refrigerated for up to 3 days—just remember to bring it to room temperature before assembling. When you're ready to serve, layer the cornbread batter over the chili and bake as directed; your tamale pie will be just as delicious without any compromise on quality! This makes for an effortless, hearty meal that will delight the whole family!

What to Serve with Easy Tex-Mex Tamale Pie

To elevate your dining experience, consider these delightful accompaniments that perfectly complement the savory flavors of your tamale pie.

  • Creamy Guacamole: A dollop of fresh guacamole adds a creamy texture and bright flavor that contrasts beautifully with the hearty chili.
  • Zesty Sour Cream: Drizzle some tangy sour cream on top for an added richness; its coolness balances the spiciness of the pie perfectly.
  • Mixed Green Salad: A light and crisp salad with a vinaigrette will provide a refreshing contrast to the warm, filling tamale pie, keeping the meal well-rounded.
  • Cilantro Lime Rice: This fragrant rice dish, enhanced with lime and cilantro, offers a zesty flavor complementing the Tex-Mex profile of the pie.
  • Corn Salsa: A sweet corn salsa bursts with freshness; its vibrant ingredients bring a delightful crunch and sweetness that lifts the flavors of the dish.
  • Cornbread Muffins: For those who can’t get enough cornbread, serve some muffins on the side—they’re perfect for dipping into the chili layer.
  • Spicy Pickled Jalapeños: Add a kick with pickled jalapeños—they bring a delicious heat and tang that pairs spectacularly with the tamale pie.
  • Chilled White Wine: A crisp, chilled white like Sauvignon Blanc will enhance the meal, cutting through the richness with refreshing acidity and notes of citrus.
  • Dessert Option - Flan: To round off the meal, indulge in a creamy, caramel flan providing a sweet, velvety finish that leaves everyone satisfied.

Tamale Pie Recipe FAQs

How do I choose the right ripeness for ingredients?
For your tamale pie, fresh vegetables are key! Choose bell peppers that are firm with no dark spots or blemishes for the best flavor and texture. The onions should feel heavy for their size with a dry skin and no soft spots. If you're using canned beans, opt for low-sodium options for healthier results.

What is the best way to store leftover tamale pie?
Store your tamale pie in an airtight container in the refrigerator for up to 3 days. Be sure to let it cool to room temperature before sealing to avoid condensation, which could make the cornbread soggy. If you need to reheat, simply pop it back in the oven at 350°F for about 15-20 minutes until warmed through.

Can I freeze tamale pie? How?
Absolutely! For freezing, prepare your tamale pie but don’t bake it. Wrap it tightly in plastic wrap and then in foil to prevent freezer burn, and it will stay fresh for up to 3 months. When you’re ready to enjoy, you can bake it straight from the freezer at 375°F for about 45-50 minutes or thaw it overnight in the fridge for quicker baking.

What are common issues when making tamale pie, and how can I fix them?
If your cornbread topping is too dense, it may be due to overmixing the batter. Try to stir just until combined for a lighter texture. If the chili seems too spicy, you can mellow it out by adding a bit of sugar or serving it with a dollop of sour cream to balance the flavors.

Are there any dietary considerations for this tamale pie recipe?
Great question! This tamale pie can easily be made gluten-free by substituting all-purpose flour with a gluten-free flour blend. For a dairy-free version, you can use almond milk or a plant-based substitute instead of sour cream and oil instead of butter. If you want a lighter protein option, ground turkey or chicken can replace the ground beef for a healthier twist.

Tamale Pie

Hearty Tamale Pie: Your New Favorite Comfort Food Delight

This Hearty Tamale Pie is a comforting, budget-friendly dish that combines a savory chili base with a fluffy cornbread topping, perfect for family dinners.
Print Recipe Pin Recipe
Prep Time 10 minutes mins
Cook Time 30 minutes mins
Total Time 40 minutes mins
Servings: 6 servings
Course: Dinner
Cuisine: Tex-Mex
Calories: 350
Ingredients Equipment Method Nutrition Notes

Ingredients
  

For the Chili Base
  • 2 tablespoons Vegetable Oil Can substitute with canola oil or olive oil.
  • 1 large Green Bell Pepper Remove seeds and ribs.
  • 1 large Onion Shallots can be used for a sweeter flavor.
  • 2 tablespoons Chili Powder Adjust amount to taste for spiciness.
  • 2 tablespoons Tomato Paste Double-concentrated is ideal.
  • 1 tablespoon Chicken Bouillon Paste Low-sodium broth is a good alternative.
  • 1 teaspoon Garlic Powder Fresh garlic can be substituted.
  • 1 teaspoon Kosher Salt Adjust according to taste.
  • 1 teaspoon Dried Oregano Fresh oregano is a nice substitute.
  • 1 teaspoon Ground Cumin Smoked cumin can add flavor.
  • 1 pound Ground Beef Lean options like turkey or pork can be used.
  • 1 can Pinto Beans Rinsed before adding.
For the Cornbread Topping
  • 1 cup All-Purpose Flour Gluten-free flour is an alternative.
  • 1 cup Cornmeal Fine or medium grind works best.
  • 1 tablespoon Sugar Can reduce or omit if desired.
  • 1 tablespoon Baking Powder Ensure it is fresh.
  • 1 large Egg Use flaxseed meal for a vegan substitute.
  • 1 cup Sour Cream Plain yogurt serves as a good substitute.
  • 1/4 cup Unsalted Butter Can substitute with oil for dairy-free.
  • 1 cup Extra-Sharp Cheddar Cheese Shred your own for the best texture.

Equipment

  • Large skillet
  • Mixing bowls
  • Spatula
  • Oven

Method
 

Step-by-Step Instructions
  1. In a large skillet, heat vegetable oil over medium heat. Add diced green bell pepper and chopped onions, and cook until soft, about 8–10 minutes.
  2. Stir in chili powder, tomato paste, and chicken bouillon paste. Mix well and add water, garlic powder, salt, oregano, and cumin. Simmer for 5–8 minutes.
  3. Add ground beef to the skillet, breaking it up. Cook until browned, about 4 minutes.
  4. Stir in rinsed pinto beans, reduce heat, and let simmer for another 8–10 minutes.
  5. Preheat your oven to 375°F (190°C). In a bowl, mix flour, cornmeal, sugar, and baking powder.
  6. In another bowl, whisk egg, sour cream, and melted butter. Gradually fold wet ingredients into dry mix until combined.
  7. Dollop cornbread batter over the chili mixture in the skillet and spread evenly.
  8. Bake for 25–30 minutes until cornbread is golden and set.
  9. Cool for a few minutes before slicing and serving with sour cream or guacamole.

Nutrition

Serving: 1sliceCalories: 350kcalCarbohydrates: 30gProtein: 18gFat: 20gSaturated Fat: 10gPolyunsaturated Fat: 2gMonounsaturated Fat: 6gCholesterol: 80mgSodium: 600mgPotassium: 500mgFiber: 5gSugar: 2gVitamin A: 600IUVitamin C: 20mgCalcium: 200mgIron: 3mg

Notes

Use an oven-safe skillet to simplify the process. Adjust seasonings to your taste and avoid overmixing the cornbread batter.

Tried this recipe?

Let us know how it was!

Nut-Free Sweet Potato Casserole with Crunchy Topping Delight

August 9, 2025 by Grace Snow Leave a Comment

“Did you hear what they’re serving at Thanksgiving this year?” I overheard my friend excitedly discussing plans for the holiday. She spoke about a nut-free sweet potato casserole that promised to be a game-changer. That’s right; we're diving into this Almost-Classic Sweet Potato Casserole—a dish that combines creamy, velvety purée with a delightful cornflake streusel instead of traditional pecans. It’s not just perfect for Thanksgiving gatherings; this recipe is also quick to prepare and a fantastic way to cater to nut-free guests without sacrificing flavor. Just the thought of that crunchy topping alongside the smooth sweetness of roasted sweet potatoes makes my mouth water! Are you ready to impress your family and friends with a comforting dish that will have them asking for seconds? Let's get cooking!

Why Will You Love This Casserole?

Comforting Flavors: The sweet potato purée is the essence of warmth, enhanced with just the right amount of dark brown sugar and spices.

Unique Crunch: Instead of traditional nut toppings, the crunchy cornflake streusel adds a delightful texture that contrasts perfectly with the smooth base.

Adaptable Recipe: This nut-free dish allows for easy substitutions like using non-dairy milk or adjusting the sweetness, making it suitable for various dietary needs.

Quick Preparation: With a straightforward roasting and mixing process, you can have this showstopper ready in no time—perfect for busy holiday schedules!

Crowd-Pleasing Appeal: This casserole is a guaranteed favorite at gatherings, not just for its flavor but also for its ability to cater to guests with nut allergies. Enjoy the best of festive flavors with our classic Thanksgiving side dishes that are just as simple and delicious!

Sweet Potato Casserole Ingredients

• Get ready to create a delicious masterpiece with these must-have ingredients!

For the Purée

  • Sweet Potatoes – Provides the base purée; offers natural sweetness and creaminess. Use fresh instead of canned for better flavor.
  • Large Eggs – Binds ingredients together while adding richness. Ensure they are at room temperature for better emulsification.
  • Half-and-Half – Adds creaminess and smooth texture to the purée. Substitute with non-dairy milk for a lactose-free version.
  • Dark Brown Sugar – Sweetens and enhances the caramel notes of the dish. Light brown sugar can be used in a pinch.
  • Unsalted Butter – Adds richness and flavor. Use margarine or coconut oil for a dairy-free option.
  • Kosher Salt – Enhances the flavors of the sweet potatoes and balances sweetness. Adjust based on dietary needs.

For the Crunchy Topping

  • Cornflakes – Creates a crunchy topping; offers a sweet and salty contrast. Check for gluten-free options if necessary.
  • Ground Cinnamon – Adds warmth and spice; complements the sweet potatoes beautifully. Nutmeg or ginger can be used for alternative flavor profiles.
  • Marshmallows – Traditional topping; melts to provide a gooey texture. If desired, omit for a less sweet version.

Gather these ingredients, and let’s create a nut-free sweet potato casserole that will be loved by all!

Step‑by‑Step Instructions for Nut-Free Sweet Potato Casserole with Crunchy Cornflake Topping

Step 1: Prepare Sweet Potatoes
Preheat your oven to 350°F (175°C). While the oven is heating, peel and chop your sweet potatoes into even chunks, then place them in a baking dish. Cover the dish with foil and roast for 50-60 minutes until the sweet potatoes are fork-tender and can be easily mashed with a fork.

Step 2: Mix Egg Mixture
In a large mixing bowl, whisk together the large eggs, half-and-half, dark brown sugar, melted unsalted butter, and kosher salt until fully combined. You should see a creamy texture forming. This egg mixture will add richness to your sweet potato casserole, ensuring every bite is deliciously smooth and well-balanced.

Step 3: Puree Sweet Potatoes
Remove the roasted sweet potatoes from the oven and let them cool for a few minutes. Transfer half of the sweet potatoes and half of the egg mixture to a food processor. Puree until the mixture is silky smooth and creamy. Repeat this process with the remaining sweet potatoes and egg mixture, ensuring a delightful texture without lumps.

Step 4: Combine and Prepare Topping
Spread the velvety sweet potato purée evenly into a greased baking dish, smoothing the top with a spatula. In a resealable bag, combine cornflakes, ground cinnamon, dark brown sugar, melted butter, and a sprinkle of salt. Closely seal the bag and shake vigorously to coat the cornflakes evenly, creating your crunchy topping for the sweet potato casserole.

Step 5: Assemble Casserole
Carefully pour the cornflake mixture over the sweet potato purée, ensuring even coverage to achieve that perfect crunchy crust. For an extra touch of sweetness and nostalgia, arrange the marshmallows over the cornflakes in a decorative pattern. This not only enhances the visual appeal but also adds an ooey-gooey layer that everyone loves.

Step 6: Bake
Place the assembled casserole in the preheated oven and bake for 25–30 minutes or until the marshmallows turn golden brown and the cornflake topping is lightly crisped. The inviting aroma will envelop your kitchen, and you'll know your nut-free sweet potato casserole is nearing perfection.

Sweet Potato Casserole Variations

Feel free to make this recipe your own and discover new flavors and textures to delight your taste buds!

  • Dairy-Free: Substitute half-and-half with almond milk or coconut milk to create a lactose-free purée that’s just as creamy. It still provides that comforting richness you love.

  • Gluten-Free: Use gluten-free cornflakes to maintain that satisfying crunch while ensuring everyone at your table can enjoy this dish. Look for options at your local store.

  • Vegan: Replace eggs with flaxseed meal mixed with water and use a non-dairy butter alternative. This ensures a vibrant, plant-based casserole packed with flavor.

  • Spicy Kick: Add a pinch of cayenne pepper to the sweet potato mixture for a subtle heat that complements the sweetness beautifully. It transforms the dish into a sweet and spicy delight.

  • Maple Sweetener: Swap dark brown sugar for pure maple syrup for a unique, earthy sweetness that pairs wonderfully with sweet potatoes. The flavor is enchanting!

  • Flavor Boost: Stir in a teaspoon of vanilla extract or a sprinkle of nutmeg to the purée for an elevated flavor experience. It ties everything together and is perfect for the holidays.

  • Crispier Topping: For an extra crispy texture, toast the cornflakes in the oven before adding them to the casserole. It adds a delightful crunch that everyone will love.

  • Fruit Addition: Mix in chopped apples or pears into the sweet potato mixture before baking for a fruity surprise that complements the dish beautifully. Your guests will love the added layers of flavor!

With these variations, you can easily manipulate the flavors to suit your taste or dietary needs. For more delicious ideas, explore other Thanksgiving side dishes and elevate your festive table!

Make Ahead Options

Preparing your Nut-Free Sweet Potato Casserole in advance is a fantastic way to save time during the holiday rush! You can roast and puree the sweet potatoes up to 3 days ahead. Simply refrigerate them in an airtight container until you're ready to assemble. The cornflake topping can also be prepared in advance and stored in a separate container to maintain its crunch. When you're ready to serve, just mix everything in the baking dish, add the cornflake topping, and marshmallows, then bake for about 25-30 minutes until the marshmallows are golden brown. This way, you’ll be able to enjoy a comforting, crowd-pleasing casserole with minimal effort on the big day!

Expert Tips for Sweet Potato Casserole

  • Roast Ahead: Prepare roasted sweet potatoes up to three days in advance. Store them in the refrigerator to save time on the day of serving.

  • Perfect Purée: For an ultra-smooth sweet potato purée, blend in a food processor instead of using a potato masher. This ensures a delightful texture in your casserole.

  • Check Doneness: Always test sweet potatoes for tenderness with a fork before pureeing. They should be completely soft for the best flavor and consistency in your sweet potato casserole.

  • Cornflake Crunch: When making the cornflake topping, ensure the mixture is well-coated with butter and spices for maximum flavor and crunch.

  • Customize Toppings: Feel free to play with toppings! Consider using crushed gluten-free cookies or toasted coconut for an exciting twist on the classic sweet potato casserole.

How to Store and Freeze Sweet Potato Casserole

Fridge: Store leftover sweet potato casserole in an airtight container for up to 4 days. This keeps it fresh and ready to enjoy whenever you're craving that delicious flavor.

Freezer: For longer storage, freeze the casserole in a freezer-safe container for up to 2 months. Make sure to label it clearly so you can find it easily later.

Reheating: When you're ready to enjoy your frozen casserole, thaw it overnight in the fridge. Reheat in the oven at 350°F for about 25-30 minutes to restore its creamy texture and crunch.

Make-Ahead: Prepare the sweet potato purée and crunchy topping in advance, then assemble the casserole and freeze it. Bake directly from frozen, adding an extra 10-15 minutes to the baking time for perfect results.

What to Serve with Nut-Free Sweet Potato Casserole?

Elevate your meal with delightful sides that harmonize beautifully with the rich, sweet flavors of this nut-free casserole.

  • Savory Green Beans: Tender green beans tossed in garlic and olive oil provide a fresh and earthy contrast to the creamy casserole. These vibrant veggies add a pop of color to your plate, enhancing the festive vibe.

  • Cranberry Sauce: A tart and sweet cranberry sauce brightens every bite of sweet potato casserole, balancing its richness with a refreshing note that recalls holiday traditions.

  • Roasted Brussels Sprouts: The caramelization of Brussels sprouts brings a nutty flavor and appealing texture, making them a perfect companion to the smoothness of the casserole. They're not only delicious but also packed with nutrients.

  • Cornbread: This slightly sweet, fluffy bread complements the casserole's flavors while providing satisfying heartiness. The perfect addition to mop up those sweet potato purée remnants on your plate!

  • Maple-Glazed Carrots: Sweet and tender, these maple-glazed carrots will add a delicious sweetness that pairs wonderfully with the savoriness of the casserole, creating a lovely harmony of flavors.

  • Apple Cider: This seasonal drink brightens any meal, its sweetness gently contrasting the casserole's savory notes. Hot cider adds warmth and comfort to your holiday gathering.

  • Pumpkin Pie: For dessert, a slice of creamy pumpkin pie completes your meal perfectly. Its warmth and spices create a nostalgic bridge from the casserole to the sweetness of holiday desserts.

Consider these pairings to transform your meal into a festive feast that celebrates the best of the season!

Sweet Potato Casserole Recipe FAQs

What type of sweet potatoes should I use for this recipe?
I recommend using fresh sweet potatoes rather than canned ones for the best flavor and texture. Look for those that are firm and free from dark spots or blemishes, which can indicate overripeness.

How do I store leftover sweet potato casserole?
Store any leftovers in an airtight container in the refrigerator for up to 4 days. Make sure the casserole is completely cooled before sealing to preserve its freshness and flavor.

Can I freeze sweet potato casserole?
Absolutely! You can freeze the casserole in a freezer-safe container for up to 2 months. To do this, allow it to cool completely after baking, then tightly seal it. Don’t forget to label it with the date for easy identification.

What’s the best way to reheat frozen sweet potato casserole?
To reheat, thaw the casserole overnight in the fridge. Preheat your oven to 350°F (175°C), cover the dish with foil to prevent drying out, and bake for 25-30 minutes until heated through. For crispiness, remove the foil during the last few minutes.

Can I adjust this recipe to accommodate dietary allergies?
Yes, definitely! This sweet potato casserole is nut-free but can also be made gluten-free by ensuring your cornflakes are certified gluten-free. You can use non-dairy milk to make it lactose-free and even substitute the eggs with a flaxseed egg if vegan-friendly options are needed.

How do I know if my sweet potatoes are fully cooked?
To check for doneness, simply pierce a sweet potato chunk with a fork. They should be fork-tender and easy to mash. If you encounter any resistance, return them to the oven for a few more minutes until perfectly soft.

Sweet Potato Casserole

Nut-Free Sweet Potato Casserole with Crunchy Topping Delight

This nut-free sweet potato casserole features creamy purée topped with a crunchy cornflake streusel, perfect for Thanksgiving gatherings.
Print Recipe Pin Recipe
Prep Time 30 minutes mins
Cook Time 1 hour hr
Total Time 1 hour hr 30 minutes mins
Servings: 8 servings
Course: Dinner
Cuisine: American
Calories: 250
Ingredients Equipment Method Nutrition Notes

Ingredients
  

For the Purée
  • 4 cups Sweet Potatoes Use fresh instead of canned for better flavor.
  • 2 large Eggs Ensure they are at room temperature.
  • 1/2 cup Half-and-Half Substitute with non-dairy milk for a lactose-free version.
  • 1/2 cup Dark Brown Sugar Light brown sugar can be used in a pinch.
  • 1/4 cup Unsalted Butter Use margarine or coconut oil for a dairy-free option.
  • 1 teaspoon Kosher Salt Adjust based on dietary needs.
For the Crunchy Topping
  • 2 cups Cornflakes Check for gluten-free options if necessary.
  • 1 teaspoon Ground Cinnamon Nutmeg or ginger can be used for alternative flavor profiles.
  • 1 cup Marshmallows If desired, omit for a less sweet version.

Equipment

  • Oven
  • Mixing Bowl
  • Food Processor
  • Baking Dish
  • Spatula
  • Resealable Bag

Method
 

Preparation Steps
  1. Preheat your oven to 350°F (175°C). Peel and chop the sweet potatoes, then roast them in a covered dish for 50-60 minutes.
  2. In a large mixing bowl, whisk together the eggs, half-and-half, dark brown sugar, melted butter, and kosher salt until creamy.
  3. Puree half of the sweet potatoes with half of the egg mixture in a food processor until silky smooth; repeat with the remaining ingredients.
  4. Spread the sweet potato purée in a greased baking dish. In a bag, combine cornflakes, cinnamon, brown sugar, melted butter, and salt; shake to coat.
  5. Pour the cornflake mixture over the sweet potato purée. Optionally, arrange marshmallows on top for added sweetness.
  6. Bake the casserole for 25–30 minutes until marshmallows are golden brown and the topping is crisp.

Nutrition

Serving: 1cupCalories: 250kcalCarbohydrates: 40gProtein: 3gFat: 10gSaturated Fat: 5gPolyunsaturated Fat: 0.5gMonounsaturated Fat: 3gCholesterol: 80mgSodium: 150mgPotassium: 300mgFiber: 4gSugar: 12gVitamin A: 18000IUVitamin C: 30mgCalcium: 100mgIron: 1mg

Notes

Prepare sweet potatoes ahead of time and store for convenience. This casserole can be made in advance and frozen if desired.

Tried this recipe?

Let us know how it was!
  • « Previous Page
  • 1
  • …
  • 26
  • 27
  • 28
  • 29
  • 30
  • Next Page »

Welcome!

Hi, I’m Grace, a Sydney-based home cook with a passion for bold flavors and trending ingredients. Whether you’re a busy beginner or a seasoned foodie, you’ll find dishes here that are fresh, fun, and full of flavor.

More about me

Popular Recipes

  • Slow Cooker Chicken Alfredo
    Creamy Slow Cooker Chicken Alfredo for Effortless Family Dinners
  • Ranch Chicken
    Crispy Ranch Chicken with Creamy Herb Sauce to Savor Tonight
  • Slow Cooker Chicken Thighs
    Irresistibly Tender Slow Cooker Chicken Thighs for Family Bliss
  • Butternut Hummus with Feta & Pomegranates
    Creamy Butternut Hummus with Feta & Pomegranates Delight

Footer

↑ back to top

About

  • Privacy Policy
  • Disclaimer
  • Terms & Conditions

Newsletter

  • Sign Up! for emails and updates

Contact

  • About me
  • Contact me

Copyright © 2025 TastyTrendIngredients