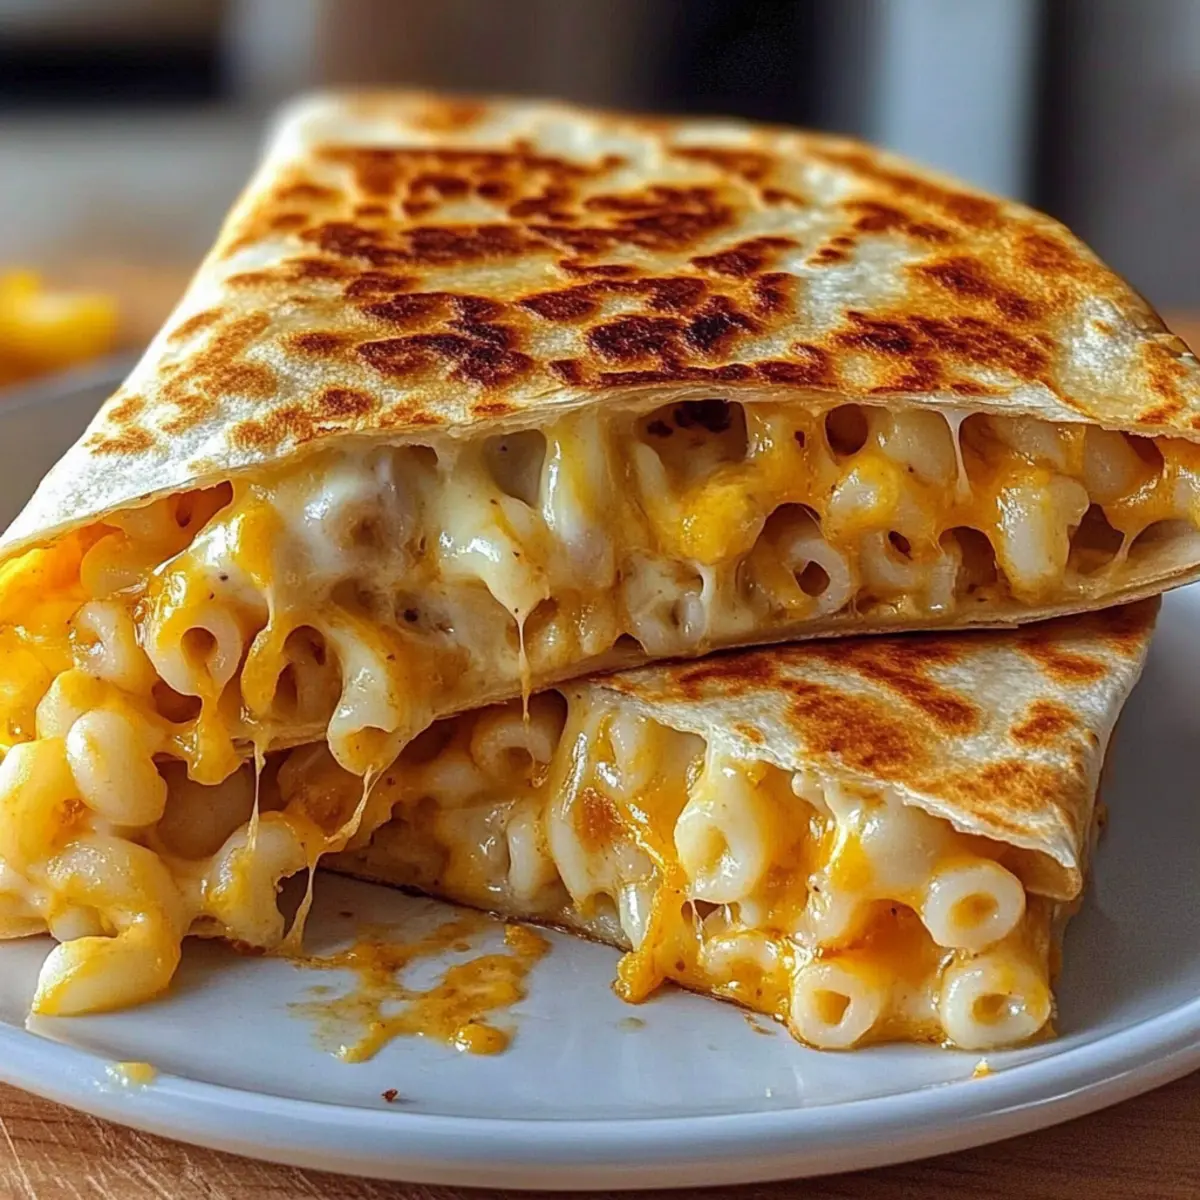
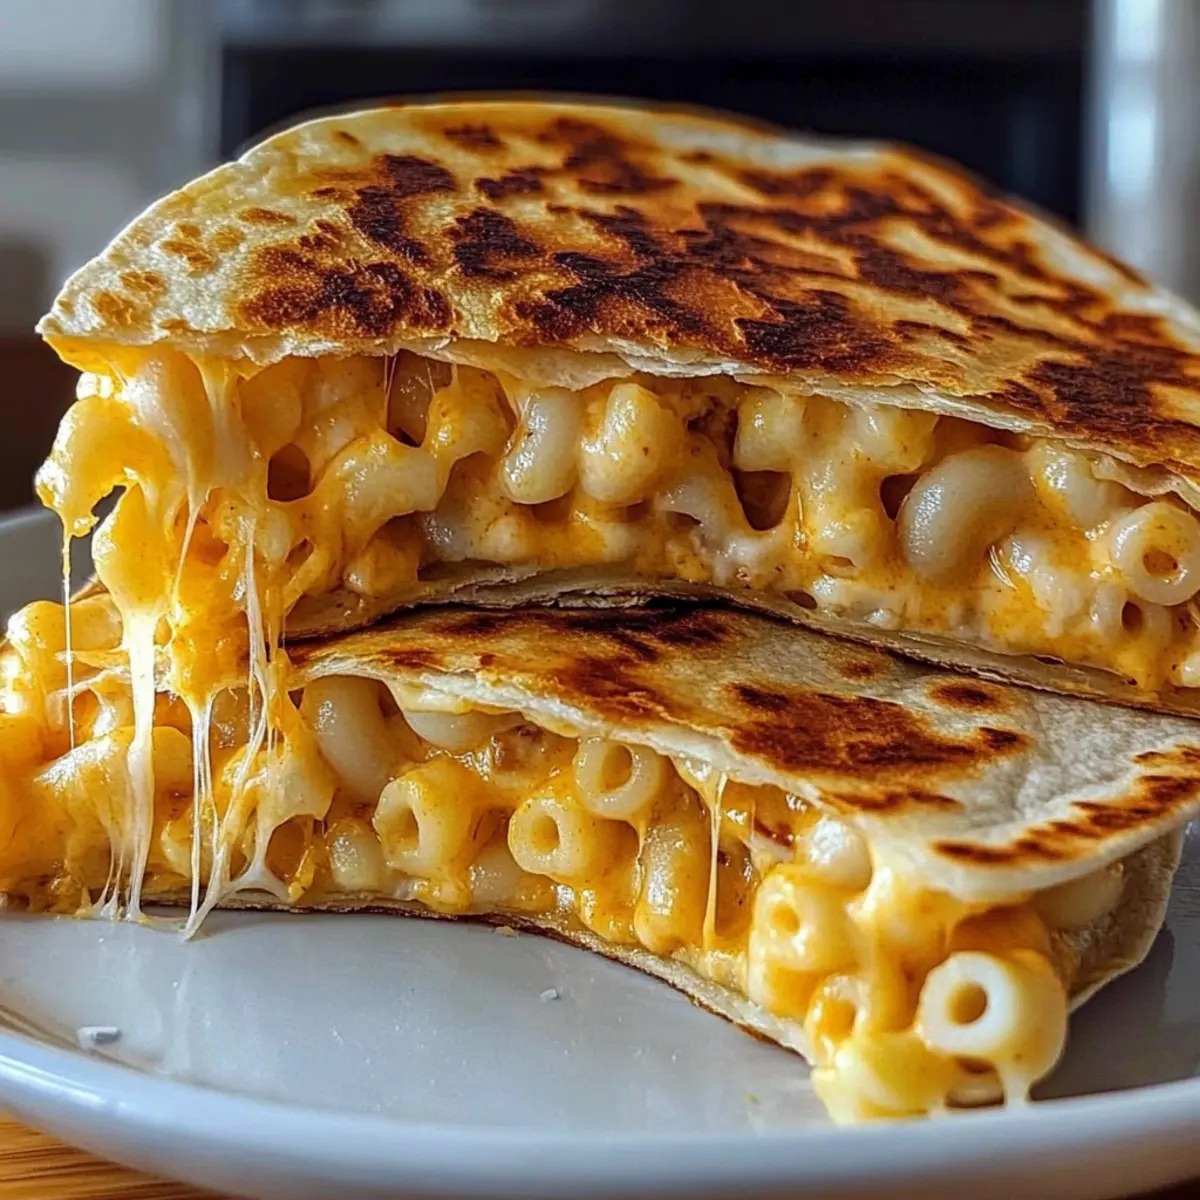
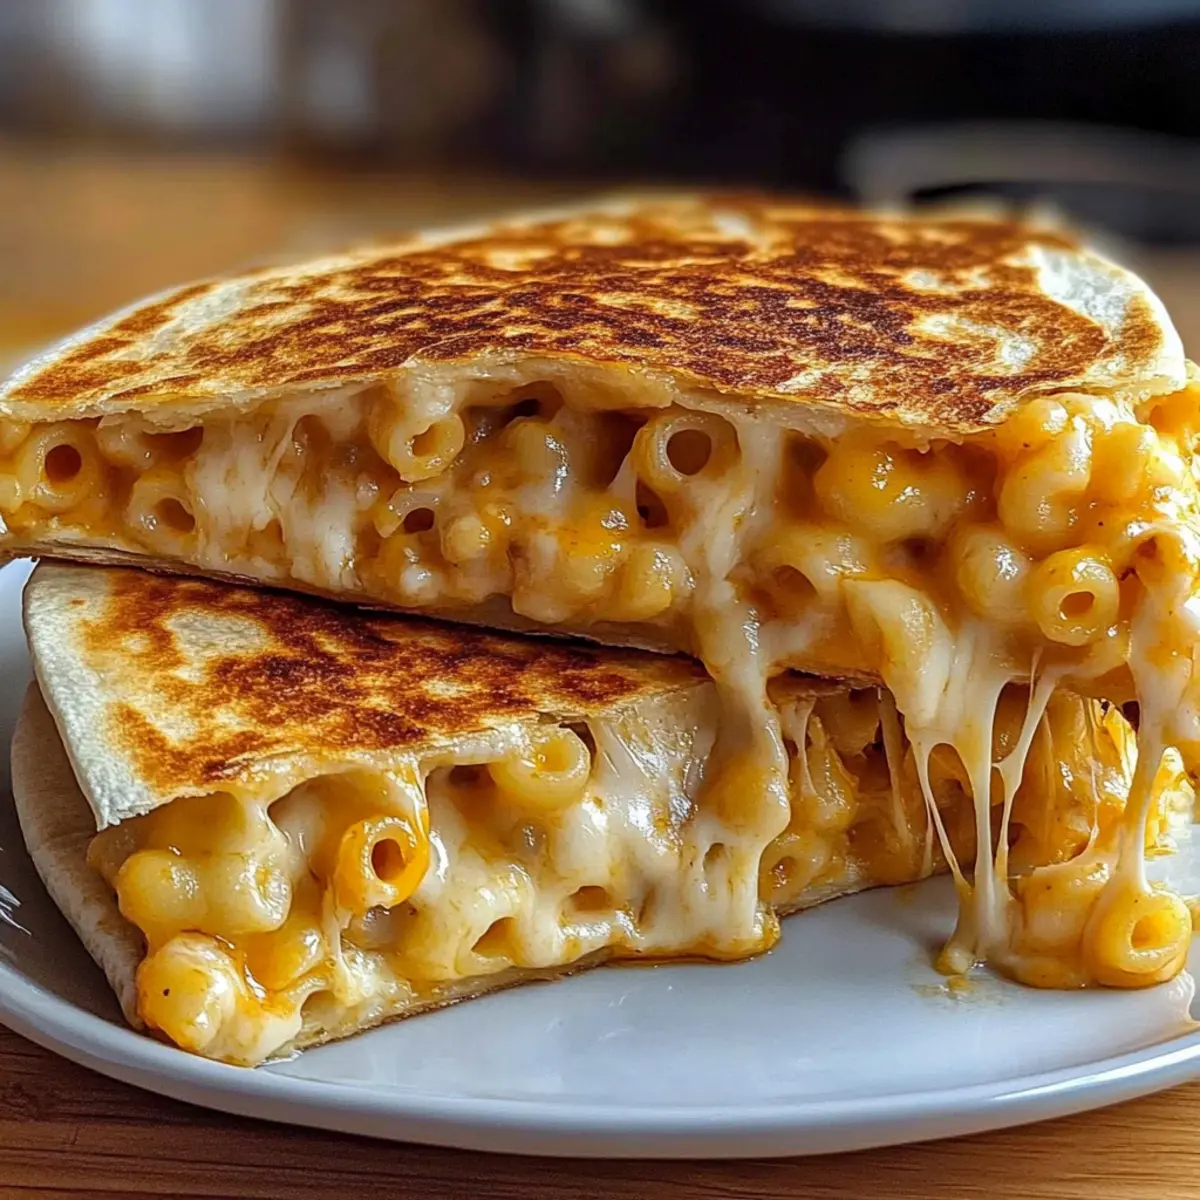
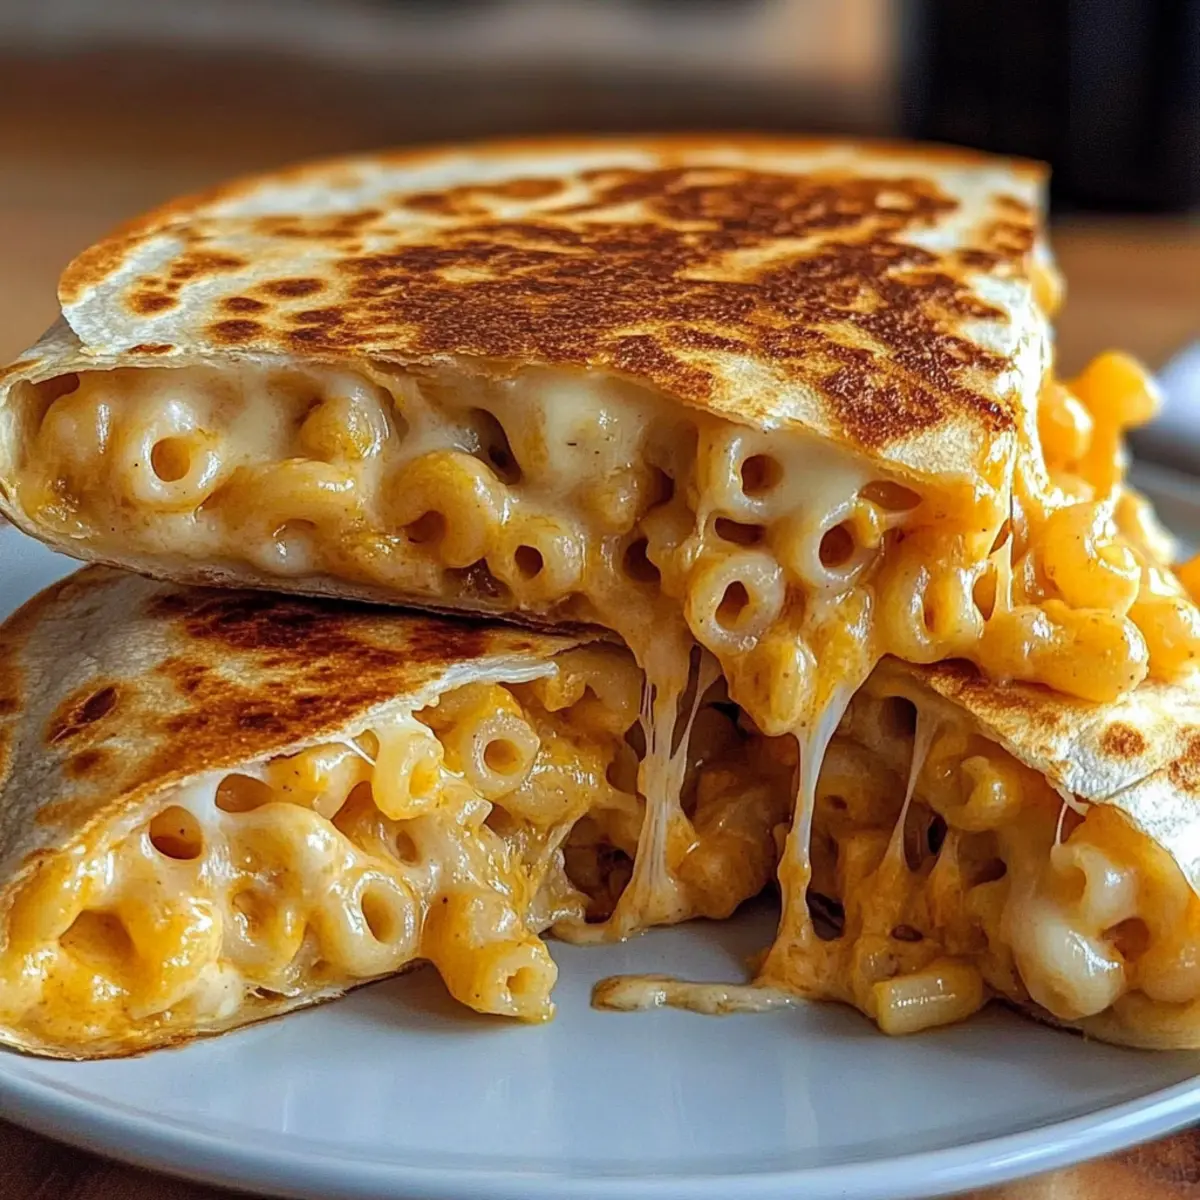
There's something magical about the first cheesy bite of Mac and Cheese Quesadillas. It’s like indulging in a nostalgic favorite, all wrapped up in a warm tortilla. This inventive dish beautifully marries the creamy goodness of classic macaroni and cheese with the crispy allure of a quesadilla, leveling up your lunch or snack game in just minutes. Not only is it a breeze to prepare, but it also lets your creativity shine—personalize it with zesty jalapeños, savory bacon, or even a splash of your favorite hot sauce! Plus, it’s vegetarian-friendly, with gluten-free options to accommodate various dietary needs. Ready to elevate your meal with this delicious twist? Let’s get cooking!
Why Are Mac and Cheese Quesadillas Unique?
Comforting Fusion: Mac and Cheese Quesadillas are the ultimate fusion dish that combines classic comfort food with a delightful twist, making them a hit with everyone.
Endless Customization: Whether you’re a vegetarian or meat-lover, you can easily customize these quesadillas with ingredients like sautéed spinach from our Chickpea Spinach Curry or bring the heat with spicy jalapeños!
Quick and Easy: Perfect for busy weeknights, these quesadillas come together in under 30 minutes—ideal for satisfying cravings without the hassle of takeout.
Crowd-Pleaser: Kids and adults alike will love the gooey, cheesy filling enveloped in a crispy tortilla, making this recipe a guaranteed success for family meals.
Perfect Pairing: Serve them with fresh guacamole, robust salsa, or even a simple salad, as seen in our Roasted Corn Fried recipe, for a complete and delicious meal.
Mac and Cheese Quesadilla Ingredients
• Dive into the deliciousness of Mac and Cheese Quesadillas with these essential ingredients!
For the Cheese Sauce
- Elbow Macaroni – A classic base that provides structure; swap in gluten-free pasta for a gluten-free option.
- Unsalted Butter – This adds a rich, creamy flavor to the roux; plant-based butter is great for a vegan version.
- All-Purpose Flour – Thickens the cheese sauce beautifully—cornstarch is a perfect substitute for gluten-free needs.
- Whole Milk – Creates that creamy consistency in the sauce; opt for oat milk for a dairy-free variant.
- Sharp Cheddar Cheese – Offers a bold, rich flavor; feel free to switch to gouda or pepper jack for a twist.
- Mozzarella Cheese – Melts like a dream, adding a stretchy chewiness to the quesadilla.
- Mustard Powder – A secret ingredient that enhances the cheese flavor; entirely optional but worth a try.
- Garlic Powder – Adds an extra layer of depth; though optional, it’s highly recommended for flavor.
- Salt and Black Pepper – Essential for seasoning; adjust to your taste for the perfect kick.
For Assembling Quesadillas
- Flour Tortillas – Encapsulate those cheesy wonders and provide a satisfying crunch; use gluten-free tortillas for dietary restrictions.
- Butter (for cooking) – Ensures crispiness when grilling the quesadillas for that parfait golden finish.
Enjoy these delightful ingredients as you whip up scrumptious Mac and Cheese Quesadillas that everyone will adore!
Step‑by‑Step Instructions for Mac and Cheese Quesadillas
Step 1: Cook Pasta
Begin by bringing a large pot of salted water to a rolling boil. Add the elbow macaroni and cook until al dente, about 7-8 minutes. Once finished, strain the pasta and set it aside, allowing it to cool slightly while you prepare the cheese sauce.
Step 2: Make Roux
In a saucepan over medium heat, melt 2 tablespoons of unsalted butter. Whisk in 2 tablespoons of all-purpose flour, cooking for about 1 minute until it forms a smooth paste. This roux acts as the base for your cheese sauce, creating a deliciously thick consistency for your Mac and Cheese Quesadillas.
Step 3: Prepare Sauce
Gradually pour in 1 cup of whole milk while continuously whisking to prevent lumps. Continue cooking the mixture for 2-3 minutes until it thickens and bubbles gently. The sauce should have a creamy texture; this will be the heart of your mac and cheese filling, combining beautifully with the macaroni.
Step 4: Incorporate Cheese
Remove the saucepan from the heat, and stir in 1 cup of sharp cheddar cheese and 1 cup of mozzarella cheese until completely melted. Add in the mustard powder, garlic powder, salt, and pepper, adjusting to taste. You’ll achieve a luscious, cheesy sauce that’s perfect for coating your macaroni.
Step 5: Combine
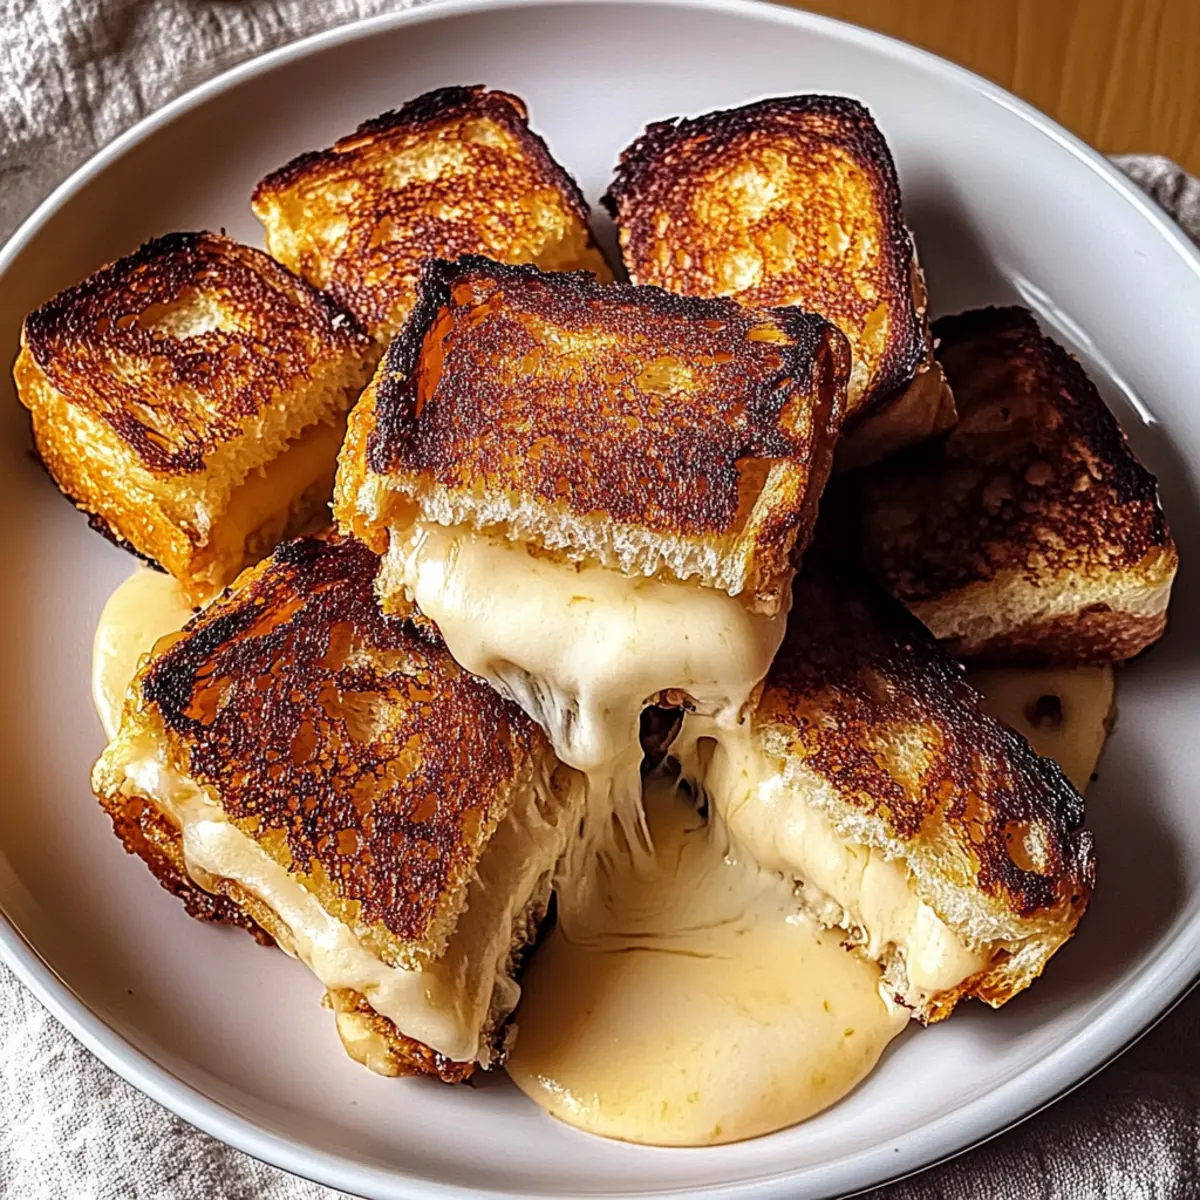
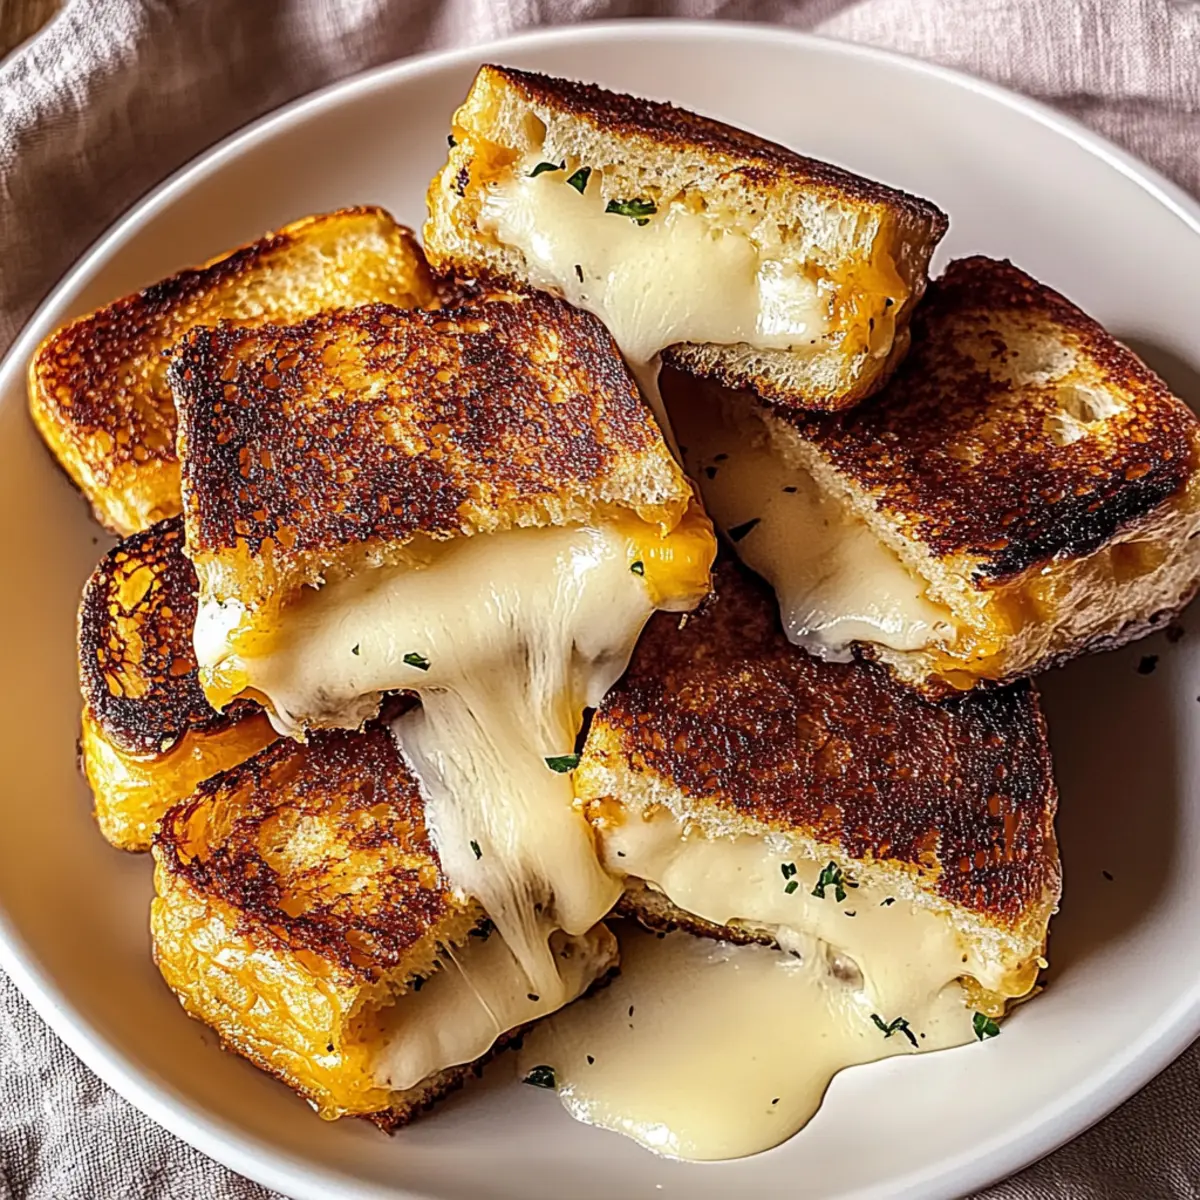
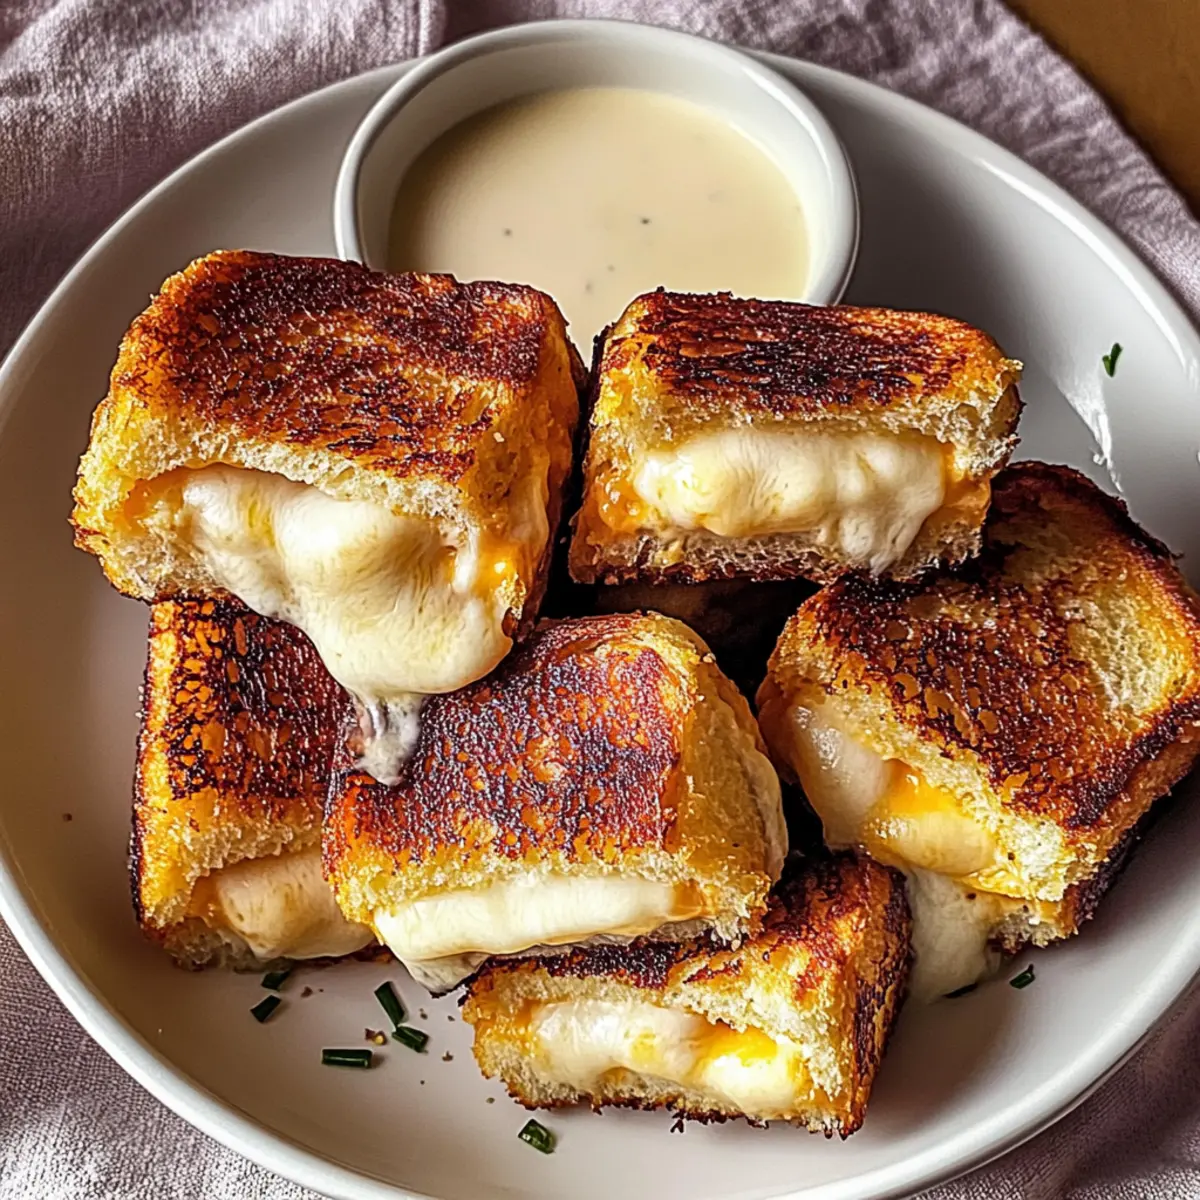
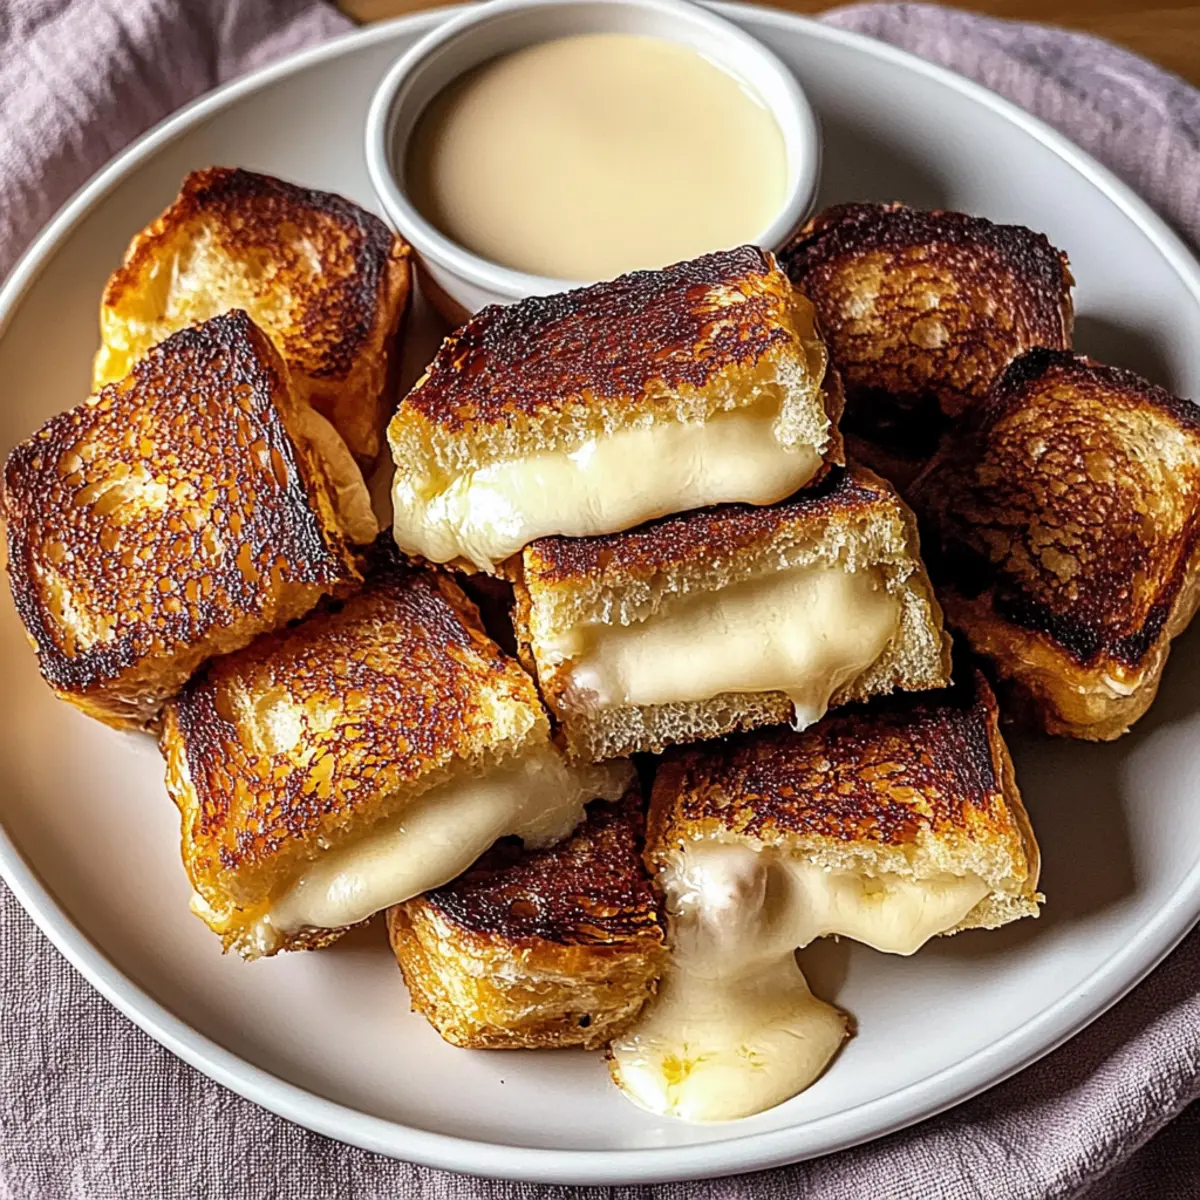
Fold the cooked elbow macaroni into the cheese sauce, ensuring each piece is generously coated. This delectable mixture will be the star filling of your Mac and Cheese Quesadillas, providing a satisfying blend of creamy cheese and tender pasta.
Step 6: Assemble Quesadillas
Lay a flour tortilla flat on a clean surface. Spread a generous amount of the mac and cheese filling over half of the tortilla, then fold the other half over, creating a half-moon shape. Repeat the process for the remaining tortillas, stacking them carefully.
Step 7: Cook Quesadillas
In a large skillet over medium heat, melt 1 tablespoon of butter. Place the assembled quesadillas in the skillet and cook for about 2-3 minutes on each side, or until golden brown and crispy. Press down gently with a spatula to ensure even cooking and the perfect crispiness.
Step 8: Rest and Serve
Once cooked, remove the quesadillas from the skillet and let them rest for 1-2 minutes on a cutting board. This helps the filling set slightly for easy slicing. Cut into wedges and serve hot, paired with your favorite dips for a delightful treat.
What to Serve with Mac and Cheese Quesadillas
Light, crisp salads or zesty dips can elevate your homemade creation and make mealtime even more delightful.
-
Salsa: A vibrant, fresh salsa adds a pop of flavor and pairs beautifully with the creamy quesadillas.
-
Guacamole: Creamy and rich, guacamole brings a luscious balance to the dish—the perfect accompaniment for a cheesy treat!
-
Simple Green Salad: A light salad with mixed greens, cherry tomatoes, and a citrus vinaigrette offers a refreshing contrast to the rich quesadillas.
-
Pico de Gallo: Fresh tomatoes, onions, and cilantro create a zesty topping that enhances each cheesy bite.
-
Tomato Soup: Warm, comforting tomato soup provides a nostalgic pairing that complements the crispy texture of the quesadillas.
-
Sweet Potato Fries: The sweetness and crunch of baked sweet potato fries make for a delightful side, enhancing the overall meal experience.
-
Chili: A hearty bowl of chili—spicy or mild—adds warmth and richness, perfect for dipping those cheesy wedges.
-
Margaritas: For an adult touch, sip a refreshing margarita to balance the savory flavors while keeping the festivities lively.
-
Brownies: Finish your meal on a sweet note with fudgy brownies; their chewy texture contrasts delightfully with the crisp quesadillas.
Make Ahead Options
Mac and Cheese Quesadillas are a fantastic choice for meal prep, saving you time on busy nights! You can prepare the creamy mac and cheese filling up to 24 hours in advance. Simply follow the initial steps to cook the pasta and create the cheese sauce, then mix them together and store in an airtight container in the refrigerator. To maintain the quality, be sure to cover the filling tightly to prevent drying out. When you're ready to enjoy, just assemble the quesadillas and cook them in a skillet for 2-3 minutes on each side until crispy. You'll delight in the same deliciousness without the rush!
How to Store and Freeze Mac and Cheese Quesadillas
Airtight Storage: Store cooked quesadillas in an airtight container in the fridge for up to 3 days to maintain their freshness and flavor.
Freezer-Friendly: For longer storage, freeze quesadillas wrapped tightly in plastic wrap or aluminum foil for up to 3 months. This prevents freezer burn.
Reheating: To reheat, bake frozen quesadillas at 350°F for about 12 minutes until heated through and crispy. Skillets can also be used to restore crispiness.
Enjoy Later: When planning meals ahead, these Mac and Cheese Quesadillas make for a perfect make-ahead option, ready to serve anytime!
Mac and Cheese Quesadillas Variations
Feel free to add your personal touch to these delicious quesadillas to create even more flavor and excitement!
-
Vegetarian Delight: Substitute cooked bacon with sautéed mushrooms and spinach for a hearty, meat-free option. Fresh veggies can enhance the texture and flavor wonderfully!
-
Spicy Kick: Toss in sliced jalapeños or a dash of hot sauce to the cheese mix for a fiery twist. This will elevate your taste buds and make each bite more exciting!
-
Cheesy Blend: Mix in smoked gouda or pepper jack cheese for a unique flavor profile—smoky and spicy additions that enrich the classic cheese taste.
-
Gluten-Free Option: Use gluten-free pasta and tortillas to make this dish accessible to all. You can still enjoy that crispy texture and creamy filling without the gluten!
-
Tex-Mex Style: Add black beans, corn, and diced tomatoes to your macaroni for a vibrant, southwestern flavor. This variation creates a delightful harmony of tastes and textures.
-
Herbed Goodness: Infuse fresh herbs such as basil or cilantro into your cheese sauce for a refreshing twist. Nothing beats a bit of herbiness to liven things up!
-
Savory Sweet: Incorporate roasted butternut squash or caramelized onions into your filling for a sweet and savory combination that surprises the palate.
-
Crispy Corn: Try adding crushed tortilla chips inside the quesadilla for added crunch and texture. A playful twist that brings a fun crunch to every bite!
These variations allow you to get creative in the kitchen! For more unique combinations, consider serving your quesadillas alongside toppings from our delightful Fried Shrimp Cabbage recipe or try dipping them into a spicy salsa paired with Beans Greens Stew. Enjoy customizing your culinary creation!
Expert Tips for Mac and Cheese Quesadillas
• Crisp It Up: Press lightly down on the quesadillas while cooking for that extra crispy texture—everyone loves a good crunch!
• Fresh Ingredients: Use freshly shredded cheese instead of pre-packaged for a smoother melt—this will elevate the flavors in your Mac and Cheese Quesadillas.
• Avoid Sogginess: Assemble the quesadillas just before cooking to keep the tortillas from becoming soggy; this preserves their crispy charm.
• Reheat Right: For leftovers, reheat in a skillet instead of the microwave; this prevents them from losing their wonderful crispiness.
• Mix It Up: Don’t hesitate to experiment with fillings! Try adding cooked chicken or vegetables—your Mac and Cheese Quesadillas will become a versatile family favorite.
Mac and Cheese Quesadillas Recipe FAQs
How do I choose the right elbow macaroni for my quesadillas?
Absolutely! Look for elbow macaroni that is firm and holds its shape well after cooking. Check for any dark spots, which may indicate overripeness or damage. If you're seeking gluten-free options, there are great substitutes available made from brown rice or quinoa pasta.
What’s the best way to store leftover quesadillas?
You can store cooked quesadillas in an airtight container in the fridge for up to 3 days. Make sure they’re cooled completely before sealing to maintain their freshness and avoid sogginess. When ready to eat, simply reheat them in a skillet to preserve that delicious crispiness!
Can I freeze Mac and Cheese Quesadillas? How?
Yes! Mac and Cheese Quesadillas freeze exceptionally well. After allowing them to cool completely, wrap each quesadilla tightly in plastic wrap or aluminum foil to prevent freezer burn and place them in a freezer-safe bag. They can be frozen for up to 3 months. When you’re ready to enjoy, bake them at 350°F for about 12 minutes until heated through and crispy.
What if my cheese sauce isn’t thickening properly?
If your cheese sauce isn't thickening, it could be that you're not whisking vigorously enough while adding the milk. Ensure the roux is cooked for at least 1 minute before adding milk; this is crucial for thickening. If it’s still too thin, try mixing a bit of cornstarch with water and whisk it into the sauce—this should help it thicken beautifully!
Can I modify this recipe for dietary restrictions?
Very! To make this dish gluten-free, swap all-purpose flour with cornstarch or a gluten-free flour blend and use gluten-free tortillas. For a dairy-free option, use plant-based butter and non-dairy milk along with vegan cheese. You can still enjoy this comforting recipe without compromising on your dietary needs!
What’s the best way to keep my quesadillas crispy when reheating?
The best method to keep your quesadillas crispy is by reheating them in a skillet over medium heat. This allows the tortilla to crisp back up while the filling warms through. Avoid using the microwave since it can make the tortillas soggy; we want that delightful crunch!
Mac and Cheese Quesadillas: A Cheesy Twist You’ll Love
Ingredients
Equipment
Method
- Bring a large pot of salted water to a rolling boil. Add elbow macaroni and cook until al dente, about 7-8 minutes. Strain and set aside.
- Melt 2 tablespoons of unsalted butter in a saucepan over medium heat. Whisk in 2 tablespoons of flour and cook for 1 minute until smooth.
- Gradually pour in 1 cup of whole milk while whisking continuously. Cook until it thickens and bubbles gently for 2-3 minutes.
- Remove from heat, stir in 1 cup of sharp cheddar cheese and 1 cup of mozzarella until melted. Add mustard powder, garlic powder, salt, and pepper.
- Fold cooked macaroni into the cheese sauce until well coated.
- Lay a tortilla flat, spread mac and cheese filling over half, and fold to form a half-moon. Repeat with remaining tortillas.
- Melt 1 tablespoon of butter in a skillet over medium heat. Cook quesadillas for 2-3 minutes on each side until golden brown.
- Let the quesadillas rest for 1-2 minutes, then cut into wedges and serve hot.