tastytrendingredients

  • Home
  • Recipes
    • Appetizers
    • Breakfast
    • Dessert
    • Dinner
    • Drinks
    • Salads
    • Snacks
    • Soups
  • About me
  • Contact
menu icon
go to homepage
  • Home
  • Recipes
    • Appetizers
    • Breakfast
    • Dessert
    • Dinner
    • Drinks
    • Salads
    • Snacks
    • Soups
  • About me
  • Contact
search icon
Homepage link
  • Home
  • Recipes
    • Appetizers
    • Breakfast
    • Dessert
    • Dinner
    • Drinks
    • Salads
    • Snacks
    • Soups
  • About me
  • Contact
×

Strawberry Crackle Salad: A Refreshing Crunch for Summer Bliss

February 12, 2026 by Grace Snow Leave a Comment

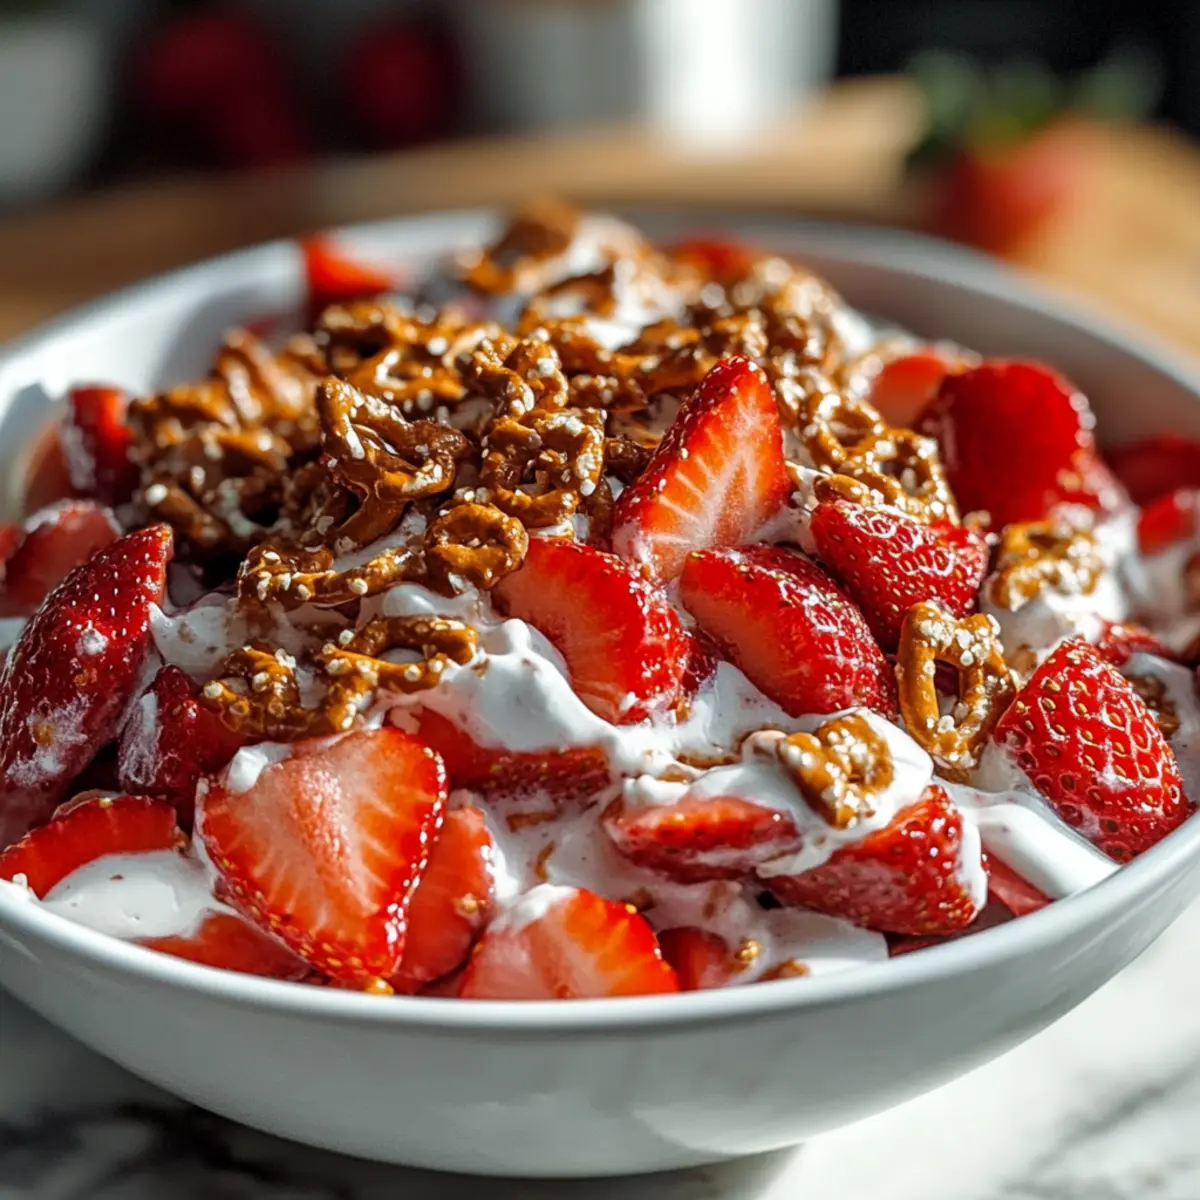
As I opened the fridge, a wave of nostalgia hit me—just like the summer picnics of my childhood. That’s when I spotted the perfect star ingredient for my Strawberry Crackle Salad, a dish that captures the joy of sunny gatherings with family and friends. This refreshing salad is a delightful mix of sweet, ripe strawberries and a crunchy pretzel topping, making it a satisfying choice that stands out at any potluck. With its creamy dressing and minimal prep time, you can whip it up in a flash, leaving you more moments to enjoy those sunny smiles. Plus, it's versatile enough to pair with your favorite grilled dishes or serve as a stand-alone treat! Ready to dive into summer flavors with me?
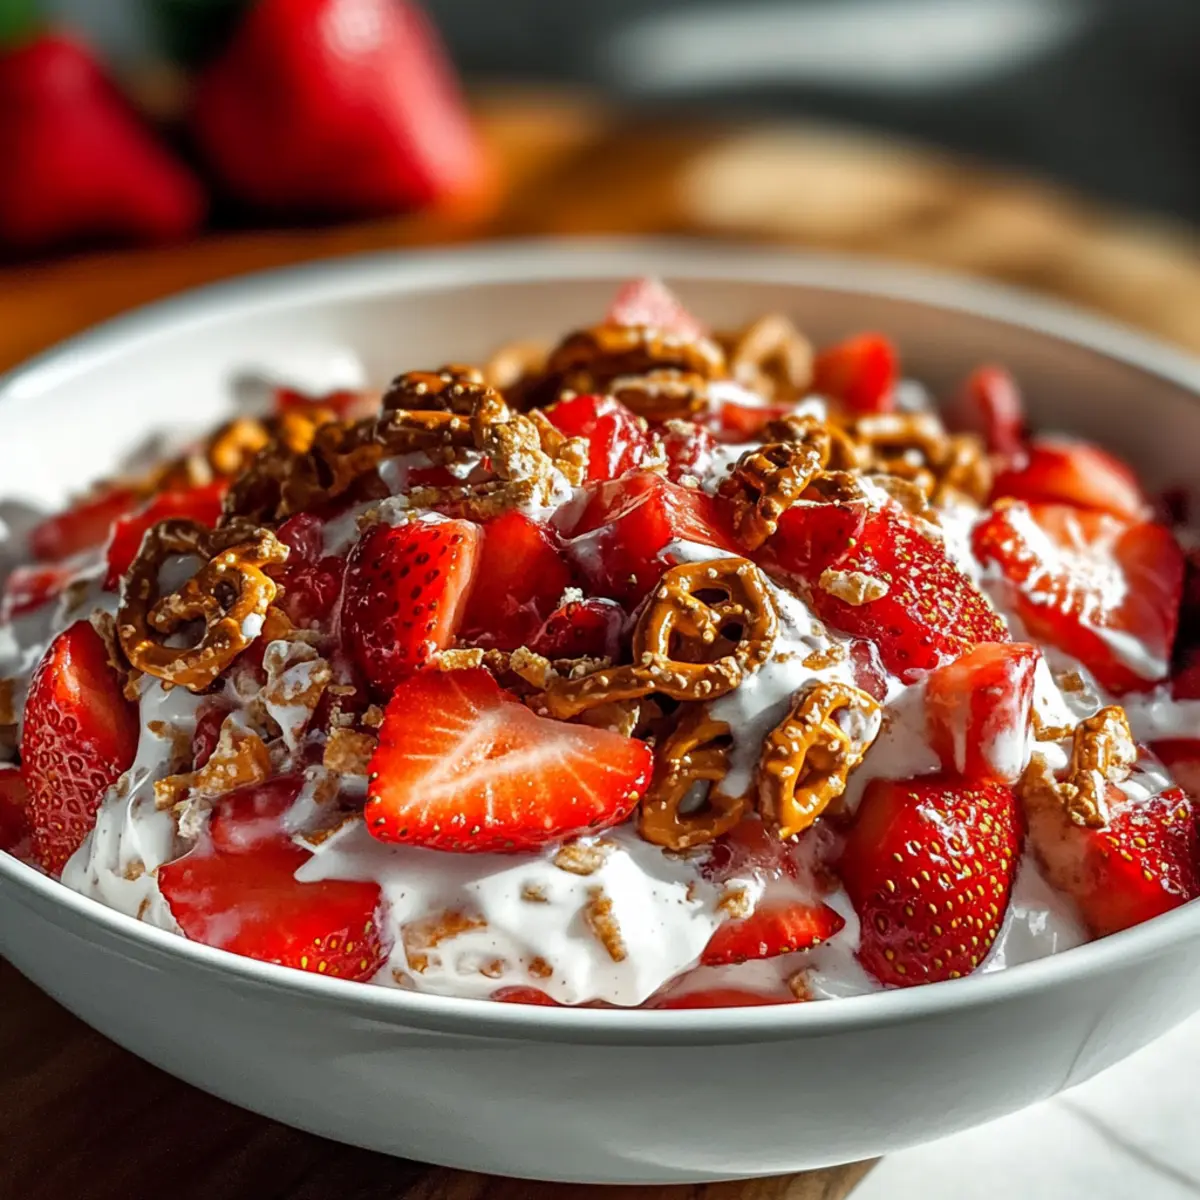
Why is Strawberry Crackle Salad a Must-Try?

Nostalgic flavors will transport you back to joyful summer picnics, evoking memories with every bite. Quick and easy to prepare, this salad takes minimal time, leaving you free to relish those great moments. Versatile enough to shine at barbecues, it pairs perfectly with grilled chicken or even on its own! Crunchy pretzels and juicy strawberries unite for a delightful texture that keeps it exciting. Plus, if you love easy yet impressive dishes, you'll find this Strawberry Crackle Salad rivals any classic, just like Chicken Salad Apples or Grilled Balsamic Steak Salad!

Strawberry Crackle Salad Ingredients

• A delightful blend of sweet and crunchy awaits!

For the Pretzel Crust

  • Crushed pretzels – Adds a delightful crunch that contrasts perfectly with the creamy dressing; can use graham crackers for a different texture.
  • Chopped pecans – Provide a nutty flavor and additional crunch; feel free to substitute with walnuts or almonds based on your preference.
  • Brown sugar – Adds sweetness and enhances other flavors; can substitute with coconut sugar for a less processed alternative.
  • Butter, melted – Binds the crust together; margarine or coconut oil can be used for a dairy-free option.

For the Creamy Dressing

  • Sliced strawberries – The key ingredient that brings sweetness and freshness; fresh is preferred for the best texture, though frozen will work in a pinch.
  • Cream cheese, softened – Provides a creamy, rich base for the salad; opt for low-fat cream cheese for a lighter version.
  • Granulated sugar – Balances the creaminess of the dressing; adjust to taste based on the sweetness of the strawberries.
  • Vanilla extract – Enhances overall flavor; pure vanilla extract is recommended for the best taste.
  • Cool Whip – Adds lightness and fluffiness to the salad; consider using homemade whipped cream for a fresher taste.

Enjoy creating your Strawberry Crackle Salad with these simple yet essential ingredients!

Step‑by‑Step Instructions for Strawberry Crackle Salad

Step 1: Prepare the Oven and Baking Sheet
Begin by preheating your oven to 400°F (200°C). While it warms up, line a baking sheet with parchment paper to prevent sticking. This will help ensure your pretzel crust bakes evenly without mess.

Step 2: Mix Pretzel Crust
In a medium bowl, combine your crushed pretzels, chopped pecans, and brown sugar. Pour in the melted butter, mixing with a spatula until everything is well coated and crumbly. The mixture should hold together when squeezed, creating a flavorful base for your Strawberry Crackle Salad.

Step 3: Bake the Crust
Spread the pretzel mixture evenly on the prepared baking sheet and bake it in the preheated oven for 8-10 minutes. You want it to be bubbling and lightly golden. Keep an eye on it, as you don’t want it to burn. Once done, remove it and let it cool completely on the sheet.

Step 4: Make the Creamy Base
In a large bowl, beat together the softened cream cheese, granulated sugar, and vanilla extract using an electric mixer until smooth and creamy. It should be free of lumps, creating a rich base for your salad. Once smooth, gently fold in the Cool Whip, blending just until combined to maintain its airy texture.

Step 5: Combine the Salad
Before serving, carefully fold the sliced strawberries into the creamy mixture using a rubber spatula. Add half of the pretzel crunch mixture and combine gently, preserving the flavor and texture of the salad. This will ensure that every bite of your Strawberry Crackle Salad is delightfully refreshing.

Step 6: Serve Immediately
Transfer the assembled Strawberry Crackle Salad to a serving bowl and top with the remaining pretzel crunch mixture. This will create a beautiful, crunchy topping that enhances both the flavor and the presentation. For the best experience, serve immediately to keep the pretzel topping crispy.
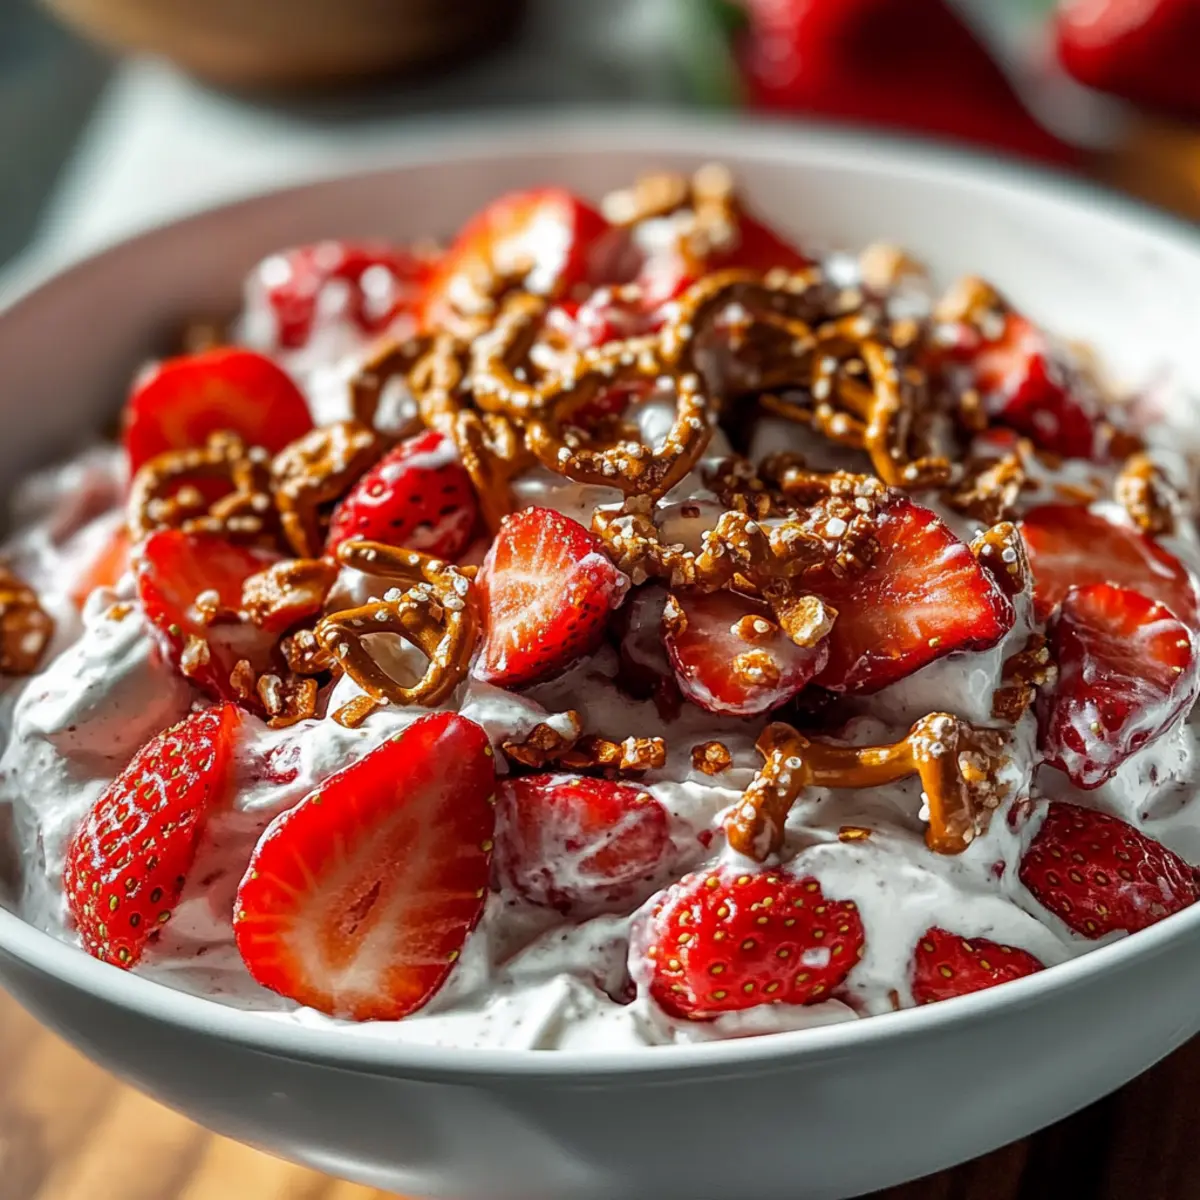
Strawberry Crackle Salad Variations

Feel free to mix it up and make this delightful salad your own with these fun twists!

  • Berry Medley: Substitute some strawberries with blueberries or raspberries for a colorful twist. The combination of flavors will brighten your salad and bring a summer vibe.

  • Coconut Bliss: Add shredded coconut for a tropical flair. Those subtle, sweet coconut shavings will give your salad a delightful chewiness that pairs beautifully with the strawberries.

  • Nutty Alternatives: Swap out pecans for your favorite nuts, such as walnuts or almonds. Each nut brings its unique crunch and flavor, adding a new layer of texture to your dish.

  • Gluten-Free Option: For a gluten-free version, replace the pretzels with gluten-free crackers. You’ll achieve that satisfying crunch without compromising on taste!

  • Creamy Upgrade: Use Greek yogurt instead of cream cheese for a tangier dressing. This adds a nice creaminess while upping the nutritional value—perfect for health-conscious gatherings.

  • Spiced Up: For a touch of heat, sprinkle in some cinnamon or a dash of cayenne pepper. This unexpected twist can enhance the sweetness of the strawberries and impress your guests.

  • Fluffy Lifts: Use homemade whipped cream in place of Cool Whip for a richer flavor. This simple switch can elevate your salad to a whole new level of deliciousness.

  • Fruity Addition: Mix in some finely chopped apples or pears. This will add additional crunch and a sweet surprise, making every bite a delightful discovery.

Your creativity will shine through in every bite of this refreshing Strawberry Crackle Salad! And, if you enjoy similar flavors, try adding a twist from my Avocado Egg Salad or use your remaining strawberries in a sumptuous German Potato Salad. Enjoy exploring!

Make Ahead Options

These Strawberry Crackle Salad preparations are perfect for busy home cooks looking to save time! You can make the pretzel crust up to 24 hours in advance by baking it and then storing it in an airtight container at room temperature to maintain its crunch. Additionally, the creamy dressing can be prepared up to 3 days ahead; blend the cream cheese, sugar, and vanilla, then fold in the Cool Whip, and refrigerate until ready to use. Just before serving, gently mix in the sliced strawberries and half of the pretzel crunch. This will ensure your Strawberry Crackle Salad remains fresh and delicious with optimal texture!

What to Serve with Strawberry Crackle Salad?

Nothing elevates a gathering quite like a well-rounded meal, and this salad makes for the perfect appetizer or side dish!

  • Grilled Chicken: Juicy, marinated chicken complements the sweetness of strawberries, creating a delightful balance of flavors. Plus, the grill’s smokiness adds a delightful contrast.
  • Herbed Quinoa: This nutritious grain infused with fresh herbs provides a hearty texture that pairs beautifully with the lightness of the salad. It makes for a fulfilling meal alongside the Strawberry Crackle Salad.
  • Summer Veggie Skewers: Colorful, grilled veggies such as bell peppers and zucchini add a vibrant visual contrast and smoky flavor, making every bite an adventure.
  • Crispy Fish Tacos: Lightly battered fish wrapped in soft tortillas adds a refreshing twist, while tangy slaw mirrors the freshness of the strawberry salad perfectly. Each crunch complements the other!
  • Iced Lemonade: A chilled glass of homemade lemonade refreshes the palate and enhances the dessert-like quality of the salad. The zesty tang is an invigorating companion.
  • Chocolate Mousse: For a sweet ending, rich chocolate mousse provides a creamy, velvety finish that beautifully balances the fruity, crunch of your meal. The contrasts create a memorable dessert experience.
  • Pineapple Mint Punch: This vibrant, refreshing drink harmonizes with the light flavors in the salad and offers a tropical flair that transports you to sunny beaches. What a delight to sip alongside!

How to Store and Freeze Strawberry Crackle Salad

Refrigerator: Store any leftover Strawberry Crackle Salad in an airtight container in the fridge for up to 2-3 days. This helps maintain its freshness and crunch.

Freezer: While it’s best enjoyed fresh, you can freeze the pretzel mixture separately for up to a month. Just be sure to wrap it tightly to prevent freezer burn.

Thawing: To enjoy the frozen pretzel mix, let it thaw at room temperature and re-crunch it in the oven for a few minutes to restore its crispiness before combining with the creamy salad.

Serving Tips: When serving leftovers, mix in freshly sliced strawberries to revitalize the flavor and texture of your Strawberry Crackle Salad.

Expert Tips for Strawberry Crackle Salad

  • Cool the Crust: Ensure the pretzel mixture cools completely before breaking it into pieces. This helps maintain that perfect crunch texture essential for your Strawberry Crackle Salad.

  • Gentle Mixing: Be gentle when folding in the Cool Whip and strawberries. This keeps the salad light and airy, enhancing the delightful flavors throughout.

  • Serve Fresh: For the best experience, serve the salad immediately after mixing. This ensures the strawberries remain fresh and the pretzel crust stays crunchy, avoiding any sogginess.

  • Adjust Sweetness: Taste the creamy base before serving and adjust the granulated sugar according to the natural sweetness of your strawberries. This customization keeps your Strawberry Crackle Salad perfectly balanced.

  • Explore Variations: Don’t hesitate to add other berries or textures! Incorporating blueberries or shredded coconut can elevate your salad, making it uniquely yours while still deliciously nostalgic.
Strawberry Crackle Salad Recipe FAQs

How do I choose ripe strawberries?
Absolutely! When selecting strawberries, look for ones that are bright red, firm, and free of dark spots. The green caps should appear fresh and green. Avoid those with a dull appearance or any signs of mold, as these may affect the flavor and texture of your Strawberry Crackle Salad.

How should I store leftovers?
To store any leftover Strawberry Crackle Salad, place it in an airtight container in the refrigerator. It will last for about 2-3 days. Ensure it's sealed well to maintain the freshness and crunch of the pretzel crust. Remember, the longer it sits, the softer the crust will become!

Can I freeze the salad?
While the salad itself isn't ideal for freezing, you can certainly freeze the pretzel mixture! Simply prepare the crust, allow it to cool, and then wrap it tightly in plastic wrap or place it in a freezer-safe bag. It can be stored for up to 3 months. When ready to use, just thaw it at room temperature and re-crunch it by baking it in a preheated oven for a few minutes before combining with the creamy dressing and fresh strawberries.

What if my pretzel mixture gets soggy?
If you find your pretzel mixture has become soggy, it could be due to moisture in your container or from the strawberries releasing juices. To prevent this, ensure the pretzel crust cools completely before breaking it apart. You could also consider storing the pretzel crunch separately and adding it to each serving right before eating for that perfect crunch!

Are there any allergy considerations?
Yes! If you're preparing this salad for someone with allergies, keep in mind that it contains nuts and dairy. For a nut-free option, omit the pecans or substitute with seeds like sunflower seeds. To make a dairy-free version, consider using a dairy-free cream cheese alternative and homemade whipped coconut cream instead of Cool Whip.

Can I make substitutions for the ingredients?
Very! If you're looking to switch things up, you can substitute graham crackers for the pretzel crust if you're after a sweeter base. If you want to keep it gluten-free, opt for gluten-free pretzels or crackers. Additionally, feel free to play around with other berries like raspberries or blueberries for a delightful berry medley that will add different flavors to your Strawberry Crackle Salad!
Strawberry Crackle Salad

Strawberry Crackle Salad: A Refreshing Crunch for Summer Bliss

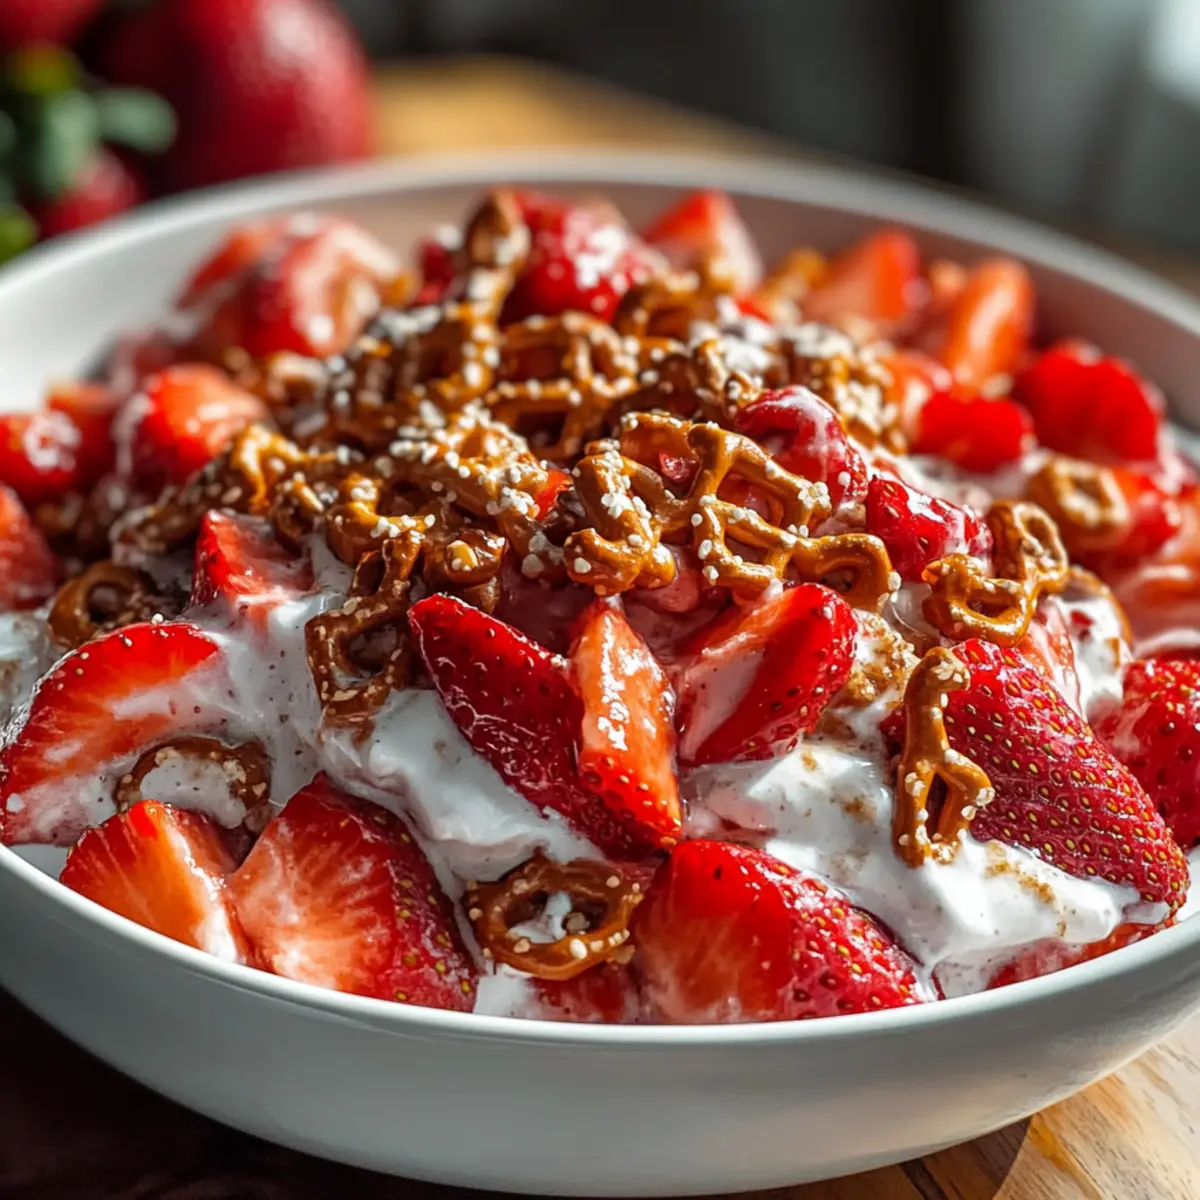
Strawberry Crackle Salad captures the joy of summer picnics with its mix of sweet strawberries and crunchy pretzel topping.
Print Recipe Pin Recipe
Prep Time 15 minutes mins
Cook Time 10 minutes mins
Cooling Time 10 minutes mins
Total Time 35 minutes mins
Servings: 6 servings
Course: Salads
Cuisine: American
Calories: 250
Ingredients Equipment Method Nutrition Notes

Ingredients
  

Pretzel Crust
  • 2 cups Crushed pretzels Can use graham crackers for a different texture.
  • 1/2 cup Chopped pecans Feel free to substitute with walnuts or almonds.
  • 1/4 cup Brown sugar Can substitute with coconut sugar.
  • 1/2 cup Butter, melted Margarine or coconut oil can be used for a dairy-free option.
Creamy Dressing
  • 2 cups Sliced strawberries Fresh is preferred.
  • 8 oz Cream cheese, softened Opt for low-fat cream cheese for a lighter version.
  • 1/2 cup Granulated sugar Adjust to taste.
  • 1 teaspoon Vanilla extract Pure vanilla extract is recommended.
  • 1 cup Cool Whip Consider using homemade whipped cream.

Equipment

  • Oven
  • Baking Sheet
  • medium bowl
  • large bowl
  • Electric mixer
  • Spatula

Method
 

Preparation
  1. Preheat your oven to 400°F (200°C) and line a baking sheet with parchment paper.
  2. In a medium bowl, combine crushed pretzels, chopped pecans, and brown sugar. Pour in melted butter and mix until coated.
  3. Spread the pretzel mixture on the baking sheet and bake for 8-10 minutes until bubbling and golden.
  4. In a large bowl, beat together cream cheese, granulated sugar, and vanilla extract until smooth. Fold in Cool Whip.
  5. Fold sliced strawberries in the creamy mixture and add half the pretzel crunch.
  6. Transfer to a serving bowl and top with remaining pretzel crunch. Serve immediately.
Nutrition

Serving: 1servingCalories: 250kcalCarbohydrates: 30gProtein: 3gFat: 12gSaturated Fat: 7gPolyunsaturated Fat: 1gMonounsaturated Fat: 4gCholesterol: 30mgSodium: 200mgPotassium: 150mgFiber: 1gSugar: 18gVitamin A: 200IUVitamin C: 30mgCalcium: 50mgIron: 0.5mg

Notes

Store leftovers in an airtight container for 2-3 days. For best results, serve immediately after mixing to keep ingredients fresh and crunchy.

Tried this recipe?

Let us know how it was!

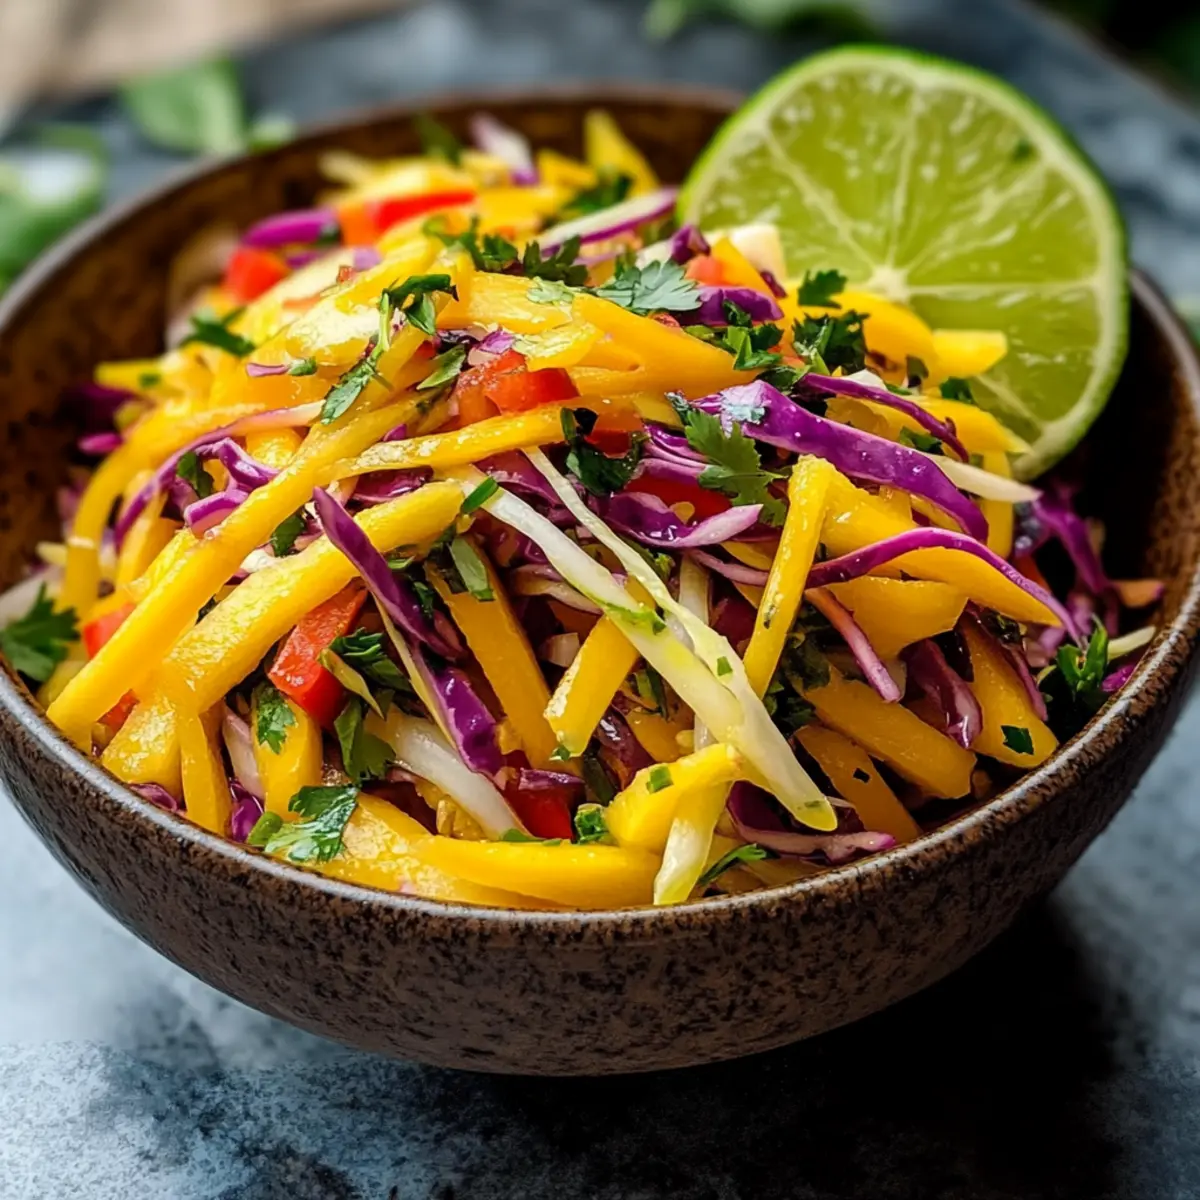
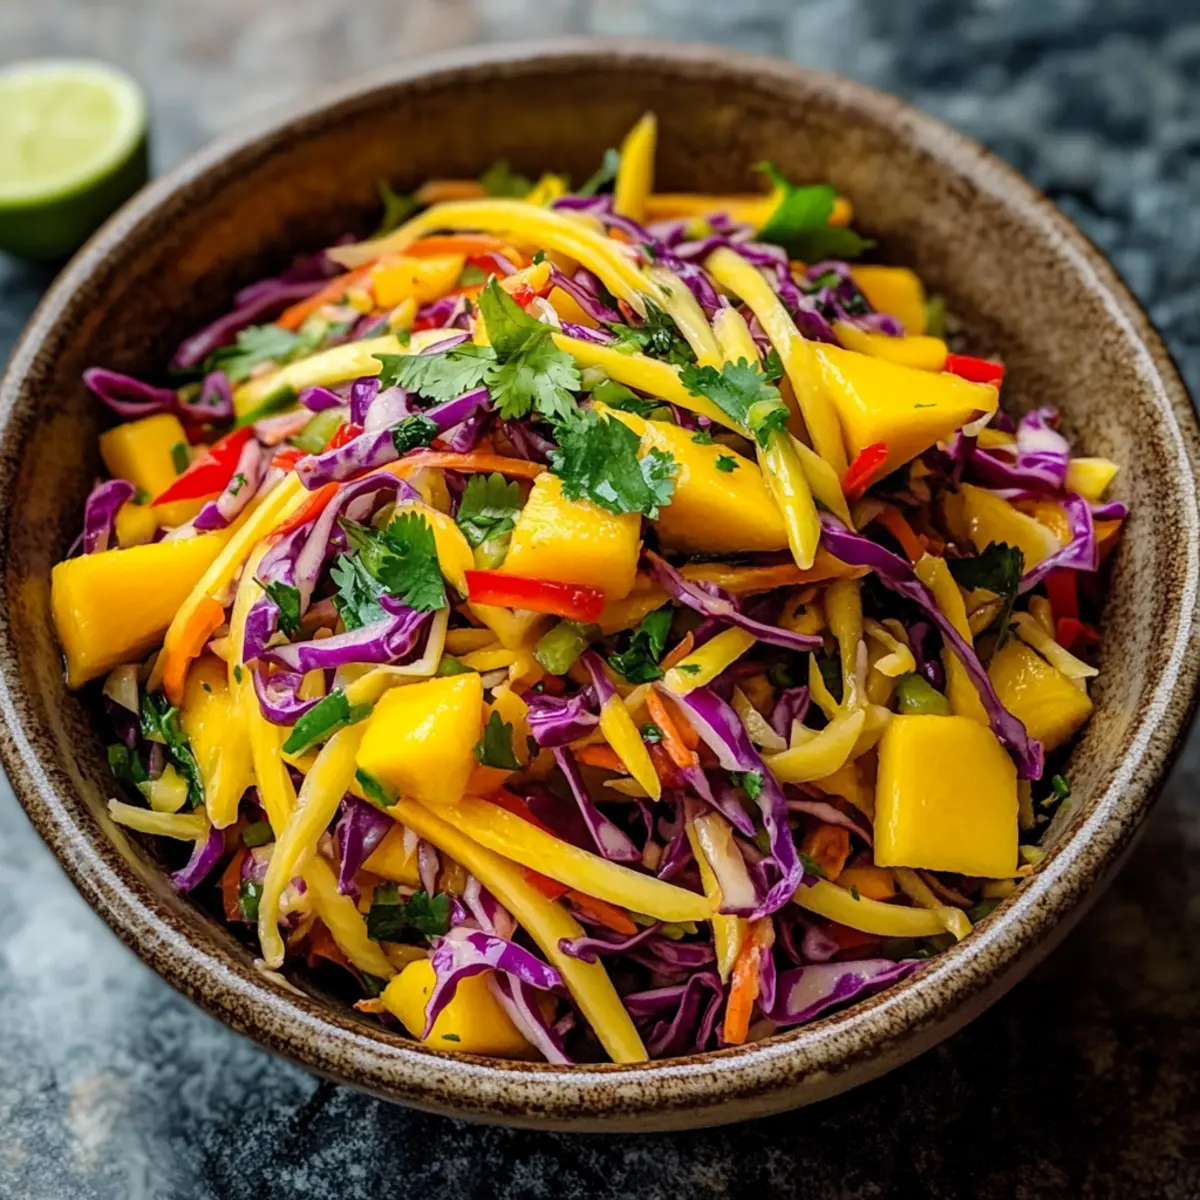
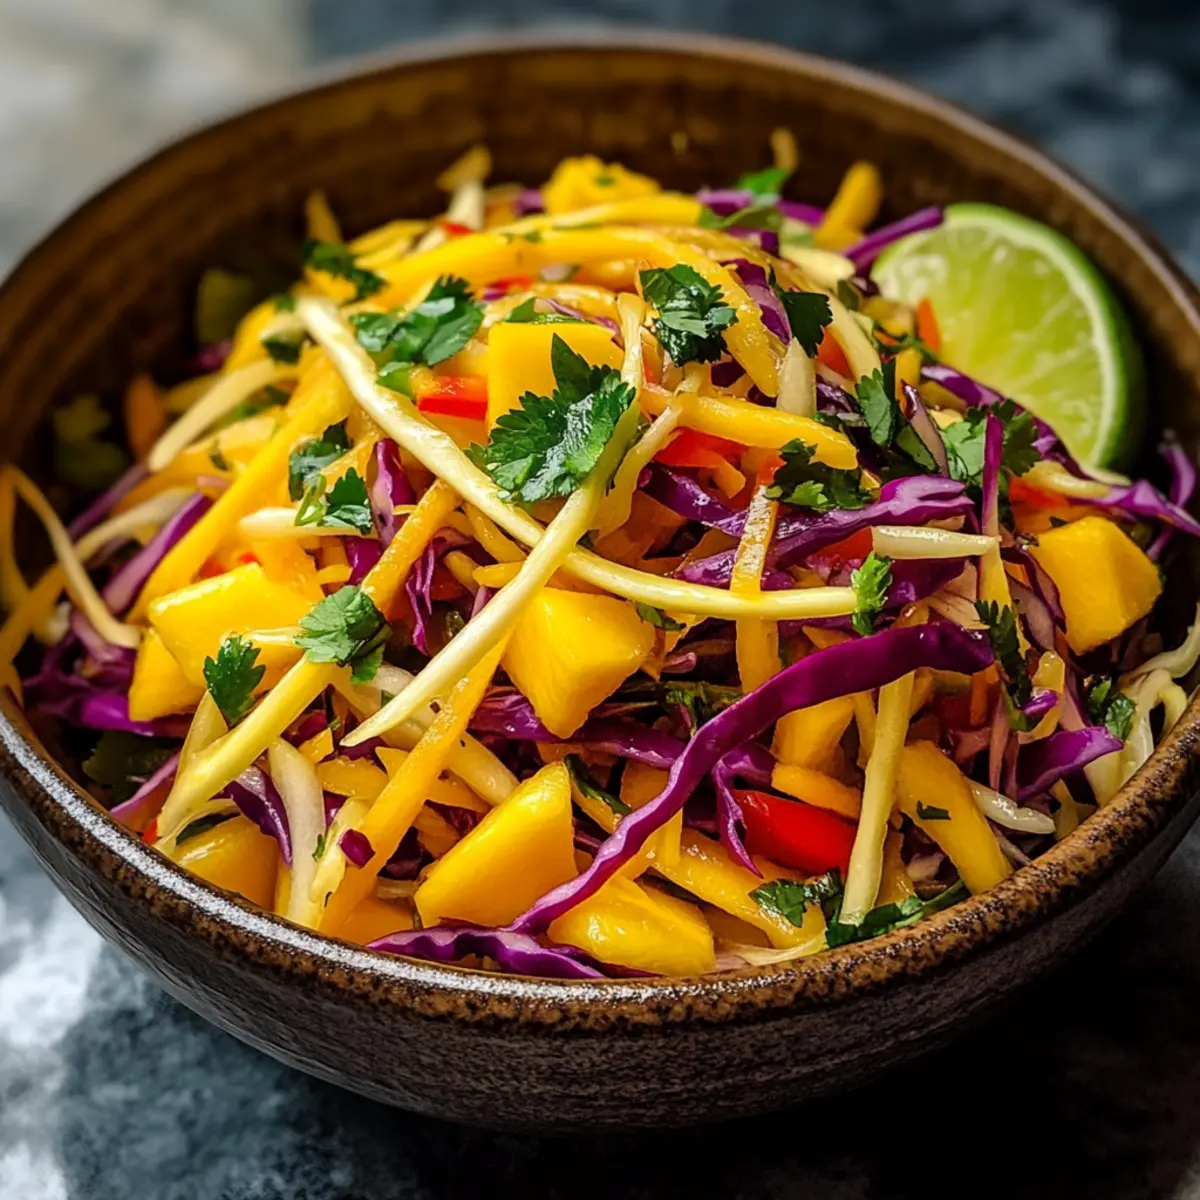
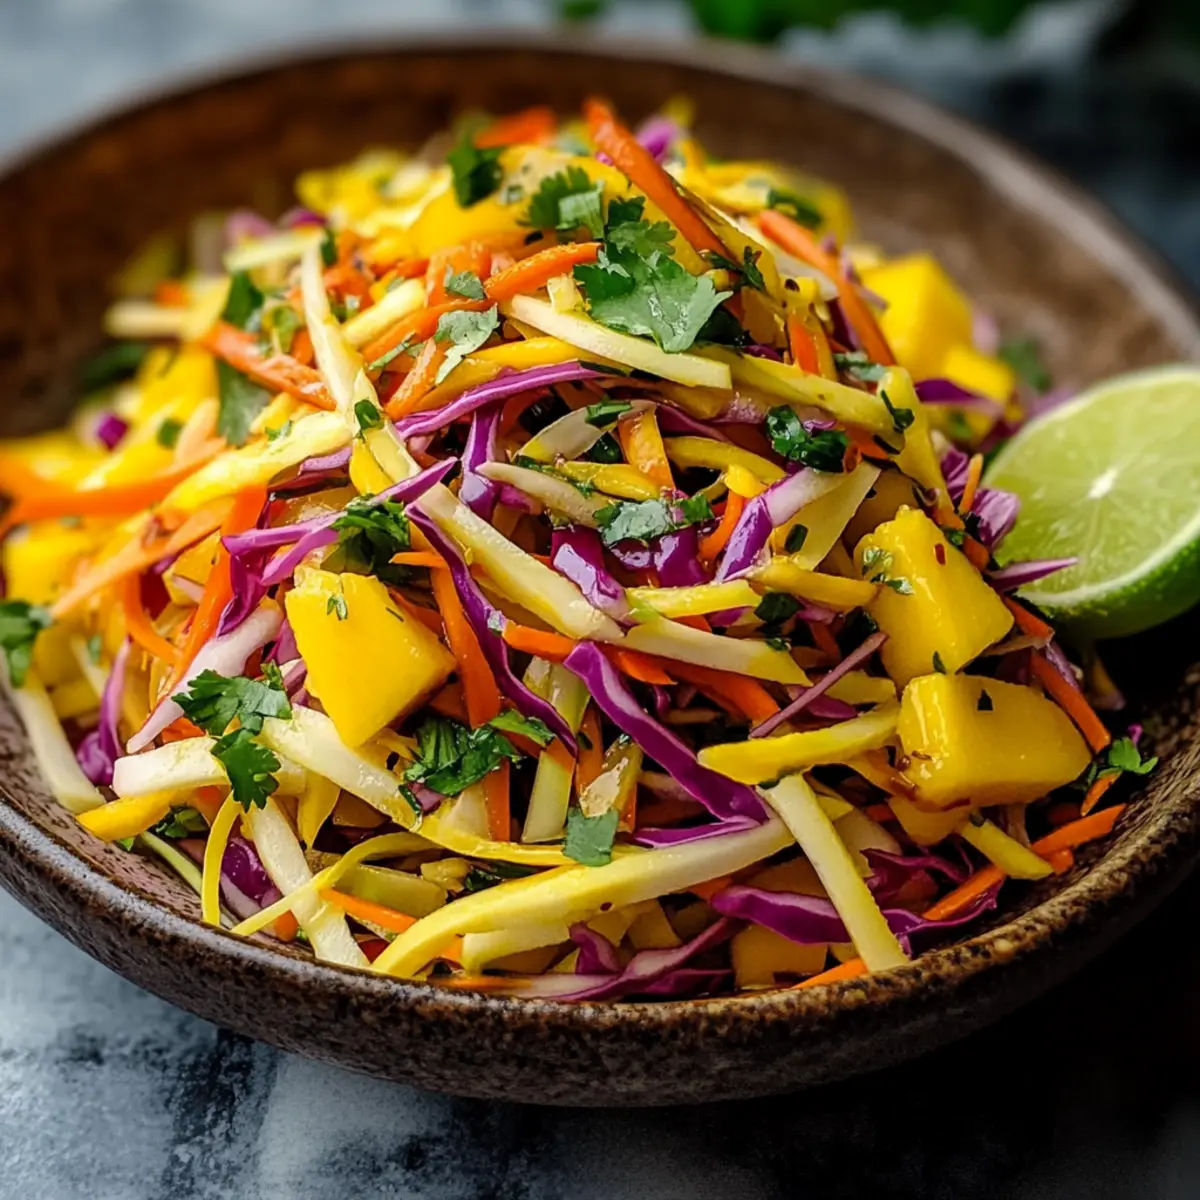
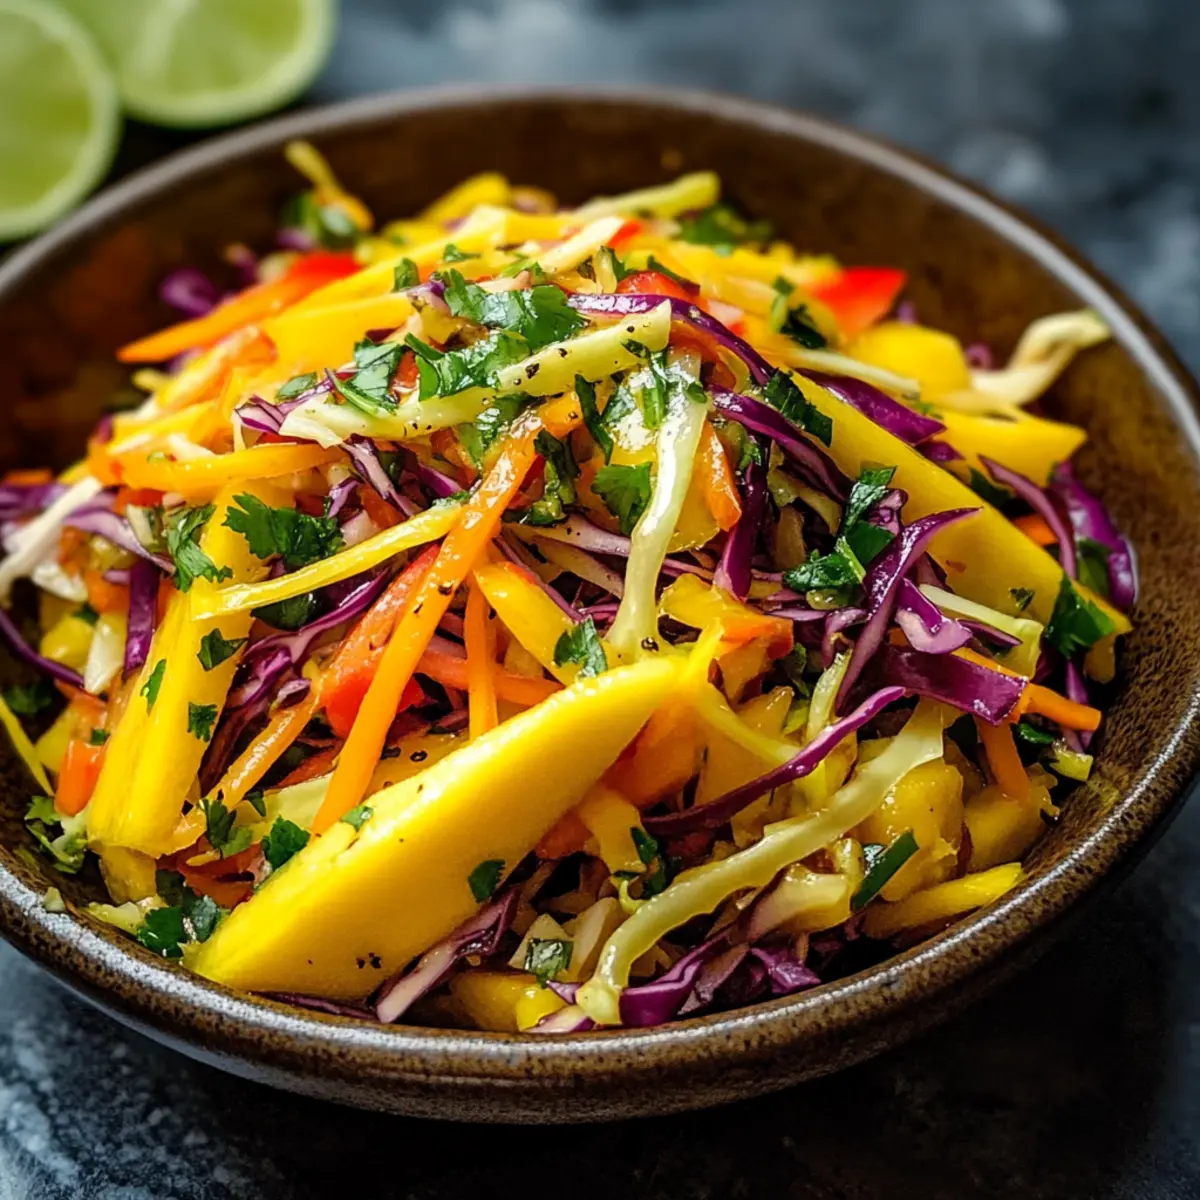
Quick And Easy Mango Slaw for a Refreshing Tropical Twist

February 8, 2026 by Grace Snow Leave a Comment

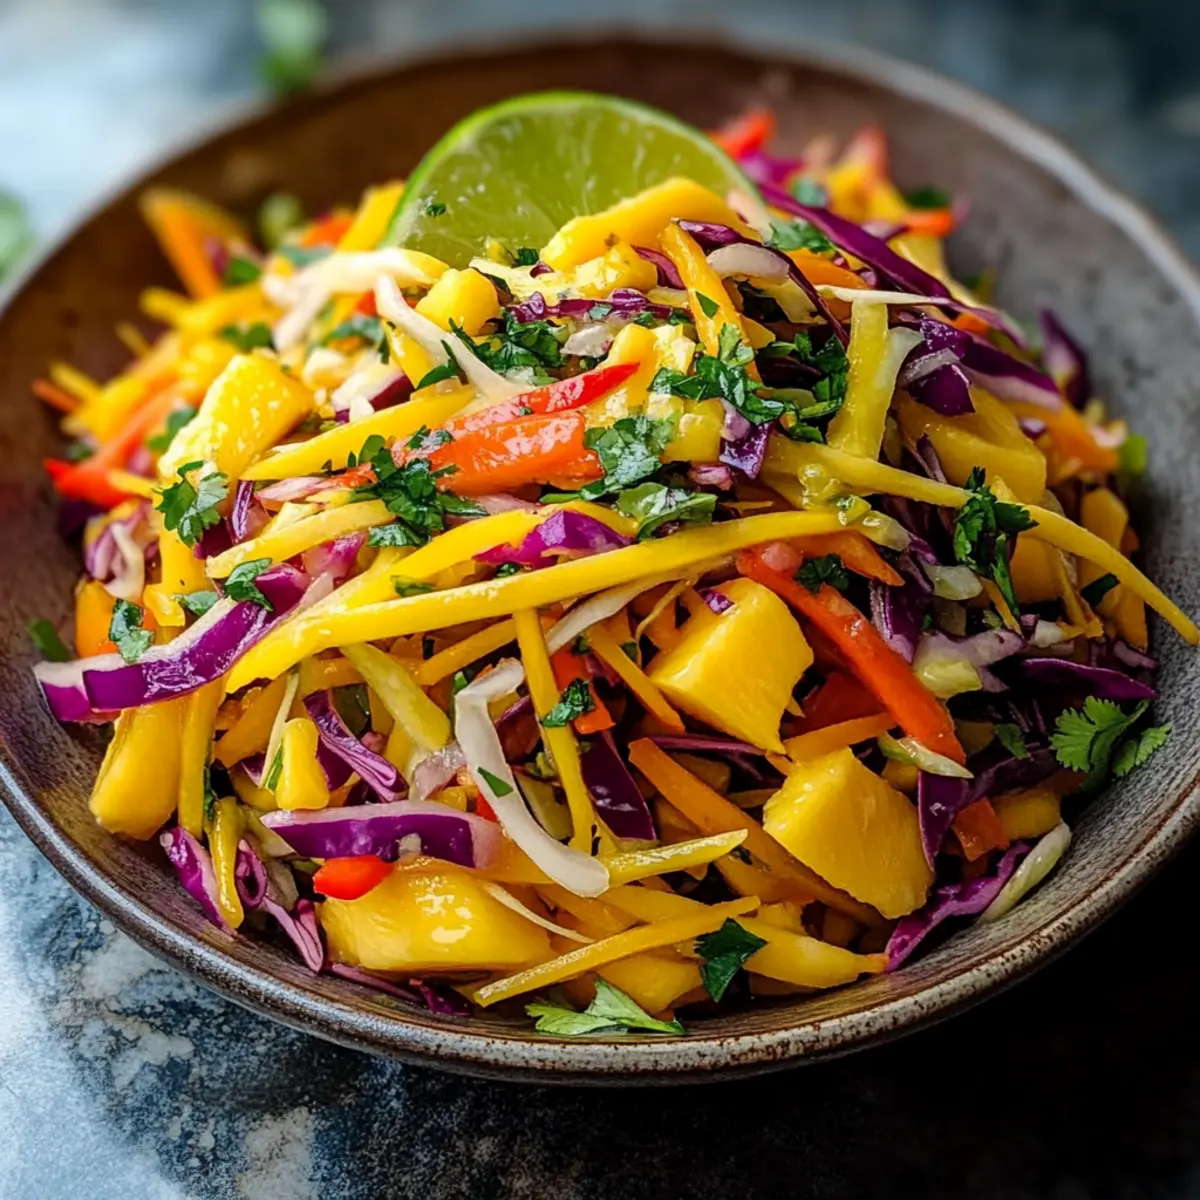
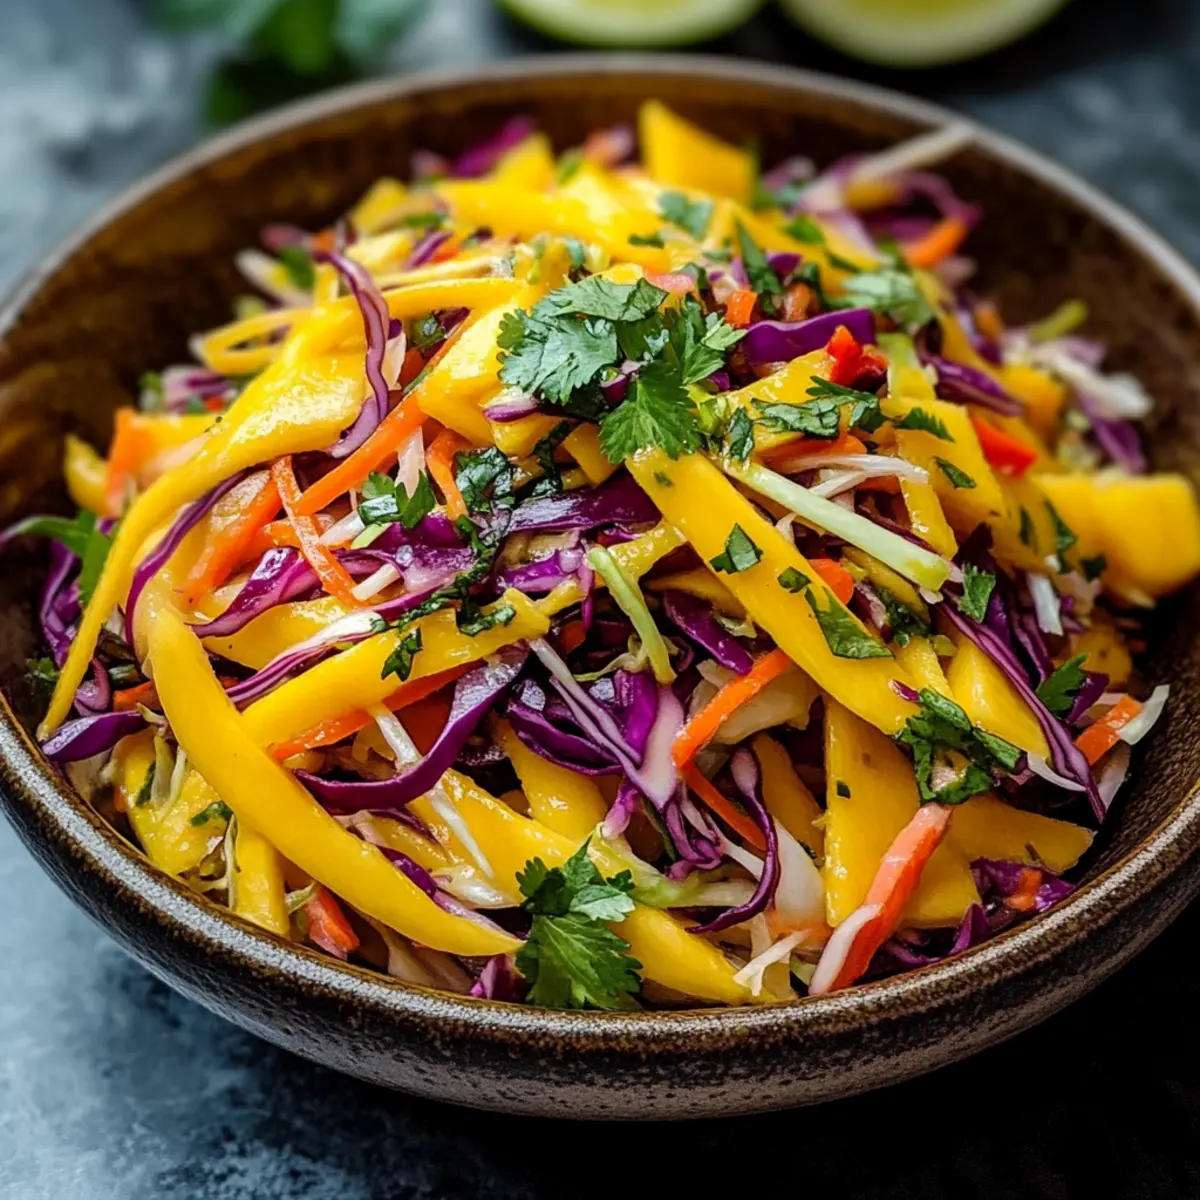
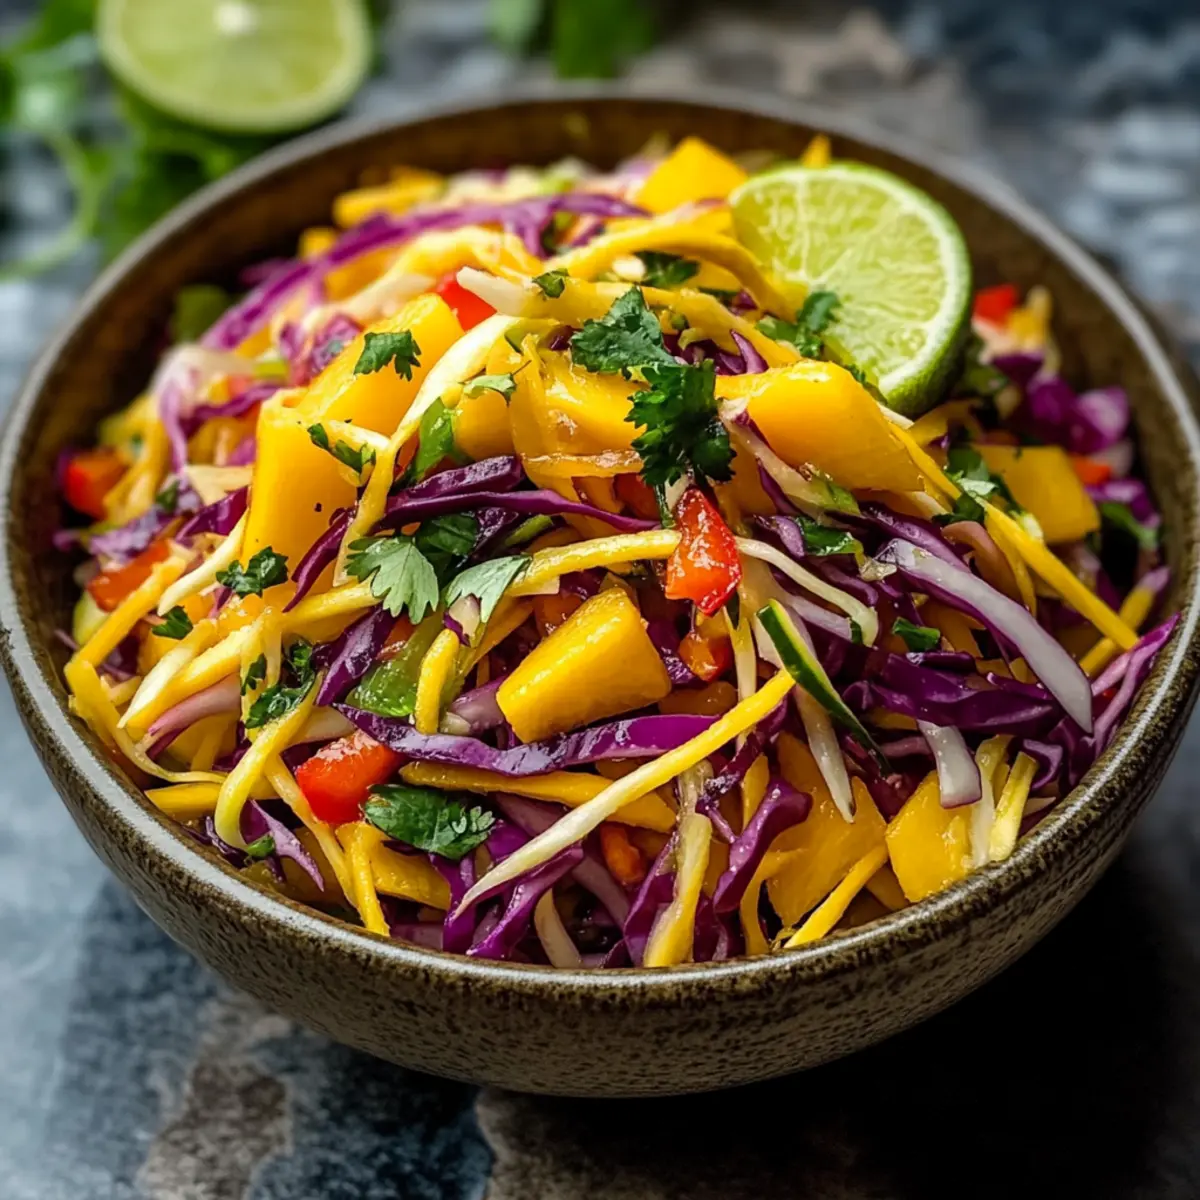
As I prepped for a casual dinner party last week, the scent of ripe mangoes instantly transported me to the sun-soaked beaches of a tropical getaway. That's when the idea struck: why not whip up a fresh and quick mango slaw? This vibrant dish not only bursts with cheerful colors but is also a delightful blend of sweetness and crunch, making it an irresistible side for any meal. Ready in just 15 minutes, this quick and easy mango slaw is perfect for busy weeknights or impromptu gatherings. Plus, it’s wonderfully customizable—feel free to add your favorite veggies or spice it up with a hint of heat. Are you ready to bring a taste of the tropics to your dinner table?

Why is this Mango Slaw a Must-Try?

Freshness comes alive in this vibrant dish, making every bite a tropical adventure. Quick to prepare, this slaw takes just 15 minutes, perfect for busy days or last-minute meals. Customizable by nature, you can easily switch up the veggies or add a kick of spice to suit your taste. Visually stunning, its bright colors are sure to impress guests, making it a crowd-pleaser. Plus, this recipe is a fantastic side for grilled meats or can even jazz up simple tacos. Don't miss out on the chance to elevate your meals with this refreshing & delicious slaw!

Quick And Easy Mango Slaw Ingredients

• Turn your tropical dreams into reality with these fresh ingredients!

For the Slaw

  • Ripe Mangoes – Adds sweetness and juiciness; choose ripe for the best flavor.
  • Green Cabbage – Provides a crunchy texture; can substitute with red cabbage for a pop of color.
  • Carrot – Adds natural sweetness and a vibrant hue; can be replaced with shredded radish for a peppery twist.
  • Red Bell Pepper – Contributes crunch and sweetness; substitute with orange or yellow bell peppers for variety.
  • Red Onion – Offers sharpness and deep flavor; opt for green onions for a milder taste.
  • Fresh Cilantro – Introduces a fresh, herbaceous note; omit if you dislike it and use parsley instead.

For the Dressing

  • Lime Juice – Provides acidity to balance flavors; lemon juice works well as an alternative.
  • Honey or Maple Syrup – Adds a touch of sweetness; for a vegan option, use agave syrup.
  • Sesame Oil – Introduces a nutty flavor; can be swapped with olive oil for a lighter taste.
  • Salt and Pepper – To taste; essential for enhancing all flavors in this quick and easy mango slaw.

Step‑by‑Step Instructions for Quick And Easy Mango Slaw

Step 1: Prepare the Vegetables
In a large mixing bowl, combine 2 cups of diced ripe mangoes, 2 cups of shredded green cabbage, 1 grated carrot, 1 sliced red bell pepper, ½ sliced red onion, and ¼ cup of chopped fresh cilantro. Use a sharp knife for clean cuts and colorful presentations. This vibrant mixture will serve as the base of your quick and easy mango slaw, bringing brightness and crunch.

Step 2: Mix the Dressing
In a separate small bowl, whisk together the juice of 1 lime, 2 tablespoons of honey (or maple syrup), 2 tablespoons of sesame oil, and a pinch of salt and pepper. Whisk until the mixture is well combined and slightly emulsified. The dressing should be tangy and sweet, ready to enhance the flavors of your fresh ingredients in the mango slaw.

Step 3: Combine and Toss
Pour the dressing over the mango and vegetable mixture in the large bowl. Using tongs or a large spoon, gently toss the ingredients together for about 1-2 minutes until everything is evenly coated. The bright colors of your quick and easy mango slaw will come together beautifully as the dressing clings to each piece, creating a cohesive dish.

Step 4: Let It Rest
Allow the slaw to sit for 5-10 minutes at room temperature. This resting period lets the flavors meld together, enhancing the taste of your quick and easy mango slaw. You’ll notice the vegetables may slightly soften while still retaining that satisfying crunch, making each bite delightful.

Step 5: Serve and Enjoy
Serve the slaw chilled or at room temperature as a refreshing side dish. It pairs beautifully with grilled meats or can be showcased as a bright topping for fish tacos. This quick and easy mango slaw is perfect for any occasion, bringing a tropical twist to your meal!

Quick And Easy Mango Slaw Variations

Feel free to let your creativity shine and customize the flavors of this vibrant mango slaw!

  • Avocado Addition: Add diced avocado for a creamy twist that balances beautifully with the crunchy vegetables. This addition not only enhances flavor but also adds healthy fats to the dish.

  • Nutty Crunch: Incorporate chopped nuts like peanuts or cashews for added crunch and richness. A sprinkle of toasted nuts on top takes your slaw to the next level, creating a delightful contrast in texture.

  • Spicy Kick: Experiment with chili flakes or diced jalapeños for an extra kick of heat. The spicy notes add depth, making it a perfect pairing for grilled meats or tacos.

  • Tropical Fruit Mix: Swap in other tropical fruits like pineapple or papaya for a mixed fruit slaw. The sweet and tangy flavors of these fruits offer a refreshing change, bringing an extra burst of tropical flair.

  • Cabbage Swap: Try using red cabbage instead of green for a striking visual effect and a slightly more robust taste. Red cabbage not only looks stunning but also provides additional antioxidants.

  • Dressing Variation: Use coconut milk instead of the sesame oil to create a tropical-inspired dressing. This twist introduces a creamy texture and a subtle sweetness that complements the mango beautifully.

  • Herb Infusion: Replace cilantro with fresh mint for a refreshing herbal note. This fragrant herb adds another layer of flavor that’s perfect for summer gatherings.

  • Wrap It Up: Use leftover slaw in sandwiches or wraps for a delightful crunchy texture. Pack it with grilled chicken or tuna for a quick lunch that’s both satisfying and flavorful!

For more delicious side dish ideas, try out our Fried Shrimp Cabbage or enhance your pizza night with our Blue Cheese Pizza. Embrace the possibilities!

What to Serve with Fresh & Quick Mango Slaw

Elevate your meal with vibrant accompaniments that echo the tropical flair of this zesty dish.

  • Grilled Chicken: Juicy and smoky, grilled chicken pairs perfectly with the sweet crunch of mango slaw, creating a meal bursting with flavor.
  • Fish Tacos: The bright, tropical notes of the slaw are ideal as a topping for fish tacos, transforming each bite into a sunny fiesta.
  • Black Bean Quinoa Bowl: This protein-packed bowl complements the slaw's sweetness, adding a hearty base with a nutty texture and earthy flavors.
  • Chili Lime Shrimp: Spicy shrimp beautifully contrast with the sweet mango, making each mouthful a refreshing dance of flavors.
  • Cornbread: Soft, slightly sweet cornbread balances the tangy slaw, adding warmth and a comforting texture to your plate.
  • Pineapple Salsa: Bright and fruity, pineapple salsa enhances the tropical vibe while offering a delightful contrast in flavors.
  • Coconut Rice: Creamy, subtly sweet coconut rice serves as a perfect base, soaking up the vibrant flavors of your meal.
  • Sparkling Water with Lime: Refreshing and light, this drink echoes the citrus notes in the slaw, making it a delightful palate cleanser.

How to Store and Freeze Quick And Easy Mango Slaw

Fridge: Store any leftover mango slaw in an airtight container in the refrigerator for up to 2 days to maintain freshness and crunch.

Make-Ahead: This slaw can be prepped ahead of time, making it a perfect side dish for busy days. Just mix the dressing separately until ready to combine.

Freezer: For best results, avoid freezing the slaw as fresh ingredients like cabbage and mango lose their texture when thawed.

Reheating: Serve the slaw chilled or at room temperature. If needed, give it a quick toss with some fresh lime juice before serving to revive flavors.

Make Ahead Options

These Quick And Easy Mango Slaw are perfect for busy home cooks looking to save time without sacrificing flavor! You can prep the vegetables (diced mangoes, shredded cabbage, grated carrot, and sliced peppers) up to 24 hours in advance and store them in an airtight container in the refrigerator to maintain freshness. The dressing can also be whisked together and kept separate, ensuring the slaw stays crunchy and vibrant. When you’re ready to enjoy, simply combine the prepped veggies with the dressing, toss gently, and let it rest for 5-10 minutes to meld the flavors. This way, you’ll have a refreshing tropical side dish ready at a moment's notice!

Expert Tips for Quick And Easy Mango Slaw

  • Choose Ripe Mangoes: A ripe mango ensures maximum sweetness and juiciness. Avoid underripe mangoes as they can be too tart, impacting the overall flavor of your mango slaw.

  • Substitution Smart: Experiment with different vegetables like red cabbage or radish. Customizing helps keep this quick and easy mango slaw exciting and suited to your preferences.

  • Fresh Ingredients Matter: Use fresh herbs for the best flavor. Wilted cilantro or old veggies can diminish the vibrant taste and texture this dish promises.

  • Rest for Flavor: Allowing the slaw to rest enhances the flavors, but don’t leave it too long to maintain the crunchiness of the vegetables.

  • Optional Add-ins: Consider topping your mango slaw with diced avocado or nuts for extra creaminess and crunch, elevating your quick and easy mango slaw experience.

Quick And Easy Mango Slaw Recipe FAQs

What ripe mangoes should I choose for the best flavor?
Absolutely! When selecting mangoes, look for fruit that gives slightly when gently pressed and has a sweet, fruity aroma. Ripe mangoes often have a deep yellow-orange skin with occasional dark spots, signaling their sweetness. Avoid ones that feel hard or have a lot of green.

How should I store leftover mango slaw?
You can store any leftover mango slaw in an airtight container in the refrigerator. It's best consumed within 2 days to maintain its freshness and crunch. If stored properly, it will stay tasty and vibrant for this duration, so you can enjoy it as a quick snack or side dish later!

Can I freeze mango slaw?
I recommend against freezing mango slaw, as the fresh ingredients like cabbage and mango lose their crispness and texture once thawed. However, if you find yourself needing to preserve it, mix and freeze just the dressing separately. When ready to use, prepare fresh ingredients and toss them with the thawed dressing for a quick and easy mango slaw that's still delicious!

What should I do if the slaw is too watery?
If your mango slaw turns out watery, don’t fret! You can strain excess liquid by placing the slaw in a fine-mesh sieve for a few minutes. Alternatively, try adding a pinch of salt to help draw out moisture from the vegetables. Mixing in additional shredded cabbage or chopped herbs can also help absorb excess liquid while enhancing the slaw's flavors.

Is this mango slaw suitable for people with dietary allergies?
This quick and easy mango slaw is quite versatile and can be adapted for various dietary needs! If you're accommodating allergies, you might want to omit the sesame oil and use olive oil instead. Likewise, for those with a honey allergy or following a vegan diet, swapping honey for agave syrup is a great alternative. Always check labels for processed ingredients if allergies are a concern.

Can I customize this recipe?
Very! One of the best things about this quick and easy mango slaw is its customizable nature. You can add diced avocado for creaminess, incorporate crunchy peanuts or cashews, or throw in some shredded jalapeño for a spicy kick. The more, the merrier—make it your own and enjoy!

Quick And Easy Mango Slaw

Quick And Easy Mango Slaw for a Refreshing Tropical Twist

Quick And Easy Mango Slaw is a vibrant and refreshing side dish that blends sweetness and crunch, perfect for any meal.
Print Recipe Pin Recipe
Prep Time 15 minutes mins
Resting Time 10 minutes mins
Total Time 25 minutes mins
Servings: 4 servings
Course: Salads
Cuisine: American, Tropical
Calories: 150
Ingredients Equipment Method Nutrition Notes

Ingredients
  

For the Slaw
  • 2 cups diced ripe mangoes choose ripe for the best flavor
  • 2 cups shredded green cabbage can substitute with red cabbage
  • 1 large carrot grated
  • 1 large sliced red bell pepper substitute with orange or yellow bell peppers
  • 0.5 large sliced red onion opt for green onions for milder taste
  • 0.25 cups chopped fresh cilantro omit if disliked
For the Dressing
  • 1 large lime juice provides acidity; lemon juice as alternative
  • 2 tablespoons honey or maple syrup use agave syrup for vegan option
  • 2 tablespoons sesame oil can swap with olive oil
  • salt and pepper to taste

Equipment

  • Mixing Bowl
  • Whisk
  • Sharp Knife

Method
 

Step-by-Step Instructions
  1. In a large mixing bowl, combine diced mangoes, shredded cabbage, grated carrot, sliced bell pepper, sliced onion, and chopped cilantro.
  2. In a separate small bowl, whisk together the lime juice, honey (or maple syrup), sesame oil, and a pinch of salt and pepper until well combined.
  3. Pour the dressing over the mango and vegetable mixture and gently toss the ingredients together for about 1-2 minutes.
  4. Allow the slaw to sit for 5-10 minutes at room temperature to let the flavors meld.
  5. Serve the slaw chilled or at room temperature as a refreshing side dish.

Nutrition

Serving: 1servingCalories: 150kcalCarbohydrates: 30gProtein: 2gFat: 7gSaturated Fat: 1gPolyunsaturated Fat: 2gMonounsaturated Fat: 4gSodium: 200mgPotassium: 300mgFiber: 4gSugar: 10gVitamin A: 500IUVitamin C: 40mgCalcium: 30mgIron: 1mg

Notes

Ensure to use fresh ingredients for the best flavor. Customize the slaw by adding different vegetables or a kick of spice as desired.

Tried this recipe?

Let us know how it was!

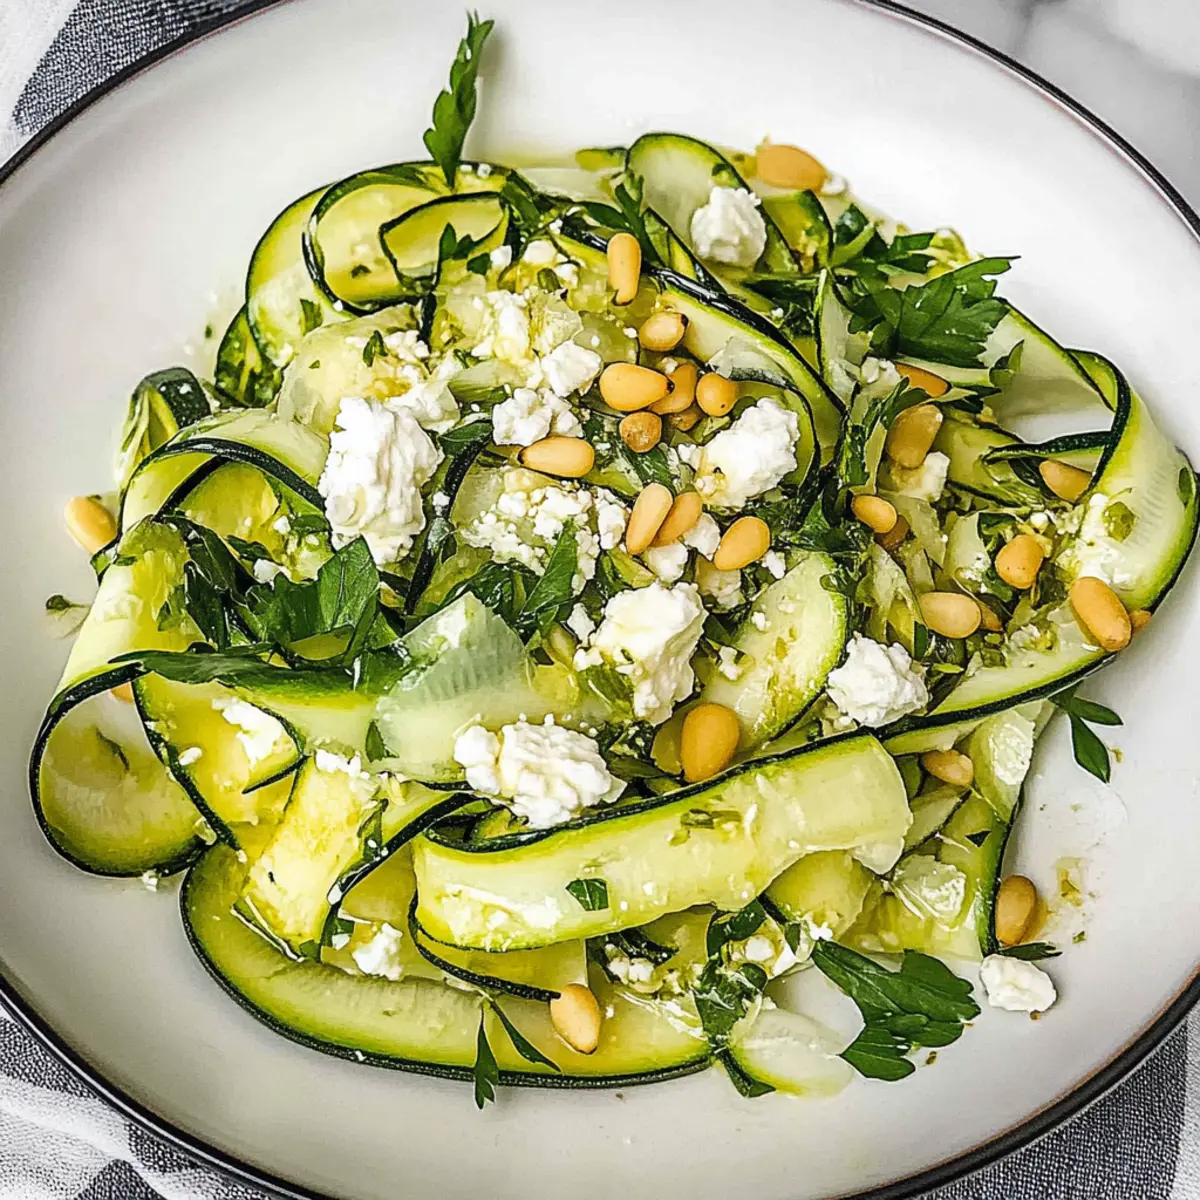
Delicious Shaved Zucchini Salad with Goat Cheese for Summer Bliss

February 2, 2026 by Grace Snow Leave a Comment

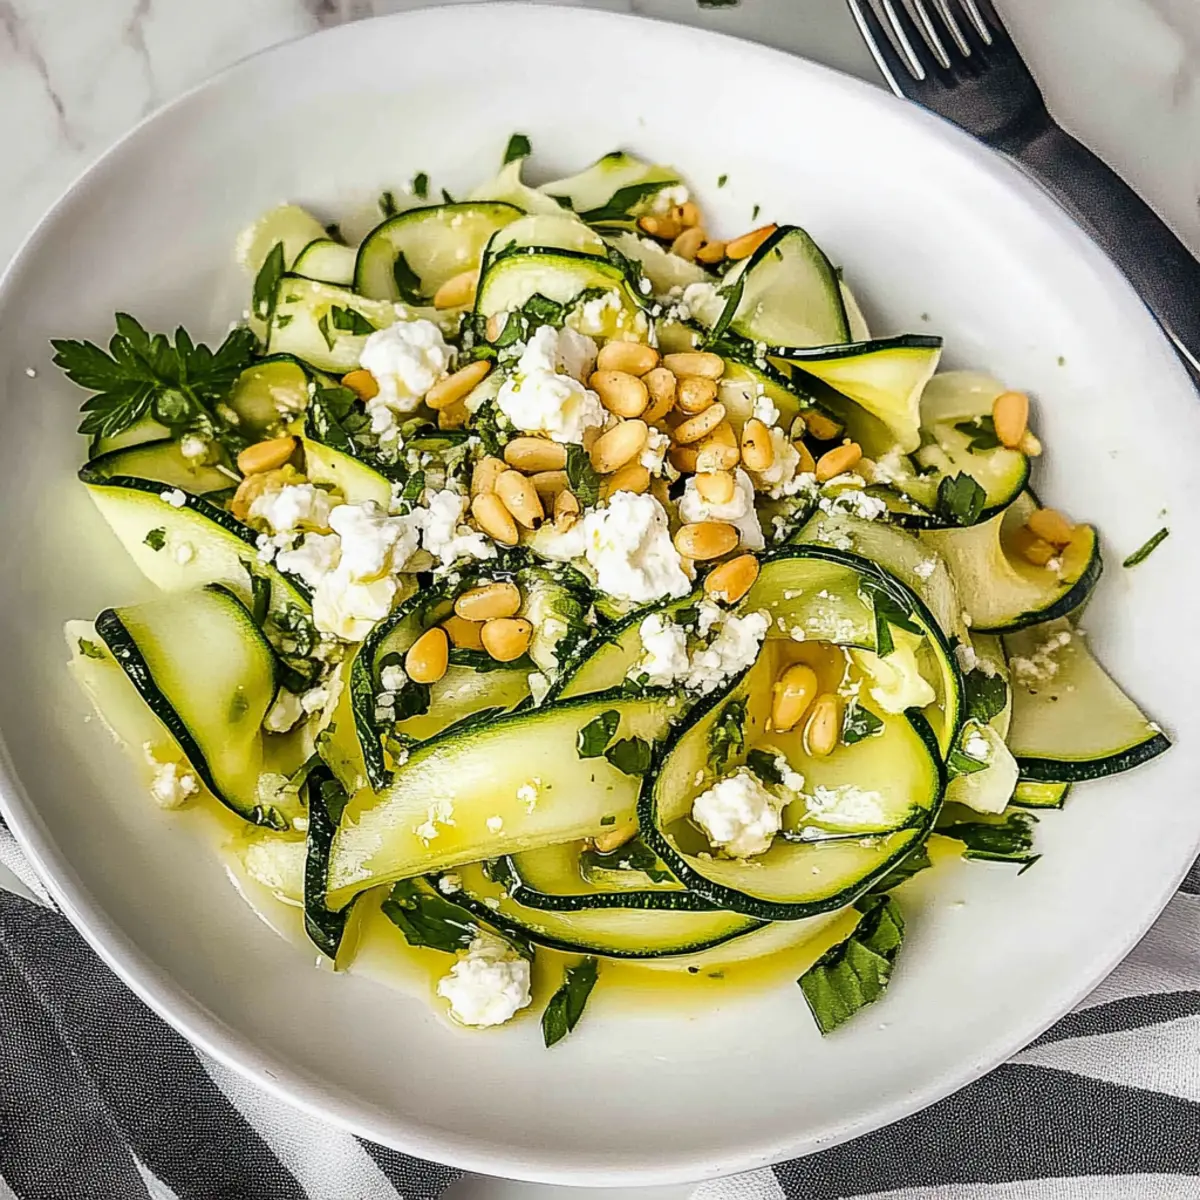
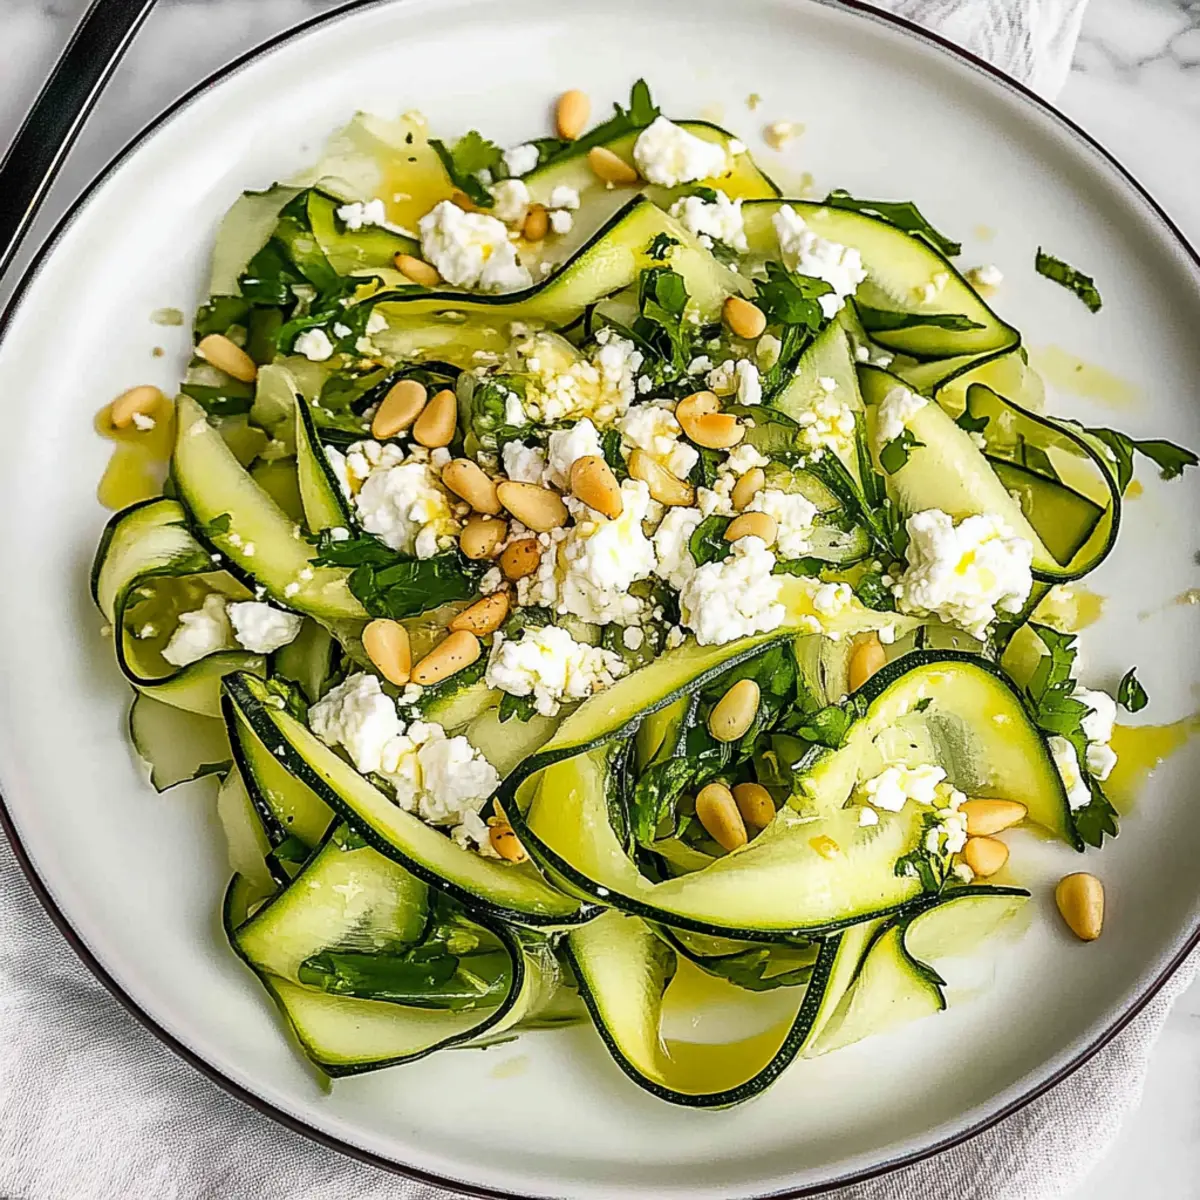
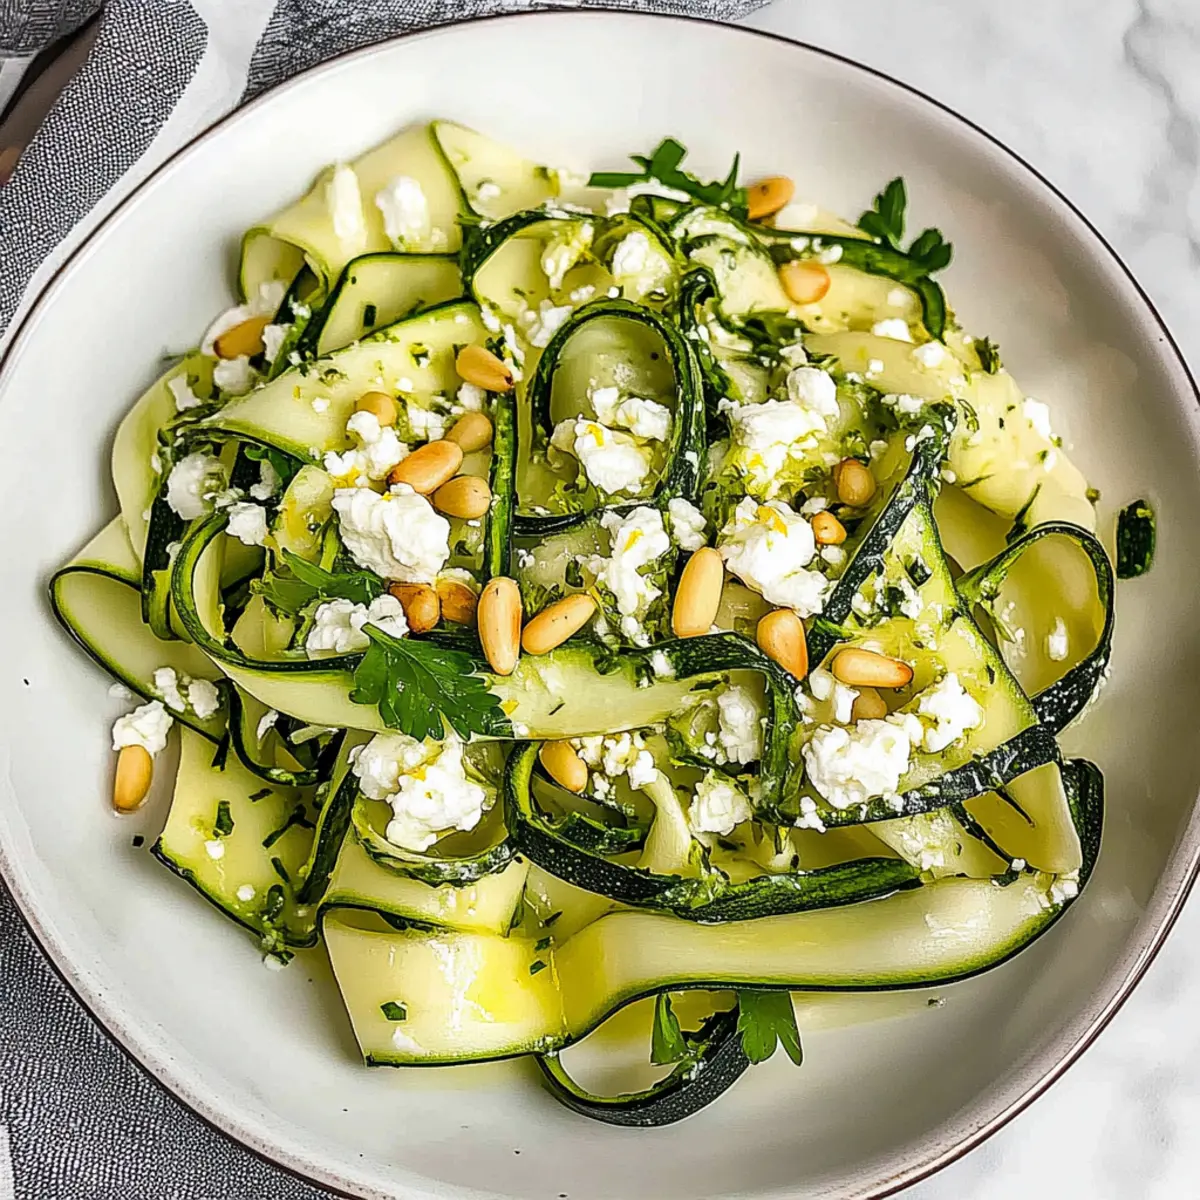
As I stood in my garden, the vibrant green of fresh zucchini caught my eye, making me feel inspired to whip up something light and refreshing. Enter the Shaved Zucchini Salad with Goat Cheese—a feast for both the eyes and the palate. This deliciously easy summer salad not only offers a delightful crunch but also stands out as a healthy side dish that can elevate any meal. With its zesty lemon boost and the creamy richness of goat cheese, it's a quick crowd-pleaser that's perfect for those hot days when you want something vibrant and satisfying. Ready to discover how to transform these simple ingredients into a dish that dazzles? Let’s dive in!

Why is this Zucchini Salad a Must-Try?

Refreshingly Unique: The combination of raw zucchini with zesty lemon creates an unparalleled refreshing experience that will tantalize your taste buds.

Quick Preparation: Ready in just 15 minutes, this salad is perfect for those busy days when you want to serve something delicious without spending hours in the kitchen.

Health-Conscious Choice: With nutrient-rich ingredients like goat cheese and pine nuts, you can enjoy a guilt-free indulgence that’s packed with flavor.

Versatile Pairing: This salad is not just a side; it can accompany grilled fish or chicken beautifully, making it a versatile staple for summer meals. For a heartier option, check out recipes like Chicken Salad with Apples or Avocado Egg Salad.

Visual Appeal: Those delicate zucchini ribbons topped with crunchy pine nuts and creamy cheese create a vibrant dish that’s sure to impress guests at your next summer gathering!

Shaved Zucchini Salad Ingredients

For the Salad
• Zucchini – Provides a fresh, crunchy base; younger zucchini offers better flavor, but yellow summer squash works as a great substitute.
• Lemon Zest – Adds bright acidity that enhances the flavors; use fresh lemons for the best taste.
• Lemon Juice – Contributes tanginess and helps marinate the zucchini nicely.
• Extra Virgin Olive Oil – Rich in healthy fats that balance the flavors; a quality oil makes a noticeable difference.
• Kosher Salt – Enhances all flavors; be sure to adjust it to your personal taste preference.
• Freshly Ground Pepper – Adds a touch of heat; opt for freshly ground for the most robust flavor.

For the Toppings
• Pine Nuts – Provide delightful crunch and nuttiness; walnuts or sunflower seeds can easily substitute if needed.
• Goat Cheese – Offers creaminess and depth; feta is a wonderful alternative if you prefer something bolder.
• Microgreens – Gives a fresh, earthy note; sprouts or mixed greens work well as substitutes.

Enjoy the vibrant flavors of this Shaved Zucchini Salad with Goat Cheese and explore various combinations that make it your own!

Step‑by‑Step Instructions for Shaved Zucchini Salad with Goat Cheese

Step 1: Shave the Zucchini
Using a vegetable peeler or mandolin, carefully shave the zucchini into thin ribbons, aiming for about ⅛ inch in thickness. Discard any seeds that may show up as you shave. You'll want around 4 cups of these delicate ribbons, which will provide a fresh, crunchy base for your Shaved Zucchini Salad with Goat Cheese.

Step 2: Marinate the Zucchini
In a mixing bowl, combine the freshly shaved zucchini with the lemon zest, lemon juice, extra virgin olive oil, kosher salt, and freshly ground pepper. Toss gently to ensure each ribbon is well-coated, then let this mixture marinate for about 10 minutes. This process allows the flavors to meld beautifully while the zucchini softens slightly.

Step 3: Plate the Salad
Once marinated, carefully arrange the zucchini ribbons on a serving plate, artfully twisting and layering the strands for visual appeal. The vibrant green from the zucchini will create a stunning display. This is a key moment for your Shaved Zucchini Salad, so take time to craft a beautiful presentation that will catch everyone's eye.

Step 4: Toast Pine Nuts
While plating the salad, heat a non-stick pan over medium heat. Add the pine nuts and toast them for around 5 minutes, stirring frequently, until they are golden brown and fragrant. Be attentive as they can burn quickly! This step adds a lovely crunch and nutty flavor that enhances the overall experience of your salad.

Step 5: Top the Salad
Sprinkle the toasted pine nuts generously over the marinated zucchini ribbons. Crumble the goat cheese atop, allowing its creamy texture to blend with the other ingredients. Finish off by adding microgreens or any desired substitute to create a fresh, earthy note. Your Shaved Zucchini Salad with Goat Cheese is now beautifully topped and ready to shine!

Storage Tips for Shaved Zucchini Salad with Goat Cheese

Fridge: Store in an airtight container; the salad can remain fresh for up to 3 days. To maintain the best texture, keep the pine nuts and microgreens separate until serving.

Freezer: It's not recommended to freeze this salad as the zucchini loses its desirable crunch and texture when thawed. Enjoy fresh!

Reheating: If you have leftover marinated zucchini (without toppings), feel free to toss it in a warm pasta dish or grain bowl for a delicious next-day meal.

Make Ahead Options

Prepping this Shaved Zucchini Salad with Goat Cheese in advance is a game-changer for busy weeknights! You can shave the zucchini and marinate it with lemon zest, lemon juice, olive oil, salt, and pepper up to 24 hours ahead of time. To keep the zucchini fresh and avoid excess moisture, place it in an airtight container and refrigerate. Toast the pine nuts just before serving to retain their crunch and flavor. Additionally, crumble the goat cheese right before plating to ensure it maintains its creamy texture. This way, when you're ready to serve, all you need to do is assemble the ingredients, making dinner stress-free and just as delicious!

What to Serve with Refreshing Shaved Zucchini Salad with Goat Cheese

This delightful salad is the perfect starting point for a bright and satisfying summer meal.

  • Grilled Chicken Breast: Juicy and tender, the savory flavors of grilled chicken pair beautifully with the tangy zucchini salad, making for a balanced dish.
    Serving this salad next to grilled chicken not only enhances the meal but also introduces a satisfying protein component.

  • Quinoa Pilaf: Light and fluffy, quinoa adds a healthy grain option that complements the fresh flavors in the salad.
    This dish creates a well-rounded plate, integrating textures that are sure to please everyone at the table.

  • Tomato Bruschetta: The sweet acidity of ripe tomatoes on crusty bread pairs perfectly with the salad's creamy goat cheese and makes for a satisfying appetizer.
    The burst of flavors from this classic dish brings a touch of Italy to your meal, enhancing the summer vibe.

  • Roasted Asparagus: Tender and slightly charred, roasted asparagus adds a lovely earthy note that contrasts nicely with the lightness of the salad.
    The addition of roasted vegetables not only boosts the nutritional profile but also brings a wonderful variety of flavors to the table.

  • Lemonade or Iced Tea: A refreshing glass of homemade lemonade or iced tea can bring that extra touch of summer to your dining experience.
    These drinks enhance the zesty finish of the salad while keeping you cool and hydrated on hot days.

  • Fresh Berry Tart: A sweet, fruity dessert like a berry tart rounds off the meal beautifully, offering a contrast to the savory and creamy elements of the salad.
    The vibrant colors of this dessert mirror the salad, creating an enticing visual feast that's hard to resist.

Expert Tips for Shaved Zucchini Salad

• Choose Fresh Zucchini: Always select small, firm zucchinis for better flavor. Younger zucchinis have a sweeter taste, perfect for your Shaved Zucchini Salad with Goat Cheese.

• Mind the Marination: Avoid over-mixing during marination; this helps keep the ribbons intact while enhancing flavor without turning mushy.

• Quality Olive Oil Matters: Opt for high-quality extra virgin olive oil as it enhances the salad’s overall taste profile significantly.

• Layer Creatively: For an impressive presentation, twist and layer the zucchini ribbons artfully on your plate, showcasing the lovely colors and textures.

• Separate Ingredients for Storing: To maintain the integrity and crunch of the salad, store components separately—particularly the pine nuts and microgreens—until serving.

Variations & Substitutions for Shaved Zucchini Salad

Feel free to explore these exciting twists and substitutions to make the Shaved Zucchini Salad with Goat Cheese uniquely yours!

  • Dairy-Free: Swap goat cheese for a vegan cheese or cashew cream to maintain creaminess without dairy.

  • Zesty Kick: Add red pepper flakes for a touch of heat that will elevate the salad's flavor profile. Just a pinch can transform your dish into a spicy delight!

  • Herb Infusion: Incorporate fresh herbs like basil, dill, or mint. This adds a burst of freshness that pairs beautifully with the zucchini and lemon.

  • Nutty Alternatives: If you’re nut-sensitive, replace pine nuts with seeds like pumpkin or sunflower seeds for that satisfying crunch while keeping it allergy-friendly.

  • Extra Veggies: Toss in additional vegetables like bell peppers or grated carrots for a pop of color and added nutrition. They contribute a lovely sweetness that complements the zesty elements.

  • Protein Boost: For a more filling option, add grilled chicken or shrimp on top. This turns your salad into a complete meal, perfect for a light lunch or dinner.

  • Dress It Up: Consider a splash of balsamic vinegar or a drizzle of tahini for added depth and creaminess. This flavor enhancement engages all the senses.

  • Flavorful Switch: Replace lemon juice with lime juice for a slight twist in flavor. It brings a different tang that’s just as refreshing!

These variations not only keep the thrill alive in your kitchen but also allow you to cater to different dietary needs and preferences! Whether you're pairing this salad with grilled fish or savoring it standalone, the options are as abundant as the summer days!

Shaved Zucchini Salad with Goat Cheese Recipe FAQs

How do I choose the best zucchini for this salad?
Absolutely! Look for small, firm zucchinis with a vibrant green color. Younger zucchinis tend to be sweeter and have a better flavor profile, perfect for your Shaved Zucchini Salad with Goat Cheese. Avoid zucchinis with dark spots all over, as they can indicate overripeness.

How should I store leftovers of the Shaved Zucchini Salad?
You can store your salad in an airtight container in the refrigerator for up to 3 days. To keep the textures intact, it's best to keep the pine nuts and microgreens separate until you’re ready to serve. This will ensure that everything stays fresh and crunchy!

Can I freeze this salad?
I recommend not freezing this salad since zucchini loses its delightful crunch and texture once thawed. Instead, enjoy the vibrant flavors fresh! If you have extra marinated zucchini, consider tossing it in a warm pasta dish or grain bowl for a delicious next-day meal.

What can I do if my salad turns mushy?
No worries! If your salad becomes mushy, it’s likely due to extended marination or excess mixing. For a quick fix, you can strain the excess liquid and gently toss the salad again. You might also consider tossing in some additional fresh ingredients like microgreens or crunchy nuts to revive that delightful texture.

Is there a way to adapt this salad for different dietary needs?
Very much so! If you're accommodating allergies, you can easily swap out goat cheese for lactose-free options or skip cheese altogether for vegan preferences. Additionally, if someone has a nut allergy, walnuts or sunflower seeds can replace pine nuts, ensuring everyone can enjoy this refreshing dish!

Shaved Zucchini Salad with Goat Cheese

Delicious Shaved Zucchini Salad with Goat Cheese for Summer Bliss

Enjoy a light and refreshing Shaved Zucchini Salad with Goat Cheese, perfect for summer meals.
Print Recipe Pin Recipe
Prep Time 15 minutes mins
Cook Time 5 minutes mins
Total Time 20 minutes mins
Servings: 4 servings
Course: Salads
Cuisine: Mediterranean
Calories: 200
Ingredients Equipment Method Nutrition Notes

Ingredients
  

For the Salad
  • 4 cups Zucchini Shaved into ribbons
  • 1 tablespoon Lemon Zest Use fresh lemons
  • 2 tablespoons Lemon Juice Freshly squeezed
  • 3 tablespoons Extra Virgin Olive Oil Quality oil preferred
  • 1 teaspoon Kosher Salt Adjust to taste
  • 1 teaspoon Freshly Ground Pepper For best flavor
For the Toppings
  • 1/4 cup Pine Nuts Can substitute with walnuts or sunflower seeds
  • 4 ounces Goat Cheese Can substitute with feta
  • 1 cup Microgreens Can substitute with sprouts or mixed greens

Equipment

  • Vegetable Peeler
  • Mixing Bowl
  • Non-Stick Pan

Method
 

Step-by-Step Instructions
  1. Using a vegetable peeler or mandolin, carefully shave the zucchini into thin ribbons, aiming for about ⅛ inch in thickness. Discard any seeds that may show up as you shave.
  2. In a mixing bowl, combine the freshly shaved zucchini with the lemon zest, lemon juice, extra virgin olive oil, kosher salt, and freshly ground pepper. Toss gently to ensure each ribbon is well-coated, then let this mixture marinate for about 10 minutes.
  3. Once marinated, carefully arrange the zucchini ribbons on a serving plate, twisting and layering the strands for visual appeal.
  4. Heat a non-stick pan over medium heat. Add the pine nuts and toast them for around 5 minutes, stirring frequently, until they are golden brown and fragrant.
  5. Sprinkle the toasted pine nuts generously over the marinated zucchini ribbons. Crumble the goat cheese atop and finish with microgreens.

Nutrition

Serving: 1servingCalories: 200kcalCarbohydrates: 9gProtein: 6gFat: 18gSaturated Fat: 5gPolyunsaturated Fat: 2gMonounsaturated Fat: 10gCholesterol: 15mgSodium: 400mgPotassium: 400mgFiber: 2gSugar: 3gVitamin A: 500IUVitamin C: 25mgCalcium: 100mgIron: 1mg

Notes

Store components separately to maintain freshness, particularly the pine nuts and microgreens.

Tried this recipe?

Let us know how it was!

Raw Avocado Pesto Zucchini Noodles for a Fresh Summer Feast

February 2, 2026 by Grace Snow Leave a Comment

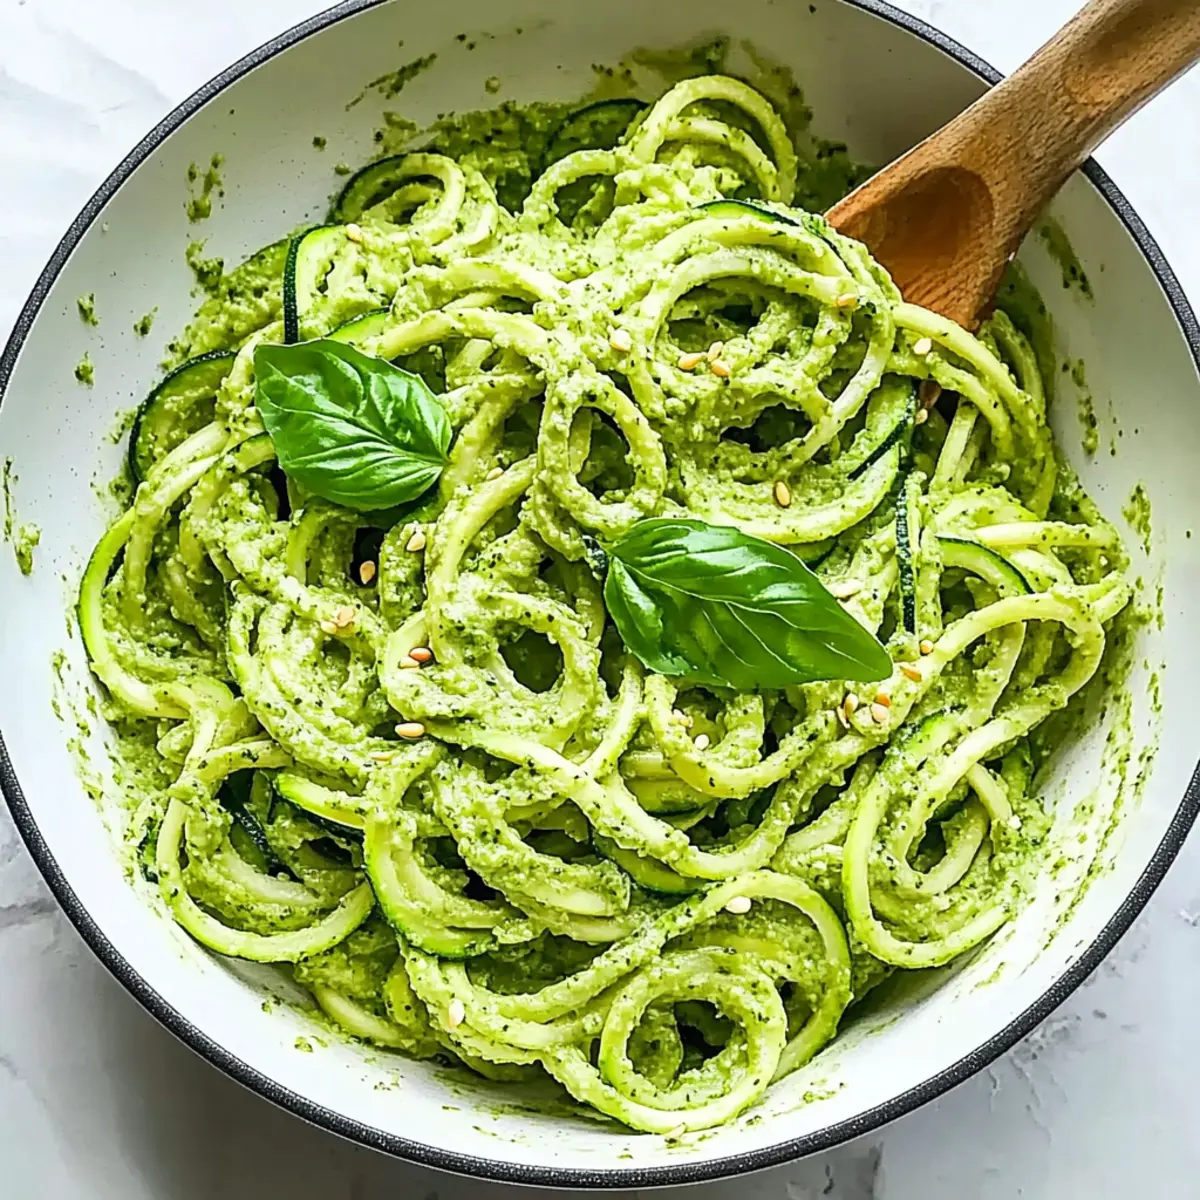
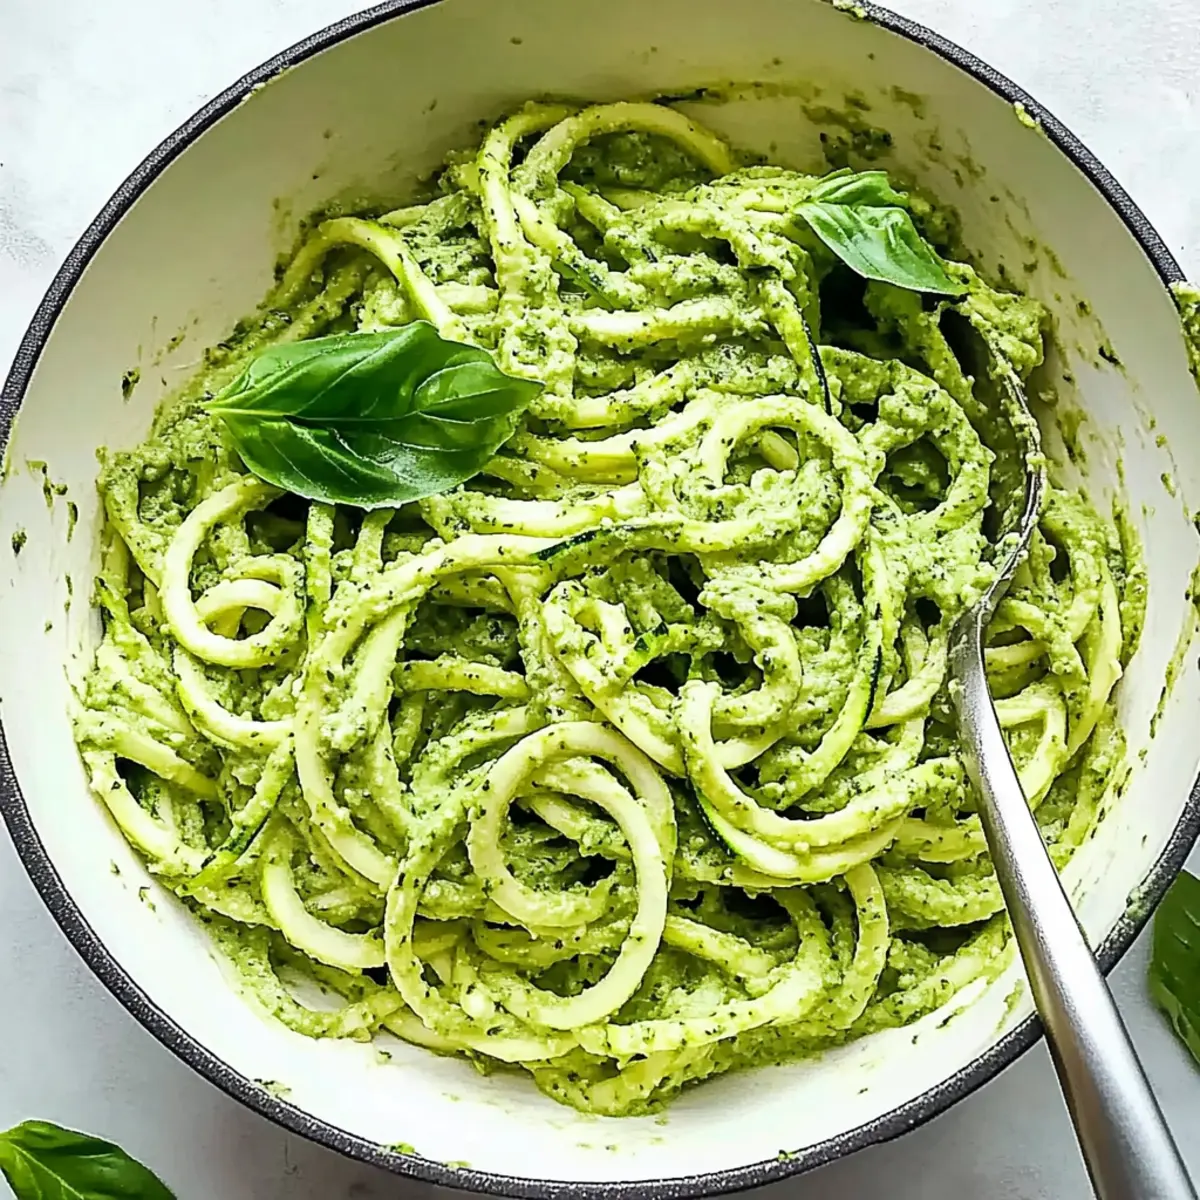
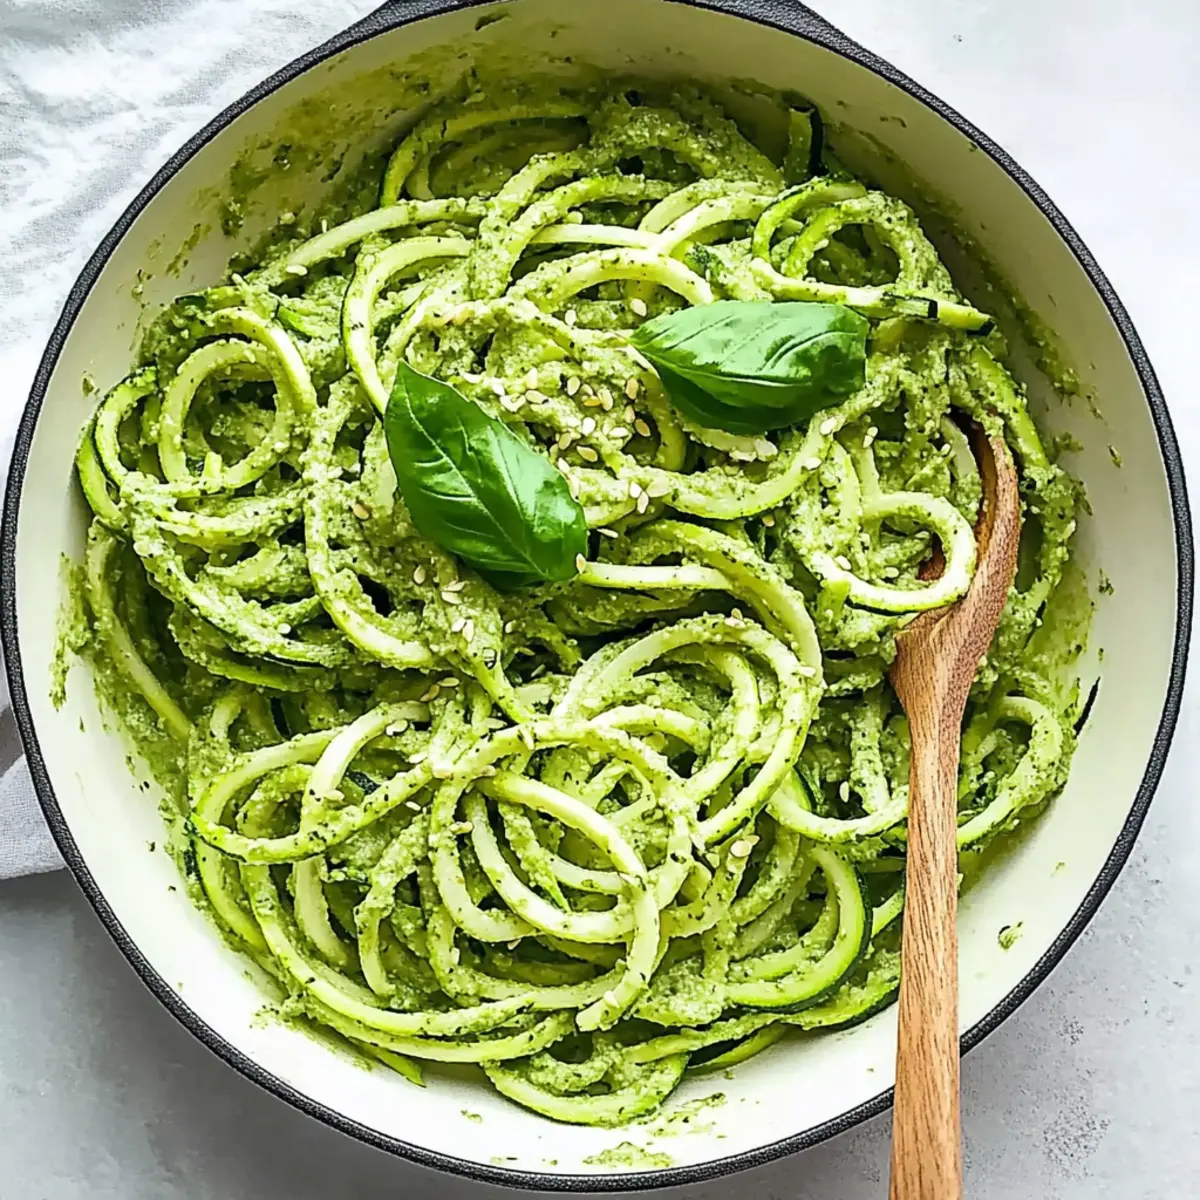
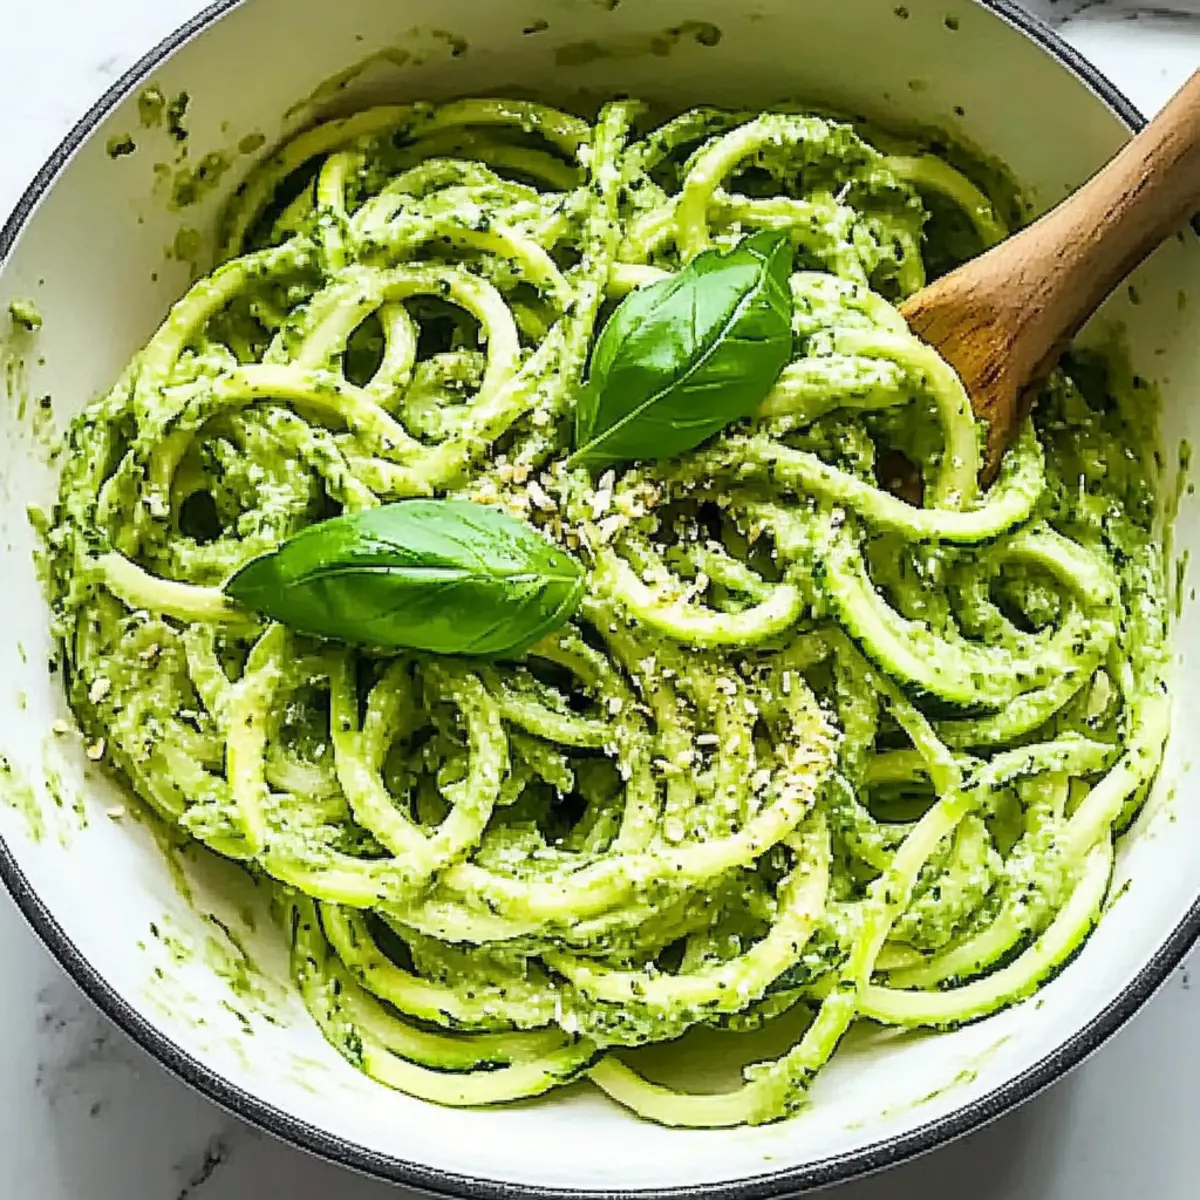
The sun-drenched days of summer often inspire us to seek out light, vibrant meals, and this is where Raw Avocado Pesto Zucchini Noodles come in. With just a quick 10-minute prep time, you can create a nutritional powerhouse that's not only dairy-free and gluten-free but also a refreshing twist on traditional pasta. Imagine tender zucchini noodles drenched in a creamy avocado pesto bursting with the fragrance of fresh basil and a hint of zesty lemon. This dish not only satisfies hunger but also embraces healthy fats, making it perfect for anyone looking to elevate their summer dining experience. Curious about how to whip this delightful dish up in your kitchen? Let’s dive in!

Why Choose Avocado Pesto Zucchini Noodles?

Quick, 10-Minute Meal: With just a handful of fresh ingredients, you can whip up this vibrant dish in no time, perfect for your busy summer days.
Creamy, Healthy Indulgence: The rich avocado pesto offers a luscious texture, providing you with wholesome fats without the guilt.
Dairy-Free and Guilt-Free: Ideal for anyone following vegan or dairy-free diets, this dish ensures everyone can enjoy a creamy pasta alternative.
Versatile Base: Add seasonal veggies or proteins, like cooked chickpeas or shredded chicken, for a hearty boost—think of it as a blank canvas for your culinary creativity.
Fresh and Flavorful: Every bite bursts with the aromatic notes of basil and a zesty kick from lemon, making it a refreshing choice for warm weather dining. Enjoy it as a light lunch or pair it with a crispy side salad for a complete meal! Explore more ideas with Cheesy Zucchini Bake or Lime Chicken Avocado for delightful variations.

Raw Avocado Pesto Zucchini Noodles Ingredients

For the Zucchini Noodles

  • Zucchini – Spiralize or julienne for that perfect noodle texture in your Raw Avocado Pesto Zucchini Noodles.
  • Sea Salt – A pinch enhances the natural flavors of the dish.

For the Avocado Pesto

  • Avocados – Ensure they are ripe for a creamy consistency in your sauce.
  • Fresh Basil – This aromatic herb is essential for that fresh pesto flavor; substitute with cilantro if desired.
  • Garlic – Fresh minced garlic elevates the overall taste; feel free to adjust based on your preference.
  • Lemon Juice – Adds a pop of brightness to balance the rich avocado blend.
  • Hemp Seeds – Incorporate these for added protein and a nutty touch; feel free to swap them for pine nuts if you like.
  • Red Pepper Flakes – Just a sprinkle adds a hint of spice, enhancing the flavor profile.

This combination of simple yet fresh ingredients will make your Raw Avocado Pesto Zucchini Noodles a go-to summer dish! Enjoy crafting this delightful, savory meal.

Step‑by‑Step Instructions for Raw Avocado Pesto Zucchini Noodles

Step 1: Prep Zucchini
Begin by washing and drying the medium zucchinis. Using a spiralizer, create long, noodle-like strands and then cut them into smaller pieces for easier eating. Toss the zucchini noodles into a large mixing bowl, letting their bright green color stand out, and set them aside as you prepare the delicious avocado pesto.

Step 2: Make the Sauce
In a food processor, combine the ripe avocados, fresh basil leaves, minced garlic, lemon juice, and hemp seeds. Blend on high for about 30-45 seconds or until the mixture turns velvety smooth and creamy. The vibrant green color of your avocado pesto will shine, signaling it's ready to elevate your zucchini noodles.

Step 3: Combine
Pour the creamy avocado pesto over the spiralized zucchini noodles in the mixing bowl. Using a pair of tongs, gently toss the noodles with the sauce for about 1-2 minutes until every strand is evenly coated, creating a luscious, vibrant dish. The transformation of zoodles to a sumptuous dish is simply delightful!

Step 4: Serve
Once well combined, serve your Raw Avocado Pesto Zucchini Noodles immediately for the freshest flavor. If desired, you can garnish with extra hemp seeds or a sprinkle of red pepper flakes to add a touch of flavor and visual appeal. Enjoy the lively flavors and textures right away, or refrigerate until you’re ready to savor this perfect summer feast!

Raw Avocado Pesto Zucchini Noodles Variations

Feel free to get creative and make this dish your own with these delightful twists and substitutions!

  • Protein Boost: Mix in cooked chickpeas or shredded chicken for a hearty lift. The extra protein will make your meal more filling and satisfying.

  • Seasonal Veggies: Toss in cherry tomatoes or bell peppers for a burst of color and crunch. These vibrant additions complement the dish beautifully!

  • Nut-Free Option: Swap hemp seeds for sunflower seeds to keep it nut-free while maintaining the nutty flavor. This simple swap won't compromise the creamy texture.

  • Herb Variety: Replace basil with cilantro or parsley for a different flavor profile. Each herb brings its unique zest to the dish!

  • Spice It Up: Increase heat by adding cayenne pepper or jalapeño for a kick. This variation is perfect for those who enjoy a spicy touch.

  • Lemon Twist: Infuse with lime juice instead of lemon for a refreshing zing. It adds a citrusy brightness that truly complements the avocado.

  • Creamy Avocado: For a silkier texture, blend in a couple of tablespoons of coconut cream alongside the avocado. This will give your pesto an even richer mouthfeel.

  • Flavor Fusion: Consider adding a spoonful of nutritional yeast for a cheesy flavor without dairy. It's a simple way to amplify the umami taste in your dish.

For even more delicious ideas, check out Gochujang Sesame Noodles for a spicy twist, or being adventurous with some Chicken Teriyaki Noodles for a fusion take on your summertime cooking! Enjoy customizing your dish!

Expert Tips for Raw Avocado Pesto Zucchini Noodles

  • Perfect Texture: Avoid watery pesto by not over-processing the avocado mixture; aim for a smooth but thick consistency.
  • Freshness Matters: Use ripe avocados for a creamy sauce, as unripe ones can lead to a less enjoyable flavor in your Raw Avocado Pesto Zucchini Noodles.
  • Season to Taste: Tweak the amount of garlic or salt according to your preference for a personalized flavor profile that suits your palate.
  • Enjoy Immediately: This dish tastes best fresh; be sure to serve promptly to maintain the crisp textures of the zucchini noodles.
  • Add Crunch: For an extra layer of texture, consider tossing in seasonal veggies like cherry tomatoes or bell peppers to enhance your meal experience.

What to Serve with Raw Avocado Pesto Zucchini Noodles

Elevate your fresh summer feast experience with delightful sides that will complement the vibrant flavors of your meal.

  • Garlic Breadsticks: Perfectly crispy on the outside and soft inside, these breadsticks provide a satisfying crunch alongside the creamy noodles.
  • Mixed Green Salad: A light salad with arugula, cherry tomatoes, and a citrus vinaigrette adds bright flavors while balancing the rich pesto.
  • Grilled Asparagus: Tender, charred asparagus spears offer a delightful contrast in texture, enhancing your dish with a nutty, smoky flavor.
  • Lemon Sorbet: A refreshing, cool dessert, this sorbet cleanses the palate and makes for a perfect sweet finish after a savory meal.
  • Chilled White Wine: A glass of crisp Sauvignon Blanc will accentuate the zesty lemon notes within your Raw Avocado Pesto Zucchini Noodles, amplifying your dining experience.
  • Crispy Chickpeas: Roasted chickpeas add a crunchy bite, enriching each spoonful with protein and a slightly nutty flavor that balances your creamy pesto.
  • Caprese Skewers: These vibrant skewers with fresh basil, ripe tomatoes, and creamy mozzarella are a simple yet elegant side, elevating the overall visual presentation of your meal.
  • Stuffed Bell Peppers: For a heartier option, stuffed bell peppers provide a delightful burst of flavor, making them a fantastic pairing with the refreshing noodles.
  • Cold Cucumber Soup: Serve this chilled soup to complement the meal with an additional layer of refreshing flavors, balancing the creamy pesto beautifully.

Make Ahead Options

These Raw Avocado Pesto Zucchini Noodles are a fantastic choice for make-ahead meal prepping! You can prepare the zucchini noodles up to 24 hours in advance. Simply spiralize them, toss them in a little sea salt to enhance flavor, and refrigerate in an airtight container. The avocado pesto can also be made ahead of time—store it in a container in the fridge for up to 3 days, ensuring you cover the surface with plastic wrap to minimize oxidation (this will prevent browning). When you're ready to serve, just combine the zucchini noodles and avocado pesto, give it a good toss, and enjoy a delicious meal with minimal effort!

Storage Tips for Raw Avocado Pesto Zucchini Noodles

Fridge: Store leftover Raw Avocado Pesto Zucchini Noodles in an airtight container for up to 1 day for optimal freshness. Drain any excess liquid before serving to keep textures intact.

Room Temperature: It's best not to leave this dish at room temperature for more than 2 hours, as the ingredients are highly perishable and maintain their best flavors when kept chilled.

Reheating: For the best experience, enjoy this dish cold or at room temperature. If you prefer it warmed, gently heat it on low in a skillet, being careful not to overcook the zucchini noodles, which can lead to a mushy texture.

Freezer: Avoid freezing this dish, as the zucchini will lose moisture, becoming overly soft and less enjoyable once thawed.

Raw Avocado Pesto Zucchini Noodles Recipe FAQs

How do I select ripe avocados for this dish?
Absolutely! When choosing avocados, look for ones that yield slightly to gentle pressure, indicating ripeness. You’ll want a smooth, dark green skin without any dark spots. If they feel hard, they’re likely unripe and will need a few days at room temperature to mature.

How should I store leftover Raw Avocado Pesto Zucchini Noodles?
Very good question! Store any leftovers in an airtight container in the fridge for up to 1 day. To maintain the best texture, drain off any excess liquid before sealing. Just remember, the longer the noodles sit, the more moisture they will release, potentially losing that delightful crunch.

Can I freeze Raw Avocado Pesto Zucchini Noodles?
No, it’s best not to freeze this dish. Zucchini has a high water content, which means freezing will result in mushy noodles upon thawing. Instead, try to enjoy it fresh or within a day for the best experience!

What if my avocado pesto turns out too thick?
If your avocado pesto is thicker than you’d like, simply add a tablespoon or two of water or even a little more lemon juice while blending until you reach your desired consistency. Blend briefly to combine, and be careful not to over-process to maintain that creamy texture!

Is this recipe safe for people with nut allergies?
Yes, indeed! The Raw Avocado Pesto Zucchini Noodles don’t contain nuts, as the hemp seeds can be easily replaced or omitted entirely. If someone has a specific seed allergy, simply leave them out and enjoy this refreshing dish free from concern.

How long can I leave this dish at room temperature?
It’s best not to leave your Raw Avocado Pesto Zucchini Noodles at room temperature for more than 2 hours, as the fresh ingredients, especially the avocado, are highly perishable. Enjoy it chilled or serve it right after preparation for that glorious fresh taste!

Raw Avocado Pesto Zucchini Noodles

Raw Avocado Pesto Zucchini Noodles for a Fresh Summer Feast

A light, vibrant, and refreshing dish featuring zucchini noodles and creamy avocado pesto, perfect for summer dining.
Print Recipe Pin Recipe
Prep Time 10 minutes mins
Total Time 10 minutes mins
Servings: 2 servings
Course: Salads
Cuisine: Vegan
Calories: 350
Ingredients Equipment Method Nutrition Notes

Ingredients
  

For the Zucchini Noodles
  • 2 medium Zucchini Spiralize or julienne for noodle texture
  • 1 pinch Sea Salt Enhances natural flavor
For the Avocado Pesto
  • 2 ripe Avocados Ensure they are ripe for a creamy consistency
  • 1 cup Fresh Basil Essential for fresh pesto flavor
  • 2 cloves Garlic Fresh minced garlic
  • 2 tablespoons Lemon Juice Adds brightness
  • 3 tablespoons Hemp Seeds For added protein and nuttiness
  • 1 teaspoon Red Pepper Flakes Adds a hint of spice

Equipment

  • Spiralizer
  • Food Processor
  • Mixing Bowl

Method
 

Step-by-Step Instructions
  1. Begin by washing and drying the medium zucchinis. Using a spiralizer, create long noodle-like strands and cut into smaller pieces. Toss in a mixing bowl.
  2. In a food processor, combine ripe avocados, basil leaves, minced garlic, lemon juice, and hemp seeds. Blend until velvety smooth.
  3. Pour the avocado pesto over zucchini noodles. Toss gently with tongs for 1-2 minutes until coated.
  4. Serve immediately or refrigerate until ready. Garnish with extra hemp seeds or red pepper flakes if desired.

Nutrition

Serving: 1servingCalories: 350kcalCarbohydrates: 20gProtein: 8gFat: 29gSaturated Fat: 4gPolyunsaturated Fat: 2gMonounsaturated Fat: 23gSodium: 200mgPotassium: 700mgFiber: 10gSugar: 4gVitamin A: 200IUVitamin C: 15mgCalcium: 30mgIron: 2mg

Notes

Enjoy immediately for best flavor and texture. Use ripe avocados for a creamy sauce.

Tried this recipe?

Let us know how it was!

Cranberry Apple Coleslaw: A Crunchy Twist You'll Love

January 29, 2026 by Grace Snow Leave a Comment

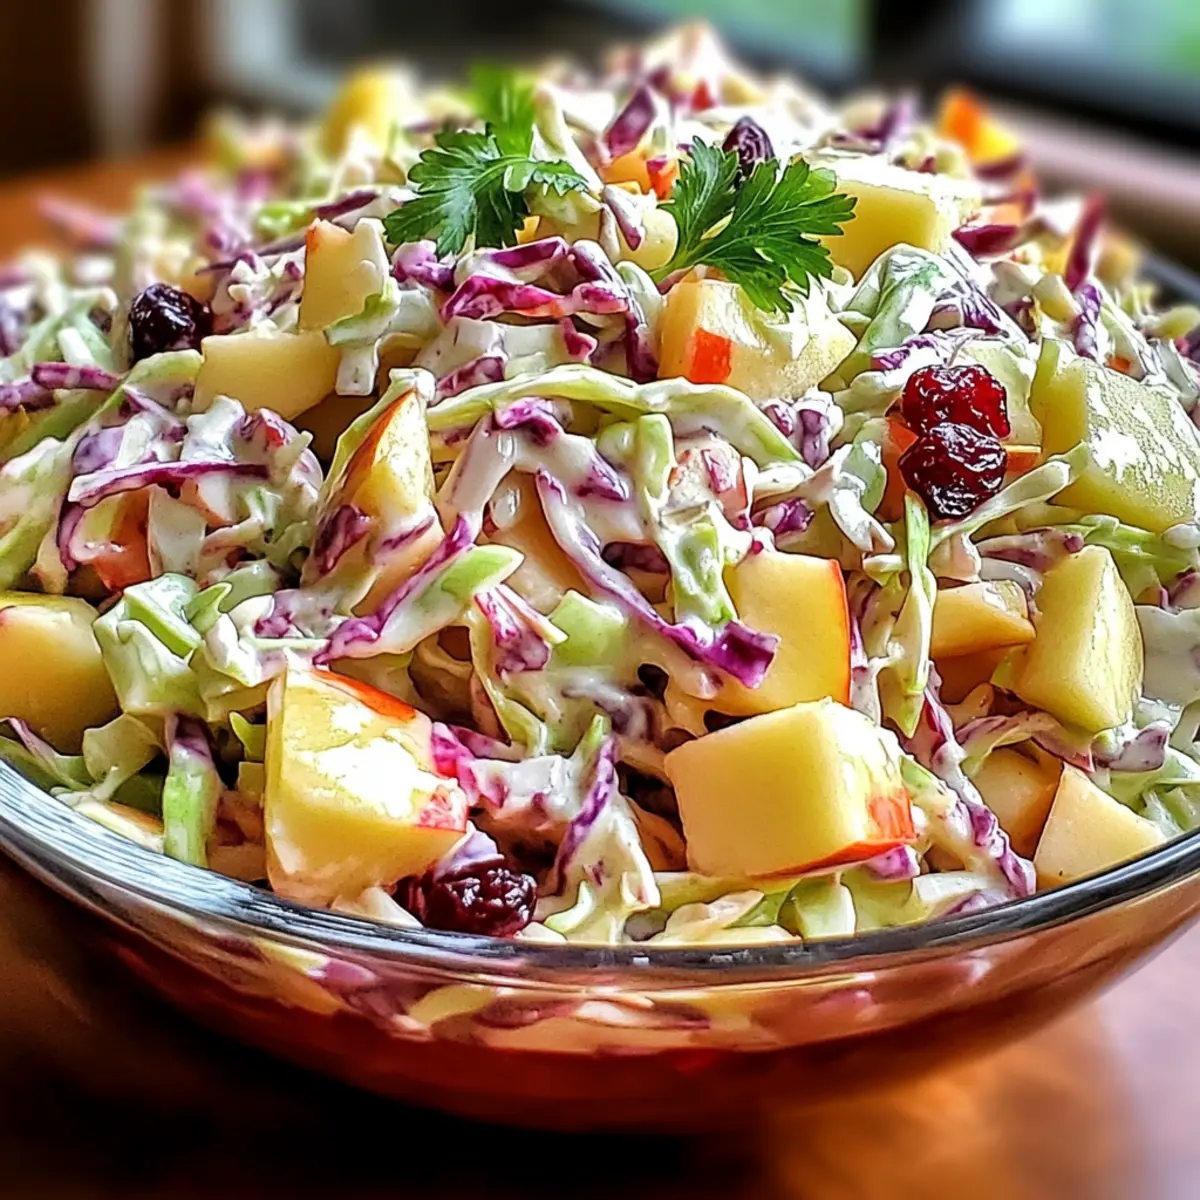
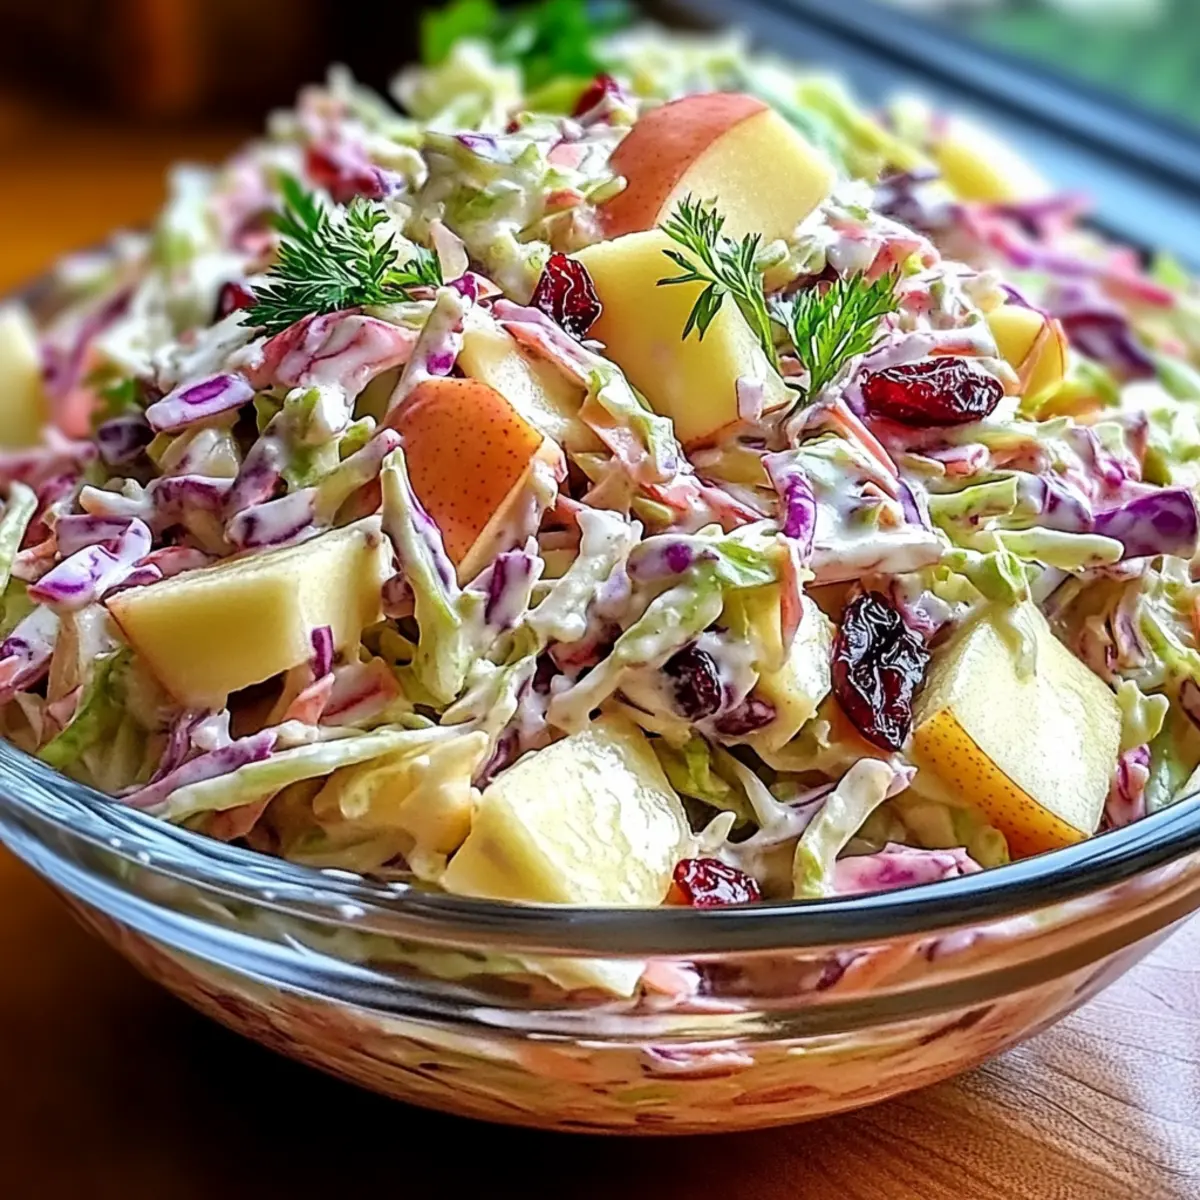
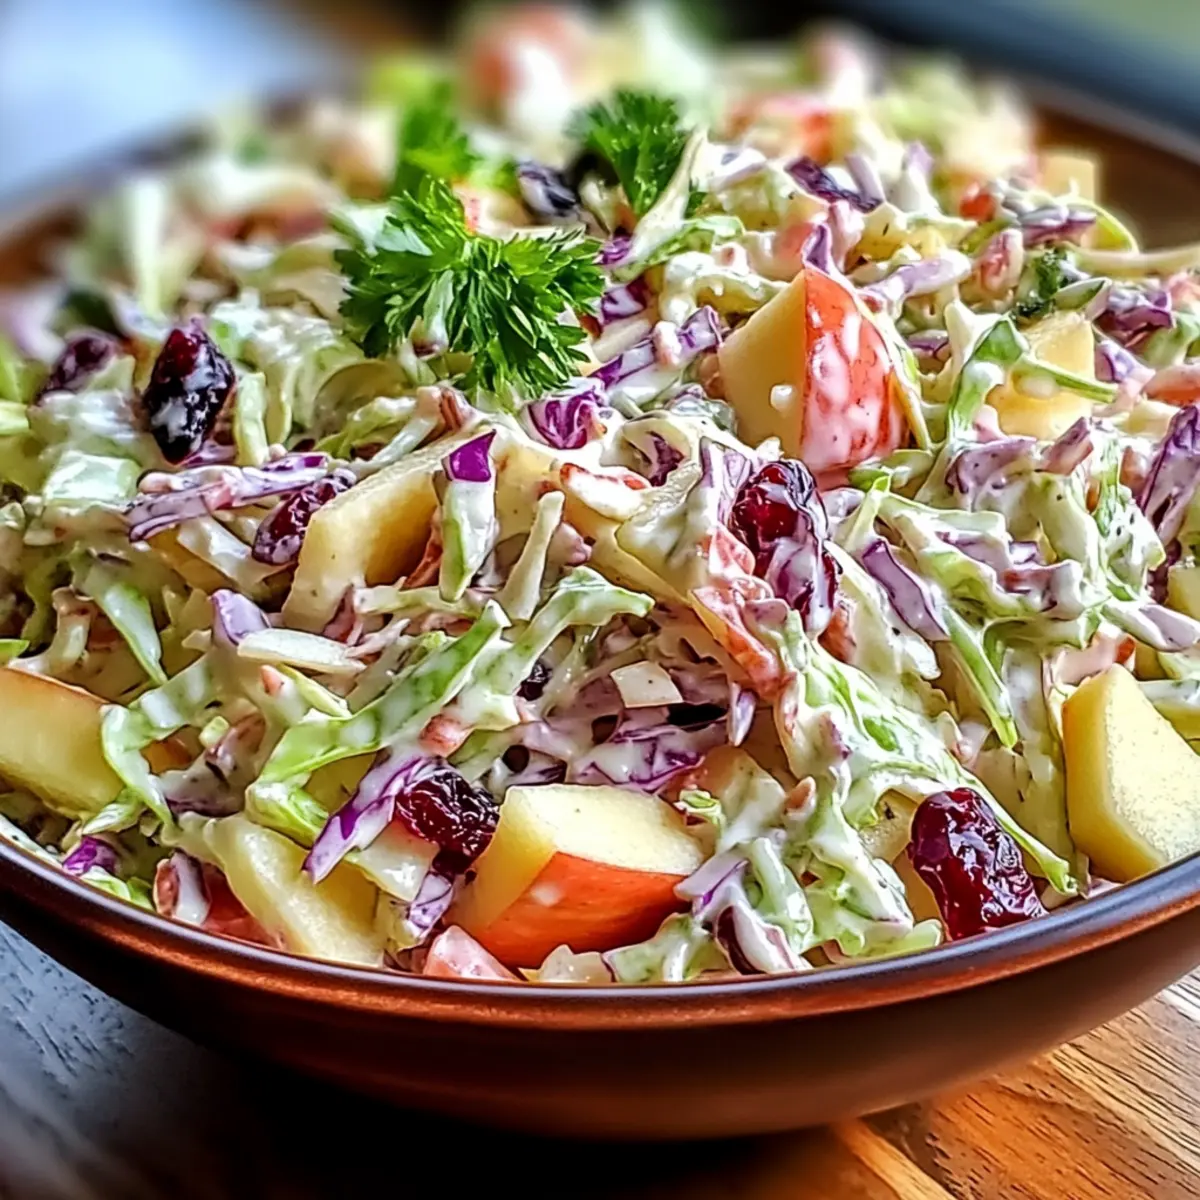
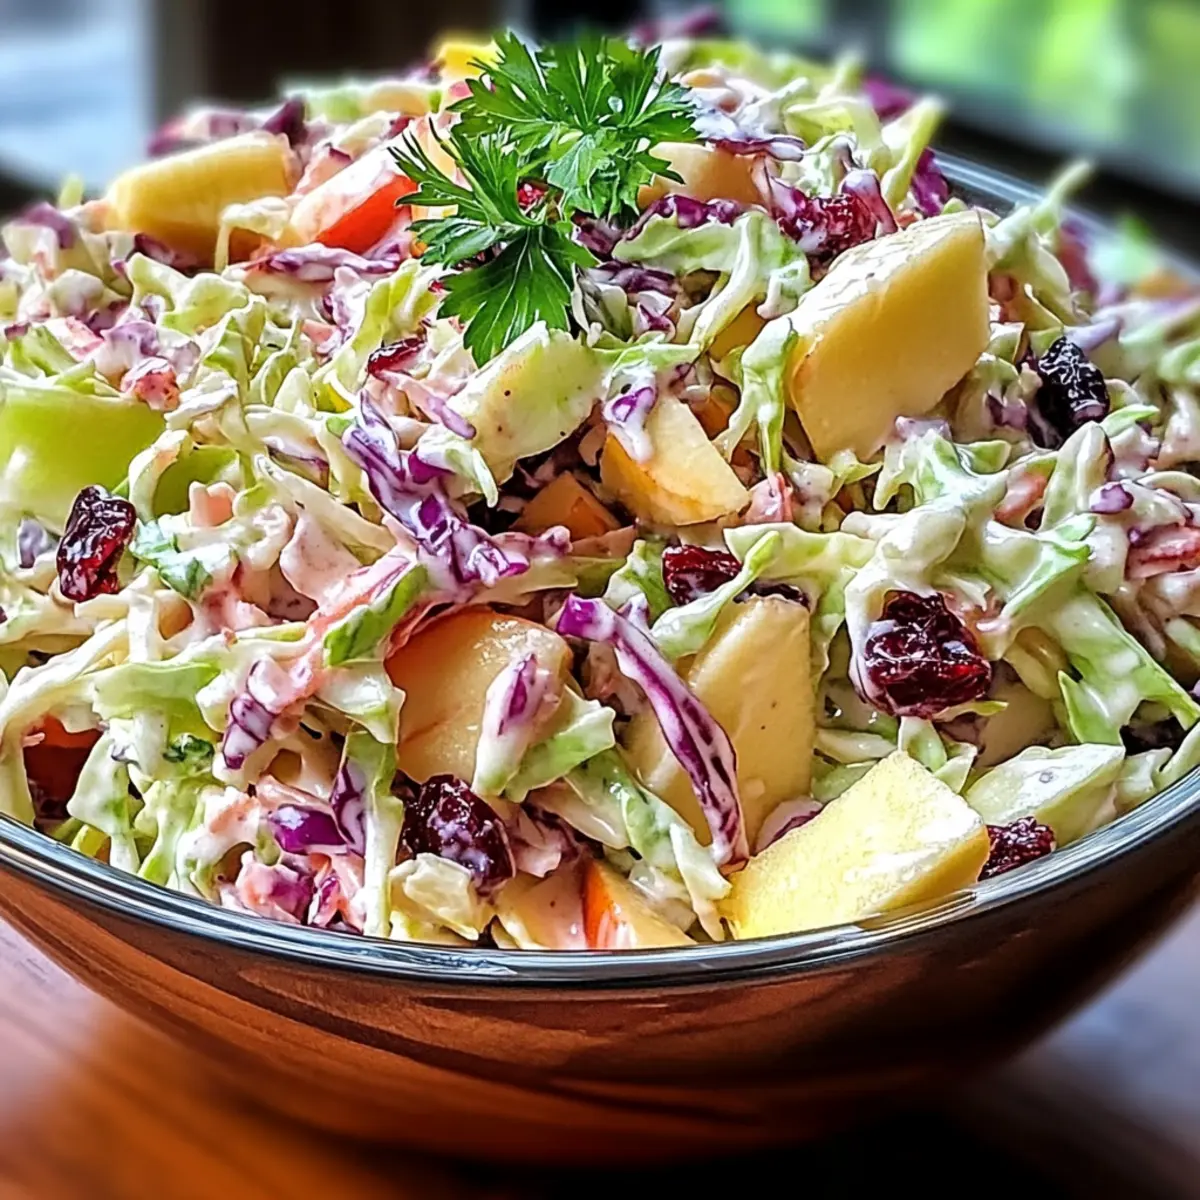
The warm crunch of cabbage paired with the bright zing of apples and the sweet-tart burst of cranberries—this isn’t just any coleslaw! My recipe for Cranberry Apple Coleslaw redefines traditional sides, bringing a delightful twist that’s perfect for everything from backyard barbecues to festive gatherings. Not only is this dish a stunning addition to your table, but it’s also incredibly versatile and easy to prepare, making it a go-to for both casual meals and special occasions. Plus, with options for lighter dressings and accommodating variations, everyone can dig in—health-conscious friends and family included! Curious about how to whip up this vibrant standout? Let’s dive into the details!

Why is Cranberry Apple Coleslaw a Must-Try?

Bright, Colorful Presentation: This coleslaw isn’t just delicious; it’s a feast for the eyes! The vibrant colors of apples and cranberries create a stunning contrast against the green cabbage.

Versatile Options: With suggestions for vegan and low-calorie dressings, this recipe fits a variety of dietary preferences, making it perfect for gatherings.

Easy Prep: A straightforward recipe means you can whip it up in no time—even on busy days!

Crowd-Pleasing Flavor: The sweet-tart combination will leave your guests raving, whether served alongside grilled meats or as a fresh filling in wraps.

Make-Ahead Convenience: Prep it ahead of time! The flavors deepen as it chills, making it a perfect dish to prepare for parties.

Nutritious Benefits: Packed with fiber and vitamins, this coleslaw supports health without sacrificing flavor. For a delightful spin on salads, try pairing it with my delicious Chicken Salad with Apples.

Cranberry Apple Coleslaw Ingredients

For the Slaw
• Cabbage – a crisp base that provides the perfect crunch, opt for finely shredded for an ideal texture.
• Apples – choose firm varieties like Granny Smith or Honeycrisp for added sweetness and freshness that complements the slaw beautifully.
• Dried Cranberries – these chewy morsels bring a sweet and tart flavor burst, making each bite delightful!

For the Dressing
• Mayonnaise (or Greek yogurt) – a creamy base for your dressing; if you’re looking for a lighter option, try a vinaigrette instead.
• Honey (or maple syrup) – provides subtle sweetness; adjust to taste based on the tartness of your cranberries.
• Apple Cider Vinegar – adds a tangy element to the dressing; for a zesty twist, you can swap it for fresh lemon juice.

Optional Add-Ins
• Chopped Nuts (walnuts/sunflower seeds) – these add an extra crunch and texture; sprinkle them in right before serving to keep them crisp.
• Seasonings – consider a dash of celery seed to enhance the flavor profile and add a hint of warmth.

Elevate your Cranberry Apple Coleslaw by personalizing it with these variations to suit your taste buds!

Step‑by‑Step Instructions for Cranberry Apple Coleslaw

Step 1: Prepare Cabbage
Begin by finely shredding about four cups of fresh cabbage. Use a sharp knife or mandoline for even, thin strips. Once shredded, lightly sprinkle the cabbage with salt to draw out excess moisture and enhance its crunchiness. Allow it to sit for 10 minutes before transferring it to a large mixing bowl.

Step 2: Chop Apples
Next, take two firm apples, such as Granny Smith or Honeycrisp. Core and slice them into thin matchsticks or small cubes, ensuring they are uniform for even distribution in the coleslaw. Add these vibrant apple pieces directly to the bowl with the cabbage, allowing their sweetness to intermingle.

Step 3: Mix Dressing
In a separate mixing bowl, combine half a cup of mayonnaise (or Greek yogurt) with two tablespoons of honey and three tablespoons of apple cider vinegar. Whisk these ingredients together until the mixture is smooth and creamy, with a glossy appearance. This dressing will provide a tangy balance to the sweetness of the cranberry apple coleslaw.

Step 4: Combine Ingredients
Pour the creamy dressing over the cabbage and apples, then add one cup of dried cranberries to the mix. Using a large spatula or wooden spoon, gently toss all the ingredients together until everything is well coated in the dressing. Aim for an even distribution of textures and flavors, resulting in a deliciously vibrant mixture.

Step 5: Chill (Optional)
For optimal flavor blending, cover the bowl with plastic wrap and place it in the refrigerator for at least 30 minutes. This chilling step allows the ingredients to marinate, enhancing the taste of your cranberry apple coleslaw. If you prefer a fresh, crisp texture, serve it immediately instead.

Step 6: Serve
When ready to serve, give the coleslaw a quick toss to redistribute the dressing. If desired, sprinkle in some chopped nuts or seeds like walnuts or sunflower seeds just before serving to maintain their crunch. This colorful and flavorful cranberry apple coleslaw is now perfect for complementing any meal!

Cranberry Apple Coleslaw Variations

Customize your cranberry apple coleslaw to match your tastes and dietary preferences—let your creativity shine through with these fun ideas!

  • Lighter Dressing: Swap mayonnaise for a tangy lemon vinaigrette for a refreshing twist.
  • Vegan Option: Use a dairy-free yogurt instead of mayo for a creamy, plant-based dressing.
  • Nutty Crunch: Add chopped walnuts, almonds, or sunflower seeds for extra texture and flavor!
  • Spicy Kick: Sprinkle in a pinch of cayenne pepper or chili powder for a satisfying heat.
  • Herb Infusion: Incorporate fresh herbs like cilantro or parsley to elevate the flavor profile.
  • Additional Veggies: Mix in finely shredded carrots or bell peppers for added color and crunch.
  • Fruity Twist: Include diced pineapple or orange segments for a sweet and tropical flair.
  • Substituting Apples: Experiment with different apple varieties, such as Fuji or Gala, for varied sweetness in every bite.

Don't forget to pair your coleslaw with something special like my delicious Chicken Salad with Apples for a wholesome meal! Have fun exploring these variations, and relish the delightful flavors that come from your kitchen!

Expert Tips for Cranberry Apple Coleslaw

  • Cabbage Crunch: Always salt the cabbage lightly before adding the dressing to remove excess moisture and keep the coleslaw crisp.

  • Apple Choices: Use firm apples such as Granny Smith or Honeycrisp, as they hold their shape well and contribute a refreshing sweetness to your cranberry apple coleslaw.

  • Dressing Prep: Consider making the dressing ahead of time and storing it separately until serving. This keeps the coleslaw from becoming too soggy.

  • Flavor Variations: Don’t hesitate to experiment with different dried fruits or add-ins to personalize your coleslaw; a handful of sunflower seeds can give it an exciting twist!

  • Make-Ahead Magic: Prepare your cranberry apple coleslaw a few hours in advance. It tastes even better after chilling, allowing the flavors to meld beautifully!

  • Healthy Substitutes: For a lighter dressing, swap mayo for Greek yogurt or a tangy vinaigrette, maintaining the dish's creamy texture while reducing calories.

How to Store and Freeze Cranberry Apple Coleslaw

Fridge: Store your cranberry apple coleslaw in an airtight container for up to 3 days. This keeps it fresh while allowing the flavors to meld together beautifully.

Freezer: While not recommended for long-term freezing due to potential texture changes, you can freeze the dressing separately for up to 1 month. Just make sure to thaw it before mixing with fresh ingredients.

Reheating: If you’ve made a batch ahead of time, simply let it sit at room temperature for about 15 minutes before serving. Avoid reheating as that can make the coleslaw wilt and lose its delightful crunch.

Serving Tips: Always add any crunchy toppings, like nuts or seeds, just before serving to maintain their texture and add that satisfying crunch you love in this cranberry apple coleslaw!

Make Ahead Options

These Cranberry Apple Coleslaw are perfect for busy cooks looking to save time during hectic weeknights! You can prepare the shredded cabbage and sliced apples, storing them together in an airtight container for up to 24 hours in the refrigerator. For optimum freshness, store the dressing separately to prevent the cabbage from becoming soggy. When you're ready to serve, simply combine the veggies with the cranberries and dressing. This way, you’ll benefit from a coleslaw that’s just as delicious, with flavors melding beautifully, while maintaining a crisp texture. Enjoy this vibrant side dish with minimal effort!

What to Serve with Cranberry Apple Coleslaw

Transform your meal from simple to sensational with these delightful pairings!

  • Grilled Chicken: Juicy and tender, grilled chicken complements the crunchiness of the coleslaw, enhancing its vibrant flavors. The smoky notes marry beautifully with the dish's refreshing sweetness.

  • Pork Tenderloin: The savory richness of pork tenderloin balances the tangy notes of the coleslaw, making it a match made in culinary heaven. Pair them together for a hearty family dinner.

  • Baked Salmon: The flaky texture and rich taste of baked salmon harmonizes with the crisp crunch of the coleslaw, providing a healthy yet indulgent side-by-side experience.

  • Quinoa Salad: A protein-packed quinoa salad adds another layer of texture alongside the coleslaw, creating an appealing medley of flavors and nutrients on your plate.

  • Sweet Potato Fries: Crispy sweet potato fries offer a delightful contrast to the crunch of the coleslaw, adding sweetness and coziness that everyone will love.

  • Sparkling Water with Lime: Refreshing and zesty, this drink cleanses the palate beautifully between bites, enhancing the culinary experience.

  • Apple Pie: For dessert, a slice of warm apple pie echoes the flavors of the coleslaw, completing your meal on a sweet note that your family will adore!

Cranberry Apple Coleslaw Recipe FAQs

What type of apples should I use for the best flavor?
I highly recommend using firm varieties like Granny Smith or Honeycrisp apples. Their crisp texture holds up well in the coleslaw and their slight tartness complements the sweetness of the cranberries beautifully.

How should I store leftovers of my cranberry apple coleslaw?
You can store your cranberry apple coleslaw in an airtight container in the refrigerator for up to 3 days. This allows the flavors to meld together while keeping the cabbage crunchy—definitely a win!

Can I freeze cranberry apple coleslaw?
While it’s not ideal to freeze the coleslaw itself due to texture changes in the cabbage, you can freeze the dressing separately for up to 1 month. Thaw the dressing in the fridge overnight before mixing with fresh, crisp ingredients when you’re ready to enjoy the dish.

What can I do if my coleslaw appears too soggy?
If your coleslaw ends up too soggy, try salting the cabbage lightly beforehand to draw out excess moisture before mixing with the dressing. Additionally, you may store the dressing separately and add it just before serving to keep everything fresh and crunchy.

Are there any dietary considerations for the cranberry apple coleslaw?
Absolutely! This recipe can easily be adapted for various dietary needs. To make it vegan, swap the mayonnaise for a plant-based alternative or a light vinaigrette. If you have nut allergies, simply omit the nuts or use seeds instead for that extra crunch without the worry.

Can I prepare the cranberry apple coleslaw ahead of time?
Yes! In fact, I often make my coleslaw a few hours ahead of serving. Leaving it in the refrigerator for about 30 minutes allows the flavors to meld, enhancing the overall taste. Just remember to add any crunchy toppings just before serving to maintain their delightful texture.

Cranberry apple coleslaw

Cranberry Apple Coleslaw: A Crunchy Twist You'll Love

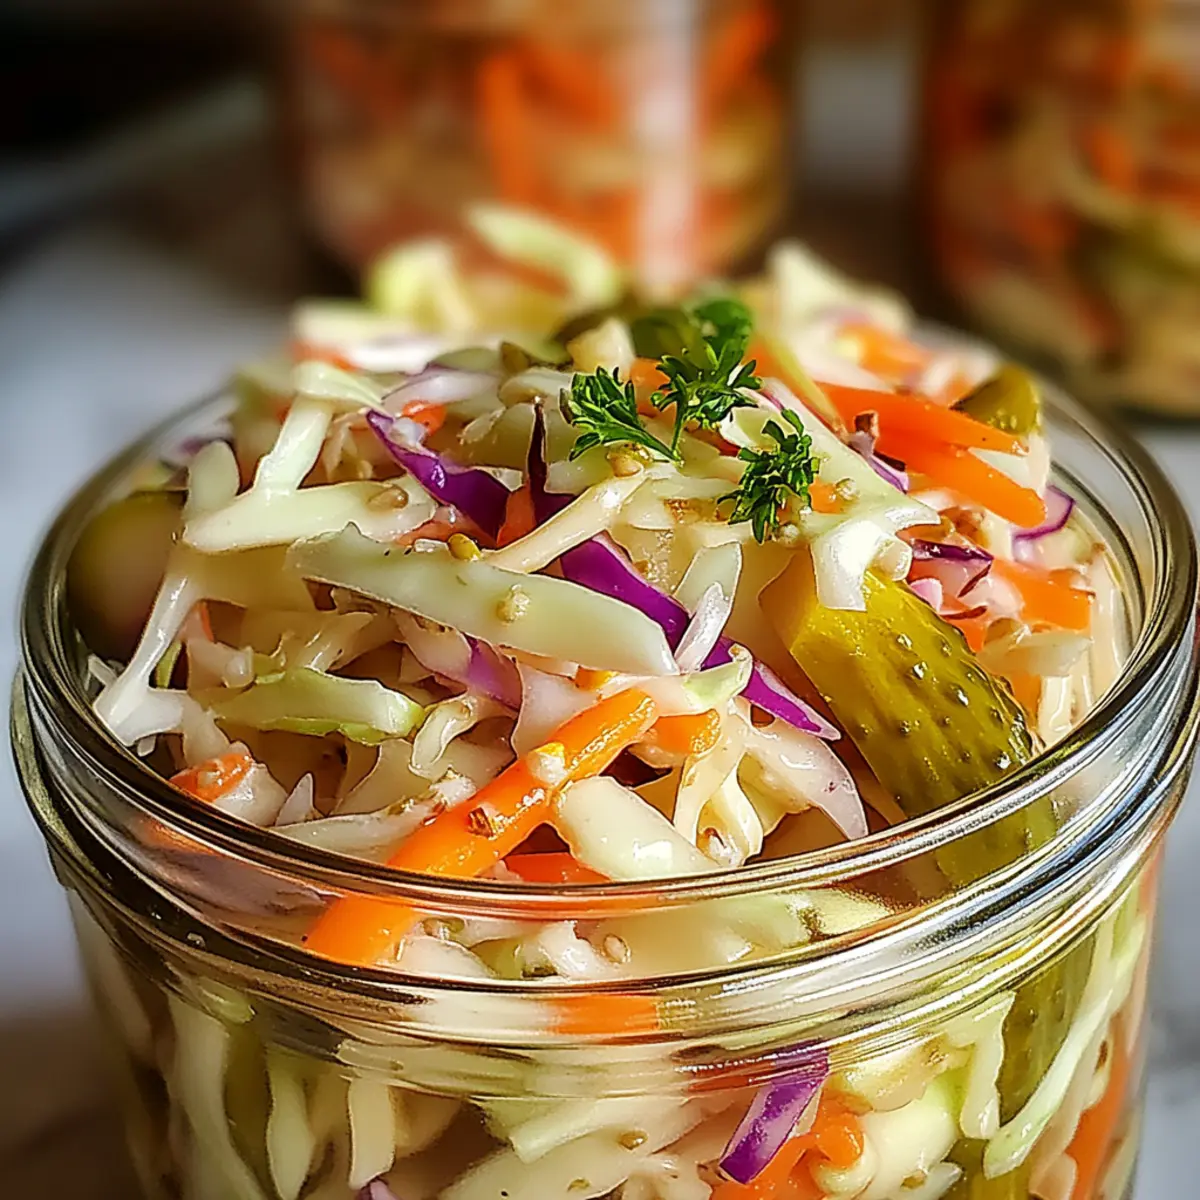
Cranberry apple coleslaw redefines traditional sides with a vibrant mix of cabbage, apples, and cranberries, making it a delightful addition to any meal.
Print Recipe Pin Recipe
Prep Time 20 minutes mins
Chilling Time 30 minutes mins
Total Time 50 minutes mins
Servings: 6 cups
Course: Salads
Cuisine: American
Calories: 200
Ingredients Equipment Method Nutrition Notes

Ingredients
  

For the Slaw
  • 4 cups finely shredded cabbage use fresh cabbage
  • 2 medium firm apples like Granny Smith or Honeycrisp
  • 1 cup dried cranberries chewy for sweet-tart flavor
For the Dressing
  • 1/2 cup mayonnaise or Greek yogurt for a lighter option
  • 2 tablespoons honey or maple syrup to taste
  • 3 tablespoons apple cider vinegar or fresh lemon juice for zesty flavor
Optional Add-Ins
  • 1/2 cup chopped nuts such as walnuts or sunflower seeds
  • seasonings consider a dash of celery seed

Equipment

  • Mixing Bowl
  • Sharp Knife
  • mandoline
  • Whisk
  • Spatula

Method
 

Step-by-Step Instructions
  1. Finely shred about four cups of fresh cabbage and sprinkle with salt. Let sit for 10 minutes.
  2. Core and slice two firm apples into thin matchsticks or small cubes and add to the bowl with the cabbage.
  3. In a separate bowl, combine half a cup of mayonnaise, two tablespoons of honey, and three tablespoons of apple cider vinegar. Whisk until smooth.
  4. Pour the dressing over cabbage and apples, then add one cup of dried cranberries. Toss gently until well coated.
  5. Cover and chill in the refrigerator for at least 30 minutes or serve immediately.
  6. Before serving, toss again and add optional chopped nuts or seeds for extra crunch.

Nutrition

Serving: 1cupCalories: 200kcalCarbohydrates: 25gProtein: 2gFat: 10gSaturated Fat: 1gPolyunsaturated Fat: 2gMonounsaturated Fat: 5gCholesterol: 5mgSodium: 150mgPotassium: 200mgFiber: 3gSugar: 10gVitamin A: 200IUVitamin C: 15mgCalcium: 30mgIron: 1mg

Notes

This coleslaw can be made ahead of time and tastes best after chilling, as flavors meld beautifully.

Tried this recipe?

Let us know how it was!

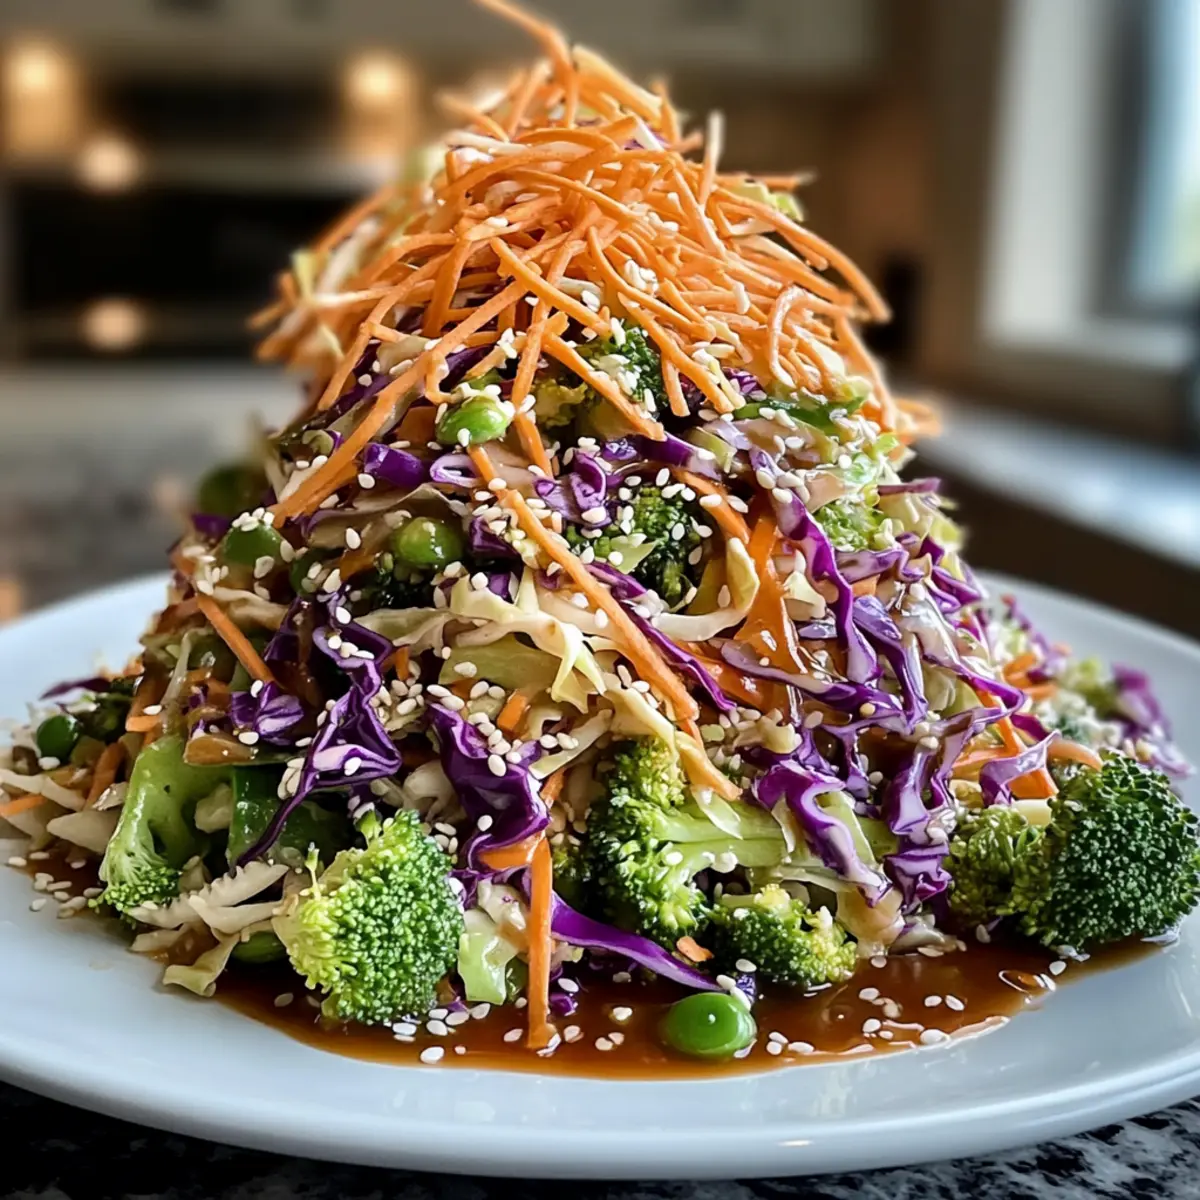
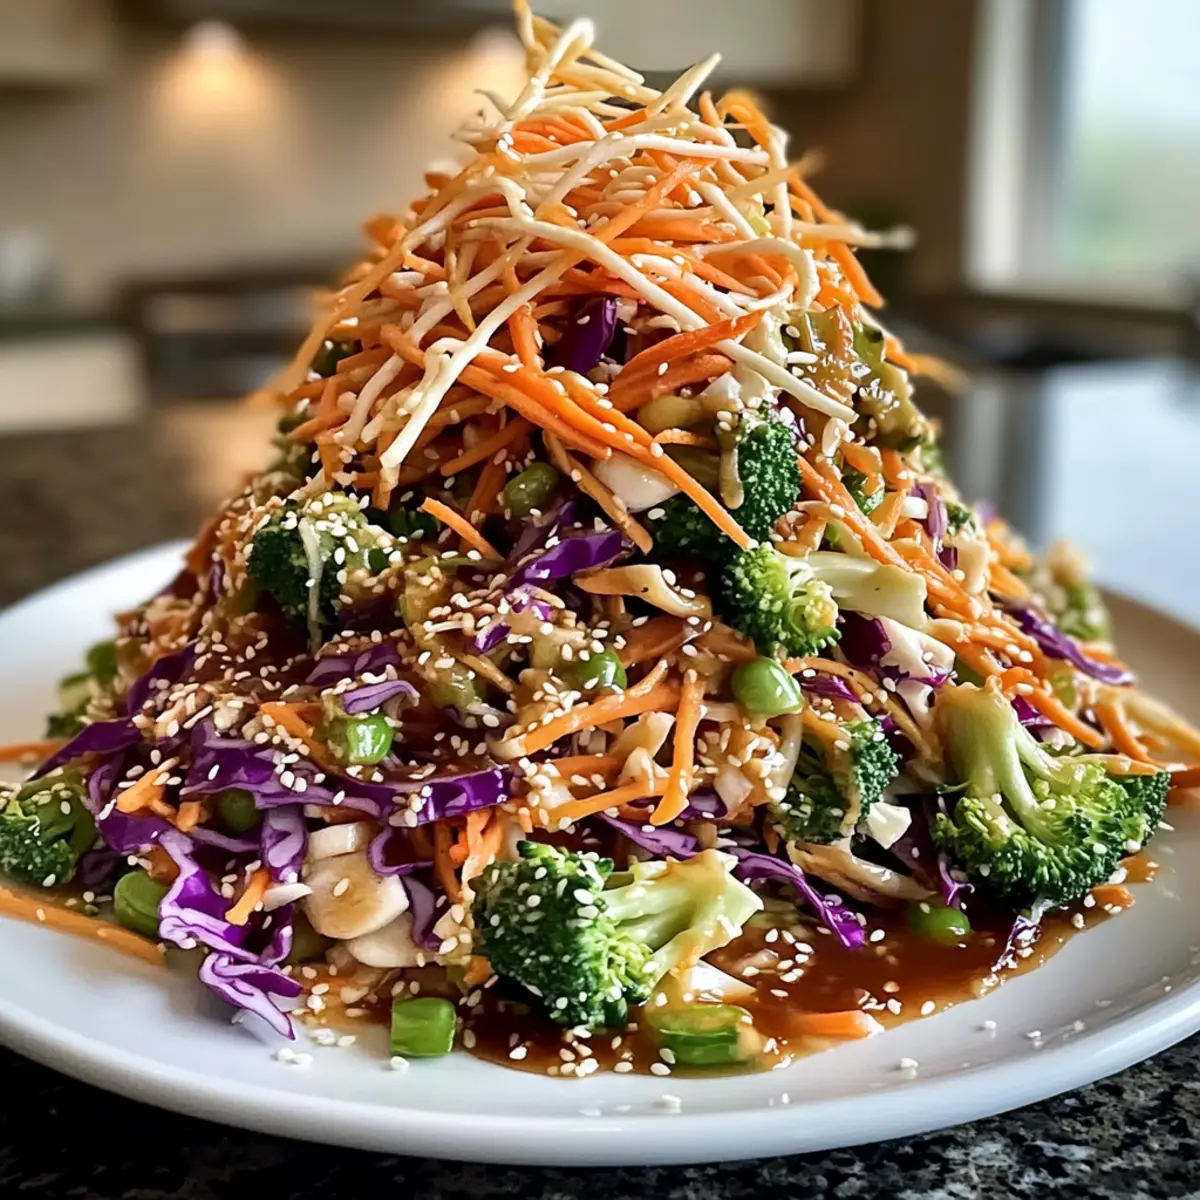
Crunchy Asian Peanut Slaw with Creamy Dressing You’ll Love

January 29, 2026 by Grace Snow Leave a Comment

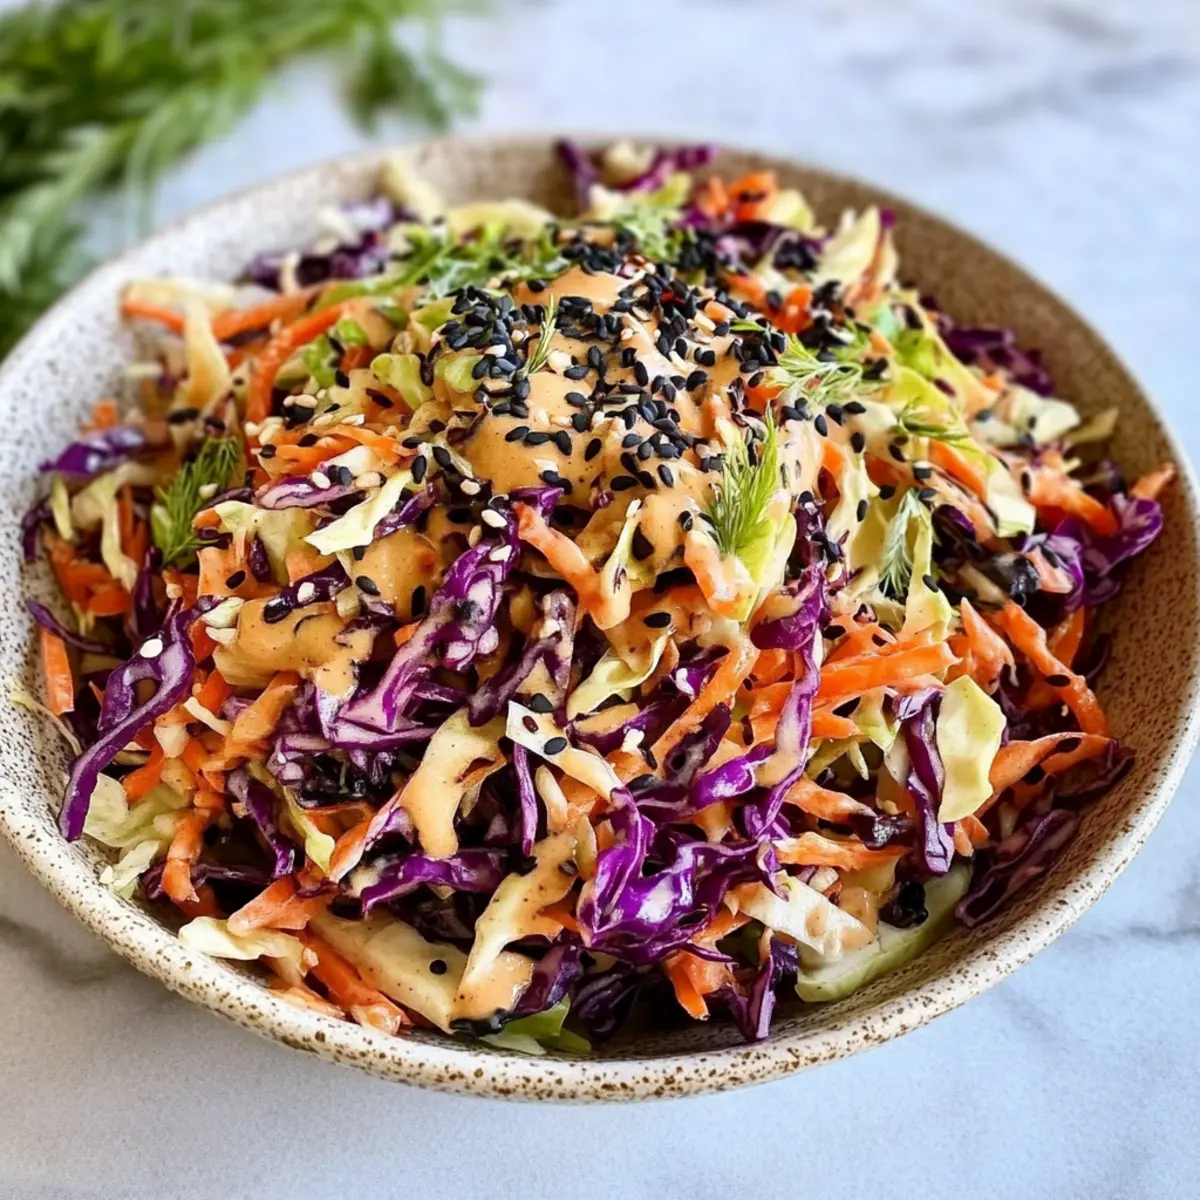
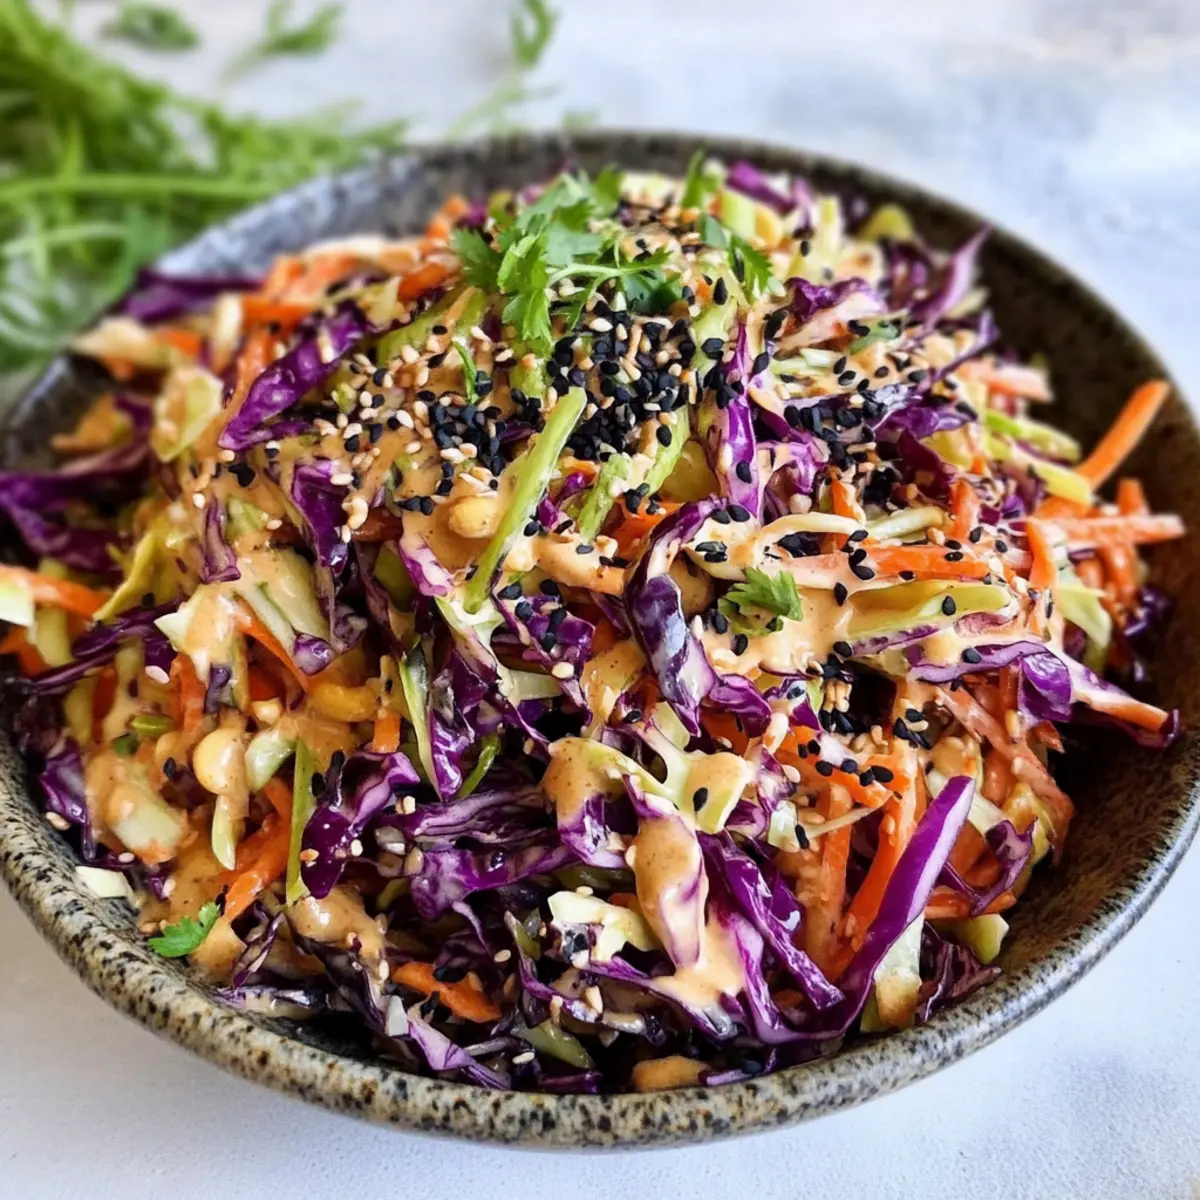
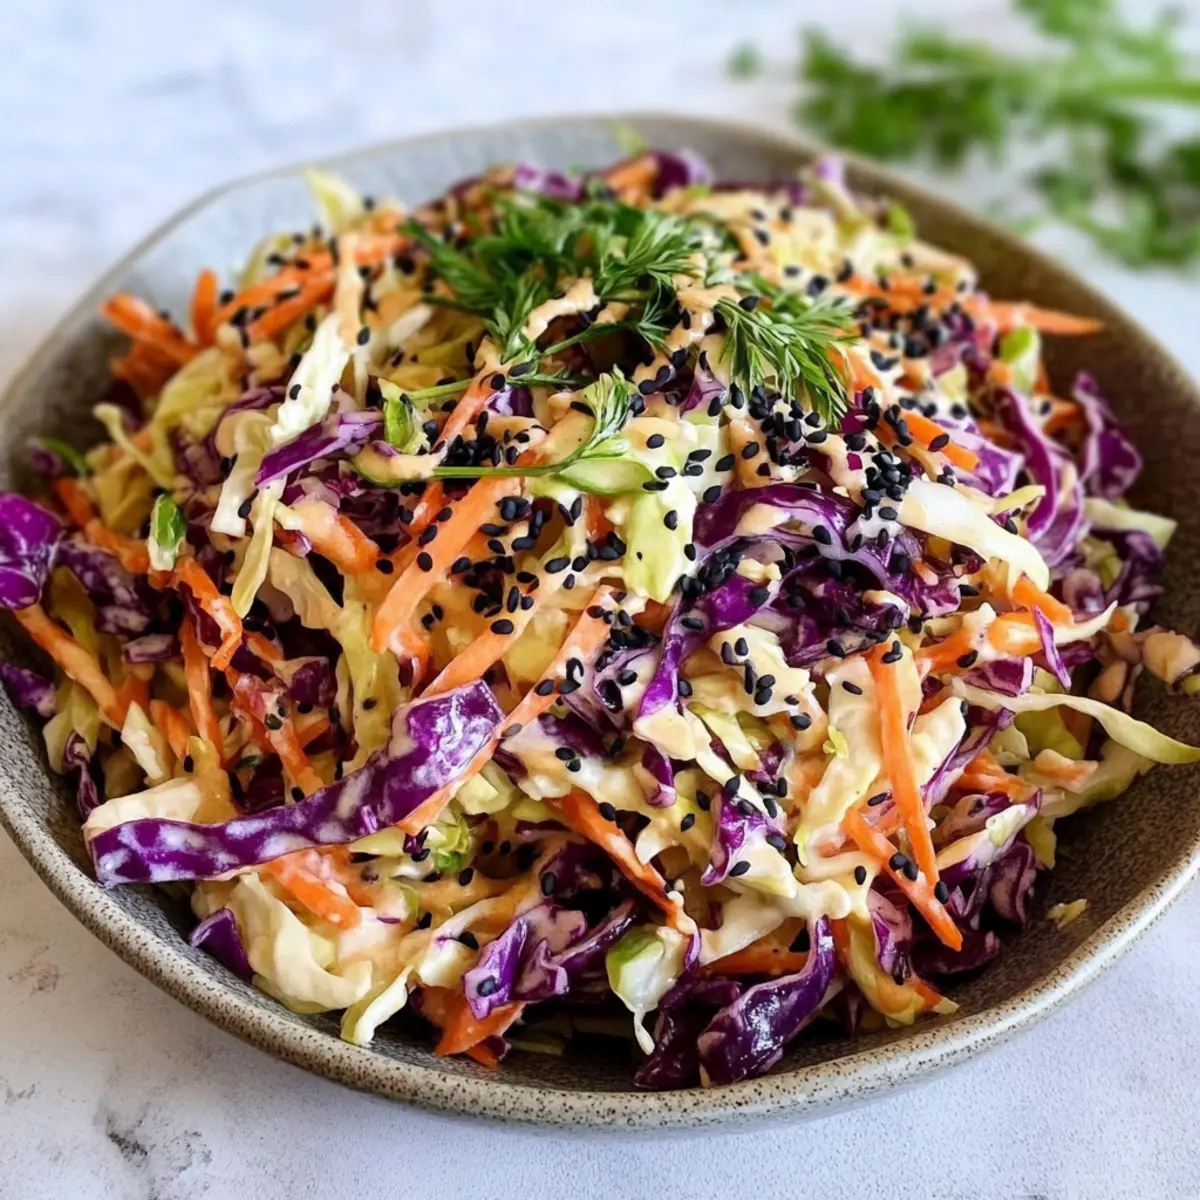
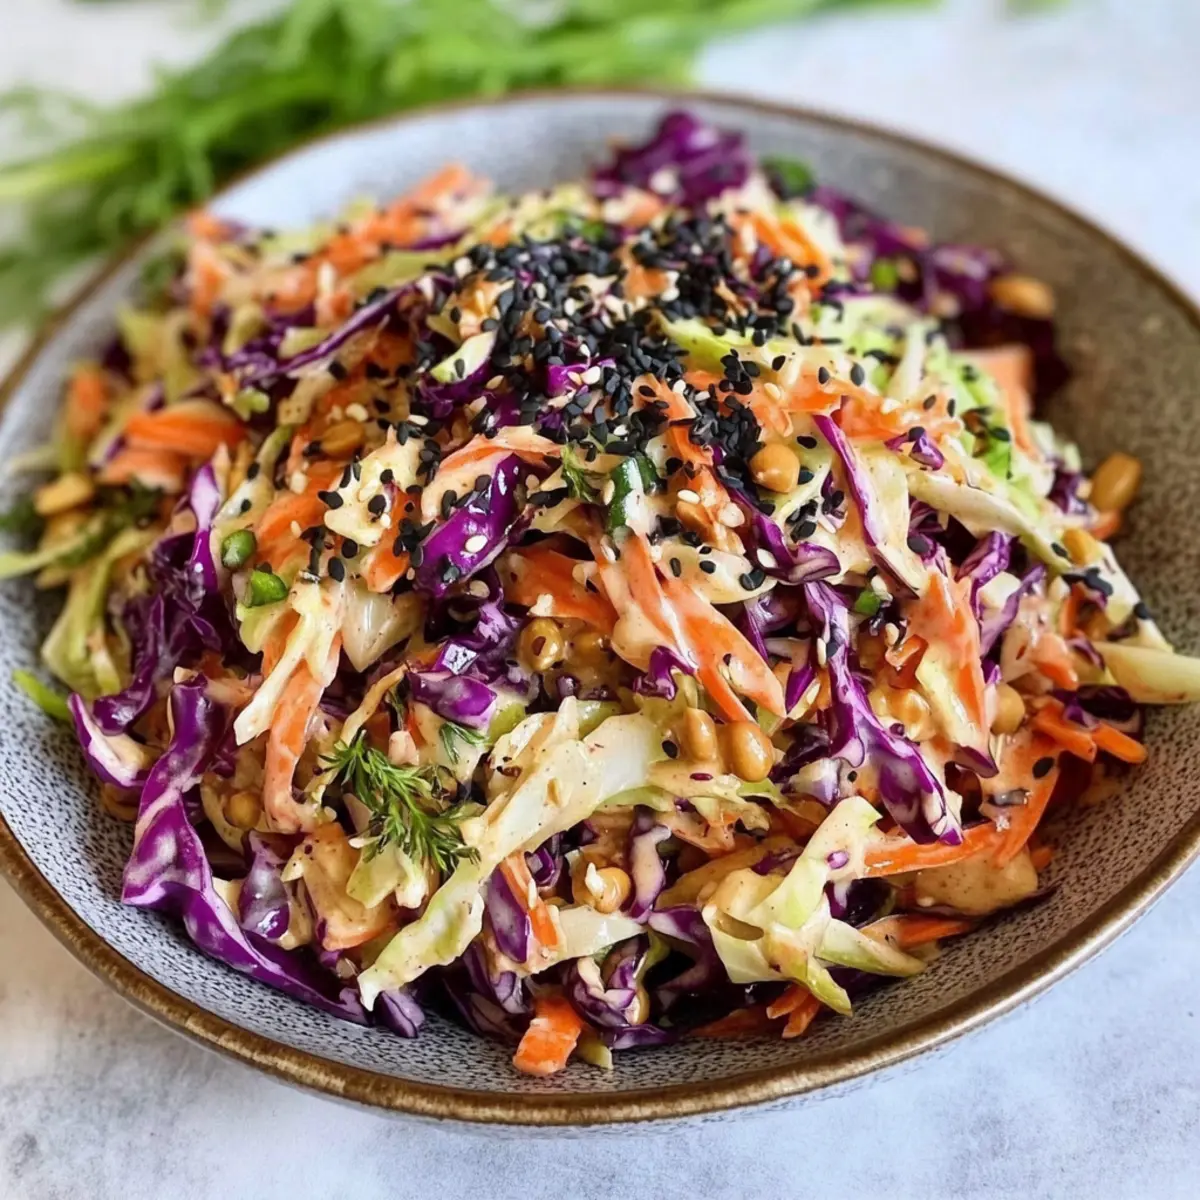
In the bustling world of quick meals, who doesn’t crave a vibrant, refreshing side that can transform any dinner into a feast? Enter my Easy Asian Peanut Slaw with Creamy Peanut Dressing—a tantalizing blend of crunchy vegetables that delivers a delightful crunch in every bite. This slaw isn’t just easy to whip up in just 15 minutes; it’s also a guilt-free, low-calorie treat that’s bursting with plant-based goodness. Tossed in a rich peanut dressing infused with zesty lime and spicy ginger, this dish is the ultimate crowd-pleaser, whether served alongside grilled meats or as the star of a picnic spread. Ready to elevate your meal and enjoy a fabulous burst of flavor? Let’s get started on this colorful journey!

Why is this slaw so irresistible?

Bold flavors: The creamy peanut dressing, with its zesty lime and ginger notes, elevates the fresh crunch of the vegetables.
Quick preparation: Whipping this up takes just 15 minutes—perfect for busy weeknights or impromptu gatherings.
Healthy indulgence: With only 134 calories per serving, this Asian Peanut Slaw is a guilt-free treat, rich in vitamins and minerals.
Versatile side dish: Whether paired with grilled chicken or enjoyed as a standalone meal, it adapts beautifully to any occasion! You might also love this alongside grilled dishes like Fried Shrimp Cabbage.
Colorful presentation: Its vibrant hues make it a feast for the eyes, sure to impress family and friends!

Asian Peanut Slaw Ingredients

For the Slaw
• Red Cabbage – Adds crunch and color; substitute with green cabbage or Brussels sprouts for a different flavor.
• Green Cabbage – Provides a fresh, mild flavor ideal for pairing with the dressing.
• Carrots – Contributes sweetness and crunch; try shredded beets for extra color and sweetness if you’d like.
• Scallions – Offers a mild onion flavor; can be replaced with chives if needed.
• Fresh Cilantro (optional) – Introduces a fresh herbaceous note; feel free to omit if cilantro isn’t your favorite.

For the Creamy Peanut Dressing
• Creamy Peanut Butter – The base of the dressing that adds richness; almond or sunflower butter can substitute easily.
• Soy Sauce – Boosts umami and saltiness; use tamari for a gluten-free adaptation.
• Coconut Milk (or plant milk) – Adds creaminess to the dressing; any non-dairy milk will work well.
• Lime Juice – Provides acidity and brightness; lemon juice can be an excellent alternative.
• Maple Syrup – Sweetens the dressing; agave nectar serves as a great substitute.
• Fresh Ginger – Infuses warmth and spice; ground ginger is a suitable alternative if fresh isn’t available.
• Sesame Seeds – Adds crunch and nuttiness; omit for a lighter dish.
• Red Pepper Flakes – Offers heat; adjust to your spice preference for this Asian Peanut Slaw.

Step‑by‑Step Instructions for Asian Peanut Slaw

Step 1: Make the Peanut Dressing
In a mixing bowl, combine ½ cup of creamy peanut butter, 2 tablespoons of lime juice, and ¼ cup of coconut milk. Whisk the mixture together vigorously for about 1-2 minutes until smooth and creamy. Then, add 2 tablespoons of soy sauce, 1 tablespoon of maple syrup, 1 teaspoon of grated fresh ginger, ¼ teaspoon of red pepper flakes, and 1 tablespoon of sesame seeds. Mix until everything is well incorporated, creating a luscious dressing.

Step 2: Prepare the Vegetables
While the dressing rests, take a large bowl and start shredding your vegetables. Begin with 2 cups of shredded red cabbage and 2 cups of shredded green cabbage—look for vibrant colors! Next, add 1 cup of shredded carrots for sweetness and crunch, followed by ¼ cup of chopped scallions for mild onion flavor. Toss the vegetables with your hands to combine those colorful ingredients, making sure they look inviting and fresh.

Step 3: Combine Dressing and Veggies
Now it’s time to bring it all together! Drizzle your creamy peanut dressing over the prepared slaw mixture in the large bowl. Carefully toss the vegetables with the dressing for about 1-2 minutes until they are all well coated and glistening. Watch as the vibrant colors of the slaw transform into a stunning, glossy salad, highlighting the appealing crunch that makes this Asian Peanut Slaw so delightful.

Step 4: Serve or Store
For best results, serve your Asian Peanut Slaw immediately to preserve the crunchy texture. If you prefer to store it, let it chill in the refrigerator in an airtight container for up to 2 days. Garnish with optional fresh cilantro, black sesame seeds, or chopped peanuts right before serving for an extra layer of flavor and visual appeal. Enjoy this refreshing side with your favorite dishes!

What to Serve with Easy Asian Peanut Slaw

Transform your vibrant slaw into a delightful meal with these complementary dishes that enhance every flavor!

  • Grilled Chicken Skewers: The savory char of grilled chicken pairs perfectly with the creamy peanut dressing, making each bite a flavor explosion.

  • Shrimp Tacos: Fresh shrimp tacos, drizzled with lime, bring a zesty contrast to the slaw's richness. Together, they create a satisfying and vibrant meal.

  • Coconut Rice: This soft, fragrant rice not only balances the crunch of the Asian Peanut Slaw but also adds a hint of tropical sweetness that rounds out your plate beautifully.

  • Spicy Miso Soup: The warm umami flavors of miso soup complement the tangy slaw, making for a comforting and nourishing combination any time of year.

  • Sesame Noodles: Serve your slaw alongside chilled sesame noodles, bringing an irresistible nutty flavor that echoes the slaw dressing and enhances the overall dining experience.

  • Fruit Salad: A colorful bowl of seasonal fruits adds a refreshing sweetness that cuts through the richness of the slaw—a perfect palate cleanser.

  • Crispy Spring Rolls: These crunchy bites are a delightful way to embrace the Asian theme while adding a fun texture contrast to your meal. They can be dipped alongside the slaw’s dressing for an added zing.

  • Cucumber Salad: A cool cucumber salad dressed in rice vinegar adds a zingy freshness to the plate, highlighting the crisp vegetables in the Asian Peanut Slaw.

  • Cold Brewed Iced Tea: Refresh yourself with a glass of lightly sweetened iced tea that enhances the slaw's flavors without overpowering them. It's a perfect drink that pairs beautifully with the meal!

  • Mango Sorbet: For dessert, a light mango sorbet brings a fruity finish to your meal, cleansing the palate and leaving you refreshed after all those vibrant flavors.

Expert Tips for Asian Peanut Slaw

  • Perfect Shreds: Use a mandolin or sharp knife to achieve uniform shreds of cabbage and carrots for a visually appealing dish.
  • Keep it Crunchy: Toss the salad just before serving to ensure the veggies remain crisp and fresh.
  • Taste and Adjust: Don’t hesitate to tweak the dressing’s ingredients to suit your preferences, whether it’s adding more lime for zing or extra maple syrup for sweetness.
  • Vibrant Presentation: Enhance the visual appeal by garnishing with fresh cilantro or chopped peanuts, making your Asian Peanut Slaw look as good as it tastes!
  • Healthy Variations: Consider experimenting with different vegetables like Brussels sprouts or shredded beets for unique flavors while keeping the slaw plant-based.

Make Ahead Options

These Asian Peanut Slaw ingredients are perfect for meal prep, saving you time on busy weeknights! You can prepare the slaw vegetables—like shredded red and green cabbage, carrots, and scallions—up to 3 days in advance. Simply store them in an airtight container in the refrigerator to maintain their crunch. For the creamy peanut dressing, make it up to 24 hours ahead and refrigerate separately to keep the flavors fresh and vibrant. When you're ready to enjoy your Asian Peanut Slaw, just toss the prepared veggies with the dressing, and add any final touches like cilantro or sesame seeds. This approach ensures you’ll have a delicious, hassle-free side dish ready to elevate any meal!

Asian Peanut Slaw Variations & Substitutions

Get ready to make your delicious slaw even more exciting with these creative twists and substitutions!

  • Dairy-Free: Use almond or sunflower butter instead of peanut butter for a nut-free option.
    Enhance the flavor with a dash of citrus or spice; the dressing will still be creamy and delicious.

  • Gluten-Free: Substitute tamari for soy sauce to keep the dish gluten-friendly.
    This small switch won't compromise flavor but ensures everyone can enjoy your vibrant slaw.

  • Spicy Kick: Add finely chopped jalapeños or a few dashes of sriracha to the dressing for some heat.
    The zesty flavor will give your slaw an exciting edge, perfect for those who love a good spice!

  • Sweet & Fruity: Incorporate diced mango or pineapple for a tropical twist on your slaw.
    The added sweetness will beautifully contrast the tangy peanut dressing, creating layers of flavor.

  • Herb Boost: Toss in fresh mint or basil along with the cilantro for an aromatic touch.
    These herbs will brighten the slaw, adding a fresh vibrancy to your already colorful dish.

  • Crunchy Additions: Include toasted almonds or cashews for extra texture and richness.
    Their crunchiness complements the slaw’s refreshing veggies, intensifying the pleasure with each bite.

  • Vegetable Variety: Try swapping Brussels sprouts for cabbage or adding shredded kale for a nutrient boost.
    This makes the slaw unique and showcases different textures while remaining deliciously crunchy.

  • Raw or Cooked: Lightly steam the cabbage and carrots to soften their crunch and enhance sweetness.
    This twist creates a different eating experience, catering to those who enjoy cooked vegetables in their slaw.

Feel free to explore these variations to make your Asian Peanut Slaw uniquely yours! And if you're seeking additional inspiration, you might enjoy pairing it with Fried Shrimp Cabbage for a delightful meal!

How to Store and Freeze Asian Peanut Slaw

  • Fridge: Store any leftover Asian Peanut Slaw in an airtight container for up to 2 days to maintain freshness and crunch.
  • Make-Ahead Dressing: Prepare the creamy peanut dressing ahead of time and refrigerate it for up to 1 week. Just give it a good whisk before using!
  • Freezer: While it’s best fresh, you can freeze the dressing in small portions for up to 1 month. Thaw in the fridge overnight before using.
  • Reheating: If you must reheat, warm the dressing gently on the stove and toss with freshly shredded veggies to revive the crunch.

Asian Peanut Slaw Recipe FAQs

What are the best ingredients for the freshest Asian Peanut Slaw?
Absolutely! For the freshest slaw, look for vibrant heads of red and green cabbage—aim for ones that feel heavy for their size and have no dark spots. When choosing carrots, opt for firm, crisp ones without blemishes. Fresh ginger should be firm and fragrant, while scallions should have bright green tops and a crisp white base.

How do I store leftover Asian Peanut Slaw?
To maintain the slaw's delicious crunch, store any leftovers in an airtight container in the refrigerator for up to 2 days. If you can, separate the dressing from the slaw—this helps keep the vegetables crisp. Enjoy it as a refreshing side dish or a quick snack later on!

Can I freeze my Asian Peanut Slaw?
While it's generally best to enjoy fresh, you can freeze the creamy peanut dressing separately in small, labeled portions for up to 1 month! Just let it thaw in the fridge overnight before use. When you’re ready, whip up some fresh vegetables to mix with the thawed dressing for an easy salad fix that’s still flavorful!

How can I troubleshoot if my slaw is too salty?
If your slaw turns out too salty, a simple fix is to add some additional shredded vegetables like carrots or cabbage to balance the saltiness. You could also mix in a touch of natural sweetener like maple syrup or a splash of lime juice to help neutralize the flavors. Remember, tasting as you go is key to finding that perfect balance!

Is this Asian Peanut Slaw suitable for dietary restrictions?
Very! This recipe is vegan and plant-based, catering to those avoiding animal products. If you have nut allergies, try substituting peanut butter with sunflower seed butter or tahini for a nut-free alternative. Always double-check your other ingredients to ensure they align with dietary needs!

Asian Peanut Slaw

Crunchy Asian Peanut Slaw with Creamy Dressing You’ll Love

Discover the vibrant and refreshing Asian Peanut Slaw, a perfect blend of crunchy vegetables tossed in a creamy dressing.
Print Recipe Pin Recipe
Prep Time 15 minutes mins
Total Time 15 minutes mins
Servings: 4 servings
Course: Salads
Cuisine: Asian
Calories: 134
Ingredients Equipment Method Nutrition Notes

Ingredients
  

For the Slaw
  • 2 cups shredded red cabbage Adds crunch and color; substitute with green cabbage or Brussels sprouts for a different flavor.
  • 2 cups shredded green cabbage Provides a fresh, mild flavor.
  • 1 cup shredded carrots Contributes sweetness and crunch; try shredded beets for extra color and sweetness if you’d like.
  • ¼ cup chopped scallions Offers a mild onion flavor; can be replaced with chives if needed.
  • optional fresh cilantro Introduces a fresh herbaceous note; feel free to omit if cilantro isn’t your favorite.
For the Creamy Peanut Dressing
  • ½ cup creamy peanut butter The base of the dressing that adds richness; almond or sunflower butter can substitute easily.
  • 2 tablespoons lime juice Provides acidity and brightness; lemon juice can be an excellent alternative.
  • ¼ cup coconut milk Adds creaminess to the dressing; any non-dairy milk will work well.
  • 2 tablespoons soy sauce Boosts umami and saltiness; use tamari for a gluten-free adaptation.
  • 1 tablespoon maple syrup Sweetens the dressing; agave nectar serves as a great substitute.
  • 1 teaspoon grated fresh ginger Infuses warmth and spice; ground ginger is a suitable alternative if fresh isn’t available.
  • ¼ teaspoon red pepper flakes Offers heat; adjust to your spice preference.
  • 1 tablespoon sesame seeds Adds crunch and nuttiness; omit for a lighter dish.

Equipment

  • Mixing Bowl
  • Sharp Knife
  • mandolin

Method
 

Step-by-Step Instructions
  1. In a mixing bowl, combine the peanut butter, lime juice, and coconut milk. Whisk until smooth and creamy.
    Asian Peanut Slaw
  2. Add soy sauce, maple syrup, grated ginger, red pepper flakes, and sesame seeds. Mix until well incorporated.
    Asian Peanut Slaw
  3. In a large bowl, shred the red cabbage, green cabbage, and carrots. Toss to combine.
    Asian Peanut Slaw
  4. Drizzle the dressing over the vegetables and toss until well coated.
    Asian Peanut Slaw
  5. Serve immediately or store in an airtight container for up to 2 days.
    Asian Peanut Slaw

Nutrition

Serving: 1cupCalories: 134kcalCarbohydrates: 15gProtein: 4gFat: 7gSaturated Fat: 1gPolyunsaturated Fat: 4gMonounsaturated Fat: 1gSodium: 300mgPotassium: 350mgFiber: 3gSugar: 3gVitamin A: 180IUVitamin C: 40mgCalcium: 4mgIron: 8mg

Notes

For best results, serve immediately to preserve the crunchy texture. Garnish with fresh cilantro or chopped peanuts if desired.

Tried this recipe?

Let us know how it was!

Cranberry Apple Coleslaw: A Festive Twist on a Classic!

January 29, 2026 by Grace Snow Leave a Comment

As the leaves turn crisp and golden, I can’t help but think of the vibrant colors that Thanksgiving brings to the table, especially that stunning bowl of cranberry apple coleslaw. This delightful and refreshing side dish is more than just a palate cleanser; it's a crunchy, slightly sweet twist on the classic. Packed with healthy ingredients and ready in just minutes, this cranberry apple coleslaw is a must-have for your holiday gatherings. Not only does it brighten up the plate, but it also complements rich main courses beautifully, making it a true crowd-pleaser. Whether you’re looking to impress guests or simply craving something homemade, you'll soon find yourself reaching for this recipe time and again. So, what’s your favorite way to add a little crunch to your meals?

Why is Cranberry Apple Coleslaw a must-try?

Vibrant Colors: This dish not only looks stunning on the table but also brightens up any meal.

Crisp, Fresh Flavor: The combination of tart cranberries and sweet apples creates a balanced crunch that elevates your taste buds.

Quick Preparation: Ready in just minutes, it's perfect for those busy holiday gatherings when time is of the essence.

Versatile Side Dish: Pair it with your favorite roasted turkey or serve it alongside any main course for a delightful contrast. For a bit of flair, check out my Chicken Salad with Apples recipe to keep your meals exciting!

Healthy Ingredients: Packed with nutrients, each bite supports your wellness journey while being indulgent enough for special occasions.

Crowd-Pleaser: Whether at Thanksgiving or a summer barbecue, this cranberry apple coleslaw is sure to impress family and friends alike!

Cranberry Apple Coleslaw Ingredients

For the Slaw
• Green cabbage – adds a refreshing crunch; feel free to substitute with purple cabbage for a pop of color.
• Shredded carrots – provides sweetness and vibrant color; use pre-shredded for quick prep.
• Fresh cranberries – the star of the show; use dried cranberries in a pinch for a sweeter touch.
• Apples – choose tart varieties like Granny Smith for a balanced flavor; you could also use sweet apples for a different twist.

For the Dressing
• Greek yogurt – a healthier alternative to mayo, adding creaminess without the guilt; you can use sour cream if preferred.
• Honey – enhances the sweetness; maple syrup makes a great vegan substitution.
• Apple cider vinegar – provides tanginess that brightens the slaw; white wine vinegar works as a delicious alternative.
• Salt and pepper – season to taste; don’t skip these as they enhance all the flavors in your cranberry apple coleslaw!

Optional Toppings
• Chopped nuts – walnuts or pecans will add a delightful crunch; you can toast them for extra flavor.
• Additional herbs – fresh parsley or mint can elevate your slaw’s flavor profile; consider using these for a fresh garnish!

Step‑by‑Step Instructions for Cranberry Apple Coleslaw

Step 1: Prepare Cabbage
Start by finely shredding half a head of green cabbage and place it in a large mixing bowl. Lightly sprinkle with salt and let it sit for about 10 minutes. This process helps to remove excess moisture, resulting in perfect texture for your cranberry apple coleslaw. After 10 minutes, give the cabbage a gentle squeeze to release moisture before moving on.

Step 2: Chop Apples
While the cabbage is resting, core and slice two firm apples into thin matchsticks or small cubes, as you prefer. Aim for a mix of textures and flavors; tart varieties like Granny Smith enhance the overall taste. As you chop, you’ll want the apples to be vibrant and fresh, lending a lovely crunch to your coleslaw.

Step 3: Mix Dressing
In a separate bowl, combine ½ cup of Greek yogurt, 2 tablespoons of honey, and 2 tablespoons of apple cider vinegar. Whisk the ingredients together until the dressing is smooth and creamy, ensuring all flavors meld together. This homemade dressing creates the perfect balance of sweetness and tanginess for your cranberry apple coleslaw.

Step 4: Combine Ingredients
Add the shredded cabbage, chopped apples, and 1 cup of dried cranberries into your large mixing bowl. Pour the creamy dressing over the top and toss everything together until all ingredients are evenly coated. This step infuses your cranberry apple coleslaw with delightful flavors and creates a wonderfully colorful dish.

Step 5: Chill (Optional)
For the best flavor, let your cranberry apple coleslaw sit in the refrigerator for at least 30 minutes before serving. This resting period allows the flavors to meld beautifully, creating a more cohesive taste profile. Cover it with plastic wrap to keep it fresh and let the anticipation build for your delicious side dish.

Step 6: Serve
Just before serving, give the coleslaw a gentle toss and add in ½ cup of chopped nuts, like walnuts or pecans, if desired. This addition brings extra crunch and a nutty flavor contrast to the sweet and tangy elements of your cranberry apple coleslaw, making it an even more delightful accompaniment to your meal.

Cranberry Apple Coleslaw Variations & Substitutions

Feel free to mix and match these ideas to create a cranberry apple coleslaw that's perfect for your taste and dietary preferences!

  • Vegan Option: Substitute Greek yogurt with a creamy plant-based yogurt for a completely vegan version without sacrificing texture.
  • Low-Calorie Twist: Use a light vinaigrette instead of the creamy dressing to cut down on calories while keeping the dish vibrant and fresh.
  • Additional Crunch: Toss in some sunflower seeds or toasted almonds for an extra layer of texture that adds delightful crunch.
  • Flavor Boost: Add a sprinkle of cinnamon for warmth, or consider a touch of ginger to enhance the fruity flavors.
  • Spicy Kick: Mix in a small diced jalapeño or a sprinkle of red pepper flakes for those who enjoy a bit of heat in their coleslaw.
  • Herb Infusion: Fresh herbs like dill or cilantro can elevate your coleslaw; try adding them in for a unique twist!
  • Fruit Variations: Swap cranberries for raisins or add fresh oranges for a citrusy pop, providing a refreshing contrast in flavors.

Want to expand your culinary repertoire? Try applying some of these ideas in my Chicken Salad with Apples and discover even more delightful combinations that suit your palate!

Expert Tips for Cranberry Apple Coleslaw

  • Choose Fresh Ingredients: Always opt for firm apples and crisp cabbage to ensure your cranberry apple coleslaw maintains its delightful crunch.

  • Salt the Cabbage: Lightly salting the shredded cabbage helps draw out moisture, preventing the coleslaw from becoming soggy.

  • Dress on Serving Day: To keep nuts crunchy and flavors fresh, dress your cranberry apple coleslaw just before serving.

  • Experiment with Variations: Don’t hesitate to mix in other ingredients like leafy greens or seasonal fruits for a twist on the traditional recipe.

  • Adjust Sweetness: Depending on your crowd, taste the dressing and adjust the honey or maple syrup to balance the tartness of cranberries.

Storage Tips for Cranberry Apple Coleslaw

Fridge: Store any leftover cranberry apple coleslaw in an airtight container for up to 3 days. This helps retain freshness while flavors meld beautifully.

Make-Ahead: If preparing in advance, consider storing the dressing separately. Mix it in right before serving to keep the vegetables crisp and prevent sogginess.

Freezer: For best results, avoid freezing once dressed; however, you can freeze the cabbage and apples separately for up to 2 months. Thaw and dress fresh for maximum flavor.

Reheating: This dish is best enjoyed cold or at room temperature, so there’s no need to reheat. Just give it a gentle toss before serving to reintroduce flavors.

What to Serve with Cranberry Apple Coleslaw

Cranberry apple coleslaw is a vibrant and refreshing side that pairs beautifully with a variety of dishes, making your meals even more delightful.

  • Grilled Chicken: The smoky flavor of grilled chicken complements the sweetness of the coleslaw, creating a perfect balance.
  • Roasted Turkey: A staple at gatherings, the rich taste of roasted turkey is beautifully offset by the bright, crispy notes of your coleslaw.
  • BBQ Ribs: The tangy sweetness of ribs pairs perfectly with the fresh crunch of the slaw, enhancing each bite.
  • Fish Tacos: A zesty fish taco becomes even more exciting when brightened by the crunch of cranberry apple slaw, adding layers of texture and flavor.
  • Pulled Pork Sandwiches: The creamy dressing of the coleslaw adds a refreshing contrast to the savory richness of pulled pork, making each bite irresistible.
  • Pasta Salad: Enhance a hearty pasta salad with a scoop of coleslaw on top, offering a crunchy texture that harmonizes beautifully.
  • Sparkling Water: Keep it light and refreshing! Sparkling water brings a bubbly aspect that’s a lovely companion to the flavors of the coleslaw.
  • Apple Crisp: For dessert, a warm apple crisp echoes the flavors of the coleslaw while adding a sweet finish to your meal.
  • Cheese Plate: Create a charcuterie board that includes cheeses that will complement the ingredients in the slaw, bringing a gourmet touch to the table.
  • Lemonade: A glass of chilled lemonade adds a citrusy zing that pairs nicely with the sweet and tangy notes of your coleslaw.

Make Ahead Options

This cranberry apple coleslaw is ideal for meal prep, saving you valuable time on busy days. You can prepare all the components—cabbage, apples, and cranberries—up to 24 hours in advance. Simply shred the cabbage, chop the apples, and mix them with dried cranberries, then store them in an airtight container in the refrigerator. To maintain freshness, store the dressing separately and add it just before serving to prevent the cabbage from wilting. When ready to serve, toss everything together with the dressing and enjoy a refreshing side that tastes just as delicious as when freshly made!

Cranberry Apple Coleslaw Recipe FAQs

What type of apples should I use for the best flavor?
Absolutely! I recommend using firm, tart varieties like Granny Smith or Honeycrisp. They add a delightful sweetness and crispness to the coleslaw while maintaining their shape, providing that satisfying crunch. If you're looking for a sweeter profile, feel free to experiment with sweeter apple varieties!

How should I store leftover cranberry apple coleslaw?
Store any leftover cranberry apple coleslaw in an airtight container in the refrigerator for up to 3 days. This helps maintain its flavors and freshness. If you're preparing it ahead of time, keep the dressing separate until you're ready to serve to avoid sogginess from the cabbage.

Can I freeze cranberry apple coleslaw?
While it's not ideal to freeze the dressed coleslaw due to the textures, you can freeze the cabbage and chopped apples separately for up to 2 months. To do this, simply place the shredded cabbage and chopped apples in a freezer-safe bag or container. When you’re ready to serve, thaw in the refrigerator overnight, then dress fresh at serving time!

What if my coleslaw turns out too salty?
If you’ve accidentally salted the cabbage too much, don’t fret! You can balance it out by adding more shredded cabbage or extra chopped apples. This’ll help dilute the saltiness. Another tip is to add a bit more honey or sweetness to counteract the saltiness and blend the flavors!

Is this coleslaw a good option for someone with dietary restrictions?
Yes, indeed! This cranberry apple coleslaw is quite versatile. For a vegan option, you can substitute Greek yogurt with a plant-based yogurt and use maple syrup instead of honey. It’s also gluten-free as long as you stick with gluten-free ingredients. Just be sure to double-check the labels to ensure everything meets your dietary needs!

How can I enhance the crunchiness of my coleslaw?
To maintain that satisfying crunch, opt to add chopped nuts or seeds just before serving. This way, they stay crisp and don't get soggy. Additionally, lightly salting your cabbage ahead of time helps draw out excess moisture, ensuring your coleslaw remains fresh and crunchy, even days later!

Cranberry Apple Coleslaw: A Festive Twist on a Classic!

Cranberry apple coleslaw is a refreshing side dish that brightens your holiday table with vibrant flavors and textures.
Print Recipe
Prep Time 15 minutes mins
Chill Time 30 minutes mins
Total Time 45 minutes mins
Servings: 6 servings
Course: Salads
Cuisine: American
Calories: 150
Ingredients Equipment Method Nutrition Notes

Ingredients
  

For the Slaw
  • 1/2 head green cabbage can substitute with purple cabbage for color
  • 1 cup shredded carrots use pre-shredded for quick prep
  • 1 cup fresh cranberries dried cranberries can be used for a sweeter touch
  • 2 medium apples choose tart varieties like Granny Smith for balanced flavor
For the Dressing
  • 1/2 cup Greek yogurt can use sour cream as a substitute
  • 2 tablespoons honey maple syrup is a great vegan substitution
  • 2 tablespoons apple cider vinegar white wine vinegar works as an alternative
  • to taste salt
  • to taste pepper
Optional Toppings
  • 1/2 cup chopped nuts walnuts or pecans, can toast for extra flavor
  • additional herbs fresh parsley or mint can elevate flavors

Equipment

  • large mixing bowl
  • Whisk

Method
 

Step-by-Step Instructions
  1. Start by finely shredding half a head of green cabbage and place it in a large mixing bowl. Lightly sprinkle with salt and let it sit for about 10 minutes.
  2. While the cabbage is resting, core and slice two firm apples into thin matchsticks or small cubes.
  3. In a separate bowl, combine ½ cup of Greek yogurt, 2 tablespoons of honey, and 2 tablespoons of apple cider vinegar. Whisk until smooth and creamy.
  4. Add the shredded cabbage, chopped apples, and 1 cup of dried cranberries into your large mixing bowl. Pour the creamy dressing over the top and toss everything together.
  5. For the best flavor, let your cranberry apple coleslaw sit in the refrigerator for at least 30 minutes before serving.
  6. Just before serving, give the coleslaw a gentle toss and add in ½ cup of chopped nuts, if desired.

Nutrition

Serving: 1cupCalories: 150kcalCarbohydrates: 20gProtein: 3gFat: 6gSaturated Fat: 2gPolyunsaturated Fat: 1gMonounsaturated Fat: 2gCholesterol: 5mgSodium: 180mgPotassium: 200mgFiber: 2gSugar: 10gVitamin A: 500IUVitamin C: 15mgCalcium: 30mgIron: 0.5mg

Notes

This coleslaw is best enjoyed cold or at room temperature. Dress just before serving for optimal freshness and crunch.

Tried this recipe?

Let us know how it was!

Sweet & Spicy Pickle Slaw: A Refreshing BBQ Essential

January 29, 2026 by Grace Snow Leave a Comment

Every bite of Sweet & Spicy Pickle Slaw feels like a summer festival right on your plate. With the crunch of fresh cabbage and carrots mingling with the zesty twist of pickles and a hint of heat, this slaw is sure to be the star of your next barbecue or family gathering. The best part? It’s quick and easy to make, perfect for those busy weeknights or spontaneous cookouts. Versatile enough to serve as a refreshing side dish or a light salad, the Sweet & Spicy Pickle Slaw is a delightful addition that everyone will savor. Are you ready to give your meals a vibrant boost? Let’s get started on this delicious journey!

Why is Sweet & Spicy Pickle Slaw a must-try?

Quick and Easy: This slaw comes together in just a few simple steps, making it perfect for any cook, whether you're a seasoned chef or a kitchen newbie.

Bursting with Flavor: Each bite offers a delightful combination of crunch, sweetness, and spice, elevating your meals from ordinary to extraordinary.

Versatile Delight: Serve it as a side for BBQ pulled pork sandwiches or enjoy it solo as a light salad for a refreshing meal.

Health-Packed: Rich in fiber from fresh veggies, this slaw is not just delicious but also a smart choice for a health-conscious diet.

Perfect for Gatherings: Its crowd-pleasing flavor and vibrant presentation make it an essential dish for summer get-togethers or family dinners. Don’t forget to check out our other delicious sides like Smoky Sweet Potatoes to complement your meal!

Sweet & Spicy Pickle Slaw Ingredients

For the Slaw
• Green Cabbage – Use about four cups of shredded cabbage for a crunchy base; choose firm heads without bruises.
• Carrots – A cup of grated fresh carrots adds beautiful color and sweetness.
• Pickles – Half a cup of chopped dill pickles brings tangy goodness; bread-and-butter pickles can be used for a sweeter twist.
• Red Onion – A quarter cup thinly sliced gives zest; soak in cold water for a milder flavor if preferred.

For the Dressing
• Mayonnaise – Half a cup provides creaminess; Greek yogurt is a lighter alternative.
• Sriracha Sauce – Two tablespoons deliver a kick of heat; adjust based on your spice tolerance.
• Honey – One tablespoon balances the heat with sweetness; local honey enhances flavor.
• Apple Cider Vinegar – One tablespoon adds acidity; opt for unfiltered for added health benefits.

This Sweet & Spicy Pickle Slaw is a simple yet vibrant addition to your table, promising a joyful experience with each bite!

Step‑by‑Step Instructions for Sweet & Spicy Pickle Slaw

Step 1: Prep Your Vegetables
Begin by shredding about four cups of green cabbage and grating one cup of fresh carrots. In a large mixing bowl, combine the shredded cabbage and grated carrots with half a cup of chopped dill pickles and a quarter cup of thinly sliced red onion. Make sure the vegetables are evenly mixed for a delightful crunch in your Sweet & Spicy Pickle Slaw.

Step 2: Whip Up the Dressing
In a separate medium-sized bowl, mix half a cup of mayonnaise, two tablespoons of Sriracha sauce, one tablespoon of honey, and one tablespoon of apple cider vinegar. Stir until the mixture is smooth and creamy, ensuring all the ingredients blend well together. This tangy dressing will add a zesty kick to your Sweet & Spicy Pickle Slaw.

Step 3: Combine Everything
Pour the prepared dressing over the vegetable mixture in your large bowl. Using a spatula, gently toss the veggies and dressing until everything is thoroughly coated. Take a moment to admire the vibrant colors of your Sweet & Spicy Pickle Slaw and ensure each bite will be bursting with flavor.

Step 4: Chill Out
Cover the bowl with plastic wrap or transfer the slaw into an airtight container. Refrigerate for at least one hour, allowing the flavors to meld beautifully. Not only will chilling enhance the taste of your Sweet & Spicy Pickle Slaw, but it will also make every bite refreshingly crisp.

Step 5: Serve It Up
Once the slaw has chilled, give it a good toss to redistribute the dressing before serving. Dish out generous portions into bowls or plates, showcasing the lovely crunch and vibrant hues. Your Sweet & Spicy Pickle Slaw is now ready to be enjoyed alongside your favorite barbecue dishes.

Step 6: Enjoy!
If desired, drizzle a bit of extra dressing over each serving for an added flavor boost. This lively slaw is sure to be the highlight of your meal, full of sweet and spicy goodness. Indulge in every crunchy bite of your refreshing Sweet & Spicy Pickle Slaw!

Make Ahead Options

Sweet & Spicy Pickle Slaw is a fantastic choice for meal prep, allowing you to enjoy its delightful flavors even on your busiest days. You can prep all the vegetables—shredded cabbage, grated carrots, chopped pickles, and sliced onion—up to 24 hours in advance; simply store them in an airtight container in the refrigerator to maintain their crispness. To keep the dressing fresh, mix it separately and refrigerate for up to 3 days. When you’re ready to serve, just toss the prepared vegetables with the dressing, let it chill for about 30 minutes to enhance the flavors, and enjoy your delicious Sweet & Spicy Pickle Slaw with minimal effort!

Sweet & Spicy Pickle Slaw Variations & Substitutions

Feel free to get creative with your slaw—options abound for adding personal flair and flavor!

  • Kale Twist: Replace green cabbage with kale for a hearty, nutrient-rich base. Kale brings a vibrant green hue and a wonderfully chewy texture.
  • Jalapeño Kick: Add chopped jalapeños for an extra spicy punch. This will elevate the heat level and add a delightful crunch.
  • Maple Sweetness: Swap honey for maple syrup in the dressing for a unique flavor twist. This gives a different, yet pleasing sweetness perfect for a cozy dinner.
  • Bell Pepper Crunch: Toss in some diced bell peppers for additional color and crunch. This vibrant addition can provide a lovely sweetness as well!
  • Creamy Substitute: Use Greek yogurt instead of mayonnaise for a lighter, tangy option. The yogurt gives creaminess without the extra calories and fat.
  • Add Fresh Herbs: Incorporate fresh herbs like cilantro or dill for an aromatic boost. These herbs will not only enhance the flavor but also bring a fresh note to the slaw.
  • Pickle Juice Splash: Drizzle a bit of pickle juice into the dressing to intensify the tangy flavor. It’s a wonderful way to elevate every bite of your slaw.
  • Vegan Option: Use vegan mayo and agave syrup instead of honey for a fully plant-based version. This keeps the delight while catering to dietary preferences.

For more delicious side options, don't forget to explore our recipes for Maple Roasted Sweet Potatoes and Sweet Potato Casserole. Each variation adds another layer of fun and flavor to your cooking adventures!

What to Serve with Sweet & Spicy Pickle Slaw

Every meal deserves a delightful companion, and this vibrant slaw pairs beautifully with a variety of dishes to create a memorable feast.

  • BBQ Pulled Pork Sandwiches: The slaw's crunch and zing wonderfully balance the rich flavors of pulled pork, making each bite a festival of taste.

  • Grilled Chicken: Pairing Sweet & Spicy Pickle Slaw with juicy grilled chicken not only brightens the plate but also adds a refreshing contrast.

  • Fish Tacos: The slaw's sweetness and heat complement the delicate flavors of fish tacos, offering a crispy twist that enhances every bite.

  • Baked Beans: Serve alongside savory baked beans for a hearty meal where the slaw provides a refreshing crunch to balance the creamy beans.

  • Corn on the Cob: The juicy sweetness of corn on the cob pairs seamlessly, making for a classic summer combo that invokes sunny days.

  • Chilled White Wine: Enjoy a glass of chilled white wine, such as Sauvignon Blanc, to enhance the slaw’s fresh flavors while complementing your main dish.

  • Chocolate Chip Cookies: For dessert, treat yourself to classic chocolate chip cookies, offering a sweet finish that contrasts nicely with the spiciness of the slaw.

  • Watermelon Salad: A tropical watermelon salad offers a sweet and juicy contrast, keeping everything light and refreshing as you savor each bite.

  • Homemade Lemonade: Quench your thirst with a pitcher of homemade lemonade, blending tanginess with sweetness that mirrors your slaw’s delightful notes.

Storage Tips for Sweet & Spicy Pickle Slaw

Fridge: Store your Sweet & Spicy Pickle Slaw in an airtight container for up to five days. This keeps it fresh and delicious, ready to accompany any meal.

Freezer: For longer storage, you can freeze the slaw, but be aware that the texture may change. Use within three months for the best quality; thaw in the fridge before serving.

Serving: Enjoy your slaw chilled! No reheating necessary—just give it a good stir before serving to redistribute the zesty dressing.

Preparation: If you plan to make this a day in advance, keep the extra dressing separate until serving to maintain the crunch of the veggies.

Expert Tips for Sweet & Spicy Pickle Slaw

  • Taste First: Always sample your dressing before mixing it into the slaw. Adjust sweetness or spiciness to your preference, ensuring a balanced flavor in your Sweet & Spicy Pickle Slaw.

  • Chill for Flavor: Allow the slaw to chill for at least one hour after mixing, as this helps the flavors meld beautifully and enhances the overall taste.

  • Freshness Matters: Use the freshest vegetables possible; it truly elevates your Sweet & Spicy Pickle Slaw from good to spectacular. Bruised or wilted veggies can result in an unappealing texture.

  • Add a Crunch: For extra texture, toss in some fresh herbs like cilantro or dill, or consider a splash of pickle juice for added flavor depth.

  • Customize Your Heat: Adjust the amount of Sriracha based on your spice tolerance. Don't hesitate to add jalapeños for an extra kick if you're feeling adventurous!

Sweet & Spicy Pickle Slaw Recipe FAQs

How do I choose ripe and fresh ingredients for the slaw?
Absolutely! When selecting your green cabbage, look for firm heads without bruises or dark spots. The carrots should be vibrant and crisp, while pickles should be freshly opened without any signs of spoilage. If you're using red onion, opt for a bulb that's firm and smooth to avoid bitterness. Fresh ingredients not only taste better but also elevate your Sweet & Spicy Pickle Slaw!

What is the best way to store Sweet & Spicy Pickle Slaw?
Very good question! Store your Sweet & Spicy Pickle Slaw in an airtight container in the refrigerator for up to five days. This keeps the slaw fresh and ready to complement your meals. Just remember to give it a good stir before serving to redistribute the dressing!

Can I freeze Sweet & Spicy Pickle Slaw? How?
Yes, you can freeze it! However, freezing may alter the texture of the veggies. To freeze your slaw, place it in an airtight container or a freezer-safe bag, making sure to remove as much air as possible. It’s best used within three months. When you're ready to enjoy, simply thaw it in the refrigerator overnight. Be sure to stir well after thawing to refresh the flavors.

What should I do if my slaw is too spicy?
If your Sweet & Spicy Pickle Slaw ends up spicier than you expected, don’t worry! You can balance the heat by adding more mayonnaise or Greek yogurt to the dressing, which will help mellow the spice. Alternatively, incorporating more shredded cabbage or grated carrots into the slaw can dilute the spiciness while adding more texture and flavor.

Is this recipe suitable for people with dietary restrictions?
Absolutely! This recipe can be adapted for various dietary needs. For those with allergies to soy or eggs, use a vegan mayonnaise or Greek yogurt. If you’re looking for a gluten-free option, this slaw is naturally gluten-free as long as your Sriracha is verified gluten-free. Always double-check your ingredients for hidden allergens, especially if serving guests!

How can I enhance the flavor of my slaw?
For an additional kick, consider tossing in some chopped fresh herbs, like cilantro or dill. You can also add a splash of pickle juice or lemon juice to brighten the flavors further. If you enjoy a little extra sweetness, you could opt for maple syrup instead of honey in the dressing. The more, the merrier!

Sweet & Spicy Pickle Slaw

Sweet & Spicy Pickle Slaw: A Refreshing BBQ Essential

Sweet & Spicy Pickle Slaw is a vibrant, crunchy dish perfect for barbecues and gatherings.
Print Recipe Pin Recipe
Prep Time 15 minutes mins
Chill Time 1 hour hr
Total Time 1 hour hr 15 minutes mins
Servings: 4 servings
Course: Salads
Cuisine: American
Calories: 150
Ingredients Equipment Method Nutrition Notes

Ingredients
  

For the Slaw
  • 4 cups shredded green cabbage choose firm heads without bruises
  • 1 cup grated carrots adds color and sweetness
  • 0.5 cup chopped dill pickles or bread-and-butter pickles for sweetness
  • 0.25 cup thinly sliced red onion soak in cold water for milder flavor
For the Dressing
  • 0.5 cup mayonnaise or Greek yogurt for a lighter alternative
  • 2 tablespoons Sriracha sauce adjust based on spice tolerance
  • 1 tablespoon honey local honey enhances flavor
  • 1 tablespoon apple cider vinegar opt for unfiltered for health benefits

Equipment

  • Mixing Bowl
  • Cutting Board
  • Knife
  • Spatula

Method
 

Preparation
  1. Shred the green cabbage and grate the carrots. In a large bowl, combine shredded cabbage, grated carrots, chopped dill pickles, and sliced red onion.
  2. In a separate bowl, mix mayonnaise, Sriracha sauce, honey, and apple cider vinegar until smooth.
  3. Pour the dressing over the vegetable mixture and toss until coated.
  4. Cover and refrigerate for at least one hour to meld flavors.
  5. Toss again before serving and enjoy your Sweet & Spicy Pickle Slaw.

Nutrition

Serving: 1cupCalories: 150kcalCarbohydrates: 13gProtein: 2gFat: 10gSaturated Fat: 1gPolyunsaturated Fat: 1gMonounsaturated Fat: 8gCholesterol: 5mgSodium: 300mgPotassium: 200mgFiber: 2gSugar: 3gVitamin A: 2500IUVitamin C: 15mgCalcium: 40mgIron: 1mg

Notes

Serve chilled and stir before serving to redistribute the dressing.

Tried this recipe?

Let us know how it was!

Quick and Easy Mango Slaw: A Refreshing Tropical Crunch

January 29, 2026 by Grace Snow Leave a Comment

In just 15 minutes, you can elevate any meal with a splash of tropical flair! My Quick and Easy Mango Slaw is a delightful mix of juicy mangoes, crisp cabbage, and vibrant carrots, all tossed in a zesty lime dressing. It’s the kind of side dish that turns weeknight dinners or summer barbecues into something special. The best part? Not only is this slaw incredibly simple to whip up, but it also adds a refreshing and healthy crunch that’s hard to resist. Plus, it’s versatile enough to complement everything from grilled meats to tacos. So, are you ready to bring a burst of sunshine to your table?

Why is Mango Slaw a must-try?

Vibrant Flavors: This Mango Slaw brings together sweet mangoes and crunchy vegetables, delivering a delightful burst of taste.

Quick Prep: With just 15 minutes from start to finish, it's perfect for busy weeknights or last-minute gatherings, allowing you to focus on what really matters.

Health Boost: Packed with vitamins and dietary fiber, it's a refreshing side that can easily elevate any meal.

Versatile Pairing: Serve it alongside grilled meats, tacos, or even fold it into a wrap for a satisfying lunch, making it an ideal companion for just about any dish.

Customizable: Feel free to add nuts for crunch or avocados for creaminess, ensuring every serving can be unique.

Quick And Easy Mango Slaw Ingredients

For the Slaw
• Ripe Mangoes – Enjoy the sweetness and juicy texture; can substitute with pineapple if needed.
• Green Cabbage – Provides that all-important crunch; Napa cabbage can lighten it up perfectly.
• Large Carrot – Adds lovely color and natural sweetness; shredded zucchini is a great alternative.
• Red Bell Pepper – Offers a sweet bite and vibrant color; feel free to use any sweet pepper available.
• Red Onion – Contributes a sharp, pungent flavor; substitute with green onions for a milder option.
• Fresh Cilantro – Brings a refreshing herbal note; parsley is a good substitute if you prefer less flavor.

For the Dressing
• Lime Juice – Provides acidity and a bright zing; in a pinch, lemon juice works just as well.
• Honey or Maple Syrup – Adds balance with sweetness; choose maple syrup for a vegan version.
• Sesame Oil – Infuses the slaw with a nutty richness; any neutral oil can work, but olive oil adds more flavor.
• Salt and Pepper – Essential for seasoning; adjust according to taste to enhance your Quick And Easy Mango Slaw.

Step‑by‑Step Instructions for Quick And Easy Mango Slaw:

Step 1: Prepare the Vegetables
In a large mixing bowl, combine 2 cups of diced ripe mangoes, 2 cups of shredded green cabbage, 1 grated large carrot, 1 sliced red bell pepper, 1 sliced red onion, and 1/2 cup of chopped fresh cilantro. Use a sharp knife and a cutting board for safety and precision. Ensure the veggies are vibrant and fresh for a colorful Quick And Easy Mango Slaw.

Step 2: Make the Dressing
In a small bowl, whisk together 1/4 cup of fresh lime juice, 2 tablespoons of honey (or maple syrup), and 2 tablespoons of sesame oil. Add a pinch of salt and pepper to taste, mixing well until the dressing is smooth and blended. The vibrant colors of the dressing will complement the slaw beautifully, adding an enticing zing.

Step 3: Combine the Slaw and Dressing
Pour the dressing over your mango and vegetable mixture. Using salad tongs or two large spoons, gently toss everything together, ensuring each piece is evenly coated in the zesty dressing. This step should take about 1 to 2 minutes, and you’ll want to see the colors pop as they come together in this Quick And Easy Mango Slaw.

Step 4: Allow Flavors to Meld
Let the slaw sit at room temperature for 5 to 10 minutes, allowing the flavors to meld beautifully. During this time, you’ll notice the cabbage starts to soften slightly while still retaining its crunch. This resting period enhances the overall taste and makes the slaw even more delightful when served.

Step 5: Serve and Enjoy
Serve the mango slaw chilled or at room temperature, perfect for picnics or gatherings. You can garnish with extra cilantro and lime wedges for a fresh presentation. This Quick And Easy Mango Slaw makes a vibrant side dish to accompany grilled meats, tacos, or even as a light lunch on its own.

Expert Tips for Quick And Easy Mango Slaw

  • Fresh Ingredients: Always use ripe mangoes and fresh vegetables for the best flavor and texture. Avoid using limp produce to maintain the slaw's vibrant crunch.

  • Adjust the Dressing: Taste and adjust the lime juice and sweetness to your liking. Too much acidity? Add a bit more honey or maple syrup to balance it out in your Quick And Easy Mango Slaw.

  • Chill for Flavor: Allow the slaw to sit for at least 10 minutes before serving. This resting time helps the flavors meld, enhancing the overall taste experience.

  • Prep Ahead: If you're short on time, prepare the veggies and dressing in advance, but don’t combine them until just before serving to keep everything crisp.

  • Add a Kick: For those who enjoy a bit of heat, sprinkle some chili flakes or add diced jalapeños. This twist can elevate your Quick And Easy Mango Slaw to a whole new level!

Make Ahead Options

These Quick and Easy Mango Slaw options are a lifesaver for busy cooks! You can chop and mix all the vegetables (mangoes, cabbage, carrots, bell peppers, onions, and cilantro) up to 24 hours in advance. Store them in an airtight container in the refrigerator to maintain their freshness and crunch. As for the dressing, prepare it a day before—just whisk together the lime juice, honey or maple syrup, sesame oil, salt, and pepper, then refrigerate. When you’re ready to serve, simply toss the slaw with the dressing, allowing it to meld for about 5-10 minutes at room temperature. This way, you’ll enjoy vibrant flavors and a delightful crunch without any last-minute stress!

Quick And Easy Mango Slaw Variations

Feel free to make this delightful slaw your own with these fun and easy twists!

  • Avocado Addition: Creamy avocado slices can be folded in just before serving for an irresistible richness.

  • Crunchy Sesame Seeds: Toss in a sprinkle of toasted sesame seeds to add nutty flavor and extra texture. It’s a simple upgrade that gives depth to every bite.

  • Spicy Kick: Add diced jalapeños or a sprinkle of chili flakes for a touch of heat, giving your slaw an exciting flavor boost.

  • Nutty Twist: Chopped peanuts or cashews sprinkled on top will give extra crunch and a hint of earthy flavor. This combo not only enhances texture but adds a satisfying bite.

  • Tropical Fusion: Throw in some diced pineapple to amplify the tropical vibes and sweetness, creating a more refreshing blend with every mouthful.

  • Wrap it Up: Use this slaw as a filling in wrap sandwiches with grilled chicken or shredded tofu. Drizzle yogurt or a creamy dressing for a heartier meal.

  • Lime Chicken Rice: Serve alongside a delightful Lime Chicken Rice for a beautifully balanced meal.

  • Chickpea Spinach Curry: Enjoy this mango slaw paired with a comforting dish of Chickpea Spinach Curry to add a refreshing contrast to the warm flavors.

Feel inspired to let your creativity shine and whip up your personalized version of Quick And Easy Mango Slaw!

What to Serve with Quick and Easy Mango Slaw

Elevate your next meal with delightful sides that complement the vibrant flavors of this refreshing slaw.

  • Grilled Chicken: The smokiness of charred chicken juxtaposes the sweet and tangy slaw, creating a comforting and satisfying balance.
  • Fish Tacos: Pairing slaw with crispy or grilled fish tacos adds an exciting crunch and refreshing contrast to the rich flavors.
  • Quinoa Salad: A protein-packed, nutty quinoa salad rounds out your meal, adding a hearty, wholesome component to the light slaw.
  • Pork Tenderloin: The savory and juicy nature of pork tenderloin complements the sweetness of the mangoes, providing a balance of flavors and textures.
  • Asian Noodle Bowl: A heavenly combination of noodle dishes brings together the freshness of the slaw and the warmth of cooked noodles, enhancing your dining experience.
  • Chilled White Wine: A crisp, chilled white wine brings a refreshing vibe and echoes the citrus notes of lime in your slaw, perfect for summer nights.
  • Coconut Rice: This gentle sweetness and creaminess showcase summer flavors alongside the crunchy mango slaw, harmonizing tropical elements beautifully.
  • Chocolate Mousse: For dessert, a light and airy chocolate mousse makes for an indulgent finish, contrasting the crispness of your slaw with its velvety richness.

How to Store and Freeze Quick And Easy Mango Slaw

Room Temperature: Enjoy your slaw fresh! If left out, consume within 2 hours to maintain its vibrant taste and crunch.

Fridge: Store any leftovers in an airtight container for up to 2 days. The flavors may deepen, but the slaw will lose some crunch, so enjoy it soon!

Freezer: While not recommended for freezing due to texture changes from the water content in the mango and veggies, you can freeze the dressing separately for up to 1 month.

Reheating: For best results, serve the Quick And Easy Mango Slaw cold. If you want to warm it, do so gently in a pan, but freshness is key!

Quick And Easy Mango Slaw Recipe FAQs

What is the best way to select ripe mangoes for my slaw?
Absolutely! Look for mangoes that yield slightly to gentle pressure, indicating ripeness. A ripe mango will have a vibrant color and sweet aroma at the stem. Avoid those with dark spots or wrinkles, as they may be overripe.

How should I store leftovers of the Quick And Easy Mango Slaw?
To keep your slaw fresh, transfer any leftovers into an airtight container and store it in the refrigerator. It should stay good for up to 2 days. Just a heads up, the slaw’s crunch may soften the longer it sits, but the flavors will continue to meld and become even tastier!

Can I freeze the Quick And Easy Mango Slaw?
While freezing isn’t ideal due to potential texture issues once thawed, you can freeze the dressing separately for up to 1 month. Just whisk it back together when you’re ready to use it! For the slaw mix, it’s best enjoyed fresh.

What if my dressing is too acidic or sweet?
If you find the dressing too tangy, simply whisk in a bit more honey or maple syrup to balance it out. Conversely, if it’s too sweet, a squeeze of lime juice can perk up the flavors. Adjusting these elements to your taste is key for the perfect Quick And Easy Mango Slaw!

Is there a way to make this recipe pet-friendly?
Yes! If you're looking to share a little slaw with your furry friend, skip the dressing and offer plain diced mango and shredded cabbage without added sauces or seasonings. Always consult your vet before introducing new foods into your pet’s diet to ensure it’s safe for them.

Can I use different vegetables in this slaw?
Very! This recipe is flexible. Feel free to substitute with veggies like shredded zucchini or thinly sliced bell peppers. You can also add chopped nuts for a delightful crunch or make it heartier with some diced avocado! The more the merrier when it comes to customization!

Quick And Easy Mango Slaw:

Quick and Easy Mango Slaw: A Refreshing Tropical Crunch

Quick And Easy Mango Slaw is a vibrant, healthy side dish combining sweet mangoes, crunchy vegetables, and zesty lime dressing.
Print Recipe Pin Recipe
Prep Time 15 minutes mins
Resting Time 10 minutes mins
Total Time 25 minutes mins
Servings: 4 servings
Course: Salads
Cuisine: Tropical
Calories: 150
Ingredients Equipment Method Nutrition Notes

Ingredients
  

For the Slaw
  • 2 cups diced ripe mangoes Substitute with pineapple if needed.
  • 2 cups shredded green cabbage Napa cabbage can be used.
  • 1 large grated carrot Shredded zucchini is a great alternative.
  • 1 large sliced red bell pepper Any sweet pepper can be used.
  • 1 large sliced red onion Substitute with green onions for a milder flavor.
  • 1/2 cup chopped fresh cilantro Parsley is a good substitute if preferred.
For the Dressing
  • 1/4 cup fresh lime juice Lemon juice can be used in a pinch.
  • 2 tablespoons honey or maple syrup Choose maple syrup for a vegan version.
  • 2 tablespoons sesame oil Any neutral oil can work.
  • salt and pepper Adjust according to taste.

Equipment

  • large mixing bowl
  • small bowl
  • Whisk
  • salad tongs
  • Cutting Board
  • Sharp Knife

Method
 

Step-by-Step Instructions
  1. In a large mixing bowl, combine 2 cups of diced ripe mangoes, 2 cups of shredded green cabbage, 1 grated large carrot, 1 sliced red bell pepper, 1 sliced red onion, and 1/2 cup of chopped fresh cilantro.
  2. In a small bowl, whisk together 1/4 cup of fresh lime juice, 2 tablespoons of honey (or maple syrup), and 2 tablespoons of sesame oil. Add a pinch of salt and pepper to taste.
  3. Pour the dressing over the mango and vegetable mixture. Using salad tongs, gently toss everything together.
  4. Let the slaw sit at room temperature for 5 to 10 minutes.
  5. Serve the mango slaw chilled or at room temperature, garnished with extra cilantro and lime wedges.

Nutrition

Serving: 1servingCalories: 150kcalCarbohydrates: 30gProtein: 2gFat: 5gSaturated Fat: 0.5gPolyunsaturated Fat: 0.2gMonounsaturated Fat: 4gSodium: 50mgPotassium: 300mgFiber: 4gSugar: 10gVitamin A: 3000IUVitamin C: 60mgCalcium: 45mgIron: 0.5mg

Notes

Always use fresh ingredients for the best flavor. Adjust the dressing to your liking and allow the slaw to sit to enhance flavors.

Tried this recipe?

Let us know how it was!

Crunchy Asian Cabbage Slaw That Will Wow Your Taste Buds

January 29, 2026 by Grace Snow Leave a Comment

The vibrant crunch of fresh vegetables in my Crunchy Asian Cabbage Slaw is like a delightful symphony of textures and flavors dancing on my tongue. This salad isn’t just a feast for the eyes; it’s an easy, healthy choice perfect for those who crave a break from fast food. With its addictive sesame dressing, this dish offers a sweet, tangy, and slightly nutty flavor that elevates any meal. The best part? It’s not only vegetarian and vegan-friendly but also gluten-free with simple substitutions. Whether you’re hosting a barbecue, bringing a dish to a potluck, or just looking for a refreshing side to your dinner, this slaw is the answer. Are you ready to toss together this colorful bowl of goodness? Let’s get started!

Why is this slaw a must-try?

Vibrant Colors: This Crunchy Asian Cabbage Slaw adds a pop of color to any meal, making it visually appealing for gatherings or family dinners.
Fresh & Flavorful: Each bite is a refreshing burst of crisp vegetables, perfectly complemented by an addictive homemade sesame dressing.
Quick to Prepare: In just about 15 minutes, you can whip up this tasty side, saving you from the hassle of fast food!
Versatile Dish: Pair it with grilled chicken, use it as a taco topping, or enjoy it on its own – it fits into countless meals.

For more easy salad inspiration, check out my delicious Sweet Potato Casserole or try the deliciously crunchy Fried Shrimp Cabbage for a wholesome dinner!

Crunchy Asian Cabbage Slaw Ingredients

This Crunchy Asian Cabbage Slaw comes together with fresh ingredients that enhance both flavor and nutrition.

For the Slaw
• Green Cabbage – Provides a crisp texture; substitute with napa cabbage for a different flavor.
• Red Cabbage – Adds vibrant color and mild flavor; use more green cabbage if unavailable.
• Carrots – Introduces natural sweetness for contrast; replace with shredded zucchini for a lower-carb option.
• Broccoli – Adds crunch and nutritional value; substitute with bell peppers for a sweeter touch.
• Green Onions – Offer a mild onion flavor; use red onions for a bolder taste.
• Crispy Chow Mein Noodles – Contribute delightful crunch; fried wonton strips or toasted nuts are great alternatives.

For the Dressing
• Sesame Seeds – Add a nutty finish; can be omitted if preferred.
• Rice Vinegar – Provides essential tanginess; substitute with apple cider vinegar for a different profile.
• Soy Sauce (or Tamari) – Adds umami depth; use coconut aminos for a soy-free version.
• Honey (or Maple Syrup) – Sweetens the dressing; adjust as necessary or use agave syrup for a vegan alternative.
• Toasted Sesame Oil – Infuses a rich, nutty flavor; regular sesame oil can also be used.
• Neutral Oil – Balances the dressing, such as canola or vegetable oil.
• Ginger (grated) – Provides warmth and a hint of spice; fresh is best, but powdered works too.
• Garlic (minced) – Adds depth; shallots are a suitable substitute.
• Lime Juice – Brightens flavors; use lemon juice if limes are not on hand.
• Sriracha (optional) – Adds heat to the dressing; omit for a milder taste.

Now you're all set to create this beautiful bowl of Crunchy Asian Cabbage Slaw that will amaze your taste buds!

Step‑by‑Step Instructions for Crunchy Asian Cabbage Slaw

Step 1: Prepare the Vegetables
Start by shredding the green and red cabbage, and grate the carrots. Finely chop the broccoli into small, bite-sized pieces, and slice the green onions. For a colorful and crunchy Crunchy Asian Cabbage Slaw, aim for uniform sizes to ensure even mixing. This should take about 10 minutes, and don’t forget to have a large mixing bowl ready for the next steps.

Step 2: Make the Dressing
In a medium bowl or jar, whisk together all the dressing ingredients: sesame seeds, rice vinegar, soy sauce, honey, toasted sesame oil, neutral oil, grated ginger, minced garlic, and lime juice. For an extra kick, add sriracha if desired. This step should take around 5 minutes, and it's important to mix until you achieve a smooth, well-combined dressing that glistens invitingly.

Step 3: Combine the Slaw and Dressing
In your large mixing bowl, add the shredded vegetables and drizzle the dressing over them. Toss gently using tongs or your hands, ensuring every piece is well-coated with that addictive sesame dressing. This crucial step helps blend all the flavors together while maintaining the brightness and crunch of your Crunchy Asian Cabbage Slaw. This should take about 3-5 minutes.

Step 4: Add the Crunchy Toppings
Right before serving, sprinkle crispy chow mein noodles or fried wonton strips on top of the slaw, and add a generous sprinkle of sesame seeds for that perfect finish. This last step adds delightful texture and visual appeal, making your slaw irresistible. Aim to serve immediately to preserve that satisfying crunch.

Step 5: Serve and Enjoy
Gather your friends or family around as you transfer the slaw to a beautiful serving bowl. For optimal crunch, it’s best to serve immediately. If you need to prepare ahead, store the dressed slaw in the fridge for up to 3 days, making sure to add your crispy toppings just before serving. Enjoy this vibrant Crunchy Asian Cabbage Slaw!
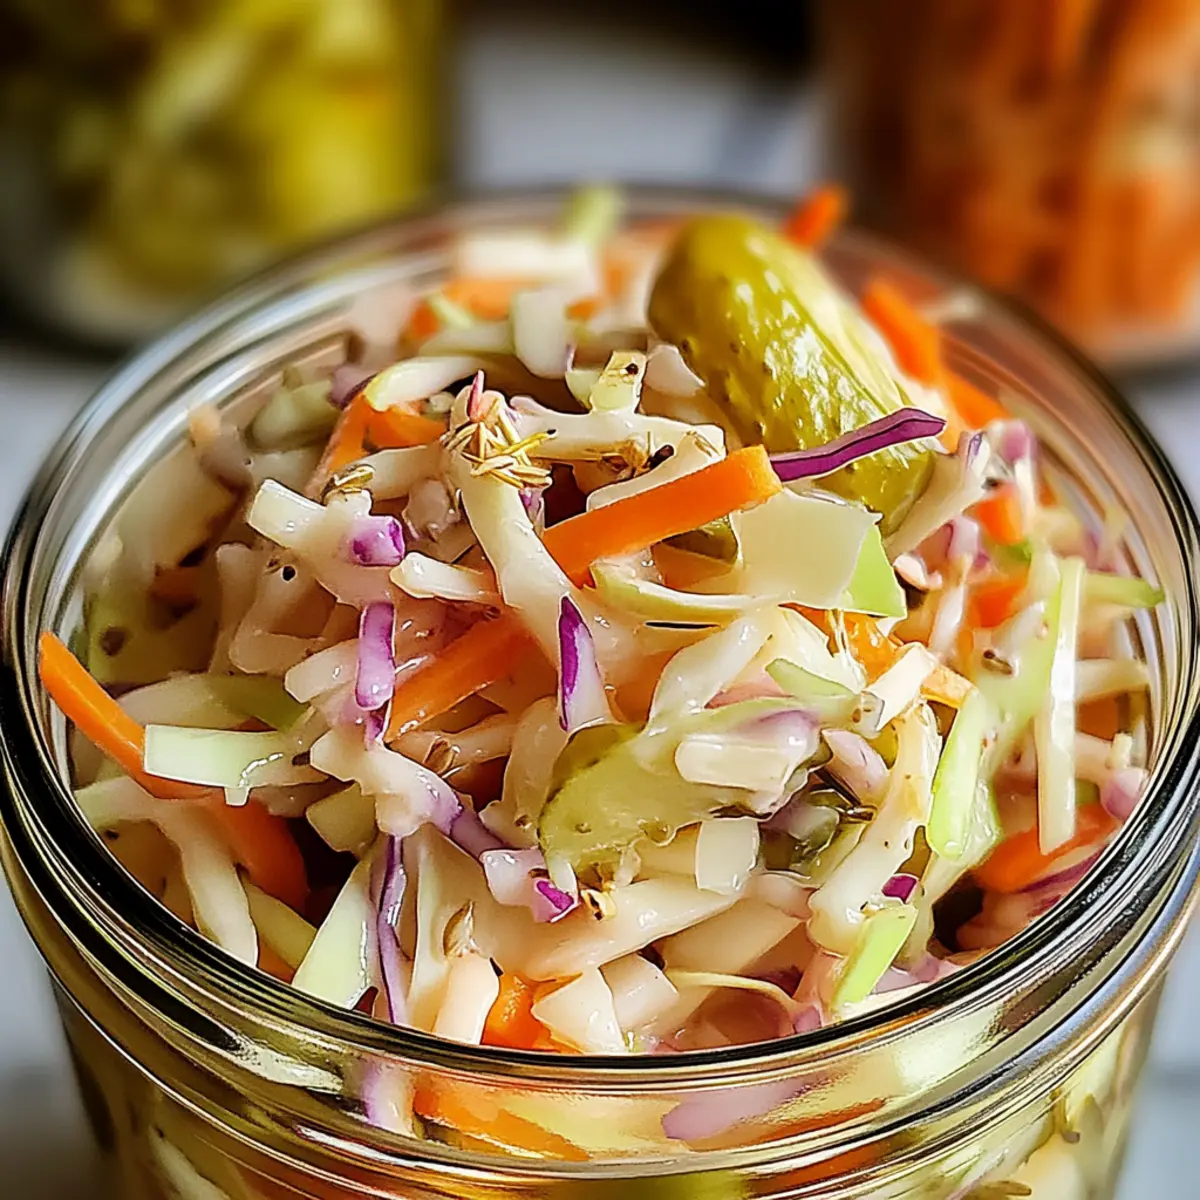
What to Serve with Crunchy Asian Cabbage Slaw

Enjoy the vibrant crunch of this salad alongside an array of delicious accompaniments that enhance your dining experience.

  • Grilled Chicken Skewers: Juicy and smoky, these skewers add a satisfying protein element that pairs beautifully with the refreshing slaw.
  • Rice Noodles: Light and chewy, these noodles serve as a delightful base, bringing an additional texture that complements the crunchy vegetables.
  • Sesame Ginger Tofu: Marinated and sautéed tofu echoes the salad’s flavors, offering a plant-based protein option that’s both hearty and delicious.
  • Miso Soup: This warm and comforting broth adds a soothing element, balancing out the bright and crisp flavors of the slaw.
  • Fresh Spring Rolls: Stuffed with veggies and paired with a savory dipping sauce, these rolls are a crunchy, fresh counterpart that feels light and refreshing.
  • Chilled Sake: This smooth and slightly sweet drink beautifully matches the sesame dressing's nuttiness, elevating the meal experience.
  • Coconut Rice: Creamy and subtly sweet, coconut rice offers a perfect contrast to the tartness of the slaw, creating a harmonious balance on the plate.
  • Lychee Sorbet: As a light dessert, this refreshing treat rounds off your meal with a sweet, tropical finish that echoes the slaw’s zing and zest.

Make Ahead Options

These Crunchy Asian Cabbage Slaw preparations are perfect for busy weeknights! You can chop and combine all the vegetables—green cabbage, red cabbage, carrots, broccoli, and green onions—up to 24 hours in advance, storing them in an airtight container in the refrigerator to maintain freshness. The addictive sesame dressing can also be whipped up and refrigerated for up to 3 days; just remember to give it a good shake before mixing. When ready to serve, simply combine the prepped vegetables with the dressing, then top with crispy chow mein noodles or fried wonton strips for that satisfying crunch. Serving this vibrant slaw will be a breeze while keeping it just as delicious!

Storage Tips for Crunchy Asian Cabbage Slaw

Fridge: Store the dressed slaw in an airtight container in the refrigerator for up to 3 days to maintain its freshness and flavor.

Crispy Toppings: Keep the crispy chow mein noodles or wonton strips in a separate container to ensure they remain crunchy and do not get soggy.

Make-Ahead: For optimal texture, prepare the slaw and dressing separately. Combine them just before serving to enjoy the vibrant crunch of your Crunchy Asian Cabbage Slaw!

Refrigeration Reminder: If you're making this slaw in advance, remember to add the toppings just prior to serving for the best experience.

Expert Tips for Crunchy Asian Cabbage Slaw

  • Keep It Crisp: Make sure to add the crispy toppings right before serving to maintain their delightful crunch in your Crunchy Asian Cabbage Slaw.

  • Customize Your Dressing: Adjust the sesame dressing thickness by adding a little water if too thick, ensuring it coats the slaw perfectly without overpowering the vegetables.

  • Prep Ahead Wisely: If you're making this slaw in advance, store the dressing and vegetables separately to retain freshness and crunch for up to 3 days.

  • Mix and Match: Feel free to experiment with additional proteins, like grilled chicken or tofu, for a heartier salad that still keeps the fresh essence of your slaw.

  • Balance Flavors: Taste the dressing and adjust the sweetness or acidity as needed. A little extra lime juice or honey can enhance the overall flavor profile beautifully.

Crunchy Asian Cabbage Slaw Variations

Feel free to let your creativity shine as you customize this delightful slaw to your own taste!

  • Dairy-Free: Use olive oil instead of sesame oil for a lighter flavor without any dairy.
    Embrace the lightness while still enjoying that crunch!

  • Nut-Free: Skip the sesame seeds and use sunflower seeds for a similar texture without the nuts.
    This keeps it allergy-friendly and just as tasty!

  • Extra Crunch: Add roasted chickpeas to bring in a hearty crunch and a protein boost.
    These will add a delightful texture and make the dish even more satisfying!

  • Spicy Kick: Mix in fresh sliced jalapeños or a dash more sriracha for a fiery punch.
    This variation perfectly complements the slaw's freshness while tantalizing your taste buds.

  • Citrus Zing: Substitute some lime juice with orange juice for a sweet, tangy twist.
    This adds a refreshing brightness that pairs wonderfully with the other flavors.

  • Creamy Addition: Stir in a tablespoon of Greek yogurt or vegan yogurt for a richer dressing experience.
    This twist will give your slaw a creamy texture without losing that vibrant flavor!

  • Herbed Up: Throw in some fresh cilantro or mint for an herby freshness that elevates the dish.
    This simple addition can transform your slaw into a more vibrant, aromatic experience.

For readers looking for more flavor boosts, give our deliciously crunchy Parmesan Artichoke Hearts a try to complement your slaw perfectly!

Crunchy Asian Cabbage Slaw Recipe FAQs

How do I select the best cabbage for the slaw?
Absolutely! When choosing green and red cabbage, look for heads that feel heavy for their size and have tightly packed leaves without dark spots or wilting. Fresh cabbage will feel crisp and firm to the touch. If you're looking for a slightly sweeter flavor, napa cabbage is a wonderful alternative for your Crunchy Asian Cabbage Slaw.

What’s the best way to store the slaw?
To preserve the freshness of your Crunchy Asian Cabbage Slaw, store it in an airtight container in the refrigerator for up to 3 days. Be sure to keep the crispy toppings separate, as storing them together can lead to sogginess. They'll maintain their delightful crunch longer this way!

Can I freeze my Crunchy Asian Cabbage Slaw?
I wouldn't recommend freezing the dressed slaw as the vegetables may lose their crisp texture. However, if you want to prep ahead, you can freeze the shredded cabbage and mixed veggies in a freezer-safe bag for up to 3 months. Just remember to thaw them in the fridge and enjoy fresh toppings for added crunch when you serve!

What if my dressing is too thick?
Very! If your sesame dressing turns out thicker than desired, simply whisk in a small amount of water, one tablespoon at a time, until you achieve your preferred consistency. This will ensure the dressing glides smoothly over your slaw, enhancing those vibrant flavors without overpowering the vegetables.

Are there any dietary considerations for this recipe?
You bet! This Crunchy Asian Cabbage Slaw is suitable for vegetarian and vegan diets. If you're avoiding gluten, make sure to substitute regular soy sauce with tamari or coconut aminos. Also, for those with food allergies, be cautious with toppings like sesame seeds and crispy noodles. Using toasted nuts instead can add a delightful crunch without the allergy concerns!

Crunchy Asian Cabbage Slaw

Crunchy Asian Cabbage Slaw That Will Wow Your Taste Buds

This Crunchy Asian Cabbage Slaw is a healthy, vibrant, and easy side salad, perfect for any meal.
Print Recipe Pin Recipe
Prep Time 15 minutes mins
Total Time 15 minutes mins
Servings: 4 servings
Course: Salads
Cuisine: Asian
Calories: 150
Ingredients Equipment Method Nutrition Notes

Ingredients
  

For the Slaw
  • 4 cups Green Cabbage Provides a crisp texture; substitute with napa cabbage for a different flavor.
  • 2 cups Red Cabbage Adds vibrant color and mild flavor; use more green cabbage if unavailable.
  • 2 medium Carrots Introduces natural sweetness for contrast; replace with shredded zucchini for a lower-carb option.
  • 1 cup Broccoli Adds crunch and nutritional value; substitute with bell peppers for a sweeter touch.
  • 4 tablespoons Green Onions Offer a mild onion flavor; use red onions for a bolder taste.
  • 1 cup Crispy Chow Mein Noodles Contribute delightful crunch; fried wonton strips or toasted nuts are great alternatives.
For the Dressing
  • 2 tablespoons Sesame Seeds Add a nutty finish; can be omitted if preferred.
  • 1/4 cup Rice Vinegar Provides essential tanginess; substitute with apple cider vinegar for a different profile.
  • 3 tablespoons Soy Sauce (or Tamari) Adds umami depth; use coconut aminos for a soy-free version.
  • 1 tablespoon Honey (or Maple Syrup) Sweetens the dressing; adjust as necessary or use agave syrup for a vegan alternative.
  • 2 tablespoons Toasted Sesame Oil Infuses a rich, nutty flavor; regular sesame oil can also be used.
  • 1/4 cup Neutral Oil Balances the dressing, such as canola or vegetable oil.
  • 1 tablespoon Ginger (grated) Provides warmth and a hint of spice; fresh is best, but powdered works too.
  • 1 clove Garlic (minced) Adds depth; shallots are a suitable substitute.
  • 2 tablespoons Lime Juice Brightens flavors; use lemon juice if limes are not on hand.
  • 1 teaspoon Sriracha (optional) Adds heat to the dressing; omit for a milder taste.

Equipment

  • Mixing Bowl
  • Whisk

Method
 

Instructions
  1. Step 1: Prepare the Vegetables. Start by shredding the green and red cabbage, and grate the carrots. Finely chop the broccoli into small, bite-sized pieces, and slice the green onions. This should take about 10 minutes.
  2. Step 2: Make the Dressing. In a medium bowl or jar, whisk together all the dressing ingredients until you achieve a smooth, well-combined dressing that glistens invitingly. This step should take around 5 minutes.
  3. Step 3: Combine the Slaw and Dressing. In your large mixing bowl, add the shredded vegetables and drizzle the dressing over them. Toss gently ensuring every piece is well-coated. This should take about 3-5 minutes.
  4. Step 4: Add the Crunchy Toppings. Right before serving, sprinkle crispy chow mein noodles or fried wonton strips on top of the slaw, and add a generous sprinkle of sesame seeds.
  5. Step 5: Serve and Enjoy. Serve immediately for optimal crunch, or store the dressed slaw in the fridge for up to 3 days, adding toppings just before serving.

Nutrition

Serving: 1servingCalories: 150kcalCarbohydrates: 10gProtein: 3gFat: 10gSaturated Fat: 1gPolyunsaturated Fat: 2gMonounsaturated Fat: 7gSodium: 180mgPotassium: 200mgFiber: 3gSugar: 2gVitamin A: 500IUVitamin C: 30mgCalcium: 50mgIron: 1mg

Notes

Expert tips include keeping the crispy toppings right before serving and storing dressing and veggies separately if made in advance.

Tried this recipe?

Let us know how it was!
  • « Previous Page
  • 1
  • …
  • 11
  • 12
  • 13
  • 14
  • 15
  • …
  • 21
  • Next Page »

Welcome!

Hi, I’m Grace, a Sydney-based home cook with a passion for bold flavors and trending ingredients. Whether you’re a busy beginner or a seasoned foodie, you’ll find dishes here that are fresh, fun, and full of flavor.

More about me

Popular Recipes

  • Honey Sriracha Salmon Bowls
    Delicious Honey Sriracha Salmon Bowls for Quick Dinners
  • Air Fryer Apple Pie Taquitos
    Crispy Air Fryer Apple Pie Taquitos for a Sweet Treat
  • Crispy Parmesan Crusted Cod
    Crispy Parmesan Crusted Cod: A Healthy Flavor Explosion
  • Air Fryer French Toast Bites
    Delicious Air Fryer French Toast Bites for Busy Mornings

Footer

↑ back to top

About

  • Privacy Policy
  • Disclaimer
  • Terms & Conditions

Newsletter

  • Sign Up! for emails and updates

Contact

  • About me
  • Contact me

Copyright © 2025 TastyTrendIngredients