tastytrendingredients

  • Home
  • Recipes
    • Appetizers
    • Breakfast
    • Dessert
    • Dinner
    • Drinks
    • Salads
    • Snacks
    • Soups
  • About me
  • Contact
menu icon
go to homepage
  • Home
  • Recipes
    • Appetizers
    • Breakfast
    • Dessert
    • Dinner
    • Drinks
    • Salads
    • Snacks
    • Soups
  • About me
  • Contact
search icon
Homepage link
  • Home
  • Recipes
    • Appetizers
    • Breakfast
    • Dessert
    • Dinner
    • Drinks
    • Salads
    • Snacks
    • Soups
  • About me
  • Contact
×

Yearwood’s Broccoli Salad: A Creamy Side Dish You’ll Love

February 19, 2026 by Grace Snow Leave a Comment

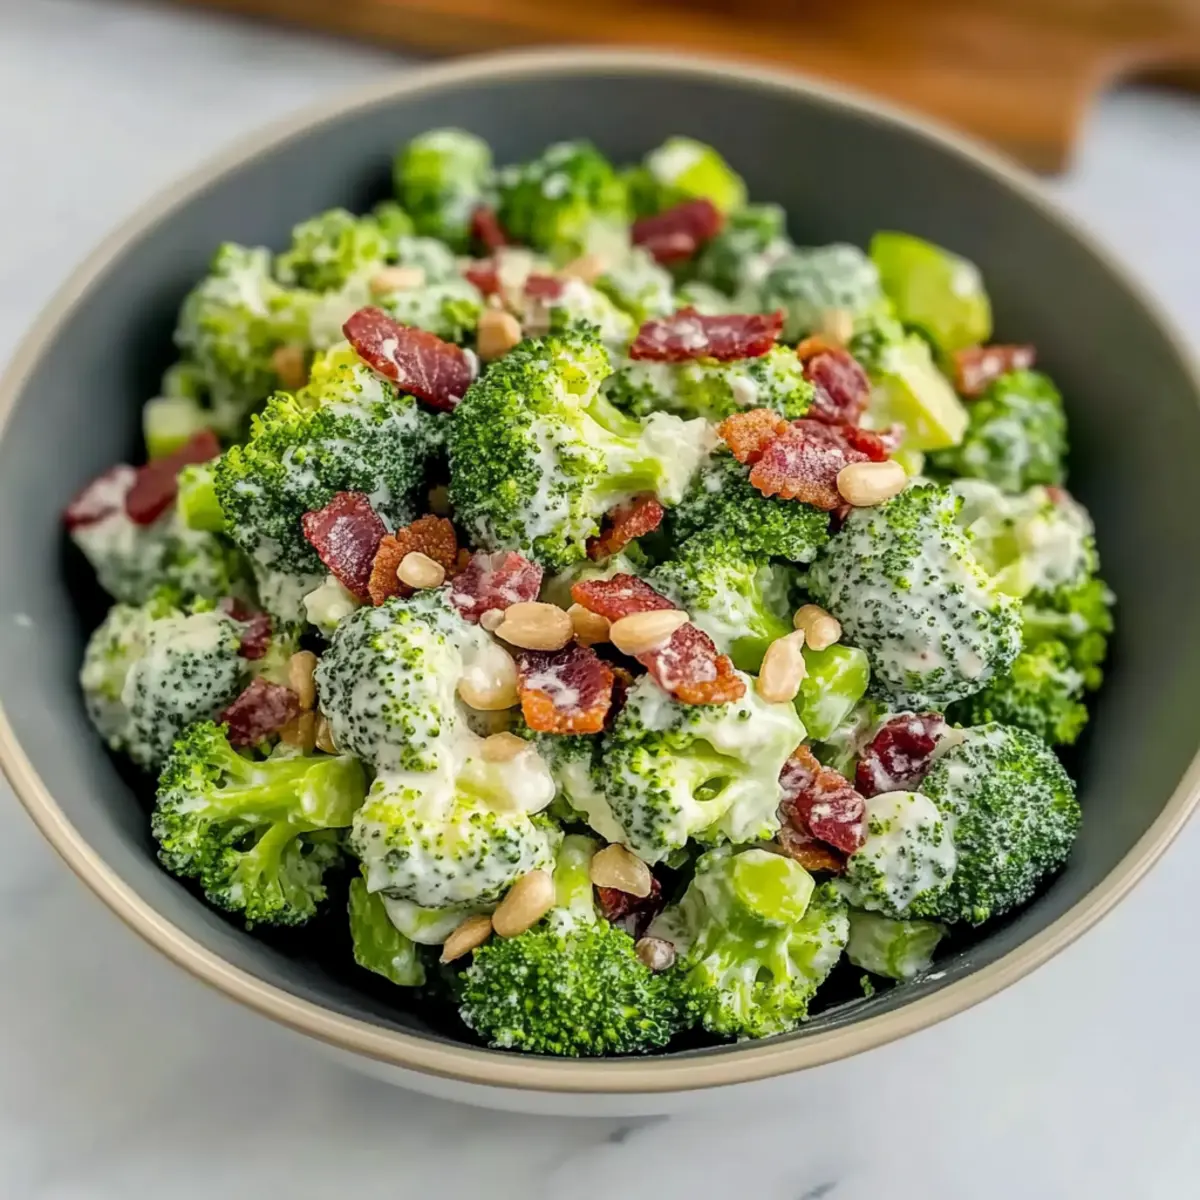
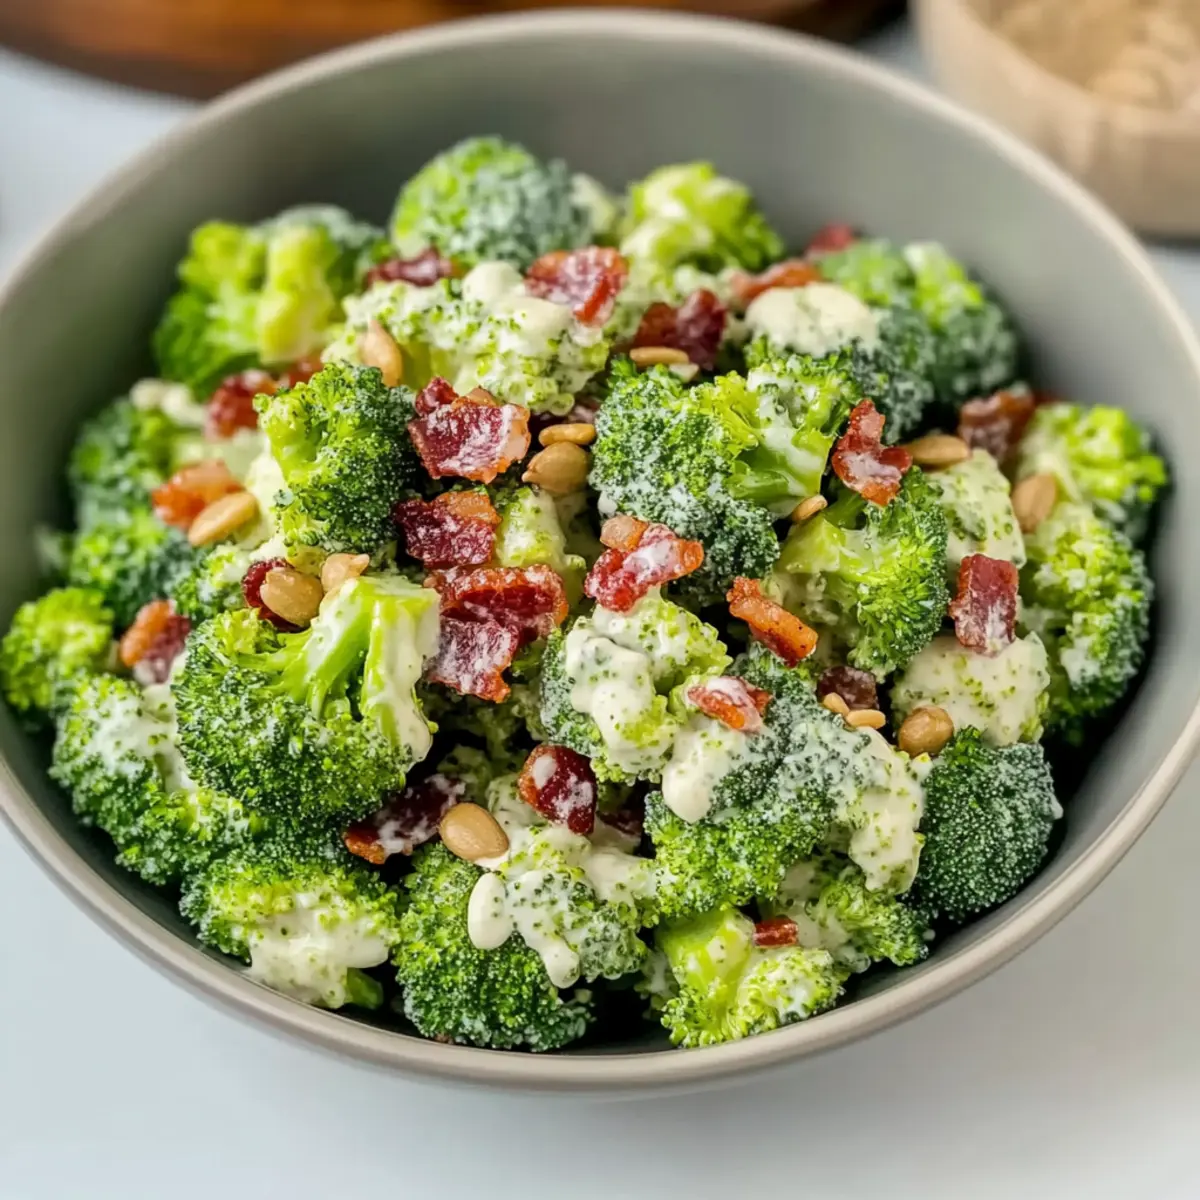
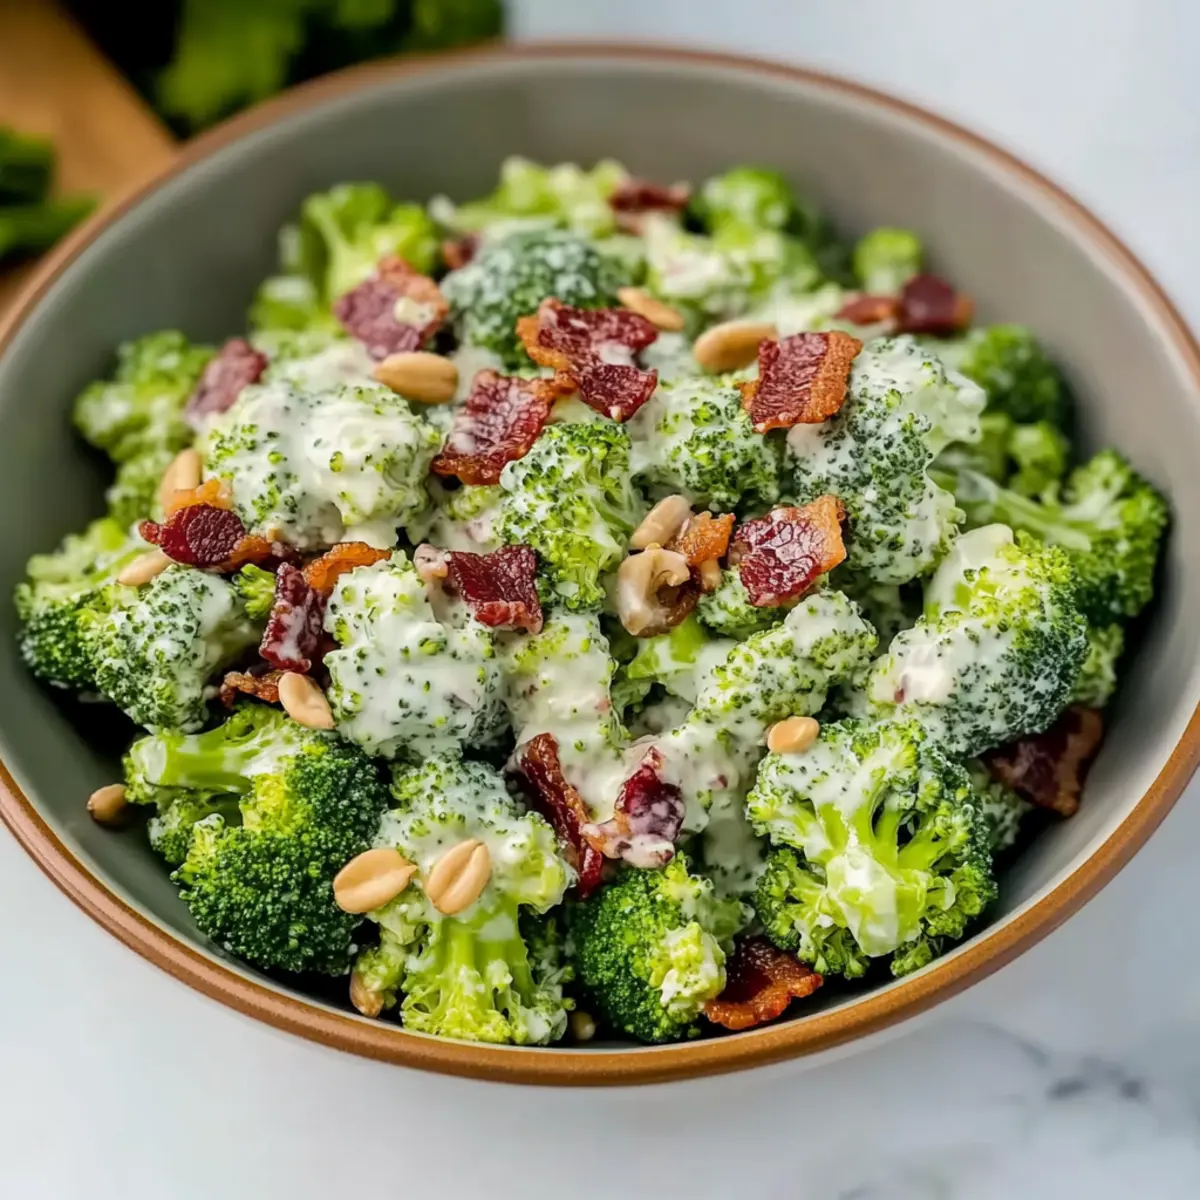
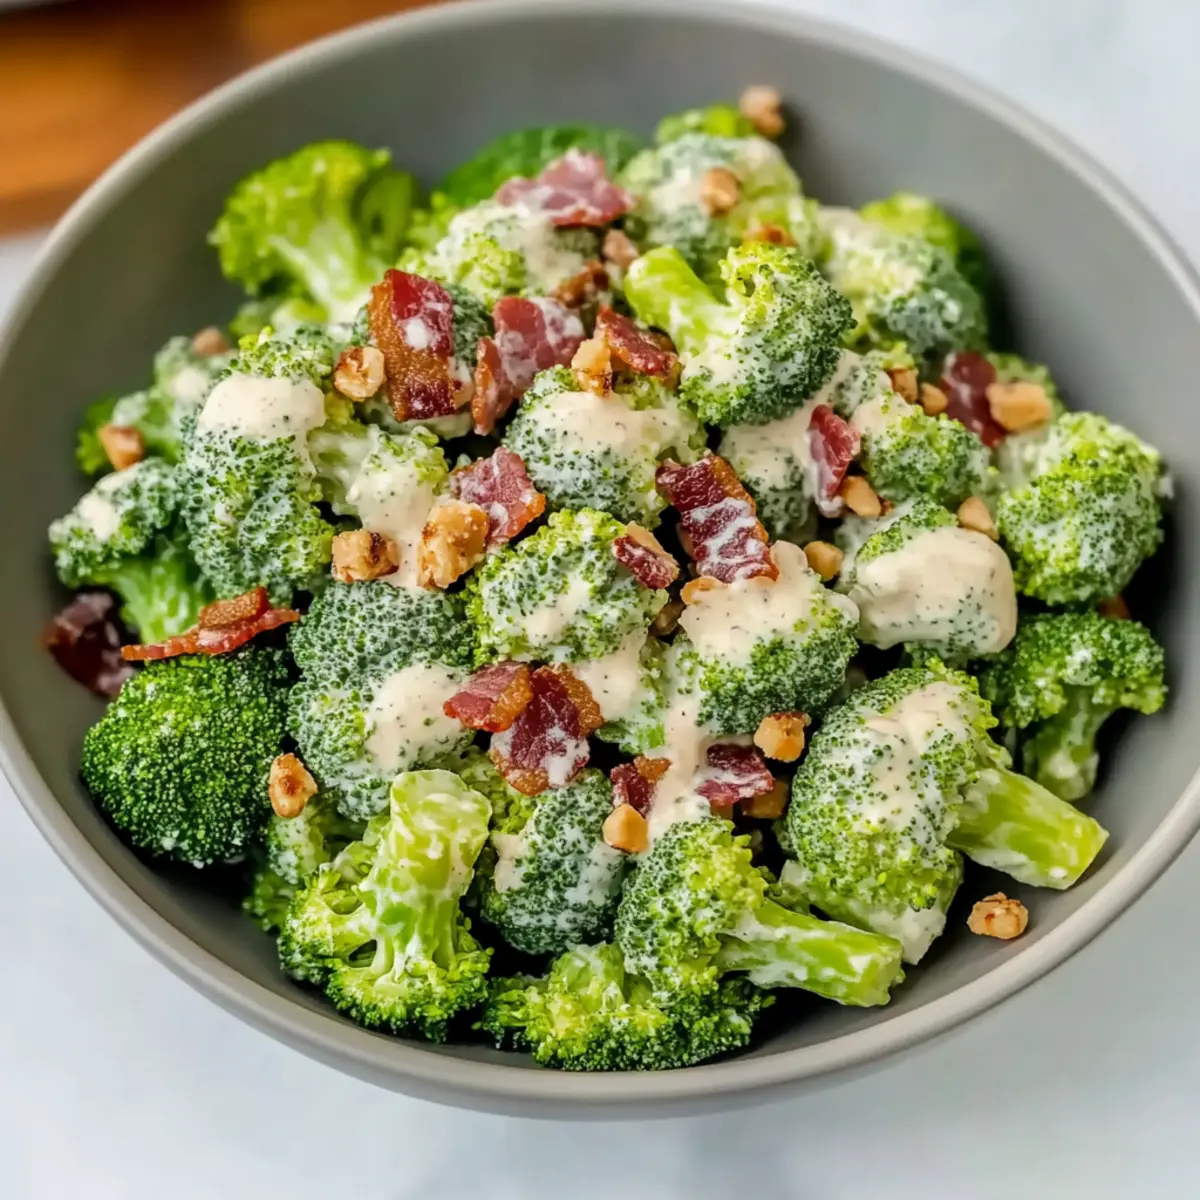
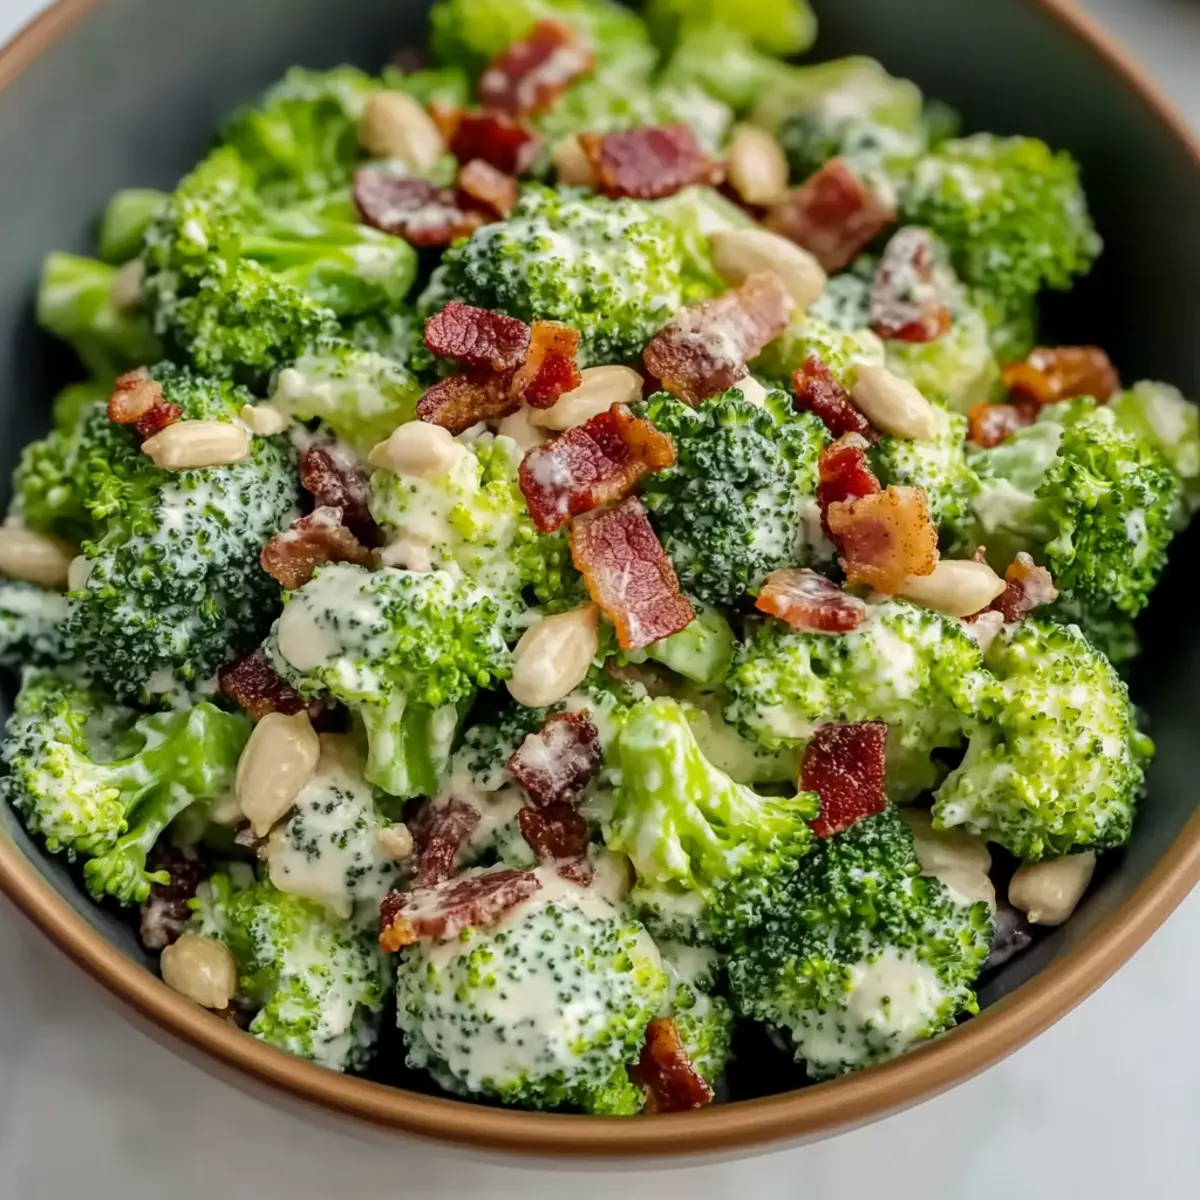
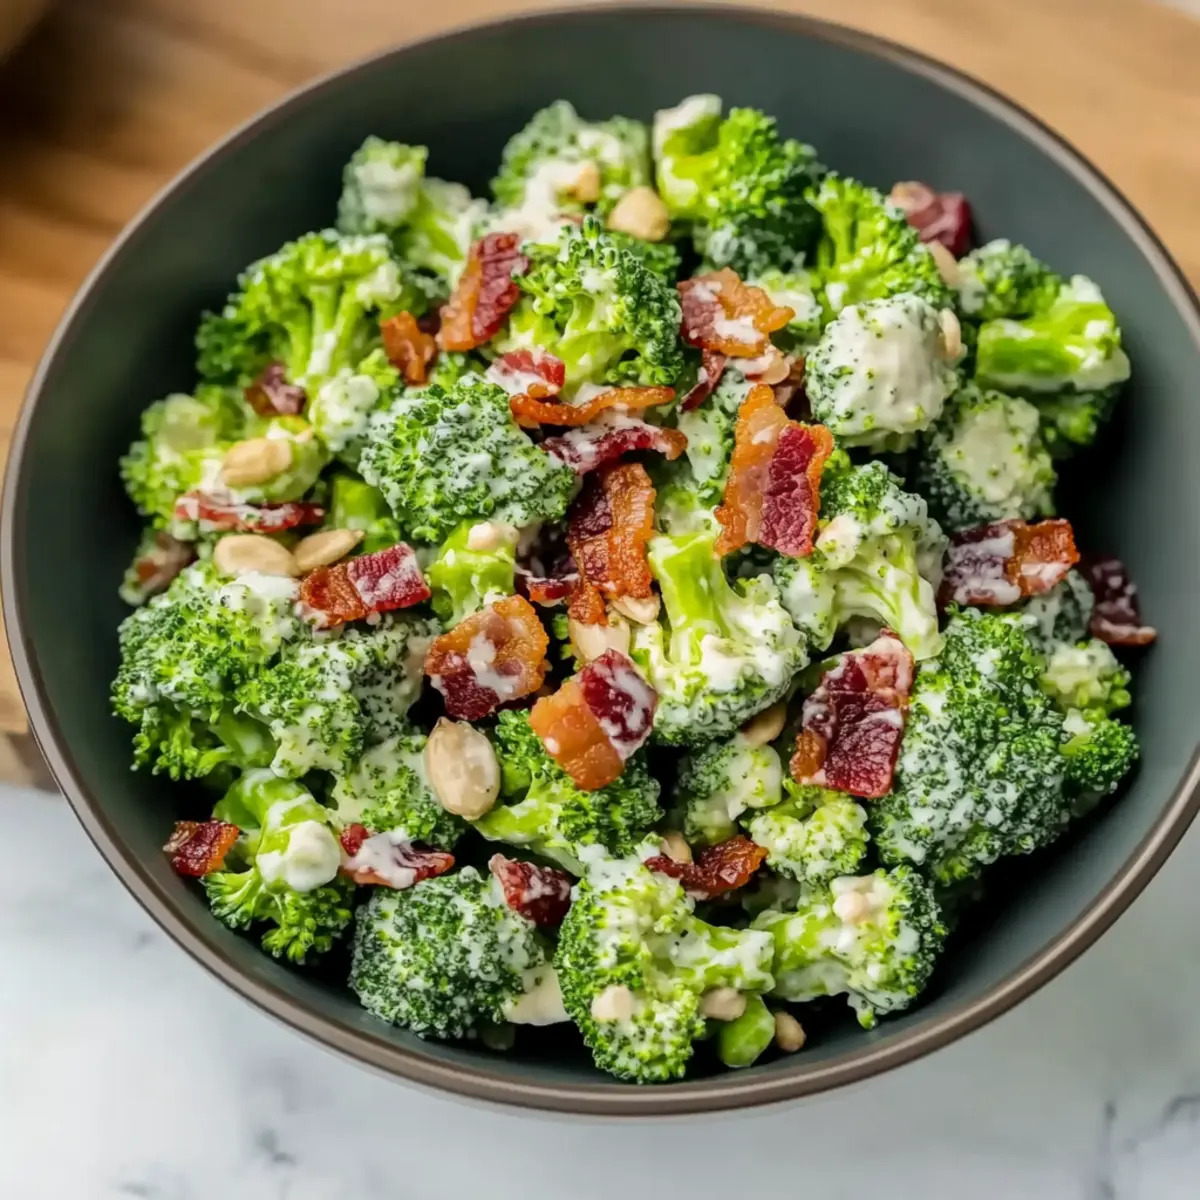
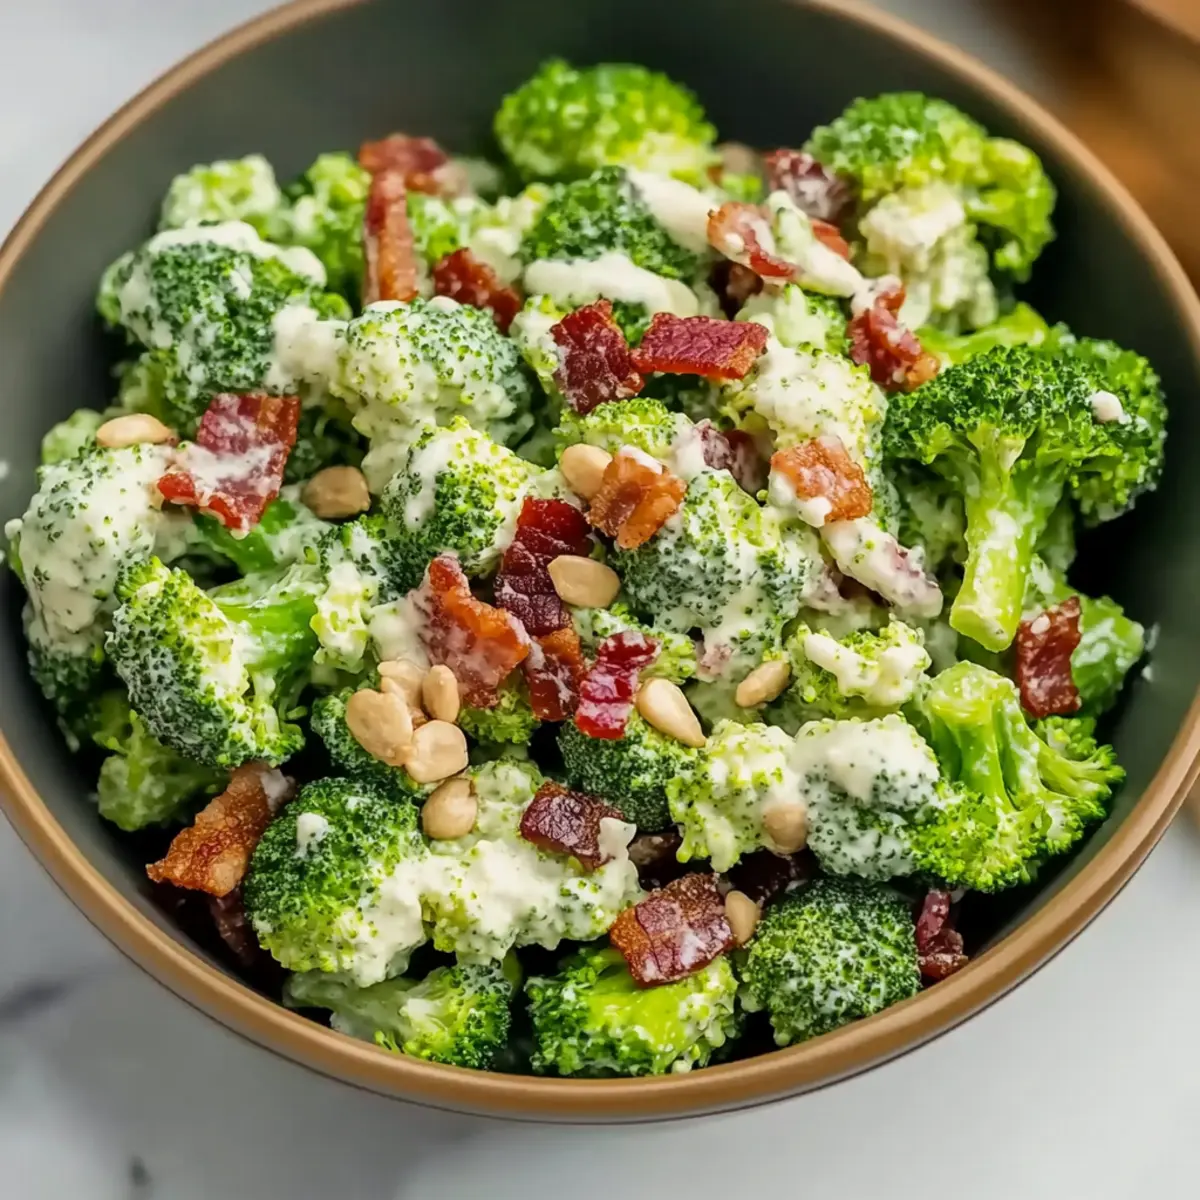
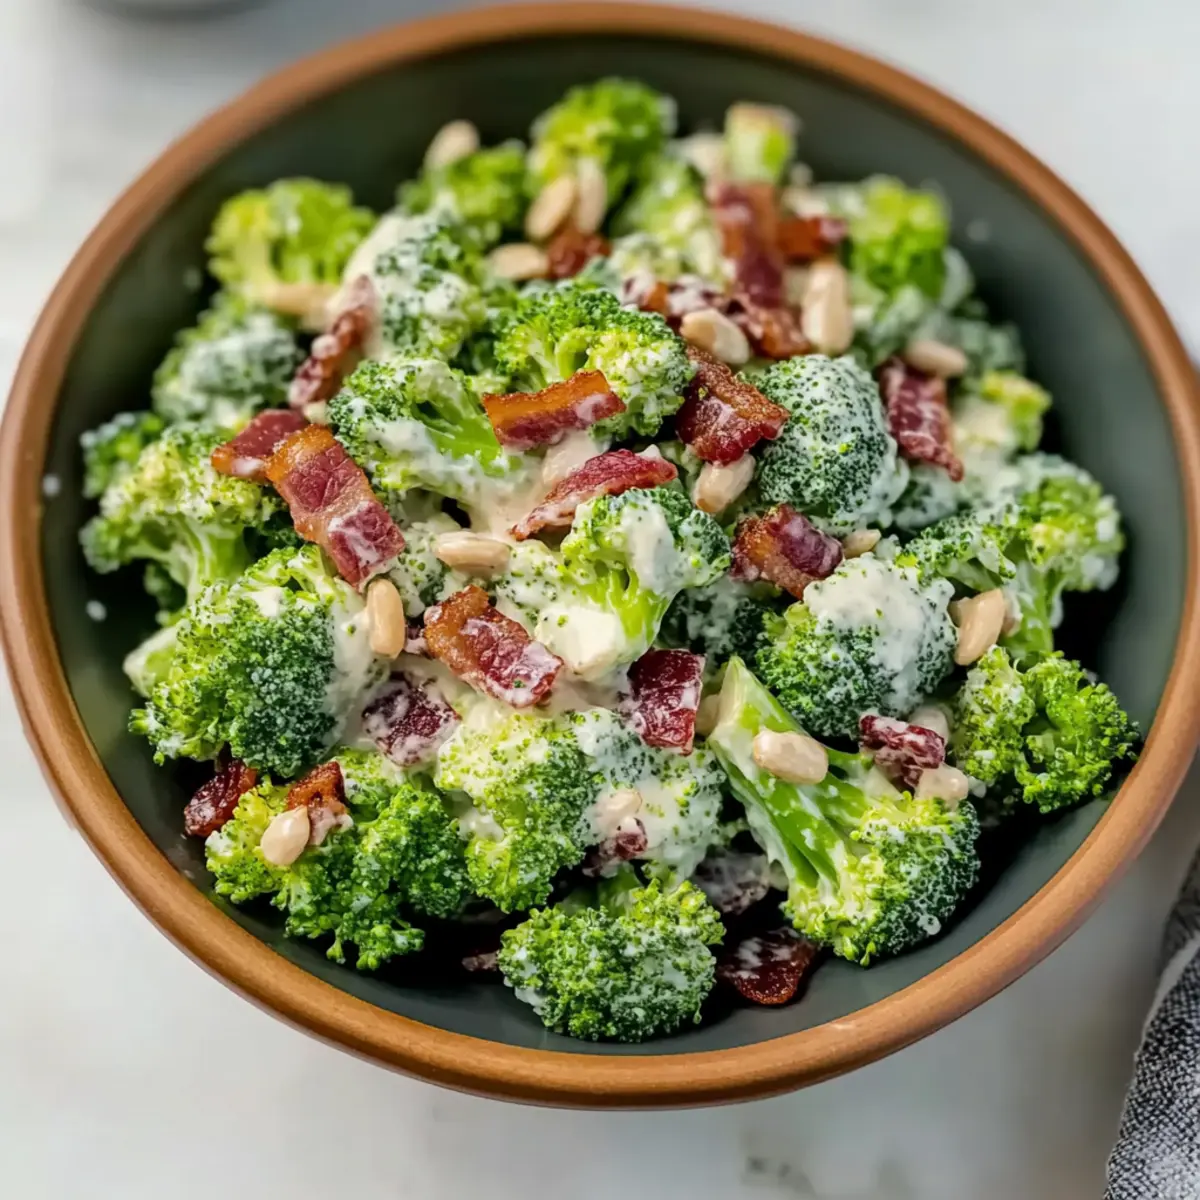
As I stood in my kitchen contemplating what dish would charm my next gathering, the thought of Trisha Yearwood’s Broccoli Salad struck me like a refreshing breeze on a hot summer day. This potluck-friendly side dish brings together the delightful crunch of fresh, blanched broccoli with the savory pop of crispy bacon and a creamy, tangy dressing that’s simply irresistible. Not only is it a crowd-pleaser, but it also comes together in a flash, making it perfect for busy cooks like us. Whether you're cooking for a festive picnic or a casual weeknight dinner, this creamy broccoli salad promises to elevate your meal with effortless flair. Ready to indulge in a vibrant side that’ll have everyone asking for seconds? Let’s dive into this delightful recipe!

Why is Broccoli Salad a Must-Try?

Freshness at Its Finest: The crisp-tender broccoli bursts with flavor, making this a vibrant addition to any meal.
Crowd-Pleasing Favorite: With its creamy dressing and crunchy bacon, it caters to diverse tastes and leaves everyone wanting more.
Quick and Easy: This salad can be whipped up in no time, perfect for busy weeknights or unexpected guests.
Make It Your Own: Feel free to experiment! Try adding dried cranberries instead of raisins or swap bacon for smoked tempeh for a vegetarian twist.
Perfect for Any Occasion: Whether it’s a backyard barbecue or a cozy family dinner, this dish shines on any table.
Transform your gatherings with this delightful salad and check out our Avocado Egg Salad for more wholesome ideas!

Yearwood’s Broccoli Salad Ingredients

For the Salad

  • Fresh Broccoli – Crisp-tender and vibrant; avoid pre-cut to get the freshest flavor.
  • Bacon – Adds an irresistible smoky crunch; cook until crispy for the best texture.
  • Sunflower Seeds – Offers a nutty crunch that enhances the salad's appeal; toss in just before serving.
  • Onion – Provides a mild bite; green onions can be a nice substitute for a fresher twist.
  • Raisins – Delivers a touch of sweetness; you can replace these with dried cranberries for a fruity contrast.

For the Dressing

  • Mayonnaise – The creamy base for the dressing; different brands might need a bit of tweaking.
  • Vinegar – Provides tanginess to balance the creaminess; adjust according to your taste preferences.
  • Sugar – Helps to balance flavors; add a little at a time until it tastes just right.

Enjoy making Yearwood’s Broccoli Salad, a scrumptious addition to any meal!

Step‑by‑Step Instructions for Yearwood’s Broccoli Salad

Step 1: Cook the Bacon
Begin by cutting your bacon into small pieces. Heat a skillet over medium heat and add the bacon, cooking until it’s crispy and golden, about 6-8 minutes. Make sure to stir occasionally for even cooking. Once done, use a slotted spoon to transfer the bacon pieces to a paper towel-lined plate to drain excess grease and remain crispy.

Step 2: Blanch the Broccoli
In a large pot, bring salted water to a rolling boil. Carefully add the fresh broccoli florets and blanch for about 30 seconds until they turn bright green and are slightly tender. Immediately transfer the florets to an ice bath to stop the cooking process, maintaining their vibrant color and crispness. Once cooled, drain the broccoli well and pat dry with paper towels.

Step 3: Prepare the Dressing
In a medium-sized mixing bowl, combine mayonnaise, vinegar, chopped onion, sugar, and raisins. Stir together using a whisk until all ingredients are thoroughly blended and the mixture is smooth. Taste your dressing and adjust the vinegar or sugar to match your preference; this creamy dressing will beautifully coat the broccoli for Yearwood’s Broccoli Salad.

Step 4: Combine Ingredients
In a large mixing bowl, toss the drained broccoli florets with the creamy dressing you just prepared. Gently mix until all the broccoli is evenly coated with the dressing, ensuring that each bite will be flavor-packed. The vibrant green of the broccoli against the creamy dressing is sure to whet your appetite.

Step 5: Refrigerate
Cover the bowl with plastic wrap or transfer the salad to an airtight container. Refrigerate the broccoli salad for at least 1 hour to allow the flavors to meld together beautifully. The salad can even sit longer if desired; just keep it chilled, as this enhances the creaminess and allows the ingredients to marry perfectly.

Step 6: Finish and Serve
Just before serving your gorgeous Yearwood’s Broccoli Salad, fold in the crispy bacon and sunflower seeds, stirring gently to combine. This last-minute addition keeps the bacon crunchy and the Sunflower seeds provide delightful texture. Serve immediately and watch as everyone at the table delights in this creamy and delicious side dish!

What to Serve with Yearwood’s Broccoli Salad

Elevate your meal with these delightful pairings that bring out the best in this creamy salad.

  • Grilled Chicken: Juicy and smoky, grilled chicken complements the salad's crispness while adding heartiness.
  • BBQ Ribs: The rich flavors of BBQ ribs contrast beautifully with the refreshing crunch of broccoli, making for a satisfying feast.
  • Fresh Fruit Salad: A mix of sweet and tart fruit adds a vibrant note that balances the creaminess of the salad, enhancing every bite.
  • Cornbread Muffins: Soft, warm cornbread muffins provide a comforting touch that pairs perfectly with the salad's textures.
  • Chilled White Wine: A glass of chilled Sauvignon Blanc or Pinot Grigio complements the tangy notes of the dressing, making your meal feel special.
  • Potato Chips: For an indulgent crunch, serve with crispy potato chips on the side; their salty flavor offsets the salad's creaminess delightfully.
  • Lemonade: A refreshing glass of homemade lemonade brings a zing that harmonizes well with the rich flavors of Yearwood’s Broccoli Salad.
  • Chocolate Chip Cookies: Round off your gathering with a sweet touch; these classic cookies offer a familiar comfort that everyone adores.

Embrace these pairings and watch them transform your meal into a delightful event, perfect for any occasion!

How to Store and Freeze Yearwood’s Broccoli Salad

Fridge: Store the salad in an airtight container for up to 3-4 days. Keep it chilled to maintain freshness and flavor.

Freezer: Freezing is not recommended for Yearwood’s Broccoli Salad as the creamy dressing may separate and become watery upon thawing.

Reheating: This salad is best enjoyed cold, so no reheating is necessary. Serve immediately after adding crispy bacon and sunflower seeds for optimal crunch.

Make-Ahead Tip: Prepare the salad without the bacon and sunflower seeds in advance, adding them just before serving to maintain all textures.

Yearwood’s Broccoli Salad: Variations & Substitutions

Feel free to let your creativity shine and customize Yearwood’s Broccoli Salad to suit your taste and dietary preferences!

  • Vegetarian Option: Swap bacon for smoked tempeh or simply omit it for a lighter version. It still packs a flavorful punch!
  • Greek Yogurt: Use Greek yogurt in place of mayonnaise for a tangy, protein-rich dressing that lightens up the salad beautifully.
  • Fruit Twist: Replace raisins with dried cranberries or even fresh apple chunks for a refreshing burst of sweetness.
  • Nutty Delight: Add chopped walnuts or pecans for an extra layer of crunch and flavor; they're perfect for nut lovers!
  • Flavor Boost: Incorporate a teaspoon of Dijon mustard into the dressing for a zesty kick that cuts through the creaminess.
  • Spicy Kick: Toss a pinch of red pepper flakes into the dressing for those who enjoy a little heat in every bite.
  • Asparagus Swap: Substitute blanched asparagus for broccoli for a unique twist that offers a slightly different flavor and texture.
  • Herb Infusion: Fresh parsley or dill can elevate the salad’s freshness; stir them in just before serving for an herbaceous touch.

Looking for more delicious side options? Pair your salad with our flavorful Balsamic Steak Salad or enjoy a classic German Potato Salad alongside!

Expert Tips for Yearwood’s Broccoli Salad

  • Blanching Perfectly: Blanch broccoli only until vibrant green, about 30 seconds. This preserves its color and keeps it crisp for Yearwood's Broccoli Salad.
  • Drying Matters: After blanching, make sure to pat the broccoli dry with paper towels to prevent a watery dressing that dilutes flavor.
  • Dressing Adjustments: Different mayonnaise brands can vary in taste. Always taste and adjust vinegar and sugar to achieve your perfect creamy dressing.
  • Timing is Key: Chill the salad for at least an hour before serving. This allows the flavors to marry beautifully and enhances the overall taste.
  • Final Mix: Add the bacon and sunflower seeds just before serving to keep them crispy and ensure a delightful crunch in every bite.

Make Ahead Options

Trisha Yearwood’s Broccoli Salad is a fantastic choice for meal prep, allowing you to save time in the kitchen! You can prepare the broccoli and creamy dressing up to 24 hours in advance. Simply blanch the broccoli, let it cool, and store it in an airtight container in the refrigerator. Prepare the dressing separately and refrigerate it as well. This keeps the ingredients fresh and prevents the broccoli from becoming soggy. When you're ready to serve, just toss the blanched broccoli with the dressing, fold in the crispy bacon and sunflower seeds, and enjoy your salad just as delicious and vibrant as when freshly made! This strategy ensures you have a flavorful side ready at a moment's notice.

Yearwood’s Broccoli Salad Recipe FAQs

How do I select the best broccoli for this salad?
Absolutely! Look for fresh broccoli with firm stalks and dark green florets. Avoid pre-cut broccoli, as it tends to lose flavor and texture. You want crisp-tender broccoli that’s vibrant and bright—if you see any dark spots or wilting, it’s best to skip it.

How should I store Yearwood’s Broccoli Salad?
To keep it fresh, store your broccoli salad in an airtight container in the refrigerator for up to 3-4 days. Make sure to keep it cool and avoid prolonged exposure to heat for the best flavor and texture.

Can I freeze Yearwood’s Broccoli Salad?
Freezing is not recommended for this creamy salad. The mayonnaise-based dressing can separate and become watery upon thawing, ruining the texture. If you need to prepare ahead, I suggest making the salad without adding the bacon and sunflower seeds, which you can stir in just before serving.

What do I do if my broccoli salad becomes too watery?
If you find your salad is on the watery side, that can often be due to the broccoli not being patted dry enough after blanching. Always ensure to dry it thoroughly to help the dressing adhere better. Additionally, if the salad sits too long before serving, it’s good practice to add a bit more mayonnaise or sour cream to thicken it back up.

Are there any dietary considerations for Yearwood’s Broccoli Salad?
If you're cooking for guests with allergies, keep in mind that this salad contains mayonnaise, which some may be allergic to. For a lighter dairy-free alternative, consider using a plant-based mayonnaise or Greek yogurt, adjusting the dressing ingredients to maintain the creamy consistency. Always check for any specific dietary needs when planning to serve this salad.

Yearwood’s Broccoli Salad

Yearwood’s Broccoli Salad: A Creamy Side Dish You’ll Love

Experience Yearwood’s Broccoli Salad, a delightful creamy side that's perfect for gatherings and packed with flavor.
Print Recipe Pin Recipe
Prep Time 15 minutes mins
Cook Time 8 minutes mins
Refrigeration Time 1 hour hr
Total Time 1 hour hr 23 minutes mins
Servings: 6 servings
Course: Salads
Cuisine: American
Calories: 250
Ingredients Equipment Method Nutrition Notes

Ingredients
  

For the Salad
  • 4 cups fresh broccoli florets avoid pre-cut to get the freshest flavor
  • 6 slices bacon cook until crispy
  • 1/2 cup sunflower seeds toss in just before serving
  • 1/4 cup onion can substitute with green onions
  • 1/2 cup raisins can substitute with dried cranberries
For the Dressing
  • 1 cup mayonnaise the creamy base for the dressing
  • 2 tablespoons vinegar adjust to taste
  • 1 tablespoon sugar add a little at a time

Equipment

  • Skillet
  • Large pot
  • Mixing Bowl
  • Whisk
  • slotted spoon

Method
 

Step-by-Step Instructions
  1. Cook the bacon by cutting it into small pieces and heating it in a skillet over medium heat for 6-8 minutes until crispy.
  2. Blanch the broccoli in boiling salted water for 30 seconds until bright green, then transfer to an ice bath.
  3. Prepare the dressing by mixing mayonnaise, vinegar, onion, sugar, and raisins in a bowl until smooth.
  4. Combine the broccoli with the creamy dressing in a large bowl, mixing gently until fully coated.
  5. Refrigerate the salad for at least 1 hour to meld flavors better.
  6. Before serving, fold in the crispy bacon and sunflower seeds gently to maintain their texture.

Nutrition

Serving: 1servingCalories: 250kcalCarbohydrates: 20gProtein: 5gFat: 18gSaturated Fat: 3gPolyunsaturated Fat: 5gMonounsaturated Fat: 8gCholesterol: 15mgSodium: 400mgPotassium: 300mgFiber: 3gSugar: 6gVitamin A: 500IUVitamin C: 60mgCalcium: 50mgIron: 1mg

Notes

For the best flavor and texture, enjoy chilled and serve immediately after adding bacon and sunflower seeds.

Tried this recipe?

Let us know how it was!

Yearwood’s Broccoli Salad: A Creamy, Crunchy Delight!

February 19, 2026 by Grace Snow Leave a Comment

A quick glance at my fridge revealed an abundance of fresh broccoli, and I knew it was time to whip up a delightful dish. Trisha Yearwood's Broccoli Salad became my focus—a creamy, crunchy medley that’s hard to resist! This recipe not only showcases vibrant green florets but also incorporates crispy bacon and sunflower seeds for added texture. It's the perfect make-ahead option for those busy summer days or potluck gatherings, saving you time while still impressing your guests. Plus, the tangy mayonnaise dressing ties everything together beautifully, allowing the flavors to develop as it chills. Ready to transform a simple veggie into a show-stopping side? Let’s dive into the steps for creating this delicious Yearwood’s Broccoli Salad!

Why is Yearwood’s Broccoli Salad a Must-Try?

Simplicity at Its Best: The recipe is easy to follow, making it perfect for both novice cooks and seasoned chefs alike.

Flavor Explosion: The crispy bacon and crunchy sunflower seeds deliver a savory punch that elevates this simple salad.

Make-Ahead Magic: It can be prepared in advance, making it a fantastic option for stress-free entertaining or potlucks. Imagine your guests' delighted faces when they taste this classic dish!

Versatile Ingredients: Feel free to customize with your favorite nuts or even substitute bacon for a vegetarian twist while still enjoying that creamy goodness.

Crowd-Pleasing Appeal: Nearly everyone loves a great broccoli salad and this one is guaranteed to disappear quickly at your next gathering. Whether served alongside grilled meats or as a standalone dish, it truly shines!

For more refreshing sides, consider trying out my Jello Salad Cottage or the delightful Avocado Egg Salad for variety!

Yearwood’s Broccoli Salad Ingredients

• Get ready to gather!

For the Salad

  • Fresh Broccoli – Aim for vibrant green florets for the best flavor and crunch.
  • Bacon – Choose thick-cut bacon for ultimate crispiness; fry until golden and crunchy.
  • Sunflower Seeds – Toss these in just before serving to keep their delightful crunch.
  • Raisins – Optional but recommended; they add a sweet contrast to the savory elements.

For the Dressing

  • Mayonnaise – A creamy base that provides luscious texture; consider a tangy variety.
  • Vinegar – Use apple cider or white wine vinegar to introduce a zesty kick.
  • Onion – Red or white, finely chopped to enhance the flavor profile; adjust based on your preference.
  • Sugar – A small amount helps balance the tanginess of the vinegar, but adjust to taste.

This classic Yearwood’s Broccoli Salad combines simple yet adaptable ingredients, making it a delightful addition to any meal!

Step‑by‑Step Instructions for Yearwood’s Broccoli Salad

Step 1: Cook the Bacon
Start by chopping the thick-cut bacon into small pieces and place them in a skillet over medium heat. Cook the bacon for about 8-10 minutes, stirring occasionally, until it's crispy and golden brown. Once done, carefully drain the bacon on a paper towel-lined plate to absorb excess grease and set it aside to cool while you prepare the salad.

Step 2: Blanch the Broccoli
In a large saucepan, bring salted water to a rapid boil. Once boiling, add the fresh broccoli florets and blanch them for exactly 3 minutes until they turn bright green and slightly tender. After the timer goes off, quickly transfer the broccoli to a bowl filled with ice water to stop the cooking process, preserving that vibrant color and crispness.

Step 3: Drain and Dry the Broccoli
After the broccoli has cooled in the ice water for about 5 minutes, drain it thoroughly in a colander. To ensure the salad dressing stays creamy and doesn’t become watery, pat the broccoli dry with paper towels, absorbing any excess moisture. Set the broccoli aside to make room for the dressing.

Step 4: Mix the Dressing
In a mixing bowl, whisk together mayonnaise, vinegar, finely chopped onion, sugar, and optional raisins until smooth. The dressing should be creamy with a balanced tang. Taste and adjust the vinegar or sugar as needed based on your preference, remembering that different mayonnaises can slightly alter the flavor of Yearwood’s Broccoli Salad.

Step 5: Combine Broccoli and Dressing
Once your dressing is ready, add the cooled, dry broccoli to the bowl. Gently toss the broccoli with the dressing until every floret is evenly coated. This mingling of flavors is essential for a delicious Yearwood’s Broccoli Salad, so take your time to ensure everything is well combined.

Step 6: Chill the Salad
Cover the mixing bowl with plastic wrap or transfer the salad to an airtight container and refrigerate for at least 1 hour. This chilling time allows the flavors to meld beautifully, enhancing the overall taste of the salad, making it an irresistible dish for your next gathering or potluck.

Step 7: Add Crunch at Serving Time
When you are ready to serve your Yearwood’s Broccoli Salad, gently fold in the reserved crispy bacon and sunflower seeds. This will ensure the bacon stays crunchy and the sunflower seeds add that delightful texture. Serve immediately to your guests for a fresh, vibrant side dish that’s sure to impress!

Expert Tips for Yearwood’s Broccoli Salad

  • Perfect Blanching: Blanch broccoli for exactly 3 minutes to ensure it's crisp-tender—overcooking can lead to a mushy texture.

  • Dry It Well: Pat the blanched broccoli thoroughly to avoid a watery dressing, which can dilute the flavors of Yearwood’s Broccoli Salad.

  • Add Crunch Last: Stir in bacon and sunflower seeds just before serving to maintain their delightful crunch.

  • Taste & Adjust: Different brands of mayonnaise can vary in tanginess, so taste your dressing and adjust vinegar and sugar to your liking.

  • Optional Additions: Feel free to throw in other ingredients, like diced bell peppers or nuts, to create your own twist on this beloved classic!

What to Serve with Yearwood’s Broccoli Salad

A vibrant spread awaits you, perfectly complementing the creamy crunch of this delightful salad.

  • Grilled Chicken: Juicy grilled chicken adds a smoky flavor that pairs beautifully with the freshness of the broccoli salad.
  • Pulled Pork Sandwiches: The tangy richness of pulled pork contrasts nicely with the crisp salad, creating a satisfying balance at your gathering.
  • Cornbread Muffins: Savory cornbread muffins introduce a comforting touch and a hint of sweetness, enhancing the overall meal experience.
  • Caprese Skewers: Fresh tomatoes and basil drizzled with balsamic glaze offer bright flavors that harmonize with the creaminess of the salad.
  • Potato Chips: Crunchy potato chips provide an irresistible crunch that mirrors the textures found in the salad while adding a casual element.
  • White Wine Spritzer: A refreshing spritzer blended with crisp white wine and club soda complements the creamy and tangy elements of this salad.
  • Fruit Salad: A light, vibrant fruit salad introduces a sweet contrast to the savory notes, keeping every bite exciting and fresh.
  • Chocolate Chip Cookies: For a sweet finish, classic chocolate chip cookies serve as a delightful treat, bringing comfort to the end of your meal.

Make Ahead Options

These Yearwood’s Broccoli Salad ingredients are perfect for meal prep, allowing you to enjoy a delightful dish whenever you need it! You can blanch and dry the broccoli up to 3 days in advance, storing it in an airtight container in the refrigerator to maintain its crispness. Additionally, prepare the creamy dressing (without the bacon and sunflower seeds) up to 24 hours prior, which will allow the flavors to meld beautifully. When you’re ready to serve, simply combine the broccoli and dressing in a bowl, gently fold in the reserved crispy bacon and sunflower seeds to preserve their crunch, and you’ll have an impressive, make-ahead salad that tastes just as delicious as when freshly made!

Yearwood’s Broccoli Salad Variations

Get ready to explore delightful twists on this beloved broccoli salad that will tickle your taste buds!

  • Nutty Boost: Substitute sunflower seeds with roasted almonds or walnuts for an exciting crunch that deepens the flavor profile.

  • Vegetarian Delight: Swap out bacon for crispy chickpeas or tempeh for a plant-based version that doesn’t skimp on taste.

  • Sweet and Savory: Add diced apples or pears for a sweet contrast that complements the savory dressing beautifully.

  • Creamy Avocado: Incorporate mashed avocado as a creamy dressing alternative, adding healthy fats while enhancing the texture.

  • Spicy Kick: Toss in a bit of diced jalapeño or red pepper flakes to bring a delightful heat that elevates the salad.

  • Herb Infusion: Sprinkle in fresh herbs like dill or parsley to enhance the salad with aromatic freshness that brightens every bite.

  • Colorful Veggies: Mix in shredded carrots or red bell pepper for extra color and sweetness, making the dish even more visually appealing.

  • Zingy Citrus: Squeeze some fresh lemon or lime juice into the dressing for a lively citrus kick that dances on your palate.

Feel free to experiment with these variations or get inspired to create your own! When you’re ready for more delicious recipes, don’t miss out on my savory Balsamic Steak Salad or the comforting classic, German Potato Salad.

How to Store and Freeze Yearwood’s Broccoli Salad

Fridge: Store the salad in an airtight container for up to 3-4 days. Remember, the bacon may lose its crispiness, so add it just before serving for that delightful crunch!

Make-Ahead: This salad is a fantastic make-ahead dish. Prepare it ahead of time, allowing the flavors to meld beautifully while staying fresh in the fridge.

Freezer: For best results, avoid freezing the salad. The texture of broccoli and bacon may be compromised upon thawing, making it less enjoyable.

Reheating: This delicious Yearwood’s Broccoli Salad is best served cold. If needed, gently mix in a bit of fresh dressing after refrigeration for an added flavor boost.

Yearwood’s Broccoli Salad Recipe FAQs

What type of broccoli should I use for Yearwood’s Broccoli Salad?
Absolutely! For the best flavor and texture, choose fresh broccoli heads that feature tight, dark green florets. Avoid any heads that have yellowing or soft spots, as these are indicators of age and loss of quality.


How long can I store Yearwood’s Broccoli Salad in the fridge?
You can store the salad in an airtight container in the refrigerator for up to 3-4 days. Just keep in mind that the bacon may lose its crunch, so it’s best to add it fresh right before serving to maintain that delightful texture!


Can I freeze Yearwood’s Broccoli Salad?
I recommend avoiding freezing this salad. The texture of the broccoli and the crispy bacon can suffer significantly when thawed, resulting in a less enjoyable dish. It’s best enjoyed fresh, so plan to make it and store it in the fridge instead!


How can I ensure the dressing doesn’t become watery?
Very good question! Make sure to pat the blanched broccoli completely dry with paper towels after draining it. This step is essential to prevent excess moisture from diluting the dressing’s flavor, allowing the creamy texture to shine through.


Are there any dietary considerations for Yearwood’s Broccoli Salad?
If you’re preparing this salad for someone with dietary restrictions, you can easily customize it! For a vegetarian version, swap out bacon for a plant-based alternative. Additionally, if you know of allergies, make sure to double-check that none of your ingredients, like mayonnaise or sunflower seeds, contain allergens.


What should I do if I find the dressing too tangy or sweet?
Don’t worry! It’s perfectly fine to adjust the dressing to your taste. Start with a bit of sugar or vinegar, adding small increments while tasting until you reach your desired balance. Remember, using different brands of mayonnaise can slightly change the overall flavor, so always taste test to get it just right!

Yearwood’s Broccoli Salad

Yearwood’s Broccoli Salad: A Creamy, Crunchy Delight!

A creamy, crunchy Yearwood’s Broccoli Salad with bacon and sunflower seeds, perfect for gatherings.
Print Recipe Pin Recipe
Prep Time 15 minutes mins
Cook Time 10 minutes mins
Chilling Time 1 hour hr
Total Time 1 hour hr 25 minutes mins
Servings: 6 servings
Course: Salads
Cuisine: American
Calories: 250
Ingredients Equipment Method Nutrition Notes

Ingredients
  

For the Salad
  • 4 cups Fresh Broccoli florets Aim for vibrant green florets
  • 8 slices Thick-cut Bacon Fry until golden and crunchy
  • 1/2 cup Sunflower Seeds Toss in just before serving
  • 1/2 cup Raisins Optional but recommended
For the Dressing
  • 1 cup Mayonnaise Consider a tangy variety
  • 2 tablespoons Vinegar Apple cider or white wine vinegar
  • 1/4 cup Finely chopped Onion Red or white, adjust based on preference
  • 1 tablespoon Sugar Adjust to taste

Equipment

  • Skillet
  • Large saucepan
  • Mixing Bowl
  • Colander

Method
 

Step-by-Step Instructions
  1. Cook the Bacon: Chop bacon into small pieces and cook in a skillet over medium heat for 8-10 minutes until crispy. Drain on a paper towel-lined plate.
  2. Blanch the Broccoli: Bring salted water to boil, add broccoli florets, and blanch for 3 minutes. Transfer to ice water to stop cooking.
  3. Drain and Dry the Broccoli: After cooling, drain the broccoli and pat dry to avoid watery dressing.
  4. Mix the Dressing: Whisk together mayonnaise, vinegar, onion, sugar, and optional raisins until smooth.
  5. Combine Broccoli and Dressing: Toss cooled broccoli with the dressing until evenly coated.
  6. Chill the Salad: Cover and refrigerate for at least 1 hour to meld flavors.
  7. Add Crunch at Serving Time: Fold in crispy bacon and sunflower seeds just before serving.

Nutrition

Serving: 1servingCalories: 250kcalCarbohydrates: 15gProtein: 7gFat: 20gSaturated Fat: 4gPolyunsaturated Fat: 6gMonounsaturated Fat: 10gCholesterol: 20mgSodium: 300mgPotassium: 250mgFiber: 3gSugar: 5gVitamin A: 500IUVitamin C: 70mgCalcium: 30mgIron: 1mg

Notes

Best served cold. Add bacon just before serving for crunch.

Tried this recipe?

Let us know how it was!

Bright and Zesty Green Bean Salad for Fresh Flavor Boost

February 17, 2026 by Grace Snow Leave a Comment

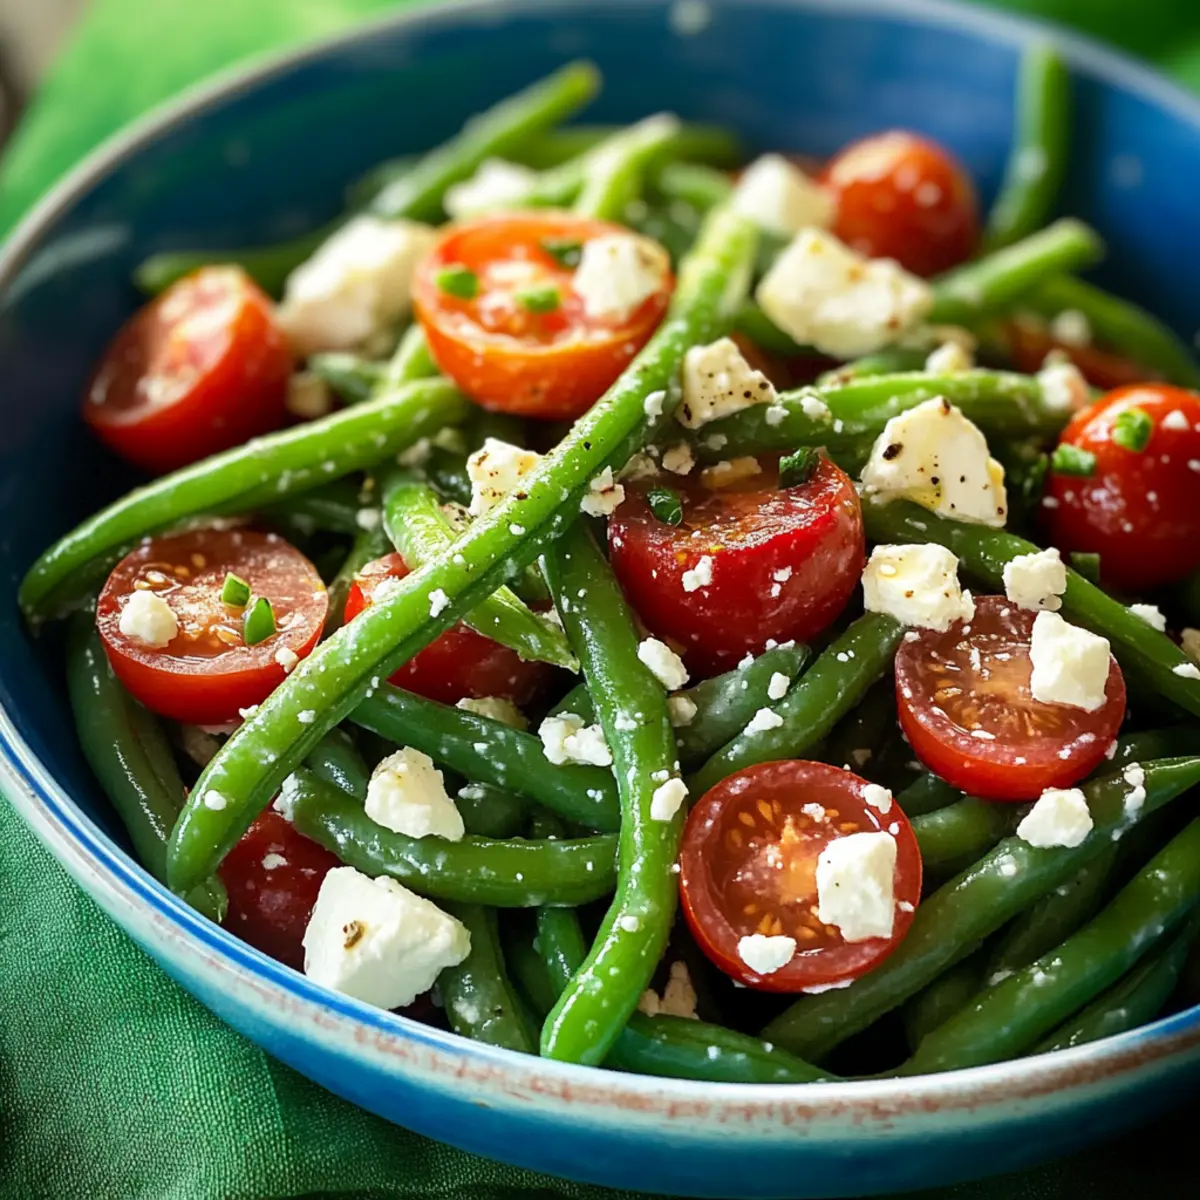
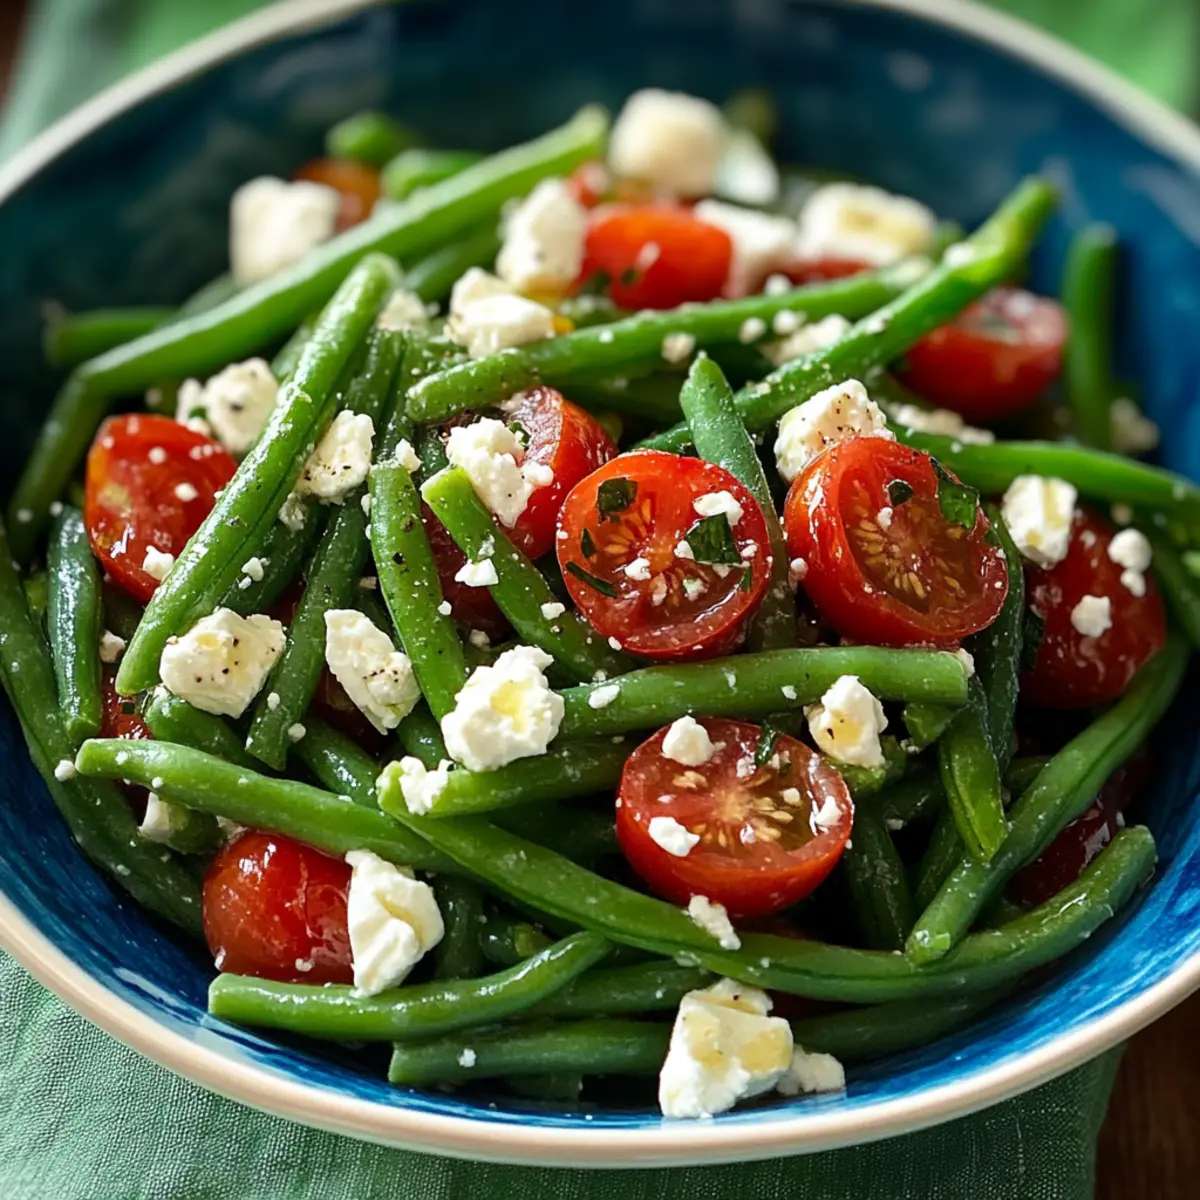
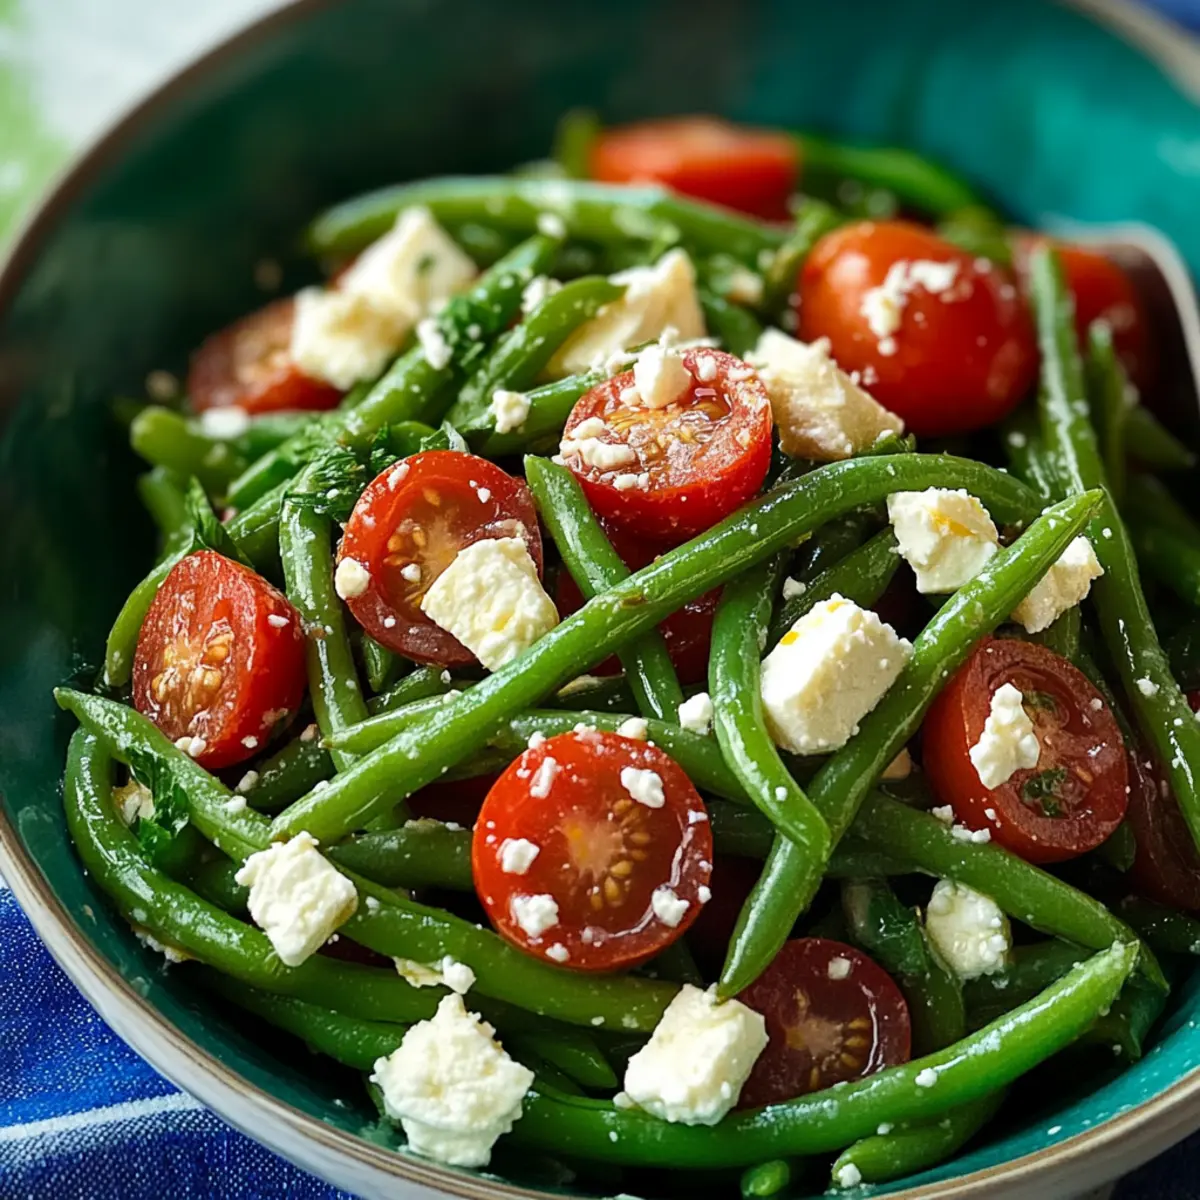
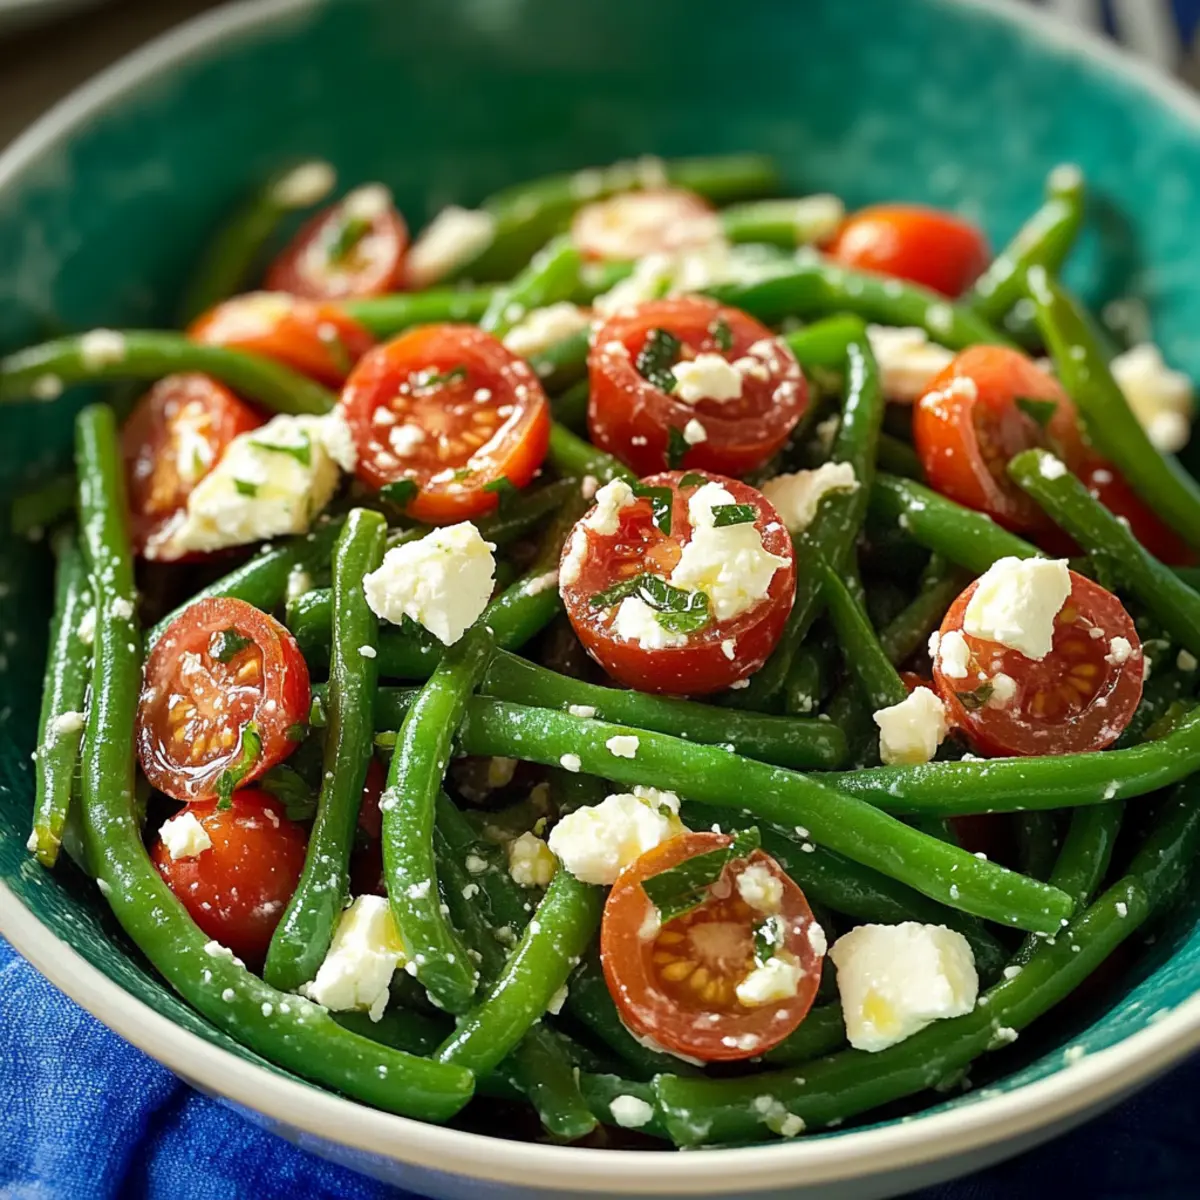
A quick step into my kitchen transformed an ordinary weeknight into a flavorful escape, thanks to this Zesty Green Bean Salad with Feta and Tomatoes. Fresh green beans, crisp and green, meet sweet grape tomatoes and creamy feta in a bright, tangy dressing that sings summer vibes. What I love most about this easy recipe is its versatility—whether you need a light side dish for dinner or something vibrant for a holiday table, this salad fits the bill perfectly. It’s not just about the taste; it’s packed with nutrients and takes mere minutes to prepare, making it a guilt-free addition to your clean-eating repertoire. Are you ready to elevate your salad game with a clean, delicious, and satisfying option? Let’s dive into this refreshing dish!

Why Is This Salad So Special?

Freshness at its finest: Crisp green beans paired with juicy grape tomatoes make each bite a burst of flavor.
Easy to make: This salad can be whipped up in just minutes, which is perfect for busy weeknights or unexpected guests.
Nutrient-rich: Packed with vitamins and antioxidants, this salad is not only delicious but also a healthy option for those focused on clean eating.
Versatile additions: Customize your dish by adding grains like quinoa or even nuts for an extra crunch. For more ideas, check out my Coconutty Beans Greens or Buffalo Tofu with Caesar Salad.
Crowd-pleaser: Whether served at a summer BBQ or a holiday gathering, this vibrant salad is sure to impress your friends and family!

Green Bean Salad Ingredients

For the Salad
• Fresh Green Beans – Provide crisp texture and vibrant color; substitute with frozen green beans if needed; thaw and blanch before using.
• Grape Tomatoes – Add sweetness and juiciness; can substitute with cherry tomatoes or any ripe tomatoes, cut in half.
• Vidalia Onion – Adds a mild, sweet onion flavor; red onion can be used for a sharper taste.
• Feta Cheese – Adds creaminess and saltiness; goat cheese can be used as a creamy substitute; omit for a dairy-free option.

For the Dressing
• Fresh Lemon Juice – Provides acidity and brightness to the dressing; use fresh juice for the best flavor.
• Olive Oil – Serves as the base of the dressing to add richness; can substitute with avocado oil or any light oil.
• Dijon Mustard – Adds depth to the dressing; a splash of vinegar can be an alternative if mustard is not available.
• Minced Garlic – Introduces a savory note; garlic powder can be used as an alternative.
• Salt – Enhances all the flavors; adjust to taste.
• Pepper – Adds a slight kick; freshly ground is recommended for the best flavor.

This Green Bean Salad strikes a perfect balance between freshness and flavor, making it an irresistible addition to your table!

Step‑by‑Step Instructions for Zesty Green Bean Salad with Feta and Tomatoes

Step 1: Boil the Green Beans
In a large pot, bring salted water to a rolling boil over high heat. Once boiling, add the fresh green beans and cook for 2 minutes—the beans should turn a vibrant green and still be crisp. When finished, drain the beans in a colander and pat them dry to remove excess moisture.

Step 2: Prepare the Salad Ingredients
In a large mixing bowl, combine the cooked green beans with the halved grape tomatoes, sliced Vidalia onion, and crumbled feta cheese. Stir gently to mix the ingredients without breaking the feta, ensuring that every bite contains a lovely blend of flavors and textures.

Step 3: Make the Zesty Dressing
In a small bowl or jar, whisk together the freshly squeezed lemon juice, olive oil, Dijon mustard, minced garlic, salt, and pepper. Mix until emulsified; the dressing should have a smooth and creamy consistency, with the tangy aroma of lemon and garlic inviting you to pour it over your Zesty Green Bean Salad.

Step 4: Combine and Toss the Salad
Drizzle the zesty dressing over the salad ingredients in the bowl. Using a large spoon or spatula, gently toss the salad until everything is evenly coated in the dressing. Be careful not to crush the ingredients; aim for a bright and colorful mixture of green beans and tomatoes.

Step 5: Marinate for Flavor
Allow the salad to marinate at room temperature for 15 minutes. This resting time helps the flavors meld beautifully, so the fresh green beans and vegetables soak up that delightful zesty dressing, enhancing the overall taste of your Green Bean Salad.

Step 6: Serve and Enjoy
After marination, give the salad a final gentle toss to re-distribute the dressing. Serve the Zesty Green Bean Salad chilled or at room temperature, garnished with an optional sprinkle of extra feta or fresh herbs for an appealing finish. Enjoy this delightful dish as a refreshing side for any occasion!

Expert Tips for Zesty Green Bean Salad

  • Fresh Ingredients Matter: Use the freshest green beans and tomatoes you can find for vibrant colors and flavors; they truly elevate your Green Bean Salad.

  • Don’t Overcook: Boil green beans only for 2 minutes; overcooking leads to mushy texture and dull color. You want them crisp!

  • Adjust to Taste: After combining the dressing, taste and tweak. More salt or lemon juice can brighten flavors based on your preference.

  • Regulate Dressing Amount: Start with less dressing to avoid sogginess. You can always add more if needed but it’s harder to fix a drenched salad!

  • Chill for Best Flavor: For optimal taste, let the salad sit for 15 minutes before serving; this allows ingredients to meld, enhancing your Green Bean Salad experience.

What to Serve with Zesty Green Bean Salad with Feta and Tomatoes

Immerse yourself in a delightful culinary experience by pairing this refreshing salad with complementary dishes bursting with flavor.

  • Grilled Chicken: Juicy and smoky chicken pairs wonderfully with the salad's zesty dressing, making each bite a harmonious blend of textures.

  • Roasted Potatoes: Crispy outside and fluffy inside, these seasoned potatoes provide a hearty contrast to the salad's crisp green beans.

  • Quinoa Pilaf: Nutty and fluffy, this grain dish adds a wholesome element that mirrors the freshness of the salad while boosting the meal’s nutritional profile.

  • Stuffed Peppers: These colorful, savory vessels filled with rice or beans echo the vibrant flavors and colors found in the green bean salad, offering a satisfying main.

  • Herbed Bread Rolls: Soft and warm, these rolls are perfect for sopping up the tangy dressing, enhancing the overall flavors of your meal.

  • Sparkling Lemonade: The refreshing bubbles and bright citrus notes sync beautifully with the salad, making it a perfect palate cleanser between bites.

Embrace these pairings to create a memorable dining experience that tantalizes your taste buds!

Green Bean Salad Customizations

Transform this Green Bean Salad into your perfect dish by making a few delightful tweaks!

  • Dairy-Free: Omit feta cheese and add avocado for creamy texture without dairy. This option keeps it fresh and light.
  • Grain-Boosted: Toss in cooked quinoa or farro for a heartier, nutrient-rich salad that fills you up while adding a delightful chewiness. It’s a great way to make this side dish a stand-alone meal!
  • Nutty Crunch: Add a handful of toasted walnuts or almonds for an unexpected crunch. It elevates the salad and brings in a touch of nutty flavor that pairs beautifully with the lemon dressing.
  • Herbaceous Delight: Mix in fresh herbs like basil, parsley, or dill for an aromatic twist! Fresh herbs can transform this salad into a garden-fresh experience.
  • Kick of Spice: Throw in some diced jalapeños or a sprinkle of red pepper flakes for those who enjoy a bit of heat. It adds a fun zing that balances the creamy feta.
  • Roasted Veggie Addition: Incorporate roasted zucchini or bell peppers for a smoky, depth-filled flavor. Roasting brings out the sweetness of these veggies, complementing the green beans beautifully.
  • Substitute Tomatoes: Try diced cucumbers instead of tomatoes for a refreshing crunch. The crispness contrasts wonderfully with the soft feta and tender green beans.
  • Mixed Cheese Option: Experiment with crumbled goat cheese or even vegan cheese alternatives if you’re looking for a different cheesy flavor that will delight the palate.

For more inspiration, consider making my Avocado Egg Salad for a topping or side or serving this alongside a hearty Chicken Salad with Apples for a complete meal!

How to Store and Freeze Green Bean Salad

Fridge: Store your green bean salad in an airtight container in the refrigerator for up to 2 days to maintain its freshness and crunch.

Freezer: Freezing is not recommended for this salad as the texture of the green beans and tomatoes will suffer. It's best enjoyed fresh for optimal taste.

Reheating: If you have leftover salad, don’t heat it. Instead, enjoy it cold or at room temperature to preserve the vibrant flavors and textures.

Before Serving: If storing, give your green bean salad a gentle toss before serving to redistribute the dressing and enhance the flavor.

Make Ahead Options

These Zesty Green Bean Salads are perfect for meal prep, allowing you to save valuable time during busy weeknights! You can prep the salad components—cooked green beans, halved tomatoes, and sliced onions—up to 24 hours in advance; simply refrigerate them in an airtight container to keep them fresh. However, it's best to add feta cheese and dressing just before serving to prevent sogginess. When ready to serve, toss the prepped ingredients with the dressing you whipped up beforehand (this can also be made up to 3 days in advance and stored in the fridge). This way, you’ll enjoy a flavor-packed, zesty meal with minimal effort!

Zesty Green Bean Salad with Feta and Tomatoes Recipe FAQs

How do I choose the best green beans?
Absolutely! Look for fresh green beans that are bright green, firm, and free from dark spots or blemishes. Snap off the ends, and make sure they feel crisp when you bend them slightly. If you're opting for frozen, ensure they are properly thawed and blanched for the best results.

What’s the best way to store this salad?
I recommend storing your Zesty Green Bean Salad in an airtight container in the refrigerator for up to 2 days. To maintain optimal crunchiness, avoid dressing the salad until just before serving, if possible. It’s best enjoyed fresh, as that’s when the flavors are at their peak!

Can I freeze leftover green bean salad?
Not really! Freezing green bean salad isn't advised, as the texture of the beans and tomatoes will become mushy upon thawing. Instead, enjoy it cold or at room temperature for the brightest flavor—up to 2 days of storage should suffice!

What should I do if my green beans are overcooked?
If your green beans turned out a bit mushy, don't worry! Next time, stick to boiling them for just 2 minutes until bright green. For now, try tossing in some toasted nuts or crunchy croutons to add texture back to your dish. A sprinkle of fresh herbs can also help brighten the overall flavor!

Is this salad suitable for special diets or allergies?
Very! This Zesty Green Bean Salad is vegetarian-friendly and can easily be made dairy-free by omitting feta or substituting it with a vegan cheese alternative. Just make sure to check labels if you're using pre-made ingredients to avoid any allergens. Enjoy!

How long should I let the salad marinate?
For maximum flavor, allow the salad to marinate for at least 15 minutes before serving. This allows the fresh green beans and vegetables to soak up the delightful zesty dressing, enhancing the overall taste of your Green Bean Salad!

Green Bean Salad

Bright and Zesty Green Bean Salad for Fresh Flavor Boost

A vibrant Green Bean Salad full of fresh flavors, perfect for any occasion.
Print Recipe Pin Recipe
Prep Time 15 minutes mins
Cook Time 2 minutes mins
Marination Time 15 minutes mins
Total Time 32 minutes mins
Servings: 4 servings
Course: Salads
Cuisine: American
Calories: 150
Ingredients Equipment Method Nutrition Notes

Ingredients
  

For the Salad
  • 1 pound Fresh Green Beans Trimmed and cut into 2-inch pieces
  • 1 cup Grape Tomatoes Halved
  • 1 medium Vidalia Onion Sliced
  • 1/2 cup Feta Cheese Crumbled
For the Dressing
  • 2 tablespoons Fresh Lemon Juice Freshly squeezed
  • 3 tablespoons Olive Oil Or avocado oil
  • 1 teaspoon Dijon Mustard
  • 1 clove Minced Garlic Or garlic powder
  • to taste Salt
  • to taste Pepper Freshly ground

Equipment

  • Large pot
  • Colander
  • Mixing Bowl
  • small bowl or jar
  • Spatula

Method
 

Preparation Steps
  1. In a large pot, bring salted water to a rolling boil over high heat. Once boiling, add the fresh green beans and cook for 2 minutes. Drain the beans in a colander and pat them dry.
  2. In a large mixing bowl, combine the cooked green beans with the halved grape tomatoes, sliced Vidalia onion, and crumbled feta cheese. Stir gently to mix without breaking the feta.
  3. In a small bowl or jar, whisk together the lemon juice, olive oil, Dijon mustard, minced garlic, salt, and pepper until emulsified.
  4. Drizzle the dressing over the salad ingredients and gently toss until everything is evenly coated in the dressing.
  5. Allow the salad to marinate at room temperature for 15 minutes to let the flavors meld.
  6. Give the salad a final gentle toss before serving. Serve chilled or at room temperature.

Nutrition

Serving: 1servingCalories: 150kcalCarbohydrates: 8gProtein: 5gFat: 12gSaturated Fat: 3gPolyunsaturated Fat: 2gMonounsaturated Fat: 7gCholesterol: 15mgSodium: 200mgPotassium: 300mgFiber: 3gSugar: 3gVitamin A: 500IUVitamin C: 15mgCalcium: 150mgIron: 1mg

Notes

For optimal taste, let the salad sit for 15 minutes before serving to enhance the flavors.

Tried this recipe?

Let us know how it was!

Lemon Parmesan Lettuce Salad – Quick & Zesty Delight

February 17, 2026 by Grace Snow Leave a Comment

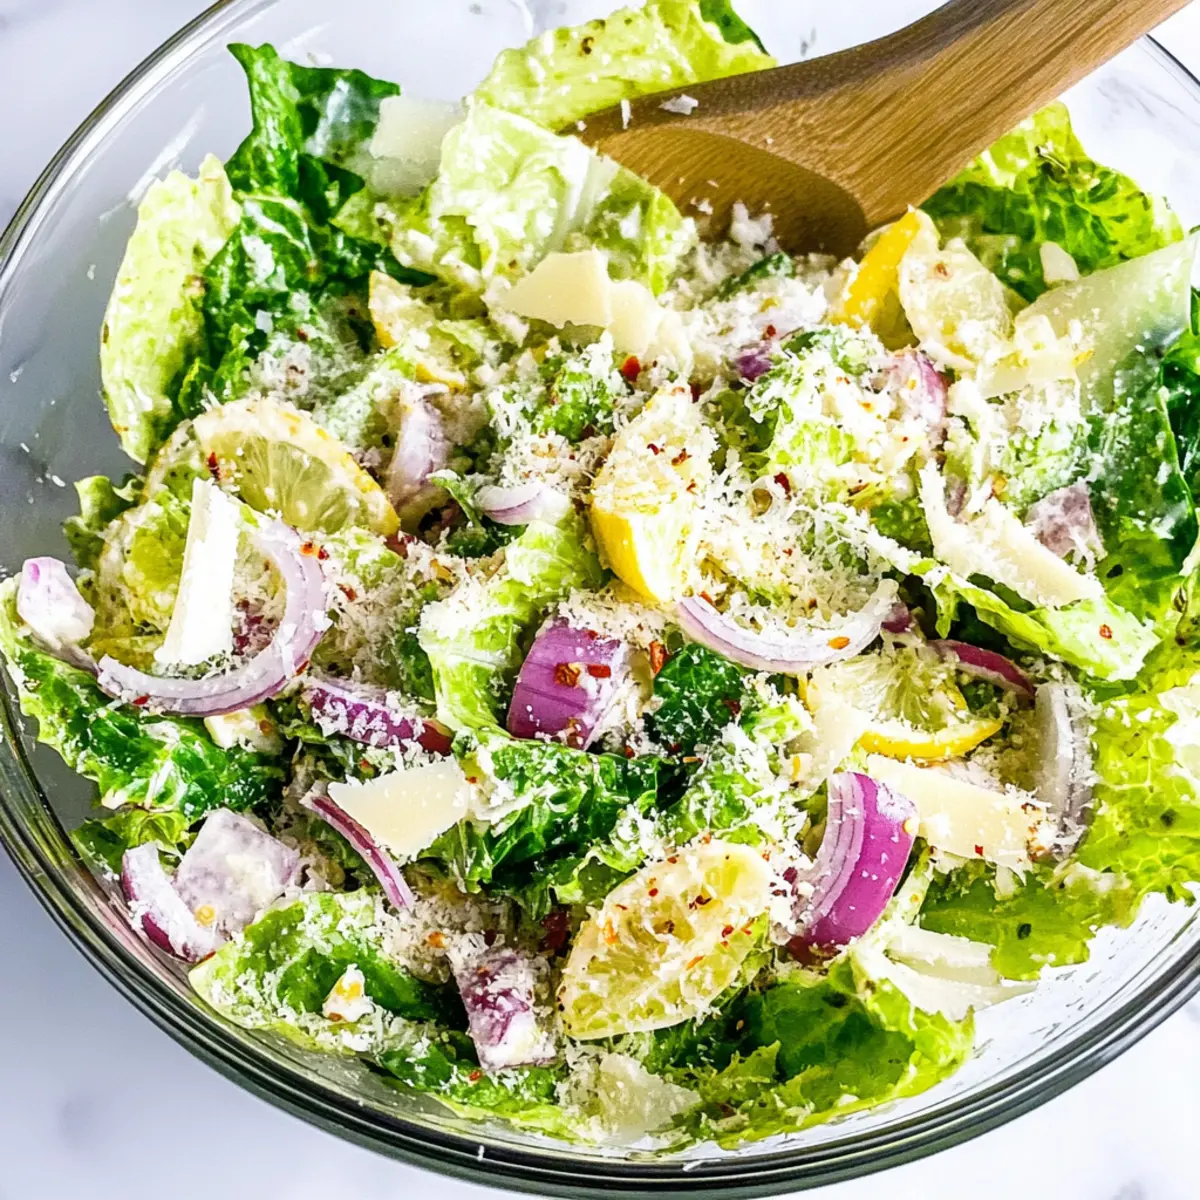
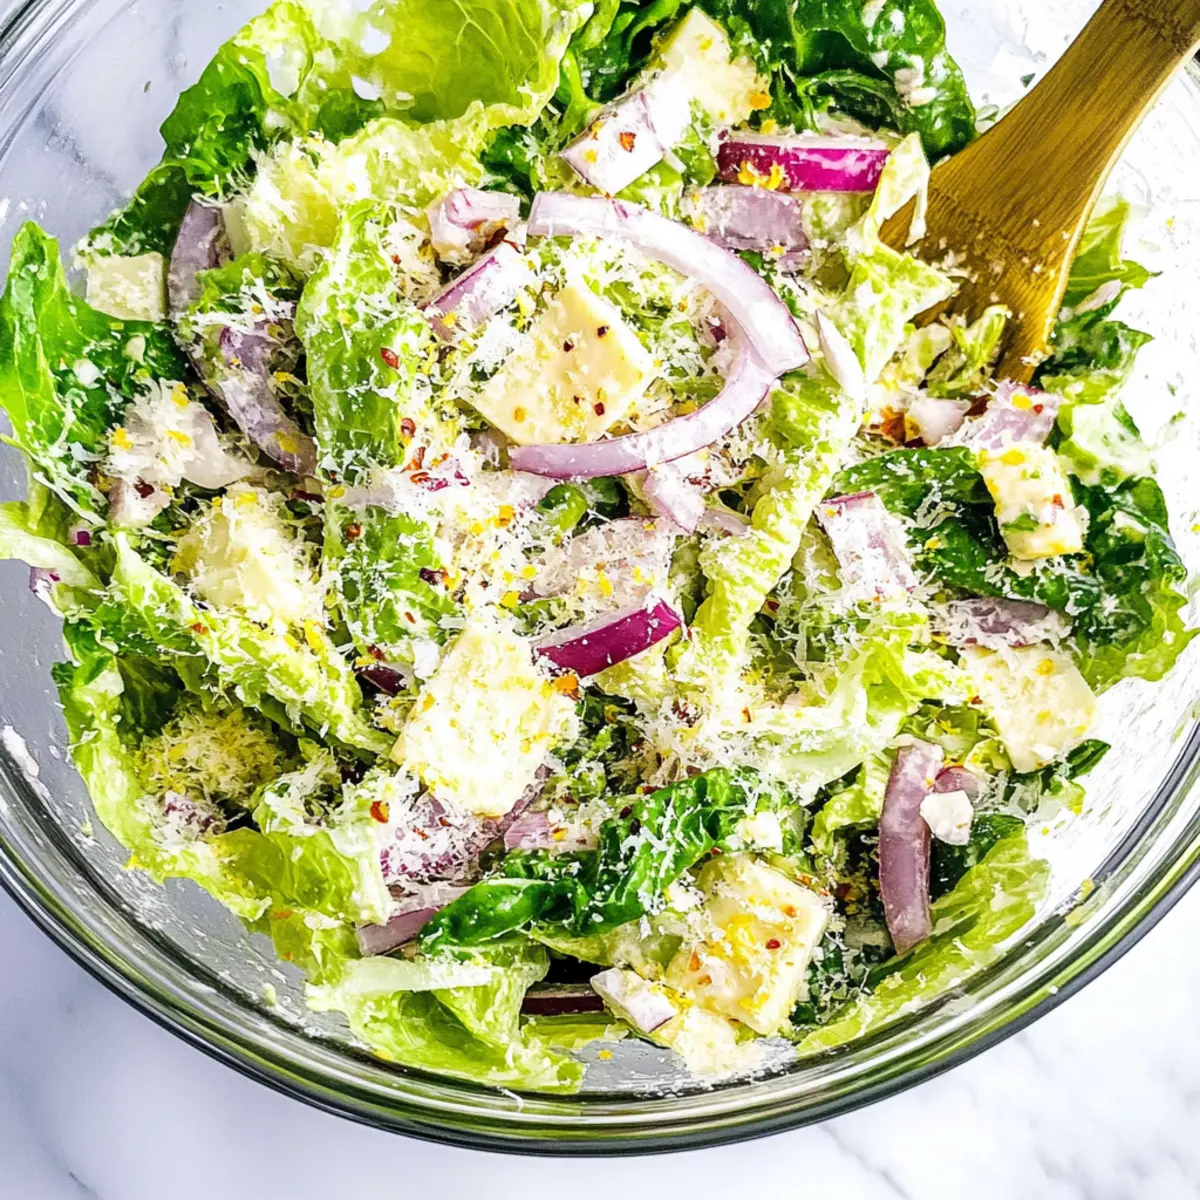
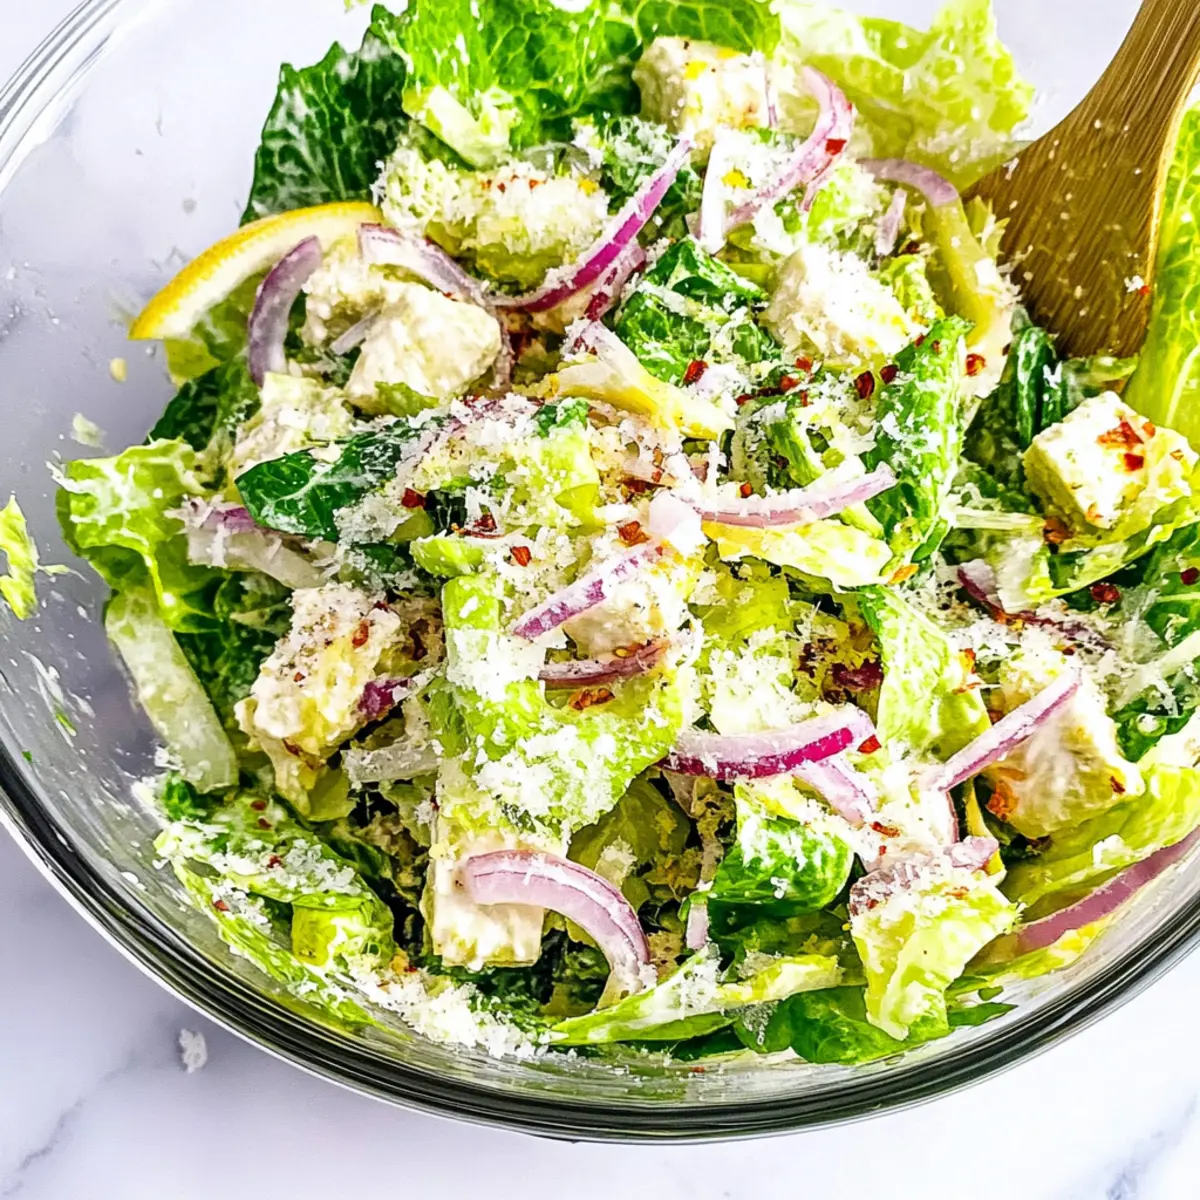
If you’re looking to revive your salad game, this Zesty Lemon Parmesan Lettuce Salad will be your new go-to! Crisp Romaine lettuce meets a luscious dressing made with bright lemon juice, tangy zest, and creamy Parmesan cheese, transforming a simple side salad into a flavor-packed companion for any meal. What I love most about this quick salad is not only its vibrant taste but also how effortlessly it elevates everyday dishes. It’s perfect for those busy nights when you crave something fresh yet don’t want to spend hours in the kitchen. Plus, it’s vegetarian-friendly, making it an ideal choice for everyone at the table! Are you ready to toss together something that’s both simple and sensational? Let’s dive into the recipe!

Why is this salad a must-try?

Simplicity: This Lemon Parmesan Lettuce Salad comes together in minutes, making it ideal for busy weeknights when you want a delicious side without the fuss.

Fresh Flavors: The bright lemon juice and zest combined with creamy Parmesan deliver a refreshing pop that will awaken your taste buds.

Versatile Delight: Pair it with grilled chicken or fish for a complete meal, or enjoy it on its own as a light lunch with a dash of salt and pepper.

Crowd-Pleaser: Whether it’s a family dinner or a gathering with friends, this salad is bound to impress and satisfy everyone at the table.

Customizable: Feel free to substitute ingredients based on your preferences; for example, adding nuts for crunch or incorporating nutritional yeast for a vegan version is simple!

Healthy Choice: With plenty of vitamins and minerals packed into each serving, you can feel good about serving this beautiful salad alongside your favorite entrees. Try it with our delightful Chicken Salad with Apples for a complete meal experience!

Lemon Parmesan Lettuce Salad Ingredients

For the Salad
• Romaine Lettuce – The base of the salad providing crunch and freshness; choose pre-washed for convenience.
• Red Onion – Adds crunch and a hint of sweetness; slice thinly for a milder taste.
• Parmesan Cheese – Brings creaminess and a salty tang; substitute with Pecorino Romano for a different flavor or nutritional yeast for a vegan option.

For the Dressing
• Extra Virgin Olive Oil – The primary ingredient for the dressing, offering richness; avocado oil can be a healthier alternative.
• Lemon Juice and Zest – Brightens the salad with acidity and flavor; always use fresh lemons for the best results.
• Honey – Balances the salad’s acidity with a touch of natural sweetness; consider maple syrup for a vegan alternative.
• Crushed Red Pepper Flakes – Adds a spicy kick; adjust according to your spice preference or swap for milder options like Aleppo pepper.
• Salt and Pepper – Fundamental for enhancing flavors; keep in mind the salty nature of parmesan when seasoning.

Final Note
Enjoy creating this Lemon Parmesan Lettuce Salad that bursts with flavor and simplicity!

Step‑by‑Step Instructions for Lemon Parmesan Lettuce Salad

Step 1: Make the Dressing
In a medium bowl, combine ¼ cup of extra virgin olive oil, the juice and zest of one lemon, 1 tablespoon of honey, and a pinch of salt and pepper. Whisk the mixture vigorously for about 30 seconds until it becomes creamy and well-blended. The dressing should have a bright, sunny appearance, perfect for drizzling over your Lemon Parmesan Lettuce Salad.

Step 2: Prepare the Salad Base
Meanwhile, take 1 head of Romaine lettuce and wash it thoroughly if not pre-washed. Pat the leaves dry with a clean kitchen towel or paper towels, then chop or tear the lettuce into bite-sized pieces. Place the greens in a large salad bowl, ensuring they are crisp and ready to hold onto the flavorful dressing.

Step 3: Add the Flavorful Ingredients
Next, thinly slice ¼ of a red onion and add it to the bowl with the Romaine lettuce. Grate ⅓ cup of Parmesan cheese and sprinkle it over the greens, adding a rich, creamy texture. For an extra kick, sprinkle in ½ teaspoon of crushed red pepper flakes, adjusting to your spice preference, and toss gently to distribute the ingredients.

Step 4: Combine and Serve
Drizzle the dressing you prepared earlier over the salad ingredients. Use a pair of salad tongs to toss everything with care until the lettuce is evenly coated and glistening. The vibrant colors and textures should be visible, making your Lemon Parmesan Lettuce Salad look absolutely irresistible. Serve immediately to enjoy the freshness and flavors at their best.

Expert Tips for Lemon Parmesan Lettuce Salad

  • Prep Ahead: Wash and chop romaine lettuce ahead of time, but wait to toss until serving to keep it crisp.

  • Adjust to Taste: When making the dressing, start with less salt and pepper; you can always add more after mixing the salad.

  • Fresh Ingredients Count: Use fresh lemons and high-quality olive oil for the best flavor in your Lemon Parmesan Lettuce Salad.

  • Custom Crunch: Add toasted nuts or seeds to elevate the texture and provide a satisfying crunch that's customizable for everyone's taste.

  • Balance the Spice: Adjust the amount of crushed red pepper flakes to control the heat; start with a little and build up as desired.

What to Serve with Zesty Lemon Parmesan Lettuce Salad

Imagine a vibrant table filled with delightful flavors that complement the crispness of your salad.

  • Grilled Chicken: Juicy and savory, grilled chicken pairs perfectly with the tanginess of the salad, creating a satisfying meal.

  • Baked Fish: A light and flaky baked fish, like lemon-herb cod, enhances the zesty notes in the salad while keeping everything fresh and light.

  • Quinoa Pilaf: Fluffy quinoa pilaf, dotted with herbs and spices, adds a lovely nuttiness that contrasts beautifully with the salad's tangy dressing.

Incorporating a dash of olive oil or lemon can elevate even basic grains. A sprinkle of freshly chopped parsley will enhance the visual appeal too!

  • Garlic Bread: The buttery crunch of garlic bread provides a hearty contrast to the lightness of the salad, perfect for soaking up any leftover dressing.

  • Roasted Vegetables: Sweet and caramelized roasted vegetables bring a depth of flavor that complements the salad's brightness beautifully.

  • Sparkling Water: A refreshing glass of sparkling water with a splash of lemon will keep your palate dancing alongside the vibrant salad flavors.

With these pairings, your dining experience will be bright, uplifting, and utterly delightful!

Make Ahead Options

This Lemon Parmesan Lettuce Salad is a fantastic choice for meal prep and can save you time during busy weeknights! You can wash and chop the Romaine lettuce up to 24 hours in advance, storing it in an airtight container lined with damp paper towels to maintain its crispness. The dressing can also be made ahead and refrigerated for up to 3 days; just give it a good whisk before using to restore its creamy texture. Additionally, you can slice the red onion and grate the Parmesan in advance. When you’re ready to serve, simply toss the prepared ingredients with the dressing to enjoy a refreshing salad that’s just as vibrant and delicious!

Storage Tips for Lemon Parmesan Lettuce Salad

Fridge: Store any leftovers in an airtight container for up to 1 day to maintain freshness. The salad is best enjoyed the same day it’s made.

Airtight Wrapping: Wrap any unused chopped romaine lettuce in damp paper towels and place it in a resealable bag to help retain its crispness for future use.

Reheating: Since this salad is best fresh, avoid reheating. Instead, enjoy it cold or at room temperature for a refreshing experience.

Preparation Tip: Consider prepping salad components ahead of time and combine them with the dressing just before serving for the best flavor and texture in your Lemon Parmesan Lettuce Salad.

Lemon Parmesan Lettuce Salad Variations

Embrace your culinary creativity and make this salad uniquely yours with delightful twists and substitutions!

  • Greens Swap: Use arugula or spinach instead of Romaine for a peppery kick. This not only changes the flavor but adds a nutritional boost as well.

  • Nuts & Seeds: Toss in some toasted pine nuts or sunflower seeds for extra crunch. The nuttiness complements the creamy dressing beautifully and provides heart-healthy fats.

  • Hearty Addition: Mix in grilled chicken or shrimp for a filling meal. It transforms the salad into a protein-packed delight, perfect for lunch or dinner.

  • Vegan-Friendly: Substitute Parmesan cheese with nutritional yeast for a cheesy flavor without dairy. You can also replace honey with maple syrup to keep it plant-based.

  • Flavor Boost: Add diced avocado for creaminess and healthy fats. This addition not only enhances the texture but provides a luxurious touch to each bite.

  • Heat Level: For an extra spicy kick, incorporate sliced jalapeños or a dash of hot sauce in the dressing. It brings a new level of excitement to your salad!

  • Fruity Twist: Mix in some halved cherry tomatoes or diced apples for a refreshing sweetness. Pairing the tangy lemon with fruit creates a delightful balance of flavors.

  • Creamier Dressing: For a more indulgent twist, mix in a dollop of Greek yogurt into the dressing. This will add rich creaminess while still keeping the zesty flavor profile intact.

Feeling inspired? Try pairing it with our flavorful Jello Salad Cottage or throw in some zesty Lemon Ricotta Protein pancakes for a complete meal experience! Every variation makes this Lemon Parmesan Lettuce Salad a delight you'll love sharing with family and friends.

Lemon Parmesan Lettuce Salad Recipe FAQs

How do I choose the best Romaine lettuce?
When selecting Romaine lettuce, look for heads that are crisp and vibrant green without any dark spots or wilting. Leaves should feel firm to the touch, indicating freshness. If you have the option, choose pre-washed lettuce for added convenience!

What’s the best way to store leftover Lemon Parmesan Lettuce Salad?
To keep any leftovers fresh, store them in an airtight container in the refrigerator for up to 1 day. Remember, the salad is best enjoyed fresh, so it’s ideal to only dress the portion you plan to eat right away. You can also wrap any unused chopped Romaine lettuce in damp paper towels and place it in a resealable bag to maintain crispness.

Can I freeze my Lemon Parmesan Lettuce Salad?
Freezing salads isn't recommended since the lettuce will turn mushy once thawed. However, if you want to preserve the dressing, you can freeze it in an airtight container for up to 3 months. Simply thaw in the refrigerator overnight before using it again – just whisk it well before dressing your salad!

What if I’m allergic to Parmesan cheese?
If you have a dairy allergy, you can easily substitute Parmesan cheese with nutritional yeast for a cheesy flavor without the dairy. Alternatively, Pecorino Romano offers a slightly different taste profile while remaining delicious. Adjust accordingly to fit your dietary needs!

How can I adjust the dressing’s acidity or sweetness?
Absolutely! To balance the flavors based on your preference, start with less lemon juice and honey. Gradually add more of each until you reach your desired taste. It’s always a good idea to taste and adjust as you combine the ingredients – that’s part of the fun in cooking!

What if my salad tastes too salty?
If your Lemon Parmesan Lettuce Salad ends up being too salty, try adding a little more chopped Romaine lettuce or extra drizzles of olive oil to balance it out. Mixing in additional ingredients like a fresh cucumber can also help dilute the saltiness while keeping the salad refreshing and tasty!

Lemon Parmesan Lettuce Salad

Lemon Parmesan Lettuce Salad – Quick & Zesty Delight

A quick and zesty Lemon Parmesan Lettuce Salad that combines crisp Romaine with a bright lemon dressing and creamy Parmesan, perfect for any meal.
Print Recipe Pin Recipe
Prep Time 10 minutes mins
Total Time 10 minutes mins
Servings: 4 servings
Course: Salads
Cuisine: American
Calories: 150
Ingredients Equipment Method Nutrition Notes

Ingredients
  

For the Salad
  • 1 head Romaine Lettuce pre-washed for convenience
  • 1/4 cup Red Onion thinly sliced
  • 1/3 cup Parmesan Cheese grated; substitute with Pecorino Romano or nutritional yeast for vegan option
For the Dressing
  • 1/4 cup Extra Virgin Olive Oil or avocado oil as alternative
  • 1 each Lemon Juice and Zest fresh lemons for best results
  • 1 tablespoon Honey or maple syrup for vegan alternative
  • 1/2 teaspoon Crushed Red Pepper Flakes adjust according to spice preference
  • Salt to taste
  • Pepper to taste

Equipment

  • medium bowl
  • Large salad bowl
  • Whisk
  • salad tongs

Method
 

Step-by-Step Instructions
  1. In a medium bowl, combine ¼ cup of extra virgin olive oil, the juice and zest of one lemon, 1 tablespoon of honey, and a pinch of salt and pepper. Whisk the mixture vigorously for about 30 seconds until creamy and well-blended.
  2. Wash and chop the Romaine lettuce into bite-sized pieces and place it in a large salad bowl.
  3. Add ¼ of a thinly sliced red onion, ⅓ cup of grated Parmesan cheese, and ½ teaspoon of crushed red pepper flakes to the bowl with the lettuce and toss gently.
  4. Drizzle the dressing over the salad ingredients and toss until the lettuce is evenly coated.

Nutrition

Serving: 1servingCalories: 150kcalCarbohydrates: 6gProtein: 4gFat: 14gSaturated Fat: 3gMonounsaturated Fat: 10gCholesterol: 10mgSodium: 150mgPotassium: 250mgFiber: 2gSugar: 1gVitamin A: 400IUVitamin C: 30mgCalcium: 150mgIron: 1mg

Notes

Prep ingredients ahead of time but combine with dressing just before serving for optimal flavor and texture.

Tried this recipe?

Let us know how it was!

Vibrant Spring Pasta Salad: A Fresh Flavor Celebration

February 17, 2026 by Grace Snow Leave a Comment

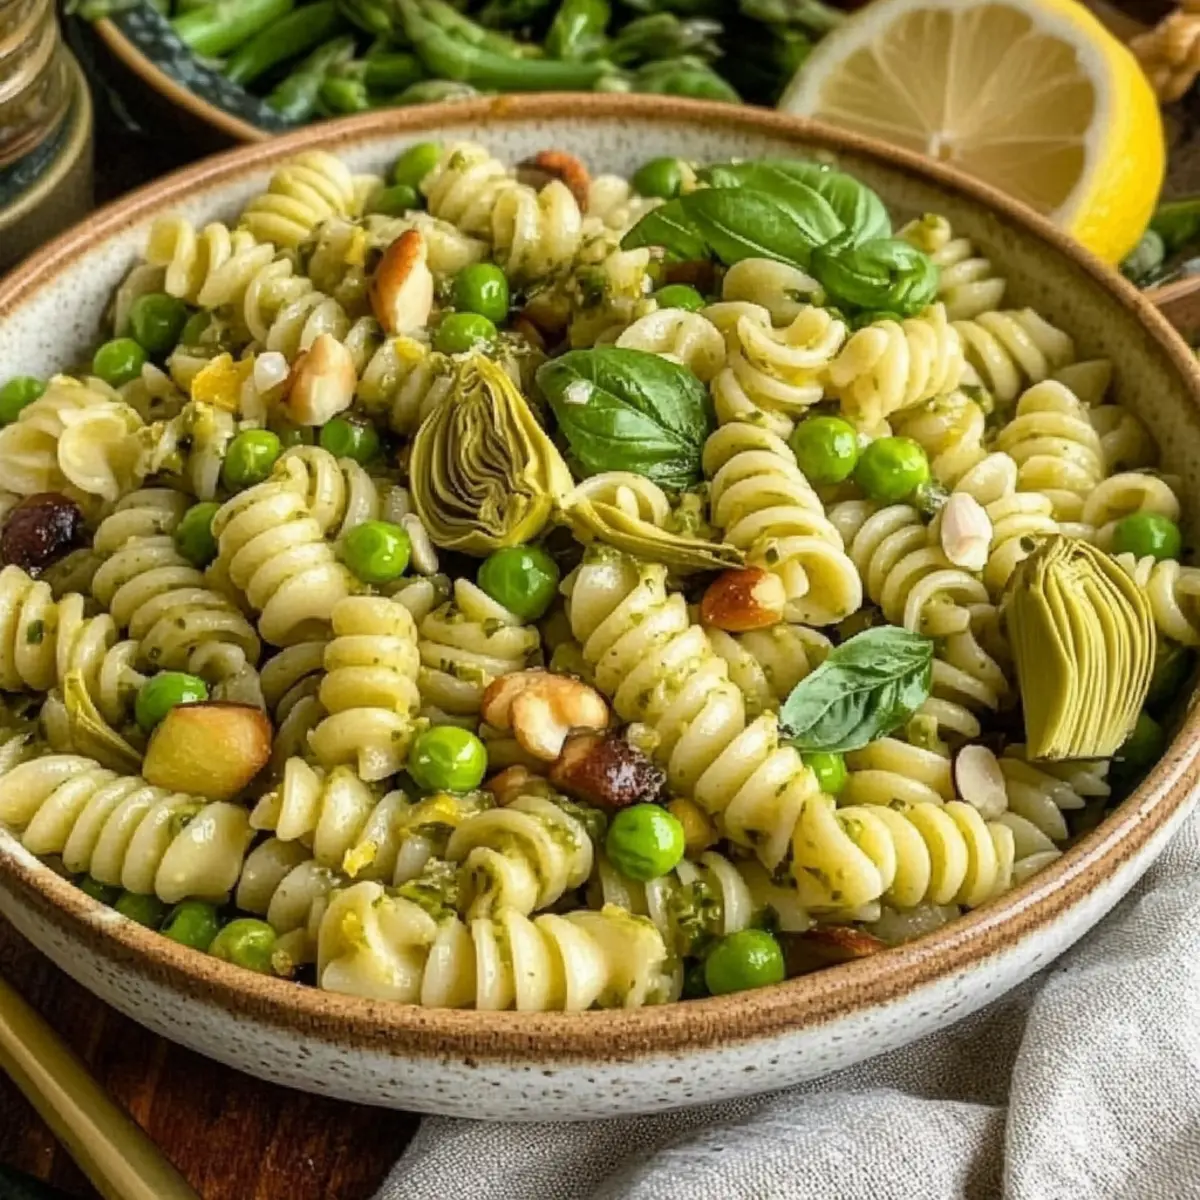
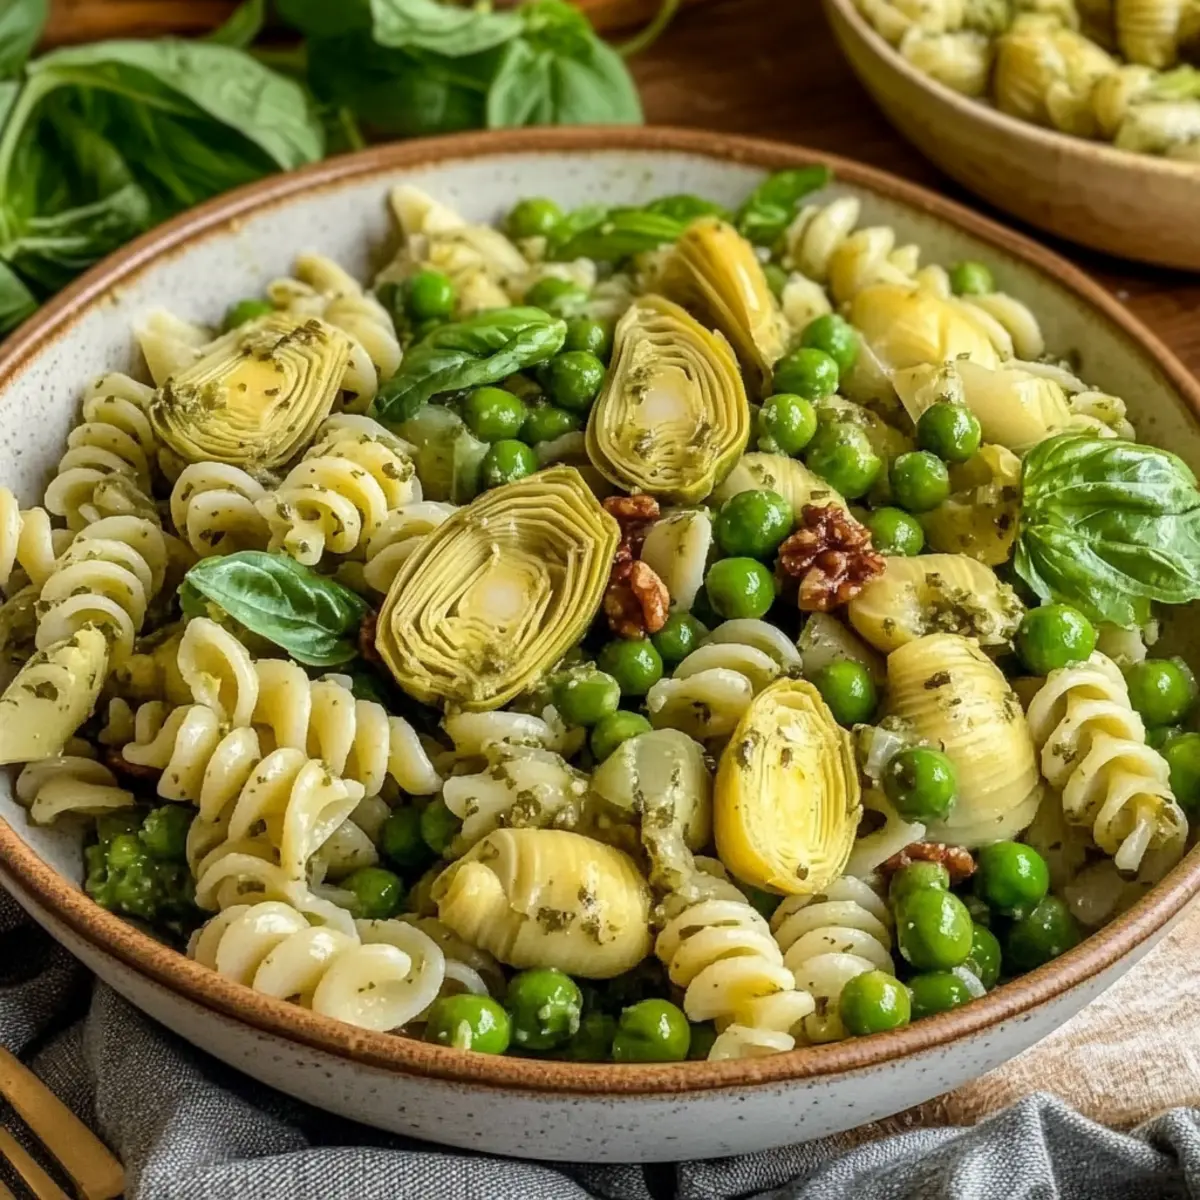
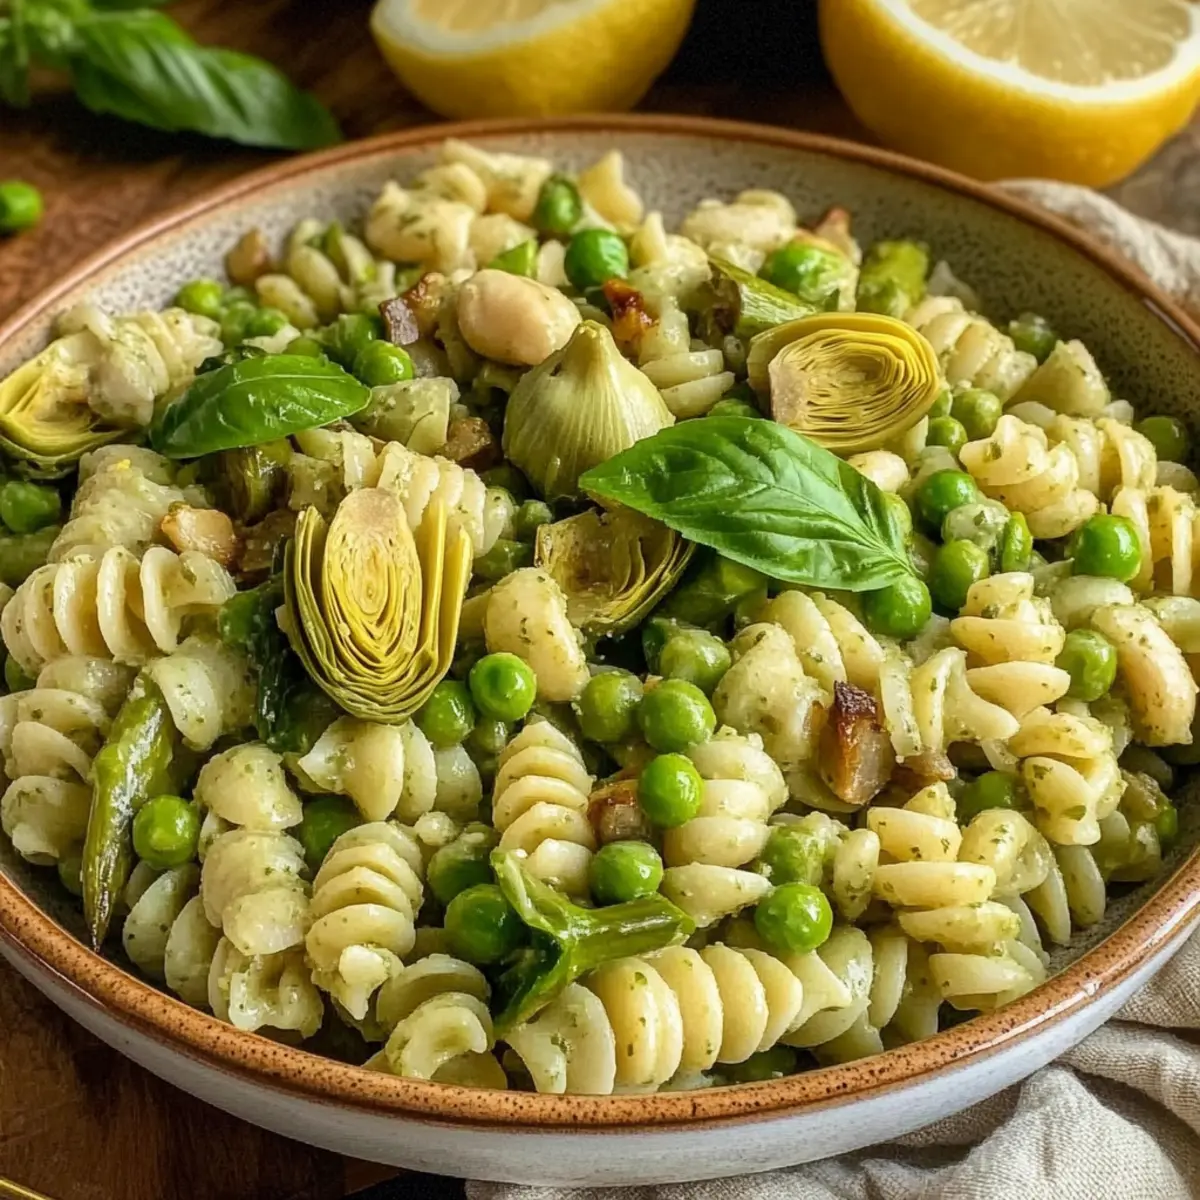
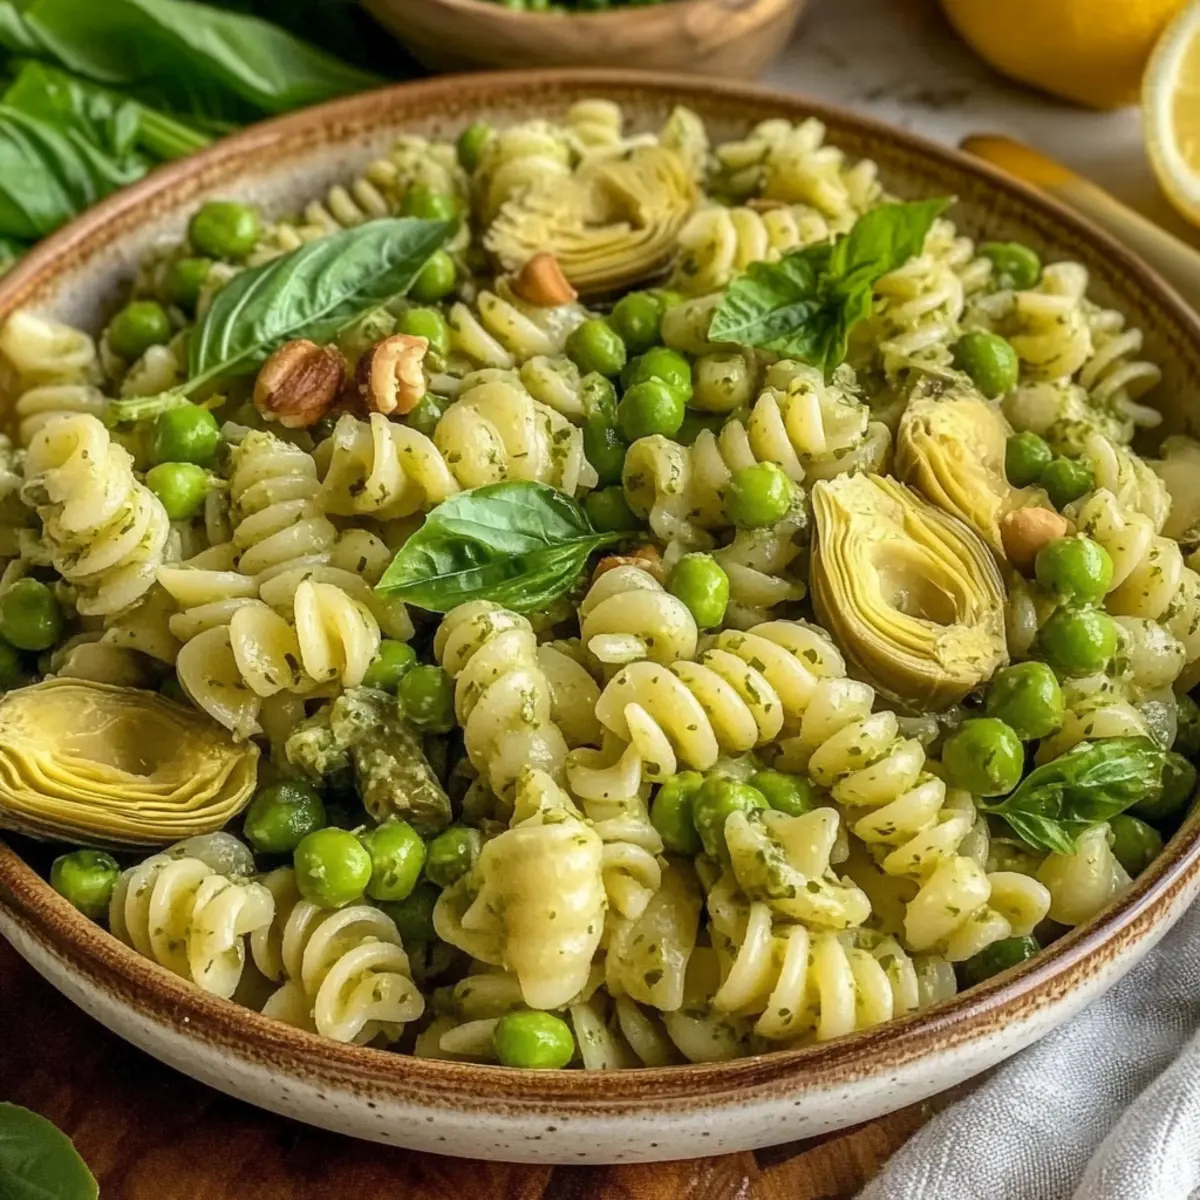
A burst of vibrant colors and flavors awaits you with this Fresh Spring Pasta Salad! As I prepared this dish, the sweet scent of fresh basil mingling with zesty lemon transported me to a sun-drenched terrace overlooking lush gardens. Featuring crisp asparagus, sweet peas, and tangy marinated artichokes, this Spring Pasta Salad makes for a delightful companion to any meal. Not only is it a healthy vegan option, but it also comes together quickly and is perfect for meal prep, allowing the delicious flavors to meld beautifully as it chills. Ideal for spring gatherings or a simple family dinner, this salad promises to satisfy your cravings for something fresh and invigorating. Ready to elevate your cooking game? Let’s dive into this recipe together!

Why is Spring Pasta Salad a Must-Try?

Vibrant colors and fresh flavors combine in this delightful salad, making it a guaranteed crowd-pleaser. Healthy yet satisfying, it's packed with nutrient-rich ingredients like asparagus and chickpeas, perfect for anyone seeking a nutritious meal. Easy to prepare, this dish comes together in under 30 minutes, ideal for those busy weeknights or spontaneous gatherings. Versatile enough to adapt, feel free to swap in your favorite veggies or proteins! And if you're looking for more meal-prep ideas, check out this Avocado Egg Salad for a quick, healthy option.

Spring Pasta Salad Ingredients

• A vibrant blend of fresh flavors awaits you!

For the Pasta

  • Dried Pasta – Choose any shape you love as the base structure of the salad.

For the Veggies

  • Asparagus – About 2 cups peeled and cut into 2-inch pieces for a crunchy, green kick.
  • Frozen Peas – Sweet and colorful; if you prefer fresh, there's no need to blanch them.
  • Cooked Chickpeas – These provide protein and texture; canned ones work beautifully for convenience.
  • Marinated Artichoke Hearts – Adds a wonderful tang; just drain to prevent extra moisture.
  • Red Onion – Finely diced for a mild bite that complements the dish.
  • Scallions – Diced to give a fresh onion flavor that enhances the overall taste.

For the Vinaigrette

  • Fresh Basil – Aromatic and essential for that bright, zesty hint in the vinaigrette.
  • Olive Oil – Richness and help emulsify the dressing perfectly.
  • Lemon Juice and Zest – Vital for an uplifting brightness in your vinaigrette.
  • Dijon Mustard – Works as the emulsifier; replace it with vegan mayo for a creamier twist.
  • Garlic Clove – Boosts flavor; adjust the amount according to your taste!
  • Salt and Ground Black Pepper – Season to taste for the perfect balance.

For Garnish

  • Toasted Pine Nuts – Optional, but they add a delightful crunch and nutty flavor to your salad.

Get ready to create an unforgettable Spring Pasta Salad that will brighten your meals and satisfy your taste buds!

Step‑by‑Step Instructions for Fresh Spring Pasta Salad

Step 1: Prep Vegetables
Begin by carefully chopping the asparagus into 2-inch pieces, then finely dice the red onion and scallions. Slice the fresh basil leaves and strain the cooked chickpeas to remove excess moisture. This colorful assortment will create a vibrant base for your Spring Pasta Salad and is essential for achieving bright flavors in each bite.

Step 2: Cook Pasta
In a large pot, bring salted water to a rolling boil. Add your chosen dried pasta and cook according to package instructions until al dente, typically about 8-10 minutes. In the last 2 minutes of cooking, add the asparagus and peas to the boiling water, ensuring they are tender yet crisp. Drain the pasta and vegetables, then cool them under cold running water to halt the cooking process.

Step 3: Make Vinaigrette
In a blender or food processor, combine fresh basil, olive oil, lemon juice, lemon zest, Dijon mustard, and a minced garlic clove. Season with salt and ground black pepper, then blend until smooth and creamy. This luscious lemon basil vinaigrette will invigorate your Spring Pasta Salad, adding a deliciously zesty finish.

Step 4: Combine Ingredients
In a large mixing bowl, combine the cooled pasta, asparagus, peas, chickpeas, marinated artichoke hearts, diced onion, and scallions. Drizzle the prepared vinaigrette over the salad and toss gently to ensure all ingredients are evenly coated. This mix of textures and flavors creates a delightful Spring Pasta Salad that celebrates the season.

Step 5: Chill
Cover the salad with plastic wrap or a lid and refrigerate for at least 2 hours, or up to 24 hours. This chilling time allows the flavors of the Spring Pasta Salad to meld beautifully, resulting in a more deliciously cohesive dish. The vibrant colors will also brighten your refrigerator!

Step 6: Serve
Before serving, give the salad a quick toss to refresh the ingredients. For an added touch, garnish the Spring Pasta Salad with fresh basil leaves and a sprinkle of toasted pine nuts for crunch. This refreshing dish is perfect for any gathering or a lovely homemade meal at home, bringing a taste of spring to your table.

Expert Tips for Spring Pasta Salad

  • Chill for Flavor: Allowing the salad to chill for 2-24 hours enhances the flavor as the vegetables absorb the lemon basil vinaigrette—don’t skip this step!

  • Pasta Shape Matters: Shorter, spiral pasta helps hold onto the vinaigrette better. If you need it gluten-free, be sure to choose an appropriate pasta option.

  • Storage Tips: Store any leftovers in a sealed container for up to 4-5 days. Avoid freezing for the best texture and flavor in your Spring Pasta Salad.

  • Adjust Seasoning: Taste and adjust salt and pepper as needed, especially after the salad has had time to chill and the flavors develop.

  • Creative Variations: Feel free to swap out or add your favorite vegetables. Ingredients like cherry tomatoes or olives can give your salad a delightful twist!

What to Serve with Fresh Spring Pasta Salad?

This delightful salad shines as a centerpiece but pairs perfectly with a variety of sides for a complete meal.

  • Grilled Vegetable Skewers: The smoky flavors of grilled zucchini, bell peppers, and mushrooms beautifully contrast the fresh taste of the salad while adding a savory element.

  • Garlic Bread: Warm, crispy garlic bread adds comforting crunch and richness, making it a lovely accompaniment to the vibrant spring salad.

  • Lemon Herb Quinoa: This fluffy, zesty quinoa is nutritious and echoes the fresh lemon notes in the pasta salad, enhancing the overall lightness of your meal.

  • Roasted Chickpeas: Crunchy and flavorful, roasted chickpeas provide an irresistible texture and extra protein that complements the vegan pasta dish.

  • Crispy Kale Chips: Light and airy yet savory, these chips offer a delightful crunch that pairs perfectly with the freshness of the salad.

  • Chilled White Wine Spritzer: A refreshing drink option, this fizzy delight enhances the meal’s lightness and elevates the garden-fresh salad experience.

Every bite becomes a celebration of flavors, creating the perfect gathering around the table!

Make Ahead Options

This Fresh Spring Pasta Salad is perfect for busy home cooks who want to save time without sacrificing flavor! You can prep many components up to 24 hours in advance; simply chop your vegetables (asparagus, onion, scallions) and strain the chickpeas for a quick start. For an even better taste, prepare the lemon basil vinaigrette 2-3 days ahead, storing it in a sealed container in the refrigerator to keep it fresh. When ready to serve, just cook the pasta and combine everything in a large bowl; the chilling time allows all the flavors to meld beautifully, ensuring every bite is just as delicious as when freshly made.

Spring Pasta Salad Variations

Feel free to let your culinary creativity shine by customizing this delicious salad to suit your taste!

  • Green Beans: Substitute asparagus with blanched green beans for a unique texture and flavor twist. They add an interesting crunch that marries beautifully with the rest of the salad ingredients.

  • Briny Olives: Toss in chopped olives or capers to introduce a brinier flavor that perfectly complements the tangy vinaigrette. This addition brings an irresistible Mediterranean flair!

  • Cherry Tomatoes: Add halved cherry tomatoes for a pop of color and additional sweetness. Their juicy burst elevates the freshness of the dish, making each bite even more delightful.

  • Quinoa Base: Want to amp up the protein? Swap out pasta for cooked quinoa for a gluten-free twist that adds heartiness without sacrificing flavor. This will make your salad even more satisfying!

  • Creamy Dressing: For a richer texture, replace the Dijon mustard with vegan mayo in the vinaigrette. This creates a creamy dressing that coats the salad beautifully, perfect for those cream lovers.

  • Spicy Kick: If you're looking to introduce some heat, consider adding a pinch of red pepper flakes or fresh jalapeños to the salad. This adds a warm zing that makes the dish pop!

  • Nuts & Seeds: Boost the crunch factor with roasted sunflower seeds or slivered almonds in place of or in addition to pine nuts. Their nutty flavor will enhance the overall experience and add a delightful crunch!

As you explore these variations, don't forget to check out some other refreshing ideas like Skillet Pasta Sun for a different pasta take or consider a savory Seafood Pasta for a heartier meal option. Enjoy experimenting with this vibrant salad!

How to Store and Freeze Spring Pasta Salad

Fridge: Store any leftovers in a sealed container for up to 4-5 days. This keeps your Spring Pasta Salad fresh and flavorful for quick lunches or dinners.

Freezer: Avoid freezing, as the texture of the vegetables and pasta may become mushy when thawed. It's best enjoyed fresh or chilled.

Chilling: Before serving, refrigerate the salad for at least 2 hours; this enhances flavor as the veggies soak up the vinaigrette.

Reheating: If you prefer a warm option, gently toss individual servings in a pan over low heat for a few minutes, but enjoy it cold for maximum freshness.

Spring Pasta Salad Recipe FAQs

What kind of pasta should I use for Spring Pasta Salad?
Absolutely! You can use any shape of dried pasta you prefer, but shorter, spiral pasta works best as it holds onto the vinaigrette beautifully. For those seeking gluten-free options, look for gluten-free pasta varieties that fit your dietary needs.

How long can I store Spring Pasta Salad in the fridge?
You can store your Spring Pasta Salad in a sealed container for up to 4-5 days. Just make sure to keep it refrigerated to maintain its freshness and flavor!

Can I freeze Spring Pasta Salad?
It's best to avoid freezing this salad, as the texture of the vegetables and pasta can become mushy when thawed. Instead, enjoy it fresh or chilled to appreciate the vibrant flavors and textures!

How can I ensure my vegetables are fresh for the salad?
When selecting your vegetables, look for bright colors and firm textures. For asparagus, choose stalks that are skinny and crisp without any dark spots. Avoid artichokes with excess moisture; draining them will help keep the salad fresh.

Can I modify the recipe to accommodate dietary restrictions?
Very! This Spring Pasta Salad is wonderfully versatile. You can easily replace ingredients based on dietary needs—like using chickpeas for a gluten-free protein option or swapping lemon for lime juice if you prefer that flavor. Always check for allergies to specific ingredients, such as nuts or garlic, for added safety.

Is there a way to enhance the flavors while storing?
Yes! After mixing your salad, allow it to chill in the refrigerator for at least 2-24 hours. This resting period allows the vegetables to absorb the lemon basil vinaigrette, enhancing the overall flavor immensely!

Spring Pasta Salad

Vibrant Spring Pasta Salad: A Fresh Flavor Celebration

This Spring Pasta Salad is a vibrant blend of fresh flavors, featuring asparagus, peas, and artichokes, perfect for any occasion.
Print Recipe Pin Recipe
Prep Time 15 minutes mins
Cook Time 10 minutes mins
Chilling Time 2 hours hrs
Total Time 2 hours hrs 25 minutes mins
Servings: 6 servings
Course: Salads
Cuisine: Vegan
Calories: 250
Ingredients Equipment Method Nutrition Notes

Ingredients
  

For the Pasta
  • 8 oz Dried Pasta Choose any shape you love.
For the Veggies
  • 2 cups Asparagus Peeled and cut into 2-inch pieces.
  • 1 cup Frozen Peas Sweet and colorful.
  • 1 can Cooked Chickpeas Drained.
  • 1 cup Marinated Artichoke Hearts Drained.
  • 1/2 cup Red Onion Finely diced.
  • 1/4 cup Scallions Diced.
For the Vinaigrette
  • 1/2 cup Fresh Basil Chopped.
  • 1/4 cup Olive Oil
  • 2 Tbsp Lemon Juice
  • 1 tsp Lemon Zest
  • 1 tsp Dijon Mustard Or vegan mayo for a creamier twist.
  • 1 clove Garlic Minced.
  • to taste Salt
  • to taste Ground Black Pepper
For Garnish
  • 1/4 cup Toasted Pine Nuts Optional.

Equipment

  • Large pot
  • Blender or food processor
  • Mixing Bowl

Method
 

Step-by-Step Instructions
  1. 1. Begin by chopping the asparagus into 2-inch pieces, finely dice the red onion and scallions, slice the fresh basil, and strain the cooked chickpeas.
  2. 2. In a large pot, bring salted water to a boil. Add the dried pasta and cook according to package instructions until al dente (about 8-10 minutes). In the last 2 minutes of cooking, add the asparagus and peas.
  3. 3. Drain the pasta and vegetables. Cool them under cold running water.
  4. 4. In a blender, combine fresh basil, olive oil, lemon juice, lemon zest, Dijon mustard, and minced garlic. Season with salt and pepper, blend until smooth.
  5. 5. In a large bowl, combine the cooled pasta, asparagus, peas, chickpeas, marinated artichoke hearts, diced onion, and scallions. Drizzle with vinaigrette and toss gently.
  6. 6. Cover the salad and refrigerate for at least 2 hours. Serve chilled, garnished with fresh basil and toasted pine nuts.

Nutrition

Serving: 1servingCalories: 250kcalCarbohydrates: 30gProtein: 8gFat: 10gSaturated Fat: 1gPolyunsaturated Fat: 2gMonounsaturated Fat: 7gSodium: 400mgPotassium: 400mgFiber: 7gSugar: 2gVitamin A: 500IUVitamin C: 25mgCalcium: 50mgIron: 2mg

Notes

Chilling improves flavors. Adjust seasonings after chilling if necessary.

Tried this recipe?

Let us know how it was!

Crunchy Fritos Corn Salad for Refreshing Summer Fun

February 17, 2026 by Grace Snow Leave a Comment

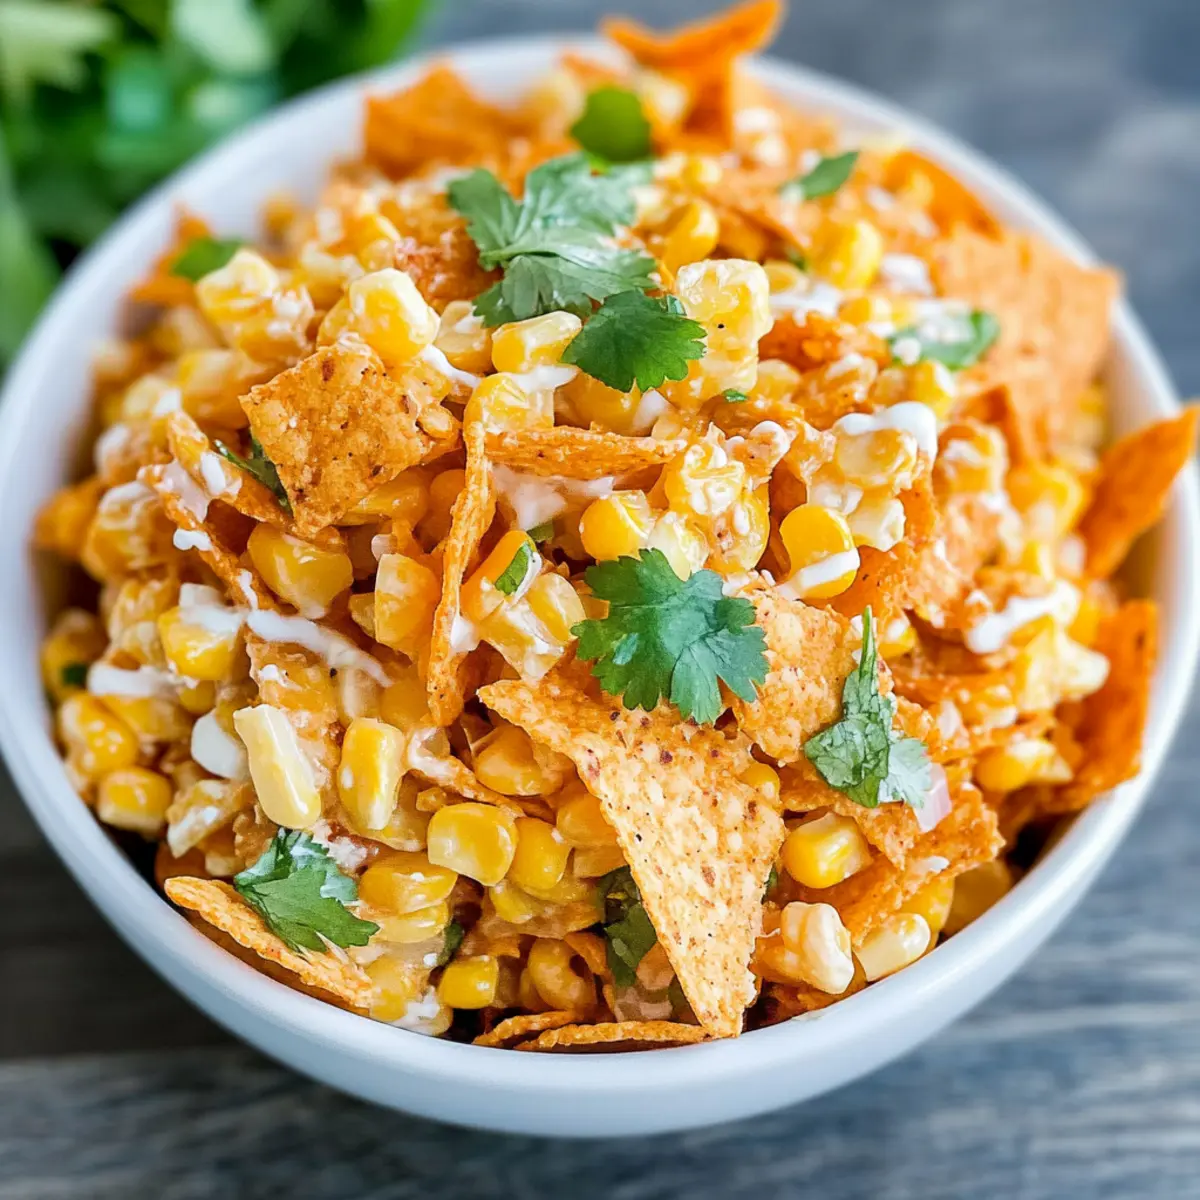
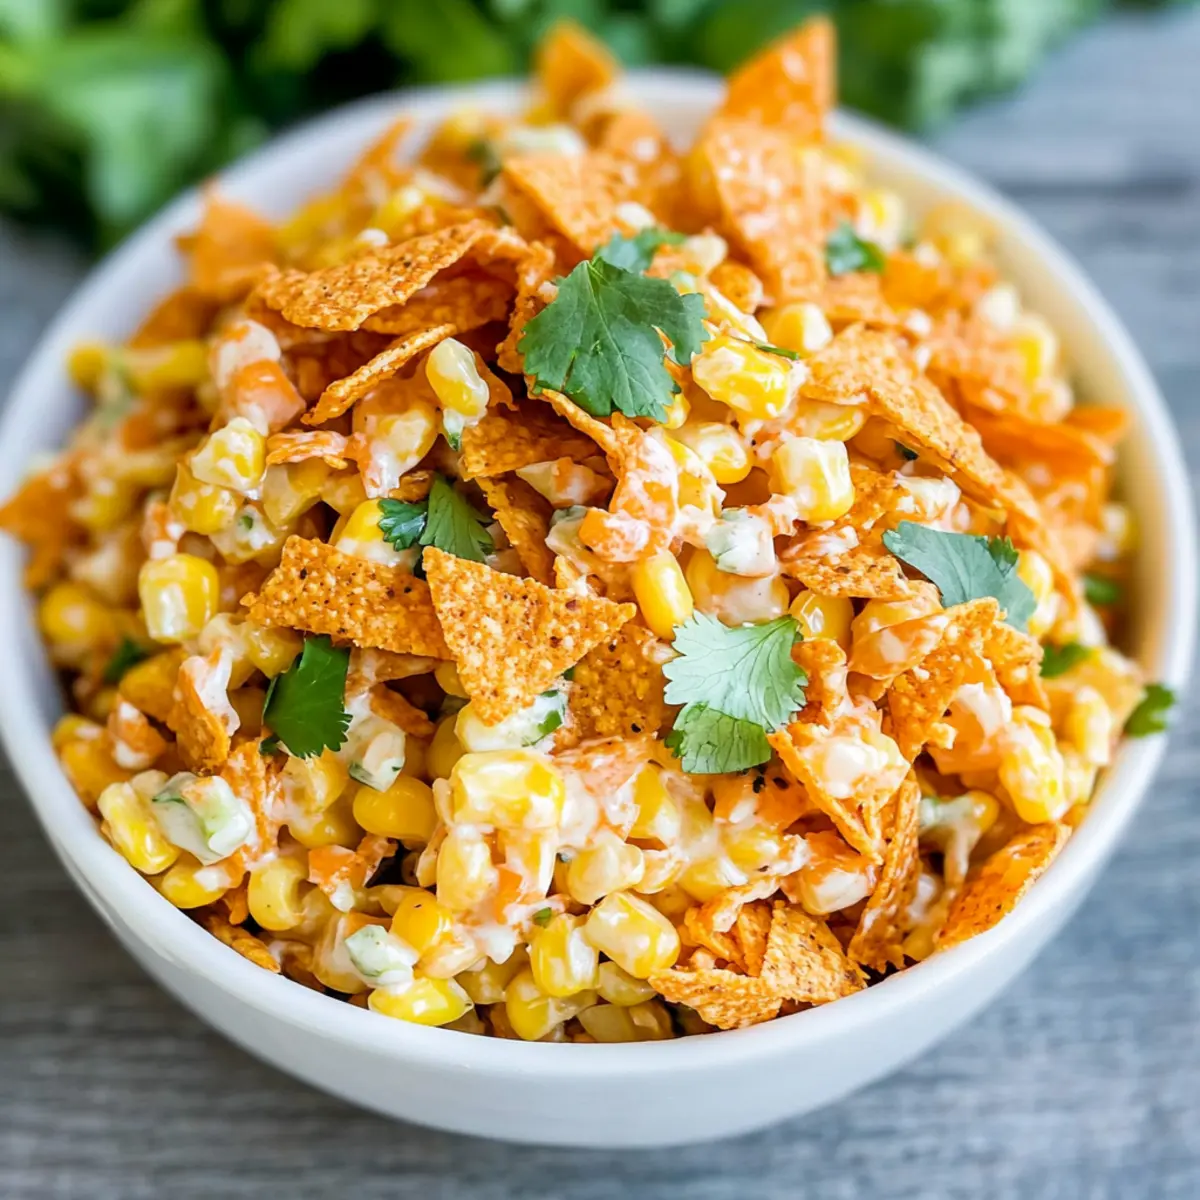
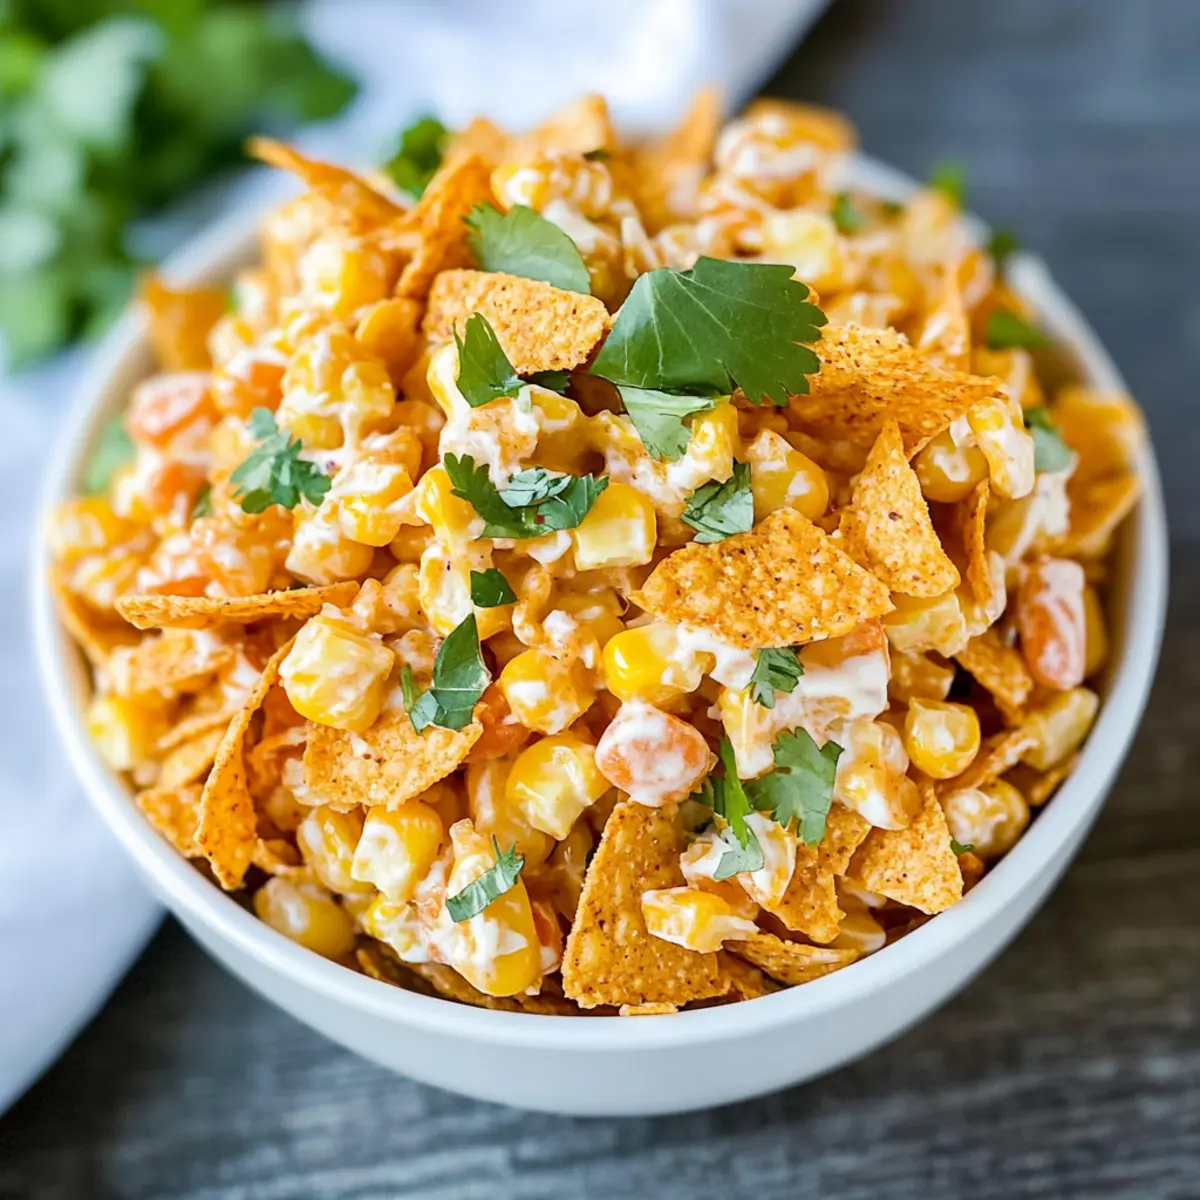
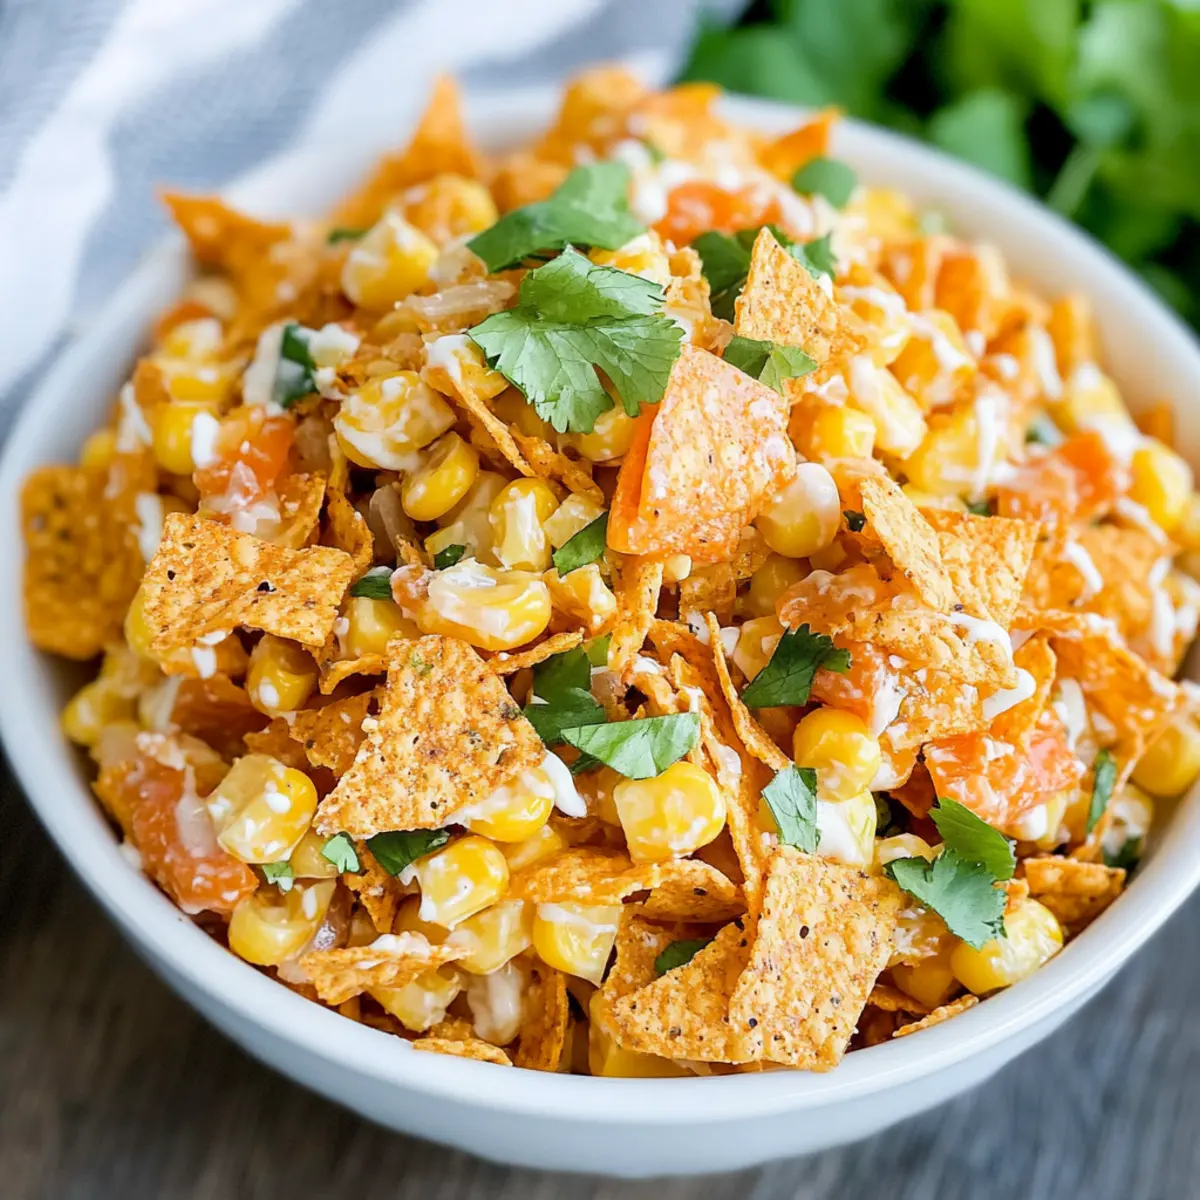
As the summer sun sets on the backyard, laughter fills the air, and the delightful scent of grilled delights wafts through the neighborhood. This is the perfect moment for an enchanting dish that requires zero cooking—enter the Fritos Corn Salad! Bursting with crisp corn, zesty red bell pepper, and a creamy mayonnaise dressing, this no-cook wonder is the ultimate crowd-pleaser for barbecues and potlucks. With just a handful of ingredients and minimal prep time, you can whip up this vibrant, crunchy side dish in no time at all. It’s not only quick to make but also offers a satisfying crunch that both kids and adults love. Are you ready to take your summer gatherings to the next level with this easy Fritos Corn Salad? Let’s dive in!

Why is Fritos Corn Salad a Must-Try?

Simplicity at Its Finest: No cooking, just mix and serve! This Fritos Corn Salad makes your life easier without sacrificing flavor.

Crowd-Pleasing Delight: Perfect for gatherings, it appeals to kids and adults alike—everyone loves the fun crunch of Fritos.

Vibrant Flavors: Crisp corn and zesty red bell pepper create a refreshing experience, enhanced by our creamy dressing. Try pairing it with grilled favorites like Hawaiian BBQ Ribs for an unforgettable meal.

Versatile Appeal: You can easily customize it! Add chicken for protein or jalapeños for a spicy kick.

Quick Prep Time: Whip this up in minutes—ideal for those impromptu summer get-togethers!

Fritos Corn Salad Ingredients

For the Salad
• Whole Kernel Corn – Provides sweetness and bulk; canned corn works best, just drain before mixing.
• Red Bell Pepper – Adds a delightful crunch and vibrant color; this is optional but really enhances the flavor.
• Shredded Mexican Blend Cheese – Contributes creaminess and savory flavor; feel free to substitute with any cheese you love.
• Mayonnaise – Acts as the creamy dressing base, making this a truly indulgent Fritos Corn Salad; light mayonnaise can make this lighter if preferred.
• Black Pepper – Adds a hint of heat; adjust according to your taste.

For the Crunch
• Chili Cheese Fritos – Delivers an irresistible crunch and flavor; plain Fritos can be used as a substitute if needed.
• Fresh Cilantro – An optional garnish that gives a fresh finish and enhances flavor; great for those who love herbal notes!

Step‑by‑Step Instructions for Fritos Corn Salad

Step 1: Combine the Base Ingredients
In a large mixing bowl, pour in one can of drained whole kernel corn, diced red bell pepper, and a generous cup of shredded Mexican blend cheese. Add about half a cup of creamy mayonnaise and a pinch of black pepper for flavor. Using a spatula, gently fold the ingredients together until everything is well-coated, creating a colorful base for your Fritos Corn Salad.

Step 2: Add Fritos for Crunch
Right before serving, take about two cups of Chili Cheese Fritos and crush them slightly—this will enhance the texture. Carefully fold the crushed Fritos into your corn salad mixture. This ensures they stay crunchy until it’s time to dig in, adding a delightful crunch that complements the creamy components of the salad perfectly.

Step 3: Garnish with Freshness
If desired, sprinkle a handful of freshly chopped cilantro over the top of your Fritos Corn Salad for an added pop of color and flavor. This step not only enhances the visual appeal but also offers a refreshing herbal note that balances the creaminess. Give it a gentle toss to incorporate the cilantro just prior to serving.

Step 4: Serve Immediately
Once your Fritos Corn Salad is perfectly mixed, transfer it to a serving bowl. Enjoy it fresh to maintain the delightful crunch of the Fritos. This vibrant, no-cook salad is ready to impress at your summer gatherings, serving as the perfect side dish to complement grilled meats or as a stand-alone delight.

Fritos Corn Salad Variations

Feel free to make this Fritos Corn Salad your own with these delightful twists and substitutions!

  • Creamy Avocado: Fold in diced avocado for a buttery texture and added creaminess that pairs beautifully with the crunchy Fritos.

  • Spicy Kick: Add chopped jalapeños for a zesty, spicy twist that will wake up your taste buds. This variation elevates the summer flavor while keeping the freshness intact.

  • Protein-Packed: Include cooked shredded chicken for a heartier salad that can stand on its own as a meal. It’s a wonderful way to turn this side dish into a satisfying main course.

  • Fresh Corn Alternative: Use fresh corn cut from the cob instead of canned for an ultra-fresh taste. The sweetness of garden-fresh corn makes the salad even more delightful!

  • Cheese Switch-Up: Try using crumbled feta or goat cheese instead of shredded Mexican blend for a tangy flavor boost. The crumble will also add an interesting texture contrast.

  • Zesty Dressing: Mix in some lime juice or a splash of vinegar to brighten up the flavor profile; a tangy dressing can really elevate your salad experience.

  • Crunchy Substitutes: Swap out Chili Cheese Fritos for plain Fritos or even tortilla chips for versatility. Experimenting will keep your salad interesting every time you serve it.

  • Herb Infusion: Add chopped fresh dill or parsley for a fresh herb finish that enhances the overall flavor. Herbs are a fantastic way to bring a pop of freshness, summer-style!

Whether you're enjoying a casual backyard gathering or looking to switch up your sides at a potluck, these variations will keep your Fritos Corn Salad impressively fresh and fun!

Storage Tips for Fritos Corn Salad

• Fridge: Store any leftovers in an airtight container for up to 3-4 days. Keep in mind that the Fritos may lose their crunch over time.

• No Cook Preparation: For best flavor, prepare the salad base a day in advance, but add the Fritos just before serving to maintain their delightful crunch.

• Room Temperature: If serving at a gathering, keep it out for no more than 2 hours to ensure freshness and food safety.

• Reheating: This salad is best enjoyed cold and does not require reheating, as the creamy dressing and textures are also best preserved when served chilled.

What to Serve with Easy No-Cook Fritos Corn Salad?

As you gather around the table filled with summer sunshine and laughter, complement your vibrant creation with flavors that truly shine.

  • Grilled Chicken Skewers: Juicy and smoky, these skewers are perfect companions, balancing the creaminess of the salad with their savory flavor.

  • Corn on the Cob: A summer classic, adding extra sweet corn enhances the joyful crunch and vivid freshness of your Fritos Corn Salad.

  • BBQ Ribs: Sticky and tender, the richness of BBQ ribs pairs beautifully with the refreshing flavors of the salad, making each bite a delight.

  • Tortilla Chips: For continued crunch, offer these alongside the salad. They echo the Fritos’ fun texture, inviting guests to dig in.

  • Watermelon Feta Salad: This refreshing dish adds a sweet, tangy contrast that lightens up the meal while bringing bright colors to your plate.

  • Lemonade or Iced Tea: Refreshing beverages elevate the BBQ experience. Their citrusy notes corresponds wonderfully with the creamy, zesty tones of the salad.

  • Chocolate Chip Cookies: For dessert, finish off with warm cookies. Their gooey sweetness surprisingly complements the savory aspects of everything else.

With these delightful pairings, your Fritos Corn Salad will be the star of the summer gathering, captivating every guest as they share stories under the sun!

Expert Tips for Fritos Corn Salad

• Serve Immediately: Enjoy your Fritos Corn Salad fresh to keep the Fritos crispy. Waiting too long may lead to sogginess, so serve right away!

• Prep Ahead Wisely: You can prepare the salad base a day in advance but only fold in the Fritos right before serving for optimum crunch.

• Customize It: Don’t hesitate to add cooked shredded chicken or diced jalapeños for an extra flavor boost. This will elevate your Fritos Corn Salad to new heights!

• Lighten It Up: For a healthier version, consider using light mayonnaise or Greek yogurt; this way, you maintain delicious creaminess without all the calories.

• Storing Leftovers: If you have any leftovers, store the salad in an airtight container in the fridge. However, be mindful that it’s best enjoyed within 3-4 days for optimal freshness.

Make Ahead Options

These Fritos Corn Salad preparations are perfect for busy home cooks looking to save time! You can mix the corn, bell pepper, cheese, mayonnaise, and black pepper up to 24 hours in advance; simply cover and refrigerate. For the best taste and texture, wait to fold in the crushed Chili Cheese Fritos until just before serving to prevent sogginess. This way, you’ll maintain that irresistible crunch that makes this salad so delightful. Additionally, this can be stored in an airtight container for up to 3 days, but be sure to consume it quickly for the best flavor experience. Enjoy the ease of summer entertaining with this simple make-ahead option!

Fritos Corn Salad Recipe FAQs

What type of corn is best for Fritos Corn Salad?
Absolutely! Whole kernel corn provides the best sweetness and bulk for the salad. I recommend using canned corn; just be sure to drain it well before mixing to prevent excess liquid from making your salad soggy.

How can I store Fritos Corn Salad?
Store any leftovers in an airtight container in the fridge for up to 3-4 days. Just a heads up, though: the Fritos may lose their delightful crunch over time, so it's best to add them just before serving.

Can I freeze Fritos Corn Salad?
I don’t recommend freezing this salad, as the texture of the corn and Fritos will change significantly once thawed. Instead, prepare the base (corn and veggies) and freeze it, then mix in the mayo and Fritos when you're ready to serve for the best result.

What if I have leftover Fritos Corn Salad?
If you find yourself with leftovers, store them in an airtight container in the fridge for up to 3-4 days. Just keep in mind that the Fritos will soften as they sit, so they’re best enjoyed fresh.

Are there any dietary considerations I should be aware of?
Definitely! This dish contains dairy from the cheese and mayonnaise, which may not be suitable for those with lactose intolerance. If allergies are a concern, use dairy-free substitutes for these ingredients. Always check labels if you plan to serve guests with dietary restrictions!

How can I make Fritos Corn Salad healthier?
Very! To lighten up your Fritos Corn Salad, you can substitute regular mayonnaise with a light version or Greek yogurt for a healthier creamy dressing. You can also add more fresh veggies like diced cucumbers or bell peppers to enhance the crunch while reducing calories.

Fritos Corn Salad

Crunchy Fritos Corn Salad for Refreshing Summer Fun

Fritos Corn Salad is a no-cook dish bursting with flavors, perfect for summer gatherings.
Print Recipe Pin Recipe
Prep Time 10 minutes mins
Total Time 10 minutes mins
Servings: 6 servings
Course: Salads
Cuisine: American
Calories: 250
Ingredients Equipment Method Nutrition Notes

Ingredients
  

For the Salad
  • 1 can whole kernel corn drained
  • 1 red bell pepper diced, optional
  • 1 cup shredded Mexican blend cheese or any cheese you love
  • 1/2 cup mayonnaise light mayonnaise can be used
  • to taste black pepper
For the Crunch
  • 2 cups Chili Cheese Fritos or plain Fritos
  • 1/4 cup fresh cilantro chopped, optional

Equipment

  • Mixing Bowl

Method
 

Step-by-Step Instructions
  1. In a large mixing bowl, pour in one can of drained whole kernel corn, diced red bell pepper, and a generous cup of shredded Mexican blend cheese. Add about half a cup of creamy mayonnaise and a pinch of black pepper for flavor. Using a spatula, gently fold the ingredients together until everything is well-coated.
  2. Right before serving, take about two cups of Chili Cheese Fritos and crush them slightly—this will enhance the texture. Carefully fold the crushed Fritos into your corn salad mixture.
  3. If desired, sprinkle a handful of freshly chopped cilantro over the top of your Fritos Corn Salad for an added pop of color and flavor. Give it a gentle toss to incorporate the cilantro just prior to serving.
  4. Once your Fritos Corn Salad is perfectly mixed, transfer it to a serving bowl. Enjoy it fresh to maintain the delightful crunch of the Fritos.

Nutrition

Serving: 1cupCalories: 250kcalCarbohydrates: 20gProtein: 5gFat: 18gSaturated Fat: 3gPolyunsaturated Fat: 0.5gMonounsaturated Fat: 1gCholesterol: 10mgSodium: 400mgPotassium: 200mgFiber: 2gSugar: 1gVitamin A: 300IUVitamin C: 15mgCalcium: 150mgIron: 1mg

Notes

Serve immediately to maintain crunch. You can prepare the salad base a day in advance but add the Fritos right before serving.

Tried this recipe?

Let us know how it was!

Authentic Hawaiian Macaroni Salad: Perfect Creamy Delight

February 17, 2026 by Grace Snow Leave a Comment

As I stood in my kitchen, the aroma of tangy apple cider vinegar and creamy mayo filled the air, transporting me straight to a sunny Hawaiian beach. Making Authentic Hawaiian Macaroni Salad is a delightful way to bring a piece of paradise into your home. This classic side dish boasts the perfect balance of softness from overcooked elbow macaroni melded with the crunch of grated carrots and onion, creating a refreshing option that pairs beautifully with everything from barbecued ribs to burgers. Not only is it incredibly easy to prepare, but this creamy delight is a crowd-pleaser at any gathering, making it a must-have for potlucks and summer picnics. Are you ready to take your taste buds on a trip to the islands?

Why is Hawaiian Macaroni Salad a Must-Try?

Unique Flavor Profile: The combination of tangy apple cider vinegar and rich mayonnaise creates a perfect balance that excites your taste buds.
Crowd-Pleasing Classic: Whether at a family barbecue or a casual gathering, this dish is always a hit, making it a go-to for potlucks.
Easy Preparation: With just a few steps, you can whip up this creamy delight in no time, allowing you to spend more time with loved ones.
Perfect Pairing: Serve it alongside grilled meats or as part of a traditional Hawaiian plate lunch; it complements virtually any dish—just like my beloved Chicken Salad Apples or Grilled Balsamic Steak Salad.
Delicious Leftovers: This salad tastes even better the next day, developing richer flavors, making it a perfect prep-ahead dish for busy schedules!

Authentic Hawaiian Macaroni Salad Ingredients

Discover what makes this dish a classic!

For the Salad

  • Elbow Macaroni – The base of the salad, it should be cooked until soft for that traditional texture.
  • Apple Cider Vinegar – A key ingredient that adds tanginess and balances the richness of the dressing.
  • Carrot – Provides a touch of sweetness and vibrant color; grate it finely for the best incorporation.
  • Grated Onion – Offers a sharp flavor that complements the creaminess; use finely grated onion to add moisture.

For the Dressing

  • Best Foods or Hellman's Mayonnaise – The essential component that gives the salad its creamy richness; stick with these brands for authenticity.
  • Milk – Helps to loosen the dressing to your desired consistency; adjust the amount based on your preference.
  • Sugar – Just a dash to balance the acidity of the vinegar and mayo—it's all about harmony.
  • Kosher Salt and Freshly Ground Black Pepper – Vital for seasoning and enhancing the overall flavor; taste and adjust as needed.

Step‑by‑Step Instructions for Authentic Hawaiian Macaroni Salad

Step 1: Cook Macaroni
Begin by boiling a pot of salted water over high heat. Once boiling, add the elbow macaroni and cook according to package directions until soft, typically about 8-10 minutes. Drain the macaroni in a colander and then transfer it to a large mixing bowl to cool slightly, allowing the warmth to enhance the flavors of the salad.

Step 2: Dress Salad
While the macaroni cools, drizzle apple cider vinegar over it and mix gently. Next, grate the carrot and onion finely, then add them to the macaroni. Stir everything together to ensure even distribution of flavors and let it sit for about 10-15 minutes, allowing the ingredients to combine and cool slightly.

Step 3: Prepare Dressing
In a separate medium bowl, whisk together a generous amount of Best Foods or Hellman's mayonnaise, milk, and a touch of sugar until you achieve a smooth consistency. This dressing should be creamy but pourable, so adjust the milk quantity as necessary. This dressing is the heart of the Authentic Hawaiian Macaroni Salad, providing that beloved richness.

Step 4: Combine
Pour the creamy dressing over the macaroni mixture. Use a spatula to gently fold the ingredients until everything is well-coated and combined. This is your moment to season with kosher salt and freshly ground black pepper, adjusting the flavor to your liking, ensuring a perfect balance for your Hawaiian Macaroni Salad.

Step 5: Chill
Cover the mixing bowl with plastic wrap or transfer the salad into an airtight container. Refrigerate the salad for at least 1 hour, or preferably overnight, to allow flavors to meld beautifully. Remember, the longer it rests, the better it tastes, enhancing the creamy and tangy profile of the salad.

Step 6: Serve
When you're ready to serve, give the salad a quick stir. If it appears thick, you can loosen it with an additional splash of milk to reach your desired consistency. Present this delightful Authentic Hawaiian Macaroni Salad on the table as a refreshing sidekick to any meal, and watch it disappear!

Storage Tips for Authentic Hawaiian Macaroni Salad

Fridge: Store in an airtight container for up to 3 days. This ensures freshness while keeping the creamy texture intact.

Freezer: While it's best enjoyed fresh, you can freeze the salad for up to 1 month. Thaw in the fridge overnight and stir in a splash of milk before serving.

Reheating: Serve cold straight from the fridge or let it sit at room temperature for about 20 minutes to soften slightly before enjoying.

Thinning: If the salad thickens in the fridge, gently stir in a little milk to restore its creamy consistency.

Expert Tips for Authentic Hawaiian Macaroni Salad

  • Mayo Matters: Use only Best Foods or Hellman's mayonnaise for true flavor authenticity; other brands may alter the taste.
  • Cook Soft: Ensure your elbow macaroni is cooked longer than al dente for that signature creamy texture; overcooked is the traditional style.
  • Chill Out: Allow your salad to marinate in the fridge for at least an hour, preferably overnight; the flavors blend beautifully with time.
  • Adjust Seasoning: Always taste your salad after chilling. Sometimes, the flavors mellow, and you may need to adjust the salt and pepper.
  • Extra Creamy: If your salad thickens too much after refrigeration, simply stir in a splash of milk for a smoother consistency before serving.

What to Serve with Hawaiian Macaroni Salad

When planning your meal, think of vibrant sides and delightful beverages to create a feast that dances on your taste buds.

  • Grilled Pineapple: The sweetness of caramelized pineapple perfectly contrasts the creamy salad, evoking tropical vibes and summer memories.

  • Barbecue Ribs: Juicy, smoky ribs create a deliciously savory pairing that complements the salad's creamy texture, bringing a taste of the islands to your table.

  • Coleslaw: A fresh, crunchy coleslaw provides a delightful textural contrast, adding crunch and brightness alongside the creamy macaroni salad.

  • Teriyaki Chicken Skewers: The sweet and tangy flavors of teriyaki mimic the luscious elements in the salad, enhancing the overall Hawaiian experience.

  • Corn on the Cob: Sweet, buttery corn offers a classic summertime flavor that pairs seamlessly with the rich, creamy macaroni, adding a satisfying bite.

  • Mai Tai Cocktail: Refreshing and fruity, this tropical drink brings delightful flavors reminiscent of Hawaiian sunsets, an ideal complement to your feast.

  • Coconut Cake: For dessert, a moist coconut cake lends sweetness and a tropical twist, rounding out your meal on a delightful note.

  • Garlic Naan: Soft, buttery naan is perfect for scooping up salad remnants and adds an unconventional yet tasty element to your culinary spread.

With just the right balance of flavors and textures, your Hawaiian Macaroni Salad will shine alongside these delightful dishes!

Make Ahead Options

These Authentic Hawaiian Macaroni Salad ingredients are perfect for meal prep! You can cook the elbow macaroni and store it in the refrigerator up to 3 days in advance. To maintain the salad's creamy texture and flavor, mix the grated carrot, onion, and vinegar with the cooled macaroni, and refrigerate them together. Prepare the dressing separately and keep it in an airtight container for up to 24 hours. When you’re ready to serve, simply combine the dressing with the macaroni mixture, season to taste, and enjoy this delightful dish just as delicious as when freshly made. This way, you’ll save time on busy days while still impressing your family!

Authentic Hawaiian Macaroni Salad Variations

Feel free to add your personal twist to this classic dish and make it your own!

  • Vegan Option: Swap mayonnaise for a plant-based mayo to keep it creamy without dairy. This alternative allows you to indulge guilt-free.

  • Extra Crunch: Add diced green bell peppers for a refreshing burst of crunch. Their crisp texture enhances the overall experience of the salad beautifully.

  • Protein Boost: Incorporate diced cooked ham or sweet peas for added nutrition, making this salad heartier and more filling. Feel free to mix and match protein sources!

  • Spicy Kick: Toss in a pinch of cayenne pepper or diced jalapeños for a touch of heat. The spice adds an exciting dimension, perfect for those who love a zesty flavor.

  • Fruit Infusion: Mix in diced pineapple or apples for a sweet contrast to the creamy dressing. This fruity twist gives a delightful tropical vibe that's hard to resist.

  • Herbaceous Twist: Freshly chopped cilantro or green onions can brighten the dish with herbal notes. The fresh flavors elevate the salad to another level.

  • Nutty Addition: Add toasted macadamia nuts or sunflower seeds for a satisfying crunch and a nutty flavor. These additions provide great texture and richness to the salad.

For more delicious ideas, check out these inspiring salads: German Potato Salad or try a refreshing Avocado Egg Salad. You'll find that creativity in the kitchen leads to delightful surprises!

Authentic Hawaiian Macaroni Salad Recipe FAQs

What type of macaroni should I use?
Absolutely stick with elbow macaroni, as it's the traditional choice for Hawaiian Macaroni Salad. Cook it until it's soft, which means overcooking it compared to al dente. This will give you that creamy texture that is characteristic of this classic dish.

How should I store leftovers of Hawaiian Macaroni Salad?
For sure! Simply transfer the salad into an airtight container and store it in the refrigerator for up to 3 days. If it thickens, just stir in a splash of milk before serving to restore its creamy consistency. It's a great way to enjoy leftovers without losing flavor!

Can I freeze Hawaiian Macaroni Salad?
Yes, you can! Although it's best enjoyed fresh, you can freeze it in a tightly sealed container for up to 1 month. To thaw, place the container in the fridge overnight. Once thawed, stir in a little milk to bring back the creaminess before serving.

What do I do if my macaroni salad is too dry?
Very easy! If you find that your Hawaiian Macaroni Salad has dried out after chilling, simply add a splash of milk or mayonnaise to loosen the texture. Stir gently until the desired creaminess is reached. This is a common adjustment, and no one will ever know the difference!

Are there any dietary considerations I should be aware of?
Definitely! If you're serving this salad at a gathering, it's wise to note that it contains mayonnaise and may not be suitable for those with egg allergies. Additionally, if you’d like to make it lighter, feel free to substitute with avocado oil mayonnaise, which retains creaminess without the heaviness of traditional mayo. Always consider your guests' dietary preferences when preparing this delightful dish!

Authentic Hawaiian Macaroni Salad

Authentic Hawaiian Macaroni Salad: Perfect Creamy Delight

Authentic Hawaiian Macaroni Salad is a creamy, tangy, and crowd-pleasing side dish perfect for any gathering.
Print Recipe Pin Recipe
Prep Time 20 minutes mins
Cook Time 10 minutes mins
Chilling Time 1 hour hr
Total Time 1 hour hr 30 minutes mins
Servings: 8 servings
Course: Salads
Cuisine: Hawaiian
Calories: 300
Ingredients Equipment Method Nutrition Notes

Ingredients
  

For the Salad
  • 8 oz Elbow Macaroni Cooked until soft
  • 1 tbsp Apple Cider Vinegar Adds tanginess
  • 1 medium Carrot Grated finely
  • 1 medium Grated Onion Finely grated to add moisture
For the Dressing
  • 1 cup Best Foods or Hellman's Mayonnaise For authenticity
  • 1/4 cup Milk Adjust for desired consistency
  • 1 tbsp Sugar Balances acidity
  • 1 tsp Kosher Salt To taste
  • 1 tsp Freshly Ground Black Pepper To taste

Equipment

  • pot
  • Colander
  • Mixing Bowl
  • Whisk
  • Spatula

Method
 

Step-by-Step Instructions
  1. Boil a pot of salted water and cook the elbow macaroni until soft, about 8-10 minutes. Drain and cool slightly.
  2. Drizzle apple cider vinegar over the macaroni, mix gently. Grate and add carrot and onion, stir to combine.
  3. In a separate bowl, whisk together mayonnaise, milk, and sugar until smooth.
  4. Pour the dressing over the macaroni mixture and fold gently to combine. Season with salt and pepper.
  5. Cover and refrigerate for at least 1 hour, preferably overnight.
  6. Stir before serving and adjust consistency with milk if necessary.

Nutrition

Serving: 1cupCalories: 300kcalCarbohydrates: 32gProtein: 4gFat: 18gSaturated Fat: 3gPolyunsaturated Fat: 0.5gMonounsaturated Fat: 1gCholesterol: 15mgSodium: 500mgPotassium: 150mgFiber: 1gSugar: 2gVitamin A: 200IUVitamin C: 2mgCalcium: 50mgIron: 0.5mg

Notes

Use only Best Foods or Hellman's mayonnaise for authentic flavor. Allow the salad to chill for optimal taste.

Tried this recipe?

Let us know how it was!

Strawberry Crackle Salad: A Refreshing Crunch for Summer Bliss

February 12, 2026 by Grace Snow Leave a Comment

As I opened the fridge, a wave of nostalgia hit me—just like the summer picnics of my childhood. That’s when I spotted the perfect star ingredient for my Strawberry Crackle Salad, a dish that captures the joy of sunny gatherings with family and friends. This refreshing salad is a delightful mix of sweet, ripe strawberries and a crunchy pretzel topping, making it a satisfying choice that stands out at any potluck. With its creamy dressing and minimal prep time, you can whip it up in a flash, leaving you more moments to enjoy those sunny smiles. Plus, it's versatile enough to pair with your favorite grilled dishes or serve as a stand-alone treat! Ready to dive into summer flavors with me?

Why is Strawberry Crackle Salad a Must-Try?

Nostalgic flavors will transport you back to joyful summer picnics, evoking memories with every bite. Quick and easy to prepare, this salad takes minimal time, leaving you free to relish those great moments. Versatile enough to shine at barbecues, it pairs perfectly with grilled chicken or even on its own! Crunchy pretzels and juicy strawberries unite for a delightful texture that keeps it exciting. Plus, if you love easy yet impressive dishes, you'll find this Strawberry Crackle Salad rivals any classic, just like Chicken Salad Apples or Grilled Balsamic Steak Salad!

Strawberry Crackle Salad Ingredients

• A delightful blend of sweet and crunchy awaits!

For the Pretzel Crust

  • Crushed pretzels – Adds a delightful crunch that contrasts perfectly with the creamy dressing; can use graham crackers for a different texture.
  • Chopped pecans – Provide a nutty flavor and additional crunch; feel free to substitute with walnuts or almonds based on your preference.
  • Brown sugar – Adds sweetness and enhances other flavors; can substitute with coconut sugar for a less processed alternative.
  • Butter, melted – Binds the crust together; margarine or coconut oil can be used for a dairy-free option.

For the Creamy Dressing

  • Sliced strawberries – The key ingredient that brings sweetness and freshness; fresh is preferred for the best texture, though frozen will work in a pinch.
  • Cream cheese, softened – Provides a creamy, rich base for the salad; opt for low-fat cream cheese for a lighter version.
  • Granulated sugar – Balances the creaminess of the dressing; adjust to taste based on the sweetness of the strawberries.
  • Vanilla extract – Enhances overall flavor; pure vanilla extract is recommended for the best taste.
  • Cool Whip – Adds lightness and fluffiness to the salad; consider using homemade whipped cream for a fresher taste.

Enjoy creating your Strawberry Crackle Salad with these simple yet essential ingredients!

Step‑by‑Step Instructions for Strawberry Crackle Salad

Step 1: Prepare the Oven and Baking Sheet
Begin by preheating your oven to 400°F (200°C). While it warms up, line a baking sheet with parchment paper to prevent sticking. This will help ensure your pretzel crust bakes evenly without mess.

Step 2: Mix Pretzel Crust
In a medium bowl, combine your crushed pretzels, chopped pecans, and brown sugar. Pour in the melted butter, mixing with a spatula until everything is well coated and crumbly. The mixture should hold together when squeezed, creating a flavorful base for your Strawberry Crackle Salad.

Step 3: Bake the Crust
Spread the pretzel mixture evenly on the prepared baking sheet and bake it in the preheated oven for 8-10 minutes. You want it to be bubbling and lightly golden. Keep an eye on it, as you don’t want it to burn. Once done, remove it and let it cool completely on the sheet.

Step 4: Make the Creamy Base
In a large bowl, beat together the softened cream cheese, granulated sugar, and vanilla extract using an electric mixer until smooth and creamy. It should be free of lumps, creating a rich base for your salad. Once smooth, gently fold in the Cool Whip, blending just until combined to maintain its airy texture.

Step 5: Combine the Salad
Before serving, carefully fold the sliced strawberries into the creamy mixture using a rubber spatula. Add half of the pretzel crunch mixture and combine gently, preserving the flavor and texture of the salad. This will ensure that every bite of your Strawberry Crackle Salad is delightfully refreshing.

Step 6: Serve Immediately
Transfer the assembled Strawberry Crackle Salad to a serving bowl and top with the remaining pretzel crunch mixture. This will create a beautiful, crunchy topping that enhances both the flavor and the presentation. For the best experience, serve immediately to keep the pretzel topping crispy.

Strawberry Crackle Salad Variations

Feel free to mix it up and make this delightful salad your own with these fun twists!

  • Berry Medley: Substitute some strawberries with blueberries or raspberries for a colorful twist. The combination of flavors will brighten your salad and bring a summer vibe.

  • Coconut Bliss: Add shredded coconut for a tropical flair. Those subtle, sweet coconut shavings will give your salad a delightful chewiness that pairs beautifully with the strawberries.

  • Nutty Alternatives: Swap out pecans for your favorite nuts, such as walnuts or almonds. Each nut brings its unique crunch and flavor, adding a new layer of texture to your dish.

  • Gluten-Free Option: For a gluten-free version, replace the pretzels with gluten-free crackers. You’ll achieve that satisfying crunch without compromising on taste!

  • Creamy Upgrade: Use Greek yogurt instead of cream cheese for a tangier dressing. This adds a nice creaminess while upping the nutritional value—perfect for health-conscious gatherings.

  • Spiced Up: For a touch of heat, sprinkle in some cinnamon or a dash of cayenne pepper. This unexpected twist can enhance the sweetness of the strawberries and impress your guests.

  • Fluffy Lifts: Use homemade whipped cream in place of Cool Whip for a richer flavor. This simple switch can elevate your salad to a whole new level of deliciousness.

  • Fruity Addition: Mix in some finely chopped apples or pears. This will add additional crunch and a sweet surprise, making every bite a delightful discovery.

Your creativity will shine through in every bite of this refreshing Strawberry Crackle Salad! And, if you enjoy similar flavors, try adding a twist from my Avocado Egg Salad or use your remaining strawberries in a sumptuous German Potato Salad. Enjoy exploring!

Make Ahead Options

These Strawberry Crackle Salad preparations are perfect for busy home cooks looking to save time! You can make the pretzel crust up to 24 hours in advance by baking it and then storing it in an airtight container at room temperature to maintain its crunch. Additionally, the creamy dressing can be prepared up to 3 days ahead; blend the cream cheese, sugar, and vanilla, then fold in the Cool Whip, and refrigerate until ready to use. Just before serving, gently mix in the sliced strawberries and half of the pretzel crunch. This will ensure your Strawberry Crackle Salad remains fresh and delicious with optimal texture!

What to Serve with Strawberry Crackle Salad?

Nothing elevates a gathering quite like a well-rounded meal, and this salad makes for the perfect appetizer or side dish!

  • Grilled Chicken: Juicy, marinated chicken complements the sweetness of strawberries, creating a delightful balance of flavors. Plus, the grill’s smokiness adds a delightful contrast.
  • Herbed Quinoa: This nutritious grain infused with fresh herbs provides a hearty texture that pairs beautifully with the lightness of the salad. It makes for a fulfilling meal alongside the Strawberry Crackle Salad.
  • Summer Veggie Skewers: Colorful, grilled veggies such as bell peppers and zucchini add a vibrant visual contrast and smoky flavor, making every bite an adventure.
  • Crispy Fish Tacos: Lightly battered fish wrapped in soft tortillas adds a refreshing twist, while tangy slaw mirrors the freshness of the strawberry salad perfectly. Each crunch complements the other!
  • Iced Lemonade: A chilled glass of homemade lemonade refreshes the palate and enhances the dessert-like quality of the salad. The zesty tang is an invigorating companion.
  • Chocolate Mousse: For a sweet ending, rich chocolate mousse provides a creamy, velvety finish that beautifully balances the fruity, crunch of your meal. The contrasts create a memorable dessert experience.
  • Pineapple Mint Punch: This vibrant, refreshing drink harmonizes with the light flavors in the salad and offers a tropical flair that transports you to sunny beaches. What a delight to sip alongside!

How to Store and Freeze Strawberry Crackle Salad

Refrigerator: Store any leftover Strawberry Crackle Salad in an airtight container in the fridge for up to 2-3 days. This helps maintain its freshness and crunch.

Freezer: While it’s best enjoyed fresh, you can freeze the pretzel mixture separately for up to a month. Just be sure to wrap it tightly to prevent freezer burn.

Thawing: To enjoy the frozen pretzel mix, let it thaw at room temperature and re-crunch it in the oven for a few minutes to restore its crispiness before combining with the creamy salad.

Serving Tips: When serving leftovers, mix in freshly sliced strawberries to revitalize the flavor and texture of your Strawberry Crackle Salad.

Expert Tips for Strawberry Crackle Salad

  • Cool the Crust: Ensure the pretzel mixture cools completely before breaking it into pieces. This helps maintain that perfect crunch texture essential for your Strawberry Crackle Salad.

  • Gentle Mixing: Be gentle when folding in the Cool Whip and strawberries. This keeps the salad light and airy, enhancing the delightful flavors throughout.

  • Serve Fresh: For the best experience, serve the salad immediately after mixing. This ensures the strawberries remain fresh and the pretzel crust stays crunchy, avoiding any sogginess.

  • Adjust Sweetness: Taste the creamy base before serving and adjust the granulated sugar according to the natural sweetness of your strawberries. This customization keeps your Strawberry Crackle Salad perfectly balanced.

  • Explore Variations: Don’t hesitate to add other berries or textures! Incorporating blueberries or shredded coconut can elevate your salad, making it uniquely yours while still deliciously nostalgic.

Strawberry Crackle Salad Recipe FAQs

How do I choose ripe strawberries?
Absolutely! When selecting strawberries, look for ones that are bright red, firm, and free of dark spots. The green caps should appear fresh and green. Avoid those with a dull appearance or any signs of mold, as these may affect the flavor and texture of your Strawberry Crackle Salad.

How should I store leftovers?
To store any leftover Strawberry Crackle Salad, place it in an airtight container in the refrigerator. It will last for about 2-3 days. Ensure it's sealed well to maintain the freshness and crunch of the pretzel crust. Remember, the longer it sits, the softer the crust will become!

Can I freeze the salad?
While the salad itself isn't ideal for freezing, you can certainly freeze the pretzel mixture! Simply prepare the crust, allow it to cool, and then wrap it tightly in plastic wrap or place it in a freezer-safe bag. It can be stored for up to 3 months. When ready to use, just thaw it at room temperature and re-crunch it by baking it in a preheated oven for a few minutes before combining with the creamy dressing and fresh strawberries.

What if my pretzel mixture gets soggy?
If you find your pretzel mixture has become soggy, it could be due to moisture in your container or from the strawberries releasing juices. To prevent this, ensure the pretzel crust cools completely before breaking it apart. You could also consider storing the pretzel crunch separately and adding it to each serving right before eating for that perfect crunch!

Are there any allergy considerations?
Yes! If you're preparing this salad for someone with allergies, keep in mind that it contains nuts and dairy. For a nut-free option, omit the pecans or substitute with seeds like sunflower seeds. To make a dairy-free version, consider using a dairy-free cream cheese alternative and homemade whipped coconut cream instead of Cool Whip.

Can I make substitutions for the ingredients?
Very! If you're looking to switch things up, you can substitute graham crackers for the pretzel crust if you're after a sweeter base. If you want to keep it gluten-free, opt for gluten-free pretzels or crackers. Additionally, feel free to play around with other berries like raspberries or blueberries for a delightful berry medley that will add different flavors to your Strawberry Crackle Salad!

Strawberry Crackle Salad

Strawberry Crackle Salad: A Refreshing Crunch for Summer Bliss

Strawberry Crackle Salad captures the joy of summer picnics with its mix of sweet strawberries and crunchy pretzel topping.
Print Recipe Pin Recipe
Prep Time 15 minutes mins
Cook Time 10 minutes mins
Cooling Time 10 minutes mins
Total Time 35 minutes mins
Servings: 6 servings
Course: Salads
Cuisine: American
Calories: 250
Ingredients Equipment Method Nutrition Notes

Ingredients
  

Pretzel Crust
  • 2 cups Crushed pretzels Can use graham crackers for a different texture.
  • 1/2 cup Chopped pecans Feel free to substitute with walnuts or almonds.
  • 1/4 cup Brown sugar Can substitute with coconut sugar.
  • 1/2 cup Butter, melted Margarine or coconut oil can be used for a dairy-free option.
Creamy Dressing
  • 2 cups Sliced strawberries Fresh is preferred.
  • 8 oz Cream cheese, softened Opt for low-fat cream cheese for a lighter version.
  • 1/2 cup Granulated sugar Adjust to taste.
  • 1 teaspoon Vanilla extract Pure vanilla extract is recommended.
  • 1 cup Cool Whip Consider using homemade whipped cream.

Equipment

  • Oven
  • Baking Sheet
  • medium bowl
  • large bowl
  • Electric mixer
  • Spatula

Method
 

Preparation
  1. Preheat your oven to 400°F (200°C) and line a baking sheet with parchment paper.
  2. In a medium bowl, combine crushed pretzels, chopped pecans, and brown sugar. Pour in melted butter and mix until coated.
  3. Spread the pretzel mixture on the baking sheet and bake for 8-10 minutes until bubbling and golden.
  4. In a large bowl, beat together cream cheese, granulated sugar, and vanilla extract until smooth. Fold in Cool Whip.
  5. Fold sliced strawberries in the creamy mixture and add half the pretzel crunch.
  6. Transfer to a serving bowl and top with remaining pretzel crunch. Serve immediately.
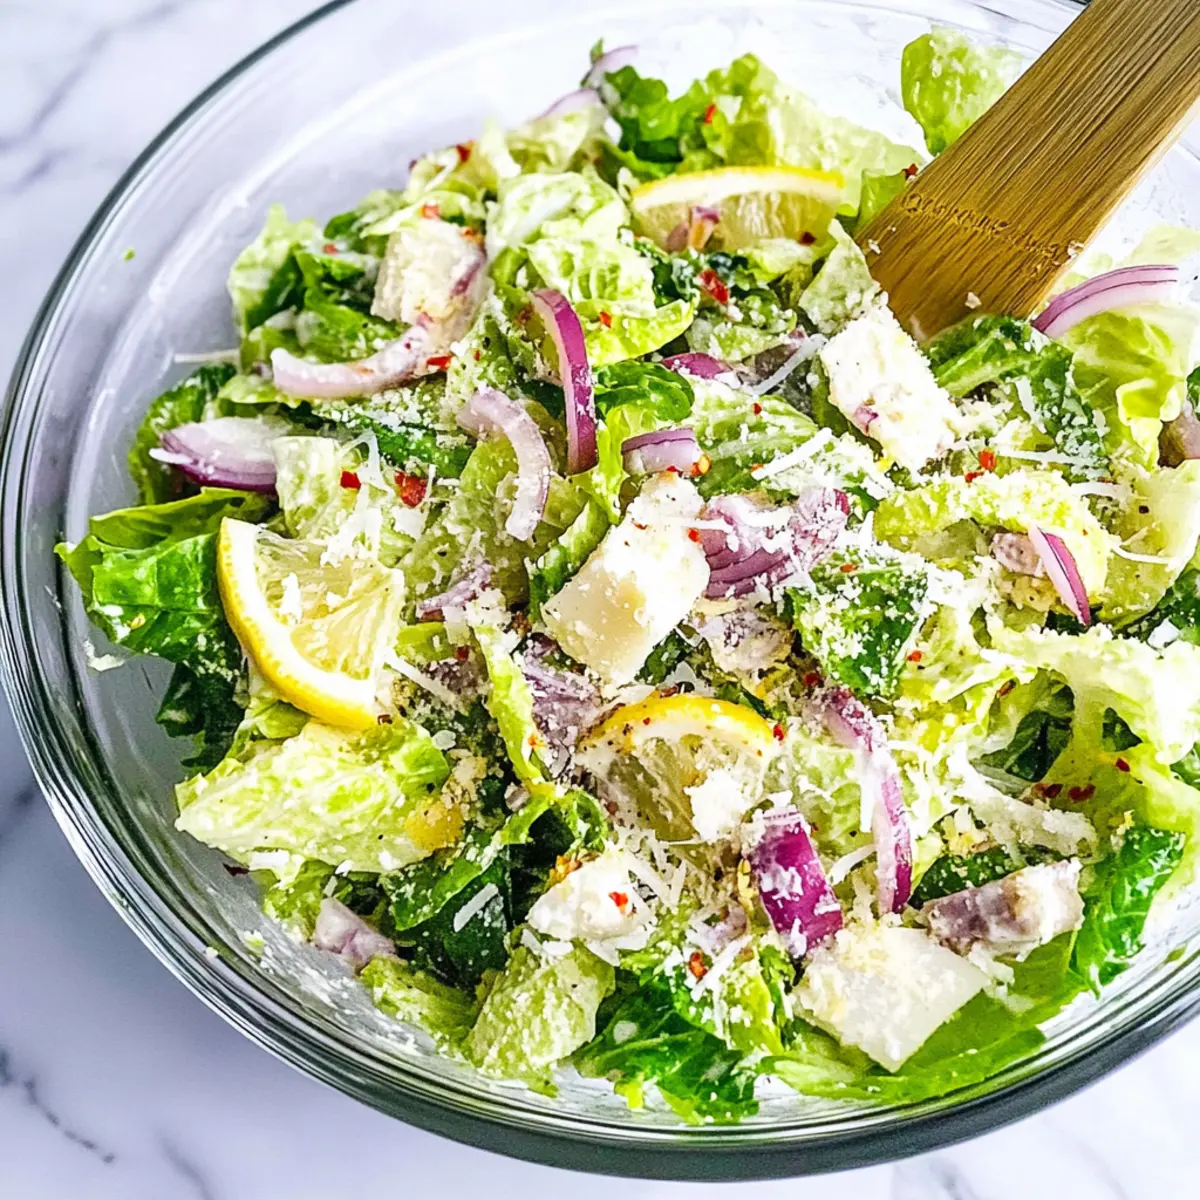
Nutrition

Serving: 1servingCalories: 250kcalCarbohydrates: 30gProtein: 3gFat: 12gSaturated Fat: 7gPolyunsaturated Fat: 1gMonounsaturated Fat: 4gCholesterol: 30mgSodium: 200mgPotassium: 150mgFiber: 1gSugar: 18gVitamin A: 200IUVitamin C: 30mgCalcium: 50mgIron: 0.5mg

Notes

Store leftovers in an airtight container for 2-3 days. For best results, serve immediately after mixing to keep ingredients fresh and crunchy.

Tried this recipe?

Let us know how it was!

Quick And Easy Mango Slaw for a Refreshing Tropical Twist

February 8, 2026 by Grace Snow Leave a Comment

As I prepped for a casual dinner party last week, the scent of ripe mangoes instantly transported me to the sun-soaked beaches of a tropical getaway. That's when the idea struck: why not whip up a fresh and quick mango slaw? This vibrant dish not only bursts with cheerful colors but is also a delightful blend of sweetness and crunch, making it an irresistible side for any meal. Ready in just 15 minutes, this quick and easy mango slaw is perfect for busy weeknights or impromptu gatherings. Plus, it’s wonderfully customizable—feel free to add your favorite veggies or spice it up with a hint of heat. Are you ready to bring a taste of the tropics to your dinner table?

Why is this Mango Slaw a Must-Try?

Freshness comes alive in this vibrant dish, making every bite a tropical adventure. Quick to prepare, this slaw takes just 15 minutes, perfect for busy days or last-minute meals. Customizable by nature, you can easily switch up the veggies or add a kick of spice to suit your taste. Visually stunning, its bright colors are sure to impress guests, making it a crowd-pleaser. Plus, this recipe is a fantastic side for grilled meats or can even jazz up simple tacos. Don't miss out on the chance to elevate your meals with this refreshing & delicious slaw!

Quick And Easy Mango Slaw Ingredients

• Turn your tropical dreams into reality with these fresh ingredients!

For the Slaw

  • Ripe Mangoes – Adds sweetness and juiciness; choose ripe for the best flavor.
  • Green Cabbage – Provides a crunchy texture; can substitute with red cabbage for a pop of color.
  • Carrot – Adds natural sweetness and a vibrant hue; can be replaced with shredded radish for a peppery twist.
  • Red Bell Pepper – Contributes crunch and sweetness; substitute with orange or yellow bell peppers for variety.
  • Red Onion – Offers sharpness and deep flavor; opt for green onions for a milder taste.
  • Fresh Cilantro – Introduces a fresh, herbaceous note; omit if you dislike it and use parsley instead.

For the Dressing

  • Lime Juice – Provides acidity to balance flavors; lemon juice works well as an alternative.
  • Honey or Maple Syrup – Adds a touch of sweetness; for a vegan option, use agave syrup.
  • Sesame Oil – Introduces a nutty flavor; can be swapped with olive oil for a lighter taste.
  • Salt and Pepper – To taste; essential for enhancing all flavors in this quick and easy mango slaw.

Step‑by‑Step Instructions for Quick And Easy Mango Slaw

Step 1: Prepare the Vegetables
In a large mixing bowl, combine 2 cups of diced ripe mangoes, 2 cups of shredded green cabbage, 1 grated carrot, 1 sliced red bell pepper, ½ sliced red onion, and ¼ cup of chopped fresh cilantro. Use a sharp knife for clean cuts and colorful presentations. This vibrant mixture will serve as the base of your quick and easy mango slaw, bringing brightness and crunch.

Step 2: Mix the Dressing
In a separate small bowl, whisk together the juice of 1 lime, 2 tablespoons of honey (or maple syrup), 2 tablespoons of sesame oil, and a pinch of salt and pepper. Whisk until the mixture is well combined and slightly emulsified. The dressing should be tangy and sweet, ready to enhance the flavors of your fresh ingredients in the mango slaw.

Step 3: Combine and Toss
Pour the dressing over the mango and vegetable mixture in the large bowl. Using tongs or a large spoon, gently toss the ingredients together for about 1-2 minutes until everything is evenly coated. The bright colors of your quick and easy mango slaw will come together beautifully as the dressing clings to each piece, creating a cohesive dish.

Step 4: Let It Rest
Allow the slaw to sit for 5-10 minutes at room temperature. This resting period lets the flavors meld together, enhancing the taste of your quick and easy mango slaw. You’ll notice the vegetables may slightly soften while still retaining that satisfying crunch, making each bite delightful.

Step 5: Serve and Enjoy
Serve the slaw chilled or at room temperature as a refreshing side dish. It pairs beautifully with grilled meats or can be showcased as a bright topping for fish tacos. This quick and easy mango slaw is perfect for any occasion, bringing a tropical twist to your meal!

Quick And Easy Mango Slaw Variations

Feel free to let your creativity shine and customize the flavors of this vibrant mango slaw!

  • Avocado Addition: Add diced avocado for a creamy twist that balances beautifully with the crunchy vegetables. This addition not only enhances flavor but also adds healthy fats to the dish.

  • Nutty Crunch: Incorporate chopped nuts like peanuts or cashews for added crunch and richness. A sprinkle of toasted nuts on top takes your slaw to the next level, creating a delightful contrast in texture.

  • Spicy Kick: Experiment with chili flakes or diced jalapeños for an extra kick of heat. The spicy notes add depth, making it a perfect pairing for grilled meats or tacos.

  • Tropical Fruit Mix: Swap in other tropical fruits like pineapple or papaya for a mixed fruit slaw. The sweet and tangy flavors of these fruits offer a refreshing change, bringing an extra burst of tropical flair.

  • Cabbage Swap: Try using red cabbage instead of green for a striking visual effect and a slightly more robust taste. Red cabbage not only looks stunning but also provides additional antioxidants.

  • Dressing Variation: Use coconut milk instead of the sesame oil to create a tropical-inspired dressing. This twist introduces a creamy texture and a subtle sweetness that complements the mango beautifully.

  • Herb Infusion: Replace cilantro with fresh mint for a refreshing herbal note. This fragrant herb adds another layer of flavor that’s perfect for summer gatherings.

  • Wrap It Up: Use leftover slaw in sandwiches or wraps for a delightful crunchy texture. Pack it with grilled chicken or tuna for a quick lunch that’s both satisfying and flavorful!

For more delicious side dish ideas, try out our Fried Shrimp Cabbage or enhance your pizza night with our Blue Cheese Pizza. Embrace the possibilities!

What to Serve with Fresh & Quick Mango Slaw

Elevate your meal with vibrant accompaniments that echo the tropical flair of this zesty dish.

  • Grilled Chicken: Juicy and smoky, grilled chicken pairs perfectly with the sweet crunch of mango slaw, creating a meal bursting with flavor.
  • Fish Tacos: The bright, tropical notes of the slaw are ideal as a topping for fish tacos, transforming each bite into a sunny fiesta.
  • Black Bean Quinoa Bowl: This protein-packed bowl complements the slaw's sweetness, adding a hearty base with a nutty texture and earthy flavors.
  • Chili Lime Shrimp: Spicy shrimp beautifully contrast with the sweet mango, making each mouthful a refreshing dance of flavors.
  • Cornbread: Soft, slightly sweet cornbread balances the tangy slaw, adding warmth and a comforting texture to your plate.
  • Pineapple Salsa: Bright and fruity, pineapple salsa enhances the tropical vibe while offering a delightful contrast in flavors.
  • Coconut Rice: Creamy, subtly sweet coconut rice serves as a perfect base, soaking up the vibrant flavors of your meal.
  • Sparkling Water with Lime: Refreshing and light, this drink echoes the citrus notes in the slaw, making it a delightful palate cleanser.

How to Store and Freeze Quick And Easy Mango Slaw

Fridge: Store any leftover mango slaw in an airtight container in the refrigerator for up to 2 days to maintain freshness and crunch.

Make-Ahead: This slaw can be prepped ahead of time, making it a perfect side dish for busy days. Just mix the dressing separately until ready to combine.

Freezer: For best results, avoid freezing the slaw as fresh ingredients like cabbage and mango lose their texture when thawed.

Reheating: Serve the slaw chilled or at room temperature. If needed, give it a quick toss with some fresh lime juice before serving to revive flavors.

Make Ahead Options

These Quick And Easy Mango Slaw are perfect for busy home cooks looking to save time without sacrificing flavor! You can prep the vegetables (diced mangoes, shredded cabbage, grated carrot, and sliced peppers) up to 24 hours in advance and store them in an airtight container in the refrigerator to maintain freshness. The dressing can also be whisked together and kept separate, ensuring the slaw stays crunchy and vibrant. When you’re ready to enjoy, simply combine the prepped veggies with the dressing, toss gently, and let it rest for 5-10 minutes to meld the flavors. This way, you’ll have a refreshing tropical side dish ready at a moment's notice!

Expert Tips for Quick And Easy Mango Slaw

  • Choose Ripe Mangoes: A ripe mango ensures maximum sweetness and juiciness. Avoid underripe mangoes as they can be too tart, impacting the overall flavor of your mango slaw.

  • Substitution Smart: Experiment with different vegetables like red cabbage or radish. Customizing helps keep this quick and easy mango slaw exciting and suited to your preferences.

  • Fresh Ingredients Matter: Use fresh herbs for the best flavor. Wilted cilantro or old veggies can diminish the vibrant taste and texture this dish promises.

  • Rest for Flavor: Allowing the slaw to rest enhances the flavors, but don’t leave it too long to maintain the crunchiness of the vegetables.

  • Optional Add-ins: Consider topping your mango slaw with diced avocado or nuts for extra creaminess and crunch, elevating your quick and easy mango slaw experience.

Quick And Easy Mango Slaw Recipe FAQs

What ripe mangoes should I choose for the best flavor?
Absolutely! When selecting mangoes, look for fruit that gives slightly when gently pressed and has a sweet, fruity aroma. Ripe mangoes often have a deep yellow-orange skin with occasional dark spots, signaling their sweetness. Avoid ones that feel hard or have a lot of green.

How should I store leftover mango slaw?
You can store any leftover mango slaw in an airtight container in the refrigerator. It's best consumed within 2 days to maintain its freshness and crunch. If stored properly, it will stay tasty and vibrant for this duration, so you can enjoy it as a quick snack or side dish later!

Can I freeze mango slaw?
I recommend against freezing mango slaw, as the fresh ingredients like cabbage and mango lose their crispness and texture once thawed. However, if you find yourself needing to preserve it, mix and freeze just the dressing separately. When ready to use, prepare fresh ingredients and toss them with the thawed dressing for a quick and easy mango slaw that's still delicious!
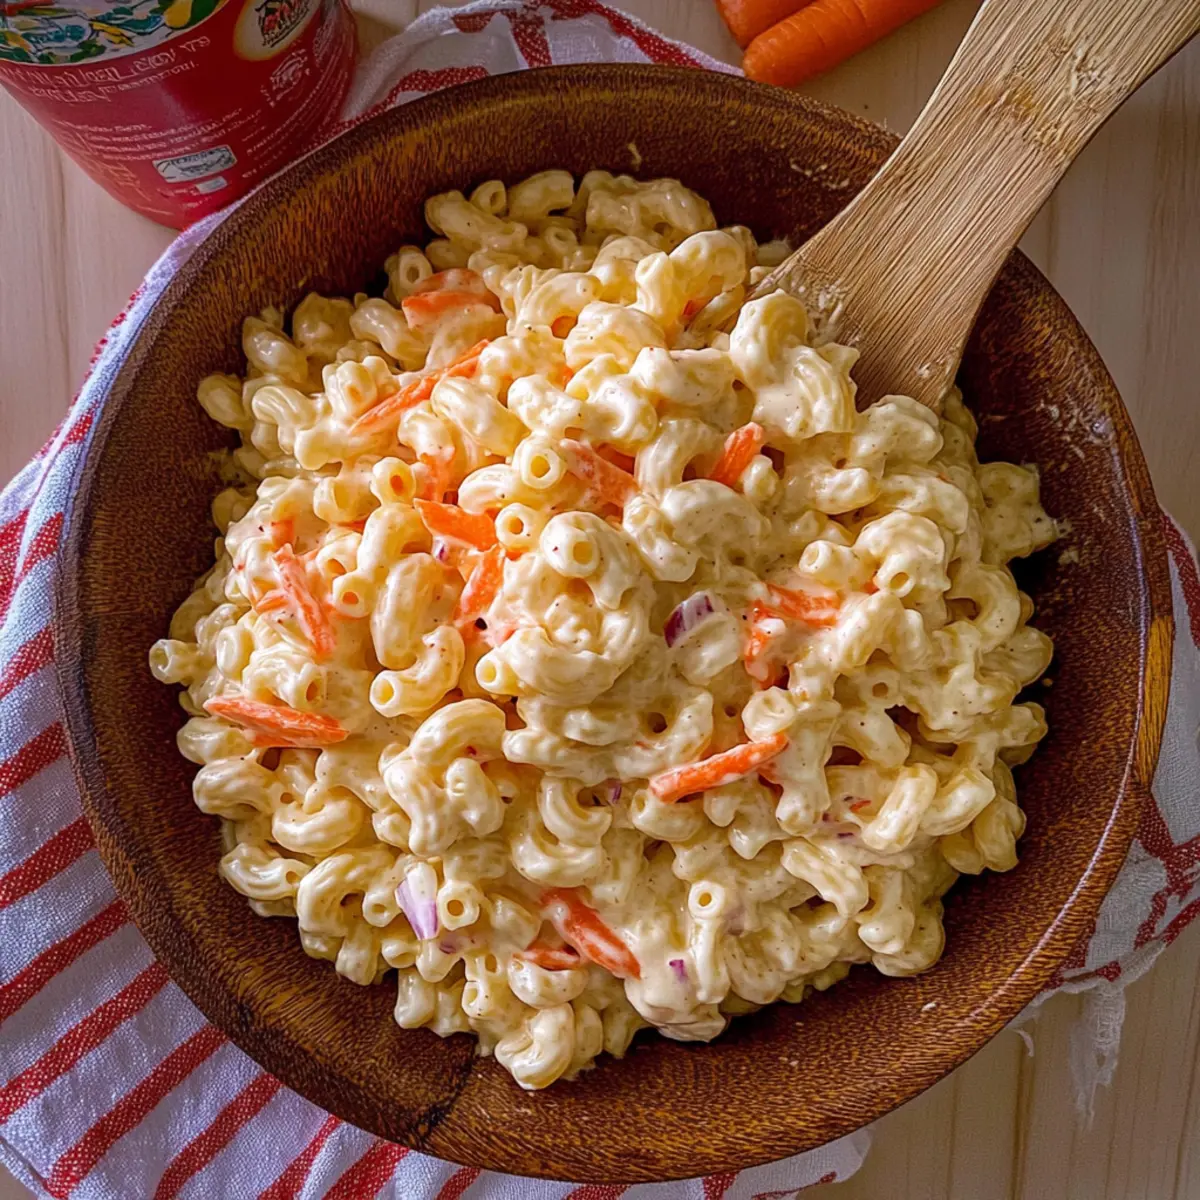
What should I do if the slaw is too watery?
If your mango slaw turns out watery, don’t fret! You can strain excess liquid by placing the slaw in a fine-mesh sieve for a few minutes. Alternatively, try adding a pinch of salt to help draw out moisture from the vegetables. Mixing in additional shredded cabbage or chopped herbs can also help absorb excess liquid while enhancing the slaw's flavors.

Is this mango slaw suitable for people with dietary allergies?
This quick and easy mango slaw is quite versatile and can be adapted for various dietary needs! If you're accommodating allergies, you might want to omit the sesame oil and use olive oil instead. Likewise, for those with a honey allergy or following a vegan diet, swapping honey for agave syrup is a great alternative. Always check labels for processed ingredients if allergies are a concern.

Can I customize this recipe?
Very! One of the best things about this quick and easy mango slaw is its customizable nature. You can add diced avocado for creaminess, incorporate crunchy peanuts or cashews, or throw in some shredded jalapeño for a spicy kick. The more, the merrier—make it your own and enjoy!

Quick And Easy Mango Slaw

Quick And Easy Mango Slaw for a Refreshing Tropical Twist

Quick And Easy Mango Slaw is a vibrant and refreshing side dish that blends sweetness and crunch, perfect for any meal.
Print Recipe Pin Recipe
Prep Time 15 minutes mins
Resting Time 10 minutes mins
Total Time 25 minutes mins
Servings: 4 servings
Course: Salads
Cuisine: American, Tropical
Calories: 150
Ingredients Equipment Method Nutrition Notes

Ingredients
  

For the Slaw
  • 2 cups diced ripe mangoes choose ripe for the best flavor
  • 2 cups shredded green cabbage can substitute with red cabbage
  • 1 large carrot grated
  • 1 large sliced red bell pepper substitute with orange or yellow bell peppers
  • 0.5 large sliced red onion opt for green onions for milder taste
  • 0.25 cups chopped fresh cilantro omit if disliked
For the Dressing
  • 1 large lime juice provides acidity; lemon juice as alternative
  • 2 tablespoons honey or maple syrup use agave syrup for vegan option
  • 2 tablespoons sesame oil can swap with olive oil
  • salt and pepper to taste

Equipment

  • Mixing Bowl
  • Whisk
  • Sharp Knife

Method
 

Step-by-Step Instructions
  1. In a large mixing bowl, combine diced mangoes, shredded cabbage, grated carrot, sliced bell pepper, sliced onion, and chopped cilantro.
  2. In a separate small bowl, whisk together the lime juice, honey (or maple syrup), sesame oil, and a pinch of salt and pepper until well combined.
  3. Pour the dressing over the mango and vegetable mixture and gently toss the ingredients together for about 1-2 minutes.
  4. Allow the slaw to sit for 5-10 minutes at room temperature to let the flavors meld.
  5. Serve the slaw chilled or at room temperature as a refreshing side dish.

Nutrition

Serving: 1servingCalories: 150kcalCarbohydrates: 30gProtein: 2gFat: 7gSaturated Fat: 1gPolyunsaturated Fat: 2gMonounsaturated Fat: 4gSodium: 200mgPotassium: 300mgFiber: 4gSugar: 10gVitamin A: 500IUVitamin C: 40mgCalcium: 30mgIron: 1mg

Notes

Ensure to use fresh ingredients for the best flavor. Customize the slaw by adding different vegetables or a kick of spice as desired.

Tried this recipe?

Let us know how it was!

Delicious Shaved Zucchini Salad with Goat Cheese for Summer Bliss

February 2, 2026 by Grace Snow Leave a Comment

As I stood in my garden, the vibrant green of fresh zucchini caught my eye, making me feel inspired to whip up something light and refreshing. Enter the Shaved Zucchini Salad with Goat Cheese—a feast for both the eyes and the palate. This deliciously easy summer salad not only offers a delightful crunch but also stands out as a healthy side dish that can elevate any meal. With its zesty lemon boost and the creamy richness of goat cheese, it's a quick crowd-pleaser that's perfect for those hot days when you want something vibrant and satisfying. Ready to discover how to transform these simple ingredients into a dish that dazzles? Let’s dive in!

Why is this Zucchini Salad a Must-Try?

Refreshingly Unique: The combination of raw zucchini with zesty lemon creates an unparalleled refreshing experience that will tantalize your taste buds.

Quick Preparation: Ready in just 15 minutes, this salad is perfect for those busy days when you want to serve something delicious without spending hours in the kitchen.

Health-Conscious Choice: With nutrient-rich ingredients like goat cheese and pine nuts, you can enjoy a guilt-free indulgence that’s packed with flavor.

Versatile Pairing: This salad is not just a side; it can accompany grilled fish or chicken beautifully, making it a versatile staple for summer meals. For a heartier option, check out recipes like Chicken Salad with Apples or Avocado Egg Salad.

Visual Appeal: Those delicate zucchini ribbons topped with crunchy pine nuts and creamy cheese create a vibrant dish that’s sure to impress guests at your next summer gathering!

Shaved Zucchini Salad Ingredients

For the Salad
• Zucchini – Provides a fresh, crunchy base; younger zucchini offers better flavor, but yellow summer squash works as a great substitute.
• Lemon Zest – Adds bright acidity that enhances the flavors; use fresh lemons for the best taste.
• Lemon Juice – Contributes tanginess and helps marinate the zucchini nicely.
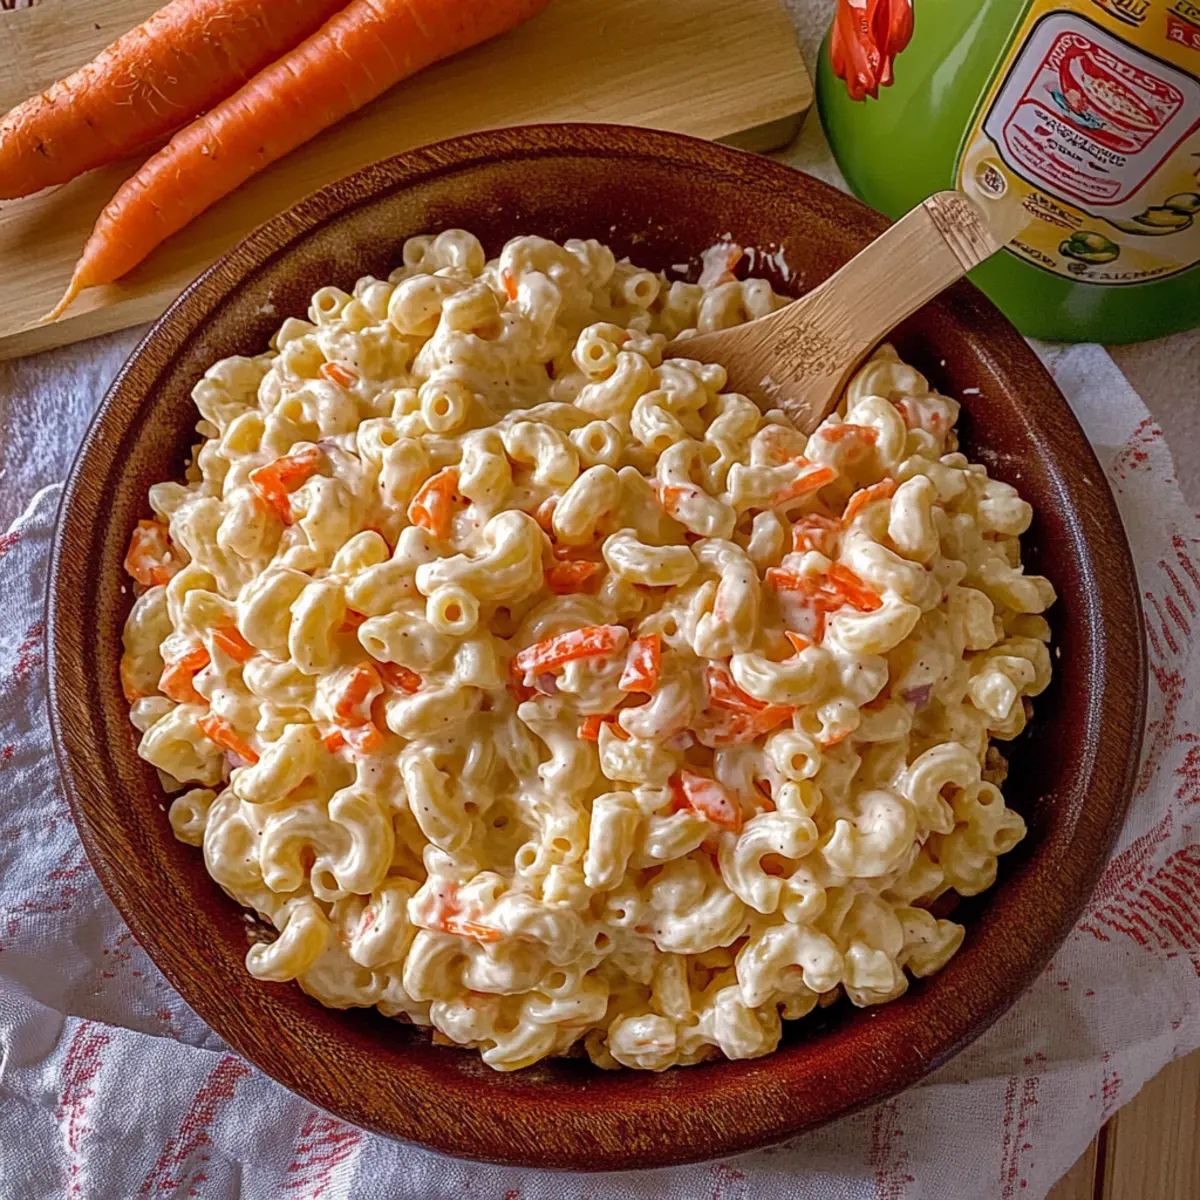
• Extra Virgin Olive Oil – Rich in healthy fats that balance the flavors; a quality oil makes a noticeable difference.
• Kosher Salt – Enhances all flavors; be sure to adjust it to your personal taste preference.
• Freshly Ground Pepper – Adds a touch of heat; opt for freshly ground for the most robust flavor.

For the Toppings
• Pine Nuts – Provide delightful crunch and nuttiness; walnuts or sunflower seeds can easily substitute if needed.
• Goat Cheese – Offers creaminess and depth; feta is a wonderful alternative if you prefer something bolder.
• Microgreens – Gives a fresh, earthy note; sprouts or mixed greens work well as substitutes.

Enjoy the vibrant flavors of this Shaved Zucchini Salad with Goat Cheese and explore various combinations that make it your own!

Step‑by‑Step Instructions for Shaved Zucchini Salad with Goat Cheese

Step 1: Shave the Zucchini
Using a vegetable peeler or mandolin, carefully shave the zucchini into thin ribbons, aiming for about ⅛ inch in thickness. Discard any seeds that may show up as you shave. You'll want around 4 cups of these delicate ribbons, which will provide a fresh, crunchy base for your Shaved Zucchini Salad with Goat Cheese.

Step 2: Marinate the Zucchini
In a mixing bowl, combine the freshly shaved zucchini with the lemon zest, lemon juice, extra virgin olive oil, kosher salt, and freshly ground pepper. Toss gently to ensure each ribbon is well-coated, then let this mixture marinate for about 10 minutes. This process allows the flavors to meld beautifully while the zucchini softens slightly.

Step 3: Plate the Salad
Once marinated, carefully arrange the zucchini ribbons on a serving plate, artfully twisting and layering the strands for visual appeal. The vibrant green from the zucchini will create a stunning display. This is a key moment for your Shaved Zucchini Salad, so take time to craft a beautiful presentation that will catch everyone's eye.

Step 4: Toast Pine Nuts
While plating the salad, heat a non-stick pan over medium heat. Add the pine nuts and toast them for around 5 minutes, stirring frequently, until they are golden brown and fragrant. Be attentive as they can burn quickly! This step adds a lovely crunch and nutty flavor that enhances the overall experience of your salad.

Step 5: Top the Salad
Sprinkle the toasted pine nuts generously over the marinated zucchini ribbons. Crumble the goat cheese atop, allowing its creamy texture to blend with the other ingredients. Finish off by adding microgreens or any desired substitute to create a fresh, earthy note. Your Shaved Zucchini Salad with Goat Cheese is now beautifully topped and ready to shine!

Storage Tips for Shaved Zucchini Salad with Goat Cheese

Fridge: Store in an airtight container; the salad can remain fresh for up to 3 days. To maintain the best texture, keep the pine nuts and microgreens separate until serving.

Freezer: It's not recommended to freeze this salad as the zucchini loses its desirable crunch and texture when thawed. Enjoy fresh!

Reheating: If you have leftover marinated zucchini (without toppings), feel free to toss it in a warm pasta dish or grain bowl for a delicious next-day meal.

Make Ahead Options

Prepping this Shaved Zucchini Salad with Goat Cheese in advance is a game-changer for busy weeknights! You can shave the zucchini and marinate it with lemon zest, lemon juice, olive oil, salt, and pepper up to 24 hours ahead of time. To keep the zucchini fresh and avoid excess moisture, place it in an airtight container and refrigerate. Toast the pine nuts just before serving to retain their crunch and flavor. Additionally, crumble the goat cheese right before plating to ensure it maintains its creamy texture. This way, when you're ready to serve, all you need to do is assemble the ingredients, making dinner stress-free and just as delicious!

What to Serve with Refreshing Shaved Zucchini Salad with Goat Cheese

This delightful salad is the perfect starting point for a bright and satisfying summer meal.

  • Grilled Chicken Breast: Juicy and tender, the savory flavors of grilled chicken pair beautifully with the tangy zucchini salad, making for a balanced dish.
    Serving this salad next to grilled chicken not only enhances the meal but also introduces a satisfying protein component.

  • Quinoa Pilaf: Light and fluffy, quinoa adds a healthy grain option that complements the fresh flavors in the salad.
    This dish creates a well-rounded plate, integrating textures that are sure to please everyone at the table.

  • Tomato Bruschetta: The sweet acidity of ripe tomatoes on crusty bread pairs perfectly with the salad's creamy goat cheese and makes for a satisfying appetizer.
    The burst of flavors from this classic dish brings a touch of Italy to your meal, enhancing the summer vibe.

  • Roasted Asparagus: Tender and slightly charred, roasted asparagus adds a lovely earthy note that contrasts nicely with the lightness of the salad.
    The addition of roasted vegetables not only boosts the nutritional profile but also brings a wonderful variety of flavors to the table.

  • Lemonade or Iced Tea: A refreshing glass of homemade lemonade or iced tea can bring that extra touch of summer to your dining experience.
    These drinks enhance the zesty finish of the salad while keeping you cool and hydrated on hot days.

  • Fresh Berry Tart: A sweet, fruity dessert like a berry tart rounds off the meal beautifully, offering a contrast to the savory and creamy elements of the salad.
    The vibrant colors of this dessert mirror the salad, creating an enticing visual feast that's hard to resist.

Expert Tips for Shaved Zucchini Salad

• Choose Fresh Zucchini: Always select small, firm zucchinis for better flavor. Younger zucchinis have a sweeter taste, perfect for your Shaved Zucchini Salad with Goat Cheese.

• Mind the Marination: Avoid over-mixing during marination; this helps keep the ribbons intact while enhancing flavor without turning mushy.

• Quality Olive Oil Matters: Opt for high-quality extra virgin olive oil as it enhances the salad’s overall taste profile significantly.

• Layer Creatively: For an impressive presentation, twist and layer the zucchini ribbons artfully on your plate, showcasing the lovely colors and textures.

• Separate Ingredients for Storing: To maintain the integrity and crunch of the salad, store components separately—particularly the pine nuts and microgreens—until serving.

Variations & Substitutions for Shaved Zucchini Salad

Feel free to explore these exciting twists and substitutions to make the Shaved Zucchini Salad with Goat Cheese uniquely yours!

  • Dairy-Free: Swap goat cheese for a vegan cheese or cashew cream to maintain creaminess without dairy.

  • Zesty Kick: Add red pepper flakes for a touch of heat that will elevate the salad's flavor profile. Just a pinch can transform your dish into a spicy delight!

  • Herb Infusion: Incorporate fresh herbs like basil, dill, or mint. This adds a burst of freshness that pairs beautifully with the zucchini and lemon.

  • Nutty Alternatives: If you’re nut-sensitive, replace pine nuts with seeds like pumpkin or sunflower seeds for that satisfying crunch while keeping it allergy-friendly.

  • Extra Veggies: Toss in additional vegetables like bell peppers or grated carrots for a pop of color and added nutrition. They contribute a lovely sweetness that complements the zesty elements.

  • Protein Boost: For a more filling option, add grilled chicken or shrimp on top. This turns your salad into a complete meal, perfect for a light lunch or dinner.

  • Dress It Up: Consider a splash of balsamic vinegar or a drizzle of tahini for added depth and creaminess. This flavor enhancement engages all the senses.

  • Flavorful Switch: Replace lemon juice with lime juice for a slight twist in flavor. It brings a different tang that’s just as refreshing!

These variations not only keep the thrill alive in your kitchen but also allow you to cater to different dietary needs and preferences! Whether you're pairing this salad with grilled fish or savoring it standalone, the options are as abundant as the summer days!

Shaved Zucchini Salad with Goat Cheese Recipe FAQs

How do I choose the best zucchini for this salad?
Absolutely! Look for small, firm zucchinis with a vibrant green color. Younger zucchinis tend to be sweeter and have a better flavor profile, perfect for your Shaved Zucchini Salad with Goat Cheese. Avoid zucchinis with dark spots all over, as they can indicate overripeness.

How should I store leftovers of the Shaved Zucchini Salad?
You can store your salad in an airtight container in the refrigerator for up to 3 days. To keep the textures intact, it's best to keep the pine nuts and microgreens separate until you’re ready to serve. This will ensure that everything stays fresh and crunchy!

Can I freeze this salad?
I recommend not freezing this salad since zucchini loses its delightful crunch and texture once thawed. Instead, enjoy the vibrant flavors fresh! If you have extra marinated zucchini, consider tossing it in a warm pasta dish or grain bowl for a delicious next-day meal.

What can I do if my salad turns mushy?
No worries! If your salad becomes mushy, it’s likely due to extended marination or excess mixing. For a quick fix, you can strain the excess liquid and gently toss the salad again. You might also consider tossing in some additional fresh ingredients like microgreens or crunchy nuts to revive that delightful texture.

Is there a way to adapt this salad for different dietary needs?
Very much so! If you're accommodating allergies, you can easily swap out goat cheese for lactose-free options or skip cheese altogether for vegan preferences. Additionally, if someone has a nut allergy, walnuts or sunflower seeds can replace pine nuts, ensuring everyone can enjoy this refreshing dish!

Shaved Zucchini Salad with Goat Cheese

Delicious Shaved Zucchini Salad with Goat Cheese for Summer Bliss

Enjoy a light and refreshing Shaved Zucchini Salad with Goat Cheese, perfect for summer meals.
Print Recipe Pin Recipe
Prep Time 15 minutes mins
Cook Time 5 minutes mins
Total Time 20 minutes mins
Servings: 4 servings
Course: Salads
Cuisine: Mediterranean
Calories: 200
Ingredients Equipment Method Nutrition Notes

Ingredients
  

For the Salad
  • 4 cups Zucchini Shaved into ribbons
  • 1 tablespoon Lemon Zest Use fresh lemons
  • 2 tablespoons Lemon Juice Freshly squeezed
  • 3 tablespoons Extra Virgin Olive Oil Quality oil preferred
  • 1 teaspoon Kosher Salt Adjust to taste
  • 1 teaspoon Freshly Ground Pepper For best flavor
For the Toppings
  • 1/4 cup Pine Nuts Can substitute with walnuts or sunflower seeds
  • 4 ounces Goat Cheese Can substitute with feta
  • 1 cup Microgreens Can substitute with sprouts or mixed greens

Equipment

  • Vegetable Peeler
  • Mixing Bowl
  • Non-Stick Pan

Method
 

Step-by-Step Instructions
  1. Using a vegetable peeler or mandolin, carefully shave the zucchini into thin ribbons, aiming for about ⅛ inch in thickness. Discard any seeds that may show up as you shave.
  2. In a mixing bowl, combine the freshly shaved zucchini with the lemon zest, lemon juice, extra virgin olive oil, kosher salt, and freshly ground pepper. Toss gently to ensure each ribbon is well-coated, then let this mixture marinate for about 10 minutes.
  3. Once marinated, carefully arrange the zucchini ribbons on a serving plate, twisting and layering the strands for visual appeal.
  4. Heat a non-stick pan over medium heat. Add the pine nuts and toast them for around 5 minutes, stirring frequently, until they are golden brown and fragrant.
  5. Sprinkle the toasted pine nuts generously over the marinated zucchini ribbons. Crumble the goat cheese atop and finish with microgreens.

Nutrition

Serving: 1servingCalories: 200kcalCarbohydrates: 9gProtein: 6gFat: 18gSaturated Fat: 5gPolyunsaturated Fat: 2gMonounsaturated Fat: 10gCholesterol: 15mgSodium: 400mgPotassium: 400mgFiber: 2gSugar: 3gVitamin A: 500IUVitamin C: 25mgCalcium: 100mgIron: 1mg

Notes

Store components separately to maintain freshness, particularly the pine nuts and microgreens.

Tried this recipe?

Let us know how it was!
  • « Previous Page
  • 1
  • …
  • 10
  • 11
  • 12
  • 13
  • 14
  • …
  • 21
  • Next Page »

Welcome!

Hi, I’m Grace, a Sydney-based home cook with a passion for bold flavors and trending ingredients. Whether you’re a busy beginner or a seasoned foodie, you’ll find dishes here that are fresh, fun, and full of flavor.

More about me

Popular Recipes

  • Honey Lime Chicken & Avocado Rice Bowl
    Honey Lime Chicken & Avocado Rice Bowl for a Flavor Burst
  • Tasty Italian Pasta Salad
    Delight in this Easy Tasty Italian Pasta Salad for Summer Fun
  • Garlic Butter Chicken Pasta
    Garlic Butter Chicken Pasta That’ll Wow Your Family Tonight
  • Creamy, Spicy Chicken Pasta
    Creamy, Spicy Chicken Pasta with Fresh Summer Veggies

Footer

↑ back to top

About

  • Privacy Policy
  • Disclaimer
  • Terms & Conditions

Newsletter

  • Sign Up! for emails and updates

Contact

  • About me
  • Contact me

Copyright © 2025 TastyTrendIngredients