tastytrendingredients

  • Home
  • Recipes
    • Appetizers
    • Breakfast
    • Dessert
    • Dinner
    • Drinks
    • Salads
    • Snacks
    • Soups
  • About me
  • Contact
menu icon
go to homepage
  • Home
  • Recipes
    • Appetizers
    • Breakfast
    • Dessert
    • Dinner
    • Drinks
    • Salads
    • Snacks
    • Soups
  • About me
  • Contact
search icon
Homepage link
  • Home
  • Recipes
    • Appetizers
    • Breakfast
    • Dessert
    • Dinner
    • Drinks
    • Salads
    • Snacks
    • Soups
  • About me
  • Contact
×

Lemon Basil Pasta Salad: A Tangy Vegan Delight You’ll Love

March 27, 2026 by Grace Snow Leave a Comment

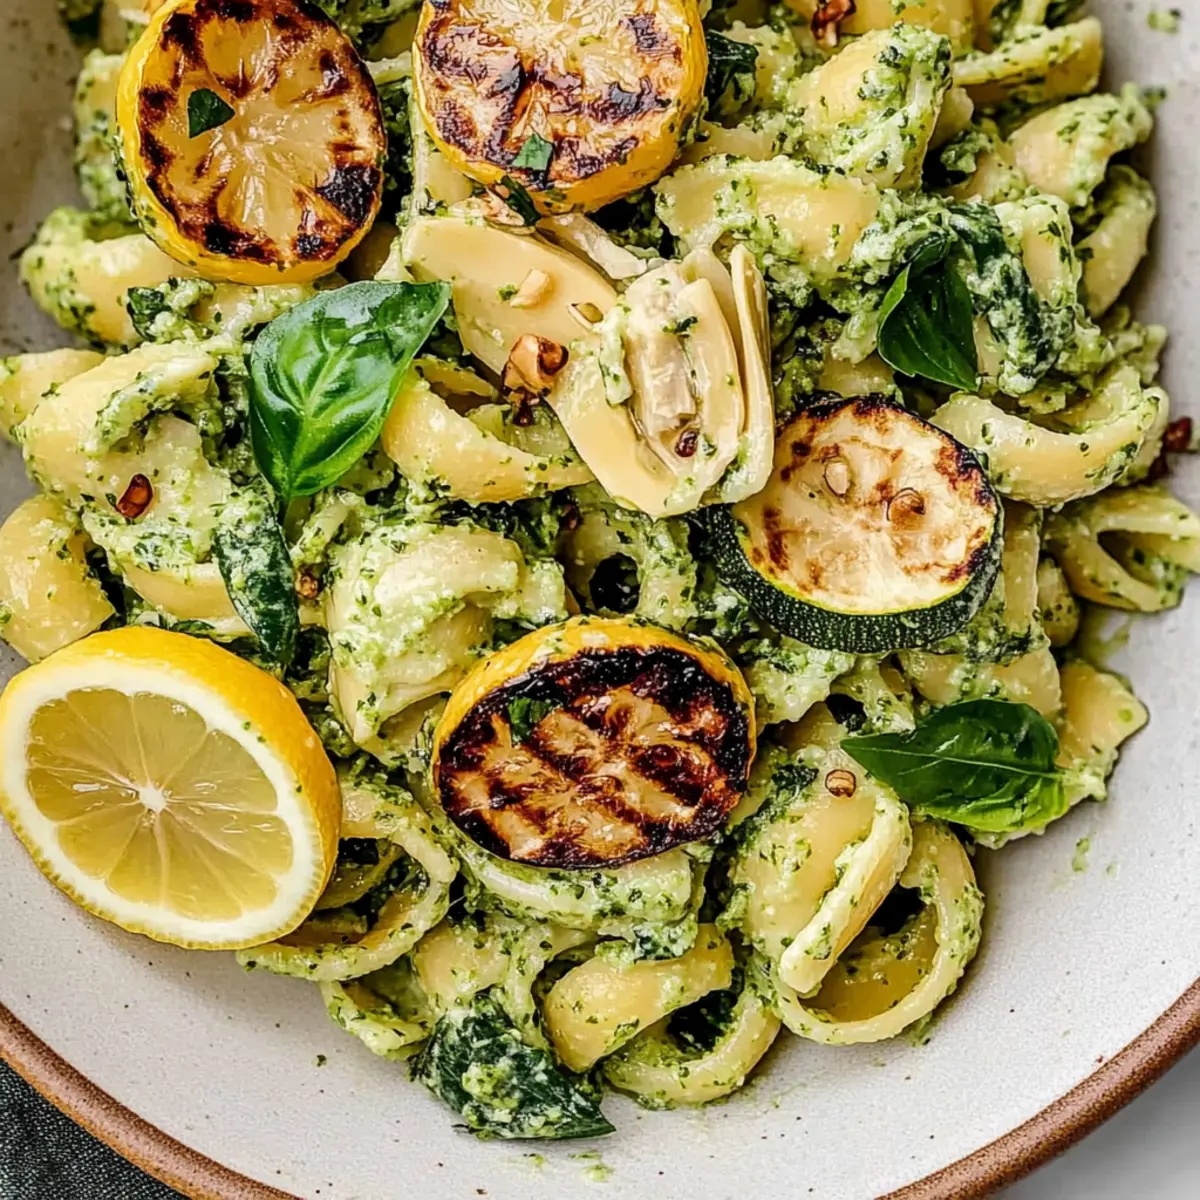
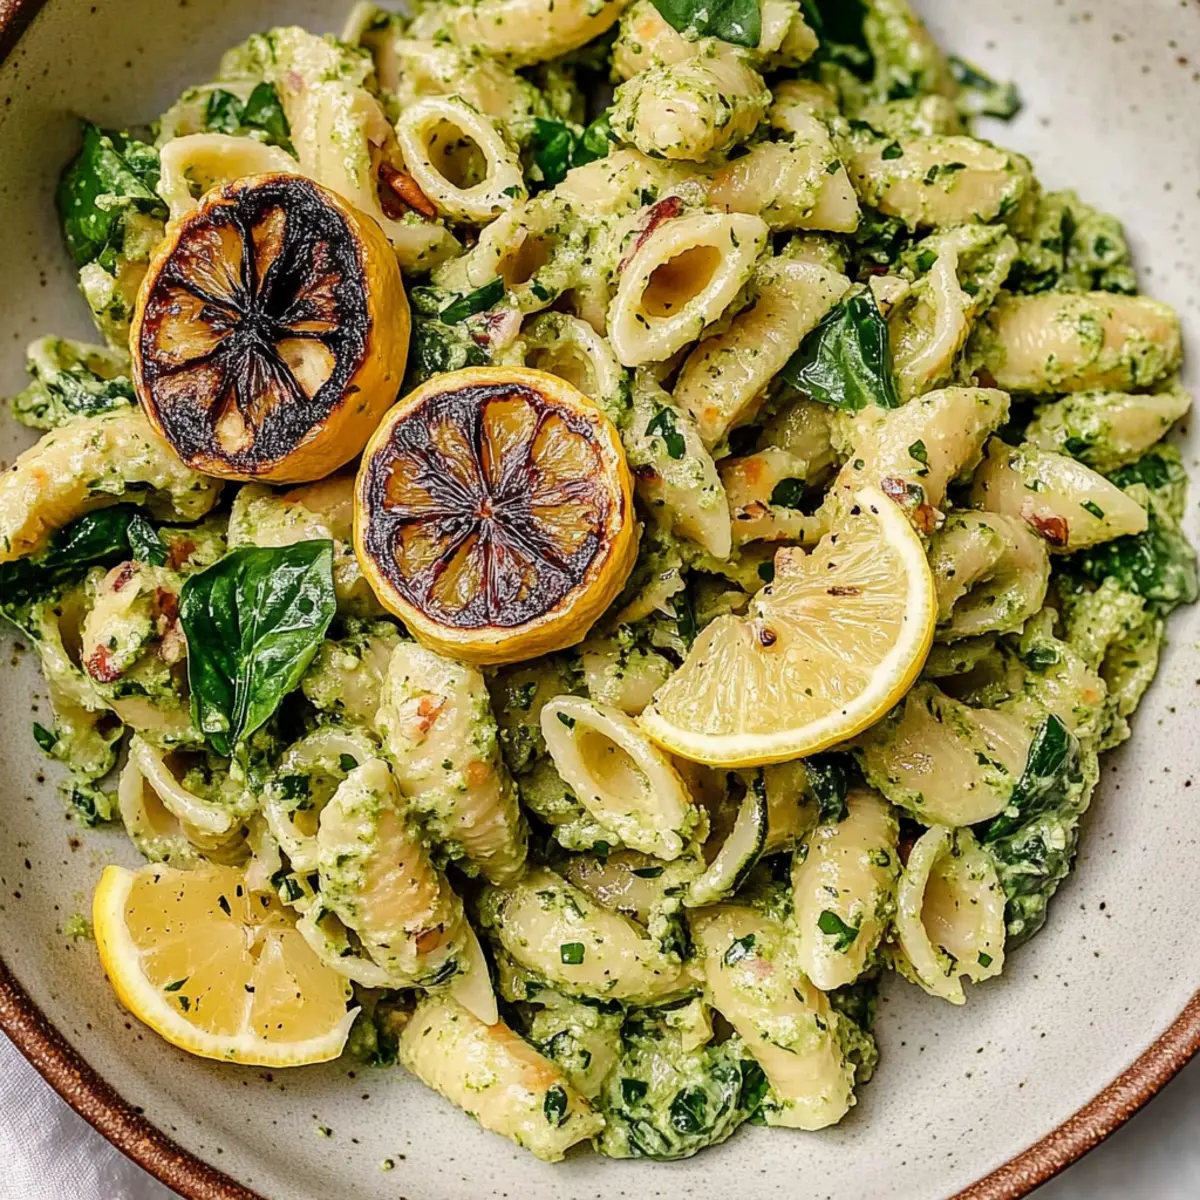
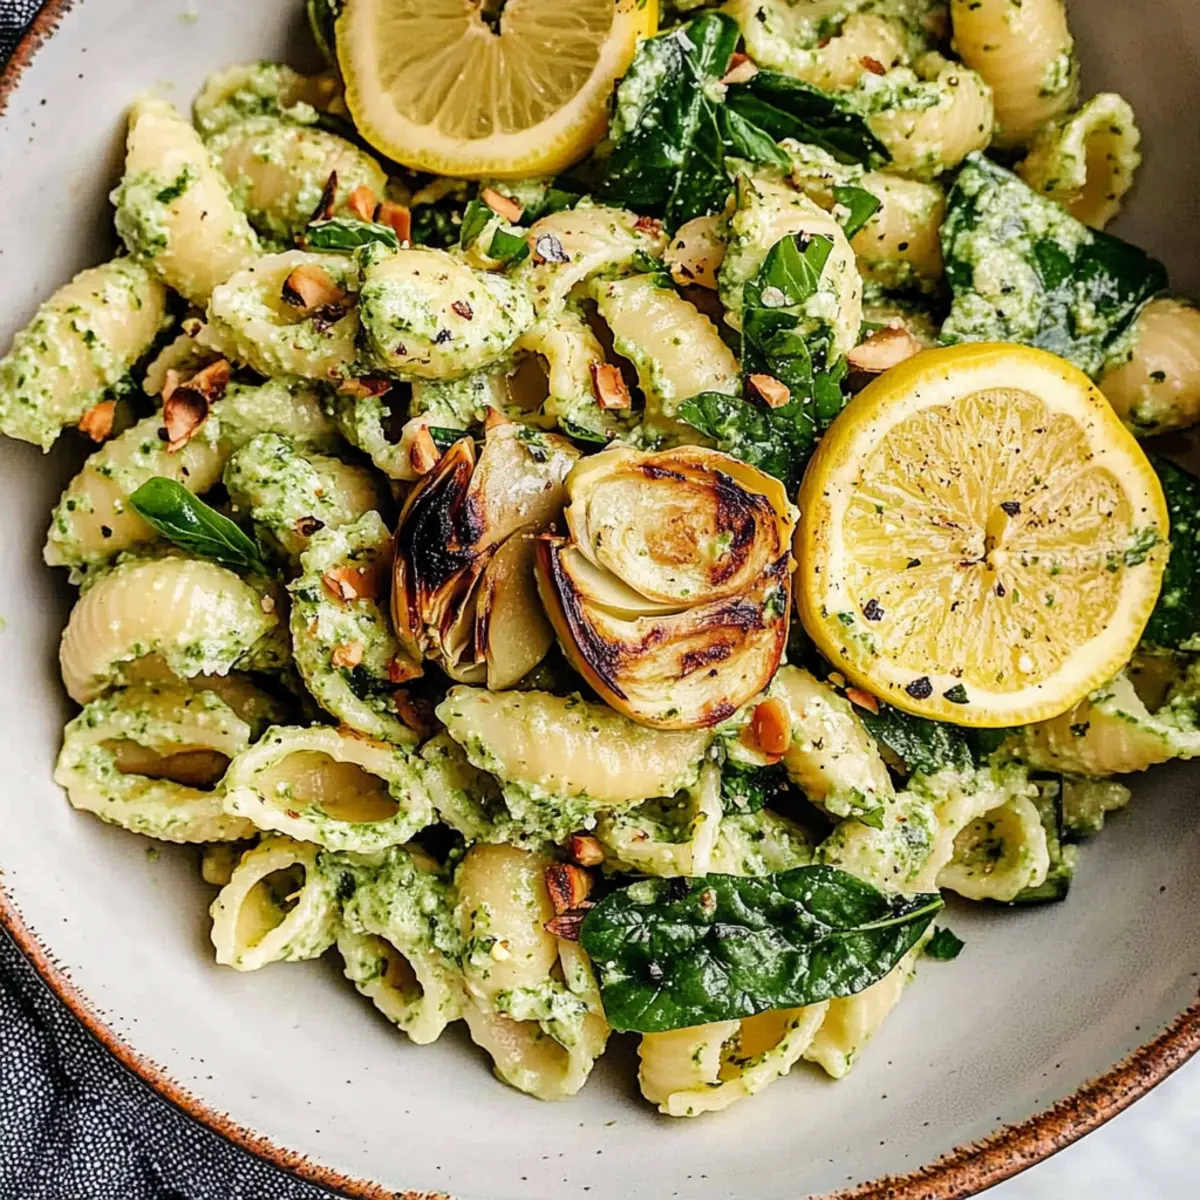
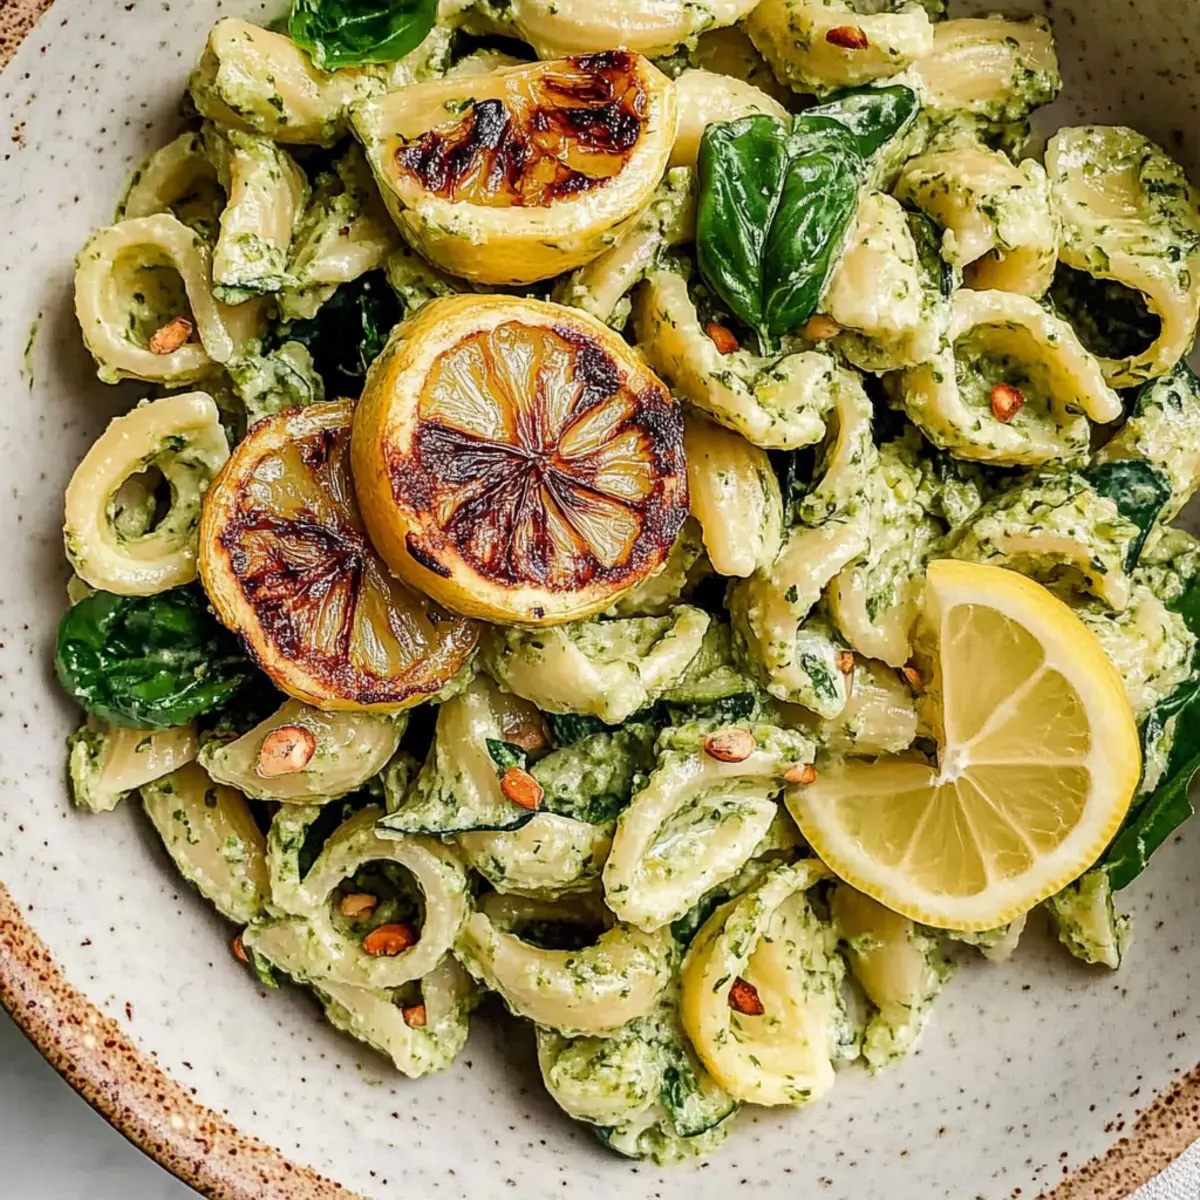
As I stood in my kitchen, the aroma of fresh basil mingling with tangy lemon engulfed me in a comforting embrace. That’s the moment I knew I’d struck gold with my Lemon Basil Pasta Salad! This delightful vegan dish transforms simple ingredients into a vibrant feast, perfect for meal prep or a quick weeknight dinner. Say goodbye to heavy, mayo-laden salads, because this recipe swaps in plant-based yogurt for a creamy, dairy-free dressing that everyone can enjoy. With just a few easy steps, you’ll have a refreshing salad packed with wholesome veggies, making it not only an impressive crowd-pleaser but also a healthy choice that keeps beautifully in the fridge. Ready to elevate your salad game? Let’s dive into this bright and flavorful recipe!

Why is this pasta salad a must-try?

Vibrant Colors: The Lemon Basil Pasta Salad bursts with vivid hues from fresh veggies, making it visually enticing for any table.
Easy & Quick: With just a few simple steps, you can whip up this refreshing dish in no time, perfect for busy weeknights or meal prep.
Creamy Dressing: The use of plant-based yogurt ensures a rich, tangy flavor while making it vegan-friendly, unlike traditional mayo-based salads.
Versatile & Customizable: Feel free to swap in your favorite pasta shapes or seasonal veggies, keeping every serving exciting and unique.
Meal Prep Hero: Enjoy delicious leftovers throughout the week, making it a smart choice for lunches or side dishes that stay fresh in the fridge.
Add in a side of grilled vegetables or serve alongside a hearty Avocado Egg Salad for a complete meal!

Lemon Basil Pasta Salad Ingredients

For the Pasta

  • Pasta – This forms the base of the salad; for a gluten-free option, use chickpea or lentil-based pasta.

For the Dressing

  • Plain Unsweetened Plant-Based Yogurt – This acts as a creamy, dairy-free base for the dressing; you can also try homemade cashew cream for a richer flavor.
  • Miso Paste – Adds a delicious umami depth; if needed, replace it with nutritional yeast for a lighter twist.
  • Lemon – Provides a zesty tang; always opt for fresh lemons to maximize flavor.

For the Vegetables

  • Herbs (Basil and Parsley) – These add a burst of freshness; nothing beats the flavor of fresh herbs!
  • Zucchini – Introduces moisture and texture; feel free to swap it with summer squash or roasted broccoli for variety.
  • Onion (Red) – Offers a sweet and sharp contrast; shallots or yellow onion work well as substitutes too.
  • Artichoke Hearts – Delivers a unique flavor profile; you can omit it or switch to sun-dried tomatoes if preferred.
  • Spinach – Brings both nutrition and vibrant color; arugula is a great substitute for added peppery notes.

This Lemon Basil Pasta Salad is your ticket to a refreshing, colorful meal that’s perfect for every occasion!

Step‑by‑Step Instructions for Lemon Basil Pasta Salad

Step 1: Prepare Vegetables
Begin by slicing the zucchini into thin rounds and sprinkling it with salt. Let the zucchini sit for about 5–10 minutes to draw out moisture, which helps enhance its flavor. Once done, pat the zucchini dry with a paper towel to remove the excess salt and moisture, setting it aside while you prep the rest of the ingredients.

Step 2: Cook Pasta
In a large pot, bring salted water to a vigorous boil over high heat. Add your choice of pasta and cook according to the package instructions until it's just al dente—typically about 8–10 minutes. Once cooked, drain the pasta and transfer it to a colander, then rinse it under cold water to stop the cooking process and cool it down for the Lemon Basil Pasta Salad.

Step 3: Sauté Onions
While the pasta cooks, heat a skillet over medium heat and add a splash of olive oil. Toss in the finely chopped red onions along with a pinch of salt, and sauté for about 5–7 minutes until the onions are translucent and softened. Once done, transfer the onions to a large mixing bowl, allowing them to cool slightly before adding other ingredients.

Step 4: Caramelize Zucchini and Lemon
In the same skillet over medium heat, add the zucchini rounds and cut lemon halves, with the lemon cut-side down. Cook the zucchini for approximately 6 minutes until caramelized and tender. After about 5–6 minutes, flip the lemon to get a nice char on the cut side as well. This caramelization will enhance the flavors, making them perfect for your pasta salad.

Step 5: Blend Dressing
In a blender, combine fresh basil, parsley, lemon zest, minced garlic, pepitas, plain unsweetened plant-based yogurt, miso paste, olive oil, fresh lemon juice, and a pinch of salt. Blend the mixture until it's smooth and creamy, and adjust the seasoning to your preference. This tangy dressing will serve as the delightful base for your Lemon Basil Pasta Salad.

Step 6: Combine Salad
In the mixing bowl with the sautéed onions, add the cooked pasta, spinach, artichoke hearts, and the caramelized zucchini. Pour in about half of the dressing and gently toss everything together, ensuring the pasta and veggies are evenly coated. Taste and adjust with the remaining dressing or extra salt as needed for a vibrant flavor.

Step 7: Serve or Store
Your Lemon Basil Pasta Salad is ready to enjoy! Serve it chilled as a refreshing meal, or transfer it to an airtight container and store it in the refrigerator for up to 4–5 days. This meal prep-friendly salad is perfect for lunches and light dinners, retaining its freshness beautifully over the week.

Lemon Basil Pasta Salad Variations

Feel free to play with this recipe and create your own version of this delightful salad!

  • Gluten-Free: Substitute regular pasta with chickpea or lentil-based pasta for a gluten-free option. This change keeps the dish wholesome without sacrificing flavor.

  • Herbal Burst: Add fresh dill or cilantro alongside basil and parsley for a unique twist. Each herb offers a new layer of freshness, brightening the salad even more.

  • Crunchy Nuts: Toss in some toasted pine nuts or walnuts for an added crunchy texture. This slight change brings a delightful contrast to the creamy dressing.

  • Zesty Kick: Incorporate a pinch of red pepper flakes for a bit of heat! A touch of spice can truly elevate the taste, balancing the creamy and tangy elements.

  • Creamy Avocado: Swap out the yogurt for mashed avocado for a rich, creamy dressing. This creates a luscious texture while keeping it completely plant-based and loaded with healthy fats.

  • Seasonal Swap: Replace zucchini with seasonal vegetables like roasted asparagus or bell peppers. This keeps the salad vibrant and reflects the flavors of each season beautifully.

  • Pasta Shape: Experiment with different pasta shapes such as fusilli or farfalle for fun bites. Each shape adds a unique twist, making your salad visually and texturally interesting.

  • Additional Veggies: Stir in some cherry tomatoes or roasted corn for extra sweetness and color. These additions enhance both nutrition and presentation, making the salad even more inviting.

This Lemon Basil Pasta Salad is a canvas for your creativity, so enjoy mixing in flavors that excite you! To explore other delicious pasta dishes, check out this delightful Skillet Pasta Sun or step up your game with a tasty Seafood Pasta Savory. Happy cooking!

What to Serve with Lemon Basil Pasta Salad

A delightful meal awaits when you pair this vibrant salad with the right accompaniments, perfect for a sunny day or any gathering.

  • Grilled Vegetables: The smoky char from grilled zucchini, bell peppers, and eggplant complements the fresh flavors, adding a satisfying warmth to each bite.

  • Chickpea Fritters: Crispy on the outside and fluffy on the inside, these plant-based bites provide protein and a hearty texture that balances the lightness of the salad.

  • Stuffed Peppers: Vibrantly colored bell peppers filled with quinoa, beans, or brown rice add a delightful touch of nutrition and further enhance the meal's visual appeal.

  • Crispy Garlic Bread: A warm, crunchy side of garlic bread brings comforting, buttery flavors that perfectly contrast the tangy notes of the pasta salad.

  • Refreshing Lemonade: Serve chilled lemonade to enhance the lemony brightness of the salad, creating a refreshing drink that ties the entire meal together perfectly.

  • Fruit Salad: A mix of seasonal fruits adds a sweet contrast, cleansing the palate while also offering a burst of vibrant colors that mirror the dish's freshness.

  • Coconut Yogurt Parfait: For dessert, a creamy coconut yogurt parfait layered with granola and fresh fruit creates a satisfying, light finish that complements the main dish beautifully.

How to Store and Freeze Lemon Basil Pasta Salad

  • Fridge: Store your Lemon Basil Pasta Salad in an airtight container for up to 4-5 days. This keeps it fresh and flavorful for your quick meal options.
  • Freezer: For longer storage, freeze the salad without dressing in a freezer-safe container for up to 2 months. Thaw in the fridge before serving.
  • Reheating: Enjoy cold or let it sit at room temperature for 15-20 minutes before serving. Add extra dressing if needed to refresh flavors.
  • Airtight Guidance: Ensure your container is well-sealed to prevent moisture and maintain the salad's vibrant colors and textures.

Make Ahead Options

Preparing the Lemon Basil Pasta Salad in advance is a wonderful way to save time during busy weeks! You can chop the vegetables and prepare the dressing up to 24 hours ahead, keeping them separate in the refrigerator to maintain their freshness and crunch. The pasta can be cooked and stored in an airtight container for up to 3 days, which helps prevent it from becoming mushy. When you're ready to serve, simply toss together the prepped ingredients and dressing, adjusting seasoning as needed for that vibrant flavor. This makes it a fantastic meal prep option for quick lunches or light dinners, keeping everything deliciously fresh just for you!

Expert Tips for Lemon Basil Pasta Salad

  • Perfect Caramelization: Ensure zucchini and lemon are evenly spaced while cooking to allow for proper caramelization, enhancing their flavors significantly.

  • Taste Test the Dressing: Adjust the tanginess of your Lemon Basil Pasta Salad dressing by adding a bit of sweetener if the yogurt is overly tart, ensuring a balanced flavor.

  • Al Dente Perfection: Always cook your pasta al dente; this maintains its texture and prevents mushiness in the salad as it sits.

  • Fresh Herbs Matter: Use freshly chopped herbs (basil and parsley) for the best flavor impact; dried herbs won’t produce the same aromatic results.

  • Vibrant Leftovers: For long-lasting freshness, store the salad without the dressing if preparing in advance. Combine just before serving to keep the veggies crisp and delicious.

Lemon Basil Pasta Salad Recipe FAQs

How do I choose ripe ingredients for my Lemon Basil Pasta Salad?
Absolutely! For the best flavor, select zucchinis that are firm and shiny without any dark spots or bruises. Fresh basil should be vibrant green, aromatic, and without wilting. When it comes to lemons, choose ones that feel heavy for their size, indicating juiciness. Red onions should be firm with no sprouts or soft spots.

What is the best way to store Lemon Basil Pasta Salad?
You can store your Lemon Basil Pasta Salad in an airtight container in the refrigerator for up to 4-5 days. Make sure the salad is completely cooled before sealing it, as this helps maintain freshness. If you’re preparing it ahead of time, it’s a good idea to keep the dressing separate until you’re ready to serve to keep the veggies crisp.

Can I freeze Lemon Basil Pasta Salad?
Very! To freeze, place the salad in a freezer-safe container, omitting the dressing. This ensures the veggies remain crisp once thawed. Your Lemon Basil Pasta Salad can be frozen for up to 2 months. When ready, move it to the fridge to thaw overnight, and then give it a good stir, adding fresh dressing as needed.

What should I do if my pasta salad seems too dry?
If you find your Lemon Basil Pasta Salad lacking moisture, don’t fret! Start by adding a few tablespoons of your reserved dressing or a splash of water or vegetable broth to loosen it up. Mix well to evenly distribute the moisture. If the flavors have faded, a squeeze of fresh lemon juice can brighten it up beautifully!

Are there any allergy considerations with this recipe?
Great question! This Lemon Basil Pasta Salad is vegan and dairy-free, which is fantastic for those with lactose intolerance. However, check the ingredient labels of the plant-based yogurt and miso paste if you have soy allergies, as some brands may contain soy. For gluten-free options, use chickpea or lentil pasta instead, ensuring everyone can enjoy this salad!

Lemon Basil Pasta Salad

Lemon Basil Pasta Salad: A Tangy Vegan Delight You’ll Love

Lemon Basil Pasta Salad is a vibrant, tangy, and vegan-friendly dish full of fresh ingredients.
Print Recipe Pin Recipe
Prep Time 15 minutes mins
Cook Time 10 minutes mins
Resting Time 5 minutes mins
Total Time 30 minutes mins
Servings: 4 servings
Course: Salads
Cuisine: Vegan
Calories: 250
Ingredients Equipment Method Nutrition Notes

Ingredients
  

For the Pasta
  • 2 cups Pasta Use gluten-free pasta for a gluten-free option.
For the Dressing
  • 1 cup Plain Unsweetened Plant-Based Yogurt Can substitute with homemade cashew cream.
  • 1 tablespoon Miso Paste Or nutritional yeast for a lighter twist.
  • 1 Juice of 1 Lemon Use fresh lemons for best flavor.
For the Vegetables
  • Herbs (Basil and Parsley) Fresh herbs are recommended.
  • 1 medium Zucchini Can replace with summer squash or roasted broccoli.
  • 1 medium Red Onion Shallots or yellow onion can be used.
  • 1 cup Artichoke Hearts Can be replaced with sun-dried tomatoes, if desired.
  • 2 cups Spinach Arugula can be substituted for a peppery flavor.

Equipment

  • Large pot
  • Skillet
  • Colander
  • Blender
  • Mixing Bowl
  • Paper towels

Method
 

Step‑by‑Step Instructions for Lemon Basil Pasta Salad
  1. Slice the zucchini into thin rounds and sprinkle with salt. Let sit for 5-10 minutes to draw out moisture. Pat dry with a paper towel and set aside.
  2. Bring salted water to a boil in a large pot. Add pasta and cook until al dente (8-10 minutes). Drain and rinse under cold water.
  3. Heat a skillet over medium heat with olive oil. Add chopped red onions and sauté for 5-7 minutes until translucent. Transfer to a mixing bowl to cool.
  4. In the same skillet, add zucchini rounds and cut lemon halves with cut-side down. Cook for about 6 minutes until caramelized. Flip lemon for even charring.
  5. In a blender, combine fresh basil, parsley, lemon zest, minced garlic, pepitas, plant-based yogurt, miso paste, olive oil, lemon juice, and salt. Blend until smooth.
  6. In the mixing bowl with the onions, add pasta, spinach, artichoke hearts, and caramelized zucchini. Pour in half the dressing and toss to coat. Adjust dressing and seasoning to taste.
  7. Serve chilled or store in an airtight container in the fridge for up to 4-5 days.

Nutrition

Serving: 1servingCalories: 250kcalCarbohydrates: 40gProtein: 8gFat: 5gSaturated Fat: 1gPolyunsaturated Fat: 2gMonounsaturated Fat: 2gSodium: 350mgPotassium: 450mgFiber: 6gSugar: 3gVitamin A: 3500IUVitamin C: 30mgCalcium: 80mgIron: 2mg

Notes

Store the salad without dressing if making in advance to keep veggies crisp. Combine with dressing just before serving.

Tried this recipe?

Let us know how it was!

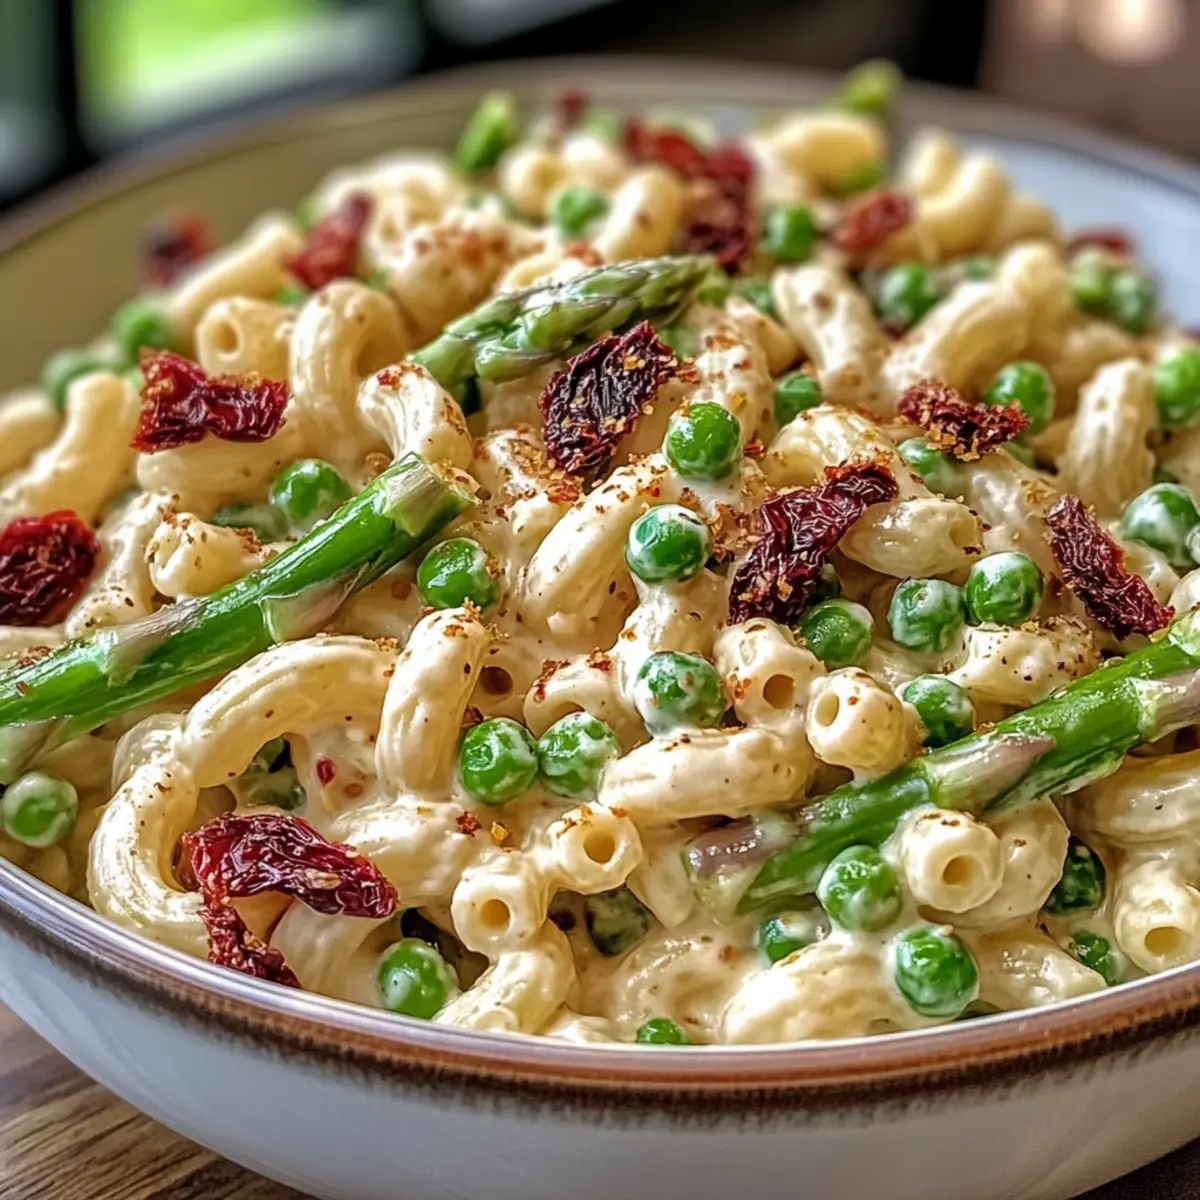
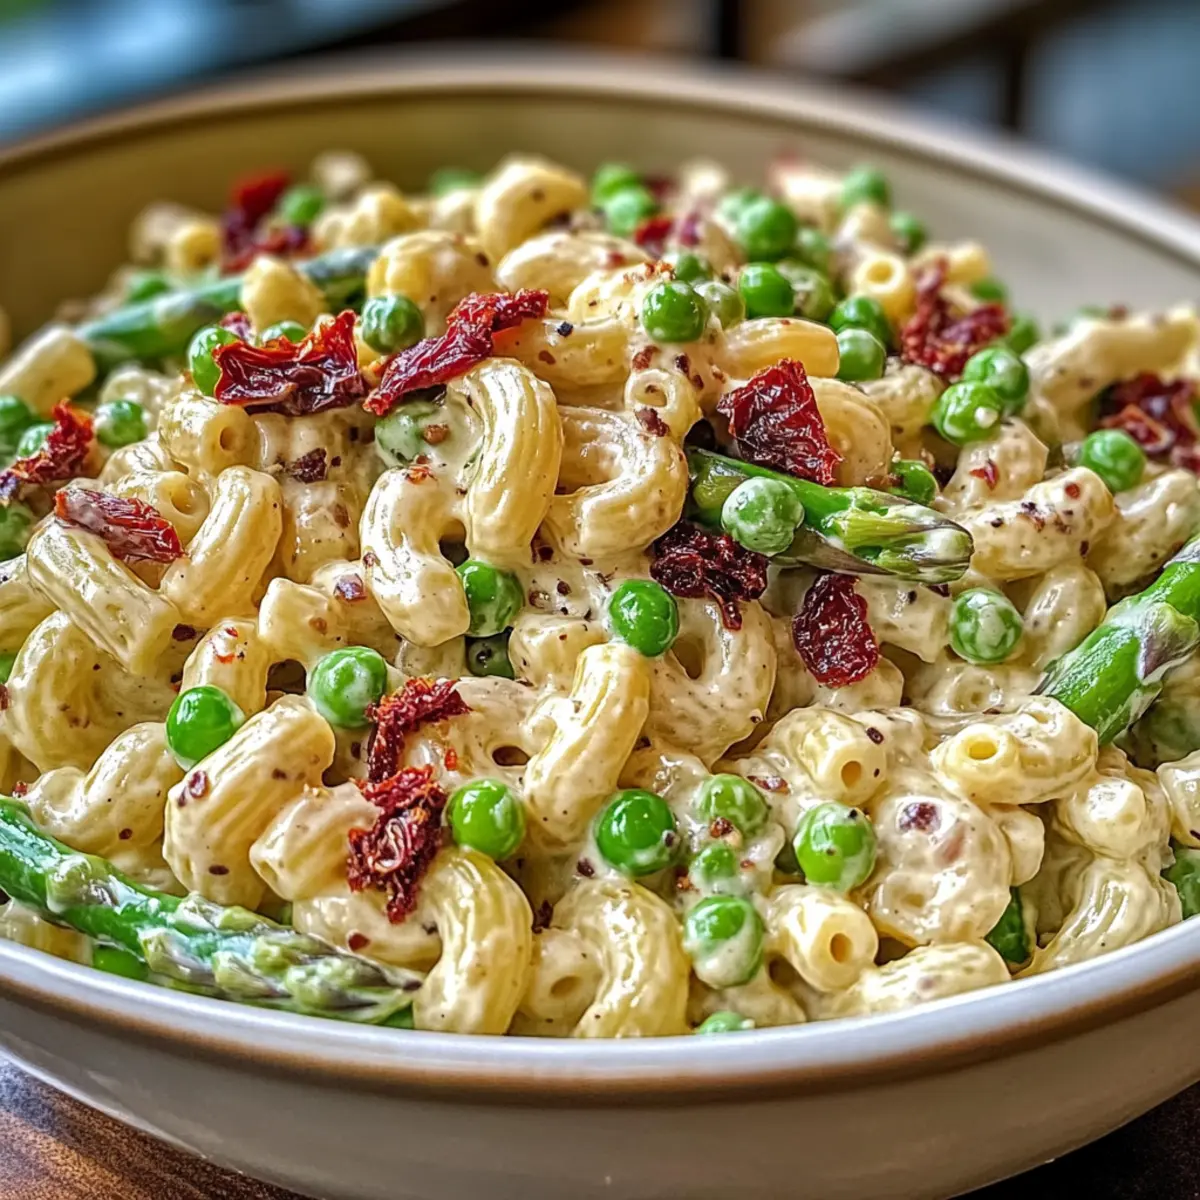
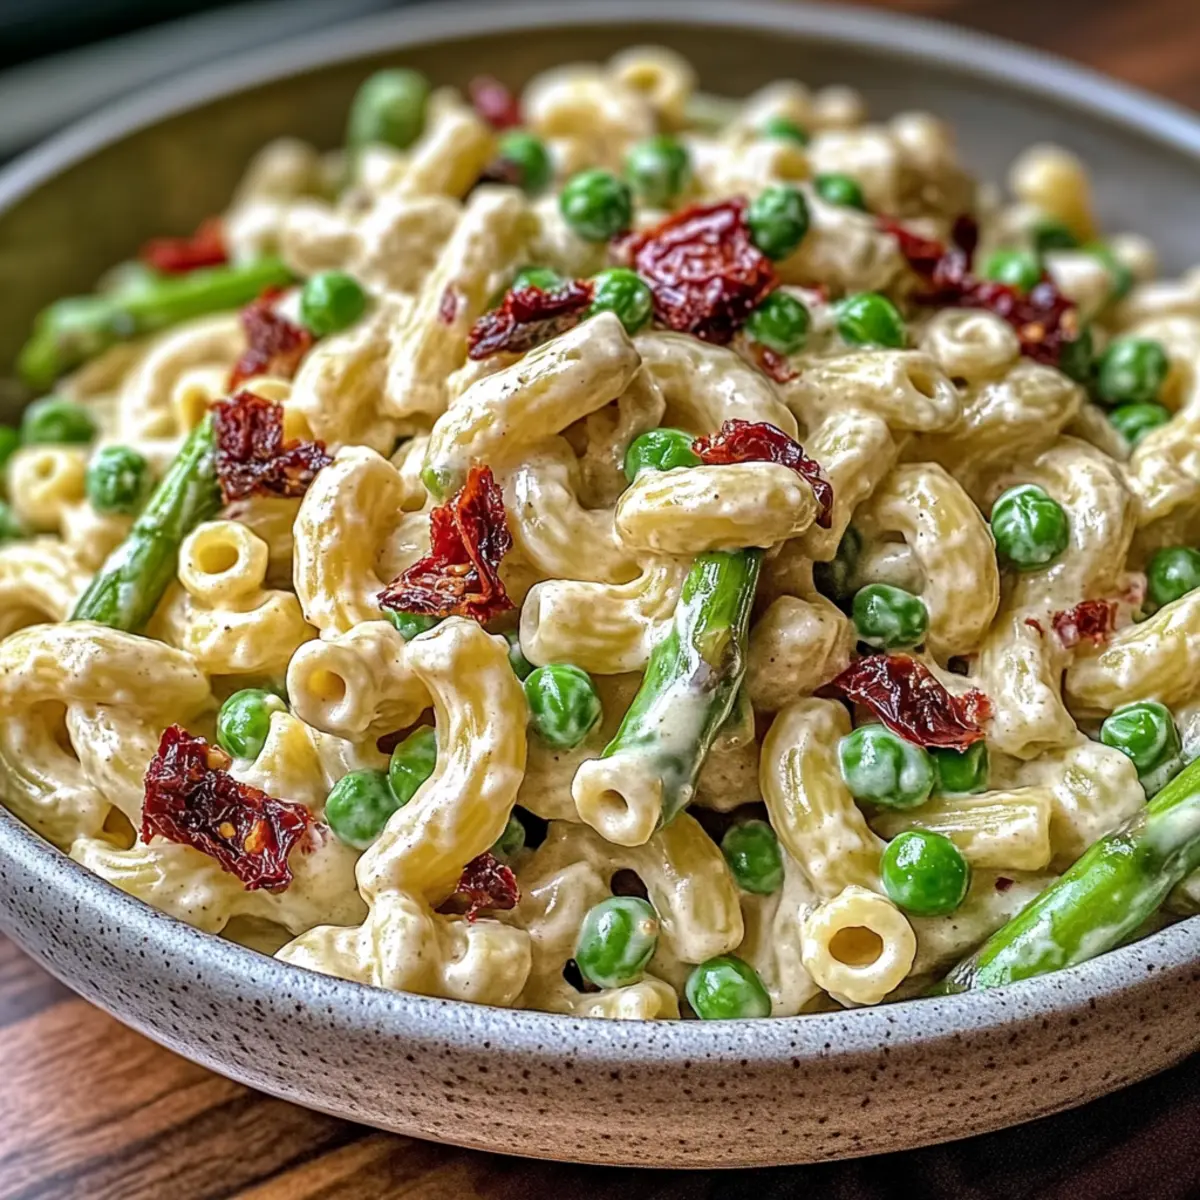
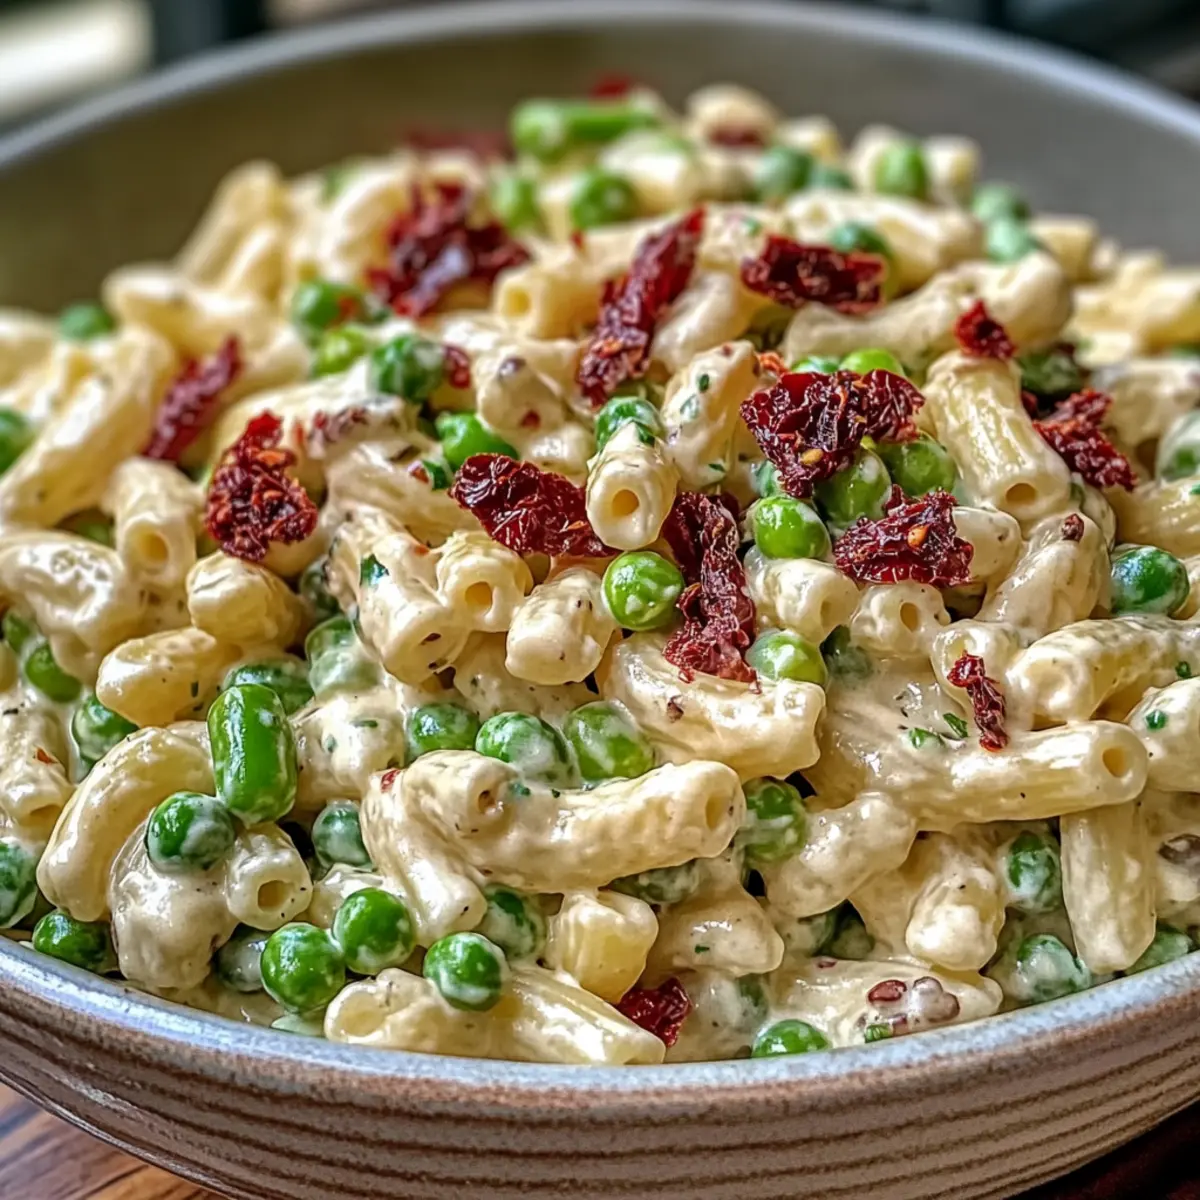
Zesty Lemon-Dijon Asparagus and Pea Macaroni Salad Delight

March 27, 2026 by Grace Snow Leave a Comment

There's a certain magic that happens when spring rolls around and fresh veggies fill the market stands. One taste of this Creamy Lemon-Dijon Asparagus and Pea Macaroni Salad, and you’ll understand what I'm talking about! Ready in just 30 minutes, this vibrant recipe is not only a feast for the eyes with its zesty greens and bright yellows but also a delightful choice for anyone looking to embrace plant-based meals. The creamy dressing, made tangy with lemon and Dijon mustard, combines seamlessly with the crisp asparagus and sweet peas—creating a dish that’s perfect for both casual weeknight dinners and festive gatherings. Best of all, it’s easy to customize to meet your dietary needs. Are you ready to dive into a bowl of fresh goodness?

Why is This Salad a Must-Try?

Quick Preparation: Whip up this vibrant Creamy Lemon-Dijon Asparagus and Pea Macaroni Salad in just 30 minutes, making it the perfect solution for busy weeknights or last-minute gatherings.

Flavor Explosion: The zingy lemon and Dijon dressing combine beautifully with fresh veggies, creating a burst of flavor that leaves palates craving more.

Customizable Delight: Feel free to modify this recipe to suit your dietary preferences—swap in gluten-free pasta or toss in some chickpeas for added protein and taste!

Visual Feast: With its bright greens, yellows, and reds, this dish isn’t just tasty; it’s a stunning centerpiece for any meal.

Crowd-Pleasing Appeal: Perfect for potlucks or picnics, everyone will love this salad. Whether served alongside grilled lemon tofu skewers or chilled cucumber soup, it complements a variety of dishes beautifully!

Lemon-Dijon Asparagus and Pea Macaroni Salad Ingredients

For the Salad
• 8 oz Elbow Macaroni Pasta – Provides a comforting base; consider gluten-free varieties to accommodate dietary needs.
• 1 cup Fresh Asparagus – Adds a crunchy texture and vibrant color; trim the tough ends for best results.
• 1 cup Frozen Peas – Sweetness and color without the need for thawing; these will cook perfectly with the hot pasta.
• 1/2 cup Sun-Dried Tomatoes – Bringing a tangy kick; ensure they are marinated and drained before chopping.

For the Dressing
• 1/2 cup Mayonnaise – Key for creaminess; swap with Vegenaise for a vegan alternative.
• 2 Lemons (juice and zest) – Infuses brightness and acidity to elevate flavor; fresh juice is recommended.
• 1 tbsp Dijon Mustard – Packs a flavorful punch; use just the right amount to balance the tang.
• 1 clove Garlic – Adds aromatic depth; can be minced for a smoother consistency.
• 1 tsp Fine Sea Salt – Essential for flavor balance; adjust according to your taste preferences.
• 1/4 tsp Fresh Ground Pepper – A hint of heat; personalize this to suit your spice level.

For the Garnish
• 1/4 cup Curly Parsley – Freshness and a pop of color; chop it finely for even distribution.
• 2 tbsp Chives – Mild onion flavor that enhances the salad; chive flowers can be pretty edible decorations!

Enjoy this Lemon-Dijon Asparagus and Pea Macaroni Salad as a colorful addition to any meal!

Step‑by‑Step Instructions for Creamy Lemon-Dijon Asparagus and Pea Macaroni Salad

Step 1: Cook Pasta and Asparagus
Bring a large pot of water to a rolling boil and add a generous amount of salt. Once boiling, add 8 ounces of elbow macaroni and cook according to package instructions, stirring occasionally until al dente, about 8-10 minutes. In the last 4 minutes of cooking, add 1 cup of chopped fresh asparagus, and in the final minute, toss in 1 cup of frozen peas to ensure vibrant color and crisp texture.

Step 2: Drain and Cool
Carefully drain the pasta and vegetable mixture in a colander, allowing excess water to escape. Immediately rinse under cool running water to halt the cooking process and prevent mushiness. Transfer the mixture to a large bowl, spreading it out to cool completely while you prepare the dressing.

Step 3: Combine Ingredients
Once the pasta mixture is cooled, stir in 1/2 cup of chopped sun-dried tomatoes. This step not only adds a tangy flavor but also enhances the overall visual appeal of your Creamy Lemon-Dijon Asparagus and Pea Macaroni Salad. Cover the bowl and let it chill in the refrigerator for about 15-20 minutes, allowing the flavors to meld beautifully.

Step 4: Make Dressing
In a separate bowl, whisk together 1/2 cup of mayonnaise, the juice and zest of 2 lemons, 1 tablespoon of Dijon mustard, 1 minced garlic clove, 1 teaspoon of fine sea salt, and 1/4 teaspoon of fresh ground pepper. Continue whisking until the dressing is completely smooth and creamy. The bright flavors of lemon and Dijon will create a perfect complement to your salad.

Step 5: Mix Salad
Pour the prepared dressing over the chilled pasta and vegetable mixture. Add 1/4 cup of finely chopped curly parsley and 2 tablespoons of chives for added freshness. Gently toss to coat all ingredients well, ensuring each bite of your Creamy Lemon-Dijon Asparagus and Pea Macaroni Salad is bursting with flavor and color.

Step 6: Serve or Store
The salad is now ready to enjoy! Serve it immediately for the best flavor and freshness. Alternatively, if you prefer to prepare it in advance, refrigerate in an airtight container for up to four days. This creamy salad makes for a delightful addition to your meals or gatherings!

How to Store and Freeze Lemon-Dijon Asparagus and Pea Macaroni Salad

  • Fridge: Store in an airtight container for up to four days. Enjoy best when fresh, as the flavors meld beautifully when chilled.
  • Freezer: For optimal taste, freeze the salad without the dressing, as it may separate when thawed. Use within a month for best quality; mix in dressing fresh upon thawing.
  • Reheating: This salad is best served cold. If you prefer it warm, gently reheat it in a skillet over low heat while adding a splash of water to revive the creaminess.
  • Leftovers: If you need to keep leftovers, use a separate container for the dressing to maintain the salad's crisp texture and flavor, ensuring the Lemon-Dijon Asparagus and Pea Macaroni Salad is always delightful!

Lemon-Dijon Asparagus and Pea Macaroni Salad Variations

Let your creativity shine by customizing this delightful salad with these scrumptious ideas!

  • Gluten-Free Pasta: Substitute elbow macaroni with gluten-free pasta like brown rice or quinoa for a wonderful alternative.

  • Fresh Tomatoes: Replace sun-dried tomatoes with fresh cherry tomatoes to lighten the dish and add a juicy burst of flavor.

  • Protein Boost: Incorporate chickpeas or white beans to transform this salad into a heartier meal that packs a protein punch!

  • Herb Twist: Swap parsley and chives for dill or tarragon, bringing a fresh and aromatic twist to the flavor profile.

  • Creamy Avocado: Dice ripe avocado and mix it in for added creaminess that pairs beautifully with the zesty dressing.

  • Spicy Kick: Sprinkle in red pepper flakes or diced jalapeño for those who enjoy a little heat—this will elevate the taste experience!

  • Nutty Texture: Toss in toasted pine nuts or slivered almonds to introduce a satisfying crunch and depth of flavor.

Elevate your Lemon-Dijon Asparagus and Pea Macaroni Salad with these personal touches. You might also enjoy it alongside a refreshing Chickpea Spinach Curry or bring ease to your gatherings with a classic Jello Salad Cottage. The culinary world is your oyster—have fun experimenting!

Expert Tips for Lemon-Dijon Asparagus and Pea Macaroni Salad

  • Al Dente Pasta: Ensure your macaroni is perfectly cooked al dente to avoid a mushy texture; overcooking can ruin the salad's appeal.
  • Chill for Flavor: Chilling the salad for 15-20 minutes allows the flavors to meld beautifully, enhancing the overall taste of the Lemon-Dijon Asparagus and Pea Macaroni Salad.
  • Fresh Ingredients: Use the freshest asparagus and peas for optimal crunch and flavor; wilted veggies will diminish the salad's vibrancy.
  • Dressing Adjustments: Feel free to tweak the amount of lemon juice or mustard in the dressing to suit your taste, balancing the zesty profile as desired.
  • Storage Smartly: If you plan to store leftovers, keep the dressing separate until serving to maintain the salad's creaminess and fresh texture.

What to Serve with Creamy Lemon-Dijon Asparagus and Pea Macaroni Salad

Create a vibrant meal experience alongside this creamy, zesty delight, perfect for any occasion!

  • Grilled Lemon Tofu Skewers: The smoky, charred flavor of grilled tofu perfectly complements the fresh and zesty notes of the salad. It adds protein while bringing a satisfying texture.

  • Garlic Herb Bread: Crispy on the outside and soft inside, this bread is essential for scooping up the salad, delivering a rustic charm to the meal. Plus, the garlic enhances all the flavors beautifully!

  • Chilled Cucumber Soup: A light and refreshing counterpart, the coolness of the soup balances the creamy salad while offering hydration on warm days.

  • Caprese Salad: This classic dish of fresh tomatoes, mozzarella, and basil contributes vibrant colors and a juicy contrast that pairs beautifully with the creamy pasta salad.

  • Roasted Vegetable Medley: Enjoy the warm earthiness of seasonal roasted veggies, elevating the meal with their caramelized sweetness that harmonizes with the zesty salad.

  • Sparking Lemonade: An invigorating drink option, this bubbly, bright beverage echoes the lemony aspects of the salad, enhancing the meal's refreshing theme.

  • Lemon Sorbet: For dessert, serve silky lemon sorbet, providing a cool and slightly tart finale that leaves guests feeling refreshed. The citrus theme ties the whole meal together!

  • Mixed Green Salad: A light, crisp salad with a variety of greens tossed in a light vinaigrette adds crunch and brightness, elevating the freshness of your table setting!

Make Ahead Options

Preparing the Creamy Lemon-Dijon Asparagus and Pea Macaroni Salad in advance is a fantastic way to save time during busy days! You can cook the pasta, asparagus, and peas up to 24 hours in advance; be sure to rinse and cool them thoroughly to maintain that delightful crunch. Additionally, the dressing can be made up to 3 days ahead and stored in the refrigerator, just remember to keep it separate from the pasta mixture until you’re ready to serve. When it’s time to enjoy your salad, simply combine the prepped elements, toss them with the dressing, and voila—you have a fresh, vibrant dish ready for any occasion!

Lemon-Dijon Asparagus and Pea Macaroni Salad Recipe FAQs

How do I select fresh asparagus for the salad?
Absolutely! Look for asparagus with firm, bright green stalks and tight, closed tips. Avoid any with dark spots or limpness; you want them to feel crisp and vibrant. A good rule is to hold the stalks—you should hear a slight snap, which indicates freshness!

What’s the best way to store leftover macaroni salad?
Very! To store your Lemon-Dijon Asparagus and Pea Macaroni Salad, transfer it to an airtight container and refrigerate. It will stay fresh for up to four days. Just remember, it tastes even better after it has a chance to chill and let the flavors meld together!

Can I freeze the macaroni salad?
Absolutely! While you can freeze this salad, I highly recommend freezing it without the dressing. To do so, let the salad cool completely, then place it in an airtight container or freezer bag. It should keep well for about a month. When you're ready to enjoy it, thaw it in the refrigerator overnight and mix in freshly made dressing.

What if my salad turns out too mushy?
No worries! If you find yourself with a mushy texture, it might be due to overcooked pasta or vegetables. The key here is to ensure your macaroni is cooked al dente, which helps maintain that delightful bite. If it still seems too soft, I recommend enjoying the salad fresh without any further cooking steps.

Are there any dietary considerations for pets or allergies?
Very much so! This salad is plant-based and generally safe for humans, but it does contain garlic and may contain ingredients like mayonnaise, which aren’t suitable for pets. If you’re serving it at a gathering, be sure to mention the ingredients for guests with allergies. Additionally, I often make a version without allergens like nuts or dairy for those with sensitivities.

Can I customize the ingredients in this macaroni salad?
Absolutely! One of the joys of this Lemon-Dijon Asparagus and Pea Macaroni Salad is its versatility. Feel free to swap elbow macaroni for gluten-free options or add proteins like chickpeas or beans. You can also experiment by adding fresh herbs or different veggies based on your preferences!

Lemon-Dijon Asparagus and Pea Macaroni Salad

Zesty Lemon-Dijon Asparagus and Pea Macaroni Salad Delight

A vibrant Lemon-Dijon Asparagus and Pea Macaroni Salad that bursts with flavor and is ready in just 30 minutes.
Print Recipe Pin Recipe
Prep Time 10 minutes mins
Cook Time 20 minutes mins
Chilling Time 20 minutes mins
Total Time 30 minutes mins
Servings: 4 servings
Course: Salads
Cuisine: Plant-Based
Calories: 350
Ingredients Equipment Method Nutrition Notes

Ingredients
  

For the Salad
  • 8 oz Elbow Macaroni Pasta Consider gluten-free varieties to accommodate dietary needs.
  • 1 cup Fresh Asparagus Trim the tough ends for best results.
  • 1 cup Frozen Peas These will cook perfectly with the hot pasta.
  • 1/2 cup Sun-Dried Tomatoes Ensure they are marinated and drained before chopping.
For the Dressing
  • 1/2 cup Mayonnaise Swap with Vegenaise for a vegan alternative.
  • 2 whole Lemons (juice and zest) Fresh juice is recommended.
  • 1 tbsp Dijon Mustard Use just the right amount to balance the tang.
  • 1 clove Garlic Can be minced for a smoother consistency.
  • 1 tsp Fine Sea Salt Adjust according to your taste preferences.
  • 1/4 tsp Fresh Ground Pepper Personalize this to suit your spice level.
For the Garnish
  • 1/4 cup Curly Parsley Chop it finely for even distribution.
  • 2 tbsp Chives Chive flowers can be pretty edible decorations.

Equipment

  • Large pot
  • Colander
  • large bowl
  • Whisk
  • Knife
  • Cutting Board

Method
 

Step-by-Step Instructions
  1. Bring a large pot of water to a rolling boil and add a generous amount of salt. Once boiling, add 8 ounces of elbow macaroni and cook according to package instructions, stirring occasionally until al dente, about 8-10 minutes. In the last 4 minutes of cooking, add 1 cup of chopped fresh asparagus, and in the final minute, toss in 1 cup of frozen peas to ensure vibrant color and crisp texture.
  2. Carefully drain the pasta and vegetable mixture in a colander, allowing excess water to escape. Immediately rinse under cool running water to halt the cooking process and prevent mushiness. Transfer the mixture to a large bowl, spreading it out to cool completely while you prepare the dressing.
  3. Once the pasta mixture is cooled, stir in 1/2 cup of chopped sun-dried tomatoes. Cover the bowl and let it chill in the refrigerator for about 15-20 minutes.
  4. In a separate bowl, whisk together 1/2 cup of mayonnaise, the juice and zest of 2 lemons, 1 tablespoon of Dijon mustard, 1 minced garlic clove, 1 teaspoon of fine sea salt, and 1/4 teaspoon of fresh ground pepper until smooth.
  5. Pour the prepared dressing over the chilled pasta and vegetable mixture. Add 1/4 cup of finely chopped curly parsley and 2 tablespoons of chives. Gently toss to coat all ingredients well.
  6. Serve immediately for the best flavor and freshness, or refrigerate in an airtight container for up to four days.

Nutrition

Serving: 1cupCalories: 350kcalCarbohydrates: 45gProtein: 10gFat: 15gSaturated Fat: 2gPolyunsaturated Fat: 3gMonounsaturated Fat: 8gCholesterol: 15mgSodium: 400mgPotassium: 500mgFiber: 5gSugar: 3gVitamin A: 500IUVitamin C: 15mgCalcium: 30mgIron: 1.5mg

Notes

Chilling the salad for 15-20 minutes allows the flavors to meld beautifully. Store leftovers with the dressing separate to maintain texture and flavor.

Tried this recipe?

Let us know how it was!

Easy Italian Pasta Salad: A Summer Delight to Share

March 22, 2026 by Grace Snow Leave a Comment

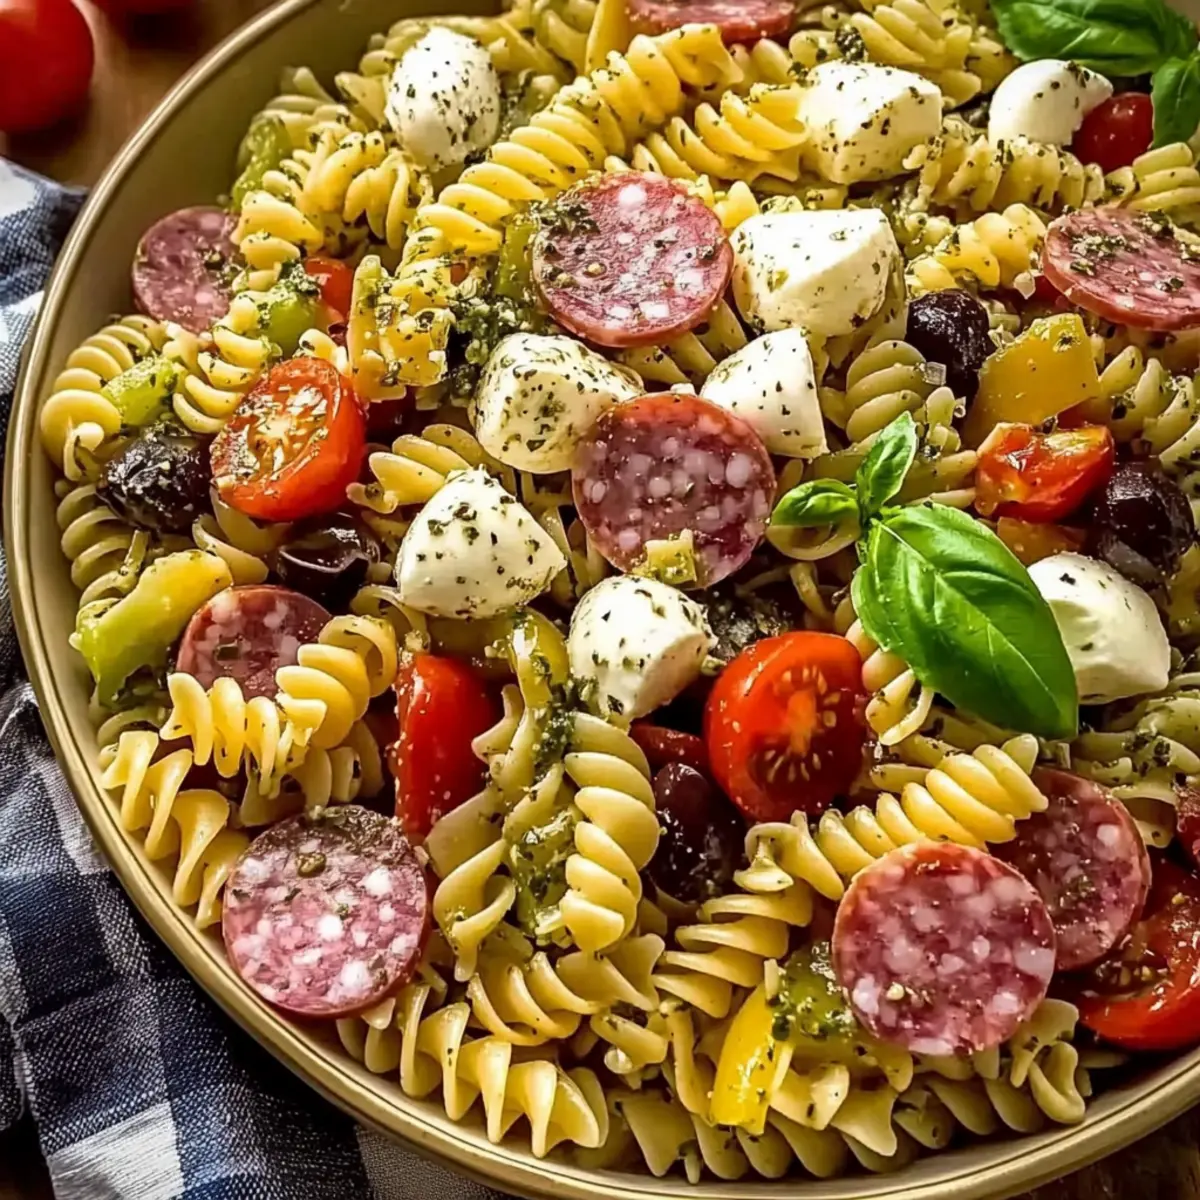
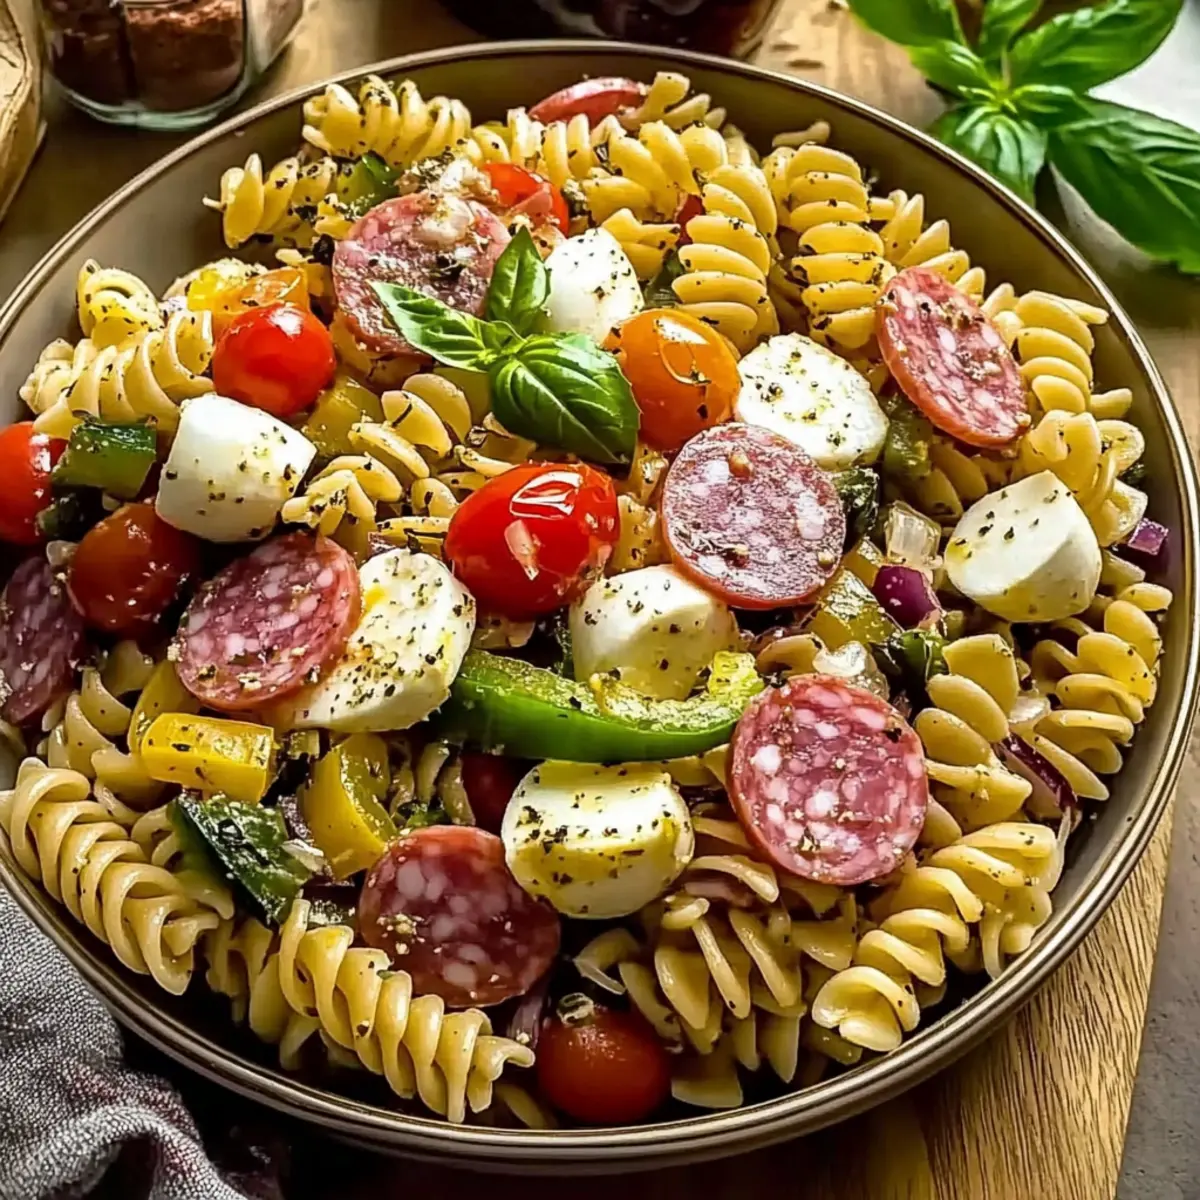
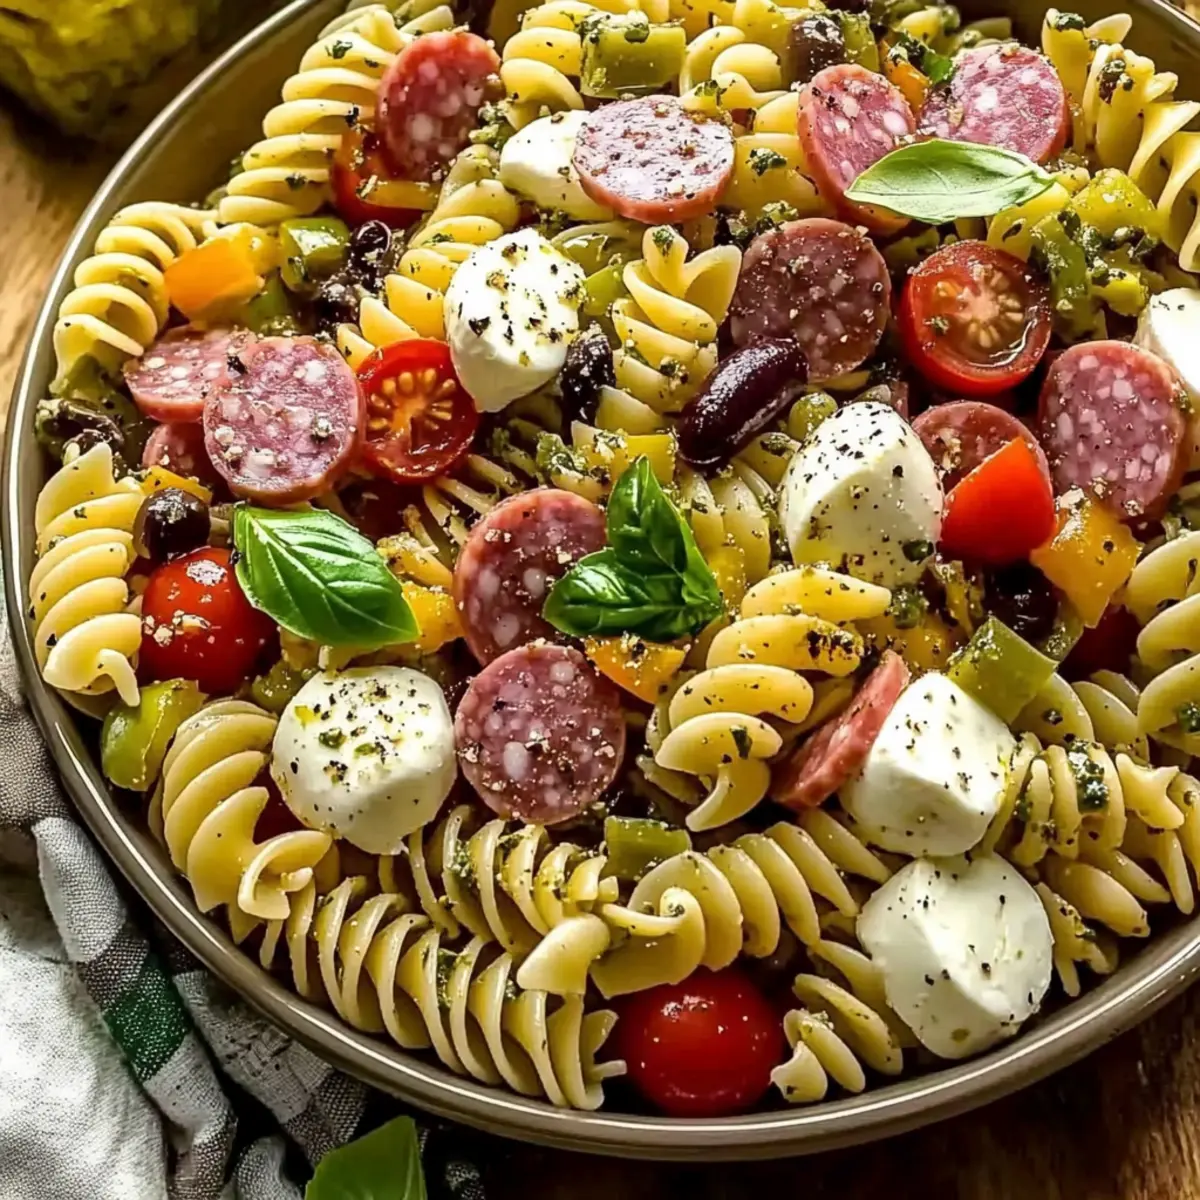
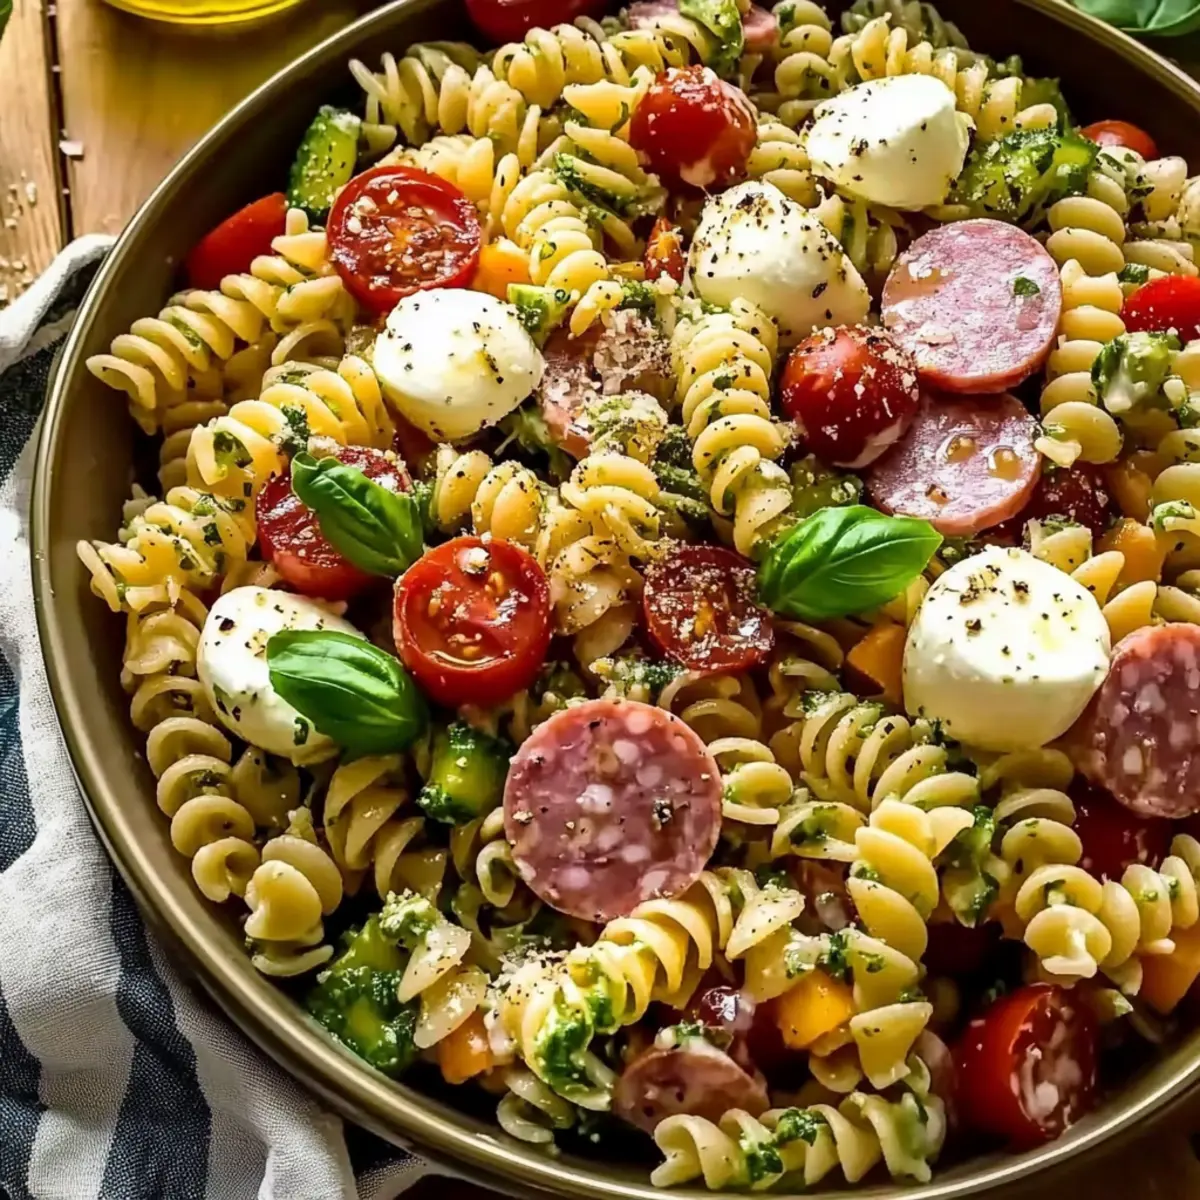
As I stood in my kitchen, the aroma of fresh veggies mingling with zesty Italian dressing brought a cheerful smile to my face. This Easy Italian Pasta Salad reminds me of sunny summer days spent with family, where vibrant colors and delicious flavors take center stage. Not only is this dish a breeze to whip up, making meal prep a joy rather than a chore, but it’s also a guaranteed crowd-pleaser that your loved ones will eagerly devour. Packed with hearty pasta, crisp vegetables, and savory salami, every bite offers a delightful textural contrast, ideal for any potluck or picnic. Are you ready to transform simple ingredients into a dish that shouts “summer”? Let’s dive into the recipe!

Why is this pasta salad a must-try?

Simplicity: This Easy Italian Pasta Salad is incredibly straightforward to prepare, making it a breeze even for novice cooks.

Vibrant Flavors: The combination of fresh veggies and tangy dressing creates a burst of flavor that is sure to impress.

Make-Ahead Magic: Perfect for meal prep, this dish can be made in advance and improves in taste as it sits.

Crowd-Pleaser: Ideal for summer gatherings, this salad is a hit at picnics or potlucks, inviting everyone to dig in.

Versatile Ingredients: You can easily customize it; swap salami for grilled chicken or add more veggies to suit your taste!

Get ready to elevate your summer dining with this delightful recipe!

Easy Italian Pasta Salad Ingredients

For the Salad

  • 1 lb pasta – Choose rotini or fusilli to allow the dressing to cling beautifully for better flavor.
  • 1 1/2 green bell pepper – Adds a sweet crunch; feel free to use any color bell pepper you like.
  • 1 1/2 red bell pepper – This brings vibrant color and additional sweetness to the salad; substitute freely.
  • 1 red onion – Provides a sharp flavor kick; consider green onions for a milder alternative.
  • 1/2 cup black olives – Introduces a briny depth; if desired, you can switch to green olives for a different taste.
  • 10 oz salami – Infuses protein and robust flavor; for a variation, try using pepperoni or cooked chicken.
  • 1 1/4 cup mozzarella – This brings creaminess and ties all the flavors together; feta makes a delightful swap for tang.
  • 1 cup cherry tomatoes – Adds sweetness and juiciness; halved for easy mixing throughout the salad.
  • 3/4 cup Parmesan – Enhances the savory aspects of the dish; consider pecorino romano for a sharper flavor profile.
  • 1 cup Italian dressing – Essential for melding flavors; opt for homemade dressing for fresher notes.
  • Salt & pepper – Vital for elevating the overall taste; adjust according to your preference.

Get ready to whip up this Easy Italian Pasta Salad and share a bowl filled with fun flavors at your next summer gathering!

Step‑by‑Step Instructions for Easy Italian Pasta Salad

Step 1: Prepare Your Ingredients
Begin by finely dicing the green and red bell peppers, and the red onion. Halve the cherry tomatoes and cube the salami and mozzarella. Gather a large bowl and your cutting board to keep things organized. This vibrant array of fresh ingredients will lay the foundation for your Easy Italian Pasta Salad, ensuring every bite is bursting with flavor.

Step 2: Cook the Pasta
Set a large pot over medium-high heat and bring salted water to a rolling boil. Add 1 pound of pasta and cook according to package directions until al dente, about 8-10 minutes. This will give the pasta a firm texture that holds up well in the salad. Once cooked, carefully drain the pasta in a colander—avoid rinsing, as you want it to retain some warmth and starch.

Step 3: Combine Ingredients
Transfer the warm, drained pasta to a large mixing bowl. Immediately add in the prepared bell peppers, red onion, cherry tomatoes, black olives, cubed salami, mozzarella, and Parmesan cheese. This step is all about creating a colorful medley for your Easy Italian Pasta Salad, where each ingredient will contribute to the beautiful final dish.

Step 4: Dress the Salad
Pour 1 cup of Italian dressing over the pasta mixture. Use a pair of tongs or a large spoon to gently toss everything together, ensuring that every component is well-coated with the dressing. This is a crucial moment where the flavors meld together; give it a good mix, and take a moment to appreciate the vibrant colors of your salad.

Step 5: Adjust Seasoning
Take a taste of your Easy Italian Pasta Salad to check the seasoning. Add salt and pepper as needed, mixing well to distribute the flavors. This step is key to achieving a balanced taste; the right seasoning will elevate your salad and make every bite deliciously satisfying.

Step 6: Chill and Serve
Cover the bowl with plastic wrap or a lid and refrigerate the salad for at least 1 hour. Chilling helps the flavors meld beautifully, making the salad even more robust. Once ready to serve, give it another toss and add a sprinkle of extra cheese or fresh herbs for a garnish, inviting everyone to enjoy this refreshing summer dish.

Easy Italian Pasta Salad Variations

Feel free to unleash your creativity and personalize this delicious pasta salad to suit your taste buds!

  • Grilled Chicken: Swap out salami for grilled chicken for a leaner protein option. This adds a lovely smoky flavor that elevates the dish.

  • Mediterranean Twist: Include artichoke hearts or sun-dried tomatoes for a burst of Mediterranean flair. Their tangy notes pair wonderfully with the dressing.

  • Fresh Herbs: Toss in fresh basil or parsley for brightness. These herbs infuse freshness, making every bite feel like summer.

  • Cheese Swap: Replace mozzarella with tangy feta for a unique twist. Feta crumbles offer a delightful creaminess that contrasts beautifully with the crunchy veggies.

  • Extra Veggies: Add a medley of vegetables such as zucchini, cucumbers, or even sliced radishes for more color and crunch. The variations can keep your palate excited!

  • Heat Lover’s Delight: For spice enthusiasts, add red pepper flakes or sliced jalapeños to give this salad a kick. A little heat can transform your dish into a flavor explosion.

  • Pasta Variations: Mix things up with different pasta shapes or even cauliflower pasta for a lower-carb alternative while still being delicious.

  • Vegan Delight: Use chickpeas or tempeh in place of salami, and opt for a vegan dressing to create a satisfying vegan version, appealing to plant-based lovers.

With these variations, every serving of your Easy Italian Pasta Salad can take on a new personality, keeping family meals lively and engaging! Whether you stick with the classic or explore new flavors, this dish is sure to delight at any gathering.

How to Store and Freeze Easy Italian Pasta Salad

Fridge: Store the Easy Italian Pasta Salad in an airtight container for up to 4 days; flavors deepen over time, making leftovers just as delightful.

Freezer: While not recommended for long-term freezing due to potential texture changes, you can freeze for up to 2 weeks if necessary. Thaw overnight in the fridge before serving.

Refreshing: If the pasta salad appears dry after refrigeration, revive it with a splash of fresh Italian dressing for a burst of flavor.

Reheating: This salad is best enjoyed cold, but if you prefer it warm, gently toss in a pan over low heat just until warmed through.

What to Serve with Easy Italian Pasta Salad?

As you create this colorful dish, consider delightful pairings that enhance your summer gatherings and bring out the best flavors.

  • Grilled Chicken: Juicy grilled chicken complements the pasta salad's textures while adding protein, making a hearty meal.

  • Garlic Bread: The warm, buttery crunch of garlic bread offers the perfect vehicle to soak up any extra dressing. Serve alongside for a comforting addition!

  • Caprese Skewers: Fresh mozzarella, basil, and tomatoes on skewers echo the salad’s ingredients while bringing a light, refreshing bite.

  • Watermelon Salad: A crisp watermelon salad with mint provides a sweet contrast that balances the savory flavors of the pasta.

  • Lemonade Spritzers: Chilled lemonade spritzers bring a zesty and refreshing drink option that pairs wonderfully with all the robust flavors.

  • Chocolate-Covered Strawberries: For dessert, these sweet bites will end your meal on a perfect note, bringing a delightful touch of indulgence.

Make Ahead Options

These Easy Italian Pasta Salad preparations are perfect for busy home cooks looking to save time! You can chop the vegetables and cube the cheese up to 24 hours in advance, storing them in an airtight container in the refrigerator to maintain freshness. The pasta can also be cooked ahead; just allow it to cool completely before combining it with the dressing to prevent it from becoming mushy. When you're ready to serve, simply toss together all the prepped ingredients, adding an extra drizzle of dressing if necessary to brighten the flavors. This way, you'll have a vibrant, crowd-pleasing salad that’s just as delicious, making it an ideal choice for meal prep or last-minute gatherings!

Expert Tips for Easy Italian Pasta Salad

  • Salty Water: Always salt the pasta water generously; it should taste like the ocean. This ensures the pasta is flavorful from the start.

  • Cool Before Dressing: Let the pasta cool fully before adding the Italian dressing. If added while warm, the pasta may absorb too much dressing and become dry.

  • Taste Test: Be sure to taste the Easy Italian Pasta Salad before serving. Cold dishes can dull flavors; adjust the salt and pepper as needed for brightness.

  • Fresh Ingredients: Using crisp, fresh vegetables is key for texture and flavor. Stay away from wrinkled or limp produce, as it can affect the overall taste of your salad.

  • Storage Secrets: Store leftovers in an airtight container for up to 4 days. If the salad appears dry, simply add a dash more dressing to revitalize it.

Easy Italian Pasta Salad Recipe FAQs

What type of pasta is best for this salad?
For the Easy Italian Pasta Salad, I recommend using rotini or fusilli. These shapes are excellent at capturing the dressing and holding onto the ingredients, creating a flavorful bite every time.

How should I store leftover Easy Italian Pasta Salad?
Store the salad in an airtight container in the refrigerator for up to 4 days. The flavors actually improve over time as they meld together, making day-two leftovers just as delicious.

Can I freeze Easy Italian Pasta Salad?
While I generally don't recommend freezing this salad because the texture can change, you can freeze it for up to 2 weeks if necessary. To do this, place it in a freezer-safe container. Thaw it overnight in the fridge before serving; just be aware that the vegetables may lose some crunch.

What if my pasta salad is too dry after refrigerating?
Absolutely, if your salad appears dry, simply add a splash of fresh Italian dressing and toss to revive it. This will bring back the flavor and moisture, making each bite just as delightful as the first.

Are there any dietary considerations for this salad?
If you're concerned about allergies, note the salami, olives, and cheese can be replaced with alternatives for specific dietary needs. You can use turkey or chicken for the protein and a dairy-free cheese option for a vegan variation. Just be sure to check all labels if you're accommodating allergies!

How do I ensure my vegetables are fresh and vibrant?
When selecting your vegetables, look for firm, brightly colored produce without dark spots or wilting. Fresh ingredients contribute to the salad’s overall texture and flavor, so it's worth taking the extra time to choose the best!

Easy Italian Pasta Salad

Easy Italian Pasta Salad: A Summer Delight to Share

This Easy Italian Pasta Salad is a vibrant and crowd-pleasing dish, perfect for summer gatherings.
Print Recipe Pin Recipe
Prep Time 20 minutes mins
Cook Time 10 minutes mins
Chilling Time 1 hour hr
Total Time 1 hour hr 30 minutes mins
Servings: 8 servings
Course: Salads
Cuisine: Italian
Calories: 350
Ingredients Equipment Method Nutrition Notes

Ingredients
  

For the Salad
  • 16 oz pasta Choose rotini or fusilli for better flavor absorption.
  • 1.5 whole green bell pepper Adds a sweet crunch.
  • 1.5 whole red bell pepper Brings vibrant color.
  • 1 whole red onion Provides a sharp flavor kick.
  • 0.5 cup black olives Introduces a briny depth.
  • 10 oz salami Infuses protein and robust flavor.
  • 1.25 cup mozzarella Brings creaminess.
  • 1 cup cherry tomatoes Adds sweetness and juiciness.
  • 0.75 cup Parmesan Enhances the savory aspects.
  • 1 cup Italian dressing Essential for melding flavors.
  • Salt
  • Pepper

Equipment

  • large mixing bowl
  • pot
  • Colander
  • Cutting Board

Method
 

Preparation Steps
  1. Begin by finely dicing the green and red bell peppers, and the red onion. Halve the cherry tomatoes and cube the salami and mozzarella.
  2. Set a large pot over medium-high heat and bring salted water to a rolling boil. Add 1 pound of pasta and cook according to package directions until al dente, about 8-10 minutes.
  3. Transfer the warm, drained pasta to a large mixing bowl. Immediately add in the prepared bell peppers, red onion, cherry tomatoes, black olives, cubed salami, mozzarella, and Parmesan cheese.
  4. Pour 1 cup of Italian dressing over the pasta mixture. Use a pair of tongs or a large spoon to gently toss everything together.
  5. Take a taste of your Easy Italian Pasta Salad to check the seasoning. Add salt and pepper as needed.
  6. Cover the bowl with plastic wrap or a lid and refrigerate the salad for at least 1 hour.

Nutrition

Serving: 1cupCalories: 350kcalCarbohydrates: 40gProtein: 15gFat: 17gSaturated Fat: 6gPolyunsaturated Fat: 2gMonounsaturated Fat: 8gCholesterol: 30mgSodium: 800mgPotassium: 300mgFiber: 3gSugar: 5gVitamin A: 450IUVitamin C: 50mgCalcium: 200mgIron: 2mg

Notes

Store leftovers in an airtight container for up to 4 days; if the salad appears dry, add a dash more dressing.

Tried this recipe?

Let us know how it was!

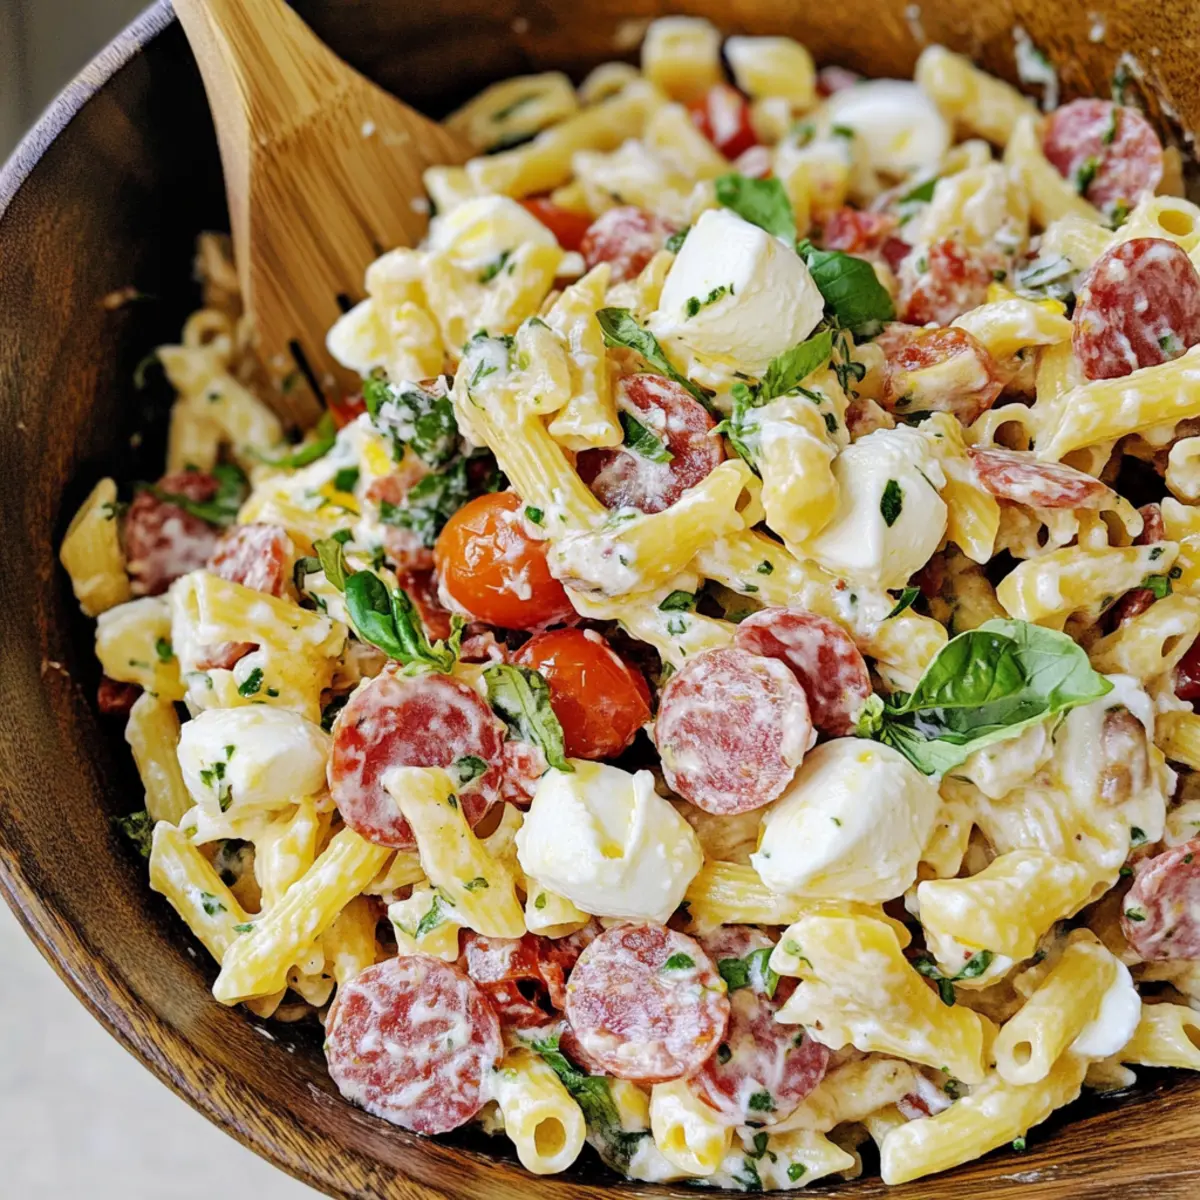
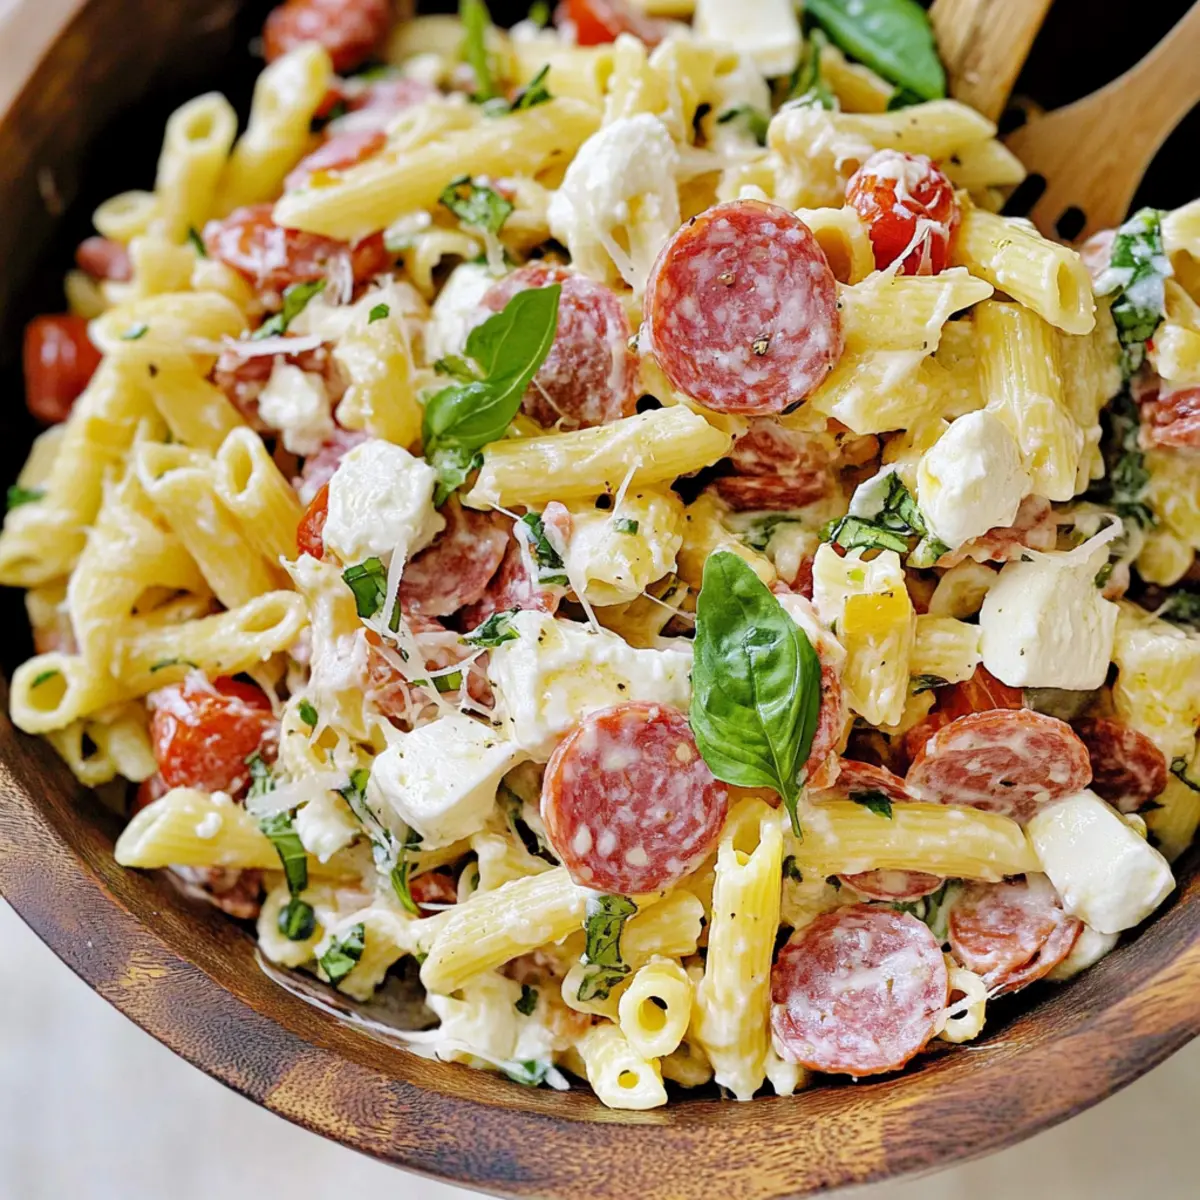
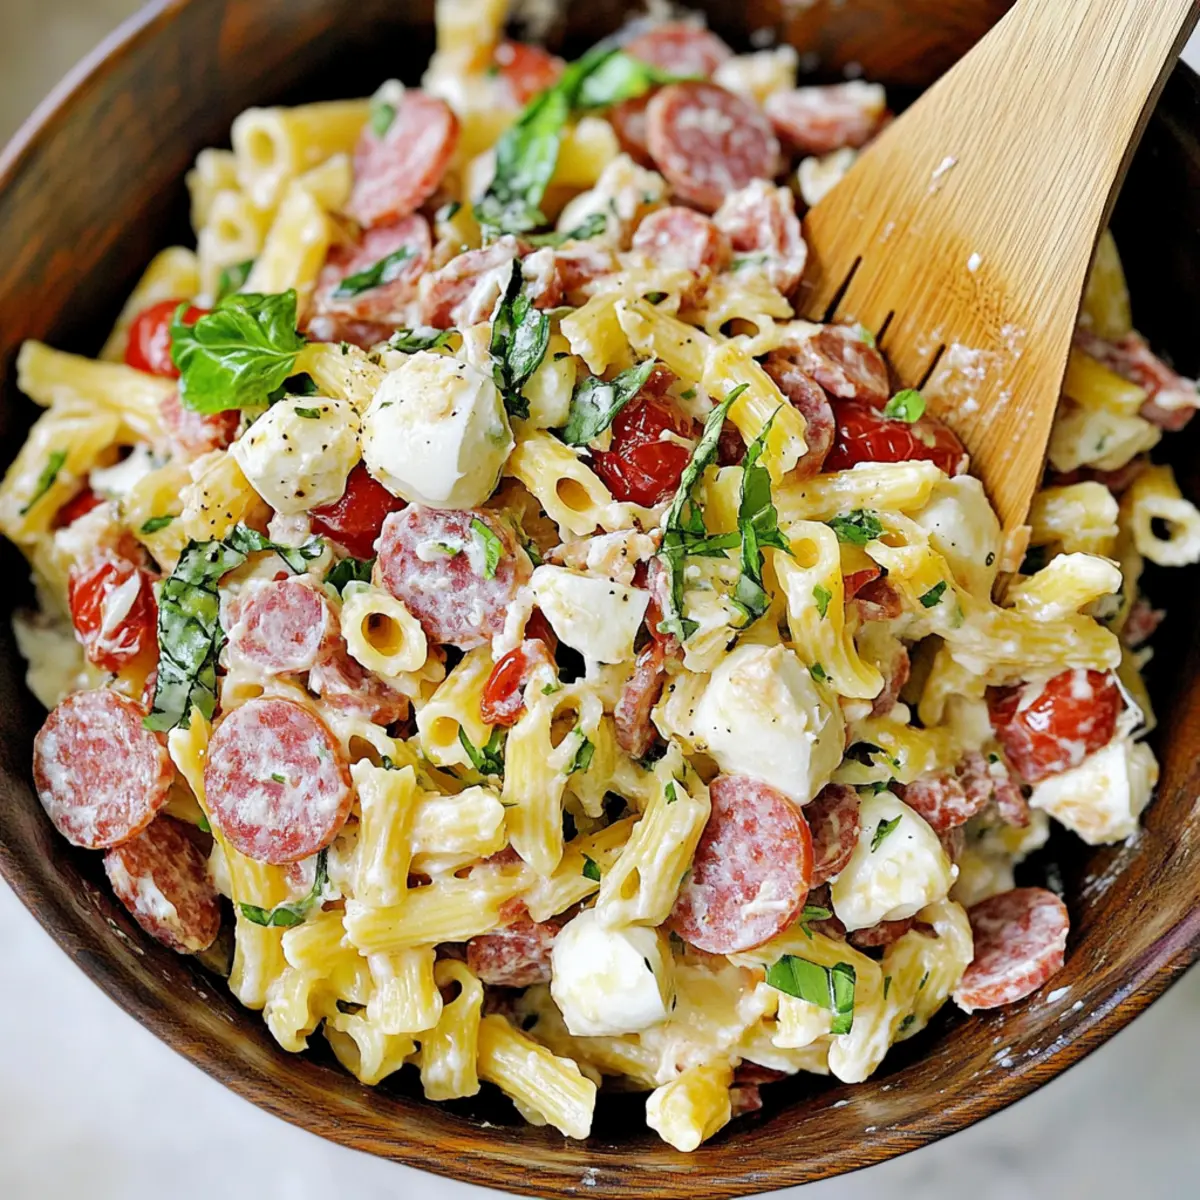
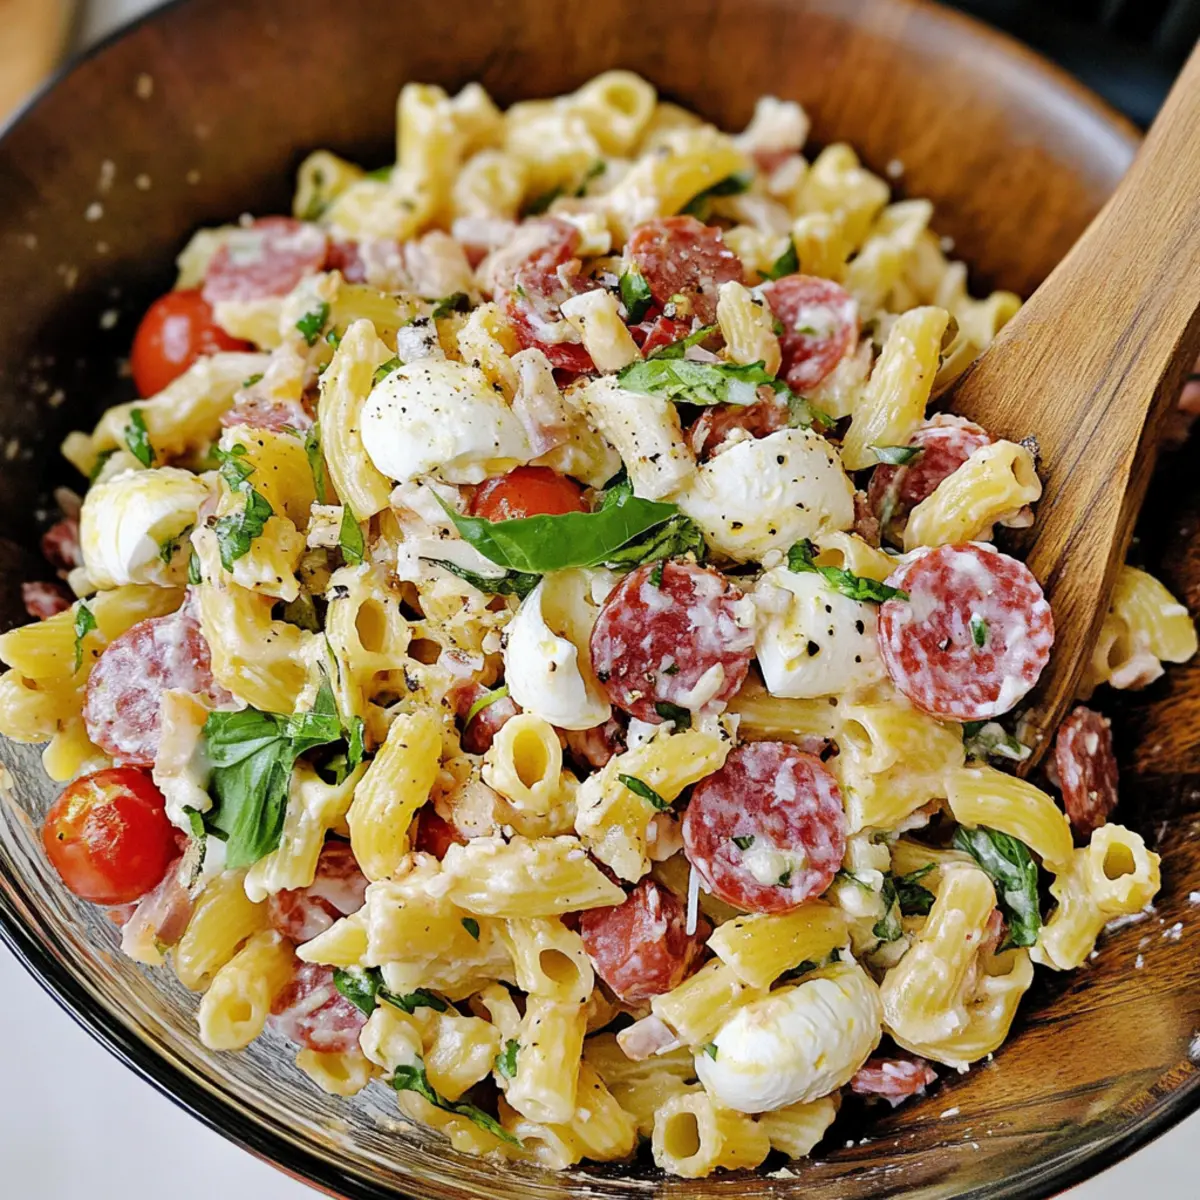
Italian Grinder Pasta Salad: A Creamy Dream for Gatherings

March 22, 2026 by Grace Snow Leave a Comment

The vibrant colors of summer and the savory scent of Italian flavors whisk me away to sun-kissed picnics, where every bite feels like a celebration. Today, I'm thrilled to share my Italian Grinder Pasta Salad, a dish that marries the delightful textures of tender campanelle pasta with the boldness of salami and pepperoni. This creamy, flavor-packed side dish is not only incredibly easy to whip up, making it a crowd-pleaser, but it’s also a fantastic make-ahead option for those lazy sunny days. With its refreshing ingredients and a zesty dressing, this recipe is the perfect companion for your next barbecue or potluck. Are you ready to dive into a bowl of vibrant, delicious goodness that even your friends will ask you to make again?

Why is this pasta salad a must-try?

Flavor Explosion: Each bite of this Italian Grinder Pasta Salad is bursting with savory salami, pepperoni, and creamy cheeses, making it incredibly satisfying.

Quick & Easy: With minimal prep and a simple dressing, you’ll be enjoying this dish in no time!

Make-Ahead Convenience: Perfect for meal prep, you can whip this up a day in advance, allowing for flavors to meld beautifully.

Summer Ready: This salad shines at picnics and barbecues, where it complements grilled meats and fresh fruits alike. Try serving it alongside a Jello Salad Cottage for a refreshing twist!

Versatile Ingredients: Swap in your favorite veggies or cheeses to make it uniquely yours—like adding diced black olives for extra brininess or mixing in cooked chickpeas for a vegetarian boost.

Crowd-Pleaser: Expect compliments and requests for the recipe; this dish is sure to become a favorite!

Italian Grinder Pasta Salad Ingredients

For the Dressing

• Mayonnaise – Adds creaminess and richness; substitute with Greek yogurt for a lighter option.
• Red Wine Vinegar – Provides acidity to balance the richness; use apple cider vinegar as an alternative.
• Fresh Garlic – Infuses the dressing with aromatic flavor; garlic powder (1/4 teaspoon) works if fresh is unavailable.
• Dried Oregano – Contributes herbal notes; Italian seasoning can replace it if needed.
• Ground Black Pepper – Adds mild heat; white pepper offers a different flavor profile.
• Crushed Red Pepper Flakes – Offers a hint of spice; adjust or omit according to your heat preference.

For the Salad

• Campanelle Pasta – Provides great texture that holds the dressing well; other short pasta shapes like fusilli work as substitutes.
• Mozzarella Pearls – Adds creaminess and a mild flavor; substitute with shredded mozzarella if small pearls are unavailable.
• Provolone Cheese – Enhances richness with a slight sharpness; swap with fontina cheese for a different flair.
• Hard Salami and Pepperoni – Adds salty, savory bites; use turkey or chicken sausage for a lighter version.
• Cherry Tomatoes – Introduces sweetness and juiciness; diced bell peppers can give a crunchy alternative.
• Red Onion – Gives sharpness; soaking in ice water mellows the flavor—shallots can serve as a milder substitute.
• Pepperoncini – Provides tanginess and a little heat; pickled jalapeños can add a spicier kick.
• Romaine Lettuce – Adds freshness and crunch; spinach or mixed greens could be a nice substitute.
• Fresh Basil – Introduces a fragrant herbal note; dried basil can be used if fresh is not available (use 1 tsp).
• Parmesan Cheese – Finishes the dish with savory depth; nutritional yeast can be a dairy-free alternative.

With these ingredients prepared, you're just a toss away from enjoying your delightful Italian Grinder Pasta Salad!

Step‑by‑Step Instructions for Italian Grinder Pasta Salad

Step 1: Prepare Dressing
In a medium bowl, whisk together 1 cup of mayonnaise, 2 tablespoons of red wine vinegar, 2 minced garlic cloves, 1 teaspoon of dried oregano, 1/2 teaspoon of ground black pepper, and a pinch of crushed red pepper flakes. Mix until creamy and smooth. Cover the bowl with plastic wrap and chill in the refrigerator for at least 30 minutes to let the flavors meld while you prepare the rest of the salad.

Step 2: Cook Pasta
Bring a large pot of salted water to a rolling boil over high heat. Add 8 ounces of campanelle pasta and cook according to package instructions, typically about 8-10 minutes, until al dente. Once cooked, drain the pasta in a colander and rinse it under cool running water for about 30 seconds to stop the cooking process, preventing the pasta from becoming mushy.

Step 3: Soak Onions
While the pasta cooks, slice 1 small red onion thinly and place the slices in a bowl of ice water. Let them soak for 10-15 minutes to mellow the sharp flavor. Once softened, drain the onions and pat them dry with paper towels to remove excess water before adding them to your pasta salad for balanced flavors.

Step 4: Combine Salad Ingredients
In a large mixing bowl, combine the cooled pasta, 1 cup of mozzarella pearls, 1/2 cup of diced provolone cheese, 1/2 cup of cubed hard salami, 1/2 cup of diced pepperoni, 1 cup of halved cherry tomatoes, drained sliced onions, 1/2 cup of sliced pepperoncini, 2 cups of chopped romaine lettuce, and 1/4 cup of chopped fresh basil. Gently stir the ingredients together until evenly distributed.

Step 5: Toss with Dressing
Pour the chilled dressing over the combined salad ingredients. Sprinkle in 1/2 cup of grated parmesan cheese for added richness. Using a spatula, gently fold the salad until everything is well-coated in the creamy dressing. Ensure every ingredient is mixed evenly and coated for a delightful Italian Grinder Pasta Salad experience.

Step 6: Garnish and Serve
Transfer your delicious Italian Grinder Pasta Salad to a vibrant serving dish. Top with additional grated parmesan, a few fresh basil leaves, and a light sprinkle of black pepper for presentation. For the best flavor, let the salad sit for about 15 minutes at room temperature before serving, allowing the flavors to meld beautifully.

What to Serve with Italian Grinder Pasta Salad

Imagine basking in the sun with a spread of vibrant flavors and delightful textures surrounding you—perfect for your summertime gatherings.

  • Grilled Chicken Skewers: Tender and smoky, these skewers offer a delicious contrast to the creamy pasta salad, making it a complete meal.
  • Garlic Bread Sticks: Crunchy on the outside and soft inside, they complement the salad’s creaminess while adding a satisfying crunch.
  • Caprese Salad: Fresh tomatoes, mozzarella, and basil create a refreshing pairing that echoes the Italian essence of your pasta salad.
  • Fruit Salad: A sweet, juicy mix of seasonal fruits provides a light, refreshing contrast that balances the savory notes of the pasta dish.
  • Zesty Lemonade: This homemade drink adds a sweet-tart citrus burst that brightens the meal and ties all the flavors together seamlessly.
  • Chocolate Chip Cookies: Finish off your feast with warm cookies—the soft sweetness brings a comforting and nostalgic end to your gathering.
  • Mixed Green Salad: Crisp greens dressed in a light vinaigrette offer freshness, enhancing the overall dining experience while keeping things light.
  • Apple Slices with Peanut Butter: This simple snack pairs well as a healthy side, adding a crunchy texture and sweetness making this meal complete.

How to Store and Freeze Italian Grinder Pasta Salad

  • Fridge: Store leftovers in an airtight container for up to 3-5 days. The flavors will continue to develop, but the pasta may absorb the dressing, affecting the texture.

  • Freezer: Freezing is not recommended for Italian Grinder Pasta Salad due to the delicate structure of the pasta and fresh ingredients, which may become mushy upon thawing.

  • Reheating: If you do have leftover salad after storing, enjoy it cold for a refreshing bite! If you prefer it warm, lightly toss it in a skillet on low heat for a few minutes, but keep in mind it’s best enjoyed fresh.

  • Make-Ahead: To prepare in advance, make the dressing a day ahead; combine the salad ingredients right before serving to maintain freshness and optimal texture.

Expert Tips for Italian Grinder Pasta Salad

  • Pasta Perfection: Always rinse cooked pasta under cold water to stop cooking and prevent stickiness, ensuring a delightful texture for your Italian Grinder Pasta Salad.

  • Chill the Dressing: For the best flavor, allow the dressing to chill for at least 30 minutes—this helps all the ingredients meld together beautifully.

  • Dress Just Before Serving: To maintain the pasta’s firmness and prevent it from soaking up too much dressing, add the dressing no more than 30 minutes before serving.

  • Onion Soaking: Soak red onions in ice water to reduce their sharpness; this simple trick enhances the balance of flavors in your salad.

  • Customizable Ingredients: Don't hesitate to swap ingredients based on your preferences or what's available—keep it personal to make your Italian Grinder Pasta Salad unique!

  • Storage Tips: Store leftovers in an airtight container in the fridge for up to 3-5 days. Keep in mind that the pasta will absorb the dressing over time.

Italian Grinder Pasta Salad Variations

Feel free to play with this recipe and make it your own—there are so many delicious ways to customize it!

  • Dairy-Free: Substitute all cheese with a dairy-free alternative like cashew cheese to keep this salad creamy without dairy.

  • Spicy Kick: Add sliced jalapeños or a dash of hot sauce to the dressing for an extra zing that spice lovers will appreciate. A little heat takes the flavor profile to another level!

  • Mediterranean Twist: Swap the salami and pepperoni for diced grilled chicken and kalamata olives for a Mediterranean flair. This change brings a whole new world of flavors to the table!

  • Veggie-Packed: Boost nutrition by mixing in blanched broccoli florets or diced bell peppers for a colorful crunch that complements the creamy dressing beautifully.

  • Pasta Shape Variety: Feel free to experiment with other pasta shapes like fusilli or rotini. Each shape offers a different texture and holds onto the dressing in its own unique way.

  • Vegan Delight: Use vegan mayo and omit cheese or replace it with a vegan cheese spread for a completely plant-based option that’s equally satisfying and delicious.

  • Herb Infusion: Incorporate fresh herbs such as parsley or chives to enhance the flavor profile, bringing freshness to every bite. You can even try using dried herbs in different combinations for a new twist!

By embracing these variations, it’s easy to keep your Italian Grinder Pasta Salad exciting and cater to different tastes and dietary needs. Get inspired and don’t hesitate to explore flavors that bring you joy! And if you’re looking for additional side options, consider adding a delightful Tofu Caesar Salad or some light Avocado Egg Salad. Bon appétit!

Make Ahead Options

These Italian Grinder Pasta Salad ingredients are perfect for meal prep, allowing you to savor deliciousness even on your busiest days! You can prepare the dressing up to 24 hours in advance, chilling it in the fridge to develop flavor. Dice the salami, pepperoni, and vegetables, and store them in airtight containers in the fridge for up to 3 days. When you're ready to serve, simply cook the pasta and mix everything together with the dressing—this way, the pasta stays perfectly al dente and the veggies crisp. Dress the salad no more than 30 minutes before serving to maintain its delightful texture and flavor contrast, ensuring your Italian Grinder Pasta Salad is just as delicious as if it were freshly made!

Italian Grinder Pasta Salad Recipe FAQs

How do I choose ripe ingredients for my Italian Grinder Pasta Salad?
Absolutely! When selecting vegetables like cherry tomatoes and romaine lettuce, look for vibrant colors and firmness. Tomatoes should be slightly soft but not mushy, while romaine should be crisp and fresh. Avoid any with dark spots or wilting. For cheeses, opt for fresh mozzarella pearls that are plump and creamy, and check that your salami and pepperoni are bright and fragrant.

What is the best way to store leftover Italian Grinder Pasta Salad?
Store leftovers in an airtight container in the fridge for up to 3-5 days. Be mindful that the pasta will absorb the dressing over time, which may alter its texture. If you prefer the salad a bit creamier, consider adding a splash of dressing just before serving again!

Can I freeze Italian Grinder Pasta Salad?
I recommend against freezing Italian Grinder Pasta Salad. The structure of the cooked pasta and fresh vegetables can become mushy upon thawing, which may spoil the delightful textures. Instead, enjoy it fresh!

What can I do if the salad is too dry after storing?
If you notice that your Italian Grinder Pasta Salad has dried out after storage, simply add a splash of your leftover dressing or a drizzle of olive oil and toss it gently to coat. This will revive the flavors and moisture without compromising the salad's integrity!

Are there any dietary considerations I should keep in mind?
For those with dietary restrictions, this recipe can easily be customized. Substitute mayonnaise with Greek yogurt for a lighter, healthier option, or use dairy-free products to cater to lactose intolerances. Always check the labels on deli meats to avoid allergens, and consider using turkey or chicken sausages as a tasty, lean alternative to traditional salami and pepperoni.

Italian Grinder Pasta Salad

Italian Grinder Pasta Salad: A Creamy Dream for Gatherings

Enjoy a vibrant Italian Grinder Pasta Salad, a creamy and delicious dish perfect for gatherings that will leave everyone asking for the recipe.
Print Recipe Pin Recipe
Prep Time 15 minutes mins
Cook Time 10 minutes mins
Chilling Time 30 minutes mins
Total Time 55 minutes mins
Servings: 6 servings
Course: Salads
Cuisine: Italian
Calories: 350
Ingredients Equipment Method Nutrition Notes

Ingredients
  

Dressing
  • 1 cup mayonnaise or Greek yogurt for a lighter option
  • 2 tablespoons red wine vinegar or apple cider vinegar as an alternative
  • 2 cloves fresh garlic or 1/4 teaspoon garlic powder
  • 1 teaspoon dried oregano or Italian seasoning
  • 1/2 teaspoon ground black pepper or white pepper
  • 1 pinch crushed red pepper flakes to adjust spice level
Salad
  • 8 ounces campanelle pasta or other short pasta shapes like fusilli
  • 1 cup mozzarella pearls or shredded mozzarella
  • 1/2 cup diced provolone cheese or fontina cheese
  • 1/2 cup cubed hard salami or turkey/chicken sausage
  • 1/2 cup diced pepperoni or turkey/chicken sausage
  • 1 cup halved cherry tomatoes or diced bell peppers
  • 1 small red onion soaked in ice water
  • 1/2 cup sliced pepperoncini or pickled jalapeños
  • 2 cups chopped romaine lettuce or spinach/mixed greens
  • 1/4 cup chopped fresh basil or 1 tsp dried basil
  • 1/2 cup grated parmesan cheese or nutritional yeast for dairy-free

Equipment

  • medium bowl
  • Large pot
  • Colander
  • Mixing Bowl
  • Spatula

Method
 

Preparation Steps
  1. In a medium bowl, whisk together mayonnaise, red wine vinegar, minced garlic, dried oregano, ground black pepper, and crushed red pepper flakes. Cover and chill for at least 30 minutes.
  2. Bring a large pot of salted water to a boil. Add campanelle pasta and cook according to package instructions, about 8-10 minutes. Drain and rinse under cool water.
  3. Slice red onion and soak in ice water for 10-15 minutes. Drain and pat dry before adding to salad.
  4. In a large mixing bowl, combine cooled pasta, mozzarella pearls, provolone cheese, salami, pepperoni, cherry tomatoes, onions, pepperoncini, romaine lettuce, and basil. Gently stir to mix.
  5. Pour the chilled dressing over salad ingredients, add grated parmesan, and gently fold until well-coated.
  6. Transfer to a serving dish, garnish with additional parmesan and basil. Let sit for 15 minutes at room temperature before serving.

Nutrition

Serving: 1servingCalories: 350kcalCarbohydrates: 30gProtein: 12gFat: 22gSaturated Fat: 5gPolyunsaturated Fat: 1gMonounsaturated Fat: 10gCholesterol: 50mgSodium: 800mgPotassium: 300mgFiber: 3gSugar: 2gVitamin A: 10IUVitamin C: 15mgCalcium: 20mgIron: 8mg

Notes

Store leftovers in an airtight container for 3-5 days. Ingredients can be customized based on your preferences.

Tried this recipe?

Let us know how it was!

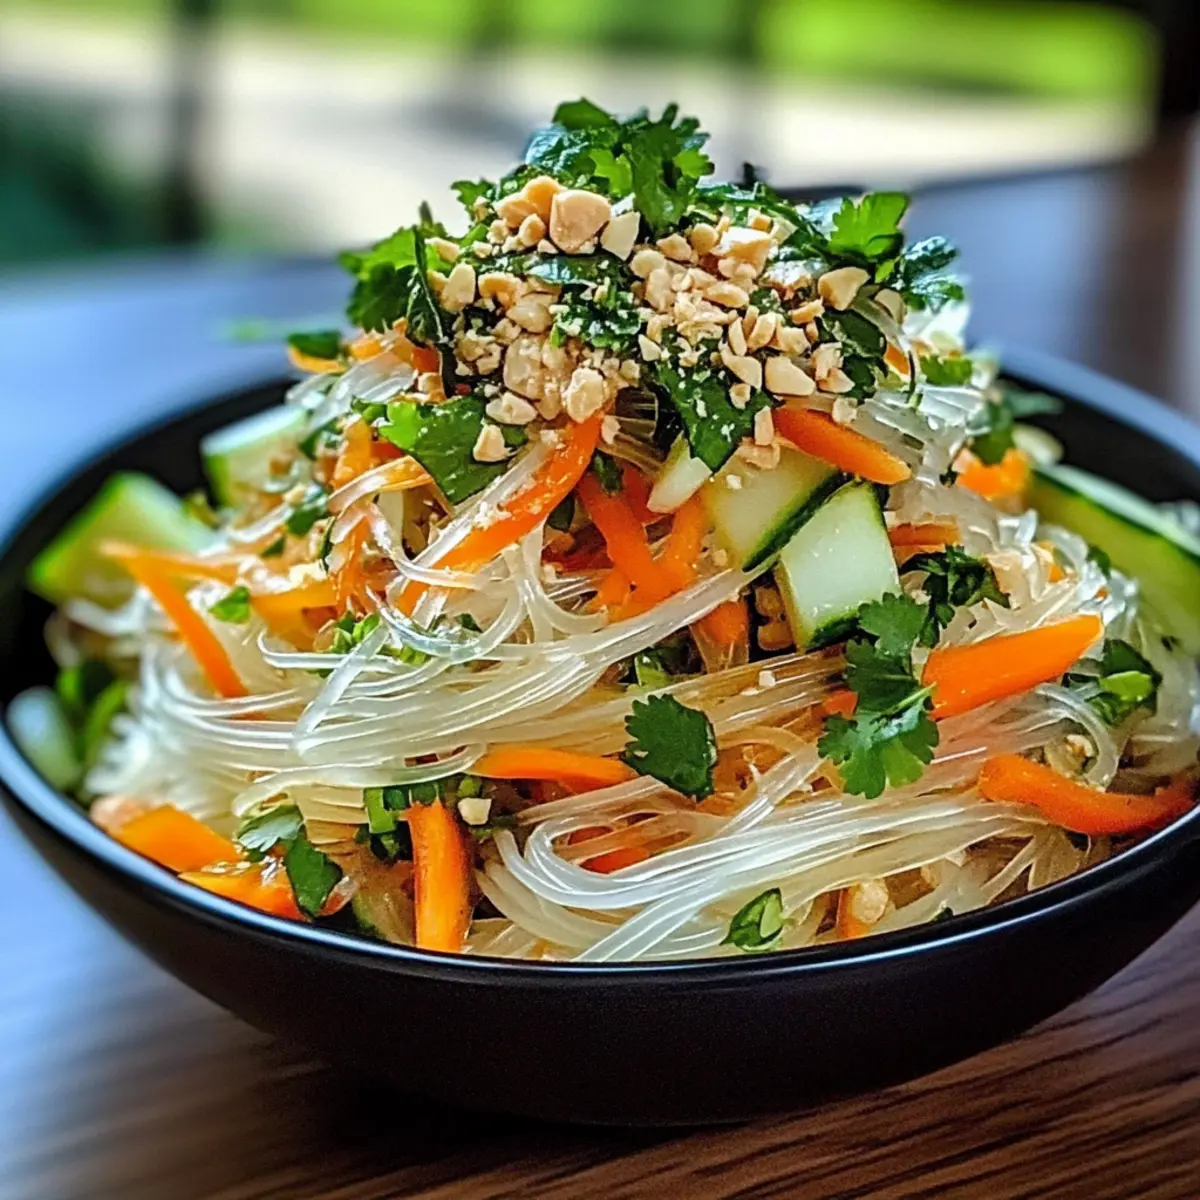
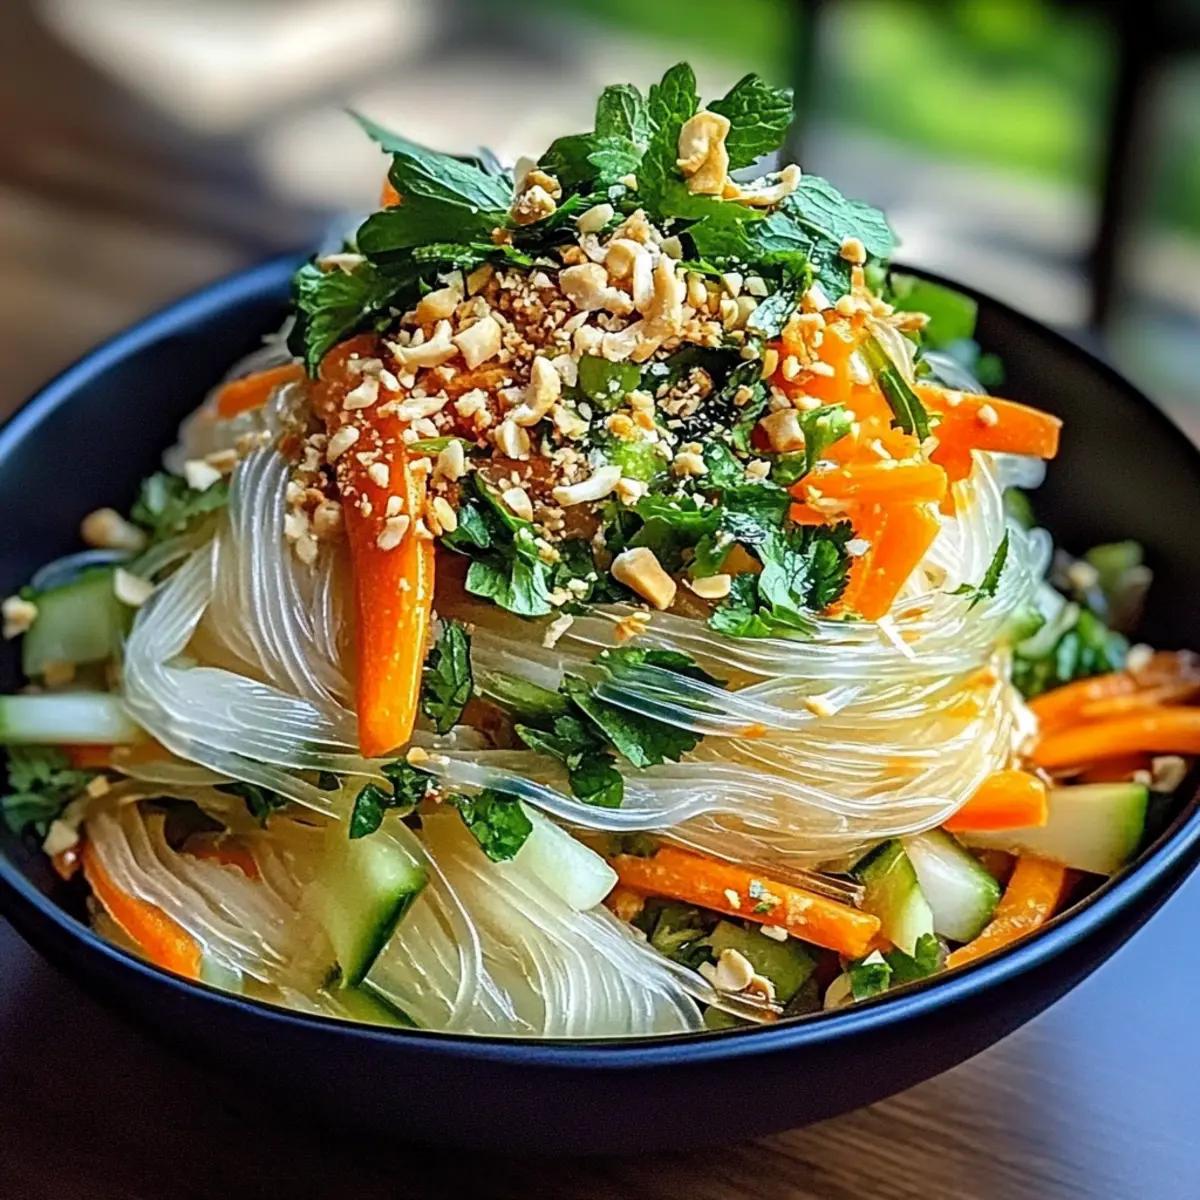
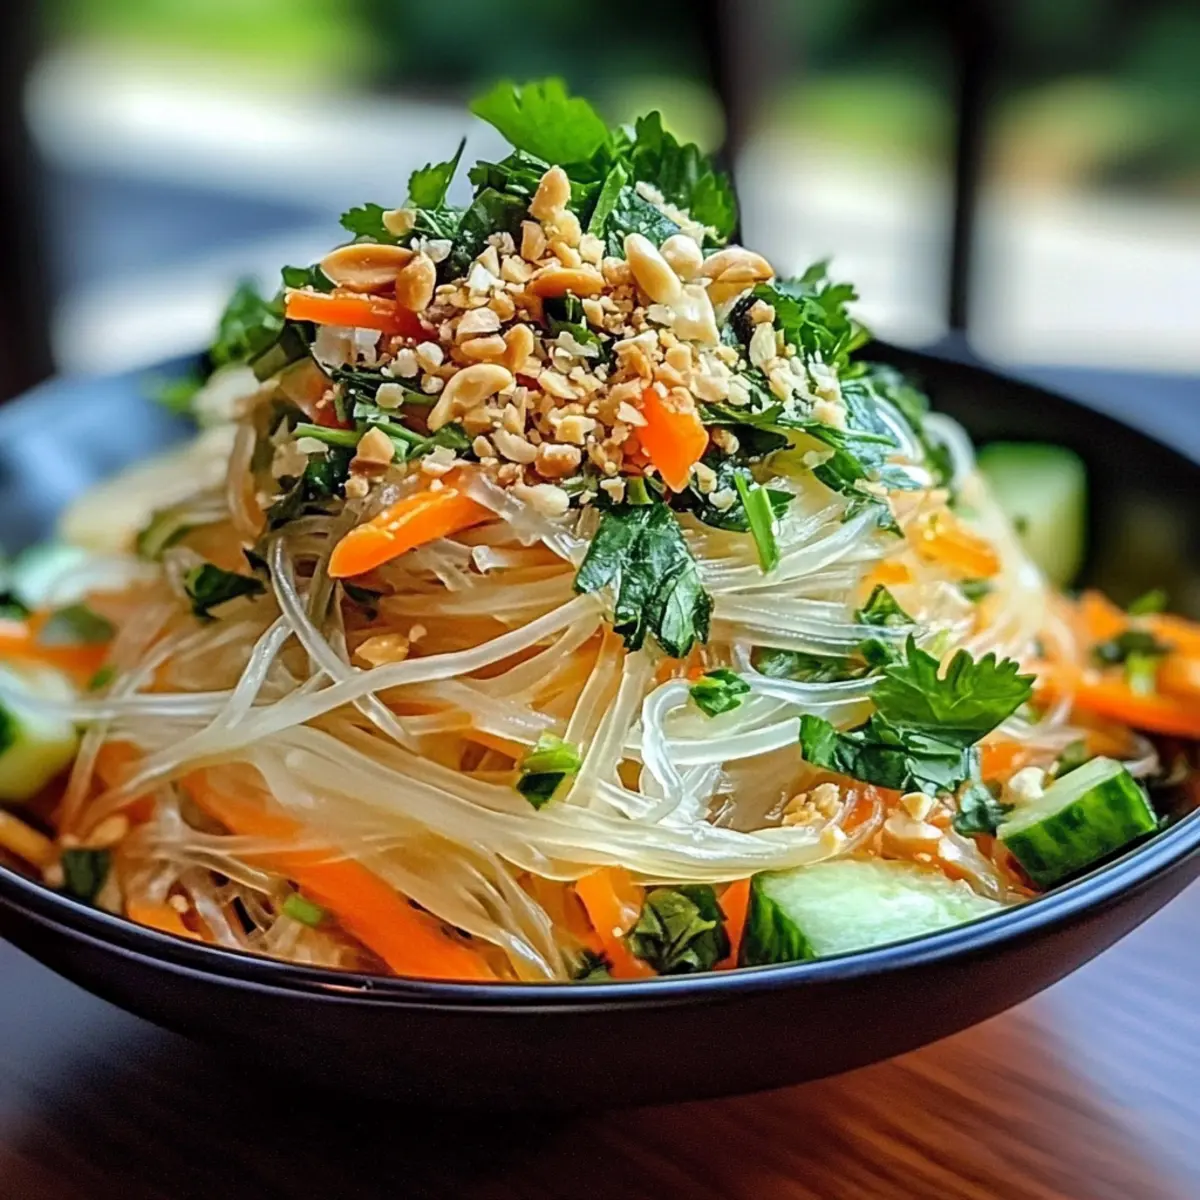
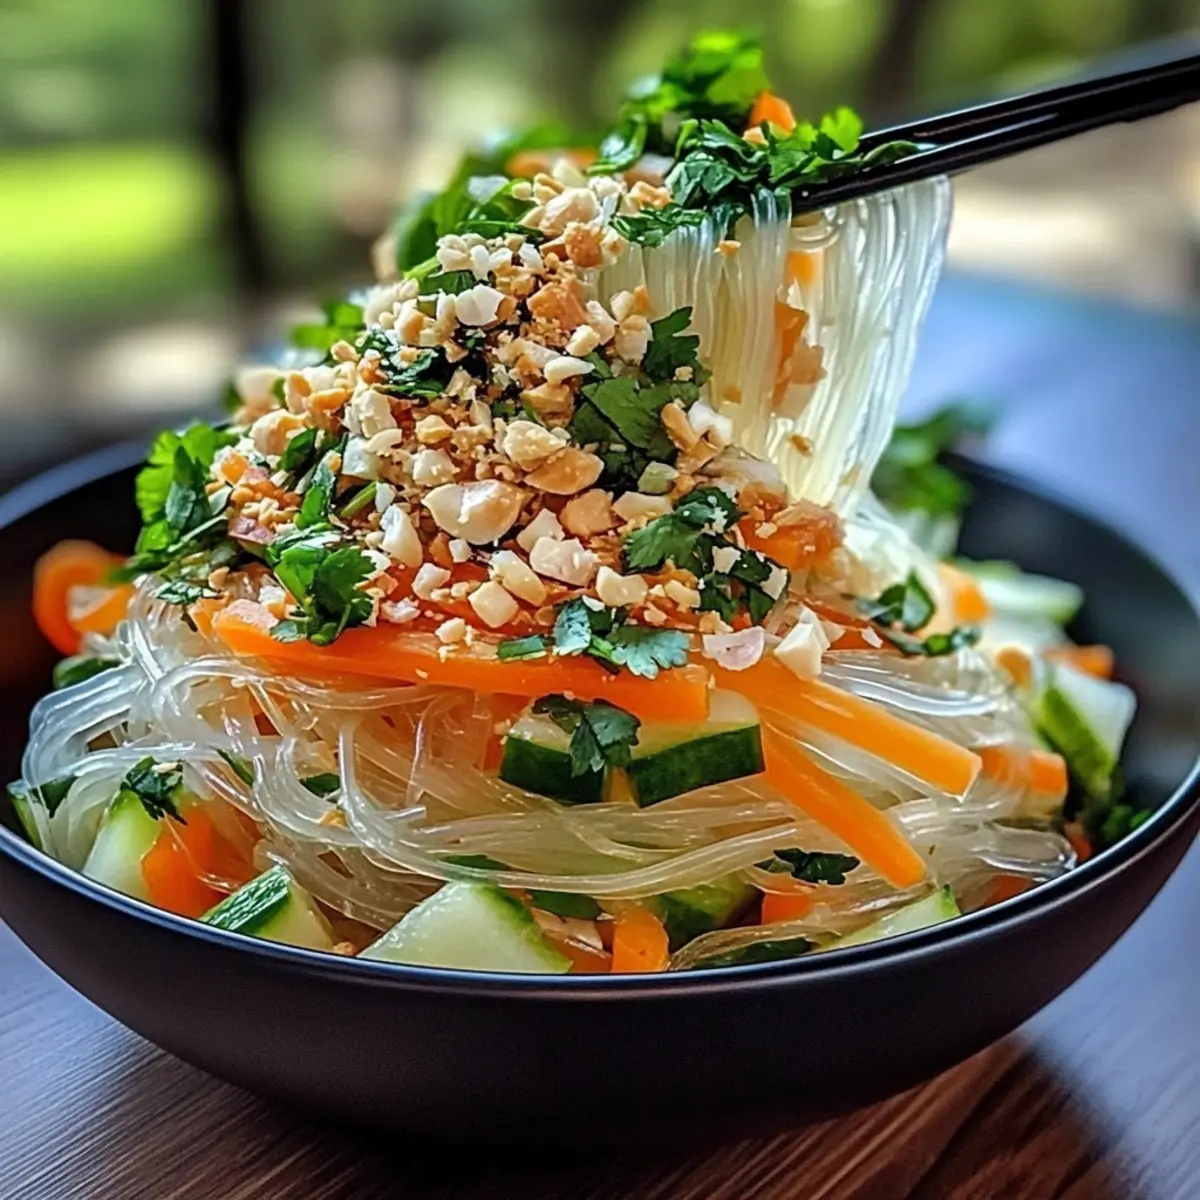
Vibrant Vietnamese Glass Noodle Salad Full of Fresh Flavor

March 17, 2026 by Grace Snow Leave a Comment

As I reached for a bowl of vibrant colors and textures, I couldn’t help but smile at the thought of this Refreshing Vietnamese Glass Noodle Salad. Known as Miến Trộn, this dish blends the delicate chewiness of glass noodles with crisp vegetables and aromatic herbs, creating a delightful experience for the senses. What I love most is how quick it is to prepare—perfect for whipping up something light and fresh on a busy day or serving as a stunning side to grilled meat. Plus, it’s naturally gluten-free and easily adaptable for anyone going vegetarian. Ready to elevate your meal with this delicious salad? Let’s dive into the recipe!

Why is this salad a must-try?

Vibrant Flavors: This Vietnamese Glass Noodle Salad bursts with fresh flavors from fragrant herbs like mint and cilantro, creating a delightful taste experience.

Quick and Easy: With just a few simple steps, you can have this salad ready in no time, perfect for busy days or last-minute gatherings.

Gluten-Free Goodness: Made with glass noodles, this dish caters to gluten-free diets without sacrificing taste or texture.

Customizable Delight: Feel free to mix and match vegetables and proteins to suit your preferences—try adding shredded chicken or crispy tofu for a heartier option!

Crowd-Pleasing Choice: Whether served as a main dish or a side, this salad impresses guests with its colorful presentation and refreshing taste, just like a satisfying Jello Salad Cottage!

Vietnamese Glass Noodle Salad Ingredients

For the Noodles
• Glass Noodles – The main base providing a chewy texture; substitute with vermicelli rice noodles if desired.

For the Fresh Herbs
• Mint – Adds a refreshing flavor that brightens the dish.
• Cilantro – Infuses a fragrant touch; feel free to adjust according to your taste.
• Basil – Offers a unique aromatic note; combine different herbs for varied profiles.

For the Vegetables
• Carrots – Provide a sweet crunch; julienne for even distribution.
• Cucumbers – Bring refreshing crispness; substitute with bell peppers for variation.

For the Dressing
• Fish Sauce – Adds a savory depth; replace with extra soy sauce for a vegetarian option.
• Lime Juice – Brings tanginess that balances flavors; adjust to your tartness preference.
• Garlic – Delivers aromatic warmth; try using fresh garlic for an intense flavor.
• Sugar – To balance the savory notes; feel free to alter the amount based on your taste.
• Sesame Oil – Adds richness and a nutty finish to the dressing.

For Optional Proteins
• Shredded Chicken – Enhances heartiness for a filling meal option.
• Tofu – Offers a plant-based protein; opt for crispy tofu for added texture.
• Boiled Eggs – Great for extra protein; slice or chop before adding to the salad.

Step‑by‑Step Instructions for Vietnamese Glass Noodle Salad

Step 1: Prep Noodles
Begin by soaking the glass noodles in a bowl of hot water for about 5-7 minutes. Stir occasionally to ensure they soften evenly and become translucent. Once tender, drain them and rinse under cold water to stop the cooking process. Toss the rinsed noodles with a drizzle of sesame oil to add flavor and prevent sticking, setting them aside for later.

Step 2: Prepare Vegetables
While the noodles are soaking, take the time to julienne or thinly slice the crisp vegetables like carrots and cucumbers. Aim for even cuts to ensure they mix uniformly in the Vietnamese Glass Noodle Salad and provide a burst of color. Arrange them on a plate, as their vibrant colors will enhance the visual appeal of your dish.

Step 3: Mix Dressing
In a separate bowl, combine essential ingredients for the dressing: pour in the fish sauce, freshly squeezed lime juice, and minced garlic. Add the sugar, whisking vigorously until dissolved to ensure a balanced flavor. Adjust the seasoning based on your taste, keeping in mind the savory and tangy notes that will elevate the salad.

Step 4: Combine Ingredients
Take a large mixing bowl and gently toss together the soaked glass noodles, fresh vegetables, and a handful of aromatic herbs like mint and cilantro. Drizzle the prepared dressing over the top and mix thoroughly but gently, ensuring all ingredients are well-coated. This harmonious blend is the essence of a refreshing Vietnamese Glass Noodle Salad.

Step 5: Serve
Once mixed, let the salad sit for about 5 minutes to allow the flavors to meld beautifully. You can serve your Vietnamese Glass Noodle Salad at room temperature or refrigerate it briefly for a chilled option. Garnish with additional herbs and, if desired, proteins like shredded chicken or crispy tofu for a satisfying meal.

Make Ahead Options

This Vietnamese Glass Noodle Salad is perfect for meal prep, allowing you to enjoy the flavors of this refreshing dish even on your busiest days! You can prepare the glass noodles and vegetables up to 24 hours in advance; simply soak the noodles and keep them well-coated with sesame oil to prevent sticking. Julienne the vegetables and store them in an airtight container in the refrigerator to maintain their crunch. The dressing can be mixed and stored separately for up to 3 days; just whisk it again before using to revive the flavors. When you're ready to serve, combine everything and let the salad sit at room temperature for a few minutes to enhance the taste. Enjoy restaurant-quality results with minimal effort!

Expert Tips for Vietnamese Glass Noodle Salad

• Dress Just Before Serving: Always add the dressing right before enjoying the salad to keep the vegetables crisp and vibrant.

• Uniform Cuts: Use a sharp knife or julienne peeler for even vegetable sizing, enhancing presentation and ensuring balanced bites in your Vietnamese Glass Noodle Salad.

• Taste as You Go: Adjust fish sauce and lime juice amounts based on personal preference; it's key to achieving that perfect flavor balance.

• Herb Variety: Don’t hesitate to mix and match fresh herbs. Try adding Thai basil or dill to create new flavor profiles that excite your palate.

• Prep Ahead: You can prepare the noodles and chop the vegetables in advance. Just store them separately and combine with the dressing when you’re ready to serve!

Vietnamese Glass Noodle Salad Variations

Feel free to let your creativity run wild and tailor this salad to your taste preferences!

  • Dairy-Free: Substitute any creamy dressings with a simple vinaigrette or a citrus-based dressing to maintain that refreshing taste.

  • Add Protein: Toss in grilled shrimp or crispy tofu for a satisfying, hearty meal. Both options provide a delightful boost of flavor and nutrition.

  • Vibrant Veggies: Incorporate colorful vegetables like bell peppers or radishes for added crunch and a visual pop. Their crisp textures will make the salad visually exciting.

  • Heat It Up: Sprinkle in some sliced chili peppers or a pinch of red pepper flakes for a spicy kick. This adds an exciting layer of flavor that will awaken your taste buds!

  • Herb Hike: Experiment with different herbs such as dill or Thai basil to create new flavor profiles. Each herb offers a unique twist that invigorates the dish.

  • Nutty Crunch: Top your salad with crushed peanuts or toasted sesame seeds. This adds not just flavor but also delightful texture that contrasts beautifully with the noodles.

  • Fruit Fusion: Toss in fresh mango or pineapple chunks for a sweet contrast to the savory elements. The fruity sweetness works wonderfully with the tangy dressing.

Get inspired to create your own version, and if you're interested in other delightful recipes, check out this nutritious Avocado Egg Salad or flavorful Tofu Caesar Salad for more culinary adventures!

What to Serve with Vietnamese Glass Noodle Salad

Nothing complements the vibrant flavors of this dish quite like a selection of delightful sides and drinks, enhancing your dining experience.

  • Grilled Lemongrass Chicken: This fragrant chicken adds a savory depth, perfectly balancing the light salad while echoing Vietnamese flavors.

  • Chili Garlic Shrimp: Juicy, spicy shrimp bring a kick to the table, making every bite a taste adventure. Paired with the salad, it creates a satisfying, well-rounded meal.

  • Spring Rolls with Peanut Sauce: These delicate rolls offer a crispy texture that contrasts beautifully with the soft glass noodles, while the creamy peanut sauce adds indulgence.

  • Pickled Vegetables: A side of tangy pickled veggies brightens the palate, enhancing the fresh flavors of the salad and adding a delightful crunch.

  • Coconut Rice: Subtle sweetness from the coconut enhances the dish while providing a creamy base. This comforting grain complements the salad without overpowering its freshness.

  • Mint Iced Tea: A cooling drink seasoned with fresh mint ties in beautifully with the salad, refreshing your palate between bites and maintaining that light, summery vibe.

  • Mango Sorbet: Conclude your meal with this light, fruity dessert. Its sweet-tart flavor offers a perfect finish after the savory notes of the salad and proteins.

How to Store and Freeze Vietnamese Glass Noodle Salad

Fridge: Store leftovers in an airtight container for up to 1 day. To maintain the salad's freshness, keep the dressing separate until ready to serve.

Freezer: It's not recommended to freeze this salad, as glass noodles can become mushy upon thawing, affecting texture and taste.

Reheating: If you've added proteins like shredded chicken or tofu, gently reheat them in a skillet over low heat prior to serving. Avoid reheating the salad itself to prevent sogginess.

Vietnamese Glass Noodle Salad Recipe FAQs

How do I choose the right glass noodles?
Absolutely! When selecting glass noodles, look for packages labeled "mung bean noodles" or "cellophane noodles." They should be translucent and smooth, free from dark spots. For a gluten-free diet, ensure there are no added ingredients like wheat starch.

How long can I store the Vietnamese Glass Noodle Salad in the fridge?
You can store leftovers in an airtight container for up to 1 day. To ensure the salad remains fresh and crunchy, it’s best to keep the dressing separate until you're ready to serve.

Can I freeze Vietnamese Glass Noodle Salad?
Unfortunately, freezing this salad is not recommended, as glass noodles tend to become mushy and lose their delightful texture. It’s best enjoyed fresh!

What should I do if my vegetables turn soggy before serving?
If you find the vegetables becoming soggy, try the following: ensure you store the salad in a cool location and don't dress it until just before serving. If it's already dressed, place the salad in the refrigerator for a short while, allowing the cold to help regain some crunch.

Are there any dietary considerations for this salad?
Very! If you're preparing this for pets or someone with allergies, be mindful of any ingredients such as fish sauce or specific herbs. For a vegetarian twist, simply replace the fish sauce with extra soy sauce. Always check labels to avoid allergens in commercially available ingredients.

What if I want to prepare the salad in advance?
If you plan to make your Vietnamese Glass Noodle Salad ahead of time, prep the noodles and chop the vegetables in advance, storing them separately in the fridge. Combine all ingredients and add the dressing just before serving. This way, your salad will maintain its vibrant colors and textures!

Vietnamese Glass Noodle Salad

Vibrant Vietnamese Glass Noodle Salad Full of Fresh Flavor

This Vietnamese Glass Noodle Salad, known as Miến Trộn, offers a vibrant mix of glass noodles, fresh vegetables, and aromatic herbs.
Print Recipe Pin Recipe
Prep Time 15 minutes mins
Cook Time 5 minutes mins
Resting Time 5 minutes mins
Total Time 25 minutes mins
Servings: 4 servings
Course: Salads
Cuisine: Vietnamese
Calories: 220
Ingredients Equipment Method Nutrition Notes

Ingredients
  

For the Noodles
  • 200 grams Glass Noodles Can substitute with vermicelli rice noodles if desired.
For the Fresh Herbs
  • 1 cup Mint Adds a refreshing flavor.
  • 1 cup Cilantro Feel free to adjust according to taste.
  • 1 cup Basil Offers a unique aromatic note.
For the Vegetables
  • 2 medium Carrots Julienne for even distribution.
  • 1 medium Cucumbers Can substitute with bell peppers.
For the Dressing
  • 3 tablespoons Fish Sauce Replace with soy sauce for vegetarian option.
  • 2 tablespoons Lime Juice Adjust to taste.
  • 2 cloves Garlic Minced fresh garlic preferred.
  • 1 tablespoon Sugar Alter based on taste.
  • 2 tablespoons Sesame Oil For flavor.
For Optional Proteins
  • 1 cup Shredded Chicken Enhances heartiness.
  • 1 cup Tofu Crispy tofu preferred.
  • 2 large Boiled Eggs Slice or chop before adding.

Equipment

  • Mixing Bowl
  • Knife
  • julienne peeler
  • measuring cups
  • Whisk

Method
 

Preparation Steps
  1. Begin by soaking the glass noodles in hot water for about 5-7 minutes. Stir occasionally. Drain and rinse under cold water, then toss with sesame oil.
  2. While the noodles soak, julienne or slice the carrots and cucumbers. Arrange the vibrant vegetables on a plate.
  3. In a bowl, combine fish sauce, lime juice, and minced garlic. Add sugar and whisk until dissolved.
  4. In a large bowl, toss together the soaked noodles, vegetables, and herbs. Drizzle with dressing and mix gently.
  5. Let the salad sit for 5 minutes before serving. Serve at room temperature or chilled, garnished with extra herbs and proteins.

Nutrition

Serving: 1bowlCalories: 220kcalCarbohydrates: 30gProtein: 10gFat: 8gSaturated Fat: 1gPolyunsaturated Fat: 1gMonounsaturated Fat: 6gCholesterol: 30mgSodium: 600mgPotassium: 200mgFiber: 2gSugar: 3gVitamin A: 100IUVitamin C: 50mgCalcium: 5mgIron: 10mg

Notes

Dress just before serving to keep vegetables crisp. You can prepare noodles and chop vegetables in advance.

Tried this recipe?

Let us know how it was!

Delicious French Potato Salad Recipe with Creamy Dijon Twist

March 17, 2026 by Grace Snow Leave a Comment

As I stood in my kitchen, the comforting aroma of boiling potatoes filled the air, transporting me back to sunlit picnics in the French countryside. Today, I’m excited to share my Easy French Potato Salad Recipe, a vibrant dish that marries tender Yukon Gold potatoes with a tangy Dijon mustard vinaigrette. This delightful creation not only offers a quick prep time—perfect for busy weeknights—but it also serves as a crowd-pleasing side dish for any gathering. Filled with fresh herbs and a creamy texture, it transforms any meal into something special. Whether you’re preparing for a summer barbecue or a cozy family dinner, this salad is guaranteed to impress without a fuss. Curious about how to elevate your potato game? Let’s dive into this delicious recipe!

Why is this salad a must-try?

Simplicity makes this recipe a breeze to whip up, requiring only basic kitchen skills. Creamy texture paired with a tangy vinaigrette offers a burst of flavor in every bite. Ideal as a versatile side dish, it pairs wonderfully with vegan burgers or complements potlucks. Plus, it's a fantastic make-ahead option that can be stored for up to three days. Elevate your meals effortlessly with this vibrant salad!

French Potato Salad Ingredients

• The key components create a flavorful blend!

For the Salad

  • Yukon Gold Potatoes – Their creamy texture and ability to hold shape make them the perfect base for this French potato salad recipe.
  • Fresh Onion Chives – These add aromatic freshness; you can swap in green onions if you prefer.
  • Fresh Thyme Leaves – Provide earthy notes; dried thyme can work in a pinch.
  • Flat Leaf Parsley or Tarragon – Contributes a fresh herbaceous flavor; feel free to use either based on your taste.
  • Sea Salt – Essential for enhancing the flavors; adjust to your liking.
  • Black Pepper – Freshly cracked adds a nice hint of spice.

For the Vinaigrette

  • Dijon Mustard – The star ingredient that adds tang; choose grainy for texture or creamy for smoothness.
  • Extra Virgin Olive Oil – A high-quality choice adds richness and depth to the vinaigrette.
  • Apple Cider Vinegar – Balances the richness; any vinegar can substitute if you're out.

Optional Ingredients

  • Bay Leaves – Add for extra flavor infusing while boiling; they're optional, so skip if you prefer.
  • Minced Garlic or Fresh Dill – For a flavorful boost to your vinaigrette. You can easily customize to personal preferences.

Dive into this recipe, and you’ll find that these ingredients beautifully combine into a salad that's not just a side, but a celebration of fresh, vibrant flavors!

Step‑by‑Step Instructions for French Potato Salad Recipe

Step 1: Prepare the Potatoes
Scrub and rinse the Yukon Gold potatoes thoroughly under cold water. Place them in a large pot and cover with water, adding a couple of bay leaves and a generous pinch of sea salt. Bring the pot to a boil over high heat, then reduce the heat to medium and simmer for 15-20 minutes. The potatoes should be tender yet firm enough to hold their shape when pierced with a fork.

Step 2: Cool and Peel the Potatoes
Once the potatoes are cooked, carefully drain the water and discard the bay leaves. Allow the potatoes to cool slightly—about 10 minutes—until they are easy to handle but still warm. Use a paring knife to peel the skin off the potatoes gently, revealing their creamy texture beneath.

Step 3: Slice the Potatoes
With the peeled potatoes, slice them into 1/4-inch thick rounds. Transfer the sliced potatoes to a large mixing bowl, taking care not to break them apart. This French potato salad recipe celebrates the potatoes' shape, so aim for even slices to ensure a lovely presentation as it cools further.

Step 4: Whisk the Vinaigrette
In a separate bowl, combine the Dijon mustard, extra virgin olive oil, apple cider vinegar, chopped parsley, thyme leaves, and minced onion chives. Whisk these ingredients together until the vinaigrette is smooth and well-blended, creating a creamy and tangy dressing that will elevate your potato salad.

Step 5: Combine the Ingredients
Pour the freshly whisked vinaigrette over the sliced potatoes in the mixing bowl. Gently fold the potatoes with a rubber spatula to ensure they are evenly coated without breaking apart. This step is key for integrating the delicious flavors throughout the salad while preserving the potatoes' structure.

Step 6: Season and Serve
Taste the salad and season with additional sea salt and freshly cracked black pepper as desired. For an extra touch of flavor, you may toss in additional fresh herbs or even a sprinkle of minced garlic. Serve immediately or let the salad marinate for about 30 minutes in the refrigerator to deepen the flavors before enjoying.

How to Store and Freeze French Potato Salad

Fridge: Store the salad in an airtight container in the refrigerator for up to 3 days. Make sure it’s well-covered to maintain freshness and prevent it from absorbing other fridge odors.

Freezer: While not recommended for this particular recipe due to texture changes, if necessary, you can freeze the salad for up to 1 month. Consider freezing the vinaigrette separately.
Reheating: If served cold, simply take the French potato salad out of the fridge and enjoy! For room temperature, let it sit for 15-30 minutes before serving.

Marinating: For the best flavor, allow the salad to marinate in the fridge for at least 30 minutes before serving, enhancing that creamy Dijon taste.

Make Ahead Options

These Easy French Potato Salad recipes are perfect for meal prep enthusiasts! You can boil and slice the Yukon Gold potatoes up to 24 hours in advance, then store them in an airtight container in the refrigerator to maintain their texture. Additionally, prepare the Dijon mustard vinaigrette ahead of time and keep it separate, ensuring it's fresh when mixed with the potatoes. Once you're ready to serve, simply combine the vinaigrette with the potatoes and fold in the fresh herbs; this will ensure the salad retains its delightful flavors. For best results, consume the salad within 3 days for optimal taste and freshness. Enjoy the convenience of having this delicious dish ready for your busy weeknights!

Expert Tips for French Potato Salad Recipe

  • Perfect Potato Cook: Ensure your Yukon Gold potatoes are tender but still firm. Check them at 12 minutes to avoid overcooking and losing their shape.
  • Enhance the Flavor: For a delicious twist, add minced garlic or fresh dill to your Dijon mustard vinaigrette to elevate the taste of your salad.
  • Chill for Best Taste: Allow your French potato salad to marinate in the refrigerator for at least 30 minutes before serving. This will deepen the flavors and make every bite more delightful.
  • Ingredient Swaps: Feel free to substitute fresh herbs or try using red or purple potatoes for a vibrant visual appeal while keeping the classic flavors intact!
  • Make Ahead: This salad is perfect for meal prep! It can be made up to three days in advance, making it an ideal side dish for busy weeknights or potlucks.

What to Serve with Easy French Potato Salad with Dijon Mustard Vinaigrette

Imagine gathering with loved ones as vibrant flavors and textures dance on your plate, creating a truly memorable meal.

  • Grilled Vegetable Skewers: These add a smoky flavor that beautifully contrasts the creamy potato salad, making for a delightful textural balance.
  • Vegan Burgers: A perfect pairing; the savory flavors of the burgers complement the tanginess of the potato salad wonderfully during summer barbecues.
  • Crispy Green Salad: Light, crunchy greens lend freshness, enhancing the garden-fresh herbs in your potato salad for a satisfying bite.
  • Roasted Chickpeas: Their crunchy texture and earthy flavors provide a hearty contrast and additional protein, making the meal more filling.
  • Fresh Baguette: Serve alongside warm, crusty bread to soak up the vinaigrette, adding a comforting rustic element to your dining experience.
  • Chilled Rosé Wine: This fruity yet dry wine pairs perfectly, enhancing the salad's flavors while keeping the meal light and refreshing.
  • Fruit Tart: A creamy, sweet dessert contrasts the savory tang of the potato salad, rounding out your meal with a delightful finish that everyone will love.
  • Herbed Quinoa: Nutty quinoa tossed with fresh herbs ties the dishes together and adds a protein-packed option that complements the potato salad.
  • Pickled Vegetables: Their acidity provides a refreshing contrast, brightening up each bite and balancing the creaminess of your side dish beautifully.

French Potato Salad Recipe Variations

Feel free to let your creativity shine by customizing this delightful salad to suit your tastes!

  • Colorful Potatoes: Substitute Yukon Gold with red or purple potatoes for a vibrant twist on texture and appearance. Each variety brings its own unique flavor profile to the table!
  • Herb Medley: Incorporate seasonal herbs like basil or dill for a fresh flavor boost that can transform your potato salad into a gourmet delight. Their aromatic properties will infuse vibrancy in each bite.
  • Crunchy Add-Ins: Toss in some steamed green beans, diced bell peppers, or even crispy roasted chickpeas for a satisfying crunch. These additions enhance both flavor and nutrition, making your salad even more delightful!
  • Garnish with Nuts: Sprinkle toasted pine nuts or slivered almonds for an unexpected crunch. Their nutty flavors pair beautifully with the creamy dressing, adding depth to your side dish.
  • Flavor Explosion: Mix in capers or olives for a punch of saltiness. These briny elements can elevate your potato salad, offering a sophisticated taste that will leave your guests impressed.
  • Creamy Vegan Twist: Replace olive oil with vegan mayo for a richer, creamier dressing. This swap enhances the indulgent feel without compromising on flavor or dietary restrictions.
  • Spicy Kick: Add a splash of your favorite hot sauce or a pinch of cayenne pepper to the vinaigrette for a zing of heat. This unexpected twist will awaken your taste buds and bring a dynamic flair to the salad.
  • Innovative Dressings: Experiment with different vinaigrettes or dressings, such as tahini or a balsamic glaze, to give the classic salad a new identity. Each dressing will transform the overall experience, keeping the dish exciting!

For more creative side dishes, consider preparing a traditional German Potato Salad or a refreshing Jello Salad Cottage. Happy cooking!

French Potato Salad Recipe FAQs

How do I select the right Yukon Gold potatoes?
Absolutely! Look for Yukon Gold potatoes that are smooth and firm to the touch. Avoid any with dark spots or blemishes, as these can indicate spots that are bruised or rotten. The ideal potatoes should be uniform in size to ensure even cooking.

What’s the best way to store leftover French potato salad?
You can store the salad in an airtight container in the refrigerator for up to 3 days. Make sure it's well-covered to maintain its freshness and prevent it from absorbing other odors from the fridge. If you notice any discoloration or off smells after a few days, it’s best to discard it.

Can I freeze French potato salad for later use?
While it's generally not recommended to freeze potato salad due to texture changes, you can freeze it for up to 1 month if necessary. To do this, I suggest separating the vinaigrette and freezing it in an airtight container, as the potatoes may become mushy once thawed. Simply mix the vinaigrette with freshly boiled potatoes upon reheating.

What should I do if my potatoes are too mushy?
If you accidentally overcook your potatoes, they might become mushy in the salad. To salvage the dish, consider turning it into a creamy potato mash instead, adding extra Dijon and herbs to taste. If you add a little more olive oil and vinegar, you can create a delightful spread or dip that still embodies those classic flavors!

Is this French potato salad recipe suitable for vegans or those with dietary restrictions?
Very! This French Potato Salad recipe is completely vegan and gluten-free. It features wholesome plant-based ingredients, making it a great option for those following a plant-based diet. Always double-check your mustard and vinegar for hidden gluten ingredients, and feel free to adjust any herbs or spices based on your allergies or preferences!

French Potato Salad Recipe

Delicious French Potato Salad Recipe with Creamy Dijon Twist

This French Potato Salad Recipe marries tender Yukon Gold potatoes with a tangy Dijon mustard vinaigrette, creating a vibrant side dish perfect for any gathering.
Print Recipe Pin Recipe
Prep Time 20 minutes mins
Cook Time 20 minutes mins
Marinating Time 30 minutes mins
Total Time 1 hour hr 10 minutes mins
Servings: 4 servings
Course: Salads
Cuisine: French
Calories: 200
Ingredients Equipment Method Nutrition Notes

Ingredients
  

For the Salad
  • 2 lbs Yukon Gold Potatoes Creamy texture and holds shape
  • 1 bunch Fresh Onion Chives Substitute with green onions if preferred
  • 2 tbsp Fresh Thyme Leaves Dried thyme can work
  • 1/4 cup Flat Leaf Parsley or Tarragon Fresh herbaceous flavor
  • 1 tsp Sea Salt Adjust to taste
  • 1/2 tsp Black Pepper Freshly cracked
For the Vinaigrette
  • 2 tbsp Dijon Mustard Tangy star ingredient
  • 1/4 cup Extra Virgin Olive Oil High-quality
  • 2 tbsp Apple Cider Vinegar Balances richness
Optional Ingredients
  • 2 pieces Bay Leaves Optional for boiling
  • 1 clove Minced Garlic Optional for vinaigrette
  • 1 tbsp Fresh Dill Optional for vinaigrette

Equipment

  • Large pot
  • Mixing Bowl
  • Whisk
  • paring knife
  • rubber spatula

Method
 

Preparation
  1. Scrub and rinse the Yukon Gold potatoes thoroughly under cold water. Place them in a large pot and cover with water, adding a couple of bay leaves and a pinch of sea salt. Bring to a boil, then reduce heat and simmer for 15-20 minutes.
  2. Once cooked, drain the water, discard bay leaves, and let the potatoes cool for 10 minutes. Peel them gently with a paring knife.
  3. Slice the peeled potatoes into 1/4-inch thick rounds and transfer to a large mixing bowl.
  4. In a separate bowl, whisk together the Dijon mustard, olive oil, apple cider vinegar, chopped parsley, thyme leaves, and onion chives until well-blended.
  5. Pour the vinaigrette over the sliced potatoes and gently fold to coat evenly.
  6. Season with additional sea salt and black pepper as desired. Let marinate in the fridge for 30 minutes before serving.

Nutrition

Serving: 1cupCalories: 200kcalCarbohydrates: 30gProtein: 4gFat: 8gSaturated Fat: 1gPolyunsaturated Fat: 1gMonounsaturated Fat: 6gSodium: 200mgPotassium: 600mgFiber: 3gSugar: 2gVitamin A: 5IUVitamin C: 15mgCalcium: 2mgIron: 8mg

Notes

Perfect for busy weeknights or potlucks. Can be made up to three days in advance for optimal flavor.

Tried this recipe?

Let us know how it was!

Persian Shirazi Salad: Fresh, Zesty Flavor to Brighten Meals

March 17, 2026 by Grace Snow Leave a Comment

Walking through the vibrant streets of Tehran, I was captivated by the fresh aromas wafting from cozy kitchens, where families gathered to savor simple, wholesome dishes. One standout that always caught my eye was the Persian Shirazi Salad—an explosion of flavor and color that can elevate any meal. This refreshing salad, filled with crunchy Persian cucumbers, juicy Roma tomatoes, and a hint of zesty lemon, comes together in just 15 minutes, making it perfect for busy home cooks. Not only is it healthy and satisfying, but it also pairs beautifully with grilled meats, adding a burst of Mediterranean charm to your table. Are you ready to discover how easy it is to whip up this delightful dish? Let's dive in!

Why is Persian Shirazi Salad a Must-Try?

Vibrant, Fresh Ingredients: This salad is a perfect showcase of crisp Persian cucumbers and juicy Roma tomatoes, offering a refreshing crunch that’s hard to resist.

Quick and Easy: In just 15 minutes, you can whip up this colorful dish, making it an ideal choice for busy weeknights or last-minute gatherings.

Versatile Side Dish: It complements grilled meats like chicken tawook or lamb kabobs, elevating your meals with a splash of zesty goodness.

Healthy and Guilt-Free: With only about 102 calories per serving, it’s a guilt-free addition to your diet, perfect for anyone seeking a light yet satisfying option.

Mediterranean Flavor: The zesty lemon and aromatic mint make every bite bursting with flavor, inviting you to savor the taste of the Mediterranean right at home!

Persian Shirazi Salad Ingredients

For the Salad
• Persian Cucumbers (6) – Provide a crisp texture and mildly sweet flavor; use only seedless varieties for optimum taste.
• Roma Tomatoes (6) – Deliver juiciness without excessive seeds; remember to remove seeds before chopping to maintain crispness.
• Red Onion (1 small) – Adds sharpness and flavor; yellow onion can serve as a suitable substitute.

For the Dressing
• Lemon (1 large) or Persian Limes (3 small) – Provides acidity to balance flavors; freshly squeezed juice is best for a bright taste.
• Dried Mint (2 tbsp) – Offers a distinct aromatic note; avoid fresh mint, as it alters the intended flavor.
• Extra Virgin Olive Oil (3 tbsp) – Enhances richness and depth; opt for high-quality oil for the best flavor.
• Salt and Black Pepper (to taste) – Essential seasonings to enhance the overall flavor of your Persian Shirazi Salad.

Step‑by‑Step Instructions for Persian Shirazi Salad

Step 1: Chop the Red Onion
Start by finely chopping the small red onion into thin pieces, aiming for a consistent size. This step should take about 3-4 minutes. The sharpness of the onion will enhance the overall flavor of the Persian Shirazi Salad. Once chopped, place the onion in a bowl and set it aside to allow the flavors to develop.

Step 2: Prepare the Persian Cucumbers
Next, take the six Persian cucumbers and cut off the ends before finely chopping them into small pieces. Aim for uniformity in size to ensure even texture. This process takes around 5 minutes. Avoid peeling the cucumbers to maintain their crispness, as these will add the refreshing crunch to the salad.

Step 3: Chop the Roma Tomatoes
Halve each of the six Roma tomatoes to remove the seeds, then finely chop them into small cubes. Take care to keep the pieces roughly the same size for consistency. This should take about 4-5 minutes. The juicy tomatoes add moisture and balance to the crisp cucumbers in your Persian Shirazi Salad.

Step 4: Combine Lemon Juice and Seasonings
In a small bowl, squeeze the juice of one large lemon (or three small Persian limes), ensuring you remove any seeds that drop in. Mix in salt, pepper, and two tablespoons of dried mint. This will take about 2 minutes. The acidity and flavors in the dressing will elevate the entire salad.

Step 5: Mix Salad Ingredients
In a large mixing bowl, combine the chopped cucumbers, tomatoes, and red onions. Carefully pour the lemon-mint dressing over the salad. This step should take about 2 minutes. Gently toss the ingredients together so that everything is evenly coated with the zesty dressing of your Persian Shirazi Salad.

Step 6: Drizzle with Olive Oil
Right before serving, drizzle three tablespoons of extra virgin olive oil over the salad. This final touch will enhance the richness and depth of flavors. Take an extra minute here to mix gently one last time to ensure all ingredients are perfectly coated, adding a silky finish to your Persian Shirazi Salad.

Step 7: Serve Fresh
Serve the salad immediately for the best crunch and freshness. It pairs beautifully with grilled meats like chicken tawook or lamb kabobs, making for a delightful and zesty side. Aim to plate the salad within a few minutes of finishing the mixing to maintain its vibrant colors and textures.

Expert Tips for Perfect Persian Shirazi Salad

  • Use Seedless Cucumbers: Opt for Persian or English cucumbers as they are sweeter and lack bitterness, ensuring a delightful crunch in your salad.

  • Even Chopping: Maintain uniform sizes while chopping all ingredients, especially cucumbers and tomatoes, for a balanced texture and beautiful presentation in your Persian Shirazi Salad.

  • Dressing Timing: If prepping ahead, store vegetables separately from the dressing. Add it just before serving to keep the salad fresh and prevent sogginess.

  • Mint Preparation: Crush the dried mint briefly before adding it to your dressing to release its essential oils for a more aromatic flavor in the salad.

  • High-Quality Olive Oil: Don’t skimp on the olive oil—using a high-quality extra virgin oil enhances the overall flavor and richness of your Persian Shirazi Salad.

Persian Shirazi Salad Variations

Feel free to get creative with your Persian Shirazi Salad by exploring these exciting variations!

  • Hearty Addition: Add chickpeas for a protein boost; they enhance both texture and nutrition, making the salad even more filling.

  • Colorful Twist: Incorporate bell peppers for added crunch and sweetness; colorful peppers will also brighten the dish visually.

  • Herb Lovers: Toss in fresh parsley or cilantro for an elevated herbal aroma, providing a refreshing contrast to the salad’s existing flavors.

  • Nutty Flavor: Sprinkle with toasted walnuts for a delightful crunch and nutty richness that complements the fresh ingredients perfectly.

  • Fruity Surprise: Add pomegranate seeds for a burst of sweetness and juicy richness that harmonizes beautifully with the salad’s zingy dressing.

  • Extra Zing: Drizzle with pomegranate molasses to introduce a sweet-tart flavor twist, enhancing the Mediterranean flair of your dish.

  • Spicy Kick: For those who enjoy heat, sprinkle in some red pepper flakes to give your salad a fiery edge that will wake up your taste buds!

  • Dressing Options: Substitute the olive oil with avocado oil for a different flavor profile; it brings a creamy texture and healthy fats. You can also explore variations like that in a traditional Italian balsamic vinaigrette for an unexpected twist.

These simple twists not only help you tailor the Persian Shirazi Salad to your taste but also allow you to experience new flavor dimensions. If you're interested in more fresh salad ideas, you might also enjoy trying Tofu Caesar Salad, or adding a unique twist to a classic by checking out German Potato Salad. Happy cooking!

What to Serve with Persian Shirazi Salad?

Indulge in a delightful dining experience that beautifully combines flavors, textures, and aromas in every bite.

  • Grilled Chicken Tawook: This marinated chicken dish is juicy and tender, providing a savory contrast to the zesty salad.
  • Lamb Kabobs: The smoky richness of grilled lamb pairs excellently, while the salad's freshness brightens each bite.
  • Crispy Pita Chips: These crunchy bites are perfect for scooping up the salad, adding an enjoyable crunch to your meal.
  • Mediterranean Quinoa: A nutty, wholesome side dish that complements the salad’s freshness, adding another layer of nutritious grains to your table.
  • Stuffed Grape Leaves: Their delightful tangy flavor harmonizes with the salad's zesty notes, creating a Mediterranean feast.
  • Hummus with Fresh Veggies: This classic dip provides a creamy texture contrast, making it a satisfying addition to your meal spread.
  • Feta Cheese Crumbles: Sprinkling feta adds a salty, creamy element that enhances the salad’s flavor profile, inviting more flavor exploration.
  • Mint Lemonade: A refreshing beverage that echoes the minty notes in the salad while quenching your thirst delightfully.

How to Store and Freeze Persian Shirazi Salad

Fridge: Store chopped cucumbers, onions, and tomatoes without the dressing for up to 2 days. This keeps ingredients fresh and prevents mushiness.

Freezer: Freezing is not recommended for this salad due to the high water content of the vegetables, which can lead to a soggy texture when thawed.

Reheating: If you have leftovers and want to enjoy them at room temperature, let them sit out for a few minutes before serving. Avoid heating, as it will compromise the freshness of the Persian Shirazi Salad.

Airtight Containers: Use airtight containers for storage to extend freshness, and add the dressing just before serving for the best taste and texture.

Make Ahead Options

These Persian Shirazi Salad ingredients are perfect for meal prep! You can chop the Persian cucumbers, Roma tomatoes, and red onion up to 3 days in advance, storing them in airtight containers in the refrigerator to maintain their freshness. To prevent sogginess, make sure to keep the dressing separate until you're ready to serve. Simply combine the chopped ingredients and the lemon-mint dressing just before serving for the best taste and crunch. This approach not only saves you time on busy weeknights but also ensures your salad is just as delicious and vibrant as if it were freshly made. Enjoy the essence of Mediterranean flavors with minimal effort!

Persian Shirazi Salad Recipe FAQs

What kind of cucumbers should I use for Persian Shirazi Salad?
Absolutely! For the best flavor and texture, I recommend using seedless Persian or English cucumbers. These varieties have a lovely sweet flavor and a crisp texture that will make your salad shine. Other types of cucumbers can be bitter and may not provide the same delightful crunch.

How can I store Persian Shirazi Salad, and for how long?
You can store the chopped cucumbers, onions, and tomatoes in the fridge without the dressing for up to 2 days. To keep the salad as fresh as possible, I suggest mixing the dressing just before serving. This way, your salad maintains that delightful crunch!

Can I freeze Persian Shirazi Salad?
While it's tempting to save this delicious dish for later, freezing is not recommended. The high water content in the vegetables can lead to a soggy texture when thawed, which will compromise the vibrant freshness of your Persian Shirazi Salad. Enjoy it fresh instead!

What if my cucumbers are too watery?
If your cucumbers are watery, I recommend salting them lightly before mixing them into the salad. After slicing, let them sit for about 10-15 minutes to draw out excess moisture, then pat them dry with a paper towel before combining them with the other ingredients. This helps maintain the integrity of your salad!

Are there any dietary considerations for Persian Shirazi Salad?
Great question! This salad is naturally vegan and gluten-free, making it suitable for a variety of diets. However, if you're preparing it for someone with allergies, ensure there are no cross-contaminations with other ingredients. It's always best to check with guests about any specific dietary restrictions!

How should I prepare the mint for ideal flavor?
To fully enjoy the aromatic notes of dried mint, crush it lightly before adding it to the dressing. This releases the essential oils and enhances the flavor in your Persian Shirazi Salad. Just a gentle press with your fingers should do the trick, allowing the mint's fragrance to bloom beautifully!

Persian Shirazi Salad

Persian Shirazi Salad: Fresh, Zesty Flavor to Brighten Meals

Discover the refreshing flavors of the Persian Shirazi Salad, a vibrant and healthy addition to meals.
Print Recipe Pin Recipe
Prep Time 15 minutes mins
Total Time 15 minutes mins
Servings: 4 servings
Course: Salads
Cuisine: Persian
Calories: 102
Ingredients Equipment Method Nutrition Notes

Ingredients
  

For the Salad
  • 6 pcs Persian Cucumbers Use only seedless varieties for optimum taste.
  • 6 pcs Roma Tomatoes Remove seeds before chopping to maintain crispness.
  • 1 small Red Onion Yellow onion can serve as a suitable substitute.
For the Dressing
  • 1 large Lemon Freshly squeezed juice is best for a bright taste.
  • 2 tbsp Dried Mint Avoid fresh mint, as it alters the intended flavor.
  • 3 tbsp Extra Virgin Olive Oil Opt for high-quality oil for the best flavor.
  • Salt To taste
  • Black Pepper To taste

Equipment

  • Cutting Board
  • Knife
  • Mixing Bowl
  • small bowl

Method
 

Step‑by‑Step Instructions
  1. Start by finely chopping the small red onion into thin pieces, aiming for a consistent size. Set aside.
  2. Cut off the ends of the Persian cucumbers and finely chop them into small pieces.
  3. Halve each Roma tomato to remove seeds, then finely chop them into small cubes.
  4. In a small bowl, squeeze the juice of the lemon, mix in salt, pepper, and dried mint.
  5. In a large mixing bowl, combine the chopped cucumbers, tomatoes, and red onions. Pour the dressing over and toss gently.
  6. Drizzle olive oil over the salad before serving and mix gently.
  7. Serve the salad immediately for the best crunch and freshness.

Nutrition

Serving: 1servingCalories: 102kcalCarbohydrates: 8gProtein: 2gFat: 8gSaturated Fat: 1gMonounsaturated Fat: 7gSodium: 100mgPotassium: 350mgFiber: 2gSugar: 3gVitamin A: 500IUVitamin C: 25mgCalcium: 40mgIron: 1mg

Notes

For optimal freshness, store vegetables separately from the dressing and add it just before serving.

Tried this recipe?

Let us know how it was!

Delicious California Roll Cucumber Salad in Just 10 Minutes

March 17, 2026 by Grace Snow Leave a Comment

On a sweltering summer day, nothing quite hits the spot like a crisp, refreshing salad. That's where my Quick and Refreshing California Roll Cucumber Salad comes in! This delightful dish combines the satisfying crunch of fresh cucumbers, the rich creaminess of avocado, and the subtle sweetness of crab—no cooking required. With just 10 minutes of prep, it’s perfect for those busy days when you crave something light yet fulfilling. Ideal as a side for summer barbecues or a standalone lunch, it's gluten-free and packed with nutrients, making it a healthy choice for any occasion. Are you ready to elevate your salad game and impress your friends with this no-cook wonder? Let’s dive into the tasty details together!

Why Is This Salad a Must-Try?

Quick Prep: In just 10 minutes, you’ll have a vibrant salad ready to impress anyone at your table.

No Cooking Required: Forget about heating up your kitchen—this dish is entirely no-cook, making it the perfect solution for hot summer days.

Healthy & Nutritious: Packed with healthy fats from avocado and lean protein from crab, it’s a guilt-free indulgence.

Versatile Pairing: This salad works beautifully as a side for grilled teriyaki chicken or sushi rolls, adding a refreshing touch to any meal!

Delicious Flavor Fusion: The combination of flavors—crisp cucumbers, creamy avocado, and sweet crab—offers a satisfying crunch that keeps you coming back for more.

Dazzle your guests at your next gathering with this California Roll Cucumber Salad!

California Roll Cucumber Salad Ingredients

For the Salad
• English Cucumbers – The crisp base for the salad; substitute with Persian cucumbers for a different flavor.
• Crab (or Imitation Crab) – Adds sweetness and protein; use imitation crab for a budget-friendly option.
• Avocado – Provides richness and healthy fats; cube just before serving to maintain freshness.
• Chopped Scallions/Radishes – Optional additions for extra crunch and flavor; toss in as desired.

For the Dressing
• Mayonnaise – Adds creaminess and tang; start with a smaller amount to avoid overpowering the salad.
• Cream Cheese – Offers a luxurious texture; this is optional and can be adjusted according to preference.
• Soy Sauce – Enhances umami flavor and unites the ingredients beautifully.
• Sesame Seeds – Optional for garnish and added crunch; they add a delightful finish.

Dive into assembling the perfect California Roll Cucumber Salad with these fresh ingredients that promise a satisfying and healthy meal!

Step‑by‑Step Instructions for California Roll Cucumber Salad

Step 1: Prepare Cucumbers
Slice the English cucumbers into 1/8-inch rounds and place them in a colander. Sprinkle a generous amount of salt over the slices and let them drain for 15-20 minutes. This step enhances their crunchiness while drawing out excess moisture, ensuring your California Roll Cucumber Salad stays fresh and crisp.

Step 2: Mix Salad Ingredients
In a large mixing bowl, combine the drained cucumber slices with diced crab (or imitation crab) and cubed avocado. Gently stir the mixture to evenly distribute the ingredients while keeping the avocado from mashing. The combination of textures—crunchy cucumbers, tender crab, and creamy avocado—sets the foundation for a delightful salad.

Step 3: Make Dressing
In a separate bowl, whisk together mayonnaise, cream cheese, soy sauce, and sesame seeds until smooth and creamy. Start with a smaller amount of mayonnaise to ensure the dressing doesn’t overpower your California Roll Cucumber Salad. Adjust the ingredients to taste, focusing on achieving a balanced, flavorful dressing that complements the fresh ingredients.

Step 4: Combine Salad
Pour the prepared dressing over the cucumber mixture in the large bowl. Gently toss everything together, making sure all the ingredients are well coated with the dressing. This step is crucial for uniting the flavors in the salad and bringing the California Roll Cucumber Salad to life.

Step 5: Serve
Serve the California Roll Cucumber Salad immediately for the best taste and texture, or chill it briefly in the fridge for about 10 minutes if you prefer it cold. For an elegant touch, garnish with extra sesame seeds before serving. Enjoy this vibrant salad on its own or as a refreshing side dish!

California Roll Cucumber Salad Variations

Feel free to make this California Roll Cucumber Salad your own with some delightful twists on classic ingredients!

  • Vegetarian Delight: Replace crab with chickpeas or tofu for a protein boost without the seafood, making it perfect for a vegetarian diet. This maintains the creamy texture while adding a nutritious touch.

  • Spicy Kick: Add a sprinkle of chili flakes or finely diced jalapeños to the dressing for an exciting heat that elevates the flavors. Just a pinch can create a zing that might surprise and delight your taste buds!

  • Dairy-Free: Swap cream cheese and mayonnaise for silken tofu blended until smooth, offering a dairy-free alternative without sacrificing creaminess. This adds richness while keeping it light and healthy!

  • Citrusy Twist: Include a splash of lemon or lime juice in the dressing for a refreshing zing that brings brightness to the salad. This citrus addition will awaken the flavors and keep it summer-fresh!

  • Crunch Factor: Toss in some toasted nuts or seeds, like almonds or sunflower seeds, to amplify crunchiness and provide a satisfying bite with every forkful. Their nuttiness perfectly complements the salad's fresh ingredients!

  • Asian Fusion: Incorporate shredded carrots or snap peas for added color and sweetness, transforming the dish into a vibrant salad with more texture. These additions not only diversify the flavors but keep the dish visually appealing!

  • Herb-Infused: Experiment with fresh herbs like cilantro or mint for a fragrant twist that enhances the overall profile. A handful can elevate the freshness of the salad and introduce delightful layers of flavor.

  • Lightening Up: For a lighter dressing, substitute mayonnaise with Greek yogurt. This adds a tangy note while significantly reducing calories, making your salad even healthier and bursting with nutrients!

As you explore these variations, consider pairing your salad with grilled teriyaki chicken or a side of miso soup for a complete meal experience that shines in both flavor and nutrition.

How to Store and Freeze California Roll Cucumber Salad

  • Room Temperature: Best enjoyed immediately after preparation to maintain texture and flavor. If left out, consume within 2 hours to ensure food safety.

  • Fridge: Store any leftovers in an airtight container in the refrigerator for up to 24 hours. Keep the dressing separate until ready to serve to retain maximum crunch.

  • Freezer: Avoid freezing the salad due to the texture changes in cucumbers and avocado, which can become mushy when thawed.

  • Reheating: Not necessary for this salad; enjoy it cold for the freshest taste and optimal enjoyment of flavors in your California Roll Cucumber Salad.

Make Ahead Options

These California Roll Cucumber Salad preparations are perfect for meal prep enthusiasts! You can slice and salt the cucumbers up to 24 hours in advance to enhance their crunchiness while drawing out moisture. Store the drained cucumber slices in an airtight container in the refrigerator. Additionally, you can mix the crab, avocado (cubed just before serving), and dressing in separate containers to keep all components fresh. When you’re ready to enjoy your salad, simply combine the cucumber, crab, and dressing, and garnish with sesame seeds. By prepping this salad ahead, you'll save valuable time during busy days while still enjoying a fresh and delicious dish!

What to Serve with Quick and Refreshing California Roll Cucumber Salad

Elevate your meal experience with delightful pairings that enhance the crisp flavors of this refreshing salad.

  • Grilled Teriyaki Chicken: The sweetness of the teriyaki glaze complements the salad’s refreshing crunch beautifully.

  • Miso Soup: A warm, savory soup that adds a comforting element alongside the cool, crisp salad.

  • Sushi Rolls: Enjoy a traditional Japanese meal with sushi that mirrors the flavors featured in the salad.

  • Mango Salsa: The tropical sweetness of fresh mango offers a vibrant contrast to the salad's savory notes, enhancing taste and texture.

  • Chilled Sake: This light, fruity drink pairs elegantly, balancing the salad’s fresh ingredients with a delightful taste.

  • Asian Slaw: A crunchy, tangy slaw adds extra texture while mirroring the fresh vegetables in the salad for a cohesive dish.

  • Brown Rice: Served warm, it provides a hearty and wholesome base, adding heartiness to the lighter salad experience.

These pairings will not only complement the California Roll Cucumber Salad but also create a harmonious and satisfying meal!

Expert Tips for California Roll Cucumber Salad

  • Fresh Avocado: Cube the avocado just before serving to prevent browning and maintain its creamy texture in the California Roll Cucumber Salad.

  • Cucumber Salting: Don’t skip the salting step for cucumbers; it helps drain excess moisture and enhances their crunchiness.

  • Flavor Balance: Start with less mayonnaise in the dressing. You can always add more if needed, ensuring the flavors stay balanced without becoming too heavy.

  • Storage Precautions: Enjoy the salad within 24 hours for the best texture. Keep the dressing separate until serving to avoid sogginess.

  • Variability: Feel free to experiment by adding more veggies or swapping crab with shrimp; this flexibility can tailor the salad to your taste!

California Roll Cucumber Salad Recipe FAQs

How do I choose the best cucumbers for this salad?
Absolutely! Look for English cucumbers that are firm, without any dark spots or blemishes. They should feel heavy for their size, indicating juiciness. If unavailable, Persian cucumbers make a delightful alternative.

How should I store the California Roll Cucumber Salad?
Store any leftovers in an airtight container in the fridge for up to 24 hours. To maintain the salad's crunch, keep the dressing separate until serving. Before storing, drain any excess liquid from the salad.

Can I freeze this salad?
I recommend avoiding freezing the California Roll Cucumber Salad. Freezing can alter the crisp texture of cucumbers and avocado, resulting in a mushy salad upon thawing. Enjoy it fresh for the best experience!

What if my avocado browns before serving?
To prevent browning, you can sprinkle a bit of lemon juice over the cubed avocado right after cutting it. This helps maintain its vibrant color. Alternatively, you can cube the avocado just before serving for optimal freshness.

Is this salad suitable for a gluten-free diet?
Yes, the California Roll Cucumber Salad is naturally gluten-free! Just ensure that the mayonnaise and soy sauce you use are labeled gluten-free, especially if you have a sensitivity or allergy.

How can I adjust the flavors of the dressing?
Feel free to tweak the dressing to suit your taste! Start with 2 tablespoons of mayonnaise and gradually add more if needed. You can also adjust the soy sauce for a saltier edge or add a splash of rice vinegar for extra tanginess. Blend it until you hit that perfect flavor note!

California Roll Cucumber Salad

Delicious California Roll Cucumber Salad in Just 10 Minutes

This California Roll Cucumber Salad is a refreshing, no-cook dish perfect for summer, with crisp cucumbers, creamy avocado, and sweet crab.
Print Recipe Pin Recipe
Prep Time 10 minutes mins
Draining Time 20 minutes mins
Total Time 30 minutes mins
Servings: 4 servings
Course: Salads
Cuisine: American
Calories: 250
Ingredients Equipment Method Nutrition Notes

Ingredients
  

For the Salad
  • 2 units English Cucumbers Substitute with Persian cucumbers for a different flavor.
  • 1 cup Crab (or Imitation Crab) Use imitation crab for a budget-friendly option.
  • 1 unit Avocado Cube just before serving to maintain freshness.
  • 1/4 cup Chopped Scallions/Radishes Optional additions for extra crunch and flavor.
For the Dressing
  • 1/2 cup Mayonnaise Start with a smaller amount to avoid overpowering.
  • 2 oz Cream Cheese Optional and can be adjusted according to preference.
  • 2 tbsp Soy Sauce Enhances umami flavor.
  • 1 tbsp Sesame Seeds Optional for garnish.

Equipment

  • large mixing bowl
  • Colander
  • Whisk

Method
 

Step-by-Step Instructions
  1. Slice the English cucumbers into 1/8-inch rounds and place in a colander. Sprinkle with salt and let drain for 15-20 minutes.
  2. In a mixing bowl, combine drained cucumber slices with diced crab and cubed avocado. Gently stir.
  3. In a separate bowl, whisk together mayonnaise, cream cheese, soy sauce, and sesame seeds until smooth.
  4. Pour the dressing over the cucumber mixture and toss gently until well coated.
  5. Serve immediately or chill for about 10 minutes. Garnish with extra sesame seeds if desired.

Nutrition

Serving: 1servingCalories: 250kcalCarbohydrates: 12gProtein: 8gFat: 20gSaturated Fat: 4gPolyunsaturated Fat: 1gMonounsaturated Fat: 15gCholesterol: 30mgSodium: 300mgPotassium: 600mgFiber: 4gSugar: 2gVitamin A: 500IUVitamin C: 15mgCalcium: 30mgIron: 1mg

Notes

Enjoy the salad within 24 hours for the best texture. Keep dressing separate until serving to avoid sogginess.

Tried this recipe?

Let us know how it was!

Crunchy Frito Cowboy Cabbage Salad for Quick Flavor Bliss

March 17, 2026 by Grace Snow Leave a Comment

The sun-soaked afternoons of summer always bring back memories of backyard BBQs and lively gatherings, where vibrant flavors and good company make everything taste better. Today, I’m excited to share my Frito Cowboy Cabbage Salad, a delightful twist on classic Tex-Mex fare that’s bound to turn heads at your next potluck or weeknight dinner. With only a few minutes of prep, this no-cook recipe is not only a breeze to whip up, but it also delivers a hearty punch of nutrition and fun, thanks to its crunchy layer of Chili Cheese Fritos. Packed with zesty veggies and protein-rich black beans, this salad is the perfect balance of wholesome and indulgent. Curious what else makes it a must-try? Let’s dive into this colorful creation!

Why is This Salad So Appealing?

Vibrant Colors: This Frito Cowboy Cabbage Salad is a feast for the eyes, with a blend of colorful veggies that make every serving look like a party on a plate.

Quick Prep: With no cooking required, you can have this salad ready in just a few minutes—perfect for those busy weeknights or last-minute gatherings.

Nutritious and Wholesome: Packed with fiber-rich black beans and fresh vegetables, this salad is as nourishing as it is delicious, giving you all the energy you need.

Crowd-Pleasing Crunch: Topping it off with crunchy Chili Cheese Fritos adds an irresistible texture that makes it a guaranteed hit at any BBQ or potluck.

Versatile and Fun: Feel free to customize with your favorite mix-ins or swaps, like using Chicken Salad Apples for an extra protein boost or a dollop of creamy dressing from our Avocado Egg Salad recipe.

Frito Cowboy Cabbage Salad Ingredients

For the Salad Base

  • Coleslaw Mix – Adds crunch and freshness; can substitute with finely shredded fresh cabbage.
  • Black Beans – Provides protein and substance; choose canned, rinsed well for the best texture.
  • Corn – Gives sweetness and texture; both canned and frozen work perfectly here.
  • Red Bell Pepper – Brings sweetness and color; substitute with yellow or orange pepper if desired.
  • Jalapeño – Introduces mild heat; omit or reduce for a milder option if you prefer.
  • Green Onions – Adds sharpness and freshness; can replace with chives for a milder taste.
  • Cilantro – Enhances flavor with herbal notes; omit if you're unsure about cilantro's taste.

For the Chipotle Dressing

  • Sour Cream – Provides creaminess; substitute with yogurt for a lighter option.
  • Mayonnaise – Adds richness; use vegan mayo for a plant-based version of this dressing.
  • Lime Juice – Offers desired acidity; it’s essential for flavor, so don’t skip this!
  • Chipotle Sauce – Delivers smokiness and heat; adjust based on your preferred spice level.

This Frito Cowboy Cabbage Salad is the perfect blend of nutrition and crunch, making it an exciting addition to any meal!

Step‑by‑Step Instructions for Frito Cowboy Cabbage Salad

Step 1: Combine the Salad Base
In a large mixing bowl, combine the coleslaw mix, drained black beans, corn, diced red bell pepper, finely chopped jalapeño, sliced green onions, and chopped cilantro. Stir these vibrant ingredients together gently until evenly mixed. You should see a colorful medley—this beautiful mix lays the foundation for your delicious Frito Cowboy Cabbage Salad.

Step 2: Prepare the Chipotle Dressing
In a separate medium bowl, whisk together the sour cream, mayonnaise, fresh lime juice, and chipotle sauce. Aim for a smooth, creamy dressing with a slightly tangy aroma. Taste the mixture to adjust the chipotle sauce to your preferred level of heat; the balance will enhance your Frito Cowboy Cabbage Salad beautifully.

Step 3: Combine Salad and Dressing
Pour the chipotle dressing over the salad ingredients in the large bowl. With a spatula, gently fold the dressing into the salad until every bit of the colorful veggies is coated in that creamy mixture. You'll notice a harmonious blend of flavors coming together, making it a deliciously inviting dish.

Step 4: Add Fritos Just Before Serving
To maintain their irresistible crunch, wait until just before serving to top the salad with Chili Cheese Fritos. Sprinkle a generous amount over the salad for an extra layer of texture and flavor. Mixing these in right before serving ensures your Frito Cowboy Cabbage Salad remains a delightful experience with every bite.

Make Ahead Options

These Frito Cowboy Cabbage Salads are a fantastic option for meal prep, saving you time during busy weeknights! You can prepare the salad base (coleslaw mix, black beans, corn, diced red bell pepper, jalapeño, green onions, and cilantro) up to 24 hours in advance by storing it in an airtight container in the refrigerator. For optimal freshness and to prevent sogginess, wait to mix in the chipotle dressing until just before serving. When ready to enjoy, toss the prepared salad with the dressing and top with Chili Cheese Fritos for that signature crunch. This make-ahead approach ensures your salad stays just as delicious as when freshly made, making meal planning a breeze!

What to Serve with Frito Cowboy Cabbage Salad

Dive into the vibrant world of Tex-Mex culinary delights, and discover the perfect pairings that elevate your meal!

  • Grilled Chicken Tacos: Juicy, seasoned chicken in soft tortillas complements the crunchy salad, creating a delicious blend of textures and flavors.

  • Cornbread Muffins: These slightly sweet, moist muffins add a comforting, homey touch that balances the salad's bold spices beautifully.

  • Spicy Black Bean Soup: Serve a warm bowl alongside for a heartier meal; the flavors from both dishes will harmonize wonderfully.

  • Chilled Fruit Salsa: Fresh fruit salsa, with its bright flavors, offers a refreshing contrast to the savory salad. It's an excellent way to cleanse the palate.

  • Avocado Lime Rice: The creamy avocado and citrusy notes add richness and round out the meal perfectly, enhancing the overall dining experience.

  • Iced Tea with Mint: A chilled mint iced tea adds a refreshing element, cleansing your palate between the hearty bites of salad and sides.

Enjoy these delightful accompaniments to take your Frito Cowboy Cabbage Salad to the next level of deliciousness!

Frito Cowboy Cabbage Salad Variations

Feel free to put your personal spin on this delicious salad and make it your own!

  • Vegan Twist: Substitute sour cream and mayonnaise with cashew cream or avocado for a creamy, dairy-free dressing. It adds a nutty flavor that complements the veggies beautifully.

  • Gluten-Free Option: Opt for gluten-free tortilla strips instead of Fritos to maintain that satisfying crunch while keeping it gluten-friendly. You won’t even miss the original!

  • Protein Packed: Add cooked quinoa or grilled chicken for an extra protein boost. This transformation will take your salad from a side dish to a hearty main course.

  • Spicy Kick: Mix in diced pickled jalapeños or a dash of hot sauce to elevate the heat level and create a zesty explosion of flavor that spicy food lovers will adore!

  • Flavorful Beans: Swap black beans for kidney beans or garbanzo beans to change up the texture and taste. Each type of bean brings its own unique flair to the dish.

  • Creamy Avocado: Incorporate diced avocado for a rich, creamy element that balances the crunch of the salad. The creaminess works harmoniously with the spicy chipotle dressing.

  • Crunchy Toppings: Instead of Chili Cheese Fritos, use crushed tortilla chips or crispy onions for a delightful alternate crunch that's equally satisfying. Try a mix for even more texture!

You might also enjoy how these variations complement other recipes like Jello Salad Cottage or some zingy Fried Shrimp Cabbage to round out your meal beautifully.

Storage Tips for Frito Cowboy Cabbage Salad

  • Fridge: Store the Frito Cowboy Cabbage Salad in an airtight container for up to 2 days. Be sure to keep the Chili Cheese Fritos separate until ready to serve to maintain their crunch.
  • Freezer: It's best not to freeze this salad due to the fresh vegetables and creamy dressing. However, you can freeze leftover chipotle dressing in an airtight container for up to 1 month.
  • Reheating: Since this is a no-cook salad, there's no need for reheating. Simply mix up any leftovers, and refresh with additional coleslaw mix and lime juice for a fresh taste.
  • Refreshing Tip: Before serving leftovers, taste and adjust the seasoning to brighten flavors, as they may mellow after storage.

Expert Tips for Frito Cowboy Cabbage Salad

  • Serve Immediately: Adding Fritos right before serving keeps them crunchy and prevents sogginess—no one likes a soggy salad!
  • Taste First: Adjust the seasoning after mixing to ensure the flavors are just right; different brands of chipotle sauce can vary in saltiness.
  • Drain Well: Make sure the black beans and corn are well-drained to avoid excess moisture in your Frito Cowboy Cabbage Salad.
  • Customize Flavor: Feel free to experiment with other veggies or beans to make the salad your own; the base is versatile and open to interpretation!
  • Chill Before Serving: For enhanced flavor, let the salad chill in the refrigerator for about 30 minutes before serving; it allows the ingredients to marry beautifully.

Frito Cowboy Cabbage Salad Recipe FAQs

What is the best way to select ripe vegetables for this salad?
Absolutely! When choosing vegetables, look for vibrant colors and firm textures. For the red bell pepper, ensure it has shiny skin without blemishes. For the jalapeño, choose ones that are firm with a bright green color. If you're using corn, fresh ears should be plump and tightly wrapped in their husks.

How should I store leftovers of the Frito Cowboy Cabbage Salad?
You can store your Frito Cowboy Cabbage Salad in an airtight container in the fridge for up to 2 days. To keep that delightful crunch of the Chili Cheese Fritos, store them separately. Before serving leftovers, you might want to refresh the salad with extra coleslaw mix and a squeeze of lime juice for a zesty boost!
Can I freeze the Frito Cowboy Cabbage Salad?
It's best not to freeze the Frito Cowboy Cabbage Salad as the fresh vegetables and creamy dressing do not hold up well in the freezer. However, if you have extra chipotle dressing, you can freeze that in an airtight container for up to 1 month. When you’re ready to use it, thaw it in the fridge overnight, stirring well before using!

What should I do if my salad is too watery?
If your salad turns out too watery, it’s likely due to excess moisture from the beans or corn. To fix this, strain the salad to remove excess liquid. After that, you might want to mix in a bit of extra coleslaw mix to absorb some of the moisture. Taste and adjust seasoning afterward; this will help refresh the flavors!

Are there any dietary considerations for this salad?
Very! This Frito Cowboy Cabbage Salad can easily be made vegan by swapping the sour cream and mayonnaise with plant-based alternatives. Additionally, it’s gluten-free if you choose gluten-free versions of the chipotle dressing and Fritos. Just be mindful of cross-contamination if cooking for someone with serious allergies!

How can I customize this salad for different tastes?
The more the merrier when it comes to customization! You could add extra veggies like diced cucumbers or cherry tomatoes for added freshness. For a protein boost, consider adding grilled chicken or diced avocado. You can even swap the black beans for chickpeas or pinto beans to change the flavor profile while still keeping it hearty and delicious!

Frito Cowboy Cabbage Salad

Crunchy Frito Cowboy Cabbage Salad for Quick Flavor Bliss

This Frito Cowboy Cabbage Salad is a colorful and nutritious dish perfect for summer gatherings.
Print Recipe Pin Recipe
Prep Time 10 minutes mins
Total Time 10 minutes mins
Servings: 6 servings
Course: Salads
Cuisine: Tex-Mex
Calories: 250
Ingredients Equipment Method Nutrition Notes

Ingredients
  

Salad Base
  • 1 bag Coleslaw Mix Adds crunch and freshness
  • 1 can Black Beans Choose canned, rinsed well
  • 1 cup Corn Canned or frozen works
  • 1 medium Red Bell Pepper Substitute with yellow or orange pepper if desired
  • 1 medium Jalapeño Omit or reduce for a milder option
  • 2 stalks Green Onions Can replace with chives for a milder taste
  • 1 cup Cilantro Omit if unsure about cilantro's taste
Chipotle Dressing
  • 1 cup Sour Cream Substitute with yogurt for a lighter option
  • 1/2 cup Mayonnaise Use vegan mayo for a plant-based version
  • 2 tablespoons Lime Juice Essential for flavor
  • 2 teaspoons Chipotle Sauce Adjust based on your preferred spice level
Topping
  • 2 cups Chili Cheese Fritos Add just before serving

Equipment

  • Mixing Bowl
  • Whisk

Method
 

Preparation
  1. Combine the coleslaw mix, drained black beans, corn, diced red bell pepper, finely chopped jalapeño, sliced green onions, and chopped cilantro in a large mixing bowl.
  2. In a separate bowl, whisk together the sour cream, mayonnaise, lime juice, and chipotle sauce for the dressing.
  3. Pour the chipotle dressing over the salad ingredients and gently fold until coated.
  4. Top with Chili Cheese Fritos just before serving to maintain their crunch.

Nutrition

Serving: 1servingCalories: 250kcalCarbohydrates: 32gProtein: 8gFat: 12gSaturated Fat: 3gPolyunsaturated Fat: 2gMonounsaturated Fat: 7gCholesterol: 15mgSodium: 400mgPotassium: 300mgFiber: 8gSugar: 4gVitamin A: 20IUVitamin C: 50mgCalcium: 4mgIron: 10mg

Notes

For enhanced flavor, chill the salad for about 30 minutes before serving. Adjust seasoning to taste before serving leftovers.

Tried this recipe?

Let us know how it was!

Fresh Mixed Greens Side Salad with Zesty Flavor Boost

February 27, 2026 by Grace Snow Leave a Comment

In a world where busy schedules often lead us to the drive-thru, I’ve discovered the magic of a quick, home-cooked Fresh Mixed Greens Side Salad. This vibrant salad comes together in just 10 minutes, making it the perfect accompaniment to your favorite steak, pasta, or grilled chicken. The zesty red wine vinaigrette adds just the right punch, effortlessly cutting through the richness of those hearty dishes. Not only is it a versatile companion for your meals, but this salad is also vegetarian, gluten-free, and dairy-free, making it an inclusive choice for everyone at your table. Whether you're looking to elevate your dinner or simply enjoy a refreshing bite, this easy salad will have you reaching for seconds. Ready to add a splash of color and flavor to your meal? Let’s dive in!

Why is this salad a must-try?

Freshness at Lightning Speed: You’ll whip up this refreshing Mixed Greens Side Salad in just 10 minutes! Perfect for those busy weeknights.

Zesty Flavor Explosion: The vibrant red wine vinaigrette brightens the greens and adds a delightful kick that complements rich meals beautifully.

Versatile Add-Ins: Customize it with crunchy cucumbers or rich cheeses like feta for a satisfying crunch.

Diet-Friendly: Being vegetarian, gluten-free, and dairy-free, this salad caters to various dietary preferences, making it a hit with everyone.

Crowd-Pleasing Choice: Pair it with prime rib or your favorite pasta, and watch everyone at the table go back for seconds, just like with a Chicken Salad with Apples.

Mixed Greens Side Salad Ingredients

• Here’s what you need to create this delightful dish!

For the Vinaigrette

  • Extra Virgin Olive Oil (4 tablespoons) – The base of your dressing; use a high-quality oil for the best flavor.
  • Red Wine Vinegar (3 tablespoons) – Adds acidity and a tangy bite that lifts the entire salad.
  • Dijon Mustard (1 teaspoon) – Helps emulsify the vinaigrette and gives it a zesty kick.
  • Honey (1 teaspoon) – Balances the acidity; substitute with agave or maple syrup for a vegan option.
  • Shallot (½, finely diced) – Brings a mild onion flavor that’s not overpowering.
  • Garlic (2 cloves, finely chopped or grated) – Adds a fragrant, aromatic depth to the vinaigrette.
  • Kosher Salt and Ground Black Pepper – Enhances the flavors; adjust to your taste.

For the Salad

  • Mixed Greens (5 ounces) – The fresh and crunchy base; a spring mix, arugula, or romaine works best.
  • Optional Add-Ins – Get creative! Try sliced cucumber for crunch, grated carrot for sweetness, or diced tomatoes for juiciness. Add toasted nuts (pine nuts, pistachios, sunflower seeds) for an extra texture twist and cheeses (goat cheese, feta, or grated parmesan) to elevate the flavor profile.

With these simple ingredients, you’re just minutes away from a vibrant Mixed Greens Side Salad that’s bursting with flavor and freshness! Enjoy!

Step‑by‑Step Instructions for Fresh Mixed Greens Side Salad

Step 1: Make the Vinaigrette
In a medium bowl or a jar with a lid, combine 4 tablespoons of extra virgin olive oil, 3 tablespoons of red wine vinegar, 1 teaspoon of Dijon mustard, and 1 teaspoon of honey. Finely dice half a shallot and add it along with 2 cloves of grated garlic. Season with kosher salt and ground black pepper, then whisk or shake vigorously for about 30 seconds until the dressing is fully emulsified and smooth. Taste and adjust the seasoning as needed.

Step 2: Prep the Greens
Rinse and dry 5 ounces of mixed greens using a salad spinner or gently patting them with clean kitchen towels. This helps maintain their crunch. In a large salad bowl, create a foundation with the fresh greens, taking a moment to enjoy their vibrant color and feel. If you’re using any optional add-ins like sliced cucumber or grated carrot, prepare those now for added freshness.

Step 3: Combine the Ingredients
Add your prepped mixed greens to the large bowl, then sprinkle with a pinch of kosher salt and ground black pepper. To take your mixed greens side salad to the next level, toss in any desired optional add-ins such as diced tomatoes or toasted nuts. These will enhance both texture and flavor, making your salad even more delightful.

Step 4: Dress the Salad
Drizzle the freshly made zesty red wine vinaigrette over the top of the mixed greens. Use just enough to lightly coat the leaves, ensuring that each bit receives a taste of that delicious, tangy dressing. Gently toss the ingredients together using salad tongs for about 30 seconds, being careful not to bruise the greens while evenly distributing the dressing.

Step 5: Serve Immediately
Once everything is well combined, serve the fresh mixed greens side salad immediately in individual bowls or on a large serving platter. The vibrant colors and freshness will invite everyone at your table to dig in. Pair this salad with your favorite rich entrees, such as steak or pasta, and relish in the delightful contrast of flavors.

Mixed Greens Side Salad Variations

Feel free to get creative with this salad, adding your personal touch for even more deliciousness!

  • Leafy Swap: Replace mixed greens with vibrant watercress or peppery arugula for a different flavor profile and crunch. Freshness is key!
  • Herb-Infused Vinaigrette: Incorporate fresh herbs like basil or parsley into the vinaigrette for a fragrant twist. It’s a delightful way to elevate the dish!
  • Balsamic Twist: Substitute red wine vinegar with balsamic vinegar for a sweeter, smoother dressing that beautifully complements the greens.
  • Protein Boost: Add grilled chicken, chickpeas, or hard-boiled eggs to transform this salad into a heartier meal. Each bite will be satisfying and filling!
  • Crunchy Nuts: Toss in toasted nuts like almonds or walnuts for an added crunch and nutty flavor that pairs beautifully with the vinaigrette.
  • Spice It Up: Sprinkle in a bit of red pepper flakes for a subtle heat that will liven up your salad and wake up your taste buds!
  • Cheesy Goodness: Drizzle your salad with crumbled goat cheese or shredded parmesan for a creamy touch that harmonizes with the tangy dressing. Just like a Tofu Caesar Salad, which brings a delightful creaminess!
  • Sweet Add-ons: Incorporate fruits like sliced strawberries or diced apples for a sweet contrast that enhances the overall flavor profile. Fresh fruit always adds a lovely burst!

Explore these variations, and you'll find endless ways to enjoy your Mixed Greens Side Salad!

How to Store and Freeze Mixed Greens Side Salad

Fridge: Store any leftover Mixed Greens Side Salad in an airtight container for up to 3 days. Keep the dressing separate to maintain the greens' crispiness.

Vinaigrette: The zesty red wine vinaigrette can be refrigerated in a sealed jar for up to a week. Shake well before using.

Freezer: Freezing is not recommended for this salad due to the delicate texture of the greens, which can become mushy.

Reheating: This salad is meant to be enjoyed cold and fresh, so there's no reheating needed—serve straight from the fridge for a refreshing bite!

Expert Tips for Mixed Greens Side Salad

  • Quality Counts: Use fresh and high-quality mixed greens for the best taste and crunch. Wilted greens can ruin the refreshing experience.
  • Customize Wisely: Feel free to mix and match the optional add-ins; however, avoid overwhelming the salad—too many ingredients can muddle flavors.
  • Vinaigrette Adjustments: Taste the vinaigrette as you make it. If too tangy, add more honey; if too sweet, a splash of vinegar can balance it out perfectly.
  • Store Separately: If preparing ahead, keep the vinaigrette in a separate container until serving to prevent sogginess in the mixed greens side salad.
  • Whisk or Shake: When making the vinaigrette, ensure thorough mixing to achieve the desired emulsification and consistent flavor throughout.

What to Serve with Fresh Mixed Greens Side Salad

Elevate your meal experience by pairing this refreshing side salad with complementary dishes that enhance its vibrant flavors.

  • Juicy Grilled Steak: The rich, charred flavor of the steak pairs beautifully with the zesty salad, cutting through the meatiness with each bite.
  • Creamy Pasta Carbonara: The lightness of the salad provides a refreshing contrast to the creamy sauce, ensuring a balanced dinner.
  • Savory Roasted Chicken: A simple roasted chicken can benefit from the salad's bright flavors, enhancing the overall dining experience.
  • Crusty Garlic Bread: Offer a crunchy side of garlic bread for dipping, adding a satisfying texture alongside the fresh greens.
  • Light Chardonnay: A glass of chilled Chardonnay echoes the vinaigrette's flavors, making each sip a delightful complement to your meal.
  • Fruit Sorbet: For dessert, a refreshing fruit sorbet cleanses the palate and provides a light, sweet finish to your meal.

Each of these pairings creates a well-rounded dining experience, showcasing the versatility of your Mixed Greens Side Salad!

Make Ahead Options

Preparing your Fresh Mixed Greens Side Salad ahead of time is a breeze, saving you precious minutes during busy weeknights! You can make the zesty red wine vinaigrette up to 1 week in advance; just store it in an airtight container in the fridge. For the salad, rinse and chop your greens up to 24 hours beforehand and keep them in a sealed bag with a paper towel to absorb any moisture, maintaining their crunch. You can also prep any desired add-ins, like diced tomatoes or sliced cucumbers, and store them separately. When ready to serve, simply toss everything together with the vinaigrette, and you'll have a fresh, vibrant Mixed Greens Side Salad that’s just as delicious as if you made it fresh!
Fresh Mixed Greens Side Salad Recipe FAQs

How do I select the best mixed greens?
Absolutely! When choosing mixed greens, look for vibrant colors and crisp textures. Avoid any greens with dark spots, wilting, or sliminess. A spring mix or arugula can elevate your salad's freshness and flavor, ensuring a perfect base for your salad.

What’s the best way to store leftover salad?
You can store leftover Mixed Greens Side Salad in an airtight container in the fridge for up to 3 days. It's essential to keep the vinaigrette separate until you're ready to serve to avoid soggy greens. That way, you can still enjoy the salad's crunch!

Can I freeze mixed greens salad?
Freezing is not recommended for this salad. The delicate texture of the mixed greens will become mushy after thawing. Instead, prepare the salad ingredients fresh and enjoy them right away for the best flavor and texture.

What can I do if the dressing is too tangy for my taste?
Very! If you find the vinaigrette too tangy, you can add a bit more honey or a splash of olive oil to mellow the acidity. Conversely, if it's too sweet, add a touch more red wine vinegar to balance it out. Just whisk it back together, and you're good to go!

Are there any dietary considerations for this salad?
This Mixed Greens Side Salad is a fantastic choice for various dietary preferences: it's vegetarian, gluten-free, and dairy-free! Just be cautious with any add-ins, especially cheeses and dressings that might contain allergens. Always check labels to ensure everyone's eating safely.

How can I customize my salad to fit different tastes?
The more the merrier! Feel free to add your favorite ingredients like sliced cucumber for crunch, diced tomatoes for juiciness, or toasted nuts for extra texture. The options are endless; just make sure not to overwhelm the salad with too many flavors at once. Enjoy experimenting!

Mixed Greens Side Salad

Fresh Mixed Greens Side Salad with Zesty Flavor Boost

A vibrant and refreshing Mixed Greens Side Salad that's quick to prepare and perfect for complementing main dishes.
Print Recipe Pin Recipe
Prep Time 10 minutes mins
Total Time 10 minutes mins
Servings: 4 servings
Course: Salads
Cuisine: Mediterranean
Calories: 150
Ingredients Equipment Method Nutrition Notes

Ingredients
  

Vinaigrette
  • 4 tablespoons Extra Virgin Olive Oil Use high-quality oil for the best flavor.
  • 3 tablespoons Red Wine Vinegar Adds acidity and tang.
  • 1 teaspoon Dijon Mustard Helps emulsify the vinaigrette.
  • 1 teaspoon Honey Balances acidity; substitute with agave or maple syrup for vegan option.
  • ½ Shallot Finely diced.
  • 2 cloves Garlic Finely chopped or grated.
  • Kosher Salt Adjust to taste.
  • Ground Black Pepper Adjust to taste.
Salad
  • 5 ounces Mixed Greens A spring mix, arugula, or romaine works best.
  • Sliced Cucumber Optional add-in for crunch.
  • Grated Carrot Optional add-in for sweetness.
  • Diced Tomatoes Optional add-in for juiciness.
  • Toasted Nuts Pine nuts, pistachios, sunflower seeds for extra texture.
  • Cheeses Goat cheese, feta, or grated parmesan to elevate flavor.

Equipment

  • Bowl
  • jar with a lid
  • Salad Spinner
  • salad tongs

Method
 

Vinaigrette Preparation
  1. In a medium bowl or a jar with a lid, combine 4 tablespoons of extra virgin olive oil, 3 tablespoons of red wine vinegar, 1 teaspoon of Dijon mustard, and 1 teaspoon of honey. Finely dice half a shallot and add it along with 2 cloves of grated garlic. Season with kosher salt and ground black pepper, then whisk or shake vigorously for about 30 seconds until the dressing is fully emulsified and smooth.
  2. Taste and adjust the seasoning as needed.
Greens Preparation
  1. Rinse and dry 5 ounces of mixed greens using a salad spinner or gently patting them with clean kitchen towels. In a large salad bowl, create a foundation with the fresh greens.
  2. If using any optional add-ins like sliced cucumber or grated carrot, prepare those now.
Combine Ingredients
  1. Add prepped mixed greens to the large bowl, then sprinkle with a pinch of kosher salt and ground black pepper.
  2. Toss in any desired optional add-ins such as diced tomatoes or toasted nuts.
Dress the Salad
  1. Drizzle the freshly made zesty red wine vinaigrette over the top of the mixed greens. Gently toss the ingredients together using salad tongs for about 30 seconds.
Serving
  1. Serve the fresh mixed greens side salad immediately in individual bowls or on a serving platter.

Nutrition

Serving: 1bowlCalories: 150kcalCarbohydrates: 10gProtein: 2gFat: 12gSaturated Fat: 2gPolyunsaturated Fat: 3gMonounsaturated Fat: 6gSodium: 200mgPotassium: 300mgFiber: 3gSugar: 2gVitamin A: 20IUVitamin C: 30mgCalcium: 4mgIron: 2mg

Notes

Store leftover salad in an airtight container for up to 3 days, keeping the dressing separate to maintain crispiness.

Tried this recipe?

Let us know how it was!
  • « Previous Page
  • 1
  • …
  • 8
  • 9
  • 10
  • 11
  • 12
  • …
  • 21
  • Next Page »

Welcome!

Hi, I’m Grace, a Sydney-based home cook with a passion for bold flavors and trending ingredients. Whether you’re a busy beginner or a seasoned foodie, you’ll find dishes here that are fresh, fun, and full of flavor.

More about me

Popular Recipes

  • Honey Lime Chicken & Avocado Rice Bowl
    Honey Lime Chicken & Avocado Rice Bowl for a Flavor Burst
  • Tasty Italian Pasta Salad
    Delight in this Easy Tasty Italian Pasta Salad for Summer Fun
  • Garlic Butter Chicken Pasta
    Garlic Butter Chicken Pasta That’ll Wow Your Family Tonight
  • Creamy, Spicy Chicken Pasta
    Creamy, Spicy Chicken Pasta with Fresh Summer Veggies

Footer

↑ back to top

About

  • Privacy Policy
  • Disclaimer
  • Terms & Conditions

Newsletter

  • Sign Up! for emails and updates

Contact

  • About me
  • Contact me

Copyright © 2025 TastyTrendIngredients