tastytrendingredients

  • Home
  • Recipes
    • Appetizers
    • Breakfast
    • Dessert
    • Dinner
    • Drinks
    • Salads
    • Snacks
    • Soups
  • About me
  • Contact
menu icon
go to homepage
  • Home
  • Recipes
    • Appetizers
    • Breakfast
    • Dessert
    • Dinner
    • Drinks
    • Salads
    • Snacks
    • Soups
  • About me
  • Contact
search icon
Homepage link
  • Home
  • Recipes
    • Appetizers
    • Breakfast
    • Dessert
    • Dinner
    • Drinks
    • Salads
    • Snacks
    • Soups
  • About me
  • Contact
×

Fresh Spring Mix Salad with Balsamic Honey Dressing Magic

April 1, 2026 by Grace Snow Leave a Comment

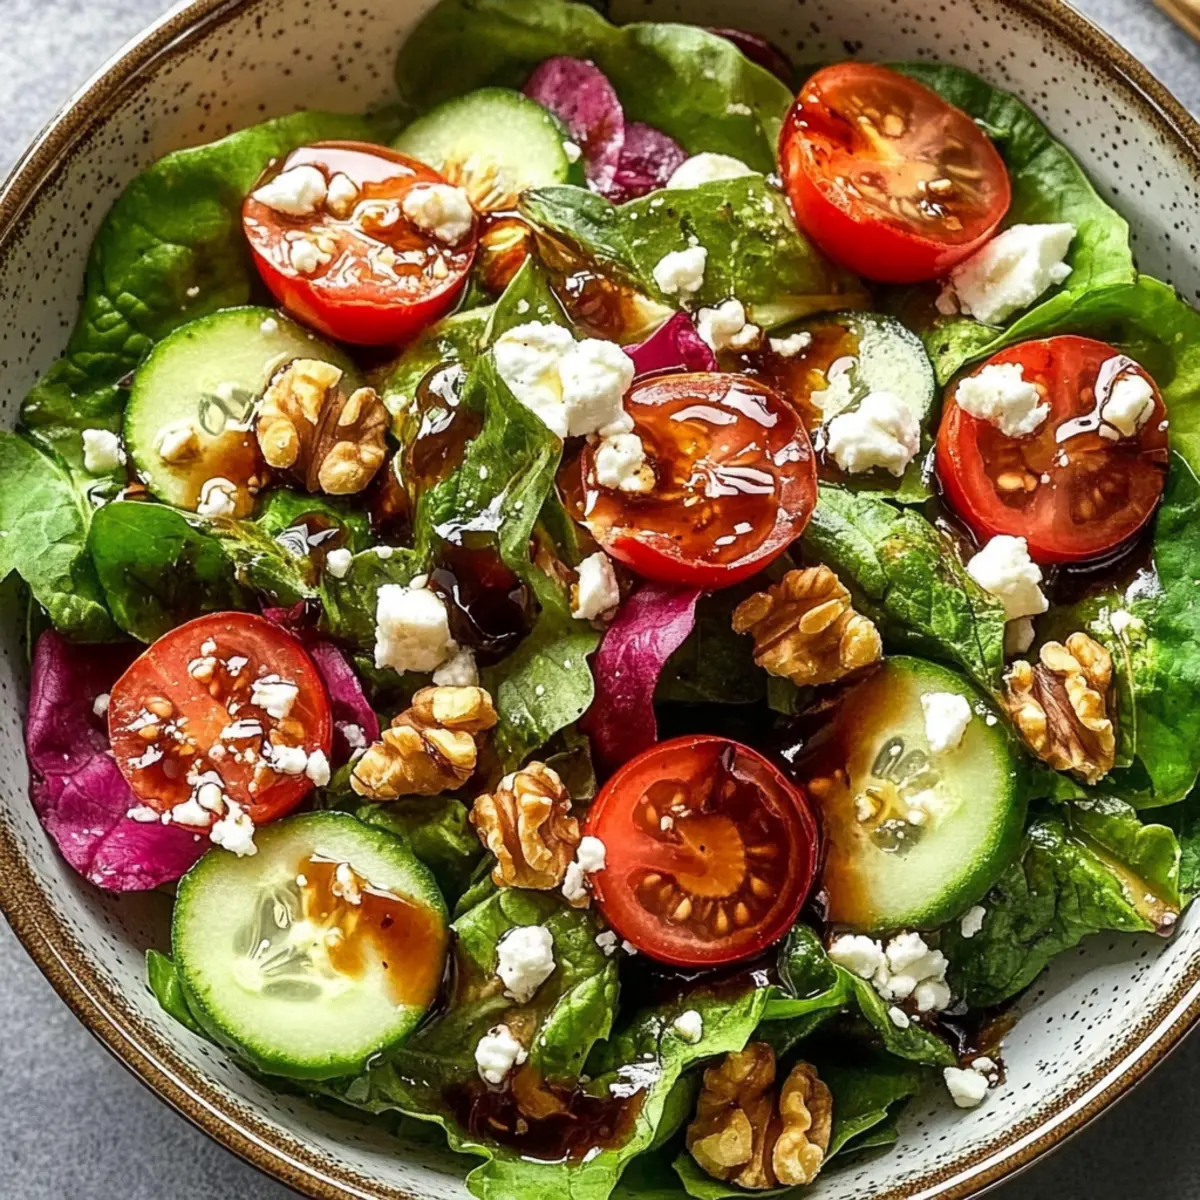
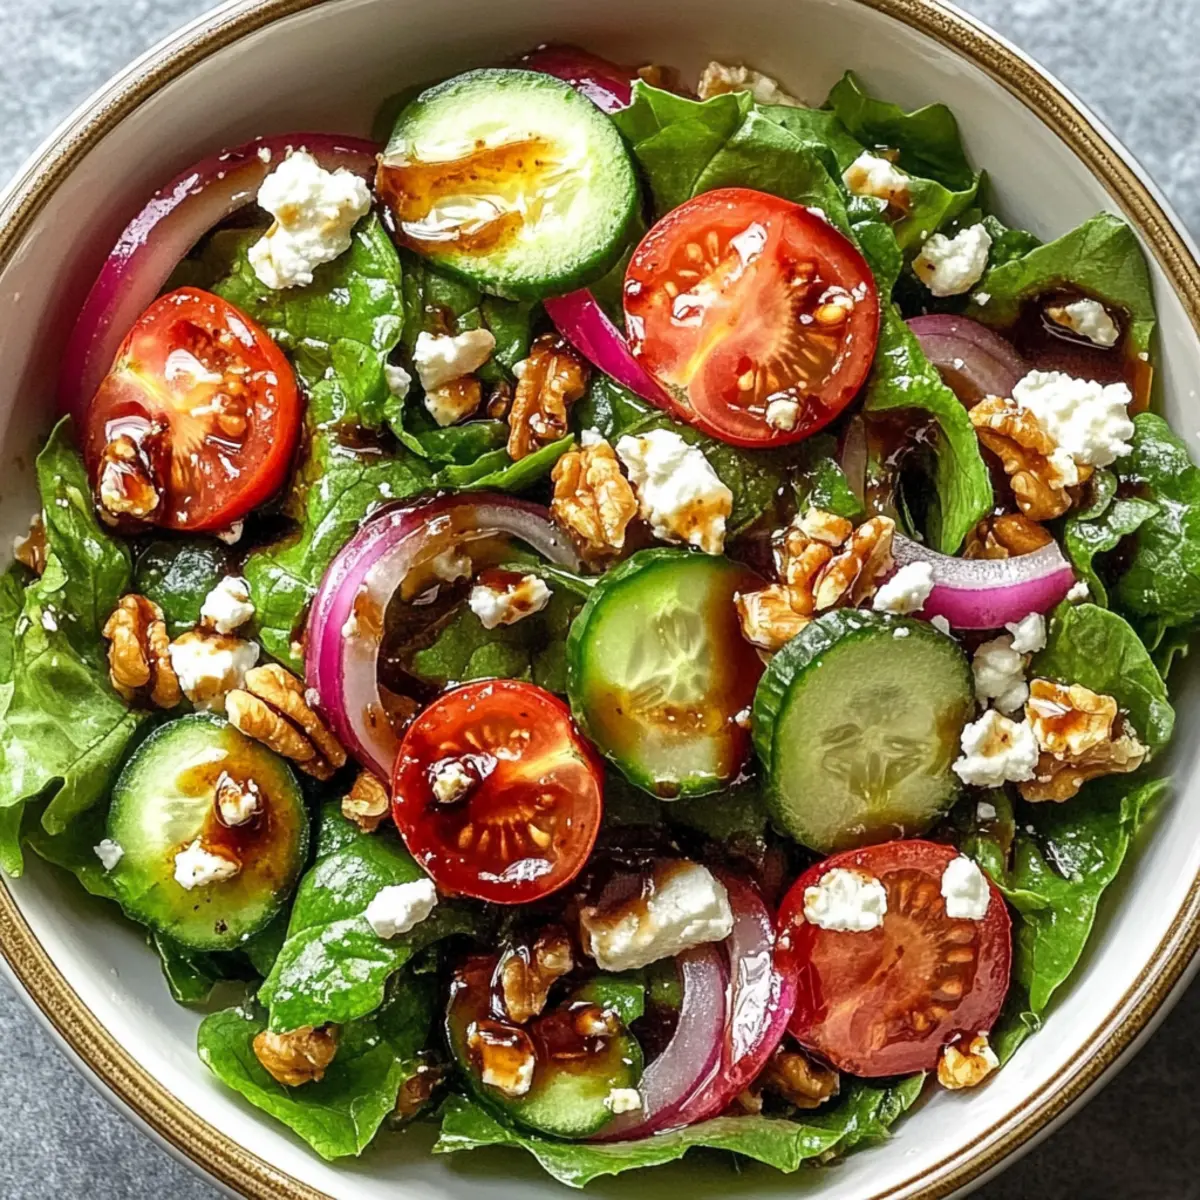
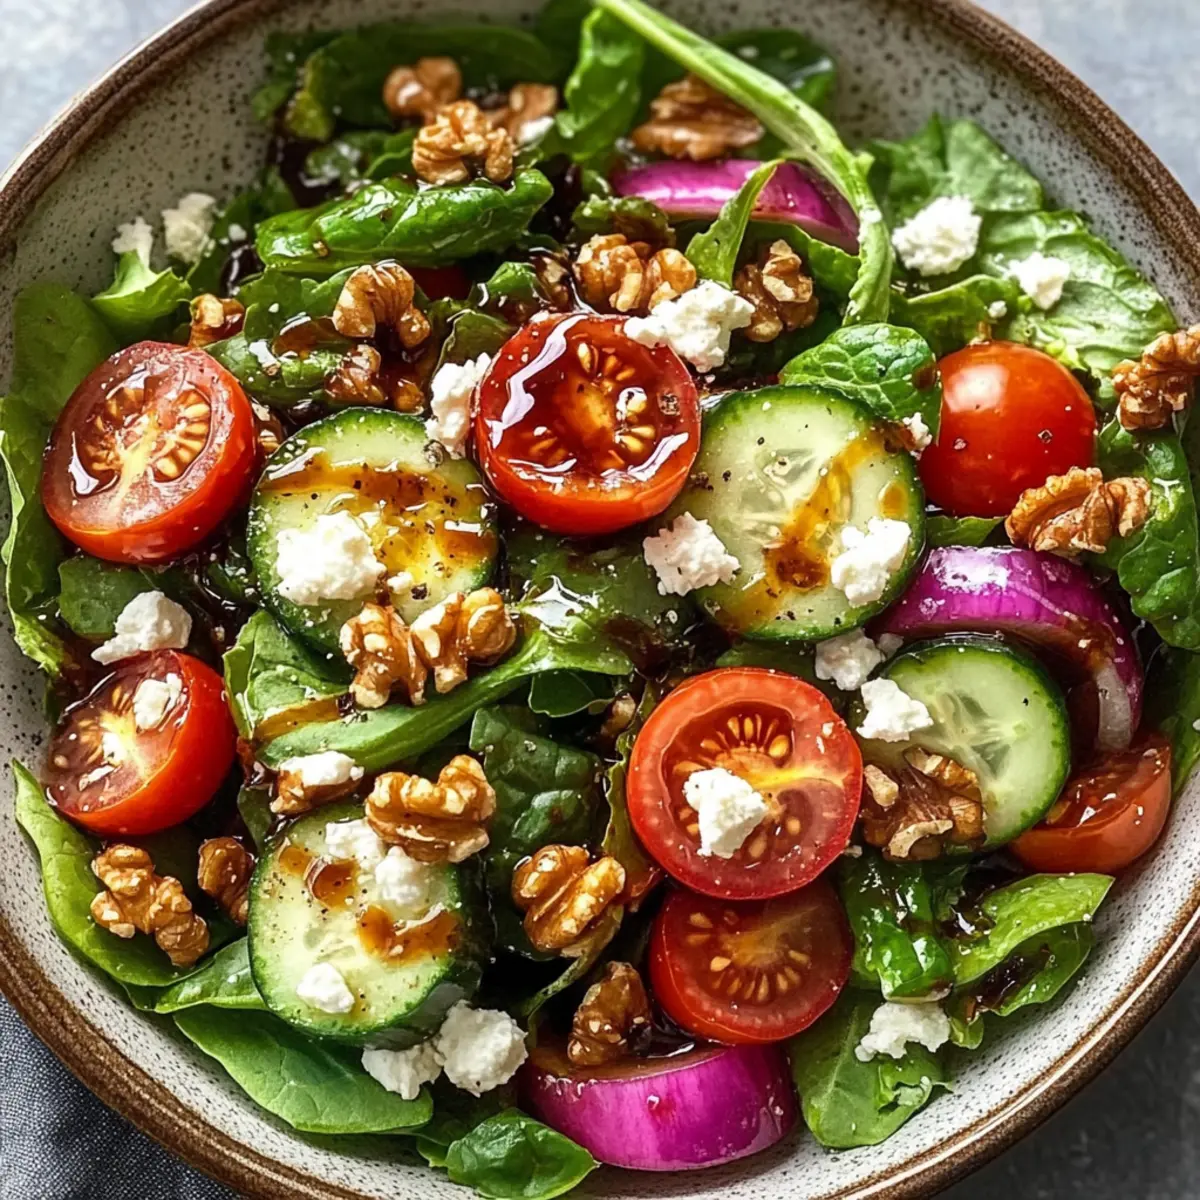
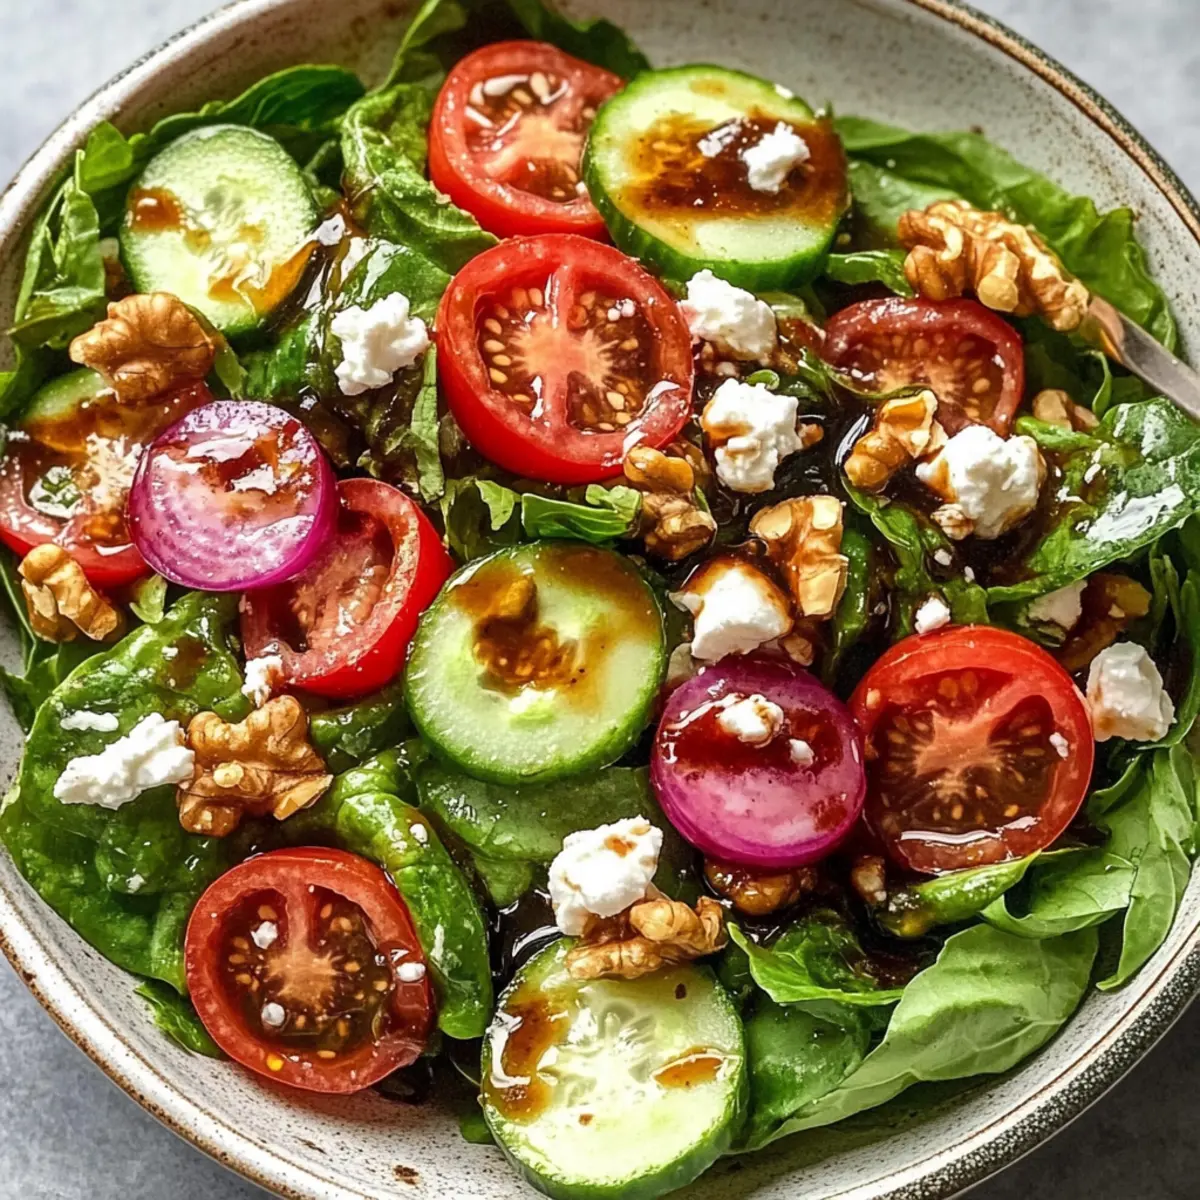
As I tossed together the vibrant colors of fresh greens and bright veggies, a cool breeze reminded me that spring is in full bloom. This Quick Spring Mix Salad with Balsamic Honey Dressing is the perfect embrace of the season—light, rejuvenating, and deeply satisfying. Whipping it up takes just 10 minutes, making it a lifesaver for those busy weeknights or sun-soaked picnic adventures. Not only is it a healthy option bursting with crunchy textures and tangy sweetness, but it’s also versatile enough to cater to various dietary needs, even offering a delightful vegan twist. Picture this: crispy lettuce, juicy cherry tomatoes, and creamy feta all drizzled with a luscious dressing that ties it together in an instant. Are you ready to bring a refreshing change to your dining table? Let’s dive into this bright dish!

Why Choose This Spring Mix Salad?

Fresh Ingredients: This salad bursts with vibrant flavors from fresh spring mix, juicy cherry tomatoes, and crisp cucumbers—perfect for a refreshing meal.

Quick Prep: In just 10 minutes, you’ll have a beautiful dish ready to impress your family or friends, making it ideal for busy weeknights.

Versatile Options: Easily customize it to fit vegan, gluten-free, or other dietary preferences by swapping out ingredients, like using maple syrup instead of honey.

Crowd-Pleasing Appeal: It's a delicious way to introduce more veggies to your table without sacrificing flavor or satisfaction! Pair this salad with grilled chicken or seafood for a wholesome meal.

With endless possibilities for personalization, this Spring Mix Salad with Balsamic Honey Dressing will have you excited to get creative in the kitchen!

Spring Mix Salad Ingredients

• Get ready to create a delightful dish with these fresh components that make the Spring Mix Salad with Balsamic Honey Dressing shine!

For the Salad Base

  • Spring mix salad greens – A fresh and crunchy base; any leafy green can substitute if needed.
  • Cherry tomatoes – Bursting with juiciness and color; small grape tomatoes make a great alternative.
  • Cucumber – Provides a refreshing crunch; prefer an English cucumber for fewer seeds.
  • Red onion – Adds sharp flavor; slice thinly for a milder taste, especially for kids.

For the Toppings

  • Feta cheese – Offers creamy, salty richness; swap with goat cheese for a milder touch or omit for a dairy-free option.
  • Walnuts/Pecans – Introduces a delicious crunch when toasted; toasting enhances their flavor immensely.

For the Dressing

  • Balsamic vinegar – Imparts a lovely acidity and depth; essential for dressing perfection.
  • Honey – Balances the dressing sweetness; use maple syrup for a fantastic vegan alternative.
  • Olive oil – Ensures a smooth dressing that adheres beautifully to the salad; extra-virgin provides the best flavor.
  • Salt and freshly ground black pepper – Essential for seasoning, adjust to taste for optimal flavor.

Step‑by‑Step Instructions for Spring Mix Salad with Balsamic Honey Dressing

Step 1: Prepare Salad Greens
Rinse the spring mix salad greens thoroughly under cold water and spin or pat them dry with a clean kitchen towel. This ensures that they are crisp and free of excess moisture. Once dried, place the fresh greens in a large salad bowl, creating a vibrant base for your Spring Mix Salad with Balsamic Honey Dressing.

Step 2: Add Fresh Ingredients
Next, halve the cherry tomatoes and slice the cucumber into thin rounds. For added flavor, thinly slice the red onion if desired. Layer these colorful ingredients over the spring mix in the bowl, allowing their juicy, refreshing textures to complement the greens beautifully.

Step 3: Top with Cheese and Nuts
Scatter crumbled feta cheese over the salad for a rich, creamy texture. Then, add a generous handful of toasted walnuts or pecans for that perfect crunch. If you haven’t toasted your nuts yet, you can wait until later, as they will provide an extra layer of flavor to your Spring Mix Salad with Balsamic Honey Dressing.

Step 4: Toast Nuts (Optional)
If you choose to toast the nuts, heat a dry skillet over medium heat. Add your walnuts or pecans and stir them for about 1-2 minutes until they are fragrant and lightly golden. Keep a close eye on them to prevent burning. Once toasted, remove from heat and let them cool before adding to the salad.

Step 5: Make the Dressing
In a small bowl or mason jar, combine balsamic vinegar, honey, and extra-virgin olive oil. Whisk or shake the mixture vigorously until it becomes glossy and slightly thickened. Season your dressing with salt and freshly ground black pepper to taste, balancing the flavors for your Spring Mix Salad with Balsamic Honey Dressing.

Step 6: Serve the Salad
Just before serving, drizzle the prepared balsamic honey dressing over the salad mixture. Gently toss all the ingredients together until they are well coated in the dressing. This final step will elevate your Spring Mix Salad with Balsamic Honey Dressing, bringing together all the fresh flavors for a delightful, fresh experience.

Expert Tips for Spring Mix Salad

Keep Greens Crisp: Dry your salad greens thoroughly; excess moisture can make them soggy and less enjoyable, ruining your Spring Mix Salad with Balsamic Honey Dressing.

Dress Wisely: To avoid wilted greens, toss the salad with dressing just before serving. This helps maintain freshness and texture.

Substitution Savvy: Don’t have feta? Opt for goat cheese or skip it entirely for a delicious dairy-free version while still enjoying the perfect balance of flavors.

Nut Toasting Perfection: Toasting nuts enhances their flavor wonderfully. Keep a close eye while toasting; they can turn from perfectly roasted to burnt in seconds!

Make Ahead Magic: Prepare salad components in advance, storing them separately in the fridge. This way, you can quickly assemble your Spring Mix Salad with Balsamic Honey Dressing when it's time to eat.

Make Ahead Options

This Quick Spring Mix Salad with Balsamic Honey Dressing is perfect for meal prep enthusiasts! You can wash and dry the spring mix salad greens, then store them in an airtight container in the refrigerator for up to 3 days. Slice your cucumbers and de-seed the cherry tomatoes to maintain their freshness, storing them separately. The dressing can be prepared up to 24 hours in advance; place it in a mason jar and keep it in the fridge—shake it before serving to reinvigorate its luscious texture. Just remember to keep the dressing separate until you're ready to serve to prevent any sogginess, ensuring your salad remains crisp and just as delicious as when freshly made!

How to Store and Freeze Spring Mix Salad

Fridge: Store salad components separately in airtight containers for up to 2 days to maintain freshness and prevent sogginess. Keep the dressing separate until just before serving.

Room Temperature: Do not leave the salad out for more than 2 hours to maintain quality and safety, especially on warm days.

Reheating: This salad is best enjoyed cold; however, if desired, warm toppings like roasted chickpeas can be preheated separately before adding to the salad.

Freezer: Freezing is not recommended for this Spring Mix Salad, as the texture of fresh greens will become soggy upon thawing.

What to Serve with Spring Mix Salad with Balsamic Honey Dressing

Elevate your dining experience with delightful side dishes that complement the vibrant flavors of your salad.

  • Grilled Chicken Breast: Juicy and seasoned, grilled chicken adds protein and heartiness, making it a satisfying meal pairing.
  • Roasted Salmon: The rich, buttery flavor of roasted salmon beautifully contrasts the tangy dressing, creating a balanced plate.
  • Quinoa Pilaf: Fluffy quinoa adds a nutty flavor and a dose of fiber, enhancing the healthful aspect of your dinner.
  • Garlic Breadsticks: Warm, crispy breadsticks offer a comforting crunch, perfect for scooping up leftover salad dressing.
  • Fruit Salad: A fresh fruit salad is a sweet, refreshing accompaniment that enhances the meal’s light feel and provides seasonal variety.
  • Classic Lemonade: Bright and refreshing, a glass of lemonade complements the sweet and tangy notes of the balsamic honey dressing.
  • Chocolate Mousse: For a sweet finish, light and airy chocolate mousse adds a decadent touch without overwhelming the palate.
  • Herbed Couscous: Fluffy couscous infused with fresh herbs brings a delightful texture and taste, enhancing the overall dining experience.

Spring Mix Salad with Balsamic Honey Dressing Variations

Feel free to get creative with this recipe and turn your Spring Mix Salad into a delightful personalized experience!

  • Vegan Option: Replace honey with maple syrup and omit feta to make this salad completely vegan. Enjoy all the freshness without compromising flavor!

  • Hearty Addition: Add sliced avocado or roasted chickpeas for added creaminess or protein, making the salad even more filling and satisfying.

  • Flavor Boost: Incorporate a variety of seasonal vegetables like bell peppers or radishes. Their vibrant colors and crisp textures provide an exciting twist.

  • Crunchy Twist: Swap walnuts or pecans for toasted sunflower seeds or pumpkin seeds. They’ll add a delightful crunch and are perfect for nut-free diets!

  • Zesty Kick: Give your dressing a zesty upgrade by adding a teaspoon of Dijon mustard. The spice will elevate the flavor profile beautifully.

  • Fruit Infusion: Toss in some sliced strawberries or apples for a sweet contrast that complements the balsamic dressing wonderfully.

  • Herbaceous Delight: Sprinkle fresh herbs like basil or parsley on top just before serving. Their aromatic profiles will breathe life into your salad.

  • Cheese Swap: If you're not a feta fan, try using crumbled goat cheese or a dairy-free cheese alternative for a creamier taste while keeping it aligned with your dietary needs.

For additional ideas, enjoy this salad alongside a flavorful Balsamic Steak Salad or a crunchy Tofu Caesar Salad for a varied meal experience!

Spring Mix Salad with Balsamic Honey Dressing Recipe FAQs

What should I consider when selecting spring mix salad greens?
Absolutely! Choose greens that are vibrant and crisp, avoiding any with dark spots or wilting leaves. Spring mix should be fresh and lightweight for the best texture. If you can’t find spring mix, feel free to substitute it with any leafy greens like arugula or baby kale!

How should I store leftover salad components?
Very! To keep your Spring Mix Salad with Balsamic Honey Dressing fresh, store the salad greens and chopped vegetables separately in airtight containers in the refrigerator. They will stay fresh for about 2 days. Keep the dressing in another container until just before serving to prevent the greens from wilting.

Can I freeze spring mix salad?
Unfortunately, freezing is not recommended for this salad. The fresh greens will become limp and soggy once thawed, losing their delightful crunch. Instead, try preparing the components in advance and storing them separately in the fridge for quick assembly.

What can I do if my salad dressing is too thick?
If your dressing is too thick, simply whisk in a teaspoon of water or extra olive oil until you achieve your desired consistency. Remember, the smoother the dressing, the better it will coat your salad! If it's too tangy, adding a pinch of sugar or a bit more honey can balance the flavors.

Is this salad suitable for everyone, including those with dietary allergies?
Yes! You can easily make this Spring Mix Salad with Balsamic Honey Dressing vegan by substituting honey with maple syrup and omitting the feta cheese. Additionally, always check that your nuts are processed in a nut-free facility if you're serving someone with nut allergies, and adjust ingredients accordingly to accommodate special dietary needs.

What are some tips for preventing my salad from getting soggy?
To keep your salad fresh and crisp, ensure that all leafy greens are dried thoroughly after washing. For added freshness, consider storing the dressing separately and mixing it in just before serving. This way, you’ll enjoy the crunch and texture that a perfect salad should have every single time!

Spring Mix Salad with Balsamic Honey Dressing

Fresh Spring Mix Salad with Balsamic Honey Dressing Magic

This Quick Spring Mix Salad with Balsamic Honey Dressing is a light and rejuvenating dish that celebrates the flavors of spring.
Print Recipe Pin Recipe
Prep Time 10 minutes mins
Total Time 10 minutes mins
Servings: 4 servings
Course: Salads
Cuisine: American
Calories: 180
Ingredients Equipment Method Nutrition Notes

Ingredients
  

Salad Base
  • 6 cups spring mix salad greens Any leafy green can substitute if needed.
  • 1 cup cherry tomatoes Halved.
  • 1 medium cucumber Sliced into thin rounds.
  • 1/4 medium red onion Thinly sliced.
Toppings
  • 1 cup feta cheese Crumble over the salad.
  • 1/2 cup toasted walnuts or pecans Toasting enhances flavor.
Dressing
  • 1/4 cup balsamic vinegar
  • 2 tablespoons honey Use maple syrup for a vegan option.
  • 1/2 cup extra-virgin olive oil
  • 1 teaspoon salt Adjust to taste.
  • 1/2 teaspoon freshly ground black pepper Adjust to taste.

Equipment

  • Salad Bowl
  • Small bowl or mason jar
  • Skillet

Method
 

Preparation Steps
  1. Rinse the spring mix salad greens thoroughly under cold water and spin or pat them dry.
  2. Place the fresh greens in a large salad bowl.
  3. Halve the cherry tomatoes and slice the cucumber into thin rounds. Add sliced red onion if desired.
  4. Scatter crumbled feta cheese over the salad and add toasted walnuts or pecans.
  5. Toast nuts in a dry skillet over medium heat for 1-2 minutes until fragrant.
  6. In a small bowl or mason jar, whisk together the balsamic vinegar, honey, and olive oil. Season with salt and pepper.
  7. Drizzle the dressing over the salad and toss gently before serving.

Nutrition

Serving: 1servingCalories: 180kcalCarbohydrates: 13gProtein: 3gFat: 15gSaturated Fat: 3gPolyunsaturated Fat: 5gMonounsaturated Fat: 7gCholesterol: 10mgSodium: 250mgPotassium: 300mgFiber: 3gSugar: 5gVitamin A: 25IUVitamin C: 15mgCalcium: 100mgIron: 1mg

Notes

Dry salad greens thoroughly to prevent sogginess. Dress salad just before serving for best results.

Tried this recipe?

Let us know how it was!

Crisp Shaved Fennel Salad & Clementine Vinaigrette Delight

April 1, 2026 by Grace Snow Leave a Comment

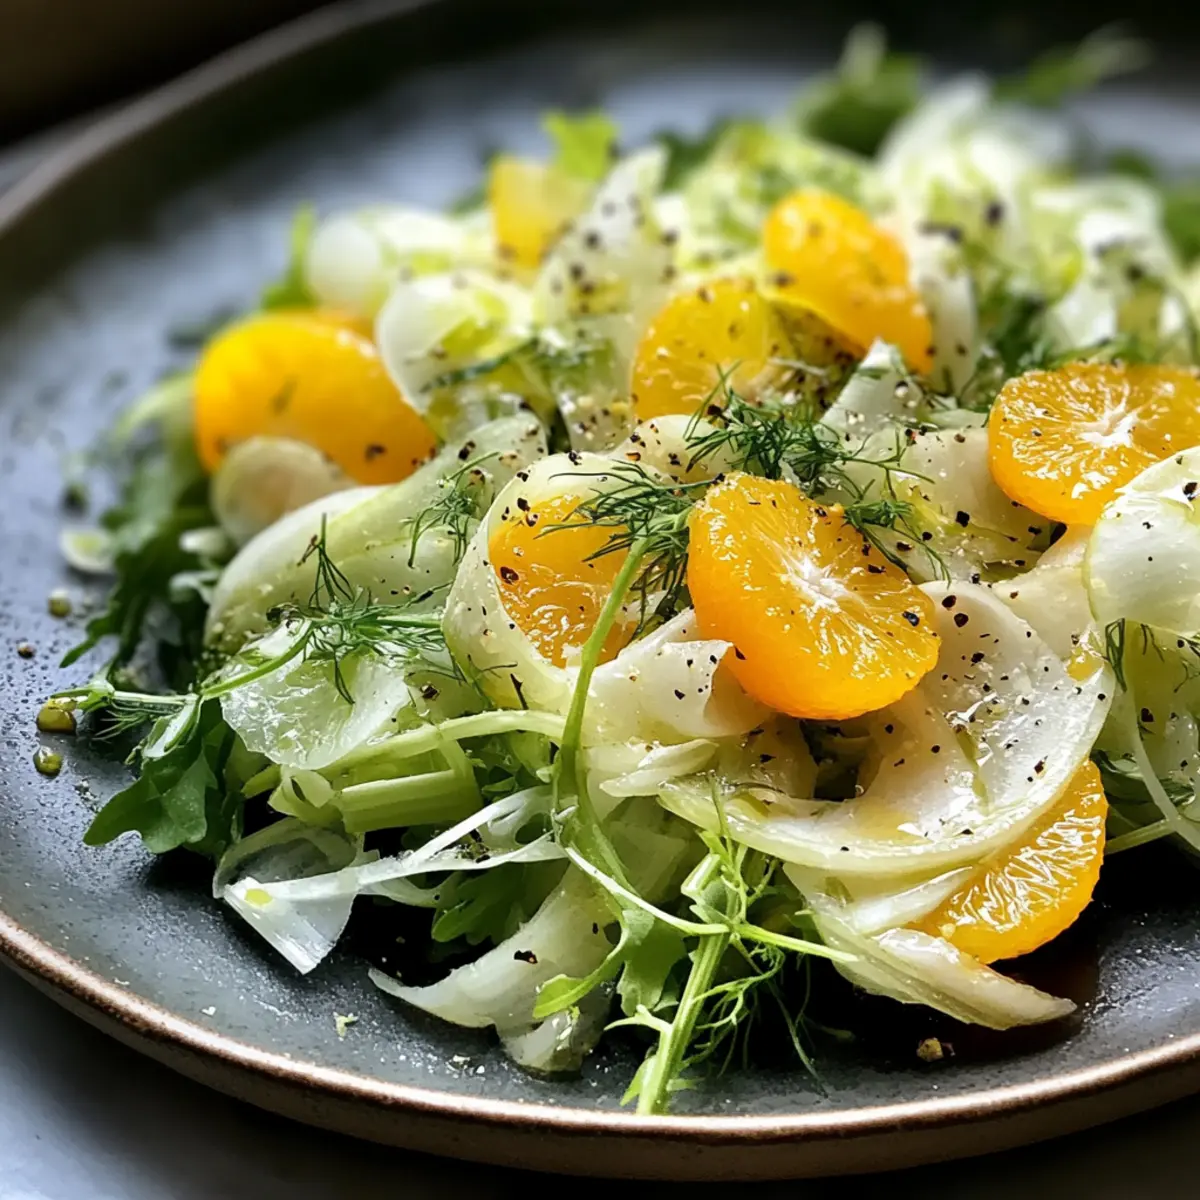
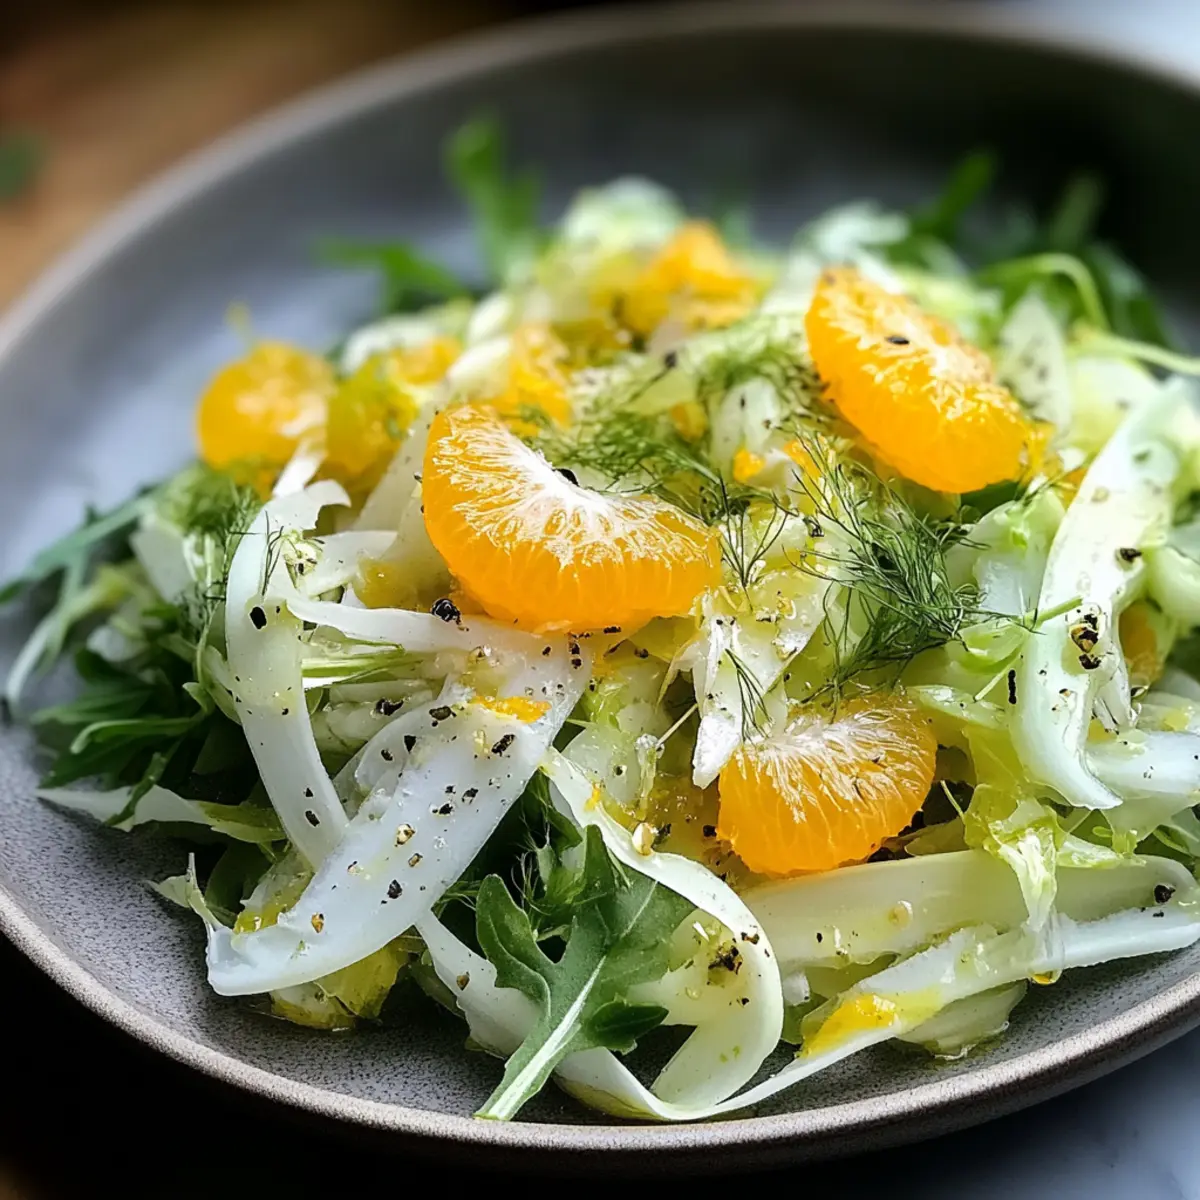
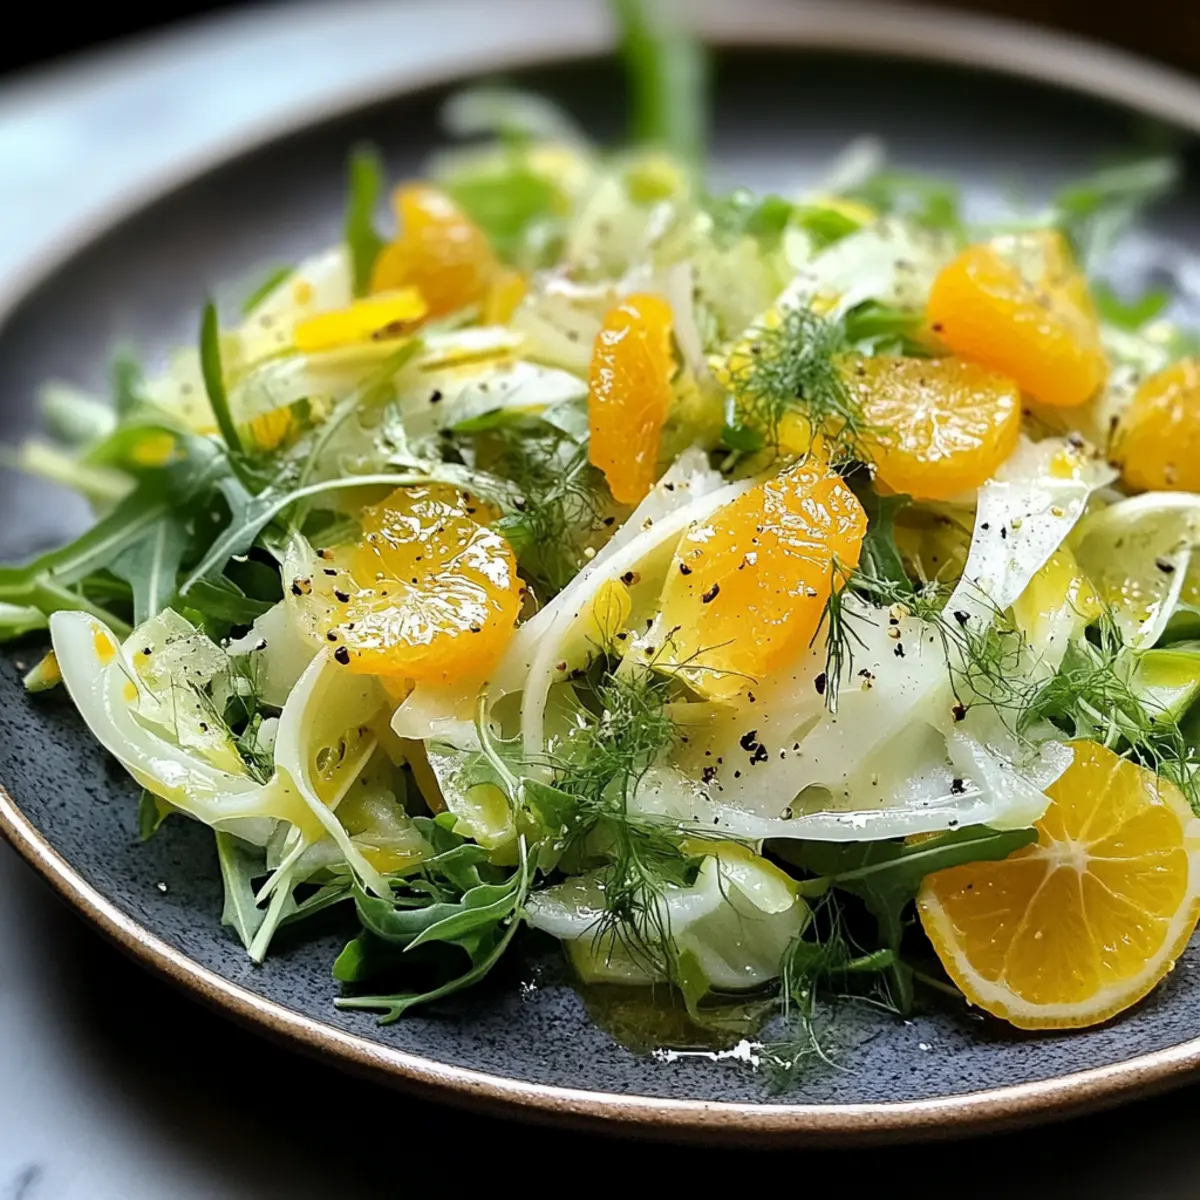
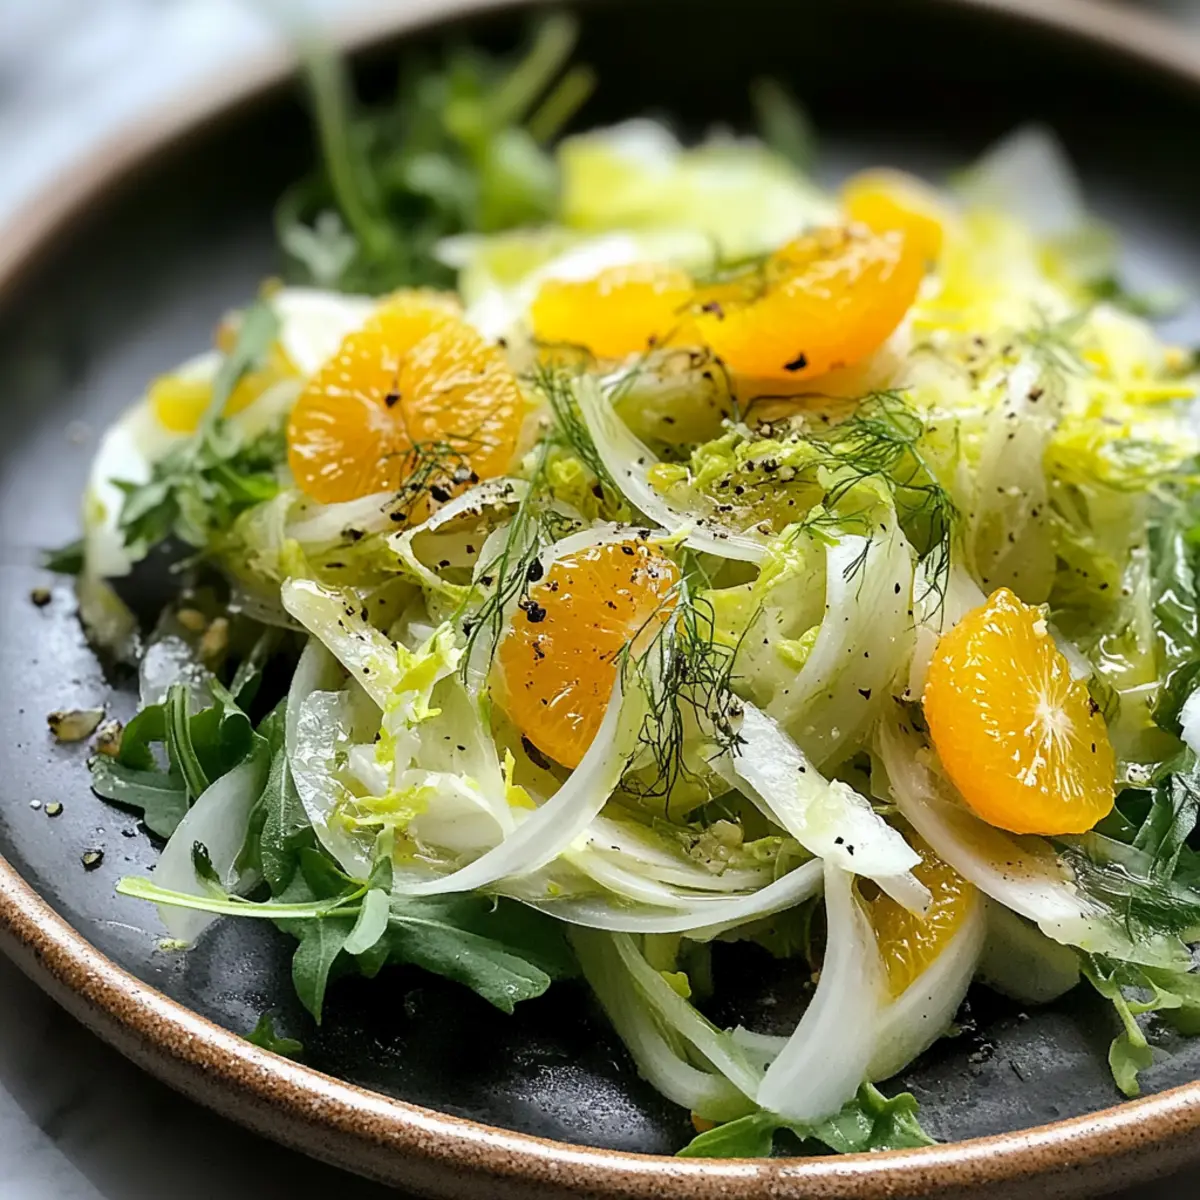
As winter settles in, those vibrant colors and fresh flavors can feel like hidden treasures waiting to be unveiled. This is exactly what you'll find in my Shaved Fennel Salad with Clementine Vinaigrette. Ready in just 15 minutes, this quick and easy, vegan salad not only refreshes your palate after hearty meals but also offers digestive support, making it an ideal companion for any dinner table. The crispness of the finely shaved fennel merges beautifully with the sweetness of juicy clementines, creating a delightful symphony of taste and texture. Trust me—each bite feels like a bright kiss of winter sunshine. Curious about how to whip up this colorful dish? Let’s dive in!

Why is this salad a must-try?

Vibrant Freshness: This Shaved Fennel Salad is a burst of color and flavor, perfectly brightening up your winter meals.
Quick & Easy: With just 15 minutes needed, you can whip up a delightful dish that’s both satisfying and nutritious.
Digestive Boost: Fennel’s unique crunch promotes digestion, making this salad a great choice post-holiday feasts.
Versatile Pairings: It pairs wonderfully with grilled chicken or seafood, adding a refreshing contrast to heartier dishes.
Vegan-Friendly: Enjoy this salad guilt-free as a light option that's entirely plant-based and gluten-free, satisfying everyone at your table.

Shaved Fennel Salad Ingredients

• Discover how to create this delicious Shaved Fennel Salad!

For the Salad

  • Arugula – adds a peppery leafy base that enhances flavor and depth.
  • Fennel – provides unique crunch and digestive benefits; slice thinly for the best texture.
  • Clementines – sweet and juicy fruits that add brightness; substitute with apples or pears if citrus is a concern.

For the Vinaigrette

  • Olive Oil – creates a rich base for the dressing; extra virgin oil is recommended for the best flavor.
  • Lemon Juice – adds acidity to balance flavors; freshly squeezed is preferred for optimal freshness.

Step‑by‑Step Instructions for Shaved Fennel Salad & Clementine Vinaigrette

Step 1: Prep Ingredients
Begin by finely shaving the fennel using a sharp knife or a mandoline slicer, aiming for thin, delicate pieces that display a vibrant white and green hue. Rinse the arugula thoroughly under cold running water, then gently pat it dry using a kitchen towel. Next, segment the clementines by removing the peel and pith, revealing the luscious, tangy flesh, and set each component aside for an engaging assembly later.

Step 2: Make Vinaigrette
In a small mixing bowl, combine a generous amount of extra virgin olive oil and freshly squeezed lemon juice. Whisk these two together vigorously for about 30 seconds until the mixture is emulsified and slightly thickened, resembling a glossy, smooth dressing. As you blend, the fragrant citrus aroma should energize your workspace, setting the tone for the delightful flavors that await in your Shaved Fennel Salad.

Step 3: Combine Salad
In a large mixing bowl, introduce the vibrant arugula, the finely shaved fennel, and the juicy clementine segments. Gently drizzle your freshly made vinaigrette over the salad components. Using two large spoons, carefully toss everything together, ensuring each piece is evenly coated with the dressing. Aim for a blend of colors and textures; the bright greens and oranges should dance together beautifully, enticing both the eyes and the palate.

Step 4: Serve
Transfer the tossed Shaved Fennel Salad to a serving platter, letting its colorful display shine. For an extra layer of flavor and crunch, consider garnishing with optional toppings like crumbled cheese, sliced avocado, or toasted nuts. Enjoy the salad fresh to savor its crispness and vibrant flavors, making it an especially refreshing side dish that captures the essence of winter sunshine in every bite.

Shaved Fennel Salad Variations

Feel free to get creative with this Shaved Fennel Salad and make it your own!

  • Kale Swap: Substitute arugula with kale for a heartier texture. Massage the kale leaves with a little olive oil to soften them before combining.

  • Nutty Crunch: Add toasted almonds or walnuts for extra crunch. The nutty flavor complements the sweetness of clementines beautifully.

  • Grain Boost: Introduce cooked quinoa or farro to transform this salad into a fulfilling main dish. It adds a wonderful chewy texture and enhances satiety.

  • Herb Infusion: Mix in fresh herbs like dill or mint to elevate the aroma and flavor profile. Their bright notes will enhance the overall experience.

  • Zesty Kick: Incorporate sliced jalapeños for a spicy kick. Adjust the amount according to your heat tolerance to find the perfect balance.

  • Creamy Element: Add crumbled feta or goat cheese for a creamy contrast. It pairs well with the crunch and sweetness, creating a delicious flavor profile.

  • Fruit Variants: Substitute clementines with apples or pears if preferred. Each brings a unique taste while still boosting the salad's crunch.

If you're inspired by the freshness of this salad, you might also enjoy pairing it with a rich dish like Balsamic Steak Salad or a lighter option such as Avocado Egg Salad. Happy experimenting!

What to Serve with Shaved Fennel Salad with Clementine Vinaigrette

Indulging in a vibrant mix of flavors, this salad invites delightful accompaniments for a memorable meal experience.

  • Creamy Avocado Toast: The buttery smoothness of avocado toast pairs beautifully, adding richness that contrasts the salad’s crispness.
  • Grilled Chicken: Juicy grilled chicken offers a hearty protein option, balancing the refreshing notes of the salad perfectly.
  • Roasted Sweet Potatoes: Sweet potatoes’ natural sweetness complements the salad’s citrus while providing a satisfying, hearty texture.
  • Light Quinoa Bowl: Fluffy quinoa enhances the salad while adding protein and a pleasant nutty flavor, perfect for a wholesome meal.
  • Toasted Almonds: Sprinkling toasted almonds adds a delightful crunch and nutty flavor that heightens the overall eating experience.
  • Crisp White Wine: A chilled, light white wine like Sauvignon Blanc brings out the zestiness of the clementines, elevating your dining experience.
  • Fresh Herbs: Consider adding fresh dill or mint on the side; their aromatic qualities will harmonize beautifully with this winter salad.
  • Peppery Arugula Pesto Pasta: This unique pasta dish complements the meal, offering a glimpse of fresh flavor and warmth that matches the salad's brightness.
  • Chilled Coconut Sorbet: For a refreshing dessert, this light sorbet continues the fruity theme while providing a cooling finish after your meal.

Expert Tips for Shaved Fennel Salad

  • Fresh Fennel Selection: Always choose firm, blemish-free fennel bulbs for the best crunch and flavor. Freshness is key in your Shaved Fennel Salad.
  • Optimal Lemon Juice: Use freshly squeezed lemon juice to ensure your vinaigrette has the maximum bright flavor and zest, enhancing the overall taste of your salad.
  • Layering Flavors: For best results, add components like crumbled cheese or nuts just before serving to maintain their texture and flavor in the Shaved Fennel Salad.
  • Storing Tips: Store salad ingredients separately in the fridge for up to 2 days to keep them fresh. Dress only when ready to serve to avoid sogginess.
  • Fennel Soaking: If fennel's flavor is too strong for your liking, soak thinly sliced fennel in cold water for 15-20 minutes to mellow its taste before combining in the salad.

How to Store and Freeze Shaved Fennel Salad

Fridge: Store salad components separately in airtight containers for up to 2 days to maintain freshness and prevent sogginess.

Pre-Made Vinaigrette: Keep the clementine vinaigrette in an airtight container in the fridge for up to 1 week. Shake well before using.

Freezer: Avoid freezing the whole salad as it can alter the texture of the vegetables. Instead, freeze leftover clementine segments for use in smoothies or other dishes.

Reheating: This salad is best enjoyed fresh. If you've prepared the ingredients in advance, simply assemble right before serving for optimal taste.

Make Ahead Options

These Shaved Fennel Salad with Clementine Vinaigrette components are perfect for busy home cooks looking to save time during meal prep! You can slice the fennel and segment the clementines up to 2 days in advance, storing them separately in airtight containers in the refrigerator to maintain their freshness and crispness. The vinaigrette can also be prepared ahead of time and kept for up to 1 week in the fridge. When you're ready to serve, simply toss the prepped ingredients together with the vinaigrette for a delicious and quick salad that is just as vibrant and delightful as when freshly made. Enjoy the ease of meal prep without sacrificing quality!

Shaved Fennel Salad with Clementine Vinaigrette Recipe FAQs

How do I select ripe fennel for the salad?
Absolutely! When choosing fennel, look for bulbs that are firm and heavy with tightly packed fronds. Avoid any with dark spots or blemishes, as these can indicate spoilage. Fresh fennel should have a crisp texture and a mild anise aroma, which ensures the best flavor for your Shaved Fennel Salad.

What’s the best way to store leftovers?
Very! To keep your salad fresh, store the components separately in airtight containers in the fridge for up to 2 days. This way, the arugula, shaved fennel, and clementine segments remain crisp and vibrant. Remember, only dress the salad just before serving to avoid wilted greens.

Can I freeze any part of the salad for later?
Yes, but with a twist! It’s best not to freeze the entire salad as the texture will suffer, especially with fennel and arugula. Instead, you can freeze leftover clementine segments. Simply place them in a single layer on a baking sheet to freeze before transferring them to a sealed bag. They can be used later in smoothies or as a sweet addition to other dishes!

What if the fennel flavor is too strong for my taste?
No worries at all! If you find the fennel flavor overwhelming, you can easily mellow it out. Slice the fennel thinly, then soak the slices in cold water for 15-20 minutes. This helps draw out some of the strong flavors. After soaking, drain and pat dry before adding to your salad, allowing for a more balanced taste.

Are there any dietary considerations I should keep in mind?
Indeed! This Shaved Fennel Salad is not only vegan and gluten-free, making it suitable for many dietary preferences, but if anyone at the table has citrus allergies, clementines can be substituted with apple or pear slices. This way, everyone can enjoy a refreshing salad without any worries!

Shaved Fennel Salad & Clementine Vinaigrette

Crisp Shaved Fennel Salad & Clementine Vinaigrette Delight

Enjoy a colorful Shaved Fennel Salad & Clementine Vinaigrette that's refreshing and vegan-friendly.
Print Recipe Pin Recipe
Prep Time 15 minutes mins
Total Time 15 minutes mins
Servings: 4 servings
Course: Salads
Cuisine: Vegan
Calories: 150
Ingredients Equipment Method Nutrition Notes

Ingredients
  

For the Salad
  • 4 cups Arugula Adds a peppery leafy base.
  • 1 bulb Fennel Slice thinly for best texture.
  • 2 cups Clementines Sweet and juicy; may substitute with apples or pears.
For the Vinaigrette
  • 1/4 cup Olive Oil Extra virgin is recommended.
  • 2 tablespoons Lemon Juice Freshly squeezed is preferred.

Equipment

  • Sharp Knife
  • Mandoline Slicer
  • Mixing Bowl
  • Kitchen Towel

Method
 

Step-by-Step Instructions
  1. Begin by finely shaving the fennel using a sharp knife or a mandoline slicer. Rinse arugula under cold water and pat dry. Segment clementines by removing peel and pith.
  2. In a mixing bowl, combine olive oil and lemon juice. Whisk until emulsified and slightly thickened.
  3. In a large bowl, combine arugula, fennel, and clementine segments. Drizzle with vinaigrette and toss gently.
  4. Transfer to a serving platter and garnish if desired. Enjoy fresh!

Nutrition

Serving: 1servingCalories: 150kcalCarbohydrates: 12gProtein: 2gFat: 10gSaturated Fat: 1gPolyunsaturated Fat: 2gMonounsaturated Fat: 7gSodium: 5mgPotassium: 200mgFiber: 3gSugar: 6gVitamin A: 500IUVitamin C: 30mgCalcium: 50mgIron: 1mg

Notes

Store salad components separately in the fridge for up to 2 days for freshness. Dress only when ready to serve.

Tried this recipe?

Let us know how it was!

Zesty Spring Roll Salad with Peanut Sauce in 30 Minutes

April 1, 2026 by Grace Snow Leave a Comment

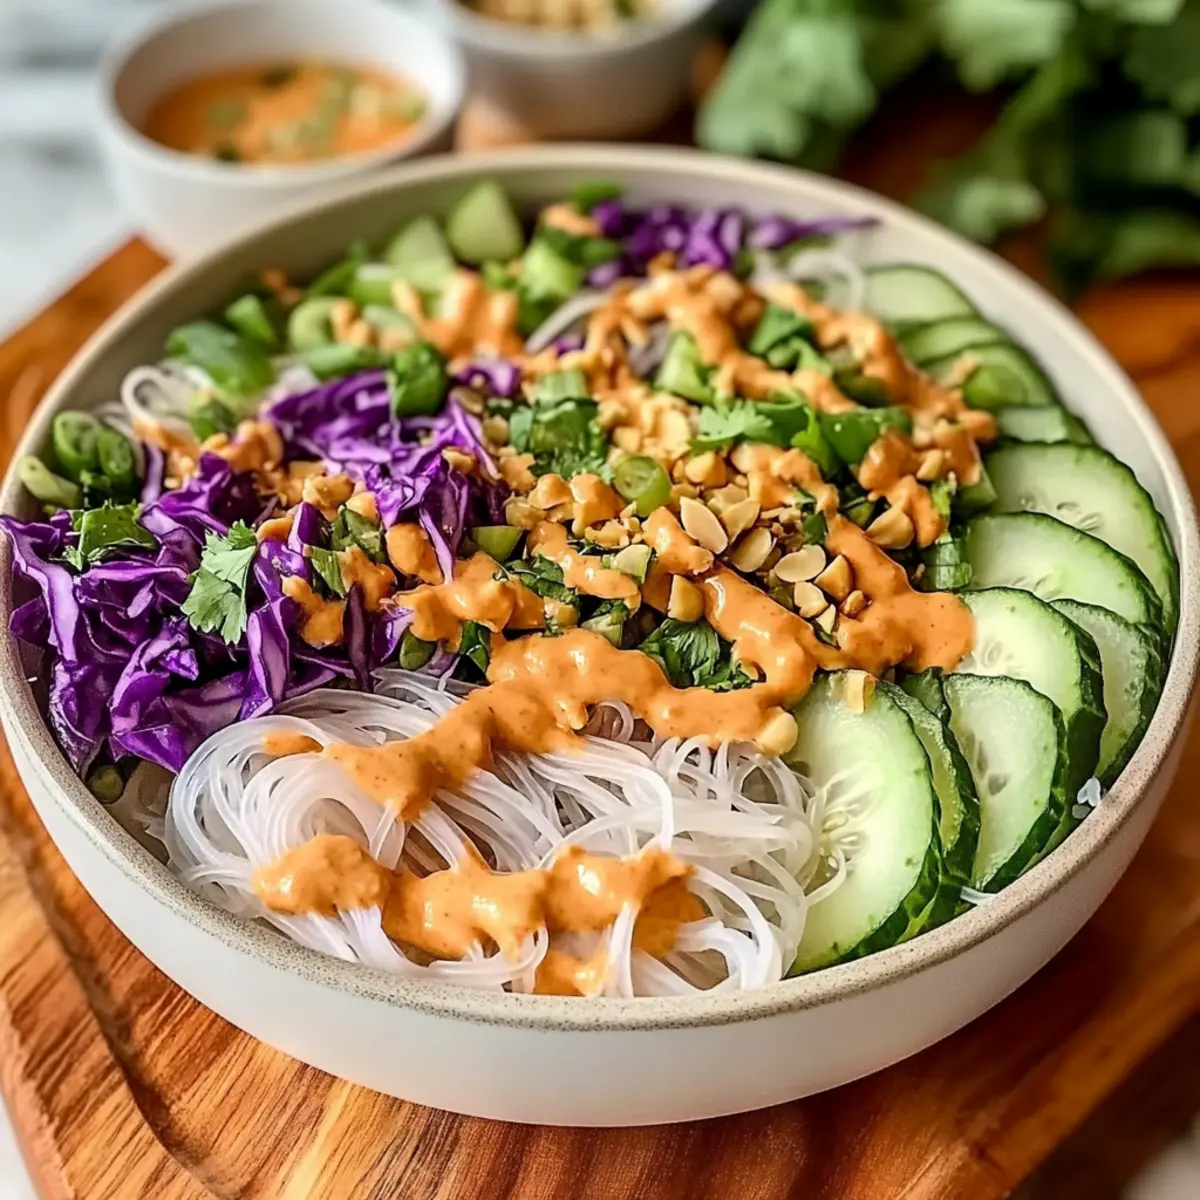
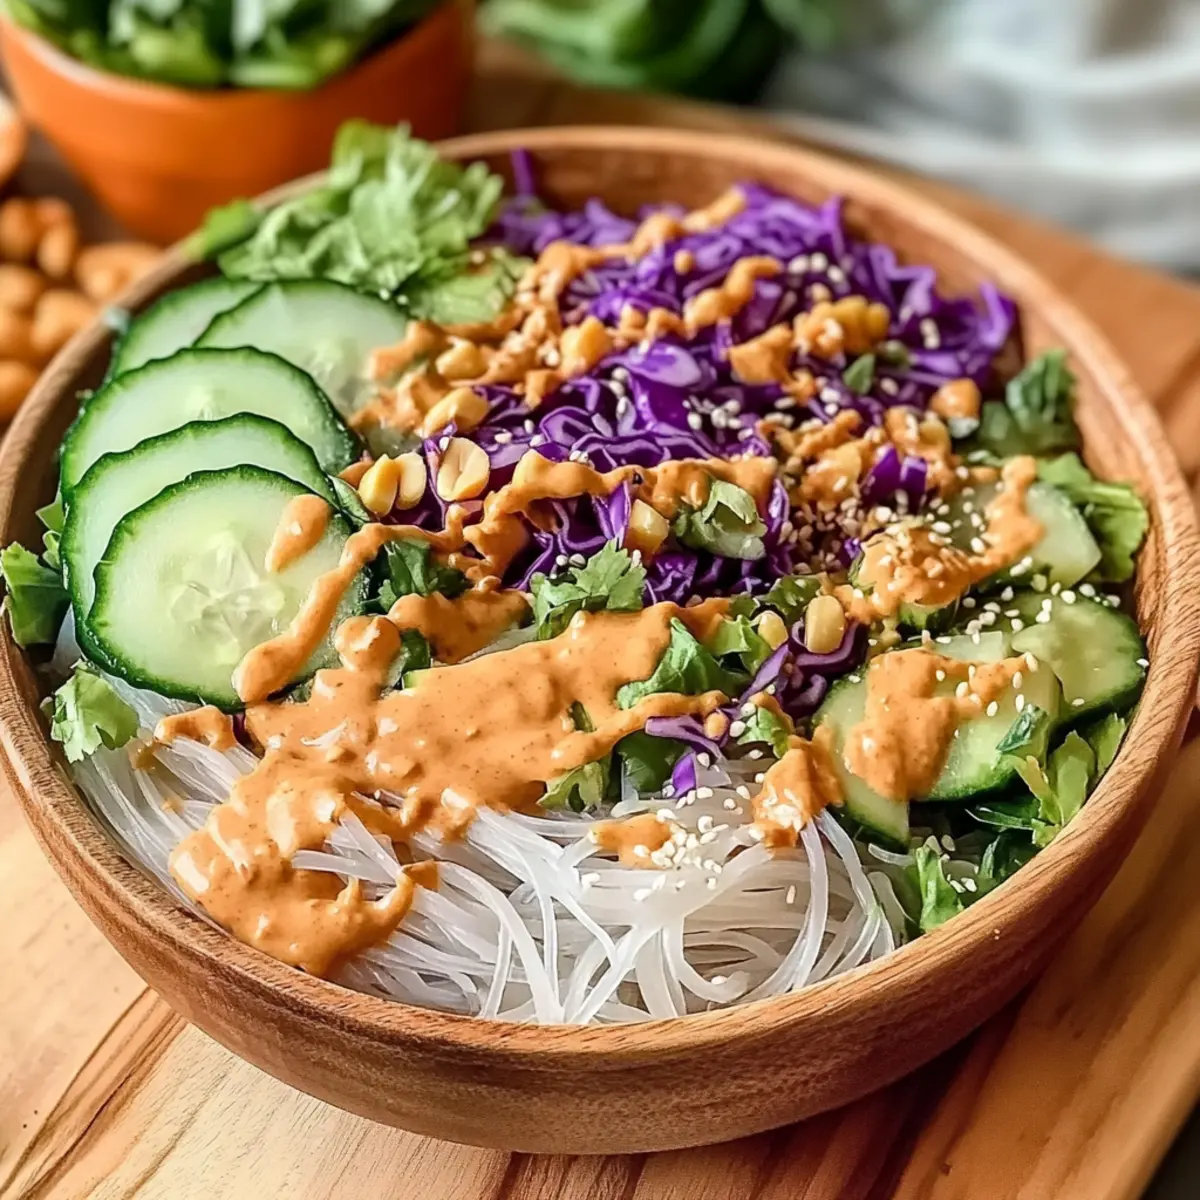
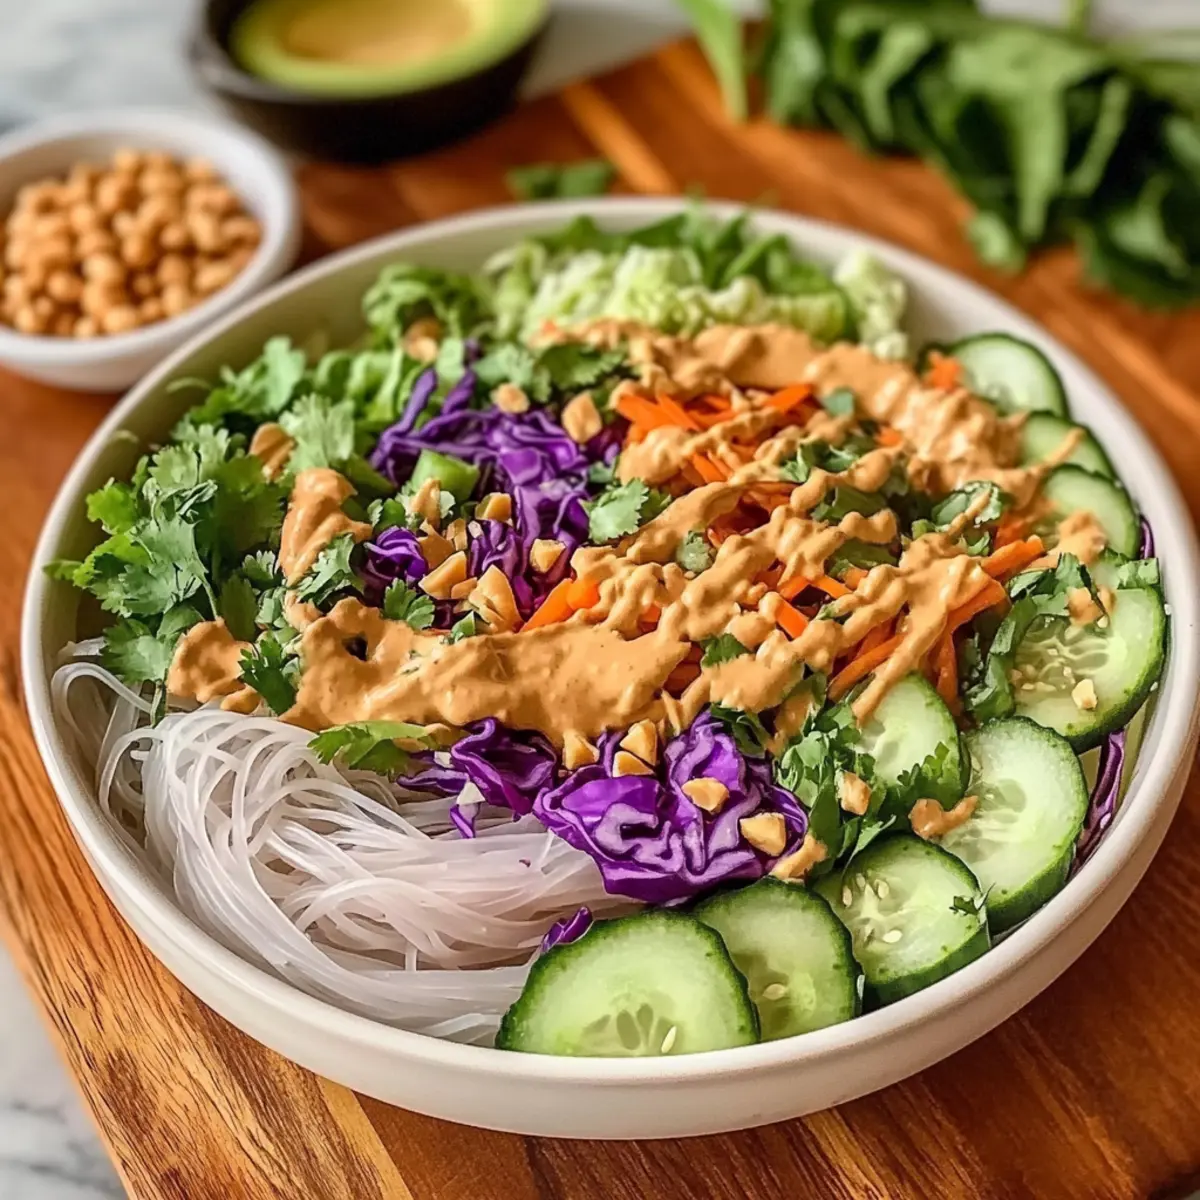
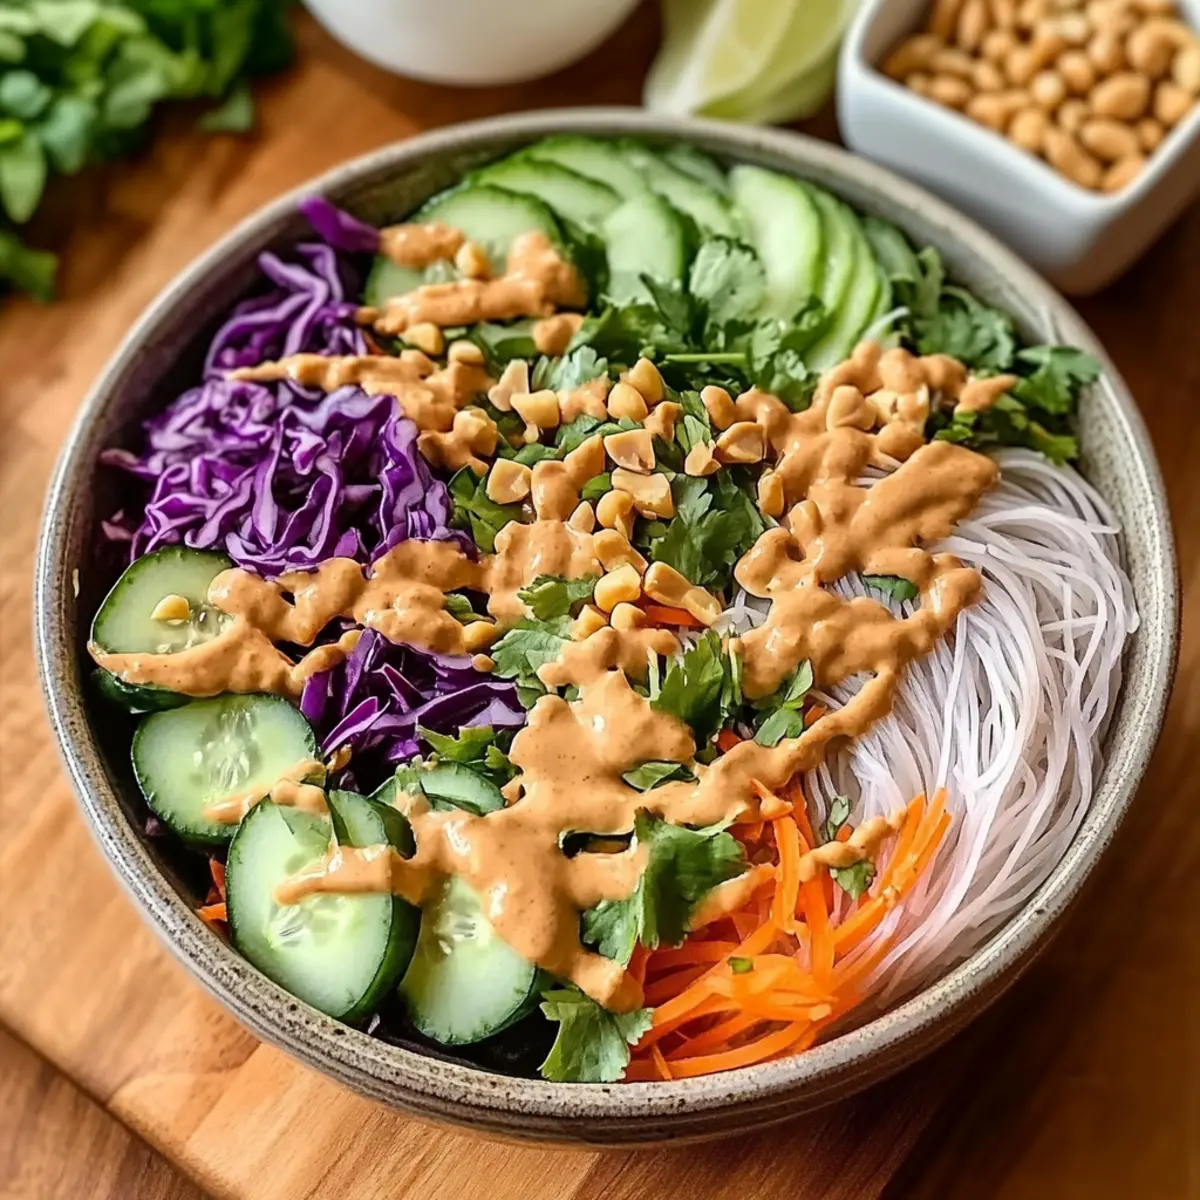
As I was chopping fresh vegetables for dinner, the vibrant colors reminded me of a beautiful spring day, with the sun shining and flowers blooming all around. That's when this Quick and Refreshing Spring Roll Salad with Peanut Sauce came to life in my kitchen. In just 30 minutes, you can whip up this delightful, vegetarian-friendly dish that’s not only perfect for a quick lunch but also customizable to suit your taste! Picture tender rice noodles mingling with crispy cucumbers, colorful bell peppers, and fragrant herbs, all drizzled with a creamy peanut sauce that ties it all together. It’s a light yet satisfying option that will make you forget all about takeout. Ready to dive into a deliciously fresh meal? Let’s get started!

Why is this salad a must-try?

Wholesome Ingredients: Each bite showcases fresh vegetables and tender rice noodles, packed with vitamins and healthy flavors.
Quick Prep Time: Ready in just 30 minutes, this salad is perfect for those busy days when you crave something nutritious.
Customizable Delight: Whether you prefer shrimp, chicken, or tofu, you can easily adjust the proteins to your taste, making it versatile for everyone.
Irresistible Peanut Sauce: The creamy peanut sauce adds a rich, tangy flavor that elevates the entire dish, leaving your taste buds dancing.
Vibrant Presentation: With its colorful medley of greens and reds, this salad is a feast for the eyes, sure to impress at any gathering. Pair it with some delicious Jello Salad Cottage for a delightful meal!

Spring Roll Salad with Peanut Sauce Ingredients

Here’s everything you’ll need to create this vibrant dish!

For the Peanut Sauce

  • Peanut Butter – Adds creaminess and flavor; use creamy peanut butter for the best texture.
  • Hoisin Sauce – Provides sweetness and umami; can substitute with brown sugar if unavailable.
  • Lime Juice – Offers acidity and brightness; freshly squeezed is preferred for better flavor.
  • Soy Sauce – Enhances the overall savory profile.
  • Water – Adjusts dressing consistency to desired thickness; add more if needed.

For the Salad

  • Thin Rice Noodles – The base of the salad; can use rice sticks or Pad Thai noodles.
  • Cucumber – Adds crunch and freshness; thinly sliced for texture.
  • Purple Cabbage – Provides color and crunch; can use coleslaw mix as a substitute.
  • Carrot – Adds sweetness and vibrancy; grated or thinly sliced.
  • Red Bell Pepper – Contributes sweetness and crunch; thinly sliced.
  • Cilantro – Offers a fresh, herbaceous flavor.
  • Mint – Provides a refreshing touch to the salad.
  • Peanuts – Optional garnish for added crunch.

This Spring Roll Salad with Peanut Sauce is a delightful way to enjoy fresh ingredients while keeping meal prep light and exciting! Enjoy!

Step‑by‑Step Instructions for Spring Roll Salad with Peanut Sauce

Step 1: Cook Noodles
Begin by preparing the thin rice noodles according to package instructions, usually boiling for 4-6 minutes. Once cooked, drain the noodles and immediately rinse them under cold water to stop the cooking process and prevent stickiness. Set the cooled noodles aside in a large mixing bowl, ready to be combined with colorful veggies for your Spring Roll Salad.

Step 2: Make Dressing
In a medium bowl, whisk together creamy peanut butter, hoisin sauce, freshly squeezed lime juice, soy sauce, and a little water to reach your desired dressing consistency. This should take about 2-3 minutes of thorough mixing until you achieve a smooth, velvety texture. Feel free to adjust the water gradually if you'd like a thinner sauce to enhance the flavor of the salad.

Step 3: Combine Salad
In your large bowl with the cooled rice noodles, add the thinly sliced cucumber, purple cabbage, grated carrot, and red bell pepper. With your hands or a pair of utensils, gently toss these vibrant ingredients together, ensuring the noodles and fresh vegetables mingle beautifully. This blend forms the base of your fresh and crunchy Spring Roll Salad.

Step 4: Toss Together
Pour the creamy peanut dressing over the colorful salad mixture and toss vigorously until all the ingredients are well-coated. This should take about 1-2 minutes, allowing the dressing to envelop the noodles and veggies evenly. The end result should look stunning and colorful, ready to impress at any table.

Step 5: Garnish and Serve
Finish off your Spring Roll Salad with a sprinkle of chopped peanuts for added crunch and texture. Serve immediately in bowls or on plates to showcase the vibrant colors. Enjoy this delightful dish as a refreshing light lunch or a casual dinner, celebrating its simplicity and bright flavors!

Expert Tips for Spring Roll Salad

  • Noodle Cooling: Rinse those cooked noodles well under cold water to prevent them from sticking together, ensuring a light texture in your Spring Roll Salad.
  • Sauce Thickness: Adjust your peanut sauce's thickness gradually by adding small amounts of water until it reaches your desired creaminess for the perfect coating.
  • Fresh Ingredients: Use the freshest vegetables and herbs possible to enhance the flavors and textures, making your salad vibrant and satisfying.
  • Storage Advice: Store leftovers in an airtight container for up to two days, keeping the dressing separate to maintain freshness and texture.
  • Customize Wisely: Don't hesitate to experiment with proteins or herbs; this flexibility makes your Spring Roll Salad truly your own, catering to every palate!

How to Store and Freeze Spring Roll Salad

Fridge: Store leftover Spring Roll Salad in an airtight container for up to 2 days. Keep the peanut dressing separate to maintain freshness and avoid sogginess.

Freezer: It's not recommended to freeze the assembled salad, as the texture of the vegetables will change. However, you can freeze the peanut sauce for up to 3 months. Just thaw it in the fridge before use.

Prepped Ingredients: You can prepare the noodles and sliced vegetables up to 3 days in advance, storing them in airtight containers in the fridge. This allows for a quick assembly at mealtime.

Reheating: If you've added protein like shrimp or chicken, reheat on low in a pan, adding a splash of water to prevent drying out. Serve warm over the salad before enjoying!

Make Ahead Options

This Spring Roll Salad with Peanut Sauce is an excellent choice for meal prep enthusiasts! You can prepare the thin rice noodles and sliced vegetables up to 3 days in advance. Store them in airtight containers in the refrigerator to maintain freshness and prevent browning. The peanut sauce can be made ahead as well and stored separately for up to 5 days; give it a good stir before use to restore its creamy texture. When you're ready to enjoy your salad, simply combine the prepped ingredients, toss with the dressing, and garnish with peanuts. This way, you’ll have a vibrant, delicious meal ready in no time!

What to Serve with Spring Roll Salad with Peanut Sauce

Nothing enhances the vibrant flavors of a Spring Roll Salad like the perfect side dishes and drinks that complement this delightful dish.

  • Crispy Egg Rolls: These warm, crunchy delights pair beautifully with the fresh salad, adding a satisfying texture to your meal. Their savory fillings harmonize with the salad's bright flavors.

  • Grilled Chicken Skewers: Marinated and charred, these skewers bring a smoky richness that rounds out the dish perfectly. Their juicy texture contrasts deliciously with the crisp vegetables of the salad.

  • Chilled Sake: This smooth, slightly sweet rice wine is the quintessential drink to elevate your dining experience. Its refreshing qualities cleanse the palate between bites of the creamy salad.

  • Mango Sticky Rice: For a sweet finish, this tropical dessert's sweetness and creamy coconut complement the tangy peanut sauce. It’s a delightful way to end your meal on a light note, balancing flavors beautifully.

  • Spicy Thai Soup: A light broth-based soup infused with spices adds a warm kick, enhancing the meal's overall flavor profile and creating a delightful contrast with the cool salad.

  • Fresh Fruit Platter: Offer a selection of seasonal fruits like pineapple or watermelon to cleanse the palate. Their natural sweetness adds a refreshing touch that pairs perfectly with the salad's crunchiness.

Spring Roll Salad with Peanut Sauce Variations

Get ready to personalize your Spring Roll Salad with exciting twists that elevate its flavor and fun!

  • Protein Boost: Add cooked shrimp or grilled chicken for a hearty touch that enhances nutritional value. For a plant-based option, try crispy tofu or chickpeas.

  • Vegetable Swap: Substitute purple cabbage with green cabbage or bok choy for a crunchy texture and a slightly different flavor profile. Feel free to mix and match according to what you have on hand!

  • Heat It Up: For those who love a kick, stir in some sriracha or sprinkle with chili flakes in the dressing. This will add a thrilling heat that perfectly contrasts the creamy peanut sauce.

  • Fruity Twist: Toss in grapefruit or mandarin orange segments to your salad for a burst of sweetness and a citrusy zing. It’s a refreshing surprise that pairs beautifully with the nuts and veggies.

  • Herbal Adventure: Try swapping out cilantro for Thai basil or scallions for a different herbaceous note. The unique flavors of these herbs can bring out new dimensions in your salad.

  • Nutty Flavor: Incorporate cashews or almonds alongside or in place of peanuts for added crunch and richness. Toasting them slightly can further deepen their flavor, elevating your dish.

  • Creamy Addition: For an extra layer of creaminess, consider mixing in a dollop of Greek yogurt or a splash of coconut cream into the peanut dressing. This will create a delightful, rich texture that complements the salad.

Feel free to get creative with your ingredients! This Spring Roll Salad with Peanut Sauce is a fantastic canvas waiting for your personal touch. And if you’re looking for more fresh and exciting options, check out my Chicken Salad with Apples for a delightful twist!

Spring Roll Salad with Peanut Sauce Recipe FAQs

What type of peanut butter should I use?
I recommend using creamy peanut butter for the best texture in your dressing. If you're looking for a healthier alternative, natural peanut butter can work too, but it may require more stirring to blend seamlessly.

How should I store leftover Spring Roll Salad?
Store any leftovers in an airtight container in the fridge for up to 2 days. It's best to keep the peanut dressing separate to maintain the salad's freshness and prevent the veggies from becoming soggy.

Can I freeze the Spring Roll Salad?
Freezing the assembled salad is not recommended, as the texture of the fresh vegetables will change. However, you can freeze the peanut sauce for up to 3 months. Just thaw it overnight in the fridge and give it a good stir before use.

How can I adjust the dressing's consistency?
If your peanut dressing is too thick for your liking, simply add water gradually, about a teaspoon at a time, while whisking until you reach your desired consistency. This allows the sauce to coat the salad beautifully without overpowering it.

What if I have allergies to peanuts or soy?
Feel free to substitute the peanut butter with sunflower seed butter for a nut-free alternative, and use tamari or coconut aminos instead of soy sauce for a gluten-free version. Always ensure to check labels to avoid cross-contamination.

What vegetables work best in this salad?
While I love the combo of cucumber, cabbage, and bell pepper, feel free to get creative! You can use napa cabbage, shredded carrots, or even snap peas. The more variety, the more fun and flavor you'll enjoy in your Spring Roll Salad!

Spring Roll Salad with Peanut Sauce

Zesty Spring Roll Salad with Peanut Sauce in 30 Minutes

A refreshing Spring Roll Salad with Peanut Sauce that’s vibrant, customizable, and ready in just 30 minutes.
Print Recipe Pin Recipe
Prep Time 15 minutes mins
Cook Time 15 minutes mins
Total Time 30 minutes mins
Servings: 4 servings
Course: Salads
Cuisine: Asian
Calories: 300
Ingredients Equipment Method Nutrition Notes

Ingredients
  

Peanut Sauce
  • 1/2 cup Peanut Butter Use creamy peanut butter for best texture.
  • 2 tablespoons Hoisin Sauce Can substitute with brown sugar if unavailable.
  • 2 tablespoons Lime Juice Freshly squeezed is preferred.
  • 2 tablespoons Soy Sauce
  • 2 tablespoons Water Adjust to desired dressing consistency.
Salad
  • 8 oz Thin Rice Noodles Can use rice sticks or Pad Thai noodles.
  • 1 cup Cucumber Thinly sliced.
  • 1 cup Purple Cabbage Can substitute with coleslaw mix.
  • 1 medium Carrot Grated or thinly sliced.
  • 1 medium Red Bell Pepper Thinly sliced.
  • 1/4 cup Cilantro Chopped.
  • 1/4 cup Mint Chopped.
  • 1/4 cup Peanuts Optional garnish.

Equipment

  • Mixing Bowl
  • Whisk
  • Colander
  • Cooking Pot

Method
 

Preparation Steps
  1. Cook the thin rice noodles according to package instructions, usually boiling for 4-6 minutes. Drain and rinse under cold water to stop cooking.
  2. In a medium bowl, whisk together peanut butter, hoisin sauce, lime juice, soy sauce, and water until smooth.
  3. In a large bowl with cooled noodles, add cucumber, cabbage, carrot, and bell pepper. Toss gently to combine.
  4. Pour the peanut dressing over the salad and toss vigorously until well-coated.
  5. Sprinkle chopped peanuts on top before serving. Enjoy!

Nutrition

Serving: 1servingCalories: 300kcalCarbohydrates: 40gProtein: 10gFat: 15gSaturated Fat: 3gPolyunsaturated Fat: 5gMonounsaturated Fat: 7gSodium: 400mgPotassium: 400mgFiber: 5gSugar: 6gVitamin A: 2000IUVitamin C: 30mgCalcium: 50mgIron: 2mg

Notes

Adjust the thickness of the peanut sauce gradually with water for your preferred consistency. Store leftovers in an airtight container for up to two days.

Tried this recipe?

Let us know how it was!

Bright and Zesty Pineapple Kiwi Salad for Summer Bliss

April 1, 2026 by Grace Snow Leave a Comment

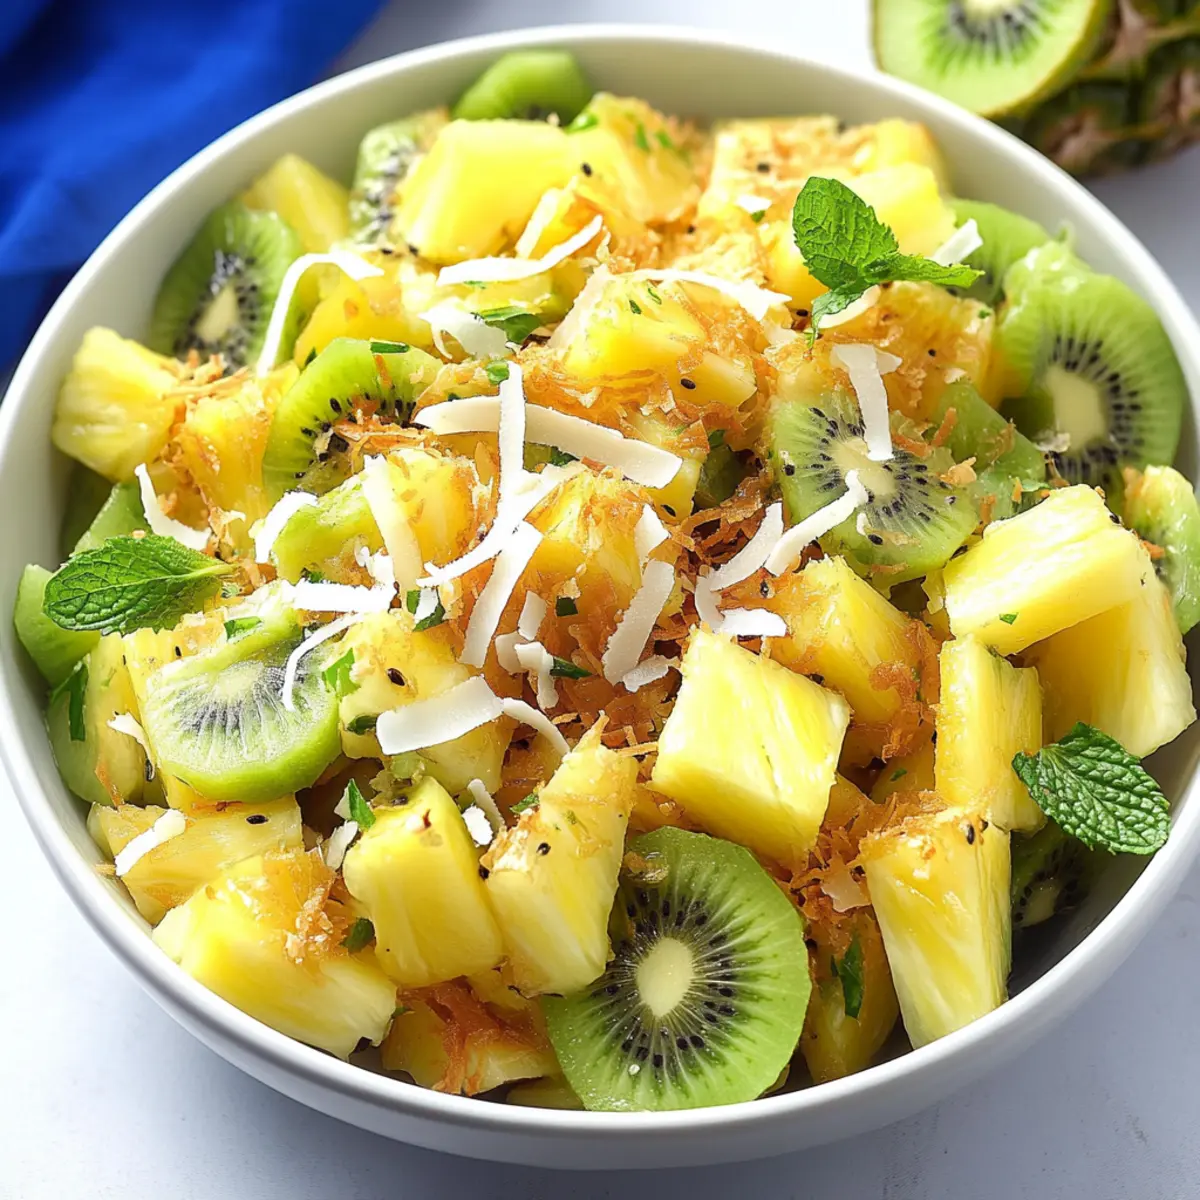
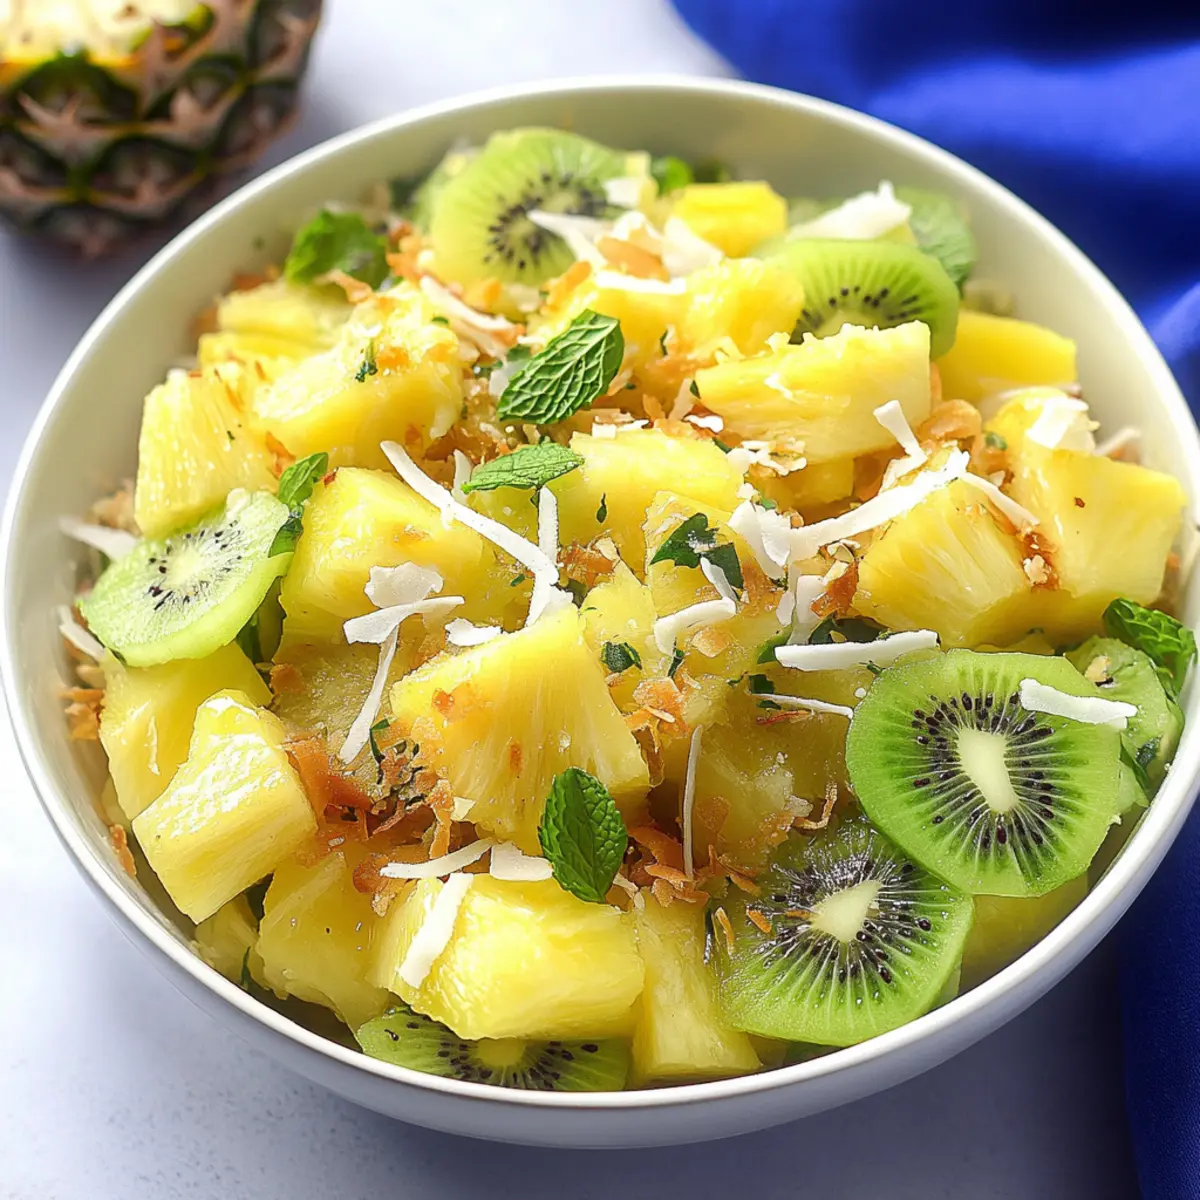
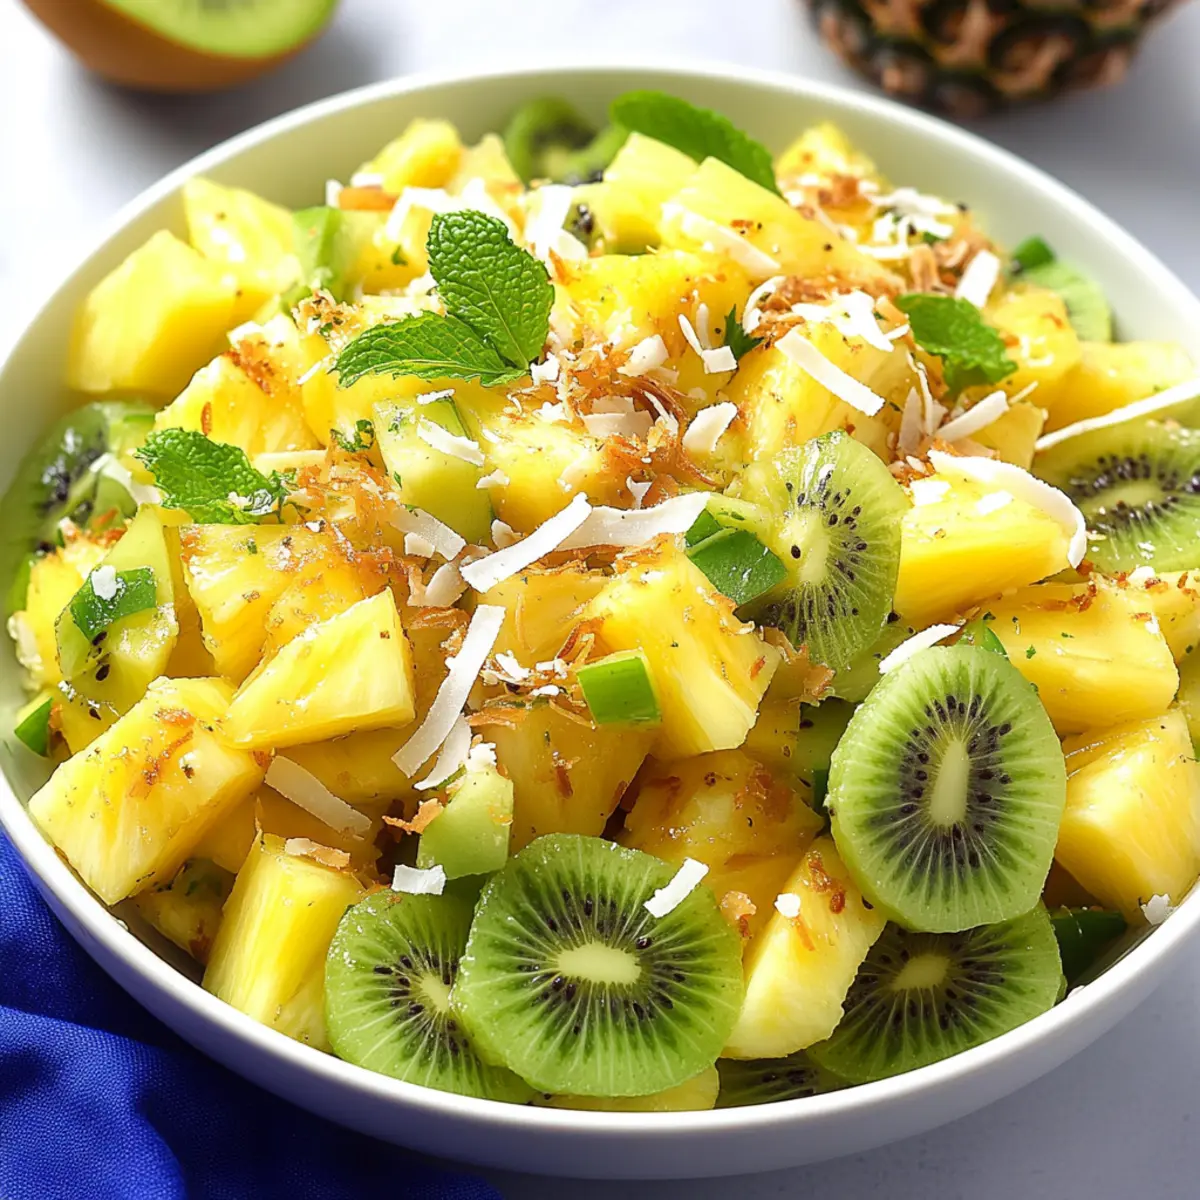
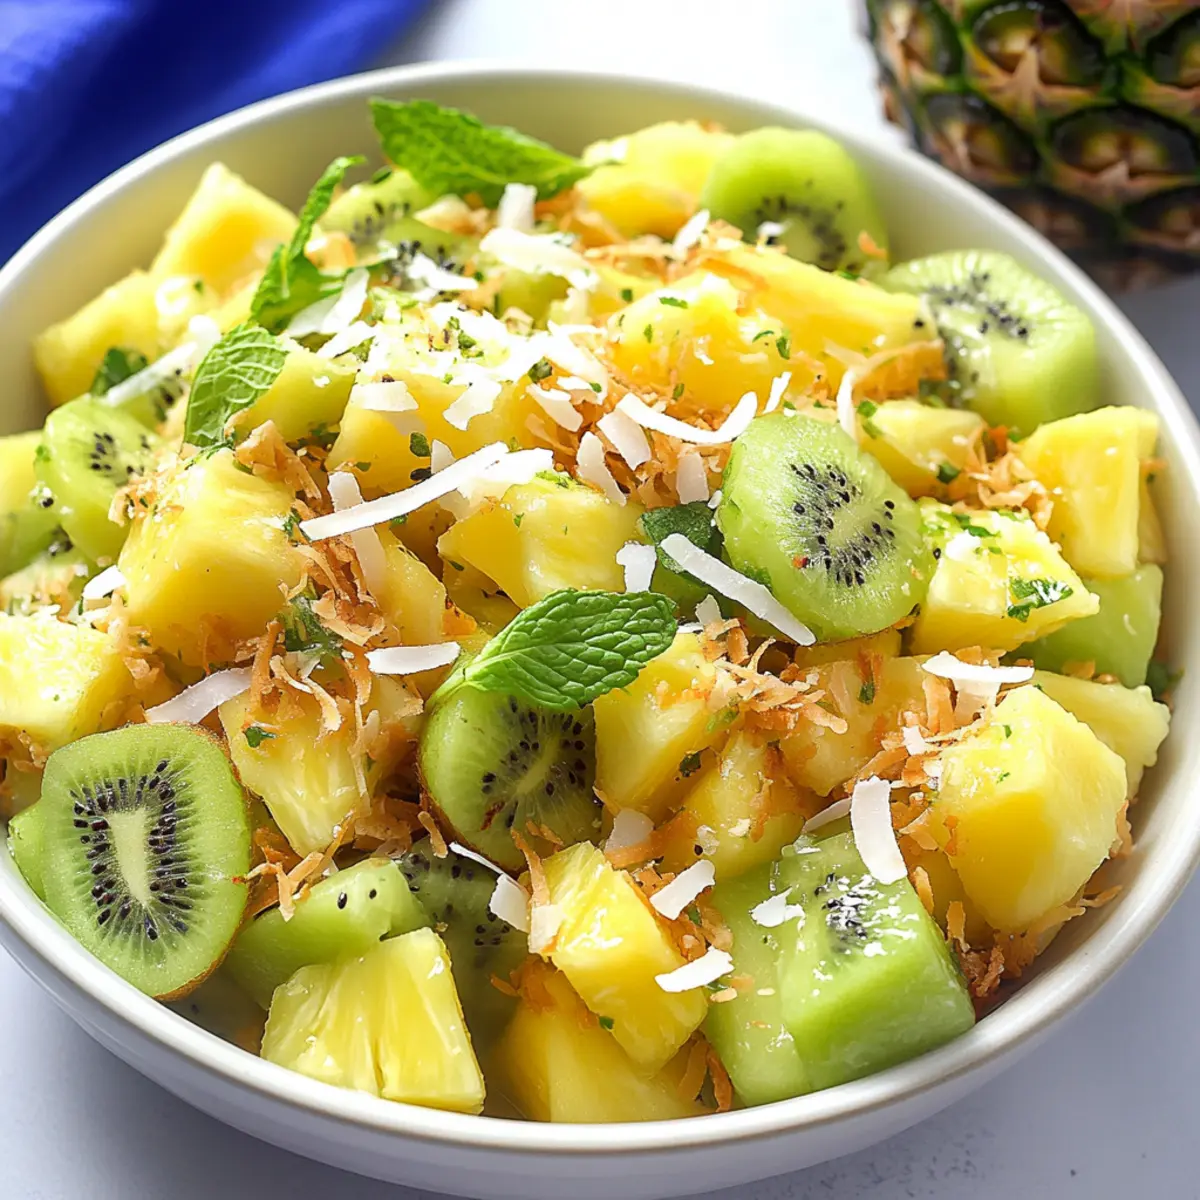
As I lifted the lid off the bowl, the bright colors of my Pineapple Kiwi Salad jumped at me like a warm summer breeze. It’s a simple delight that comes together in just 15 minutes, making it perfect for those lazy afternoons when you crave something light and refreshing. The sweet juiciness of ripe pineapple pairs beautifully with the tangy kiwi, while a drizzle of honey lime dressing elevates every bite. Topped with crunchy toasted coconut, this salad not only tantalizes the taste buds but also adds a textural twist that will leave everyone asking for more. Whether you’re hosting a summer picnic or just want to brighten up a weekday meal, you’ll find this dish is both a crowd-pleaser and a breeze to whip up. Are you ready to take your taste buds on a tropical adventure?

Why is Pineapple Kiwi Salad a Must-Try?

Vibrant Colors: The bright yellows and greens of this salad offer a visual feast, making it as appealing as it is delicious!

Quick Preparation: In just 15 minutes, you’ll have a refreshing side that’s perfect for busy days; no culinary prowess needed!

Tropical Flavor Combo: The blend of sweet pineapple and tart kiwi creates a unique flavor profile that will transport you to a sunny beach.

Perfect for Any Occasion: Whether it’s a summer picnic or a backyard barbecue, this Pineapple Kiwi Salad is a hit at any gathering.

Nutritional Benefits: With around 160 calories per serving, it’s a guilt-free treat rich in vitamins, making it a wholesome choice alongside dishes like Chicken Salad Apples or Tofu Caesar Salad.

Versatile Variations: Feel free to mix it up! Swap in mango or add berries for extra zest. Enjoy the freedom to make it your own!

Pineapple Kiwi Salad Ingredients

• Here's what you'll need to bring this vibrant salad to life!

For the Salad

  • Fresh Pineapple – ensures sweetness; use ripe pineapple for the best flavor.
  • Kiwis – provides a delightful tartness; pick ripe ones for optimal sweetness.
  • Fresh Mint Leaves – enhances freshness and aroma; substitute with basil for a unique twist.
  • Shredded Coconut – adds crunch and tropical flair; choose sweetened or unsweetened based on your preference.

For the Dressing

  • Limes – supplies acidity to balance the sweetness; zest them before juicing for an extra zing.
  • Honey – naturally sweetens the dressing; swap for agave syrup for a vegan alternative.

This Pineapple Kiwi Salad is not just a dish, but a delicious experience waiting to be enjoyed!

Step‑by‑Step Instructions for Pineapple Kiwi Salad

Step 1: Toast the Coconut
Preheat your oven to 350°F (175°C). Spread the shredded coconut evenly on a lined baking sheet. Bake for 5-7 minutes, stirring halfway through, until it turns a light golden brown. Keep a close eye on it to prevent burning. This step adds a delightful crunch to your Pineapple Kiwi Salad!

Step 2: Prepare the Fruit
While the coconut is toasting, take your fresh pineapple and carefully cube the flesh. For the kiwis, slice them in half and gently scoop out the fruit. Cut the kiwi into bite-sized pieces and add them to a large mixing bowl. The vibrant colors of the fruit will start to come together beautifully.

Step 3: Add Fresh Mint
Next, roll up a handful of fresh mint leaves tightly. Using a sharp knife, slice the mint thinly to create ribbons, also known as chiffonade. Toss the mint into the bowl with your prepared pineapple and kiwi. This addition not only enhances the flavor but also adds a lovely aroma to your Pineapple Kiwi Salad.

Step 4: Make the Honey Lime Dressing
In a separate small bowl, zest and juice your limes. Whisk in the honey until everything is smoothly combined. This zingy dressing will perfectly balance the sweetness of the fruits. The vibrant green of the lime zest will brighten the overall presentation of your Pineapple Kiwi Salad.

Step 5: Combine Everything
Pour the honey lime dressing over the fruit and mint mixture in the large bowl. Gently toss everything together using a spatula until the fruits are evenly coated with the dressing. This step ensures each bite is filled with the refreshing flavors of the Pineapple Kiwi Salad.

Step 6: Serve with Toasted Coconut
Refrigerate the assembled salad for a few minutes to chill it slightly before serving. Just before presenting, sprinkle the toasted coconut on top to maintain its crunch. This final touch elevates your Pineapple Kiwi Salad, making it a delightful treat that’s as refreshing as it is visually appealing.

Pineapple Kiwi Salad Variations

Feel free to get creative with your Pineapple Kiwi Salad, transforming it to suit your taste and dietary preferences!

  • Tropical Twist: Substitute fresh pineapple with diced mango for added sweetness and a hint of tropical flair. The juicy mango complements the kiwi beautifully.

  • Berry Boost: Toss in fresh berries, like strawberries or blueberries, for a vibrant splash of color and taste. These little gems create a berry-licious spin on the classic salad.

  • Nutty Crunch: Include a handful of chopped almonds or walnuts for extra protein and texture. The nuttiness perfectly balances the fruit's sweetness.

  • Herby Freshness: Switch fresh mint for basil or cilantro for a unique flavor kick. Each herb brings a different aromatic twist to the salad.

  • Spicy Kick: Add a pinch of cayenne pepper or sliced jalapeños for an adventurous heat that elevates the flavor profile. Just a dash can bring exciting contrast!

  • Creamy Indulgence: Incorporate a dollop of yogurt or coconut cream for a rich, creamy texture that adds depth to the refreshing salad. This twist makes it feel indulgent!

  • Zesty Orange: Mix in some fresh orange segments for extra citrusy zest. The sweetness of the oranges contrasts nicely with the tartness of the kiwi.

This Pineapple Kiwi Salad is an opportunity for you to experiment! Pair it with dishes like German Potato Salad or the vibrant Grilled Balsamic Steak Salad for a delightful meal. Enjoy making it your own!

Expert Tips for Pineapple Kiwi Salad

  • Choose Ripe Fruit: Use ripe pineapple and kiwis for the sweetest flavors; unripe fruit can lead to a less enjoyable salad.
  • Mint Substitution: If you don’t have mint, fresh basil can provide a different, delightful flavor twist without compromising freshness.
  • Coconut Crunch: Toast the coconut right before serving to keep it crunchy; adding it too early can lead to sogginess.
  • Dress Wisely: Always toss the dressing gently to avoid mashing the soft fruit; you want to maintain the salad's beautiful texture.
  • Make Ahead: Prep the fruit salad a day ahead but keep the coconut separate until serving for the best texture in your Pineapple Kiwi Salad.

What to Serve with Pineapple Kiwi Salad?

The perfect meal deserves the perfect companions, and this vibrant salad is no exception!

  • Grilled Chicken Skewers: Juicy, slightly charred chicken adds protein and a smoky flavor that complements the tropical sweetness.
  • Quinoa Salad: A light, fluffy quinoa salad with lemon and herbs provides a satisfying contrast and is packed with nutrients.
  • Avocado Toast: The creamy texture of ripe avocado on crusty bread adds richness, balancing the refreshing salad beautifully.
  • Coconut Rice: Fragrant coconut-infused rice mirrors the salad's tropical theme, making each bite a little slice of paradise.
  • Mango Slices: Serve fresh mango alongside for a double dose of tropical flavor; both fruits harmonize splendidly!
  • Sparkling Water with Lime: A refreshing drink that echoes the salad's zesty flavors; add some mint leaves for an extra touch of freshness.
  • No-Bake Cheesecake Cups: Delightful and creamy, these mini desserts can end the meal on a sweet note, contrasting the salad's tangy flavors.
  • Grilled Shrimp Tacos: Lightly grilled shrimp in soft tortillas with fresh lime offer a savory option that matches the salad's brightness.
  • Lemon Sorbet: A light, icy treat to cleanse the palate; its zesty flavor complements the salad without overwhelming it.

How to Store and Freeze Pineapple Kiwi Salad

Fridge: Store your Pineapple Kiwi Salad in an airtight container in the refrigerator for up to 3 days. This keeps the ingredients fresh and flavorful.

Freezer: Freezing is not recommended for this salad, as the texture of the fruits will change when thawed, making them mushy and unappealing.

Toasted Coconut: Keep the toasted coconut in a separate airtight container at room temperature for up to a month. Add it just before serving to maintain its crunch.

Make-Ahead Tip: You can prepare the salad a day in advance, but wait to add the toasted coconut until right before serving to keep it crispy and delightful.

Make Ahead Options

Preparing the Pineapple Kiwi Salad in advance is a fantastic time-saver for busy weeknights or gatherings! You can chop the pineapple and kiwis, along with slicing the mint, up to 24 hours ahead. Simply store the fruit and mint in an airtight container in the refrigerator to keep them fresh. The honey lime dressing can also be mixed and stored separately for up to 3 days, ensuring it retains its vibrant flavor. To maintain the perfect crunch, hold off on adding the toasted coconut until just before serving. When you're ready to indulge, simply combine everything and sprinkle on that delightful coconut for a refreshing treat just as delicious as when freshly made!

Pineapple Kiwi Salad Recipe FAQs

How do I know if the pineapple is ripe?
To select a ripe pineapple, look for a firm fruit with a sweet aroma at the base. The skin should be a vibrant golden color, and when you gently tug on a leaf from the crown, it should come out easily. Avoid pineapples with dark spots or overly soft areas.

How should I store leftover Pineapple Kiwi Salad?
Store your Pineapple Kiwi Salad in an airtight container in the refrigerator for up to 3 days. This helps maintain its freshness. If you notice any browning or mushiness, it’s best to discard it rather than eat.

Can I freeze Pineapple Kiwi Salad?
Freezing is not recommended for this salad. The fruits will become mushy when thawed, affecting the overall texture and flavor of your Pineapple Kiwi Salad. Instead, enjoy it fresh!

What should I do if my dressing seems too thick?
If your honey lime dressing feels thick, you can easily loosen it. Add a teaspoon of water or extra lime juice to the dressing and whisk until you reach the desired consistency. This will maintain that refreshing taste without making it soupy.

Is this salad suitable for someone with allergies?
Absolutely! This salad is naturally gluten-free and can be adapted for various dietary needs. If you have a tree nut allergy, skip the coconut or substitute it with seeds like sunflower or pumpkin. Always double-check with guests to ensure safety if serving at gatherings.

How can I prepare the salad in advance?
You can make the fruit components of the Pineapple Kiwi Salad a day ahead. Just keep the fruit in an airtight container in the fridge. For the best results, add the toasted coconut and dressing just before serving to maintain that lovely crunch and freshness.

Pineapple Kiwi Salad

Bright and Zesty Pineapple Kiwi Salad for Summer Bliss

A refreshing Pineapple Kiwi Salad perfect for hot summer days, combining sweet pineapple and tangy kiwi with a honey lime dressing.
Print Recipe Pin Recipe
Prep Time 15 minutes mins
Cook Time 7 minutes mins
Total Time 22 minutes mins
Servings: 4 servings
Course: Salads
Cuisine: Tropical
Calories: 160
Ingredients Equipment Method Nutrition Notes

Ingredients
  

For the Salad
  • 1 medium Fresh Pineapple ensures sweetness; use ripe pineapple for the best flavor
  • 3 medium Kiwis provides a delightful tartness; pick ripe ones for optimal sweetness
  • 1/4 cup Fresh Mint Leaves enhances freshness and aroma; substitute with basil for a unique twist
  • 1/2 cup Shredded Coconut adds crunch and tropical flair; choose sweetened or unsweetened based on your preference
For the Dressing
  • 2 medium Limes supplies acidity to balance the sweetness; zest them before juicing for an extra zing
  • 2 tablespoons Honey naturally sweetens the dressing; swap for agave syrup for a vegan alternative

Equipment

  • Oven
  • Baking Sheet
  • Mixing Bowl
  • Sharp Knife
  • Whisk

Method
 

Preparation
  1. Preheat your oven to 350°F (175°C). Spread the shredded coconut evenly on a lined baking sheet. Bake for 5-7 minutes, stirring halfway through, until it turns a light golden brown.
  2. While the coconut is toasting, cube the fresh pineapple and slice the kiwis in half, scooping out the fruit and cutting it into bite-sized pieces.
  3. Roll up the mint leaves tightly and slice them thinly to create ribbons. Toss the mint into the bowl with your prepared pineapple and kiwi.
  4. In a separate small bowl, zest and juice your limes. Whisk in the honey until smooth.
  5. Pour the honey lime dressing over the fruit and mint mixture. Gently toss until the fruits are evenly coated.
  6. Refrigerate the salad for a few minutes to chill. Just before serving, sprinkle the toasted coconut on top.

Nutrition

Serving: 1servingCalories: 160kcalCarbohydrates: 38gProtein: 2gFat: 1gSaturated Fat: 1gSodium: 5mgPotassium: 300mgFiber: 3gSugar: 24gVitamin A: 5IUVitamin C: 90mgCalcium: 20mgIron: 0.5mg

Notes

Serve immediately for the best flavor and texture. Store leftovers in an airtight container for up to 3 days.

Tried this recipe?

Let us know how it was!

Deviled Egg Potato Salad: A Tangy Twist Everyone Will Love

March 29, 2026 by Grace Snow Leave a Comment

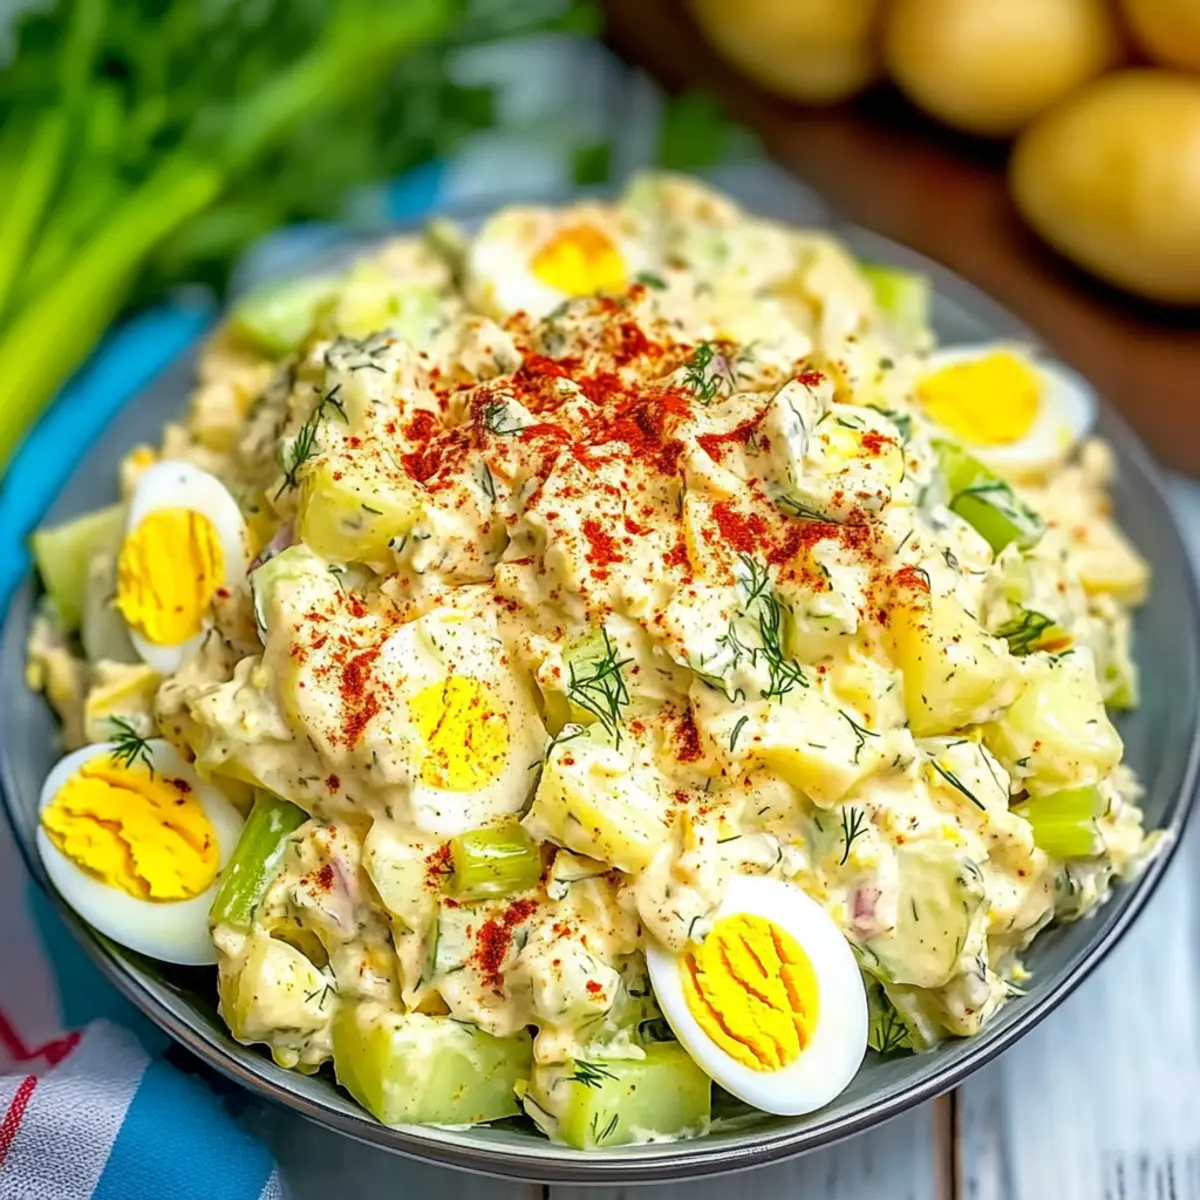
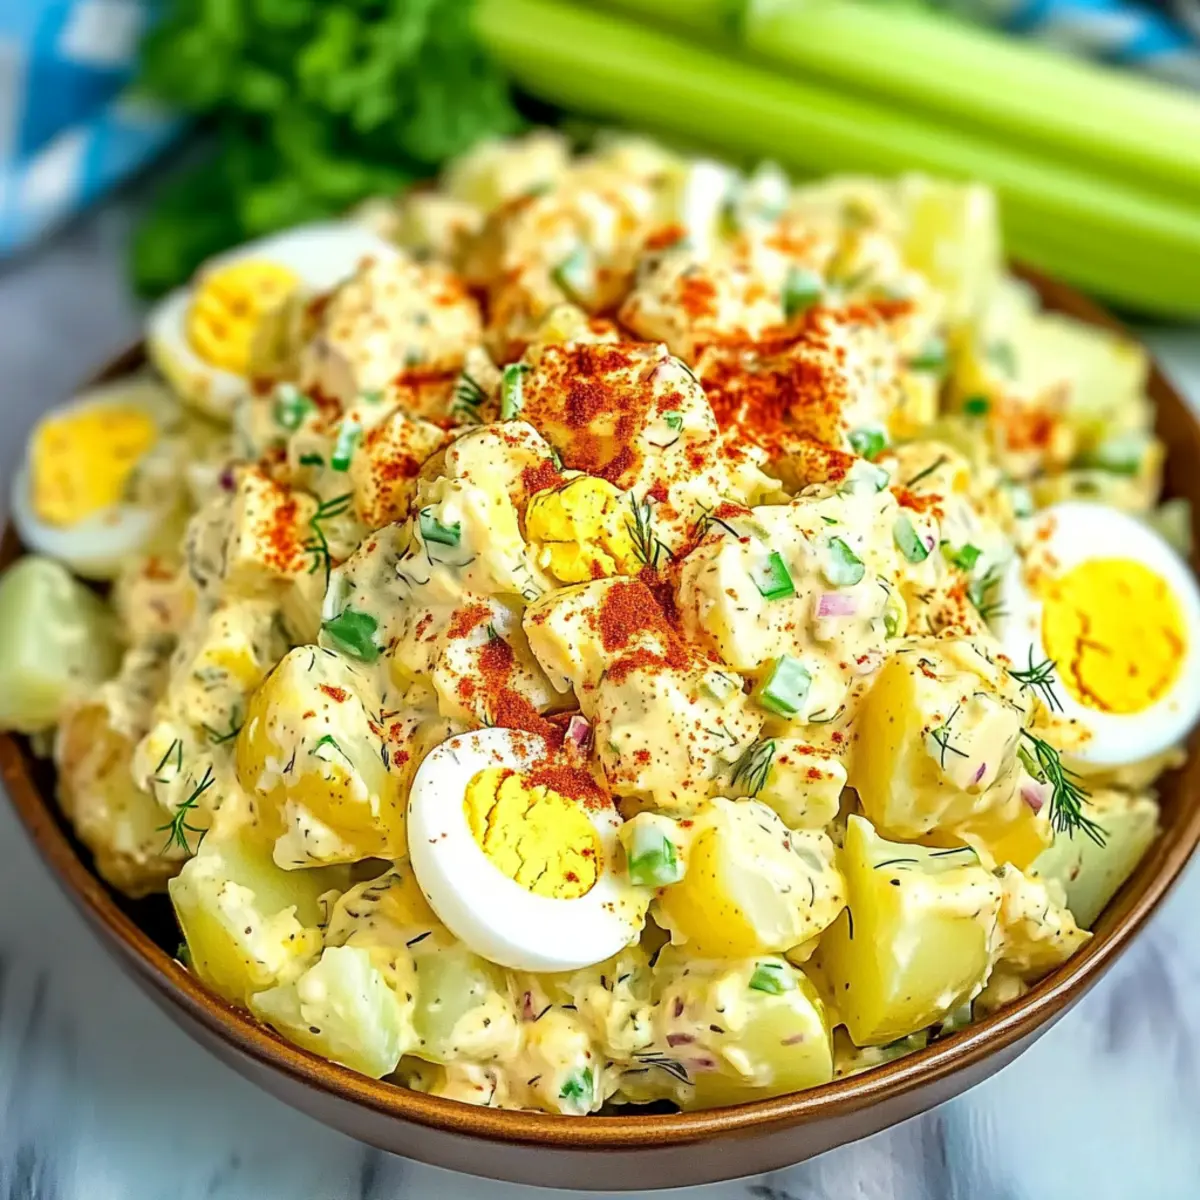
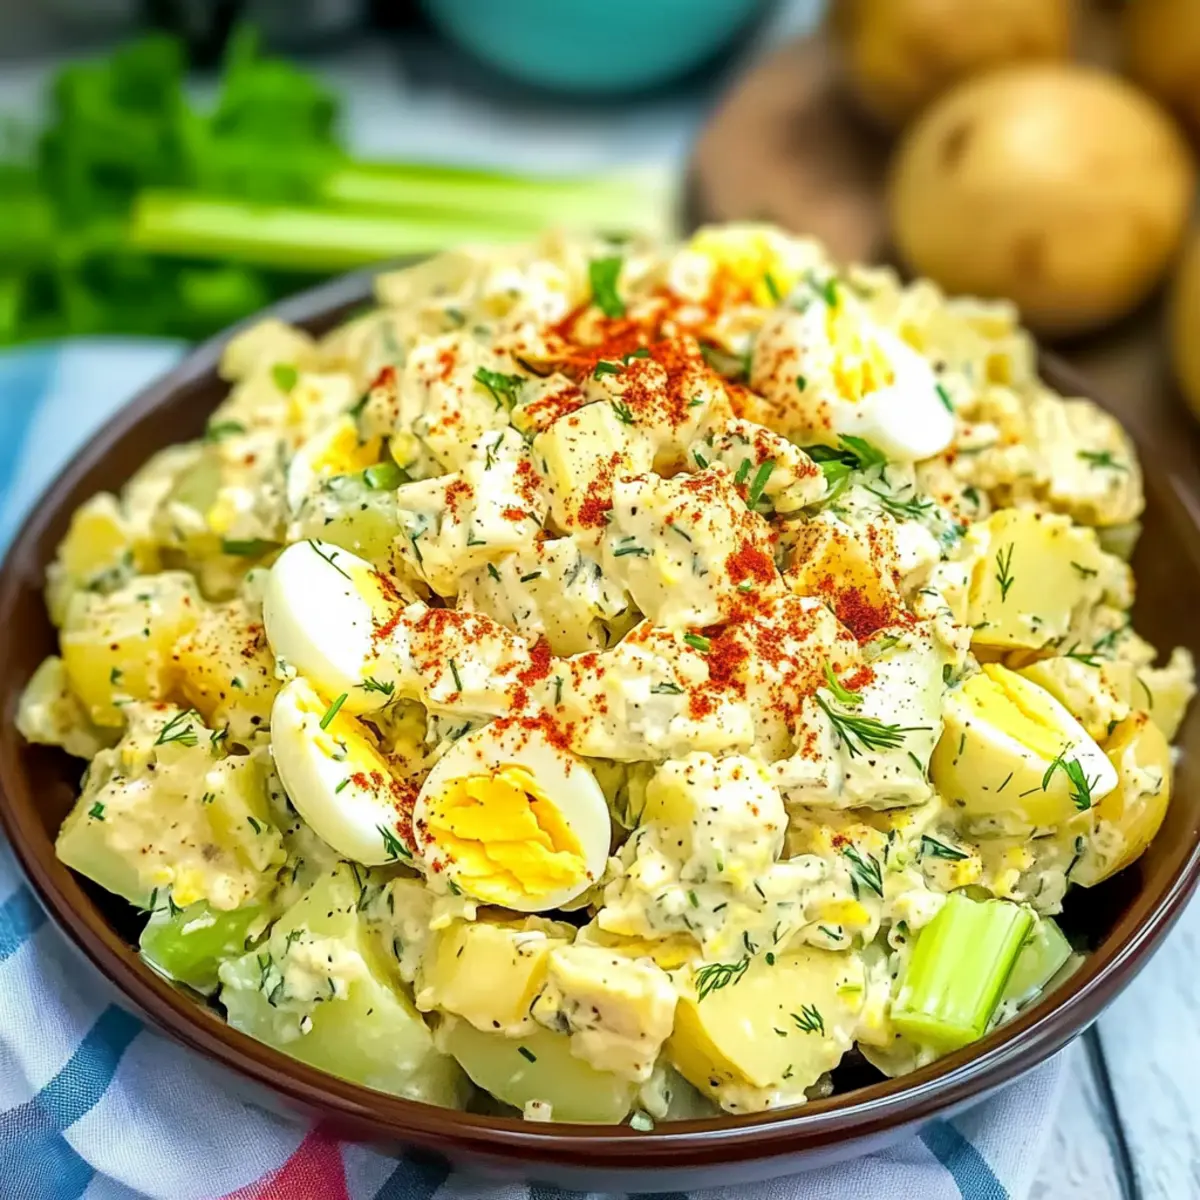
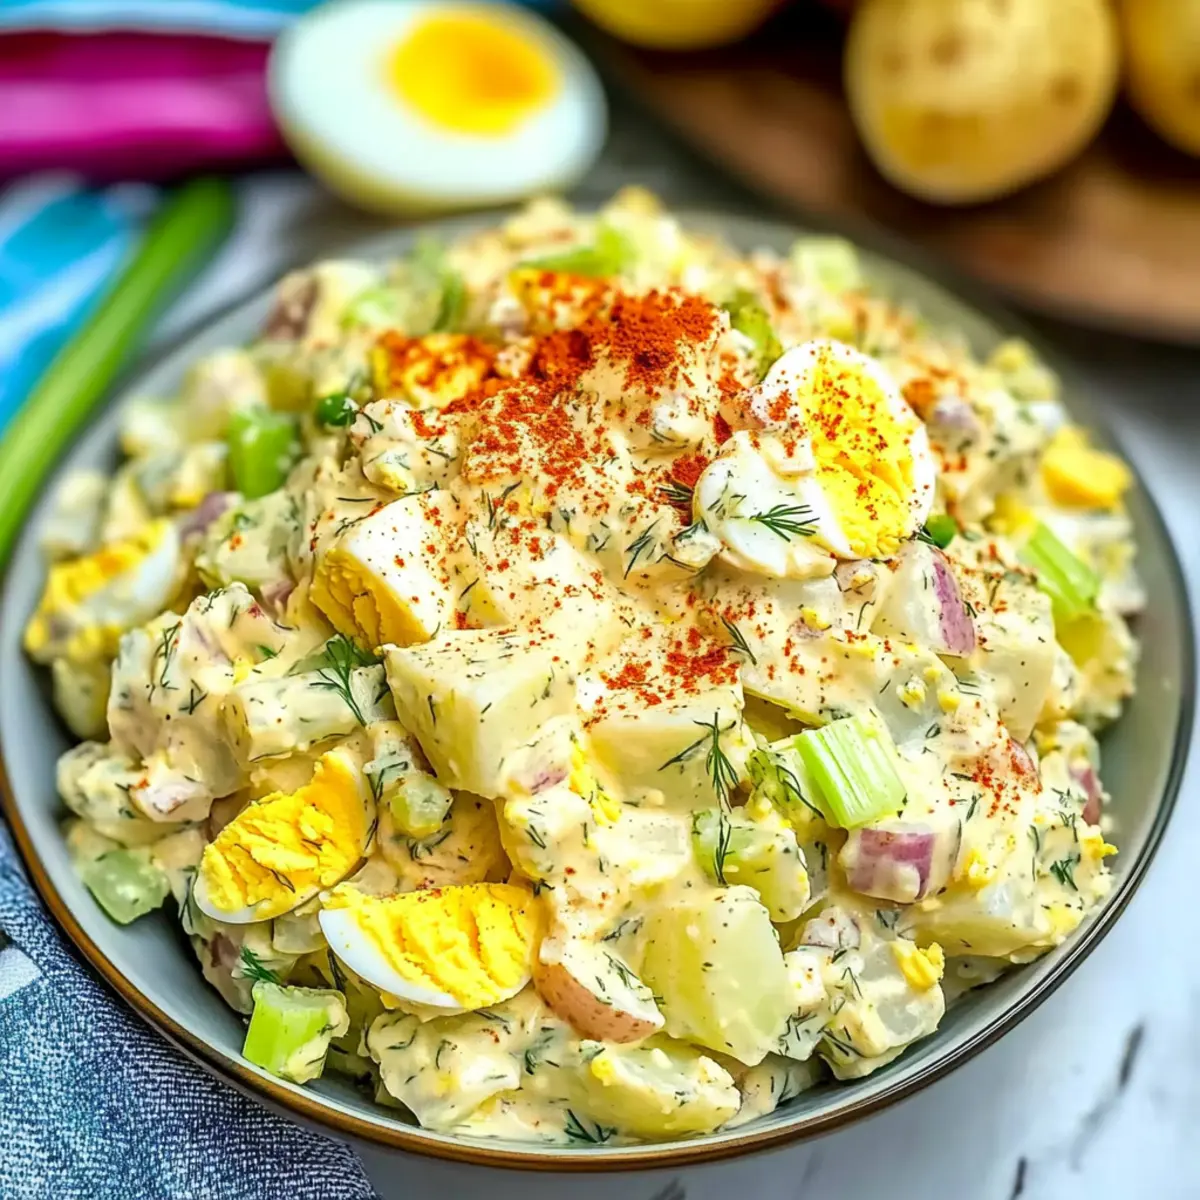
As the sizzling sun brings life to our backyard barbeques, I’m reminded of the tantalizing flavors of summer gatherings. That’s when I perfected my Deviled Egg Potato Salad—a delightful blend that nods to childhood nostalgia while inviting fresh creativity. This creamy and tangy side dish promises to win hearts with ease, making it a kid-friendly crowd-pleaser that’s perfect for potlucks and cookouts alike. With just a quick preparation and the added perk of being make-ahead-friendly, you’ll have more time to mingle with loved ones. So, why not add a twist to your classic potato salad today? Are you ready to discover the savory fun that awaits in each bite?

Why Choose Deviled Egg Potato Salad?

Nostalgic Flavor: This dish combines the beloved taste of deviled eggs with creamy potato salad, taking you on a delightful trip down memory lane.

Versatile Additions: Want to get creative? You can easily mix in ingredients like crispy bacon or grilled chicken, tailoring it to your taste.

Make-Ahead Wonder: Perfect for busy schedules, this salad tastes even better the next day, making it an effortless option for gatherings.

Crowd Favorite: Whether at a summer barbecue or festive potluck, this dish will be the star of the show—just like a classic German Potato Salad.

Kid-Friendly: Your little ones will love the creamy texture and scrumptious flavors, putting an end to fast food boredom!

Easy Prep: With a simple preparation process, you can whip this up in no time, allowing you to focus on enjoying the occasion.

Deviled Egg Potato Salad Ingredients

  • For the Salad Base
    • Eggs – 10 large eggs provide creaminess and protein; using older eggs makes peeling easier.
    • Russet Potatoes – 2 lbs, peeled and cubed; they form the salad base, offering delightful texture. Consider Yukon Gold potatoes as a fantastic alternative.
    • Celery – 3 stalks, diced; they add a wonderful crunch and freshness to the dish, and cucumbers can be swapped in if desired.

  • For the Flavor
    • Red Onion – ½, finely diced; introduces a mild sharpness, while shallots or green onions can give a gentler flavor.
    • Green Onions – ⅓ cup, diced; they enhance flavor with a hint of bite; chives can be a suitable substitute.
    • Mayonnaise – 1 ¼ cup; this is key for creaminess and body; swap for Greek yogurt for a lighter twist.
    • Dijon Mustard – 1 tablespoon; adds a delightful tang; yellow mustard is a perfect substitute if needed.
    • Stone-Ground Mustard – 1 teaspoon; for a textured element; use more Dijon if stone-ground isn't available.
    • Sweet Pickle Relish – ½ cup; brings in sweetness and tang; use dill relish for a less sweet option.
    • Salt and Pepper – To taste; these will elevate the overall flavor profile.
    • Paprika – ½ teaspoon; for garnish and a subtle hint of flavor.
    • Fresh Dill – Diced, for garnish; it's optional but gives a nice touch, while parsley can stand in if you prefer.

This Deviled Egg Potato Salad is a perfect blend of flavors that can be enjoyed in many ways!

Step‑by‑Step Instructions for Deviled Egg Potato Salad

Step 1: Boil Eggs
Start by placing 10 large eggs in a pot and covering them with cold water. Bring the water to a full boil over medium-high heat, then cover the pot with a lid and turn off the heat. Let the eggs sit in the hot water for 15 minutes before transferring them to an ice bath. Once cooled, peel the eggs, ensuring the shells come off cleanly.

Step 2: Boil Potatoes
In a separate pot, fill with water and add 2 lbs of peeled, cubed russet potatoes. Salt the water for added flavor and bring it to a boil. Cook the potatoes for 8-10 minutes until they are tender but not falling apart. Drain the potatoes and rinse them with cold water to stop cooking, then set aside to cool completely.

Step 3: Prepare Dressing
While the eggs and potatoes are cooling, cut the boiled eggs in half and carefully separate the yolks from the whites. In a mixing bowl, mash the yolks with 1 ¼ cups of mayonnaise, 1 tablespoon of Dijon mustard, 1 teaspoon of stone-ground mustard, ½ cup of sweet pickle relish, and salt and pepper to taste. Aim for a smooth consistency to create the creamy dressing for your Deviled Egg Potato Salad.

Step 4: Combine Ingredients
Chop the egg whites and add them to a large mixing bowl along with the cooled potatoes, diced celery, ½ finely diced red onion, and ⅓ cup of diced green onions. Pour the prepared dressing over the mixture, gently stirring everything together until each ingredient is evenly coated. The combination of flavors will make your Deviled Egg Potato Salad truly delightful.

Step 5: Chill and Serve
Once combined, garnish your Deviled Egg Potato Salad with a sprinkle of paprika and additional egg halves if desired. Cover the bowl and refrigerate for at least one hour before serving to allow the flavors to meld beautifully. This dish can be prepared a day in advance, making it perfect for summer gatherings or potlucks.

Deviled Egg Potato Salad Variations

Feel free to explore these scrumptious variations that will elevate your Deviled Egg Potato Salad to new heights!

  • Add Meat: Incorporate cooked ham, grilled chicken, or turkey for a heartier salad. The savory flavors will meld beautifully, making every bite satisfying.

  • Bacon Addition: Mix in crispy bacon for a delightful crunch and smoky flavor. This twist adds a dimension of richness, perfect for meat lovers.

  • Spicy Version: Spice things up by adding chopped jalapeños or a sprinkle of cayenne. The kick will harmonize with the creamy base, giving a fiery touch that’s unforgettable.

  • Ranch Flavor: Substitute ranch seasoning for the mustard to create a creamy, herbaceous dressing. This change brings a tasty twist that will please ranch lovers!

  • Mexican-Inspired: Add taco seasoning, fresh lime juice, and chopped cilantro for a zesty variation. This bright flavor combination takes your taste buds on a delightful adventure.

  • Fresh Herbs: Instead of dill, try using parsley or basil for a vibrant fresh touch. The new herbs will impart a different aroma and flavor profile, enhancing the dish's complexity.

  • Cheesy Addition: Stir in some shredded cheddar or crumbled feta for a cheesy kick. The creaminess will align perfectly with the potatoes and eggs for a comfort dish.

  • Nutty Crunch: Add toasted walnuts or pecans for a fantastic crunch and depth of flavor. The nuts will add earthy notes that bring a satisfying texture contrast.

These variations are great opportunities to experiment and make the dish your own. If you're looking for something lighter, you can always check out my recipes for Avocado Egg Salad or for a fun side, consider making a Jello Salad Cottage! Each variation offers its unique flair, complementing the classic charm of Deviled Egg Potato Salad, ensuring everyone at your table finds something to love. Enjoy your culinary journey!

How to Store and Freeze Deviled Egg Potato Salad

Airtight Container: Store your Deviled Egg Potato Salad in an airtight container in the fridge for up to 3 days to keep it fresh and tasty.

Prepping Ahead: If preparing in advance, mix all ingredients and store the dressing separately until ready to serve for the best flavor and texture.

Freezer Tips: While freezing isn't ideal for creamy salads, if needed, freeze in a sealed container for up to 1 month; defrost in the fridge overnight for best results.

Reheating: For best enjoyment, this salad is best served cold and does not require reheating; serve straight from the fridge for a refreshing treat!

What to Serve with Deviled Egg Potato Salad

As you gather around the table, this creamy side dish is the perfect base for building a memorable meal that brings everyone together.

  • Grilled Chicken: The smoky, savory flavors of grilled chicken beautifully complement the creamy salad, creating a satisfying harmony of tastes.

  • Corn on the Cob: Sweet, tender corn is a classic summer pairing. The juicy bites contrast beautifully with the richness of the potato salad.

  • Pulled Pork Sandwiches: The tangy sweetness of pulled pork sandwiches offers a delightful contrast, making every bite a celebration of flavor.

  • Crispy Potato Chips: For added crunch, serve with crispy potato chips. They not only enhance the texture but also make for a fun side to munch on.

  • Caprese Salad: A fresh, vibrant Caprese salad brings bright flavors and a refreshing touch to round out your meal beautifully.

  • Fruit Salad: A light and refreshing fruit salad provides a sweet contrast, helping to cleanse the palate amidst the creaminess of your Deviled Egg Potato Salad.

  • Lemonade or Iced Tea: Cool, citrusy lemonade or refreshing iced tea makes for the perfect drink pairing, balancing the richness of the salad with a burst of freshness.

  • Brownie Bites: End your meal on a sweet note with bite-sized brownies for a delightful chocolate contrast to a savory feast.

Each pairing brings its unique flavors to the table, ensuring your meal with Deviled Egg Potato Salad is a delightful experience!

Expert Tips for Deviled Egg Potato Salad

  • Perfect Eggs: Start with cold water for boiling eggs to avoid cracking. This helps them cook evenly and peel easily.

  • Cool Ingredients: Ensure both the potatoes and eggs are thoroughly cooled before mixing. Warm ingredients can lead to a runny dressing!

  • Taste Test: Adjust seasoning at the end! After mixing, taste the salad and add kosher salt and black pepper as needed for the best flavors.

  • Texture Balance: Combine softened potatoes gently to maintain texture—over-mixing can make the salad too mushy.

  • Flavor Enhancements: Experiment with ingredients—a dash of vinegar in boiled water can help make eggs easier to peel, adding a zing to your Deviled Egg Potato Salad!

Make Ahead Options

Preparing this Deviled Egg Potato Salad ahead of time is a fantastic way to save precious minutes during busy weeknights or gatherings! You can boil the eggs and potatoes up to 24 hours in advance, ensuring they are completely cool before refrigerating them separately. The dressing can also be prepared ahead of time and stored in an airtight container for up to 3 days. When you’re ready to assemble, simply chop the egg whites and combine all ingredients, tossing everything in the dressing until evenly coated. To maintain the salad's delightful creaminess, refrigerate it for at least an hour before serving, allowing the flavors to meld beautifully. Just as delicious, this make-ahead option frees you up to enjoy your time with loved ones!

Deviled Egg Potato Salad Recipe FAQs

What type of eggs should I use for this salad?
I recommend using large eggs for the best results; older eggs are easier to peel after boiling, making your prep process smoother.

How long can I store Deviled Egg Potato Salad in the fridge?
You can store this delicious salad in an airtight container in the refrigerator for up to three days. Keeping it sealed helps maintain its freshness and flavor.

Can I freeze Deviled Egg Potato Salad?
Freezing is generally not recommended for creamy salads like this one due to their texture. However, if you must freeze, place the salad in a sealed container, and it should last up to one month. When you're ready to enjoy it, defrost it in the refrigerator overnight.

What should I do if my potatoes become mushy?
To avoid mushy potatoes, ensure you boil them just until tender, about 8-10 minutes, and then rinse in cold water immediately to stop cooking. If they mush up despite your best efforts, try using a firmer potato variety like Yukon Gold next time!

Are there any dietary considerations I should keep in mind?
Absolutely! This salad is generally kid-friendly, but keep an eye on the ingredients if serving to friends with allergies. For a lighter option, you can substitute mayonnaise with Greek yogurt. Always check for allergens in mustards or pickles as well.

Can I add different ingredients to my Deviled Egg Potato Salad?
Very much so! You can mix in extras like cooked ham, grilled chicken, or crispy bacon for heartiness. Feel free to explore flavors with jalapeños for a spicy kick or ranch seasoning for a twist—cooking is all about creativity!

Deviled Egg Potato Salad

Deviled Egg Potato Salad: A Tangy Twist Everyone Will Love

Deviled Egg Potato Salad is a creamy and tangy side dish, ideal for summer gatherings and kid-friendly potlucks.
Print Recipe Pin Recipe
Prep Time 20 minutes mins
Cook Time 25 minutes mins
Chilling Time 1 hour hr
Total Time 1 hour hr 45 minutes mins
Servings: 8 cups
Course: Salads
Cuisine: American
Calories: 300
Ingredients Equipment Method Nutrition Notes

Ingredients
  

For the Salad Base
  • 10 large eggs provides creaminess and protein; using older eggs makes peeling easier.
  • 2 lbs russet potatoes peeled and cubed; consider Yukon Gold as an alternative.
  • 3 stalks celery diced; adds crunch and freshness, cucumbers can be swapped in.
For the Flavor
  • 0.5 red onion finely diced; introduces mild sharpness.
  • 0.33 cup green onions diced; enhances flavor with a hint of bite.
  • 1.25 cups mayonnaise key for creaminess; swap for Greek yogurt for a lighter twist.
  • 1 tablespoon Dijon mustard adds a delightful tang.
  • 1 teaspoon stone-ground mustard for a textured element; use more Dijon if stone-ground isn't available.
  • 0.5 cup sweet pickle relish brings sweetness and tang; use dill relish for a less sweet option.
  • salt and pepper to taste; elevate overall flavor.
  • 0.5 teaspoon paprika for garnish and subtle flavor.
  • fresh dill diced; optional garnish.

Equipment

  • pot
  • Mixing Bowl
  • Ice Bath

Method
 

Step-by-Step Instructions
  1. Boil 10 large eggs in a pot covered with cold water; bring to a boil, cover, turn off heat, and sit for 15 minutes before transferring to an ice bath.
  2. In a separate pot, boil 2 lbs of peeled, cubed russet potatoes in salted water for 8-10 minutes until tender. Drain and cool completely.
  3. Mash the yolks of the boiled eggs with 1 ¼ cups mayonnaise, 1 tablespoon Dijon mustard, 1 teaspoon stone-ground mustard, ½ cup relish, and season with salt and pepper.
  4. Chop the egg whites and mix with cooled potatoes, diced celery, ½ red onion, and ⅓ cup green onions. Combine with the dressing.
  5. Garnish with paprika and additional egg halves if desired. Refrigerate for at least one hour before serving.

Nutrition

Serving: 1cupCalories: 300kcalCarbohydrates: 35gProtein: 8gFat: 15gSaturated Fat: 3gPolyunsaturated Fat: 1gMonounsaturated Fat: 10gCholesterol: 180mgSodium: 300mgPotassium: 600mgFiber: 3gSugar: 2gVitamin A: 10IUVitamin C: 20mgCalcium: 2mgIron: 8mg

Notes

This dish can be prepared a day in advance and is perfect for summer gatherings or potlucks.

Tried this recipe?

Let us know how it was!

Crack Corn Salad: Irresistibly Creamy & Customizable Delight

March 29, 2026 by Grace Snow Leave a Comment

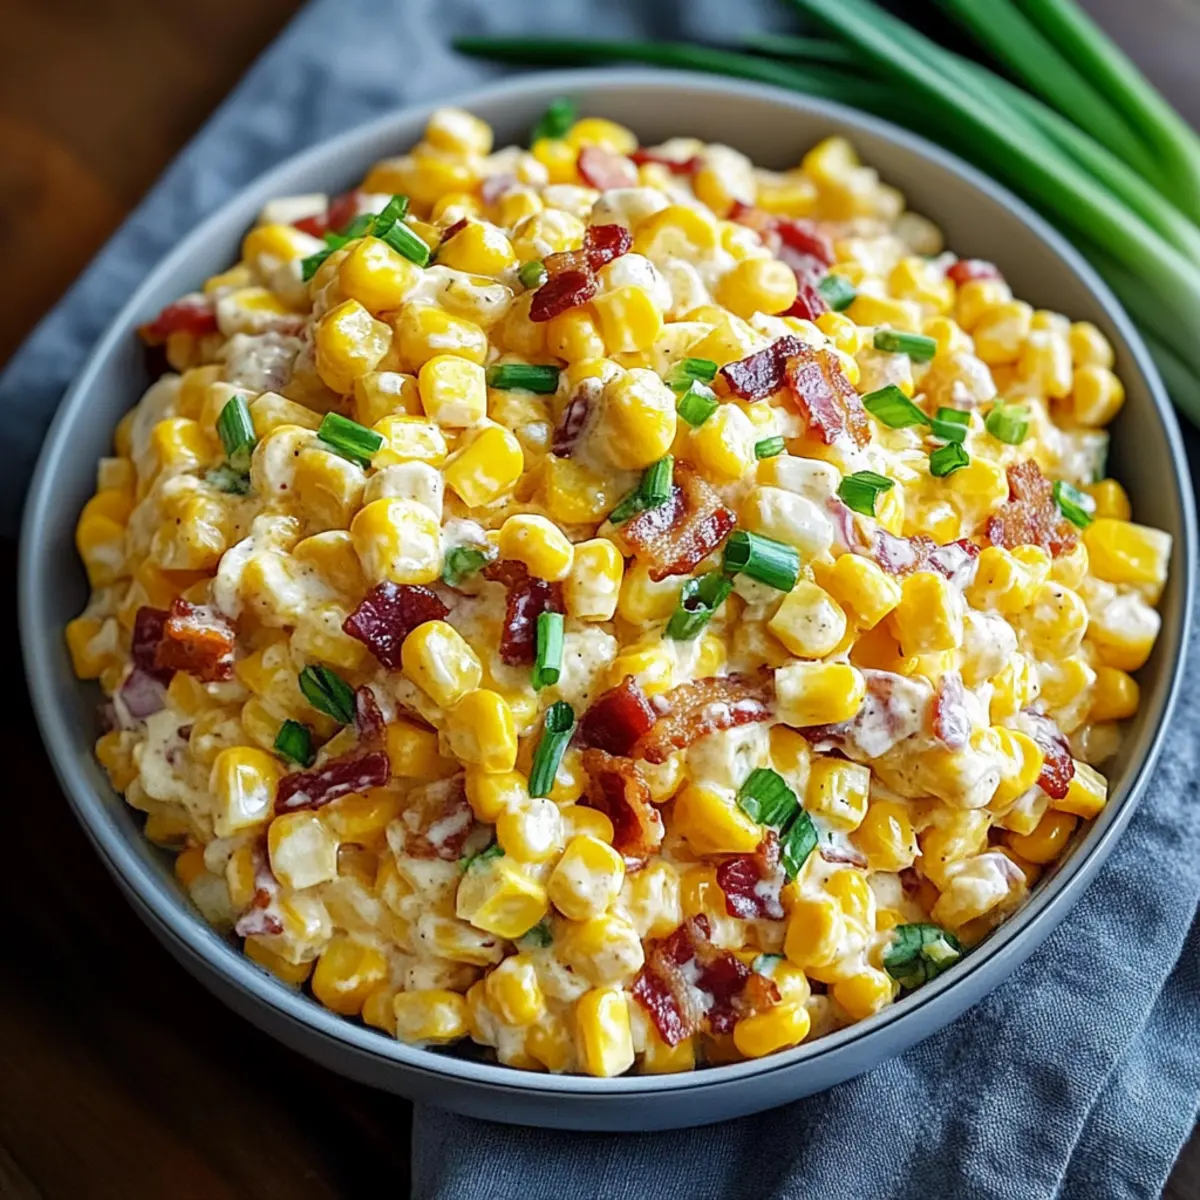
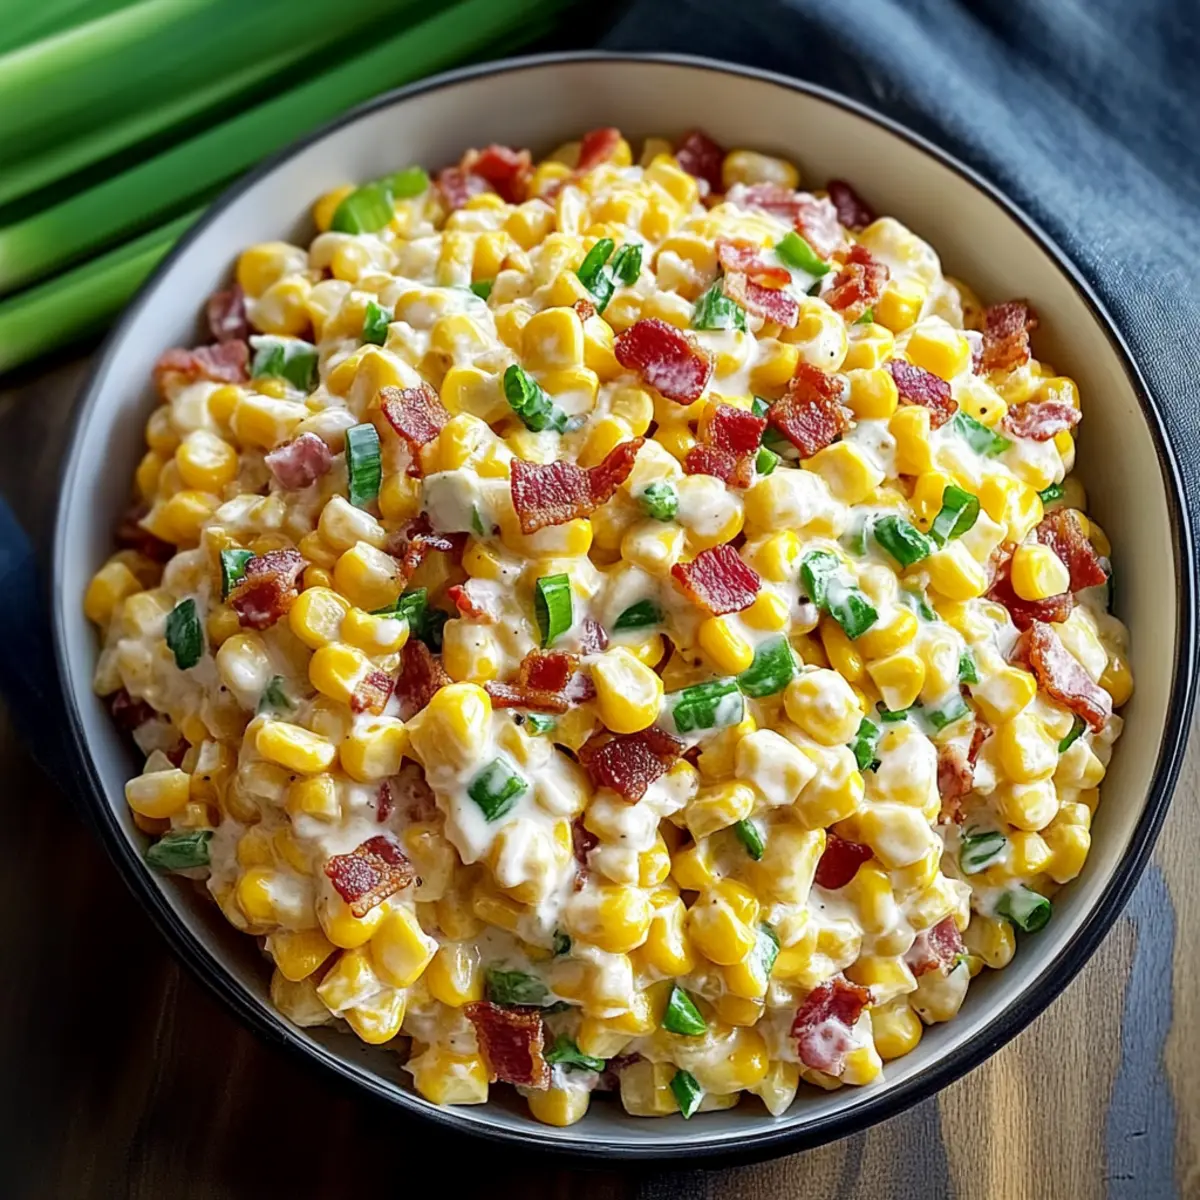
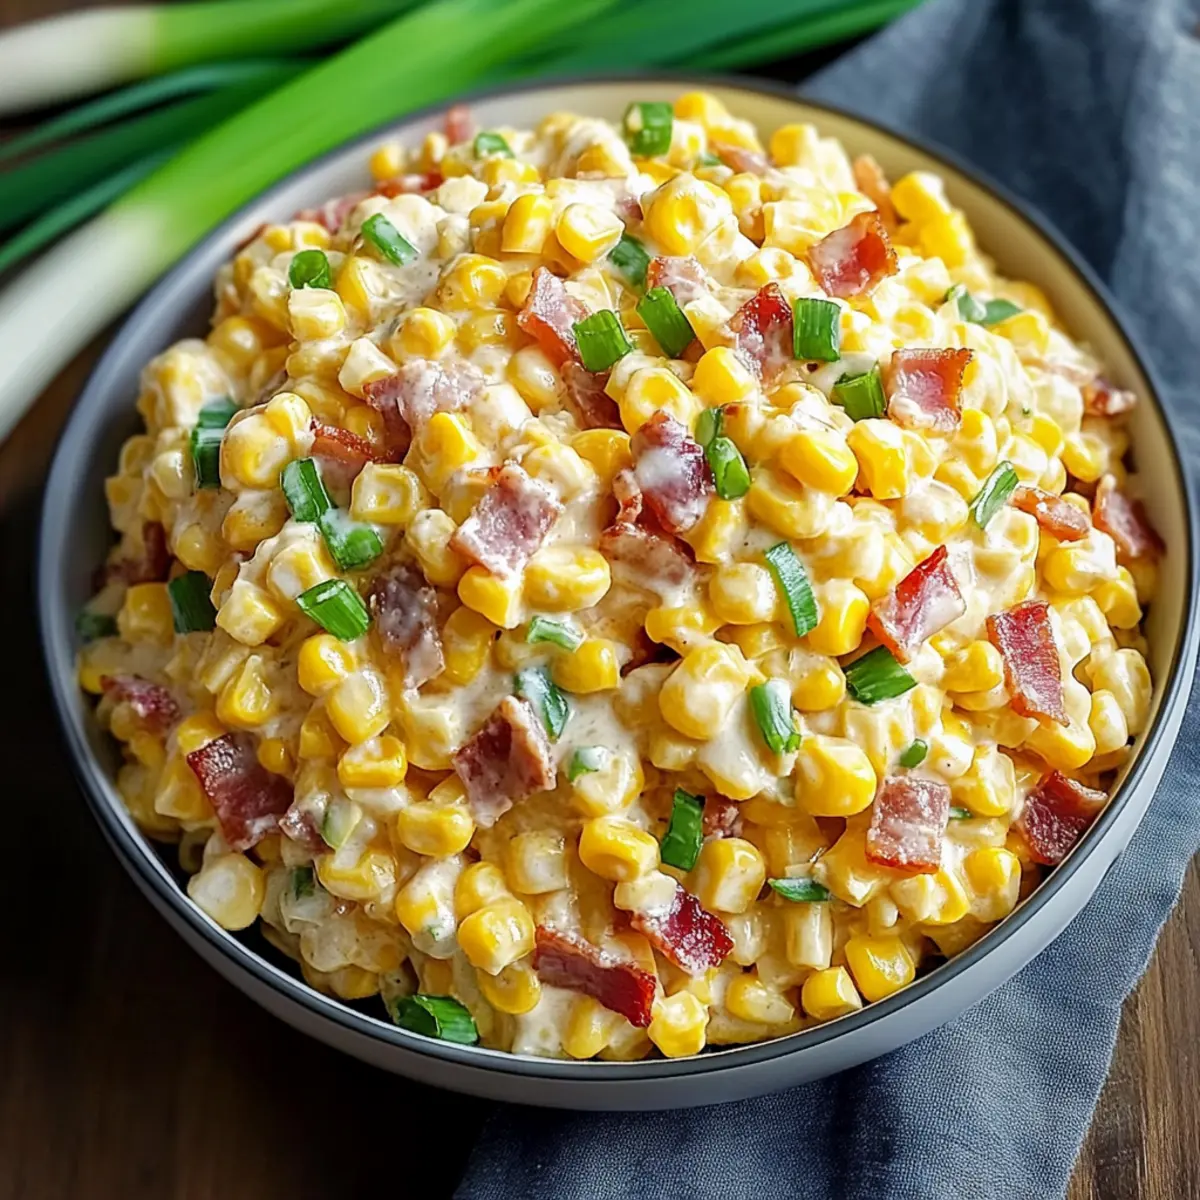
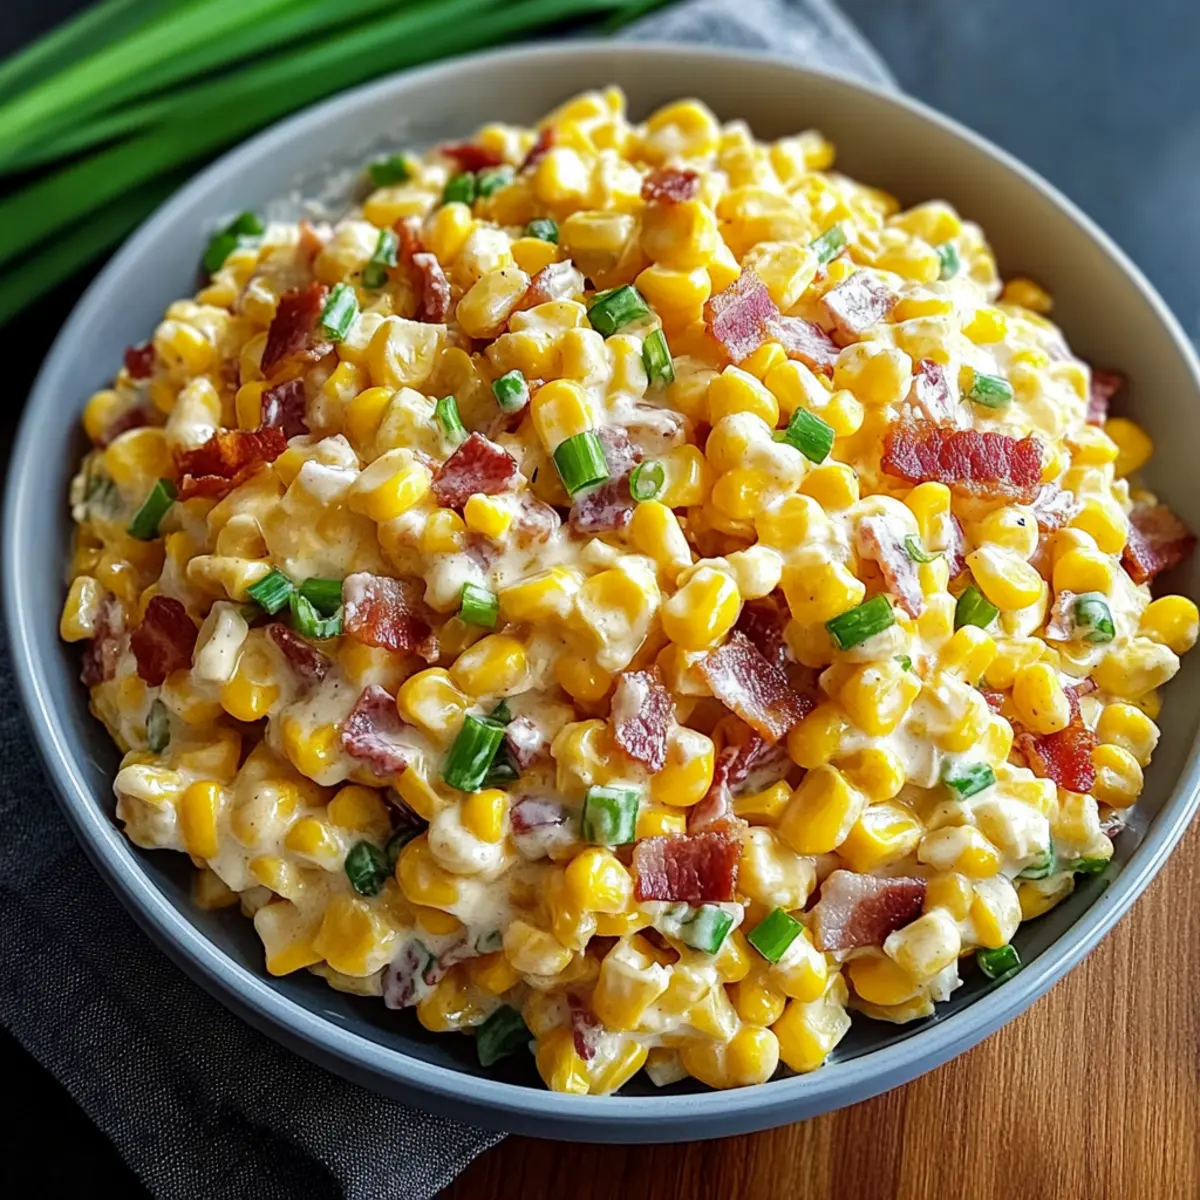
Under the sweltering sun, I found myself at a summer barbecue surrounded by laughter, vibrant colors, and the delightful aroma of grilling delights. Suddenly, a bowl of what seemed like pure joy caught my eye—the Creamy Crack Corn Salad. Fluffy corn, crispy bacon, and a touch of tangy cheddar mingled together to create a dish that was not just easy on the eyes but delectable too. This Corn Salad is the ultimate summer side dish, perfect for potlucks and picnics. It’s make-ahead friendly and adapts effortlessly to your taste, inviting you to add your special twist. You won’t just please a crowd; you’ll earn the title of BBQ hero! So, what fun additions will you sprinkle into your own version of this crowd-pleaser?

What makes this salad so irresistible?

Creamy Delight: This Crack Corn Salad is not only rich and decadent but also incredibly easy to whip up, making it a time-saver for busy cooks.
Customizable Goodness: Feel free to get creative with add-ins like diced bell peppers or a spicy kick from jalapeños!
Crowd-Pleasing Appeal: It's the perfect side dish for summer barbecues or potlucks, guaranteed to be a hit!
Make-Ahead Friendly: Prepare it in advance for an effortless gathering meal; it tastes even better after a few hours in the fridge!
Flavor Fusion: The blend of sweet corn, crispy bacon, and tangy cheddar creates a delightful harmony of flavors that keeps everyone coming back for more. Consider pairing it with Tofu Caesar Salad or Chicken Salad Apples for a complete spread.

Crack Corn Salad Ingredients

For the Salad
• Corn Kernels – the sweet base for this creamy Crack Corn Salad; you can use fresh, frozen, or canned varieties.
• Mayonnaise – brings richness and creaminess to the dressing; for a lighter twist, Greek yogurt is a great substitute.
• Sour Cream – adds tangy depth and creaminess; opt for low-fat versions if you're looking for a healthier choice.
• Ranch Dressing Mix – infuses herbal flavors throughout the salad; homemade seasoning provides better ingredient control.
• Garlic Powder – enhances the savory notes; fresh minced garlic can be swapped in for a bolder flavor.
• Onion Powder – rounds out the seasoning; fresh onions lend a stronger taste but use them sparingly.
• Paprika – beautifies the salad and adds a subtle smokiness; smoked paprika can give it an exciting twist.
• Cheddar Cheese – a key flavor element; dairy-free cheese works well for a vegan alternative.
• Bacon – crunchy goodness that contributes umami; consider turkey bacon for a lighter option or skip for a vegetarian dish.
• Green Onions – fresh flavor and a mild bite; substitute with regular onions, but adjust the quantity to taste.
• Salt and Pepper – essential for balancing flavors; adjust to your liking before serving.

For Extra Flavor
• Additional Veggies – feel free to toss in diced red bell peppers or cherry tomatoes for a fresh crunch.
• Spicy Elements – add jalapeños or a dash of hot sauce to bring some heat and excitement to the mix.
• Herbs – sprinkle in chopped cilantro, chives, or parsley for a fresh, herbaceous touch.
• Southwestern Twist – black beans and chili powder can lend a hearty richness to your version.

Step‑by‑Step Instructions for Crack Corn Salad

Step 1: Prepare the Creamy Base
In a large mixing bowl, whisk together 1 cup of mayonnaise, 1 cup of sour cream, 1 packet of ranch dressing mix, 1 teaspoon of garlic powder, 1 teaspoon of onion powder, and 1 teaspoon of paprika until smooth and creamy. Ensure there are no lumps for a delightful texture. This rich mixture serves as the flavorful base for your Crack Corn Salad.

Step 2: Combine Salad Ingredients
Add 4 cups of corn kernels, 1 cup of shredded cheddar cheese, 8 slices of crispy bacon (crumbled), and 1/4 cup of chopped green onions to the creamy mixture. Gently toss all the ingredients together until well-coated. You want to see vibrant colors blending harmoniously for an inviting visual that promises deliciousness in each bite.

Step 3: Chill for Flavor Fusion
Cover the bowl tightly with plastic wrap or a lid, and place it in the refrigerator for at least 2 hours, or preferably overnight. Chilling allows the flavors of the Crack Corn Salad to meld beautifully, resulting in a creamy taste that’s even more enticing. This step is crucial for developing that signature tangy flavor profile.

Step 4: Final Touches Before Serving
Once ready to serve, uncover the salad and give it a gentle stir to mix any settled ingredients. Taste the salad and adjust the seasoning with salt and pepper as desired, enhancing the balance of flavors. The Crack Corn Salad should be creamy, slightly sweet, and bursting with flavor, perfect for any summer occasion.

What to Serve with Creamy Crack Corn Salad?

Elevate your summer gatherings with delightful sides and drinks that perfectly complement this creamy creation, ensuring a full feast of flavors.

  • BBQ Ribs: The smoky, tender ribs harmonize beautifully with the creamy sweetness of the salad, offering a satisfying contrast.

  • Grilled Chicken: Juicy, marinated chicken adds a savory note that pairs exceptionally well with the tangy flavors of the corn salad.

  • Cornbread Muffins: These soft and slightly sweet muffins provide a perfect pairing, echoing the corn in the salad while adding a lovely texture.

  • Cold Beverages: Refreshing lemonade or iced tea enhances the summer vibe, washing down every bite with a citrusy zing.

  • Fresh Fruit Salad: A mix of seasonal fruits adds a bright, refreshing contrast to the creamy salad, balancing flavors while adding a burst of color.

  • Potato Chips or Tortilla Chips: The crunchy texture offers a delightful contrast to the creaminess of the salad, perfect for scooping!

  • Dessert Option: Pair with a light strawberry shortcake for a sweet ending that echoes the salad’s summer theme beautifully.

  • Pickled Vegetables: Tangy pickles or quick-pickled onions brighten the meal, adding acidity that cuts through the creaminess perfectly.

  • Herbed Focaccia: This soft, fragrant bread works wonderfully to soak up any leftover bits of salad dressing, making for an irresistible combination.

Make Ahead Options

These Creamy Crack Corn Salad are perfect for busy cooks looking to save time! You can prepare the creamy dressing (1 cup mayonnaise, 1 cup sour cream, ranch seasoning, garlic powder, onion powder, and paprika) up to 24 hours in advance, storing it in the fridge to keep it fresh. The corn, cheese, bacon, and green onions can be added just before serving to maintain their crunch and flavor. For best results, chill the combined salad for at least 2 hours (or overnight) to allow the flavors to meld beautifully. Just give it a gentle stir and adjust seasoning with salt and pepper before serving, ensuring you enjoy this delightful dish at its best!

How to Store and Freeze Crack Corn Salad

Fridge: Store your Crack Corn Salad in an airtight container for up to 3–4 days. It not only stays fresh but tastes even better after a day in the fridge!

Freezer: For longer storage, consider freezing the salad without add-ins like bacon or cheese. It can be frozen for up to 2 months. Thaw in the refrigerator and add fresh ingredients before serving.

Reheating: If refrigerated, simply stir well before serving. If frozen, ensure to let it thaw completely and adjust seasoning as needed before enjoying.

Traveling: If you're taking this salad to a potluck, use an insulated carrier to keep it chilled during transport.

Crack Corn Salad Variations

Feel free to get creative with your Crack Corn Salad and make it truly yours! The possibilities are endless, with variations that can add new textures and flavors.

  • Lighter Option: Replace sour cream with Greek yogurt and use low-fat mayonnaise for a creamy but lighter salad. It’s a great way to keep the deliciousness without the guilt!

  • Spicy Kick: Mix in diced jalapeños or a dash of your favorite hot sauce for an exciting twist. The heat will make your taste buds dance and balance beautifully with the creamy dressing.

  • Fresh Add-ins: Incorporate diced red bell peppers, cherry tomatoes, or even cubed avocado for an extra burst of freshness. These vibrant colors and textures elevate the salad while adding a healthy crunch.

  • Herbaceous Twist: Blend in chopped cilantro, chives, or parsley for added freshness and aroma. Fresh herbs can bring your salad to life, creating a delightful herb-infused experience.

  • Southwestern Version: Add black beans, chopped red onions, and a sprinkle of chili powder for a hearty twist. It’s a fun way to give a classic dish a southwestern flair that everyone will love!

  • Cheese Variations: Experiment with different cheeses like feta or pepper jack to change the flavor profile. Each cheese brings a unique character that can truly change the game!

  • Nuts & Seeds: Toss in some sunflower seeds or chopped nuts for a delightful crunch and an added layer of flavor. This makes for a wonderful surprise in every bite, adding texture that takes this salad to new heights.

  • Fruit Infusion: Consider adding diced fruits like mango or pineapple for a sweet and tangy contrast. The sweetness complements the creaminess perfectly, making each mouthful a summer delight.

For more delightful salads, check out this refreshing Avocado Egg Salad or try the classic German Potato Salad for a perfect side dish pairing!

Expert Tips for Crack Corn Salad

  • Chill Time Matters: Allowing the salad to chill for several hours maximizes flavor infusion, making every bite more delectable.
  • Avoid Watery Add-Ins: Steer clear of adding watery ingredients like tomatoes or avocados until just before serving to keep the salad’s texture intact.
  • Stir Before Serving: Gently stir the salad just before serving, as the dressing may settle, ensuring every bite is creamy and delicious.
  • Customize to Your Taste: Don’t hesitate to experiment with different add-ins, but be mindful not to overcrowd the salad so each flavor shines through.
  • Quality Ingredients: Using fresh corn or high-quality dressings can elevate this Crack Corn Salad, taking it from ordinary to extraordinary.

Crack Corn Salad Recipe FAQs

What type of corn should I use for this salad?
Absolutely! You can use fresh corn on the cob, frozen corn, or even canned corn kernels for this salad. If using fresh corn, about 4 ears are perfect, while frozen or canned corn should be drained prior to mixing.

How should I store leftover Crack Corn Salad?
Store your Crack Corn Salad in an airtight container in the refrigerator for up to 3–4 days. Keeping it chilled will maintain its creamy texture and enhance the flavors over time. Just remember to stir well before serving!

Can I freeze Crack Corn Salad?
Yes, but I recommend freezing it without the bacon and cheese to preserve the texture. Pack it in a freezer-safe container for up to 2 months. To enjoy, simply thaw in the refrigerator and then mix in the fresh ingredients before serving to ensure optimal taste.

What should I do if my salad seems too watery?
If your salad ends up watery, it could be from watery ingredients or too much dressing. One approach is to drain excess liquid by using a fine mesh strainer. Then, add a little more corn or shredded veggies to absorb the moisture. Moreover, serve the salad chilled to prevent sogginess.

Are there any dietary considerations for this recipe?
Definitely! For gluten-free eaters, use a gluten-free ranch dressing mix. You can also make it vegetarian by omitting the bacon and opting for a dairy-free cheese. Always check the labels of store-bought ingredients to ensure they meet your dietary needs.

How can I make this salad healthier?
Very simple! Substitute the regular mayonnaise with Greek yogurt to reduce calories and add protein. You can also opt for low-fat sour cream and incorporate more fresh veggies, such as bell peppers or cucumbers, to boost the salad's nutritional profile while keeping it flavorful.

Crack Corn Salad

Crack Corn Salad: Irresistibly Creamy & Customizable Delight

Enjoy this Crack Corn Salad, a creamy summer side dish that is not only delicious but also customizable to your preferences.
Print Recipe Pin Recipe
Prep Time 20 minutes mins
Chill Time 2 hours hrs
Total Time 2 hours hrs 20 minutes mins
Servings: 8 servings
Course: Salads
Cuisine: American
Calories: 220
Ingredients Equipment Method Nutrition Notes

Ingredients
  

For the Salad
  • 4 cups corn kernels fresh, frozen, or canned varieties
  • 1 cup mayonnaise
  • 1 cup sour cream can substitute with Greek yogurt
  • 1 packet ranch dressing mix homemade seasoning recommended
  • 1 teaspoon garlic powder fresh minced garlic can be used
  • 1 teaspoon onion powder fresh onions may be used
  • 1 teaspoon paprika smoked paprika can add extra flavor
  • 1 cup cheddar cheese dairy-free cheese for vegan option
  • 8 slices bacon crumbled, consider turkey bacon for a lighter option
  • 1/4 cup green onions chopped
  • to taste salt
  • to taste pepper
For Extra Flavor
  • additional veggies diced red bell peppers or cherry tomatoes
  • spicy elements jalapeños or hot sauce
  • herbs chopped cilantro, chives, or parsley
  • southwestern twist black beans and chili powder

Equipment

  • Mixing Bowl
  • Whisk
  • Spatula
  • Airtight Container

Method
 

Step 1: Prepare the Creamy Base
  1. In a large mixing bowl, whisk together 1 cup of mayonnaise, 1 cup of sour cream, 1 packet of ranch dressing mix, 1 teaspoon of garlic powder, 1 teaspoon of onion powder, and 1 teaspoon of paprika until smooth and creamy.
Step 2: Combine Salad Ingredients
  1. Add 4 cups of corn kernels, 1 cup of shredded cheddar cheese, 8 slices of crispy bacon (crumbled), and 1/4 cup of chopped green onions to the creamy mixture. Gently toss all the ingredients together until well-coated.
Step 3: Chill for Flavor Fusion
  1. Cover the bowl tightly and place it in the refrigerator for at least 2 hours, or preferably overnight.
Step 4: Final Touches Before Serving
  1. Once ready to serve, gently stir the salad and adjust seasoning with salt and pepper.

Nutrition

Serving: 1cupCalories: 220kcalCarbohydrates: 18gProtein: 4gFat: 18gSaturated Fat: 3gPolyunsaturated Fat: 1gMonounsaturated Fat: 2gCholesterol: 15mgSodium: 310mgPotassium: 200mgFiber: 1gSugar: 4gVitamin A: 5IUVitamin C: 4mgCalcium: 10mgIron: 4mg

Notes

Chill the salad for optimal flavor and stir gently before serving to ensure even distribution of ingredients.

Tried this recipe?

Let us know how it was!

Savor the Summer with Chicken Club Pasta Salad Delight

March 28, 2026 by Grace Snow Leave a Comment

Every summer gathering deserves a dish that shines—and that’s exactly what my Chicken Club Pasta Salad brings to the table! Picture a delightful toss of tender rotisserie chicken, crispy bacon, and vibrant veggies swirling together in a creamy dressing. This recipe offers a light, refreshing twist on traditional pasta salads, perfect for potlucks or casual lunches. With just 10 minutes of prep and a little chill time, it’s not only quick to whip up but also makes for a meal prep favorite that dazzles with flavor. Whether you're catering to picky eaters or health-conscious friends, the versatility of this Chicken Club Pasta Salad means you can easily adapt it to fit any dietary preference. Ready to uncover the magic of this summer staple? Let’s dive in!

Why is Chicken Club Pasta Salad a Must-Try?

Quick Preparation: Just 10 minutes of active time makes this salad a go-to for busy days or last-minute gatherings.

Versatile Ingredients: With options to swap in favorite vegetables or proteins, this salad caters to everyone—even those who enjoy a good Skillet Pasta with Sun-Dried Tomatoes!

Bold Flavors: The combination of crisp bacon, savory chicken, and zesty dressing creates a flavor explosion that refreshes your palate in every bite.

Perfect for Meal Prep: Make it ahead of time and enjoy it chilled—ideal for those looking to enjoy quick, satisfying meals throughout the week.

Crowd-Pleaser: Whether at a BBQ or a casual lunch, this delightful dish is sure to impress—even those who usually opt for heavier fare like Spatchcock Chicken will love it!

Chicken Club Pasta Salad Ingredients

For the Pasta
• Corkscrew-shaped pasta – Provides a fun texture; any pasta shape can be used if preferred.

For the Dressing
• Italian-style salad dressing – Adds a zesty kick; homemade dressing can elevate the flavor even more.
• Mayonnaise – Offers a creamy element; consider low-fat mayo or Greek yogurt for a lighter option.

For the Protein
• Chopped rotisserie chicken – A savory source of protein; leftover grilled chicken or turkey works well too.
• Crispy cooked bacon – Adds a savory crunch; opt for turkey bacon for a lighter touch or omit for vegetarian variant.

For the Vegetables
• Chopped celery – Brings a refreshing crunch; can swap with bell peppers for a different flavor.
• Chopped green bell pepper – Adds sweetness and crunch; feel free to mix colors or omit entirely.
• Cherry tomatoes – Provides juiciness and color; grape tomatoes or diced regular tomatoes are great substitutes.
• Avocado – Offers healthy fats and creaminess; add just before serving to keep it fresh.

For the Cheese
• Cubed Muenster cheese – Contributes richness and flavor; substitute with cheddar or mozzarella as desired.

Step‑by‑Step Instructions for Chicken Club Pasta Salad

Step 1: Cook the Pasta
Begin by boiling water in a large pot. Add a generous pinch of salt and toss in 8 ounces of corkscrew-shaped pasta. Cook the pasta for 8 to 10 minutes until it reaches an al dente texture, which means it should be firm yet tender. Once done, drain the pasta and rinse it under cold water to stop the cooking process and help it cool down quickly.

Step 2: Prepare the Dressing
In a large mixing bowl, combine ½ cup of Italian-style salad dressing with ¼ cup of mayonnaise. Use a whisk to blend them together until smooth and creamy; this will create a zesty base for your Chicken Club Pasta Salad. Make sure it’s well combined to ensure that every bite is deliciously flavored.

Step 3: Combine Ingredients
Add the cooled pasta to the dressing in the bowl, followed by 2 cups of chopped rotisserie chicken, 6 slices of crispy cooked bacon, and 1 cup of cubed Muenster cheese. Then, incorporate 1 cup of chopped celery, 1 chopped green bell pepper, and 1 cup of halved cherry tomatoes. Gently stir the mixture until all ingredients are coated evenly with the dressing.

Step 4: Chill
Cover the bowl with plastic wrap or a lid to seal in the flavors and prevent any odors from mingling in the refrigerator. Allow the Chicken Club Pasta Salad to chill for at least 30 minutes. This chilling time is vital for allowing the flavors to meld beautifully together and ensuring a refreshing taste when served.

Step 5: Garnish (Optional)
Just before serving, consider adding freshly chopped herbs like parsley or basil for an added pop of color and flavor. If desired, gently fold in 1 diced avocado to bring a creamy texture to the salad. Serve the Chicken Club Pasta Salad cold for a delightful and refreshing summer dish that will impress any guest!

Chicken Club Pasta Salad Variations

Customize your Chicken Club Pasta Salad with these creative and delicious tweaks!

  • Dairy-Free: Substitute cheese with nutritional yeast or omit it entirely for a lighter option that keeps all the flavors intact.
    You'll still get the comforting essence of a classic pasta salad.

  • Vegetarian Delight: Replace chicken and bacon with roasted chickpeas or grilled vegetables.
    This option keeps your salad hearty while staying entirely plant-based and delicious.

  • Whole Wheat Twist: Use whole wheat or legume-based pasta for added fiber and protein.
    It transforms your salad into a wholesome meal that fills you up!

  • Creamy Avocado Dressing: Mash ripe avocado with lime juice instead of using mayonnaise for a fresh, creamy alternative.
    This simple swap adds a delightful richness without extra fat.

  • Spicy Kick: Toss in some diced jalapeños or a sprinkle of red chili flakes to elevate flavor and introduce a fiery twist.
    Perfect for those who like their salads to have a little heat!

  • Seafood Fusion: Swap in shrimp or crab for a seafood spin on the traditional Chicken Club.
    It’s a unique twist that introduces a taste of the ocean with every bite. You might also enjoy this with Seafood Pasta on special occasions!

  • Nutty Crunch: Add a handful of toasted almonds or walnuts for a satisfying crunch that complements the creamy textures.
    The nuts will bring a lovely depth to your salad.

  • Herb Scents: Experiment with fresh herbs like dill, cilantro, or basil to refresh the overall flavor profile.
    An herbaceous lift can completely transform your dish into a gourmet experience.

Feel free to mix and match these variations to make your Chicken Club Pasta Salad your own!

Expert Tips for Chicken Club Pasta Salad

  • Pasta Prep: Rinse the pasta after cooking to prevent it from clumping together and ensure a light, airy texture in your Chicken Club Pasta Salad.

  • Dressing Mix: Whisk the Italian dressing and mayonnaise separately before combining with other ingredients for even flavor distribution throughout the salad.

  • Avocado Addition: Add the avocado just before serving to maintain its vibrant color and creamy texture, which enhances the overall dish.

  • Adjusting Moisture: If the salad seems dry after chilling, don’t hesitate to add a splash of dressing to help the flavors meld beautifully.

  • Vegetable Variety: Feel free to mix in seasonal veggies like zucchini or bell peppers, making your Chicken Club Pasta Salad versatile and exciting for every gathering.

What to Serve with Chicken Club Pasta Salad

Looking to create a memorable meal alongside this refreshing salad? Here are some delightful pairings that complement its vibrant flavors.

  • Warm Garlic Bread: Perfect for soaking up the creamy dressing and adding a comforting touch to your meal.

  • Grilled Veggies: A mix of seasonal vegetables like zucchini and bell peppers adds a smoky, charred flavor that contrasts beautifully with the salad.

  • Chilled Fruit Salad: Fresh, juicy fruits will cleanse your palate and provide a refreshing sweetness, making it an ideal side dish on warm days.

  • Iced Tea with Mint: This cool beverage enhances the salad’s flavors, offering a refreshing counterpart to its savory elements.

  • Classic Caesar Salad: The crunchy romaine, creamy dressing, and tangy cheese create a deliciously familiar contrast to the Chicken Club Pasta Salad.

  • Chocolate Mousse: Finish your meal on a sweet note with a light and airy dessert that satisfies without being too heavy. Its rich flavor pairs perfectly after a savory dish.

Embrace the joy of summer dining by pairing your Chicken Club Pasta Salad with these delicious options!

Make Ahead Options

These Chicken Club Pasta Salad preparations are a lifesaver for busy weeknights or gatherings! You can make the salad itself up to 24 hours in advance by combining the pasta, chicken, bacon, cheese, and veggies (except for the avocado), ensuring they’re well-coated with the dressing. Store it in an airtight container in the refrigerator to maintain freshness. Just remember to add diced avocado just before serving to keep it from browning. This way, you’ll have a delicious, ready-to-serve salad that tastes just as delightful as when freshly made, saving you time without compromising on flavor!

How to Store and Freeze Chicken Club Pasta Salad

Fridge: Store in an airtight container in the refrigerator for up to 3-4 days. This keeps the Chicken Club Pasta Salad fresh and ready for quick meals!

Freezer: For longer storage, freeze the salad without the avocado and dressing for up to 2 months. Be sure to use a freezer-safe container to maintain its quality.

Thawing: When ready to enjoy, thaw overnight in the fridge. Add fresh avocado and dressing just before serving for a delightful taste and texture.

Reheating: If preferred slightly warm, gently heat the Chicken Club Pasta Salad in the microwave, but make sure not to overheat it to preserve the fresh flavors and texture.

Chicken Club Pasta Salad Recipe FAQs

How do I choose ripe ingredients?
Absolutely! For the best flavor, select ripe cherry tomatoes that are firm and bright in color. Look for avocados that yield gently to pressure—this indicates ripeness. If you find dark spots all over the avocado, it may be overripe. For bell peppers, choose those that are vibrant and blemish-free for added crunch.

How should I store Chicken Club Pasta Salad?
Store your Chicken Club Pasta Salad in an airtight container in the refrigerator for up to 3-4 days. This keeps it fresh and ready for quick lunches or snacks throughout the week. It's important to keep the salad chilled, as it can spoil quickly if left out in warm temperatures.

Can I freeze Chicken Club Pasta Salad?
Yes! For optimal taste, freeze the salad without the avocado and dressing. Use a freezer-safe container, and it will keep well for up to 2 months. When you’re ready to enjoy it, simply thaw it overnight in the fridge and mix in fresh avocado and dressing just before serving for the best flavor.

What if my Chicken Club Pasta Salad seems dry after chilling?
Very! If you notice your salad appears dry after being chilled, add a splash of Italian dressing and gently stir to incorporate. This will rejuvenate the flavors and help everything meld beautifully together, ensuring a deliciously creamy texture remains intact.

Is this recipe suitable for my dietary needs?
Absolutely! This Chicken Club Pasta Salad is easily adaptable. For a lighter option, you can use Greek yogurt instead of mayonnaise, and turkey bacon or even omit it to make it vegetarian-friendly. Always check for personal allergies or dietary restrictions before serving, especially with ingredients like cheese and dressing.

Can I meal prep with this salad?
The more the merrier! Chicken Club Pasta Salad is perfect for meal prep. Prepare it in advance without the avocado and dressing to maintain freshness. Just add those ingredients right before serving to ensure a delightful, fresh taste at mealtime without hassle!

Chicken Club Pasta Salad

Savor the Summer with Chicken Club Pasta Salad Delight

Enjoy a delightful Chicken Club Pasta Salad that's perfect for summer gatherings, featuring chicken, bacon, and fresh vegetables.
Print Recipe Pin Recipe
Prep Time 10 minutes mins
Cook Time 10 minutes mins
Chill Time 30 minutes mins
Total Time 50 minutes mins
Servings: 6 servings
Course: Salads
Cuisine: American
Calories: 400
Ingredients Equipment Method Nutrition Notes

Ingredients
  

For the Pasta
  • 8 ounces corkscrew-shaped pasta Any pasta shape can be used if preferred.
For the Dressing
  • ½ cup Italian-style salad dressing Homemade dressing can elevate the flavor.
  • ¼ cup mayonnaise Consider low-fat mayo or Greek yogurt for a lighter option.
For the Protein
  • 2 cups chopped rotisserie chicken Leftover grilled chicken or turkey works well too.
  • 6 slices crispy cooked bacon Opt for turkey bacon for a lighter touch or omit for vegetarian variant.
For the Vegetables
  • 1 cup chopped celery Can swap with bell peppers for a different flavor.
  • 1 piece chopped green bell pepper Feel free to mix colors or omit entirely.
  • 1 cup halved cherry tomatoes Grape tomatoes or diced regular tomatoes are great substitutes.
  • 1 piece avocado Add just before serving to keep it fresh.
For the Cheese
  • 1 cup cubed Muenster cheese Substitute with cheddar or mozzarella as desired.

Equipment

  • Large pot
  • large mixing bowl
  • Whisk

Method
 

Step-by-Step Instructions
  1. Begin by boiling water in a large pot. Add a generous pinch of salt and toss in the corkscrew-shaped pasta. Cook for 8 to 10 minutes until al dente. Drain and rinse under cold water.
  2. In a large mixing bowl, combine the Italian-style salad dressing and mayonnaise. Whisk together until smooth and creamy.
  3. Add the cooled pasta, chopped rotisserie chicken, crispy cooked bacon, cubed Muenster cheese, chopped celery, chopped green bell pepper, and halved cherry tomatoes. Stir gently until combined.
  4. Cover with plastic wrap or a lid and chill for at least 30 minutes.
  5. Just before serving, add freshly chopped herbs or fold in the diced avocado. Serve cold.

Nutrition

Serving: 1servingCalories: 400kcalCarbohydrates: 35gProtein: 22gFat: 24gSaturated Fat: 6gPolyunsaturated Fat: 2gMonounsaturated Fat: 10gCholesterol: 80mgSodium: 600mgPotassium: 400mgFiber: 3gSugar: 3gVitamin A: 15IUVitamin C: 30mgCalcium: 15mgIron: 10mg

Notes

Rinse the pasta after cooking to prevent clumping. Whisk the dressing separately for better flavor distribution. Adjust moisture with additional dressing if needed. Feel free to mix in seasonal veggies.

Tried this recipe?

Let us know how it was!

Delicious Honeycrisp Apple Feta Salad for Cozy Fall Vibes

March 28, 2026 by Grace Snow Leave a Comment

As the leaves shift to vibrant hues and the air turns crisp, there’s a certain magic in embracing the season's natural bounty. This Vibrant Honeycrisp Apple Feta Salad is my go-to way to celebrate autumn’s harvest. With the delightful crunch of sweet Honeycrisp apples, creamy feta cheese, and the chewy burst of dried cranberries, it’s a healthy dish that not only pleases the palate but is also a breeze to prepare. Whether you’re hosting a festive gathering or just looking to elevate a busy weeknight meal, this salad is versatile and customizable—perfect for everyone at the table. Ready to bring a touch of fall to your kitchen? Let’s dive into the colorful flavors of this delicious and seasonal salad!

Why Is This Salad So Special?

Seasonal Freshness: This salad captures the essence of autumn with fresh Honeycrisp apples that deliver a crisp, juicy bite—perfectly complementing cooler days.

Quick and Easy: In just 15 minutes, you have a stunning dish ready for any gathering or weeknight meal without the fuss.

Versatile Customization: Feel free to switch out feta for goat cheese or toss in some grilled chicken for added protein—the options are endless!

Nutritious Goodness: Packed with vitamins from apples, greens, and nuts, this salad is a healthy choice you can feel good about.

Crowd-Pleasing Presentation: With its vibrant colors and textures, this salad not only satisfies the stomach but also draws admiration at your dining table, much like a delightful Tofu Caesar Salad!

Honeycrisp Apple Feta Salad Ingredients

For the Salad
• Honeycrisp Apples – provides a sweet, crunchy texture; choose firm ones for the best quality.
• Feta Cheese – adds a tangy flavor; crumble it for an even distribution or swap for goat cheese for a twist.
• Chopped Walnuts – delivers an earthy crunch; toasted pecans can be a tasty alternative or omit for nut-free options.
• Dried Cranberries – contribute sweetness and chewiness; feel free to substitute with your favorite dried fruit like raisins.
• Mixed Greens – forms the base; try a blend of arugula and butter lettuce for a delightful mix.

For the Dressing
• Olive Oil – serves as the dressing base; use high-quality oil for the best flavor.
• Apple Cider Vinegar – adds tanginess; lemon juice can work in a pinch as a substitute.
• Honey – sweetens the dressing and balances flavors; adjusting based on the apples' sweetness is important.
• Salt and Pepper – essentials for seasoning; adjust to your taste for a perfect finish.

Embrace the colorful crunch of this Honeycrisp Apple Feta Salad—your go-to for vibrant autumn meals!

Step‑by‑Step Instructions for Honeycrisp Apple Feta Salad

Step 1: Prepare the Dressing
In a small bowl, whisk together ¼ cup of high-quality olive oil, 2 tablespoons of apple cider vinegar, and 1 tablespoon of honey until the mixture is smooth and well combined. Season with a pinch of salt and freshly cracked pepper to taste. Set this dressing aside, allowing the flavors to meld while you prepare the salad ingredients.

Step 2: Assemble the Salad
Grab a large mixing bowl and layer a generous handful of mixed greens as your base. Select firm Honeycrisp apples and slice them thinly—aim for about ¼ inch thick. Arrange the apple slices beautifully over the greens, followed by crumbled feta, chopped walnuts, and a handful of dried cranberries to add visual appeal and flavor to your Honeycrisp Apple Feta Salad.

Step 3: Dress the Salad
Carefully drizzle the prepared dressing over the salad components, making sure to cover the greens and toppings evenly. This step not only adds flavor but also helps the salad ingredients shine. Consider using a spoon to help direct the dressing if it’s too thick, ensuring that every bit of deliciousness is included.

Step 4: Toss Gently
Using a pair of salad tongs, gently toss the salad to combine all the ingredients, being careful not to break apart the delicate apple slices or crumbled feta. Aim for a light folding motion, which ensures every bite captures the vibrant flavors of the Honeycrisp Apple Feta Salad without losing the appealing textures.

Step 5: Serve Immediately
Transfer the beautifully tossed salad to a serving platter or individual bowls. To keep the salad fresh and crunchy, it’s best to serve it immediately after tossing. Enjoy the explosive flavors and colorful presentation, perfect as a light meal or a side dish for your autumn celebrations!

What to Serve with Honeycrisp Apple Feta Salad

Elevate your cozy fall meal with delightful pairings that highlight the freshness of this vibrant salad!

  • Crispy Roasted Brussels Sprouts: Their earthy flavor complements the sweetness of apples, creating a well-rounded dish that’s sure to please.

  • Warm Quinoa Pilaf: The nutty quinoa adds a hearty texture, making each bite of salad even more satisfying when served alongside.

  • Sweet Potato Mash: Creamy and comforting, sweet potato mash contrasts beautifully with the crispness of the salad, delivering a delightful balance.

  • Grilled Chicken or Salmon: For a protein-packed option, grilled chicken or salmon adds heartiness while enhancing the autumn flavors of the salad.

  • Herbed Garlic Bread: The warmth of garlic bread pairs wonderfully with this fresh dish, offering a comforting touch to your meal.

  • Chai-Spiced Apple Cider: A warm sip of spiced apple cider echoes the flavors of the salad, creating a seasonal drink that guests will adore.

  • Pumpkin Cheesecake: End on a sweet note with a slice of creamy pumpkin cheesecake; its rich flavor beautifully complements the tartness of the salad.

  • Spiced Cranberry Smoothie: A refreshing and fruity drink option that echoes the dried cranberries in the salad while offering a nutritious touch.

  • Classic Lemonade: The tangy sweetness of lemonade acts as a zesty contrast to the rich, creamy feta in the salad, keeping things refreshing.

Each of these choices adds a unique flair to your table, crafting a delightful autumn feast everyone will remember.

Storage Tips for Honeycrisp Apple Feta Salad

  • Room Temperature: Once assembled, it's best to enjoy your Honeycrisp Apple Feta Salad immediately to retain freshness. If left out, consume within 2 hours to ensure food safety.

  • Fridge: Store leftover salad components separately in airtight containers. The mixed greens can last up to 1 day, while apples should be eaten within 1 day for optimal crunch.

  • Dressing: You can keep the dressing in the fridge for up to 3 days in a sealed container. Shake well before using to remix the ingredients.

  • Freezer: Freezing is not recommended for the prepared salad due to the texture loss of the fresh ingredients; however, you can freeze leftover dressing for future use within 1 month.

Make Ahead Options

These Honeycrisp Apple Feta Salads are a godsend for busy home cooks looking to save time! You can prepare the dressing up to 3 days in advance; simply whisk together the olive oil, apple cider vinegar, and honey, and store it in an airtight container in the refrigerator. Additionally, slice the Honeycrisp apples with a bit of lemon juice to prevent browning, and they can be stored in the fridge for up to 24 hours before serving. When you're ready to enjoy this vibrant Honeycrisp Apple Feta Salad, just toss the salad ingredients together with the pre-made dressing for a fresh, delicious meal that's just as wonderful as when you first prepared it!

Honeycrisp Apple Feta Salad Variations

Feel free to sprinkle your unique twist on this delightful salad, embracing flavors that excite your palate!

  • Protein Boost: Add grilled chicken or seared salmon to turn this salad into a hearty main dish that’s satisfying and delicious.

  • Crunchy Alternatives: Substitute chopped walnuts with toasted pecans or sunflower seeds for a change in texture and flavor; both options offer delightful crunch.

  • Herb Infusion: Mix in fresh herbs like basil or mint for a burst of freshness that elevates the salad's aroma and taste.

  • Vegan Delight: Swap feta with vegan cheese and use maple syrup instead of honey for a plant-based version that still tastes amazing.

  • Sweet and Savory Twist: Introduce thinly sliced red onion or pear for a sweet-savory balance that’ll keep your guests guessing!

  • Heat It Up: Sprinkle in some red pepper flakes or diced jalapeños to bring a touch of heat that beautifully contrasts with the salad's natural sweetness.

  • Nut-Free Option: Omit all nuts and include crispy chickpeas for added crunch without the allergens; they make for a protein-rich alternative.

  • Flavorful Dressings: Swap the olive oil dressing for a balsamic vinaigrette or some lemon-tahini sauce to add a whole new flavor profile—perfect for experimenting!

Enhancing your Honeycrisp Apple Feta Salad can create even more excitement at your table. If you love experimenting with fresh combinations, you might also enjoy a warming German Potato Salad or refreshing Balsamic Steak Salad as you explore the season's bountiful flavors!

Expert Tips for Honeycrisp Apple Feta Salad

  • Choose Firm Apples: Use firm Honeycrisp apples to ensure a crisp texture in your salad; avoid any that feel soft or bruised.

  • Add Freshness Last: Dress the Honeycrisp Apple Feta Salad just before serving to prevent the greens from wilting and maintaining the crispness.

  • Control Sweetness: Adjust the honey in your dressing based on the sweetness of your apples; it's crucial for balancing flavors perfectly.

  • Ingredient Prep: Slice the apples thinly for even distribution and a delightful crunch; thicker slices can dominate the salad's texture.

  • Mix and Match: Feel free to customize! Substitute feta with goat cheese or walnuts with toasted pecans for a fresh twist.

Honeycrisp Apple Feta Salad Recipe FAQs

How do I choose the best Honeycrisp apples?
Absolutely! When selecting Honeycrisp apples, look for firm, unblemished fruit. Avoid any apples that feel soft or have dark spots. The perfect apple should feel crisp in your hand and smell sweet; these cues indicate freshness and flavor.

How should I store leftover salad components?
For optimal freshness, store leftover components like mixed greens, apples, and feta separately in airtight containers. The greens will stay fresh for about 1 day, while sliced apples should be consumed within 1 day to maintain their crunch. This method keeps everything delightful and ready to enjoy!

Can I freeze the Honeycrisp Apple Feta Salad?
Freezing is not recommended for the prepared salad, as the fresh ingredients lose their texture when thawed. However, you can freeze the dressing in a sealed container or freezer bag for up to 1 month. Just thaw it in the fridge overnight before using again, and give it a good shake!

What if my apples turn brown before I get to use them?
If you need to slice your apples ahead of time, toss them in a little lemon juice to prevent browning. This simple trick not only preserves their color but also adds a slight tang that complements the salad beautifully.

Can I adjust the recipe to fit dietary restrictions?
Very! This Honeycrisp Apple Feta Salad can easily be customized. For a nut-free version, simply omit the walnuts or use seeds like sunflower seeds instead. If you need a dairy-free option, swap the feta for a plant-based cheese or omit it altogether. Enjoy personalizing it to fit your needs!

What are some good additions to this salad?
Feel free to get creative! You can add grilled chicken or seared salmon for extra protein. Swap feta with goat cheese for a delightful twist, or mix in some fresh herbs like mint or basil to elevate the flavor profiles. The more the merrier—tailor it to your taste!

Honeycrisp Apple Feta Salad

Delicious Honeycrisp Apple Feta Salad for Cozy Fall Vibes

This Honeycrisp Apple Feta Salad is a vibrant and healthy dish celebrating autumn's harvest.
Print Recipe Pin Recipe
Prep Time 15 minutes mins
Total Time 15 minutes mins
Servings: 4 servings
Course: Salads
Cuisine: American
Calories: 250
Ingredients Equipment Method Nutrition Notes

Ingredients
  

For the Salad
  • 2 cups Honeycrisp Apples sliced thinly
  • 1 cup Feta Cheese crumbled
  • 1/2 cup Chopped Walnuts toasted pecans can be a substitute
  • 1/2 cup Dried Cranberries or substitute with your favorite dried fruit
  • 4 cups Mixed Greens a blend of arugula and butter lettuce is recommended
For the Dressing
  • 1/4 cup Olive Oil high-quality for best flavor
  • 2 tablespoons Apple Cider Vinegar or lemon juice as a substitute
  • 1 tablespoon Honey adjust based on apple sweetness
  • to taste Salt and Pepper for seasoning

Equipment

  • Mixing Bowl
  • Whisk
  • salad tongs
  • small bowl

Method
 

Dressing Preparation
  1. In a small bowl, whisk together olive oil, apple cider vinegar, and honey until smooth. Season with salt and pepper to taste.
Salad Assembly
  1. In a large mixing bowl, layer mixed greens as the base. Add sliced Honeycrisp apples, crumbled feta, chopped walnuts, and dried cranberries.
Dressing the Salad
  1. Drizzle the prepared dressing over the salad components and ensure an even coverage.
Tossing
  1. Gently toss the salad with tongs to combine without breaking the apple slices or feta.
Serving
  1. Transfer the salad to a serving platter or individual bowls and serve immediately.

Nutrition

Serving: 1bowlCalories: 250kcalCarbohydrates: 30gProtein: 6gFat: 12gSaturated Fat: 3gPolyunsaturated Fat: 2gMonounsaturated Fat: 7gCholesterol: 10mgSodium: 300mgPotassium: 250mgFiber: 4gSugar: 15gVitamin A: 500IUVitamin C: 15mgCalcium: 100mgIron: 1mg

Notes

For best flavor, dress the salad just before serving. Feel free to customize ingredients for your preferences.

Tried this recipe?

Let us know how it was!

Refreshing Simple Strawberry Romaine Feta Salad for Summer Bliss

March 28, 2026 by Grace Snow Leave a Comment

As I crunched into the first bite of this Simple Strawberry Romaine Feta Salad, a wave of summer bliss washed over me. The sweetness of ripe strawberries dances harmoniously with the crispness of fresh romaine and the creamy tang of feta—it's truly a delightful medley! Best of all, this vibrant salad comes together in just 15 minutes, making it perfect for a light lunch or a refreshing side dish for your favorite grilled meats. You can easily customize it based on what you have on hand, turning it into a versatile option for any occasion. Ready to savor the perfect balance of flavors and textures? Let’s dive in and create a salad that not only nourishes the body but also the soul!

Why is this salad a must-try?

Freshness in every bite: This Simple Strawberry Romaine Feta Salad bursts with seasonal flavors that refresh your palate.
Quick preparation: In just 15 minutes, you can whip up this vibrant dish, making it a go-to for busy days.
Customizable: With the ability to swap in seasonal fruits or proteins, it fits any craving or dietary need. Consider pairing it with a delicious Chicken Salad with Apples for a memorable meal!
Crowd-pleaser: Perfect for picnics or barbecues, it’s sure to impress guests and family alike.
Textural delight: A beautiful medley of crunchy romaine, juicy strawberries, and creamy feta creates an irresistible salad experience!

Simple Strawberry Romaine Feta Salad Ingredients

For the Dressing
• Olive Oil – Main fat in the dressing, providing richness; substitute with avocado oil for a different flavor.
• Cider Vinegar – Adds tanginess to the dressing; apple cider vinegar can be used as an alternative.
• Mustard – Helps emulsify the dressing, giving it a slight kick; Dijon mustard is recommended for optimal flavor.
• Garlic – Provides aromatic depth to the dressing; can be omitted for a milder taste.
• Honey – Adds sweetness to balance the acidity; maple syrup can be used for a vegan version.
• Salt – Enhances overall flavor; adjust to taste.
• Shallot – Adds a mild onion flavor; can be substituted with red onion or omitted if unavailable.

For the Salad
• Strawberries – Star fruit of the salad; use fresh strawberries for the best results—frozen strawberries should not be used as they will become mushy.
• Spinach – Provides nutritional value and adds a tender texture; can be replaced with kale for a heartier option.
• Romaine – Contributes crunchiness and forms the base of the salad; iceberg lettuce is a suitable substitute.
• Feta Cheese – Creamy element that adds saltiness; crumble fresh feta for better texture; goat cheese can be an alternative.
• Almonds – Add crunch and nutty flavor; substitute walnuts or sunflower seeds if nut allergy is a concern.
• Red Onion – Provides a sharp taste; adjust quantity based on personal preference.

Step‑by‑Step Instructions for Simple Strawberry Romaine Feta Salad

Step 1: Toast the Almonds
Begin by heating a dry skillet over medium heat. Add slivered almonds and toast them for about 4 minutes, stirring occasionally until they turn golden brown and fragrant. Keep a close eye on them, as they can burn quickly! Once toasted, transfer the almonds to a plate to cool completely.

Step 2: Prepare the Dressing
Next, mince the garlic and shallot, and dice one strawberry. In a blender, combine these ingredients with olive oil, cider vinegar, Dijon mustard, honey, and salt. Blend the mixture until smooth and emulsified. This homemade vinaigrette will elevate your Simple Strawberry Romaine Feta Salad with a burst of flavor.

Step 3: Wash the Greens
Thoroughly rinse and dry the romaine and spinach leaves. Use a salad spinner or pat them dry with a clean kitchen towel to ensure they aren’t soggy. Tear the romaine into bite-sized pieces and leave the spinach whole, creating a beautiful base for your salad.

Step 4: Assemble the Salad
Divide the freshly washed romaine and spinach evenly among serving plates. Crumble feta cheese on top, then scatter the sliced strawberries, red onion, and toasted almonds. This mix of textures and colors makes the Simple Strawberry Romaine Feta Salad visually appealing and delicious.

Step 5: Serve with Dressing
Just before serving, drizzle the dressing over the salad or offer it on the side to keep the greens crisp. Enjoy this vibrant blend of flavors, making it a refreshing dish perfect for any summer meal.

Expert Tips for Simple Strawberry Romaine Feta Salad

• Keep It Crisp: Always dress the salad right before serving to maintain the freshness and crunch of the greens.

• Dry Thoroughly: Make sure to dry your washed greens completely; excess water can lead to a soggy salad and dilute the flavors.

• Mind the Almonds: Toast the almonds carefully, stirring frequently, as they can burn quickly, ruining their nutty flavor.

• Fresh Berries: Use fresh strawberries for best results. Avoid frozen strawberries, as they can turn mushy and affect the salad's texture.

• Taste as You Go: Adjust seasoning to your preference. Tasting the dressing helps ensure harmony in your Simple Strawberry Romaine Feta Salad.

Simple Strawberry Romaine Feta Salad Variations

Feel free to get creative and customize your salad experience with these delightful twists!

  • Berry Bliss: Swap strawberries with fresh blueberries or diced peaches to highlight seasonal flavors. This variation adds a sweet surprise in each bite!
  • Protein Boost: Add grilled chicken or salmon on top for a heartier meal. It makes this salad not just a side but a satisfying entrée that can be enjoyed any day.
  • Nutty Alternatives: Substitute almonds with pecans or hazelnuts for a different crunch. Each nut adds its unique flavor, enriching the overall experience and delighting your taste buds.
  • Cheese Swap: Try goat cheese instead of feta for a tangier flavor profile. It pairs beautifully with the sweet strawberries and would compliment a Grilled Balsamic Steak Salad perfectly!
  • Dressing Variations: Experiment with a balsamic vinaigrette instead of the standard dressing for an enriched, sweet, yet tangy kick that takes your salad to another level.
  • Green Base: Substitute kale for romaine for a more robust option. Kale offers a hearty texture and earthy flavor that holds up wonderfully with the dressing.
  • Heat it Up: For a touch of heat, toss in some sliced jalapeños or a pinch of red pepper flakes. This spicy twist can revitalize your salad for those who enjoy a little zing!
  • Herb Infusion: Incorporate fresh herbs like mint or basil for an aromatic lift. The fresh scent complements the other flavors beautifully, evoking a fresh garden in each bite.

With so many delightful options to explore, you can always craft your ideal Simple Strawberry Romaine Feta Salad tailored to fit your tastes or the season!

Make Ahead Options

Enjoying this Simple Strawberry Romaine Feta Salad can be a breeze with a bit of meal prep! You can wash and dry the romaine and spinach up to 3 days in advance, storing them in an airtight container lined with paper towels to absorb excess moisture. The homemade vinaigrette can be prepared and refrigerated in a sealed jar for up to 1 week. Just remember to slice the strawberries and assemble the salad just before serving to keep everything fresh and crunchy. When ready to enjoy, simply toss the greens with the dressing and top with feta, strawberries, and almonds for a quick, delicious meal that feels gourmet!

What to Serve with Quick and Easy Strawberry Romaine Feta Salad

This salad shines on its own, but pairing it with complementary dishes will elevate your dining experience to new heights.

  • Grilled Chicken: Juicy, grilled chicken breasts add a delightful heartiness, harmonizing perfectly with the crisp salad.
  • Steak Tacos: Flavorful steak tacos bring a satisfying, meaty contrast, perfect for a summer family gathering.
  • Quinoa Bowl: Serve alongside a chilled quinoa bowl for additional texture and a healthy grain option that rounds out the meal beautifully.
  • Roasted Vegetables: The warmth of roasted seasonal vegetables adds depth while providing a gorgeous burst of colors on your plate.
  • Chilled White Wine: A crisp Sauvignon Blanc enhances the refreshing notes of the salad, making for a delightful complement.
  • Lemon Sorbet: For dessert, a light and zesty lemon sorbet cleanses the palate after the vibrant flavors of the salad.
  • Caprese Skewers: These mozzarella, basil, and tomato bites are refreshing on their own, elevating your appetizer game when paired with the Simple Strawberry Romaine Feta Salad.
  • Pasta with Pesto: For a slightly heavier side, a pasta salad tossed in bright pesto sauce offers a delightful burst of flavor and texture.
  • Garlic Bread: Serve with warm, buttery garlic bread to soak up any leftover vinaigrette, creating a comforting addition to your meal.
  • Lemonade: A glass of homemade lemonade brings together the freshness and brightness of summer—a perfect beverage to enjoy with your salad.

How to Store and Freeze Simple Strawberry Romaine Feta Salad

Fridge: Store any leftover salad in an airtight container for up to 2 days, but keep the dressing separate until serving to maintain freshness.

Dressing Storage: Keep the homemade vinaigrette in an airtight jar in the fridge for up to 1 week. Shake well before using.

Greens Prep: Wash and dry romaine and spinach, then store in a container lined with paper towels for up to 3-4 days.

Freezing: This salad is not suitable for freezing, as the texture of the fresh ingredients, especially romaine and strawberries, will suffer.

Simple Strawberry Romaine Feta Salad Recipe FAQs

How do I choose ripe strawberries?
Look for strawberries that are bright red with a shiny appearance. They should be firm, free of dark spots, and the green tops should be fresh and green. Avoid strawberries with soft patches or excessive bruising as that indicates overripeness.

How long can I store the salad in the fridge?
You can store leftover Simple Strawberry Romaine Feta Salad in an airtight container for up to 2 days. However, it's ideal to keep the dressing separate until serving to prevent the greens from wilting and losing their crispness.

Can I freeze the Simple Strawberry Romaine Feta Salad?
Unfortunately, freezing this salad is not recommended. The fresh textures of romaine and strawberries won't hold up after being frozen, turning mushy when thawed. Instead, consider preparing smaller batches to enjoy fresh!

What if I have nut allergies? Can I still make this salad?
Absolutely! If nut allergies are a concern, simply omit the almonds or substitute them with seeds like sunflower seeds or pumpkin seeds for that delightful crunch without any allergens. You can also toss in some crispy chickpeas for added texture.

Can I make this salad ahead of time?
Yes, but with a few tips! Wash and dry your greens ahead of time, storing them in a container lined with paper towels to keep them fresh for about 3-4 days. You can also prepare the dressing a week in advance and store it in an airtight jar in the fridge. Just combine everything right before serving for the best flavor and freshness!

Simple Strawberry Romaine Feta Salad

Refreshing Simple Strawberry Romaine Feta Salad for Summer Bliss

This Simple Strawberry Romaine Feta Salad is a refreshing blend of flavors, perfect for summer meals or light lunches.
Print Recipe Pin Recipe
Prep Time 15 minutes mins
Total Time 15 minutes mins
Servings: 4 servings
Course: Salads
Cuisine: American
Calories: 280
Ingredients Equipment Method Nutrition Notes

Ingredients
  

Dressing Ingredients
  • 1/4 cup Olive Oil Substitute with avocado oil for a different flavor.
  • 2 tablespoons Cider Vinegar Apple cider vinegar can be used as an alternative.
  • 1 teaspoon Dijon Mustard Recommended for optimal flavor.
  • 1 clove Garlic Can be omitted for a milder taste.
  • 1 teaspoon Honey Maple syrup can be used for a vegan version.
  • 1/2 teaspoon Salt Adjust to taste.
  • 1 small Shallot Can be substituted with red onion or omitted if unavailable.
Salad Ingredients
  • 2 cups Fresh Strawberries Use fresh strawberries for the best results.
  • 2 cups Spinach Can be replaced with kale for a heartier option.
  • 4 cups Romaine Lettuce Iceberg lettuce is a suitable substitute.
  • 1 cup Feta Cheese Crumble fresh feta for better texture.
  • 1/2 cup Almonds Substitute walnuts or sunflower seeds if nut allergy is a concern.
  • 1/4 cup Red Onion Adjust quantity based on personal preference.

Equipment

  • Skillet
  • Blender
  • Salad Spinner

Method
 

Salad Preparation Steps
  1. Step 1: Toast the Almonds - Begin by heating a dry skillet over medium heat. Add slivered almonds and toast them for about 4 minutes, stirring occasionally until they turn golden brown and fragrant. Keep a close eye on them, as they can burn quickly! Once toasted, transfer the almonds to a plate to cool completely.
  2. Step 2: Prepare the Dressing - Mince the garlic and shallot, and dice one strawberry. In a blender, combine these ingredients with olive oil, cider vinegar, Dijon mustard, honey, and salt. Blend the mixture until smooth and emulsified.
  3. Step 3: Wash the Greens - Thoroughly rinse and dry the romaine and spinach leaves. Tear the romaine into bite-sized pieces and leave the spinach whole.
  4. Step 4: Assemble the Salad - Divide the freshly washed romaine and spinach evenly among serving plates. Crumble feta cheese on top, then scatter the sliced strawberries, red onion, and toasted almonds.
  5. Step 5: Serve with Dressing - Just before serving, drizzle the dressing over the salad or offer it on the side to keep the greens crisp.

Nutrition

Serving: 1bowlCalories: 280kcalCarbohydrates: 20gProtein: 6gFat: 22gSaturated Fat: 3gPolyunsaturated Fat: 2gMonounsaturated Fat: 15gCholesterol: 10mgSodium: 240mgPotassium: 340mgFiber: 3gSugar: 8gVitamin A: 1500IUVitamin C: 50mgCalcium: 300mgIron: 1.5mg

Notes

Dress the salad right before serving for maximum freshness. Adjust seasoning to taste.

Tried this recipe?

Let us know how it was!

Blueberry Pistachio Spring Salad - A Crunchy, Refreshing Delight

March 28, 2026 by Grace Snow Leave a Comment

As spring rolls in and the sun begins to warm our days, I can’t help but think about all the vibrant, fresh ingredients waiting to make their seasonal debut. One of my absolute favorites is this Blueberry Pistachio Spring Salad, which perfectly captures the essence of the season. Not only is it a delightful burst of flavors—with the sweetness of juicy blueberries and the satisfying crunch of pistachios—but it’s also a breeze to whip up in just 15 minutes! Whether you're looking for a quick weeknight meal or a stunning side for your next gathering, this salad is vegetarian, gluten-free, and packed with wholesome goodness. Curious how to bring this colorful dish to your table? Let’s dive into the recipe!

Why is this salad a must-try?

Simplicity at Its Best: This Blueberry Pistachio Spring Salad comes together in just 15 minutes, making it perfect for a quick weeknight meal.

Vibrant Ingredients: With juicy blueberries and crunchy pistachios, every bite is a delightful explosion of flavor and texture.

Healthy and Wholesome: Packed with good fats and antioxidants, this salad supports a balanced diet while still being satisfying.

Versatile Adaptations: Feel free to swap in seasonal fruits like apples or peaches or add hearty grains for a filling twist. For an equally delicious side, consider preparing a Chicken Salad Apples or Tofu Caesar Salad to accompany your plate!

Crowd-Pleaser: Its vibrant colors and refreshing flavors make this salad a surefire hit at gatherings or barbecue parties!

Blueberry Pistachio Spring Salad Ingredients

For the Salad
• Mixed Salad Greens – a soft, crisp canvas that enhances the fresh flavors.
• Fresh Blueberries – opt for sweet seasonal blueberries for a juicy burst of flavor.
• Shelled Pistachios – contributes remarkable crunch; walnuts or almonds can easily substitute for variation.
• Crumbled Feta Cheese – adds a creamy, savory contrast; goat cheese is a fantastic alternative.
• Red Onion (thinly sliced) – provides a sharp note; switch to mild green onion for a softer taste.

For the Dressing
• Extra Virgin Olive Oil – high-quality olive oil enriches the salad with depth and flavor.
• Honey – a natural sweetener for the dressing; maple syrup works as a delightful vegan substitute.
• Balsamic Vinegar – delivers a tangy touch; apple cider vinegar can be used if preferred.
• Dijon Mustard – helps emulsify the dressing; regular mustard is an effective substitute.
• Salt – enhances the overall taste; sea salt or kosher salt offers a lovely texture.
• Black Pepper – a dash adds a hint of heat; freshly ground provides the best flavor.

Dive into the freshness of this Blueberry Pistachio Spring Salad and savor every nourishing bite!

Step‑by‑Step Instructions for Blueberry Pistachio Spring Salad

Step 1: Wash Greens
Begin by rinsing the mixed salad greens thoroughly under cold water to remove any dirt or impurities. Use a salad spinner to dry the greens completely, ensuring they remain crisp and prevent the salad from becoming soggy. This will serve as a refreshing base for your Blueberry Pistachio Spring Salad.

Step 2: Prepare Blueberries
Next, gently rinse the fresh blueberries and place them in a colander to drain. Take a moment to check for any damaged berries, removing them to ensure only the juiciest and sweetest blueberries are added to your salad. Their vibrant color will enhance the salad's appeal and flavor.

Step 3: Chop Pistachios
Now, take your shelled pistachios and roughly chop them into smaller pieces. Aim for a mix of sizes to provide a delightful crunch throughout the Blueberry Pistachio Spring Salad. Set the chopped nuts aside, as they will add texture and richness to the overall dish.

Step 4: Crumble Feta
In a separate bowl, crumble the feta cheese into small, bite-sized pieces. This creamy addition will create a savory contrast to the sweetness of the blueberries. The feta's richness enhances the salad, so sprinkle it generously over your mixed ingredients later in the process.

Step 5: Slice Onion
Peel the red onion and slice it thinly into rings or half-rings, aiming for uniform thinness. The sharpness of the onion is essential for balancing the sweetness of the blueberries in your Blueberry Pistachio Spring Salad. If preferred, you can substitute with green onion for a milder flavor.

Step 6: Make Dressing
In a small bowl, whisk together the extra virgin olive oil, honey, balsamic vinegar, Dijon mustard, salt, and freshly ground black pepper until the mixture is smooth and well combined. This dressing will beautifully coat all your ingredients, adding a lovely depth of flavor that complements the salad perfectly.

Step 7: Assemble Salad
In a large mixing bowl, combine the prepared salad greens, fresh blueberries, chopped pistachios, crumbled feta, and sliced red onion. Gently fold the ingredients together to ensure an even distribution of flavors while preserving the integrity of the blueberries.

Step 8: Dress Salad
Pour the dressing over the assembled salad and toss gently to coat all ingredients evenly. Be careful not to bruise the blueberries; a soft hand will ensure every bite remains delightful. This step is crucial for melding the flavors in your Blueberry Pistachio Spring Salad.

Step 9: Serve
Finally, taste the salad and adjust the seasoning if needed. Serve the Blueberry Pistachio Spring Salad immediately for a fresh experience. If you prefer, refrigerate it for a brief time before serving to enjoy it chilled, keeping that garden-fresh essence intact.

What to Serve with Blueberry Pistachio Spring Salad

As spring unfolds, you’ll want to create a delightful meal that complements the bright flavors of this refreshing salad.

  • Grilled Chicken: The savory, smoky flavor pairs beautifully with the fruity notes of the salad and adds a hearty element.

  • Quinoa Pilaf: This nutty side dish adds more texture and rounds out your meal with wholesome grains, making it satisfying and nutritious.

  • Roasted Asparagus: Tender and lightly charred, these greens highlight the freshness of the salad while adding a lovely earthy counterbalance.

  • Garlic Bread: Crunchy and buttery, this classic side is perfect for mopping up any leftover dressing, creating a comforting contrast to the salad.

  • Chilled White Wine: A crisp Sauvignon Blanc or Pinot Grigio enhances the fresh flavors, making it the perfect accompaniment to your meal.

  • Apple Crisp: For dessert, a warm, sweet apple crisp sprinkled with oats offers a cozy finish that complements the vibrant theme of the meal.

  • Mango Smoothie: Refreshing and fruity, this drink provides a tropical twist that brightens up any spring table and pairs well with the salad's flavors.

Expert Tips for Blueberry Pistachio Spring Salad

  • Dry Greens Well: Make sure to thoroughly dry the mixed salad greens; excess moisture can lead to a soggy salad.
  • Gently Toss Ingredients: Be careful when mixing; bruising the blueberries can release excess juice and alter the salad’s texture.
  • Keep Ingredients Separate: Prepare each component ahead of time and combine just before serving to maintain freshness and crispness in your Blueberry Pistachio Spring Salad.
  • Presentation Matters: Reserve a few whole blueberries and pistachios for a stunning garnish atop the salad, making it visually appealing for guests.
  • Taste Before Serving: Always taste and adjust seasoning before serving; a little extra salt or pepper can elevate the flavors wonderfully.

How to Store and Freeze Blueberry Pistachio Spring Salad

Fridge: Store any leftover salad in an airtight container in the refrigerator for up to 2 days. Keep the dressing on the side to maintain the crispness of the greens.

Room Temperature: It's best to avoid leaving the Blueberry Pistachio Spring Salad at room temperature for more than 2 hours, especially if it contains feta cheese.

Freezer: Freezing is not recommended for this salad due to the delicate nature of the greens and blueberries; they won’t retain their texture once thawed.

Reheating: This salad is best enjoyed fresh, so there's no reheating necessary or recommended. The flavors are brightest when served chilled or at room temperature.

Make Ahead Options

This Blueberry Pistachio Spring Salad is perfect for meal prep, allowing busy home cooks to enjoy a fresh, vibrant dish with minimal effort! You can wash and dry the mixed salad greens up to 3 days in advance, as well as prepare the blueberries and pistachios for a delightful flavor blend. Just store them separately in airtight containers in the refrigerator to maintain their quality. The homemade dressing can be whisked together up to 24 hours ahead of time; simply keep it stored in the fridge. When you're ready to serve, combine all components in a bowl, toss gently with the dressing, and enjoy a refreshing salad that tastes just as delicious as when you made it fresh!

Blueberry Pistachio Spring Salad Variations

Feel free to let your creativity shine as you customize this beautiful salad with exciting twists and swaps!

  • Fruit Swap: Replace blueberries with seasonal fruits like sliced apples or peaches for a sweet twist. Each fruit adds its own unique flavor, so feel free to explore!

  • Grain Add-In: Add cooked quinoa or farro to make the salad heartier and more filling. A grain boost not only enhances texture but also brings a delightful chewiness to every bite.

  • Vegan Alternative: For a vegan version, swap feta with crumbled tofu or chickpeas. The tofu adds protein, while chickpeas bring a lovely creaminess that still complements the other flavors beautifully.

  • Nut Variation: Switch pistachios for walnuts or almonds to change the crunch factor. Each nut has its own distinct taste and texture, providing new surprises in every mouthful.

  • Herb Infusion: Toss in fresh herbs like mint or basil for an aromatic lift. Their fragrant notes will transform the salad, giving it a refreshing summer vibe that’s hard to resist.

  • Creamy Dressing: Replace the vinaigrette with a creamy dressing of your choice, like avocado dressing or tahini. The creaminess beautifully melds with the other ingredients, catering to those who prefer richer flavors.

  • Spicy Kick: For those who crave heat, sprinkle in some red pepper flakes or diced jalapeños. This kick will elevate the salad and create a lively contrast with the sweetness of the blueberries.

For a delightful experience, think about how these variations might complement other seasonal dishes. Perhaps enjoy your modified salad alongside a robust German Potato Salad or a zesty Grilled Balsamic Steak Salad. Happy cooking, and enjoy making this salad your own!

Blueberry Pistachio Spring Salad Recipe FAQs

How do I choose the right blueberries for my salad?
Absolutely! When selecting blueberries, look for ones that are plump, firm, and have a deep blue color. Avoid any berries with dark spots or wrinkles, as they signify overripeness. Seasonal blueberries are usually the sweetest and most flavorful, making them perfect for your Blueberry Pistachio Spring Salad.

What's the best way to store leftovers?
To keep your Blueberry Pistachio Spring Salad fresh, store any leftovers in an airtight container in the refrigerator for up to 2 days. I recommend keeping the dressing separate until you're ready to enjoy it again. This way, the greens stay crisp and delicious!

Can I freeze Blueberry Pistachio Spring Salad?
I wouldn't recommend freezing this salad. Freezing can alter the texture of both the greens and the blueberries, making them mushy when thawed. If you want to prep ingredients in advance, you can freeze the pistachios, while keeping the salad components fresh in the fridge until serving.

What should I do if my salad dressing is too thick?
Very! If your dressing turns out thicker than you'd like, just whisk in a little extra olive oil or a splash of water to loosen it up. This can help it blend seamlessly with the salad ingredients. Taste as you go to adjust the flavor!

Is this salad suitable for people with nut allergies?
For sure! If you're making this salad for someone with a nut allergy, you can easily swap out the pistachios for seeds, like sunflower or pumpkin seeds, to maintain that satisfying crunch while keeping it safe for everyone. Just make sure to check the other ingredients for any allergens, particularly the feta cheese if dairy allergies are a concern.

Blueberry Pistachio Spring Salad

Blueberry Pistachio Spring Salad - A Crunchy, Refreshing Delight

Discover the freshness of Blueberry Pistachio Spring Salad, a vibrant and nutritious dish perfect for spring.
Print Recipe Pin Recipe
Prep Time 15 minutes mins
Total Time 15 minutes mins
Servings: 4 servings
Course: Salads
Cuisine: American
Calories: 250
Ingredients Equipment Method Nutrition Notes

Ingredients
  

For the Salad
  • 4 cups Mixed Salad Greens a soft, crisp canvas that enhances the fresh flavors
  • 2 cups Fresh Blueberries opt for sweet seasonal blueberries for a juicy burst of flavor
  • 1 cup Shelled Pistachios contributes remarkable crunch
  • 1 cup Crumbled Feta Cheese adds a creamy, savory contrast
  • 1/2 medium Red Onion (thinly sliced) provides a sharp note
For the Dressing
  • 1/4 cup Extra Virgin Olive Oil high-quality olive oil enriches the salad
  • 2 tablespoons Honey natural sweetener for the dressing
  • 2 tablespoons Balsamic Vinegar delivers a tangy touch
  • 1 tablespoon Dijon Mustard helps emulsify the dressing
  • 1 teaspoon Salt enhances the overall taste
  • 1/2 teaspoon Black Pepper a dash adds a hint of heat

Equipment

  • Salad Spinner
  • Colander
  • Mixing Bowl
  • Whisk

Method
 

Preparation Steps
  1. Wash Greens: Rinse the mixed salad greens thoroughly under cold water and dry them completely.
  2. Prepare Blueberries: Gently rinse and drain the fresh blueberries, removing damaged berries.
  3. Chop Pistachios: Roughly chop the shelled pistachios into smaller pieces.
  4. Crumble Feta: Crumble the feta cheese into small, bite-sized pieces.
  5. Slice Onion: Peel and thinly slice the red onion.
  6. Make Dressing: Whisk olive oil, honey, balsamic vinegar, Dijon mustard, salt, and black pepper in a small bowl.
  7. Assemble Salad: Combine the salad greens, blueberries, pistachios, feta, and onion in a large bowl.
  8. Dress Salad: Pour the dressing over the salad and toss gently.
  9. Serve: Adjust seasoning if necessary and serve immediately.

Nutrition

Serving: 1bowlCalories: 250kcalCarbohydrates: 25gProtein: 6gFat: 16gSaturated Fat: 3gPolyunsaturated Fat: 7gMonounsaturated Fat: 6gCholesterol: 15mgSodium: 300mgPotassium: 400mgFiber: 4gSugar: 10gVitamin A: 300IUVitamin C: 30mgCalcium: 150mgIron: 1mg

Notes

For best results, prepare each component ahead of time and combine just before serving to maintain freshness.

Tried this recipe?

Let us know how it was!
  • « Previous Page
  • 1
  • …
  • 7
  • 8
  • 9
  • 10
  • 11
  • …
  • 21
  • Next Page »

Welcome!

Hi, I’m Grace, a Sydney-based home cook with a passion for bold flavors and trending ingredients. Whether you’re a busy beginner or a seasoned foodie, you’ll find dishes here that are fresh, fun, and full of flavor.

More about me

Popular Recipes

  • Honey Lime Chicken & Avocado Rice Bowl
    Honey Lime Chicken & Avocado Rice Bowl for a Flavor Burst
  • Tasty Italian Pasta Salad
    Delight in this Easy Tasty Italian Pasta Salad for Summer Fun
  • Garlic Butter Chicken Pasta
    Garlic Butter Chicken Pasta That’ll Wow Your Family Tonight
  • Creamy, Spicy Chicken Pasta
    Creamy, Spicy Chicken Pasta with Fresh Summer Veggies

Footer

↑ back to top

About

  • Privacy Policy
  • Disclaimer
  • Terms & Conditions

Newsletter

  • Sign Up! for emails and updates

Contact

  • About me
  • Contact me

Copyright © 2025 TastyTrendIngredients