tastytrendingredients

  • Home
  • Recipes
    • Appetizers
    • Breakfast
    • Dessert
    • Dinner
    • Drinks
    • Salads
    • Snacks
    • Soups
  • About me
  • Contact
menu icon
go to homepage
  • Home
  • Recipes
    • Appetizers
    • Breakfast
    • Dessert
    • Dinner
    • Drinks
    • Salads
    • Snacks
    • Soups
  • About me
  • Contact
search icon
Homepage link
  • Home
  • Recipes
    • Appetizers
    • Breakfast
    • Dessert
    • Dinner
    • Drinks
    • Salads
    • Snacks
    • Soups
  • About me
  • Contact
×

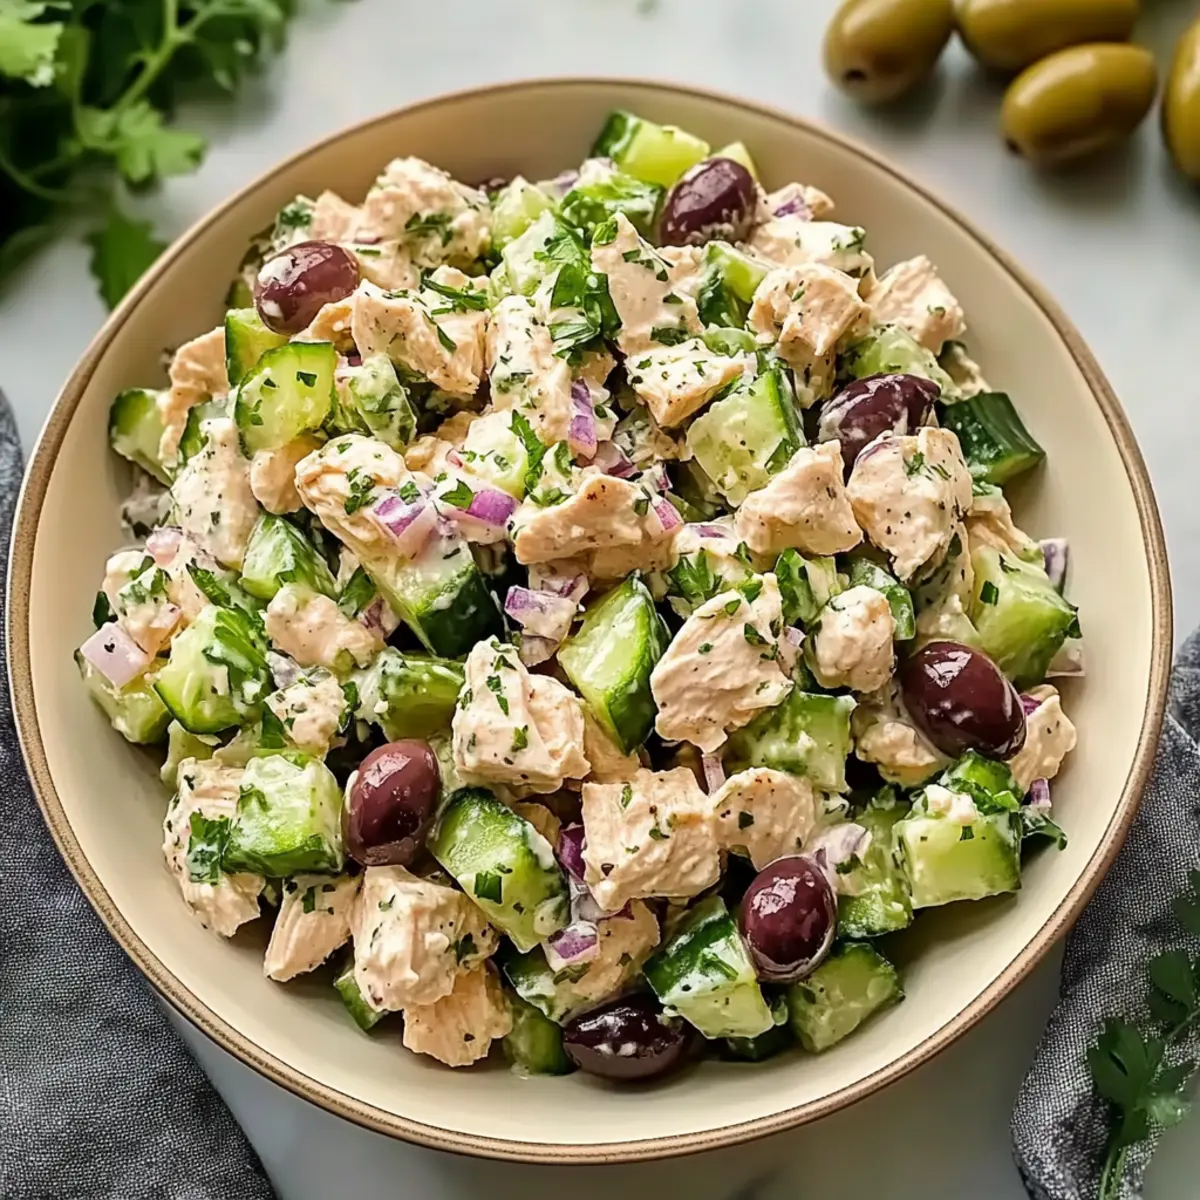
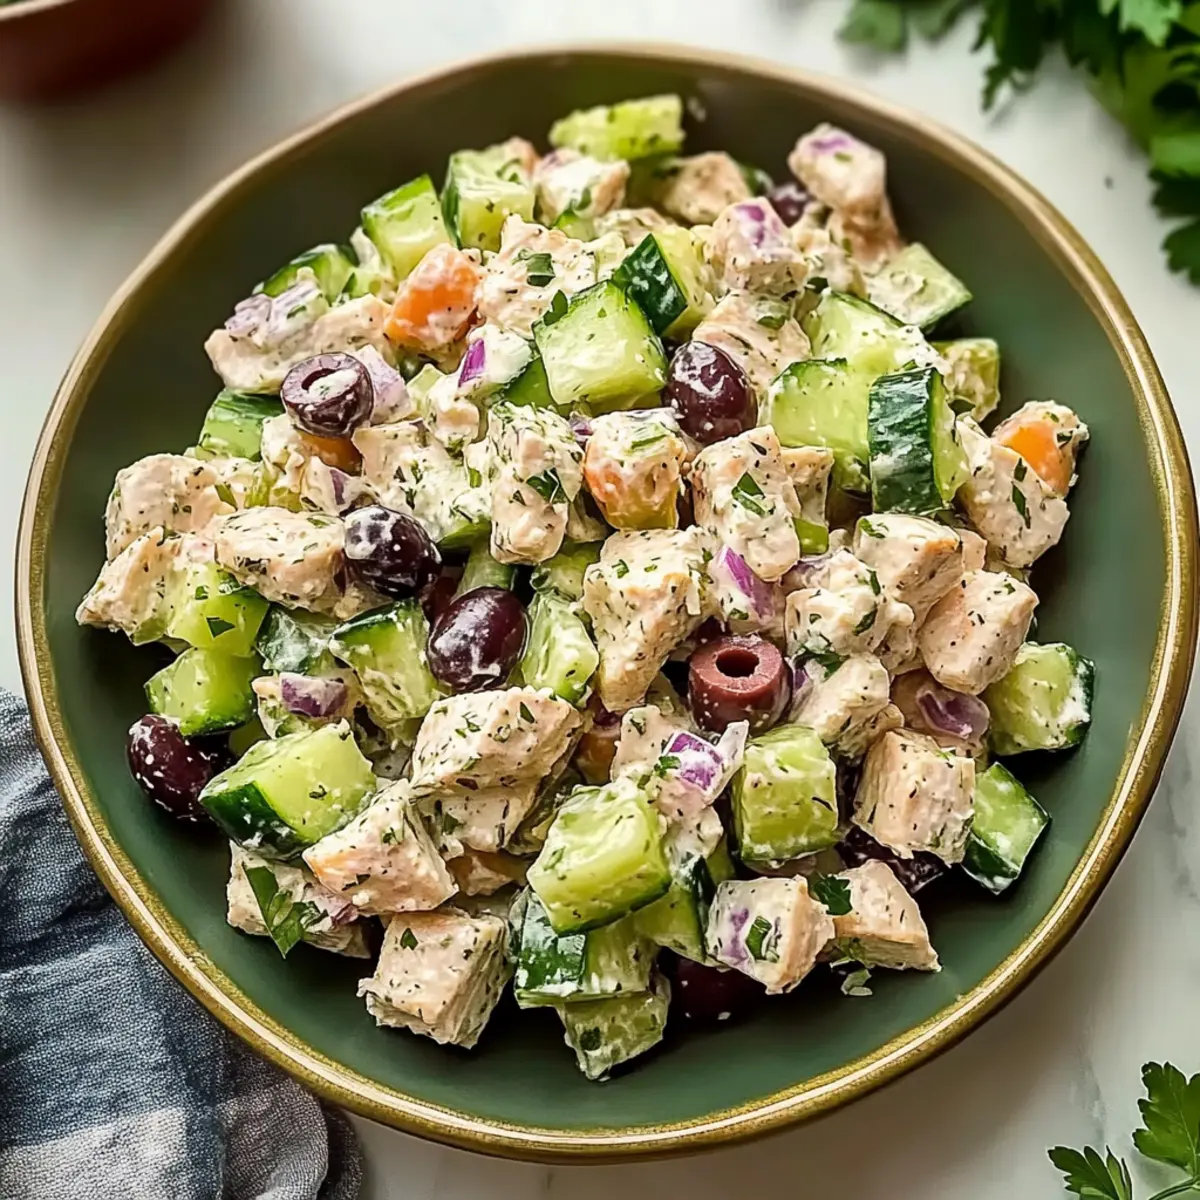
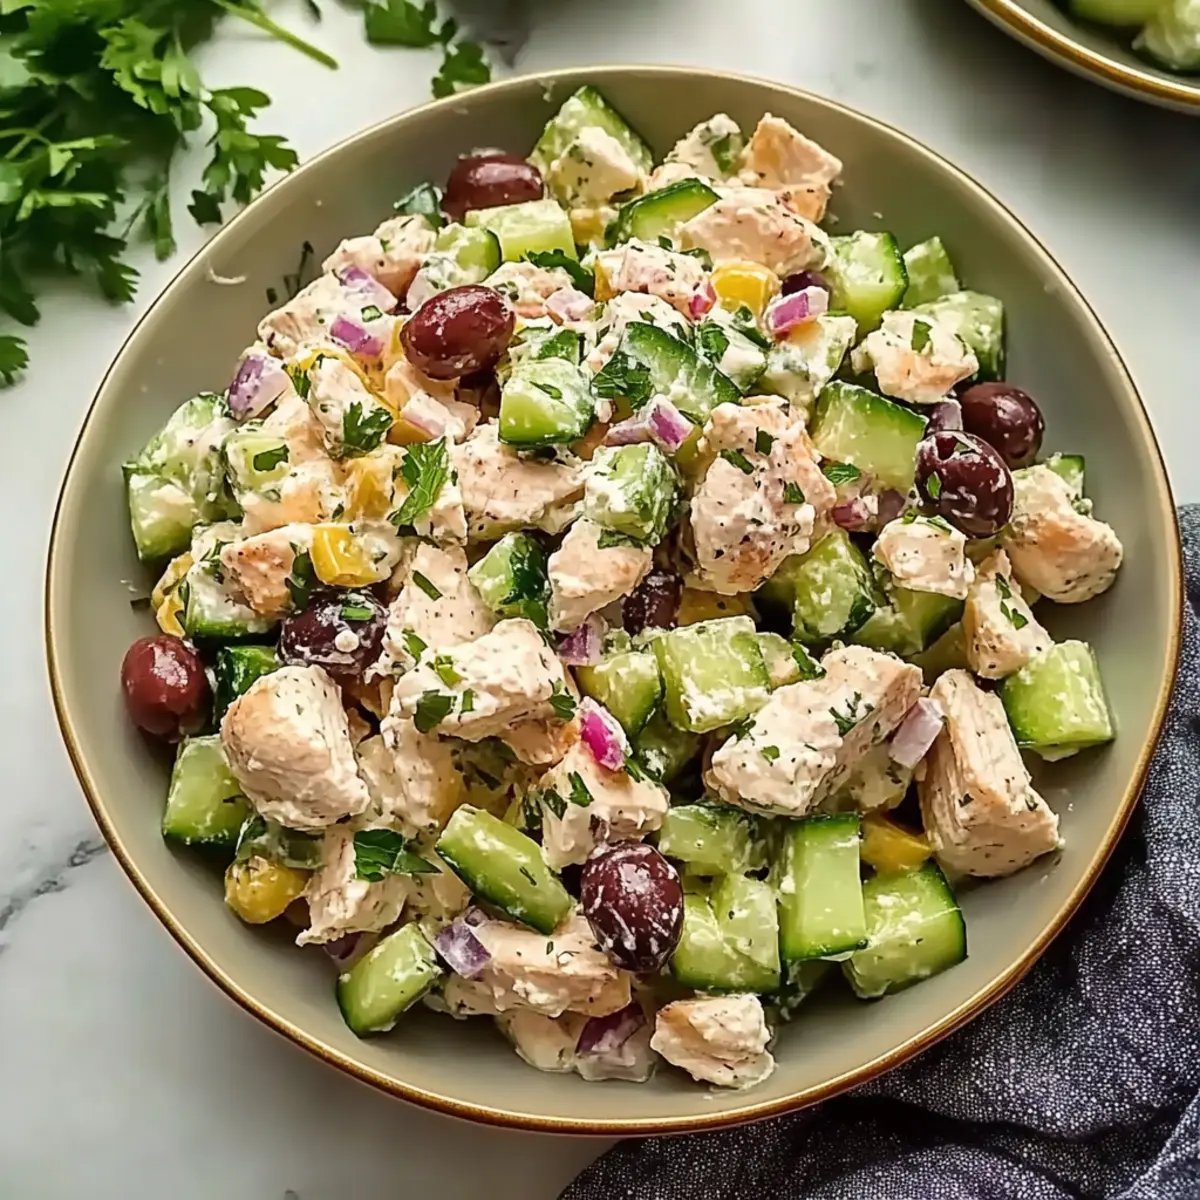
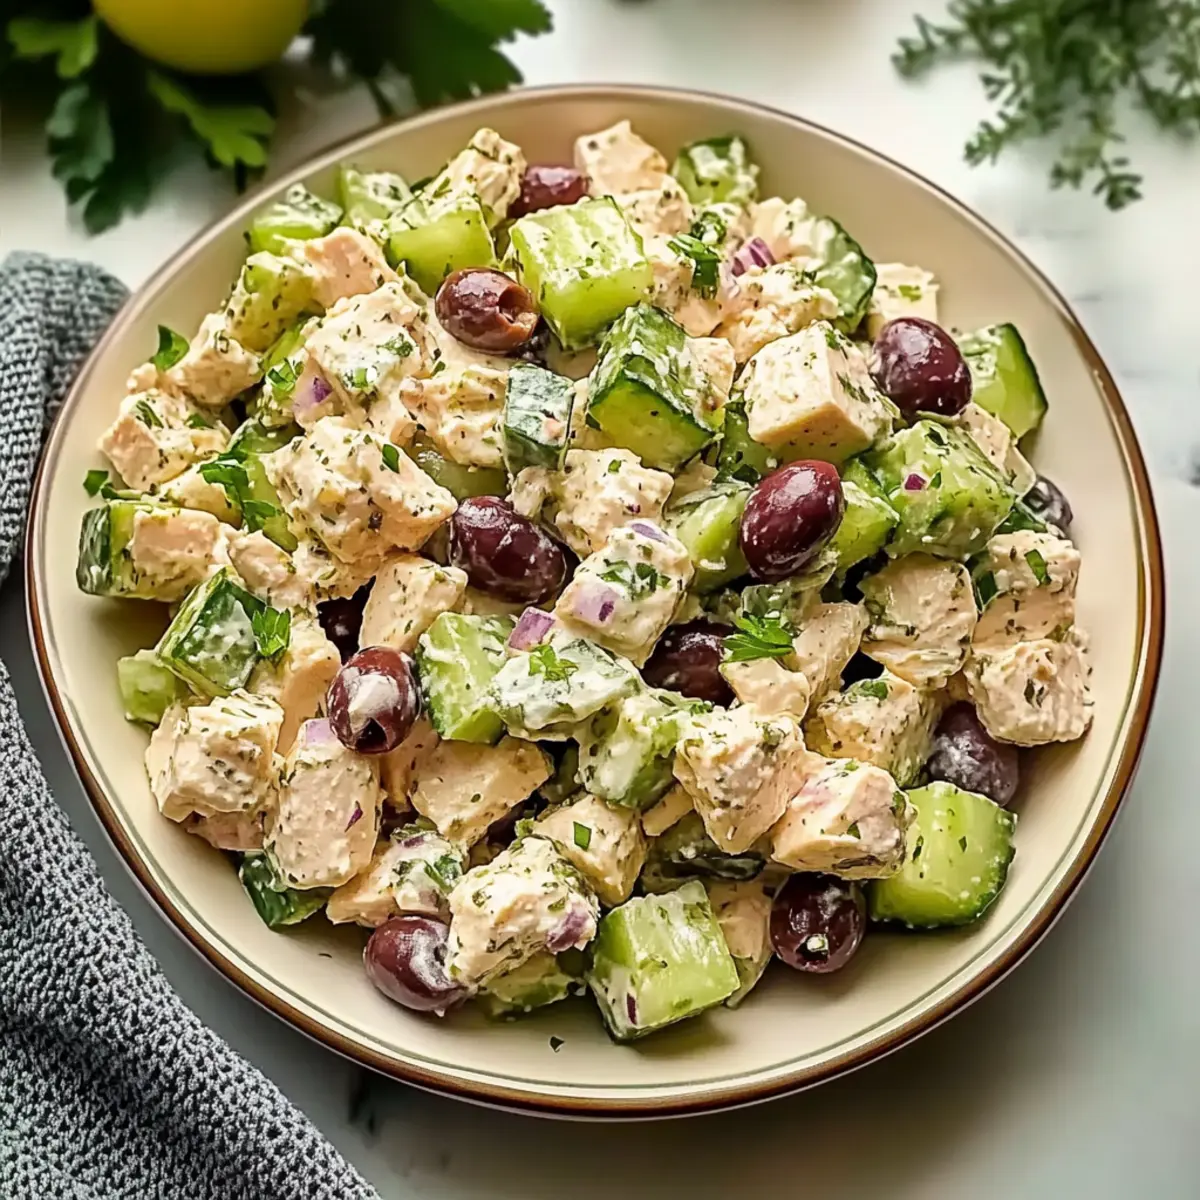
High Protein Mediterranean Chicken Salad for a Fresh Twist

April 11, 2026 by Grace Snow Leave a Comment

As I was slicing through the crisp cucumbers, the fresh scent of summer instantly enveloped me, transporting me to a cozy Mediterranean café. This High Protein Mediterranean Chicken Salad captures that essence, blending savory canned chicken with tangy feta and briny olives to create a dish that’s both satisfying and light. Perfect for anyone following a low-carb or keto lifestyle, it's a breeze to whip up and makes for an excellent meal prep choice—just let the flavors mingle in the fridge and watch them come alive! The best part? You won't sacrifice taste or nutrition with this refreshing recipe. Interested in giving your weeknight dinners a bright, delicious twist? Let’s dive into this culinary adventure!

Why is This Salad So Special?

Satisfying Protein: Packed with canned chicken, this salad delivers a hefty protein punch, perfect for those looking to fuel up without the fuss.

Creamy Delight: The combination of mayonnaise and Greek yogurt creates a luscious dressing that complements the dish beautifully.

Fresh Crunch: Crisp cucumber and dill offer a refreshing bite, making every forkful a delightful experience.

Versatile Variations: Easily switch between canned and grilled chicken, or enjoy it with different cheeses to cater to your taste—why not try it as a hearty filling in lettuce wraps or on a bed of greens?

Quick & Simple: This recipe comes together in a flash, making it an ideal weeknight option for busy cooks looking to escape the fast-food rut.

Meal Prep Friendly: Make it ahead of time, and it only gets better—just think about how those flavors meld while chilling in the fridge!

High Protein Mediterranean Chicken Salad Ingredients

• A delightfully fresh mix awaits!

For the Salad

  • Canned Chicken – The star protein of the dish; look for chunk white meat for the best texture.
  • Cucumber – Provides a satisfying crunch; be sure to dice it into 1/4-inch pieces and remove the seeds to avoid excess moisture.
  • Feta Cheese – Adds creaminess and a salty kick; crumbling it before mixing ensures even distribution.
  • Olives – Infuses a briny flavor; feel free to choose your favorite variety and adjust according to your taste.
  • Red Onion – Offers mild heat; finely mince it to blend in without overpowering the salad.

For the Dressing

  • Mayonnaise – Acts as a creamy base; using a high-quality option like Hellmann's enhances the flavor.
  • Greek Yogurt – Brings tanginess and richness; full-fat is recommended for the best consistency.
  • Lemon Juice – Brightens up the flavors; add it gradually to achieve your preferred balance.
  • Garlic Powder – Elevates the overall taste profile; a little goes a long way.
  • Dijon Mustard – Adds depth and a slight tang that complements the salad perfectly.
  • Greek Seasoning – Essential for that Mediterranean flair; this blend of herbs ties everything together beautifully.
  • Fresh Dill – The perfect herb for a fresh taste; it enhances the salad’s overall appeal.

Let’s get ready to create a delightful High Protein Mediterranean Chicken Salad that will brighten any meal!

Step‑by‑Step Instructions for High Protein Mediterranean Chicken Salad

Step 1: Prepare Ingredients
Begin by dicing the cucumber into 1/4-inch pieces, ensuring to remove the seeds for optimal crunch. Finely mince the red onion, chop the fresh dill, crumble the feta cheese, and roughly chop the olives. Gather all your ingredients together, as having everything ready will streamline the process of creating your High Protein Mediterranean Chicken Salad.

Step 2: Make Dressing
In a large mixing bowl, whisk together a generous amount of mayonnaise and Greek yogurt until smooth and creamy. Squeeze in fresh lemon juice gradually, then stir in Dijon mustard, garlic powder, and Greek seasoning. This dressing will provide the flavorful foundation for your salad, so make sure it’s well-mixed and creamy before moving on to the next step.

Step 3: Combine Chicken and Dressing
Open the canned chicken and drain it well to remove excess moisture. Gently fold the drained chicken into the prepared dressing, ensuring each piece is coated without breaking it apart. This step is key to achieving the protein-packed center of your High Protein Mediterranean Chicken Salad, so take your time and be gentle.

Step 4: Add Vegetables
Now, fold in the diced cucumber, minced red onion, crumbled feta, chopped olives, and fresh dill into the chicken mixture. Be careful to maintain the integrity of the cucumber and feta chunks to ensure a delightful texture in every bite. This blend of fresh ingredients elevates the overall taste and adds a vibrant crunch.

Step 5: Chill
Cover the bowl with plastic wrap or transfer the salad to an airtight container and refrigerate for at least 30 minutes. This chilling period allows the flavors of your High Protein Mediterranean Chicken Salad to meld beautifully, creating a refreshing dish that’s full of vivid Mediterranean flavors, ready to serve when you are.

Expert Tips for High Protein Mediterranean Chicken Salad

  • Drain Chicken Well: Ensuring that the canned chicken is thoroughly drained eliminates excess moisture and prevents a watery salad.

  • Cucumber Prep: Removing the seeds is essential for maintaining crunchiness; this way, the salad stays fresh and doesn’t get soggy.

  • Chill for Flavor: Allow at least 30 minutes in the refrigerator for the flavors to meld together, enhancing your High Protein Mediterranean Chicken Salad's overall taste.

  • Taste Lemon Gradually: Adding lemon juice incrementally helps you achieve the desired acidity without overpowering the delicate flavors.

  • Mind the Feta Distribution: Crumbling the feta cheese before adding it ensures even distribution throughout the salad, providing consistent creaminess in every bite.

  • Experiment with Variations: Try incorporating different vegetables or cheeses, like goat cheese or bell peppers, to keep your meals exciting and cater to your personal taste!

Storage Tips for High Protein Mediterranean Chicken Salad

Fridge: Store your salad in an airtight container for up to 4 days. It's best to keep the cucumbers separate until serving to maintain their crunch.

Freezer: While not recommended for freezing due to the mayonnaise and yogurt base, you could freeze the chicken mixture (without veggies) for up to 2 months; thaw in the fridge overnight before serving.

Make-Ahead: Feel free to prepare the salad 1-2 days in advance for meal prep, just add the cucumbers right before serving to keep everything fresh and crisp.

Reheating: Since this dish is served cold, all you need to do is mix and enjoy; no reheating required! Enjoy your High Protein Mediterranean Chicken Salad as a refreshing and nutritious meal.

What to Serve with High Protein Mediterranean Chicken Salad

This delightful dish is perfect for pairing with fresh sides and beverages that bring out its vibrant flavors.

  • Crispy Lettuce Wraps: Perfect for a low-carb option, these wraps add an extra crunch while allowing the salad’s flavors to shine.

  • Herbed Quinoa: A fluffy quinoa dish cooked with fresh herbs complements the Mediterranean flavors and provides a wholesome grain option.

  • Garlic Breadsticks: These warm, buttery breadsticks provide a comforting contrast to the salad's freshness, making them a comforting addition.

  • Watermelon Feta Salad: The sweet and tangy notes of this salad harmonize beautifully with the savory chicken salad, offering a refreshing balance.

  • Roasted Vegetables: Seasonal veggies roasted with olive oil and herbs make for a hearty side, adding depth and use of rich Mediterranean flavors.

  • Minted Lemonade: A refreshing drink that ties in bright citrus notes, elevating the entire meal with its zingy sweetness.

  • Dark Chocolate Mousse: For a sweet finish, this rich dessert will contrast nicely with the salad and add a touch of indulgence to your meal.

These combinations will elevate your dining experience and transform your High Protein Mediterranean Chicken Salad into a complete and satisfying meal!

Make Ahead Options

This High Protein Mediterranean Chicken Salad is an ideal candidate for meal prep, making it easier than ever to enjoy a fresh and nutritious meal during busy weeks! You can prepare the salad up to 24 hours in advance; simply make the dressing and combine the canned chicken with the other ingredients, avoiding the cucumber until just before serving. Keeping the cucumber separate will help maintain its delightful crunch. Store the salad in an airtight container in the refrigerator for optimal freshness. When ready to serve, just fold in the diced cucumber, and you'll have a refreshing dish that tastes just as delicious as when it was freshly made!

High Protein Mediterranean Chicken Salad Variations

Feel free to bring your own twist to this delicious salad—the possibilities are truly endless!

  • Grilled Chicken: Swap out the canned chicken for fresh grilled chicken for a smoky, charred flavor that adds depth. It’s a delightful change that enhances the overall texture.

  • Dairy-Free: Use dairy-free cream cheese or avocado instead of feta for a creamy consistency while keeping it plant-based. This version is just as satisfying and creamy!

  • Spicy Kick: Add diced jalapeños or red pepper flakes for a kick of heat, perfect for those who enjoy warming up their meals. A little spice can elevate this salad into something extraordinary.

  • Veggie Boost: Incorporate extra vegetables like bell peppers, shredded carrots, or spinach to enhance nutrition and add vibrant colors. This not only diversifies textures but makes the dish visually stunning too.

  • Nuts for Crunch: Toss in some toasted almonds or walnuts to add a nutty flavor and delightful crunch that contrasts beautifully with the creamy dressing.

  • Herb Variations: Try swapping fresh dill for fresh basil or parsley for a different herbaceous note that gives the salad a fresh spin. Each herb brings its unique aroma!

  • Mediterranean Twist: Use marinated artichokes or sun-dried tomatoes for a unique flavor boost that will transport you straight to a Mediterranean feast! It’s all about those delightful flavor profiles.

  • Protein-Packed Quinoa: Add cooked quinoa to the mix for an additional protein boost and a slight earthy flavor that complements the chicken perfectly. This makes for a more substantial meal, perfect for meal prep.

Explore these variations to make your High Protein Mediterranean Chicken Salad even more exciting, and enjoy the creative process in your kitchen!

High Protein Mediterranean Chicken Salad Recipe FAQs

What type of canned chicken should I use?
Absolutely! For the best texture, I recommend opting for chunk white meat canned chicken. It tends to be more tender and flavorful, making it a delightful addition to your salad. If you're in the mood for a fresh option, using about 1.5 cups of rotisserie or freshly cooked chicken is a fantastic alternative!

How should I store leftover salad?
Very! Store your High Protein Mediterranean Chicken Salad in an airtight container in the fridge for up to 4 days. However, I suggest keeping the cucumbers separate until serving to maintain their satisfying crunch. This way, you'll enjoy every refreshing bite!

Can I freeze this salad?
Not really! Freezing is not ideal due to the mayonnaise and yogurt base as they may separate and change texture when thawed. However, you can freeze the chicken mixture (without veggies) for up to 2 months. Just thaw it in the fridge overnight, then mix in fresh cucumbers and the other ingredients right before serving.

What if I don't like feta cheese?
No problem at all! You can substitute feta cheese with goat cheese for a different flavor experience, or simply omit the cheese altogether for a dairy-free option. Feel free to explore and make this High Protein Mediterranean Chicken Salad your own!

How do I keep my cucumbers crunchy in the salad?
Great question! To ensure your cucumbers remain crisp, make sure to remove the seeds by slicing them in half and scooping them out before dicing. This prevents the excess moisture from making your salad watery and keeps that delightful crunch intact. Enjoy each bite of freshness!

High Protein Mediterranean Chicken Salad

High Protein Mediterranean Chicken Salad for a Fresh Twist

A refreshing High Protein Mediterranean Chicken Salad, combining savory canned chicken, tangy feta, and briny olives, perfect for low-carb or keto diets.
Print Recipe Pin Recipe
Prep Time 10 minutes mins
Chilling Time 30 minutes mins
Total Time 40 minutes mins
Servings: 4 servings
Course: Salads
Cuisine: Mediterranean
Calories: 280
Ingredients Equipment Method Nutrition Notes

Ingredients
  

For the Salad
  • 1 can Canned Chicken chunk white meat preferred
  • 1 medium Cucumber diced into 1/4-inch pieces, seeds removed
  • 1/2 cup Feta Cheese crumbled
  • 1/2 cup Olives your favorite variety
  • 1/4 medium Red Onion finely minced
For the Dressing
  • 1/2 cup Mayonnaise high quality recommended
  • 1/2 cup Greek Yogurt full-fat preferred
  • 1 tablespoon Lemon Juice adjust to taste
  • 1/2 teaspoon Garlic Powder
  • 1 teaspoon Dijon Mustard
  • 1 tablespoon Greek Seasoning
  • 1 tablespoon Fresh Dill chopped

Equipment

  • Mixing Bowl
  • Knife
  • Cutting Board

Method
 

Preparation
  1. Begin by dicing the cucumber into 1/4-inch pieces, ensuring to remove the seeds.
  2. Finely mince the red onion, chop the fresh dill, crumble the feta cheese, and roughly chop the olives.
  3. Gather all your ingredients together.
Making the Dressing
  1. In a large mixing bowl, whisk together mayonnaise and Greek yogurt until smooth and creamy.
  2. Squeeze in fresh lemon juice gradually and stir in Dijon mustard, garlic powder, and Greek seasoning.
Combining Ingredients
  1. Open the canned chicken and drain it well.
  2. Gently fold the drained chicken into the prepared dressing, ensuring it is coated without breaking apart.
Adding Vegetables
  1. Fold in the diced cucumber, minced red onion, crumbled feta, chopped olives, and fresh dill into the chicken mixture.
Chilling
  1. Cover the bowl with plastic wrap or transfer the salad to an airtight container and refrigerate for at least 30 minutes.

Nutrition

Serving: 1servingCalories: 280kcalCarbohydrates: 6gProtein: 30gFat: 15gSaturated Fat: 3gPolyunsaturated Fat: 1gMonounsaturated Fat: 10gCholesterol: 90mgSodium: 600mgPotassium: 400mgFiber: 2gSugar: 3gVitamin A: 5IUVitamin C: 6mgCalcium: 150mgIron: 2mg

Notes

Store in an airtight container in the fridge for up to 4 days. Add cucumbers right before serving for freshness.

Tried this recipe?

Let us know how it was!

Delicious Ditalini Pasta Salad for Effortless Entertaining

April 10, 2026 by Grace Snow Leave a Comment

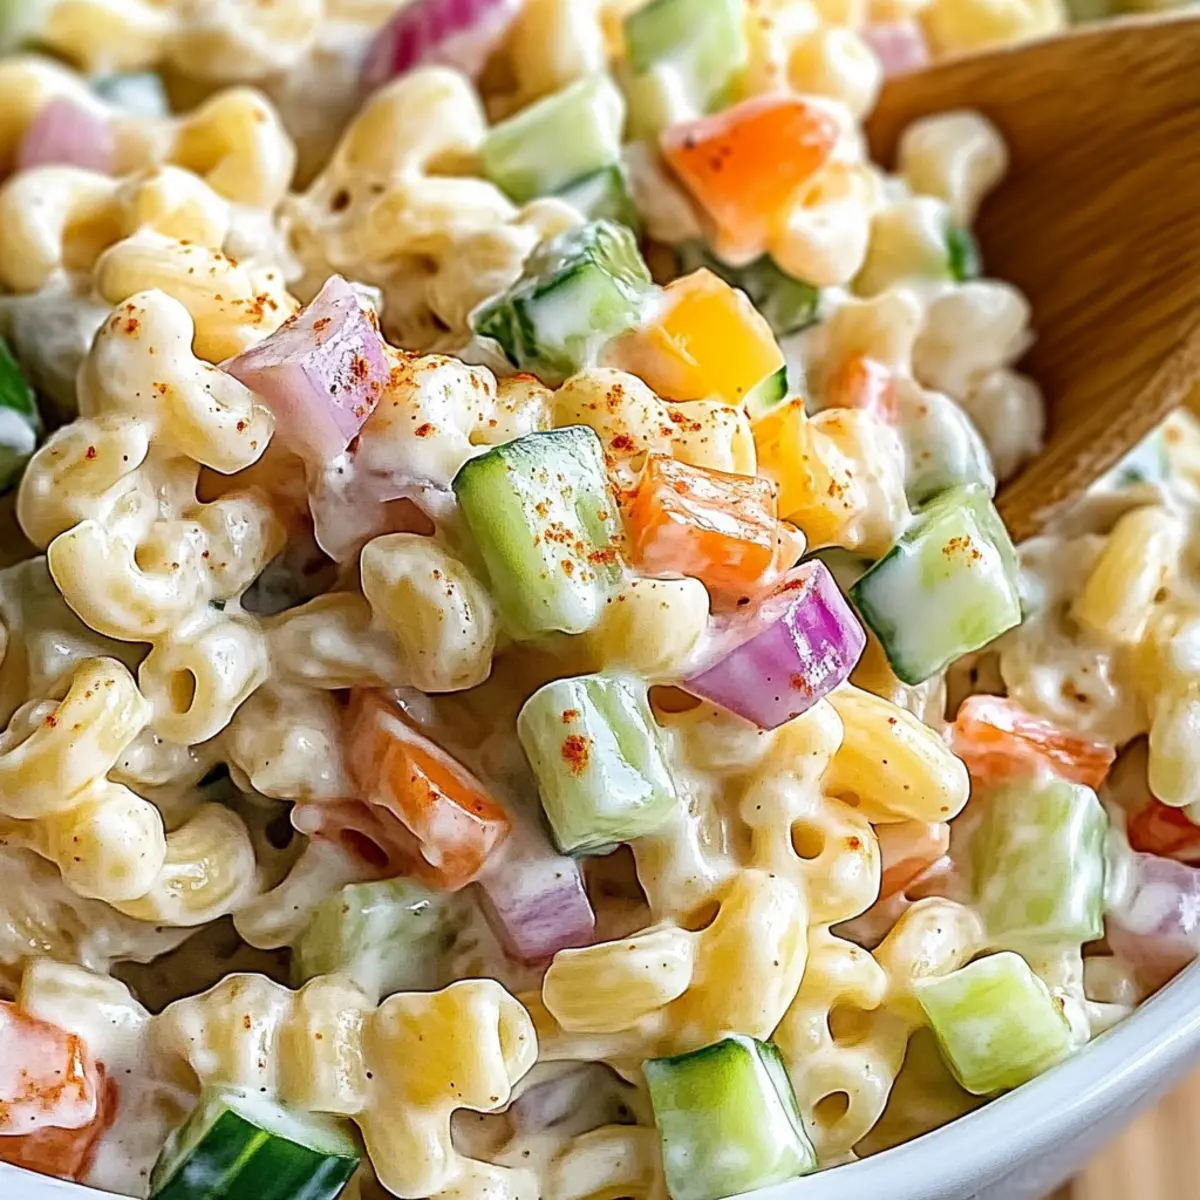
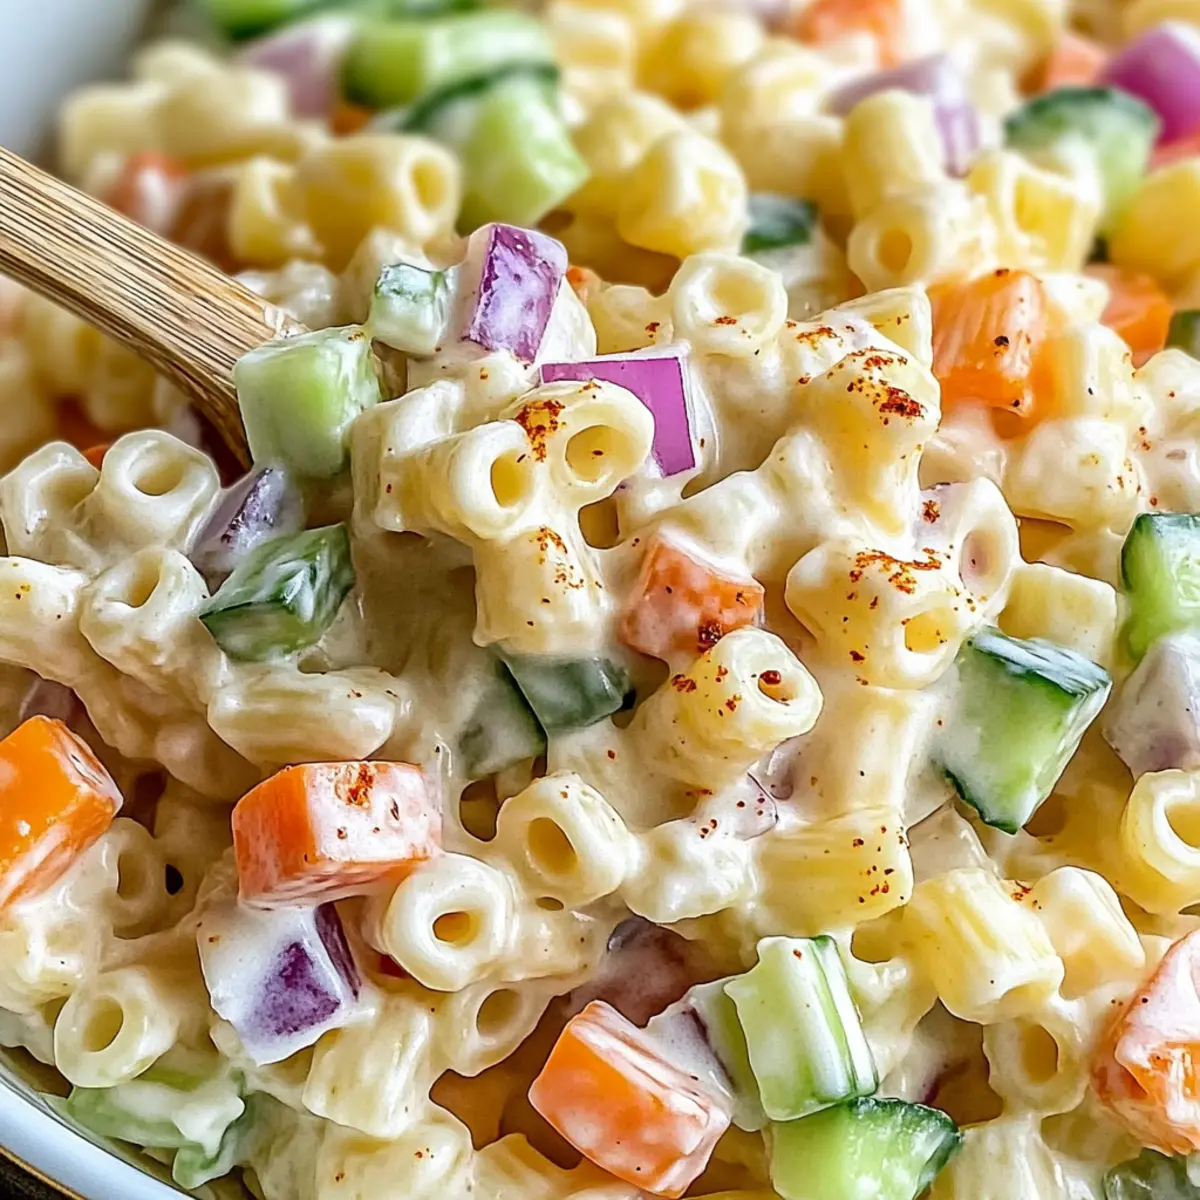
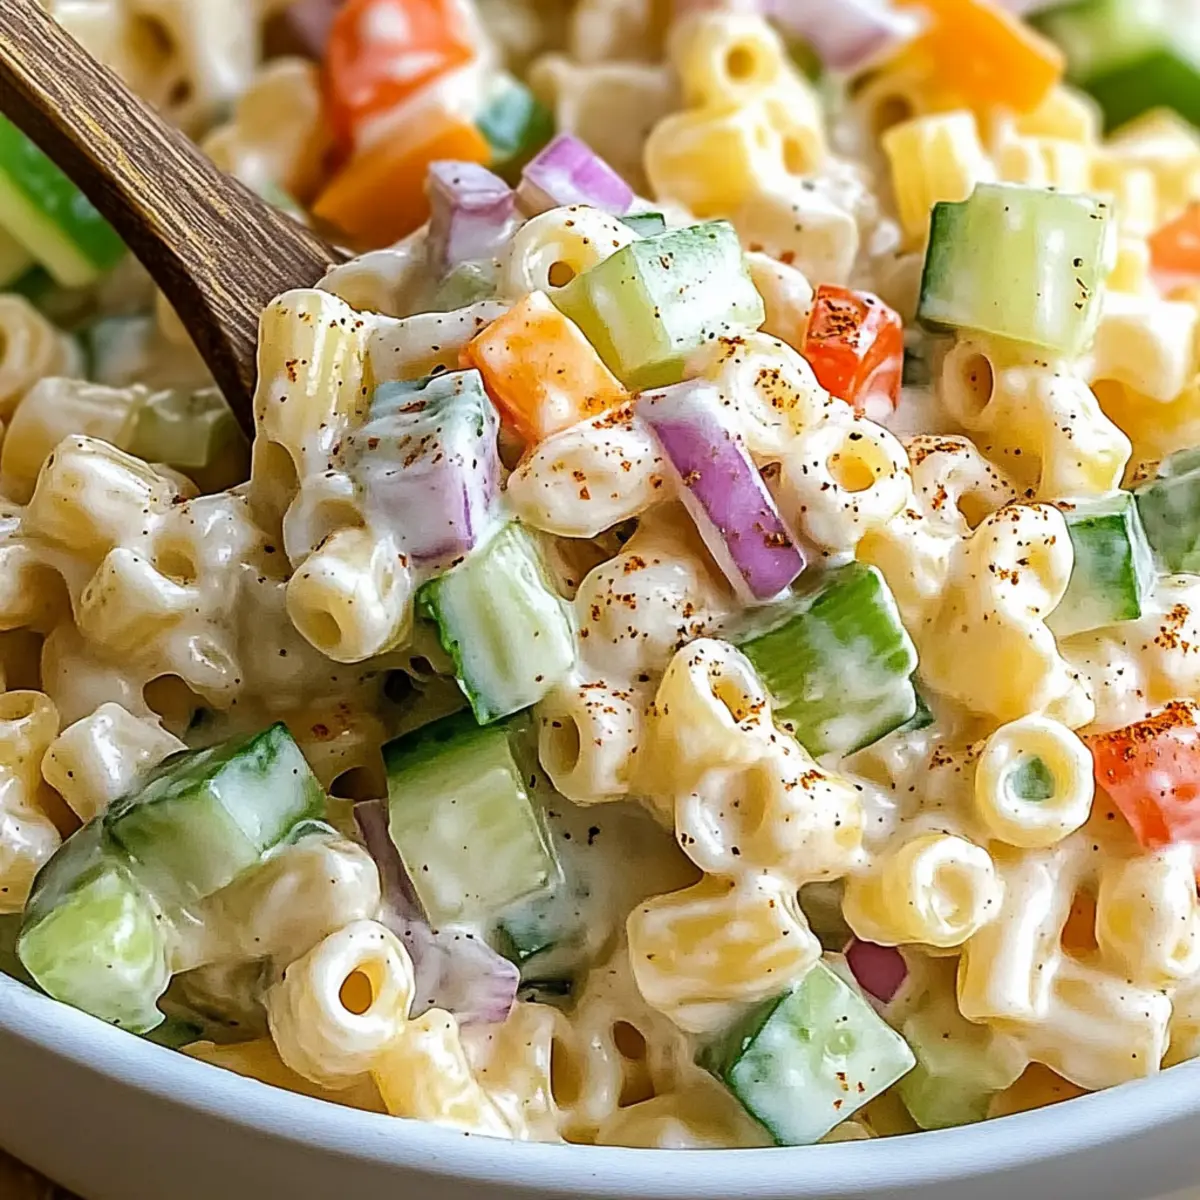
Amidst the clinking of glasses and the laughter of friends at summer picnics, there's a dish that always steals the show: Ditalini Pasta Salad. This creamy delight, brimming with vibrant vegetables and tender pasta, is a beautiful canvas for personalization, making it a go-to for those spontaneous gatherings or planned potlucks. Not only is it quick to prepare—perfect for busy days—but its versatility ensures that every bite brings a fresh twist, allowing you to tailor the ingredients to suit your taste. Need an easy, crowd-pleasing option that also doubles as a meal prep hero? This ditalini pasta salad is your answer. What unique ingredients will you add to make it your very own?

Why is Ditalini Pasta Salad a Must-Try?

Versatile: This Ditalini Pasta Salad is a blank canvas for culinary creativity; customize it with your favorite veggies, proteins, or dressings!

Quick and Easy: Perfect for those busy weeknights, this recipe comes together in no time, letting you focus on what matters—enjoying delicious food with loved ones.

Crowd-Pleasing: With a creamy texture and vibrant flavors, it's a guaranteed hit at potlucks and summer picnics, ensuring everyone leaves happy.

Meal Prep Friendly: Make it ahead of time! The flavors deepen after a day in the fridge, making it ideal for quick lunches or dinners throughout the week; you won’t regret preparing extra.

Healthy Option: Feel free to adapt to fit dietary needs with simple swaps for vegan or gluten-free options. Check out ideas like Avocado Egg Salad for more nutritious servings alongside!

Ditalini Pasta Salad Ingredients

Get ready to whip up a scrumptious Ditalini Pasta Salad with these easy-to-find ingredients!

For the Salad

  • Ditalini Pasta – Provides a delightful base; cook al dente for the best texture.
  • Celery – Adds a refreshing crunch and a pop of color; finely chop for even distribution.
  • Bell Peppers – Offer vibrant colors and sweetness; mix and match your favorites!
  • Onions – Bring a subtle bite; sweet or red onions work beautifully for flavor.
  • Cucumbers – Contribute crispness and hydration; peel for a smoother texture.

For the Dressing

  • Mayonnaise – Creates a creamy base for the dressing; swap with a vegan alternative if desired.
  • Apple Cider Vinegar – Introduces a tangy flavor, balancing the richness of the mayonnaise.
  • Sugar – Enhances sweetness to balance the acidity in the dressing.
  • Dijon Mustard – Adds a flavorful kick and depth to the dressing.
  • Salt – Essential for enhancing the overall flavor; adjust to your taste preference.
  • Black Pepper – Offers a hint of warmth; freshly ground is best for optimum taste.
  • Garlic Powder – Adds a savory note, enhancing the dressing's punch.
  • Paprika – Provides a subtle smokiness and a pop of color.

Feel free to elevate your Ditalini Pasta Salad with your choice of herbs, additional veggies, or proteins!

Step‑by‑Step Instructions for Ditalini Pasta Salad

Step 1: Cook the Pasta
Bring a large pot of salted water to a rolling boil over high heat. Add the ditalini pasta and cook according to the package directions, generally around 8-10 minutes, until al dente. Stir occasionally to prevent sticking. Once done, the pasta should be tender but still slightly firm when bitten.

Step 2: Cool the Pasta
Drain the cooked ditalini pasta in a colander and rinse it under cold running water for about 30 seconds. This step is crucial as it cools the pasta quickly and helps prevent it from sticking together. Allow the pasta to drain completely, ensuring it's well-cooled before mixing with the other ingredients.

Step 3: Prepare the Dressing
In a medium-sized mixing bowl, whisk together the mayonnaise, apple cider vinegar, sugar, Dijon mustard, salt, black pepper, garlic powder, and paprika until smooth and well-blended. Aim for a creamy and slightly tangy dressing that coats the ditalini pasta perfectly. Set this aside while you prepare the vegetables.

Step 4: Chop the Vegetables
Take your prepared vegetables, including celery, bell peppers, onions, and cucumbers, and chop them into bite-sized pieces. The colors and crunch from these veggies will add freshness to your ditalini pasta salad. Aim for a uniform size to ensure even distribution throughout the salad.

Step 5: Combine Ingredients
In a large mixing bowl, combine the cooled ditalini pasta and chopped vegetables. Gently fold the mixture to evenly distribute the ingredients, allowing the vibrant colors to shine. This is your base for the ditalini pasta salad—make sure every piece is nestled among the rest.

Step 6: Dress the Salad
Pour the prepared dressing over the ditalini pasta and vegetable mixture. Toss gently with a spatula until everything is well-coated in the creamy dressing. Keeping your movements gentle is key to maintaining the texture of the vegetables and pasta, ensuring a delightful bite in every serving.

Step 7: Chill the Salad
Cover the bowl with plastic wrap or a lid, and refrigerate the ditalini pasta salad for at least 1 hour before serving. Chilling allows the flavors to meld beautifully, creating a delicious depth that enhances the overall taste of the salad. It’s best enjoyed cold, making it perfect for warm summer days.

Ditalini Pasta Salad Variations & Substitutions

Feel free to get creative with your Ditalini Pasta Salad; let your culinary imagination run wild!

  • Vegan Option: Swap mayonnaise for a plant-based alternative to cater to vegan diets without losing creaminess.
    Elevating this salad to a vegan delight is simple with the right dressing; it’s sure to be a hit!

  • Gluten-Free: Use gluten-free ditalini pasta or any favorite gluten-free pasta for a safe option.
    This allows everyone to enjoy the creamy goodness without worry. Don't skimp on mixing in fresh veggies for added flavor!

  • Protein Boost: Add diced chicken, chickpeas, or even tuna for extra protein and substance.
    These additions transform your salad into a hearty main dish that’s satisfying and delicious!

  • Herb Infusion: Introduce fresh herbs such as basil or dill for a vibrant flavor twist.
    These herbs not only elevate taste but also add a beautiful touch of color to the salad.

  • Crunch Factor: Consider adding nuts, like toasted walnuts or sunflower seeds, for extra crunch and flavor.
    These will provide a satisfying texture alongside the creamy dressing and crisp veggies.

  • Heat Level: Spice things up by mixing in diced jalapeños or pepper flakes for a zesty kick.
    It's perfect for those who love a bit of heat in their dishes; just a small touch can elevate the overall experience!

  • Sweet Surprise: Include diced apples or grapes for a sweet and surprising flavor contrast.
    This delightful addition will enhance the savory elements of the salad, providing a balanced bite!

  • Warming Variation: Serve it warm by tossing it lightly with sautéed veggies instead of the standard cold method.
    This option transforms your classic salad into a cozy dish that’s perfect for cooler days!

Explore these variations to tailor your Ditalini Pasta Salad, or check out links like Skillet Pasta Sun or Seafood Pasta Savory for further inspiration in your cooking journey!

What to Serve with Creamy Ditalini Pasta Salad?

As you gather around the table, let the delightful flavors of summer shine through by pairing bold and comforting dishes with your creamy ditalini pasta salad.

  • Garlic Bread: Perfectly crispy and buttery, this classic accompaniment balances the creamy salad with its satisfying crunch and warmth.

  • Grilled Chicken Skewers: Juicy and smoky, these skewers add a hearty protein element, complementing the lightness of the salad without overwhelming it.

  • Fresh Fruit Salad: A refreshing mix of seasonal fruits provides a sweet contrast to the savory pasta salad, cleansing the palate and adding vibrant color to your plate.

  • Caprese Salad: With its juicy tomatoes and creamy mozzarella, this Italian staple brings an added layer of richness and freshness, magical with pasta!

  • Coleslaw: Crunchy and tangy, coleslaw pairs beautifully, introducing layers of texture that enhance the overall dining experience.

  • Lemonade or Iced Tea: These refreshing drinks help cool off warm summer days while providing a zesty note that complements the creamy flavors of the salad.

  • Brownie Bites: These rich, fudgy treats serve as a delightful end to your gathering, adding a sweet touch that is hard to resist after a savory feast.

With these delicious options, you can curate a lively meal that everyone will remember fondly!

Expert Tips for Ditalini Pasta Salad

  • Cook Perfect Pasta: Ensure to cook ditalini pasta just until al dente. Overcooking can lead to a mushy salad, so keep an eye on the clock!

  • Chill Well: Allow your salad to chill for at least 1 hour in the refrigerator. This enhances the flavors, making your ditalini pasta salad even more enjoyable!

  • Customize Creatively: Don’t hesitate to swap in your favorite vegetables or proteins. This salad is incredibly versatile; let your taste preferences shine!

  • Balance the Dressing: Adjust the seasoning in the dressing to suit your palate. Taste as you mix, ensuring the mayonnaise and vinegar create a balanced flavor profile.

  • Store Smartly: Keep any leftovers in an airtight container in the fridge for 3 to 5 days. A great way to enjoy multiple meals from this delicious ditalini pasta salad!

Storage Tips for Ditalini Pasta Salad

  • Fridge: Store your ditalini pasta salad in an airtight container for up to 3-5 days. This helps to keep the flavors fresh and prevent spoilage.
  • Freezer: While freezing is not recommended for creamy salads, you can freeze the pasta alone for up to 2 months. Thaw in the fridge before mixing with fresh veggies and dressing.
  • Reheating: If served cold, there's no need to reheat! Just give it a gentle stir before serving. For warm dishes, heat the pasta separately and then mix in with the salad fresh ingredients.
  • Make-Ahead: Prepare the salad a day in advance to allow the flavors to meld. Cover tightly and refrigerate; it tastes even better the next day!

Make Ahead Options

Ditalini Pasta Salad is truly a lifesaver for busy home cooks! You can prepare several components of this delightful dish up to 3 days in advance. First, cook the ditalini pasta and store it in an airtight container in the refrigerator to keep it fresh; this will prevent it from becoming mushy when mixed with the dressing. Additionally, chop your vegetables and keep them in another sealed container to maintain their crunchiness. When you're ready to serve, simply combine the prepared pasta and veggies with the dressing you made earlier. This not only saves you time but also allows the flavors to meld beautifully, making your Ditalini Pasta Salad just as delicious as on the day it was made!

Ditalini Pasta Salad Recipe FAQs

What type of ditalini pasta should I use?
Absolutely! It's best to choose high-quality ditalini pasta that has a smooth texture. Look for brands that specify "durum wheat" for optimal bite and cook it al dente to avoid mushiness in your salad.

How should I store leftovers of the ditalini pasta salad?
Keep the ditalini pasta salad in an airtight container in the refrigerator for up to 3-5 days. Be sure to seal it tightly to maintain flavors and freshness, and remember to give it a gentle stir before serving to reintegrate any settled ingredients.

Can I freeze ditalini pasta salad?
While it's not ideal to freeze the creamy salad itself, you can freeze just the cooked ditalini pasta for up to 2 months. To do this, cool the pasta completely, place it in a freezer-safe container, and label it with the date. When ready to use, thaw it in the fridge and mix with fresh veggies and dressing.

What are common troubleshooting tips for ditalini pasta salad?
If the pasta is too sticky after cooking, rinse it under cold water immediately to remove excess starch. If you find the dressing too thick, simply whisk in a little more apple cider vinegar or a splash of water to achieve your desired consistency.

Are there any dietary considerations for the ditalini pasta salad?
Absolutely! This salad can easily be adapted for various dietary needs. Substitute regular mayonnaise with a plant-based alternative for a vegan version, and use gluten-free ditalini pasta to cater to gluten sensitivity. Additionally, double-check your veggie choices if allergies are a concern—opt for safe vegetables that suit everyone at your gathering.

Can I make this salad ahead of time?
Very! In fact, I often prepare ditalini pasta salad a day in advance. The flavors meld beautifully after sitting in the fridge overnight! Just cover it tightly with plastic wrap and refrigerate for the best taste experience before serving.

Ditalini Pasta Salad

Delicious Ditalini Pasta Salad for Effortless Entertaining

This Ditalini Pasta Salad is a creamy, versatile dish perfect for summer picnics and meal prep, making it an easy crowd-pleaser.
Print Recipe Pin Recipe
Prep Time 15 minutes mins
Cook Time 10 minutes mins
Chilling Time 1 hour hr
Total Time 1 hour hr 25 minutes mins
Servings: 6 servings
Course: Salads
Cuisine: American
Calories: 250
Ingredients Equipment Method Nutrition Notes

Ingredients
  

For the Salad
  • 8 oz Ditalini Pasta Cook al dente for the best texture
  • 2 stalks Celery Finely chopped for even distribution
  • 1 cup Bell Peppers Mix and match colors for vibrancy
  • 1 small Onion Use sweet or red onions for best flavor
  • 1 cup Cucumbers Peeled for smoother texture
For the Dressing
  • 1 cup Mayonnaise Can be replaced with a vegan alternative
  • 2 tbsp Apple Cider Vinegar For tangy flavor
  • 1 tbsp Sugar To balance the acidity
  • 1 tbsp Dijon Mustard Adds depth to the dressing
  • 1 tsp Salt Adjust according to taste preference
  • 1 tsp Black Pepper Freshly ground is best
  • 1 tsp Garlic Powder Enhances the flavor of the dressing
  • 1 tsp Paprika Adds a subtle smokiness

Equipment

  • Large pot
  • Colander
  • Mixing Bowl
  • Spatula
  • Knife
  • Cutting Board

Method
 

Step-by-Step Instructions
  1. Bring a large pot of salted water to a boil. Add the ditalini pasta and cook for 8-10 minutes until al dente. Stir occasionally.
  2. Drain the pasta and rinse under cold water for 30 seconds to cool it down.
  3. In a bowl, whisk together the mayonnaise, apple cider vinegar, sugar, Dijon mustard, salt, black pepper, garlic powder, and paprika until smooth.
  4. Chop the celery, bell peppers, onions, and cucumbers into bite-sized pieces.
  5. In a large bowl, combine the cooled ditalini pasta and chopped vegetables. Fold gently to mix.
  6. Pour the dressing over the pasta and vegetable mixture, and toss gently to coat.
  7. Cover and refrigerate for at least 1 hour before serving to allow flavors to meld.
Nutrition

Serving: 1servingCalories: 250kcalCarbohydrates: 32gProtein: 5gFat: 12gSaturated Fat: 2gPolyunsaturated Fat: 1gMonounsaturated Fat: 8gCholesterol: 10mgSodium: 500mgPotassium: 200mgFiber: 2gSugar: 2gVitamin A: 500IUVitamin C: 20mgCalcium: 20mgIron: 1mg

Notes

Customize with additional veggies or proteins as desired. Ensure to adjust the seasoning to your preference.

Tried this recipe?

Let us know how it was!

Delicious Bow Tie Pasta Salad: Your New Summer Favorite

April 10, 2026 by Grace Snow Leave a Comment

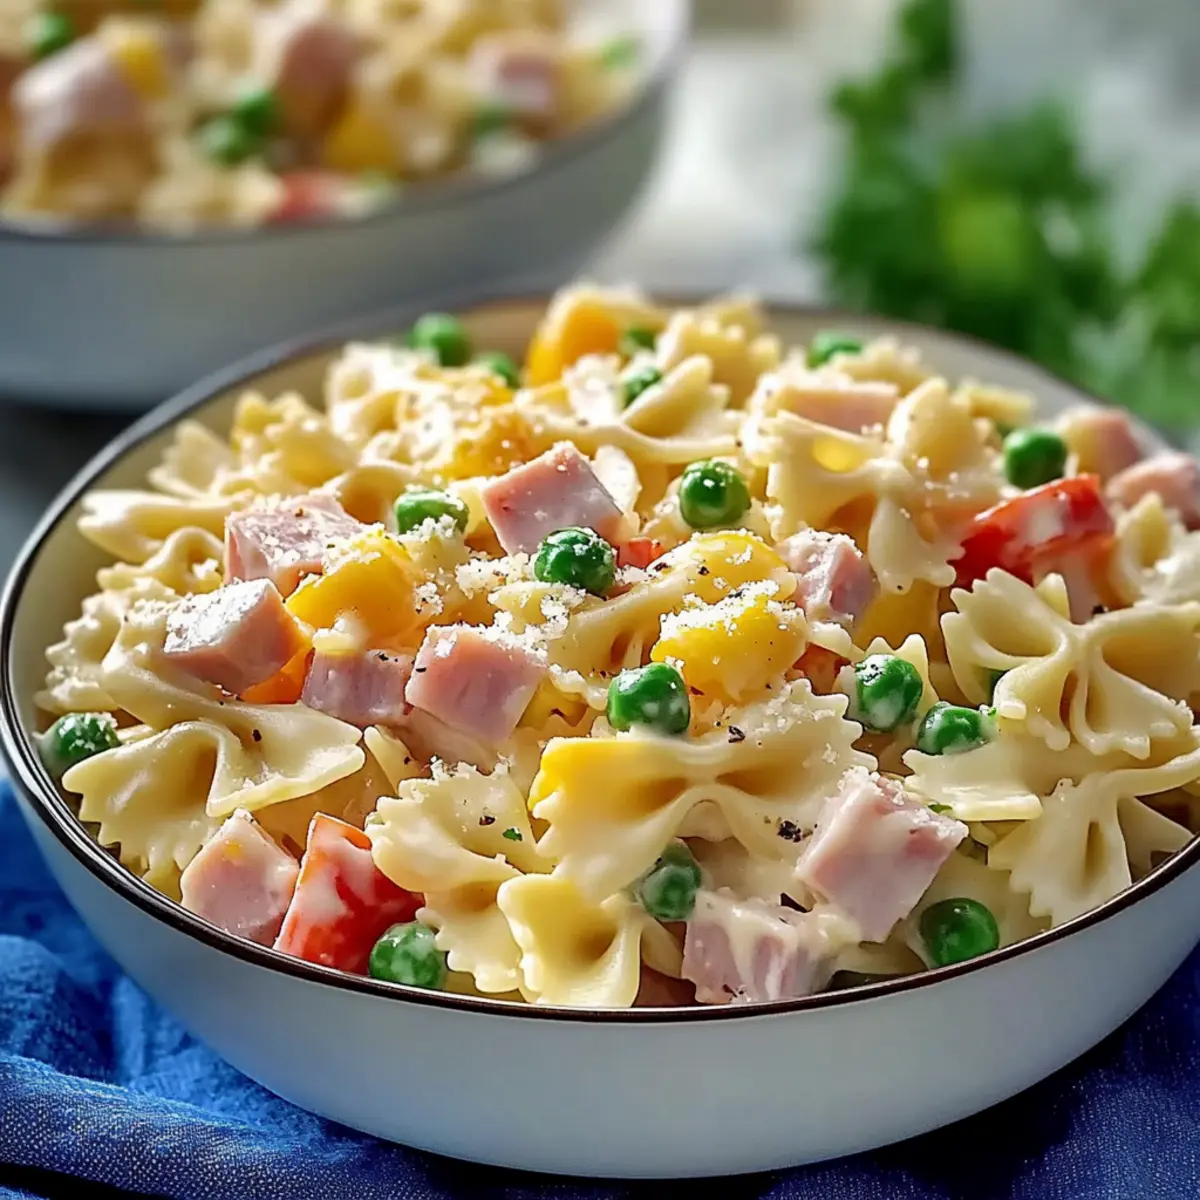
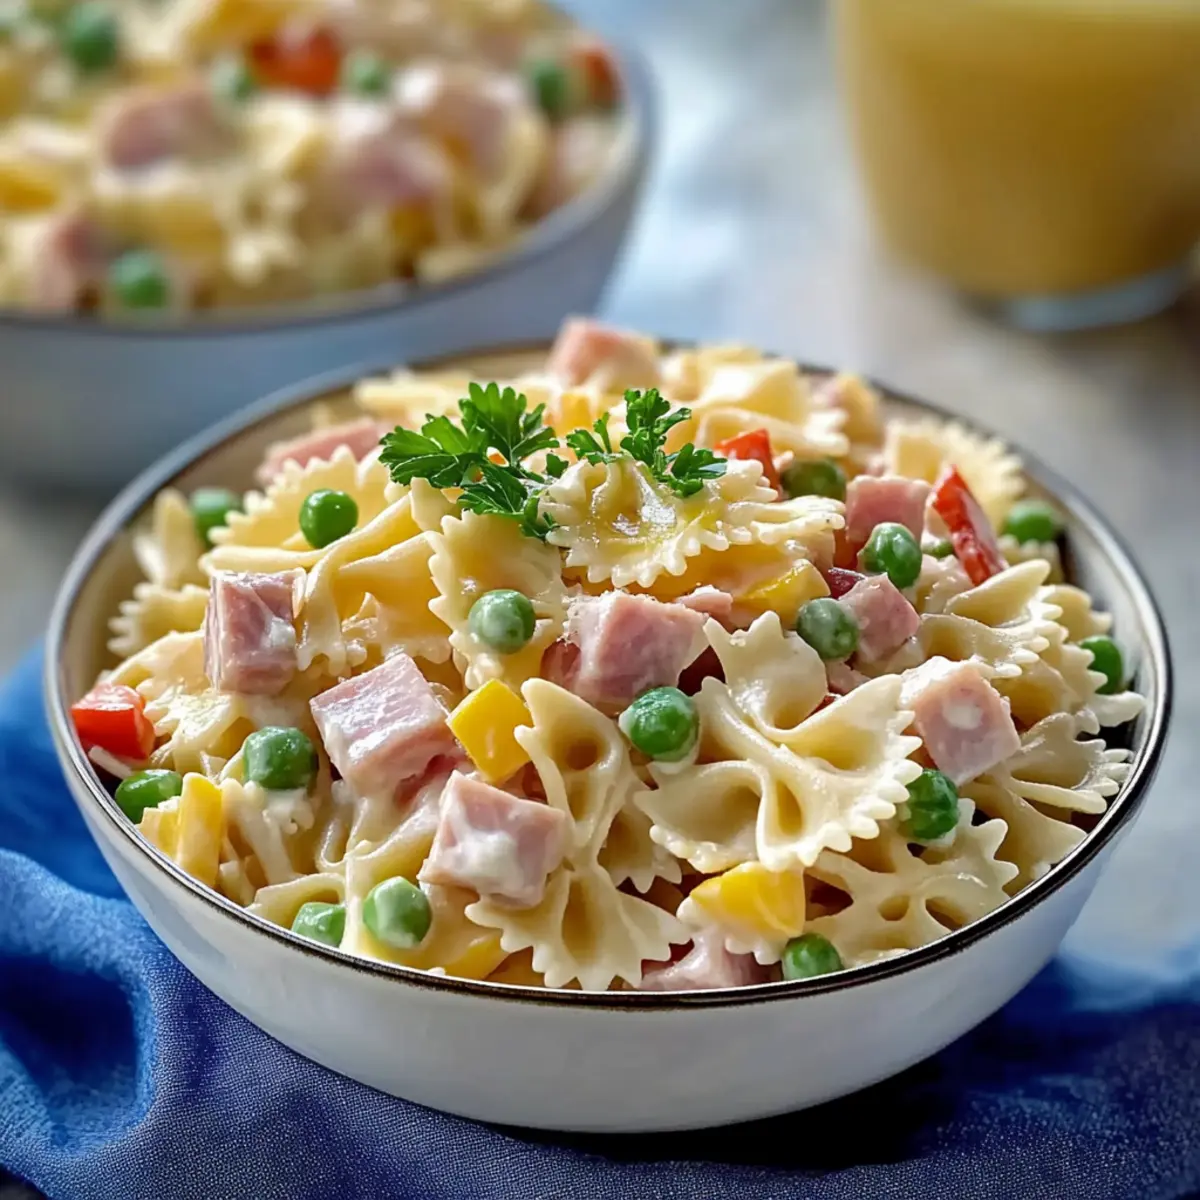
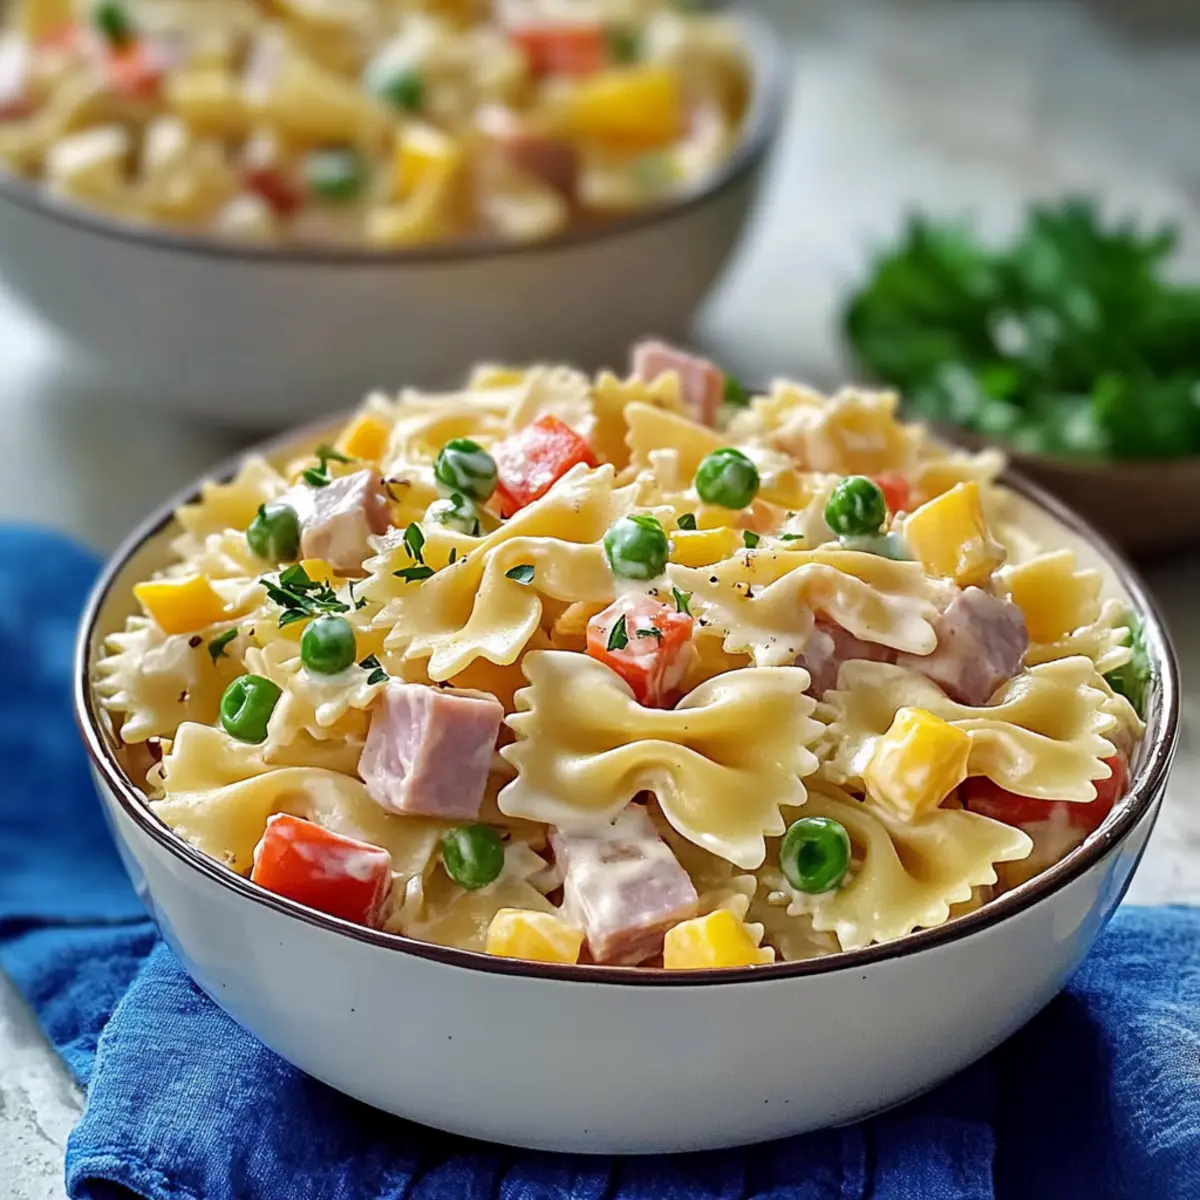
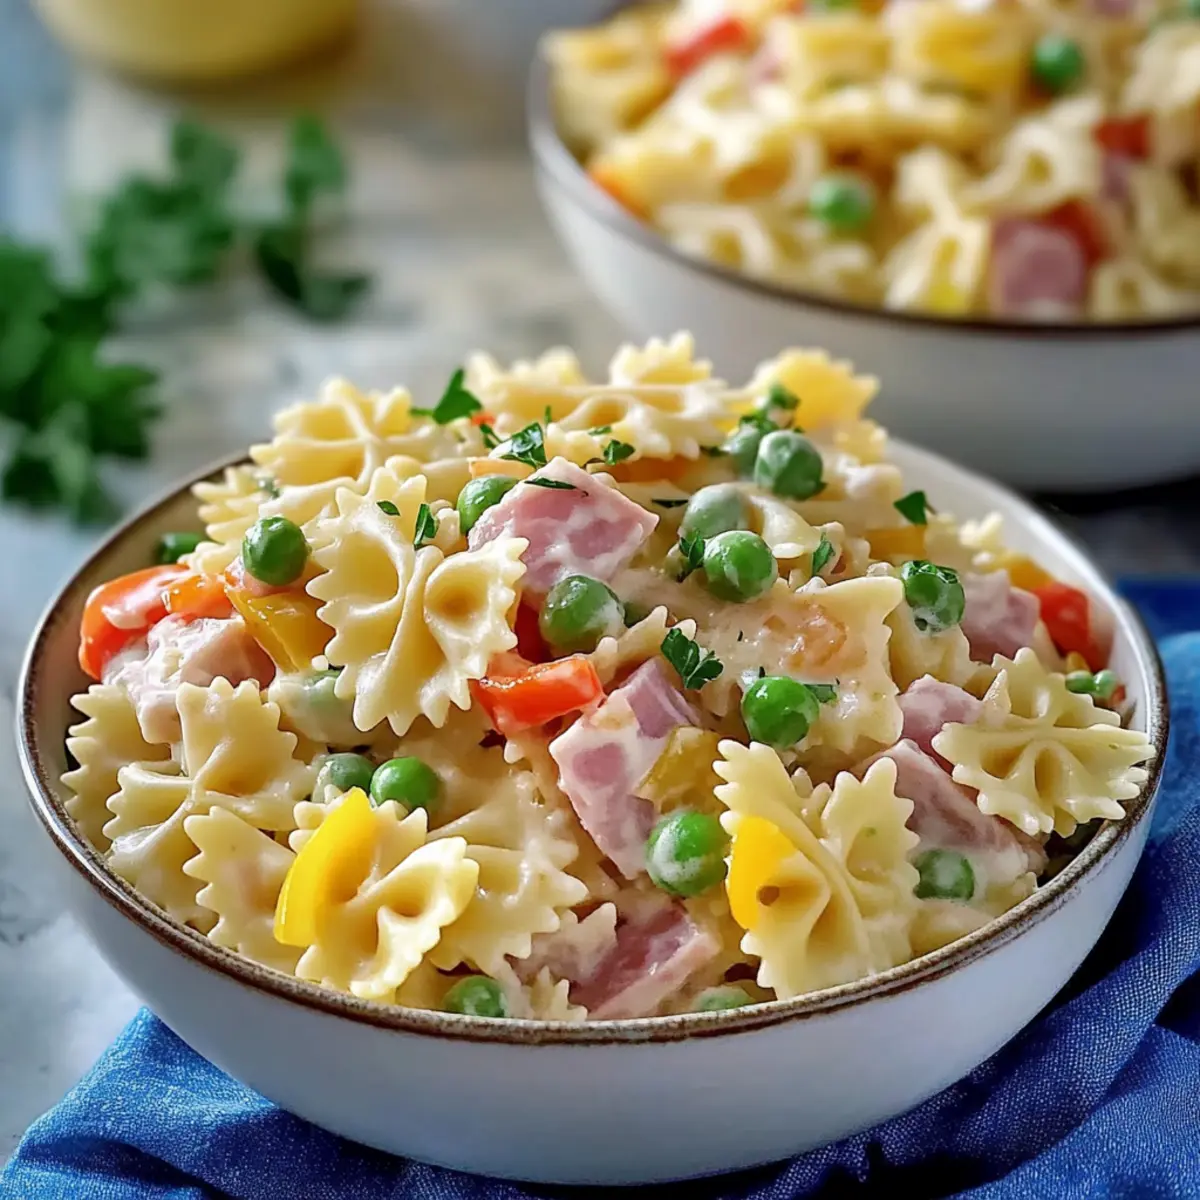
As I tossed together my latest kitchen creation, a vibrant bow tie pasta salad, I couldn’t help but marvel at its rainbow of colors and textures. This easy-to-prepare dish, perfect for summer gatherings, is not just a treat for the eyes but a delightful crowd-pleaser for the palate. With its creamy dressing and a medley of crunchy veggies, this Bow Tie Pasta Salad is family-friendly and wonderfully adaptable, allowing everyone to personalize it to their liking. Whether you're aiming for a quick weeknight meal or a stellar side for your next potluck, this recipe is guaranteed to steal the show. Curious how to whip up this mouthwatering salad and impress your loved ones? Let's dive into the delicious details!

Why is Bow Tie Pasta Salad a Must-Make?

Versatile and Adaptable: This salad is a canvas for creativity, allowing you to swap out ingredients to suit your taste. Whether you prefer grilled chicken or a medley of fresh veggies like cucumbers or cherry tomatoes, the options are endless!

Crowd-Pleasing Flavor: The creamy dressing pairs beautifully with the crunchy vegetables, making this a dish that’s sure to impress. Serve it alongside grilled meats or even a refreshing Jello Salad Cottage for a potluck hit.

Easy Preparation: It’s quick to whip up, making it perfect for busy weeknights or those last-minute gatherings. Simply toss the ingredients together, chill, and you’re good to go!

Make-Ahead Friendly: Prepare it ahead of time and let the flavors meld together in the fridge for up to four days. A vibrant side that tastes even better after a day or two!

Eye-Catching Presentation: The colorful ingredients not only delight the palate but also make this salad a beautiful centerpiece for any meal. This Bow Tie Pasta Salad is all about elevating your dining experience!

Bow Tie Pasta Salad Ingredients

For the Dressing

  • Mayonnaise – Adds creaminess; substitute with Greek yogurt for a lighter version.
  • Relish – Provides tangy sweetness; chopped pickles can be a great alternative.
  • Sugar – Balances the tang of the relish; adjust according to your sweetness preference.
  • Mustard – Delivers a subtle zing; use Dijon or honey mustard for variety.
  • Vinegar – Adds necessary acidity; apple cider vinegar is a perfect replacement.
  • Salt and Pepper – Essential seasonings; adjust according to your taste.

For the Salad

  • Bow Tie Pasta – The base of the salad; easily swap with rotini, penne, or shells if desired.
  • Cheddar Cheese – Introduces flavor and texture; Monterey Jack or other favorite cheeses work well too.
  • Ham – Provides protein and heartiness; cooked chicken or turkey can be delightful substitutes.
  • Onion – Adds crispness and a sharp bite; you can omit for a milder flavor.
  • Peas – Offers sweetness and pops of color; frozen peas are convenient and great for this dish.
  • Bell Pepper – Contributes crunch and vibrancy; any color works, or leave it out if preferred.
  • Fresh Parsley – Adds freshness and a pop of green; dried parsley can work but is less vibrant.

Step‑by‑Step Instructions for Mouthwatering Bow Tie Pasta Salad

Step 1: Prepare the Dressing
In a medium bowl, whisk together 1 cup of mayonnaise, ¼ cup of relish, 1 tablespoon of sugar, 1 tablespoon of mustard, and 2 tablespoons of vinegar. Add a pinch of salt and pepper to taste. This creamy dressing should be smooth and well combined; set it aside for now to allow the flavors to meld before adding it to the rest of the Bow Tie Pasta Salad.

Step 2: Prep Ingredients
While the dressing sits, dice about 1 cup of ham and cube 1 cup of cheddar cheese. Mince half an onion and chop 1 bell pepper into small pieces. If using fresh parsley, finely chop about ¼ cup. These fresh ingredients will add crunch and vibrant colors to your Bow Tie Pasta Salad, so keep them ready for the next step.

Step 3: Cook the Pasta
In a large pot, bring 4-6 quarts of salted water to a boil. Add 12 ounces of bow tie pasta and cook according to package instructions, typically around 9-11 minutes, until al dente. Stir occasionally to prevent sticking. You'll know it's ready when the pasta is firm yet tender. Drain the pasta and set it aside to cool before mixing it into the salad.

Step 4: Cool the Pasta
Once drained, rinse the cooked bow tie pasta under cold water to stop the cooking process and cool it down, preventing clumping. This should take about 1-2 minutes. Make sure the pasta feels cool to the touch; this step ensures that the dressing won’t break down when added, keeping your Bow Tie Pasta Salad delightful and creamy.

Step 5: Combine Ingredients
In a large mixing bowl, combine the cooled bow tie pasta with the prepared ham, cheddar cheese, minced onion, peas, chopped bell pepper, and parsley. Gently fold the ingredients together until everything is distributed evenly. The vibrant colors of the veggies will begin to shine, making this Bow Tie Pasta Salad visually appealing.

Step 6: Add Dressing
Pour the prepared dressing over the pasta mixture and toss gently to coat all the ingredients evenly. Use a spatula or tongs for this step to ensure the dressing clings to each piece without breaking the pasta or vegetables. Your delicious Bow Tie Pasta Salad should start to look creamy and inviting at this point.

Step 7: Chill Before Serving
Cover the bowl with plastic wrap or transfer the salad to an airtight container, then refrigerate for at least 1 hour before serving. This chilling time allows the flavors to meld beautifully, enhancing the overall taste and ensuring your Bow Tie Pasta Salad is both refreshing and satisfying when it's time to enjoy.

Make Ahead Options

These Bow Tie Pasta Salad is a fantastic meal prep option for busy cooks! You can prepare the dressing and chop the veggies up to 24 hours in advance. Simply store the dressing in an airtight container in the refrigerator. The pasta can be cooked and cooled, then refrigerated for up to 3 days. To maintain quality, avoid mixing the dressing with the pasta until just before serving; this will keep the salad fresh and creamy. When you’re ready to enjoy, combine the pasta with the prepared ingredients, toss with the dressing, and chill for at least 1 hour to let the flavors meld beautifully. Enjoy the deliciousness of this Bow Tie Pasta Salad with minimal effort!

Bow Tie Pasta Salad Variations

Feel encouraged to personalize this delightful bow tie pasta salad to suit your tastes and dietary needs!

  • Vegetarian Delight: Omit the ham and add chickpeas for a hearty protein boost. This gives the salad a wonderful, satisfying texture.
  • Spicy Kick: Include diced jalapeños or a splash of hot sauce in the dressing for a little extra heat. Feel free to adjust the amount to match your spice tolerance!
  • Herb Infusion: Enhance flavors by adding fresh basil or dill instead of parsley. They bring a refreshing aroma and unique taste that elevates the dish.
  • Creamy Avocado: Substitute half of the mayonnaise with mashed avocado for a richer, creamier texture that's packed with healthy fats. It adds a beautifully vibrant green hue!
  • Nutty Twist: Toss in some toasted pine nuts or walnuts for added crunch and a hint of nuttiness. They offer a delightful contrast to the creamy dressing.
  • Seasonal Veggies: Incorporate roasted seasonal vegetables, like zucchini or bell peppers, to add a warm, earthy element. This twist transforms the salad into a comforting dish perfect for any season!
  • Seafood Variation: Add cooked shrimp or crab meat for a delectable seafood twist. It transforms your salad into a luxurious treat fit for special occasions.
  • Sweet Additions: Toss in some diced apples or grapes for a touch of sweetness that complements the savory elements beautifully. A fruit addition brings balance to the salad.

Don't forget, this versatile recipe pairs wonderfully with other refreshing dishes, like Seafood Pasta Savory, making it perfect for any gathering. Enjoy experimenting with your Bow Tie Pasta Salad!

What to Serve with Mouthwatering Bow Tie Pasta Salad?

Elevate your summer gatherings with delightful accompaniments that harmonize beautifully with this vibrant dish.

  • Grilled Chicken: Juicy and smoky, grilled chicken adds protein and complements the salad’s creamy textures seamlessly. It’s a classic choice for a well-rounded meal.

  • Coleslaw: Crunchy and tangy, coleslaw enhances the dish's textures while providing a refreshing contrast. Its coolness pairs beautifully with the warm sun on lazy summer afternoons.

  • Garlic Bread: Soft, buttery, and infused with garlic, this classic side adds a comforting touch. Warm bites of garlic bread serve as a delightful way to scoop up any extra pasta salad on your plate.

  • Caprese Salad: A fresh mix of tomatoes, mozzarella, and basil brings vibrant colors and a burst of flavor. The salad’s lightness balances the richness of the pasta, keeping your meal refreshing.

  • Watermelon Feta Salad: This sweet and salty combination offers a juicy counterpart to the pasta salad. Its freshness is like a cool breeze on a hot day, making it perfect for outdoor picnics.

  • Sparkling Lemonade: A zesty and bubbly drink provides a thirst-quenching contrast. The brightness of lemon enhances the flavors of the pasta salad, making every bite feel like summer bliss.

How to Store and Freeze Bow Tie Pasta Salad

Fridge: Store your Bow Tie Pasta Salad in an airtight container for up to 4 days. This makes it a convenient make-ahead meal for busy weeknights!

Freezer: It’s best not to freeze Bow Tie Pasta Salad as the dressing and veggies can become mushy upon thawing. Enjoy fresh instead!

Refreshing Tip: If the salad seems dry after a day or two in the fridge, simply stir in a bit of additional mayonnaise to restore its creamy texture.

Serving Suggestion: Serve chilled for the best flavor and texture, making it a perfect picnic or potluck option!

Expert Tips for Bow Tie Pasta Salad

  • Rinse Thoroughly: Rinse cooked pasta under cold water to prevent clumping and ensure each piece stays distinct in your Bow Tie Pasta Salad.
  • Dressing Timing: Add the dressing only to the cooled pasta; warm pasta can break down the mayo and impact texture.
  • Flavor Check: Always taste and adjust seasonings after chilling, as cold temperatures can dull flavors. You might need a pinch more salt!
  • Fresh Ingredients: For a bright and crisp texture, consider adding fresh peas right before serving for maximum crunch in your Bow Tie Pasta Salad.
  • Make-Ahead Magic: This salad gets better with time! Prepare it ahead of your event for a hassle-free experience while flavors develop beautifully in the fridge.

Bow Tie Pasta Salad Recipe FAQs

How do I choose ripe vegetables for my Bow Tie Pasta Salad?
Absolutely! When selecting vegetables like bell peppers and onions, look for those that are firm and vibrant in color. Avoid any that have dark spots or are soft, as this indicates they may be past their prime. Fresh peas should be bright green and snap easily when handled, ensuring they are sweet and crunchy for your salad!

How should I store Bow Tie Pasta Salad and for how long?
You can store your Bow Tie Pasta Salad in an airtight container in the fridge for up to 4 days. This is perfect for make-ahead meals. Just ensure the salad is completely cooled before sealing the container. If it seems to dry out after a day or two, I often stir in a bit more mayonnaise to refresh the texture.

Can I freeze Bow Tie Pasta Salad?
It's best not to freeze Bow Tie Pasta Salad. Unfortunately, the creamy dressing and vegetables can become mushy upon thawing, which affects the overall taste and texture. Instead, enjoy it fresh! If you find yourself with leftovers, keep them in the fridge and consume them within the 4-day window for the best quality.

What if my dressing curdles or separates?
Very! If that happens, try whisking in a little more mayonnaise or a splash of vinegar to bring it back together. It’s crucial not to add the dressing to warm pasta, as heat can cause the mayonnaise to break down. If you notice separation after chilling, give it a good stir before serving to reincorporate the ingredients.

Are there any dietary considerations when making Bow Tie Pasta Salad?
Definitely! If you're catering to allergies, be sure to check for gluten in your pasta and dairy in your cheese and mayo. For substitutions, consider using gluten-free pasta and dairy-free mayo or yogurt to accommodate dietary needs. Just communicate with your guests to ensure everyone can enjoy this delightful salad!

Can pets eat ingredients from my Bow Tie Pasta Salad?
It's important to keep in mind that while some ingredients in the Bow Tie Pasta Salad, like cucumber and peas, are safe for pets, others, such as onion and certain seasonings, can be harmful. Always double-check what’s safe for your furry friends before sharing any of your kitchen creations with them!

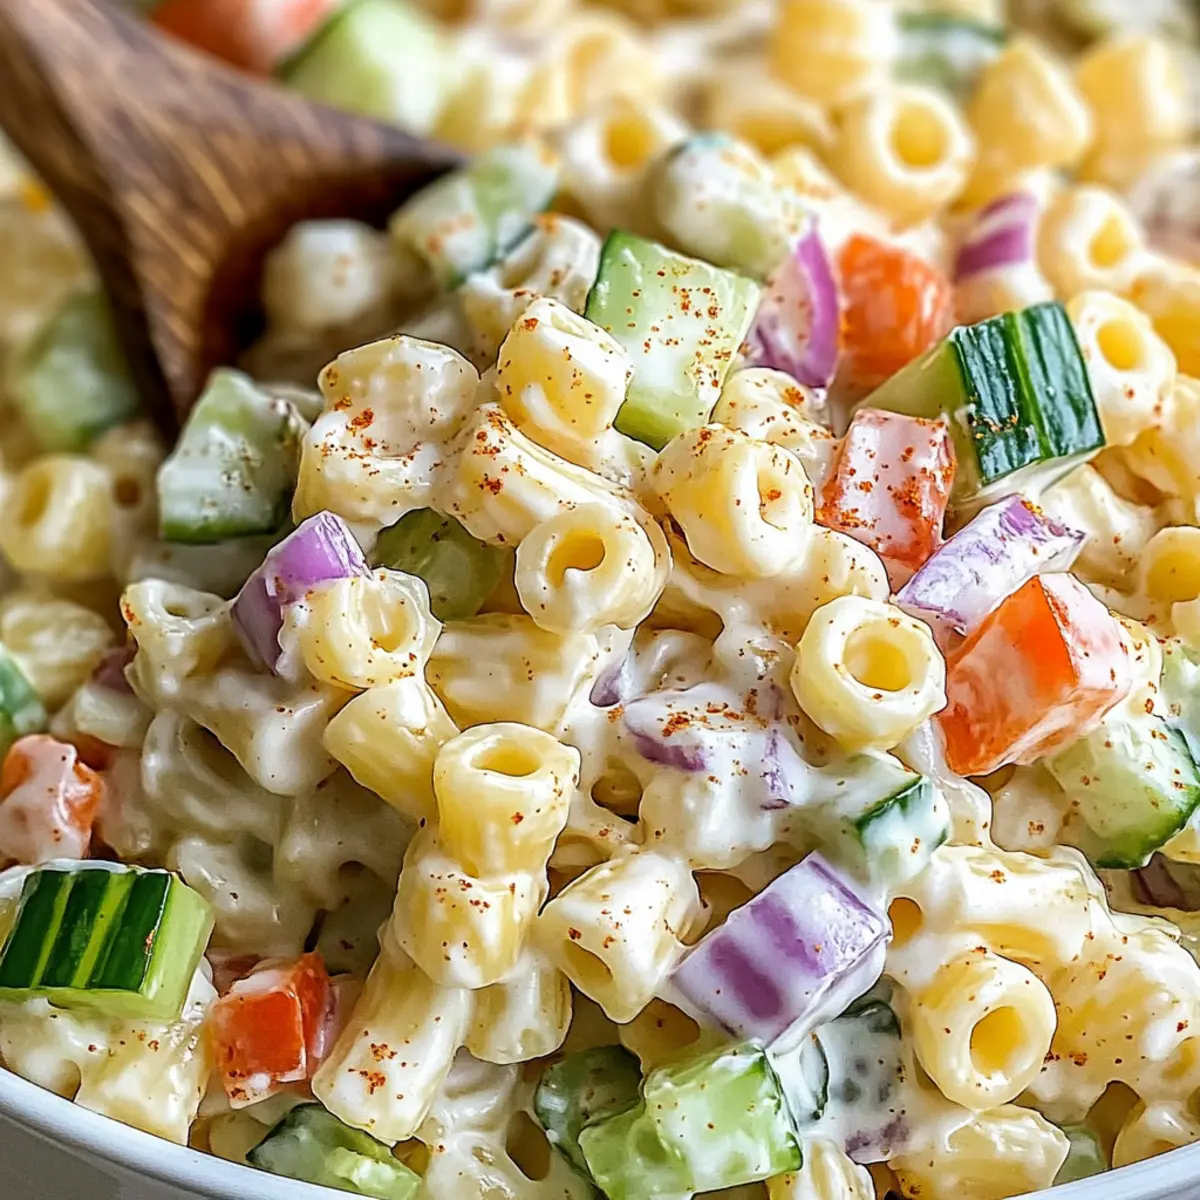
Bow Tie Pasta Salad

Delicious Bow Tie Pasta Salad: Your New Summer Favorite

This vibrant Bow Tie Pasta Salad is a delightful crowd-pleaser, perfect for summer gatherings and easily adaptable to personal preferences.
Print Recipe Pin Recipe
Prep Time 20 minutes mins
Cook Time 10 minutes mins
Chill Time 1 hour hr
Total Time 1 hour hr 30 minutes mins
Servings: 6 servings
Course: Salads
Cuisine: American
Calories: 320
Ingredients Equipment Method Nutrition Notes

Ingredients
  

Dressing
  • 1 cup mayonnaise Substitute with Greek yogurt for a lighter version.
  • ¼ cup relish Chopped pickles can be a great alternative.
  • 1 tablespoon sugar Adjust according to your sweetness preference.
  • 1 tablespoon mustard Use Dijon or honey mustard for variety.
  • 2 tablespoons vinegar Apple cider vinegar is a perfect replacement.
  • salt Adjust according to your taste.
  • pepper Adjust according to your taste.
Salad
  • 12 ounces bow tie pasta Easily swap with rotini, penne, or shells.
  • 1 cup cheddar cheese Monterey Jack or other favorite cheeses work well.
  • 1 cup ham Cooked chicken or turkey can be substitutes.
  • ½ cup onion You can omit for a milder flavor.
  • 1 cup peas Frozen peas are convenient and great for this dish.
  • 1 cup bell pepper Any color works, or leave it out if preferred.
  • ¼ cup fresh parsley Dried parsley can work but is less vibrant.

Equipment

  • Mixing Bowl
  • Large pot

Method
 

Prep and Cook
  1. In a medium bowl, whisk together mayonnaise, relish, sugar, mustard, and vinegar. Season with salt and pepper, then set aside.
  2. Dice ham and cube cheddar cheese. Mince onion and chop bell pepper. If using, finely chop parsley.
  3. In a large pot, bring salted water to a boil. Add bow tie pasta and cook according to package instructions, about 9-11 minutes. Drain and set aside to cool.
  4. Rinse the cooked pasta under cold water for 1-2 minutes to stop cooking and cool it down.
  5. Combine the cooled pasta with ham, cheddar, onion, peas, bell pepper, and parsley. Gently fold together.
  6. Pour the dressing over the pasta mixture and toss gently to coat.
  7. Refrigerate for at least 1 hour before serving to allow flavors to meld.
Nutrition

Serving: 1cupCalories: 320kcalCarbohydrates: 30gProtein: 12gFat: 18gSaturated Fat: 3gPolyunsaturated Fat: 1gMonounsaturated Fat: 4gCholesterol: 30mgSodium: 460mgPotassium: 230mgFiber: 2gSugar: 3gVitamin A: 8IUVitamin C: 10mgCalcium: 15mgIron: 6mg

Notes

For optimal freshness, serve chilled and consider adding fresh peas right before serving.

Tried this recipe?

Let us know how it was!

Healthy Chicken Pasta Salad: Wholesome & Flavorful Delight

April 10, 2026 by Grace Snow Leave a Comment

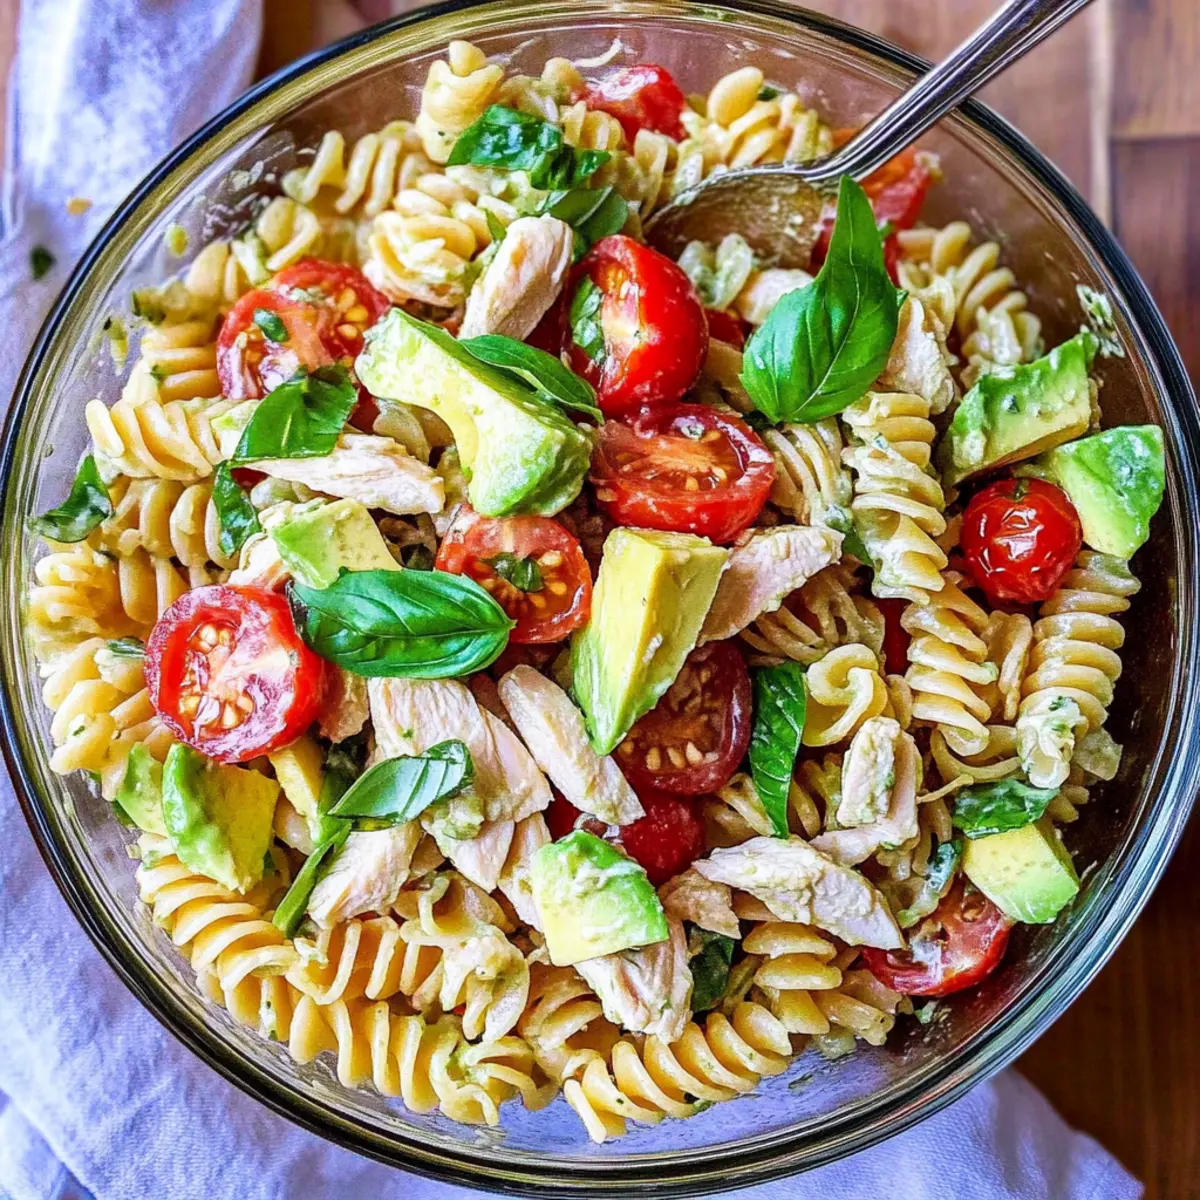
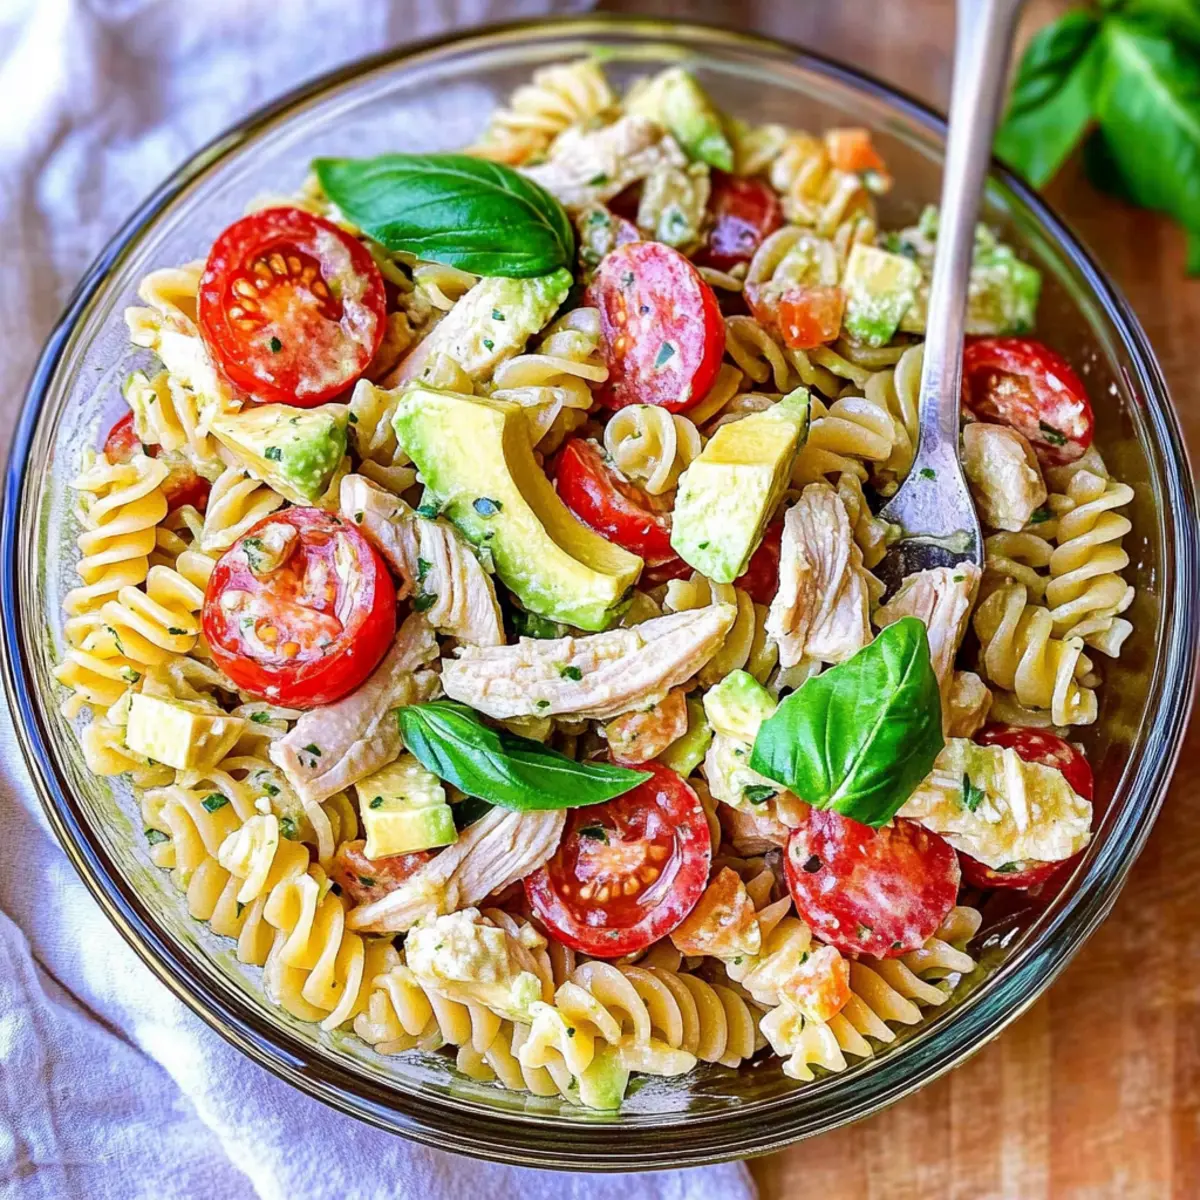
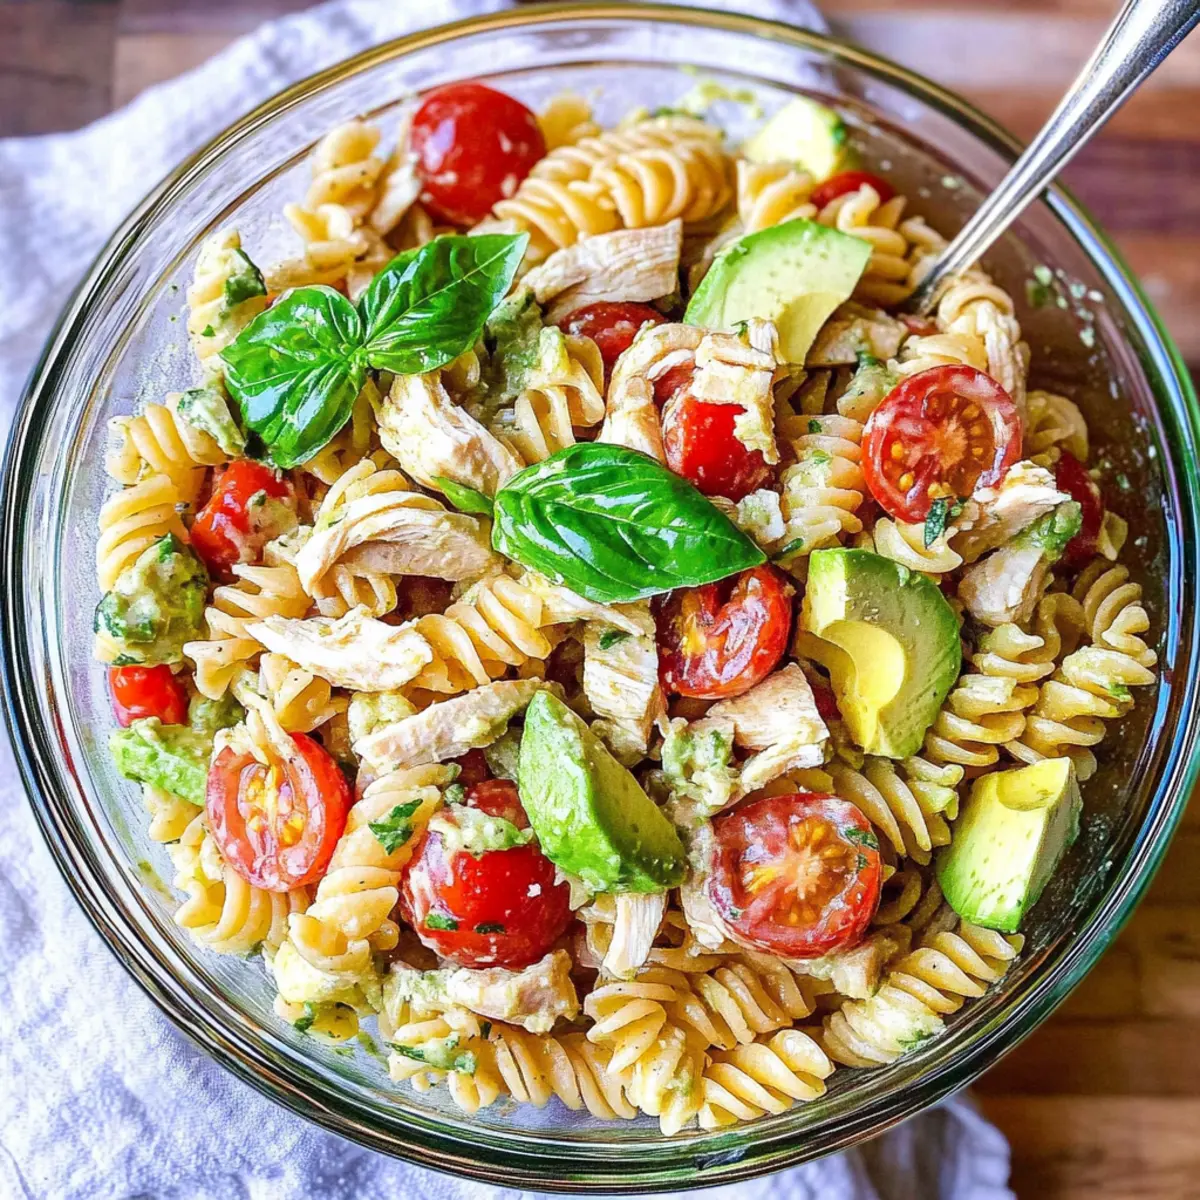
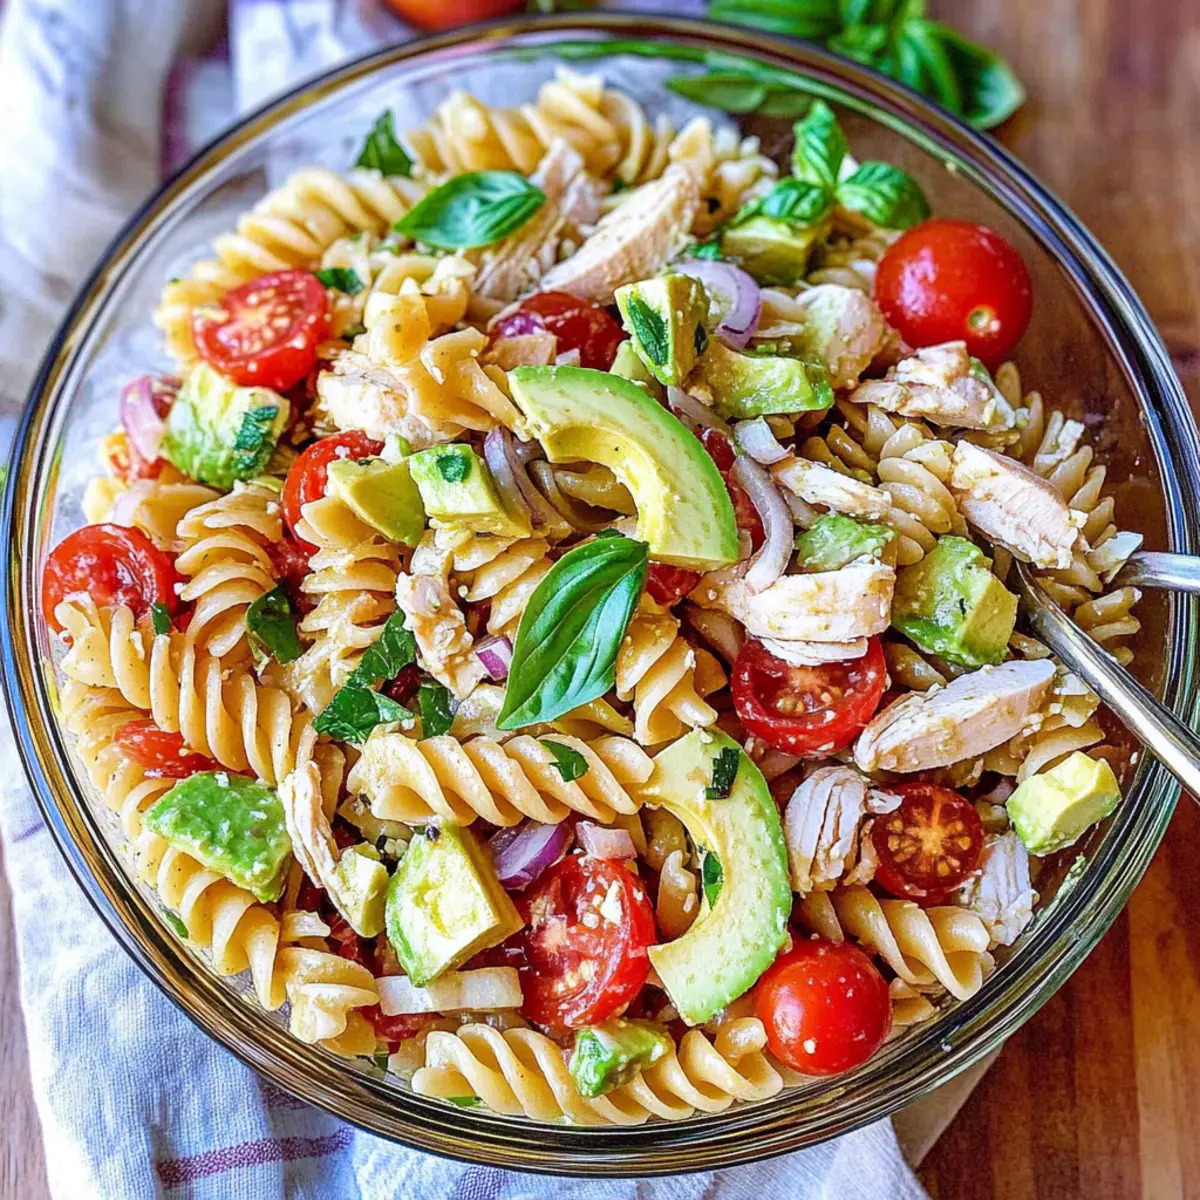
As I stood by the kitchen counter chopping vibrant cherry tomatoes and creamy avocado, a sense of calm washed over me. There’s something magical about assembling a dish that feels as refreshing as a summer breeze. This Healthy Chicken Pasta Salad is a delightful blend of robust flavors, featuring protein-packed chicken, juicy tomatoes, and aromatic basil, all tossed together in under 20 minutes. It’s the kind of meal that not only fuels your body but also lifts your spirits—a perfect go-to for lunch or light dinners. Plus, no mayo means you can enjoy it guilt-free, and it’s ideal for meal prep! Ready to create a colorful, nutritious masterpiece that satisfies without weighing you down? Let’s dive in!

Why is this Chicken Pasta Salad Special?

Quick to Prepare: This Healthy Chicken Pasta Salad takes just 20 minutes, making it a fantastic option for those busy days when you're craving something healthy without spending hours in the kitchen.

Nutrient-Dense: Packed with protein-rich chicken and healthy fats from avocado, this salad fuels your body while keeping you satisfied.

Versatile Ingredients: Customize it easily! Swap in your favorite veggies or try adding Cauliflower Pasta Ready for an extra healthy twist.

No Mayo Needed: Enjoy a light, creamy texture without the guilt of mayo—ideal for staying on track with your health goals.

Perfect for Meal Prep: This salad is great for making ahead and stays fresh in your fridge for up to three days, making it perfect for lunch or quick dinners.

Get ready to impress family and friends with this vibrant, flavorful dish that'll leave everyone asking for seconds!

Healthy Chicken Pasta Salad Ingredients

For the Salad

  • Rotini Pasta – Provides structure and a hearty base; swap for bow tie, penne, or macaroni if you prefer.
  • Shredded Chicken – Adds protein; consider using rotisserie chicken for convenience or grilled chicken breasts for a fresh option.
  • Avocado – Contributes creaminess; remember it can brown, so add it just before serving if making ahead.
  • Cherry Tomatoes – Offer juiciness and sweetness; any ripe small tomatoes can work if cherry tomatoes aren’t available.
  • Fresh Basil – Imparts a fragrant herbal touch; use dried basil in a pinch, but fresh delivers the best flavor.
  • Red Onion – Adds crunch and sharpness; adjust the quantity to taste or substitute with green onions for a milder flavor.

For the Dressing

  • Olive Oil – Acts as a base for the dressing; extra-virgin is preferred for its robust flavor.
  • White Wine Vinegar – Provides acidity to balance the flavors; you can substitute with apple cider vinegar for a milder taste.
  • Italian Seasoning – Enhances the overall flavor; if you're out, use individual herbs like oregano and thyme.
  • Salt & Pepper – Essential for seasoning; adjust to taste for the perfect finishing touch.

Make this Healthy Chicken Pasta Salad your next go-to dish and savor the joy of wholesome flavors!

Step‑by‑Step Instructions for Healthy Chicken Pasta Salad

Step 1: Prepare the Pasta
Start by bringing a large pot of salted water to a rolling boil over high heat. Once boiling, add 8 ounces of rotini pasta, cooking it for about 8-10 minutes until al dente, or firm to the bite. Drain the pasta in a colander and rinse it under cold water to cool down quickly. Set it aside in a large mixing bowl to prepare for the rest of your delicious Healthy Chicken Pasta Salad.

Step 2: Chop the Ingredients
While the pasta is cooking, dice 1 ripe avocado and halve a cup of cherry tomatoes, setting them aside for later. Chop half a small red onion and roughly tear a handful of fresh basil leaves. These colorful ingredients will add vibrancy and flavor to your salad. Make sure to keep everything handy and ready to combine, enticing you with their freshness as you assemble your Healthy Chicken Pasta Salad.

Step 3: Mix the Chicken
Add your shredded chicken (around 2 cups) to the bowl with the cooked rotini pasta. If you're using rotisserie chicken, make sure it's warmed slightly for better melding of flavors. About this time, you should appreciate the protein boost this Healthy Chicken Pasta Salad provides as you mix the chicken into the pasta.

Step 4: Prepare the Dressing
In a small jar or bowl, combine 3 tablespoons of olive oil with 2 tablespoons of white wine vinegar, 1 teaspoon of Italian seasoning, and a pinch of salt and pepper. Close the jar tightly and shake it vigorously until the dressing emulsifies and thickens slightly. This bright dressing will perfectly complement your Healthy Chicken Pasta Salad, enhancing the exquisite flavors of the fresh ingredients.

Step 5: Combine the Salad
Drizzle the prepared dressing over the pasta and chicken mixture. Gently fold in the diced avocado, cherry tomatoes, chopped red onion, and fresh basil with a spatula. Be careful not to mash the avocado. Toss everything together until the ingredients are fully combined and evenly coated with the dressing, creating a deliciously vibrant and healthy Chicken Pasta Salad.

Step 6: Serve and Enjoy
Your Healthy Chicken Pasta Salad is now ready to serve! Spoon it into bowls or plates, and admire the colorful presentation of your creation. For added enjoyment, feel free to pair it with some whole grain bread or your favorite side. If not serving immediately, refrigerate the salad for up to 3 days, but remember to add the avocado just before enjoying it for the freshest flavor.

Healthy Chicken Pasta Salad Variations

Feel free to get creative with this recipe—your taste buds will thank you!

  • Dairy-Free: Swap avocado with a drizzle of tahini for a unique creaminess while keeping it dairy-free.

  • Whole Grain Boost: Use whole wheat pasta instead of regular rotini for added fiber and a nutty flavor.

  • Spicy Kick: Add a pinch of red pepper flakes or sliced jalapeños to your dressing for a delightful heat that will awaken your palate!

  • Savory & Sweet: Toss in some dried cranberries or chopped apples for a sweet contrast to the savory chicken and vegetables.

  • Extra Veggies: Include grated carrots or diced bell peppers for added color, crunch, and nutritional benefits! These veggies add a satisfying texture to the salad.

  • Mediterranean Twist: Incorporate olives and feta cheese for a Mediterranean flair, bringing in a briny flavor that’s irresistible alongside the fresh basil.

  • Seafood Option: Replace chicken with shrimp or crab for a seafood pasta salad that’s equally delicious and rich in protein. It’s perfect for coastal gatherings!

  • Herb Variety: Don't hesitate to switch up the herbs—try cilantro or parsley for a fresh twist that brings a different aroma to your salad.

Whether you explore these variations or invent your own, let your creativity shine! This salad can easily transform into different delightful meals, much like my beloved Avocado Egg Salad or Seafood Pasta Savory. Enjoy the journey of tasty experimentation!

What to Serve with Healthy Chicken Pasta Salad

This vibrant salad is the perfect centerpiece for a wholesome meal, inviting you to complement it with delightful side dishes.

  • Zesty Garlic Bread: The crispy, buttery crunch of garlic bread enhances the salad’s freshness, perfect for mopping up any remaining dressing.

  • Crisp Cucumber Slices: Cool, crunchy cucumbers bring a refreshing contrast to the rich avocado, making each bite a delightful experience.

  • Light Fruit Salad: A medley of seasonal fruits adds a sweet flare, balancing the savory flavors of the dish with juicy bites.

  • Grilled Vegetables: Smoky, charred veggies like zucchini or bell peppers introduce a hearty element, enriching your plate and providing more textures.

  • Italian Chopped Salad: This mix of greens, olives, and cheese harmonizes with the flavors in the chicken pasta salad, making it a colorful and nutritious addition.

  • Herbal Iced Tea: A soothing herbal iced tea with a hint of lemon complements the fresh flavors beautifully and adds a refreshing touch.

  • Chocolate Avocado Mousse: For dessert, a creamy mousse made from avocado and cocoa is a rich yet healthy finish, echoing the creamy avocado in your salad while providing a sweet note.

How to Store and Freeze Healthy Chicken Pasta Salad

Fridge: Store your Healthy Chicken Pasta Salad in an airtight container in the refrigerator for up to 3 days. Be sure to toss it gently before serving leftovers to redistribute the dressing.

Freezer: For best results, it’s recommended to freeze only the chicken and pasta separately from the vegetables to preserve freshness. Use within 1-2 months for optimal taste.

Reheating: If refrigerated, you can enjoy leftovers cold, or gently reheat the chicken and pasta in a microwave. Add fresh avocado just before serving for the best flavor and texture.

Expert Tips for Healthy Chicken Pasta Salad

  • Choose Quality Chicken: Opt for rotisserie chicken to save time or grill your own. Ensure it’s cooked through for the best flavor and safety—medium-low heat is key.

  • Avoid Avocado Browning: If you’re making the salad ahead, keep the avocado separate and add it just before serving to maintain its freshness and beautiful color.

  • Customize for Flavor: Experiment with your favorite veggies like bell peppers or olives for added crunch and flavor diversity. This Healthy Chicken Pasta Salad adapts beautifully!

  • Make a Creamy Dressing: For a thicker texture without mayo, try adding a spoonful of Greek yogurt to your dressing. It elevates the creamy richness while keeping it healthy.

  • Season to Your Taste: Don’t be shy with salt and pepper! Adjusting these seasonings will enhance your Healthy Chicken Pasta Salad's overall flavor, making each bite delightful.

Make Ahead Options

This Healthy Chicken Pasta Salad is perfect for meal prep, allowing busy cooks to save time while still enjoying delicious, nutritious meals throughout the week! You can prepare the salad ingredients, including the rotini pasta, shredded chicken, diced cherry tomatoes, and chopped red onion, up to 3 days in advance. Just remember to keep the diced avocado separate to prevent browning; add it just before serving to maintain its creamy texture. Store the salad ingredients in an airtight container in the refrigerator. When ready to serve, simply drizzle on the homemade dressing and toss everything together for a fresh, vibrant dish that tastes just as delightful as when it was first made!

Healthy Chicken Pasta Salad Recipe FAQs

How do I select ripe avocados for this salad?
Absolutely! When choosing avocados, look for ones that are firm yet yield gently to pressure when squeezed. The skin should be a dark green to almost black color, free from dark spots. Avoid avocados that feel overly soft or have blemishes.

How should I store my Healthy Chicken Pasta Salad?
For optimal freshness, store your Healthy Chicken Pasta Salad in an airtight container in the refrigerator. It will stay fresh for up to 3 days. Be sure to give it a gentle toss before serving leftovers to evenly redistribute the dressing, keeping every bite delicious!

Can I freeze this pasta salad for later?
Very! However, it's best to freeze only the chicken and pasta separately. Vegetables like avocado and tomatoes don’t freeze well. To freeze, place the cooled chicken and pasta in a freezer-safe bag or container and use within 1-2 months for the best flavor. To enjoy later, thaw in the fridge overnight and add fresh ingredients prior to serving.

What if the avocado browns before I eat the salad?
If you wish to avoid browning, it’s smart to add the avocado just before serving the salad. If you’ve already mixed it in, a gentle squeeze of lemon or lime juice can help slow the browning process. Also, storing in an airtight container will minimize air exposure that speeds up browning.

Are there any allergy considerations I should keep in mind?
Definitely! If you're serving this Healthy Chicken Pasta Salad to guests, be mindful of common allergens. Ensure the olive oil and vinegar are allergy-friendly, as some individuals may have sensitivities to certain brands. Feel free to swap any ingredients based on dietary restrictions—like using gluten-free pasta if necessary.

How can I make this salad suitable for meal prep?
For meal prep, assemble the salad without the avocado and dressing. Store in individual containers in the fridge, and add the dressing and avocado just before enjoying. This way, your salad will stay fresh and delicious throughout the week—perfect for on-the-go lunches or quick dinners!

Healthy Chicken Pasta Salad

Healthy Chicken Pasta Salad: Wholesome & Flavorful Delight

This Healthy Chicken Pasta Salad is a refreshing blend of chicken, tomatoes, and avocado, perfect for lunch or light dinners.
Print Recipe Pin Recipe
Prep Time 10 minutes mins
Cook Time 10 minutes mins
Total Time 20 minutes mins
Servings: 4 servings
Course: Salads
Cuisine: American
Calories: 350
Ingredients Equipment Method Nutrition Notes

Ingredients
  

For the Salad
  • 8 ounces Rotini Pasta Can substitute with bow tie, penne, or macaroni.
  • 2 cups Shredded Chicken Use rotisserie or grilled chicken.
  • 1 Avocado Add just before serving if making ahead.
  • 1 cup Cherry Tomatoes Any ripe small tomatoes can work.
  • 1 handful Fresh Basil Dried basil can be used in a pinch.
  • 0.5 small Red Onion Adjust quantity to taste.
For the Dressing
  • 3 tablespoons Olive Oil Extra-virgin preferred.
  • 2 tablespoons White Wine Vinegar Can substitute with apple cider vinegar.
  • 1 teaspoon Italian Seasoning Use individual herbs if out of this.
  • Salt & Pepper Adjust to taste.

Equipment

  • pot
  • Colander
  • Mixing Bowl
  • Jar or Bowl for Dressing

Method
 

Step-by-Step Instructions
  1. Bring a large pot of salted water to a boil. Add rotini pasta and cook for 8-10 minutes until al dente. Drain and rinse under cold water. Set aside in a mixing bowl.
  2. Dice avocado and halve cherry tomatoes. Chop red onion and tear basil leaves. Set aside.
  3. Add shredded chicken to the bowl with cooked pasta and mix.
  4. In a jar, combine olive oil, white wine vinegar, Italian seasoning, salt, and pepper. Shake until emulsified.
  5. Drizzle dressing over the pasta and chicken. Fold in avocado, tomatoes, onion, and basil gently.
  6. Serve immediately or refrigerate for up to 3 days, adding avocado just before serving.

Nutrition

Serving: 1servingCalories: 350kcalCarbohydrates: 30gProtein: 25gFat: 15gSaturated Fat: 2gPolyunsaturated Fat: 1gMonounsaturated Fat: 10gCholesterol: 70mgSodium: 300mgPotassium: 600mgFiber: 5gSugar: 2gVitamin A: 500IUVitamin C: 15mgCalcium: 40mgIron: 1mg

Notes

This salad is great for meal prep and can be customized with different vegetables or proteins.

Tried this recipe?

Let us know how it was!

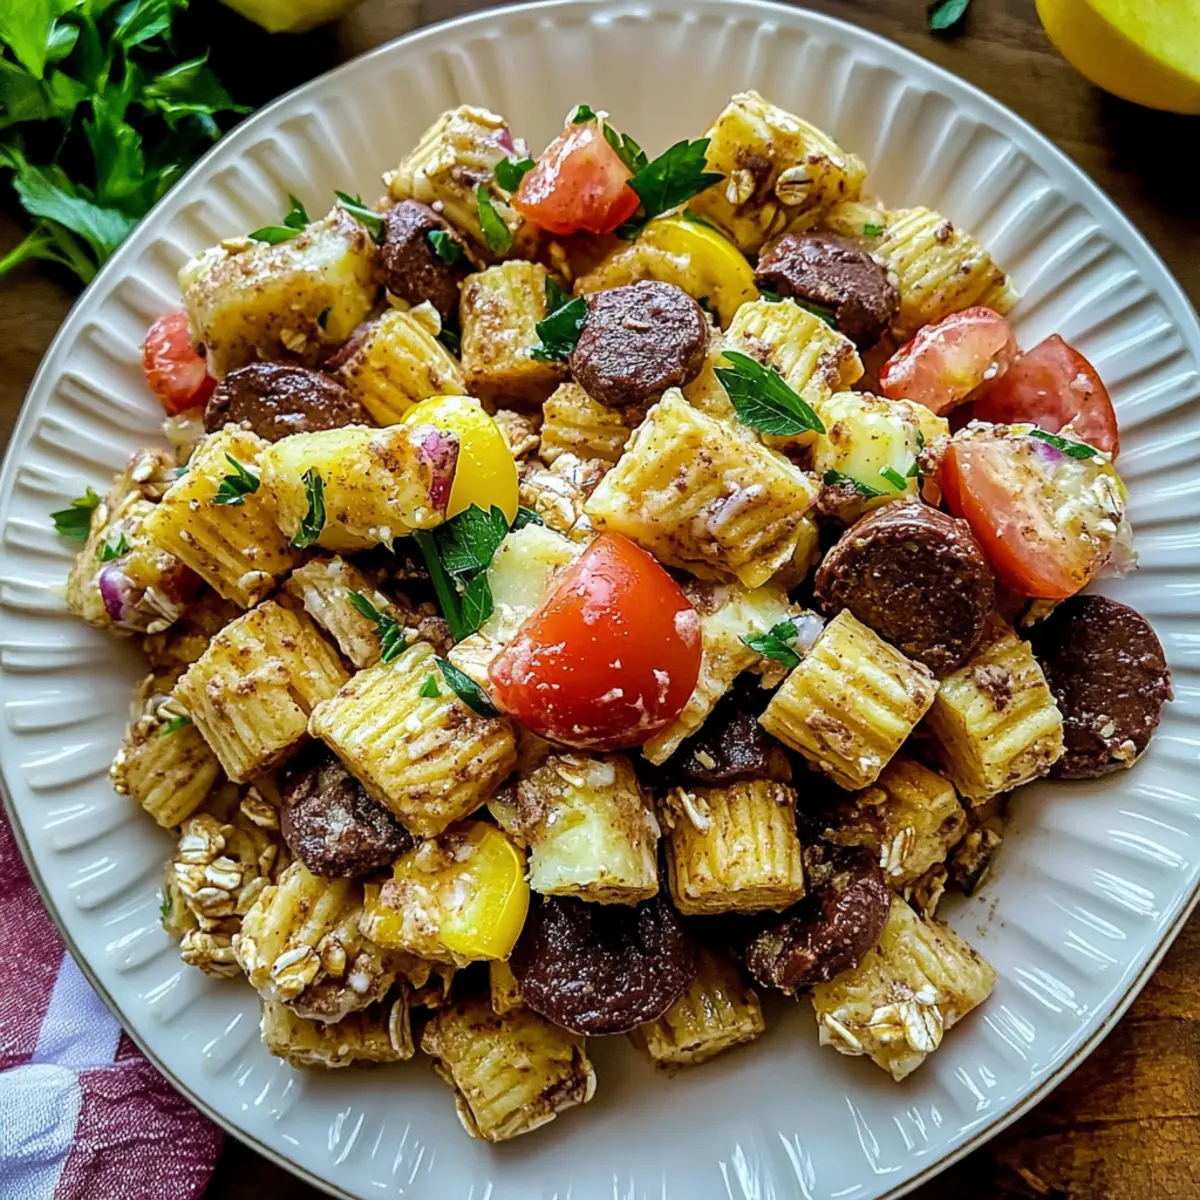
Fresh Horiatiki Pasta Salad: A Flavorful Village Twist

April 10, 2026 by Grace Snow Leave a Comment

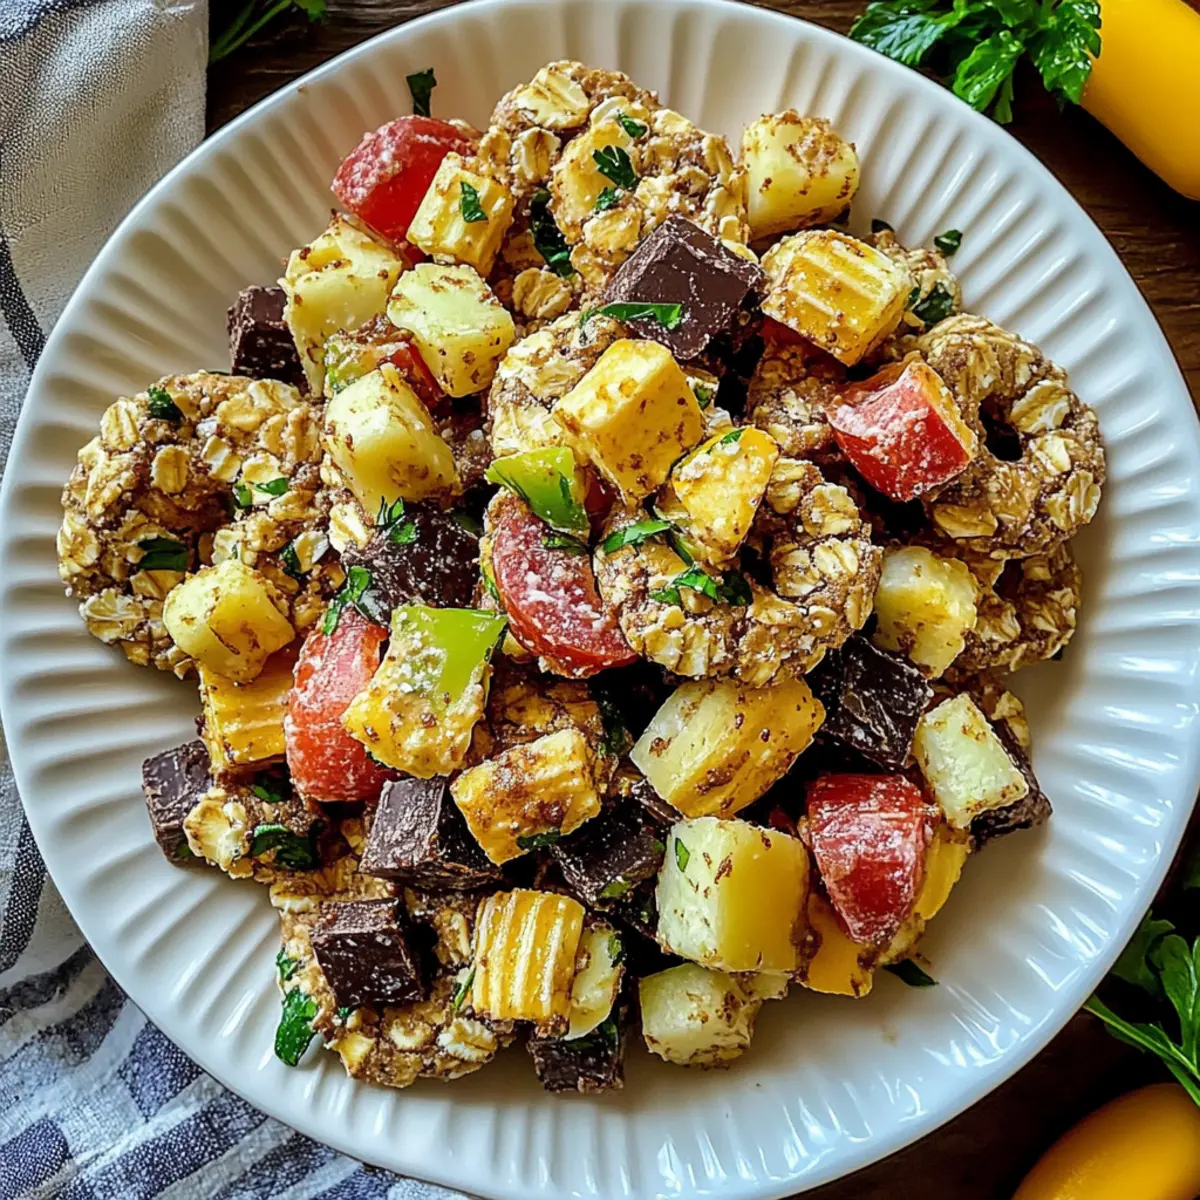
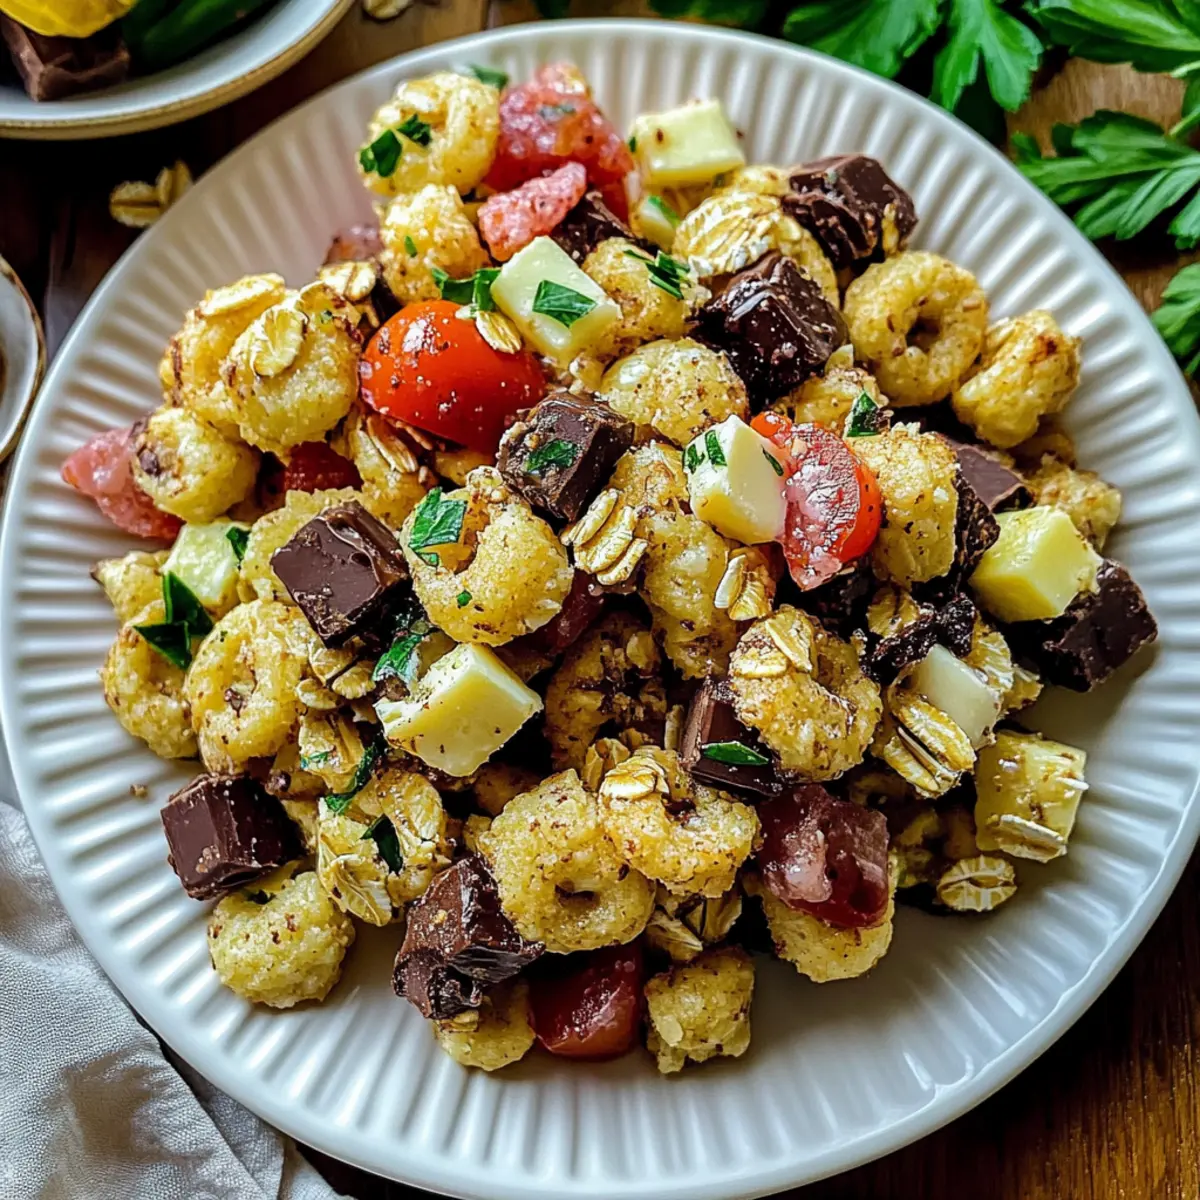
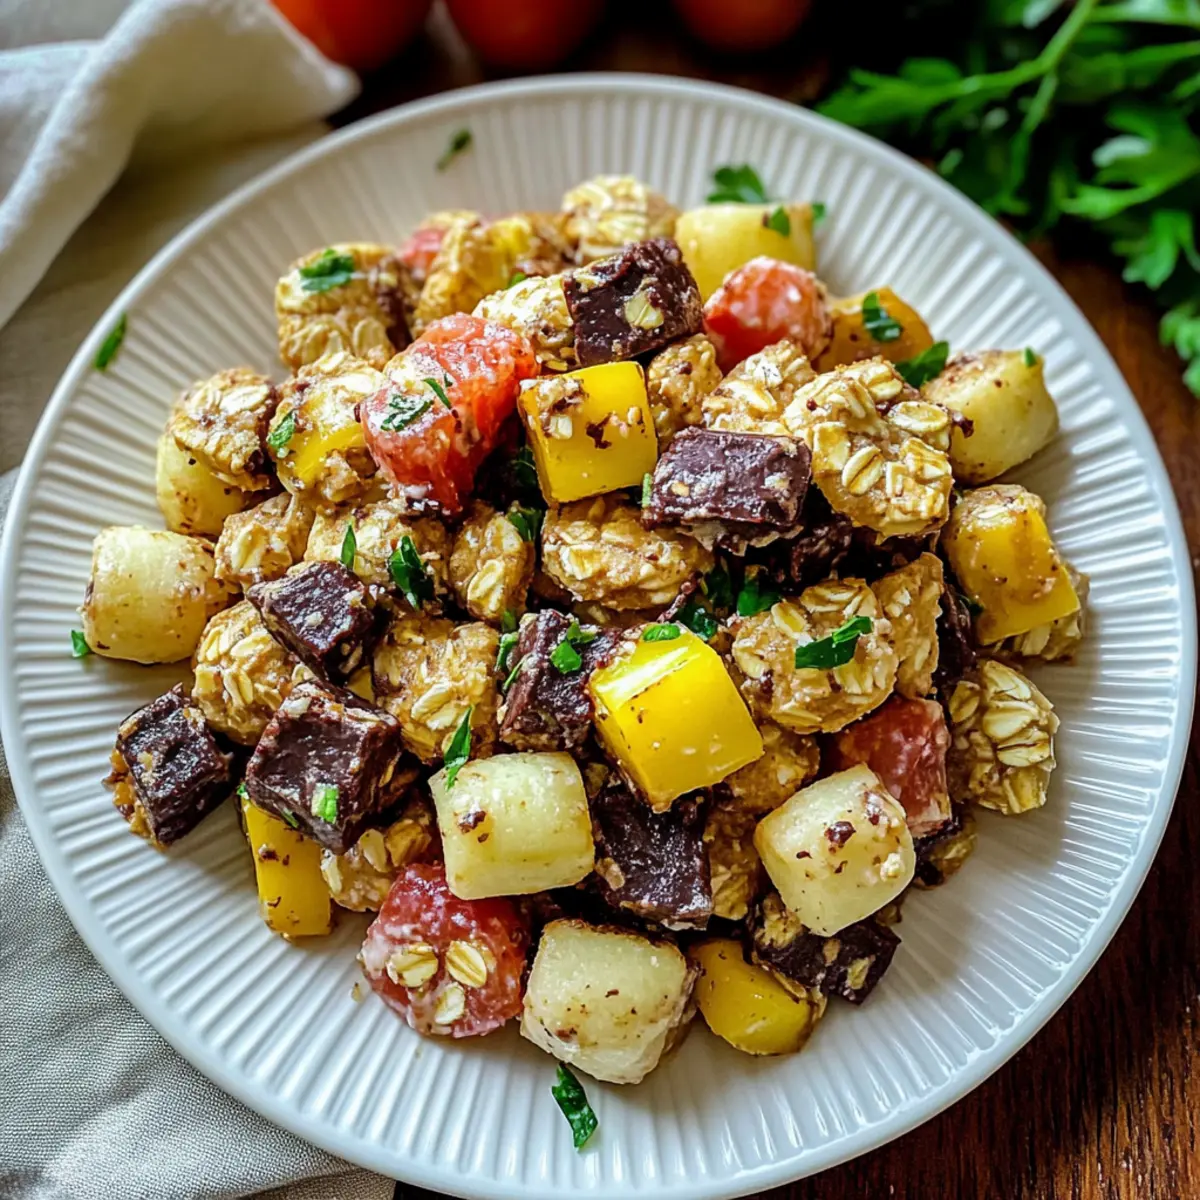
As I bit into the first cookie, the delightful blend of chocolate and oats enveloped my taste buds, instantly transporting me to my favorite childhood memories. These 4-Ingredient Crunchy Chocolate Oat Cookies are not just a treat; they’re a quick and simple solution for anyone craving a sweet snack without the fuss. With just a handful of gluten-free ingredients, you can whip up these cookies in under 20 minutes—perfect for busy evenings or impromptu gatherings. Whether you're a baking novice or looking to simplify your dessert routine, these cookies deliver a satisfying crunch with every bite. Ready to find out how easy it is to indulge in a tasty, homemade delight?

Why Are These Cookies a Must-Try?

Simplicity at Its Best: With only four simple ingredients, making these cookies is a breeze, even for beginner bakers.

Decadent Flavor: The rich chocolate cocoa marries beautifully with the wholesome oats, delivering a treat that’s as tasty as it is satisfying.

Quick & Easy: You can enjoy these freshly baked cookies in just 20 minutes, making them perfect for last-minute snacking or dessert fixes.

Healthy Indulgence: Packed with nutrients from oats and healthy fats from peanut butter, these cookies allow you to indulge guilt-free.

Versatile Variations: Whether you prefer mix-ins like chocolate chips or a nut-free option with sunbutter, this recipe invites creativity to suit your taste.

Elevate your snacking game with these cookies that will surely impress family and friends! If you love quick, wholesome treats, you might also want to explore my recipes for Skillet Pasta Sun or Avocado Egg Salad for a delightful meal.

Chocolate Oat Cookies Ingredients

Get ready to bake with these easy chocolate oat cookies!

For the Cookie Dough
• Oats – Provide structure and chewiness; use rolled oats for the best texture.
• Cocoa Powder – Adds a rich chocolate flavor; opt for unsweetened for better control over sweetness.
• Peanut Butter – Acts as a binding agent and adds creaminess; almond butter can be used for a nut-free alternative.
• Sweetener (e.g., Honey or Maple Syrup) – Adds necessary sweetness and moisture; agave syrup works well for a vegan option.

Don't hesitate to customize these cookies with your favorite mix-ins or variations!

Step‑by‑Step Instructions for 4-Ingredient Crunchy Chocolate Oat Cookies

Step 1: Preheat the Oven
Begin by preheating your oven to 350°F (175°C). This step ensures that your cookies will bake evenly, resulting in a perfectly crunchy texture. While the oven heats up, gather your ingredients and prepare a baking sheet lined with parchment paper for easy cookie transfer later.

Step 2: Mix the Dry Ingredients
In a large mixing bowl, combine rolled oats and unsweetened cocoa powder. Stir them together thoroughly until they are evenly distributed. This step is essential as it sets the foundation for your flavorful chocolate oat cookies. The cocoa will give the cookies a deep, rich color as well as an irresistible taste.

Step 3: Combine the Wet Ingredients
Add in creamy peanut butter and your choice of sweetener (like honey or maple syrup) into the bowl with the dry ingredients. Stir everything together using a spatula or wooden spoon until the mixture forms a cohesive dough. The peanut butter plays a crucial role in binding the ingredients, so ensure that everything is well-mixed and no dry patches remain.

Step 4: Shape the Cookies
Using a tablespoon, scoop out portions of the dough and place them onto the prepared baking sheet, spacing them about 2 inches apart. Gently flatten each scoop slightly with the back of the spoon. This helps the cookies bake evenly and develop their signature crunchy exterior while retaining a chewy center.

Step 5: Bake the Cookies
Place the baking sheet in the preheated oven and bake for 12-15 minutes. You'll know they are ready when the edges feel firm, and the tops have set but may still appear soft. Keep an eye on the cookies during the last few minutes to prevent them from overbaking, as each oven can vary in temperature.

Step 6: Cool the Cookies
After baking, remove the cookies from the oven and let them cool on the baking sheet for about 5 minutes. This cooling period allows them to firm up a bit more before transferring. Once slightly cooled, use a spatula to carefully transfer them to a wire rack to cool completely, where they will continue to harden into delicious crunchy chocolate oat cookies.

Make Ahead Options

These 4-Ingredient Crunchy Chocolate Oat Cookies are perfect for meal prep enthusiasts looking to save time during busy weeks! You can prepare the dough up to 24 hours in advance by mixing all the ingredients and storing it in an airtight container in the refrigerator. This keeps everything fresh and ready when you need it. Alternatively, you can also scoop and shape the cookies on the baking sheet, cover them with plastic wrap, and refrigerate for up to 3 days. When you're ready to bake, simply pop them in a preheated oven and adjust the baking time if needed. This way, you'll enjoy the same delightful texture and flavor, making your baking experience effortless!

How to Store and Freeze Chocolate Oat Cookies

Room Temperature: Store the cookies in an airtight container at room temperature for up to 7 days to maintain their delightful crunch.

Fridge: If you want to extend their freshness, refrigerate the cookies in an airtight container for up to 2 weeks. Just note that refrigeration may soften their texture slightly.

Freezer: For longer storage, freeze the cookies in a single layer on a baking sheet until solid, then transfer to a freezer-safe bag. They can be stored for up to 3 months.

Reheating: To enjoy warm cookies, reheat in the oven or microwave for a few seconds until warmed through. Indulge in these chocolate oat cookies whenever the craving strikes!

What to Serve with 4-Ingredient Crunchy Chocolate Oat Cookies

These cookies pair perfectly with delightful accompaniments that will elevate your snack time experience!

  • Creamy Greek Yogurt: Its tartness balances the sweetness of the cookies, adding a refreshing element when enjoyed together.

  • Fresh Berries: Juicy strawberries or raspberries enhance the flavors with their bright acidity, making for a gorgeous color contrast on your plate.

  • Chilled Milk: There's nothing like dipping a cookie into a cold glass of milk, providing a classic comfort that enhances every bite of the crunchy treat.

  • Nutty Trail Mix: Add some variety with a mix of nuts and dried fruit, creating a delightful crunch and chewy texture that rounds out your snack.

  • Chocolate Dipped Fruit: For a chocolate lover's dream, serve these cookies alongside chocolate-dipped bananas or strawberries to amplify the chocolate flavor in your meal.

  • Peppermint Tea: The soothing nature of peppermint tea pairs beautifully, offering a gentle contrast to the rich, decadent cookies while aiding digestion.

  • Coffee: A hot cup of black coffee or a latte can enhance the chocolate flavor, creating a cozy and inviting afternoon indulgence.

Let your imagination play as you build the perfect snack platter around your delicious cookies!

Crunchy Chocolate Oat Cookies Variations

Feel free to make these delightful cookies your own with easy twists and substitutions that will enhance their flavor and texture!

  • Nut-Free: Substitute peanut butter with sunbutter for a deliciously nut-free treat that everyone can enjoy.
  • Sweetness Swap: Use coconut sugar or brown sugar instead of honey or maple syrup for a different flavor profile and a hint of caramel.
  • Chocolate Boost: Mix in dark chocolate chips for an extra chocolaty delight that melts in your mouth.
  • Fruit Fusion: Add dried cranberries or raisins for a sweet and tangy surprise in every bite.
  • Crispy Texture: Incorporate crushed nuts or seeds for a delightful crunch that contrasts beautifully with the chewy oats.

Add a pinch of cinnamon or a dash of vanilla extract to elevate the flavor profile, infusing warmth into your cookies. Whether you go for a nutty flare or fruity twist, these variations transform your chocolate oat cookies into something uniquely yours!

Ready for another culinary adventure? Check out my recipe for Jello Salad Cottage for a refreshing side or indulge in a savory Seafood Pasta Savory dish that’s as flavorful as it gets.

Expert Tips for Crunchy Chocolate Oat Cookies

• Mixing Matters: Ensure the dough is thoroughly mixed; insufficient mixing can lead to crumbly cookies that don't hold together well.

• Oat Choices: Always opt for rolled oats. Quick oats can make the cookies mushy, compromising the delightful crunchy texture you desire.

• Watch the Oven: Keep an eye on your cookies during the last few minutes of baking. Overbaking can turn them overly hard—aim for firm edges and soft tops.

• Cooling Time: Give your cookies a few minutes to cool on the baking sheet; this helps them firm up nicely before transferring to a wire rack.

• Storage Smarts: Store cookies in an airtight container at room temperature. This keeps them fresh and crunchy for up to a week, perfect for on-the-go snacking.

Enjoy your time making these delicious cookies!

4-Ingredient Crunchy Chocolate Oat Cookies Recipe FAQs

How do I choose the right oats for this recipe?
Absolutely! For the best texture, I recommend using rolled oats. They provide the perfect amount of chewiness and structure. Avoid using quick oats as they may result in mushy cookies that lack that satisfying crunch.

How should I store leftover chocolate oat cookies?
You can store these cookies in an airtight container at room temperature for up to 7 days. This helps preserve their delightful crunch! If you want them to last longer, you can refrigerate them for up to 2 weeks, but be aware that refrigeration may soften their texture slightly.

Can I freeze the chocolate oat cookies for later?
Yes, definitely! To freeze, place the cookies in a single layer on a baking sheet until they are solid. Then, transfer them to a freezer-safe bag, removing as much air as possible. They can stay frozen for up to 3 months! When you're ready to enjoy, thaw at room temperature or reheat in the oven for a few minutes.

What if my cookie dough is too dry?
Very! If your dough feels too dry and crumbly, you can adjust by adding a little more peanut butter or sweetener. Start with a tablespoon and mix well until you reach a cohesive consistency. The peanut butter not only binds but also adds moisture, so don't be shy!

Can my pets eat chocolate oat cookies?
No, it’s important to keep these cookies away from pets. The cocoa powder can be harmful to dogs and cats. If you want to make a treat for your furry friends, consider creating a dog-friendly version using carob instead of cocoa powder.

What variations can I try with this recipe?
The more the merrier! You can easily customize these cookies by mixing in chocolate chips, dried fruits, or even a splash of vanilla extract for extra flavor. For a nut-free alternative, simply swap the peanut butter with sunflower seed butter (sunbutter) to make them accessible for all.

Horiatiki (Village) Pasta Salad

Fresh Horiatiki Pasta Salad: A Flavorful Village Twist

A delightful Horiatiki Pasta Salad that brings a fresh village twist to your table, making it a must-try dish.
Print Recipe Pin Recipe
Prep Time 20 minutes mins
Total Time 20 minutes mins
Servings: 4 servings
Course: Salads
Cuisine: Greek
Calories: 150
Ingredients Equipment Method Nutrition Notes

Ingredients
  

For the Cookie Dough
  • 2 cups Rolled Oats Provides structure and chewiness
  • 1 cup Cocoa Powder Adds rich flavor
  • 1 cup Peanut Butter Acts as binding agent
  • 1/2 cup Sweetener (Honey or Maple Syrup) Adds necessary sweetness

Equipment

  • Bowls
  • Oven
  • Baking Sheet
  • Parchment Paper
  • Spatula

Method
 

Step-by-Step Instructions
  1. Preheat your oven to 350°F (175°C) and prepare a baking sheet lined with parchment paper.
  2. In a large mixing bowl, combine rolled oats and cocoa powder until evenly distributed.
  3. Add peanut butter and sweetener into the dry ingredients and mix until a cohesive dough forms.
  4. Scoop portions of dough onto the prepared baking sheet, spacing them about 2 inches apart and flatten each scoop slightly.
  5. Bake for 12-15 minutes until the edges feel firm and the tops have set.
  6. Let the cookies cool on the baking sheet for 5 minutes before transferring them to a wire rack.

Nutrition

Serving: 1cookieCalories: 150kcalCarbohydrates: 18gProtein: 4gFat: 7gSaturated Fat: 2gPolyunsaturated Fat: 1gMonounsaturated Fat: 3gSodium: 125mgPotassium: 150mgFiber: 2gSugar: 5gCalcium: 20mgIron: 1mg

Notes

Store cookies in an airtight container at room temperature for up to a week.

Tried this recipe?

Let us know how it was!

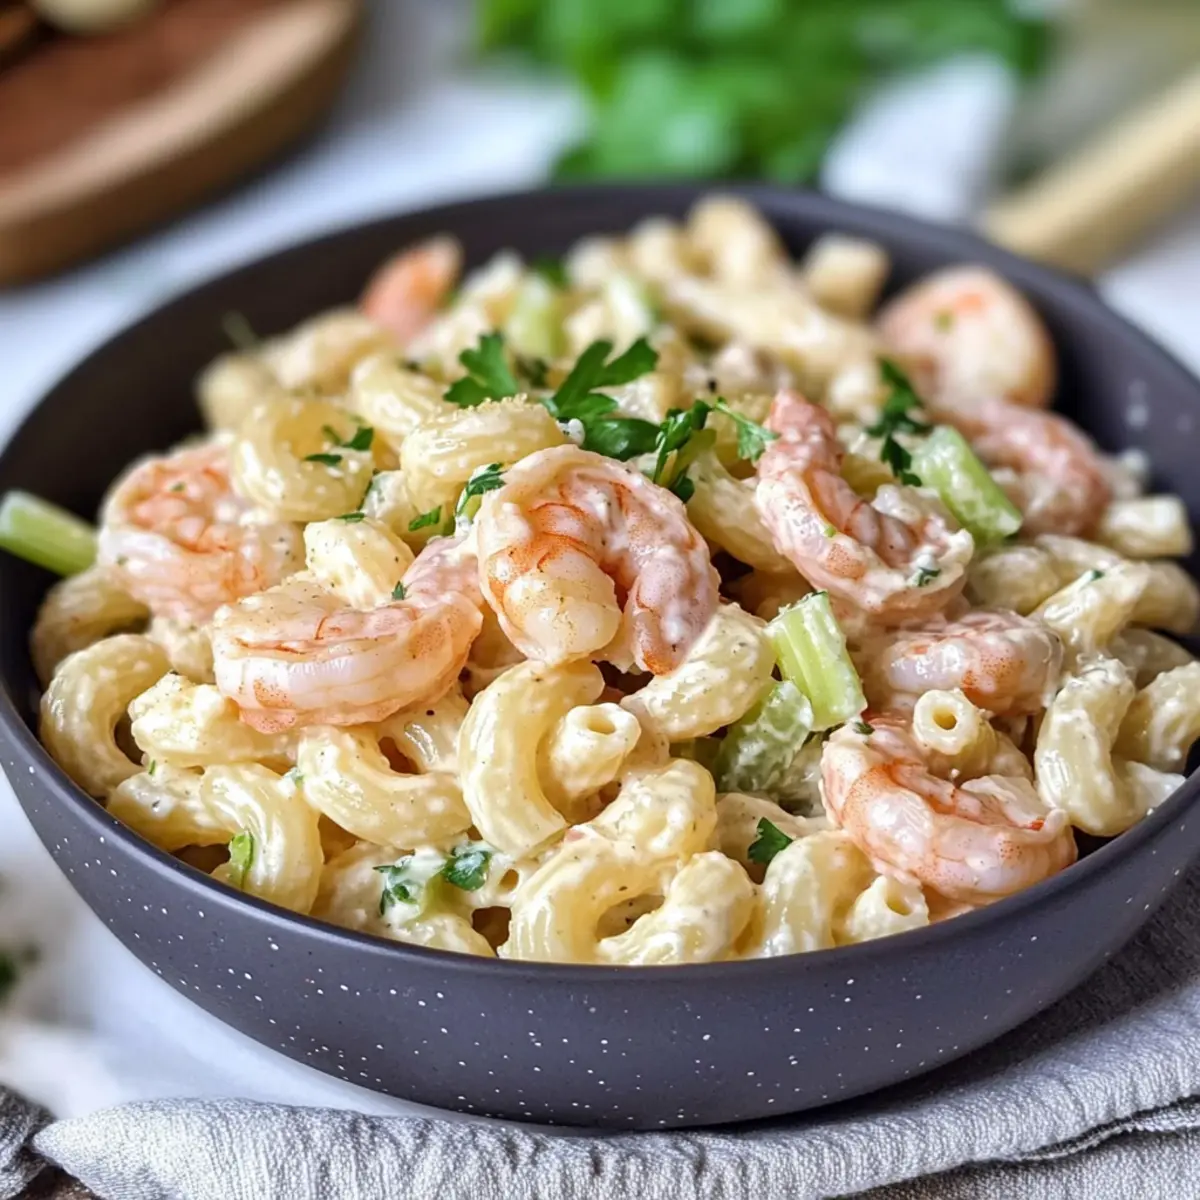
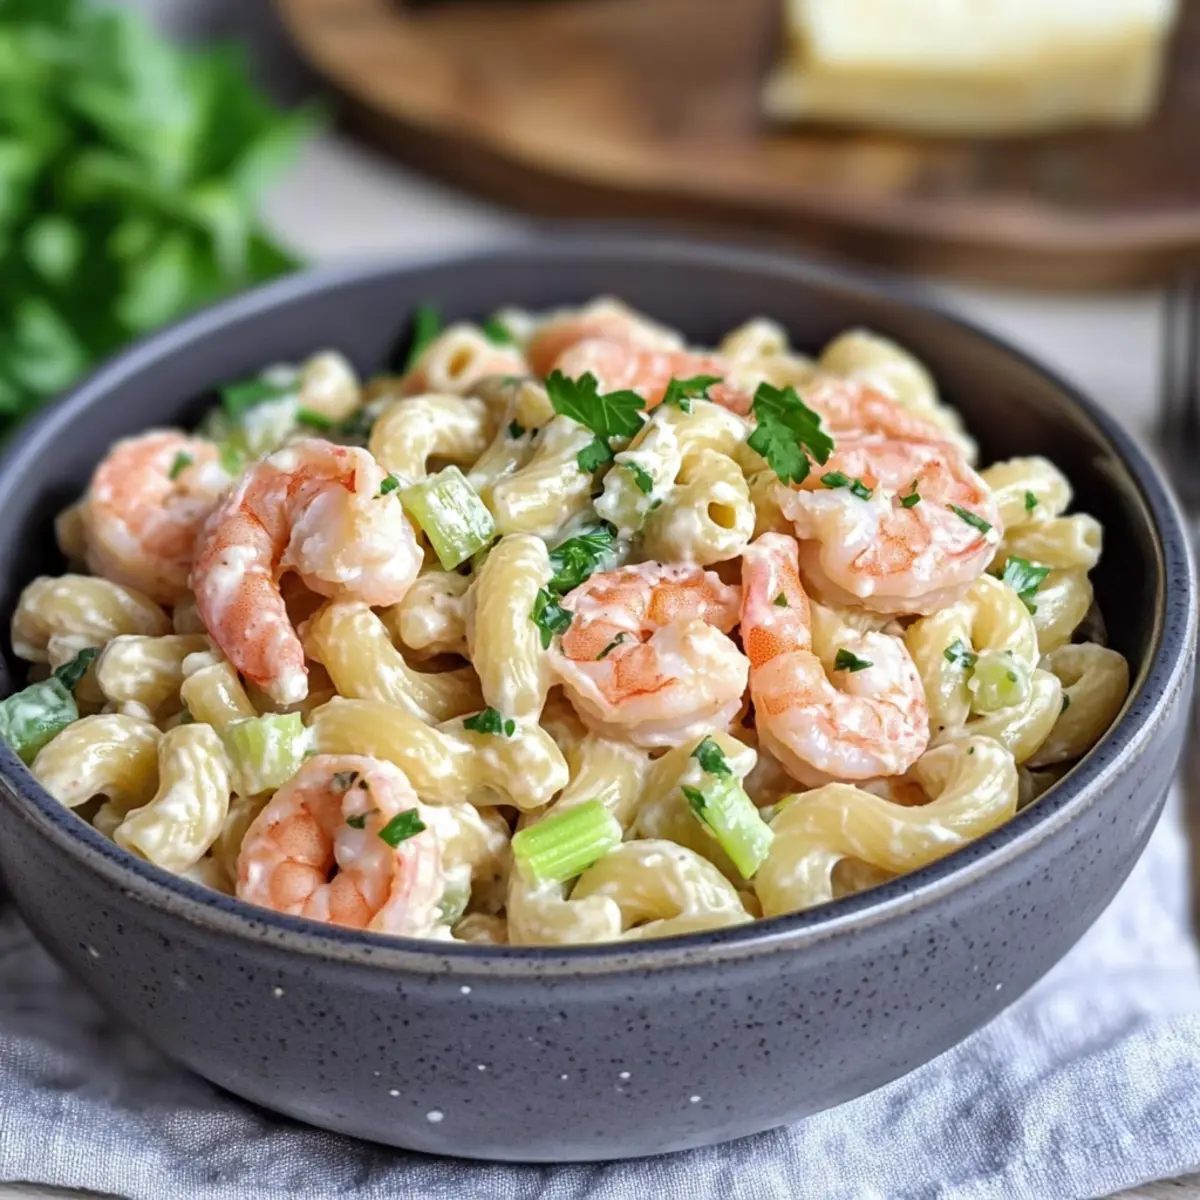
Creamy Shrimp Pasta Salad for a Refreshing Summer Meal

April 10, 2026 by Grace Snow Leave a Comment

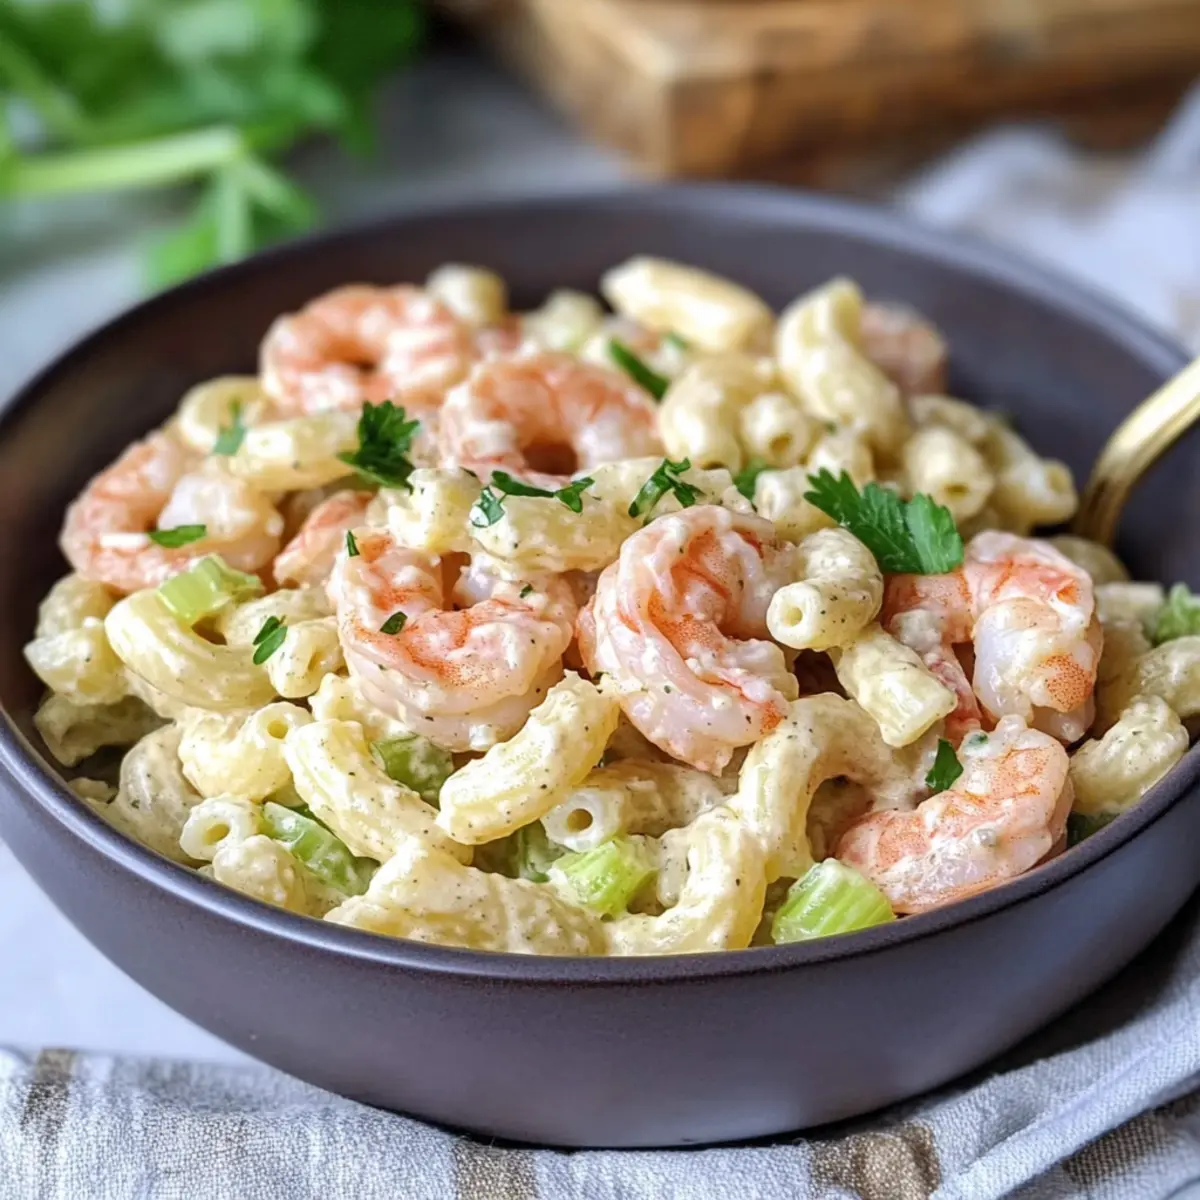
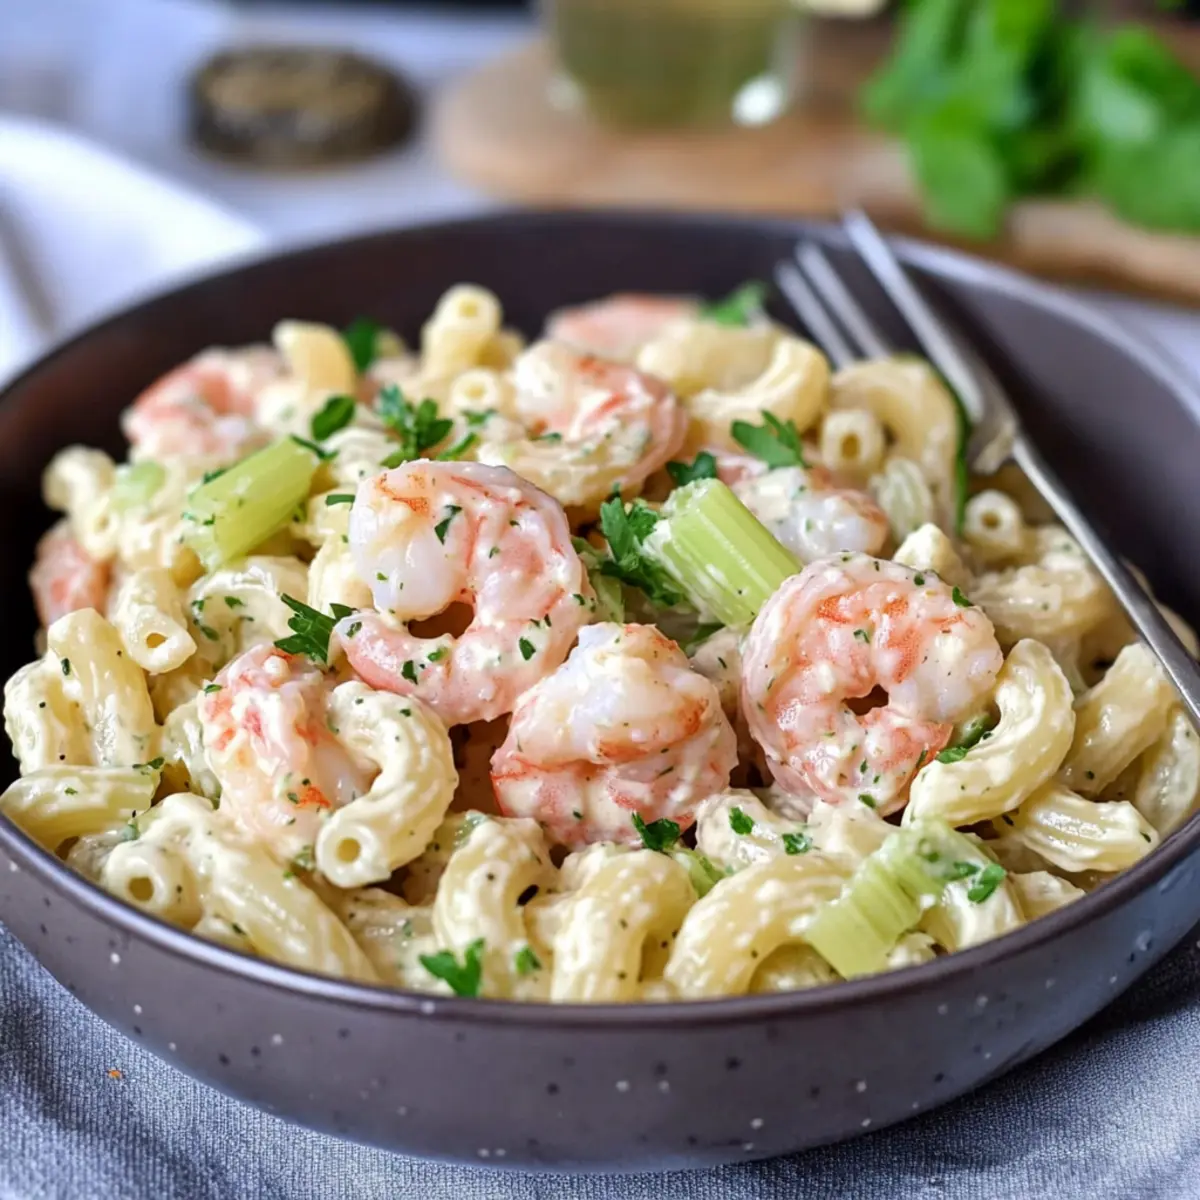
Summer is just around the corner, and I'm already dreaming of light, refreshing meals that keep the heat at bay. That’s where this Quick & Creamy Shrimp Pasta Salad comes into play! Perfect for those sunny days, this dish comes together in under 30 minutes, making it a hassle-free option when you want something delicious without spending hours in the kitchen. Packed with tender shrimp and a creamy dressing, it’s not only a family favorite but also a crowd-pleaser for potlucks and gatherings. Plus, it's a fantastic make-ahead option, allowing the flavors to meld beautifully while you focus on other preparations. What’s your go-to dish for warm weather?

Why is this Shrimp Pasta Salad a Must-Try?

Quick & Easy: This Shrimp Pasta Salad is ready in under 30 minutes, perfect for busy weeknights or last-minute gatherings.

Refreshing Flavors: The zesty lemon and crisp veggies make every bite a burst of freshness, ideal for hot summer days.

Make-Ahead Magic: Prepare it in advance to allow the flavors to mingle, ensuring a delightful dish when you need it most.

Versatile Options: Swap shrimp for crab or chicken, or even try different pasta shapes for variety!

Crowd-Pleasing Appeal: This salad is a crowd favorite at potlucks—serve it alongside Shrimp Tacos Zesty for an even more impressive spread!

Shrimp Pasta Salad Ingredients

For the Base

  • Cooked Macaroni – Provides structure and a hearty base for the salad. Can substitute with gluten-free pasta as needed.
  • Cooked Shrimp – Adds protein and flavor. Use pre-cooked shrimp for faster prep.

For the Vegetables

  • Shallot – Offers mild onion flavor and sweetness. Substitute with green onions for a sharper taste.
  • Chopped Celery – Adds crunch and freshness. Optional if a softer texture is preferred.
  • Chopped Parsley – Provides freshness and color. Substitute with dill for a different herbaceous flavor.

For the Dressing

  • Granulated Garlic – Infuses the salad with savory notes. Fresh minced garlic can also be used.
  • Cumin – Enhances depth of flavor with its earthy tones. Omit if sensitive to strong spices.
  • Lemon Juice – Adds acidity and brightness. Lime juice can serve as an alternative.
  • Olive Oil – Helps emulsify the dressing. Any neutral oil can be used in a pinch.
  • Worcestershire Sauce – Adds umami and depth. Coconut aminos can be used for a gluten-free option.
  • Mayonnaise & Sour Cream – Creamy components for the dressing. Greek yogurt is a lighter substitute.
  • Mustard Powder – Contributes an additional tanginess. Regular mustard can replace it.
  • Brown Sugar – Balances the dressing with sweetness. Honey or agave can work as a substitute.
  • Salt & Pepper – Essential for seasoning. Adjust according to taste preferences.

Step‑by‑Step Instructions for Shrimp Pasta Salad

Step 1: Marinate the Shrimp
Begin by marinating the cooked shrimp in a bowl with lemon juice, olive oil, garlic, and cumin. Allow it to sit for about 10 minutes, letting the shrimp soak up the flavors. You’ll know it’s ready when the shrimp shine with a zesty glaze, enhancing their natural sweetness.

Step 2: Sauté the Shrimp
Heat a non-stick skillet over medium heat and add the marinated shrimp. Sauté for approximately 5 minutes, stirring occasionally, until the shrimp turn pink and opaque. Once cooked through, remove from heat and set aside to cool, ensuring they retain their tender texture.

Step 3: Prepare the Dressing
In a mixing bowl, combine sour cream, mayonnaise, Worcestershire sauce, brown sugar, mustard powder, granulated garlic, salt, and pepper. Whisk thoroughly for about 2-3 minutes until the mixture is smooth and creamy. This luscious dressing will be the heart of your Shrimp Pasta Salad.

Step 4: Mix the Salad Ingredients
In a large mixing bowl, add the cooked macaroni, sautéed shrimp, chopped shallot, diced celery, and parsley. Gently toss the ingredients together, allowing the flavors to start melding. Visualize a colorful medley as you combine these elements, each bringing a unique texture to the salad.

Step 5: Combine and Coat
Pour the prepared dressing over the pasta and shrimp mixture. Carefully toss everything together until each component is evenly coated in the creamy dressing. Take your time to ensure the macaroni and shrimp are enveloped in that delightful mixture, making every bite rich and flavorful.

Step 6: Chill Before Serving
Cover the salad with plastic wrap and refrigerate for at least 30 minutes. Chilling allows the ingredients to mingle and the flavors to deepen, enhancing the overall taste of your Shrimp Pasta Salad. The result will be a refreshing dish ready to impress your family or guests.

What to Serve with Shrimp Pasta Salad?

Looking to create a delightful spread that complements this quick and creamy dish?

  • Grilled Corn on the Cob: The sweet, charred flavor of grilled corn enhances the meal, adding a summery, smoky element that's hard to resist.
  • Garlic Bread: Crispy and buttery, garlic bread is warming and comforting, perfect for dipping in any leftover creamy dressing.
  • Classic Caesar Salad: The crunch of romaine and the garlicky dressing provide a satisfying contrast, creating a refreshing palate cleanser.
  • Caprese Skewers: These colorful bites of mozzarella, basil, and tomato bring a fresh and vibrant touch, perfectly manicured for summer gatherings.
  • Chilled White Wine: A glass of chilled Sauvignon Blanc brings fruity notes that balance the richness of the salad, enhancing every bite.
  • Lemon Sorbet: This light dessert refreshes the palate after the meal, its citrus zing echoing the zesty lemon in the salad.
  • Vegetable Platter: A medley of crisp veggies served with a zesty dip adds a fresh, crunchy element that rounds out the meal.
  • Coconut Rice: Sweet and fluffy coconut rice adds a unique twist, bringing tropical vibes that perfectly match the shrimp flavors.
  • Tomato Gazpacho: This chilled soup is a refreshing start that complements the creamy shrimp, creating a harmonious summer dining experience.

Expert Tips for Shrimp Pasta Salad

  • Cool the Shrimp: Ensure shrimp are fully cooled before mixing with the dressing to prevent curdling. Patience pays off!

  • Flavor Infusion: Allow the salad to chill in the refrigerator for at least 30 minutes before serving. This step enhances flavor integration beautifully.

  • Don’t Overcook: Avoid overcooking shrimp to prevent them from becoming rubbery; they should be pink and firm for the best texture in your shrimp pasta salad.

  • Mix It Up: Feel free to substitute shrimp with crab or chicken to suit different tastes or dietary preferences. Variety is the spice of life!

  • Dressing Consistency: If your dressing is too thick, thin it out with a bit of additional lemon juice or olive oil. This will help ensure smooth coverage over your salad.

Make Ahead Options

This Quick & Creamy Shrimp Pasta Salad is perfect for meal prep, allowing you to save valuable time on busy days. You can prepare the shrimp and dressing up to 24 hours in advance; just be sure to refrigerate them separately to maintain their freshness. To do this, marinate the shrimp and sauté them as directed, then let them cool completely before storing them in an airtight container. The dressing can be whisked together and kept in the fridge as well. When you're ready to serve, simply mix the cooled shrimp with the cooked macaroni, chopped vegetables, and dressing. This way, you'll enjoy the same delicious flavors with minimal effort!

Shrimp Pasta Salad Variations

Customize your Shrimp Pasta Salad with these delicious twists that will tantalize your taste buds!

  • Seafood Swap: Substitute shrimp for crab or lobster for a luxurious seafood experience. It's a delightful way to elevate your dish for special occasions!

  • Pasta Choices: Experiment with different pasta shapes like penne or rotini, or even try Cauliflower Pasta Ready for a low-carb version. This adds a fun twist to the traditional recipe!

  • Veggie Boost: Add diced bell peppers or sweet peas for extra color and nutrition. The pops of color will make your salad as appealing as it is tasty.

  • Herb Variations: Swap parsley for fresh dill or basil to infuse new flavors. Each herb brings its own personality to the mix, enhancing the overall taste.

  • Creamy Alternatives: Use Greek yogurt instead of mayonnaise and sour cream for a refreshing, healthier dressing without sacrificing creaminess. It’s a great option for lighter meals!

  • Zesty Kick: Incorporate a touch of diced jalapeño or a dash of hot sauce to spice things up. For heat lovers, this addition will create a delightful burst of flavor.

  • Fruity Addition: Try mixing in diced mango or pineapple for a tropical twist that perfectly complements the creamy dressing. This fruity hint adds an unexpected layer of flavor!

  • Nutty Crunch: Toss in some toasted walnuts or pecans to add a delightful crunch. The nutty flavor pairs wonderfully with the creamy salad for a satisfying texture contrast.

Feel free to flex your culinary creativity and make this Shrimp Pasta Salad your own! If you’re looking for more seafood inspiration, don’t forget to check out Shrimp Tacos Zesty or Shrimp Ceviche Zesty. Happy cooking!

How to Store and Freeze Shrimp Pasta Salad

Fridge: Store your Shrimp Pasta Salad in an airtight container for up to 2 days. This helps keep it fresh and safe to eat while ensuring the flavors meld beautifully.

Freezer: Although not recommended for best texture, you can freeze the salad for up to 1 month. If you choose to freeze, omit the dressing and add it after thawing to maintain creaminess.

Reheating: To enjoy the salad after freezing, thaw overnight in the fridge. Mix in fresh dressing, as the original may separate on freezing.

Serving Note: Always serve the shrimp pasta salad cold for a refreshing taste that’s perfect for summer gatherings.

Shrimp Pasta Salad Recipe FAQs

What type of shrimp should I use for the Shrimp Pasta Salad?
Absolutely! Using pre-cooked shrimp is a great option for quick prep. If you prefer, you can also use raw shrimp and cook them yourself. Just ensure they’re bright pink and opaque when done. For the best flavor, look for shrimp that’s wild-caught and extra-large for a delightful bite!

How do I store Shrimp Pasta Salad and for how long?
You can store your Shrimp Pasta Salad in an airtight container in the fridge for up to 2 days. Just be sure to keep it chilled to preserve the flavors and freshness. Cover the container tightly to avoid any pesky odors from other foods mixing in.

Can I freeze Shrimp Pasta Salad?
Very! While freezing isn't ideal for the texture, you can freeze it for up to 1 month. To do this, omit the dressing before freezing, as it can separate and become watery. When you're ready to enjoy it, let the salad thaw overnight in the fridge and add fresh dressing before serving to boost the creaminess.

What if my shrimp pasta salad is too thick?
If you find your Shrimp Pasta Salad dressing is a bit too thick, don't worry! Just thin it out by adding a teaspoon of lemon juice or a splash of olive oil. Mix thoroughly until you achieve your desired consistency, and your salad will be creamy and smooth, ready to delight your taste buds!

Are there any dietary considerations for this recipe?
Definitely! If you're cooking for someone with allergies, make sure to check for shellfish allergies before serving this shrimp salad. You can also adapt the recipe for gluten-free diets by substituting regular macaroni with gluten-free pasta options. Remember, the more the merrier; feel free to experiment with different proteins or veggies based on your guests’ preferences!

How can I keep the pasta salad from getting mushy?
To prevent the pasta in your Shrimp Pasta Salad from becoming mushy, make sure to cook the macaroni al dente. This means it should be slightly firm to the bite, which will help maintain a pleasant texture when mixed with the creamy dressing. Also, rinse the pasta under cold water after cooking to halt the cooking process and cool it down quickly.

Shrimp Pasta Salad

Creamy Shrimp Pasta Salad for a Refreshing Summer Meal

This shrimp pasta salad is a light and creamy dish perfect for summer gatherings, ready in under 30 minutes.
Print Recipe Pin Recipe
Prep Time 10 minutes mins
Cook Time 10 minutes mins
Chilling Time 30 minutes mins
Total Time 50 minutes mins
Servings: 4 servings
Course: Salads
Cuisine: American
Calories: 350
Ingredients Equipment Method Nutrition Notes

Ingredients
  

For the Base
  • 2 cups Cooked Macaroni Can substitute with gluten-free pasta as needed.
  • 1 lb Cooked Shrimp Use pre-cooked shrimp for faster prep.
For the Vegetables
  • 1 medium Shallot Substitute with green onions for a sharper taste.
  • 1 cup Chopped Celery Optional if a softer texture is preferred.
  • 1/4 cup Chopped Parsley Substitute with dill for a different flavor.
For the Dressing
  • 1 teaspoon Granulated Garlic Fresh minced garlic can also be used.
  • 1/2 teaspoon Cumin Omit if sensitive to strong spices.
  • 2 tablespoons Lemon Juice Lime juice can serve as an alternative.
  • 1/4 cup Olive Oil Any neutral oil can be used in a pinch.
  • 1 tablespoon Worcestershire Sauce Coconut aminos can be used for a gluten-free option.
  • 1/2 cup Mayonnaise Greek yogurt is a lighter substitute.
  • 1/4 cup Sour Cream Greek yogurt is a lighter substitute.
  • 1 teaspoon Mustard Powder Regular mustard can replace it.
  • 1 tablespoon Brown Sugar Honey or agave can work as a substitute.
  • to taste Salt Adjust according to taste preferences.
  • to taste Pepper Adjust according to taste preferences.

Equipment

  • Mixing Bowl
  • non-stick skillet

Method
 

Preparation Steps
  1. Begin by marinating the cooked shrimp in a bowl with lemon juice, olive oil, garlic, and cumin for about 10 minutes.
  2. Heat a non-stick skillet over medium heat and add the marinated shrimp. Sauté for approximately 5 minutes, stirring occasionally, until the shrimp turn pink and opaque.
  3. In a mixing bowl, combine sour cream, mayonnaise, Worcestershire sauce, brown sugar, mustard powder, granulated garlic, salt, and pepper. Whisk thoroughly until the mixture is smooth and creamy.
  4. In a large mixing bowl, add the cooked macaroni, sautéed shrimp, chopped shallot, diced celery, and parsley. Gently toss the ingredients together.
  5. Pour the prepared dressing over the pasta and shrimp mixture. Carefully toss everything together until well coated.
  6. Cover the salad with plastic wrap and refrigerate for at least 30 minutes.

Nutrition

Serving: 1cupCalories: 350kcalCarbohydrates: 25gProtein: 18gFat: 20gSaturated Fat: 3gPolyunsaturated Fat: 2gMonounsaturated Fat: 15gCholesterol: 150mgSodium: 800mgPotassium: 350mgFiber: 2gSugar: 3gVitamin A: 400IUVitamin C: 5mgCalcium: 50mgIron: 2mg

Notes

Ensure shrimp are cool before mixing with dressing to prevent curdling. Allowing salad to chill enhances flavor integration. Avoid overcooking shrimp for best texture.

Tried this recipe?

Let us know how it was!

Sweet and Zesty Honey Lime Shrimp Salad for Summer Bliss

April 9, 2026 by Grace Snow Leave a Comment

It was one of those sweltering days when the thought of turning on the oven felt unbearable. I needed something refreshing that captured the essence of summer without sacrificing flavor. Enter the Southwest Honey Lime Shrimp Salad, a dish that delivers a delightful blend of sweet and tangy marinated shrimp, alongside fresh corn, juicy cherry tomatoes, and creamy avocado. Not only is this salad gluten-free, but its quick preparation makes it an absolute lifesaver for busy days when you crave something healthy and satisfying. Perfect for lunch or dinner, this vibrant main dish salad invites you to savor every bite while enjoying the sunny outdoors. So, are you ready to bring a taste of summer to your table?

Why is this Honey Lime Shrimp Salad a Must-Try?

Bursting with Flavor: The honey lime marinade infuses the shrimp with a deliciously sweet and tangy taste that’s hard to resist.
Quick to Prepare: With a prep time of just 15-30 minutes, this salad is perfect for those busy summer days.
Versatile Ingredients: Feel free to customize it with your favorite veggies or proteins, like grilled chicken or black beans for added crunch!
Nutritious and Light: Packed with fresh produce and lean protein, this dish makes a satisfying yet healthy meal option without the guilt.
Impressive Presentation: The vibrant colors and textures make it not just a meal, but a feast for the eyes, ready to impress your guests at any summer gathering.
Perfect for Leftovers: Enjoy the flavors even more the next day! Just keep the vinaigrette separate until serving to maintain freshness.

Honey Lime Shrimp Salad Ingredients

For the Marinade

  • Olive Oil – Adds moisture and richness to the shrimp. Substitution: Avocado oil can be used for a different flavor profile.
  • Honey – Provides natural sweetness and balances the lime acidity. Substitution: Agave syrup or maple syrup can be used.
  • Lime Zest and Juice – Enhances flavor with bright acidity. Substitution: Lemon can be used as an alternative.
  • Chili Powder – Adds a mild, spicy undertone to the marinade. Substitution: Smoked paprika for a different flavor.
  • Ground Cumin – Offers earthy warmth and depth to the recipe. Substitution: Ground coriander can deliver a lighter taste.
  • Garlic Powder – Infuses the shrimp with a savory note. Substitution: Fresh minced garlic can also be used.
  • Kosher Salt and Fresh Ground Black Pepper – Enhances overall flavor; adjust according to taste.

For the Salad

  • Medium-Sized Shrimp (1 lb) – The primary protein, giving a chewy texture once cooked. Ensure shrimp are peeled and deveined.
  • Butter Lettuce (1 head or 5 cups) – Forms the fresh base of the salad, offering a soft crunch. Substitution: Romaine or green leaf lettuce can be used.
  • Cherry Tomatoes (1 cup, halved) – Adds juiciness and a sweet burst of flavor.
  • Avocado (1, sliced) – Contributes creaminess and healthy fats. Tip: Use ripe avocados for the best texture.
  • Fresh or Frozen Corn (1/2 cup) – Brings sweetness and crunch to the dish. Note: Grilled or charred corn can elevate the flavor.
  • Queso Fresco (1/3 cup, crumbled) – Provides a mild, salty contrast with a creamy texture. Substitution: Feta cheese offers a similar taste and texture.
  • Cilantro (for garnish) – Adds a fresh herbaceous note. Omit if you’re not a fan of cilantro.

Step‑by‑Step Instructions for Honey Lime Shrimp Salad

Step 1: Prepare the Marinade
In a small jar or bowl, blend together olive oil, honey, lime zest, and lime juice with chili powder, ground cumin, garlic powder, kosher salt, and fresh ground black pepper. Shake or whisk thoroughly until everything is well incorporated and the mixture is unified. This honey lime marinade will infuse your shrimp with delightful flavors, setting the stage for a refreshing honey lime shrimp salad.

Step 2: Marinate the Shrimp
Pat the medium-sized shrimp dry with paper towels to enhance their ability to absorb the marinade. In a large mixing bowl, toss the shrimp with three tablespoons of the prepared marinade. Let the shrimp marinate for 15 to 30 minutes, stirring occasionally. This marination time allows the sweet and tangy flavors to penetrate the shrimp, making them utterly delicious.

Step 3: Assemble the Salad Base
While the shrimp is marinating, prepare the salad by arranging butter lettuce on a large serving platter or individual bowls. This crunchy base is perfect for your honey lime shrimp salad. Next, scatter fresh corn, halved cherry tomatoes, sliced avocado, and crumbled queso fresco over the lettuce. Take a moment to admire the vibrant colors as they come together!

Step 4: Cook the Shrimp
Heat a skillet over medium-high heat and add a drizzle of olive oil. Once hot, carefully add the marinated shrimp in a single layer, making sure not to overcrowd the pan. Cook for 2 minutes without moving them, until they develop a lovely caramelization. The shrimp should begin to turn opaque, indicating they're almost ready.

Step 5: Finalize Cooking
Flip the shrimp and allow them to cook for an additional 1-2 minutes, or until fully cooked and opaque. Once done, remove the skillet from the heat and let the shrimp cool slightly. Be sure to save any remaining marinade in the pan to further enhance the flavors of your salad.

Step 6: Combine and Serve
Top the arranged salad base with the cooked shrimp, drizzling the reserved marinade over everything for added flavor. Garnish your honey lime shrimp salad with freshly chopped cilantro for an aromatic touch. Serve right away, allowing everyone to enjoy this refreshing dish bursting with summer flavors!

What to Serve with Southwest Honey Lime Shrimp Salad

Enhance your meal experience with delightful pairings that perfectly complement this vibrant shrimp salad.

  • Crispy Garlic Bread: The crunchy texture and buttery flavor of garlic bread bring a comforting sidekick to your refreshing salad. Perfect for soaking up any leftover marinade!

  • Quinoa Pilaf: Light and nutty, quinoa adds a wholesome contrast to the tender shrimp, making it a delightful bed for the salad or a side dish.

  • Grilled Veggies: Roasted seasonal vegetables, like zucchini and bell peppers, bring warmth and earthiness, making each bite of the cold shrimp salad even more enjoyable.

  • Watermelon Feta Salad: The sweetness of juicy watermelon paired with refreshing feta creates a delightful balance to the shrimp’s tangy flavor.

  • Chilled White Wine: A crisp Sauvignon Blanc or Pinot Grigio can elevate your dining experience, enhancing the tangy notes of the honey lime shrimp.

  • Pineapple Salsa: This vibrant, tropical salsa adds a fresh twist with each bite, blending the flavors of juicy fruit with a hint of zest, perfectly balancing the salad’s profile.

  • Avocado Corn Tortilla Chips: Crispy chips served with guacamole make for a great crunchy snack that pairs well with the creaminess and freshness of the shrimp salad.

  • Lemon Sorbet: Brush off the heat with a light and invigorating lemon sorbet for dessert! Its zesty flavor serves as a refreshing palate cleanser after a flavorful meal.

Storage Tips for Honey Lime Shrimp Salad

  • Fridge: Store any leftovers in airtight containers for up to 3 days. Keep shrimp, lettuce, and vinaigrette separate to maintain freshness and texture.

  • Freezer: It’s not recommended to freeze assembled salads, as the lettuce will wilt. However, shrimp can be frozen in a single layer before cooking for up to 2 months.

  • Reheating: If using frozen shrimp, thaw overnight in the refrigerator. Reheat in a skillet over medium heat until warmed through, avoiding overcooking.

  • Assembling: For the best experience, assemble the salad just before serving, combining all elements for a fresh burst of flavor in your honey lime shrimp salad.

Expert Tips for Honey Lime Shrimp Salad

  • Marination Time: Allow shrimp to marinate for at least 15 minutes; longer marination enhances flavor without compromising texture.

  • Cooking Technique: Cook shrimp in a single layer to achieve caramelization; avoid overcrowding the skillet for perfect results.

  • Keep It Fresh: To prevent sogginess, store shrimp and vinaigrette separately until ready to serve in your honey lime shrimp salad.

  • Vegetable Variety: Feel free to add additional veggies like bell peppers or radishes for extra crunch and color in your salad.

  • Garnish Wisely: Consider using chopped scallions instead of cilantro if you know some guests aren’t fans of the herb; it adds a lovely brightness!

Make Ahead Options

These Southwest Honey Lime Shrimp Salad components are perfect for meal prep enthusiasts! You can marinate the shrimp up to 24 hours in advance, allowing the flavors to infuse deeply. Additionally, you can prepare the salad base (butter lettuce, corn, cherry tomatoes, and avocado) and store it in an airtight container in the refrigerator for up to 3 days. To maintain quality, keep the shrimp and salad separate until you're ready to serve, preventing sogginess. When you’re ready to enjoy your salad, simply cook the shrimp as instructed and assemble the salad quickly for fresh, vibrant results. Enjoy a delicious dinner with minimal effort!

Honey Lime Shrimp Salad Variations

Get ready to make this delightful salad your own! There are endless possibilities to customize flavors and textures.

  • Grilled Chicken: Swap the shrimp for grilled chicken for a heartier protein option that still shines in this vibrant dish.

  • Tortilla Strips: Add crunchy tortilla strips for an exciting textural twist that enhances the southwestern flair of the salad.

  • Quinoa Upgrade: For a filling touch, incorporate cooked quinoa to add a nutty flavor and extra protein to each bite.

  • Vegetarian Delight: Replace shrimp with grilled zucchini and bell peppers for a veggie-packed alternative bursting with flavor.

  • Spicy Kick: Sprinkle some red pepper flakes or diced jalapeños on top for a spicy twist that will tantalize your taste buds.

  • Creamier Avocado: Mash the avocado and mix it into the salad for a creamier texture that brings the dish together beautifully.

  • Chunky Salsa: Drizzle some fresh salsa on top for a bright, zesty finish that ties all the flavors together.

  • Seafood Medley: Mix in scallops or crab meat to create a seafood lover's dream that elevates your honey lime shrimp salad to a whole new level.

Looking for more ways to enjoy flavorful shrimp? Check out my recipe for Pan Fried Shrimp, or try some refreshing Shrimp Ceviche for a light meal!

Honey Lime Shrimp Salad Recipe FAQs

How do I select the best shrimp for my salad?
Absolutely! Look for medium-sized shrimp that are firm to the touch and have a fresh, ocean-like smell. Avoid shrimp with dark spots or a dull appearance, which can indicate they're not as fresh. If possible, opt for shrimp that are wild-caught, as they often have a better flavor and texture compared to farm-raised options.

What are the best storage methods for leftover Honey Lime Shrimp Salad?
Very! To keep your Honey Lime Shrimp Salad fresh, store the components separately in airtight containers. The shrimp can last up to 3 days in the fridge, while lettuce should be eaten sooner for the best texture. It's a good idea to dress the salad right before serving to avoid sogginess!

Can I freeze the shrimp for this salad?
Certainly! If you want to prepare in advance, you can freeze the marinated shrimp in a single layer on a parchment-lined baking sheet for about an hour. Once they're firm, transfer them to a freezer-safe bag and store for up to 2 months. When ready to cook, thaw overnight in the refrigerator and proceed with the cooking instructions.

What if I have leftovers but don't want them to get soggy?
I often recommend storing your Honey Lime Shrimp Salad by keeping the shrimp, lettuce, and dressing separate. When you're ready to eat, simply combine them for that fresh, just-made taste! This way, you can enjoy every delectable bite without worrying about losing that crispiness.

Are there any dietary considerations for my Honey Lime Shrimp Salad?
Definitely! This shrimp salad is gluten-free, making it a great choice for those with gluten sensitivities. Additionally, if anyone in your family has shellfish allergies, be cautious as shrimp may not be suitable. You can also easily modify the recipe by substituting shrimp with grilled chicken or marinated vegetables for a vegetarian option.

How can I tell if my shrimp is overcooked?
Absolutely! Overcooked shrimp will lose their tender, juicy texture and become rubbery, which no one wants in their Honey Lime Shrimp Salad. Properly cooked shrimp will be opaque throughout and slightly firmer to the touch. If they look chalky or curled tightly, that's a sign they are overdone. Keep an eye on them while cooking to achieve that perfect bite!

Honey Lime Shrimp Salad

Sweet and Zesty Honey Lime Shrimp Salad for Summer Bliss

A refreshing Honey Lime Shrimp Salad, bursting with flavor and perfect for summer.
Print Recipe Pin Recipe
Prep Time 30 minutes mins
Cook Time 5 minutes mins
Marination Time 30 minutes mins
Total Time 1 hour hr 5 minutes mins
Servings: 4 servings
Course: Salads
Cuisine: Southwest
Calories: 320
Ingredients Equipment Method Nutrition Notes

Ingredients
  

For the Marinade
  • 3 tablespoons Olive Oil Substitution: Avocado oil can be used for a different flavor profile.
  • 2 tablespoons Honey Substitution: Agave syrup or maple syrup can be used.
  • 1 tablespoon Lime Zest
  • 3 tablespoons Lime Juice Substitution: Lemon can be used as an alternative.
  • 1 teaspoon Chili Powder Substitution: Smoked paprika for a different flavor.
  • 1 teaspoon Ground Cumin Substitution: Ground coriander can deliver a lighter taste.
  • 1 teaspoon Garlic Powder Substitution: Fresh minced garlic can also be used.
  • to taste Kosher Salt Enhances overall flavor; adjust according to taste.
  • to taste Fresh Ground Black Pepper Enhances overall flavor; adjust according to taste.
For the Salad
  • 1 lb Medium-Sized Shrimp Ensure shrimp are peeled and deveined.
  • 1 head Butter Lettuce Substitution: Romaine or green leaf lettuce can be used.
  • 1 cup Cherry Tomatoes Halved.
  • 1 Avocado Tip: Use ripe avocados for the best texture.
  • 1/2 cup Fresh or Frozen Corn Note: Grilled or charred corn can elevate the flavor.
  • 1/3 cup Queso Fresco Substitution: Feta cheese offers a similar taste and texture.
  • to taste Cilantro Omit if you’re not a fan of cilantro.

Equipment

  • Mixing Bowl
  • Skillet
  • Jar or bowl for marinade

Method
 

Preparation Steps
  1. In a small jar or bowl, blend together olive oil, honey, lime zest, lime juice, chili powder, ground cumin, garlic powder, kosher salt, and fresh ground black pepper. Shake or whisk thoroughly until unified.
  2. Pat the medium-sized shrimp dry with paper towels. Toss the shrimp with three tablespoons of the prepared marinade and let marinate for 15 to 30 minutes.
  3. Arrange butter lettuce on a serving platter or bowls. Scatter fresh corn, halved cherry tomatoes, sliced avocado, and crumbled queso fresco over the lettuce.
  4. Heat a skillet over medium-high heat, add olive oil, and cook marinated shrimp in a single layer for 2 minutes until caramelized.
  5. Flip the shrimp and cook for an additional 1-2 minutes until fully cooked and opaque. Remove from heat and let cool slightly.
  6. Top the salad base with cooked shrimp, drizzling remaining marinade over. Garnish with cilantro and serve immediately.

Nutrition

Serving: 1servingCalories: 320kcalCarbohydrates: 15gProtein: 28gFat: 18gSaturated Fat: 4gPolyunsaturated Fat: 2gMonounsaturated Fat: 10gCholesterol: 200mgSodium: 400mgPotassium: 600mgFiber: 4gSugar: 8gVitamin A: 25IUVitamin C: 30mgCalcium: 200mgIron: 3mg

Notes

Allow shrimp to marinate for at least 15 minutes; longer marination enhances flavor. Store shrimp and vinaigrette separately until serving for freshness.

Tried this recipe?

Let us know how it was!

Delicious Corn And Grilled Zucchini Salad with Feta Twist

April 8, 2026 by Grace Snow Leave a Comment

As the sizzling sound of zucchini hitting the grill fills the air, I can't help but feel a rush of summer nostalgia. This Grilled Corn and Zucchini Salad with Feta and Arugula brings back memories of sun-drenched picnics and backyard barbecues. With the perfect combination of sweet, charred corn and tender zucchini, this gluten-free and vegetarian dish is not only quick to prepare—ready in just 25 minutes—but also a vibrant centerpiece for any gathering. The creamy feta adds a delightful contrast, while the peppery arugula elevates each bite. I love how this dish effortlessly transforms fresh, seasonal ingredients into a light meal that everyone will adore. Curious how you can whip up this summer delight? Let’s dive into the recipe!

Why Is This Salad a Summer Favorite?

Bursting with flavor, this salad combines creamy feta and fresh arugula for a delightful twist. Quick and effortless, you can whip it up in just 25 minutes, making it perfect for busy weeknights or last-minute gatherings. Versatile ingredients allow you to customize, whether adding grilled vegetables or nuts. Plus, it's gluten-free and vegetarian, ensuring it appeals to a wide range of dietary preferences. This salad pairs beautifully with grilled meats from a Grilled Balsamic Steak or can stand alone as a light lunch. Trust me, this vibrant dish will brighten your table and leave everyone asking for seconds!

Corn And Grilled Zucchini Salad Ingredients

• Perfect for summer picnics!

For the Salad

  • Zucchini – Adds bulk and tenderness; swap with yellow summer squash for a colorful twist.
  • Corn – Brings sweetness and crunch; fresh is best, but thaw frozen corn before grilling.
  • Feta Cheese – Offers creaminess and saltiness; goat cheese makes a tasty alternative.
  • Arugula – Provides a peppery bite; spinach works well if you prefer something milder.

For the Dressing

  • Olive Oil – Vital for grilling and flavor; opt for high-quality extra virgin for maximum taste.
  • Lemon Juice – Adds brightness to the salad; always choose fresh lemon over bottled for the best flavor.
  • Salt and Pepper – Essential for seasoning; taste after adding feta for the perfect balance.

This Corn and Grilled Zucchini Salad can be a perfect dish for hot summer days!

Step‑by‑Step Instructions for Corn And Grilled Zucchini Salad

Step 1: Prepare the Zucchini
Begin by slicing the zucchini into thick rounds, about ¾ inch in thickness, to ensure they grill evenly. Drizzle the slices with olive oil and sprinkle with salt and pepper. Preheat your grill or a grill pan over medium-high heat, and once ready, add the zucchini rounds. Grill for about 5-7 minutes on each side until they are golden brown and have nice char marks.

Step 2: Grill the Corn
While the zucchini is grilling, take your fresh corn cob or thawed frozen corn. If using corn on the cob, remove the husk and silk. Place the corn on the grill alongside the zucchini after flipping them. Grill for about 5 minutes, turning occasionally, until the kernels are tender and have developed a lovely golden color. Remove both the zucchini and corn from the grill and allow them to cool slightly.

Step 3: Combine Ingredients
In a large mixing bowl, chop the grilled zucchini into bite-sized pieces and add them along with the grilled corn, which should be sliced off the cob. Stir gently to combine these two main ingredients of your Corn And Grilled Zucchini Salad, ensuring the smoky flavors meld together beautifully.

Step 4: Add Greens and Cheese
Next, crumble freshly feta cheese directly into the bowl with the zucchini and corn mixture. Then, gently add a handful of vibrant arugula for that peppery freshness. This combination enhances the salad's flavor and texture, balancing the creamy feta with the fresh crunch of arugula.

Step 5: Dress the Salad
To finish off your Corn And Grilled Zucchini Salad, drizzle a couple of tablespoons of high-quality olive oil and fresh lemon juice over the top. Season with a pinch of salt and freshly cracked black pepper to taste. Toss everything together delicately but thoroughly, ensuring that every bite is beautifully coated in the dressing.

Step 6: Serve or Chill
Served immediately is the best way to enjoy the salad; however, if preparing in advance, cover and refrigerate it without the arugula. Add the arugula just before serving to keep it fresh and vibrant. This salad is perfect as a light lunch or as a delightful side at summer gatherings!

What to Serve with Grilled Corn and Zucchini Salad

Elevate your summer gatherings with delightful pairings that complement this vibrant salad, turning your meal into a delicious feast.

  • Grilled Chicken: The smoky flavors of grilled chicken enhance the salad's fresh ingredients, making it a satisfying pairing.

  • Herbed Quinoa Salad: A light and nutty quinoa dish with fresh herbs adds earthy depth and pairs beautifully with the savory feta.

  • Watermelon Feta Salad: The refreshing sweetness of watermelon complements the salty feta, creating a delightful contrast with each bite.

  • Garlic Bread: Crispy, garlicky bread is perfect for soaking up any remaining salad juices and adds a satisfying crunch to the meal.

  • Chilled White Wine: A crisp Sauvignan Blanc or a fruity Rosé balances the flavors of the salad, making it a perfect summer sipper.

  • Grilled Shrimp Skewers: Sweet and smoky shrimp add a touch of indulgence, echoing the grill flavors in the salad.

  • Roasted Beet Salad: Earthy roasted beets with goat cheese make a flavorful side that pairs well with the salad's peppery arugula.

  • Lemon Sorbet: The bright, refreshing flavors of lemon sorbet serve as a light and zesty dessert, cleansing the palate after your meal.

  • Crispy Chickpeas: For added crunch, sprinkle roasted chickpeas over the salad, providing protein and texture to this colorful dish.

Corn And Grilled Zucchini Salad Variations

Feel free to let your creativity shine with these delightful twists on the classic recipe that will truly elevate your experience!

  • Add Color: Mix in grilled red onions or bell peppers to bring vibrant color and a sweet crunch.

  • Nutty Crunch: Toss in walnuts or pecans for an extra layer of flavor and a satisfying crunch, making each bite more exciting.

  • Dairy-Free: Swap feta cheese for a plant-based cheese to cater to dairy-free diets, allowing everyone to enjoy this salad without compromise.

  • Zesty Spin: Add a teaspoon of cumin or smoked paprika for a smokier taste that teases the taste buds and adds depth.

  • Green Upgrade: Substitute arugula with baby kale for a heartier texture that pairs surprisingly well with the grilled vegetables.

  • Heat It Up: Include a sprinkle of red pepper flakes or toss in some jalapeño for a kick that spices up your summer gatherings.

  • Citrus Twist: Try using lime juice instead of lemon to give your salad a refreshing twist that complements the grilled flavors beautifully.

If you're feeling adventurous, consider expanding your summer spread by pairing this salad with a refreshing Avocado Egg Salad or some smoky Grilled Mushrooms for a delightful feast. Enjoy your culinary adventures!

Expert Tips for Corn and Grilled Zucchini Salad

  • Grilling Perfection: Ensure your grill is preheated to medium-high; this helps achieve those beautiful char marks that enhance both flavor and texture in your corn and grilled zucchini salad.

  • Fresh Ingredients: Use fresh corn if possible, as frozen corn may not provide the same sweetness. When using frozen, make sure to thaw and pat it dry to maximize grilling results.

  • Keep Arugula Fresh: If preparing the salad ahead of time, store the arugula separately until just before serving. This keeps it crisp and avoids wilting, ensuring your salad looks as fresh as it tastes.

  • Balance Salinity: Feta can be quite salty, so taste your salad after incorporating it. Adjust the seasoning with salt and pepper accordingly to achieve the perfect flavor profile.

  • Quick Cleanup: Grill mats or non-stick sprays can make cleaning up your grill easier, giving you one less thing to worry about while you enjoy your delicious corn and grilled zucchini salad!

Storage Tips for Corn And Grilled Zucchini Salad

Fridge: Store any leftover Corn and Grilled Zucchini Salad in an airtight container in the refrigerator for up to 1 day.

Arugula: If you prepare the salad in advance, keep the arugula separate until just before serving to maintain its freshness and prevent wilting.

Reheating: If reheating, do it gently in a skillet over low heat. Avoid microwaving, as it may make the zucchini soggy.

Freshness: For the best flavor and texture, consume the salad fresh. It beautifully captures the essence of summer and should be enjoyed right away when possible.

Make Ahead Options

These Corn and Grilled Zucchini Salad components are fantastic for those busy days ahead! You can grill the zucchini and corn up to 24 hours in advance, allowing their smoky flavors to deepen. To do this, allow the grilled vegetables to cool completely before refrigerating them in an airtight container. However, it's crucial to keep the arugula separate until just before serving to maintain its crispness and vibrant color. When you’re ready to enjoy your salad, simply combine the prepared veggies with crumbled feta, fresh arugula, a drizzle of olive oil, and lemon juice, then toss to unite the flavors. This makes your meal prep not only simpler but just as delicious as when freshly made!

Corn And Grilled Zucchini Salad Recipe FAQs

How do I choose ripe zucchini for this salad?
Absolutely! When selecting zucchini, look for firm, glossy skin without any blemishes. The zucchini should feel heavy for its size. Smaller zucchinis (about 6-7 inches long) tend to be more tender and flavorful. Avoid zucchinis with dark spots all over, as they may be overripe.

What is the best way to store leftovers of Corn And Grilled Zucchini Salad?
To keep your leftovers fresh, store the Corn and Grilled Zucchini Salad in an airtight container in the refrigerator, where it will last for up to 1 day. If you prepare it ahead, remember to keep the arugula separate until just before serving to prevent it from wilting and losing its crispness!

Can I freeze Corn and Grilled Zucchini Salad?
While I don’t recommend freezing the salad as is (the veggies and arugula may become mushy), you can freeze the grilled zucchini and corn separately. To do this, let them cool completely, then place them in a freezer-safe bag, ensuring all air is removed. They can last for up to 3 months. When ready to use, defrost in the fridge, grill lightly, then mix with fresh arugula and feta for the best result.

What should I do if my grilled zucchini is too mushy?
Very! If you find your zucchini has turned mushy, it might be due to overcooking. Next time, try cutting thicker slices (¾ inch is ideal) to retain firmness. Ensure your grill is preheated to a medium-high temperature, and grill in small batches for even cooking. Additionally, grilling should take only 5-7 minutes per side—keep a close eye to avoid losing that delightful texture!

Is this salad suitable for someone with dairy allergies?
Of course! While the original recipe features feta cheese, you can easily modify it for dairy allergies by using a dairy-free cheese alternative or simply omitting the cheese altogether. The salad will still shine with the grilled zucchini and corn's sweetness! Make sure to use vegan-friendly dressing options, such as olive oil and lemon juice, to keep it allergy-friendly.

Can I add other vegetables to the Corn And Grilled Zucchini Salad?
The more the merrier! Feel free to customize your salad by adding grilled red onions or bell peppers. These additions not only enhance the flavor but also add beautiful colors and textures. You can also toss in some nuts like walnuts or pecans for extra crunch—a delicious way to give your salad a personal touch!

Corn And Grilled Zucchini Salad

Delicious Corn And Grilled Zucchini Salad with Feta Twist

Enjoy a vibrant Corn And Grilled Zucchini Salad, a perfect summer dish with grilled corn, zucchini, feta, and arugula.
Print Recipe Pin Recipe
Prep Time 10 minutes mins
Cook Time 15 minutes mins
Total Time 25 minutes mins
Servings: 4 servings
Course: Salads
Cuisine: American
Calories: 200
Ingredients Equipment Method Nutrition Notes

Ingredients
  

For the Salad
  • 1 large Zucchini Slice into thick rounds
  • 2 cobs Corn Use fresh corn or thawed frozen corn
  • 1 cup Feta Cheese Crumble into pieces
  • 2 cups Arugula
For the Dressing
  • 2 tablespoons Olive Oil Extra virgin for maximum taste
  • 2 tablespoons Lemon Juice Use fresh lemon juice
  • to taste Salt
  • to taste Black Pepper

Equipment

  • Grill
  • Grill pan
  • Mixing Bowl

Method
 

Step-by-Step Instructions
  1. Slice the zucchini into thick rounds, drizzle with olive oil and season with salt and pepper. Preheat the grill over medium-high heat and grill the zucchini for about 5-7 minutes on each side.
  2. Grill the corn for about 5 minutes, turning occasionally until tender. Remove from the grill and allow to cool slightly.
  3. Chop the grilled zucchini into bite-sized pieces, and add along with the grilled corn to a mixing bowl.
  4. Crumble the feta cheese into the bowl and add the arugula.
  5. Drizzle with olive oil and lemon juice, season, and toss gently.
  6. Serve immediately or chill without the arugula.

Nutrition

Serving: 1servingCalories: 200kcalCarbohydrates: 15gProtein: 6gFat: 14gSaturated Fat: 4gPolyunsaturated Fat: 2gMonounsaturated Fat: 6gCholesterol: 15mgSodium: 400mgPotassium: 350mgFiber: 3gSugar: 4gVitamin A: 500IUVitamin C: 20mgCalcium: 200mgIron: 1mg

Notes

Great for summer picnics! Keep arugula separate until serving to maintain freshness.

Tried this recipe?

Let us know how it was!

Crisp and Zesty Spring Radish Salad for Fresh Flavor Bliss

April 6, 2026 by Grace Snow Leave a Comment

The vibrant colors of spring are finally here, and nothing says “fresh” quite like a Spring Radish Salad. As I tossed together some crisp red radishes, bright parsley, and zesty lemon juice, I couldn’t help but marvel at how a few simple ingredients can come together to create such a colorful spectacle. This quick side dish is not only healthy and low-calorie, but it also transforms the sharp bite of radishes into a mellow delight that perfectly complements any meal. Whether you’re hosting a picnic or simply looking to elevate your dinner table, this salad is the ideal choice for anyone tired of fast food. What’s your favorite crunchy ingredient to add to a salad?

What makes this salad a must-try?

Freshness at its peak: Made with crisp radishes and bright parsley, this salad is a celebration of spring flavors.

Quick preparation: With minimal chopping and mixing required, it’s perfect for busy weeknights or last-minute gatherings.

Versatility shines through: Pair it alongside tacos, grilled meats, or as a standalone dish at your next barbecue—a unique twist on our classic German Potato Salad.

Nutritional powerhouse: Low in calories yet high in fiber, it supports healthy digestion while satisfying your cravings for something crunchy.

Crowd-pleaser: Its vibrant colors and fresh taste make it an instant hit, even with those who typically shy away from vegetables! Don’t forget, it can be adapted easily—toss in some cherry tomatoes for extra sweetness, too. Whether you're hosting friends or just want a light lunch, this Spring Radish Salad is the refreshing treat you’ve been searching for!

Spring Radish Salad Ingredients

• Create a vibrant dish with these fresh elements!

For the Salad

  • Radishes – A crunchy essential; choose vibrant red radishes for a beautiful color contrast.
  • Parsley – Adds a pop of green; cilantro can be used for a different herbaceous flavor.
  • Lemon Juice – Provides bright acidity; freshly squeezed juice enhances the flavor, while bottled juice is a handy alternative.
  • Olive Oil – Richness that balances flavors; avocado oil is a great substitute if desired.
  • Kosher Salt – Enhances all the tastiness; you can swap it with sea salt or table salt if necessary.
  • Black Pepper – Delivers a hint of heat; using freshly ground pepper will elevate the dish's taste.

This Spring Radish Salad comes together with these simple but vibrant ingredients, making it a delightful addition to any meal!

Step‑by‑Step Instructions for Spring Radish Salad

Step 1: Prepare the Radishes
Begin by rinsing the red radishes thoroughly under cool water to remove any dirt. Then, chop off the green tops and root ends, slicing the radishes into small, even cubes about half an inch thick for uniform texture. This will take approximately 5 minutes, and you should end up with vibrant, crunchy pieces that showcase their bright color against the cutting board.

Step 2: Chop the Parsley
Next, take a handful of fresh parsley, rinse it under cool water, and gently pat it dry using a paper towel. Finely chop the parsley leaves, discarding any tough stems; you’ll want about a quarter cup. This will add a fresh, herbaceous flavor to the spring radish salad. Combine the chopped parsley with the cubed radishes in a medium serving bowl for a colorful mix.

Step 3: Add Lemon Juice and Seasoning
Squeeze the juice of one fresh lemon over the radish and parsley mixture, being careful to catch any seeds with your hand or a juicer. Follow with a generous sprinkle of kosher salt and freshly ground black pepper to taste. Use about a teaspoon of salt and a few cracks of pepper to enhance the flavors. Toss everything together gently until evenly coated, allowing the ingredients to mingle beautifully.

Step 4: Drizzle with Olive Oil
To elevate the flavors in the spring radish salad, drizzle about two tablespoons of olive oil over your combined salad mix. Olive oil provides a rich depth that balances the tangy lemon juice and crunchy vegetables. Toss the salad again gently, ensuring that the olive oil envelops all the ingredients for added moisture and flavor.

Step 5: Taste and Adjust
After mixing, take a moment to taste your creation. If you feel it needs a bit more brightness, add an extra squeeze of lemon juice. If you enjoy a bit more seasoning, sprinkle in additional salt and pepper. This final adjustment allows you to customize the spring radish salad to your palate, making it just right for serving.

Step 6: Serve Immediately or Chill
For the best flavor and texture, serve your spring radish salad immediately. However, if you prefer a slightly chilled salad, cover it and place it in the refrigerator for up to 30 minutes to let the flavors develop. When ready to serve, give it a gentle toss to redistribute any settled ingredients, and enjoy this refreshing dish alongside your favorite meals or as a light snack!

Expert Tips for Spring Radish Salad

Fine Cubes Matter: Ensure radishes are finely cubed to achieve the perfect texture and even marination, enhancing the taste of your Spring Radish Salad.

Customize the Zest: Adjust lemon juice to suit your palate; add more for an extra punch or reduce for a milder flavor—personalize as you like!

Fresh Ingredients: Use the freshest radishes and parsley to maximize flavor and crunch in your salad, avoiding any wilted herbs.

Taste as You Go: Always taste the salad before serving, allowing you to tweak seasoning for a delightful final flavor profile.

Serve Chilled: For the best experience, serve the Spring Radish Salad chilled, or allow it to sit for 30 minutes to enhance the flavor infusion.

What to Serve with Spring Radish Salad

Brightening up your table with this refreshing salad is just the beginning—for a delightful meal, consider these perfect pairings.

  • Grilled Chicken: The smoky flavor of grilled chicken complements the crispness of the salad, making every bite a satisfying contrast. This duo makes for a well-rounded meal that will impress anyone at your table.

  • Quinoa Pilaf: This nutty and fluffy dish adds a hearty element alongside the lightness of the radish salad. The grains capture the vibrant flavors while adding a touch of earthiness.

  • Fresh Baguette: A crusty baguette works perfectly to soak up the zesty lemon dressing, enhancing the meal’s flavor profile. Add a smear of butter or olive oil for an even more indulgent experience.

  • Roasted Sweet Potatoes: The sweetness of roasted sweet potatoes balances the peppery bite of the radishes, creating a beautiful harmony of flavors on your plate.

  • Cucumber Mint Yogurt Dip: A cool, creamy dip enhances any crunchy vegetable, making it an excellent side to your salad at parties. Serve with whole grain crackers for an added texture.

  • Sparkling Lemonade: A refreshing drink that mirrors the salad's zestiness, sparkling lemonade adds a festive touch and is perfect for gatherings or picnics.

  • Cheese Platter: A variety of cheeses such as goat cheese or feta can enrich the meal, offering creaminess that pairs well with the salad’s crisp elements.

Let your creativity shine as you mix and match these accompaniments, building a delightful dining experience around your Spring Radish Salad!

Spring Radish Salad Variations

Feel free to put your own twist on this refreshing salad and make it uniquely yours!

  • Daikon Radishes: Swap red radishes for daikon for a milder taste and a crunchy texture. The subtle sweetness of daikon adds a unique flair.

  • Cucumbers: Add diced cucumbers to the salad for an extra layer of crunch and hydration. You’ll appreciate the refreshing coolness they bring on warm days.

  • Cherry Tomatoes: Toss in cherry tomatoes for a burst of sweetness and color, contrasting beautifully with the radishes’ spice. Their vibrant hue enhances the overall appeal.

  • Feta Cheese: Crumble some feta cheese into the mix for a delightful creamy texture that brings richness to every bite. This tangy addition creates a delightful contrast with the crispy veggies.

  • Spicy Kick: Incorporate thinly sliced jalapeños or red pepper flakes for an added layer of heat for those who crave a bit of spice. The warmth from the peppers balances the dish perfectly.

  • Herb Variations: Feel free to substitute parsley with fresh cilantro or dill, each providing a distinctive flavor. These herbs can create a beautiful palate of flavors that can evoke different cuisines.

  • Nuts or Seeds: For added crunch, sprinkle some toasted nuts or seeds, like sunflower seeds or slivered almonds, into the salad. They elevate the dish’s texture, making it even more satisfying.

  • Citrus Twist: Experiment with a mix of citrus juices, like lime or orange, right alongside lemon juice, providing a refreshing twist bursting with vibrant flavor. This variation can take your salad to an exciting new level!

Make sure to try this Spring Radish Salad alongside a light protein or a classic Balsamic Steak Salad. Whether it’s served as a standalone dish or a unique side, your twist will surely impress family and friends!

How to Store and Freeze Spring Radish Salad

Fridge: Store the Spring Radish Salad in an airtight container in the fridge for up to 3 days. This will help preserve its freshness, though it’s best enjoyed within the first day for optimal crunch.

Make-Ahead: Prepare the salad components separately—chop radishes and parsley, squeeze lemon juice, and mix oil and seasoning. Assemble no more than an hour before serving to maintain crispness.

Freezer: Freezing is not recommended for this salad, as the texture of radishes and fresh herbs changes significantly once thawed, leading to a soggy dish.

Reheating: There’s no need to reheat this salad; serve it chilled for the best flavors and textures. Enjoy the refreshing crunch just as it is!

Make Ahead Options

These Spring Radish Salads are perfect for meal prep enthusiasts looking to save time on busy weeknights! You can chop the radishes and parsley up to 24 hours in advance, storing them separately in airtight containers in the refrigerator to maintain their crispness. The lemon juice, olive oil, salt, and pepper can also be pre-measured and combined in a small jar for easy dressing. When you're ready to serve, simply toss the prepped ingredients together with the dressing just before eating to ensure the salad remains fresh and delightful. This way, you’ll have a vibrant, crunchy salad that’s just as delicious as if you made it fresh, saving you valuable time without sacrificing flavor!

Spring Radish Salad Recipe FAQs

What kind of radishes should I use for this salad?
Absolutely! For this Spring Radish Salad, vibrant red radishes are highly recommended due to their crisp texture and peppery taste. If you're looking for a milder flavor or different texture, you can also try daikon radishes. Just remember, freshness is key to achieving that delightful crunch!

How long can I store leftover Spring Radish Salad?
You can store the Spring Radish Salad in an airtight container in the fridge for up to 3 days. While it will still be safe to eat after this period, the salad is best enjoyed within the first day to maintain its crispness. As it sits, the radishes may start to lose their crunch and the flavors may meld, which is not quite the texture we want!

Can I freeze this salad?
Freezing this Spring Radish Salad is not recommended. The texture of the radishes and fresh herbs will change significantly once thawed, resulting in a soggy dish. Instead, consider preparing the individual components ahead of time and mixing them right before serving. This keeps the salad fresh and crunchy!

What should I do if my radishes are too pungent?
If you find that your radishes are a bit too sharp or pungent, you can try soaking them in cold water for about 30 minutes before chopping. This process can help mellow their bite. Another option is to add a bit more lemon juice and olive oil when you mix the salad, as the acidity can balance out the intensity.

Is this salad suitable for people with allergies?
Very! The Spring Radish Salad is naturally vegetarian and can be made gluten-free. However, if you or your guests have specific allergies, be sure to double-check the labels on your olive oil and any salt used, as they can sometimes contain additives. It's always wise to ask guests about potential allergens prior to serving!

Spring Radish Salad

Crisp and Zesty Spring Radish Salad for Fresh Flavor Bliss

Enjoy the refreshing taste of Spring Radish Salad, a vibrant dish perfect for picnics and barbecues.
Print Recipe Pin Recipe
Prep Time 10 minutes mins
Chilling Time 30 minutes mins
Total Time 40 minutes mins
Servings: 4 servings
Course: Salads
Cuisine: American
Calories: 73
Ingredients Equipment Method Nutrition Notes

Ingredients
  

For the Salad
  • 1 bunch Radishes choose vibrant red radishes
  • 1/4 cup Parsley finely chopped, tough stems discarded
  • 1 medium Lemon Juice freshly squeezed
  • 2 tablespoons Olive Oil can substitute with avocado oil
  • 1 teaspoon Kosher Salt or sea salt
  • to taste Black Pepper preferably freshly ground

Equipment

  • Cutting Board
  • Knife
  • medium serving bowl
  • juicer

Method
 

Preparation Steps
  1. Rinse the radishes under cool water, chop off the green tops and root ends, then slice into half-inch cubes.
  2. Chop the parsley finely and combine with cubed radishes in a medium serving bowl.
  3. Squeeze lemon juice over the mixture, add salt and pepper to taste, and toss gently.
  4. Drizzle olive oil over the salad and toss again to coat evenly.
  5. Taste and adjust seasoning with more lemon juice, salt, or pepper as desired.
  6. Serve immediately or chill for up to 30 minutes before serving.

Nutrition

Serving: 1servingCalories: 73kcalCarbohydrates: 7gProtein: 1gFat: 5gSaturated Fat: 1gPolyunsaturated Fat: 1gMonounsaturated Fat: 3gSodium: 176mgPotassium: 250mgFiber: 2gSugar: 1gVitamin A: 500IUVitamin C: 18mgCalcium: 30mgIron: 0.5mg

Notes

Finely cubed radishes enhance texture and flavor; serve chilled for optimal taste.

Tried this recipe?

Let us know how it was!

Easter Spring Mix Salad with Blueberry Vinaigrette Bliss

April 6, 2026 by Grace Snow Leave a Comment

As the blooms of spring begin to emerge, there’s something truly uplifting about incorporating fresh, vibrant ingredients into our meals. Enter the 10-Minute Easter Spring Mix Salad—your new go-to dish that captures the essence of the season in every bite! This salad is not only incredibly quick to whip up but also packed with nutrients, making it a delightful and healthy addition to your Easter brunch or any gathering. The sweet notes from the blueberries, paired with the creamy tang of goat cheese and a homemade vinaigrette, create a salad that’s as beautiful as it is delicious. Plus, it's vegetarian-friendly! Are you ready to bring a burst of flavor and color to your table?

Why is this salad a spring essential?

Speedy Preparation: This salad is crafted in just 10 minutes, making it your perfect companion for last-minute gatherings or busy weeknight dinners.

Vibrant Flavors: The sweet blueberries and creamy goat cheese lend each bite a delightful burst of flavor, leaving your palate satisfied and refreshed.

Nutrient-Packed: Loaded with vitamins and minerals, this is one dish that’s as nourishing as it is colorful—great for your body and your mind!

Versatility: Enjoy it on its own or pair it with grilled chicken from your favorite BBQ or even alongside a hearty Chicken Salad with Apples for a wholesome meal.

Crowd-Pleasing: Whether you serve it at Easter brunch or a casual weeknight dinner, it’s sure to impress family and friends while accommodating vegetarian diets.

Easter Spring Mix Salad Ingredients

  • For the Dressing

  • Olive Oil – the base for dressing; provides richness and flavor; use California Olive Ranch for its mild taste.

  • Apple Cider Vinegar – adds acidity and brightness; prefer Bragg for best tang.

  • Blueberries – used in dressing and as a salad topping; adds sweetness; fresh blueberries preferred for optimal flavor.

  • Monk Fruit Powder – sweetener in dressing; can be substituted with honey or another sweetener to taste.

  • Salt – enhances overall flavors; adjust according to preference.

  • Pepper – provides subtle spice; freshly ground is best.

  • Fresh Lemon Juice – brightens the dressing; use fresh for best results.

  • For the Salad

  • Spring Mix – base for salad; provides a variety of textures; can substitute with baby spinach or arugula.

  • Walnuts – added crunch and flavor; toast before use for enhanced taste.

  • Goat Cheese – provides creamy texture and tang; crumble into small pieces for even distribution.

This Easter Spring Mix Salad is a quick and healthy addition to any meal, bursting with vibrant flavors and textures!

Step‑by‑Step Instructions for Easter Spring Mix Salad

Step 1: Toast Walnuts
Begin by heating a dry skillet over medium heat, allowing it to warm for about 2 minutes. Add the walnuts to the skillet, toasting them for approximately 5 minutes until they become fragrant and lightly browned. Keep an eye on them to prevent burning, then transfer the toasted walnuts to a plate and let them cool while you prepare the dressing.

Step 2: Prepare Dressing
In a blender, combine ¼ cup of olive oil, 2 tablespoons of apple cider vinegar, 3 tablespoons of blueberries, 1 tablespoon of monk fruit powder, a pinch of salt, a dash of freshly ground pepper, and 1 tablespoon of fresh lemon juice. Blend on high for 30-45 seconds until smooth and fully emulsified. This blueberry vinaigrette will be fresh and vibrant, perfectly complementing your Easter Spring Mix Salad.

Step 3: Assemble Salad
Grab a large bowl and place the spring mix as the base. Evenly scatter the toasted walnuts over the greens, followed by the remaining blueberries and crumbled goat cheese. This colorful combination not only adds texture but also incorporates a variety of flavors, ensuring every bite of your Easter Spring Mix Salad is delicious and inviting.

Step 4: Dress Salad
Right before serving, pour the homemade blueberry dressing over the salad. Use just enough dressing to coat the greens without making them soggy. Gently toss the salad with your hands or salad tongs to ensure all ingredients are well mixed while preserving the freshness of the spring mix. Now, your Easter Spring Mix Salad is ready to be served with style!

Easter Spring Mix Salad Variations

Feel free to get creative and personalize this delightful salad to suit your preferences or what you have on hand!

  • Berry Swap: Replace blueberries with strawberries or raspberries for a unique twist and a pop of color. The flavors will shift to a sweeter, tangy experience.

  • Cheese Choice: Substitute goat cheese with feta or even a creamy vegan alternative for varied flavors and textures. Both options will add that sought-after creaminess without compromising taste.

  • Protein Boost: For a more filling version, toss in grilled chicken or sliced steak. This transforms your salad into a wholesome main dish, perfect for when you need something hearty.

  • Nutty Variation: Try swapping walnuts with pecans or almonds for a different crunchy profile. Each nut brings its own distinct flavor, enhancing the overall experience.

  • Herbal Freshness: Mix in fresh herbs like basil or parsley for an aromatic lift and a burst of freshness in every bite. These herbs can take your salad to a whole new level!

  • Vegan Delight: Skip goat cheese and add avocado slices for creaminess while keeping the dish plant-based. The rich texture of avocado complements the blueberries beautifully.

  • Spicy Kick: Add a chopped jalapeño or a dash of red pepper flakes to your dressing for a bit of heat. This unexpected twist can create a delightful contrast to the sweetness of the blueberries.

  • Bulk it Up: Incorporate cooked quinoa or farro into the salad for a heartier option. This not only adds texture but also enhances the nutritional value, making it even more satisfying.

For additional inspiration, consider pairing your Easter Spring Mix Salad with a refreshing Tofu Caesar Salad or a comforting German Potato Salad to create a diverse meal that your guests will love!

Expert Tips for Easter Spring Mix Salad

  • Dress Wisely: Always dress your salad just before serving; this keeps the spring mix crispy and delightful, avoiding a soggy texture.

  • Control the Dressing: Begin with half the batch of blueberry vinaigrette, tossing gently, and add more gradually until you achieve perfect coverage without overwhelming the greens.

  • Cheese Distribution: Crumbling goat cheese into smaller pieces allows for better flavor distribution throughout your Easter Spring Mix Salad, ensuring every bite is packed with creamy goodness.

  • Chop Safety: When toasting walnuts, keep a close watch since they can burn quickly; a light golden hue enhances their flavor beautifully.

  • Blend Smoothly: For a perfectly emulsified dressing, blend well until smooth to avoid clumps, ensuring it coats the salad evenly and creates a beautiful presentation.

Make Ahead Options

Preparing the Easter Spring Mix Salad ahead of time is a fantastic way to save time during busy days! You can make the blueberry vinaigrette up to 1 week in advance, storing it in an airtight container in the refrigerator to maintain its vibrant flavors. The walnuts can also be toasted up to 3 days prior, allowing them to stay crunchy when added to the salad. For the fresh ingredients, assemble the spring mix and goat cheese in separate containers; this will keep the greens crisp and the cheese creamy for 2-3 days in the fridge. When you’re ready to serve, simply combine everything, drizzle with the dressing, and enjoy a refreshing, hassle-free meal that’s just as delicious as when freshly made!

What to Serve with Easter Spring Mix Salad

This colorful salad not only stands out on its own but also pairs beautifully with a variety of dishes to create a well-rounded meal.

  • Grilled Chicken: Adding juicy grilled chicken boosts protein and complements the tangy blueberry dressing perfectly.

  • Honey-Glazed Carrots: Their natural sweetness mirrors the blueberries, resulting in a harmonious blend of flavors on the plate.

  • Creamy Pasta Salad: A rich pasta salad provides a delightful contrast to the fresh, crunchy elements of the spring mix, making each bite enjoyable.

  • Quiche Lorraine: This savory classic brings a comforting element to your brunch table and balances the salad’s lightness beautifully.

  • Baked Salmon: Citrusy flavors from the salmon enhance the salad, creating a refreshing and elegant combination for dinner gatherings.

  • Sparkling Lemonade: A chilled, sparkling drink elevates your meal experience, refreshing your palate and enhancing the lightness of the salad.

  • Fruit Tart: A vibrant dessert to wrap up your meal, bringing a sweet and fruity finish that echoes the blueberry flavor in the salad.

  • Roasted Sweet Potatoes: Their creamy texture and natural sweetness provide a delicious, earthy depth that marries well with the salad's bright notes.

How to Store and Freeze Easter Spring Mix Salad

Fridge: Store leftover salad components in separate airtight containers in the refrigerator, keeping them fresh for up to 3-4 days.

Dressing: The blueberry vinaigrette can be made in advance and stored in the fridge for up to one week. Shake well before use.

Freezer: It's not recommended to freeze the prepared salad or its components, as the textures will change upon thawing.

Assembling Tips: Keep the dressing separate until ready to serve; this prevents the greens from wilting and maintains the crispness of your Easter Spring Mix Salad.

Easter Spring Mix Salad Recipe FAQs

How do I select the best blueberries for my salad?
Absolutely! When choosing blueberries, look for berries that are firm and plump, with a deep blue color and a slight powdery coating. Avoid those with dark spots all over, as this indicates overripeness. Fresh blueberries give the best flavor, but if you can only find frozen, they will work—just thaw and drain before using.

How long can I store my Easter Spring Mix Salad?
The salad components can be stored separately in airtight containers in the fridge for about 3 to 4 days. This helps maintain their freshness and texture. The dressing is even more forgiving and can last up to one week in the refrigerator—just give it a good shake before using it again.

Can I freeze the components of the salad?
Very! While I don’t recommend freezing the assembled salad due to the potential for sogginess and texture changes, you can freeze certain components. If you have leftover walnuts, you can freeze them in a single layer on a baking sheet for about 2-3 hours, then transfer them to an airtight container for up to 3 months. For the dressing, however, it’s best made fresh when you’re ready to enjoy your salad!

What should I do if my walnuts burn while toasting?
Oh, don’t worry; it happens to the best of us! If your walnuts burn, it's important to start over with a fresh batch. To toast walnuts safely, heat the skillet over medium heat and keep your eye on them; stir often—this usually takes about 5 minutes. If they start to smell nutty and turn golden, they’re ready. You want that delicious toasted flavor without the burnt taste.

Is this Easter Spring Mix Salad suitable for those with nut allergies?
Definitely! If you're serving someone with nut allergies, you can simply omit the walnuts and replace them with seeds like sunflower seeds or pumpkin seeds for added crunch. This will still give you that delightful texture without the nut allergy concern. Always confirm with your guests if they have other specific dietary needs too!

Can I use a different cheese in this salad?
The more the merrier! If goat cheese isn’t your thing or you’re looking for an alternative, feta works beautifully with its tanginess, or you could opt for a vegan cheese to make this salad suitable for all diets. Just be sure to crumble it evenly over the greens for balanced flavor in every bite!

Easter Spring Mix Salad

Easter Spring Mix Salad with Blueberry Vinaigrette Bliss

Discover the vibrant flavors of the Easter Spring Mix Salad, a quick and nutritious addition to your brunch! Perfectly sweetened with blueberry vinaigrette.
Print Recipe Pin Recipe
Prep Time 10 minutes mins
Cook Time 5 minutes mins
Total Time 15 minutes mins
Servings: 4 servings
Course: Salads
Cuisine: American
Calories: 250
Ingredients Equipment Method Nutrition Notes

Ingredients
  

Dressing
  • ¼ cup olive oil California Olive Ranch preferred
  • 2 tablespoons apple cider vinegar Bragg preferred
  • 3 tablespoons blueberries fresh for optimal flavor
  • 1 tablespoon monk fruit powder can substitute with honey
  • to taste salt
  • to taste pepper freshly ground is best
  • 1 tablespoon fresh lemon juice use fresh for best results
Salad
  • 6 cups spring mix can substitute with baby spinach or arugula
  • 1 cup walnuts toast before use for enhanced taste
  • 4 ounces goat cheese crumbled for even distribution

Equipment

  • Blender
  • Skillet
  • large bowl

Method
 

Preparation
  1. Step 1: Toast Walnuts - Heat a dry skillet over medium heat for 2 minutes. Add walnuts and toast for 5 minutes until fragrant and lightly browned. Transfer to a plate to cool.
  2. Step 2: Prepare Dressing - In a blender, combine olive oil, apple cider vinegar, blueberries, monk fruit powder, salt, pepper, and lemon juice. Blend on high for 30-45 seconds until smooth.
  3. Step 3: Assemble Salad - In a large bowl, place spring mix as the base. Scatter toasted walnuts, remaining blueberries, and crumbled goat cheese over the greens.
  4. Step 4: Dress Salad - Pour dressing over salad right before serving, toss gently to coat without sogginess.

Nutrition

Serving: 1servingCalories: 250kcalCarbohydrates: 15gProtein: 6gFat: 22gSaturated Fat: 4gPolyunsaturated Fat: 2gMonounsaturated Fat: 14gCholesterol: 10mgSodium: 200mgPotassium: 300mgFiber: 3gSugar: 4gVitamin A: 500IUVitamin C: 20mgCalcium: 150mgIron: 1mg

Notes

Dress salad just before serving to maintain crispness. Adjust dressing quantity based on preference for coverage.

Tried this recipe?

Let us know how it was!
  • « Previous Page
  • 1
  • …
  • 5
  • 6
  • 7
  • 8
  • 9
  • …
  • 21
  • Next Page »

Welcome!

Hi, I’m Grace, a Sydney-based home cook with a passion for bold flavors and trending ingredients. Whether you’re a busy beginner or a seasoned foodie, you’ll find dishes here that are fresh, fun, and full of flavor.

More about me

Popular Recipes

  • Honey Lime Chicken & Avocado Rice Bowl
    Honey Lime Chicken & Avocado Rice Bowl for a Flavor Burst
  • Tasty Italian Pasta Salad
    Delight in this Easy Tasty Italian Pasta Salad for Summer Fun
  • Garlic Butter Chicken Pasta
    Garlic Butter Chicken Pasta That’ll Wow Your Family Tonight
  • Creamy, Spicy Chicken Pasta
    Creamy, Spicy Chicken Pasta with Fresh Summer Veggies

Footer

↑ back to top

About

  • Privacy Policy
  • Disclaimer
  • Terms & Conditions

Newsletter

  • Sign Up! for emails and updates

Contact

  • About me
  • Contact me

Copyright © 2025 TastyTrendIngredients