tastytrendingredients

  • Home
  • Recipes
    • Appetizers
    • Breakfast
    • Dessert
    • Dinner
    • Drinks
    • Salads
    • Snacks
    • Soups
  • About me
  • Contact
menu icon
go to homepage
  • Home
  • Recipes
    • Appetizers
    • Breakfast
    • Dessert
    • Dinner
    • Drinks
    • Salads
    • Snacks
    • Soups
  • About me
  • Contact
search icon
Homepage link
  • Home
  • Recipes
    • Appetizers
    • Breakfast
    • Dessert
    • Dinner
    • Drinks
    • Salads
    • Snacks
    • Soups
  • About me
  • Contact
×

Green Goddess Pasta Salad Ready in Just 20 Minutes!

January 11, 2026 by Grace Snow Leave a Comment

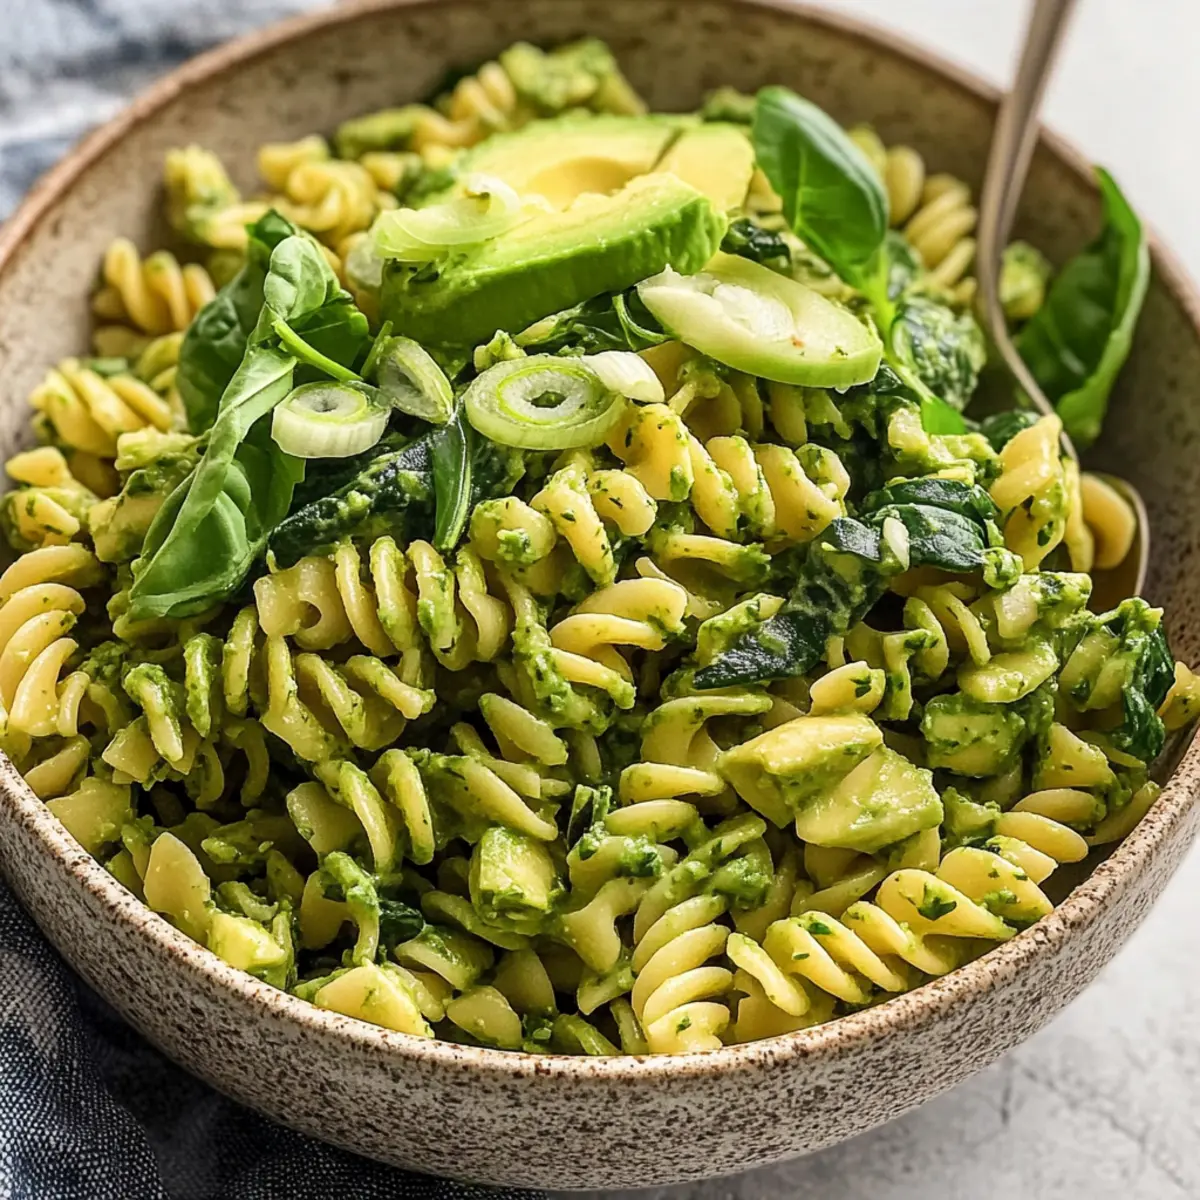
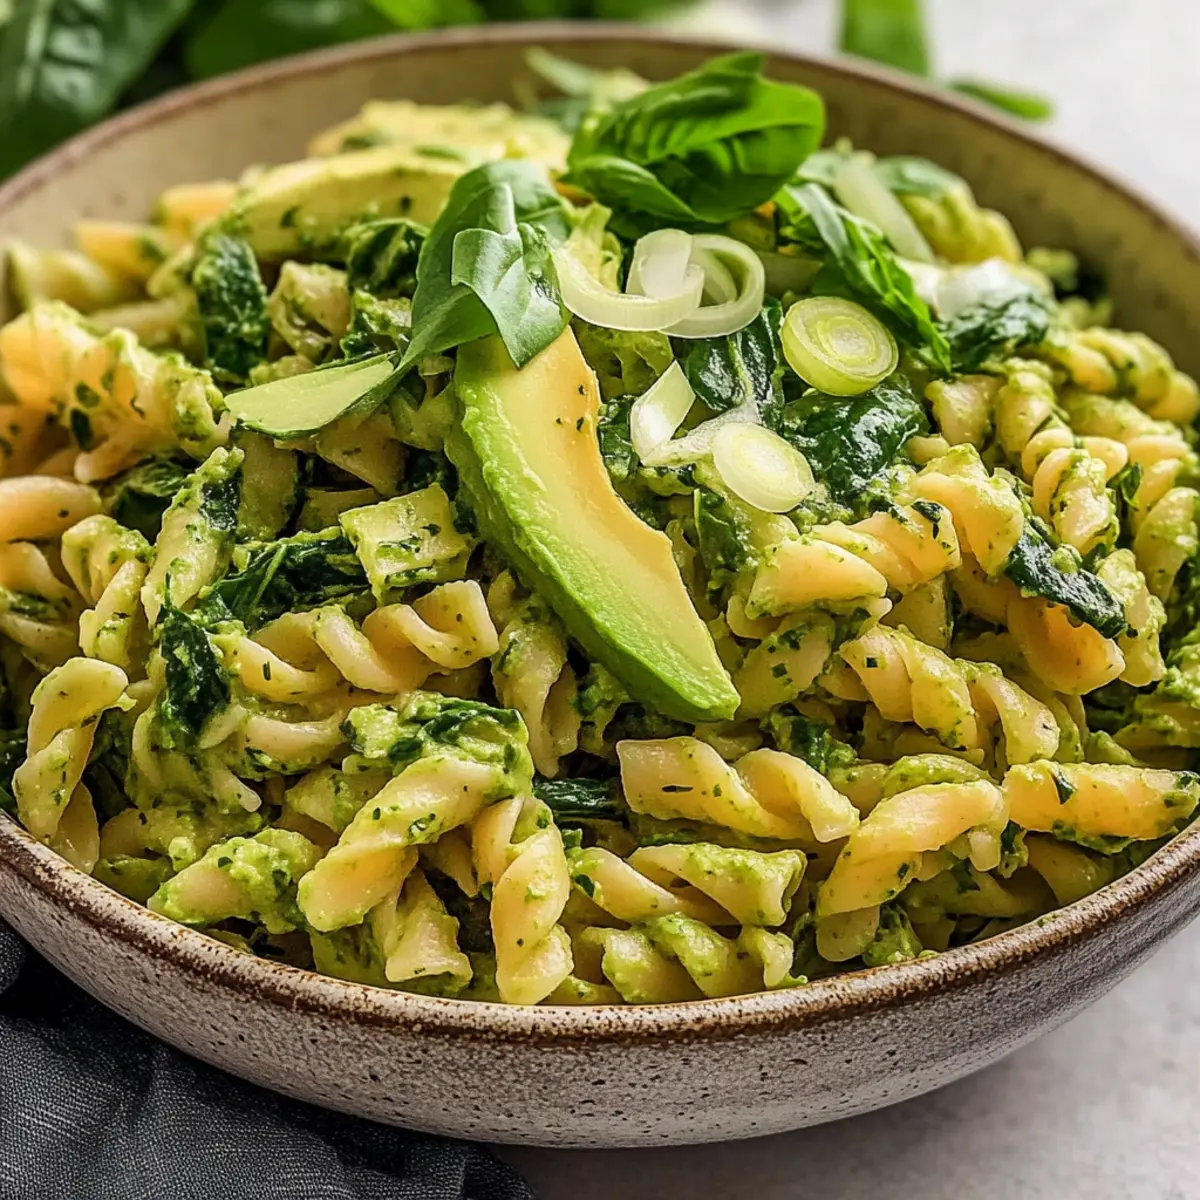
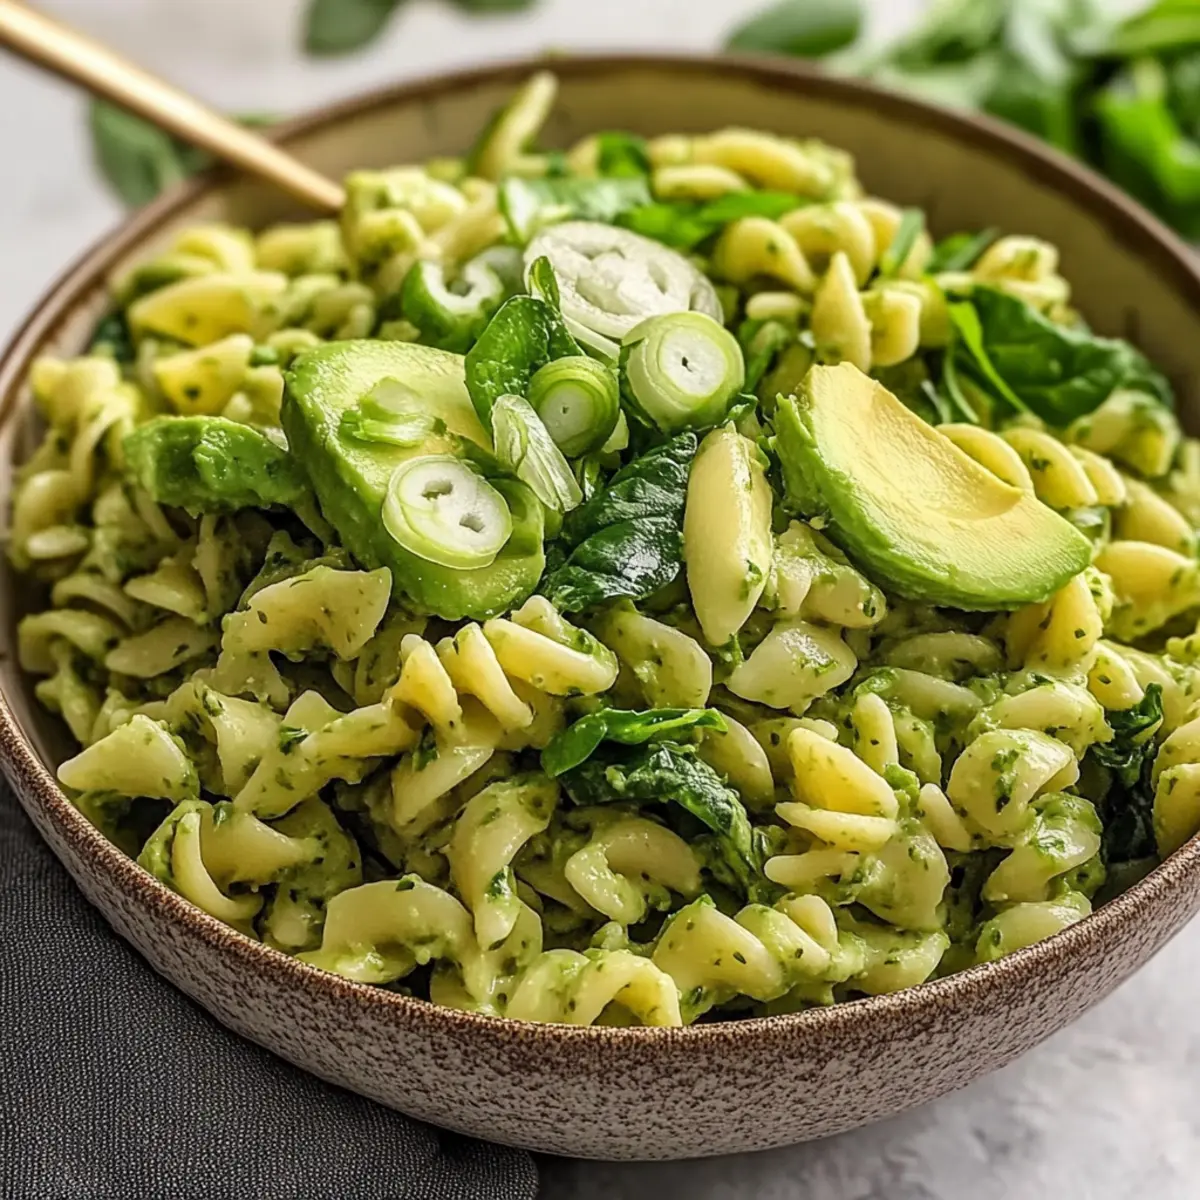
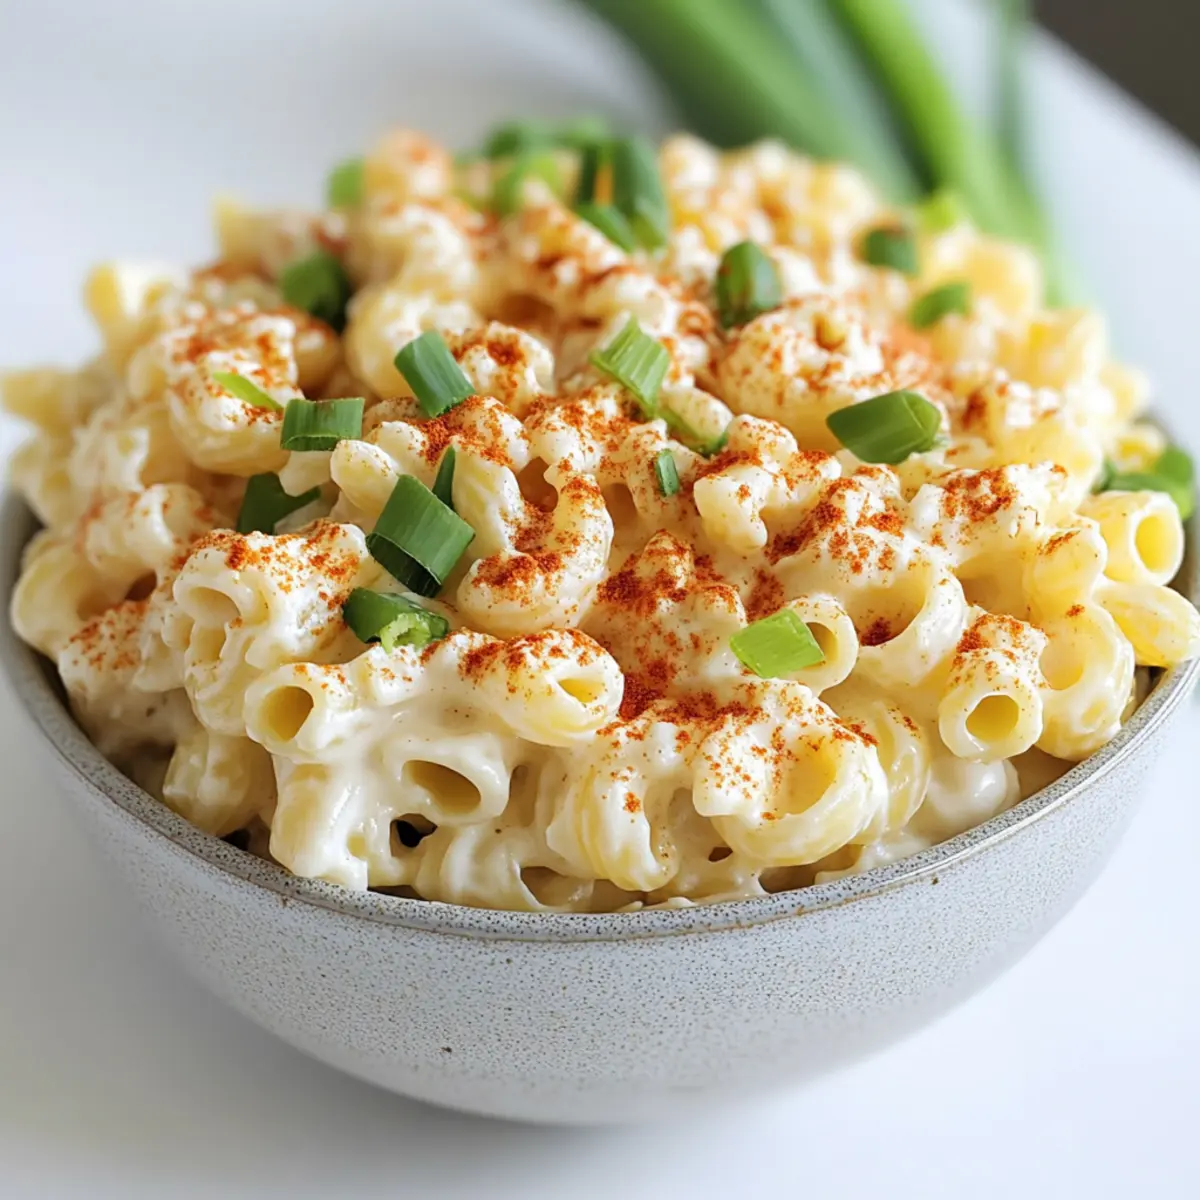
As I stood in my kitchen, the aroma of fresh herbs wafted through the air, transporting me to sun-drenched summer picnics. That's when I realized I needed a dish that encapsulated that vibrant essence: enter the Green Goddess Pasta Salad. This colorful creation is not just a feast for the eyes; it’s a quick and easy vegan delight that comes together in just 20 minutes! With creamy avocado bringing a rich texture and a medley of summer greens elevating each bite, this pasta salad is perfect for those busy weeknights when time is tight, but flavor is non-negotiable. Plus, it’s fully customizable with endless options for pasta and veggies, making it a versatile addition to your week’s menu. Ready to stir up some culinary magic in your kitchen?

Why is This Pasta Salad a Must-Try?

Quick Preparation: This fantastic Green Goddess Pasta Salad can be whipped up in just 20 minutes, making it an ideal solution for busy weeknight meals.

Vegan Delight: Packed with wholesome ingredients like creamy avocado and fresh herbs, it's a guilt-free indulgence you can feel good about.

Customizable: Feel free to substitute with gluten-free pasta or your favorite veggies, catering to any dietary preferences effortlessly!

Crowd-Pleaser: Whether it's a family gathering or a picnic, this salad is vibrant and appealing, sure to impress every guest at the table.

Nutrient-Rich: With healthy fats from avocado and fiber from greens, it’s not just delicious—it’s nourishing too!

Elevate your meal experience with this versatile dish, perfect when paired with Avocado Egg Salad for a hearty lunch or alongside a refreshing Jello Salad Cottage for dinner!

Green Goddess Pasta Salad Ingredients

For the Pasta
• Pasta – The base of the salad providing structure; opt for gluten-free pasta if desired.

For the Dressing
• Avocado – Adds creaminess and healthy fats; use a slightly ripe avocado to avoid browning.
• Herbs (Basil and Dill) – Provide aromatic flavor; feel free to experiment with your favorite herbs for a unique twist.
• White Wine Vinegar – Adds acidity and balance; substitute with apple cider vinegar for a different zing.
• Garlic – Enhances flavor depth; adjust the quantity to suit your taste, but 3-4 cloves are recommended.
• Nutritional Yeast – Provides umami flavor; can be omitted or swapped with miso paste or vegan parmesan for an alternative.

For the Salad Mix
• Spinach – Offers fresh greens; fresh is ideal but thawed frozen spinach works too.
• Green Onions – For garnish and a subtle onion flavor; can be replaced with shallots if preferred.

Make your Green Goddess Pasta Salad today and let this vibrant, nutrient-rich dish revitalize your dinner routine!

Step‑by‑Step Instructions for Green Goddess Pasta Salad

Step 1: Boil the Pasta
Begin by bringing a large pot of salted water to a rolling boil over high heat. Once boiling, add your choice of pasta and cook according to the package instructions, typically around 8 to 10 minutes, until al dente. Drain the pasta in a colander and set it aside to cool slightly, allowing it to retain its shape while you prepare the rest of the salad.

Step 2: Cool the Pasta
Return the drained pasta to the pot and drizzle about a tablespoon of olive oil over it to prevent sticking. Add a few ice cubes to cool it off quickly, tossing gently for even distribution. This step ensures your pasta maintains a delightful texture in the Green Goddess Pasta Salad without becoming mushy.

Step 3: Prepare the Dressing
In a blender or food processor, combine a ripe avocado, fresh herbs like basil and dill, a splash of white wine vinegar, garlic, and nutritional yeast. Blend on high until smooth, scraping down the sides as needed, which should take about 1 to 2 minutes. The dressing should be creamy and vibrant, ready to elevate your pasta salad.

Step 4: Mix the Salad
Once your pasta has cooled, transfer it to a large mixing bowl. Add fresh spinach, chickpeas, and any crunchy vegetables of your choice. Pour the creamy Green Goddess dressing over the pasta and veggies, and toss everything together gently until well combined. Each bite should be coated in that rich, herbaceous flavor.

Step 5: Garnish and Serve
Finally, slice some green onions and sprinkle them generously over the top of your Green Goddess Pasta Salad for a fresh touch. Serve immediately for the best flavor and texture, or refrigerate for about 15 minutes to allow the flavors to meld. This pasta salad can be enjoyed warm or cold, making it a versatile dish for any occasion.

What to Serve with Vegan 20 Minute Green Goddess Pasta Salad

Elevate your meal by exploring delightful pairings that enhance the flavors and bring balance to your vibrant creation.

  • Crusty Bread: Perfect for soaking up the delicious Green Goddess dressing and adds a comforting, hearty element to your meal.

  • Roasted Vegetables: A medley of seasonal veggies, such as zucchini and bell peppers, provides a sweet and savory contrast to the creamy pasta salad.

  • Chickpea Fritters: Crispy on the outside and tender inside, these offer a protein-packed addition that complements the salad’s texture beautifully.

  • Mixed Green Salad: A simple, refreshing salad with mixed greens and a light vinaigrette adds a crisp element, enhancing the overall freshness.

  • Lemonade Spritzer: A fizzy drink with the zesty kick of lemon complements the Green Goddess flavors and provides a refreshing palate cleanser.

  • Fruit Salad: Seasonal fruits like berries and melons introduce a natural sweetness, creating a perfect balance with the herbaceous notes of the salad.

  • Vegan Garlic Bread: A slice of this savory treat brings together warm flavors that harmonize wonderfully with the pasta's coolness and creaminess.

How to Store and Freeze Green Goddess Pasta Salad

Fridge: Keep your Green Goddess Pasta Salad in an airtight container for up to 3 days. To maintain freshness, press plastic wrap over the top of the salad before sealing.

Freezer: This salad is best enjoyed fresh, but if you need to freeze, store it in a freezer-safe container without the avocado dressing. It can last up to 2 months.

Reheating: When ready to enjoy after freezing, thaw overnight in the fridge, then stir in fresh dressing ingredients or a splash of olive oil to restore creaminess.

Serving Tip: If you're serving leftovers, consider topping with additional fresh herbs and green onions right before serving for a burst of flavor.

Green Goddess Pasta Salad Variations

Feel free to get creative and make this Green Goddess Pasta Salad truly your own!

  • Gluten-Free: Substitute regular pasta with gluten-free options like lentil pasta or brown rice pasta for a deliciously safe alternative.
  • Herb Twist: Experiment with fresh herbs! Swap basil and dill for cilantro or parsley to give it an entirely different flavor profile.
  • Roasted Veggies: Add some roasted veggies like bell peppers or zucchini for a delicious caramelized touch and extra texture in every bite.
  • Protein Boost: Mix in some grilled tofu or chickpeas for a heartier version that packs an extra punch of protein, making it an even more satisfying meal.
  • Nutritional Swap: If you’re not a fan of nutritional yeast, try using a sprinkle of vegan parmesan or a spoonful of tahini for that creamy umami essence.
  • Different Dressings: Switch up the dressing by mixing in a tablespoon of pesto or tahini for a unique spin that complements the greens beautifully.
  • Extra Crunch: Toss in some toasted seeds or nuts like pumpkin seeds or almonds to add an extra crunch and elevate the salad's flavor.
  • Spice it Up: For those who like a bit of heat, add a pinch of red pepper flakes or some diced jalapeños to the mix for a zesty kick!

If you love speedy meals that can be tailored to your taste, check out this Skillet Pasta Sun or invigorate your palate with Seafood Pasta Savory.

Expert Tips for Green Goddess Pasta Salad

  • Ripeness Matters: Ensure your avocado is ripe but not overly soft. A perfectly ripe avocado maintains color and texture in your Green Goddess Pasta Salad.

  • Prevent Browning: To keep leftover salad fresh, press plastic wrap directly onto the surface before sealing the container. This minimizes exposure to air and helps avoid avocado oxidation.

  • Don’t Skip Salt: Salting the pasta water enhances flavor. Adding salt elevates your dish’s overall taste, so don’t let this crucial step slip your mind!

  • Chill for Best Flavor: If you have a little time, let the salad chill in the fridge for about 15 minutes post-preparation. This allows the flavors to meld beautifully and taste even better.

  • Veggie Variety: Feel free to get creative! Substitute or add in your favorite crunchy vegetables like bell peppers or cucumbers for additional texture to the Green Goddess Pasta Salad.

Make Ahead Options

This Green Goddess Pasta Salad is a fantastic option for meal prep, saving you valuable time during your busy week! You can prepare the dressing and cook the pasta up to 24 hours in advance—just store the dressing in an airtight container to keep it fresh and vibrant. If you’re using avocado, add it just before serving to prevent browning. To maintain quality, mix the cooled pasta with your desired veggies and chickpeas just before mealtime, and pour the dressing over everything to ensure a delightful flavor burst. With these make-ahead steps, you’ll easily have a nutritious meal ready with minimal effort!

Green Goddess Pasta Salad Recipe FAQs

How do I select the right avocado for this pasta salad?
Absolutely! Choose an avocado that is slightly ripe to ensure it’s creamy yet firm enough to maintain its texture in the salad. Look for avocados that yield gently to pressure but aren’t overly soft, as this will help avoid browning and maintain that vibrant green color in your Green Goddess Pasta Salad.

How can I store leftover Green Goddess Pasta Salad?
Very! Store your Green Goddess Pasta Salad in an airtight container in the fridge for up to 3 days. To minimize browning, make sure to press plastic wrap directly onto the surface of the salad before sealing the container. This trick will help keep it fresh and delicious for your next meal.

Can I freeze Green Goddess Pasta Salad?
The more the merrier! While this pasta salad is best enjoyed fresh, you can freeze it for up to 2 months. However, make sure to omit the avocado dressing prior to freezing, as it doesn’t freeze well. Store the salad mix in a freezer-safe container, and when you’re ready to enjoy it again, thaw overnight in the fridge and stir in fresh dressing ingredients to restore creaminess.

What can I do if my pasta salad is too dry?
If you find that your Green Goddess Pasta Salad feels dry, don't worry! Simply add a splash of olive oil or a few spoonfuls of your dressing to moisten it. Toss gently to ensure that each ingredient is evenly coated, enhancing both flavor and texture.

Is this pasta salad suitable for people with nut allergies?
Absolutely! The Green Goddess Pasta Salad is nut-free, making it a great option for those with nut allergies. However, always double-check the labels on any substitute ingredients you choose, such as vegan cheeses, to ensure they don't contain nuts.

Can I make this salad ahead of time?
Yes! You can prepare the pasta salad in advance and store it in the fridge. To enhance the flavor, let it chill for about 15 minutes before serving. Just make sure to keep the dressing separate until you’re ready to enjoy, as this will help prevent the salad from becoming too soggy!

Green Goddess Pasta Salad

Green Goddess Pasta Salad Ready in Just 20 Minutes!

This Green Goddess Pasta Salad is a quick, vibrant, and customizable vegan dish that embodies the essence of summer picnics.
Print Recipe Pin Recipe
Prep Time 10 minutes mins
Cook Time 10 minutes mins
Cooling Time 5 minutes mins
Total Time 20 minutes mins
Servings: 4 servings
Course: Salads
Cuisine: American, Vegan
Calories: 300
Ingredients Equipment Method Nutrition Notes

Ingredients
  

For the Pasta
  • 8 oz Pasta Gluten-free optional
For the Dressing
  • 1 whole Avocado Slightly ripe
  • 1 cup Herbs (Basil and Dill) Fresh
  • 2 tbsp White Wine Vinegar Can substitute with apple cider vinegar
  • 3-4 cloves Garlic Adjust to taste
  • 2 tbsp Nutritional Yeast Optional; can use miso or vegan parmesan instead
For the Salad Mix
  • 4 cups Spinach Fresh or thawed frozen
  • 2 whole Green Onions For garnish

Equipment

  • Large pot
  • Colander
  • Blender
  • Mixing Bowl

Method
 

Step-by-Step Instructions
  1. Bring a large pot of salted water to a boil. Add pasta and cook according to package instructions for 8-10 minutes until al dente. Drain and set aside.
  2. Drizzle olive oil over drained pasta and add ice cubes. Toss gently to cool and prevent sticking.
  3. Blend avocado, herbs, white wine vinegar, garlic, and nutritional yeast until smooth and creamy.
  4. In a large bowl, combine cooled pasta, spinach, and any crunchy veggies. Pour the dressing over and toss gently.
  5. Slice green onions and sprinkle over the salad. Serve immediately or refrigerate for 15 minutes to meld flavors.

Nutrition

Serving: 1servingCalories: 300kcalCarbohydrates: 40gProtein: 7gFat: 14gSaturated Fat: 2gPolyunsaturated Fat: 3gMonounsaturated Fat: 8gSodium: 350mgPotassium: 600mgFiber: 8gSugar: 2gVitamin A: 3500IUVitamin C: 15mgCalcium: 50mgIron: 2mg

Notes

Perfect when paired with Avocado Egg Salad or Jello Salad Cottage for a hearty meal. Keep leftovers fresh by pressing plastic wrap on the surface before sealing the container.

Tried this recipe?

Let us know how it was!

Deviled Egg Pasta Salad That'll Brighten Your Summer Picnics

January 11, 2026 by Grace Snow Leave a Comment

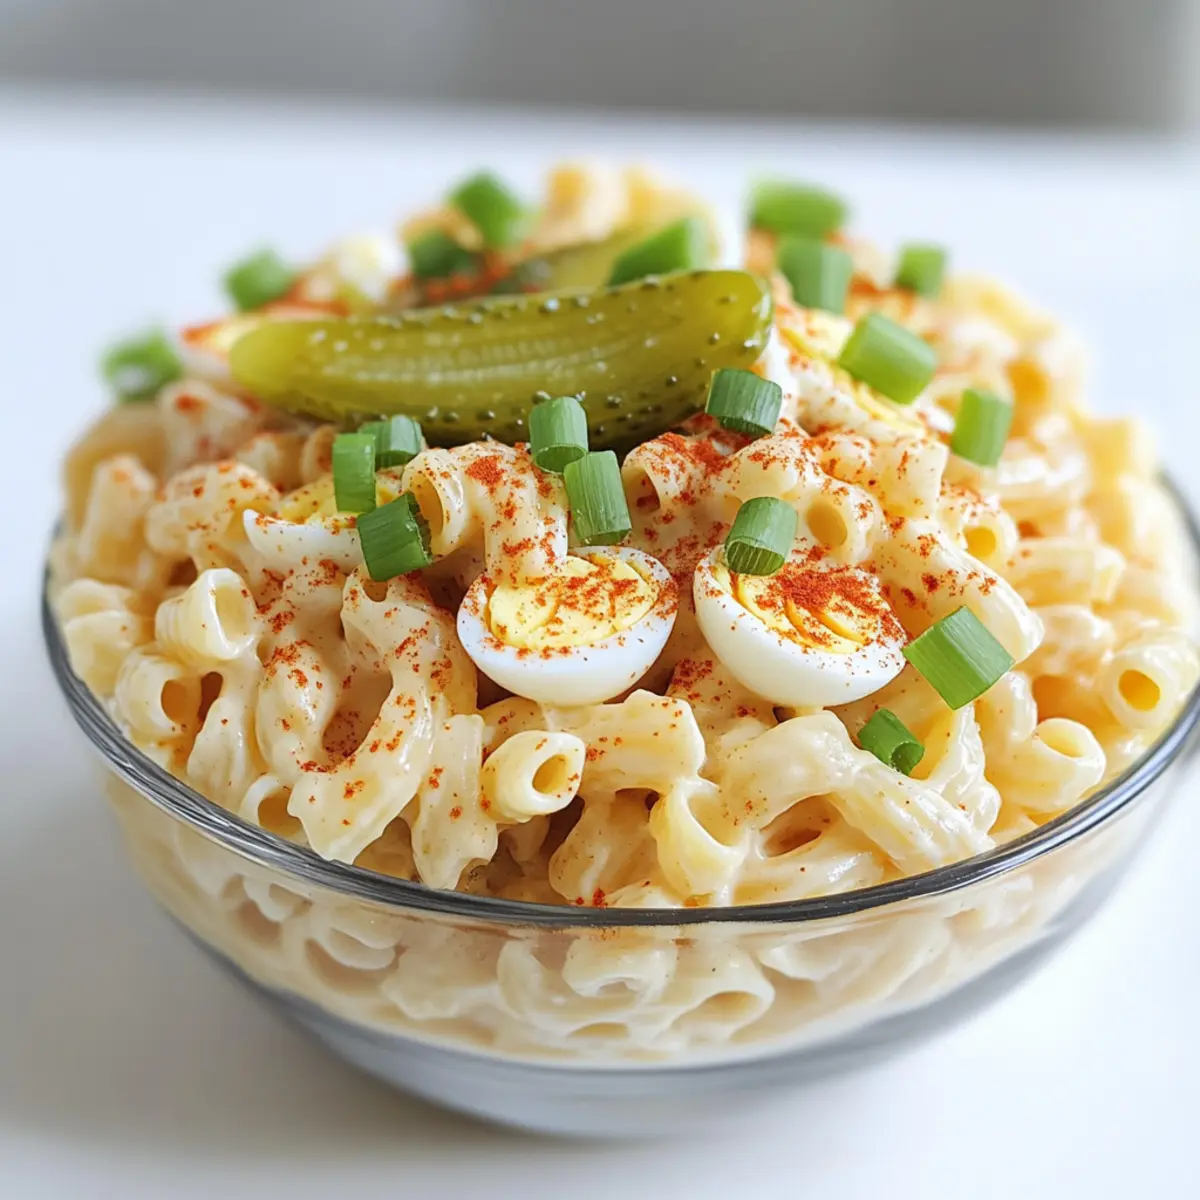
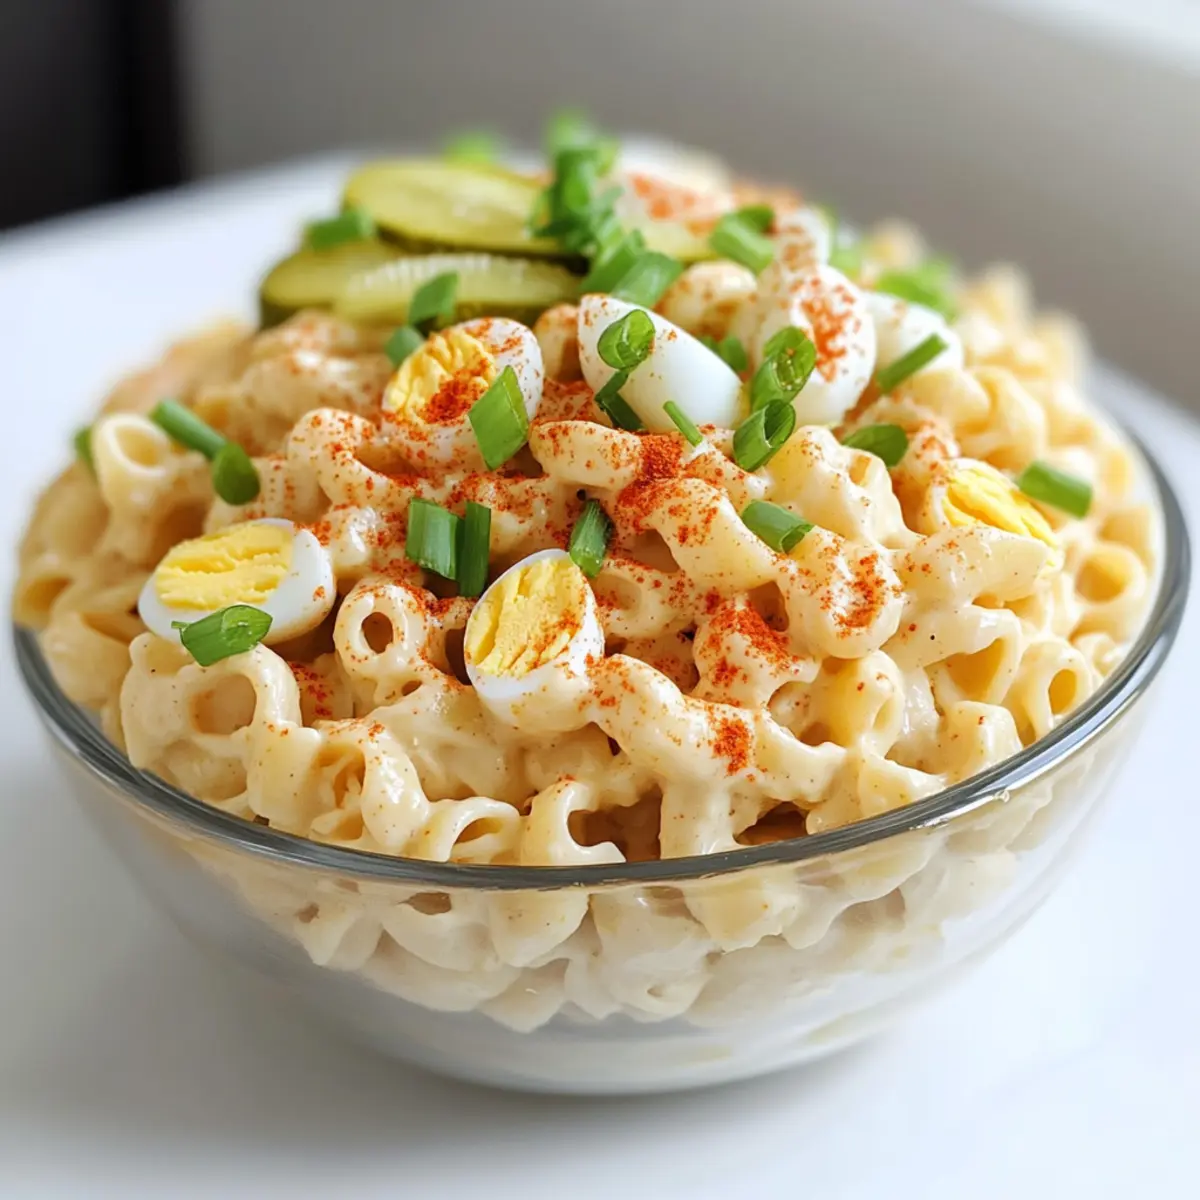
As the sun begins to shine brighter and the air becomes warmer, my culinary adventures naturally shift towards light, refreshing dishes. This is where my Creamy Deviled Egg Pasta Salad comes to the rescue! It takes the beloved flavors of traditional deviled eggs and transforms them into a delightful pasta salad, making it the perfect companion for all your spring and summer gatherings. With a quick prep that lets you spend more time enjoying the company of friends and family, this creamy pasta salad is sure to impress. Plus, the added crunch from red onions and pickles gives it an irresistible texture that will have everyone reaching for seconds. Curious to know how to whip up this crowd-pleaser? Let’s dive into the recipe!

Why is Deviled Egg Pasta Salad a Must-Try?

Creamy, the blend of mayo and tangy mustard creates a luscious dressing that brings joy in every bite. Savory goodness shines through with the combination of hard-boiled eggs and the crunch of pickles, reminding you of your favorite deviled eggs. Quick prep means you can whip this up in no time, perfect for those sunny days when you want to enjoy rather than slave away in the kitchen. Versatile too—substitute ingredients as you like or pair it with grilled meats for a complete meal! And for more delicious side dish inspiration, check out this refreshing Avocado Egg Salad. This pasta salad is sure to be a hit at your next gathering!

Deviled Egg Pasta Salad Ingredients

For the Pasta
• 8 ounces small pasta (elbows or ditalini) – Provides the perfect base for your creamy salad, ensuring each bite is satisfying.

For the Dressing
• 3/4 cup mayo – Adds a rich creaminess; substitute with Greek yogurt for a lighter twist.
• 1 tablespoon pickle juice – Enhances flavor with a tangy kick that complements the salad beautifully.
• 1 tablespoon dijon mustard – Contributes a subtle sharpness; use yellow mustard for a milder taste.

For the Salad
• 6 hard-boiled eggs (peeled and diced) – The star of the show, giving your Deviled Egg Pasta Salad its traditional flavor profile.
• 1/2 cup red onion – Adds a delightful crunch and mild heat; substitute with green onions for a lighter flavor.
• 1/3 cup chopped pickles – Provides the necessary crunch and tang; sweet or dill pickles work wonderfully.
• 1 teaspoon garlic powder – Boosts overall seasoning to elevate the flavor experience.
• 1/2 teaspoon paprika – Enhances warmth and color; sprinkle before serving for that perfect finishing touch.
• Salt and pepper – Essential for balancing all the flavors and enhancing the overall taste.
• Green onions (sliced, for serving) – Adds a fresh and vibrant garnish just before serving.

Feel free to gather these ingredients, and let’s create a delightful Deviled Egg Pasta Salad that will brighten up your summer picnics!

Step‑by‑Step Instructions for Deviled Egg Pasta Salad

Step 1: Cook the Pasta
Begin by bringing a large pot of salted water to a boil. Add the 8 ounces of small pasta—elbows or ditalini—and cook according to the package instructions until al dente, about 8–10 minutes. Once cooked, drain the pasta in a colander and rinse it under cold water until cool to the touch. This step stops the cooking process, ensuring your Deviled Egg Pasta Salad has the perfect texture.

Step 2: Prepare the Dressing
In a large mixing bowl, combine 3/4 cup mayo, 1 tablespoon pickle juice, and 1 tablespoon dijon mustard. Whisk these ingredients together until smooth and creamy. The dressing should be well-blended and luscious, setting the stage for the rich flavors of your deviled egg-inspired salad. Taste and adjust with salt and pepper as needed, creating a base that harmonizes all new ingredients to come.

Step 3: Assemble the Salad
To the bowl with your prepared dressing, add the cooled pasta, 6 diced hard-boiled eggs, 1/2 cup finely chopped red onion, and 1/3 cup chopped pickles. Sprinkle in 1 teaspoon garlic powder and 1/2 teaspoon paprika for that essential flavor. Gently toss everything together, ensuring the pasta and eggs are evenly coated with the flavorful dressing. The mixture should be colorful and inviting, reflecting the deliciousness that awaits.

Step 4: Chill the Salad
Cover the bowl with plastic wrap or transfer the salad to an airtight container. Place it in the refrigerator to chill for at least 30 minutes. This resting period allows the flavors of your Deviled Egg Pasta Salad to meld beautifully, enhancing the overall taste. Take this time to relax while you anticipate the delightful dish you’ll soon enjoy!

Step 5: Finish & Serve
Just before serving, remove the Deviled Egg Pasta Salad from the refrigerator. Give it a gentle stir and taste again, adjusting any seasonings if necessary. To elevate the dish visually, sprinkle with additional paprika and garnish with sliced green onions. Serve chilled at your spring or summer gatherings, inviting friends and family to savor the creamy, savory delight of this pasta salad.

Deviled Egg Pasta Salad Variations

Feel free to customize this dish to match your flavor preferences and dietary needs!

  • Whole Wheat: Substitute elbow pasta with whole wheat for a heartier option, adding a nutty flavor to your salad.
  • Gluten-Free: Use gluten-free pasta to make this dish accessible to everyone at your summer gatherings, ensuring all can delight in this creamy goodness.
  • Extra Crunch: Add diced celery or bell peppers for a refreshing crunch, boosting the salad's appeal and adding vibrant color.
  • Bacon Crush: Incorporate crumbled bacon for an irresistible smoky twist that pairs beautifully with the creamy dressing.
  • Herbaceous Flavors: Mix in fresh dill or parsley to infuse a delightful herb flavor into the salad and elevate each bite with freshness.
  • Spicy Kick: Add jalapeños or a dash of cayenne pepper to introduce some heat, making your pasta salad a vibrant choice for those who love a little spice.
  • Fruitiness: Toss in chopped apples or grapes for a sweet surprise that balances the savory elements of the dish, creating a unique flavor profile.
  • Creamy Avocado: Blend in diced avocado for an even greener, creamier texture that adds a rich, buttery flavor to your salad.

These variations make it easy to tailor the dish to your gathering's needs. And if you’re looking for more delightful salads, consider trying this refreshing Tofu Caesar Salad, or how about combining flavors with this delicious Jello Salad Cottage? Enjoy being the culinary star of your summer picnics!

Storage Tips for Deviled Egg Pasta Salad

  • Fridge: Store your Deviled Egg Pasta Salad in an airtight container for up to 3-4 days. This helps maintain its creamy texture and fresh flavors.

  • Serving: When ready to serve, give the salad a good stir and adjust any seasonings if necessary. The flavors will meld beautifully after chilling, making it even tastier!

  • Avoid Freezing: Do not freeze the pasta salad, as the ingredients won’t retain their texture once thawed, compromising the delightful experience.

  • Make-Ahead: Prepare the salad a day in advance for optimal convenience; just ensure it’s well-covered in the fridge to keep it fresh!

Make Ahead Options

These Deviled Egg Pasta Salad are perfect for meal prep, allowing you to focus more on enjoying your time with family and friends. You can prepare the salad up to 3 days in advance, making it an ideal side for spontaneous gatherings. Simply cook the pasta and mix all ingredients, but avoid adding garnishes like green onions or paprika until you’re ready to serve, ensuring they retain their fresh flavor and vibrant appearance. Store the salad in an airtight container in the refrigerator to keep it just as delicious until serving. When it’s time to enjoy, give it a gentle stir, garnish, and you’ll be ready to impress without the last-minute rush!

Expert Tips for Deviled Egg Pasta Salad

  • Cooling the Pasta: Rinse the cooked pasta under cold water immediately after draining. This stops the cooking process and prevents a mushy texture in your Deviled Egg Pasta Salad.

  • Adjusting Creaminess: Feel free to modify the mayo amount based on your taste preferences! A touch more mayo will yield an even creamier dressing, enhancing the flavor of the salad.

  • Serving Freshness: It’s best to serve the pasta salad chilled, so prepare it ahead of time! Just don’t forget to give it a quick stir and taste just before serving to adjust the seasoning.

  • Ingredient Substitutions: If you’re looking for more crunch, consider adding diced celery or bell peppers. These add freshness, elevating the overall appeal of your Deviled Egg Pasta Salad.

  • Avoid Freezing: Remember that freezing is a no-go! The salad's texture won’t hold up well, so enjoy fresh for the best experience.

What to Serve with Deviled Egg Pasta Salad

As the sun shines and gatherings abound, pairing this delightful pasta salad elevates your meal to new heights.

  • Grilled Chicken: Juicy, herb-marinated chicken adds a satisfying heartiness that complements the creamy pasta salad perfectly.
  • Broccoli Salad: A fresh, crunchy broccoli salad with a tangy dressing offers a vibrant contrast and brings a zesty flair to your table.
  • Corn on the Cob: Sweet and tender corn on the cob, slathered in butter, adds a delightful summer feel that harmonizes beautifully.
  • Fruit Salad: A refreshing fruit salad brings bright, natural sweetness to the mix, balancing the rich flavors of the pasta salad wonderfully.
  • Crisp Lettuce Wraps: Light and refreshing, lettuce wraps filled with grilled shrimp or tofu provide a fun, crunchy element to your spread.
  • Lemonade or Iced Tea: Quench your thirst with homemade lemonade or iced tea; their citrusy tang and refreshing nature perfectly complement the creamy dish.
  • Chocolate Chip Cookies: End the meal on a sweet note with classic chocolate chip cookies; their warm, gooey texture is always a crowd-pleaser.
  • Potato Chips: Serve alongside a bowl of salty potato chips for that extra crunch and playful contrast to the creamy salad.
  • Caprese Skewers: Fresh mozzarella, basil, and cherry tomatoes on skewers deliver a burst of color, showcasing seasonal ingredients beautifully.

Deviled Egg Pasta Salad Recipe FAQs

What type of pasta is best for Deviled Egg Pasta Salad?
When it comes to pasta for this dish, I recommend small pasta shapes like elbows or ditalini. They catch the creamy dressing perfectly and allow for satisfying bites. You can also try whole wheat or gluten-free pasta for a different twist!

How should I store leftover Deviled Egg Pasta Salad?
Absolutely! Store your Deviled Egg Pasta Salad in an airtight container in the refrigerator for up to 3-4 days. This will help maintain its creamy texture and fresh flavors, ensuring you can enjoy it later. Just give it a stir and maybe adjust seasonings before serving again!

Can I freeze Deviled Egg Pasta Salad?
I advise against freezing this salad. The ingredients, especially the mayonnaise and eggs, won’t hold up well once thawed, leading to a less appetizing texture. Enjoy it fresh for the best taste and quality!

How can I tell if my hard-boiled eggs are fresh?
Freshness is crucial! To check if your eggs are fresh, fill a bowl with water and gently place the eggs inside. If they sink and lay flat on the bottom, they’re fresh. If they stand upright or float, it’s best to discard them. Always use the freshest eggs for your Deviled Egg Pasta Salad to achieve the best flavor.

Can I make the Deviled Egg Pasta Salad ahead of time?
Definitely! You can prepare the salad a day in advance; just store it in an airtight container in the fridge. The flavors will meld beautifully, making it even more delicious the next day. Just remember to stir it well and give it a quick taste to see if any seasonings need adjusting before serving!

Deviled Egg Pasta Salad

Deviled Egg Pasta Salad That'll Brighten Your Summer Picnics

A refreshing Deviled Egg Pasta Salad that combines the flavors of traditional deviled eggs, perfect for summer picnics.
Print Recipe Pin Recipe
Prep Time 15 minutes mins
Cook Time 10 minutes mins
Chill Time 30 minutes mins
Total Time 55 minutes mins
Servings: 6 servings
Course: Salads
Cuisine: American
Calories: 300
Ingredients Equipment Method Nutrition Notes

Ingredients
  

For the Pasta
  • 8 ounces small pasta (elbows or ditalini) Provides the perfect base for the creamy salad.
For the Dressing
  • 3/4 cup mayo Adds a rich creaminess.
  • 1 tablespoon pickle juice Enhances flavor with a tangy kick.
  • 1 tablespoon dijon mustard Contributes a subtle sharpness.
For the Salad
  • 6 pieces hard-boiled eggs (peeled and diced) The star ingredient.
  • 1/2 cup red onion Adds a delightful crunch.
  • 1/3 cup chopped pickles Provides necessary crunch and tang.
  • 1 teaspoon garlic powder Boosts overall seasoning.
  • 1/2 teaspoon paprika Enhances warmth and color.
  • Salt Essential for flavor.
  • Pepper Essential for flavor.
  • Green onions (sliced, for serving) Adds fresh garnish before serving.

Equipment

  • Large pot
  • Mixing Bowl
  • Colander

Method
 

Step-by-Step Instructions
  1. Cook the pasta in a large pot of salted boiling water for 8-10 minutes until al dente, then drain and rinse under cold water.
  2. Prepare the dressing by whisking together mayo, pickle juice, and dijon mustard until smooth and creamy.
  3. Assemble the salad by adding the cooled pasta, diced eggs, red onion, chopped pickles, garlic powder, and paprika to the dressing. Toss gently.
  4. Chill the salad in the refrigerator for at least 30 minutes.
  5. Finish and serve the salad by stirring, adjusting seasonings, garnishing with paprika and green onions, then serving chilled.

Nutrition

Serving: 1servingCalories: 300kcalCarbohydrates: 28gProtein: 10gFat: 18gSaturated Fat: 3gPolyunsaturated Fat: 0.5gMonounsaturated Fat: 5gCholesterol: 200mgSodium: 500mgPotassium: 300mgFiber: 2gSugar: 2gVitamin A: 500IUVitamin C: 2mgCalcium: 30mgIron: 1mg

Notes

Adjust mayo and seasoning to your preference. The salad tastes best when chilled for at least 30 minutes before serving.

Tried this recipe?

Let us know how it was!

Refreshing Strawberry Cucumber Salad: A Summer Delight

January 7, 2026 by Grace Snow Leave a Comment

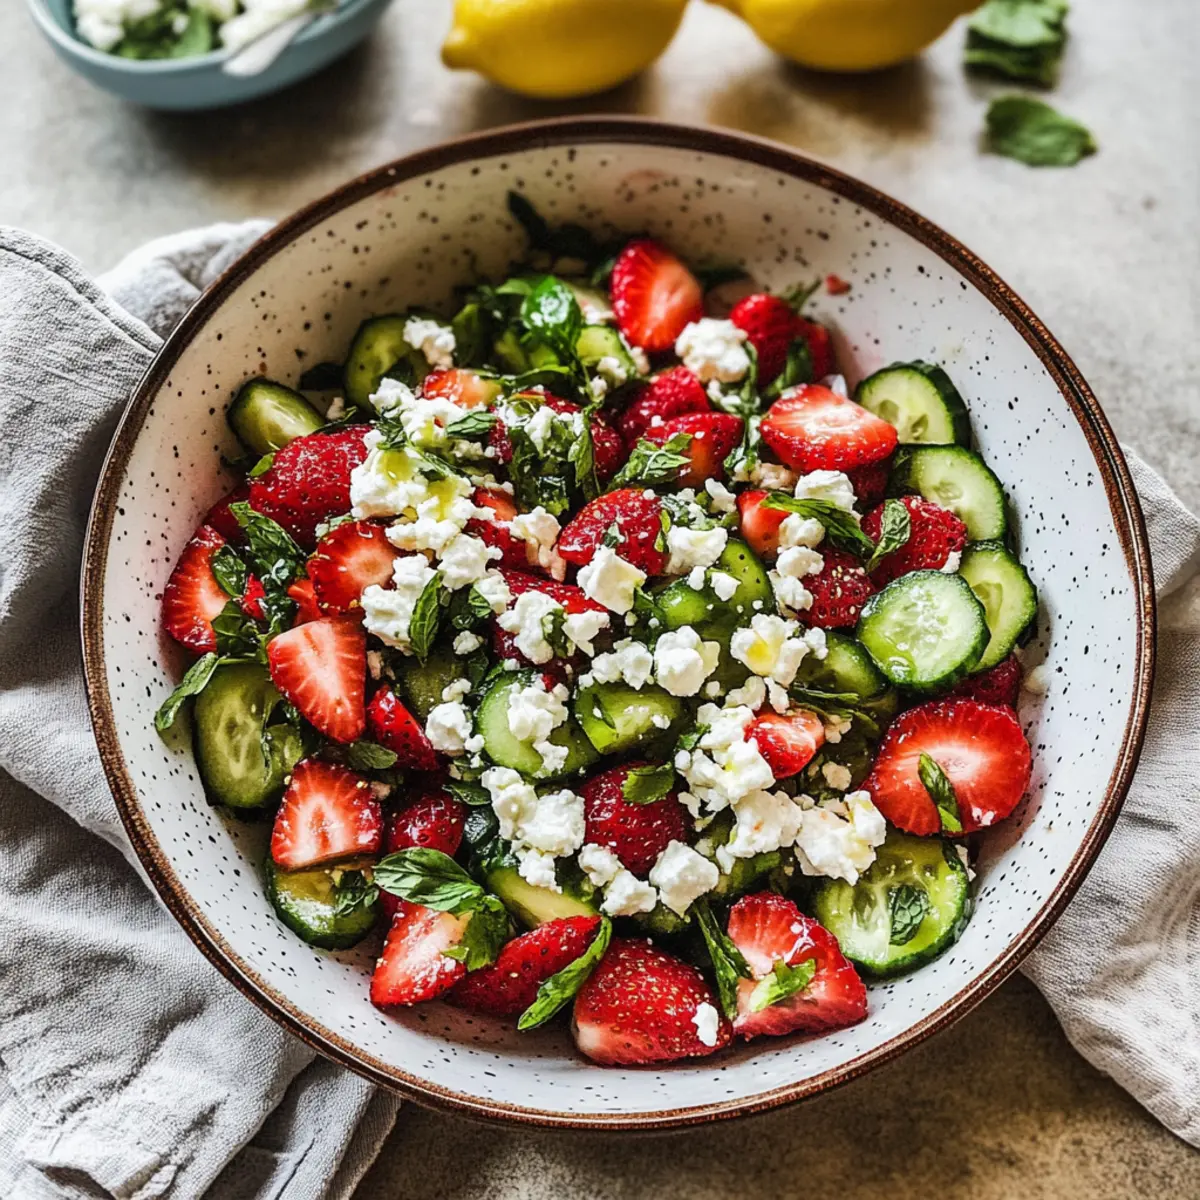
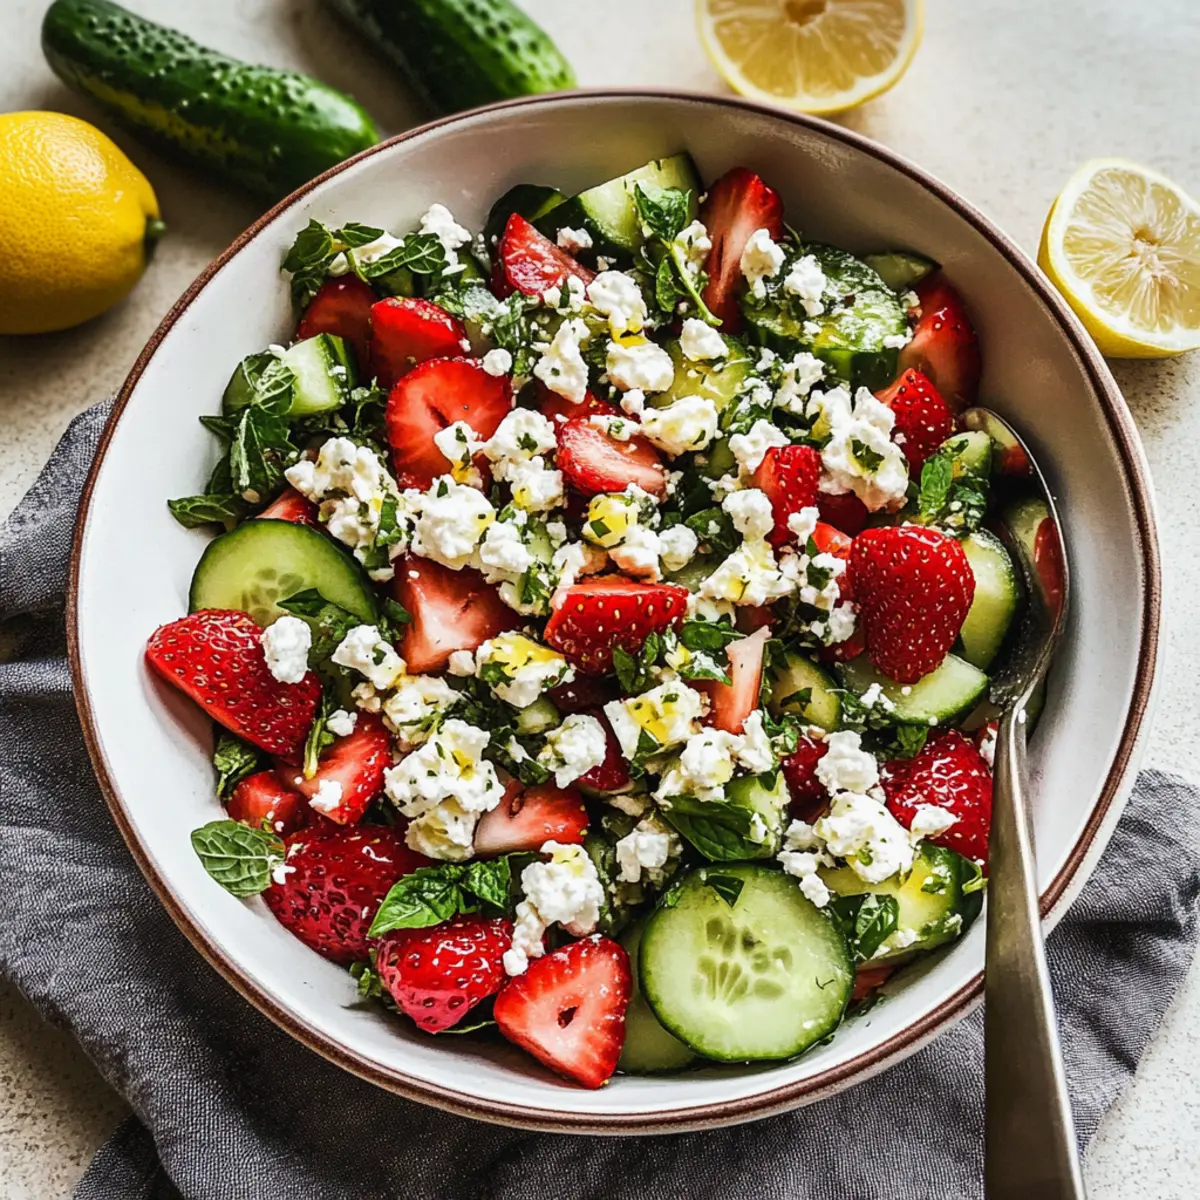
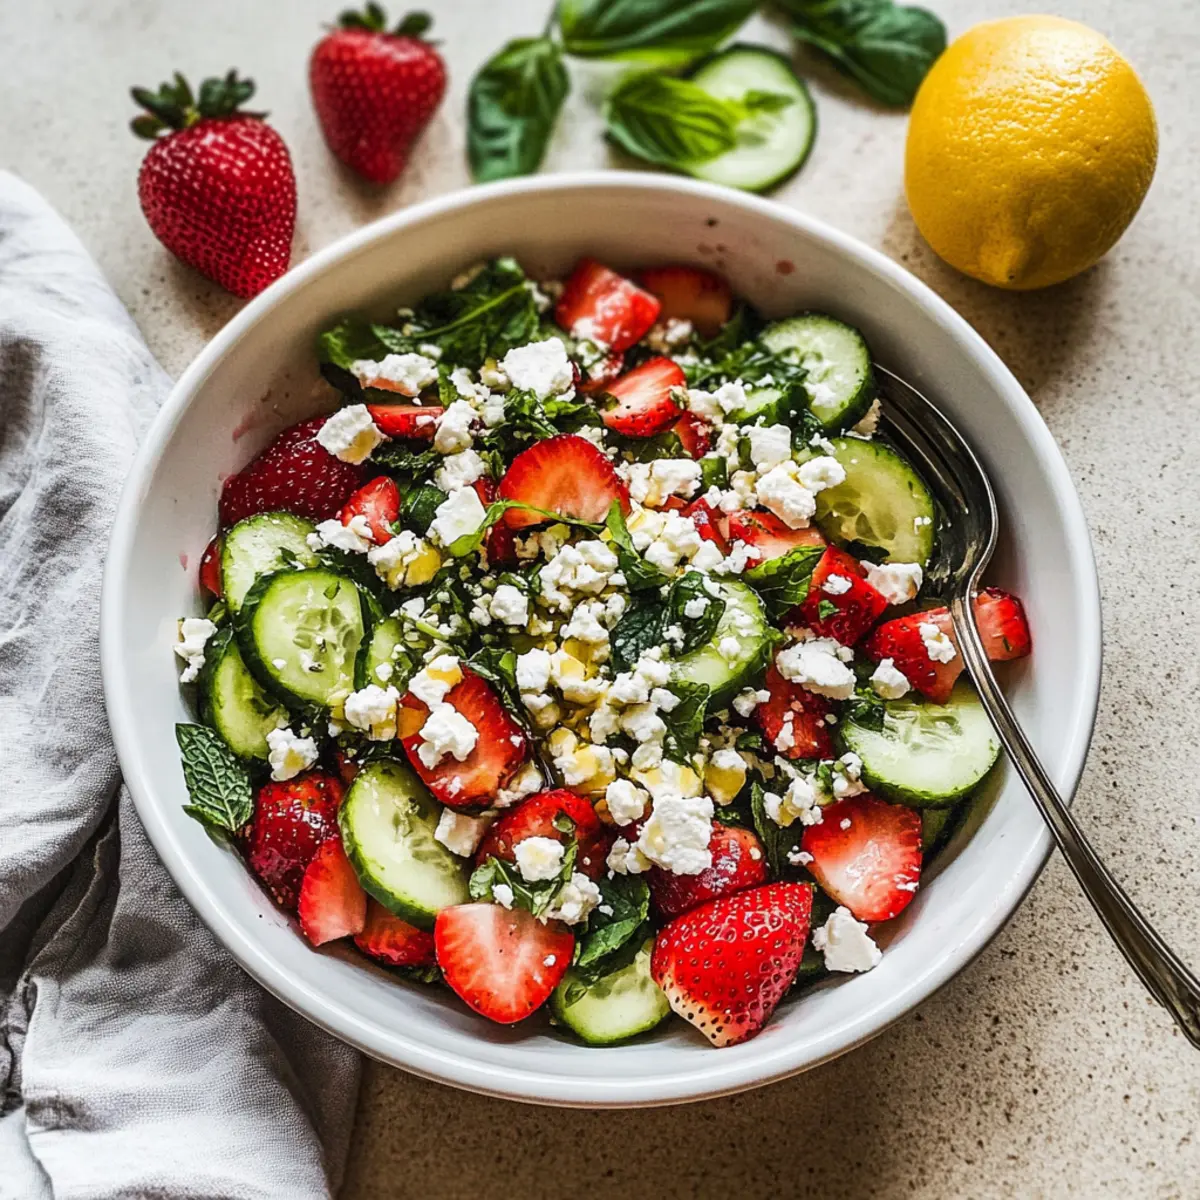
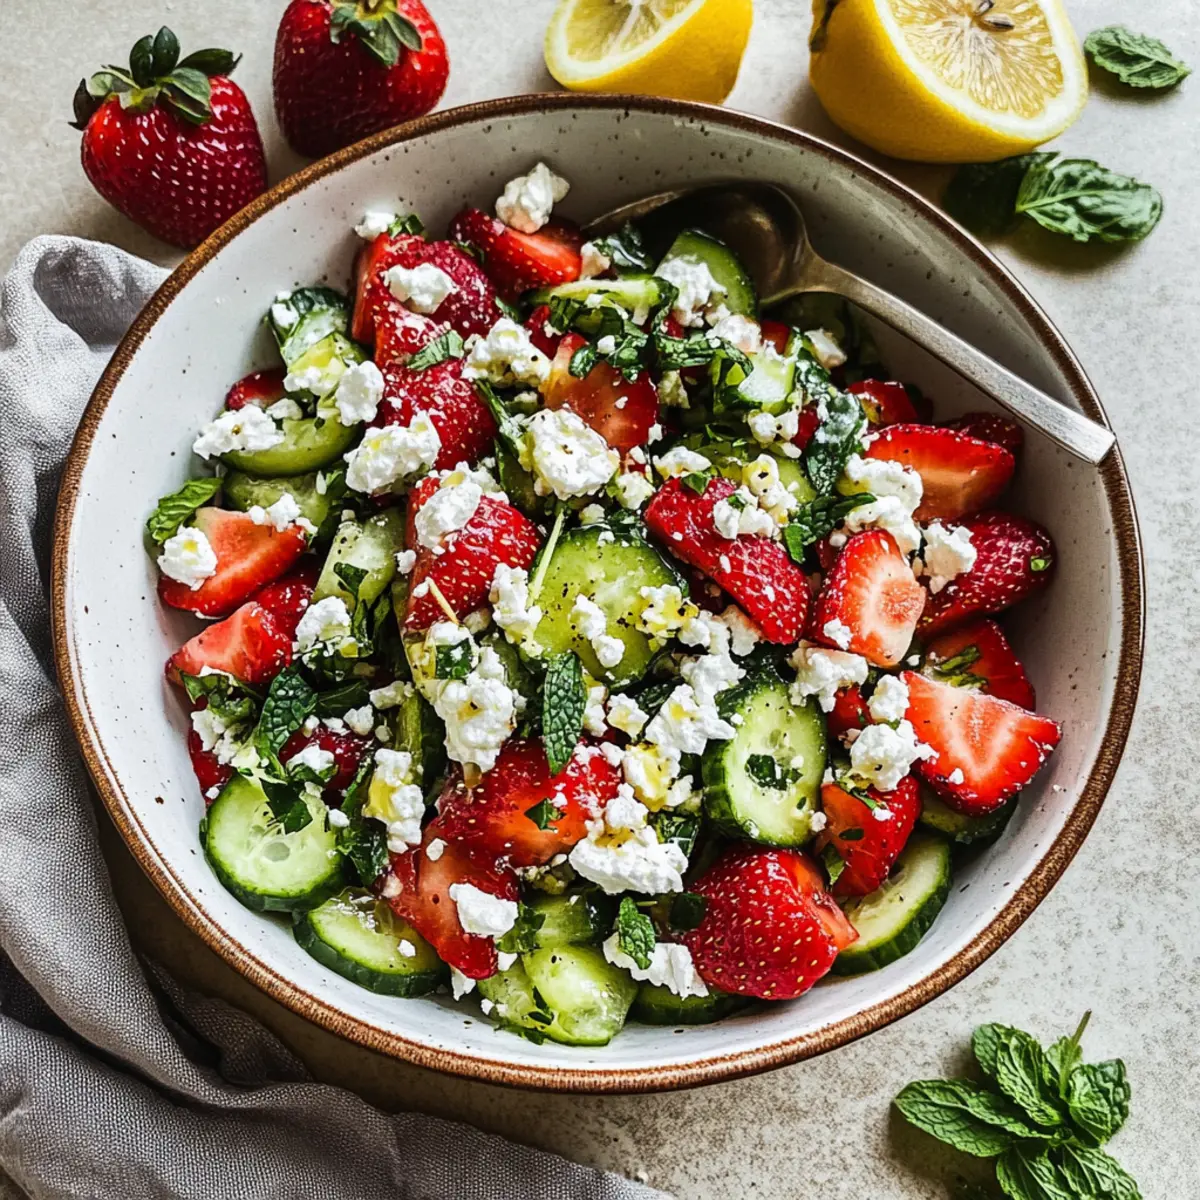
As I stood in my kitchen, the warm sun streaming through the window, I couldn’t help but marvel at the vibrant colors of the fresh produce on my counter. This is the perfect moment to whip up a quick and easy Strawberry Cucumber Salad, a dish that brilliantly captures the essence of summer in every bite. With just 20 minutes to spare, you can create this refreshing side that strikes a delightful balance between the sweetness of ripe strawberries and the crunch of crisp cucumbers. It’s not just a treat for the senses; it’s also gluten-free and vegetarian, making it a versatile choice for any meal. Picture it paired alongside grilled meats or enjoyed as a light lunch all on its own. Ready to dive in and elevate your summer dining experience? Let’s get started!

Why is This Salad So Refreshing?

Quick and Easy: In just 20 minutes, you’ll have a vibrant salad ready to impress your guests.

Flavor Explosion: The sweet strawberries combined with crunchy cucumbers and herby mint bring a delightful balance that will awaken your taste buds.

Versatile Pairing: This salad is perfect alongside grilled chicken or shrimps, or even as a standalone lunch like our Avocado Egg Salad.

Health Benefits: Gluten-free and packed with Vitamin C, it’s a guilt-free indulgence that actually boosts your health!

Make Ahead Option: Prepare ingredients in advance for a fast assembly, making it a convenient choice for busy days.

Elevate your summer meals with this salad—it's a guaranteed crowd-pleaser!

Strawberry Cucumber Salad Ingredients

• Fresh, colorful ingredients create a deliciously vibrant dish.

For the Salad

  • Chopped Strawberries – Choose ripe berries for natural sweetness and vibrant color.
  • Chopped Cucumbers – Opt for Persian or mini cucumbers for a crispy texture.
  • Crumbled Feta Cheese – Use high-quality sheep's feta for a creamy, tangy kick.
  • Fresh Basil – Aromatic herbs bring an earthy note; slice them to release their flavor.
  • Fresh Mint – A refreshing element; tear the leaves just before serving.
  • Salt + Pepper – Essential for enhancing and balancing the flavors.

For the Dressing

  • Olive Oil – Rich base for the dressing, adding smoothness and depth.
  • Lemon Juice – Brightens the salad with a zesty acidity that complements the sweetness.
  • Honey – Incorporate a touch of sweetness; substitute with maple syrup for a vegan option.
  • White Wine Vinegar – Provides a tangy punch; apple cider vinegar works as a substitute.
  • Garlic Powder – Infuses depth into the dressing for a more complex flavor profile.

Incorporate these ingredients for a delightful Strawberry Cucumber Salad that is both refreshing and satisfying!

Step‑by‑Step Instructions for Strawberry Cucumber Salad

Step 1: Prepare the Dressing
In a small bowl or jar, combine ¼ cup of olive oil, the juice of one lemon, 2 tablespoons of honey, 1 tablespoon of white wine vinegar, and ½ teaspoon of garlic powder. Season with a pinch of salt and pepper. Whisk vigorously or seal the jar and shake until well combined, about 30 seconds. The dressing should have a smooth and creamy texture, ready to enhance your Strawberry Cucumber Salad.

Step 2: Chop the Ingredients
In the meantime, take 2 cups of chopped strawberries and 2 cups of chopped cucumbers and place them in a large mixing bowl. Use ripe strawberries for maximum sweetness and opt for Persian cucumbers for their delightful crunch. Ensure that the strawberries are roughly the same size as the cucumber pieces for an even distribution of flavors in your refreshing salad.

Step 3: Incorporate the Herbs and Cheese
Next, gently fold in ½ cup of crumbled feta cheese, ¼ cup of freshly chopped basil, and ¼ cup of freshly torn mint leaves into the bowl with strawberries and cucumbers. Use a spatula to incorporate these ingredients with care, preserving the integrity of the soft strawberries and feta while evenly distributing their fragrant and flavorful essence throughout your Strawberry Cucumber Salad.

Step 4: Combine the Salad and Dressing
Now it’s time to bring it all together! Drizzle the prepared dressing over the salad mixture and toss everything gently, ensuring each piece is coated without breaking the ingredients apart. This should take about a minute to achieve a beautiful blend of colors and flavors in your Strawberry Cucumber Salad. The vivid hues of the salad will make it truly tempting!

Step 5: Taste and Adjust Seasonings
Before serving, taste the salad and adjust the seasonings as needed. Add more salt, pepper, or a drizzle of honey to enhance the flavor profile. Allow the salad to sit for about 5 minutes to allow the flavors to marry together, making the Strawberry Cucumber Salad even more delicious.

Step 6: Serve Immediately
Transfer your vibrant Strawberry Cucumber Salad to a serving dish and enjoy it immediately. This delightful salad pairs beautifully with grilled meats or stands alone as a light, refreshing lunch. For the best flavor and texture, it's best to serve it fresh, ensuring that the crispy cucumbers and juicy strawberries shine through.

Strawberry Cucumber Salad Variations

Feel free to adapt this salad recipe to suit your taste buds and dietary needs—let your creativity shine!

  • Vegan Option: Substitute feta with a plant-based alternative for a creamy texture that fits your vegan lifestyle. Enjoy the same delightful flavors with a fresh twist!
  • Sweetness Swap: Replace honey in the dressing with maple syrup for a vegan-friendly alternative. It adds a unique depth of flavor while keeping that delightful sweetness.
  • Herb Variations: Switch up the herbs by using fresh cilantro or dill for an exciting flavor twist. Each herb brings its own character, inspiring a whole new salad experience!
  • Nutty Crunch: Add toasted pecans or almonds on top for an earthy crunch that enhances the texture and provides a satisfying contrast to the soft strawberries.
  • Zesty Kick: Incorporate diced jalapeño for a mild kick of heat. It balances the sweetness beautifully and adds a refreshing surprise to every bite!
  • Fruit Medley: Mix in diced kiwi or mango for an unexpectedly fruity twist. The diverse flavors will create a delicious fusion that's sure to impress!
  • Spicy Feta: Opt for a spicy feta cheese to lend an exciting edge to your dressing. The creaminess paired with a hint of heat will elevate your salad to new levels!
  • Serving Style: Turn this salad into a wrap by using large lettuce leaves as a base. It’s perfect for a fresh, portable meal, ideal for picnics or packed lunches!

Explore these variations and enjoy your Strawberry Cucumber Salad in a whole new light. If you're looking for more delicious dishes to complement your summer meals, check out our refreshing German Potato Salad or try the vibrant Balsamic Steak Salad for a delightful main course!

Storage Tips for Strawberry Cucumber Salad

  • Fridge: Store leftover Strawberry Cucumber Salad in an airtight container in the fridge for up to 1 day. It’s best enjoyed fresh, as the cucumbers may become soggy over time.

  • Dressing Separation: If you prepare the salad in advance, keep the dressing separate until ready to serve. This prevents sogginess and preserves the crunchy texture of the cucumbers.

  • Room Temperature: The salad may sit at room temperature for up to 2 hours during serving; after that, it’s best to refrigerate any leftovers to ensure freshness.

  • Reheating: There’s no need to reheat this salad as it’s served cold. Prioritize enjoying it fresh for the most delightful experience!

Expert Tips for Strawberry Cucumber Salad

  • Quality Ingredients: Use ripe, in-season strawberries for the sweetest flavor. Fresh produce elevates your Strawberry Cucumber Salad to something extraordinary.

  • Crunchy Texture: Opt for Persian or mini cucumbers, which provide the perfect crispiness. Avoid larger cucumbers, as they can be watery and less flavorful.

  • Mind the Herbs: Add chopped basil and mint just before serving to maintain their vibrant color and fresh taste. Adding them too early can lead to browning.

  • Dressing Separation: If you're prepping ahead, store the dressing separately from the salad. This keeps the cucumbers from getting soggy and maintains a fresh crunch.

  • Feel Free to Experiment: Don't hesitate to try different cheeses or herbs! Vegan alternatives can spark creativity, allowing you to make a truly customized Strawberry Cucumber Salad.

Make Ahead Options

These Strawberry Cucumber Salad components are perfect for meal prep, allowing you to save precious time on busy weeknights! You can chop the strawberries and cucumbers up to 24 hours in advance and store them separately in airtight containers to maintain their freshness and crunch. Additionally, prepare the honey lemon dressing a day ahead, refrigerating it until you're ready to serve to prevent the fruits from becoming soggy. When it's time to enjoy your refreshing Strawberry Cucumber Salad, simply combine the prepped ingredients, sprinkle in the crumbled feta and fresh herbs, toss with the dressing, and savor the vibrant flavors—all without the last-minute rush!

What to Serve with Strawberry Cucumber Salad

This vibrant salad is a delightful accompaniment that can elevate any meal, providing fresh and colorful flavors.

  • Grilled Chicken: Juicy grilled chicken offers a hearty contrast to the lightness of the salad, making for a balanced summer meal.
  • Shrimp Skewers: The slight sweetness of grilled shrimp complements the strawberries, while the savory notes add depth to the overall dining experience.
  • Quinoa Salad: A protein-packed quinoa salad mixed with fresh veggies can create a satisfying vegetarian option, pairing beautifully with the refreshing tastes of the cucumber salad.
  • Lemon Herb Rice: Light and zesty, this rice dish mirrors the salad's freshness, enhancing the meal with a touch of brightness.
  • Creamy Potato Salad: The rich creamy texture of traditional potato salad provides a lovely contrast to the crisp elements of the strawberry cucumber salad.
  • Rosemary Grilled Pork: The aromatic qualities of rosemary-infused pork harmonize perfectly with the vibrant flavors of the salad, creating a memorable dish.
  • Iced Green Tea: Serve with a refreshing glass of iced green tea to cleanse the palate and offer a refreshing finish to your meal.
  • Frozen Yogurt: A scoop of tangy frozen yogurt makes for a delightful dessert that mirrors the sweetness of the strawberries, leaving a light ending to your dining experience.

Strawberry Cucumber Salad Recipe FAQs

What should I look for when selecting strawberries?
When choosing strawberries, look for berries that are bright red all around, firm to the touch, and free from dark spots or mold. Ripe strawberries should have a sweet fragrance and should be slightly soft but not mushy. Ideally, buy them in season for the best flavor!

How should I store leftover Strawberry Cucumber Salad?
Store any leftover Strawberry Cucumber Salad in an airtight container in the fridge for up to 1 day. It's best enjoyed fresh, as the cucumbers may become soggy over time. To extend freshness, keep the dressing separate until you're ready to serve.

Can I freeze the Strawberry Cucumber Salad?
Freezing is not recommended for this salad due to the high water content of cucumbers and strawberries, which may turn mushy once thawed. Instead, enjoy it fresh! If you have excess herbs, consider freezing them in ice cube trays mixed with a little olive oil for later use.

What dietary considerations should I keep in mind?
This Strawberry Cucumber Salad is gluten-free and vegetarian, making it suitable for many diets. If you're aiming for a vegan option, simply replace the honey with maple syrup. Also, if you have allergies or dietary restrictions, please ensure that the feta cheese is safe for your needs or substitute it with a dairy-free alternative.

How can I prevent my cucumbers from becoming soggy?
To keep cucumbers crisp, store them in a separate container, uncut, until just before you're ready to serve. You can also peel them for a less watery texture, or sprinkle salt over cut cucumbers and let them drain for about 30 minutes before mixing them into the salad. This draws out excess moisture!

Strawberry Cucumber Salad

Refreshing Strawberry Cucumber Salad: A Summer Delight

A vibrant Strawberry Cucumber Salad that captures summer's essence, perfect as a light side or stand-alone lunch. Gluten-free and vegetarian.
Print Recipe Pin Recipe
Prep Time 20 minutes mins
Total Time 20 minutes mins
Servings: 4 servings
Course: Salads
Cuisine: American
Calories: 150
Ingredients Equipment Method Nutrition Notes

Ingredients
  

For the Salad
  • 2 cups chopped strawberries Use ripe berries for natural sweetness.
  • 2 cups chopped cucumbers Opt for Persian or mini cucumbers.
  • ½ cup crumbled feta cheese Use high-quality sheep's feta.
  • ¼ cup fresh basil Chopped.
  • ¼ cup fresh mint Torn leaves.
  • to taste salt
  • to taste pepper
For the Dressing
  • ¼ cup olive oil Rich base for the dressing.
  • 1 each lemon Juiced.
  • 2 tablespoons honey Substitute with maple syrup for vegan option.
  • 1 tablespoon white wine vinegar Apple cider vinegar may be used.
  • ½ teaspoon garlic powder

Equipment

  • Mixing Bowl
  • small bowl or jar
  • Whisk
  • Spatula

Method
 

Step-by-Step Instructions
  1. In a small bowl or jar, combine the dressing ingredients: olive oil, lemon juice, honey, white wine vinegar, and garlic powder. Whisk until well combined.
  2. In a large mixing bowl, add the chopped strawberries and cucumbers.
  3. Gently fold in the crumbled feta cheese, chopped basil, and torn mint leaves.
  4. Drizzle the prepared dressing over the salad mixture and toss gently to coat.
  5. Taste the salad and adjust the seasonings if needed. Allow it to sit for 5 minutes before serving.
  6. Transfer to a serving dish and enjoy immediately.

Nutrition

Serving: 1cupCalories: 150kcalCarbohydrates: 12gProtein: 3gFat: 10gSaturated Fat: 2gPolyunsaturated Fat: 1gMonounsaturated Fat: 7gCholesterol: 5mgSodium: 200mgPotassium: 250mgFiber: 2gSugar: 5gVitamin A: 100IUVitamin C: 30mgCalcium: 150mgIron: 1mg

Notes

For the best flavor, serve fresh. Store leftovers in an airtight container for up to 1 day.

Tried this recipe?

Let us know how it was!

Crunchy Green Cabbage Cucumber Salad for a Refreshing Meal

January 7, 2026 by Grace Snow Leave a Comment

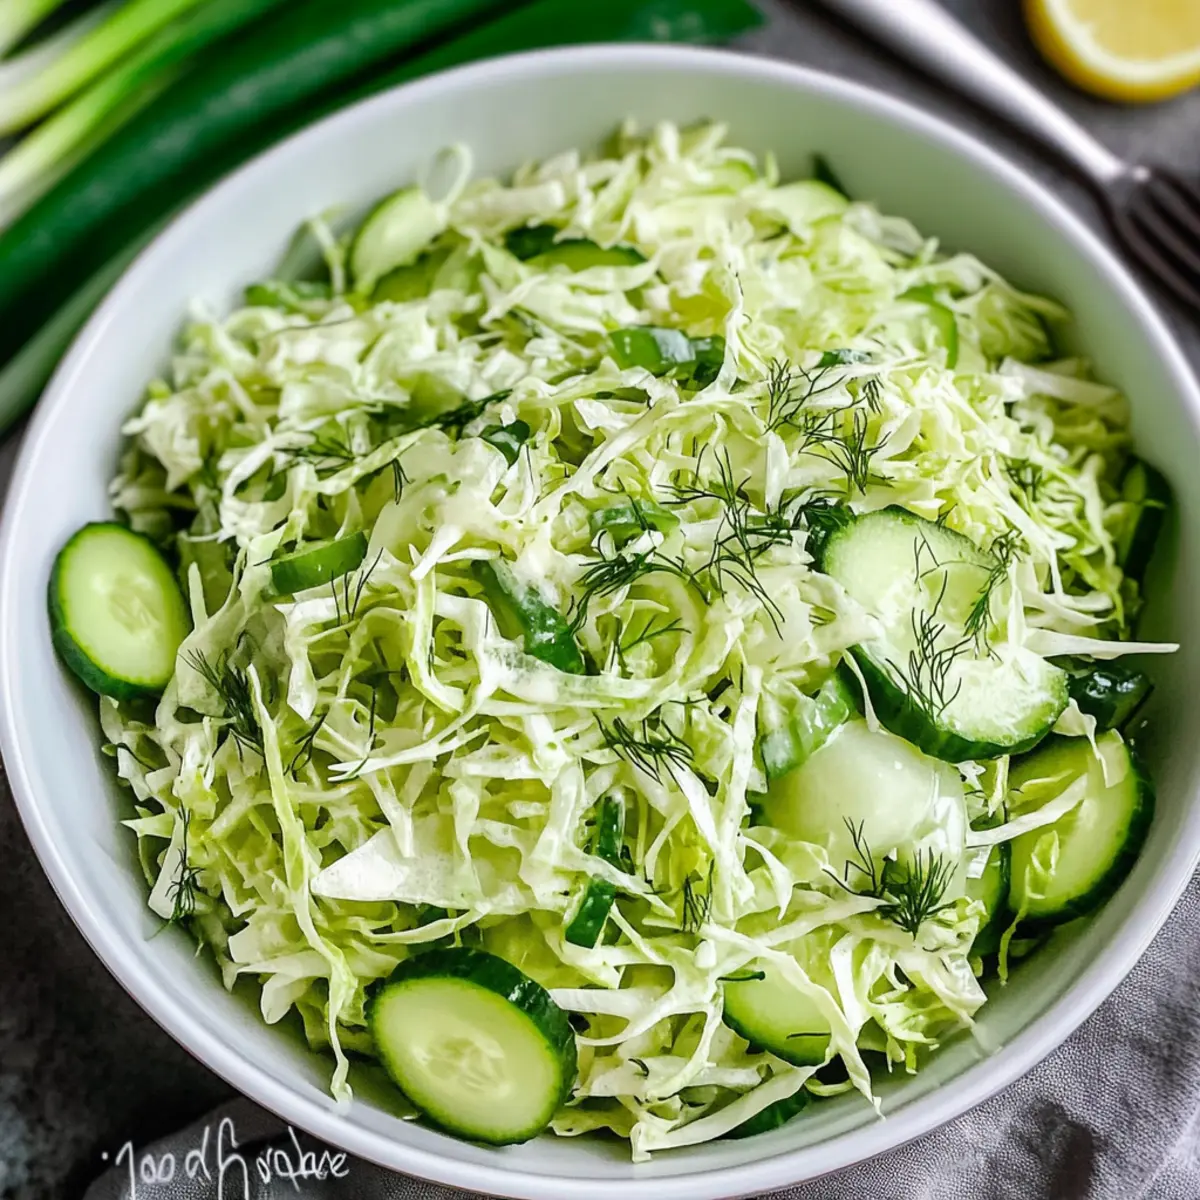
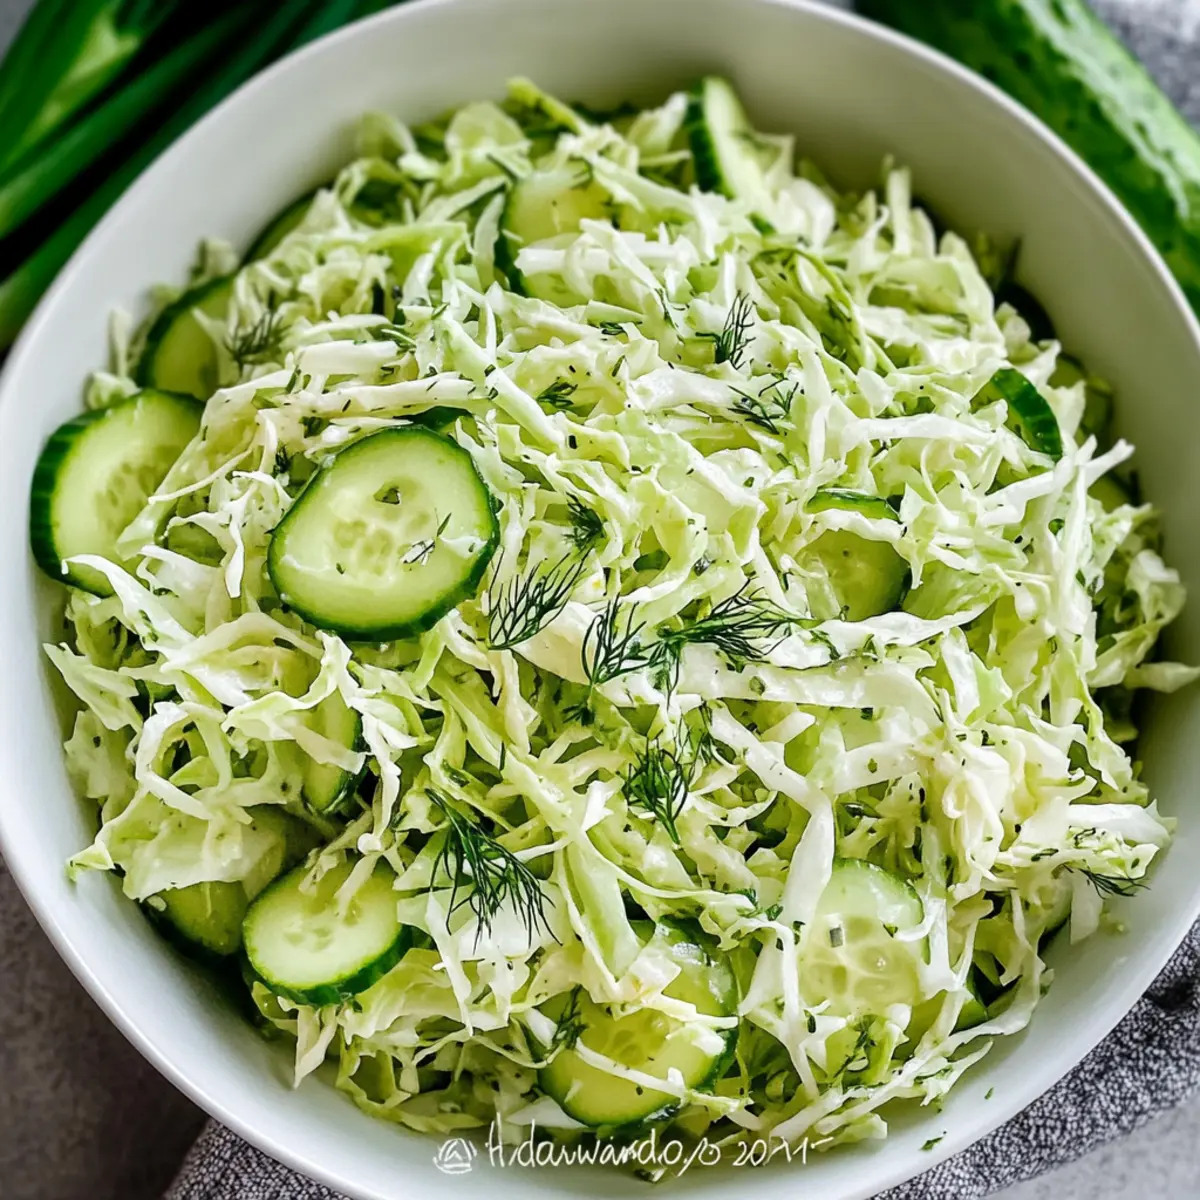
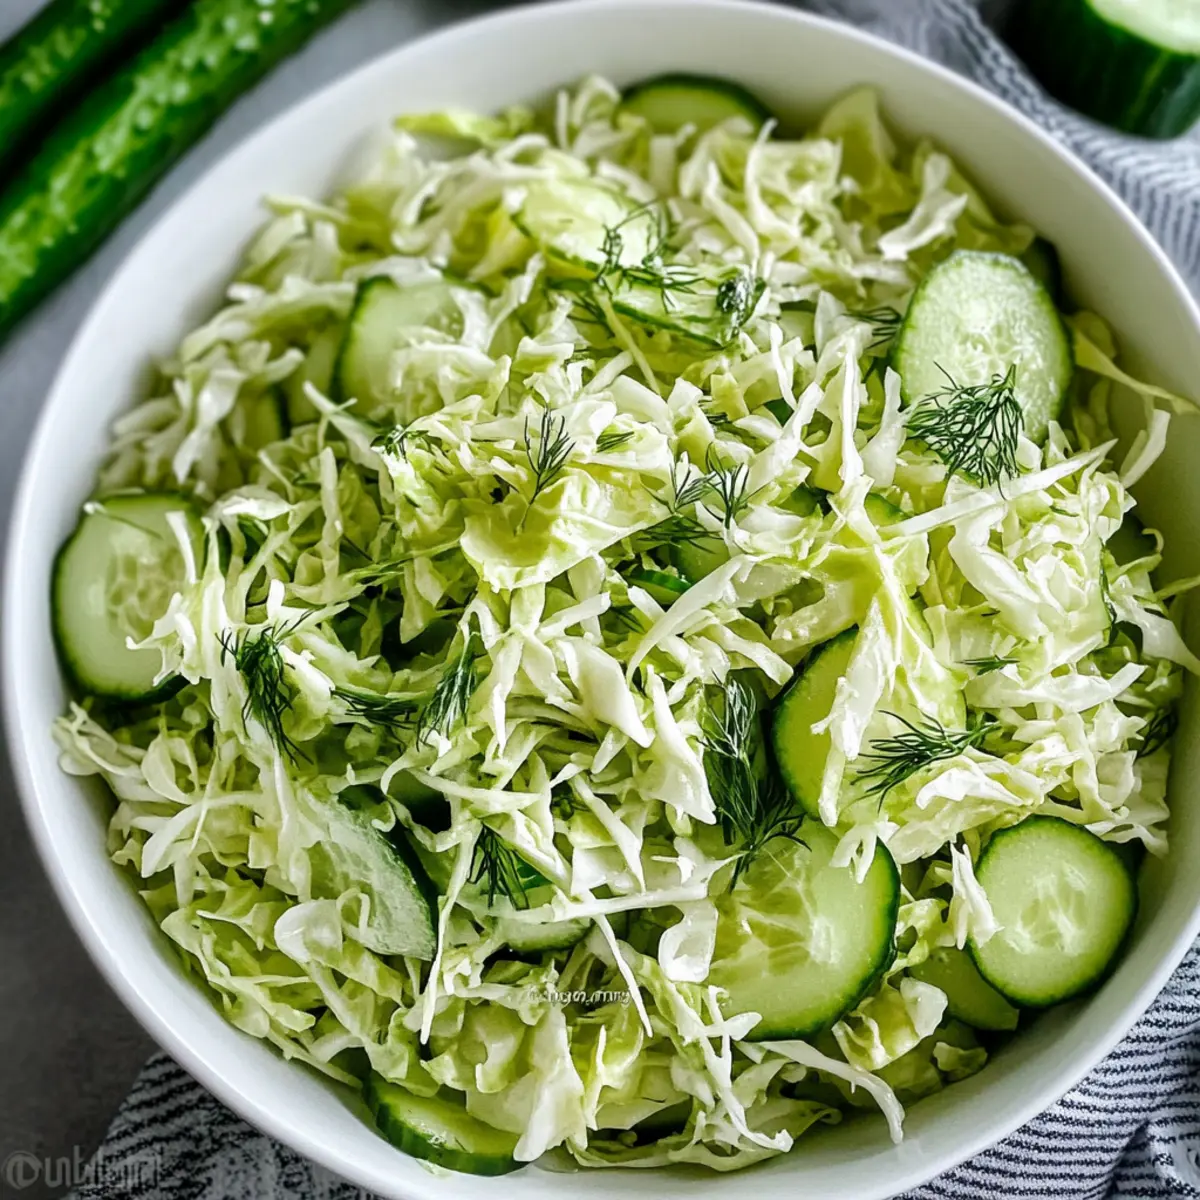
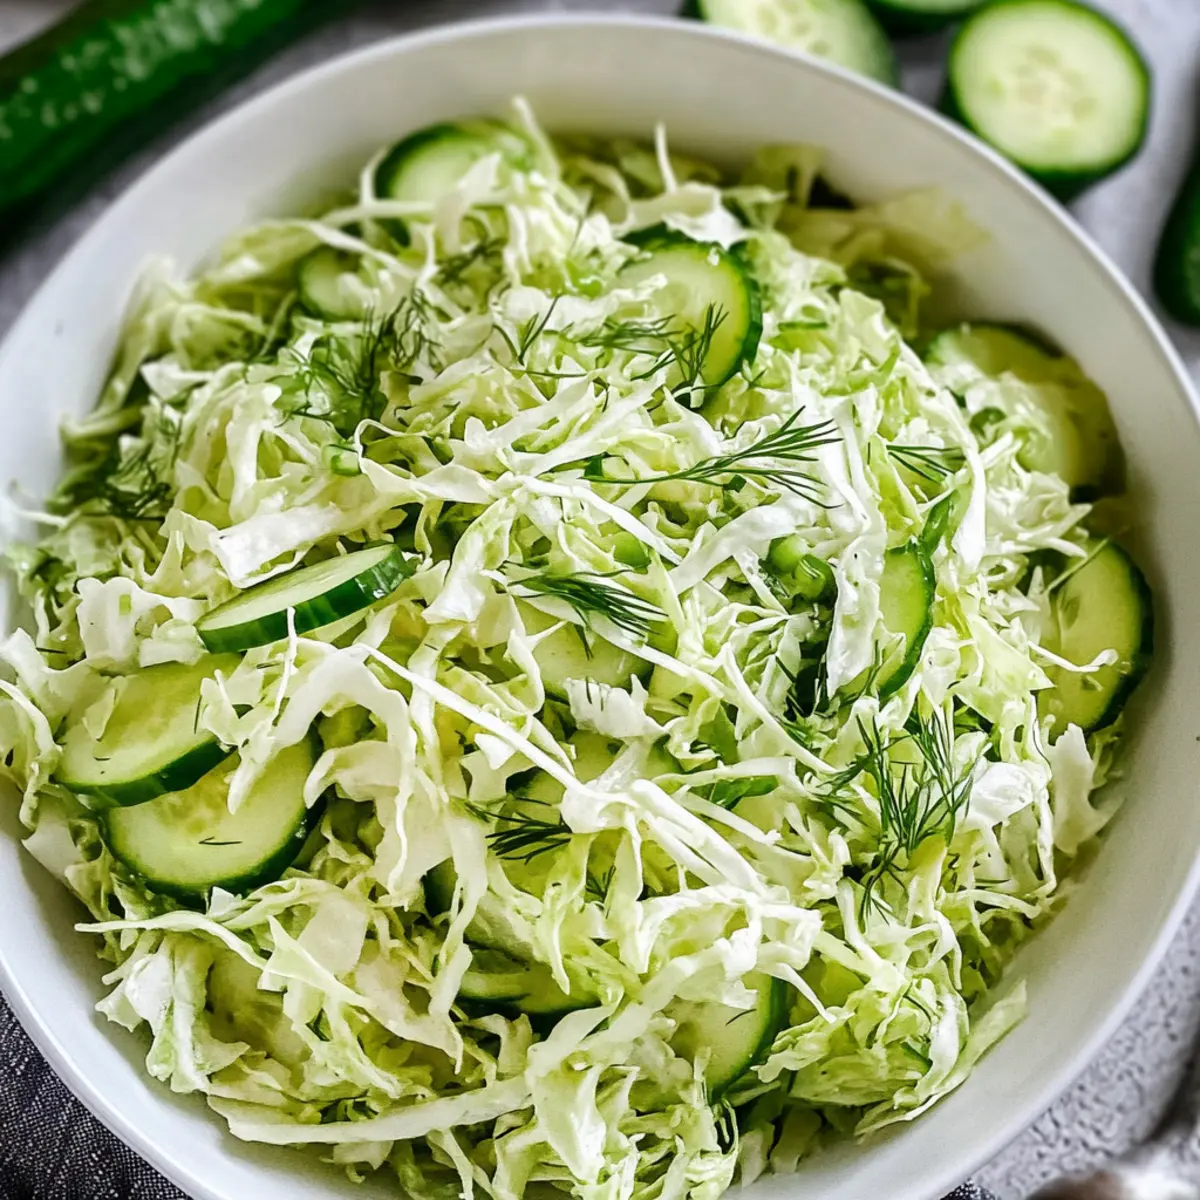
As I stood in my kitchen the other day, the vibrant colors of fresh vegetables caught my eye, sparking an idea for a dish that embodies simplicity and flavor: Easy Green Cabbage Cucumber Salad. This refreshing side dish is not only a perfect companion for summer barbecues and potlucks, but it’s also incredibly quick to prepare—ideal for those busy weeknights when you crave something bright and healthy without the fuss. Imagine the satisfying crunch of green cabbage paired with cool, crisp cucumbers and a dash of fresh dill, all coated in a tangy dressing. Plus, this salad is make-ahead friendly, allowing you to whip it up in advance and store it in the fridge for a hassle-free addition to any meal. Ready to elevate your salad game? Let’s dive into this deliciously easy recipe!

Why Is This Salad So Refreshing?

Crunchy textures: Delight in the crispy combination of green cabbage and cool cucumbers that create a vibrant crunch in every bite.
Versatile dish: This salad shines as a potluck favorite, pairing nicely with grilled meats or as a refreshing side to elevate any meal.
Make-ahead convenience: Prepare it ahead of time, allowing the flavors to meld beautifully, providing you with a hassle-free side on busy days.
Nutritional powerhouse: Packed with vitamins C and K, this salad is not only delicious but also a healthy addition to your repertoire.
Simple ingredients: With fresh, accessible ingredients, you can whip up a tasty dish like this German Potato Salad just as easily!
Quick preparation: Ready in no time, you can enjoy this salad without spending hours in the kitchen.

Green Cabbage Cucumber Salad Ingredients

For the Salad

  • Green Cabbage – Offers a crunchy base; select fresh heads without any wilted leaves for the best texture.
  • Cucumbers – Brings crispness and lightness; both standard and English cucumbers work wonderfully.
  • Green Onions – Adds a mild onion flavor and vibrant color; red onions can be used for a more pronounced taste.
  • Fresh Dill – Imparts a fragrant herbal note; if unavailable, parsley can substitute, or you can skip it for a simpler profile.

For the Dressing

  • Sunflower Oil – Provides a rich base for the dressing; feel free to use olive oil for a different flavor twist.
  • Distilled White Vinegar – Adds essential acidity to balance the flavors; apple cider vinegar is a lovely alternative for a milder kick.
  • Fine Salt – Enhances all the flavors; adjust to personal taste for a perfect seasoning.
  • Ground Black Pepper – Introduces subtle heat; freshly ground pepper will elevate the flavor even more.

Step‑by‑Step Instructions for Easy Green Cabbage Cucumber Salad

Step 1: Prepare the Dressing
In a measuring cup, whisk together ½ cup of sunflower oil, ¼ cup of distilled white vinegar, 1 teaspoon of fine salt, and ½ teaspoon of ground black pepper. Allow the mixture to sit for about 5 minutes so the salt can dissolve completely, while the flavors start to meld. This dressing will enhance the overall taste of your Green Cabbage Cucumber Salad.

Step 2: Wash and Dry Veggies
Rinse the green cabbage and cucumbers thoroughly under cold water, then pat them dry with a clean kitchen towel or paper towels. This step is crucial to ensure that your vegetables remain crisp and don’t dilute the dressing. You can place them aside momentarily as you prepare the other ingredients of the salad.

Step 3: Shred the Cabbage
Remove the outer leaves of the green cabbage and cut it into quarters. Using a mandolin or a sharp knife, shred the cabbage into thin strips, placing them into a large mixing bowl. Aim for a uniform size for an even texture throughout your Easy Green Cabbage Cucumber Salad, which will make it more visually appealing and enjoyable to eat.

Step 4: Slice the Cucumbers
Take the cucumbers and halve them lengthwise. Then, slice each half into thin, half-moon shapes. This will add beautiful shapes and textures to the salad. Combine the sliced cucumbers with the shredded cabbage in the mixing bowl and marvel at the fresh colors as they come together.

Step 5: Chop the Aromatics
Finely chop the green onions and fresh dill to release their robust flavors. Add these aromatic ingredients directly into the mixing bowl with the cabbage and cucumbers. These herbs provide a wonderful contrast to the crunch of the cabbage and cucumbers while adding a delightful freshness that makes this salad shine.

Step 6: Combine the Salad
Pour the prepared dressing over the mixed vegetables in the bowl. Using salad tongs or two large spoons, gently toss everything together until all the vegetables are well-coated in the dressing. Take a moment to enjoy the vibrant colors and aromas of your Easy Green Cabbage Cucumber Salad coming together beautifully.

Step 7: Chill and Serve
You can serve the salad immediately for a fresh, crunchy experience, or refrigerate it for 1-2 hours. Allowing it to chill helps the flavors meld and the cabbage to soften slightly. If serving later, give it a good stir and taste; you might want to add a pinch more salt or pepper before enjoying this refreshing side dish!

Make Ahead Options

These Easy Green Cabbage Cucumber Salad preparations are perfect for meal prep enthusiasts! You can shred the cabbage and slice the cucumbers up to 24 hours in advance. Store them in an airtight container in the refrigerator to maintain their crispness. Additionally, you can prepare the dressing a day ahead and refrigerate it separately; this not only saves time but allows the flavors to meld beautifully. When you're ready to serve, simply combine the prepped vegetables, add the dressing, and toss gently. This way, you’ll have a refreshing side dish ready to impress with minimal last-minute effort—just as delicious as if made fresh!

How to Store and Freeze Green Cabbage Cucumber Salad

Fridge: Store your Green Cabbage Cucumber Salad in an airtight container for up to 2-3 days. This helps maintain freshness and texture, but seasoning may need adjustment before serving.

Make-Ahead: You can prepare the salad a day in advance. Ensure it's tightly covered in the refrigerator, which allows the flavors to develop, making it even more delicious.

Freezer: While it's not recommended to freeze the salad due to the high water content in cucumbers, any cabbage leftovers can be frozen for later use in cooked dishes, lasting about 3 months.

Reheating: If you’ve frozen cabbage, thaw it in the fridge overnight. Use it in stir-fries or soups for a quick and healthy meal. Avoid reheating the salad directly, as it’s best enjoyed cold.

Expert Tips for Green Cabbage Cucumber Salad

  • Uniform Shreds: Use a mandolin slicer for evenly shredded cabbage. This ensures a consistent texture, making your Green Cabbage Cucumber Salad delightful in every bite.

  • Chill Before Serving: Refrigerate the salad for about 1-2 hours before enjoying. This lets the flavors marry beautifully and improves the overall taste.

  • Taste and Adjust: After refrigeration, always taste the salad again before serving. You may need to adjust the seasoning, as flavors can intensify over time.

  • Fresh Ingredients: Select the freshest vegetables possible to enhance the crunch and flavor. Wilted or old vegetables can lead to a less appealing salad.

  • Vinegar Variations: Feel free to experiment with different types of vinegar. Apple cider vinegar provides a milder taste compared to distilled, adding a unique twist to your dressing.

Green Cabbage Cucumber Salad Variations

Feel free to explore these exciting twists that can elevate your Green Cabbage Cucumber Salad into something uniquely yours!

  • Kale Twist: Substitute half the cabbage for kale for added nutrients and a heartier texture. The kale adds a lovely earthy flavor to each bite, seamlessly blending with the crisp cucumbers.

  • Carrot Sweetness: Add shredded carrots to the mix for a pop of color and subtle sweetness. This adds a delightful crunch that complements the cabbage beautifully without overwhelming the existing flavors.

  • Bell Pepper Crunch: Incorporate sliced bell peppers for an extra crunch and vibrant colors in your salad. Their natural sweetness and variety of textures make this salad even more appealing.

  • Spicy Kick: For those who love heat, toss in some diced jalapeños or a sprinkle of red pepper flakes. The spicy notes contrast nicely with the cool cucumbers, creating a dynamic flavor profile.

  • Creamy Edition: For a richer salad, blend in a dollop of Greek yogurt into the dressing. This adds creaminess while maintaining the salad's refreshing appeal, making each morsel a delightful experience.

  • Herb Medley: Mix additional herbs like parsley or cilantro for a fresh flavor boost. Experimenting with different herbs can transform this simple salad into a fragrant delight that captivates your senses.

  • Asian Flair: Drizzle with a soy sauce or sesame oil dressing instead of the traditional vinaigrette. This twist creates an exciting flavor fusion, perfect for serving alongside Asian-inspired dishes.

  • Pickled Veggies: Add some pickled radishes or cucumbers for a tangy twist. The acidity of the pickles gives your salad a surprising zing that brightens every bite, making it irresistible!

Whether you're pairing this salad with grilled meats or simply enjoying it on its own, enhancing it with these variations can transform your experience into something truly memorable. If you're in the mood for more flavorful salads, why not try a Chicken Salad with Apples or a delightful Buffalo Tofu with Caesar Salad?

What to Serve with Easy Green Cabbage Cucumber Salad

Imagine a delightful spread unfolding, where light, bright flavors dance on your palate alongside this vibrant salad.

  • Grilled Chicken Skewers: Tender and juicy, they add a smoky element that complements the crisp salad beautifully. The flavors meld perfectly with the freshness of the vegetables.

  • Herbed Quinoa: This nutty side provides protein and a delightful texture that harmonizes with the crunchy salad. Consider tossing in some extra herbs for a burst of flavor!

  • Roasted Sweet Potatoes: Their sweet, earthy notes play off the tanginess of the salad, creating a satisfying balance on your plate. The contrasting textures make each bite a joy.

  • Balsamic Glazed Vegetables: Rich and caramelized, these vegetables add depth to your meal while still keeping it light. Their sweetness pairs wonderfully with the freshness of the salad.

  • Light White Wine: A chilled glass of Sauvignon Blanc or Pinot Grigio offers a refreshing zing that elevates your dining experience. Its crisp acidity balances the salad’s flavors brilliantly.

  • Lemon Sorbet: A light and refreshing dessert, it serves as a palate cleanser after a meal, leaving a lingering brightness that echoes the salad’s crispness. Enjoy it on a warm evening for an extra treat!

Green Cabbage Cucumber Salad Recipe FAQs

How do I choose the right green cabbage?
Absolutely! When selecting green cabbage for your salad, look for heads that feel heavy for their size and have tightly packed leaves without any dark spots or wilted outer leaves. Opting for a bright green head ensures optimal crunch and freshness.

How should I store the Green Cabbage Cucumber Salad?
You can store your salad in an airtight container in the refrigerator for up to 2-3 days. This keeps it fresh, but remember to check the seasoning before serving as it may require a pinch more salt or pepper after refrigeration.

Can I freeze the Green Cabbage Cucumber Salad?
Not really! Freezing this salad isn't recommended because cucumbers have high water content which can make them mushy when thawed. However, if you have leftover shredded cabbage, it can be frozen for up to 3 months. Just make sure it's tightly wrapped in freezer-friendly packaging.

What should I do if the salad tastes too acidic?
Very! If you find the salad too tangy, it’s an easy fix. Add a teaspoon of sugar or honey to the mixture, which balances the acidity, or incorporate a bit of additional oil to mellow the flavors. Toss well and taste again until it suits your palate.

Is this Green Cabbage Cucumber Salad suitable for my dog?
This salad isn’t recommended for dogs. While raw cabbage is safe in moderation, the vinegar and seasoning can upset their stomachs. Always stick to plain, fresh vegetables like carrots or green beans for a safe pet treat!

What if I want to make the salad in advance?
Definitely! To make it ahead, prepare the salad and dressing separately. Store them in airtight containers in the fridge. Mix them together just before serving to keep the veggies crisp. You can do this up to a day in advance, allowing flavors to meld beautifully!

Green Cabbage Cucumber Salad

Crunchy Green Cabbage Cucumber Salad for a Refreshing Meal

This Green Cabbage Cucumber Salad is a perfect, refreshing side dish for summer barbecues, quick to prepare and packed with flavor.
Print Recipe Pin Recipe
Prep Time 15 minutes mins
Chilling Time 1 hour hr
Total Time 1 hour hr 15 minutes mins
Servings: 4 servings
Course: Salads
Cuisine: American
Calories: 150
Ingredients Equipment Method Nutrition Notes

Ingredients
  

For the Salad
  • 1 head Green Cabbage Select fresh heads without wilted leaves.
  • 2 cups Cucumbers Standard or English cucumbers work well.
  • 1 bunch Green Onions Finely chopped.
  • 1/4 cup Fresh Dill Can substitute with parsley.
For the Dressing
  • 1/2 cup Sunflower Oil Can use olive oil for a different flavor.
  • 1/4 cup Distilled White Vinegar Apple cider vinegar is a good alternative.
  • 1 teaspoon Fine Salt Adjust to taste.
  • 1/2 teaspoon Ground Black Pepper Freshly ground is best.

Equipment

  • mandolin slicer
  • Mixing Bowl
  • Measuring cup
  • salad tongs

Method
 

Preparation Steps
  1. In a measuring cup, whisk together the sunflower oil, distilled white vinegar, fine salt, and ground black pepper. Allow it to sit for about 5 minutes.
  2. Rinse the green cabbage and cucumbers thoroughly under cold water, then pat them dry.
  3. Remove the outer leaves of the green cabbage and cut it into quarters. Shred the cabbage into thin strips.
  4. Halve the cucumbers lengthwise and slice each half into thin, half-moon shapes.
  5. Finely chop the green onions and fresh dill and add to the bowl with cabbage and cucumbers.
  6. Pour the prepared dressing over the mixed vegetables and gently toss until well-coated.
  7. Serve immediately or refrigerate for 1-2 hours before serving.

Nutrition

Serving: 1servingCalories: 150kcalCarbohydrates: 10gProtein: 2gFat: 12gSaturated Fat: 1gPolyunsaturated Fat: 3gMonounsaturated Fat: 8gSodium: 250mgPotassium: 300mgFiber: 2gSugar: 3gVitamin A: 100IUVitamin C: 23mgCalcium: 50mgIron: 0.5mg

Notes

This salad is great to make-ahead. Store in the fridge in an airtight container for 2-3 days. Adjust seasoning before serving if necessary.
Tried this recipe?

Let us know how it was!

Cucumber Salad with Crab Meat Delight for a Fresh Summer Bite

January 7, 2026 by Grace Snow Leave a Comment

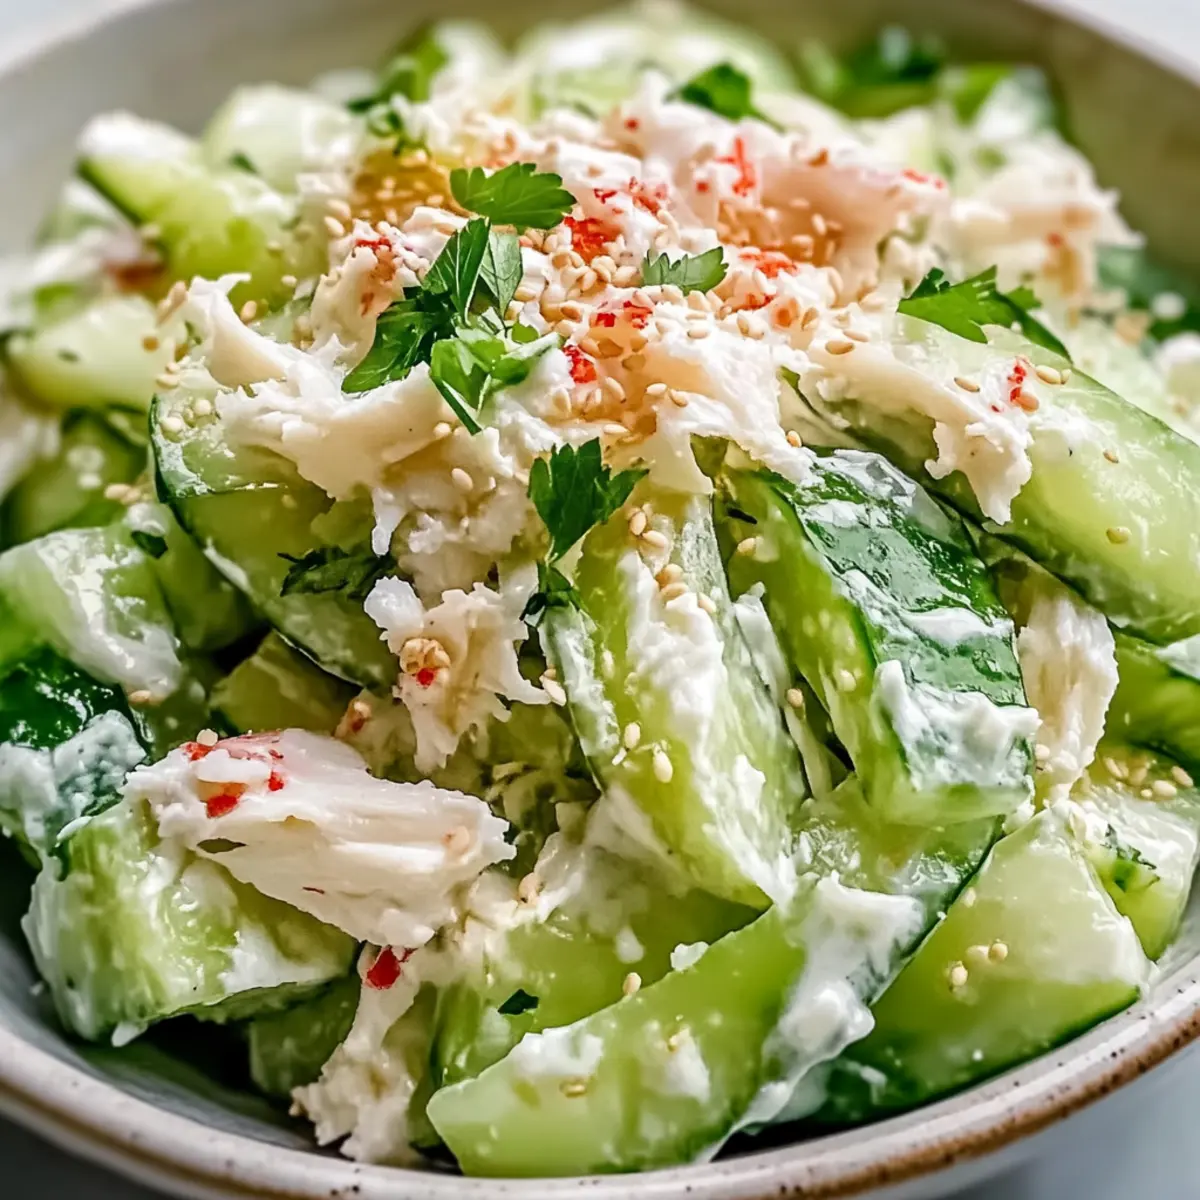
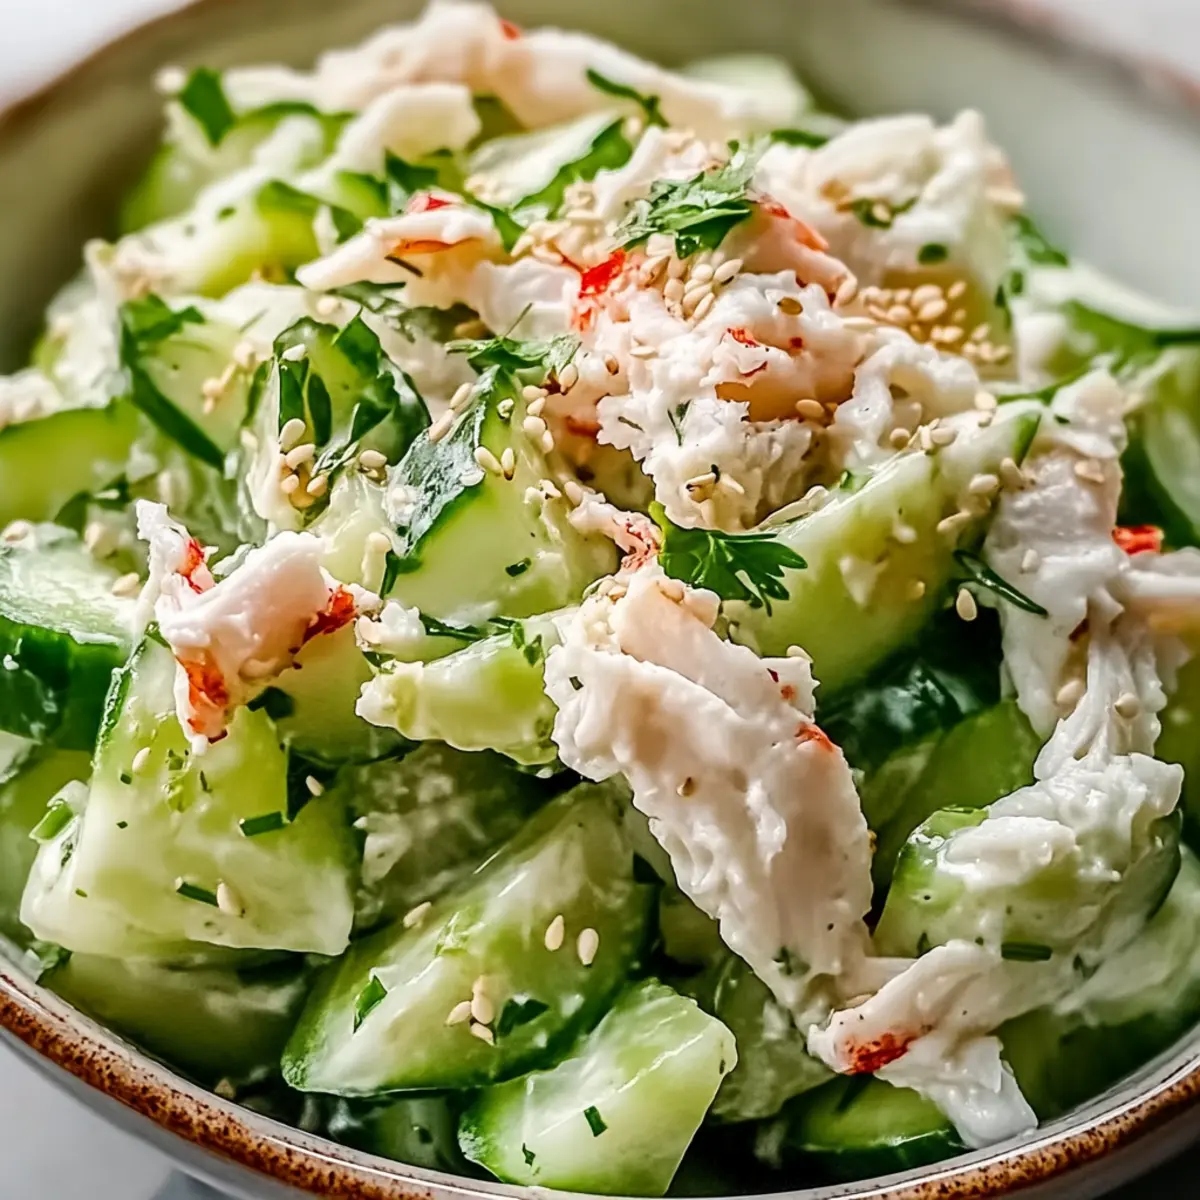
Have you ever found yourself staring at a fridge full of fresh produce, unsure of what to whip up? That’s how this Cucumber Salad with Crab Meat Delight came to life—a spontaneous creation that turned into one of my go-to light summer meals. Picture crunchy Persian cucumbers folded with sweet, tender crab meat, leavened with a creamy dressing that pulls it all together in the most delightful way. The best part? This salad is not just quick to prepare; it elevates any lunch or dinner spot with its fancy yet effortless vibe. Whether you're looking to impress guests or treat yourself on a warm evening, this refreshing dish checks all the boxes for flavor and simplicity. Ready to dive into the world of fresh seafood and crisp vegetables? Let’s get started!

Why is This Salad So Irresistible?

Freshness leaps off the plate with vibrant, crispy cucumbers and perfectly sweet crab meat, making every bite a celebration of summer. Quick and Easy: This recipe is a breeze—whip it up in just 15 minutes! Versatility makes it a star; serve it as an elegant appetizer or a delightful main dish. Plus, this crowd-pleaser will impress family and friends alike at your next gathering, perfectly pairing with dishes like German Potato Salad or Balsamic Steak Salad. Don't forget, it’s also a light, guilt-free alternative to heavy meals—ideal for those warm summer nights!

Cucumber Salad with Crab Meat Ingredients

• Perfect for a quick summer dish!

For the Salad Base

  • Persian Cucumbers – Their natural sweetness and crunch elevate the flavor; substitute with Japanese or English cucumbers if needed.
  • Imitation Crab Meat – Adds a delightful seafood taste and protein; break it into smaller pieces by hand for better mixing.

For the Dressing

  • Mayonnaise – Creates a creamy base that hugs every ingredient beautifully.
  • Rice Vinegar – Provides a tangy touch; start with half the amount and adjust to your taste.
  • Garlic Powder – Infuses a savory flavor that balances with the sweetness of the crab.
  • Sugar – A pinch helps to mellow the tangy vinegar for a well-rounded dressing.
  • Black Pepper – Just a sprinkle enhances the overall flavor profile.

Feel free to adapt and enjoy this Cucumber Salad with Crab Meat Delight, making it your own for summer gatherings!

Step‑by‑Step Instructions for Cucumber Salad with Crab Meat Delight

Step 1: Prepare Cucumbers
Begin by washing and drying the Persian cucumbers. Julienne them into thin strips and sprinkle with a generous pinch of sea salt. Allow the cucumbers to sit for about 10 minutes; this helps draw out excess moisture, ensuring a crisp salad. Afterward, pat the cucumbers dry using paper towels to remove any collected liquid.

Step 2: Prep Crab Meat
While the cucumbers are resting, take your imitation crab meat and break it into small, bite-sized pieces using your hands. This method preserves the delicate texture and allows the meat to blend beautifully with other ingredients in your Cucumber Salad with Crab Meat Delight. Set it aside in a mixing bowl for later incorporation.

Step 3: Make Dressing
In a medium-sized bowl, combine mayonnaise, rice vinegar, garlic powder, sugar, and black pepper. Whisk these ingredients together until the mixture is smooth and creamy. Taste the dressing and adjust the flavors if needed; more vinegar can enhance the tang, while extra sugar can balance the acidity. This dressing is the creamy heart of your salad.

Step 4: Combine Ingredients
In a large mixing bowl, gently toss the julienned cucumbers with the shredded crab meat. Pour the prepared dressing over the top, and using a spatula, mix everything together carefully. Aim for an even coating on each cucumber and crab piece, allowing the flavors of Cucumber Salad with Crab Meat Delight to meld together.

Step 5: Serve
To finish, transfer the salad into a serving bowl. For a beautiful presentation, garnish with optional toppings such as sesame seeds or freshly chopped herbs. Serve the Cucumber Salad with Crab Meat Delight right away while chilled to enjoy the freshness and creamy texture that makes this dish irresistible on a warm summer day.

Make Ahead Options

These Cucumber Salad with Crab Meat Delight preparations are perfect for busy weeknights, saving you time without sacrificing flavor. You can julienne the cucumbers and salt them up to 24 hours in advance; just remember to pat them dry before adding them later to maintain their crispness. The imitation crab meat can also be shredded and stored in an airtight container for up to 3 days in the refrigerator. For the dressing, prepare it separately and refrigerate for up to 48 hours to keep all the components fresh. When you're ready to serve, simply combine the cucumbers, crab, and dressing, and relish the effortless, restaurant-quality taste of your freshly assembled Cucumber Salad with Crab Meat Delight!

Cucumber Salad with Crab Meat Variations

Feel free to play with this recipe and make it your own, delightful flavors await!

  • Real Crab: Swap imitation crab for real crab meat for a decadent upgrade that adds an elegant touch. The fresh taste of the ocean shines through, making every bite a pure delight.
  • Avocado Boost: Add diced avocado for a creamy, luscious texture that complements the crab beautifully. This twist introduces an extra layer of richness you won’t want to miss!
  • Crunchy Bell Peppers: Toss in some diced bell peppers for an extra crunch and a pop of color. This simple addition brings a fresh, zesty kick that wakes up your taste buds.
  • Spicy Kick: Introduce a dash of sriracha or red pepper flakes for a hint of heat that excites the palate. It adds boldness to the creamy dressing, perfect for those who love a little spice!
  • Herb Fusion: Fresh herbs are your friend! Mix in chopped cilantro or parsley for a vibrant, fragrant note that enhances the overall flavor profile. The freshness of the herbs will elevate your dish!
  • Gluten-Free: Use gluten-free mayonnaise if you’re sticking to a gluten-free diet. It seamlessly blends into the dressing while keeping it all health-friendly.
  • Chilled Melon: For a fruity twist, add small cubes of chilled melon like cantaloupe or honeydew for a refreshing sweetness. It’s like a summer party in your bowl!
  • Sesame Seeds: Sprinkle toasted sesame seeds on top for a nutty flavor and an appealing crunch. This little touch of contrast makes each spoonful heavenly!

Looking for more vibrant salad inspirations? Check out my recipe for a lovely Tofu Caesar Salad or a refreshing Chicken Salad with Apples that are equally delightful in a summer spread!

What to Serve with Cucumber Salad with Crab Meat Delight?

Elevate your meal with delightful pairings that complement the flavors of this fresh summer salad.

  • Steamed Rice: A warm serving of fluffy rice harmonizes beautifully with the salad's cool crunch, creating a satisfying bite.

  • Miso Soup: This light, savory soup provides umami depth and contrasts the freshness of the salad, perfect for a complete Asian-inspired meal.

  • Crispy Seaweed Snacks: These provide a delightful crunch and a taste of the ocean, enhancing the seafood elements of the salad.

  • Grilled Shrimp Skewers: Infused with a hint of garlic and herbs, these tender morsels add a touch of heartiness while echoing the salad's flavors.

  • Quinoa Salad: A refreshing quinoa salad with lime and herbs adds earthiness, contrasting nicely with the lightness of the cucumber and crab.

  • Honeydew Melon Slices: The sweet juiciness of honeydew is a refreshing palate cleanser, balancing the savory notes of the salad.

  • Chilled White Wine: A glass of crisp Sauvignon Blanc offers lovely acidity that cuts through the creaminess, making every bite more enjoyable.

  • Lemon Sorbet: For dessert, this light and tangy sorbet cleanses the palate with its vibrant flavor, wrapping up your meal on a refreshing note.

How to Store and Freeze Cucumber Salad with Crab Meat

Fridge: Store leftovers in an airtight container for up to 2 days. Drain any excess liquid before serving to retain the salad's crispness.

Freezer: This salad is best enjoyed fresh and does not freeze well due to the texture changes in cucumbers and crab meat.

Reheating: If you choose to consume the salad after storing, serve it chilled directly from the fridge, but it's recommended not to reheat as it can affect the flavor and texture of the Cucumber Salad with Crab Meat Delight.

Expert Tips for Cucumber Salad with Crab Meat Delight

  • Choose the Right Cucumbers: Use Persian cucumbers for the best sweetness and crunch. Substitute with Japanese cucumbers if necessary—but skip regular garden cucumbers to avoid excess water.

  • Avoid Watery Salads: Always salt the cucumbers first and pat them dry. This step is crucial for a refreshing Cucumber Salad with Crab Meat Delight without a soggy texture.

  • Hand-Shred Crab Meat: Shredding by hand maintains the crab's delicate texture better than using a knife, ensuring every bite is tender and flavorful.

  • Adjust Dressing to Taste: Feel free to tweak the rice vinegar and sugar levels to customize the tang and sweetness, making the dressing just right for your palate.

  • Serve Fresh: For the best experience, serve your salad within 2 hours of preparation. Leftovers can be stored for up to 2 days but may lose their crispness.

  • Prep Ahead: Make the dressing in advance and keep it separate until serving time. This tip keeps the salad fresh and prevents sogginess!

Cucumber Salad with Crab Meat Delight Recipe FAQs

How do I choose the best cucumbers for this salad?
Absolutely! For the best flavor and texture in your Cucumber Salad with Crab Meat Delight, opt for Persian cucumbers. They are naturally sweet and crunchy. If unavailable, Japanese cucumbers work well, while English cucumbers can be used if cut small. Avoid regular garden cucumbers as they tend to release excess water, making the salad soggy.

How should I store leftovers?
Leftovers can be stored in an airtight container in the fridge for up to 2 days. It's crucial to drain any excess liquid before serving again to help maintain the salad's crispness. If you’re planning to enjoy it later, I recommend checking for any wet spots and patting them dry with paper towels before serving!

Can I freeze the cucumber salad?
I wouldn't recommend freezing Cucumber Salad with Crab Meat Delight. The cucumbers lose their delightful crunch when frozen, and the crab meat's texture changes too. Instead, enjoy it fresh, as that’s when all its flavors shine!

What should I do if my salad turns out too watery?
If you encounter a watery salad, it usually stems from excess moisture in the cucumbers. To prevent this, always sprinkle sea salt on sliced cucumbers and allow them to sit for about 10 minutes before patting them dry. If it happens, try draining the liquid and gently mixing in a bit more dressing to enhance the flavor!

Are there any dietary considerations I need to keep in mind?
Yes! When preparing Cucumber Salad with Crab Meat Delight, be aware of potential allergies related to seafood, as imitation crab often contains fish. If serving to others, inform them about ingredients. For pets, it’s best to keep this dish away as seafood can pose risks to dogs and cats.

Can I prepare this salad in advance?
Very much so! For optimal freshness, prepare the dressing a day before and store it in the refrigerator. Keep the cucumbers and crab meat separate until you're ready to serve. When it's time to combine, toss everything together for a fresh and crisp salad.

Cucumber Salad with Crab Meat Delight

Cucumber Salad with Crab Meat Delight for a Fresh Summer Bite

This Cucumber Salad with Crab Meat Delight combines fresh produce and creamy dressing, making it a perfect summer dish.
Print Recipe Pin Recipe
Prep Time 15 minutes mins
Total Time 15 minutes mins
Servings: 4 servings
Course: Salads
Cuisine: American
Calories: 220
Ingredients Equipment Method Nutrition Notes

Ingredients
  

For the Salad Base
  • 4 cups Persian Cucumbers Substitute with Japanese or English cucumbers if needed.
  • 8 ounces Imitation Crab Meat Break into smaller pieces by hand for better mixing.
For the Dressing
  • 1 cup Mayonnaise
  • 2 tablespoons Rice Vinegar Start with half the amount and adjust to taste.
  • 1 teaspoon Garlic Powder
  • 1 teaspoon Sugar
  • to taste Black Pepper Just a sprinkle.

Equipment

  • Mixing bowls
  • Spatula
  • Whisk
  • Paper towels

Method
 

Step-by-Step Instructions
  1. Begin by washing and drying the Persian cucumbers. Julienne them into thin strips and sprinkle with a generous pinch of sea salt. Allow the cucumbers to sit for about 10 minutes.
  2. While the cucumbers are resting, take your imitation crab meat and break it into small, bite-sized pieces using your hands.
  3. In a medium-sized bowl, combine mayonnaise, rice vinegar, garlic powder, sugar, and black pepper. Whisk these ingredients together until the mixture is smooth and creamy.
  4. In a large mixing bowl, gently toss the julienned cucumbers with the shredded crab meat. Pour the prepared dressing over the top, and mix everything together carefully.
  5. Transfer the salad into a serving bowl. Garnish with optional toppings such as sesame seeds or freshly chopped herbs. Serve right away while chilled.

Nutrition

Serving: 1cupCalories: 220kcalCarbohydrates: 8gProtein: 12gFat: 18gSaturated Fat: 2gCholesterol: 15mgSodium: 430mgPotassium: 250mgFiber: 2gSugar: 2gVitamin A: 200IUVitamin C: 10mgCalcium: 50mgIron: 1mg

Notes

Serve fresh and within 2 hours of preparation for the best experience. Leftovers can be stored for up to 2 days but may lose their crispness.

Tried this recipe?

Let us know how it was!

Creamy Cucumber Salad: Your Perfect Summer Refreshment

January 7, 2026 by Grace Snow Leave a Comment

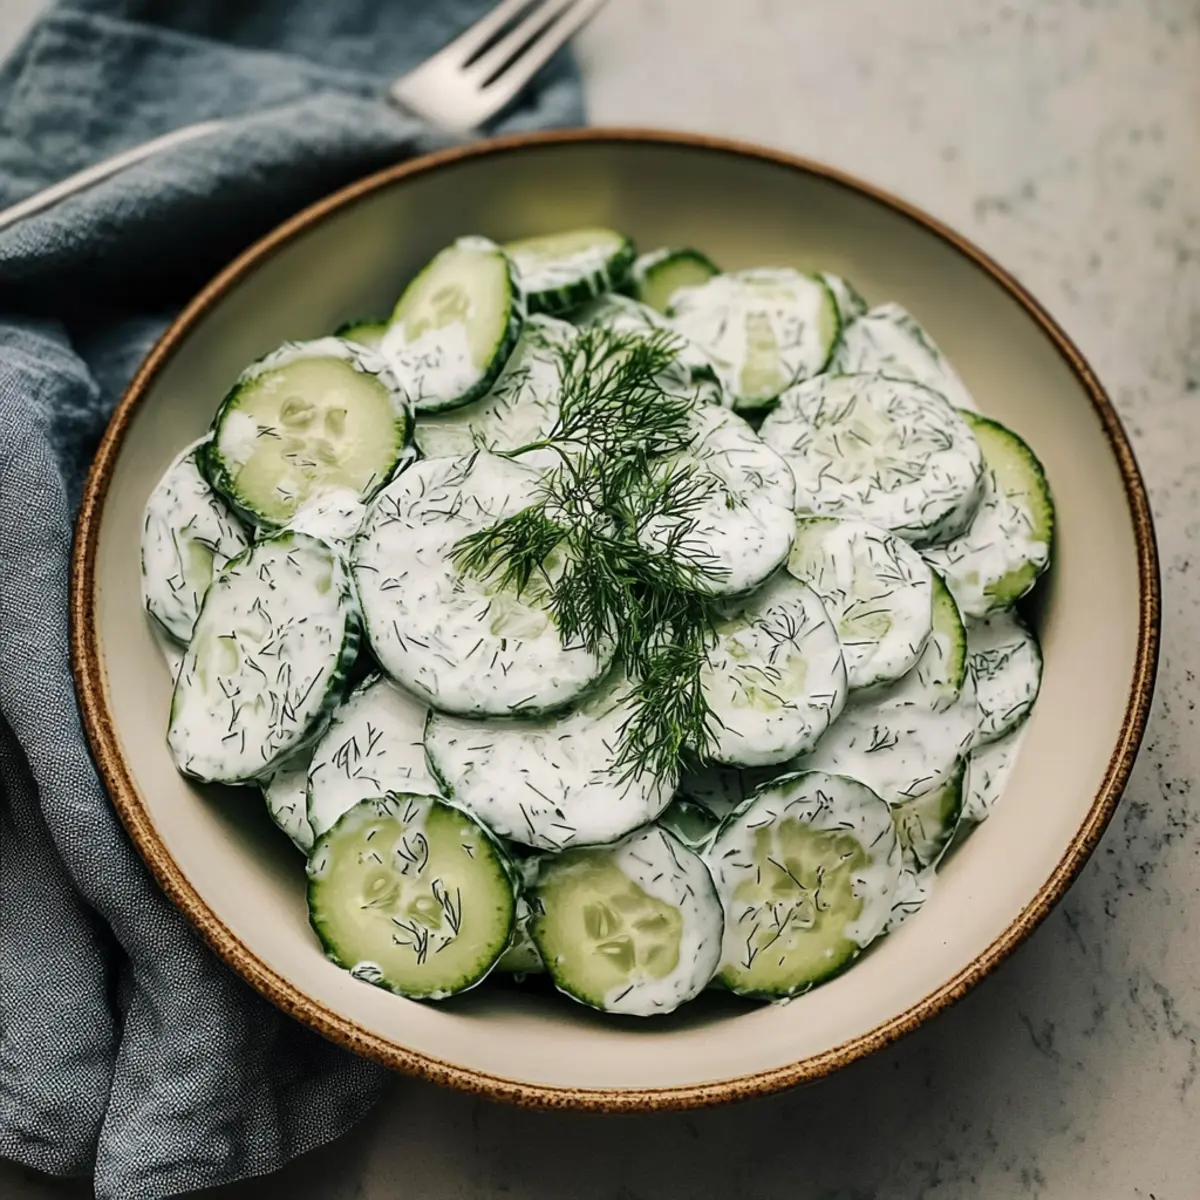
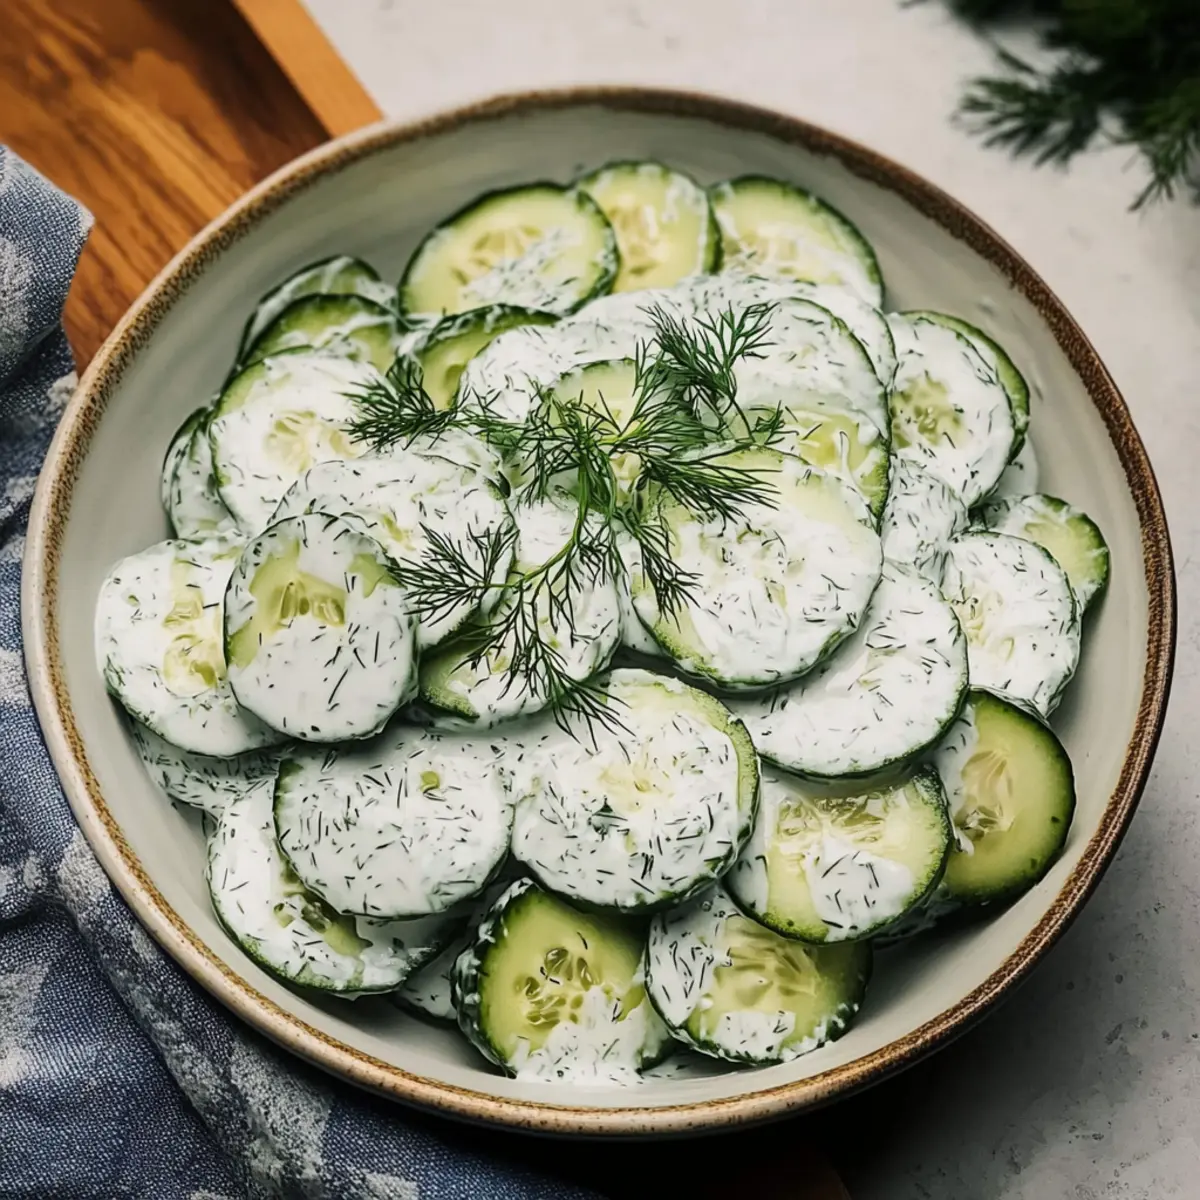
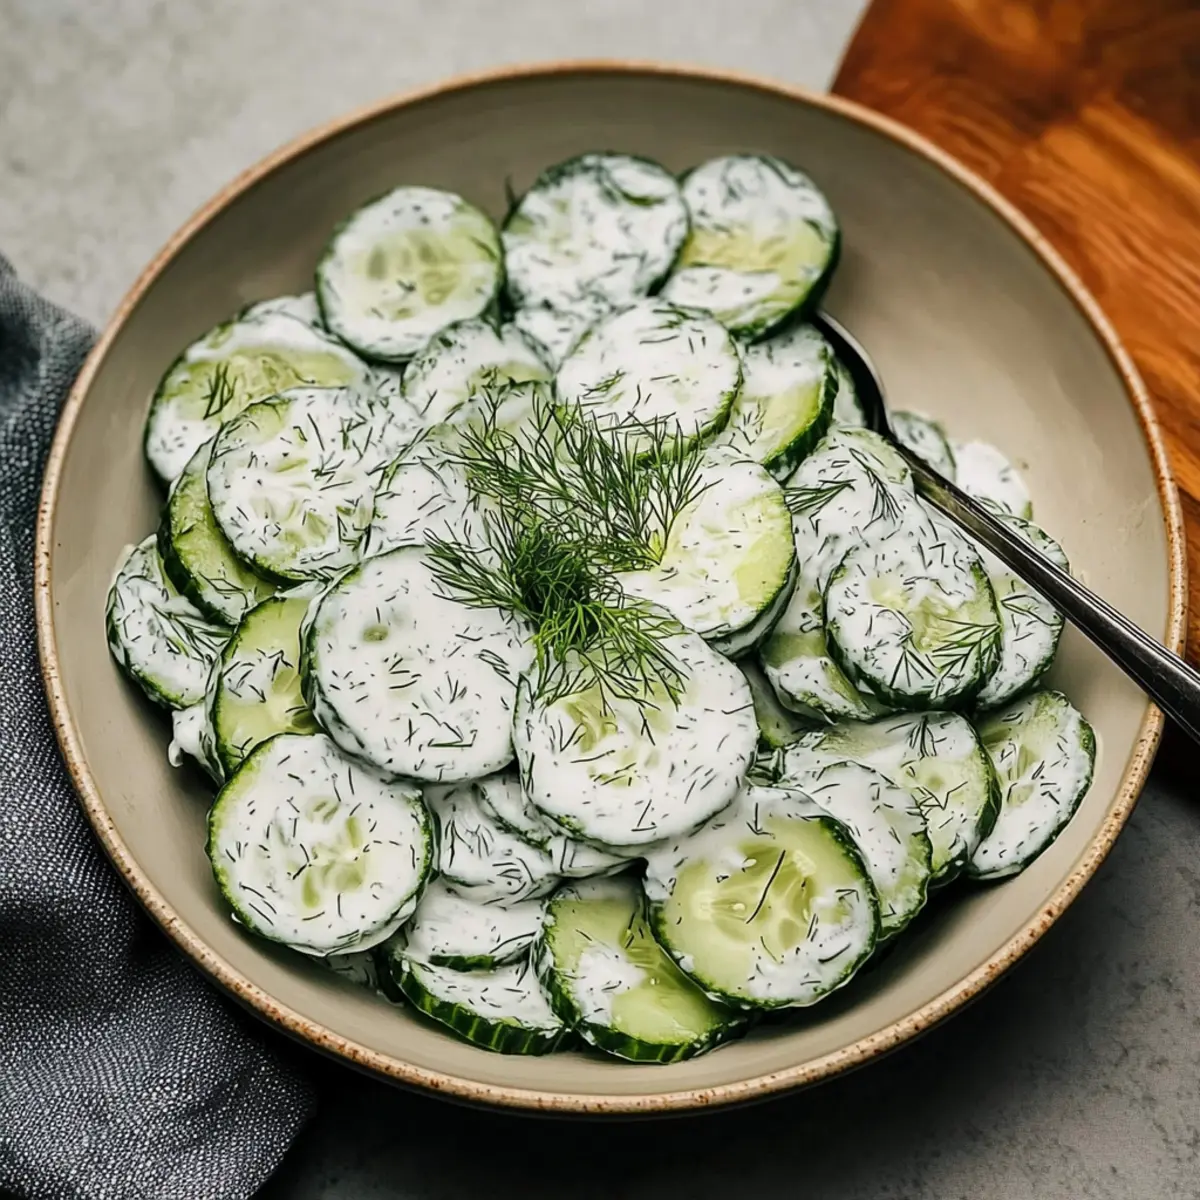
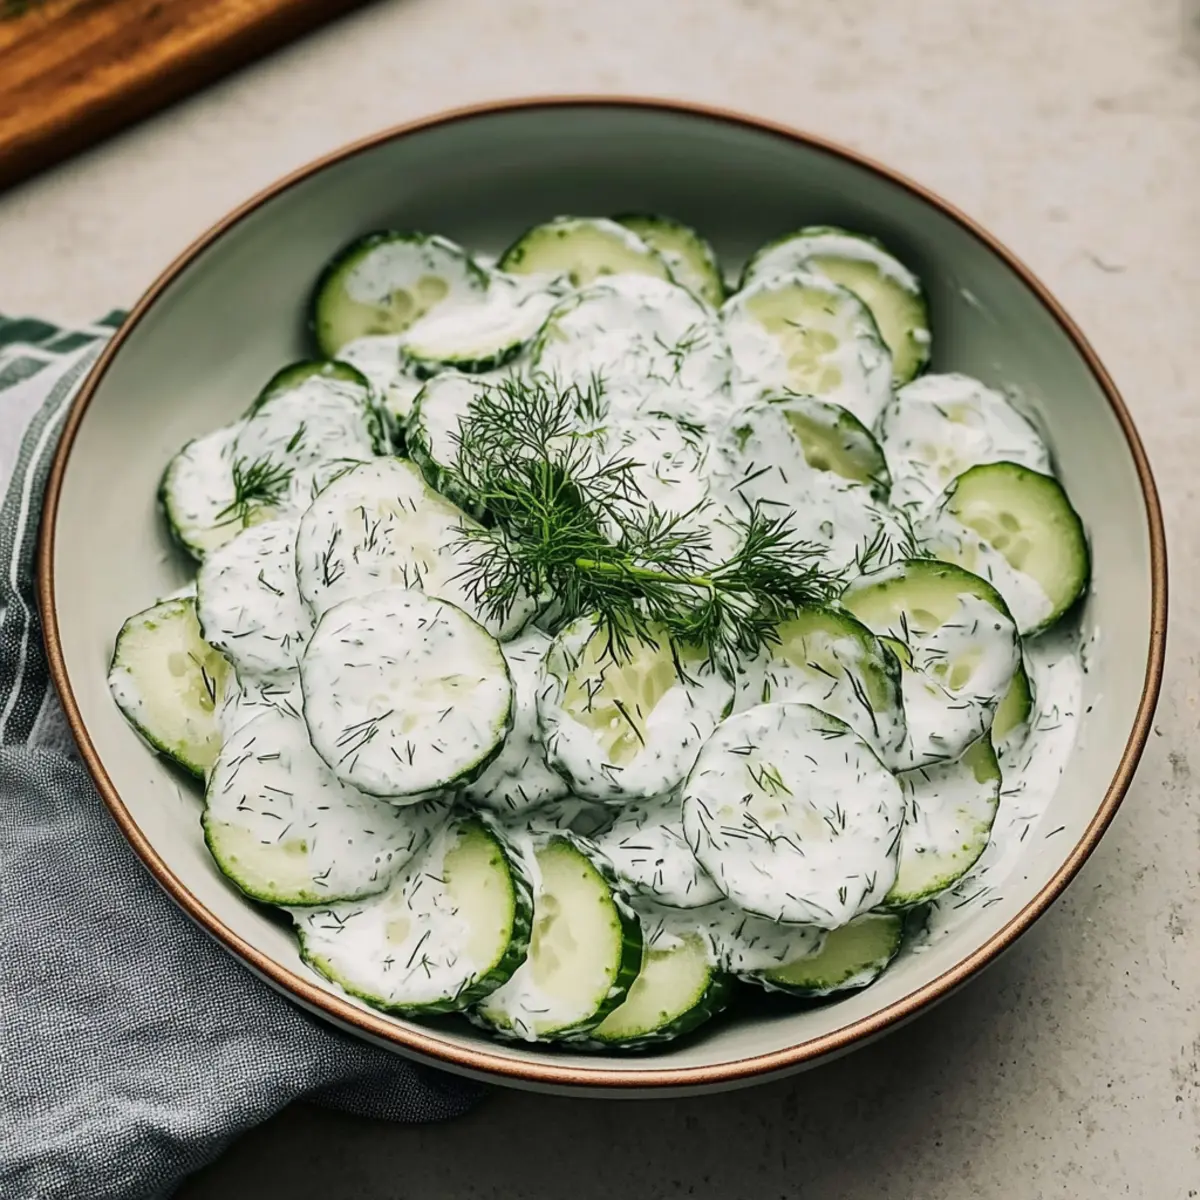
Lately, I’ve found myself craving something light and refreshing, especially with summer gatherings just around the corner. That’s when I whipped up my Creamy Cucumber Salad, a delightful dish that dances on your palate with its cool, crispy cucumbers enveloped in a tangy dill dressing. This gluten-free, vegetarian gem is not only a breeze to prepare but can also be made ahead of time, melding those flavors beautifully. Whether you're serving it at a picnic, a backyard barbecue, or as a side to your favorite grilled meat, this salad is bound to be a crowd-pleaser. Can you resist the allure of a dish that whispers “chill”? Keep reading to discover the simple steps to make this refreshing summer side!

Why is Creamy Cucumber Salad a Must-Try?

Refreshing, Bright Flavor: The combination of cool cucumbers, creamy dressing, and vibrant dill creates a taste that’s simply irresistible on hot days.

Easy Preparation: With just six ingredients and simple steps, this dish can be whipped up in no time, making it perfect for busy summer schedules.

Perfectly Make-Ahead: Prepare it up to 24 hours in advance, allowing the flavors to meld beautifully for a delightful serving every time. Pair it with your favorite grilled meats for a complete meal, or enjoy it alongside a creamy dip like Avocado Egg Salad for a refreshing snack!

Crowd-Pleasing Side: Ideal for picnics, barbecues, or casual dinners, the Creamy Cucumber Salad is a versatile dish that will impress your guests!

Nutritionally Light: At around 36 calories per serving, it’s a guilt-free addition to any meal, perfect for those looking to stay light and refreshed.

Creamy Cucumber Salad Ingredients

For the Salad

  • English cucumbers – Provides crunch and refreshing flavor; use regular cucumbers if unavailable, but they may have more seeds.
  • Kosher salt – Enhances flavor and draws moisture from the cucumbers; sea salt can work as an alternative.
  • Sour cream – Adds creaminess and tang; substitute Greek yogurt for a lower-fat option and a different taste.
  • Greek yogurt – Provides creaminess while reducing fat content; can be swapped with additional sour cream if preferred.

For the Dressing

  • Apple cider vinegar – Adds acidity, balancing the creamy components; you can use white vinegar or lemon juice as substitutes.
  • Fresh dill – Imparts a distinctive, aromatic flavor; dried dill can be a backup in a pinch, though fresh is recommended for optimal taste.
  • Ground pepper – Adds mild spice and depth of flavor; feel free to use black pepper as a substitute and adjust to your liking.

Step‑by‑Step Instructions for Creamy Cucumber Salad

Step 1: Prepare the Cucumbers
Begin by thinly slicing the English cucumbers into ¼-inch coins; this will ensure a perfect crunch in your Creamy Cucumber Salad. Place the cucumber slices in a fine mesh strainer over a bowl and set them aside to allow excess moisture to drip off.

Step 2: Salt the Cucumbers
Sprinkle the kosher salt evenly over the cucumber slices, making sure to toss them gently to coat. Let the salted cucumbers sit at room temperature for about 30 minutes, which will draw out moisture and intensify their flavor, creating a delectable crunch.

Step 3: Drain and Dry the Cucumbers
After 30 minutes, return to the strainer and gently toss the cucumbers to release any additional moisture. Using paper towels, blot the cucumber slices to absorb any excess liquid, ensuring that your Creamy Cucumber Salad won’t become watery.

Step 4: Make the Dressing
In a mixing bowl, combine the sour cream, Greek yogurt, apple cider vinegar, ground pepper, and fresh dill. Whisk these ingredients together until smooth and creamy, creating a rich dressing that will beautifully coat your cucumbers when mixed.

Step 5: Combine Cucumbers and Dressing
Carefully fold the drained cucumbers into the creamy dressing, ensuring that each slice is evenly coated. This step is crucial for the flavors of your Creamy Cucumber Salad to meld together harmoniously, enhancing every delightful bite.

Step 6: Chill the Salad
Transfer the mixed salad into an airtight container and place it in the refrigerator. Let it chill for at least 2 hours to allow the flavors to develop, or up to 24 hours for an even more robust taste. This chilling time is key to achieving a refreshing experience!

Step 7: Adjust and Serve
Before serving your Creamy Cucumber Salad, give it a gentle stir and taste. Adjust the seasoning with additional salt or pepper if desired. Serve this refreshing summer side alongside grilled meats or at your next picnic, and watch it disappear in delight!

Expert Tips for Creamy Cucumber Salad

  • Prevent Watery Salad: To avoid a soggy texture, ensure the cucumber slices are well salted and thoroughly dried after sitting with salt.

  • Flavor Enhancement: Allow your Creamy Cucumber Salad to chill for at least 2 hours. This rest time melds the flavors beautifully, creating a more delicious dish.

  • Consistent Slicing: If you’re not comfortable with knife skills, use a mandoline for uniform cucumber slices; this ensures even texture and presentation.

  • Adjust Acidity: Taste your dressing before combining it with the cucumbers. You can tweak the acidity by adding more vinegar or a squeeze of lemon to fit your palate.

  • Storage Reminder: Keep any leftovers in an airtight container in the fridge for up to 3 days, but make sure to consume them quickly for the best flavor and texture.

What to Serve with Creamy Cucumber Salad

Brighten any meal with this refreshing side that pairs exquisitely with a variety of dishes, bringing delightful flavors to your table.

  • Grilled Chicken Skewers: Tender, charred meat offers a delicious contrast to the creamy and crunchy elements of the salad.
  • Roasted Potatoes: Crispy, golden potatoes with herbs complement the fresh cucumbers, adding heartiness to your meal.
  • Lemon Herb Quinoa: Fluffy, zesty quinoa brings a lightness that harmonizes beautifully with the salad's creamy texture. It’s a great gluten-free option to consider!
  • Garlic Butter Shrimp: Juicy shrimp sautéed in garlic butter provide a savory punch, enhancing the lightness of the cucumber salad.
  • Fresh Corn on the Cob: Sweet and buttery corn brings summer vibes that pair delightfully with the cool, tangy salad.
  • Watermelon Feta Salad: A sweet and salty side that balances the creamy cucumber flavor with freshness and a touch of fruitiness.
  • Chilled White Wine: A crisp Sauvignon Blanc or a light Pinot Grigio elevates the entire dining experience, refreshing your palate as you indulge.
  • Lemon Sorbet: For dessert, a scoop of lemon sorbet cools off the meal with a refreshing sweetness that echoes the salad’s flavors.

Creamy Cucumber Salad Variations

Feel free to get creative and customize your Creamy Cucumber Salad to suit your taste or dietary needs!

  • German Twist: Add thinly sliced red onion for a zesty crunch. This variation brings a bright flavor that complements the cool cucumbers beautifully, enhancing every bite.

  • Sweet Touch: Mix a teaspoon of sugar into the dressing for a subtly sweet flavor. This sweet counterbalance can make your salad extra delightful, especially when served alongside spicy dishes.

  • Zesty Lemon: Substitute apple cider vinegar with fresh lemon juice for a brighter, citrusy twist. The lemon's acidity brightens the dish and pairs perfectly with grilled meats, making it a delightful side.

  • Herb Upgrade: Experiment with fresh herbs like parsley or chives alongside dill. This combination adds layers of flavor and richness that can transform your salad into a herbaceous delight.

  • Creamy Avocado: Fold in diced avocado for a rich, creamy texture. Avocado not only enhances the salad's creaminess but also adds healthy fats, making it even more satisfying.

  • Spicy Kick: Add a pinch of red pepper flakes or diced jalapeños for a little heat. This variation is perfect for those who enjoy a bit of spice, adding a fun twist to a classic dish.

  • Nutty Addition: Sprinkle some toasted sunflower seeds or slivered almonds for a delightful crunch. These nuts give an extra texture that adds depth, elevating your creamy salad experience.

  • Side Pairing Suggestion: Serve your salad as a refreshing side to a mouthwatering main like Balsamic Steak Salad, enhancing the overall meal with cool complementing flavors.

How to Store and Freeze Creamy Cucumber Salad

Fridge: Store leftover Creamy Cucumber Salad in an airtight container for up to 3 days. This keeps it fresh while preventing any odors from the refrigerator.

Make-Ahead: You can prepare the salad up to 24 hours in advance, letting it chill in the refrigerator for the best flavor. This helps the creamy dressing meld beautifully with the cucumbers.

Serving Tip: When ready to serve, give the salad a gentle stir and taste for any needed adjustments in seasoning, as flavors can intensify while sitting.

Freezer: Freezing is not recommended as it can change the texture of the cucumbers, making them mushy once thawed. Enjoy this salad fresh for the best experience!

Make Ahead Options

These Creamy Cucumber Salad preparations are perfect for busy home cooks looking to save time! You can slice and salt the cucumbers up to 24 hours in advance, letting them sit to draw moisture before refrigerating. Additionally, you can prepare the dill dressing ahead of time and store it separately in the fridge for up to 3 days. To maintain quality, ensure the cucumbers are completely dried before mixing with the dressing. When you're ready to serve, simply combine the cucumbers and dressing, give it a quick stir, and enjoy a refreshing, flavor-packed salad that's just as delicious as if it were made fresh!

Creamy Cucumber Salad Recipe FAQs

How do I choose the right cucumbers for my salad?
Absolutely! For the best flavor and texture, opt for English cucumbers as they have a mild taste and fewer seeds, providing that perfect crunch. If you can't find them, regular cucumbers will work as well, just keep in mind they tend to be seedier and may need some additional prep to balance the texture.

What’s the best way to store leftover Creamy Cucumber Salad?
To keep your Creamy Cucumber Salad fresh, place any leftovers in an airtight container and store it in the refrigerator for up to 3 days. This method prevents odors from other foods affecting your salad while maintaining its delicious crunch.

Can I prepare the salad in advance, and how long can it sit?
Very much so! You can prepare the Creamy Cucumber Salad up to 24 hours in advance. Just be sure to give it a good stir just before serving as it will allow all the flavors to meld together beautifully. It’s a fantastic make-ahead dish that will only get better with time!

How do I freeze Creamy Cucumber Salad for later use?
Freezing is not recommended for this salad because the cucumbers' texture may turn mushy once thawed, which could drastically alter the intended experience. For the best results, enjoy the salad fresh and make it as needed!

What should I do if my salad turns out watery?
To avoid a watery consistency, ensure you properly salt and drain the cucumbers as indicated in the recipe. If it already seems watery, consider blotting the cucumbers with a paper towel to absorb excess moisture before mixing them with the dressing. This step is crucial to keep that desirable crunch intact.

Are there any dietary considerations I should note?
Yes, this Creamy Cucumber Salad is gluten-free and vegetarian-friendly, making it a great option for various dietary needs. If you're serving it to someone with allergies, be mindful about using sour cream or Greek yogurt substitutes—like a dairy-free alternative—to accommodate their needs.

Creamy Cucumber Salad

Creamy Cucumber Salad: Your Perfect Summer Refreshment

Enjoy a light and refreshing Creamy Cucumber Salad that’s a must-try for summer gatherings!
Print Recipe Pin Recipe
Prep Time 15 minutes mins
Chilling Time 2 hours hrs
Total Time 2 hours hrs 15 minutes mins
Servings: 4 servings
Course: Salads
Cuisine: American
Calories: 36
Ingredients Equipment Method Nutrition Notes

Ingredients
  

For the Salad
  • 2 Large English cucumbers Or regular cucumbers if unavailable.
  • 1 Teaspoon Kosher salt Sea salt can work as an alternative.
  • 1/2 Cup Sour cream Can substitute with Greek yogurt.
  • 1/2 Cup Greek yogurt Can swap with additional sour cream if preferred.
For the Dressing
  • 2 Tablespoons Apple cider vinegar White vinegar or lemon juice can be used as substitutes.
  • 1 Tablespoon Fresh dill Dried dill can be used in a pinch.
  • 1/4 Teaspoon Ground pepper Black pepper can be a substitute.

Equipment

  • Mixing Bowl
  • fine mesh strainer
  • Paper towels

Method
 

Step-by-Step Instructions
  1. Begin by thinly slicing the English cucumbers into ¼-inch coins; place the cucumber slices in a fine mesh strainer over a bowl to allow excess moisture to drip off.
  2. Sprinkle the kosher salt evenly over the cucumber slices, tossing gently to coat. Let them sit at room temperature for about 30 minutes.
  3. After 30 minutes, return to the strainer and toss gently to release moisture. Blot the cucumber slices with paper towels to absorb excess liquid.
  4. In a mixing bowl, combine the sour cream, Greek yogurt, apple cider vinegar, ground pepper, and fresh dill. Whisk until smooth and creamy.
  5. Carefully fold the drained cucumbers into the creamy dressing, ensuring each slice is evenly coated.
  6. Transfer the mixed salad into an airtight container and refrigerate for at least 2 hours to allow flavors to develop.
  7. Before serving, give the salad a gentle stir and taste. Adjust seasoning with additional salt or pepper if desired.

Nutrition

Serving: 1servingCalories: 36kcalCarbohydrates: 5gProtein: 2gFat: 1gSaturated Fat: 1gCholesterol: 5mgSodium: 160mgPotassium: 120mgFiber: 1gSugar: 2gVitamin A: 200IUVitamin C: 6mgCalcium: 50mgIron: 0.3mg

Notes

The salad can be made up to 24 hours in advance for better flavor melding. Store leftovers in an airtight container for up to 3 days.

Tried this recipe?

Let us know how it was!

Asian Cucumber Salad: Refreshingly Crunchy and Flavorful

January 7, 2026 by Grace Snow Leave a Comment

As I took a break from my usual meal prep madness, a vibrant TikTok video caught my eye, showcasing a gorgeous spiralized Asian cucumber salad. Intrigued, I dove into the dance of flavors, where crunchy cucumbers meet a savory sesame soy marinade, transforming a simple side into a refreshing sensation. This Asian cucumber salad isn’t just quick to whip up; it's also vegan and low-calorie, making it an irresistible choice for health-conscious food lovers. Packed with flavor and texture, it'll surely be a showstopper at your next gathering or simply on a busy weeknight. What twists will you add to this delightful dish?

Why Is This Salad So Addictive?

Refreshing and Light: This Asian cucumber salad brings a burst of freshness, perfect for warm days or as a palate cleanser.
Quick to Make: With just a few steps, you can whip up this vibrant dish in no time, keeping weeknight meals stress-free.
Vegan and Low-Calorie: Enjoy guilt-free indulgence; this salad fits seamlessly into a plant-based diet while being low in calories.
Versatile and Customizable: Add your favorite proteins like tofu or shrimp for a heartier meal, or mix in colorful veggies for extra crunch.
Crowd-Pleasing Appeal: Serve it at parties or family gatherings, and watch it disappear faster than you can say "delicious!" Pair it with your favorite grilled proteins, like Balsamic Steak Salad, for a well-rounded meal.

Asian Cucumber Salad Ingredients

For the Salad
• Cucumbers – Fresh, crunchy base; English cucumbers are ideal for less bitterness.
• Granulated White Sugar – Balances flavors with sweetness; maple syrup or agave can substitute.
• Sesame Seeds – Adds nuttiness and texture; toasting them enhances the flavor.
• Garlic – Provides depth; use fresh for the best aroma, or dried if needed.
• Green Onion – Offers a mild onion flavor; chives work as a great substitute.

For the Dressing
• Soy Sauce – The key seasoning for umami richness; opt for low-sodium to control salt.
• Rice Vinegar – Introduces a tangy kick; apple cider vinegar is a flavorful alternative.
• Chinese Chili Oil – Adds a spicy twist; adjust to taste or replace with hot sauce.
• Sesame Oil – Imparts a rich, nutty flavor; can use olive oil but will change the taste.

Enjoy creating this vibrant Asian cucumber salad, a refreshing and quick dish perfect for any occasion!

Step‑by‑Step Instructions for Asian Cucumber Salad

Step 1: Prepare Marinade
In a mixing bowl, combine granulated white sugar, sesame seeds, crushed garlic, and chopped green onions. Stir in soy sauce, rice vinegar, Chinese chili oil, and sesame oil. Whisk the mixture well until the sugar dissolves and the ingredients are fully blended, creating a savory and aromatic marinade. Set it aside for now as we get the cucumbers ready.

Step 2: Cut Cucumbers
Trim both ends of each cucumber and set it on a cutting board. Place two chopsticks parallel to each side of the cucumber to control cutting depth. Make diagonal slices along the length, creating beautiful spirals, then flip the cucumber and continue cutting diagonally in the opposite direction to achieve the desirable shape.

Step 3: Salt Cucumbers
Transfer the cucumber spirals into a bowl and generously sprinkle salt over them. With clean hands, gently massage the salt into the cucumbers for about a minute. Let them sit for 8-10 minutes—this process will draw out excess moisture, ensuring a crisp texture in your Asian cucumber salad.

Step 4: Rinse and Coat
After the cucumbers have released moisture, rinse the salted spirals thoroughly under cold water in a colander to remove excess salt. Once rinsed, drain well and transfer the cucumbers back into the bowl. Pour the prepared marinade over the cucumbers and mix until every piece is evenly coated, combining those delightful flavors together.

Step 5: Serve
Your vibrant Asian cucumber salad is now ready! For an immediate refreshing taste, serve right away. Alternatively, refrigerate it for about 15-30 minutes to let the flavors meld and intensify. Enjoy this crunchy, flavorful dish as a side or a light main dish anytime you crave something fresh!

Asian Cucumber Salad Variations & Substitutions

Feel free to play with this Asian cucumber salad recipe—your creativity can take it to delicious new heights!

  • Spicy Version: Add red pepper flakes or sriracha to the marinade for an extra kick. It'll bring a warm heat that enhances the fresh flavor, perfect for spice lovers.

  • Dairy-Free: Use coconut aminos instead of soy sauce for a gluten-free and soy-free option. This will lend a slightly sweet flavor profile while still keeping things plant-based.

  • Add Proteins: Toss in cooked shrimp or marinated tofu for a heartier salad, turning it into a satisfying main course. Protein-packed variations make it a complete meal!

  • Different Veggies: Incorporate diced bell peppers, carrots, or radishes for added crunch and color. Each veggie adds its unique flair, making your salad even more visually stunning.

  • Citrus Twist: Squeeze fresh lime or lemon juice into the marinade for a zesty burst of freshness. You’ll infuse the salad with a bright, tangy flavor that dances on your palate.

  • Nuts and Seeds: Add sliced almonds or hemp seeds for a delightful crunch and nutrition boost. This twist enhances the texture and adds healthy fats that keep you feeling full.

  • Herb Infusion: Mix in fresh herbs like cilantro or mint for an aromatic flair. These vibrant additions will elevate the flavor and make every bite refreshing and fragrant.

  • Sweeten the Deal: Swap out granulated sugar for honey or agave syrup for a more natural sweetness. Each option brings its unique character to the dish, making it just that much more delightful.

Explore your personal taste with these variations, and don't forget to pair this salad with something fantastic like Balsamic Steak Salad or a crispy Tofu Caesar Salad for a gorgeous, well-rounded meal. Enjoy making it your own!

How to Store and Freeze Asian Cucumber Salad

  • Room Temperature: Enjoy your Asian cucumber salad immediately for the best flavor and crunch; avoid leaving it out for more than 2 hours.
  • Fridge: Store in an airtight container for up to 1 day. This keeps the salad fresh and ensures the cucumbers retain their crispness.
  • Freezer: Freezing is not recommended as freezing can negatively affect the texture of the cucumbers, making them mushy upon thawing.
  • Reheating: This salad is best served cold; if refrigerating, simply take it out and enjoy—no reheating necessary!

Expert Tips for Asian Cucumber Salad

  • Cut with Care: Make sure to do diagonal cuts on the cucumbers for perfect spirals that absorb the marinade beautifully.
  • Rinse Thoroughly: After salting the cucumbers, be diligent in rinsing to avoid overpowering saltiness. A quick rinse will keep your Asian cucumber salad light and flavorful.
  • Prep Ahead: Consider making the salad in advance to let the flavors develop. Allow it to marinate in the fridge for at least 30 minutes before serving.
  • Taste as You Go: Adjust components like soy sauce and vinegar based on your preference. A little taste test will ensure the best flavor balance.
  • Extra Crunch: For ultimate texture, massage the cucumbers well in salt and let them drain properly before mixing with the marinade. This step enhances the crispness of your salad!

Make Ahead Options

This Asian cucumber salad is a fantastic choice for meal prep, saving you time on busy weeknights! You can prepare the marinade and slice the cucumbers up to 24 hours in advance. Just keep the cucumber spirals in a sealed container after salting and rinsing, ensuring they stay crisp in the refrigerator. To maintain quality, combine the cucumbers with the marinade only right before serving—this helps prevent them from becoming soggy. When you’re ready to enjoy, simply mix the cucumbers with the marinade and let them rest for about 15-30 minutes to enhance those delicious flavors. It’s the perfect way to keep your dinner both efficient and scrumptious!

What to Serve with Asian Cucumber Salad

Elevate your meal with vibrant sides and pairings that complement the refreshing flavors of this crunchy salad.

  • Grilled Teriyaki Chicken: The sweet, savory glaze of teriyaki chicken harmonizes perfectly with the salad's bright flavors, creating a balanced plate.
  • Sushi Rolls: Light and flavorful sushi, like vegetable or avocado rolls, not only pairs well, but adds a delightful touch of umami that enhances the fresh salad.
  • Rice Noodle Stir-Fry: This dish brings hearty noodles into the mix, adding a satisfying texture and delicious flavors that meld beautifully with the cucumber salad.
  • Edamame Beans: These green pearls of protein provide a slight crunch and a boost of nutrition, making them a fitting accompaniment to the salad's lightness.
  • Miso Soup: A warm bowl of miso soup complements the cool cucumber salad perfectly, creating a lovely contrast in temperature and flavor.
  • Fresh Fruit Platter: A medley of seasonal fruits, such as melons or berries, can cleanse the palate and enhance the meal with vibrant sweetness, making it feel refreshed and balanced.
  • Peanut Dressing Dipped Veggies: Carrot and celery sticks with a creamy peanut dressing offer crunch and a nutty contrast that enhances the fresh flavors of the salad.
  • Chilled Sake or Green Tea: Pair your meal with a glass of chilled sake or a warm cup of green tea to cleanse your palate and complement the dish’s Asian roots.

Asian Cucumber Salad Recipe FAQs

How do I choose the right cucumbers for this salad?
Absolutely! For the best crunch and flavor, opt for fresh English cucumbers. They have fewer seeds and a milder taste, making them ideal for salads. Look for cucumbers that are firm, dark green, and free of dark spots or wrinkles. If you don’t have English cucumbers, regular slicing cucumbers will work, but you may want to peel them to reduce bitterness.

What’s the best way to store leftover Asian cucumber salad?
Very! If you have leftovers, store them in an airtight container in the refrigerator. They will stay fresh for up to 1 day. To maintain their crunchiness, avoid adding the dressing until you’re ready to serve. For the best taste, consume it the same day you make it.

Can I freeze Asian cucumber salad?
Unfortunately, freezing is not recommended for this salad. Cucumbers have a high water content, and when frozen, they can become mushy once thawed, losing their delightful crunch. Instead, enjoy this salad fresh or make a smaller batch that fits your needs.

What if my cucumber salad turns out too salty?
Don't worry! If you find the salad too salty, a simple fix is to add an extra squeeze of fresh lime juice or a splash of rice vinegar to balance the flavors. You can also dilute the marinade by adding an extra tablespoon of soy sauce (low-sodium, if preferred) and mixing it well.

Are there any allergy considerations I should be aware of?
Yes, absolutely! If you're serving this Asian cucumber salad to guests, keep in mind that soy sauce contains gluten and can be a concern for those with gluten sensitivities or celiac disease. You can substitute with gluten-free soy sauce or tamari to accommodate dietary restrictions. Always check labels for potential allergens.

Can I add other ingredients to my cucumber salad?
Very much so! Feel free to customize your salad with extra veggies like diced bell peppers, shredded carrots, or even cooked shrimp or tofu for added protein. Tossing in some fresh herbs like cilantro or mint can brighten the flavors even further, making it uniquely yours!

Asian Cucumber Salad

Asian Cucumber Salad: Refreshingly Crunchy and Flavorful

This Asian cucumber salad combines crunchy cucumbers with a savory sesame soy marinade, making it a refreshing and low-calorie dish.
Print Recipe Pin Recipe
Prep Time 15 minutes mins
Marinating Time 30 minutes mins
Total Time 45 minutes mins
Servings: 4 servings
Course: Salads
Cuisine: Asian
Calories: 120
Ingredients Equipment Method Nutrition Notes

Ingredients
  

For the Salad
  • 3 cups Cucumbers English cucumbers are ideal
  • 1 tablespoon Granulated White Sugar Maple syrup or agave can substitute
  • 2 tablespoons Sesame Seeds Toast for enhanced flavor
  • 2 cloves Garlic Use fresh for best aroma
  • 2 tablespoons Green Onion Chives work as a substitute
For the Dressing
  • 1/4 cup Soy Sauce Opt for low-sodium
  • 1/4 cup Rice Vinegar Apple cider vinegar is an alternative
  • 1 tablespoon Chinese Chili Oil Adjust to taste or replace with hot sauce
  • 1 tablespoon Sesame Oil Can substitute with olive oil

Equipment

  • Mixing Bowl
  • Colander
  • Cutting Board
  • Chopsticks

Method
 

Step-by-Step Instructions for Asian Cucumber Salad
  1. In a mixing bowl, combine granulated white sugar, sesame seeds, crushed garlic, and chopped green onions. Stir in soy sauce, rice vinegar, Chinese chili oil, and sesame oil. Whisk until the sugar dissolves and ingredients are blended.
  2. Trim both ends of each cucumber. Use chopsticks to control cutting depth and make diagonal slices along the cucumber to create spirals.
  3. Transfer cucumber spirals into a bowl and sprinkle salt over them. Massage the salt into the cucumbers for about a minute. Let sit for 8-10 minutes to draw out moisture.
  4. Rinse the salted spirals under cold water in a colander. Once rinsed, drain and transfer back into the bowl. Pour the marinade over and mix until evenly coated.
  5. Serve the salad immediately or refrigerate for 15-30 minutes to let flavors meld.

Nutrition

Serving: 1servingCalories: 120kcalCarbohydrates: 10gProtein: 3gFat: 8gSaturated Fat: 1gPolyunsaturated Fat: 4gMonounsaturated Fat: 2gSodium: 600mgPotassium: 300mgFiber: 2gSugar: 2gVitamin A: 500IUVitamin C: 10mgCalcium: 50mgIron: 1mg

Notes

For the best flavor, serve immediately or let marinate in the refrigerator before serving.

Tried this recipe?

Let us know how it was!

Energizing Workout Egg Avocado Salad for Simple Nourishment

January 5, 2026 by Grace Snow Leave a Comment

Have you ever craved something that’s both nourishing and quick to whip up after a workout? Enter my Protein-Packed Workout Egg Avocado Salad! This delightful dish combines the creaminess of ripe avocados with hard-boiled eggs for a satisfying meal that's rich in protein. In just 27 minutes, you can transform simple ingredients into a vibrant salad bursting with flavor, perfect for a quick lunch or a light dinner. Not only is it incredibly easy to make, but it’s also an ideal choice for anyone looking to ditch takeout in favor of something wholesome. Whether you’re a seasoned home chef or just starting out, this recipe ensures you can prepare a delicious and healthy meal effortlessly. Intrigued by how these flavors come together? Let’s dive into the recipe!

Why is this salad a must-try?

Nourishing and Quick: This salad is perfect for busy evenings when you need a nutritious meal in a hurry. Protein-Rich Ingredients: Packed with eggs and avocados, it fuels your recovery and keeps you satisfied. Flavorful Twist: The combination of fresh cilantro and zesty lime elevates each bite to lively perfection. Versatility at Its Best: Enjoy it on its own, as a filling in lettuce wraps, or spread on toasted bread for a complete meal. Looking for another healthy option? Try this delicious Avocado Egg Salad for a creamy delight!

Workout Egg Avocado Salad Ingredients

• Discover the essentials for a nourishing meal!

  • For the Salad Base

  • Large Eggs – Protein powerhouse providing richness and a firm texture; substitute with extra-firm tofu for a vegan option.

  • Ripe Avocados – Offers healthy fats that aid recovery and create a creamy base; choose avocados that yield slightly to pressure for optimal ripeness.

  • Red Onion – Adds sharpness and crunch; substitute with green onions for a milder flavor or omit for a less pungent taste.

  • Cherry Tomatoes – Contributes sweetness and acidity, balancing richness; use any small tomato variety, like grape tomatoes, if necessary.
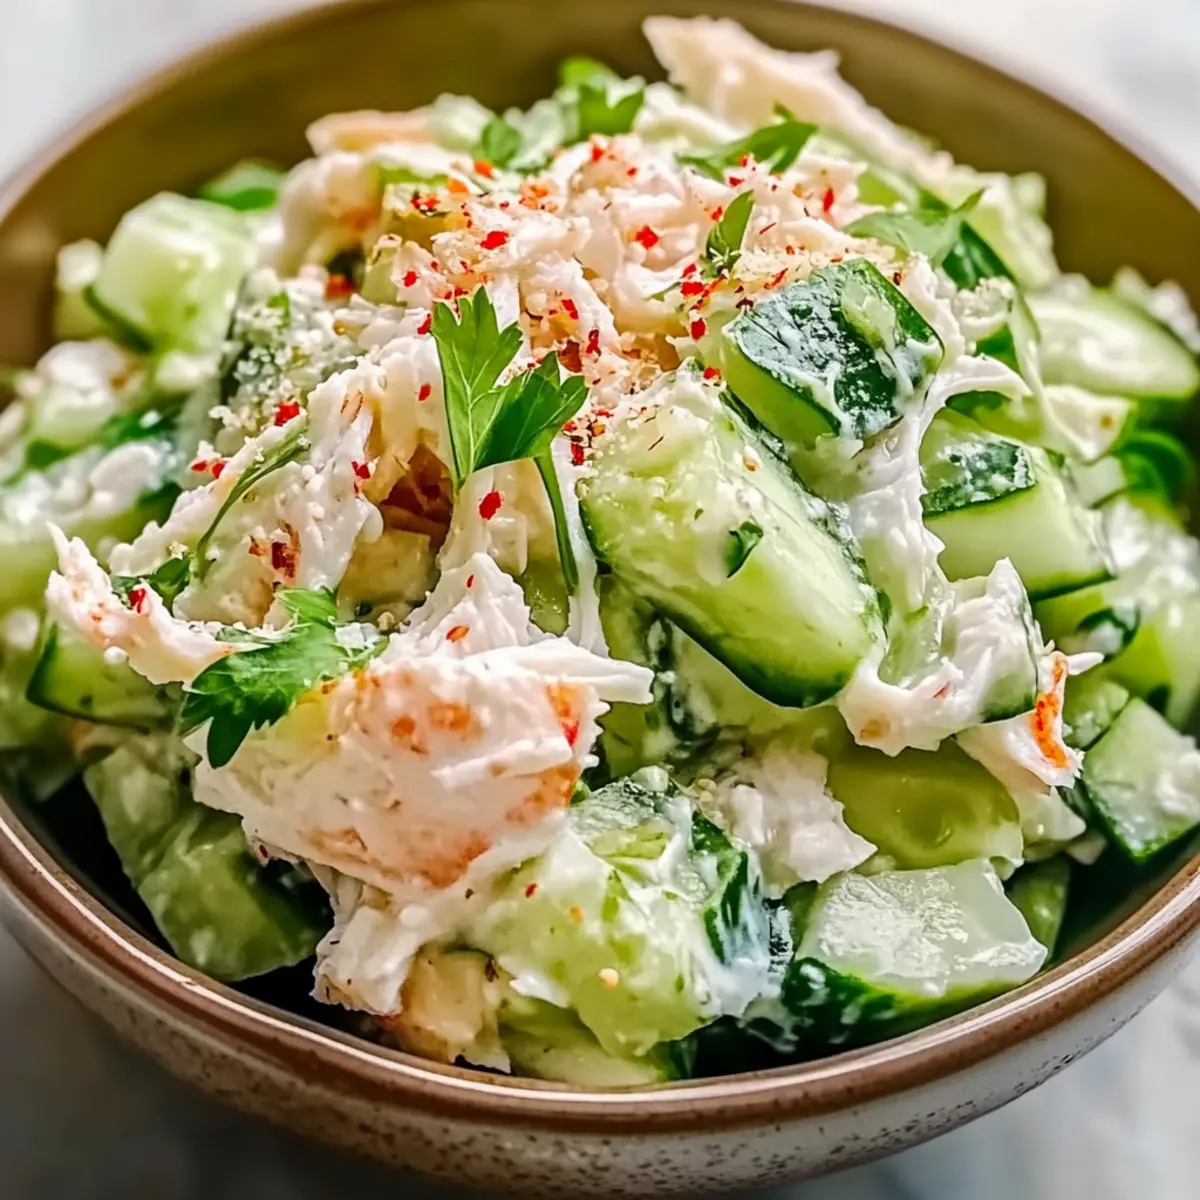
  • Fresh Cilantro – Brings a burst of citrusy freshness; replace with parsley for a different herb flavor.

  • For the Dressing

  • Lime Juice – Enhances flavor with tanginess while helping prevent avocado browning; lemon juice can be a substitute if lime is unavailable.

  • Olive Oil – Adds silkiness to the texture and a fruity note; use avocado oil as an alternative for a similar flavor profile.

  • Salt and Pepper – Essential for flavor enhancement; adjust quantities to personal taste.

  • Red Pepper Flakes – Optional for spice; can be replaced with diced jalapeños for more heat.

Get ready to whip up a delicious Workout Egg Avocado Salad that’s not just delightful but incredibly nourishing!

Step‑by‑Step Instructions for Workout Egg Avocado Salad

Step 1: Boil Eggs
Place large eggs gently into a pot and fill it with enough water to cover them by at least an inch. Bring the water to a rolling boil over medium-high heat, then cover the pot and remove it from heat. Let the eggs sit in the hot water for 10–12 minutes for perfectly hard-boiled eggs.

Step 2: Prepare Ingredients
While the eggs are cooking, take ripe avocados and slice them in half. Scoop the flesh into a mixing bowl, using a fork to mash the avocados. Leave some chunks for added texture. This creates a creamy base that will complement the flavors in your Workout Egg Avocado Salad beautifully.

Step 3: Combine Vegetables
Next, chop the red onion, halve the cherry tomatoes, and roughly chop the fresh cilantro. Add all these vibrant veggies to the mashed avocado along with a generous drizzle of lime juice and olive oil. Gently mix everything together, ensuring the ingredients are evenly distributed while maintaining some delightful chunks.

Step 4: Cool Eggs
Once the eggs are done cooking, transfer them to a bowl of ice water. Allow them to cool for about 5 minutes, which makes peeling easier. This quick cooling method helps to prevent overcooking and keeps the egg yolks perfectly creamy rather than rubbery.

Step 5: Chop Eggs
After the eggs have cooled, peel off the shells and chop the eggs into bite-sized pieces. Carefully fold the chopped eggs into the salad mixture. Aim to combine without mashing everything together, retaining that lovely texture of the egg amidst the creamy avocado.

Step 6: Season Salad
Now it’s time to elevate the flavors! Season your Workout Egg Avocado Salad with salt, pepper, and a pinch of red pepper flakes if you crave some heat. Stir gently to ensure all the ingredients are perfectly coated with the seasoning, enhancing the taste of this wholesome dish.

Step 7: Taste Test
Finally, give your salad a taste. Adjust any seasonings as desired, adding more salt, pepper, or lime juice according to your preference. This final touch allows you to personalize the Workout Egg Avocado Salad to your liking, making every bite a delicious experience!

Workout Egg Avocado Salad Variations

Feel free to get creative with this recipe and make it your own by adding unique twists!

  • Vegan: Substitute large eggs with extra-firm tofu for a plant-based protein boost. Simply crumble tofu and mix it in!
  • Quinoa Boost: Add cooked quinoa for extra fiber and protein. It adds a fantastic nutty flavor to the salad.
  • Add Crunch: Incorporate diced bell peppers or snap peas for a delightful crunch. They bring a pop of color and freshness as well!
  • Creamy Twist: Swap olive oil for Greek yogurt for creaminess without the calories. It will add a lovely tang to your salad.
  • Herb Variation: Replace cilantro with dill or mint for a refreshing herbal twist. Each herb brings a different nuance to the flavor profile.
  • Heat Level: For an extra spicy kick, toss in diced jalapeños instead of red pepper flakes. Adjust to your heat preference!
  • Nutty Flavor: Sprinkle in some toasted sunflower seeds or walnuts for added crunch and healthy fats. It’s an amazing texture contrast!
  • Fruit Fusion: Mix in some diced mango or pineapple for a sweet touch that perfectly balances the richness of the avocado.

If you’re looking for more refreshing salad ideas, check out this Chicken Salad with Apples for a delightful fruit twist or our Grilled Balsamic Steak Salad for a hearty option! Enjoy experimenting!

What to Serve with Workout Egg Avocado Salad

Crafting the perfect meal alongside this vibrant salad can enhance your dining experience and bring a delightful balance of flavors and textures to your table.

  • Whole Grain Toast: A slice of toasted whole grain bread provides a hearty base that complements the creamy salad while adding fiber to keep you satisfied longer.

  • Crispy Sweet Potato Fries: These naturally sweet and crispy fries offer a satisfying crunch and a bit of sweetness that pairs wonderfully with the protein-rich salad.

  • Zesty Cucumber Salad: Light and refreshing, a cucumber salad with lime and mint adds a cool contrast, enhancing the flavors of the avocado while keeping it light.

  • Quinoa Pilaf: An earthy quinoa pilaf with herbs can elevate your meal, providing additional protein and a nutty flavor that complements the richness of the egg and avocado.

  • Grilled Veggie Skewers: Colorful skewers of grilled bell peppers and zucchini bring a smoky flavor that enhances the salad's freshness and makes a beautiful presentation.

  • Lemonade or Herbal Iced Tea: A refreshing drink like lemonade or iced herbal tea can cleanse the palate, offering a sweet and tangy contrast to the savory profile of the salad.

  • Fresh Fruit Bowl: A light fruit bowl with seasonal berries or citrus not only adds a refreshing touch but also serves as a perfect finish to your meal, brightening your day.

Make Ahead Options

Preparing your Workout Egg Avocado Salad ahead of time is a fantastic way to save precious minutes during your busy week! You can hard-boil the eggs and store them in the refrigerator for up to 7 days. Simply mash the ripe avocados and mix them with lime juice to prevent browning, refrigerating this mixture up to 24 hours in advance. Additionally, you can chop the veggies (red onion, tomatoes, cilantro) and store them in an airtight container for up to 3 days. When it's time to serve, just combine everything, fold in the chopped eggs, and season as desired. This way, your salad stays fresh and delicious with minimal effort, perfect for quick meal prep!

How to Store and Freeze Workout Egg Avocado Salad

Fridge: Store any leftovers in an airtight container for up to 2 days. Keep in mind that the avocado may brown over time, so consume soon for the best flavor.

Freezer: We recommend not freezing this salad as the texture of the avocado and eggs can be affected. Fresh ingredients work best in this protein-rich dish.

Reheating: If you've added any warm ingredients like quinoa, you can gently reheat them in the microwave but avoid reheating the entire salad to maintain texture and flavor.

Serving Suggestion: Enjoy your Workout Egg Avocado Salad fresh for a delightful meal; it’s best served shortly after preparation for the ultimate taste and texture experience!

Expert Tips for Workout Egg Avocado Salad

  • Timely Boiling: Use a timer for cooking eggs; overcooking can lead to a greenish yolk. Aim for 10–12 minutes for perfect results.
  • Mash Well: For a creamier texture, mash avocados thoroughly before mixing them with other ingredients. This enhances the overall mouthfeel of your salad.
  • Watch the Lime: Add lime juice gradually—if you prefer a milder flavor, start with less and adjust to your taste. It complements the avocado beautifully in this Workout Egg Avocado Salad.
  • Freshness Matters: Enjoy your salad fresh! Though it keeps for 1-2 days in the fridge, consume it soon for optimal flavor and prevent avocado browning.
  • Customize Spices: Feel free to substitute red pepper flakes with diced jalapeños for an extra kick; customize the heat to suit your palate.

Workout Egg Avocado Salad Recipe FAQs

How do I choose ripe avocados for this salad?
Absolutely! When selecting avocados, look for fruits that yield slightly to gentle pressure. The skin should be dark green to black, indicating ripeness. If the avocados are hard, set them aside at room temperature for a couple of days until they soften.

How long can I store leftovers of the salad?
Very! You can store your Workout Egg Avocado Salad in an airtight container in the refrigerator for up to 2 days. Just remember that the avocado will start to brown over time, so it's best to enjoy it fresh for peak flavor.

Can I freeze the salad for later use?
Unfortunately, I recommend against freezing this salad. Freezing can significantly alter the texture of both the avocado and the eggs, resulting in a watery mess. Enjoy it fresh for the best taste and experience!

What if my boiled eggs are overcooked?
No worries! If you accidentally overcook your eggs and notice a greenish ring around the yolk, don’t fret—it's safe to eat! To achieve perfect hard-boiled eggs, try cooking them for 10-12 minutes and immediately placing them in cold water to halt the cooking.

Is this salad suitable for people with egg allergies?
Certainly! If you have an egg allergy, you can substitute the large eggs with extra-firm tofu, which provides a similar texture and adds protein. Another option is using chickpeas, which can create a hearty base while keeping your salad delicious.

Can I add more vegetables to the salad?
Absolutely! The more the merrier! You can include chopped bell peppers, cucumbers, or even leafy greens like spinach. This not only boosts the nutrient content but also adds delightful crunch and flavors to your Workout Egg Avocado Salad!

Workout Egg Avocado Salad

Energizing Workout Egg Avocado Salad for Simple Nourishment

This Workout Egg Avocado Salad is a nourishing and quick dish, perfect for after workouts.
Print Recipe Pin Recipe
Prep Time 15 minutes mins
Cook Time 12 minutes mins
Cooling Time 5 minutes mins
Total Time 27 minutes mins
Servings: 2 salads
Course: Salads
Cuisine: American
Calories: 320
Ingredients Equipment Method Nutrition Notes

Ingredients
  

For the Salad Base
  • 4 large eggs Protein powerhouse providing richness and a firm texture; substitute with extra-firm tofu for a vegan option.
  • 2 medium ripe avocados Offers healthy fats that aid recovery and create a creamy base.
  • 1 small red onion Adds sharpness and crunch; substitute with green onions for a milder flavor.
  • 1 cup cherry tomatoes Contributes sweetness and acidity.
  • 0.5 cup fresh cilantro Brings a burst of citrusy freshness; replace with parsley for a different flavor.
For the Dressing
  • 2 tablespoons lime juice Enhances flavor with tanginess while helping prevent avocado browning.
  • 2 tablespoons olive oil Adds silkiness to the texture.
  • 1 teaspoon salt Essential for flavor enhancement; adjust to taste.
  • 0.5 teaspoon black pepper Essential for flavor enhancement; adjust to taste.
  • 0.25 teaspoon red pepper flakes Optional for spice; can be replaced with diced jalapeños.

Equipment

  • pot
  • Mixing Bowl
  • Fork
  • Knife

Method
 

Preparation Steps
  1. Place large eggs gently into a pot and fill it with enough water to cover them by at least an inch. Bring the water to a rolling boil, then cover the pot and remove it from heat. Let the eggs sit in the hot water for 10–12 minutes.
  2. While the eggs are cooking, slice ripe avocados in half and scoop the flesh into a mixing bowl, mashing with a fork and leaving some chunks for texture.
  3. Chop the red onion, halve the cherry tomatoes, and roughly chop the fresh cilantro. Add to the mashed avocado with lime juice and olive oil. Mix gently.
  4. Transfer eggs to a bowl of ice water and cool for about 5 minutes before peeling.
  5. Peel the eggs and chop into bite-sized pieces. Fold into the salad mixture gently.
  6. Season the salad with salt, pepper, and red pepper flakes, stirring to coat the ingredients.
  7. Taste and adjust seasonings according to your preference.

Nutrition

Serving: 1saladCalories: 320kcalCarbohydrates: 15gProtein: 14gFat: 24gSaturated Fat: 4gPolyunsaturated Fat: 2gMonounsaturated Fat: 16gCholesterol: 370mgSodium: 450mgPotassium: 650mgFiber: 8gSugar: 2gVitamin A: 500IUVitamin C: 10mgCalcium: 40mgIron: 2mg

Notes

Enjoy your salad fresh! Though it keeps for 1-2 days in the fridge, consume soon for optimal flavor.

Tried this recipe?

Let us know how it was!

Vibrant Korean Carrot Salad: A Crunchy, Flavorful Delight

December 29, 2025 by Grace Snow Leave a Comment

As I diced the onions and felt their sharp aroma fill the kitchen, I knew I was about to create something special. This Korean Carrot Salad, or Koreiskaya Morkovka, is a delightful fusion of sweetness and spice that breathes life into any meal. What I love most about this easy side dish is not just its vibrant crunch but also its versatility. Whether you're complementing grilled meats or bringing a refreshing kick to a buffet, this vegetarian gem delivers. Plus, it’s budget-friendly and super simple to whip up, making it my go-to recipe for gatherings or cozy dinners at home. Ready to discover how this salad can transform your plate? Let’s dive in!

Why is Korean Carrot Salad a Must-Try?

Vibrant, Fresh Flavors: This Korean Carrot Salad bursts with bold flavors that tantalize your taste buds. Infused with spices, the balance of sweet and tangy makes every bite refreshing.

Budget-Friendly: Made primarily from inexpensive ingredients, this salad won’t break the bank.

Easy to Prepare: Quick to whip up, it’s perfect for those busy weeknights or last-minute gatherings.

Versatile Appeal: Great as a side for grilled meats or as a standalone dish, it pairs beautifully with meals like Balsamic Steak Salad or even a hearty Chicken Salad with Apples.

Crowd-Pleaser: Whether you’re serving family or friends, this salad is sure to impress and satisfy.

Storage Wonder: Easily stored in the fridge, it keeps well for days, allowing the flavors to develop even further. Enjoy this easy, vibrant recipe that everyone will love!

Korean Carrot Salad Ingredients

For the Salad

  • Carrots – Freshly julienned to provide a sweet base that amps up the crunch factor.
  • Onion – Finely diced to enhance depth of flavor when caramelized.
  • Avocado Oil – Ideal for sautéing onions due to its high smoke point; substitute with any neutral oil if necessary.
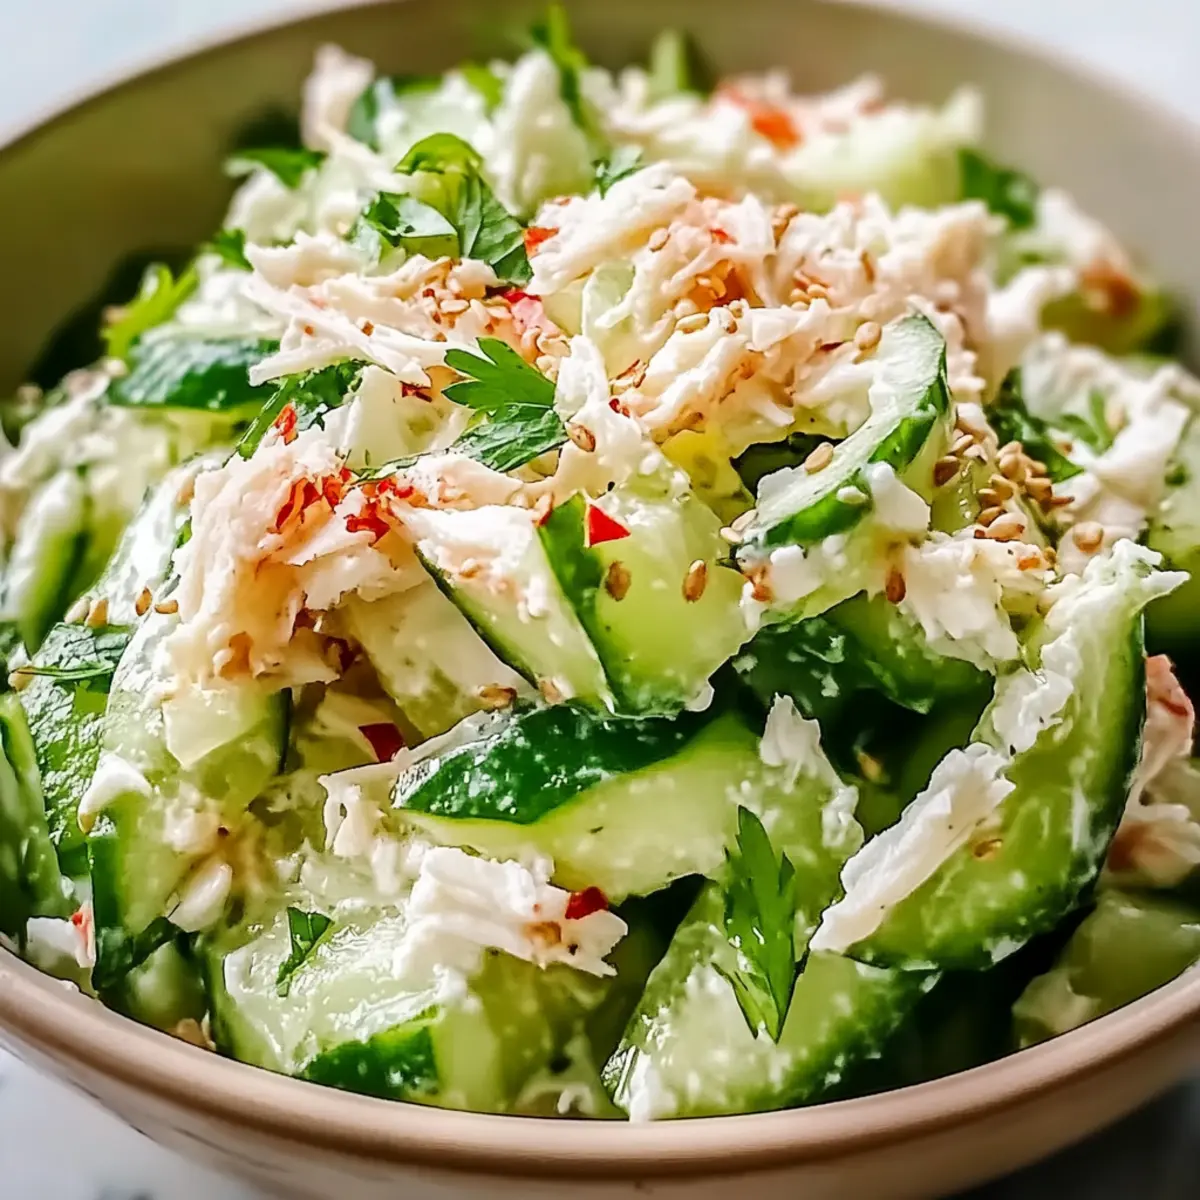
  • Kosher Salt – Essential for enhancing flavors; adjust to taste based on preference.
  • Sugar – Balances saltiness and acidity; you can tweak this depending on your sweetness preference.
  • Smoked Paprika – Introduces a smoky depth; regular paprika works as a substitute for a milder profile.
  • Ground Coriander – Adds a warm, citrusy note that pairs wonderfully with the carrots.
  • Cayenne Pepper – For a spicy kick; adjust for your desired spice level.
  • Garlic – Minced for a robust flavor infusion in the salad.
  • Cilantro – Fresh herb that brightens the dish; can be omitted if you’re not a fan.
  • White Vinegar – Provides acidity and zest; modify the amount to suit your taste.

For Caramelizing the Onions

  • Avocado Oil – Use the same oil for consistency in flavor and texture; ensure it's heated before adding onions.

Optional Garnish

  • Extra Cilantro – Sprinkle on top for added freshness and color when serving.

This delightful Korean Carrot Salad can elevate any meal with its vibrant flavors and textures! Enjoy crafting this easy side dish that's sure to be a hit at your table.

Step‑by‑Step Instructions for Korean Carrot Salad

Step 1: Caramelize the Onions
Begin by heating 2 tablespoons of avocado oil in a skillet over medium-low heat. Once the oil is shimmering, add 1 finely diced onion and cook for about 8 to 10 minutes, stirring occasionally, until the onions turn golden brown and soft. This step is crucial for developing a rich flavor base for your Korean Carrot Salad.

Step 2: Prepare the Carrots
While the onions caramelize, take 4 large carrots and julienne them using a mandolin for even slices. Place the julienned carrots into a large mixing bowl. Sprinkle them with a pinch of kosher salt and 1 tablespoon of sugar, tossing well to combine. This will help draw out their sweetness and enhance the flavor profile of your salad.

Step 3: Add Spices to Carrots
Next, create a well in the center of the bowl with the seasoned carrots. Add 1 teaspoon of ground coriander, 1 teaspoon of smoked paprika, a pinch of cayenne pepper (to your taste), and 2 minced garlic cloves into the well. These spices add depth and warmth, making your Korean Carrot Salad aromatic and flavorful.

Step 4: Combine Hot Oil and Onions
Once your onions are beautifully caramelized, increase the skillet’s heat briefly until the oil is sizzling. Carefully strain the onions, pouring the hot oil over the carrot mixture in the bowl. The heat will activate the spices, making the salad fragrant. Allow it to sit for about a minute to infuse the flavors together seamlessly.

Step 5: Mix the Salad Thoroughly
After a minute, use tongs or a large spoon to mix the carrot mixture thoroughly, incorporating the oils and spices from the bottom. Discard the cooked onions or save them for another dish. This step combines all the flavors and textures, establishing the base of your refreshing Korean Carrot Salad.

Step 6: Final Touches
Now, add a handful of chopped fresh cilantro and 2 tablespoons of white vinegar to the carrot mixture. Mix well until everything is well combined, ensuring the vinegar gives a zesty tang to balance the sweetness of the carrots. This is where the salad truly comes to life, adding brightness and freshness.

Step 7: Marinate Before Serving
Transfer your vibrant Korean Carrot Salad to mason jars or a sealed container and refrigerate for at least 4 hours, preferably overnight. This marination allows the flavors to meld beautifully, intensifying the taste. When you're ready to serve, enjoy the salad cold, garnished with extra cilantro for a pop of color and flavor.

Storage Tips for Korean Carrot Salad

Fridge: Store your Korean Carrot Salad in an airtight container in the refrigerator for up to 7 days. The flavors will deepen and improve over time.

Freezer: For longer storage, you can freeze the salad for up to 3 months. However, the texture of the carrots may change, so it's best to consume it fresh.

Reheating: Enjoy the salad cold or at room temperature; avoid reheating as it’s best served fresh, allowing the crispy texture to shine.

Serving Suggestion: When ready to serve, give the salad a good stir, and garnish with extra cilantro for a vibrant touch!

Expert Tips for Korean Carrot Salad

  • Choose Fresh Carrots: Opt for whole, fresh carrots instead of pre-shredded versions to maintain a satisfying crunch in your Korean Carrot Salad.
  • Caramelize Slowly: Take your time when caramelizing the onions; low and slow ensures they develop maximum flavor and sweetness without burning.
  • Adjust Spiciness: Start with a small amount of cayenne pepper and taste as you go; you can always add more for your desired heat level.
  • Use Hot Oil Wisely: Pour the sizzling oil over the carrot mix promptly; this step is essential for activating the spices and enhancing the salad's flavor.
  • Marinate Well: Allow the salad to sit in the fridge for at least 4 hours to let the flavors meld; overnight is even better for a more robust taste.

Korean Carrot Salad Variations

Feel free to put your own spin on this lovely Korean Carrot Salad and make it your own!

  • Add Color: Incorporate bell peppers for extra crunch and vibrant color, brightening up the dish and adding a sweet crunch.

  • Herb Swap: Use parsley instead of cilantro for a fresh herb flavor that appeals to everyone or simply omit it if you’re not a fan.

  • Crunchy Nuts: Toss in some chopped walnuts or almonds for a delightful nutty texture that pairs wonderfully with the crisp carrots.

  • Spicy Kick: Increase the cayenne pepper or add a dash of sriracha to amp up the heat level if you love a little thrill in your salad.

  • Creamy Contrast: Drizzle a bit of sesame oil or even a touch of mayonnaise before serving to achieve a creamy variation that adds richness.

  • Sweet Twist: Add raisin or dried cranberries for a pop of sweetness that balances the tangy vinegar beautifully. This sweet and savory combo is oh-so-delicious!

  • Zesty Touch: Replace white vinegar with apple cider vinegar for a fruitier acidity that brightens the entire salad and adds a unique twist.

  • Asian Flair: Include a sprinkle of sesame seeds or nori flakes for a final touch of flavor and a subtle hint of umami that elevates the dish.

These variations allow for endless creativity with your Korean Carrot Salad. Don't hesitate to explore and discover your perfect blend!

What to Serve with Korean Carrot Salad?

Pair your meal beautifully and elevate your dining experience with delightful accompaniments that complement the bold flavors of this vibrant salad.

  • Grilled Chicken Skewers: The smoky char of marinated chicken enhances the salad's zingy notes, creating a perfect balance of flavors.
  • Steamed Jasmine Rice: This fluffy base absorbs the spicy tang of the salad, making for a comforting and delicious pairing.
  • Cucumber Kimchi: Adding a crunchy and tangy bite, this side brings another layer of texture and spice that harmonizes with the salad.
  • Sesame Noodles: These nutty, savory noodles serve as a hearty complement to the refreshing crunch of Korean Carrot Salad, enriching your meal.
  • Roasted Brussels Sprouts: Caramelized and slightly sweet, they contrast beautifully with the salad's sharpness, adding a delectable depth to your plate.
  • Chilled Soju or Makgeolli: Refreshing rice wines introduce a subtly sweet note that enhances the meal’s overall experience while bringing a nod to Korean cuisine.
  • Miso Soup: Light and savory, this warm broth prepares the palate for the salad's bold flavors and makes for a soothing contrast.
  • Fruit Sorbet: For dessert, a light and fruity sorbet cleanses the palate after the meal, finishing with a touch of sweetness.
  • Savory Crêpes: Filled with mushrooms or cheese, they create a satisfying contrast to the crisp, zesty salad, making for an elegant main dish pairing.
  • Herb Bread: A crusty loaf with a herby spread offers a fantastic way to scoop up the salad and adds a rustic charm to your table setting.

Make Ahead Options

These Korean Carrot Salad preparations are perfect for busy weeknights! You can julienne the carrots and prepare the spice mixture up to 24 hours in advance; simply store them in airtight containers in the refrigerator. For the onions, caramelize them and let cool before refrigerating—this keeps their rich flavors intact. When you’re ready to serve, combine the carrot mixture with the hot oil and onions, and add the fresh cilantro and vinegar. Let the salad marinate for at least 4 hours (preferably overnight) for the best flavor infusion. By prepping ahead, you’ll save precious time while still enjoying a refreshing and vibrant dish!

Korean Carrot Salad Recipe FAQs

How do I select the best carrots for my salad?
Absolutely! Look for fresh, firm carrots with a vibrant orange color and smooth skin. Avoid any that have dark spots or are overly soft, as these can indicate aging. Whole carrots typically provide the best texture for the salad.

What is the best way to store Korean Carrot Salad?
You can store your Korean Carrot Salad in an airtight container in the refrigerator for up to 7 days. The flavors actually deepen as it sits, making it even more delicious over time. Just give it a good stir before serving, and garnish with extra cilantro for a fresh touch!

Can I freeze Korean Carrot Salad?
While you can technically freeze the salad for up to 3 months, the texture of the carrots might change once thawed. For the best experience, I recommend enjoying the salad fresh! If you decide to freeze, place it in a tight-sealing container, ensuring there’s minimal air exposure.

What do I do if my onions burn while caramelizing?
Don’t worry! If your onions burn, it’s best to start over as burned onions can impart a bitter taste to your salad. Cook them slowly over medium-low heat, stirring often for 8-10 minutes. This will let you achieve that beautiful golden brown color without scorching.

Is Korean Carrot Salad safe for my pets or those with allergies?
While the salad is vegetarian-friendly, be cautious if you have pets. Ingredients like onions can be harmful to dogs and some other animals. For those with allergies, check the specific spices like paprika or cayenne, as these can trigger sensitivities. Always adjust the recipe according to dietary needs.

Korean Carrot Salad

Vibrant Korean Carrot Salad: A Crunchy, Flavorful Delight

Experience the refreshing taste of Korean Carrot Salad, a delightful mix of sweetness and spice, perfect as a side dish or standalone.
Print Recipe Pin Recipe
Prep Time 15 minutes mins
Cook Time 10 minutes mins
Marinating Time 4 hours hrs
Total Time 6 hours hrs 5 minutes mins
Servings: 4 servings
Course: Salads
Cuisine: Korean
Calories: 150
Ingredients Equipment Method Nutrition Notes

Ingredients
  

For the Salad
  • 4 large carrots Freshly julienned to provide a sweet base.
  • 1 onion Finely diced to enhance flavor.
  • 2 tablespoons avocado oil Ideal for sautéing onions.
  • 1 teaspoon kosher salt Adjust to taste.
  • 1 tablespoon sugar Balances saltiness and acidity.
  • 1 teaspoon smoked paprika Introduces a smoky depth.
  • 1 teaspoon ground coriander Adds a warm, citrusy note.
  • 1 pinch cayenne pepper Adjust for desired spice level.
  • 2 cloves garlic Minced for flavor infusion.
  • 1 bunch cilantro Fresh herb that brightens the dish.
  • 2 tablespoons white vinegar Provides acidity and zest.
For Caramelizing the Onions
  • 2 tablespoons avocado oil Use the same oil for consistency.
Optional Garnish
  • 1 bunch extra cilantro Sprinkle on top for added freshness.

Equipment

  • Skillet
  • mandolin
  • Mixing Bowl
  • mason jars or airtight container

Method
 

Step-by-Step Instructions
  1. Heat avocado oil in a skillet over medium-low heat. Add finely diced onion and cook for 8-10 minutes until golden brown.
  2. Julienne carrots and place in mixing bowl. Sprinkle with kosher salt and sugar, tossing well.
  3. Create a well in the center of carrots and add ground coriander, smoked paprika, cayenne pepper, and minced garlic.
  4. Pour sizzling oil from skillet over the carrot mixture. Allow to sit for a minute.
  5. Mix the carrot mixture thoroughly, incorporating all flavors, discarding or saving the cooked onions.
  6. Add chopped cilantro and white vinegar to the carrot mixture. Mix well until combined.
  7. Transfer salad to containers and refrigerate for at least 4 hours before serving.

Nutrition

Serving: 1servingCalories: 150kcalCarbohydrates: 15gProtein: 2gFat: 8gSaturated Fat: 1gPolyunsaturated Fat: 1gMonounsaturated Fat: 6gSodium: 200mgPotassium: 400mgFiber: 3gSugar: 5gVitamin A: 10000IUVitamin C: 20mgCalcium: 50mgIron: 1mg

Notes

Store in an airtight container for up to 7 days. The salad tastes better as it marinates.

Tried this recipe?

Let us know how it was!

Vibrant Green Vegan Salad for a Refreshing, Healthy Meal

December 29, 2025 by Grace Snow Leave a Comment

As the golden sun begins to warm the day, I find myself craving something light and vibrant—like a burst of spring in a bowl. Enter my Green Vegan Salad with Quinoa and Lemony Vinaigrette. Packed with fresh seasonal greens and protein-rich quinoa, this salad isn’t just visually stunning; it's a quick and healthy option that whisks away the heaviness often found in fast food. With minimal prep time, it serves as the perfect canvas for your favorite crunchy veggies and creamy avocado. Each bite offers a satisfying mix of textures, leaving you refreshed and revitalized. Curious about how to elevate your lunch or dinner game with this delightful dish? Keep reading!

Why is this salad a must-try?

Freshness and Flavor: Each ingredient brings its own vibrant taste, creating an explosion of freshness in your mouth. Nutritious Boost: Packed with protein from quinoa and fiber from veggies, this salad fuels your body while satisfying your cravings. Quick Prep: With minimal cooking time, you can whip this up in no time—perfect for busy weekdays! Versatile Options: Feel free to customize with seasonal veggies or swap nuts for seeds, allowing for endless creativity. Eye-Catching Presentation: The beautiful array of green hues makes this salad a showstopper at any meal, sure to impress guests and family alike!

Green Vegan Salad Ingredients

• Dive into fresh flavors and textures with these wholesome components!

For the Base

  • Quinoa – Provides a gluten-free base, adding protein and texture. Substitution: Small pasta like orzo or chewy grains like freekah can be used.
  • Mixed Salad Leaves – A base layer for freshness and volume. Any seasonal salad greens work well.

For the Vegetables

  • Broccoli – Adds crunch and enhances fiber content. Note: Use half a medium head for this recipe.
  • Asparagus – Contributes a fresh, slightly earthy flavor. Keep it slightly firm when cooked for better texture.
  • Courgette/Zucchini – Adds moisture and lightness. Sliced thinly for even cooking.
  • Frozen Peas – Provide sweetness and vibrant color. Use petit pois for a delicate touch.

For the Garnish

  • Almonds – Offer crunch and healthy fats for satiety. Can substitute with other nuts or seeds.
  • Avocado – Adds creaminess and healthy fats. Sliced before serving for an appealing presentation.
  • Spring Onions/Scallions – Provide a mild onion flavor to elevate the salad. Use the green part for color and bite.

For the Dressing

  • Lemon Juice – Brightens up the flavors with a zesty kick. Freshly squeezed is best for maximum flavor.
  • Herbs – Adds an aromatic touch that enhances the dish's overall freshness. Try fresh basil or parsley for an extra burst of flavor.

Step‑by‑Step Instructions for Green Vegan Salad

Step 1: Prepare Quinoa
Start by rinsing 1 cup of quinoa under cold water to enhance its nutty flavor. In a medium saucepan, combine the rinsed quinoa with 2 cups of water and a pinch of salt. Bring this mixture to a boil over medium-high heat, then reduce the heat to low, cover, and simmer for about 15 minutes, or until the quinoa is fluffy and the water is absorbed. Once cooked, remove from heat and let it cool.

Step 2: Cook Vegetables
While the quinoa cools, prepare your vegetables. Chop half a medium head of broccoli and trim the ends of the asparagus, cutting them into 2-inch pieces. You can either steam them for about 4-5 minutes until slightly firm or roast them in a preheated oven at 400°F (200°C) for 10-12 minutes. Both methods will help retain their vibrant color and nutrients, enhancing your Green Vegan Salad.

Step 3: Combine Ingredients
In a large mixing bowl, add the cooled quinoa, steamed or roasted broccoli, asparagus, thinly sliced courgette, and 1 cup of frozen peas. Gently fold in a generous handful of mixed salad leaves, ensuring that everything is evenly mixed. Add ½ cup of roughly chopped almonds for an extra crunch that complements the fresh ingredients in the salad beautifully.

Step 4: Make Vinaigrette
For the zesty lemony vinaigrette, whisk together the juice of 1 lemon, 3 tablespoons of olive oil, and a pinch of salt and pepper in a separate small bowl. If desired, mix in finely chopped herbs like basil or parsley for added freshness. The vinaigrette will add a delightful brightness to your Green Vegan Salad, enhancing all the flavors harmoniously.

Step 5: Dress Salad
Drizzle the prepared vinaigrette over the salad ingredients in the mixing bowl. Gently toss everything together using salad tongs or two large forks, ensuring every component is well-coated with the dressing. This step is crucial as the dressing will elevate the overall flavor of your Green Vegan Salad, making it irresistible and mouthwatering.

Step 6: Garnish and Serve
Finally, slice a ripe avocado and distribute the pieces atop the salad. Then sprinkle finely chopped spring onions for an added burst of mild onion flavor and color. Serve chilled or at room temperature. Your vibrant Green Vegan Salad with Quinoa and Lemony Vinaigrette is now ready to delight everyone at the table!

Make Ahead Options

These Green Vegan Salad with Quinoa and Lemony Vinaigrette are perfect for meal prep, making your busy weeknights a breeze! You can cook the quinoa and refrigerate it in an airtight container up to 3 days in advance—allow it to cool fully before storing to keep it fluffy. The vegetables can also be steamed or roasted ahead of time and stored separately for up to 2 days to maintain their vibrant color and crunch. When ready to serve, simply combine all components, dress with the vinaigrette, and top with slices of avocado and spring onions. This way, you'll have a delightfully fresh salad ready in minutes, just as delicious as if you made it that day!

Green Vegan Salad Variations

Feel free to get creative with your Green Vegan Salad, adding your favorite twists and flavors for a truly personalized dish!

  • Nut-Free: Swap almonds for sunflower seeds or pumpkin seeds to keep it crunchy while being nut-free.

  • Roasted Chickpeas: Incorporate crispy roasted chickpeas for a protein-packed and satisfying addition that elevates the salad's heartiness.

  • Extra Greens: Mix in other seasonal greens like kale or arugula for an added dimension that enhances both flavor and nutrition.

  • Herb Explosion: Use a variety of fresh herbs like cilantro or dill in your vinaigrette to take the flavor to fresh heights, making each bite more aromatic.

  • Spicy Kick: Add sliced jalapeños or a sprinkle of red pepper flakes for a pleasant heat that contrasts beautifully against the creamy avocado.

  • Mediterranean Flair: Toss in some olives and cherry tomatoes for a Mediterranean twist that complements the freshness of the greens.

  • Creamy Addition: Include a dollop of hummus or tahini dressing for a creamy element that balances the salad’s crisp textures.

  • Citrus Burst: Experiment with different citrus juices like lime or orange in your vinaigrette for a zingy citrus note that brightens the entire dish.

With these variations, your Green Vegan Salad can be endlessly delightful! Looking for more vibrant ideas? Check out my recipes for Avocado Egg Salad and Tofu Caesar Salad for a twist on healthy eating!

Expert Tips for Green Vegan Salad

  • Vegetable Cooking: Avoid overcooking your vegetables; they should be firm for maximum crunch and nutrition. This will keep your Green Vegan Salad vibrant and fresh!
  • Quinoa Rinsing: Always rinse quinoa before cooking to remove its natural coating, which can taste bitter. This enhances both flavor and texture.
  • Flavorful Vinaigrette: For an extra burst of flavor, use freshly squeezed lemon juice and add herbs like basil or parsley to your vinaigrette.
  • Customize Ingredients: Don’t be afraid to experiment! Swap out veggies or nuts based on what's in season or your personal preferences to make your Green Vegan Salad uniquely yours.
  • Make Ahead: Prep your salad components in advance and mix with the dressing just before serving to maintain freshness and prevent sogginess.

How to Store and Freeze Green Vegan Salad

  • Fridge: Store any leftover Green Vegan Salad in an airtight container for up to 1 day. To maintain freshness, keep the dressing separate until ready to serve.
  • Freezer: This salad isn't ideal for freezing due to the texture of the veggies and greens. It's best enjoyed fresh!
  • Reheating: If you have leftover cooked quinoa, you can reheat it gently in the microwave. Add a splash of water to maintain moisture.
  • Meal Prep: Prepare components in advance! Store quinoa and chopped veggies separately in the fridge, then combine for a quick fresh meal throughout the week.

What to Serve with Green Vegan Salad

This delightful green dish is the perfect centerpiece for a fresh and vibrant meal that invigorates your senses.

  • Creamy Avocado Toast: The smooth texture and richness of avocado pair beautifully with the crunchy salad, creating a satisfying bite.
  • Quinoa Stuffed Peppers: The flavorful, protein-packed peppers complement the salad's lightness while maintaining a wholesome, healthy profile.
  • Zesty Lemon Hummus: A tangy dip that adds an extra layer of flavor; perfect for scooping up with crisp veggie sticks or pita chips.
  • Grilled Vegetable Skewers: Charred and smoky, featuring seasonal veggies, these skewers add depth in flavor while enhancing the dish’s colorful appeal.
  • Chilled White Wine Spritzer: A refreshing drink to sip on, this light, bubbly beverage elevates your meal with a zesty twist.
  • Fruit Salad Medley: A sweet, juicy contrast to the salad, a mix of seasonal fruits offers a pop of color and sweetness, rounding out the meal.
  • Zucchini Noodles: Light and fresh, these noodles can be served with a simple sauce, adding a delightful base that pairs wonderfully with the salad’s textures.
  • Almond Butter Cookies: For dessert, these chewy cookies bring a nutty sweetness that complements the crunchy notes of your Green Vegan Salad.

Green Vegan Salad Recipe FAQs

How do I choose ripe vegetables for the salad?
Absolutely! When selecting vegetables for your Green Vegan Salad, look for vibrant colors and crisp textures. For broccoli, choose florets that are bright green without dark spots, and opt for asparagus that is firm and not limp. Courgettes should feel smooth and firm, while peas should be bright green. Freshness is key!

What’s the best way to store leftovers?
Very! Store any leftover Green Vegan Salad in an airtight container in the refrigerator for up to 1 day. To keep the salad fresh and avoid wilting, I recommend placing the dressing in a separate container until you're ready to enjoy it again. This way, your salad stays crisp and delicious!

Can I freeze this salad for later?
Not recommended! This Green Vegan Salad isn't ideal for freezing due to the texture of the fresh greens and cooked vegetables. Freezing may result in a mushy salad, which is far from the delightful light and crunchy experience this dish offers. Instead, I suggest preparing your salad fresh or prepping components separately for quick meals.

What should I do if my quinoa turns out mushy?
If your quinoa turns out mushy, don’t worry—it happens to the best of us! For next time, make sure to rinse the quinoa thoroughly before cooking to remove excess saponins. Cook it with a ratio of 1 part quinoa to 2 parts water and avoid stirring during cooking. Allow it to rest covered off the heat for about 5 minutes before fluffing it gently with a fork.

Are there any allergens I should consider?
Yes! If you're cooking for someone with allergies, be aware that almonds can be a concern, so feel free to replace them with sunflower seeds for a nut-free option. Additionally, ensure that the herbs you use are safe for the individual's dietary needs. This way, everyone can enjoy your Green Vegan Salad without worry!

Green vegan salad

Vibrant Green Vegan Salad for a Refreshing, Healthy Meal

Experience a refreshing burst of spring in a bowl with this Green Vegan Salad, packed with quinoa and vibrant seasonal veggies.
Print Recipe Pin Recipe
Prep Time 10 minutes mins
Cook Time 15 minutes mins
Cooling Time 10 minutes mins
Total Time 35 minutes mins
Servings: 4 portions
Course: Salads
Cuisine: Vegan
Calories: 250
Ingredients Equipment Method Nutrition Notes

Ingredients
  

For the Base
  • 1 cup quinoa Substitution: Small pasta like orzo or chewy grains like freekah can be used.
  • 4 cups mixed salad leaves Any seasonal salad greens work well.
For the Vegetables
  • 0.5 head broccoli Use half a medium head for this recipe.
  • 1 bunch asparagus Keep it slightly firm when cooked for better texture.
  • 1 medium courgette/zucchini Sliced thinly for even cooking.
  • 1 cup frozen peas Use petit pois for a delicate touch.
For the Garnish
  • 0.5 cup almonds Can substitute with other nuts or seeds.
  • 1 medium avocado Sliced before serving for an appealing presentation.
  • 2 stalks spring onions/scallions Use the green part for color and bite.
For the Dressing
  • 1 medium lemon juice Freshly squeezed is best for maximum flavor.
  • 3 tablespoons olive oil
  • 1 pinch salt
  • 1 pinch pepper
  • 0.25 cup herbs Try fresh basil or parsley for an extra burst of flavor.

Equipment

  • Medium saucepan
  • Mixing Bowl
  • Steam pot or oven
  • Salad tongs or large forks
  • Small bowl for vinaigrette

Method
 

Preparation Steps
  1. Rinse 1 cup of quinoa under cold water. Combine quinoa with 2 cups of water and a pinch of salt in a medium saucepan. Bring to a boil, then reduce heat to low, cover, and simmer for about 15 minutes until fluffy. Let cool.
  2. Chop half a medium head of broccoli and trim the asparagus, cutting into 2-inch pieces. Steam for about 4-5 minutes or roast in a preheated oven at 400°F (200°C) for 10-12 minutes for optimal texture.
  3. In a large mixing bowl, combine cooled quinoa, broccoli, asparagus, thinly sliced courgette, and 1 cup of frozen peas. Fold in mixed salad leaves and add ½ cup of roughly chopped almonds.
  4. Whisk together the juice of 1 lemon, 3 tablespoons of olive oil, and a pinch of salt and pepper for the vinaigrette. Optionally add herbs for extra flavor.
  5. Drizzle the vinaigrette over the salad and gently toss to coat all ingredients.
  6. Top the salad with sliced avocado and sprinkle with chopped spring onions. Serve chilled or at room temperature.

Nutrition

Serving: 1portionCalories: 250kcalCarbohydrates: 30gProtein: 8gFat: 12gSaturated Fat: 1gPolyunsaturated Fat: 3gMonounsaturated Fat: 7gSodium: 200mgPotassium: 450mgFiber: 8gSugar: 3gVitamin A: 15IUVitamin C: 90mgCalcium: 6mgIron: 10mg

Notes

For best results, avoid overcooking vegetables to retain their crunch. Prep components ahead of time for easy assembly just before serving.

Tried this recipe?

Let us know how it was!
  • « Previous Page
  • 1
  • …
  • 13
  • 14
  • 15
  • 16
  • 17
  • …
  • 21
  • Next Page »

Welcome!

Hi, I’m Grace, a Sydney-based home cook with a passion for bold flavors and trending ingredients. Whether you’re a busy beginner or a seasoned foodie, you’ll find dishes here that are fresh, fun, and full of flavor.

More about me

Popular Recipes

  • Honey Lime Chicken & Avocado Rice Bowl
    Honey Lime Chicken & Avocado Rice Bowl for a Flavor Burst
  • Tasty Italian Pasta Salad
    Delight in this Easy Tasty Italian Pasta Salad for Summer Fun
  • Garlic Butter Chicken Pasta
    Garlic Butter Chicken Pasta That’ll Wow Your Family Tonight
  • Creamy, Spicy Chicken Pasta
    Creamy, Spicy Chicken Pasta with Fresh Summer Veggies

Footer

↑ back to top

About

  • Privacy Policy
  • Disclaimer
  • Terms & Conditions

Newsletter

  • Sign Up! for emails and updates

Contact

  • About me
  • Contact me

Copyright © 2025 TastyTrendIngredients