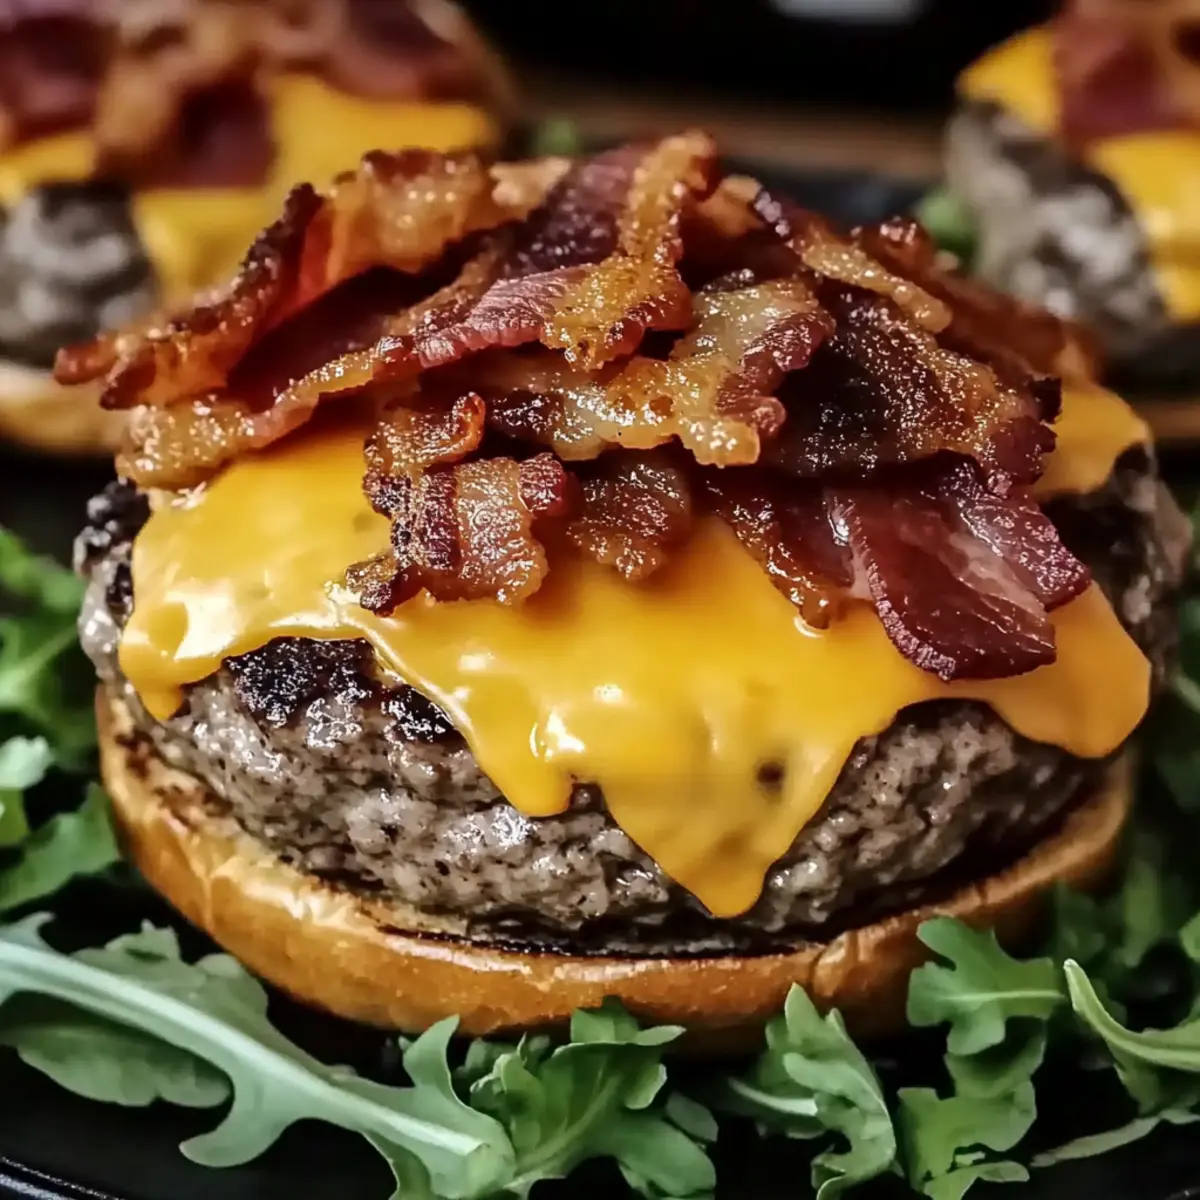
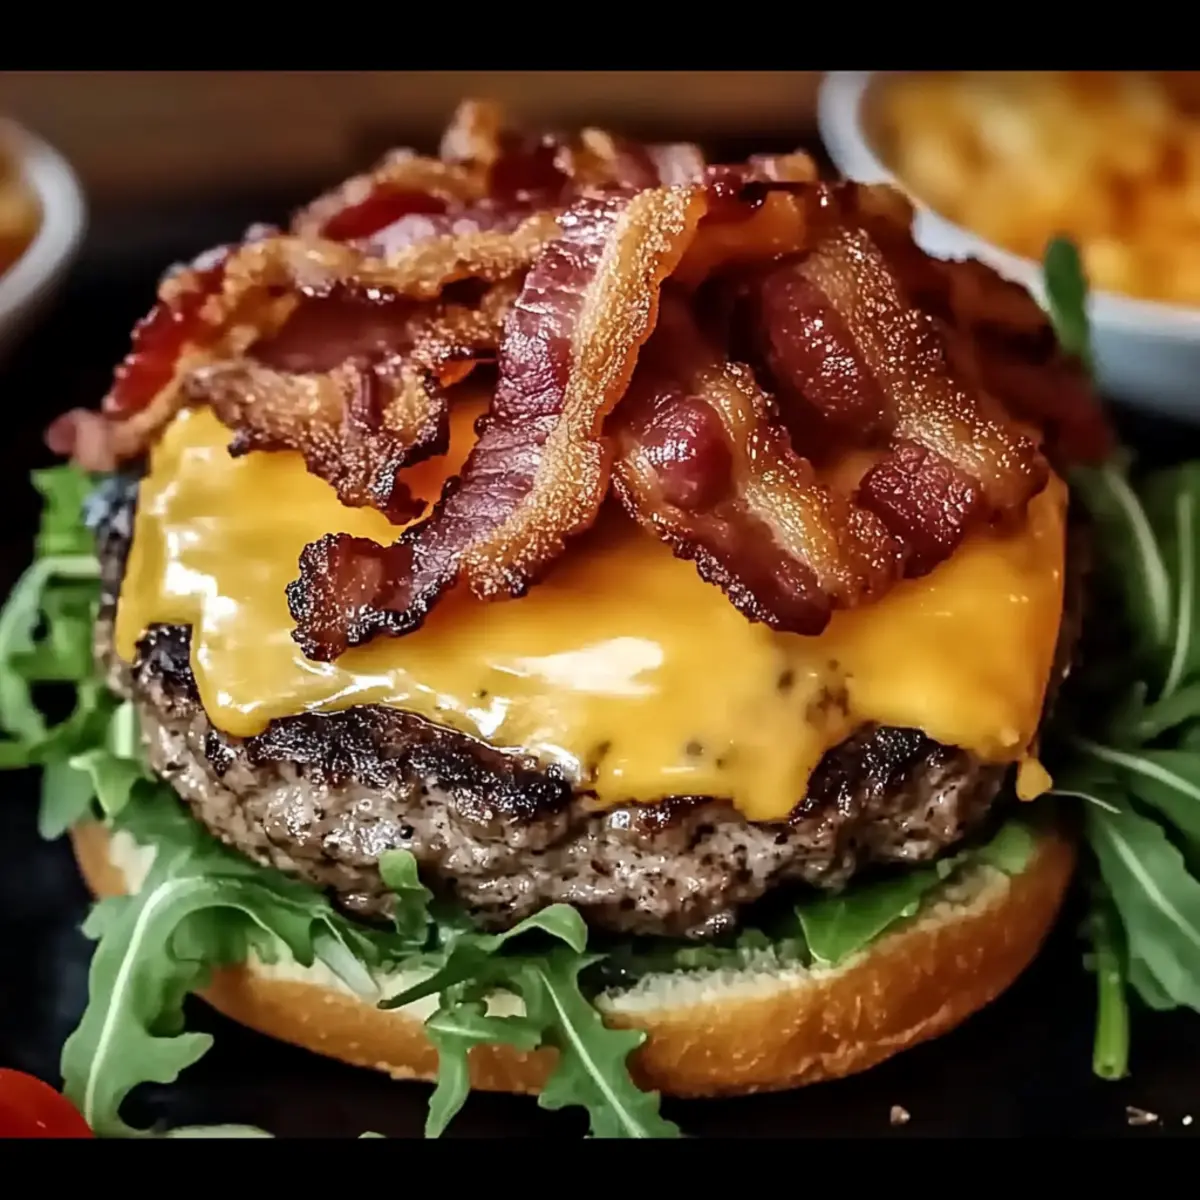
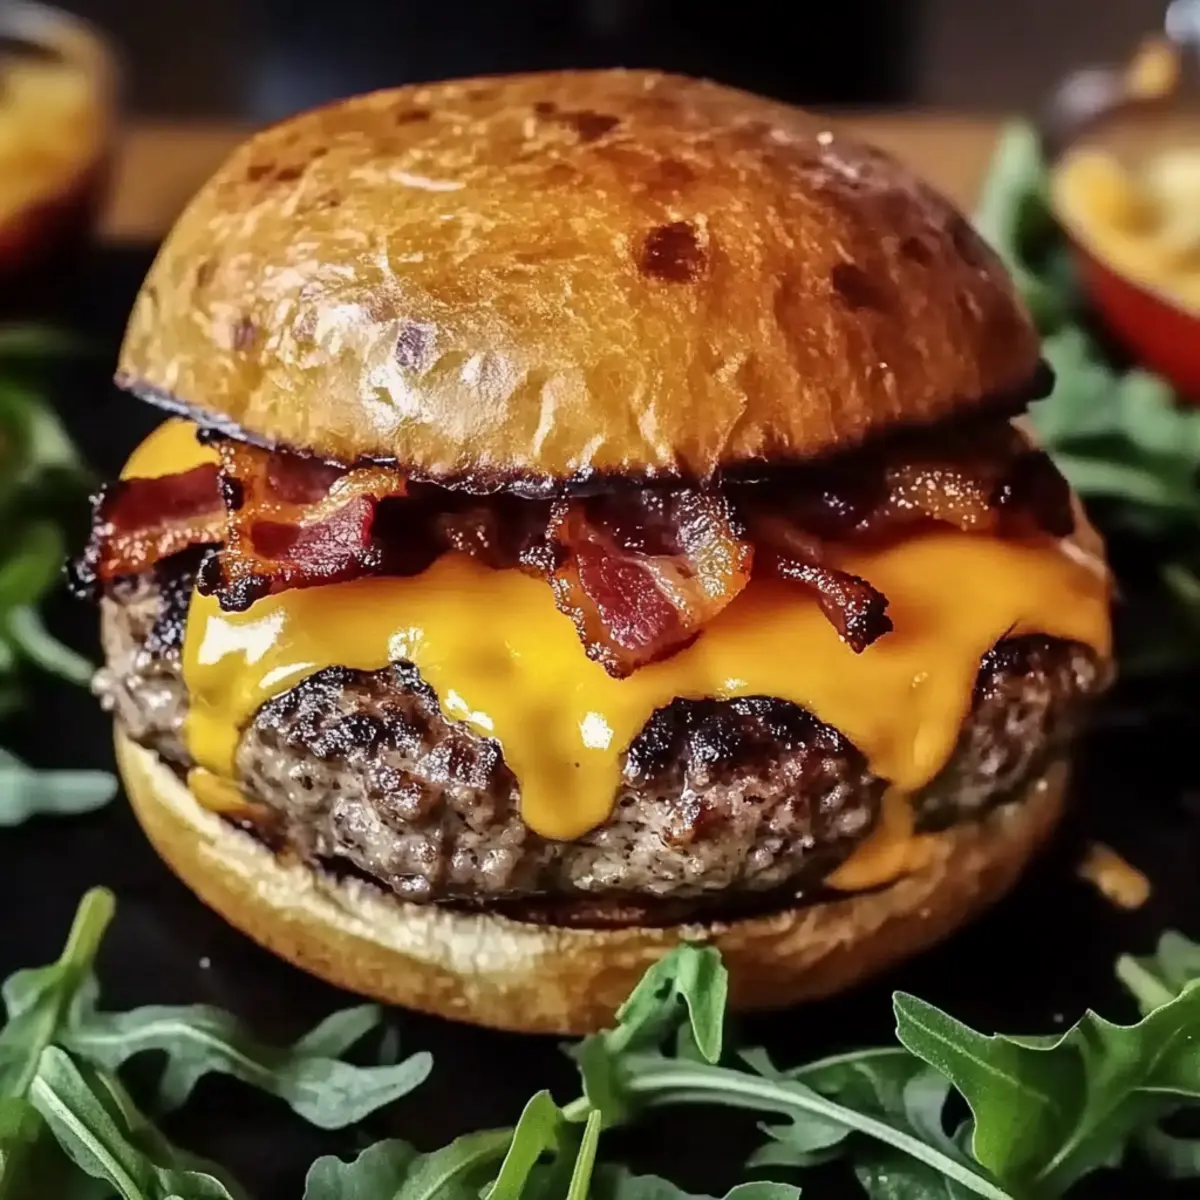
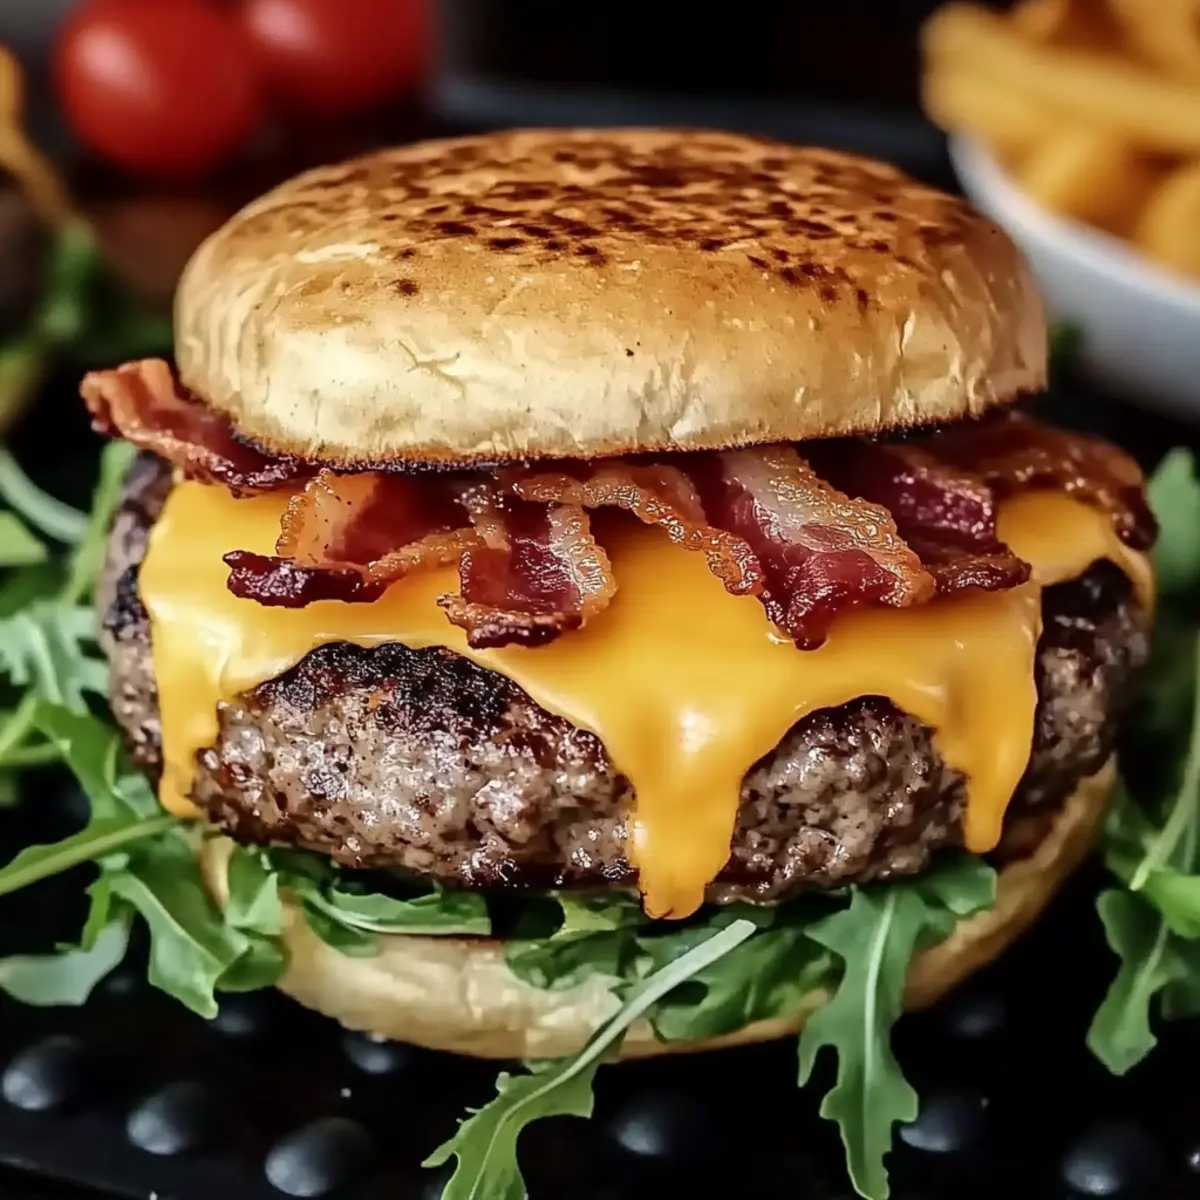
tastytrendingredients

  • Home
  • Recipes
    • Appetizers
    • Breakfast
    • Dessert
    • Dinner
    • Drinks
    • Salads
    • Snacks
    • Soups
  • About me
  • Contact me
menu icon
go to homepage
  • Home
  • Recipes
    • Appetizers
    • Breakfast
    • Dessert
    • Dinner
    • Drinks
    • Salads
    • Snacks
    • Soups
  • About me
  • Contact me
search icon
Homepage link
  • Home
  • Recipes
    • Appetizers
    • Breakfast
    • Dessert
    • Dinner
    • Drinks
    • Salads
    • Snacks
    • Soups
  • About me
  • Contact me
×

Delicious Cranberry Glazed Chicken Thighs for Cozy Nights

October 28, 2025 by Grace Snow Leave a Comment

As I stood by the stove, the tantalizing aroma of cranberries mingling with spices wafted through my kitchen, instantly transporting me to cozy autumn evenings. This Easy Cranberry Glazed Chicken Thighs with Wild Rice Pilaf is not just a dish; it’s a warm hug on a plate, effortlessly bringing comfort to busy weeknights. In just 30 minutes, you can serve up a one-pan meal that’s not only gluten-free but also bursting with festive flavors that brighten chilly days. Picture tender chicken thighs bathed in a tangy-sweet glaze, perfectly complemented by the nutty richness of wild rice—it’s the kind of home-cooked goodness that makes you feel right at home. Let’s dive into this delightful recipe that promises to not only satisfy your taste buds but also save you time in the kitchen. Are you ready to impress your family with this flavorful autumn-inspired gem?

Why Are Cranberry Glazed Chicken Thighs a Must-Try?

Simplicity at Its Finest: This recipe comes together in just 30 minutes, making it perfect for busy weeknights.

Flavor Explosion: The tangy-sweet glaze infused with fresh cranberries and spices elevates your chicken to a whole new level.

One-Pan Wonder: Enjoy the ease of a truly one-pan meal, which means less cleanup and more dining delight—a win-win!

Versatile Comfort: Pair it with wild rice pilaf or mashed potatoes for a hearty meal that guests will rave about.

Crowd-pleaser: Watch everyone at the table light up with joy—nothing says comfort like juicy chicken dressed in a vibrant, sticky glaze.

This dish promises not only satisfaction but also a delightful dining experience that rivals your favorite takeout. For more chicken inspiration, check out our Honey Garlic Chicken Thighs or Spatchcock Chicken Flavor for flavorful weeknight ideas!

Cranberry Glazed Chicken Thighs Ingredients

• Here’s everything you’ll need for this delightful recipe!

For the Chicken

  • Boneless Skinless Chicken Thighs – Juicy meat for tenderness and even cooking. Bone-in thighs can enhance flavor; adjust cooking time accordingly.
  • Kosher Salt – Essential for seasoning both the chicken and glaze. No notable substitutions.
  • Fresh Ground Black Pepper – Adds depth to the chicken's flavor. No notable substitutions.
  • Extra-Virgin Olive Oil – Used for searing. No notable substitutions.

For the Glaze

  • Minced Shallot – Provides a savory base for the glaze. Can be replaced with onion if necessary.
  • Fresh Cranberries – Creates the tangy, sweet glaze. Frozen cranberries can be used if fresh are unavailable.
  • Water – Helps soften the cranberries during cooking. No notable substitutions.
  • Apple Cider Vinegar – Brings acidity to balance the glaze's sweetness. Rice vinegar can be a milder alternative.
  • Honey – Sweetens the glaze. Maple syrup or brown sugar can substitute for a different flavor profile.
  • Ground Ginger – Adds warmth and spice complexity. Fresh ginger can be used for a more robust flavor.
  • Allspice – Infuses subtle warmth. Can be omitted or replaced with cinnamon or nutmeg.

Garnish

  • Fresh Thyme – Enhances visual appeal and adds a fresh herbal note. No notable substitutions.

Gather these ingredients and get ready to whip up your delicious Cranberry Glazed Chicken Thighs that’ll warm your soul and impress your loved ones!

Step‑by‑Step Instructions for Cranberry Glazed Chicken Thighs

Step 1: Prep Chicken
Begin by patting your boneless skinless chicken thighs dry with paper towels. Season both sides generously with kosher salt and fresh ground black pepper, letting them rest on the countertop for about 10 minutes to allow the flavors to absorb and the meat to come to room temperature.

Step 2: Prepare Glaze
In a large skillet, heat 1 tablespoon of extra-virgin olive oil over medium heat. Once hot, add the minced shallots and sauté for about 2 minutes until they become fragrant and translucent. This will create a savory base for your cranberry glaze, enhancing the overall flavor of the dish.

Step 3: Cook Cranberries
Next, stir in the fresh cranberries, ½ cup of water, apple cider vinegar, and honey into the skillet. Allow the mixture to come to a gentle simmer and cook for 5–8 minutes, or until the cranberries burst and the glaze thickens to a syrupy consistency. The vibrant color and aroma will fill your kitchen, promising deliciousness ahead.

Step 4: Mash Cranberries
After cooking, lightly mash the cranberry mixture with a fork or potato masher to break down some of the fruit and create a cohesive glaze. Stir in ground ginger, allspice, and a pinch of salt, then let it simmer for an additional minute. Once combined, transfer the glaze to a bowl and set aside.

Step 5: Sear Chicken
Using the same skillet, add another tablespoon of extra-virgin olive oil and increase the heat to medium-high. Once the oil shimmers, add the chicken thighs skin-side down. Sear them for about 5–7 minutes or until they develop a beautiful golden-brown crust. Flip the thighs over and cook for an additional 4–6 minutes, ensuring the internal temperature reaches 165°F.

Step 6: Finish
After the chicken is cooked, reduce the heat to low and spoon the tangy cranberry glaze generously over each thigh. Allow the chicken to rest in the skillet for about 5 minutes, letting the glaze soak in. Before serving, garnish with fresh thyme for a pop of color and herbal freshness, elevating your cozy cranberry glazed chicken thighs to the next level!

Cranberry Glazed Chicken Thighs Variations

Feel free to explore these exciting twists to elevate your dish even further and suit your taste!

  • Cherry Glaze: Swap cranberries for cherries for a sweeter, fruitier glaze that pairs beautifully with chicken. The burst of cherry flavor will surprise your palate!

  • Milder Glaze: Reduce the apple cider vinegar to soften the tartness. You can add extra honey for balancing out the sweetness—perfect for the kiddos!

  • Turkey Upgrade: Incorporate leftover roasted turkey or chicken breasts for a delightful leaner version. This is a fantastic way to enjoy holiday leftovers!

  • Spicy Kick: Add crushed red pepper flakes to the glaze for a subtle heat that complements the sweet tang of cranberries. It’s all about that flavor balance!

  • Herby Twist: Mix in fresh rosemary or sage to the glaze for an aromatic experience. These herbs can bring an earthy note, making it cozy and vibrant.

  • Citrus Burst: Add a splash of fresh orange juice or zested orange peel to brighten your glaze's flavor profile. The citrus will awaken the dish beautifully!

  • Maple Sweetness: Substitute honey with maple syrup for a different depth of sweetness. The rich flavor of maple enhances the glaze and pairs so well with savory chicken.

  • Nutty Addition: Stir in some toasted pecans or walnuts right before serving for a delightful crunch, adding both texture and a nutty richness to the dish.

And if you’re seeking more delightful chicken recipes, check out Honey Garlic Chicken Thighs for another flavorful option that's sure to please!

Make Ahead Options

These Easy Cranberry Glazed Chicken Thighs are perfect for meal prep enthusiasts! You can prepare the glaze up to 24 hours in advance, allowing the flavors to meld beautifully. Simply simmer the cranberries, shallots, and spices, then let it cool before refrigerating in an airtight container. The chicken can also be seasoned and stored for up to 3 days in the fridge, ensuring it's ready to cook at a moment's notice. When you're ready to serve, simply sear the chicken and warm the glaze in a saucepan before drizzling it over the cooked thighs. This way, you’ll save time and still enjoy a comforting, restaurant-quality meal!

Storage Tips for Cranberry Glazed Chicken Thighs

Fridge: Store leftovers in an airtight container for up to 3 days. Make sure the chicken is cooled completely before sealing to maintain moisture.

Freezer: For longer storage, freeze the cranberry glazed chicken thighs and glaze separately for up to 2 months. Wrap each item tightly in plastic wrap and place in freezer bags for best results.

Reheating: Thaw overnight in the fridge and reheat gently on the stove over low heat. Add a splash of water if the glaze has thickened too much during freezing. Enjoy your juicy Cranberry Glazed Chicken Thighs as if they were just made!

What to Serve with Easy Cranberry Glazed Chicken Thighs

Elevate your dining experience with mouthwatering sides that beautifully complement this delightful one-pan dish.

  • Fluffy Wild Rice Pilaf: The nutty texture of wild rice adds a wholesome touch, soaking up every bit of that vibrant cranberry glaze.
  • Creamy Mashed Potatoes: The smooth and buttery richness balances the tangy glaze, creating a comforting and satisfying combination.
  • Roasted Root Vegetables: Caramelized carrots and parsnips bring earthy sweetness, enhancing the dish’s flavor palette with tender, roasted goodness.
  • Garlic Green Beans: Crisp-tender green beans drizzled with garlic-infused olive oil add a fresh crunch and a pop of color to your plate.

Pairing your chicken with a simple green salad is another excellent option. The lightness and freshness of mixed greens dressed in a lemon vinaigrette will contrast beautifully with the richness of the dish.

  • Apple Crisp: For a sweet ending, serve a warm apple crisp. Its cinnamon-spiced, caramelized apples will echo the cozy autumn vibes of your cranberry dish.
  • Cider Mimosas: Bright and refreshing, these drinks can be a delightful accompaniment, balancing savory and sweet notes with every sip.

Expert Tips for Cranberry Glazed Chicken Thighs

  • Prep Ahead: Prepare the glaze a day in advance for deeper flavors. Store it in the fridge and simply warm it up before using.

  • Searing Skills: Allow the chicken to sear undisturbed for the first few minutes. This prevents sticking and ensures a perfect golden crust.

  • Check for Doneness: Always use a meat thermometer to check that your chicken thighs reach an internal temperature of 165°F for safe eating.

  • Flavor Boost: Feel free to add a pinch of crushed red pepper flakes to the glaze for an unexpected hint of heat that complements the sweetness beautifully.

  • Watch the Glaze: Keep an eye on the glaze while it simmers. If it thickens too much, add a splash of water to maintain the right consistency for drizzling over your chicken.

Cranberry Glazed Chicken Thighs Recipe FAQs

How should I select fresh cranberries?
When choosing fresh cranberries, look for bright, glossy berries free of dark spots or blemishes. Firm cranberries that bounce when dropped are a good indication of freshness. If you find some that are too soft or shriveled, it's better to avoid them as they might be past their prime.

How should I store leftovers?
Absolutely! Store any leftovers in an airtight container and refrigerate them for up to 3 days. Make sure the chicken has cooled completely before sealing to retain moisture and flavor, ensuring a delicious meal when you're ready to enjoy it again.

Can I freeze cranberry glazed chicken thighs?
Yes, you can! For longer storage, freeze the chicken and glaze separately for up to 2 months. Wrap each portion tightly in plastic wrap, then place them in freezer bags labeled with the date. When ready to eat, thaw the items overnight in the fridge, and gently reheat on the stove over low heat. If the glaze thickens too much, add a splash of water to revive it.

What if my glaze turns out too thick?
If your glaze is too thick, do not fret! Just add a tablespoon of water at a time while gently stirring it over low heat until you reach your desired consistency. This adjustment can help you achieve that perfect, drizzly glaze without losing flavor.

Can I adapt this recipe for dietary restrictions?
Certainly! This recipe is naturally gluten-free, but if you're allergic to certain ingredients, consider alternatives such as using maple syrup instead of honey or skipping the ginger if you're sensitive to spices. For those cooking for pets, ensure no sauce or glaze makes it into your furry friends' meals, as some ingredients may not be suitable for them.

Can I use frozen cranberries instead?
Yes! If fresh cranberries aren't available, frozen cranberries work just as well. Simply toss them into the skillet without thawing—they'll cook down beautifully and create that delightful glaze you’re after. This substitution makes the recipe even more convenient for any time of the year!

Cranberry Glazed Chicken Thighs

Delicious Cranberry Glazed Chicken Thighs for Cozy Nights

Indulge in Cranberry Glazed Chicken Thighs, a warm, comforting dish perfect for busy evenings.
Print Recipe Pin Recipe
Prep Time 10 minutes mins
Cook Time 20 minutes mins
Resting Time 5 minutes mins
Total Time 30 minutes mins
Servings: 4 servings
Course: Dinner
Cuisine: American
Calories: 350
Ingredients Equipment Method Nutrition Notes

Ingredients
  

For the Chicken
  • 1 pound Boneless Skinless Chicken Thighs Bone-in thighs can enhance flavor; adjust cooking time accordingly.
  • 1 teaspoon Kosher Salt Essential for seasoning both the chicken and glaze.
  • 1 teaspoon Fresh Ground Black Pepper Adds depth to the chicken's flavor.
  • 1 tablespoon Extra-Virgin Olive Oil Used for searing.
For the Glaze
  • 1 tablespoon Minced Shallot Can be replaced with onion if necessary.
  • 1 cup Fresh Cranberries Frozen cranberries can be used if fresh are unavailable.
  • 0.5 cup Water Helps soften the cranberries during cooking.
  • 2 tablespoons Apple Cider Vinegar Brings acidity to balance the glaze's sweetness.
  • 2 tablespoons Honey Sweetens the glaze.
  • 1 teaspoon Ground Ginger Adds warmth and spice complexity.
  • 0.25 teaspoon Allspice Can be omitted or replaced with cinnamon or nutmeg.
Garnish
  • 2 sprigs Fresh Thyme Enhances visual appeal and adds a fresh herbal note.

Equipment

  • Skillet

Method
 

Step-by-Step Instructions
  1. Begin by patting your boneless skinless chicken thighs dry with paper towels. Season both sides generously with kosher salt and fresh ground black pepper, letting them rest on the countertop for about 10 minutes to allow the flavors to absorb and the meat to come to room temperature.
  2. In a large skillet, heat 1 tablespoon of extra-virgin olive oil over medium heat. Once hot, add the minced shallots and sauté for about 2 minutes until they become fragrant and translucent.
  3. Stir in the fresh cranberries, ½ cup of water, apple cider vinegar, and honey into the skillet. Allow the mixture to come to a gentle simmer and cook for 5–8 minutes, or until the cranberries burst and the glaze thickens to a syrupy consistency.
  4. Lightly mash the cranberry mixture with a fork or potato masher to break down some of the fruit and create a cohesive glaze. Stir in ground ginger, allspice, and a pinch of salt, then let it simmer for an additional minute.
  5. Using the same skillet, add another tablespoon of extra-virgin olive oil and increase the heat to medium-high. Once the oil shimmers, add the chicken thighs skin-side down. Sear them for about 5–7 minutes or until they develop a beautiful golden-brown crust.
  6. Flip the thighs over and cook for an additional 4–6 minutes, ensuring the internal temperature reaches 165°F.
  7. Reduce the heat to low and spoon the tangy cranberry glaze generously over each thigh. Allow the chicken to rest in the skillet for about 5 minutes, letting the glaze soak in. Garnish with fresh thyme before serving.

Nutrition

Serving: 1servingCalories: 350kcalCarbohydrates: 30gProtein: 34gFat: 10gSaturated Fat: 1.5gPolyunsaturated Fat: 0.5gMonounsaturated Fat: 6gCholesterol: 150mgSodium: 560mgPotassium: 450mgFiber: 3gSugar: 10gVitamin A: 300IUVitamin C: 15mgCalcium: 20mgIron: 2mg

Notes

This dish can be paired with wild rice pilaf or mashed potatoes for a hearty meal that guests will rave about.

Tried this recipe?

Let us know how it was!

Keto Hamburger Broccoli Skillet – A Quick & Creamy Delight

October 28, 2025 by Grace Snow Leave a Comment

Chopping vegetables and hearing the sizzling sound of ground beef in the skillet is a symphony I adore. The Keto Hamburger Broccoli Skillet captures this joy, marrying the hearty richness of ground beef with vibrant broccoli and melty cheddar cheese, all in one easy dish. In just 30 minutes, you can whip up this quick meal that’s perfect for those hectic weeknights, delighting your taste buds while keeping your carb count in check. Not only is this recipe a time-saver, but it also packs a nutritious punch that leaves you feeling satisfied and guilt-free. Are you ready to indulge in a low-carb dish that truly delights? Let's dive in!

Why is this skillet a must-try?

Quick and Easy: This Keto Hamburger Broccoli Skillet comes together in just 30 minutes—ideal for busy evenings!

One-Pan Wonder: Say goodbye to dish duty; everything cooks in one pan, keeping cleanup a breeze.

Flavor-Packed: With ground beef, fresh broccoli, and gooey cheddar, this dish offers rich flavors that will satisfy even the pickiest eaters.

Nutritious and Low-Carb: Enjoy a hearty meal that fits perfectly into your keto lifestyle without sacrificing taste or satisfaction.

Versatile Options: Feel free to mix it up with different proteins or veggies; it's all about what you love! If you’re looking for more delicious one-pan ideas, check out Skillet Pasta Sun for another quick recipe!

Keto Hamburger Broccoli Skillet Ingredients

For the Skillet

  • Ground Beef – Provides protein and richness; substitute with ground turkey or chicken for a leaner option.
  • Broccoli Florets – Adds nutrition and a vibrant green color; fresh or frozen can be used, but ensure preservation of crunch.
  • Diced Onion – Enhances flavor and sweetness; shallots can also be substituted for a milder taste.
  • Minced Garlic – Offers aromatic flavors; garlic powder may be used as a substitute.
  • Olive Oil – Used for sautéing, adds healthy fats; vegetable oil can be an alternative.
  • Salt – Enhances overall flavor; adjust to taste.
  • Black Pepper – Adds spice; freshly cracked is recommended for better flavor.
  • Garlic Powder & Onion Powder – Provide depth of flavor; use fresh garlic for a stronger taste if desired.

For the Creamy Sauce

  • Heavy Cream – Makes the sauce rich and creamy; coconut cream can be used for a dairy-free option.
  • Shredded Cheddar Cheese – Creates a creamy texture and savory flavor; Monterey Jack can be used for a different taste.
  • Worcestershire Sauce (optional) – Adds an umami flavor, perfect for enhancing the dish.
  • Red Pepper Flakes (optional) – Provides a spicy kick, great for those who enjoy a little heat.

This Keto Hamburger Broccoli Skillet is a delightful way to enjoy a wholesome meal without the fuss, perfectly blending flavors and nutrition in one quick dish.

Step‑by‑Step Instructions for Keto Hamburger Broccoli Skillet

Step 1: Sauté the Ground Beef
In a large skillet, heat 2 tablespoons of olive oil over medium heat until shimmering. Add 1 pound of ground beef, breaking it apart with a spatula as it cooks. Stir frequently for about 6-8 minutes, or until the meat is browned and no longer pink. Once cooked, ensure it's well distributed in the skillet before moving to the next step.

Step 2: Add Aromatics
Push the cooked ground beef to one side of the skillet. Add 1 diced onion and 2 minced garlic cloves to the open space. Sauté these aromatic ingredients for about 3 minutes until the onion becomes translucent and fragrant. This blend will amplify the flavors in your Keto Hamburger Broccoli Skillet, creating a savory base for the dish.

Step 3: Introduce the Broccoli
Next, toss in 2 cups of broccoli florets, stirring them into the skillet for about 1 minute. Season generously with salt, black pepper, garlic powder, and onion powder to taste. The bright green broccoli will add a vibrant crunch, so ensure it gets coated in the seasonings for maximum flavor.

Step 4: Cook the Broccoli
Cover the skillet with a lid and reduce the heat to medium-low. Let the broccoli steam and cook for 5-7 minutes, stirring halfway through, until it becomes tender yet still crisp. This method will preserve its beautiful bright color and nutritional benefits while soaking up the flavors around it.

Step 5: Create the Creamy Base
Stir in ½ cup of heavy cream, scraping the bottom of the skillet to incorporate any flavorful bits leftover from the ground beef and vegetables. Mix thoroughly to create a creamy sauce that binds all the ingredients together, enhancing the richness of your Keto Hamburger Broccoli Skillet.

Step 6: Melt the Cheese
Sprinkle 1 cup of shredded cheddar cheese over the skillet mixture. Cover with a lid again and allow it to melt for about 2-3 minutes. The cheese will transform into a gooey topping that brings everything together wonderfully, adding that comforting element we all love.

Step 7: Final Seasoning Touches
For an extra flavor boost, drizzle a little Worcestershire sauce and sprinkle some red pepper flakes over the top, if desired. These optional ingredients add depth and a hint of heat to your Keto Hamburger Broccoli Skillet. Stir gently to combine just before serving.

What to Serve with Keto Hamburger Broccoli Skillet

Brighten your meal experience with delightful side dishes that perfectly complement this hearty one-pan wonder.

  • Cauliflower Rice: A fluffy and low-carb alternative to enhance the wholesome flavor of the skillet, providing additional texture and nutrients. Serve it drizzled with a touch of olive oil for extra richness.

  • Simple Green Salad: Crisp lettuce topped with refreshing cucumbers and a tangy vinaigrette balances the richness of the skillet, offering a light contrast that's both vibrant and nutritious.

  • Garlic Breadsticks: Treat yourself with warm, buttery breadsticks that add a satisfying crunch and soak up the creamy sauce. They’re perfect for dipping, making every bite even more enjoyable.

  • Roasted Asparagus: Tender asparagus spears, roasted with a drizzle of olive oil and a sprinkle of salt, add a pop of color and freshness to your plate. Their crisp texture beautifully complements the dish.

  • Sparkling Water with Lemon: Refreshing and bubbly, this zesty drink cleanses the palate and enhances the meal without adding any carbs. Add a slice of lemon for a hint of brightness.

  • Baked Sweet Potato Wedges: Sweet potatoes bring a natural sweetness that contrasts nicely with the savory skillet, while their fiber content keeps you feeling full. Dip them in the skillet’s creamy sauce for a delicious twist.

  • Creamy Coleslaw: A light and crunchy slaw made with cabbage, carrots, and a creamy dressing offers a refreshing side that cuts through the richness of the Keto Hamburger Broccoli Skillet.

  • Dark Chocolate Dessert: For a little indulgence, treat yourself with a small serving of dark chocolate. Its richness and slight bitterness complement the dish beautifully, satisfying your sweet cravings without going overboard.

Make Ahead Options

These Keto Hamburger Broccoli Skillets are perfect for meal prep enthusiasts! You can chop the broccoli, onion, and garlic and store them in the refrigerator up to 3 days in advance, keeping them fresh in an airtight container. Additionally, you can brown the ground beef and season it, then refrigerate this mixture for up to 24 hours. When you're ready to enjoy your meal, simply sauté the onions and garlic, add in the prepped beef and broccoli, and proceed with the creamy sauce preparation. This way, you’ll have a delicious, homemade dish with minimal effort, ensuring every bite is just as satisfying as when freshly made!

Expert Tips for Keto Hamburger Broccoli Skillet

  • Watch the Cooking Time: Keep an eye on the broccoli to maintain its vibrant color and crunch; aim for tender yet crisp florets.

  • Use Fresh Ingredients: For the best flavor in your Keto Hamburger Broccoli Skillet, opt for fresh garlic and high-quality cheese instead of pre-packaged options.

  • Taste as You Go: Don't hesitate to adjust seasonings while cooking. Gradually add salt and spices to suit your personal preference—it's easier to add than to remove!

  • Experiment with Variations: Tweak the recipe by substituting ground beef with turkey, or add other colorful vegetables. It's all about creating your perfect low-carb meal!

  • Reheating Tips: When reheating leftovers, add a splash of cream or a bit of water to keep the dish moist and avoid drying it out.

Keto Hamburger Broccoli Skillet Variations

Feel free to get creative with this delicious recipe and make it your own; the possibilities are endless!

  • Ground Turkey: Swap ground beef for ground turkey for a leaner protein option that still delivers delicious flavor.

  • Extra Veggies: Add bell peppers or zucchini to the mix for a colorful, nutrient-packed addition that enhances both flavor and texture.

  • Cheese Change: Switch out cheddar for mozzarella or pepper jack for a milder or spicier flavor profile; it brings a new dimension to every bite.

  • Coconut Cream: For a dairy-free twist, swap heavy cream for coconut cream, creating a subtle sweetness that pairs beautifully with the savory elements.

  • Cauliflower Rice Base: Serve your skillet over cauliflower rice or zucchini noodles, making the dish feel more filling while keeping it low-carb.

  • Herb Boost: Mix in some fresh herbs like basil or parsley right before serving for a fresh pop of flavor and a beautiful presentation.

  • Spice It Up: For those who crave heat, add chopped jalapeños or a dash of your favorite hot sauce to give the skillet a fiery kick.

  • Savory Mushrooms: Incorporate sautéed mushrooms for an earthy flavor that complements the beef and broccoli beautifully.

For more tempting one-pan recipes, be sure to check out the flavorful Skillet Pasta Sun to keep your mealtime exciting!

How to Store and Freeze Keto Hamburger Broccoli Skillet

Fridge: Store leftovers in an airtight container for up to 3 days. Make sure to seal it well to retain flavors and freshness.

Freezer: Portion out the skillet into freezer-safe containers or bags for easy meal prep. It can be frozen for up to 2 months. Thaw overnight in the fridge before reheating.

Reheating: For best results, reheat the Keto Hamburger Broccoli Skillet in a skillet over medium heat, adding a splash of heavy cream or water to keep it creamy and moist.

Room Temperature: Consume any leftovers within 2 hours to avoid spoilage. Always refrigerate after this timeframe to maintain safety.

Keto Hamburger Broccoli Skillet Recipe FAQs

What type of broccoli should I use for this recipe?
You can use either fresh or frozen broccoli florets for the Keto Hamburger Broccoli Skillet. Fresh broccoli gives a nice crunch and vibrant color, while frozen can save time. If using frozen, ensure it’s thawed and drained to prevent excess moisture in your dish.

How should I store leftovers of the Keto Hamburger Broccoli Skillet?
Store leftovers in an airtight container in the refrigerator for up to 3 days. Make sure to seal it well to retain freshness and flavors. If you find yourself with extra portions, freezing it can extend its life significantly!

Can I freeze the Keto Hamburger Broccoli Skillet?
Absolutely! To freeze, portion the dish into freezer-safe containers or bags, labeling them with the date. It can be frozen for up to 2 months. When you're ready to enjoy it again, simply thaw overnight in the fridge and reheat on the stovetop. Adding a splash of heavy cream while reheating keeps it creamy and delicious.

What if my broccoli seems too mushy after cooking?
No worries! To avoid overcooking, keep a close eye on the broccoli when covered. Aim for a tender yet crisp texture by cooking for about 5-7 minutes. If you notice it getting mushy, next time try reducing the cooking time or checking it halfway to stir and monitor its crunch factor.

Are there any dietary considerations for this dish?
The Keto Hamburger Broccoli Skillet is low-carb and perfect for those following a ketogenic diet. If you have allergies, be cautious with any dairy; you can substitute heavy cream with coconut cream for a dairy-free option. Always ensure that spices and additional ingredients like Worcestershire sauce are suitable for your dietary needs.

Can I add different vegetables to the skillet?
Yes, the more the merrier! You can easily add bell peppers, zucchini, or even spinach to the mix. Just chop them up to a similar size as the broccoli and adjust the cooking time slightly based on how quickly they cook. This flexibility makes the Keto Hamburger Broccoli Skillet an easy way to incorporate more veggies into your meals!

Keto Hamburger Broccoli Skillet

Keto Hamburger Broccoli Skillet – A Quick & Creamy Delight

Keto Hamburger Broccoli Skillet is a quick and creamy low-carb dish that blends ground beef, broccoli, and cheddar cheese in just 30 minutes.
Print Recipe Pin Recipe
Prep Time 10 minutes mins
Cook Time 20 minutes mins
Total Time 30 minutes mins
Servings: 4 servings
Course: Dinner
Cuisine: American
Calories: 450
Ingredients Equipment Method Nutrition Notes

Ingredients
  

For the Skillet
  • 1 pound Ground Beef Provides protein and richness; substitute with ground turkey or chicken for a leaner option.
  • 2 cups Broccoli Florets Adds nutrition and a vibrant green color; fresh or frozen can be used.
  • 1 medium Diced Onion Enhances flavor and sweetness; shallots can also be substituted.
  • 2 cloves Minced Garlic Offers aromatic flavors; garlic powder may be used as a substitute.
  • 2 tablespoons Olive Oil Used for sautéing, adds healthy fats; vegetable oil can be an alternative.
  • to taste Salt Enhances overall flavor; adjust to taste.
  • to taste Black Pepper Adds spice; freshly cracked is recommended for better flavor.
  • 1 teaspoon Garlic Powder Provides depth of flavor; use fresh garlic for a stronger taste if desired.
  • 1 teaspoon Onion Powder Provides depth of flavor; use fresh onion for a stronger taste if desired.
For the Creamy Sauce
  • ½ cup Heavy Cream Makes the sauce rich and creamy; coconut cream can be used for a dairy-free option.
  • 1 cup Shredded Cheddar Cheese Creates a creamy texture and savory flavor; Monterey Jack can be used for a different taste.
  • to taste Worcestershire Sauce Adds an umami flavor, perfect for enhancing the dish.
  • to taste Red Pepper Flakes Provides a spicy kick, great for those who enjoy a little heat.

Equipment

  • Skillet

Method
 

Cooking Instructions
  1. In a large skillet, heat 2 tablespoons of olive oil over medium heat until shimmering. Add 1 pound of ground beef, breaking it apart with a spatula as it cooks. Stir frequently for about 6-8 minutes, or until the meat is browned and no longer pink.
  2. Push the cooked ground beef to one side of the skillet. Add 1 diced onion and 2 minced garlic cloves to the open space. Sauté these aromatic ingredients for about 3 minutes until the onion becomes translucent and fragrant.
  3. Next, toss in 2 cups of broccoli florets, stirring them into the skillet for about 1 minute. Season generously with salt, black pepper, garlic powder, and onion powder to taste.
  4. Cover the skillet with a lid and reduce the heat to medium-low. Let the broccoli steam and cook for 5-7 minutes, stirring halfway through, until it becomes tender yet still crisp.
  5. Stir in ½ cup of heavy cream, scraping the bottom of the skillet to incorporate any flavorful bits leftover. Mix thoroughly to create a creamy sauce.
  6. Sprinkle 1 cup of shredded cheddar cheese over the mixture. Cover with a lid and allow it to melt for about 2-3 minutes.
  7. For an extra flavor boost, drizzle a little Worcestershire sauce and sprinkle some red pepper flakes over the top, if desired. Stir gently to combine just before serving.

Nutrition

Serving: 1servingCalories: 450kcalCarbohydrates: 8gProtein: 35gFat: 35gSaturated Fat: 15gPolyunsaturated Fat: 1gMonounsaturated Fat: 8gCholesterol: 90mgSodium: 600mgPotassium: 640mgFiber: 4gSugar: 2gVitamin A: 500IUVitamin C: 70mgCalcium: 250mgIron: 3mg

Notes

Store leftovers in an airtight container for up to 3 days. For freezing, portion out into freezer-safe containers for up to 2 months. Reheat in a skillet with a splash of cream or water to keep it moist.

Tried this recipe?

Let us know how it was!

One-Pot Taco Spaghetti: Quick, Cheesy Bliss in 30 Minutes

October 28, 2025 by Grace Snow Leave a Comment

The aroma of spices and cheese wafting through the kitchen transports me to a cozy Mexican cantina, mingling with the unmistakable comfort of a family dinner at home. This One-Pot Taco Spaghetti is my go-to solution for busy weeknights, blending the zest of taco night with the satisfying ease of pasta. In under 30 minutes, you can whip up this quick dinner that’s not only a crowd-pleaser but also a hearty meal the whole family will love. You’ll find versatile options for both vegetarian and gluten-free eaters, ensuring everyone can enjoy a taste of this fusion delight. So, are you ready to bring a little taco flair to your dinner table?

Why is One-Pot Taco Spaghetti a Must-Try?

Simplicity: This recipe brings joy to busy weeknights with just one pot and minimal cleanup.

Flavor Explosion: The melding of taco spices and savory cheese delivers a bold, delicious taste that will make your taste buds dance.

Family-Friendly: Perfectly suited for everyone at the table, you can easily adjust it for dietary preferences—like opting for vegetarian options with black beans or keeping it gluten-free with the right pasta.

Quick Preparation: Prep and cook in under 30 minutes, making it an ideal option for those hectic evenings when you're craving something hearty yet fast.

Versatile: From simple ingredients to creative add-ins—like extra veggies or various types of cheese—this dish is as flexible as it is satisfying!

One-Pot Taco Spaghetti Ingredients

• Discover the essential components of this quick dinner!

For the Pasta

  • Spaghetti – The base of the dish; feel free to swap in linguine, fettuccine, or gluten-free pasta for variety.

For the Protein

  • Ground Beef or Turkey – Provides hearty protein; substitute with black beans or lentils for a vegetarian option.

For the Flavor

  • Taco Seasoning – Infuses the dish with bold, zesty flavor; use your favorite store-bought blend or make a homemade mix.

For the Creaminess

  • Cheddar Cheese – Added richness and creaminess; substitute with Monterey Jack or a dairy-free cheese for different flavors.

For the Sauce

  • Diced Tomatoes – Adds moisture and depth; fresh tomatoes or tomato sauce can also work beautifully.

For Cooking

  • Water – Essential for cooking the spaghetti; ensure you have about 4 cups to cover the pasta completely.

Now that you have everything you need, let’s get cooking and savor the delightful flavors of this One-Pot Taco Spaghetti!

Step‑by‑Step Instructions for One-Pot Taco Spaghetti

Step 1: Brown the Meat
In a large skillet over medium heat, add your ground beef or turkey. Cook for about 5 to 7 minutes, breaking it apart with a wooden spoon, until it’s browned all over and no longer pink. Make sure to drain any excess fat, ensuring a leaner meal as you kick off this One-Pot Taco Spaghetti.

Step 2: Add Flavor
Stir in your taco seasoning and diced tomatoes, allowing them to mix thoroughly with the cooked meat. Cook for an additional 2 minutes, stirring occasionally, until the tomatoes soften and the spices become aromatic. This step melds the flavors beautifully, setting the stage for the rich taste that will define your dish.

Step 3: Incorporate Pasta
Now it’s time to elevate our One-Pot Taco Spaghetti! Add the uncooked spaghetti into the skillet, ensuring it’s evenly distributed. Pour in enough water to cover the pasta, approximately 4 cups, and increase the heat to bring the mixture to a rapid boil. Once boiling, reduce the heat to low, cover the skillet, and simmer for about 10 to 12 minutes, or until the pasta is tender and has absorbed most of the liquid.

Step 4: Add Cheese for Creaminess
Remove your skillet from the heat and immediately stir in the shredded cheddar cheese. Keep stirring until the cheese completely melts and creates a creamy, luscious sauce that coats the spaghetti beautifully. This step is essential for achieving that comforting, cheesy essence that makes your One-Pot Taco Spaghetti so irresistible.

Step 5: Serve and Garnish
Once the cheese is melted and the dish is well-combined, it’s time to serve! Spoon generous portions into bowls and enjoy warm. Consider garnishing with optional toppings like a dollop of sour cream, diced avocado, or fresh cilantro to add an extra layer of flavor and a fresh pop of color to your delicious meal.

How to Store and Freeze One-Pot Taco Spaghetti

  • Fridge: Keep leftovers in an airtight container for up to 3 days. Make sure to cool the spaghetti completely before refrigerating to maintain freshness.

  • Freezer: Portion the One-Pot Taco Spaghetti into freezer-safe containers and store for up to 2 months. Be sure to label them with the date for easy tracking.

  • Thawing: When you're ready to enjoy your frozen spaghetti, transfer it to the fridge a day prior to allow it to thaw gradually.

  • Reheating: Warm the One-Pot Taco Spaghetti in a skillet over medium heat, adding a splash of water or broth to restore moisture, ensuring it remains creamy and delicious as you reheat.

One-Pot Taco Spaghetti Variations

Feel free to get creative with this dish—there's a world of flavor just waiting to be explored!

  • Gluten-Free: Swap regular spaghetti for gluten-free pasta to accommodate dietary needs without sacrificing taste. Your family won’t even notice the difference!

  • Vegetarian Delight: Substitute ground meat with canned black beans or lentils for a hearty vegetarian version. This adds protein and a rich texture while keeping it satisfying.

  • Cheese Experiment: Try pepper jack cheese for an extra kick or experiment with a blend of cheeses for a more complex flavor profile. Mixing and matching keeps every bite exciting!

  • Veggie Boost: Toss in diced bell peppers, zucchini, or spinach before adding the pasta to sneak in some extra nutrition and color. It’s an easy way to enjoy meal diversity.

  • Spicy Kick: For those who love heat, incorporate diced jalapeños or a splash of hot sauce when browning the meat. Just a little can elevate the flavor to a whole new level.

  • Taco Twist: Treat your One-Pot Taco Spaghetti like tacos by adding in corn, avocado, or even crushed tortilla chips on top right before serving—because who doesn’t love a little crunch?

  • Creamy Upgrade: Stir in a dollop of cream cheese or sour cream after adding the cheddar for a tangy and creamy finish that will have everyone asking for seconds.

  • Flavor Infusion: Instead of water, use vegetable or chicken broth to cook your pasta for an added layer of flavor. This simple swap can make a huge difference!

For more meal inspiration, check out my recipes for Taco Spaghetti Cheesy or Fish Taco Bowls to keep the taco theme alive. Enjoy your culinary adventures!

Make Ahead Options

These One-Pot Taco Spaghetti are perfect for meal prep enthusiasts! You can prepare the ground meat mixed with taco seasoning and diced tomatoes up to 24 hours in advance. Just refrigerate the mixture in an airtight container to keep the flavors intact. When you're ready to serve, simply reheat the meat mixture in a large skillet, add the uncooked spaghetti along with the necessary water, and follow the usual cooking instructions. This means you can enjoy a delicious, comforting meal with minimal effort, making your busy weeknights feel a little less rushed. Just remember to stir in the cheese once the pasta is cooked to maintain that creamy goodness!

What to Serve with One-Pot Taco Spaghetti

The perfect meal deserves delightful companions that enhance its vibrant flavors and textures.

  • Creamy Avocado Salad: This fresh salad adds a cool, creamy contrast to the zesty spaghetti, making each bite a refreshing experience. Toss ripe avocados with lime juice, diced tomatoes, and red onion for a quick, tangy side.

  • Crunchy Corn Chips: These provide a satisfying crunch that complements the creamy pasta. Use them for dipping or crush them on top of your dish for an added texture.

  • Spicy Roasted Vegetables: With a blend of bell peppers, zucchini, and spices, these roasted veggies introduce a smoky, fiery element that pairs beautifully with the taco seasoning.

  • Tangy Coleslaw: A side of coleslaw lends a crisp, tangy bite that balances the rich flavors of the One-Pot Taco Spaghetti. Opt for a simple vinaigrette to keep it light and vibrant.

  • Chunky Salsa: The freshness of homemade or store-bought salsa bursts with flavor, bringing an extra layer of brightness to your meal. Serve alongside for a delightful, tangy accompaniment.

  • Zesty Limeade: Refresh your palate with a cool glass of zesty limeade. The citrusy sweetness will elevate the meal and provide a lovely contrast to the savory dish.

With these thoughtful pairings, you’re sure to create a full meal that delights every family member!

Expert Tips for One-Pot Taco Spaghetti

  • Water Coverage: Ensure your spaghetti is well-submerged in water; this prevents uneven cooking and sticking, achieving perfect one-pot perfection.

  • Pasta Timing: Monitor cooking time closely, especially if using a different pasta shape to avoid overcooking. Al dente is best for a better texture.

  • Flavor Boost: For enhanced flavor, sauté onions and garlic with the meat before adding taco seasoning; this creates a deeper flavor profile in your One-Pot Taco Spaghetti.

  • Don’t Skip Garnishes: Fresh toppings like cilantro or avocado add brightness and contrast to the creamy dish, elevating the overall dining experience.

  • Meal Prep Friendly: Consider preparing the protein and seasoning mix ahead of time, up to 24 hours in advance, for a quick assembly when meal time arrives.

One-Pot Taco Spaghetti Recipe FAQs

How do I choose ripe tomatoes for my One-Pot Taco Spaghetti?
Absolutely! Look for tomatoes that are firm yet slightly soft to the touch, with a rich, deep color. Avoid those with dark spots or blemishes, as these can indicate overripeness. For a burst of fresh flavor, you can also opt for vine-ripened tomatoes if they're available!

How should I store leftovers from my One-Pot Taco Spaghetti?
Very simple! Store your leftovers in an airtight container in the fridge for up to 3 days. Make sure to cool the spaghetti completely before packing it away—this keeps it fresh and prevents excess moisture from building up in the container.

Can I freeze One-Pot Taco Spaghetti? How?
Yes! To freeze your One-Pot Taco Spaghetti, portion it into freezer-safe containers and store them for up to 2 months. Here's how: Allow the spaghetti to cool completely, then fill the containers, leaving a little space at the top for expansion. Label them with the date, then place them in your freezer. When you're ready to serve, thaw it in the fridge overnight before reheating.

What can I do if my pasta is overcooked or mushy?
If your pasta ends up overcooked or mushy, don’t worry too much! You can try adding a sprinkle of extra cheese, which can help bind it together and enhance its flavor. A touch of fresh herbs, citrus juice, or a vitamin-rich sauce can also revitalize the dish. In the future, keep an eye on the timing for the pasta to ensure it stays al dente, enhancing that delightful texture!

Are there any dietary considerations for pets or allergies in this recipe?
Very important! This dish contains common allergens like cheese and pasta, which could be problematic for lactose-intolerant individuals or those with gluten sensitivities. For pets, it's best to avoid feeding them any human food that contains spices and cheese, as it could upset their stomach. Opt for veggie-based or gluten-free alternatives if you are accommodating such allergies—this way, everyone can enjoy a delicious meal safely!

One-Pot Taco Spaghetti

One-Pot Taco Spaghetti: Quick, Cheesy Bliss in 30 Minutes

This One-Pot Taco Spaghetti blend the zest of taco night with pasta for a quick and satisfying dinner.
Print Recipe Pin Recipe
Prep Time 10 minutes mins
Cook Time 20 minutes mins
Total Time 30 minutes mins
Servings: 4 servings
Course: Dinner
Cuisine: Mexican
Calories: 500
Ingredients Equipment Method Nutrition Notes

Ingredients
  

For the Pasta
  • 8 oz Spaghetti Can swap with linguine, fettuccine, or gluten-free pasta.
For the Protein
  • 1 lb Ground Beef or Turkey Substitute with black beans or lentils for a vegetarian option.
For the Flavor
  • 1 packet Taco Seasoning Store-bought or homemade mix.
For the Creaminess
  • 1 cup Cheddar Cheese Can substitute with Monterey Jack or dairy-free cheese.
For the Sauce
  • 14.5 oz can Diced Tomatoes Fresh tomatoes or tomato sauce can also work.
For Cooking
  • 4 cups Water Ensure to cover the pasta completely.

Equipment

  • Large skillet

Method
 

Cooking Instructions
  1. Brown the meat in a large skillet over medium heat for 5 to 7 minutes until browned, draining any excess fat.
  2. Stir in taco seasoning and diced tomatoes; cook for an additional 2 minutes.
  3. Add uncooked spaghetti and enough water to cover the pasta; bring to a boil, then reduce heat and simmer for 10 to 12 minutes.
  4. Stir in shredded cheddar cheese until melted and creamy.
  5. Serve warm and garnish with optional toppings like sour cream, diced avocado, or cilantro.

Nutrition

Serving: 1servingCalories: 500kcalCarbohydrates: 45gProtein: 30gFat: 20gSaturated Fat: 10gPolyunsaturated Fat: 2gMonounsaturated Fat: 7gCholesterol: 80mgSodium: 800mgPotassium: 600mgFiber: 5gSugar: 3gVitamin A: 400IUVitamin C: 15mgCalcium: 200mgIron: 3mg

Notes

Ensure spaghetti is submerged in water during cooking for even texture. You can prepare the protein and seasoning mix up to 24 hours in advance for quick assembly.

Tried this recipe?

Let us know how it was!

Comforting American Goulash: Easy One-Pot Family Favorite

October 27, 2025 by Grace Snow Leave a Comment

As I stirred the pot, a warm aroma filled my kitchen, instantly transporting me back to family dinner nights that felt like a cozy hug. This Hearty One-Pot American Goulash is the ultimate comfort food, blending tender elbow macaroni with seasoned ground beef and a richly spiced tomato sauce. It’s the kind of dish that effortlessly brings everyone to the table, perfect for those busy weeknights or when I want to prepare a delicious meal ahead of time. The beauty of this recipe lies in its customization—feel free to swap in your favorite veggies or adjust the spices to suit your family's tastes. Are you ready to create a nostalgic feast that will warm the hearts of everyone around your table?

Why is American Goulash a Must-Try?

Ease of Preparation: This one-pot dish comes together quickly, making it a no-fuss choice for busy nights.

Comforting Aroma: The rich blend of spices and simmering tomatoes fills your kitchen with a nostalgic scent that’s hard to resist.

Customizable Delights: Whether you prefer a vegetarian version with assorted veggies or a flavorful twist with ground sausage, the options are endless.

Family-Friendly Appeal: Kids and adults alike love the combination of pasta and beef, ensuring everyone leaves the table satisfied.

Meal Prep Friendly: Leftovers keep well in the fridge or freezer, allowing you to enjoy this hearty meal even on your most hectic days.

Dive into this cozy dish and check out my tips on adding more vegetables for a healthier touch!

American Goulash Ingredients

For the Base
• Olive Oil – Ideal for sautéing and adds a hint of flavor; substitute with any neutral oil if needed.
• Onion – The key to aromatic depth; yellow or white onions work best.
• Garlic – Freshly minced ensures maximum flavor; don’t skimp on this essential ingredient.
• Ground Beef – The main protein source; opt for lean to keep it light, or swap for ground turkey for a healthier choice.
• Beef Broth – Adds richness to the sauce; vegetarians can swap with vegetable broth.
• Elbow Macaroni – Traditional and perfect for soaking up flavors; feel free to use other short pasta types if you prefer.
• Tomato Sauce – The hearty base for American goulash; high-quality canned sauce elevates the dish.
• Diced Tomatoes – Adds texture and acidity; use canned with juices for the best results.
• Worcestershire Sauce – Infuses umami; can be omitted for a vegetarian twist.
• Italian Seasoning – Provides a blend of herbs; dried oregano or basil can be excellent substitutes.
• Bay Leaf – Adds a subtle depth of flavor; don't forget to remove it before serving!
• Salt & Pepper – Essential seasonings; adjust to your taste.
• Crushed Red Pepper (optional) – Spice it up with this optional kick; omit for a milder version.

For Garnish
• Fresh Parsley – Brightens the dish with a pop of color; basil or cilantro make great alternatives.
• Shredded Cheddar Cheese (optional) – For that creamy finish; freshly grated melts beautifully!

Whether you're cozying up on a chilly night or bringing family together around the dinner table, the delightful taste of this American goulash will surely satisfy everyone’s cravings!

Step‑by‑Step Instructions for American Goulash

Step 1: Sauté the Aromatics
Heat 2 tablespoons of olive oil in a large pot over medium-high heat. Once shimmering, add 1 chopped onion and sauté for about 3-4 minutes until they become translucent. The aroma of the onions fills the kitchen, setting the stage for your hearty American goulash. Stir occasionally to ensure even cooking.

Step 2: Add Garlic
Add in 2 minced garlic cloves, cooking for an additional 30 seconds until fragrant. The garlic will complement the onion's sweetness and bring a wonderful depth to your dish. Keep stirring to prevent the garlic from burning, as it can quickly change flavor if overcooked.

Step 3: Brown the Beef
Stir in 1 pound of ground beef, using a wooden spoon to break it apart. Cook until browned, about 5-7 minutes, and drain any excess grease if necessary. The meat should be well-cooked and crumbly, adding its savory richness to the base of your American goulash.

Step 4: Combine Ingredients
Add 15 ounces of tomato sauce, 14.5 ounces of diced tomatoes (with juice), 1 tablespoon of Worcestershire sauce, and 1 tablespoon of Italian seasoning. Season with salt and pepper to taste. Stir until everything is well combined and you achieve a harmonious mixture of flavors and colors.

Step 5: Simmer the Sauce
Pour in 2 cups of beef broth and bring the mixture to a simmer, uncovered, over medium heat. Allow it to cook for 15-20 minutes. You'll notice the sauce thickening and the flavors melding beautifully—a perfect base for your comforting goulash.

Step 6: Cook the Pasta
Add 2 cups of uncooked elbow macaroni directly into the pot, stirring to incorporate. Cover and let it cook for 10-12 minutes, or until the pasta is al dente. Keep an eye on it, as you'll want the pasta to absorb the sauce without becoming mushy, ensuring the heartiness of your American goulash.

Step 7: Final Touches
Once the pasta reaches your desired texture, remove the bay leaf that was added for flavor. Taste the dish and adjust the seasoning if needed. The American goulash should be fragrant and full of flavor, ready to be served.

Step 8: Serve with Garnishes
Ladle the goulash into bowls and garnish with freshly chopped parsley for a pop of color. If desired, sprinkle shredded cheddar cheese on top to add a creamy finish. Serve hot and enjoy this delightful family favorite that is sure to please everyone gathered around the table.

What to Serve with Hearty One-Pot American Goulash

Dive into a comforting meal that’s sure to ignite warm conversations and satisfied smiles around your table.

  • Crusty Garlic Bread: Perfect for mopping up the rich sauce, adding a delightful crunch that complements the soft macaroni. It’s not just a side; it’s an invitation to savor every bite.

  • Fresh Green Salad: A crisp, vibrant salad brings a refreshing contrast, balancing the warm, hearty goulash. Toss mixed greens with cherry tomatoes and a light vinaigrette for a zesty touch.

  • Steamed Broccoli: Its bright green color and tender crunch provide a nutritious element, while soaking up the delicious goulash sauce. A delightful pairing that's both healthy and satisfying.

  • Cheesy Biscuit Bites: Soft and chewy, these cheesy treats add a playful touch to your meal as you enjoy the goulash. They’re perfect for sharing, pulling apart, and savoring with every spoonful.

  • Wine Pairing: A medium-bodied red wine, like a Merlot, enhances the flavors of the dish beautifully, providing a smooth finish that complements the richness of the goulash.

  • Chocolate Chip Cookies: End on a sweet note! The warm, gooey texture of these homemade cookies offers a delightful contrast to the savory goulash, creating a cozy and satisfying dining experience.

American Goulash Variations & Substitutions

Feel free to get creative with this comforting dish and adapt it to your taste buds!

  • Gluten-Free Pasta: Swap elbow macaroni for gluten-free pasta like brown rice or quinoa pasta to suit dietary needs.
  • Ground Turkey: Choose lean ground turkey instead of beef for a lighter twist without sacrificing flavor.
  • Spicy Sausage: Mix in ground sausage for a zesty kick. The natural spices in the sausage will add complexity to the dish.
  • Vegetarian Style: Use beans or lentils instead of meat for a hearty vegetarian goulash, making it protein-packed and satisfying.
  • Veggie Upgrade: Stir in diced zucchini, bell peppers, or corn for an additional nutritional boost. These colorful vegetables enhance both flavor and texture!
  • Herbs & Spices: Boost the flavor by including fresh basil or thyme. These herbs can elevate the aroma and taste, giving your goulash a fresh twist.
  • Creamy Variations: Stir in a dollop of cream cheese or sour cream right before serving for a velvety texture and rich flavor.
  • Add Heat: Sprinkle in cayenne pepper or diced jalapeños for an extra layer of heat if you enjoy a spicy meal!

Every variation contributes its own unique flair! Enjoy making this dish truly yours, and don't forget to check out my tips for a veggie boost in your recipe.

Expert Tips for American Goulash

  • Perfect Pasta: To ensure al dente texture, slightly undercook the macaroni during the initial phase. It’ll soak up flavors while avoiding mushiness.

  • Veggie Boost: Add colored bell peppers, mushrooms, or spinach to the mix for added nutrition and vibrant colors in your American goulash.

  • Flavor Depth: For an extra umami kick, consider adding a splash of balsamic vinegar or a bit of soy sauce to the skillet before simmering.

  • Make-Ahead Magic: This dish freezes beautifully! Simply undercook the pasta slightly and store in airtight containers for quick heat-and-eat meals later.

  • Season to Taste: Always taste and adjust the salt and pepper before serving. A little adjustment can elevate your American goulash to perfection!

Make Ahead Options

These American goulash preparations are a true lifesaver for busy weeknights! You can cook the entire recipe up to 3 days in advance, allowing the flavors to meld beautifully in the refrigerator. To prep, simply follow the recipe up to the point before adding the elbow macaroni—allow everything to cool, then store it in an airtight container. When you’re ready to serve, reheat in a pot, add a splash of beef broth, and stir in the uncooked macaroni; cover and cook until the pasta is al dente. This approach ensures your goulash remains just as delicious, saving you time without sacrificing flavor on those hectic evenings!

How to Store and Freeze American Goulash

Fridge: Store leftovers in airtight containers for up to 4 days. Make sure to cool the goulash completely before sealing to maintain freshness.

Freezer: This comforting American goulash freezes well for up to 3 months. Portion into freezer-safe containers or bags, leaving some space for expansion.

Reheating: To reheat, thaw overnight in the fridge if frozen, then gently heat in a pot over low heat, adding a splash of beef broth or water to restore moisture.

Avoiding Texture Issues: Slightly undercook the macaroni if you plan to freeze, as it will continue to absorb liquid when reheating, helping to maintain the perfect texture.

American Goulash Recipe FAQs

What type of pasta should I use for American goulash?
I recommend using elbow macaroni, as it's the traditional choice that absorbs the sauce beautifully. However, you can substitute it with other short pasta like shells or penne if you choose. Just avoid long pasta types, which don’t blend as well with the sauce.

How long can I store leftover American goulash in the fridge?
Store your leftovers in airtight containers, and they’ll stay fresh for up to 4 days. It’s a comforting dish that keeps well, making it perfect for lunches or dinners throughout the week!

Can I freeze American goulash? How should I do it?
Absolutely! American goulash freezes beautifully. To freeze, slightly undercook the macaroni when you first make it. After it has cooled, portion it into airtight, freezer-safe containers or bags, leaving space for expansion. It will keep well for up to 3 months. When you’re ready to enjoy it again, simply thaw it overnight in the fridge and then reheat gently, adding a splash of broth or water to keep it moist.

What can I do if my goulash turns out too dry?
If your goulash is too dry, no worries! You can add a bit more beef broth or even a splash of water while reheating. Mix it well and let it simmer for a few minutes until the goulash absorbs the added moisture. This should restore that delicious, comforting consistency.

Can I make American goulash vegetarian?
Yes, you can! Substitute ground beef with plant-based meat alternatives or simply use more vegetables for a hearty veggie version. Make sure to use vegetable broth instead of beef broth and skip the Worcestershire sauce for a completely vegetarian dish. You can include ingredients like lentils, mushrooms, zucchini, or bell peppers for a delightful mix of flavors.

Is American goulash a good option for meal prep?
Definitely! This dish is fantastic for meal prep due to its easy storage and reheating options. Just make sure to store it in individual portions. You can enjoy it for quick lunches and dinners throughout the week, so you can spend less time cooking and more time enjoying your meals!

American goulash

Comforting American Goulash: Easy One-Pot Family Favorite

This American goulash combines tender elbow macaroni, seasoned ground beef, and a spiced tomato sauce for a comforting family meal.
Print Recipe Pin Recipe
Prep Time 10 minutes mins
Cook Time 30 minutes mins
Total Time 40 minutes mins
Servings: 6 servings
Course: Dinner
Cuisine: American
Calories: 350
Ingredients Equipment Method Nutrition Notes

Ingredients
  

For the Base
  • 2 tablespoons Olive Oil or any neutral oil
  • 1 medium Onion chopped
  • 2 cloves Garlic minced
  • 1 pound Ground Beef or ground turkey
  • 2 cups Beef Broth or vegetable broth for vegetarians
  • 2 cups Elbow Macaroni uncooked
  • 15 ounces Tomato Sauce high-quality canned
  • 14.5 ounces Diced Tomatoes with juices
  • 1 tablespoon Worcestershire Sauce omit for vegetarian
  • 1 tablespoon Italian Seasoning or dried oregano/basil
  • 1 leaf Bay Leaf remove before serving
  • to taste Salt
  • to taste Pepper
  • optional Crushed Red Pepper omit for milder version
For Garnish
  • to taste Fresh Parsley chopped
  • to taste Shredded Cheddar Cheese optional

Equipment

  • Large pot

Method
 

Step‑by‑Step Instructions
  1. Heat 2 tablespoons of olive oil in a large pot over medium-high heat. Add 1 chopped onion and sauté for about 3-4 minutes until translucent.
  2. Add in 2 minced garlic cloves, cooking for an additional 30 seconds until fragrant.
  3. Stir in 1 pound of ground beef, cooking for about 5-7 minutes until browned.
  4. Add 15 ounces of tomato sauce, 14.5 ounces of diced tomatoes, 1 tablespoon of Worcestershire sauce, and 1 tablespoon of Italian seasoning. Season with salt and pepper.
  5. Pour in 2 cups of beef broth, bring to a simmer and cook for 15-20 minutes.
  6. Add 2 cups of uncooked elbow macaroni, cover, and cook for 10-12 minutes or until pasta is al dente.
  7. Remove the bay leaf, taste and adjust seasoning as needed.
  8. Serve hot garnished with freshly chopped parsley and optional shredded cheddar cheese.

Nutrition

Serving: 1bowlCalories: 350kcalCarbohydrates: 45gProtein: 20gFat: 10gSaturated Fat: 3gPolyunsaturated Fat: 1gMonounsaturated Fat: 6gCholesterol: 50mgSodium: 800mgPotassium: 400mgFiber: 4gSugar: 6gVitamin A: 500IUVitamin C: 10mgCalcium: 150mgIron: 3mg

Notes

This American goulash is a family favorite that can be customized with vegetables and perfect for meal prep.

Tried this recipe?

Let us know how it was!

Slow Cooker Beef Manhattan: Warm Up with This Cozy Classic

October 27, 2025 by Grace Snow Leave a Comment

"Have you ever craved that cozy, home-cooked meal that wraps you in nostalgia? My Slow Cooker Beef Manhattan delivers just that, bringing the heart of the Midwest right to your table. This dish features juicy, fork-tender beef nestled in a savory broth and served over fluffy mashed potatoes and crispy toasted bread, drenched in silky brown gravy. What makes this recipe truly special? It’s not only a low-effort crowd-pleaser perfect for family dinners on a chilly evening, but it also allows the flavors to develop beautifully while you go about your day. Ready to dive into a delicious, hearty meal that will make everyone feel at home? Let’s get started!"

Why is this dish a must-try?

Simplicity, this Slow Cooker Beef Manhattan requires minimal prep, making it perfect for busy weeknights. Hearty flavors come together effortlessly, enveloping tender beef in a rich broth that warms the soul. Nostalgic appeal invites memories of comforting meals shared with loved ones. Versatile options allow for seasonal veggies or substitutions like chicken, keeping mealtime exciting. Crowd-pleaser qualities guarantee satisfied smiles, and the recipe yields leftovers ideal for meal prepping, making it a time-saving win. Celebrate cozy cooking by pairing it with a fresh salad or a deliciously light side from my Ground Beef Enchiladas for balanced meal nights!

Slow Cooker Beef Manhattan Ingredients

Here’s everything you need to make your Slow Cooker Beef Manhattan!

For the Beef

  • Beef Roast (2 pounds) – Use chuck or round roast for the best tenderness and flavor.
  • Onion (1 medium, sliced) – Adds sweetness and depth; shallots work as a milder substitute.
  • Beef Broth (2 cups) – Liquid base for cooking; low-sodium options are great for less salt.
  • Worcestershire Sauce (2 tablespoons) – Infuses umami and richness; soy sauce can be a substitute, but adjust salt levels.
  • Soy Sauce (1 tablespoon) – Elevates savory notes; tamari can be used for gluten-free cooking.
  • Garlic Powder (1 teaspoon) – Adds depth; fresh minced garlic can offer a stronger punch.

For Seasoning

  • Onion Powder (1 teaspoon) – Boosts the overall onion flavor.
  • Dried Thyme (1 teaspoon) – Imparts herbal notes; you can swap with oregano if needed.
  • Black Pepper (1 teaspoon) – Adds a hint of heat; adjust according to your taste.
  • Salt (1/2 teaspoon) – Provides simple seasoning; reduce if using salted broth.

For Gravy and Serving

  • Cornstarch (2 tablespoons) + Cold Water (2 tablespoons, for slurry) – Thickens the gravy; arrowroot powder is a good alternative.
  • Bread (6 slices) – Acts as the base layer; Texas toast or whole grain offers a delightful crunch.
  • Mashed Potatoes (4 cups) – Creamy balance for the dish; homemade is best, but store-bought is fine too.

Step‑by‑Step Instructions for Slow Cooker Beef Manhattan

Step 1: Prepare the Base
Start by placing the sliced onion evenly at the bottom of your slow cooker. This will create a flavorful base for your Slow Cooker Beef Manhattan. A medium onion, sliced thinly, adds sweetness to the dish as it cooks. Lay the onions so they cover the entire bottom, setting the stage for the tender beef roast to come.

Step 2: Add the Beef Roast
Next, take your beef roast, about two pounds of chuck or round, and place it directly on top of the onions. This way, as the roast cooks, it will soak up the rich flavors. Make sure to position it nicely to allow for even cooking. The beef should be seared to a deep brown if you have time, as this enhances the flavor.

Step 3: Pour in the Liquids
Now, carefully pour in the beef broth, two cups in total, which will provide moisture and flavor as it cooks. Add two tablespoons of Worcestershire sauce and one tablespoon of soy sauce to deepen the savory taste of your dish. Ensure that the liquids cover the beef, creating the perfect cooking environment inside the slow cooker.

Step 4: Season the Roast
It's time to season your beef roast! Sprinkle one teaspoon each of garlic powder, onion powder, dried thyme, and black pepper over the meat. Finish with half a teaspoon of salt. These spices will enhance the overall flavor profile of your Slow Cooker Beef Manhattan as it slowly simmers.

Step 5: Cook to Perfection
Cover the slow cooker securely with its lid and set it to cook on LOW for 8 hours or HIGH for 4 to 5 hours. You'll know your beef is done when it's fork-tender and shreds easily. The aroma of your cooking beef will fill your kitchen, making it hard to resist peeking!

Step 6: Shred the Beef
Once your cooking time is complete, carefully remove the lid and, using two forks, shred the beef directly in the slow cooker. It should be tender and fall apart easily. Set aside the beef and strain the onions from the broth for a smoother gravy experience.

Step 7: Make the Gravy
In a small bowl, mix two tablespoons of cornstarch with two tablespoons of cold water to create a slurry. Stir this mixture into the warm broth in the slow cooker to thicken it into a glossy gravy. Allow it to cook for a few more minutes until it reaches your desired thickness.

Step 8: Serve Your Dish
To assemble your Slow Cooker Beef Manhattan, take a slice of bread and place it on a plate as the base. Next, add a generous scoop of fluffy mashed potatoes on top of the bread. Finally, pile on the shredded beef and drizzle with the rich, thick gravy. This comforting dish is now ready for your family to enjoy!

Storage Tips for Slow Cooker Beef Manhattan

  • Fridge: Store leftovers in an airtight container for up to 3 days. Ensure the beef and gravy are completely cooled before sealing to maintain freshness.

  • Freezer: If you want to enjoy this comforting dish later, freeze it in a well-sealed container for up to 2 months. Thaw overnight in the fridge before reheating.

  • Reheating: Reheat on the stovetop over low heat, stirring occasionally until warmed through, or microwave in short intervals, ensuring even heating. Add a splash of broth if needed to moisten.

  • Leftover Usage: Transform any remaining beef Manhattan into a delicious sandwich or wrap for a quick meal, bringing new life to this slow cooker classic!

Slow Cooker Beef Manhattan Variations

Feel free to make this Slow Cooker Beef Manhattan your own with these delightful twists and swaps!

  • Vegetable Boost: Add chopped carrots, peas, or green beans in the last hour of cooking for added nutrition and color. The veggies will soak up the delicious broth, turning your dish into a heartier meal.
  • Poultry Option: Swap the beef for chicken or turkey. This lighter version offers a different flavor while keeping the same comforting vibes. Just adjust the cooking time slightly as poultry cooks faster than beef!
  • Cauliflower Mash: Substitute traditional mashed potatoes with cauliflower mash for a low-carb alternative. This creamy option will delight everyone at the table, and it's a fantastic way to enjoy more veggies.
  • Spicy Kick: Add a dash of hot sauce or crushed red pepper flakes to introduce some heat to your dish. This simple addition elevates the flavor and adds a fun twist for spice lovers.
  • Herb Variation: Experiment with herbs by swapping thyme for rosemary or adding a bay leaf during cooking for aromatic depth. These variations can create exciting new flavor profiles while keeping it cozy.
  • Barbecue Twist: For a sweet and tangy flavor, mix barbecue sauce with your broth instead of Worcestershire sauce. This gives your dish a unique flair and is a sure-fire hit for those who love BBQ.
  • Bread Variety: Use different types of bread, like garlic bread or whole-grain instead of white, for a nutritious spin. The crispy base adds a delightful texture that contrasts beautifully with the rich gravy.

These variations promise to spice up your Slow Cooker Beef Manhattan experience. Happy cooking!

What to Serve with Slow Cooker Beef Manhattan

Elevate your meal with delightful accompaniments that perfectly balance the comforting richness of this hearty dish.

  • Creamy Mashed Potatoes: The fluffy, buttery texture pairs beautifully with the savory gravy, enhancing each soggy bite with richness.

  • Buttery Corn on the Cob: This sweet, crunchy side adds a refreshing contrast, providing a delightful pop of flavor against the meaty dish.

  • Garlic Green Beans: Crisp-tender green beans sautéed with garlic offer a vibrant touch, bringing a burst of freshness and color alongside your main meal.

  • Homemade Coleslaw: A crisp, tangy slaw gives a welcome crunch and acidity, cutting through the richness of the beef and gravy.

  • Mixed Greens Salad: Drizzled with a light vinaigrette, a fresh salad introduces a bright atmosphere, making each bite feel light and balanced.

  • Sweet Potato Fries: Crispy on the outside and tender on the inside, the sweet and salty flavors of fries provide a satisfying companion to your beef classic.

  • Red Wine: A warm glass of red wine enhances heartiness, adding an element of sophistication that pairs beautifully with rich beef flavors.

  • Chocolate Cake: End your meal on a sweet note with a slice of chocolate cake; its rich, creamy frosting complements the savory aspects of the dish.

Expert Tips for Slow Cooker Beef Manhattan

  • Sear for Flavor: Searing the beef roast before adding it to the slow cooker enhances the overall flavor. Don’t skip this step if you can!

  • Warm Shredding: Shred the beef while it's warm for easier handling and better texture. Cold meat can be tough to pull apart.

  • Gravy Thickness: Adjust the cornstarch slurry based on your preference for gravy thickness. Start with the suggested amount, then add more if needed.

  • Cook Time Matters: Cooking on LOW for 8 hours yields the most tender beef. If you're in a hurry, use the HIGH setting, but the flavor may not develop as richly.

  • Use Quality Broth: Opt for homemade or high-quality beef broth for the best flavor in your Slow Cooker Beef Manhattan. It makes a tasty difference!

Make Ahead Options

For busy home cooks, preparing Slow Cooker Beef Manhattan ahead of time can be a real lifesaver! You can slice the onions and season the beef roast up to 24 hours in advance, storing them in the fridge. Additionally, you can cook the entire dish and refrigerate the leftovers for up to 3 days. To maintain quality, store the shredded beef, gravy, and mashed potatoes separately in airtight containers. When you're ready to enjoy your meal, simply reheat everything on the stovetop or in the microwave until warmed through. Serve it over toasted bread, and you'll have a delicious, comforting dish with minimal effort on your busy weeknight.

Slow Cooker Beef Manhattan Recipe FAQs

What kind of beef roast should I use for the best flavor?
For a truly satisfying Slow Cooker Beef Manhattan, I recommend using a chuck or round roast. These cuts provide excellent tenderness and flavor when slow-cooked, making them perfect for this dish. Chuck roast is especially good because it has a nice marbling of fat that adds richness to your broth.

How should I store leftovers of my Slow Cooker Beef Manhattan?
Absolutely! You can store leftovers in an airtight container in the fridge for up to 3 days. Be sure the beef and gravy have cooled down completely before sealing to keep everything fresh. If you have any remaining mashed potatoes, I'd store them separately to maintain their texture.

Can I freeze my Slow Cooker Beef Manhattan?
Yes, you can freeze this dish for later enjoyment! Portion the beef and gravy into well-sealed containers or freezer bags and store for up to 2 months. When you're ready to enjoy it, simply thaw overnight in the fridge before reheating.

What if my gravy isn’t thick enough?
If you find your gravy isn't to your liking, no worries at all! To thicken it, mix an additional tablespoon of cornstarch with cold water to make a slurry. Stir this into the simmering gravy and cook for a few minutes until you achieve your desired consistency. Feel free to adjust based on your thickness preference!

Are there any dietary considerations I should be aware of?
Definitely! If you're making this Slow Cooker Beef Manhattan for someone with dietary restrictions, consider using gluten-free soy sauce or tamari in place of regular soy sauce. Also, if you're serving this to pets, remember that certain ingredients like onion can be harmful. Always double-check any allergies in your household before serving!

How can I enhance the flavor of the beef as it cooks?
For extra flavor, you can sear the beef roast in a hot skillet before placing it in the slow cooker. This step caramelizes the meat, providing a richer taste. Don’t skip it if you have the time! Additionally, using homemade beef broth will elevate the dish to new heights of comfort food goodness.

Slow Cooker Beef Manhattan

Slow Cooker Beef Manhattan: Warm Up with This Cozy Classic

Enjoy a nostalgic meal with Slow Cooker Beef Manhattan featuring tender beef in savory broth served over mashed potatoes.
Print Recipe Pin Recipe
Prep Time 15 minutes mins
Cook Time 8 hours hrs
Total Time 8 hours hrs 15 minutes mins
Servings: 6 servings
Course: Dinner
Cuisine: American
Calories: 650
Ingredients Equipment Method Nutrition Notes

Ingredients
  

For the Beef
  • 2 pounds Beef Roast Use chuck or round roast for best tenderness
  • 1 medium Onion sliced; shallots work as substitute
  • 2 cups Beef Broth low-sodium options are great
  • 2 tablespoons Worcestershire Sauce infuses umami
  • 1 tablespoon Soy Sauce tamari can be used for gluten-free
  • 1 teaspoon Garlic Powder or use fresh minced garlic
For Seasoning
  • 1 teaspoon Onion Powder boosts overall flavor
  • 1 teaspoon Dried Thyme swap with oregano if needed
  • 1 teaspoon Black Pepper adjust according to taste
  • 1/2 teaspoon Salt reduce if using salted broth
For Gravy and Serving
  • 2 tablespoons Cornstarch thickens the gravy
  • 2 tablespoons Cold Water for slurry
  • 6 slices Bread Texas toast or whole grain
  • 4 cups Mashed Potatoes homemade is best

Equipment

  • Slow Cooker

Method
 

Step-by-Step Instructions
  1. Start by placing the sliced onion evenly at the bottom of your slow cooker.
  2. Next, take your beef roast and place it directly on top of the onions.
  3. Now, carefully pour in the beef broth, Worcestershire sauce, and soy sauce.
  4. Sprinkle the garlic powder, onion powder, dried thyme, black pepper, and salt over the roast.
  5. Cover the slow cooker and cook on LOW for 8 hours or HIGH for 4 to 5 hours.
  6. Once done, shred the beef directly in the slow cooker.
  7. In a small bowl, mix cornstarch with cold water to create a slurry and stir into the broth.
  8. To serve, layer the bread, mashed potatoes, and then the shredded beef topped with gravy.

Nutrition

Serving: 1servingCalories: 650kcalCarbohydrates: 45gProtein: 50gFat: 30gSaturated Fat: 12gPolyunsaturated Fat: 4gMonounsaturated Fat: 10gTrans Fat: 1gCholesterol: 120mgSodium: 800mgPotassium: 900mgFiber: 5gSugar: 3gVitamin A: 200IUVitamin C: 5mgCalcium: 60mgIron: 3mg

Notes

Searing the beef enhances flavor. Opt for high-quality broth for the best result.

Tried this recipe?

Let us know how it was!

Lobster Pot Pie: Comforting Seafood Delight in Every Bite

October 27, 2025 by Grace Snow Leave a Comment

The aroma of savory seafood wafts through the kitchen, and suddenly, I'm back to that cozy seaside bistro where I first tasted Lobster Pot Pie. With its buttery crust and rich filling, this dish is comfort food redefined—a sumptuous, home-cooked meal you can whip up in no time. The Ultimate Lobster Pot Pie combines tender lobster meat with fresh vegetables, enveloped in a flaky crust that's not just delicious but also deceptively simple to create. It's a go-to for impressing family and friends or satisfying an adventurous craving. Plus, it makes for a wonderful weeknight dinner or celebratory dish, making any meal feel special. Are you ready to dive into this seafood masterpiece? Let's embark on this culinary journey together!

Why is Lobster Pot Pie a must-try?

Comforting, decadent flavors: This Lobster Pot Pie is your ticket to a warm, indulgent meal that brings the flavors of the sea straight to your kitchen. Quick and easy: With a streamlined process, you’ll impress guests without spending hours in the kitchen. Crowd-pleaser: Perfect for seafood lovers, this dish will dazzle at any gathering, alongside options like Tamale Pie Hearty or Crock Pot Chicken. Versatile ingredients: Feel free to customize by swapping lobster for crab or shrimp! Gourmet experience: Those tender bites of lobster in a creamy filling create a restaurant-quality meal you can prepare at home. Dive into this incredible comfort food and elevate your next dinner!

Lobster Pot Pie Ingredients

For the Filling

  • Lobster Meat – Provides delightful seafood flavor; substitute with crab or shrimp if necessary.
  • Heavy Cream – Adds richness and creaminess; can be replaced with half-and-half for a lighter version.
  • Chicken or Seafood Stock – Contributes depth of flavor; homemade or store-bought options work well.
  • Olive Oil – Used for sautéing aromatics; can substitute with butter for added flavor.
  • Onion – Base flavor for the filling; optional to use shallots for a milder taste.
  • Garlic – Enhances overall savoriness; fresh garlic is recommended but garlic powder can suffice in a pinch.
  • Carrots – Add texture and sweetness; integral for the traditional pot pie flavor.
  • Celery – Offers crunch and freshness; can be swapped with parsnips or bell peppers.
  • Frozen Peas – Adds color and pops of sweetness; fresh peas are a great alternative.
  • Fresh Thyme – Imparts herbal notes; can be replaced with dried thyme (use less, about 1/3 amount).
  • Lemon Juice – Brightens the dish; can use vinegar as a substitute.
  • Salt & Black Pepper – Essential for seasoning; adjust to taste.

For the Crust

  • Pre-made Pie Crusts – Provides the outer layer; homemade crust is encouraged for a personal touch.
  • Egg (for egg wash) – Gives the crust a golden finish; optional if desired.

Step‑by‑Step Instructions for Lobster Pot Pie

Step 1: Preheat the Oven
Begin by preheating your oven to 400°F (200°C). This ensures that when it’s time to bake the Lobster Pot Pie, the crust will turn beautifully golden and flaky. While the oven warms up, gather your ingredients and prepare your workspace for a smooth cooking experience.

Step 2: Sauté Aromatics
In a large skillet, heat 2 tablespoons of olive oil over medium heat. Add 1 chopped onion and 2 minced garlic cloves, sautéing them for about 3-4 minutes until the onion becomes translucent and aromatic. This base will infuse the pot pie filling with delicious flavors. Stir occasionally to prevent browning.

Step 3: Add Vegetables
Once your aromatics are ready, stir in 1 cup of diced carrots and 1 cup of diced celery, sautéing for another 5 minutes. You want the vegetables to soften slightly but still retain some crunch for texture in your Lobster Pot Pie. Keep stirring to ensure even cooking.

Step 4: Make the Filling
Pour in 1 cup of heavy cream and 1 cup of either chicken or seafood stock, mixing everything well. Allow the mixture to gently simmer for about 5 minutes, letting the flavors meld together. You should see it thicken slightly, becoming creamy and inviting—perfect for enveloping that tender lobster.

Step 5: Combine Lobster and Peas
Add in 2 cups of cooked lobster meat and 1 cup of frozen peas, stirring to combine. Let the filling simmer for an additional 5 minutes, ensuring the lobster warms through. This is where the magic happens as the flavors combine; you’ll want the mixture bubbling softly around the edges.

Step 6: Season the Filling
Remove the skillet from heat and stir in 1 teaspoon of fresh thyme, 1 tablespoon of lemon juice, and a pinch of salt and black pepper to taste. Taste the filling and adjust the seasoning if needed. This step elevates the flavor profile and gives the Lobster Pot Pie its signature zest.

Step 7: Prepare the Crust
Place one pre-made pie crust into a 9-inch pie dish, ensuring it fits snugly along the edges. Carefully pour the lobster filling into the crust, spreading it out evenly for a gorgeous presentation. This foundational layer will hold all that deliciousness, so make sure it’s well-distributed.

Step 8: Top with Crust
Lay the second pie crust over the top, gently crimping the edges to seal in the filling. Cut several slits in the top crust to create steam vents—this will prevent it from puffing up while baking. Take a moment to admire how beautiful your Lobster Pot Pie is starting to look!

Step 9: Egg Wash
In a small bowl, whisk together one egg and a splash of water to create an egg wash. Using a pastry brush, gently brush the top of the crust with this mixture. This final touch will give your lobster pot pie a lovely golden finish that will shine bright and appetizing when it comes out of the oven.

Step 10: Bake
Place the assembled Lobster Pot Pie in the oven and bake for 30-35 minutes or until the crust is golden brown and flaky. You’ll know it’s ready when you can see the filling bubbling through the slits and the aroma fills your kitchen with warmth.

Step 11: Cool Down
Once baked, remove the pot pie from the oven and allow it to cool for 10-15 minutes. This resting period helps the filling set and makes it easier to slice. Keep your kitchen surroundings filled with excitement for the delicious Lobster Pot Pie that’s about to make an appearance at your table!

Expert Tips for Lobster Pot Pie

  • Proper Lobster Cooking: Ensure the lobster meat is fully cooked before adding it to the filling. Use a thermometer to verify that the internal temperature reaches 165°F (74°C) during baking.

  • Avoid Overcooking: Be cautious not to overcook the filling after adding the lobster. This helps keep the meat tender and juicy, enhancing your Lobster Pot Pie.

  • Cool Before Serving: Always let the pot pie cool for 10-15 minutes before cutting. This prevents burns and allows the flavors to set perfectly.

  • Even Crust Cooking: To achieve a crispy crust, make sure to cut slits in the top crust for steam to escape. This will keep your Lobster Pot Pie looking and tasting fabulous.

  • Homemade vs. Store-Bought: While pre-made pie crusts save time, making your own can elevate the dish further, giving it a personal touch that friends and family will love.

  • Season to Taste: Adjust the seasoning in the filling as you'll want it to shine through. A little more lemon juice or a pinch of salt can make a big difference in your Lobster Pot Pie!

How to Store and Freeze Lobster Pot Pie

Fridge: Store any leftovers in an airtight container for up to 3 days. Make sure it's completely cooled before placing it in the fridge to preserve freshness.

Freezer: If you want to freeze the Lobster Pot Pie, it can be wrapped tightly in plastic wrap and aluminum foil. Enjoy it within 2 months for the best flavor and texture.

Reheating: When ready to serve, thaw in the fridge overnight. Reheat in the oven at 350°F (175°C) for about 20-25 minutes until heated through, ensuring your comfort food remains deliciously creamy.

Make-Ahead: The pot pie can be assembled a day in advance. Just cover it with foil and refrigerate before baking; adjust the baking time to accommodate the cold filling.

Lobster Pot Pie Variations & Substitutions

Feel free to get creative with this Lobster Pot Pie recipe and make it your own! Your kitchen journey can burst with flavor and excitement.

  • Seafood Swap: Replace the lobster with crab or shrimp for a different seafood experience that still delights.

  • Lighter Crust: Use a puff pastry for a lighter, flakier crust that adds an airy touch to each bite.

  • Cheesy Delight: Mix in some cheese, like cheddar or Gruyère, to the filling for a rich, gooey surprise. It's a game changer, trust me!

  • Veggie Boost: Add in extra vegetables such as bell peppers or sweet corn for a pop of color and flavor. This makes the pot pie not only heartier but also more nutritious!

  • Gluten-Free Option: Use a gluten-free pie crust to ensure everyone can join in on the deliciousness. It's an easy swap that keeps the joy intact!

  • Herb Infusion: Experiment with different fresh herbs, like dill or parsley, instead of thyme for a unique aromatic twist. Your kitchen will smell divine!

  • Zingy Seasoning: Add a dash of hot sauce or cayenne for a kick of heat that takes the comfort food to a vibrant level. Spice it up your way!

  • Creamy Twist: Substitute heavy cream with coconut milk for a dairy-free version that brings a mild sweetness. Your palate will thank you for this delightful twist!

Each variation opens the door to new tastes and experiences, making your Lobster Pot Pie a dish that can be cherished time and again. If you're looking for more incredible seafood inspiration, check out One Pot Salmon or try out my hearty Crock Pot Chicken for comforting family favorites!

What to Serve with Lobster Pot Pie?

A comforting Lobster Pot Pie deserves delectable companions to enhance your dining experience and make your meal memorable.

  • Crisp Mixed Green Salad: A refreshing salad with vinaigrette complements the rich filling, providing a light and crunchy contrast to the hearty pie. The fresh greens add color and balance the meal beautifully.

  • Buttery Garlic Bread: This warm, crispy bread is perfect for mopping up any creamy filling that spills from the pie. Its delightful garlic aroma and buttery flavor make every bite of the Lobster Pot Pie shine even brighter.

  • Roasted Asparagus: The slight bitterness of roasted asparagus elevates the dish with a sophisticated touch. With a dash of olive oil and a sprinkle of salt, this green vegetable sidesteps easily into your meal.

  • Creamy Coleslaw: The crunch of coleslaw adds a delightful textural contrast while its creamy dressing offers a refreshing palate cleanser between bites. This pairing is perfect for those who enjoy a little tang with their seafood.

  • Champagne or Sparkling Wine: Elevate your dining experience with a glass of bubbly. The effervescence and acidity of champagne cut through the richness of the Lobster Pot Pie, creating an elegant balance.

  • Lemon Sorbet: A light dessert, lemon sorbet cleanses the palate after the savory pie. Its bright, citrusy flavor perfectly echoes the lemon notes baked into the pot pie, leaving a cheerful finish to your meal.

Make Ahead Options

These Lobster Pot Pies are perfect for busy cooks looking to save time without sacrificing flavor! You can prepare the entire filling up to 24 hours in advance, allowing it to cool before transferring it to an airtight container in the refrigerator. This not only speeds up your prep time on the day of baking but also enhances the flavors as they meld overnight. When you’re ready to bake, simply fill your pie crusts with the chilled filling, cover with the top crust, and brush with the egg wash. Bake as directed, noting that you may need to add a few extra minutes to ensure it’s heated through. Enjoy restaurant-quality results with minimal effort!

Lobster Pot Pie Recipe FAQs

What type of lobster meat should I use?
Absolutely! For the best flavor, use fresh cooked lobster meat. If unavailable, you can substitute with crab or shrimp for a similar texture and taste. Just ensure the seafood is pre-cooked before adding it to the filling.

How should I store leftovers?
To keep your Lobster Pot Pie fresh, store any leftovers in an airtight container in the fridge for up to 3 days. Make sure the pie is completely cooled before refrigerating to preserve its delicious flavor and texture.

Can I freeze Lobster Pot Pie?
Yes, you can freeze it! Wrap the pie tightly in plastic wrap and then in aluminum foil to prevent freezer burn. It’s best enjoyed within 2 months. When ready to eat, simply thaw it in the fridge overnight, and reheat in the oven at 350°F (175°C) for about 20-25 minutes until fully warmed through.

What if my filling is too runny?
If you find that your filling is too runny, don’t worry! The solution is simple. You can thicken it by adding a tablespoon of cornstarch blended with a little cold water, then return it to the heat until it simmers and thickens. This will ensure your Lobster Pot Pie has a rich, creamy consistency without being soupy.

Is this recipe suitable for my dietary needs?
Great question! If you have specific dietary considerations, it’s easy to adjust this Lobster Pot Pie. For a dairy-free option, use coconut milk instead of cream and earth balance or similar products in place of butter. Always double-check any allergies with ingredients such as shellfish.

Lobster Pot Pie

Lobster Pot Pie: Comforting Seafood Delight in Every Bite

This Lobster Pot Pie brings comforting flavors of the sea and a flaky crust to your dinner table.
Print Recipe Pin Recipe
Prep Time 30 minutes mins
Cook Time 35 minutes mins
Cooling Time 15 minutes mins
Total Time 1 hour hr 20 minutes mins
Servings: 6 slices
Course: Dinner
Cuisine: Seafood
Calories: 400
Ingredients Equipment Method Nutrition Notes

Ingredients
  

Filling
  • 2 cups Lobster Meat Substitute with crab or shrimp if necessary.
  • 1 cup Heavy Cream Can be replaced with half-and-half for a lighter version.
  • 1 cup Chicken or Seafood Stock Homemade or store-bought options work well.
  • 2 tablespoons Olive Oil Can substitute with butter for added flavor.
  • 1 medium Onion Optional to use shallots for a milder taste.
  • 2 cloves Garlic Fresh garlic is recommended but garlic powder can suffice.
  • 1 cup Carrots Diced, integral for the traditional pot pie flavor.
  • 1 cup Celery Diced, can be swapped with parsnips or bell peppers.
  • 1 cup Frozen Peas Fresh peas are a great alternative.
  • 1 teaspoon Fresh Thyme Can be replaced with dried thyme (use less, about 1/3 amount).
  • 1 tablespoon Lemon Juice Can use vinegar as a substitute.
Crust
  • 2 pre-made Pie Crusts Homemade crust is encouraged for a personal touch.
  • 1 egg Egg (for egg wash) Optional if desired.

Equipment

  • Large skillet
  • 9-inch pie dish
  • Whisk
  • Pastry brush

Method
 

Preparation
  1. Preheat your oven to 400°F (200°C).
  2. In a large skillet, heat olive oil over medium heat. Add chopped onion and minced garlic, sauté for about 3-4 minutes until onion is translucent.
  3. Stir in diced carrots and celery, sauté for another 5 minutes until soft but still crunchy.
  4. Pour in heavy cream and either chicken or seafood stock, mixing well. Let it simmer for about 5 minutes.
  5. Add in cooked lobster meat and frozen peas, stirring to combine. Let it simmer for another 5 minutes.
  6. Season the filling with fresh thyme, lemon juice, salt, and black pepper. Adjust seasoning to your taste.
  7. Place one pie crust into a 9-inch pie dish and pour the lobster filling evenly.
  8. Lay the second pie crust over the top, crimp the edges, and cut slits for steam vents.
  9. Whisk together egg and water for egg wash, and brush over the top crust.
  10. Bake for 30-35 minutes or until the crust is golden brown and filling is bubbling.
  11. Allow to cool for 10-15 minutes before slicing.

Nutrition

Serving: 1sliceCalories: 400kcalCarbohydrates: 30gProtein: 25gFat: 20gSaturated Fat: 10gPolyunsaturated Fat: 5gMonounsaturated Fat: 4gCholesterol: 75mgSodium: 800mgPotassium: 500mgFiber: 2gSugar: 3gVitamin A: 15IUVitamin C: 10mgCalcium: 8mgIron: 15mg

Notes

Serve with a side salad or crusty bread for a complete meal. Adjust seasoning as desired for the best flavor profile.

Tried this recipe?

Let us know how it was!

Caramelized Pulled Beef Brisket: Melt-in-Your-Mouth Delight

October 27, 2025 by Grace Snow Leave a Comment

As I stood in the kitchen, the aroma of caramelizing beef danced through the air, making my mouth water and my stomach rumble—who knew dinner could summon such anticipation? Today, I’m excited to share my recipe for Caramelized Pulled Beef Brisket, a dish that transforms a humble cut of beef into a tender, smoky masterpiece through slow cooking. Perfect for meal prep or a satisfying weekend feast, this recipe not only delivers on flavor but requires surprisingly little hands-on time. Whether you savor it in sandwiches, tacos, or paired with creamy mashed potatoes, you’ll find it effortlessly versatile and completely crowd-pleasing. Ready to elevate your dinner game? Let’s dive in!

Why is This Recipe a Must-Try?

Tender, Juicy Perfection: The slow-cooked beef brisket becomes irresistibly soft, practically melting in your mouth.
Unique Flavor Profile: With a delightful blend of smoked paprika, garlic, and delicious barbecue sauce, each bite is bursting with smoky richness.
Versatile Serving Options: Whether you choose to pile it on a toasted brioche bun or serve it in lettuce wraps for a low-carb delight, the choices are endless!
Minimal Hands-On Time: Once you set the brisket to simmer, it does all the work, making it perfect for busy weeknights or special occasions.
Crowd-Pleasing Delight: This dish is sure to impress friends and family, making it your new go-to for gatherings. Try pairing it with complementary sides like creamy mashed potatoes or roasted vegetables for a complete meal!

Caramelized Pulled Beef Brisket Ingredients

• To create this melt-in-your-mouth dish, gather the following delicious ingredients.

For the Brisket

  • Beef Brisket – A tough cut that becomes juicy and tender when slow-cooked; use beef chuck roast for a leaner alternative.
  • Olive Oil – Used for searing the brisket to enhance flavor through browning.
  • Salt & Black Pepper – Basic seasoning to elevate the meat's taste.
  • Smoked Paprika – Adds a smokiness that complements the brisket's flavor.
  • Garlic Powder & Onion Powder – Provide aromatic depth and savory notes.
  • Chili Powder – Optional, adds heat for those who enjoy a spicy kick.

For the Cooking Liquid

  • Beef Broth – Keeps the brisket moist during cooking and enhances overall flavor; low-sodium or homemade is best.
  • Barbecue Sauce – Adds sweetness and smokiness; feel free to use homemade or store-bought.
  • Worcestershire Sauce – Provides umami depth with tangy complexity.
  • Dijon Mustard – Adds a hint of sharpness to the braising liquid.
  • Brown Sugar – Crucial for the caramelization step, creating a sticky, golden crust.
  • Onion (sliced) & Garlic (minced) – Additional aromatics for flavor infusion during cooking.

For Caramelization

  • Butter – Used in the caramelization process for richness.
  • Beef Drippings – Enhances flavor in the caramelization sauce.

With these incredible ingredients, your Caramelized Pulled Beef Brisket will be a showstopper at the dinner table—tender, smoky, and bursting with flavor in every bite!

Step‑by‑Step Instructions for Caramelized Pulled Beef Brisket

Step 1: Prepare the Brisket
Begin by patting the beef brisket dry with paper towels to help the seasoning stick. In a bowl, mix together the salt, black pepper, smoked paprika, garlic powder, onion powder, and chili powder. Rub this seasoning mixture all over the brisket, ensuring every inch is coated to infuse it with flavor throughout the slow cooking process.

Step 2: Sear the Brisket
Heat a large skillet over medium-high heat and add a drizzle of olive oil. Once hot, carefully place the seasoned brisket into the skillet, searing it for 2-3 minutes on each side until a beautiful golden-brown crust develops. This step enhances the rich flavor of your Caramelized Pulled Beef Brisket and helps to lock in moisture, so don’t skip it!

Step 3: Combine Ingredients in Slow Cooker
Transfer the brisket to a slow cooker, and add the beef broth, barbecue sauce, Worcestershire sauce, Dijon mustard, and brown sugar. Toss in the sliced onion and minced garlic to amp up the flavor profile. Set the slow cooker to low and let it cook for 6-8 hours, or until the beef is fork-tender and easily shreds apart, filling your kitchen with mouthwatering aromas.

Step 4: Rest and Shred the Brisket
Once cooking is complete, carefully remove the brisket from the slow cooker and let it rest on a cutting board for about 10 minutes. This resting period is crucial as it allows the juices to redistribute within the meat, ensuring every bite of your Caramelized Pulled Beef Brisket remains juicy. After resting, use two forks to shred the brisket into tender pieces and reserve the cooking liquid for later.

Step 5: Caramelization Process
In a skillet over medium heat, melt a few tablespoons of butter, then add the reserved cooking liquid, brown sugar, and a splash of Worcestershire sauce. Stir to combine and allow the mixture to simmer slightly until it thickens. Toss the shredded brisket into the caramelization sauce, mixing until all pieces are well coated and caramelized, which enhances the heavenly flavor of your dish.

Storage Tips for Caramelized Pulled Beef Brisket

  • Fridge: Store leftover Caramelized Pulled Beef Brisket in an airtight container for up to 4 days. This helps keep it moist and flavorful for your next meal.
  • Freezer: To keep the brisket for longer, freeze portions in airtight bags for up to 3 months. For optimal taste and texture, ensure all air is removed from the bags.
  • Thawing: When you're ready to enjoy your frozen brisket, thaw it overnight in the fridge before reheating. This maintains its delicious flavor and juicy texture.
  • Reheating: Gently reheat in a skillet over medium heat with a splash of reserved cooking liquid, or cover and warm in the oven for irresistibly tender results.

Make Ahead Options

Caramelized Pulled Beef Brisket is a fantastic choice for meal prep, making your busy weeknights a breeze! You can season and sear the brisket up to 24 hours in advance (this allows the flavors to penetrate the meat deeply). Simply wrap it tightly and refrigerate. The cooking process can also be done up to 3 days ahead; just shred the brisket and reserve the cooking liquid, then refrigerate in an airtight container. To maintain quality, keep the brisket covered with its juices to prevent drying out. When you're ready to serve, just reheat in a skillet over medium heat, and toss with the caramelization sauce for that irresistible finish—your dinner will be just as delicious as if it were freshly made!

Expert Tips for Caramelized Pulled Beef Brisket

  • Resting is Key: Allow the brisket to rest for 10 minutes after cooking. This helps retain moisture, ensuring your Caramelized Pulled Beef Brisket is juicy and tender.

  • Don't Skip the Sear: Searing the brisket before slow cooking adds rich flavor and a beautiful crust. It's a key step to avoid bland and chewy results.

  • Mind the Cooking Time: Overcooking can lead to dry meat. Ensure you check for fork-tenderness after the recommended cooking time for the best texture.

  • Store Wisely: Keep leftovers in an airtight container with some cooking juices to retain moisture. This keeps the brisket flavorful for your next meal!

  • Heat Gently: When reheating, do so over medium heat in a skillet or covered in the oven. Quick reheating can dry out the meat, making it less enjoyable.

What to Serve with Caramelized Pulled Beef Brisket

A comforting and flavorful meal is just a pairing away; let’s enhance the experience of your beef brisket feast.

  • Creamy Mashed Potatoes: These buttery, smooth potatoes soak up the savory juices from the brisket, creating a perfect marriage of flavors.

  • Tangy Coleslaw: Fresh and crunchy, coleslaw adds a refreshing contrast to the rich brisket, cutting through the richness while balancing textures.

  • Toasted Brioche Buns: Soft and slightly sweet, these buns cradle the pulled beef beautifully, making for a delightful sandwich that enhances each bite.

  • Roasted Seasonal Vegetables: Colorful, caramelized squash, carrots, or bell peppers provide both visual appeal and complementary sweetness, rounding out your meal beautifully.

  • Creamy Mac and Cheese: Rich, cheesy goodness pairs wonderfully with the smoky brisket, offering a comforting side dish that is always a crowd-pleaser.

  • Fluffy Rice Pilaf: Light yet flavorful, this side absorbs the brisket’s delicious juices while adding subtle notes of herbs and spices, making every mouthful a delight.

  • Craft Beer or Red Wine: A cold beer or a glass of red wine can beautifully complement the deep flavors of the brisket, making for an elevated dining experience.

  • Chocolate Chip Cookies: End your meal on a sweet note with warm, gooey cookies that contrast the savory meat, providing the perfect dessert to cherish.

Caramelized Pulled Beef Brisket Variations

Feel free to make this delicious dish your own with these creative adaptations!

  • Honey Swap: Replace brown sugar with honey for a natural sweetness. This gives a unique flavor that enhances the brisket beautifully.
  • Low-Carb Lettuce Wraps: Serve the shredded brisket in crispy lettuce wraps instead of traditional buns for a fresh and healthy twist!
  • Taco Night: Layer the brisket in warm corn tortillas, topped with pico de gallo and avocado for a delightful taco night.
  • Smoky Chipotle Kick: Add a teaspoon of chipotle powder for a spicy, smoky flavor that elevates your brisket to new heights.
  • BBQ Variations: Experiment with different barbecue sauces; a tangy vinegar-based sauce can add a fun twist to the traditional profile.
  • Vegetarian Style: For a vegetarian option, use jackfruit as a brisket substitute, seasoned similarly for a meaty texture.
  • Asian-Inspired: Include soy sauce and ginger in your cooking liquid for an enticing Asian flavor that pairs perfectly with steamed rice.
  • Savory Sides: Serve with creamy coleslaw or homemade pickles to create a delightful contrast with the smoky beef.

By exploring these variations, you'll keep your Caramelized Pulled Beef Brisket exciting and fresh every time! And don’t forget to try out Ground Beef Enchiladas for another flavorful family meal or mix it with some barbecue sauce to really up the ante!

Caramelized Pulled Beef Brisket Recipe FAQs

What is the best way to select beef brisket for this recipe?
Absolutely! When selecting beef brisket, look for a cut with good marbling and a bright red color. Avoid cuts with dark spots or excessive fat, as these can affect flavor and texture. If you're looking for a leaner option, you can substitute with beef chuck roast, which also works wonderfully in slow cooking.

How should I store leftover Caramelized Pulled Beef Brisket?
Very! Store your leftover brisket in an airtight container and refrigerate it for up to 4 days. This keeps it moist and flavorful. If you want to save it for a longer period, you can freeze portions in airtight freezer bags for up to 3 months. Remember to remove as much air as possible from the bags to prevent freezer burn!

Can I freeze Caramelized Pulled Beef Brisket? If so, how?
Definitely! To freeze your brisket, ensure it has cooled completely after cooking. Then, portion it out and place it in freezer-safe bags or containers, making sure to include some of the cooking juices to maintain moisture. Lay the bags flat in the freezer to save space. When ready to eat, simply thaw overnight in the fridge and reheat gently!

What should I do if my brisket turns out dry?
Oh no! If your brisket ends up dry, there are a couple of things you can do. First, ensure your brisket has cooked for the full recommended time until it’s fork-tender; the slow cooker or oven temperature may be a factor. When reheating leftovers, add a splash of beef broth or the reserved cooking liquid, covering the dish while warming to keep it moist. This will help restore some moisture and flavor.

Are there any dietary considerations I should keep in mind?
Absolutely! If cooking for guests or family with dietary restrictions, be mindful of potential allergens. While the recipe is naturally gluten-free, check the ingredients—like barbecue sauce and Worcestershire sauce—for gluten if needed. You can also substitute brown sugar for honey or coconut sugar if you're looking for a healthier alternative! Always inquire about specific allergies before serving.

Caramelized Pulled Beef Brisket

Caramelized Pulled Beef Brisket: Melt-in-Your-Mouth Delight

This Caramelized Pulled Beef Brisket is a tender, smoky dish that transforms a humble cut of beef into a melt-in-your-mouth delight.
Print Recipe Pin Recipe
Prep Time 15 minutes mins
Cook Time 7 hours hrs
Resting Time 10 minutes mins
Total Time 7 hours hrs 25 minutes mins
Servings: 6 servings
Course: Dinner
Cuisine: American
Calories: 350
Ingredients Equipment Method Nutrition Notes

Ingredients
  

For the Brisket
  • 3 pounds Beef Brisket or beef chuck roast for a leaner option
  • 2 tablespoons Olive Oil for searing
  • 1 tablespoon Salt
  • 1 teaspoon Black Pepper
  • 2 teaspoons Smoked Paprika
  • 1 teaspoon Garlic Powder
  • 1 teaspoon Onion Powder
  • 1 teaspoon Chili Powder optional
For the Cooking Liquid
  • 2 cups Beef Broth low-sodium or homemade
  • 1 cup Barbecue Sauce homemade or store-bought
  • 2 tablespoons Worcestershire Sauce
  • 1 tablespoon Dijon Mustard
  • 1 tablespoon Brown Sugar for caramelization
  • 1 medium Onion sliced
  • 4 cloves Garlic minced
For Caramelization
  • 3 tablespoons Butter
  • 1 cup Beef Drippings

Equipment

  • Skillet
  • Slow Cooker
  • Cutting Board

Method
 

Preparation and Cooking
  1. Pat the beef brisket dry with paper towels and rub the seasoning mixture all over the brisket.
  2. Heat olive oil in a large skillet over medium-high heat and sear the brisket for 2-3 minutes on each side.
  3. Transfer the brisket to a slow cooker, add all cooking liquid ingredients, and cook on low for 6-8 hours.
  4. After cooking, let the brisket rest for about 10 minutes before shredding it into tender pieces.
  5. In a skillet, melt butter and add the cooking liquid; mix with shredded brisket until well coated.

Nutrition

Serving: 1servingCalories: 350kcalCarbohydrates: 15gProtein: 45gFat: 14gSaturated Fat: 6gPolyunsaturated Fat: 1gMonounsaturated Fat: 7gCholesterol: 120mgSodium: 800mgPotassium: 600mgFiber: 1gSugar: 8gVitamin C: 2mgCalcium: 2mgIron: 15mg

Notes

This dish is perfect for meal prep and can be enjoyed in various ways, including sandwiches or tacos.

Tried this recipe?

Let us know how it was!

Savory Turkey and Stuffing Meatballs with Gravy to Savor

October 23, 2025 by Grace Snow Leave a Comment

In the midst of a hectic week, there's nothing quite like the comforting aroma of home-cooked food wafting through the kitchen. Enter my Turkey and Stuffing Meatballs with Gravy, a dish that delivers all the festive flavors of Thanksgiving in under an hour. These savory meatballs, crafted from juicy ground turkey and delectable stuffing mix, make for an easy weeknight dinner that will please everyone at the table. Not only are they a breeze to whip up, but the addition of a rich, velvety gravy elevates them into true comfort food territory. Whether served over fluffy mashed potatoes or nestled into a warm bowl of egg noodles, this recipe invites you to savor a little taste of celebration every day. Are you ready to add this delightful twist on a classic to your weekly menu?

What makes these meatballs special?

Hearty Comfort: These Turkey and Stuffing Meatballs with Gravy bring the warmth of a Thanksgiving feast to your plate any night of the week.

Quick & Easy: With minimal prep and just under an hour to cook, you can whip up a satisfying meal that crowds will rave about.

Savory Goodness: The combination of tender turkey and flavorful stuffing creates a dish that's both delightful and nostalgic.

Versatile Serving Options: Enjoy these meatballs over mashed potatoes, egg noodles, or even as a delightful appetizer with cranberry sauce!

Elevate your dinner routine and indulge in this comforting dish that’s sure to satisfy, just like my Sweet Potatoes Black or Fried Shrimp Cabbage.

Turkey and Stuffing Meatballs Ingredients

• Discover the delightful components of these Turkey and Stuffing Meatballs with Gravy.

For the Meatballs

  • Ground Turkey – The main protein that provides a light and tender texture; substituting with ground chicken will yield softer meatballs.
  • Large Eggs – Essential for binding the mixture together and adding moisture; opt for three if using medium eggs for a better hold.
  • Granulated Garlic – Adds savory depth; feel free to replace it with fresh garlic for a more intense flavor.
  • Salt – Enhances the overall flavors; adjust based on your broth's saltiness for the perfect balance.
  • Black Pepper – Adds a hint of spice; freshly ground will elevate the dish with a bolder flavor.
  • Onion – Finely grated or minced, it infuses moisture and flavor; shallots can be used for a sweeter twist.
  • Boxed Stuffing Mix – Provides seasoning and texture; choose turkey or chicken flavor for a savory kick.
  • Butter – Adds richness and assists in browning; olive oil can be a healthier alternative.
  • Olive Oil – Enhances flavor during cooking; you may substitute it with vegetable oil as needed.
  • Low Sodium Chicken Broth – Keeps the meatballs moist and is crucial for the gravy; vegetable broth can lighten the dish.
  • Dried Thyme – Adds an herby note to both meatballs and gravy; fresh thyme can be substituted for a vibrant flavor.

For the Gravy

  • Flour – Used to make the roux for thickening gravy; cornstarch or a gluten-free blend can be used as an alternative.

Get ready to bring the wonderful flavors of Thanksgiving into your kitchen with these simple yet satisfying Turkey and Stuffing Meatballs with Gravy!

Step‑by‑Step Instructions for Turkey and Stuffing Meatballs With Gravy

Step 1: Preheat the Oven
Begin by preheating your oven to 350°F (175°C). In a large mixing bowl, crumble the ground turkey and add in the large eggs, granulated garlic, salt, black pepper, and finely grated onion. Stir in the boxed stuffing mix until everything is well-combined, creating a flavorful base for your Turkey and Stuffing Meatballs.

Step 2: Form Meatballs
Using a standard ice cream scoop, portion out the mixture and shape it into uniform meatballs, about 1 to 1.5 inches in diameter. This ensures even cooking and a consistent texture in your Turkey and Stuffing Meatballs. Place the meatballs on a baking sheet lined with parchment paper while you prepare to cook them.

Step 3: Sear the Meatballs
Heat a large skillet over medium-high heat and add a combination of butter and olive oil. Once the butter has melted and the oil is hot, add the meatballs in batches, searing them for about 1 to 2 minutes on each side until they achieve a beautiful golden brown crust. This step adds flavor and color to your dish.

Step 4: Bake the Meatballs
Return all the browned meatballs to the skillet and carefully pour in the low sodium chicken broth along with the dried thyme. Cover the skillet and transfer it to the preheated oven, baking for approximately 20 minutes, or until the meatballs reach an internal temperature of 165°F (74°C). The broth will keep the meatballs juicy.

Step 5: Prepare the Gravy
While the meatballs are baking, you can make the gravy. In a separate saucepan, melt some butter over medium heat, then whisk in the flour to create a roux. Gradually add in some of the cooking liquid from the skillet to avoid lumps, stirring until the gravy thickens to your desired consistency. This is what makes your Turkey and Stuffing Meatballs truly comforting.

Step 6: Serve and Enjoy
Once the meatballs are cooked, remove them from the oven and transfer to a serving dish. Drizzle the luscious gravy over the top, and for an optional touch, strain the gravy for a smoother finish. Serve these delightful Turkey and Stuffing Meatballs with gravy over mashed potatoes or egg noodles for a cozy meal that captures the essence of a Thanksgiving feast.

What to Serve with Turkey and Stuffing Meatballs with Gravy

Breathe in the cozy aromas of home cooking as you create a delightful meal that comforts the soul and pleases everyone at the table.

  • Creamy Mashed Potatoes: The whisper of butter and cream creates a luscious bed for the savory meatballs and gravy.

  • Garlic Bread: Crunchy and warm, this bread option offers a perfect contrast to the tender meatballs and is a hit for dipping in the rich gravy.

  • Sautéed Green Beans: Fresh and vibrant green beans add a crisp texture, balancing the softness of the meatballs. A hint of garlic ensures they’re bursting with flavor.

  • Roasted Brussels Sprouts: Caramelized to perfection, their slightly bitter flavor pairs beautifully with the sweet richness of the meatballs' stuffing mix.

  • Cranberry Sauce: This tangy sweet condiment brings a pop of brightness that contrasts beautifully with the savory notes, evoking a true Thanksgiving spirit.

  • Cauliflower Rice: For a lighter option, this grain-free substitute absorbs the gravy and offers a delightful texture, keeping your plate healthy yet satisfying.

  • Apple Cider: A chilled glass of apple cider refreshes the palate between bites, while its sweet and tart essence complements the hearty meal.

  • Pumpkin Cheesecake: End your meal on a sweet note with this creamy dessert, echoing the flavors of fall and holiday gatherings, leaving everyone smiling.

Expert Tips for Turkey and Stuffing Meatballs

  • Proper Mixing: Ensure you mix the turkey and stuffing thoroughly but don’t overwork the meat. This will keep your Turkey and Stuffing Meatballs tender rather than tough.

  • Uniform Size: Use an ice cream scoop for consistent meatball size. This way, they cook evenly, enhancing the overall texture and flavor.

  • Avoid Soggy Meatballs: Don’t skip the searing step! Browning the meatballs adds flavor and helps keep them firm while baking in the broth.

  • Check Temperature: Use an instant-read thermometer to ensure the meatballs reach an internal temperature of 165°F. This prevents overcooking and drying them out.

  • Flavor Boost: For an extra depth of flavor, add any juices released while the meatballs rest into the gravy. This little trick can elevate your Turkey and Stuffing Meatballs With Gravy to another level!

Turkey and Stuffing Meatballs Variations

Feel free to get creative and customize these meatballs to suit your taste preferences and dietary needs!

  • Ground Chicken: Substitute ground turkey with ground chicken for a slightly different texture and flavor profile.
  • Herbaceous Twist: Use fresh herbs instead of dried thyme for a bright, vibrant flavor that will enhance every bite.
  • Spicy Kick: Add crushed red pepper flakes to the meat mixture for a delicious heat that beautifully balances the savory notes.
  • Vegetable Boost: Mix in finely chopped spinach or zucchini to amp up the nutrition and add moisture to the meatballs.
  • Gluten-Free Option: Swap boxed stuffing mix with gluten-free bread crumbs or crushed gluten-free crackers for a gluten-free dish.
  • Mini Meatball Bites: Create smaller meatballs for a perfect appetizer or game day snack; serve with a side of cranberry sauce for dipping.
  • Savory Gravy Twist: Use mushroom broth instead of chicken broth for a deep, umami flavor in your gravy.
  • Savory & Sweet: Incorporate dried cranberries or apples into the meatball mixture for a delightful contrast to the savory ingredients.

These variations guarantee a delicious meal every time! Try them with my Roasted Bratwurst Peppers for another comforting dish or serve them alongside some flavorful Skillet Pasta Sun for a complete feast!

Make Ahead Options

These Turkey and Stuffing Meatballs with Gravy are a fantastic option for busy weeknights and meal prep enthusiasts! You can mix the meatball ingredients and shape them into meatballs up to 24 hours in advance; just cover them tightly and refrigerate until you're ready to cook. Additionally, the gravy can be prepared ahead of time and stored in the fridge for up to 3 days. To maintain quality, allow the meatballs and gravy to cool before refrigerating, and reheat gently on the stove with a splash of broth before serving. Simply bake the meatballs and serve with the warmed gravy for a comforting meal that feels like a special occasion, all while saving you precious time!

How to Store and Freeze Turkey and Stuffing Meatballs

Fridge: Store leftover Turkey and Stuffing Meatballs in an airtight container for up to 5 days. This will keep them fresh and flavorful for quick weeknight meals.

Freezer: For longer storage, freeze the meatballs after cooking, placing them in a single layer on a baking sheet until solid. Then transfer to a freezer-safe bag for up to 3 months.

Reheating: To reheat, gently warm the meatballs in a saucepan with a bit of chicken broth to prevent drying out. Heat until warmed through, enjoying that savory flavor again!

Storage Tip: If stored in gravy, you may need to add extra broth during reheating to maintain a silky consistency for your Turkey and Stuffing Meatballs.

Turkey and Stuffing Meatballs with Gravy Recipe FAQs

What kind of ground turkey is best to use?
Absolutely! For the juiciest meatballs, choose 93% lean ground turkey. This balance of fat keeps the meatballs tender and flavorful. If you'd like a leaner option, ground chicken also works beautifully and makes for softer meatballs.

How do I store leftover Turkey and Stuffing Meatballs?
I recommend storing leftover meatballs in an airtight container in the refrigerator for up to 5 days. Make sure they are completely cooled before sealing to maintain freshness. For longer storage, you can freeze them for up to 3 months.

Can I freeze these meatballs? How?
Yes! Freeze the Turkey and Stuffing Meatballs after cooking. First, allow them to cool completely. Then, place them in a single layer on a baking sheet lined with parchment paper, ensuring they don’t touch. Freeze until solid, about 1-2 hours, and then shift them to a freezer-safe bag, removing as much air as possible to prevent freezer burn. They’ll be delicious for months!

What should I do if my gravy is too thick?
If your gravy becomes too thick, it’s very easy to fix! Gradually whisk in additional chicken broth or water, a tablespoon at a time, while heating on medium-low. Keep stirring until you reach your desired consistency. A silky gravy is what we’re after, so don’t hesitate to tweak it!

Are these meatballs suitable for gluten-free diets?
Certainly! To adapt this recipe for gluten-free dietary needs, simply use a gluten-free stuffing mix and substitute the flour in the gravy with cornstarch or a gluten-free flour blend. This way, you can still enjoy those heartwarming flavors without any added gluten!

Can I make these meatballs in advance?
Very much so! To meal prep, you can prepare the meatballs a day ahead and refrigerate them in the raw form. Shape and store them in an airtight container, and when you're ready to cook, just sear and bake them as instructed. This saves time on busy weeknights!

Turkey and Stuffing Meatballs With Gravy

Savory Turkey and Stuffing Meatballs with Gravy to Savor

Delight in Turkey and Stuffing Meatballs with Gravy, a comforting dish that delivers Thanksgiving flavors in under an hour.
Print Recipe Pin Recipe
Prep Time 15 minutes mins
Cook Time 25 minutes mins
Total Time 40 minutes mins
Servings: 4 meatballs
Course: Dinner
Cuisine: American
Calories: 320
Ingredients Equipment Method Nutrition Notes

Ingredients
  

For the Meatballs
  • 1 lb Ground Turkey
  • 2 large Large Eggs
  • 1 tsp Granulated Garlic
  • 1 tsp Salt
  • 1 tsp Black Pepper
  • 1 medium Onion finely grated
  • 1 box Boxed Stuffing Mix turkey or chicken flavor
  • 2 tbsp Butter
  • 2 tbsp Olive Oil
  • 1 cup Low Sodium Chicken Broth
  • 1 tsp Dried Thyme
For the Gravy
  • 2 tbsp Flour

Equipment

  • Mixing Bowl
  • Baking Sheet
  • Skillet
  • Saucepan
  • Ice cream scoop

Method
 

Step-by-Step Instructions
  1. Preheat the oven to 350°F (175°C). In a large mixing bowl, crumble the ground turkey and add in the large eggs, granulated garlic, salt, black pepper, and finely grated onion. Stir in the boxed stuffing mix until well-combined.
  2. Using a standard ice cream scoop, portion out the mixture and shape it into uniform meatballs, about 1 to 1.5 inches in diameter. Place the meatballs on a baking sheet lined with parchment paper.
  3. Heat a large skillet over medium-high heat and add a combination of butter and olive oil. Once melted, add the meatballs in batches, searing them for about 1 to 2 minutes on each side until golden brown.
  4. Return all browned meatballs to the skillet and pour in the low sodium chicken broth along with the dried thyme. Cover and transfer to the oven, baking for approximately 20 minutes, or until the internal temperature reaches 165°F.
  5. While the meatballs bake, make the gravy by melting some butter in a saucepan, whisking in the flour to create a roux. Gradually add some of the cooking liquid, stirring until thickened.
  6. Remove the meatballs and transfer to a serving dish. Drizzle the gravy over the top and serve over mashed potatoes or egg noodles.

Nutrition

Serving: 2meatballsCalories: 320kcalCarbohydrates: 15gProtein: 25gFat: 18gSaturated Fat: 6gPolyunsaturated Fat: 2gMonounsaturated Fat: 8gCholesterol: 120mgSodium: 720mgPotassium: 450mgFiber: 1gSugar: 1gCalcium: 2mgIron: 8mg

Notes

For best results, ensure even cooking and don't skip the searing step to enhance flavor.

Tried this recipe?

Let us know how it was!

Savory Smoked Spatchcocked Turkey That Wows Every Guest

October 22, 2025 by Grace Snow Leave a Comment

As I stood by the smoker, the intoxicating aroma of a juicy smoked spatchcocked turkey enveloped me, transforming my kitchen into a haven of comfort and anticipation. This recipe is not only straightforward to prepare but creates a captivating centerpiece for your holiday feast. Infused with a delightful smoky flavor and boasting crispy golden skin, this bird guarantees to impress your guests while saving you time and hassle in the kitchen. Perfect for Thanksgiving, it allows you to savor every moment of the celebration without the stress often associated with cooking a whole turkey. Ready to dive into a world of flavor and elevate your holiday dining experience? Let’s get started on the journey to your best turkey yet!

Why is Smoked Spatchcocked Turkey a Must-Try?

Simplicity Made Delicious: This recipe takes the stress out of Thanksgiving, ensuring a stunning turkey with minimal effort.

Mouthwatering Smokiness: Infused with apple cider, your turkey will have a depth of flavor that rivals any traditional roast.

Crispy Skin Awaits: The spatchcock technique results in perfectly crispy skin while keeping the meat juicy and tender.

Crowd-Pleasing Centerpiece: Impress your guests with a show-stopping turkey that’s sure to become a holiday favorite.

Time-Saving Cooking: With just a few hours in the smoker, you can spend more time enjoying the company of loved ones.

For additional tips on creating the ideal Thanksgiving meal, check out our serving suggestions. This turkey is versatile enough to pair beautifully with classic sides, making it the perfect choice for your festive gathering!

Smoked Spatchcocked Turkey Ingredients

For the Turkey

  • 18 lb turkey – Ensure it's fully defrosted before cooking for best results.
  • Kosher salt (optional) – Enhances overall flavor; only use if your spice rub is low in sodium.
  • Black pepper (optional) – Adds a touch of spiciness; adjust according to your spice rub's profile.

For the Spice Rub

  • ⅓ cup poultry spice rub – This blend adds depth and flavor; feel free to substitute with your favorite or homemade mix for a personal touch.

For Moisture

  • 3 cups apple cider or apple juice – Provides moisture and a hint of sweetness; apple juice is a less tart alternative that works beautifully in this smoked spatchcocked turkey recipe.

Let the deliciousness begin as you prepare this incredible smoked spatchcocked turkey that’s sure to leave everyone at the table asking for seconds!

Step‑by‑Step Instructions for Juicy Smoked Spatchcocked Turkey

Step 1: Preheat the Smoker
Begin by preheating your smoker to 400°F for 15 minutes, allowing it to reach the ideal cooking temperature. This is crucial for achieving that perfect smoky flavor right from the start. Ensure the smoker's wood chips are loaded and ready to create an aromatic environment for your juicy smoked spatchcocked turkey.

Step 2: Prepare the Turkey
While the smoker heats, prepare your 18 lb turkey by spatchcocking it. Use sharp kitchen shears to remove the backbone, then flatten the turkey by pressing down firmly on the breast. Rub the poultry spice blend generously all over the turkey, ensuring to get into the crevices and underneath the skin for maximum flavor impact.

Step 3: Initial Smoking Phase
Carefully place the turkey, breast side up, directly onto the grill grates of the smoker. Smoke for the first 30 minutes at 400°F to give it a great initial sear and crispy skin. Keep an eye on the smoke—if it starts to dissipate, you may need to replenish the wood chips to maintain that luscious smokiness throughout the cooking process.

Step 4: Lower the Temperature
After the initial smoking, reduce the smoker temperature to 300°F. Continue to cook your smoked spatchcocked turkey for about 3 to 4 hours, monitoring the internal temperature. Every hour, mist with apple cider or apple juice to keep the meat moist and add subtle sweetness, ensuring that your turkey remains juicy throughout.

Step 5: Check for Doneness
As your turkey approaches cooking time, check the internal temperature at the thickest part of the breast using a meat thermometer. The turkey should reach 160°F for perfect doneness. A golden brown skin with visible juices running clear indicates that your juicy smoked spatchcocked turkey is close to being ready to rest.

Step 6: Rest Before Carving
Once your turkey hits the desired temperature, carefully remove it from the smoker. Cover it loosely with aluminum foil and allow it to rest for 20-30 minutes. Resting is essential for redistributing the juices, ensuring that every bite of your smoked spatchcocked turkey is tender and flavorful before carving and serving.

What to Serve with Juicy Smoked Spatchcocked Turkey

Creating the perfect Thanksgiving meal is all about balance and flavor, and your juicy smoked spatchcocked turkey sets the stage beautifully.

  • Creamy Truffle Parmesan Mashed Potatoes: The rich, velvety texture enhances the turkey's smoky flavor, making every bite indulgent and satisfying.

  • Classic Cranberry Sauce: The tangy sweetness of this sauce cuts through the richness of the turkey, providing a refreshing contrast that brightens the meal.

  • Green Bean Casserole: This beloved side adds creaminess and a crunchy topping, bringing a delightful texture that complements the tender turkey perfectly.

  • Savory Stuffing: Packed with herbs and spices, stuffing adds depth and a cozy element to your Thanksgiving feast.

  • Roasted Brussels Sprouts: The slight bitterness of Brussels sprouts, caramelized to perfection, offers a lovely contrast to the turkey's rich smokiness.

  • Homemade Gravy: A must-have that brings everything together, this rich and flavorful gravy can further enhance the moistness of your smoked turkey.

Serve these alongside the juicy smoked spatchcocked turkey, and you’ll have a spread that transforms your Thanksgiving into a feast of laughter, love, and unforgettable flavors!

Variations & Substitutions: Smoked Spatchcocked Turkey

Feel free to explore your culinary creativity with this smoked spatchcocked turkey recipe by making delightful tweaks to tailor it to your taste!

  • Dairy-Free: Substitute any butter-based basting with olive oil or melted coconut oil for a rich, flavorful skin without dairy.

  • Herb Infusion: Try adding fresh herbs like rosemary or thyme into the spice rub to elevate the flavor profile with aromatic freshness. The more herbs, the more aromatic the experience.

  • Spice Level: If you crave a bit of heat, incorporate cayenne pepper or a dash of hot sauce into your spice blend. Adjust the amount to reach your desired spice level, giving your turkey a tantalizing kick.

  • Citrus Twist: Squeeze fresh lemon or orange juice over the turkey before smoking for a zesty brightness that pairs wonderfully with apple cider. This adds a refreshing contrast to the smoky notes.

  • Juice Variations: Use cranberry juice or pear juice in place of apple cider for an entirely different flavor twist. Each alternative brings a unique sweetness that complements the turkey beautifully.

  • Smoky Choices: For a deeper smoky flavor, experiment with pecan or cherry wood chips instead of hickory. Each type of wood imparts its own distinct aroma and taste, perfect for those looking to customize their smoking experience.

  • Single Serve Options: Consider cutting the turkey into smaller pieces for faster cooking and easier portioning. This is especially helpful if you're preparing for a gathering with varied preferences.

For additional inspiration on side dishes, check out our serving suggestions that perfectly complement your flavorful turkey! Feel free to let your taste buds guide you on this delicious culinary journey.

Make Ahead Options

These Juicy Smoked Spatchcocked Turkey preparations are perfect for busy home cooks looking to save time! You can spatchcock the turkey and apply the poultry spice rub up to 24 hours in advance; just wrap it tightly in plastic wrap and refrigerate. To enhance flavor and moisture, mist the turkey with apple cider before you smoke it. The final cooking can be done on the same day as your gathering, ensuring it’s just as delicious as if it were freshly prepared. When ready to serve, simply smoke it as directed, and enjoy a flavorful turkey that’s sure to impress your guests while giving you more time to relax!

Expert Tips for Smoked Spatchcocked Turkey

  • Brining Benefits: Brining your turkey a few days prior enhances juiciness. Consider a simple salt-water brine to make every bite succulent.
  • Internal Temperature Check: Always ensure your turkey reaches an internal temperature of 165°F for safety. Don’t rely solely on cooking time; use a thermometer for accuracy!
  • Basting Boost: Misting your turkey with apple cider every hour not only adds flavor but also helps keep it moist. This technique is key for a juicy smoked spatchcocked turkey.
  • Resting Ritual: Allow your turkey to rest covered in foil for at least 20-30 minutes before carving. This redistributes juices, enhancing tenderness.
  • Flavor Exploration: Experiment with different spice rubs and wood chips while smoking to create unique flavor profiles that will wow your guests.

How to Store and Freeze Smoked Spatchcocked Turkey

Fridge: Store any leftover smoked spatchcocked turkey in an airtight container for up to 4 days. Ensure it's completely cooled before sealing to preserve its flavor and moisture.

Freezer: For longer storage, freeze portions of the turkey in airtight bags or containers. It can last up to 3 months; make sure to label with the date for easy tracking.

Reheating: Thaw frozen turkey in the refrigerator overnight before reheating. To keep it juicy, reheat in the oven at 325°F, covering with foil to retain moisture.

Room Temperature: Avoid leaving the turkey out for more than 2 hours. If serving at gatherings, keep it in a warming tray or covered to maintain its deliciousness.

Smoked Spatchcocked Turkey Recipe FAQs

How do I select the best turkey for smoking?
Absolutely! When selecting a turkey for smoking, look for one that is fresh or thoroughly frozen, preferably organic or free-range for more flavor. Make sure it’s fully defrosted before cooking for the best results. A weight of around 12 to 18 pounds works well for even cooking in a smoker.

What’s the best way to store leftover smoked spatchcocked turkey?
I recommend storing any leftover smoked spatchcocked turkey in an airtight container in the refrigerator. It will remain fresh for up to 4 days. Allow the turkey to cool completely before sealing to maintain its moisture and flavor. For longer storage, consider freezing; it can last up to 3 months.

Can I freeze smoked spatchcocked turkey?
Absolutely! To freeze, allow the turkey to cool completely, then carve it into portions. Place the pieces in airtight freezer bags or containers, making sure to remove as much air as possible. Label them with the date for easy reference. For the best quality, consume within 3 months, but it can be safe for longer.

What should I do if my smoked turkey isn’t cooking evenly?
If your smoked turkey isn’t cooking evenly, ensure it's properly spatchcocked to allow for even heat distribution. You might want to rotate the turkey halfway through the cooking process. Additionally, if you notice that one side is browning faster, you can cover it loosely with aluminum foil to prevent burning while the rest continues to cook.

Is this smoked spatchcocked turkey recipe pet-friendly?
While turkey itself is safe for dogs in moderation, avoid giving them any seasoned meat, especially when using spices or ingredients like onion or garlic as they can be harmful. Always remove the skin before offering turkey to your pets and consult your veterinarian if unsure.

What should I watch for while smoking turkey?
Very important! During the smoking process, keep an eye on your smoker’s temperature and the internal temperature of the turkey. The ideal temperature for doneness should reach 160°F in the thickest part of the breast. Mist the turkey with apple cider every hour to keep it moist and flavorful, making sure to monitor the smoke level and replenish wood chips if necessary.

Smoked Spatchcocked Turkey

Savory Smoked Spatchcocked Turkey That Wows Every Guest

This Smoked Spatchcocked Turkey impresses with its smoky flavor and crispy skin, making it a holiday must-try.
Print Recipe Pin Recipe
Prep Time 15 minutes mins
Cook Time 4 hours hrs
Resting Time 30 minutes mins
Total Time 4 hours hrs 45 minutes mins
Servings: 10 servings
Course: Dinner
Cuisine: American
Calories: 450
Ingredients Equipment Method Nutrition Notes

Ingredients
  

For the Turkey
  • 18 lb turkey Ensure it's fully defrosted before cooking for best results.
  • Kosher salt Enhances overall flavor; use if your spice rub is low in sodium.
  • Black pepper Adjust according to your spice rub's profile.
For the Spice Rub
  • ⅓ cup poultry spice rub Feel free to substitute with your favorite or homemade mix.
For Moisture
  • 3 cups apple cider or apple juice Provides moisture and a hint of sweetness.

Equipment

  • Smoker
  • Meat Thermometer
  • Kitchen Shears

Method
 

Step-by-Step Instructions
  1. Preheat your smoker to 400°F for 15 minutes, ensuring it's ready for optimal smoky flavor.
  2. Spatchcock the turkey by removing the backbone and flattening it by pressing down on the breast. Rub the spice blend generously.
  3. Place the turkey breast side up on the grill grates of the smoker. Smoke for the first 30 minutes at 400°F.
  4. Lower the temperature to 300°F and continue cooking for 3 to 4 hours, misting with apple cider every hour.
  5. Check the internal temperature, it should reach 160°F. Look for golden brown skin and juicy breasts.
  6. Once at the desired temperature, remove from the smoker, cover with foil, and let rest for 20-30 minutes.

Nutrition

Serving: 1lbCalories: 450kcalProtein: 60gFat: 20gSaturated Fat: 5gPolyunsaturated Fat: 1gMonounsaturated Fat: 10gCholesterol: 150mgSodium: 100mgPotassium: 700mgCalcium: 1mgIron: 4mg

Notes

Brining enhances juiciness; ensure to check the internal temperature and allow resting post-cooking for the best results.

Tried this recipe?

Let us know how it was!

Delicious Turkey Wild Rice Casserole for Cozy Nights

October 20, 2025 by Grace Snow Leave a Comment

The aroma of a warm casserole wafting through the kitchen evokes the coziest memories, doesn’t it? My Instant Pot Leftover Turkey Wild Rice Casserole takes those holiday leftovers and transforms them into a comforting one-pot meal that your family will adore. It's a fantastic way to repurpose turkey, mixing it with hearty wild rice, vibrant veggies, and a touch of creamy goodness. One of the best parts about this recipe is how quickly it comes together—perfect for any busy home chef. Plus, it’s gluten-free friendly! So whether you’re looking to make the most of your holiday feast or simply craving a satisfying meal, this casserole will warm both your heart and your stomach. What’s your favorite way to use up leftovers?

Why Love This Turkey Wild Rice Casserole?

Versatile Delight: This recipe is perfect for transforming any leftover turkey into an exciting dish that'll please everyone's taste buds. One-Pot Wonder: Easy clean-up means more time with loved ones and less in the kitchen! Nutritious & Hearty: Packed with veggies and healthy grains, this casserole brings satisfaction without guilt. Quick Cooking: In just about 30 minutes, you have a warm, delicious meal ready to serve. You might even enjoy serving it alongside a refreshing salad or some crusty bread for an even more delightful experience. If you're looking for more ideas, check out our delicious Cornbread Breakfast Casserole for a breakfast twist, too!

Turkey Wild Rice Casserole Ingredients

For the Casserole

  • Unsalted Butter – Adds rich flavor and helps soften vegetables.
  • Garlic (2 cloves, minced) – Builds the savory base for the Turkey Wild Rice Casserole.
  • White Onion (1, diced) – Provides aromatic sweetness and depth.
  • Celery (½ cup, diced) – Classic aromatic for texture and flavor.
  • Carrots (½ cup, diced) – Adds sweetness and vibrant color.
  • Chicken Broth (3 cups) – Supplies necessary liquid for cooking and enhances flavor.
  • Wild Rice (1 cup) – Adds chewiness and earthy flavor; nutty taste.
  • Long Grain Rice (½ cup) – Complements the wild rice, enhancing the dish's texture.
  • Red Lentils (½ cup) – Cook quickly, adding protein and soft texture.
  • Corn (½ cup) – Introduces sweetness and more color.
  • Sage Stuffing (1 cup, dry) – Provides herby, season-based flavor; can use homemade or store-bought.
  • Leftover Turkey (2 cups, shredded) – The star ingredient, giving protein and heartiness to the dish.

For Seasoning

  • Salt (1 tsp) – Enhances overall flavor.
  • Black Pepper (1 tsp) – Adds warmth.
  • Dried Thyme (½ tsp) – Contributes earthy flavor.
  • Dried Rosemary (½ tsp) – Imparts a slightly piney flavor.
  • Dried Sage (1 tsp) – Complements stuffing and turkey flavor.
  • Bay Leaves (2) – Infuses subtle flavor during cooking.

For the Creamy Finish

  • Heavy Cream (½ cup) – Stirred in at the end for a creamy finish.
  • Fresh Thyme – Used as a garnish for color and freshness.

Step‑by‑Step Instructions for Turkey Wild Rice Casserole

Step 1: Sauté the Aromatics
Set your Instant Pot to sauté mode and melt 2 tablespoons of unsalted butter. Add 2 minced garlic cloves, 1 diced white onion, ½ cup diced celery, and ½ cup diced carrots. Sauté for about 2 minutes, stirring occasionally, until the vegetables are softened and fragrant, then turn off the Instant Pot to keep the base warm.

Step 2: Deglaze the Pot
Pour in 3 cups of chicken broth into the pot, using a wooden spoon to scrape up any browned bits from the bottom. This step is crucial for adding depth of flavor to your Turkey Wild Rice Casserole and avoiding the dreaded burn notice during cooking, so ensure all particles are deglazed well.

Step 3: Add the Grains and Veggies
Stir in 1 cup of wild rice, ½ cup of long grain rice, ½ cup of red lentils, and ½ cup of corn to the pot. Mix until everything is well combined, ensuring the grains are evenly distributed. This will create a hearty base for your casserole, adding both texture and nutrition to the dish.

Step 4: Layer the Turkey and Seasoning
Place 2 cups of shredded leftover turkey on top of the rice mixture without stirring. Sprinkle with 1 teaspoon of salt, 1 teaspoon of black pepper, ½ teaspoon of dried thyme, ½ teaspoon of dried rosemary, 1 teaspoon of dried sage, and add 2 bay leaves. This layering allows the flavors to meld beautifully during pressure cooking.

Step 5: Cook Under Pressure
Seal the Instant Pot lid and switch the setting to manual high pressure. Cook for 20 minutes, allowing the casserole to build pressure and cook thoroughly. The lovely aroma will entice your family while it’s cooking, making everyone eager for a cozy meal.

Step 6: Natural Pressure Release
Once the cooking time is done, let the Instant Pot naturally release pressure for 10 minutes. Afterward, carefully turn the valve to release any remaining pressure. This step helps the Turkey Wild Rice Casserole develop flavor and ensures a perfect texture for your dish.

Step 7: Final Touches
Open the lid and remove the bay leaves from the casserole. Stir in ½ cup of heavy cream to add a rich, creamy finish to your casserole. This last step enriches the flavors and gives the dish that cozy, comforting feel everyone loves.

Step 8: Garnish and Serve
Spoon the Turkey Wild Rice Casserole into bowls and garnish with fresh thyme for a pop of color and freshness. Serve warm, and watch your family enjoy every hearty, creamy bite—it’s a delightful way to turn holiday leftovers into a comforting feast.

What to Serve with Instant Pot Leftover Turkey Wild Rice Casserole?

There’s nothing quite like a cozy meal paired with delightful sides to elevate your dining experience and fill your home with warmth.

  • Simple Side Salad: A light lemon parmesan chopped salad adds a refreshing crunch that balances the creamy casserole perfectly.
  • Crusty Bread: Serve with pumpkin seed or cranberry walnut bread for a nutty contrast that complements the rich flavors of the casserole.
  • Steamed Green Beans: Their crisp-tender texture and mild flavor create a beautiful, fresh counterpart to the hearty turkey wild rice casserole.
  • Roasted Brussels Sprouts: Caramelized and slightly sweet, they add a delightful depth of flavor alongside the savory casserole.
  • Sweet Potato Mash: Creamy and slightly sweet, this side dish contrasts beautifully with the casserole’s savory notes and adds a pop of color to your plate.
  • Savory Cornbread: Perfect for soaking up the creamy sauce, cornbread adds a touch of sweetness and heartiness that rounds out the meal beautifully.
  • Cranberry Sauce: A spoonful of tart cranberry sauce brightens the flavors and celebrates the holiday spirit even after the feast is over.
  • Pumpkin Slab Pie: To finish your meal, a slice of this fall favorite adds a rich sweetness and serves as the perfect indulgence to sweeten the cozy vibe.

How to Store and Freeze Turkey Wild Rice Casserole

Fridge: Store leftover turkey wild rice casserole in an airtight container for up to 3 days. Make sure it’s cooled before sealing to prevent condensation.

Freezer: For longer storage, you can freeze the casserole for up to 3 months. Place it in a freezer-safe container and ensure it's properly sealed.

Reheating: Thaw in the fridge overnight. Reheat in the microwave or on the stovetop, adding a splash of broth or water if needed to regain creaminess.

Make-Ahead Tip: Prepare the casserole ahead of time and store it unbaked in the fridge. It can be baked fresh when you're ready to enjoy a cozy meal!

Expert Tips for Turkey Wild Rice Casserole

  • Deglaze Well: Thoroughly scrape the bottom of the pot after sautéing to prevent a burn notice. This helps your Turkey Wild Rice Casserole achieve deep, rich flavors.

  • Uniform Veggies: Cut your vegetables into similar sizes to ensure they cook evenly. This makes a big difference in texture throughout the dish.

  • Let it Rest: Allow the casserole to sit for a few minutes after cooking. This helps thicken the sauce and enhances flavor, making every bite even more delightful.

  • Creamy Finish: Stir in heavy cream just before serving for an extra layer of richness. If desired, substitute with full-fat coconut milk for a lighter touch.

  • Leftover Flexibility: Don't hesitate to use any meat or veggies you have on hand! Rotisserie chicken or even mushrooms can be excellent alternatives for a personalized twist on the classic Turkey Wild Rice Casserole.

Turkey Wild Rice Casserole Variations

Feel free to tailor this casserole to your family’s taste with these enticing variations!

  • Rotisserie Chicken: Swap out the turkey for rotisserie chicken for a quick and easy option. It’s perfect for those nights when time is of the essence but comfort food is still a must!

  • Mushroom Medley: Add diced mushrooms to the sautéed veggies for an earthy flavor boost. The mushrooms will add a delightful texture and depth, making each bite even more satisfying.

  • Lentil Alternatives: Replace red lentils with more rice, quinoa, or even chickpeas for variety. This allows you to adjust the protein and texture to suit your preferences!

  • Gluten-Free Friendly: Use gluten-free stuffing and ensure your chicken broth is gluten-free. This way, everyone at the table can enjoy this cozy casserole without worry.

  • Creamy Coconut Twist: Substitute heavy cream with full-fat coconut milk for a light, tropical flair. It adds a wonderful creaminess while being dairy-free!

  • Herb Explosion: Experiment with fresh herbs like parsley, dill, or cilantro for a freshness that elevates the flavors in your casserole. Fresh herbs can truly bring your dish to life!

  • Spice it Up: Want some heat? Stir in a teaspoon or two of red pepper flakes or your favorite hot sauce before cooking. It will add a delightful kick that'll spice things up!

  • Vegan Option: For a vegan twist, skip the turkey and use roasted vegetables along with plant-based cream. This way, you’ll make a hearty, plant-packed dish that everyone can enjoy.

If you find yourself yearning for more hearty comfort dishes, don’t miss out on our delicious recipe for Spicy Miso Casserole as your next kitchen adventure!

Make Ahead Options

These Turkey Wild Rice Casserole preparations are perfect for busy home cooks eager to save time during the week! You can prepare the base (steps 1-4) up to 24 hours in advance by storing it in an airtight container in the refrigerator. Be sure to let it cool completely before sealing to preserve quality. When ready to cook, simply add the particulate, seal the Instant Pot, and follow the pressure cooking steps. If you plan to freeze for up to three months, assemble everything but the heavy cream, and add that just before serving to maintain a rich and creamy texture. This way, you'll have a hearty, comforting meal in no time—just as delicious as if made fresh!

Turkey Wild Rice Casserole Recipe FAQs

How do I select ripe ingredients for this casserole?
Absolutely! When choosing your vegetables, look for fresh, firm carrots and celery without dark spots or blemishes. For the onion, opt for one that feels heavy for its size and has a dry skin. As for the wild rice, check for packaging that doesn’t have holes or tears to ensure you’re getting the best quality. The fresher the ingredients, the tastier your Turkey Wild Rice Casserole will be!

How should I store leftovers of the casserole?
Store leftover Turkey Wild Rice Casserole in an airtight container in the refrigerator for up to 3 days. It's crucial to let the dish cool down before sealing it to prevent condensation from making it soggy. I often separate it into portion-sized containers for easy reheating. Just pop them in the microwave when you're ready for a quick meal!

Can I freeze the Turkey Wild Rice Casserole?
Yes, you can freeze it! To do this, allow the casserole to cool completely, then transfer it to a freezer-safe container. It can be frozen for up to 3 months. To reheat, thaw it overnight in the refrigerator and reheat in the microwave or on the stovetop, adding a splash of broth or water to restore creaminess. This way, you have a hearty meal ready whenever you want it!

What should I do if my casserole is too thick after cooking?
If your Turkey Wild Rice Casserole turns out thicker than you’d like, simply add a little chicken broth or water while reheating. Stir it in gradually until you reach the desired consistency. If you find that it’s too thick right after cooking, you can add a splash of broth and stir before closing the lid to allow it to steam gently for a few more minutes.

Are there any dietary considerations for this recipe?
Very! This casserole can be made gluten-free by choosing a gluten-free stuffing and using gluten-free chicken broth. Additionally, ensure that your leftover turkey doesn’t include any elements that could trigger allergies. If you're serving this to pets, keep in mind that certain ingredients like onions and garlic can be harmful to them—so it’s best to keep this dish just for human enjoyment!

Turkey Wild Rice Casserole

Delicious Turkey Wild Rice Casserole for Cozy Nights

Transform leftover turkey into a comforting one-pot meal with this Turkey Wild Rice Casserole, perfect for busy nights.
Print Recipe Pin Recipe
Prep Time 10 minutes mins
Cook Time 30 minutes mins
Total Time 40 minutes mins
Servings: 6 servings
Course: Dinner
Cuisine: American
Calories: 350
Ingredients Equipment Method Nutrition Notes

Ingredients
  

For the Casserole
  • 2 tablespoons Unsalted Butter Adds rich flavor and helps soften vegetables.
  • 2 cloves Garlic, minced Builds the savory base for the casserole.
  • 1 count White Onion, diced Provides aromatic sweetness and depth.
  • 0.5 cup Celery, diced Classic aromatic for texture and flavor.
  • 0.5 cup Carrots, diced Adds sweetness and vibrant color.
  • 3 cups Chicken Broth Supplies necessary liquid for cooking.
  • 1 cup Wild Rice Adds chewiness and earthy flavor.
  • 0.5 cup Long Grain Rice Enhances the dish's texture.
  • 0.5 cup Red Lentils Cook quickly, adding protein.
  • 0.5 cup Corn Introduces sweetness.
  • 1 cup Sage Stuffing, dry Provides herby flavor.
  • 2 cups Leftover Turkey, shredded Gives protein and heartiness.
For Seasoning
  • 1 teaspoon Salt Enhances overall flavor.
  • 1 teaspoon Black Pepper Adds warmth.
  • 0.5 teaspoon Dried Thyme Contributes earthy flavor.
  • 0.5 teaspoon Dried Rosemary Imparts a slightly piney flavor.
  • 1 teaspoon Dried Sage Complements stuffing and turkey flavor.
  • 2 count Bay Leaves Infuses subtle flavor.
For the Creamy Finish
  • 0.5 cup Heavy Cream Stirred in at the end for a creamy finish.
  • Fresh Thyme Used as a garnish for freshness.

Equipment

  • Instant Pot

Method
 

Step‑by‑Step Instructions
  1. Set your Instant Pot to sauté mode and melt 2 tablespoons of unsalted butter. Add 2 minced garlic cloves, 1 diced white onion, ½ cup diced celery, and ½ cup diced carrots. Sauté for about 2 minutes, stirring occasionally, until softened.
  2. Pour in 3 cups of chicken broth, scraping up any browned bits from the bottom.
  3. Stir in 1 cup of wild rice, ½ cup of long grain rice, ½ cup of red lentils, and ½ cup of corn.
  4. Layer 2 cups of shredded leftover turkey on top without stirring. Sprinkle with seasonings.
  5. Seal the Instant Pot lid and cook on manual high pressure for 20 minutes.
  6. Let the Instant Pot naturally release pressure for 10 minutes.
  7. Open the lid and remove the bay leaves. Stir in ½ cup of heavy cream.
  8. Serve warm, garnished with fresh thyme.

Nutrition

Serving: 1cupCalories: 350kcalCarbohydrates: 45gProtein: 22gFat: 12gSaturated Fat: 7gPolyunsaturated Fat: 1gMonounsaturated Fat: 3gCholesterol: 85mgSodium: 720mgPotassium: 500mgFiber: 4gSugar: 2gVitamin A: 180IUVitamin C: 6mgCalcium: 50mgIron: 2mg

Notes

This casserole is flexible; use other meats or veggies if desired. Allow it to rest for better flavor and texture.

Tried this recipe?

Let us know how it was!
  • « Previous Page
  • 1
  • …
  • 51
  • 52
  • 53
  • 54
  • 55
  • …
  • 71
  • Next Page »

Welcome!

Hi, I’m Grace, a Sydney-based home cook with a passion for bold flavors and trending ingredients. Whether you’re a busy beginner or a seasoned foodie, you’ll find dishes here that are fresh, fun, and full of flavor.

More about me

Popular Recipes

  • Chocolate Cake Pops
    Delightful Chocolate Cake Pops for Your Sweet Cravings
  • Cottage Cheese Banana Bread
    Cottage Cheese Banana Bread: Moist, Protein-Packed Delight
  • Flourless Oat Waffles
    Flourless Oat Waffles for a Quick, Healthy Breakfast Boost
  • Cinnamon Waffles
    Fluffy Cinnamon Waffles with Dreamy Whipped Cream Bliss

Footer

↑ back to top

About

  • Privacy Policy
  • Disclaimer
  • Terms & Conditions

Newsletter

  • Sign Up! for emails and updates

Contact

  • About me
  • Contact me

Copyright © 2025 TastyTrendIngredients