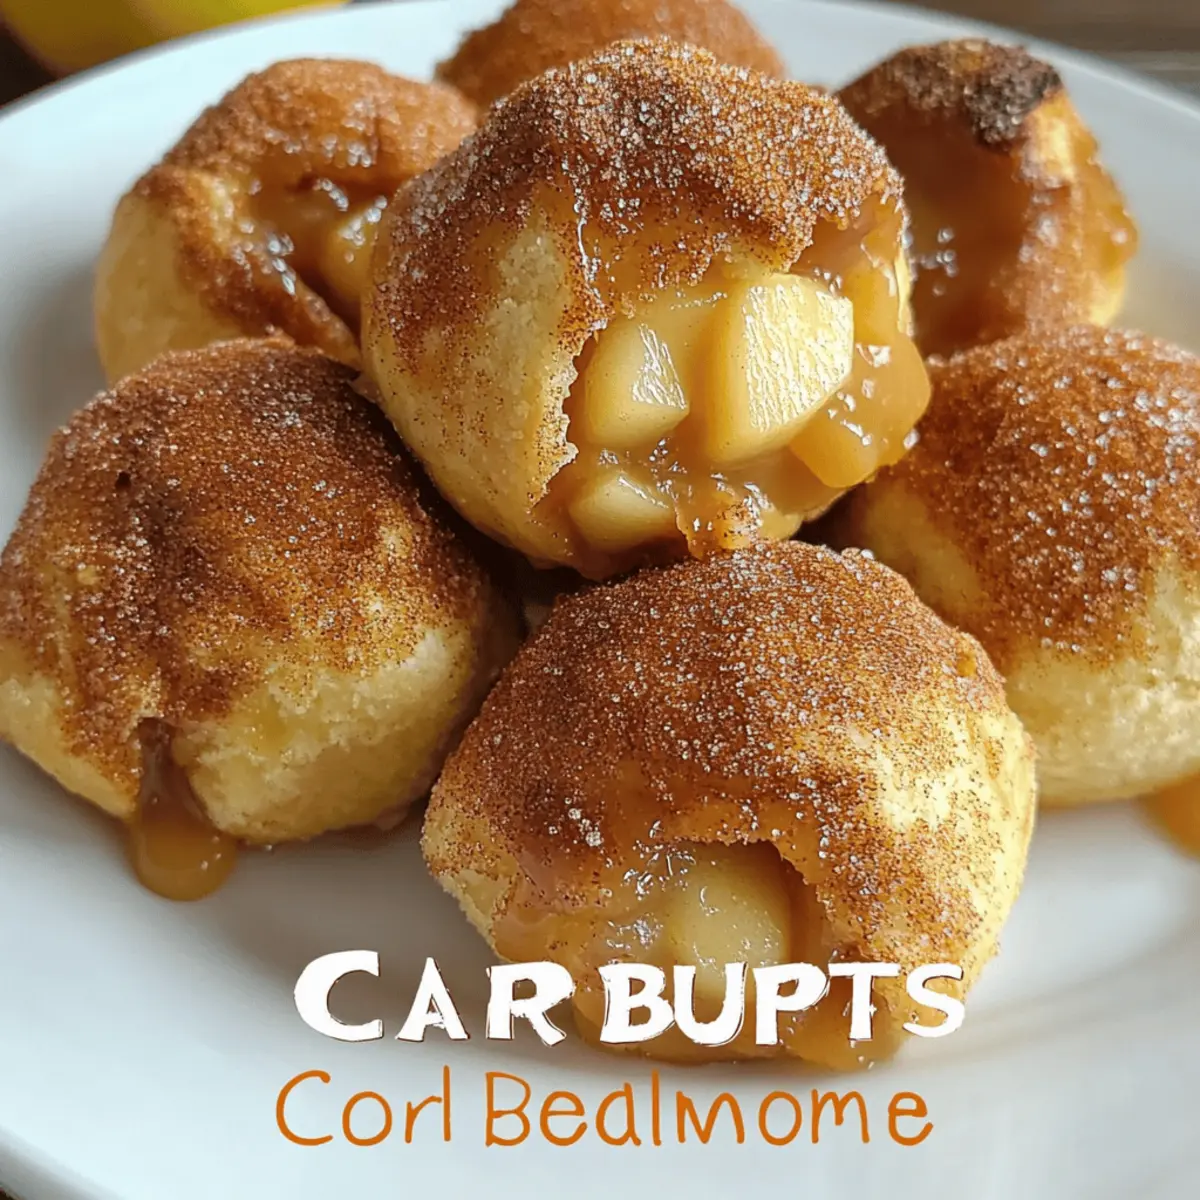
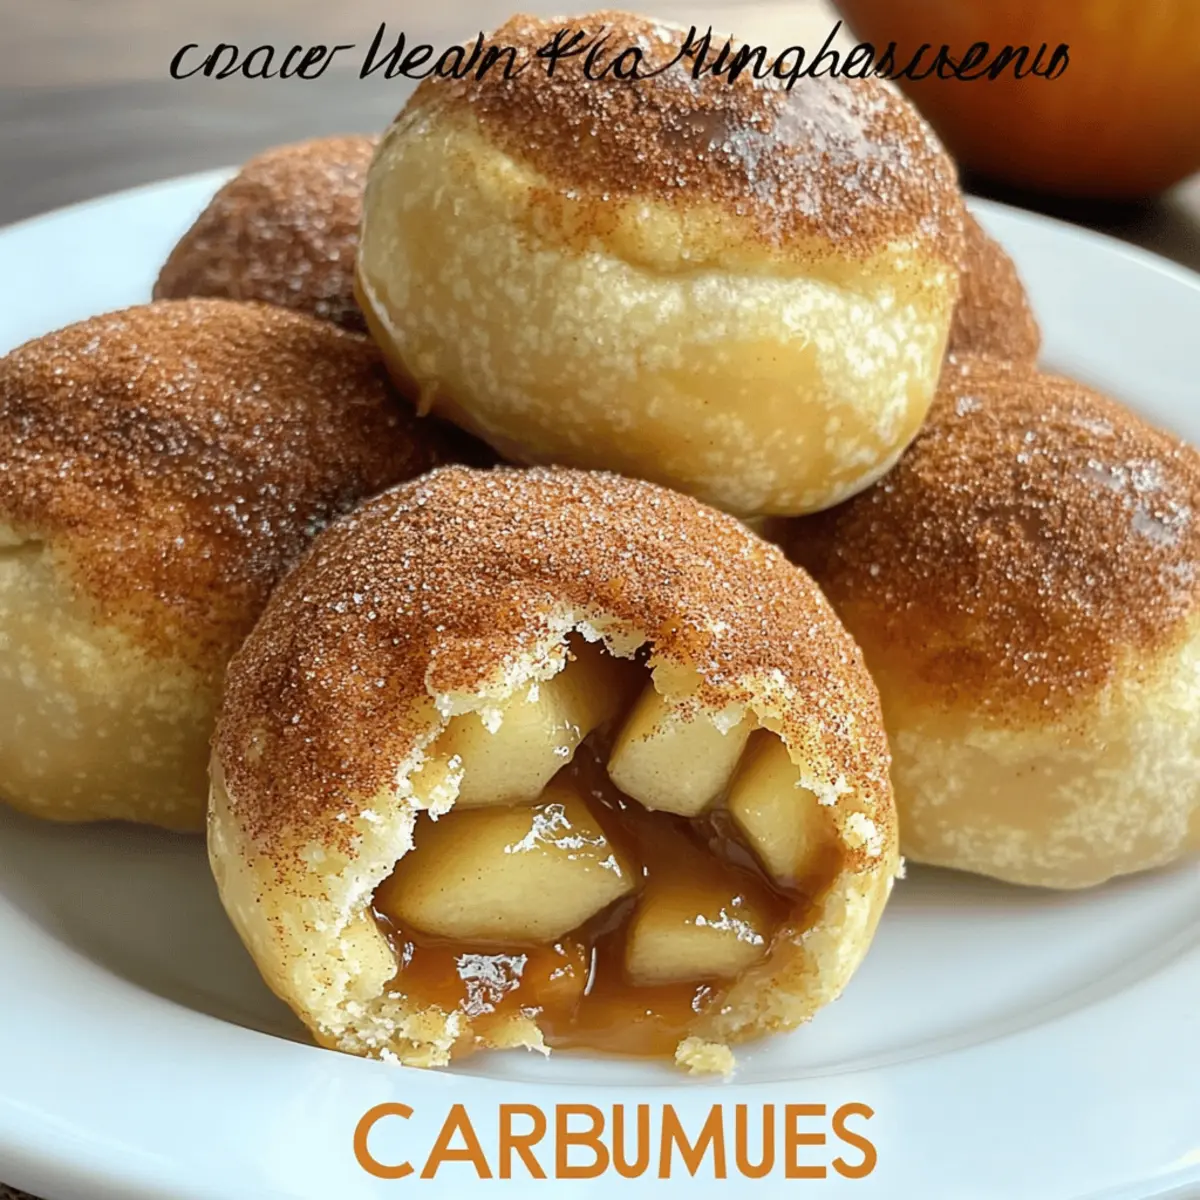
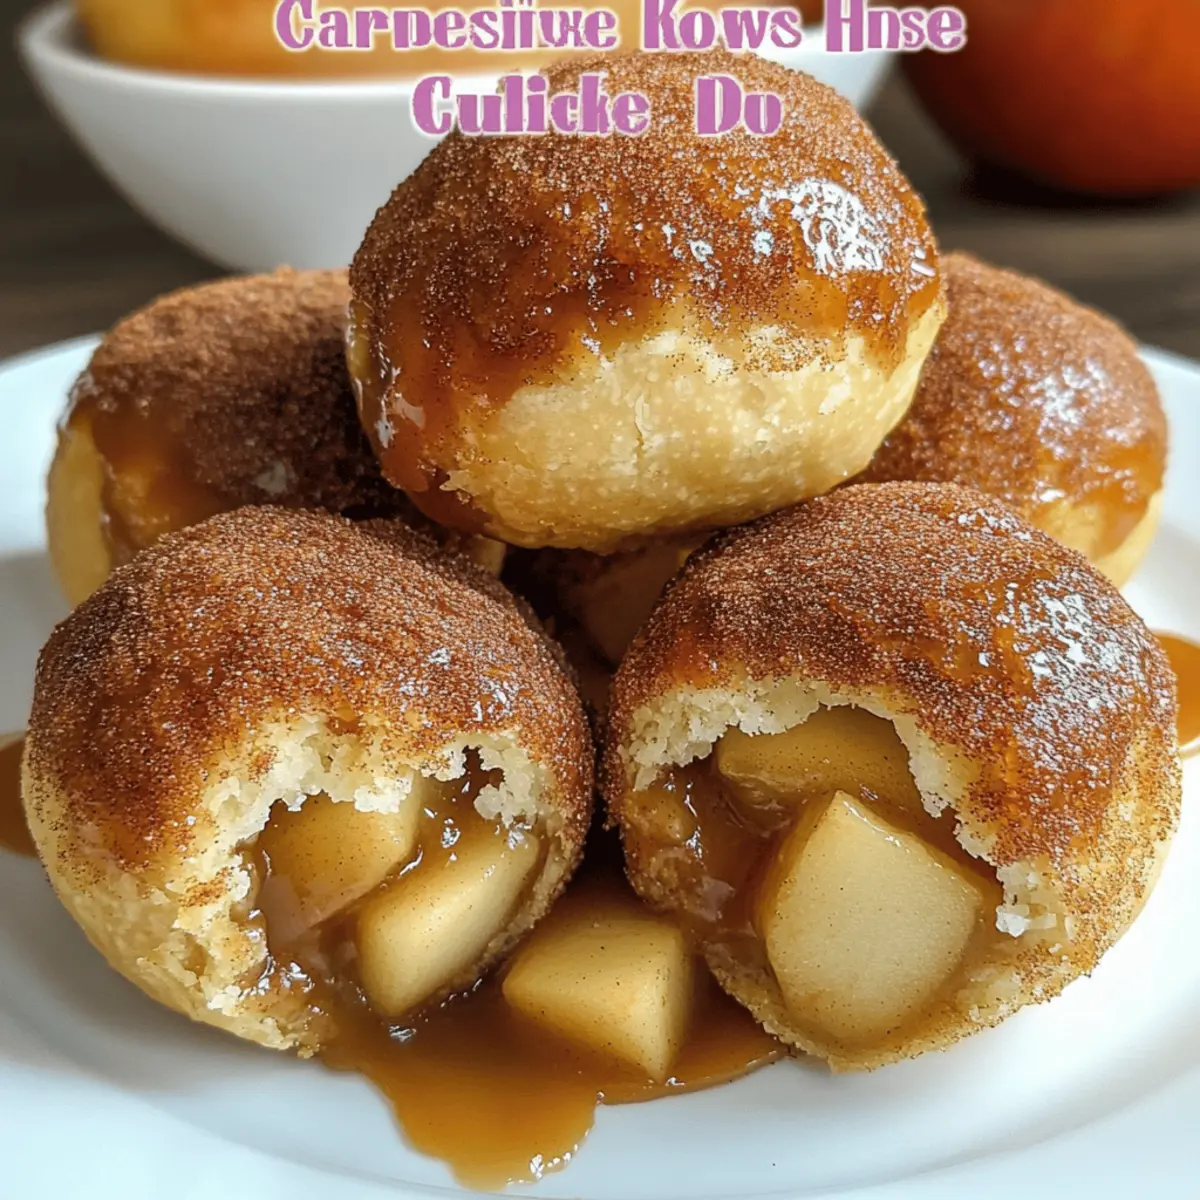
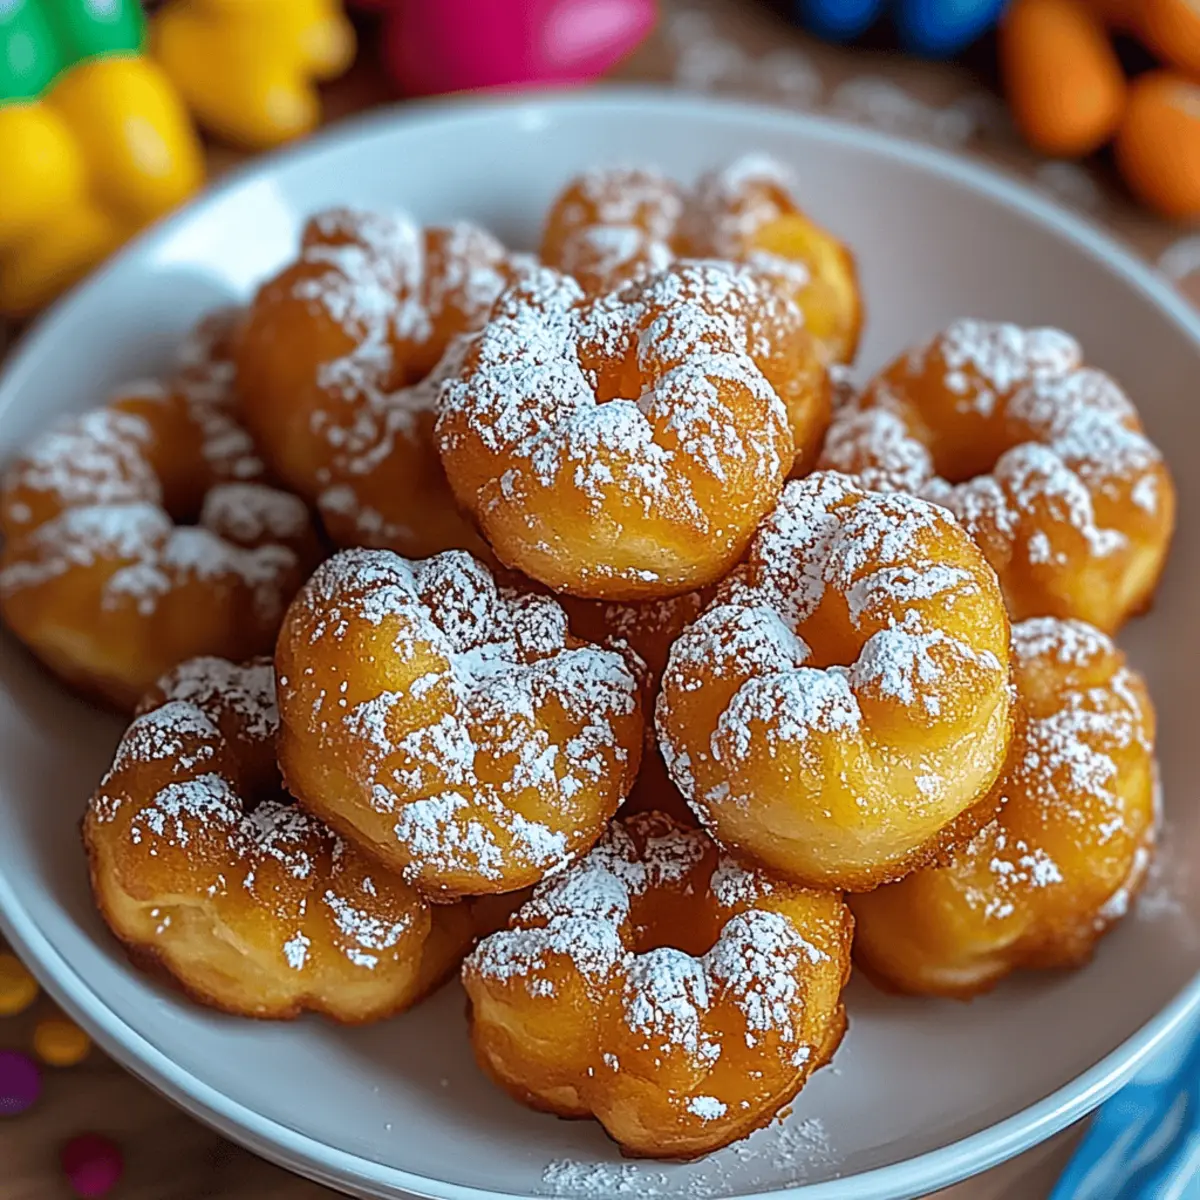
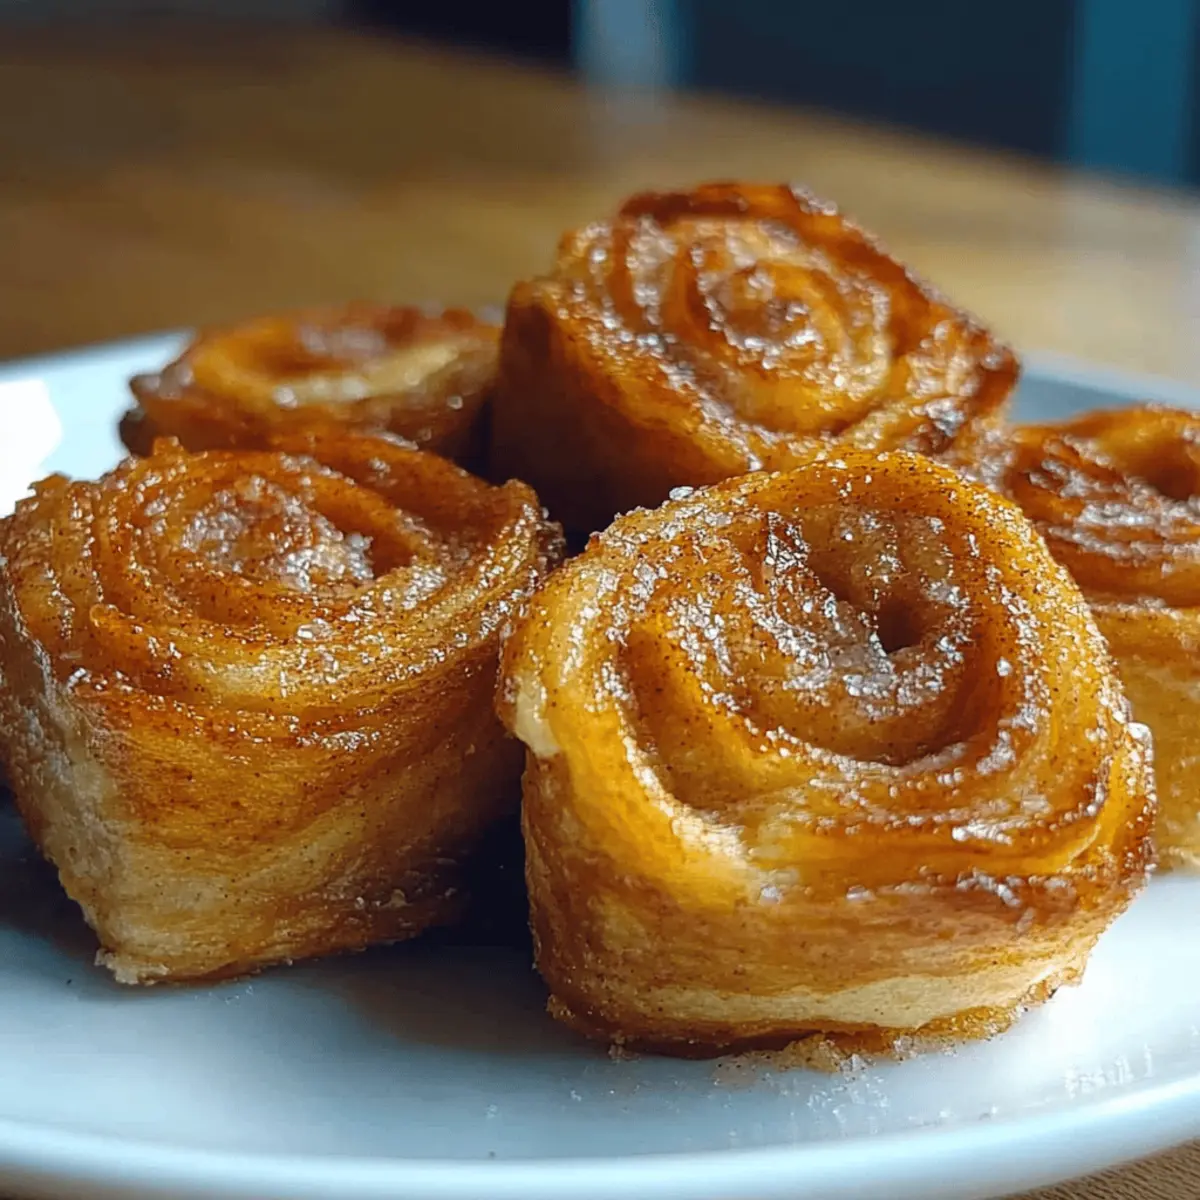
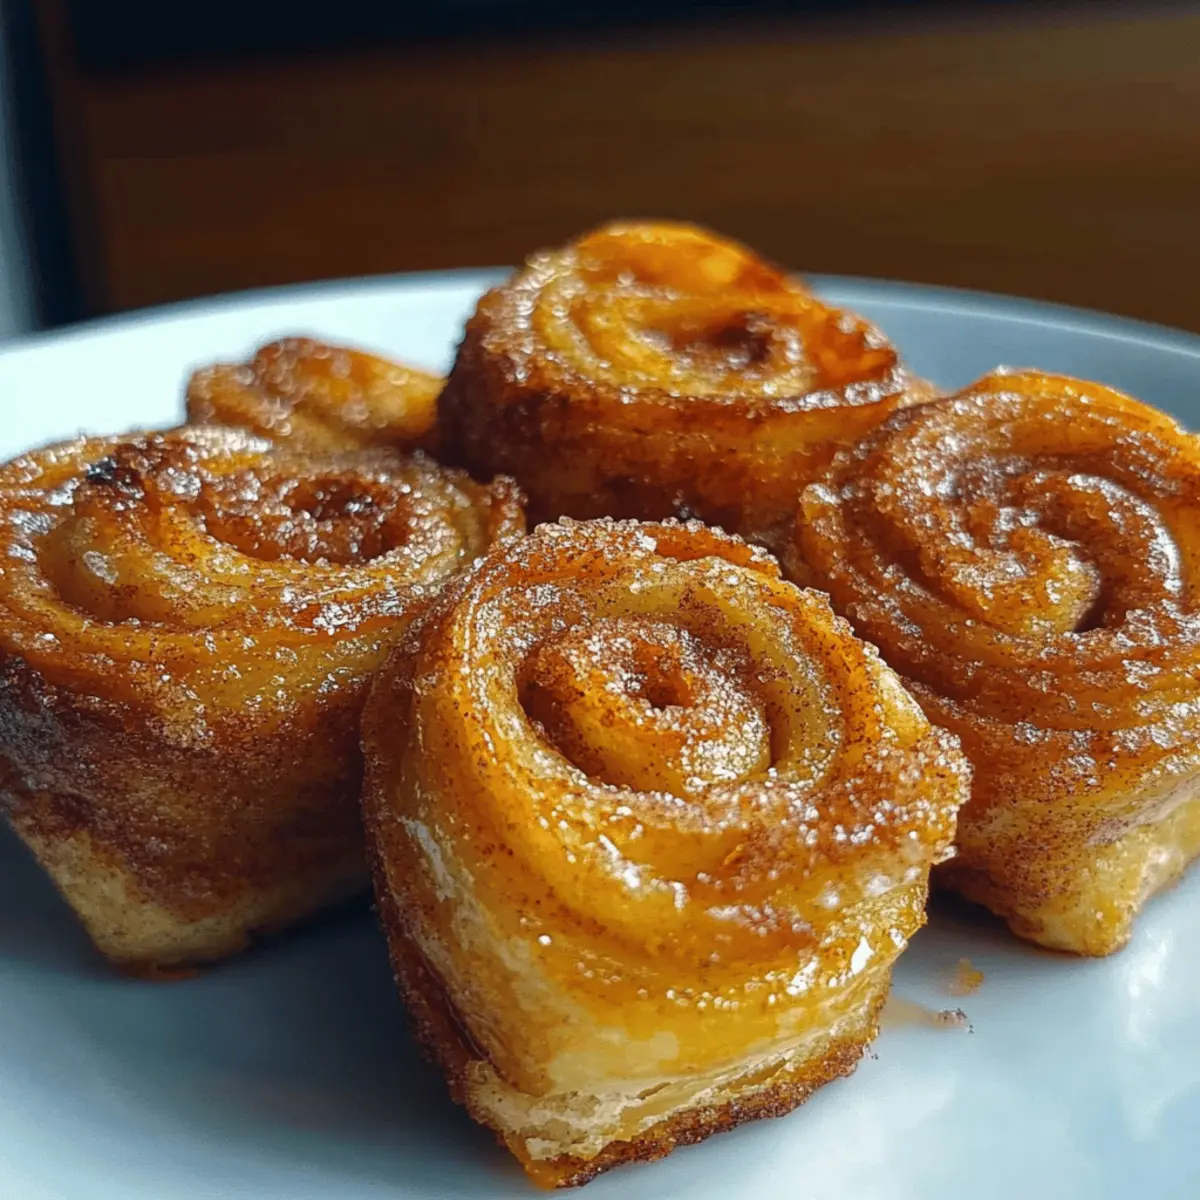
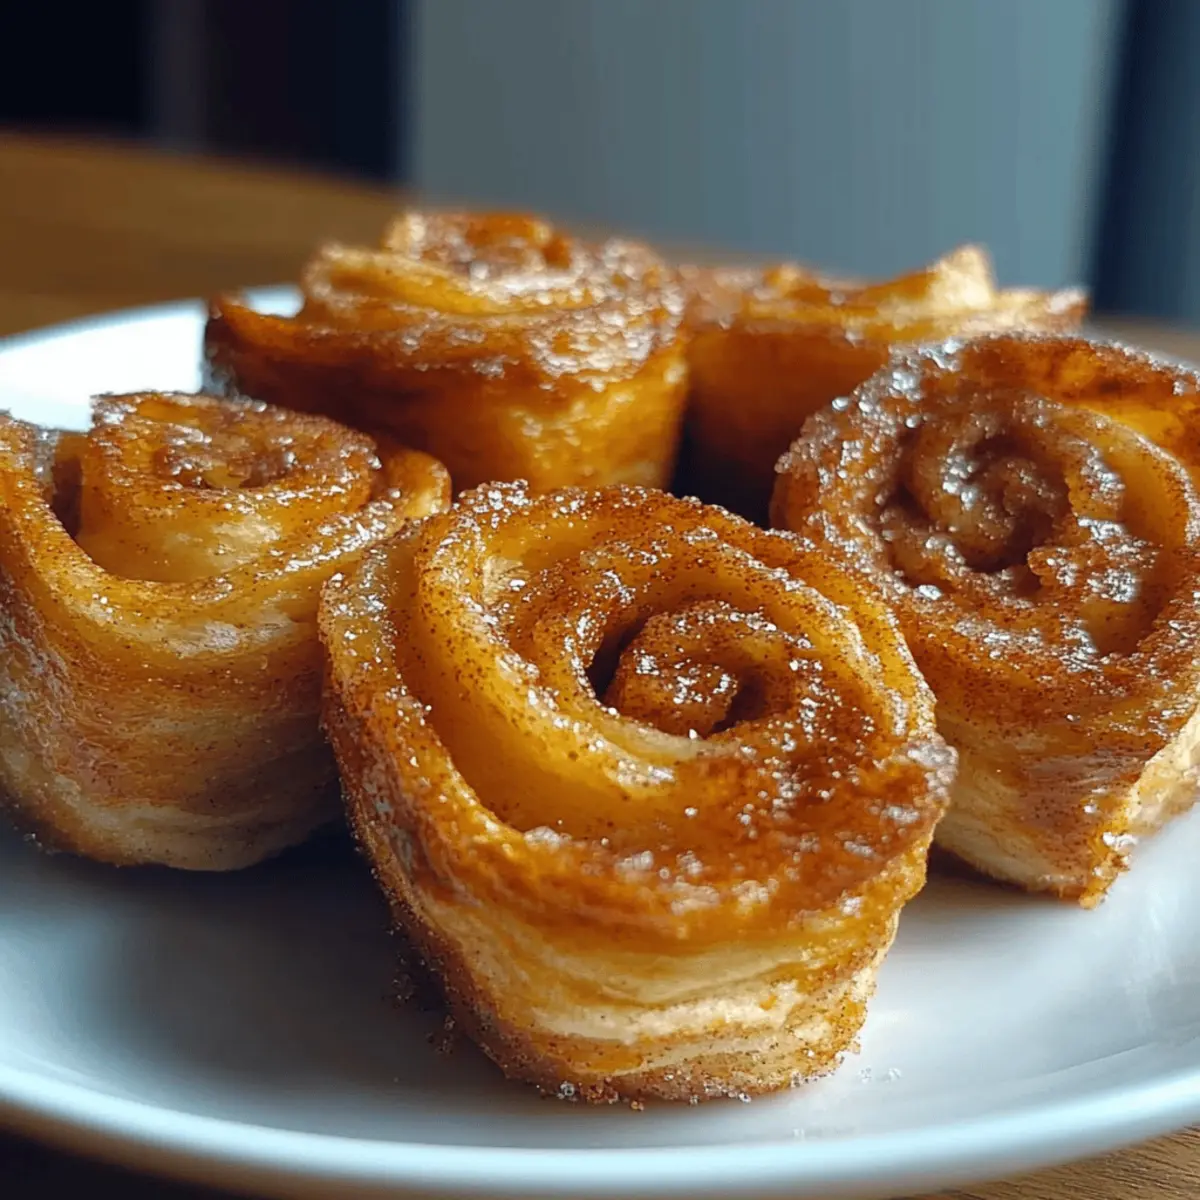
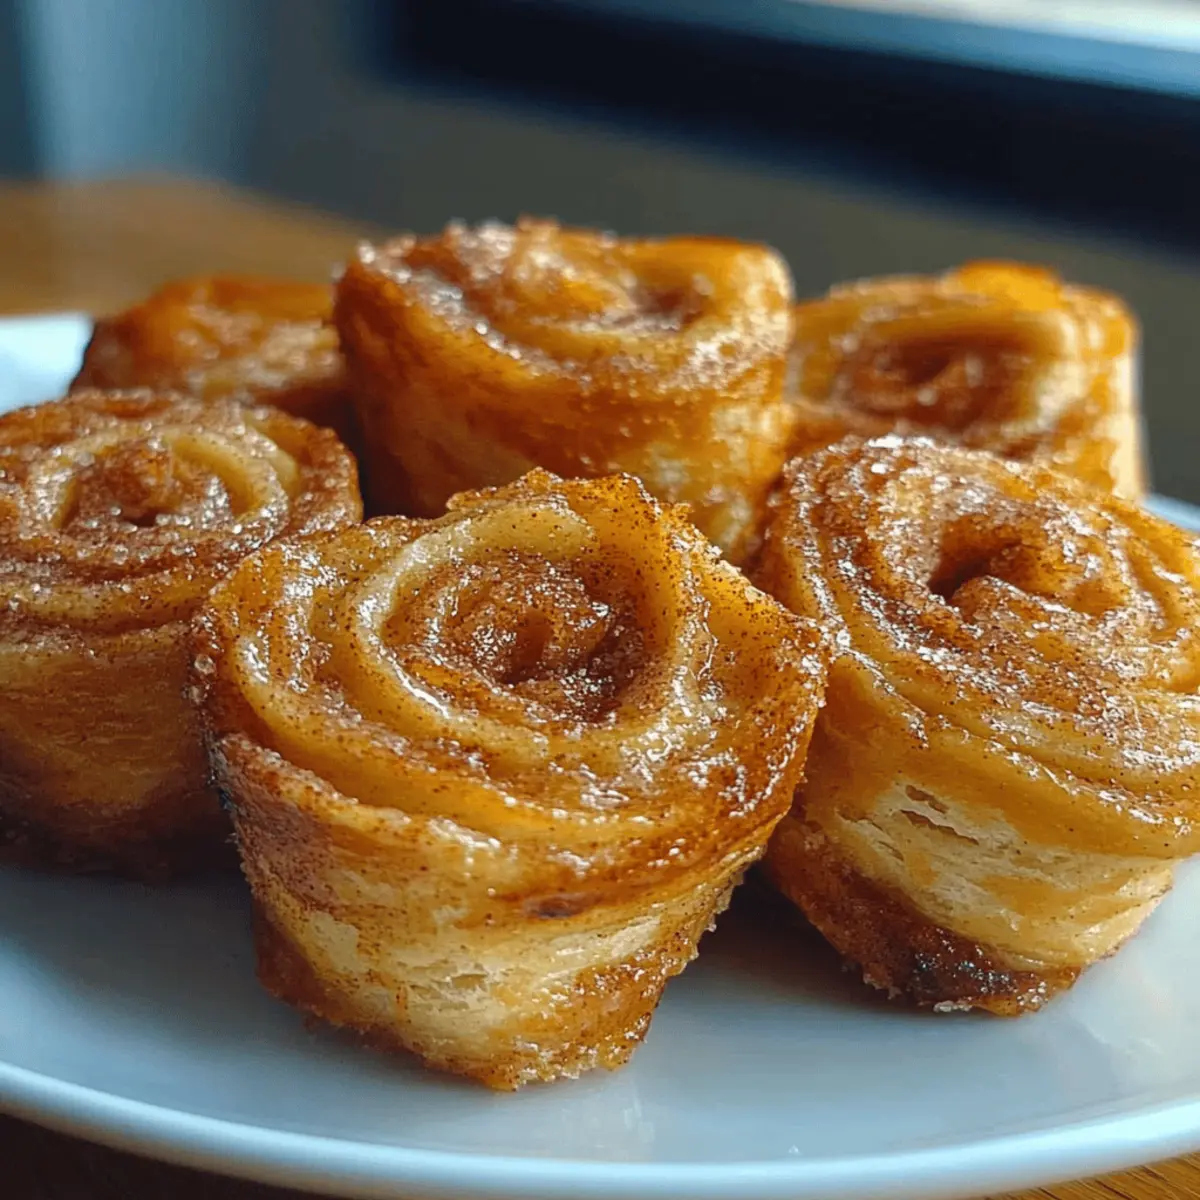
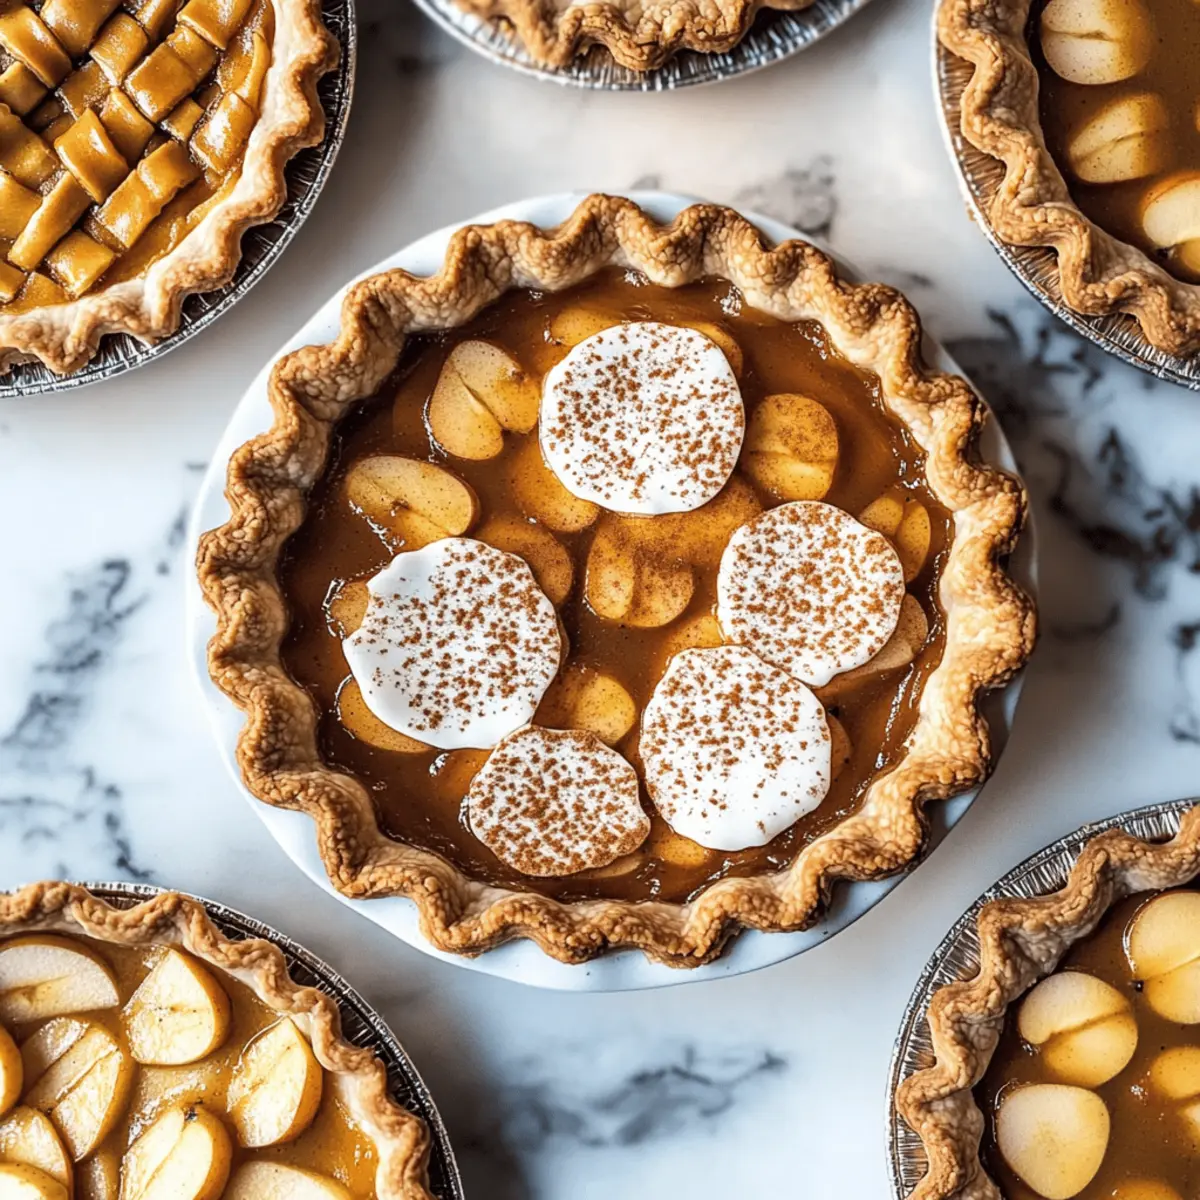
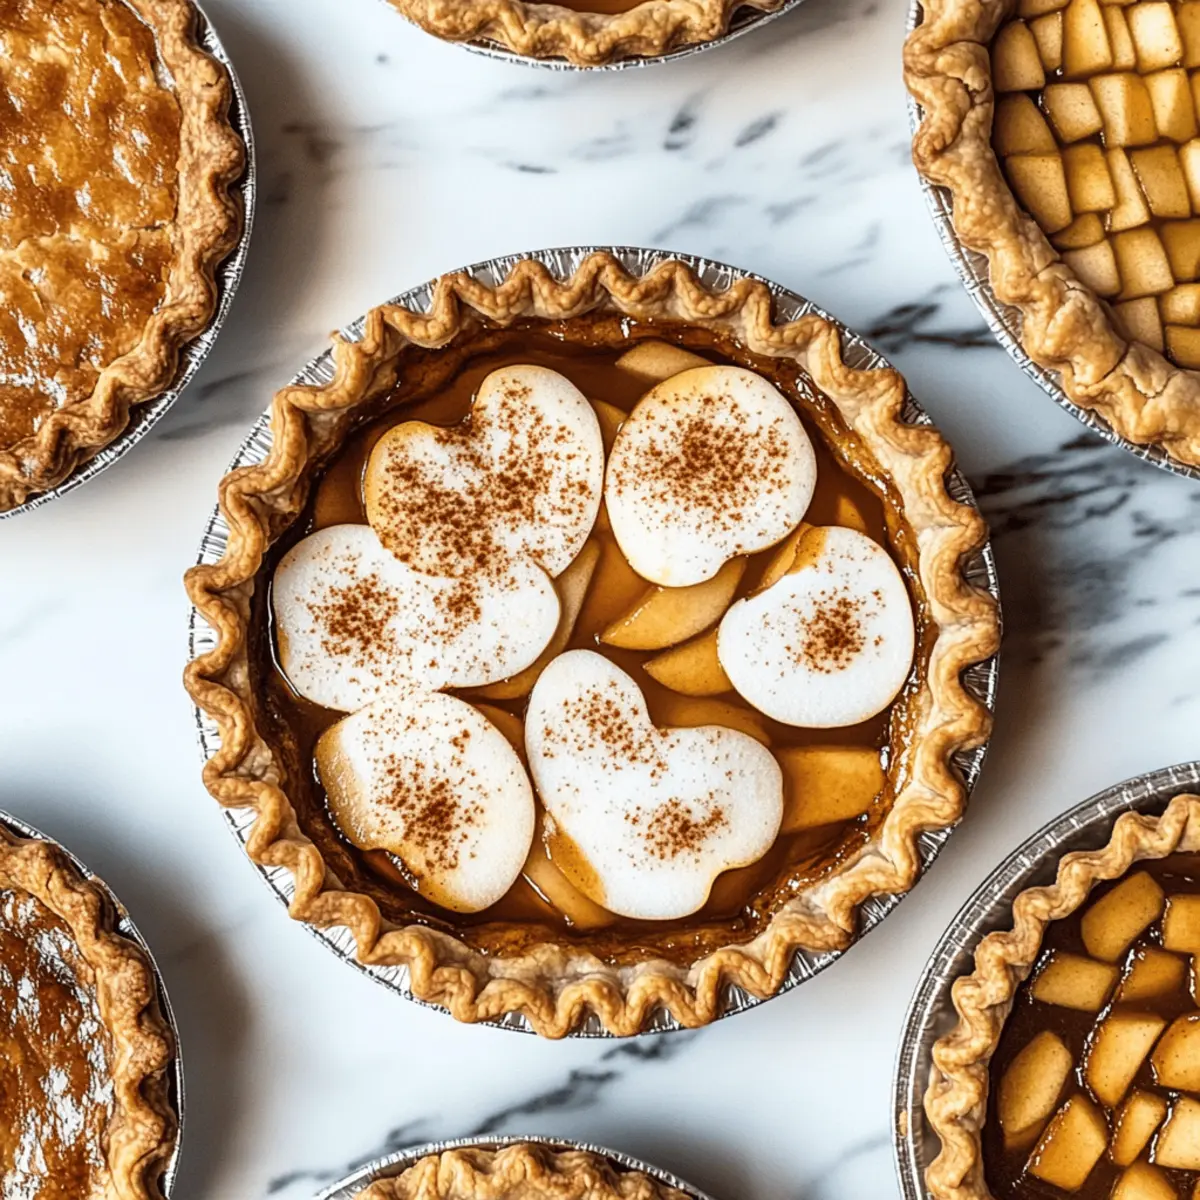
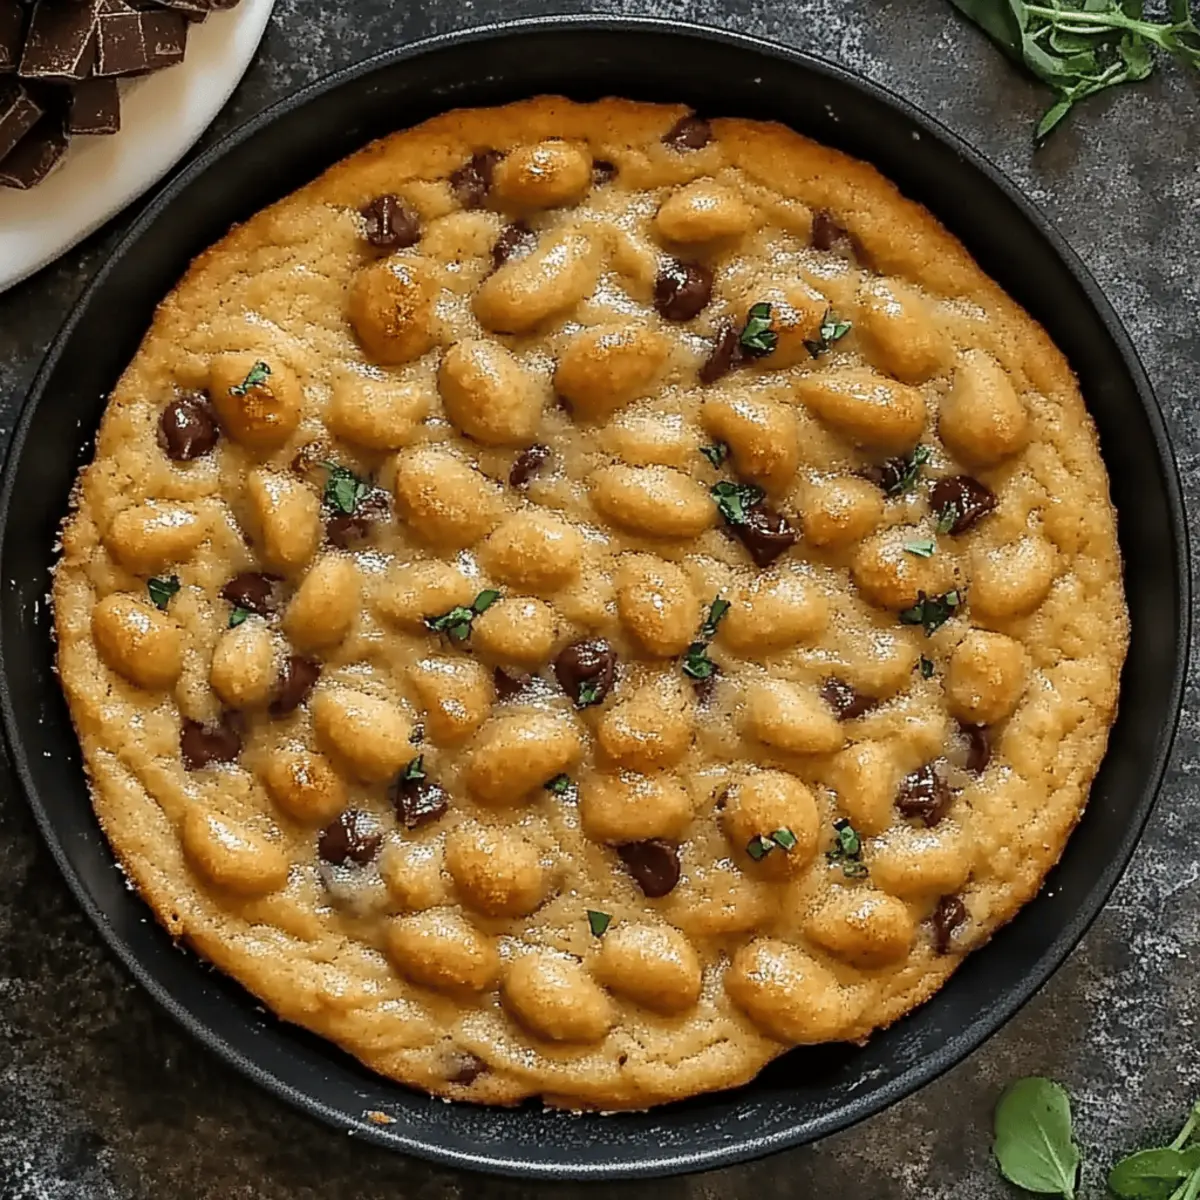
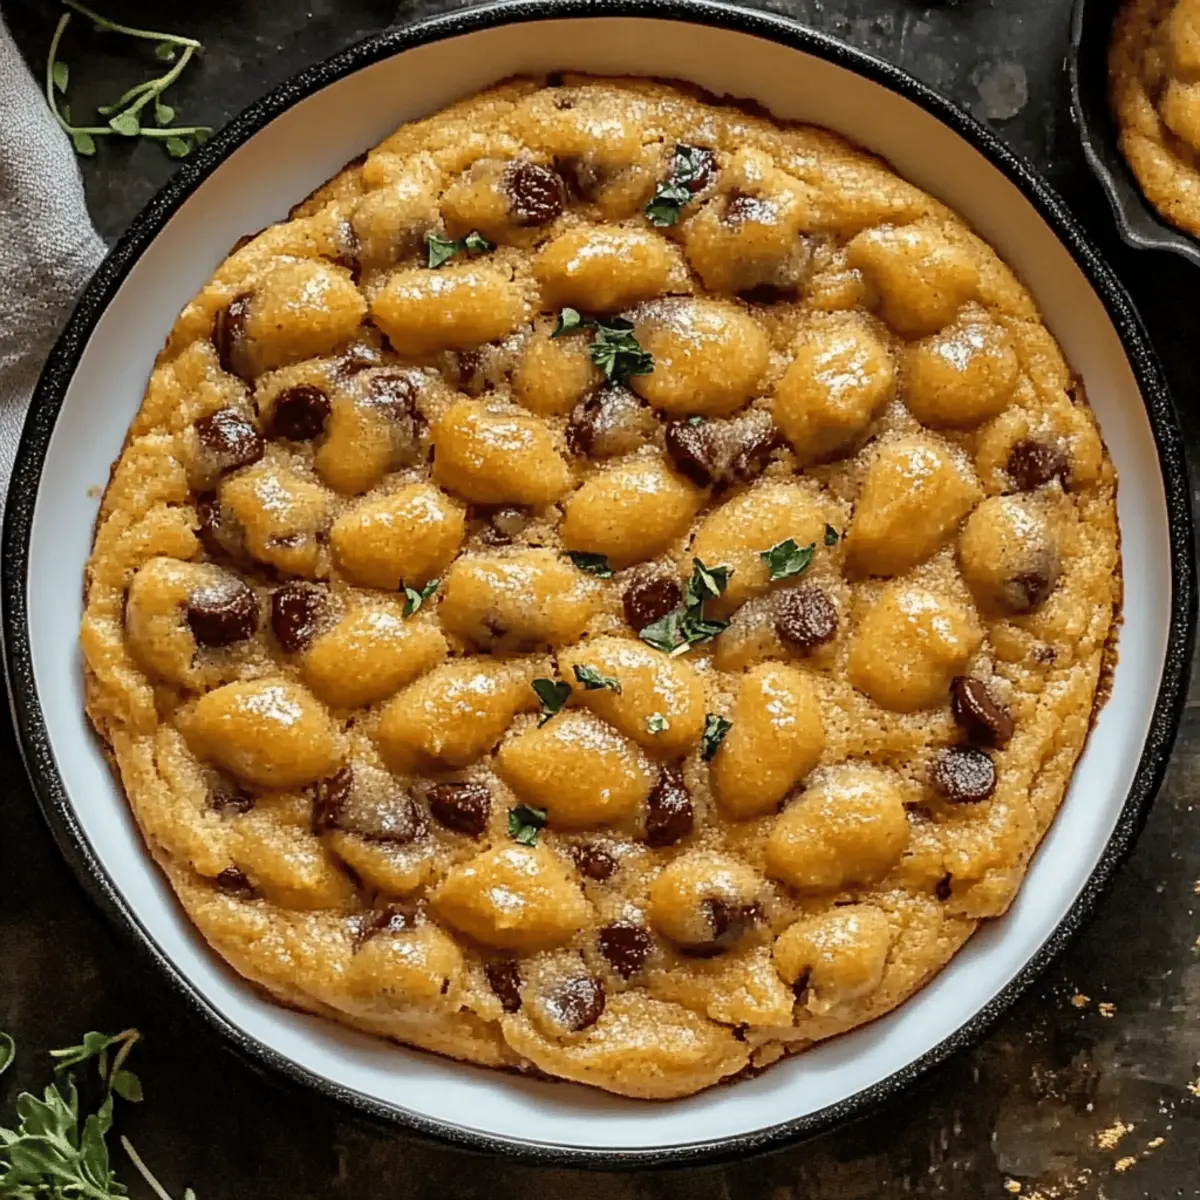
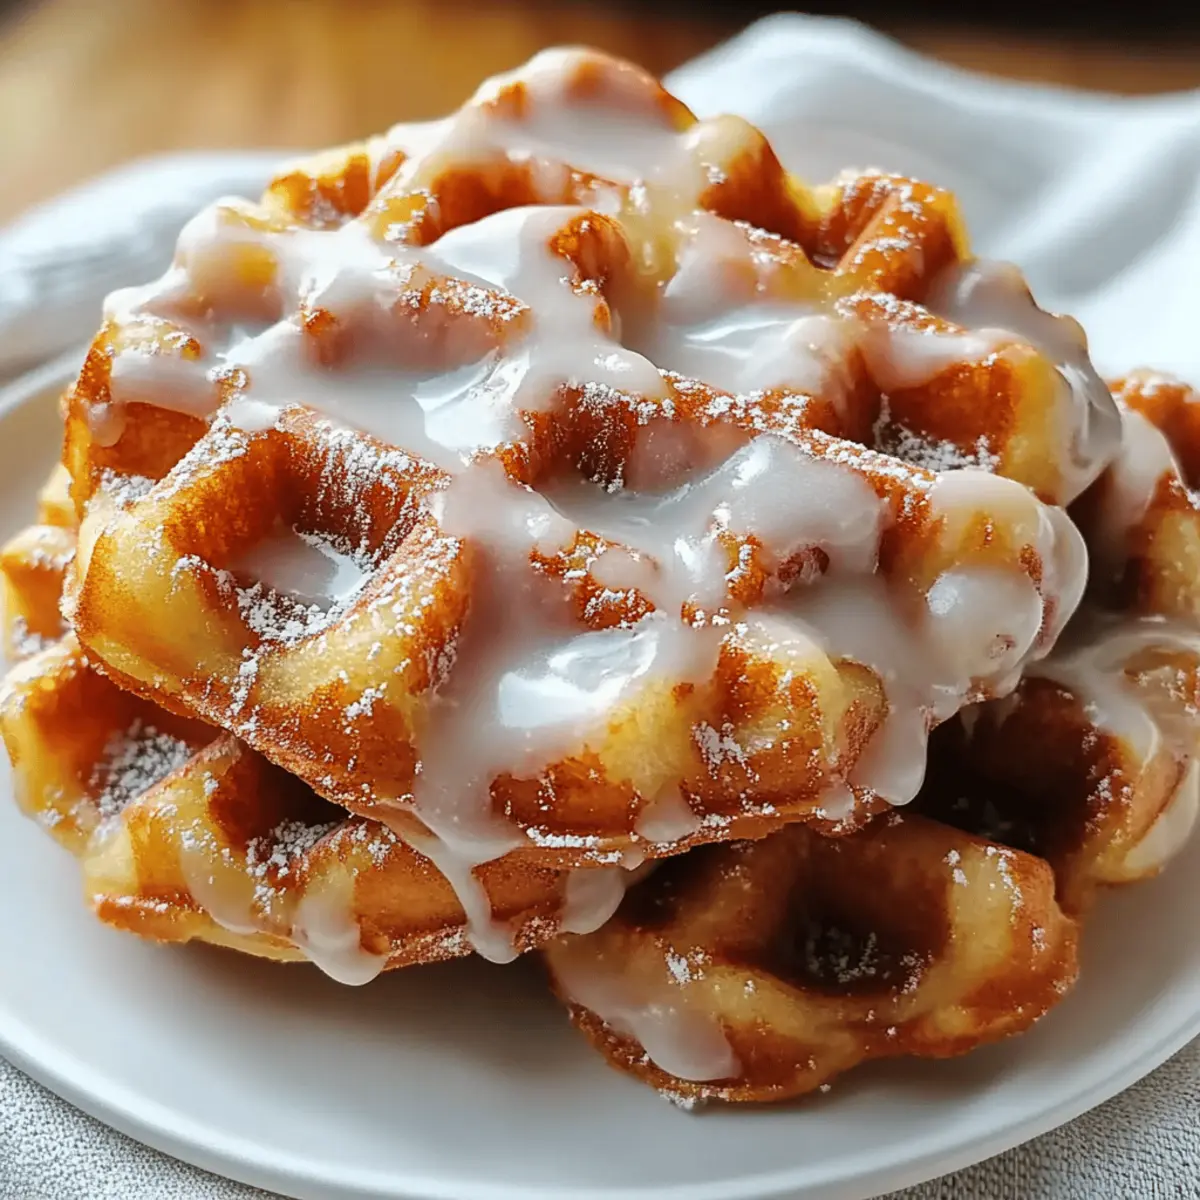
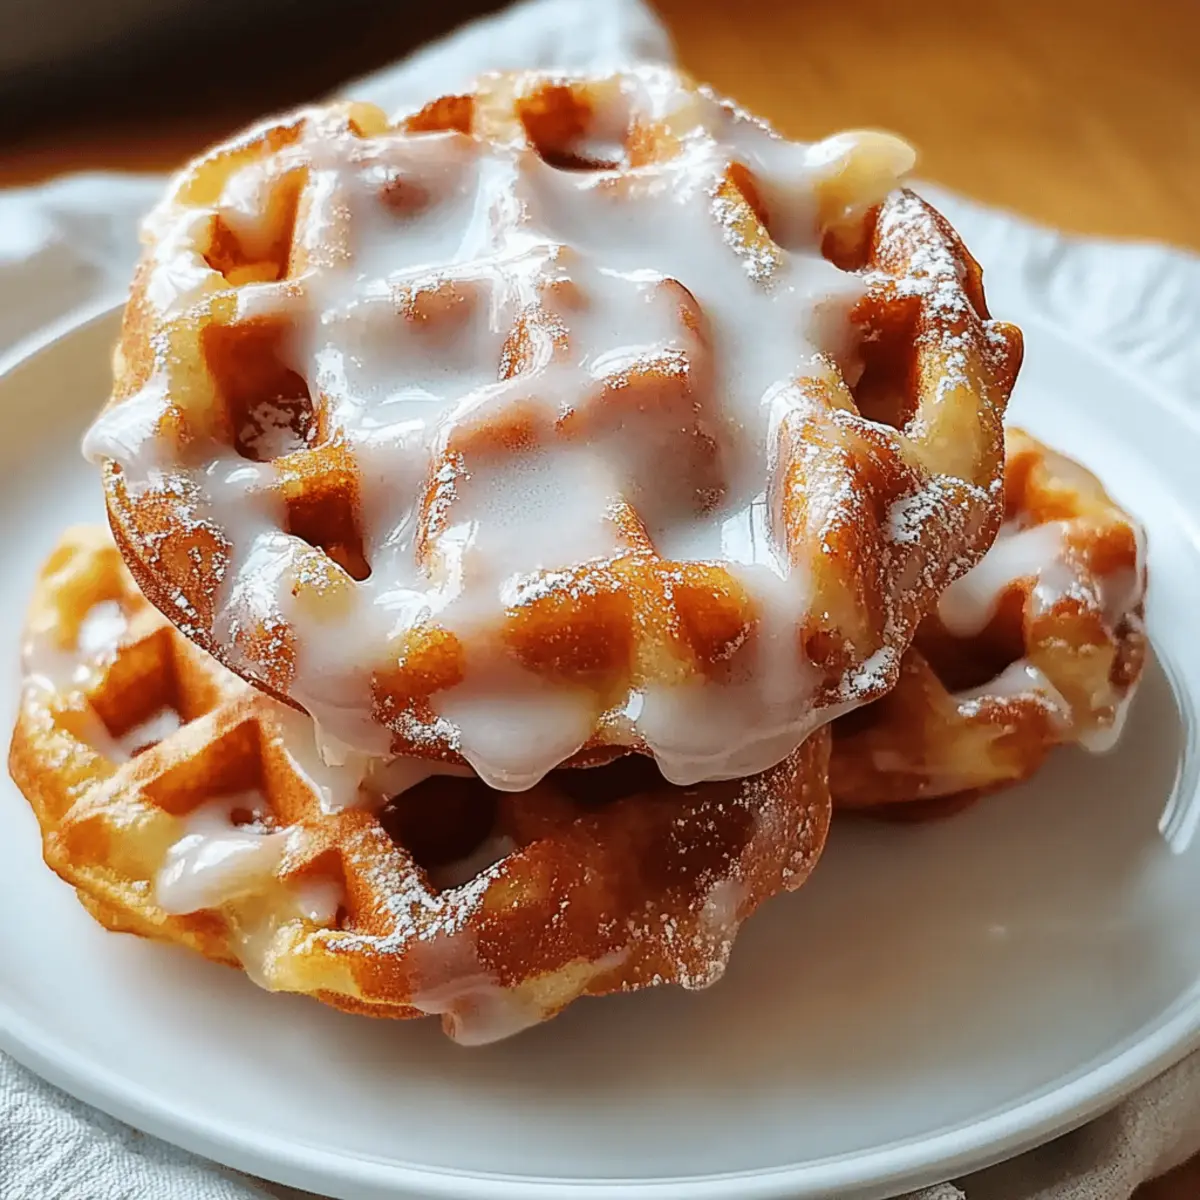
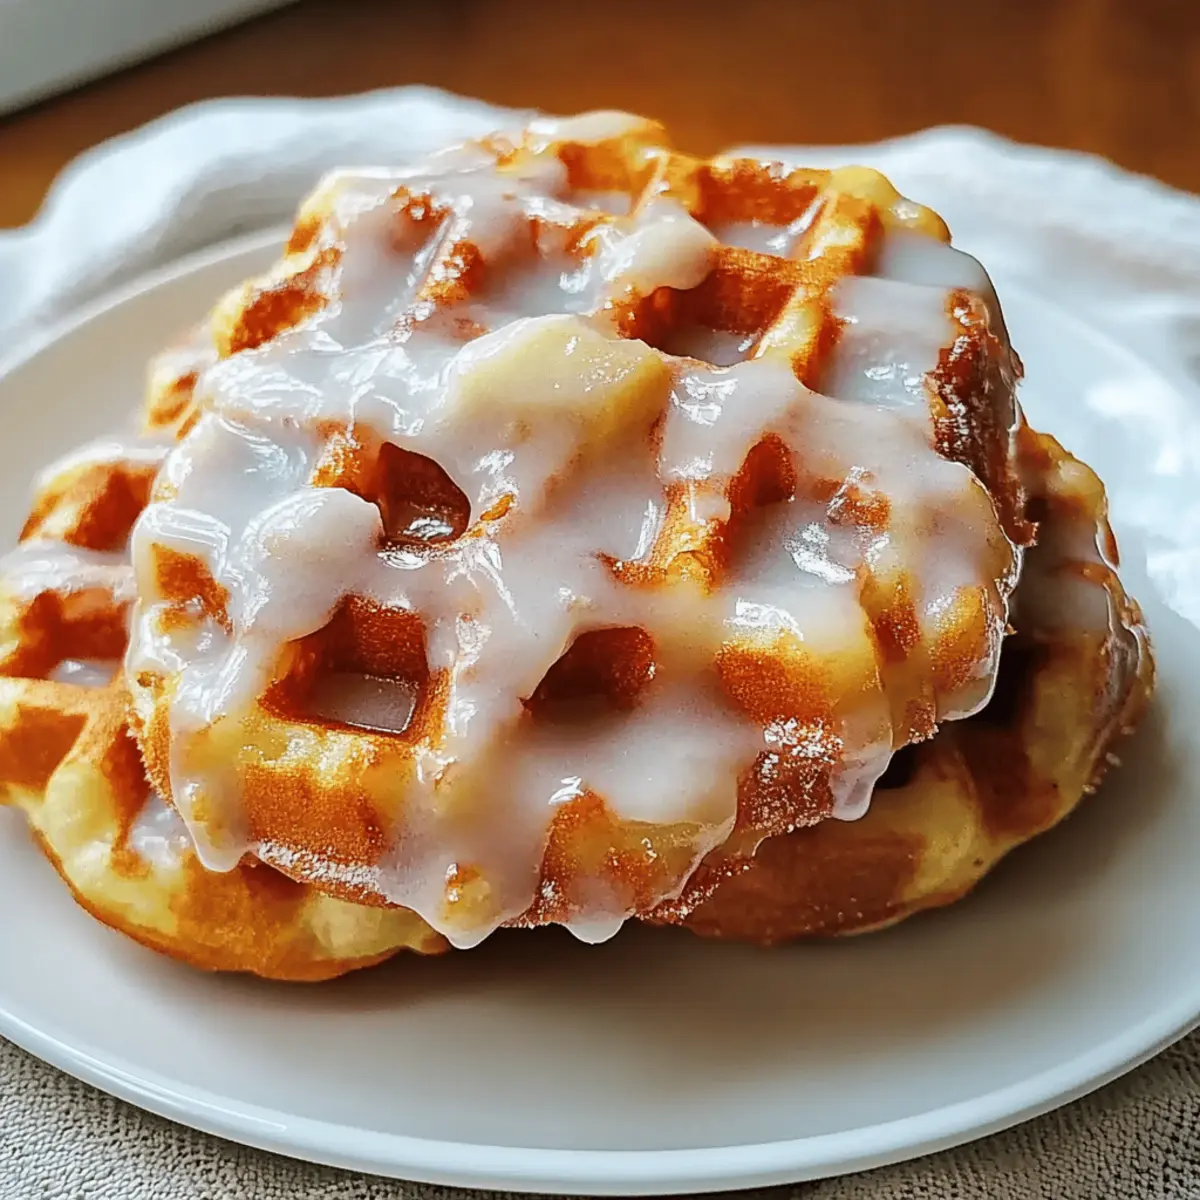
The moment I first inhaled the scent of apples sizzling in cinnamon, I felt like I was transported into a cozy autumn kitchen. That delightful aroma comes to life in my recipe for Apple Fritter Waffle Donuts, which are not just a treat but a nostalgic hug from your childhood. These airy little wonders combine the comforting textures of waffles and the indulgent sweetness of apple fritters, making them ideal for breakfast or an afternoon snack. With a few simple ingredients and quick prep time, you can whip up these irresistible donuts topped with a drizzle of creamy vanilla glaze. They’re perfect for impressing guests or simply enjoying a warm bite on a lazy weekend morning. Curious how to bring this warm, delicious magic into your kitchen? Let’s dive into the recipe!
Why Apple Fritter Waffle Donuts Rock?
Irresistible fusion: These Apple Fritter Waffle Donuts offer the best of both worlds by combining the crunchy texture of waffles with the sweet, warm goodness of apple fritters.
Quick and easy: The recipe requires minimal time and ingredients, making it perfect for busy mornings or spontaneous snack cravings.
Endless customization: Feel free to experiment with spices or toppings, such as adding pecans for an extra crunch or swapping apples for seasonal fruits.
Crowd-pleaser: Whether it's a family brunch or a cozy gathering, these donuts are sure to delight everyone, just like my Cheesy Corn Fritters do!
Vegetarian & gluten-free option: With a simple swap to gluten-free flour, everyone can enjoy these tasty treats. Trust me, you won't be able to resist the sweet vanilla glaze that ties it all together!
Apple Fritter Waffle Donuts Ingredients
-
For the Batter
• All-purpose flour – Provides structure; can substitute with a 1:1 gluten-free flour blend.
• Baking powder – Leavening agent for fluffiness.
• Baking soda – Aids in rising and texture.
• Salt – Enhances flavor.
• Ground cinnamon – Adds warm spice which complements the apples beautifully.
• Nutmeg – Contributes depth of flavor.
• Eggs – Binds ingredients and adds richness.
• Granulated sugar – Sweetness; adjust based on taste.
• Light brown sugar – Adds moisture and caramel notes.
• Buttermilk – Introduces tang and moisture; can replace with milk + 1 tablespoon vinegar.
• Unsalted butter – Creates richness and tenderness when melted.
• Vanilla extract – Flavor enhancer that elevates the sweet notes.
• Tart apples (e.g., Granny Smith) – Adds tartness and texture; ensure apples are peeled, cored, and diced into small chunks for even cooking.
• Chopped pecans or walnuts (optional) – Adds crunch and flavor contrast. -
For the Glaze
• Powdered sugar – Sweetness and smooth texture that drizzles beautifully.
• Milk – Adjusts consistency of glaze; add to reach your desired thickness.
• Extra powdered sugar (for dusting) – Optional finishing touch for a little extra sweetness.
Embrace the joy of homemade goodies with these Apple Fritter Waffle Donuts that will fill your home with warmth and sweet aromas!
Step‑by‑Step Instructions for Apple Fritter Waffle Donuts:
Step 1: Prepare Apples
Start by peeling, coring, and dicing the tart apples, such as Granny Smith, into small chunks. This ensures even cooking and maximum flavor. Set the diced apples aside while you prepare the batter, as they will be folded in later, and make sure to choose fresh, firm apples for the best texture.
Step 2: Mix Dry Ingredients
In a large mixing bowl, whisk together the all-purpose flour, baking powder, baking soda, salt, ground cinnamon, and nutmeg until thoroughly combined. This blend forms the foundation for your Apple Fritter Waffle Donuts, creating a balanced flavor that complements the apples. The mixture should appear well-aerated and uniform to ensure even rising when cooked.
Step 3: Mix Wet Ingredients
In another bowl, combine the eggs, granulated sugar, light brown sugar, buttermilk, melted unsalted butter, and vanilla extract. Whisk these ingredients together until the mixture is smooth and slightly frothy, which will help achieve a light and fluffy texture in your donuts. This will take about a minute of vigorous whisking, ensuring a delightful incorporation of flavors.
Step 4: Combine Mixtures
Now, pour the wet ingredient mixture into the bowl with the dry ingredients. Gently stir using a spatula until just combined; a few lumps are okay as overmixing can lead to denser donuts. Carefully fold in the diced apples and optional chopped nuts, being sure not to crush the apple pieces as you integrate them into the batter.
Step 5: Preheat Waffle Iron
Preheat your waffle iron to a medium-high setting and lightly grease the plates with nonstick spray or melted butter. This will help prevent the Apple Fritter Waffle Donuts from sticking, allowing for a crisp exterior and easy release after cooking. Let it heat up for about 5 minutes or until ready.
Step 6: Cook Waffle Donuts
Spoon about ¼ cup of the batter onto the center of each waffle section. Close the lid and cook the donuts until they are golden brown and crisp, which typically takes about 3 to 5 minutes depending on your waffle iron. Once done, carefully remove each donut and transfer them to a wire rack to cool slightly, maintaining their crispy texture.
Step 7: Make Glaze
In a mixing bowl, whisk together powdered sugar, a splash of milk, and a hint of vanilla extract until smooth. Adjust the milk until you achieve your desired consistency for drizzling. The glaze should be thick, yet pourable, providing a luscious finish to your Apple Fritter Waffle Donuts when they are ready to be served.
Step 8: Serve
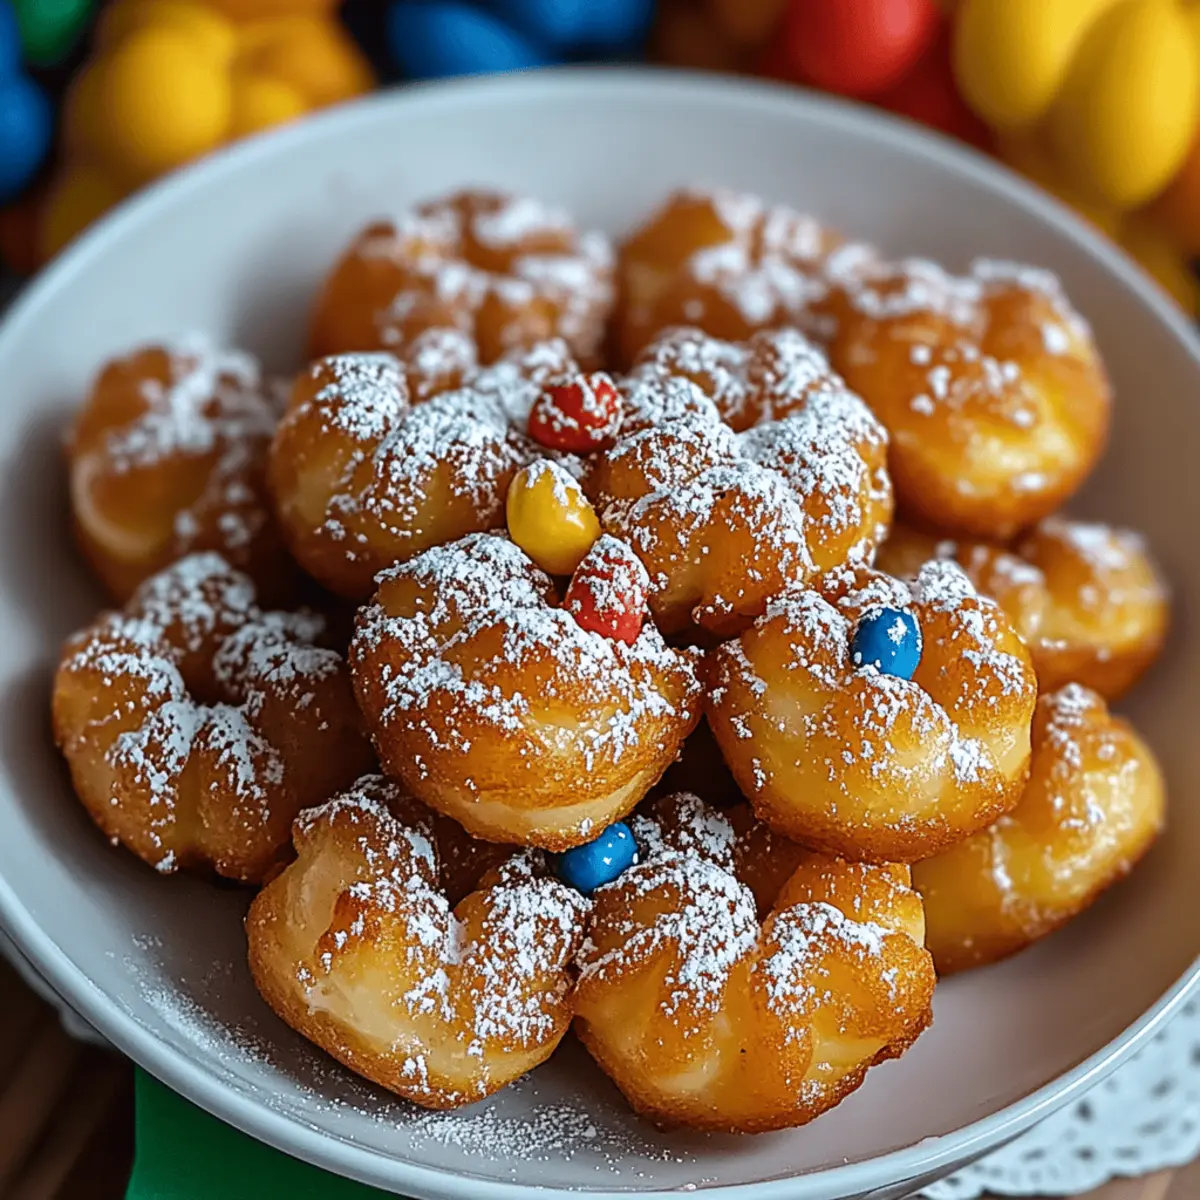
Drizzle the vanilla glaze generously over the warm Apple Fritter Waffle Donuts. For an optional touch, you can dust with extra powdered sugar for added sweetness. Serve these delightful treats warm or at room temperature, enjoying every bite of their airy texture and sumptuous flavors!
What to Serve with Irresistible Apple Fritter Waffle Donuts?
Warm up your breakfast table with delicious accompaniments that highlight the sweet, spiced allure of these delightful treats.
-
Crispy Bacon: The salty, savory crunch of crispy bacon perfectly balances the sweetness of the donuts, creating a harmonious breakfast trio.
-
Fresh Fruit Salad: A refreshing mix of berries, melons, and citrus brightens the plate, adding a burst of color and natural sweetness that complements the donuts.
-
Syrupy Maple Glaze: Drizzle pure maple syrup over your Apple Fritter Waffle Donuts for an extra layer of sweetness that enhances their warm, spiced flavors.
-
Creamy Yogurt Parfait: Layer creamy Greek yogurt with granola and honey to create a delightful contrast in texture and a light, tangy counterpoint to the sweetness of the donuts.
-
Rich Coffee: A steaming cup of coffee or a spiced chai latte adds a warm, comforting touch, making every bite of these scrumptious donuts even more satisfying.
-
Chai-Spiced Tea: A cup of chai tea infused with warm spices highlights the flavors in the donuts while enhancing the cozy, inviting atmosphere of your breakfast table.
-
Whipped Cream Topping: Adding a dollop of lightly sweetened whipped cream will elevate your donuts into dessert territory while offering a luxurious creaminess to each bite.
Expert Tips for Apple Fritter Waffle Donuts
-
Mix Gently: Avoid overmixing the batter. A few lumps are fine and will help keep your Apple Fritter Waffle Donuts light and fluffy.
-
Use Fresh Apples: Choose firm, tart apples like Granny Smith. They add the perfect contrast of flavor and texture to your donuts.
-
Preheat Waffle Iron: Ensure your waffle iron is hot before adding the batter. This step is vital for achieving a crispy exterior without undercooking.
-
Keep Donuts Warm: If making multiple batches, keep finished donuts warm in a 200°F oven. This way, they remain crisp and inviting until serving.
-
Experiment with Spices: Feel free to add a dash of cardamom or ginger to the batter for unique, aromatic flavors that complement the apples beautifully.
Apple Fritter Waffle Donuts Variations
Feel free to let your creativity shine by customizing these scrumptious treats to suit your taste!
-
Gluten-Free: Swap all-purpose flour with a 1:1 gluten-free flour blend for a delightful gluten-free version that everyone can enjoy.
-
Fruit Variations: Instead of apples, experiment with diced pears or mixed berries for a burst of different flavors. Each fruit brings its unique sweetness and tartness!
-
Spiced Up: Add cardamom or ginger to the batter for an aromatic twist that elevates the classic flavor profile of your donuts. It’s a warm hug in every bite!
-
Maple Glaze: Ditch the vanilla glaze for a rich maple syrup glaze for a more decadent finish that pairs perfectly with the fruity goodness.
-
Nutty Crunch: Toss in some chopped pecans or walnuts directly into the batter for an added crunch that enhances texture and flavor. The more, the merrier!
-
Cinnamon Sugar Coating: Instead of drizzling with glaze, toss the warm donuts in a mix of cinnamon and sugar for a sweet crispy exterior that’s irresistibly tasty.
-
Lightning Heat: For those who adore a kick, try adding a pinch of cayenne pepper to the batter. The surprise heat creates a wonderful contrast with the sweetness of the apples!
-
Cheese Surprise: Fold in some cream cheese chunks into the batter to introduce pockets of creamy goodness with each bite. This twist makes every mouthful even more delightful!
While you're at it, why not check out my delicious Chicken Salad Apples recipe for a refreshing and fun meal option to pair with your sweet treats? Or if you're interested in another comforting snack, my Cheesy Corn Fritters might just make your day! Enjoy your culinary adventure!
Storage Tips for Apple Fritter Waffle Donuts
Room Temperature: Keep freshly made Apple Fritter Waffle Donuts in an airtight container at room temperature for up to 1 day to maintain their delightful texture.
Fridge: For longer freshness, store the donuts in the refrigerator for up to 3 days. Ensure they are wrapped well to prevent them from drying out.
Freezer: Layer the cooled donuts between wax paper and place them in a freezer bag, where they can be stored for up to 2 months. Thaw overnight in the fridge before serving.
Reheating: To enjoy warm donuts again, reheat in a toaster oven or regular oven at 350°F for about 5-7 minutes to restore crispness.
Make Ahead Options
These Apple Fritter Waffle Donuts are perfect for meal prep enthusiasts! You can whisk together the dry ingredients and store them in an airtight container for up to 3 days to save time during busy mornings. Additionally, you can prepare the wet mixture (excluding the apples) and refrigerate it for up to 24 hours. To maintain quality, store the prepped ingredients separately and mix just before cooking to keep the batter fresh and fluffy. When you're ready to enjoy your donut delights, simply fold in the diced apples and cook them in your waffle iron as instructed for freshly made, delightful treats in no time!

Apple Fritter Waffle Donuts Recipe FAQs
How do I know when my apples are ripe for the recipe?
Absolutely! When choosing apples for your Apple Fritter Waffle Donuts, look for firm, crisp apples without any dark spots or bruises. Granny Smith apples work wonderfully due to their tartness. If the apples feel too soft or mushy, it's best to pass and find firmer ones for the perfect texture in your donuts.
What’s the best way to store leftover Apple Fritter Waffle Donuts?
For optimal freshness, store any leftover Apple Fritter Waffle Donuts in an airtight container at room temperature for up to 1 day. If you want them to last longer, refrigerate them for up to 3 days. Just make sure they are wrapped well to avoid drying out.
Can I freeze these donuts, and how?
Absolutely! To freeze your Apple Fritter Waffle Donuts, allow them to cool completely after cooking. Layer them between sheets of wax paper in an airtight freezer bag, separating each layer for easier access. These donut treasures can be frozen for up to 2 months. When you're ready to enjoy, simply thaw them overnight in the fridge and reheat in a toaster oven for that fresh-out-of-the-waffle-iron experience!
What can I do if my batter is too thick or too thin?
Very! If your batter seems too thick, try adding a tablespoon of milk at a time until you reach your desired consistency. Conversely, if it’s too thin, you can sprinkle in a bit more flour, around a tablespoon at a time, until it thickens up. The goal is to have a spoonable, yet pourable batter that will provide that perfect fluffy texture.
Are there any dietary considerations with this recipe?
You're covered! This recipe is vegetarian, and if you use a gluten-free flour blend, it caters to gluten-free diets as well. Always check the labels of individual ingredients like baking powder and vanilla extract to ensure they're gluten-free. If there are any nut allergies, you can leave out the pecans or walnuts without compromising on the deliciousness!
What if the donuts don’t cook evenly in my waffle iron?
Don't fret! Even heating is key for perfectly cooked Apple Fritter Waffle Donuts. If they are undercooked, try preheating your waffle iron for a few more minutes before cooking the next batch. Also, ensure you're not overloading the batter; about ¼ cup per donut section should suffice for even cooking. If you notice uneven cooking, you can rotate the donuts halfway through the cooking time for more uniform results.
Delicious Apple Fritter Waffle Donuts with Vanilla Glaze
Ingredients
Equipment
Method
- Prepare the apples by peeling, coring, and dicing them into small chunks.
- Mix the dry ingredients in a large bowl: whisk together flour, baking powder, baking soda, salt, cinnamon, and nutmeg.
- In another bowl, mix the wet ingredients: whisk together eggs, granulated sugar, brown sugar, buttermilk, melted butter, and vanilla extract.
- Combine wet and dry ingredients gently; fold in diced apples and nuts.
- Preheat waffle iron and grease it lightly.
- Cook the batter in the waffle iron until golden brown, typically 3-5 minutes.
- Prepare the glaze by whisking powdered sugar, splash of milk, and vanilla until smooth.
- Drizzle the glaze over warm donuts and serve.