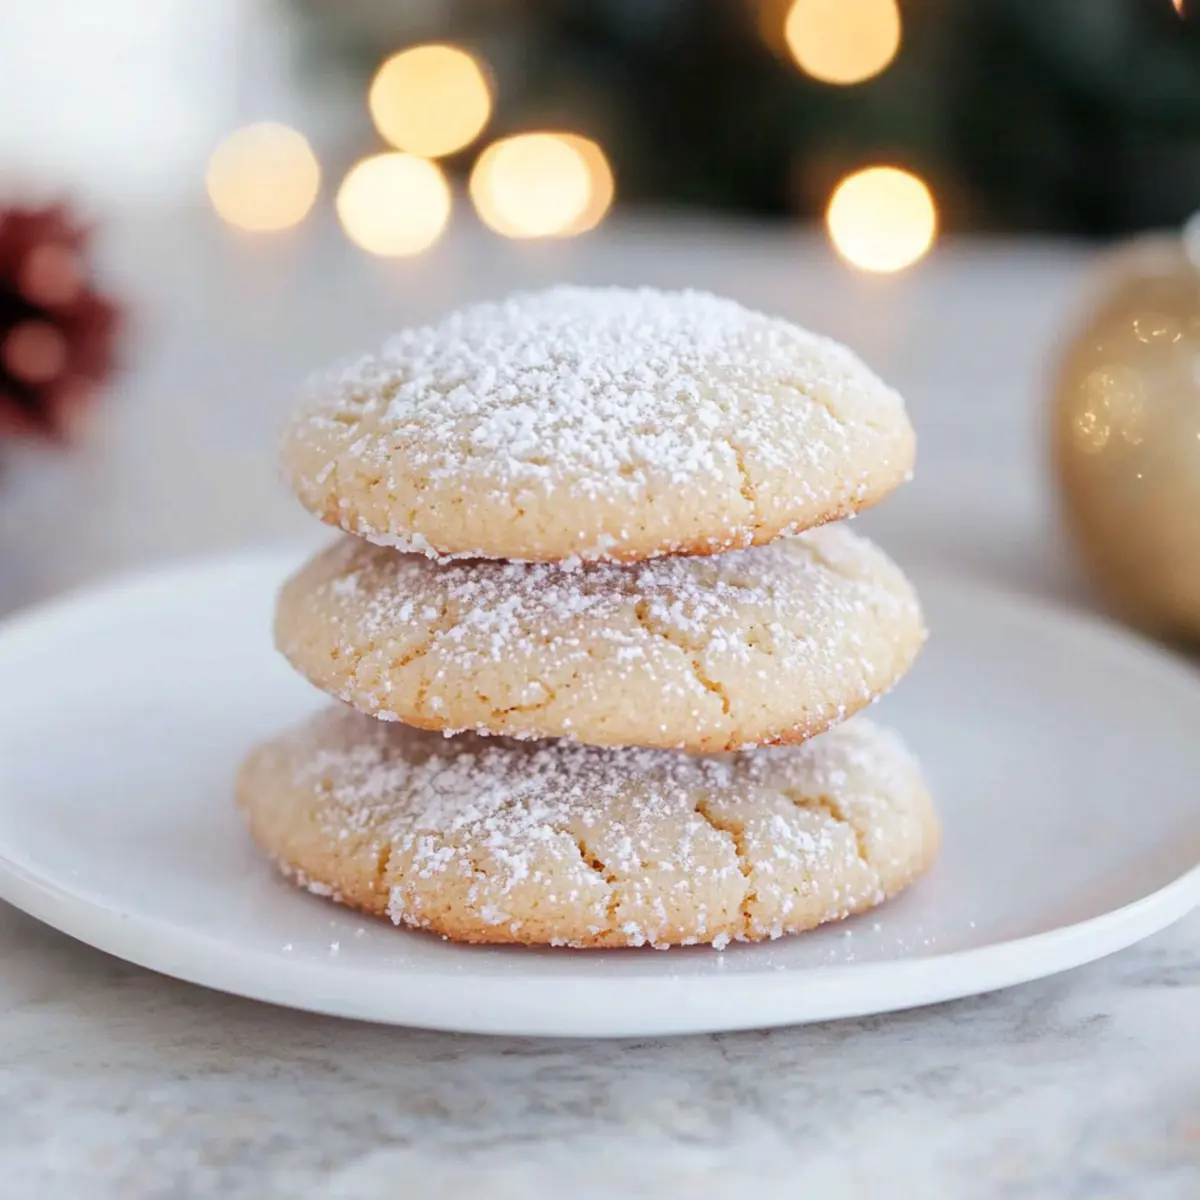
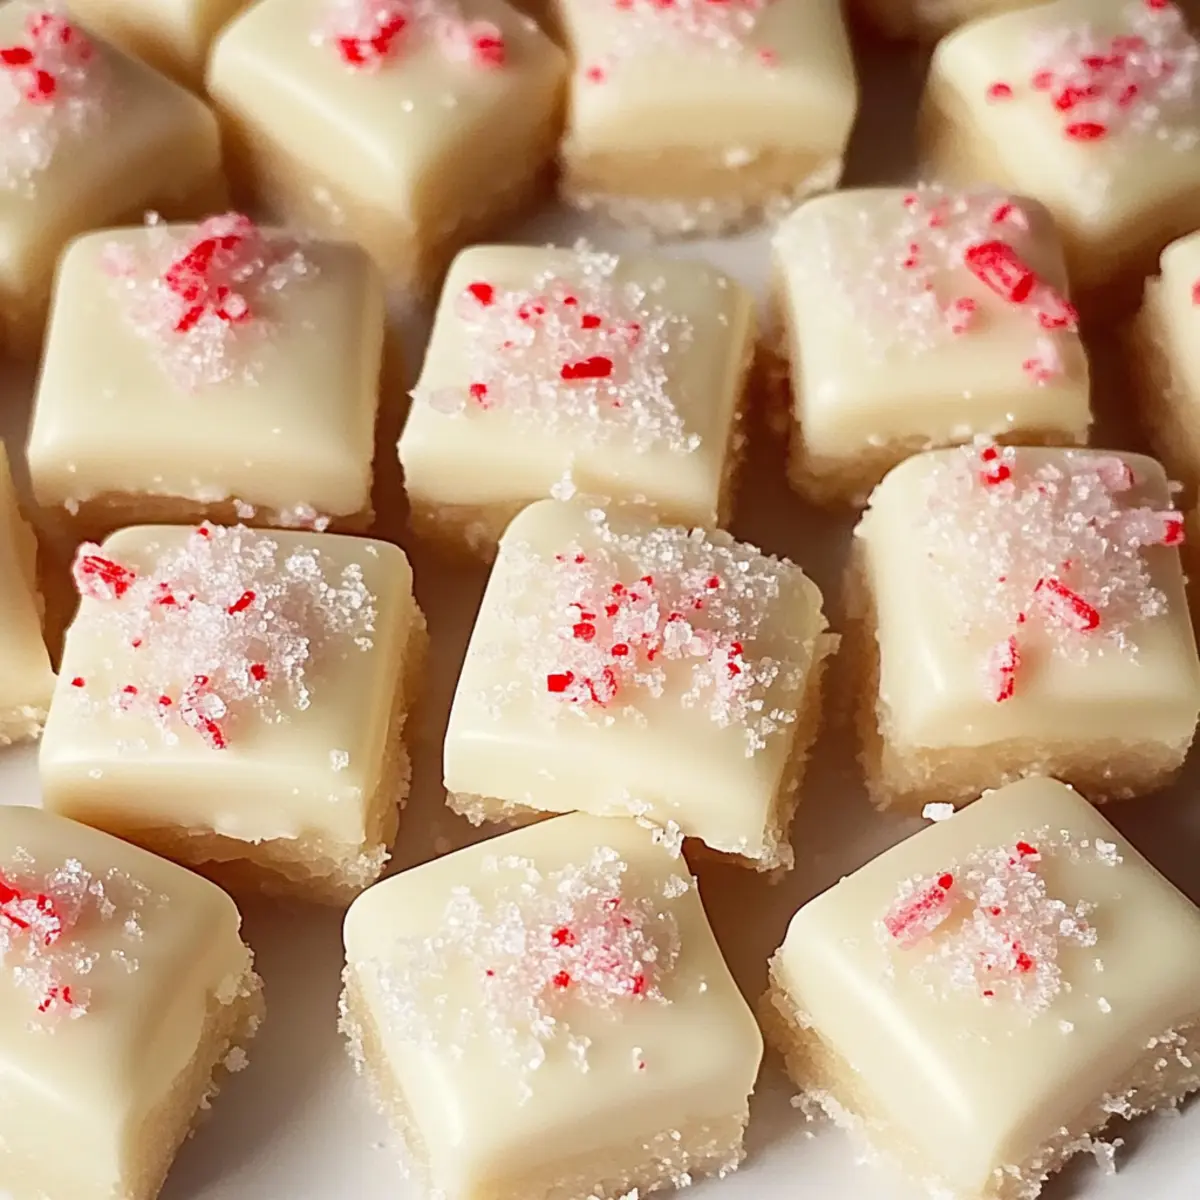
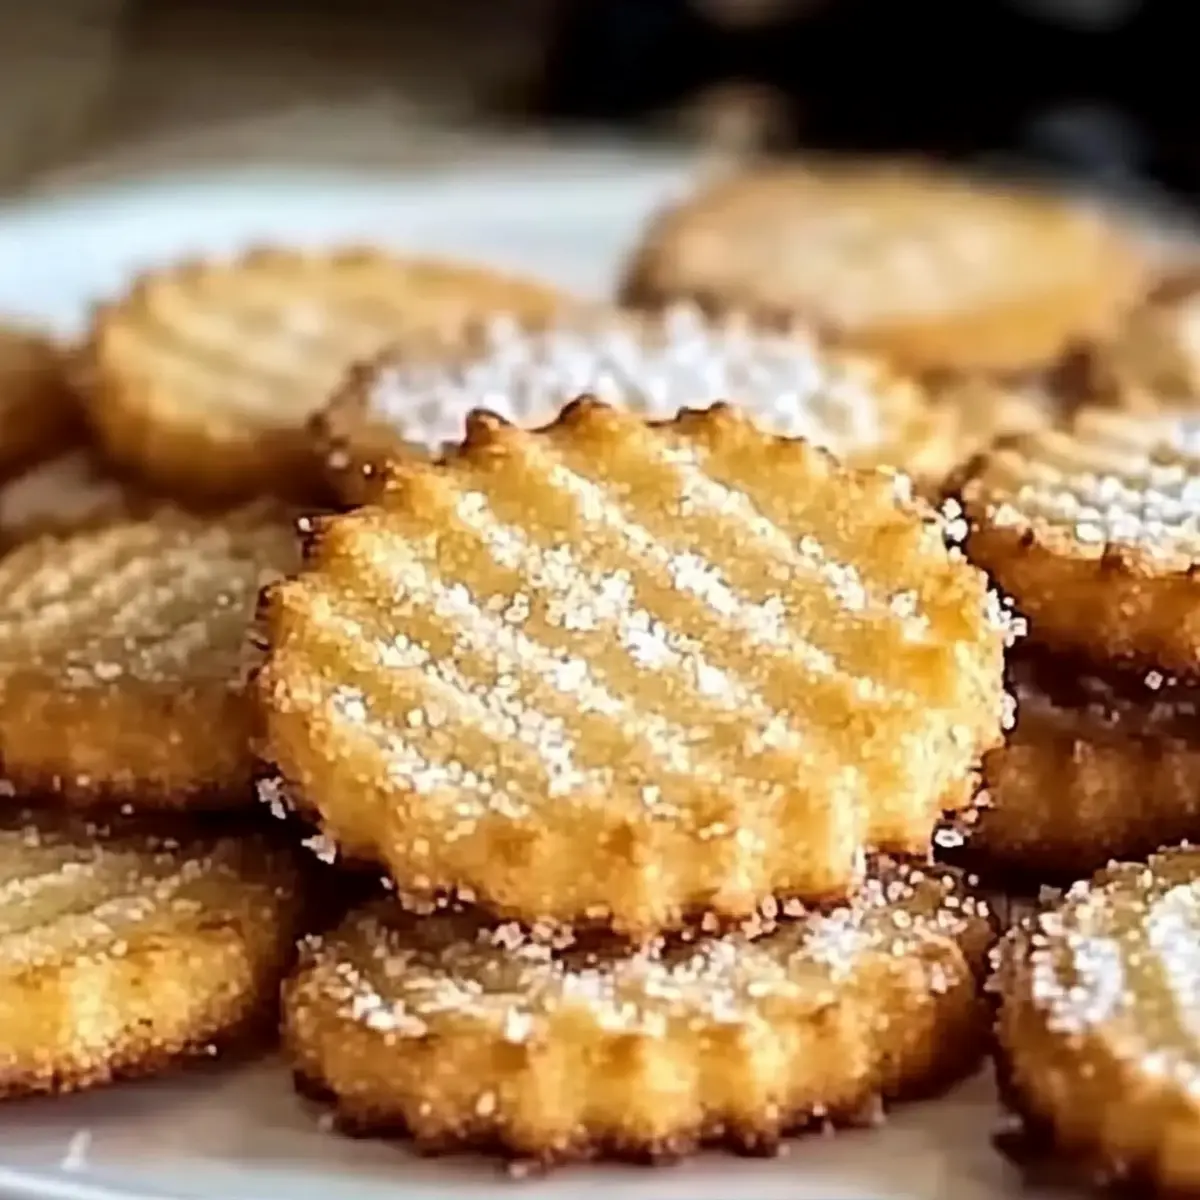
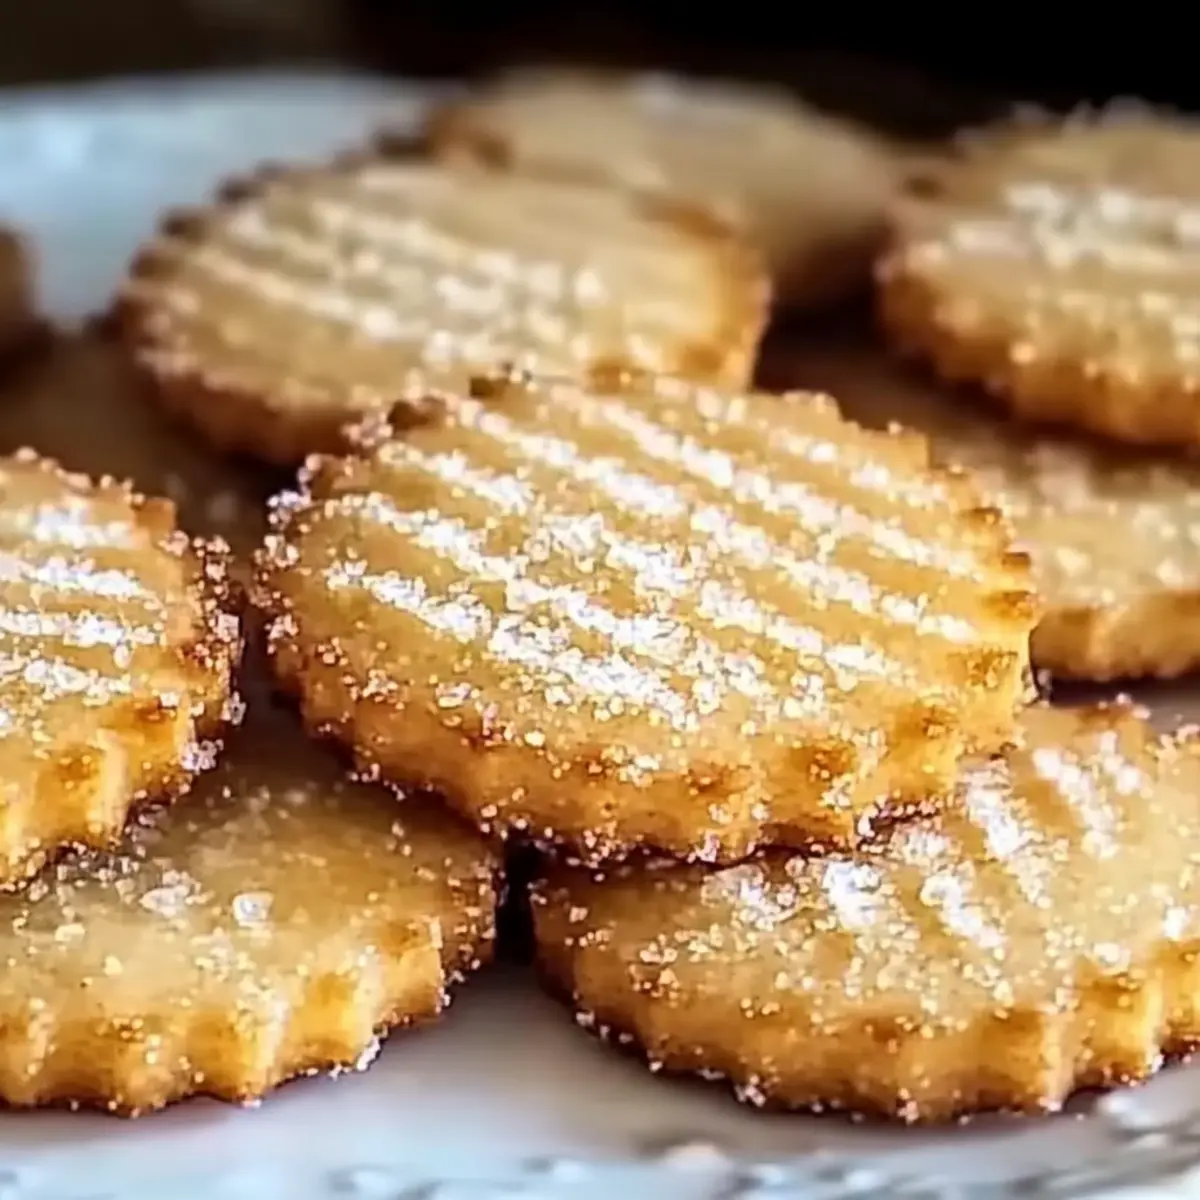
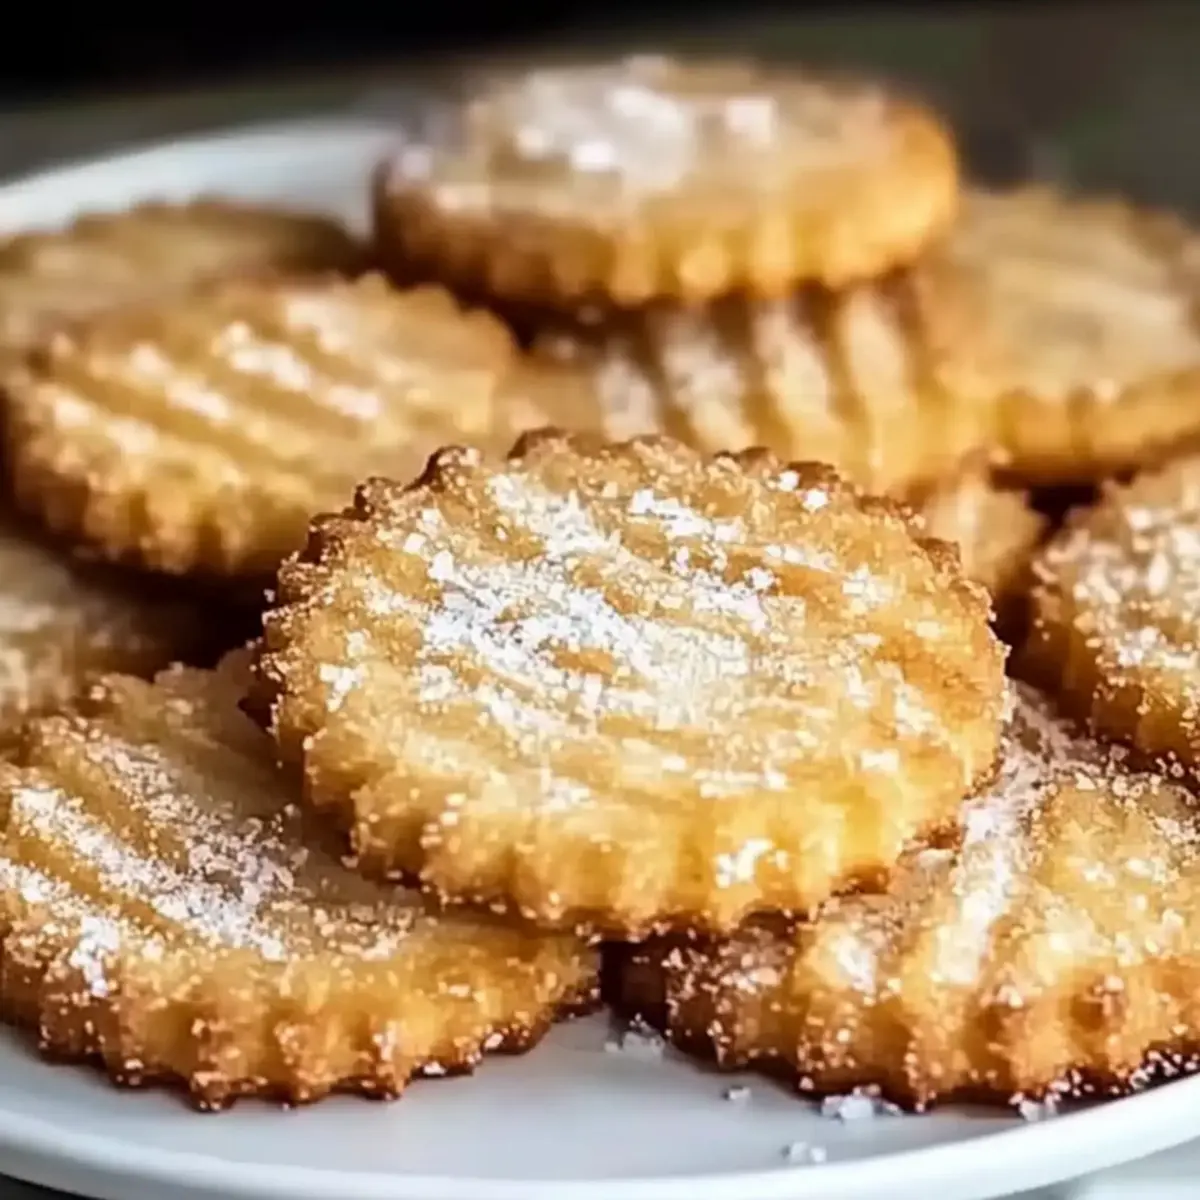
tastytrendingredients

  • Home
  • Recipes
    • Appetizers
    • Breakfast
    • Dessert
    • Dinner
    • Drinks
    • Salads
    • Snacks
    • Soups
  • About me
  • Contact me
menu icon
go to homepage
  • Home
  • Recipes
    • Appetizers
    • Breakfast
    • Dessert
    • Dinner
    • Drinks
    • Salads
    • Snacks
    • Soups
  • About me
  • Contact me
search icon
Homepage link
  • Home
  • Recipes
    • Appetizers
    • Breakfast
    • Dessert
    • Dinner
    • Drinks
    • Salads
    • Snacks
    • Soups
  • About me
  • Contact me
×

Decadent Pumpkin Caramel Chocolates You’ll Love to Make

October 17, 2025 by Grace Snow Leave a Comment

As I was rummaging through my pantry, a hidden can of pumpkin puree caught my eye, sparking a delicious idea: Pumpkin Caramel Chocolates! These delightful morsels not only satisfy my sweet tooth, but they also cater to a variety of dietary needs—vegan, gluten-free, and dairy-free. Perfect for Halloween celebrations or anytime you crave a treat, this recipe is incredibly simple yet looks absolutely impressive. With a rich, spiced pumpkin filling enveloped in luxurious chocolate, you’ll find these treats not only quick to prepare but also a fantastic way to impress family and friends. Are you ready to bring some fun and flavor into your kitchen? Let’s dive in!

Why Are Pumpkin Caramel Chocolates Amazing?

Deliciously Unique: These chocolates bring a wholesome twist to traditional candy, combining rich pumpkin flavor with a creamy texture.
Diet-Friendly: Perfect for everyone, they’re vegan, gluten-free, and free from common allergens like dairy and eggs.
Fun Variations: Use fascinating molds like skulls or hearts to create festive surprises for any occasion!
Quick & Simple: With just a few steps, you can enjoy gourmet-style treats in no time at all.
Impressive Presentation: Whether for Halloween or just because, these chocolates will wow your guests and make any gathering special!

Pumpkin Caramel Chocolates Ingredients

For the Chocolate Shell
• Vegan Chocolate – Choose high-quality vegan chocolate for a rich outer shell that complements the pumpkin filling.

For the Pumpkin Filling
• Pumpkin Puree – Make sure to use pure pumpkin for the best flavor and texture in your Pumpkin Caramel Chocolates.
• Coconut Cream – This adds a velvety richness; nut cream can be a delightful substitute if desired.
• Maple Syrup – Sweeten your filling naturally; agave syrup or coconut sugar works well if you prefer a different sweetness.

For the Spices
• Cinnamon – A warm spice that enhances the pumpkin flavor; adjust according to your taste preference.
• Nutmeg – Offers a lovely hint of earthiness to the filling; perfect for that fall vibe.

These delectable Pumpkin Caramel Chocolates will surely be a hit, satisfying sweet cravings while catering to various dietary needs!

Step‑by‑Step Instructions for Pumpkin Caramel Chocolates

Step 1: Melt Chocolate
Begin by creating a double boiler with a heatproof bowl set over a pot of simmering water. Add your high-quality vegan chocolate and stir consistently for about 5-7 minutes, or until fully melted and smooth. Keep a close eye on the chocolate to prevent burning, aiming for a luscious, glossy consistency ideal for your Pumpkin Caramel Chocolates.

Step 2: Coat Molds
Once your chocolate is melted, carefully remove the bowl from the heat. Using a spoon or a small ladle, fill your chosen molds halfway with the warm chocolate. Gently tap the molds against the countertop to remove any air bubbles and ensure an even coating. Allow the chocolate to set at room temperature for about 10-15 minutes, or until it firms up slightly.

Step 3: Prepare Filling
While the chocolate sets, it’s time to whip up the filling for your Pumpkin Caramel Chocolates. In a mixing bowl, combine the pumpkin puree, coconut cream, maple syrup, cinnamon, and nutmeg. Using a whisk or a hand mixer, blend the ingredients for about 2-3 minutes until the mixture is smooth and creamy. This filling should be rich and fragrant, perfect for your chocolates.

Step 4: Fill Molds
Now that both the chocolate shells and filling are ready, return to your molds. Carefully spoon the creamy pumpkin filling into each mold, filling them almost to the top. Use a small spatula to smooth out the filling for an even surface. This step is crucial as it will create a delightful contrast with the chocolate shell.

Step 5: Seal
With the molds filled, it’s time to seal in that delicious filling. Use the remaining melted chocolate to spooningly cover each mold with a layer until the filling is fully enclosed. Ensure the tops are smooth and well-sealed to prevent any leakage. Aim for a nice, even coating to match the elegance of your Pumpkin Caramel Chocolates.

Step 6: Chill
Place your filled molds in the refrigerator and allow them to chill for at least 45 minutes, or until the chocolate is fully set. To speed up the process, you can pop them into the freezer for about 20-30 minutes. When done, the chocolates should have a firm texture and a beautiful, shiny exterior.

Step 7: Unmold
Once your Pumpkin Caramel Chocolates have set, gently remove them from the molds. Start by flexing the mold slightly to loosen the chocolates, then carefully push them out. Take your time to avoid breaking them; they should easily release and showcase their delightful pumpkin filling. Enjoy the satisfying moment of unveiling your creations!

What to Serve with Pumpkin Caramel Chocolates?

Savoring these sweet treats opens the door to delightful pairing possibilities that enhance their rich pumpkin flavor.

  • Spiced Chai Latte: The warm spices in chai elevate the autumnal notes in the chocolates, creating a cozy beverage pairing.

  • Toasted Coconut Macaroons: The chewy texture and nutty flavor of macaroons beautifully complement the creamy filling, adding a lovely contrast.

  • Pumpkin Soup: A bowl of savory pumpkin soup can provide a delightful, warm contrast, enhancing the tasting experience of the chocolates.

  • Cinnamon Sugar Cookies: The sweetness of cinnamon cookies ties perfectly with the chocolates, promising a nostalgic and comforting flavor combination.

  • Fresh Fruit Salad: Bright and refreshing fruits like apples and pears can cut through the richness of the chocolates, adding a light touch to the meal.

  • Vegan Ice Cream: A scoop of vanilla or spiced ice cream will create a decadent dessert experience, with each spoonful harmonizing beautifully.

  • Herbal Tea: A calming herbal tea, perhaps with lemongrass or mint, serves as a refreshing palate cleanser between bites.

  • Maple Pecan Pie: For those who love indulgence, a slice of pecan pie enhances the autumnal theme while offering a deliciously sweet finish.

  • Caramel Drizzle: Drizzling some extra maple or date caramel on top can intensify the flavors and add a touch of elegance to your presentation.

Make Ahead Options

These Pumpkin Caramel Chocolates are perfect for busy home cooks looking to save time without sacrificing flavor! You can prepare the chocolate shells and the pumpkin filling up to 24 hours in advance. Simply melt the chocolate, coat the molds, and refrigerate them. For the filling, mix the pumpkin puree, coconut cream, maple syrup, and spices, then store it in an airtight container in the fridge. When you're ready to finish your Pumpkin Caramel Chocolates, just spoon in the filling, seal with more chocolate, and chill for at least 45 minutes before unmolding. This way, you'll have scrumptious treats ready to impress, with minimal last-minute effort!

Expert Tips for Pumpkin Caramel Chocolates

• Quality Matters: Use high-quality vegan chocolate to ensure a smooth and rich exterior; it greatly affects your Pumpkin Caramel Chocolates' final taste.

• No Overheating: Be patient when melting chocolate; overheating can cause it to seize up, ruining the texture of your delicious treats.

• Chill Smartly: If you're short on time, chilling the molds in the freezer can speed up the setting process, but avoid leaving them too long to prevent cracking.

• Don’t Rush the Filling: Make sure your pumpkin filling is smooth before filling the molds; any lumps can compromise the mouthfeel and aesthetic of the chocolates.

• Experiment with Molds: Feel free to get creative with molds—using fun shapes can make your Pumpkin Caramel Chocolates a festive hit at any gathering!

Pumpkin Caramel Chocolates: Delicious Variations

Feel free to explore different flavors and textures with these delightful twists on Pumpkin Caramel Chocolates!

  • Nut-Free: Substitute coconut cream with sunflower seed butter for a creamy filling that remains allergen-friendly yet full of flavor.

  • Chocolate Variations: Experiment with dark, white, or even flavored vegan chocolates for unique taste profiles and eye-catching colors in your molds.

  • Spiced Delight: Boost the flavor by adding a pinch of ginger or clove to the pumpkin filling for an extra layer of warmth.

  • Crunchy Surprise: Fold in finely chopped pecans or walnuts into the pumpkin filling for a delightful crunch that contrasts the smooth chocolate.

  • Seasonal Shapes: Use holiday-themed molds like pumpkins or ghosts for Halloween, while heart shapes make perfect gifts for Valentine's Day.

  • Caramel Drizzle: After unmolding, drizzle with a homemade vegan caramel sauce for an elegant finish and an extra sweet treat.

  • Mini Versions: Create bite-sized chocolates by using mini molds, perfect for sharing at gatherings or gifting!

The versatility of these chocolates means you can tailor them to your taste preferences. Whether you’re feeling adventurous or beautifully classic, there’s a perfect bite waiting for you. For more delectable pumpkin-themed treats, don’t miss our Pumpkin Brownies Decadent or try our charming Pumpkin Cinnamon Roll for a cozy brunch!

How to Store and Freeze Pumpkin Caramel Chocolates

Fridge: Store your Pumpkin Caramel Chocolates in an airtight container in the refrigerator for up to two weeks, ensuring they stay fresh and delicious.

Freezer: For longer storage, freeze the chocolates in a single layer laid on parchment paper, then transfer to an airtight container; they can last for up to three months.

Thawing: When ready to enjoy, move the frozen chocolates to the fridge and allow them to thaw slowly for best texture before serving.

Reheating: If you find yourself needing to soften any chocolate, place them at room temperature for about 10-15 minutes until slightly warmed for an irresistible bite!

Pumpkin Caramel Chocolates Recipe FAQs

What type of pumpkin puree should I use?
Absolutely! Be sure to use pure pumpkin puree without any additives for the best flavor in your Pumpkin Caramel Chocolates. Canned pumpkin works perfectly, as does homemade puree made from roasted pumpkin. Just avoid the spiced varieties as they might alter the intended taste.

How should I store my Pumpkin Caramel Chocolates?
To keep your delightful chocolates fresh, store them in an airtight container in the refrigerator for up to two weeks. This way, they’ll maintain their luscious texture and flavor, making it easy to enjoy them whenever you have a sweet craving!

Can I freeze Pumpkin Caramel Chocolates?
Very much so! To freeze, place your chocolates in a single layer on a parchment-lined tray and put them in the freezer until solid. Once frozen, transfer them to an airtight container for storage. They can last up to three months! To thaw, gently move the chocolates to your fridge and let them slowly come to temperature before indulging.

What common issues might I encounter while making these chocolates?
If you find your chocolate is seizing or becoming grainy, it may have overheated. Always melt chocolate carefully using a double boiler, keeping the heat low. Also, make sure your filling mixture is smooth before spooning it into the molds to avoid lumps that could disrupt the texture of your Pumpkin Caramel Chocolates.

Are these chocolates suitable for people with dietary restrictions?
Absolutely! These Pumpkin Caramel Chocolates are vegan, gluten-free, dairy-free, egg-free, and soy-free, making them a wonderful treat for those with various dietary needs. However, always check your chocolate’s ingredient list to ensure it's free from allergens that may affect you or your loved ones.

Pumpkin Caramel Chocolates

Decadent Pumpkin Caramel Chocolates You’ll Love to Make

Delight in these delicious Pumpkin Caramel Chocolates that cater to vegan, gluten-free, and dairy-free diets, perfect for Halloween or any treat craving.
Print Recipe Pin Recipe
Prep Time 15 minutes mins
Cook Time 15 minutes mins
Chilling Time 45 minutes mins
Total Time 1 hour hr 15 minutes mins
Servings: 12 chocolates
Course: Dessert
Cuisine: American
Calories: 80
Ingredients Equipment Method Nutrition Notes

Ingredients
  

For the Chocolate Shell
  • 8 ounces Vegan Chocolate Choose high-quality for best flavor.
For the Pumpkin Filling
  • 1 cup Pumpkin Puree Use pure pumpkin for best flavor.
  • 1/2 cup Coconut Cream Can substitute with nut cream.
  • 1/4 cup Maple Syrup Agave syrup or coconut sugar can be used.
For the Spices
  • 1 teaspoon Cinnamon Adjust according to taste.
  • 1/2 teaspoon Nutmeg Provides a lovely fall flavor.

Equipment

  • Double Boiler
  • Mixing Bowl
  • Whisk
  • Spatula
  • Chocolate molds

Method
 

Step-by-Step Instructions
  1. Melt chocolate using a double boiler, stirring consistently for about 5-7 minutes until fully melted and smooth.
  2. Coat molds halfway with the warm chocolate, tap to remove air bubbles, and let set for about 10-15 minutes.
  3. Prepare filling by mixing pumpkin puree, coconut cream, maple syrup, cinnamon, and nutmeg in a bowl for 2-3 minutes.
  4. Fill molds with pumpkin filling, smoothing the surface with a spatula.
  5. Seal molds with remaining melted chocolate until the filling is fully enclosed.
  6. Chill in the refrigerator for at least 45 minutes until chocolate is set.
  7. Unmold chocolates gently by flexing the mold and pushing them out carefully.

Nutrition

Serving: 1chocolateCalories: 80kcalCarbohydrates: 10gProtein: 1gFat: 4gSaturated Fat: 3gMonounsaturated Fat: 1gSodium: 5mgPotassium: 50mgFiber: 1gSugar: 6gVitamin A: 2500IUVitamin C: 1mgCalcium: 10mgIron: 0.5mg

Notes

Store in an airtight container in the refrigerator for up to two weeks or freeze for up to three months. Thaw in the fridge before serving.

Tried this recipe?

Let us know how it was!

Monster Cakes: Irresistibly Fun Treats to Wow Kids

October 17, 2025 by Grace Snow Leave a Comment

The air is filled with excitement as Halloween approaches, making it the perfect time for some spooky baking! There’s something wonderfully creative about making Mini Monster Cakes that both kids and adults will adore. These aren't just any treats; they’re dreamy bites packed with richness and moisture that elevate your Halloween celebrations. With especially vibrant colors and whimsical designs, these cakes promise to be a hit at any kids' party. Plus, the decorating techniques I'll share will invigorate your baking game and provide a delightful way to bond with loved ones. Ready to unleash your inner pastry monster? Let’s dive into the fun!

Why Are Monster Cakes So Fun?

Creativity Unleashed: Decorating Mini Monster Cakes allows you to express your playful side while involving kids in the fun!
Deliciously Fudgy: These cakes boast a moist texture that’s irresistibly rich, making them a favorite among kids and adults alike.
Vibrant Colors: With the use of gel colors, each cake can become a colorful monster masterpiece!
Easy to Personalize: Swap out designs to match different themes or preferences—think pastel monsters for a softer touch!
Memorable Moments: Baking and decorating together creates lasting memories, perfect for building family traditions.
Perfect for Any Occasion: While great for Halloween, these cakes can brighten up any celebration, just like Ricotta Protein Pancakes or delightful Crab Cakes Forget.

Monster Cakes Ingredients

For the Cake

  • Unsalted Butter – Provides richness and moisture in the cake; substitute with margarine for a dairy-free version.
  • Oil – Enhances moisture and tenderness; can be replaced with applesauce for a healthier option.
  • White Sugar – Sweetens the cake and helps with the moist texture; brown sugar can be used for a deeper flavor.
  • Eggs – Acts as a binder and adds richness; for a vegan substitute, use flax eggs (1 tbsp flaxseed meal + 2.5 tbsp water per egg).
  • Milk – Adds moisture and richness to the batter; substitute with almond milk or oat milk for a dairy-free version.
  • Vanilla Extract – Provides flavor depth; using pure vanilla gives the best results.
  • Sea Salt – Balances sweetness and enhances flavors.
  • Black Cocoa Powder – Adds color and a rich chocolate flavor; Dutch cocoa can be used with some black food coloring to achieve the desired shade.
  • All-Purpose Flour – Provides structure; a gluten-free flour blend can be used for a gluten-free version.
  • Baking Powder – This leavening agent ensures the cake is fluffy.

For the Frosting

  • Vanilla Buttercream (made from butter, confectioner’s sugar, salt, heavy cream, and vanilla extract) – Offers sweetness and stability for decorating.

For Coloring

  • Gel Colors (Orange, Yellow, Teal, Blue, Purple) – Used to color buttercream; recommended for vibrant hues without altering frosting texture.

For Decoration

  • Candy Eyes, Gum Paste/Fondant – Perfect for adding whimsical monster faces and playful features.

These delightful ingredients come together to create the perfect base for your Monster Cakes, ensuring each bite is as fun to make as it is to eat!

Step‑by‑Step Instructions for Mini Monster Cakes

Step 1: Prepare the Cake
Begin by preheating your oven to 325°F (163°C). In a large mixing bowl, combine the melted unsalted butter, oil, and white sugar, mixing until well combined. Next, whisk in the eggs, milk, vanilla extract, and salt until smooth. In a separate bowl, sift together the all-purpose flour, black cocoa powder, and baking powder. Gradually mix the dry ingredients into the wet mixture, ensuring not to over-mix. Pour the batter into lined cake pans and bake for 20-30 minutes, or until springy to the touch and a toothpick inserted in the center comes out clean. Allow the cakes to cool before chilling them in the refrigerator.

Step 2: Cut and Shape Cakes
Once your Mini Monster Cakes have cooled, use a pastry cutter to slice the cakes into rounds. This step is crucial for creating your monster shapes. Gather any leftover cake scraps and crush them to form dough for cake pops. Use the cake pop dough to mold half-spheres that will add extra character to your monster creations later. Ensure the shapes are uniform for a polished look.

Step 3: Make and Color Buttercream
Next, whip the softened butter in a clean bowl until it's fluffy and light. Gradually add the confectioner’s sugar, mixing well, then pour in the heavy cream and vanilla extract, blending until smooth. Once the buttercream is ready, divide the frosting into separate bowls, adding gel colors such as orange, yellow, teal, blue, and purple to create vibrant shades. Mix thoroughly to achieve the desired hues, preparing for the fun decorating process ahead.

Step 4: Assemble and Decorate Cakes
Start assembling your Mini Monster Cakes by stacking the layers with a layer of buttercream in between each. After stacking, apply a crumb coat of frosting around the outside to seal in any crumbs, then chill the cakes for about 15 minutes to set the layers. Once chilled, use the colored buttercream to decorate your cakes. Employ various piping techniques to create monster features like fur, scales, or spikes, bringing your monster designs to life. Finally, use candy eyes and gum paste or fondant to add whimsical faces, ensuring every Mini Monster Cake looks unique and fun.

Make Ahead Options

These Mini Monster Cakes are perfect for busy home cooks looking to save time and stress during Halloween festivities! You can bake the cakes up to 2 days in advance and store them in an airtight container in the refrigerator to maintain their moist, fudgy texture. Additionally, you can prepare the colored buttercream and refrigerate it for an overnight chill, ensuring easy assembling when you’re ready to decorate. To finish, simply allow the cake layers to come to room temperature, apply a crumb coat, and then decorate with the buttercream and fun monster features. This way, you’ll delight your little ones with delightful cakes that are just as fresh and fun as if made the same day!

Expert Tips for Mini Monster Cakes

  • Room Temperature Buttercream: Ensure your buttercream is at room temperature for easy mixing and smooth piping. Cold frosting is harder to work with and can lead to decorating frustrations.

  • Use Gel Food Colors: Stick to gel colors rather than liquid food coloring; they provide vibrant hues without altering the texture of your frosting, making your Monster Cakes pop visually.

  • Chill After Crumb Coating: After applying the crumb coat, chill the cakes for 15 minutes before finishing decoration. This helps set the design and prevents smudging during the decorating process.

  • Involve the Kids: Get kids involved in decorating their own Mini Monster Cakes; it's a wonderful way to bond and give them a sense of creativity in the kitchen.

  • Experiment with Texture: Don't hesitate to mix different cake textures! For instance, combine the fudgy Mini Monster Cakes with lighter whipped toppings or fluffy decorations for an exciting mouthfeel.

  • Customizable Designs: Personalize each monster to reflect different personalities! Swap decorations and colors to match the theme or preferences of your party, making each Monster Cake unique and fun.

What to Serve with Mini Monster Cakes

The spooky season beckons moments of laughter and joy as you whip up these vibrant treats, making every bite feel like a celebration.

  • Witch’s Brew Punch: A fizzy, fruity concoction that adds a fun twist, enhancing the playful spirit of Halloween parties.
  • Spooky Fruit Skewers: Fresh apple and banana slices adorned with eyes bring a healthy touch while maintaining a festive theme.
  • Goblins’ Green Salad: Crisp romaine lettuce topped with a tangy dressing and fun toppings brings a refreshing crunch to the sweet treats.
  • Ghostly Vanilla Ice Cream: A scoop of creamy vanilla complements the fudgy texture, perfectly celebrating the sweet and spooky combination.
  • Pumpkin Spice Cookies: Share the flavors of fall with soft, spiced cookies to balance the richness of your monster cakes.
  • Candy Corn Cupcakes: Adorable mini cupcakes with candy corn sprinkles echo the sweet fun, ensuring all festive vibes are captured.
  • Candy Apple Bar: Let guests create their own loaded candy apples, combining fun textures and colors alongside the adorable monster cakes.
  • Chilling Hot Chocolate: Warm drinks with a hint of cinnamon create a cozy pairing, perfect for satisfying sweet cravings on chilly nights.
  • Caramel Flavored Popcorn: Old-fashioned popcorn drizzled with caramel brings a crunchy bite that plays beautifully with the cake's soft texture.
  • Mummy Dogs: Fun, savory treats wrapped in crescent rolls that add a savory contrast, making the perfect addition to any kids' Halloween feast.

Monster Cakes Variations & Substitutions

Get ready to unleash your creativity with these fun adaptations that will elevate your Mini Monster Cakes and delight everyone around the table!

  • Vegan Option: Use flax eggs and substitute milk with almond or oat milk for a delicious vegan-friendly version. These tweaks keep the monster magic alive without the animal products!
  • Gluten-Free: Swap all-purpose flour for a gluten-free flour blend to cater to gluten-sensitive friends. You won’t lose any of the fudginess or flavor with this easy adaptation!
  • Flavor Infusions: Try adding a tablespoon of coffee or espresso powder to the batter for an unexpected layer of flavor. The subtle coffee notes work beautifully with chocolate – a real treat for adults!
  • Decorative Themes: Customize the colors and designs according to holidays or themes! Imagine vibrant pastel monsters for springtime or classic black and orange for Halloween.
  • Sprinkles Galore: Add a fun twist by mixing in colorful sprinkles to the batter before baking for a confetti-effect cake that packs even more visual delight.
  • Different Toppings: Instead of candy eyes, use mini marshmallows, chocolate chips, or fruit to create unique monster expressions. This keeps the decorating playful and gives kids a chance to let their imaginations run wild!
  • Texture Variations: For a delightful crunch, sprinkle toasted nuts or crushed cookies in between the cake layers. This creates an exciting texture that contrasts beautifully with the moist cake.
  • Heat It Up: Add a dash of cayenne pepper or chili powder to the batter for a spicy kick that will keep your guests guessing and intrigued!

By incorporating some of these variations, you can create an array of delectable Monster Cakes that cater to every palate. So, round up your little helpers and dive into this creative baking adventure!

Storage Tips for Monster Cakes

  • Room Temperature: Monster Cakes can be kept at room temperature for up to 1 day. Make sure they are covered with plastic wrap or in a cake dome to retain moisture and freshness.
  • Fridge: For longer storage, place the cakes in an airtight container in the refrigerator for up to 3 days. This helps maintain their fudgy texture and flavor.
  • Freezer: To freeze Monster Cakes, wrap individual pieces tightly in plastic wrap, then place them in a freezer-safe bag. They can be frozen for up to 2 months. Allow to thaw in the fridge before decorating or serving.
  • Reheating: If desired, you can lightly warm the cakes in the microwave for about 10-15 seconds for a freshly baked taste. Enjoy your delicious Monster Cakes any time!

Mini Monster Cakes Recipe FAQs

How do I choose the right ripeness of ingredients for my Mini Monster Cakes?
Absolutely! When selecting ingredients, ensure that your eggs are fresh—check for a clean shell and no cracks. For the butter, it should be softened but not melted, which helps achieve that creamy texture in your batter. As for your milk, using it at room temperature will blend better with the rest of the ingredients, ensuring a smooth cake batter.

How should I store my Mini Monster Cakes?
Very! You can keep your Mini Monster Cakes covered at room temperature for one day. If you're planning to enjoy them later, place them in an airtight container in the fridge for up to 3 days. This way, the moist, fudgy center remains intact! Just remember to bring them back to room temperature before serving for the best flavor.

Can I freeze Mini Monster Cakes, and if so, how?
Of course! Freezing is a great way to save your delicious creations. To freeze them, first wrap individual cakes tightly in plastic wrap to prevent freezer burn. Next, place each wrapped cake in a freezer-safe bag. They can be frozen for up to 2 months. When you're ready to enjoy them, simply thaw in the fridge overnight before decorating or serving.

What if my Mini Monster Cakes don't rise properly?
Oh no! If your cakes don't rise, it could be due to old baking powder. Make sure your baking powder is fresh and stored in a cool, dry place. Also, don’t over-mix your batter; it can lead to dense cakes. For best results, combine wet and dry ingredients until just mixed; it’s okay if there are a few lumps—these will bake out perfectly!

Are Mini Monster Cakes suitable for kids with allergies?
Absolutely! These cakes can be made accommodating by using substitutes. For example, you can replace the dairy with non-dairy milk (like almond or oat milk) and use flax eggs for an egg-free version. Always double-check the specific brands of ingredients, particularly for allergen information, to ensure they meet dietary restrictions.

Can I use different colors or decorating techniques for my Monster Cakes?
The more the merrier! Customize your Monster Cakes using a variety of gel colors for the buttercream and explore different piping techniques. From fur to scales, let your imagination run wild! You can also experiment with sprinkles and edible glitter to make them even more festive and fun for your Halloween gatherings.

Monster Cakes

Monster Cakes: Irresistibly Fun Treats to Wow Kids

These Monster Cakes are creatively decorated treats that are perfect for Halloween, offering a moist and rich dessert that kids will love.
Print Recipe Pin Recipe
Prep Time 30 minutes mins
Cook Time 25 minutes mins
Chilling Time 15 minutes mins
Total Time 1 hour hr 10 minutes mins
Servings: 12 cakes
Course: Dessert
Cuisine: American
Calories: 350
Ingredients Equipment Method Nutrition Notes

Ingredients
  

For the Cake
  • 1 cup Unsalted Butter Provides richness and moisture; substitute with margarine for dairy-free.
  • 1/2 cup Oil Enhances moisture; can replace with applesauce for healthier option.
  • 2 cups White Sugar Sweetens cake; brown sugar can deepen flavor.
  • 4 large Eggs Acts as binder; use flax eggs for vegan.
  • 1 cup Milk Adds moisture; substitute with almond milk or oat milk.
  • 2 teaspoons Vanilla Extract Provides flavor depth; use pure vanilla for best results.
  • 1/4 teaspoon Sea Salt Balances sweetness.
  • 1/2 cup Black Cocoa Powder Adds color and rich chocolate flavor.
  • 2 cups All-Purpose Flour Provides structure; gluten-free blend can be used.
  • 1 tablespoon Baking Powder Leavening agent for fluffy cake.
For the Frosting
  • 1 batch Vanilla Buttercream Made from butter, confectioner's sugar, salt, heavy cream, and vanilla.
For Coloring
  • 5 colors Gel Colors Includes Orange, Yellow, Teal, Blue, Purple for vibrant hues.
For Decoration
  • 1 cup Candy Eyes For whimsical monster faces.
  • 1 cup Gum Paste/Fondant For playful features.

Equipment

  • Mixing Bowl
  • Whisk
  • Pastry cutter
  • Cake Pans
  • Electric mixer

Method
 

Prepare the Cake
  1. Preheat your oven to 325°F (163°C). In a bowl, mix melted butter, oil, and sugar. Whisk in eggs, milk, vanilla, and salt. In another bowl, sift flour, cocoa, and baking powder. Gradually mix dry ingredients into wet. Pour into cake pans and bake for 20-30 minutes.
Cut and Shape Cakes
  1. Once cooled, slice cakes into rounds. Use scraps to form dough for cake pops, molding half-spheres for character.
Make and Color Buttercream
  1. Whip softened butter until fluffy. Gradually add confectioner’s sugar, then cream and vanilla until smooth. Divide frosting and mix with gel colors.
Assemble and Decorate Cakes
  1. Stack layers with buttercream between, apply a crumb coat, and chill for 15 minutes. Decorate with colored buttercream and add candy eyes for unique monster features.

Nutrition

Serving: 1cakeCalories: 350kcalCarbohydrates: 45gProtein: 3gFat: 18gSaturated Fat: 10gPolyunsaturated Fat: 1gMonounsaturated Fat: 5gCholesterol: 85mgSodium: 200mgPotassium: 100mgFiber: 1gSugar: 25gVitamin A: 300IUCalcium: 50mgIron: 1mg

Notes

These cakes can be customized to reflect different personalities by changing decorations and colors for your event.

Tried this recipe?

Let us know how it was!

Kraken Cupcakes: Whimsical Rum-Raisin Delights for Halloween

October 16, 2025 by Grace Snow Leave a Comment

While preparing for Halloween, I stumbled upon a charming idea that whisked me away to mythical pirate adventures! These Kraken Cupcakes are not just your average treats; they are soft, rum-infused delights, filled with juicy raisins and topped with playful fondant tentacles that spark creativity. Perfect for family baking sessions, this recipe offers a fun way to engage your kids in the kitchen and create lasting memories. Plus, they make a stunning centerpiece at any Halloween gathering, ensuring a festive atmosphere that delights young and old alike. So why not dive into these whimsical cupcakes and surprise your guests with a spooky sweet treat?

Why are Kraken Cupcakes a must-try?

Whimsical design: These cupcakes are not only delicious but also an eye-catching centerpiece for your Halloween festivities, sure to start conversations!
Moist texture: Each bite is bursting with rum and juicy raisins, delivering a delightful flavor experience that's anything but ordinary.
Kid-friendly fun: Engage the whole family in decorating the playful fondant tentacles, making it a perfect baking project for young aspiring chefs.
Collective creativity: The unique pirate theme allows for a variety of decorating possibilities, making every batch uniquely yours.
Easy to make: With straightforward instructions, you can whip up these treats without complicated techniques—ideal for busy bakers to enjoy!
So, gather your ingredients and explore this fun-filled recipe that introduces a taste of adventure right in your kitchen.

Kraken Cupcakes Ingredients

For the Cupcake Batter

  • Raisins – Add natural sweetness and chewiness; can substitute with chopped dates for a different texture.
  • Spiced Rum – Infuses the cake with flavor reminiscent of pirate voyages; substitute with vanilla extract for a non-alcoholic version.
  • Unsalted Butter (softened) – Provides richness and moisture; no substitution necessary for flavor.
  • Dark Brown Soft Sugar – Adds depth and moisture to the cupcakes; can replace with light brown sugar if needed.
  • Medium Eggs (lightly beaten) – Acts as a binder for structure; ensure they are at room temperature for best results.
  • Vanilla Extract – Enhances and balances flavors; no direct substitute, although imitation vanilla can be used.
  • Self-Raising Flour – Gives cupcakes their lift and fluffy texture; measure carefully or adapt with all-purpose flour and baking powder (1 cup flour + 1.5 tsp baking powder).

For the Decoration

  • Orange Fondant Icing – Used for decorative tentacles; alternatively, use colored buttercream for ease of use.
  • Yellow Fondant Icing – Used for detailing tentacles; no direct substitution, but edible gel colors can enhance chocolate or frosting.
  • Icing Sugar (sifted) – Forms the base for the frosting and decor; substitution not recommended as it's needed for structure.
  • Blue Food Colouring Gel – Used to color the icing; substitute with natural food coloring if desired.

Step‑by‑Step Instructions for Kraken Cupcakes

Step 1: Prepare Oven & Cupcake Liners
Preheat your oven to 350°F (175°C) while you line a cupcake tray with colorful cupcake liners. This step is essential to ensure even baking of your Kraken cupcakes, so make sure your oven is fully heated by the time your batter is ready to go in.

Step 2: Mix Dry Ingredients
In a large mixing bowl, combine the self-raising flour, dark brown soft sugar, and a pinch of salt. Whisk together until the mixture is uniform and lump-free, ensuring a smooth batter for your Kraken cupcakes. This step sets the foundation for your moist and fluffy treats.

Step 3: Beat Butter & Sugar
In a separate bowl, cream together the softened unsalted butter and the remaining dark brown sugar. Use a hand mixer on medium speed for about 3-4 minutes until the mixture is light and fluffy, indicating that the butter is well aerated, which will help your cupcakes rise beautifully.

Step 4: Incorporate Eggs & Rum
Add the lightly beaten eggs, spiced rum, and vanilla extract to the butter and sugar mixture. Beat everything together until smooth and creamy, taking care to scrape down the sides of the bowl as needed. This adds richness and flavor to your Kraken cupcakes, making them a delightful treat.

Step 5: Combine Wet & Dry Mixtures
Gradually fold the dry ingredient mixture into the wet batter using a spatula. Mix gently until just combined; over-mixing can lead to dense cupcakes. The batter should be thick but smooth, ready to rise into fluffy Kraken cupcakes once baked.

Step 6: Stir in Raisins
Gently fold in the plump raisins into the batter, ensuring they're evenly distributed. This step adds sweetness and a chewy texture to your Kraken cupcakes, reminiscent of treasure found in a pirate’s trove.

Step 7: Fill Liners & Bake
Spoon the prepared batter into the lined cupcake cups, filling them about two-thirds full to allow for rising. Place the tray in the preheated oven and bake for 20-25 minutes. They're ready when a toothpick inserted in the center comes out clean and the tops bounce back when lightly pressed.

Step 8: Cool & Decorate
Once baked, remove the Kraken cupcakes from the oven and let them cool in the tray for about 5 minutes before transferring them to a wire rack. Allow them to cool completely before frosting with your buttercream and adding artistic fondant tentacles for that whimsical Halloween touch.

Make Ahead Options

These Kraken Cupcakes are perfect for busy cooks looking to save time during the Halloween rush! You can prepare the cupcake batter up to 24 hours in advance and refrigerate it in an airtight container. This way, when you're ready to bake, simply spoon the batter into lined cupcake cups and bake as directed. Furthermore, the cooled cupcakes can be stored in an airtight container for up to 3 days—just remember not to frost them until you're ready to serve, as this will keep the decorations fresh and fun. With these make-ahead options, you can easily whip up a batch of delightful Kraken Cupcakes without the stress of last-minute baking!

What to Serve with Kraken Cupcakes?

These whimsical treats are perfect as a festive centerpiece, elevating your Halloween celebrations with delightful flavors and visual charm.

  • Pirate Punch: A fruity blend of tropical juices with a splash of ginger ale, this drink captures the adventurous pirate spirit and pairs wonderfully with the rich flavors of the cupcakes.
  • Spiced Apple Cider: Warm spiced apple cider can enhance the autumn vibe, offering a cozy, aromatic experience that complements the rum in the cupcakes.
  • Chocolate-Dipped Pretzels: The salty crunch of chocolate-dipped pretzels creates a delightful contrast to the sweet icing, adding a fun texture to your dessert table. Engage your guests by letting them decorate their own!
  • Pumpkin Flavored Popcorn: Sweet and salty popcorn tossed with pumpkin spices provides a playful snack that harmonizes with the Halloween theme while keeping guests munching happily.
  • Vanilla Ice Cream: A scoop of creamy vanilla ice cream can temper the sweetness of the cupcakes, offering a delightful contrast that rounds out the dessert experience.
  • Themed Cheese Platter: A selection of cheeses paired with crackers and seasonal fruits adds a savory element to the sweet, balancing the flavors beautifully—a great way to keep your party versatile!
  • Apple Crisp: This warm, cinnamon-scented dessert evokes the essence of fall and makes a comforting duo with the moist rum-infused cupcakes.
  • Hocus Pocus Cocktail: An imaginative cocktail featuring green apple schnapps and vodka gives a spirited boost to your celebration, inviting guests to sip and enjoy the festive theme.

How to Store and Freeze Kraken Cupcakes

Room Temperature: Keep uniced Kraken cupcakes in an airtight container for up to 2 days. This prevents them from drying out while allowing their soft texture to shine.

Fridge: If you've already iced the cupcakes, store them in the fridge in a sealed container for up to 3 days. This helps maintain the freshness of the fondant decorations.

Freezer: You can freeze uniced Kraken cupcakes for up to 3 months. Wrap each cupcake individually in plastic wrap and then in foil before placing them in a freezer bag.

Reheating: To enjoy cupcakes from the freezer, thaw them in the fridge overnight. Serve at room temperature, or pop them in the microwave for about 10-15 seconds to enjoy a warm, moist treat!

Expert Tips for Kraken Cupcakes

  • Room Temperature Eggs: Ensure your eggs are at room temperature to help create a better emulsion, resulting in a moist cake.
  • Measuring Flour: Spoon and level the flour when measuring to avoid dense cupcakes; too much flour can lead to dryness.
  • Rum for Flavor: For a more pronounced rum flavor, let the batter sit for about 10 minutes before baking, allowing the flavors to meld nicely.
  • Watch the Bake Time: Every oven is different; start checking your Kraken cupcakes at the 20-minute mark to prevent over-baking.
  • Cooling Time: Always cool cupcakes completely before decorating to ensure the frosting doesn’t melt—patience is key for beautiful presentation!

Kraken Cupcakes Variations & Substitutions

Feel free to play around with these Kraken Cupcakes and let your imagination sail into the delicious unknown!

  • Chocolate Chip Delight: Substitute raisins with chocolate chips for a decadent, gooey twist that chocolate lovers will adore. You could even add a sprinkle of sea salt on top for that perfect sweet-salty contrast!
  • Non-Alcoholic Option: Replace spiced rum with vanilla extract or apple juice to retain flavor while making it kid-friendly. Everyone can enjoy these festive treats without worry!
  • Festive Color Swaps: Use vibrant colored buttercream instead of fondant for a burst of color. Pink for cotton candy sea creatures or purple for a mystical ocean vibe—let your themed fantasies flow!
  • Flavored Rums: Experiment with flavored rums like coconut or pineapple for a tropical flair. This small change can transport your guests to a breezy tropical getaway!
  • Gluten-Free Goodness: Use a gluten-free flour blend instead of self-raising flour to make these cupcakes gluten-free. They’ll still rise and taste fabulous, keeping everyone happy at your gathering.
  • Nutty Texture: Gently fold in some chopped nuts, like walnuts or pecans, for added crunch and flavor. It’ll give your Kraken Cupcakes an interesting texture that resembles hidden treasures.
  • Higher Spice Level: Introduce pumpkin spice or cinnamon to your batter for a warm, spicy note that complements the rum beautifully. It's a perfect twist for fall baking!
  • Lemon Zest Twist: Add some lemon zest to the batter for a refreshing zing. This brightens the flavor and gives a lovely contrast to the rich rum and sweet raisins.

Let your creativity shine through these variations and make each cupcake batch uniquely yours! If you’re seeking more inspiration, check out our Christmas Rum Cake for festive ideas or try our Easy Vanilla Buttercream to top off your treats!

Kraken Cupcakes Recipe FAQs

How do I select the best raisins for my cupcakes?
Look for plump, moist raisins without any dark spots all over, which can indicate they are overly dried out. If possible, opt for organic raisins to avoid preservatives. Soaking them in warm water for about 10-15 minutes prior to mixing them into your batter can also enhance their texture and moisture content.

How should I store my Kraken Cupcakes?
Uniced Kraken cupcakes can be stored in an airtight container at room temperature for up to 2 days. If they are already frosted, keep them in the refrigerator in a sealed container for up to 3 days. This helps preserve the texture and flavor of the icing.

Can I freeze my Kraken Cupcakes?
Absolutely! To freeze uniced Kraken cupcakes, wrap each individually in plastic wrap and then in foil before placing them in a freezer bag. They can be frozen for up to 3 months. When you're ready to enjoy, simply thaw them in the refrigerator overnight, and they’ll be as fresh as when you baked them!

What should I do if my cupcakes are dense or don't rise?
If your Kraken cupcakes turn out dense, it might be due to over-mixing the batter or using too much flour. Be sure to measure flour carefully by fluffing it up first, spooning it into your measuring cup, and leveling it off with a knife. Remember to fold your dry ingredients gently into the wet until just combined to encourage that light, fluffy texture.

Are these cupcakes suitable for kids with dietary restrictions?
If you're catering to kid-friendly dietary needs, you can make these cupcakes non-alcoholic by substituting spiced rum with vanilla extract. For allergies, ensure ingredients like butter and eggs are substituted with safe alternatives (like applesauce or dairy-free options) while adapting the recipe to maintain the desired texture and flavor.

What can I use instead of fondant for decorating?
If you're not comfortable working with fondant, feel free to use colored buttercream instead. It's easier to work with and still delicious! Just pipe on the tentacles and swirl designs to create a similar whimsical effect without the fuss.

Kraken cupcakes

Kraken Cupcakes: Whimsical Rum-Raisin Delights for Halloween

Delight in these Kraken cupcakes, whimsical treats infused with rum and raisins, perfect for Halloween festivities.
Print Recipe Pin Recipe
Prep Time 30 minutes mins
Cook Time 25 minutes mins
Cooling Time 5 minutes mins
Total Time 1 hour hr
Servings: 12 cupcakes
Course: Dessert
Cuisine: American
Calories: 200
Ingredients Equipment Method Nutrition Notes

Ingredients
  

Cupcake Batter
  • 1 cup Raisins Can substitute with chopped dates
  • 0.5 cup Spiced Rum Can substitute with vanilla extract
  • 0.5 cup Unsalted Butter (softened)
  • 1 cup Dark Brown Soft Sugar Can replace with light brown sugar
  • 2 medium Eggs (lightly beaten) At room temperature
  • 1 tbsp Vanilla Extract Imitation can be used
  • 1.5 cups Self-Raising Flour Or 1 cup flour + 1.5 tsp baking powder
Decoration
  • 1 cup Orange Fondant Icing Or colored buttercream
  • 0.5 cup Yellow Fondant Icing Edible gel colors can enhance it
  • 2 cups Icing Sugar (sifted) Substitution not recommended
  • 1 tbsp Blue Food Colouring Gel Can substitute with natural food coloring

Equipment

  • Mixing bowls
  • Cupcake tray
  • hand mixer
  • Spatula
  • wire rack

Method
 

Baking Instructions
  1. Preheat your oven to 350°F (175°C) and line a cupcake tray with colorful liners.
  2. In a large bowl, mix self-raising flour, dark brown soft sugar, and a pinch of salt.
  3. Cream together softened butter and remaining dark brown sugar until light and fluffy.
  4. Add eggs, spiced rum, and vanilla extract to the mixture, then beat until smooth.
  5. Gradually fold dry ingredients into the wet mixture until just combined.
  6. Gently fold in the raisins until evenly distributed.
  7. Fill cupcake liners two-thirds full and bake for 20-25 minutes.
  8. Cool in the tray for 5 minutes before transferring to a wire rack to cool completely.
Decoration Instructions
  1. Once cooled, decorate with frosting and add fondant tentacles for a whimsical touch.

Nutrition

Serving: 1cupcakeCalories: 200kcalCarbohydrates: 30gProtein: 2gFat: 9gSaturated Fat: 5gCholesterol: 30mgSodium: 120mgPotassium: 120mgFiber: 1gSugar: 15gVitamin A: 2IUCalcium: 2mgIron: 4mg

Notes

Ensure eggs are at room temperature for best results. Measure flour correctly to avoid dryness.

Tried this recipe?

Let us know how it was!

Adorable Marshmallow Penguins for a Festive Holiday Treat

October 14, 2025 by Grace Snow Leave a Comment

As I stood in my kitchen, melted chocolate glistening in a bowl, a delightful wave of nostalgia washed over me. Remember those magical moments during the holidays, crafting sweet treats with family? This recipe for Marshmallow Penguins brings that joy to life! These adorable little creatures are not just quick and easy to whip up but also make for an enchanting centerpiece at any festive gathering. Imagine the smiles on your loved ones' faces when they see these fluffy marshmallow beauties waddling among the holiday treats! And if you’re looking for a dairy-free option, I’ve got you covered with simple substitutions. So grab your marshmallows and let's dive into creating these charming festive treats. Are you ready to turn your kitchen into a winter wonderland?

Why are Marshmallow Penguins a must-try?

Fun and Festive: These adorable marshmallow penguins are a delightful addition to any holiday spread, inspiring joy and laughter from kids and adults alike. Easy to Make: With just a few simple ingredients and minimal prep time, you can whip up these treats in no time, perfect for busy holiday schedules. Customizable Creations: Add your spin with various chocolates or toppings—go dairy-free with ease! Great for Gifting: Pack them in cute boxes as thoughtful homemade gifts that will impress friends and family. Nostalgic Touch: Revive those cherished family moments spent baking together and share the joy of creation with loved ones. These marshmallow penguins are not just treats; they're a heartfelt tradition in the making!

Marshmallow Penguins Ingredients

For the Penguins
• Marshmallows – These fluffy delights form the body of your penguin; opt for taller ones for a more defined shape.
• Dark Chocolate – Essential for a rich, coating; choose dairy-free chocolate for a scrumptious dairy-free option.
• Yellow and Orange Smarties – These fun candies become the beaks; if you prefer dairy-free, swap in dried apricot pieces.
• Edible Candy Eyes – Add personality to each penguin by giving them expressive eyes!

For Assembly
• Baking Paper – Line your tray for easy cleanup and to keep your penguins secure while they set.
• Microwave-Safe Bowl – Perfect for melting chocolate without fuss.

Get ready to transform your kitchen into a festive haven with these charming marshmallow penguins, a delightful and easy recipe that will spread holiday cheer for everyone!

Step‑by‑Step Instructions for Marshmallow Penguins

Step 1: Prepare Your Work Surface
Begin by lining a baking tray with greaseproof or baking paper, ensuring it fits comfortably in your fridge. This will prevent the marshmallow penguins from sticking and allow easy removal later. A smooth, flat surface will help you arrange your adorable creations neatly as you assemble the penguins.

Step 2: Melt the Chocolate
Take a microwave-safe bowl and break dark chocolate into chunks. Microwave it in 30-second bursts, stirring in between until the chocolate is fully melted and smooth. Aim for a glossy texture without overheating, as burnt chocolate can lose its charm. This creamy dip will provide the delightful coating for your marshmallow penguins.

Step 3: Dip the Marshmallows
Grab a marshmallow and dip one end into the melted chocolate, leaving the other end as the 'tummy' untouched. Hold the marshmallow upside down for a few moments to let any excess chocolate drip off, creating a lovely round shape. The rich chocolate will start forming a delicious coat on your cute marshmallow penguins.

Step 4: Set the Penguins on the Tray
Carefully stand the dipped marshmallow on the prepared tray. As you place them down, note that small chocolate puddles will form behind each penguin, resembling their tail. This fun detail adds to their charm! Continue this process with the remaining marshmallows, creating a whole family of lovable penguins.

Step 5: Chill to Firm Up
Once all the marshmallows are dipped and arranged on the tray, place it into the refrigerator. Allow the chocolate to harden for about 10-15 minutes. This will ensure that your marshmallow penguins have a sturdy coat and will hold their shape beautifully, ready for the next charming details.

Step 6: Prepare the Beaks
While the penguins chill, cut your yellow and orange Smarties in half for beaks. Be sure to discard any crumbled pieces, as you'll want perfect halves for each penguin. These tiny beaks will bring life to your creations, adding personality to each marshmallow penguin you prepare with love.

Step 7: Assemble the Face
Once the chocolate has set, lay the penguins down flat on the tray. Use the remaining melted chocolate to attach two candy eyes and a halved Smartie for each penguin's beak. A gentle touch helps maintain control as you create these whimsical faces, turning each marshmallow into a cute character.

Step 8: Let Them Set Completely
After attaching the eyes and beaks, return the marshmallow penguins to the fridge for another set time. Allow them to stay cool for about 10 minutes, ensuring all components adhere well together. This final chill will ensure that your festive treats are perfectly assembled and ready for admiration.

Step 9: Store or Serve
Once fully set, your marshmallow penguins are ready to be kept or served! Store them in an airtight container at room temperature or in the fridge if you prefer them chilled. These delightful treats are perfect for holiday gatherings, allowing you to share joy and creativity with friends and family.

What to Serve with Marshmallow Penguins

Bring a festive charm to your holiday table with these delightful treats, creating a memorable experience for family and friends.

  • Hot Chocolate: A classic pairing, this creamy drink enhances the sweetness of marshmallow penguins, making every bite feel like a cozy hug.
  • Spiced Christmas Cookies: Prepare a variety of spiced cookies for a crunchy contrast to the soft, fluffy penguins, offering a delightful texture mix.
  • Festive Fruit Platter: Juicy oranges, tart berries, and crisp apples add a refreshing balance, enhancing the sweetness while introducing vibrant colors to your table.
  • Peppermint Bark: The cool peppermint flavor alongside creamy chocolate complements the rich chocolate coating of the penguins, making for a delightful duo.
  • Gingerbread Latte: Warm and fragrant, this coffee treat brings a rich depth of flavor that pairs beautifully with the marshmallow sweetness.
  • Nutty Trail Mix: With its crunchy texture and salty notes, a mix of nuts and dried fruits contrasts nicely with the soft penguins, adding variety and interest.

Imagine a table bursting with colors, textures, and flavors—these pairings will elevate your marshmallow penguin experience to new festive heights!

Marshmallow Penguins Variations & Substitutions

Feel free to get creative and customize your marshmallow penguins for an even more delightful experience!

  • Dairy-Free: Substitute dark chocolate with dairy-free chocolate chips for the same rich flavor without the dairy.

  • Colorful Beaks: Use fondant or icing instead of Smarties for a splash of color and added artistry. Shape them into fun designs for unique personalities!

  • Mini Penguins: Swap standard marshmallows for mini marshmallows for smaller treats. They're adorable and easy to pop in your mouth!

  • Flavor Twist: Try flavored chocolate, such as white chocolate with a hint of peppermint extract, to add a festive flair to your creations.

  • Nuts for Texture: Add crushed nuts (like almonds or hazelnuts) to the chocolate coating for an exciting crunch and a delightful contrast to the marshmallow fluffiness.

  • Spicy Kick: Enhance the flavor profile by sprinkling a tiny pinch of cayenne pepper in the melted chocolate for a spicy surprise that delights adventurous taste buds.

  • Fruit Fillings: Consider adding a slice of fresh banana or a dollop of raspberry jam inside the marshmallow for a fruity burst. This unexpected twist could make your treat even more special!

  • Sweet Pairings: Serve your penguins alongside a cup of homemade hot cocoa or perfect your holiday table with some delicious gingerbread cookies for those cozy moments spent with family.

Remember, there are endless possibilities to turn these festive creatures into a reflection of your creativity and taste!

Make Ahead Options

These adorable Marshmallow Penguins are perfect for those busy holiday schedules! You can prepare the penguins by dipping the marshmallows in chocolate up to 24 hours in advance. Simply follow the initial steps of lining your tray and melting the chocolate, then dip the marshmallows and refrigerate them until they firm up. To maintain their quality, store the dipped marshmallows in an airtight container in the fridge until you're ready to finish assembly. When it's time to serve, add the candy eyes and beaks, allowing them to set for an additional 10 minutes. This way, you get to enjoy the festive fun without the rush, ensuring a delightful treat with minimal effort!

Expert Tips for Marshmallow Penguins

Melting Chocolate Magic: Ensure to melt chocolate carefully using short bursts of heat; overheating can lead to burnt chocolate that loses its appeal.

Perfect Assembly: Use a teaspoon or cocktail stick to gently assist in positioning marshmallows. This keeps your penguins upright while they set, avoiding any leaning or toppling!

Chill Time Matters: Allow each layer of chocolate to cool completely to ensure a sturdy coating. Improper cooling can lead to a sticky mess—definitely not what you want for your marshmallow penguins!

Creative Beaks: For a unique twist, consider substituting Smarties with fondant or colored icing for beaks. This opens up possibilities to customize your festive penguins further!

Storage Savvy: Keep your marshmallow penguins in an airtight container after assembly to maintain freshness. This helps retain their fluffy texture and delightful flavor for your holiday festivities!

How to Store and Freeze Marshmallow Penguins

Room Temperature: Keep your marshmallow penguins in an airtight container at room temperature for up to 7 days for maximum freshness and texture.

Fridge: For extended freshness, refrigerate in an airtight container, allowing the marshmallows to maintain their fluffy texture for about two weeks.

Freezer: If you want to freeze them, wrap each penguin individually in plastic wrap and place in a freezer-safe container for up to 3 months. Thaw in the fridge before serving.

Reheating: There's no need to heat these charming marshmallow penguins—enjoy them chilled or at room temperature as delightful festive treats!

Marshmallow Penguins Recipe FAQs

How do I choose the right marshmallows for this recipe?
Opt for taller marshmallows if you want a more defined penguin shape. Look for those that are soft and squishy without any dark spots or hardness, which indicates they may be stale. Fresh marshmallows will yield the best texture and flavor for your adorable Marshmallow Penguins.

How should I store my marshmallow penguins?
Store your marshmallow penguins in an airtight container at room temperature for up to 7 days, allowing them to keep their delightful textures. If you want them to last longer, refrigerate them, where they can stay fresh for about two weeks. Just ensure the container is sealed well to avoid them becoming sticky.

Can I freeze marshmallow penguins?
Absolutely! To freeze, I recommend wrapping each marshmallow penguin individually in plastic wrap to prevent freezer burn. Place them all in a freezer-safe container, and they should hold up well for up to 3 months. When you’re ready to enjoy, simply thaw them in the fridge overnight for a delightful treat.

What should I do if the chocolate seized while melting?
If your chocolate seizes, it can happen if moisture gets in or if it’s overheated. The best remedy is to add a teaspoon of vegetable oil or solid coconut oil to the chocolate and stir until smooth. This will help restore the consistency needed for dipping those marshmallows. Always melt in short bursts and stir often to prevent this mishap!

Can pets safely eat marshmallow penguins?
It's best to avoid sharing marshmallow penguins with pets, especially dogs. Ingredients like chocolate can be harmful to them. If you’re looking for fun treats for pets, consider making a batch of dog-friendly snacks using pup-friendly ingredients instead!

What allergen considerations should I keep in mind for this recipe?
When making marshmallow penguins, be aware of allergies related to chocolate and the candy ingredients. For a dairy-free option, ensure to select dairy-free chocolate and substitute Smarties with dried apricot pieces if needed. Always check the packaging for allergens to ensure everyone can enjoy them safely.

Marshmallow Penguins

Adorable Marshmallow Penguins for a Festive Holiday Treat

These Marshmallow Penguins are a delightful and easy holiday treat that brings joy and creativity to any festive gathering.
Print Recipe Pin Recipe
Prep Time 30 minutes mins
Chilling Time 25 minutes mins
Total Time 55 minutes mins
Servings: 12 penguins
Course: Dessert
Cuisine: American
Calories: 100
Ingredients Equipment Method Nutrition Notes

Ingredients
  

For the Penguins
  • 12 pieces Marshmallows Opt for taller ones for a more defined shape.
  • 200 grams Dark Chocolate Choose dairy-free chocolate for a delicious dairy-free option.
  • 10 pieces Yellow Smarties Swappable with dried apricot pieces for a dairy-free option.
  • 10 pieces Orange Smarties Swappable with dried apricot pieces for a dairy-free option.
  • 24 pieces Edible Candy Eyes Add personality to each penguin!
For Assembly
  • 1 sheet Baking Paper Line your tray for easy cleanup.
  • 1 piece Microwave-Safe Bowl For melting chocolate.

Equipment

  • Microwave-safe bowl
  • Baking tray
  • greaseproof or baking paper

Method
 

Preparation
  1. Begin by lining a baking tray with greaseproof or baking paper.
  2. Take a microwave-safe bowl and break dark chocolate into chunks. Microwave it in 30-second bursts, stirring in between until the chocolate is fully melted and smooth.
  3. Grab a marshmallow and dip one end into the melted chocolate, leaving the other end as the 'tummy'.
  4. Carefully stand the dipped marshmallow on the prepared tray.
  5. Once all the marshmallows are dipped, place the tray into the refrigerator for about 10-15 minutes to chill.
  6. While the penguins chill, cut your yellow and orange Smarties in half for beaks.
  7. Once the chocolate has set, use the remaining melted chocolate to attach two candy eyes and a halved Smartie for each penguin's beak.
  8. Return the marshmallow penguins to the fridge for another 10 minutes to ensure all components adhere well together.
  9. Once fully set, your marshmallow penguins are ready to be kept or served.

Nutrition

Serving: 1penguinCalories: 100kcalCarbohydrates: 20gProtein: 1gFat: 3gSaturated Fat: 2gPolyunsaturated Fat: 0.5gMonounsaturated Fat: 0.5gSodium: 10mgPotassium: 50mgSugar: 15gIron: 1mg

Notes

Ensure to melt chocolate carefully and allow each layer of chocolate to cool completely for best results.

Tried this recipe?

Let us know how it was!

Marshmallow Penguins: Adorable Christmas Treats You'll Love

October 14, 2025 by Grace Snow Leave a Comment

As I walked through the bustling aisles of my local market during the holiday season, a delightful sight caught my eye: a charming display of fluffy marshmallows painted like playful penguins. That spark of inspiration propelled me into the kitchen to recreate these adorable festive treats—Easy Chocolate-Dipped Marshmallow Penguins! These little guys are not just a fun food project to tackle with your kids; they also provide an enjoyable escape from the usual holiday hustle. Quick to assemble and equally impressive, they make delightful homemade gifts or enchanting party snacks that everyone will adore. Who wouldn't want to nibble on such a whimsically chocolatey delight? Ready to bring some cheer to your table? Let’s dive into this sweet adventure together!

Why Are Marshmallow Penguins So Special?

Delightfully adorable: These Marshmallow Penguins are not only cute but also a fun project to enjoy with the kids, making holiday memories together.

Rich chocolate coating: Each fluffy penguin gets a decadent dark chocolate dip that creates a rich contrast to the soft marshmallow inside.

Easy to customize: With simple substitutions, you can easily make these festive treats your own! Try using colored melting chocolates or swap out Smarties for your favorite candy.

Perfect for gifting: These charming little treats make for delightful homemade gifts that are sure to elicit smiles from friends and family.

Quick prep time: In just a few easy steps, you can have these adorable treats ready for your next holiday gathering. Why not pair them with a cup of hot cocoa? Perfect for the season!

Marshmallow Penguins Ingredients

For the Penguins

  • Marshmallows – These fluffy delights provide the primary structure; taller marshmallows create an even cuter shape for your marshmallow penguins.
  • Dark Chocolate – Melts into a rich coating that adds decadence; opt for dairy-free chocolate if you're catering to dietary needs.
  • Yellow and Orange Smarties – Serve as adorable beaks; feel free to substitute with Skittles or dried apricots for a different flavorful twist.
  • Edible Candy Eyes – These little accents bring your penguins to life; easily found at baking or craft stores.

For Assembly

  • Grease-proof Paper – Use this to line your tray for easy cleanup and to keep your penguins upright as they cool.

With just these simple ingredients, you'll be well on your way to creating your own delightful Marshmallow Penguins that everyone will love!

Step‑by‑Step Instructions for Marshmallow Penguins

Step 1: Prepare Tray
Begin your marshmallow penguins adventure by lining a baking tray or plate with grease-proof paper. Ensure it fits comfortably in your fridge, as this will be essential for cooling later. This step not only allows for easy cleanup but also provides a stable base for your adorable penguins as their chocolate coats set.

Step 2: Melt Chocolate
Next, break dark chocolate into small pieces and place them in a microwave-safe bowl. Melt the chocolate in 30-second bursts at medium power, stirring between each interval until smooth and glossy. This process usually takes about 1-2 minutes. Be sure to approach this gently, as overheating could cause the chocolate to seize and ruin your dipping process.

Step 3: Dip Marshmallows
Once your chocolate is perfectly melted, take a tall marshmallow and dip it into the rich chocolate. Coat about three-quarters of the marshmallow, leaving the bottom portion uncoated to create the body. Hold the marshmallow over the bowl briefly, letting any excess chocolate drip off before placing it upright on the prepared tray. Repeat this with each marshmallow for your marshmallow penguins.

Step 4: Set Marshmallows
Stand the dipped marshmallows upright on your lined tray. As you place them, allow the excess chocolate to pool and form little tails—this adds a whimsical charm to your marshmallow penguins. Once all marshmallows are dipped, let them sit for a moment to firm up slightly as you move to the next step.

Step 5: Cool
Now, it's time to chill! Carefully place the tray in the refrigerator for 10-15 minutes, allowing the chocolate coating to harden completely. You'll know the chocolate is set when it appears firm and shiny, which is crucial for a perfect finish to your adorable marshmallow penguins.

Step 6: Decorate
After the chocolate is firmly set, take the tray out of the fridge. If your chocolate has firmed too much, re-melt a small amount. Next, cut the yellow and orange Smarties in half; these will serve as the penguins' beaks. Use a bit of melted chocolate to attach the Smarties to each marshmallow, then add edible candy eyes, placing them just above the beak for a super-cute appearance.

Step 7: Final Chill
Return your decorated marshmallow penguins to the fridge for an additional 5-10 minutes to set the decorations fully. This last chill ensures that every detail stays in place and solidifies the fun look of your festive creations, ready to delight family and friends.

Step 8: Store
Lastly, transfer your completed marshmallow penguins to an airtight container for storage. Keep them at room temperature for up to a week, ensuring they remain fresh and delightful. Now you can proudly showcase these cute treats at holiday gatherings or gift them as sweet surprises!

Marshmallow Penguins Variations & Substitutions

Feel free to explore the fun side of these Marshmallow Penguins by trying out some exciting variations!

  • Dairy-Free Chocolate: Use dairy-free dark chocolate to cater to lactose-intolerant friends or vegans. The chocolate's richness will still shine through!
  • Colorful Melting Chocolates: Swap the dark chocolate for colored melting chocolates to create vibrant, festive penguins that pop on your holiday table. They’ll be a hit with kids!
  • Alternative Candy Beaks: Replace Smarties with yellow/orange gumdrops or even dried mango for a fun flavor twist and chewy texture. It's like giving your penguins a makeover!
  • Mini Cookie Eyes: If you can’t find candy eyes, mini chocolate chip cookies or even tiny marshmallows can work perfectly, adding an extra touch of creativity.
  • Chocolate Drizzle: After the chocolate coating sets, add a drizzle of white chocolate over the top for a beautiful winter effect and an extra layer of sweetness.
  • Spiced Marshmallows: Enhance the marshmallows by using flavored options—think peppermint or cinnamon—to bring a warm, festive charm to your penguins.
  • Nut Butter Coating: For a protein twist, dip your marshmallows in melted nut butter instead of chocolate, followed by a sprinkle of crushed nuts for added crunch. This makes for a delightful, nutty treat!
  • Frozen Treats: Freeze your penguins after decorating for a cool dessert! They turn into fun, frozen treats, perfect for a warm holiday gathering.

Whichever variation you choose, you’re sure to create something magical! These delightful treats are not just about taste; they're a joyful creation that brings loved ones together. For even more sweet ideas, check out our Dairy-Free Option Recipes or consider Creating Colorful Treats for Kids to keep the fun going!

What to Serve with Easy Chocolate-Dipped Marshmallow Penguins

Create the perfect holiday treat experience with delicious pairings that enhance the joy of your festive marshmallow penguins!

  • Hot Cocoa: A classic warm drink that complements the sweetness of the marshmallows while adding a cozy touch to your celebration.

  • Gingerbread Cookies: Their spicy flavor contrasts beautifully with the sweetness of the penguins, offering a delightful texture combination for your holiday spread.

  • Fruit Platter: Crisp, refreshing fruits like oranges and apples provide a burst of freshness, balancing the rich, chocolate-coated treats perfectly.

  • Christmas Punch: A fruity, festive beverage adds a bubbly flair, making your gathering lively and inviting, ideal for sipping alongside these playful sweets.

  • Cupcakes: Light, fluffy cupcakes drizzled with holiday-themed toppings bring a delightful dose of sweetness and aesthetics to your dessert table.

  • Chocolate Fondue: Serve melted chocolate with dippable fruits, marshmallows, and snacks for a fun interactive experience that pairs perfectly with the penguins!

Each of these delicious suggestions will make your holiday gatherings even sweeter, ensuring that your marshmallow penguins shine as the star of the season!

Make Ahead Options

These delightful Marshmallow Penguins are fantastic for meal prep, letting you soak in the festive fun without the last-minute rush! You can prepare the chocolate-dipped marshmallows up to 24 hours in advance by following your usual dipping process and allowing the chocolate to set. Simply store the dipped marshmallows in an airtight container in the fridge, ensuring they stay fresh and chocolatey. When you're ready to finish, add the Smarties beaks and candy eyes just before serving to maintain their whimsical appeal. This way, you can enjoy more time with loved ones while impressing your guests with these charming treats!

How to Store and Freeze Marshmallow Penguins

Room Temperature: Store your marshmallow penguins in an airtight container at room temperature for up to 7 days to keep them fresh and fluffy.

Refrigerator: If you have leftovers, you can place them in the fridge, but note that this may make the chocolate coating slightly firmer.

Freezer: For longer storage, freeze the marshmallow penguins in a single layer on a baking sheet, then transfer to an airtight container. They can be frozen for up to 3 months.

Reheating: When you're ready to enjoy, simply let them thaw at room temperature for a couple of hours. Enjoy these delightful marshmallow penguins at any festive occasion!

Expert Tips for Marshmallow Penguins

  • Chocolate Temperature: Keep melted chocolate warm but not hot. Overheating can cause it to seize, ruining that perfect dip for your marshmallow penguins.

  • Mess-Free Dipping: Use a cocktail stick to hold the marshmallow while dipping. This method keeps your fingers clean and allows for precise drips.

  • Let Chocolate Set: Be patient during cooling. A proper chill of 10-15 minutes ensures a hard chocolate coating that won’t smudge when decorating your marshmallow penguins.

  • Creative Variations: Experiment with different candies for the beak and eyes. Mini chocolate chips or colored melting chocolates can create fun, personalized marshmallow penguins!

  • Storage Solution: Store your marshmallow penguins in an airtight container to maintain softness and freshness. They'll stay delightful for up to a week—perfect for sharing!

Marshmallow Penguins Recipe FAQs

What is the best way to choose marshmallows for this recipe?
Absolutely! For the best results, I recommend using taller marshmallows, as they create an adorably varied shape for your marshmallow penguins. Look for marshmallows that are soft and fluffy without any dark spots all over—this indicates they are fresh. If taller marshmallows aren't available, regular-sized marshmallows will work just fine!

How do I store leftover marshmallow penguins?
After crafting your delicious marshmallow penguins, keep them in an airtight container at room temperature for up to 7 days. Ensure the container is sealed tightly to prevent them from drying out. If you place them in the fridge, please note that the chocolate might get a bit firmer, which can change the texture slightly.

Can I freeze the marshmallow penguins?
Yes, indeed! To freeze your marshmallow penguins, first arrange them in a single layer on a baking sheet to prevent sticking. Once they’re frozen solid, transfer them to an airtight container. They can be stored in the freezer for up to 3 months! When you’re ready to enjoy them, simply let them thaw at room temperature for a couple of hours.

What should I do if my chocolate seizes during melting?
Very good question! If your chocolate seizes, don’t panic! You can almost always salvage it. Simply add a tablespoon of vegetable oil or coconut oil to the bowl and gently reheat in the microwave in 10-second intervals, stirring in between until smooth again. This should help restore its silky texture for perfect dipping!

Are these marshmallow penguins safe for pets?
While marshmallow penguins are delightful for humans, they aren’t suitable for our furry friends. The chocolate in this recipe is toxic to dogs and cats, so be sure to keep these treats out of their reach. If you want a pet-friendly option, consider making plain marshmallow shapes without any chocolate or extra sweeteners.

Can I use different candies for the beaks and eyes?
The more the merrier! You can easily swap Smarties for other candies like Skittles, M&M’s, or even cut dried apricots. Just keep in mind the total flavor combination you want to achieve. For the eyes, mini chocolate chips or small dots of white frosting also work perfectly—making your marshmallow penguins even more fun and unique!

Marshmallow Penguins

Marshmallow Penguins: Adorable Christmas Treats You'll Love

These delightful Marshmallow Penguins are a fun and cute holiday treat perfect for kids and adults alike!
Print Recipe Pin Recipe
Prep Time 15 minutes mins
Cooling Time 15 minutes mins
Total Time 30 minutes mins
Servings: 12 treats
Course: Dessert
Cuisine: American
Calories: 90
Ingredients Equipment Method Nutrition Notes

Ingredients
  

For the Penguins
  • 12 pieces Marshmallows Tall marshmallows create a cuter shape.
  • 200 grams Dark Chocolate Opt for dairy-free chocolate if needed.
  • 12 pieces Yellow Smarties Can substitute with Skittles or dried apricots.
  • 12 pieces Orange Smarties Can substitute with Skittles or dried apricots.
  • 12 pieces Edible Candy Eyes Easily found at baking or craft stores.
For Assembly
  • 1 sheet Grease-proof Paper To line the tray for easy cleanup.

Equipment

  • Microwave-safe bowl
  • Baking tray
  • Cocktail stick

Method
 

Step-by-Step Instructions
  1. Prepare Tray: Line a baking tray with grease-proof paper, then place it in the fridge for cooling later.
  2. Melt Chocolate: Break dark chocolate into small pieces and melt in a microwave-safe bowl in 30-second bursts until smooth.
  3. Dip Marshmallows: Dip each marshmallow into the melted chocolate, coating about three-quarters of it.
  4. Set Marshmallows: Stand the dipped marshmallows on the lined tray, allowing the chocolate to pool for tails.
  5. Cool: Chill the tray in the refrigerator for 10-15 minutes until the chocolate is set.
  6. Decorate: Attach halved Smarties for beaks and add candy eyes using melted chocolate.
  7. Final Chill: Return the decorated penguins to the fridge for another 5-10 minutes to set completely.
  8. Store: Transfer to an airtight container; store at room temperature for up to a week.

Nutrition

Serving: 1treatCalories: 90kcalCarbohydrates: 15gProtein: 1gFat: 3gSaturated Fat: 2gSodium: 15mgPotassium: 20mgSugar: 10g

Notes

These marshmallow penguins are a delightful holiday project, perfect for making with kids. Store in an airtight container for maximum freshness.

Tried this recipe?

Let us know how it was!

Craft Adorable Marshmallow Snowmen for Festive Fun

October 14, 2025 by Grace Snow Leave a Comment

As I grabbed a handful of fluffy marshmallows, I couldn’t help but think about the magic of the holiday season. These delightful marshmallow snowmen are a perfect companion for cozy hot cocoa nights, bringing that festive spirit right to your kitchen. With just a few simple ingredients, you’ll craft these charming treats that are not only a kid-friendly activity but also an artistic way to make memorable moments with family. Whether you're gathering around the fireplace or hosting a festive movie night, these Easy Marshmallow Snowmen for Hot Cocoa are sure to spread smiles and warmth. Ready to let your creativity shine and bring a little whimsy to your winter gatherings? Let's dive into this delightful recipe!

Why are Marshmallow Snowmen a Must-Make?

Kid-Friendly Fun: These marshmallow snowmen are perfect for little hands to assemble, making them an engaging holiday project.

Creative Activity: Personalizing each snowman with various decorations fosters creativity, turning your kitchen into a fun and festive workshop.

Quick Assembly: With minimal prep time, these delightful treats fit right into your busy holiday schedule, allowing you to craft joy in minutes.

Delicious Treat: The soft, sweet marshmallows couple beautifully with hot cocoa, adding a delicious twist to your winter beverage.

Great for Gatherings: Impress your family and friends at holiday gatherings or movie nights with these adorable snowmen that are guaranteed to be a hit!

Bring a smile this season with these delightful treats and check out our other fun holiday recipes for more festive inspiration!

Marshmallow Snowman Ingredients

• Here’s what you need to craft your marshmallow snowmen!

For the Snowmen

  • Marshmallows – Use mini marshmallows for heads and regular-sized ones for the body to create the perfect snowman shape.
  • Candy Corn – This sweet treat makes an adorable carrot nose; orange tic-tacs can serve as a fun alternative.
  • Toothpicks or Pretzels – These hold your snowman together; for a more kid-friendly version, use mini pretzels for arms!

For the Hot Cocoa

  • Chocolate Mix – Any chocolate mix will do to create the warm, inviting base for your snowman, or opt for real melted chocolate for extra indulgence.

For Decorations

  • Chocolate Chips – Use these for eyes that bring your snowman to life.
  • Icing – Perfect for adding buttons and any decorative details to personalize each snowman.

These fun and festive ingredients will ensure that your marshmallow snowman creation is a go-to treat for your holiday celebrations!

Step‑by‑Step Instructions for marshmallow snowman

Step 1: Prepare Hot Cocoa
Begin by preparing your hot cocoa according to the package instructions, usually requiring boiling water or milk. Pour the warm, inviting cocoa into mugs, filling them about three-quarters full. The rich chocolate aroma will fill your kitchen, creating a cozy atmosphere. Set the mugs aside to make room for your festive marshmallow snowman assembly!

Step 2: Assemble Snowmen
Take one large marshmallow and position it at the bottom as the base of your snowman. Using a toothpick or a mini pretzel, secure a second large marshmallow on top for the body. Finally, gently skewer a mini marshmallow on top for the head. Make sure everything feels securely stacked; this is the perfect time to ensure your marshmallow snowman is stable before the decorations!

Step 3: Decorate the Snowmen
Now comes the fun part—decorating your marshmallow snowman! Use candy corn to create a sweet little carrot nose, gently pressing it into place. For the eyes, press two chocolate chips onto the snowman's head. Add icing on the body for buttons or any other fun details you wish to incorporate, allowing your creativity to make each marshmallow snowman unique.

Step 4: Serve with Cocoa
Once your adorable marshmallow snowmen are fully decorated, it’s time to serve them! Carefully place each snowman into its mug of hot cocoa, ensuring they stand up straight. As they float in the warm drink, they will slowly start to blend into the cocoa, creating a delightful and festive look, perfect for enjoying with family during the holidays!

Make Ahead Options

These delightful marshmallow snowmen are perfect for those busy holiday seasons when you want to save time during the festivities! You can assemble the snowmen up to 24 hours in advance by stacking the marshmallows and inserting the pretzels without decorations to maintain their structure. Store them in an airtight container in the refrigerator to keep them fresh. When it's time to serve, simply add the candy corn noses and the chocolate chips for eyes right before placing them in your hot cocoa, ensuring they maintain their freshness and delightful taste. With this make-ahead option, you’ll have charming treats ready to impress your guests with minimal last-minute effort!

Storage Tips for Marshmallow Snowmen

  • Room Temperature: Marshmallow snowmen are best enjoyed fresh, as they can lose their fluffy texture and look over time. If not eaten immediately, store them in a cool, dry place for up to 2 hours.
  • Fridge: If you've assembled marshmallow snowmen with cream or icing decorations, refrigerate them for a few hours, but keep them in an airtight container to prevent them from drying out.
  • Freezer: It's not recommended to freeze marshmallow snowmen as freezing can change their texture and make them less enjoyable when thawed.
  • Reheating: If your cocoa has cooled, gently reheat it. Avoid putting assembled snowmen in the microwave as they may collapse or melt; instead, add them fresh to warm cocoa just before serving.

Marshmallow Snowman Variations to Try

Feel free to put your personal twist on these whimsical marshmallow snowmen for a customized festive treat!

  • Flavored Marshmallows: Swap traditional marshmallows with peppermint or chocolate-filled ones for a delightful twist that enhances flavor.

  • Mini Pretzels for Arms: Instead of toothpicks, use mini pretzels for a fun and kid-friendly touch, allowing little hands to help assemble.

  • Cookie Icing: Use cookie icing to create colorful scarves or hats, turning your snowmen into a decorative holiday display.

  • Alternative Candy Noses: Substitute candy corn with orange tic-tacs or gummy candies for a fun variety of nose options.

  • Sprinkle Decoration: Use sprinkles for added flair! A sprinkle of colorful bits on the snowmen gives them a cheerful and festive look.

  • Fruit-Flavored Toppings: Consider using small fruit slices or dried fruits for eyes and buttons, giving a healthy twist to your treats.

  • Spicy Kick: For a unique flavor profile, add a sprinkle of cinnamon or a pinch of cayenne on top of the marshmallows—your taste buds might thank you!

  • Personalized Snowmen Faces: Encourage creativity with a variety of candy options for facial features, ensuring each snowman has its own personality.

As you play with these variations, you might also want to explore other festive treats like our delicious Gingerbread Men or consider a delightful Hot Cocoa Bar to complement your snowmen!

What to Serve with Easy Marshmallow Snowmen for Hot Cocoa

Complement your festive marshmallow creation with delightful treats that enhance the cozy experience of winter gatherings.

  • Gingerbread Cookies: The warm spices of gingerbread cookies pair wonderfully with hot cocoa, bringing holiday nostalgia with every bite.
  • Peppermint Bark: A crunchy, chocolatey treat that not only adds a refreshing minty twist but also a seasonal flair to your dessert table.
  • Spiced Apple Cider: This warm, fragrant drink brings another layer of holiday spirit, making your hot cocoa experience extra comforting.
  • Chocolate Covered Pretzels: The sweet and salty combination provides a delightful crunch that contrasts beautifully with the soft marshmallows.
  • Mini Panettone: This fluffy Italian bread, dotted with candied fruits, adds an elegant touch to your spread and enhances the festive atmosphere.
  • Snowflake Sugar Cookies: Add a whimsical touch to your dessert table with these beautifully iced cookies, echoing the winter theme perfectly.
  • Hot Chocolate Bombs: Elevate your cocoa game even more by introducing these decadent treats that melt into a delightful explosion of flavors.
  • Whipped Cream: A dollop of fluffy whipped cream on top of your hot cocoa adds richness, enhancing the flavors of your marshmallow snowman.
  • Festive Fruit Platter: Brighten your table with a colorful selection of seasonal fruits, offering a refreshing balance to the sweetness of the treats.

Create a magical winter wonderland by pairing these delightful options with your marshmallow snowman for a truly unforgettable holiday gathering!

Expert Tips for Marshmallow Snowmen

  • Secure Construction: Ensure marshmallows are tightly skewered to prevent collapsing in the hot cocoa. A sturdy base is essential for your marshmallow snowman!
  • Creative Choices: Experiment with different candies for eyes and buttons to make each snowman truly unique. Personalization adds a special touch!
  • Kid-Friendly Modifications: Use mini pretzels instead of toothpicks for a safer option that kids will love, making the assembly process even more enjoyable!
  • Serving Suggestions: Present your marshmallow snowmen in festive mugs; they make for a beautiful holiday display, perfect for gatherings and cozy nights.
  • Storing Leftovers: If you have any assembled snowmen, refrigerate them for a short time if using cream-based decorations, but aim to enjoy them fresh!

Easy Marshmallow Snowmen for Hot Cocoa Recipe FAQs

How do I select the right marshmallows for my snowmen?
Absolutely! For the best snowman structure, use regular-sized marshmallows for the body and mini marshmallows for the head. Look for fresh, fluffy marshmallows without any dark spots or signs of drying out. Ensure they feel soft to the touch, indicating they’re at peak freshness.

How do I store my marshmallow snowmen?
Marshmallow snowmen are best enjoyed fresh to capture their delightful texture. If you need to store them, keep them at room temperature for up to 2 hours in a cool, dry place. If using cream or icing decorations, refrigerate them in an airtight container for a few hours. This keeps them looking good without drying out!

Can I freeze marshmallow snowmen?
I often don’t recommend freezing marshmallow snowmen, as freezing can adversely change their texture, making them less fluffy and enjoyable. However, if you must freeze them, ensure they're tightly wrapped in plastic wrap, and only freeze them for up to 1 month. Thaw them in the fridge to maintain some texture, but expect some loss of fluffiness.

What if my marshmallow snowmen are falling apart?
Very! If your snowmen are wobbling or collapsing, ensure marshmallows are tightly skewered. When assembling, gently push down the top marshmallow onto the bottom one while greasing the toothpick or pretzel with a bit of icing for better grip. Also, ensure the cocoa isn’t too hot when you add them, as heat can weaken the structure.

Are marshmallow snowmen safe for kids?
Absolutely! These marshmallow snowmen are a fun and safe activity for kids. For additional safety, consider using mini pretzels instead of toothpicks during assembly. However, watch for allergies related to the ingredients, such as chocolates or decorative candies. Always check labels and stick to known allergens to keep everyone safe.

marshmallow snowman

Craft Adorable Marshmallow Snowmen for Festive Fun

Create delightful marshmallow snowmen for hot cocoa nights during the holiday season, ensuring festive fun for everyone!
Print Recipe Pin Recipe
Prep Time 10 minutes mins
Cook Time 5 minutes mins
Total Time 15 minutes mins
Servings: 4 snowmen
Course: Dessert
Cuisine: Holiday
Calories: 150
Ingredients Equipment Method Nutrition Notes

Ingredients
  

For the Snowmen
  • 1 bag mini marshmallows
  • 1 bag regular-sized marshmallows
  • 1 cup candy corn for carrot noses
  • 1 cup toothpicks or mini pretzels for assembly
For the Hot Cocoa
  • 1 packet chocolate mix or real melted chocolate
For Decorations
  • 1 cup chocolate chips for eyes
  • 1 tube icing for buttons and details

Equipment

  • mugs
  • toothpicks or pretzels

Method
 

Step-by-Step Instructions
  1. Prepare hot cocoa according to the package instructions and pour it into mugs, filling them about three-quarters full.
  2. Assemble the snowmen by stacking one large marshmallow as the base, another on top for the body, and a mini marshmallow for the head.
  3. Decorate each snowman with candy corn for the nose, chocolate chips for the eyes, and icing for buttons and details.
  4. Serve each snowman in a mug of hot cocoa and enjoy the delightful creation.

Nutrition

Serving: 1snowmanCalories: 150kcalCarbohydrates: 30gProtein: 1gFat: 2gSaturated Fat: 1gSodium: 5mgPotassium: 30mgSugar: 28gVitamin A: 10IUCalcium: 2mgIron: 1mg

Notes

These marshmallow snowmen are best enjoyed fresh, with tips to secure them and creative variations for a festive touch.

Tried this recipe?

Let us know how it was!

Halloween Oreo Balls: Easy No-Bake Treats for Festive Fun

October 14, 2025 by Grace Snow Leave a Comment

As I stood in my kitchen, the scent of crushed Oreos filled the air, instantly transporting me back to my childhood Halloween parties. This magical time of year calls for delightful treats, and that's where these Halloween Oreo Balls come in! These adorable, no-bake goodies are not just a fun project for the family; they are versatile and can be transformed into spooky ghosts, cheerful pumpkins, or mischievous mummies. With just a few ingredients and minimal prep time, you’ll have delicious, kid-friendly treats perfect for gatherings or simply to enjoy at home. What could be more satisfying than wielding a spatula, decorating with sprinkles, and bonding over creativity? Get ready to impress friends and family with these charming bites—because let's be honest, who wouldn’t want to indulge in these sweet, festive delights? What spooky design will you create first?

Why Make Halloween Oreo Balls?

Fun to Create: These treats are perfect for involving the whole family in the kitchen, making memories while decorating together.

No-Bake Delight: Forget turning on the oven! With just a few simple steps, you’ll have festive goodies ready in no time.

Endless Customization: Let your creativity shine! From mummies to pumpkins, there’s no limit to the designs you can whip up.

Crowd-Pleasing Flavor: The mesmerizing mix of Oreo and cream cheese is a nostalgic favorite for both kids and adults, ensuring your treats disappear fast!

Quick Cleanup: Minimal mess means more time to enjoy these tasty bites and less time stressing over dishes. Check out our easy serving suggestions to make your Halloween festivities even more delightful!

Halloween Oreo Balls Ingredients

Get ready to create these delightful Halloween Oreo Balls!

For the Mixture

  • Oreo cookies – A classic treat that provides the structure and sweetness. Consider using Halloween-themed Oreos for extra fun!
  • Cream cheese – Adds creaminess and binds the mixture together; full-fat is recommended for the best flavor.

For the Coating

  • Candy melts/white chocolate chips – These add flavor and a festive touch; choose vibrant colors like orange, black, or white for Halloween themes!

For Decorating

  • Candy eyes, sprinkles, or mini chocolate chips – Essential for adding those whimsical finishing touches; let your creativity run wild!
  • Gel food coloring (optional) – Tint your coating to match your spooky designs.

Other Essentials

  • Parchment paper – A must-have to prevent sticking while your treats cool and set.

Gather these ingredients and get ready to whip up your gorgeous Halloween Oreo Balls!

Step‑by‑Step Instructions for Halloween Oreo Balls

Step 1: Crush Oreos
Begin by crushing the Oreo cookies to form fine crumbs. You can either use a food processor for a quick blend or place the Oreos in a sealed plastic bag and crush them with a rolling pin or your hands until uniform. Aim for a texture similar to sand to ensure easy mixing later.

Step 2: Combine Ingredients
In a large mixing bowl, combine the crushed Oreos with softened cream cheese. Use a spatula or your hands to blend the mixture until fully incorporated and a smooth dough forms. This step is crucial as it helps bind the Halloween Oreo Balls, allowing for easy rolling later on.

Step 3: Form Balls
Scoop out a tablespoon of the Oreo mixture and roll it into a neat ball, about 1 inch in diameter. Place each ball on a baking sheet lined with parchment paper to prevent sticking. This process should go quickly; aim to form and place all the balls before moving on to the next step.

Step 4: Chill
Refrigerate the formed Oreo balls for at least 20 minutes. This chilling time allows them to firm up, making them easier to dip in chocolate later. You can also speed up the process by placing them in the freezer for about 10 minutes—just don’t forget to keep an eye on them!

Step 5: Melt Chocolate
In a microwave-safe bowl, combine the candy melts or white chocolate chips. Microwave the mixture in 30-second intervals, stirring between each to ensure it melts evenly without burning. The result should be a smooth, pourable chocolate—perfect for coating your Halloween Oreo Balls.

Step 6: Dip Balls
Using a fork or toothpick, dip each chilled Oreo ball into the melted chocolate, making sure to coat it thoroughly. Allow excess chocolate to drip off before placing the coated ball back onto the parchment paper. Repeat this process until all the balls are beautifully coated in chocolate.

Step 7: Decorate
While the melted chocolate is still wet, add your favorite decorations like candy eyes, sprinkles, or mini chocolate chips to each ball. This is where your creativity can shine—transform them into spooky ghosts or cheerful pumpkins right before serving.

Step 8: Set
Allow the chocolate coating to harden at room temperature. If you’re in a hurry, you can place the decorated balls back in the refrigerator for about 10-15 minutes to speed up the setting process. Once the coating has set, your festive Halloween Oreo Balls are ready to serve!

Halloween Oreo Balls Variations

Get ready to unlock your creativity with these delightful twists on Halloween Oreo Balls!

  • Peanut Butter Swap: Replace standard Oreos with peanut butter Oreos for a nutty richness that adds a new layer of flavor to your treats.

  • Chocolate Coating: Ditch the traditional white chocolate and use dark or milk chocolate instead. This will bring a richer and bolder chocolatey taste to every bite.

  • Flavor Boost: Enhance the cream cheese mixture with a splash of vanilla or peppermint extract. The added flavor will surprise and delight your taste buds!

  • No-Bake Pumpkin Spice: Add pumpkin puree and a sprinkle of pumpkin spice to the mixture for a seasonal twist that embodies the essence of fall. It's a cozy and festive flavor!

  • Customization with Colors: Use colored candy melts to match your themed party décor, such as vibrant yellows or spooky greens, making your treats even more visually striking.

  • Texture Addition: Stir in crushed nuts or cookie bits for an extra crunch that elevates the texture and adds a delightful contrast to the creamy filling.

  • Ghostly Designs: Use melted black chocolate to create spooky ghosts. Simply add black chocolate coats and then attach candy eyes for an adorable Halloween look.

  • Chili Heat: For the adventurous, mix a pinch of chili powder into the chocolate coating for a playful, sweet-and-spicy experience that surprises the palate.

Get inspired, gather your ingredients, and transform these Halloween Oreo Balls into unique creations that will impress your family and friends! For even more ideas and festive fun, explore our tips on easy serving suggestions or how to store and freeze your treats. Happy decorating!

Make Ahead Options

These Halloween Oreo Balls are perfect for busy home cooks looking to streamline their meal prep! You can prepare the Oreo and cream cheese mixture up to 24 hours in advance—just form the balls and store them in an airtight container in the refrigerator. Additionally, you can dip and decorate the balls up to 3 days before serving; simply refrigerate them once set to maintain their delightful crunch. When you're ready to impress your guests, allow the treats to come to room temperature for about 15 minutes before serving, ensuring their creamy inside and crispy shell are just as delicious as freshly made.

What to Serve with Halloween Oreo Balls

As the magic of Halloween fills the air, complement these delightful treats with dishes that enhance your festive celebration.

  • Spooky Fruit Salad: A medley of seasonal fruits like oranges and grapes creates a vibrant, refreshing side that balances the sweetness of the Oreo Balls.
  • Ghostly Cheese Platter: Include an assortment of cheeses and crackers, along with some veggie sticks, to provide a savory contrast to the sweet treats.
  • Pumpkin Spice Cupcakes: These fluffy, spiced cupcakes echo the Halloween spirit while offering an additional sweet touch that everyone will love.
  • Chocolate Milkshakes: Creamy milkshakes topped with whipped cream and chocolate drizzle make a fun, indulgent drink to accompany your Oreo Balls.
  • Candy Corn Trail Mix: Mix candy corn with nuts and pretzels for a crunchy, salty-sweet treat that will delight and surprise your guests.
  • Pumpkin Soup: A warm, velvety pumpkin soup can serve as a cozy appetizer that beautifully aligns with the fall flavors of Halloween.
  • Witch's Brew Punch: A vibrant punch made with lemonade and green food coloring, garnished with floating fruit, adds a festive spirit to your gathering.
  • Ginger Snap Cookies: Spicy and crisp, these cookies are a wonderful textural complement that will keep your guests coming back for more throughout the party!

Expert Tips for Halloween Oreo Balls

  • Keep It Chilled: Refrigerate the formed mixture while you work to prevent the Oreo balls from becoming too soft during dipping.

  • Dip with Care: Use a fork for dipping to help shake off excess chocolate, ensuring a smooth and even coating on your Halloween Oreo Balls.

  • Quick Decorating: Work quickly after dipping to add your toppings; otherwise, the chocolate may set, making it harder for decorations to stick.

  • Play with Flavor: Don’t hesitate to add different extracts to your cream cheese mixture for a surprise twist that complements the classic Oreo taste.

  • Storage Savvy: Store any leftovers in an airtight container in the fridge for up to a week, so you can enjoy these festive treats longer!

How to Store and Freeze Halloween Oreo Balls

Fridge: Store your Halloween Oreo Balls in an airtight container in the refrigerator for up to one week; they’ll stay fresh and delicious, ready to enjoy any time!

Freezer: If you want to extend their life, freeze undipped Oreo balls for up to two months. When you're ready to indulge, simply thaw them and dip in chocolate before serving.

Reheating: There’s no need to reheat these delights! Enjoy them chilled or at room temperature—each bite delivers a satisfying treat just as they are.

Wrapping: If you freeze your Halloween Oreo Balls, be sure to wrap them tightly before placing them in a freezer bag or container to prevent freezer burn—keeping them in perfect condition for a spooky surprise!

Halloween Oreo Balls Recipe FAQs

How do I know if my Oreos are fresh enough to use?
Absolutely! Look for Oreos that are intact and free from any broken pieces. Ideally, the packaging should be sealed, and the expiration date should be checked. Fresh Oreos will have a crisp snap when you break them, while older ones may feel soft or stale.

What’s the best way to store Halloween Oreo Balls?
You can store your Halloween Oreo Balls in an airtight container in the refrigerator for up to one week. This method keeps them fresh and ready for snacking! If you want to save some for later, follow the freezing instructions below to enjoy them at a later date.

Can I freeze Halloween Oreo Balls?
The more the merrier when it comes to saving treats! To freeze undipped Oreo balls, place them on a baking sheet and freeze until firm. Once solid, transfer the balls to an airtight container or freezer bag, where they can be stored for up to two months. When you're ready to enjoy, simply thaw them in the fridge before dipping them in chocolate.

What if my chocolate isn’t melting smoothly?
No worries! If your chocolate isn’t melting well, it may be too hot or have been in the microwave for too long. Try microwaving in shorter intervals of 15 seconds, stirring in between to keep the temperature even and prevent seizing. If it seizes up, you can add a small amount of vegetable oil or coconut oil to help it smooth out again.

Are Halloween Oreo Balls suitable for people with allergies?
Very! While they are loved for their tasty goodness, it's important to remember they contain dairy due to cream cheese. If you're preparing them for someone with specific allergies, check that the Oreos do not contain allergens like nuts or gluten, as some varieties might. Instead, consider using allergen-free versions of each ingredient to make them safe for all!

Can I make these without cream cheese?
Absolutely! If you're looking for a dairy-free option, consider substituting cream cheese with a dairy-free cream cheese or even nut butters, which can give a different flavor profile while still binding the mixture well. Just make sure it’s softened to blend properly.

Halloween Oreo Balls

Halloween Oreo Balls: Easy No-Bake Treats for Festive Fun

Discover how to make delicious Halloween Oreo Balls, a fun and easy no-bake treat for festive fun!
Print Recipe Pin Recipe
Prep Time 30 minutes mins
Chilling Time 20 minutes mins
Total Time 50 minutes mins
Servings: 20 balls
Course: Dessert
Cuisine: American
Calories: 100
Ingredients Equipment Method Nutrition Notes

Ingredients
  

For the Mixture
  • 36 cookies Oreo cookies Use Halloween-themed Oreos for extra fun.
  • 8 oz Cream cheese Full-fat recommended for the best flavor.
For the Coating
  • 12 oz Candy melts or white chocolate chips Use vibrant colors for Halloween.
For Decorating
  • Candy eyes, sprinkles, or mini chocolate chips Essential for whimsical finishing touches.
  • Gel food coloring (optional) Tint your coating to match spooky designs.
Other Essentials
  • Parchment paper Prevents sticking while treats cool.

Equipment

  • large mixing bowl
  • Food Processor
  • Spatula
  • Baking Sheet
  • Parchment Paper
  • Microwave-safe bowl
  • fork or toothpick

Method
 

Step-by-Step Instructions
  1. Crush the Oreo cookies to form fine crumbs using a food processor or by placing them in a plastic bag and crushing them.
  2. Combine the crushed Oreos with softened cream cheese in a large mixing bowl and blend until fully incorporated.
  3. Scoop a tablespoon of the mixture and roll it into a ball, placing each on a baking sheet lined with parchment paper.
  4. Chill the formed Oreo balls in the refrigerator for at least 20 minutes to firm them up.
  5. Melt the candy melts or white chocolate chips in a microwave-safe bowl, stirring every 30 seconds until smooth.
  6. Dip each chilled Oreo ball into the melted chocolate using a fork, allowing excess chocolate to drip off.
  7. Add decorations while the chocolate is still wet, using candy eyes, sprinkles, or mini chocolate chips.
  8. Allow the chocolate coating to harden at room temperature or refrigerate for 10-15 minutes to speed up the process.

Nutrition

Serving: 1ballCalories: 100kcalCarbohydrates: 15gProtein: 1gFat: 5gSaturated Fat: 3gCholesterol: 10mgSodium: 50mgPotassium: 50mgSugar: 10gCalcium: 2mgIron: 2mg

Notes

Store Halloween Oreo Balls in an airtight container in the fridge for up to one week or freeze undipped balls for up to two months.

Tried this recipe?

Let us know how it was!

Creative Halloween Shrunken Heads Pie for Family Fun

October 14, 2025 by Grace Snow Leave a Comment

As I prepped for this year's Halloween festivities, I stumbled upon a delightful surprise—an enchanting blend of fall's flavors transformed into a dessert that’s as playful as it is delicious. Meet the Halloween Shrunken Heads Pie, where sweet apples take on whimsical faces, inviting both children and adults into a culinary adventure. This delightful treat not only brings a sense of creativity to your kitchen but also features a nutty crunch from walnuts and a tart sweetness from cranberries. Perfect for family gatherings, this customizable pie makes it easy to create variations that suit everyone's taste buds. So, are you ready to carve out some fun this Halloween?

Why Is This Halloween Shrunken Heads Pie Special?

Playful Presentation: This pie transforms ordinary apples into whimsical shrunken heads, adding an element of surprise and fun to your dessert table.

Customizable Delight: Tailor the filling with different nuts like almonds or pecans and swap in your favorite dried fruits for a unique twist.

Family Fun: Get everyone involved in the carving process—it's a perfect way to create lasting memories while cooking together.

Balanced Flavors: The combination of crunchy walnuts and tart cranberries against the backdrop of sweet, aromatic apples is both satisfying and festive.

Easy Prep: With options for both homemade and store-bought crusts, you can whip this delicious pie up in no time, letting you focus on the fun!

So, why not explore more festive ideas, like a Tamale Pie Hearty or a Spinach Pie Deliciously to complement your Halloween feast?

Halloween Shrunken Heads Pie Ingredients

For the Pie Crust
• Pie Crust – A sturdy base for your tart; use store-bought for convenience or make your own for a personal touch.

For the Apple Heads
• Firm Apples (4-6 medium) – Essential for carving and holding shape during baking; recommended varieties include Granny Smith or Honeycrisp.
• Citric Acid or Lemon Juice (1 tbsp or ½ cup) – Prevents browning of carved apples to maintain their appearance; lemon juice works as a natural alternative.
• Water (2 cups) – Soaking solution for the carved apples.

For the Filling
• Chopped Walnuts (¾ cup) – Adds crunch and richness; can substitute with pecans or almonds for alternative flavors.
• Dried Cranberries (¼ cup) – Sweet component that pairs excellently with apples and enhances the filling's flavor.
• Honey (¼ cup) – Natural sweetener complementing the tartness of apples; maple syrup is a vegan-friendly alternative.
• Orange Juice (1½ tbsp, optional) – Adds depth to the filling; can be excluded for simplicity.
• Cinnamon (¼ tsp, optional) – Warm spice enhancing flavor; adjust to personal taste.

Bring your Halloween Shrunken Heads Pie to life with these ingredients, and let the fun begin!

Step‑by‑Step Instructions for Halloween Shrunken Heads Pie

Step 1: Prepare Apples
Begin by carefully halving, coring, and peeling 4 to 6 medium firm apples, preferably Granny Smith or Honeycrisp. Use a paring knife to carve whimsical faces into each apple, showcasing your creativity. Once done, set them aside to soak, ensuring they maintain their playful appearance through baking.

Step 2: Prevent Browning
In a mixing bowl, combine 2 cups of water with 1 tablespoon of citric acid or ½ cup of lemon juice. Soak the carved apples for about 5 minutes, which will help preserve their color. After soaking, pat the apples dry with a paper towel to remove excess moisture before baking.

Step 3: Bake Apples
Preheat your oven to 200°F (93°C). Carefully place the soaked apple heads on a baking sheet lined with parchment paper and bake them for approximately 3 hours. Watch for the apples to shrivel slightly, indicating they are done. Once ready, allow the apple heads to cool for 2-3 hours before assembling the pie.

Step 4: Prepare Tart Shell
Raise the oven temperature to 350°F (175°C). Roll out your pie crust and line a 9-inch tart pan, pressing it gently against the sides. Pre-bake the crust for about 10 minutes, or until it turns a light golden brown. This pre-baking ensures a crisp base for your Halloween Shrunken Heads Pie.

Step 5: Fill Tart
Once your tart shell is ready, place the apple heads into the crust, arranging them creatively. Fill in the gaps with ¾ cup of chopped walnuts and ¼ cup of dried cranberries. Drizzle ¼ cup of honey over the filling, add 1½ tablespoons of optional orange juice, and sprinkle with cinnamon if desired, basting the apple heads so they soak in all the flavors.

Step 6: Final Bake
Return the assembled pie to the oven and bake for an additional 15-17 minutes. This final bake helps meld the flavors and achieves a beautiful golden crust. Keep an eye on the pie as it bakes, ensuring that the apples remain whimsical and maintain their fun shapes. Let the pie cool before slicing for your festive Halloween celebration.

Make Ahead Options

These Halloween Shrunken Heads Pie are perfect for busy home cooks looking to save time while still creating a magical dessert! You can carve your apple heads up to 24 hours in advance—just soak them in a mixture of water and lemon juice to prevent browning. Additionally, you can prepare the pie crust and refrigerate it for up to 3 days. When it's time to serve, simply bake the apples and fill the tart as instructed. This way, you’ll have a festive treat ready in no time, ensuring that your Halloween gathering is just as delightful and delicious as you envisioned.

What to Serve with Halloween Shrunken Heads Pie

Indulging in this whimsical dessert invites a lineup of delightful accompaniments that will elevate your Halloween gathering to a festive feast.

  • Whipped Cream:
    Light and airy, a dollop of whipped cream perfectly balances the pie's warmth, adding a creamy texture that enhances every bite.

  • Vanilla Ice Cream:
    Serve alongside a scoop of rich vanilla ice cream for a delightful contrast; the cold creaminess beautifully complements the warm spices and sweet apples.

  • Hot Apple Cider:
    A steaming mug of spiced apple cider warms the heart and pairs wonderfully with the pie's flavors, creating a cozy atmosphere for your spooky soirée.

  • Pumpkin Spice Cookies:
    These soft, chewy cookies bring an autumnal sweetness, their warm spices harmonizing beautifully with the flavors in the shrunken heads pie.

  • Cranberry Sauce:
    A homemade cranberry sauce adds a vibrant tartness that cuts through the sweetness of the pie, providing a fresh pop of flavor on each plate.

  • Chai Latte:
    This spiced beverage offers a comforting warmth and intricate flavors that can enhance the cozy vibes of enjoying your Halloween Shrunken Heads Pie.

  • Candied Nuts:
    Crunchy, sweet candied walnuts or pecans can serve as a festive garnish on the dessert table while complementing the pie's nutty richness perfectly.

Take your Halloween celebration to the next level by incorporating these tempting pairings, leaving your guests enchanted and delighted!

Expert Tips for Halloween Shrunken Heads Pie

Apple Selection: Choose firm varieties like Granny Smith to prevent mushiness and ensure that the carved heads maintain their shape during baking.

Creative Carving: Use a paring knife with care to design unique faces; this adds character and fun to each apple head.

Browning Prevention: Soaking the carved apples in the citric solution is crucial for keeping their color vibrant throughout the baking process.

Baking Time Monitoring: Watch the apples as they bake to achieve the perfect shriveled look without burning; a toothpick should slide in easily when they are done.

Customization Opportunities: Feel free to swap out walnuts for pecans or almonds, and try adding different dried fruits to personalize your Halloween Shrunken Heads Pie.

Storage Tips for Halloween Shrunken Heads Pie

Room Temperature: Store any uneaten pie at room temperature for up to 1 day, covering it with a clean kitchen towel to preserve its texture.

Fridge: Refrigerate the Halloween Shrunken Heads Pie for up to 3 days in an airtight container to keep it fresh and flavorful.

Freezer: For longer storage, freeze individual slices wrapped tightly in plastic wrap for up to 2 months. Thaw in the fridge before enjoying.

Reheating: To reheat, place slices in a preheated oven at 350°F (175°C) for about 10 minutes until warmed throughout, bringing back that delicious flavor.

Halloween Shrunken Heads Pie Variations

Invite creativity into your kitchen with these fun and easy twists that allow your Halloween Shrunken Heads Pie to shine even brighter!

  • Nut-Free: Swap walnuts for sunflower seeds or pumpkin seeds for a nut-free alternative, retaining that delightful crunch without the allergens.

  • Dried Fruit Medley: Mix in some chopped dried apricots or figs to enhance the natural sweetness and add interesting texture. The diversity will surprise your taste buds pleasantly!

  • Spicy Kick: Add a pinch of cayenne pepper or chili powder for a surprising spicy contrast to the sweetness of the pie. It’s a delightful twist for adventurous eaters!

  • Tropical Touch: Incorporate unsweetened coconut flakes into the filling for a tropical vibe, adding a chewy texture that complements the sweet apples perfectly. This new flavor profile is sure to transport you to a sunny beach!

  • Chocolate Drizzle: After baking, drizzle melted dark chocolate over the pie for an indulgent touch that balances the fruitiness. Imagine that rich chocolate swirling over the shriveled apple heads—pure heaven!

  • Cinnamon Sugar Crust: Mix some cinnamon and sugar into the pie crust for extra flavor. This sweet touch will elevate the dessert experience and keep the festive spirit alive.

  • Vegan-Friendly: Replace honey with maple syrup for a vegan alternative to sweeten your pie without sacrificing flavor. You’ll love how versatile and inclusive this twist is!

  • Extra Citrus: For a zingy taste, add the zest of an orange or lemon to the filling mix. It’ll brighten up the flavors and enhance the overall aroma.

Feel free to explore more delightful and festive recipes, like a Tamale Pie Hearty or a Spinach Pie Deliciously, to round out your Halloween gathering!

Halloween Shrunken Heads Pie Recipe FAQs

How do I choose the right apples for my Halloween Shrunken Heads Pie?
Absolutely! For the best results, aim for firm apple varieties like Granny Smith or Honeycrisp. These types hold their shape well during baking and offer a delightful tartness that contrasts nicely with the sweetness of other filling ingredients.

What is the best way to store leftover Halloween Shrunken Heads Pie?
For sure! Store any uneaten pie at room temperature for up to 1 day, covering it loosely. For longer preservation, refrigerate the pie in an airtight container for up to 3 days. If you’d like to keep it even longer, freeze individual slices wrapped tightly in plastic wrap for up to 2 months. Just remember to thaw them in the fridge before enjoying!

Can I freeze the carved apples for later use?
Certainly! However, for the best quality, it’s wise to assemble your pie fresh after carving. If you want to prep ahead, carved apples can be soaked in a citric acid solution and kept in the fridge for up to 24 hours. Ensure they're well-pat dried before baking to avoid excess moisture.

What should I do if the carved apples turn brown before baking?
Very! If your apples start to brown, quickly soak them in a mixture of 2 cups of water with 1 tablespoon of citric acid or ½ cup of lemon juice for about 5 minutes. This step is vital as it preserves their playful appearance for a whimsical look in the final pie and enhances the overall presentation.

Can I make this recipe nut-free?
Absolutely! Simply substitute the walnuts with sunflower seeds or omit them entirely. You can also explore using seeds or additional dried fruits, like raisins or dried apricots, for added texture and sweetness, ensuring everyone can enjoy this delightful Halloween Shrunken Heads Pie!

Halloween Shrunken Heads Pie

Creative Halloween Shrunken Heads Pie for Family Fun

Enjoy a whimsical and delicious Halloween Shrunken Heads Pie, featuring sweet apples and nutty crunch for family fun.
Print Recipe Pin Recipe
Prep Time 30 minutes mins
Cook Time 3 hours hrs
Cooling Time 2 hours hrs
Total Time 5 hours hrs 30 minutes mins
Servings: 8 slices
Course: Dessert
Cuisine: American
Calories: 250
Ingredients Equipment Method Nutrition Notes

Ingredients
  

For the Pie Crust
  • 1 Pie Crust Store-bought or homemade
For the Apple Heads
  • 4-6 medium Firm Apples Granny Smith or Honeycrisp recommended
  • 1 tbsp Citric Acid or Lemon Juice Prevents browning
  • 2 cups Water Soaking solution
For the Filling
  • ¾ cup Chopped Walnuts Can substitute with pecans or almonds
  • ¼ cup Dried Cranberries
  • ¼ cup Honey Maple syrup is a vegan alternative
  • 1½ tbsp Orange Juice Optional
  • ¼ tsp Cinnamon Optional

Equipment

  • 9-inch tart pan
  • Parchment Paper
  • Mixing Bowl
  • paring knife

Method
 

Step-by-Step Instructions
  1. Prepare Apples: Halve, core, and peel the apples, carving faces into each. Set aside to soak.
  2. Prevent Browning: Combine water with citric acid or lemon juice. Soak apples for about 5 minutes.
  3. Bake Apples: Preheat oven to 200°F (93°C) and bake the apples for approximately 3 hours. Let cool.
  4. Prepare Tart Shell: Raise oven to 350°F (175°C), roll out crust, and pre-bake for 10 minutes.
  5. Fill Tart: Place apple heads in crust, fill with walnuts and cranberries, drizzle with honey and optional ingredients.
  6. Final Bake: Bake pie for 15-17 minutes until golden, then cool before slicing.

Nutrition

Serving: 1sliceCalories: 250kcalCarbohydrates: 36gProtein: 3gFat: 12gSaturated Fat: 1gPolyunsaturated Fat: 2gMonounsaturated Fat: 8gSodium: 50mgPotassium: 150mgFiber: 3gSugar: 15gVitamin A: 2IUVitamin C: 6mgCalcium: 2mgIron: 4mg

Notes

Customize with different nuts and dried fruits for a unique twist.

Tried this recipe?

Let us know how it was!

Delight Your Family with Polar Bear Christmas Cupcakes

October 11, 2025 by Grace Snow Leave a Comment

"Can you believe the holidays are here again?" As I gaze at the twinkling lights and the first snowflakes falling outside, I can’t help but feel a rush of excitement to bake something special. Enter my Polar Bear Christmas Cupcakes! These delightful festive treats are not only whimsical with their charming bear decorations and snowy frosting, but they also pack a flavor punch that will impress your family and friends. The beauty of this recipe lies in its quick prep and the joy it brings to any holiday gathering. Whether you're hosting a festive party or just looking to indulge yourself while watching a holiday classic, these cupcakes create the perfect centerpiece. Curious to learn how to bring these adorable, tasty treats to life? Let’s dive into the magic of baking!

Why are Polar Bear Cupcakes so special?

Whimsical, these Polar Bear Christmas Cupcakes bring holiday cheer to your kitchen with their adorable design.
Easy to make, this recipe requires simple ingredients and minimal baking skills, perfect for both beginners and seasoned bakers alike.
Customizable, let your creativity shine by experimenting with different flavors and decorations to suit your festive mood.
Perfect for gatherings, these cupcakes are sure to impress your family and friends at any holiday celebration.
Delicious, each bite offers a sweet balance of fluffy cake and rich frosting that’ll have everyone coming back for more! You can also check out our guide on holiday desserts for more delightful options.

Polar Bear Christmas Cupcake Ingredients

Prepare to bake delightful Polar Bear Christmas Cupcakes with these essential ingredients!

For the Cake Base
• All-Purpose Flour – Provides structure; substitute with gluten-free flour for a GF version.
• Baking Powder – A vital leavening agent; ensure freshness for the best rise.
• Baking Soda – Aids in rising and browning; can replace with more baking powder if needed.
• Salt – Enhances the overall flavor of your cupcakes.
• Unsalted Butter (softened) – Adds richness; margarine works as a non-dairy option.
• Granulated Sugar – Contributes sweetness and moisture; opt for brown sugar for a caramel twist.
• Large Eggs – Binds the ingredients and adds richness; flax eggs can serve as a vegan alternative.
• Vanilla Extract – Infuses flavor; almond extract can offer a delightful variation if desired.
• Buttermilk – Ensures moisture and a slight tang; substitute with milk mixed with lemon juice.

For the Frosting
• Powdered Sugar – Sweetens the frosting; consider confectioner’s sugar alternatives for a lower sugar option.
• Heavy Cream/Milk – Adjusts frosting consistency; non-dairy milk is a fine substitute if preferred.

For Decorating
• White Chocolate Chips – Perfect for cute bear eyes; dark chocolate chips can be a tasty swap if you prefer.
• Mini Chocolate Chips – Ideal for additional decoration, contributing to the bear's cuteness.
• Shredded Coconut – Creates a snowy effect; feel free to omit if coconut isn’t your thing.
• Mini Marshmallows – Use for adorable ears on your polar bear designs.

Step‑by‑Step Instructions for Polar Bear Christmas Cupcakes

Step 1: Preheat the Oven
Preheat your oven to 350°F (175°C) and prepare a cupcake pan by lining it with festive cupcake liners. This ensures even baking and makes for an easy release when your Polar Bear Christmas Cupcakes are ready to come out of the oven.

Step 2: Mix the Dry Ingredients
In a medium bowl, whisk together the all-purpose flour, baking powder, baking soda, and salt. This is essential to evenly distribute the leavening agents throughout your dry ingredients, ensuring your cupcakes rise beautifully and have a delightful texture.

Step 3: Cream Butter and Sugar
In a large mixing bowl, beat the softened unsalted butter and granulated sugar together until light and fluffy, about 3-5 minutes using an electric mixer. The mixture should turn pale and airy, indicating it’s ready to incorporate the next ingredients for your dreamy cupcakes.

Step 4: Add Eggs and Vanilla
Crack in the large eggs one at a time, mixing well after each addition, then pour in the vanilla extract. This step enriches the batter, adding moisture and flavor that accommodates the sweetness of your Polar Bear Christmas Cupcakes.

Step 5: Combine Mixtures
Gradually add the dry ingredients to the butter mixture while alternating with the buttermilk, mixing just until combined. Be careful not to overmix; you want the batter to be smooth, ensuring your cupcakes will be light and fluffy when baked to perfection.

Step 6: Fill the Cupcake Liners
Scoop the batter into the prepared cupcake liners, filling each about two-thirds full. This helps the cupcakes rise evenly and prevents them from overflowing. Bake them in your preheated oven for 18-20 minutes, or until a toothpick inserted into the center comes out clean.

Step 7: Cool the Cupcakes
Once done, allow the cupcakes to cool in the pan for about 5 minutes. Then, carefully transfer them to a wire rack to cool completely. This cooling process is crucial to prevent your frosting from melting later!

Step 8: Prepare the Frosting
In a clean mixing bowl, beat the softened butter until creamy. Gradually mix in the powdered sugar, then add vanilla extract and heavy cream, beating until fluffy. You want a smooth, spreadable consistency that will perfectly coat your Polar Bear Christmas Cupcakes.

Step 9: Frost the Cupcakes
Once your cupcakes are fully cooled, pipe or spread the fluffy frosting on top using a piping bag or spatula. Aim for generous dollops of frosting to mimic the fluffy snow atop your delightful cupcakes.

Step 10: Decorate
Create your adorable polar bears by placing mini marshmallows for ears, white chocolate chips for eyes, and mini chocolate chips for the nose. If you desire, sprinkle shredded coconut around the frosting for that enchanting snowy effect, completing your Polar Bear Christmas Cupcakes!

Expert Tips for Polar Bear Christmas Cupcakes

• Room Temperature Ingredients: Ensure all ingredients are at room temperature for better mixing and a fluffier cupcake texture.

• Avoid Overmixing: Mix your batter until just combined to prevent dense Polar Bear Christmas Cupcakes. Overmixing can lead to tough cupcakes.

• Baking Time Matters: Keep a close eye on your cupcakes while baking; even a minute too long can make them dry. Use a toothpick to check for doneness.

• Creative Decorations: Don’t hesitate to get creative with the decorations! Use various toppings for your polar bears to personalize each one to your liking.

• Test Frosting Consistency: Adjust the frosting consistency with additional heavy cream or sugar until it reaches the desired spreadability for a perfect frost.

Make Ahead Options

These Polar Bear Christmas Cupcakes are perfect for meal prep, allowing you to enjoy festive cheer without the last-minute rush! You can prepare the cupcake batter up to 24 hours in advance by mixing it and storing it in the refrigerator. When you're ready to bake, just scoop the batter into liners and pop them in the oven! The frosting can also be made ahead of time and kept covered in the fridge for up to 3 days; just give it a quick stir before frosting your cooled cupcakes. This way, you'll have everything ready for a sweet holiday treat with minimal effort, ensuring they taste just as delightful as when freshly made!

How to Store and Freeze Polar Bear Christmas Cupcakes

Room Temperature: Store uneaten cupcakes in an airtight container at room temperature for up to 2 days to maintain their softness and freshness.

Fridge: If you want to keep them longer, refrigerate in an airtight container for up to 1 week. The frosting may be slightly firmer but will remain delicious!

Freezer: For longer storage, freeze undecorated cupcakes inside a freezer-safe bag or container for up to 3 months. Thaw in the fridge before decorating when you're ready to enjoy them.

Reheating: If you've frozen the cupcakes, let them come to room temperature before frosting to ensure your Polar Bear Christmas Cupcakes are soft and inviting when served!

Polar Bear Christmas Cupcakes Variations

Feel free to explore your creativity with these delightful variations that will elevate your Polar Bear Christmas Cupcakes into something truly unique!

  • Lemon Twist: Add lemon zest to the batter for a bright, citrusy flavor that pairs well with the sweetness of the frosting.
    A dash of sunshine in each bite can invigorate your festive gatherings, leaving everyone delighted!

  • Chocolate Lovers: Substitute cocoa powder for some of the flour to create a rich, chocolatey base for your cupcakes.
    Top with dark chocolate frosting for a decadent treat that both kids and adults will adore!

  • Minty Fresh: Add peppermint extract to the frosting for a delightful twist on classic flavors, ideal for holiday cheer.
    This refreshing flavor can remind you of candy canes, making your desserts even more festive!

  • Nutty Addition: Toss in some finely chopped nuts, like walnuts or almonds, to the batter for an added crunch.
    This twist not only enhances the texture but also brings warmth and heartiness, perfect for cozy gatherings.

  • Vegan Option: Replace eggs with flax eggs and opt for plant-based milk and non-dairy butter for a vegan-friendly version.
    Everyone deserves a tasty treat during the holidays, and this version ensures no one is left out!

  • Fun Decorations: Experiment with toppings by using colorful sprinkles or edible glitter on the frosting to make them extra festive.
    Each cupcake will become a little piece of art, spreading joy and cheer at every gathering!

  • Spicy Surprise: Mix in a pinch of cinnamon or ginger to the batter for a warm, spiced flavor perfect for the holiday season.
    This flavor boost can evoke the essence of traditional holiday treats, making it an irresistible choice for everyone.

By incorporating these ideas, you can transform your cupcakes and create memorable treats for the season. For a range of delightful options, consider also checking out our guide on holiday desserts for more inspiring ideas!

What to Serve with Polar Bear Christmas Cupcakes

There's nothing quite like creating a festive spread to accompany these whimsical, snowy treats, perfect for your holiday gatherings.

  • Hot Cocoa: This classic warm beverage adds cozy comfort, perfectly complementing the sweet frosting and bringing out the festive vibes of the season.
  • Spiced Apple Cider: The warm spices harmonize beautifully with the sweetness of the cupcakes, leaving your guests feeling merry and bright.
  • Christmas Cookie Platter: A variety of cookies offers delightful textures and flavors that will enhance the overall holiday dessert experience. Imagine the joy on your loved ones' faces!
  • Winter Fruit Salad: A refreshing mix of citrus and winter fruits adds brightness and balances the sweetness of the cupcakes with a burst of freshness.
  • Peppermint Bark: This crunchy, minty treat perfectly contrasts the soft cupcakes while bringing a festive flair that everyone will love.
  • Eggnog: Creamy and rich, it enhances the festive atmosphere and pairs wonderfully with the textures of your Polar Bear Christmas Cupcakes.
  • Pecan Pie: A slice of this classic pie offers warmth and richness, providing a delightful contrast to the cupcakes' light and fluffy nature.
  • Gingerbread Men: These holiday classics add an additional layer of fun and variety, making your spread visually vibrant and full of cheer!
  • Christmas Punch: A sweet, spiced beverage can offer a festive way to toast and celebrate during your holiday festivities, perfectly tying together the sweet treats.
  • Festive Cheesecake: A creamy, rich dessert simply elevates your dessert table, creating an unforgettable finish to a delightful holiday meal.

Polar Bear Christmas Cupcakes Recipe FAQs

How do I choose the right ingredients for my Polar Bear Christmas Cupcakes?
Absolutely! To ensure your cupcakes are delicious, make sure your butter and eggs are at room temperature. This allows for better mixing and a fluffier texture. For flour, don’t hesitate to use gluten-free options if needed. Fresh baking powder and soda are crucial too, as they make your cupcakes rise beautifully.

What’s the best way to store Polar Bear Christmas Cupcakes?
I recommend storing your cupcakes in an airtight container at room temperature for up to 2 days. If you want to keep them fresh longer, you can refrigerate them for up to a week. Just be aware that the frosting might firm up a bit.

Can I freeze Polar Bear Christmas Cupcakes?
Of course! For longer storage, freeze the undecorated cupcakes in a freezer-safe bag or container for up to 3 months. When you're ready to enjoy them, simply let them thaw in the fridge. This way, they’ll be soft and ready for decorating!

What should I do if my cupcakes are too dense?
Very good question! If your cupcakes turn out dense, it might be due to overmixing the batter. Aim to mix until just combined, and check that your leavening agents (baking powder and soda) are fresh. Also, ensure you're adding the right amount of buttermilk for moisture.

Can I make these cupcakes vegan or allergy-friendly?
Absolutely! To make your Polar Bear Christmas Cupcakes vegan, swap the large eggs for flax eggs (1 tablespoon ground flaxseed mixed with 2.5 tablespoons water for each egg) and use a dairy-free butter and milk alternative. Be mindful of any allergies with the decorations and opt for allergen-free chocolate chips if needed!

How long will the frosting last on the cupcakes?
I often find that frosted cupcakes maintain their delightful flavor for about 1 week when refrigerated. Just remember, if you keep them at room temperature, they’ll be best enjoyed within 2 days. Always check for any changes in texture or taste before serving!

Polar Bear Christmas Cupcakes

Delight Your Family with Polar Bear Christmas Cupcakes

Delight your family with Polar Bear Christmas Cupcakes, a whimsical and tasty treat for the holidays.
Print Recipe Pin Recipe
Prep Time 30 minutes mins
Cook Time 20 minutes mins
Cooling Time 5 minutes mins
Total Time 55 minutes mins
Servings: 12 cupcakes
Course: Dessert
Cuisine: Holiday
Calories: 300
Ingredients Equipment Method Nutrition Notes

Ingredients
  

For the Cake Base
  • 2 cups All-Purpose Flour Substitute with gluten-free flour for a GF version.
  • 1 tbsp Baking Powder Ensure freshness for the best rise.
  • 1 tsp Baking Soda Can replace with more baking powder if needed.
  • 1 tsp Salt Enhances overall flavor.
  • 1 cup Unsalted Butter (softened) Margarine works as a non-dairy option.
  • 1 cup Granulated Sugar Opt for brown sugar for a caramel twist.
  • 3 large Eggs Flax eggs can serve as a vegan alternative.
  • 2 tsp Vanilla Extract Almond extract offers a delightful variation.
  • 1 cup Buttermilk Substitute with milk mixed with lemon juice.
For the Frosting
  • 3 cups Powdered Sugar Consider confectioner’s sugar alternatives for a lower sugar option.
  • 1 cup Heavy Cream/Milk Non-dairy milk is a fine substitute.
For Decorating
  • 1 cup White Chocolate Chips Dark chocolate chips can be a tasty swap.
  • 1/2 cup Mini Chocolate Chips Ideal for additional decoration.
  • 1 cup Shredded Coconut Feel free to omit if coconut isn’t your thing.
  • 12 pieces Mini Marshmallows Use for ears on your polar bear designs.

Equipment

  • Cupcake pan
  • Mixing bowls
  • Electric mixer
  • piping bag

Method
 

Cupcake Making Process
  1. Preheat your oven to 350°F (175°C) and prepare a cupcake pan by lining it with festive cupcake liners.
  2. In a medium bowl, whisk together the all-purpose flour, baking powder, baking soda, and salt.
  3. In a large mixing bowl, beat the softened unsalted butter and granulated sugar together until light and fluffy, about 3-5 minutes.
  4. Crack in the large eggs one at a time, mixing well after each addition, then pour in the vanilla extract.
  5. Gradually add the dry ingredients to the butter mixture while alternating with the buttermilk, mixing just until combined.
  6. Scoop the batter into the prepared cupcake liners, filling each about two-thirds full. Bake for 18-20 minutes.
  7. Allow the cupcakes to cool in the pan for about 5 minutes, then transfer them to a wire rack to cool completely.
  8. In a clean mixing bowl, beat the softened butter until creamy. Gradually mix in the powdered sugar, then add vanilla extract and heavy cream, beating until fluffy.
  9. Once the cupcakes are fully cooled, pipe or spread the fluffy frosting on top.
  10. Create polar bear decorations using mini marshmallows for ears, white chocolate chips for eyes, and mini chocolate chips for the nose.

Nutrition

Serving: 1cupcakeCalories: 300kcalCarbohydrates: 40gProtein: 3gFat: 15gSaturated Fat: 9gCholesterol: 50mgSodium: 200mgPotassium: 150mgFiber: 1gSugar: 25gVitamin A: 200IUCalcium: 30mgIron: 0.5mg

Notes

Ensure all ingredients are at room temperature for better mixing and a fluffier cupcake texture. Avoid overmixing to prevent dense cupcakes.

Tried this recipe?

Let us know how it was!

Delight Your Family with Polar Bear Christmas Cupcakes

October 11, 2025 by Grace Snow Leave a Comment

"Can you believe the holidays are here again?" As I gaze at the twinkling lights and the first snowflakes falling outside, I can’t help but feel a rush of excitement to bake something special. Enter my Polar Bear Christmas Cupcakes! These delightful festive treats are not only whimsical with their charming bear decorations and snowy frosting, but they also pack a flavor punch that will impress your family and friends. The beauty of this recipe lies in its quick prep and the joy it brings to any holiday gathering. Whether you're hosting a festive party or just looking to indulge yourself while watching a holiday classic, these cupcakes create the perfect centerpiece. Curious to learn how to bring these adorable, tasty treats to life? Let’s dive into the magic of baking!

Why are Polar Bear Cupcakes so special?

Whimsical, these Polar Bear Christmas Cupcakes bring holiday cheer to your kitchen with their adorable design.
Easy to make, this recipe requires simple ingredients and minimal baking skills, perfect for both beginners and seasoned bakers alike.
Customizable, let your creativity shine by experimenting with different flavors and decorations to suit your festive mood.
Perfect for gatherings, these cupcakes are sure to impress your family and friends at any holiday celebration.
Delicious, each bite offers a sweet balance of fluffy cake and rich frosting that’ll have everyone coming back for more! You can also check out our guide on holiday desserts for more delightful options.

Polar Bear Christmas Cupcake Ingredients

Prepare to bake delightful Polar Bear Christmas Cupcakes with these essential ingredients!

For the Cake Base
• All-Purpose Flour – Provides structure; substitute with gluten-free flour for a GF version.
• Baking Powder – A vital leavening agent; ensure freshness for the best rise.
• Baking Soda – Aids in rising and browning; can replace with more baking powder if needed.
• Salt – Enhances the overall flavor of your cupcakes.
• Unsalted Butter (softened) – Adds richness; margarine works as a non-dairy option.
• Granulated Sugar – Contributes sweetness and moisture; opt for brown sugar for a caramel twist.
• Large Eggs – Binds the ingredients and adds richness; flax eggs can serve as a vegan alternative.
• Vanilla Extract – Infuses flavor; almond extract can offer a delightful variation if desired.
• Buttermilk – Ensures moisture and a slight tang; substitute with milk mixed with lemon juice.

For the Frosting
• Powdered Sugar – Sweetens the frosting; consider confectioner’s sugar alternatives for a lower sugar option.
• Heavy Cream/Milk – Adjusts frosting consistency; non-dairy milk is a fine substitute if preferred.

For Decorating
• White Chocolate Chips – Perfect for cute bear eyes; dark chocolate chips can be a tasty swap if you prefer.
• Mini Chocolate Chips – Ideal for additional decoration, contributing to the bear's cuteness.
• Shredded Coconut – Creates a snowy effect; feel free to omit if coconut isn’t your thing.
• Mini Marshmallows – Use for adorable ears on your polar bear designs.

Step‑by‑Step Instructions for Polar Bear Christmas Cupcakes

Step 1: Preheat the Oven
Begin by preheating your oven to 350°F (175°C). While the oven warms up, line a cupcake pan with festive cupcake liners to prepare for your Polar Bear Christmas Cupcakes. This step is essential for achieving that delightful golden crust and fluffy texture as they bake.

Step 2: Mix the Dry Ingredients
In a medium bowl, whisk together 2 cups of all-purpose flour, 1 teaspoon of baking powder, ½ teaspoon of baking soda, and ½ teaspoon of salt. This combination will ensure your cupcakes rise perfectly. Set the bowl aside, allowing the dry ingredients to blend and create a foundation for your cupcakes.

Step 3: Cream Butter and Sugar
In a large mixing bowl, beat together ½ cup of softened unsalted butter and 1 cup of granulated sugar until the mixture is light and fluffy. This will take about 3-5 minutes of mixing. You'll know it’s ready when it appears pale and airy, creating a rich base for your Polar Bear Christmas Cupcakes.

Step 4: Add Eggs and Vanilla
Next, incorporate 2 large eggs one at a time, mixing thoroughly after each addition. Stir in 2 teaspoons of vanilla extract until well blended. The eggs will enrich the batter while ensuring moisture, heightening both the texture and flavor in your delightful cupcakes.

Step 5: Combine Mixtures
Gradually add the prepared dry ingredients into the butter mixture while alternating with 1 cup of buttermilk. Mix until just combined, being careful not to overbeat. The batter should be smooth and somewhat thick, ready to create the fluffy cupcakes that will dazzle your holiday table.

Step 6: Fill the Cupcake Liners
Scoop the batter into the lined cupcake pan, filling each liner about two-thirds full. Bake in the preheated oven for 18-20 minutes. To check for doneness, insert a toothpick into the center of a cupcake; it should come out clean when they are perfectly baked and ready to cool on a wire rack.

Step 7: Cool the Cupcakes
Once baked, let the cupcakes cool in the pan for about 5 minutes. Carefully transfer them to a wire rack to cool completely. This is a crucial step that helps prevent sogginess while allowing the flavors to settle in your festive Polar Bear Christmas Cupcakes.

Step 8: Prepare the Frosting
While your cupcakes cool, beat ½ cup of softened butter in a mixing bowl until creamy. Gradually add in 3 cups of powdered sugar, mixing until smooth. Finish by incorporating 1 teaspoon of vanilla extract and enough heavy cream to achieve a fluffy consistency; this will create the snowy frosting your bears deserve.

Step 9: Frost the Cupcakes
Once the cupcakes are completely cool, frost them using a piping bag or spatula. Generously apply the creamy frosting atop each cupcake, creating the perfect snowy base for your Polar Bear Christmas Cupcakes to shine.

Step 10: Decorate the Cupcakes
Now it’s time for the fun part! Place mini marshmallows on top for ears, use white chocolate chips for the eyes, and mini chocolate chips for the nose. For an extra festive touch, sprinkle shredded coconut around the edges to mimic a beautiful snowy backdrop, bringing your polar bear creations to life!

Make Ahead Options

These Polar Bear Christmas Cupcakes are a dream for busy bakers who want to save time during the hectic holiday season! You can prepare the cupcake batter up to 24 hours in advance; simply cover it with plastic wrap and refrigerate to keep it fresh. For best results, fill the cupcake liners and bake them just before serving—this keeps them fluffy and delightful. Additionally, frosting can be made ahead and stored in the fridge for up to 3 days; just allow it to soften at room temperature before using. When ready to serve, frost the cupcakes and add your adorable decorations for a spectacular touch that will wow your guests!

What to Serve with Polar Bear Christmas Cupcakes

Amidst the warmth of holiday celebrations, these charming cupcakes are just the sweet touch to a delightful festive spread.

  • Hot Cocoa: A creamy, indulgent cup of hot cocoa pairs beautifully, enhancing the cozy feel of winter gatherings.
  • Peppermint Bark: This crunchy seasonal favorite offers a refreshing minty contrast to the sweet, fluffy cupcakes.
  • Eggnog: The creamy, spiced flavor of eggnog adds an extra festive cheer to your holiday dessert table.

Imagine enjoying a warm slice of spicy gingerbread alongside these cupcakes, creating a comforting traditional pairing. It sparks memories of cheerful holidays past, making both treats star attractions.

  • Fruit Salad: A bright mix of seasonal fruits like pomegranate and orange adds a refreshing, zesty bite to complement the sweetness.
  • Chocolate Dipped Strawberries: The rich chocolate pairs perfectly with the dreamy frosting, offering a luscious harmony of flavors.
  • Sugar Cookies: Soft, buttery sugar cookies elevate the holiday spirit while complementing the playful design of your cupcakes.
  • Spiced Chai Tea: A warm cup of spiced chai adds warming spices that enhance the festive flavors of the holidays.

Storage Tips for Polar Bear Christmas Cupcakes

Room Temperature: Store your Polar Bear Christmas Cupcakes in an airtight container at room temperature for up to 2 days to maintain their freshness and fluffy texture.

Fridge: If you need them to last a bit longer, refrigerate the cupcakes for up to a week. Ensure they are well-sealed to prevent drying out.

Freezer: For longer storage, freeze undecorated cupcakes in an airtight container for up to 3 months. Thaw overnight in the fridge before frosting and decorating.

Reheating: If you've stored your cupcakes in the fridge, let them come to room temperature before serving. For a cozy touch, gently warm them in the microwave for about 10-15 seconds.

Expert Tips for Polar Bear Christmas Cupcakes

  • Room Temperature Ingredients: Ensure all ingredients, especially butter and eggs, are at room temperature for easier mixing and a smoother batter.
  • Careful Mixing: Avoid overmixing once you combine the wet and dry ingredients. This can lead to dense and heavy cupcakes instead of the fluffy texture you want.
  • Watch the Timer: Keep an eye on the baking time—start checking at the 18-minute mark. Overbaking can result in dry cupcakes, diminishing their holiday charm.
  • Creative Decorations: Feel free to get whimsical with decorations! Try edible glitter or different candies for eyes and nose to make each polar bear unique.
  • Flavor Variations: Don’t hesitate to switch up flavor extracts, like using almond or peppermint, to create variations of these Polar Bear Christmas Cupcakes that your loved ones will adore.

Polar Bear Christmas Cupcakes Variations & Substitutions

Feel free to make these delightful cupcakes your own with your preferred twists and swaps!

  • Gluten-Free: Replace all-purpose flour with a gluten-free flour blend for a gluten-free treat.
  • Vegan: Use flax eggs in place of the large eggs and non-dairy butter for a vegan-friendly option.
  • Miniatures: Create cupcakes in mini sizes for bite-sized treats, great for parties and gatherings.
  • Flavor Boost: Add peppermint extract to the batter for a refreshing holiday twist that sparks the season's joy.
  • Chocolate Lovers: Substitute some of the flour with cocoa powder to create a rich chocolatey version of the Polar Bear cupcakes.
  • Frosting Variations: Experiment with cream cheese frosting for a tangy alternative that adds delightful depth to the sweetness.
  • Sprinkles & Decorations: Switch out shredded coconut with festive edible glitter or colorful sprinkles to brighten up your cupcakes.
  • Nutty Goodness: Fold in chopped nuts like pecans or walnuts into the batter for an added crunch that enhances texture.

No matter how you choose to personalize these Polar Bear Christmas Cupcakes, enjoy the fun of creating and sharing these festive delights with loved ones. And don't forget to explore more about holiday dessert ideas or baking tips to elevate your festive baking experience!

Polar Bear Christmas Cupcakes Recipe FAQs

What should I look for in ripe ingredients?
Absolutely! For the best results in your Polar Bear Christmas Cupcakes, choose fresh ingredients. Ensure your butter is softened but not melted for optimum creaming. When selecting eggs, opt for large eggs that are free from cracks. If using buttermilk, check that it is not expired, as freshness is key to achieving that tangy flavor and moist texture.

How should I store leftover cupcakes?
Very good question! Store your Polar Bear Christmas Cupcakes in an airtight container at room temperature for up to 2 days for optimal freshness. If you need to extend their life, refrigerate them for up to a week but ensure they are well-sealed to prevent drying. Remember, the cupcakes can dry out quickly if not stored properly!

Can I freeze the cupcakes?
You absolutely can! To freeze your Polar Bear Christmas Cupcakes, it’s best to do so without the frosting. Once cooled, place the cupcakes in an airtight container or a freezer-safe zip-top bag. They can be frozen for up to 3 months. When you're ready to enjoy them, simply thaw overnight in the fridge, then frost and decorate them before serving.

What are some common troubleshooting tips?
If you find that your cupcakes are dense, avoid overmixing the batter once you combine the wet and dry ingredients. For optimal fluffiness, make sure all your ingredients are at room temperature before use. Additionally, monitor your baking time closely; overbaking can lead to dry cupcakes. If you notice them browning too much, consider reducing the temperature by 25°F next time.

What should I consider for dietary restrictions?
For those with dietary concerns, there are plenty of adjustments you can make! For gluten-free options, substitute all-purpose flour with a gluten-free alternative. To cater to vegans, replace eggs with flax eggs (1 tablespoon of flaxseed meal mixed with 2.5 tablespoons of water equals 1 egg) and use margarine or coconut oil instead of butter. Always check for allergies regarding chocolate chips and coconut, and remember to have a variety of decorations that suit different dietary needs!

Can I customize the flavors of these cupcakes?
The more the merrier when it comes to flavors! You can easily swap out traditional vanilla for lemon, peppermint, or even chocolate extracts to create unique twists on the classic Polar Bear Christmas Cupcakes. Try experimenting with different toppings too—edible glitter or colored candies can make for an exciting and delightful decoration experience!

Polar Bear Christmas Cupcakes

Delicious Polar Bear Christmas Cupcakes to Brighten Your Holidays

These Polar Bear Christmas Cupcakes are festive, adorable treats that blend whimsy and flavor, perfect for the holiday season.
Print Recipe Pin Recipe
Prep Time 30 minutes mins
Cook Time 20 minutes mins
Cooling Time 5 minutes mins
Total Time 55 minutes mins
Servings: 12 cupcakes
Course: Dessert
Cuisine: American
Calories: 250
Ingredients Equipment Method Nutrition Notes

Ingredients
  

For the Batter
  • 2 cups All-Purpose Flour substitute with gluten-free flour for a gluten-free version
  • 1 teaspoon Baking Powder ensure it's fresh for maximum rise
  • 0.5 teaspoon Baking Soda can replace with more baking powder if necessary
  • 0.5 teaspoon Salt enhances flavor
  • 0.5 cups Unsalted Butter (softened) margarine serves as a non-dairy substitute
  • 1 cups Granulated Sugar try brown sugar for a hint of caramel flavor
  • 2 large Eggs for binding and richness
  • 2 teaspoons Vanilla Extract almond extract can provide a delightful twist
  • 1 cups Buttermilk milk mixed with lemon juice can work too
For the Frosting
  • 3 cups Powdered Sugar consider confectioner's sugar alternatives for a lower sugar option
  • 0.5 cups Heavy Cream/Milk go for non-dairy milk if desired
For Decorating
  • 0.5 cups White Chocolate Chips dark chocolate chips can be an optional swap
  • 0.5 cups Mini Chocolate Chips perfect for adding cute little noses
  • 1 cup Shredded Coconut omit for a non-coconut version
  • 8 units Mini Marshmallows for the bear ears decoration

Equipment

  • Cupcake pan
  • Mixing bowls
  • Whisk
  • piping bag
  • Oven

Method
 

Step-by-Step Instructions
  1. Preheat your oven to 350°F (175°C) and line a cupcake pan with festive cupcake liners.
  2. In a medium bowl, whisk together the flour, baking powder, baking soda, and salt.
  3. In a large mixing bowl, beat together the softened butter and granulated sugar until light and fluffy.
  4. Incorporate the eggs one at a time and then stir in the vanilla extract.
  5. Gradually add the dry ingredients into the butter mixture while alternating with the buttermilk.
  6. Scoop the batter into the lined cupcake pan, filling each liner about two-thirds full, and bake for 18-20 minutes.
  7. Cool the cupcakes in the pan for 5 minutes before transferring them to a wire rack.
  8. Beat the softened butter until creamy, then gradually add the powdered sugar and mix until smooth.
  9. Frost the cooled cupcakes using a piping bag or spatula.
  10. Decorate with mini marshmallows for ears, white chocolate chips for eyes, and mini chocolate chips for the nose.

Nutrition

Serving: 1cupcakeCalories: 250kcalCarbohydrates: 36gProtein: 3gFat: 12gSaturated Fat: 7gPolyunsaturated Fat: 1gMonounsaturated Fat: 3gCholesterol: 40mgSodium: 200mgPotassium: 100mgSugar: 22gVitamin A: 200IUCalcium: 20mgIron: 1mg

Notes

Ensure all ingredients are at room temperature for easier mixing and a smoother batter. Check baking time at the 18-minute mark to avoid overbaking.

Tried this recipe?

Let us know how it was!
  • « Previous Page
  • 1
  • …
  • 39
  • 40
  • 41
  • 42
  • 43
  • …
  • 57
  • Next Page »

Welcome!

Hi, I’m Grace, a Sydney-based home cook with a passion for bold flavors and trending ingredients. Whether you’re a busy beginner or a seasoned foodie, you’ll find dishes here that are fresh, fun, and full of flavor.

More about me

Popular Recipes

  • Chocolate Cake Pops
    Delightful Chocolate Cake Pops for Your Sweet Cravings
  • Cottage Cheese Banana Bread
    Cottage Cheese Banana Bread: Moist, Protein-Packed Delight
  • Flourless Oat Waffles
    Flourless Oat Waffles for a Quick, Healthy Breakfast Boost
  • Cinnamon Waffles
    Fluffy Cinnamon Waffles with Dreamy Whipped Cream Bliss

Footer

↑ back to top

About

  • Privacy Policy
  • Disclaimer
  • Terms & Conditions

Newsletter

  • Sign Up! for emails and updates

Contact

  • About me
  • Contact me

Copyright © 2025 TastyTrendIngredients