tastytrendingredients

  • Home
  • Recipes
    • Appetizers
    • Breakfast
    • Dessert
    • Dinner
    • Drinks
    • Salads
    • Snacks
    • Soups
  • About me
  • Contact me
menu icon
go to homepage
  • Home
  • Recipes
    • Appetizers
    • Breakfast
    • Dessert
    • Dinner
    • Drinks
    • Salads
    • Snacks
    • Soups
  • About me
  • Contact me
search icon
Homepage link
  • Home
  • Recipes
    • Appetizers
    • Breakfast
    • Dessert
    • Dinner
    • Drinks
    • Salads
    • Snacks
    • Soups
  • About me
  • Contact me
×

Zesty Key Lime Pie Mini Desserts for Effortless Indulgence

January 3, 2026 by Grace Snow Leave a Comment

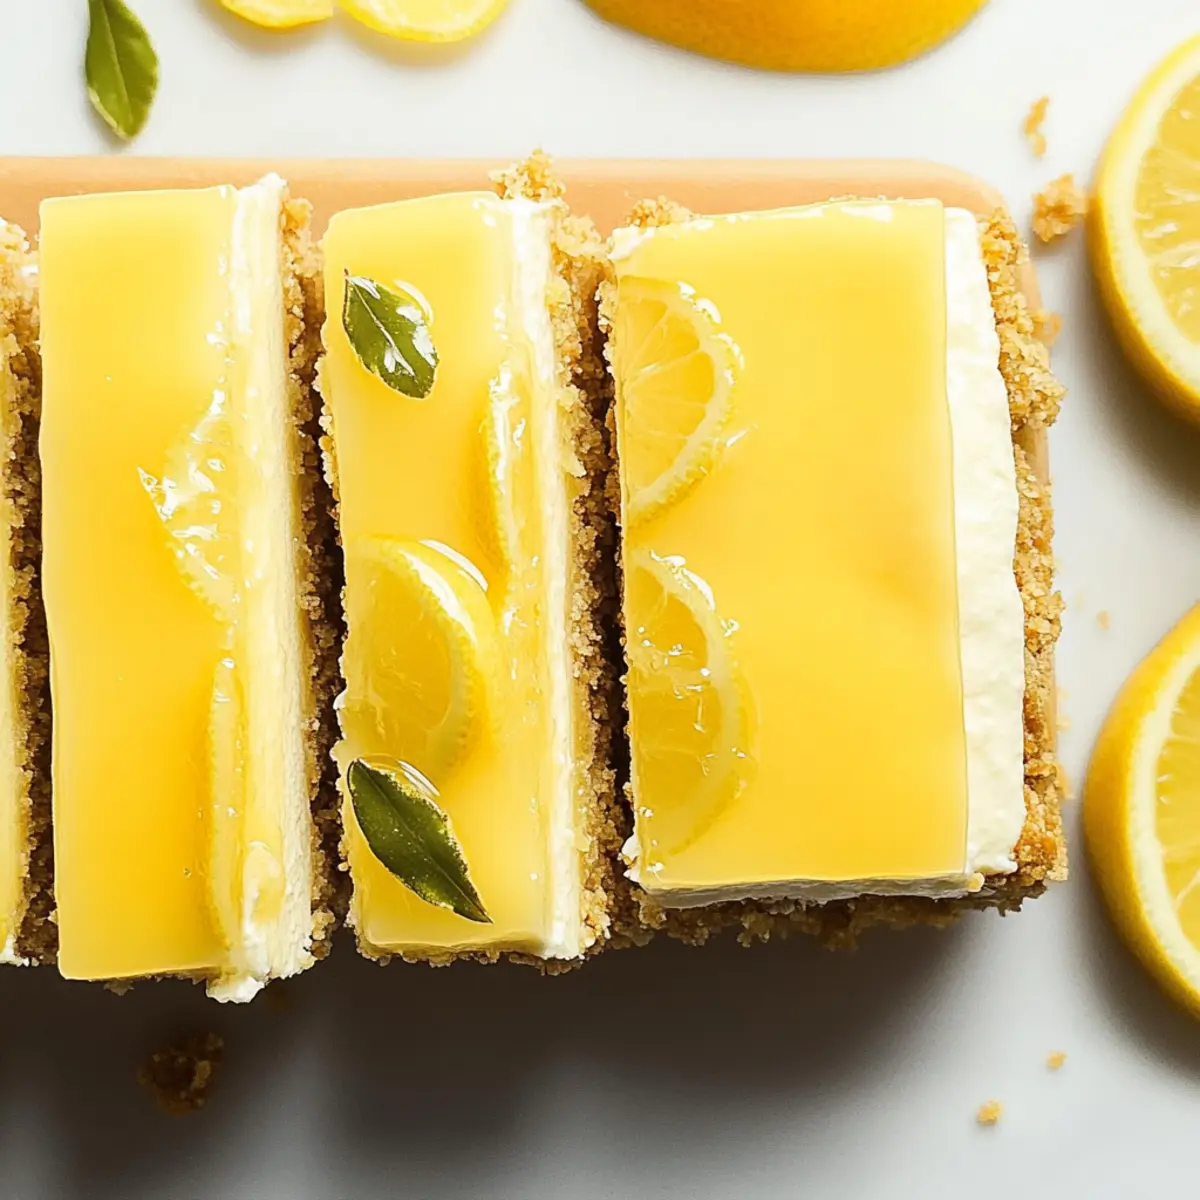
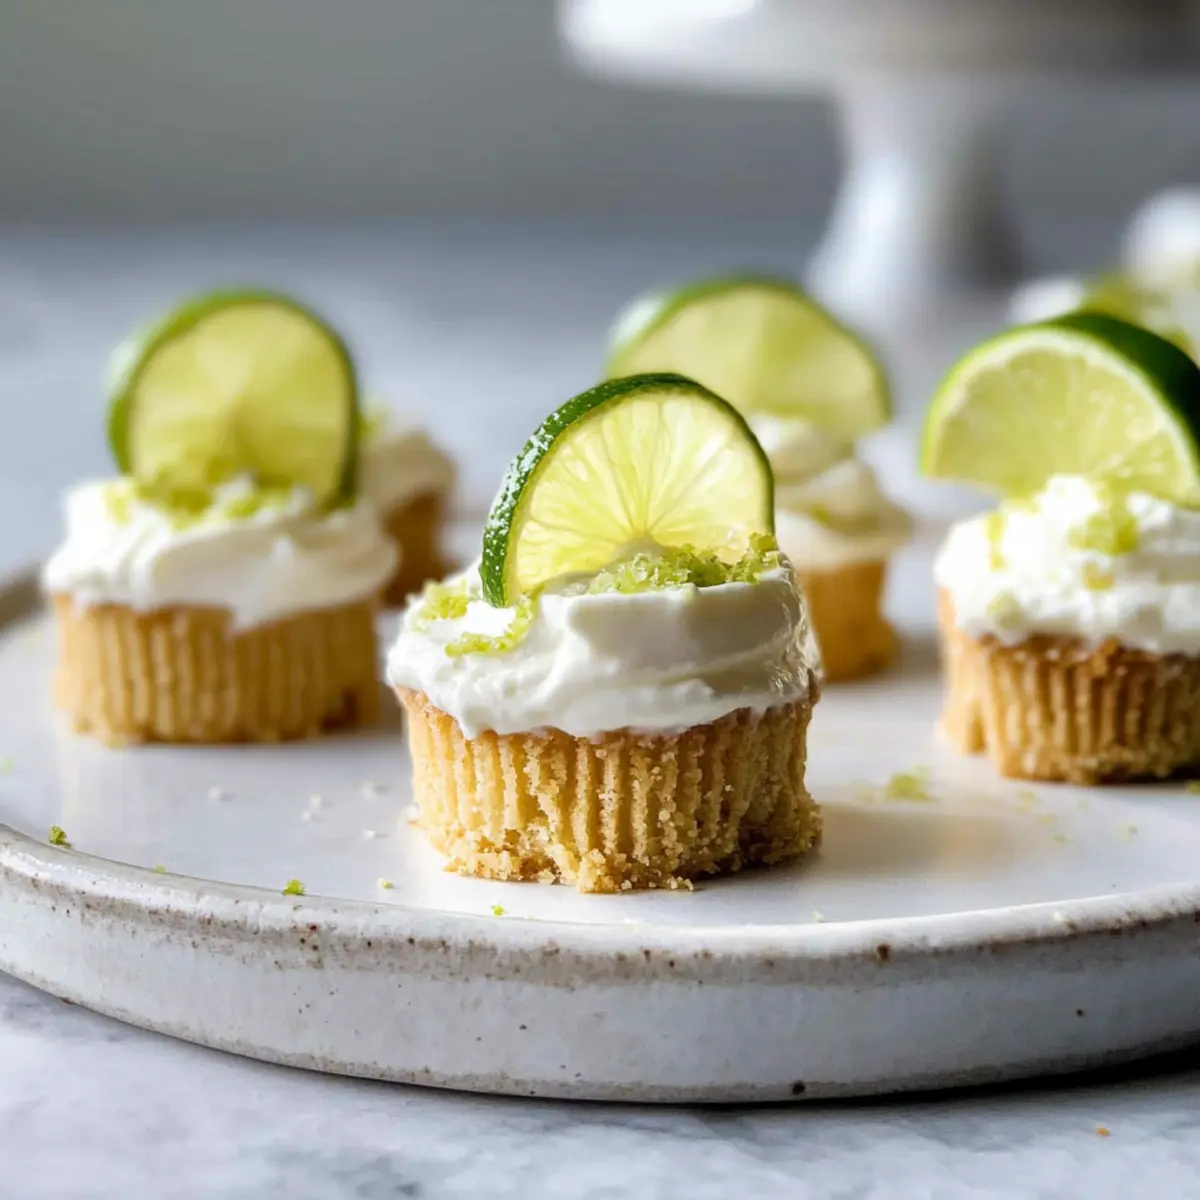
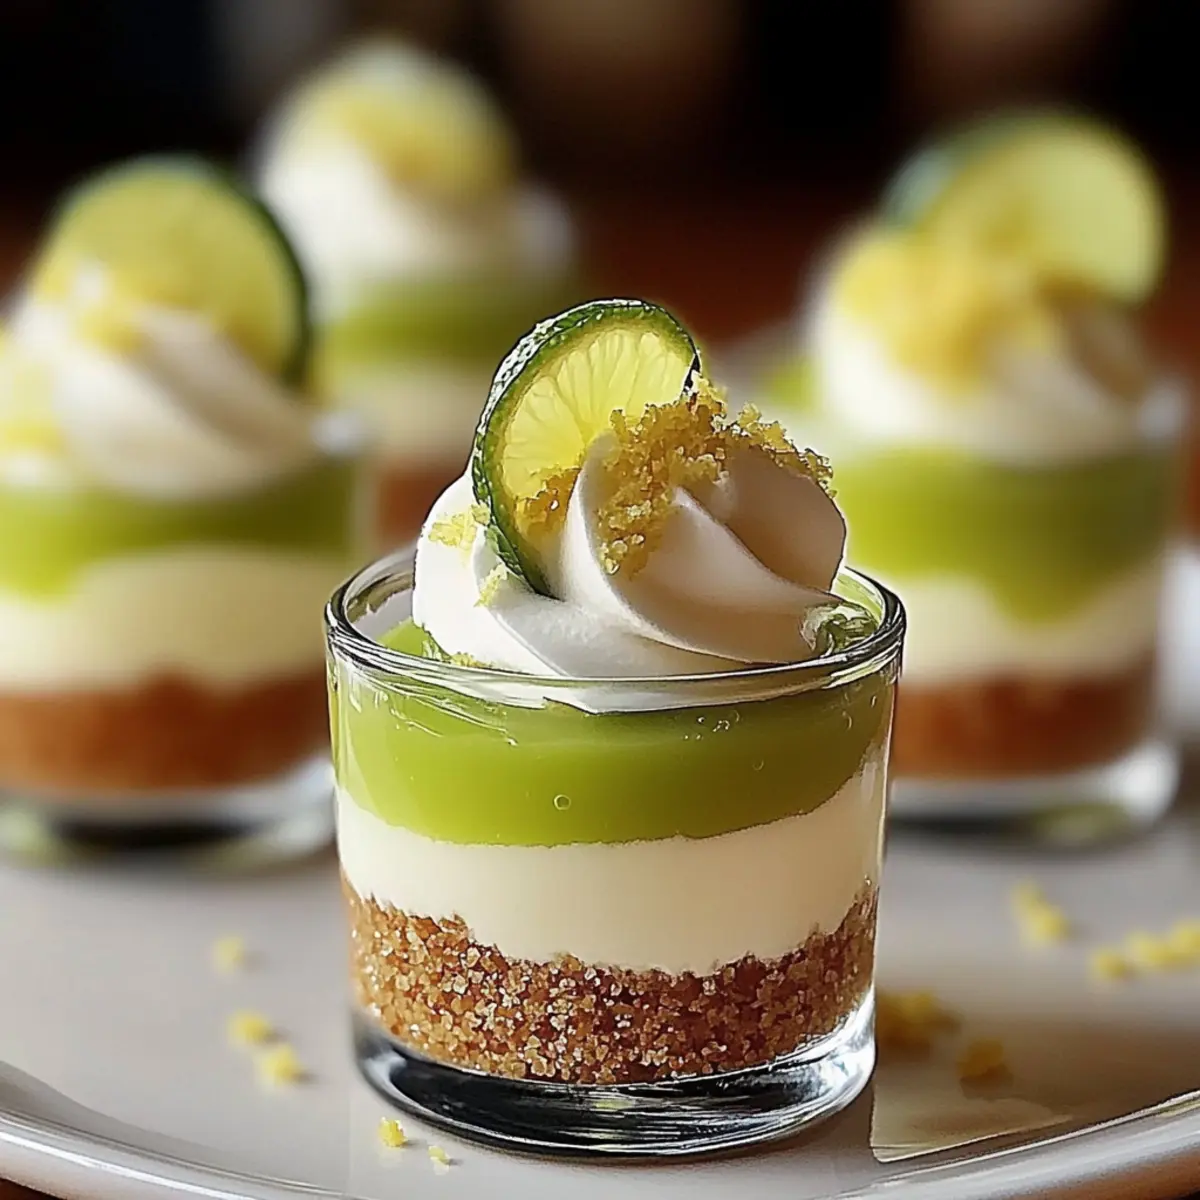
As I sat on my patio, the sun was shining bright, reminding me of lazy summer afternoons by the beach. That's when the idea struck: a refreshing twist on a classic favorite! These no-bake Key Lime Pie Mini Desserts are just the thing to bring a taste of sunshine to your table. Not only are they a breeze to make—perfect for those of us who want to whip up something delightful in no time—but they also promise a satisfying, guilt-free treat with customizable options. With their creamy texture and tart citrus flavor, these mini desserts are sure to impress your guests or add a touch of joy to your day. Ready to dive into this vibrant, easy-to-create dessert? Let's get started!

Why Are These Mini Desserts So Irresistible?

Effortless Preparation: These no-bake delights come together in minutes, making them perfect for busy schedules.

Refreshing Flavor: Each bite bursts with tangy key lime, complemented by the sweetness of the creamy filling.

Customizable Options: Feel free to experiment with flavors—try coconut cream for a vegan twist or layer in fresh berries for added vibrancy!

Perfect for Any Occasion: Their elegant presentation and individual servings make them ideal for parties, family gatherings, or casual weekend treats.

Guilt-Free Indulgence: With low-fat ingredients and customizable sweetness, you can satisfy your sweet tooth without the extra calories.

So why not start your culinary adventure with these Key Lime Pie Mini Desserts today? They’re the perfect way to bring a taste of sunshine to your table!

Key Lime Pie Mini Desserts Ingredients

For the Crust
• Graham Cracker Crumbs – Provides a sweet, crunchy base; substitute with crushed ginger snaps for a unique twist.
• Melted Butter – Binds the crumbs together for a firm crust; opt for coconut oil for a dairy-free option.
• White Sugar – Adds sweetness to the crust, balancing the tartness of the filling.

For the Filling
• Reduced-Fat Cream Cheese – Creates a creamy filling with tanginess; use full-fat for a richer taste.
• Low-Fat Vanilla Greek Yogurt – Adds creaminess and tang; can be replaced with dairy-free yogurt for vegan options.
• Fat-Free Sweetened Condensed Milk – Sweetens while keeping the dessert light; opt for evaporated milk for a different texture.
• Key Lime Juice – The star flavor; always use fresh for the best taste!
• Green Food Coloring (optional) – Enhances visual appeal; use sparingly for a lovely touch to your dessert layers.

These Key Lime Pie Mini Desserts are quick, delightful, and fully customizable. Let's get ready to create some sunshine in your kitchen!

Step‑by‑Step Instructions for Key Lime Pie Mini Desserts

Step 1: Prepare the Crust
In a mixing bowl, combine graham cracker crumbs, melted butter, and sugar until well-blended. Press the mixture firmly and evenly into the bottom of mini dessert glasses using the back of a spoon. Aim for a smooth, level surface. Once completed, set these aside to allow the crust to firm up, creating a solid base for your Key Lime Pie mini desserts.

Step 2: Mix the Filling
In a separate bowl, beat the softened cream cheese and low-fat vanilla Greek yogurt together until smooth and creamy, which should take about 2-3 minutes with an electric mixer. In another bowl, whisk together the fat-free sweetened condensed milk and freshly squeezed key lime juice. Gradually add this mixture to the cream cheese blend, mixing until fully combined and creamy.

Step 3: Color the Filling (Optional)
If you wish to create a two-tone effect in your Key Lime Pie mini desserts, divide the filling into two portions. Add a few drops of green food coloring to one half, stirring gently until the color is evenly distributed. This step not only adds visual appeal but also enhances the presentation as you layer the filling in the dessert glasses.

Step 4: Assemble the Desserts
Using a piping bag or a zip-top bag with the corner snipped off, alternately pipe layers of the plain and colored filling into the prepared dessert glasses. Start with a layer of plain filling, then follow with the colored filling, repeating until the glasses are filled to the top. This creates a visually stunning layered effect in your mini desserts.

Step 5: Chill and Set
Cover the assembled Key Lime Pie mini desserts with plastic wrap and place them in the refrigerator. Allow them to chill for at least 2 hours, or until firm to the touch. This chilling time is essential for the filling to set properly and for the flavors to meld together beautifully.

Step 6: Garnish and Serve
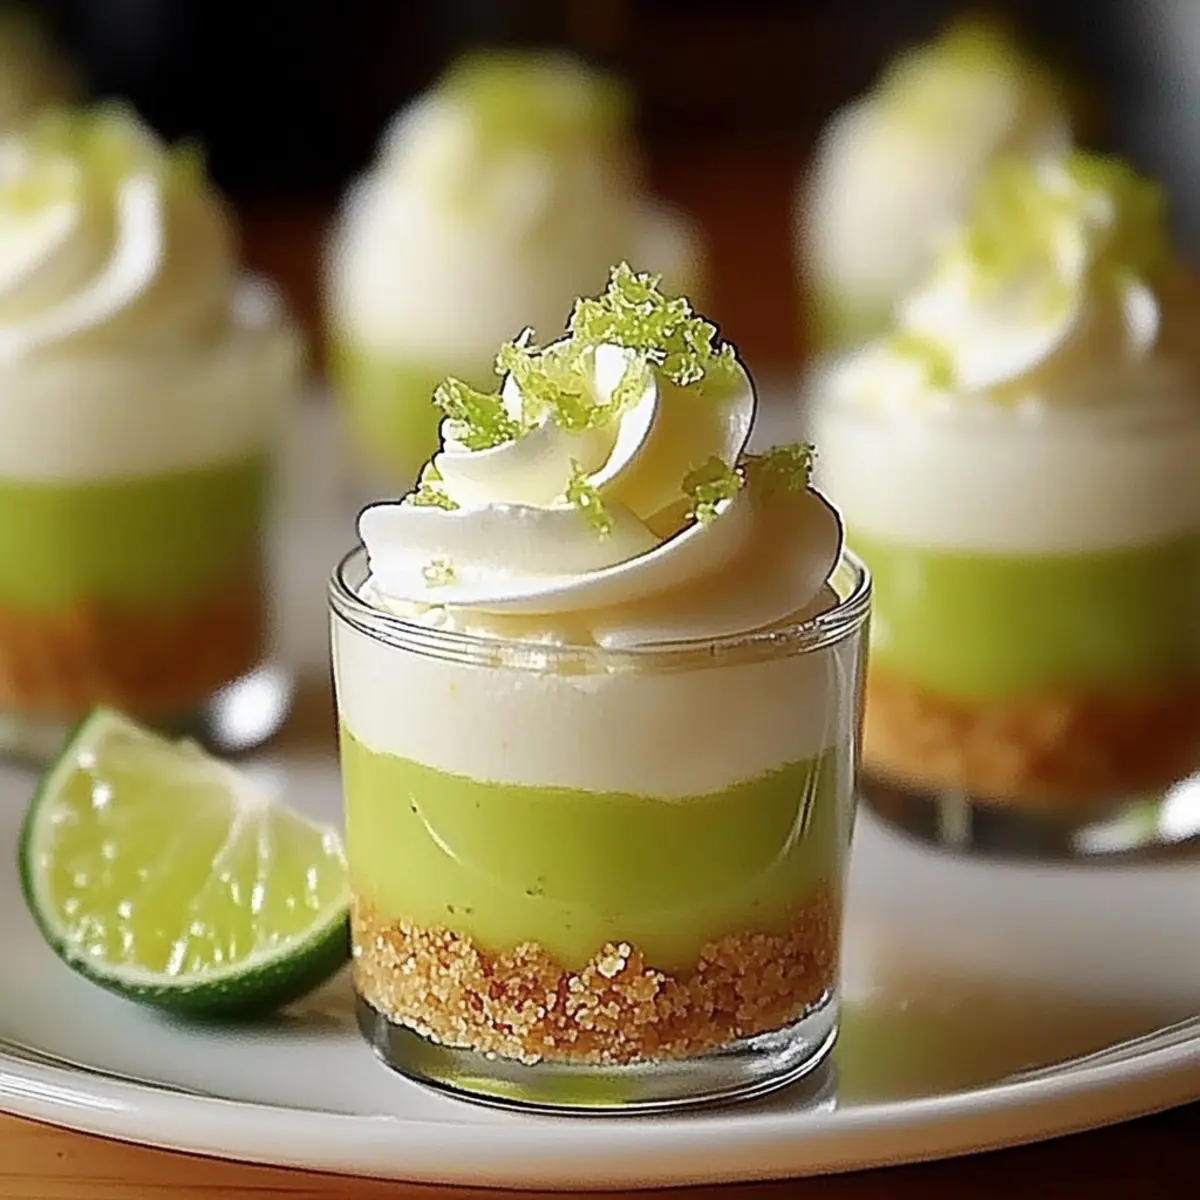
Once chilled and firm, remove the mini desserts from the refrigerator. Garnish with whipped cream, a sprinkle of lime zest, and a few graham cracker crumbs on top for added texture. Serve immediately for delightful bites of refreshment, showcasing the zesty flavors of your homemade Key Lime Pie mini desserts.

What to Serve with Key Lime Pie Mini Desserts

Elevate your dessert experience with delightful pairings that enhance the bright and zesty flavors of these mini treats.

  • Iced Tea: A chilled glass with a hint of mint refreshes the palette, perfectly complementing the tangy citrus notes. The coolness of iced tea offsets the sweetness beautifully.

  • Grilled Shrimp Skewers: Light and savory seafood adds a nice contrast to the creamy sweetness. Serve them with a sprinkle of lime juice for a harmonious flavor.

  • Mixed Green Salad: A fresh salad with citrus vinaigrette provides a light and crisp counterpart. The crisp greens and tart dressing balance the richness of the desserts.

  • Coconut Sorbet: This frozen delight offers a creamy, tropical twist that complements the key lime flavor. The cooling sorbet is like a vacation on your taste buds!

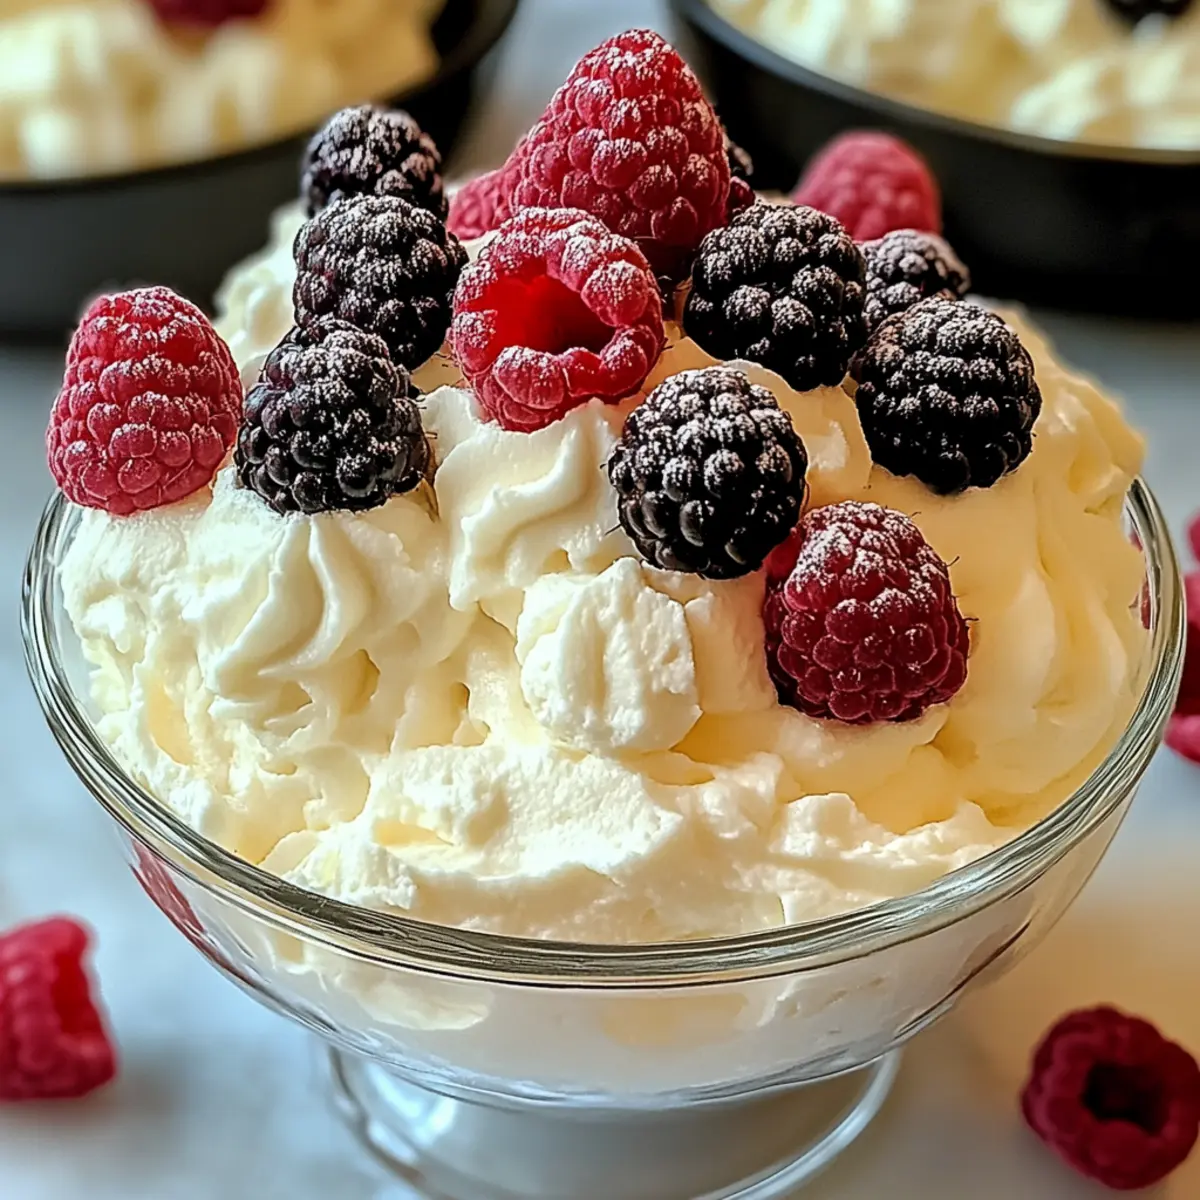
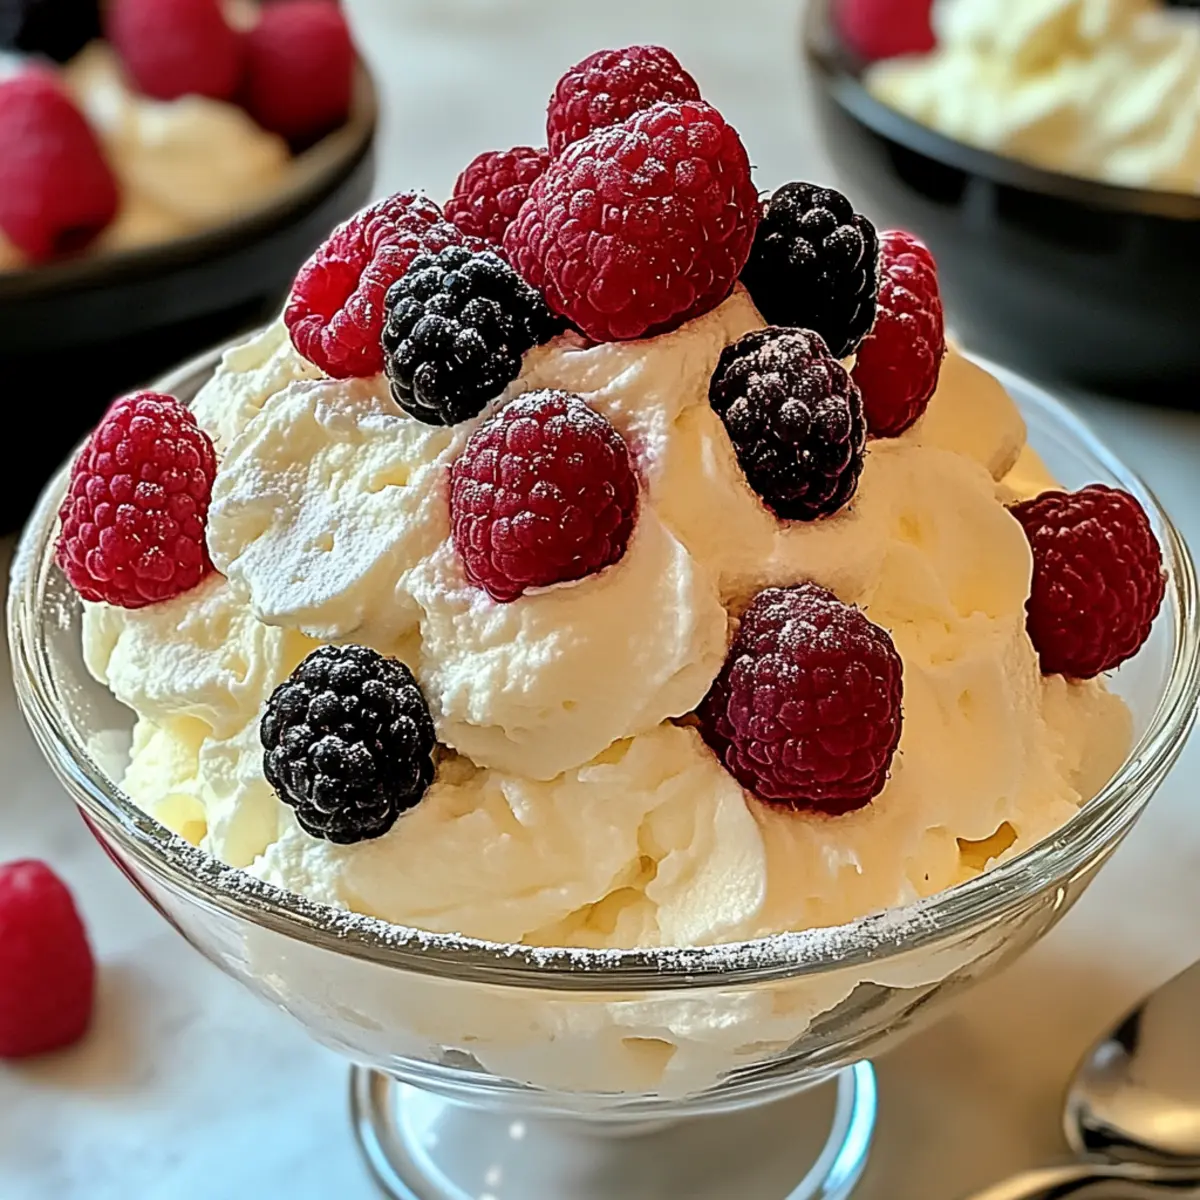
  • Fresh Berries: Serve a side of strawberries or raspberries to add natural sweetness and a pop of color. Their juicy burst contrasts with the creamy dessert.

  • Mojitos: For a refreshing cocktail option, mojitos infused with mint and lime perfectly echo the citrusy notes of the mini desserts, creating a playful pairing.

  • Pineapple Upside-Down Cake: This classic dessert brings a chewy, caramelized contrast that resonates with the flavors in the mini treats.

  • Lemonade: A glass of bright lemonade with its sugary tartness enhances the citrus experience, leaving you feeling refreshed and happy.

  • Chocolate Biscotti: The richness of chocolate and the crunchiness of biscotti create a unique texture and flavor interplay that makes each dessert bite more enjoyable.

Key Lime Pie Mini Desserts Variations

Feel free to let your creativity shine by customizing these enticing mini desserts to suit your taste!

  • Dairy-Free: Substitute Greek yogurt with coconut cream for a luscious vegan option that packs a tropical punch.
    This alternative gives you that creamy texture while keeping everything plant-based.

  • Berry Layered Delight: Add fresh strawberries or blueberries between the filling layers for a colorful burst of flavor.
    This fruitiness adds not only visual appeal but also contrasting sweetness that complements the tart lime.

  • Zesty Orange Twist: Swap key lime juice for fresh orange juice for a brighter, sweeter version of the dessert.
    The oranges provide a delightful citrus flavor that refreshes without overwhelming.

  • Chocolate Indulgence: Drizzle melted dark chocolate over each dessert before chilling for an indulgent touch.
    This unexpected layer will surprise and delight chocolate lovers in your life!

  • Nutty Crust Upgrade: Try using almond flour instead of graham cracker crumbs for a gluten-free, nutty base.
    This change adds a unique flavor and texture that pairs beautifully with the creamy filling.

  • Spiced Adventure: Add a dash of cinnamon or nutmeg to the crust mixture for a warm, spiced essence.
    These cozy spices take the dessert to a whole new level while enhancing the overall flavor profile.

  • Creamy Avocado Add-In: Blend in half an avocado into the cream cheese filling for a subtle richness while keeping it nutritious.
    This variation gives an ultra-smooth texture that everyone will enjoy, without the flavor being too overpowering.

  • Key Lime Pie Parfait: Layer the filling and crust in a glass, adding whipped cream and garnishes for a beautiful parfait presentation.
    This method not only looks stunning but also enhances the dining experience with every elegant layer!

For more delicious recipes, don't miss out on these delightful options like Chipotle Lime Chicken or the rich and savory Tamale Pie Hearty. Customize away and have fun in your kitchen!

How to Store and Freeze Key Lime Pie Mini Desserts

Fridge: Keep your Key Lime Pie mini desserts in an airtight container in the refrigerator for up to 3 days to maintain freshness and flavor.

Freezer: If you want to store them longer, freeze in an airtight container for up to 1 month. Be aware that the texture may change slightly upon thawing.

Reheating: These mini desserts are best served cold, so no need to reheat! Simply remove from the fridge or freezer and enjoy immediately.

Expert Tips for Key Lime Pie Mini Desserts

  • Soften Cream Cheese: Ensure your cream cheese is completely softened for smooth mixing, avoiding any lumps that disrupt the creamy texture of your filling.

  • Use Fresh Juice: Opt for fresh key lime juice instead of bottled for a more vibrant and authentic flavor in your Key Lime Pie mini desserts.

  • Layering Technique: Pipe your filling carefully in layers. For a beautiful presentation, alternate plain and colored filling slowly to maintain distinct layers.

  • Chill Thoroughly: Don’t rush the chilling process—letting your mini desserts set for at least 2 hours ensures a firm consistency that’s satisfying to bite into.

  • Experiment with Toppings: Get creative with toppings! Try fresh fruit, lime zest, or even a drizzle of chocolate sauce to elevate your Key Lime Pie mini desserts.

Make Ahead Options

These Key Lime Pie Mini Desserts are absolutely perfect for meal prep, saving you valuable time during busy weeks! You can prepare the crust up to 24 hours ahead and store it in an airtight container at room temperature to maintain its crunch. Additionally, the filling can be mixed and refrigerated for up to 3 days; just ensure it's covered tightly to preserve its creamy texture. When you're ready to serve, simply assemble the desserts by piping the filling into the crusts, chill for an hour to firm up, and garnish. This way, you’ll impress your guests with your delicious desserts while keeping your kitchen time to a minimum!

Key Lime Pie Mini Desserts Recipe FAQs

How do I know if key limes are ripe?
When selecting key limes, look for fruit that feels heavy for its size and has a slightly glossy skin. They should be firm but give a little when gently squeezed. Ripe key limes have a bright green color without dark spots or blemishes.

How should I store leftovers of the mini desserts?
To ensure the freshness of your Key Lime Pie mini desserts, store them in an airtight container in the refrigerator for up to 3 days. This will help maintain the creamy texture and vibrant flavor.

Can I freeze these mini desserts? If so, how?
Absolutely! You can freeze your Key Lime Pie mini desserts for up to 1 month. To freeze, carefully place them in an airtight container, separating layers with parchment paper if needed. When ready to enjoy, thaw them in the fridge overnight for best results—just keep in mind that the texture may be slightly softer upon thawing.

What should I do if my filling didn't set properly?
If your filling hasn't set, it could be due to insufficient chilling time or not using enough key lime juice. Make sure to chill the desserts for a full 2 hours at a minimum. If you're concerned about the consistency, you can return them to the fridge for a little longer. For future batches, ensure that your cream cheese is well-softened before mixing, as this helps create a smooth texture.

Are there any allergy considerations with the ingredients?
Yes, some ingredients may pose allergies. The cream cheese and Greek yogurt contain dairy, so consider using dairy-free alternatives, like coconut cream and non-dairy yogurt, for a vegan option. Always double-check your ingredient labels, especially for pre-packaged items like condensed milk, to accommodate any allergies or dietary restrictions.

Can I customize the sweetness of my mini desserts?
Certainly! You can adjust the sweetness to your preference by varying the amount of fat-free sweetened condensed milk. For a less sweet version, start with half the recommended amount and mix until smooth. Taste as you go to ensure you achieve the perfect balance for your Key Lime Pie mini desserts!

Key Lime Pie mini desserts

Zesty Key Lime Pie Mini Desserts for Effortless Indulgence

These no-bake Key Lime Pie mini desserts are a refreshing twist on a classic, offering customizable options for a guilt-free indulgence.
Print Recipe Pin Recipe
Prep Time 20 minutes mins
Chilling Time 2 hours hrs
Total Time 2 hours hrs 20 minutes mins
Servings: 6 mini desserts
Course: Dessert
Cuisine: American
Calories: 150
Ingredients Equipment Method Nutrition Notes

Ingredients
  

Crust
  • 1 cup Graham Cracker Crumbs Substitute with crushed ginger snaps for a unique twist.
  • 6 tablespoons Melted Butter Opt for coconut oil for a dairy-free option.
  • 2 tablespoons White Sugar
Filling
  • 8 oz Reduced-Fat Cream Cheese Use full-fat for a richer taste.
  • 1 cup Low-Fat Vanilla Greek Yogurt Can be replaced with dairy-free yogurt for vegan options.
  • 1 can Fat-Free Sweetened Condensed Milk Opt for evaporated milk for a different texture.
  • 1/2 cup Key Lime Juice Always use fresh for the best taste!
  • a few drops Green Food Coloring Use sparingly for a lovely touch.

Equipment

  • Mixing bowls
  • Electric mixer
  • piping bag
  • Mini dessert glasses

Method
 

Crust Preparation
  1. In a mixing bowl, combine graham cracker crumbs, melted butter, and sugar until well-blended. Press the mixture firmly and evenly into the bottom of mini dessert glasses using the back of a spoon.
  2. Set these aside to allow the crust to firm up.
Filling Preparation
  1. In a separate bowl, beat the softened cream cheese and low-fat vanilla Greek yogurt together until smooth and creamy.
  2. In another bowl, whisk together the fat-free sweetened condensed milk and freshly squeezed key lime juice. Gradually add this mixture to the cream cheese blend, mixing until fully combined.
Filling Coloring
  1. If desired, divide the filling into two portions and add a few drops of green food coloring to one half, stirring gently.
Dessert Assembly
  1. Using a piping bag, alternately pipe layers of the plain and colored filling into the prepared dessert glasses.
  2. Repeat until the glasses are filled to the top.
Chilling
  1. Cover the assembled desserts with plastic wrap and refrigerate for at least 2 hours.
Garnishing
  1. Remove the mini desserts from the refrigerator and garnish with whipped cream, lime zest, and graham cracker crumbs.
  2. Serve immediately.

Nutrition

Serving: 1mini dessertCalories: 150kcalCarbohydrates: 18gProtein: 3gFat: 8gSaturated Fat: 4gMonounsaturated Fat: 2gCholesterol: 15mgSodium: 150mgPotassium: 60mgFiber: 1gSugar: 10gVitamin A: 100IUVitamin C: 3mgCalcium: 50mgIron: 0.5mg

Notes

Soften cream cheese completely before mixing. Use fresh key lime juice for the best flavor. Ensure layers are piped carefully for a beautiful presentation.

Tried this recipe?

Let us know how it was!

Mango Strawberry Sunset Cupcakes for a Tropical Treat

January 3, 2026 by Grace Snow Leave a Comment

“Just imagine the vibrant colors and enticing aromas swirling in your kitchen as you whip up a batch of Mango Strawberry Sunset Cupcakes.” This delightful recipe brings the sun-soaked flavors of tropical paradise straight to your table! With their moist, tender crumb, and a swirl of luscious mango and strawberry frosting that’s as beautiful as a sunset, these cupcakes are perfect for any occasion. They are effortlessly simple to make, ensuring you can impress your family and friends without spending hours in the kitchen. Plus, they’re vegetarian-friendly, making them a guilt-free indulgence! Whether you're looking to brighten up a weekday dessert or add a sweet touch to a special gathering, these cupcakes will not only satisfy your sweet tooth but also bring a little piece of summer into every bite. Are you ready to dive into this tropical treat?

Why Are Mango Strawberry Sunset Cupcakes Special?

Tropical Bliss: These cupcakes deliver a burst of sun-soaked flavors that make every bite feel like a mini-vacation.

Easy to Make: They require just basic baking skills, perfect for anyone looking to whip up a fast, delicious treat.

Visually Stunning: The sunset swirl frosting not only tastes delightful but also looks gorgeous—sure to impress any crowd!

Customizable: With options for different fruit purées and fillings, you can adapt these cupcakes to your taste.

Vegetarian-Friendly: Guilt-free indulgence for everyone at your gathering, making them an inclusive dessert choice.

Perfect for Any Occasion: Whether it's a casual get-together or a festive celebration, these cupcakes offer a sweet way to elevate your dessert spread.

Embrace the summer vibes with these delightful treats, and for more tips on baking, check out our guide on cake decorating techniques.

Mango Strawberry Sunset Cupcake Ingredients

• Dive into the sweet tropical goodness with these must-have ingredients!

For the Cupcakes

  • All-Purpose Flour – Provides structure and texture to the cupcakes; substitute with a gluten-free flour blend if needed.
  • Baking Powder – Helps the cupcakes rise and creates a light texture—make sure it’s fresh for the best results.
  • Salt – Enhances sweetness and balances flavors; feel free to use sea salt or kosher salt for a different touch.
  • Unsalted Butter – Adds richness and flavor; can be swapped with margarine for a dairy-free option.
  • Granulated Sugar – Sweetens the batter perfectly; try coconut sugar for a more natural alternative.
  • Eggs – Binds the ingredients and adds moisture; for an egg-free option, use flax eggs (1 tablespoon ground flaxseed mixed with 2.5 tablespoons water per egg).
  • Vanilla Extract – Adds warmth and depth of flavor; almond extract works well as a fragrant substitute.
  • Milk – Contributes moisture and richness; replace with plant-based milk for a dairy-free version.
  • Mango Purée – Infuses those tropical flavors that make this recipe shine; substitute with peach or apricot purée if mango is unavailable.
  • Strawberry Jam – Perfect for center-filling, providing a sweet surprise; homemade or store-bought works beautifully.

For the Frosting

  • Powdered Sugar – Essential for fluffy frosting; sift it to ensure a smooth consistency before use.
  • Heavy Cream – Adds richness and helps achieve a light, fluffy frosting; opt for coconut cream as an alternative for dairy-free frosting.

Enjoy crafting your Mango Strawberry Sunset Cupcakes with these delightful ingredients!

Step‑by‑Step Instructions for Mango Strawberry Sunset Cupcakes

Step 1: Preheat and Prepare
Begin by preheating your oven to 350°F (175°C) and prepare a muffin tin by lining it with vibrant cupcake liners. This essential step not only prevents sticking but adds a fun splash of color to your baking. Having your oven ready ensures your Mango Strawberry Sunset Cupcakes bake evenly and come out perfectly fluffy.

Step 2: Mix Dry Ingredients
In a medium bowl, whisk together the all-purpose flour, baking powder, and salt until well combined. This creates a uniform mixture that will help your cupcakes rise beautifully. Take a moment to break up any clumps in the flour, ensuring everything blends seamlessly for that perfect texture in your tropical treats.

Step 3: Cream Butter and Sugar
In a separate large mixing bowl, cream the unsalted butter and granulated sugar together until the mixture is light and fluffy, which usually takes about 3-5 minutes. Use a hand mixer or stand mixer for best results. You’re looking for a buttery, pale consistency that promises a moist cupcake base rich in flavor.

Step 4: Incorporate Eggs and Extracts
Next, beat in the eggs one at a time, adding the vanilla extract and mixing until smooth. Afterward, pour in the milk and mango purée, blending everything well until the mixture is creamy and uniform. This step brings the vibrant flavors of the tropics to your Mango Strawberry Sunset Cupcakes, setting the stage for a delightful treat.

Step 5: Combine Dry and Wet Mixtures
Gradually mix the dry ingredients into the wet mixture, folding gently until just combined. Take care not to overmix; a few lumps are perfectly fine and will help keep your cupcakes light and airy. The batter should be thick yet smooth, filled with the promise of deliciousness waiting to rise in the oven.

Step 6: Fill and Bake
Spoon the batter into the lined cupcake liners, filling each about ¾ full for an ideal rise. Place the muffin tin in the preheated oven and bake for 18-20 minutes until a toothpick inserted into the center comes out clean. As they bake, enjoy the enchanting aroma of your Mango Strawberry Sunset Cupcakes filling the kitchen, signifying their deliciousness.

Step 7: Cool the Cupcakes
Once baked, remove the cupcakes from the oven and allow them to cool in the tin for about 5 minutes. Then, carefully transfer them to a wire rack to cool completely. This cooling process is essential, as it prevents your frosting from melting later and ensures a delightful texture in every bite.

Step 8: Assemble with Jam
To create a delightful surprise inside each cupcake, take a piping bag or a small knife and fill the centers with strawberry jam. Insert the tip into the center of each cupcake and squeeze gently to fill it with a sweet burst of flavor. This hidden treasure will perfectly complement the tropical tastes of your Mango Strawberry Sunset Cupcakes.

Step 9: Prepare the Frosting
For the frosting, beat the softened butter in a bowl until creamy, then gradually add the sifted powdered sugar. Mix in the vanilla extract and heavy cream until you achieve a fluffy, spreadable consistency. Adjust with more cream if necessary to create the perfect texture for decorating your cupcakes with a tantalizing sunset swirl.

Step 10: Color the Frosting
Divide the frosting into two separate bowls, tinting one with mango purée for a sunny yellow hue and the other with strawberry purée for a lovely pink shade. These beautiful colors are reminiscent of a sunset and will elevate the visual appeal of your Mango Strawberry Sunset Cupcakes to match their delicious taste.

Step 11: Decorate with Style
Using a piping bag fitted with a star tip (or even a simple zip-top bag with a corner cut off), pipe the tinted frostings onto each cupcake to create a stunning sunset swirl. You can get creative with the design, mixing and matching the colors for a show-stopping effect that will captivate your guests and add flair to any occasion.

Step 12: Add Final Touches
For an extra special presentation, garnish your cupcakes with fresh fruit slices on top, such as mango or strawberries. This not only enhances the tropical vibe of your Mango Strawberry Sunset Cupcakes but also adds a fresh, fruity charm that'll make these cupcakes irresistible to anyone who gazes upon them.

How to Store and Freeze Mango Strawberry Sunset Cupcakes

Airtight Container: Store your Mango Strawberry Sunset Cupcakes in an airtight container at room temperature for up to 3 days to maintain their freshness and softness.

Refrigeration: If you want to keep them longer, refrigerate the cupcakes for up to a week. Just ensure they are covered to avoid drying out.

Freezing: Freeze the unfrosted cupcakes for up to 3 months. Wrap each cupcake tightly in plastic wrap and place them in a freezer-safe bag. Frost when ready to serve.

Reheating: To enjoy a warm cupcake, microwave for about 10-15 seconds. This revives their moist texture and comforting flavor, perfect for any sweet craving!

Make Ahead Options

These Mango Strawberry Sunset Cupcakes are a fantastic choice for meal prep, saving you time and stress for special events or busy weeknights! You can prepare the cupcake batter and refrigerate it in an airtight container for up to 24 hours before baking; this helps meld the flavors while keeping the cupcakes just as tender. Additionally, you can fill the cupcakes with strawberry jam and frost them up to 3 days in advance. Ensure they're stored in an airtight container to maintain freshness. When you’re ready to serve, simply bring the frosted cupcakes to room temperature for an hour, and they’ll taste just as delicious as if freshly made!

Expert Tips for Mango Strawberry Sunset Cupcakes

Room Temperature Butter: Ensure your butter is at room temperature before creaming, as it incorporates air better for fluffier cupcakes.

Don’t Overmix: When combining wet and dry ingredients, mix until just incorporated; a few lumps are okay to maintain lightness in your Mango Strawberry Sunset Cupcakes.

Fresh Ingredients: Always check the freshness of your baking powder and eggs; this is crucial for achieving the perfect rise.

Adjust Frosting Consistency: If your frosting is too thick, add a splash of cream a little at a time until you reach the desired fluffy consistency.

Creative Decoration: Use a piping bag with a round tip for beautiful swirls, and don’t be shy to mix colors for a stunning presentation.

Mango Strawberry Sunset Cupcake Variations

Feel free to let your creativity soar as you customize these delightful cupcakes with fun twists and substitutes!

  • Gluten-Free: Swap all-purpose flour with a gluten-free flour blend for a gluten-free treat, ensuring everyone can enjoy them.
  • Dairy-Free: Use plant-based butter and milk to make a delicious dairy-free version without compromising on flavor.
  • Flavored Frosting: Mix in a hint of coconut extract to your frosting for an extra tropical touch that will tantalize your taste buds.
  • Fruity Filling: Replace strawberry jam with raspberry or blueberry jam for a vibrant burst of different fruits inside your cupcakes.
  • Spiced Up: Add a pinch of cinnamon or nutmeg to the batter for a warm, spiced flavor profile that complements the fruity sweetness beautifully.
  • Zesty Kick: Incorporate a teaspoon of lime zest into the batter for a refreshing zing that enhances the tropical flavors.
  • Bright and Bold: Tint the frosting with natural food coloring or additional fruit purees for more vibrant shades that reflect a real sunset.
  • Mini Cupcakes: Use a mini muffin tin to create bite-sized versions, perfect for sampling or as part of a dessert platter for gatherings.

Let your imagination guide you and consider pairing these tropical treats with a refreshing tropical smoothie for an extra fruity experience! Enjoy mixing and matching to find your favorite version!

What to Serve with Mango Strawberry Sunset Cupcakes?

Indulge in a delightful array of pairings that complement the vibrant flavors of your tropical treat!

  • Cold Coconut Milk: Its creamy sweetness complements the fruity cupcakes, adding a refreshing tropical touch.

  • Tropical Smoothie: Blend up some pineapple, banana, and coconut for a fruity drink that mirrors the flavors of the cupcakes.

  • Vanilla Ice Cream: A scoop alongside the cupcakes creates a lovely contrast of warm and cold, enriching the dessert experience.

  • Fresh Fruit Salad: A medley of mango, strawberries, and kiwi adds extra freshness, enhancing the cupcake’s tropical vibe.

  • Chocolate Drizzle: A light drizzle of chocolate over the frosting adds a rich element that balances the fruity sweetness perfectly.

  • Herbal Iced Tea: A lightly sweetened herbal tea brings a refreshing note, cleansing the palate between bites of cupcake.

Elevate your dessert table with these delightful pairings, making your Mango Strawberry Sunset Cupcakes the star of the show!

Mango Strawberry Sunset Cupcakes Recipe FAQs

What type of mango is best for mango purée?
Absolutely! For the best flavor in your mango purée, I recommend using ripe, sweet mangoes like Ataulfo or Haden. Look for mangoes that are slightly soft to the touch with a fragrant aroma; avoid those with dark spots or wrinkles, as they can indicate overripeness.

How should I store leftover cupcakes?
Very! Store any leftover Mango Strawberry Sunset Cupcakes in an airtight container at room temperature for up to 3 days. If you want to keep them longer, you can refrigerate them for up to a week. Just make sure they are well-covered to keep them from drying out.

Can I freeze these cupcakes?
For sure! If you want to freeze your Mango Strawberry Sunset Cupcakes, I suggest freezing them unfrosted. Wrap each cupcake tightly in plastic wrap, then place them in a freezer-safe bag. They will keep well for up to 3 months. When you’re ready to enjoy, simply thaw, frost, and serve!

What can I do if my cupcakes come out dense?
It's very common! If your cupcakes turn out denser than expected, it could be due to overmixing the batter. Gently mix just until the ingredients are combined; a few lumps are perfectly fine! Another tip is to check the freshness of your baking powder; old leavening agents can prevent proper rise.

Can I make this recipe gluten-free?
Absolutely! To transform your Mango Strawberry Sunset Cupcakes into a gluten-free delight, simply use a gluten-free flour blend in place of the all-purpose flour. Make sure to check that the baking powder and other ingredients are also gluten-free to keep your cupcakes safe for those with dietary restrictions.

Are there any allergy considerations for these cupcakes?
Definitely! When making Mango Strawberry Sunset Cupcakes, it’s important to consider your guests' dietary needs. Substitute eggs with flax eggs for a vegan option, and use dairy-free butter and plant-based milk for those avoiding dairy. Always check labels for allergens in your chosen ingredients!

Mango Strawberry Sunset Cupcakes

Mango Strawberry Sunset Cupcakes for a Tropical Treat

These Mango Strawberry Sunset Cupcakes are vibrant, tropical delights with luscious frosting, perfect for any occasion.
Print Recipe Pin Recipe
Prep Time 30 minutes mins
Cook Time 20 minutes mins
Cooling Time 5 minutes mins
Total Time 55 minutes mins
Servings: 12 cupcakes
Course: Dessert
Cuisine: Tropical
Calories: 250
Ingredients Equipment Method Nutrition Notes

Ingredients
  

For the Cupcakes
  • 2 cups All-Purpose Flour Substitute with gluten-free flour blend if needed.
  • 2 teaspoons Baking Powder Ensure it's fresh for best results.
  • 1 teaspoon Salt Use sea salt or kosher salt for different touch.
  • 1 cup Unsalted Butter Can be swapped with margarine for dairy-free option.
  • 1.5 cups Granulated Sugar Try coconut sugar for a more natural alternative.
  • 3 large Eggs Use flax eggs for egg-free option.
  • 1 teaspoon Vanilla Extract Almond extract can be used as a fragrant substitute.
  • 1 cup Milk Replace with plant-based milk for dairy-free version.
  • 1 cup Mango Purée Substitute with peach or apricot purée if needed.
  • 1 cup Strawberry Jam Homemade or store-bought works beautifully.
For the Frosting
  • 4 cups Powdered Sugar Sift for smooth consistency.
  • 1/2 cup Heavy Cream Coconut cream is a good alternative for dairy-free frosting.

Equipment

  • Oven
  • Muffin tin
  • Mixing bowls
  • piping bag

Method
 

Cupcake Instructions
  1. Preheat your oven to 350°F (175°C) and prepare a muffin tin with cupcake liners.
  2. In a medium bowl, whisk together the flour, baking powder, and salt until well combined.
  3. In a separate large mixing bowl, cream the butter and sugar together until light and fluffy.
  4. Beat in the eggs one at a time, then mix in vanilla, milk, and mango purée until smooth.
  5. Gradually mix the dry ingredients into the wet mix until just combined.
  6. Spoon batter into lined cupcake liners, filling each about ¾ full.
  7. Bake for 18-20 minutes until a toothpick comes out clean. Cool for 5 minutes in the tin.
  8. Fill centers of cupcakes with strawberry jam using a piping bag.
  9. For the frosting, beat butter until creamy, then add sifted powdered sugar and heavy cream, mixing until fluffy.
  10. Divide frosting, tint one with mango purée and the other with strawberry purée.
  11. Pipe the tinted frostings onto cupcakes to create a sunset swirl.
  12. Garnish with fresh fruit slices like mango or strawberries.

Nutrition

Serving: 1cupcakeCalories: 250kcalCarbohydrates: 36gProtein: 3gFat: 12gSaturated Fat: 7gPolyunsaturated Fat: 0.5gMonounsaturated Fat: 4gCholesterol: 45mgSodium: 180mgPotassium: 120mgFiber: 1gSugar: 18gVitamin A: 200IUVitamin C: 2mgCalcium: 30mgIron: 0.5mg

Notes

Ensure butter is at room temperature for fluffier cupcakes. Use fresh ingredients for best results.

Tried this recipe?

Let us know how it was!

Refreshing Lemon Tiramisu: A Light No-Bake Delight

January 3, 2026 by Grace Snow Leave a Comment

There's something special about a dessert that captures the sunshine of summer on your plate, and this Luscious Lemon Tiramisu does just that! This delightful no-bake Italian dessert takes the quintessential tiramisu and gives it a refreshing citrus twist, making it perfect for any warm-weather gathering. With a luscious blend of creamy mascarpone and bright lemon flavors, this dessert is not only a crowd-pleaser but also incredibly easy to prepare, freeing you from the stress of baking. What’s more, you can make it ahead of time, allowing the flavors to meld beautifully in the fridge. If you’re ready to elevate your dessert game and impress your friends and family, let’s dive into this heavenly lemon tiramisu recipe. Can you taste the brightness already?

Why is Lemon Tiramisu a Must-Try?

Refreshing and Zesty: This lemon tiramisu revitalizes the classic tiramisu with its bright citrus flavors, making it the perfect dessert for warm weather gatherings.
No-Bake Ease: You can whip up this elegant dessert without turning on the oven, saving you time and effort.
Crowd-Pleasing: Perfect for sharing at parties or family get-togethers, this dessert is sure to be a hit with guests of all ages.
Make-Ahead Convenience: The flavors meld beautifully when prepared a day in advance, letting you enjoy more time with family and friends.
Elevate your next gathering with this delightful treat—paired beautifully with a cup of coffee or even a light dessert wine! Want more lemon inspiration? Check out these Lemon Ricotta Protein Pancakes or the comforting Lemon Chicken Soup for a complete lemon-infused meal!

Lemon Tiramisu Ingredients

For the Lemon Syrup

  • Fresh Lemon Juice – This lemony base adds vibrant tartness; about 3 lemons yields 1/2 cup.
  • Water – Used to dilute the lemon juice for syrup; no substitution needed.
  • Granulated Sugar – Sweetens the syrup; you can swap with alternative sweeteners, adjusting to taste.

For the Mascarpone Cream

  • Heavy Whipping Cream – Whips up beautifully for a creamy texture; don’t substitute as it affects the outcome.
  • Mascarpone Cheese – The heart of this creamy delight; use a cream cheese and heavy cream mix if unavailable.
  • Powdered Sugar – Provides sweetness to the mascarpone; regular sugar works, but may result in a grainy finish.
  • Pure Vanilla Extract – Enhances the overall flavor; stick to pure for the best results.
  • Lemon Zest – Adds an extra zing to the cream; opt for organic lemons to avoid pesticides.

For the Assembly

  • Ladyfinger Cookies (Savoiardi) – These spongy cookies create the dessert's structure; avoid substitutes for the authentic texture.
  • Extra Lemon Zest or Candied Lemon Slices (for garnish) – Optional but makes for a beautiful finishing touch.

This Lemon Tiramisu embodies a refreshing twist on the classic Italian dessert, inviting you to savor its delightful layers!

Step‑by‑Step Instructions for Lemon Tiramisu

Step 1: Make the Lemon Syrup
In a medium saucepan over medium heat, combine 1/2 cup of fresh lemon juice, 1/2 cup of water, and 1/4 cup of granulated sugar. Stir the mixture until the sugar fully dissolves and the liquid simmers gently, about 5 minutes. Remove from heat and allow the lemon syrup to cool completely, giving it that zesty base needed for your Lemon Tiramisu.

Step 2: Prepare the Mascarpone Cream
In a large mixing bowl, whip 1 cup of cold heavy whipping cream along with 1/4 cup of powdered sugar and 1 teaspoon of pure vanilla extract. Beat until soft peaks form, approximately 3-4 minutes. In a separate bowl, beat 1 cup of mascarpone cheese with the zest of 1 lemon until smooth. They will unite beautifully in the next step, ensuring a creamy Lemon Tiramisu.

Step 3: Fold the Mixtures Together
Gently fold the whipped cream into the mascarpone mixture using a spatula. Use a light hand to preserve the airiness of the cream—this will create a fluffy texture for your Lemon Tiramisu. Make sure no streaks of whipped cream remain, as it should be blended seamlessly, yielding a luscious cream that’s perfect for layering.

Step 4: Assemble the Dessert
Quickly dip ladyfinger cookies into the cooled lemon syrup, ensuring they soak for no more than 2-3 seconds, as you want them moist but not soggy. Layer them at the bottom of a 9x9-inch dish. Spread half of the creamy mascarpone mixture over the soaked ladyfingers, smoothing it out gently before moving on to the next layer for your Lemon Tiramisu.

Step 5: Create the Final Layer
Repeat the process by dipping more ladyfingers into the lemon syrup and layering them on top of the mascarpone cream. Finish by spreading the remaining mascarpone mixture evenly across the top, creating a beautiful, creamy surface that beckons for garnishing later. Make sure each layer is well-aligned for a polished presentation.

Step 6: Chill for Best Flavor
Cover the assembled Lemon Tiramisu tightly with plastic wrap and refrigerate for at least 4-6 hours, or ideally overnight. This chilling period allows the flavors to meld and the dessert to set, creating that irresistible combination of creamy and refreshing tartness.

Step 7: Garnish & Serve
Before serving, lift the lid on your chilled masterpiece and sprinkle extra lemon zest or arrange candied lemon slices on top. This not only enhances the visual appeal but adds a delightful burst of flavor when each slice is served. Your guests will be singing praises as they savor this elegant Lemon Tiramisu!

Expert Tips for Lemon Tiramisu

  • Use Fresh Lemons: Fresh lemon juice and zest enhance flavor significantly; avoid bottled lemon juice for a truly vibrant taste.
  • Chill Ingredients: Ensure your heavy cream is cold before whipping; this creates the fluffy texture needed for the perfect Lemon Tiramisu.
  • Gentle Folding: When incorporating whipped cream into the mascarpone, fold gently to maintain airiness; this ensures a light, fluffy dessert.
  • Layering Technique: Dip ladyfingers quickly to prevent sogginess; a brief soak (2-3 seconds) retains structure while absorbing flavor.
  • Make It Ahead: Allowing your dessert to chill overnight enhances the melding of flavors, making it even more delicious when served.
  • Presentation Matters: Garnish with extra lemon zest or candied lemon slices for a stunning finish that elevates your Lemon Tiramisu!

Make Ahead Options

These lemon tiramisu are perfect for busy home cooks looking to savor exquisite flavors without the last-minute rush! You can prepare the lemon syrup and mascarpone cream up to 24 hours in advance, storing them separately in airtight containers in the refrigerator. Additionally, you can assemble the dessert and chill it for up to 2 days before serving, which allows the flavors to meld beautifully. When you’re ready to serve, simply garnish with extra lemon zest or candied lemon slices for that fresh burst of flavor. This make-ahead approach ensures your lemon tiramisu remains just as delicious and impressively elegant, allowing you more time to enjoy with loved ones!

What to Serve with Luscious Lemon Tiramisu?

There's nothing quite like creating a meal that perfectly complements a zesty, no-bake dessert, leaving your guests wanting more.

  • Fresh Berries: A mix of strawberries, blueberries, and raspberries adds a burst of color and acidity that complements the lemon's brightness beautifully.
  • Italian Coffee: A rich, bold espresso or smooth cappuccino enhances the dessert experience, creating a delightful contrast to the creamy sweetness.
  • Mint-Infused Water: Refreshing and aromatic, this light beverage cleanses the palate and echoes the vibrant notes of your tiramisu.
  • Almond Biscotti: The crunchy texture and nutty flavor offer a delightful counterpoint to the soft, creamy layers of your lemon tiramisu.
  • Citrus Salad: A light salad of mixed citrus fruits drizzled with honey accentuates the lemon flavor while adding a refreshing touch.
  • Light Sparkling Wine: A glass of prosecco or a light Moscato brings a festive touch, enhancing the celebratory feel of any dessert spread.
  • Pistachio Gelato: Creamy and nutty, this gelato acts as the perfect counterbalance to the tartness of the tiramisu, providing a luxurious finish.
  • Coconut Sorbet: Light and refreshing, this dessert is a cooling treat that harmonizes beautifully with the lemon flavors of your dish.
  • Lemon Sorbet: Intensify the lemon experience with this tart and icy treat, promoting a refreshing taste that ties the meal together.
  • Cheese Platter: A spread of soft cheeses, nuts, and dried fruits offers a savory option that rounds out your meal and balances the sweetness of the dessert.

How to Store and Freeze Lemon Tiramisu

Fridge: Store your Lemon Tiramisu covered in the refrigerator for up to 2 days. This ensures it remains fresh and allows the flavors to develop further.

Freezer: For longer storage, you can freeze it for up to 2 months. Be sure to wrap individual portions tightly in plastic wrap and then place them in an airtight container.

Thawing: To enjoy frozen Lemon Tiramisu, transfer it to the fridge and allow it to thaw overnight before serving.

Reheating: There’s no need to reheat; serve chilled for the best taste experience!

Lemon Tiramisu Variations & Substitutions

Feel free to make this lemon tiramisu your own with these fun and flavorful twists!

  • Limoncello Boost: Incorporate a splash of Limoncello into the lemon syrup for a delightful adult version. The aromatic taste will elevate your dessert to a whole new level!

  • Almond Extract Twist: Swap out vanilla extract for almond extract for a unique flavor profile that compliments the brightness of lemon beautifully. You'll be amazed at how this small change can enhance the overall experience!

  • Gluten-Free Ladyfingers: Use gluten-free ladyfinger cookies to accommodate dietary restrictions without compromising on the dessert's delightful texture. It's a win-win for everyone at the table!

  • Coconut Cream: Replace heavy whipping cream with chilled coconut cream for a dairy-free alternative. This offers a tropical twist complemented by the zesty lemon, making every bite feel like a summer getaway.

  • Berry Bliss: Add layers of fresh berries, like raspberries or blueberries, between the ladyfingers for a pop of color and natural sweetness. The combination of flavors will wow your guests!

  • Mint Infusion: Throw in a few fresh mint leaves in the lemon syrup for a refreshing herbaceous note that brings a new dimension to your tiramisu. It's a lovely surprise that harmonizes beautifully with the lemon.

  • Chocolate Drizzle: Enhance your dessert with a drizzle of dark chocolate before serving. The bitterness and richness will create a decadent contrast to the bright acidity of the lemon!

These variations can elevate your lemon tiramisu and make it a conversation starter at your gatherings. While you're exploring lemony delights, don't forget to check out these Lemon Ricotta Protein Pancakes or the comforting Lemon Chicken Soup for a full flavorful experience!

Lemon Tiramisu Recipe FAQs

What should I look for when choosing lemons for this recipe?
Absolutely! When selecting lemons, look for ones that are firm and bright yellow, with a smooth skin. Avoid lemons with blemishes or dark spots as these can indicate overripeness. A fresh lemon should feel heavier for its size, suggesting juiciness—a key component for your zesty lemon tiramisu!

How should I store leftover Lemon Tiramisu?
Very! Store your Lemon Tiramisu covered in the refrigerator for up to 2 days. This keeps it fresh and allows the flavors to meld even more. If you notice any significant change in texture or flavor, it might be best to enjoy it sooner rather than later!

Can I freeze Lemon Tiramisu?
Absolutely! You can freeze your Lemon Tiramisu for up to 2 months. To do this, wrap individual portions tightly in plastic wrap, then place them in an airtight container. When you're ready to enjoy, transfer the frozen tiramisu to the refrigerator overnight for a gentle thaw. Serve it chilled for the best bite!

What if my whipped cream doesn’t reach soft peaks?
No worries! If your whipped cream isn’t reaching soft peaks, ensure that your heavy cream is very cold; this helps in achieving the desired texture. Also, be careful not to overbeat past soft peaks, as it can quickly turn buttery. If necessary, start over with fresh cold cream and whip slowly, gradually increasing the speed until you achieve that light, fluffy consistency for the mascarpone cream.

Are there any dietary considerations I should keep in mind with Lemon Tiramisu?
Definitely! This recipe contains dairy and gluten from the mascarpone and ladyfinger cookies, which may not be suitable for some dietary restrictions. For a gluten-free version, substitute regular ladyfingers with gluten-free options. If allergies to dairy are a concern, consider using a mixture of dairy-free cream cheese and coconut cream or soy-based whipped cream, adjusting sweetness as needed.

Can I make Lemon Tiramisu ahead of time?
Absolutely! This delightful dessert can actually be made up to 2 days in advance. The chilling time enhances the flavors, allowing layers to meld beautifully. Just cover it tightly in the fridge to maintain its freshness. Prepare ahead and free yourself from last-minute dessert stress—your guests will thank you!

Lemon Tiramisu

Refreshing Lemon Tiramisu: A Light No-Bake Delight

This Lemon Tiramisu is a refreshing twist on the classic Italian dessert, perfect for warm gatherings.
Print Recipe Pin Recipe
Prep Time 30 minutes mins
Chilling Time 6 hours hrs
Total Time 6 hours hrs 30 minutes mins
Servings: 8 slices
Course: Dessert
Cuisine: Italian
Calories: 330
Ingredients Equipment Method Nutrition Notes

Ingredients
  

For the Lemon Syrup
  • 1/2 cup Fresh Lemon Juice Juice from about 3 lemons
  • 1/2 cup Water Used to dilute the lemon juice
  • 1/4 cup Granulated Sugar Sweetens the syrup; alternative sweeteners can be used
For the Mascarpone Cream
  • 1 cup Heavy Whipping Cream Ensure it's cold for best results
  • 1 cup Mascarpone Cheese The main creamy ingredient; can substitute with cream cheese
  • 1/4 cup Powdered Sugar Provides sweetness to the mixture
  • 1 teaspoon Pure Vanilla Extract For flavor enhancement
  • 1 tablespoon Lemon Zest Use organic lemons for the best flavor
For the Assembly
  • 24 pieces Ladyfinger Cookies (Savoiardi) These spongy cookies are essential for structure
  • Extra Lemon Zest or Candied Lemon Slices For garnish; optional

Equipment

  • Medium saucepan
  • large mixing bowl
  • Spatula
  • 9x9-inch dish

Method
 

Step-by-Step Instructions for Lemon Tiramisu
  1. In a medium saucepan over medium heat, combine 1/2 cup of fresh lemon juice, 1/2 cup of water, and 1/4 cup of granulated sugar. Stir until sugar dissolves and mixture simmers gently for about 5 minutes. Remove from heat and let cool.
  2. In a large mixing bowl, whip 1 cup of cold heavy whipping cream with 1/4 cup of powdered sugar and 1 teaspoon of pure vanilla extract until soft peaks form, about 3-4 minutes.
  3. In a separate bowl, beat 1 cup of mascarpone cheese with the zest of 1 lemon until smooth. Combine both mixtures and fold gently to maintain airiness.
  4. Dip ladyfinger cookies quickly into the cooled lemon syrup for 2-3 seconds, then layer them in a 9x9-inch dish. Spread half of the mascarpone mixture over the ladyfingers.
  5. Repeat dipping and layering with remaining ladyfingers and mascarpone mixture, ensuring that layers align neatly.
  6. Cover tightly with plastic wrap and refrigerate for at least 4-6 hours, or overnight for best flavor.
  7. Before serving, garnish with extra lemon zest or candied lemon slices.

Nutrition

Serving: 1slicesCalories: 330kcalCarbohydrates: 40gProtein: 4gFat: 18gSaturated Fat: 10gCholesterol: 70mgSodium: 160mgPotassium: 120mgSugar: 22gVitamin A: 500IUVitamin C: 8mgCalcium: 90mgIron: 0.5mg

Notes

Use fresh lemons for optimal flavor; allow the dessert to chill overnight for the best taste.

Tried this recipe?

Let us know how it was!

Mango Strawberry Sunset Cupcakes to Brighten Your Day

January 3, 2026 by Grace Snow Leave a Comment

As the sun dips below the horizon, radiating golden hues across the kitchen, the tantalizing scent of ripe mango and fresh strawberries fills the air. That's when I knew it was time to whip up a batch of my delightful Mango Strawberry Sunset Cupcakes. These cupcakes are not only a visual treat for your eyes, but they also embody the spirit of summer—a perfect fusion of fruity zest and fluffy sweetness. With their quick prep time, you can easily whip these up for a last-minute gathering or a cozy night in. Plus, they're a fantastic way to impress anyone who claims they don’t like desserts! Trust me; once you sink your teeth into these colorful confections, you'll wish you had made a double batch. What will you pair with these vibrant cupcakes to make your gathering unforgettable?

Why are these cupcakes a must-try?

Vibrancy in Every Bite: The eye-catching colors of these cupcakes not only please the palate but also brighten up any dessert table.
Fruity Fusion: The combination of ripe mango and fresh strawberries brings a refreshing twist, perfect for summer gatherings or cozy nights in.
Quick and Easy: With minimal prep time, you can enjoy homemade goodness without the hassle. Ideal for those last-minute celebrations!
Crowd-Pleasing Delight: These Mango Strawberry Sunset Cupcakes are bound to impress guests, even if they claim they aren’t dessert lovers.
Versatile Pairing: Serve them with a scoop of vanilla ice cream or alongside a fruit salad for a delightful treat. For more delicious cupcakes, check out our Cupcake Archives.

Mango Strawberry Sunset Cupcakes Ingredients

For the Cupcake Batter

  • All-purpose flour – Provides the perfect base for a light and fluffy texture.
  • Granulated sugar – Sweetens the batter and enhances the fruity flavors.
  • Baking powder – Helps the cupcakes rise to that perfect height.
  • Salt – Balances sweetness, allowing the mango and strawberry to shine.
  • Eggs – Offers structure and moisture, making each bite delightful.
  • Unsalted butter – Adds richness and a buttery flavor to the cupcakes.
  • Milk – Keeps the batter moist; feel free to substitute with almond or oat milk for a dairy-free version.
  • Mango puree – Infuses an irresistible tropical taste into the cupcakes.
  • Strawberry puree – Adds a burst of sweet and tangy flavor alongside the mango.

For the Frosting

  • Cream cheese – Provides a creamy, tangy base that complements the fruity cupcakes perfectly.
  • Powdered sugar – Sweetens the frosting while making it light and fluffy.
  • Vanilla extract – Enhances the overall flavor profile, adding warmth to the frosting.
  • Fresh strawberries – Chopped finely to fold into the frosting, adding bits of freshness and color.

These Mango Strawberry Sunset Cupcakes are an easy and delightful dessert option, perfect for any occasion!

Step‑by‑Step Instructions for Mango Strawberry Sunset Cupcakes

Step 1: Preheat the Oven
Begin by preheating your oven to 350°F (175°C). While the oven warms up, line a muffin tin with colorful cupcake liners to make your Mango Strawberry Sunset Cupcakes visually appealing. This preparation ensures a seamless baking process and prevents any sticking during the cupcake removal later.

Step 2: Mix Dry Ingredients
In a medium bowl, whisk together the all-purpose flour, baking powder, and salt until evenly combined. This step creates a uniform mixture that will help the cupcakes rise properly. Set the bowl aside, and let these dry ingredients mingle while you move on to the wet ingredients.

Step 3: Cream Butter and Sugar
In another bowl, cream together the softened butter and granulated sugar with a hand mixer for about 3 to 5 minutes. You want the mixture to become light and fluffy, turning pale in color. This process introduces air into your batter, which is essential for creating that delightful texture in your Mango Strawberry Sunset Cupcakes.

Step 4: Incorporate Eggs and Vanilla
Beat the eggs and vanilla extract into the creamed butter and sugar mixture. Mix until everything is well combined. Next, pour in the milk and mango purée, and continue to stir until the mixture is homogenous. This fruity base adds moisture and tropical flavor to your batter.

Step 5: Combine Wet and Dry Ingredients
Gradually mix the dry ingredients into the wet mixture, stirring just until no streaks of flour remain. Be careful not to overmix; a few lumps are perfectly acceptable. The key to light and airy Mango Strawberry Sunset Cupcakes lies in maintaining that gentle touch while merging the ingredients.

Step 6: Fill Cupcake Liners
With a spoon or ice cream scoop, fill each cupcake liner about three-quarters full with batter. This will allow room for the cupcakes to rise without spilling over. Once filled, carefully place the muffin tin into your preheated oven and bake for 18-20 minutes, or until a toothpick inserted in the center comes out clean.

Step 7: Cool the Cupcakes
Once baked, remove the muffin tin from the oven and let it cool on a wire rack for about 10 minutes. Gently take the cupcakes out of the tin and place them directly on the rack to cool completely. This crucial step prevents sogginess and allows the cupcakes to achieve that perfect texture.

Step 8: Fill with Strawberry Jam
Once the cupcakes are completely cool, use a piping bag or a knife to create a small hole in the center of each cupcake. Spoon or pipe in the strawberry jam to create a delightful surprise filling. Each bite will burst with flavor from the jam, enhancing the overall experience of your Mango Strawberry Sunset Cupcakes.

Step 9: Prepare the Frosting
For the frosting, beat together softened cream cheese and powdered sugar until smooth and fluffy. Gradually add in vanilla extract and heavy cream, mixing continuously until the frosting achieves a light, spreadable consistency. If it gets too thick, you can add a splash more cream to reach your desired texture.

Step 10: Tint the Frosting
Divide the frosting into two bowls. In one bowl, gently mix in mango purée to achieve a sunny yellow hue, while in the other bowl, incorporate strawberry purée for a lovely pink shade. This vibrant frosting will not only taste delicious but also create a stunning visual contrast on your Mango Strawberry Sunset Cupcakes.

Step 11: Decorate the Cupcakes
Using a piping bag fitted with a decorative tip, swirl the yellow and pink frostings together to mimic a beautiful sunset. Start from the center of each cupcake and work your way outwards for an appealing finish. Optionally, garnish your cupcakes with slices of fresh fruit for an added touch of tropical charm.

What to Serve with Mango Strawberry Sunset Cupcakes

These delightful cupcakes are the perfect centerpiece, but they also play beautifully alongside a variety of tasty accompaniments that amplify their tropical essence.

  • Coconut Milk Shake: Creamy and refreshing, a chilled coconut milk shake enhances the tropical vibe and balances the sweetness of the cupcakes.

  • Tropical Fruit Salad: A vibrant mix of seasonal fruits like pineapple, kiwi, and berries brings a burst of freshness, making each bite an adventure of flavors. Toss in a squeeze of lime for added zest!

  • Vanilla Ice Cream: The classic pairing that never fails! A scoop of smooth vanilla ice cream adds a delightful creaminess, complementing the fruity undertones beautifully. Drizzle with caramel or chocolate sauce for a decadent twist.

  • Sparkling Lemonade: Refreshing and zesty, a glass of sparkling lemonade cleanses the palate and adds a refreshing dimension to the sweet treats. Perfect for sunny celebrations, it offers a delightful contrast.

  • Pineapple Upside-Down Cake: For a tropical vibe, serve with this classic cake that features juicy pineapple rings. The caramelized sugar and buttery cake will delight everyone during dessert.

  • Chocolate Dipped Strawberries: Indulge in a classic dessert pairing! The sweetness of ripe strawberries, enhanced with smooth chocolate, creates a memorable tasting experience alongside the cupcakes.

  • Mint Mojito: A refreshing mint mojito brings a cool and invigorating touch, balancing flavors wonderfully while adding a touch of sophistication to your gathering.

  • Passion Fruit Sorbet: Cool off with a scoop of refreshing passion fruit sorbet. Its tangy flavors complement the tropical notes of the cupcakes, creating an effortlessly elegant dessert spread.

Feel free to mix and match for your perfect dessert table!

Mango Strawberry Sunset Cupcakes Variations

Feel free to let your creativity shine by customizing these delightful cupcakes in ways that suit your taste buds!

  • Gluten-Free: Substitute all-purpose flour with a gluten-free flour blend for a deliciously light and fluffy texture that's safe for gluten-sensitive folks.

  • Vegan Delight: Swap out the eggs for flax eggs and use plant-based butter and milk. This variation keeps the tropical flavors intact while catering to a vegan lifestyle. You'll still get that moist texture—perfect for anyone wanting to indulge without the animal products!

  • Fruit Mash-Up: Instead of mango purée, try using peach or apricot purée for a refreshing change. Each fruit brings its unique flavor profile to the party, and you can create delicious cupcakes based on what’s in season!

  • Jam Surprises: Transform your jam filling with other fruit options, like raspberry or blueberry. The tangy notes of raspberry, for instance, will offer an intriguing and tart contrast to the sweetness of the cupcakes.

  • Frosting Finesse: Make the frosting interesting by adding lemon zest or a splash of coconut extract to elevate its flavor further. A little citrus can brighten the frosting and add a burst of freshness.

  • Nutty Crunch: Fold in finely chopped nuts, such as walnuts or pistachios, into the batter before baking. This will introduce a delightful crunch that contrasts beautifully with the soft, airy cupcakes.

  • Spice it Up: Add a pinch of cinnamon or nutmeg to the batter for a cozy warmth. These spices work wonders with fruity flavors, creating an unexpected comfort twist.

  • Tropical Heat: For those who love a kick, incorporate a touch of cayenne pepper or finely chopped jalapeños into the frosting. This adventurous twist will surprise your guests with a sweet heat experience!

With these tasty twists, your Mango Strawberry Sunset Cupcakes can shine on any occasion. Curious to try more dessert ideas? Dive into our adventures in the kitchen with the Desserts Collection!

Make Ahead Options

These Mango Strawberry Sunset Cupcakes are a fantastic option for those looking to save time during busy weeks! You can prepare the cupcake batter up to 24 hours in advance by mixing it and storing it in an airtight container in the refrigerator; just make sure to bring it back to room temperature before baking. Additionally, you can fill the cupcakes with strawberry jam a day ahead, keeping them covered to maintain freshness. When ready to serve, simply bake the cupcakes and frost them with the whipped cream cheese frosting, which can also be made ahead and stored in the fridge for up to 3 days. This way, you'll have delicious homemade treats at your fingertips with minimal last-minute effort!

Expert Tips for Mango Strawberry Sunset Cupcakes

  • Room Temperature Butter: Ensure butter is softened to room temperature for easier creaming; this creates a lighter texture in the cupcakes.

  • Avoid Overmixing: Gently mix the wet and dry ingredients just until combined. Overmixing can lead to dense Mango Strawberry Sunset Cupcakes.

  • Check Freshness of Baking Powder: Use fresh baking powder to ensure optimal rise and fluffiness in your cupcakes.

  • Frosting Consistency: If your frosting is too thick, add a splash more cream. The ideal consistency should be smooth and easily spreadable.

  • Cool Completely: Let cupcakes cool fully on a wire rack before filling or frosting to maintain their ideal texture and avoid sogginess.

  • Use Piping Bags: For beautiful presentation, use a piping bag to swirl your tinted frosting, creating that lovely sunset effect on your Mango Strawberry Sunset Cupcakes.

Storage Tips for Mango Strawberry Sunset Cupcakes

Room Temperature: Keep the cupcakes in an airtight container at room temperature for up to 3 days to maintain their softness and flavor.

Fridge: If you want to store them longer, place the cupcakes in the fridge where they will stay fresh for up to 1 week. Just remember to let them come to room temperature before serving for the best taste!

Freezer: For extended storage, you can freeze the unfrosted cupcakes individually wrapped in plastic wrap and placed in a freezer-safe bag for up to 3 months. Just thaw, frost, and enjoy whenever you're ready!

Reheating: If you prefer them warm, simply microwave a cupcake for 10-15 seconds to bring back that fresh-baked feel. Enjoy these delightful Mango Strawberry Sunset Cupcakes at their best!

Mango Strawberry Sunset Cupcakes Recipe FAQs

What should I look for when selecting mangoes and strawberries?
When choosing mangoes, look for ones that are slightly soft to the touch and have a sweet fragrance. A ripe mango should have little to no green spots, preferably displaying vibrant yellow or red hues. For strawberries, choose berries that are bright red with fresh green leaves, avoiding any that show dark spots or are overly soft.

How do I store leftover cupcakes properly?
Absolutely! Store your Mango Strawberry Sunset Cupcakes in an airtight container at room temperature for up to 3 days to keep them moist. If you need to keep them longer, refrigerate them in an airtight container for up to a week. Make sure to let them come to room temperature before serving for the best texture.

Can I freeze these cupcakes?
Yes, you can! To freeze your Mango Strawberry Sunset Cupcakes, start by wrapping each unfrosted cupcake tightly in plastic wrap and then place them in a freezer-safe bag. They can stay fresh for up to 3 months. When ready to enjoy, simply thaw at room temperature, frost them, and savor the delightful taste!

What if my cupcakes turn out dense or heavy?
If your cupcakes come out dense, it may be due to overmixing the batter or using expired baking powder. Be sure to gently mix the wet and dry ingredients until just combined—some lumps are okay! Additionally, always check the freshness of your baking powder; it should be active for optimum rise.

Are these cupcakes suitable for people with dietary restrictions?
Certainly! You can easily make the Mango Strawberry Sunset Cupcakes gluten-free by substituting all-purpose flour with a gluten-free flour blend. For dairy-free options, use plant-based butter and milk. If you're making them vegan, replace the eggs with flax eggs (1 tablespoon ground flaxseed mixed with 2.5 tablespoons water per egg). Enjoy these fruity delights worry-free!

Mango Strawberry Sunset Cupcakes to Brighten Your Day

Delight in these vibrant Mango Strawberry Sunset Cupcakes, a perfect fusion of tropical flavors sure to impress dessert lovers.
Print Recipe
Prep Time 20 minutes mins
Cook Time 20 minutes mins
Cooling Time 10 minutes mins
Total Time 50 minutes mins
Servings: 12 cupcakes
Course: Dessert
Cuisine: American
Calories: 250
Ingredients Equipment Method Nutrition Notes

Ingredients
  

For the Cupcake Batter
  • 2 cups all-purpose flour Provides the perfect base for a light and fluffy texture.
  • 1 cup granulated sugar Sweetens the batter and enhances the fruity flavors.
  • 2 tsp baking powder Helps the cupcakes rise to that perfect height.
  • 1/2 tsp salt Balances sweetness, allowing the mango and strawberry to shine.
  • 3 large eggs Offers structure and moisture, making each bite delightful.
  • 1/2 cup unsalted butter Adds richness and a buttery flavor to the cupcakes.
  • 1 cup milk Keeps the batter moist; feel free to substitute with almond or oat milk for a dairy-free version.
  • 1/2 cup mango puree Infuses an irresistible tropical taste into the cupcakes.
  • 1/2 cup strawberry puree Adds a burst of sweet and tangy flavor alongside the mango.
For the Frosting
  • 8 oz cream cheese Provides a creamy, tangy base that complements the fruity cupcakes perfectly.
  • 2 cups powdered sugar Sweetens the frosting while making it light and fluffy.
  • 1 tsp vanilla extract Enhances the overall flavor profile, adding warmth to the frosting.
  • 1/2 cup fresh strawberries Chopped finely to fold into the frosting, adding bits of freshness and color.

Equipment

  • Muffin tin
  • Mixing bowls
  • hand mixer
  • piping bag

Method
 

Baking Instructions
  1. Preheat your oven to 350°F (175°C) and line a muffin tin with colorful cupcake liners.
  2. In a medium bowl, whisk together flour, baking powder, and salt until evenly combined.
  3. Cream together softened butter and sugar with a hand mixer for 3 to 5 minutes until light and fluffy.
  4. Beat in the eggs and vanilla extract, then mix in milk and mango purée until well combined.
  5. Gradually mix dry ingredients into the wet mixture, stirring until no streaks of flour remain.
  6. Fill cupcake liners about three-quarters full with batter, then bake for 18-20 minutes or until a toothpick comes out clean.
  7. Cool the cupcakes on a wire rack for about 10 minutes before removing from the tin.
  8. Once cooled, create a small hole in the center of each cupcake and fill with strawberry jam.
  9. Beat together cream cheese and powdered sugar until smooth, then add vanilla and heavy cream until spreadable.
  10. Divide frosting into two bowls, tint one with mango purée and the other with strawberry purée.
  11. Using a piping bag, swirl the yellow and pink frostings together on each cupcake and optionally garnish with fresh fruit.

Nutrition

Serving: 1cupcakeCalories: 250kcalCarbohydrates: 35gProtein: 3gFat: 12gSaturated Fat: 7gCholesterol: 40mgSodium: 150mgPotassium: 100mgFiber: 1gSugar: 18gVitamin A: 300IUVitamin C: 5mgCalcium: 40mgIron: 0.5mg

Notes

Store cupcakes in an airtight container at room temperature for up to 3 days or in the fridge for up to 1 week. They can also be frozen for up to 3 months.

Tried this recipe?

Let us know how it was!

Divine Vegan Lemon Cheesecake That's a Breeze to Make

January 1, 2026 by Grace Snow Leave a Comment

As I flipped through old recipe notebooks, I stumbled upon a forgotten gem—a creamy, refreshing no-bake masterpiece that whisked me away to sunlit summers. Enter my Easy Vegan Lemon Cheesecake Bars, a delightful treat that’s sure to brighten any gathering! The combination of luscious lemon filling and a crunchy cookie crust creates a dessert that feels indulgent yet is effortlessly simple to whip up. These bars are not just a crowd-pleaser; they’re also a thoughtful choice for anyone craving plant-based delights. They’re eggless, dairy-free, and adaptable for gluten-free diets, making them an invitation for everyone at the table to dig in. Ready to bring a slice of sunshine into your kitchen? Let’s get started on this refreshing treat!

Why is this Vegan Lemon Cheesecake irresistible?

Simplicity: The no-bake nature means you can create this gorgeous dessert without turning on the oven, saving time and energy.

Fresh Flavor: The zesty lemon filling paired with homemade lemon curd offers a refreshing burst of flavor that screams summer!

Versatile: You can easily swap ingredients, like using coconut yogurt instead of vegan Greek-style yogurt, ensuring it fits your tastes and dietary needs.

Crowd-Pleasing: Perfect for gatherings, this dessert appeals to vegans and non-vegans alike, making it a delightful addition to any table.

Quick and Easy: With only a few simple steps, you’ll have a beautiful dessert ready in no time. Need more vegan inspiration? Check out these Vegan Cacao Nib treats or refreshing Lemon Ricotta Protein pancakes for your next brunch!

Vegan Lemon Cheesecake Ingredients

For the Crust
• Vegan Cookies – The base for the crust, providing sweetness and texture; feel free to substitute with gluten-free cookies if desired.
• Unsalted Vegan Butter – This acts as a binding agent for the crust; block-style gives better consistency.
• Sea Salt – Enhances the flavor, amplifying the deliciousness of the crust.

For the Filling
• Cashews – Contributes ultimate creaminess to the filling; for best results, soak ahead of time or quick-soak in boiled water.
• Vegan Cream Cheese – The primary ingredient lending richness and creaminess; opt for brands you enjoy!
• Vegan Greek-Style Yogurt – Adds tangy flavor and creaminess; substitute with vegan sour cream or thick coconut yogurt if needed.
• Vanilla Extract – Provides depth and warmth to the flavor profile of the filling.
• Agave Syrup or Maple Syrup – Use this natural sweetener to balance the tartness of the lemon.

For the Topping
• Homemade Lemon Curd – A delightful, tangy addition that pairs beautifully with the vegan lemon cheesecake and elevates the overall taste experience!

Step‑by‑Step Instructions for Vegan Lemon Cheesecake

Step 1: Prepare the Lemon Curd
Start by making your homemade lemon curd, which should be chilled for up to 2 days before assembling the Vegan Lemon Cheesecake. Combine fresh lemon juice, zest, and sweetener in a saucepan over medium heat. Stir constantly until thickened, about 10 minutes. Transfer to a bowl, covering with plastic wrap to prevent a skin from forming, and refrigerate until needed.

Step 2: Soak the Cashews
For a dreamy, creamy filling, soak 1 cup of raw cashews in water for at least 4 hours. If you're short on time, pour boiling water over the cashews and let them sit for 30 minutes. Drain and rinse thoroughly to remove any bitterness. This essential step ensures your Vegan Lemon Cheesecake achieves that luscious texture.

Step 3: Make the Crust
In a food processor, crush 2 cups of vegan cookies and a pinch of sea salt until they resemble fine crumbs. Gradually add ½ cup of melted unsalted vegan butter, pulsing until combined and the mixture sticks together. Press this mixture firmly into the bottom of a lined 9-inch loaf pan to form an even crust. Refrigerate for about 15-20 minutes to set.

Step 4: Prepare the Filling
Place the soaked cashews, cooled lemon curd, 8 ounces of vegan cream cheese, ½ cup of vegan Greek-style yogurt, 1 teaspoon of vanilla extract, and ½ cup of agave syrup into the food processor. Blend on high speed until completely smooth and creamy, scraping down the sides as necessary. Once mixed, pour the filling over the chilled crust in the loaf pan.

Step 5: Chill to Set
Cover and refrigerate your Vegan Lemon Cheesecake for a minimum of 6 hours, although overnight is preferred for optimal firmness. This step is crucial for achieving the perfect texture. Once set, the cheesecake will be firm enough to hold its shape when sliced, making it ideal for serving.

Step 6: Top with Lemon Curd
Warm the remaining lemon curd you prepared earlier until it's easily spreadable; this should take just a minute in the microwave or on low heat. Carefully spread the lemon curd over the top of the set cheesecake, making it look smooth and glossy. Return the cheesecake to the refrigerator for an additional hour to allow everything to meld beautifully.

Step 7: Serve
Slice your Vegan Lemon Cheesecake Bars using a hot, wet knife for clean edges. You can garnish with fresh berries or mint leaves for an elegant touch. These bars can be stored in the fridge for up to 5 days or frozen for later indulgence. Enjoy a slice of sunshine with each bite!

Storage Tips for Vegan Lemon Cheesecake

Fridge: Store your Vegan Lemon Cheesecake bars in an airtight container for up to 5 days; they’ll retain their delicious flavor and texture, perfect for spontaneous cravings.

Freezer: For longer storage, wrap individual bars in plastic wrap, then place them in a freezer-safe container. They can be frozen for up to a month—just thaw at room temperature before enjoying!

Serving: When ready to serve, let the frozen bars sit out for about 15-30 minutes for the best texture; this way, they’ll soften slightly for an irresistible bite.

Reheating: If you have leftover cheesecake, there's no need to reheat it! Enjoy it cold for a refreshing treat that maintains its creamy consistency.

Expert Tips for Vegan Lemon Cheesecake

Creamy Cashews: Ensure cashews are adequately soaked to yield a creamy texture in your filling—this is essential for the perfect Vegan Lemon Cheesecake!

Parchment Paper: Line your pan with parchment paper for easy removal of the cheesecake; it makes slicing and serving a breeze.

Refrigeration Time: For the best results, allow your cheesecake to chill overnight—this helps it to set properly and enhances the flavor.

Warm Your Knife: Use a hot, wet knife to cut your cheesecake bars for clean edges; wiping the knife between cuts prevents messy slices.

Flavor Variations: Feel free to experiment with different types of nut butters or sweeteners to customize your Vegan Lemon Cheesecake to your taste!

Make Ahead Options

These Easy Vegan Lemon Cheesecake Bars are perfect for busy weeknights or gatherings! You can prepare the lemon curd up to 2 days in advance and store it in the refrigerator, ensuring a zesty kick when ready to serve. Additionally, soak the cashews for the filling ahead of time or even up to 4 hours in advance; if short on time, a quick-boil soak for 30 minutes works wonders. To maintain the cheesecake's creamy texture, refrigerate it for at least 6 hours (preferably overnight) to allow it to set properly. When you're ready to enjoy, simply spread the lemon curd on top and slice using a hot, wet knife for that perfect finish. You’ll have a delightful dessert that feels fresh and vibrant, saving you precious time in the kitchen!

Vegan Lemon Cheesecake Variations & Substitutions

Don't be afraid to get creative with your vegan lemon cheesecake—there are plenty of delicious options to tailor it to your taste!

  • Fruit Curds: Swap lemon curd for lime or mango curd for a tropical twist. Each fruit adds its unique brightness to the cheesecake, making every bite a new experience.

  • Nut Swap: Prefer a different flavor? Use almonds or macadamia nuts in place of cashews. Each nut will infuse a distinct richness, offering a delightful contrast to the lemon’s zing.

  • Whole-Food Crust: Try a date-coconut-almond crust for a more nutritious alternative. This wholesome foundation adds texture and natural sweetness, pairing beautifully with the creamy filling.

  • Spiced Up: For an extra kick, add a pinch of cinnamon or nutmeg to the filling. These spices will warm up the flavor profile, giving your cheesecake a cozy vibe perfect for cool evenings.

  • Chocolate Drizzle: A decadent twist can come from a vegan chocolate drizzle on top. This luscious addition turns your lemon cheesecake into an irresistible treat for chocolate lovers.

  • Sweetener Alternatives: If you prefer a different sweetener, use coconut sugar or stevia instead of agave syrup or maple syrup. Adjust the amount to your taste, finding the right balance of sweetness.

  • Nut-Free Option: For a nut-free version, replace cashews with silken tofu blended until smooth. This swap maintains the creamy texture while being accessible for those with nut allergies.

  • Flavor Infusions: Consider adding a splash of coconut milk for a richer flavor, or even a few drops of lemon extract for an intensified lemony aroma that’ll have everyone craving more.

These variations not only enhance the flavor but also ensure there's something for everyone to enjoy. And if you're looking for other delicious plant-based recipes, be sure to check out my delightful Vegan Cacao Nib treats or refreshing Lemon Ricotta Protein pancakes perfect for brunch!

What to Serve with Easy Vegan Lemon Cheesecake Bars

Elevate your dessert experience by pairing these luscious bars with delightful accompaniments that will make your taste buds dance!

  • Fresh Berries: The sweetness and tartness of strawberries or blueberries create a beautiful contrast, enhancing the cheesecake's flavors. A handful of vibrant berries adds a gorgeous pop of color to your plate.

  • Mint Leaves: A sprig of fresh mint lends a refreshing touch that balances the tangy lemon notes, making each bite feel extra special. Light and aromatic, it elevates your presentation beautifully.

  • Coconut Whipped Cream: This fluffy, dairy-free topping adds a rich creaminess that complements the zesty filling, creating an indulgent yet light dessert. It's an elegant touch that feels indulgent but is easy to whip up!

  • Iced Herbal Tea: A chilled glass of herbal tea like chamomile or mint provides a refreshing contrast to the sweetness of the cheesecake, making for a delightful palate cleanser. It’s perfect for sipping on a sunny afternoon.

  • Lemon Sorbet: For a citrus lovers’ dream, serve a scoop of lemon sorbet alongside your cheesecake. The icy treat amplifies the zingy flavors while providing a refreshing, cool sensation.

  • Crushed Pistachios: Sprinkle crushed pistachios for an unexpected crunch and a nutty flavor that enhances the texture of the dessert. This adds an elegant crunch that balances the creaminess of the cheesecake.

  • Sparkling Water with Lime: This refreshing drink serves as a light accompaniment that cleanses the palate without overwhelming the taste of your cheesecake. Enjoy the bubbly fizz alongside every decadent bite!

  • Chocolate Drizzle: A drizzle of melted dairy-free chocolate on top adds a sweet and slightly bitter touch, enhancing the dessert while keeping it beautifully elegant. Chocolate and lemon make an irresistible pairing!

With these delightful pairings, you’re set to create an unforgettable dessert experience for everyone around your table!

Easy No-Bake Vegan Lemon Cheesecake Recipe FAQs

How do I choose ripe lemons for this recipe?
Absolutely! When selecting lemons, look for ones that are bright yellow and heavy for their size. Avoid any with dark spots or wrinkles, as this may indicate they are past their prime. Fresh lemons will yield the juiciest and most flavorful results for your cheesecake.

What's the best way to store Vegan Lemon Cheesecake bars?
Very simple! Once fully set, store your Vegan Lemon Cheesecake bars in an airtight container in the refrigerator for up to 5 days. If you're planning on making them ahead, I often make them 1-2 days in advance, and they keep wonderfully while maintaining their creamy texture.

Can I freeze these cheesecake bars?
Absolutely! For longer storage, wrap each individual Vegan Lemon Cheesecake bar in plastic wrap and then place them in a freezer-safe container. They can be frozen for up to 1 month. When you're ready to enjoy, simply let them thaw at room temperature for about 15-30 minutes before serving for the perfect bite!

What if my filling isn't smooth after blending?
No worries! If your filling isn’t as creamy as you'd hoped, it may be due to the cashews not being soaked long enough. Make sure to soak the cashews for at least 4 hours or quick-soak in boiled water for 30 minutes. Blend again, adding a splash of lemon juice or water to help achieve that desired smooth consistency.

Are there any dietary considerations I should be aware of?
Great question! This recipe is vegan, dairy-free, and eggless, making it suitable for a variety of diets. If you’re serving guests with allergies, be sure to check the labels on your vegan cream cheese and yogurt as some brands might include allergens like soy or nuts. Additionally, if you opt for a gluten-free cookie base, make sure all ingredients are certified gluten-free as well.

Can I make variations of this recipe?
Very much so! Feel free to experiment with different fruits for curds—think lime or mango for a tropical twist! You can also swap out the cashews for other nuts like almonds for a different flavor profile. This versatility makes it a fun recipe to adjust according to your preferences!

Vegan Lemon Cheesecake

Divine Vegan Lemon Cheesecake That's a Breeze to Make

This Vegan Lemon Cheesecake is a refreshing, no-bake delight that's creamy and crowd-pleasing!
Print Recipe Pin Recipe
Prep Time 30 minutes mins
Chill Time 7 hours hrs
Total Time 7 hours hrs 30 minutes mins
Servings: 12 bars
Course: Dessert
Cuisine: Vegan
Calories: 250
Ingredients Equipment Method Nutrition Notes

Ingredients
  

Crust
  • 2 cups Vegan Cookies Gluten-free cookies can be substituted.
  • 1/2 cup Unsalted Vegan Butter Must be melted.
  • 1 pinch Sea Salt
Filling
  • 1 cup Cashews Soaked in water for at least 4 hours or quick-soaked in boiling water.
  • 8 ounces Vegan Cream Cheese Choose a brand you enjoy.
  • 1/2 cup Vegan Greek-Style Yogurt Can be substituted with vegan sour cream or thick coconut yogurt.
  • 1 teaspoon Vanilla Extract
  • 1/2 cup Agave Syrup or Maple Syrup Acts as natural sweetener.
Topping
  • 1 batch Homemade Lemon Curd Chilled and ready to use.

Equipment

  • Food Processor
  • 9-inch Loaf Pan
  • Microwave

Method
 

Preparation Steps
  1. Prepare the Lemon Curd by combining lemon juice, zest, and sweetener in a saucepan over medium heat. Stir until thickened, about 10 minutes. Refrigerate until needed.
  2. Soak the cashews in water for at least 4 hours or quick-soak in boiling water for 30 minutes. Drain and rinse.
  3. Crush the vegan cookies and sea salt in a food processor. Add melted vegan butter and pulse until combined. Press into a lined 9-inch loaf pan and refrigerate for 15-20 minutes.
  4. In a food processor, blend soaked cashews, cooled lemon curd, vegan cream cheese, vegan yogurt, vanilla extract, and agave syrup until smooth. Pour over the crust.
  5. Cover and refrigerate for at least 6 hours or preferably overnight to set.
  6. Warm the remaining lemon curd and spread over the set cheesecake. Refrigerate for an additional hour.
  7. Slice using a hot, wet knife and serve with fresh berries or mint leaves.

Nutrition

Serving: 1barCalories: 250kcalCarbohydrates: 30gProtein: 4gFat: 12gSaturated Fat: 4gPolyunsaturated Fat: 0.5gMonounsaturated Fat: 5gSodium: 150mgPotassium: 200mgFiber: 2gSugar: 12gVitamin C: 15mgCalcium: 2mgIron: 6mg

Notes

Store in an airtight container in the fridge for up to 5 days or freeze for later. Allow frozen bars to sit out for 15-30 minutes before serving.

Tried this recipe?

Let us know how it was!

Easy Keto Cheesecake Fluff: Indulge Guilt-Free Today!

January 1, 2026 by Grace Snow Leave a Comment

The moment I whipped together the ingredients for this Easy Keto Cheesecake Fluff, I couldn't believe how effortlessly the flavors came together. This delightful no-bake dessert is perfect for anyone following a low-carb lifestyle, allowing you to indulge without the guilt of traditional sweets. With quick prep and a light, airy texture that melts in your mouth, it’s sure to be a hit at any gathering or simply as a comforting treat at home. Imagine serving it in pretty little cups, garnished with fresh berries and a sprinkle of zest—pure bliss! Are you ready to treat yourself to this easy, satisfying dessert?

Why is this cheesecake fluff a must-try?

Indulgent Pleasure: This Easy Keto Cheesecake Fluff offers a rich, creamy treat without the carbs, perfectly satisfying those cheesecake cravings.
Quick & No-Bake: With minimal prep time and no baking required, you can whip this up last minute for unexpected guests.
Versatile Flavors: Customize it with different extracts or mix in your favorite fruits, just like adding berries to your Breakfast Egg Muffins.
Effortlessly Light: The whipped cream creates a fluffy texture that feels like a cloud of flavor in every bite.
Crowd-Pleasing: Whether at a cozy dinner or a festive gathering, this dessert is sure to impress. You might even find it the perfect pairing for slice of Ice Cream Cake!

Easy Keto Cheesecake Fluff Ingredients

For the Cream Base

  • Cream Cheese – Provides a rich, creamy base for the fluff; make sure it’s softened for easy mixing.
  • Powdered Erythritol – Acts as a perfect low-carb sweetener; adjust the amount based on your sweetness preference.
  • Vanilla Extract – Adds delightful depth and flavor to the cheesecake mixture; use pure extract for better taste.
  • Lemon Juice – Enhances the tangy flavor profile, making it reminiscent of traditional cheesecakes.

For the Whipped Cream

  • Heavy Cream – Whipped to soft or stiff peaks, this is crucial for achieving the light, fluffy texture of your Easy Keto Cheesecake Fluff.

Optional Mix-ins

  • Fresh Berries – Raspberries, strawberries, or blueberries add a pop of color and a burst of flavor when garnishing.
  • Almond Extract – Substitute this for vanilla to create a slightly different, nutty flavor profile.
  • Cocoa Powder – For a chocolatey twist, mix in cocoa powder for a delicious chocolate cheesecake variation.

Get ready to indulge guilt-free in this delicious Easy Keto Cheesecake Fluff!

Step‑by‑Step Instructions for Easy Keto Cheesecake Fluff

Step 1: Beat the Cream Cheese
In a large mixing bowl, use an electric mixer to beat the softened cream cheese until smooth and creamy, about 2-3 minutes. Ensure there are no lumps, as this will create a lovely base for your Easy Keto Cheesecake Fluff. The consistency should be velvety and spreadable, making it easier to incorporate the other ingredients.

Step 2: Add the Sweeteners and Flavor
Gradually mix in powdered erythritol, vanilla extract, and lemon juice into the cream cheese mixture. Continue beating for another 2-3 minutes until the mixture is fluffy and well combined. The sweetness and hint of tartness from the lemon will enhance the overall flavor, making sure you enjoy every bite of your keto dessert.

Step 3: Whip the Heavy Cream
In a separate bowl, pour in the heavy cream and whip using an electric mixer until stiff peaks form, around 3-5 minutes. This step is crucial for achieving that light and airy texture in your Easy Keto Cheesecake Fluff. The cream should hold its shape when you lift the whisk, indicating it’s ready to be folded into the cream cheese mixture.

Step 4: Fold in the Whipped Cream
Gently fold the whipped cream into the cheesecake mixture using a rubber spatula. Be cautious not to deflate the whipped cream; use a gentle, sweeping motion to combine the two mixtures until no white streaks remain. This technique helps maintain the fluffy consistency that makes your Easy Keto Cheesecake Fluff irresistibly light.

Step 5: Chill the Fluff
Transfer the combined mixture into individual serving dishes or a larger bowl, smoothing the top with a spatula. Cover with plastic wrap and refrigerate for at least 30 minutes. Chilling not only enhances the flavor but also helps the fluff to set, ensuring that each bite is deliciously cool and creamy.

Step 6: Serve and Garnish
Once chilled, remove the Easy Keto Cheesecake Fluff from the refrigerator. Garnish with fresh berries or a dusting of powdered erythritol for a decorative touch. Serve immediately and watch your guests enjoy this delightful low-carb dessert that’s perfect for any occasion, from casual weeknight treats to festive gatherings.

What to Serve with Easy Keto Cheesecake Fluff

Indulge in a delightful spread that complements the light, creamy texture of this no-bake dessert, ensuring a satisfying meal.

  • Fresh Berries: A vibrant mix of raspberries, strawberries, and blueberries that adds a burst of flavor and complements the cheesecake’s sweetness.
  • Coffee or Tea: A warm cup enhances the dessert experience, adding depth and balance to the creamy fluff, ideal for cozy catch-ups.
  • Almond Flour Cookies: These low-carb treats bring a satisfying crunch to each bite, creating a perfect textural contrast to the fluff’s creaminess.
  • Whipped Coconut Cream: For an extra luscious experience, top your cheesecake fluff with a dollop of this light alternative, making it even more decadent.
  • Chocolate Shavings: Dark chocolate sprinkles can add a hint of richness, transforming your dessert into a gourmet delight that diners will remember.
  • Sugar-Free Lemonade: A refreshing drink that perfectly cuts through the sweetness and ties together the flavors in this delightful meal.
  • Pecan Pie Bites: Serve these low-carb bites alongside for a sweet surprise that offers a crunchy, nutty twist, elevating the dessert spread.

Expert Tips for Easy Keto Cheesecake Fluff

  • Use Softened Cream Cheese: Ensure your cream cheese is at room temperature for easy mixing, preventing lumps in your Easy Keto Cheesecake Fluff.
  • Gentle Folding Technique: Carefully fold the whipped cream into the mixture to keep it light and fluffy; aggressive stirring can deflate the texture.
  • Taste and Adjust Sweetness: Before serving, taste your fluff and adjust the sweetness of erythritol according to your preference—everyone has different sweet spots!
  • Plenty of Chill Time: Don’t rush the chilling process; letting it sit for at least 30 minutes improves the flavor and texture remarkably.
  • Creative Variations: Experiment with extracts or mix-ins like cocoa powder or coffee for a delicious twist on the classic Easy Keto Cheesecake Fluff.

Make Ahead Options

These Easy Keto Cheesecake Fluff desserts are perfect for meal prep enthusiasts looking to save time during busy weeks! You can prepare the entire cheesecake fluff mixture up to 24 hours in advance and store it in an airtight container in the refrigerator. Just remember to gently re-fold the mixture before serving—this will help maintain that luscious, airy texture. Additionally, you can whip the heavy cream and mix it with the cream cheese base ahead of time, but avoid adding any garnishes until just before serving to keep them fresh. With these prep tips, you’ll have a delightful, no-bake dessert ready to impress your family at a moment's notice, all while enjoying that guilt-free keto goodness!

Easy Keto Cheesecake Fluff Variations

Feel free to experiment and make this Easy Keto Cheesecake Fluff your own! Let your creativity shine as you explore new flavors and textures.

  • Almond Extract: Swap vanilla with almond extract for a nutty flavor that adds a delightful twist to your fluff.

  • Chocolatey Indulgence: Mix in cocoa powder for a rich chocolate cheesecake variation—perfect for chocolate lovers!

  • Mocha Magic: Add instant coffee to the mixture for a delicious mocha flavor that keeps your taste buds dancing.

  • Berry Bliss: Fold in fresh berries like blueberries or strawberries for an added burst of flavor and a pop of color.

  • Nutty Crunch: Top with chopped nuts, like pecans or walnuts, for a delightful crunchy finish against the creamy texture.

  • Coconut Delight: Add unsweetened shredded coconut to the mix for a tropical vibe that pairs beautifully with the creaminess.

  • Layered Delight: Layer the fluff with your favorite low-carb dessert, like a slice of Blue Cheese Pizza for a decadent experience.

  • Refreshing Citrus: Mix in a bit of orange or lime zest to brighten the flavors, creating a refreshing citrus twist for your dessert.

Whichever way you choose to customize, this Easy Keto Cheesecake Fluff will remain a delightful treat for your taste buds! Enjoy it as a perfect ending to a lovely meal or snack on it during the week—like a fun experience straight out of making Vegan Cacao Cream!

How to Store and Freeze Easy Keto Cheesecake Fluff

Fridge: Store your Easy Keto Cheesecake Fluff in an airtight container in the refrigerator for up to 1 week. This will keep it fresh and maintain the delicious creamy texture.

Freezer: If you want to enjoy it later, you can freeze the fluff for up to 3 months. Just make sure to use a freezer-safe container, leaving some space for expansion.

Thawing: To thaw, place it in the refrigerator overnight. Once thawed, give it a gentle stir; the texture should remain fluffy and inviting!

Reheating: There's no need to reheat this no-bake dessert. Serve it chilled straight from the fridge or after thawing for the best experience!

Easy Keto Cheesecake Fluff Recipe FAQs

What type of cream cheese should I use for the best results?
Absolutely! Opt for full-fat cream cheese, as it provides a rich, creamy base that contributes to the indulgent flavor and texture. Ensure it's softened to room temperature for the easiest mixing—this prevents any lumps and helps achieve a smooth consistency.

How long can I store my Easy Keto Cheesecake Fluff in the refrigerator?
You can store your Easy Keto Cheesecake Fluff in an airtight container in the refrigerator for up to 1 week. Just make sure it’s well-covered to maintain its freshness and creamy texture. If you're planning on serving it later, it's a perfect make-ahead dessert!

Can I freeze the Easy Keto Cheesecake Fluff?
Yes, you can freeze it for up to 3 months! To freeze, place it in a freezer-safe container, leaving space for expansion. When you’re ready to enjoy, transfer it to the refrigerator overnight to thaw. Gently stir before serving to revive that fluffy texture.

What can I do if my whipped cream doesn’t form stiff peaks?
Very! First, make sure your heavy cream is cold; this aids in whipping. If it still doesn’t hold peaks, don’t panic! You can try whipping it a little longer, or you can add a teaspoon of cornstarch to stabilize it for better results.

Are there any dietary considerations I should keep in mind?
Definitely! This Easy Keto Cheesecake Fluff is low-carb and perfect for those on a ketogenic diet. However, if you have friends with allergies, be aware that cream cheese and heavy cream may not be suitable for lactose-intolerant individuals. Using coconut cream as a dairy alternative can create a delightful variation too!

How can I enhance the flavor profile further?
For added taste, consider mixing in ingredients like cocoa powder for a chocolate version or almond extract instead of vanilla for a nutty twist. I often like to garnish with a sprinkle of lemon zest or fresh berries for a refreshing touch—it's like giving your cheesecake fluff an extra hug!

Easy Keto Cheesecake Fluff

Easy Keto Cheesecake Fluff: Indulge Guilt-Free Today!

Easy Keto Cheesecake Fluff is a delightful no-bake dessert perfect for low-carb lifestyles, providing a rich, creamy treat without the guilt.
Print Recipe Pin Recipe
Prep Time 15 minutes mins
Chill Time 30 minutes mins
Total Time 45 minutes mins
Servings: 4 cups
Course: Dessert
Calories: 250
Ingredients Equipment Method Nutrition Notes

Ingredients
  

For the Cream Base
  • 8 oz Cream Cheese softened
  • 1/2 cup Powdered Erythritol adjust to taste
  • 1 tsp Vanilla Extract use pure for best flavor
  • 1 tbsp Lemon Juice
For the Whipped Cream
  • 1 cup Heavy Cream whipped to soft or stiff peaks
Optional Mix-ins
  • 1/2 cup Fresh Berries for garnishing
  • 1 tsp Almond Extract optional substitute for vanilla
  • 2 tbsp Cocoa Powder for chocolate variation

Equipment

  • Electric mixer
  • Mixing bowls
  • rubber spatula
  • Serving dishes

Method
 

Step-by-Step Instructions
  1. In a large mixing bowl, beat the softened cream cheese until smooth and creamy, about 2-3 minutes.
  2. Gradually mix in powdered erythritol, vanilla extract, and lemon juice into the cream cheese mixture. Continue beating for another 2-3 minutes until fluffy.
  3. In a separate bowl, whip the heavy cream until stiff peaks form, around 3-5 minutes.
  4. Gently fold the whipped cream into the cheesecake mixture using a rubber spatula.
  5. Transfer the combined mixture into serving dishes, cover with plastic wrap, and refrigerate for at least 30 minutes.
  6. Once chilled, garnish with fresh berries or powdered erythritol and serve.

Nutrition

Serving: 1cupCalories: 250kcalCarbohydrates: 8gProtein: 3gFat: 25gSaturated Fat: 15gCholesterol: 90mgSodium: 150mgPotassium: 120mgSugar: 1gVitamin A: 500IUVitamin C: 1mgCalcium: 40mg

Notes

For best results, ensure the cream cheese is softened and allow plenty of chill time before serving.

Tried this recipe?

Let us know how it was!

Mini Key Lime Cheesecakes: Refreshing Bites of Bliss

January 1, 2026 by Grace Snow Leave a Comment

As I savored the last bite of a rich and creamy dessert on a sun-soaked afternoon, I couldn’t help but crave a lighter, zestier twist. Enter Mini Key Lime Cheesecakes with Greek Yogurt—my answer to the indulgent cravings that come with every gathering. These delightful, single-serve desserts bring the refreshing tang of key limes to life while swapping out traditional ingredients for a healthier spin. Crafted with just seven easy-to-find ingredients, they’re not only gluten-free but also a breeze to whip up, making them perfect for any occasion, from casual picnics to elegant dinners. Picture your guests raving over these charming mini cheesecakes that are as impressive as they are simple to make! Ready to take your dessert game to the next level? Let’s dive in!

Why are Mini Key Lime Cheesecakes irresistible?

Simplicity at its finest: With only seven ingredients, crafting these delightful cheesecakes is a breeze, even for novice bakers.

Lighter alternative: By using Greek yogurt, you're indulging without the guilt, enjoying all the creamy goodness with a healthier twist.

Refreshing zing: The tartness of key lime paired with the sweet crust creates a perfect balance that will tickle your taste buds.

Versatility: Whether for a summer gathering or an intimate dinner, these mini delights fit every occasion, leaving guests craving more!

Make-ahead convenience: Chilling them overnight enhances their flavors and makes them a fantastic time-saver. Pair them with a dollop of Greek yogurt or even try variations like Fiesta Lime Chicken with Avocado for a complete meal experience!

Mini Key Lime Cheesecakes Ingredients

Here’s everything you need to create these delectable mini cheesecakes!

For the Crust

  • Graham Cracker Crumbs – Provides a deliciously crunchy base; consider using gluten-free options for a healthier spin.
  • Butter or Ghee – Acts as a binding agent for the crust; ghee can be a great dairy-free alternative.

For the Filling

  • Cream Cheese – Gives the cheesecake its rich and creamy texture; choose low-fat or full-fat based on your dietary goals.
  • Plain Greek Yogurt – Adds a tangy flavor and enhances the overall texture of the cheesecakes; aim for 2% or whole milk for best results.
  • Sugar – Sweetens the filling perfectly; feel free to swap with low-calorie sweeteners like Swerve for a sugar-free rinse.
  • Egg – Provides structure to the cheesecake; make sure it’s at room temperature for easy mixing.
  • Egg White – Lightens the texture of the cheesecake; if not available, it’s okay to omit.
  • Lime Juice – Infuses a refreshing tartness; opt for freshly squeezed juice for the best flavor.
  • Lime Zest – Amplifies the zesty lime flavor; adjust the amount based on your preference for intensity.

Enjoy these Mini Key Lime Cheesecakes as a delightful treat that brings both pleasure and a healthier alternative to your dessert table!

Step‑by‑Step Instructions for Mini Key Lime Cheesecakes

Step 1: Preheat the Oven
Begin by preheating your oven to 325°F (163°C). While the oven heats, line a 12-cup muffin tin with foil liners. To ensure easy removal later, lightly spray the liners with a non-stick cooking spray. This preparation sets you up for the perfect foundation for your delightful Mini Key Lime Cheesecakes.

Step 2: Prepare the Crust
In a food processor, pulse the graham crackers into fine crumbs. Melt the butter or ghee and combine it with the crumbs until they’re well mixed and resemble wet sand. Evenly distribute this mixture among the muffin liners, pressing down firmly with a measuring cup or your fingers to create a compact crust. Bake these for 8–10 minutes until lightly golden and aromatic, then let them cool slightly.

Step 3: Make the Filling
In a large mixing bowl, use an electric mixer to beat the softened cream cheese until it’s light and fluffy, about 2 minutes. Gradually add in the Greek yogurt and sugar, mixing until smooth. Add the room-temperature egg, egg white, fresh lime juice, and lime zest, blending until just combined. Taking care not to overmix ensures your Mini Key Lime Cheesecakes have a light texture.

Step 4: Bake the Cheesecakes
Carefully spoon the creamy filling over the pre-baked crusts, filling each liner about three-quarters full. Place the muffin tin into the preheated oven and bake for 15–20 minutes. The edges should be set while the centers jiggle slightly—this indicates they’re perfectly done. Remove them from the oven and allow them to cool in the pan for about 10 minutes.

Step 5: Cool & Chill
After cooling for a bit, transfer the Mini Key Lime Cheesecakes to a wire rack to reach room temperature. Once they’ve cooled, place them in the refrigerator and chill for at least 2 hours, allowing the flavors to meld beautifully and the texture to firm up. Patience here makes for a delightful dessert experience.

How to Store and Freeze Mini Key Lime Cheesecakes

Fridge: Keep your Mini Key Lime Cheesecakes in an airtight container in the refrigerator for up to 3 days. This helps maintain their creamy texture and refreshing flavor.

Freezer: For longer storage, freeze individual cheesecakes by wrapping each one tightly in plastic wrap, then placing them in a freezer-safe bag. They can last up to 2 months.

Thawing: To enjoy a frozen Mini Key Lime Cheesecake, transfer it to the fridge to thaw overnight before serving for optimal texture and taste.

Serving After Storage: If desired, freshen up your cheesecakes by topping them with a dollop of Greek yogurt or freshly grated lime zest before serving!

Tips for the Best Mini Key Lime Cheesecakes

  • Room Temperature Ingredients: Ensure all your ingredients, especially cream cheese and eggs, are at room temperature to achieve a smooth, clump-free filling.

  • Don’t Overmix: Once you add the eggs to the mixture, mix just until combined to avoid a dense texture. Overmixing can lead to heavy cheesecakes.

  • Foil Liners: Using foil liners not only makes for easy removal but also adds a polished presentation to your Mini Key Lime Cheesecakes without the need for extra plating.

  • Chill Time Matters: Allow your cheesecakes to chill for at least 2 hours after baking. They will firm up beautifully and develop a richer flavor profile during this time.

  • Testing for Doneness: Look for edges that are set but with a slightly jiggly center; this ensures a perfectly creamy texture once set in the refrigerator.

  • Flavorful Add-Ins: Don’t hesitate to add a touch more lime zest or a hint of coconut for an unexpected twist. Adjust according to your taste for delightful variations!

Mini Key Lime Cheesecakes Variations & Substitutions

Feel free to get creative and customize these delightful Mini Key Lime Cheesecakes to fit your taste buds!

  • Lemon Twist: Swap lime juice and zest for lemon to create a bright, citrusy alternative that still shines.

  • Coconut Cream: Fold in half a cup of light coconut cream into the filling for a creamy, tropical twist that complements the lime perfectly.

  • Dairy-Free: Use cashew cream and coconut yogurt instead of cream cheese and Greek yogurt for a delicious vegan version.

  • No-Bake Option: Skip the baking step by chilling the cheesecake mixture in the muffin liners for a cool, refreshing treat perfect for hot days.

  • Fruit-Infused: Add a layer of blended berries—like blueberries or raspberries—underneath the cheesecake filling for a splash of color and flavor.

  • Chocolate Crust: Replace graham cracker crumbs with crushed chocolate cookies for a delightful chocolatey addition that pairs well with the tartness.

  • Heat it Up: Add finely chopped jalapeño to the filling for an unexpected kick that elevates these cheesecakes to a new level of flavor.

  • Serve with a Twist: Pair your cheesecakes with a side of Mini Tropical Pavlovas for a delightful dessert platter.

With these variations, you can always keep dessert exciting while enjoying the delicious taste of fresh Mini Key Lime Cheesecakes!

Make Ahead Options

These Mini Key Lime Cheesecakes are perfect for meal prep enthusiasts! You can prepare the crust and filling up to 24 hours in advance. For optimal quality, make the graham cracker crust, and once cooled, store it in an airtight container in the refrigerator. Likewise, prepare the filling but keep it separate until you're ready to bake. When you're set to serve, simply spoon the filling over the crusts and bake as instructed. Chilling them overnight enhances their flavors, ensuring they remain just as delicious when enjoyed the next day. These make-ahead tips will make your busy weeknights a breeze!

What to Serve with Mini Key Lime Cheesecakes

Picture yourself hosting a delightful gathering, where sweet treats echo the laughter of friends and family under the sun.

  • Fresh Berries: Juicy strawberries or blueberries balance the creamy tang, adding a pop of color and freshness to each bite.

  • Coconut Whipped Cream: Light and airy, this dreamy topping complements the cheesecakes while enhancing the tropical vibes of your dessert.

  • Herb-Infused Iced Tea: A refreshing blend with hints of mint or basil can cleanse the palate beautifully between each indulgent cheesecake.

  • Lime Sorbet: A zesty pairing that echoes the key lime flavor of the cheesecakes while providing a cooling, summery contrast.

  • Chocolate Dipped Nuts: Crunchy and sweet, these add a delightful texture to your dessert spread, perfect for those who enjoy a touch of decadence.

  • Spiced Pineapple Salsa: For a tropical twist, serve a light salsa with ripe pineapple, cilantro, and lime juice to enhance all the flavors on your table.

Embrace these pairings to create a vibrant and memorable dessert experience that will leave everyone longing for seconds!

Mini Key Lime Cheesecakes Recipe FAQs

What type of limes should I use for my Mini Key Lime Cheesecakes?
Absolutely, the best option is to use Key limes for their distinct tart flavor. They are smaller and have a more aromatic zest compared to regular limes, providing that authentic taste in your cheesecakes. If you can't find Key limes, Persian limes are a fine substitute, but keep in mind the flavor might be slightly less tangy.

How should I store my Mini Key Lime Cheesecakes?
To keep your cheesecakes fresh, store them in an airtight container in the refrigerator for up to 3 days. If you need to make them ahead, they can be prepared a day in advance. Just ensure they’re well-covered to avoid any absorption of odors from other foods.

Can I freeze Mini Key Lime Cheesecakes? How do I do it?
Yes, you can absolutely freeze your cheesecakes! Follow these steps:

  1. Allow the cheesecakes to cool completely in the fridge.
  2. Wrap each cheesecake individually in plastic wrap to prevent freezer burn.
  3. Place the wrapped cheesecakes into a freezer-safe bag or container.
    They can be frozen for up to 2 months. When you’re ready to enjoy, simply transfer them to the refrigerator for overnight thawing.

What if my cheesecakes are bubbling or cracking during baking?
Don't worry! A jiggly center is actually a good sign, meaning they’ll set nicely in the fridge. If you see bubbling or cracks, it might mean they were baked a bit too long or the oven’s temperature was slightly high. Ensure to bake them until the edges are firm, yet the centers remain slightly soft. Using a water bath during baking can also help maintain moisture and prevent cracking.

Can I make these Mini Key Lime Cheesecakes dairy-free?
Certainly! You can easily convert this recipe to be dairy-free. Substitute the cream cheese with a dairy-free cream cheese alternative and use coconut yogurt in place of Greek yogurt. The texture might change slightly, but it will still offer a creamy result with that lovely key lime flavor.

Are these cheesecakes safe for pets or allergies?
While the Mini Key Lime Cheesecakes are delicious for human enjoyment, it’s important to keep them away from pets as ingredients like cream cheese and sugar aren’t ideal for them. If you're preparing these for someone with allergies, check for any specific dietary restrictions, especially regarding dairy or eggs, and consider suitable substitutes as necessary.

Mini Key Lime Cheesecakes

Mini Key Lime Cheesecakes: Refreshing Bites of Bliss

These Mini Key Lime Cheesecakes are a healthier dessert option that satisfies cravings while being gluten-free and easy to make.
Print Recipe Pin Recipe
Prep Time 20 minutes mins
Cook Time 20 minutes mins
Chilling Time 2 hours hrs
Total Time 2 hours hrs 40 minutes mins
Servings: 12 cheesecakes
Course: Dessert
Cuisine: American
Calories: 160
Ingredients Equipment Method Nutrition Notes

Ingredients
  

For the Crust
  • 1 cup Graham Cracker Crumbs Consider using gluten-free options.
  • 4 tablespoons Butter or Ghee Ghee can be a dairy-free alternative.
For the Filling
  • 8 ounces Cream Cheese Choose low-fat or full-fat based on dietary goals.
  • 1 cup Plain Greek Yogurt Aim for 2% or whole milk.
  • 1/2 cup Sugar Can swap with low-calorie sweeteners like Swerve.
  • 1 large Egg Room temperature for easier mixing.
  • 1 large Egg White Omit if not available.
  • 1/2 cup Lime Juice Preferably freshly squeezed.
  • 1 tablespoon Lime Zest Adjust amount based on taste preference.

Equipment

  • Oven
  • Muffin tin
  • Food Processor
  • Electric mixer
  • Mixing Bowl
  • measuring cups
  • Measuring Spoons

Method
 

Preparation
  1. Preheat your oven to 325°F (163°C) and line a 12-cup muffin tin with foil liners, spraying them lightly with non-stick spray.
  2. In a food processor, pulse graham crackers into fine crumbs. Melt butter or ghee and combine with crumbs to create a wet sand texture. Press this mixture into the muffin liners.
  3. Bake the crusts for 8–10 minutes until lightly golden, then let cool.
  4. In a mixing bowl, beat cream cheese until fluffy. Gradually add Greek yogurt and sugar, mixing until smooth. Add egg, egg white, lime juice, and lime zest, blending until just combined.
  5. Spoon filling over the baked crusts, filling each about three-quarters full. Bake for 15–20 minutes until edges are set and centers jiggle slightly.
  6. Cool in the pan for 10 minutes, then transfer to a wire rack to cool completely. Chill in the refrigerator for at least 2 hours before serving.

Nutrition

Serving: 1cheesecakeCalories: 160kcalCarbohydrates: 20gProtein: 4gFat: 7gSaturated Fat: 4gMonounsaturated Fat: 3gCholesterol: 30mgSodium: 150mgPotassium: 60mgFiber: 1gSugar: 10gVitamin A: 200IUVitamin C: 1mgCalcium: 50mgIron: 0.5mg

Notes

Ensure all ingredients are at room temperature for a smooth filling. Don't overmix after adding the eggs to prevent a dense texture.

Tried this recipe?

Let us know how it was!

Creamy Vegan Mango Cheesecake That Melts in Your Mouth

January 1, 2026 by Grace Snow Leave a Comment

As I poured the bright, golden-hued mango curd over my newly set Vegan Mango Cheesecake, I could almost hear the tropical waves crashing in the distance. This delightful dessert captures the essence of summer with its creamy, no-bake filling nestled on a crunchy cookie crust that you won’t believe is vegan! Whether you’re hosting a gathering or simply craving something sweet, this Vegan Mango Cheesecake promises to impress without the fuss. It’s not only a breeze to prepare but also offers a refreshing, guilt-free indulgence that everyone will adore, regardless of dietary preferences. Ready to whip up this slice of paradise? Let's dive into this delicious journey!

Why is Vegan Mango Cheesecake So Irresistible?

Creamy, Dreamy Texture: This cheesecake's luscious filling melts in your mouth, offering a delightful balance of creaminess and freshness. Perfect for anyone looking to indulge without dairy!

Easy No-Bake Preparation: With minimal effort, you can whip up this no-bake dessert that doesn't require turning on the oven, making it a perfect choice for hot summer days.

Refreshing Tropical Flavor: The vibrant mango curd and fresh mango topping bring a burst of tropical sweetness, elevating your dessert game and making it an instant crowd-pleaser.

Versatile and Customizable: Feel free to experiment with different crust options or add your favorite spices for a personal touch—perfect for accommodating everyone at your table!

Whether you're enjoying it at a summer gathering or just treating yourself, this Vegan Mango Cheesecake is a must-try. Pair it with a refreshing drink or take a look at other recipes like my Vegan Cacao Nib for a delightful dessert spread!

Vegan Mango Cheesecake Ingredients

• Indulge in this refreshing dessert with a few simple ingredients!

For the Crust
• Vegan Cookies (200g) – Use digestives for a classic feel; substitute with gluten-free cookies if needed.
• Unsalted Vegan Butter (80g) – Binds the crust ingredients together; opt for block-style vegan butter for best results.
• Sea Salt (¼ tsp) – Enhances the flavor of the crust.
• Ground Ginger (½ tsp, optional) – Adds warmth and depth to the crust's flavor; omit if desired.

For the Filling
• Cashews (200g, soaked) – Primary component providing creaminess; quick-soak in boiled water for 30 minutes if not pre-soaked.
• Vegan Cream Cheese (500g) – Central to the filling’s texture; choose a thick brand to ensure proper setting.
• Vegan Greek-Style Yogurt (120g) – Contributes to the filling's silky texture; can substitute with firm silken tofu or coconut yogurt if unavailable.
• Vanilla Extract (1 tsp) – Enhances the overall flavor profile.
• Lime Zest (1 tsp, optional) – Adds brightness and balances sweetness; omit if preferred.

For the Topping
• Vegan Mango Curd – Adds a rich tropical flavor and color; can be prepped up to 2 days in advance.
• Fresh Mango (1, diced, for decoration) – Provides a vibrant topping and enhances the tropical theme.

Dive into these ingredients and get ready for a delicious Vegan Mango Cheesecake that everyone will love!

Step‑by‑Step Instructions for Vegan Mango Cheesecake

Step 1: Prepare Mango Curd
Begin by making the vegan mango curd, which can be done up to two days in advance for convenience. In a saucepan over medium heat, combine mango puree with your chosen sweetener and thicken it until glossy and vibrant, stirring continuously for about 10 minutes. Once ready, refrigerate the curd in an airtight container until cool and set.

Step 2: Soak Cashews
Prepare the cashews for the filling by soaking them in water for at least four hours or quick-soaking in boiling water for just 30 minutes. After soaking, thoroughly rinse and drain the cashews. This step is crucial for ensuring your Vegan Mango Cheesecake has that wonderfully creamy texture.

Step 3: Prepare Crust
In a food processor, blitz the vegan cookies, unsalted vegan butter, sea salt, and optional ground ginger until the mixture resembles fine crumbs. Firmly press this mixture into the base of a lined 7.5 or 8-inch springform pan, ensuring it is evenly distributed. Refrigerate the crust for about 30 minutes to help it firm up.

Step 4: Make Filling
In a high-speed blender, combine the soaked cashews, half of the prepared vegan mango curd, vegan cream cheese, vegan Greek-style yogurt, vanilla extract, and lime zest. Blend until completely smooth and creamy, about 2-3 minutes. Pour this luscious filling into the chilled crust, spreading it evenly, and refrigerate for at least 8 hours or preferably overnight to allow it to set firmly.

Step 5: Add Topping
Once the filling has set beautifully, gently warm the remaining mango curd over a double boiler until it becomes spreadable. Carefully pour the curd over the cheesecake, using the back of a spoon to create swirls and even coverage if desired. Place it back into the fridge for about an hour to allow the topping to firm up.

Step 6: Decorate
To finish off your vegan mango cheesecake, remove the springform pan without damaging the edges. Carefully peel away the parchment paper from the crust. Now, adorn the cheesecake with fresh diced mango chunks and mint leaves for a delightful touch, enhancing both the presentation and flavor profile of this tropical treat.

Variations & Substitutions for Vegan Mango Cheesecake

Feel free to be creative and add your own twist to this delightful dessert!

  • Gluten-Free Crust: Use gluten-free cookies like almond or coconut for an equally tasty crust that everyone can enjoy.
    Now you can share this tropical delight without worrying about gluten intolerance!

  • Nuts-Free Option: Instead of cashews, use soaked sunflower seeds for the filling to achieve creaminess without nuts.
    This tweak ensures those with nut allergies can still partake in this irresistible treat.

  • Different Fruit: Swap mango for equally beautiful fruits like passion fruit or blueberries to change up flavors yet maintain a tropical vibe.
    Each fruit brings its own personality, inviting new adventures in every bite!

  • Added Spice: Incorporate spices such as cinnamon, nutmeg, or cardamom to the crust for a warm, aromatic flavor that brings depth.
    This subtle twist elevates the dessert to a whole new level while still keeping it refreshing.

  • Creamy Tofu Substitute: Use firm silken tofu mixed with a bit of lemon juice instead of vegan cream cheese for a lighter, protein-packed filling.
    You won’t sacrifice taste, and it provides a fun textural element that's sure to surprise your guests!

  • Coconut Whipped Topping: Instead of mango curd for the topping, make a coconut whipped cream for a rich, creamy addition.
    It's a decadent touch that not only tastes amazing but looks beautiful too!

  • Chocolate Lovers: Add melted dark chocolate to half the mango curd for a luscious chocolate swirl that adds richness and intrigue.
    For those who can’t resist the combination of chocolate and mango, this is an absolute game-changer!

  • Opt for Citrus Zing: Substitute lime zest with lemon or orange zest for a fresher, citrus twist that brightens the overall flavor.
    These small shifts can reenergize this classic and offer a pleasant surprise to your senses.

Embrace these variations to make this vegan mango cheesecake your own! If you're looking for more delightful plant-based recipes, you might also enjoy trying out my Vegan Sushi Indulge or whip up a comforting Blackberry Crisp for a refreshing dessert spread.

How to Store and Freeze Vegan Mango Cheesecake

Fridge: Keep the Vegan Mango Cheesecake in an airtight container for up to 5 days. This ensures it stays fresh and maintains its creamy texture.

Freezer: You can freeze slices of the cheesecake for up to 3 months. Wrap each slice tightly in plastic wrap to prevent freezer burn, then place in a freezer-safe container.

Thawing: When ready to enjoy, remove the cheesecake from the freezer and let it thaw at room temperature for about 1 hour before serving. This restores the dessert's lovely texture.

Reheating: There's no need to reheat; simply serve chilled directly from the fridge or after thawing for the best taste experience!

Expert Tips for Vegan Mango Cheesecake

  • Soak Cashews Well: Ensure cashews are fully soaked to achieve that creamy texture; quick-soaking may suffice but isn't ideal for the best results.

  • Quality Cream Cheese: Choose a thick brand of vegan cream cheese to ensure the filling sets nicely and provides a rich flavor in your Vegan Mango Cheesecake.

  • Chill Time Matters: Allow ample time for the cheesecake to set; overnight refrigeration is recommended for the best texture and flavor integration.

  • Topping Techniques: When adding the mango curd topping, gently warm it first to make spreading easier; swirl for an aesthetic finish or keep it smooth!

  • Crust Alternatives: Experiment with different types of vegan or gluten-free cookies for the crust to personalize the flavor profile and cater to dietary preferences.

What to Serve with Vegan Mango Cheesecake

As your delicious vegan mango cheesecake chills to perfection, let’s explore some delightful pairings that will elevate your dessert experience.

  • Refreshing Coconut Water: This hydrating beverage perfectly complements the tropical flavors, enhancing the summery vibe of the cheesecake.

  • Mint-Infused Iced Tea: A light, herbal drink that provides an aromatic counterpoint to the richness of the cheesecake, creating a balanced refreshment.

  • Crispy Tropical Fruit Salad: A medley of fresh fruits like pineapple, kiwi, and berries brings a zingy contrast and additional freshness, keeping the palate bright.

  • Chilled Sparkling Lemonade: The zesty sparkle of this drink will cleanse the palate, making every cheesecake bite feel refreshing and exciting.

  • Creamy Coconut Whipped Topping: Adding a dollop of this light, airy topping gives an added richness and a delightful coconut flavor that pairs beautifully with mango.

  • Dark Chocolate Drizzle: A gourmet touch that adds a delightful contrast with its bittersweet richness, creating a luxurious dessert experience.

  • Almond Biscotti: Offering a wonderful crunch, this cookie adds texture and nutty flavors that enhance the overall dessert tasting experience.

  • Coconut Sorbet: This dairy-free alternative is not only refreshing but its creamy coconut texture mirrors that of the cheesecake, making for a harmonious dessert duo.

Make Ahead Options

These Vegan Mango Cheesecake preparations are perfect for busy home cooks looking to save time without sacrificing flavor! You can whip up the vegan mango curd up to 2 days in advance and store it in an airtight container in the refrigerator, ensuring it stays fresh and vibrant. Additionally, the crust can be prepared and refrigerated for 24 hours before assembling. When you're ready to enjoy, simply blend the soaked cashews and other filling ingredients, pour the mixture into the prepared crust, and let it set in the fridge for at least 8 hours or preferably overnight. This way, you'll have a luscious and creamy Vegan Mango Cheesecake ready to impress friends and family with minimal effort!

Vegan Mango Cheesecake Recipe FAQs

How do I select ripe mangoes for the curd?
Absolutely! When choosing mangoes, look for those that are slightly soft to the touch and have a sweet aroma; this indicates ripeness. The skin should be free of dark spots or blemishes. If you're unsure, opt for a mango that has a vibrant yellow or orange hue.

What’s the best way to store leftover Vegan Mango Cheesecake?
To keep your cheesecake fresh, store it in an airtight container in the refrigerator for up to 5 days. This prevents it from absorbing any other odors and helps maintain its delightful creamy texture.

Can I freeze slices of Vegan Mango Cheesecake?
Absolutely! To freeze, wrap each slice tightly in plastic wrap and place them in a freezer-safe container. The cheesecake can be kept in the freezer for up to 3 months. When you're ready to enjoy a slice, simply thaw it at room temperature for about an hour before serving.

What if my cashews aren’t blending smoothly?
If you find that your cashews aren’t blending into a smooth cream, it's likely they weren't soaked long enough. I recommend soaking them for at least 4 hours. For a quick fix, you can soak them in boiling water for 30 minutes. Rinse and drain thoroughly before blending for optimal creaminess.

Are there any common allergies I should be aware of?
Yes, while this Vegan Mango Cheesecake is plant-based, it does contain cashews which are a common allergen. If you're serving individuals with nut allergies, consider substituting cashews with silken tofu or a firm coconut yogurt. Always check ingredient labels if using pre-made items to ensure they meet dietary restrictions.

Can pets enjoy this Vegan Mango Cheesecake?
Generally, this cheesecake is not suitable for pets. The main ingredient of cashews can be problematic in large amounts for animals, and ingredients like vanilla extract could also be harmful. It's best to treat your furry friends with specifically designed pet-friendly treats instead!

Vegan Mango Cheesecake

Creamy Vegan Mango Cheesecake That Melts in Your Mouth

This Vegan Mango Cheesecake features a creamy, no-bake filling and a crunchy cookie crust, perfect for summer gatherings.
Print Recipe Pin Recipe
Prep Time 30 minutes mins
Cook Time 10 minutes mins
Chill Time 8 hours hrs
Total Time 8 hours hrs 40 minutes mins
Servings: 8 slices
Course: Dessert
Cuisine: Vegan
Calories: 300
Ingredients Equipment Method Nutrition Notes

Ingredients
  

For the Crust
  • 200 g Vegan Cookies Use digestives for a classic feel; substitute with gluten-free cookies if needed.
  • 80 g Unsalted Vegan Butter Opt for block-style vegan butter for best results.
  • 0.25 tsp Sea Salt Enhances the flavor of the crust.
  • 0.5 tsp Ground Ginger Optional, adds warmth and depth.
For the Filling
  • 200 g Cashews Soaked; quick-soak in boiled water for 30 minutes if not pre-soaked.
  • 500 g Vegan Cream Cheese Choose a thick brand to ensure proper setting.
  • 120 g Vegan Greek-Style Yogurt Can substitute with firm silken tofu or coconut yogurt.
  • 1 tsp Vanilla Extract Enhances the overall flavor profile.
  • 1 tsp Lime Zest Optional, adds brightness.
For the Topping
  • Vegan Mango Curd Can be prepped up to 2 days in advance.
  • 1 Fresh Mango Diced, for decoration.

Equipment

  • Food Processor
  • High-speed blender
  • Springform pan
  • Saucepan

Method
 

Step‑by‑Step Instructions
  1. Prepare the vegan mango curd by combining mango puree with your sweetener over medium heat, stirring until thickened for about 10 minutes. Refrigerate until cool.
  2. Soak cashews for at least 4 hours or quick-soak in boiling water for 30 minutes. Rinse and drain after soaking.
  3. In a food processor, blitz the vegan cookies, unsalted vegan butter, sea salt, and ground ginger until fine crumbs. Press into a lined springform pan and refrigerate for 30 minutes.
  4. Blend soaked cashews, half of the mango curd, vegan cream cheese, vegan Greek yogurt, vanilla extract, and lime zest until smooth. Pour into the crust and refrigerate for at least 8 hours.
  5. Warm the remaining mango curd over a double boiler until spreadable, then pour it over the cheesecake. Refrigerate for an hour.
  6. Remove the springform pan and peel away parchment. Decorate with fresh diced mango and mint leaves.

Nutrition

Serving: 1sliceCalories: 300kcalCarbohydrates: 35gProtein: 5gFat: 15gSaturated Fat: 6gPolyunsaturated Fat: 2gMonounsaturated Fat: 7gSodium: 200mgPotassium: 150mgFiber: 2gSugar: 18gVitamin A: 5IUVitamin C: 10mgCalcium: 2mgIron: 4mg

Notes

Allow ample time for proper setting and consider using alternative crust ingredients to fit dietary needs.

Tried this recipe?

Let us know how it was!

Delightful Marshmallow Whip Cheesecake with No-Bake Ease

January 1, 2026 by Grace Snow Leave a Comment

It's a warm summer evening, and laughter fills the air as friends gather in my kitchen, their eyes lighting up at the sight of my latest creation. This No-Bake Marshmallow Whip Cheesecake is the star of the night, combining the whimsical sweetness of marshmallow fluff with the creamy richness of cheesecake, all resting on a buttery graham cracker crust. Not only is it incredibly easy to whip up—perfect for those busy days—but it also stands as a go-to crowd-pleaser for any occasion. Best of all, you can customize it with your favorite toppings or make it ahead of time. Whether it's for a backyard barbecue or a cozy family dinner, this dessert offers a delightful way to share sweet moments. Ready to dive into this fluffy delight? Let’s get started!

Why is this cheesecake a must-try?

Effortless Preparation: This no-bake cheesecake requires minimal effort, making it perfect for busy weeknights or surprise gatherings.

Decadent Flavor: The creaminess of cream cheese combined with marshmallow fluff creates a rich, sugary treat that tantalizes the taste buds.

Versatile Toppings: Customize your cheesecake with delightful toppings like fresh fruit or chocolate drizzle for a personal touch.

Make-Ahead Magic: You can easily prepare this the day before, allowing the flavors to meld and making your life easier on the day of your event.

Crowd Favorite: Whether at a casual family meal or a summer picnic, this cheesecake is sure to impress and satisfy every sweet tooth, leaving everyone asking for seconds!

Marshmallow Whip Cheesecake Ingredients

For the Crust
• Graham Cracker Crumbs – The buttery base that holds your cheesecake together; for a twist, try using crushed Oreos.
• Sugar – Adds sweetness to the crust; you can substitute with a low-calorie sweetener if desired.
• Butter (melted) – Binds the crust beautifully; opt for unsalted butter for the best flavor balance.

For the Filling
• Cream Cheese – The heart of the cheesecake, lending creaminess; be sure it's at room temperature for a smooth mix.
• Marshmallow Fluff – Infuses that light, sweet flavor; alternatively, whipped cream can tone down the sweetness.
• Vanilla Extract – Elevates the overall taste; always use pure vanilla for the most delightful aroma.
• Whipped Topping (or whipped cream) – Adds airiness to the filling; homemade whipped cream delivers unmatched freshness.

Optional Toppings
• Fresh Fruits – Strawberries, blueberries, or raspberries add a refreshing burst of flavor and a beautiful presentation.
• Chocolate Drizzle – A decadent touch that complements the marshmallow sweetness; melted chocolate works like a charm.
• Mini Marshmallows – Fun, playful, and perfect for topping; they lend a nostalgic feel to your cheesecake.

This Marshmallow Whip Cheesecake is not just a treat; it’s the perfect blend of flavors and textures that will leave you and your loved ones asking for more!

Step‑by‑Step Instructions for Marshmallow Whip Cheesecake

Step 1: Prepare the Crust
In a medium bowl, combine graham cracker crumbs and sugar. Pour in the melted butter and mix until it resembles wet sand. Firmly press this mixture into the bottom of a 9-inch springform pan to create an even layer. Chill the crust in the refrigerator for at least 30 minutes to help it set before adding the filling.

Step 2: Make the Filling
In a large mixing bowl, beat the cream cheese with an electric mixer on medium speed until smooth and creamy, about 2 minutes. Gradually add the marshmallow fluff and vanilla extract, mixing until well combined. The filling should be light and fluffy; don’t rush it, as this helps achieve the perfect Marshmallow Whip Cheesecake texture.

Step 3: Fold in Whipped Topping
Gently fold in the whipped topping using a spatula or wooden spoon until just combined. Be careful not to overmix, as you want to retain the airiness in the filling. The mixture should be light and airy, showcasing the delightful blend of marshmallow and cream cheese.

Step 4: Assemble Cheesecake
Spread the fluffy cheesecake filling evenly over the chilled graham cracker crust. Use a spatula to smooth the top, ensuring it looks inviting. Cover the cheesecake with plastic wrap and refrigerate for at least 4 hours, but overnight is best for optimal flavor melding and stability.

Step 5: Serve with Toppings
Before slicing, arrange your favorite toppings on the cheesecake, such as fresh strawberries, mini marshmallows, or a drizzle of chocolate sauce for added flair. Carefully release the springform ring and slice the cheesecake into generous pieces. Serve chilled and enjoy the delightful flavors of your homemade Marshmallow Whip Cheesecake!

Make Ahead Options

Making this delicious Marshmallow Whip Cheesecake ahead of time is a great way to save precious moments on busy days! You can prepare the graham cracker crust up to 3 days in advance, simply keep it wrapped tightly in plastic wrap in the refrigerator. Additionally, the cheesecake filling can also be mixed and refrigerated for up to 24 hours before assembly. Just remember to let it come to room temperature before folding in the whipped topping to maintain its fluffiness. When you're ready to serve, spread the filling over the chilled crust, refrigerate for at least 4 hours, or preferably overnight, for the best flavor. This not only ensures a stress-free serving experience but also allows the flavors to meld beautifully, making your Marshmallow Whip Cheesecake just as delightful as when freshly made!

Storage Tips for Marshmallow Whip Cheesecake

Fridge: Store your cheesecake covered with plastic wrap or in an airtight container for up to 3 days to maintain its creamy texture and freshness.

Freezer: Wrap the cheesecake tightly in plastic wrap and foil to prevent freezer burn, and it can be frozen for up to 1 month. Thaw in the refrigerator overnight before serving.

Reheating: This cheesecake is served chilled, so there's no need for reheating. Just add your desired toppings before slicing and serving cold.

Serving Suggestions: To enhance your experience, pair the cheesecake with fresh fruits or a drizzle of chocolate sauce just before serving.

What to Serve with Creamy No-Bake Marshmallow Whip Cheesecake

Indulging in a slice of this heavenly cheesecake opens up a world of delightful pairings that elevate your dessert experience.

  • Fresh Berries: Their juicy sweetness adds a refreshing contrast to the creamy cheesecake, creating a vibrant, colorful plate.
  • Chocolate Sauce: A luscious drizzle brings richness and decadence that perfectly complements the fluffy marshmallow layers.
  • Whipped Cream: A dollop of freshly made whipped cream enhances the cheesecake’s airy texture and adds a classic touch.
  • Mint Leaves: A few fresh mint leaves not only brighten the dish visually but also provide a fragrant burst that balances sweetness.
  • Caramel Drizzle: The warmth of caramel harmonizes beautifully with marshmallow fluff, turning each bite into a heavenly treat.
  • Coffee: A cup of fresh-brewed coffee adds a lovely bitter contrast, making it the ultimate partner for this sweet cheesecake.
  • Almonds: Chopped, toasted almonds introduce a delightful crunch, enriching the dessert's texture and flavors beautifully.
  • Coconut Flakes: Lightly toasted coconut flakes add tropical notes, enhancing the whimsy of this delightful cheesecake.

Expert Tips for the Best Marshmallow Whip Cheesecake

  • Room Temperature Cream Cheese: Ensure your cream cheese is at room temperature. This prevents lumps and helps create a silky smooth filling.

  • Chill for Flavor: Refrigerate the cheesecake overnight if possible. This allows the flavors to develop fully, making every bite more delicious.

  • Gentle Folding: When adding whipped topping, fold gently to retain airiness. Overmixing can deflate the light texture of your Marshmallow Whip Cheesecake.

  • Crust Setting: Properly chill the crust for at least 30 minutes before adding the filling. This ensures it sets well and provides a sturdy base.

  • Customization Choices: Don’t hesitate to experiment with toppings. Fresh fruits, chocolate drizzles, or even crushed nuts can elevate your cheesecake to new heights!

Marshmallow Whip Cheesecake Variations

Feel free to explore and make this cheesecake uniquely yours with these delightful twists!

  • Dairy-Free: Use coconut cream instead of cream cheese for a rich and creamy filling that's entirely dairy-free.
    It's a great option for those with dairy sensitivities, and the coconut adds a subtle tropical flair.

  • Chocolate Lovers: Incorporate cocoa powder into the cream cheese filling for a decadent chocolate marshmallow cheesecake.
    If you love the richness of chocolate, this variation will satisfy your cravings beautifully.

  • Fruit-Infused: Add a layer of fresh fruit puree, like strawberry or mango, between the crust and filling.
    This fruity layer elevates the cheesecake's freshness and adds a delightful pop of color.

  • Nutty Crust: Replace graham cracker crumbs with crushed nuts like almonds or pecans for a gluten-free and crunchy crust.
    This adds a wonderfully hearty texture that complements the creamy filling perfectly.

  • Spicy Kick: Incorporate a pinch of cinnamon or ginger into the cream cheese mixture for a warm, spiced flavor.
    It's a simple way to add a comforting twist, making your dessert more memorable.

  • Mini Cheesecakes: Use a muffin tin lined with cupcake liners for adorable mini versions, perfect for parties or portion control.
    These bite-sized delights are always a hit and make serving so much easier!

  • Swirls of Flavor: Swirl in some Nutella or raspberry jam before chilling to create beautiful marbled patterns.
    The visual appeal adds an impressive touch, making your dessert as stunning as it is delicious.

  • Homemade Whipped Cream: Instead of store-bought whipped topping, make your own for a fresher taste and customizable sweetness.
    It's a simple way to enhance the overall flavor of your cheesecake and impress your friends.

For even more inspiration, try adding delightful toppings like caramel drizzle or fresh berries to elevate your cheesecake experience!

Marshmallow Whip Cheesecake Recipe FAQs

How do I choose the right marshmallow fluff?
When selecting marshmallow fluff, look for a product that has a smooth texture and a well-balanced sweetness. Check the expiration date to ensure maximum freshness. If you want a lower-sugar alternative, you can opt for sugar-free marshmallow cream, which can be found in most grocery stores.

How should I store the cheesecake?
To keep your Marshmallow Whip Cheesecake fresh, wrap it tightly in plastic wrap or store it in an airtight container in the fridge for up to 3 days. If you need more time, you can freeze it by tightly wrapping it in plastic wrap and then foil for up to 1 month. Thaw it in the refrigerator overnight before enjoying.

Can I freeze the cheesecake? How?
Absolutely! To freeze your cheesecake, first, allow it to chill completely in the fridge. Then, wrap it tightly in plastic wrap followed by aluminum foil to prevent freezer burn. Label it with the date and pop it in the freezer. When you’re ready to enjoy it, just transfer it to the fridge for an overnight thaw.

What do I do if the filling is lumpy?
If your cream cheese filling turns out lumpy, it’s likely because the cream cheese wasn’t at room temperature. To remedy this, place the lumpy filling back in a mixing bowl and beat it for a minute or two with an electric mixer until smooth. If you encounter lumps, don’t hesitate to give it a good stir as it will help incorporate the ingredients better.

Is this cheesecake suitable for people with allergies?
Be cautious if anyone has allergies, as this recipe contains dairy (from cream cheese and whipped topping) and may contain gluten (from graham crackers). For a gluten-free option, use gluten-free graham crackers or or even a nut-based crust. Additionally, if you're making it for someone with lactose intolerance, you can use lactose-free cream cheese and whipped topping as substitutes.

What are some variations I can try?
The beauty of the Marshmallow Whip Cheesecake is its versatility! You can add lemon zest for a zesty twist or swirl in some raspberry jam for a fruity kick. If you prefer mini cheesecakes, use a muffin tin with cupcake liners for personalized servings. The more the merrier with toppings! Enjoy experimenting!

Marshmallow Whip Cheesecake

Delightful Marshmallow Whip Cheesecake with No-Bake Ease

A delightful Marshmallow Whip Cheesecake that is creamy, sweet, and perfect for any occasion with no baking required.
Print Recipe Pin Recipe
Prep Time 30 minutes mins
Chilling Time 4 hours hrs
Total Time 4 hours hrs 30 minutes mins
Servings: 8 slices
Course: Dessert
Calories: 320
Ingredients Equipment Method Nutrition Notes

Ingredients
  

For the Crust
  • 1 cup Graham Cracker Crumbs or crushed Oreos for a twist
  • 2 tablespoons Sugar or low-calorie sweetener
  • 6 tablespoons Butter melted, preferably unsalted
For the Filling
  • 8 ounces Cream Cheese at room temperature
  • 1 cup Marshmallow Fluff or whipped cream to tone down sweetness
  • 1 teaspoon Vanilla Extract use pure vanilla
  • 2 cups Whipped Topping or homemade whipped cream
Optional Toppings
  • 1 cup Fresh Fruits like strawberries, blueberries, or raspberries
  • 1 cup Chocolate Drizzle melted chocolate
  • 1 cup Mini Marshmallows

Equipment

  • 9-inch springform pan
  • Mixing Bowl
  • Electric mixer

Method
 

Preparation Steps
  1. In a medium bowl, combine graham cracker crumbs and sugar. Pour in the melted butter and mix until it resembles wet sand. Firmly press this mixture into the bottom of a 9-inch springform pan to create an even layer. Chill the crust for at least 30 minutes.
  2. In a large mixing bowl, beat the cream cheese with an electric mixer on medium speed until smooth and creamy, about 2 minutes. Gradually add the marshmallow fluff and vanilla extract, mixing until well combined.
  3. Gently fold in the whipped topping until just combined to retain airiness.
  4. Spread the cheesecake filling over the chilled crust, smoothing the top. Cover with plastic wrap and refrigerate for at least 4 hours or overnight.
  5. Before serving, add your favorite toppings such as fresh fruits or chocolate drizzle. Slice and serve chilled.

Nutrition

Serving: 1sliceCalories: 320kcalCarbohydrates: 45gProtein: 4gFat: 15gSaturated Fat: 9gPolyunsaturated Fat: 0.5gMonounsaturated Fat: 3.5gCholesterol: 40mgSodium: 230mgPotassium: 120mgFiber: 1gSugar: 25gVitamin A: 400IUCalcium: 60mgIron: 0.5mg

Notes

Chill the cheesecake overnight for better flavor development. Be gentle while folding in whipped topping to keep the airy texture.

Tried this recipe?

Let us know how it was!

Decadent White Chocolate Raspberry Swirl Cheesecake Delight

January 1, 2026 by Grace Snow Leave a Comment

The kitchen is alive with the enticing aroma of creamy cheesecake, and I can't help but revel in the thrill of creating a true showstopper: White Chocolate Raspberry Swirl Cheesecake. With its buttery graham cracker crust and vibrant raspberry swirls, this dessert not only pleases the eyes but also delights the palate. Perfect as a make-ahead treat, it allows you to impress your guests at gatherings while keeping your sanity intact. Plus, the silky texture and rich flavors of white chocolate make it irresistibly decadent, ensuring that even the last slice will be sought after. Curious how to achieve this slice of heaven? Let’s dive into the details!

Why is This Cheesecake a Must-Try?

Decadent flavors collide in every bite, as the rich combination of white chocolate and tart raspberry creates a flavor explosion that’s utterly irresistible. Visually stunning, the beautiful swirls of raspberry not only enhance aesthetics but also offer a delightful contrast to the creamy filling. Make-ahead convenience allows you to prepare this dessert in advance, making it perfect for gatherings or celebrations. Versatile variations mean you can easily swap in different fruits or toppings for a personalized touch. Lastly, crowd appeal is guaranteed – this cheesecake is sure to impress family and friends, leaving everyone asking for seconds!

White Chocolate Raspberry Swirl Cheesecake Ingredients

For the Raspberry Sauce
• Frozen Raspberries – Provides a tartness and vibrant color to the cheesecake; feel free to use fresh raspberries if available.
• Water – Essential for cooking the raspberry sauce and dissolving the sugar effectively.
• Sugar – Sweetens the raspberry sauce; you can use alternative sweeteners if you prefer.
• Cornstarch – Thickens the raspberry sauce; arrowroot powder can work as a great substitute.

For the Crust
• Graham Cracker Crumbs – Forms the luscious crust; opt for gluten-free crumbs for a gluten-free version.
• Butter – Binds the crust ingredients together; coconut oil is a good substitute for a dairy-free option.

For the Filling
• White Chocolate Chips – Adds a depth of richness and creaminess to the filling; consider dark chocolate for a different flavor.
• Half and Half – Ensures your filling is beautifully creamy; a milk and cream mixture can also suffice.
• Cream Cheese – The key player providing texture and richness in this cheesecake; light cream cheese can lighten the recipe slightly.
• Sugar (additional) – Balances the flavors of the cheesecake.
• Flour – Stabilizes the filling; gluten-free flour is a viable alternative.
• Eggs – Provide necessary structure; if needed, egg substitutes can be selected but may alter the texture.
• Vanilla Extract – Enhances the filling's flavor; swap in other extracts like almond for a unique twist.

Optional Toppings
• Whipped Cream – Adds a delightful lightness when served on top; consider a dollop for extra indulgence.
• Additional Raspberry Sauce – Drizzle on top for presentation and added flavor; it beautifully complements the cheesecake’s taste.

Now that you have all the ingredients for this stunning White Chocolate Raspberry Swirl Cheesecake, you're one step closer to creating a dessert that will wow everyone at your next gathering!

Step‑by‑Step Instructions for White Chocolate Raspberry Swirl Cheesecake

Step 1: Prepare the Crust
Begin by preheating your oven to 325°F (163°C). In a mixing bowl, combine graham cracker crumbs and melted butter until well blended. Press this mixture firmly into the bottom of a greased 9-inch springform pan, creating an even layer. Bake the crust for about 10 minutes until lightly golden, then remove it and set aside to cool while you prepare the filling.

Step 2: Cook the Raspberry Sauce
In a saucepan, combine the frozen raspberries, sugar, cornstarch, and water, stirring gently. Bring the mixture to a boil over medium heat, allowing it to thicken and bubble for about 5-7 minutes. Once thickened, strain the sauce through a fine sieve to remove seeds, achieving a smooth consistency. Let this raspberry sauce cool while you work on the cheesecake filling.

Step 3: Melt the White Chocolate
Place your white chocolate chips in a heatproof bowl and combine them with the half and half. Set the bowl over a saucepan of simmering water, stirring frequently until fully melted and smooth. Alternatively, you can melt the mixture gently in the microwave in 20-second intervals. Once melted, set the bowl aside to cool slightly as you prepare the cheesecake batter.

Step 4: Make the Cheesecake Batter
In a large mixing bowl, beat the cream cheese and sugar together until light and fluffy, around 3-4 minutes. Gradually add in the flour, mixing until just combined. Then, incorporate the eggs one at a time, ensuring each is fully mixed in before adding the next. Finally, pour in the cooled melted white chocolate and vanilla extract, blending until the batter is smooth.

Step 5: Combine the Mixtures
Pour the creamy cheesecake batter into the cooled crust, spreading it evenly. Next, take your prepared raspberry sauce and drizzle it over the top of the cheesecake in a swirling pattern. Use a knife or a toothpick to gently swirl the sauce into the cheesecake batter, creating a beautiful marbled effect without overmixing.

Step 6: Bake the Cheesecake
Carefully place the springform pan in the oven, ensuring it is situated on a baking sheet to catch any drips. Bake the cheesecake for 55 to 60 minutes until the edges are set but the center still has a slight jiggle. Once done, turn off the oven and crack the oven door, allowing the cheesecake to cool gradually for about an hour.

Step 7: Chill Before Serving
After cooling, remove the cheesecake from the oven and let it reach room temperature. Once cooled, cover the cheesecake and refrigerate for at least 8 hours, or overnight for best results. This chilling time allows the flavors to meld beautifully, giving you that decadent white chocolate raspberry swirl cheesecake you’ve been dreaming of.

What to Serve with White Chocolate Raspberry Swirl Cheesecake

Indulge in the sweetness of this dessert by pairing it with complementary flavors and textures for a truly delightful experience.

  • Whipped Cream: A dollop of fluffy whipped cream adds lightness and richness, enhancing the cheesecake's creamy texture.
  • Fresh Berries: Serve with fresh raspberries or strawberries for a burst of vibrant color and tartness that complements the cheesecake beautifully.
  • Chocolate Sauce: Drizzling warm chocolate sauce over each slice introduces a rich contrast that makes every bite even more decadent.
  • Mint Leaves: Fresh mint leaves act as a refreshing garnish, bringing a hint of crispness that brightens the overall dessert experience.
  • Coffee or Espresso: Sip on a cup of coffee or a rich espresso to balance the sweetness and enhance the cheesecake’s flavors.
  • Ice Cream: A scoop of vanilla or raspberry ice cream on the side creates a delightful blend of temperatures and smoothness.
  • Fruit Sorbet: A refreshing fruit sorbet complements the richness of the cheesecake while cleansing the palate between bites.
  • Almond Biscotti: For added crunch and nutty flavor, serve with almond biscotti that provides a delightful textural contrast.
  • Moscato or Champagne: Pairing this dessert with a sweet Moscato or bubbly champagne elevates the celebration and accentuates the cheesecake's fruity notes.

Enjoy experimenting with these pairings to find the perfect harmony for your White Chocolate Raspberry Swirl Cheesecake!

Variations on White Chocolate Raspberry Swirl Cheesecake

Customize this delightful dessert to match your cravings and dietary needs!

  • Berry Alternatives: Swap frozen raspberries for strawberries, blueberries, or mixed berries for a different flavor profile. Each berry provides a unique twist on the classic sparkling taste.

  • Chocolate Ganache: Add a luscious layer of chocolate ganache on top for an extra decadent treat. This addition elevates your cheesecake to new heights, making it even more appealing for chocolate lovers.

  • Citrus Zest: Incorporate lemon or orange zest into the filling for a refreshing citrus flair. The bright, sunny notes contrast beautifully with the creamy textures and rich flavors.

  • Nut-Based Crust: Replace graham cracker crumbs with crushed nuts or almond meal for a gluten-free crust option. This adds a nutty crunch that complements the overall flavor beautifully.

  • Dairy-Free Version: Use dairy-free cream cheese and coconut cream in place of traditional cream cheese and half and half for a dairy-free treat. It’s indulgent yet suitable for those avoiding dairy!

  • Swirled Flavor Variants: Mix in a hint of almond or mint extract for a surprising twist. A touch of these extracts can transform the flavor profile without overpowering the main ingredients.

  • Heat it Up: Add some crushed red pepper flakes or a dash of cayenne to the raspberry sauce for a spicy kick. This unexpected element will tantalize your taste buds and keep everyone guessing.

  • Decadent Toppings: Consider topping with shaved white chocolate or toasted coconut for an elegant finish. These additions bring both visual appeal and flavor, making your cheesecake even more tempting.

Feel free to experiment with these variations, just like you might do with recipes like German Chocolate Poke or Tuscan White Bean! The possibilities are endless, and the joy of baking lies in personal expression. Enjoy!

Make Ahead Options

This Decadent White Chocolate Raspberry Swirl Cheesecake is a fantastic option for meal prep enthusiasts looking to save time during busy weeks. You can prepare the crust and the raspberry sauce up to 3 days in advance; simply store them separately in airtight containers in the refrigerator. To maintain the crust's crispness, wait until just before serving to assemble the cheesecake. When you’re ready to enjoy the cheesecake, combine the filling and bake. Chill it for a minimum of 8 hours (or overnight) to allow the flavors to develop. With these make-ahead tips, you’ll have a show-stopping dessert ready with minimal last-minute effort!

How to Store and Freeze White Chocolate Raspberry Swirl Cheesecake

Fridge: Keep your cheesecake in an airtight container in the refrigerator for up to 5 days. This storage method maintains its creamy texture and flavors beautifully.

Freezer: For long-term storage, wrap individual slices or the whole cheesecake tightly in plastic wrap and then aluminum foil. It can be frozen for up to 2 months.

Reheating: Thaw the cheesecake overnight in the fridge before serving. For individual slices, you can leave them at room temperature for about 30 minutes to regain their creamy goodness.

Make-Ahead: This White Chocolate Raspberry Swirl Cheesecake is perfect for making ahead of time. Prepare it up to 2 days in advance and store it in the fridge until ready to serve.

Expert Tips for White Chocolate Raspberry Swirl Cheesecake

  • Room Temperature Ingredients: Ensure all ingredients are at room temperature before mixing to achieve a smoother, creamier texture in your cheesecake batter.

  • Mix with Care: Avoid overmixing after adding the eggs. Gentle mixing prevents air bubbles that can cause cracks in your beautiful White Chocolate Raspberry Swirl Cheesecake.

  • Use a Water Bath: Baking your cheesecake in a water bath helps regulate the temperature and adds moisture, resulting in a creamier consistency without cracks.

  • Cool Gradually: After baking, cool your cheesecake in the oven with the door ajar for an hour. This gentle cooling helps prevent sudden temperature changes that can lead to cracks.

  • Chill for Flavor: Allow the cheesecake to chill in the refrigerator for at least 8 hours, ideally overnight. This enhances the flavors, making every bite even more delightful!

White Chocolate Raspberry Swirl Cheesecake Recipe FAQs

How do I select ripe raspberries for the sauce?
Absolutely! When choosing raspberries, look for ones that are plump and vibrant in color, with no dark spots or signs of mold. Ripe raspberries should have a sweet aroma and feel slightly firm yet yield to gentle pressure.

How should I store leftover cheesecake?
Very! Store any leftover White Chocolate Raspberry Swirl Cheesecake in an airtight container in the refrigerator for up to 5 days. This will keep it fresh and maintain its creamy texture, allowing you to enjoy it later.

Can I freeze White Chocolate Raspberry Swirl Cheesecake?
Of course! To freeze, wrap the cheesecake tightly in plastic wrap, then in aluminum foil to prevent freezer burn. You can freeze it for up to 2 months. When ready to enjoy, thaw it overnight in the refrigerator for the best texture.

What should I do if my cheesecake cracks while baking?
Don’t worry—this happens to the best of us! To prevent cracking, make sure to bake at the right temperature and avoid overmixing after adding the eggs. If it cracks despite your best efforts, you can cover it with whipped cream or a ganache to hide those imperfections beautifully!

Are there any dietary considerations I should keep in mind?
Absolutely! This cheesecake contains gluten and dairy, so if you have any allergies or dietary restrictions, consider using gluten-free graham cracker crumbs and plant-based cream cheese. If you have a gluten sensitivity, gluten-free flour can also be used to maintain its luscious texture.

White Chocolate Raspberry Swirl Cheesecake

Decadent White Chocolate Raspberry Swirl Cheesecake Delight

Indulge in this White Chocolate Raspberry Swirl Cheesecake, a mesmerizing dessert with vibrant swirls and rich flavors.
Print Recipe Pin Recipe
Prep Time 30 minutes mins
Cook Time 1 hour hr
Chilling Time 8 hours hrs
Total Time 9 hours hrs 30 minutes mins
Servings: 12 slices
Course: Dessert
Cuisine: American
Calories: 450
Ingredients Equipment Method Nutrition Notes

Ingredients
  

Raspberry Sauce
  • 2 cups Frozen Raspberries Fresh raspberries can be used if available.
  • 1 cup Water Essential for cooking the raspberry sauce.
  • 1/2 cup Sugar Alternative sweeteners can be used.
  • 2 tablespoons Cornstarch Arrowroot powder can be a substitute.
Crust
  • 1 1/2 cups Graham Cracker Crumbs Opt for gluten-free crumbs for a gluten-free version.
  • 1/2 cup Butter Coconut oil is a good substitute for dairy-free option.
Filling
  • 1 cup White Chocolate Chips Dark chocolate can be used for a different flavor.
  • 1/2 cup Half and Half A milk and cream mixture can suffice.
  • 16 ounces Cream Cheese Light cream cheese can be used.
  • 1 cup Sugar Balances the flavors.
  • 1/4 cup Flour Gluten-free flour is a viable alternative.
  • 3 large Eggs Egg substitutes can be used if needed.
  • 1 teaspoon Vanilla Extract Other extracts like almond can be swapped.
Optional Toppings
  • 1 cup Whipped Cream Adds lightness when served.
  • 1/2 cup Additional Raspberry Sauce For drizzle on top.

Equipment

  • Oven
  • Springform pan
  • Mixing Bowl
  • Saucepan
  • fine sieve
  • Heatproof bowl

Method
 

Preparation Steps
  1. Preheat your oven to 325°F (163°C). In a mixing bowl, combine graham cracker crumbs and melted butter until well blended. Press into a greased 9-inch springform pan and bake for about 10 minutes until golden.
  2. In a saucepan, combine frozen raspberries, sugar, cornstarch, and water, stirring gently. Bring to a boil over medium heat for 5-7 minutes until thickened. Strain to remove seeds and let cool.
  3. Melt white chocolate chips with half and half in a heatproof bowl over simmering water, stirring frequently until smooth. Alternatively, microwave in 20-second intervals until melted and cool slightly.
  4. In a large mixing bowl, beat cream cheese and sugar until light and fluffy. Gradually add flour, mixing until just combined, then incorporate eggs one at a time. Finally, stir in melted white chocolate and vanilla until smooth.
  5. Pour the cheesecake batter into the cooled crust and drizzle prepared raspberry sauce over the top. Use a knife to gently swirl the sauce into the batter.
  6. Bake the cheesecake for 55-60 minutes until edges are set but the center jiggles slightly. Turn off the oven, crack the door, and allow the cheesecake to cool gradually for an hour.
  7. Remove cheesecake and let it reach room temperature. Cover and refrigerate for at least 8 hours, or overnight for best results.

Nutrition

Serving: 1sliceCalories: 450kcalCarbohydrates: 40gProtein: 6gFat: 30gSaturated Fat: 18gMonounsaturated Fat: 8gTrans Fat: 1gCholesterol: 80mgSodium: 250mgPotassium: 150mgFiber: 1gSugar: 25gVitamin A: 800IUVitamin C: 5mgCalcium: 100mgIron: 1mg

Notes

Ensure all ingredients are at room temperature before mixing for best texture. Avoid overmixing after adding eggs, and consider a water bath for baking for creamier texture and no cracks.

Tried this recipe?

Let us know how it was!
  • « Previous Page
  • 1
  • …
  • 15
  • 16
  • 17
  • 18
  • 19
  • …
  • 49
  • Next Page »

Welcome!

Hi, I’m Grace, a Sydney-based home cook with a passion for bold flavors and trending ingredients. Whether you’re a busy beginner or a seasoned foodie, you’ll find dishes here that are fresh, fun, and full of flavor.

More about me

Popular Recipes

  • Cheesy Chicken Garlic Bread Sandwich
    Cheesy Chicken Garlic Bread Sandwich for Cozy Family Moments
  • Easy Chicken Ranch Wraps
    Easy Chicken Ranch Wraps: Quick, Creamy & Totally Satisfying
  • Chicken Caesar Sandwiches
    Delicious Chicken Caesar Sandwiches for Quick Comfort Food
  • best Cuban sandwich
    The Best Cuban Sandwich You’ll Want Every Weeknight!

Footer

↑ back to top

About

  • Privacy Policy
  • Disclaimer
  • Terms & Conditions

Newsletter

  • Sign Up! for emails and updates

Contact

  • About me
  • Contact me

Copyright © 2025 TastyTrendIngredients