tastytrendingredients

  • Home
  • Recipes
    • Appetizers
    • Breakfast
    • Dessert
    • Dinner
    • Drinks
    • Salads
    • Snacks
    • Soups
  • About me
  • Contact
menu icon
go to homepage
  • Home
  • Recipes
    • Appetizers
    • Breakfast
    • Dessert
    • Dinner
    • Drinks
    • Salads
    • Snacks
    • Soups
  • About me
  • Contact
search icon
Homepage link
  • Home
  • Recipes
    • Appetizers
    • Breakfast
    • Dessert
    • Dinner
    • Drinks
    • Salads
    • Snacks
    • Soups
  • About me
  • Contact
×

Halloween Bread Bowl: Spooky Spinach Dip Delight

October 15, 2025 by Grace Snow Leave a Comment

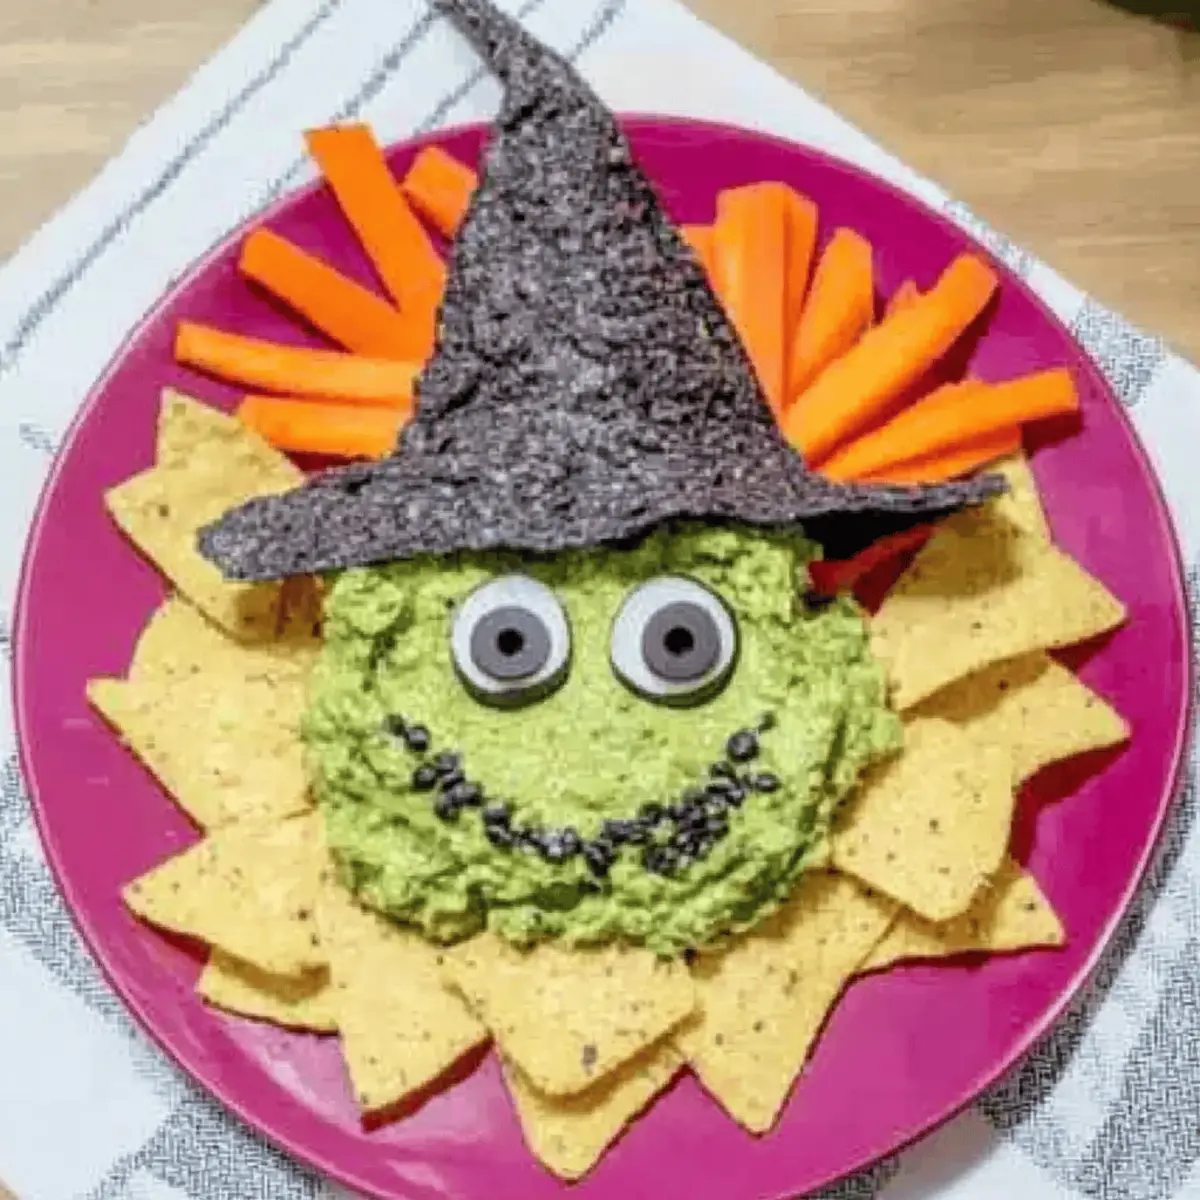
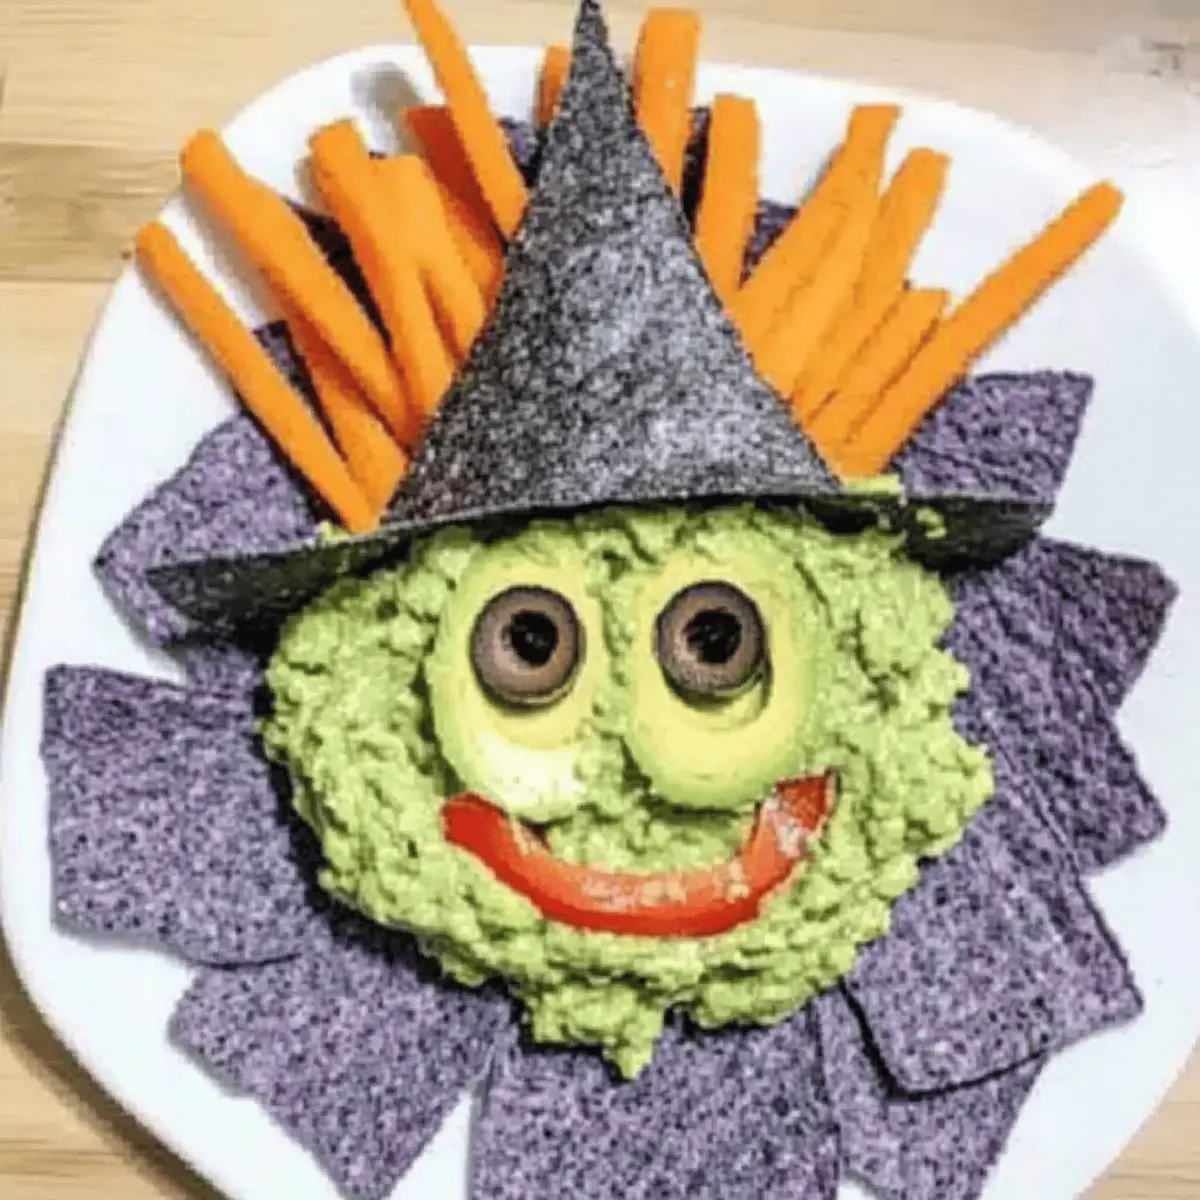
As autumn leaves begin to fall and the days shorten, it's the perfect time to host a spooky gathering filled with fun and delicious surprises. I’m excited to share a delightfully eerie Halloween appetizer that will steal the show: a Lipton Spinach Dip served in a creative coffin-shaped bread bowl! This playful presentation not only brings a festive touch to your celebrations but also offers the creamy, savory goodness of spinach dip in a crunch-friendly vessel. The best part? It’s incredibly easy to prepare in advance, allowing the flavors to meld overnight for a truly delicious treat. Whether you’re entertaining friends or family, this Halloween bread bowl will leave everyone raving. Ready to add a dash of fun to your next party?

Why is This Halloween Bread Bowl a Hit?

Uniquely Fun: This spooky presentation transforms your typical dip into a conversation starter that will wow your guests.

Make-Ahead Magic: Prepare the creamy spinach dip a day in advance, ensuring maximum flavor while saving you time on party day.

Versatile Serving Options: Pair it with pretzel crisps, tortilla chips, or fresh veggies for an appealing spread that suits all tastes.

Vegetarian Delight: Perfect for both vegetarians and those seeking lighter fare, this dip satisfies without compromising on flavor.

Crowd-Pleasing Appeal: Whether for Halloween parties, game-day gatherings, or casual get-togethers, this bread bowl will impress and entertain everyone! For more fun ideas, check out our Cornbread Breakfast Casserole or delightful Cheesy Garlic Bread.

Halloween Bread Bowl Ingredients

• Prepare to create your spooky masterpiece with these essential ingredients!

For the Coffin Bread Bowl

  • Whole loaf of bread, unsliced – Look for a firm, rectangular shape like Farmstyle bread for best results.
  • 1 crunchy bread stick – This adds a playful handle to create a lid for your coffin.

For the Spinach Dip

  • 1 10-oz package frozen chopped spinach – Provides the base flavor; ensure it's fully thawed and drained for the best texture.
  • 1 cup light mayonnaise – Adds creaminess; Greek yogurt makes a great substitute for a lighter option.
  • 1 cup light sour cream – Contributes to the dip's rich texture; can be swapped with a non-dairy alternative if desired.
  • 1/2 cup chopped onion or celery – Offers fresh crunch; shallots or green onions can provide a milder flavor.
  • 1 package (1.4 oz) Knorr or Lipton Veggie Soup Mix – Delivers essential seasoning; feel free to create your homemade blend for customization.
  • 1 8-ounce can water chestnuts, finely chopped – Brings a delightful crunch; omit if unavailable for a smoother dip.

Get ready to impress your guests with this easy yet engaging Halloween bread bowl filled with delectable spinach dip!

Step‑by‑Step Instructions for Halloween Spinach Dip in Coffin Bread Bowl

Step 1: Thaw the Spinach
Begin by removing the frozen chopped spinach from the packaging and placing it in a sieve or a clean kitchen towel. Allow the spinach to thaw completely, which typically takes about 1 hour at room temperature. Once thawed, squeeze it firmly to remove any excess water, ensuring your Halloween bread bowl dip doesn't become watery.

Step 2: Prepare the Dip
In a large mixing bowl, combine the drained spinach with 1 cup of light mayonnaise, 1 cup of light sour cream, and ½ cup of chopped onion or celery. Add the package of veggie soup mix and the finely chopped water chestnuts. Mix well until all ingredients are fully incorporated. Cover the mixture and refrigerate it for at least 2 hours to allow the flavors of your spooky spinach dip to meld beautifully.

Step 3: Craft the Coffin Bread Bowl
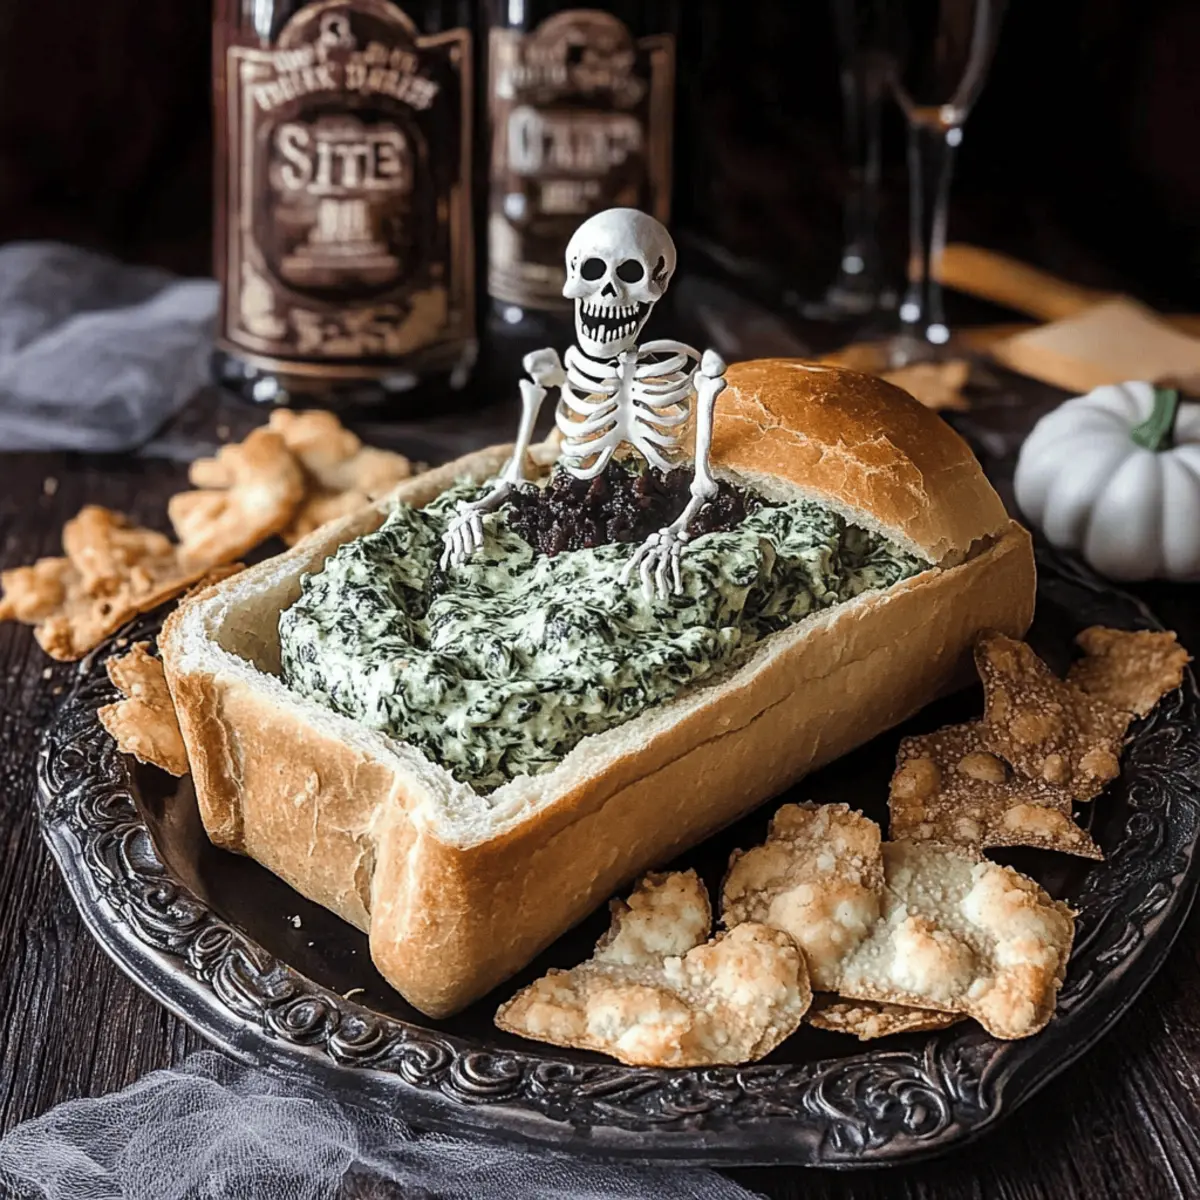
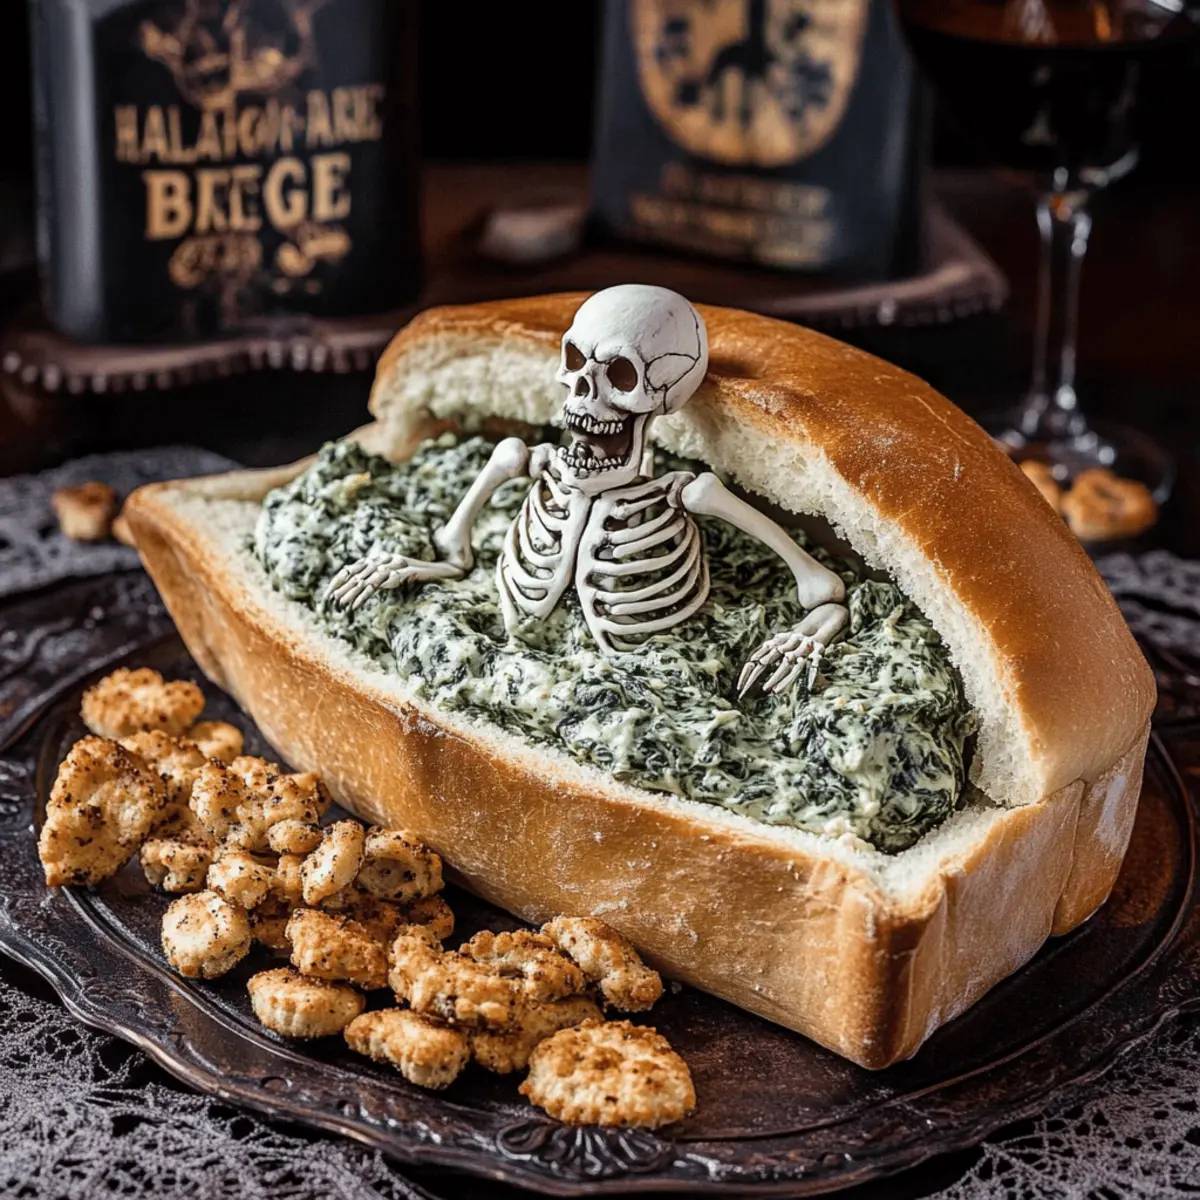
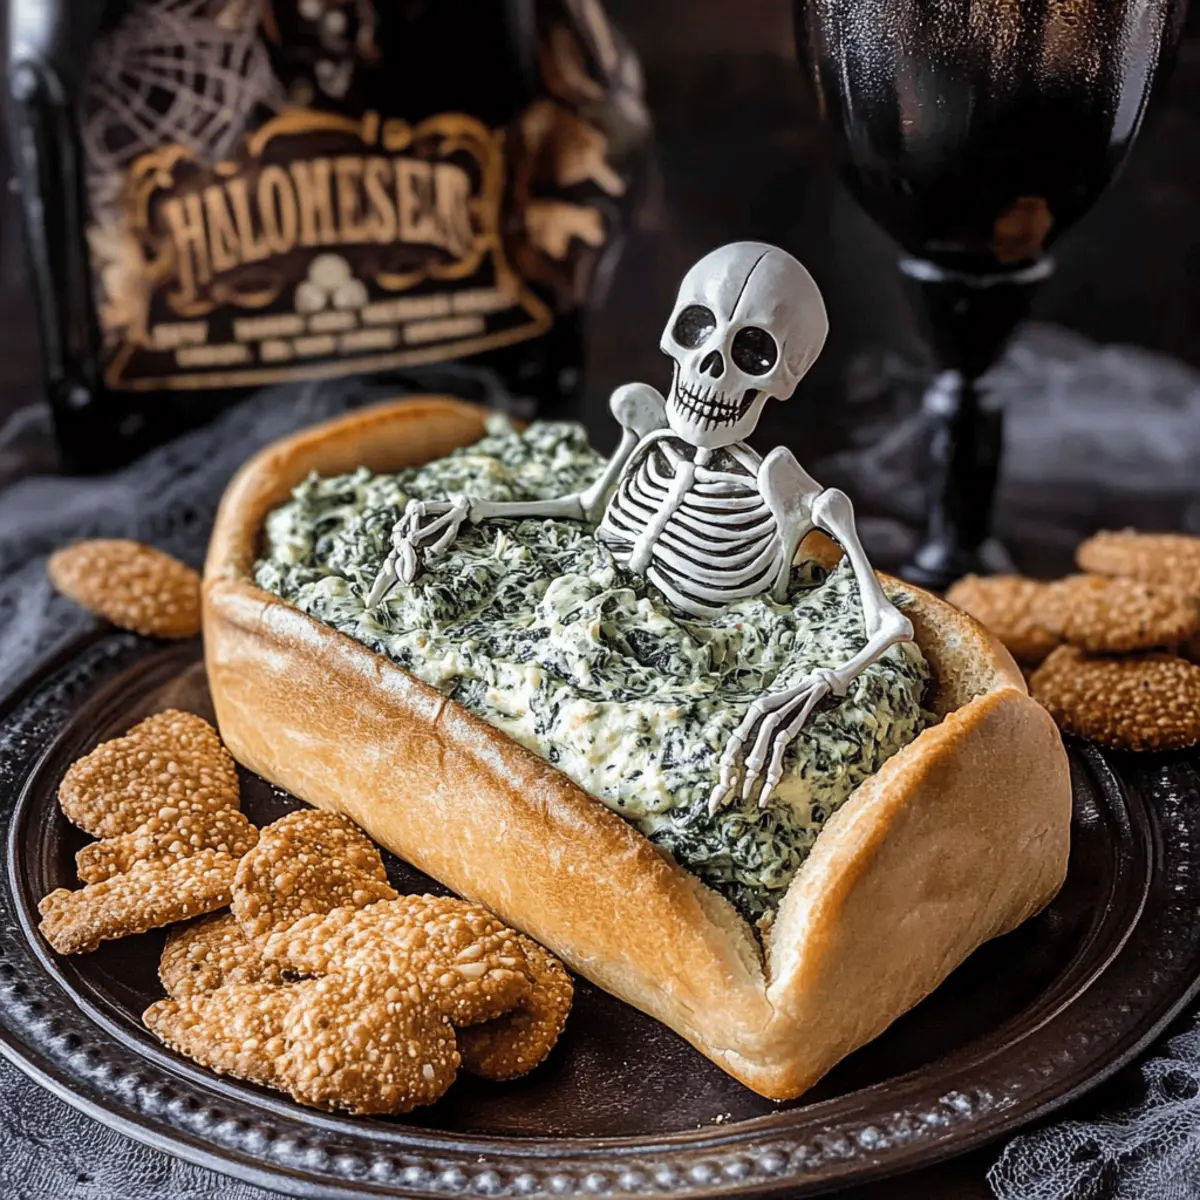
Take your whole loaf of bread and place it on a cutting board. Using a serrated knife, carefully cut the top off the loaf on three sides, leaving one side connected to create a lid. Aim for a coffin shape. Ensure the cut is smooth, allowing easy access to the dip once filled.

Step 4: Hollow Out the Bread
With the top removed, use your hands or a small knife to hollow out the center of the bread, creating a cavity large enough to hold the spinach dip. Leave about ½ inch of bread around the edges for structure. This will form a cute coffin for your delicious dip and keeps the bread from becoming soggy.

Step 5: Create the Coffin Handle
To add a whimsical touch, take your crunchy bread stick and attach it to the front of the bread coffin using toothpicks. This will serve as a playful handle for the lid. Make sure the bread stick is securely fastened, as it will enhance the Halloween vibe.

Step 6: Fill with Spinach Dip
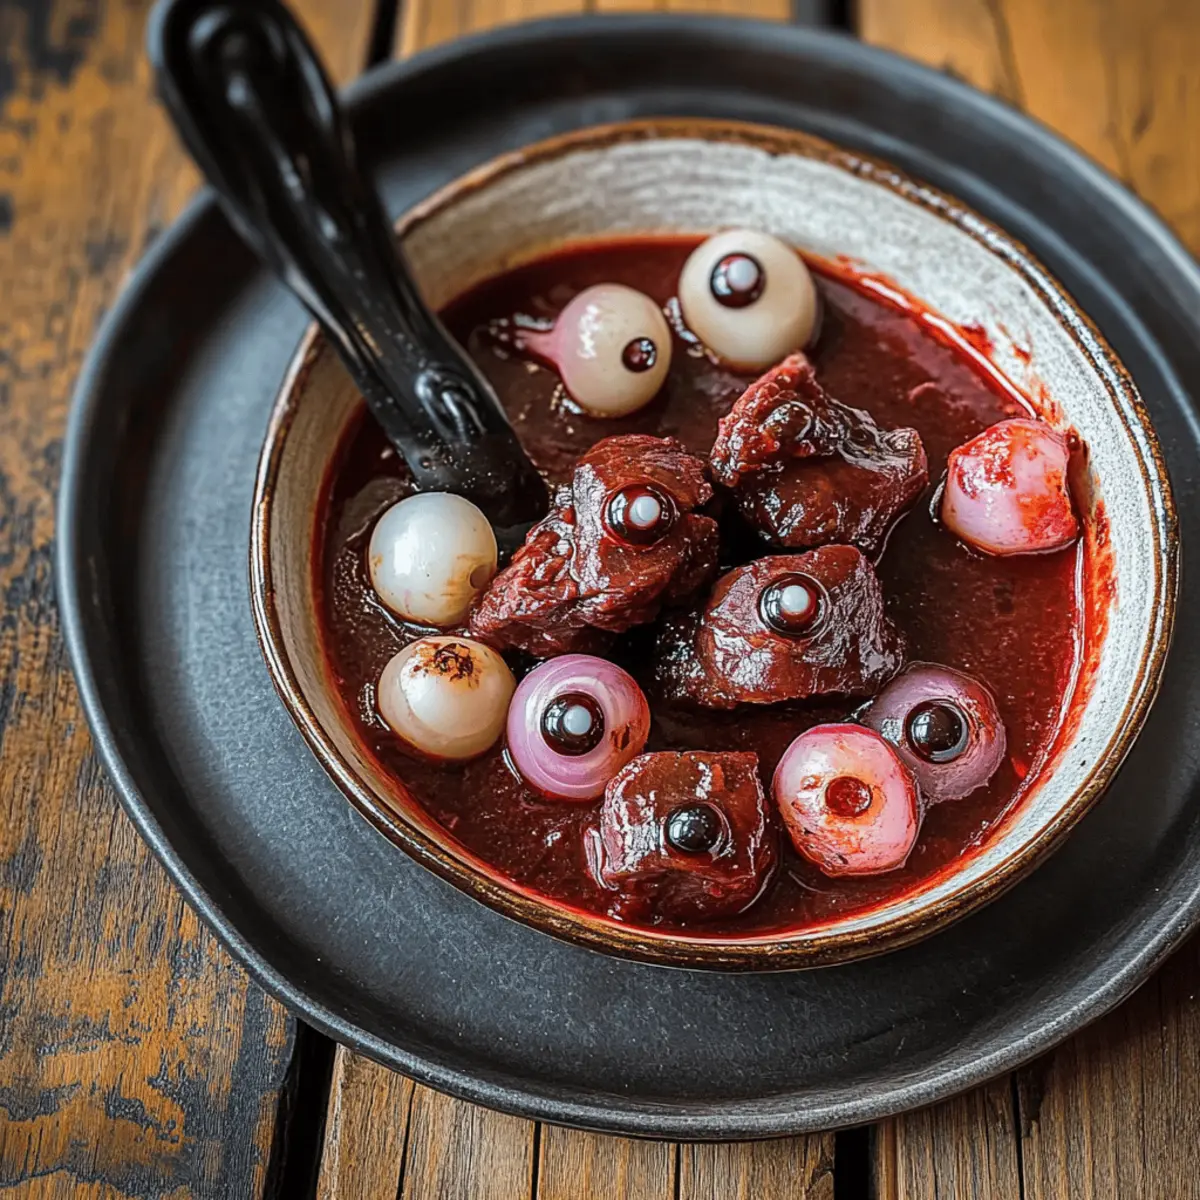
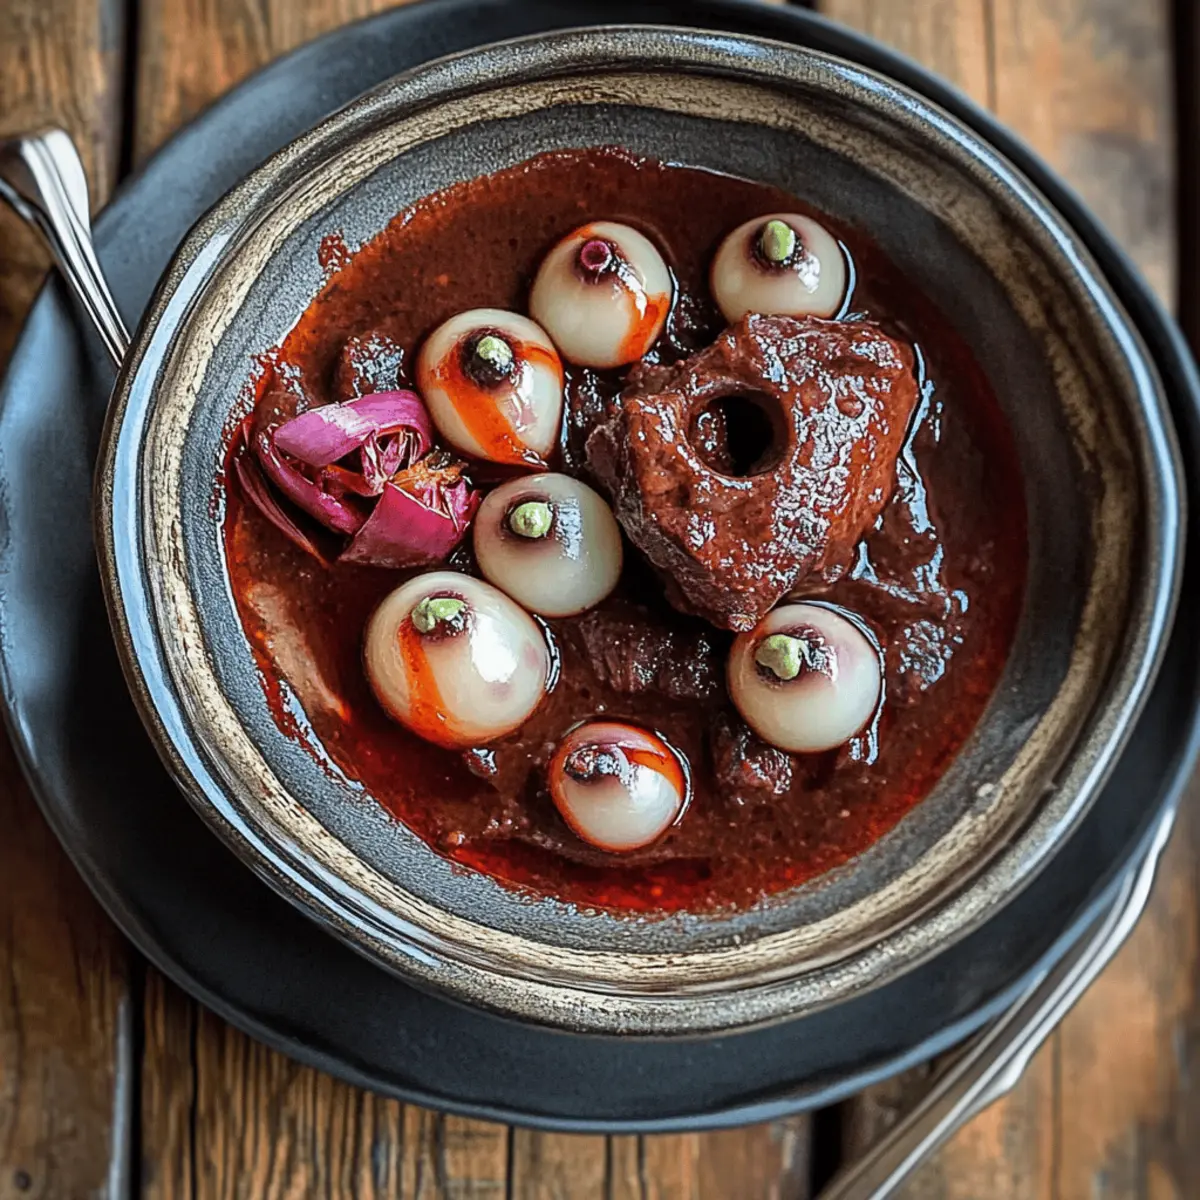
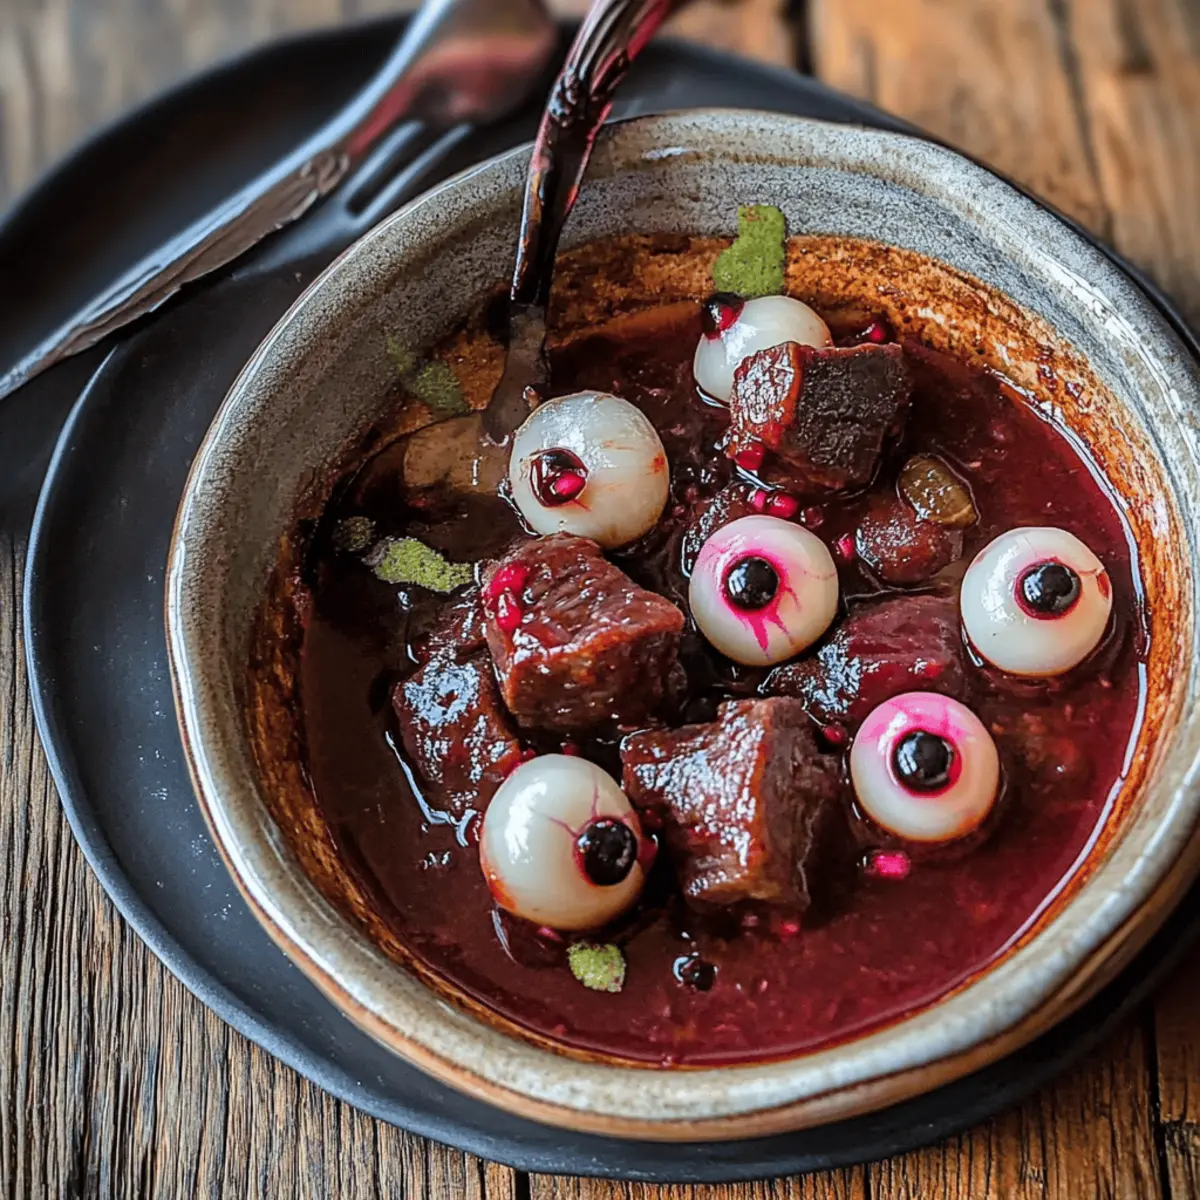
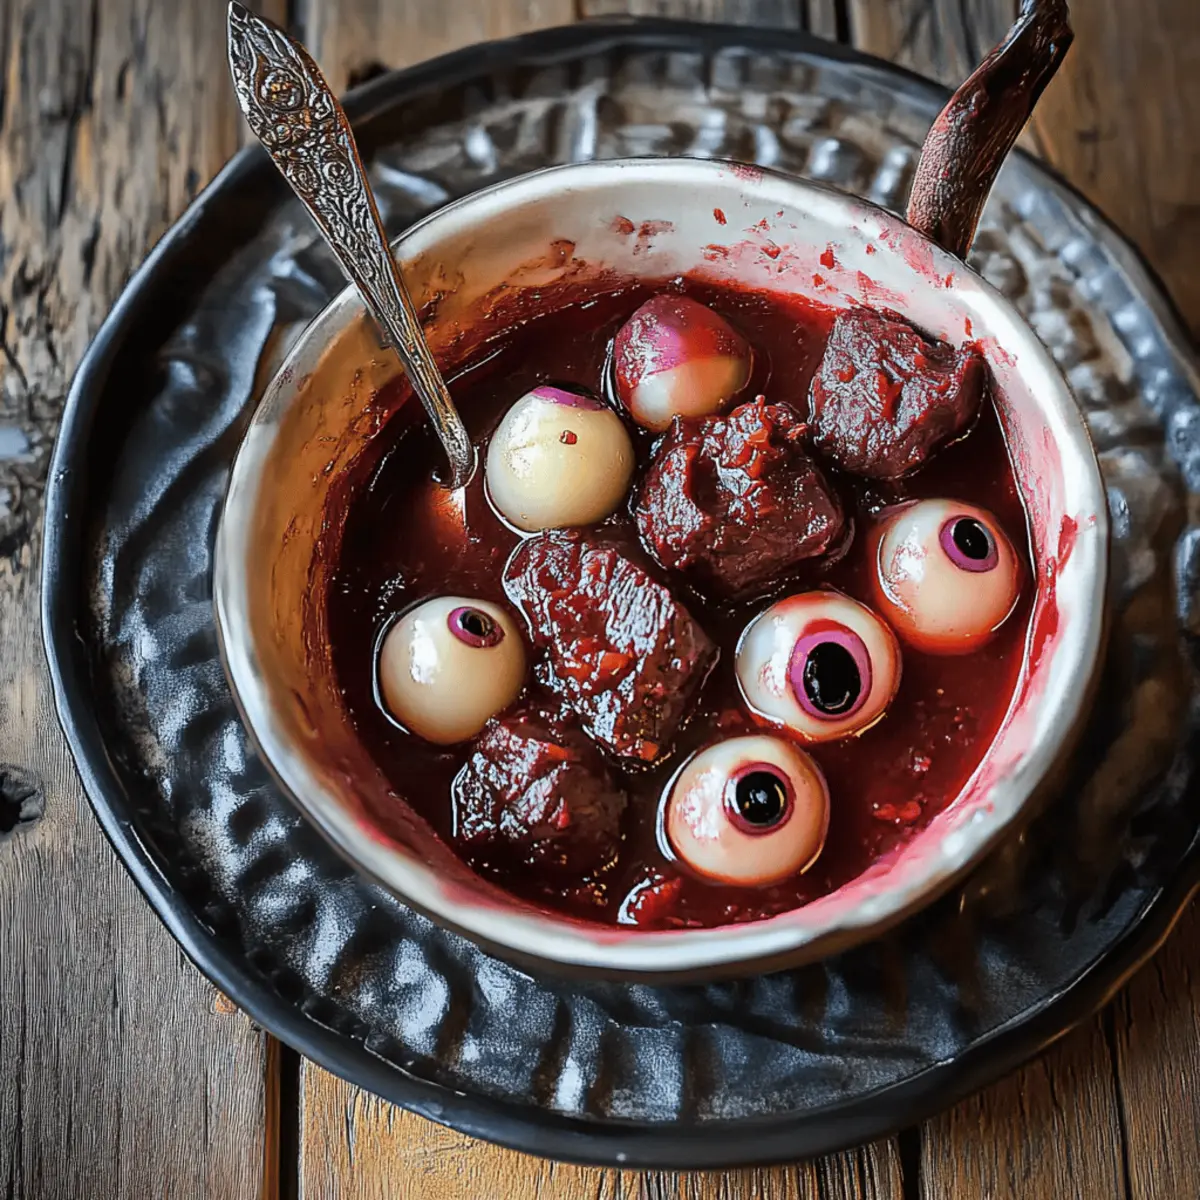
Now, it’s time to fill your hollowed-out bread bowl with the chilled spinach dip. Use a spoon to evenly distribute the dip into the bread cavity, ensuring it’s packed well but not overflowing. Place a mini skeleton or other fun decoration inside the dip for an extra spooky touch!

Step 7: Prop the Lid Open & Serve
To keep the lid of your coffin bread bowl open, use wooden skewers as props. Position them so that the lid is held slightly ajar. Serve your Halloween bread bowl with an assortment of pretzel crisps, tortilla chips, or fresh vegetable sticks on the side for a delightful and festive appetizer at your gathering.

Make Ahead Options

These Halloween Bread Bowls are perfect for busy home cooks looking to save time! You can prepare the creamy spinach dip up to 24 hours in advance; just mix all the ingredients and refrigerate it in an airtight container. For the bread bowl, you can hollow it out and assemble it without the dip about 3 days prior, ensuring the bread stays firm and uncut to prevent sogginess. To maintain quality, store the bread bowl wrapped in plastic wrap in a cool, dry place. When you're ready to serve, simply fill the hollowed bread with the chilled spinach dip, prop the lid open, and enjoy your spooky creation, deliciously ready to impress your guests!

How to Store and Freeze Halloween Bread Bowl

Fridge: Keep any leftover filled Halloween bread bowl in the refrigerator without the lid for up to 3 days to maintain freshness and prevent sogginess.

Freezer: If you have extra spinach dip, store it in an airtight container for up to 2 months. Thaw in the fridge before using and refill a fresh bread bowl.

Reheating: To enjoy the dip, simply reheat it gently in a microwave or serve it chilled. The rich flavors remain delicious even after freezing!

Make-Ahead: The spinach dip can be made a day in advance and kept chilled before filling the bread bowl for optimal flavor melding.

Halloween Bread Bowl Variations & Substitutions

Feel free to get creative and customize this recipe to suit your taste and dietary preferences!

  • Greener Greens: Swap spinach for Swiss chard or kale for a delightful variation with different textures and nutrients.
    Make sure to sauté the greens slightly to soften them, enhancing the overall flavor of your dip.

  • Herb Infusion: Add fresh herbs like dill or parsley to the dip for extra flavor and freshness.
    These fragrant additions can elevate the taste and make for a lively twist that your guests will love!

  • Creamy Swap: Substitute light mayonnaise with Greek yogurt for a tangy, protein-packed option.
    This simple switch offers a lighter touch while still keeping that creamy consistency we all adore.

  • Bread Variety: Experiment with different types of bread, like sourdough or ciabatta, to create unique flavors and textures.
    Each bread type contributes a distinct character, so don't hesitate to mix things up!

  • Spicy Kick: For those who love heat, mix in some diced jalapeños or a splash of hot sauce to the dip.
    This fiery touch adds an exciting contrast to the creamy dip, making it unforgettable!

  • Nutty Crunch: Incorporate chopped nuts, like pecans or walnuts, into the dip for an unexpected crunch.
    This variation not only adds texture but also provides healthy fats that'll surprise your taste buds.

  • Omit Water Chestnuts: If you prefer a smoother texture, feel free to skip the water chestnuts; your dip will still be delicious!
    The absence of this ingredient will make for a creamier consistency that's equally satisfying.

  • Unique Dippers: Instead of traditional tortilla chips, try serving your Halloween bread bowl with veggie chips or puffed snacks.
    These alternatives bring a fun twist that aligns perfectly with your festive theme!

For even more creative ideas, check out our delicious Pitaya Smoothie Bowl options or try our hearty Fish Taco Bowls as a fresh accompaniment to your gathering!

What to Serve with Halloween Spinach Dip in Coffin Bread Bowl

Transform your Halloween gathering into a feast of flavors with these delightful pairings that will enhance the festive atmosphere!

  • Pretzel Crisps: These crunchy snacks provide a satisfying contrast to the creamy dip, making each bite a tasty experience.
  • Tortilla Chips: Their light and crispy texture complements the spinach dip beautifully, encouraging guests to keep dipping and munching.
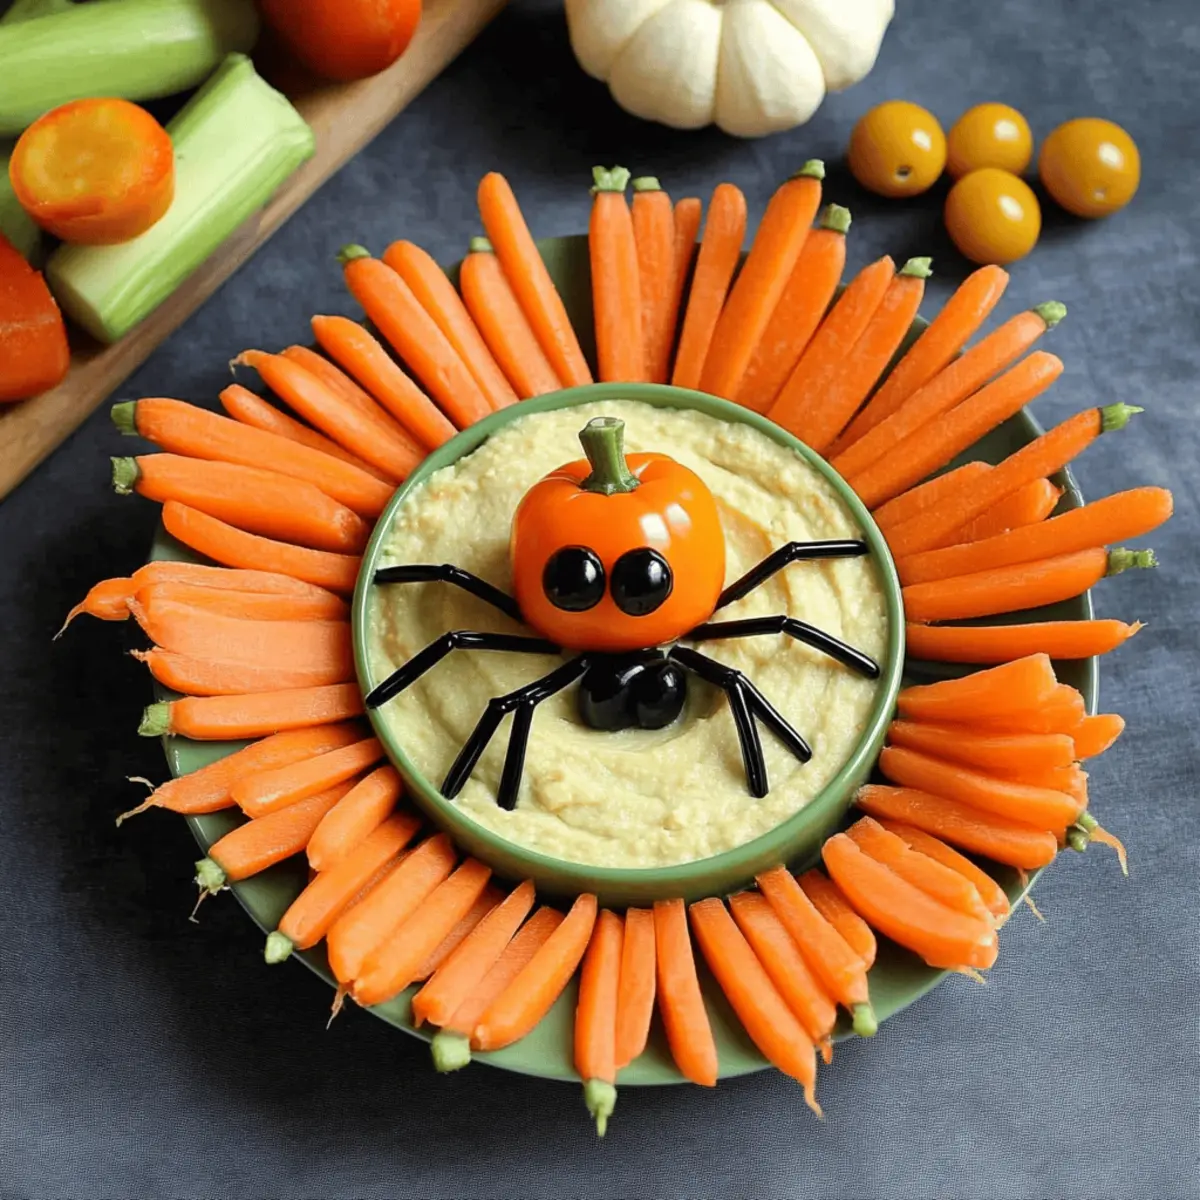
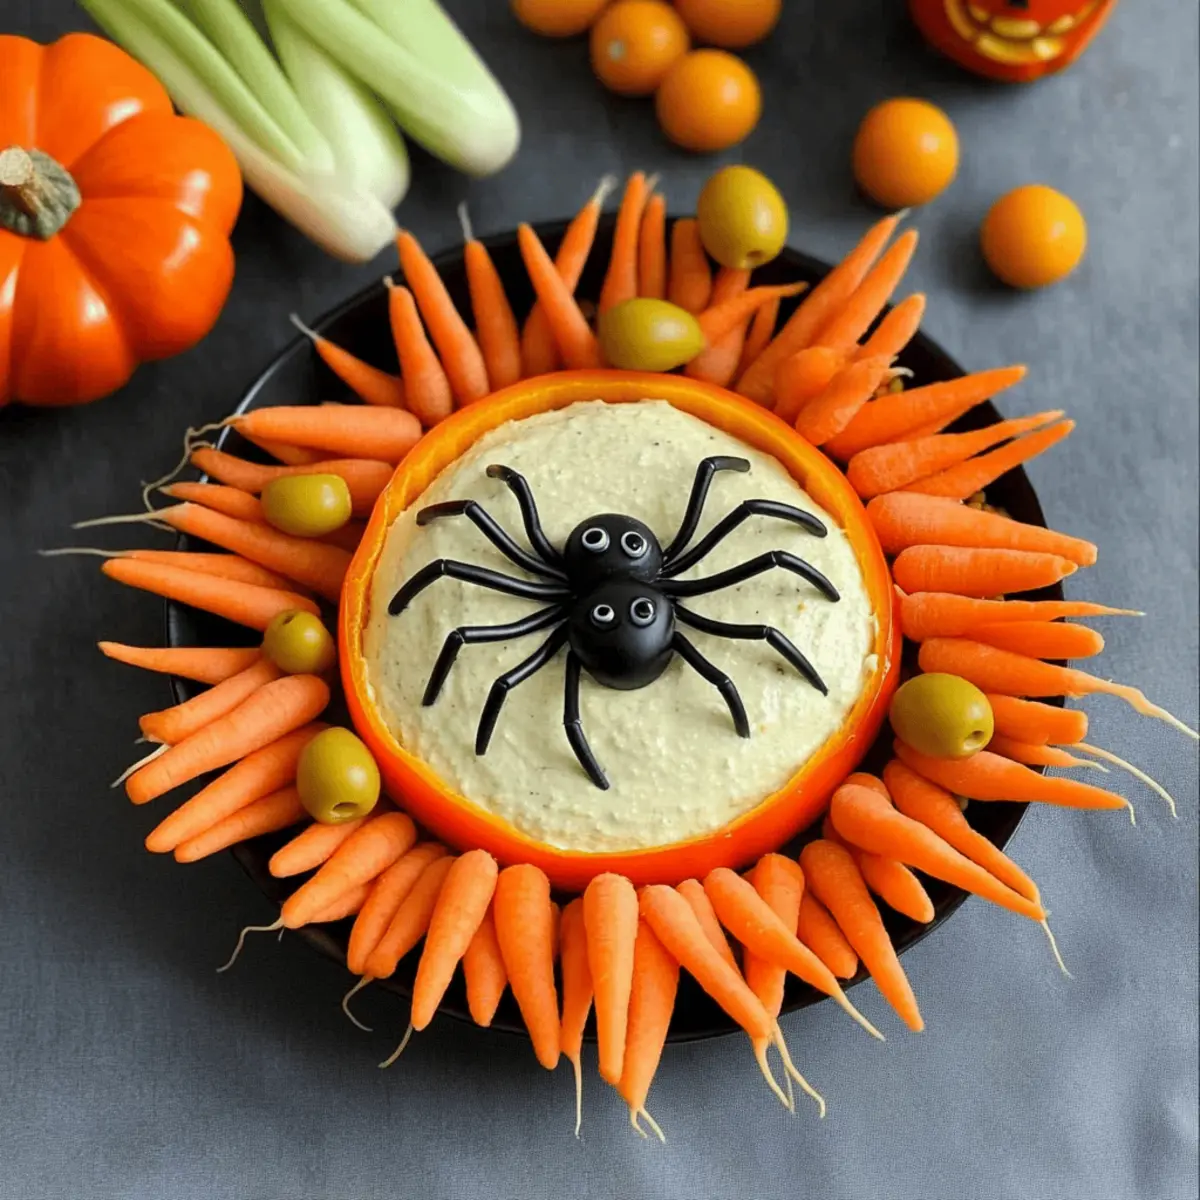
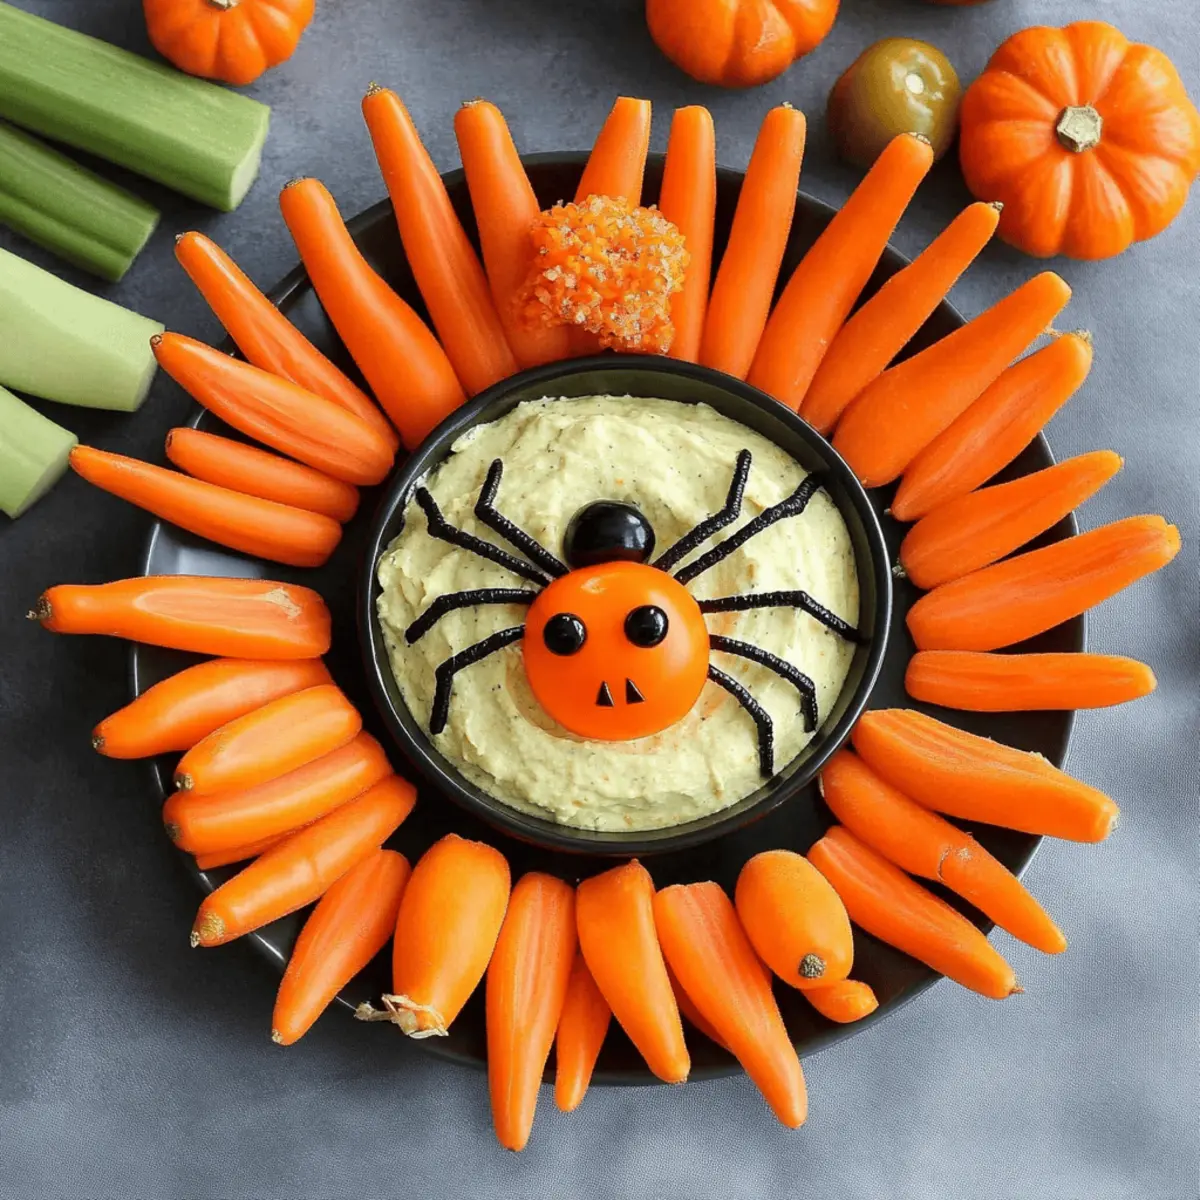
  • Fresh Vegetable Sticks: Carrots, celery, and bell peppers add a refreshing crunch and vibrant colors, appealing to health-conscious guests.
  • Cheesy Garlic Bread: For an indulgent twist, serve this warm, buttery treat alongside your Halloween dip for an irresistible combination.

Pair with a Crisp White Wine: A chilled Sauvignon Blanc will balance the creaminess of the dip and elevate your Halloween party experience.

Bringing together these fun sides ensures a delicious spread and makes the spooky season even more special. Let the celebrations begin!

Expert Tips for Halloween Bread Bowl

• Bread Choice Matters: Use a sturdy loaf like Farmstyle bread to hold the spinach dip without getting soggy throughout your gathering.

• Avoid Watery Dip: Be sure to fully thaw and squeeze out excess moisture from the spinach. This step is vital for achieving the right dip consistency.

• Chill for Flavor: To enhance taste, prepare the spinach dip at least 2 hours in advance. This allows the flavors to meld and develop perfectly.

• Backup Plan: If your bread lid breaks during assembly, use toothpicks or wooden skewers to secure it back together—no one will notice!

• Decorate Creatively: Let the Halloween spirit shine! Include mini skeletons or spooky props in and around your Halloween bread bowl for a fun visual twist.

Halloween Spinach Dip in Coffin Bread Bowl Recipe FAQs

How do I choose the right bread for my Halloween bread bowl?
Absolutely! For your coffin bread bowl, look for a firm and sturdy loaf, such as Farmstyle bread. A rectangular shape provides a solid structure to hold the dip without becoming soggy, ensuring that your Halloween masterpiece looks great and holds up throughout the gathering.

How do I store leftovers or make this ahead of time?
Very good question! You can keep any leftover filled Halloween bread bowl in the refrigerator for up to 3 days without the lid to maintain freshness and prevent sogginess. The spinach dip can also be made a day in advance—just store it in an airtight container in the fridge until you’re ready to fill your bread bowl.

Can I freeze the spinach dip for later use?
Yes, you can! If you have extra spinach dip, simply store it in an airtight container and freeze it for up to 2 months. When you're ready to enjoy it again, thaw the dip in the refrigerator overnight before refilling a fresh bread bowl. The flavors will still be delicious, even after freezing!

What if my spinach dip is too watery?
Don't worry; it happens to the best of us! Ensure that you thoroughly thaw your frozen spinach and squeeze out any excess moisture before mixing it into your dip. If your dip ends up too watery after mixing, you can add a bit more sour cream or mayonnaise to balance it out and maintain that creamy texture.

Are there any dietary considerations for this recipe?
Certainly! This Halloween bread bowl is a vegetarian delight. If you or your guests have dietary restrictions, you can easily make substitutions such as using Greek yogurt instead of mayonnaise for a lighter option, and non-dairy sour cream for those avoiding dairy. Always check ingredients for allergens, especially the veggie soup mix, which may contain additives.

Halloween Bread Bowl

Halloween Bread Bowl: Spooky Spinach Dip Delight

Enjoy a spooky Halloween Bread Bowl filled with creamy spinach dip that's easy to prepare and sure to impress your guests.
Print Recipe Pin Recipe
Prep Time 30 minutes mins
Chilling Time 2 hours hrs
Total Time 2 hours hrs 30 minutes mins
Servings: 8 servings
Course: Appetizers
Cuisine: American
Calories: 250
Ingredients Equipment Method Nutrition Notes

Ingredients
  

For the Coffin Bread Bowl
  • 1 loaf whole bread, unsliced Firm, rectangular shape like Farmstyle bread
  • 1 stick crunchy bread stick For creating a lid
For the Spinach Dip
  • 1 package frozen chopped spinach (10 oz) Thawed and drained for best texture
  • 1 cup light mayonnaise Greek yogurt is a lighter option
  • 1 cup light sour cream Non-dairy alternative can be used
  • 1/2 cup chopped onion or celery Shallots or green onions are milder alternatives
  • 1 package Knorr or Lipton Veggie Soup Mix (1.4 oz) Can create a homemade blend for customization
  • 1 can water chestnuts, finely chopped (8 oz) Omit if unavailable for a smoother dip

Equipment

  • Mixing Bowl
  • sieve
  • Cutting Board
  • Serrated knife

Method
 

Preparation
  1. Remove the frozen chopped spinach from the packaging and place it in a sieve or a clean kitchen towel. Allow the spinach to thaw completely, which typically takes about 1 hour at room temperature. Once thawed, squeeze it firmly to remove any excess water.
  2. In a large mixing bowl, combine the drained spinach with light mayonnaise, light sour cream, and chopped onion or celery. Add the veggie soup mix and the finely chopped water chestnuts. Mix well and refrigerate for at least 2 hours.
  3. Take the whole loaf of bread and place it on a cutting board. Using a serrated knife, carefully cut the top off on three sides, leaving one side connected to create a lid in a coffin shape.
  4. Hollow out the center of the bread, leaving about 1/2 inch of bread around the edges for structure.
  5. Attach the crunchy bread stick to the front of the bread coffin using toothpicks to create a handle for the lid.
  6. Fill the hollowed-out bread bowl with the chilled spinach dip. Use a spoon to evenly distribute the dip into the cavity.
  7. Use wooden skewers as props to hold the lid open slightly. Serve with an assortment of pretzel crisps, tortilla chips, or fresh vegetable sticks.

Nutrition

Serving: 1servingCalories: 250kcalCarbohydrates: 30gProtein: 5gFat: 13gSaturated Fat: 2gPolyunsaturated Fat: 0.5gMonounsaturated Fat: 1gCholesterol: 10mgSodium: 500mgPotassium: 150mgFiber: 2gSugar: 2gVitamin A: 15IUVitamin C: 5mgCalcium: 6mgIron: 4mg

Notes

Prepare the spinach dip at least 2 hours in advance for optimal flavor. Use sturdy bread to hold the dip without getting soggy.

Tried this recipe?

Let us know how it was!

Halloween Mummy Stuffed Peppers: A Fun & Tasty Party Treat

October 15, 2025 by Grace Snow Leave a Comment

As I slid the baking tray into the oven, an air of excitement filled my kitchen. Who would have thought a simple stuffed pepper could turn into something so adorably festive? These Halloween Mummy Stuffed Peppers are not just fun to look at; they’re a delicious blend of savory black beans and melty mozzarella cheese, all wrapped up in sweet, crunchy peppers. In just 10 minutes, you can whip up a vegetarian-friendly fiesta that’s perfect for both kids' parties and adult gatherings alike. Not only are they a crowd-pleaser, but they also allow you to indulge guilt-free while celebrating the spooky spirit of Halloween. Curious about how to create this frightfully delightful snack? Let’s dive into the recipe!

Why Are These Mummy Stuffed Peppers a Hit?

Quick and Easy: These Halloween Mummy Stuffed Peppers take just 10 minutes to prepare, perfect for last-minute party planning.

Vegetarian Delight: Packed with black beans and cheese, they offer a satisfying option for veggie lovers.

Festive Presentation: With their adorable mummy appearance, they’re sure to be a hit with both kids and adults!

Versatile Filling: Feel free to mix in your favorite ingredients like diced tomatoes or spicy jalapeños for a twist. If you love stuffed peppers, check out my Ricotta Stuffed Peppers for another tasty variation.

Guilt-Free Indulgence: Each bite is a wholesome treat, making this recipe a fun addition to your Halloween spread.

Fun Garnish: The candy eyeballs add a playful touch that makes them irresistible at any gathering!

Halloween Mummy Stuffed Peppers Ingredients

Get ready to create a spooktacular dish that everyone will love!

For the Peppers

  • Sweet Peppers – 24, halved and stems removed; use colorful mini sweet peppers for an eye-catching presentation.

For the Filling

  • Black Beans – 1 cup, drained and rinsed; canned beans are a perfect time-saver for this vegetarian delight.

For the “Bandages”

  • Mozzarella Cheese – 1/2 cup, sliced thin or shredded; for a thicker layer, choose fresh mozzarella to enhance the mummy look.

For the Eyes

  • Candy Eyes – As needed for decoration; place on warm cheese to ensure they stick properly and create a cute effect.

Step‑by‑Step Instructions for Halloween Mummy Stuffed Peppers

Step 1: Preheat the Oven
Begin by preheating your oven to 350°F (175°C). This step is crucial, as it ensures that your Halloween Mummy Stuffed Peppers bake evenly and achieve the perfect gooey cheese texture. While the oven warms up, you can prepare the sweet peppers.

Step 2: Prepare the Peppers
Take 24 mini sweet peppers and carefully cut them in half lengthwise. Remove the stems and place them cut side up on a baking sheet lined with parchment paper. This not only makes for an adorable presentation but also allows the flavors to meld beautifully as they bake.

Step 3: Fill the Peppers
Now it’s time to fill those lovely pepper halves! Spoon in the drained and rinsed black beans until each pepper is generously packed. The rich black beans will provide a hearty base for your Halloween Mummy Stuffed Peppers, delivering both flavor and protein in every bite.

Step 4: Add the Cheese Bandages
Next, drape 2-4 strips of mozzarella cheese over the black beans in each pepper, mimicking the look of mummy bandages. Make sure the cheese is layered creatively, allowing it to melt and ooze slightly during baking, which adds to the delightful mummy appearance.

Step 5: Bake and Melt
Carefully place the baking sheet in the preheated oven and bake for about 5 minutes. Keep a close eye on your Halloween Mummy Stuffed Peppers as they bake; you’ll know they’re done when the cheese is melted and bubbly, creating a cozy and inviting look.

Step 6: Add the Eyes
Once your mummies are out of the oven, it’s time for the finishing touch! Press 2 candy eyeballs into the warm, melted cheese on each pepper. This step is essential to ensuring your mummies have a playful and spooky expression that will delight both kids and adults alike.

Step 7: Serve Warm
Finally, serve your Halloween Mummy Stuffed Peppers warm, either on their own or with a spicy dipping sauce for added flavor. This delicious, visually appealing dish is perfect for Halloween festivities, sure to be a hit at your next gathering. Enjoy the delightful reactions!

Expert Tips for Halloween Mummy Stuffed Peppers

  • Prep Ahead: You can make these Halloween Mummy Stuffed Peppers a few hours in advance, storing them without candy eyeballs until you're ready to serve.

  • Avoid Moisture: Don’t prep the stuffed peppers overnight, as excess moisture can cause the candy eyes to bleed, ruining their appearance.

  • Perfect Melt: Ensure the mozzarella cheese is fully melted before placing the candy eyes on top for the best adherence and presentation.

  • Cheese Choices: Try using different cheeses like pepper jack for extra flavor or fresh mozzarella for a more dramatic gooeyness.

  • Creative Fillings: Feel free to customize the filling with your favorite ingredients, like corn or diced tomatoes, for added texture and taste.

Make Ahead Options

These Halloween Mummy Stuffed Peppers are perfect for meal prep, allowing you to enjoy more time with your guests during the celebrations! You can prepare the peppers by cutting and filling them with black beans and mozzarella cheese up to 24 hours in advance. Simply place them in an airtight container in the refrigerator to maintain their freshness. However, it's best to wait until just before serving to add the candy eyeballs to prevent them from bleeding. When you’re ready to bake, pop them in the oven straight from the fridge for about 5 minutes, and you’ll have delightful, cheesy snacks that are just as delicious as when they were freshly made!

Storage Tips for Halloween Mummy Stuffed Peppers

  • Fridge: Store leftover Halloween Mummy Stuffed Peppers in an airtight container for up to 2 days. This keeps them fresh and ready for another round of snacking!

  • Freezer: For longer storage, wrap individual peppers tightly in plastic wrap, then place them in a freezer-safe bag. They can be frozen for up to 2 months.

  • Reheating: To enjoy leftover stuffed peppers, reheat them in the oven at 350°F (175°C) for about 10 minutes or in the microwave for 1-2 minutes until heated through.

  • Make-Ahead Tip: Prepare the stuffed peppers ahead of time without the candy eyeballs. Wait to add those until right before serving for the best presentation!

What to Serve with Halloween Mummy Stuffed Peppers

Perfectly warm and gooey, these delightful appetizers will inspire a laughter-filled gathering with every bite.

  • Crispy Tortilla Chips: Their crunchy texture makes a perfect contrast to the soft stuffed peppers, ideal for scooping up any leftover fillings.

  • Spicy Guacamole: Creamy and luscious, the avocado dip adds a refreshing kick that balances the savory flavors of the Mummy Peppers.

  • Mini Cornbread Muffins: These sweet, fluffy bites offer a comforting, homey touch, complementing the festive vibes of your Halloween spread.

Indulge in a flavor explosion! Pair these spooky mummies with a zesty salsa for an additional layer of zest and tang that tantalizes your taste buds.

  • Apple Cider: The warm spices in this autumn favorite bring a cozy feeling, making it the perfect drink to wash down every bite.

  • Chocolate Cupcakes: Finish off on a sweet note with rich, moist cupcakes. They provide a delicious contrast to the savory stuffed peppers and add a festive flair to your Halloween feast.

Halloween Mummy Stuffed Peppers Variations

Feel free to play with these Mummy Stuffed Peppers to make them uniquely your own and delight your family and guests!

  • Spicy Twist: Add diced jalapeños or chopped serrano peppers to the filling for a spicy surprise! A little heat will elevate the flavor and give your mummies an exciting kick.

  • Cheesy Blend: Swap out mozzarella for pepper jack or cheddar cheese for added flavor. Mixing different cheeses can create an interesting depth of taste that's sure to impress.

  • Vegetarian Boost: Incorporate corn or diced tomatoes for a pop of color and extra flavor. The sweetness of corn pairs beautifully with the savory filling, making every bite a treat!

  • Protein-Packed: Use refried beans instead of black beans for a creamier filling. This will create a different texture and add richness that’s equally satisfying.

  • Herb Infusion: Sprinkle fresh herbs like cilantro or parsley into the mix for a fresh twist. Herbs introduce bright flavors that contrast nicely with the richness of the cheese.

  • Mini Mummies: Make mini versions using smaller peppers like cherry or baby bell. These bite-sized delights are perfect for parties and are incredibly cute on a platter.

  • Smoky Flavor: Mix in some smoked paprika or chipotle powder to the filling for a smoky depth. The hint of smokiness will give your mummies a surprising yet delicious profile.

If you're a fan of stuffed pepper variations, you’ll love these options! You can also check out my delightful Ricotta Stuffed Peppers or whip up some delicious Roasted Bratwurst Peppers. Enjoy creating fun and flavorful twists on your Halloween Mummy Stuffed Peppers!

Halloween Mummy Stuffed Peppers Recipe FAQs

What kind of peppers should I use for the Halloween Mummy Stuffed Peppers?
Absolutely! I recommend using colorful mini sweet peppers for a vibrant presentation. They not only look adorable but also provide a nice crunch. If you can’t find mini ones, regular sweet bell peppers work too!

How should I store leftover Halloween Mummy Stuffed Peppers?
Leftovers can be stored in an airtight container in the refrigerator for 2 days. Just make sure to let them cool completely before sealing to keep them fresh. When ready to enjoy, you can reheat them in the oven or microwave.

Can I freeze Halloween Mummy Stuffed Peppers?
Yes, you can! Wrap each stuffed pepper individually in plastic wrap and place them in a freezer-safe bag. They can be frozen for up to 2 months. When you’re ready to eat them, simply thaw overnight in the fridge and reheat in the oven at 350°F (175°C) for about 10 minutes.

How can I prevent the candy eyes from bleeding or melting?
To keep those cute candy eyes from bleeding, avoid prepping the stuffed peppers overnight. If you're assembling them ahead of time, store them without the candy eyes and add them just before serving. This will ensure they maintain their delightful appearance!

Can I use other types of cheese for the mummy bandages?
Very! You can mix it up with different cheeses. For a spicy kick, try pepper jack. If you prefer a stringier, gooey texture, fresh mozzarella is the way to go. Just be sure to slice or shred it thinly for the best effect!

Halloween Mummy Stuffed Peppers

Halloween Mummy Stuffed Peppers: A Fun & Tasty Party Treat

These Halloween Mummy Stuffed Peppers are a delicious blend of black beans and mozzarella, perfect for Halloween gatherings.
Print Recipe Pin Recipe
Prep Time 10 minutes mins
Cook Time 5 minutes mins
Total Time 15 minutes mins
Servings: 12 peppers
Course: Appetizers
Cuisine: Vegetarian
Calories: 150
Ingredients Equipment Method Nutrition Notes

Ingredients
  

For the Peppers
  • 24 Sweet Peppers halved and stems removed; use colorful mini sweet peppers
For the Filling
  • 1 cup Black Beans drained and rinsed; canned beans are a perfect time-saver
For the 'Bandages'
  • 1/2 cup Mozzarella Cheese sliced thin or shredded; for a thicker layer, choose fresh mozzarella
For the Eyes
  • Candy Eyes As needed for decoration; place on warm cheese to ensure they stick properly

Equipment

  • Oven
  • Baking Sheet
  • Parchment Paper

Method
 

Step‑by‑Step Instructions
  1. Preheat your oven to 350°F (175°C).
  2. Cut 24 mini sweet peppers in half lengthwise and remove the stems. Place them cut side up on a baking sheet lined with parchment paper.
  3. Spoon in the drained and rinsed black beans until each pepper is generously packed.
  4. Drape 2-4 strips of mozzarella cheese over the black beans in each pepper.
  5. Bake the stuffed peppers for about 5 minutes until the cheese is melted and bubbly.
  6. Press 2 candy eyeballs into the warm, melted cheese on each pepper.
  7. Serve warm, either on their own or with a spicy dipping sauce.

Nutrition

Serving: 1pepperCalories: 150kcalCarbohydrates: 15gProtein: 6gFat: 7gSaturated Fat: 4gPolyunsaturated Fat: 1gMonounsaturated Fat: 2gCholesterol: 20mgSodium: 300mgPotassium: 300mgFiber: 4gSugar: 2gVitamin A: 500IUVitamin C: 60mgCalcium: 200mgIron: 2mg

Notes

You can prep these stuffed peppers a few hours in advance. Avoid prepping them overnight to prevent excess moisture affecting the candy eyes.

Tried this recipe?

Let us know how it was!

Eye of Newt Stew: Hauntingly Delicious for Halloween Nights

October 15, 2025 by Grace Snow Leave a Comment

As the chill of autumn settles in, the kitchen beckons with the scent of something enchanting cooking on the stove. I recently stumbled upon a recipe that transforms traditional beef stew into a whimsical feast—introducing my Eye of Newt Stew. This captivating dish features tender beef braised in bold red wine, complemented by the earthy sweetness of onions and the surprising burst of pomegranate. Perfect for Halloween, this stew not only impresses with its hauntingly beautiful pearl onion "eyeballs," but it can be prepared ahead of time, making it ideal for gatherings. Plus, it's a comforting meal that allows for delicious variations, ensuring everyone at your table can indulge. Are you ready to take a bold culinary leap this season?

Why Is Eye of Newt Stew Unique?

Irresistible Flavor: The blend of tender beef, rich red wine, and earthy onions creates a taste sensation you're sure to love.

Perfect for Halloween: The “eyeball” pearl onions not only elevate the dish visually but also add a delightful surprise!

Time-Saving Meal: Easily make this stew ahead of time, allowing the flavors to deepen and impress your guests without last-minute fuss.

Versatile Options: With simple substitutions like omitting tomato paste, you can cater to nightshade-free diets or add fish sauce for an umami boost.

Crowd Pleaser: This dish is a showstopper that brings everyone together—serve with crusty bread or over mashed potatoes for a heartwarming experience. Make sure to check out my Lamb Stew Hearty for another comforting yet impressive option!

Eye of Newt Stew Ingredients

For the Stew

• Beef Chuck-Eye Roast – This cut offers rich flavor and tenderness, perfect for a hearty stew.
• Bacon Grease or Avocado Oil – Used for sautéing; helps boost flavor, but vegetable oil works as a dairy-free alternative.
• Yellow Onion – Provides a sweet base; slice thinly to ensure even cooking.
• Carrot – Adds a natural sweetness; diced, and you can use purple carrots for a spooky flair.
• Celery – Diced for adding depth to the flavor of the stew.
• Mushrooms – Brings umami and texture; consider high vitamin D varieties for added health benefits.
• Garlic Cloves – Enhances the stew with a fragrant aroma; mince for maximum flavor.
• Tomato Paste – Thickens the stew and adds depth; omit for a comforting nightshade-free Eye of Newt Stew.
• Fish Sauce – Optional for an umami boost; doesn't impart a fishy taste.
• Red Wine – Use a robust type like Cabernet Sauvignon to enrich the flavor profile.
• Chicken Stock – The base for braising; feel free to substitute with vegetable stock for a lighter taste.
• Unflavored Gelatin – Improves mouthfeel and thickness, adding luxurious texture.
• Gluten-Free Worcestershire Sauce – Ensures your stew remains gluten-free while enhancing the flavor profile.
• Thyme and Bay Leaves – These herbs provide aromatic flavor depth; fresh is always best!

For the Eyeballs

• Frozen Pearl Onions – Thawed and simmered; they make perfect "eyeballs" for this spooky stew.
• Butter or Dairy-Free Alternative – Use for sautéing pearl onions until tender.
• Caper Berries or Small Black Olives – Fill the hollowed-out onions for a briny burst of flavor.

For the Sauce

• Pomegranate Juice – Adds a sweet yet tangy element to the dish, blending beautifully with the other flavors.
• Glucomann Powder – An optional ingredient to improve sauce texture, giving a luxurious finish.

With these carefully selected ingredients, you’re just steps away from creating an unforgettable Eye of Newt Stew that’s sure to delight your taste buds and charm your guests!

Step‑by‑Step Instructions for Eye of Newt Stew

Step 1: Preheat the Oven
Begin by preheating your oven to 325ºF (163ºC). This temperature is perfect for slow-cooking your Eye of Newt Stew, allowing the beef to become incredibly tender. While the oven warms up, gather your ingredients and equipment, including a Dutch oven for the stovetop and oven cooking.

Step 2: Sauté the Vegetables
In a large Dutch oven, heat about 2 tablespoons of bacon grease or avocado oil over medium heat. Once hot, add sliced yellow onions, diced carrots, diced celery, and mushrooms. Sauté the mixture for about 10 minutes until the onions turn golden brown and fragrant, stirring occasionally to ensure even cooking and prevent burning.

Step 3: Add Garlic and Tomato Paste
Add minced garlic to your sautéed vegetables and stir for an additional minute until fragrant. Next, incorporate 2 tablespoons of tomato paste into the mixture and cook for 2 minutes, allowing the tomato paste to darken slightly and develop its flavor, which will enrich the Eye of Newt Stew.

Step 4: Deglaze with Red Wine
Pour in 1 cup of robust red wine, such as Cabernet Sauvignon, and use a wooden spoon to scrape any browned bits from the bottom of the pot. This deglazing method enhances the stew’s flavor. Next, add 1 cup of chicken stock, fish sauce (if using), gelatin, thyme sprigs, bay leaves, and gluten-free Worcestershire sauce to the pot.

Step 5: Add the Beef
Bring the contents of the pot to a gentle boil, then carefully add the 2-inch beef chuck-eye chunks, ensuring the meat is fully submerged in the liquid. If necessary, add more chicken stock to cover the beef. The submersion is crucial for evenly cooked, tender beef in your Eye of Newt Stew.

Step 6: Bake the Stew
Once the beef is added, cover the Dutch oven with its lid and transfer it to the preheated oven. Allow the stew to bake for 3 to 4 hours. Check occasionally for tenderness, ensuring the beef is fork-tender and the flavors have melded beautifully by the time the cooking is completed.

Step 7: Skim Excess Fat
After the cooking time has elapsed, remove the Dutch oven from the oven and let it cool slightly. Skim off any excess fat that has risen to the surface of the stew. For easier fat removal, refrigerate the stew overnight and skim off the solidified fat before reheating, but feel free to proceed immediately if serving guests!

Step 8: Prepare the “Eyeballs”
While the stew cools, prepare the “eyeball” garnish. In a separate saucepan, simmer thawed pearl onions in a bit of butter or a dairy-free alternative over medium heat for about 20 minutes until they are tender. Season with salt and pepper, then set them aside on a plate while you fill them.

Step 9: Make the Pomegranate Sauce
For the special touch that brings your Eye of Newt Stew together, prepare the pomegranate sauce. In a small saucepan, reduce 1 cup of pomegranate juice over medium heat until it becomes syrupy, which should take about 10 minutes. If desired, whisk in glucomann powder for added thickness.

Step 10: Assemble the Dish
Finally, hollow out the cooked pearl onions gently, filling them with caper berries or small black olives for a fun “eyeball” effect. To serve, ladle the Eye of Newt Stew into bowls, artistically arrange the pearl onion “eyeballs” on top, and drizzle with the luscious pomegranate sauce for an irresistible feast that dazzles!

Make Ahead Options

These Eye of Newt Stew preparations are perfect for busy home cooks looking to save time! You can sauté the vegetables and prepare the braising liquid up to 24 hours in advance, storing them in the refrigerator to maintain freshness. Additionally, the beef can be cut into chunks and marinated overnight in the braising liquid to enhance flavor. When you're ready to serve, simply combine the prepped ingredients in the Dutch oven and bake as directed—this ensures a hearty and delicious stew, just as rich and tender as if cooked on the same day. For optimum quality, refrigerate leftovers in an airtight container for up to 3 days or freeze for longer storage.

What to Serve with Eye of Newt Stew?

Indulging in this enchanting stew opens the door to a world of mouthwatering side dishes that will enhance your dining experience.

  • Crusty Bread: Perfect for dipping, the warm, crunchy texture complements the rich stew and soaks up every drop of the delicious sauce.
  • Garlic Mashed Potatoes: Creamy and flavorful, these mashed potatoes offer a comforting pairing that balances the boldness of the stew's flavors.
  • Roasted Brussels Sprouts: Crispy, caramelized exteriors paired with a tender interior add a healthy crunch, grounding the dish with earthy notes.
  • Autumn Salad: Fresh greens with pomegranate seeds, walnuts, and a light vinaigrette introduce a bright, crisp contrast to the hearty stew.
  • Buttery Cornbread: This sweet and fluffy bread provides a delightful texture and balances the savory richness of the stew, making every bite heavenly.
  • Red Wine: A glass of the same bold red wine used in your stew will harmonize flavors beautifully, creating a festive and cozy atmosphere.
  • Pumpkin Pie: For a seasonal dessert, this spiced pie captures the essence of fall, leading your meal toward a sweet, warming finish.
  • Spicy Roasted Chickpeas: These crunchy bites add a zesty twist to your table, enhancing the overall experience with a satisfying snack element.
  • Creamy Polenta: Smooth and comforting, polenta creates a lovely base that pairs wonderfully with the rich texture of the Eye of Newt Stew.

Eye of Newt Stew Variations & Substitutions

Feel free to unleash your creativity in the kitchen and tailor this delectable stew to your taste and dietary needs!

  • Vegetarian Option: Swap beef for plant-based proteins like mushrooms or jackfruit for a hearty vegetarian stew that still packs a flavor punch.
  • Nightshade-Free: Omit the tomato paste and enjoy this stew free from nightshade vegetables while maintaining its richness.
  • Alternative Sauces: Substitute pomegranate sauce with a delicious blackberry or raspberry sauce to add a sweet and tangy twist.
  • Herb Boost: Use fragrant fresh herbs such as rosemary or parsley instead of dried for a vibrant flavor infusion right before serving.
  • Spicy Kick: Add a dash of smoked paprika or crushed red pepper flakes to kick up the heat level—perfect for those who enjoy a little spice!
  • Richness Upgrade: Incorporate a splash of balsamic vinegar or soy sauce for an umami boost that deepens the overall taste of the stew.
  • Different Stocks: Use vegetable stock instead of chicken stock for more plant-based options without compromising on flavor—ideal for vegetarian diners.
  • Texture Variants: Add barley or farro to increase the heartiness of your Eye of Newt Stew, introducing a delightful chewiness.

These inventive variations allow you to craft a unique Eye of Newt Stew suited to everyone around your dinner table. Looking for more comforting stews? Check out my Crock Pot Chicken Stew or try the delightful Beans Greens Stew for a hearty meal!

Storage Tips for Eye of Newt Stew

  • Fridge: Store your Eye of Newt Stew in an airtight container for up to 3 days. Allow it to cool completely before refrigerating to maintain its delicious flavors.

  • Freezer: For longer storage, freeze the stew in a freezer-safe container for up to 3 months. To prevent freezer burn, ensure the container is tightly sealed.

  • Reheating: When ready to enjoy, reheat on the stovetop over medium heat. Add a splash of stock or water if needed to rejuvenate the sauce's consistency.

  • Fat Removal: For a lighter dish, consider cooling the stew overnight in the fridge, allowing the fat to solidify for easy removal before reheating.

Expert Tips for Eye of Newt Stew

  • Choose Quality Meat: Select a good quality beef chuck-eye roast for maximum tenderness and flavor; this cut stands up beautifully to slow braising.

  • Control Liquid Levels: Ensure the beef is fully submerged in liquid during cooking; dry spots lead to tough meat. Add stock as needed!

  • Fresh Herbs Matter: Use fresh thyme and bay leaves to enhance your stew’s aromatic profile; dried can’t compare to the depth that fresh provides.

  • Let It Rest: Refrigerate overnight after cooking for more balanced flavors and easier fat removal; the next day, simply reheat before serving.

  • Whimsical Presentation: Take the time to prepare the pearl onion "eyeballs"; they not only elevate the visual appeal but also surprise your guests with delightful flavor!

  • Adjust for Preferences: Feel free to substitute or omit ingredients like tomato paste for a nightshade-free Eye of Newt Stew; versatility keeps meal prep exciting!

Eye of Newt Stew Recipe FAQs

How do I select the best beef for Eye of Newt Stew?
Absolutely! For the best flavor and tenderness, I recommend using a quality beef chuck-eye roast. Look for marbling throughout the meat, which indicates juiciness and richness. The cut should be bright red without excessive dark spots. Cutting it into 2-inch chunks ensures even cooking and melting tenderness in your stew!

What’s the best way to store leftover Eye of Newt Stew?
After cooking, allow your stew to cool completely before transferring it to an airtight container. It can be stored in the fridge for up to 3 days. For longer storage, freeze it in a freezer-safe container for up to 3 months. Just make sure it's tightly sealed to prevent freezer burn!

Can I freeze Eye of Newt Stew?
Very! To freeze, let the stew cool entirely, then ladle it into freezer-safe containers. Make sure to leave some space for expansion. When you're ready to enjoy it again, simply thaw it in the fridge overnight and heat it on the stovetop. If the sauce appears too thick, add a little stock or water while reheating to get the right consistency.

What if my stew is too thick after cooking?
No worries at all! If your Eye of Newt Stew ends up thicker than you like, just add a splash of chicken stock or even water during the reheating process. Stir continuously while it warms to integrate the liquid evenly, and soon you'll have that perfect, luscious sauce again!

Is Eye of Newt Stew suitable for dietary restrictions?
Yes, indeed! This dish can be made nightshade-free by omitting the tomato paste. Additionally, by selecting gluten-free Worcestershire sauce and using bacon grease or avocado oil, you can keep it suitable for gluten-free diets as well. For vegetarian options, consider substituting beef with mushrooms or jackfruit! Always check that your other ingredients meet your specific dietary needs, particularly if allergies are a concern.

Can pets safely consume leftovers from Eye of Newt Stew?
While the ingredients might seem tempting, it's best to avoid giving your furry friends any stew, especially due to possible onions, garlic, and seasonings like fish sauce that may not be safe for them. Instead, stick to dog-friendly treats or veggies when sharing with your pets!

Eye of Newt Stew

Eye of Newt Stew: Hauntingly Delicious for Halloween Nights

Eye of Newt Stew is a comforting and whimsical beef stew, featuring pearl onion 'eyeballs' and rich flavors perfect for Halloween gatherings.
Print Recipe Pin Recipe
Prep Time 30 minutes mins
Cook Time 3 hours hrs 30 minutes mins
Cooling Time 30 minutes mins
Total Time 4 hours hrs 30 minutes mins
Servings: 6 servings
Course: Soups
Cuisine: Halloween
Calories: 550
Ingredients Equipment Method Nutrition Notes

Ingredients
  

For the Stew
  • 2 pounds Beef Chuck-Eye Roast cut into 2-inch chunks
  • 2 tablespoons Bacon Grease or Avocado Oil for sautéing
  • 1 large Yellow Onion sliced thinly
  • 1 cup Carrot diced
  • 1 cup Celery diced
  • 8 ounces Mushrooms high vitamin D varieties recommended
  • 4 cloves Garlic minced
  • 2 tablespoons Tomato Paste optional
  • 1 tablespoon Fish Sauce optional
  • 1 cup Red Wine robust variety like Cabernet Sauvignon
  • 1 cup Chicken Stock or vegetable stock
  • 1 tablespoon Unflavored Gelatin optional
  • 2 tablespoons Gluten-Free Worcestershire Sauce
  • 2 sprigs Thyme fresh preferred
  • 2 leaves Bay Leaves fresh preferred
For the Eyeballs
  • 1 cup Frozen Pearl Onions thawed
  • 2 tablespoons Butter or Dairy-Free Alternative for sautéing
  • 1/4 cup Caper Berries or Small Black Olives
For the Sauce
  • 1 cup Pomegranate Juice
  • 1 tablespoon Glucomann Powder optional

Equipment

  • Dutch oven

Method
 

Cooking Steps
  1. Preheat your oven to 325ºF (163ºC).
  2. In a large Dutch oven, heat about 2 tablespoons of bacon grease or avocado oil over medium heat. Add sliced yellow onions, diced carrots, diced celery, and mushrooms. Sauté for about 10 minutes until golden brown and fragrant.
  3. Add minced garlic and stir for an additional minute. Incorporate 2 tablespoons of tomato paste and cook for 2 minutes.
  4. Pour in 1 cup of red wine and scrape browned bits. Then add 1 cup of chicken stock, fish sauce (if using), gelatin, thyme, bay leaves, and Worcestershire sauce.
  5. Bring to a gentle boil, add beef chunks, ensuring meat is submerged in the liquid. Add more chicken stock if necessary.
  6. Cover and bake for 3 to 4 hours, checking occasionally for tenderness.
  7. Skim off excess fat after cooking. Refrigerate overnight for easier fat removal if desired.
  8. In a separate saucepan, simmer thawed pearl onions in butter or dairy-free alternative for about 20 minutes until tender. Season and set aside.
  9. Reduce 1 cup of pomegranate juice over medium heat for about 10 minutes until syrupy. Whisk in glucomann powder for thickness if desired.
  10. Hollow out cooked pearl onions and fill with caper berries or olives. Serve the stew, topping with pearl onions and drizzling with pomegranate sauce.

Nutrition

Serving: 1bowlCalories: 550kcalCarbohydrates: 35gProtein: 40gFat: 25gSaturated Fat: 10gPolyunsaturated Fat: 3gMonounsaturated Fat: 10gTrans Fat: 1gCholesterol: 100mgSodium: 800mgPotassium: 900mgFiber: 4gSugar: 6gVitamin A: 120IUVitamin C: 15mgCalcium: 40mgIron: 5mg

Notes

This stew can be stored for up to 3 days in the fridge or frozen for up to 3 months. Reheat on the stovetop, adding stock as needed.

Tried this recipe?

Let us know how it was!

Eye of Newt Stew: Hauntingly Delicious for Halloween Nights

October 15, 2025 by Grace Snow Leave a Comment

As the chill of autumn settles in, the kitchen beckons with the scent of something enchanting cooking on the stove. I recently stumbled upon a recipe that transforms traditional beef stew into a whimsical feast—introducing my Eye of Newt Stew. This captivating dish features tender beef braised in bold red wine, complemented by the earthy sweetness of onions and the surprising burst of pomegranate. Perfect for Halloween, this stew not only impresses with its hauntingly beautiful pearl onion "eyeballs," but it can be prepared ahead of time, making it ideal for gatherings. Plus, it's a comforting meal that allows for delicious variations, ensuring everyone at your table can indulge. Are you ready to take a bold culinary leap this season?

Why Is Eye of Newt Stew Unique?

Irresistible Flavor: The blend of tender beef, rich red wine, and earthy onions creates a taste sensation you're sure to love.

Perfect for Halloween: The “eyeball” pearl onions not only elevate the dish visually but also add a delightful surprise!

Time-Saving Meal: Easily make this stew ahead of time, allowing the flavors to deepen and impress your guests without last-minute fuss.

Versatile Options: With simple substitutions like omitting tomato paste, you can cater to nightshade-free diets or add fish sauce for an umami boost.

Crowd Pleaser: This dish is a showstopper that brings everyone together—serve with crusty bread or over mashed potatoes for a heartwarming experience. Make sure to check out my Lamb Stew Hearty for another comforting yet impressive option!

Eye of Newt Stew Ingredients

For the Stew

• Beef Chuck-Eye Roast – This cut offers rich flavor and tenderness, perfect for a hearty stew.
• Bacon Grease or Avocado Oil – Used for sautéing; helps boost flavor, but vegetable oil works as a dairy-free alternative.
• Yellow Onion – Provides a sweet base; slice thinly to ensure even cooking.
• Carrot – Adds a natural sweetness; diced, and you can use purple carrots for a spooky flair.
• Celery – Diced for adding depth to the flavor of the stew.
• Mushrooms – Brings umami and texture; consider high vitamin D varieties for added health benefits.
• Garlic Cloves – Enhances the stew with a fragrant aroma; mince for maximum flavor.
• Tomato Paste – Thickens the stew and adds depth; omit for a comforting nightshade-free Eye of Newt Stew.
• Fish Sauce – Optional for an umami boost; doesn't impart a fishy taste.
• Red Wine – Use a robust type like Cabernet Sauvignon to enrich the flavor profile.
• Chicken Stock – The base for braising; feel free to substitute with vegetable stock for a lighter taste.
• Unflavored Gelatin – Improves mouthfeel and thickness, adding luxurious texture.
• Gluten-Free Worcestershire Sauce – Ensures your stew remains gluten-free while enhancing the flavor profile.
• Thyme and Bay Leaves – These herbs provide aromatic flavor depth; fresh is always best!

For the Eyeballs

• Frozen Pearl Onions – Thawed and simmered; they make perfect "eyeballs" for this spooky stew.
• Butter or Dairy-Free Alternative – Use for sautéing pearl onions until tender.
• Caper Berries or Small Black Olives – Fill the hollowed-out onions for a briny burst of flavor.

For the Sauce

• Pomegranate Juice – Adds a sweet yet tangy element to the dish, blending beautifully with the other flavors.
• Glucomann Powder – An optional ingredient to improve sauce texture, giving a luxurious finish.

With these carefully selected ingredients, you’re just steps away from creating an unforgettable Eye of Newt Stew that’s sure to delight your taste buds and charm your guests!

Step‑by‑Step Instructions for Eye of Newt Stew

Step 1: Preheat the Oven
Begin by preheating your oven to 325ºF (163ºC). This temperature is perfect for slow-cooking your Eye of Newt Stew, allowing the beef to become incredibly tender. While the oven warms up, gather your ingredients and equipment, including a Dutch oven for the stovetop and oven cooking.

Step 2: Sauté the Vegetables
In a large Dutch oven, heat about 2 tablespoons of bacon grease or avocado oil over medium heat. Once hot, add sliced yellow onions, diced carrots, diced celery, and mushrooms. Sauté the mixture for about 10 minutes until the onions turn golden brown and fragrant, stirring occasionally to ensure even cooking and prevent burning.

Step 3: Add Garlic and Tomato Paste
Add minced garlic to your sautéed vegetables and stir for an additional minute until fragrant. Next, incorporate 2 tablespoons of tomato paste into the mixture and cook for 2 minutes, allowing the tomato paste to darken slightly and develop its flavor, which will enrich the Eye of Newt Stew.

Step 4: Deglaze with Red Wine
Pour in 1 cup of robust red wine, such as Cabernet Sauvignon, and use a wooden spoon to scrape any browned bits from the bottom of the pot. This deglazing method enhances the stew’s flavor. Next, add 1 cup of chicken stock, fish sauce (if using), gelatin, thyme sprigs, bay leaves, and gluten-free Worcestershire sauce to the pot.

Step 5: Add the Beef
Bring the contents of the pot to a gentle boil, then carefully add the 2-inch beef chuck-eye chunks, ensuring the meat is fully submerged in the liquid. If necessary, add more chicken stock to cover the beef. The submersion is crucial for evenly cooked, tender beef in your Eye of Newt Stew.

Step 6: Bake the Stew
Once the beef is added, cover the Dutch oven with its lid and transfer it to the preheated oven. Allow the stew to bake for 3 to 4 hours. Check occasionally for tenderness, ensuring the beef is fork-tender and the flavors have melded beautifully by the time the cooking is completed.

Step 7: Skim Excess Fat
After the cooking time has elapsed, remove the Dutch oven from the oven and let it cool slightly. Skim off any excess fat that has risen to the surface of the stew. For easier fat removal, refrigerate the stew overnight and skim off the solidified fat before reheating, but feel free to proceed immediately if serving guests!

Step 8: Prepare the “Eyeballs”
While the stew cools, prepare the “eyeball” garnish. In a separate saucepan, simmer thawed pearl onions in a bit of butter or a dairy-free alternative over medium heat for about 20 minutes until they are tender. Season with salt and pepper, then set them aside on a plate while you fill them.

Step 9: Make the Pomegranate Sauce
For the special touch that brings your Eye of Newt Stew together, prepare the pomegranate sauce. In a small saucepan, reduce 1 cup of pomegranate juice over medium heat until it becomes syrupy, which should take about 10 minutes. If desired, whisk in glucomann powder for added thickness.

Step 10: Assemble the Dish
Finally, hollow out the cooked pearl onions gently, filling them with caper berries or small black olives for a fun “eyeball” effect. To serve, ladle the Eye of Newt Stew into bowls, artistically arrange the pearl onion “eyeballs” on top, and drizzle with the luscious pomegranate sauce for an irresistible feast that dazzles!

Eye of Newt Stew Variations & Substitutions

Feel free to unleash your creativity in the kitchen and tailor this delectable stew to your taste and dietary needs!

  • Vegetarian Option: Swap beef for plant-based proteins like mushrooms or jackfruit for a hearty vegetarian stew that still packs a flavor punch.
  • Nightshade-Free: Omit the tomato paste and enjoy this stew free from nightshade vegetables while maintaining its richness.
  • Alternative Sauces: Substitute pomegranate sauce with a delicious blackberry or raspberry sauce to add a sweet and tangy twist.
  • Herb Boost: Use fragrant fresh herbs such as rosemary or parsley instead of dried for a vibrant flavor infusion right before serving.
  • Spicy Kick: Add a dash of smoked paprika or crushed red pepper flakes to kick up the heat level—perfect for those who enjoy a little spice!
  • Richness Upgrade: Incorporate a splash of balsamic vinegar or soy sauce for an umami boost that deepens the overall taste of the stew.
  • Different Stocks: Use vegetable stock instead of chicken stock for more plant-based options without compromising on flavor—ideal for vegetarian diners.
  • Texture Variants: Add barley or farro to increase the heartiness of your Eye of Newt Stew, introducing a delightful chewiness.

These inventive variations allow you to craft a unique Eye of Newt Stew suited to everyone around your dinner table. Looking for more comforting stews? Check out my Crock Pot Chicken Stew or try the delightful Beans Greens Stew for a hearty meal!

Storage Tips for Eye of Newt Stew

  • Fridge: Store your Eye of Newt Stew in an airtight container for up to 3 days. Allow it to cool completely before refrigerating to maintain its delicious flavors.

  • Freezer: For longer storage, freeze the stew in a freezer-safe container for up to 3 months. To prevent freezer burn, ensure the container is tightly sealed.

  • Reheating: When ready to enjoy, reheat on the stovetop over medium heat. Add a splash of stock or water if needed to rejuvenate the sauce's consistency.

  • Fat Removal: For a lighter dish, consider cooling the stew overnight in the fridge, allowing the fat to solidify for easy removal before reheating.

Expert Tips for Eye of Newt Stew

  • Choose Quality Meat: Select a good quality beef chuck-eye roast for maximum tenderness and flavor; this cut stands up beautifully to slow braising.

  • Control Liquid Levels: Ensure the beef is fully submerged in liquid during cooking; dry spots lead to tough meat. Add stock as needed!

  • Fresh Herbs Matter: Use fresh thyme and bay leaves to enhance your stew’s aromatic profile; dried can’t compare to the depth that fresh provides.

  • Let It Rest: Refrigerate overnight after cooking for more balanced flavors and easier fat removal; the next day, simply reheat before serving.

  • Whimsical Presentation: Take the time to prepare the pearl onion "eyeballs"; they not only elevate the visual appeal but also surprise your guests with delightful flavor!

  • Adjust for Preferences: Feel free to substitute or omit ingredients like tomato paste for a nightshade-free Eye of Newt Stew; versatility keeps meal prep exciting!

Make Ahead Options

These Eye of Newt Stew preparations are perfect for busy nights when you want to simplify meal planning! You can sauté the vegetables and even sear the beef up to 24 hours in advance, storing them in airtight containers in the refrigerator to maintain freshness. Additionally, the stew can be fully prepared and refrigerated for up to 3 days, allowing the flavors to develop beautifully. When you're ready to enjoy it, simply reheat on the stovetop until simmering, then proceed with the final steps—adding the colourful "eyeballs" and pomegranate sauce before serving. This ensures you'll have a delicious, home-cooked meal with minimal effort on the day of serving!

What to Serve with Eye of Newt Stew?

Indulging in this enchanting stew opens the door to a world of mouthwatering side dishes that will enhance your dining experience.

  • Crusty Bread: Perfect for dipping, the warm, crunchy texture complements the rich stew and soaks up every drop of the delicious sauce.
  • Garlic Mashed Potatoes: Creamy and flavorful, these mashed potatoes offer a comforting pairing that balances the boldness of the stew's flavors.
  • Roasted Brussels Sprouts: Crispy, caramelized exteriors paired with a tender interior add a healthy crunch, grounding the dish with earthy notes.
  • Autumn Salad: Fresh greens with pomegranate seeds, walnuts, and a light vinaigrette introduce a bright, crisp contrast to the hearty stew.
  • Buttery Cornbread: This sweet and fluffy bread provides a delightful texture and balances the savory richness of the stew, making every bite heavenly.
  • Red Wine: A glass of the same bold red wine used in your stew will harmonize flavors beautifully, creating a festive and cozy atmosphere.
  • Pumpkin Pie: For a seasonal dessert, this spiced pie captures the essence of fall, leading your meal toward a sweet, warming finish.
  • Spicy Roasted Chickpeas: These crunchy bites add a zesty twist to your table, enhancing the overall experience with a satisfying snack element.
  • Creamy Polenta: Smooth and comforting, polenta creates a lovely base that pairs wonderfully with the rich texture of the Eye of Newt Stew.

Eye of Newt Stew Recipe FAQs

How should I select my beef for Eye of Newt Stew?
When choosing your beef, I recommend using a Chuck-Eye Roast, which is incredibly flavorful and tender when braised. Look for meat that is bright red with good marbling, as the fat content adds richness to your stew. Avoid any packages with dark spots or discoloration.

What’s the best way to store leftover Eye of Newt Stew?
Absolutely! Store your Eye of Newt Stew in an airtight container in the fridge for up to 3 days. Make sure it cools completely before sealing to lock in its flavors and freshness. When you're ready to enjoy it again, simply reheat it on the stove over low heat, stirring occasionally.

Can I freeze Eye of Newt Stew, and if so, how?
Yes! You can freeze the Eye of Newt Stew for up to 3 months. To do so, allow the stew to cool completely, then transfer it to a freezer-safe container. Be sure to leave some space at the top for expansion as it freezes. When ready to enjoy, thaw it overnight in the fridge and reheat gently on the stove.

What if my stew is too thick after cooking?
If you find your Eye of Newt Stew is too thick, don’t fret! Simply add a bit of broth or water—about a quarter cup at a time—while gently heating it on the stove. Stir well until you reach your desired consistency. Remember, a delicious stew should flow like a charm, even if it’s hearty!

Is there a nightshade-free version of Eye of Newt Stew?
Yes, indeed! To make a nightshade-free Eye of Newt Stew, simply omit the tomato paste. You can also substitute the pomegranate sauce with a fruity reduction from berries like blackberries or raspberries that provide a similar sweet-tart flavor without the nightshades. Enjoy the spooky experience without compromise!

Can my pets eat any of the ingredients in Eye of Newt Stew?
Be cautious with what you share with your furry friends! While the cooked beef is a tasty treat for dogs, avoid giving them stew with garlic, onion, or seasonings, as these can be harmful. It’s best to keep the stew to yourself, but you can offer them plain, cooked beef as a special snack!

Eye of Newt Stew

Eye of Newt Stew: Hauntingly Delicious for Halloween Nights

Eye of Newt Stew is a whimsical, comforting dish featuring tender beef, bold wine, and 'eyeball' pearl onions, perfect for Halloween gatherings.
Print Recipe Pin Recipe
Prep Time 30 minutes mins
Cook Time 4 hours hrs
Cooling Time 30 minutes mins
Total Time 5 hours hrs
Servings: 6 servings
Course: Soups
Cuisine: American
Calories: 450
Ingredients Equipment Method Nutrition Notes

Ingredients
  

For the Stew
  • 2 pounds Beef Chuck-Eye Roast cut into 2-inch chunks
  • 2 tablespoons Bacon Grease or Avocado Oil for sautéing
  • 1 large Yellow Onion sliced thinly
  • 1 cup Carrot diced, purple for flair optional
  • 1 cup Celery diced
  • 8 ounces Mushrooms high vitamin D varieties recommended
  • 4 cloves Garlic minced
  • 2 tablespoons Tomato Paste optional
  • 1 tablespoon Fish Sauce optional for umami
  • 1 cup Red Wine robust type like Cabernet Sauvignon
  • 1 cup Chicken Stock or vegetable stock
  • 1 tablespoon Unflavored Gelatin optional for thickness
  • 1 tablespoon Gluten-Free Worcestershire Sauce for flavor
  • 3 sprigs Thyme fresh
  • 2 leaves Bay Leaves fresh
For the Eyeballs
  • 1 cup Frozen Pearl Onions thawed
  • 1 tablespoon Butter or Dairy-Free Alternative for sautéing
  • 1/4 cup Caper Berries or Small Black Olives for filling
For the Sauce
  • 1 cup Pomegranate Juice reduces for sauce
  • 1 tablespoon Glucomann Powder optional for thickness

Equipment

  • Dutch oven

Method
 

Cooking Steps
  1. Preheat your oven to 325ºF (163ºC). Gather ingredients and equipment including a Dutch oven.
  2. Heat bacon grease or avocado oil in a large Dutch oven over medium heat. Sauté onions, carrots, celery, and mushrooms for about 10 minutes.
  3. Add minced garlic and stir for 1 minute. Then incorporate tomato paste and cook for 2 minutes.
  4. Deglaze the pot with red wine, scraping browned bits. Add chicken stock, fish sauce (if using), gelatin, thyme, bay leaves, and Worcestershire sauce.
  5. Add beef chunks, ensuring they are submerged. Add more stock if necessary.
  6. Cover the Dutch oven and transfer it to the oven. Bake for 3 to 4 hours until beef is fork-tender.
  7. Skim excess fat from the surface after cooking. Refrigerate overnight for easier fat removal if possible.
  8. Simmer thawed pearl onions in butter for about 20 minutes until tender. Season with salt and pepper.
  9. Reduce pomegranate juice in a saucepan until syrupy, about 10 minutes. Optionally whisk in glucomann powder.
  10. Hollow out pearl onions and fill with caper berries or olives. Serve the stew with the pearl onion 'eyeballs' and drizzle with pomegranate sauce.

Nutrition

Serving: 1bowlCalories: 450kcalCarbohydrates: 20gProtein: 30gFat: 25gSaturated Fat: 10gPolyunsaturated Fat: 3gMonounsaturated Fat: 7gCholesterol: 100mgSodium: 800mgPotassium: 600mgFiber: 2gSugar: 5gVitamin A: 15IUVitamin C: 20mgCalcium: 4mgIron: 15mg

Notes

Ensure beef is submerged in liquid to avoid dryness during cooking. Choose quality ingredients, especially for wine, to enhance flavors.

Tried this recipe?

Let us know how it was!

Eye of Newt Stew: Hauntingly Delicious for Halloween Nights

October 15, 2025 by Grace Snow Leave a Comment

As the chill of autumn settles in, the kitchen beckons with the scent of something enchanting cooking on the stove. I recently stumbled upon a recipe that transforms traditional beef stew into a whimsical feast—introducing my Eye of Newt Stew. This captivating dish features tender beef braised in bold red wine, complemented by the earthy sweetness of onions and the surprising burst of pomegranate. Perfect for Halloween, this stew not only impresses with its hauntingly beautiful pearl onion "eyeballs," but it can be prepared ahead of time, making it ideal for gatherings. Plus, it's a comforting meal that allows for delicious variations, ensuring everyone at your table can indulge. Are you ready to take a bold culinary leap this season?

Why Is Eye of Newt Stew Unique?

Irresistible Flavor: The blend of tender beef, rich red wine, and earthy onions creates a taste sensation you're sure to love.

Perfect for Halloween: The “eyeball” pearl onions not only elevate the dish visually but also add a delightful surprise!

Time-Saving Meal: Easily make this stew ahead of time, allowing the flavors to deepen and impress your guests without last-minute fuss.

Versatile Options: With simple substitutions like omitting tomato paste, you can cater to nightshade-free diets or add fish sauce for an umami boost.

Crowd Pleaser: This dish is a showstopper that brings everyone together—serve with crusty bread or over mashed potatoes for a heartwarming experience. Make sure to check out my Lamb Stew Hearty for another comforting yet impressive option!

Eye of Newt Stew Ingredients

For the Stew

• Beef Chuck-Eye Roast – This cut offers rich flavor and tenderness, perfect for a hearty stew.
• Bacon Grease or Avocado Oil – Used for sautéing; helps boost flavor, but vegetable oil works as a dairy-free alternative.
• Yellow Onion – Provides a sweet base; slice thinly to ensure even cooking.
• Carrot – Adds a natural sweetness; diced, and you can use purple carrots for a spooky flair.
• Celery – Diced for adding depth to the flavor of the stew.
• Mushrooms – Brings umami and texture; consider high vitamin D varieties for added health benefits.
• Garlic Cloves – Enhances the stew with a fragrant aroma; mince for maximum flavor.
• Tomato Paste – Thickens the stew and adds depth; omit for a comforting nightshade-free Eye of Newt Stew.
• Fish Sauce – Optional for an umami boost; doesn't impart a fishy taste.
• Red Wine – Use a robust type like Cabernet Sauvignon to enrich the flavor profile.
• Chicken Stock – The base for braising; feel free to substitute with vegetable stock for a lighter taste.
• Unflavored Gelatin – Improves mouthfeel and thickness, adding luxurious texture.
• Gluten-Free Worcestershire Sauce – Ensures your stew remains gluten-free while enhancing the flavor profile.
• Thyme and Bay Leaves – These herbs provide aromatic flavor depth; fresh is always best!

For the Eyeballs

• Frozen Pearl Onions – Thawed and simmered; they make perfect "eyeballs" for this spooky stew.
• Butter or Dairy-Free Alternative – Use for sautéing pearl onions until tender.
• Caper Berries or Small Black Olives – Fill the hollowed-out onions for a briny burst of flavor.

For the Sauce

• Pomegranate Juice – Adds a sweet yet tangy element to the dish, blending beautifully with the other flavors.
• Glucomann Powder – An optional ingredient to improve sauce texture, giving a luxurious finish.

With these carefully selected ingredients, you’re just steps away from creating an unforgettable Eye of Newt Stew that’s sure to delight your taste buds and charm your guests!

Step‑by‑Step Instructions for Eye of Newt Stew

Step 1: Preheat the Oven
Begin by preheating your oven to 325ºF (163ºC). This temperature is perfect for slow-cooking your Eye of Newt Stew, allowing the beef to become incredibly tender. While the oven warms up, gather your ingredients and equipment, including a Dutch oven for the stovetop and oven cooking.

Step 2: Sauté the Vegetables
In a large Dutch oven, heat about 2 tablespoons of bacon grease or avocado oil over medium heat. Once hot, add sliced yellow onions, diced carrots, diced celery, and mushrooms. Sauté the mixture for about 10 minutes until the onions turn golden brown and fragrant, stirring occasionally to ensure even cooking and prevent burning.

Step 3: Add Garlic and Tomato Paste
Add minced garlic to your sautéed vegetables and stir for an additional minute until fragrant. Next, incorporate 2 tablespoons of tomato paste into the mixture and cook for 2 minutes, allowing the tomato paste to darken slightly and develop its flavor, which will enrich the Eye of Newt Stew.

Step 4: Deglaze with Red Wine
Pour in 1 cup of robust red wine, such as Cabernet Sauvignon, and use a wooden spoon to scrape any browned bits from the bottom of the pot. This deglazing method enhances the stew’s flavor. Next, add 1 cup of chicken stock, fish sauce (if using), gelatin, thyme sprigs, bay leaves, and gluten-free Worcestershire sauce to the pot.

Step 5: Add the Beef
Bring the contents of the pot to a gentle boil, then carefully add the 2-inch beef chuck-eye chunks, ensuring the meat is fully submerged in the liquid. If necessary, add more chicken stock to cover the beef. The submersion is crucial for evenly cooked, tender beef in your Eye of Newt Stew.

Step 6: Bake the Stew
Once the beef is added, cover the Dutch oven with its lid and transfer it to the preheated oven. Allow the stew to bake for 3 to 4 hours. Check occasionally for tenderness, ensuring the beef is fork-tender and the flavors have melded beautifully by the time the cooking is completed.

Step 7: Skim Excess Fat
After the cooking time has elapsed, remove the Dutch oven from the oven and let it cool slightly. Skim off any excess fat that has risen to the surface of the stew. For easier fat removal, refrigerate the stew overnight and skim off the solidified fat before reheating, but feel free to proceed immediately if serving guests!

Step 8: Prepare the “Eyeballs”
While the stew cools, prepare the “eyeball” garnish. In a separate saucepan, simmer thawed pearl onions in a bit of butter or a dairy-free alternative over medium heat for about 20 minutes until they are tender. Season with salt and pepper, then set them aside on a plate while you fill them.

Step 9: Make the Pomegranate Sauce
For the special touch that brings your Eye of Newt Stew together, prepare the pomegranate sauce. In a small saucepan, reduce 1 cup of pomegranate juice over medium heat until it becomes syrupy, which should take about 10 minutes. If desired, whisk in glucomann powder for added thickness.

Step 10: Assemble the Dish
Finally, hollow out the cooked pearl onions gently, filling them with caper berries or small black olives for a fun “eyeball” effect. To serve, ladle the Eye of Newt Stew into bowls, artistically arrange the pearl onion “eyeballs” on top, and drizzle with the luscious pomegranate sauce for an irresistible feast that dazzles!

What to Serve with Eye of Newt Stew

As you prepare to unveil the magic of your Eye of Newt Stew, consider these delightful pairings that will elevate your meal to haunting heights.

  • Crusty Bread:
    A warm, rustic loaf is perfect for soaking up the rich, savory stew. Its chewy exterior and soft interior are incredibly comforting!

  • Garlic Mashed Potatoes:
    Creamy and buttery, these mashed potatoes add a dreamy texture that complements the hearty beef and pomegranate sauce beautifully.

  • Roasted Vegetables:
    Seasonal veggies like Brussels sprouts and carrots bring brightness and crunch, offering a unique contrast to the richness of the stew.

  • Spooky Salad:
    A vibrant mixed salad with caramelized pecans and goat cheese provides freshness, counterbalancing the stew's deep flavors while adding a festive touch.

  • Herbed Rice Pilaf:
    Fluffy and fragrant, a pilaf infused with thyme and parsley provides a lovely base that soaks up the flavorful broth delightfully.

  • Mulled Wine:
    Warm spiced mulled wine ties in perfectly with the cozy feel of the stew while enhancing the rich, red wine flavors.

  • Pumpkin Pie:
    Finish the meal with a slice of spiced pumpkin pie to embrace the essence of fall and create a sweet ending to your Halloween feast.

Enjoy these perfect accompaniments that will transform your dinner into a magical occasion!

Make Ahead Options

These Eye of Newt Stew preparations are perfect for busy nights when you want to simplify meal planning! You can sauté the vegetables and even sear the beef up to 24 hours in advance, storing them in airtight containers in the refrigerator to maintain freshness. Additionally, the stew can be fully prepared and refrigerated for up to 3 days, allowing the flavors to develop beautifully. When you're ready to enjoy it, simply reheat on the stovetop until simmering, then proceed with the final steps—adding the colourful "eyeballs" and pomegranate sauce before serving. This ensures you'll have a delicious, home-cooked meal with minimal effort on the day of serving!

Eye of Newt Stew Variations & Substitutions

Get ready to tailor your Eye of Newt Stew experience! Let your creativity run wild as you explore these delightful variations that add a personal touch to this captivating dish.

  • Vegetarian Option: Substitute beef with plant-based proteins like mushrooms or jackfruit. This variation provides a hearty yet meatless alternative that's just as satisfying.

  • Nightshade-Free Stew: Omit the tomato paste entirely and add more carrots and celery for sweetness. You'll create a delicious nightshade-free stew without sacrificing flavor.

  • Spicy Kick: Spice things up by adding a pinch of cayenne pepper or crushed red pepper flakes. This will introduce a gentle heat to balance the richness of the stew.

  • Herb Boost: Experiment with fresh herbs like rosemary or sage in addition to thyme. These additions will elevate the aroma and offer a delightful twist in flavor.

  • Asian Twist: Replace red wine with a bold cooking wine and add ginger and scallions for an Asian-inspired take. Pair this with a drizzle of sesame oil before serving for extra depth.

  • Fruity Variation: Swap out pomegranate juice with a berry sauce—like blackberry or raspberry—for a fruity twist. The sweetness from the berries will add a beautiful contrast to the savory beef.

  • Glucomann Free: If glucomann powder isn’t available, you can thicken the sauce by simmering it longer until it reaches your desired consistency.

  • Saucy Delight: Use beef broth instead of chicken stock for a richer taste or try adding a splash of balsamic vinegar to enhance the stew’s acidity. A touch of depth to your dish makes for a more complex flavor profile.

Make sure to explore other hearty options like my Lamb Stew Hearty or the comforting Pot Chicken Stew, which also allow for creativity in the kitchen!

How to Store and Freeze Eye of Newt Stew

Fridge: Store your Eye of Newt Stew in an airtight container for up to 3 days. Let it cool completely before sealing to maintain freshness.

Freezer: For longer storage, freeze the stew in a freezer-safe container for up to 3 months. Ensure it's completely cooled before transferring to avoid ice crystals.

Reheating: To reheat, thaw overnight in the fridge, then warm gently on the stove over low heat. Stir occasionally, adding a splash of broth or water if needed to restore moisture.

Serving Tip: Enhance the texture and flavor as you reheat, allowing the stew to come back to life with its cozy, delicious essence.

Helpful Tricks for Eye of Newt Stew

  • Submerge the Beef: Ensure the beef is completely submerged in liquid to avoid dryness during cooking; add more stock if necessary.
  • Quality Ingredients: Choose a robust red wine like Cabernet Sauvignon to enhance flavors; your stew's depth will greatly depend on it!
  • Colorful Carrots: Opt for purple carrots if available; they add a spooky effect to your Eye of Newt Stew and make it visually striking.
  • Skimming Fat: Skimming excess fat before serving lightens the dish; consider refrigerating overnight for easier removal.
  • Don't Rush Simmering: Allow the stew to simmer slowly in the oven; this melds the flavors beautifully, creating a deep, comforting taste.

Eye of Newt Stew Recipe FAQs

How should I select my beef for Eye of Newt Stew?
When choosing your beef, I recommend using a Chuck-Eye Roast, which is incredibly flavorful and tender when braised. Look for meat that is bright red with good marbling, as the fat content adds richness to your stew. Avoid any packages with dark spots or discoloration.

What’s the best way to store leftover Eye of Newt Stew?
Absolutely! Store your Eye of Newt Stew in an airtight container in the fridge for up to 3 days. Make sure it cools completely before sealing to lock in its flavors and freshness. When you're ready to enjoy it again, simply reheat it on the stove over low heat, stirring occasionally.

Can I freeze Eye of Newt Stew, and if so, how?
Yes! You can freeze the Eye of Newt Stew for up to 3 months. To do so, allow the stew to cool completely, then transfer it to a freezer-safe container. Be sure to leave some space at the top for expansion as it freezes. When ready to enjoy, thaw it overnight in the fridge and reheat gently on the stove.

What if my stew is too thick after cooking?
If you find your Eye of Newt Stew is too thick, don’t fret! Simply add a bit of broth or water—about a quarter cup at a time—while gently heating it on the stove. Stir well until you reach your desired consistency. Remember, a delicious stew should flow like a charm, even if it’s hearty!

Is there a nightshade-free version of Eye of Newt Stew?
Yes, indeed! To make a nightshade-free Eye of Newt Stew, simply omit the tomato paste. You can also substitute the pomegranate sauce with a fruity reduction from berries like blackberries or raspberries that provide a similar sweet-tart flavor without the nightshades. Enjoy the spooky experience without compromise!

Can my pets eat any of the ingredients in Eye of Newt Stew?
Be cautious with what you share with your furry friends! While the cooked beef is a tasty treat for dogs, avoid giving them stew with garlic, onion, or seasonings, as these can be harmful. It’s best to keep the stew to yourself, but you can offer them plain, cooked beef as a special snack!

Eye of Newt Stew

Eye of Newt Stew: Hauntingly Delicious for Halloween Nights

Eye of Newt Stew, a playful yet sophisticated dish, combines tender beef and earthy flavors, perfect for Halloween festivities.
Print Recipe Pin Recipe
Prep Time 30 minutes mins
Cook Time 4 hours hrs
Total Time 4 hours hrs 30 minutes mins
Servings: 6 servings
Course: Soups
Cuisine: Halloween
Calories: 350
Ingredients Equipment Method Nutrition Notes

Ingredients
  

For the Stew
  • 3 pounds Beef Chuck-Eye Roast Cut into 2-inch chunks
  • 2 tablespoons Bacon Grease or Avocado Oil For sautéing
  • 1 large Yellow Onion Sliced thin
  • 2 medium Carrot Diced, preferably purple
  • 2 stalks Celery Diced
  • 8 ounces Mushrooms Look for high vitamin D mushrooms
  • 4 cloves Garlic Minced
  • 1 tablespoon Tomato Paste Omit for nightshade-free
  • 1 teaspoon Fish Sauce Optional
  • 1 bottle Red Wine Robust variety like Cabernet Sauvignon
  • 4 cups Chicken Stock Substitute with vegetable stock for a lighter flavor
  • 1 packet Unflavored Gelatin Optional
  • 2 tablespoons Gluten-Free Worcestershire Sauce Ensure gluten-free
  • 2 teaspoons Thyme Fresh or dried
  • 2 leaves Bay Leaves
  • 1 cup Frozen Pearl Onions Thawed
  • 2 tablespoons Butter or Dairy-Free Alternative For sautéing
  • 1/2 cup Caper Berries or Small Black Olives For filling
  • 1 cup Pomegranate Juice
  • 1 teaspoon Glucomann Powder Optional

Equipment

  • Dutch oven

Method
 

Step-by-Step Instructions
  1. Preheat the oven to 325ºF (163ºC).
  2. In a large Dutch oven, heat bacon grease or avocado oil over medium heat. Add sliced yellow onions, diced carrots, diced celery, and mushrooms. Sauté for about 10 minutes until the onions are soft and caramelized.
  3. Stir in minced garlic and cook for an additional minute. Then, add tomato paste and cook for 2 minutes.
  4. Deglaze the pot with red wine, scrape the bottom, and add chicken stock, fish sauce, gelatin, thyme, bay leaves, and Worcestershire sauce.
  5. Bring to a boil, then reduce to a simmer. Add beef chunks ensuring they are submerged. Add more stock if necessary.
  6. Cover and bake in the oven for 3 to 4 hours until the beef is fork-tender.
  7. Skim excess fat from the surface after removing from the oven.
  8. Simmer thawed pearl onions in butter over medium heat for about 20 minutes until tender.
  9. Reduce pomegranate juice in a separate pan until syrupy, optionally adding glucomann powder.
  10. Hollow out the pearl onions and fill them with caper berries or olives. Plate the stew, drizzle with pomegranate sauce and place the 'eyeballs' on top.

Nutrition

Serving: 1cupCalories: 350kcalCarbohydrates: 18gProtein: 28gFat: 20gSaturated Fat: 8gPolyunsaturated Fat: 1gMonounsaturated Fat: 8gCholesterol: 70mgSodium: 800mgPotassium: 700mgFiber: 2gSugar: 3gVitamin A: 700IUVitamin C: 10mgCalcium: 50mgIron: 3mg

Notes

Refrigerating overnight deepens flavors and makes fat removal easier. Use fresh herbs for best flavor.

Tried this recipe?

Let us know how it was!

Halloween Witch Chips and Guacamole: A Spooky Snack Delight

October 15, 2025 by Grace Snow Leave a Comment

The air is alive with anticipation, and the scent of autumn fills the room. With Halloween just around the corner, I couldn't resist creating a dish that transforms this festive season into a healthier celebration. Meet my Halloween Witch Chips and Guacamole — a fun and visually delightful snack that’s perfect for all ages! These whimsical blue corn tortilla chips shaped like witches’ hats paired with creamy, nutritious guacamole not only look adorable but also offer a satisfying crunch. As a vegetarian and vegan-friendly option, this spooky treat is an absolute crowd-pleaser at any gathering. Whether you're hosting a Halloween party or simply looking for a fun way to enjoy healthy snacks, this recipe is a game changer. Isn’t it time to spice up your Halloween festivities with a bite that’s both fun and nurturing? Let’s dive into this enchanting creation!

Why Are Witch Chips So Fun?

Playful Presentation: These Halloween Witch Chips are not just snacks; they're a visual delight that sparks joy and creativity. Children and adults alike will love the whimsical design of witch faces made from guacamole and veggies.

Healthy Treats: By using fresh ingredients like creamy avocados and vibrant vegetables, you can enjoy a nutritious option instead of typical Halloween sweets, helping you maintain a healthy lifestyle.

Versatile Ingredients: This recipe is easily customizable! Feel free to swap out veggies or even try different dipping sauces to cater to the crowd. If you enjoyed these, don’t miss out on the delicious Pan Fried Shrimp for another festive recipe!

Quick and Easy: With straightforward steps for both guacamole preparation and assembly, you can whip these up in no time for last-minute gatherings.

Crowd Favorite: Perfect for parties, this dish allows you to impress guests with your creativity while ensuring everyone can enjoy a veggie-packed snack that keeps the mood festive!

Halloween Witch Chips and Guacamole Ingredients

For the Guacamole
• Avocados – Creaminess and rich flavor; you can swap with ripe bananas for a different texture.
• Garlic clove – Adds savory depth; optional for those sensitive to strong flavors.
• Roma tomatoes – Contributes freshness and acidity; regular tomatoes may be used instead.
• Onion – Adds sharpness and texture; shallots can be a milder alternative.
• Lime juice – Offers acidity to balance flavors; lemon juice is a viable substitution.
• Fresh cilantro – Enhances the guacamole's freshness; omit if you dislike coriander.
• Jalapeño – Adds heat; can be left out for a milder taste.

For the Witch Chips
• Blue corn tortilla chips – Serve as the witch's hat, adding crunch; use regular chips if blue corn is unavailable.
• Black olive – Functions as the witch's eyes; any dark olive variety will work.
• Slice of avocado – Forms the nose for a matching hue; extra pieces of cucumber can alternatively serve this role.
• Slice of red bell pepper – Represents the mouth's bold color; any other colorful peppers may be suitable.
• Carrot sticks – Create an interesting hair effect; broccoli or zucchini can replace them for varying textures.

Step‑by‑Step Instructions for Halloween Witch Chips and Guacamole

Step 1: Prepare the Guacamole
Begin by mashing five ripe avocados in a large mixing bowl using a potato masher or fork until smooth and creamy, about 2-3 minutes. Next, mix in minced garlic, diced Roma tomatoes, finely chopped onion, fresh lime juice, chopped cilantro, and jalapeño (if using). Stir until all ingredients are well combined and vibrant in color. You can serve immediately or cover the guacamole with lime juice to prevent browning while refrigerating.

Step 2: Shape the Witch’s Face
On a large plate, spoon the creamy guacamole and shape it into a whimsical face, smoothing it with the back of a spoon. Make sure to leave enough guacamole for facial features. Position a halved black olive for the eyes, a slice of avocado as the nose, and a slice of red bell pepper to create a bright mouth. The arrangement should be playful and inviting, resembling a friendly witch.

Step 3: Create Colorful Hair
Next, grab your carrot sticks and arrange them around the top of the guacamole face to form the witch's hair, ensuring they stick out playfully. For more variety, feel free to mix different vegetable options, like broccoli or zucchini, to add interesting textures and colors. Make sure the hair looks full and vibrant to enhance the visual appeal of your Halloween Witch Chips and Guacamole.

Step 4: Assemble the Witch’s Hat
Now it's time to adorn the witch's head! Carefully arrange blue corn tortilla chips on the top of the guacamole face to form a charming witch's hat. Ensure the chips are placed at different angles for a whimsical look, just like a classic witch's hat. The crunchy texture of the chips will create a delicious contrast with the creamy guacamole, making this spooky snack delightful both to see and to taste.

Step 5: Serve and Enjoy
Finally, present your Halloween Witch Chips and Guacamole masterpiece at your gathering! This creative dish will surely wow your guests as an appetizer. For added flair, consider serving with additional slices of vegetables or a side of your favorite salsa for dipping. Remember, the key is to have fun while preparing this festive treat, creating lasting memories around the Halloween table!

What to Serve with Halloween Witch Chips and Guacamole

Elevate your Halloween festivities with delightful accompaniments to make this fun and flavorful dish truly memorable.

  • Crispy Veggie Platter: A colorful array of fresh vegetables like bell peppers, cucumbers, and celery will add crunch and contrast to the creamy guacamole.
  • Spicy Salsa: A zesty and tangy salsa complements the flavors brilliantly, uplifting the overall experience of your spooky snack. Choose mango salsa for a fruity twist!
  • Homemade Tortilla Chips: Boost the fun factor by crafting your own chips from corn tortillas—seasoned and baked, they'll be the perfect crunchy base for your guacamole.
  • Seasoned Popcorn: Lightly salted popcorn sprinkled with paprika or nutritional yeast creates a surprising snack that’s perfect for munching in between!
  • Apple Slices with Almond Butter: For a bit of sweetness, serve crisp apple slices with a drizzle of almond butter, balancing the savory witch chips with natural sweetness.
  • Sparkling Water with Lime: A refreshing drink option, sparkling water dressed up with lime slices adds a fizzy lift to your Halloween gathering, keeping everyone hydrated!
  • Pumpkin Spice Cookies: End on a sweet note with soft and chewy pumpkin spice cookies that resonate with the season, providing comfort alongside the delightful savory flavors.
  • Roasted Chickpeas: For a healthy crunch, offer roasted chickpeas seasoned with your favorite spices; they'll add a protein punch and a satisfying crunch to your buffet.
  • Fall-themed Cocktails: For adults, consider serving festive cocktails like spiked apple cider or pumpkin margaritas, enhancing the celebration atmosphere!

Halloween Witch Chips and Guacamole Variations

Inviting you to sprinkle your own creativity into this spooky treat, let’s explore some delightful adjustments!

  • Dairy-Free: Replace any cheese with nutritional yeast for a cheesy flavor without dairy.
  • Spicy Twist: Add diced jalapeños directly into the guacamole for an extra kick. It will give your dish a fiery surprise that thrill seekers will adore.
  • Herbaceous Hues: Swap cilantro with fresh basil or parsley for a unique flavor profile; both herbs bring freshness while complementing the guacamole beautifully.
  • Nutty Finish: Stir in a tablespoon of tahini for added creaminess and a rich, nutty taste. This subtle change will add depth to your guacamole.
  • Colorful Chips: Use beet or spinach chips instead of blue corn for a vibrant, eye-catching look. Kids will be fascinated, and you'll enjoy the added nutrients!
  • Crunchy Alternatives: Instead of tortilla chips, try pita chips or crunchy veggie sticks for a different texture that's just as fun for dipping.
  • Seasonal Surprise: Mix in pumpkin puree with the guacamole for a fall-inspired twist. This adds creaminess and a touch of seasonal flavor.
  • Salsa Boost: Enhance your guacamole with a scoop of your favorite salsa for extra flavor. You might love the kick of a fresh mango salsa!

No doubt that you’ll find something in this mix to elevate your own Halloween festivities! For more savory ideas, don't miss the delicious Chickpea Spinach Curry or the rewarding flavors in Roasted Corn Fried. Happy cooking!

How to Store and Freeze Halloween Witch Chips and Guacamole

Fridge: Store leftover guacamole in an airtight container with plastic wrap pressed against the surface to minimize air exposure. It will stay fresh for up to 3 days.

Freezer: If you want to freeze guacamole, make sure to place it in an airtight container, pressing out as much air as possible to prevent browning. It can be frozen for up to 3 months.

Reheating: While the Halloween Witch Chips should be consumed fresh for optimal crunch, guacamole can be thawed overnight in the fridge. Stir well before serving for best results.

Tips: For best results, prepare the Halloween Witch Chips just before serving, as they can lose their crispness when stored.

Make Ahead Options

These Halloween Witch Chips and Guacamole are perfect for meal prep and can save you a lot of time on the big day! You can prepare the guacamole up to 24 hours in advance by mashing the avocados and mixing in the rest of the ingredients, then store it in an airtight container with a layer of lime juice on top to prevent browning. The veggies can also be prepped in advance—slice your carrots, peppers, and avocado up to 3 days beforehand and keep them refrigerated in separate containers. When you're ready to serve, simply assemble the witch's face using the prepped components and crown it with the blue corn tortilla chips for a fun and fresh presentation that’s just as delicious as if you made it all on the day!

Expert Tips for Halloween Witch Chips and Guacamole

• Ripeness Matters: Ensure your avocados are perfectly ripe for creamy guacamole; use slightly soft ones, but not mushy, for the best texture.

• Color Variation: Feel free to mix up the vegetables used for the witch’s face; colorful peppers, radishes, or even cherry tomatoes can add fun to your Halloween Witch Chips and Guacamole.

• Layering for Freshness: If not serving immediately, protect your guacamole from browning by layering it with lime juice; this keeps it looking fresh and appetizing.

• Crunchy Contrast: For added texture and flavor, consider baking your own tortilla chips from corn tortillas, giving your witch’s hat a homemade touch.

• Mix It Up: Experiment with your guacamole's flavors by adding spices like cumin or smoked paprika, or mixing in different herbs instead of cilantro for a unique twist.

Halloween Witch Chips and Guacamole Recipe FAQs

What kind of avocados should I use for the best guacamole?
Absolutely! For the creamiest guacamole, look for avocados that are slightly soft to the touch but not mushy. Hass avocados are my go-to; they have a rich flavor and creamy texture that's perfect for this spooky snack.

How can I store leftover guacamole?
To keep your guacamole fresh, transfer it into an airtight container and press a piece of plastic wrap directly onto the surface before sealing the lid. This minimizes air exposure and allows it to stay fresh in the fridge for up to 3 days. Don't forget about that lime juice to slow down browning!

Can I freeze guacamole?
Yes, you can! To freeze guacamole, place it in an airtight container—be sure to press out as much air as possible to prevent browning. It can be frozen for up to 3 months. Thaw it overnight in the refrigerator and stir well before serving. It's a great way to enjoy this tasty dip later on!

What if I want to make the witch's features gluten-free or accommodate allergies?
No problem at all! For gluten-sensitive guests, simply use gluten-free corn tortilla chips instead of regular ones. Additionally, if you're accommodating people with allergies, consider using alternative vegetables for facial features, such as cucumber for the nose or omitting the jalapeño if someone is sensitive to spice.

How can I ensure my tortilla chips stay crunchy when serving?
To retain the crunchiness of your Halloween Witch Chips, it's best to prepare and serve them just before your event. If you must prepare them in advance, store them in an airtight container at room temperature and avoid refrigeration, which can make them soggy. Enjoy the festive crunch!

Halloween Witch Chips and Guacamole

Halloween Witch Chips and Guacamole: A Spooky Snack Delight

Enjoy Halloween with these Halloween Witch Chips and Guacamole, a fun and nutritious snack perfect for all ages!
Print Recipe Pin Recipe
Prep Time 15 minutes mins
Total Time 15 minutes mins
Servings: 6 servings
Course: Snacks
Cuisine: American
Calories: 200
Ingredients Equipment Method Nutrition Notes

Ingredients
  

For the Guacamole
  • 5 ripe avocados can substitute with ripe bananas
  • 1 clove garlic optional
  • 2 medium Roma tomatoes can use regular tomatoes
  • 1 small onion can substitute with shallots
  • 1 tablespoon lime juice can substitute with lemon juice
  • 0.5 cup fresh cilantro omit if disliked
  • 1 small jalapeño leave out for milder taste
For the Witch Chips
  • 1 bag blue corn tortilla chips can use regular chips
  • 1 small black olive use any dark olive
  • 1 slice avocado cucumber can be used instead
  • 1 slice red bell pepper other colorful peppers may be used
  • a few carrot sticks can replace with broccoli or zucchini

Equipment

  • Mixing Bowl
  • potato masher
  • Spoon
  • Plate

Method
 

Step-by-Step Instructions
  1. Mash the ripe avocados in a bowl until smooth. Mix in garlic, tomatoes, onion, lime juice, cilantro, and jalapeño. Stir well.
  2. On a plate, shape the guacamole into a whimsical face. Use black olives for eyes, avocado slice for the nose, and red pepper for the mouth.
  3. Arrange carrot sticks around the guacamole for hair, or use broccoli/zucchini for variety.
  4. Place blue corn tortilla chips on top of the guacamole to create a witch's hat, varying angles for a whimsical look.
  5. Serve the Halloween Witch Chips and Guacamole at your gathering, optionally with vegetable slices or salsa for dipping.

Nutrition

Serving: 1servingCalories: 200kcalCarbohydrates: 20gProtein: 3gFat: 12gSaturated Fat: 2gPolyunsaturated Fat: 1gMonounsaturated Fat: 9gSodium: 200mgPotassium: 400mgFiber: 6gSugar: 1gVitamin A: 10IUVitamin C: 30mgCalcium: 2mgIron: 4mg

Notes

Ensure avocados are ripe for the best texture and taste. Consider layering with lime juice if not serving immediately to maintain freshness.

Tried this recipe?

Let us know how it was!

Witches Hat Cheese Ball: The Ultimate Halloween Snack Delight

October 15, 2025 by Grace Snow Leave a Comment

As the crisp autumn air rolls in and the leaves start to twirl to the ground, my imagination dances with visions of spooky soirées and festive feasts. One treat that never fails to enchant at these gatherings is the Witches Hat Cheese Ball. This whimsical Halloween snack combines creamy goodness with vibrant bell peppers and fresh green onions, making it not just a feast for the eyes but also a burst of delightful flavors. It’s an easy-to-prepare party appetizer that’s perfect for stress-free entertaining, and since it’s gluten-free and can be tailored to be keto-friendly, everyone at your table will be able to indulge without worry. So, are you ready to conjure up this bewitching delight and impress your guests? Let’s dive in!

Why is the Witches Hat Cheese Ball a Must-Try?

Unforgettable Presentation: This whimsical appetizer steals the show with its unique hat shape, making it a centerpiece on any Halloween table.

Easy to Prepare: With just a few simple steps, you can whip up this charming dish in no time, freeing you to focus on other festive treats like Avocado Egg Salad.

Flavor Explosion: Creamy cheese meets crunchy veggies, creating an irresistible blend that keeps guests coming back for more.

Versatile Options: Easily adapt this cheese ball for dietary preferences—it's gluten-free and can be keto-friendly!

Crowd-Pleasing Fun: Kids and adults alike will love this quirky snack that adds a playful touch to your Halloween gathering. Prepare to make lasting memories with this delightful treat!

Witches Hat Cheese Ball Ingredients

• Get ready to create a delightful masterpiece!

For the Cheese Ball

  • Cream Cheese – A rich and creamy base for that luscious texture; remember to use block cream cheese for perfect shaping!
  • Red Bell Pepper – Adds a lovely sweetness and vibrant color; feel free to swap with other sweet peppers for a twist!
  • Green Onions – Infuses freshness and a mild flavor; chives work beautifully as a substitute if you prefer.
  • Chopped Fresh Parsley – Offers a hint of earthiness and elevates visual appeal; dried parsley can work in a pinch.

For the Decor

  • Pitted Black Olives – These create the whimsical ‘hat’ exterior, providing a savory bite; other olives can be used or simply omitted for a different look.
  • Olive Oil (optional) – Brush on the olives for a beautiful shine; skip this step if you want to keep it simple.

This Witches Hat Cheese Ball is not just a snack; it’s a conversation starter!

Step‑by‑Step Instructions for Witches Hat Cheese Ball

Step 1: Soften the Cream Cheese
Begin by removing the block of cream cheese from the refrigerator and letting it sit at room temperature for about 30 minutes. This softening step is crucial, as it allows the cream cheese to mix more smoothly with the other ingredients, creating a creamy base for your Witches Hat Cheese Ball.

Step 2: Chop the Vegetables
While the cream cheese softens, finely chop the red bell pepper and green onions. Aim for small, uniform pieces to ensure they incorporate well into the cheese mixture. The vibrant colors of the peppers and the fresh greens will make your Witches Hat Cheese Ball visually appealing and add a pop of flavor to each bite.

Step 3: Mix the Ingredients
In a mixing bowl, combine the softened cream cheese, chopped red bell pepper, green onions, and chopped fresh parsley. Use a hand mixer or a sturdy spoon to blend everything together until evenly mixed and creamy. This step should take about 2-3 minutes, creating a harmonious mixture that will form the foundation of your spooky appetizer.

Step 4: Shape the Cheese Mixture
Lay a sheet of cling wrap on your countertop and spoon the cheese mixture onto the center. Gather the edges of the plastic wrap and carefully shape the mixture into a cone, resembling a witch's hat. Ensure it is tightly wrapped to maintain its shape, then twist the top closed. This sculpting technique gives your Witches Hat Cheese Ball its enchanting form.

Step 5: Chill the Cheese Ball
Transfer the wrapped cheese cone onto a serving plate and place it in the refrigerator. Allow it to chill for at least 4 hours, or even up to 48 hours. Chilling not only firms the cheese ball but also allows the flavors to meld beautifully, making every bite of the Witches Hat Cheese Ball bursting with flavor.

Step 6: Prepare the Hat Decoration
Once chilled, remove the cheese ball from the refrigerator and carefully unwrap it. To create the whimsical 'hat,' slice the pitted black olives in half and position them on top of the cone. You can decorate the cheese ball in a playful manner, ensuring it resembles a classic witch's hat and adds an extra touch of festivity to your Halloween celebration.

Step 7: Final Presentation
If desired, lightly brush the olives with olive oil to enhance their shine and appearance. Before serving your Witches Hat Cheese Ball, ensure it’s positioned on a platter with your choice of dippers, such as crackers or vegetable sticks. Your guests will surely be drawn in by the creative presentation and enticing aroma of this delightful Halloween appetizer!

Witches Hat Cheese Ball Variations

Feel free to unleash your creativity and make this festive appetizer uniquely yours!

  • Colorful Peppers: Swap the red bell pepper for yellow or orange for a twist in flavor and presentation. Your cheeseball will have a vibrant, eye-catching look that will excite your guests!

  • Herb Enhancements: Experiment with using fresh basil or dill instead of parsley for an unexpected flavor boost that brightens every bite. Each herbal variation can add its own delightful twist to the taste experience.

  • Savory Add-ins: Fold in some finely diced jalapeños for a delightful kick that elevates the cheese ball's flavor profile. This will cater to those who crave a bit of heat during the festivities!

  • Keto-Friendly Pairings: Instead of crackers, serve with salami or thick-cut ham to cater to your keto guests. These savory pairings not only look elegant but also complement the creamy cheese beautifully.

  • Edible Decorations: Use different herbs or edible flowers to decorate your cheese ball, adding a colorful touch that delights the eye and palate. The edible flowers can elevate the seasonal spirit of your party!

  • Mixed Olives: Swap black olives for green olives or a medley of olives for a fun flavor combination and unique appearance. With this twist, the flavor of your cheese ball will surprise and excite your guests.

  • Sweet & Savory Dippers: Substitute traditional crackers with crispy pumpkin chips or sweet potato chips. They add a compelling combination of flavors that can heighten the flavor notes of your Witches Hat Cheese Ball, offering a delightful change.

Remember, your Witches Hat Cheese Ball can spark joy and creativity, just like preparing other festive dishes such as Jello Salad or even a comforting Potato Blue Cheese treat!

What to Serve with Witches Hat Cheese Ball

As your guests gather around, the Witches Hat Cheese Ball will charm their taste buds while you add complementary delights that create a magical feast.

  • Crunchy Vegetable Sticks: A colorful assortment of carrots, celery, and bell peppers not only adds freshness but also balances the creamy richness of the cheese ball.

  • Savory Crackers: Choose a variety of crisp crackers to add texture and flavor contrasts. The crunchiness of the crackers will enhance the creamy goodness of the cheese.

  • Crispy Pumpkin Chips: These seasonal treats bring a delightful crunch and a hint of sweetness, perfectly matching the whimsical vibe of your Halloween soirée.

  • Tangy Apple Slices: Slices of crisp apples add a refreshing bite and slight acidity, cleansing the palate between bites of savory cheese.

  • Herbed Pita Chips: The herby notes in pita chips provide a wonderful contrast, complementing the cheese while keeping everything light and flavorful.

  • Bubbly White Wine: A chilled Sauvignon Blanc or sparkling wine pairs beautifully with the creamy cheese, enhancing your gathering's festive atmosphere.

  • Seasonal Fruit Platter: Including figs, grapes, and berries will add vibrant color and contrast, rounding out the table with natural sweetness.

  • Dark Chocolate Squares: For a sweet finale, dark chocolate squares make a decadent counterpoint to the savory cheese ball, offering a rich, delightful finish to your Halloween gathering.

Expert Tips for Witches Hat Cheese Ball

  • Room Temperature Cheese: Ensure your cream cheese is at room temperature before mixing. This makes it easy to blend with other ingredients and helps achieve a smooth consistency.

  • Watch Your Chopping: When chopping the veggies, aim for uniform pieces. This ensures an even texture throughout the Witches Hat Cheese Ball, enhancing both flavor and appearance.

  • Tight Wrapping: Use cling wrap to tightly shape the cheese ball. This prevents it from collapsing during refrigeration and helps maintain its charming witch hat shape.

  • Decor Variations: Don’t hesitate to get creative with toppings! Feel free to substitute the black olives with other dark olives or even edible flowers for a unique spin on your Witches Hat Cheese Ball.

  • Make Ahead: Prepare the cheese ball up to 48 hours in advance. This allows the flavors to meld beautifully and gives you a hassle-free experience when entertaining!

How to Store and Freeze Witches Hat Cheese Ball

Fridge: The Witches Hat Cheese Ball can be kept in the refrigerator for up to 48 hours. If you have leftovers, they may last for an additional 6 days, though freshness is best within the first two days.

Wrapping: To maintain flavor and shape, tightly wrap the cheese ball in cling wrap or foil before refrigerating. This reduces exposure to air and keeps it from drying out.

Freezer: If you wish to freeze it, shape and wrap the cheese ball securely in plastic wrap, then place it in an airtight container. It can be stored in the freezer for up to 2 months.

Reheating: When ready to serve, thaw the cheese ball in the refrigerator overnight. Avoid refreezing once defrosted, as this can affect the texture and flavor of the Witches Hat Cheese Ball.

Make Ahead Options

This Witches Hat Cheese Ball is perfect for busy home cooks looking to save time on party prep! You can make the cheese ball mixture up to 48 hours in advance; simply follow the initial steps of mixing the ingredients and shaping the cheese into a cone using cling wrap. Once shaped, refrigerate it to ensure it holds its form and flavor. On the day of serving, just take it out, decorate with sliced olives to create the ‘hat,’ and enjoy the delightful blend of creamy and crunchy textures. By prepping ahead, you’ll have more time to focus on enjoying your spooky soirée without the stress!

Witches Hat Cheese Ball Recipe FAQs

What kind of cream cheese should I use for the Witches Hat Cheese Ball?
Absolutely! For the best results, use block cream cheese instead of spreadable varieties. Block cream cheese holds its shape better and allows for easier mixing and molding, creating that perfect cone shape reminiscent of a witch's hat.

How should I store the Witches Hat Cheese Ball?
The Witches Hat Cheese Ball can be stored in the refrigerator for up to 48 hours before serving. If you have leftovers, they should maintain their quality for an additional 6 days. Just be sure to wrap it tightly in cling wrap or foil to prevent it from drying out and to keep the flavors fresh.

Can I freeze the Witches Hat Cheese Ball?
Yes! To freeze your Witches Hat Cheese Ball, wrap it tightly in cling wrap and then place it in an airtight container. It can be frozen for up to 2 months. When you're ready to enjoy it, simply thaw it in the refrigerator overnight before serving. Avoid refreezing once it has been thawed to preserve its texture and flavor.

What if my cheese ball is too soft to hold its shape?
Very! If you find that your cheese ball isn't holding its shape, it may be due to the cream cheese being too soft. Ensure you use fully block cream cheese and allow it to chill adequately for at least 4 hours in the fridge wrapped tightly. If it's still too soft, consider adding a small amount of shredded cheese or using a little more cream cheese to thicken it.

Can I make the Witches Hat Cheese Ball ahead of time?
Absolutely! The Witches Hat Cheese Ball can be made up to 48 hours in advance. This not only allows the flavors to meld deliciously but also gives you peace of mind when it comes to party prep. Just make sure to keep it wrapped tightly in the refrigerator until you're ready to serve.

Are there any dietary considerations for the Witches Hat Cheese Ball?
Yes! This cheese ball is naturally gluten-free and can be easily tailored to fit a keto-friendly diet. If you're serving guests with specific dietary preferences, consider offering a selection of dippers, such as celery sticks or salami, instead of crackers. And always check for allergies with ingredients like olives or green onions!

Witches Hat Cheese Ball

Witches Hat Cheese Ball: The Ultimate Halloween Snack Delight

Witches Hat Cheese Ball is a whimsical appetizer perfect for Halloween gatherings, combining creamy cheese with vibrant veggies.
Print Recipe Pin Recipe
Prep Time 30 minutes mins
Chilling Time 4 hours hrs
Total Time 4 hours hrs 30 minutes mins
Servings: 8 servings
Course: Appetizers
Cuisine: Halloween
Calories: 150
Ingredients Equipment Method Nutrition Notes

Ingredients
  

For the Cheese Ball
  • 8 ounces Cream Cheese Block cream cheese for perfect shaping
  • 1 medium Red Bell Pepper Sweet and vibrant; can swap with other sweet peppers
  • 2 stalks Green Onions Chives can be used as a substitute
  • 1/4 cup Chopped Fresh Parsley Dried parsley can work in a pinch
For the Decor
  • 1/2 cup Pitted Black Olives Creates the whimsical ‘hat’ exterior
  • Olive Oil Optional, for brushing on olives for shine

Equipment

  • Mixing Bowl
  • cling wrap
  • Spoon
  • Knife
  • serving plate

Method
 

Preparation Steps
  1. Begin by removing the block of cream cheese from the refrigerator and letting it sit at room temperature for about 30 minutes.
  2. While the cream cheese softens, finely chop the red bell pepper and green onions.
  3. In a mixing bowl, combine the softened cream cheese, chopped red bell pepper, green onions, and chopped fresh parsley.
  4. Lay a sheet of cling wrap on your countertop and spoon the cheese mixture onto the center. Shape the mixture into a cone.
  5. Transfer the wrapped cheese cone onto a serving plate and place it in the refrigerator for at least 4 hours.
  6. Once chilled, remove the cheese ball from the refrigerator and carefully unwrap it. Slice the pitted black olives in half and position them on top.
  7. Optionally, lightly brush the olives with olive oil to enhance their shine.

Nutrition

Serving: 1servingCalories: 150kcalCarbohydrates: 6gProtein: 4gFat: 12gSaturated Fat: 7gPolyunsaturated Fat: 1gMonounsaturated Fat: 4gCholesterol: 30mgSodium: 200mgPotassium: 150mgFiber: 1gSugar: 1gVitamin A: 500IUVitamin C: 20mgCalcium: 100mgIron: 1mg

Notes

This cheese ball can be made up to 48 hours in advance, ensuring flavors meld beautifully before serving.

Tried this recipe?

Let us know how it was!

Savor the Warmth: Ghoulash Stew for Cozy Nights

October 15, 2025 by Grace Snow Leave a Comment

As the crisp autumn air settles in, the thought of gathering around a warm hearth with a hearty bowl of Ghoulash Stew feels more inviting than ever. This dish is more than just a meal; it’s a comforting embrace on a chilly day. With tender chunks of beef simmering in a well-seasoned broth, enriched by aromatic vegetables, it brings a rich depth of flavor to any family gathering. Plus, the long simmering time not only makes it a fantastic make-ahead option, but also allows the flavors to meld beautifully for that true taste of home. Ready to dive into a cozy culinary adventure? Let’s get cooking!

Why is Ghoulash Stew a must-try?

Hearty Comfort: This stew wraps you in warmth, delivering a cozy experience that’s perfect for chilly evenings and gatherings.

Flavor Explosion: With tender beef and a medley of spices, each spoonful bursts with savory goodness that enchants your taste buds.

Make-Ahead Marvel: Preparing it in advance allows flavors to develop, making it even more delicious when served the next day.

Versatile Ingredients: Customize with your favorite vegetables or switch the beef for turkey, making it a flexible dish for any palate.

Crowd-Pleasing: Ideal for family dinners or casual get-togethers, everyone will appreciate this satisfying and rich meal.

Pairing Perfection: Serve with crusty bread or crackers to soak up the delicious broth, and consider a side of fresh greens for a complete meal!

Ghoulash Stew Ingredients

  • For the Beef
    • Beef Chuck or Stew Meat – The star of the dish, ensuring a rich, hearty flavor; cut into 1 1/2-inch pieces for even cooking.

  • For the Broth
    • All-Purpose Flour – Thickens the stew, giving it that comforting consistency; can be omitted for a gluten-free version.
    • Ground Paprika – Introduces a sweet, smoky flavor that complements the stew beautifully; can use smoked paprika for added depth.
    • Salt – Essential for enhancing the flavors; adjust to taste as you go.
    • Ground Black Pepper – Adds a hint of spice; freshly ground is always best for maximum flavor.
    • Vegetable Oil – Needed for sautéing veggies; olive oil or butter work as delicious alternatives.

  • For the Vegetables
    • Large Onion, Chopped – Forms a flavorful base for the stew; yellow onions lend a sweet flavor.
    • Carrots, Sliced – Adds a touch of sweetness and color; feel free to add more for extra flavor.
    • Celery Stalks, Chopped – Contributes crunch and aromatic notes; balances the sweetness of the carrots.
    • Sliced Bell Peppers – Incorporate vibrant color and sweetness to the dish; any color will do!
    • Cloves Garlic, Minced – Infuses deep flavor; fresh is recommended for the best aroma.
    • Diced Whole Tomatoes (14 oz can) – Brings acidity and depth; make sure to reserve the juice for added flavor.

  • For Seasoning
    • Beef Broth – Acts as the stew's flavorful base; low-sodium broth allows you to control the saltiness.
    • Bay Leaves – Adds a subtle herbal flavor; just remember to remove before serving.
    • Italian Seasoning – An excellent blend of herbs that enhances the overall profile; feel free to make your own mix!

  • For the Creamy Finish
    • Sour Cream (8 oz container) – Creates a velvety texture and tangy flavor; Greek yogurt is a healthy substitute for lighter options.

Dive into cooking this delightful Ghoulash Stew, and let the flavors meld together to create a warming comfort food that’s perfect for your cozy autumn nights!

Step‑by‑Step Instructions for Ghoulash Stew

Step 1: Prepare the Beef
Begin by dicing your beef chuck or stew meat into 1 1/2-inch pieces for even cooking. In a large bowl, toss the beef with all-purpose flour, salt, ground paprika, and freshly ground pepper to coat each piece. Set aside on a plate, allowing the flavors to mingle while you prepare the vegetables.

Step 2: Sauté Vegetables
In a large pot, heat 2 tablespoons of vegetable oil over medium heat until shimmering. Add the chopped onions, sliced carrots, and chopped celery, stirring frequently. Sauté for about 5–7 minutes or until the vegetables are softened and the onions are translucent. The aroma will fill your kitchen, letting you know it's time for the next step.

Step 3: Add Garlic and Peppers
Introduce the minced garlic and sliced bell peppers to the pot, cooking for an additional 2–3 minutes. Stir until the garlic is fragrant and the peppers begin to soften. This combination adds depth to your Ghoulash Stew, making it all the more delicious.

Step 4: Brown the Beef
Raise the heat to medium-high and carefully add the seasoned beef to the pot, distributing it evenly. Sear the meat on all sides for about 5–6 minutes, allowing it to develop a rich brown color. This browning step enhances the stew’s flavor, so keep an eye on it, ensuring it doesn’t burn.

Step 5: Incorporate Tomatoes and Liquid
Once the beef is browned, pour in the diced tomatoes and their juice, scraping any brown bits from the bottom for added flavor. Follow with the beef broth and bay leaves, stirring gently to combine. Bring this mixture to a gentle simmer, allowing the bubbling to create an inviting atmosphere in your kitchen.

Step 6: Simmer the Stew
Cover the pot and reduce the heat to low, letting the Ghoulash Stew simmer for 1.5 to 2 hours. Stir occasionally and enjoy the tantalizing aroma as the flavors meld together. The beef should become tender, while the vegetables soften, enriching the broth beautifully.

Step 7: Finish with Creaminess
Once the stewing time is up and the beef is fork-tender, remove the pot from heat. Stir in the sour cream until well combined, giving your stew a creamy texture. Taste and adjust the seasoning, adding more salt and pepper if necessary to enhance the dish before serving.

Step 8: Serve and Savor
Ladle the Ghoulash Stew into bowls, inviting everyone to the cozy table. Consider garnishing with fresh herbs for a pop of color and flavor. This hearty dish pairs wonderfully with crusty bread, perfect for soaking up the delightful broth.

What to Serve with Ghoulash Stew

As the comforting aroma of Ghoulash Stew fills your kitchen, consider these delightful pairings to complete your cozy meal experience.

  • Crusty Bread: An absolute essential for dipping, crusty bread soaks up the rich stew perfectly, enhancing each bite.

  • Garlic Breadsticks: The warm, buttery flavor of garlic breadsticks complements the hearty stew, making for a satisfying contrast in textures.

  • Mixed Green Salad: A crisp salad with vinaigrette adds freshness to the meal, balancing the richness of the stew and refreshing the palate.

  • Roasted Root Vegetables: Sweet and earthy, roasted carrots and potatoes create a delightful side that mirrors the warm flavors of the stew.

  • Coleslaw: A tangy coleslaw adds crunch and acidity, providing a refreshing note to accompany the hearty meal.

  • Red Wine: Pairing with a glass of red wine, like a Cabernet Sauvignon or Merlot, enhances the savory elements in the stew, making for a comforting and cohesive dining experience.

  • Apple Crisp: For a sweet ending, a warm apple crisp brings a delightful contrast of flavors to the table, rounding off the meal with the essence of autumn.

  • Savory Biscuits: Fluffy biscuits are perfect for scooping up the stew while adding a comforting, buttery element to your dining experience.

Expert Tips for Ghoulash Stew

  • Browning the Beef: Ensure you brown the beef properly before adding it to the pot. This step enhances the stew's depth of flavor through caramelization.

  • Simmering Time: Don’t rush the simmering process; allow your Ghoulash Stew to cook for at least 1.5 to 2 hours. The longer it simmers, the more the flavors develop.

  • Adjusting Seasoning: Always taste your stew before serving and adjust seasoning as needed. A little extra salt or pepper can elevate the flavor significantly.

  • Creamy Finish: For a richer finish, stir in the sour cream slowly to prevent curdling. This gives your stew a lovely creamy texture that's irresistible.

  • Veggie Variations: Feel free to customize the vegetables based on what you have on hand. Adding peas or potatoes can change the dish's profile while maintaining its hearty essence.

How to Store and Freeze Ghoulash Stew

Fridge: Store your Ghoulash Stew in an airtight container for up to 4 days. Let it cool completely before transferring to ensure it stays fresh.

Freezer: For longer storage, freeze the stew in freezer-safe containers for up to 3 months. Make sure to leave some space for expansion as it freezes.

Reheating: When ready to enjoy, thaw in the fridge overnight and reheat gently on the stove over low heat, stirring occasionally. Add a splash of beef broth if needed for consistency.

Make-Ahead Tip: This stew is perfect for meal prep! Prepare it in advance, allow it to cool, and store it in the fridge or freezer for a hearty meal anytime.

Make Ahead Options

These Ghoulash Stew are perfect for those busy weeknights! You can brown the beef and sauté the vegetables up to 24 hours in advance, letting you skip the time-consuming steps when it’s time to serve. Simply refrigerate the prepped ingredients in an airtight container. That's not all—feel free to combine all components except the sour cream and simmer them, then let the stew cool completely before storing for up to 3 days. When you're ready to enjoy, simply reheat on the stovetop and stir in the sour cream just before serving, ensuring it retains that creamy, velvety finish. You’ll have a hearty, satisfying meal with minimal effort!

Ghoulash Stew Variations & Substitutions

Feel free to get creative with this Ghoulash Stew and tailor it to suit your preferences and dietary needs!

  • Turkey Swap: Use ground turkey instead of beef for a lighter, healthier version. It’s a delicious alternative that still packs loads of flavor!

  • Vegetable Medley: Add seasonal veggies like zucchini or turnips for extra nutrition and a delightful twist. This can customize the flavor and texture to your liking.

  • Heat It Up: Spice things up by adding a pinch of cayenne or crushed red pepper flakes for a zesty kick. Adjust the heat to your comfort level for that cozy warmth.

  • Herb Infusion: Try adding fresh herbs such as thyme or parsley during cooking for a burst of freshness. Just remember to adjust the seasoning as fresh herbs can vary in strength.

  • Gluten-Free Option: Simply omit the all-purpose flour or use a gluten-free flour blend to keep the same great texture and flavor without the gluten.

  • Creamy Alternative: Swap sour cream with Greek yogurt for a tangy twist that also adds protein. It creates a wonderful creamy finish without sacrificing flavor.

  • Umami Boost: Enhance the stew with a tablespoon of soy sauce or Worcestershire sauce, bringing an additional layer of savory depth that rounds out the flavors beautifully.

  • Broth Variations: For different flavor profiles, experiment with low-sodium vegetable broth or reduce the amount of broth for a thicker consistency, much like a sauce for a comforting pasta dish.

With these variations, your Ghoulash Stew can fit into any dietary preference or flavor craving! If you're looking for more hearty ideas, consider a comforting Lamb Stew Hearty or a delightful Crock Pot Chicken Stew. Happy cooking!

Ghoulash Stew Recipe FAQs

What type of beef is best for Ghoulash Stew?
Absolutely! Beef chuck is ideal for this recipe because it has a good amount of fat content, making it tender and flavorful when cooked low and slow. Cut it into 1 1/2-inch pieces to ensure even cooking throughout.

How long can I store Ghoulash Stew in the fridge?
You can store your Ghoulash Stew in an airtight container for up to 4 days. Be sure to let it cool completely before storing to maintain its freshness and flavor.

Can I freeze Ghoulash Stew?
Very! Ghoulash Stew freezes beautifully. Pour it into freezer-safe containers and it can last for up to 3 months. Just remember to leave some space in the containers for expansion during freezing!

What if my stew is too thick?
If you find your stew is thicker than desired, simply add a splash of beef broth or water while reheating to achieve your desired consistency. Stir it in gradually until it reaches your preferred texture.

Are there any dietary considerations with Ghoulash Stew?
Definitely! If you’re looking for a gluten-free option, omit the all-purpose flour and use a gluten-free thickener. For those with dairy restrictions, substitute sour cream with a dairy-free yogurt alternative, ensuring the flavors remain rich and comforting.

Can I use different vegetables in Ghoulash Stew?
Of course! Feel free to customize your stew with whatever vegetables you have on hand. Carrots, peas, or even potatoes can easily enhance the dish while adding extra flavor and nutrition. The more, the merrier!

Ghoulash Stew

Savor the Warmth: Ghoulash Stew for Cozy Nights

Savor the inviting taste of Ghoulash Stew, a warm and hearty dish perfect for chilly nights.
Print Recipe Pin Recipe
Prep Time 30 minutes mins
Cook Time 2 hours hrs
Total Time 2 hours hrs 30 minutes mins
Servings: 6 servings
Course: Dinner
Cuisine: Hungarian
Calories: 350
Ingredients Equipment Method Nutrition Notes

Ingredients
  

For the Beef
  • 2 pounds Beef Chuck or Stew Meat cut into 1 1/2-inch pieces
For the Broth
  • 1/4 cup All-Purpose Flour can be omitted for gluten-free version
  • 2 tablespoons Ground Paprika smoked paprika for added depth
  • 1 teaspoon Salt adjust to taste
  • 1/2 teaspoon Ground Black Pepper freshly ground recommended
  • 2 tablespoons Vegetable Oil can use olive oil or butter
For the Vegetables
  • 1 large Onion, Chopped yellow onions preferred
  • 3 medium Carrots, Sliced adjust quantity to taste
  • 2 stalks Celery, Chopped
  • 2 cups Sliced Bell Peppers any color
  • 4 cloves Garlic, Minced fresh for best flavor
  • 14 oz Diced Whole Tomatoes reserve juice
For Seasoning
  • 4 cups Beef Broth low-sodium recommended
  • 2 leaves Bay Leaves remove before serving
  • 1 tablespoon Italian Seasoning homemade blend encouraged
For the Creamy Finish
  • 1 cup Sour Cream can substitute with Greek yogurt

Equipment

  • Large pot

Method
 

Step‑by‑Step Instructions for Ghoulash Stew
  1. Prepare the Beef: Dice beef chuck or stew meat into 1 1/2-inch pieces, toss with flour, salt, paprika, and pepper. Set aside.
  2. Sauté Vegetables: Heat vegetable oil over medium heat, add onions, carrots, celery. Sauté for 5–7 minutes until softened.
  3. Add Garlic and Peppers: Stir in garlic and bell peppers, cooking for an additional 2–3 minutes until fragrant.
  4. Brown the Beef: Raise heat, add seasoned beef, sear on all sides for about 5–6 minutes.
  5. Incorporate Tomatoes and Liquid: Add diced tomatoes and beef broth, scrape brown bits from pot, add bay leaves.
  6. Simmer the Stew: Cover and reduce heat to low, simmer for 1.5 to 2 hours, stirring occasionally.
  7. Finish with Creaminess: Stir in sour cream, adjust seasoning as needed before serving.
  8. Serve and Savor: Ladle into bowls, serve with crusty bread and garnish as desired.

Nutrition

Serving: 1bowlCalories: 350kcalCarbohydrates: 28gProtein: 30gFat: 15gSaturated Fat: 6gPolyunsaturated Fat: 1gMonounsaturated Fat: 8gCholesterol: 80mgSodium: 600mgPotassium: 850mgFiber: 4gSugar: 6gVitamin A: 1200IUVitamin C: 30mgCalcium: 50mgIron: 3mg

Notes

This dish is perfect for meal prep; the flavors improve with time. It can be tailored with different vegetables based on personal preference.

Tried this recipe?

Let us know how it was!

Delicious Graveyard Taco Dip for Your Spooky Halloween Party

October 15, 2025 by Grace Snow Leave a Comment

As I laid my eyes on the festive spread at last year’s Halloween party, my heart raced when I spotted a delightful creation nestled amongst the treats: a Graveyard Taco Dip. Instantly, my imagination ignited, picturing layers of creamy goodness forming a spooky graveyard scene. This easy dip is a crowd-pleaser, perfect for livening up any gathering and sure to be a hit among friends and family. Not only is it a visual masterpiece, but it’s also incredibly simple to whip up—ideal for those busy autumn nights when we crave comfort without fuss. Ready to make your own spooky statement this Halloween? Let’s dive into how to bring this delicious dip to life!

Why Is Graveyard Taco Dip a Must-Make?

Crowd-Pleasing Delight: This spooky dip is guaranteed to impress your guests, becoming the life of the party!

Simple Prep: Just layer and chill—no complicated steps involved, leaving you with time to enjoy the festivities.

Flavorful Layers: Each bite combines creamy refried beans and zingy taco seasoning, balanced by cool avocado and zesty salsa—yum!

Versatile Dip: Pair with crispy tortilla chips, crunchy veggie sticks, or pita for delightful dipping options. Plus, you can customize it with extras like jalapeños for a kick!

Visual Appeal: The spooky tombstone decorations elevate the presentation, making it both a delicious treat and a conversation starter.

Get ready to elevate your Halloween party with this Delicious Graveyard Taco Dip for Your Spooky Halloween Party and ensure it’s a night to remember!

Graveyard Taco Dip Ingredients

For the Beans Layer

  • Refried Beans – Provides a rich base and savory depth; can substitute with black beans for a different flavor.

For the Creamy Layer

  • Sour Cream – Adds creaminess and tang; substitute Greek yogurt for a lighter version.
  • Taco Seasoning – Infuses robust flavors; use homemade seasoning for a fresher taste.
  • Mayonnaise – Adds richness and moisture; can replace with sour cream for a tangier kick.

For the Avocado Layer

  • Avocados – Contributes creaminess and healthy fats; for a twist, use guacamole instead.
  • Garlic – Enhances flavor with aromatic zest; substitute with garlic powder if fresh is unavailable.

For the Salsa Layer

  • Salsa – Provides moisture and flavor variety; opt for mild, medium, or spicy based on preference.

For the Topping

  • Scallions (Green Onions) – Adds freshness and a mild onion flavor; chives can be used as a substitute.

For Decorations

  • Tortillas – Create spooky tombstone decorations; use a firm tortilla for sturdiness and crispiness when baked.

Get ready to delight your guests with this eye-catching Graveyard Taco Dip that will be the star of your Halloween celebration!

Step‑by‑Step Instructions for Graveyard Taco Dip

Step 1: Prepare the Creamy Layer
In a small bowl, combine 1 cup of sour cream with 1 tablespoon of taco seasoning. Stir well until the mixture is fully blended and creamy. This base will add a zesty kick to your Graveyard Taco Dip. Set aside while you prepare the avocado layer, allowing the flavors to meld beautifully.

Step 2: Make the Avocado Layer
In another small bowl, mash 1 ripe avocado and mix it with 1 minced garlic clove and 2 tablespoons of mayonnaise. Stir until smooth and well-combined, creating a luscious and flavorful layer for your dip. The vibrant green of the avocado layer will add a pop of color to your presentation.

Step 3: Assemble the Layers
Take a small dish or pie plate and start with a base layer of 1 can of refried beans, spreading it evenly across the bottom. Next, layer the sour cream mixture on top, followed by the avocado mixture. Finally, scoop ½ cup of your favorite salsa over the avocado, creating a beautiful layered effect. Each layer should be distinct and visible to enhance the look of your Graveyard Taco Dip.

Step 4: Add the Final Touches
Sprinkle 2 tablespoons of chopped scallions on top of the salsa for added freshness and a mild onion flavor. This finishing touch not only enhances flavor but also contributes to the colorful appearance of your Graveyard Taco Dip. Now, it’s time to give this dip a moment to chill!

Step 5: Chill Before Serving
Cover the assembled dip tightly and refrigerate for at least 1 hour. This chilling time allows the flavors to blend together beautifully, making each bite even more delicious. If you want to prepare it the day before, feel free—just remember to keep it covered to retain freshness.

Step 6: Create Spooky Decorations
While the Graveyard Taco Dip chills, preheat your oven to 350°F. Cut out tombstone shapes from tortillas and place them on a baking sheet. Bake for about 10 minutes or until they are golden and crispy, making them perfect for decorating your dip. Let them cool before you add any writing.

Step 7: Final Presentation
Once the dip is chilled, arrange your tortilla tombstones artistically on top. Use a food-safe marker to write spooky names or phrases on them, enhancing the Halloween theme. Serve your delightful Graveyard Taco Dip with crispy tortilla chips or vegetable sticks for a tasty and festive treat that’s sure to delight your guests!

Graveyard Taco Dip Variations

Feel free to get creative with this delicious dip and make it your own with these enticing variations!

  • Black Olives: Sprinkle sliced black olives on top for a briny flavor boost and added texture.

  • Jalapeños: Add sliced fresh or pickled jalapeños to the layers for a spicy kick that will thrill heat lovers.

  • Vegetarian Delight: Swap the refried beans for mashed black beans for a more vibrant option that maintains delicious flavors.

  • Crunchy Alternative: Replace the tortilla decorations with baked pita chips for a different crunch and a fun twist on presentation.

  • Guacamole Twist: Use store-bought guacamole instead of fresh avocados for a quick and creamy shortcut that still packs a savory punch.

  • Flavor Boost: Experiment with flavored salsa—try a corn or mango salsa for a fruity contrast that complements the savory layers beautifully.

  • Cheesy Layer: Mix shredded cheese into the sour cream mixture to create a cheesy surprise that adds richness to every bite.

  • Fruity Salsa: Swap out traditional salsa with a fresh tomato and cucumber salad for a light, refreshing alternative that enhances the dip's flavor profile.

Feel free to explore these variations to make your spooky centerpiece even more spectacular! Pair your Graveyard Taco Dip with fun treats like Fish Taco Bowls or a classic Taco Bell Crunchwrap for an unforgettable Halloween feast.

What to Serve with Graveyard Taco Dip

Nothing sets the stage for a spectacular Halloween party quite like a fantastic spread to complement your spooky dip!

  • Crispy Tortilla Chips: The perfect crunchy vehicle for scooping up creamy layers, they provide a satisfying contrast to the dip’s smooth texture.

  • Veggie Sticks: Fresh carrots, celery, and bell peppers add a colorful crunch that balances the richness of the taco dip, brightening the overall flavor.

  • Cheesy Quesadillas: Stuffed with gooey cheese and your choice of fillings, these delightful bites pair well with the flavors in the dip, offering comfort and joy.

  • Savory Meatballs: Whether they're sweet, spicy, or tangy, meatballs can add heartiness to your spread, making it more filling for guests. Their unique flavors bring an interesting twist!

  • Spooky Mocktails: Refreshing drinks like a blood-orange soda or a ghostly limeade keep the vibe festive while washing down bites of your delicious dip.

  • Halloween Cupcakes: End the meal on a sweet note with cupcakes decorated as ghouls or pumpkins, bringing a playful element to your Halloween feast and leaving guests happy.

  • Spiced Pumpkin Seeds: Roasted seeds infused with cinnamon and paprika not only offer a crunchy snack but also add seasonal flair to your table!

Make Ahead Options

This Graveyard Taco Dip is perfect for meal prep enthusiasts! You can easily prepare the dip up to 24 hours in advance, which is a real time-saver for busy weeknights or your Halloween party. Simply layer the refried beans, sour cream mixture, avocado layer, and salsa in a dish; just cover it tightly with plastic wrap and refrigerate. To maintain the dip's deliciousness, wait to add the chopped scallions until just before serving. When you're ready to wow your guests, take the chilled dip out and garnish it with your spooky tortilla tombstones. This way, it stays just as delicious and fresh as when you first made it!

Expert Tips for Graveyard Taco Dip

• Chill Time Matters: Allow the dip to chill for at least an hour. This enhances the flavors and ensures a well-textured dip.

• Fresh Ingredients: Use ripe avocados and fresh garlic for the best taste. Avoid overripe avocados, which can affect the dip's creaminess.

• Crispy Tortilla Decorations: Bake the tortilla tombstones just before serving. If made too early, they may become soggy in the dip.

• Layering Technique: When assembling your Graveyard Taco Dip, ensure each layer is distinct to create a visually appealing effect.

• Customization Options: Don’t hesitate to add additional toppings like black olives or jalapeños for extra flavor, making it fun and unique!

How to Store and Freeze Graveyard Taco Dip

Fridge: Store the dip in an airtight container for up to 3 days. Make sure to cover tightly to keep it fresh and flavorful.

Freezer: While it's best enjoyed fresh, you can freeze the bean layer separately for up to a month. Thaw in the fridge before reassembling the dip.

Reheating: If you’ve frozen the refried beans, gently heat them on the stove before layering in your dip again. Avoid reheating the entire assembled dip to maintain its texture.

Make-Ahead: Feel free to prepare the Graveyard Taco Dip a day in advance; just keep it covered in the fridge to enhance flavors for your Halloween party!

Graveyard Taco Dip Recipe FAQs

What kind of beans should I use for the dip?
I recommend using refried beans for a creamy base, but feel free to substitute black beans for a different flavor profile. Just make sure whatever beans you choose are well-prepared and seasoned to keep up with the delicious layers of this Graveyard Taco Dip!

How long can I store the dip in the fridge?
You can store your prepared Graveyard Taco Dip in an airtight container for up to 3 days. Make sure it’s covered tightly to preserve freshness and flavors. If you’re planning to make it ahead of time, it’s a great idea to prepare it the day before your event!

Can I freeze the dip?
While it's best enjoyed fresh, you can freeze the bean layer of the dip separately for up to a month. Just follow these steps:

  1. Spread the refried beans in an airtight container.
  2. Seal it well and place it in the freezer.
  3. When ready to use, thaw it in the fridge overnight.
  4. Reheat gently on the stove before reassembling the dip.
    Avoid freezing the entire dip to maintain the texture of the other layers.

What are some signs my avocados are ripe?
Absolutely! Look for avocados that yield slightly to gentle pressure—this indicates they’re ripe and ready for use. Avoid ones with dark spots all over, as they may be overripe. Ideally, they should be a nice dark green and just a bit soft to the touch when you gently squeeze them.

Can I make this dip if I have dietary restrictions?
Very! This Graveyard Taco Dip can easily accommodate dietary preferences. For those with lactose intolerance, using dairy-free sour cream and mayonnaise works wonderfully. Also, feel free to replace the taco seasoning with a gluten-free version if needed. Just make sure to check all ingredient labels to ensure they align with your dietary needs!

What if I want to add extra toppings?
If you're feeling adventurous, consider adding black olives or sliced jalapeños for a bit more flavor and a fun twist! You can even mix in some diced tomatoes or chopped bell peppers for added crunch. The more the merrier—it’s all about creating the perfect dip for your Halloween festivities!

Graveyard Taco Dip

Delicious Graveyard Taco Dip for Your Spooky Halloween Party

This Graveyard Taco Dip is a crowd-pleasing appetizer perfect for your Halloween party.
Print Recipe Pin Recipe
Prep Time 20 minutes mins
Cook Time 10 minutes mins
Chilling Time 1 hour hr
Total Time 1 hour hr 30 minutes mins
Servings: 8 servings
Course: Appetizers
Cuisine: Mexican
Calories: 200
Ingredients Equipment Method Nutrition Notes

Ingredients
  

For the Beans Layer
  • 1 can Refried Beans Provides a rich base and savory depth; can substitute with black beans for a different flavor.
For the Creamy Layer
  • 1 cup Sour Cream Adds creaminess and tang; substitute Greek yogurt for a lighter version.
  • 1 tablespoon Taco Seasoning Infuses robust flavors; use homemade seasoning for a fresher taste.
  • 2 tablespoons Mayonnaise Adds richness and moisture; can replace with sour cream for a tangier kick.
For the Avocado Layer
  • 1 ripe Avocado Contributes creaminess and healthy fats; for a twist, use guacamole instead.
  • 1 clove Garlic Enhances flavor with aromatic zest; substitute with garlic powder if fresh is unavailable.
For the Salsa Layer
  • ½ cup Salsa Provides moisture and flavor variety; opt for mild, medium, or spicy based on preference.
For the Topping
  • 2 tablespoons Scallions (Green Onions) Adds freshness and a mild onion flavor; chives can be used as a substitute.
For Decorations
  • 1 firm tortilla Tortillas Create spooky tombstone decorations; use a firm tortilla for sturdiness and crispiness when baked.

Equipment

  • small bowl
  • Baking Sheet
  • Pie Plate

Method
 

Preparation Steps
  1. In a small bowl, combine 1 cup of sour cream with 1 tablespoon of taco seasoning. Stir well until the mixture is fully blended and creamy. Set aside.
  2. In another small bowl, mash 1 ripe avocado and mix it with 1 minced garlic clove and 2 tablespoons of mayonnaise.
  3. Take a small dish or pie plate and start with a base layer of refried beans, spreading it evenly across the bottom. Layer the sour cream mixture on top, followed by the avocado mixture. Lastly, scoop ½ cup of salsa over the avocado.
  4. Sprinkle 2 tablespoons of chopped scallions on top for added freshness. Cover the assembled dip tightly and refrigerate for at least 1 hour.
  5. Preheat your oven to 350°F. Cut out tombstone shapes from tortillas and place them on a baking sheet. Bake for about 10 minutes or until they are golden and crispy.
  6. Once the dip is chilled, arrange your tortilla tombstones on top and write spooky names or phrases on them. Serve with crispy tortilla chips or vegetable sticks.

Nutrition

Serving: 1cupCalories: 200kcalCarbohydrates: 20gProtein: 5gFat: 10gSaturated Fat: 2gPolyunsaturated Fat: 1gMonounsaturated Fat: 7gCholesterol: 5mgSodium: 400mgPotassium: 250mgFiber: 3gSugar: 2gVitamin A: 500IUVitamin C: 5mgCalcium: 50mgIron: 1mg

Notes

Allow the dip to chill for at least an hour to enhance flavors. Use ripe avocados and fresh garlic for the best taste.

Tried this recipe?

Let us know how it was!

Spooky Spider Halloween Appetizer That's Fun and Healthy

October 15, 2025 by Grace Snow Leave a Comment

As I scoured my kitchen for the perfect Halloween party idea, a sudden inspiration hit me: a playful Spooky Spider Halloween Appetizer Dip! This delightful dish not only elevates the festive spirit with a charming orange bell pepper spider, but it also makes meal prep a breeze—ready in under 30 minutes! What I love most about this recipe is its versatility; it's vegan, gluten-free, and a surefire way to impress guests while keeping them healthy. Plus, the colorful ingredients make it visually appealing, ensuring this dip becomes the talk of the table. Are you ready to bring a little fun and creativity to your Halloween gatherings? Let’s get started!

Why is this dip a Halloween must-try?

Playful Presentation: The charming pepper spider perched atop your dip adds a whimsical touch that’s sure to impress guests of all ages.

Quick and Easy: This recipe can be prepared in under 30 minutes, making it perfect for busy schedules or last-minute party planning.

Healthy Choice: It caters to various dietary preferences, being both vegan and gluten-free, without compromising on flavor or fun.

Versatile Variations: Feel free to switch up the flavors—use different dip bases or get creative with other colorful veggies to keep things exciting!

Crowd-Pleaser: With its vibrant colors and rich textures, this appetizer not only looks fantastic but tastes delicious, making it a hit at any Halloween gathering. Enjoy with fresh veggie sticks or whole-grain crackers for added crunch!

Spooky Spider Halloween Appetizer Ingredients

• Whip up this fun dish to delight your guests!

For the Spider

  • 1 orange bell pepper – Choose a naturally curved pepper for the spider's body; if needed, carve it from the side.
  • 1 sliced black olive – These add a savory touch and create the eyes, enhancing the overall appearance.

For the Dip

  • 1 cup hummus or guacamole – Both options are vegan and gluten-free; their thickness helps hold the spider's shape.
  • Fresh veggies or whole-grain crackers – Perfect for dipping and adding crunch to your Halloween spread.

Feel free to mix and match, but sticking with the Spooky Spider Halloween Appetizer theme keeps the festive spirit alive!

Step‑by‑Step Instructions for Spooky Spider Halloween Appetizer Dip

Step 1: Shape the Spider Body
Begin by cutting off the bottom of the orange bell pepper to create a rounded spider body. Aim for a stable shape, as this will be the focal point of your Spooky Spider Halloween Appetizer. Make sure it sits evenly on your serving dish, as the stability of the spider is essential for the presentation.

Step 2: Create the Legs
From the remaining pepper, slice out eight long, slender pieces for the spider's legs. Each leg should be about the same length to ensure your spider looks balanced and appealing. As you cut, try to create a natural curve in the legs for a more lifelike appearance when placed around the spider’s body.

Step 3: Make the Eyes
To give your spider a charming glow, take a black olive and cut out two tiny triangles. These will serve as your creepy spider eyes, adding a perfect touch to your Spooky Spider Halloween Appetizer. Make sure the triangles are proportional to the body so they stand out but don't overwhelm the design.

Step 4: Assemble the Spider
Carefully place the spider's body in the center of your chosen dip, which should be in a shallow bowl. Arrange the legs around the body, ensuring they're evenly spaced for a realistic look. Then, position the olive eye triangles on the body, using a dab of the dip to secure them if necessary; this will help them stay in place.

Step 5: Serve and Enjoy
Once your Spooky Spider Halloween Appetizer is fully assembled, present it with a platter filled with fresh veggie sticks or whole-grain crackers for dipping. The colorful combination of the dip and the playful spider will not only catch eyes but also tug at heartstrings. Gather your loved ones around and get ready for a spooky, delightful experience!

How to Store and Freeze Spooky Spider Halloween Appetizer

Fridge: Store any leftover Spooky Spider Halloween Appetizer Dip in an airtight container for up to 3 days. Keep the spider components separate to maintain freshness.

Pepper Pieces: If you prepare the orange bell pepper spider pieces in advance, wrap them tightly in plastic wrap and place in the fridge, where they can stay fresh for 1-2 days.

Freezer: While it's best to serve fresh, you can freeze thicker dips like hummus for up to 2 months. However, the bell pepper spider should not be frozen as it loses its shape and texture.

Reheating: If you've frozen the dip, thaw it in the fridge overnight and stir well before serving again. Avoid reheating the vegetables as they are best fresh!

Make Ahead Options

These Spooky Spider Halloween Appetizer Dips are perfect for meal prep enthusiasts looking to save time! You can prepare the spider components—such as cutting the orange bell pepper and slicing the black olives—up to 24 hours in advance. Just wrap the pepper pieces in plastic wrap to keep them fresh, and store them in the refrigerator. Additionally, you can make the dip of your choice (hummus or guacamole) and refrigerate it for up to three days prior to serving. When you’re ready to impress your guests, simply assemble the spider just before serving by placing it on the dip and arranging the legs and eyes for a fun presentation. This ensures your appetizer is just as delicious and playful, with minimal last-minute efforts on your part!

Spooky Spider Halloween Appetizer Variations

Feel free to add your personal touch to this charming appetizer dip and let your creativity shine!

  • Colorful Peppers: Use green or purple bell peppers for a unique spider twist that stays festive and fun.
    Mixing up colors not only brightens the dish but adds a playful flair to your Halloween spread.

  • Veggie Eyes: Replace black olives with sliced black radishes for a crunchy, eye-catching alternative.
    This swap gives your spider an earthy twist while maintaining the spooky vibe—impress your guests with this clever change!

  • Cheesy Delight: Incorporate a layer of shredded vegan cheese on top of your dip for a melty surprise.
    This not only adds richness but also enhances the overall flavor, making each bite that much more indulgent.

  • Herb Infusion: Add fresh herbs like cilantro or parsley to your dip to elevate its freshness.
    Herbs can invigorate the flavor profile, transforming your appetizer into a vibrant delight that guests will rave about.

  • Nutty Crunch: Sprinkle toasted pumpkin seeds on your dip before adding the spider for added crunch.
    The delightful texture and nutty flavor provide a pleasing contrast to the creamy dip below, making each bite an adventure.

  • Spicy Twist: Mix in some diced jalapeños if you crave a little heat in your dip.
    This fiery addition will surely excite spice lovers and give your spooky dip a fun kick that keeps things interesting!

  • Sweet & Savory: Incorporate a dash of maple syrup into your hummus or guacamole for a surprisingly delightful depth.
    Balancing the savory with sweet can create a unique flavor fusion that keeps palates guessing.

  • Make It a Centerpiece: Transform this into an octopus for an additional Halloween theme, changing the cut of the pepper accordingly.
    Adjusting the design adds even more flair to your presentation and keeps the creativity flowing for your holiday spread.

For more fun ideas or variations in flavors, check out these healthy dip recipes to give you additional inspiration that fits within your culinary schemes. Enjoy your spooky kitchen fun!

Expert Tips for Spooky Spider Halloween Appetizer

Choose the Right Pepper: Selecting a naturally curved orange bell pepper will create a more appealing spider shape. Look for one that has a rounded bottom.

Avoid Runny Dips: Ensure you pick a thicker dip like guacamole or hummus. Runny dips won't support the spider's shape effectively.

Prep in Advance: To save time on the day of your gathering, prepare the spider components a day ahead. Store them wrapped in the fridge for easy assembly.

Experiment with Colors: Don’t be afraid to mix it up! Use different colored bell peppers and vegetables to enhance your Spooky Spider Halloween Appetizer's appeal.

Secure Those Eyes: If the olive eyes don’t stick well, a small dab of dip will hold them in place, ensuring your spider looks perfect for your guests!

What to Serve with Spooky Spider Halloween Appetizer Dip

Elevate your Halloween feast with scrumptious sides that delight both the eyes and the palate.

  • Crispy Veggie Sticks: Fresh carrots, celery, and bell peppers add a satisfying crunch that pairs well with the creamy dip.
  • Whole-Grain Crackers: Their hearty texture complements the dip's richness while offering a wholesome alternative to chips.
  • Savory Roasted Chickpeas: These crunchy bites add protein and flavor, creating a satisfying balance with the smoothness of the dip.
  • Pumpkin Spice Hummus: For a festive twist, serve this sweet and savory dip alongside your spooky creation for a delightful contrast.
  • Crispy Tortilla Chips: Perfect for those who love a classic pairing, these chips add extra texture and are strong enough to scoop up every bite.
  • Apple Slices: The sweetness of fresh apple slices provides a refreshing contrast to the savory dip, perfect for those looking for lighter options.
  • Sparkling Apple Cider: This bubbly drink not only fits the season but also offers a fun, festive vibe to keep the spirits high during your gathering.
  • Chocolate-Covered Pretzels: For a sweet treat, these candies bring an unexpected sweetness, providing a delightful finish to the Halloween spread.

Mix and match these flavorful accompaniments to create a festive table that will enchant guests and keep the Halloween spirit alive!

Spooky Spider Halloween Appetizer Dip Recipe FAQs

What should I look for when selecting an orange bell pepper?
Absolutely! When choosing an orange bell pepper for your spider, look for one that has a natural curvature. A rounded bottom is essential for stability and to capture the playful spider shape. Avoid peppers with any dark spots or signs of decay, as these can affect both appearance and taste.

How can I store the leftovers of the Spooky Spider Halloween Appetizer Dip?
Very easy! Store any leftover dip in an airtight container in the refrigerator for up to 3 days. It's important to keep the spider components separate to maintain their freshness. Wrap the pepper spider pieces in plastic wrap and place them in the fridge, where they’ll stay fresh for 1-2 days until you're ready to serve again.

Can I freeze the Spooky Spider Halloween Appetizer Dip?
Yes, you can! If you have extra dip, especially thicker options like hummus, you can freeze it for up to 2 months. To do this, place the dip in a freezer-safe container, leaving some space at the top for expansion. Thaw in the fridge overnight before serving. However, avoid freezing the bell pepper spider, as it won't maintain its shape or texture.

What can I do if the olive eyes won’t stick to the spider?
No problem! If your olive eyes don’t adhere well to the pepper body, simply use a small dab of dip as glue. This little trick will help hold the eyes in place, ensuring your Spooky Spider Halloween Appetizer looks perfect and ready for your guests!

Are there any dietary considerations I should keep in mind with this recipe?
Great question! This recipe is vegan and gluten-free, making it suitable for a variety of dietary preferences. However, if guests have specific allergies, it’s wise to check if they're allergic to olives or any alternative dips you may choose. Always ensure to label your dish clearly, especially if you are creating variations with different ingredients.

How can I make this appetizer more visually appealing?
Absolutely! To elevate the visual appeal, you can experiment by using different colored bell peppers or veggies. For instance, a green bell pepper can create an eerie vibe, while dark-colored radishes can make for fun eyes! Additionally, serving the dip with a rainbow of fresh vegetable sticks not only enhances the look but adds delightful crunch!

Spooky Spider Halloween Appetizer

Spooky Spider Halloween Appetizer That's Fun and Healthy

Prepare a Spooky Spider Halloween Appetizer that's fun and healthy, perfect for festive gatherings.
Print Recipe Pin Recipe
Prep Time 15 minutes mins
Total Time 30 minutes mins
Servings: 8 servings
Course: Appetizers
Cuisine: Gluten-Free, Vegan
Calories: 150
Ingredients Equipment Method Nutrition Notes

Ingredients
  

For the Spider
  • 1 whole orange bell pepper Choose a naturally curved pepper for the body.
  • 1 sliced black olive These add a savory touch and create the eyes.
For the Dip
  • 1 cup hummus or guacamole Both options are vegan and gluten-free.
  • fresh veggies or whole-grain crackers Perfect for dipping.

Equipment

  • Cutting Board
  • Knife
  • Shallow Bowl

Method
 

Step-by-Step Instructions
  1. Begin by cutting off the bottom of the orange bell pepper to create a rounded spider body.
  2. From the remaining pepper, slice out eight long, slender pieces for the spider's legs.
  3. To give your spider a charming glow, cut two tiny triangles from a black olive for the eyes.
  4. Carefully place the spider's body in the center of your chosen dip and arrange the legs around it.
  5. Once assembled, present it with a platter of fresh veggie sticks or whole-grain crackers.

Nutrition

Serving: 1servingCalories: 150kcalCarbohydrates: 20gProtein: 3gFat: 7gSaturated Fat: 1gPolyunsaturated Fat: 2gMonounsaturated Fat: 4gSodium: 150mgPotassium: 300mgFiber: 5gSugar: 2gVitamin A: 500IUVitamin C: 40mgCalcium: 30mgIron: 1mg

Notes

Choose a naturally curved bell pepper for the best spider shape. Prepare in advance to save time on the day of serving.

Tried this recipe?

Let us know how it was!
  • « Previous Page
  • 1
  • …
  • 186
  • 187
  • 188
  • 189
  • 190
  • …
  • 244
  • Next Page »

Welcome!

Hi, I’m Grace, a Sydney-based home cook with a passion for bold flavors and trending ingredients. Whether you’re a busy beginner or a seasoned foodie, you’ll find dishes here that are fresh, fun, and full of flavor.

More about me

Popular Recipes

  • Delicious Keto Philly Cheesesteak Bowls You’ll Crave Daily
  • twice baked potato casserole
    Indulge in This Creamy Twice Baked Potato Casserole Delight
  • Red Potato Casserole
    Irresistible Red Potato Casserole with Crunchy Topping
  • Cowboy Potato Casserole
    Comforting Cowboy Potato Casserole for Cozy Nights

Footer

↑ back to top

About

  • Privacy Policy
  • Disclaimer
  • Terms & Conditions

Newsletter

  • Sign Up! for emails and updates

Contact

  • About me
  • Contact me

Copyright © 2025 TastyTrendIngredients