tastytrendingredients

  • Home
  • Recipes
    • Appetizers
    • Breakfast
    • Dessert
    • Dinner
    • Drinks
    • Salads
    • Snacks
    • Soups
  • About me
  • Contact me
menu icon
go to homepage
  • Home
  • Recipes
    • Appetizers
    • Breakfast
    • Dessert
    • Dinner
    • Drinks
    • Salads
    • Snacks
    • Soups
  • About me
  • Contact me
search icon
Homepage link
  • Home
  • Recipes
    • Appetizers
    • Breakfast
    • Dessert
    • Dinner
    • Drinks
    • Salads
    • Snacks
    • Soups
  • About me
  • Contact me
×

Rustic Peach Frangipane Tart: A Summer Dessert Delight

February 20, 2026 by Grace Snow Leave a Comment

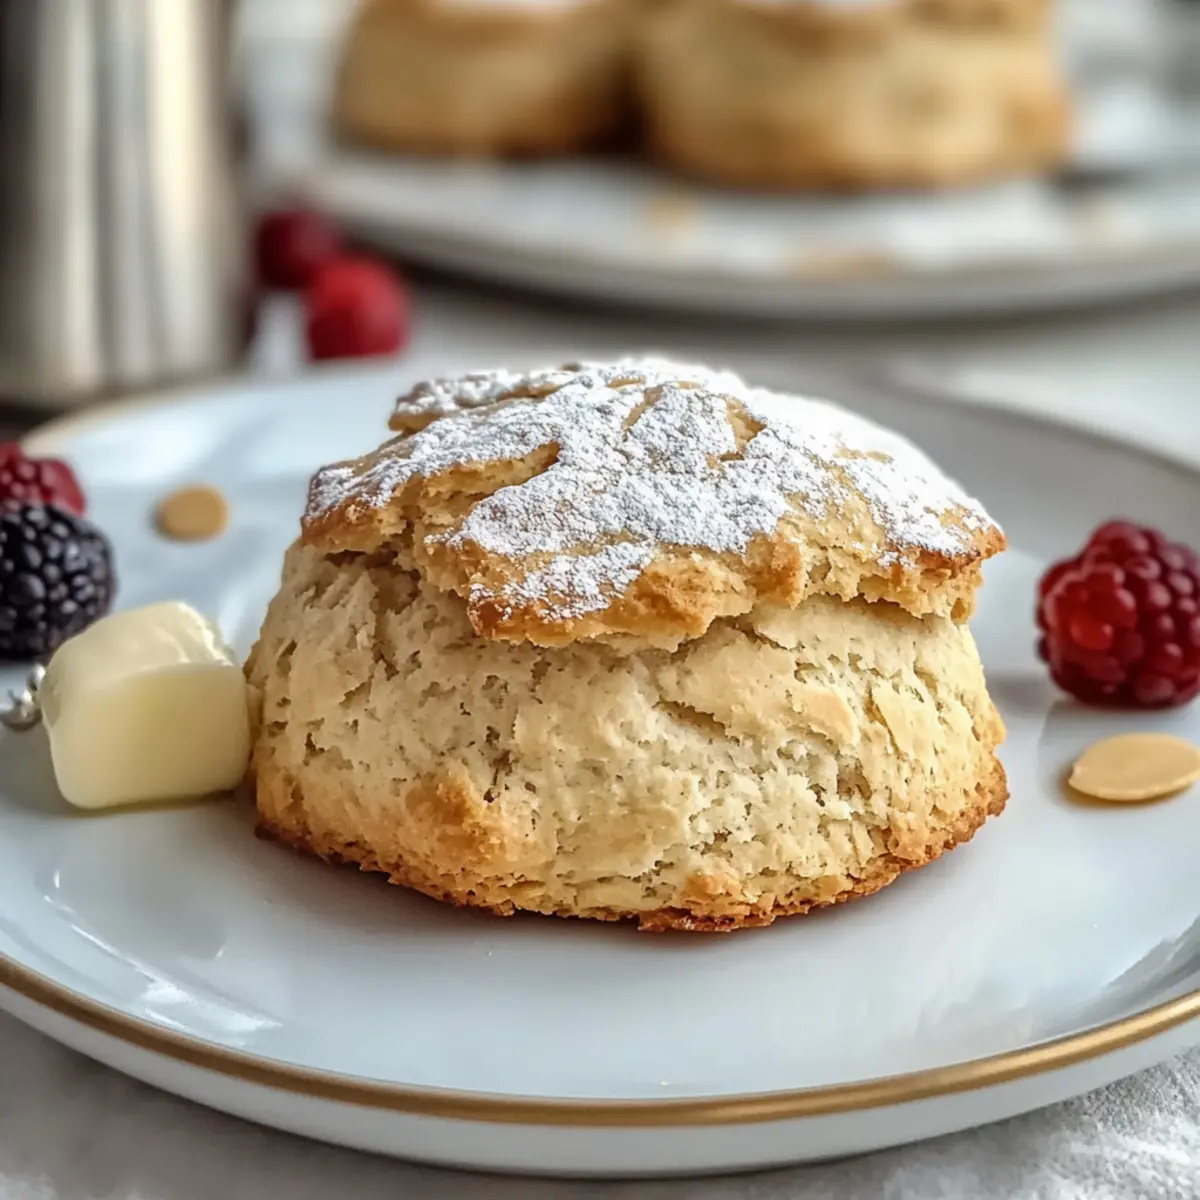
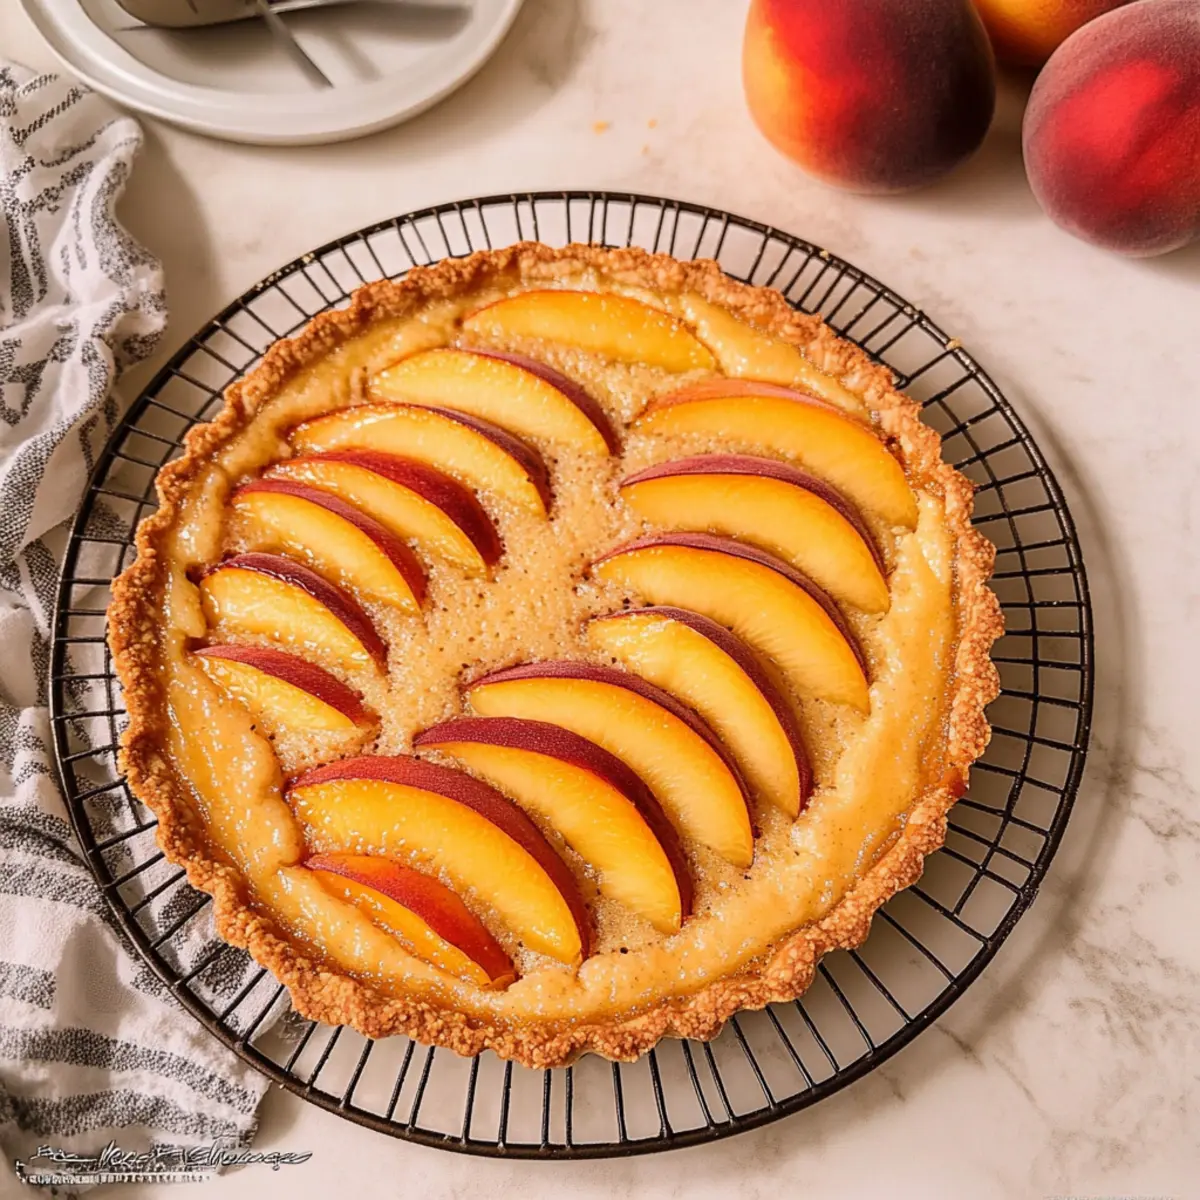
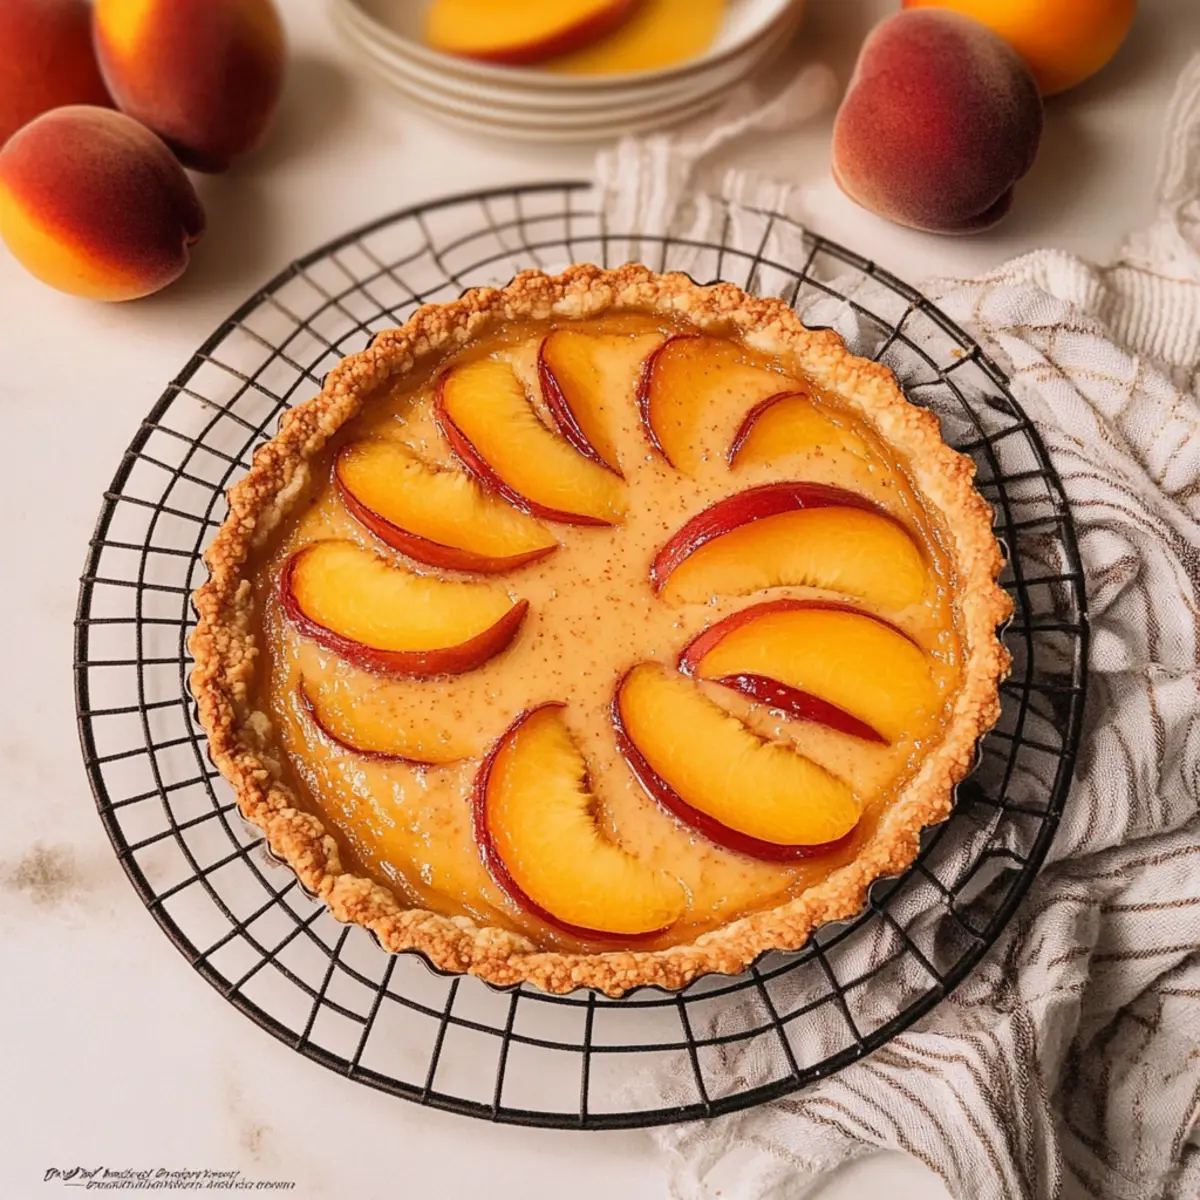
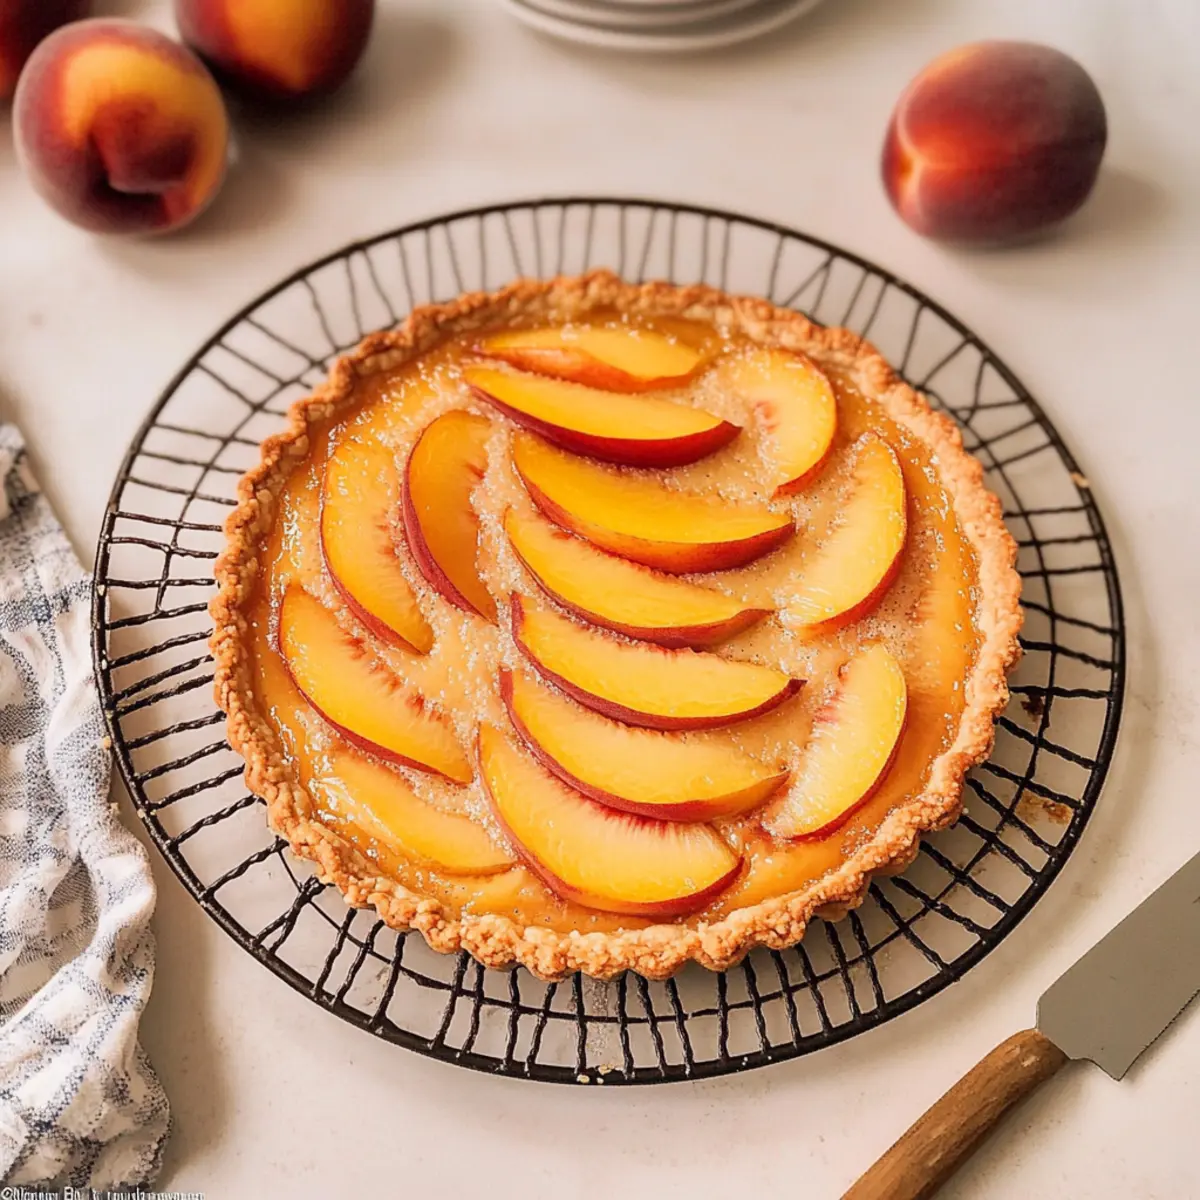
As the sun begins to warm the air and the scent of summer blooms fills the garden, my thoughts turn to one of my favorite seasonal delights: the Rustic Peach Frangipane Tart. This airy tart showcases luscious slices of ripe peaches nestled in a silky almond frangipane, all encased in a perfectly crisp shortcrust shell. Not only is this dessert a stunning centerpiece for summer gatherings, but it’s also surprisingly easy to whip up, making it a delightful achievement in the kitchen. Plus, it can be served warm or chilled, offering versatility that transforms any occasion into something special. Ready to impress your loved ones with a recipe that’s sure to become a new tradition? Let’s dive into making this peachy wonder!

Why not try this refreshing dessert?

Simplicity at its best: The Rustic Peach Frangipane Tart is easy to make, requiring minimal cooking skills while bringing an impressive result to your dessert table.
Bursting with flavor: Juicy peaches pair perfectly with the creamy almond frangipane, creating a delightful balance that dances on your taste buds.
Versatile serving options: Enjoy it warm, chilled, or alongside a scoop of vanilla ice cream for a classic pairing—your choice! Don’t forget to check out these Peaches Cream Cookies for another peachy treat.
Crowd-pleaser guaranteed: Whether it’s a family gathering or a friendly get-together, this tart is sure to impress all your guests.
Endless variations: Mix it up by substituting different stone fruits, making it a recipe you'll love to make time and again!

Rustic Peach Frangipane Tart Ingredients

For the Crust

  • Butter – Adds richness and a crumby texture to the crust; margarine can be used as a substitute if needed.
  • Granulated Sugar – Sweetens the crust and frangipane; brown sugar can offer a deeper flavor profile.
  • All-Purpose Flour – Forms the base of the crust; consider substituting with a gluten-free flour blend for a gluten-free version.

For the Frangipane

  • Almond Flour – Provides moisture and contributes an almond flavor; substitute with finely ground pecans for a different nut profile.
  • Custard Powder – Acts as a thickener and adds creaminess; you can replace it with an equal amount of all-purpose flour if unavailable, but it may change the texture.
  • Vanilla Extract – Enhances the overall flavor of the frangipane; use pure extract for the best taste.
  • Almond Extract – Intensifies the almond flavor and complements the peaches beautifully; skip this if you're using different nuts.

For Topping

  • Turbinado Sugar – Provides a crunchy topping; if unavailable, regular granulated sugar can work as a substitute.
  • Peaches – Fresh stone fruit adds moisture and sweetness; if using canned peaches, ensure they are well-drained to prevent excess moisture.

Create this Rustic Peach Frangipane Tart with these carefully selected ingredients, and enjoy a dessert bursting with vibrant summer flavors!

Step‑by‑Step Instructions for Rustic Peach Frangipane Tart

Step 1: Prepare the Dough
In a mixing bowl, cream together softened butter and granulated sugar until the mixture is light and fluffy, about 2-3 minutes. Gradually incorporate all-purpose flour and a pinch of salt until a cohesive dough forms. Wrap the dough in plastic wrap and chill it in the refrigerator for 15 minutes to firm up, ensuring a crisp crust for the Rustic Peach Frangipane Tart.

Step 2: Pre-bake the Crust
Roll out the chilled dough on a floured surface into a 12-inch circle, then gently press it into a 9-inch tart pan with removable bottom. Trim excess dough and poke the bottom with a fork to prevent bubbling. Preheat your oven to 350°F (175°C), and bake the crust for 13-20 minutes until it turns lightly golden. Keep an eye on the edges, covering them with foil if they brown too quickly.

Step 3: Make the Frangipane
While the crust cools, prepare the frangipane by beating together softened butter, granulated sugar, almond flour, and custard powder in a bowl. Add vanilla and almond extracts, mixing until the batter is smooth and creamy, for about 3-4 minutes. This almond-infused delight will create a luscious filling for your Rustic Peach Frangipane Tart.

Step 4: Assemble Tart
Once the crust has cooled, pour the prepared frangipane into the center, spreading it evenly. Carefully arrange freshly sliced peaches in an even layer atop the frangipane, nestling them slightly into the mixture. For an inviting crunchy top, sprinkle turbinado sugar generously over the peaches, adding texture and sweetness to the Rustic Peach Frangipane Tart.

Step 5: Bake the Tart
Place the assembled tart in the preheated oven and bake at 350°F (175°C) for 30-40 minutes. Keep an eye on it; the frangipane will be set when it has a slight jiggle in the center and a lovely golden crust around the edges. This beautiful golden hue and puffed filling indicate that your Rustic Peach Frangipane Tart is nearly ready.

Step 6: Cool and Serve
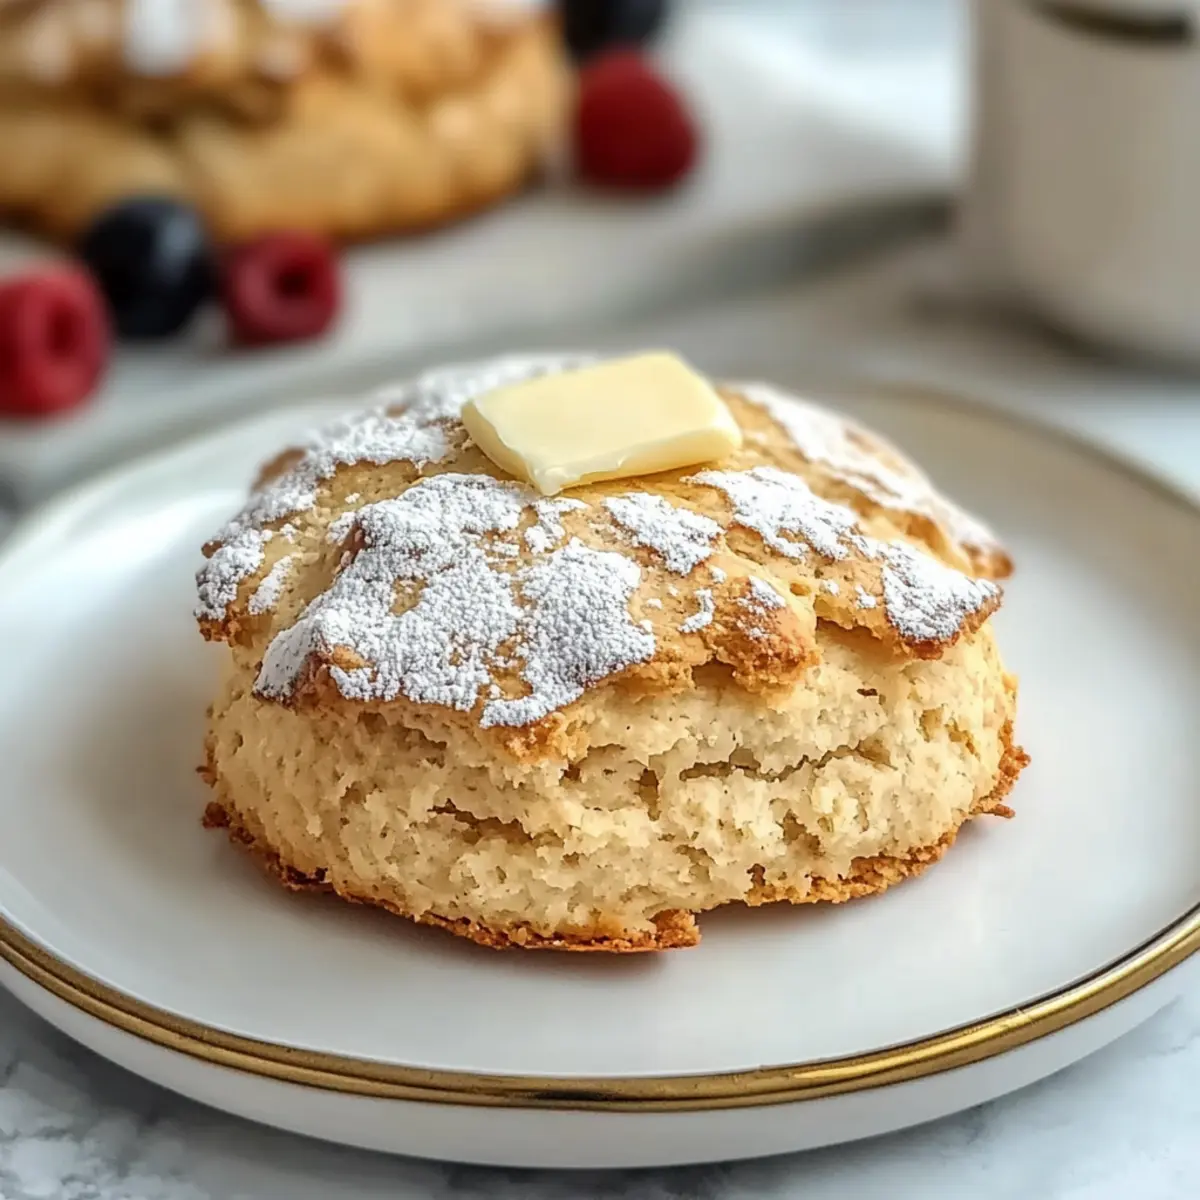
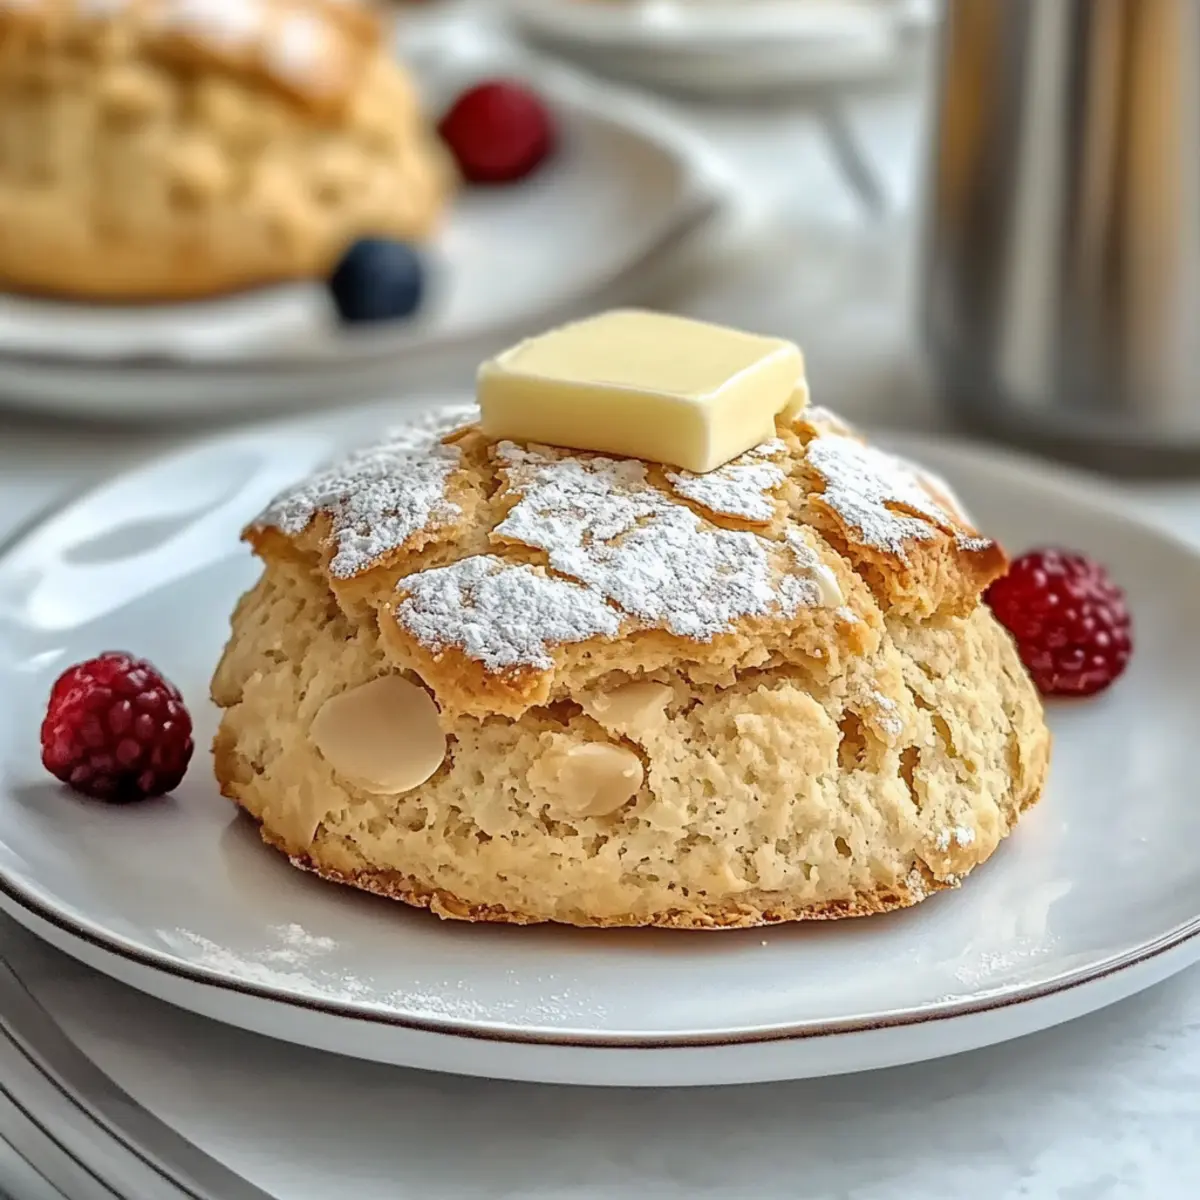
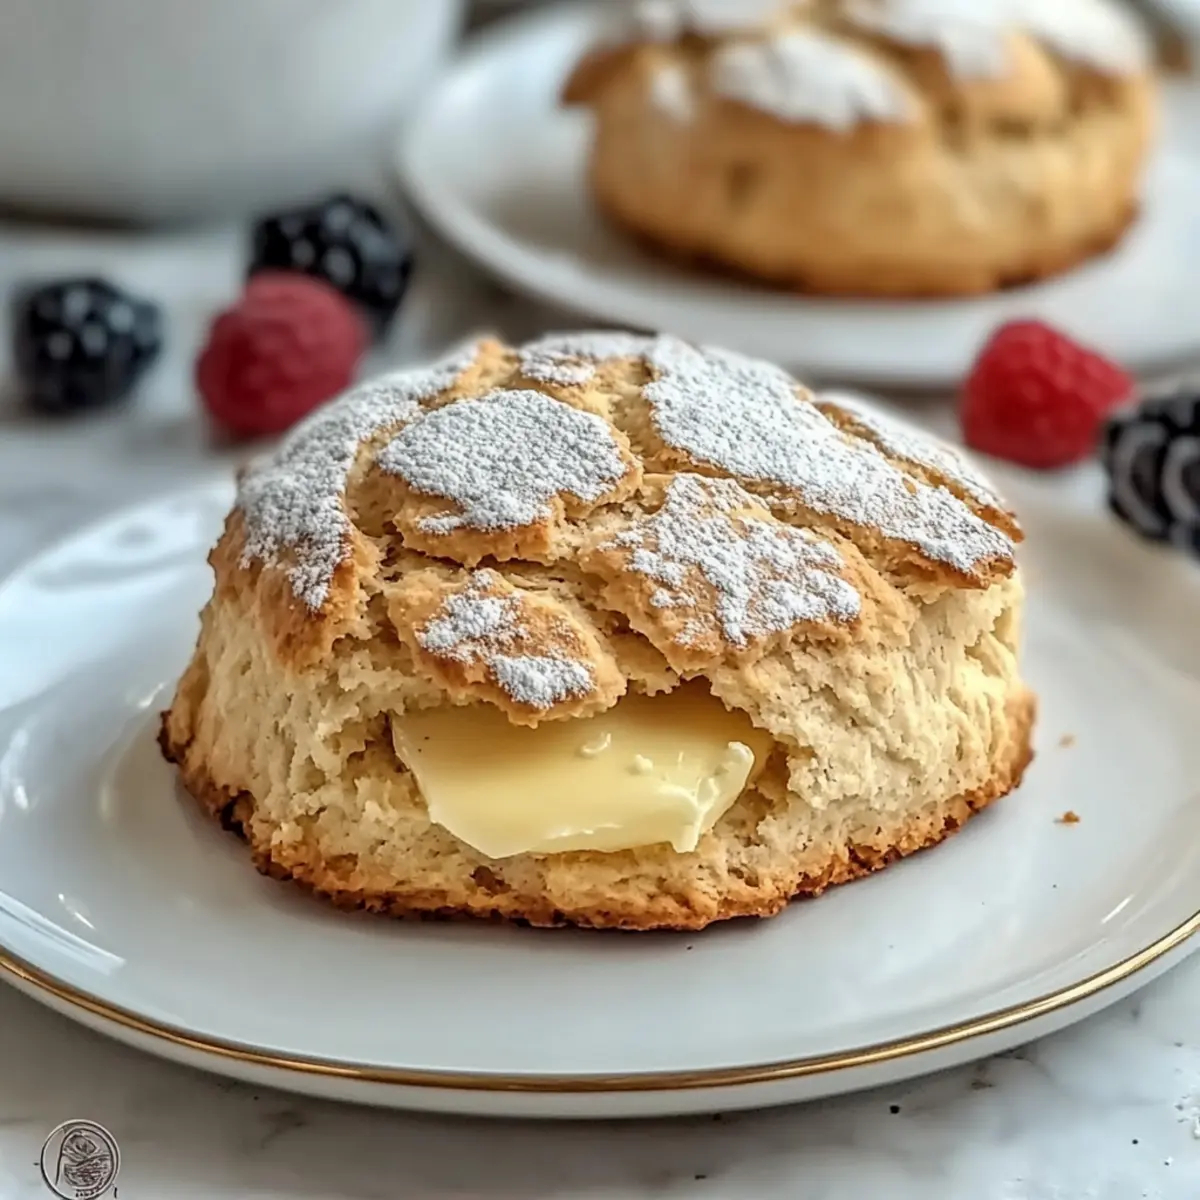
Remove the tart from the oven and let it cool in the pan for about 10-15 minutes before releasing it. Slice the Rustic Peach Frangipane Tart and serve warm, at room temperature, or chilled, depending on your preference. Each slice showcases juicy peaches and creamy almond frangipane, making it a delightful addition to any summer gathering.

Make Ahead Options

These Rustic Peach Frangipane Tarts are perfect for busy cooks looking to save time during the week! You can prepare the tart crust up to 24 hours in advance; simply wrap it tightly in plastic wrap and refrigerate. Additionally, the frangipane filling can be made and stored in the fridge for up to 3 days, ensuring that when you're ready to serve, all you need to do is assemble the tart. Just remember to arrange your peach slices right before baking to maintain their freshness and vibrant color. When it's time to bake, simply pour the prepared frangipane into your pre-baked crust, layer on those juicy peaches, and pop it in the oven for a delightful dessert that tastes just as delicious as if made fresh!

Storage Tips for Rustic Peach Frangipane Tart

Room Temperature: Store the tart at room temperature for up to 2 days in a cool, dry area, covering lightly with a clean kitchen towel to maintain freshness.

Fridge: Keep the Rustic Peach Frangipane Tart in an airtight container in the fridge for up to 3 days to prevent it from drying out; this helps preserve the delicate flavors and textures.

Freezer: For longer storage, slice the tart and wrap each piece tightly in plastic wrap, then aluminum foil; freeze for up to 2 months. Thaw in the fridge before serving.

Reheating: Enjoy slices warmed up in a preheated oven at 350°F (175°C) for about 10 minutes, or serve chilled for a refreshing summer dessert experience.

What to Serve with Rustic Peach Frangipane Tart

Imagine indulging in a splendid dessert spread that enhances each bite of this delightful tart, creating a feast for the senses.

  • Vanilla Ice Cream: The creamy, cold sweetness of vanilla ice cream perfectly contrasts the warm almond and peach flavors of the tart, creating a luscious bite that melts in your mouth.

  • Whipped Cream: A dollop of freshly whipped cream brings a lightness and airy texture that balances the richness of frangipane, adding a delightful creaminess that everyone loves.

  • Fresh Berries: Juicy strawberries, blueberries, or raspberries offer a burst of tartness against the sweet, caramelized peaches. Their vibrant colors add not just flavor, but visual appeal to your dessert platter.

  • Mint Leaves: Add a sprinkle of fresh mint leaves atop the tart or alongside your serving to introduce a refreshing contrast that enhances the flavors of stone fruit beautifully.

  • Almond Biscotti: For a delightful crunch, serve with crispy almond biscotti. The nutty flavor ties in beautifully with the frangipane, making every bite a little more special.

  • Sparkling Wine: A glass of chilled sparkling wine or prosecco elevates the experience, capturing the festive spirit of summer gatherings while complementing the sweetness of the tart.

  • Dark Chocolate Shavings: For chocolate lovers, a sprinkle of dark chocolate shavings over the tart adds a rich, decadent twist that surprisingly enhances its almond notes.

  • Coconut Cream: Light and sweet coconut cream provides a tropical touch that brightens the overall flavor profile, making this pairing an exotic surprise on your dessert table.

Each of these accompaniments will not only enhance your Rustic Peach Frangipane Tart but also create a harmonious experience that your guests will cherish long after the last bite.

Rustic Peach Frangipane Tart Variations

Feel inspired to make this delightful tart your own with these fun and flavorful twists!

  • Stone Fruit Swap: Replace peaches with ripe plums or sweet nectarines for a juicy, tart alternative. The different flavor profiles will elevate your summer dessert!

  • Nut-Free Frangipane: Use sunflower seed flour instead of almond flour for a nut-free version. This keeps the creamy texture intact while catering to nut allergies.

  • Sugar Alternatives: Swap granulated sugar for coconut sugar for a lower-glycemic option. It adds a rich, caramel-like flavor that pairs beautifully with the peaches.

  • Extra Flavor: Add a drizzle of honey or a splash of bourbon to the frangipane for a deeper flavor complexity. This twist will surprise your guests and leave them wanting more!

  • Herbal Touch: Incorporate fresh basil or mint into the peach filling. This twist creates a refreshing herbal note that brightens the tart's flavor and aroma.

  • Fruity Layer: Spread a layer of apricot jam beneath the frangipane for an extra burst of sweetness. This addition creates a beautiful, shiny finish and complements the peach flavor.

  • Spiced Delight: Mix in a teaspoon of cinnamon or nutmeg to the frangipane for a warm, spiced undertone that pairs wonderfully with summer fruits. It’s like a cozy hug for your taste buds!

  • Tartness Upgrade: Try using a mix of sweet and tart peaches or introduce some tart cherries into the mix for a balanced flavor explosion. This delicious combination adds depth and excitement to your baking!

Don't forget to also check out these delightful Peaches Cream Cookies for another delightful peach experience!

Expert Tips for Rustic Peach Frangipane Tart

  • Butter Temperature Matters: Ensure your butter is at room temperature for easy creaming, which leads to a light and flaky crust in your Rustic Peach Frangipane Tart.

  • Canned Peaches Caution: If using canned peaches, select those not in syrup and thoroughly dry them to avoid adding extra moisture that can affect the tart's integrity.

  • Frangipane Texture Check: Look for a golden crust and a slightly puffed frangipane layer; a gentle jiggle in the center indicates perfect doneness without overbaking.

  • Peach Placement: Nestle peach slices gently into the frangipane for an aesthetically pleasing presentation, ensuring they’re slightly submerged for even baking.

  • Sugar Substitutions: Experiment with different sugars; using brown sugar in the crust can deepen flavor, while turbinado sugar gives a delightful crunch on top.

Rustic Peach Frangipane Tart Recipe FAQs

What kind of peaches should I use for the Rustic Peach Frangipane Tart?
Absolutely! Fresh, ripe peaches are ideal for this tart, as their sweetness and juiciness enhance the overall flavor. Look for peaches that yield slightly to pressure and have a sweet aroma. If you must use canned peaches, be sure to choose those packed in juice or water, and drain and pat them dry to remove excess moisture.

How should I store my Rustic Peach Frangipane Tart?
You can store the tart at room temperature for about 2 days if the weather is cool and dry. For longer freshness, place it in an airtight container in the refrigerator, where it will keep for up to 3 days. This helps maintain the delicate flavors and textures. If you want to keep it for a more extended period, consider slicing it and wrapping each piece tightly in plastic wrap, then in foil, and freezing for up to 2 months.

Can I freeze the Rustic Peach Frangipane Tart?
Definitely! To freeze, first make sure the tart is completely cooled. Slice the tart and wrap each piece tightly in plastic wrap, followed by aluminum foil to prevent freezer burn. It will stay fresh in the freezer for up to 2 months. When you're ready to enjoy it again, simply let the slices thaw in the refrigerator overnight, or warm them up in a preheated oven at 350°F (175°C) for about 10 minutes to bring back some of that delightful fresh-baked flavor.

What should I do if my frangipane is too runny?
Very! If your frangipane comes out too runny after baking, it could be due to underbaking or excess moisture from your fruit. To troubleshoot, make sure you fully bake the tart until the frangipane is set and slightly jiggles in the center. If you're using very juicy peaches, try reducing their quantity or pitting and slicing them with more thorough drying before adding them to the tart.

Is this recipe suitable for those with nut allergies?
If you're catering to someone with nut allergies, I recommend substituting the almond flour with sunflower seed flour. This will still give you a similar texture while making it nut-free. Alternatively, you could also explore using a combination of oat flour and cornstarch for a delightful but different take on the frangipane filling. Always double-check labels and make sure all your ingredients are free from cross-contamination to ensure safety.

Rustic Peach Frangipane Tart

Rustic Peach Frangipane Tart: A Summer Dessert Delight

The Rustic Peach Frangipane Tart is a delightful summer dessert featuring luscious peaches in a creamy almond frangipane.
Print Recipe Pin Recipe
Prep Time 25 minutes mins
Cook Time 1 hour hr
Chilling Time 15 minutes mins
Total Time 1 hour hr 40 minutes mins
Servings: 8 slices
Course: Dessert
Cuisine: American
Calories: 280
Ingredients Equipment Method Nutrition Notes

Ingredients
  

For the Crust
  • 1 cup Butter softened
  • 1/2 cup Granulated Sugar
  • 1 1/2 cups All-Purpose Flour gluten-free option available
For the Frangipane
  • 1 cup Almond Flour or finely ground pecans
  • 2 tablespoons Custard Powder or all-purpose flour
  • 1 teaspoon Vanilla Extract pure recommended
  • 1 teaspoon Almond Extract optional
For Topping
  • 2 tablespoons Turbinado Sugar or granulated sugar
  • 3 cups Peaches fresh, sliced

Equipment

  • Mixing Bowl
  • tart pan
  • Oven
  • Rolling Pin

Method
 

Step‑by‑Step Instructions for Rustic Peach Frangipane Tart
  1. In a mixing bowl, cream together softened butter and granulated sugar until light and fluffy, about 2-3 minutes. Gradually incorporate all-purpose flour and a pinch of salt until a cohesive dough forms. Wrap in plastic wrap and chill for 15 minutes.
  2. Roll out the chilled dough into a 12-inch circle, then press it into a 9-inch tart pan. Poke the bottom with a fork and preheat the oven to 350°F (175°C). Bake for 13-20 minutes until lightly golden.
  3. In a bowl, beat together softened butter, granulated sugar, almond flour, and custard powder. Add vanilla and almond extracts, mixing until smooth and creamy for about 3-4 minutes.
  4. Pour the frangipane into the cooled crust and arrange sliced peaches on top. Sprinkle turbinado sugar over the peaches.
  5. Bake the tart in the preheated oven at 350°F (175°C) for 30-40 minutes until set with a slight jiggle in the center and a golden crust.
  6. Let the tart cool in the pan for 10-15 minutes before releasing. Serve warm, at room temperature, or chilled.

Nutrition

Serving: 1sliceCalories: 280kcalCarbohydrates: 35gProtein: 4gFat: 14gSaturated Fat: 8gPolyunsaturated Fat: 1gMonounsaturated Fat: 4gCholesterol: 40mgSodium: 150mgPotassium: 150mgFiber: 2gSugar: 15gVitamin A: 500IUVitamin C: 5mgCalcium: 20mgIron: 1mg

Notes

Use room temperature butter for easy creaming. If using canned peaches, dry them thoroughly to avoid excess moisture.

Tried this recipe?

Let us know how it was!

Almond Flour Scones: Quick, Flaky Perfection in 10 Minutes

February 20, 2026 by Grace Snow Leave a Comment

Did you ever find yourself needing a quick yet delightful treat that feels indulgent without the guilt? That’s where my 10-Minute Irresistible Almond Flour Scones come in! These gluten-free scones are so easy to whip up, making them perfect for a last-minute brunch gathering or an afternoon pick-me-up. With their moist, tender crumb and a subtly nutty flavor, they're not only delicious but also customizable—add chocolate chips or fresh berries for a touch of sweetness, or experiment with spices for a cozy twist. Whether you pair them with your favorite tea or enjoy them plain, these scones elevate any occasion effortlessly. Ready to impress your taste buds? Let’s dive in!

Why Are Almond Flour Scones So Irresistible?

Quick and Easy: In just 10 minutes, you can have fresh scones hot from the oven. Perfect for busy mornings or unexpected guests!

Gluten-Free Delight: Made with almond flour, these scones offer a nutty flavor that still satisfies your cravings without the gluten.

Customizable Options: Add-ins like chocolate chips or fresh berries let you tailor these scones to your liking. Feeling adventurous? Try adding spices for a unique twist!

Crowd-Pleaser: Whether it’s brunch or afternoon tea, you’ll impress family and friends with these delightful treats. Pair them with clotted cream or homemade jam for a luxurious touch.

Versatile Storage: Enjoy fresh scones for up to 5 days in the fridge, or freeze for longer storage—ideal for busy bakers!

Almond Flour Scones Ingredients

• You’ll love this delightful mix of wholesome ingredients!

For the Scones

  • Almond Flour – This gluten-free flour provides a tender texture and nutty flavor; finely ground is best for perfect scones.
  • Egg – Acts as a binder for moisture; for a vegan option, substitute with a flax egg (1 tbsp ground flaxseed + 2.5 tbsp water).
  • Maple Syrup – Adds a hint of sweetness; can be replaced with honey or agave nectar for variety.
  • Melted Butter or Coconut Oil – Delivers richness; choose coconut oil for a dairy-free alternative.
  • Baking Powder – Ensures the scones rise beautifully; you may add a pinch of baking soda for an extra fluffy texture.

Optional Add-ins

  • Chocolate Chips – Perfect for a touch of sweetness and indulgence; mix in dark or white chocolate for variety.
  • Fresh Berries – Adds a fruity burst; blueberries or raspberries work wonderfully.
  • Lemon Zest – Provides a citrusy brightness to enhance the flavor profile of your almond flour scones.

Each ingredient plays a crucial role in crafting almond flour scones that are not only quick and easy but also irresistibly tasty!

Step‑by‑Step Instructions for Almond Flour Scones

Step 1: Preheat the Oven
Begin by preheating your oven to 350°F (175°C). While the oven warms up, take a baking sheet and line it with parchment paper. This will ensure your almond flour scones bake evenly and don’t stick. Having a prepared workspace will make the process smoother as you move on to mixing the ingredients.

Step 2: Combine the Dry Ingredients
In a medium bowl, combine the almond flour and baking powder. Stir them together thoroughly, breaking up any lumps to ensure even distribution. The almond flour should be finely ground for the best texture. This mixture should be light and fluffy when properly combined—just what you need for tender almond flour scones!

Step 3: Mix the Wet Ingredients
In a separate bowl, crack an egg and whisk it together with maple syrup and melted butter or coconut oil. Mix until the ingredients are fully combined and smooth. This wet mixture will add moisture to your almond flour scones, contributing to their signature tender crumb.

Step 4: Merge the Mixtures
Gently pour the wet ingredients into the dry mixture, using a spatula to fold them together just until combined. Be careful not to overmix; this will keep your scones light and fluffy. The dough will be slightly sticky but should hold its shape nicely.

Step 5: Incorporate Optional Add-ins
If you’re feeling creative, now's the time to fold in any optional add-ins like chocolate chips, fresh berries, or lemon zest. Mix gently to evenly distribute these ingredients without overworking the dough. This step adds delightful bursts of flavor to your almond flour scones, making each bite special.

Step 6: Shape the Dough
Using a cookie scoop or your hands, form the dough into mounds about ¼ cup each and place them on your prepared baking sheet with a little space in between. Aim for a rustic look with slightly rounded tops. This spacing will allow the almond flour scones to rise and bake beautifully.

Step 7: Bake the Scones
Slide the baking sheet into your preheated oven and bake for 15-18 minutes. Keep an eye on the scones; they should turn golden brown and feel firm to the touch. These visual cues will tell you they’re perfectly baked and ready to be enjoyed straight from the oven.

Step 8: Cool and Serve
Once out of the oven, allow the almond flour scones to cool on the baking sheet for a few minutes before transferring them to a wire rack. This cooling step helps them set while still being warm and inviting. Serve your scones warm, perhaps with a side of clotted cream or your favorite jam for an extra special treat.

Expert Tips for Almond Flour Scones

  • Finely Ground Flour: Use finely ground almond flour to achieve a tender texture; coarse flour will result in a denser scone.

  • Avoid Overmixing: Gently combine wet and dry ingredients to keep the almond flour scones fluffy; overmixing toughens the dough.

  • Check Baking Time: Start checking your scones at 15 minutes to prevent over-baking; they should be golden brown and firm to the touch.

  • Experiment with Add-ins: Feel free to personalize your scones with chocolate chips, berries, or spices; just remember to adjust moisture if needed.

  • Proper Storage: Store leftover scones in an airtight container for up to 2 days or freeze for up to 3 months to maintain freshness.

What to Serve with 10-Minute Irresistible Almond Flour Scones

Pairing these delightful scones with the right accompaniments will elevate your experience and make any moment feel special.

  • Clotted Cream: This rich treat adds velvety luxury, perfectly enhancing the nutty flavor of almond flour scones.
  • Homemade Jam: A dollop of your favorite fruit jam provides a sweet burst and complements the scone's moist texture beautifully.

These pairings turn a simple scone into an indulgent affair! Imagine enjoying one warm, with clotted cream melting into its flaky layers, or savoring the juicy tang of a raspberry jam spread.

  • Herbal Tea: A calming cup of chamomile or mint tea harmonizes with the scones, making it a delightful afternoon pick-me-up.
  • Fresh Berries: Serve with a bowl of fresh mixed berries for a refreshing contrast that brightens each bite of the scones.

Fruits add a pop of color while their natural sweetness balances the nutty depth of the scones. Your taste buds will revel in this lovely combination!

  • Iced Coffee: For those who favor a caffeine boost, a chilled coffee can provide the perfect refreshment alongside warm scones, creating a cozy brunch vibe.
  • Lemon Curd: This zesty spread gives a tangy twist that brightens the scones, making it a fantastic treat with a splash of citrus flavor.

Serving these sumptuous options alongside your almond flour scones invites a delightful and memorable experience, making each bite a moment to cherish.

Make Ahead Options

These Almond Flour Scones are a fantastic option for meal prep! You can mix the dry ingredients (almond flour and baking powder) up to 3 days in advance and store them in an airtight container at room temperature to keep them fresh. Additionally, the wet mixture (egg, maple syrup, and melted butter or coconut oil) can be prepared the night before and refrigerated overnight. When you’re ready to bake, simply combine the mixtures, add any optional goodies, and shape the dough. Bake them fresh for 15-18 minutes, and you’ll enjoy delicious scones just like they were made from scratch, saving you precious time on busy mornings!

Almond Flour Scones: Customization Ideas

Feel free to get creative and customize your almond flour scones to fit your personal tastes!

  • Nut-Free Option: Substitute almond flour with sunflower seed flour for a delightful nut-free scone. Just know that the flavor will shift slightly.

  • Spiced Delight: Add cinnamon or nutmeg to the dry ingredients for a cozy, aromatic touch that welcomes your taste buds home.

  • Savory Twist: Mix in cheddar cheese and fresh herbs, like chives or thyme, for a savory scone that pairs beautifully with soups and salads.

  • Berry Medley: Swap in seasonal fresh berries, such as strawberries or blackberries, for a burst of fruity flavor in every bite. They’ll add sweetness and a pop of color!

  • Chocolate Lovers' Dream: Use dark or white chocolate chips instead of semi-sweet for a decadent twist. You might even try cacao nibs for a slightly more intense chocolate experience.

  • Zesty Kick: Incorporate more lemon zest or even a splash of orange juice for a citrusy brightness that balances the nutty flavor.

  • Extra Crunch: Add pumpkin seeds or chopped walnuts for texture and a delightful crunch in each bite, making each scone even more irresistible.

By embracing these delicious swaps and additions, you can create a perfect scone that suits any occasion. Whether it's a sweet indulgence for afternoon tea or a savory treat for brunch, your almond flour scones can be as unique as you are!

How to Store and Freeze Almond Flour Scones

Room Temperature: Keep the scones in an airtight container for up to 2 days to preserve their freshness and texture. Enjoy them warm or at room temperature for the best experience.

Fridge: If you want to extend their shelf life, store the almond flour scones in the fridge for up to 5 days. Just reheat briefly in the oven for a warm treat!

Freezer: For longer storage, place cooled scones in a zip-top bag and freeze for up to 3 months. Thaw overnight in the fridge or leave at room temperature for a few hours before enjoying.

Reheating: To revive your scones, reheat them in a preheated oven at 350°F (175°C) for about 5-8 minutes, ensuring they regain their delightful freshness.

Almond Flour Scones Recipe FAQs

What is the best way to choose almond flour?
Absolutely! For the best results, look for finely ground almond flour; it provides a tender texture and helps create fluffy scones. Make sure there are no visible coarse grains and that the flour is fresh, as older almond flour can develop a rancid taste.

How should I store leftover scones?
Very simply! Keep your almond flour scones in an airtight container at room temperature for up to 2 days. If you'd like to extend their freshness, they can be refrigerated for up to 5 days. Just remember to reheat them briefly in the oven for a warm treat!

Can I freeze almond flour scones?
Absolutely! To freeze, let the scones cool completely, then place them in a zip-top bag. They can be stored in the freezer for up to 3 months. When you're ready to enjoy one, simply thaw overnight in the fridge or leave it at room temperature for a few hours.

What should I do if my scones are too dry?
If you find that your almond flour scones are dry, it’s often due to overmixing or too little moisture. For next time, make sure to gently fold the wet and dry ingredients until just combined. If the dough feels too crumbly, try adding a splash of milk or extra maple syrup to hydrate it before shaping and baking.

Are there any dietary considerations for almond flour scones?
Definitely! These scones are gluten-free, making them suitable for those with gluten intolerances. If you have nut allergies, you can substitute almond flour with sunflower seed flour, although this might slightly alter the scone’s flavor. Always check the ingredients of any add-ins, like chocolate chips, for allergens.

Almond Flour Scones

Almond Flour Scones: Quick, Flaky Perfection in 10 Minutes

Delightful Almond Flour Scones are quick, gluten-free treats that can be made in just 10 minutes, perfect for any occasion.
Print Recipe Pin Recipe
Prep Time 10 minutes mins
Cook Time 18 minutes mins
Total Time 28 minutes mins
Servings: 8 scones
Course: Breakfast
Calories: 150
Ingredients Equipment Method Nutrition Notes

Ingredients
  

For the Scones
  • 2 cups Almond Flour finely ground for best texture
  • 1 large Egg acts as a binder; use flax egg for vegan
  • 2 tbsp Maple Syrup or substitute with honey or agave
  • 1/4 cup Melted Butter or Coconut Oil coconut oil for dairy-free
  • 1 tbsp Baking Powder a pinch of baking soda optional
Optional Add-ins
  • 1/2 cup Chocolate Chips dark or white for variety
  • 1/2 cup Fresh Berries blueberries or raspberries
  • 1 tbsp Lemon Zest adds citrusy brightness

Equipment

  • Oven
  • Baking Sheet
  • Mixing bowls
  • Spatula

Method
 

Step-by-Step Instructions for Almond Flour Scones
  1. Preheat the oven to 350°F (175°C) and line a baking sheet with parchment paper.
  2. Combine the almond flour and baking powder in a medium bowl, stirring to break up any lumps.
  3. Whisk together the egg, maple syrup, and melted butter or coconut oil in a separate bowl.
  4. Pour the wet ingredients into the dry mixture and fold gently until just combined.
  5. Incorporate any optional add-ins like chocolate chips or berries.
  6. Form the dough into mounds about ¼ cup each and place them on the baking sheet.
  7. Bake for 15-18 minutes until golden brown and firm to the touch.
  8. Allow to cool for a few minutes before transferring to a wire rack.

Nutrition

Serving: 1sconeCalories: 150kcalCarbohydrates: 12gProtein: 4gFat: 10gSaturated Fat: 3gPolyunsaturated Fat: 1gMonounsaturated Fat: 6gCholesterol: 30mgSodium: 180mgPotassium: 100mgFiber: 2gSugar: 3gVitamin A: 250IUCalcium: 50mgIron: 1mg

Notes

Enjoy fresh scones for up to 5 days in the fridge or freeze for longer storage.

Tried this recipe?

Let us know how it was!

Strawberry Honey Custard Tarts: A Springtime Delight

February 20, 2026 by Grace Snow Leave a Comment

While baking on a bright spring morning, I couldn’t help but swoon over how the aroma of fresh strawberries wafted through my kitchen, mingling beautifully with hints of creamy honey yogurt. Enter these delightful Strawberry Honey Custard Tarts with Homemade Lemon Curd—your new go-to dessert for any spring gathering. With their flaky crust, luscious creamy filling, and a tangy layer of lemon curd, they strike the perfect balance for your Easter brunch or any refreshingly sweet occasion. Not only are these tarts a crowd-pleaser that will have everyone coming back for seconds, but they’re also easily adaptable for whatever seasonal fruit you have on hand. So, who’s ready to let their taste buds dance in delight?

Why Make Strawberry Honey Custard Tarts?

Irresistible Appeal: These Stunning tarts are the ultimate springtime dessert, perfect for Easter brunch or any festive occasion.

Flavor Explosion: Enjoy the luscious combination of fresh strawberries, creamy honey yogurt custard, and tangy lemon curd, creating a delightful balance of sweet and tart flavors.

Easy to Adapt: Feel free to swap seasonal fruits like peaches or blueberries for a unique twist every time you bake!

Quick Preparation: With straightforward steps, you can whip these up effortlessly, ensuring you spend more time enjoying them with friends and family.

Visual Delight: The vibrant colors and stunning presentation will make your tarts the centerpiece of any gathering, just like my Honey Garlic Chicken steals the show at dinner!

Perfect for Sharing: These delicious tarts are ideal for gatherings, guaranteeing you'll leave people asking for your recipe!

Strawberry Honey Custard Tarts Ingredients

• Get ready to transform simple ingredients into an unforgettable spring treat!

For the Tart Crust

  • Flour – Essential for structure; you can swap with gluten-free flour if needed.
  • Sea Salt – Balances sweetness; a must-have for flavor enhancement.
  • Sugar – Adds sweetness and helps with crust caramelization; try coconut sugar for a deeper taste.
  • Butter – Delivers richness and flakiness; chilled coconut oil makes it dairy-free.
  • Vanilla Extract – Enhances flavor; pure extract is preferred for the best taste.
  • Cold Water – Hydrates dough for the right texture; ice water keeps dough cool.

For the Filling

  • Strawberries – Fresh and flavorful, adding natural sweetness; exchange for blueberries or cherries if desired.
  • Vanilla Yogurt – Forms the creamy custard base; Greek yogurt works well for a thicker consistency.
  • Honey – Sweetens the filling naturally; use maple syrup for a vegan alternative.
  • Eggs – Binds the custard; a flaxseed or chia egg is perfect for an egg-free version.
  • Additional Sugar – Sweetens to taste; adjust according to your preference.

For the Lemon Curd

  • Lemon Juice & Zest – Provides refreshing acidity; fresh lemons are best for flavor.
  • Unsalted Butter – Adds richness to the curd; substitute with salted butter but reduce additional salt.
  • Coarse Salt – Enhances lemon curd flavors; use any salt sparingly for balance.

Step‑by‑Step Instructions for Strawberry Honey Custard Tarts

Step 1: Make Lemon Curd
In a medium saucepan, combine unsalted butter, sugar, lemon juice, lemon zest, and a pinch of coarse salt. Cook over low heat, stirring constantly until the butter melts. Gradually whisk in the eggs, ensuring the mixture thickens without boiling, for about 8-9 minutes. Once thickened, transfer the lemon curd to a bowl, cover, and cool in the refrigerator while you prepare the tarts.

Step 2: Prepare Pie Dough
Preheat your oven to 375°F (190°C). In a mixing bowl, whisk together flour, sugar, and sea salt. Cut in chilled butter until the mixture resembles coarse crumbs. Stir in the vanilla extract and just enough cold water, a tablespoon at a time, to form a dough. Chill the dough discs in the refrigerator for at least 30 minutes to ensure a flaky crust.

Step 3: Roll Dough
After chilling, remove the dough from the refrigerator and roll it out on a lightly floured surface to about 1/8-inch thickness. Carefully line your tart pans with the rolled dough, pressing it into the corners. Prick the base with a fork to prevent bubbling, then pre-bake the crusts with pie weights for 10 minutes, until lightly golden. Allow them to cool completely.

Step 4: Make Filling
In a large bowl, whisk together the eggs, additional sugar, and vanilla extract until smooth. Gently stir in the honey yogurt until fully combined. Layer the sliced strawberries evenly into the cooled tart crusts, then pour the custard filling over the fruit, reaching just below the crust edges.

Step 5: Bake Tarts
Place the filled tarts in the preheated oven and bake for 30-35 minutes. You’ll know they're done when the custard is set and the crust is beautifully golden brown. Keep an eye on them to prevent over-baking, as a slight jiggle in the center is preferable for creamy custard.

Step 6: Finish and Serve
Once baked, remove the tarts from the oven and let them cool for about 10 minutes. Drizzle the tangy lemon curd generously over the top of each tart. Allow them to cool completely before serving, as this will enhance the flavor of your delightful Strawberry Honey Custard Tarts.

Expert Tips for Strawberry Honey Custard Tarts

  • Perfect Lemon Curd: Whisk gently and constantly while cooking the lemon curd to avoid curdling the eggs. This ensures a smooth, creamy texture.

  • Chill for Flakiness: Always chill your dough for at least 30 minutes. This crucial step helps achieve a beautifully flaky crust for your tarts.

  • Cooling Time Matters: Allow the tarts to cool completely after baking. This is vital for ensuring the custard sets properly, preventing any undesired runniness.

  • Fruit Swap: Want to mix things up? Feel free to substitute strawberries with seasonal fruits like peaches or blueberries to create your unique version of these Strawberry Honey Custard Tarts.

  • Check for Doneness: A slight jiggle in the center of the custard indicates that it’s perfectly set. Avoid over-baking to preserve that delightful creaminess!

What to Serve with Strawberry Honey Custard Tarts?

Elevate your spring gatherings with these delightful tarts by complementing them with the perfect pairings that tantalize your taste buds.

  • Whipped Cream:
    A dollop of lightly sweetened whipped cream adds a luscious, creamy touch that perfectly balances the tarts' fruitiness.

  • Vanilla Ice Cream:
    This classic pairing creates a delightful contrast between the warm tart and the cold creaminess of ice cream, making every bite heavenly.

  • Fresh Mint Leaves:
    A sprinkle of fresh mint leaves brightens up the presentation and adds a refreshing herbal note that enhances the dessert's overall flavor profile.

  • Earl Grey Tea:
    The subtle bergamot flavor complements the lemon curd beautifully, creating an elegant and comforting pairing for afternoon tea or dessert.

  • Sparkling Lemonade:
    Served chilled, this refreshing drink mirrors the tartness of the lemon curd, adding a zesty sparkle that is perfect for a spring celebration.

  • Chocolate Drizzle:
    A rich dark chocolate drizzle over the tarts brings a sophisticated twist, marrying the sweetness of honey with the smooth bitterness of chocolate.

  • Fruit Salad:
    A light fruit salad with seasonal berries and citrus creates a colorful and fresh contrast that enhances the tarts' natural flavors and adds texture.

  • Almond Biscotti:
    Crunchy almond biscotti provide a delightful contrast in texture and can be dipped into the lemon curd for an extra layer of flavor.

  • Lemon Sorbet:
    The refreshing, icy treat contrasts wonderfully with the warmth of the tart, offering a light and invigorating finish to your meal.

Make Ahead Options

These Strawberry Honey Custard Tarts are perfect for busy cooks looking to save time while still enjoying a delicious dessert! You can prepare the lemon curd up to 3 days in advance; simply store it in an airtight container in the refrigerator to maintain its freshness and flavor. The tart crust can also be made ahead—roll it out, fit it into the tart pans, and refrigerate it for up to 24 hours before baking. When you're ready to serve, simply pre-bake the crusts, fill them with fresh strawberries and custard, and bake as directed. This way, you’ll have delightful tarts that are just as delicious and ready in no time!

Variations & Substitutions for Strawberry Honey Custard Tarts

Feel free to add your personal touch to these tarts and delight in experimenting with flavors and textures!

  • Seasonal Fruit: Replace strawberries with peaches or apricots for a whole new fruity experience! Each fruit brings its unique sweetness and character.
  • Flavored Yogurt: Use strawberry or honey yogurt instead of vanilla yogurt to elevate the custard's taste with a delightful twist. The flavor combination will surprise and please your palate!
  • Larger Tart: Create a single large tart by using a 12-inch tart pan and bake it for about 40-45 minutes for a show-stopping centerpiece. Perfect for bigger gatherings!
  • Dairy-Free: Substitute butter with chilled coconut oil in the crust and dairy-free yogurt for a scrumptious, dairy-free version that everyone will enjoy. No missing out on rich flavors!
  • Heat it Up: Add a pinch of chili powder or cayenne to the honey custard for a surprising kick that beautifully contrasts the sweetness. It adds an exciting burst of flavor!
  • Nutty Crust: Incorporate ground almonds or hazelnuts into the crust for a crunchy texture and nutty flavor that perfectly complements the creamy filling. You’ll add depth and character!
  • Herbaceous Twist: Infuse lemon curd with a hint of fresh basil or mint for a refreshing herbaceous note. It’s an unexpected twist that leaves an impression!
  • Boozy Kick: Stir in a splash of your favorite liqueur, like Limoncello or amaretto, into the custard mixture for an adult-friendly version of the dessert. Enjoy responsibly!

These variations allow you to personalize your tarts while capturing the essence of spring! You might even want to try pairing your tarts with a dollop of whipped cream or a scoop of vanilla ice cream for extra indulgence. You could also check out other delightful recipes like my Honey BBQ Chicken that complements these sweet tarts beautifully at your family gatherings!

How to Store and Freeze Strawberry Honey Custard Tarts

Fridge: Store your tarts in the refrigerator for up to 3 days, covering them with plastic wrap to maintain freshness and prevent drying out.

Freezer: If you need to freeze the tarts, wrap them tightly in plastic wrap and aluminum foil. They keep well for up to 2 months. Thaw in the fridge before serving.

Reheating: To restore the tarts’ crispness, reheat in a preheated oven at 350°F (175°C) for 10-15 minutes before serving. This will help freshen the flavors of your Strawberry Honey Custard Tarts!

Best Enjoyed Fresh: For the ultimate taste experience, enjoy these tarts within 24 hours of baking. The flavors of strawberries and creamy custard shine best when freshly made!

Strawberry Honey Custard Tarts Recipe FAQs

How do I choose ripe strawberries for the tarts?
Look for plump strawberries with a bright red color and vibrant green leaves. Avoid those with dull or dark spots, as these may indicate overripeness. Fresh strawberries should feel firm yet slightly soft to the touch, ensuring they're sweet and juicy for your tarts.

What’s the best way to store leftover tarts?
Store your tarts in the refrigerator for up to 3 days. Be sure to cover them with plastic wrap or place them in an airtight container to maintain freshness and prevent them from drying out. I often find they taste best when enjoyed within the first 24 hours, so gather your friends and family for immediate enjoyment!

Can I freeze Strawberry Honey Custard Tarts?
Absolutely! To freeze, wrap the cooled tarts tightly in plastic wrap, followed by aluminum foil to prevent freezer burn. They can be frozen for up to 2 months. When you're ready to enjoy them, thaw the tarts in the refrigerator overnight and reheat them briefly in a preheated oven at 350°F (175°C) for about 10-15 minutes to revive their delightful texture.

What should I do if my lemon curd doesn’t thicken properly?
If your lemon curd is runny, it may not have cooked long enough. Try returning it to the stovetop over low heat. Whisk constantly for a few more minutes until it thickens. Remember, patience is key—proper thickening usually takes around 8-9 minutes while maintaining a gentle heat to prevent curdling.

Can I make these tarts in advance for a gathering?
Yes! You can prepare the tart crust and lemon curd a day ahead and refrigerate them separately. Assemble and fill the tarts a few hours before serving. This allows the flavors to meld beautifully, enhancing your tarts' overall taste!

Are these tarts suitable for people with egg allergies?
For an egg-free version, you can substitute eggs in the custard with a flaxseed or chia egg. Mix 1 tablespoon of ground flaxseed or chia seeds with 3 tablespoons of water, allow it to sit for about 5 minutes until it thickens, and use this as a replacement in the recipe for similar binding properties.

Strawberry Honey Custard Tarts

Strawberry Honey Custard Tarts: A Springtime Delight

These Strawberry Honey Custard Tarts are a delightful spring dessert perfect for gatherings.
Print Recipe Pin Recipe
Prep Time 40 minutes mins
Cook Time 45 minutes mins
Cooling Time 10 minutes mins
Total Time 1 hour hr 35 minutes mins
Servings: 8 tarts
Course: Dessert
Cuisine: French
Calories: 250
Ingredients Equipment Method Nutrition Notes

Ingredients
  

For the Tart Crust
  • 2 cups Flour can swap with gluten-free flour
  • 1/2 teaspoon Sea Salt balances sweetness
  • 2 tablespoons Sugar try coconut sugar for deeper taste
  • 1 cup Butter chilled coconut oil makes it dairy-free
  • 1 teaspoon Vanilla Extract pure extract is preferred
  • 3-4 tablespoons Cold Water ice water keeps dough cool
For the Filling
  • 2 cups Strawberries exchange for blueberries or cherries if desired
  • 1 cup Vanilla Yogurt Greek yogurt works well for thicker consistency
  • 1/2 cup Honey use maple syrup for vegan alternative
  • 3 large Eggs can substitute with flaxseed or chia egg
  • 2 tablespoons Additional Sugar adjust according to your taste preference
For the Lemon Curd
  • 1/2 cup Lemon Juice fresh lemons are best
  • 1 tablespoon Lemon Zest provides refreshing acidity
  • 1/4 cup Unsalted Butter substitute with salted butter but reduce additional salt
  • 1/4 teaspoon Coarse Salt use sparingly for balance

Equipment

  • Medium saucepan
  • Mixing Bowl
  • tart pans
  • Whisk
  • Rolling Pin

Method
 

Lemon Curd Preparation
  1. In a medium saucepan, combine unsalted butter, sugar, lemon juice, lemon zest, and a pinch of coarse salt. Cook over low heat, stirring constantly until the butter melts. Gradually whisk in the eggs, ensuring the mixture thickens without boiling, for about 8-9 minutes. Once thickened, transfer the lemon curd to a bowl, cover, and cool in the refrigerator while you prepare the tarts.
Prepare Pie Dough
  1. Preheat your oven to 375°F (190°C). In a mixing bowl, whisk together flour, sugar, and sea salt. Cut in chilled butter until the mixture resembles coarse crumbs. Stir in the vanilla extract and just enough cold water, a tablespoon at a time, to form a dough. Chill the dough discs in the refrigerator for at least 30 minutes.
Roll Dough
  1. Remove the chilled dough from the refrigerator and roll it out on a lightly floured surface to about 1/8-inch thickness. Carefully line your tart pans with the rolled dough, pressing it into the corners. Prick the base with a fork to prevent bubbling, then pre-bake the crusts with pie weights for 10 minutes until lightly golden. Allow them to cool completely.
Make Filling
  1. In a large bowl, whisk together the eggs, additional sugar, and vanilla extract until smooth. Gently stir in the honey yogurt until fully combined. Layer the sliced strawberries evenly into the cooled tart crusts, then pour the custard filling over the fruit.
Bake Tarts
  1. Place the filled tarts in the preheated oven and bake for 30-35 minutes. You’ll know they're done when the custard is set and the crust is beautifully golden brown.
Finish and Serve
  1. Once baked, remove the tarts from the oven and let them cool for about 10 minutes. Drizzle the tangy lemon curd generously over the top of each tart. Allow them to cool completely before serving.

Nutrition

Serving: 1tartCalories: 250kcalCarbohydrates: 32gProtein: 4gFat: 12gSaturated Fat: 7gPolyunsaturated Fat: 1gMonounsaturated Fat: 3gCholesterol: 80mgSodium: 150mgPotassium: 150mgFiber: 1gSugar: 10gVitamin A: 500IUVitamin C: 20mgCalcium: 50mgIron: 1mg

Notes

For best results, chill dough for at least 30 minutes. Enjoy these tarts within 24 hours of baking for optimal flavor and texture.

Tried this recipe?

Let us know how it was!

Light and Fluffy Ricotta Almond Pillows for Guilt-Free Indulgence

February 20, 2026 by Grace Snow Leave a Comment

As I strolled through the local market, a subtle aroma of roasted almonds drew me closer to a cozy little stall. It was there I stumbled upon the inspiration for my latest delight: Light and Fluffy Ricotta Almond Pillows. These cookies are a game changer, combining the rich creaminess of ricotta with the nutty essence of almonds, delivering an irresistible dessert that’s low in calories—just 120 each! Perfect for anyone seeking a delightful treat without the guilt, these cookies are not only beginner-friendly but also a fantastic way to impress friends and family with minimal effort. Ready to transform your baking routine? Let's dive in and discover how to make these airy pillows of goodness!

Why you should try these cookies?

Guilt-Free Indulgence: Each Light and Fluffy Ricotta Almond Pillow is just 120 calories, making them a deliciously low-calorie treat for any sweet tooth.
Beginner-Friendly: Simple steps and easy-to-find ingredients ensure that anyone can whip up these delightful cookies!
Versatile Flavors: Feel free to swap almonds for hazelnuts or walnuts, or add a zing of lemon zest or a dash of cinnamon for an exciting twist!
Perfectly Light Texture: These cookies have an airy, melt-in-your-mouth quality that will wow your guests and family alike.
Crowd-Pleasing: Serve them with a side of fresh berries or a dollop of mascarpone for an elegant dessert anyone will adore. If you love this vibe, you might also enjoy my Herby Ricotta Stuffed peppers for a savory twist!

Light and Fluffy Ricotta Almond Pillows Ingredients

• Get ready to bake these dreamy treats!

For the Dough

  • Ricotta Cheese – Adds creaminess and moisture; try blending cottage cheese if needed.
  • Granulated Sugar – Provides sweetness and enhances flavor perfectly.
  • Vanilla Extract – Introduces aromatic notes to elevate the flavor.
  • Almond Extract – Enriches the cookie with a delightful nutty aroma.
  • Large Egg – Acts as a binder, bringing everything together smoothly.
  • All-Purpose Flour – Provides structure; swap for gluten-free flour for a gluten-free option.
  • Baking Powder – Helps with leavening, making your cookies fluffy.
  • Salt – Balances the sweetness, ensuring a well-rounded flavor.
  • Slivered Almonds – Adds crunch and enhances the nutty flavor of the dessert.

For the Topping

  • Powdered Sugar – Lightly dust on top before serving for that elegant touch.

For the Baking Sheet

  • Butter or Oil – Use for greasing to prevent sticking.

Take a moment to gather these ingredients, and you'll soon be on your way to creating scrumptious Light and Fluffy Ricotta Almond Pillows that will leave everyone wanting more!

Step‑by‑Step Instructions for Light and Fluffy Ricotta Almond Pillows

Step 1: Preheat Your Oven
Start by preheating your oven to 350°F (175°C). While it's heating, take a moment to grease a baking sheet with butter or oil to prevent your delightful Light and Fluffy Ricotta Almond Pillows from sticking. If you prefer, you can also line the baking sheet with parchment paper for an easy cleanup.

Step 2: Mix Wet Ingredients
In a large mixing bowl, combine the ricotta cheese, granulated sugar, vanilla extract, almond extract, and large egg. Use a whisk or an electric mixer on low speed, ensuring the mixture becomes smooth and creamy. Take a moment to enjoy the lovely aroma as the flavors blend—this is the key to the rich taste of your cookies!

Step 3: Whisk Dry Ingredients
In a separate bowl, sift together the all-purpose flour, baking powder, and a pinch of salt. This step is crucial for evenly distributing the leavening agent and ensuring your cookies rise beautifully. The flour mixture should be light and airy, setting the stage for the soft texture of the Light and Fluffy Ricotta Almond Pillows.

Step 4: Combine Mixtures
Gradually fold the dry ingredients into the wet mixture using a spatula. Be gentle, mixing until just combined; it's important not to overmix, as this will help maintain the airy texture of your cookies. You'll notice a cohesive dough forming, and the enticing scent will fill your kitchen!

Step 5: Add Almonds
Fold in the slivered almonds with care, ensuring they are evenly distributed throughout the dough. This adds a wonderful crunch and enhances the nutty flavor of the Light and Fluffy Ricotta Almond Pillows. The texture should now be just right for shaping!

Step 6: Shape Dough
With a cookie scoop or spoon, portion out the dough into pillow-like shapes, placing them onto the prepared baking sheet about 2 inches apart. The dough should retain its shape, so don’t worry about being perfect; each cookie will be a delightful treat varying in form, adding to their charm!

Step 7: Bake
Carefully place the baking sheet in the preheated oven. Bake the cookies for 15-18 minutes, or until they are lightly golden and puffed up. Keep an eye on them, and trust your senses—when a warm, nutty aroma fills your kitchen, they're likely done!

Step 8: Cool and Dust
Once baked, remove the Light and Fluffy Ricotta Almond Pillows from the oven and let them cool on a wire rack for about 10 minutes. This allows them to firm up slightly. After cooling, lightly dust each cookie with powdered sugar for that final touch of sweetness and elegance before serving.

What to Serve with Light and Fluffy Ricotta Almond Pillows

These delightful pillows are perfect for pairing, enhancing the experience of your homemade treat with complementary flavors and textures.

  • Fresh Berries: The tartness of strawberries or raspberries cuts through the sweetness, adding a refreshing element to your dessert.
  • Dollop of Mascarpone: A rich and creamy topping that enhances the indulgence and beautifully contrasts the fluffy pillows.
  • Warm Vanilla Ice Cream: Provide a luscious, creamy scoop alongside your cookies for a comforting experience that feels like a warm hug.
  • Drizzle of Chocolate Sauce: For the chocolate lovers, a warm drizzle elevates these pillows to a luxurious dessert, creating delightful flavor contrasts.
  • Herbed Yogurt Dip: A light and tangy dip brings a savory note, balancing the sweetness of the cookies and adding an unexpected twist.
  • Lemon Zest Spritz: A fresh sprinkle of lemon zest over the cookies brightens them and enhances the almond flavor, giving every bite a zesty edge.
  • Nutty Tea: Serve with a warm cup of chai or almond-infused tea for a cozy pairing that complements the nutty essence of the cookies.
  • Chilled Sparkling Water: Refresh your palate with some lemon-infused sparkling water; it’s a delightful contrast to the rich cookies!
  • Fruit Salad: A light medley of seasonal fruits provides a burst of freshness that balances the richness of the ricotta cookies beautifully.

How to Store and Freeze Light and Fluffy Ricotta Almond Pillows

  • Room Temperature: Keep cookies in an airtight container at room temperature for up to 2 days to maintain their delightful softness.
  • Fridge: Light and Fluffy Ricotta Almond Pillows last up to 3 days in the fridge. Store them in a container to prevent drying out.
  • Freezer: For longer storage, freeze the cookies for up to 1 month. Place in a single layer with parchment paper between them to keep them intact.
  • Reheating: When you’re ready to enjoy, reheat the frozen pillows at 300°F for 5-7 minutes to restore their fluffy texture and delightful freshness.

Light and Fluffy Ricotta Almond Pillows Variations

Customize these delightful pillows to your heart's content—each variation offers a new twist to enhance your baking adventure!

  • Nut-Free: Replace slivered almonds with sunflower seeds or omit them altogether for a nut-free version. This keeps all the flavor and lightness while accommodating allergies.

  • Gluten-Free: Use your favorite gluten-free flour blend to maintain its airy texture while ensuring it's suitable for gluten-sensitive folks. No one will miss the regular flour!

  • Citrus Zest: Add a teaspoon of lemon or orange zest for a refreshing twist that brightens the nutty flavors. It’s a wonderful way to elevate these cookies!

  • Spiced Touch: A pinch of cinnamon or nutmeg stirred in will add warmth and a cozy aroma. Perfect for chilly evenings or festive gatherings.

  • Bourbon Vanilla: Swap regular vanilla extract for bourbon vanilla extract to deepen those flavor notes. It’s a subtly sophisticated upgrade for special occasions.

  • Chocolate Drizzle: Drizzle melted dark or white chocolate over the cooled cookies for a decadent finish. It adds an extra layer of sweetness that chocolate lovers will adore!

  • Berry Bliss: Serve these pillows alongside fresh mixed berries for a pop of color and a juicy contrast. It’s a delightful balance of flavors that brings joy to your palate!

For those looking for more inspiration, don’t miss my tasty Pan Fried Shrimp or the delightful Coconutty Beans and Greens Stew as savory complements to your sweet creations.

Expert Tips for Light and Fluffy Ricotta Almond Pillows

  • Avoid Overmixing: Mixing just until combined ensures your cookies remain airy and fluffy. Overmixing can lead to a denser texture.

  • Chill if Sticky: If your dough feels too sticky, don’t panic! Chill it in the fridge for about 20 minutes, or lightly dust your hands with flour for easier shaping.

  • Fresh Ricotta is Key: Make sure to use fresh ricotta cheese. This will not only enhance the creaminess but also contribute to the overall moisture of your Light and Fluffy Ricotta Almond Pillows.

  • Properly Grease Your Baking Sheet: Whether you use butter or oil, greasing the baking sheet or lining it with parchment paper is crucial for easy removal and presentation of your delightful cookies.

  • Store Wisely: To maintain freshness, store your cookies in a single layer with parchment paper in between layers. This prevents them from sticking together and ensures they remain fluffy.

Make Ahead Options

These Light and Fluffy Ricotta Almond Pillows are perfect for meal prep enthusiasts! You can prepare the dough up to 24 hours in advance. Simply follow the instructions up to the point of shaping the cookies, then wrap the dough tightly in plastic wrap and refrigerate it. This prevents any air from drying out the mixture. When you're ready to bake, scoop the chilled dough onto a prepared baking sheet and allow it to sit at room temperature for about 15 minutes before baking. This small step ensures the cookies are just as delicious as when freshly made, providing you with a delightful treat with minimal effort during busy weeknights!

Light and Fluffy Ricotta Almond Pillows Recipe FAQs

What kind of ricotta cheese should I use for the cookies?
I recommend using fresh, whole-milk ricotta cheese for the best texture and flavor. If you can’t find ricotta, mascarpone or blended cottage cheese can serve as great alternatives, ensuring that your Light and Fluffy Ricotta Almond Pillows remain creamy and moist.

How should I store the Light and Fluffy Ricotta Almond Pillows?
Store your cookies in an airtight container at room temperature for up to 2 days. If you want to keep them longer, place them in the fridge for up to 3 days to maintain freshness. Just remember to layer them with parchment paper to avoid sticking!

Can I freeze the Light and Fluffy Ricotta Almond Pillows?
Absolutely! To freeze, place the cookies in a single layer with parchment paper between them and store in an airtight container or freezer bag for up to 1 month. When you’re ready to enjoy them, simply reheat in a preheated oven at 300°F for 5-7 minutes to restore their delightful fluffy texture.

What should I do if the dough is too sticky?
If you find the dough is sticky, it’s a simple fix! You can lightly dust your hands with flour while shaping the cookies or chill the dough in the fridge for about 20 minutes. This will make it easier to scoop and shape without compromising the airy lightness you desire.

Are there any allergy considerations with these cookies?
Great question! These Light and Fluffy Ricotta Almond Pillows contain gluten from the flour and may pose a risk for those with nut allergies due to the almonds. To adapt for gluten-free needs, I recommend using a gluten-free flour blend as a substitute. Always check labels and involve substitutes to suit your dietary restrictions!

Can I replace the almonds with other nuts or flavors?
Yes, absolutely! You can substitute almonds with other nuts like hazelnuts or walnuts for a different flavor profile. For an exciting twist, consider adding a hint of citrus with lemon zest or a cozy sprinkle of cinnamon to the dough! Experiment and discover new favorite variations of your Light and Fluffy Ricotta Almond Pillows!

Light and Fluffy Ricotta Almond Pillows

Light and Fluffy Ricotta Almond Pillows for Guilt-Free Indulgence

Enjoy guilt-free indulgence with Light and Fluffy Ricotta Almond Pillows, a delightful dessert low in calories and perfect for impressing friends and family.
Print Recipe Pin Recipe
Prep Time 15 minutes mins
Cook Time 18 minutes mins
Cooling Time 10 minutes mins
Total Time 43 minutes mins
Servings: 12 cookies
Course: Dessert
Cuisine: American
Calories: 120
Ingredients Equipment Method Nutrition Notes

Ingredients
  

For the Dough
  • 1 cup Ricotta Cheese Try blending cottage cheese if needed.
  • 1/2 cup Granulated Sugar Provides sweetness.
  • 1 tsp Vanilla Extract Adds aromatic notes.
  • 1/2 tsp Almond Extract Enriches flavor.
  • 1 large Egg Acts as a binder.
  • 1 cup All-Purpose Flour Swap for gluten-free flour if needed.
  • 1 tsp Baking Powder For leavening.
  • 1/4 tsp Salt Balances sweetness.
  • 1/2 cup Slivered Almonds Adds crunch.
For the Topping
  • 1 cup Powdered Sugar For dusting before serving.
For the Baking Sheet
  • 1 tbsp Butter or Oil For greasing.

Equipment

  • Mixing Bowl
  • Whisk
  • Spatula
  • Baking Sheet
  • Parchment Paper
  • Oven

Method
 

Baking Instructions
  1. Preheat your oven to 350°F (175°C) and grease a baking sheet with butter or oil.
  2. In a mixing bowl, combine ricotta cheese, granulated sugar, vanilla extract, almond extract, and egg. Whisk until smooth.
  3. In another bowl, sift together all-purpose flour, baking powder, and salt.
  4. Gradually fold the dry ingredients into the wet mixture until just combined.
  5. Fold in the slivered almonds until evenly distributed.
  6. Scoop the dough onto the prepared baking sheet, spacing them about 2 inches apart.
  7. Bake for 15-18 minutes until golden and puffed.
  8. Let cool for 10 minutes, then dust with powdered sugar before serving.

Nutrition

Serving: 1cookieCalories: 120kcalCarbohydrates: 15gProtein: 3gFat: 5gSaturated Fat: 1gPolyunsaturated Fat: 0.5gMonounsaturated Fat: 3gCholesterol: 20mgSodium: 80mgPotassium: 50mgFiber: 1gSugar: 4gVitamin A: 50IUCalcium: 70mgIron: 0.5mg

Notes

For best results, avoid overmixing to keep cookies airy. Chill the dough if sticky, and use fresh ricotta for enhanced creaminess.

Tried this recipe?

Let us know how it was!

Delight Your Taste Buds with Heavenly London Fog Cake

February 20, 2026 by Grace Snow Leave a Comment

There's something magical about the aroma of Earl Grey tea mingling with fragrant lavender—it transports me to a quaint café on a rainy afternoon in London. Today, I'm excited to share with you my recipe for a Heavenly London Fog Cake, a delightful treat that brings the essence of cozy afternoons right into your kitchen. This cake is not only luxuriously soft but also incredibly versatile, making it perfect for anyone seeking a gluten-free or vegan option without sacrificing flavor. The moist layers, infused with a sweet lavender milk soak, deliver a slice of pure comfort, while the elegant lavender cream cheese frosting adds a beautiful finishing touch. Whether you're looking to wow your guests or treat yourself after a long day, this cake is bound to become a beloved staple in your baking repertoire. Ready to uncover the secret behind this enchanting dessert? Let’s dive in!

Why is this London Fog Cake special?

Irresistible Flavor: The enchanting blend of Earl Grey and lavender infuses this cake with unique, aromatic notes that will captivate your taste buds.

Versatile Recipe: With options for gluten-free and vegan variations, everyone can enjoy a slice of this delight.

Effortlessly Elegant: The stunning cream cheese frosting not only adds a pop of color but also complements the cake's rich flavors perfectly.

Time-Saving Treat: This recipe is straightforward, making it easy to whip up for last-minute gatherings or cozy afternoons at home.

Perfect for Any Occasion: Whether you're hosting a tea party or celebrating a special occasion, this Heavenly London Fog Cake is guaranteed to impress. Pair it with a cup of Earl Grey tea or lavender lemonade for the ultimate experience!

Heavenly London Fog Cake Ingredients

For the Cake
• Earl Grey Tea (2 tsp) – Provides a robust tea flavor; switch it out for chai or jasmine tea for a delightful twist.
• Culinary Lavender (2 tbsp) – Adds floral notes to the cake and frosting; omit for a refreshing citrus zest instead.
• All-Purpose Flour (2 cups) – Forms the main structure of the cake; be sure to measure accurately to avoid a dense texture—substitute with gluten-free flour as needed.
• Baking Powder (2 tsp) – Ensures a lovely rise; check it's fresh for the best results.
• Baking Soda (1 tsp) – A key player for leavening.
• Salt (1 tsp) – Enhances the overall flavor, elevating the cake's taste.
• Unsalted Butter (1 cup) – Creates a rich, moist experience; substitute vegan butter for a dairy-free option.
• Granulated Sugar (1.5 cups) – Sweetens the cake; adjust the amount based on your preference for sweetness.
• Eggs (4 large) – Binds ingredients and adds structure; swap with flaxseed meal or chia for a vegan version.
• Vanilla Bean Paste (2 tsp) – Enhances the cake's richness; you can use vanilla extract as an alternative.
• Buttermilk (1 cup) – Contributes moisture and tanginess; replace with non-dairy milk mixed with vinegar to make it dairy-free.
• Whole Milk (1 cup) – Utilized in soaking—adds extra moisture; try a non-dairy milk instead.
• Sweetened Condensed Milk (1 cup) – For soaking; provides creaminess; ensure a dairy-free version if needed.

For the Frosting
• Cream Cheese (8 oz) – The base of the frosting, making it rich and creamy; substitute with dairy-free cream cheese for a vegan option.
• Powdered Sugar (2 cups) – Sweetens and thickens the frosting; adjust for your desired level of sweetness.
• Vanilla Extract (1 tsp) – Optional flavor enhancer to uplift the frosting's taste.
• Purple Food Coloring (1 drop) – Optional for added aesthetic appeal, creating a stunning visual on the cake.

Experience this Heavenly London Fog Cake and let its comforting elegance shine during any occasion!

Step‑by‑Step Instructions for Heavenly London Fog Cake

Step 1: Preheat the Oven and Prepare the Pan
Begin by preheating your oven to 350°F (175°C). While it heats, grab a 9×9 inch metal baking pan and grease it lightly with butter or cooking spray. This ensures your Heavenly London Fog Cake won't stick, allowing it to rise perfectly and come out easily.

Step 2: Process the Earl Grey Tea and Lavender
Using a spice grinder or food processor, combine 2 teaspoons of Earl Grey tea and 2 tablespoons of culinary lavender. Pulse until finely ground and aromatic, taking about 1–2 minutes. This fragrant blend will infuse your cake with the enchanting essence of the London fog.

Step 3: Mix the Dry Ingredients
In a large mixing bowl, whisk together 2 cups of all-purpose flour, the processed tea and lavender mixture, 2 teaspoons of baking powder, 1 teaspoon of baking soda, and 1 teaspoon of salt. Ensure these ingredients are evenly combined, as they’ll provide the structure and rich flavor for your cake.

Step 4: Cream Butter and Sugar
In another bowl, beat 1 cup of unsalted butter and 1.5 cups of granulated sugar using a hand mixer or stand mixer. Mix on medium speed until the mixture is light and fluffy, which should take about 2 minutes. This step builds a beautiful base for your Heavenly London Fog Cake.

Step 5: Add Egg and Vanilla
Beat in 4 large eggs, one at a time, ensuring each is fully combined before adding the next. Add 2 teaspoons of vanilla bean paste (or extract) and mix until smooth. This enriches the mixture and creates a delightful flavor profile, laying the groundwork for your cake.

Step 6: Combine Wet and Dry Mixtures
Gradually blend in 1 cup of buttermilk into the butter and egg mixture. Then, slowly add the dry ingredient mixture, mixing on low speed until everything is just combined and creamy. Be careful not to overmix; you want your cake to remain light and airy for that perfect texture.

Step 7: Bake the Cake
Pour the batter into the prepared baking pan, smoothing the top with a spatula. Bake in the preheated oven for 38 to 44 minutes, or until a toothpick inserted into the center comes out clean. The cake should be lightly golden on the edges and spring back when touched.

Step 8: Cool the Cake
Once baked, allow the cake to cool in the pan for about 30 minutes. Then, carefully transfer it to a wire rack to cool completely. This step is crucial for achieving the moist texture that defines your Heavenly London Fog Cake.

Step 9: Prepare the Milk Soak
In a small saucepan, gently heat 1 cup of whole milk, along with another teaspoon of Earl Grey and 1 tablespoon of lavender. Simmer for about 15 minutes, allowing the flavors to steep. Once fragrant, remove from heat and mix in 1 cup of sweetened condensed milk and 1 teaspoon of vanilla extract.

Step 10: Make the Frosting
To create the lavender cream cheese frosting, beat 8 oz of cold cream cheese in a mixing bowl until fluffy. Gradually incorporate 2 cups of powdered sugar and remaining lavender until fully combined. Add 1 teaspoon of vanilla extract, mixing until smooth and creamy, ready to spread on your cake.

Step 11: Soak the Cake
Using a toothpick or skewer, poke holes evenly across the cake's surface. Pour the fragrant milk soak generously over the cake, allowing it to seep into the holes. This soaking process adds moisture and enhances the flavor, contributing to the indulgent experience of your Heavenly London Fog Cake.

Step 12: Frost and Serve
After the cake has absorbed the soak, frost it generously with the lavender cream cheese frosting. Smooth the top and edges evenly with a spatula. Finally, slice your beautiful creation into 16 portions, serve, and watch as everyone enjoys this delightful treat!

Heavenly London Fog Cake Variations

Feel free to get creative with this delightful cake and make it your own—each twist adds a unique touch!

  • Gluten-Free: Substitute all-purpose flour with a gluten-free flour blend to accommodate dietary needs.

  • Vegan: Use plant-based butter, non-dairy milk, and replace eggs with flaxseed meal or chia seeds for a delicious vegan version.

  • Chai Infusion: Replace Earl Grey tea with chai tea for a cozy, spiced flavor that warms the soul. The rich spices will be a comforting surprise!

  • Fruity Addition: Fold in fresh berries like raspberries or blueberries into the batter. Their natural sweetness and burst of flavor will brighten each slice!

  • Citrus Glaze: Drizzle a tangy citrus glaze over the frosting for an extra zing. Combine powdered sugar with fresh lemon or orange juice for a refreshing finish.

  • Nutty Crunch: Add chopped walnuts or almonds into the batter for a delightful crunch. This texture contrast pairs beautifully with the moistness of the cake.

  • Lavender Omission: If you're not a fan of floral notes, simply omit the culinary lavender and replace it with a tablespoon of lemon zest for a bright and zesty profile.

  • Double Delight: Layer this cake with a creamy chocolate ganache in between the cake layers for a chocolate twist that perfectly complements the Earl Grey.

Looking for more sweet inspiration? Check out my delightful [Chocolate Pudding Cake](https://tastytrendingredients.com/chocolate-pudding-cake/) or the stunning [Ice Cream Cake](https://tastytrendingredients.com/ice-cream-cake/) for wonderful variations that will satisfy your sweet cravings!

How to Store and Freeze Heavenly London Fog Cake

Fridge: Store in an airtight container for up to 3 days to maintain freshness and flavor. This method keeps the cake moist and delicious, ready for any snack attack!

Freezer: Wrap individual slices tightly in plastic wrap or place in a freezer-safe bag. They can be frozen for up to 2 months without losing their enchanting flavor of Earl Grey and lavender.

Reheating: Thaw slices overnight in the fridge, then warm in the microwave for about 10-15 seconds before serving. This will bring back that delightful softness and flavorful essence you love.

Expert Tips for Heavenly London Fog Cake

  • Ingredient Temperature: Ensure all ingredients are at room temperature before starting. This helps create a uniform batter and enhances the cake's texture.

  • Flour Measurement: Use a spoon to aerate your all-purpose flour before measuring it. This prevents dense cakes, ensuring your Heavenly London Fog Cake remains airy and light.

  • Soaking Time: Allow the cake to soak in the milk mixture for at least 30 minutes for optimal moisture. This step is essential for achieving that decadent, tres leches-like texture.

  • Mixing Tips: Avoid overmixing your batter after adding the dry ingredients. Gentle mixing creates a fluffier cake, whereas overmixing can lead to a dense result.

  • Frosting Consistency: For the perfect lavender cream cheese frosting, ensure your cream cheese is cold. This aids in achieving a smooth and spreadable frosting that won’t melt or run.

Make Ahead Options

Preparing your Heavenly London Fog Cake ahead of time is a fantastic time-saver for busy home cooks! You can mix the dry ingredients and store them in an airtight container for up to 3 days. Additionally, the cake itself can be baked in advance and refrigerated for up to 24 hours; just make sure it’s completely cooled before wrapping it tightly to maintain moisture. The milk soak can also be prepared ahead; simply refrigerate it until you’re ready to assemble. When it’s time to serve, just soak the cake, frost it, and enjoy a wonderfully moist and flavorful dessert that’s just as delicious as if made fresh!

What to Serve with Heavenly London Fog Cake

Imagine pairing this delicate cake with delightful side dishes and beverages that will elevate your dessert experience to new heights.

  • Earl Grey Tea: The aromatic tea echoes the flavors in the cake, creating a comforting and harmonious pairing.
  • Lavender Lemonade: A refreshing drink that complements the floral notes of the cake while adding a zesty twist, ensuring a delightful contrast to the sweetness.
  • Fresh Berries: Strawberries, blueberries, or raspberries add a juicy burst of flavor, enhancing the cake's elegant presentation and providing a lovely texture.
  • Whipped Cream: Light and airy, freshly whipped cream adds a creamy touch that balances the cake's moist richness, offering a delightful mouthfeel with each bite.
  • Chocolate Ganache: Drizzling warm chocolate ganache over your cake invokes a touch of decadence, creating an indulgent combination of flavors that chocolate lovers will adore.
  • Almond Croissant: For a slice of delightful luxury, serve this cake alongside an almond croissant, adding a bit of flair reminiscent of a charming café setting.
  • Sparkling Water with Mint: A simple, refreshing beverage that cleanses the palate and brings an invigorating herbal note to the meal.
  • Honeyed Yogurt: A dollop of honeyed yogurt is a rich, creamy counterpart that enhances the cake's floral sweetness while introducing a tangy element.

Heavenly London Fog Cake Recipe FAQs

How do I select the right Earl Grey tea for this cake?
Absolutely! Choose a high-quality loose-leaf Earl Grey or tea bags that have a strong aroma. This will ensure that the flavor shines through in your Heavenly London Fog Cake. If you enjoy a different flavor profile, try chai or jasmine tea as delicious alternatives!

What’s the best way to store leftover London Fog Cake?
I recommend storing your cake in an airtight container at room temperature for up to 3 days. If you prefer to keep it fresher for longer, you can refrigerate it, but remember that it might be slightly denser. To maintain optimal moisture, cover it well before placing it in the fridge.

Can I freeze the Heavenly London Fog Cake, and how?
Yes, you absolutely can freeze this cake! Wrap individual slices tightly in plastic wrap or place them in a freezer-safe bag. Be sure to squeeze out as much air as possible to prevent freezer burn. Your cake will stay delicious for up to 2 months! Thaw slices overnight in the fridge and warm them briefly in the microwave for 10-15 seconds to revive that fluffy texture.

What should I do if my cake doesn’t rise properly?
Very common! If your cake doesn’t rise, it's usually due to expired baking powder or baking soda. Always check expiration dates and make sure to store these leavening agents in a cool, dry place. Also, avoid overmixing your batter after adding the flour, as this can lead to a dense cake instead of a light, fluffy one.

Is this London Fog Cake safe for my family with allergies?
Good question! This recipe contains common allergens like eggs and dairy, but you can easily adapt it for dietary needs. Substitute eggs with flaxseed meal or chia seeds for a vegan version, and use dairy-free butter, cream cheese, and non-dairy milk. Just make sure to check the labels of all your ingredients to avoid any unintended allergens!

How long should I let the cake soak in the milk mixture?
For the best results, I recommend letting your Heavenly London Fog Cake soak in the milk mixture for at least 30 minutes. This allows the cake to absorb all that flavorful lavender and Earl Grey goodness, resulting in a beautifully moist and decadent dessert that everyone will love!

Heavenly London Fog Cake

Heavenly London Fog Cake

Delight in the aromatic blend of Earl Grey tea and lavender with this Heavenly London Fog Cake, perfect for any baking occasion.
Print Recipe Pin Recipe
Prep Time 30 minutes mins
Cook Time 44 minutes mins
Cooling Time 30 minutes mins
Total Time 1 hour hr 44 minutes mins
Servings: 16 slices
Course: Dessert
Cuisine: British
Calories: 320
Ingredients Equipment Method Nutrition Notes

Ingredients
  

For the Cake
  • 2 tsp Earl Grey Tea Provides a robust tea flavor
  • 2 tbsp Culinary Lavender Adds floral notes to the cake and frosting
  • 2 cups All-Purpose Flour Forms the main structure of the cake
  • 2 tsp Baking Powder Ensures a lovely rise
  • 1 tsp Baking Soda A key player for leavening
  • 1 tsp Salt Enhances the overall flavor
  • 1 cup Unsalted Butter Creates a rich, moist experience
  • 1.5 cups Granulated Sugar Sweetens the cake
  • 4 large Eggs Binds ingredients and adds structure
  • 2 tsp Vanilla Bean Paste Enhances the cake's richness
  • 1 cup Buttermilk Contributes moisture and tanginess
  • 1 cup Whole Milk Utilized in soaking
  • 1 cup Sweetened Condensed Milk For soaking; provides creaminess
For the Frosting
  • 8 oz Cream Cheese The base of the frosting
  • 2 cups Powdered Sugar Sweetens and thickens the frosting
  • 1 tsp Vanilla Extract Optional flavor enhancer
  • 1 drop Purple Food Coloring Optional for aesthetic appeal

Equipment

  • 9x9 inch metal baking pan
  • Mixing bowls
  • Hand mixer or stand mixer
  • spice grinder or food processor
  • Whisk
  • Spatula
  • wire rack
  • small saucepan

Method
 

Preparation
  1. Preheat your oven to 350°F (175°C) and grease a 9×9 inch metal baking pan.
  2. Process 2 teaspoons of Earl Grey tea and 2 tablespoons of culinary lavender until finely ground.
  3. In a large mixing bowl, whisk together 2 cups of all-purpose flour, the processed tea and lavender, baking powder, baking soda, and salt.
  4. In another bowl, beat 1 cup of unsalted butter and 1.5 cups of granulated sugar until light and fluffy.
  5. Add 4 large eggs one at a time, mixing in 2 teaspoons of vanilla bean paste.
  6. Blend in 1 cup of buttermilk, then gradually add the dry ingredients, mixing until just combined.
  7. Pour the batter into the prepared pan and bake for 38 to 44 minutes.
  8. Allow the cake to cool in the pan for about 30 minutes before transferring to a wire rack.
Soaking and Frosting
  1. Prepare the milk soak by heating 1 cup of whole milk with 1 teaspoon of Earl Grey and 1 tablespoon of lavender for 15 minutes.
  2. Mix in 1 cup of sweetened condensed milk and 1 teaspoon of vanilla extract.
  3. Poke holes in the cooled cake, then pour the milk soak over it.
  4. To make the frosting, beat 8 oz of cream cheese until fluffy and gradually incorporate 2 cups of powdered sugar and remaining lavender.
  5. Frost the soaked cake generously and slice into 16 portions.

Nutrition

Serving: 1sliceCalories: 320kcalCarbohydrates: 45gProtein: 4gFat: 15gSaturated Fat: 9gPolyunsaturated Fat: 1gMonounsaturated Fat: 4gCholesterol: 70mgSodium: 250mgPotassium: 180mgFiber: 1gSugar: 25gVitamin A: 500IUCalcium: 100mgIron: 1mg

Notes

Allow at least 30 minutes for soaking for optimal moisture. Ensure all ingredients are at room temperature for the best texture.

Tried this recipe?

Let us know how it was!

Delicious Blood Orange Black Sesame Crumb Cake in Minutes

February 20, 2026 by Grace Snow Leave a Comment

As I turned the corner into my kitchen, the zesty aroma of blood oranges mingling with the earthy notes of black sesame sent my senses into a delighted whirl. This Blood Orange Black Sesame Crumb Cake has become my go-to recipe, effortlessly combining a tender crumb with a crunchy streusel that will leave you reaching for another slice. Perfect for busy days, this simple cake comes together quickly, whether you're looking for an afternoon pick-me-up or a delightful dessert. Best of all, it's a versatile treat; swap in your favorite citrus for a twist that keeps things exciting. Curious about how you can brighten up your next baking session? Let's dive into this delicious recipe!

Why is This Cake a Game-Changer?

Simple Preparation: This Blood Orange Black Sesame Crumb Cake requires minimal effort, making it ideal for weeknight baking.

Zingy Citrus Flavor: The blood oranges infuse a vibrant and refreshing taste that wakes up your palate, especially when paired with the nuttiness of black sesame.

Versatile Options: Adapt this recipe easily by swapping the blood oranges for other citrus fruits like lemons or grapefruits.

Perfect for Any Occasion: Whether it’s a casual afternoon snack or a dessert for guests, it’s sure to impress and please.

Make-Ahead Convenience: This cake stores beautifully, allowing you to prepare it in advance for busy days or surprise visits, just like my favorite Ice Cream Cake.

Treat yourself and loved ones to a delightful slice, and brighten up your baking repertoire!

Blood Orange Black Sesame Crumb Cake Ingredients

For the Cake
• Blood Oranges – Provides zest and juice for flavor; can substitute with lemons, grapefruits, or bergamot for different citrus profiles.
• Sour Cream – Adds moisture and tenderness to the cake; Greek yogurt can be used as an alternative.
• All-Purpose Flour – Forms the structure of the cake; can be substituted with gluten-free flour if needed.
• Granulated Sugar – Sweetness balances the tang of the blood orange; use coconut sugar for a lower glycemic option.
• Baking Powder – Helps the cake rise and achieve a light texture; ensure it's fresh for best results.
• Unsalted Butter – Provides richness and moisture; can substitute with margarine or a vegan butter alternative.
• Eggs – Help retain moisture and act as a binder; for a vegan version, use flax eggs or apple sauce.

For the Streusel Topping
• Black Sesame Seeds – Adds unique flavor and texture; can be replaced with poppy seeds or omitted if unavailable.
• All-Purpose Flour – Used for the streusel texture; ensures a crumbly topping to complement the cake.
• Unsalted Butter – Creates the rich and crumbly struesel; use an alternative for a vegan version if needed.

Indulge in this Blood Orange Black Sesame Crumb Cake, where classic flavors meet delightful textures!

Step‑by‑Step Instructions for Blood Orange Black Sesame Crumb Cake

Step 1: Preheat and Prepare
Begin by preheating your oven to 350°F (175°C). While the oven warms up, grease and line a loaf pan with parchment paper, ensuring it hangs over the edges for easy removal later. This preparation step is crucial for getting your Blood Orange Black Sesame Crumb Cake baked evenly without sticking.

Step 2: Mix Wet Ingredients
In a mixing bowl, combine granulated sugar and unsalted butter. Beat on medium speed until the mixture is light and fluffy, about 3-4 minutes. Add the eggs one at a time, mixing well after each addition. Next, stir in the sour cream and the zest of blood oranges, allowing their fresh aroma to fill your kitchen.

Step 3: Combine Dry Ingredients
In a separate bowl, whisk together the all-purpose flour and baking powder until well combined. Gradually incorporate this dry mixture into the wet ingredients using a spatula, folding gently until just combined. Be careful not to overmix, as this step ensures a tender crumb in your Blood Orange Black Sesame Crumb Cake.

Step 4: Prepare Streusel
To make the streusel topping, mix together black sesame seeds, all-purpose flour, and melted butter in a small bowl. Use your fingers or a fork to blend until the mixture resembles coarse crumbs. Set this aside; it will add a delightful crunch on top of your cake after baking, creating a beautiful contrast with the moist crumb.

Step 5: Assemble and Bake
Pour the batter into the prepared loaf pan, spreading it evenly with a spatula. Generously sprinkle the black sesame streusel over the top, creating a lovely crunch. Place the pan in your preheated oven and bake for 50-60 minutes, or until the top is golden brown and a toothpick inserted into the center comes out clean.

Step 6: Cool and Serve
Once baked, remove the Blood Orange Black Sesame Crumb Cake from the oven. Allow it to cool in the pan for about 10 minutes before carefully transferring it to a wire rack to cool completely. This helps to set the crumb structure while ensuring you can slice neat pieces later on.

What to Serve with Blood Orange Black Sesame Crumb Cake

Elevate your baking experience by pairing this cake with delightful accompaniments that enhance its vibrant flavors and textures.

  • Creamy Greek Yogurt: A dollop adds tang and creaminess, perfectly balancing the zesty sweetness of the cake.

  • Fresh Berries: Strawberries, blueberries, or raspberries add a burst of freshness and a colorful contrast on your plate.

  • Herbal Tea: A fragrant cup complements the zesty notes of the cake, making it a delightful afternoon pick-me-up.

  • Vanilla Ice Cream: The decadence of vanilla ice cream brings a rich, creamy element, creating a luxurious dessert experience.

  • Citrus Salad: A light, refreshing salad of mixed citrus fruits brings a bright counterpoint to this crumb cake’s intense flavors.

  • Toasted Nuts: Chopped almonds or walnuts add a crunchy texture that pairs beautifully with the moist crumb of the cake.

  • Espresso: The boldness of coffee enhances the cake’s flavor while the slight bitterness balances the sweetness.

  • Lemonade: A chilled glass provides a refreshing drink option that syncs nicely with the citrus notes of the cake.

  • Dark Chocolate Drizzle: A simple drizzle of melted dark chocolate adds an indulgent twist that enhances the overall dessert experience.

  • Peach or Apricot Jam: Spread on the side for an extra touch of sweetness; the fruit flavor melds beautifully with the cake's citrus notes.

Make Ahead Options

These Blood Orange Black Sesame Crumb Cakes are perfect for meal prep lovers! You can prepare the batter and refrigerate it for up to 24 hours in advance, keeping all the delightful flavors intact. Simply mix the wet and dry ingredients separately, then combine them right before baking to ensure a fresh, fluffy cake. You can also make the streusel topping ahead of time and store it in an airtight container in the refrigerator for up to 3 days. When you're ready to bake, just pour the batter into your prepared pan, sprinkle on the topping, and bake as instructed for a cake that’s just as delicious as if you made it from scratch that day. Enjoy the convenience of homemade goodness during your busy week!

Expert Tips for Blood Orange Black Sesame Crumb Cake

  • Mix Ingredients Gently: Overmixing can lead to a dense cake. Fold the wet and dry ingredients just until combined for a tender crumb.

  • Zest with Care: Use the finest part of the grater to ensure your blood orange zest is fresh and aromatic, enhancing the cake's flavor.

  • Streusel Texture: Make sure the struesel achieves a crumbly texture before adding it to the cake. It should hold together yet remain light for the perfect crunch.

  • Essential Cooling Time: Allow the cake to cool adequately before slicing to prevent crumbs. Warm cake can crumble easily, ruining your beautiful slices.

  • Adaptable Flavors: Don’t hesitate to switch up the citrus! Experiment with lemons or grapefruits to create your unique twist on the blood orange black sesame crumb cake.

Blood Orange Black Sesame Crumb Cake Variations

Feel free to personalize this delightful cake and make it truly your own while enjoying its vibrant flavors!

  • Lemon Zest: Swap blood oranges for fresh lemons for a zesty, vibrant cake that brightens your day. The tartness pairs beautifully with the nutty streusel.

  • Gluten-Free Option: Replace all-purpose flour with a gluten-free blend to accommodate dietary needs. Just make sure to check the blend’s measurements for the best results.

  • Cream Cheese Swirl: Add dollops of cream cheese batter in the cake for a rich, creamy texture. A delightful surprise that’s reminiscent of cheesecake in every bite!

  • Nutty Crunch: Toss in some chopped walnuts or pecans to the streusel for an added layer of crunch. The nuts add a wonderful depth of flavor and texture to every slice.

  • Spice It Up: Incorporate a dash of ground cinnamon or cardamom into the batter for a warm, aromatic twist. This adds a cozy feeling, perfect for chilly days.

  • Citrus Mix-Up: Combine blood oranges with grapefruits for a more complex and refreshing flavor profile. It’s a vibrant twist that will keep everyone guessing!

  • Chocolate Drizzle: Drizzle melted dark chocolate over the cooled cake for a touch of decadence. This contrast of flavors will elevate your cake to a whole new level of indulgence.

Explore vibrant variations while enjoying this cake, much like how you can with my favorite Chocolate Pudding Cake. We're talking endless delicious possibilities!

Storage Tips for Blood Orange Black Sesame Crumb Cake

Room Temperature: Store the cake tightly wrapped in plastic wrap or an airtight container for up to 3 days to maintain moisture and freshness.

Fridge: If you want to extend the life of your Blood Orange Black Sesame Crumb Cake, keep it in the refrigerator for up to a week, ensuring it is well-wrapped to prevent drying out.

Freezer: For longer storage, slice the cake and wrap individual pieces in plastic wrap, then place them in a freezer-safe bag. It can be frozen for up to a month; thaw overnight in the fridge before enjoying!

Reheating: To enjoy your cake warm, simply pop a slice in the microwave for about 10-15 seconds or until heated through, enhancing those delightful citrus flavors.

Blood Orange Black Sesame Crumb Cake Recipe FAQs

What should I look for when selecting blood oranges?
Absolutely! When choosing blood oranges, look for fruit that feels heavy for its size and has a firm texture. The skin should be smooth and vibrant, with no dark spots all over, which indicates freshness. A few bruises are okay, but avoid any soft or shriveled ones.

How can I store Blood Orange Black Sesame Crumb Cake, and for how long?
You can store your Blood Orange Black Sesame Crumb Cake at room temperature, tightly wrapped in plastic wrap or an airtight container, for up to 3 days. For extended freshness, refrigerate it for up to a week. Just ensure it's securely wrapped to keep moisture in!

Can I freeze the Blood Orange Black Sesame Crumb Cake?
Very much so! To freeze, first slice the cake into individual pieces and wrap each slice tightly in plastic wrap. Then, place the wrapped slices in a freezer-safe bag. It can be frozen for up to a month. When you're ready to enjoy, simply thaw overnight in the fridge and indulge!

What should I do if my crumb cake is dense or doesn't rise?
If your Blood Orange Black Sesame Crumb Cake turns out dense, it might be due to overmixing the batter. Mix the wet and dry ingredients just until combined for a light texture. Also, ensure your baking powder is fresh, as expired leavening agents can hinder the cake from rising adequately. If it still doesn't rise, check the oven temperature to ensure it’s calibrated correctly.

Can I make this recipe allergy-friendly or vegan?
Absolutely! To create a vegan version of the Blood Orange Black Sesame Crumb Cake, you can substitute the eggs with flax eggs (1 tablespoon of ground flaxseed mixed with 2.5 tablespoons of water for each egg) or applesauce. For dairy-free options, use unsweetened almond or coconut yogurt instead of sour cream and opt for a plant-based butter alternative. This way, everyone can enjoy this delightful treat!

Is there any special consideration for feeding this cake to pets?
Definitely! While the ingredients in this cake are safe for humans, it’s best to keep it away from pets. Particularly, the sugar content and citrus can upset their stomachs, so stick to dog- or cat-friendly treats for your furry friends!

Blood Orange Black Sesame Crumb Cake

Delicious Blood Orange Black Sesame Crumb Cake in Minutes

This Blood Orange Black Sesame Crumb Cake combines zesty citrus and nutty flavors, creating a delightful dessert perfect for any occasion.
Print Recipe Pin Recipe
Prep Time 15 minutes mins
Cook Time 1 hour hr
Cooling Time 10 minutes mins
Total Time 1 hour hr 25 minutes mins
Servings: 8 slices
Course: Dessert
Cuisine: American
Calories: 220
Ingredients Equipment Method Nutrition Notes

Ingredients
  

For the Cake
  • 3 medium Blood Oranges Zest and juice needed
  • 1 cup Sour Cream Can substitute with Greek yogurt
  • 2 cups All-Purpose Flour Can substitute with gluten-free flour
  • 1 cup Granulated Sugar Use coconut sugar for lower glycemic option
  • 2 teaspoons Baking Powder Ensure it's fresh
  • 1/2 cup Unsalted Butter Can substitute with margarine or vegan butter
  • 3 large Eggs For a vegan version, use flax eggs or apple sauce
For the Streusel Topping
  • 1/4 cup Black Sesame Seeds Can be replaced with poppy seeds
  • 1/2 cup All-Purpose Flour Used for streusel texture
  • 1/4 cup Unsalted Butter Use an alternative for vegan version

Equipment

  • Loaf pan
  • Mixing Bowl
  • Whisk
  • Spatula
  • measuring cups
  • Measuring Spoons

Method
 

Step‑by‑Step Instructions
  1. Preheat your oven to 350°F (175°C) and prepare a loaf pan with grease and parchment paper.
  2. In a mixing bowl, beat together granulated sugar and unsalted butter until light and fluffy. Add eggs one at a time, mixing well. Stir in sour cream and zest of blood oranges.
  3. In a separate bowl, whisk together all-purpose flour and baking powder. Gradually fold this into the wet mixture until just combined.
  4. For the streusel, mix black sesame seeds, all-purpose flour, and melted butter until it resembles coarse crumbs.
  5. Pour the batter into the prepared loaf pan and sprinkle streusel topping on top. Bake for 50-60 minutes until golden brown.
  6. Allow the cake to cool in the pan for about 10 minutes before transferring it to a wire rack to cool completely.

Nutrition

Serving: 1sliceCalories: 220kcalCarbohydrates: 30gProtein: 3gFat: 10gSaturated Fat: 6gPolyunsaturated Fat: 1gMonounsaturated Fat: 3gCholesterol: 45mgSodium: 150mgPotassium: 120mgFiber: 1gSugar: 15gVitamin A: 550IUVitamin C: 30mgCalcium: 60mgIron: 1.2mg

Notes

This cake can be stored for up to 3 days at room temperature or in the fridge for up to a week. It can also be frozen for up to a month.

Tried this recipe?

Let us know how it was!

Delicious Neapolitan Cake: A Sweet Slice of Joy

February 19, 2026 by Grace Snow Leave a Comment

As I watched the vibrant layers of my freshly baked Neapolitan Cake emerge from the oven, I couldn't help but feel a thrill of excitement. The delightful combination of chocolate, strawberry, and vanilla offers a nostalgic nod to those classic ice cream days, bringing a splash of joy to any dining table. This easy-to-make cake not only impresses guests with its stunning presentation, but it also boasts quick preparation, making it perfect for busy weeknights and spontaneous gatherings. Each slice presents a beautiful array that is bound to bring smiles and sweet moments to your family and friends. Are you ready to indulge in this homemade delight that’s equal parts comforting and celebratory?

Why is Neapolitan Cake a must-try?

Visually Stunning: The trio of vibrant layers makes it an eye-catching centerpiece for any occasion.
Nostalgic Flavors: Enjoy the classic combination of chocolate, strawberry, and vanilla, reminiscent of ice cream treats from childhood.
Quick Preparation: Perfect for busy schedules, this cake comes together in no time without compromising flavor.
Crowd-Pleasing: It's ideal for gatherings, ensuring everyone will find their favorite flavor in each slice.
Versatile Enjoyment: Serve it as a festive dessert or a cozy after-dinner treat; it's perfect for any occasion! If you're looking for more delicious dessert ideas, check out my recipes for Ice Cream Cake and Chocolate Pudding Cake.

Neapolitan Cake Ingredients

For the Cake Base
• All-Purpose Flour – Provides structure to the cake; you can substitute with cake flour for a lighter texture.
• Cocoa Powder – Adds a rich chocolate flavor; opt for unsweetened cocoa for the best results.
• Granulated Sugar – Sweetens the cake and improves texture; brown sugar can be used for a deeper flavor.
• Baking Powder – Ensures the cake rises; make sure it's fresh for perfect lifting.
• Salt – Balances the flavors; it's essential for the overall taste.
• Eggs – Adds moisture and stability; for a vegan option, flax eggs will work as a substitute.
• Whole Milk – Contributes to moisture and richness; buttermilk can replace it for a tangy twist.
• Vanilla Extract – Enhances overall flavor; pure extract is recommended for the best taste.

For the Flavored Layers
• Melted Chocolate – Used for the chocolate layer; dark or semi-sweet chocolate creates the best depth.
• Pureed Strawberries – Provides a light, fruity flavor for that luscious strawberry layer; both fresh and frozen strawberries are suitable.

For the Frosting
• Cream Cheese Frosting – Perfect for layering and decorating; adjust sweetness by changing the amount of powdered sugar used.

This Neapolitan Cake is a delightful mix of flavors and colors, making it a favorite for both kids and adults alike!

Step‑by‑Step Instructions for Neapolitan Cake

Step 1: Preheat Oven
Begin by preheating your oven to 350°F (175°C). While the oven heats up, prepare three round cake pans by greasing them generously or lining the bottoms with parchment paper. This will ensure that your Neapolitan Cake layers release easily once baked, setting the stage for a seamless assembly.

Step 2: Mix Dry Ingredients
In a large mixing bowl, whisk together 2 cups of all-purpose flour, 1 cup of granulated sugar, 1/2 cup of cocoa powder, 2 teaspoons of baking powder, and a pinch of salt until everything is evenly combined. This dry mixture is essential for building the fluffy texture of your cake, so make sure there are no lumps and it appears light and airy.

Step 3: Combine Wet Ingredients
In a separate bowl, crack open 3 large eggs and whisk them together with 1 cup of whole milk and 1 teaspoon of vanilla extract until the mixture is smooth and fully blended. This harmonious combination of wet ingredients adds moisture and flavor to your Neapolitan Cake, ensuring each layer is delightfully rich.

Step 4: Combine Mixtures
Gradually pour the wet ingredients into the bowl of dry ingredients, mixing gently with a spatula or whisk. Aim for a few gentle strokes to combine them until just blended. Avoid overmixing to keep your cake light and fluffy; the batter should be smooth and slightly thick while maintaining a little airiness.

Step 5: Flavor Batters
Divide the combined batter evenly into three separate bowls. In one bowl, stir in melted chocolate for the chocolate layer, mixing until fully incorporated. To another, add pureed strawberries for a fresh and fruity flavor, and keep the third bowl as is for the classic vanilla layer. Each bowl should reflect its respective flavor.

Step 6: Bake
Pour each flavored batter into the prepared cake pans, ensuring an even distribution across the layers. Place them in the preheated oven and bake for 25-30 minutes, or until the cakes spring back when lightly pressed and a toothpick inserted into the center comes out clean. Your Neapolitan Cake layers should rise beautifully!

Step 7: Cool Cakes
Once baked, remove the pans from the oven and let them cool for about 10 minutes. Afterward, carefully transfer the cakes onto wire racks to cool completely. This step is crucial as fully cooled layers ensure sturdy stacking and prevent melting the frosting when you assemble your cake.

Step 8: Layer and Frost
When the cakes are completely cool, take one layer and place it on a serving plate. Generously spread a layer of cream cheese frosting on top before adding the second flavored cake layer. Repeat this process with frosting between each layer and on top for a beautifully finished Neapolitan Cake. Enjoy the delightful, colorful layers that await!

How to Store and Freeze Neapolitan Cake

Fridge: Store the Neapolitan Cake in an airtight container for up to 3 days. This helps keep its flavors fresh while preventing it from drying out.

Freezer: For longer storage, freeze individual slices wrapped tightly in plastic wrap, then place in a freezer bag. It can last for up to 2 months.

Thawing: To enjoy frozen slices, thaw in the fridge overnight before indulging in your deliciously layered treat.

Reheating: If you prefer your Neapolitan Cake warm, gently microwave individual slices for 10-15 seconds until slightly heated through.

Make Ahead Options

These Neapolitan Cake layers are perfect for meal prep, allowing you to indulge without the last-minute rush! You can bake the cake layers up to 24 hours in advance; simply allow them to cool completely before wrapping them tightly in plastic wrap to prevent drying out. The cream cheese frosting can also be made ahead and stored in the fridge for up to 3 days. When you're ready to serve, assemble the layers by spreading frosting in between and on top, giving a quick beat to the frosting if it’s a bit stiff from refrigeration. This way, your Neapolitan Cake remains just as delicious, ensuring you have a delightful dessert ready to impress!

What to Serve with Neapolitan Cake

Each delightful bite of this colorful masterpiece invites you to create a complete meal experience that resonates with joy and flavor.

  • Fresh Berries: The natural sweetness and acidity of strawberries, raspberries, or blueberries enhance the fruity notes in the cake, creating a refreshing contrast.
  • Vanilla Ice Cream: A scoop of creamy vanilla ice cream adds a luscious, melty counterpart to each slice, reminiscent of the classic ice cream flavors in the cake.
  • Chocolate Ganache: Drizzling warm chocolate ganache over the top brings an extra indulgence that chocolate lovers will adore, emphasizing the rich chocolate layer.
  • Whipped Cream: Light and airy whipped cream elevates the dessert to new heights, adding an inviting texture while balancing the sweetness perfectly.
  • Coffee or Espresso: A hot cup of coffee or a shot of espresso serves as a lovely palate cleanser, complementing the cake's flavors while enhancing the chocolate richness.
  • Mint Chutney: A surprising pairing of mint chutney offers a refreshing zing that contrasts wonderfully with the cake's sweetness, awakening your taste buds.
  • Sparkling Water: Serve chilled sparkling water with a slice to cleanse the palate and balance the richness, making it a versatile option for all tastes.
  • Chocolate Covered Pretzels: For a delightful crunch, these sweet and salty bites provide an interesting texture, making for a simple yet satisfying pairing.

Neapolitan Cake Variations & Substitutions

Feel free to get creative with this Neapolitan Cake and make it uniquely yours with these delicious alternatives!

  • Mini Neapolitan Cakes: Use smaller cake pans or muffin tins for individual-sized treats, perfect for parties or lunchboxes. These tiny cakes will be a hit with kids and adults alike!

  • Frosting Variations: Swap cream cheese frosting for whipped cream or a smooth buttercream for a different flavor experience. The lighter options will add a fluffy texture that's heavenly!

  • Flavor Infusions: Boost the vanilla layer with lemon zest for a zesty twist. This brightens up the flavor and takes your cake to a whole new level of delicious.

  • Alternative Milk Options: Use almond milk, oat milk, or coconut milk to make it dairy-free while still retaining that moist texture. Enjoy a delightful twist on this classic cake!

  • Gluten-Free Option: Substitute all-purpose flour with gluten-free flour blend. Just make sure it contains xanthan gum, as it needs a bind for an airy cake.

  • Berry Medley: Instead of pureed strawberries, mix in blueberries or raspberries for the fruity layer for a colorful and vibrant cake. Each bite will burst with flavor and freshness!

  • Layered Ice Cream Cake: Transform this recipe into an ice cream cake by sandwiching layers of ice cream between the cake layers. If you love a cold treat, this twist is perfect on a hot day.

For a touch of inspiration, you might also enjoy making a Chocolate Pudding Cake or a delicious Ice Cream Cake for your next gathering!

Expert Tips for Neapolitan Cake

• Use Room Temperature Ingredients: Make sure all ingredients, including eggs and milk, are at room temperature. This helps to create a smoother batter and ensures your Neapolitan Cake rises nicely.

• Avoid Overmixing: When combining wet and dry ingredients, mix just until incorporated. Overmixing can lead to a dense cake rather than the fluffy texture you desire.

• Double Check Doneness: Use a toothpick or cake tester in the center of each layer. If it comes out clean or with a few moist crumbs, your Neapolitan Cake is ready to come out of the oven!

• Chill Before Frosting: Allow your cake layers to cool completely on wire racks before frosting. This prevents the frosting from melting and helps it to hold its shape.

• Storage Tips: Keep leftovers in an airtight container in the fridge for up to three days, or freeze individual slices for a sweet treat later on.

Neapolitan Cake Recipe FAQs

What is the best way to select ripe strawberries for the Neapolitan Cake?
Absolutely! Look for strawberries that are bright red with a natural shine. Avoid those with dark spots or dull skin, which may indicate overripeness. When squeezed gently, they should feel firm yet slightly soft, signaling juiciness. I often choose strawberries that are in season for the best flavor!

How should I store the Neapolitan Cake once it’s baked?
To keep your cake at its best, store it in an airtight container in the fridge for up to 3 days. Be sure to stack layers with parchment in between if you want to avoid smudging the frosting.

Can I freeze leftover slices of Neapolitan Cake?
Yes, you can! To freeze, wrap individual slices tightly in plastic wrap, then place them in a freezer-safe bag. They will remain fresh for up to 3 months. When you're ready to enjoy, just thaw them in the fridge overnight for the best consistency.

What if my cake layers are too dry?
If your Neapolitan Cake turns out dry, it might be due to overbaking. Always start checking for doneness at 25 minutes. Make sure your toothpick comes out with a few moist crumbs instead of completely clean. If it’s already baked, you can drizzle a simple syrup over the layers to add moisture back in.

Is there a way to make this Neapolitan Cake vegan?
Very much so! To make a vegan Neapolitan Cake, substitute 3 flax eggs (1 tablespoon of ground flaxseed mixed with 2.5 tablespoons of water per egg) for regular eggs. Additionally, use plant-based milk, and opt for dairy-free cream cheese for the frosting.

How can I make sure my frosting doesn’t melt?
To prevent your cream cheese frosting from melting, make sure all your cake layers are completely cool before applying it. If it’s a warm day, you can refrigerate the frosted cake for about 15-20 minutes before serving to help it set.

Neapolitan Cake

Delicious Neapolitan Cake: A Sweet Slice of Joy

Indulge in a delicious Neapolitan Cake, a nostalgic blend of chocolate, strawberry, and vanilla for any occasion.
Print Recipe Pin Recipe
Prep Time 30 minutes mins
Cook Time 30 minutes mins
Cooling Time 10 minutes mins
Total Time 1 hour hr 10 minutes mins
Servings: 8 slices
Course: Dessert
Cuisine: Italian
Calories: 350
Ingredients Equipment Method Nutrition Notes

Ingredients
  

For the Cake Base
  • 2 cups All-Purpose Flour Can substitute with cake flour for a lighter texture.
  • 1 cup Granulated Sugar Brown sugar can be used for deeper flavor.
  • 0.5 cups Cocoa Powder Opt for unsweetened cocoa for the best results.
  • 2 teaspoons Baking Powder Ensure it’s fresh for perfect lifting.
  • 1 pinch Salt Essential for balancing flavors.
  • 3 large Eggs Flax eggs can be used for a vegan option.
  • 1 cup Whole Milk Buttermilk can be used for a tangy twist.
  • 1 teaspoon Vanilla Extract Pure extract is recommended.
For the Flavored Layers
  • 0.5 cups Melted Chocolate Dark or semi-sweet chocolate recommended.
  • 1 cup Pureed Strawberries Fresh or frozen strawberries are suitable.
For the Frosting
  • 2 cups Cream Cheese Frosting Adjust sweetness by changing powdered sugar.

Equipment

  • Oven
  • Mixing bowls
  • Cake Pans
  • Whisk
  • Spatula
  • wire rack

Method
 

Step-by-Step Instructions for Neapolitan Cake
  1. Preheat oven to 350°F (175°C) and prepare three round cake pans by greasing or lining with parchment paper.
  2. In a large bowl, whisk together flour, sugar, cocoa powder, baking powder, and salt.
  3. In another bowl, whisk eggs, milk, and vanilla until smooth.
  4. Gradually combine wet and dry ingredients, mixing gently.
  5. Divide batter into three bowls, flavor one with melted chocolate, another with pureed strawberries, and leave the third plain.
  6. Pour flavored batters into prepared pans and bake for 25-30 minutes.
  7. Remove from oven and cool for 10 minutes, then transfer to wire racks to cool completely.
  8. Layer and frost with cream cheese frosting between each cake layer.

Nutrition

Serving: 1sliceCalories: 350kcalCarbohydrates: 50gProtein: 5gFat: 15gSaturated Fat: 8gCholesterol: 50mgSodium: 200mgPotassium: 150mgFiber: 2gSugar: 25gVitamin A: 500IUVitamin C: 2mgCalcium: 50mgIron: 1mg

Notes

Use room temperature ingredients for best results. Avoid overmixing to prevent a dense cake. Ensure cake layers cool completely before frosting.

Tried this recipe?

Let us know how it was!

Delicious Pizza Grilled Cheese – Your New Favorite Comfort Meal

February 19, 2026 by Grace Snow Leave a Comment

There I was, standing in my kitchen, debating between takeout and something homemade when a genius idea sparked: why not combine my favorite comfort foods into one irresistible creation? Enter the Pizza Grilled Cheese! This quick meal brings together crispy, golden-buttered bread, gooey mozzarella, and zesty marinara sauce, delivering a pizza experience without the hassle of dough-making. Not only is it ready in just 10 minutes, but it also allows for endless customization with toppings that cater to everyone in the family, making it a perfect kid-friendly option. Whether you serve it for a cozy dinner or a satisfying late-night snack, this recipe is a delightful way to whip up something truly special. Curious to learn how to master this delicious dish? Let’s dive in!

Why is Pizza Grilled Cheese a Must-Try?

Irresistible Combination: Imagine the crispy satisfaction of grilled cheese combined with the savory goodness of pizza. This recipe marries the best of both worlds in a single bite!

Quick and Easy: With just 10 minutes of prep and cook time, you can enjoy a homemade meal that’s perfect for busy nights or lazy weekends.

Endless Customization: Personalize your Pizza Grilled Cheese with toppings everyone loves. Substitute traditional turkey pepperoni with veggies or a blend of cheeses for a unique twist!

Family-Friendly Appeal: Kids and adults alike will adore this delicious comfort food. Serve it with a side of Grilled Mushrooms Savory for a complete meal!

Satisfying Texture: You’ll bite into a crispy crust, melty cheese, and a burst of flavorful marinara that makes every mouthful enjoyable.

Pizza Grilled Cheese Ingredients

For the Sandwich

• Bread – Use your favorite type, such as sourdough or whole wheat, for a delicious base; it's where the magic begins!
• Butter – This adds richness and helps create a golden, crispy texture; you can swap it for olive oil for a lighter option.
• Marinara or Pizza Sauce – The secret to that classic pizza flavor; opt for homemade or a high-quality store-bought version.
• Shredded Mozzarella Cheese – The main star for that gooey, melty goodness; feel free to mix in provolone for extra flavor!
• Grated Parmesan Cheese – A sprinkle of salty notes enhances the dish; substitute with nutritional yeast for a vegan alternative.
• Turkey Pepperoni – A lean choice that maintains the essence of pizza; or go vegetarian with toppings like bell peppers or olives.
• Garlic Powder – A dash brings aromatic flavor; fresh garlic can elevate the profile even further!
• Italian Seasoning – A blend of herbs that amps up the flavor; replace it with oregano or basil if preferred.
• Chopped Fresh Basil (optional) – Brightens up the sandwich with freshness and color; you can skip it if you like.

Cooking Tips

• For perfect texture, maintain medium-low heat while grilling to avoid burnt bread.
• Thinly slice toppings to ensure even cooking and keep your sandwich from getting soggy.
• Pre-cooking veggies keeps moisture in check and enhances flavor.
• For crispy leftovers, reheat them in an oven or skillet rather than the microwave.

Your journey to crafting the ultimate Pizza Grilled Cheese starts here! Enjoy exploring the endless possibilities with this comfort food classic.

Step‑by‑Step Instructions for Pizza Grilled Cheese

Step 1: Prep the Bread
Start by buttering one side of each bread slice generously to ensure a crispy texture. Sprinkle garlic powder and Italian seasoning over the buttered side for added flavor. This simple step is crucial for creating a savory base that complements the Pizza Grilled Cheese experience.

Step 2: Assemble the Sandwich
Place two slices of bread, buttered side down, on a clean surface. Spread a generous layer of marinara sauce on the inside of each slice. Layer the shredded mozzarella cheese, followed by turkey pepperoni or your preferred toppings. Top with another slice of bread, this time with the buttered side facing up, ready for grilling.

Step 3: Heat the Skillet
Preheat a skillet over medium-low heat for about 2 minutes, ensuring it’s the right temperature to grill without burning. This gradual heating allows for even cooking and achieves that perfect golden-brown crust on your Pizza Grilled Cheese. A non-stick skillet is ideal for easy flipping.

Step 4: Cook the Sandwich
Carefully place the assembled sandwich in the hot skillet and grill for approximately 3-4 minutes. Press it gently with a spatula to promote even browning. Keep an eye on the color; it should turn golden and crispy while the cheese starts melting, filling the kitchen with an irresistible aroma.

Step 5: Flip and Finish Cooking
Once the first side is nicely browned, flip the sandwich carefully using your spatula. Cook for an additional 3-4 minutes until the second side is golden and the cheese is thoroughly melted. Look for a perfect balance between crispy exterior and gooey interior for your ideal Pizza Grilled Cheese!

Step 6: Serve and Enjoy
Remove the sandwich from the skillet and let it cool slightly before slicing in half to reveal the deliciously melted cheese inside. Garnish with fresh basil for a pop of color and serve with extra marinara sauce for dipping. Now, your Pizza Grilled Cheese is ready to delight everyone at the table!

How to Store and Freeze Pizza Grilled Cheese

Fridge: Wrap cooled sandwiches in foil or an airtight container for storage. They will stay fresh in the fridge for up to 3 days.

Freezer: For longer storage, individually wrap cooked sandwiches in plastic wrap and then foil. They can be frozen for up to 1 month, keeping their flavors intact.

Reheating: When ready to enjoy, reheat in an oven at 350°F (175°C) for about 10-15 minutes, or in a skillet over medium-low heat, ensuring the crust stays crispy while the cheesy goodness melts.

Make-Ahead Tip: Assemble sandwiches but do not cook them; store in the fridge for up to a day before grilling to enjoy a quick meal anytime!

Pizza Grilled Cheese Variations & Substitutions

Feel free to let your culinary creativity shine and customize this delightful recipe to suit your taste!

  • Cheese Blend: Mix mozzarella with provolone or gouda for a richer flavor and a beautifully melty texture.
  • Bread Options: Swap traditional bread for a ciabatta roll or a large whole grain tortilla for a unique twist.
  • Heat Level: Add sliced jalapeños or pepper jack cheese to spice things up, giving each bite a fiery kick!
  • Veggie Delight: Replace turkey pepperoni with grilled veggies like zucchini, mushrooms, or even Grilled Mushrooms Savory for a fresh take.
  • Mini Dippers: Cut sandwiches into strips for easy dipping into marinara sauce, creating a fun appetizer for family game night.
  • Low-Carb Alternative: Try cauliflower bread or even portobello mushrooms as a carb-conscious substitute while keeping lots of flavor.
  • Flavor Boosters: Incorporate sun-dried tomatoes or roasted red peppers to introduce a Mediterranean flair to your grilled cheese.
  • Gourmet Touch: Drizzle with balsamic reduction after cooking to elevate your Pizza Grilled Cheese with a touch of sweetness and depth.

With these variations, you can easily make this Pizza Grilled Cheese your family's new favorite comfort meal!

Make Ahead Options

These Pizza Grilled Cheese sandwiches are perfect for meal prep enthusiasts! You can assemble the sandwiches up to 24 hours in advance by buttering the bread, adding marinara, cheese, and toppings. Simply wrap them tightly in plastic wrap or foil to prevent drying out in the refrigerator. When you're ready to enjoy your delicious Pizza Grilled Cheese, heat a skillet over medium-low and grill for 3-4 minutes on each side until golden and crispy, ensuring the cheese melts perfectly. This simple make-ahead option saves time and delivers just as delicious results when it's time to serve!

What to Serve with Pizza Grilled Cheese

Transform your tasty creation into a complete meal that will impress everyone around the table.

  • Crisp Mixed Greens: A light salad adds freshness and texture, balancing the richness of the grilled cheese beautifully.

  • Garlic Bread Sticks: Pair this cheesy delight with crispy, buttery garlic breadsticks for a comforting, pizza-inspired accompaniment that fans will love.

  • Zesty Marinara Dip: A side of zesty marinara for dipping enhances the pizza flavors and brings an extra layer of delight to each bite.

  • Roasted Vegetables: Serve alongside colorful roasted veggies for a nutritious touch that harmonizes with the sandwich’s cheesy goodness.

  • Sweet Potato Fries: The crispy, sweet exterior of sweet potato fries provides a satisfying contrast to the gooey Pizza Grilled Cheese.

  • Chilled Lemonade: A refreshing glass of lemonade cuts through the richness, offering the perfect balance to your cozy meal.

  • Chocolate Chip Cookies: End on a sweet note! Classic cookies add a delightful finish to your comfort food feast, creating a complete homemade experience.

Expert Tips for Pizza Grilled Cheese

  • Choose the Right Bread: Opt for sturdy bread that can hold up to the toppings. Sourdough or whole wheat is ideal, while thin bread might lead to a soggy sandwich.

  • Layer Wisely: Avoid overcrowding your sandwich with toppings. Too many ingredients can prevent proper melting and might make the Pizza Grilled Cheese hard to handle.

  • Monitor the Heat: Maintaining medium-low heat is key for even cooking. Too high, and you risk burning the bread before the cheese melts.

  • Pre-cook Veggies: If adding vegetables, such as bell peppers or onions, sauté them beforehand. This step reduces moisture and enhances their flavor.

  • Reheat with Care: For leftover Pizza Grilled Cheese, avoid microwaving. Instead, reheat in a skillet or oven to retain that crispy texture you love!

  • Experiment with Cheese: Don't hesitate to mix cheeses! Combining mozzarella with provolone or pepper jack can elevate the flavor of your Pizza Grilled Cheese.

Pizza Grilled Cheese Recipe FAQs

What type of bread is best for Pizza Grilled Cheese?
Absolutely! For a perfect Pizza Grilled Cheese, I recommend using sturdy bread like sourdough or whole wheat. These varieties provide the necessary structure to hold up against the fillings and prevent sogginess. If you're feeling adventurous, ciabatta or even a large tortilla wrap can add a fun twist as well!

How should I store leftover Pizza Grilled Cheese?
Very easy! Wrap your cooled Pizza Grilled Cheese sandwiches in foil or place them in an airtight container. They can stay fresh in the fridge for up to 3 days. Just make sure they're completely cooled beforehand to maintain their texture!

Can I freeze Pizza Grilled Cheese?
Yes, you can! For freezing, wrap each cooked sandwich individually in plastic wrap and then in foil to prevent freezer burn. This way, you can store them for up to 1 month. When you want to enjoy them again, simply reheat in the oven at 350°F (175°C) for about 10-15 minutes or in a skillet over medium-low heat.

What if my Pizza Grilled Cheese is too soggy?
Great question! The key to a crispy Pizza Grilled Cheese is ensuring your toppings, especially vegetables, are cut thinly and pre-cooked to minimize moisture. Also, avoid adding too many ingredients, as overcrowding can prevent proper melting and lead to sogginess. If you find your bread getting damp, just pop the sandwich back on the skillet for a minute or two to help crisp it back up!

Are there any dietary considerations for Pizza Grilled Cheese?
Absolutely! You can easily customize this recipe to meet various dietary needs. For a vegan option, simply substitute the cheese with your favorite kind of dairy-free cheese and omit the butter, using olive oil instead. If you have allergies, keep an eye on ingredients like marinara sauce from the store as they can contain hidden allergens, or opt for a homemade version to control what goes into your meal.

How can I customize my Pizza Grilled Cheese toppings?
The more the merrier! You can mix and match toppings based on your preferences. Instead of turkey pepperoni, consider using veggies like bell peppers, mushrooms, or olives for a vegetarian option. Adding jalapeños or spicy pepper jack cheese is also a great way to add some heat if your taste buds crave it!

Pizza Grilled Cheese

Delicious Pizza Grilled Cheese – Your New Favorite Comfort Meal

This Pizza Grilled Cheese brings crispy bread, gooey mozzarella, and zesty marinara together for a delightful quick meal.
Print Recipe Pin Recipe
Prep Time 5 minutes mins
Cook Time 5 minutes mins
Total Time 10 minutes mins
Servings: 2 sandwiches
Course: Snacks
Cuisine: American
Calories: 450
Ingredients Equipment Method Nutrition Notes

Ingredients
  

For the Sandwich
  • 4 slices Bread Sourdough or whole wheat recommended.
  • 2 tablespoons Butter Can substitute with olive oil.
  • 1/4 cup Marinara or Pizza Sauce Homemade or high-quality store-bought.
  • 1 cup Shredded Mozzarella Cheese Mix with provolone for extra flavor.
  • 2 tablespoons Grated Parmesan Cheese Substitute with nutritional yeast for vegan.
  • 1/4 cup Turkey Pepperoni Can be replaced with vegetables if preferred.
  • 1 teaspoon Garlic Powder Fresh garlic elevates flavor.
  • 1 teaspoon Italian Seasoning Can be replaced with oregano or basil.
  • 1/4 cup Chopped Fresh Basil Optional for garnish.

Equipment

  • Skillet

Method
 

Step-by-Step Instructions for Pizza Grilled Cheese
  1. Butter one side of each bread slice and sprinkle with garlic powder and Italian seasoning for flavor.
  2. Assemble the sandwich with buttered sides facing out, layering marinara, mozzarella, pepperoni, and top with another slice of bread.
  3. Preheat a skillet over medium-low heat for 2 minutes.
  4. Grill the sandwich for 3-4 minutes, pressing gently until golden and crispy.
  5. Flip the sandwich and cook for another 3-4 minutes until golden and cheese is melted.
  6. Serve with fresh basil and extra marinara for dipping.

Nutrition

Serving: 1sandwichCalories: 450kcalCarbohydrates: 40gProtein: 20gFat: 25gSaturated Fat: 12gPolyunsaturated Fat: 2gMonounsaturated Fat: 10gCholesterol: 50mgSodium: 800mgPotassium: 250mgFiber: 3gSugar: 2gVitamin A: 15IUVitamin C: 2mgCalcium: 25mgIron: 10mg

Notes

Experiment with different cheese blends and toppings for unique variations.

Tried this recipe?

Let us know how it was!

Cozy Up With Authentic Irish Apple Cake That's Pure Joy

February 19, 2026 by Grace Snow Leave a Comment

As the leaves turn golden and the crisp autumn air sweeps in, there's nothing quite like the scent of freshly baked goods wafting from the kitchen. This is where my Authentic Irish Apple Cake comes into play, with its delightful blend of tart Granny Smith apples enveloped in a moist, spiced cake. It’s a simple dessert that's perfect for cozy gatherings or a quiet afternoon treat! One of the best things about this cake is how effortlessly it brightens up a chilly day, and paired with a creamy custard sauce, it transforms into a comforting indulgence. Plus, it’s a fantastic way to showcase seasonal apples while honing your baking skills. Curious to uncover the secrets behind this warm slice of Irish tradition? Let’s dive in!

Why is this cake a must-bake?

Unforgettable Flavor: The combination of tart apples and warm cinnamon creates a delightful balance that's hard to resist.

Homestyle Comfort: Each bite evokes the feeling of cozy afternoons spent at home, perfect for sharing with family and friends.

Versatile Serving Options: Whether enjoyed warm with custard or chilled with ice cream, this cake adapts to any occasion, making it a crowd-pleaser.

Simple and Straightforward: Even if you're new to baking, this recipe requires only basic skills and embraces forgiving ingredients.

Autumn Delight: With seasonal apple varieties like Honeycrisp or Bramley, you're bound to discover new flavor dimensions with every bake, elevating your fall gatherings.

Perfect for Celebrations: Pair it with a cup of tea or coffee, and you’ll have a comforting dessert fit for any celebration, just like my Chocolate Pudding Cake or German Chocolate Poke Cake!

Authentic Irish Apple Cake Ingredients

• For the Cake

  • Unsalted Butter – Adds richness and moisture; can substitute with margarine for a dairy-free option.
  • Granulated Sugar – Provides sweetness and lovely browning; brown sugar can deepen the flavor.
  • Large Eggs – Acts as a binder and helps the cake rise; no substitutes recommended for best results.
  • Whole Milk or Cream – Contributes to the cake’s tenderness; feel free to use almond milk for a non-dairy version.
  • All-Purpose Flour – Gives the cake its structure; gluten-free flour blends work for a gluten-free option.
  • Baking Powder – This leavening agent is essential for the perfect rise.
  • Cinnamon – Introduces a warm spice; nutmeg can be a wonderful complement.
  • Salt – Enhances the flavor balance and rounds out the sweetness.

• For the Apples

  • Granny Smith Apples – Their tartness beautifully contrasts the sweetness of the cake; try substituting with Honeycrisp or Bramley apples for a unique twist.

• For the Streusel Topping

  • Old Fashioned Rolled Oats – Adds texture; quick oats can be used but the texture may differ.
  • Confectioner’s Sugar – Perfect for dusting and adds an aesthetic appeal.

• For the Custard Sauce

  • Egg Yolks, Sugar, Whole Milk, Vanilla – These create a creamy topping; using store-bought custard can save time.

Embrace the joy of homemade desserts this season with this Authentic Irish Apple Cake—it’s a hug in cake form, waiting to be savored!

Step‑by‑Step Instructions for Authentic Irish Apple Cake

Step 1: Preheat the Oven
Preheat your oven to 350°F (175°C) and grease a 9-inch springform pan for easy release later. This step is crucial as a properly heated oven will help the cake rise evenly. Ensure your pan is well-greased to prevent sticking, setting the stage for a beautifully baked Authentic Irish Apple Cake.

Step 2: Prepare the Custard Sauce
In a small saucepan, heat 2 cups of whole milk over medium heat until it just begins to simmer. While it warms, whisk together 4 egg yolks and 1/2 cup sugar until creamy. Gradually temper the yolks by incorporating the hot milk, then return the mixture to the stove. Cook on low heat, stirring constantly, until it thickens slightly, about 5 minutes. Strain it through a sieve and chill while you make the cake.

Step 3: Make the Streusel Topping
In a mixing bowl, combine 1 cup of all-purpose flour, 1/3 cup of sugar, and 1 cup of old-fashioned rolled oats. Cut in 1/2 cup of cold, unsalted butter until the mixture resembles coarse crumbs. This streusel will add a delightful crunch to your Authentic Irish Apple Cake. Once ready, chill the mixture in the refrigerator while you prepare the cake batter.

Step 4: Prepare the Cake Batter
In a large bowl, cream together 1 cup of softened unsalted butter and 1 cup of granulated sugar until light and fluffy—this should take about 4-5 minutes. Add in 3 large eggs, one at a time, mixing well after each addition. Then, combine the dry ingredients which include 2 cups of all-purpose flour, 1 teaspoon of baking powder, 1 teaspoon of cinnamon, and 1/4 teaspoon of salt. Gradually add this to the butter mixture, alternating with 1 cup of whole milk.

Step 5: Assemble the Cake
Pour the cake batter evenly into the prepared 9-inch springform pan. Peel and slice 3-4 Granny Smith apples, fanning them out on top of the batter for a lovely presentation. Sprinkle your chilled streusel topping generously over the apples, ensuring even coverage. This assembly not only looks appealing but also adds fantastic textures to the Authentic Irish Apple Cake.

Step 6: Bake the Cake
Place the pan in the preheated oven and bake for 50-60 minutes, until the cake is golden brown and a toothpick inserted into the center comes out clean. The aroma of baking apples and spices will fill your kitchen, creating an enticing atmosphere. Keep an eye on it towards the end of the baking time to prevent over-browning.

Step 7: Cool and Serve
Once baked, remove the cake from the oven and allow it to cool in the pan for about 15 minutes before carefully releasing the sides of the springform pan. Dust the top with confectioners' sugar for that final touch of sweetness. Serve your Authentic Irish Apple Cake while warm, alongside the chilled custard sauce for a delightful dessert experience.

How to Store and Freeze Authentic Irish Apple Cake

Room Temperature: Store leftover cake covered at room temperature for up to 3 days for optimal freshness. This keeps the crumb moist and delicious.

Fridge: If you need to store it longer, wrap the cake tightly and refrigerate for up to a week, which helps maintain flavor and texture.

Freezer: For longer storage, freeze slices of the cake in an airtight container for up to 2 months. Thaw in the fridge overnight before serving.

Reheating: To enjoy the cake warm, reheat individual slices in the microwave for about 15-20 seconds or in a preheated oven at 350°F (175°C) for 10-15 minutes. Pair with custard for a comforting treat!

Expert Tips for Authentic Irish Apple Cake

• Cold Ingredients: Ensure your butter and other ingredients are cold for a crumbly streusel. This prevents it from becoming too wet.

• Custard Care: Cook your custard slowly and stir constantly to avoid curdling. A gentle hand ensures a silky finish.

• Apple Preparation: To prevent browning, toss your sliced apples in lemon juice if preparing them ahead of time. This maintains freshness.

• Springform Pan Use: Opt for a springform pan for easy release. This helps maintain the cake's structure when serving.

• Texture Variation: Experiment with different apple varieties, like Honeycrisp or Bramley, for unique flavors in your Authentic Irish Apple Cake.

Authentic Irish Apple Cake Variations

Feel free to let your creativity shine and customize this delightful cake according to your taste and preferences!

  • Different Apples: Experiment with Honeycrisp or Bramley apples for unique flavor profiles. Each variety offers its distinct sweetness and tartness, making every bake a new adventure.

  • Nutty Streusel: Swap out the oats in the streusel for walnuts or pecans for an added crunch. The nutty flavor brings a delightful twist and complements the apples beautifully.

  • Gluten-Free Option: Use a gluten-free flour blend in place of all-purpose flour to make this cake gluten-free without sacrificing taste.

  • Spice It Up: Add a pinch of nutmeg or allspice to the cake batter for a deeper, more complex flavor profile. These warm spices enhance the cozy autumn vibe of the cake.

  • Creamy Contrast: Serve with a dollop of whipped cream or vanilla ice cream for a brighter dessert experience. The contrasting temperatures create an indulgent moment.

  • Fruity Add-Ins: Toss in a handful of raisins or dried cranberries into the batter for a chewy texture and bursts of sweetness. They complement the apples wonderfully and add a savory surprise.

  • Vegan Twist: Replace butter with coconut oil and eggs with flax eggs or mashed banana for a vegan-friendly adaptation. It’s a delicious way to make a beloved dessert inclusive.

  • Caramel Drizzle: Drizzle some caramel sauce over the finished cake for an indulgent treat. The sweet, rich flavor elevates your cake into a luxurious dessert.

Looking for other delightful options? You might also enjoy trying my Ice Cream Cake or indulging in the rich flavors of a Chocolate Pudding Cake, perfect companions to your cozy baking adventures!

What to Serve with Authentic Irish Apple Cake

As you savor each bite of this delightful cake, elevate your dessert experience by considering these perfect pairings.

  • Custard Sauce: Creamy and rich, it amplifies the warm spices and tart apples, creating a luscious combination.

  • Freshly Brewed Coffee: The bold flavors and aromatic profile balance the sweetness of the cake beautifully, making every slice more enjoyable.

  • Whipped Cream: Light and fluffy, a dollop of whipped cream adds a delightful texture that contrasts with the moist cake.

  • Vanilla Ice Cream: The cold creaminess melts alongside the warm cake, enhancing the spiced flavors for an indulgent treat.

  • Caramel Drizzle: Sweet and buttery, a drizzle of caramel elevates the cake's earthy notes, offering a touch of decadence.

  • Tea: A classic choice—choose an Earl Grey or chai; both complement the cake’s warming spices beautifully, while enhancing the cozy atmosphere of your gathering.

  • Spiced Cider: Warm spiced cider echoes the cake’s cinnamon, making it a perfect companion for chilly fall evenings.

  • Cheese Plate: Sharp cheddar or tangy goat cheese provides a delightful contrast, balancing the sweet flavors of the cake with zest and richness.

With these suggestions, you’re all set to create a comforting and memorable dessert experience that celebrates the irresistible charm of this Authentic Irish Apple Cake!

Make Ahead Options

These Authentic Irish Apple Cakes are perfect for busy home cooks looking to save time! You can prepare the cake batter and store it in the refrigerator for up to 24 hours in advance, ensuring it's ready when you need it. Additionally, the streusel topping can be mixed and chilled for up to 3 days to enhance texture. Just remember to slice and toss your Granny Smith apples in lemon juice (to prevent browning) if you're prepping them ahead of time. When you’re ready to bake, simply layer the apples on top of the batter, sprinkle the streusel, and pop it in the oven for a fresh, delicious dessert that's just as delightful, even after making it ahead!

Authentic Irish Apple Cake Recipe FAQs

What type of apples should I use for the best flavor?
For the best results in your Authentic Irish Apple Cake, I highly recommend using Granny Smith apples. Their tartness beautifully contrasts the sweetness of the cake. If you're feeling adventurous, you can also experiment with Honeycrisp or Bramley apples for delightful variations in flavor and texture!

How should I store leftover apple cake?
You can store any leftover cake covered at room temperature for up to 3 days. If you want to extend its freshness, wrap the cake tightly in plastic wrap and refrigerate for up to a week. This helps maintain its delicious flavor and texture!

Can I freeze Authentic Irish Apple Cake?
Absolutely! To freeze, slice the cake into individual pieces and place them in an airtight container or zip-top freezer bag, separating layers with parchment paper if needed. It can be stored in the freezer for up to 2 months. When you're ready to enjoy it, simply thaw the slices in the refrigerator overnight and reheat as desired.

What should I do if my custard sauce curdles?
If your custard sauce curdles, don’t worry! To fix it, you can pass it through a sieve to remove the curds. For future attempts, remember to cook the custard over low heat while constantly stirring; this will help maintain a smooth texture. If it's too thick, simply whisk in a bit of warm milk until you reach the desired consistency.

Can I substitute ingredients in the recipe for dietary restrictions?
Yes, this recipe is quite flexible! If you’re looking for a dairy-free option, you can substitute unsalted butter with margarine and use almond milk instead of whole milk. For a gluten-free version, swap out the all-purpose flour for a gluten-free flour blend. Just remember that these substitutions may slightly alter the flavor and texture of the cake.

How can I determine when the cake is done baking?
To check if your Authentic Irish Apple Cake is done, insert a toothpick into the center of the cake. If it comes out clean or with just a few moist crumbs attached, it’s ready! Additionally, you should notice a lovely golden-brown color on top and a slight spring when you gently press the surface.

Authentic Irish Apple Cake

Cozy Up With Authentic Irish Apple Cake That's Pure Joy

Delight in the comforting flavors of Authentic Irish Apple Cake, a perfect dessert for autumn gatherings.
Print Recipe Pin Recipe
Prep Time 30 minutes mins
Cook Time 1 hour hr
Cooling Time 15 minutes mins
Total Time 1 hour hr 45 minutes mins
Servings: 8 slices
Course: Dessert
Cuisine: Irish
Calories: 350
Ingredients Equipment Method Nutrition Notes

Ingredients
  

For the Cake
  • 1 cup Unsalted Butter Softened
  • 1 cup Granulated Sugar
  • 3 Large Eggs At room temperature
  • 1 cup Whole Milk Or cream
  • 2 cups All-Purpose Flour
  • 1 teaspoon Baking Powder
  • 1 teaspoon Cinnamon
  • 1/4 teaspoon Salt
For the Apples
  • 3-4 Granny Smith Apples Peeled and sliced
For the Streusel Topping
  • 1 cup Old Fashioned Rolled Oats
  • 1/3 cup Sugar
  • 1 cup All-Purpose Flour
  • 1/2 cup Unsalted Butter Cold, cut into pieces
For the Custard Sauce
  • 4 Egg Yolks
  • 1/2 cup Sugar
  • 2 cups Whole Milk
  • 1 teaspoon Vanilla Extract

Equipment

  • 9-inch springform pan
  • Mixing bowls
  • Whisk
  • Saucepan
  • sieve

Method
 

Preparation
  1. Preheat your oven to 350°F (175°C) and grease a 9-inch springform pan.
  2. In a small saucepan, heat 2 cups of whole milk over medium heat.
  3. Whisk together 4 egg yolks and 1/2 cup sugar until creamy.
  4. Combine in saucepan and cook on low heat until slightly thickened, about 5 minutes.
  5. Chill while you make the cake.
Making the Streusel Topping
  1. In a mixing bowl, combine 1 cup of flour, 1/3 cup of sugar, and 1 cup of oats.
  2. Cut in 1/2 cup of cold butter until the mixture resembles coarse crumbs.
  3. Chill in the refrigerator.
Baking the Cake
  1. Cream together 1 cup of softened butter and 1 cup of sugar until light and fluffy.
  2. Add in 3 large eggs, one at a time, mixing well after each.
  3. Combine dry ingredients and add to the butter mixture, alternating with 1 cup of milk.
  4. Pour into prepared pan, top with sliced apples, and sprinkle with streusel.
  5. Bake for 50-60 minutes until golden brown and a toothpick comes out clean.
Serving
  1. Allow the cake to cool for 15 minutes before removing from the springform pan.
  2. Dust with confectioners' sugar and serve with custard sauce.

Nutrition

Serving: 1sliceCalories: 350kcalCarbohydrates: 46gProtein: 5gFat: 16gSaturated Fat: 10gPolyunsaturated Fat: 1gMonounsaturated Fat: 4gCholesterol: 120mgSodium: 200mgPotassium: 150mgFiber: 2gSugar: 20gVitamin A: 500IUVitamin C: 6mgCalcium: 80mgIron: 1mg

Notes

Experiment with different apple varieties like Honeycrisp or Bramley for unique flavors.

Tried this recipe?

Let us know how it was!

Crispy Traditional Irish Boxty: Perfect Breakfast Bliss

February 19, 2026 by Grace Snow Leave a Comment

The kitchen filled with the warm, comforting aroma of frying potatoes, transporting me back to my grandmother's kitchen in Ireland. This Traditional Irish Boxty recipe is a cherished gem, bringing together grated and mashed potatoes to create a delightful pancake that's both crispy on the outside and fluffy on the inside. Not only is it quick to whip up, perfect for breakfast or as a cozy side dish, but it also celebrates the beauty of home-cooked meals using simple ingredients. Whether you’re hosting a brunch or craving a hearty snack, these little potato pancakes carry a slice of Irish history and hospitality. Curious about how to achieve that ideal balance of crunch and softness? Let’s dive in!

Why is Boxty so beloved?

Crispy Delight: The texture of these pancakes strikes an unbeatable balance—crispy on the outside and fluffy within, making them a true breakfast treat.

Quick and Easy: With simple ingredients and straightforward steps, you can whip up these Traditional Irish Boxty without spending hours in the kitchen.

Versatile Serving Options: Enjoy them with a dollop of sour cream, or serve alongside eggs for a filling meal. They perfectly complement savory dishes like fish or Irish stew as well.

Healthy and Hearty: Made primarily with potatoes, these pancakes offer a comforting, vegetarian option that satisfies.

Cultural Comfort: Enjoying boxty is not just eating; it’s a shared cultural experience steeped in Irish history, perfect for gathering around the table. Curious about storage? Check out my tips on meal prep and keeping them fresh for later!

Traditional Irish Boxty Ingredients

Unlock the secrets to creating these delightful potato pancakes with these essential ingredients!

For the Batter

  • Potatoes – The heart of the dish; choose starchy varieties like Russet or Yukon Gold for the best texture.
  • Gluten-Free Flour Blend – This acts as a binder; regular flour can be used but may change the texture slightly.
  • Milk – Helps achieve a smooth batter; be cautious with amounts to keep it from becoming too runny.
  • Egg (1) – Essential for binding the mixture, ensuring the pancakes hold together when cooking.
  • Salt – Enhances flavor; adjust to your personal taste preference.
  • Oil or Butter – The key to achieving that perfect, crispy exterior when frying the pancakes.

Enjoy making your Traditional Irish Boxty with these simple yet effective ingredients!

Step‑by‑Step Instructions for Traditional Irish Boxty

Step 1: Prepare Potatoes
Start by peeling and washing your starchy potatoes like Russet or Yukon Gold. Grate half of the potatoes using a box grater or food processor until fine; then, mash the other half until smooth in a large bowl. This combination creates the unique texture of Traditional Irish Boxty, balancing fluffiness with crispy elements.

Step 2: Mix Ingredients
In the bowl containing your mashed potatoes, add the grated potatoes, gluten-free flour blend, a splash of milk, the egg, and a sprinkle of salt. Stir everything together until you achieve a cohesive batter; adjust with more milk if necessary to ensure a thick, yet spreadable consistency.

Step 3: Heat Pan
Place a large frying pan over medium heat and add a couple of tablespoons of oil or butter. Allow the fat to heat up for about 2 minutes until shimmering; this will help you achieve a beautifully crispy exterior on the Boxty. You want the temperature just right to ensure even cooking.

Step 4: Cook Pancakes
Spoon about a quarter cup of the batter into the hot pan for each pancake. Gently flatten the batter with the back of a spatula to about half an inch thick. Cook them for 3-4 minutes until golden brown and crispy on one side, then carefully flip using a spatula and cook for another 3-4 minutes on the other side.

Step 5: Serve Warm
Once your Traditional Irish Boxty is cooked to a crispy golden perfection, transfer the pancakes to a plate lined with paper towels to absorb any excess oil. Serve warm immediately, or keep them on low heat in the oven while cooking the remaining batter. Enjoy each bite with your favorite toppings!

Make Ahead Options

Traditional Irish Boxty is a fantastic recipe for meal prep enthusiasts! You can prepare the batter up to 24 hours in advance by combining the grated and mashed potatoes, gluten-free flour blend, milk, egg, and salt, then refrigerating the mixture. To maintain the quality and prevent browning, cover the bowl tightly with plastic wrap. When you’re ready to serve, simply heat a frying pan, add oil or butter, and cook the pancakes for about 3-4 minutes on each side until golden and crispy. This way, you’ll enjoy freshly cooked boxty with minimal effort on busy mornings!

Traditional Irish Boxty Customizations

Feel free to add your personal touch to these delightful pancakes—let your creativity shine through each unique variation!

  • Dairy-Free: Substitute milk with almond or oat milk for a lactose-free version that still packs a fantastic flavor.

  • Gluten-Free: Use a gluten-free all-purpose flour blend instead of regular flour for a completely gluten-free boxty that everyone can enjoy.

  • Herbed Delight: Add fresh herbs like chives or parsley to the batter for a fresh flavor boost, perfect for brightening up your breakfast table.

  • Spicy Kick: Spice things up by mixing in a dash of cayenne pepper or paprika, elevating the traditional flavor profile to something exciting.

  • Cheesy Addition: Fold in shredded cheese like cheddar or feta into the batter for a savory twist that melts beautifully while cooking.

  • Veggie Boost: Incorporate finely chopped vegetables such as bell peppers, spinach, or zucchini for a colorful and nutritious addition to your boxty.

  • Onion Variation: Sauté some onions until golden brown and mix them into the batter for an added layer of sweetness and depth.

  • Sweet Twist: For a dessert version, swap some of the potato with finely grated apples or zucchini, add cinnamon, and serve with maple syrup or yogurt.

Feel free to explore these options, and don’t forget to check out my tips for meal prep and keeping them fresh. Every pancake can tell a different story on your plate!

How to Store and Freeze Traditional Irish Boxty

Fridge: Store leftovers in an airtight container for up to 2 days. Reheat in a skillet over medium heat for a few minutes until warm and crispy again.

Freezer: Wrap individual pancakes in plastic wrap and then place them in a freezer bag for up to 2 months. Thaw in the refrigerator overnight before reheating.

Reheating: For best results, reheat frozen or refrigerated pancakes in a skillet with a little oil or butter to regain crispiness. Alternatively, use an oven at 350°F (175°C) for about 10-15 minutes.

Helpful Tricks for Traditional Irish Boxty

  • Correct Potato Prep: Avoid excess moisture by not over-squeezing grated potatoes. This prevents soggy pancakes and ensures ideal crispiness.

  • Fresh Mashed Potatoes: For the best texture, always use freshly mashed potatoes. Instant potatoes can work, but they should be thick to maintain structure.

  • Pan Temperature: Ensure the frying pan is adequately heated before adding the batter. An under-heated pan can lead to uneven cooking and a less crispy surface.

  • Cooking Technique: Don't overcrowd the pan—give each pancake enough space to cook evenly. This helps achieve that desired golden-brown exterior for your Traditional Irish Boxty.

  • Baking Alternative: If you prefer less oil, try baking at 375°F (190°C) for 15-20 minutes, flipping halfway for uniform cooking and crispiness.

What to Serve with Traditional Irish Boxty

Enjoying your Irish Boxty makes a lovely foundation for a cozy, inviting meal that warms the heart and delights the senses.

  • Creamy Sour Cream: A dollop of sour cream adds creamy tanginess that beautifully balances the crispy texture of the boxty.

  • Savory Smoked Salmon: The rich, smoky flavors of salmon paired with the fluffy pancakes create a satisfying, elegant brunch option.

  • Perfectly Scrambled Eggs: Fluffy scrambled eggs offer a protein-packed complement, making for a hearty breakfast that feels indulgent yet wholesome.

  • Baked Beans: Sweet and savory baked beans enhance the traditional vibe, bringing in a warm, comforting flavor that pairs well with the pancakes.

  • Zesty Salsa: A fresh tomato salsa introduces bright acidity and chunky texture, elevating each bite with a refreshing zing and a vibrant twist.

  • Crispy Bacon Strips: The salty crunch of bacon adds a savory contrast, creating a classic Irish breakfast ensemble that’s utterly irresistible.

  • Herbed Garden Salad: A light garden salad with fresh herbs cuts through the richness of the pancakes, adding a crunchy, fresh element to your meal.

  • Rich Irish Stew: For a heartier combination, serve the boxty alongside a bowl of traditional Irish stew; the pancakes help soak up the delicious gravy.

  • Chilled Cider: A crisp, cold cider refreshes the palate while echoing the rustic charm of an Irish pub, completing a delightful dining experience.

  • Decadent Apple Crisp: For dessert, a warm apple crisp brings a sweet finish, with its cinnamon-spiced flavor harmonizing perfectly with the potato pancakes.

Traditional Irish Boxty Recipe FAQs

How do I choose the right potatoes for Boxty?
Absolutely! For the best results, it's essential to use starchy potatoes like Russet or Yukon Gold. These varieties are ideal because they provide a crispy exterior while keeping the inside fluffy. If you pick waxy potatoes, you may end up with a pancake that’s too dense or gummy.

How should I store leftover Boxty?
To keep your leftover Traditional Irish Boxty fresh, place them in an airtight container in the refrigerator for up to 2 days. When you’re ready to enjoy them again, simply reheat them in a skillet over medium heat for a few minutes until they're warm and crispy again. This method ensures you retain that delightful crispy texture!

Can I freeze Traditional Irish Boxty?
Yes, you can! To freeze, lay individual pancakes on a plate lined with parchment paper, then wrap each tightly in plastic wrap. Place the wrapped pancakes in a freezer bag for up to 2 months. When you're ready to eat, thaw them overnight in the refrigerator and reheat in a skillet for best results. You’ll be amazed at how well they hold up!

What can I do if my Boxty turns out soggy?
If your Traditional Irish Boxty ends up soggy, it might be due to excess moisture in the grated potatoes. To troubleshoot, make sure you gently squeeze out any liquid from the grated potatoes before mixing them into the batter. Additionally, ensure your frying pan is hot enough before adding the batter, as a cooler pan can lead to steam rather than crispiness.

Are there any dietary considerations with Boxty?
Definitely! Traditional Irish Boxty can easily be made vegetarian by using vegetable oil instead of butter for frying. Additionally, to make it gluten-free, simply use a gluten-free flour blend. Always check the labels to avoid cross-contamination if you or someone you're serving has food allergies. Happy cooking!

Traditional Irish Boxty

Crispy Traditional Irish Boxty: Perfect Breakfast Bliss

This Traditional Irish Boxty recipe is a cherished gem, combining grated and mashed potatoes for a delightful pancake that's crispy and fluffy.
Print Recipe Pin Recipe
Prep Time 15 minutes mins
Cook Time 15 minutes mins
Total Time 30 minutes mins
Servings: 4 pancakes
Course: Breakfast
Cuisine: Irish
Calories: 180
Ingredients Equipment Method Nutrition Notes

Ingredients
  

For the Batter
  • 2 cups starchy potatoes (like Russet or Yukon Gold) peeled and grated
  • 1 cup gluten-free flour blend acts as a binder
  • 1/2 cup milk adjust to maintain batter consistency
  • 1 large egg for binding
  • 1 teaspoon salt to taste
  • 2 tablespoons oil or butter for frying

Equipment

  • frying pan
  • Box grater
  • large bowl
  • Spatula

Method
 

Cooking Directions
  1. Peel and wash the starchy potatoes. Grate half of them and mash the other half until smooth.
  2. In a bowl, combine mashed potatoes, grated potatoes, gluten-free flour, milk, egg, and salt. Stir until cohesive.
  3. Heat a frying pan over medium heat with oil or butter for about 2 minutes.
  4. Spoon about a quarter cup of batter into the pan for each pancake. Flatten to half an inch thick and cook for 3-4 minutes until golden, then flip.
  5. Cook the other side for another 3-4 minutes. Transfer to a plate lined with paper towels, serve warm.

Nutrition

Serving: 1pancakeCalories: 180kcalCarbohydrates: 30gProtein: 4gFat: 6gSaturated Fat: 2gPolyunsaturated Fat: 1gMonounsaturated Fat: 2gCholesterol: 60mgSodium: 300mgPotassium: 450mgFiber: 3gSugar: 1gVitamin A: 200IUVitamin C: 10mgCalcium: 30mgIron: 1mg

Notes

Use freshly mashed potatoes and avoid excess moisture. Bake at 375°F for a healthier option if preferred.

Tried this recipe?

Let us know how it was!
  • « Previous Page
  • 1
  • …
  • 16
  • 17
  • 18
  • 19
  • 20
  • …
  • 179
  • Next Page »

Welcome!

Hi, I’m Grace, a Sydney-based home cook with a passion for bold flavors and trending ingredients. Whether you’re a busy beginner or a seasoned foodie, you’ll find dishes here that are fresh, fun, and full of flavor.

More about me

Popular Recipes

  • Cheesy Chicken Garlic Bread Sandwich
    Cheesy Chicken Garlic Bread Sandwich for Cozy Family Moments
  • Easy Chicken Ranch Wraps
    Easy Chicken Ranch Wraps: Quick, Creamy & Totally Satisfying
  • Chicken Caesar Sandwiches
    Delicious Chicken Caesar Sandwiches for Quick Comfort Food
  • best Cuban sandwich
    The Best Cuban Sandwich You’ll Want Every Weeknight!

Footer

↑ back to top

About

  • Privacy Policy
  • Disclaimer
  • Terms & Conditions

Newsletter

  • Sign Up! for emails and updates

Contact

  • About me
  • Contact me

Copyright © 2025 TastyTrendIngredients