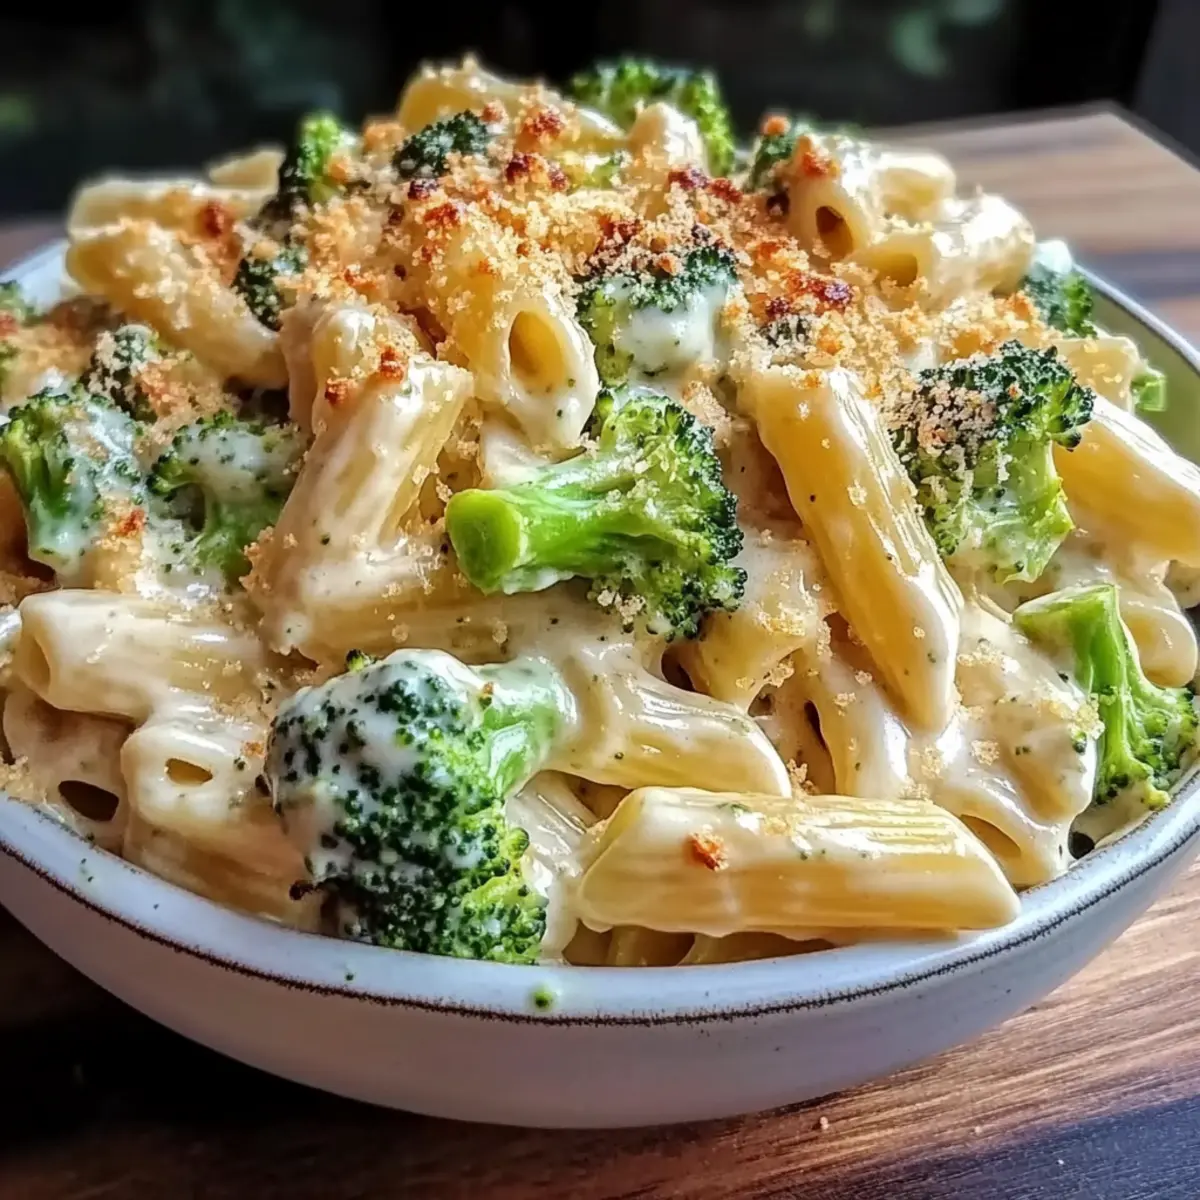
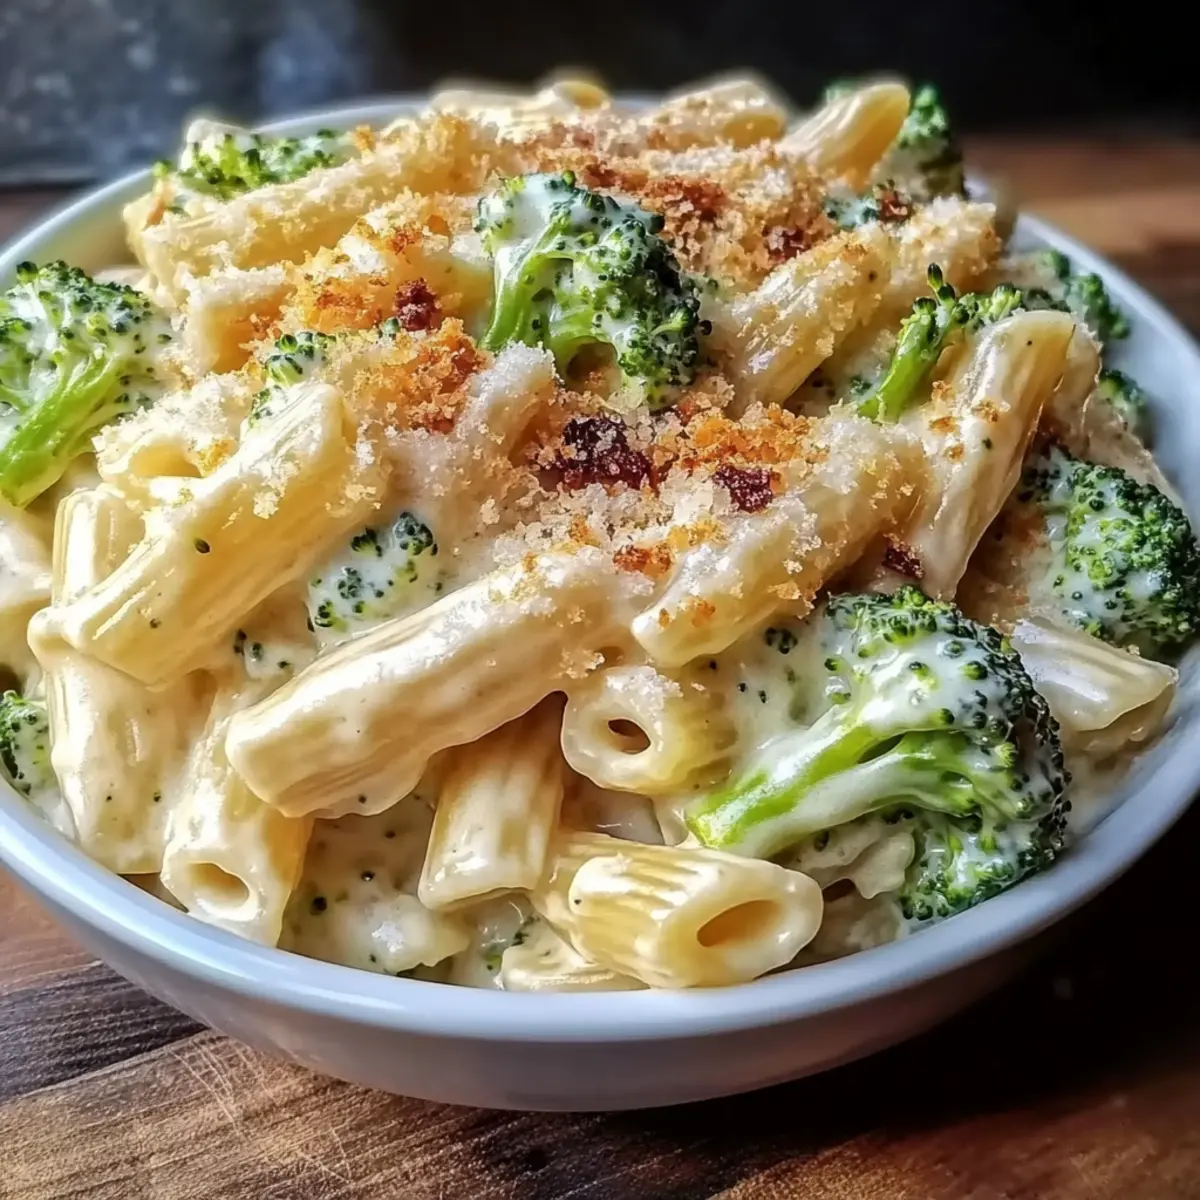
tastytrendingredients

  • Home
  • Recipes
    • Appetizers
    • Breakfast
    • Dessert
    • Dinner
    • Drinks
    • Salads
    • Snacks
    • Soups
  • About me
  • Contact me
menu icon
go to homepage
  • Home
  • Recipes
    • Appetizers
    • Breakfast
    • Dessert
    • Dinner
    • Drinks
    • Salads
    • Snacks
    • Soups
  • About me
  • Contact me
search icon
Homepage link
  • Home
  • Recipes
    • Appetizers
    • Breakfast
    • Dessert
    • Dinner
    • Drinks
    • Salads
    • Snacks
    • Soups
  • About me
  • Contact me
×

Savor the Flavor: Quick and Easy Taco Bowl That's Customizable

April 13, 2026 by Grace Snow Leave a Comment

What if I told you that taco night could be exciting, customizable, and ready in less than 30 minutes? Enter my Quick and Easy Taco Bowl, a vibrant dish that hits all the right notes. This recipe features a hearty blend of seasoned ground beef, fluffy brown rice, and crisp veggies, making it perfect for busy weeknights or casual family dinners. The best part? You can easily adapt it for gluten-free, vegetarian, or low-carb diets, ensuring everyone at the table is satisfied. With endless topping options, this bowl brings a fun twist to traditional Tex-Mex flavors, allowing you to create a meal that feels personalized and comforting. Are you ready to discover how to turn your kitchen into a taco fiesta?

Why make a Taco Bowl tonight?

Versatility at its Best: This Quick and Easy Taco Bowl can be customized for various diets, offering options from gluten-free to vegetarian.

Flavor Explosion: The vibrant mix of seasoned ground beef, fresh veggies, and zesty pico de gallo delivers a satisfying taste that pleases everyone.

Speedy Preparation: Ready in under 30 minutes, you can easily whip up this meal on busy weeknights without sacrificing flavor or quality.

Interactive Dining Experience: With a buffet-style assembly, each family member can personalize their bowl, making dinner fun and engaging.

Nutrient-Rich Ingredients: Packed with protein, fiber, and healthy fats, this dish is a wholesome choice for a nourishing dinner alternative to fast food.

Try pairing your bowl with an Acai Bowl Nutritious for a refreshing dessert option after your meal!

Quick and Easy Taco Bowl Ingredients

For the Bowl Base
• Ground Beef – Classic taco filling, seasoned to perfection; substitute with ground turkey or plant-based crumbles for a leaner option.
• Brown Rice – Hearty base adding fiber and nuttiness; switch to cauliflower rice for low-carb alternatives.

For the Toppings
• Romaine Lettuce – Adds crunch and freshness; use iceberg lettuce for a milder taste.
• Black Beans – Source of plant-based protein; remember to drain and rinse for optimal texture.
• Shredded Cheddar Cheese – Melts beautifully over your bowl; opt for dairy-free cheese for a vegan option.
• Avocado – Provides creaminess and healthy fats; dice just before serving to keep it fresh.
• Pico de Gallo – Bright and zesty topping that adds a burst of flavor; feel free to use store-bought for convenience.
• Sour Cream – Adds creaminess and tang; Greek yogurt makes a healthier alternative.
• Fresh Cilantro – Enhances flavors and provides a fresh garnish; parsley works well if cilantro isn't preferred.

For the Seasoning
• Taco Seasoning – Essential for flavoring the beef; consider homemade spices for customization.

With these vibrant ingredients in hand, you're well on your way to creating a delightful Quick and Easy Taco Bowl that everyone will love!

Step‑by‑Step Instructions for Quick and Easy Taco Bowl

Step 1: Brown the Beef
In a large skillet over medium-high heat, add your ground beef and cook for 5–7 minutes, breaking it apart with a spatula until it's browned and no longer pink. Make sure to drain any excess fat, leaving behind just enough to retain flavor. The seasoned meat will be the hearty base of your Quick and Easy Taco Bowl.

Step 2: Season and Simmer
Stir in your taco seasoning along with 1/4 cup of water, and let it simmer for about 5 minutes. Stir occasionally to ensure even coverage of the seasoning, and keep an eye out for a thickened sauce that clings to the beef. This step is essential to develop the vibrant flavors that make your Quick and Easy Taco Bowl so delicious.

Step 3: Prepare the Rice
While the beef is simmering, cook your brown rice according to package instructions, which usually takes about 20 minutes. Alternatively, warm up leftover rice in a microwave-safe bowl for 1–2 minutes. The fluffy texture of the rice is a perfect contrast to the seasoned beef and fresh toppings in your taco bowl.

Step 4: Chop the Veggies
As your rice cooks, take a moment to chop your romaine lettuce into bite-sized pieces and set it aside in a bowl. Dice your avocado just before assembly to keep it fresh and vibrant. The crunch of the lettuce and the creaminess of the avocado will add great textures to your Quick and Easy Taco Bowl.

Step 5: Heat the Beans
Drain and rinse your black beans, then place them in a saucepan over medium heat for about 3–5 minutes until warm. For an added flavor boost, consider lightly seasoning the beans with a pinch of salt or cumin. This step brings protein into your bowl, making it both satisfying and nutritious.

Step 6: Assemble the Bowls
Now, it's time to build your Quick and Easy Taco Bowl! Start by layering the fluffy brown rice and crisp lettuce as the base in serving bowls. The bright base will set the stage for the hearty and vibrant ingredients that follow.

Step 7: Add the Toppings
Top your rice and lettuce with the seasoned ground beef and warm black beans. Sprinkle generous amounts of shredded cheddar cheese over the top, allowing it to melt slightly from the warmth below. Add pico de gallo for a fresh burst of flavor, followed by diced avocado and a dollop of sour cream to enrich the bowl.

Step 8: Finish and Serve
As a final touch, garnish your taco bowls with fresh cilantro and a squeeze of lime juice to brighten the flavors. If desired, you can also add crunchy tortilla strips or hot sauce for an extra kick. Enjoy this customizable Quick and Easy Taco Bowl with your family, savoring both the delicious flavors and the fun of building your own meals!

What to Serve with Quick and Easy Taco Bowl

Elevate your taco night with these delicious pairings that add extra flavor, texture, and joy to your meal.

  • Creamy Guacamole: A fresh, creamy dip made with ripe avocados, lime, and cilantro that adds a buttery richness to the bowl.

  • Spicy Corn Salsa: A zesty mix of corn, jalapeños, and bell peppers providing a delightful crunch that complements the warm fillings perfectly.

  • Crispy Tortilla Chips: Golden and crunchy, these chips are perfect for scooping up any leftover toppings while adding a satisfying crunch.

  • Chilled Mexican Street Corn Salad: A refreshing, tangy side that brings a burst of sweetness and creamy texture, enhancing your taco experience.

  • Zesty Lime Rice: Fluffy rice infused with lime juice and zest brightens your meal, providing a fresh contrast to the savory taco bowl.

  • Fiesta Black Bean Salad: This colorful blend of black beans, tomatoes, and bell peppers adds protein and fiber, creating a wholesome sidekick.

  • Coconut Lemonade: A sweet, tangy drink that balances the tacos' savory flavors, offering a refreshing sip between bites.

  • Homemade Churros: Don’t forget dessert! These warm, sugary treats are a delightful way to round out a fun and flavorful meal.

How to Store and Freeze Quick and Easy Taco Bowl

Fridge: Keep cooked beef and rice in airtight containers for up to 4 days. This helps maintain their flavors and textures, making mealtime easy throughout the week.

Freezer: Store any leftover beef and rice in freezer-safe containers for up to 3 months. Thaw in the fridge overnight before reheating for a quick meal.

Toppings Storage: For optimal freshness, store toppings like lettuce, avocado, and pico de gallo separately in the fridge. Use them within 1–2 days for best quality in your Quick and Easy Taco Bowl.

Reheating: To reheat, warm the beef and rice in the microwave, stirring occasionally until hot. Add fresh toppings right before serving for an enjoyable experience!

Expert Tips for Quick and Easy Taco Bowl

  • Prep Ahead: Prepare ingredients in advance, like chopping veggies and cooking the beef, to save time on busy nights.

  • Stay Fresh: Always dice your avocado just before serving to avoid browning and maintain that creamy texture in your Quick and Easy Taco Bowl.

  • Perfect Seasoning: Avoid over-seasoning your beef by tasting as you go; remember, you can always add more taco seasoning, but you can’t take it away!

  • Mix It Up: Feel free to experiment by substituting ingredients that your family prefers. Using cauliflower rice is a great way to make it low-carb!

  • Serving Suggestions: Make it fun! Serve ingredients buffet-style so everyone can build their Quick and Easy Taco Bowl to their liking.

  • Leftover Love: Store extra ingredients separately in airtight containers. This way, you can enjoy your taco bowl components for up to four days!

Make Ahead Options

These Quick and Easy Taco Bowls are perfect for meal prep enthusiasts! You can prepare the seasoned ground beef and brown rice up to 3 days in advance, storing them separately in airtight containers in the refrigerator to maintain their quality. If you're planning to serve them later, simply reheat the beef and rice in the microwave or on the stovetop before assembly. While you can chop romaine lettuce and prepare pico de gallo ahead of time, it’s best to store them separately and assemble the bowls just before serving. This way, your meal retains its fresh crunch and vibrant flavors, ensuring your taco night is just as delicious as the first time!

Quick and Easy Taco Bowl Variations

Feel free to unleash your creativity and make this dish your own with these exciting substitutions!

  • Dairy-Free: Swap shredded cheddar cheese for dairy-free cheese to keep it vegan-friendly. You won't miss a beat in flavor!
  • Low-Carb Delight: Use cauliflower rice instead of brown rice for a light yet satisfying base, perfect for a keto-friendly meal. Enjoy the texture without the carbs!
  • Vegetarian Option: Replace ground beef with seasoned black beans or roasted sweet potatoes for a hearty but meatless alternative. This twist is packed with flavor and nutrition!
  • Spicy Kick: Add sliced jalapeños or a drizzle of hot sauce on top for an extra burst of heat. It's a surefire way to elevate the flavor profile!
  • Crunch Factor: Toss in some crushed tortilla chips or roasted corn to add a delightful crunch to your bowl. Your tacos will become a texture extravaganza!
  • Fresh Salad Twist: Turn this bowl into a refreshing rice salad by cooling all ingredients before assembly and mixing with lime juice. Perfect for warm weather dining!

Looking for more delicious spins on your favorite meals? Check out these delightful recipes like Fish Taco Bowls or Taco Spaghetti Cheesy for more culinary inspiration!

Quick and Easy Taco Bowl Recipe FAQs

How do I choose the right ground beef?
Absolutely! Look for lean ground beef, around 80% lean, which has enough fat to keep the meat moist and flavorful. Check for a bright red color without any dark spots or an off smell, indicating freshness. If you're leaning toward healthier options, ground turkey or even plant-based crumbles work wonderfully as substitutes.

How should I store the leftover taco bowl ingredients?
Very! After cooking, store the beef and rice separately in airtight containers in the fridge for up to 4 days. Keep fresh toppings like avocado, lettuce, and pico de gallo in separate containers as well to maintain their quality. This makes assembling your Quick and Easy Taco Bowl a breeze on busy nights!

Can I freeze the cooked beef and rice?
For sure! Place your leftover cooked beef and rice in freezer-safe containers. They can last up to 3 months in the freezer. When you're ready to enjoy them again, simply thaw them overnight in the fridge and reheat in the microwave, ensuring you're stirring occasionally for even warming.

What can I do if the taco seasoning is too spicy?
Oh no! If your Quick and Easy Taco Bowl ends up spicier than you'd like, consider adding a spoonful of sour cream or Greek yogurt to balance the heat. You can also mix in a little more cooked rice to dilute the flavor. Lastly, adding a sprinkle of sugar or honey can mitigate spiciness.

Is this recipe suitable for vegetarians or those with allergies?
Absolutely! To cater to vegetarians, swap the meat for roasted sweet potatoes or seasoned black beans. If watching for allergens, be mindful of your cheese choice and opt for dairy-free options, and ensure canned beans are gluten-free. With these adjustments, everyone can enjoy a delicious serving!

How do I prevent my avocado from browning?
I often recommend dicing the avocado just before serving your Quick and Easy Taco Bowl. To go the extra mile, sprinkle some lime juice over the cut avocado; the acid helps to prevent browning and keeps it looking fresh. This way, your taco bowl stays vibrant and appealing!

Quick and Easy Taco Bowl

Savor the Flavor: Quick and Easy Taco Bowl That's Customizable

Discover the Quick and Easy Taco Bowl, a customizable meal ready in under 30 minutes.
Print Recipe Pin Recipe
Prep Time 10 minutes mins
Cook Time 20 minutes mins
Total Time 30 minutes mins
Servings: 4 bowls
Course: Dinner
Cuisine: Tex-Mex
Calories: 550
Ingredients Equipment Method Nutrition Notes

Ingredients
  

For the Bowl Base
  • 1 pound Ground Beef Seasoned to perfection; substitute with ground turkey or plant-based crumbles for a leaner option.
  • 1 cup Brown Rice Switch to cauliflower rice for low-carb alternatives.
For the Toppings
  • 2 cups Romaine Lettuce Use iceberg lettuce for a milder taste.
  • 1 can Black Beans Drain and rinse for optimal texture.
  • 1 cup Shredded Cheddar Cheese Opt for dairy-free cheese for a vegan option.
  • 1 medium Avocado Dice just before serving to keep it fresh.
  • 1 cup Pico de Gallo Feel free to use store-bought for convenience.
  • 1/2 cup Sour Cream Greek yogurt makes a healthier alternative.
  • 1/4 cup Fresh Cilantro Parsley works well if cilantro isn't preferred.
For the Seasoning
  • 2 tablespoons Taco Seasoning Consider homemade spices for customization.

Equipment

  • Large skillet
  • Saucepan
  • Cutting Board
  • Knife

Method
 

Step-by-Step Instructions
  1. In a large skillet over medium-high heat, add your ground beef and cook for 5–7 minutes, breaking it apart with a spatula until it's browned and no longer pink. Drain any excess fat.
  2. Stir in your taco seasoning along with 1/4 cup of water, and let it simmer for about 5 minutes.
  3. Cook your brown rice according to package instructions, which usually takes about 20 minutes.
  4. Chop your romaine lettuce into bite-sized pieces and set it aside in a bowl. Dice your avocado just before assembly.
  5. Drain and rinse your black beans, then place them in a saucepan over medium heat for about 3–5 minutes until warm.
  6. Layer the fluffy brown rice and crisp lettuce in serving bowls.
  7. Top your rice and lettuce with the seasoned ground beef and warm black beans. Sprinkle cheddar cheese, add pico de gallo, diced avocado, and sour cream.
  8. Garnish with fresh cilantro and a squeeze of lime juice.

Nutrition

Serving: 1bowlCalories: 550kcalCarbohydrates: 50gProtein: 30gFat: 25gSaturated Fat: 10gPolyunsaturated Fat: 5gMonounsaturated Fat: 10gCholesterol: 70mgSodium: 800mgPotassium: 600mgFiber: 10gSugar: 2gVitamin A: 10IUVitamin C: 15mgCalcium: 30mgIron: 15mg

Notes

Feel free to experiment with substitutes that your family prefers and store extra ingredients separately in airtight containers for up to four days.

Tried this recipe?

Let us know how it was!

Delicious Taco Salad Bowls With Shredded Chicken in 15 Minutes

April 13, 2026 by Grace Snow Leave a Comment

Standing in my kitchen, the aroma of spices draws me in, evoking memories of cheerful gatherings with friends and family. Today, I'm thrilled to share my Quick Taco Salad Bowls with Shredded Chicken—a meal that’s as vibrant as it is satisfying. With just 15 minutes of prep, these bowls transform basic ingredients into a colorful feast, perfect for weekday lunches or relaxed dinners. Not only are they customizable to suit every palate, but using rotisserie chicken adds tremendous flavor without the fuss. Whether you’re in the mood for a zesty topping of salsa or creamy avocado, you have the creative freedom to make this dish your own. Ready to assemble a delicious and wholesome meal that’ll brighten your table? Dive in; your taste buds will thank you!

Why will you love Taco Salad Bowls?

Quick and Convenient: This recipe comes together in just 15 minutes, making it the ultimate solution for busy weeknights.

Flavorful Fillings: With zesty shredded chicken and customizable toppings, every bite is an explosion of delicious flavors.

Healthy and Wholesome: Packed with protein from chicken and beans, plus fiber-rich veggies, these bowls are as nutritious as they are tasty.

Versatile Options: Feel free to swap in your favorite ingredients or even try a vegetarian version with black beans or seasoned tofu.

Perfect for Sharing: A colorful salad bowl that appeals to everyone—set it out and let your guests build their own!

Pair these with Fish Taco Bowls for a fun taco night or enjoy with a side of German Potato Salad for a well-rounded meal.

Taco Salad Bowls With Shredded Chicken Ingredients

For the Base
• Shredded Cooked Chicken – Provides protein and flavor; using rotisserie chicken makes this quick and hearty.
• Romaine Lettuce – A crunchy base for the salad; chop it up big for a satisfying bite.

For the Filling
• Taco Seasoning – Adds spice and depth; store-bought saves time, but homemade offers customization.
• Black Beans – Contributes protein and fiber; chickpeas or lentils work well for a different twist.
• Corn – Sweetness and texture; fresh corn is ideal in season, while canned or frozen are great backups.

For the Toppings
• Cherry Tomatoes – Adds freshness and acidity; they brighten up each bite.
• Avocado – Adds creamy richness and healthy fats; swap for sliced cucumbers if you prefer a lighter option.
• Shredded Cheese – Opt for your favorite cheese for extra flavor; it’s optional but highly recommended!
• Salsa – A flavorful topping that brings everything together; try it mild or spicy according to your taste.
• Sour Cream – Optional creamy addition; a dollop of guacamole can also be a delightful substitute.

Enjoy crafting your own Taco Salad Bowls with Shredded Chicken by mixing and matching these ingredients based on what you have on hand!

Step‑by‑Step Instructions for Taco Salad Bowls With Shredded Chicken

Step 1: Prepare the Chicken
In a mixing bowl, combine the shredded cooked chicken with taco seasoning, making sure each piece is evenly coated. This should take about 2 minutes. Feel free to use your hands or a spoon to mix well. The chicken should take on a vibrant, seasoned appearance that's ready to shine in your Taco Salad Bowls.

Step 2: Optional Heating
If you prefer warm chicken, heat a skillet over medium heat. Add the seasoned chicken and cook for about 5-7 minutes, stirring occasionally, until it’s warmed throughout and slightly sizzling. You’ll know it’s done when it becomes aromatic and reaches a uniform temperature, enhancing the flavors for your salad.

Step 3: Build the Base
Grab your serving bowls and layer a generous amount of chopped romaine lettuce as the base. This should fill the bottom of the bowls nicely, providing a crunchy foundation. Aim for a vibrant green layer, as it offers both visual appeal and adds a fresh, crisp texture to your Taco Salad Bowls.

Step 4: Add Chicken
Distribute the seasoned or heated chicken evenly over the romaine lettuce. Make sure each bowl gets a hearty portion, creating a delightful contrast to the vibrant greens. The seasoned chicken will serve as the star of your Taco Salad Bowls, adding both flavor and protein to the mix.

Step 5: Layer the Fillings
Next, evenly distribute the black beans and corn over the chicken layer. Sprinkle in about a quarter cup of each ingredient per bowl, ensuring a colorful presentation. The black beans will add beautiful depth and texture, while the corn brings a sweet crunch that complements the chicken perfectly.

Step 6: Add Fresh Toppings
Now, it’s time to bring in the fresh elements! Gently sprinkle halved cherry tomatoes over each bowl, followed by slices of creamy avocado. Aim for a mix of colors and textures to brighten your Taco Salad Bowls. This step enhances not only the visual appeal but also the delightful flavors in every bite.

Step 7: Finish with Cheese and Salsa
Top each bowl with a sprinkle of shredded cheese, if desired, and a generous spoonful of salsa. The cheese will add richness, while the salsa introduces a punch of flavor to tie everything together. Allow the vibrant colors of your toppings to shine in your Taco Salad Bowls.

Step 8: Serve with a Smile
Finally, if you’re using sour cream, add a dollop on top of each salad bowl for added creaminess. Serve immediately alongside tortilla chips for extra crunch. The presentation should be inviting and colorful, making your Taco Salad Bowls With Shredded Chicken a perfect meal for sharing and enjoying together!

What to Serve with Taco Salad Bowls with Shredded Chicken

Get ready to elevate your mealtime experience with these delightful accompaniments that perfectly complement your vibrant taco salad bowls.

  • Crispy Tortilla Chips: These add a satisfying crunch. Perfect for dipping in salsa or enjoying alongside your salad bowls for an irresistible texture contrast.

  • Guacamole Delight: This creamy avocado dip brings a luxurious touch. The richness of guacamole beautifully balances the zestiness of the salad, making each bite a creamy dream.

  • Mexican Street Corn: A sweet and buttery corn dish topped with cheese and spices adds a delightful twist. Its sweetness harmonizes with the savory chicken, creating a comforting flavor contrast.

  • Lime Cilantro Rice: Fluffy rice infused with lime and fresh cilantro provides a flavorful bed beneath your taco salad. The bright flavors enhance the overall dish, binding everything together beautifully.

  • Spicy Black Bean Dip: Creamy and bold, this dip adds an extra layer of flavor. Perfect on the side, it invites you to savor every element of your meal, from the crunchy to the creamy.

  • Fresh Fruit Salsa: A refreshing fruit salsa bursting with seasonal fruits complements the spices beautifully. With every bite, you’ll enjoy a splash of sweetness that cleanses the palate.

  • Frosty Margaritas: A classic pairing, these cocktails with a hint of lime are fantastic for balancing the spicy notes of the salad. Your taco night won’t feel complete without this refreshing drink!

  • Chocolate Churros: For dessert, indulge in these crispy, cinnamon-sugar treats. The sweetness promises a delightful conclusion to a savory meal, leaving everyone satisfied and smiling.

Helpful Tricks for Taco Salad Bowls

  • Choose Quality Chicken: Use a high-quality rotisserie chicken for flavor; it saves time and enhances your Taco Salad Bowls immensely.

  • Don’t Overdo the Seasoning: Start with a small amount of taco seasoning, then adjust to taste. Too much can overpower the dish.

  • Keep Ingredients Fresh: Store your toppings separately until serving to maintain texture and freshness in your Taco Salad Bowls.

  • Experiment with Veggies: Incorporate a range of colorful vegetables for added nutrition and flavor. Bell peppers or radishes can brighten your salad.

  • Presentation Matters: Layer ingredients artfully for visual appeal. A beautifully presented dish makes your Taco Salad Bowls even more inviting!

  • Customize for Everyone: Always have optional toppings available for guests—this allows everyone to tailor their own Taco Salad Bowls to their taste preferences.

Storage Tips for Taco Salad Bowls with Shredded Chicken

Fridge: Store unassembled ingredients in separate airtight containers in the fridge for up to 3 days. This ensures freshness and keeps the textures intact.

Freezer: If you have leftover cooked shredded chicken, it can be frozen for up to 3 months. Thaw in the fridge before using in your Taco Salad Bowls.

Reheating: Heat the chicken in a skillet over medium heat for about 5-7 minutes, stirring until warmed through. Assemble the salad with fresh ingredients afterward.

Maintenance of Freshness: Keep toppings like avocado and salsa separate until serving to maintain quality in your Taco Salad Bowls.

Taco Salad Bowls With Shredded Chicken Variations

Feel free to get creative with your Taco Salad Bowls and explore these delightful variations!

  • Vegetarian Option: Skip the chicken and use a mix of black beans, corn, and extra veggies like bell peppers or zucchini. This twist will keep your meal satisfying and hearty!

  • Spicy Kick: Add fresh jalapeños or a drizzle of hot sauce for a zesty heat that’ll tantalize your taste buds. Just remember to adjust based on your spice level preference!

  • Cheese Lover’s Delight: Swap out shredded cheese for cotija or crumbled feta. Each cheese brings its unique flavor profile, elevating your salad bowl to new heights.

  • Crunchy Twists: Toss in crushed tortilla chips or crispy fried onions on top for an extra crunch that adds texture and excitement to every bite!

  • Fresh Herb Burst: Incorporate freshly chopped cilantro or green onions as a vibrant garnish. This will enhance the flavors and provide freshness that complements the chicken and veggies beautifully.

  • Creative Dressings: Swap salsa for your favorite dressing, such as a zesty lime vinaigrette or a creamy avocado dressing. This simple change can bring a whole new vibe to your dish!

  • Ranch or Caesar Fusion: Drizzle ranch or Caesar dressing instead of sour cream for a creamy twist that’ll make your salad feel indulgent yet still fresh.

  • Pair these tasty variations with a side of Buffalo Tofu with Caesar Salad for a flavor-packed meal that caters to all preferences!

With these fun twists, every Taco Salad Bowl can become a unique masterpiece suitable for any palate. Enjoy the journey of flavor!

Make Ahead Options

These Taco Salad Bowls with Shredded Chicken are perfect for meal prep enthusiasts! You can prepare the shredded chicken seasoned with taco seasoning up to 3 days in advance and store it in an airtight container in the refrigerator to maintain freshness. Additionally, chop the romaine lettuce and keep it separated, so it stays crisp until serving. The black beans, corn, and other toppings can also be prepped ahead, kept in separate containers for up to 3 days. When you're ready to enjoy, simply assemble your salad bowls right before serving. This way, you’ll have a delicious, vibrant meal with minimal effort, saving you time during busy weeknights!

Taco Salad Bowls with Shredded Chicken Recipe FAQs

How do I choose ripe avocado for my taco salad bowls?
Absolutely! Look for avocados that are slightly soft when gently squeezed. If they feel mushy or have dark spots all over, avoid those. For a perfectly ripe avocado, you can store them at room temperature until they yield to gentle pressure, usually within 2-3 days.

What’s the best way to store leftover Taco Salad ingredients?
Very! Store unassembled ingredients in separate airtight containers in the fridge for up to 3 days to maintain freshness. Keep lettuce, tomatoes, and avocado away from the chicken and beans until you're ready to enjoy your Taco Salad Bowls again.

Can I freeze leftover cooked shredded chicken?
Absolutely! To freeze, portion the shredded chicken into freezer-safe bags, removing as much air as possible. It can safely be stored for up to 3 months. When ready to use, thaw overnight in the fridge and then reheat in a skillet over medium heat for 5-7 minutes before assembling your taco salad.

What can I do if my black beans are too dry?
If your black beans are too dry, you can add a splash of chicken or vegetable broth while reheating them on the stove. Alternatively, mix in a little salsa or olive oil to moisten them up. This small addition can enhance flavor and texture without overwhelming your dish.

Are there any allergy considerations I should be aware of?
Definitely! If you're preparing Taco Salad Bowls for guests, make sure to ask about dietary restrictions. Dairy-free individuals can skip the cheese and sour cream, opting for guacamole instead. Always double-check store-bought ingredients like salsa for additives that might trigger allergies.

Can I make Taco Salad Bowls vegetarian?
Very! To create a vegetarian version, simply substitute the shredded chicken with seasoned tofu or skip it altogether and load up on additional beans, corn, and your favorite veggies. You can add lentils for extra protein and texture, ensuring everyone can enjoy their customized Taco Salad Bowls!

Taco Salad Bowls With Shredded Chicken

Delicious Taco Salad Bowls With Shredded Chicken

Taco Salad Bowls With Shredded Chicken are a quick and customizable dish that combines vibrant ingredients into a satisfying meal.
Print Recipe Pin Recipe
Prep Time 15 minutes mins
Cook Time 7 minutes mins
Total Time 22 minutes mins
Servings: 4 bowls
Course: Salads
Cuisine: Mexican
Calories: 450
Ingredients Equipment Method Nutrition Notes

Ingredients
  

For the Base
  • 2 cups Shredded Cooked Chicken Using rotisserie chicken saves time.
  • 4 cups Romaine Lettuce Chopped into large pieces.
For the Filling
  • 1 packet Taco Seasoning Store-bought or homemade.
  • 1 can Black Beans Drained and rinsed.
  • 1 cup Corn Fresh, canned, or frozen.
For the Toppings
  • 1 cup Cherry Tomatoes Halved.
  • 1 medium Avocado Sliced.
  • 1 cup Shredded Cheese Optional.
  • 1 cup Salsa Mild or spicy, to taste.
  • 1 cup Sour Cream Optional, can substitute with guacamole.

Equipment

  • Mixing Bowl
  • Skillet
  • Serving Bowls

Method
 

Step‑by‑Step Instructions
  1. In a mixing bowl, combine the shredded cooked chicken with taco seasoning, mixing well to coat each piece.
  2. Optional: Heat a skillet over medium heat, add seasoned chicken, and cook for 5-7 minutes until warmed through.
  3. Layer a generous amount of chopped romaine lettuce in serving bowls as the base.
  4. Distribute the seasoned chicken evenly over the lettuce.
  5. Sprinkle black beans and corn over the chicken, aiming for about a quarter cup of each per bowl.
  6. Add halved cherry tomatoes and slices of avocado on top.
  7. Sprinkle shredded cheese and add a spoonful of salsa on each bowl.
  8. If using sour cream, add a dollop on top of each salad bowl and serve immediately with tortilla chips.

Nutrition

Serving: 1bowlCalories: 450kcalCarbohydrates: 35gProtein: 30gFat: 22gSaturated Fat: 10gPolyunsaturated Fat: 1gMonounsaturated Fat: 11gCholesterol: 85mgSodium: 800mgPotassium: 600mgFiber: 10gSugar: 3gVitamin A: 4200IUVitamin C: 30mgCalcium: 250mgIron: 3mg

Notes

Customize your Taco Salad Bowls with various toppings and ingredients for different flavors and textures.

Tried this recipe?

Let us know how it was!

Savory Seven-Layer Taco Salad for Flavorful Gatherings

April 13, 2026 by Grace Snow Leave a Comment

As the sun sets and game day approaches, I find myself daydreaming about the vibrant flavors waiting to be devoured. Enter the Seven-Layer Taco Salad—a colorful, engaging dish that’s as pleasing to the eye as it is to the palate. This masterpiece is not only a fantastic way to gather friends and family around the table, but it also features layers that are easily customizable to fit any dietary needs. Whether you’re in the mood for zesty guacamole, savory seasoned beef, or a hearty vegetarian option, this salad has it all. With quick prep and a burst of textures—crunchy, creamy, and cheesy—it's destined to become your go-to for everything from casual dinners to lively summer cookouts. Ready to dive into this delicious layering adventure? Let's get started!

Why is this Seven-Layer Taco Salad a Must-Try?

Vibrant, Colorful Layers: The Seven-Layer Taco Salad showcases a rainbow of fresh ingredients that not only look delightful but also tantalize your taste buds.

Customizable Options: Tailor it to your taste! Whether you prefer seasoned beef or want to explore vegetarian alternatives like crumbled tofu, this recipe easily adapts to any dietary preference.

Effortless Preparation: With a quick assembly process, you can whip up this dish in no time—perfect for game days or last-minute gatherings.

Crowd-Pleasing Flavor: Featuring well-seasoned layers of flavors, this salad is sure to impress your family and friends. It's like enjoying your tacos in salad form!

Perfectly Textured: Enjoy the contrast of crunchy lettuce, creamy guacamole, and hearty refried beans, giving each bite a delightful variety that keeps everyone coming back for more. Give it a try alongside our Avocado Egg Salad for a refreshing twist!

Seven-Layer Taco Salad Ingredients

• Get ready to layer up with these delicious essentials!

For the Base
• Ground Beef – Provides protein and a hearty base; substitute with seasoned lentils or crumbled tofu for a vegetarian option.
• Taco Seasoning Mix – Adds essential flavor and spice; try homemade seasoning for a fresher taste.
• Refried Beans – Adds creaminess and depth to the layers; consider black beans for a different flavor profile.

For the Creamy Layers
• Sour Cream – Acts as a rich, creamy layer; Greek yogurt can be swapped for a healthier choice.
• Guacamole – Brings freshness and creaminess; use avocado instead if preferred.

For the Toppings
• Salsa – Provides moisture and flavor; fresh salsa elevates the dish, but jarred is okay in a pinch.
• Shredded Lettuce – A crucial layer for crunch; iceberg or romaine are great choices for that texture.
• Shredded Cheddar Cheese – Adds richness and flavor; any cheese like Monterey Jack is a fantastic alternative.
• Diced Tomatoes – Offers freshness and juiciness; cherry tomatoes are convenient and can be used whole.
• Sliced Black Olives – Introduces a briny flavor; omit or replace with diced bell peppers for a fresh twist.
• Chopped Green Onions – Provides a mild onion flavor and a pop of color; chives can work as a subtler option.

For Serving
• Tortilla Chips – Optional for serving; they add crunch and are perfect for scooping up all these delicious layers!

This Seven-Layer Taco Salad is the perfect dish to shine at any gathering. Enjoy exploring these layers of flavors!

Step‑by‑Step Instructions for Seven-Layer Taco Salad

Step 1: Brown the Beef
In a large skillet, heat over medium heat, add the ground beef, and cook for about 5 minutes, breaking it apart with a spatula until it’s thoroughly browned and crumbly. Stir occasionally to ensure even cooking, then drain any excess fat to prepare for seasoning. This savory beef layer will form the heart of your delicious Seven-Layer Taco Salad.

Step 2: Season the Beef
After draining the fat, return the browned beef to the skillet and sprinkle the taco seasoning mix over it. Add water according to the package instructions and bring to a simmer. Cook for another 5 minutes, allowing it to thicken while stirring occasionally. The seasoned beef will add a burst of flavor that elevates your Seven-Layer Taco Salad to the next level.

Step 3: Create the Base Layer
Grab a clear serving dish to showcase the beautiful layers of your Seven-Layer Taco Salad. Begin by spreading a generous layer of refried beans at the bottom, using a spatula to ensure even coverage. This creamy base not only adds depth but also acts as a delicious foundation for the layers above.

Step 4: Add the Beef Layer
Next, spoon the seasoned ground beef over the layer of refried beans, spreading it evenly to ensure every bite features that hearty flavor. This layer will create a satisfying center for your salad, filled with well-seasoned goodness that contrasts wonderfully with the refreshing veggies.

Step 5: Layer the Creaminess
Now it's time to enrich your salad with creamy layers. Begin by dolloping sour cream generously over the beef, smoothing it out to create a beautiful visual contrast. Follow this with an equally generous layer of guacamole, making sure to spread it evenly. These creamy elements bring richness to your Seven-Layer Taco Salad.

Step 6: Add the Salsa
Next, pour over your salsa, ensuring it covers the creamy layer completely. This will add moisture and enhance the overall flavor profile. If you’re using fresh salsa, its vibrant colors and zest will bring a refreshing touch to your Seven-Layer Taco Salad, making it visually appealing and delicious.

Step 7: Pile on the Toppings
Carefully top your salad with shredded lettuce, followed by shredded cheddar cheese, making sure to cover the layers evenly. Then, add diced tomatoes, sliced black olives, and chopped green onions on top for that extra crunch and color. Each of these toppings adds a delightful twist to the Seven-Layer Taco Salad, making it inviting and appetizing.

Step 8: Serve and Enjoy
Your stunning Seven-Layer Taco Salad is now complete! Serve immediately alongside tortilla chips for extra crunch, allowing everyone to scoop up the layers in delicious bites. The vivid layers, combined with contrasting textures, create a dish that's not only delectable but also perfect for gatherings.

Seven-Layer Taco Salad Variations

Excited to personalize your dish? Here are some delicious ways to customize while keeping every bite vibrant and enticing!

  • Vegetarian Delight: Substitute ground beef with seasoned lentils or crumbled tofu for a plant-based option that’s equally satisfying. Enjoy the same bold flavors without the meat!

  • Sweet Potato Twist: Add roasted sweet potatoes and black beans for an even heartier, meat-free version that provides sweetness and texture. This delightful combination will surprise your taste buds!

  • Greek-Inspired: Swap sour cream with Greek yogurt and add feta cheese for a tangy twist that complements the Mexican flavors. The Greek influence elevates the freshness of the salad.

  • Spicy Kick: For those who love heat, mix diced jalapeños into your salsa or layer them directly for a fiery surprise. It adds depth and a kick that spice lovers crave!

  • Crunchy Alternatives: Replace tortilla chips with crunchy taco-flavored corn chips or even crispy pita chips for a unique twist. Each bite offers a different texture that’s sure to impress.

  • Herbal Infusion: Toss in fresh cilantro or parsley as an additional layer for an aromatic lift that enhances the overall flavor. Fresh herbs bright up any layered dish!

  • Creamy Avocado Upgrade: If you adore creaminess, mix avocado directly into your guacamole for a richer texture. Enjoying the extra smoothness brings a delightful experience to your palate.

  • Fresh Salsa Variations: Experiment with fruit-based salsas, like mango or peach, for a refreshing and sweet complement to the savory flavors in your salad. This unexpected twist brings a taste of summer to your gathering!

These ideas ensure your Seven-Layer Taco Salad is an adaptable dish everyone will love. For more tasty inspirations, check out our Taco Spaghetti Cheesy or try a refreshing Chicken Salad Apples. Enjoy mixing and matching!

Make Ahead Options

Preparing your Seven-Layer Taco Salad in advance is a fantastic way to save time on busy days! You can cook the ground beef and prepare the refried beans up to 3 days ahead; just store them separately in airtight containers in the refrigerator to maintain their freshness. Additionally, chop the veggies and mix the sour cream and guacamole, pressing plastic wrap against the guacamole to prevent browning. When you're ready to serve, simply layer the components in a clear serving dish, starting with the refried beans, followed by the beef, creamy layers, and toppings. This way, you’ll enjoy a beautifully layered salad that tastes just as delicious as when freshly made!

Storage Tips for Seven-Layer Taco Salad

Fridge: Store any leftovers in an airtight container for up to 3 days. Keep the layers separate if possible to maintain freshness, especially the veggies.

Freezer: This salad is not ideal for freezing due to its fresh ingredients, but if you must, freeze the seasoned beef and beans separately for up to 2 months.

Reheating: Thaw the beef and beans in the fridge overnight, then warm gently in a skillet before assembling the salad again. Avoid reheating other layers to maintain texture.

Make-Ahead: Prepare beef, beans, and toppings 2 days in advance. Keep them stored separately in the fridge and assemble your Seven-Layer Taco Salad just before serving for best results.

What to Serve with Seven-Layer Taco Salad

Elevate your meal experience by pairing this vibrant salad with complementary dishes that enhance its zesty delight.

  • Crispy Tortilla Chips: Perfectly crunchy, these chips add an irresistible scoopable texture, making every bite more fun.

  • Zesty Mexican Street Corn: This sweet and spicy corn dish brings a burst of flavor that balances well with the salad’s creaminess.

  • Chilled Avocado Cucumber Salad: The refreshing coolness of this salad enhances the robust flavors, providing a light, crunchy contrast.

  • Creamy Cilantro Lime Rice: The citrusy notes in this rice dish harmonize beautifully with the taco-flavored layers for a cohesive dinner.

  • Classic Guacamole: Serve alongside extra guacamole for those who crave more creaminess, ensuring every scoop bursts with flavor.

  • Margaritas or Sparkling Water: Add a refreshing beverage to counterbalance the richness of the salad, enhancing your dining experience.

  • Chocolate Flan Dessert: For a sweet ending, this velvety dessert contrasts the savory salad, providing an indulgent finish to your meal.

  • Sliced Jalapeños: A spicy kick on the side allows guests to customize their salad experience, appealing to heat lovers.

  • Fresh Fruit Salsa: A vibrant, fruit-based salsa offers a refreshing sweetness that complements the spiciness of the layers.

Expert Tips for Seven-Layer Taco Salad

  • Fresh Ingredients Matter: Use the freshest veggies, meats, and condiments to enhance the flavors and textures of your Seven-Layer Taco Salad. They'll make a noticeable difference.

  • Assemble Right Before Serving: To avoid a soggy salad, layer the ingredients just before you’re ready to serve. This is particularly important for the lettuce and creamy elements.

  • Prevent Guacamole Browning: If preparing ahead, cover surface of guacamole with plastic wrap, pressing it directly onto the layer to minimize browning and keep it vibrant.

  • Taste as You Go: After seasoning the beef, taste it! Adjust the spices to your liking. A little more heat or seasoning can elevate your beef flavor significantly.

  • Customize Your Layers: Feel free to mix and match ingredients! Whether opting for black beans over refried or adding extra toppings, your personal touch is welcomed in this layered salad.

  • Choose Crunch Wisely: Use sturdy tortilla chips for serving; they should be robust enough to scoop up the hearty layers of your Seven-Layer Taco Salad.

Seven-Layer Taco Salad Recipe FAQs

What’s the best way to select ripe ingredients for my Seven-Layer Taco Salad?
Absolutely! When choosing your ingredients, look for firm, bright vegetables. For ripe avocados, they should yield slightly to gentle pressure. Tomatoes should be vibrant and fragrant, while lettuce should be crisp without any dark spots or wilting.

How should I store leftovers from my Seven-Layer Taco Salad?
Very! If you have leftovers, keep them in an airtight container in the fridge for up to 3 days. To maintain freshness, it's best to store the layers separately, especially the lettuce and any creamy toppings like sour cream or guacamole.

Can I freeze any part of the Seven-Layer Taco Salad?
Sure! While the fully assembled salad doesn't freeze well, you can freeze the seasoned beef and refried beans separately for up to 2 months. To do this, let them cool completely, then place them in freezer-safe containers. When ready to use, thaw them overnight in the fridge and reheat on the stovetop before assembling the salad again.

What should I do if my seasoned beef turns out too bland?
Not to worry! If you find your beef lacking flavor, start by adding more taco seasoning or a splash of hot sauce to boost the spice. You can also mix in freshly chopped garlic or onion while cooking for deeper flavor. If you feel adventurous, a pinch of smoked paprika adds a lovely smokiness that complements the dish beautifully.

Are there any dietary considerations for making this Seven-Layer Taco Salad?
Definitely! This recipe can easily be made vegetarian by swapping out ground beef for seasoned lentils or crumbled tofu. Additionally, be mindful of any allergies—substitute ingredients like sour cream with Greek yogurt for dairy concerns, and always double-check salsa ingredients to ensure it's gluten-free if needed.

How long can I keep prepared ingredients in the fridge before assembling?
You can prepare your beef, beans, and toppings up to 2 days in advance. Store them separately in airtight containers in the fridge to preserve their freshness. When it's time to serve, simply assemble your vibrant Seven-Layer Taco Salad and enjoy!

Seven-Layer Taco Salad

Savory Seven-Layer Taco Salad for Flavorful Gatherings

This Seven-Layer Taco Salad is a vibrant, customizable dish perfect for gatherings, combining delightful layers of flavors and textures.
Print Recipe Pin Recipe
Prep Time 15 minutes mins
Cook Time 10 minutes mins
Total Time 25 minutes mins
Servings: 6 servings
Course: Salads
Cuisine: Mexican
Calories: 350
Ingredients Equipment Method Nutrition Notes

Ingredients
  

For the Base
  • 1 pound Ground Beef Substitute with seasoned lentils or crumbled tofu for vegetarian
  • 1 packet Taco Seasoning Mix Try homemade seasoning for a fresher taste
  • 1 can Refried Beans Consider black beans for a different flavor profile
For the Creamy Layers
  • 1 cup Sour Cream Greek yogurt can be swapped for a healthier choice
  • 1 cup Guacamole Use avocado instead if preferred
For the Toppings
  • 1 cup Salsa Fresh salsa elevates the dish
  • 2 cups Shredded Lettuce Iceberg or romaine work well
  • 1 cup Shredded Cheddar Cheese Monterey Jack is a great alternative
  • 1 cup Diced Tomatoes Cherry tomatoes can be used whole
  • 1/2 cup Sliced Black Olives Omit or replace with diced bell peppers if desired
  • 1/4 cup Chopped Green Onions Chives can also work well
For Serving
  • 1 bag Tortilla Chips Optional for serving; perfect for scooping up the layers

Equipment

  • Large skillet
  • clear serving dish
  • Spatula

Method
 

Step‑by‑Step Instructions
  1. In a large skillet, heat over medium heat, add the ground beef, and cook for about 5 minutes, breaking it apart with a spatula until it’s thoroughly browned and crumbly.
  2. After draining the fat, return the browned beef to the skillet and sprinkle the taco seasoning mix over it. Add water according to the package instructions and bring to a simmer.
  3. Grab a clear serving dish and spread a layer of refried beans at the bottom.
  4. Spoon the seasoned ground beef over the layer of refried beans, spreading it evenly.
  5. Dollop sour cream generously over the beef, smoothing it out.
  6. Spread guacamole evenly over the sour cream layer.
  7. Pour salsa over the creamy layer.
  8. Top the salad with shredded lettuce, followed by shredded cheddar cheese, diced tomatoes, sliced black olives, and chopped green onions.
  9. Serve immediately alongside tortilla chips for extra crunch.

Nutrition

Serving: 1servingCalories: 350kcalCarbohydrates: 30gProtein: 20gFat: 20gSaturated Fat: 8gPolyunsaturated Fat: 1gMonounsaturated Fat: 9gCholesterol: 60mgSodium: 800mgPotassium: 600mgFiber: 5gSugar: 3gVitamin A: 500IUVitamin C: 15mgCalcium: 200mgIron: 3mg

Notes

Assembling the salad right before serving helps avoid sogginess. Store leftovers in an airtight container for up to 3 days.

Tried this recipe?

Let us know how it was!

Taco Pasta Salad Recipe: Quick, Colorful, and Customizable Delight

April 13, 2026 by Grace Snow Leave a Comment

With each bite, the vibrant colors of this Taco Pasta Salad light up my kitchen and remind me of summer picnics and joyful gatherings. This isn’t just any salad—it's a culinary carnival, packed with hearty pasta and lively taco ingredients that come together in a delightful explosion of texture and flavor. What I adore most about this Taco Pasta Salad recipe is its playful versatility; whether you’re in a rush or planning an elaborate potluck, it’s quick to whip up and can be customized to fit whatever cravings or ingredients you have on hand. Plus, it’s a nourishing option that satisfies both the palate and the body, making it a perfect fit for any mealtime. Ready to make your taste buds dance? Let’s dive into this delicious journey!

Why You’ll Love This Taco Pasta Salad?

Versatility: This recipe is a canvas for your creativity! With endless customization options like swapping beans for quinoa or adding your favorite seasonal veggies, it fits any dietary preference.

Quick & Easy: Perfect for busy weeknights, you can have this colorful salad ready in no time. With simple prep steps, you'll be enjoying a delicious meal in under 30 minutes!

Crowd-Pleaser: Whether it's a picnic or a potluck, it's always a hit. The vibrant flavors and textures appeal to both kids and adults, making it a delightful centerpiece for any gathering.

Fueling: Packed with nutrients, fiber, and protein, each serving is a wholesome choice. With ingredients like black beans and colorful veggies, you're not just feeding appetites, but nourishing bodies!

Texture Bliss: The combination of creamy dressing, crispy veggies, and hearty pasta creates an irresistible medley of flavors and textures that keeps every bite exciting.

For more tasty ideas, try my Taco Spaghetti Cheesy or for a light option, check out Cauliflower Pasta Ready.

Taco Pasta Salad Ingredients

• Mix and match these ingredients to create your perfect Taco Pasta Salad!

For the Pasta
• Pasta – Choose rotini or penne for the best texture; feel free to substitute with gluten-free pasta for a dietary-friendly option.

For the Dressing
• Ranch Dressing – Adds a creamy, tangy flavor; swap for a yogurt-based dressing for a lighter option.
• Salsa – Infuses vibrant taco flavors; adjust the spiciness by selecting mild or hot salsa depending on your taste.

For the Vegetables
• Cherry Tomatoes – Bring sweetness and juiciness; if unavailable, use diced regular tomatoes as a substitute.
• Bell Peppers – Provide crunch and color; any variety you have on hand will work beautifully.
• Red Onion – Elevates flavor and aroma; substitute with green onions for a milder taste if preferred.

For the Protein
• Black Beans – Packed with protein and fiber; kidney or pinto beans make great stand-ins if needed.
• Corn – Offers sweetness and texture; you can use fresh, canned, or frozen corn based on what's available.

For the Cheese
• Cheese (e.g., Cheddar) – Adds creaminess and flavor; consider dairy-free cheese for a plant-based version that suits all diets.

Step‑by‑Step Instructions for Taco Pasta Salad Recipe

Step 1: Cook Pasta
Begin by bringing a large pot of salted water to a rolling boil over high heat. Add your choice of rotini or penne pasta, and cook for 8-10 minutes until al dente—tender yet firm to the bite. Once cooked, drain the pasta using a colander and rinse it briefly with cold water to stop the cooking process. Set aside to cool while you prepare the other ingredients.

Step 2: Make Dressing
In a small bowl, whisk together 1/2 cup of ranch dressing and 1/4 cup of your favorite salsa until smooth and well-combined. This creamy dressing will not only add flavor but will also bring all the components of your Taco Pasta Salad together. Adjust the mixture to your taste by incorporating more salsa if you prefer extra zest.

Step 3: Chop Veggies
While the pasta is cooling, take a cutting board and chop your colorful vegetables. Dice the cherry tomatoes, bell peppers, and red onion into bite-sized pieces, creating a vibrant medley. If you’re using any optional veggies, dice them as well. This will enhance the textures and flavors in your Taco Pasta Salad, providing a delightful crunch.

Step 4: Combine Ingredients
In a large mixing bowl, add the cooled pasta along with the chopped vegetables, canned black beans, corn, and a sprinkle of shredded cheese. Pour the flavorful dressing over the top and gently toss the ingredients together until everything is evenly coated. This combination will create a colorful and nutritious Taco Pasta Salad that’s bursting with flavor.

Step 5: Chill
To let the flavors meld beautifully, cover the bowl with plastic wrap or a lid and refrigerate your Taco Pasta Salad for at least 30 minutes. Chilling it not only enhances the taste but also helps the pasta soak in the zesty dressing and the freshness of the vegetables. Once chilled, your salad will be ready to serve!

Make Ahead Options

These Taco Pasta Salad Recipe components are perfect for meal prep, saving you time during busy weeknights! You can cook the pasta and chop the vegetables up to 24 hours in advance; simply refrigerate the pasta in an airtight container and store chopped veggies separately to maintain their crunch. Additionally, you may mix the dressing (ranch and salsa) and refrigerate it up to 3 days ahead to let the flavors meld. When it’s time to serve, toss the cooled pasta, veggies, black beans, and corn together with the dressing, then chill for at least 30 minutes to allow the flavors to marry beautifully. This way, you'll enjoy the vibrant taste and texture while saving valuable cooking time!

What to Serve with Taco Pasta Salad?

Elevate your meal with delightful sides and pairings that complement the vibrant flavors of this hearty pasta salad.

  • Garlic Bread: A warm, crispy companion that adds a delightful crunch and absorbs the zesty flavors from the salad. Perfect for soaking up any leftover dressing!

  • Grilled Chicken Skewers: Juicy and seasoned to perfection, these skewers provide a delicious protein boost that pairs beautifully with the colorful elements of the salad.

  • Mexican Street Corn: Sweet corn slathered in savory spices and creamy sauce adds a burst of flavor that enhances the taco theme. It's a delightful and festive addition!

  • Crispy Tortilla Chips: Serve these with a side of guacamole or salsa for dipping. Their crunch contrasts wonderfully with the creamy pasta salad, creating a satisfying texture combination.

  • Avocado Lime Dressing: Drizzle this zesty dressing over the salad for an extra layer of brightness. It complements the flavors while adding a lush creaminess that delights the palate.

  • Chilled White Wine: A refreshing glass of Sauvignon Blanc or a light Pinot Grigio will balance out the rich flavors of the salad, making each bite more enjoyable.

Your taco-themed meal is sure to impress with these delightful pairings that keep the fun and flavor flowing!

Expert Tips for Taco Pasta Salad

  • Perfect Pasta: Ensure your pasta is al dente for the right texture. Overcooking can lead to mushiness, ruining the salad's integrity.

  • Flavorful Dressing: Experiment with different dressings! While ranch is a favorite, try a yogurt-based or zesty vinaigrette for a refreshing twist in your Taco Pasta Salad.

  • Veggie Variety: Don’t hesitate to mix in your favorite vegetables! Seasonal options or leftovers can add unique flavors and boost nutrition—just ensure they’re chopped into even pieces.

  • Let It Chill: Allowing the salad to chill for at least 30 minutes helps meld the flavors. Don’t skip this step! It’s crucial for a deliciously tangy Taco Pasta Salad.

  • Protein Boost: For a heartier meal, add cooked ground turkey or shredded chicken. It enhances flavor and turns this dish into a complete dinner option.

Taco Pasta Salad Recipe Variations

Explore exciting twists to make this delectable Taco Pasta Salad uniquely yours!

  • Dairy-Free: Swap regular cheese for dairy-free alternatives like cashew or almond cheese for a plant-based delight. Enjoy the same creamy texture without compromising dietary needs.

  • Quinoa Boost: Replace black beans with quinoa for a gluten-free, protein-packed salad. This nutty grain adds a new layer of texture that pairs wonderfully with the robust flavors.

  • Taco Spice Blast: Sprinkle in taco seasoning for an extra punch of flavor. This simple addition brings even more warmth and zest to your dish—just be sure to adjust the seasoning of your dressing accordingly!

  • Veggie Variety: Incorporate seasonal veggies such as diced cucumbers or shredded carrots. Not only do they boost nutrition, but they also add vibrant colors and crunch to your salad.

  • Protein Powerhouse: Add cooked ground turkey or shredded chicken for a hearty protein boost. This fabulous twist transforms your salad into a satisfying meal that’ll keep you and your family feeling full.

  • Heat it Up: Toss in some jalapeños or add hot sauce to your dressing for an extra kick. Spice up your life and turn up the heat depending on your mood—keep it milder for a family-friendly option.

  • Pasta Twist: Experiment with different pasta shapes like farfalle or fusilli for a fun presentation. Each shape retains sauce differently, which can enhance the taste experience at mealtime.

For more colorful creations, why not give my Skillet Pasta Sun a try, or indulge in a savory Seafood Pasta for a flavorful variation?

Storage Tips for Taco Pasta Salad

Fridge: Store leftover Taco Pasta Salad in an airtight container for up to 3 days. This helps to maintain freshness and flavor as the ingredients meld beautifully.

Freezer: For longer storage, you can freeze the salad without dressing in a freezer-safe container for up to 2 months. When ready to eat, thaw in the fridge overnight and add dressing before serving.

Reheating: If you prefer a warm dish, gently reheat the pasta salad in the microwave for 1-2 minutes. This can enhance the flavors, but be careful not to overcook the ingredients.

Make-Ahead: Feel free to prepare the Taco Pasta Salad up to 2 days in advance. Storing it in the fridge allows the flavors to deepen, making this dish even tastier when it's time to serve!

Taco Pasta Salad Recipe FAQs

What type of pasta is best for this recipe?
I recommend using rotini or penne for the best texture in your Taco Pasta Salad. They hold onto the dressing and mix well with the other ingredients. If you need a gluten-free option, feel free to substitute any gluten-free pasta that you love!

How should I store leftover Taco Pasta Salad?
You can store leftovers in an airtight container in the fridge for up to 3 days. This will help keep the flavors fresh and vibrant. Just remember that the longer it sits, the more the flavors meld together, so it might even taste better the next day!

Can I freeze Taco Pasta Salad?
Yes, you can freeze Taco Pasta Salad, but it’s best to do so without the dressing. Place the salad in a freezer-safe container and freeze it for up to 2 months. When you're ready to enjoy, simply thaw it in the fridge overnight, add your dressing, and mix before serving.

What if I have dietary restrictions?
Absolutely! This recipe is highly customizable. To make it dairy-free, swap the cheese for a dairy-free alternative, and choose a dressing that's also dairy-free. For gluten sensitivities, just use gluten-free pasta. If you're concerned about allergies, make sure to check for ingredient labels—especially with the dressing and beans.

How can I adjust the spice level?
You can easily customize the spice level of your Taco Pasta Salad. If you’re looking for a milder dish, opt for mild salsa and leave out any hot sauces. For those who love a kick, add jalapeños or use hot salsa. Start with a little and taste as you go!

What can I do if the pasta gets mushy?
If your pasta becomes mushy, you can try to balance the texture by adding some crunchy vegetables like bell peppers or peas, which can help offset the soft pasta. For future preparations, always aim to cook the pasta al dente, as it holds its shape better in the salad.

Taco Pasta Salad Recipe

Taco Pasta Salad Recipe: Quick, Colorful, and Customizable Delight

Enjoy a vibrant and nutritious Taco Pasta Salad packed with flavor, perfect for any gathering.
Print Recipe Pin Recipe
Prep Time 10 minutes mins
Cook Time 10 minutes mins
Chilling Time 30 minutes mins
Total Time 50 minutes mins
Servings: 4 servings
Course: Salads
Cuisine: Mexican
Calories: 350
Ingredients Equipment Method Nutrition Notes

Ingredients
  

For the Pasta
  • 8 oz rotini or penne pasta Feel free to substitute with gluten-free pasta.
For the Dressing
  • 1/2 cup ranch dressing Swap for a yogurt-based dressing for a lighter option.
  • 1/4 cup salsa Adjust spiciness with mild or hot salsa.
For the Vegetables
  • 1 cup cherry tomatoes Diced; substitute with diced regular tomatoes if needed.
  • 1 cup bell peppers Any variety works.
  • 1/2 cup red onion Substitute with green onions for a milder taste.
For the Protein
  • 1 can black beans Packed with protein and fiber.
  • 1 cup corn Fresh, canned, or frozen can be used.
For the Cheese
  • 1 cup cheese (e.g., Cheddar) Consider dairy-free cheese for a plant-based option.

Equipment

  • Large pot
  • Colander
  • Mixing Bowl
  • Cutting Board
  • Knife
  • small bowl

Method
 

Step-by-Step Instructions
  1. Begin by bringing a large pot of salted water to a rolling boil. Add your choice of pasta, and cook for 8-10 minutes until al dente. Drain and rinse with cold water.
  2. In a small bowl, whisk together ranch dressing and salsa until smooth. Adjust to taste with more salsa if preferred.
  3. Chop the cherry tomatoes, bell peppers, and red onion into bite-sized pieces.
  4. In a large bowl, combine the cooled pasta, chopped vegetables, black beans, corn, and cheese. Pour the dressing over and gently toss until evenly coated.
  5. Cover and refrigerate for at least 30 minutes to allow flavors to meld.

Nutrition

Serving: 1cupCalories: 350kcalCarbohydrates: 50gProtein: 15gFat: 12gSaturated Fat: 5gPolyunsaturated Fat: 2gMonounsaturated Fat: 2gCholesterol: 20mgSodium: 500mgPotassium: 600mgFiber: 8gSugar: 5gVitamin A: 500IUVitamin C: 30mgCalcium: 150mgIron: 2mg

Notes

Store leftovers in an airtight container for up to 3 days; freezable without dressing for up to 2 months.

Tried this recipe?

Let us know how it was!

Zesty Taco Pasta Salad Recipe for Quick Weeknight Joy

April 13, 2026 by Grace Snow Leave a Comment

As I rummaged through my pantry one afternoon, I stumbled upon a vibrant medley of ingredients begging to be transformed into something delicious. That's when the idea for my Taco Pasta Salad Recipe burst to life! This dish fuses hearty pasta with zesty taco toppings, creating a colorful, satisfying meal that’s perfect for weeknight dinners or spills over with fun for parties. Not only is it quick to throw together, but it’s also incredibly customizable, allowing you to feature whatever veggies or proteins you have on hand. With a balance of flavors and textures, this salad is both wholesome and utterly delicious. How about exploring the twist and turns of this laid-back yet lively dish together?

Why Choose This Taco Pasta Salad?

Quick and Easy: Whipping up this Taco Pasta Salad takes mere minutes, making it a no-fuss option for busy weeknights.

Flavor Explosion: The zesty combination of ranch dressing and salsa delivers a bold flavor that dances on your taste buds.

Endless Customization: Swap in your favorite veggies or leftover proteins—like adding cooked ground beef or beans for extra heartiness!

Nutrient-Rich: This dish is loaded with fresh veggies, beans, and cheese, ensuring every serving is both nutritious and delicious.

Perfect for Sharing: Whether it's a potluck, BBQ, or a family gathering, this vibrant salad is sure to impress a crowd. Check out similar dishes like Seafood Pasta Savory or Taco Spaghetti Cheesy for more crowd-pleasing options!

Taco Pasta Salad Ingredients

• Dive into this festively fresh Taco Pasta Salad recipe where every ingredient counts!

For the Pasta
• Pasta – The base of your salad; feel free to use rotini, penne, or gluten-free pasta for dietary needs.

For the Dressing
• Ranch Dressing – Adds a creamy tang essential for flavor; swap for vinaigrette for a lighter take!
• Salsa – Brings zesty moisture; choose mild or spicy to match your heat preference.

For the Veggies
• Cherry Tomatoes – Offers sweetness and brightness; substitute with regular tomatoes or bell peppers if needed.
• Bell Peppers – Adds a crunch and refreshing note; use any color or skip if you're short on time!
• Red Onion – Provides a sharp flavor contrast; sweet onion works for a milder sweetness if preferred.

For the Protein
• Black Beans – Boosts protein and fiber; you can replace with any canned beans or add cooked ground meat for heartiness.

For Added Sweetness
• Corn – Delivers a touch of sweetness; frozen or canned corn will do just fine.

For the Creamy Touch
• Cheese (e.g., cheddar) – Introduces richness; opt for your favorite shredded cheese or omit for a dairy-free option.

Feel ready to create a tantalizing Taco Pasta Salad that’s as customizable as your creativity allows!

Step‑by‑Step Instructions for Taco Pasta Salad Recipe

Step 1: Cook the Pasta
Begin by bringing a large pot of salted water to a rolling boil. Add your choice of pasta, like rotini or penne, and cook for 8-10 minutes until it's al dente, tender yet firm to the bite. Once cooked, drain the pasta and set it aside to cool; this will ensure your Taco Pasta Salad is refreshing and delicious.

Step 2: Whisk the Dressing
In a medium bowl, combine ranch dressing and salsa, stirring them together until fully blended. Aim for a smooth and creamy consistency to ensure every bite of your Taco Pasta Salad is bursting with flavor. Set this dressing aside as you prep the fresh ingredients for your salad.

Step 3: Chop the Vegetables
While the pasta is cooling and your dressing is ready, take the time to chop fresh veggies. Dice cherry tomatoes, bell peppers, and red onion into bite-sized pieces for a colorful mix. This vibrant medley will not only enhance the visual appeal but also add layers of flavor and texture to your Taco Pasta Salad.

Step 4: Combine Ingredients
In a large mixing bowl, combine the cooled pasta with your chopped vegetables. Next, add in black beans, corn, and shredded cheese for extra heartiness and nutrition. Gently fold all ingredients together, ensuring the flavors are evenly distributed throughout your Taco Pasta Salad for a harmonious blend.

Step 5: Dress the Salad
Pour your previously whisked dressing over the salad mixture. Gently toss everything together to coat each component in the creamy dressing. Be careful not to crush the pasta or veggies; you want to maintain that delightful crunch and vibrant look in your Taco Pasta Salad.

Step 6: Chill and Serve
Cover the bowl with plastic wrap or a lid, and refrigerate the Taco Pasta Salad for at least 30 minutes. This chilling time allows the flavors to meld beautifully, making each bite even more savory. After chilling, it’s ready to serve as a side dish or a satisfying main course!

What to Serve with Taco Pasta Salad?

Delight your taste buds by complementing this vibrant dish with equally delicious sides that make for a complete meal.

  • Crispy Tortilla Chips: These add a satisfying crunch and are perfect for scooping up the salad, enhancing the whole experience.

  • Grilled Veggies: Softened bell peppers, zucchini, and mushrooms offer a smoky flavor that pairs beautifully with the zesty undertones of the salad.

  • Spicy Black Bean Soup: A warm, hearty side that adds a comforting touch, balancing the coolness of the pasta salad with its rich flavors.

  • Fresh Guacamole: Creamy and refreshing, guacamole brightens each bite of salad while echoing its Mexican-inspired flair.

  • Watermelon Feta Salad: The sweetness of watermelon and salty feta create a refreshing, palate-cleansing contrast to the savory pasta dish.

  • Limeade or Iced Tea: A chilled, citrusy drink refreshes your palate and complements the spices in the Taco Pasta Salad, making mealtime fun and festive. Enjoying it outdoors, under the sun, only adds to the experience!

How to Store and Freeze Taco Pasta Salad

Fridge: Keep your Taco Pasta Salad in an airtight container in the refrigerator for up to 3 days. This helps maintain its freshness and prevents it from becoming soggy.

Make-Ahead: For best flavor, consider preparing the salad a day in advance. The chilling time allows the flavors to meld beautifully and gives a delightful taste experience!

Freezer: While it's best enjoyed fresh, you can freeze any leftovers for up to 1 month. Just note that the texture may change after thawing, especially with the veggies.

Reheating: If you've frozen your salad, gently thaw it in the fridge overnight. To enjoy it cold, feel free to add a bit of fresh dressing to revive its flavor and moisture!

Expert Tips for Taco Pasta Salad

• Fresh Ingredients Matter: Using high-quality, fresh vegetables and cheeses enhances the flavor significantly. Avoid wilted or overly soft produce for the best results.

• Chill for Flavor Boost: Allow the Taco Pasta Salad to chill for at least 30 minutes before serving. This resting period lets the flavors blend and intensify, making every bite more delicious.

• Stay Creative: Don't hesitate to add unexpected ingredients, like diced jalapeños for heat or different beans for unique flavors. This makes your Taco Pasta Salad recipe truly customizable!

• Mind the Dressing: If you prefer a lighter version, opt for a vinaigrette or yogurt-based dressing instead of ranch, but remember to taste and adjust as needed for the perfect balance.

• Serving Size Savvy: If preparing for a larger gathering, scale up the ingredients while maintaining the same ratios. This ensures that your Taco Pasta Salad remains flavorful and satisfying in every bite.

Make Ahead Options

These Taco Pasta Salad Recipe preparations are perfect for busy weeknights! You can cook the pasta and chop vegetables up to 24 hours in advance, storing them in airtight containers in the refrigerator to maintain their freshness. The dressing can also be prepared ahead of time; simply whisk together the ranch dressing and salsa, and store it separately. When you're ready to serve, combine the cooled pasta, chopped veggies, black beans, corn, and cheese, then pour the dressing over the salad and gently toss it together. This way, you’ll have a flavorful and colorful dish ready to enjoy in no time, just as delicious as if it were freshly made!

Taco Pasta Salad Recipe Variations

Explore the delightful possibilities of tailoring your Taco Pasta Salad to fit your unique cravings and pantry finds!

  • Gluten-Free: Swap regular pasta for gluten-free alternatives like quinoa or gluten-free rotini to cater to dietary restrictions.

  • Creamy Alternative: Replace ranch dressing with a dollop of Greek yogurt mixed with a splash of lime juice for a tangy twist.

  • Extra Spice: Add diced jalapeños or a splash of hot sauce for a fiery kick that will tantalize your taste buds.

  • Veggie Boost: Toss in seasonal vegetables like zucchini or spinach for added nutrients and a burst of color.

  • Hearty Protein: Enhance your salad by adding cooked ground turkey, chicken, or even sautéed shrimp to amp up the protein content.

Looking for more ideas? Why not try it with Skillet Pasta Sun or switch things up with a Jello Salad Cottage? These delightful variations promise a new spin on your taco treat!

  • Savory Cheese Swap: Opt for crumbled feta or cotija cheese instead of cheddar for a Mediterranean flair and a tangy counterpoint to the flavors.

  • Sweet Corn Addition: Add fresh corn cut off the cob for a crunchier texture and a bit more sweetness that complements the other ingredients beautifully.

Taco Pasta Salad Recipe FAQs

What type of pasta is best for this Taco Pasta Salad?
Absolutely! For the best texture and flavor, I recommend using rotini or penne pasta. These shapes hold sauce and ingredients well. If you're gluten-free, feel free to swap in your favorite gluten-free pasta—just make sure to follow the cooking instructions on the package for perfect results!

How should I store leftover Taco Pasta Salad?
Very simple! Store your Taco Pasta Salad in an airtight container in the refrigerator for up to 3 days. This ensures the flavors remain fresh while keeping the texture intact. I often find it's best enjoyed within the first day or two before the veggies soften.

Can I freeze Taco Pasta Salad?
While it's best enjoyed fresh, you can freeze leftovers for up to 1 month. To do this, transfer the salad to a freezer-safe container, leaving some space for expansion. When you're ready to enjoy it, thaw it overnight in the fridge. Be aware the texture may slightly change, especially for the veggies, but a splash of fresh dressing can revive its flavor!

What if I have allergies or dietary restrictions?
Absolutely! This Taco Pasta Salad is very customizable. For a dairy-free version, just omit the cheese or use vegan cheese. You can also substitute the ranch dressing with a dairy-free dressing or vinaigrette. If you're avoiding gluten, use gluten-free pasta as mentioned, and always check labels on canned goods to ensure they're allergy-friendly.

What veggies can I use if I don’t have cherry tomatoes or bell peppers?
Very flexible! If you're lacking cherry tomatoes or bell peppers, feel free to substitute with whatever you have on hand. Diced cucumbers, zucchini, or even shredded carrots can add a satisfying crunch to your salad. Personalize it with seasonal veggies to keep things fresh and exciting!

How can I enhance the flavor of the salad even more?
I often recommend adding spices or herbs for a flavor boost! Consider mixing in cumin or chili powder for warmth, or freshly chopped cilantro and lime juice for a burst of zest. The more the merrier when it comes to tailoring it to your taste—be playful!

Taco Pasta Salad Recipe

Zesty Taco Pasta Salad Recipe for Quick Weeknight Joy

A vibrant Taco Pasta Salad Recipe that combines hearty pasta with zesty taco toppings for a quick and customizable dish.
Print Recipe Pin Recipe
Prep Time 10 minutes mins
Cook Time 10 minutes mins
Chilling Time 30 minutes mins
Total Time 50 minutes mins
Servings: 6 servings
Course: Salads
Cuisine: Mexican
Calories: 350
Ingredients Equipment Method Nutrition Notes

Ingredients
  

For the Pasta
  • 8 oz Pasta (rotini, penne, or gluten-free)
For the Dressing
  • 1 cup Ranch Dressing or vinaigrette for a lighter take
  • 1 cup Salsa mild or spicy
For the Veggies
  • 1 cup Cherry Tomatoes or regular tomatoes
  • 1 cup Bell Peppers any color
  • 1/2 cup Red Onion or sweet onion
For the Protein
  • 1 can Black Beans or any canned beans
For Added Sweetness
  • 1 cup Corn frozen or canned
For the Creamy Touch
  • 1 cup Cheese (e.g., cheddar) shredded, optional

Equipment

  • Large pot
  • medium bowl
  • large mixing bowl
  • Knife

Method
 

Preparation Steps
  1. Cook the pasta by boiling salted water, add pasta and cook for 8-10 minutes until al dente. Drain and cool.
  2. Whisk together ranch dressing and salsa in a medium bowl until smooth.
  3. Chop cherry tomatoes, bell peppers, and red onion into bite-sized pieces.
  4. Combine cooled pasta, chopped vegetables, black beans, corn, and shredded cheese in a large mixing bowl.
  5. Pour the dressing over the salad and gently toss to combine.
  6. Cover and refrigerate for at least 30 minutes before serving.

Nutrition

Serving: 1cupCalories: 350kcalCarbohydrates: 45gProtein: 12gFat: 15gSaturated Fat: 4gPolyunsaturated Fat: 2gMonounsaturated Fat: 5gCholesterol: 20mgSodium: 600mgPotassium: 500mgFiber: 8gSugar: 5gVitamin A: 30IUVitamin C: 40mgCalcium: 20mgIron: 10mg

Notes

Using fresh ingredients enhances flavor. Chill for better taste. Feel free to customize with additional ingredients.

Tried this recipe?

Let us know how it was!

Grilled Shrimp Caesar Wraps: A Tasty Twist on a Classic

April 13, 2026 by Grace Snow Leave a Comment

As I flipped through my recipe notes, a culinary epiphany struck: why not combine the glorious simplicity of a classic Caesar salad with the irresistible allure of smoky grilled shrimp? That's how my Grilled Shrimp Caesar Wraps came to life—a quick meal that's not only protein-packed but also incredibly satisfying. Perfect for those busy weekdays when you crave something healthy without sacrificing flavor, these wraps wrap up all the goodness of a Caesar salad in a convenient tortilla. Imagine tender shrimp, crisp romaine, and creamy dressing dancing together in delightful harmony. Whether it's a midday lunch or a relaxed dinner, this recipe delivers all the taste and texture excitement you're looking for. Curious to know how to assemble this tantalizing treat? Let’s dive in!

Why are Grilled Shrimp Caesar Wraps a must-try?

Versatile and Fun: These wraps easily adapt to your dietary preferences; swap shrimp for grilled chicken or even tofu for a twist!
Quick and Easy: Perfect for busy evenings, you can whip these up in under 30 minutes, making them an ideal choice for a satisfying meal without the wait.
Fresh, Crunchy Ingredients: Each bite bursts with the vibrant flavors of romaine and the savory richness of Caesar dressing, offering a delightful contrast that will please your palate.
Crowd-Pleasing Appeal: Whether it’s a family dinner or a casual get-together, everyone will love the fun and flavors of these wraps. Consider pairing them with garlic butter potatoes or a refreshing side salad for a complete meal! If you enjoy these, you’ll also love experimenting with variations like Turmeric Dill Shrimp or our zesty Shrimp Tacos.

Grilled Shrimp Caesar Wraps Ingredients

For the Shrimp
• Shrimp – Use fresh or frozen for the best flavor; thaw completely if frozen before grilling.
• Cajun Seasoning – Adds a spicy kick; substitute with paprika for a milder option.

For the Wraps
• Tortilla – Whole wheat or gluten-free tortillas provide a healthy base for your wraps.
• Romaine Lettuce – Adds a refreshing crunch; feel free to swap with green leaf or iceberg.

For the Dressing
• Caesar Dressing – The creamy and tangy star of the show; opt for a lighter version to keep it healthy.
• Parmesan Cheese – Grated for savory depth; consider vegan cheese for a dairy-free alternative.

Optional Toppings
• Bacon Bits/Croutons – Add for extra crunch; you can easily omit these for a lighter wrap.

These Grilled Shrimp Caesar Wraps are a delightful blend of flavors and textures, and they're so easy to prepare! Enjoy your delicious culinary adventure!

Step‑by‑Step Instructions for Grilled Shrimp Caesar Wraps

Step 1: Prepare the Shrimp
Start by preheating your grill to medium heat, around 350°F (175°C). While it's heating, season your shrimp with Cajun seasoning for a zesty kick. Once the grill is ready, place the shrimp on the grill grates and cook for 5–7 minutes, turning occasionally, until they are opaque and have nice grill marks.

Step 2: Prepare the Tortillas
While the shrimp grill, warm your tortillas for better flexibility. You can do this on a dry skillet over medium heat for about 30 seconds on each side. This step ensures they stay soft and pliable, making it easier to wrap your delicious shrimp and toppings in the tortillas.

Step 3: Assemble the Wraps
Once the shrimp are grilled to perfection, it’s time to assemble your Grilled Shrimp Caesar Wraps. Start with a warm tortilla, laying down a generous layer of romaine lettuce, followed by the smoky shrimp, a drizzle of creamy Caesar dressing, and freshly shaved Parmesan. Don’t forget any optional toppings like croutons or bacon bits for extra crunch!

Step 4: Roll and Serve
To finish your wraps, carefully fold in the sides of the tortilla and roll it tightly from the bottom up. Once rolled, slice each wrap in half diagonally for an appealing presentation. Serve your Grilled Shrimp Caesar Wraps immediately, enjoying the flavorful combination of ingredients that make every bite a delight!

Expert Tips for Grilled Shrimp Caesar Wraps

  • Don’t Overcook: Shrimp should be opaque and firm but still juicy. Avoid grilling them too long to keep their tenderness intact.

  • Prep Ahead: If making these wraps ahead of time, store components separately. This helps maintain freshness and crunch until mealtime.

  • Seasoning Variations: If Cajun isn’t your style, try different spices like Old Bay or lemon pepper to customize the flavor of your grilled shrimp.

  • Tortilla Warmth: Warming your tortillas makes them more pliable, ensuring a neat and easy roll for your Grilled Shrimp Caesar Wraps.

  • Fresh Ingredients: Opt for fresh romaine lettuce for the best crunch, and choose high-quality Caesar dressing to elevate the flavors in every bite.

Grilled Shrimp Caesar Wraps Variations

Get ready to explore new layers of flavor with these delightful twists on Grilled Shrimp Caesar Wraps!

  • Protein Swap: Swap shrimp for grilled chicken or tofu to tailor this recipe to your dietary preferences. Both options ensure a satisfying and protein-rich meal.

  • Dressing Change: Opt for ranch or Italian dressing for a new flavor profile that adds freshness. Your taste buds will thank you when that creamy richness meets the crunchy vegetables!

  • Add Veggies: Toss in grilled bell peppers or zucchini for additional texture and nutrition. These veggies not only add color but infuse a smoky sweetness that enhances the whole wrap.

  • Heat Level: For a spicier kick, sprinkle in some jalapeños or sriracha to your wrap. The heat will balance beautifully with the creamy dressing, giving your taste experience a fiery edge.

  • Texture Twist: Incorporate crunchy slaw made from cabbage and carrots for extra crunch. Mixing this fresh slaw into your wrap elevates the texture while adding a delightful zing.

  • Herb Boost: Fresh basil or cilantro can replace romaine for a fragrant burst of flavor. Imagine biting into your wrap, where every taste is bright and aromatic!

  • Wrap It Differently: Instead of a classic tortilla, try using lettuce wraps for a lighter, low-carb version. These wraps provide a unique crunch while keeping it fresh and crisp.

  • Flavor Enhancer: Top with balsamic glaze for a deliciously tangy and sweet finish that complements the savory elements beautifully. Just a drizzle can elevate your wrap into a gourmet treat!

Enjoy diving into these variations, and don’t forget to pair your delicious wraps with a side of Garlic Butter Potatoes for an unforgettable meal. Each twist offers a delightful new way to love your Grilled Shrimp Caesar Wraps!

How to Store and Freeze Grilled Shrimp Caesar Wraps

  • Room Temperature: Best enjoyed fresh, these wraps can be left out for up to 2 hours before they should be refrigerated to maintain food safety.

  • Fridge: Store assembled wraps in an airtight container for up to 3 days. However, it's best to keep components separate to keep the tortilla crisp and the shrimp fresh.

  • Freezer: To freeze, wrap each prepared but unassembled Grilled Shrimp Caesar Wrap tightly in plastic wrap and place in a freezer-safe bag for up to 2 months. Thaw in the fridge before reheating.

  • Reheating: For optimal quality, reheat grilled shrimp gently in a skillet over low heat. Enjoy the wraps fresh, but if you need to reheat, warm the wrapped tortillas in the oven for a few minutes at 350°F (175°C).

Make Ahead Options

Grilled Shrimp Caesar Wraps are a fantastic choice for meal prep, allowing you to save time on busy weeknights! You can prepare the shrimp up to 24 hours in advance by seasoning and grilling them, then storing them in an airtight container in the fridge. Additionally, wash and chop your romaine lettuce and store it separately to maintain its crispness, keeping it fresh for up to 3 days. When you're ready to serve, simply warm the tortillas and assemble your wraps with the prepped shrimp, lettuce, Caesar dressing, and Parmesan. This way, you’ll have a delicious, homemade meal in just minutes, full of flavor and freshness!

What to Serve with Grilled Shrimp Caesar Wraps

As you enjoy these delicious wraps, consider adding delightful side dishes that elevate your meal experience.

  • Garlic Butter Potatoes: The creamy, rich flavors of garlic butter complement the smokiness of the shrimp beautifully, adding a comforting twist.
  • Crisp Side Salad: A light mix of greens tossed with lemon vinaigrette enhances the freshness of the wraps, offering a textural contrast.
  • Grilled Asparagus: The slight char and tenderness of grilled asparagus pairs nicely with the wraps, enhancing the healthy profile of your meal.
  • Fruit Salad: A refreshing medley of seasonal fruits can cleanse the palate, providing a sweet contrast to the savory flavors.
  • Coleslaw: Crunchy, tangy coleslaw brings a delightful crunch and creaminess, making every bite of the wrap even more satisfying.
  • Sparkling Lemonade: Refreshing and bubbly, it acts as a palate cleanser that pairs well with the savory richness of the wraps.
  • Chips and Salsa: For an added crunch, serve some tortilla chips with zesty salsa. The spice will complement the flavors of the grilled shrimp.
  • Chocolate Mousse: This rich and creamy dessert is a luxurious finish to a flavorful meal, providing a sweet contrast to the main course.

Grilled Shrimp Caesar Wraps Recipe FAQs

What type of shrimp should I use for my Grilled Shrimp Caesar Wraps?
Absolutely! For the best flavor, I recommend using fresh shrimp, but frozen shrimp works just as well if you thaw it completely before grilling. Choose large or jumbo shrimp for a satisfying bite—look for those that are firm and have a slight ocean smell, avoiding any with dark spots.

How long can I store Grilled Shrimp Caesar Wraps in the fridge?
You can keep your assembled wraps in the fridge for up to 3 days. However, to maintain their freshness and texture, I suggest storing the components separately, especially the tortilla, shrimp, and dressing. This way, your wrap stays crispy and delicious!

Can I freeze Grilled Shrimp Caesar Wraps?
Yes, you can freeze them! To do this, wrap each prepared but unassembled Grilled Shrimp Caesar Wrap tightly in plastic wrap and place them in a freezer-safe bag. They can stay in the freezer for up to 2 months. When you're ready to enjoy them, thaw in the fridge overnight and reheat the shrimp gently before assembling.

What are some common troubleshooting tips for grilled shrimp?
Very! One common issue is overcooking, which can lead to tough and rubbery shrimp. Make sure to grill them for just 5–7 minutes until they turn opaque. If you find your shrimp sticking to the grill, try lightly oiling the grill grates beforehand or using skewers. Always ensure your grill is preheated to a medium temperature of about 350°F (175°C) for the best results.

Are there any dietary considerations for Grilled Shrimp Caesar Wraps?
Yes! If you're dealing with allergens, ensure that your shrimp hasn’t been processed with gluten and check the Caesar dressing to keep it gluten-free if necessary. For those with dairy sensitivities, you can swap out the regular Parmesan cheese for a vegan alternative, and if you're managing a shellfish allergy, feel free to use grilled chicken or tofu instead for a tasty alternative.

How should I prepare my ingredients for the wraps?
The more the merrier! To prepare, start by seasoning your shrimp as desired; I often use Cajun seasoning for a spicy kick. Make sure to warm your tortillas on a skillet for about 30 seconds on each side. This helps prevent tearing and ensures they’re flexible for rolling. Once everything is cooked and prepped, layer your ingredients in this order: lettuce, shrimp, dressing, and any toppings. This keeps the wrap balanced and delightful!

Grilled Shrimp Caesar Wraps

Grilled Shrimp Caesar Wraps: A Tasty Twist on a Classic

A quick and healthy meal featuring grilled shrimp and Caesar salad wrapped in tortilla.
Print Recipe Pin Recipe
Prep Time 15 minutes mins
Cook Time 10 minutes mins
Total Time 25 minutes mins
Servings: 4 wraps
Course: Dinner
Cuisine: American
Calories: 350
Ingredients Equipment Method Nutrition Notes

Ingredients
  

For the Shrimp
  • 1 pound Shrimp, fresh or frozen Thaw completely if frozen
  • 1 tablespoon Cajun Seasoning Substitute with paprika for a milder option
For the Wraps
  • 4 pieces Tortilla Whole wheat or gluten-free
  • 2 cups Romaine Lettuce Can swap with green leaf or iceberg
For the Dressing
  • 1/2 cup Caesar Dressing Opt for a lighter version
  • 1/4 cup Parmesan Cheese Grated; consider vegan cheese for a dairy-free alternative
Optional Toppings
  • 1/4 cup Bacon Bits or Croutons Add for extra crunch; omit for lighter wraps

Equipment

  • Grill
  • Skillet

Method
 

Step-by-Step Instructions for Grilled Shrimp Caesar Wraps
  1. Preheat your grill to medium heat, around 350°F (175°C). Season shrimp with Cajun seasoning. Grill shrimp for 5–7 minutes until opaque.
  2. Warm tortillas on a dry skillet over medium heat for about 30 seconds on each side for flexibility.
  3. Assemble wraps with a warm tortilla, romaine lettuce, smoky shrimp, Caesar dressing, and Parmesan. Add optional toppings.
  4. Fold in the sides and roll the tortilla tightly from the bottom up. Slice in half diagonally and serve immediately.

Nutrition

Serving: 1wrapCalories: 350kcalCarbohydrates: 30gProtein: 25gFat: 15gSaturated Fat: 5gPolyunsaturated Fat: 1gMonounsaturated Fat: 3gCholesterol: 160mgSodium: 800mgPotassium: 470mgFiber: 4gSugar: 2gVitamin A: 1200IUVitamin C: 10mgCalcium: 150mgIron: 2mg

Notes

Enjoy your delicious culinary adventure! Keep ingredients fresh for the best taste.

Tried this recipe?

Let us know how it was!

Zesty Mexican Chopped Salad for Refreshing Home Meals

April 13, 2026 by Grace Snow Leave a Comment

In the sweltering heat of summer, nothing beats a cool, refreshing dish that feels as vibrant as the season itself. Enter the Mexican Chopped Salad—a quick and healthy medley of fresh vegetables that come together in just 15 minutes! Perfect for busy weeknights or as an eye-catching centerpiece for gatherings, this salad is not only customizable but also an energizing alternative to takeout. Each colorful bite delivers a delightful crunch and a burst of flavors that will leave you wanting more. Plus, it’s an excellent choice for meal prep, ensuring you’ll have a nutritious option ready to go whenever hunger strikes! Curious about how to whip up this fiesta of fresh ingredients? Let's get started!

Why is Mexican Chopped Salad a Must-Try?

Quick and Easy: In just 15 minutes, you can prepare a delightful dish that elevates any meal. Vibrant Colors: This salad bursts with color, making it visually appealing at gatherings or just for yourself. Health Booster: Packed with fresh veggies and nutrients, it’s a healthy option that satisfies. Customizable: Tailor it to your taste with proteins or spices; try adding grilled chicken or jalapeños for a twist! Meal Prep Friendly: Perfect for prepping ahead of time, this salad stays fresh and ready to enjoy. If you're looking for a lighter alternative to fast food, this refreshing option is just a toss away!

Mexican Chopped Salad Ingredients

Discover the key components for a vibrant Mexican Chopped Salad!

For the Salad

  • Romaine Lettuce – Adds crispness and volume; kale offers a hearty alternative.
  • Cherry Tomatoes – Provide sweetness and juiciness; feel free to use any tomato variety for flexibility.
  • Cucumber – Offers crunch and freshness; diced zucchini can work well as a substitute.
  • Bell Pepper – Adds vibrant color and sweetness; jalapeño can spice things up if desired.
  • Corn – Introduces a sweet, crunchy element; use canned or frozen corn for convenience.
  • Black Beans – Contributes protein and richness; kidney beans or chickpeas are great alternative sources.
  • Avocado – Provides creaminess and healthy fats; choose ripe avocados for the best texture.
  • Red Onion – Imparts sharpness and color contrast; green onions can offer a milder taste.
  • Cilantro – Adds a fresh, herbaceous note; parsley works well for a different flavor.
  • Shredded Cheese (Cheddar or Mexican Blend) – Adds a savory finish; feta or cotija can offer a delightful twist.

For the Dressing

  • Lime Juice – Delivers acidity and brightness; freshly squeezed lime enhances the flavor.
  • Olive Oil – Serves as the dressing base, providing richness and a smooth texture.
  • Chili Powder – Adds heat and depth; consider smoked paprika for a unique flavor profile.
  • Salt and Pepper – Essential seasonings to elevate and balance all flavors.

Now that you know the ingredients, it's time to create this wholesome Mexican Chopped Salad that will brighten up any meal!

Step‑by‑Step Instructions for Mexican Chopped Salad

Step 1: Wash and Chop Vegetables
Begin by washing the romaine lettuce, cherry tomatoes, cucumber, and bell pepper under cold water to remove any dirt. Then, using a sharp knife and chopping board, chop the romaine into bite-sized pieces and halve the cherry tomatoes. Dice the cucumber and bell pepper, aiming for uniform sizes for even mixing. Set these vibrant veggies aside in a large bowl.

Step 2: Prepare Black Beans
Rinse the black beans thoroughly under cold running water to remove excess sodium and preservatives if using canned beans. Drain them well in a colander and then add them to the bowl with the chopped vegetables. Their rich color and texture will complement the salad beautifully and provide a protein boost.

Step 3: Combine Salad Ingredients
In the same large bowl, add the corn, diced avocado, finely chopped red onion, and roughly chopped cilantro to the mixture of vegetables and beans. Gently toss everything together with your hands or a large spoon, making sure to distribute the ingredients evenly, maintaining the freshness and crunchiness of each component in your Mexican Chopped Salad.

Step 4: Whisk the Dressing
In a separate small bowl, whisk together the freshly squeezed lime juice, quality olive oil, chili powder, salt, and pepper until the mixture is well combined and emulsified. The zest of lime and richness of olive oil create a flavorful dressing that will enhance the fresh ingredients of the salad.

Step 5: Dress the Salad
Pour the freshly made dressing over the salad mixture in the large bowl. Using a gentle tossing motion, combine the ingredients until all vegetables and beans are evenly coated with the dressing. Ensure that the colors are vibrant and the flavors meld beautifully in this refreshing Mexican Chopped Salad.

Step 6: Add Cheese Topping
Sprinkle the shredded cheese over the top of your salad as the final touch. The cheese adds a savory finish that contrasts wonderfully with the crisp vegetables. If desired, consider crumbling some feta or cotija cheese for a unique twist that enhances the overall flavor profile.

Step 7: Serve or Chill
Serve the Mexican Chopped Salad immediately for optimal freshness, or cover it with plastic wrap and refrigerate for up to 30 minutes to allow flavors to meld. This not only enhances the taste but also cools the salad to the perfect temperature, making it a refreshing option for your next meal.

What to Serve with Mexican Chopped Salad?

Elevate your meal experience with delightful pairings that complement the fresh flavors and vibrant colors of this refreshing salad.

  • Grilled Chicken: Juicy and tender, grilled chicken adds protein and enhances the salad's colorful medley.
  • Corn Tortilla Chips: Crunchy and salty, these chips make for a perfect scoop or side, adding an extra layer of texture.
  • Black Bean Tacos: Spicy black bean tacos echo the salad's ingredients and offer a hearty, scrumptious addition to your meal.

For a refreshing beverage, consider serving Margaritas: Their citrusy flavor elevates the fiesta feeling and pairs beautifully with the salad's zing.

  • Chilled White Wine: A crisp Sauvignon Blanc brings out the salad's fresh notes, making every bite even more delightful.
  • Fruit Salsa: A sweet and zesty fruit salsa adds a vibrant twist that balances the salad's savory elements.
  • Creamy Avocado Dressing: This adds richness while echoing the avocado notes in the salad for a cohesive dish experience.

With these pairings, your table will be dressed for a vibrant and delicious dining experience!

Expert Tips for Mexican Chopped Salad

  • Gentle Tossing: Toss the salad gently to avoid bruising the delicate ingredients, ensuring maximum freshness and crunch in your Mexican Chopped Salad.

  • Dressing Timing: If preparing ahead, keep the dressing separate until serving to maintain crisp vegetables and vibrant flavors.

  • Flavor Adjustment: Taste the dressing before serving and adjust seasoning as needed; you want a balanced flavor that enhances the fresh ingredients.

  • Adding Crunch: For an extra bite, consider topping with tortilla strips or crushed tortilla chips—this adds a delicious crunch to the salad experience.

  • Storage Tips: Store any leftover Mexican Chopped Salad in an airtight container in the fridge and consume within 1-2 days for the best taste and texture.

Make Ahead Options

Preparing your Mexican Chopped Salad ahead of time is a fantastic way to save time during busy weeknights! You can chop all the vegetables (romaine, tomatoes, cucumber, bell peppers, and red onion) up to 24 hours in advance and store them in an airtight container in the refrigerator. Just remember to keep the avocado and dressing separate until you're ready to serve, as this will prevent browning and ensure the veggies stay crisp. When you're ready to enjoy your salad, simply combine everything, add the dressing, and sprinkle with cheese, resulting in a vibrant dish that tastes just as fresh as if it were made on the spot!

Mexican Chopped Salad Variations & Substitutions

Feel free to play with this Mexican Chopped Salad to match your own taste preferences and dietary needs!

  • Dairy-Free: Omit the shredded cheese and enjoy a creamy dressing made from blended avocado and lime instead.

  • Spicy Kick: Add sliced jalapeños to bring heat and depth to the salad. Their bright flavor pairs beautifully with the cool veggies.

  • Protein-Packed: Incorporate grilled chicken, shrimp, or tofu for an extra boost of protein and making it a more filling meal.

  • Low-Carb: Substitute black beans with diced grilled zucchini to maintain volume without the carbs. The grilled flavor enhances the overall taste!

  • Crispy Texture: Top with tortilla strips or crushed tortilla chips for that satisfying crunch. It adds a delightful texture contrast to the crisp salad.

  • Herb Swap: If you’re not a fan of cilantro, parsley works beautifully! It provides a milder flavor while still adding a fresh touch.

  • Vegan Options: Use chickpeas instead of black beans for a hearty plant-based protein. They also offer great flavor and texture.

  • Sweet Twist: Add diced mango or pineapple for a touch of sweetness that contrasts wonderfully with the savory ingredients.

For more delicious ideas, check out the refreshing Avocado Egg Salad or try a tasty side of German Potato Salad!

Storage Tips for Mexican Chopped Salad

Fridge: Store leftovers in an airtight container in the fridge for up to 1-2 days to maintain freshness and crunch.

Dressing: If preparing ahead, keep the dressing separate until serving to prevent the salad from becoming soggy.

Meal Prep: For meal prep, store individual ingredients separately and mix them just before eating to keep everything crisp and flavorful.

Reheating: This salad is best enjoyed cold. If you need to reheat black beans or corn, do so separately and allow to cool before mixing with the salad.

Mexican Chopped Salad Recipe FAQs

How do I choose ripe avocados for my Mexican Chopped Salad?
Absolutely! To select ripe avocados, gently press the skin; it should yield slightly but not feel mushy. Dark green or almost black skin usually indicates ripeness, while an avocado that's too hard is not ready yet. If you buy unripe ones, leave them at room temperature for a few days until they soften.

How should I store leftover Mexican Chopped Salad?
Very good question! Store any leftover salad in an airtight container in the fridge. It's best consumed within 1-2 days for optimal freshness. If you’ve mixed the dressing in already, it may get a bit soggy, so consider keeping the dressing separate and adding it right before enjoying the leftovers.

Can I freeze Mexican Chopped Salad?
For the best quality, I wouldn’t recommend freezing the salad once assembled, as fresh ingredients can lose their texture. However, if you want to freeze components, do so separately. Freeze black beans and corn in airtight containers for up to 3 months. Thaw and add fresh ingredients when you're ready to enjoy!

What should I do if my salad dressing is too acidic?
If you find your dressing too tart, add a pinch of sugar or honey to balance the flavors. Whisk in additional olive oil if it’s too strong; this also adds richness. Always taste as you go and make adjustments until it’s just right for your palate!

Can I prepare the Mexican Chopped Salad in advance?
Absolutely! You can prep the salad a few hours ahead by chopping the vegetables and storing them separately in the fridge. Just be sure to keep the dressing aside to maintain the freshness and crunch of your salad until serving time. This way, it stays vibrant and delicious!

Are there any dietary considerations for this salad?
Yes! If you're catering to dietary restrictions, consider using gluten-free canned beans and avoiding cheese for a dairy-free option. The salad is naturally vegan when prepared without cheese. It's packed with nutritious ingredients suitable for many dietary needs, just make sure to check for allergies specific to your guests.

Mexican Chopped Salad

Zesty Mexican Chopped Salad for Refreshing Home Meals

Refreshing Mexican Chopped Salad packed with vibrant flavors and healthy ingredients perfect for summer meals.
Print Recipe Pin Recipe
Prep Time 15 minutes mins
Total Time 15 minutes mins
Servings: 4 servings
Course: Salads
Cuisine: Mexican
Calories: 260
Ingredients Equipment Method Nutrition Notes

Ingredients
  

For the Salad
  • 1 head Romaine Lettuce Chopped
  • 1 cup Cherry Tomatoes Halved
  • 1 cup Cucumber Diced
  • 1 cup Bell Pepper Diced
  • 1 cup Corn Canned or frozen
  • 1 can Black Beans Rinsed
  • 1 medium Avocado Diced
  • 1/4 cup Red Onion Finely chopped
  • 1/4 cup Cilantro Chopped
  • 1 cup Shredded Cheese Cheddar or Mexican Blend
For the Dressing
  • 1/4 cup Lime Juice Freshly squeezed
  • 1/4 cup Olive Oil
  • 1 teaspoon Chili Powder
  • 1 teaspoon Salt
  • 1 teaspoon Pepper

Equipment

  • large bowl
  • Knife
  • Chopping board
  • small bowl
  • Colander

Method
 

Step-by-Step Instructions
  1. Wash and chop the romaine lettuce, cherry tomatoes, cucumber, and bell pepper.
  2. Rinse the black beans and add them to the bowl with the chopped vegetables.
  3. Combine corn, diced avocado, chopped red onion, and cilantro with the vegetable mixture.
  4. Whisk together lime juice, olive oil, chili powder, salt, and pepper in a small bowl.
  5. Pour dressing over the salad mixture and toss gently to combine.
  6. Sprinkle shredded cheese on top as the final touch.
  7. Serve immediately or chill for up to 30 minutes before serving.

Nutrition

Serving: 1servingCalories: 260kcalCarbohydrates: 30gProtein: 10gFat: 12gSaturated Fat: 3gPolyunsaturated Fat: 1gMonounsaturated Fat: 8gCholesterol: 10mgSodium: 300mgPotassium: 500mgFiber: 8gSugar: 4gVitamin A: 30IUVitamin C: 100mgCalcium: 15mgIron: 10mg

Notes

For maximum freshness, keep dressing separate until ready to serve. Store leftovers in an airtight container for 1-2 days.

Tried this recipe?

Let us know how it was!

Creamy Garlic Parmesan Shrimp Roll-Ups for Cozy Nights

April 13, 2026 by Grace Snow Leave a Comment

As I stood in my kitchen, the aroma of garlic sizzling in butter brought me back to evenings spent with family, laughter echoing around the table. Today, I'm excited to share my recipe for Creamy Garlic Parmesan Shrimp Roll-Ups—these cheesy delights are not only rich and savory but also incredibly easy to whip up. A perfect comfort food, they transform simple ingredients into a crowd-pleasing appetizer or a delightful main course when paired with a fresh salad. Plus, the versatility of using either tortillas or crescent dough means you can tailor these roll-ups to your taste. Are you ready to take your cooking to the next level and impress everyone at your next gathering? Let's dive in!

Why You'll Adore This Recipe

Simplicity: With just a handful of ingredients and straightforward steps, you can create a delicious dish without wasting time in the kitchen.

Irresistible Cheese: The cream cheese and freshly grated Parmesan meld perfectly, creating a rich, gooey filling that will keep your friends coming back for more.

Versatile Wraps: Choose between tortillas for an easy, quick experience or crescent dough for a delightful flakiness that elevates these roll-ups to a new level.

Perfect for Gatherings: Whether as an appetizer at your next party or a fun family dinner, these roll-ups are sure to be a hit. Want more crowd-pleasers? Check out my Shrimp Tacos Zesty or Honey Garlic Chicken for more delightful ideas!

Make-Ahead Option: Assemble the roll-ups in advance and pop them in the oven before your guests arrive, making entertaining a breeze!

Transform your cooking experience with these scrumptious roll-ups!

Creamy Garlic Parmesan Shrimp Roll-Ups Ingredients

For the Filling

  • Shrimp – the main protein, providing juicy and flavorful bites; thawed frozen shrimp works beautifully.
  • Cream Cheese – adds richness and creaminess to the filling; Greek yogurt can be a lighter option.
  • Parmesan Cheese – lends a nutty, salty flavor; opt for freshly grated for optimal melting.
  • Garlic – imparts delightful aromatic depth; fresh minced garlic is recommended for the best taste.

For the Wrapper

  • Tortillas or Crescent Dough – the wrap that holds your delicious filling; tortillas are simpler to slice, while crescent dough gives a flaky texture.

Enjoy making these Creamy Garlic Parmesan Shrimp Roll-Ups!

Step‑by‑Step Instructions for Creamy Garlic Parmesan Shrimp Roll-Ups

Step 1: Preheat Your Oven
Begin by preheating your oven to 375°F (190°C) to ensure it's hot and ready for baking. This temperature is ideal for creating that perfect golden brown crust on your Creamy Garlic Parmesan Shrimp Roll-Ups. While the oven heats up, gather all your ingredients to streamline the preparation process.

Step 2: Mix the Filling
In a mixing bowl, combine 8 ounces of softened cream cheese, ½ cup of freshly grated Parmesan cheese, and 2 cloves of minced garlic. Using a hand mixer or a spatula, blend the ingredients together until they are smooth and creamy. This flavorful mixture will serve as the delicious filling for your roll-ups.

Step 3: Incorporate the Shrimp
Next, take 1 pound of thawed shrimp—ensuring they are patted dry to avoid excess moisture—and gently fold them into the cheesy mixture. Mix well until every piece of shrimp is evenly coated with the creamy filling. The shrimp will add a delightful burst of flavor to your Creamy Garlic Parmesan Shrimp Roll-Ups.

Step 4: Prepare the Wraps
Choose either tortillas or crescent dough as your wrap. If using tortillas, lay them flat on a clean surface; for crescent dough, roll out the dough to create a rectangle. Spoon an ample amount of the shrimp filling onto each wrap, making sure to spread it evenly from edge to edge for the best flavor in every bite.

Step 5: Roll Them Up
Carefully roll each tortilla or crescent dough, tucking in the ends to secure the filling inside. Make sure to roll tightly for a compact roll-up that holds together well during baking. Place the finished roll-ups seam-side down on a greased baking sheet, ensuring they’re spaced evenly apart for even cooking.

Step 6: Bake to Perfection
Slide the baking sheet into the preheated oven and bake for approximately 15 to 20 minutes. Keep an eye on your Creamy Garlic Parmesan Shrimp Roll-Ups; they are done when they become golden brown and bubbly with a delightful aroma wafting through your kitchen.

Step 7: Serve Hot
Once baked, remove the roll-ups from the oven and allow them to cool slightly before serving. These delicious morsels are best enjoyed hot, paired with your favorite dipping sauces like spicy mayo or marinara. Gather your family and friends, and get ready to impress them with your delightful creamy shrimp roll-ups!

What to Serve with Irresistible Creamy Garlic Parmesan Shrimp Roll-Ups

Enhance your dining experience with delightful pairings that complement the rich and savory flavors of these creamy roll-ups.

  • Crisp Garden Salad: A fresh salad with mixed greens and a light vinaigrette balances the richness, adding a refreshing crunch.

  • Savory Garlic Bread: Warm, buttery garlic bread is perfect for soaking up any leftover creamy filling, elevating your indulgent experience.

  • Roasted Vegetables: Seasonal roasted veggies provide a delightful contrast in texture and a pop of color, enhancing the meal's appeal.

  • Creamy Potato Soup: A warm bowl of smooth potato soup enriches the comfort food vibes, creating a cozy and satisfying meal.

  • Zesty Coleslaw: The tangy crunch of coleslaw adds brightness and a refreshing palate cleanser, making every bite delightful.

  • Chilled White Wine: A glass of chilled Sauvignon Blanc complements the shrimp's flavors, enhancing the overall dining experience beautifully.

  • Spicy Marinara Sauce: Serve with a side of zesty marinara for dipping, which adds a vibrant flavor contrast to the creamy roll-ups.

  • Mango Salsa: The sweetness of mango salsa provides a fruity kick that pairs wonderfully with the savory shrimp filling, creating a flavor explosion.

  • Chocolate Lava Cake: End your meal on a sweet note with warm, gooey chocolate lava cake, perfectly contrasting the savory flavors of the roll-ups.

Expert Tips for Creamy Garlic Parmesan Shrimp Roll-Ups

  • Thaw Properly: Make sure your shrimp are completely thawed and patted dry to prevent excess moisture, which can make the filling soggy.

  • Cream Cheese Consistency: If your filling seems too thick, add a splash of milk to achieve the right creamy consistency, ensuring easy wrapping.

  • Watch Baking Time: Keep an eye on the roll-ups while baking; baking times can vary depending on whether you use tortillas or crescent dough.

  • Use Fresh Ingredients: Freshly minced garlic and freshly grated Parmesan cheese enhance the flavors significantly. Don't settle for powdered or pre-grated options!

  • Try Dip Pairing: These Creamy Garlic Parmesan Shrimp Roll-Ups are amazing dipped in spicy mayo or tangy marinara; try different dips for a flavor adventure!

How to Store and Freeze Creamy Garlic Parmesan Shrimp Roll-Ups

  • Fridge: Store baked roll-ups in an airtight container for up to 3 days. Reheat in the oven at 350°F for 10 minutes for best results.

  • Freezer: To freeze, place uncooked roll-ups in a single layer on a baking sheet; once frozen, transfer to a zip-top bag for up to 2 months. Bake straight from the freezer, adding 5 minutes to the baking time.

  • Reheating: For best flavor and texture, reheat baked roll-ups in the oven, rather than the microwave, to maintain their crispy exterior.

  • Make-Ahead: Prepare roll-ups ahead of time, refrigerate, and bake just before serving. This keeps your hosting stress-free while still serving fresh, delicious Creamy Garlic Parmesan Shrimp Roll-Ups!

Creamy Garlic Parmesan Shrimp Roll-Ups Variations

Feel free to unleash your creativity and customize these delicious roll-ups to match your taste preferences!

  • Dairy-Free: Substitute cream cheese and Parmesan with store-bought dairy-free alternatives for a creamy filling that caters to lactose sensitivities.

  • Spicy Kick: Add a tablespoon of sriracha or a pinch of red pepper flakes to the filling for an exciting heat that complements the creamy shrimp.

  • Vegetable Medley: Swap the shrimp for a mix of sautéed bell peppers, spinach, and mushrooms for a vibrant vegetarian twist packed with flavor.

  • Herb Explosion: Enhance the flavor profile by mixing in fresh herbs like parsley, dill, or chives into the filling for a fragrant update.

  • Crispy Exterior: Brush the outside of crescent dough with melted butter or olive oil before baking to achieve an extra crispy and golden crust.

  • Cheese Variety: Switch up the cheese! Try adding mozzarella or cheddar for a melty, gooey filling that brings a delightful twist to the classic recipe.

  • Zesty Citrus: Incorporate some lemon zest into the shrimp mixture for a refreshing zing that brightens the overall dish.

  • Garlic Lovers: Increase the garlic quantity to suit your palate, or even roast the garlic beforehand for a sweeter, more mellow flavor profile.

These roll-ups are versatile and perfect for experimenting! If you enjoy shrimp dishes, you might also love my Pan Fried Shrimp or Turmeric Dill Shrimp Stir-Fry for more scrumptious ideas.

Make Ahead Options

These Creamy Garlic Parmesan Shrimp Roll-Ups are perfect for meal prep enthusiasts looking to save time during busy weeknights! You can assemble the roll-ups up to 24 hours in advance. Simply prepare the shrimp filling and roll them in your chosen tortillas or crescent dough. After rolling, tightly wrap them in plastic wrap and refrigerate to maintain freshness. When you're ready to serve, simply pop them in a preheated oven at 375°F for about 15 to 20 minutes, or until golden brown. This way, you can enjoy perfectly baked, hearty roll-ups with minimal effort—just as delicious as when freshly made!

Creamy Garlic Parmesan Shrimp Roll-Ups Recipe FAQs

What kind of shrimp should I use?
Absolutely! I recommend using thawed frozen shrimp for convenience and good flavor. Look for large, peeled, and deveined shrimp to save time. If using fresh shrimp, make sure they have a mild sea breeze scent and a firm texture—avoid any that smell overly fishy or have dark spots on their shells.

How do I store leftover Creamy Garlic Parmesan Shrimp Roll-Ups?
You can store baked roll-ups in an airtight container in the refrigerator for up to 3 days. When reheating, set your oven to 350°F and bake them for about 10 minutes. This will restore their lovely crisp exterior while warming the creamy filling!

Can I freeze the roll-ups, and if so, how?
Yes, you can freeze these tasty roll-ups! Start by arranging the uncooked roll-ups in a single layer on a baking sheet. Freeze them until solid, about 1-2 hours, then transfer them to a zip-top bag. They’ll keep well in the freezer for up to 2 months. When you're ready to enjoy, bake them straight from the freezer, adding roughly 5 extra minutes to the cooking time.

What should I do if my filling is too thick?
Very! If your filling feels thick and hard to spread, just add a splash of milk to loosen it up. Mix it well until you achieve a smooth, creamy consistency that spreads easily on your wraps. This will help ensure everything rolls up nicely without tearing.

Can I make these roll-ups vegetarian?
Definitely! You can swap out the shrimp for a medley of cooked vegetables like bell peppers, spinach, or zucchini for a delightful veggie version. Just sauté your veggies first to remove excess moisture and boost their flavors, then mix them into the cheese filling as you would with the shrimp.

Are there any allergens I should be aware of?
I recommend checking for common allergens, especially if you're serving guests. The main allergens in this recipe are dairy (cream cheese and Parmesan) and shellfish (shrimp). For a dairy-free alternative, you could use a vegan cream cheese and skip the Parmesan, or use nutritional yeast for a cheesy flavor without the dairy.

Creamy Garlic Parmesan Shrimp Roll-Ups

Creamy Garlic Parmesan Shrimp Roll-Ups for Cozy Nights

Creamy Garlic Parmesan Shrimp Roll-Ups are a rich and savory comfort food that transforms simple ingredients into a crowd-pleasing appetizer.
Print Recipe Pin Recipe
Prep Time 15 minutes mins
Cook Time 20 minutes mins
Total Time 35 minutes mins
Servings: 4 roll-ups
Course: Appetizers
Cuisine: American
Calories: 250
Ingredients Equipment Method Nutrition Notes

Ingredients
  

For the Filling
  • 1 pound thawed shrimp patted dry
  • 8 ounces cream cheese softened
  • 1/2 cup freshly grated Parmesan cheese
  • 2 cloves garlic minced
For the Wrapper
  • 4 pieces tortillas
  • 1 package crescent dough alternative

Equipment

  • Mixing Bowl
  • Baking Sheet
  • hand mixer
  • Spatula

Method
 

Step-by-Step Instructions
  1. Preheat your oven to 375°F (190°C).
  2. In a mixing bowl, combine cream cheese, Parmesan cheese, and minced garlic until smooth.
  3. Fold in the thawed shrimp until well coated.
  4. Lay the tortillas flat, or roll out the crescent dough, then spoon filling evenly onto each wrap.
  5. Roll tightly, tucking in the ends, and place seam-side down on a greased baking sheet.
  6. Bake for 15 to 20 minutes or until golden brown and bubbly.
  7. Serve hot with your favorite dipping sauces.

Nutrition

Serving: 1roll-upCalories: 250kcalCarbohydrates: 15gProtein: 19gFat: 15gSaturated Fat: 9gPolyunsaturated Fat: 1gMonounsaturated Fat: 3gCholesterol: 80mgSodium: 500mgPotassium: 200mgFiber: 1gSugar: 2gVitamin A: 500IUVitamin C: 1mgCalcium: 200mgIron: 1mg

Notes

Thaw shrimp properly and use fresh ingredients for the best results.

Tried this recipe?

Let us know how it was!

Creamy Tuscan Salmon Pasta: A Quick & Cozy Dinner Delight

April 13, 2026 by Grace Snow Leave a Comment

As I stood in my kitchen, the aroma of sautéed garlic and fresh tomatoes wafting through the air, I was reminded of the sun-drenched hills of Tuscany. The recipe for Creamy Tuscan Salmon Pasta had become my go-to for those bustling weeknights when I crave a comforting Italian dish without spending hours slaving away. With just a handful of ingredients, this easy weeknight dinner comes together in a mere 30 minutes, transforming simple salmon and pasta into a luxurious meal that feels indulgent yet approachable. It’s a delightful way to impress guests or treat yourself after a long day—all while keeping lactose sensitivity in mind. Who could resist the allure of silky pasta enveloped in a rich, garlicky cream sauce? Join me in exploring this quick culinary escape that’s sure to become a beloved addition to your dinner repertoire. What’s your favorite way to elevate a busy weeknight meal?

Why is this the perfect pasta dish?

Simplicity at its best: This Creamy Tuscan Salmon Pasta is incredibly quick to whip up, thanks to its straightforward preparation that requires minimal cooking skills.

Irresistible flavor balance: The rich cream, savory salmon, and fresh spinach perfectly complement the sweet burst of cherry tomatoes, creating an explosion of taste.

Versatile ingredient swaps: Feel free to substitute salmon with shrimp or integrate sun-dried tomatoes for an exciting twist!

Low lactose option: Keeping dietary needs in mind, this comforting dish can easily accommodate low lactose preferences without compromising on flavor.

Crowd-pleaser appeal: Impress your family or guests with this elegant dish; it’s fancy enough for a special occasion yet simple enough for a casual weeknight meal.

Time-saving magic: Ready in just 30 minutes, this delicious recipe lets you enjoy an amazing meal without the usual time constraints—perfect after a busy day!

Creamy Tuscan Salmon Pasta Ingredients

For the Pasta
• Pasta of choice – Use your favorite variety, such as fettuccine or penne, for the best texture.

For the Salmon
• Salmon fillets – Opt for fresh salmon for superior flavor; frozen is fine if thawed properly.

For the Sauce
• Heavy cream – Provides the luxurious texture of the creamy sauce; consider half-and-half for a lighter option.
• Parmesan cheese – Grate it fresh from a block for a smoother sauce; substitute with Grana Padano if needed.
• Fresh spinach – Adds vibrant color and nutrition; feel free to swap it with baby kale or arugula if you prefer.
• Cherry tomatoes – These offer a wonderful sweetness; sun-dried tomatoes (oil-packed) can enhance flavor depth brilliantly.

For the Seasoning
• Garlic – Freshly minced garlic is key for the aromatic base of the sauce.
• Salt and pepper – Essential for enhancing the overall flavor; adjust to your taste preferences.

When you whip up this Creamy Tuscan Salmon Pasta, every bite will transport you to a lovely Italian evening!

Step‑by‑Step Instructions for Creamy Tuscan Salmon Pasta

Step 1: Prepare Ingredients
Begin by gathering all your ingredients for the Creamy Tuscan Salmon Pasta. Chop the cherry tomatoes in half, mince three cloves of garlic, and grate about a cup of fresh Parmesan cheese. Having everything ready will streamline your cooking process and ensure that you can whip this delicious dish together in just about 30 minutes.

Step 2: Cook Salmon
Season the salmon fillets generously with salt and pepper. In a large skillet, heat a tablespoon of olive oil over medium-high heat for about 2 minutes. Once the oil is hot, carefully add the salmon skin-side down. Sear the salmon for 4-5 minutes until golden brown and cooked through. Flip it over to cook the other side for an additional 2-3 minutes. Remove from the skillet and set aside.

Step 3: Make Sauce
In the same skillet, reduce the heat to medium and add the minced garlic. Sauté for about 30 seconds until fragrant, stirring continuously, then pour in 1 cup of heavy cream. Stir well and bring the mixture to a gentle simmer for about 2 minutes. Add the grated Parmesan cheese, stirring until it melts smoothly into the creamy sauce, transforming it into a luxurious texture.

Step 4: Incorporate Vegetables
Add the halved cherry tomatoes and about 2 cups of fresh spinach to the cream sauce. Stir gently for 2-3 minutes until the spinach has wilted and the tomatoes are slightly blistered. You’ll notice vibrant colors emerging as the ingredients meld together beautifully. Ensure the heat stays low to avoid boiling, which could affect the sauce's consistency.

Step 5: Combine Pasta and Sauce
Meanwhile, cook your pasta of choice in a large pot of salted boiling water according to package instructions. Reserve about a cup of pasta water, then drain the pasta once al dente. Quickly toss the cooked pasta into the skillet with the creamy sauce, stirring well to coat the noodles evenly. If the sauce seems too thick, add a splash of the reserved pasta water to achieve your desired consistency.

Step 6: Serve
Plate the creamy Tuscan salmon pasta generously. Place the seared salmon fillet on top of each serving, and if desired, sprinkle more grated Parmesan cheese and a dash of freshly cracked black pepper for added flavor. You’ve now created a stunning dish that brings the essence of Tuscany right to your table!

Make Ahead Options

These Creamy Tuscan Salmon Pasta ingredients are perfect for meal prep! You can chop the cherry tomatoes, mince the garlic, and grate the Parmesan cheese up to 24 hours in advance, storing them in airtight containers in the refrigerator to maintain their freshness and quality. The salmon can be seasoned and stored in the fridge for one day; just be sure to pat it dry before cooking to achieve that perfect sear. When you're ready to serve, simply sauté the salmon, make the creamy sauce, and combine everything with freshly cooked pasta for delightful results that feel just as gourmet as if made from scratch in the moment.

What to Serve with Creamy Tuscan Salmon Pasta

Transform your pasta night into a complete dining experience that delights every sense.

  • Roasted Asparagus: The tender yet crisp texture and lightly charred flavor perfectly balance the richness of the creamy sauce. Plus, the vibrant green adds a pop of color to your plate.

  • Garlic Bread: This classic side is ideal for soaking up any extra sauce left behind. The warm, buttery bread brings an inviting aroma and enhances the Italian essence of your meal.

  • Crisp Side Salad: A fresh mix of greens, cherry tomatoes, and a tangy vinaigrette adds a refreshing contrast to the indulgent pasta, making each bite a delightful experience.

  • Seared Brussels Sprouts: Their nutty taste and crispy edges offer a contrast to the creamy salmon pasta, bringing depth to the meal. Don’t forget to toss them with a hint of balsamic for added zing!

  • White Wine: A glass of chilled Pinot Grigio or Sauvignon Blanc complements the dish wonderfully, enhancing the flavors while the acidity brightens the richness of the sauce.

  • Tiramisu: End your meal on a sweet note with this classic Italian dessert. Its light, coffee-infused layers beautifully contrast the savory pasta dish and leave you with a delightful finish.

Creamy Tuscan Salmon Pasta Variations

Feel free to play around with this creamy delight—your next family dinner will sing with flavor!

  • Seafood Swap: Try shrimp instead of salmon for a delightful twist; just adjust the cooking time to ensure perfect tenderness.
  • Low-Fat Option: Use light cream or a non-dairy alternative like coconut cream to craft a guilt-free version, while still retaining a rich taste.
  • Cheesy Goodness: Add crumbled goat cheese or feta for an extra layer of tangy flavor that complements the creaminess beautifully.
  • Veggie Boost: Toss in seasonal vegetables like asparagus or zucchini to amp up the nutrition and add delightful crunch.
  • Herb Infusion: Sprinkle fresh basil or parsley just before serving for an aromatic lift that brightens each bite.
  • Spicy Kick: Add a pinch of red pepper flakes or a drizzle of chili oil for warmth that balances the creamy sauce; it’s sure to excite your taste buds!
  • Pasta Alternatives: Swap traditional pasta for whole grain or even gluten-free options for a hearty yet wholesome meal. If you love veggie-based twists, try zucchini noodles or cauliflower pasta for a light touch.
  • Sun-Dried Tomato Touch: Incorporate sun-dried tomatoes for a burst of intensity, enhancing the overall flavor profile of this already delicious dish.

No matter how you choose to adapt it, your Creamy Tuscan Salmon Pasta will remain a comforting staple that brings joy to your kitchen!

Expert Tips for Creamy Tuscan Salmon Pasta

Pat the Salmon Dry: Ensure the salmon is patted dry before searing to achieve a beautifully crisp exterior.

Don’t Overcook the Sauce: Keep a close eye on the sauce; letting it boil can cause it to separate. Stir gently to maintain the creamy texture.

Reserve Pasta Water: Always set aside some pasta water before draining; it’s a miracle worker for adjusting sauce consistency without losing flavor.

Use Fresh Ingredients: Fresh spinach and garlic significantly enhance the flavor; skip pre-minced garlic or wilted spinach for best results in your Creamy Tuscan Salmon Pasta.

Experiment with Proteins: Swap out salmon for shrimp or cod for a delightful twist; just adjust cooking times accordingly for perfect results!

Taste as You Go: Make sure to taste and adjust seasonings; the balance of salt and pepper can elevate your dish significantly!

Storage Tips for Creamy Tuscan Salmon Pasta

Fridge: Store leftovers in airtight containers for up to 2 days. Keep the salmon and pasta separate to maintain texture.

Freezer: For longer storage, freeze portions in airtight containers for up to 1 month. It’s best to avoid freezing the creamy sauce to preserve its texture.

Reheating: Reheat gently on the stovetop, adding a splash of reserved pasta water or a bit of cream to restore creaminess to your creamy Tuscan salmon pasta.

Serving: For best taste and quality, consume thawed and reheated pasta within 24 hours after defrosting.

Creamy Tuscan Salmon Pasta Recipe FAQs

How do I choose the right salmon?
When selecting salmon for this recipe, fresh is always preferred for its rich flavor and texture. Look for fillets with a vibrant color and minimal dark spots. If you opt for frozen salmon, ensure it’s fully thawed overnight in the refrigerator before cooking to maintain quality.

How should I store leftovers?
To store your Creamy Tuscan Salmon Pasta, place it in airtight containers in the fridge. Keep the salmon and pasta separate to preserve texture, and enjoy within 2 days. If you find yourself with more leftovers, you can freeze portions in airtight containers for up to 1 month. Just be cautious, as the creamy sauce doesn’t freeze well.

Can I freeze the Creamy Tuscan Salmon Pasta?
Yes, you can freeze it! To freeze, allow the dish to cool completely, then portion it into airtight containers or freezer bags. Be mindful to leave some space for expansion. When you're ready to enjoy it again, thaw it in the fridge overnight and reheat slowly on the stovetop with a splash of reserved pasta water or cream to revive its creamy texture.

What can I do if the sauce separates?
If your sauce breaks and appears separated, don’t worry! Simply remove it from the heat and whisk in a few tablespoons of cold butter or a splash of reserved pasta water until it emulsifies and comes back together. Stir gently to reintegrate the sauce, and you’ll have that silky consistency you’re looking for!

Are there any dietary considerations for this recipe?
Absolutely! If you're catering to lactose sensitivity, use lactose-free cream and cheese to keep all the creamy goodness without the discomfort. Additionally, you can replace the salmon with shrimp or a non-seafood protein to accommodate various dietary restrictions while keeping the rich flavors intact.

What should I do if my tomatoes aren’t sweet enough?
If your cherry tomatoes aren't bursting with sweetness, consider adding a pinch of sugar while sautéing them in the sauce. Alternatively, using sun-dried tomatoes can enhance the flavor profile and provide that delicious sweetness. Adding fresh basil at the end can also brighten the dish beautifully!

Creamy Tuscan Salmon Pasta

Creamy Tuscan Salmon Pasta: A Quick & Cozy Dinner Delight

Creamy Tuscan Salmon Pasta is a comforting Italian dish made with salmon, pasta, and a rich, garlicky cream sauce, ready in just 30 minutes.
Print Recipe Pin Recipe
Prep Time 15 minutes mins
Cook Time 15 minutes mins
Total Time 30 minutes mins
Servings: 4 servings
Course: Dinner
Cuisine: Italian
Calories: 600
Ingredients Equipment Method Nutrition Notes

Ingredients
  

For the Pasta
  • 8 ounces pasta of choice such as fettuccine or penne
For the Salmon
  • 4 fillets salmon fresh or properly thawed frozen salmon
For the Sauce
  • 1 cup heavy cream consider half-and-half for a lighter option
  • 1 cup Parmesan cheese grated fresh for smooth sauce
  • 2 cups fresh spinach can substitute with baby kale or arugula
  • 1 cup cherry tomatoes halved, can substitute with sun-dried tomatoes
For the Seasoning
  • 3 cloves garlic freshly minced
  • to taste salt
  • to taste pepper

Equipment

  • Large skillet
  • Pot for boiling pasta

Method
 

Step‑by‑Step Instructions
  1. Gather all your ingredients. Chop the cherry tomatoes, mince the garlic, and grate the Parmesan cheese.
  2. Season the salmon fillets with salt and pepper. In a skillet, heat olive oil over medium-high heat. Sear the salmon skin-side down for 4-5 minutes, flip, and cook for another 2-3 minutes. Remove and set aside.
  3. In the same skillet, reduce the heat, add minced garlic, and sauté until fragrant. Pour in heavy cream and bring to a gentle simmer. Add grated Parmesan and stir until melted.
  4. Add halved cherry tomatoes and fresh spinach to the sauce. Stir gently until the spinach wilts and tomatoes blister, about 2-3 minutes.
  5. Cook your pasta in a pot of salted boiling water till al dente, then drain, reserving some pasta water. Toss cooked pasta with the sauce, adding pasta water to achieve desired consistency.
  6. Plate the pasta, top with salmon fillet, and sprinkle with more Parmesan and black pepper if desired.

Nutrition

Serving: 1servingCalories: 600kcalCarbohydrates: 45gProtein: 30gFat: 30gSaturated Fat: 15gPolyunsaturated Fat: 5gMonounsaturated Fat: 10gCholesterol: 90mgSodium: 500mgPotassium: 800mgFiber: 3gSugar: 4gVitamin A: 2000IUVitamin C: 30mgCalcium: 350mgIron: 2mg

Notes

For best results, use fresh ingredients and adjust seasonings to taste.

Tried this recipe?

Let us know how it was!

Creamy Salmon Pasta: A Quick Comfort Food Delight

April 13, 2026 by Grace Snow Leave a Comment

The aroma of freshly roasted salmon and garlic wafting through the kitchen is enough to turn an ordinary weeknight into a gourmet experience. My Creamy Salmon Pasta has become my go-to dish when I crave comfort without spending hours slaving over the stove. This delightful recipe marries the tender, flaky goodness of salmon with jammy tomatoes and vibrant spinach, all enveloped in a rich garlic parmesan sauce, making it the perfect solution for busy evenings. With just 30 minutes of prep and cooking time, you can bring a restaurant-quality meal right to your table, ensuring everyone leaves satisfied. Ready to impress? Let’s dive into this scrumptious dish that proves comfort food can also be quick and easy! What variations would you like to explore?

Why is this salmon pasta a must-try?

Simplicity at Its Best: This recipe takes just 30 minutes from start to finish, making it the perfect weeknight dinner for busy cooks.

Rich, Savory Flavor: The buttery garlic parmesan sauce beautifully complements the flaky salmon and sweet roasted tomatoes, creating a truly gourmet experience.

Versatile and Customizable: Feel free to swap fettuccine for your favorite pasta shape or add seasonal vegetables like zucchini or asparagus for extra nutrition.

Perfect Crowd-Pleaser: Impress your family and friends with this dish that’s sure to satisfy everyone, proving that homemade meals can be both comforting and exciting.

Meal Prep Friendly: Leftovers can be stored in the fridge for 2-3 days, making this creamy salmon pasta not just a dinner solution but also a comforting lunch option.

Creamy Salmon Pasta Ingredients

For the Pasta
• Fettuccine Pasta – The main carbohydrate base; any pasta shape like linguini or penne can be used for versatility.
• Salt – Essential for seasoning the pasta water; adjust to taste.

For the Salmon and Veggies
• Fresh Salmon – Provides protein and a rich flavor; ensure salmon is thawed if previously frozen for best results.
• Cherry Tomatoes – Adds sweetness and acidity when roasted; diced fresh tomatoes can be used instead of cherry tomatoes.
• Baby Spinach – Adds freshness and nutrition; feel free to increase the quantity according to preference.
• Olive Oil – Used for roasting; optional flavored oils can add extra taste.

For the Creamy Sauce
• Unsalted Butter – Base for the creamy sauce; margarine or non-dairy butter can be used for a vegan option.
• Garlic – Provides aromatic flavor; fresh minced garlic is recommended for best taste.
• Heavy Cream – Creates the rich, creamy texture of the sauce; avoid replacing it with milk for the same creamy consistency.
• Freshly Grated Parmesan Cheese – Key flavor component; avoid pre-grated cheese for a smoother sauce.
• Ground Black Pepper – Adds warmth and flavor; adjust to taste.

Now that you have your ingredients ready, you’re on your way to crafting the perfect Creamy Salmon Pasta!

Step‑by‑Step Instructions for Creamy Salmon Pasta

Step 1: Roast the Vegetables
Preheat your oven to 400°F (200°C). On a baking sheet, place the fresh salmon fillets and halved cherry tomatoes. Drizzle them with olive oil, then season with salt and pepper. Roast everything in the oven for about 10-12 minutes until the salmon flakes easily and the tomatoes are slightly blistered, releasing sweet juices.

Step 2: Cook the Pasta
While the salmon and tomatoes are roasting, bring a large pot of salted water to a boil. Add the fettuccine pasta and cook it according to the package directions, typically around 8-10 minutes. Before draining, reserve a cup of the starchy pasta water; this will help in creating the creamy sauce later. Drain the pasta and set it aside.

Step 3: Make the Creamy Sauce
In a large skillet over medium heat, melt 2 tablespoons of unsalted butter. Add the minced garlic and sauté for about 1 minute until fragrant, being careful not to burn it. Pour in the heavy cream and bring it to a gentle simmer, stirring occasionally. After about 2-3 minutes, add freshly grated Parmesan cheese, continuing to stir until the sauce thickens and becomes creamy.

Step 4: Combine Pasta and Sauce
Add the drained fettuccine to the creamy sauce in the skillet. Toss gently to coat the pasta evenly, and if the sauce appears too thick, gradually stir in some reserved pasta water until you reach your desired creaminess. Fold in the fresh baby spinach, allowing it to wilt slightly in the heat of the sauce, creating a deliciously vibrant dish.

Step 5: Finish the Dish
Carefully flake the roasted salmon into bite-sized pieces and gently mix it into the creamy salmon pasta along with the roasted tomatoes. Ensure everything is thoroughly combined for even distribution of flavors. Serve hot, garnishing each plate with a sprinkle of additional Parmesan and a dash of ground black pepper for an extra flourish.

Make Ahead Options

These Creamy Salmon Pasta is perfect for meal prep enthusiasts looking to simplify busy weeknights! You can prepare the roasted salmon and cherry tomatoes up to 24 hours in advance; simply season and roast as directed, then store them in an airtight container in the refrigerator. Additionally, you can cook the fettuccine noodles and store them separately. When you're ready to serve your meal, heat the creamy sauce and fold in the prepped salmon, tomatoes, and spinach just before tossing with the pasta. This ensures all ingredients maintain their freshness and flavor, providing you with a delicious homemade dinner with minimal effort!

How to Store and Freeze Creamy Salmon Pasta

Fridge: Store leftovers in an airtight container for up to 3 days. Reheat gently on the stovetop or in the microwave, adding a splash of heavy cream to maintain creaminess.

Freezer: Freeze the creamy salmon pasta in a safe, airtight container for up to 2 months. To reheat, thaw overnight in the fridge and warm gently on the stovetop, adding a little cream if necessary.

Reheating: When reheating, do so over low heat to prevent the sauce from breaking. Stir frequently and incorporate a bit of reserved pasta water to help with consistency.

Separation Tip: If the sauce separates after freezing, simply whisk or stir it back together while gently warming it up. Enjoy your creamy salmon pasta even after storage!

Expert Tips for Creamy Salmon Pasta

  • Grate Your Cheese: Always grate your own parmesan for a silky-smooth sauce; pre-grated versions have anti-caking agents that can affect texture.
  • Surefire Salmon: Pat your salmon dry with a paper towel before roasting to promote perfect browning instead of steaming.
  • Low and Slow: To prevent breaking your creamy sauce, keep the heat low and avoid a rapid boil while simmering.
  • Creaminess Control: Use reserved pasta water to adjust the sauce's consistency; this starchy magic takes your creamy salmon pasta to the next level.
  • Texture Tip: Keep the salmon skin on during roasting for more moisture and flavor, creating an irresistibly tender bite.

What to Serve with Creamy Salmon Pasta

Elevate your dinner experience by adding delightful sides and drinks that perfectly complement the richness of your meal.

  • Lemon Arugula Salad: The bright, citrusy notes cut through the creaminess, refreshing your palate with each bite. This salad adds a vibrant crunch alongside the silky pasta.

  • Garlic Cheese Bread: Warm and buttery, this cheesy side is perfect for scooping up those delicious sauce remnants, making it irresistible for the whole family.

  • Roasted Asparagus: Drizzled with olive oil and lightly seasoned, asparagus adds a healthy, crisp element that pairs beautifully with the salmon, enhancing the overall meal balance.

  • Chardonnay Wine: A chilled glass of this white wine complements the rich flavors of your pasta. Its subtle acidity harmonizes with the cream and brings out the salmon's taste.

  • Creamy Coleslaw: A refreshing slaw adds a crisp texture and tangy taste, contrasting beautifully with the creamy pasta and roasted veggies.

  • Chocolate Mousse: For dessert, a light chocolate mousse is the perfect sweet ending, providing a deliciously rich counterpoint to the savory flavors of the main dish.

Creating a full dining experience has never been easier—these pairings ensure your creamy salmon pasta night becomes a cherished occasion.

Creamy Salmon Pasta Variations

Feel free to let your culinary creativity shine by customizing this creamy salmon pasta to suit your preferences!

  • Smoked Salmon: Swap fresh salmon for smoked salmon for a delightful twist of flavor. The rich, smoky taste pairs beautifully with the creamy sauce.

  • Seasonal Veggies: Add seasonal vegetables like zucchini or asparagus to boost nutrition and texture. They're colorful and delicious additions, making every bite a little different!

  • Pasta Alternatives: Use whole wheat or gluten-free pasta instead of fettuccine for a healthier or dietary-friendly option. Your dish will still deliver on comfort and flavor.

  • Cheese Variation: Try substituting the parmesan with crumbled feta for a tangy twist. The creamy yet salty feta adds a whole new dimension to this classic dish.

  • Zest it Up: A splash of lemon juice right before serving brightens the dish and adds a refreshing zing, elevating those savory flavors.

  • Spicy Kick: Add red pepper flakes for a kick of heat. Just a pinch can transform the dish into something exciting for spice lovers.

  • Herb Infusion: Incorporate fresh herbs like dill or basil in your creamy sauce for an aromatic touch. They not only enhance flavor but also add a beautiful pop of color.

If you're exploring other delicious pasta options, don't forget to check out my amazing recipes for Seafood Pasta Savory and Skillet Pasta Sun. Your dinner table will be anything but boring!

Creamy Salmon Pasta Recipe FAQs

How do I choose fresh salmon for this recipe?
Absolutely! Look for salmon fillets that are bright in color, with a fresh ocean smell. The flesh should be firm and moist. Avoid any fillets with dark spots or a dull appearance. If you're buying frozen salmon, make sure it's completely thawed before cooking for the best results.

What is the best way to store leftovers of creamy salmon pasta?
Very! To store leftovers, place them in an airtight container and refrigerate for up to 3 days. When reheating, I recommend adding a splash of heavy cream to keep the sauce creamy and delicious. Simply reheat gently on the stovetop or in the microwave.

Can I freeze creamy salmon pasta?
Certainly! You can freeze creamy salmon pasta for up to 2 months in an airtight container. To reheat, thaw it overnight in the fridge and warm it gently on the stovetop, stirring frequently. If the sauce has thickened, don’t worry—just add a little cream or reserved pasta water until it reaches the desired consistency.

What should I do if the sauce separates while reheating?
Absolutely! If the sauce separates, just whisk or stir it back together over low heat. The gentle warming should help reintegrate the creaminess. Adding in a splash of reserved pasta water or a bit more cream can also help to restore its silky texture.

Are there any dietary considerations for creamy salmon pasta?
Yes! This dish is perfect for those who are not allergic to seafood or dairy. If you're making it for someone with a dairy allergy, consider using non-dairy butter and cream alternatives. For those mindful of their calorie intake, you can scale back on the cream and cheese while still enjoying a tasty meal.

Can I make creamy salmon pasta in advance?
Certainly! You can prepare the elements of this dish ahead of time. Cook the pasta and roast the salmon and vegetables, then store them separately in the fridge. When you're ready to serve, just whip up the sauce and combine everything—it's a great way to have a gourmet meal ready in no time!

Creamy Salmon Pasta

Creamy Salmon Pasta: A Quick Comfort Food Delight

Enjoy this Creamy Salmon Pasta that's quick to prepare and deliciously comforting.
Print Recipe Pin Recipe
Prep Time 15 minutes mins
Cook Time 15 minutes mins
Total Time 30 minutes mins
Servings: 4 servings
Course: Dinner
Cuisine: Italian
Calories: 620
Ingredients Equipment Method Nutrition Notes

Ingredients
  

For the Pasta
  • 8 oz Fettuccine Pasta or any preferred pasta shape
  • 1 tbsp Salt for pasta water
For the Salmon and Veggies
  • 1 lb Fresh Salmon thawed if previously frozen
  • 1 cup Cherry Tomatoes halved
  • 2 cups Baby Spinach adjust according to preference
  • 2 tbsp Olive Oil for roasting
For the Creamy Sauce
  • 2 tbsp Unsalted Butter or margarine for a vegan option
  • 2 cloves Garlic minced
  • 1 cup Heavy Cream do not replace with milk
  • 1 cup Freshly Grated Parmesan Cheese avoid pre-grated for smoother sauce
  • 1 tsp Ground Black Pepper adjust to taste

Equipment

  • Oven
  • Large pot
  • Skillet
  • Baking Sheet

Method
 

Step-by-Step Instructions
  1. Preheat your oven to 400°F (200°C). On a baking sheet, place the salmon and halved cherry tomatoes, drizzle with olive oil, and season with salt and pepper. Roast for about 10-12 minutes.
  2. While roasting, boil salted water in a large pot. Cook the fettuccine according to package instructions, usually 8-10 minutes. Reserve a cup of pasta water, drain, and set aside.
  3. In a large skillet, melt butter over medium heat. Add minced garlic and sauté until fragrant, then pour in heavy cream and simmer gently. Stir in grated Parmesan until the sauce thickens.
  4. Add the drained pasta to the skillet, tossing to coat. If too thick, gradually stir in reserved pasta water. Fold in spinach until wilted.
  5. Flake roasted salmon into bite-sized pieces and gently mix into the pasta along with roasted tomatoes. Serve hot, garnished with additional Parmesan and black pepper.

Nutrition

Serving: 1bowlCalories: 620kcalCarbohydrates: 45gProtein: 35gFat: 35gSaturated Fat: 20gPolyunsaturated Fat: 5gMonounsaturated Fat: 10gCholesterol: 90mgSodium: 600mgPotassium: 800mgFiber: 3gSugar: 5gVitamin A: 500IUVitamin C: 10mgCalcium: 300mgIron: 2mg

Notes

Leftovers can be stored in the fridge for up to 3 days. Reheat gently on the stovetop with a splash of cream.

Tried this recipe?

Let us know how it was!
  • « Previous Page
  • 1
  • …
  • 15
  • 16
  • 17
  • 18
  • 19
  • …
  • 216
  • Next Page »

Welcome!

Hi, I’m Grace, a Sydney-based home cook with a passion for bold flavors and trending ingredients. Whether you’re a busy beginner or a seasoned foodie, you’ll find dishes here that are fresh, fun, and full of flavor.

More about me

Popular Recipes

  • Chocolate Cake Pops
    Delightful Chocolate Cake Pops for Your Sweet Cravings
  • Cottage Cheese Banana Bread
    Cottage Cheese Banana Bread: Moist, Protein-Packed Delight
  • Flourless Oat Waffles
    Flourless Oat Waffles for a Quick, Healthy Breakfast Boost
  • Cinnamon Waffles
    Fluffy Cinnamon Waffles with Dreamy Whipped Cream Bliss

Footer

↑ back to top

About

  • Privacy Policy
  • Disclaimer
  • Terms & Conditions

Newsletter

  • Sign Up! for emails and updates

Contact

  • About me
  • Contact me

Copyright © 2025 TastyTrendIngredients