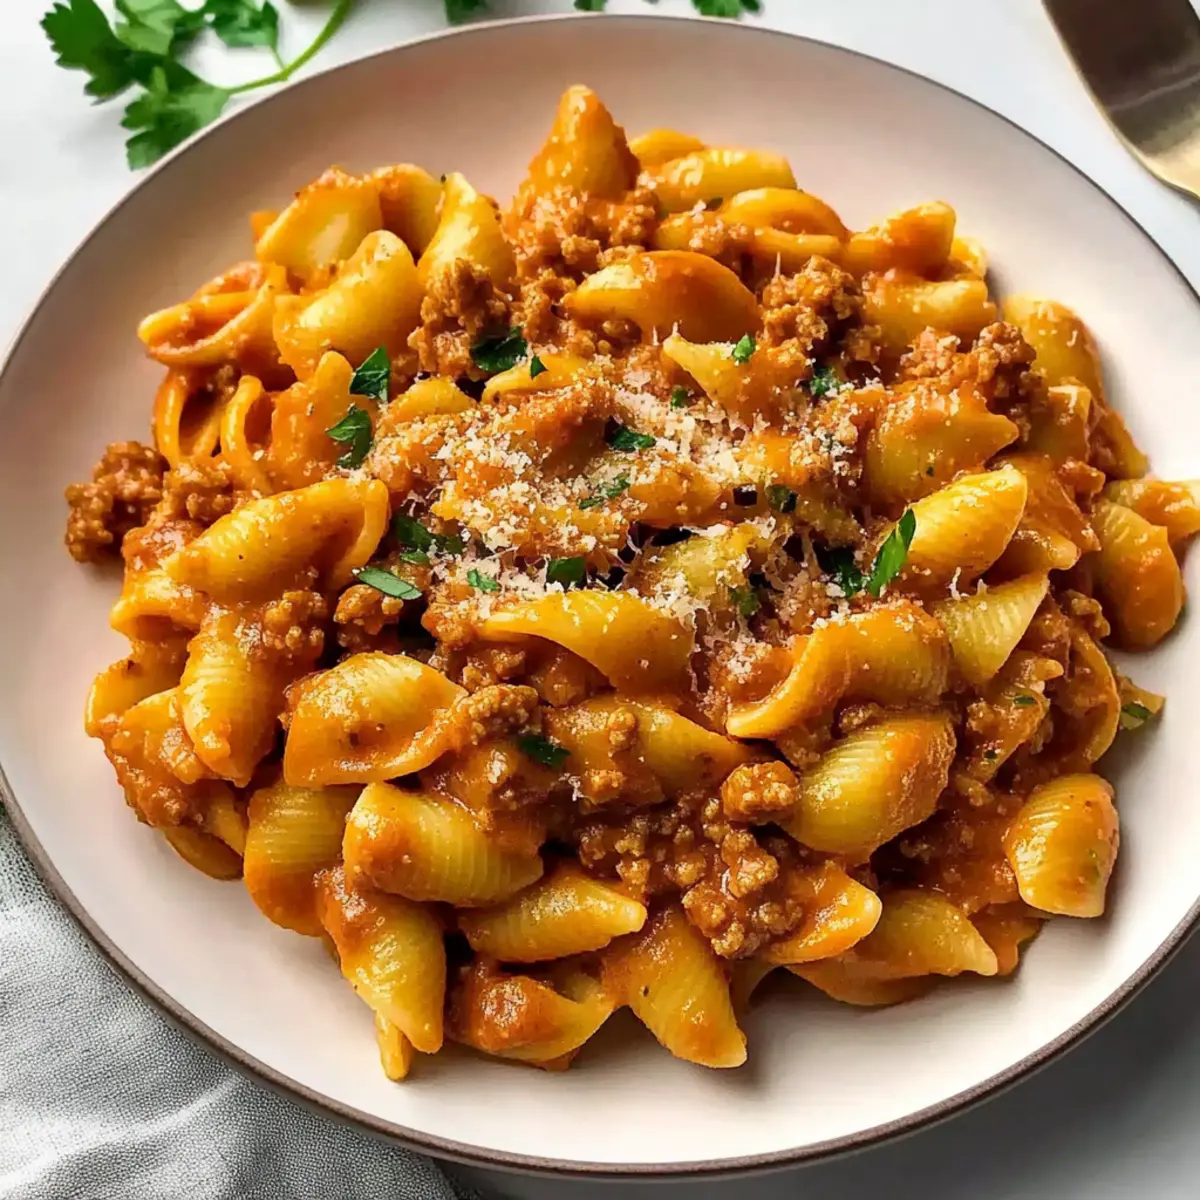
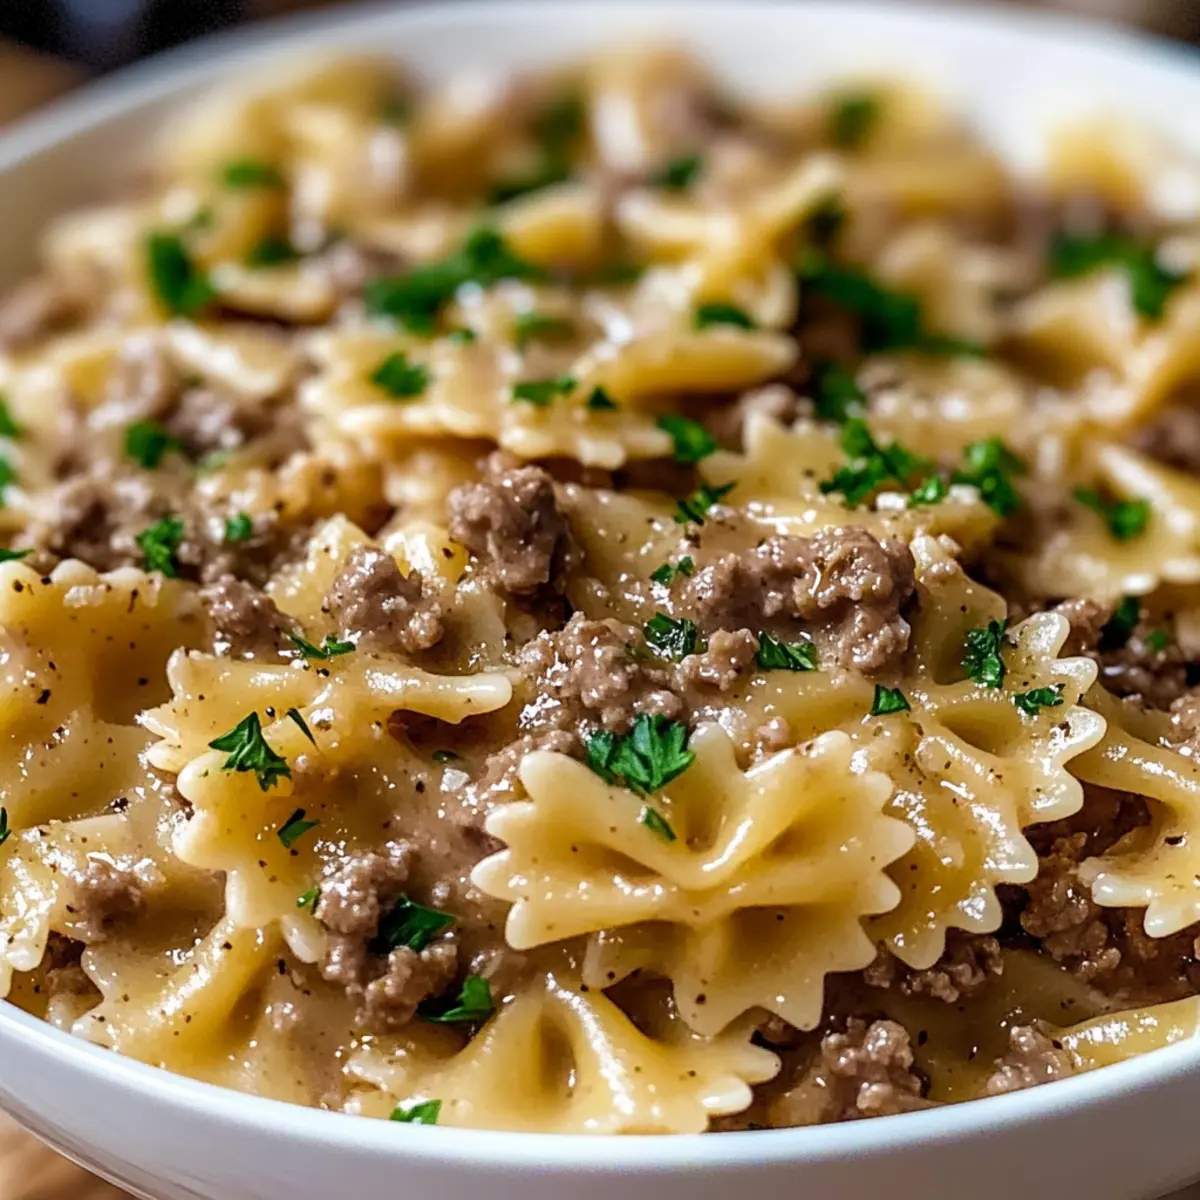
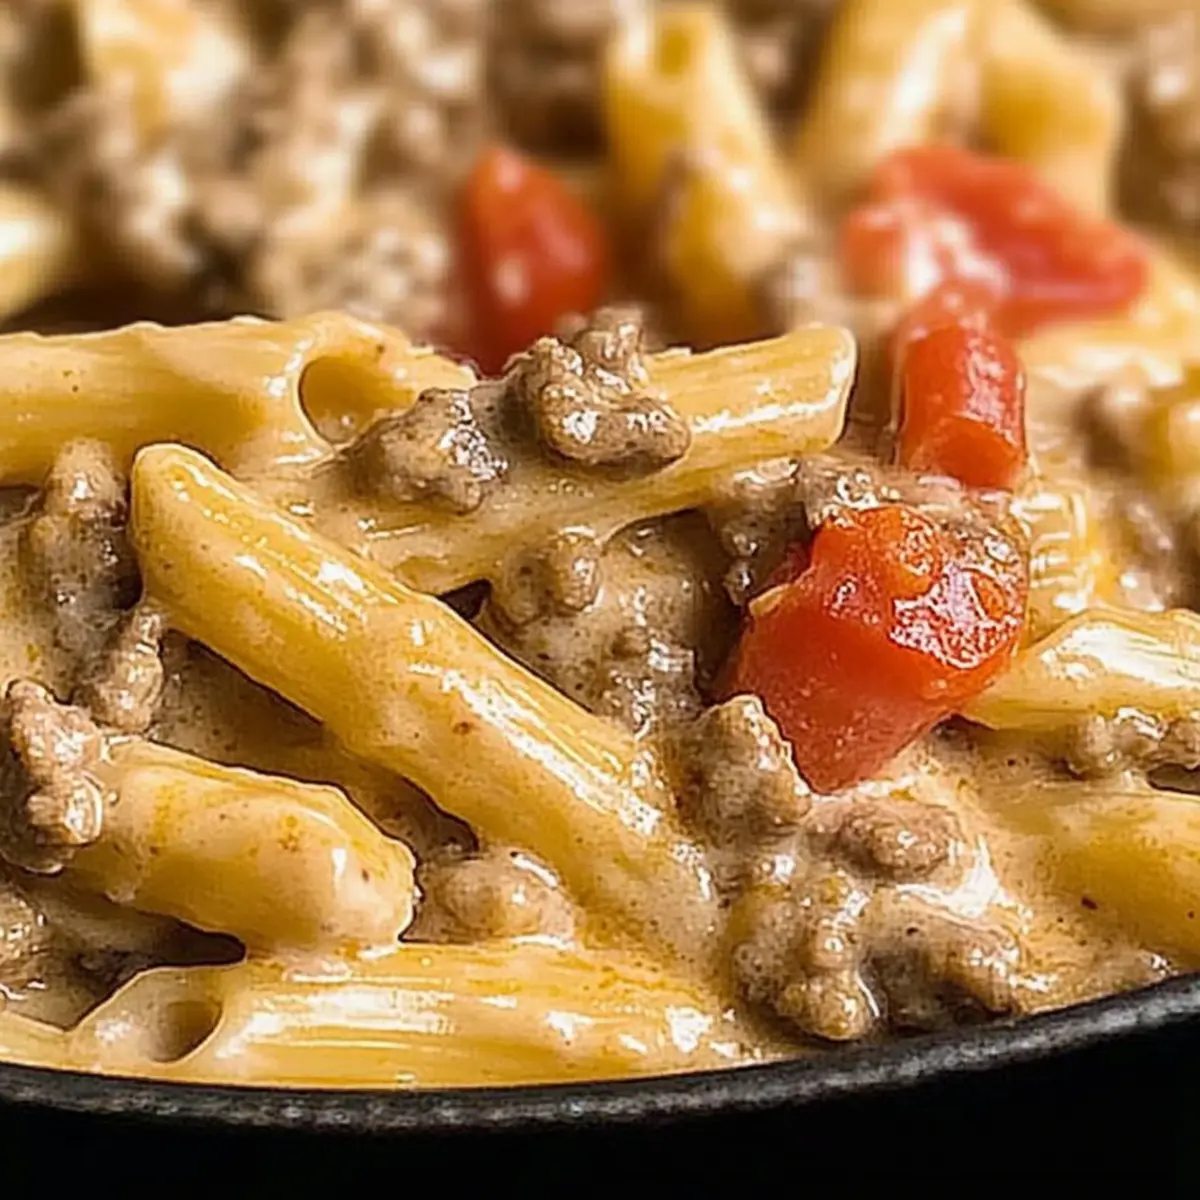
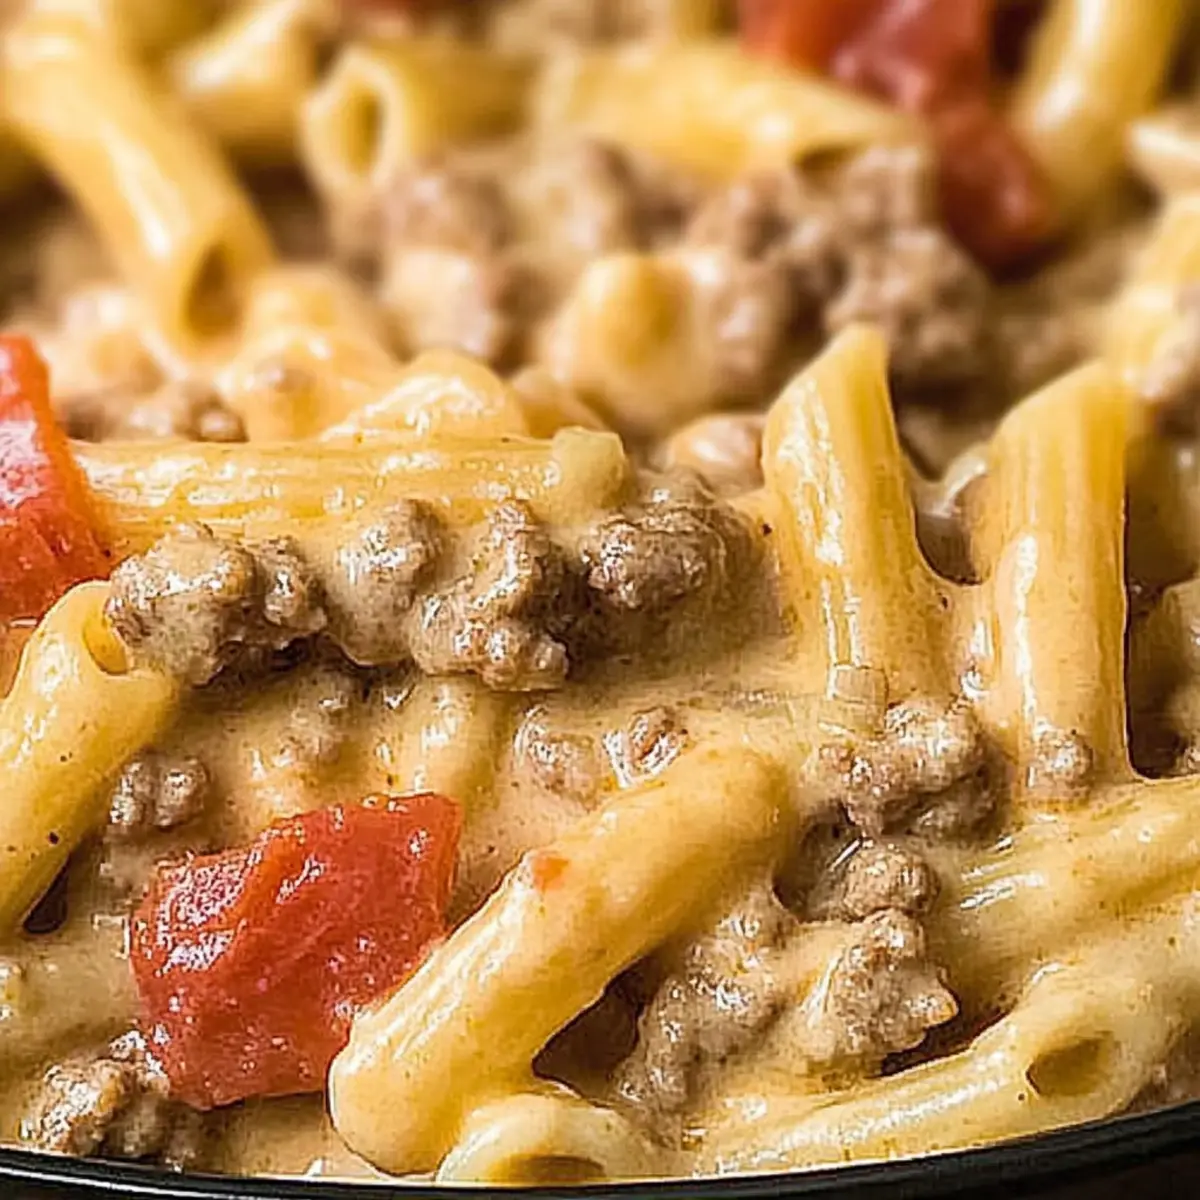
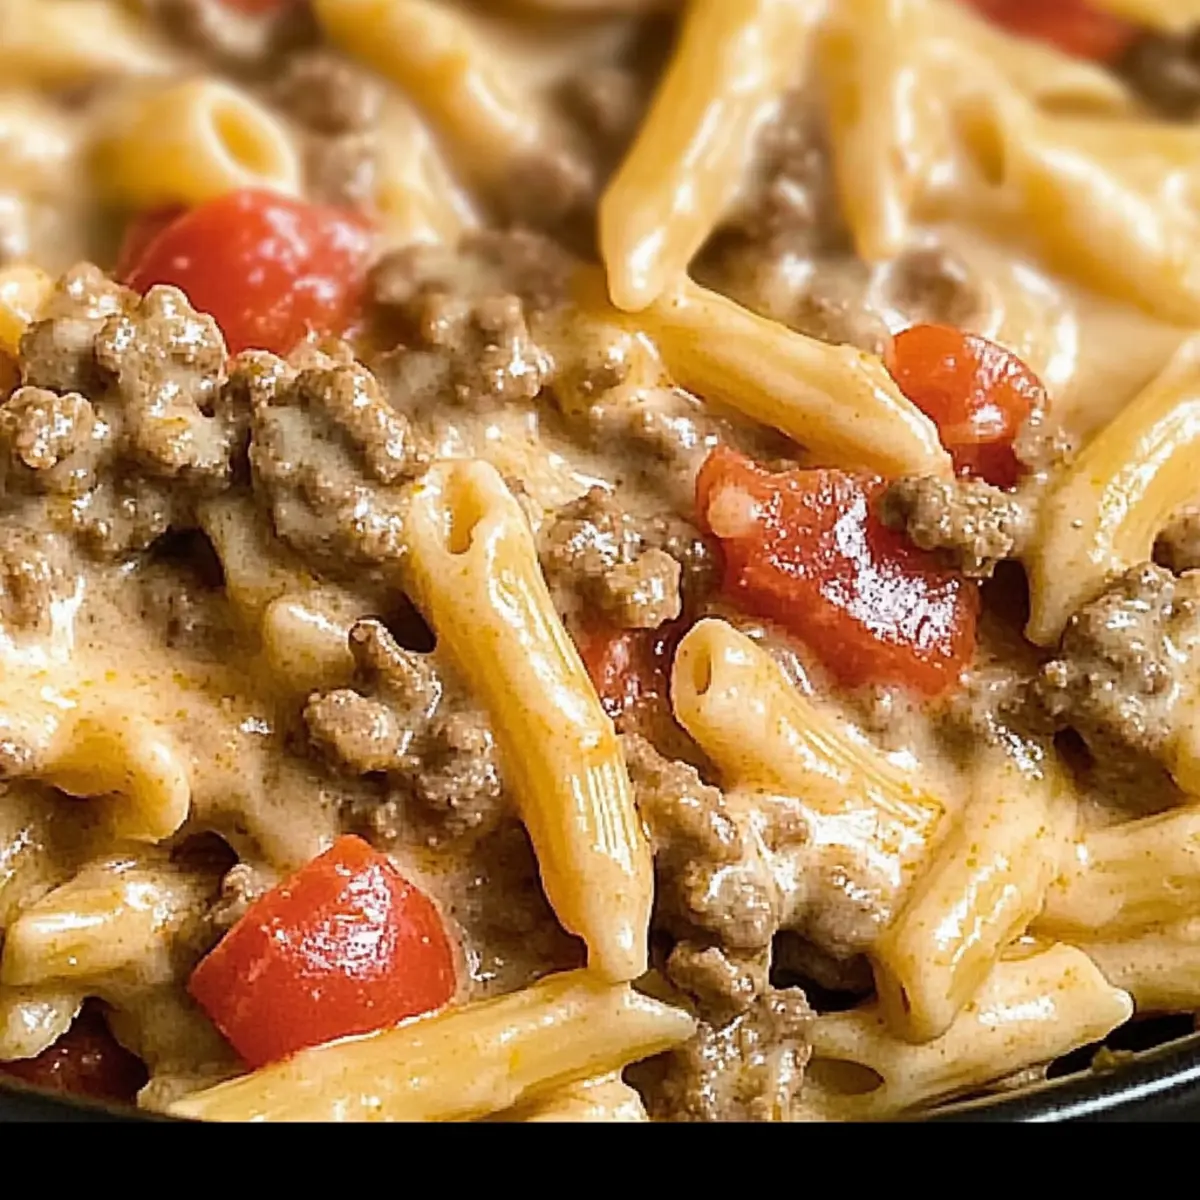
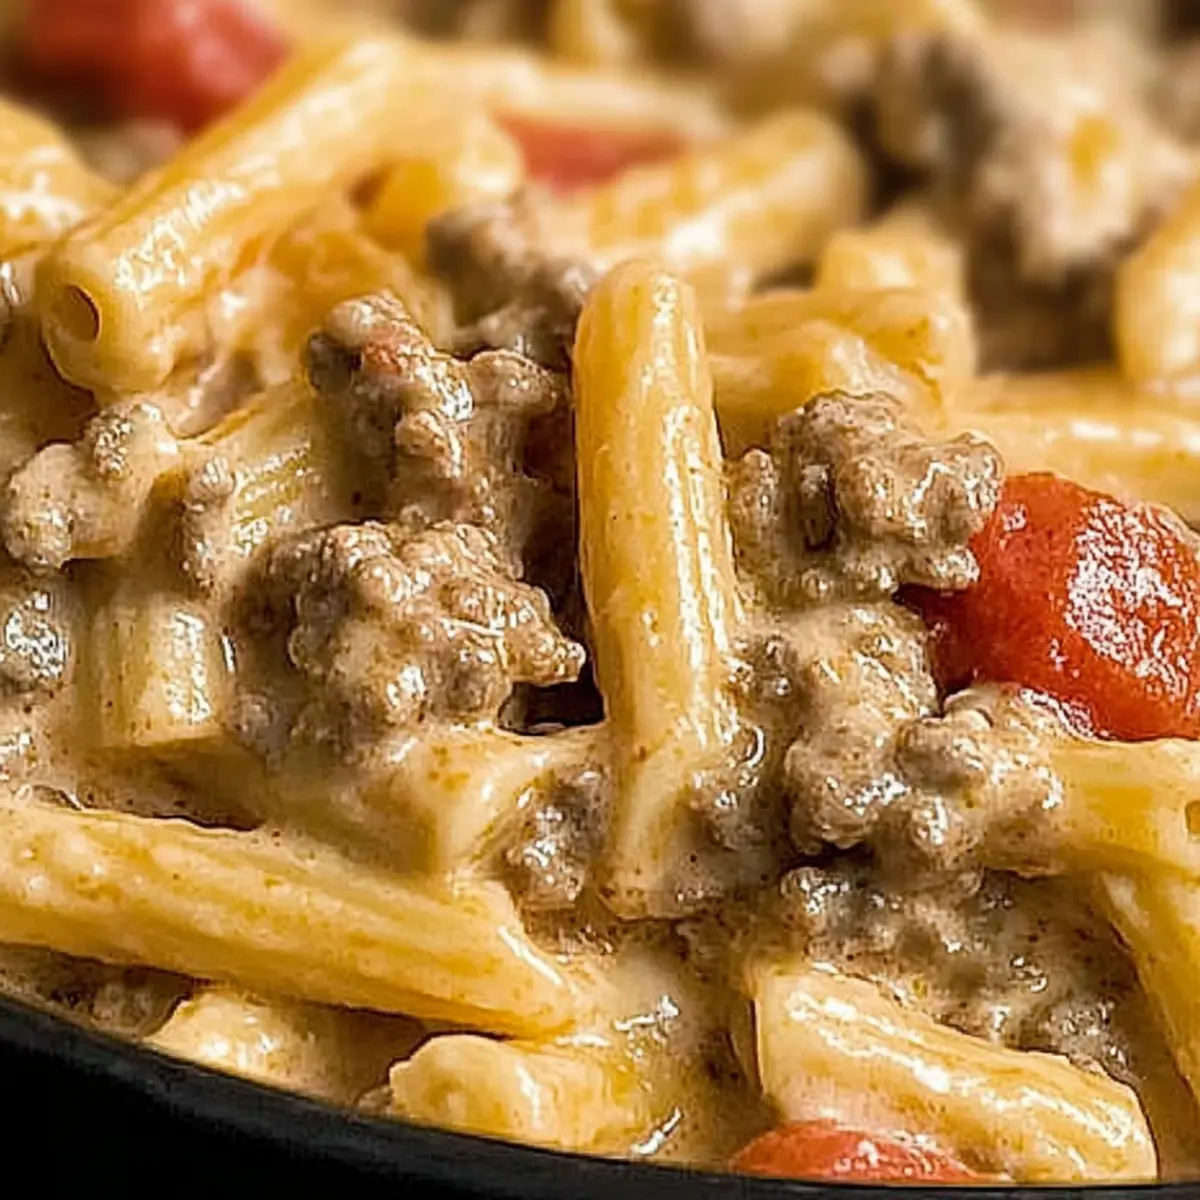
tastytrendingredients

  • Home
  • Recipes
    • Appetizers
    • Breakfast
    • Dessert
    • Dinner
    • Drinks
    • Salads
    • Snacks
    • Soups
  • About me
  • Contact me
menu icon
go to homepage
  • Home
  • Recipes
    • Appetizers
    • Breakfast
    • Dessert
    • Dinner
    • Drinks
    • Salads
    • Snacks
    • Soups
  • About me
  • Contact me
search icon
Homepage link
  • Home
  • Recipes
    • Appetizers
    • Breakfast
    • Dessert
    • Dinner
    • Drinks
    • Salads
    • Snacks
    • Soups
  • About me
  • Contact me
×

Fresh Horiatiki Pasta Salad: A Flavorful Village Twist

April 10, 2026 by Grace Snow Leave a Comment

As I bit into the first cookie, the delightful blend of chocolate and oats enveloped my taste buds, instantly transporting me to my favorite childhood memories. These 4-Ingredient Crunchy Chocolate Oat Cookies are not just a treat; they’re a quick and simple solution for anyone craving a sweet snack without the fuss. With just a handful of gluten-free ingredients, you can whip up these cookies in under 20 minutes—perfect for busy evenings or impromptu gatherings. Whether you're a baking novice or looking to simplify your dessert routine, these cookies deliver a satisfying crunch with every bite. Ready to find out how easy it is to indulge in a tasty, homemade delight?

Why Are These Cookies a Must-Try?

Simplicity at Its Best: With only four simple ingredients, making these cookies is a breeze, even for beginner bakers.

Decadent Flavor: The rich chocolate cocoa marries beautifully with the wholesome oats, delivering a treat that’s as tasty as it is satisfying.

Quick & Easy: You can enjoy these freshly baked cookies in just 20 minutes, making them perfect for last-minute snacking or dessert fixes.

Healthy Indulgence: Packed with nutrients from oats and healthy fats from peanut butter, these cookies allow you to indulge guilt-free.

Versatile Variations: Whether you prefer mix-ins like chocolate chips or a nut-free option with sunbutter, this recipe invites creativity to suit your taste.

Elevate your snacking game with these cookies that will surely impress family and friends! If you love quick, wholesome treats, you might also want to explore my recipes for Skillet Pasta Sun or Avocado Egg Salad for a delightful meal.

Chocolate Oat Cookies Ingredients

Get ready to bake with these easy chocolate oat cookies!

For the Cookie Dough
• Oats – Provide structure and chewiness; use rolled oats for the best texture.
• Cocoa Powder – Adds a rich chocolate flavor; opt for unsweetened for better control over sweetness.
• Peanut Butter – Acts as a binding agent and adds creaminess; almond butter can be used for a nut-free alternative.
• Sweetener (e.g., Honey or Maple Syrup) – Adds necessary sweetness and moisture; agave syrup works well for a vegan option.

Don't hesitate to customize these cookies with your favorite mix-ins or variations!

Step‑by‑Step Instructions for 4-Ingredient Crunchy Chocolate Oat Cookies

Step 1: Preheat the Oven
Begin by preheating your oven to 350°F (175°C). This step ensures that your cookies will bake evenly, resulting in a perfectly crunchy texture. While the oven heats up, gather your ingredients and prepare a baking sheet lined with parchment paper for easy cookie transfer later.

Step 2: Mix the Dry Ingredients
In a large mixing bowl, combine rolled oats and unsweetened cocoa powder. Stir them together thoroughly until they are evenly distributed. This step is essential as it sets the foundation for your flavorful chocolate oat cookies. The cocoa will give the cookies a deep, rich color as well as an irresistible taste.

Step 3: Combine the Wet Ingredients
Add in creamy peanut butter and your choice of sweetener (like honey or maple syrup) into the bowl with the dry ingredients. Stir everything together using a spatula or wooden spoon until the mixture forms a cohesive dough. The peanut butter plays a crucial role in binding the ingredients, so ensure that everything is well-mixed and no dry patches remain.

Step 4: Shape the Cookies
Using a tablespoon, scoop out portions of the dough and place them onto the prepared baking sheet, spacing them about 2 inches apart. Gently flatten each scoop slightly with the back of the spoon. This helps the cookies bake evenly and develop their signature crunchy exterior while retaining a chewy center.

Step 5: Bake the Cookies
Place the baking sheet in the preheated oven and bake for 12-15 minutes. You'll know they are ready when the edges feel firm, and the tops have set but may still appear soft. Keep an eye on the cookies during the last few minutes to prevent them from overbaking, as each oven can vary in temperature.

Step 6: Cool the Cookies
After baking, remove the cookies from the oven and let them cool on the baking sheet for about 5 minutes. This cooling period allows them to firm up a bit more before transferring. Once slightly cooled, use a spatula to carefully transfer them to a wire rack to cool completely, where they will continue to harden into delicious crunchy chocolate oat cookies.

Make Ahead Options

These 4-Ingredient Crunchy Chocolate Oat Cookies are perfect for meal prep enthusiasts looking to save time during busy weeks! You can prepare the dough up to 24 hours in advance by mixing all the ingredients and storing it in an airtight container in the refrigerator. This keeps everything fresh and ready when you need it. Alternatively, you can also scoop and shape the cookies on the baking sheet, cover them with plastic wrap, and refrigerate for up to 3 days. When you're ready to bake, simply pop them in a preheated oven and adjust the baking time if needed. This way, you'll enjoy the same delightful texture and flavor, making your baking experience effortless!

How to Store and Freeze Chocolate Oat Cookies

Room Temperature: Store the cookies in an airtight container at room temperature for up to 7 days to maintain their delightful crunch.

Fridge: If you want to extend their freshness, refrigerate the cookies in an airtight container for up to 2 weeks. Just note that refrigeration may soften their texture slightly.

Freezer: For longer storage, freeze the cookies in a single layer on a baking sheet until solid, then transfer to a freezer-safe bag. They can be stored for up to 3 months.

Reheating: To enjoy warm cookies, reheat in the oven or microwave for a few seconds until warmed through. Indulge in these chocolate oat cookies whenever the craving strikes!

What to Serve with 4-Ingredient Crunchy Chocolate Oat Cookies

These cookies pair perfectly with delightful accompaniments that will elevate your snack time experience!

  • Creamy Greek Yogurt: Its tartness balances the sweetness of the cookies, adding a refreshing element when enjoyed together.

  • Fresh Berries: Juicy strawberries or raspberries enhance the flavors with their bright acidity, making for a gorgeous color contrast on your plate.

  • Chilled Milk: There's nothing like dipping a cookie into a cold glass of milk, providing a classic comfort that enhances every bite of the crunchy treat.

  • Nutty Trail Mix: Add some variety with a mix of nuts and dried fruit, creating a delightful crunch and chewy texture that rounds out your snack.

  • Chocolate Dipped Fruit: For a chocolate lover's dream, serve these cookies alongside chocolate-dipped bananas or strawberries to amplify the chocolate flavor in your meal.

  • Peppermint Tea: The soothing nature of peppermint tea pairs beautifully, offering a gentle contrast to the rich, decadent cookies while aiding digestion.

  • Coffee: A hot cup of black coffee or a latte can enhance the chocolate flavor, creating a cozy and inviting afternoon indulgence.

Let your imagination play as you build the perfect snack platter around your delicious cookies!

Crunchy Chocolate Oat Cookies Variations

Feel free to make these delightful cookies your own with easy twists and substitutions that will enhance their flavor and texture!

  • Nut-Free: Substitute peanut butter with sunbutter for a deliciously nut-free treat that everyone can enjoy.
  • Sweetness Swap: Use coconut sugar or brown sugar instead of honey or maple syrup for a different flavor profile and a hint of caramel.
  • Chocolate Boost: Mix in dark chocolate chips for an extra chocolaty delight that melts in your mouth.
  • Fruit Fusion: Add dried cranberries or raisins for a sweet and tangy surprise in every bite.
  • Crispy Texture: Incorporate crushed nuts or seeds for a delightful crunch that contrasts beautifully with the chewy oats.

Add a pinch of cinnamon or a dash of vanilla extract to elevate the flavor profile, infusing warmth into your cookies. Whether you go for a nutty flare or fruity twist, these variations transform your chocolate oat cookies into something uniquely yours!

Ready for another culinary adventure? Check out my recipe for Jello Salad Cottage for a refreshing side or indulge in a savory Seafood Pasta Savory dish that’s as flavorful as it gets.

Expert Tips for Crunchy Chocolate Oat Cookies

• Mixing Matters: Ensure the dough is thoroughly mixed; insufficient mixing can lead to crumbly cookies that don't hold together well.

• Oat Choices: Always opt for rolled oats. Quick oats can make the cookies mushy, compromising the delightful crunchy texture you desire.

• Watch the Oven: Keep an eye on your cookies during the last few minutes of baking. Overbaking can turn them overly hard—aim for firm edges and soft tops.

• Cooling Time: Give your cookies a few minutes to cool on the baking sheet; this helps them firm up nicely before transferring to a wire rack.

• Storage Smarts: Store cookies in an airtight container at room temperature. This keeps them fresh and crunchy for up to a week, perfect for on-the-go snacking.

Enjoy your time making these delicious cookies!

4-Ingredient Crunchy Chocolate Oat Cookies Recipe FAQs

How do I choose the right oats for this recipe?
Absolutely! For the best texture, I recommend using rolled oats. They provide the perfect amount of chewiness and structure. Avoid using quick oats as they may result in mushy cookies that lack that satisfying crunch.

How should I store leftover chocolate oat cookies?
You can store these cookies in an airtight container at room temperature for up to 7 days. This helps preserve their delightful crunch! If you want them to last longer, you can refrigerate them for up to 2 weeks, but be aware that refrigeration may soften their texture slightly.

Can I freeze the chocolate oat cookies for later?
Yes, definitely! To freeze, place the cookies in a single layer on a baking sheet until they are solid. Then, transfer them to a freezer-safe bag, removing as much air as possible. They can stay frozen for up to 3 months! When you're ready to enjoy, thaw at room temperature or reheat in the oven for a few minutes.

What if my cookie dough is too dry?
Very! If your dough feels too dry and crumbly, you can adjust by adding a little more peanut butter or sweetener. Start with a tablespoon and mix well until you reach a cohesive consistency. The peanut butter not only binds but also adds moisture, so don't be shy!

Can my pets eat chocolate oat cookies?
No, it’s important to keep these cookies away from pets. The cocoa powder can be harmful to dogs and cats. If you want to make a treat for your furry friends, consider creating a dog-friendly version using carob instead of cocoa powder.

What variations can I try with this recipe?
The more the merrier! You can easily customize these cookies by mixing in chocolate chips, dried fruits, or even a splash of vanilla extract for extra flavor. For a nut-free alternative, simply swap the peanut butter with sunflower seed butter (sunbutter) to make them accessible for all.

Horiatiki (Village) Pasta Salad

Fresh Horiatiki Pasta Salad: A Flavorful Village Twist

A delightful Horiatiki Pasta Salad that brings a fresh village twist to your table, making it a must-try dish.
Print Recipe Pin Recipe
Prep Time 20 minutes mins
Total Time 20 minutes mins
Servings: 4 servings
Course: Salads
Cuisine: Greek
Calories: 150
Ingredients Equipment Method Nutrition Notes

Ingredients
  

For the Cookie Dough
  • 2 cups Rolled Oats Provides structure and chewiness
  • 1 cup Cocoa Powder Adds rich flavor
  • 1 cup Peanut Butter Acts as binding agent
  • 1/2 cup Sweetener (Honey or Maple Syrup) Adds necessary sweetness

Equipment

  • Bowls
  • Oven
  • Baking Sheet
  • Parchment Paper
  • Spatula

Method
 

Step-by-Step Instructions
  1. Preheat your oven to 350°F (175°C) and prepare a baking sheet lined with parchment paper.
  2. In a large mixing bowl, combine rolled oats and cocoa powder until evenly distributed.
  3. Add peanut butter and sweetener into the dry ingredients and mix until a cohesive dough forms.
  4. Scoop portions of dough onto the prepared baking sheet, spacing them about 2 inches apart and flatten each scoop slightly.
  5. Bake for 12-15 minutes until the edges feel firm and the tops have set.
  6. Let the cookies cool on the baking sheet for 5 minutes before transferring them to a wire rack.

Nutrition

Serving: 1cookieCalories: 150kcalCarbohydrates: 18gProtein: 4gFat: 7gSaturated Fat: 2gPolyunsaturated Fat: 1gMonounsaturated Fat: 3gSodium: 125mgPotassium: 150mgFiber: 2gSugar: 5gCalcium: 20mgIron: 1mg

Notes

Store cookies in an airtight container at room temperature for up to a week.

Tried this recipe?

Let us know how it was!

Creamy Shrimp Pasta Salad for a Refreshing Summer Meal

April 10, 2026 by Grace Snow Leave a Comment

Summer is just around the corner, and I'm already dreaming of light, refreshing meals that keep the heat at bay. That’s where this Quick & Creamy Shrimp Pasta Salad comes into play! Perfect for those sunny days, this dish comes together in under 30 minutes, making it a hassle-free option when you want something delicious without spending hours in the kitchen. Packed with tender shrimp and a creamy dressing, it’s not only a family favorite but also a crowd-pleaser for potlucks and gatherings. Plus, it's a fantastic make-ahead option, allowing the flavors to meld beautifully while you focus on other preparations. What’s your go-to dish for warm weather?

Why is this Shrimp Pasta Salad a Must-Try?

Quick & Easy: This Shrimp Pasta Salad is ready in under 30 minutes, perfect for busy weeknights or last-minute gatherings.

Refreshing Flavors: The zesty lemon and crisp veggies make every bite a burst of freshness, ideal for hot summer days.

Make-Ahead Magic: Prepare it in advance to allow the flavors to mingle, ensuring a delightful dish when you need it most.

Versatile Options: Swap shrimp for crab or chicken, or even try different pasta shapes for variety!

Crowd-Pleasing Appeal: This salad is a crowd favorite at potlucks—serve it alongside Shrimp Tacos Zesty for an even more impressive spread!

Shrimp Pasta Salad Ingredients

For the Base

  • Cooked Macaroni – Provides structure and a hearty base for the salad. Can substitute with gluten-free pasta as needed.
  • Cooked Shrimp – Adds protein and flavor. Use pre-cooked shrimp for faster prep.

For the Vegetables

  • Shallot – Offers mild onion flavor and sweetness. Substitute with green onions for a sharper taste.
  • Chopped Celery – Adds crunch and freshness. Optional if a softer texture is preferred.
  • Chopped Parsley – Provides freshness and color. Substitute with dill for a different herbaceous flavor.

For the Dressing

  • Granulated Garlic – Infuses the salad with savory notes. Fresh minced garlic can also be used.
  • Cumin – Enhances depth of flavor with its earthy tones. Omit if sensitive to strong spices.
  • Lemon Juice – Adds acidity and brightness. Lime juice can serve as an alternative.
  • Olive Oil – Helps emulsify the dressing. Any neutral oil can be used in a pinch.
  • Worcestershire Sauce – Adds umami and depth. Coconut aminos can be used for a gluten-free option.
  • Mayonnaise & Sour Cream – Creamy components for the dressing. Greek yogurt is a lighter substitute.
  • Mustard Powder – Contributes an additional tanginess. Regular mustard can replace it.
  • Brown Sugar – Balances the dressing with sweetness. Honey or agave can work as a substitute.
  • Salt & Pepper – Essential for seasoning. Adjust according to taste preferences.

Step‑by‑Step Instructions for Shrimp Pasta Salad

Step 1: Marinate the Shrimp
Begin by marinating the cooked shrimp in a bowl with lemon juice, olive oil, garlic, and cumin. Allow it to sit for about 10 minutes, letting the shrimp soak up the flavors. You’ll know it’s ready when the shrimp shine with a zesty glaze, enhancing their natural sweetness.

Step 2: Sauté the Shrimp
Heat a non-stick skillet over medium heat and add the marinated shrimp. Sauté for approximately 5 minutes, stirring occasionally, until the shrimp turn pink and opaque. Once cooked through, remove from heat and set aside to cool, ensuring they retain their tender texture.

Step 3: Prepare the Dressing
In a mixing bowl, combine sour cream, mayonnaise, Worcestershire sauce, brown sugar, mustard powder, granulated garlic, salt, and pepper. Whisk thoroughly for about 2-3 minutes until the mixture is smooth and creamy. This luscious dressing will be the heart of your Shrimp Pasta Salad.

Step 4: Mix the Salad Ingredients
In a large mixing bowl, add the cooked macaroni, sautéed shrimp, chopped shallot, diced celery, and parsley. Gently toss the ingredients together, allowing the flavors to start melding. Visualize a colorful medley as you combine these elements, each bringing a unique texture to the salad.

Step 5: Combine and Coat
Pour the prepared dressing over the pasta and shrimp mixture. Carefully toss everything together until each component is evenly coated in the creamy dressing. Take your time to ensure the macaroni and shrimp are enveloped in that delightful mixture, making every bite rich and flavorful.

Step 6: Chill Before Serving
Cover the salad with plastic wrap and refrigerate for at least 30 minutes. Chilling allows the ingredients to mingle and the flavors to deepen, enhancing the overall taste of your Shrimp Pasta Salad. The result will be a refreshing dish ready to impress your family or guests.

What to Serve with Shrimp Pasta Salad?

Looking to create a delightful spread that complements this quick and creamy dish?

  • Grilled Corn on the Cob: The sweet, charred flavor of grilled corn enhances the meal, adding a summery, smoky element that's hard to resist.
  • Garlic Bread: Crispy and buttery, garlic bread is warming and comforting, perfect for dipping in any leftover creamy dressing.
  • Classic Caesar Salad: The crunch of romaine and the garlicky dressing provide a satisfying contrast, creating a refreshing palate cleanser.
  • Caprese Skewers: These colorful bites of mozzarella, basil, and tomato bring a fresh and vibrant touch, perfectly manicured for summer gatherings.
  • Chilled White Wine: A glass of chilled Sauvignon Blanc brings fruity notes that balance the richness of the salad, enhancing every bite.
  • Lemon Sorbet: This light dessert refreshes the palate after the meal, its citrus zing echoing the zesty lemon in the salad.
  • Vegetable Platter: A medley of crisp veggies served with a zesty dip adds a fresh, crunchy element that rounds out the meal.
  • Coconut Rice: Sweet and fluffy coconut rice adds a unique twist, bringing tropical vibes that perfectly match the shrimp flavors.
  • Tomato Gazpacho: This chilled soup is a refreshing start that complements the creamy shrimp, creating a harmonious summer dining experience.

Expert Tips for Shrimp Pasta Salad

  • Cool the Shrimp: Ensure shrimp are fully cooled before mixing with the dressing to prevent curdling. Patience pays off!

  • Flavor Infusion: Allow the salad to chill in the refrigerator for at least 30 minutes before serving. This step enhances flavor integration beautifully.

  • Don’t Overcook: Avoid overcooking shrimp to prevent them from becoming rubbery; they should be pink and firm for the best texture in your shrimp pasta salad.

  • Mix It Up: Feel free to substitute shrimp with crab or chicken to suit different tastes or dietary preferences. Variety is the spice of life!

  • Dressing Consistency: If your dressing is too thick, thin it out with a bit of additional lemon juice or olive oil. This will help ensure smooth coverage over your salad.

Make Ahead Options

This Quick & Creamy Shrimp Pasta Salad is perfect for meal prep, allowing you to save valuable time on busy days. You can prepare the shrimp and dressing up to 24 hours in advance; just be sure to refrigerate them separately to maintain their freshness. To do this, marinate the shrimp and sauté them as directed, then let them cool completely before storing them in an airtight container. The dressing can be whisked together and kept in the fridge as well. When you're ready to serve, simply mix the cooled shrimp with the cooked macaroni, chopped vegetables, and dressing. This way, you'll enjoy the same delicious flavors with minimal effort!

Shrimp Pasta Salad Variations

Customize your Shrimp Pasta Salad with these delicious twists that will tantalize your taste buds!

  • Seafood Swap: Substitute shrimp for crab or lobster for a luxurious seafood experience. It's a delightful way to elevate your dish for special occasions!

  • Pasta Choices: Experiment with different pasta shapes like penne or rotini, or even try Cauliflower Pasta Ready for a low-carb version. This adds a fun twist to the traditional recipe!

  • Veggie Boost: Add diced bell peppers or sweet peas for extra color and nutrition. The pops of color will make your salad as appealing as it is tasty.

  • Herb Variations: Swap parsley for fresh dill or basil to infuse new flavors. Each herb brings its own personality to the mix, enhancing the overall taste.

  • Creamy Alternatives: Use Greek yogurt instead of mayonnaise and sour cream for a refreshing, healthier dressing without sacrificing creaminess. It’s a great option for lighter meals!

  • Zesty Kick: Incorporate a touch of diced jalapeño or a dash of hot sauce to spice things up. For heat lovers, this addition will create a delightful burst of flavor.

  • Fruity Addition: Try mixing in diced mango or pineapple for a tropical twist that perfectly complements the creamy dressing. This fruity hint adds an unexpected layer of flavor!

  • Nutty Crunch: Toss in some toasted walnuts or pecans to add a delightful crunch. The nutty flavor pairs wonderfully with the creamy salad for a satisfying texture contrast.

Feel free to flex your culinary creativity and make this Shrimp Pasta Salad your own! If you’re looking for more seafood inspiration, don’t forget to check out Shrimp Tacos Zesty or Shrimp Ceviche Zesty. Happy cooking!

How to Store and Freeze Shrimp Pasta Salad

Fridge: Store your Shrimp Pasta Salad in an airtight container for up to 2 days. This helps keep it fresh and safe to eat while ensuring the flavors meld beautifully.

Freezer: Although not recommended for best texture, you can freeze the salad for up to 1 month. If you choose to freeze, omit the dressing and add it after thawing to maintain creaminess.

Reheating: To enjoy the salad after freezing, thaw overnight in the fridge. Mix in fresh dressing, as the original may separate on freezing.

Serving Note: Always serve the shrimp pasta salad cold for a refreshing taste that’s perfect for summer gatherings.

Shrimp Pasta Salad Recipe FAQs

What type of shrimp should I use for the Shrimp Pasta Salad?
Absolutely! Using pre-cooked shrimp is a great option for quick prep. If you prefer, you can also use raw shrimp and cook them yourself. Just ensure they’re bright pink and opaque when done. For the best flavor, look for shrimp that’s wild-caught and extra-large for a delightful bite!

How do I store Shrimp Pasta Salad and for how long?
You can store your Shrimp Pasta Salad in an airtight container in the fridge for up to 2 days. Just be sure to keep it chilled to preserve the flavors and freshness. Cover the container tightly to avoid any pesky odors from other foods mixing in.

Can I freeze Shrimp Pasta Salad?
Very! While freezing isn't ideal for the texture, you can freeze it for up to 1 month. To do this, omit the dressing before freezing, as it can separate and become watery. When you're ready to enjoy it, let the salad thaw overnight in the fridge and add fresh dressing before serving to boost the creaminess.

What if my shrimp pasta salad is too thick?
If you find your Shrimp Pasta Salad dressing is a bit too thick, don't worry! Just thin it out by adding a teaspoon of lemon juice or a splash of olive oil. Mix thoroughly until you achieve your desired consistency, and your salad will be creamy and smooth, ready to delight your taste buds!

Are there any dietary considerations for this recipe?
Definitely! If you're cooking for someone with allergies, make sure to check for shellfish allergies before serving this shrimp salad. You can also adapt the recipe for gluten-free diets by substituting regular macaroni with gluten-free pasta options. Remember, the more the merrier; feel free to experiment with different proteins or veggies based on your guests’ preferences!

How can I keep the pasta salad from getting mushy?
To prevent the pasta in your Shrimp Pasta Salad from becoming mushy, make sure to cook the macaroni al dente. This means it should be slightly firm to the bite, which will help maintain a pleasant texture when mixed with the creamy dressing. Also, rinse the pasta under cold water after cooking to halt the cooking process and cool it down quickly.

Shrimp Pasta Salad

Creamy Shrimp Pasta Salad for a Refreshing Summer Meal

This shrimp pasta salad is a light and creamy dish perfect for summer gatherings, ready in under 30 minutes.
Print Recipe Pin Recipe
Prep Time 10 minutes mins
Cook Time 10 minutes mins
Chilling Time 30 minutes mins
Total Time 50 minutes mins
Servings: 4 servings
Course: Salads
Cuisine: American
Calories: 350
Ingredients Equipment Method Nutrition Notes

Ingredients
  

For the Base
  • 2 cups Cooked Macaroni Can substitute with gluten-free pasta as needed.
  • 1 lb Cooked Shrimp Use pre-cooked shrimp for faster prep.
For the Vegetables
  • 1 medium Shallot Substitute with green onions for a sharper taste.
  • 1 cup Chopped Celery Optional if a softer texture is preferred.
  • 1/4 cup Chopped Parsley Substitute with dill for a different flavor.
For the Dressing
  • 1 teaspoon Granulated Garlic Fresh minced garlic can also be used.
  • 1/2 teaspoon Cumin Omit if sensitive to strong spices.
  • 2 tablespoons Lemon Juice Lime juice can serve as an alternative.
  • 1/4 cup Olive Oil Any neutral oil can be used in a pinch.
  • 1 tablespoon Worcestershire Sauce Coconut aminos can be used for a gluten-free option.
  • 1/2 cup Mayonnaise Greek yogurt is a lighter substitute.
  • 1/4 cup Sour Cream Greek yogurt is a lighter substitute.
  • 1 teaspoon Mustard Powder Regular mustard can replace it.
  • 1 tablespoon Brown Sugar Honey or agave can work as a substitute.
  • to taste Salt Adjust according to taste preferences.
  • to taste Pepper Adjust according to taste preferences.

Equipment

  • Mixing Bowl
  • non-stick skillet

Method
 

Preparation Steps
  1. Begin by marinating the cooked shrimp in a bowl with lemon juice, olive oil, garlic, and cumin for about 10 minutes.
  2. Heat a non-stick skillet over medium heat and add the marinated shrimp. Sauté for approximately 5 minutes, stirring occasionally, until the shrimp turn pink and opaque.
  3. In a mixing bowl, combine sour cream, mayonnaise, Worcestershire sauce, brown sugar, mustard powder, granulated garlic, salt, and pepper. Whisk thoroughly until the mixture is smooth and creamy.
  4. In a large mixing bowl, add the cooked macaroni, sautéed shrimp, chopped shallot, diced celery, and parsley. Gently toss the ingredients together.
  5. Pour the prepared dressing over the pasta and shrimp mixture. Carefully toss everything together until well coated.
  6. Cover the salad with plastic wrap and refrigerate for at least 30 minutes.

Nutrition

Serving: 1cupCalories: 350kcalCarbohydrates: 25gProtein: 18gFat: 20gSaturated Fat: 3gPolyunsaturated Fat: 2gMonounsaturated Fat: 15gCholesterol: 150mgSodium: 800mgPotassium: 350mgFiber: 2gSugar: 3gVitamin A: 400IUVitamin C: 5mgCalcium: 50mgIron: 2mg

Notes

Ensure shrimp are cool before mixing with dressing to prevent curdling. Allowing salad to chill enhances flavor integration. Avoid overcooking shrimp for best texture.

Tried this recipe?

Let us know how it was!

Delicious Rhubarb Cream Cheese Bars Perfect for Any Celebration

April 10, 2026 by Grace Snow Leave a Comment

As I stood at the kitchen counter, a vibrant bundle of rhubarb caught my eye, its tart allure promising an adventure in baking. That's when I decided to whip up my Rhubarb Cream Cheese Bars—a dessert that beautifully marries the tangy zest of rhubarb with the creamy richness of cream cheese. This delightful treat is not only incredibly quick to prepare but also a guaranteed crowd-pleaser, transforming any gathering into a sweet celebration. With a crumbly crust and a luscious topping, each bite is a tantalizing balance of flavors that keeps you coming back for more. The best part? You can easily swap in other fruits for a fun twist! Curious to find out how to bring this delicious creation to life? Let's dive into the recipe!

Why are Rhubarb Cream Cheese Bars so irresistible?

Tangy, Sweet Combination: The unique blend of tart rhubarb and creamy cheese creates an explosion of flavors that captivates your taste buds.

Quick to Prepare: You don’t need to be a master baker! With simple steps, you can whip these up in no time, ideal for unexpected guests.

Versatile Choices: Personalize your bars by swapping rhubarb for berries or adding a twist of lemon zest for that extra zing!

Perfect for Gatherings: These crowd-pleasing bars are a hit at parties, offering a delightful treat everyone will love, much like my Peaches Cream Cookies.

Rhubarb Cream Cheese Bars Ingredients

For the Crust

  • All-purpose flour – Provides structure to the crust; can substitute with gluten-free flour for a gluten-free option.
  • Granulated sugar – Adds sweetness to the cream cheese mixture and crust; consider using stevia or a sugar substitute for a lower-calorie option.
  • Unsalted butter – Serves as the fat component for a tender crust; margarine can be used as a substitute.
  • Ground cinnamon – Adds warmth and subtle spice to the crust; optional nutmeg can be used for a variation in flavor.

For the Cream Cheese Filling

  • Cream cheese – Key ingredient for the creamy filling; Greek yogurt can serve as a lower-fat alternative.
  • Vanilla extract – Enhances the overall flavor; replace with almond extract for a different twist.
  • Egg – Binds the filling mixture; a flax egg can be used for a vegan version.

For the Rhubarb Layer

  • Rhubarb – Main flavor component that provides tanginess; can substitute with cranberries or raspberries, adjusting sugar based on fruit tartness.

For the Topping

  • Brown sugar – Adds depth and moisture to the crumble topping; light brown sugar can be used as a substitute.
  • Rolled oats – Contributes a chewy texture and crunchy topping; can easily be replaced with quick oats.
  • Melted butter – Binds the crumble topping together; use coconut oil for a dairy-free option.

Combine these ingredients to create a delightful batch of Rhubarb Cream Cheese Bars that will dazzle your friends and family!

Step‑by‑Step Instructions for Rhubarb Cream Cheese Bars

Step 1: Preheat the Oven
Begin by gathering all your ingredients and preheating your oven to 350°F (175°C). While the oven heats, grease a 9x13 inch baking dish to prevent the bars from sticking. This is important for achieving a clean slice when the Rhubarb Cream Cheese Bars are finished baking.

Step 2: Prepare the Crust
In a mixing bowl, combine your all-purpose flour, powdered sugar, and softened unsalted butter. Use a fork or pastry cutter to mix until the mixture becomes crumbly and resembles wet sand. Once combined, press this mixture firmly into the bottom of the greased baking dish to form a solid crust, creating a nice base for your bars.

Step 3: Bake the Crust
Place the crust in your preheated oven and bake for 10-12 minutes, or until it turns lightly golden. Keep an eye on it to ensure it doesn’t overbake. Once done, remove it from the oven and let it cool slightly, which allows the crust to set before adding your creamy layer.

Step 4: Mix the Cream Cheese Filling
In a separate bowl, beat the softened cream cheese, granulated sugar, and vanilla extract together until the mixture is smooth and creamy. This should take about 2-3 minutes with an electric mixer. Spread this luscious cream cheese filling evenly over the cooled crust, creating a rich layer that balances the tangy rhubarb.

Step 5: Prepare the Rhubarb Layer
Now, take your diced rhubarb and toss it with a little sugar and flour in a bowl. This step helps to balance the tartness and prevents too much moisture from seeping into the cream cheese layer. Distribute the rhubarb mixture evenly over the cream cheese filling, ensuring every bite will have that fantastic tang!

Step 6: Create the Crumble Topping
For the topping, mix rolled oats, brown sugar, flour, and melted butter in a bowl until crumbly. Use your fingers to break up any large lumps. This will create a delightful crunchy topping that contrasts beautifully with the creamy and fruity layers. Evenly sprinkle this crumble mixture over the rhubarb layer, making sure to cover it fully.

Step 7: Bake the Bars
Return the assembled Rhubarb Cream Cheese Bars to the oven and bake for an additional 35-40 minutes, or until the topping is golden and firm to the touch. The aroma of baked rhubarb and sweet cream cheese should fill your kitchen, promising a delightful treat.

Step 8: Cool and Slice
Once baked, allow the bars to cool completely in the pan on a wire rack. This cooling time helps the layers to set properly, making slicing easier. Once cool, cut into squares and store in an airtight container in the refrigerator. These delicious bars are now ready for any occasion!

Expert Tips for Rhubarb Cream Cheese Bars

  • Use Room Temperature Cream Cheese: Ensure your cream cheese is at room temperature for a silky-smooth mixture. This prevents any lumps that might ruin the texture of your bars.

  • Avoid Soggy Crust: Pre-baking the crust for 10-12 minutes is crucial to maintain its crispness. This step prevents excess moisture from the rhubarb and cream cheese layers.

  • Proper Rhubarb Preparation: If using frozen rhubarb, be sure to thaw it fully and drain any excess moisture. This helps prevent the filling from becoming too watery.

  • Cool Before Slicing: Allow the bars to cool completely before slicing. This ensures clean cuts and helps the layers set beautifully, enhancing the overall presentation.

  • Experiment with Fruits: Feel free to swap rhubarb with other fruits like strawberries or blueberries for a twist. Just adjust sugar based on the fruit's natural sweetness or tartness.

  • Optimize Storage: Store your Rhubarb Cream Cheese Bars in an airtight container in the refrigerator for up to 5 days for optimal flavor and freshness.

What to Serve with Rhubarb Cream Cheese Bars?

As you prepare to share these delightful bars, consider pairing them with complementary treats to create a memorable meal experience.

  • Vanilla Ice Cream: A scoop of creamy vanilla ice cream enhances the tangy flavor of the rhubarb, creating a heavenly match in every bite.

  • Fresh Berries Salad: A mix of strawberries and blueberries adds a refreshing contrast. The sweetness of the berries complements the tartness of the rhubarb beautifully.

  • Whipped Cream: A dollop of lightly sweetened whipped cream offers a fluffy texture that contrasts wonderfully with the dense bars, making each bite a little indulgent.

  • Citrus Sorbet: The bright, zesty notes of citrus sorbet cleanse the palate between bites, enhancing the flavors of the rhubarb without overpowering it.

  • Cheese Platter: Pair with mild cheeses like brie or goat cheese. The creaminess of cheese balances the tangy sweetness, providing a savory option for your dessert spread.

  • Mint Tea: A hot cup of mint tea adds a refreshing element to the meal. Its lightness contrasts with the richness of the bars, making for a delightful sip after dessert.

  • Espresso: A shot of robust espresso pairs perfectly, balancing the sweetness with its rich flavor—making it a sophisticated end to any meal.

  • Chocolate Drizzle: For an extra touch, a swirl of melted chocolate over the bars adds richness, making them even more decadent for special occasions.

Make Ahead Options

These Rhubarb Cream Cheese Bars are perfect for meal prep enthusiasts! You can prepare the crust and cream cheese filling up to 24 hours in advance. Start by making the crust and letting it cool completely before covering it tightly with plastic wrap. Additionally, you can mix the cream cheese filling and store it in the refrigerator until you’re ready to assemble. The rhubarb can be prepped up to 3 days ahead; just toss it with sugar and flour, then refrigerate it in an airtight container to maintain its freshness. When ready to serve, simply layer everything together and bake as directed for delicious bars that taste just as fresh!

How to Store and Freeze Rhubarb Cream Cheese Bars

Fridge: Store your Rhubarb Cream Cheese Bars in an airtight container for up to 4-5 days. Make sure they are completely cool before sealing to maintain their texture.

Freezer: For longer storage, wrap the bars tightly in plastic wrap and place them in an airtight container. They can be frozen for up to 3 months.

Thawing: To enjoy, simply transfer the frozen bars to the fridge to thaw overnight or leave them at room temperature for a couple of hours before serving.

Reheating: If you prefer them warm, reheat individual bars in the microwave for 10-15 seconds to restore their delightful creaminess.

Rhubarb Cream Cheese Bars Variations

Feel free to add your own twist to these delightful bars and elevate your experience!

  • Berry Delight: Swap rhubarb for strawberries or blueberries for a sweet twist. The juicy berries lend a different flavor profile that complements the creamy filling beautifully.

  • Citrus Zest: Incorporate lemon or orange zest into the cream cheese mixture. This adds a refreshing brightness that enhances the overall flavor, making each bite sing!

  • Jam Swirl: Add a swirl of homemade rhubarb jam or your favorite fruit preserve into the cream cheese layer before baking. This will introduce a deliciously sweet and tangy surprise in every slice.

  • Nutty Crunch: Mix in chopped almonds or walnuts with the crumble topping for added texture. The crunch from the nuts creates a delightful contrast to the creamy and fruity layers.

  • Cinnamon Sugar Dusting: Sprinkle cinnamon sugar over the crumble topping right before it goes in the oven. This transforms the topping into a sweet, fragrant layer that everyone will love.

  • Vegan Friendly: Replace cream cheese with a vegan alternative, like a nut-based cheese spread, and substitute the egg with a flax egg. This way, everyone can enjoy the bars!

  • Chocolate Drizzle: Add a ganache or a drizzle of melted chocolate on top after cooling for a decadent touch. The richness of chocolate perfectly balances the tartness of rhubarb.

  • Caramel Drizzle: Drizzle with caramel sauce before serving for an extra layer of sweetness. This delectable addition is sure to have everyone reaching for seconds, just like with my Ice Cream Cake!

Rhubarb Cream Cheese Bars Recipe FAQs

How do I select ripe rhubarb for my bars?
Absolutely! When choosing rhubarb, look for firm, vibrant stalks that are bright red or pink. Avoid any stems with dark spots or wilting, as these indicate age or spoilage. The fresher the rhubarb, the better your bars will taste!

What’s the best way to store leftover Rhubarb Cream Cheese Bars?
Very! Keep your bars in an airtight container in the refrigerator, where they’ll stay fresh for about 4 to 5 days. Just ensure they are completely cooled before storing to help maintain their texture.

Can I freeze Rhubarb Cream Cheese Bars? If so, how?
Of course! To freeze, wrap the bars tightly in plastic wrap and place them in an airtight container. They can be frozen for up to 3 months. For serving, thaw them overnight in the fridge or let them sit out at room temperature for a couple of hours before enjoying.

What should I do if the crust turns out soggy?
No worries! If your crust ends up soggy, it may not have been pre-baked long enough initially. For future batches, ensure to bake the crust until it's lightly golden (about 10-12 minutes). If you already have soggy bars, consider chilling them for a few hours in the fridge, as this may help firm things up a bit.

Are there any dietary considerations I should keep in mind?
Certainly! If you're making these bars for someone with allergies, note that the recipe contains dairy and gluten. You can easily make them gluten-free by substituting gluten-free flour and using a dairy-free cream cheese alternative. Just adjust the sugar if you replace rhubarb with sweeter fruits for those managing sugar intake.

Can I use frozen rhubarb instead of fresh?
Definitely! Using frozen rhubarb is an excellent choice. Just make sure to thaw and drain it well to avoid excess moisture which could make your bars soggy. Toss the thawed rhubarb in a bit of sugar and flour, like you would with fresh, before adding it to the cream cheese layer!

Rhubarb Cream Cheese Bars

Delicious Rhubarb Cream Cheese Bars Perfect for Any Celebration

Rhubarb Cream Cheese Bars combine tart rhubarb and creamy cheese for a delicious dessert that everyone will love.
Print Recipe Pin Recipe
Prep Time 15 minutes mins
Cook Time 50 minutes mins
Cooling Time 30 minutes mins
Total Time 1 hour hr 35 minutes mins
Servings: 12 bars
Course: Dessert
Cuisine: American
Calories: 250
Ingredients Equipment Method Nutrition Notes

Ingredients
  

For the Crust
  • 2 cups all-purpose flour can substitute with gluten-free flour
  • 1 cup granulated sugar can use stevia or a sugar substitute
  • 1/2 cup unsalted butter can use margarine
  • 1 teaspoon ground cinnamon optional nutmeg can be used for variation
For the Cream Cheese Filling
  • 8 ounces cream cheese can use Greek yogurt as a lower-fat alternative
  • 1 teaspoon vanilla extract can replace with almond extract
  • 1 large egg can use a flax egg for vegan option
For the Rhubarb Layer
  • 2 cups rhubarb can substitute with cranberries or raspberries
For the Topping
  • 1/2 cup brown sugar can use light brown sugar
  • 1 cup rolled oats can use quick oats
  • 1/2 cup melted butter can use coconut oil for dairy-free option

Equipment

  • 9x13-inch baking dish
  • Mixing Bowl
  • Electric mixer
  • fork or pastry cutter

Method
 

Step-by-Step Instructions for Rhubarb Cream Cheese Bars
  1. Preheat your oven to 350°F (175°C) and grease a 9x13 inch baking dish.
  2. Combine all-purpose flour, granulated sugar, and softened unsalted butter in a mixing bowl until crumbly.
  3. Press the mixture firmly into the bottom of the greased baking dish to form the crust.
  4. Bake the crust for 10-12 minutes until lightly golden, then let it cool slightly.
  5. Beat the softened cream cheese, granulated sugar, and vanilla extract together until smooth, then spread over the cooled crust.
  6. Toss diced rhubarb with sugar and flour and distribute evenly over the cream cheese filling.
  7. Mix rolled oats, brown sugar, flour, and melted butter until crumbly, then sprinkle over the rhubarb layer.
  8. Bake for an additional 35-40 minutes until topping is golden, then allow to cool completely before slicing.

Nutrition

Serving: 1barCalories: 250kcalCarbohydrates: 35gProtein: 4gFat: 12gSaturated Fat: 7gPolyunsaturated Fat: 1gMonounsaturated Fat: 4gCholesterol: 30mgSodium: 150mgPotassium: 180mgFiber: 2gSugar: 15gVitamin A: 5IUVitamin C: 10mgCalcium: 4mgIron: 6mg

Notes

Ensure the cream cheese is at room temperature for a smooth mixture. Store bars in an airtight container in the refrigerator for optimal freshness.

Tried this recipe?

Let us know how it was!

Lemon Rhubarb Sunshine Loaf That Brightens Your Day

April 10, 2026 by Grace Snow Leave a Comment

As I stood in my kitchen, the scent of zesty lemon intertwined with the tartness of fresh rhubarb, bringing the promise of sunshine to my day. This Lemon Rhubarb Sunshine Loaf is nothing short of a cheerful celebration of spring flavors, perfect for brightening any gathering. With its moist, tender crumb and a balance of sweet and tangy notes, it’s an effortless treat that can transition from breakfast to dessert effortlessly. Fans of homemade goodies will love how simple it is to whip up, and those seeking a gluten-free twist can easily make adaptations without sacrificing taste. So why not dive into this delightful recipe and uncover the joy it brings? What will you pair your slice with—perhaps a dollop of whipped cream or a cup of iced tea?

Why Is This Loaf So Irresistible?

Bright, Tangy Flavor: This Lemon Rhubarb Sunshine Loaf bursts with zesty freshness, marrying citrus and tart rhubarb in every bite. Effortless Preparation: With straightforward steps, even novice bakers can achieve a stunning result without fuss. Versatile Options: Customize with coconut, strawberries, or ginger for personal flair—perfect for those craving creativity! Perfect for Any Occasion: Serve warm for breakfast or chill for dessert, making it a go-to for gatherings. Plus, it pairs beautifully with refreshing drinks like iced tea or a crisp rosé. For a nutritious twist, check out my Lemon Ricotta Protein or light Lemon Chicken Soup!

Lemon Rhubarb Sunshine Loaf Ingredients

For the Loaf

  • All-purpose flour – Essential for loaf structure; can be substituted with a gluten-free flour blend for a delicious alternative.
  • Granulated sugar – Adds sweetness and helps create a delightful crackly crust; adjust the quantity to match your taste preferences.
  • Baking powder – Acts as the leavening agent for a perfectly risen loaf; always check your baking powder for freshness.
  • Large eggs – Provides binding and moisture; whisk them beforehand for even distribution in the batter.
  • Extra virgin olive oil – Keeps the loaf moist and tender; feel free to swap it out with melted butter for a richer flavor.
  • Lemon zest – Delivers bright, citrusy notes that enhance the overall flavor; use fresh lemon zest for the best results.
  • Fresh rhubarb – The star ingredient that balances sweetness and tartness; ensure it’s chopped uniformly for even texture—substitute with strawberries for a sweeter option.
  • Salt – Elevates all the flavors; don’t skip this important ingredient!

Optional Add-ins

  • Shredded coconut – Adds a tropical twist to your loaf; consider this for an exciting flavor variation.
  • Grated ginger – Infuses a spicy kick that pairs beautifully with the tangy fruit; adjust to suit your palate.
  • Chopped strawberries – A lovely alternative to rhubarb, perfect for those seeking a sweeter option.

Now that you have all your ingredients lined up, you’re ready to create this mouth-watering Lemon Rhubarb Sunshine Loaf that will surely shine on your table!

Step‑by‑Step Instructions for Lemon Rhubarb Sunshine Loaf

Step 1: Preheat the Oven and Prepare the Pan
Begin by preheating your oven to 350°F (175°C). While the oven is warming up, grease a standard loaf pan with butter or non-stick cooking spray to ensure your Lemon Rhubarb Sunshine Loaf comes out easily once baked. This careful preparation will set the stage for a beautiful golden crust.

Step 2: Mix the Dry Ingredients
In a large mixing bowl, combine all-purpose flour, granulated sugar, baking powder, and salt. Using a whisk, mix these dry ingredients until they are evenly integrated, ensuring there are no lumps. This base will provide the structure for your loaf, so make sure everything is well blended before moving on.

Step 3: Prepare the Wet Ingredients
In another bowl, beat together the large eggs, extra virgin olive oil, and freshly grated lemon zest. Whisk these ingredients until they are thoroughly combined and frothy, creating a smooth mixture. This luscious blend will add moisture to your Lemon Rhubarb Sunshine Loaf, enhancing its tender texture and delightful flavor.

Step 4: Combine Wet and Dry Mixtures
Carefully fold the wet mixture into the bowl of dry ingredients. Stir gently until just combined, being cautious not to overmix; this could lead to a dense loaf. The goal is to create a batter that still has a few lumps, preserving the lightness that your Lemon Rhubarb Sunshine Loaf needs for that perfect rise.

Step 5: Fold in the Rhubarb
Once your batter is nearly ready, toss the chopped fresh rhubarb in a small amount of flour to prevent it from sinking. Then, gently fold the rhubarb into the batter, ensuring it’s evenly distributed without overworking the mixture. The rhubarb will infuse your loaf with its sweet tartness, creating that signature sunshine flavor.

Step 6: Pour and Bake
Pour your batter into the prepared loaf pan, smoothing the top with a spatula for an even bake. Place the pan in the oven and bake for 50 to 60 minutes, or until the top is golden brown and a toothpick inserted into the center comes out clean. Keep an eye on it during the last few minutes of baking for perfect doneness.

Step 7: Cool the Loaf
Once baked, remove the pan from the oven and let the Lemon Rhubarb Sunshine Loaf cool in the pan for about 10 minutes. After this initial cool-down, gently transfer the loaf to a wire rack to cool completely. Allowing it to cool thoroughly will help maintain its structure and ensure clean slicing.

Expert Tips for Lemon Rhubarb Sunshine Loaf

  • Prevent Sinking: Toss chopped rhubarb in a little flour before folding it into the batter. This helps keep it evenly distributed and prevents sinking.

  • Avoid Overmixing: Mix the wet and dry ingredients until just combined. Overmixing can make the loaf dense, which you want to avoid for a light and tender texture.

  • Do Not Rush Cooling: Let the loaf cool completely in the pan before slicing. This allows it to set properly and maintain its structure, ensuring perfect slices.

  • Check Doneness: Use a toothpick to check for doneness; insert it into the center of the loaf. If it comes out clean, your Lemon Rhubarb Sunshine Loaf is ready!

  • Storage Tip: Store the loaf wrapped tightly in the refrigerator for up to 3 days. For longer storage, freeze slices, and toast them for a quick treat later.

Make Ahead Options

These Lemon Rhubarb Sunshine Loaves are fantastic for busy home cooks looking to save time during the week! You can prepare the batter up to 24 hours in advance; simply mix the dry ingredients and store them in an airtight container, while the wet ingredients can be mixed and refrigerated separately. To prevent the rhubarb from sinking, toss it in a light dusting of flour before folding it in right before baking. When you're ready to whip up this delightful loaf, just combine the mixtures, pour into a prepared pan, and bake as directed. This way, you'll enjoy the same moist, tender texture with minimal effort!

Lemon Rhubarb Sunshine Loaf Variations

Feel free to get creative with your baking and explore these delightful twists on the classic loaf!

  • Gluten-Free: Substitute all-purpose flour with a gluten-free flour blend for a deliciously inclusive option. It maintains that sought-after moistness!

  • Berry Blast: Replace rhubarb with chopped strawberries or raspberries for added sweetness. The juicy berries will create a lovely contrast to the lemony zest.

  • Tropical Twist: Incorporate shredded coconut into the batter for a fun, tropical flair. It's like a mini-vacation in every bite!

  • Spicy Kick: Grate fresh ginger into the mix to enhance flavors with some spice. This tantalizing addition will surely elevate your loaf!

  • Nutty Addition: Fold in some chopped walnuts or pecans for extra crunch and richness. This variation adds a satisfying texture while complementing the fruity goodness.

Each of these variations offers a unique spin, inviting your friends and family to experience something new. Perhaps you’ll serve this loaf alongside a refreshing glass of iced tea or indulge in a slice topped with fresh berries and whipped cream. If you're looking for something else lemony to try, check out my delightful Lemon Ricotta Protein or the comforting Lemon Chicken Soup for more delicious recipes!

How to Store and Freeze Lemon Rhubarb Sunshine Loaf

Fridge: Wrap the loaf tightly in plastic wrap or aluminum foil and store it in the refrigerator for up to 3 days. This keeps it fresh and moist for your next slice!

Freezer: For longer storage, slice the loaf and wrap each piece individually before placing them in an airtight container. The Lemon Rhubarb Sunshine Loaf can be frozen for up to 2 months.

Reheating: When you’re ready to enjoy, simply toast individual slices for about 10 seconds in a toaster or quick reheat in the microwave for a warm, delightful treat.

Room Temperature: If you plan to eat the loaf within a day or two, it can be kept at room temperature, wrapped in a kitchen towel for better moisture retention.

What to Serve with Lemon Rhubarb Sunshine Loaf?

Elevate your delightful loaf experience by pairing it with these enchanting sides and beverages that are sure to brighten your table.

  • Creamy Mashed Potatoes: These smooth potatoes provide a comforting contrast to the tangy loaf, creating a warm and inviting meal.
  • Whipped Cream with Fresh Berries: A dollop of whipped cream with juicy berries offers a refreshing and indulgent topping, perfect for dessert lovers.
  • Iced Tea with Mint: Chill out with a glass of iced tea infused with fresh mint, enhancing the zesty notes of the loaf while keeping your palate refreshed.
  • Simple Green Salad: A crisp salad with a light vinaigrette brings a fresh crunch that balances the sweetness of the loaf with vibrant flavors.
  • Chilled Rosé Wine: This wine’s fruity notes complement the tangy lemon and rhubarb beautifully, making it an elegant drink for spring gatherings.
  • Coconut Sorbet: A scoop of coconut sorbet adds a tropical twist, harmonizing flavors and providing a cooling counterpoint to the warm loaf.
  • Toasted Almonds: These crunchy nuts add nuttiness and texture, creating a delightful contrast to the soft loaf while enhancing each delicious bite.
  • Chocolate Drizzle: A light drizzle of chocolate sauce turns your loaf into a decadent treat, enriching the experience with a luscious, sweet touch.
  • Steamed Asparagus: Tender and lightly seasoned asparagus adds a touch of elegance and complements the loaf’s flavors wonderfully for a brunch spread.

Lemon Rhubarb Sunshine Loaf Recipe FAQs

What kind of rhubarb should I use for this recipe?
Absolutely! For the best flavor, use fresh rhubarb that is firm and vibrant, avoiding any stalks with dark spots or signs of wilting. If fresh rhubarb isn't available, you can substitute it with strawberries for a sweeter variation.

How should I store leftover Lemon Rhubarb Sunshine Loaf?
To keep your loaf fresh, wrap it tightly in plastic wrap or aluminum foil and store it in the refrigerator for up to 3 days. This method retains moisture, ensuring each slice remains delightful and tender.

Can I freeze Lemon Rhubarb Sunshine Loaf?
Definitely! For freezing, slice the loaf first, then wrap each slice individually in plastic wrap, and place them in an airtight container. This way, it can be frozen for up to 2 months without losing its wonderful texture. To reheat, simply toast for about 10 seconds for a quick treat!

What should I do if my loaf sinks in the middle?
No worries! If your Lemon Rhubarb Sunshine Loaf sinks, it's often due to overmixing or too much liquid. To prevent this, make sure to fold in your ingredients gently until just combined. Additionally, tossing the rhubarb in a little flour before adding it to the batter can help keep it distributed evenly and prevent sinking.

Are there any dietary modifications I can make for this recipe?
Very! You can easily adapt this recipe for gluten-free diets by substituting all-purpose flour with a gluten-free blend. For a vegan version, replace the large eggs with flax eggs (1 tablespoon of ground flaxseed mixed with 2.5 tablespoons of water per egg) to maintain binding and moisture without the use of animal products. These tweaks allow everyone to enjoy this yummy Lemon Rhubarb Sunshine Loaf!

Lemon Rhubarb Sunshine Loaf

Lemon Rhubarb Sunshine Loaf That Brightens Your Day

This Lemon Rhubarb Sunshine Loaf is a cheerful celebration of spring flavors, perfect for any gathering.
Print Recipe Pin Recipe
Prep Time 15 minutes mins
Cook Time 1 hour hr
Cooling Time 10 minutes mins
Total Time 1 hour hr 25 minutes mins
Servings: 8 slices
Course: Dessert
Cuisine: American
Calories: 200
Ingredients Equipment Method Nutrition Notes

Ingredients
  

For the Loaf
  • 2 cups All-purpose flour Can be substituted with a gluten-free flour blend.
  • 1 cup Granulated sugar Adjust quantity to taste.
  • 2 teaspoons Baking powder Check for freshness.
  • 3 large Large eggs Whisk beforehand for even distribution.
  • 1/2 cup Extra virgin olive oil Can be swapped with melted butter.
  • 1 tablespoon Lemon zest Use fresh for best results.
  • 1 cup Fresh rhubarb Chopped uniformly; substitute with strawberries if desired.
  • 1/2 teaspoon Salt Elevates the flavors.
Optional Add-ins
  • 1/2 cup Shredded coconut Adds a tropical twist.
  • 1 tablespoon Grated ginger Adjust to suit your palate.
  • 1 cup Chopped strawberries Perfect for those seeking a sweeter option.

Equipment

  • Loaf pan
  • Mixing bowls
  • Whisk

Method
 

Step-by-Step Instructions for Lemon Rhubarb Sunshine Loaf
  1. Preheat your oven to 350°F (175°C) and grease a standard loaf pan.
  2. In a large bowl, combine flour, sugar, baking powder, and salt. Mix until evenly integrated.
  3. In another bowl, beat the eggs, olive oil, and lemon zest until frothy.
  4. Fold the wet mixture into the dry ingredients until just combined.
  5. Toss rhubarb in flour and fold it into the batter.
  6. Pour batter into the loaf pan and bake for 50 to 60 minutes.
  7. Let the loaf cool in the pan for about 10 minutes before transferring to a wire rack.

Nutrition

Serving: 1sliceCalories: 200kcalCarbohydrates: 30gProtein: 3gFat: 8gSaturated Fat: 1gPolyunsaturated Fat: 2gMonounsaturated Fat: 3gCholesterol: 40mgSodium: 120mgPotassium: 100mgFiber: 1gSugar: 10gVitamin A: 2IUVitamin C: 8mgCalcium: 2mgIron: 4mg

Notes

Store wrapped tightly in the fridge for up to 3 days or freeze slices for up to 2 months. Toast slices for a quick treat later.

Tried this recipe?

Let us know how it was!

Delicious Norwegian Rhubarb Cake for a Cozy Spring Treat

April 9, 2026 by Grace Snow Leave a Comment

Spring whispers in every bite of this delightful Norwegian Rhubarb Cake, or Rabarbrakake. With soft, buttery crumbs interwoven with tangy rhubarb, this rustic dessert perfectly encapsulates the essence of seasonal baking. Not only is it a wonderful option for brunch gatherings or tea time, but it’s also a crowd-pleaser that offers a satisfying comfort without the guilt of indulgent desserts. The simple addition of cinnamon sugar on top brings an inviting aroma, beckoning friends and family to the table. Plus, it’s a breeze to whip up—and perfect for using up that fresh rhubarb you’ve been eyeing at the market. Ready to delve into a slice of nostalgia that celebrates tradition and sustainability? Let’s get baking!

Why is this cake a must-try?

Simplicity makes it perfect for bakers of all levels, allowing anyone to enjoy the process without stress. Seasonal freshness shines through the use of vibrant rhubarb, making every bite a celebration of spring's bounty. Delightfully light and not overly sweet, it’s the ideal dessert for those who crave comfort without the heaviness. The aromatic cinnamon sugar topping adds a warm embrace that draws everyone to the table. Plus, it pairs beautifully with a cup of coffee or a dollop of cream for a truly enjoyable experience. If you love traditional flavors, this cake aligns beautifully with options like Ice Cream Cake or delightful twists such as Chocolate Pudding Cake.

Norwegian Rhubarb Cake Ingredients

  • For the Batter

  • Unsalted Butter – Provides richness and moisture; use margarine for a dairy-free version.

  • Granulated Sugar – Adds sweetness and helps create a gentle crust; substitute with coconut sugar for a more rustic flavor.

  • Large Eggs – Provide structure and moisture; flax eggs can be used for a vegan alternative.

  • Whole Milk – Contributes to a tender crumb; almond milk can be used for a lactose-free version.

  • All-Purpose Flour – Creates the cake's structure; gluten-free flour can be substituted for a gluten-free option.

  • Baking Powder – Acts as a leavening agent; ensure it’s fresh for best results.

  • Salt – Enhances all flavors; sea salt can replace table salt for a different flavor profile.

  • Rhubarb – Provides tartness and moisture; use fresh for the best results, but frozen rhubarb is an alternative if fresh is unavailable, though it may impact texture.

  • For the Topping

  • Granulated Sugar – Creates a caramelized topping; brown sugar could be an alternative for a deeper flavor.

  • Ground Cinnamon – Adds warmth and spice; consider cardamom or ginger for a unique twist.

Step‑by‑Step Instructions for Norwegian Rhubarb Cake

Step 1: Preheat the Oven and Prepare the Pan
Start by preheating your oven to 350°F (175°C). Meanwhile, take a 9-inch round cake pan and grease it thoroughly with butter or cooking spray to ensure easy release after baking. Then, lightly flour the pan, tapping out any excess. This ensures your Norwegian Rhubarb Cake will come out beautifully without sticking.

Step 2: Cream Butter and Sugar
In a large mixing bowl, combine the softened unsalted butter with granulated sugar. Using an electric mixer, beat them together on medium speed until the mixture is light and fluffy, which should take about 3-5 minutes. You'll know it's ready when the texture appears smooth and pale, indicating that air has been incorporated.

Step 3: Add the Eggs
Next, crack in the large eggs one at a time, mixing well after each addition. Scrape down the sides of the bowl to ensure everything is incorporated. This step is crucial for the structure of your Norwegian Rhubarb Cake, so take your time and ensure each egg is fully blended before moving on to the next.

Step 4: Incorporate the Milk
Once the eggs are mixed in, pour in the whole milk and gently blend until just combined. This addition will enhance the moisture and tenderness of your cake. You should achieve a thick, creamy mixture; this will serve as the base for your delicious batter.

Step 5: Combine Dry Ingredients
In a separate bowl, whisk together the all-purpose flour, baking powder, and salt until evenly mixed. Gradually add this dry mixture to the wet ingredients, stirring gently until just combined. Be careful not to overmix; you want the batter for your Norwegian Rhubarb Cake to remain tender and fluffy.

Step 6: Fold in the Rhubarb
Now it's time to add the star ingredient! Fold the chopped rhubarb into your batter gently, ensuring it's evenly distributed throughout. This will provide the delightful tartness that balances the sweetness of the cake. Take a moment to admire the vibrant color and texture as you prepare to pour it into the pan.

Step 7: Transfer to the Cake Pan
Pour the batter into your prepared cake pan, using a spatula to smooth the top evenly. This will promote even baking and a nice presentation for your Norwegian Rhubarb Cake. Give the pan a gentle tap on the counter to release any trapped air bubbles before moving on to baking.

Step 8: Prepare the Cinnamon Sugar Topping
In a small bowl, mix together the additional granulated sugar and ground cinnamon. Once combined, sprinkle this aromatic mixture evenly over the top of the cake batter, creating a delightful, crackly crust as it bakes and caramelizes in the oven.

Step 9: Bake the Cake
Place the cake pan in the preheated oven and bake for 40 to 45 minutes. Keep an eye on the cake during the last few minutes. It's done when a toothpick inserted into the center comes out clean and the top is lightly golden. The enticing aroma will fill your kitchen!

Step 10: Cool and Serve
Once baked, remove the Norwegian Rhubarb Cake from the oven and allow it to cool in the pan for about 10 minutes. Then, carefully transfer it to a wire rack to cool further. This step enhances the texture and flavor, making your cake even more enjoyable when ready to slice and serve.

Expert Tips for Norwegian Rhubarb Cake

  • Mix Gently: Avoid overmixing the batter; this can lead to a tough texture in your Norwegian Rhubarb Cake. Mix just until combined for a tender crumb.
  • Fresh Rhubarb: Always use fresh, firm rhubarb stalks for the best taste and texture. Trim off any toxic leaves before chopping.
  • Check for Doneness: Use a toothpick to check if your cake is done. If it comes out clean after 40-45 minutes, your cake is perfectly baked!
  • Cooling Time: Allow the cake to cool completely before slicing. Cooling enhances texture and lets flavors meld together beautifully.
  • Presentation Tips: For a lovely finish, consider adding slivered almonds on top or a light dusting of powdered sugar for an elegant touch.

Make Ahead Options

These Norwegian Rhubarb Cakes are ideal for meal prep lovers! You can prepare the batter up to 24 hours in advance, storing it in the refrigerator to keep it fresh. Simply mix the ingredients, fold in the chopped rhubarb, and cover the bowl tightly. On the day you want to serve, pour the batter into your pan, sprinkle with the cinnamon sugar topping, and bake as per the recipe instructions. This method allows the flavors to meld beautifully, ensuring your cake is just as delicious as if it were made fresh that day. Enjoy a delightful dessert with minimal effort on busy evenings!

Norwegian Rhubarb Cake Variations & Substitutions

Feel free to explore your creativity and adjust this delightful dessert to suit your tastes!

  • Dairy-Free: Use margarine and almond milk for a delicious, dairy-free version that doesn't sacrifice flavor.

  • Coconut Sugar: Replace granulated sugar with coconut sugar for a subtly sweet and rustic flavor profile that enhances the cake's warmth.

  • Vegan: Substitute large eggs with flax eggs (1 tablespoon ground flaxseed mixed with 2.5 tablespoons water for each egg) to make this cake vegan-friendly.

  • Gluten-Free: Swap out all-purpose flour for a gluten-free all-purpose blend. This ensures everyone can join in the fun of enjoying this delectable treat.

  • Nuts: Add slivered almonds or chopped walnuts into the batter for a delightful crunch and a hint of nuttiness that complements the rhubarb's tartness.

  • Spice It Up: Instead of cinnamon, try cardamom or ground ginger for a unique twist that brings an exciting infusion of flavor.

  • Fruity Addition: Mix in some fresh berries like blueberries or raspberries for an additional layer of sweetness and texture that contrasts beautifully with the rhubarb.

  • Creamy Pairing: Serve your slice with a dollop of whipped cream or a side of sour cream to enhance the cake's flavors and add a refreshing touch.

Regardless of how you choose to customize your Norwegian Rhubarb Cake, the heart of this recipe remains the same: a celebration of seasonal ingredients and a nod to tradition. Happy baking!

What to Serve with Norwegian Rhubarb Cake

The delightful balance of sweet and tart in this cake creates the perfect backdrop for an array of flavorful accompaniments.

  • Whipped Cream: Adds a light, airy texture and richness that enhances the cake's comforting flavors.
  • Sour Cream: Offers a tangy contrast that beautifully complements the cake’s sweetness while adding creaminess.
  • Vanilla Ice Cream: A classic pairing that provides a cold, creamy element to each warm slice, elevating your dessert experience.
  • Fresh Berries: Strawberries, blueberries, or raspberries introduce an extra burst of flavor, freshness, and a pop of color on the plate.
  • Almonds: A sprinkle of slivered almonds gives a satisfying crunch and nutty flavor that pairs wonderfully with the cake’s buttery crumb.
  • Coffee or Tea: A warm beverage complements the cake’s rustic charm, making it a delightful choice for afternoon gatherings.
  • Lemonade or Iced Tea: These refreshing drinks can provide a bright counterpoint to the cake’s tangy rhubarb and sweet notes.
  • Chocolate Sauce: A drizzle transforms the cake into a more decadent dessert, perfect for special occasions.
  • Cardamom-Spiced Cream: Infusing cream with cardamom adds a warm spice that pairs exquisitely with the rhubarb's tartness.

How to Store and Freeze Norwegian Rhubarb Cake

Room Temperature: Store the cake covered at room temperature for up to 3 days. This keeps it moist and enjoyable, perfect for a cozy dessert after dinner.

Fridge: If you plan to keep the cake for longer, refrigerate it covered for up to 5 days. Let it come to room temperature before serving for the best flavor.

Freezer: To freeze, wrap slices in plastic wrap and then store in an airtight container for up to 3 months. Thaw overnight in the fridge when you're ready to enjoy your Norwegian Rhubarb Cake again.

Reheating: Warm up individual slices in the microwave for 15-20 seconds or in a preheated oven at 350°F (175°C) for about 10 minutes to restore that fresh-baked taste.

Norwegian Rhubarb Cake Recipe FAQs

How do I select the best rhubarb for this cake?
When selecting rhubarb, look for firm, vibrant stalks without any soft spots or signs of wilting. The vibrant green and pink color is a good indicator of freshness. Avoid stalks with dark spots or mushy areas, which may indicate spoilage. Fresh rhubarb will have a crisp texture, making it ideal for this delicious Norwegian Rhubarb Cake.

What are the best storage methods for leftover cake?
To store your Norwegian Rhubarb Cake, keep it covered at room temperature for up to 3 days to maintain its moisture. If you want to keep it longer, refrigerate it in an airtight container for up to 5 days. Allowing the cake to reach room temperature before serving will enhance the flavor.

Can I freeze Norwegian Rhubarb Cake, and if so, how?
Absolutely! To freeze your Norwegian Rhubarb Cake, slice it into individual portions. Wrap each slice tightly in plastic wrap and then place them in an airtight container or freezer bag. This will help prevent freezer burn and preserve the flavor. It can be frozen for up to 3 months. When you’re ready to enjoy it, thaw the slices in the fridge overnight.

What should I do if my cake is too dry?
If your Norwegian Rhubarb Cake turns out dry, it may be due to overmixing the batter or baking it for too long. To avoid this in the future, mix the batter just until combined and check for doneness a few minutes before the timer goes off. If you find that the cake is already dry, consider serving it with a dollop of whipped cream or a scoop of vanilla ice cream to add moisture and richness.

Is this recipe suitable for those with dietary restrictions?
Yes! This Norwegian Rhubarb Cake can be easily adapted for various dietary needs. For a dairy-free version, swap the unsalted butter for margarine or a plant-based butter alternative, and use almond milk instead of whole milk. If gluten-free is your goal, substitute the all-purpose flour with a gluten-free flour blend. Flax eggs can also replace the large eggs to make it vegan-friendly.

Can I use frozen rhubarb instead of fresh?
Yes, you can use frozen rhubarb if fresh isn’t available. However, keep in mind that frozen rhubarb may release more moisture as it bakes, leading to a slightly different texture. It's best to thaw the frozen rhubarb and drain excess liquid, which will help maintain the proper consistency of your Norwegian Rhubarb Cake.

Norwegian Rhubarb Cake

Delicious Norwegian Rhubarb Cake for a Cozy Spring Treat

Enjoy the delightful Norwegian Rhubarb Cake, a perfect spring dessert with tangy rhubarb and a hint of cinnamon sugar.
Print Recipe Pin Recipe
Prep Time 15 minutes mins
Cook Time 45 minutes mins
Cooling Time 10 minutes mins
Total Time 1 hour hr 10 minutes mins
Servings: 8 slices
Course: Dessert
Cuisine: Norwegian
Calories: 250
Ingredients Equipment Method Nutrition Notes

Ingredients
  

For the Batter
  • 1 cup Unsalted Butter Softened
  • 1 cup Granulated Sugar Can substitute with coconut sugar
  • 3 large Large Eggs Flax eggs can be used for a vegan alternative
  • 1 cup Whole Milk Almond milk can be used for lactose-free version
  • 2 cups All-Purpose Flour Gluten-free flour can be substituted
  • 2 teaspoons Baking Powder Ensure it's fresh
  • 1/2 teaspoon Salt Sea salt can replace table salt
  • 2 cups Rhubarb Fresh preferred, can use frozen
For the Topping
  • 1/4 cup Granulated Sugar Brown sugar could be an alternative
  • 1 teaspoon Ground Cinnamon Consider cardamom or ginger for a twist

Equipment

  • 9-inch round cake pan
  • Mixing Bowl
  • Electric mixer
  • Spatula

Method
 

Step-by-Step Instructions
  1. Preheat your oven to 350°F (175°C) and grease a 9-inch round cake pan with butter or cooking spray, then flour it lightly.
  2. In a large mixing bowl, cream the softened butter and granulated sugar until light and fluffy.
  3. Add the eggs one at a time, mixing well after each addition.
  4. Incorporate the milk and blend until just combined.
  5. Whisk together the flour, baking powder, and salt in a separate bowl, then gradually stir this into the wet ingredients.
  6. Fold in the chopped rhubarb gently until evenly distributed.
  7. Pour the batter into the prepared cake pan and smooth the top.
  8. Mix the topping ingredients and sprinkle evenly over the batter.
  9. Bake for 40-45 minutes until a toothpick comes out clean.
  10. Allow to cool in the pan for 10 minutes before transferring to a wire rack.

Nutrition

Serving: 1sliceCalories: 250kcalCarbohydrates: 35gProtein: 3gFat: 12gSaturated Fat: 7gPolyunsaturated Fat: 1gMonounsaturated Fat: 3gCholesterol: 70mgSodium: 180mgPotassium: 150mgFiber: 1gSugar: 15gVitamin A: 500IUVitamin C: 5mgCalcium: 50mgIron: 0.5mg

Notes

Avoid overmixing the batter to keep the texture tender. Use fresh rhubarb for the best results. Let the cake cool completely before slicing for enhanced flavors.

Tried this recipe?

Let us know how it was!

Sweet and Tart Rhubarb Rolls: A Must-Try Spring Treat

April 9, 2026 by Grace Snow Leave a Comment

“Have you ever layered your favorite sweet and tart flavors to perfection?” If you haven't, let me introduce you to a delightful treat that brings a unique twist to your baking repertoire: Tart and Sweet Rhubarb Rolls with Pink Glaze. These soft, fluffy yeast rolls packed with a homemade rhubarb filling are perfect for weekend brunch or a sweet afternoon snack. What I love about these Rhubarb Rolls is how they spotlight the vibrant tang of rhubarb, allowing it to shine all on its own, far from the strawberry-pairing norm. Plus, they are surprisingly easy to whip up, making them a great choice for both seasoned bakers and those new to the kitchen. With a beautiful drizzle of pink glaze that brings it all together, you’ll be just as captivated by their appearance as the flavors. Ready to roll your way to a delicious bake? Let’s get started!

Why Try These Rhubarb Rolls?

Irresistible Duo: Sweet and tart collide in these rolls, offering a flavor profile that's simply addictive.

Effortless Baking: Straightforward steps mean you can enjoy homemade goodness without any fuss, ideal for bakers of all levels.

Versatile Delight: Perfectly suited for brunch, tea time, or a delightful snack, these rolls shine in any setting.

Unique Appeal: Showcasing rhubarb on its own allows it to steal the spotlight; who knew a fruit could be so captivating?

Crowd-Pleasing Treat: Guaranteed to impress, these rolls can turn any gathering into a memorable occasion, leaving your guests asking for the recipe. Try serving them warm with a nice cup of coffee for an unbeatable pairing!

Rhubarb Rolls Ingredients

For the Dough

  • Whole Milk – Provides moisture and fat to enrich the dough; you can substitute non-dairy milk for a dairy-free option.
  • Unsalted Butter – Adds richness and flavor to the dough; margarine works well for a dairy-free version.
  • Instant Yeast (or Active Dry Yeast) – Leavens the dough, creating a fluffy texture; ensure yeast is fresh for the best results.
  • Granulated Sugar – Sweetens the dough and helps with browning; honey or maple syrup may alter the texture but can work as alternatives.
  • Large Egg – Binds ingredients and enriches the dough; for a vegan option, a flax egg can be used.
  • Salt – Enhances flavor and strengthens dough structure.
  • All-Purpose Flour – Provides structure and texture to the rolls; use bread flour for a denser result.

For the Rhubarb Filling

  • Sliced Rhubarb – The star ingredient, providing tartness and moisture; fresh is preferred, but frozen can also be used.
  • Granulated Sugar (for filling) – Balances the tartness of the rhubarb.
  • Lemon Juice – Brightens flavor and aids in thickening the filling.
  • Cornstarch – Thickens the rhubarb filling to a jam-like consistency.

For the Egg Wash

  • Large Egg (for egg wash) – Gives a golden finish to rolls when baked; mix with water or milk for best results.

For the Glaze

  • Powdered Sugar – Sweetens the glaze.
  • Lemon Juice (for glaze) – Adjusts consistency and adds tartness to the glaze.

These Rhubarb Rolls are not just a recipe—they're an invitation to explore flavors and enjoy a moment of baking bliss. Happy rolling!

Step‑by‑Step Instructions for Rhubarb Rolls

Step 1: Prepare Dough
In a small saucepan, heat 1 cup of whole milk and 4 tablespoons of unsalted butter over low heat until warm, about 110°F. In a mixing bowl, combine 2 ¼ teaspoons of instant yeast and ¼ cup of granulated sugar. Pour in the milk mixture, then add 1 large egg, 4 cups of all-purpose flour, and 1 teaspoon of salt. Using a stand mixer with a dough hook, mix on low speed for approximately 5 minutes until the dough is elastic and smooth.

Step 2: First Rise
Shape the dough into a ball and place it in a lightly greased bowl, covering it with a kitchen towel. Let the dough rise in a warm spot until it doubles in size, which will take about 1 to 1.5 hours. You’ll know it’s ready when it has puffed up nicely and feels airy to the touch—this is key for soft Rhubarb Rolls.

Step 3: Make Filling
While the dough rises, prepare the rhubarb filling. In a medium saucepan over medium heat, combine 2 cups of sliced rhubarb, ½ cup of granulated sugar, 2 tablespoons of lemon juice, and 2 tablespoons of cornstarch. Cook this mixture, stirring occasionally for about 10 minutes, until it thickens to a jam-like consistency. Once done, remove from heat and allow it to cool slightly while your dough continues to rise.

Step 4: Assemble Rolls
Preheat your oven to 350°F. After the dough has risen, punch it down gently to release air. Roll it out on a floured surface into a rectangle, approximately 12x18 inches. Spread the cooled rhubarb filling evenly across the dough, then roll it up tightly from the long side. Cut the roll into 12 equal pieces, placing them into a greased 9x13 baking dish with the spiral side up, leaving a bit of space between each roll.

Step 5: Second Rise
Cover the cut rolls with a kitchen towel and let them rise again in a warm environment for 30 to 45 minutes. They should puff up nicely and fill any gaps in the pan. Keep an eye out; the rolls should look fluffy and almost double in size, which means they are ready for baking.

Step 6: Bake
Once the rolls have risen, create an egg wash by whisking together 1 large egg with 1 tablespoon of water or milk. Brush this over the top of the rolls to achieve a golden finish. Bake in the preheated oven for 25 to 30 minutes, or until they are golden brown and sound hollow when tapped on the bottom.

Step 7: Prepare Glaze
While the Rhubarb Rolls are baking, mix 1 cup of powdered sugar with 2 tablespoons of the reserved rhubarb filling and 1 tablespoon of lemon juice in a small bowl. Whisk until smooth and pourable, adjusting the consistency with a little water if needed.

Step 8: Drizzle and Serve
Once the rolls are out of the oven, allow them to cool slightly for about 10 minutes in the pan. Drizzle the pink glaze generously over the warm rolls, enhancing their charm with a beautiful finish. Serve these delightful Rhubarb Rolls warm, letting the sweet and tart flavors brighten your day!

Make Ahead Options

These Rhubarb Rolls are perfect for meal prep, allowing you to enjoy fresh-baked goodness even on your busiest days! You can prepare the dough up to 24 hours in advance by mixing everything and letting it rise in the refrigerator instead of at room temperature. Also, the rhubarb filling can be made ahead and stored in an airtight container in the fridge for up to 3 days. When you're ready to bake, simply let the dough come to room temperature for about 30 minutes, assemble the rolls, and then follow the second rise and baking instructions. This way, you’ll have soft, delicious Rhubarb Rolls that taste just as delightful, saving you time without compromising quality!

Expert Tips for Making Rhubarb Rolls

  • Yeast Activation: Ensure your yeast blooms: Mix with warm milk and sugar; if it doesn’t foam after 5-10 minutes, it may not be active, leading to flat rolls.

  • Rising Time Matters: Don't rush the rising process; adequate time allows for a lighter, fluffier texture. Aim for the dough to double in size during both rises.

  • Filling Balance: Taste the rhubarb filling before spreading: adjust sugar if your rhubarb is particularly tart, ensuring a perfect sweet-tart balance in your Rhubarb Rolls.

  • Baking Watch: Keep an eye on the rolls while baking: ovens vary, and overbaking can dry them out. Look for a golden brown color and a hollow sound when tapped.

  • Glaze Consistency: For the perfect glaze, adjust thickness according to preference: add more powdered sugar for a thicker glaze or more lemon juice for a pourable finish.

What to Serve with Tart and Sweet Rhubarb Rolls?

These mouthwatering rolls are best enjoyed as part of a full meal experience, especially when paired with complementary flavors and textures.

  • Fresh Fruit Salad: A medley of seasonal fruits offers a refreshing contrast to the rich flavors of the rolls, while brightening the brunch spread.

  • Crispy Bacon or Sausage: The salty, savory notes of crispy bacon or sausage create a delightful balance to the sweet and tart rhubarb rolls, rounding out the meal beautifully.

  • Creamy Yogurt Parfait: Layering creamy yogurt with granola and berries alongside the rolls provides a satisfying texture and elevates the overall brunch presentation.

  • Herbal Tea: A warm cup of herbal tea, like chamomile or mint, enhances the tender sweetness and leaves your palate refreshed after enjoying the rolls.

  • Iced Coffee: The rich flavors of iced coffee complement the sweetness of the rolls perfectly, making for an energizing brunch or afternoon treat.

  • Whipped Cream or Mascarpone: A dollop of slightly sweetened whipped cream or mascarpone cheese alongside the rolls adds an indulgent element, making each bite even more decadent.

  • Honey Butter: A spread of honey butter on the warm rolls elevates their natural sweetness while introducing a creamy texture—a perfect finishing touch!

  • Chocolate Drizzle: For a sweet indulgence, drizzle melted chocolate over the rolls; the pairing of sweet chocolate with tart rhubarb makes a sinfully delicious treat.

  • Sparkling Water with Lemon: A refreshing glass of sparkling water with a squeeze of fresh lemon keeps things vibrant and clean, enhancing the overall dining experience.

Rhubarb Rolls Variations & Substitutions

Feel free to get creative with your Rhubarb Rolls! Customizing your ingredients can lead to delightful surprises.

  • Dairy-Free: Substitute whole milk with almond or oat milk and use vegan butter for a completely dairy-free treat.
  • Sugar Alternatives: Try using coconut sugar or agave nectar instead of granulated sugar for a less refined sweetness.
  • Flour Swap: For a heartier texture, use whole wheat flour in place of all-purpose flour. This adds a nutty flavor to the rolls.
  • Fruit Fusion: Mix things up by adding diced apples or strawberries to the rhubarb filling for a sweet twist. Experimenting can lead to a fun new flavor profile!
  • Nutty Crunch: Toss in chopped pecans or walnuts into the filling for an added crunch. It adds texture and a delicious nutty flavor.
  • Spice It Up: Incorporate ground cinnamon or cardamom into the dough for a warm, spicy touch that complements the tartness of the rhubarb beautifully.
  • Zesty Lemon: Add extra lemon zest to the filling for a brighter, more citrus-forward flavor for those who love a tangy kick.
  • Glazed Delights: Drizzle honey over the finished rolls instead of glaze for a natural sweetness that brings out the rhubarb's tartness beautifully.

Explore these variations to find your favorite twist, and who knows, you just might find a new family favorite! If you love experimenting with flavors, consider trying different fillings like my Apple Cinnamon Rolls for more baking fun.

How to Store and Freeze Rhubarb Rolls

Room Temperature: Store Rhubarb Rolls in an airtight container at room temperature for up to 2 days. Keep them away from direct sunlight to maintain freshness.

Fridge: For extended freshness, these rolls can be stored in the refrigerator for up to 5 days. Place them in a covered container and reheat in the microwave for about 10-15 seconds before enjoying.

Freezer: To freeze, wrap each roll tightly in plastic wrap and then in aluminum foil, sealing tightly. They can be frozen for up to 2 months. Thaw in the fridge overnight before reheating in the microwave or oven.

Reheating: When ready to eat, gently reheat your Rhubarb Rolls in the microwave or oven until warm, ensuring that they retain their fluffy texture and delightful flavors.

Rhubarb Rolls Recipe FAQs

What type of rhubarb should I use?
Absolutely! Fresh rhubarb is preferred for its vibrant flavor and texture. Look for stalks that are firm, bright, and free from dark spots. However, if fresh is unavailable, frozen rhubarb can also work in this recipe—just be sure to thaw it and drain any excess moisture before using.

How should I store my Rhubarb Rolls?
You can store your Rhubarb Rolls at room temperature in an airtight container for up to 2 days. For longer storage, refrigerate them for about 5 days. Simply cover them well to keep them fresh. When you're ready to enjoy, just reheat them in the microwave for about 10-15 seconds!

Can I freeze Rhubarb Rolls?
Very! To freeze, individually wrap each roll tightly in plastic wrap, then in aluminum foil for extra protection against freezer burn. These delicious rolls can be frozen for up to 2 months. When you’re ready to enjoy, thaw them in the fridge overnight, then reheat in the microwave or a preheated oven.

What should I do if my dough doesn’t rise?
If your dough doesn't rise, don’t worry—this can happen! First, ensure your yeast is fresh; it should foam up when activated. If it doesn’t, unfortunately, it may be inactive. For the next batch, try warming the environment where you let your dough rise or adding a little more sugar to help with activation.

Can these Rhubarb Rolls be made dairy-free or vegan?
Definitely! To make these Rhubarb Rolls dairy-free, substitute whole milk with non-dairy milk and use margarine instead of unsalted butter. If you want to take it a step further and make it vegan, replace the large egg with a flax egg (1 tablespoon ground flaxseed mixed with 2.5 tablespoons of water, let sit until gelatinous). These simple swaps will still yield amazing results!

Can I add additional flavors or ingredients?
The more the merrier! You can enhance your Rhubarb Rolls by adding spices like cinnamon or nutmeg to the dough for a warm twist. Feel free to experiment by adding other fruits like apples or berries, or incorporate nuts into the filling or as a topping for an added crunch. Your creativity is welcome here!

Rhubarb Rolls

Sweet and Tart Rhubarb Rolls: A Must-Try Spring Treat

These sweet and tart Rhubarb Rolls offer a delightful twist to your baking repertoire, perfect for brunch or as an afternoon snack.
Print Recipe Pin Recipe
Prep Time 30 minutes mins
Cook Time 30 minutes mins
Rising Time 1 hour hr 30 minutes mins
Total Time 2 hours hrs 30 minutes mins
Servings: 12 rolls
Course: Breakfast
Cuisine: American
Calories: 200
Ingredients Equipment Method Nutrition Notes

Ingredients
  

For the Dough
  • 1 cup Whole Milk Can be substituted with non-dairy milk.
  • 4 tablespoons Unsalted Butter Margarine can be used for a dairy-free version.
  • 2 ¼ teaspoons Instant Yeast Can substitute with active dry yeast.
  • ¼ cup Granulated Sugar Honey or maple syrup can be used as alternatives.
  • 1 large Egg For vegan, substitute with a flax egg.
  • 1 teaspoon Salt
  • 4 cups All-Purpose Flour Bread flour can be used for a denser result.
For the Rhubarb Filling
  • 2 cups Sliced Rhubarb Fresh is preferred but frozen can also be used.
  • ½ cup Granulated Sugar Balances tartness.
  • 2 tablespoons Lemon Juice Brightens flavor.
  • 2 tablespoons Cornstarch Thickens filling.
For the Egg Wash
  • 1 large Egg Mix with water or milk for best results.
For the Glaze
  • 1 cup Powdered Sugar
  • 2 tablespoons Lemon Juice Adjusts consistency.

Equipment

  • Mixing Bowl
  • Saucepan
  • Stand Mixer
  • Baking Dish
  • Whisk

Method
 

Prepare Dough
  1. Heat 1 cup of whole milk and 4 tablespoons of unsalted butter over low heat until warm, about 110°F. In a mixing bowl, combine 2 ¼ teaspoons of instant yeast and ¼ cup of granulated sugar. Pour in the milk mixture, then add 1 large egg, 4 cups of all-purpose flour, and 1 teaspoon of salt. Using a stand mixer with a dough hook, mix on low speed for approximately 5 minutes until the dough is elastic and smooth.
First Rise
  1. Shape the dough into a ball and place it in a lightly greased bowl, covering it with a kitchen towel. Let the dough rise in a warm spot until it doubles in size, about 1 to 1.5 hours.
Make Filling
  1. In a medium saucepan over medium heat, combine 2 cups of sliced rhubarb, ½ cup of granulated sugar, 2 tablespoons of lemon juice, and 2 tablespoons of cornstarch. Cook for about 10 minutes, until thickened to a jam-like consistency.
Assemble Rolls
  1. Preheat your oven to 350°F. After the dough has risen, punch it down gently. Roll it out into a rectangle, approximately 12x18 inches. Spread the cooled rhubarb filling evenly across the dough, then roll it up tightly from the long side. Cut into 12 equal pieces and place them in a greased 9x13 baking dish with the spiral side up.
Second Rise
  1. Cover the cut rolls with a kitchen towel and let them rise again for 30 to 45 minutes.
Bake
  1. Create an egg wash by whisking together 1 large egg with 1 tablespoon of water or milk. Brush this over the top of the rolls. Bake for 25 to 30 minutes, or until golden brown.
Prepare Glaze
  1. Mix 1 cup of powdered sugar with 2 tablespoons of reserved rhubarb filling and 1 tablespoon of lemon juice in a small bowl, whisk until smooth.
Drizzle and Serve
  1. Allow the rolls to cool slightly for about 10 minutes, then drizzle the pink glaze over the warm rolls.

Nutrition

Serving: 1rollCalories: 200kcalCarbohydrates: 35gProtein: 3gFat: 7gSaturated Fat: 4gPolyunsaturated Fat: 1gMonounsaturated Fat: 2gCholesterol: 40mgSodium: 150mgPotassium: 120mgFiber: 1gSugar: 10gVitamin A: 300IUVitamin C: 5mgCalcium: 50mgIron: 1mg

Notes

Ensure your yeast is active for the best rise. Store in an airtight container at room temperature for up to 2 days.

Tried this recipe?

Let us know how it was!

Grilled Shrimp Caesar Wraps: Quick, Flavorful, and Healthy

April 9, 2026 by Grace Snow Leave a Comment

As I flipped through a collection of bright, colorful recipes, a wave of nostalgia hit me—grilled shrimp, the smoky scent wafting from the grill, a staple from my summer gatherings. Today, I want to share my take on Grilled Shrimp Caesar Wraps, where smoky, savory shrimp meets the crisp freshness of Caesar salad, all enveloped in a soft tortilla. This dish isn’t just quick to whip up; it's also a nutrient-packed powerhouse that’s perfect for lunch or a light dinner. Plus, it stands out at casual get-togethers with its delightful mix of flavors and textures. So, are you ready to elevate your wrap game and impress your friends? Let’s dive into this delicious adventure together!

Why Try Grilled Shrimp Caesar Wraps?

Flavorful Explosion: Each bite bursts with the smoky goodness of grilled shrimp paired with a creamy Caesar dressing.
Quick & Easy: With minimal prep and just a few ingredients, this recipe fits perfectly into busy lifestyles.
Versatile Meal: Whether it's a casual lunch or a fancy dinner, these wraps cater to any occasion. Pair them with your favorite side or try them with Pan Fried Shrimp.
Nutrient-Packed: High in protein and rich in healthy fats, they keep you satisfied without weighing you down.
Diet-Friendly: Gluten-free options are easily made by switching the tortilla for lettuce wraps! Enjoy the crunch of fresh veggies and try it next to a side of Grilled Mushrooms.
Crowd-Pleasing: Impress friends and family with this unique twist on a classic Caesar salad, making it a hit at any gathering!

Grilled Shrimp Caesar Wrap Ingredients

• Everything you need for a delicious meal!

For the Shrimp

  • Shrimp – the star of the dish, providing a rich source of omega-3 fatty acids; feel free to substitute with chicken or tofu for a different flavor profile.

For the Wrap

  • Tortilla – serves as the soft foundation; opt for flour or whole wheat for a delightful touch or go for lettuce wraps for a gluten-free alternative.

For the Salad Base

  • Romaine Lettuce – adds a crunchy, refreshing element; spinach or kale can be great alternatives for extra nutrients.

For the Dressing

  • Caesar Dressing – delivers the creamy, tangy taste; light dressing options can keep the wraps healthier without sacrificing flavor.

For the Topping

  • Parmesan Cheese – enhances the savory experience; consider nutritional yeast for a dairy-free twist.
  • Bacon Bits/Croutons (optional) – brings an extra crunch and flavor; feel free to leave them out for a lighter dish.

Prepare these ingredients, and you're well on your way to creating delectable Grilled Shrimp Caesar Wraps that are quick, healthy, and sure to please!

Step‑by‑Step Instructions for Grilled Shrimp Caesar Wraps

Step 1: Prep the Shrimp
Start by thoroughly rinsing the shrimp under cold water, then pat them dry with paper towels. In a bowl, season the shrimp with salt, pepper, and your choice of spices, like Cajun seasoning for a kick. Let the shrimp marinate for about 10 minutes to absorb the flavors while you heat up the grill.

Step 2: Preheat the Grill
Preheat your grill to medium-high heat, around 400°F (204°C). Once hot, lightly oil the grill grates to prevent sticking. Arrange the seasoned shrimp in a single layer on the grill. Watch closely as they cook, aiming for a grill time of 2-3 minutes per side, until they turn pink and opaque, signaling they’re perfectly cooked.

Step 3: Assemble the Wraps
While the shrimp is grilling, gather your other ingredients. Lay a soft tortilla flat on a clean surface. Begin by placing a generous handful of chopped romaine lettuce in the center of the tortilla. Once the shrimp have finished grilling, layer them on top of the lettuce, followed by a drizzle of creamy Caesar dressing and a sprinkle of Parmesan cheese.

Step 4: Add Optional Toppings
If desired, enhance your Grilled Shrimp Caesar Wraps by adding crispy bacon bits or crunchy croutons for an extra layer of texture. Ensure that these delightful toppings are evenly distributed over the shrimp and salad mixture, giving your wraps that added crunch and flavor boost.

Step 5: Roll the Wraps
Carefully fold the sides of the tortilla inward, then tightly roll it from the bottom up to encase the flavorful filling. Make sure the wrap is secure without spilling any contents. This step is crucial for keeping all the delicious ingredients, like the smoky grilled shrimp, perfectly packed inside.

Step 6: Serve
Once rolled, slice the Grilled Shrimp Caesar Wraps in half diagonally for a beautiful presentation. Serve immediately for the best taste and texture, or package them for meal prep when you're on the go. Enjoy this nutritious meal that’s bursting with flavor, perfect for any casual gathering or busy weekday lunch!

Make Ahead Options

Grilled Shrimp Caesar Wraps are perfect for meal prep enthusiasts looking to save time on busy weeknights! You can prepare the shrimp and marinate them up to 24 hours in advance (just keep them refrigerated) to enhance the flavors. Additionally, wash and chop the romaine lettuce and store it in an airtight container to maintain its freshness for 3 days. When you're ready to serve, simply grill the shrimp, assemble the wraps with the lettuce, drizzle with Caesar dressing, and sprinkle Parmesan cheese as you like. This way, your delicious Grilled Shrimp Caesar Wraps will be just as flavorful and satisfying with minimal effort!

How to Store and Freeze Grilled Shrimp Caesar Wraps

Fridge: Store assembled wraps in an airtight container for up to 2 days; however, it's best to keep shrimp and dressing separate to maintain freshness.

Freezer: If you prefer, freeze unassembled ingredients (shrimp, lettuce, and wraps) for up to 3 months; defrost before assembling for optimal texture.

Reheating: To enjoy leftovers, gently reheat the shrimp in a microwave or skillet over low heat; avoid overcooking to keep them tender.

Wrap Assembly: Only assemble your Grilled Shrimp Caesar Wraps just before eating to ensure the lettuce remains crisp and the tortillas don't become soggy.

Expert Tips for Grilled Shrimp Caesar Wraps

  • Fresh Shrimp: Always use fresh or properly thawed shrimp to enhance the flavor and avoid rubbery texture. Frozen shrimp are convenient but should be fully defrosted before cooking.

  • Seasoning Balance: Don’t skimp on seasoning the shrimp! A well-seasoned shrimp elevates the entire dish. Avoid the temptation to use too much salt; a pinch goes a long way.

  • Grill Temp Matters: Ensure your grill is preheated to the right temperature for perfect charring. If it's too low, shrimp can become mushy instead of juicy and flavorful.

  • Don’t Overfill: When assembling the wraps, avoid overfilling to keep them from falling apart. A handful of lettuce and shrimp with a drizzle of dressing is all you need for balance.

  • Serving Fresh: Serve your Grilled Shrimp Caesar Wraps immediately after rolling for the best texture. If prepping ahead, keep dressing separate until ready to eat for crispness.

Grilled Shrimp Caesar Wraps Variations

Customize your Grilled Shrimp Caesar Wraps to suit your taste buds and dietary needs for an irresistible twist!

  • Chicken Swap: Replace shrimp with grilled chicken for a hearty alternative. Juicy, seasoned chicken can be just as satisfying.

  • Vegan Delight: Use grilled tofu instead of shrimp, marinated in a rich sauce for flavor. This delicious substitute packs protein and makes it entirely plant-based.

  • Lettuce Wraps: Ditch the tortillas for crisp romaine or iceberg lettuce. This gluten-free option adds a refreshing crunch while keeping calories low.

  • Spicy Kick: Add a pinch of cayenne pepper or chipotle seasoning to the shrimp marinade. The extra heat will awaken your taste buds!

  • Creamy Avocado: Slice up an avocado to add a creamy texture and healthy fats. This luscious addition enhances both flavor and nutrition.

  • Nutty Flavor: Sprinkle some toasted pine nuts or sliced almonds inside the wraps. This adds a delightful crunch and a nutty flavor profile to every bite.

  • Zesty Citrus: Drizzle some fresh lime or lemon juice over the shrimp before grilling. The citrus brightness elevates the overall flavor beautifully.

  • Side Pairing: Serve with a light side salad of mixed greens dressed with a vinaigrette for added freshness and nutrition. Enjoy a healthy contrast that complements your wraps perfectly.

Dive into these delightful variations and embrace the flavors of your culinary creativity, making your Grilled Shrimp Caesar Wraps a customized feast! For additional inspiration, consider pairing them with a side of Buffalo Tofu Caesar for a unique flavor experience!

What to Serve with Grilled Shrimp Caesar Wraps

Treat your taste buds to a delightful meal by complementing your wraps with scrumptious sides and drinks.

  • Garlic Butter Potatoes: A creamy, indulgent side that contrasts the freshness of the wraps, adding a rich, buttery note. They also bring comforting warmth to the meal.

  • Roasted Vegetables: Colorful and caramelized, these veggies enhance the dish with their earthy flavors and provide delightful crunch. Toss with olive oil and herbs for extra flair.

  • Crisp Side Salad: Combine mixed greens with a light vinaigrette for a refreshing bite that balances the wraps’ richness—perfect for adding a fresh touch.

  • Sweet Potato Fries: The subtle sweetness and crispy texture offer a new dimension, making them a fun and enjoyable addition. Pair them with a zesty dipping sauce for an extra twist.

  • Chilled White Wine: A glass of Sauvignon Blanc complements the smoky shrimp flavors beautifully, enhancing the overall dining experience with its crisp finish.

  • Fruit Salad: A light, refreshing mix of seasonal fruits adds a burst of sweetness to the plate, making your meal bright and uplifting! A touch of mint can elevate the taste further.

These delightful options make great companions for your Grilled Shrimp Caesar Wraps, transforming your meal into a truly memorable experience!

Grilled Shrimp Caesar Wraps Recipe FAQs

How do I choose fresh shrimp?
Absolutely! When selecting shrimp, look for those that are firm, translucent, and without any off-putting odor. Fresh shrimp should have a clean, ocean-like scent. If you're buying frozen, ensure they are fully sealed and without ice crystals, indicating they haven't thawed and refrozen.

How should I store leftover Grilled Shrimp Caesar Wraps?
To keep your wraps fresh, store the assembled Grilled Shrimp Caesar Wraps in an airtight container in the fridge for up to 2 days. However, for the best taste and crunch, separate the shrimp and dressing until you're ready to eat. This way, the lettuce stays crisp and the tortillas won’t become soggy.

Can I freeze the ingredients for my wraps?
Absolutely! You can freeze the unassembled ingredients—shrimp, lettuce, and tortillas—for up to 3 months. To freeze, place each component in separate airtight containers or freezer bags. When you're ready to enjoy, allow the shrimp to defrost in the fridge overnight, then assemble the wraps fresh to maintain optimal texture.

What if my shrimp turns out rubbery?
If your shrimp become rubbery, it may be due to overcooking. Always keep an eye on them! Grill shrimp only until they turn pink and opaque, about 2-3 minutes per side, as they require minimal cooking time. If you're worried about this, consider using a meat thermometer; shrimp should reach an internal temperature of 120°F to be perfectly cooked.

Can I use a different type of tortilla?
Very! While this recipe traditionally uses flour or whole wheat tortillas, you can definitely use corn tortillas, which are gluten-free, or lettuce wraps for a low-carb option. Just keep in mind that the method of rolling may vary slightly depending on the substitute you choose.

Are there any dietary alternatives for the dressing and cheese?
Of course! For a lighter option, consider using a yogurt-based Caesar dressing or simply a drizzle of olive oil and lemon juice for a fresh twist. If you're looking for a dairy-free alternative, nutritional yeast can replicate that cheesy flavor without using parmesan.

Grilled Shrimp Caesar Wraps

Grilled Shrimp Caesar Wraps

A quick, flavorful, and healthy dish featuring grilled shrimp and Caesar salad in a soft tortilla.
Print Recipe Pin Recipe
Prep Time 10 minutes mins
Cook Time 6 minutes mins
Total Time 16 minutes mins
Servings: 4 wraps
Course: Dinner
Cuisine: American
Calories: 350
Ingredients Equipment Method Nutrition Notes

Ingredients
  

For the Shrimp
  • 1 pound shrimp peeled and deveined
For the Wrap
  • 4 large tortillas flour, whole wheat or lettuce for gluten-free
For the Salad Base
  • 2 cups romaine lettuce chopped
For the Dressing
  • 1/2 cup Caesar dressing light options available
For the Topping
  • 1/4 cup Parmesan cheese grated
  • 1/4 cup bacon bits or croutons optional

Equipment

  • Grill
  • Mixing Bowl
  • Tongs

Method
 

Preparation
  1. Start by thoroughly rinsing the shrimp under cold water, then pat them dry with paper towels.
  2. In a bowl, season the shrimp with salt, pepper, and your choice of spices, like Cajun seasoning for a kick.
  3. Let the shrimp marinate for about 10 minutes.
  4. Preheat your grill to medium-high heat, around 400°F (204°C), and lightly oil the grill grates.
  5. Arrange the seasoned shrimp in a single layer on the grill, cooking for 2-3 minutes per side until pink and opaque.
Assembly
  1. Lay a soft tortilla flat on a clean surface and place a generous handful of chopped romaine lettuce in the center.
  2. Layer the grilled shrimp on top of the lettuce, followed by a drizzle of creamy Caesar dressing and a sprinkle of Parmesan cheese.
  3. If desired, add crispy bacon bits or crunchy croutons.
  4. Carefully fold the sides of the tortilla inward and tightly roll it from the bottom up.
  5. Slice the Grilled Shrimp Caesar Wraps in half diagonally and serve immediately.

Nutrition

Serving: 1wrapCalories: 350kcalCarbohydrates: 30gProtein: 25gFat: 15gSaturated Fat: 5gPolyunsaturated Fat: 2gMonounsaturated Fat: 8gCholesterol: 150mgSodium: 800mgPotassium: 400mgFiber: 3gSugar: 2gVitamin A: 150IUVitamin C: 25mgCalcium: 250mgIron: 2mg

Notes

Store assembled wraps in an airtight container for up to 2 days; keep shrimp and dressing separate for freshness.

Tried this recipe?

Let us know how it was!

Dill Pickle Ranch Smash Chicken Tacos for Tasty Taco Nights

April 9, 2026 by Grace Snow Leave a Comment

As I took my first bite, the satisfying crunch of crispy cheese lace met the creamy delight of ranch, and an explosion of tangy dill pickle flavor sent my taste buds soaring. These Dill Pickle Ranch Smash Chicken Tacos have quickly become a favorite in my home, and it’s easy to see why! Not only are they ready in just 30 minutes, making them a perfect weeknight dinner, but their customizable nature means everyone can create their own unique version. Whether you’re craving a classic or a twist with different toppings, this crowd-pleasing recipe welcomes creativity while delivering comfort in every bite. Have you ever experienced a taco that feels like a party wrapped in a tortilla? Let's dive into this delicious adventure together!

Why are these tacos a must-try?

Quick Preparation: These Dill Pickle Ranch Smash Chicken Tacos come together in just 30 minutes, making them an ideal choice for busy weeknights.

Extensive Customization: Whether you prefer spicy jalapeños or creamy avocado, this recipe invites you to personalize each taco to fit your taste.

Crowd-Pleaser: Perfect for gatherings, these tacos are sure to impress friends and family alike with their unforgettable flavor combination.

Final Crunch: The crispy cheese lace adds a delightful texture that elevates every bite, ensuring a satisfying experience.

Versatile Ingredients: Feel free to swap ground chicken for turkey or even shredded rotisserie chicken for a speedy meal, as discussed in my Huli Huli Chicken recipe.

Dive in and discover why these tasty tacos steal the show!

Dill Pickle Ranch Smash Chicken Tacos Ingredients

For the Chicken Filling
• Ground Chicken – The main protein source that gives these tacos their delicious flavor; feel free to substitute with turkey or plant-based meat.
• Garlic Powder – Adds a savory depth; adjust to suit your preference.
• Paprika – Provides mild spice and vibrant color; swap with chili powder for an added kick.
• Salt & Black Pepper – Essential for seasoning; don't skip these!

For the Tacos
• Small Tortillas – The perfect base for your tacos; use gluten-free options as needed.
• Shredded Cheese (Mozzarella or Jack) – Crucial for creating the crispy cheese lace; other melting cheeses work too.
• Chopped Dill Pickles – Offers a tangy crunch; you can substitute with sweet pickles or olives for a twist.
• Pickle Brine – Optional, but it enhances the zest; don’t skip this if you love pickles.
• Shredded Cabbage – Adds freshness and crunch; lettuce makes a great alternative.
• Cottage Cheese – Makes a creamy topping combined with ranch seasoning and lemon for a burst of flavor.

These Dill Pickle Ranch Smash Chicken Tacos are all about flavor and fun, so gather your ingredients and let’s start cooking!

Step‑by‑Step Instructions for Dill Pickle Ranch Smash Chicken Tacos

Step 1: Prepare Chicken Mixture
In a medium bowl, combine ground chicken with garlic powder, paprika, salt, and black pepper. Use your hands or a fork to mix thoroughly until the spices are evenly distributed. This flavorful mix will be the foundation of your Dill Pickle Ranch Smash Chicken Tacos.

Step 2: Cook Chicken
Heat a non-stick skillet over medium heat. Add the seasoned ground chicken mixture, breaking it apart with a spatula. Cook for 8–10 minutes, stirring occasionally, until the chicken is browned and fully cooked through. It should be fragrant and no longer pink in the center.

Step 3: Make Crispy Cheese Lace
In a separate skillet, spread shredded cheese in a thin, even layer over medium-low heat. Allow it to cook for 3-4 minutes, watching closely as it melts and begins to turn golden brown. Once crispy, carefully remove it from the skillet and let cool briefly to maintain its shape.

Step 4: Warm Tortillas
Using the same skillet, warm small tortillas for about 30 seconds on each side until they are pliable and slightly toasted. This step is essential for ensuring your tortillas can comfortably hold the filling of your Dill Pickle Ranch Smash Chicken Tacos without tearing.

Step 5: Assemble Tacos
Layer each warmed tortilla with a generous portion of the cooked chicken mixture. Add chopped dill pickles and a handful of shredded cabbage on top, which provides a delightful crunch. Fold the tortillas gently to secure the delicious filling inside.

Step 6: Add Creamy Topping
In a small bowl, mix together cottage cheese with ranch seasoning and a squeeze of lemon. Drizzle this creamy mixture over the assembled tacos, then sprinkle with a touch of pickle brine for an extra zing. Finish by placing the crispy cheese lace on top for an irresistible crunch.

How to Store and Freeze Dill Pickle Ranch Smash Chicken Tacos

Refrigeration: Store any leftover chicken mixture in an airtight container in the fridge for up to 3 days. This makes it easy to enjoy taco night again!

Crispy Cheese Storage: Keep crispy cheese lace in a separate container for best results, ideally consumed within one day to maintain crunchiness.

Freezing Options: Freeze the chicken mixture in a freezer-friendly container for up to 3 months. When ready to use, thaw overnight in the fridge before reheating.

Reheating Tips: Reheat the chicken mixture in a skillet over medium heat until warmed through, and warm tortillas just before serving for the perfect Dill Pickle Ranch Smash Chicken Tacos experience.

Dill Pickle Ranch Smash Chicken Tacos Variations

Feel free to get creative and make these tacos your own, capturing all the delightful flavors you love!

  • Ground Turkey: Substitute ground chicken with ground turkey for a leaner option without losing flavor.
  • Rotisserie Chicken: Use shredded rotisserie chicken for a quick and easy meal that cuts down on prep time.
  • Spicy Twist: Add diced jalapeños for a fiery kick, elevating your taco experience to new heights.
  • Creamy Avocado: Slice up some avocado for a creamy, rich contrast that pairs perfectly with the zesty flavors.
  • Flavorful Pickles: Experiment with different types of pickles—try bread and butter or even olives for a unique taste sensation.
  • Cheese Swap: Opt for pepper jack cheese to infuse extra spice or a sharp cheddar for an interesting flavor twist.
  • Fresh Herbs: Fresh cilantro or parsley can brighten the mix, adding a fresh pop of color and flavor that makes each bite extraordinary.
  • Loaded Tacos: Create a taco bar with toppings like sautéed onions, corn, or even pickled red onions to let everyone customize their perfect taco night.

As you dive into the world of taco-making, don’t forget to try pairing these with my Crock Pot Chicken for a complete meal or enjoy them with some zesty Shrimp Tacos to delight the taste buds!

What to Serve with Dill Pickle Ranch Smash Chicken Tacos

Complement your taco night with delightful side dishes and refreshing drinks that elevate this flavorful experience.

  • Crispy Tortilla Chips: Perfect for scooping up any extra ranch topping, their crunch enhances the overall texture. Serve with salsa for a tangy contrast.

  • Fresh Southwest Salad: A vibrant mix of greens, tomatoes, and avocado provides a refreshing bite to balance the rich flavors of the tacos. Dress lightly with lime vinaigrette for a zesty finish.

  • Creamy Coleslaw: This dish adds a sweet-crunchy element that pairs perfectly with the zesty taco filling. Its sweetness and crunch complement the tangy goodness in each bite.

  • Spicy Pickle Potato Wedges: A perfect nod to the dill pickle theme, the added spice offers a bold flavor that complements the tacos beautifully while giving a good crunch.

  • Grilled Corn on the Cob: Charred and buttery, corn adds a sweet smokiness that contrasts deliciously with the tangy flavors in the tacos. It’s a summertime favorite that brings nostalgia to the table.

  • Margaritas: Pair these tacos with refreshing margaritas for a fun twist. The citrusy notes cut through the richness, ensuring every bite and sip is a burst of flavor.

  • Peach Iced Tea: A sweet, refreshing drink that cools down your palate, helping balance the mouthwatering tang and crunchiness of the tacos. Ideal for a warm evening gathering.

Enjoy these delicious pairings as you indulge in your Dill Pickle Ranch Smash Chicken Tacos!

Make Ahead Options

These Dill Pickle Ranch Smash Chicken Tacos are perfect for meal prep, allowing you to enjoy taco night with minimal stress! You can prepare the chicken mixture up to 3 days in advance by mixing ground chicken with garlic powder, paprika, salt, and pepper, then refrigerating it in an airtight container. Additionally, the crispy cheese lace can be made the same day but stored separately to maintain its crunch—ideally enjoyed within 24 hours. When ready to serve, simply reheat the chicken in a skillet and warm the tortillas for optimal texture. This means less time in the kitchen and more time enjoying delicious tacos with your family!

Expert Tips for Dill Pickle Ranch Smash Chicken Tacos

Perfect Chicken Cooking: Ensure the chicken is fully cooked until golden brown, imparting a depth of flavor that enhances your Dill Pickle Ranch Smash Chicken Tacos.

Crispy Cheese Watch: Monitor the cheese lace closely, cooking it on medium-low heat to avoid burning and ensure the perfect texture.

Tortilla Technique: Warm your tortillas thoroughly, as this makes them pliable for easy folding and prevents them from tearing when filled.

Mix It Up: Experiment with ingredient substitutions based on your taste preferences; there’s room for creativity, so don’t hesitate to make these tacos your own!

Serving Style: Pair your tacos with fresh sides like a crunchy salad or tortilla chips to complement their flavor and texture at your next gathering.

Dill Pickle Ranch Smash Chicken Tacos Recipe FAQs

How do I choose the right ripeness of ingredients?
Absolutely! For the best flavor, choose firm, bright green dill pickles without any dark spots or blemishes. When selecting cabbage, go for crisp leaves that feel heavy for their size. Always check the expiration dates on cottage cheese, ensuring it’s fresh for that creamy topping.

How should I store leftovers?
Very important! Store any leftover chicken mixture in an airtight container in the refrigerator, where it will stay fresh for up to 3 days. To keep the crispy cheese lace at its best, store it separately and consume it within a day for optimal crunch.

Can I freeze the chicken mixture?
Absolutely! To freeze, place the leftover chicken mixture in a freezer-friendly container, sealing it tightly to prevent freezer burn. It will remain good for up to 3 months. Just thaw it overnight in the fridge when you’re ready to enjoy it again.

What should I do if my chicken mixture is too dry?
If you find your chicken mixture is a bit too dry, add a splash of pickle brine or a touch of olive oil to bring back moisture. Mix well and cook on low heat for a few minutes to allow the flavors to meld. Also, ensure it’s fully cooked but avoid overcooking, which can dry it out.

Are there any dietary considerations for this recipe?
For sure! This recipe can easily accommodate gluten-free diets by opting for gluten-free tortillas. If you or anyone eating has allergies, be mindful of using ranch dressing and check for any allergens in the ingredients, like in the cheese.

Can I customize the toppings?
The more the merrier! Feel free to add or replace toppings according to your taste. Consider incorporating sliced jalapeños for heat, avocado for creaminess, or even diced tomatoes for freshness. The beauty of these Dill Pickle Ranch Smash Chicken Tacos lies in their customization!

Dill Pickle Ranch Smash Chicken Tacos

Dill Pickle Ranch Smash Chicken Tacos for Tasty Taco Nights

These Dill Pickle Ranch Smash Chicken Tacos are a quick, customizable dinner option with a burst of flavor from tangy dill pickles.
Print Recipe Pin Recipe
Prep Time 10 minutes mins
Cook Time 20 minutes mins
Total Time 30 minutes mins
Servings: 4 tacos
Course: Dinner
Cuisine: Mexican
Calories: 400
Ingredients Equipment Method Nutrition Notes

Ingredients
  

For the Chicken Filling
  • 1 lb Ground Chicken Feel free to substitute with turkey or plant-based meat.
  • 1 tsp Garlic Powder Adjust to suit your preference.
  • 1 tsp Paprika Swap with chili powder for an added kick.
  • 1 tsp Salt
  • 1/2 tsp Black Pepper
For the Tacos
  • 8 small Tortillas Use gluten-free options as needed.
  • 1 cup Shredded Cheese (Mozzarella or Jack) Other melting cheeses work too.
  • 1/2 cup Chopped Dill Pickles Substitute with sweet pickles or olives for a twist.
  • 2 tbsp Pickle Brine Optional but enhances the zest.
  • 1 cup Shredded Cabbage Lettuce makes a great alternative.
  • 1/2 cup Cottage Cheese Mixed with ranch seasoning and lemon.

Equipment

  • non-stick skillet
  • Mixing Bowl

Method
 

Step-by-Step Instructions
  1. In a medium bowl, combine ground chicken with garlic powder, paprika, salt, and black pepper. Mix thoroughly.
  2. Heat a non-stick skillet over medium heat and add the chicken mixture. Cook for 8-10 minutes until fully cooked.
  3. In a separate skillet, spread shredded cheese in a thin layer over medium-low heat. Cook until crispy.
  4. Warm tortillas in the same skillet for about 30 seconds on each side until pliable.
  5. Layer each tortilla with the chicken mixture, dill pickles, and shredded cabbage. Fold gently.
  6. Mix cottage cheese with ranch seasoning and a squeeze of lemon, then drizzle over tacos and top with crispy cheese lace.

Nutrition

Serving: 1tacoCalories: 400kcalCarbohydrates: 30gProtein: 25gFat: 20gSaturated Fat: 10gPolyunsaturated Fat: 2gMonounsaturated Fat: 5gCholesterol: 70mgSodium: 800mgPotassium: 500mgFiber: 2gSugar: 3gVitamin A: 500IUVitamin C: 15mgCalcium: 150mgIron: 2mg

Notes

Feel free to customize the toppings based on your preference and pair with sides like salad or tortilla chips.

Tried this recipe?

Let us know how it was!

Cheesy Taco Sticks: The Ultimate Family-Friendly Snack

April 9, 2026 by Grace Snow Leave a Comment

Transforming an ordinary taco night into something extraordinary is easier than you might think! With Baked Cheesy Taco Sticks, you can create a fun and family-friendly dish that’s ready in a snap. These cheesy delights combine seasoned beef and gooey mozzarella wrapped in warm, baked dough, allowing you to indulge without the hassle of frying. Perfect for busy weeknights or game-day gatherings, this recipe is not just quick to prepare but also totally customizable. Swap in your favorite fillings—like spicy jalapeños for a kick, or keep it lighter with a vegetarian option. Don't you just love meals that marry comfort with creativity? Let’s dive into the simple yet satisfying world of Cheesy Taco Sticks!

Why Are Cheesy Taco Sticks a Must-Try?

Simplicity: This recipe is incredibly easy to make, requiring minimal ingredients and basic cooking skills.

Customizable Delight: Whether you prefer spicy, vegetarian, or mini versions, you can tailor these Cheesy Taco Sticks to your family’s tastes, making them a versatile option for any occasion.

Family Appeal: Quick to prepare and packed with cheesy goodness, they make an ideal choice for a cozy family dinner or a fun snack during game day.

Golden Crispiness: Baked to perfection, these sticks offer a satisfying crunch while keeping the filling warm and gooey, creating that perfect contrast of textures.

Time-Saving: With a total prep and cook time of about 30 minutes, these taco sticks fit seamlessly into your busy schedule, ensuring you never have to resort to fast food again.

Elevate your next taco night or surprise your guests with these delightful Cheesy Corn Fritters as a side!

Cheesy Taco Sticks Ingredients

Explore the simple yet flavorful ingredients that make these Cheesy Taco Sticks a family favorite!

For the Filling
• Ground Beef – This main protein adds rich flavor; substitute with ground turkey or chicken for a lighter option.
• Onion – Adds sweetness and texture; must be finely diced for even cooking.
• Garlic – Freshly minced enhances depth; don’t skip this essential flavor booster!
• Olive Oil – Used for sautéing onion and garlic; can substitute with any cooking oil you have handy.
• Chili Powder – Provides spice and warmth; adjust quantity based on your heat preference.
• Ground Cumin – Delivers an earthy flavor essential for that classic taco taste.
• Smoked Paprika – Introduces a smoky note; feel free to omit if you're out.
• Salt & Black Pepper – Essential seasonings; don't forget to adjust to your taste.
• Water – Helps moisten the filling; beef broth can be a richer alternative.

For the Dough
• Refrigerated Pizza Dough – The main wrapper; choose crescent dough for a flakier variant.

For the Cheese
• Shredded Mozzarella Cheese – Melts beautifully for a gooey filling; mix with other cheeses if desired.
• Shredded Cheddar Cheese – Adds classic taco flavor; substitute with Monterey Jack for a twist.

For the Finish
• Melted Butter – Brushed on top for added richness; mixing it with garlic powder elevates the flavor.
• Optional Toppings – Sesame seeds, everything bagel seasoning, or taco seasoning can add extra texture and flavor!

Get ready to whip up a batch of Cheesy Taco Sticks that not only satisfy but also offer a delicious twist to your usual meal routine!

Step‑by‑Step Instructions for Cheesy Taco Sticks

Step 1: Prepare the Filling
In a large skillet, heat 1 tablespoon of olive oil over medium heat. Add 1 finely diced onion and sauté for about 3–4 minutes until softened and translucent. Stir in 2 cloves of freshly minced garlic, cooking for another 30 seconds until fragrant. This aromatic base sets the stage for delicious Cheesy Taco Sticks.

Step 2: Brown the Beef
Next, add 1 pound of ground beef to the skillet, breaking it apart with a spatula. Cook for approximately 5–7 minutes until the beef is browned and no longer pink. Drain any excess fat from the skillet to keep the filling lean and flavorful, ensuring your Cheesy Taco Sticks are scrumptious without being greasy.

Step 3: Season the Mixture
Sprinkle in 1 tablespoon of chili powder, 1 teaspoon of ground cumin, and 1 teaspoon of smoked paprika, along with salt and black pepper to taste. Pour in ¼ cup of water, stirring well to combine. Let the filling simmer for around 3–5 minutes until thickened, allowing the flavors to meld together beautifully for your Cheesy Taco Sticks.

Step 4: Prepare the Dough
While the filling simmers, preheat your oven to 400°F (200°C) and lightly grease a baking sheet or line it with parchment paper. Roll out a tube of refrigerated pizza dough on a floured surface into a rectangle, about ¼ inch thick. Cut the dough into strips approximately 2 inches wide, which will wrap around your flavorful filling to create the Cheesy Taco Sticks.

Step 5: Assemble the Sticks
Spoon a generous amount of the beef filling onto one end of each dough strip, adding a mix of shredded mozzarella and cheddar cheese on top. Fold the dough over the filling and pinch the edges firmly to seal, ensuring the delicious contents stay inside. This careful assembly will ensure your Cheesy Taco Sticks hold together during baking.

Step 6: Brush & Bake
Arrange the stuffed dough sticks on the prepared baking sheet, ensuring they have some space in between. Brush the tops lightly with melted butter, and if desired, sprinkle with sesame seeds or everything bagel seasoning for added flavor. Bake in the preheated oven for 12–15 minutes until golden brown and puffy, creating a delightful crust for your Cheesy Taco Sticks.

Step 7: Cool & Serve
Once baked, remove the Cheesy Taco Sticks from the oven and let them cool for a few minutes on the baking sheet. This cooling time allows the cheese to set slightly, making them easier to handle. Serve warm with your favorite dipping sauces like salsa or guacamole for a delightful snack or dinner option!

Expert Tips for Cheesy Taco Sticks

Lean Protein Choice: Use lean ground beef to prevent greasiness in your filling, ensuring a lighter and flavorful Cheesy Taco Sticks experience.

Don’t Overstuff: Avoid the temptation to fill the dough too generously; overstuffing can lead to leaks during baking, making a mess.

Cheese Thickness: Ensure your cheese mixture isn't too runny. A thick filling helps keep everything inside when baking and enhances flavor.

Perfectly Sealed: Pinch the edges of the dough securely to seal, preventing any delicious filling from escaping as it bakes to golden perfection.

Cool Slightly: Allow the Cheesy Taco Sticks to cool for a few minutes post-baking. This setting time ensures that the gooey cheese holds together better and is easier to eat.

Cheesy Taco Sticks Variations & Substitutions

Feel free to mix it up with these delicious options to customize your Cheesy Taco Sticks just the way you like them!

  • Spicy Version: Add diced jalapeños or a splash of hot sauce to the filling for a fiery kick! Spice lovers will rejoice in the delightful heat blending seamlessly with the cheesy mixture.

  • Chicken Taco Sticks: Swap ground beef for shredded or ground chicken for a lighter version that’s equally tasty. This swap allows you to enjoy a classic flavor with a healthier twist.

  • Vegetarian Delight: Replace meat with seasoned black beans, lentils, or even grilled veggies for a hearty vegetarian alternative. You won't miss the meat with all these vibrant flavors!

  • Breakfast Taco Sticks: Incorporate scrambled eggs and crumbled breakfast sausage for a delightful breakfast treat. These make for a wonderful family brunch option that can be enjoyed anytime.

  • Mini Taco Sticks: Cut the dough into smaller pieces for bite-sized snacks perfect for gatherings. These also make for great party appetizers that are sure to please the crowd!

  • Dairy-Free Swap: Use vegan cheese or skip the cheese altogether for a dairy-free version. There are many flavorful non-dairy options available that melt beautifully, making it easier for everyone to join in on the fun!

  • Flavor Boost: Mix in your favorite spices, such as taco seasoning or smoked paprika, to enhance the filling further. This simple adjustment can elevate the overall taste and make every bite memorable.

  • Zucchini Addition: Grate zucchini and sneak it into the filling for added nutrients and moisture. This is a clever way to incorporate more veggies while keeping the delicious taco flavor intact.

Just as you can personalize these Cheesy Taco Sticks, you might also enjoy creating a fabulous accompaniment with some homemade Cheesy Garlic Bread or pairing them with savory Cheesy Corn Fritters for a delightful meal!

Make Ahead Options

These Cheesy Taco Sticks are perfect for meal prep enthusiasts looking to save time during busy weeknights! You can prepare the filling (ground beef, onions, garlic, and seasonings) up to 3 days in advance and refrigerate it in an airtight container. Additionally, you can assemble the sticks completely and keep them wrapped in plastic, storing them in the fridge for up to 24 hours before baking. To maintain the quality, ensure you don’t brush the dough with butter until you’re ready to bake. When it’s time to serve, simply preheat the oven, brush with melted butter, and bake the Cheesy Taco Sticks as directed. You'll have a delicious meal ready with minimal effort!

How to Store and Freeze Cheesy Taco Sticks

Room Temperature: Allow Cheesy Taco Sticks to cool completely before storing at room temperature in an airtight container to maintain freshness for up to 2 days.

Fridge: Store in the refrigerator in a sealed container for up to 4 days. Reheat in the oven or microwave before serving for optimal texture.

Freezer: For longer storage, freeze Cheesy Taco Sticks individually wrapped in plastic wrap, then place them in a freezer-safe bag. They can last up to 2 months.

Reheating: Reheat frozen sticks directly from the freezer in a preheated oven at 375°F (190°C) for about 15-20 minutes until heated through. This keeps them crispy.

What to Serve with Cheesy Taco Sticks

When it comes to crafting a meal around these flavorful delights, think vibrant flavors and satisfying textures to awaken your taste buds.

  • Salsa Verde: This bright and tangy sauce adds a refreshing kick that complements the cheesy goodness of the sticks beautifully.
  • Guacamole: Silky avocado creaminess creates a delightful contrast, enhancing flavors while keeping things fresh.
  • Pico de Gallo: Freshness in every bite, this tomato, onion, and cilantro mix adds crunch and zest that perfectly balances the rich filling.
  • Mexican Street Corn Salad: This creamy, tangy side brings a pop of sweetness and smokiness, making every bite of taco stick even more exciting.

Pair your Cheesy Taco Sticks with a fun beverage like a Margarita or a Sparkling Water with Lime for a refreshing twist. These drinks not only elevate the meal but also add a celebratory flair to your dining experience.

  • Cheesy Mexican Rice: This comforting side dish not only plays nicely with the cheesy taco sticks but also soaks up all those wonderful flavors.
  • Chips and Queso: The crunch and warmth of tortilla chips dipped in melted cheese sauce is a classic pairing that is always a hit at gatherings.
  • Mini Taco Cups: For added excitement, serve these mini delights filled with traditional taco toppings as an irresistible appetizer that echoes the main course.

Cheesy Taco Sticks Recipe FAQs

How do I choose the best ripe ingredients for the filling?
Absolutely! When selecting ingredients, aim for fresh, high-quality produce. For onions, choose those that are firm with smooth skin, avoiding any that have dark spots or soft spots. Garlic should be plump and firm. If using ground beef, opt for lean cuts for less grease and better flavor.

What’s the best way to store leftover Cheesy Taco Sticks?
You can store your Cheesy Taco Sticks in the refrigerator in an airtight container for up to 4 days. Allow them to cool completely before sealing to maintain their texture. Reheating them in an oven is ideal to preserve their crispy exterior!

Can I freeze Cheesy Taco Sticks for later use?
Yes, indeed! To freeze, let the Cheesy Taco Sticks cool completely, then individually wrap each stick in plastic wrap. Place them in a freezer-safe bag or container, and they will last up to 2 months. When you're ready to enjoy them, reheat directly from the freezer for about 15–20 minutes in a 375°F (190°C) oven until they're hot and crispy again.

What should I do if the cheese leaks out during baking?
No worries! This can happen if the filling is too runny or the dough is overstuffed. To avoid this, make sure the filling is thick enough by letting it simmer until it reduces, and always pinch the dough securely to seal. If it does leak, simply enjoy the cheesy goodness that oozes out—after all, who doesn’t love a bit of extra flavor?

Are Cheesy Taco Sticks suitable for special dietary needs?
Very! You can easily make them gluten-free by using gluten-free pizza dough or tortillas. For dairy-free options, use dairy-free cheese alternatives. If you have allergies, make sure to read labels carefully and adjust the ingredients as needed. Remember, Cheesy Taco Sticks are all about customization to fit your family’s needs!

Cheesy Taco Sticks

Cheesy Taco Sticks: The Ultimate Family-Friendly Snack

Baked Cheesy Taco Sticks are a family-friendly snack that combines seasoned beef and gooey mozzarella in baked dough. Perfect for game day or busy weeknights!
Print Recipe Pin Recipe
Prep Time 15 minutes mins
Cook Time 15 minutes mins
Total Time 30 minutes mins
Servings: 4 sticks
Course: Snacks
Cuisine: Mexican
Calories: 300
Ingredients Equipment Method Nutrition Notes

Ingredients
  

Filling
  • 1 pound Ground Beef or ground turkey or chicken
  • 1 medium Onion finely diced
  • 2 cloves Garlic freshly minced
  • 1 tablespoon Olive Oil or any cooking oil
  • 1 tablespoon Chili Powder adjust quantity based on preference
  • 1 teaspoon Ground Cumin
  • 1 teaspoon Smoked Paprika optional
  • to taste Salt & Black Pepper
  • 1/4 cup Water can substitute with beef broth
Dough
  • 1 package Refrigerated Pizza Dough or crescent dough
Cheese
  • 1 cup Shredded Mozzarella Cheese or mix with other cheeses
  • 1 cup Shredded Cheddar Cheese or substitute with Monterey Jack
Finish
  • 2 tablespoons Melted Butter with optional garlic powder
  • Optional Toppings such as sesame seeds or taco seasoning

Equipment

  • Skillet
  • Baking Sheet
  • Parchment Paper
  • Rolling Pin

Method
 

Preparation
  1. Heat olive oil in a skillet over medium heat. Sauté onion for 3-4 minutes until softened. Add garlic and cook for another 30 seconds.
  2. Add ground beef to the skillet and cook for 5-7 minutes until browned. Drain excess fat.
  3. Stir in chili powder, cumin, smoked paprika, salt, and pepper. Add water and simmer for 3-5 minutes until thickened.
  4. Preheat oven to 400°F (200°C). Roll out pizza dough and cut into strips about 2 inches wide.
  5. Place beef filling on one end of each dough strip, top with cheese, fold the dough, and pinch the edges to seal.
  6. Arrange sticks on a baking sheet, brush with melted butter, and sprinkle toppings. Bake for 12-15 minutes until golden brown.
  7. Let them cool for a few minutes and serve with dipping sauces.

Nutrition

Serving: 1stickCalories: 300kcalCarbohydrates: 25gProtein: 18gFat: 15gSaturated Fat: 7gPolyunsaturated Fat: 1gMonounsaturated Fat: 2gCholesterol: 60mgSodium: 450mgPotassium: 350mgFiber: 2gSugar: 1gVitamin A: 15IUVitamin C: 2mgCalcium: 100mgIron: 2mg

Notes

These Cheesy Taco Sticks are easy to customize and perfect for family dinners or snack time. Experiment with different fillings and toppings to suit your taste.

Tried this recipe?

Let us know how it was!

Mouthwatering Chuck Roast Tacos That You'll Crave Again

April 9, 2026 by Grace Snow Leave a Comment

The aroma of slow-cooked beef wafting through my kitchen transports me right back to family dinners filled with laughter and love. Today, I'm excited to share my beloved recipe for Easy Chuck Roast Tacos, where tender, juicy beef is the star of the show. This dish not only comes together with minimal hands-on time but also allows you to customize each taco with your favorite toppings, making it perfect for a cozy weeknight meal or a festive gathering. Whether it’s the aromatic blend of spices or that satisfying first bite, these tacos promise to bring warmth to your table and smiles to your faces. What toppings will you choose to make them your own? Let’s dive into the recipe!

Why Will You Love Chuck Roast Tacos?

Simplicity: This recipe features a straightforward process—just sear, slow cook, and shred! Perfect for busy weeknights or effortless entertaining.

Flavor Explosion: The combination of spices infuses the beef with savory goodness, while lime juice adds that zesty kick to brighten each bite.

Customizable: With endless topping options like jalapeños, cilantro, and cheese, you can tailor each taco to suit your family's tastes. Want something lighter? Try them with fresh veggies, just like you would with Roasted Corn Tacos.

Melt-in-Your-Mouth Texture: The slow cooking transforms chuck roast into tender, juicy shreds that are simply irresistible.

Crowd Pleaser: Whether serving friends or family, these tacos are sure to become a favorite. If you're looking for a heartier option, don't miss out on Roasted Bratwurst Peppers.

Get ready to enjoy a delightful taco night!

Chuck Roast Tacos Ingredients

These ingredients will create the perfect filling for your delicious tacos!

For the Beef
• Chuck Roast – A flavorful cut ideal for slow cooking; brisket or round roast works well as substitutes.
• Olive Oil – Essential for searing the meat; vegetable or canola oil are good alternatives with higher smoke points.

For Flavor Enhancement
• Onion – Adds savory depth; yellow onion is preferred, but red onion or shallots can work in a pinch.
• Garlic – Fresh garlic enhances flavor immensely; in a hurry? Garlic powder is an acceptable substitute.
• Beef Broth – Moisture and flavor enhancer; homemade is best, but store-bought works, or choose chicken or vegetable broth for lighter options.

For Seasoning
• Spices (Chili Powder, Cumin) – Key for an authentic taste; taco seasoning can replace these, just adjust for saltiness.
• Lime Juice – Adds a bright, zesty flavor when stirred in after cooking, transforming the dish!

These chuck roast tacos are not only set to impress your taste buds but also bring joy and comfort to your dinner table!

Step‑by‑Step Instructions for Easy Chuck Roast Tacos

Step 1: Sear the Roast
Heat a tablespoon of olive oil in a large skillet over medium-high heat. Generously season the chuck roast with salt and pepper before placing it in the hot skillet. Sear the meat for 4-5 minutes on each side until it develops a rich, brown crust. This step enhances the flavors of your Easy Chuck Roast Tacos.

Step 2: Transfer to Slow Cooker
Carefully move the seared chuck roast to your slow cooker. Layer the sliced onion and minced garlic around the roast, then pour in the beef broth. Finally, sprinkle chili powder and cumin evenly over the top, breathing in the aromatic scents. This prep will ensure the roast absorbs all those tasty flavors as it cooks slowly.

Step 3: Cook
Cover the slow cooker with its lid and set it to cook on low for 7-8 hours, or on high for 4-5 hours. You’ll know it's ready when the meat is tender and shreds easily with a fork. The long cooking time will transform your chuck roast into the perfect filling for tacos, bursting with savory goodness.

Step 4: Shred Meat
Once cooked, carefully remove the roast from the slow cooker using tongs. Place it on a cutting board and use two forks to shred the meat into bite-sized pieces. Mix the shredded beef back into the juices in the slow cooker for added flavor. Your filling for the Easy Chuck Roast Tacos is coming together beautifully!

Step 5: Add Lime Juice
For a bright finish, squeeze the juice from one lime into the shredded meat mixture. Stir it in thoroughly to combine, enhancing the flavors of the beef. This little addition is what takes your Easy Chuck Roast Tacos to the next level, making them zesty and refreshing.

Step 6: Prepare Tacos
Warm the tortillas according to package instructions, either in a skillet or microwave. Once warmed, fill each tortilla generously with the shredded beef mixture from the slow cooker. Feel free to customize your tacos with all your favorite toppings, like shredded cheese, diced onions, jalapeños, and cilantro for a delicious and personalized meal.

Storage Tips for Chuck Roast Tacos

Fridge: Store leftover shredded beef in an airtight container for up to 3-4 days to maintain freshness and flavor.

Freezer: For longer storage, freeze the shredded meat in a freezer-safe container for up to 3 months. Defrost overnight in the fridge before reheating.

Reheating: When ready to enjoy your Chuck Roast Tacos again, reheat in a skillet over medium heat with a splash of beef broth to keep the meat moist and flavorful.

Wrapping: Place wrapped tacos in foil or keep them in an airtight container to preserve the quality of your toppings and tortillas when storing leftovers.

Make Ahead Options

These Easy Chuck Roast Tacos are perfect for busy home cooks looking to save time during the week! You can season and sear the chuck roast up to 24 hours in advance, then refrigerate it. Additionally, the shredded beef can be stored in an airtight container for up to 3 days after cooking. To maintain its mouthwatering flavor, ensure to mix in the juices from the slow cooker before refrigerating. When ready to serve, simply reheat the meat in a skillet over low heat or in the microwave, adding a splash of beef broth if needed to enjoy tender, succulent beef tacos that are just as delicious as when freshly made!

Chuck Roast Tacos Variations

Feel free to get creative with these Chuck Roast Tacos—they’re perfect for personalizing your flavors and textures!

  • Dairy-Free: Skip cheese and sour cream. Instead, try avocado slices or a cashew cream for a rich complement.

  • Spicy Kick: Add chopped jalapeños or a dash of hot sauce to the beef before serving. This will turn up the heat and add a delightful punch.

  • Veggie Boost: Load your tacos with fresh veggies like bell peppers, avocado, and shredded lettuce. Not only do they add crunch, but they also enhance flavors beautifully.

  • Grainy Twist: Substitute traditional flour tortillas with whole wheat or corn tortillas for added nutrition. Each option brings its own unique flavor to your tacos.

  • Herb Infusion: Toss in fresh cilantro or parsley before serving for a fresh burst of flavor. Don’t be shy—herbs can truly elevate the taste of your tacos.

  • Flavorful Orientations: For something different, try a ginger-soy sauce mix in place of traditional spices. Think of a fusion idea by even switching to seafood with Shrimp Tacos Zesty.

  • Roasted Goodness: For an extra flavor dimension, consider roasting your tortillas briefly on a dry skillet before filling. It adds a delightful crispness that’s hard to resist.

  • Sweet & Savory: Add a touch of sweetness with honey or agave syrup mixed into the beef for a unique twist that pairs surprisingly well with the savory elements.

Let your imagination run wild, and enjoy the delightful journey of crafting your dream taco!

Expert Tips for Chuck Roast Tacos

  • Choose Wisely: Ensure your chuck roast is well-marbled for maximum flavor. Lean cuts won’t yield the same tender results for your Chuck Roast Tacos.

  • Sear Smart: Don't rush the searing step. Taking the time to brown the meat creates a deeper flavor base that enhances the entire dish.

  • Know Your Timing: If you're in a hurry, use a pressure cooker to prepare the chuck roast. It cuts the cooking time to 60-75 minutes on high pressure without sacrificing tenderness.

  • Storage Savvy: Leftover shredded meat can be stored in an airtight container for 3-4 days or frozen for up to 3 months. Just add a splash of broth when reheating!

  • Spice It Up: Taste before adding lime juice. Adjust spice levels as needed to ensure that your Chuck Roast Tacos are just how you like them!

What to Serve with Easy Chuck Roast Tacos?

Complete your taco night with delicious sides and drinks that elevate this family favorite.

  • Creamy Guacamole: This rich, buttery dip balances the savory beef and adds a cool, refreshing element with every bite.

  • Spicy Black Beans: Seasoned with garlic and cumin, these beans add warmth and protein, making the meal heartier and fuller.

  • Pico de Gallo: Fresh tomatoes, onion, and cilantro create a vibrant topping that brightens the tacos, adding a burst of flavor.

  • Mexican Street Corn: Grilled corn brushed with mayo, lime, and cotija cheese provides a sweet and savory side that complements the tacos beautifully.

  • Crispy Tortilla Chips: Serve these alongside your tacos for a satisfying crunch that pairs perfectly with dips like salsa or guacamole.

  • Refreshing Agua Fresca: A light fruit drink like watermelon or cucumber agua fresca cleanses the palate and offers a sweet contrast to the savory tacos.

  • Chocolate Flan: This rich, creamy dessert provides an indulgent finish to your meal, marrying flavors of chocolate and caramel in a delightful way.

  • Cold Mexican Beer: A crisp lager or light ale is the perfect pairing to wash down the flavors of the tacos and enhance the overall dining experience.

Chuck Roast Tacos Recipe FAQs

What type of chuck roast should I use for tacos?
Absolutely! Look for a well-marbled chuck roast, as the fat content enhances flavor and tenderness during slow cooking. If you can't find chuck roast, brisket or round roast make great substitutes.

How should I store leftover chuck roast tacos?
After enjoying your delicious tacos, store leftover shredded beef in an airtight container in the refrigerator for up to 3-4 days. This will keep it fresh and flavorful for your next taco night!

Can I freeze the shredded beef for later use?
Certainly! To freeze, place the shredded beef in a freezer-safe container or resealable bag, pressing out as much air as possible. It can last up to 3 months in the freezer. When you're ready to enjoy, defrost overnight in the fridge and reheat gently on the stove with a little beef broth for moisture.

What should I do if my chuck roast is tough after cooking?
If you find your chuck roast isn't as tender as expected, it may need more time in the slow cooker. Re-season if needed, and continue cooking on low for another hour or two to help break down the connective tissues further into tender, delicious shreds.

Are these tacos suitable for people with certain dietary restrictions?
Yes, these chuck roast tacos can be tailored to accommodate various diets! For gluten-free options, use corn tortillas. If you have allergies, check the labels on broth and toppings, opting for low-sodium or allergen-friendly alternatives to ensure everyone's safe to enjoy this comfort food.

How do I reheat leftover tacos while keeping them moist?
Simply heat your leftover beef in a skillet over medium heat with a splash of beef broth. Stir gently until warmed through to keep the meat moist and juicy without drying it out!

Chuck Roast Tacos

Mouthwatering Chuck Roast Tacos That You'll Crave Again

Enjoy these Chuck Roast Tacos featuring tender beef, customizable toppings, and a burst of flavor, perfect for a cozy dinner.
Print Recipe Pin Recipe
Prep Time 15 minutes mins
Cook Time 8 hours hrs
Total Time 8 hours hrs 15 minutes mins
Servings: 4 tacos
Course: Dinner
Cuisine: Mexican
Calories: 300
Ingredients Equipment Method Nutrition Notes

Ingredients
  

For the Beef
  • 3 lbs Chuck Roast or brisket/round roast as substitutes
  • 1 tbsp Olive Oil or vegetable/canola oil for alternatives
For Flavor Enhancement
  • 1 medium Onion yellow onion preferred
  • 4 cloves Garlic fresh preferred, garlic powder as substitute
  • 2 cups Beef Broth homemade or store-bought; chicken or vegetable broth works too
For Seasoning
  • 2 tbsp Chili Powder
  • 1 tbsp Cumin
  • 1 medium Lime Juice freshly squeezed

Equipment

  • Slow Cooker
  • Skillet
  • Cutting Board
  • Tongs

Method
 

Step-by-Step Instructions
  1. Heat a tablespoon of olive oil in a large skillet over medium-high heat. Season the chuck roast with salt and pepper, then sear for 4-5 minutes on each side until browned.
  2. Transfer the seared chuck roast to the slow cooker. Layer the sliced onion and minced garlic around it, then pour in the beef broth. Sprinkle chili powder and cumin on top.
  3. Cover the slow cooker and cook on low for 7-8 hours or high for 4-5 hours, until the meat is tender.
  4. Remove the roast and shred it on a cutting board using two forks, then mix it back into the juices.
  5. Squeeze lime juice over the shredded meat and stir well.
  6. Warm the tortillas and fill each with the shredded beef mixture, adding your favorite toppings.

Nutrition

Serving: 1tacoCalories: 300kcalCarbohydrates: 30gProtein: 20gFat: 12gSaturated Fat: 3gPolyunsaturated Fat: 1gMonounsaturated Fat: 7gCholesterol: 70mgSodium: 600mgPotassium: 350mgFiber: 3gSugar: 2gVitamin A: 5IUVitamin C: 15mgCalcium: 4mgIron: 15mg

Notes

Use well-marbled chuck roast for best flavor. You can use a pressure cooker for faster cooking.

Tried this recipe?

Let us know how it was!
  • « Previous Page
  • 1
  • …
  • 18
  • 19
  • 20
  • 21
  • 22
  • …
  • 216
  • Next Page »

Welcome!

Hi, I’m Grace, a Sydney-based home cook with a passion for bold flavors and trending ingredients. Whether you’re a busy beginner or a seasoned foodie, you’ll find dishes here that are fresh, fun, and full of flavor.

More about me

Popular Recipes

  • Chocolate Cake Pops
    Delightful Chocolate Cake Pops for Your Sweet Cravings
  • Cottage Cheese Banana Bread
    Cottage Cheese Banana Bread: Moist, Protein-Packed Delight
  • Flourless Oat Waffles
    Flourless Oat Waffles for a Quick, Healthy Breakfast Boost
  • Cinnamon Waffles
    Fluffy Cinnamon Waffles with Dreamy Whipped Cream Bliss

Footer

↑ back to top

About

  • Privacy Policy
  • Disclaimer
  • Terms & Conditions

Newsletter

  • Sign Up! for emails and updates

Contact

  • About me
  • Contact me

Copyright © 2025 TastyTrendIngredients