tastytrendingredients

  • Home
  • Recipes
    • Appetizers
    • Breakfast
    • Dessert
    • Dinner
    • Drinks
    • Salads
    • Snacks
    • Soups
  • About me
  • Contact
menu icon
go to homepage
  • Home
  • Recipes
    • Appetizers
    • Breakfast
    • Dessert
    • Dinner
    • Drinks
    • Salads
    • Snacks
    • Soups
  • About me
  • Contact
search icon
Homepage link
  • Home
  • Recipes
    • Appetizers
    • Breakfast
    • Dessert
    • Dinner
    • Drinks
    • Salads
    • Snacks
    • Soups
  • About me
  • Contact
×

Irresistibly Creamy Peanut Butter Dessert Sauce in 5 Minutes

May 21, 2026 by Grace Snow Leave a Comment

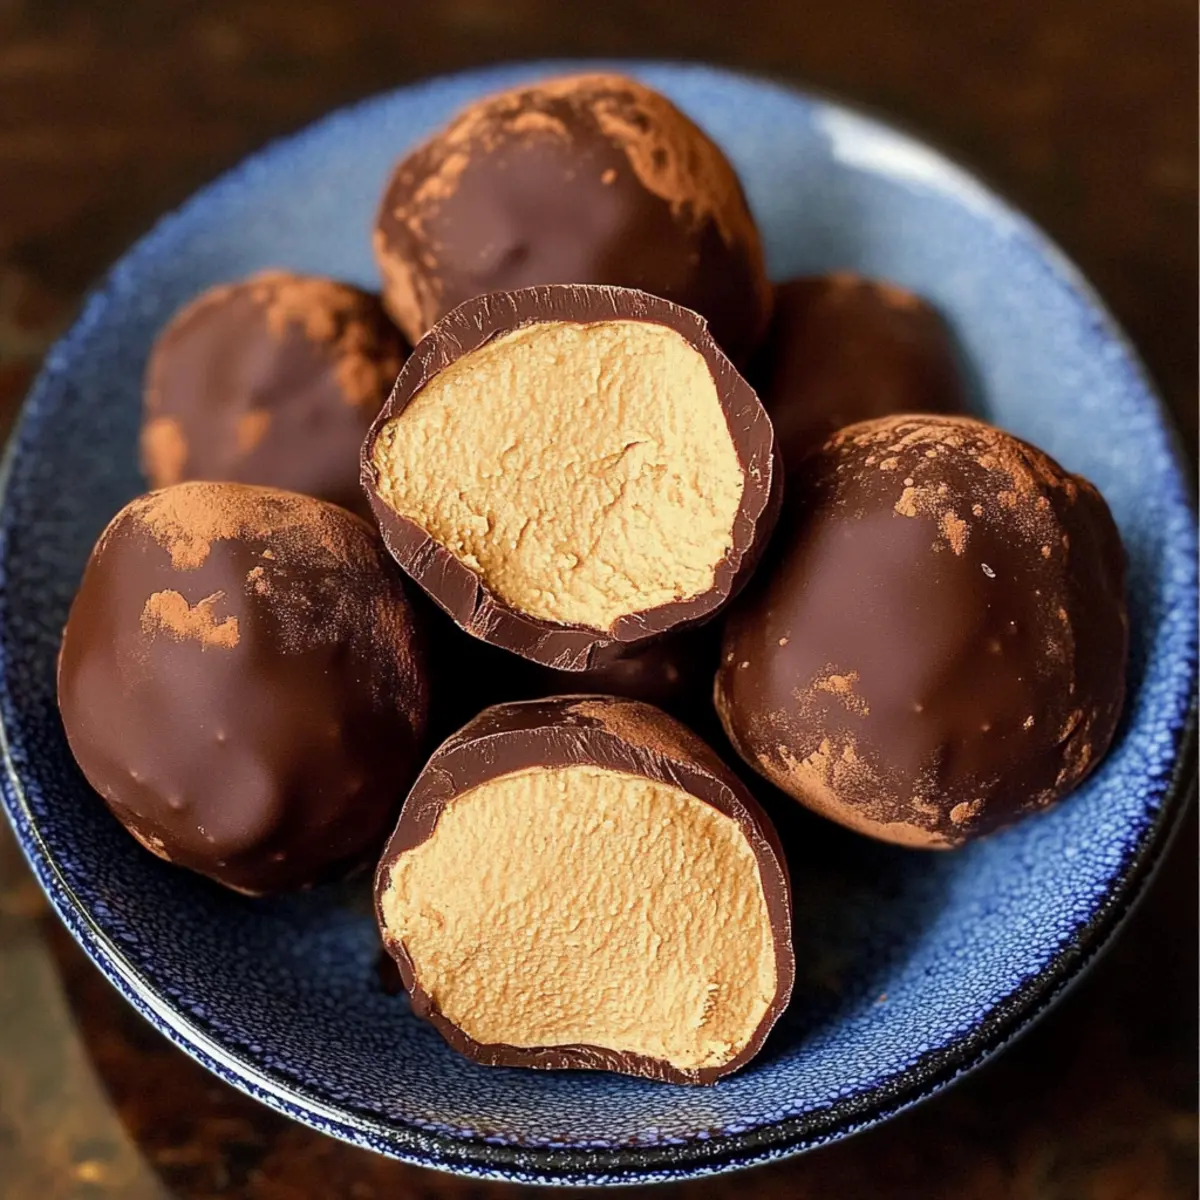
As I was whipping up a quick dessert last weekend, I stumbled upon a simple truth: the best treats often come from just a handful of ingredients. That’s exactly how this Peanut Butter Dessert Sauce came to life! With only four ingredients and about five minutes of my time, this creamy, dreamy sauce became the star of my dessert table. Not only does it drizzle effortlessly over ice cream, pancakes, and cheesecakes, but its rich, nutty flavor also takes any dessert to the next level. Quick to prepare and utterly delightful, this easy 4-ingredient recipe is your ticket to transforming everyday sweets into something special. So, what will you be pouring this luscious goodness over?

Why Is This Sauce So Irresistible?

Simplicity is key: With just four ingredients, you can whip up this Peanut Butter Dessert Sauce in a flash, making it perfect for busy weeknights or last-minute gatherings. Versatile delight: Drizzle it over ice cream, pancakes, or even Mini Tropical Pavlovas for a tropical twist! Decadent flavor ensures each bite is a creamy, nutty sensation that brings smiles to everyone. Crowd-pleaser status is guaranteed, as this sauce transforms any dessert into a showstopper. Plus, it’s an excellent way to elevate simple treats without the fuss. Why settle for fast food when you can create something this delightful at home?

Peanut Butter Dessert Sauce Ingredients

For the Sauce

  • Creamy Peanut Butter – This ingredient gives the sauce its rich, nutty flavor; stick to brands like Skippy or Jif for the best texture.
  • Sweetened Condensed Milk – Essential for sweetness and achieving that creamy consistency; it forms the base of your sauce.
  • Whole Milk – This helps adjust the pouring consistency; swap it out with almond milk or oat milk based on your preference.
  • Vanilla Extract – A must-have for depth of flavor, bringing the classic dessert taste to life in this peanut butter dessert sauce.

Step‑by‑Step Instructions for Peanut Butter Dessert Sauce

Step 1: Combine Ingredients
In a small saucepan, scoop in 1 cup of creamy peanut butter and pour in 1 can of sweetened condensed milk. Set the heat to low and gently stir the mixture using a wooden spoon. Keep an eye on it as it warms and begins to blend together, which should happen in about 3-5 minutes. You’re aiming for a thick, smooth consistency that glistens in the light.

Step 2: Cook and Stir
Continue to stir the peanut butter and condensed milk mixture over low heat. As it cooks, you’ll notice the sauce starting to thicken and become silky. This should take an additional 2-3 minutes. Make sure to stir constantly to prevent any sticking or burning. The perfect Peanut Butter Dessert Sauce should look glossy and luscious now!

Step 3: Add Milk
Once your sauce has thickened beautifully, gradually whisk in 1/4 cup of whole milk. This will help achieve your desired pouring consistency, making it ideal for drizzling. Keep the pan on low heat and whisk until the milk is fully incorporated, which will take about 1-2 minutes. The sauce should now have a creamy, pourable texture, ready for your favorite desserts!

Step 4: Incorporate Vanilla
Remove the saucepan from heat and add 1 teaspoon of vanilla extract to your peanut butter dessert sauce. Give it a good stir to combine thoroughly. This step enhances the overall flavor, rounding off the delicious sweetness and nutty notes. The sauce will still be warm and fragrant, perfect for pouring over your desserts!

Step 5: Serve or Store
Drizzle your warm Peanut Butter Dessert Sauce over ice cream, pancakes, or cheesecake, and watch it melt into a dreamy indulgence. If you want to store it, allow it to cool and then transfer it to an airtight container. This sauce can be kept in the refrigerator for up to two weeks. If it thickens too much, simply reheat it gently in the microwave for 20-30 seconds and stir in a splash of milk, if needed.

Expert Tips for Peanut Butter Dessert Sauce

  • Choose the Right Peanut Butter: Use creamy, not natural peanut butter to achieve that smooth, luscious consistency in your peanut butter dessert sauce.

  • Mind the Heat: Avoid high heat during cooking; low and slow ensures the sauce thickens without burning or sticking. Stir continuously for a seamless finish.

  • Adjust Consistency: If your sauce is too thick after cooling, simply reheat it in the microwave for a few seconds and add a splash of milk for a pourable texture.

  • Storage Know-How: Keep your peanut butter dessert sauce in an airtight container in the refrigerator for up to two weeks. It may thicken, so remember to reheat gently before serving.

  • Flavor Enhancements: Experiment with variations by using chocolate peanut butter or adding a pinch of salt for a salted caramel twist; this keeps your dessert versatile and exciting!

Peanut Butter Dessert Sauce Variations

Feel free to get creative and customize your Peanut Butter Dessert Sauce to suit your taste buds.

  • Almond Butter: Swap creamy peanut butter with almond butter for a delightful twist. This nutty alternative brings a subtle richness that’s equally satisfying.

  • Chocolate Peanut Butter: Use chocolate peanut butter for an indulgent, sweet sauce that tastes like dessert in a jar. Your chocolate-loving friends will be thanking you—each drizzle is pure bliss!

  • Salted Version: Add a pinch of sea salt for a salted variation that beautifully balances the sweetness. It’s like a gourmet touch that elevates your sauce to a whole new level.

  • Coconut Milk: Swap whole milk with coconut milk for a dairy-free option. This substitution adds a tropical flair while keeping your sauce creamy and luscious.

  • Spicy Kick: Mix in a pinch of cayenne pepper for a surprisingly delicious spicy peanut butter dessert sauce. It’s an exciting twist that packs a flavor punch for brave dessert enthusiasts!

  • Maple Syrup: Instead of sweetened condensed milk, try using maple syrup to bring a rich, earthy sweetness. This variation pairs beautifully with pancakes and waffles, lending a cozy breakfast vibe.

  • Nutty Crunch: Fold in some chopped nuts such as peanuts or pecans for added texture. The crunchiness complements the creamy sauce beautifully, and it’s a simple way to elevate every dessert.

  • Drizzle Over Delights: Pour over Shrimp Tacos Zesty for a surprising twist! The sauce can transform other savory dishes, making it a versatile addition to your culinary adventures.

With these variations, the possibilities are endless, ensuring your dessert experience is anything but ordinary!

Make Ahead Options

These Peanut Butter Dessert Sauce delights are perfect for meal prep enthusiasts! You can prepare the sauce up to 2 weeks in advance and store it in an airtight container in the refrigerator. Simply follow the initial steps of combining creamy peanut butter and sweetened condensed milk, then allow it to cool completely before transferring it to your storage container. This will help maintain its smooth, creamy texture. When you're ready to serve, reheat the sauce gently in the microwave for 20-30 seconds, and whisk in a splash of whole milk to achieve the desired consistency. This way, you can enjoy homemade indulgence with minimal effort on busy weeknights!

How to Store and Freeze Peanut Butter Dessert Sauce

Fridge: Store your peanut butter dessert sauce in an airtight container for up to 2 weeks. It will thicken as it cools, so remember this when you’re ready to enjoy it again.

Freezer: If you want to keep it longer, freeze the sauce in ice cube trays or small containers for up to 3 months. Allow it to defrost overnight in the fridge before reheating.

Reheating: To enjoy, reheat the sauce in the microwave for 20-30 seconds; stir in a splash of milk as needed to bring it back to a pourable consistency.

Room Temperature: For best flavor, serve the sauce warm over your favorite desserts. If it cools down too much, a quick fidget in the microwave will set it right.

What to Serve with Quick & Easy 4-Ingredient Peanut Butter Dessert Sauce

Transform your desserts into unforgettable delights with the perfect accompaniment to this luscious sauce.

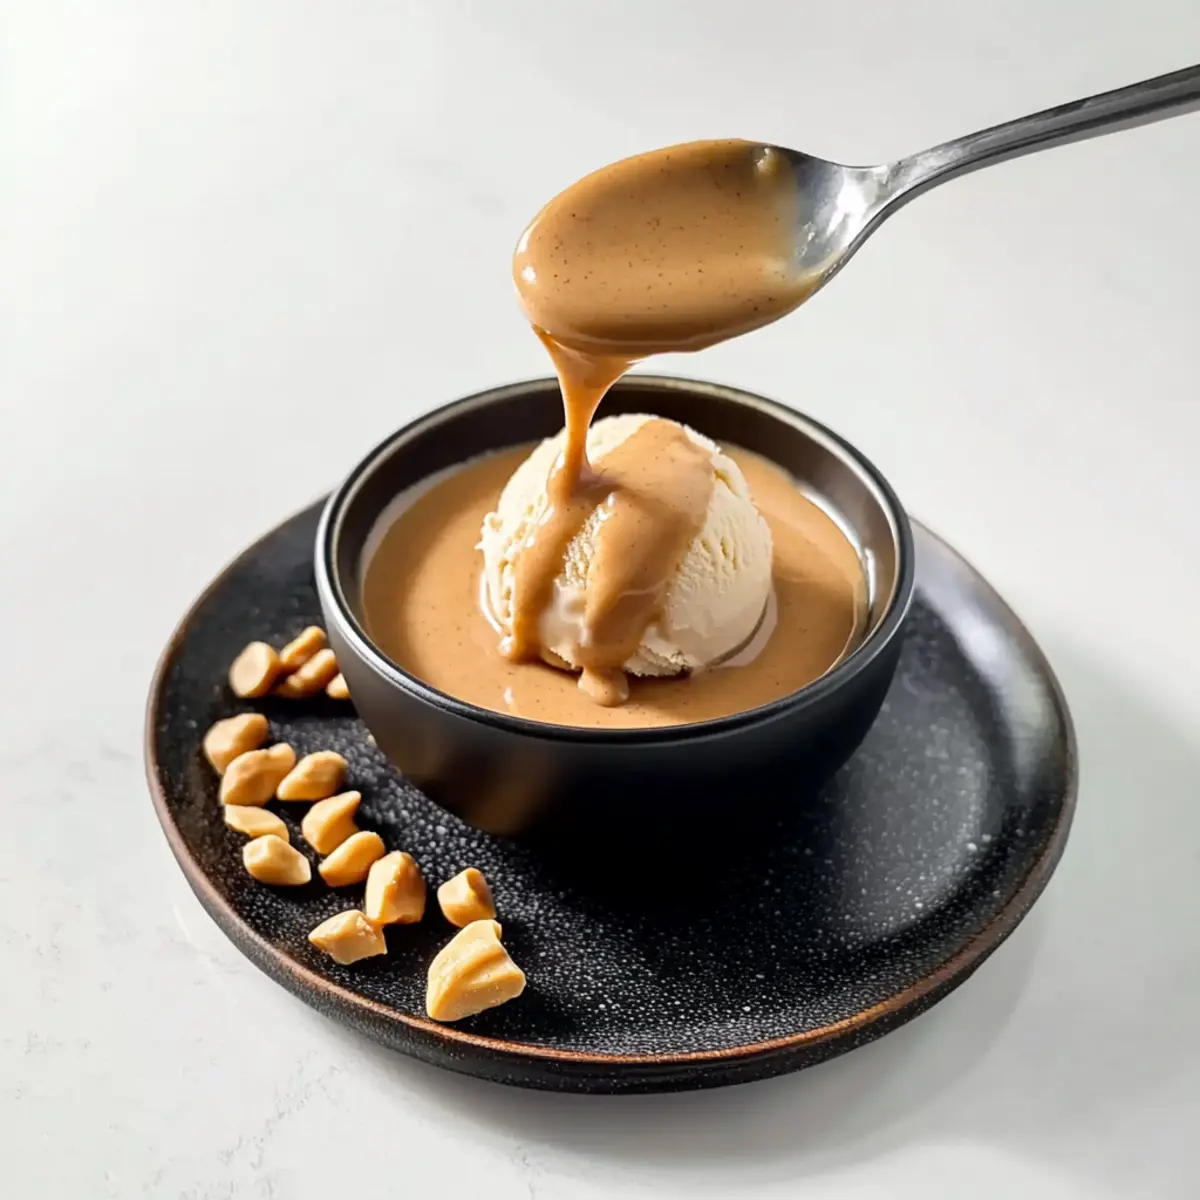
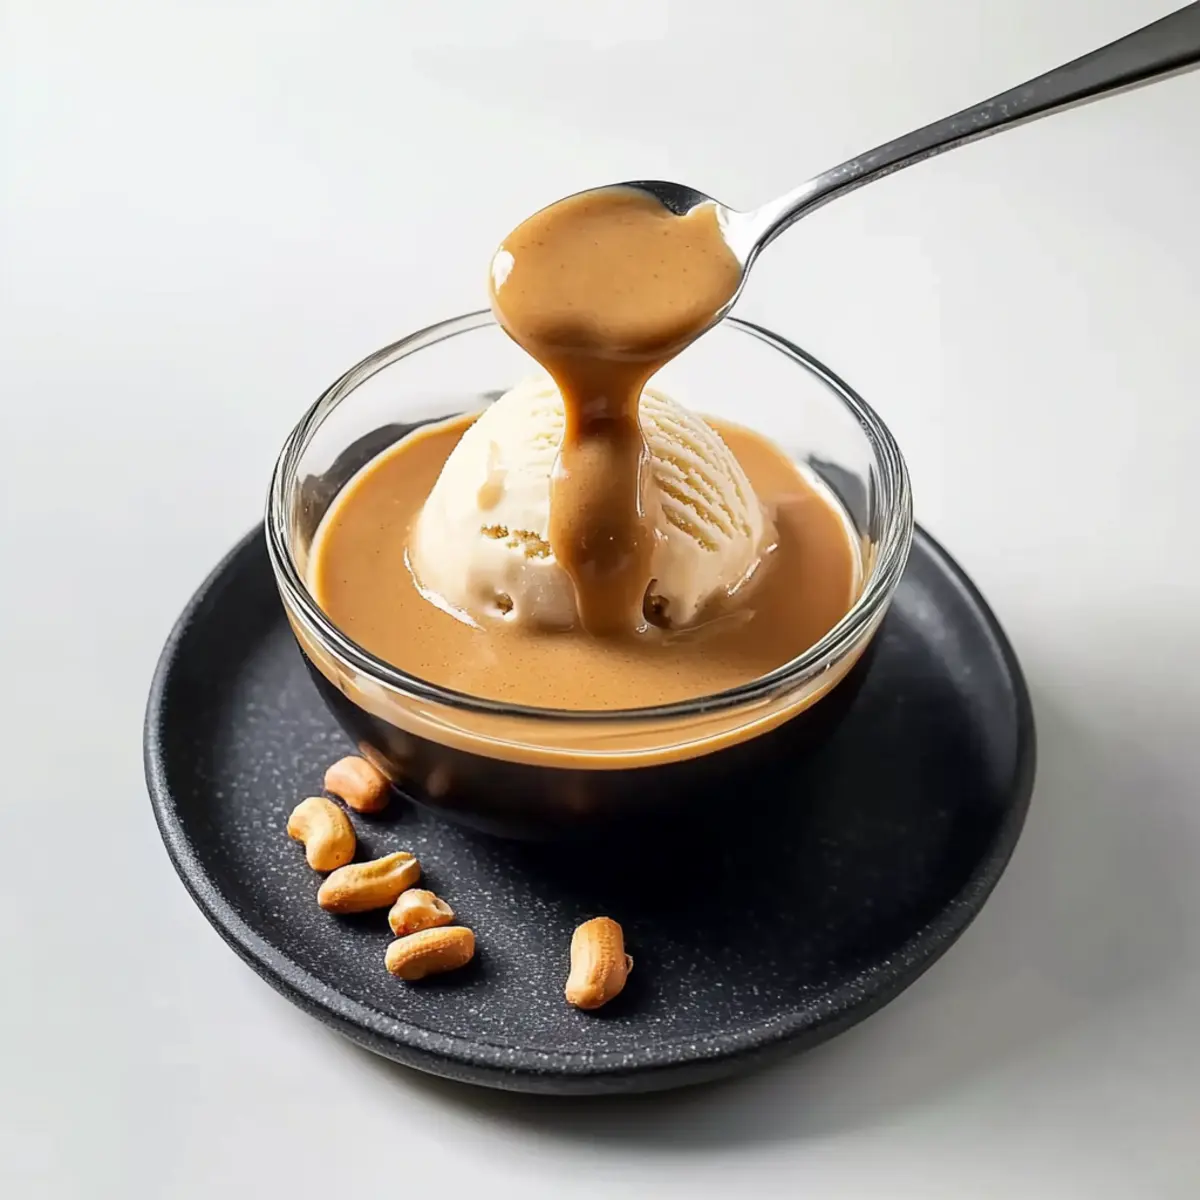
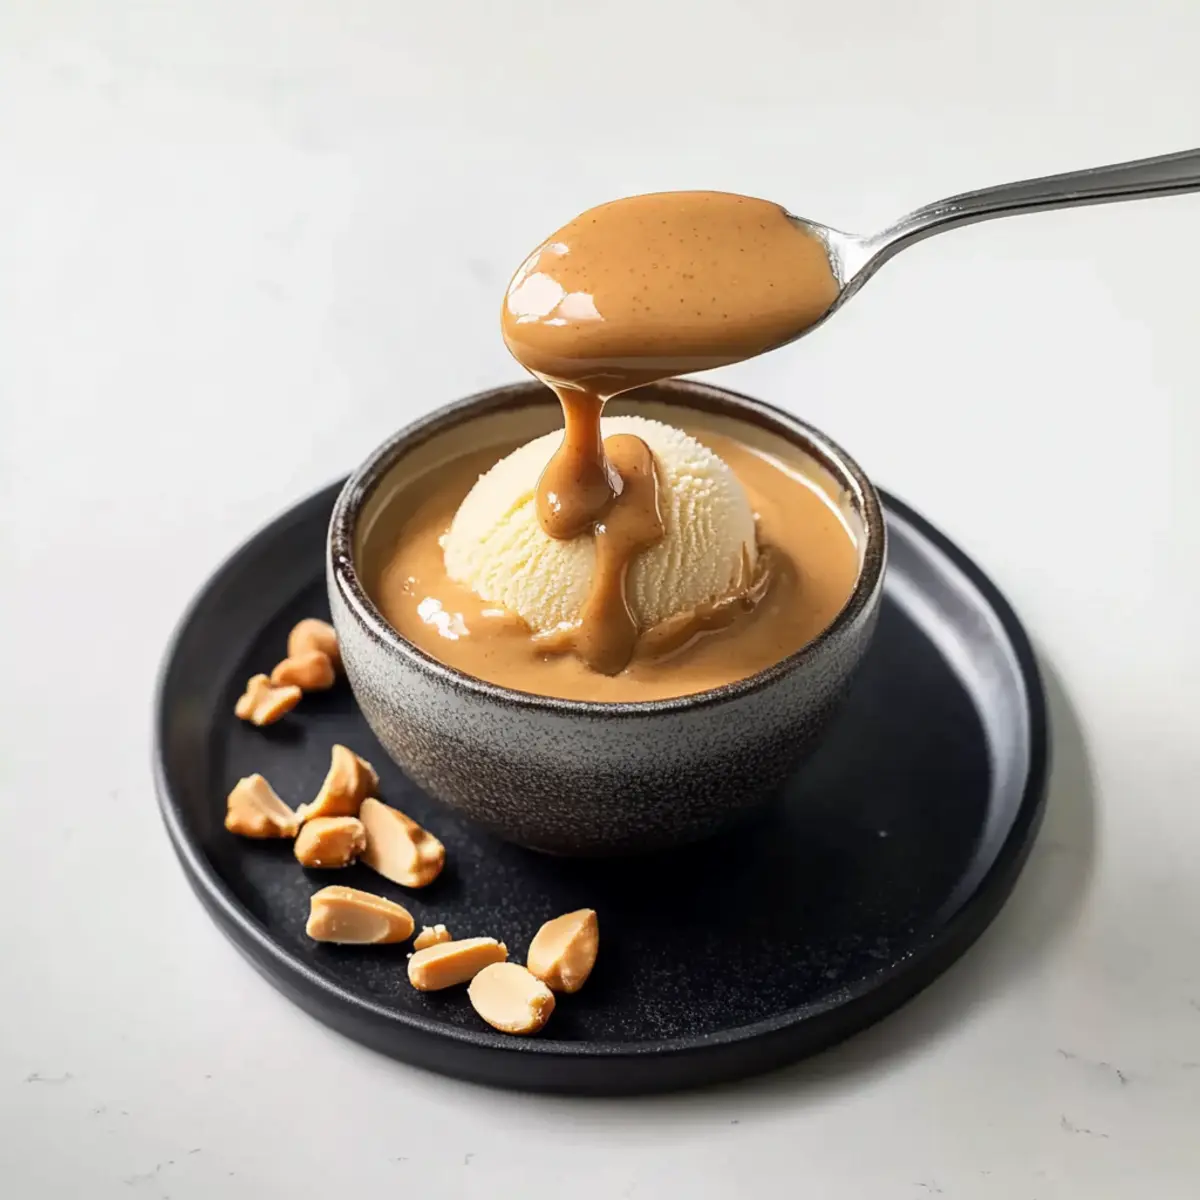
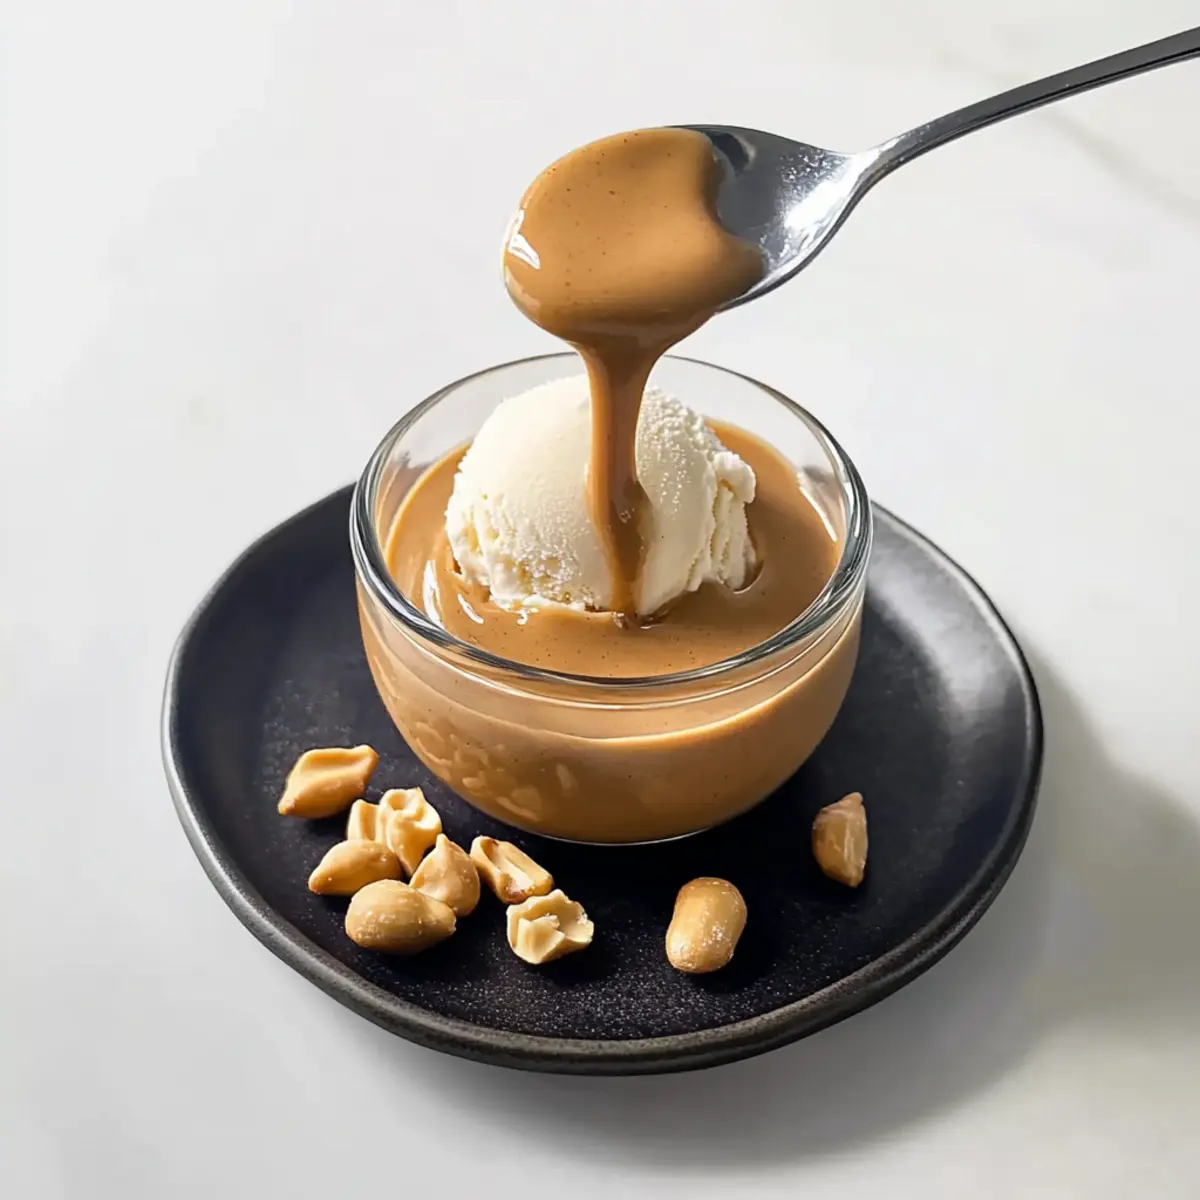
  • Creamy Vanilla Ice Cream: The cool creaminess contrasts beautifully with the warm peanut butter sauce, creating an irresistible flavor pairing.
  • Fluffy Pancakes: Drizzling this sauce over fluffy pancakes turns a simple breakfast into a delightful brunch that everyone will love. The warm, nutty notes will elevate each bite!
  • Cheesecake Slices: The rich, creamy texture of cheesecake harmonizes flawlessly with the nutty sweetness of this sauce, turning a classic dessert into an indulgent treat.
  • Fresh Strawberries: Juicy strawberries provide a refreshing burst, and when paired with peanut butter sauce, they become an exquisite balance of flavors. This pairing adds a fresh twist to your dessert spread!
  • Chocolate Brownies: Warm brownies soaked in this sauce amplify the decadence, combining rich chocolate and nutty flavors in every mouthwatering bite.
  • Waffles: Perfect for lazy mornings, topping waffles with this sauce creates a warm, satisfying treat that’s sure to delight the whole family. Add sliced bananas for an even sweeter experience!
  • Milkshakes: Blend vanilla ice cream and milk with this sauce for a creamy milkshake that’s a dream come true for peanut butter lovers.
  • Banana Bread Pudding: Bake up a comforting banana bread pudding and drizzle this irresistible sauce on top for a sensational twist. It’s the kind of dessert that feels like a warm hug!

Peanut Butter Dessert Sauce Recipe FAQs

How do I choose the right peanut butter for this recipe?
Absolutely! For the best texture and flavor in your Peanut Butter Dessert Sauce, opt for creamy peanut butter rather than natural. Brands like Skippy or Jif work wonderfully because they provide a smooth consistency that blends seamlessly with the sweetened condensed milk, creating that deliciously luscious sauce you desire.

How should I store the peanut butter dessert sauce?
Store your peanut butter dessert sauce in an airtight container in the refrigerator for up to 2 weeks. It will thicken as it cools, so don't worry if it feels a bit denser after chilling. Just remember to reheat it gently before serving; you can pop it in the microwave for 20-30 seconds, stirring in a splash of milk to help return its pourable consistency.

Can I freeze this sauce for later use?
Very! Freezing your peanut butter dessert sauce is a great option. Pour the sauce into ice cube trays or small, freezer-safe containers, and it will keep well in the freezer for up to 3 months. When you're ready to enjoy it, simply let it thaw overnight in the fridge. Reheat it gently in the microwave, adding a bit of milk if it needs thinning out.

What should I do if my sauce is too thick?
Don't worry; this can happen! If your peanut butter dessert sauce thickens too much after cooling, reheat it in the microwave for 20-30 seconds. Stir it well, and if it’s still not pourable, just add a splash of milk and stir until you achieve your desired consistency. This should get it back to that dreamy texture!

Are there any dietary considerations I should be aware of?
I recommend always checking for allergies! This sauce contains peanuts and dairy, which can be problematic for some individuals. If you’re catering to those with dietary restrictions, consider using almond butter for a nut-free option and swapping the whole milk with plant-based alternatives like coconut or oat milk.

Can I enhance the flavor of the peanut butter dessert sauce?
Absolutely! You can mix things up by using flavored peanut butter, like chocolate peanut butter. For an extra layer of taste, a pinch of salt or a splash of coffee extract can elevate it further. Just remember, exploring flavors keeps your dessert experience interesting and fun!

Peanut Butter Dessert Sauce

Irresistibly Creamy Peanut Butter Dessert Sauce in 5 Minutes

This Peanut Butter Dessert Sauce is a quick and easy 4-ingredient recipe, perfect for drizzling over desserts.
Print Recipe Pin Recipe
Prep Time 5 minutes mins
Cook Time 8 minutes mins
Total Time 13 minutes mins
Servings: 4 servings
Course: Dessert
Cuisine: American
Calories: 120
Ingredients Equipment Method Nutrition Notes

Ingredients
  

For the Sauce
  • 1 cup Creamy Peanut Butter Stick to brands like Skippy or Jif for the best texture.
  • 1 can Sweetened Condensed Milk Essential for sweetness and achieving that creamy consistency.
  • 1/4 cup Whole Milk Can be swapped with almond milk or oat milk.
  • 1 teaspoon Vanilla Extract Enhances overall flavor.

Equipment

  • small saucepan

Method
 

Step-by-Step Instructions for Peanut Butter Dessert Sauce
  1. In a small saucepan, scoop in 1 cup of creamy peanut butter and pour in 1 can of sweetened condensed milk. Set the heat to low and gently stir the mixture using a wooden spoon for 3-5 minutes.
  2. Continue to stir the mixture over low heat, noticing the sauce thickening and becoming silky for an additional 2-3 minutes.
  3. Gradually whisk in 1/4 cup of whole milk while keeping the pan on low heat, whisk until fully incorporated for about 1-2 minutes.
  4. Remove from heat and add 1 teaspoon of vanilla extract, stir to combine thoroughly.
  5. Drizzle the warm sauce over desserts and store in an airtight container in the fridge for up to two weeks.

Nutrition

Serving: 30gramsCalories: 120kcalCarbohydrates: 15gProtein: 3gFat: 6gSaturated Fat: 1.5gPolyunsaturated Fat: 1gMonounsaturated Fat: 3.5gCholesterol: 5mgSodium: 90mgPotassium: 100mgSugar: 10gVitamin A: 1IUCalcium: 30mgIron: 0.5mg

Notes

Keep sauce in an airtight container; reheat gently if it thickens.

Tried this recipe?

Let us know how it was!

Quick and Easy Chimichurri Sauce for Flavor-Packed Dishes

May 21, 2026 by Grace Snow Leave a Comment

The kitchen was alive with the vibrant scents of fresh herbs as I whipped up my go-to condiment, Quick and Easy Chimichurri Sauce. This classic Argentinian sauce is a culinary gem that transforms ordinary dishes into extraordinary meals with just a handful of ingredients. Within five minutes, you’ll have a zesty, herb-packed sauce ready to dip freshly grilled meats, drizzle over roasted veggies, or toss into salads. Not only is it effortless to prepare, but this sauce is also a crowd-pleaser, appealing to everyone at your table. Plus, it's an excellent way to use up those herbs that are just begging to be celebrated. Curious to know how you can elevate your next meal with this fresh concoction? Let's dive into the recipe!

Why is Chimichurri Sauce So Popular?

Versatile Flavor Boost: This quick and easy chimichurri sauce elevates everything from grilled chicken to roasted vegetables, making your dishes unforgettable.

Fresh Ingredients: Bursting with vibrant herbs, garlic, and zesty vinegar, it’s a flavor-packed addition that brightens any meal.

Speedy Preparation: In just 5 minutes, you can whip up this delightful sauce—perfect for those busy nights when you need a tasty lift without the fuss.

Herb Utilization: It’s an ideal recipe to use up your leftover herbs, turning potential waste into a delicious condiment that enhances your cooking creativity.

Crowd-Pleasing Appeal: Whether you're hosting a dinner party or enjoying a casual meal, this chimichurri will impress your guests and family alike—just like my favorite Blue Cheese Pizza!

Quick and Easy Chimichurri Sauce Ingredients

• Perfect for vibrant flavor!

For the Sauce

  • Fresh Parsley – The cornerstone of chimichurri, offering a herby essence; substitute curly parsley if needed.
  • Fresh Cilantro – Adds a refreshing, citrusy aroma; if you're not a fan, just increase the parsley.
  • Garlic – The pungent kick that makes every bite exciting; opt for fresh for the best flavor impact.
  • Olive Oil – Provides a smooth consistency and carries the sauce's flavors beautifully; use extra virgin for richness.
  • Red Wine Vinegar – Brings acidity and brightness; white wine vinegar can work for a softer touch.
  • Dried Oregano – Infuses an earthy tone; if you have fresh at hand, it will work splendidly too.
  • Red Pepper Flakes – Adds a hint of heat; feel free to adjust based on your spice tolerance.
  • Salt & Black Pepper – Essential for enhancing taste; tweak according to your preferences.
  • Fresh Lemon Juice – Lifts the overall flavor with added brightness; adjust to taste for extra zing.

Now, with these ingredients lined up, you’re just a few simple steps away from your own homemade quick and easy chimichurri sauce that can elevate any dish!

Step‑by‑Step Instructions for Quick and Easy Chimichurri Sauce

Step 1: Prepare the Herbs
Start by rinsing a generous bunch of fresh parsley and cilantro under cold water to remove any dirt or grit. Gently pat them dry with a clean kitchen towel or paper towels. Next, remove the thick stems, as they can be tough; use only the tender parts of the herbs for a vibrant and flavorful chimichurri sauce.

Step 2: Blend Ingredients
In a food processor, combine the cleaned parsley, cilantro, a few cloves of fresh garlic, dried oregano, red pepper flakes, salt, and black pepper. Pulse the mixture until it's roughly chopped, allowing the colors and aromas to blend together. Do this for about 15-20 seconds, ensuring not to over-process—the goal is a fresh, herby mixture with some texture.

Step 3: Add Liquids
Pour in half a cup of extra virgin olive oil, 2 tablespoons of red wine vinegar, and the juice of half a fresh lemon into the food processor. Pulse again for another 15-20 seconds until the ingredients are well combined but still maintain a chunky consistency. This step is crucial for achieving the ideal ratios in your quick and easy chimichurri sauce.

Step 4: Adjust Seasoning
After blending, taste your chimichurri sauce to see if it meets your preference. If desired, add more salt, pepper, or a splash of vinegar for extra acidity. Pulse once more for about 10 seconds to mix in any adjustments. Make sure the flavor profile is vibrant and balanced, as it should be bursting with fresh herb goodness.

Step 5: Serve or Store
Transfer your vibrant chimichurri sauce to a serving bowl or a jar with a tight-fitting lid. You can use it immediately for a delicious topping or dipping sauce, or refrigerate it for up to a week. Letting the sauce sit for a couple of hours in the fridge enhances the flavors, making it even more irresistible!

What to Serve with Quick and Easy Chimichurri Sauce

Elevate your mealtime experience by pairing this vibrant sauce with delicious dishes that complement its fresh, zesty flavors.

  • Grilled Steak: The bold flavor of a perfectly grilled steak marries beautifully with chimichurri, enhancing each bite's juiciness and depth.
  • Roasted Vegetables: Drizzling roasted bell peppers, zucchini, and squash with chimichurri brings a fresh contrast, lifting their earthy flavors.
  • Tossed Salads: A splash of chimichurri over greens adds a vibrant kick, turning a simple salad into an aromatic feast for the senses.
  • Chicken Skewers: Grilled chicken skewers dipped in chimichurri create a delightful combination of spice and brightness that will captivate your palate.
  • Fish Tacos: Use chimichurri as a zesty dressing for fish tacos, enhancing the fresh fish with a burst of herbaceous goodness.
  • Crusty Bread: Serve alongside warm, crusty bread for dipping, allowing the sauce's rich herbal notes to soak into each morsel.
  • Quinoa Bowl: Mixed with grains like quinoa, chimichurri adds an exciting layer of flavor, creating a healthy and satisfying meal option.
  • Sangria: Enjoy a glass of refreshing Sangria to balance the sauce's aromatic herbs with a touch of fruity sweetness, making for a well-rounded dining experience.

Expert Tips for Quick and Easy Chimichurri Sauce

  • Chunky Texture: Avoid over-processing the sauce to preserve its delightful chunky consistency. Chimichurri should have a fresh, rustic look rather than being completely pureed.

  • Herb Variations: Don’t hesitate to mix in different herbs! Try adding fresh basil or mint for a unique twist on your quick and easy chimichurri sauce.

  • Adjust to Taste: Always taste and adjust seasoning before serving. A little more salt or a splash of vinegar can elevate the overall flavor balance perfectly.

  • Marinating Magic: For a deeper flavor, let your chimichurri sit for at least an hour before serving. This allows the fresh herbs and spices to meld beautifully.

  • Storage Success: Store in an airtight container in the fridge. The flavors will improve after a couple of hours, and your sauce will last up to a week!

Quick and Easy Chimichurri Sauce Variations

Customize your chimichurri sauce to suit your taste buds and culinary adventures!

  • Basil Twist: Swap cilantro for fresh basil for a slightly sweeter, aromatic flavor profile. It’s delightful and refreshing!

  • Minty Fresh: Add a tablespoon of fresh mint to introduce a cooling note that pairs beautifully with grilled meats. Your guests will love the surprise!

  • Apple Cider Vinegar: Substitute red wine vinegar with apple cider vinegar for a slightly sweeter tang. This twist adds depth while keeping the freshness intact.

  • Heat It Up: For an extra kick, increase the red pepper flakes or toss in a diced jalapeño. Adjust to your heat preference!

  • Lemon Herb Delight: Boost the brightness by adding more lemon juice or zest. The zing will elevate the herbaceous flavors and brighten your dishes.

  • Nutty Addition: Blend in a handful of toasted walnuts or almonds for a richer texture and nutty flavor, perfect for spreading on bread or grilled veggies.

  • Creamy Style: Mix in a dollop of Greek yogurt or sour cream for a creamy chimichurri that works wonderfully as a dip. It’s a delightful twist that adds creaminess without losing the essence!

  • Herb Medley: Combine parsley, cilantro, and arugula for a peppery finish. This burst of greens will add an unexpected but delightful layer of flavor.

Explore these variations and find your favorite way to enjoy this quick and easy chimichurri sauce! It's a fantastic addition to dishes like my delicious Corn Fried Egg or even a zesty topping for grilled shrimp with Pan Fried Mayo.

Storage Tips for Quick and Easy Chimichurri Sauce

  • Fridge: Store your chimichurri sauce in an airtight container in the refrigerator for up to one week. The flavors actually improve as it sits!
  • Freezer: For longer storage, freeze the chimichurri sauce in ice cube trays. Once frozen, transfer the cubes to a zip-top bag and keep for up to 3 months.
  • Thawing: To use frozen chimichurri, simply thaw cubes in the fridge overnight or place them in warm water until they soften.
  • Reheating: When ready to enjoy your chimichurri, give it a gentle stir after thawing to revive its fresh taste. This quick and easy chimichurri sauce is perfect for enhancing all your favorite dishes!

Make Ahead Options

These Quick and Easy Chimichurri Sauce options are perfect for busy home cooks looking to save time during the week! You can prepare the entire sauce up to 3 days in advance by blending all the ingredients and storing the mixture in an airtight container in the fridge. This not only saves you time but also allows the flavors to meld beautifully. Make sure to give it a gentle stir before serving, as the oil may separate slightly when chilled. For added freshness, you might want to mix in a splash of lemon juice just before serving for a zesty kick! Enjoy having this vibrant sauce ready to elevate your meals any night of the week.

Quick and Easy Chimichurri Sauce Recipe FAQs

How do I choose the right herbs for chimichurri?
Absolutely! When selecting herbs for your chimichurri, look for fresh, vibrant parsley and cilantro. The parsley should appear bright green without any dark spots, and the cilantro should be fragrant. If you can only find curly parsley, it can work in a pinch, but flat-leaf has the best flavor for this sauce.

What’s the best way to store chimichurri sauce?
You can store your chimichurri sauce in an airtight container in the refrigerator for up to one week. Just ensure it’s sealed tightly to maintain its vibrant flavors. The sauce actually tastes better after a few hours in the fridge, as the ingredients meld beautifully together!

Can I freeze chimichurri sauce?
Yes, absolutely! To freeze your chimichurri sauce, pour it into ice cube trays and freeze until solid. Once frozen, transfer the cubes to a zip-lock bag for easier storage. These cubes can last up to 3 months in the freezer. When you're ready to use it, simply thaw the desired number of cubes in the fridge overnight or in warm water for a quicker method.

What should I do if my chimichurri is too bitter?
If your chimichurri sauce tastes too bitter, it may be from the herbs. To balance this out, you can add a bit more olive oil or a splash of red wine vinegar to brighten the flavors. Additionally, incorporating a squeeze of lemon juice can help cut through bitterness and enhance the freshness of your sauce.

Is chimichurri safe for pets?
Very! While chimichurri sauce contains fresh herbs and garlic, which can be harmful in large amounts, the small quantity used in the sauce typically won’t pose a risk to pets. However, it’s always a good idea to consult your vet if you have concerns, especially if your pet has any known sensitivities or health issues.

Quick and Easy Chimichurri Sauce

Quick and Easy Chimichurri Sauce for Flavor-Packed Dishes

Quick and easy chimichurri sauce transforms ordinary dishes into extraordinary meals with fresh herbs and zesty vinegar.
Print Recipe Pin Recipe
Prep Time 5 minutes mins
Total Time 5 minutes mins
Servings: 1 cup
Course: Appetizers
Cuisine: Argentinian
Calories: 200
Ingredients Equipment Method Nutrition Notes

Ingredients
  

For the Sauce
  • 1 cup Fresh Parsley Substitute curly parsley if needed.
  • 1/2 cup Fresh Cilantro Increase parsley if not a fan.
  • 3 cloves Garlic Use fresh for best flavor impact.
  • 1/2 cup Olive Oil Extra virgin recommended for richness.
  • 2 tablespoons Red Wine Vinegar White wine vinegar can be used.
  • 1 teaspoon Dried Oregano Fresh can also be used.
  • 1/2 teaspoon Red Pepper Flakes Adjust based on spice tolerance.
  • to taste Salt Enhance taste as needed.
  • to taste Black Pepper Enhance taste as needed.
  • 1 tablespoon Fresh Lemon Juice Adjust to taste for extra zing.

Equipment

  • Food Processor

Method
 

Step-by-Step Instructions
  1. Rinse fresh parsley and cilantro under cold water and pat dry. Remove the thick stems.
  2. In a food processor, combine parsley, cilantro, garlic, oregano, red pepper flakes, salt, and black pepper. Pulse until roughly chopped.
  3. Pour olive oil, red wine vinegar, and lemon juice into the food processor. Pulse again until well combined but chunky.
  4. Taste and adjust seasoning with salt, pepper, or vinegar as needed. Pulse briefly to mix adjustments.
  5. Transfer to a serving bowl or jar. Use immediately or refrigerate for up to a week.

Nutrition

Serving: 1cupCalories: 200kcalCarbohydrates: 4gProtein: 1gFat: 20gSaturated Fat: 3gPolyunsaturated Fat: 2gMonounsaturated Fat: 15gSodium: 50mgPotassium: 200mgVitamin A: 20IUVitamin C: 10mgCalcium: 2mgIron: 2mg

Notes

Letting the sauce sit for a couple of hours enhances the flavors. Store in an airtight container.

Tried this recipe?

Let us know how it was!

Refreshing Raita Recipe – Your Perfect Cooling Dip for Spicy Meals

May 21, 2026 by Grace Snow Leave a Comment

The sizzling aroma of your favorite Indian dishes is in the air, and what’s missing? The cool, refreshing wave of Easy Cucumber Raita! This creamy yogurt dip is a lovely sidekick, specifically crafted to complement spicy meals like Tandoori chicken or biryani. Not only is this raita quick to whip up, but it also brings a delightful crunch from fresh cucumber, making it a must-have in your kitchen arsenal. Perfect for those warm days when you need a touch of refreshment, this versatile condiment can elevate any meal while remaining incredibly simple to prepare. So, are you ready to dive into the world of flavors with this delightful raita recipe?

Why Is Cucumber Raita a Must-Try?

Cooling, Creamy Delight: Cucumber Raita offers a refreshing contrast to spicy dishes, enhancing your dining experience.
Quick and Easy: This recipe requires minimal ingredients and can be made in just minutes—perfect for busy weeknights or unexpected guests.
Versatile Pairing: Whether with Tandoori chicken or grilled veggies, it complements various meals beautifully. Consider trying it with your favorite starch, like naan, for a satisfying combo!
Healthy Indulgence: With just 31 calories per serving, it's a guilt-free dip that adds flavor without the calories.
Flavor Variations: Customize your raita! Add diced tomatoes for a colorful twist or mix in some grated carrot for sweetness.

Raita Ingredients

• You’ll love how simple it is!

For the Base

  • Whole Milk Plain Yogurt – Adds creaminess and tangy flavor; Greek yogurt can be used for a thicker consistency.
  • Cucumber, finely diced – Provides a refreshing crunch; use English cucumber to minimize seeds and excess water.
  • Minced Red Onion – Adds mild sweetness and sharpness; can be omitted for a milder flavor.
  • Lemon Juice – Offers acidity and brightness to balance the flavors; substitute with lime juice if desired.

For the Freshness

  • Fresh Mint Leaves, chopped – Delivers a cooling herbal note; fresh dill can also be used for a different flavor profile.
  • Fresh Cilantro, chopped – Adds earthy tones and freshness; optional to omit if cilantro is not preferred.

For the Spice

  • Ground Cumin – Provides warm, nutty spice complexity; substitute with ground coriander for a different flavor.
  • Coriander – Enhances the overall flavor profile; fresh coriander leaves can be used instead.

For Seasoning

  • Salt – Balances flavors and enhances taste; adjust to taste.
  • Pepper – Adds a mild kick; adjust quantity according to your preference.

This Easy Cucumber Raita recipe is not just a dip; it's an experience that cools and complements all your spicy meals beautifully!

Step‑by‑Step Instructions for Easy Cucumber Raita

Step 1: Prepare the Yogurt Base
In a mixing bowl, add 2 cups of whole milk plain yogurt. Using a whisk or spatula, stir the yogurt until it becomes smooth and creamy, about 1–2 minutes. This creamy base is essential for your Easy Cucumber Raita, so make sure there are no lumps before moving to the next step.

Step 2: Add Fresh Ingredients
Finely dice one medium-sized English cucumber and add it to the yogurt mixture. If you’re using red onion, mince about ¼ cup and mix that in too, along with the juice of half a lemon. Ensure the cucumber is well-drained to avoid excess moisture. Stir these ingredients together, creating a refreshing foundation for your raita.

Step 3: Incorporate Herbs and Spices
Chop a handful of fresh mint leaves and cilantro, then sprinkle them into the bowl. Also, add ½ teaspoon of ground cumin and a pinch of salt and pepper to taste. These spices will elevate the flavors of your Easy Cucumber Raita, providing that delightful contrast to spicy dishes. Stir all the ingredients gently until well combined.

Step 4: Mix Thoroughly
Continue to mix the raita until all the components are evenly distributed and the colors are vibrant. Aim for a uniform texture, where the yogurt is well-blended with the cucumber and herbs. This step ensures each bite of your Easy Cucumber Raita packs a punch of flavor and freshness.

Step 5: Chill and Meld Flavors
Cover the mixing bowl tightly with plastic wrap or a lid and refrigerate the raita for at least 30 minutes. This chilling time allows the flavors to meld beautifully, enhancing your raita's refreshing qualities. The longer it sits, the better it will taste, so don’t rush this step!

Step 6: Serve and Enjoy
Once chilled, give your Easy Cucumber Raita a quick stir to revive the texture before serving. Spoon it into a serving bowl and garnish with additional chopped mint or cucumber if desired. This creamy dip is best enjoyed cold and should be consumed within 4–5 days for optimal freshness.

What to Serve with Easy Cucumber Raita?

Elevate your dining experience by pairing this refreshing dip with mouthwatering sides that complement its coolness and enhance your meal.

  • Spicy Tandoori Chicken: The fiery, smoky flavors beautifully contrast the cooling raita, making each bite a delightful experience.
  • Fluffy Basmati Rice: This fragrant rice provides a perfect neutral base that harmonizes with the raita, soaking up its creamy goodness.
  • Grilled Veggie Skewers: Charred vegetables add a smoky element, creating a fresh and savory balance with the vibrant flavors of the raita.
  • Crispy Naan Bread: Soften your palate with warm, pillowy naan that’s perfect for dipping into the raita, adding a comforting touch to your meal.
  • Chickpea Salad: A protein-packed salad with crunch and brightness enhances the raita's refreshing notes, ensuring a balanced dish.
  • Mint Lemonade: This cool, refreshing drink echoes the raita's minty profile, making it a perfect match for a hot summer day.
  • Mango Lassi: A sweetened yogurt drink that offers tropical notes, perfectly balancing the spice of your meal and echoing the yogurt's creamiest depths.
  • Pineapple Chutney: The sweet and tangy fruit accompaniment complements the raita's coolness, providing a delightful contrast to spicy dishes.
  • Rosewater Rice Pudding: End your meal on a sweet note with this creamy dessert, harmonizing the cooling effect of the raita while adding a fragrant finish.

Helpful Tricks for Cucumber Raita

  • Chill Time Matters: Allow the raita to chill for at least 30 minutes before serving. This lets the flavors meld beautifully for maximum refreshment.
  • Cucumber Drainage: Ensure the cucumber is well-drained to avoid excess moisture, which can dilute your raita’s creamy texture.
  • Garnish for Appeal: Reserve some diced cucumber or mint for garnish just before serving. This adds a pop of color and enhances visual appeal.
  • Taste Adjustments: Don’t hesitate to tweak the seasonings. If the raita feels bland, a touch more salt or lemon juice can elevate its flavor beautifully.
  • Customize Your Raita: Experiment with different variations by adding diced tomatoes or grated carrots for added texture and sweetness in your cucumber raita!

How to Store and Freeze Raita

Fridge: Store your Cucumber Raita in an airtight container in the refrigerator. It will keep fresh for up to 4-5 days, ensuring you always have this refreshing dip on hand.

Freezer: While it’s best to enjoy raita fresh, you can freeze it for up to a month. Make sure to store it in a freezer-safe container, leaving space for expansion.

Thawing: To thaw, move the raita to the fridge overnight. Stir well before serving, as some ingredients may separate during freezing.

Serving: For the best taste, serve chilled and give it a quick stir to revive its creamy texture. A sprinkle of fresh herbs can brighten the flavors of your raita!

Make Ahead Options

Preparing Easy Cucumber Raita ahead of time is a wonderful way to save precious moments during busy weeknights! You can prepare all the ingredients up to 24 hours in advance—simply mix the yogurt, diced cucumber, minced red onion, and lemon juice together in a bowl, ensuring you drain the cucumber well to prevent excess moisture. Store the mixture in an airtight container in the refrigerator. When you're ready to serve, stir in the fresh mint, cilantro, cumin, and spices just before serving to maintain their vibrant flavors. Your raita will be just as delicious and refreshing, making it the perfect time-saving addition to your meals!

Raita Variations & Substitutions

Feel free to tailor your raita to suit your taste and dietary needs—your culinary creativity is welcome here!

  • Lactose-Free: Substitute whole milk yogurt with a lactose-free yogurt for a digestive-friendly option.
  • Spicy Kick: Add 1-2 finely chopped green chilies to your raita for a flavor boost and extra heat. This adds a wonderful warmth that contrasts beautifully with the cooling cucumber.
  • Herb Swap: Instead of mint and cilantro, try using fresh dill for a twist that adds a unique flavor profile. The fresh dill will offer an aromatic touch that complements well with the yogurt base.
  • Crunchy Surprise: Mix in some finely chopped bell peppers for added crunch and color. This adds a vibrant twist to the traditional raita, making it even more appealing.
  • Fruit Fusion: Incorporate diced mango for a sweet, tropical twist. This delightful choice brings in sweetness and pairs nicely with spicy dishes.
  • Creamier Base: Use Greek yogurt instead of regular yogurt for an extra-thick consistency that enhances richness. The thickness will keep it creamy and satisfying.
  • Nutty Flavor: Mix in a sprinkle of toasted sesame seeds for a subtle nutty flavor and added texture. Just a sprinkle can elevate the raita to new heights.
  • Citrus Zing: Replace lemon juice with fresh lime juice for a brighter flavor; lime adds an invigorating twist that enhances the dish's freshness.

Experimenting with these substitutions allows you to create your perfect raita that’s just right for you—what will you try first? For more options, consider adding some of your favorite veggies or even a splash of yogurt dressing to explore exciting new flavors!

Easy Cucumber Raita Recipe FAQs

How do I select the best cucumber for my raita?
Absolutely! For the best results, choose an English cucumber, which has fewer seeds and less excess water, making it perfect for a crunchy raita. Look for firm cucumbers that are dark green and free from dark spots or blemishes.

How long can I store Cucumber Raita in the refrigerator?
You can store your Cucumber Raita in an airtight container in the refrigerator for up to 4-5 days. Be sure to give it a quick stir before serving, as the ingredients may separate slightly during storage.

Can I freeze Cucumber Raita?
Yes, you can freeze Cucumber Raita! Just make sure to store it in a freezer-safe container, leaving some space for expansion. It can be frozen for up to a month. To thaw, simply move it to the fridge overnight. Stir it well before serving, as some ingredients may separate during freezing.

Why is my raita watery, and how can I fix it?
Very often, excess moisture from cucumbers can lead to a watery raita. To prevent this, make sure to properly drain the cucumbers before mixing them into the yogurt. If your raita turns out watery, try adding some extra yogurt or thickening it with a bit of chilled, strained Greek yogurt until it reaches your desired consistency.

Is Cucumber Raita safe for vegans or those with dairy allergies?
Indeed! Traditional raita is yogurt-based and not suitable for vegans or those with dairy allergies. However, you can easily make a vegan version by using non-dairy yogurt, such as coconut or almond yogurt. It replicates the creamy texture beautifully and still offers that refreshing flavor!

What can I serve with Cucumber Raita?
Cucumber Raita pairs perfectly with spicy Indian dishes, such as Tandoori chicken or biryani. It's also fantastic alongside grilled meats and vegetables or as a dip for fresh pita or naan. Feel free to get creative—you can also use it as a spread on sandwiches for an extra punch of flavor!

Raita

Refreshing Raita Recipe – Your Perfect Cooling Dip for Spicy Meals

This Easy Cucumber Raita is a delicious, cooling dip perfect for enhancing spicy Indian meals.
Print Recipe Pin Recipe
Prep Time 10 minutes mins
Chill Time 30 minutes mins
Total Time 40 minutes mins
Servings: 4 servings
Course: Salads
Cuisine: Indian
Calories: 31
Ingredients Equipment Method Nutrition Notes

Ingredients
  

For the Base
  • 2 cups Whole Milk Plain Yogurt Greek yogurt can be used for thicker consistency.
  • 1 medium English Cucumber, finely diced Use to minimize seeds and excess water.
  • 0.25 cups Minced Red Onion Can be omitted for milder flavor.
  • 0.5 tablespoons Lemon Juice Substitute with lime juice if desired.
For the Freshness
  • 1 handful Fresh Mint Leaves, chopped Fresh dill can also be used.
  • 1 handful Fresh Cilantro, chopped Optional to omit if cilantro is not preferred.
For the Spice
  • 0.5 teaspoon Ground Cumin Substitute with ground coriander for a different flavor.
  • 1 teaspoon Coriander Fresh coriander leaves can be used instead.
For Seasoning
  • to taste Salt Adjust to taste.
  • to taste Pepper Adjust quantity according to your preference.

Equipment

  • Mixing Bowl
  • Whisk or spatula

Method
 

Step-by-Step Instructions
  1. In a mixing bowl, add yogurt and stir until smooth and creamy, about 1–2 minutes.
  2. Finely dice cucumber and add it to the yogurt mixture along with minced red onion and lemon juice.
  3. Chop mint and cilantro, then sprinkle into the bowl with cumin, salt, and pepper.
  4. Mix until all ingredients are evenly distributed.
  5. Cover and refrigerate for at least 30 minutes to allow flavors to meld.
  6. Give the raita a quick stir, spoon it into a serving bowl, and garnish with mint or cucumber if desired.

Nutrition

Serving: 1cupCalories: 31kcalCarbohydrates: 4gProtein: 2gFat: 1gSodium: 50mgPotassium: 120mgSugar: 3gVitamin A: 100IUVitamin C: 2mgCalcium: 100mg

Notes

Chill for at least 30 minutes before serving for best flavor. Will keep fresh in the fridge for up to 4–5 days.

Tried this recipe?

Let us know how it was!

Crispy Air Fryer French Fries That Outshine Fast Food

May 20, 2026 by Grace Snow Leave a Comment

A mouthwatering aroma fills the kitchen as I slice through crisp Russet potatoes, preparing for a truly delightful experience. Meet my Homemade Crispy Air Fryer French Fries—a dish that effortlessly rivals your favorite fast-food indulgences! With just a simple cold water soak and some well-chosen seasonings, these fries transform into a golden-brown symphony of flavor and texture. The best part? They’re quick to whip up and offer a healthier alternative to frozen options, making them perfect for any weeknight dinner or gathering. Ready to take your fry game to the next level? Let’s dive into this irresistible recipe that will make your taste buds dance!

Why Choose Air Fryer French Fries?

Crispy Perfection: These fries achieve the ideal crunch thanks to a simple soaking technique that draws out excess starch.

Healthier Choice: With minimal oil, you can enjoy guilt-free fries that outshine takeout options.

Quick & Easy: This recipe is designed for those who crave homemade goodness without spending hours in the kitchen.

Versatile Enjoyment: Pair them with a variety of dips like ketchup or aioli—perfect for parties or casual weeknight meals.

Crowd-Pleaser: They’re sure to impress family and friends with their restaurant-quality taste, making every meal feel special.

Ready for more delicious dishes? Check out my Air Fryer Fish for a perfect meal pairing or indulge your sweet side with Cherry Clafoutis French for dessert!

Air Fryer French Fries Ingredients

• Let's make those tasty fries!

For the Fries

  • Russet Potatoes – The best choice for achieving that classic fry texture and ideal crispiness.
  • Olive Oil – Just a tablespoon helps brown the fries and enhances flavor; don’t skip it or you’ll have pale fries.
  • Salt – Essential for seasoning; adjust according to your personal preference for taste.
  • Garlic Powder – Adds a lovely flavor—feel free to adjust or omit based on your palate.
  • Smoked Paprika – Provides a delightful smoky touch; use regular paprika if you prefer a milder flavor.
  • Black Pepper – For added seasoning; taste and adjust as needed.

Ready to whip up those homemade air fryer French fries? You're going to love the crispy goodness!

Step‑by‑Step Instructions for Air Fryer French Fries

Step 1: Prepare Potatoes
Start by washing and peeling the Russet potatoes if desired. Cut them into ¼–⅓ inch matchsticks to ensure even cooking and maximum crispiness. Lay them out on a cutting board, ensuring all the fries are similar in size, which will help them cook uniformly in the air fryer.

Step 2: Soak
Submerge the cut potatoes in a bowl of cold water and soak them for 25–30 minutes, or up to 2 hours for enhanced crispiness. This soaking process removes excess starch, which is key to achieving that irresistible crunch. You’ll know they’re ready when they appear whiter and have released some starch.

Step 3: Dry
After soaking, drain the water and thoroughly pat the fries dry using kitchen towels. This step is crucial—if moisture remains, your Air Fryer French Fries will turn out soggy instead of crispy. Aim for completely dry fries to allow the oil and seasonings to adhere perfectly.

Step 4: Season
Transfer the dried fries to a large mixing bowl. Drizzle with olive oil and sprinkle on salt, garlic powder, smoked paprika, and black pepper. Toss the fries with your hands until every piece is evenly coated in oil and seasonings. This ensures that every fry is bursting with flavor.

Step 5: Preheat Air Fryer
Set your air fryer to 380°F and preheat it for about 3–5 minutes. Preheating is essential for getting those Air Fryer French Fries perfectly crispy. While it heats, you can finalize the last touches on your fries, making sure they’re ready to go.

Step 6: Cook
Lightly spray the air fryer basket with cooking spray to prevent sticking. Add the seasoned fries in a single layer, ensuring they aren’t overcrowded. Cook at 380°F for 14–18 minutes, tossing halfway through to promote even cooking. They’re ready when they’re golden brown and irresistibly crispy!

Step 7: Serve
Once your fries reach the perfect golden hue, remove them from the air fryer. While still hot, toss them with an extra pinch of salt for added flavor. Optionally, garnish with fresh parsley and serve alongside your favorite dipping sauces. Get ready for a delightful crunch!

What to Serve with Homemade Crispy Air Fryer French Fries

Building a meal that complements the addictive crunch of crispy fries can elevate your dining experience to new heights.

  • Classic Burger: The juiciness of a beef or veggie burger pairs perfectly with the fries, creating a satisfying, comfort-food combo. The richness of a well-cooked burger marries beautifully with the crispy golden fries.

  • Creamy Coleslaw: This crunchy, fresh side adds a refreshing contrast to the fries, enhancing the meal's texture. The tangy dressing in coleslaw brings a delightful brightness.

  • Crispy Chicken Tenders: Dipped in your favorite sauce, these pair perfectly with the fries, satisfying all your cravings. The combination of crunch from both sides makes for a delightful meal.

  • Garlic Aioli: Rich and creamy, this dipping sauce enhances the flavor of each fry, making every bite a culinary treat. The garlic's savory depth complements the fry's crispiness beautifully.

  • Grilled Veggies: Roasted or grilled zucchini, bell peppers, and asparagus introduce a colorful and healthy touch to your plate, balancing the meal with vibrant flavors. Their slight char adds even more complexity to the feast.

  • Cheesy Nachos: For a fun twist, serve your fries alongside cheesy nachos loaded with jalapeños and guacamole. The fusion of flavors will take your taste buds on a delicious adventure!

  • Sparkling Lemonade: This refreshing drink brightens the meal with zesty notes, cleansing the palate while complementing the savory flavors of the fries. Its fizz adds a festive flair to your dining experience.

  • Chocolate Milkshake: For dessert, a rich chocolate shake provides a sweet finish, perfectly balancing the savory elements of your meal. The combo of salty fries and sweet shake is pure, nostalgic bliss.

  • Tartar Sauce: A zesty tartar sauce, especially with a touch of dill, becomes a sumptuous dip that enhances the classic fry experience. This would be particularly delightful if you’re adding seafood to the dinner spread.

Storage Tips for Air Fryer French Fries

Room Temperature: Enjoy your homemade Air Fryer French Fries fresh for the best taste; however, if needed, they can sit at room temperature for up to 1 hour before they begin to lose their crispy texture.

Fridge: If you have leftovers, store them in an airtight container in the fridge for up to 2 days. This will help maintain some of their texture, though they will lose some crispiness.

Freezer: For longer storage, freeze fully cooled fries in a single layer on a baking sheet, then transfer to an airtight freezer bag. They can be stored for up to 3 months.

Reheating: To regain their crispiness, reheat fries in the air fryer at 350°F for about 5–7 minutes. This method will help restore that delightful crunch!

Expert Tips for Air Fryer French Fries

  • Soak for Crispiness: Don’t skip the soaking step! It’s vital for removing excess starch and achieving that desired crispiness in your Air Fryer French Fries.

  • Check Fry Thickness: Cut your fries uniformly to ensure even cooking. If some are thicker, they may require more time, while thinner ones cook faster.

  • Don’t Overcrowd: Fry in batches if needed. Overcrowding the basket can lead to uneven cooking and prevent that glorious crisp texture.

  • Dry Thoroughly: Make sure to pat your fries dry after soaking. Any leftover moisture will result in soggy fries instead of the crispy treat you desire.

  • Adjust Seasonings: Feel free to personalize the seasoning to your taste. Experimenting with spices can elevate your Air Fryer French Fries even further!

Air Fryer French Fries Variations

Feel free to get creative and tailor these crispy delights to your taste buds; the options are endless!

  • Sweet Potato: Swap out Russet potatoes for sweet potatoes for a naturally sweeter, healthier twist. The vibrant color adds a lovely touch too!

  • Seasoned Garlic Fries: Sprinkle in fresh minced garlic or even garlic salt for a robust flavor boost that elevates your fries to gourmet status.

  • Cheesy Fries: Top with shredded cheddar or Parmesan just before they finish cooking for a gooey, cheesy delight. A sprinkle of chives can add a lovely freshness!

  • Spicy Fries: Add chili powder or cayenne pepper to the seasoning mix for a fiery kick. These will surely satisfy those cravings for something with a little heat.

  • Herbed Fries: Mix in dried herbs like thyme or rosemary for an aromatic twist. The combination of herbs creates a delightful flavor harmony.

  • Vegan Poutine: Top your fries with vegan gravy and dairy-free cheese curds for a plant-based twist on the classic poutine. It’s comfort food at its finest!

  • Cajun Fries: Sprinkle Cajun seasoning for a zesty, flavorful take. This spiced up version is vibrant and perfect for adding a pop to any meal.

Looking for additional delicious fare? Try my Air Fryer Fish for a complete meal or indulge in a delightful Cherry Clafoutis French to satisfy your sweet tooth!

Make Ahead Options

These Homemade Crispy Air Fryer French Fries are perfect for meal prep and can save you time during those busy weeknights! You can cut and soak the Russet potatoes in cold water for up to 2 hours in advance to draw out excess starch, improving crispiness. If you need to prep even earlier, wash, peel, and cut the fries, then soak them, and refrigerate them for up to 24 hours. Make sure to dry them thoroughly before tossing with olive oil and seasonings right before cooking. When you're ready to enjoy your fries, simply proceed with the cooking instructions, and you'll still achieve that delightful crunch just like freshly made Air Fryer French Fries!

Air Fryer French Fries Recipe FAQs

How do I choose the right potatoes for crispy fries?
Absolutely! For the crispiest fries, Russet potatoes are the best bet due to their high starch content, which creates that perfect fluffy interior. When selecting them, aim for firm potatoes without any dark spots or blemishes. Yukon Gold potatoes can also work, but they may not get as crispy as Russets.

What’s the best way to store leftover Air Fryer French Fries?
If you have any leftovers, place them in an airtight container and store in the fridge for up to 2 days. To retain as much crispiness as possible, it’s best to use them fresh. When reheating, give them a quick toss in the air fryer at 350°F for about 5-7 minutes. This will help them regain their lovely crunch.

Can I freeze Air Fryer French Fries?
Absolutely! To freeze, first let your fries cool completely after cooking. Then spread them out in a single layer on a baking sheet and place them in the freezer for about an hour until solid. Once frozen, transfer the fries to an airtight freezer bag, squeezing out as much air as possible. They can be stored for up to 3 months. When you’re ready to enjoy them, cook them straight from frozen in your air fryer for about 15-20 minutes at 380°F.

What if my fries aren’t crispy after cooking?
Very! If your fries turn out soft, it may be because they retained moisture before cooking. Ensure you soak your cut potatoes and thoroughly dry them afterward. Additionally, overcrowding the air fryer basket can also cause this issue—so cook in batches for an ideal texture. If you did all this and still end up with soggy fries, you can always pop them back in the air fryer for a few extra minutes for a crisping boost.

Are these fries suitable for a vegan diet?
Absolutely! These Air Fryer French Fries are vegan-friendly as they contain no animal products. Just be mindful of any dipping sauces you use; opt for plant-based options like vegan mayonnaise or chili sauce to keep things deliciously vegan!

Can I use different seasonings for my fries?
The more the merrier! Feel free to experiment with a range of seasonings like chili powder, onion powder, Parmesan cheese (if dairy is okay for you), or even some herb mixes. This way, you can customize your fries to create exciting flavor profiles, and each batch can be a delightful new experience!

Air Fryer French Fries

Crispy Air Fryer French Fries That Outshine Fast Food

Delicious Air Fryer French Fries that are healthier, quick to make, and full of flavor.
Print Recipe Pin Recipe
Prep Time 30 minutes mins
Cook Time 18 minutes mins
Soaking Time 30 minutes mins
Total Time 1 hour hr 18 minutes mins
Servings: 4 fries
Course: Snacks
Cuisine: American
Calories: 150
Ingredients Equipment Method Nutrition Notes

Ingredients
  

For the Fries
  • 4 medium Russet Potatoes Best for classic fry texture
  • 1 tbsp Olive Oil Essential for browning
  • 1 tsp Salt Adjust to taste
  • 1 tsp Garlic Powder Optionally adjust based on preference
  • 1 tsp Smoked Paprika For a smoky flavor
  • 1 tsp Black Pepper To taste

Equipment

  • Air fryer

Method
 

Step-by-Step Instructions
  1. Wash and peel the Russet potatoes if desired. Cut them into ¼–⅓ inch matchsticks.
  2. Soak the cut potatoes in a bowl of cold water for 25–30 minutes.
  3. Drain and pat the fries dry with kitchen towels.
  4. Drizzle fries with olive oil and sprinkle with salt, garlic powder, smoked paprika, and black pepper. Toss until evenly coated.
  5. Preheat your air fryer to 380°F for about 3–5 minutes.
  6. Add seasoned fries in a single layer to the air fryer and cook for 14–18 minutes, tossing halfway through.
  7. Remove fries when golden brown and toss with an extra pinch of salt before serving.

Nutrition

Serving: 1cupCalories: 150kcalCarbohydrates: 30gProtein: 2gFat: 5gSaturated Fat: 1gPolyunsaturated Fat: 2gMonounsaturated Fat: 2gSodium: 200mgPotassium: 600mgFiber: 3gSugar: 1gVitamin C: 10mgCalcium: 2mgIron: 5mg

Notes

For best results, do not skip the soaking step and ensure fries are well dried before cooking.

Tried this recipe?

Let us know how it was!

Delicious Coffee Truffles: Creamy Treats for Coffee Lovers

May 20, 2026 by Grace Snow Leave a Comment

As I stood in the kitchen, the aroma of freshly brewed coffee filled the air, reminding me of cozy afternoons spent indulging in treats that tantalize both the taste buds and the heart. That's when I decided to whip up a batch of Coffee Truffles—a delightful, no-bake treat that beautifully combines chocolate and coffee. These truffles are not only incredibly easy to prepare, but they also cater to a variety of dietary preferences, making them perfect for everyone at your table. Imagine serving these irresistible bites, each one boasting a creamy, luscious center, at your next gathering, or even better, sharing them as homemade gifts. So, are you ready to dive into this delicious adventure and discover just how satisfying it is to make your own Coffee Truffles?

Why will you adore Coffee Truffles?

Decadent, these Coffee Truffles offer a luxurious taste experience that melts in your mouth, blending rich chocolate and vibrant coffee flavors. Easy to make, you can whip them up quickly with just a few ingredients, perfect for those busy days. Diet-friendly options ensure everyone can enjoy them, whether you're vegan or sticking to a keto lifestyle. Versatile combinations—try Mocha or Coffee Cardamom variations—keep your taste buds dancing and make every batch unique. Impressive presentation makes them an ideal dessert for gatherings or thoughtful homemade gifts. So, why not serve them alongside your favorite coffee for a delightful pairing?

Coffee Truffles Ingredients

For the Truffles
• Cream Cheese or Coconut Butter – Provides a creamy texture; use vegan cream cheese for a dairy-free option.
• Butter – Adds richness and helps emulsify the mixture; substitute with additional coconut butter for a dairy-free alternative.
• Powdered Sugar or Erythritol – Sweetness to balance the coffee and chocolate; Erythritol is great for a low-carb recipe.
• Instant Coffee – Imparts the classic coffee flavor; substitute with instant espresso for a stronger kick.
• Chocolate Chips or Broken Up Chocolate (optional) – Coats the truffles for a luscious finish; opt for dairy-free chocolate to keep it vegan-friendly.

For Coating (optional)
• Melted Chocolate – Creates a smooth, chocolatey finish around the truffles; mixing in a bit of oil can enhance texture for dipping.
• Cocoa Powder (optional) – Use for dusting the truffles for an elegant touch; it complements the coffee flavor beautifully.

Each of these ingredients works together to make your Coffee Truffles a delightful and decadent surprise!

Step‑by‑Step Instructions for Coffee Truffles

Step 1: Prepare Ingredients
Begin by bringing your cream cheese or coconut butter and butter to room temperature, allowing them to soften for about 15-20 minutes. This will help achieve a smooth, well-blended texture for your Coffee Truffles. As they warm up, gather your instant coffee, powdered sugar, and any additional flavorings or coatings you wish to use.

Step 2: Mix Ingredients
In a medium mixing bowl, combine the softened cream cheese or coconut butter, butter, powdered sweetener, and instant coffee. Using a hand mixer, whip the mixture on medium speed for about 2-3 minutes until all ingredients are fully blended and the mixture is smooth and creamy. Scrape down the sides of the bowl as needed to ensure an even consistency throughout.

Step 3: Form Truffles
Once the mixture is smooth, transfer it into a shallow container for easy scooping or refrigerate it for about 10 minutes until it's firm enough to handle. Using a mini cookie scoop or your hands, form small balls, roughly 1 inch in diameter, and place them on a parchment-lined plate. Ensure they are spaced apart to avoid sticking.

Step 4: Chill Truffles
Place the formed truffles in the refrigerator and chill for at least 30 minutes to set. This will allow them to firm up and hold their shape. If you're short on time, you can also freeze them for about 15-20 minutes, but be careful not to let them freeze too hard, as this may affect the texture.

Step 5: Coat Truffles (Optional)
If you desire a chocolate coating, melt your chocolate chips in a microwave-safe bowl in 30-second intervals, stirring between each until smooth. For a shinier finish, consider adding a teaspoon of coconut oil to the melted chocolate. Dip each chilled truffle into the chocolate until completely coated, and return them to the parchment-lined plate to set.

Step 6: Serve & Store
Once the chocolate coating has hardened, serve your delicious Coffee Truffles right away, or store them in an airtight container in the refrigerator for up to one week. For longer storage, freeze them for up to two months, allowing them to thaw slightly before enjoying this delightful treat!

Storage Tips for Coffee Truffles

Fridge: Keep your Coffee Truffles stored in an airtight container in the refrigerator for up to 1 week, ensuring they stay fresh and creamy.

Freezer: For longer storage, freeze the truffles for up to 2 months. Place them in a single layer in a freezer-safe container to prevent sticking.

Reheating: Thaw frozen truffles in the refrigerator overnight before serving to maintain their texture and flavor.

Serving: Allow the truffles to sit at room temperature for about 10-15 minutes before enjoying, enhancing the rich, creamy indulgence.

Make Ahead Options

These Coffee Truffles are a fantastic treat to prep in advance, making your busy days a little sweeter! You can prepare the truffle mixture and refrigerate it for up to 3 days before rolling it into balls. Just make sure to cover it well to prevent drying out. When you're ready to enjoy your delightful truffles, scoop and shape them, then chill for about 30 minutes to firm up. If you want to coat them, melt your chocolate right before serving, dip each truffle, and allow them to set. With these make ahead options, you can savor rich, creamy Coffee Truffles with minimal effort when the occasion calls!

What to Serve with Decadent Coffee Truffles?

Indulging in these rich coffee truffles opens the door to creating an unforgettable meal experience filled with delightful pairings.

  • Fresh Berries: Their natural sweetness and tartness balance the richness of the truffles, adding a refreshing burst of flavor to each bite.

  • Vanilla Ice Cream: A scoop of smooth vanilla ice cream offers a creamy contrast that enhances the flavor while inviting decadent pleasure with every spoonful.

  • Espresso Shot: A shot of robust espresso complements the coffee flavor in the truffles, making it a perfect match for coffee lovers to elevate the experience.

  • Chocolate-Covered Almonds: Crunchy almonds coated in chocolate introduce a delightful texture, perfectly harmonizing with the smoothness of the truffles for added indulgence.

  • Dark Chocolate Bark: Simple, yet elegant. This adds a crunchy contrast and intensifies the chocolate notes, making it a divine pairing for the truffles.

  • Sparkling Water with Lemon: A refreshing drink like sparkling water with a hint of lemon cleanses the palate between bites, allowing the flavors of the truffles to shine even brighter.

  • Coconut Milk Latte: Creamy and subtly sweet, this latte introduces a tropical twist, tying together the coffee flavors in the truffles while enhancing the overall experience.

  • Nuts and Dried Fruits Platter: A colorful array of nuts and dried fruits adds texture and variety, creating a visually stunning and delicious complement to the indulgent truffles.

  • Flavored Whipped Cream: A dollop of whipped cream flavored with vanilla or almond gives these truffles a luxurious touch, enhancing the creamy texture of each bite.

Coffee Truffles Variations & Substitutions

Feel free to unleash your creativity with these delightful Coffee Truffles; each variation promises a unique twist that will satisfy your palate!

  • Mocha Twist: Add cocoa powder to the mixture for a deeper chocolate flavor. This rich addition will have coffee lovers swooning!
  • Spicy Cardamom: Mix in ground cardamom for an exotic twist that adds warmth and complexity, perfect for cozy gatherings.
  • Pumpkin Spice: Stir in pumpkin pie spice for that seasonal flair. These make for an inviting autumn treat you won’t want to miss!
  • Vegan Delight: Opt for coconut butter and plant-based chocolate to create a delicious vegan-friendly version. Your non-vegan friends will love them too!
  • Flavor Explosion: Try adding hazelnut liqueur or a splash of almond extract for an extra layer of flavor that enriches the coffee experience.
  • Nutty Crunch: Fold in chopped nuts like walnuts or pecans for added texture. It brings a delightful crunch that complements the creamy center beautifully.
  • Chili Infusion: For those who enjoy a kick, mix in a pinch of cayenne pepper to the truffle mixture. This spicy surprise will keep them coming back for more!
  • Healthy Alternatives: Use cacao nibs instead of chocolate chips for a more intense chocolate flavor with added health benefits. Pair this with a drizzle of honey for a little natural sweetness.

For even more delicious inspiration, check out my Vegan Sushi Indulge recipe for exciting flavor ideas. Or, if you're in the mood for a sweet delight with a coffee twist, my Coffee Cajeta Ice is a must-try!

Tips for the Best Coffee Truffles

  • Room Temperature Ingredients: Ensure cream cheese or coconut butter and butter are at room temperature before mixing for a smooth, creamy texture in your coffee truffles.

  • Mixing Method: Use a hand mixer for the best result. A fork can work, but it may leave the mixture uneven and lumpy.

  • Firmness Check: Chill the truffle mixture until it's firm enough to scoop but not too hard. This balance ensures nicely shaped coffee truffles that maintain their creamy center.

  • Coating Tips: When dipping in melted chocolate, add a teaspoon of coconut oil for a glossy finish and smoother texture. This secret helps prevent cracks in the coating.

  • Flavor Enhancements: Don't hesitate to adjust sweetness to your preference, especially when using sugar substitutes. Taste as you go to find your perfect balance!

Coffee Truffles Recipe FAQs

How do I select the right coffee for my truffles?
Choosing the right coffee can significantly impact the flavor of your Coffee Truffles. I recommend using high-quality instant coffee or espresso for a strong, rich flavor. Look for brands that have a smooth blend without excessive bitterness for the best results. If you prefer a deeper flavor, opt for espresso powder instead, which provides a more pronounced coffee taste.

How should I store my Coffee Truffles?
Absolutely! Store your Coffee Truffles in an airtight container in the refrigerator for up to one week. This keeps them fresh and creamy. If you want to enjoy them longer, you can freeze them for up to two months. Just make sure to store them in a single layer to prevent sticking. When you're ready to indulge, thaw them in the refrigerator overnight for optimal texture.

Can I freeze the Coffee Truffles?
Yes, you can! To freeze your Coffee Truffles, place them in a single layer on a parchment-lined baking sheet and freeze until solid. After about 1-2 hours, transfer them to a freezer-safe container or bag and store for up to two months. This method helps maintain their shape and creaminess. When ready to enjoy, simply thaw them in the fridge overnight.

What can I do if my truffle mixture is too soft?
If your Coffee Truffle mixture is too soft to form into balls, don't worry! Simply refrigerate the mixture for another 15-20 minutes to help it firm up. You can also consider adding a tablespoon of powdered sugar or another binding ingredient like ground nuts or coconut flour to help achieve the right consistency. Remember to keep mixing until it reaches a smooth texture!

Are these Coffee Truffles safe for a vegan diet?
Very! You can easily adapt these Coffee Truffles by using coconut butter and a dairy-free chocolate coating. You can find vegan cream cheese in many grocery stores or simply stick to the coconut butter. This way, everyone can enjoy these delicious bites without any worries about dietary restrictions!

How can I enhance the flavor of my Coffee Truffles?
I love experimenting with flavors! You can enhance your Coffee Truffles by adding a teaspoon of hazelnut liqueur or flavored extracts like almond or vanilla to the mixture. Additionally, consider incorporating spices like cardamom or cinnamon for a delightful twist. Just remember to adjust the sweetness based on your additional ingredients!

Coffee Truffles

Delicious Coffee Truffles: Creamy Treats for Coffee Lovers

Coffee Truffles are a delicious no-bake treat combining chocolate and coffee flavors, perfect for coffee lovers.
Print Recipe Pin Recipe
Prep Time 20 minutes mins
Chill Time 30 minutes mins
Total Time 50 minutes mins
Servings: 12 truffles
Course: Dessert
Cuisine: American
Calories: 90
Ingredients Equipment Method Nutrition Notes

Ingredients
  

For the Truffles
  • 8 oz Cream Cheese or Coconut Butter Use vegan cream cheese for a dairy-free option.
  • 2 tbsp Butter Substitute with additional coconut butter for a dairy-free alternative.
  • 1 cup Powdered Sugar or Erythritol Erythritol is great for a low-carb recipe.
  • 2 tbsp Instant Coffee Substitute with instant espresso for a stronger kick.
  • 1 cup Chocolate Chips or Broken Up Chocolate Opt for dairy-free chocolate to keep it vegan-friendly.
For Coating (optional)
  • 1 cup Melted Chocolate Mixing in a bit of oil can enhance texture for dipping.
  • Cocoa Powder Use for dusting the truffles for an elegant touch.

Equipment

  • Mixing Bowl
  • hand mixer
  • Parchment Paper
  • Microwave-safe bowl

Method
 

Prepare and Mix
  1. Bring cream cheese or coconut butter and butter to room temperature (15-20 minutes). Gather remaining ingredients.
  2. In a bowl, combine cream cheese or coconut butter, butter, powdered sweetener, and instant coffee. Whip with a hand mixer for 2-3 minutes.
Form and Chill
  1. Transfer mixture to a shallow container and refrigerate for about 10 minutes until firm enough to handle. Form small balls (1 inch in diameter).
  2. Chill formed truffles in the refrigerator for at least 30 minutes.
Coat and Serve
  1. Melt chocolate chips in a microwave-safe bowl, adding coconut oil for a glossy finish. Dip each truffle in chocolate until coated.
  2. Once coated, let truffles set on parchment. Serve immediately or store in an airtight container.

Nutrition

Serving: 1truffleCalories: 90kcalCarbohydrates: 10gProtein: 1gFat: 6gSaturated Fat: 4gPolyunsaturated Fat: 0.5gMonounsaturated Fat: 1.5gCholesterol: 15mgSodium: 30mgPotassium: 80mgFiber: 1gSugar: 5gVitamin A: 200IUCalcium: 20mgIron: 0.5mg

Notes

Adjust sweetness to preference, especially with sugar substitutes. Let truffles sit at room temperature for 10-15 minutes before serving for the best texture.

Tried this recipe?

Let us know how it was!

Lemon Garlic Butter Cod That Transforms Your Weeknight Dinners

May 20, 2026 by Grace Snow Leave a Comment

As I stood in my kitchen the other evening, the aroma of sizzling garlic wafted through the air, instantly transporting me to a quaint seaside bistro. That’s when I decided to whip up my Irresistible Lemon Garlic Butter Cod—a quick and easy weeknight dinner that has become a staple in my home. In just 25 minutes, you can bring home the rich and tangy flavors of this low-fat dish that’s perfect when you want something fresh yet comforting. Plus, it's incredibly versatile: feel free to substitute the cod with your favorite white fish or even toss in some seasonal veggies for a one-pan wonder. Curious how a few simple ingredients can transform your evenings? Let me guide you!

Why Is This Cod Recipe a Must-Try?

Simplicity at Its Best: With just a handful of ingredients, this dish is all about ease without compromising on flavor.

Quick and Easy: Ready in under 25 minutes, perfect for those busy weeknights when you crave something special without the fuss.

Flavor Explosion: The vibrant lemon and rich garlic butter create a dynamic taste experience that’s sure to impress.

Crowd-Pleaser: Whether you’re entertaining guests or feeding the family, this cod is bound to become a favorite again and again.

Versatile Substitutions: Don’t have cod? Use tilapia or halibut instead! Feel free to mix in seasonal veggies like asparagus for a wholesome, one-pan meal.

Elevate your dinner game effortlessly with this delightful dish, and serve it alongside some Cheesy Garlic Bread for the ultimate experience!

Lemon Garlic Butter Cod Ingredients

  • For the Cod
    • Cod Fillets – Fresh or thoroughly thawed; this flaky fish serves as the perfect base for the rich sauce.

  • For the Sauce
    • Lemon Juice – Freshly squeezed enhances flavor and adds brightness to the dish.
    • Lemon Zest – Provides aromatic oils for an intensified lemon flavor.
    • Unsalted Butter – Adds richness to the sauce; can substitute with olive oil for a lighter option.
    • Minced Garlic – Offers a robust flavor foundation; fresh garlic is recommended for the best taste.
    • Red Pepper Flakes – Optional for a hint of spice; allows customization based on heat preference.

  • For Garnish
    • Fresh Parsley – Chopped for garnish; adds color and fresh flavor at the end, brightening up the dish.

This Lemon Garlic Butter Cod is a delightful recipe that guarantees a burst of flavor with each bite!

Step‑by‑Step Instructions for Lemon Garlic Butter Cod

Step 1: Preheat the Oven
Begin by preheating your oven to 400°F (200°C). This temperature ensures that the cod bakes evenly, resulting in a tender, flaky texture. While the oven warms up, gather your ingredients so everything is ready to go.

Step 2: Melt the Butter
In a small saucepan, place 4 tablespoons of unsalted butter over medium heat. Allow the butter to melt gently, swirling the pan occasionally to prevent scorching. It should be fully melted in about 2-3 minutes, and you'll want to see it bubbling slightly before moving on to the next step.

Step 3: Sauté the Garlic
Add 3 minced garlic cloves to the melted butter, cooking for about 1 minute. Stir continuously until the garlic is fragrant but not browned. This quick sauté releases rich flavors that will infuse the Lemon Garlic Butter Cod beautifully, providing a robust foundation for the sauce.

Step 4: Incorporate Lemon
Remove the saucepan from heat and stir in the juice of one fresh lemon along with the lemon zest. Mix well, allowing the citrus to meld with the garlic butter. At this stage, your sauce should have a delightful aroma; it's the heart of your dish that brings a refreshing brightness.

Step 5: Prepare the Cod
Take your cod fillets and place them in a baking dish, ensuring they are evenly spaced. Pour the lemon garlic butter sauce generously over the fillets, making sure they are well-coated. This technique allows the flavors to penetrate the fish, promising delicious results in your Lemon Garlic Butter Cod.

Step 6: Bake the Cod
Carefully slide the baking dish into the preheated oven and bake the cod for 12-15 minutes. Keep an eye on the fish; it’s done when it flakes easily with a fork and appears opaque. This cooking time ensures the cod remains moist and tender, packed with flavor.

Step 7: Garnish and Serve
Once baked, remove the dish from the oven and let it rest for a minute. Sprinkle freshly chopped parsley over the top for a pop of color and extra freshness. Your Lemon Garlic Butter Cod is now ready to be served, offering a beautiful and flavorful centerpiece for your dinner table.

How to Store and Freeze Lemon Garlic Butter Cod

Fridge: Store any leftovers in an airtight container for up to 2 days. Make sure the cod is completely cooled before sealing to retain moisture and flavor.

Freezer: You can freeze the cooked Lemon Garlic Butter Cod for up to 3 months. Wrap each fillet tightly in plastic wrap, then place them in a freezer-safe bag, removing as much air as possible.

Reheating: To reheat from the fridge, microwave gently in 30-second intervals until warmed through, or bake in a preheated oven at 350°F (175°C) for about 10 minutes, until heated evenly.

Make-Ahead Sauce: Prepare the garlic lemon butter sauce up to 3 days in advance and refrigerate it in a sealed container. Rewarm gently on the stove before using it again.

What to Serve with Irresistible Lemon Garlic Butter Cod

Imagine a dinner table filled with vibrant colors and tantalizing aromas that transport you to a cozy seaside bistro.

  • Garlic Mashed Potatoes: The creamy texture pairs beautifully with the flaky cod, providing a comforting foundation for the zesty sauce.
  • Steamed Asparagus: A light, fresh vegetable that adds a crisp contrast, enhancing the dish’s lemony brightness.
  • Quinoa Salad: Nutty and wholesome, this salad absorbs the flavors of the cod, adding a delightful chewiness and healthful boost.
  • Crispy Roasted Broccoli: With its crunchy edges, roasted broccoli complements the butter sauce, creating a harmonious balance of textures.
  • Couscous with Lemon: Fluffy and subtly lemon-infused, couscous serves as a wonderful side that mirrors the flavors in your Lemon Garlic Butter Cod.
  • Chilled White Wine: A glass of crisp Sauvignon Blanc or Pinot Grigio is an ideal pairing, bringing out the lemon notes without overwhelming the palate.
  • Lemon Sorbet: Finish your meal on a refreshing note; the sweet and tart sorbet cleanses the palate and echoes the dish’s citrus theme.
  • Herbed Garlic Bread: Perfect for soaking up any leftover sauce, this fluffy, crunchy bread complements the rich flavors of the cod beautifully.

Expert Tips for Lemon Garlic Butter Cod

  • Fresh is Best: Always use fresh fish for the best flavor and texture. Frozen cod can be used, but ensure it's thawed properly to prevent uneven cooking.

  • Garlic Care: Don’t let the garlic brown when sautéing. Browned garlic can become bitter, which might overshadow the delightful lemon flavor you want in your cod.

  • Flavor Infusion: Allow the lemon garlic butter sauce to rest for a moment before pouring it over the fish. This extra step enhances the infusion of flavors, ensuring your Lemon Garlic Butter Cod is irresistibly tasty.

  • Oven Check: Keep an eye on the cod while it bakes. Cod can dry out quickly, so it's better to check a minute or two early to ensure you achieve that perfectly flaky consistency.

  • Spice Wisely: Adjust the amount of red pepper flakes according to your taste preferences. Adding them gradually allows you to achieve the perfect kick without overpowering the dish.

Lemon Garlic Butter Cod Variations

Feel free to unleash your creativity and make this dish your own with these exciting twists!

  • Tilapia Swap: Substitute cod with tilapia for a milder flavor and softer texture. It works beautifully with the lemon garlic butter.

  • Add Veggies: Toss in asparagus or cherry tomatoes with the cod for a wholesome one-pan meal. The veggies absorb the rich sauce, making every bite delightful.

  • Herb infusions: Experiment with fresh herbs like dill or basil to add a unique twist. They elevate the dish with an additional layer of freshness and aroma.

  • Creamy Upgrade: Stir in a tablespoon of cream or Greek yogurt into the garlic butter for a creamy, dreamy texture. This addition creates a luxurious sauce that clings perfectly to the fish.

  • Citrus Twist: Swap lemon for orange or lime juice for a refreshing change. Each citrus brings a different zing, making it an exciting alternative throughout the seasons.

  • Spice it up: Don’t shy away from adjusting the heat! Add more red pepper flakes or even a dash of cayenne pepper if you enjoy a bit of a kick.

  • Nutty Finish: Sprinkle chopped toasted almonds or pine nuts on top before serving for a crunchy texture contrast. This simple addition takes the dish from ordinary to extraordinary.

This Lemon Garlic Butter Cod is not just a meal but an experience. Pair it with some Lemon Chicken Soup for a complete, satisfying feast that’ll charm everyone at the table!

Make Ahead Options

These Lemon Garlic Butter Cod fillets are perfect for meal prep enthusiasts! You can prepare the lemon garlic butter sauce up to 3 days in advance; simply refrigerate it in an airtight container to preserve its rich flavors. Additionally, you can season and place the cod fillets in the baking dish, adding the prepared sauce right before you're ready to bake. This step not only saves time but also ensures your cod stays just as delicious and tender when you serve it. When you're ready to enjoy the dish, simply preheat your oven and bake for 12-15 minutes, watching closely for the cod to flake easily with a fork—such a fantastic way to streamline your busy weeknights!

Lemon Garlic Butter Cod Recipe FAQs

How do I choose the best cod fillets?
Absolutely! When selecting cod fillets, look for fresh, bright white flesh with a mild ocean scent. The fillets should be moist and bounce back when lightly pressed. Avoid any with dark spots or a fishy odor, as this indicates age. If you’re using frozen cod, ensure it’s thoroughly thawed overnight in the refrigerator for even cooking.

What’s the best way to store leftover Lemon Garlic Butter Cod?
Very simple! Store any leftovers in an airtight container in the fridge for up to 2 days. Make sure the cod is completely cooled before sealing to keep it moist and flavorful. If you want to enjoy it later, consider freezing it instead.

Can I freeze Lemon Garlic Butter Cod?
Yes, you can! To freeze your Lemon Garlic Butter Cod, wrap each fillet tightly in plastic wrap, then place them in a freezer-safe bag, ensuring as much air as possible is removed. It will last up to 3 months in the freezer. When you're ready to enjoy, thaw it in the fridge overnight before reheating.

What should I do if the cod seems undercooked?
If the cod isn't flaking easily, it likely needs more time in the oven. Continue baking in 1-2 minute increments, checking periodically. Keep an eye on it to ensure it doesn't overcook, as cod can become dry quickly. The ideal output is tender, flaky fish that is opaque throughout.

Is this recipe suitable for people with dietary restrictions?
Yes! This Lemon Garlic Butter Cod is a low-fat dish, making it suitable for many dietary needs. However, be cautious with the butter used; you can substitute it with olive oil for a dairy-free option. If you’re serving this dish to someone with shellfish allergies or dietary restrictions, ensure they are comfortable with fish.

Can I make the garlic lemon butter sauce ahead of time?
Absolutely! You can prepare the garlic lemon butter sauce up to 3 days in advance. Store it in a sealed container in the refrigerator. When ready to use, simply rewarm it gently on the stove over low heat until it’s smooth again, then pour it over your cod before baking.

Lemon Garlic Butter Cod

Lemon Garlic Butter Cod That Transforms Your Weeknight Dinners

This Lemon Garlic Butter Cod is a quick and easy weeknight dinner that brings rich and tangy flavors to your table.
Print Recipe Pin Recipe
Prep Time 10 minutes mins
Cook Time 15 minutes mins
Total Time 25 minutes mins
Servings: 4 fillets
Course: Dinner
Cuisine: Mediterranean
Calories: 250
Ingredients Equipment Method Nutrition Notes

Ingredients
  

For the Cod
  • 4 fillets Cod Fresh or thoroughly thawed
For the Sauce
  • 1/4 cup Lemon Juice Freshly squeezed
  • 1 tablespoon Lemon Zest
  • 4 tablespoons Unsalted Butter Can substitute with olive oil
  • 3 cloves Minced Garlic Fresh garlic recommended
  • 1/4 teaspoon Red Pepper Flakes Optional
For Garnish
  • 1/4 cup Fresh Parsley Chopped

Equipment

  • Oven
  • Saucepan
  • Baking Dish

Method
 

Step-by-Step Instructions
  1. Preheat your oven to 400°F (200°C). Gather your ingredients.
  2. In a small saucepan, melt the butter over medium heat.
  3. Add the minced garlic to the butter and sauté for about 1 minute.
  4. Remove from heat and stir in the lemon juice and lemon zest.
  5. Place the cod fillets in a baking dish and pour the sauce over them.
  6. Bake the cod for 12-15 minutes until it flakes easily with a fork.
  7. Garnish with freshly chopped parsley before serving.

Nutrition

Serving: 1filletCalories: 250kcalCarbohydrates: 3gProtein: 30gFat: 14gSaturated Fat: 8gPolyunsaturated Fat: 1gMonounsaturated Fat: 5gCholesterol: 60mgSodium: 300mgPotassium: 500mgVitamin A: 10IUVitamin C: 15mgCalcium: 2mgIron: 4mg

Notes

This dish pairs beautifully with Cheesy Garlic Bread for an even more delightful dinner experience.

Tried this recipe?

Let us know how it was!

Crispy Lemon Pepper Tofu for a Zesty Weeknight Treat

May 20, 2026 by Grace Snow Leave a Comment

As the sun dips low, casting a warm glow across the kitchen, I find myself craving something light yet satisfying. Enter my crispy Lemon Pepper Tofu—a high protein vegan delight that transforms an everyday ingredient into an irresistible dinner option. This dish is perfect for those weeknights when you're torn between convenience and taste; it comes together in just 30 minutes and offers a zesty punch that will excite your palate. With a delightfully crispy exterior and a bright, tangy flavor, this tofu turns a simple meal into a gourmet experience, even for those skeptical about plant-based proteins. Whether you’re a full-time foodie or just dabbling in home cooking, this recipe is bound to become a cherished favorite. Ready to elevate your tofu game and impress your dinner guests? Let’s get cooking!

Why is Lemon Pepper Tofu a must-try?

Quick and Easy: This Lemon Pepper Tofu comes together in just 30 minutes, making it perfect for busy weeknights.

Crispy Perfection: The breaded and seared tofu achieves a delightful crunch, proving that tofu can be anything but bland.

Burst of Flavor: With zesty lemon juice and fragrant black pepper, every bite is a refreshing and invigorating experience.

High Protein and Vegan: Packed with protein and gluten-free, it’s a nutritious choice for anyone looking to embrace a plant-based diet without sacrificing taste.

Versatile Dish: Pair it with a salad or some quinoa for a complete meal, or use it as a taco filling for an exciting twist!

Elevate your dinner routine with this delicious dish that will surely impress everyone at your table!

Lemon Pepper Tofu Ingredients

• Dive into the deliciousness of Lemon Pepper Tofu with these simple ingredients!

For the Tofu

  • Extra Firm Tofu – Key to achieving a crispy texture; opt for extra firm to keep it sturdy.
  • Cornstarch – Helps create a crunchy breading; if you prefer, you can use potato starch instead.

For the Flavor

  • Lemon Juice – Brings a bright, zesty tang; freshly squeezed juice is a game-changer.
  • Lemon Zest – Adds a concentrated lemon flavor; a microplane will help you zest evenly.
  • Black Pepper – Adds a lovely spiciness; adjust to your taste for that perfect kick.
  • Salt – Essential for enhancing flavors; kosher or sea salt works best for this dish.

This Lemon Pepper Tofu recipe is not only delicious but also a fantastic high-protein vegan option that will have everyone asking for seconds!

Step‑by‑Step Instructions for Lemon Pepper Tofu

Step 1: Prepare Tofu
Start by draining the extra firm tofu and pressing it to eliminate excess moisture; this is crucial for achieving a crispy texture. Cut the pressed tofu into bite-sized cubes, ensuring they are uniform in size for even cooking. Allow the tofu to sit for a few minutes while you gather the other ingredients, letting it firm up.

Step 2: Bread Tofu
In a bowl, toss the cubed tofu with cornstarch until each piece is fully coated. This step is essential for creating that crunchy outer layer you'll love in your Lemon Pepper Tofu. Make sure the cornstarch clings well to each cube; for best results, you can even shake off any excess and let the tofu sit for a moment.

Step 3: Cook Tofu
Heat a skillet over medium-high heat and add a couple of tablespoons of oil. Once the oil shimmers, gently place the cornstarch-coated tofu cubes in a single layer without overcrowding. Sear the tofu for about 3-4 minutes on each side, until they turn golden brown and crispy. You'll know they’re ready when they develop a delightful crunch.

Step 4: Make Sauce
In a small mixing bowl, combine freshly squeezed lemon juice, lemon zest, black pepper, and salt to create a zesty sauce. Whisk well to blend all the flavors, ensuring that the tangy and spicy notes harmonize beautifully. This sauce will add a burst of flavor to your crispy Lemon Pepper Tofu.

Step 5: Coat Tofu
Once the tofu is perfectly crispy and golden, remove it from the skillet and transfer it to a clean mixing bowl. Pour the zesty lemon sauce over the hot tofu and gently toss until each piece is evenly coated. The heat from the tofu will help the sauce adhere better, infusing every bite with delicious flavor.

Step 6: Serve
Plate your Lemon Pepper Tofu beautifully and feel free to garnish with additional lemon zest or fresh herbs for an appealing finish. Serve this crispy delight with steamed rice, quinoa, or a fresh salad for a balanced meal. The contrasting textures and vibrant flavors will surely impress anyone at your table.

Expert Tips for Lemon Pepper Tofu

  • Press Tofu Well: Ensure you press the tofu adequately to remove moisture; this is vital for achieving that irresistible crispiness.

  • Avoid Overcrowding: When searing, don’t overcrowd your skillet. This ensures even cooking and prevents steaming, which keeps your Lemon Pepper Tofu wonderfully crunchy.

  • Set the Right Temperature: Make sure the oil is hot before adding tofu. This helps create the crispy outer layer you're aiming for, so wait until it shimmers.

  • Customize the Sauce: Feel free to adjust the lemon and pepper quantities based on your taste. A hint of maple syrup can balance the tanginess beautifully.

  • Reheat Carefully: If you have leftovers, reheat them in a skillet rather than the microwave to keep the tofu crisp!

Make Ahead Options

These Lemon Pepper Tofu cubed delights are perfect for meal prep enthusiasts seeking to save time during busy weeknights! You can cube and coat the tofu with cornstarch up to 24 hours in advance; simply refrigerate them in an airtight container to maintain their texture. The zesty lemon sauce can also be prepared ahead of time and stored in the fridge for up to 3 days. When you're ready to serve, just reheat the prepped tofu in a skillet until crispy, toss it in the lemon sauce, and voilà! You'll enjoy a fresh, vibrant dish that's just as delicious as if made from scratch!

What to Serve with Crispy Lemon Pepper Tofu

Enhance your dinner experience with delightful side dishes that complement this zesty tofu!

  • Steamed Jasmine Rice: The fluffy texture of jasmine rice beautifully balances the crispy tofu while absorbing the tangy lemon sauce.

  • Quinoa Salad: A protein-packed quinoa salad mixed with fresh veggies provides a refreshing crunch and complements the tofu's flavors.

  • Garlic Roasted Broccoli: The savory roasted broccoli adds a burst of nutrition and a lovely earthy contrast to the bright lemon notes.

  • Cucumber Tomato Salad: Cool, crisp cucumbers and ripe tomatoes tossed in a light vinaigrette add freshness and a vibrant pop of color to your plate.

  • Avocado Toast: Creamy avocado spread over toasted bread offers a rich texture that harmonizes with the tofu’s crispness.

  • Lemon Herb Couscous: Fluffy couscous infused with herbs and lemon brightens up the meal, echoing the flavors of the crispy lemon pepper tofu.

  • Chilled White Wine: A glass of chilled Sauvignon Blanc enhances the lemony essence of the dish, making each sip a refreshing complement.

  • Coconut Sorbet: For dessert, a scoop of coconut sorbet is light and refreshing, providing a creamy counterbalance to the savory tofu.

Serve these delightful pairings alongside your crispy lemon pepper tofu for a colorful and satisfying meal that will be a hit at your dinner table!

Lemon Pepper Tofu Variations

Feel free to get creative and make this delicious dish your own—there are so many delightful twists to explore!

  • Lime Twist: Substitute lime juice for lemon for a tangy twist. The zesty flavor remains vibrant but adds a tropical flair that’s perfect for summer.

  • Cheesy Flavor: Add nutritional yeast to the cornstarch mix for a subtle cheesy taste. It not only boosts the flavor but also enriches your tofu with extra nutrients.

  • Herb Infusion: Toss in fresh herbs like parsley or cilantro along with the sauce for a burst of freshness. This simple addition elevates the dish, pairing beautifully with the lemony profile.

  • Veggie Power: Mix in sautéed vegetables such as bell peppers or zucchini during the cooking process. This not only adds color but also makes your meal even more wholesome.

  • Spice it Up: For a kick, sprinkle in some cayenne pepper or red pepper flakes. It’s a playful way to heighten the heat level and give your taste buds an extra thrill.

  • Asian Flair: Toss your tofu with a splash of soy sauce or sesame oil before serving. This adds a lovely umami depth, perfectly blending Asian flavors into the dish.

For even more culinary inspiration, check out my favorite Buffalo Tofu Caesar for a tangy twist or try the Ricotta Stuffed Peppers with some leftovers!

Each variation opens up a whole new world of taste and fun, so bring your family along for the ride and see which one becomes your new favorite!

Storage Tips for Lemon Pepper Tofu

Fridge: Store leftover Lemon Pepper Tofu in an airtight container in the fridge for up to 3 days to maintain freshness.

Freezer: For longer storage, freeze the cooked tofu in a single layer on a baking sheet, then transfer to a freezer bag for up to 2 months.

Reheating: To reheat, place the tofu in a skillet over medium heat with a touch of oil, allowing it to regain its crispy texture. Avoid using the microwave if possible, as it can make the tofu soggy.

Avoid Moisture: Ensure the tofu is completely cooled before storing to prevent condensation and sogginess, preserving its delightful crunch when reheated.

Lemon Pepper Tofu Recipe FAQs

How do I choose the right tofu for this recipe?
Absolutely! For the best results with your Lemon Pepper Tofu, I highly recommend using extra firm tofu. It holds its shape well and crisps up nicely when cooked. Look for a block that feels solid and is free of excessive moisture. If you see dark spots or an off smell, it's best to choose a fresh block instead.

What’s the best way to store leftover Lemon Pepper Tofu?
To maintain the deliciousness of your Lemon Pepper Tofu, store it in an airtight container in the fridge for up to 3 days. Let it cool completely before sealing, as condensation will make it soggy. When you’re ready to enjoy leftovers, simply reheat in a skillet over medium heat with a splash of oil to retain that much-loved crispiness!

Can I freeze Lemon Pepper Tofu?
Yes, you can! To freeze your Lemon Pepper Tofu, first let it cool, then spread the cooked pieces in a single layer on a baking sheet. Freeze until solid, then transfer them to a freezer bag for up to 2 months. When ready to enjoy, thaw in the fridge overnight, then reheat in a skillet to crisp them back up. It's a great way to save some for later!

What should I do if my tofu isn’t crispy?
Very! If your tofu isn't crispy enough, here are a few troubleshooting tips: Make sure to press the tofu thoroughly to remove excess moisture before breading. Heat your oil until it's shimmering before adding the tofu to avoid steaming rather than frying. Also, don't overcrowd the pan—give each piece enough space to fry evenly. Each step is crucial to achieve that satisfying crunch!

Are there any dietary considerations with Lemon Pepper Tofu?
Of course! This recipe is vegan, gluten-free, and high in protein, making it suitable for a wide range of diets. If you have specific allergies, double-check the seasoning ingredients—especially if using pre-mixed seasonings. And if you’re cooking for pets, keep the lemon, black pepper, and salt away from their portions; some can be harmful to animals. Always better to be safe!

Can I customize the flavor of the sauce?
Absolutely! The joy of cooking is in making it your own. If you prefer a bit of sweetness to balance the acidity of the lemon, add a teaspoon or two of maple syrup to the sauce. You can also adjust the amount of black pepper to suit your desired spice level or even add herbs like dried oregano for a unique twist. Enjoy being creative with the flavors!

Lemon Pepper Tofu

Crispy Lemon Pepper Tofu for a Zesty Weeknight Treat

Experience this crispy Lemon Pepper Tofu, a delightful high protein vegan dish perfect for weeknight dinners.
Print Recipe Pin Recipe
Prep Time 10 minutes mins
Cook Time 20 minutes mins
Total Time 30 minutes mins
Servings: 4 servings
Course: Dinner
Cuisine: Vegan
Calories: 180
Ingredients Equipment Method Nutrition Notes

Ingredients
  

Tofu
  • 1 block Extra Firm Tofu Key to achieving a crispy texture
  • 2 tablespoons Cornstarch Helps create a crunchy breading
Flavor
  • 2 tablespoons Lemon Juice Freshly squeezed juice is a game-changer
  • 1 teaspoon Lemon Zest Adds a concentrated lemon flavor
  • 1/2 teaspoon Black Pepper Adjust to your taste for that perfect kick
  • 1/2 teaspoon Salt Essential for enhancing flavors

Equipment

  • Skillet
  • Mixing Bowl
  • Cutting Board
  • Knife
  • measuring cups
  • Microplane

Method
 

Preparation
  1. Start by draining the extra firm tofu and pressing it to eliminate excess moisture. Cut into bite-sized cubes.
  2. Toss the cubed tofu with cornstarch until fully coated.
  3. Heat a skillet over medium-high heat and add oil. Sear the tofu for 3-4 minutes on each side until golden brown.
  4. Combine lemon juice, lemon zest, black pepper, and salt in a bowl to create the sauce. Whisk to blend.
  5. Remove the crispy tofu from the skillet, pour the lemon sauce over, and toss gently.
  6. Plate your Lemon Pepper Tofu, garnish with lemon zest or herbs, and serve with rice or salad.

Nutrition

Serving: 1servingCalories: 180kcalCarbohydrates: 10gProtein: 15gFat: 9gSaturated Fat: 1gPolyunsaturated Fat: 1gMonounsaturated Fat: 1gSodium: 300mgPotassium: 350mgFiber: 3gSugar: 1gVitamin C: 15mgCalcium: 20mgIron: 15mg

Notes

Make sure to press the tofu well before cooking to achieve a crispy texture. Adjust lemon and pepper to taste.

Tried this recipe?

Let us know how it was!

Pineapple Chicken Tacos That Will Brighten Your Dinner Tonight

May 20, 2026 by Grace Snow Leave a Comment

Every summer, I find myself daydreaming about vibrant street tacos, the kind that are bursting with flavors and sunshine. That’s exactly the inspiration behind my Pineapple Chicken Tacos! This easy dinner recipe brings the lively essence of Mexican cuisine straight to your kitchen without the hassle. With just a handful of ingredients, you’ll create a perfect blend of succulent chicken and refreshing pineapple salsa that transforms simple weeknight meals into mini celebrations. What I love most is how adaptable this dish is—not only is it a crowd-pleaser, but it also lends itself beautifully to meal prep or using up leftovers. Ready to share in this culinary adventure with me? Let's dive into the fun world of Pineapple Chicken Tacos!

Why are Pineapple Chicken Tacos special?

Fresh, Bold Flavors: The combination of juicy pineapple and perfectly spiced chicken creates a salsa that's bright, sweet, and savory.

Quick Prep Time: With minimal cooking involved, you can whip up these tacos in no time—perfect for busy weeknights!

Crowd-Pleasing Delight: Whether you're hosting a summer gathering or just feeding the family, these tacos are sure to impress diners of all ages.

Versatile Meal Option: Want to mix things up? This recipe can easily adapt for meal prep or help you use up leftovers. Check out how I make Shrimp Tacos Zesty for another delicious twist!

Pineapple Chicken Tacos Ingredients

For the Chicken

  • Boneless Skinless Chicken Breasts – The main protein, diced for quick cooking; substitute with thighs for juiciness.
  • Olive Oil – Enhances flavor and helps with cooking; essential for a tasty, golden finish.
  • Smoked Paprika – Adds depth and a gentle smokiness to the chicken.
  • Chili Powder – Offers mild heat that can be adjusted to suit your spice preference.
  • Garlic Powder – Infuses savory notes for a more flavorful dish.
  • Salt – Essential for seasoning; vary to personal taste.

For the Pineapple Salsa

  • Fresh Pineapple – Provides sweetness and acidity; finely diced for a refreshing salsa.
  • Red Onion – Adds crunch and sharpness; chop finely for the best texture.
  • Fresh Cilantro – Brings a burst of freshness; parsley can be used as a milder alternative.
  • Lime Juice – Brightens the salsa and balances the sweetness of the pineapple.

For the Tacos

  • Corn or Flour Tortillas – Serves as the base for your tacos; warm to improve texture.

Dive into these Pineapple Chicken Tacos, where fresh ingredients unite for a delicious adventure!

Step‑by‑Step Instructions for Pineapple Chicken Tacos

Step 1: Prepare the Chicken
In a mixing bowl, toss diced boneless skinless chicken breasts with olive oil, smoked paprika, chili powder, garlic powder, and a sprinkle of salt. Ensure all pieces are well-coated for maximum flavor. Let the chicken marinate for about 10 minutes while you prepare your cooking space. You’ll want everything ready for a sizzling experience!

Step 2: Cook the Chicken
Heat a large skillet over medium-high heat for approximately 2-3 minutes until it’s hot. Add the marinated chicken pieces in a single layer, making sure they do not touch, to allow them to sear nicely. Cook undisturbed for about 3 minutes until golden brown and slightly charred, then stir to ensure even cooking for another 4-5 minutes until the chicken is fully cooked and registers 165°F internally.

Step 3: Make the Pineapple Salsa
While the chicken is cooking, combine finely diced fresh pineapple, chopped red onion, fresh cilantro, and a generous squeeze of lime juice in a medium bowl. Mix well to blend the flavors and let it sit for a few minutes. The salsa will brighten in flavor, and the combination will make your Pineapple Chicken Tacos irresistibly fresh!

Step 4: Warm the Tortillas
In another skillet or microwave, warm your corn or flour tortillas until they are pliable and steaming, which should take about 30 seconds in the microwave or 1-2 minutes in a dry skillet over low heat. This step ensures that your tortillas are soft and ready to hold all that delicious filling in your Pineapple Chicken Tacos.

Step 5: Assemble the Tacos
To assemble your Pineapple Chicken Tacos, place a scoop of the cooked chicken on each warm tortilla. Top generously with the refreshing pineapple salsa you just made, ensuring an even distribution of flavors. Feel free to add any extras like sliced jalapeños or a sprinkle of cotija cheese to elevate your taco experience!

Step 6: Serve and Enjoy
Serve your assembled Pineapple Chicken Tacos immediately, allowing everyone to dig in while the flavors are fresh and vibrant. A light salad or some grilled corn on the side would complement this meal beautifully, making your dinner a delightful and flavorful experience!

What to Serve with Pineapple Chicken Tacos

Transform your taco night into a feast with these perfect pairings that enhance the vibrant flavors of your Pineapple Chicken Tacos.

  • Creamy Guacamole: This rich, creamy dip adds a luscious texture and cool contrast, making every bite even more satisfying.

  • Zesty Lime Rice: Fluffy rice with a hint of lime brightens the plate and complements the sweetness of the pineapple beautifully. It's a perfect base for those taco toppings!

  • Crisp Cabbage Slaw: A crunchy slaw can add a refreshing and crisp bite to your meal, providing a pleasing contrast to the warm tortillas and juicy chicken.

  • Grilled Corn on the Cob: Sweet, charred corn pairs wonderfully with smoky chicken tacos, bringing a fun, summery vibe to your dinner.

  • Fresh Salsa Verde: This tangy salsa adds a burst of flavor and a zesty kick that elevates your tacos. Pair it for those who crave a bit more heat!

  • Margaritas: A classic pairing, these refreshing cocktails provide a splash of citrusy goodness that complements the tropical essence of your Pineapple Chicken Tacos.

  • Churros for Dessert: End your meal on a sweet note with crispy churros, offering a delightful contrast to the savory taco filling with warm cinnamon sugar.

Feel free to mix and match these favorites to craft your ideal dinner experience!

Make Ahead Options

These Pineapple Chicken Tacos are perfect for those looking to streamline dinner prep! You can marinate the diced chicken in olive oil, smoked paprika, and spices up to 24 hours in advance, ensuring that it soaks in all those delicious flavors. The pineapple salsa can also be prepared ahead of time and refrigerated for up to 2 days; just be sure to add a squeeze of lime juice before serving to maintain freshness. When you're ready to serve, simply cook the chicken, warm the tortillas, and assemble the tacos for a quick and vibrant meal that will impress the whole family without sacrificing quality!

Expert Tips for Pineapple Chicken Tacos

  • Perfect Sear: Ensure your skillet is hot before adding the chicken; this allows for a golden crust and enhances texture.

  • Adjust Spice: Control the heat in your tacos by varying the chili powder; add diced jalapeños to the salsa for an extra kick if desired.

  • Fresh Ingredients: Use ripe fresh pineapple for the salsa to guarantee that irresistible sweetness and acidity that complements the chicken.

  • Storage Solutions: To keep leftovers fresh, store the meat and salsa separately; the chicken will last up to four days, while salsa is best consumed within two days.

  • Warm Tortillas: Don’t skip warming the tortillas; this improves texture and makes them pliable, ensuring a perfect taco experience.

Pineapple Chicken Tacos Variations & Substitutions

Feel free to let your creativity shine with these delicious twists and swaps that will take your Pineapple Chicken Tacos to the next level!

  • Dairy-Free: Swap out traditional toppings like cheese or sour cream for creamy avocado or a sprinkle of nutritional yeast for a cheesy flavor without the dairy.
  • Spicy Kick: Add finely chopped fresh jalapeños to the pineapple salsa for a fiery flavor boost that will ignite your taste buds.
  • Alternative Proteins: Use shrimp or even crispy tofu instead of chicken for a different protein source; both options pair wonderfully with the sweet salsa.

Consider this: Shrimp cooks super quick and brings a delicate sweetness that complements the pineapple perfectly!

  • Added Fruits: Mix in diced mango or peach with the salsa for a tropical twist; these fruits add an extra layer of sweetness.
  • Smoky Flavor: Sprinkle some chipotle powder into your chicken seasoning for a smoky depth that transforms the flavor profile altogether. If you enjoy a bit of heat, this is a fabulous addition!
  • Tortilla Variety: Experiment with different types of tortillas, like lettuce wraps for a low-carb version or whole wheat tortillas for added fiber.
  • Herb Swap: Replace cilantro with fresh mint for a refreshing change; it works surprisingly well with the tropical flavors!

Feeling inspired? You might also enjoy how the bold flavors of Honey Garlic Chicken dance on your palate, or check out my succulent Chipotle Lime Chicken for another twist on taco night!

How to Store and Freeze Pineapple Chicken Tacos

Room Temperature: Enjoy your Pineapple Chicken Tacos immediately for the best flavor and texture; avoid leaving them out for more than 2 hours to prevent spoilage.

Fridge: Store leftover chicken and salsa in airtight containers in the fridge. The chicken stays fresh for up to 4 days, while the salsa is best consumed within 2 days to maintain its vibrant taste.

Freezer: For longer storage, freeze the cooked chicken in a single layer on a baking sheet then transfer to a zip-top bag. It can be frozen for up to 3 months. Reheat thoroughly before serving.

Reheating: To reheat, thaw the chicken overnight in the fridge, then warm in a skillet over medium heat until heated through. Serve with fresh salsa to enjoy the delightful flavors again!

Pineapple Chicken Tacos Recipe FAQs

How do I choose the right pineapple for the salsa?
Absolutely! Look for a pineapple that feels firm yet slightly soft at the base, with a sweet aroma at the stem end. The color should be vibrant, and avoid any fruit with dark spots or wrinkles. Ripe pineapples are best for the salsa, as they will add the perfect sweetness and acidity.

What is the best way to store leftover Pineapple Chicken Tacos?
Very! Store leftover chicken and salsa separately in airtight containers. The cooked chicken stays fresh in the refrigerator for up to 4 days, while the salsa is best consumed within 2 days. This method maintains the flavors and prevents the tortillas from becoming soggy.

Can I freeze the cooked chicken for later use?
Absolutely! To freeze the chicken, first spread it out in a single layer on a baking sheet and freeze until solid. Then transfer the chicken to a zip-top freezer bag and label it. It can be stored for up to 3 months! When you're ready to enjoy it again, thaw overnight in the fridge and reheat in a skillet.

How can I adjust the spiciness of the chicken for my family?
Very! You can control the heat by adjusting the amount of chili powder used in the recipe. For a bit of zing, add diced jalapeño to the salsa or sprinkle additional chili powder on top before serving. The more the merrier when it comes to flavor—try different spice levels to find your family’s sweet spot!

Can I use gluten-free tortillas for my Pineapple Chicken Tacos?
Absolutely! You can easily swap out regular corn or flour tortillas for gluten-free tortillas. Many stores offer excellent gluten-free options, so you'll still enjoy that delicious taco experience without any dietary concerns.

Are these tacos safe for pets to eat?
Very! While the ingredients in Pineapple Chicken Tacos are delicious, you should avoid giving them to pets, especially the seasoned chicken and salsa. Ingredients like onion and garlic can be harmful to dogs and cats. Always opt for plain, unseasoned chicken if treating your furry friend!

Pineapple Chicken Tacos

Pineapple Chicken Tacos That Will Brighten Your Dinner Tonight

Pineapple Chicken Tacos are bursting with vibrant flavors, perfect for a quick and delicious dinner.
Print Recipe Pin Recipe
Prep Time 15 minutes mins
Cook Time 15 minutes mins
Total Time 30 minutes mins
Servings: 4 tacos
Course: Dinner
Cuisine: Mexican
Calories: 250
Ingredients Equipment Method Nutrition Notes

Ingredients
  

For the Chicken
  • 1 pound Boneless Skinless Chicken Breasts Diced for quick cooking; substitute with thighs for juiciness.
  • 2 tablespoons Olive Oil Enhances flavor and helps with cooking.
  • 1 teaspoon Smoked Paprika Adds depth and smokiness.
  • 1 teaspoon Chili Powder Offers mild heat.
  • 1 teaspoon Garlic Powder Infuses savory notes.
  • to taste teaspoon Salt Essential for seasoning.
For the Pineapple Salsa
  • 1 cup Fresh Pineapple Finely diced for a refreshing salsa.
  • 1/4 cup Red Onion Chopped finely for best texture.
  • 1/4 cup Fresh Cilantro Brings a burst of freshness.
  • 2 tablespoons Lime Juice Brightens the salsa.
For the Tacos
  • 8 pieces Corn or Flour Tortillas Warm to improve texture.

Equipment

  • Large skillet
  • Mixing Bowl

Method
 

Preparation and Cooking
  1. In a mixing bowl, toss diced chicken with olive oil, smoked paprika, chili powder, garlic powder, and salt. Let marinate for 10 minutes.
  2. Heat a skillet over medium-high heat. Add marinated chicken, cook undisturbed for 3 minutes, then stir and cook for an additional 4-5 minutes until fully cooked.
  3. In another bowl, combine pineapple, red onion, cilantro, and lime juice for the salsa. Mix well and let sit for a few minutes.
  4. Warm the tortillas in a skillet or microwave until pliable.
  5. Assemble tacos by placing chicken on tortillas, topping with pineapple salsa.
  6. Serve immediately and enjoy!

Nutrition

Serving: 1tacoCalories: 250kcalCarbohydrates: 30gProtein: 20gFat: 10gSaturated Fat: 2gPolyunsaturated Fat: 0.5gMonounsaturated Fat: 7gCholesterol: 60mgSodium: 300mgPotassium: 400mgFiber: 2gSugar: 5gVitamin A: 200IUVitamin C: 30mgCalcium: 20mgIron: 1mg

Notes

These tacos are great for meal prep and versatile with ingredient substitutions.

Tried this recipe?

Let us know how it was!

Savory Herb Braised Short Ribs for Comfort Food Bliss

May 20, 2026 by Grace Snow Leave a Comment

As I walked through the market, the rich aroma of herbs and slow-cooked meat wafted through the air, reminding me of family gatherings filled with laughter and comfort food. Today, I'm excited to share my recipe for Herb Braised Short Ribs in a Dutch Oven—an absolute showstopper for your next Sunday dinner. With its melt-in-your-mouth tenderness and a savory sauce that envelopes every bite, this dish is not just a meal; it’s a heartfelt experience. Plus, the Dutch oven method means less fuss and more time enjoying good company. Whether you're a seasoned home chef or new to the kitchen, this meal brings warmth and joy to your table. Are you ready to transform a simple cut of meat into something extraordinary?

Why are these short ribs a must-try?

Tenderness is key: These Herb Braised Short Ribs are so tender, they practically melt in your mouth, making them the ultimate comfort food.

Flavor explosion: The rich combination of wine, herbs, and pancetta creates a deeply aromatic sauce that's simply unforgettable.

Ease of preparation: Cooking in a Dutch oven simplifies the process, leaving you with a savory dish without much hassle.

Crowd-pleaser: Perfect for family gatherings or cozy dinners, this dish will impress everyone at the table.

Versatile: Pair these ribs with creamy mashed potatoes or polenta for an ideal meal—just like with my Herby Ricotta Stuffed peppers, it’s all about flavor harmony!

Make-ahead magic: The flavors meld even better the next day, ensuring a delightful leftover experience.

Herb Braised Short Ribs Ingredients

• Discover the key components for this comforting dish!

For the Ribs

  • Bone-in Beef Short Ribs – Choose English-style for more meat and better retention during cooking.
  • Kosher Salt – Essential for enhancing flavor and helping to tenderize the meat.
  • Fresh Ground Black Pepper – Provides depth; freshly ground is best for optimal taste.
  • All-Purpose Flour – Use to coat the ribs for a delicious, flavorful crust when browned.

For Searing

  • Olive Oil – Ideal for searing the short ribs; substitute with vegetable oil if desired.
  • Pancetta – Adds a rich flavor; you can also use bacon as a substitute.

For the Aromatic Base

  • Onion – Freshly diced onions create a sweet aromatic base for the braising liquid.
  • Carrots – Sweetness from these vibrant veggies balances out the rich flavors.
  • Shallots – Intensity and sweetness work in harmony with the other aromatics.

For the Braising Liquid

  • Dry Red or White Wine – Adds incredible depth; select your favorite for a personalized touch. Non-alcoholic wine or extra broth can be used if needed.
  • Beef or Chicken Broth – This is crucial for creating a rich sauce full of flavor.

For the Finishing Touch

  • Fresh Thyme & Rosemary – These aromatic herbs infuse the dish with wonderful herbal notes; dried herbs can be used but use less, as they are more concentrated.

With these Herb Braised Short Ribs ingredients, you’re well on your way to creating a comforting masterpiece that will warm hearts and fill bellies! Happy cooking!

Step‑by‑Step Instructions for Herb Braised Short Ribs

Step 1: Season the Ribs
Generously season the bone-in beef short ribs with kosher salt and freshly ground black pepper, ensuring they're well coated. Dredge each rib in all-purpose flour, shaking off any excess. This step enhances flavor and promotes a delicious crust when seared, setting the foundation for your comforting Herb Braised Short Ribs.

Step 2: Render the Pancetta
In a large Dutch oven, heat over medium heat and add diced pancetta. Cook until the pancetta is crispy—about 5-7 minutes—while releasing its rich flavors into the pot. Once done, remove the pancetta and keep it aside, leaving that savory fat in the pot for browning the ribs.

Step 3: Brown the Short Ribs
Increase the heat to high and add olive oil to the Dutch oven. Sear the floured short ribs on all sides for approximately 3-4 minutes until they develop a golden-brown crust. Make sure not to move them too much during this time for optimal browning. Once browned, set the ribs aside with the pancetta.

Step 4: Sauté the Aromatics
Lower the heat to medium and add diced onion, carrots, and shallots to the Dutch oven. Sauté the vegetables for about 2 minutes until softened and fragrant, which adds depth to the rich sauce. This step creates a beautiful aromatic base for your Herb Braised Short Ribs.

Step 5: Deglaze with Wine
Pour in your choice of dry red or white wine, using a wooden spoon to scrape any browned bits off the bottom of the pot. Bring the mixture to a boil and let it cook for 2 minutes to evaporate some of the alcohol, allowing the robust flavors to shine through and enhance the dish.

Step 6: Add Broth and Return Ribs
Stir in beef or chicken broth along with any additional seasonings needed. Return the browned ribs and crispy pancetta to the pot, ensuring the ribs are nearly submerged in the flavorful liquid. This will create the luscious sauce that will envelop your Herb Braised Short Ribs as they cook.

Step 7: Incorporate the Herbs
Add fresh thyme and rosemary to the Dutch oven, layering on aromatic perfection. Cover the pot and transfer it to a preheated oven at 350°F. Allow the Herb Braised Short Ribs to braise for 2 hours, during which time they'll become incredibly tender and infused with flavor.

Step 8: Finish Braising
After 2 hours, reduce the oven temperature to 325°F and continue to cook for an additional 30-45 minutes. Check for tenderness—when the meat easily pulls away from the bone, your Herb Braised Short Ribs are ready to wow your guests with delectable flavor and texture.

Step 9: Rest and Skim the Fat
Once cooked, carefully remove the Dutch oven from the oven and let the dish rest, covered, for 20 minutes. This resting period allows the juices to redistribute. Before serving, skim off any excess fat from the surface of the sauce to leave a cleaner, more flavorful finish.

Storage Tips for Herb Braised Short Ribs

Fridge: Store leftover Herb Braised Short Ribs in an airtight container for up to 4 days. The flavors meld beautifully overnight, enhancing the taste.

Freezer: For longer storage, freeze the short ribs in portions with sauce for up to 3 months. This makes for easy meals later on.

Reheating: To reheat frozen short ribs, place them in a covered Dutch oven at 300°F for about 30 minutes until warmed through. Enjoy the flavors just as delectable as when first made!

What to Serve with Herb Braised Short Ribs

Imagine the comforting aroma wafting through your home as you create a splendid meal around these tender ribs.

  • Creamy Mashed Potatoes: Silky and rich, these potatoes absorb the luscious sauce, making every bite a delight.

  • Garlic Roasted Brussels Sprouts: The crispy edges of the sprouts offer a satisfying crunch that contrasts beautifully with the tender meat. You’ll love the burst of garlicky goodness!

  • Herbaceous Green Salad: A refreshing mix of greens with a tangy vinaigrette adds brightness, balancing the rich flavors of the ribs. This combination is a perfect palate cleanser to keep the meal light.

  • Polenta: Creamy polenta adds a comforting, velvety texture that soaks up the savory juices. It's a warm hug on your plate!

  • Buttered Corn on the Cob: Sweet corn provides a delightful crunch and a touch of sweetness that pairs wonderfully with the savory elements of the dish.

  • Full-Bodied Red Wine: A glass of cabernet or merlot enhances the meal, echoing the deep flavors of the braised short ribs and elevating your dining experience.

Herb Braised Short Ribs Variations

Feel free to explore new flavors and adaptations as you create your wonderful dish!

  • Italian Twist: Incorporate oregano and basil for an Italian flavor profile. Serve with a side of pasta to keep the theme going.

  • Spicy Kick: Add crushed red pepper flakes during the braising for a warm, spicy finish. Just a pinch can elevate the dish beautifully.

  • Mushroom Magic: Mix in hearty mushrooms like shiitake or porcini for an earthier flavor. They add depth and a lovely texture to the sauce.

  • Smoky Flavor: Use smoked paprika for a subtle smoky note. Just a teaspoon can transform this comforting dish into a campfire classic.

  • Root Vegetable Bliss: Toss in potatoes or parsnips for a heartier twist. They’ll absorb the luscious sauce, making each bite even more enjoyable.

  • Non-Alcoholic Option: Swap the wine with additional beef broth or a splash of apple cider vinegar for a tangy depth without alcohol.

  • Terrific Toppings: Serve with freshly grated Parmesan or a sprinkle of chives for an extra burst of flavor. A garnish can elevate presentation and taste.

  • Rich Red Wine: For an added depth, swap in a robust red wine like Cabernet Sauvignon, which pairs well with the rich flavors of your dish. The perfect complement to those Herby Ricotta Stuffed peppers you might serve alongside!

Expert Tips for Herb Braised Short Ribs

  • Sear with Patience: Make sure to let the short ribs sear without moving them to achieve a fantastic crust and maximize flavor.

  • Low and Slow: Stick to low braising temperatures for tender, succulent meat. Avoid rushing the process; patience is key for the best results.

  • Perfecting the Sauce: Skim excess fat before serving, but for easier removal, chill the dish. The cooled fat will solidify, allowing for effortless skimming.

  • Cooking in Batches: If your Dutch oven is on the smaller side, sear the ribs in batches to prevent overcrowding, which ensures they brown evenly.

  • Season Generously: Don’t hold back on seasonings! The robust flavors of kosher salt and black pepper enhance the overall taste of your Herb Braised Short Ribs.

Make Ahead Options

These Herb Braised Short Ribs are perfect for meal prep enthusiasts! You can season and brown the ribs, then let them marinate in the refrigerator for up to 24 hours to infuse even more flavor. Additionally, chop your onion, carrots, and shallots in advance; they’ll stay fresh in an airtight container in the fridge for up to 3 days. When you’re ready to enjoy, simply sauté the aromatics and follow the braising steps as usual. This method maintains the quality, ensuring your dish is just as delicious and tender as ever, saving you time on busy weeknights while delivering that comforting, home-cooked experience.

Herb Braised Short Ribs Recipe FAQs

What kind of short ribs should I use?
For the best results, I recommend using bone-in English-style beef short ribs. They contain more meat and retain moisture better during cooking, resulting in that tender, juicy texture we all crave.

How should I store leftover Herb Braised Short Ribs?
Store your leftover short ribs in an airtight container in the refrigerator for up to 4 days. This will allow the flavors to meld beautifully overnight, making the next day’s meal even more delightful!

Can I freeze Herb Braised Short Ribs?
Absolutely! For freezing, portion the short ribs with their sauce into airtight containers or freezer bags. They’ll stay fresh for up to 3 months. When ready to enjoy, simply reheat them in a covered Dutch oven at 300°F for about 30 minutes until warmed through.

Why are my short ribs tough after cooking?
That can happen if the ribs were cooked at too high a temperature or not long enough. It's essential to maintain a low and slow cooking process. If you're using a Dutch oven, you want to keep it covered and allow the ribs to braise gently—this achieves the fork-tender texture you’re aiming for.

What herbs can I use if I don’t have fresh thyme or rosemary?
If fresh herbs aren't available, dried alternatives work! Just remember that dried herbs are more concentrated, so use about 1/3 of the amount required for fresh. For thyme, 1 teaspoon dried will suffice, and for rosemary, 1/2 teaspoon dried should do the trick!

Are Herb Braised Short Ribs safe for pets?
It's best to avoid giving short ribs to pets, especially anything cooked with onions or rich sauces, as these can be harmful to them. Stick with plain, unseasoned meat if you want to share a tiny bit with your furry friend!

Herb Braised Short Ribs

Savory Herb Braised Short Ribs for Comfort Food Bliss

These Herb Braised Short Ribs provide melt-in-your-mouth tenderness, perfect for a comforting family dinner.
Print Recipe Pin Recipe
Prep Time 30 minutes mins
Cook Time 2 hours hrs 30 minutes mins
Resting Time 20 minutes mins
Total Time 3 hours hrs 20 minutes mins
Servings: 6 ribs
Course: Dinner
Cuisine: American
Calories: 450
Ingredients Equipment Method Nutrition Notes

Ingredients
  

For the Ribs
  • 3 lbs Bone-in Beef Short Ribs Choose English-style for more meat
  • 1 tbsp Kosher Salt Essential for flavor
  • 1 tsp Fresh Ground Black Pepper Freshly ground is best
  • 1/4 cup All-Purpose Flour For coating the ribs
For Searing
  • 2 tbsp Olive Oil Ideal for searing
  • 4 oz Pancetta Adds rich flavor
For the Aromatic Base
  • 1 medium Onion Diced
  • 2 medium Carrots Diced
  • 2 medium Shallots Diced
For the Braising Liquid
  • 1 cup Dry Red or White Wine Select your favorite
  • 4 cups Beef or Chicken Broth Crucial for flavor
For the Finishing Touch
  • 2 sprigs Fresh Thyme
  • 2 sprigs Fresh Rosemary

Equipment

  • Dutch oven

Method
 

Step-by-Step Instructions
  1. Generously season the ribs with kosher salt and black pepper, coat with flour.
  2. In a Dutch oven, cook pancetta over medium heat until crispy, then remove.
  3. Increase heat and sear short ribs in olive oil until browned all sides.
  4. Sauté onions, carrots, and shallots in the Dutch oven until softened.
  5. Deglaze the pot with wine and scrape up any browned bits. Cook briefly.
  6. Add broth and return ribs and pancetta to the pot, ensuring ribs are submerged.
  7. Add thyme and rosemary, cover, and braise in oven at 350°F for 2 hours.
  8. Reduce heat to 325°F and continue to cook for 30-45 minutes.
  9. Let rest covered for 20 minutes before serving, skim off excess fat.

Nutrition

Serving: 1ribCalories: 450kcalCarbohydrates: 10gProtein: 35gFat: 30gSaturated Fat: 12gPolyunsaturated Fat: 3gMonounsaturated Fat: 15gCholesterol: 90mgSodium: 800mgPotassium: 600mgFiber: 1gSugar: 2gVitamin A: 500IUVitamin C: 6mgCalcium: 30mgIron: 3mg

Notes

Serve with creamy mashed potatoes or polenta for a perfect meal.

Tried this recipe?

Let us know how it was!

Delicious Thai Style Sweet Chili Ribs for Flavor Lovers

May 20, 2026 by Grace Snow Leave a Comment

Every waft of savory aromas from my kitchen brings me back to the bustling streets of Thailand. Let me share with you my secret to making Irresistible Thai Style Sweet Chili Ribs that are slow-cooked to perfection. This delicious recipe strikes a perfect balance of warm, sweet, and spicy flavors that will have everyone at the table asking for seconds. One of the best parts? It’s incredibly versatile! You can easily adjust the heat levels to match your family’s preferences, and even swap out the pork ribs for chicken or plant-based options for a lighter twist. Ideal for busy weeknights yet fancy enough for a weekend gathering, these ribs pair wonderfully with jasmine rice or fresh veggies. So, are you ready to elevate your family dinners with this mouthwatering dish?

Why are Thai Style Sweet Chili Ribs a must-try?

Flavor Explosion: Each bite bursts with a perfect blend of sweet, spicy, and savory elements that transport your taste buds straight to Thailand.
Versatility at Its Finest: Customize the heat levels to suit every palate, making it an ideal dish for family gatherings.
Slow-Cooker Simplicity: Enjoy the ease of slow cooking while freeing up your time for other tasks or entertaining guests.
Irresistibly Tender: The ribs come out falling-off-the-bone tender and glazed to perfection, making them a sure hit at any meal.
Serving Options Galore: Pair with fluffy jasmine rice or quinoa for a complete meal or enjoy alongside fresh veggies for a lighter choice; the possibilities are endless!

Thai Style Sweet Chili Ribs Ingredients

• You'll need these essential ingredients to create the irresistible flavor profile of Thai Style Sweet Chili Ribs.

For the Ribs

  • Pork Ribs – Bone-in cuts provide a rich, meaty base that enhances flavor dramatically.
  • Garlic – Fresh garlic adds aromatic depth; feel free to adjust based on your personal taste!

For the Sauce

  • Sweet Chili Sauce – This key ingredient delivers necessary sweetness; consider making your own for a fresher taste.
  • Lime Juice – Balances the sweetness with acidity; freshly squeezed lime juice elevates the overall flavor.
  • Fish Sauce – Introduces a deep umami flavor; use soy sauce for a vegetarian-friendly option if needed.
  • Honey/Sugar – Promotes delicious caramelization; reduce the amount for a lighter sauce.
  • Chili Flakes – Opt for adjustable heat by adding chili flakes according to your spice preference; simply omit for milder ribs.

Each bite you take will encapsulate a symphony of flavors that speaks to the heart of Thai cuisine!

Step‑by‑Step Instructions for Thai Style Sweet Chili Ribs

Step 1: Prepare Ribs
Begin by seasoning the pork ribs generously with salt and pepper, ensuring they are evenly coated for maximum flavor. Place the seasoned ribs into your slow cooker, stacking them neatly to fit, and drizzle a bit of oil if desired to enhance browning. This preparation sets the stage for your delicious Thai Style Sweet Chili Ribs.

Step 2: Make Sauce
In a mixing bowl, combine the sweet chili sauce, minced garlic, freshly squeezed lime juice, fish sauce, and honey or sugar. Whisk together until well blended, and adjust the chili flakes to your heat preference, adding more for extra spice. This sauce is the heart of your Thai Style Sweet Chili Ribs, so make sure it has a balanced flavor.

Step 3: Combine
Pour the prepared sauce over the ribs in the slow cooker, making sure to cover all surfaces well. Use a spatula to gently flip the ribs if necessary, ensuring a thorough coating. This step is crucial, as it infuses the ribs with the sweet and spicy flavors that make this dish irresistible.

Step 4: Cook
Cover the slow cooker with its lid and set it to low heat. Allow the ribs to cook for 6-8 hours, checking occasionally after about 6 hours. They are done when they are tender and pulling apart easily. The long cooking time ensures your Thai Style Sweet Chili Ribs become infused with the delicious sauce.

Step 5: Glaze and Crisp
Once the ribs are tender, transfer them carefully to a baking dish. Brush them generously with additional sweet chili sauce for extra flavor. Place the dish under the broiler in your oven for about 5-7 minutes, watching closely to prevent burning. This step caramelizes the sugars, creating a delightful glaze that enhances the ribs' appearance and taste.

Step 6: Serve
After broiling, remove the ribs from the oven and let them rest for a few minutes. Slice the ribs if desired, then serve them on a plate garnished with fresh herbs like cilantro or lime slices. Pair your Thai Style Sweet Chili Ribs with fluffy jasmine rice or quinoa to complete a delicious meal that everyone will love.

Expert Tips for Perfect Thai Style Sweet Chili Ribs

  • Seal in Flavor: Always keep the lid on the slow cooker while cooking; this retains moisture and prevents the ribs from becoming tough.

  • Watch the Broil: When glazing, broil the ribs carefully for 5-7 minutes. A minute too long can lead to burnt edges, ruining your delicious Thai Style Sweet Chili Ribs.

  • Adjust Spice Gradually: Start with a conservative amount of chili flakes to gauge your heat preference. It’s easier to add more spice than to tone it down later!

  • Make-Ahead Magic: Consider preparing the sauce and seasoning the ribs up to 24 hours in advance. This not only saves time but also enhances the flavor!

  • Serve with Freshness: Garnish with fresh herbs and lime slices just before serving to elevate that vibrant Thai flavor profile and add a lovely presentation.

Storage Tips for Thai Style Sweet Chili Ribs

Fridge: Store cooled Thai Style Sweet Chili Ribs in an airtight container for up to 3 days to maintain freshness and flavor.

Freezer: Wrap the ribs tightly in plastic wrap and then aluminum foil; they can be frozen for up to 3 months. Thaw overnight in the fridge before reheating for best results.

Reheating: Reheat in the oven at 350°F (175°C) for about 15-20 minutes, or until warmed through. You can also use the microwave, but the oven keeps the glaze crispy.

Moisture Retention: To keep the ribs juicy during storage, consider adding a splash of sweet chili sauce when reheating, enhancing their flavor and moisture.

Make Ahead Options

These Thai Style Sweet Chili Ribs are perfect for busy home cooks looking to save time during the week! You can season the pork ribs and prepare the sauce up to 24 hours in advance, allowing the flavors to meld together beautifully. Simply store the seasoned ribs and sauce separately in airtight containers in the refrigerator. When you're ready to enjoy, just combine the sauce with the ribs in the slow cooker and let them cook on low for 6-8 hours. This meal prep tip ensures your ribs remain just as delicious and tender while saving you valuable time on hectic days. Enjoy restaurant-quality results with minimal effort!

What to Serve with Irresistible Thai Style Sweet Chili Ribs

Looking to build a memorable meal around these finger-licking ribs? Here are some perfect accompaniments to elevate your dining experience.

  • Fluffy Jasmine Rice: This fragrant rice absorbs the rich, sticky sauce perfectly, balancing the dish's sweet and spicy notes.
  • Crisp Asian Slaw: The freshness and crunch of cabbage, carrots, and ginger in a light dressing provides a refreshing contrast to the tender ribs. A vibrant slaw adds a healthy crunch and bright colors to your plate.
  • Steamed Broccoli: A simple side that offers a nutritious boost; its mild flavor complements the boldness of the ribs beautifully.
  • Quinoa Salad: Nutty quinoa mixed with herbs, lime, and veggies offers a hearty, gluten-free option that enhances the meal’s texture.
  • Grilled Pineapple Slices: The natural sweetness of caramelized pineapple enhances the tropical flavors, adding a juicy, vibrant element to the meal. Pairing fruit with savory can create delightful surprises!
  • Chilled Coconut Water: This refreshing drink enhances the tropical vibe and offers a light and hydrating option alongside your spicy meal.
  • Mango Sticky Rice Dessert: Indulge in this traditional Thai dessert to round off your meal—its sweetness will harmonize beautifully with the flavors of the ribs.
  • Lime Wedges: A sprinkle of fresh lime juice over the ribs just before serving brightens up the dish, enhancing every bite with zesty freshness.

Thai Style Sweet Chili Ribs Variations

Feel free to play with the ingredients and flavors to create your own twist on these delicious ribs!

  • Chicken Option: Swap out pork ribs for boneless, skinless chicken thighs for a lighter and equally delicious meal.
    Chicken absorbs the sweet chili flavor well while cooking to tenderness similar to pork.

  • Vegetarian-Friendly: Use a plant-based sauce along with tofu or seitan to bring those bold flavors to a meatless version everyone can enjoy!
    The tofu soaks up the sauce beautifully, making each bite as satisfying as traditional ribs.

  • Extra Spicy: For those who like it hot, increase the chili flakes or add chopped fresh chili peppers directly into the sauce for an extra punch.
    Each bite will have your taste buds dancing, leaving you craving more!

  • Healthy Swap: Replace sugar with a natural sweetener like maple syrup or agave nectar for a less-processed version.
    Not only does it add depth of flavor, but it’s also a great way to keep the sweetness intact with less guilt.

  • Homemade Sauce: Consider making your sweet chili sauce for a fresher, personalized twist that perfectly suits your palate.
    Experiment with ginger or sesame oil to give it a unique flavor profile that can elevate your ribs to a culinary delight!

  • Lime Zest: Add a sprinkle of freshly grated lime zest on top right before serving for a zesty kick that brightens up the entire dish.
    It adds an aromatic fragrance that beautifully complements the sticky glaze.

  • Smoky Flavor: Dust the ribs with a bit of smoked paprika or liquid smoke before cooking for an amazing depth of flavor.
    This twist transforms your dish into an irresistible barbecue-style delight reminiscent of summertime cookouts.

  • Crispy Finish: For an added texture, sprinkle on some crushed peanuts after glazing the ribs, giving a delightful crunch to your tender meat.
    This combination offers not just flavor but also a fun contrast that will surprise your guests!

Don’t forget to explore other delicious ideas like making Smoky Sweet Potatoes for sides or trying out Maple Roasted Sweet Potato alongside your meal.

Thai Style Sweet Chili Ribs Recipe FAQs

How do I choose the best pork ribs?
Definitely select ribs that have a nice layer of meat over the bone. Look for cuts with some fat marbling, as this fat will render during cooking, keeping the meat moist and flavorful. Avoid ribs with dark spots or excessive liquid in the packaging, which can be signs of aging.

What’s the best way to store leftovers?
Store cooled Thai Style Sweet Chili Ribs in an airtight container in the fridge for up to 3 days. Ensure they’re completely cooled before sealing to maintain freshness and flavor. For longer storage, you can wrap them tightly in plastic wrap followed by aluminum foil and freeze for up to 3 months.

Can I freeze the sweet chili ribs?
Absolutely! To freeze your Thai Style Sweet Chili Ribs effectively, wrap them tightly in plastic wrap and then cover them with aluminum foil to prevent freezer burn. After freezing, make sure to thaw them overnight in the fridge before reheating for the best taste and texture.

What if my ribs don’t get tender after cooking?
If your ribs aren’t tender after the full 8 hours, it simply means they need more time in the slow cooker. I recommend checking them after an additional hour, as slow cooker times can vary. Another tip is to ensure the lid remains on during cooking to keep the moisture in.

Are there any dietary considerations for these ribs?
Yes! For a vegetarian adaptation, you can substitute the pork ribs with boneless, skinless chicken thighs and use a plant-based sweet chili sauce instead of fish sauce. Additionally, make sure to check your sauces for allergens like gluten or soy if anyone in your family has dietary restrictions.

How do I reheat my Thai Style Sweet Chili Ribs while keeping them moist?
To reheat, place the ribs in a preheated oven at 350°F (175°C) for about 15-20 minutes, covered with foil to retain moisture. Adding a splash of sweet chili sauce will help enhance the flavor and keep them juicy. You can also use the microwave, but be cautious, as it may tend to dry them out.

Thai Style Sweet Chili Ribs

Delicious Thai Style Sweet Chili Ribs for Flavor Lovers

Irresistible Thai Style Sweet Chili Ribs with a perfect balance of sweet and spicy flavors.
Print Recipe Pin Recipe
Prep Time 20 minutes mins
Cook Time 7 hours hrs
Resting Time 10 minutes mins
Total Time 7 hours hrs 30 minutes mins
Servings: 4 ribs
Course: Dinner
Cuisine: Thai
Calories: 320
Ingredients Equipment Method Nutrition Notes

Ingredients
  

For the Ribs
  • 2 pounds Pork Ribs Bone-in cuts
  • 1 teaspoon Garlic Fresh, minced
For the Sauce
  • 1 cup Sweet Chili Sauce Store-bought or homemade
  • 2 tablespoons Lime Juice Freshly squeezed
  • 2 tablespoons Fish Sauce Can substitute with soy sauce
  • 2 tablespoons Honey/Sugar Adjust for sweetness
  • 1 teaspoon Chili Flakes Adjust for spice preference

Equipment

  • Slow Cooker
  • Mixing Bowl
  • Baking Dish

Method
 

Preparation Steps
  1. Season the pork ribs generously with salt and pepper. Place them in the slow cooker and drizzle with oil.
  2. In a mixing bowl, combine sweet chili sauce, minced garlic, lime juice, fish sauce, and honey or sugar. Whisk until blended.
  3. Pour the sauce over the ribs in the slow cooker, ensuring they are well coated.
  4. Cover and cook on low heat for 6-8 hours until ribs are tender.
  5. Transfer ribs to a baking dish, brush with sweet chili sauce, and broil for 5-7 minutes.
  6. Let rest for a few minutes, slice if desired, and serve garnished with fresh herbs.

Nutrition

Serving: 1ribsCalories: 320kcalCarbohydrates: 30gProtein: 18gFat: 16gSaturated Fat: 6gPolyunsaturated Fat: 0.5gMonounsaturated Fat: 9gCholesterol: 70mgSodium: 700mgPotassium: 450mgFiber: 1gSugar: 12gVitamin C: 2mgCalcium: 10mgIron: 2mg

Notes

Consider preparing the sauce and seasoning the ribs a day in advance for enhanced flavor.

Tried this recipe?

Let us know how it was!
  • « Previous Page
  • 1
  • …
  • 19
  • 20
  • 21
  • 22
  • 23
  • …
  • 245
  • Next Page »

Welcome!

Hi, I’m Grace, a Sydney-based home cook with a passion for bold flavors and trending ingredients. Whether you’re a busy beginner or a seasoned foodie, you’ll find dishes here that are fresh, fun, and full of flavor.

More about me

Popular Recipes

  • One Pot Keto Tuna Casserole
    One Pot Keto Tuna Casserole: Creamy Comfort in Minutes
  • Ultimate Jalapeno Popper Chicken Salad
    Ultimate Jalapeno Popper Chicken Salad That'll Wow Your Tastebuds
  • Green Chile Cheese Dip
    Mouthwatering Green Chile Cheese Dip for Cozy Gatherings
  • Easy Chimichurri Sauce
    Fresh and Zesty Easy Chimichurri Sauce in Just Minutes

Footer

↑ back to top

About

  • Privacy Policy
  • Disclaimer
  • Terms & Conditions

Newsletter

  • Sign Up! for emails and updates

Contact

  • About me
  • Contact me

Copyright © 2025 TastyTrendIngredients