tastytrendingredients

  • Home
  • Recipes
    • Appetizers
    • Breakfast
    • Dessert
    • Dinner
    • Drinks
    • Salads
    • Snacks
    • Soups
  • About me
  • Contact
menu icon
go to homepage
  • Home
  • Recipes
    • Appetizers
    • Breakfast
    • Dessert
    • Dinner
    • Drinks
    • Salads
    • Snacks
    • Soups
  • About me
  • Contact
search icon
Homepage link
  • Home
  • Recipes
    • Appetizers
    • Breakfast
    • Dessert
    • Dinner
    • Drinks
    • Salads
    • Snacks
    • Soups
  • About me
  • Contact
×

Coconut Chicken Rice Bowl: A Tropical Taste of Home

May 20, 2026 by Grace Snow Leave a Comment

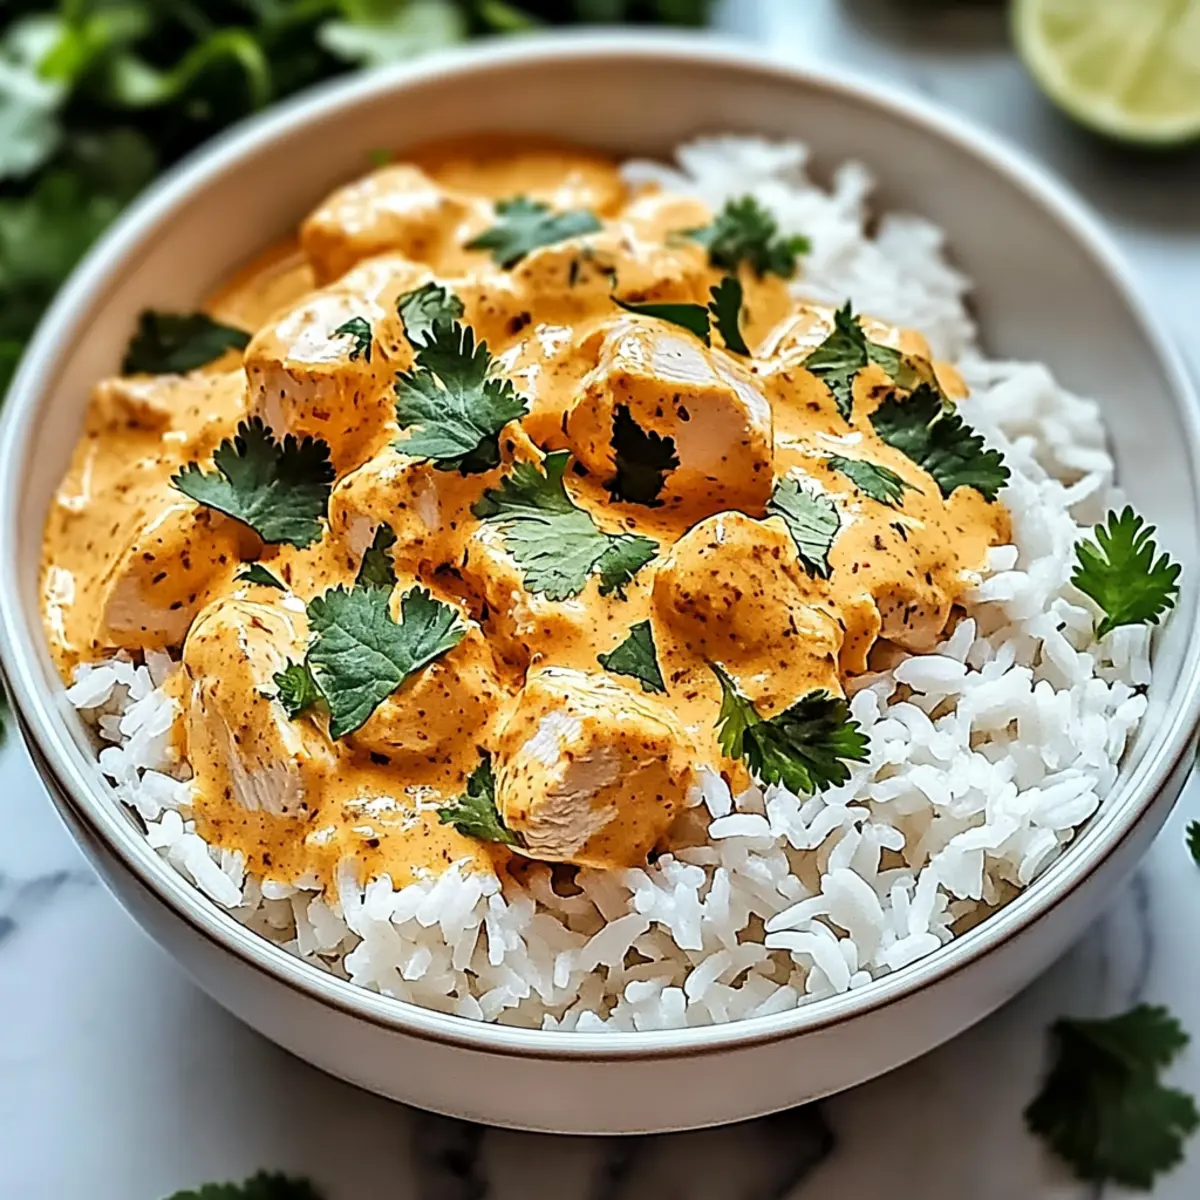
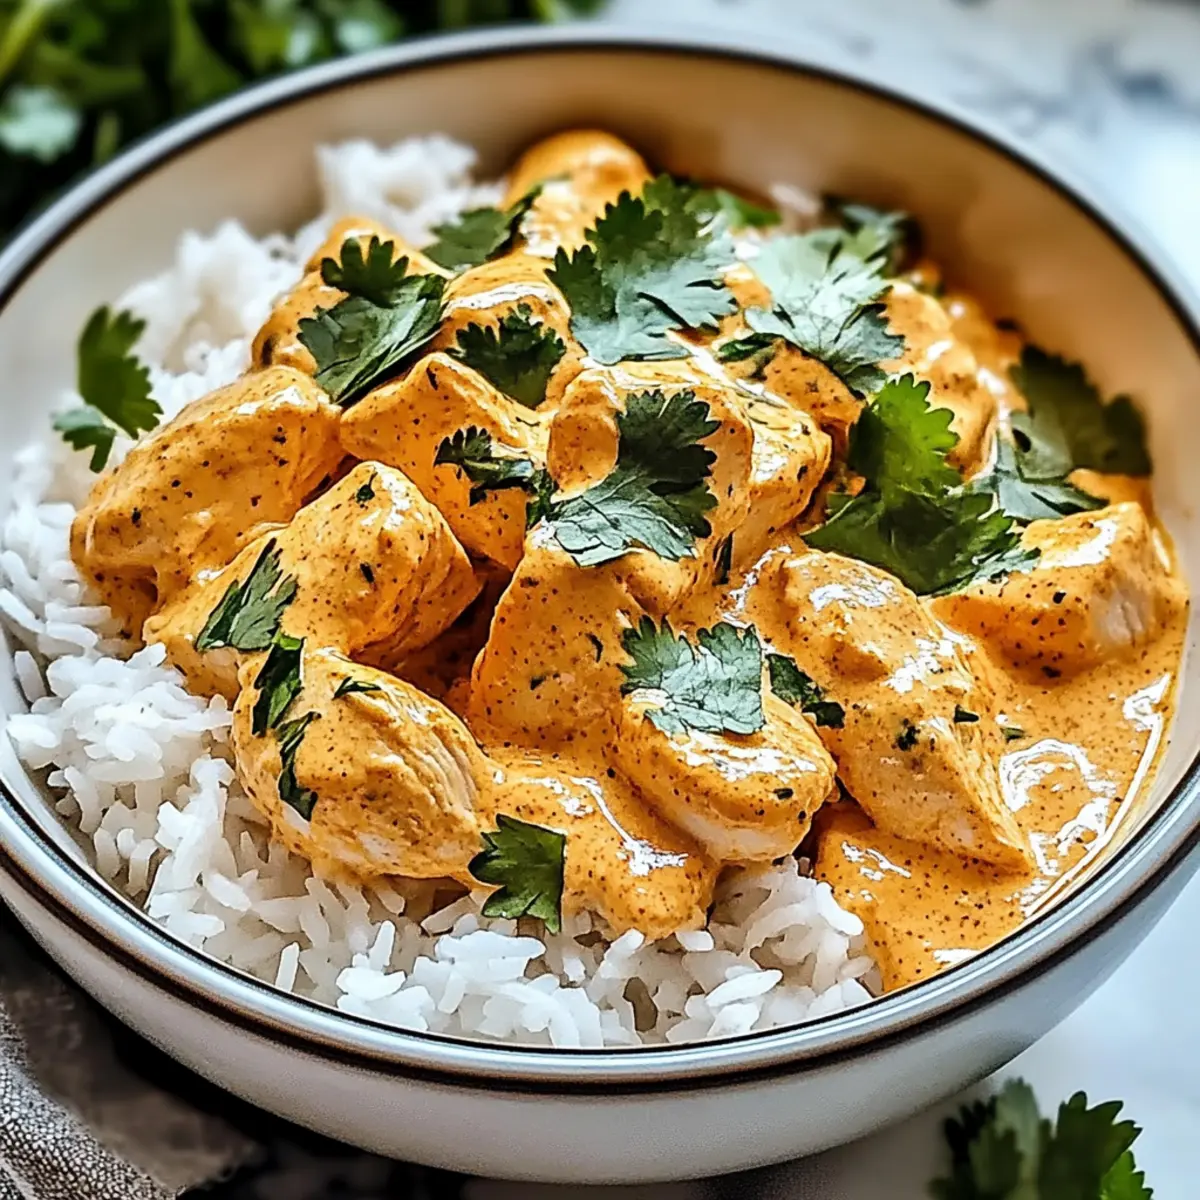
As I stirred the pot, the rich aroma of coconut and ginger whisked me away to a sun-soaked beach. This Tropical Coconut Chicken Rice Bowl is my go-to for those evenings when life is chaotic, yet I crave something comforting and nurturing. Ready in just 20 minutes, it brings a quick flavor escape right to your table without the fuss of takeout. The beauty of this dish lies in its customization—whether you're a chicken lover or prefer vibrantly seasoned shrimp, tofu, or chickpeas, each bowl is a delightful canvas waiting for your touch. Plus, it packs a nutritious punch while being gluten-free, making it a perfect choice for everyone at the dinner table. Ready to dive into a tropical delight that’s as nourishing as it is delicious?

Why Choose Tropical Coconut Chicken Rice Bowl?

Quick Preparation: This Coconut Chicken Rice Bowl is ready in just 20 minutes, making it the perfect solution for busy weeknights when time is short.
Nutritious & Flavorful: Packed with essential nutrients and flavor, each bowl is a delicious balance of proteins and healthy fats suitable for the whole family.
Customizable: Whether you prefer chicken, shrimp, tofu, or chickpeas, you can easily swap ingredients to satisfy your cravings or dietary needs.
Gluten-Free Option: Using gluten-free soy sauce or coconut aminos allows everyone to enjoy this dish worry-free.
Crowd-Pleasing Appeal: The vibrant colors and rich aromas make it a showstopper, sure to impress your dinner guests. For a balancing side, consider serving it alongside a refreshing mango salad or grilled pineapple to elevate your meal!

Coconut Chicken Rice Bowl Ingredients

For the Chicken
• Boneless, Skinless Chicken Breasts – The primary protein that adds heartiness to this Coconut Chicken Rice Bowl; feel free to substitute with shrimp, tofu, or chickpeas for varied flavors.

For the Sauce
• Coconut Milk – Creamy and rich; using light coconut milk can reduce fat without losing deliciousness.
• Soy Sauce (or Tamari) – Provides that savory umami depth; swap with coconut aminos for a soy-free option.
• Lime Juice – Fresh juice is a must for that bright acidity which elevates the dish.
• Garlic – Fresh minced cloves add aromatic goodness; jarred garlic works in a pinch.
• Ginger – Freshly grated ginger gives a zesty kick that infuses the sauce with warmth.

For the Base
• Cooked Rice – Acts as the comforting foundation; jasmine, basmati, or brown rice are great options, or try cauliflower rice for a low-carb alternative.

For Cooking
• Vegetable Oil (or Coconut Oil) – Helps cook the chicken while adding a hint of flavor.
• Salt and Pepper – The essential seasonings to enhance every element of the dish.

For Garnish
• Fresh Cilantro or Green Onions – Adds a pop of color and freshness; parsley can also be used for a different twist.

Step‑by‑Step Instructions for Tropical Coconut Chicken Rice Bowl

Step 1: Heat Oil
In a large skillet, heat 1 tablespoon of vegetable or coconut oil over medium heat until shimmering. This process should take about 1-2 minutes. Ensure the oil is hot before adding the chicken, as this helps create a nice sear, which will enrich the flavor of your Tropical Coconut Chicken Rice Bowl.

Step 2: Cook Chicken
Add 1 pound of diced boneless, skinless chicken breasts, seasoned with salt and pepper, to the skillet. Cook for 5-7 minutes while stirring occasionally until the chicken is golden brown and fully cooked, reaching an internal temperature of 165°F. The chicken will turn golden and slightly crisp on the outside, indicating it’s ready for the next step.

Step 3: Add Aromatics
Once the chicken is cooked through, stir in 2 minced garlic cloves and 1 teaspoon of grated ginger. Saute for about 1 minute, stirring frequently until fragrant. The wonderful aromas will start to fill your kitchen, making it hard to resist this Tropical Coconut Chicken Rice Bowl filled with flavor.

Step 4: Create Sauce
Pour in 1 can of coconut milk, followed by 1 tablespoon of soy sauce and 1 teaspoon of lime juice. Stir everything together and bring the mixture to a gentle simmer. Allow it to cook for 5-7 minutes, stirring occasionally until the sauce thickens slightly. You’ll notice the rich, creamy sauce developing as it cooks.

Step 5: Prepare Rice
While the sauce is simmering, cook 2 cups of rice according to the package instructions. Whether you're using jasmine or brown rice, this usually takes about 15 minutes. Once cooked, fluff the rice with a fork, and it will serve as the perfect base for your Tropical Coconut Chicken Rice Bowl.

Step 6: Assemble Bowl
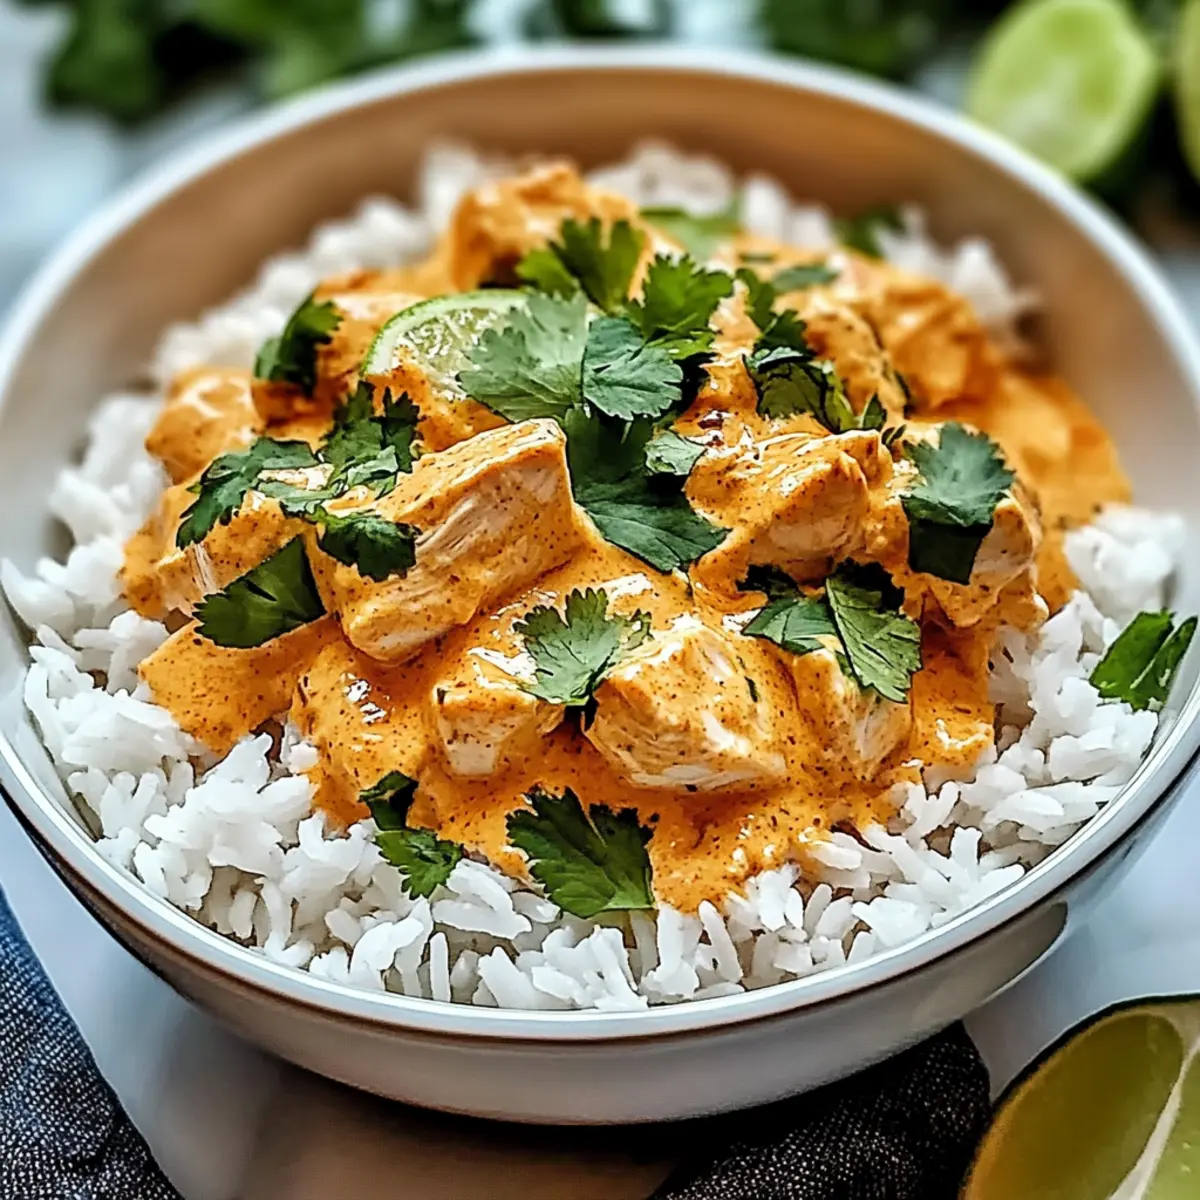
To serve, place a generous scoop of rice in each bowl and ladle the coconut chicken mixture over it. Garnish with freshly chopped cilantro or sliced green onions for a pop of color and freshness. Your Tropical Coconut Chicken Rice Bowl is now ready to enjoy, radiating a delightful tropical vibe straight to your table!

Make Ahead Options

These Tropical Coconut Chicken Rice Bowls are perfect for meal prep enthusiasts! You can marinate the chicken in the coconut milk, soy sauce, lime juice, garlic, and ginger mixture up to 24 hours in advance. This not only saves time but enhances the flavor as the chicken absorbs all those delicious notes. For even more convenience, cook 2 cups of rice beforehand and refrigerate it for up to 3 days. When you're ready to serve, simply sauté the marinated chicken until it's cooked through, and warm the rice in the microwave or on the stovetop. This preparation allows you to whip up these Coconut Chicken Rice Bowls in a snap, ensuring a crowd-pleasing meal with minimal effort!

Tips for the Best Coconut Chicken Rice Bowl

  • Sear for Success: Ensure your skillet is hot before adding chicken; this creates a flavorful crust instead of steaming it.
  • Don't Rush the Sauce: Allow the coconut milk mixture to simmer for a few minutes to achieve that creamy, thick consistency; rushing will leave it watery.
  • Fresh Matters: Opt for fresh garlic and ginger for a more vibrant flavor in your Coconut Chicken Rice Bowl; powdered versions lack the same aromatic punch.
  • Perfectly Cooked Rice: Fluff your rice with a fork after cooking for the best texture; this helps separate the grains, making your bowl even more delightful.
  • Customize Wisely: While it's tempting to toss in all your favorite veggies, consider the moisture content; too many can dilute the sauce's richness.

How to Store and Freeze Tropical Coconut Chicken Rice Bowl

Fridge: Store leftover Coconut Chicken Rice Bowl in an airtight container for up to 3 days to maintain freshness and flavor.

Freezer: Freeze in a safe container for up to 3 months. Thaw overnight in the fridge before reheating for the best texture.

Reheating: Gently reheat in the microwave or on the stovetop over low heat to preserve the creamy sauce; add a splash of coconut milk if the sauce thickens too much.

Coconut Chicken Rice Bowl: Customization Ideas

Feel free to let your imagination and palate run wild with these delightful variations to create your perfect Tropical Coconut Chicken Rice Bowl.

  • Seafood Swap: Substitute chicken with shrimp for a fresh seafood version that brings a delightful ocean taste. Just sauté the shrimp until they turn pink and lose their translucency—this is your cue that they’re perfectly cooked!

  • Vegetarian Option: Replace the chicken with tofu or chickpeas to make a hearty plant-based alternative. The tofu absorbs the sauce beautifully, ensuring every bite is bursting with flavor.

  • Cauliflower Rice: For a low-carb base, swap out regular rice for cauliflower rice. Simply sauté the cauliflower until tender—it adds a nice texture while keeping things light!

  • Spicy Kick: Incorporate red pepper flakes or a splash of sriracha to add some heat. Adjust the spice level according to your preference, transforming the dish into a fiery feast!

  • Tropical Toppings: Add chunks of fresh mango or pineapple for that extra sweetness and texture. They contribute a burst of freshness and a lovely contrast to the savory coconut sauce.

  • Nutty Delight: Top your bowl with toasted coconut flakes or chopped nuts for added crunch and flavor. This simple touch elevates the dish to a tropical paradise!

  • Herbal Notes: Experiment with different herbs like basil or mint instead of cilantro for a unique flavor twist. These herbs can bring a fresh perspective while still pairing wonderfully with the coconut.

  • Savory Boost: Add a teaspoon of curry powder or turmeric to the sauce for a fragrant and vibrant taste. This creates an entirely different flavor profile that’s just as comforting.

Need some more inspiration? You can try these customizable ideas alongside recipes like Chicken Adobo Again or Honey Garlic Chicken, where you can explore even more mouthwatering flavors!

What to Serve with Tropical Coconut Chicken Rice Bowl?

A tropical dinner is all about the medley of flavors, textures, and fresh elements that transport you to sun-soaked shores.

  • Mango Salad: Fresh, juicy mangoes combined with crisp veggies create a refreshing counterpart that enhances the coconut’s sweetness. It adds vibrant colors and a tangy kick to your meal.

  • Grilled Pineapple: Charred pineapple slices provide a juicy burst of sweetness, perfectly complementing the creamy richness of the coconut sauce. The caramelization adds an irresistible smoky flavor!

  • Sesame Green Beans: Lightly sautéed green beans dressed in sesame oil offer crispness and a nutty taste that pairs wonderfully with the rice bowl's softness, bringing balance to your plate.

  • Avocado Slices: Creamy avocado adds a dollop of richness, making each bite feel luxurious. Its smooth texture mirrors the bowl's sauce, while its mild flavor lets the chicken shine through.

  • Coconut Rice: Elevate the experience by serving the bowl over coconut-infused rice, enhancing the dish’s tropical vibe and tying all flavors together beautifully.

  • Chili Lime Corn: Zesty, roasted corn tossed with lime makes for a delightful side that encapsulates summer in every bite, providing a sweet contrast to the savory chicken.

  • Cucumber Salad: A light, crunchy cucumber salad with a hint of lime brings freshness to the meal, soothing the palate between bites of the rich coconut chicken.

  • Iced Herbal Tea: A subtly sweet herbal tea chilled with mint leaves offers a refreshing drink option that cleanses the palate and complements the dish's flavors beautifully.

  • Pineapple Sorbet: For dessert, a light pineapple sorbet adds a refreshing and sweet end to your tropical meal, balancing out the savory flavors of the rice bowl perfectly!

Tropical Coconut Chicken Rice Bowl Recipe FAQs

How do I choose the right coconut milk?
Absolutely! When selecting coconut milk, look for full-fat versions in the canned goods aisle for a rich and creamy sauce. The brand matters too; choose one that has minimal additives. If you’re aiming for a lighter option, light coconut milk is available and works well too, just bear in mind it may be slightly less creamy.

How should I store leftover Coconut Chicken Rice Bowl?
Very! Store leftovers in an airtight container in the refrigerator for up to 3 days. Make sure the bowl cools completely before sealing to prevent condensation. If you want to enjoy it later, freeze it in a safe container for up to 3 months; this keeps it delicious and ready for another tropical escape.

Can I freeze the Coconut Chicken Rice Bowl?
Of course! To freeze, allow the dish to cool completely, then transfer it to a freezer-safe container, labeling it with the date. It’s best consumed within 3 months for optimal taste, but it can last longer. When ready to enjoy, simply thaw overnight in the fridge before reheating gently on the stovetop.

What can I do if the coconut sauce is too thin?
No problem! If the sauce turns out too thin, whisk together 1 tablespoon of cornstarch with 2 tablespoons of cold water to create a slurry. Gradually stir this into the simmering sauce. Allow it to cook for a few more minutes until it thickens to your desired consistency.

Are there any dietary restrictions I should consider?
Definitely! This recipe is gluten-free when you use gluten-free soy sauce or coconut aminos, making it safe for those with gluten sensitivities. If you’re cooking for pets, be cautious about any added seasonings or ingredients such as onion or garlic, which can be harmful to them. Always check with dietary preferences to ensure everyone at the table can enjoy a delightful meal!

Coconut Chicken Rice Bowl

Coconut Chicken Rice Bowl: A Tropical Taste of Home

A comforting Coconut Chicken Rice Bowl, ready in 20 minutes, customizable, and gluten-free, perfect for busy weeknights.
Print Recipe Pin Recipe
Prep Time 10 minutes mins
Cook Time 10 minutes mins
Total Time 20 minutes mins
Servings: 4 bowls
Course: Dinner
Cuisine: Tropical
Calories: 500
Ingredients Equipment Method Nutrition Notes

Ingredients
  

For the Chicken
  • 1 pound Boneless, Skinless Chicken Breasts Can substitute with shrimp, tofu, or chickpeas.
For the Sauce
  • 1 can Coconut Milk Using light coconut milk can reduce fat.
  • 1 tablespoon Soy Sauce Can substitute with coconut aminos for soy-free option.
  • 1 teaspoon Lime Juice Fresh juice recommended.
  • 2 cloves Garlic Minced, fresh or jarred.
  • 1 teaspoon Ginger Freshly grated.
For the Base
  • 2 cups Cooked Rice Jasmine, basmati, or brown rice recommended.
For Cooking
  • 1 tablespoon Vegetable Oil Can use coconut oil.
  • to taste Salt
  • to taste Pepper
For Garnish
  • to taste Fresh Cilantro or Green Onions Parsley can be used as an alternative.

Equipment

  • Skillet
  • measuring cups
  • Measuring Spoons
  • Knife
  • Cutting Board

Method
 

Step-by-Step Instructions
  1. Heat 1 tablespoon of vegetable or coconut oil in a large skillet over medium heat until shimmering.
  2. Add 1 pound of diced chicken, seasoned with salt and pepper, and cook for 5-7 minutes until golden brown and fully cooked.
  3. Stir in 2 minced garlic cloves and 1 teaspoon of grated ginger, cooking for about 1 minute until fragrant.
  4. Pour in 1 can of coconut milk, followed by 1 tablespoon of soy sauce and 1 teaspoon of lime juice. Stir and simmer for 5-7 minutes until thickened.
  5. While the sauce simmers, cook 2 cups of rice according to package instructions.
  6. To serve, place rice in bowls and ladle the coconut chicken mixture over it. Garnish with chopped cilantro or green onions.

Nutrition

Serving: 1bowlCalories: 500kcalCarbohydrates: 60gProtein: 30gFat: 18gSaturated Fat: 10gPolyunsaturated Fat: 2gMonounsaturated Fat: 4gCholesterol: 80mgSodium: 800mgPotassium: 600mgFiber: 4gSugar: 2gVitamin A: 500IUVitamin C: 10mgCalcium: 50mgIron: 2mg

Notes

For the best texture, fluff the rice after cooking and ensure the skillet is hot before adding chicken to achieve a nice sear.

Tried this recipe?

Let us know how it was!

Roasted Tomato and Garlic Ricotta Pasta You’ll Love Tonight

May 20, 2026 by Grace Snow Leave a Comment

As the sweet aroma of roasted tomatoes and garlic wafts through my kitchen, I can't help but feel a sense of comfort and joy. Today, I’m excited to share my recipe for Roasted Tomato and Garlic Ricotta Pasta, a delightful dish that transforms simple ingredients into an impressive meal in under 30 minutes. This satisfying pasta not only offers the balance of creamy ricotta and luscious roasted tomatoes, but it also proves to be a time-saver for those busy weeknights when you crave gourmet flavor without the fuss. Whether you’re cooking for family or hosting friends, this crowd-pleaser will leave everyone asking for seconds. Can't wait to dive into this scrumptious flavor journey together? Let’s get cooking!

Why is this pasta recipe a must-try?

Simplicity at Its Best: With just a few ingredients and straightforward steps, you'll create a gourmet dish without the hassle.
Flavor Explosion: Roasted tomatoes combined with creamy ricotta and fragrant garlic produce a taste that will delight your palate.
Quick Dinner Solution: In under 30 minutes, you can have a hearty meal ready, perfect for busy weeknights.
Crowd-Pleaser: Whether you're cooking for family or entertaining friends, this dish is sure to impress everyone at the table. Don't forget to check out complementary recipes like Cauliflower Pasta Ready for more ideas!

Roasted Tomato and Garlic Ricotta Pasta Ingredients

  • For the Pasta
    • Pasta – 12 ounces of your favorite type (spaghetti, penne, fusilli) to provide the dish's comforting base.

  • For the Sauce
    • Cherry Tomatoes – 2 cups, halved; roasting enhances their sweetness for a delightful contrast.
    • Garlic – 4 cloves, minced; it adds a robust, aromatic kick to the sauce.
    • Olive Oil – 1/4 cup; the key to infusing flavor into the roasted tomatoes.
    • Salt – 1/2 teaspoon; helps to balance and elevate the flavors, adjust as needed.
    • Black Pepper – 1/4 teaspoon; adds a subtle hint of spice, perfect for finishing touches.

  • For the Creaminess
    • Ricotta Cheese – 1 cup; its creamy texture makes this Roasted Tomato and Garlic Ricotta Pasta irresistible.

  • For the Garnish
    • Fresh Basil – optional for garnishing; it introduces a burst of freshness and vibrant color.
    • Grated Parmesan Cheese – optional for serving; enhances umami and richness, making it even more appealing.

Step‑by‑Step Instructions for Roasted Tomato and Garlic Ricotta Pasta

Step 1: Preheat the Oven
Set your oven to 400°F (200°C) to create the perfect environment for roasting. While the oven heats up, grab a baking dish to prepare your cherry tomatoes, garlic, olive oil, salt, and pepper. This step is crucial as the high heat will blister the tomatoes, enhancing their natural sweetness and flavor.

Step 2: Prepare the Tomatoes and Garlic
In your baking dish, combine 2 cups of halved cherry tomatoes, 4 cloves of minced garlic, 1/4 cup of olive oil, 1/2 teaspoon of salt, and 1/4 teaspoon of black pepper. Toss everything together until the tomatoes are well coated in the oil and seasonings. Once ready, slide the dish into the preheated oven and roast for 20-25 minutes, or until the tomatoes are blistered and soft.

Step 3: Cook the Pasta
While the tomatoes roast, fill a large pot with water and add a generous amount of salt. Bring the water to a rolling boil over high heat. Once boiling, add 12 ounces of your preferred pasta and cook according to package instructions until it reaches al dente tenderness. Reserve about 1 cup of the starchy pasta water before draining it to keep your sauce moist later.

Step 4: Combine the Ingredients
In a large mixing bowl, combine the drained pasta with the roasted tomatoes and garlic, including all the delicious juices from the baking dish. Gently fold in 1 cup of creamy ricotta cheese, mixing well to integrate all the flavors. If the pasta seems dry, gradually stir in your reserved pasta water until you achieve a luscious consistency that clings to each piece of pasta.

Step 5: Plate and Serve
Now it's time to serve your Roasted Tomato and Garlic Ricotta Pasta! Dish the pasta into bowls, garnishing with optional fresh basil leaves for added brightness and flavor. For an extra umami boost, sprinkle grated Parmesan cheese on top. Enjoy this heartwarming meal while it's still warm and let the comforting aromas entice your family or friends to the table.

Roasted Tomato and Garlic Ricotta Pasta Variations

Feel free to get creative and customize your Roasted Tomato and Garlic Ricotta Pasta with these tempting variations!

  • Vegetable Boost: Add spinach or zucchini for extra nutrition and a burst of color; toss them in during the last few minutes of roasting for tender bites.

  • Cheese Swap: Try goat cheese or cream cheese instead of ricotta for a different creamy twist; they’ll give your dish a unique flavor profile that’s just as comforting.

  • Herb Infusion: Incorporate oregano or thyme for a fragrant herbal touch; sprinkle them in with the garlic for an aromatic experience that enhances the overall dish.

  • Spice It Up: For a hint of heat, add some red pepper flakes; start with a pinch, and adjust to your taste, making this pasta dish an exciting option for spice lovers.

  • Nutty Flavor: Toss in toasted pine nuts or walnuts for added crunch and depth; they’ll not only give texture but also a delightful nutty flavor that complements the ricotta beautifully.

  • Vegan Delight: Use cashew cream blended with nutritional yeast in place of ricotta for a dairy-free alternative; this creamy swap is sure to keep the dish rich and delicious.

  • Saucy Twist: For a richer sauce, drizzle in heavy cream or a splash of white wine to elevate the flavor; this will create a silken texture that envelops the pasta perfectly.

  • Pasta Variety: Experiment with alternative pasta types like whole grain or gluten-free; each offers unique flavors and textures while keeping the spirit of the meal intact.

Feeling inspired? You might also enjoy serving this pasta alongside a light arugula salad like the one in the delightful Roasted Corn Fried recipe, or explore other comforting dishes like the Cauliflower Pasta Ready for even more culinary adventures!

Make Ahead Options

These Roasted Tomato and Garlic Ricotta Pasta preparations are ideal for busy weeknights! You can roast the tomatoes and garlic up to 24 hours in advance, allowing them to develop even richer flavors. Simply store the roasted mixture in an airtight container in the refrigerator until you're ready to serve. You can also cook the pasta ahead of time, keeping it in the fridge for up to 3 days. When you’re ready to enjoy this delightful dish, just reheat the roasted tomatoes, toss in the pre-cooked pasta, then fold in the ricotta for that creamy finish. This way, you’ll savor every bite just as deliciously as when freshly made, without the last-minute rush!

Storage Tips for Roasted Tomato and Garlic Ricotta Pasta

Fridge: Store leftovers in an airtight container for up to 3 days. Let the pasta cool completely before sealing to retain freshness.

Freezer: For longer storage, freeze the pasta in airtight containers for up to 2 months. Make sure to label containers with the date to track freshness.

Thawing: When ready to enjoy, thaw in the fridge overnight before reheating for the best results, maintaining the flavors of the Roasted Tomato and Garlic Ricotta Pasta.

Reheating: Reheat gently over medium heat, adding a splash of water or olive oil to prevent dryness and enhance creaminess.

Expert Tips for Roasted Tomato and Garlic Ricotta Pasta

  • Tomato Quality Matters: Choose ripe, sweet cherry tomatoes for roasting. Under-ripe tomatoes won't develop the same depth of flavor, making your dish less vibrant.

  • Don't Rush the Roasting: Ensure to roast tomatoes until they're blistered and soft. This caramelizes their sugars, enhancing the overall taste of the Roasted Tomato and Garlic Ricotta Pasta.

  • Pasta Water Trick: Always reserve some pasta cooking water before draining. It’s essential for adjusting the sauce’s consistency and keeping it beautifully creamy.

  • Gentle Reheating: If you have leftovers, reheat gently over medium heat with a splash of water or olive oil. This helps avoid mushiness and maintains the pasta's texture.

  • Balancing Flavors: Taste as you go! Adjust the salt and pepper after mixing in the ricotta, ensuring the flavors are balanced and mouthwatering in your Roasted Tomato and Garlic Ricotta Pasta.

What to Serve with Roasted Tomato and Garlic Ricotta Pasta

Elevate your pasta experience by pairing it with delightful sides that bring out its rich, comforting flavors.

  • Crispy Garlic Bread: The crunchy, buttery bread is perfect for soaking up every last bit of the luscious sauce.

  • Arugula Salad: A simple salad dressed with lemon and olive oil adds a zesty freshness that balances the creaminess of the pasta. It's a light, peppery contrast that enhances the meal.

  • Roasted Vegetables: Seasonal vegetables like zucchini or bell peppers roasted with olive oil create a beautiful, colorful side that complements the dish's flavors beautifully. The natural sweetness from roasting pairs wonderfully with the tomatoes in your pasta.

  • Chilled White Wine: A glass of crisp Pinot Grigio or Sauvignon Blanc offers a refreshing sip that enhances the meal, making every bite feel even more indulgent.

  • Tiramisu: End the meal on a sweet note with a creamy, coffee-flavored dessert. Its light, airy texture provides a perfect contrast to the hearty pasta dish.

  • Pesto Bruschetta: Topped with vibrant pesto, fresh tomatoes, and mozzarella, this appetizer is a delightful way to kick off your meal while echoing the pasta's flavors.

  • Lemon Sorbet: A light and refreshing dessert, lemon sorbet cleanses the palate after the rich pasta, leaving you feeling satisfied but not weighed down.

Roasted Tomato and Garlic Ricotta Pasta Recipe FAQs

What type of tomatoes should I use for the best flavor?
Absolutely! For the best results, use ripe cherry tomatoes. Their natural sweetness intensifies when roasted, making a world of difference in the overall flavor of your Roasted Tomato and Garlic Ricotta Pasta. If you can't find cherry tomatoes, feel free to use other varieties of ripe tomatoes, but keep in mind that they may need to be cut into smaller pieces for even roasting.

How should I store leftovers of the Roasted Tomato and Garlic Ricotta Pasta?
To maintain freshness, store any leftovers in an airtight container in the fridge. Your pasta will stay good for up to 3 days. It’s best to let the pasta cool completely before sealing the container to avoid excess moisture, which can lead to sogginess.

Can I freeze the Roasted Tomato and Garlic Ricotta Pasta? If so, how?
Yes, you can! To freeze this delightful pasta dish, first let it cool down completely. Then, transfer the pasta into airtight containers or freezer bags, ensuring you push out as much air as possible. It can be frozen for up to 2 months. Label the containers with the date to track freshness. When you're ready to enjoy it again, thaw in the fridge overnight before reheating gently on the stove.

What should I do if my pasta feels dry after mixing in the ricotta?
Very! If your pasta seems a bit dry, don't hesitate to take your reserved pasta water and add it gradually until you reach your desired creaminess. Start with a couple of tablespoons and stir well to incorporate. This simple trick adjusts the consistency beautifully without affecting the flavors of your Roasted Tomato and Garlic Ricotta Pasta.

Are there any dietary considerations I should be aware of?
Yes, keep in mind that this recipe contains dairy, primarily from the ricotta and optional Parmesan cheese. If you or your guests have dairy allergies, you can try substituting these with a plant-based ricotta or simply using a blend of cashews and nutritional yeast for a creamy texture. Always check for any other personal dietary restrictions when preparing meals for guests.

Roasted Tomato and Garlic Ricotta Pasta

Roasted Tomato and Garlic Ricotta Pasta You’ll Love Tonight

Savor the delightful Roasted Tomato and Garlic Ricotta Pasta, an impressive meal made in under 30 minutes.
Print Recipe Pin Recipe
Prep Time 10 minutes mins
Cook Time 25 minutes mins
Total Time 35 minutes mins
Servings: 4 servings
Course: Dinner
Cuisine: Italian
Calories: 450
Ingredients Equipment Method Nutrition Notes

Ingredients
  

For the Pasta
  • 12 ounces Pasta your favorite type (spaghetti, penne, fusilli)
For the Sauce
  • 2 cups Cherry Tomatoes halved
  • 4 cloves Garlic minced
  • 1/4 cup Olive Oil
  • 1/2 teaspoon Salt adjust as needed
  • 1/4 teaspoon Black Pepper
For the Creaminess
  • 1 cup Ricotta Cheese
For the Garnish
  • Fresh Basil optional
  • Grated Parmesan Cheese optional for serving

Equipment

  • Oven
  • Baking Dish
  • Large pot
  • Mixing Bowl

Method
 

Step-by-Step Instructions
  1. Preheat the oven to 400°F (200°C). Prepare your ingredients for roasting.
  2. Combine cherry tomatoes, minced garlic, olive oil, salt, and black pepper in a baking dish. Toss well and roast for 20-25 minutes.
  3. Meanwhile, cook the pasta in salted boiling water until al dente. Reserve 1 cup of pasta water.
  4. Combine the drained pasta with the roasted tomatoes and garlic, add ricotta, and mix with reserved pasta water if needed.
  5. Serve in bowls, garnished with fresh basil and grated Parmesan.

Nutrition

Serving: 1servingCalories: 450kcalCarbohydrates: 55gProtein: 15gFat: 18gSaturated Fat: 6gPolyunsaturated Fat: 1gMonounsaturated Fat: 10gCholesterol: 35mgSodium: 300mgPotassium: 350mgFiber: 4gSugar: 6gVitamin A: 500IUVitamin C: 15mgCalcium: 200mgIron: 2mg

Notes

Choose ripe cherry tomatoes for the best flavor. Reserve pasta water for creamy sauce consistency.

Tried this recipe?

Let us know how it was!

Savory Korean BBQ Short Ribs: Tender Perfection for Any Occasion

May 20, 2026 by Grace Snow Leave a Comment

The first time I tasted Korean BBQ, I was instantly transported to a bustling street market in Seoul, where the smoky aroma of grilled meats danced through the air. Today, I’m excited to share my twist on this unforgettable experience with my Korean BBQ Short Ribs recipe. This homestyle dish is not just a crowd-pleaser; it also offers the convenience of three different cooking methods—perfect for any occasion or skill level. Whether you decide to grill, slow-cook in a Crockpot, or use an air fryer, these tender, flavorful short ribs promise to warm your heart and feed your soul. Ready to impress your family or friends with some authentic flavor? Let’s dive into the delightful world of Korean BBQ together!

Why are these short ribs a must-try?

Flavor Explosion: Each bite delivers a perfect balance of savory, sweet, and slightly smoky notes, making this dish irresistibly delicious.
Versatile Cooking Methods: Whether you prefer grilling, crockpot cooking, or using an air fryer, this recipe accommodates your style, ensuring tender results every time.
Time-Saving: With marinating done ahead of time, you can whip this up quickly for a weeknight dinner or take your time for weekend gatherings.
Crowd-Pleasing: Perfect for impressing guests, these Korean BBQ short ribs are a surefire hit alongside steamed rice and vibrant side dishes.
Cultural Experience: Enjoy a taste of Korea at home and create unforgettable memories with family and friends around the dinner table. If you’re looking for more delicious ideas, check out my Honey BBQ Chicken for another flavorful treat!

Korean BBQ Short Ribs Ingredients

• Prepare to tantalize your taste buds with these essential ingredients for the ultimate Korean BBQ short ribs!

For the Marinade

  • Beef Short Ribs – Choose well-marbled cuts for maximum flavor and tenderness.
  • Low Sodium Soy Sauce – Provides a savory base; substitute with regular soy sauce for a richer taste.
  • Brown Sugar – Balances the saltiness; honey can work as a natural sweetener.
  • Water – Helps the marinade penetrate the meat for deeper flavor.
  • Mirin – Adds sweetness and depth; rice vinegar is a suitable alternative.
  • Sesame Oil – Infuses a nutty aroma; can be swapped for a lighter oil if desired.
  • Garlic (5 cloves) – Boosts flavor with its aromatic punch; garlic powder can be a convenient substitute.
  • Ginger (1 tsp) – Introduces warmth and spice; ground ginger is an excellent alternative.
  • Onion (1, blended) – Offers sweetness to the marinade; shallots can provide a milder taste.
  • Black Pepper (1/4 tsp) & Salt (1/4 tsp) – Seasoning to enhance flavors; adjust to your preference.

For Garnishing

  • Green Onions (2, chopped) – Adds freshness and a delightful crunch to your finished dish.

With this collection of ingredients, you're all set to create mouthwatering Korean BBQ short ribs that are sure to impress!

Step‑by‑Step Instructions for Korean BBQ Short Ribs

Step 1: Prepare the Marinade
In a blender, combine low sodium soy sauce, brown sugar, water, mirin, sesame oil, garlic, ginger, and the blended onion until smooth, about 1-2 minutes. This rich marinade brings bold flavors to your Korean BBQ short ribs, so be sure to blend well for a uniform taste. Set aside half a cup for basting later, and proceed with marinating the meat.

Step 2: Marinate the Short Ribs
Place the beef short ribs in a 9x13 glass dish, ensuring they’re in a single layer. Pour the marinade over the ribs, making sure all pieces are thoroughly coated. Cover the dish and refrigerate for at least 1 hour or, for best results, overnight. This allows the ribs to absorb the flavors deeply, resulting in incredibly tender Korean BBQ short ribs.

Step 3: Grilling Method
Preheat your grill to medium-high heat, about 400°F. Remove the marinated short ribs from the refrigerator and discard the marinade. Grill the ribs for 3-4 minutes per side, or until they reach an internal temperature of 145°F and have nice grill marks. The exterior should begin to caramelize, creating a beautiful glaze on the Korean BBQ short ribs.

Step 4: Crockpot Method
Transfer the marinated short ribs and the reserved marinade into your crockpot. Set it to cook on high for 4 hours or low for 8 hours, until the meat is fork-tender and pulls away easily from the bone. For added texture, you can quickly broil the cooked ribs for 2-3 minutes to create a slightly crisp exterior, enhancing the flavor of your Korean BBQ short ribs.

Step 5: Air Fryer/Skillet Method
If you prefer using an air fryer, preheat it to 375°F. Arrange the marinated short ribs in a single layer, cooking for 5-7 minutes, turning halfway through, until crispy and caramelized. Alternatively, you can heat a skillet over medium-high heat and pan-fry the ribs for about 5 minutes per side until they're beautifully browned and delicious. This quick method is perfect for those busy weeknight dinners featuring Korean BBQ short ribs.

Step 6: Garnish and Serve
Once cooked, let your Korean BBQ short ribs rest for a few minutes before garnishing them with freshly chopped green onions. This adds a burst of color and flavor, elevating your dish. Serve the ribs alongside steamed rice and vibrant vegetable side dishes for a complete meal that is sure to impress family and friends.

Expert Tips for Korean BBQ Short Ribs

  • Marinade Coverage: Ensure ribs are fully submerged in the marinade for maximum flavor and tenderness, enhancing your Korean BBQ short ribs’ deliciousness.

  • Resting Time: Let the cooked ribs rest for a few minutes before serving to allow juices to redistribute, keeping them juicy and tender.

  • Mind the Heat: Watch the grilling or cooking temperature to prevent overcooking. High heat can easily char the outside while leaving the inside undercooked.

  • Broiling for Texture: For crispy edges, consider broiling the short ribs for a couple of minutes after cooking; this adds a delightful texture to your dish.

  • Be Creative: Don’t hesitate to experiment with marinades or side dishes for the Korean BBQ short ribs; adding gochujang can spice things up!

Make Ahead Options

These Korean BBQ Short Ribs are a fantastic option for meal prep enthusiasts! You can marinate the short ribs up to 24 hours in advance, allowing the rich flavors to permeate the meat for incredible tenderness. Simply prepare the marinade, coat the short ribs thoroughly, and refrigerate them in an airtight container. For an easy finish, take the marinated ribs out and either grill, crockpot cook, or air fry as directed, knowing they’ll be just as delicious as if prepared fresh. This way, you can have a comforting, restaurant-quality meal ready with minimal effort on a busy weeknight!

Korean BBQ Short Ribs Variations & Substitutions

Customize your cooking adventure and elevate the flavors of these Korean BBQ short ribs with your personal touch!

  • Spicy Twist: Add gochujang to the marinade for a zing of heat that balances beautifully with the sweet notes.
  • Herb Infusion: Stir in fresh cilantro or mint for a refreshing burst of flavor that brightens every bite.
  • Cut Alternatives: Swap out short ribs for flank steak or pork belly to explore different textures and flavors in this dish.
  • Sauce Swap: Use miso paste instead of brown sugar for a richer umami flavor that complements the savory notes perfectly.
  • Smoke It Up: Add a few drops of liquid smoke to the marinade for a delightful BBQ flavor reminiscent of outdoor grilling, no matter the cooking method.
  • Sweetener Alternatives: Replace brown sugar with maple syrup or agave nectar for a unique twist on sweetness that has its own charm.
  • Vegetarian Version: Use tofu marinated in the same sauce; cook it up in an air fryer for a satisfying plant-based alternative.
  • Flavor Boost: Toss in sesame seeds or crushed red pepper flakes into your seasoning for a nutty finish and added crunch.

Happy cooking! For another mouthwatering dish, consider trying my Honey BBQ Chicken for another delightful meal that’ll bring smiles to the table!

What to Serve with Korean BBQ Short Ribs

Creating a memorable feast goes beyond just the main dish, so consider these delicious companions to elevate your Korean BBQ experience.

  • Steamed Rice: A classic, fluffy rice base that soaks up the savory sauce, balancing rich flavors beautifully.
  • Kimchi: This fermented side dish adds a spicy, tangy kick, making every bite of short rib even more exciting and vibrant.
  • Stir-Fried Vegetables: Colorful and crunchy veggies stir-fried in garlic or sesame oil provide a fresh and healthy contrast to the tender meat.
  • Sweet Potato Mash: Creamy and slightly sweet, this side offers a delightful twist that complements the savory notes of the ribs.
  • Pickled Vegetables: A crunchy, tangy assortment brightens the palate and enhances the meal's overall flavor profile.
  • Cold Noodle Salad: Light and refreshing, a chilled noodle salad tossed with soy sauce and sesame adds a lovely cool touch after the hearty short ribs.
  • Sake or Soju: To complete your meal, sip on these traditional Korean beverages that perfectly accompany the rich, meaty flavors.
  • Chocolate Mousse: For dessert, indulge in a light chocolate mousse; its smooth texture and sweetness create a delightful finish after the spiciness of the meal.

Storage Tips for Korean BBQ Short Ribs

Fridge: Store leftover Korean BBQ short ribs in an airtight container for up to 3 days. This keeps the meat juicy and full of flavor.

Freezer: For longer storage, freeze the short ribs in an airtight container or freezer bag for up to 3 months. Label with the date to track freshness.

Reheating: When ready to enjoy, thaw in the fridge overnight. Reheat in the oven at 350°F for about 15-20 minutes, or until heated through for the best taste and texture.

Serving Suggestions: For a delightful meal, serve reheated ribs with fresh garnishes and sides—just like when they were first made!

Korean BBQ Short Ribs Recipe FAQs

How do I choose the right beef short ribs?
When selecting beef short ribs, look for cuts that have good marbling, which is the streaks of fat running through the meat. This fat helps keep the ribs juicy and flavorful during cooking. Avoid ribs that are too lean or have a lot of bone and little meat. Marked with a rich, deep color and no dark spots, these are signs of freshness and quality.

How should I store leftover Korean BBQ short ribs?
After serving, make sure to let your leftover Korean BBQ short ribs cool completely. Place them in an airtight container and store them in the refrigerator for up to 3 days. If you want to keep them longer, you can freeze them by wrapping them in plastic wrap followed by aluminum foil or placing them in a freezer bag, where they'll stay good for up to 3 months.

Can I freeze cooked Korean BBQ short ribs?
Absolutely! Freezing your cooked Korean BBQ short ribs is a great way to save delicious leftovers. Just ensure they are cooled first, then pack them tightly in an airtight container or a freezer bag. When ready to eat, thaw them in the fridge overnight, then reheat them in the oven at 350°F for 15-20 minutes or until warmed through for the best texture.

What should I do if my ribs are tough after cooking?
If your ribs turn out tough, it could be due to undercooking or not marinating long enough. Next time, ensure you cook them until they are fork-tender and allow for adequate marinating, preferably overnight for up to 24 hours. If you're using the crockpot, check that the cooking duration is enough—aim for at least 4 hours on high or 8 hours on low to allow the collagen to break down properly.

Can I adjust the marinade for dietary restrictions?
Certainly! If you're looking for alternatives, use a gluten-free soy sauce or tamari instead of regular soy sauce for a gluten-free version. For sugar alternatives, honey or maple syrup can work well in place of brown sugar. If you're concerned about allergies, always check ingredient labels carefully and replace any allergens with your preferred substitutes.

Korean BBQ Short Ribs

Savory Korean BBQ Short Ribs: Tender Perfection for Any Occasion

Indulge in Korean BBQ Short Ribs, a must-try dish bursting with flavor for any occasion.
Print Recipe Pin Recipe
Prep Time 1 hour hr
Cook Time 20 minutes mins
Marinating Time 1 hour hr
Total Time 2 hours hrs 20 minutes mins
Servings: 4 ribs
Course: Dinner
Cuisine: Korean
Calories: 400
Ingredients Equipment Method Nutrition Notes

Ingredients
  

For the Marinade
  • 3 pounds Beef Short Ribs Choose well-marbled cuts for flavor
  • 1/2 cup Low Sodium Soy Sauce Substitute with regular soy sauce for richer taste
  • 1/4 cup Brown Sugar Honey can be used as a sweetener
  • 1/4 cup Water
  • 1/4 cup Mirin Rice vinegar is a suitable alternative
  • 2 tablespoons Sesame Oil Can be swapped for a lighter oil
  • 5 cloves Garlic Garlic powder can be a substitute
  • 1 teaspoon Ginger Ground ginger is an excellent alternative
  • 1 Onion Blended
  • 1/4 teaspoon Black Pepper
  • 1/4 teaspoon Salt Adjust to preference
For Garnishing
  • 2 Green Onions Chopped

Equipment

  • Grill
  • Crockpot
  • Air fryer
  • Blender
  • Skillet

Method
 

Step-by-Step Instructions
  1. In a blender, combine low sodium soy sauce, brown sugar, water, mirin, sesame oil, garlic, ginger, and blended onion until smooth, about 1-2 minutes.
  2. Place the beef short ribs in a 9x13 glass dish. Pour the marinade over the ribs and refrigerate for at least 1 hour or overnight.
  3. Preheat your grill to medium-high heat, about 400°F. Remove the ribs from the marinade and grill for 3-4 minutes per side until internal temperature reaches 145°F.
  4. Transfer the marinated short ribs and reserved marinade into your crockpot. Cook on high for 4 hours or low for 8 hours until fork-tender.
  5. Preheat air fryer to 375°F. Cook marinated short ribs in a single layer for 5-7 minutes, turning halfway through.
  6. Let the ribs rest for a few minutes, garnish with green onions, and serve with steamed rice and vegetable sides.

Nutrition

Serving: 5ouncesCalories: 400kcalCarbohydrates: 20gProtein: 35gFat: 20gSaturated Fat: 8gPolyunsaturated Fat: 0.5gMonounsaturated Fat: 10gCholesterol: 120mgSodium: 750mgPotassium: 500mgFiber: 1gSugar: 10gVitamin A: 200IUVitamin C: 5mgCalcium: 50mgIron: 2mg

Notes

Ensure ribs are fully submerged in marinade for maximum flavor. Let cooked ribs rest before serving to keep them juicy.

Tried this recipe?

Let us know how it was!

Dolly Parton's 5 Ingredient Casserole: Comfort in Every Bite

May 20, 2026 by Grace Snow Leave a Comment

In the whirlwind of weekly chaos, I found myself on a mission to create a meal that combines comfort and simplicity. Enter Dolly Parton’s 5 Ingredient Casserole, a delightful dish that transforms my kitchen into a cozy retreat with layers of creamy, cheesy goodness. This recipe is not just about ease; it’s a heartwarming way to reconnect with the joy of home-cooked meals on even the busiest evenings. With just five everyday ingredients, you can whip up a satisfying beef casserole that’s both quick to prepare and perfect for satisfying cravings. Whether you're feeding a hungry family or unwinding after a hectic day, this dish envelops you in warmth and flavor. So, are you ready to dig in and discover how simple comfort can be?

What makes this casserole a must-try?

Simplicity: With just five ingredients, you can create a delicious meal without breaking a sweat.

Crowd-Pleasing: This dish is sure to win over the entire family with its cheesy, hearty layers.

Versatile: Feel free to swap in ground turkey or your favorite cheese for a personal touch—experiment!

Comforting Flavor: The combination of creamy goodness and seasoned beef creates a warm, inviting experience on your plate.

Quick Prep Time: You can prep this casserole in under an hour, making it perfect for busy weeknights.

Pair it with a fresh side salad or some crusty bread for a complete meal, just like you would with my Cornbread Breakfast Casserole. Trust me; this dish is destined to become a staple in your recipe repertoire!

Dolly Parton’s 5 Ingredient Casserole Ingredients

For the Filling

  • Ground Beef – Provides protein and a rich, hearty flavor. Substitution Note: Ground turkey can be used, but the flavor will be lighter.
  • Cream of Chicken Soup – Adds creaminess and depth of flavor. Substitution Note: Cream of mushroom soup can be used, though it alters the dish’s character.
  • Sour Cream – Enhances creaminess and adds a slight tangy flavor. Substitution Note: Greek yogurt can be substituted for a lighter option, although the texture may differ.

For the Base

  • Frozen Hash Browns – Acts as the base layer, offering a creamy texture once baked. Note: Do not use fresh potatoes as they will release excess moisture.

For the Topping

  • Cheddar Cheese – Provides a gooey, flavorful topping that melts to perfection. Note: Avoid low-fat cheese to prevent a watery finish.

Now that you have these simple ingredients, you’re just a few steps away from making a comforting dish that’s perfect for any evening. Each bite of this Dolly Parton’s 5 Ingredient Casserole is like a warm hug—be sure to give it a try!

Step‑by‑Step Instructions for Dolly Parton’s 5 Ingredient Casserole

Step 1: Preheat Your Oven
Begin by preheating your oven to 350°F (175°C). This ensures that when your Dolly Parton’s 5 Ingredient Casserole is ready to bake, the heat is just right for achieving a golden, bubbly top that signifies it’s done. While the oven heats, you can prepare the filling ingredients.

Step 2: Cook the Beef
In a cast iron skillet over medium-high heat, add your ground beef. Cook it for about 5–7 minutes, stirring occasionally until it is browned and no pink remains. Once cooked, drain the excess fat to avoid a greasy casserole. This flavorful beef will be the hearty base of your dish.

Step 3: Mix the Creamy Filling
In a medium bowl, combine the cream of chicken soup and sour cream. Whisk these together until smooth and well blended. This creamy mixture will elevate the flavors of your Dolly Parton’s 5 Ingredient Casserole, providing that rich and comforting texture everyone loves.

Step 4: Layer the Ingredients
Grease a 9x13 baking dish to prevent sticking. Start layering by placing half of the thawed hash browns at the bottom, followed by half of the cooked beef, then half of the creamy mixture, and half of the cheddar cheese. Repeat these layers for a deliciously fulfilling casserole.

Step 5: Bake Until Golden
Place your casserole in the preheated oven and bake it for 45–50 minutes. Keep an eye on it; you’ll know it’s ready when the edges are bubbling and the cheese is a beautiful golden brown. The enticing aroma will fill your home, inviting everyone to gather for a comforting meal.

Dolly Parton's 5 Ingredient Casserole Variations

Feel free to play around with this delightful casserole; your kitchen adventure awaits!

  • Lean Option: Substitute ground turkey for a healthier alternative; keep in mind it will be milder in taste. Turkey still holds up well in this dish, giving you a lighter feel without losing comfort.

  • Cheesy Twist: Try mixing different cheeses like Monterey Jack or pepper jack for a spicy kick. A blend can elevate the flavor profile and make it even more indulgent.

  • Veggie Power: Add a pop of color and nutrition by mixing in vegetables such as corn, green beans, or diced bell peppers. They'll add texture and enhance the comfort factor of your dish.

  • Creamy Variance: Swap the cream of chicken soup for cream of mushroom for a unique flavor dimension, or even make your own creamy sauce for a fresh twist. The depth of flavor will surprise you!

  • Spicy Upgrade: For those who enjoy heat, sprinkle some red pepper flakes or diced jalapeños into the beef mixture. It infuses a delightful kick that contrasts beautifully with the creamy layers.

  • Herb Infusion: Elevate the flavor by mixing in fresh herbs like parsley or chives. A handful adds a burst of freshness and complements the rich ingredients brilliantly.

  • Potato Variety: If you want a twist on texture, use tater tots instead of hash browns. They will create a crispy, golden topping that adds a new dimension of fun to the casserole.

  • Savory Boost: Consider adding a dash of Worcestershire sauce or a spoonful of Dijon mustard to the beef while cooking. This small addition deepens the flavor and makes every bite more satisfying.

With all these variations, there’s no shortage of ways to make this casserole uniquely yours—just like my family’s favorite Sweet Potato Casserole can be dressed up with pecans or marshmallows! Enjoy experimenting!

How to Store and Freeze Dolly Parton’s 5 Ingredient Casserole

Fridge: Store leftovers in an airtight container for up to 3 days. This keeps the flavors fresh and ready for a quick reheat.

Freezer: Individual portions can be frozen for up to 2 months. Wrap each portion tightly in plastic wrap and then place in a freezer-safe bag for best results.

Reheating: For optimal texture, reheat the casserole in the oven at 350°F (175°C) for about 20-25 minutes or until heated through. This will help maintain the creamy layers of your Dolly Parton’s 5 Ingredient Casserole.

Thawing: When ready to enjoy a frozen portion, thaw it in the fridge overnight before reheating to ensure even heating.

What to Serve with Dolly Parton’s 5 Ingredient Casserole

Enhance your dining experience with delightful sides that complement the warmth and comfort of this irresistible casserole.

  • Garden Salad: A refreshing garden salad with crunchy greens and vibrant veggies balances the casserole’s creamy richness perfectly. Add a zesty vinaigrette for an extra kick.

  • Garlic Bread: Crispy, buttery garlic bread adds a delightful crunch to your meal, making every bite a true delight. It’s perfect for soaking up any leftover cheesy goodness.

  • Roasted Vegetables: Roasted seasonal vegetables provide a wonderful contrast to the casserole’s texture, offering both color and nutrition to your plate. Try a mix of bell peppers, zucchini, and carrots for a flavorful side.

  • Fruit Salad: A sweet, juicy fruit salad adds a refreshing note to your meal while bringing bright, natural sweetness. Consider combining berries, pineapple, and melon for a vibrant mix.

  • Coleslaw: A tangy coleslaw with a creamy dressing offers crunch and brightness, balancing the richness of the casserole with its crispy texture. It’s a classic pairing that adds a familiar touch.

  • Iced Tea or Lemonade: Refreshing iced tea or homemade lemonade becomes the perfect drink choice, cutting through the casserole's richness with their crisp and cooling flavors.

Each of these sides will elevate your cozy meal with Dolly Parton’s 5 Ingredient Casserole, making for a delightful gathering at your table!

Expert Tips for Dolly Parton’s Casserole

  • Perfect Ground Beef: Ensure to drain excess fat for a well-balanced dish; greasiness can overpower the casserole's flavors.
  • Frozen vs. Fresh: Always choose frozen hash browns over fresh. Fresh ones release moisture, leading to a soggy casserole.
  • Layer Sensibly: Layering is key; ensure each layer is even for a well-cooked casserole. This helps achieve the perfect texture in your Dolly Parton’s 5 Ingredient Casserole.
  • Rest Before Serving: Allow the casserole to rest for 10-15 minutes after baking. This helps the layers set, making it easier to slice and serve.
  • Cover When Prepping Ahead: If making in advance, cover tightly with foil in the fridge. Increase baking time by 10-15 minutes when ready to cook to ensure thorough heating.

Make Ahead Options

Dolly Parton’s 5 Ingredient Casserole is perfect for meal prep, allowing you to save time on those busy weeknights! You can prepare the entire casserole up to 24 hours in advance; simply assemble the layers as described and cover tightly with foil before refrigerating. To maintain its creamy texture and prevent drying out, it’s essential to ensure it’s well wrapped. When you're ready to serve, bake it straight from the fridge, adding an additional 10-15 minutes to the baking time for that bubbly, golden finish everyone loves. This way, you’ll enjoy a comforting, hearty meal that's just as delicious when prepped ahead!

Dolly Parton’s 5 Ingredient Casserole Recipe FAQs

What type of ground beef should I use?
Absolutely! I recommend using lean ground beef (80/20 or 90/10) to avoid excess greasiness in your casserole. If you're looking for a lighter option, ground turkey works well too; just keep in mind that it may result in a milder flavor.

How should I store leftover casserole?
Very easy! You can store leftovers in an airtight container for up to 3 days in the refrigerator. This keeps your casserole fresh and ready to enjoy again. When you're ready to indulge, simply reheat it in the oven for the best texture.

Can I freeze Dolly Parton’s 5 Ingredient Casserole?
Definitely! For freezing, I recommend portioning out the casserole into individual servings. Wrap each portion tightly in plastic wrap and then place it in a freezer-safe bag. This allows it to be stored for up to 2 months. Just remember to label it with the date for easy reference!

What should I do if my casserole seems too watery?
If you find your casserole is turning out watery, it could be due to using fresh hash browns instead of frozen. Fresh potatoes release moisture while baking, so it’s best to avoid them. Additionally, ensure you’re draining any excess fat after cooking the beef. Next time, stick to frozen hash browns, and your casserole will have that perfect creamy texture!

Is this recipe diet-friendly for allergies?
Yes! If anyone in your household has dietary restrictions, you can easily modify this recipe. For those avoiding gluten, make sure to use gluten-free cream of chicken or mushroom soup. To cater to lactose intolerance, Greek yogurt can replace sour cream, providing a similar tang without the dairy. Always double-check labels for allergies to ingredients used.

How can I add more nutrition or flavor to the casserole?
The more the merrier! Feel free to mix in vegetables like corn, green beans, or spinach to enhance the nutrition and flavor profile of your dish. You can also experiment with different cheeses such as Monterey Jack or pepper jack for a little kick! Always ensure these additions fit well with the original five ingredients for a harmonious blend in taste.

Dolly Partons 5 Ingredient Casserole

Dolly Parton's 5 Ingredient Casserole: Comfort in Every Bite

Dolly Parton's 5 Ingredient Casserole is a comforting dish combining beef, creamy goodness, and cheese, perfect for families and busy evenings.
Print Recipe Pin Recipe
Prep Time 15 minutes mins
Cook Time 50 minutes mins
Resting Time 15 minutes mins
Total Time 1 hour hr 20 minutes mins
Servings: 6 servings
Course: Dinner
Cuisine: American
Calories: 360
Ingredients Equipment Method Nutrition Notes

Ingredients
  

For the Filling
  • 1 pound Ground Beef Substitution Note: Ground turkey can be used, but the flavor will be lighter.
  • 1 can Cream of Chicken Soup Substitution Note: Cream of mushroom soup can be used, though it alters the dish’s character.
  • 1 cup Sour Cream Substitution Note: Greek yogurt can be substituted for a lighter option, although the texture may differ.
For the Base
  • 1 package Frozen Hash Browns Note: Do not use fresh potatoes as they will release excess moisture.
For the Topping
  • 2 cups Cheddar Cheese Note: Avoid low-fat cheese to prevent a watery finish.

Equipment

  • cast iron skillet
  • 9x13 baking dish
  • medium bowl

Method
 

Step‑By‑Step Instructions
  1. Preheat your oven to 350°F (175°C).
  2. In a cast iron skillet over medium-high heat, add your ground beef. Cook it for about 5–7 minutes, stirring occasionally until it is browned and no pink remains. Drain the excess fat.
  3. In a medium bowl, combine the cream of chicken soup and sour cream. Whisk these together until smooth and well blended.
  4. Grease a 9x13 baking dish. Layer half of the thawed hash browns at the bottom, followed by half of the cooked beef, then half of the creamy mixture, and half of the cheddar cheese. Repeat these layers.
  5. Place your casserole in the preheated oven and bake it for 45–50 minutes until the edges are bubbling and the cheese is golden brown.

Nutrition

Serving: 1servingCalories: 360kcalCarbohydrates: 35gProtein: 24gFat: 20gSaturated Fat: 10gPolyunsaturated Fat: 1gMonounsaturated Fat: 7gTrans Fat: 1gCholesterol: 80mgSodium: 800mgPotassium: 450mgFiber: 2gSugar: 2gVitamin A: 500IUVitamin C: 2mgCalcium: 300mgIron: 2mg

Notes

Allow the casserole to rest for 10-15 minutes after baking to help the layers set. Cover tightly with foil if prepping in advance and increase baking time if cooking from the fridge.

Tried this recipe?

Let us know how it was!

Greek Chicken Tenders: Juicy, Flavor-Packed, and Gluten-Free

May 18, 2026 by Grace Snow Leave a Comment

In a delightful twist on a classic, I recently discovered how a simple marinade can transform ordinary chicken into an extraordinary meal. These Juicy Greek Chicken Tenders are not just quick and easy to whip up, but they also bring the vibrant flavors of Mediterranean cuisine right to your table. Perfect for busy weeknights or casual gatherings, this gluten-free and kid-friendly dish is a super healthy option that even picky eaters will love. With variations that cater to every palate, from zesty lemon kicks to savory herb infusions, these tenders are sure to impress your family and friends. Are you ready to elevate your dinner game? Let’s dive into this recipe!

Why are Greek Chicken Tenders a Must-Try?

Simplicity at Its Best: The marinade is quick to whip up, making these tenders perfect for busy weeknights.

Zesty Flavor Explosion: Each bite delivers a burst of Mediterranean zest from Greek yogurt and fresh lemon.

Kid-Friendly Appeal: Even the pickiest of eaters will love these flavors, making them a hit in family dinners.

Gluten-Free Goodness: Delightfully light yet satisfying, these tenders are an excellent choice for gluten-restricted diets.

Versatile Twists: Try pairing with tzatziki or serve alongside colorful veggies for a delightful dinner experience.

Greek Chicken Tenders Ingredients

For the Marinade

  • Plain Greek Yogurt – Tenderizes the chicken while adding flavor and moisture; substitute with non-dairy yogurt for a dairy-free option.
  • Olive Oil – Adds richness and aids in marination; replace with lemon juice for a lighter version.
  • Fresh Lemon Juice & Zest – Provide acidity and brightness; use lime for a fun twist in flavor.
  • Garlic (minced) – Adds depth and savory flavor; fresh garlic is preferred, but powdered can work in a pinch.
  • Dried Oregano – Imparts earthy herbal notes typical of Greek cuisine; thyme or Italian herb blends can be used as substitutes.
  • Salt – Enhances all flavors; adjust according to taste preferences.
  • Black Pepper – Adds mild heat; white pepper can be used for a milder taste.
  • Ground Cumin (optional) – Adds warmth and depth; can be omitted for simplicity.

For the Chicken

  • Chicken Tenders – A lean protein source that absorbs the marinade well; can substitute with sliced chicken breast or thighs.
  • Fresh Parsley or Dill (optional) – Adds color and freshness, enhancing the final presentation.

These Greek Chicken Tenders are not only bursting with flavor but also easy to adapt to your personal taste, making them a versatile addition to your dinner repertoire!

Step‑by‑Step Instructions for Juicy Greek Chicken Tenders

Step 1: Prepare the Marinade
In a large mixing bowl, whisk together 1 cup of plain Greek yogurt, 2 tablespoons of olive oil, the juice and zest of one lemon, 3 minced garlic cloves, 1 teaspoon of dried oregano, and season with salt and black pepper to taste. Ensure the mixture is smooth and well-combined, giving it a luscious, creamy texture that will enhance the flavor of your Greek Chicken Tenders.

Step 2: Marinate the Chicken
Add 1 pound of chicken tenders to the marinade, ensuring each piece is thoroughly coated. Use your hands or a spatula to toss them gently. Cover the bowl with plastic wrap and refrigerate for at least 1 hour, but ideally, for 4 to 8 hours. This will allow the chicken to absorb all the delightful Mediterranean flavors, making it irresistibly juicy when cooked.

Step 3: Prepare for Cooking
Choose your cooking method: if grilling, preheat your grill to medium-high heat. For pan-searing, heat a tablespoon of olive oil in a skillet over medium-high heat. For baking, preheat your oven to 400°F (200°C). Once your cooking surface is ready, remove the chicken from the marinade, allowing the excess to drip off for even cooking.

Step 4: Cook the Chicken
If grilling, place the chicken tenders on the grill and cook for about 3-4 minutes on each side until they’re golden brown and cooked through, with an internal temperature of 165°F. If pan-searing, cook in the preheated skillet for the same duration, watching for a nice brown crust to form. For baking, lay the tenders on a parchment-lined baking sheet and bake for 18-20 minutes, turning halfway through.

Step 5: Rest and Serve
After cooking your Juicy Greek Chicken Tenders, let them rest for 3-5 minutes to retain their juices. This step is crucial for achieving that tender bite. Once rested, garnish with fresh parsley or dill for added color and freshness. Now, they’re ready to be served, drizzled with a little extra lemon if desired, perfectly paired with your favorite sides!

Make Ahead Options

These Juicy Greek Chicken Tenders are perfect for busy home cooks looking to save time during the week! You can prep the marinade and marinate the chicken tenders up to 24 hours before cooking. Simply whisk together the marinade ingredients, toss the chicken in, and refrigerate. For the best flavor and tenderness, marinate for at least 4 to 8 hours, but if time is short, even an hour will do. When you’re ready to serve, cook the chicken straight from the marinade using your chosen method—grilling, baking, or pan-searing. This way, you’ll enjoy all the juicy, flavorful goodness with minimal last-minute effort!

What to Serve with Juicy Greek Chicken Tenders

Elevate your dining experience with delightful pairings that complement the tantalizing flavors of these succulent tenders.

  • Lemon Herb Rice: This fluffy, zesty rice absorbs the chicken's flavors, adding a refreshing twist to each bite.
  • Tzatziki Sauce: The cool, creamy yogurt dip balances the savory spices, enhancing the Mediterranean vibe of your meal.
  • Grilled Vegetables: A medley of colorful grilled veggies adds texture and brings a vibrant, healthy element to your plate.
  • Greek Salad: Crisp lettuce, juicy tomatoes, and tangy olives create a refreshing contrast that brightens each bite of chicken.
  • Pita Bread: Soft, warm pita is perfect for wrapping around the chicken, making for a fun and interactive dining experience.
  • Roasted Potatoes: Crispy, golden potatoes seasoned with herbs complement the tender chicken while adding a hearty feel to the meal.
  • Hummus: Paired with fresh veggies, this creamy dip enhances the Mediterranean flavors and provides a satisfying crunch.
  • Minted Yogurt Drink: A chilled yogurt beverage with mint offers a refreshing palate cleanser that intrigues your taste buds.

Greek Chicken Tenders Variations & Substitutions

Customize your Greek Chicken Tenders with these delightful twists for different tastes and dietary needs!

  • Dairy-Free: Substitute plain Greek yogurt with non-dairy yogurt alternatives like coconut or almond-based for a creamy texture.
  • Extra Zesty: Add a tablespoon of Dijon mustard to the marinade for a tangy punch that brightens every bite.
  • Herb Infusion: Experiment with fresh herbs such as cilantro or mint instead of oregano, introducing a refreshing twist.
  • Sweet and Savory: Mix in a tablespoon of honey or maple syrup to the marinade for a hint of sweetness that complements the savory chicken.
  • Crispy Coating: Dredge the marinated chicken tenders in crushed gluten-free crackers or panko breadcrumbs for a crunchy texture.
  • Mediterranean Medley: Fold in chopped olives and roasted red peppers into the marinade, enhancing the Mediterranean flavor profile beautifully.
  • Fiery Flavor: Spice things up by adding chipotle powder or chopped jalapeños to the marinade for a kick of heat, reminiscent of Chipotle Lime Chicken.
  • Serve with a Twist: Instead of traditional sides, try pairing these tenders with a vibrant Greek salad or tzatziki for a refreshing meal.

Feel free to get creative with these variations and make this recipe your own!

Expert Tips for Juicy Greek Chicken Tenders

  • Marinate Time Matters: Allow chicken to marinate for at least 4 hours to soak in the Greek yogurt flavors. Avoid less than 30 minutes for the best taste.
  • Even Thickness: Ensure chicken tenders are of uniform thickness. Pound them gently if needed to promote even cooking and tenderness.
  • Mind the Heat: When cooking, avoid using very high heat, which can dry out the chicken. Medium to medium-high is ideal for juicy Greek chicken tenders.
  • Rest is Best: Always let the cooked chicken rest for 3-5 minutes before serving. This helps retain moisture, ensuring each bite is succulent.
  • Reheat Wisely: If you have leftovers, reheat them in an oven or stovetop. This preserves moisture better than a microwave, keeping your chicken tenders juicy and flavorful.

Storage Tips for Greek Chicken Tenders

Fridge: Store cooked Greek Chicken Tenders in an airtight container for up to 4 days to maintain freshness and prevent spoilage.

Freezer: For longer storage, freeze uncooked chicken tenders in a freezer-safe bag for up to 2 months. Just remember to defrost them in the refrigerator before cooking!

Reheating: To preserve moisture, reheat leftovers in the oven at 350°F until warmed through, rather than using the microwave, which can dry them out.

Marinated Chicken: If you're marinating extra tenders, they can be stored in the fridge for up to 8 hours. Avoid freezing once marinated for safety and quality.

Greek Chicken Tenders Recipe FAQs

How do I select the best chicken tenders?
Absolutely! When choosing chicken tenders, look for meat that is pale pink in color and firm to the touch. Avoid any packages with visible dark spots or a slimy texture, indicating spoilage. Freshness is key to ensuring your Greek Chicken Tenders are juicy and flavorful.

What are the best storage methods for leftovers?
For maximum freshness, store your cooked Greek Chicken Tenders in an airtight container in the refrigerator for up to 4 days. Be sure to let them cool completely before sealing the container to prevent moisture buildup. If you need to keep them longer, freeze uncooked tenders in a freezer-safe bag for up to 2 months.

Can I freeze marinated chicken tenders?
Yes, but with caution! If you want to freeze marinated Greek Chicken Tenders, do so before cooking. Place the coated tenders in a freezer-safe bag and eliminate as much air as possible before sealing. Just remember to thaw them in the refrigerator overnight before cooking to maintain food safety and quality.

What should I do if my chicken tenders are dry or tough?
Very! If your chicken tends to come out dry, make sure to marinate for a minimum of 4 hours—longer is even better! Also, ensure you’re cooking at medium to medium-high heat, as higher temperatures can strip moisture. If you consistently encounter dryness, try pounding the chicken to even out the thickness, ensuring uniform cooking.

Are these Greek Chicken Tenders suitable for those with dietary restrictions?
Absolutely! These Greek Chicken Tenders are gluten-free and can also be adapted for various dietary needs. For a dairy-free alternative, simply swap plain Greek yogurt with a non-dairy yogurt. Always check ingredient labels and consider personal allergies when preparing the marinade, especially with ingredients like garlic and spices.

Greek Chicken Tenders

Greek Chicken Tenders: Juicy, Flavor-Packed, and Gluten-Free

These Greek Chicken Tenders are juicy, flavorful, and gluten-free, perfect for busy weeknights or gatherings.
Print Recipe Pin Recipe
Prep Time 10 minutes mins
Cook Time 20 minutes mins
Marination Time 4 hours hrs
Total Time 4 hours hrs 30 minutes mins
Servings: 4 tenders
Course: Dinner
Cuisine: Mediterranean
Calories: 220
Ingredients Equipment Method Nutrition Notes

Ingredients
  

For the Marinade
  • 1 cup Plain Greek Yogurt Substitute with non-dairy yogurt for a dairy-free option.
  • 2 tablespoons Olive Oil Can be replaced with lemon juice.
  • 1 whole Fresh Lemon Juice & Zest Use lime for a fun twist.
  • 3 cloves Garlic Minced; fresh garlic preferred.
  • 1 teaspoon Dried Oregano Thyme or Italian herbs can substitute.
  • to taste Salt Adjust according to taste.
  • to taste Black Pepper White pepper can be used for a milder taste.
  • optional Ground Cumin Can be omitted for simplicity.
For the Chicken
  • 1 pound Chicken Tenders Can substitute with sliced chicken breast or thighs.
  • optional Fresh Parsley or Dill For garnish and added freshness.

Equipment

  • Mixing Bowl
  • Grill or skillet or oven
  • plastic wrap

Method
 

Step-by-Step Instructions
  1. Prepare the Marinade: In a large mixing bowl, whisk together the yogurt, olive oil, lemon juice and zest, minced garlic, oregano, salt, and pepper until smooth.
  2. Marinate the Chicken: Add the chicken tenders to the marinade, coating well. Cover and refrigerate for at least 1 hour, preferably 4-8 hours.
  3. Prepare for Cooking: Choose your method (grill, skillet, or oven) and preheat accordingly. Remove chicken from marinade.
  4. Cook the Chicken: Grill or pan-sear for about 3-4 minutes on each side, or bake at 400°F for 18-20 minutes until cooked through.
  5. Rest and Serve: Let the chicken rest for 3-5 minutes before serving. Garnish with parsley or dill.

Nutrition

Serving: 1tenderCalories: 220kcalCarbohydrates: 4gProtein: 28gFat: 10gSaturated Fat: 2gPolyunsaturated Fat: 1gMonounsaturated Fat: 7gCholesterol: 80mgSodium: 350mgPotassium: 350mgSugar: 1gVitamin A: 50IUVitamin C: 5mgCalcium: 60mgIron: 1mg

Notes

These tenders are versatile and can be paired with tzatziki or colorful veggies.

Tried this recipe?

Let us know how it was!

Whiskey Peach BBQ Meatballs Recipe: Sweet, Savory Bliss

May 18, 2026 by Grace Snow Leave a Comment

As the aroma of sweet peaches and smoky whiskey wafts through the kitchen, I can’t help but get excited about a culinary creation that’s certain to impress. These Whiskey Peach BBQ Meatballs are a delightful twist on the classic favorite, combining the comforting heartiness of meatballs with a fruity flair that’s perfect for any gathering. What I love most about this recipe is how quick and easy it is, making it an ideal choice for busy evenings or unexpected guests. Plus, it’s a guaranteed crowd-pleaser that stands out with its sweet and savory balance. Are you ready to elevate your barbecue game and tantalize your taste buds? Let’s dive into this deliciousness!

Why Will You Love These Meatballs?

Flavor Explosion: The unique pairing of whiskey and peaches creates a sweet, savory sauce that tantalizes every taste bud.

Quick to Make: With just a few simple steps, you can whip up these delicious meatballs in no time, perfect for those busy weeknights.

Versatile Serving Options: Serve them as an appetizer at your next gathering or over a bed of rice for a hearty main dish—everyone will love them! Consider trying these alongside our Honey BBQ Chicken for a delightful BBQ feast.

Crowd-Pleaser: Whether for family dinners or parties, these meatballs earn rave reviews every time.

Leftover Friendly: Make a big batch, freeze them uncooked, and have a convenient meal option ready whenever you need a flavorful dish!

Whiskey Peach BBQ Meatballs Ingredients

Elevate your barbecue experience with these flavorful meatballs!

For the Meatballs

  • Ground Beef – Provides protein and structure; can substitute with ground turkey or chicken for a leaner option.
  • Breadcrumbs – Adds texture and binds the meatballs; use gluten-free breadcrumbs for a gluten-free version.
  • Chopped Onion – Contributes moisture and flavor; yellow or white onions work best.
  • Minced Garlic – Adds depth of flavor; fresh is preferred, but powdered garlic can be used.
  • Egg – Binds ingredients together; can substitute with a flax egg for a vegan option.
  • Salt and Black Pepper – Enhance overall flavor; adjust to taste.
  • Smoked Paprika – Brings a smoky flavor profile; regular paprika is a good substitute.
  • Fresh Parsley – Adds freshness and color; can be omitted or replaced with cilantro.

For the Sauce

  • Peach Preserves – Provides sweetness and moisture to the sauce; apricot or mango preserves can be used for variation.
  • Whiskey – Enhances the sauce flavor with a kick; for a non-alcoholic version, use apple juice or a flavored soda.
  • Ketchup – Adds sweetness and tanginess to the sauce; low-sugar ketchup can be a healthier choice.
  • Apple Cider Vinegar – Offers acidity to balance sweetness; white vinegar is a practical substitute.
  • Worcestershire Sauce – Adds umami depth; soy sauce can be used as an alternative.
  • Mustard Powder – Complements the sweet elements with tanginess; mustard sauce could be an alternative.

Step‑by‑Step Instructions for Whiskey Peach BBQ Meatballs Recipe

Step 1: Preheat Oven
Preheat your oven to 400°F (200°C). This temperature ensures even cooking and helps achieve a delightful golden crust on the meatballs. As the oven heats, take a moment to gather your ingredients and prepare your baking sheet by lining it with parchment paper.

Step 2: Mix Ingredients
In a large mixing bowl, combine ground beef, breadcrumbs, chopped onion, minced garlic, egg, salt, black pepper, smoked paprika, and fresh parsley. Use your hands to mix gently until just combined—avoid overmixing to keep the meatballs tender. The mixture should be moist and cohesive, ready for shaping.

Step 3: Shape Meatballs
Once the mixture is prepared, use your hands to form 1-inch meatballs, placing each one carefully on the parchment-lined baking sheet. Aim for uniform size to ensure even cooking. You should have about 20 meatballs. This step is crucial to creating the perfect Whiskey Peach BBQ Meatballs!

Step 4: Bake Meatballs
Transfer the baking sheet with meatballs to the preheated oven and bake for 20 minutes. Keep a watchful eye; the meatballs should be browned and reach an internal temperature of 165°F (74°C) for food safety. This process locks in the flavors and creates a delicious crust.

Step 5: Prepare Sauce
While the meatballs are baking, grab a medium saucepan and combine peach preserves, whiskey, ketchup, apple cider vinegar, Worcestershire sauce, mustard powder, salt, and pepper. Heat over medium heat for 5-7 minutes, stirring occasionally, until the sauce thickens slightly and becomes fragrant. This enticing sauce will elevate your Whiskey Peach BBQ Meatballs.

Step 6: Combine and Serve
Once the meatballs are cooked through, remove them from the oven and gently toss them in the prepared sauce until well coated. Serve warm, garnished with additional parsley for a pop of color. Your Whiskey Peach BBQ Meatballs are ready to impress your family or guests!

Storage Tips for Whiskey Peach BBQ Meatballs

Fridge: Store leftover meatballs in an airtight container in the fridge for up to 3 days. Reheat gently in the oven or microwave, ensuring they’re warmed through.

Freezer: To maintain freshness, freeze uncooked meatballs on a baking sheet. Once frozen, transfer them to a freezer bag for up to 3 months. Bake directly from frozen, adding a few extra minutes to the cooking time.

Reheating: When ready to serve leftovers, place meatballs in a baking dish with a splash of sauce and cover with foil. Bake at 350°F (175°C) for about 15-20 minutes until heated through.

Separating Sauce: For optimal storage, keep the BBQ sauce separate from the meatballs if not consumed immediately. This helps preserve texture and flavor for later use.

What to Serve with Whiskey Peach BBQ Meatballs

Elevate your meal with delightful sides that complement the sweet and savory richness of these mouthwatering meatballs.

  • Creamy Mashed Potatoes: The smooth, buttery texture contrasts beautifully with the bouncy meatballs. Add a drizzle of gravy for a comforting touch.

  • Grilled Vegetable Skewers: Brightly colored veggies bring a fresh crunch that balances the richness of the meatballs. Zucchini, bell peppers, and cherry tomatoes offer a smoky flavor from the grill.

  • Crispy Coleslaw: This tangy side adds a refreshing crunch, with a crispness that cuts through the sweetness of the sauce. Tossed with a creamy dressing, it makes a perfect pairing.

  • Cornbread Muffins: Soft and slightly sweet, these muffins are ideal for soaking up the flavorful sauce. They add a delightful Southern twist to your meal.

  • Garden Salad with Berry Vinaigrette: Fresh greens, mixed with juicy berries, create a burst of flavor. The acidity of the vinaigrette will enhance the rich meatballs, making every bite delightful.

  • Chilled Fruit Salad: A refreshing blend of seasonal fruits balances the warm, savory dish. It’s a light way to cleanse your palate between bites.

  • Iced Sweet Tea: This classic beverage sweetens the meal and offers a cooling contrast to the spicy-sweet meatballs. Serve it over ice for the perfect refreshment.

Whiskey Peach BBQ Meatballs Variations

Get ready to explore delightful twists that elevate your cooking experience into something truly extraordinary!

  • Dairy-Free: Replace any breadcrumbs with almond flour for a deliciously nutty flavor without dairy.
  • Hearty Addition: Blend in some grated carrots or zucchini for extra vegetables and moisture in your meatballs.
  • Spicy Kick: Mix in diced jalapeños or a splash of hot sauce to the meat mixture for a fiery flavor boost.
  • Gluten-Free: Use gluten-free breadcrumbs to ensure everyone can enjoy these scrumptious meatballs.
  • Fruit Fusion: Swap peach preserves for apricot or mango for a delightful twist that brightens the sauce.
  • Air Fryer Option: Cook meatballs in an air fryer for a healthier and equally delicious crispy exterior.
  • Sweet Addition: Toss in some chopped dried cranberries for a sweet surprise that beautifully complements the savory.
  • Savory Twist: Add crumbled bacon to the meatball mix for an irresistible smoky flavor.

With so many options, you can tailor these Whiskey Peach BBQ Meatballs to suit your mood! Enjoy them with our wonderful Peaches Cream Cookies for a sweet finish to your meal. Or pair them with Spatchcock Chicken Flavor for an unforgettable feast!

Make Ahead Options

These Whiskey Peach BBQ Meatballs are perfect for meal prep enthusiasts! You can prepare the meatball mixture and shape it into balls up to 24 hours in advance, storing them covered in the refrigerator to maintain their moisture and flavor. Additionally, the meatballs can be frozen uncooked for up to 3 months—just place them on a baking sheet to freeze before transferring to an airtight container. When you're ready to enjoy, simply bake from frozen at 400°F (200°C) for an additional 5-10 minutes. Prepare the sauce ahead of time too, refrigerating it for up to 3 days; reheat on the stove just before combining with the freshly baked meatballs for a quick, delicious meal!

Expert Tips for the Best Whiskey Peach BBQ Meatballs

  • Don’t Overmix: Mixing too thoroughly can result in tough meatballs. Gently combine ingredients for a tender texture.

  • Check Temperature: Use a meat thermometer to ensure internal temperature reaches 165°F (74°C) for food safety and perfect doneness.

  • Watch the Sauce: Stir the sauce frequently while cooking to prevent burning. Keeping an eye on it enhances the flavors of your Whiskey Peach BBQ Meatballs.

  • Freeze for Convenience: Make a big batch of uncooked meatballs and freeze. Bake them fresh whenever needed for a quick meal option.

  • Experiment with Flavors: Don’t hesitate to swap out the peach preserves for different options like apricot for a new taste adventure!

Whiskey Peach BBQ Meatballs Recipe FAQs

What type of ground meat is best for these meatballs?
Absolutely! Ground beef is the traditional choice for its flavor and texture, but you can easily substitute with ground turkey or chicken for a leaner option. Just remember that chicken can be more delicate, so handle it gently during mixing and shaping.

How should I store leftover whiskey peach BBQ meatballs?
To store leftover meatballs, keep them in an airtight container in the fridge for up to 3 days. When reheating, I recommend placing them in a baking dish, adding a splash of sauce, and covering with foil, baking at 350°F (175°C) for about 15-20 minutes to retain their moisture and flavor.

Can I freeze the whiskey peach BBQ meatballs?
Yes! You can freeze these meatballs to enjoy later. I suggest freezing them uncooked first. To do this, shape your meatballs and place them on a baking sheet lined with parchment paper, then freeze until firm. Once frozen, transfer them to a freezer bag and they’ll last up to 3 months. Bake from frozen at 400°F (200°C) for an additional 5-10 minutes until cooked through.

What if my sauce is too thick?
If you find that your sauce has thickened too much, don’t worry! Simply stir in a tablespoon of water or apple juice at a time over medium heat until you reach your desired consistency. Just keep stirring until it's smooth again. This will help balance the flavors without compromising the taste.

Are these meatballs suitable for a gluten-free diet?
Very! Simply swap regular breadcrumbs for gluten-free varieties, and you’ll have a delicious option that everyone can enjoy. Always check labels on your ingredients, especially sauces like ketchup and Worcestershire, for any gluten-containing additives.

How can I make these meatballs spicier?
Want to spice things up? Absolutely! You can add diced jalapeños to the meat mixture or a few dashes of hot sauce into the BBQ sauce while it cooks. Adjust the amount to suit your heat preference, and feel free to experiment a little—cooking is all about enjoying the process!

Whiskey Peach BBQ Meatballs Recipe

Whiskey Peach BBQ Meatballs Recipe: Sweet, Savory Bliss

Whiskey Peach BBQ Meatballs Recipe combines sweet peaches and savory flavors for a crowd-pleasing dish.
Print Recipe Pin Recipe
Prep Time 15 minutes mins
Cook Time 20 minutes mins
Total Time 35 minutes mins
Servings: 4 meatballs
Course: Dinner
Cuisine: American
Calories: 320
Ingredients Equipment Method Nutrition Notes

Ingredients
  

For the Meatballs
  • 1 lb Ground Beef can substitute with ground turkey or chicken
  • 1/2 cup Breadcrumbs or gluten-free breadcrumbs
  • 1 Chopped Onion yellow or white onions
  • 2 cloves Minced Garlic fresh preferred
  • 1 Egg can substitute with a flax egg for vegan option
  • 1 tsp Salt
  • 1/2 tsp Black Pepper adjust to taste
  • 1 tsp Smoked Paprika regular paprika is a substitute
  • 1/4 cup Fresh Parsley can omit or replace with cilantro
For the Sauce
  • 1/2 cup Peach Preserves or apricot/mango preserves
  • 1/4 cup Whiskey or apple juice for non-alcoholic
  • 1/4 cup Ketchup or low-sugar ketchup
  • 2 tbsp Apple Cider Vinegar or white vinegar as substitute
  • 1 tbsp Worcestershire Sauce or soy sauce as alternative
  • 1 tsp Mustard Powder or mustard sauce as alternative

Equipment

  • Mixing Bowl
  • Baking Sheet
  • Parchment Paper
  • Saucepan
  • Meat Thermometer

Method
 

Preparation Steps
  1. Preheat your oven to 400°F (200°C) and prepare your baking sheet with parchment paper.
  2. In a large mixing bowl, combine ground beef, breadcrumbs, chopped onion, minced garlic, egg, salt, black pepper, smoked paprika, and fresh parsley.
  3. Form 1-inch meatballs and place them on the parchment-lined baking sheet.
  4. Bake the meatballs in the preheated oven for 20 minutes, ensuring they reach an internal temperature of 165°F (74°C).
  5. In a saucepan, combine peach preserves, whiskey, ketchup, apple cider vinegar, Worcestershire sauce, mustard powder, salt, and pepper. Heat until the sauce thickens slightly.
  6. Toss the cooked meatballs in the prepared sauce and serve warm.

Nutrition

Serving: 4meatballsCalories: 320kcalCarbohydrates: 18gProtein: 24gFat: 16gSaturated Fat: 6gPolyunsaturated Fat: 2gMonounsaturated Fat: 8gCholesterol: 80mgSodium: 600mgPotassium: 350mgFiber: 1gSugar: 10gVitamin A: 500IUVitamin C: 4mgCalcium: 30mgIron: 3mg

Notes

These meatballs make excellent leftovers and can be easily frozen before cooking for future meals.

Tried this recipe?

Let us know how it was!

Loaded Breakfast Stuffed Croissants for a Cheesy Morning Boost

May 18, 2026 by Grace Snow Leave a Comment

As I opened my fridge one bustling morning, a wave of culinary inspiration washed over me—what if I could transform those buttery croissants into something sensational? That's how these Loaded Breakfast Stuffed Croissants were born! With a flaky, warm exterior enveloping a scrumptious, cheesy egg filling, these croissants are the ultimate breakfast hack. Not only do they come together in a flash, but they also let you customize the fillings to match your taste and pantry staples. Whether you're a fan of savory sausage, vibrant veggies, or gooey melted cheese, these croissants cater to every craving. So, are you ready to elevate your breakfast game and impress your loved ones with this delightful treat? Let's dive into the recipe!

Why are Loaded Breakfast Stuffed Croissants amazing?

Versatile: You can easily customize these croissants to fit your own tastes—swap in your favorite veggies, proteins, or cheeses!

Quick & Easy: Prepared in just 30 minutes, they’re perfect for busy mornings or a lazy brunch.

Comforting Flavor: The warm, flaky croissants paired with a creamy egg filling create a delightful contrast that satisfies every palate.

High-Protein Boost: With eggs and your choice of sausage or bacon, these croissants pack a protein punch to kickstart your day.

Crowd-Pleaser: Whether serving them at a family gathering or a cozy brunch with friends, they are sure to impress everyone at the table—like my go-to Breakfast Egg Muffins that never fail to delight!

Loaded Breakfast Stuffed Croissants Ingredients

For the Croissants
• Large Croissants – Use fresh bakery-style croissants for the best flaky texture.

For the Filling
• Large Eggs – Create a rich, protein-packed filling that sets the stage for our loaded breakfast stuffed croissants.
• Milk – Makes the eggs softer and creamier, giving your filling a luscious texture.
• Shredded Cheddar Cheese – Best if freshly grated to melt smoothly and enhance flavor.
• Cooked Breakfast Sausage or Bacon – Adds a hearty, savory flavor to keep everyone coming back for seconds!
• Diced Bell Peppers – Introduces a burst of freshness; swap with spinach or mushrooms for a veggie kick.
• Chopped Green Onions – Enhances flavor with a mild onion touch that complements the eggs beautifully.
• Salt and Black Pepper – Essential for balancing and enhancing the flavors in the filling.
• Butter – Prevents eggs from sticking during cooking and adds richness.

These ingredients will combine to create the irresistible Loaded Breakfast Stuffed Croissants that will become a beloved addition to your breakfast repertoire!

Step‑by‑Step Instructions for Loaded Breakfast Stuffed Croissants

Step 1: Preheat the Oven
Start by preheating your oven to 350°F (175°C). This temperature will ensure that your Loaded Breakfast Stuffed Croissants bake evenly and become beautifully golden. While the oven warms up, take a moment to gather all your ingredients and equipment, including a baking dish and a mixing bowl.

Step 2: Prepare the Croissants
Carefully slice each croissant in half horizontally using a serrated knife. This will create a pocket perfect for stuffing. Arrange the croissant halves standing up in a baking dish, leaving enough space between them to allow for even cooking. This setup will help the croissants hold their shape during baking.

Step 3: Whisk the Egg Mixture
In a mixing bowl, whisk together the large eggs, milk, salt, and pepper until the mixture is smooth and slightly bubbly. Aim for a light, fluffy consistency that indicates air has been incorporated. This step is crucial for a rich filling in your Loaded Breakfast Stuffed Croissants that has that perfect creamy texture.

Step 4: Cook the Eggs
Melt a tablespoon of butter in a skillet over medium heat. Once the butter is melted and bubbly, pour in the egg mixture. Stir gently with a spatula, cooking the eggs until they are softly set, about 3-4 minutes. You want a slightly creamy texture since the eggs will continue to cook as the croissants bake.

Step 5: Add the Fillings
Remove the skillet from the heat and stir in the cooked sausage or bacon, diced bell peppers, and chopped green onions. Make sure all ingredients are well combined, as each bite of your Loaded Breakfast Stuffed Croissants should be bursting with flavor and varied textures.

Step 6: Stuff the Croissants
Spoon the egg and filling mixture evenly into each croissant half. Don’t be shy; make sure to fill them generously! Once filled, sprinkle a handful of shredded cheddar cheese over the top of each croissant. This will create a deliciously gooey layer that melts beautifully while baking.

Step 7: Bake the Croissants
Place the baking dish in the preheated oven and bake for 10-15 minutes. Keep an eye on them; they should be golden and the cheese perfectly melted. The croissants will become slightly crisp, providing a wonderful texture contrast to the creamy filling.

Step 8: Cool and Serve
Once baked, remove the Loaded Breakfast Stuffed Croissants from the oven and let them cool for a few minutes. This resting period allows the filling to set slightly for easier serving. Serve them warm and enjoy a delightful start to your day!

Expert Tips for Loaded Breakfast Stuffed Croissants

  • Use Fresh Croissants: Start with fresh bakery-style croissants for the best texture; day-old ones may work but can become soggy if overfilled.

  • Don't Overcook Eggs: Cook the eggs just until they’re soft and creamy in the skillet—overcooking will lead to dry filling, affecting your Loaded Breakfast Stuffed Croissants.

  • Grate Cheese Fresh: Opt for freshly grated cheese instead of pre-shredded; it melts better and adds more flavor to your delicious croissants.

  • Customize Fillings: Feel free to swap ingredients! Use different meats, veggies, or cheeses to tailor the recipe to your taste preferences or what's in your pantry.

  • Allow to Rest: Let the stuffed croissants cool slightly after baking; this helps the flavors meld together and makes them easier to handle.

Make Ahead Options

These Loaded Breakfast Stuffed Croissants are perfect for meal prep enthusiasts! You can prepare the filling up to 24 hours in advance by cooking the eggs, sausage or bacon, and veggies, then storing them in an airtight container in the fridge. When you're ready to enjoy your breakfast, simply stuff the croissants with the mixture, sprinkle with cheese, and bake for about 10-15 minutes until golden and bubbly. To ensure they’re just as delicious, use slightly day-old croissants for better structure and refrigerate the filling without adding the cheese until you're ready to bake. This way, you can serve a gourmet breakfast with minimal effort, even on your busiest mornings!

What to Serve with Loaded Breakfast Stuffed Croissants

Brighten your breakfast or brunch spread with delightful accompaniments that elevate the experience.

  • Fresh Fruit Salad: A medley of seasonal fruits adds a refreshing contrast to the rich croissants while balancing flavors perfectly.

  • Honey Butter Skillet Corn: Sweet and savory, this dish complements the croissants’ creaminess and brings a touch of comfort.

  • Roasted Baby Potatoes: Crispy on the outside and fluffy inside, these potatoes offer a hearty crunch that pairs wonderfully with the soft croissant filling.

  • Mixed Green Salad: Light and crisp greens drizzled with a tangy vinaigrette create a refreshing palate cleanser between bites.

  • Herbed Yogurt Dip: This cool and creamy dip enhances the savory flavors of the croissants and adds an exciting layer of texture.

  • Mimosas: A bubbly, citrusy drink that perfectly matches the luxurious nature of the stuffed croissants, making every bite feel festive.

Whether sharing with loved ones or enjoying solo, these pairings make for a breakfast or brunch experience that’s both satisfying and delightful!

Storage Tips for Loaded Breakfast Stuffed Croissants

• Fridge: Store leftovers in an airtight container for up to 3 days. Reheat in the oven for 10 minutes at 350°F (175°C) to restore crispness.

• Freezer: Wrap individually in plastic wrap and store in a freezer bag for up to 1 month. Reheat directly from frozen in the oven until heated through and the croissant is crispy.

• Make-Ahead: Prepare the filling a day in advance and store it in the fridge. Assemble and bake just before serving for a hot and fresh breakfast experience.

• Room Temperature: If serving immediately, Loaded Breakfast Stuffed Croissants can be kept at room temperature for up to 2 hours before they should be refrigerated.

Loaded Breakfast Stuffed Croissants Variations

Feel free to explore new flavors and textures with these exciting ideas to personalize your croissants!

  • Vegetarian: Replace sausage or bacon with sautéed mushrooms, spinach, or zucchini to create a delicious meat-free option.

  • Cheesy Twist: Use a mix of cheeses like pepper jack for a spicy kick or mozzarella for a milder experience; both melt beautifully!

  • Herb-Infused: Add fresh herbs like basil, cilantro, or chives to the egg mixture for an aromatic touch that will elevate your croissants' flavor profile.

  • Spicy Kick: Toss in some diced jalapeños or a sprinkle of chili flakes in the filling to awaken your taste buds with a fiery twist.

  • Sweet Option: For a sweeter variation, try adding a spoonful of jam or fresh fruit on top before baking, balancing sweet and savory in each bite.

  • Breakfast Classic: Stuff the croissants with classic breakfast items like crispy fried potatoes or hash browns for extra heartiness, reminiscent of a diner-style plate.

  • Creamy Addition: Mixing in a splash of cream cheese into the egg mixture creates an even richer filling, ensuring each bite oozes with delight.

  • Savory Swap: For a truly loaded option, consider adding crumbled feta cheese and sun-dried tomatoes for a Mediterranean flair—perfect for brunch gatherings!

As you experiment, don’t forget to check out other delightful recipes like my Herby Ricotta Stuffed and Cornbread Breakfast Casserole for more ways to make your breakfast special!

Loaded Breakfast Stuffed Croissants Recipe FAQs

How do I choose the best croissants for my Loaded Breakfast Stuffed Croissants?
Absolutely! For the best results, look for fresh bakery-style croissants, as they provide that perfect flaky and buttery texture. If you can, aim for croissants that are slightly day-old; they hold up better when stuffed and won’t become too soggy during baking. Avoid any croissants with dark spots or signs of staleness, as those can affect the final taste.

What is the best way to store leftovers from Loaded Breakfast Stuffed Croissants?
Very! Store any leftovers in an airtight container in the refrigerator for up to 3 days. To reheat, simply place them in a preheated oven at 350°F (175°C) for about 10 minutes. This will help to restore their crispiness while warming the filling. Alternatively, if you’re looking to make a batch ahead of time, wrap each croissant tightly in plastic wrap and freeze them individually for up to 1 month.

Can I freeze Loaded Breakfast Stuffed Croissants? How do I do that properly?
Absolutely! Freezing cooked Loaded Breakfast Stuffed Croissants is a great way to have a quick meal ready at your fingertips. Once cooked and cooled, wrap each croissant tightly in plastic wrap. Place wrapped croissants into a freezer bag, removing as much air as possible. They can be stored in the freezer for up to 1 month. When ready to enjoy, simply reheat directly from frozen in the oven until warmed through and crispy, which usually takes about 15-20 minutes.

What should I do if my egg filling ends up too dry while cooking?
Oh, don’t worry; it happens to the best of us! If your egg filling becomes dry in the skillet, try reducing the cooking time during Step 4 of the instructions. You want to cook the eggs until they are creamy, not fully set, since they will continue to cook in the oven. If you notice they are drying, whisk in a bit of additional milk to loosen the texture before combining with your other ingredients.

Are there any dietary considerations for making Loaded Breakfast Stuffed Croissants?
Very! When preparing these croissants, you can make modifications to suit dietary needs. For instance, if you’re accommodating a vegetarian diet, simply omit the sausage or bacon and load up on more veggies or even cheese. Additionally, keep in mind any allergies—common ingredients like eggs, cheese, or gluten in croissants should be replaced with suitable alternatives, such as egg substitutes or gluten-free croissants. Just be sure to check the labels on all products used.

Loaded Breakfast Stuffed Croissants

Loaded Breakfast Stuffed Croissants for a Cheesy Morning Boost

Loaded Breakfast Stuffed Croissants are a delicious breakfast hack, featuring flaky croissants and a cheesy egg filling.
Print Recipe Pin Recipe
Prep Time 10 minutes mins
Cook Time 15 minutes mins
Cooling Time 5 minutes mins
Total Time 30 minutes mins
Servings: 4 croissants
Course: Breakfast
Cuisine: American
Calories: 350
Ingredients Equipment Method Nutrition Notes

Ingredients
  

For the Croissants
  • 4 large Croissants Use fresh bakery-style croissants for the best flaky texture.
For the Filling
  • 4 large Eggs Create a rich, protein-packed filling.
  • 1/4 cup Milk Makes the eggs softer and creamier.
  • 1 cup Shredded Cheddar Cheese Best if freshly grated to melt smoothly.
  • 1 cup Cooked Breakfast Sausage or Bacon Adds a hearty, savory flavor.
  • 1/2 cup Diced Bell Peppers Introduces a burst of freshness.
  • 1/4 cup Chopped Green Onions Enhances flavor with a mild onion touch.
  • 1 teaspoon Salt Essential for balancing flavors.
  • 1/2 teaspoon Black Pepper Essential for balancing flavors.
  • 1 tablespoon Butter Prevents eggs from sticking during cooking.

Equipment

  • Baking Dish
  • Mixing Bowl
  • Skillet
  • Serrated knife

Method
 

Step‑by‑Step Instructions
  1. Preheat the oven to 350°F (175°C).
  2. Carefully slice each croissant in half horizontally to create a pocket.
  3. In a mixing bowl, whisk together the eggs, milk, salt, and pepper until smooth.
  4. Melt butter in a skillet over medium heat, pour in the egg mixture, and cook gently until softly set.
  5. Stir in cooked sausage or bacon, diced bell peppers, and chopped green onions.
  6. Spoon the egg mixture into each croissant half and sprinkle cheese on top.
  7. Place the baking dish in the oven and bake for 10-15 minutes until golden and cheese is melted.
  8. Let cool for a few minutes before serving.

Nutrition

Serving: 1croissantCalories: 350kcalCarbohydrates: 20gProtein: 15gFat: 25gSaturated Fat: 10gPolyunsaturated Fat: 1gMonounsaturated Fat: 12gCholesterol: 150mgSodium: 500mgPotassium: 250mgFiber: 1gSugar: 1gVitamin A: 600IUVitamin C: 5mgCalcium: 200mgIron: 2mg

Notes

These croissants can be customized with different meats, vegetables, or cheeses based on personal preference.

Tried this recipe?

Let us know how it was!

Cheesy Sausage Egg Breakfast Roll-Ups for Quick Mornings

May 18, 2026 by Grace Snow Leave a Comment

As I took my first bite of a Cheesy Sausage Egg Breakfast Roll-Up, I was wrapped in a comforting blend of flavors—savory sausage, fluffy scrambled eggs, and melted cheese all snuggled in a warm tortilla. Mornings can often feel rushed, but these delightful roll-ups transform breakfast into a cozy moment of satisfaction, all in just 30 minutes. Not only are they quick to prepare, but their customizable nature makes them perfect for everyone at the table, whether you prefer spicy sausage or fresh veggies. Plus, they’re an excellent make-ahead option, ready to help you conquer the day without the hassle of fast food. Curious about how to whip these up in your own kitchen? Let’s dive into the deliciousness!

Why Are Breakfast Roll-Ups So Great?

Customization is key with these roll-ups, allowing you to tailor flavors to individual preferences. Quick prep means you can whip them up in just 30 minutes, making breakfast a breeze. Crowd-pleasing and perfect for all ages, they transform any morning into a satisfying experience. For added fun, why not toss in some veggies like in my Cheesy Zucchini Bake or use a twist on flavors with Breakfast Egg Muffins? Meal prep is simple too—make a batch ahead and store them for an effortless morning. Enjoy the rich, savory flavor that combines comfort and ease in every bite!

Cheesy Sausage Egg Breakfast Roll-Ups Ingredients

For the Egg Mixture
• Eggs – Use large eggs at room temperature for a fluffier scramble.
• Milk – A splash of milk adds creamy richness to the eggs.
• Salt – Adjust to taste for enhanced flavor.
• Pepper – Freshly ground black pepper adds a delightful seasoning kick.

For the Fillings
• Pre-cooked Breakfast Sausage Links – The star of the roll-ups; opt for turkey sausage for a lighter twist or plant-based sausage for a vegetarian option.
• Shredded Cheddar Cheese – The gooey goodness that brings everything together; consider substituting with pepper jack for a spicy kick.

For the Wrap
• Flour Tortillas – Soft, pliable tortillas hold all the deliciousness together; gluten-free tortillas are available if needed.
• Butter – Adds flavor and helps achieve a beautiful golden-brown finish; non-stick cooking spray is a handy alternative.

Feel free to get creative with these Cheesy Sausage Egg Breakfast Roll-Ups and customize them to suit your taste!

Step‑by‑Step Instructions for Cheesy Sausage Egg Breakfast Roll-Ups

Step 1: Whisk Eggs
Begin by cracking 6 large eggs into a mixing bowl, adding a splash of milk, salt, and pepper to taste. Use a whisk to blend the mixture until it becomes frothy and uniform in color, which should take about 1-2 minutes. This egg mixture will create a fluffy base for your Cheesy Sausage Egg Breakfast Roll-Ups.

Step 2: Scramble Eggs
In a non-stick skillet, melt 2 tablespoons of butter over medium heat until it starts to bubble. Pour in your egg mixture and carefully stir with a spatula, cooking for 5-7 minutes. Stir gently until the eggs are fluffy and just set—avoid overcooking, as they will continue to cook slightly once removed from the heat.

Step 3: Toast Tortillas
To prepare your tortillas, lightly toast them in a skillet or briefly warm them in the microwave for about 15-20 seconds. You want them pliable enough to roll without tearing. This step ensures your tortillas will hold the filling beautifully in your Cheesy Sausage Egg Breakfast Roll-Ups.

Step 4: Fill Tortillas
Lay each warmed tortilla flat and place a pre-cooked breakfast sausage link in the center. Spoon a generous portion of scrambled eggs over the sausage and sprinkle with shredded cheddar cheese. Aim for even distribution to ensure that every bite of your roll-up is packed with flavor.

Step 5: Roll Up
Carefully fold the sides of each tortilla over the filling and then roll it up tightly from the bottom to the top. Make sure to tuck in the ends as you go to seal in the delicious ingredients. This step is crucial for the integrity of your Cheesy Sausage Egg Breakfast Roll-Ups.

Step 6: Cook Roll-Ups
Wipe down the skillet and apply a light layer of non-stick cooking spray. Place the roll-ups seam side down and cook for 2-3 minutes on each side, until golden brown and crisp. Keep an eye on them to prevent burning, as they should achieve a beautiful crust while heating through.

Step 7: Serve
Once they’re golden and crispy, remove the roll-ups from the skillet and plate them warm. These Cheesy Sausage Egg Breakfast Roll-Ups pair perfectly with a side of salsa or hot sauce for a little extra kick, enhancing their flavor and making for a satisfying breakfast experience.

Expert Tips for Cheesy Sausage Egg Breakfast Roll-Ups

  • Warm Tortillas: Ensure your tortillas are warmed properly to avoid tearing while rolling. This step helps in crafting perfect Cheesy Sausage Egg Breakfast Roll-Ups.
  • Egg Consistency: Avoid overcooking your scrambled eggs; they should be just set and fluffy when removed from heat for the best texture.
  • Customize Flavors: Feel free to experiment with different sausage types and cheeses. Try spicy sausage or pepper jack for added flavor in your roll-ups!
  • Add Veggies: Incorporating sautéed veggies like bell peppers or spinach can enhance nutrition and flavor, making your breakfast even more delightful.
  • Perfect Crunch: For extra crispiness, ensure the roll-ups are thoroughly cooked on each side until golden brown—this gives them that irresistible crunch!

Make Ahead Options

These Cheesy Sausage Egg Breakfast Roll-Ups are a fantastic choice for meal prep, making your busy mornings smoother and more enjoyable! You can prepare the egg mixture and fill the tortillas up to 24 hours in advance by storing them in an airtight container in the refrigerator. To maintain quality and prevent the tortillas from becoming soggy, wrap each roll-up tightly with plastic wrap. When you're ready to serve, simply cook them in a skillet for 2-3 minutes on each side until they’re golden brown and heated through. This way, you can enjoy a delicious breakfast with minimal effort!

How to Store and Freeze Cheesy Sausage Egg Breakfast Roll-Ups

Fridge: Store roll-ups in an airtight container for up to 3-4 days. Just reheat in the microwave or skillet for a quick breakfast solution.

Freezer: Individually wrap each roll-up in plastic wrap and then foil. They can be frozen for up to 2-3 months, perfect for busy mornings!

Reheating: To reheat from frozen, simply microwave for 1-2 minutes or place in a skillet over medium heat, cooking until warmed through and crisp.

Serving Tip: Enjoy them with salsa or avocado—these additions can elevate the flavor and make your Cheesy Sausage Egg Breakfast Roll-Ups even more satisfying!

Cheesy Sausage Egg Breakfast Roll-Ups Variations

Feel free to get creative with your roll-ups, adapting flavors to match your cravings or dietary needs!

  • Vegetarian: Swap out the sausage for sautéed mushrooms and spinach for a hearty spin.
  • Spicy Kick: Use spicy sausage or add jalapeños for a fiery flavor boost.
  • Gluten-Free: Choose gluten-free tortillas to make this delicious breakfast accessible to everyone.
  • Cheese Swap: Switch cheddar for feta or Swiss cheese to explore different flavor profiles.
  • Herb-Infused: Mix fresh herbs like chives or cilantro into the scrambled eggs for a fresh, aromatic taste.
  • BBQ Flavor: Brush a bit of barbecue sauce on the sausage before assembling for a smoky flair.
  • Extra Crunch: Add crushed tortilla chips to the filling for a delightful texture.
  • Breakfast in a Bowl: Try creating a deconstructed version by layering ingredients in a bowl instead of rolling them up for those at home.

There are countless ways to enjoy these Cheesy Sausage Egg Breakfast Roll-Ups! And if you're looking for more inspiration, you might like my Corn Fried Egg or Cornbread Breakfast Casserole recipes, which offer another layer of yummy breakfast options.

What to Serve with Cheesy Sausage Egg Breakfast Roll-Ups

A delightful breakfast is just the beginning when you pair these comforting roll-ups with the right sides and drinks.

  • Fresh Salsa: This zesty addition provides a burst of flavor and balances the richness of the roll-ups beautifully.
  • Sliced Avocado: Creamy avocado adds a smooth texture, making your meal feel luxurious and extra satisfying.
  • Fruit Salad: A refreshing side of mixed fruit brings sweetness and lightness, perfect for brightening up a savory breakfast.
  • Greek Yogurt: This tangy, creamy option pairs well with the roll-ups and boosts your protein intake for a fulfilling start to the day.
  • Coffee or Tea: Enjoy a steaming cup of your favorite brew for that cozy morning touch; a splash of cream or milk enhances each sip.
  • Smoothie: A berry or green smoothie contributes freshness and nutrients, complementing the filling nature of the roll-ups while keeping your morning vibrant.

Cheesy Sausage Egg Breakfast Roll-Ups Recipe FAQs

How do I select the best eggs for my roll-ups?
Absolutely! For the fluffiest scrambled eggs, choose large eggs that are fresh and at room temperature. This temperature allows for better blending with milk and gives a more consistent scramble.

How should I store leftover roll-ups?
You can easily store your Cheesy Sausage Egg Breakfast Roll-Ups in an airtight container in the fridge for up to 3-4 days. Just give them a quick reheat in the microwave or skillet when you're ready to enjoy them again!

Can I freeze these breakfast roll-ups?
Yes, indeed! To freeze, wrap each roll-up tightly in plastic wrap, then in foil, and store in a freezer-safe bag. They're great for up to 2-3 months. For reheating, simply microwave for 1-2 minutes or heat in a skillet until warm and crispy.

What if my tortillas tear while rolling?
Don't worry! If they tear, it’s likely they're too cold. I recommend warming them properly before filling, either in a skillet or microwave. This will make them more pliable and prevent tearing, ensuring a beautiful roll-up.

Are there any dietary concerns to consider?
Certainly! If you're preparing these for anyone with specific dietary needs, opt for gluten-free tortillas for those avoiding gluten. Additionally, using turkey or plant-based sausage can cater to lighter diets or vegetarian preferences. Always check ingredient labels for allergens!

Cheesy Sausage Egg Breakfast Roll-Ups

Cheesy Sausage Egg Breakfast Roll-Ups for Quick Mornings

Indulge in Cheesy Sausage Egg Breakfast Roll-Ups that combine savory sausage, fluffy eggs, and cheese, transforming rushed mornings into a cozy breakfast moment.
Print Recipe Pin Recipe
Prep Time 10 minutes mins
Cook Time 20 minutes mins
Total Time 30 minutes mins
Servings: 4 roll-ups
Course: Breakfast
Cuisine: American
Calories: 300
Ingredients Equipment Method Nutrition Notes

Ingredients
  

For the Egg Mixture
  • 6 large Eggs Use large eggs at room temperature for a fluffier scramble.
  • 1 splash Milk A splash of milk adds creamy richness to the eggs.
  • to taste Salt Adjust to taste for enhanced flavor.
  • to taste Pepper Freshly ground black pepper adds a delightful seasoning kick.
For the Fillings
  • 4 links Pre-cooked Breakfast Sausage Opt for turkey sausage for a lighter twist or plant-based sausage for a vegetarian option.
  • 1 cup Shredded Cheddar Cheese Consider substituting with pepper jack for a spicy kick.
For the Wrap
  • 4 large Flour Tortillas Soft, pliable tortillas hold all the deliciousness together; gluten-free tortillas are available if needed.
  • 2 tablespoons Butter Adds flavor and helps achieve a beautiful golden-brown finish; non-stick cooking spray is a handy alternative.

Equipment

  • non-stick skillet
  • Mixing Bowl
  • Whisk
  • Spatula

Method
 

Step-by-Step Instructions
  1. Begin by cracking 6 large eggs into a mixing bowl, adding a splash of milk, salt, and pepper to taste. Whisk until frothy and uniform in color, about 1-2 minutes.
  2. In a non-stick skillet, melt 2 tablespoons of butter over medium heat. Pour in your egg mixture and carefully stir, cooking for 5-7 minutes until fluffy and just set.
  3. Lightly toast tortillas in a skillet or warm briefly in the microwave for about 15-20 seconds, ensuring they're pliable.
  4. Lay each warmed tortilla flat, place a pre-cooked sausage link in the center, spoon scrambled eggs over the sausage, and sprinkle with shredded cheddar cheese.
  5. Fold the sides of each tortilla over the filling and roll tightly from the bottom to the top, tucking in the ends.
  6. Wipe the skillet, apply a light layer of non-stick cooking spray, and cook the roll-ups seam side down for 2-3 minutes on each side until golden brown and crisp.
  7. Remove from the skillet and plate warm. Serve with salsa or hot sauce for added flavor.

Nutrition

Serving: 1roll-upCalories: 300kcalCarbohydrates: 30gProtein: 15gFat: 15gSaturated Fat: 7gPolyunsaturated Fat: 2gMonounsaturated Fat: 2gCholesterol: 220mgSodium: 600mgPotassium: 300mgFiber: 2gSugar: 1gVitamin A: 800IUVitamin C: 1mgCalcium: 200mgIron: 2mg

Notes

Customize flavors with different sausage types or cheeses, and add sautéed veggies for enhanced nutrition.

Tried this recipe?

Let us know how it was!

Hawaiian Roll French Toast Recipe for a Tropical Breakfast Bliss

May 18, 2026 by Grace Snow Leave a Comment

As I stood in my kitchen, the aroma of buttery goodness wafted through the air, instantly transporting me to a sunny paradise. That’s the magic of this Hawaiian Roll French Toast Recipe. It’s not just another breakfast dish; it's a slice of tropical delight that can transform your mornings any day of the week. Whipping up this quick breakfast is such a joy, especially when it becomes a family favorite to please both kids and adults alike. This recipe is all about comfort and ease—perfect for those rushed weekday mornings or those leisurely brunches when you want to impress. Curious about how you can take your breakfast game to a whole new level? Let’s dive into this delicious adventure!

Why is this Hawaiian Roll French Toast special?

Rich, Sweet Flavor: The lush sweetness of Hawaiian rolls combined with the creamy custard creates an irresistible breakfast that’s hard to beat.
Quick & Easy: Ready in just minutes, this recipe is perfect for busy mornings or spontaneous brunches.
Family-Friendly: Even picky eaters will adore this tropical twist on French toast, making it a crowd-pleaser.
Versatile Toppings: Explore unique variations like Coconut Cream French Toast or indulge with fresh berries for a delightful topping experience.
Satisfying Texture: Each bite features a golden-brown exterior that contrasts beautifully with the fluffy, soft interior, offering pure breakfast bliss.
Meal Prep Friendly: Make ahead and enjoy warm or cold; just freeze for a quick breakfast option later!

Hawaiian Roll French Toast Ingredients

• The essential items you'll need for this delightful dish!

For the Batter

  • Hawaiian Rolls – The star of the show, these sweet rolls bring that soft, pillowy texture essential for a heavenly French toast experience.
  • Eggs – Acts as the binding agent in the custard, providing richness and allowing the rolls to soak up all that delicious flavor.
  • Milk – Adds creaminess to the custard; feel free to substitute with any non-dairy alternative for a lighter version.
  • Vanilla Extract – A must-have for enhancing flavor; opt for pure extract for a more robust and aromatic taste.
  • Ground Cinnamon – A warm spice that adds depth; using fresh spices can elevate your dish even more.
  • Nutmeg – Grounds the sweetness with its warm flavor; only a pinch adds a lovely hint to the custard.

For Cooking

  • Butter – Adds richness while cooking; use a non-stick spray if you're looking to cut down on the fat content.

Optional Toppings

  • Syrup – Drizzle on maple syrup to enhance the sweetness of this delightful Hawaiian Roll French Toast; try flavored syrups for an extra twist!
  • Fresh Fruit – Berries or sliced fruit add a refreshing burst and beautiful color, balancing the sweetness perfectly and making it visually appealing.
  • Coconut Cream – Layered on top for a tropical twist, it complements the Hawaiian flavors brilliantly!

With these ingredients, you're on your way to whipping up a fantastic Hawaiian Roll French Toast that will surely become a morning favorite!

Step‑by‑Step Instructions for Hawaiian Roll French Toast Recipe

Step 1: Prepare Custard
In a medium bowl, whisk together four large eggs, one cup of milk, two teaspoons of vanilla extract, and a pinch of ground cinnamon until the mixture is smooth and frothy. Aim for a lovely blend that holds a slight thickness—this custard is the heart of the Hawaiian Roll French Toast. Set the bowl aside, as you’ll be using it shortly.

Step 2: Soak Rolls
Cut the Hawaiian rolls in half, creating mini sandwich shapes. Dip each piece into the custard, ensuring they’re fully coated but not overly saturated; about 30 seconds should do. Lay them on a clean plate, allowing them to absorb the custard while you heat your cooking surface, ensuring maximum flavor infusion.

Step 3: Heat Pan
Preheat a non-stick skillet over medium heat (approximately 350°F). Once warm, add a tablespoon of butter, allowing it to melt and coat the bottom of the skillet. A sizzling sound indicates it's just right for frying, creating that golden exterior we all love in Hawaiian Roll French Toast.

Step 4: Cook Toast
Place the soaked rolls in the skillet, ensuring they don't overcrowd the pan for even cooking. Allow them to cook for about 3-4 minutes on each side, flipping when they turn a perfect golden-brown. Keep an eye out for that caramelized edge; it’s a beautiful sight and a key indicator that they’re ready.

Step 5: Serve
Once cooked, transfer the Hawaiian Roll French Toast to a serving platter while they’re still hot. Feel free to drizzle with maple syrup and add fresh fruit on top for a burst of color and flavor. These indulgent slices bring tropical joy to your breakfast table, promising to be a hit with your family!

What to Serve with Hawaiian Roll French Toast

Imagine a breakfast spread that dances with flavors and colors, perfectly complementing your tropical French toast delight!

  • Crispy Bacon: The salty crunch of bacon provides a savory contrast, enhancing the sweetness of the French toast perfectly. A classic combo that never disappoints!
  • Fresh Fruit Salad: A vibrant mix of seasonal fruits adds brightness and freshness, balancing the richness of the syrupy toast. Consider including strawberries, kiwi, and pineapple for a tropical twist.
  • Coconut Whipped Cream: Light and airy, this sweet topping adds a lush, creamy indulgence that accentuates the tropical vibes of Hawaiian Roll French Toast. A luscious treat!
  • Maple Syrup: Drizzling with rich maple syrup elevates the sweetness while adding depth; choose flavored varieties for an extra dose of fun on your plate.
  • Scrambled Eggs: Light and fluffy scrambled eggs make for a protein-packed pair, creating a well-rounded meal that's satisfying and delicious.
  • Mimosas: A refreshing mimosa adds a celebratory touch to brunch, pairing perfectly with the sweet flavors of your Hawaiian Roll French Toast. Cheers to a relaxing morning!
  • Chocolate Chips: For a decadent twist, sprinkle mini chocolate chips on top for an irresistible indulgence that transforms your breakfast into a treat!
  • Yogurt Parfait: Layering Greek yogurt with granola and fruits creates a delightful contrast; a healthy alternative that brings great texture alongside the French toast's softness.

Hawaiian Roll French Toast Variations

Discover the endless possibilities to delight your taste buds with this Hawaiian Roll French Toast recipe!

  • Gluten-Free: Substitute the Hawaiian rolls with gluten-free bread or rolls for those with dietary restrictions.
  • Coconut Cream French Toast: Incorporate shredded coconut into the custard mix, or lavish with coconut cream for a tropical twist. This adds a rich creaminess that pairs beautifully with the sweet rolls.
  • Nutty Crunch: Toss in some crunchy nuts like pecans or almonds into the batter or sprinkle on top for a satisfying texture. The contrast between the creamy custard and the crunchy topping will surely impress!
  • Berry Explosion: Top your French toast with a medley of fresh seasonal berries like strawberries, blueberries, or raspberries, and drizzle with syrup for a vibrant, fruity flair. It not only brightens your dish but also adds a refreshing burst!
  • Choco-Lovers’ Delight: Fold mini chocolate chips into the custard for a dessert-like treat. This sweet decadence will appeal particularly to the younger palates at your breakfast table.
  • Pumpkin Spice Option: For a fall-inspired version, add pumpkin puree and a touch of pumpkin spice to the custard mixture. It brings warmth and comfort, perfect for chilly mornings.
  • Caramelized Banana Topping: Sauté banana slices in butter and brown sugar until caramelized, then layer them on top for a sweet, indulgent finish. The warm bananas add an enticing aroma and flavor that’s hard to resist.
  • Savory Spin: Swap out the vanilla for savory spices, and serve alongside crispy bacon or sausage for a surprising twist on this traditionally sweet dish. It's a blend of flavors that certainly piques the curiosity!

Feel free to personalize your Hawaiian Roll French Toast with these creative ideas, and why not pair it with a refreshing drink like a glass of fresh orange juice or a light mimosa? For more delicious inspirations, explore these delightful Pumpkin Cinnamon Roll options!

Expert Tips for the Best Hawaiian Roll French Toast

  • Proper Soaking: Avoid sogginess: Don’t soak the rolls for more than 30 seconds to keep the texture fluffy and light.

  • Freshness Matters: Use fresh rolls: Stale Hawaiian rolls can become mushy, so opt for fresh ones for the best results.

  • Preheat Correctly: Get the pan ready: Ensure your skillet is hot enough before cooking to achieve that delightful golden-brown crust.

  • Flavor Infusion: Add spices wisely: Incorporating ground cinnamon or nutmeg into the custard enhances the taste of your Hawaiian Roll French Toast recipe.

  • Make It Your Own: Customize toppings: Fresh fruit, flavored syrups, or coconut cream can elevate your dish, making it a fun breakfast for everyone.

Make Ahead Options

These Hawaiian Roll French Toast slices are a dream for meal prep! You can prepare the custard mixture (eggs, milk, vanilla, and spices) up to 24 hours in advance and refrigerate it in a sealed container. Additionally, you can soak the cut Hawaiian rolls in the custard overnight; simply layer them in a dish and cover with plastic wrap to prevent drying out. When you're ready to serve, heat your skillet and cook the soaked rolls directly from the fridge for about 3-4 minutes per side until golden brown. This approach not only saves you precious time on busy mornings but ensures you’ll have the same deliciously fluffy French toast bursting with tropical flavors—every bite just as delightful as if made fresh!

How to Store and Freeze Hawaiian Roll French Toast

Fridge: Store cooked Hawaiian Roll French Toast in an airtight container for up to 3 days to maintain freshness and flavor.

Freezer: Wrap individual slices in plastic wrap and then foil; freeze for up to 2 months. This ensures they remain tasty and easy to reheat.

Reheating: Reheat directly from the freezer in the microwave or oven, warming until heated through. Add a drizzle of syrup for extra flavor!

Make-Ahead Tip: Prepare the custard mixture the night before and soak the rolls in the morning for a quicker breakfast experience.

Hawaiian Roll French Toast Recipe FAQs

What type of Hawaiian Rolls should I use?
Absolutely! Fresh Hawaiian rolls work best for this recipe as they provide the ideal soft and sweet texture. If you can, choose rolls without dark spots or signs of staleness, as stale rolls tend to lead to undesirable mushiness when soaked.

How should I store leftover Hawaiian Roll French Toast?
Very simple! After cooking, store the leftover Hawaiian Roll French Toast in an airtight container in the refrigerator for up to 3 days. To reheat, simply pop the slices in the microwave or toaster oven until warmed through.

Can I freeze Hawaiian Roll French Toast?
Yes, indeed! To freeze, wrap each slice individually in plastic wrap, then in aluminum foil to prevent freezer burn. You can store them in the freezer for up to 2 months. When ready to enjoy, reheat directly from the freezer, either in the microwave for a quick option or in the oven for a crispier texture.

What if my Hawaiian Roll French Toast is too soggy?
No worries! If your French toast turns out soggy, it usually means the rolls were oversoaked. For the perfect flip, aim to soak each piece for about 30 seconds; this allows enough time for flavor infusion without compromising texture. Make sure to preheat your skillet adequately before cooking too!

Is this recipe suitable for dietary restrictions?
Absolutely! You can easily adapt the Hawaiian Roll French Toast Recipe for gluten-free diets by using gluten-free Hawaiian rolls. Additionally, substitute the milk with any non-dairy milk alternatives, like almond or oat milk, to accommodate lactose intolerance or vegan preferences. Just check the labels to avoid any allergens!

Hawaiian Roll French Toast Recipe

Hawaiian Roll French Toast Recipe for a Tropical Breakfast Bliss

Delight in this Hawaiian Roll French Toast Recipe, a sweet and warm breakfast treat that transports you to a tropical paradise.
Print Recipe Pin Recipe
Prep Time 10 minutes mins
Cook Time 15 minutes mins
Total Time 25 minutes mins
Servings: 4 slices
Course: Breakfast
Cuisine: Tropical
Calories: 350
Ingredients Equipment Method Nutrition Notes

Ingredients
  

For the Batter
  • 6 pieces Hawaiian Rolls Cut in half
  • 4 large Eggs Acts as a binding agent
  • 1 cup Milk Can substitute with non-dairy alternative
  • 2 teaspoons Vanilla Extract Use pure for better flavor
  • 1 teaspoon Ground Cinnamon Adds warmth and depth
  • 1 pinch Nutmeg Enhances sweetness
For Cooking
  • 1 tablespoon Butter Can use non-stick spray
Optional Toppings
  • to taste Syrup Maple syrup or flavored syrups
  • to taste Fresh Fruit Berries or sliced fruit for garnish
  • to taste Coconut Cream For a tropical twist

Equipment

  • medium bowl
  • non-stick skillet
  • Whisk

Method
 

Directions
  1. In a medium bowl, whisk together eggs, milk, vanilla extract, and cinnamon until smooth and frothy.
  2. Cut the Hawaiian rolls in half and dip each piece into the custard for about 30 seconds.
  3. Preheat a non-stick skillet over medium heat and melt butter in the skillet.
  4. Place the soaked rolls in the skillet and cook for about 3-4 minutes on each side until golden-brown.
  5. Serve hot, drizzled with syrup and topped with fresh fruit.

Nutrition

Serving: 1sliceCalories: 350kcalCarbohydrates: 40gProtein: 8gFat: 18gSaturated Fat: 10gPolyunsaturated Fat: 1gMonounsaturated Fat: 6gCholesterol: 180mgSodium: 450mgPotassium: 200mgFiber: 1gSugar: 15gVitamin A: 400IUCalcium: 150mgIron: 1mg

Notes

Make sure to use fresh Hawaiian rolls for the best flavor. Enjoy customizing with your favorite toppings!

Tried this recipe?

Let us know how it was!

Irresistible Apple Cheesecake Buns with Crumble Topping

May 18, 2026 by Grace Snow Leave a Comment

There’s something magical about the first bite of a warm, freshly baked bun, especially when it evokes the sweet nostalgia of cherished family gatherings. These Apple Cheesecake Buns with a Crumble Topping bring together the spiced goodness of orchard apples and the creamy delight of cheesecake, all wrapped in a fluffy, buttery dough. Perfect for those cozy brunches or a delightful afternoon treat, these buns promise a fun twist on classic baking, making them a guaranteed crowd-pleaser. Plus, with endless filling variations—think juicy pears or vibrant berries—you can tailor this dessert to suit any palate. Are you ready to dive into this deliciously comforting experience?

Why are these buns a must-try?

Deliciously Unique: The Apple Cheesecake Buns are a delightful twist on traditional desserts, combining two loved treats into one irresistible package.

Endless Versatility: Play with flavors by swapping fillings—pears, berries, or even your favorite jams can elevate the taste profile effortlessly.

Crowd-Pleasing Appeal: Perfect for gatherings or cozy mornings, these buns bring warmth and joy, making them a hit at any occasion.

Simple to Craft: With straightforward steps, even novice bakers can create these indulgent treats without the fuss.

Textural Harmony: Each bun features a soft, fluffy center contrasted by a satisfyingly crunchy crumble—every bite is an adventure in flavor and texture.

You’ll want to serve these buns warm, perhaps alongside a dollop of whipped cream or ice cream for an extra decadent experience!

Apple Cheesecake Buns Ingredients

• Gather these must-have ingredients to create your delicious Apple Cheesecake Buns with a Crumble Topping!

For the Dough

  • All-purpose flour – The backbone of your buns; for a chewier texture, consider substituting with bread flour.
  • Whole milk – Adds hydration and richness; almond milk works well for a dairy-free version.
  • Large egg – Acts as a binding agent; swap it out for an egg substitute if going vegan.
  • Unsalted butter – Infuses flavor and richness; margarine can be used for a dairy-free alternative.
  • Instant yeast – Helps the dough rise quickly; active dry yeast may require proofing but can be used.
  • Granulated sugar – Provides sweetness for the dough, while brown sugar can deepen the flavor.
  • Vanilla sugar – Enhances flavor; mix regular sugar with 1 tsp vanilla extract for a perfect substitute.
  • Salt – Balances all flavors in the dough.

For the Cheesecake Filling

  • Cream cheese – Offers a creamy, dreamy filling; choose vegan cream cheese for plant-based diets.
  • Brown sugar – Sweetens and enhances the flavor of the filling.
  • Cinnamon – Adds warmth and spice; nutmeg can be swapped for an interesting twist.
  • Cornstarch + Water – Thickens the apple mixture, but arrowroot powder can work too.

For the Crumble Topping

  • Cold butter – Essential for a crumbly texture; plant-based butter is a great vegan option.
  • Powdered sugar + Milk – Whip this combo together to create a smooth glaze; non-dairy milk can be substituted.

For the Egg Wash (optional)

  • Egg yolk – Provides a beautiful golden sheen; for a vegan option, simply omit or use a plant-based milk wash instead.

With these ingredients ready, you’ll be well on your way to baking those heavenly Apple Cheesecake Buns with a Crumble Topping!

Step‑by‑Step Instructions for Apple Cheesecake Buns with a Crumble Topping

Step 1: Prepare the Dough
In a large mixing bowl, combine 4 cups of all-purpose flour, 1 cup of warm whole milk, 1 large egg, 2 teaspoons of instant yeast, 1/4 cup granulated sugar, 1/4 cup vanilla sugar, and 1 teaspoon salt. Mix these ingredients until well incorporated, then knead the dough on a floured surface for about 8-10 minutes until it’s smooth and elastic. Place the dough in a greased bowl, cover it with a kitchen towel, and let it rise in a warm spot for 1 hour, or until it doubles in size.

Step 2: Sauté the Apples
While the dough rises, peel, core, and dice 2 cups of apples (preferably Granny Smith) into small pieces. In a skillet, melt 2 tablespoons of unsalted butter over medium heat. Add the diced apples, 1/4 cup brown sugar, and 1 teaspoon of cinnamon, cooking until the apples soften and the mixture is fragrant, about 5-7 minutes. Combine 2 tablespoons of cornstarch with 2 tablespoons of water, then stir this into the skillet to thicken the mixture. Cook for an additional 2 minutes until it becomes glossy, then remove from heat and let it cool completely.

Step 3: Make the Cheesecake Filling
In a mixing bowl, beat together 8 ounces of cream cheese, 1/4 cup granulated sugar, and 1 tablespoon of vanilla sugar using a hand mixer on medium speed until completely smooth and creamy, approximately 3-5 minutes. This cheesecake filling should be thick but spreadable, so set it aside for assembly once your dough has risen and the apple mixture has cooled.

Step 4: Divide and Shape the Dough
After the dough has risen, punch it down gently and transfer it to a lightly floured surface. Divide the dough into 9 equal portions and roll each into a ball. Allow them to rest for 15 minutes, which will make them easier to shape. After resting, press each ball down with your hand to create a shallow indentation, ensuring it's deep enough to hold the filling without overflowing.

Step 5: Assemble the Buns
Preheat your oven to 180°C (350°F). Spoon the cheesecake filling into the indentation of each dough piece, followed by the cooled apple mixture. Make sure to fill each bun generously but avoid overfilling. In a separate bowl, mix together 1 cup of flour, 1/2 cup of cold butter, and 1/4 cup of brown sugar until crumbly to create the crumble topping. Sprinkle this crumbly mixture generously over each filled bun.

Step 6: Bake the Buns
Carefully place your assembled Apple Cheesecake Buns on a parchment-lined baking sheet, spacing them at least 2 inches apart. Bake in the preheated oven for 20-25 minutes, or until the buns are golden brown and the crumble topping is crisp. You'll know they are done when they are puffy and beautifully golden, filling your kitchen with a delightful aroma.

Step 7: Glaze and Serve
Once the buns are baked, remove them from the oven and allow them to cool for about 10 minutes on a wire rack. In the meantime, prepare the glaze by whisking together 1 cup of powdered sugar with enough milk to achieve a smooth, pourable consistency. Drizzle this sweet glaze over the slightly cooled buns, then serve warm. The blend of flavors in these Apple Cheesecake Buns with a Crumble Topping is sure to wow your family and friends!

Apple Cheesecake Buns Variations & Substitutions

Feel free to explore your culinary creativity with these delightful twists on the classic Apple Cheesecake Buns!

  • Fruit Swap: Substitute apples with pears, blueberries, or raspberry jam. For berries, simply add sugar and cornstarch directly to the dough without pre-cooking.

  • Nutty Delight: Add chopped walnuts or pecans to the crumble topping for an extra crunch. The added texture will blend beautifully with the soft bun, elevating each bite.

  • Spice It Up: Experiment with ginger or allspice as an alternate seasoning to the cinnamon. This subtle change can add a lively warmth to an already cozy dessert.

  • Gluten-Free Variation: Use a gluten-free all-purpose flour mix to accommodate gluten sensitivities, ensuring everyone can enjoy the magical taste.

  • Dairy-Free Option: Replace the cream cheese with vegan cream cheese and the bread with a plant-based milk for a deliciously inclusive treat. This way, you can cater to your vegan friends without compromising flavor.

  • Zesty Citrus: Grate the zest of an orange or lemon into the filling for a refreshing brightness that complements the sweetness of the apples. It’s an unexpected yet delightful flavor enhancer.

  • Maple Syrup Sweetener: For a rich, deep sweetness, substitute the granulated sugar in the dough with maple syrup. Just adjust the liquid content slightly to maintain consistency.

  • Caramel Topping: Drizzle some caramel sauce over the buns after glazing for an indulgent finish that takes these treats over the top. Who can resist a sweet caramel touch?

For further inspiration, you might also enjoy trying out these recipes—like this delectable Pan Fried Shrimp or these comforting Sweet Potatoes with Black Beans. Let your creativity shine in the kitchen!

Make Ahead Options

These Apple Cheesecake Buns with a Crumble Topping are a dream for busy home cooks! You can prepare the dough and filling up to 24 hours in advance. Simply follow the initial steps of the recipe, then wrap the shaped dough tightly in plastic wrap and refrigerate it. For the filling, store the cooled apple mixture and cheesecake filling in separate airtight containers in the fridge. When you're ready to bake, let the dough come to room temperature for about 30 minutes, then assemble and bake as directed. This prep-ahead method ensures the buns rise beautifully and taste just as delicious, saving you precious time during hectic mornings or special brunches!

What to Serve with Apple Cheesecake Buns with a Crumble Topping

Indulge in the perfect symphony of flavors by creating a well-rounded meal that compliments these delightful buns.

  • Fresh Fruit Salad: A refreshing mix of seasonal fruits adds brightness and balances the sweet, rich flavors of the buns. Try a zesty citrus blend to highlight the spices.

  • Cinnamon Spiced Coffee: The warm, aromatic notes of cinnamon in your coffee deepen the comforting experience of these buns, making your brunch cozy and inviting.

  • Maple Syrup Drizzle: A light drizzle of maple syrup elevates each bite, enhancing the sweetness while introducing a delightful maple flavor that pairs beautifully with apples.

  • Vanilla Ice Cream: Serve a scoop on the side; the cold creaminess contrasts perfectly with the warm, soft buns and enhances the overall indulgence of this dessert.

  • Toasted Nuts: Adding chopped pecans or walnuts as a topping can bring in a satisfying crunch that complements the soft texture of the buns. They also add a boost of healthy fats and protein.

  • Herbal Tea: A cup of jasmine or mint tea cleanses the palate and offers a light, fragrant accompaniment to the richness of the cheese and spice, making it an ideal post-brunch drink.

Serve these alongside your Apple Cheesecake Buns with a Crumble Topping, and watch as they transform your gathering into a cherished memory!

Expert Tips for Apple Cheesecake Buns

  • Cool the Filling: Always let the apple mixture cool completely before adding it to the buns to prevent flattening the dough.

  • Choose the Right Apples: Use firm apples like Granny Smith, which hold their shape during baking and add the perfect tartness.

  • Perfect the Indentation: Ensure you indent the dough deep enough to hold the filling. Shallow indentations may overflow and lose shape during baking.

  • Crumble Texture: For added texture, incorporate chopped nuts into the crumble topping, adding delightful crunch and flavor to the Apple Cheesecake Buns.

  • Serving Warm: These buns are best enjoyed warm, making them even more irresistible when served alongside whipped cream or ice cream.

Storage Tips for Apple Cheesecake Buns

Room Temperature: Enjoy your Apple Cheesecake Buns fresh for up to 2 hours at room temperature. After that, store them in an airtight container to maintain moisture.

Fridge: Store leftovers in the refrigerator for up to 3-4 days in an airtight container. This helps keep the cream cheese filling from spoiling while preserving the bun's softness.

Freezer: For longer storage, these buns can be frozen for up to 2 months. Wrap each bun tightly in plastic wrap and then in aluminum foil before placing them in a freezer bag.

Reheating: Reheat in a preheated oven at 300°F (150°C) for about 5-10 minutes until warmed through and the crumble topping is crisp again. Enjoy!

Apple Cheesecake Buns with Crumble Topping Recipe FAQs

What type of apples are best for this recipe?
Absolutely! For the best results, use firm apples like Granny Smith. They hold their shape well during baking and provide the perfect tartness that balances the sweetness of the cream cheese filling.

How should I store leftover Apple Cheesecake Buns?
You can store the buns in an airtight container in the refrigerator for up to 3-4 days. This will help maintain the freshness of the cream cheese filling while keeping the buns soft. Just remember to reheat them in a preheated oven at 300°F (150°C) for about 5-10 minutes before enjoying them again!

Can I freeze Apple Cheesecake Buns? If so, how?
Yes, you can freeze these delightful buns! Wrap each bun tightly in plastic wrap, then in aluminum foil to protect them from freezer burn. Place them in a freezer bag or container. They will keep well for up to 2 months. When you’re ready to enjoy them, thaw overnight in the refrigerator and reheat at 300°F (150°C) for 5-10 minutes.

What should I do if my dough doesn't rise?
Very! If your dough doesn't rise, it may be due to inactive yeast. Ensure your yeast is fresh and hasn’t expired. Also, check that your milk was warm, but not too hot, when mixing—temperatures over 120°F (49°C) can kill the yeast. If the environment is too cold, try placing the dough in a slightly warm oven (turned off) to encourage rising. Giving it a little extra time can also help!

What can I substitute for dairy ingredients?
For a dairy-free version of Apple Cheesecake Buns with a Crumble Topping, you can use almond milk instead of whole milk, and substitute cream cheese with vegan cream cheese. Margarine can replace the unsalted butter, and for the egg wash, you can simply omit the egg or use a plant-based milk wash. These alternatives help keep the flavors intact while accommodating dietary needs.

Apple Cheesecake Buns with a Crumble Topping

Irresistible Apple Cheesecake Buns with Crumble Topping

These Apple Cheesecake Buns with a Crumble Topping combine the spiced goodness of apples and creamy cheesecake in a fluffy dough, making them an irresistible dessert.
Print Recipe Pin Recipe
Prep Time 1 hour hr
Cook Time 25 minutes mins
Resting Time 15 minutes mins
Total Time 1 hour hr 40 minutes mins
Servings: 9 buns
Course: Dessert
Cuisine: American
Calories: 320
Ingredients Equipment Method Nutrition Notes

Ingredients
  

For the Dough
  • 4 cups all-purpose flour or bread flour for chewier texture
  • 1 cup whole milk or almond milk for dairy-free
  • 1 large egg can substitute for egg substitute if vegan
  • 2 tablespoons unsalted butter or margarine for dairy-free
  • 2 teaspoons instant yeast can use active dry yeast
  • 1/4 cup granulated sugar brown sugar can deepen flavor
  • 1/4 cup vanilla sugar mix regular sugar with 1 tsp vanilla extract
  • 1 teaspoon salt
For the Cheesecake Filling
  • 8 ounces cream cheese or vegan cream cheese for plant-based
  • 1/4 cup brown sugar
  • 1 teaspoon cinnamon can swap with nutmeg
  • 2 tablespoons cornstarch plus 2 tablespoons of water, or arrowroot powder
For the Crumble Topping
  • 1/2 cup cold butter or plant-based butter for vegan option
  • 1 cup powdered sugar plus milk for consistency
For the Egg Wash (optional)
  • 1 large egg yolk omit for vegan option

Equipment

  • Mixing Bowl
  • Skillet
  • Baking Sheet
  • Whisk
  • wire rack
  • measuring cups
  • Measuring Spoons

Method
 

Dough Preparation
  1. In a large mixing bowl, combine 4 cups of all-purpose flour, 1 cup of warm whole milk, 1 large egg, 2 teaspoons of instant yeast, 1/4 cup granulated sugar, 1/4 cup vanilla sugar, and 1 teaspoon salt. Mix until well incorporated, knead on a floured surface for 8-10 minutes until smooth and elastic. Place in a greased bowl, cover, and let rise in a warm spot for 1 hour, until doubled.
Apple Sautéing
  1. Peel, core, and dice 2 cups of apples. Melt 2 tablespoons of unsalted butter in a skillet over medium heat. Add the diced apples, 1/4 cup brown sugar, and 1 teaspoon of cinnamon; cook until softened, about 5-7 minutes. Combine 2 tablespoons of cornstarch with 2 tablespoons of water and stir into the skillet. Cook until glossy and remove from heat to cool completely.
Cheesecake Filling
  1. In a mixing bowl, beat together 8 ounces of cream cheese, 1/4 cup granulated sugar, and 1 tablespoon of vanilla sugar until smooth, about 3-5 minutes. Set aside for assembly.
Divide and Shape
  1. After the dough has risen, punch it down, divide into 9 portions, and roll into balls. Rest for 15 minutes, then press to create shallow indentations to hold the filling.
Buns Assembly
  1. Preheat oven to 180°C (350°F). Spoon cheesecake filling and cooled apple mixture into each dough indentation. Mix 1 cup flour, 1/2 cup cold butter, and 1/4 cup brown sugar for the crumble topping and sprinkle over each filled bun.
Baking
  1. Place assembled buns on a parchment-lined baking sheet, bake for 20-25 minutes until golden brown. They'll be done when puffy and aromatic.
Glaze and Serve
  1. Allow baked buns to cool for 10 minutes. Whisk 1 cup powdered sugar with milk until smooth and drizzle over buns. Serve warm for best flavor.

Nutrition

Serving: 1bunCalories: 320kcalCarbohydrates: 45gProtein: 5gFat: 15gSaturated Fat: 9gPolyunsaturated Fat: 1gMonounsaturated Fat: 4gCholesterol: 60mgSodium: 250mgPotassium: 150mgFiber: 2gSugar: 10gVitamin A: 500IUVitamin C: 2mgCalcium: 50mgIron: 1mg

Notes

Serve these buns warm with whipped cream or ice cream for a delightful experience.

Tried this recipe?

Let us know how it was!
  • « Previous Page
  • 1
  • …
  • 20
  • 21
  • 22
  • 23
  • 24
  • …
  • 245
  • Next Page »

Welcome!

Hi, I’m Grace, a Sydney-based home cook with a passion for bold flavors and trending ingredients. Whether you’re a busy beginner or a seasoned foodie, you’ll find dishes here that are fresh, fun, and full of flavor.

More about me

Popular Recipes

  • One Pot Keto Tuna Casserole
    One Pot Keto Tuna Casserole: Creamy Comfort in Minutes
  • Ultimate Jalapeno Popper Chicken Salad
    Ultimate Jalapeno Popper Chicken Salad That'll Wow Your Tastebuds
  • Green Chile Cheese Dip
    Mouthwatering Green Chile Cheese Dip for Cozy Gatherings
  • Easy Chimichurri Sauce
    Fresh and Zesty Easy Chimichurri Sauce in Just Minutes

Footer

↑ back to top

About

  • Privacy Policy
  • Disclaimer
  • Terms & Conditions

Newsletter

  • Sign Up! for emails and updates

Contact

  • About me
  • Contact me

Copyright © 2025 TastyTrendIngredients