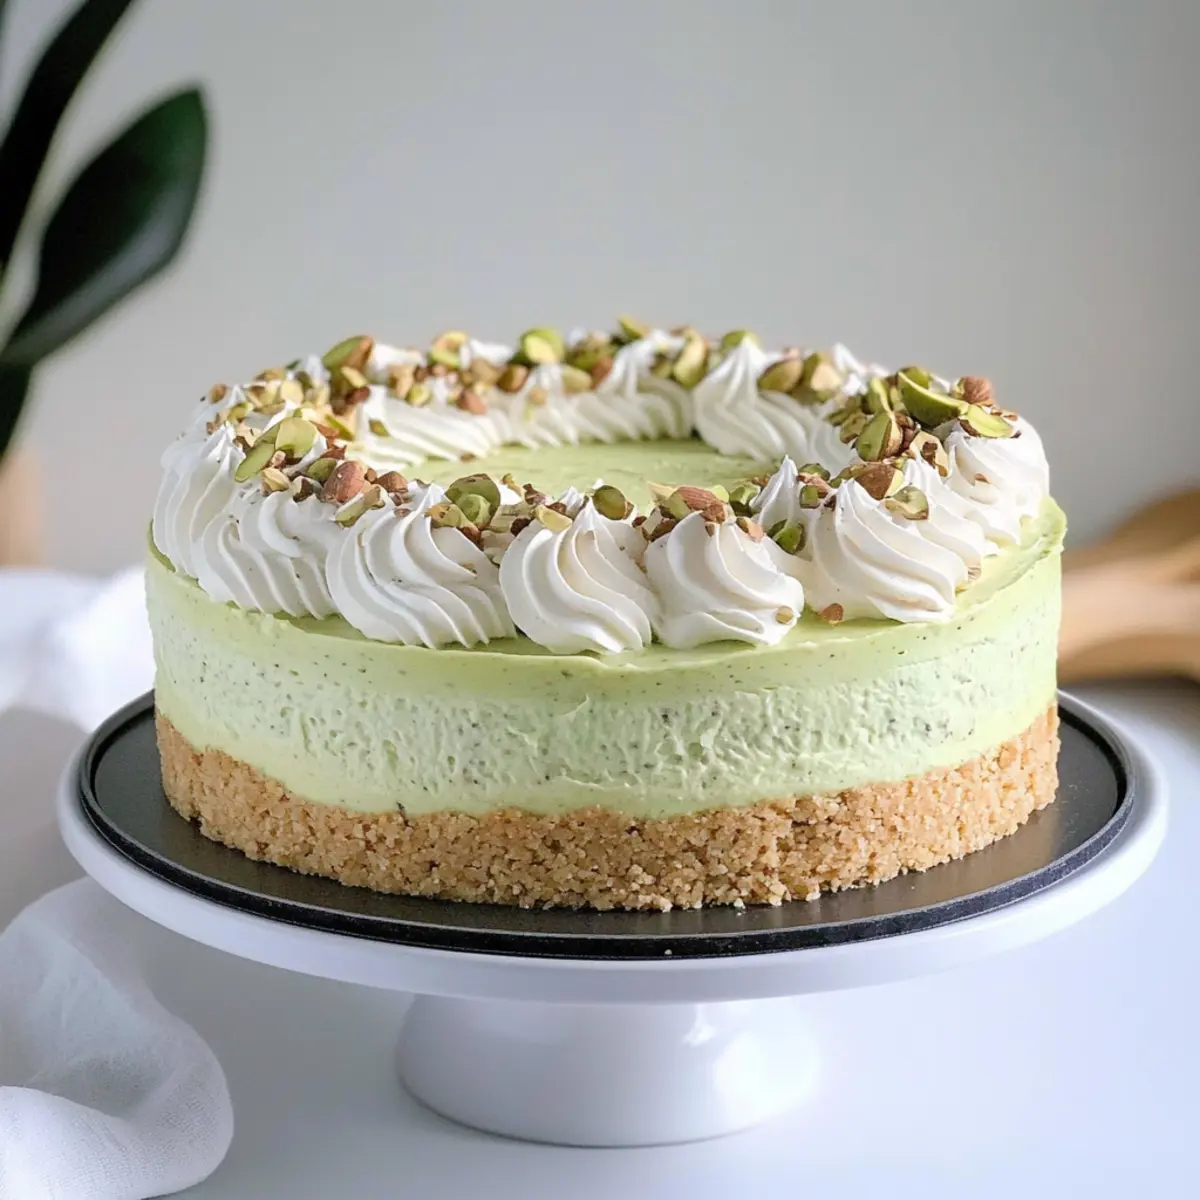
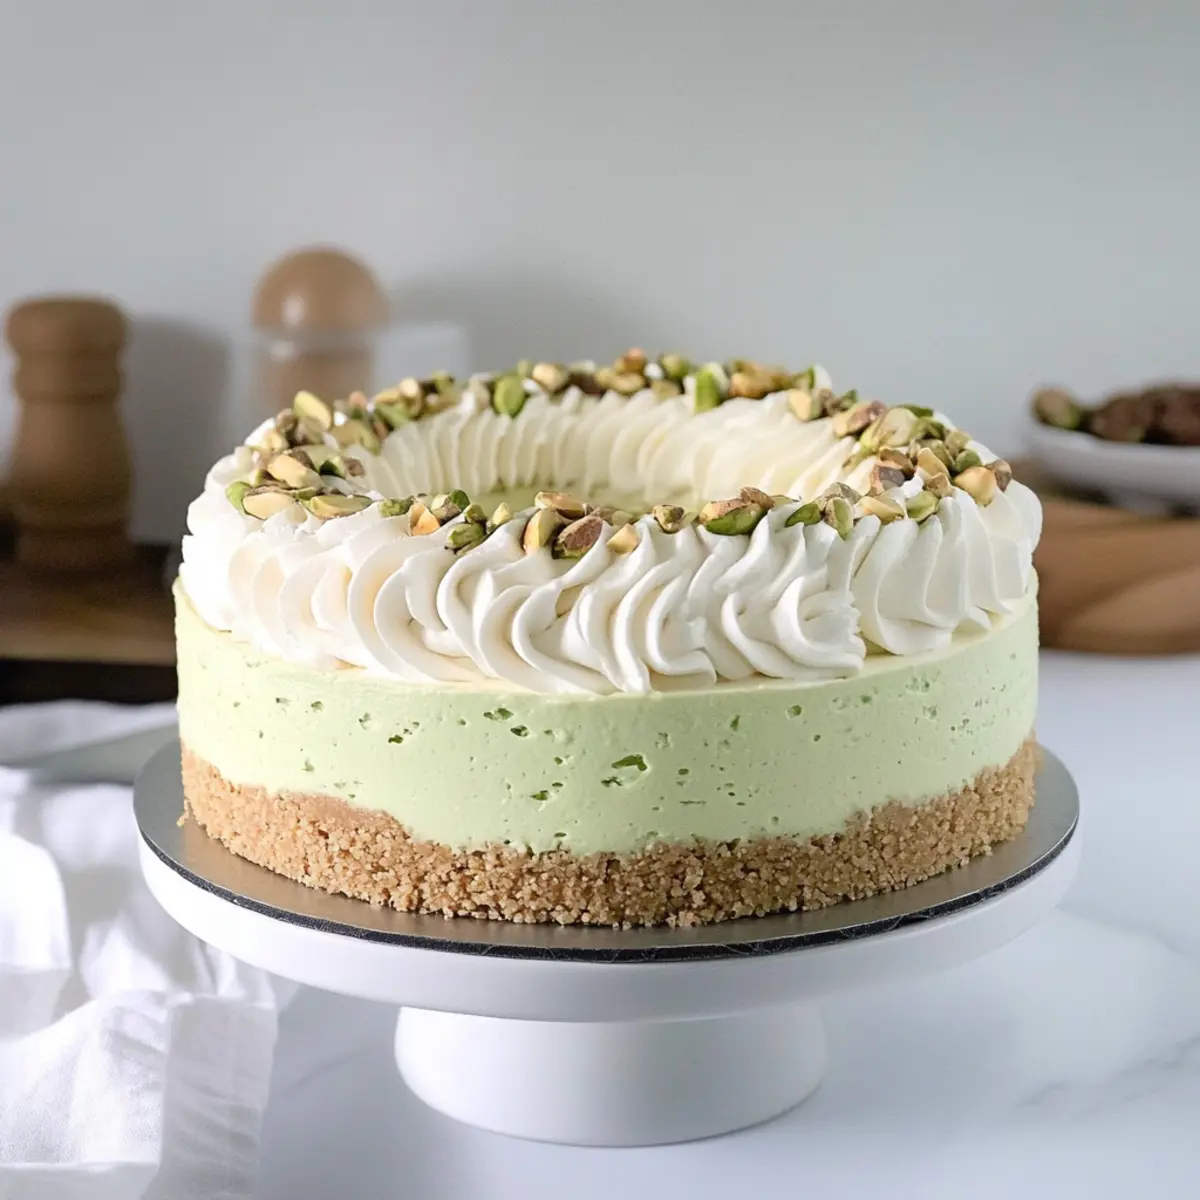
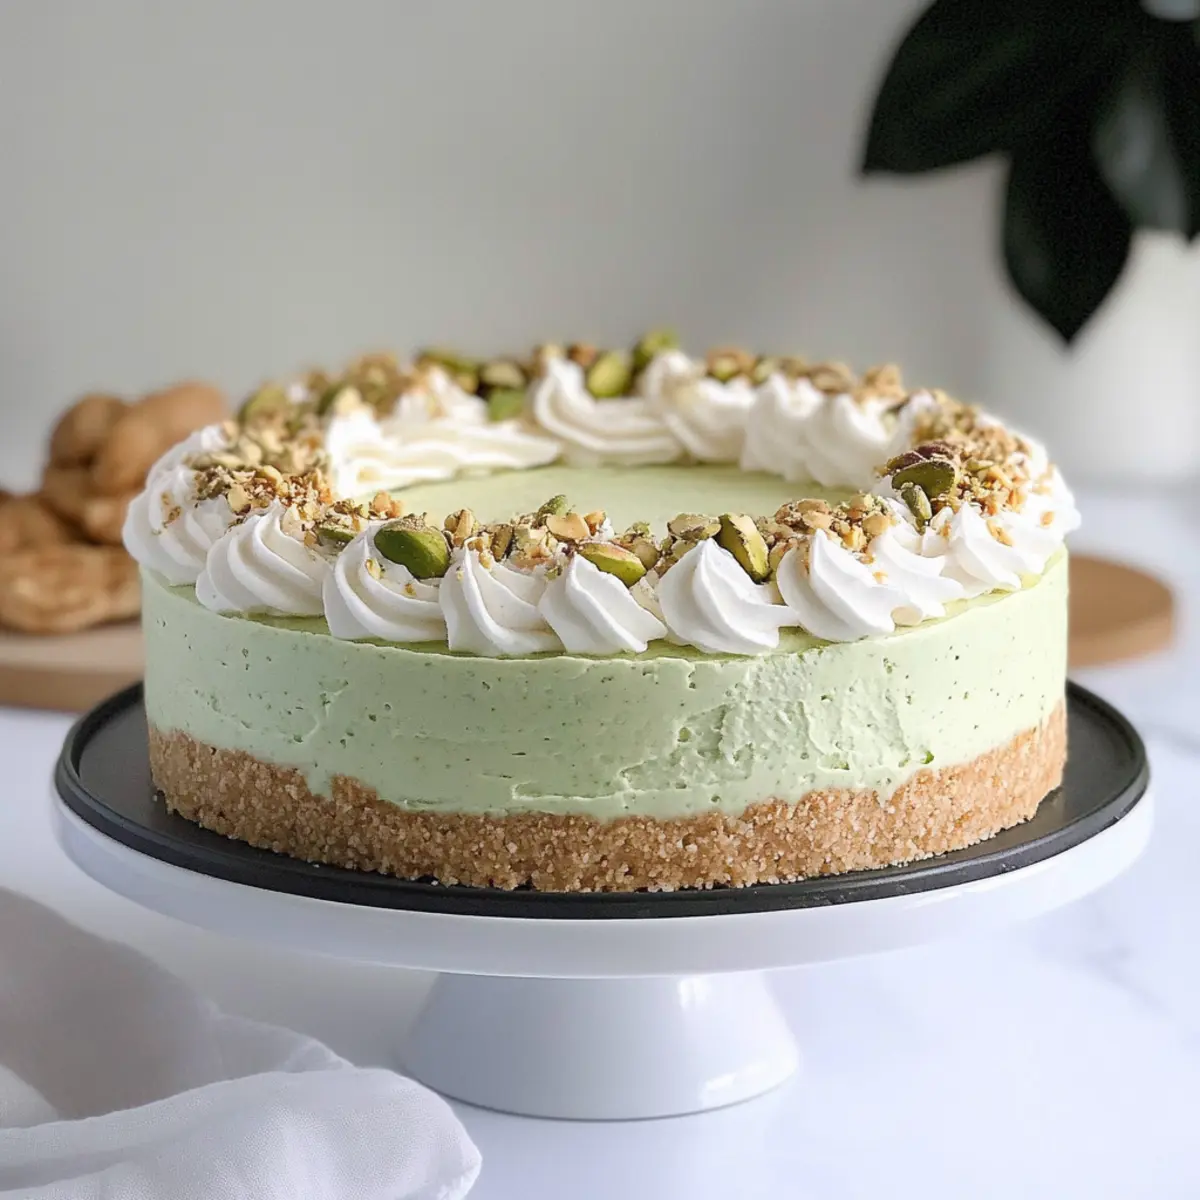
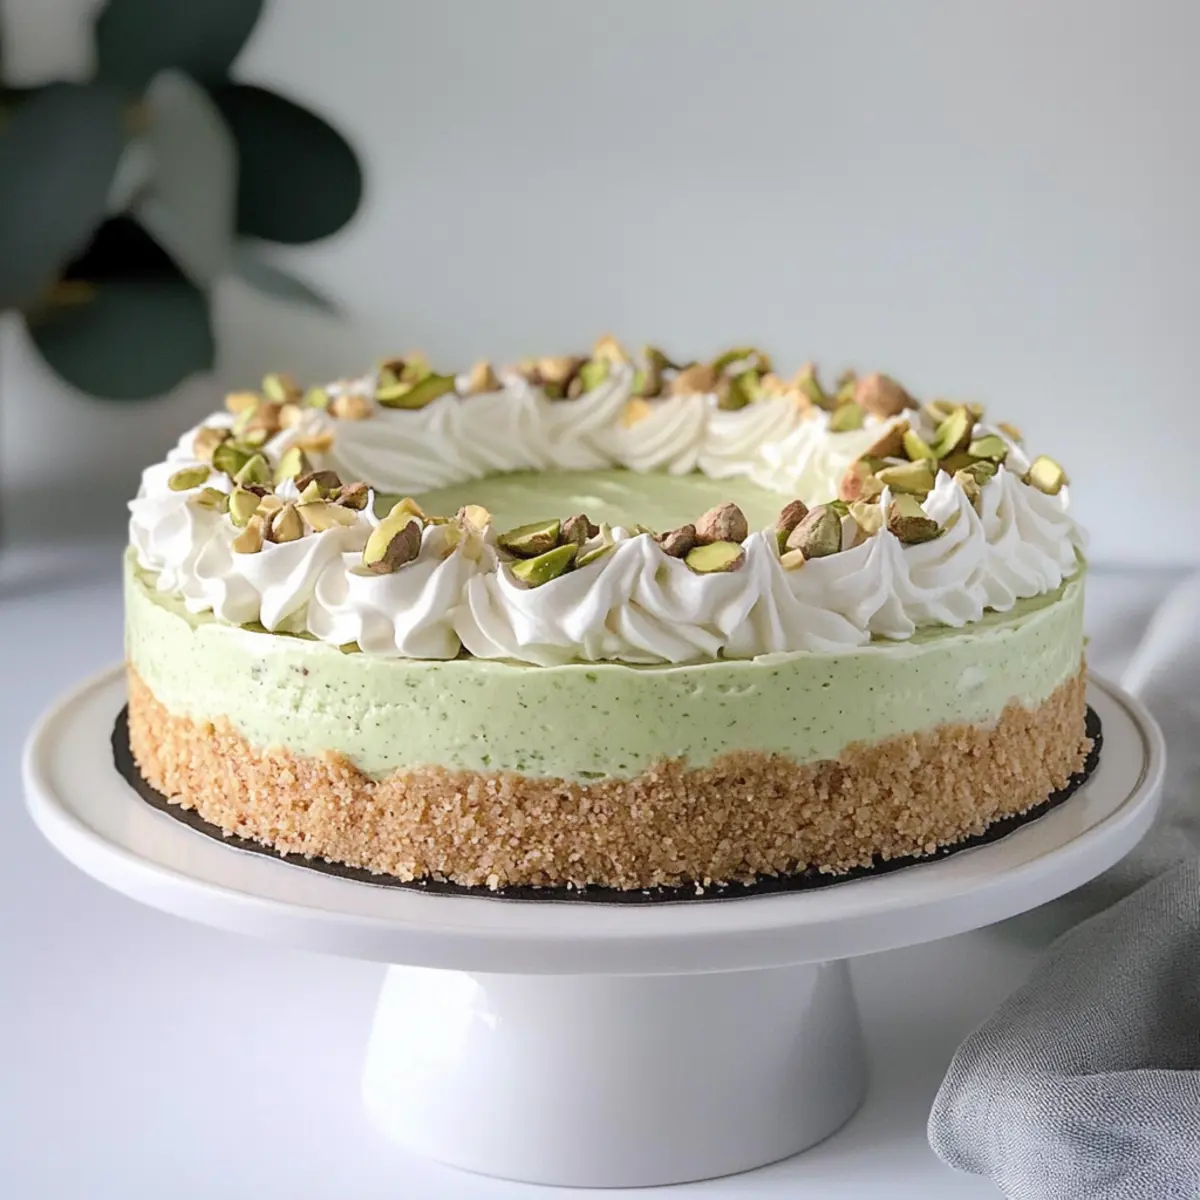
tastytrendingredients

  • Home
  • Recipes
    • Appetizers
    • Breakfast
    • Dessert
    • Dinner
    • Drinks
    • Salads
    • Snacks
    • Soups
  • About me
  • Contact me
menu icon
go to homepage
  • Home
  • Recipes
    • Appetizers
    • Breakfast
    • Dessert
    • Dinner
    • Drinks
    • Salads
    • Snacks
    • Soups
  • About me
  • Contact me
search icon
Homepage link
  • Home
  • Recipes
    • Appetizers
    • Breakfast
    • Dessert
    • Dinner
    • Drinks
    • Salads
    • Snacks
    • Soups
  • About me
  • Contact me
×

Nutella Cookies: Quick, Chewy Treats for Sweet Cravings

August 30, 2025 by Grace Snow Leave a Comment

“Imagine” the sweet aroma of cookies wafting through your home, wrapping you in a cozy hug, and igniting the joy of baking. With just three simple ingredients, my Nutella Cookies are your answer to those unexpected afternoon cravings or last-minute dinner guest surprises. This quick 20-minute recipe isn’t just about convenience—it’s a delightful way to indulge in gooey chocolate goodness that’s chewy on the inside with a slight crispness on the edges. Perfect for busy days, these cookies are vegetarian-friendly and offer a gluten-free option if you swap out the flour. Whether you’re sharing them with friends or sneaking a few for yourself, you’ll find they create a little moment of happiness in every bite. Curious about how to whip up this deceptively simple treat? Let’s dive into the recipe!

Why Are Nutella Cookies So Irresistible?

Quick and Easy: With just three ingredients, these cookies can be whipped up in a flash, making them perfect for busy weeknights or unexpected guests.

Rich Flavor: Nutella’s creamy chocolatey goodness takes center stage, offering a decadent treat that will satisfy any sweet tooth.

Customizable: Feel free to personalize your Nutella cookies! Add mini chocolate chips or crushed hazelnuts for delightful variations that elevate the flavor and texture.

Gluten-Free Option: With a simple swap for gluten-free flour, everyone can enjoy these delicious cookies, catering to various dietary needs.

Chewy Delight: Each bite reveals a chewy interior with lightly crisp edges, combining the best of cookie worlds—a treat that feels indulgent yet comforting.

Indulge further with other sweet creations like my Matcha Cookies Soft or Mexican Wedding Cookies for more delightful options!

Nutella Cookies Ingredients

For the Cookie Dough
• Nutella – The star of the cookies, offering rich cocoa flavors and moisture. Substitution: Can replace both butter and sugar, but may alter final taste.
• Large Egg – Binds the ingredients together and helps maintain cookie structure. Prep Note: Ensure it's at room temperature for optimal mixing.
• All-Purpose Flour – Gives the cookies their body and shape, balancing moisture from Nutella. Substitution: Use a 1-to-1 gluten-free flour blend for a gluten-free version.

Step‑by‑Step Instructions for Nutella Cookies

Step 1: Preheat the Oven
Begin by preheating your oven to 350°F (175°C). While the oven is warming up, line a baking sheet with parchment paper to prevent the Nutella cookies from sticking. This preparation will ensure your cookies bake evenly and effortlessly release from the pan.

Step 2: Mix Nutella and Egg
In a mixing bowl, combine the star ingredient—Nutella—with a large egg. Use a whisk or a spatula to blend the mixture until it reaches a smooth and glossy consistency. This process takes just a few moments and will create a rich base for your Nutella cookies, filled with chocolaty goodness.

Step 3: Incorporate the Flour
Gradually add the all-purpose flour to your Nutella and egg mixture. Using a spatula, stir gently until a thick and firm dough begins to form. Be careful not to overmix; the right texture will be soft yet cohesive, setting the stage for those signature chewy Nutella cookies.

Step 4: Shape the Cookies
Using your hands, roll the dough into 1-inch balls and place them on the prepared baking sheet, ensuring there's enough space between each for spreading. This spacing is essential as the Nutella cookies will puff slightly while baking, creating that perfect chewy texture.

Step 5: Chill for Thickness (Optional)
For a thicker cookie, you can chill the rolled dough in the refrigerator for about 30 minutes before baking. This optional step enhances the fudginess of your Nutella cookies, giving them a delightful texture that’s well worth the wait.

Step 6: Bake the Cookies
Place the baking sheet in the preheated oven and bake the Nutella cookies for 10 to 12 minutes. Keep an eye on them; the edges should turn lightly golden while the centers remain soft. This balance will ensure you achieve that delightful chewiness.

Step 7: Cool the Cookies
Once baked, remove the Nutella cookies from the oven and let them cool on the baking sheet for 3 minutes. This resting period allows the cookies to set slightly before transferring them to a wire rack for complete cooling, ensuring a perfect texture throughout.

Nutella Cookies Variations & Substitutions

Feel free to get creative with your Nutella cookies! A little twist here or there can take your baking to the next level.

  • Gluten-Free: Substitute all-purpose flour with a 1-to-1 gluten-free flour blend for a delicious alternative that everyone can enjoy. It’s an easy swap that keeps the cookie taste intact!

  • Add Some Crunch: Incorporate crushed hazelnuts or walnuts into the dough for an added texture. The nutty crunch complements the creamy Nutella beautifully.

  • Chocolate Boost: Mix in a tablespoon of cocoa powder or mini chocolate chips for a richer chocolate experience. This variation enhances the indulgent chocolate flavor irresistibly.

  • A Touch of Spice: Add a sprinkle of cinnamon or a dash of sea salt to the dough. This addition brings warmth to the flavor and elevates the cookie experience.

  • Chewy Surprise: Press a chocolate or peanut butter cup into the center of each cookie before baking to create a molten-filled treat. It adds a delightful surprise in every bite!

  • Custom Flavoring: Try adding a teaspoon of vanilla extract for an aromatic enhancement that pairs perfectly with the Nutella’s flavor profile.

  • Vegan Version: Use a flax egg (1 tablespoon ground flaxseed mixed with 2.5 tablespoons water) instead of a large egg and coconut flour as a substitute for all-purpose flour. You’ll have a vegan-friendly treat!

  • Fruity Twist: Fold in a handful of dried cranberries or cherries to introduce a hint of tartness, which balances the sweetness of Nutella beautifully.

For extra deliciousness, check out my Eggnog Cookies Soft or try these delightful Thumbprint Cookies Melt to keep the joy of baking alive!

Storage Tips for Nutella Cookies

Room Temperature: Store Nutella cookies in an airtight container at room temperature for up to 4 days to maintain their chewy texture and flavor.

Fridge: While not necessary, you can refrigerate the cookies in an airtight container for up to a week if you prefer a chilled treat.

Freezer: For longer storage, freeze Nutella cookies in a sealed bag for up to 2 months. Write the date on the bag for easy reference.

Reheating: Thaw at room temperature or microwave for 10 seconds for a warm, gooey delight, ready once again to satisfy that sweet craving!

What to Serve with 3-Ingredient Nutella Cookies

Imagine the bliss of sinking your teeth into a warm Nutella cookie while savoring delightful pairings that elevate your snack experience.

  • Creamy Ice Cream: A scoop of vanilla ice cream softens the rich chocolate flavor, creating a delightful contrast to warm cookies. It’s a classic partnership that never fails to please.

  • Fresh Berries: Juicy strawberries or raspberries add a vibrant burst of freshness, beautifully balancing the sweetness of Nutella cookies. The tartness is a delightful surprise in every bite.

  • Nutty Hazelnut Coffee: A cup of nutty hazelnut coffee awakens your senses and complements the chocolatey goodness of the cookies, turning snack time into a cozy ritual.

  • Chocolate Dipping Sauce: For ultimate indulgence, serve them with melted chocolate for dipping. This extra layer of chocolate is heavenly and makes your treat feel utterly decadent.

  • Milk: A cold glass of milk is the classic pairing, enhancing the flavors while offering a refreshing contrast to the warm, chewy cookie. It's pure comfort in a glass!

  • Whipped Cream: A dollop of fluffy whipped cream on top creates a whimsical touch, inviting you to indulge while adding luscious creaminess to each mouthful.

Savor the moment and create memories as you enjoy these Nutella cookies, paired perfectly with these delightful options!

Make Ahead Options

These Nutella Cookies are a dream for busy home cooks who love to plan ahead! You can prepare the cookie dough up to 24 hours in advance by mixing Nutella, egg, and flour, then storing it in an airtight container in the refrigerator. This not only saves you time but also allows the flavors to meld beautifully. If you're looking for an even quicker solution, roll the dough into balls and freeze them for up to 3 months. When it’s time to bake, just place the frozen cookies directly on the baking sheet and add an extra minute to the baking time. This way, you’ll enjoy warm, chewy Nutella Cookies just as delightful as fresh out of the oven—perfect for those unexpected moments of sweetness!

Expert Tips for Nutella Cookies

  • Chill for Thickness: Refrigerating the dough for 30 minutes enhances the cookies' fudginess, resulting in a thicker texture that many find irresistible.

  • Don’t Overmix: Mix until just combined to maintain a tender and chewy cookie. Overmixing can result in a denser texture than desired.

  • Watch the Baking Time: Keep an eye on your cookies while baking; they are done when edges are golden, and centers are still soft to ensure that classic chewy consistency.

  • Add Flavorful Extras: Mini chocolate chips or nuts elevate the flavor profile. Just be cautious not to add too much to avoid dryness.

  • Perfect Storage: Store your Nutella cookies in an airtight container at room temperature for up to 4 days. For longer storage, freeze in a sealed bag for up to 2 months.

Nutella Cookies Recipe FAQs

How do I choose the right Nutella for my cookies?
Absolutely! When selecting Nutella for your cookies, look for a jar with a consistent, creamy texture and a well-sealed lid to ensure freshness. Avoid any with visible separation or dark spots, as these may indicate age or spoilage. If you want to get creative, you can even explore brands that have similar hazelnut spreads, keeping in mind that flavor variations might slightly change the end result.

What is the best way to store Nutella cookies?
Store your Nutella cookies in an airtight container at room temperature for up to 4 days. This method helps retain their delightful chewiness. For longer storage, simply seal the cookies in a freezer bag and freeze for up to 2 months. To thaw, leave them out at room temperature for about 30 minutes, or microwave them for 10 seconds to enjoy that fresh-baked taste.

Can I freeze Nutella cookies, and how do I do it properly?
Yes, you can freeze Nutella cookies! To freeze, ensure they are completely cooled, then lay them in a single layer on a baking sheet and freeze until solid. Afterward, transfer them to a freezer-safe bag, making sure to remove as much air as possible to prevent freezer burn. These cookies can be kept in the freezer for up to 2 months. When you're ready to indulge, thaw them at room temperature or gently microwave for a warm treat.

What should I do if my Nutella cookie dough is too sticky?
If your dough is too sticky, don't worry—it happens! Start by dusting your hands and the work surface with a little additional flour. This should help you to shape the dough into balls more easily. You can also chill the dough for about 30 minutes in the refrigerator to make it firmer, which will help with shaping and prevent excessive spreading during baking.

Are Nutella cookies suitable for people with allergies?
Nutella cookies contain eggs and may not be suitable for individuals with egg allergies. For a gluten-free version, replace all-purpose flour with a gluten-free flour blend. If you’re making these cookies for someone who may have nut allergies, it’s essential to be cautious as Nutella contains hazelnuts. Always check ingredient labels to ensure safety.

Can I make these Nutella cookies vegan?
To create a vegan version, substitute the large egg with a flax egg. To make a flax egg, mix 1 tablespoon of ground flaxseed with 2.5 tablespoons of water and let it sit for about 5 minutes until it thickens. This will help bind your ingredients just like the egg does! Additionally, ensure you’re using a dairy-free hazelnut spread, and you’re all set for delicious vegan Nutella cookies!

Nutella Cookies

Nutella Cookies: Quick, Chewy Treats for Sweet Cravings

Nutella Cookies are quick, chewy treats that satisfy sweet cravings with just three ingredients.
Print Recipe Pin Recipe
Prep Time 10 minutes mins
Cook Time 12 minutes mins
Chilling Time 30 minutes mins
Total Time 52 minutes mins
Servings: 12 cookies
Course: Dessert
Cuisine: American
Calories: 100
Ingredients Equipment Method Nutrition Notes

Ingredients
  

For the Cookie Dough
  • 1 cup Nutella Can replace both butter and sugar, but may alter final taste.
  • 1 large Egg Ensure it's at room temperature for optimal mixing.
  • 1 cup All-Purpose Flour Use a 1-to-1 gluten-free flour blend for a gluten-free version.

Equipment

  • Mixing Bowl
  • Whisk or spatula
  • Baking Sheet
  • Parchment Paper

Method
 

Step-by-Step Instructions for Nutella Cookies
  1. Preheat your oven to 350°F (175°C) and line a baking sheet with parchment paper.
  2. In a mixing bowl, combine Nutella with a large egg and blend until smooth.
  3. Gradually add the flour and stir until a thick and firm dough forms.
  4. Roll the dough into 1-inch balls and place them on the baking sheet with space in between.
  5. For thicker cookies, chill the rolled dough in the refrigerator for about 30 minutes.
  6. Bake for 10 to 12 minutes until edges are golden and centers are still soft.
  7. Let the cookies cool on the baking sheet for 3 minutes before transferring to a wire rack.

Nutrition

Serving: 1cookieCalories: 100kcalCarbohydrates: 15gProtein: 2gFat: 4gSaturated Fat: 2gMonounsaturated Fat: 2gCholesterol: 20mgSodium: 50mgPotassium: 50mgFiber: 1gSugar: 8gCalcium: 1mgIron: 2mg

Notes

Store Nutella cookies in an airtight container at room temperature for up to 4 days. For longer storage, freeze in a sealed bag for up to 2 months.

Tried this recipe?

Let us know how it was!

Keto Pepperoni Cheese Roll-Ups for a Quick Tasty Snack

August 30, 2025 by Grace Snow Leave a Comment

As I pulled the first batch of Keto Pepperoni Cheese Roll-Ups from the oven, the delightful aroma of melty cheese and zesty pepperoni filled my kitchen, instantly whisking me away to my favorite pizza joint. These roll-ups are not only a quick and satisfying solution for those of us navigating the low-carb lifestyle, but they’re also a dream come true for a busy schedule, taking less than 10 minutes from prep to plate. Packed with pantry staples like mozzarella and pepperoni, they transform into a delectable snack or appetizer that’s both crispy and gooey. Whether you’re looking to impress at your next gathering or simply craving something comforting, these roll-ups are the perfect fit. Ready to elevate your snacking game with this delicious twist?

Why are these roll-ups a must-try?

Simplicity made delicious: These Keto Pepperoni Cheese Roll-Ups come together in under 10 minutes, perfect for busy days.
Flavor explosion in every bite: Enjoy a delightful combo of crispy cheese and savory pepperoni that satisfies any craving.
Versatile snack for any occasion: Great for game day, parties, or a quick meal prep, they’ll please everyone.
Low-carb goodness: With minimal carbs, they fit seamlessly into your keto lifestyle.
Crowd-pleaser: Serve them up warm with a side of keto marinara sauce for irresistible dippable goodness!

Keto Pepperoni Cheese Roll-Ups Ingredients

• For the cheese lovers in all of us!

For the Roll-Ups

  • Mozzarella Cheese Slices – The star of the show! Use firm, whole milk mozzarella for the best flavor and meltability.
  • Pepperoni Slices – Adds delicious meaty flavor; opt for nitrate-free versions for a healthier choice.
  • Italian Seasoning – Infuses classic pizza taste with herbs like oregano and basil; sprinkle it on for extra pizzazz!

For Dipping Sauce (Optional)

  • Keto Marinara Sauce – Perfect for dipping; make sure it’s low in sugar to keep your snack keto-friendly.

Step‑by‑Step Instructions for Keto Pepperoni Cheese Roll-Ups

Step 1: Preheat the Oven
Begin by preheating your oven to 400°F (200°C). While the oven warms up, prepare a baking sheet by lining it with parchment paper to prevent sticking and ensure easy cleanup. This is the first step toward making your Keto Pepperoni Cheese Roll-Ups perfectly crispy!

Step 2: Arrange the Cheese Slices
Once the oven reaches the desired temperature, take 12 slices of mozzarella cheese and evenly space them on the prepared baking sheet. Make sure they’re placed far enough apart to allow for melting without merging together. This arrangement ensures each roll-up gets that delightful cheese crispiness!

Step 3: Bake the Cheese
Slide the baking sheet into your preheated oven and let the cheese bake for 6 to 7 minutes. Keep an eye on them; you’re looking for the edges to become bubbly and golden brown. This indicates that the mozzarella is melting perfectly, ready to be rolled into delicious pockets of flavor.

Step 4: Cool Briefly
After baking, carefully remove the sheet from the oven and allow the cheese to cool for about 30 seconds. This slight cooling will help the cheese firm up just enough to make rolling easier without cracking, ensuring your Keto Pepperoni Cheese Roll-Ups turn out fantastic.

Step 5: Add the Toppings
Now it’s time to enhance those cheesy beauties! Sprinkle a pinch of Italian seasoning over each melted cheese slice for that classic pizza flavor. Then, lay a slice or two of pepperoni on top of the cheese, making sure it covers the surface nicely to pack every roll with flavor.

Step 6: Roll Up the Cheese
With the toppings in place, gently roll each cheese slice from one end to the other. Start at one edge and carefully tuck the cheese around the pepperoni, placing the seam-side down on the baking sheet. This technique helps keep your Keto Pepperoni Cheese Roll-Ups intact and looking appetizing.

Step 7: Serve and Enjoy
Your roll-ups are now ready to be enjoyed! Serve them warm or at room temperature, and if you like, pair them with a side of keto marinara sauce for dipping. This adds an extra layer of flavor that complements the crispy cheese and savory pepperoni beautifully!

Expert Tips for Keto Pepperoni Cheese Roll-Ups

  • Use Quality Cheese: Opt for firm, whole milk mozzarella to achieve the best flavor and meltability. Avoid pre-shredded cheese, which can hinder consistency.
  • Space It Out: Make sure to leave enough space between cheese slices on the baking sheet to allow each Keto Pepperoni Cheese Roll-Up to melt evenly without merging together.
  • Watch the Clock: Bake until edges are bubbly and golden, keeping a close eye to prevent hard or burnt cheese.
  • Cool Before Rolling: Let the cheese cool for a brief moment, ensuring it firms up slightly and makes rolling easier without cracking.
  • Adjust Your Toppings: Feel free to add spices or toppings to personalize your Keto Pepperoni Cheese Roll-Ups, but avoid overloading, as this can complicate the rolling process.

Keto Pepperoni Cheese Roll-Ups Variations

Feel free to make these roll-ups your own with these exciting customizations that will tickle your taste buds!

  • Cheese Swap: Use cheddar or provolone instead of mozzarella for a different flavor twist. Each cheese brings its own unique taste to the party!
  • Veggie Boost: Add thinly sliced veggies like bell peppers or mushrooms inside the roll-up for a nutritious crunch. It’s a sneaky way to pack in extra veggies!
  • Spicy Heat: Sprinkle crushed red pepper flakes on top before baking to turn up the heat a notch. This variation is perfect for spice lovers!
  • Herb-Infused: Experiment with fresh herbs like basil or parsley instead of the dried Italian seasoning. The freshness will elevate these roll-ups into a gourmet snack!
  • Savory Sweet: Incorporate a touch of sugar-free BBQ sauce on the cheese slices before adding pepperoni for a sweet-savory flavor profile.
  • Crunchy Coating: For added texture, coat the rolled-up cheese in almond flour or pork rinds before baking for a delightful crunch.
  • Freezer-Friendly: Make a big batch and freeze uncooked roll-ups. When the craving strikes, you can bake them straight from the freezer for quick satisfaction!
  • Dipping Delight: Serve with a side of homemade keto marinara sauce for a delicious dipping experience that will delight your taste buds.

Let your imagination soar, and enjoy these scrumptious Keto Pepperoni Cheese Roll-Ups in your favorite ways!

What to Serve with Keto Pepperoni Cheese Roll-Ups

Elevate your dining experience with delightful accompaniments that perfectly complement the savory charm of these roll-ups.

  • Crispy Garden Salad: A fresh mix of greens and vegetables adds a crunchy contrast and balances the richness of the cheese. Toss in a zesty vinaigrette for a refreshing touch.

  • Garlic Butter Zoodles: Spiralized zucchini sautéed in garlic butter offers a delicious low-carb side that harmonizes perfectly with the pepperoni's savoriness. It’s a comforting and nutritious addition to your plate.

  • Stuffed Mushrooms: The earthiness of mushrooms filled with cream cheese and herbs pairs wonderfully, creating a lovely flavor profile that enhances every bite of the roll-ups.

  • Low-Carb Veggie Platter: Crisp bell peppers, cucumbers, and cherry tomatoes add colorful freshness to your table, providing a crunchy counterbalance without extra carbs! Serve with a creamy dip for added flavor.

  • Keto Marinara Sauce: A must-have for dipping, this low-sugar sauce intensifies the pizza flavors, making each bite of your roll-ups even more indulgent and satisfying.

  • Sparkling Lemonade: For a refreshing drink, serve up this fizzy beverage that cuts through the fatty richness of the roll-ups, offering a bright, citrusy contrast that’s delightful!

Each of these pairings complements the crispy, gooey Keto Pepperoni Cheese Roll-Ups, making for a well-rounded meal that delights the senses.

How to Store and Freeze Keto Pepperoni Cheese Roll-Ups

  • Fridge: Store any leftover Keto Pepperoni Cheese Roll-Ups in an airtight container for up to 3 days. This keeps them fresh and ready to snack on!
  • Freezer: For longer storage, freeze the roll-ups in a single layer on a baking sheet before transferring them to a freezer-safe bag. They can last up to 2 months.
  • Reheating: To bring back that crispy texture, reheat in an oven or air fryer at 350°F (175°C) for 5-8 minutes until warm and crispy.
  • Thawing: If frozen, thaw the roll-ups in the fridge overnight before reheating for best results. Enjoy your delicious low-carb snack again!

Make Ahead Options

These Keto Pepperoni Cheese Roll-Ups can be a fantastic time-saver for busy weeknights! You can prepare the roll-ups up to 24 hours in advance by baking and rolling them as usual, then storing them in an airtight container in the refrigerator. To maintain their crispy texture, allow them to cool completely before sealing. When you're ready to serve, simply reheat them in the oven at 350°F (175°C) for about 5-7 minutes until warmed through. This way, you can enjoy these delicious roll-ups just as fresh and satisfying as when they first came out of the oven!

Keto Pepperoni Cheese Roll-Ups Recipe FAQs

What type of mozzarella is best for this recipe?
Absolutely! For perfect roll-ups, I recommend using firm, whole milk mozzarella. This type melts beautifully, allowing you to achieve that crispy exterior while keeping the interior gooey. Avoid pre-shredded cheese, as it often contains anti-caking agents that can prevent smooth melting.

How should I store leftover Keto Pepperoni Cheese Roll-Ups?
To keep your roll-ups fresh, store any leftovers in an airtight container in the fridge for up to 3 days. When you’re ready to enjoy them again, simply reheat in the oven or air fryer for about 5 to 8 minutes at 350°F (175°C) to regain that delightful crispiness.

Can I freeze these roll-ups?
Yes, you can freeze your Keto Pepperoni Cheese Roll-Ups! First, arrange them in a single layer on a baking sheet and freeze until firm. Then, transfer them to a freezer-safe bag or container. They’ll stay good for up to 2 months. When you’re ready to snack, thaw in the fridge overnight before reheating for the best texture.

What’s the best way to reheat frozen roll-ups?
To reheat your frozen Keto Pepperoni Cheese Roll-Ups, preheat your oven to 350°F (175°C). Place the roll-ups on a baking sheet and bake for 5 to 8 minutes, or until warmed through and the cheese is crispy again. This method helps restore their deliciousness as if they were freshly made!

Can I customize the ingredients?
Very! While the classic version is delightful, feel free to substitute other cheeses like cheddar or provolone for a flavor twist. Additionally, add thinly sliced veggies like bell peppers or mushrooms for extra nutrition. Just be careful not to overload the roll-ups, as it may complicate the rolling process!

Are there any allergy considerations for this recipe?
Definitely! If you or a loved one have dairy allergies, consider using a dairy-free cheese alternative that melts well. Always check labels to ensure any pepperoni you use is gluten-free if that’s a concern. It’s important to enjoy snacking safely, so adjust to meet your dietary needs!

Keto Pepperoni Cheese Roll-Ups

Keto Pepperoni Cheese Roll-Ups for a Quick Tasty Snack

Quick and tasty Keto Pepperoni Cheese Roll-Ups are a low-carb delight and perfect for snacking.
Print Recipe Pin Recipe
Prep Time 5 minutes mins
Cook Time 7 minutes mins
Cooling Time 1 minute min
Total Time 13 minutes mins
Servings: 4 roll-ups
Course: Snacks
Cuisine: Keto
Calories: 150
Ingredients Equipment Method Nutrition Notes

Ingredients
  

For the Roll-Ups
  • 12 slices Mozzarella Cheese firm, whole milk for best flavor
  • 12 slices Pepperoni optional nitrate-free
  • 1 teaspoon Italian Seasoning
For Dipping Sauce (Optional)
  • 1 cup Keto Marinara Sauce low sugar

Equipment

  • Oven
  • Baking Sheet
  • Parchment Paper

Method
 

Step-by-Step Instructions
  1. Preheat your oven to 400°F (200°C) and prepare a baking sheet with parchment paper.
  2. Arrange 12 slices of mozzarella cheese on the baking sheet, spaced apart.
  3. Bake in the preheated oven for 6-7 minutes until cheese is bubbly and golden brown.
  4. Allow cheese to cool for 30 seconds for easier rolling.
  5. Sprinkle Italian seasoning over cheese and add pepperoni slices.
  6. Gently roll up each cheese slice from one end to the other, seam-side down.
  7. Serve warm with keto marinara sauce if desired.

Nutrition

Serving: 1roll-upCalories: 150kcalCarbohydrates: 2gProtein: 12gFat: 10gSaturated Fat: 5gPolyunsaturated Fat: 1gMonounsaturated Fat: 3gCholesterol: 30mgSodium: 300mgPotassium: 100mgVitamin A: 200IUCalcium: 200mgIron: 0.5mg

Notes

Use firm whole milk mozzarella for the best results. Adjust toppings to personal preference but avoid overloading for easier rolling.

Tried this recipe?

Let us know how it was!

Air Fryer Corn Ribs: Crispy, Cheesy Elotes Bliss at Home

August 28, 2025 by Grace Snow Leave a Comment

As I stood in my kitchen on a sunny afternoon, the tantalizing aroma of roasted corn filled the air, whisking me back to vibrant street fairs where elotes reign supreme. While I adore those classic grilled delights, I often crave a quicker option that captures their essence—and that’s when I stumbled upon Air Fryer Corn Ribs, Elotes Style. These crispy, golden treats come together in less than 30 minutes, making them a perfect go-to snack for any occasion. Not only do they deliver a bold, cheesy taste with a delightful crunch, but they also cater to various dietary preferences with easy swaps for vegan-friendly options. Ready to take your snacking to the next level? Let’s dive into this delicious recipe!

Why are Air Fryer Corn Ribs a must-try?

Quick Preparation: You’ll love that this recipe can be ready in under 30 minutes—perfect for those busy days!

Flavor Explosion: Each bite is filled with the smoky, cheesy goodness reminiscent of traditional elotes, satisfying your cravings instantly.

Versatile Toppings: Feel free to customize with different cheeses or spices like taco seasoning or chili powder for a personal twist.

Healthier Option: Air frying reduces the need for excess oil, making these corn ribs a lighter yet indulgent snack.

Crowd-Pleaser: Whether it's a casual get-together or a solo snack, these corn ribs are sure to impress and delight everyone.

If you're searching for other quick and delicious bites, consider trying Air Fryer Fish or Cheesy Corn Fritters for your next meal!

Air Fryer Corn Ribs Ingredients

• For the Corn Ribs

  • Fresh Corn Cobs – The heart of the recipe, providing natural sweetness and should be fresh for the best flavor.
  • Butter (or Vegan Butter) – Adds richness to each rib, ensuring a delightful browning effect; room temperature versions mix easily.

• For the Sauce

  • Mayonnaise – This creamy addition provides a tang that enhances the corn ribs; Greek yogurt can lighten it up if desired.
  • Cotija Cheese (or Feta) – A must for that salty, tangy layer that perfectly balances the dish; for a dairy-free option, nutritional yeast works wonders.
  • Roasted Poblano – Brings a lovely smoky kick to the corn; chipotle powder is a fantastic alternative if needed.

• For Seasoning

  • Chopped Cilantro – Brightens the flavor with its fresh herbal notes; omit if you prefer, and parsley is a great substitute.
  • Lime Juice – A splash adds a zesty brightness, with fresh juice providing optimal taste.
  • Tajín – This tangy seasoning offers that signature elotes flavor; chili powder or paprika can stand in if you’re out.
  • Taco Seasoning – Delivers a robust blend of spices; feel free to create a homemade mix for even more personalization.
  • Smoked Salt or Kosher Salt – Enhances the overall flavor; adjust your quantity with regular salt based on potency.
  • Garlic Powder & Lemon Pepper – Lends aromatic depth to each bite, though fresh garlic can easily replace the powder.

These Air Fryer Corn Ribs are not only a breeze to prepare but will definitely become a staple snack in your kitchen!

Step‑by‑Step Instructions for Air Fryer Corn Ribs

Step 1: Prepare the Corn
Begin by placing fresh corn cobs upright on a cutting board. Carefully slice each ear lengthwise into quarters, using a sharp knife for clean cuts. To keep your hands safe, you can hold onto the corn with a damp towel. This will create the corn ribs that are the heart of the delicious Air Fryer Corn Ribs.

Step 2: Make the Seasoned Butter
In a mixing bowl, combine room temperature butter with your favorite dry seasonings: taco seasoning, garlic powder, lemon pepper, Tajín, and smoked salt. Stir the mixture until everything is well blended. Generously coat each corn rib with the seasoned butter, ensuring every bite packs a flavorful punch.

Step 3: Air Fry the Corn Ribs
Preheat your air fryer to 375°F (190°C) for optimal cooking. Once ready, place the butter-coated corn ribs in the air fryer basket in a single layer, making sure not to overcrowd them. Air fry for about 10 to 12 minutes, shaking the basket halfway through to ensure even crispiness and achieving that golden-brown look that means they're cooked to perfection.

Step 4: Finish with Flavor
While the corn ribs are air frying, prepare the tangy topping by mixing mayonnaise with chopped roasted poblano. Once the ribs are crispy, carefully brush the mixture over the hot corn ribs for a creamy, smoky finish. Next, sprinkle with cotija cheese, chopped cilantro, and a dash of Tajín, followed by a squeeze of fresh lime juice to elevate those enticing flavors that make Air Fryer Corn Ribs irresistible.

What to Serve with Air Fryer Corn Ribs, Elotes Style

A delightful medley of flavors awaits you when pairing dishes with these crispy corn delights.

  • Creamy Guacamole: This smooth, rich dip adds a cool contrast to the warm, cheesy corn ribs. You’ll love how the freshness brightens every bite.

  • Zesty Taco Salad: Topped with black beans, crisp veggies, and tangy dressing, this salad complements the smoky flavors beautifully, offering a fresh crunch to balance the dish.

  • Spicy Jalapeño Poppers: For those who crave heat, these cheesy, stuffed peppers provide a fiery kick, perfect alongside the crispy corn ribs for an irresistible snack platter.

  • Citrus-Infused Quinoa: Serve this light, fluffy side drizzled with lime and cilantro; it echoes the corn's vibrancy and creates a refreshing balance.

  • Chilled Cerveza or Sangria: A cold beer or fruity sangria makes idyllic accompaniments, enhancing the festive spirit and cooling off the spicy elements in your meal.

  • Fresh Fruit Salsa: Think mango or pineapple salsa that brings a sweet-tangy brightness, marrying wonderfully with the elotes-style flavors and adding a burst of freshness.

These pairings create a complete experience, making your Air Fryer Corn Ribs a standout sensation in every gathering or cozy evening at home!

Air Fryer Corn Ribs Variations

Customize your Air Fryer Corn Ribs with these fun and delicious twists that will take your snacking experience to the next level!

  • Vegan Option: Substitute butter with vegan butter and cotija cheese with nutritional yeast for a plant-based delight. Experience the same great flavors while keeping it cruelty-free!

  • Heat Boost: For an extra kick, add diced jalapeños or sprinkle in some cayenne pepper. These additions will elevate the heat level and add a spicy surprise in every bite.

  • Cheesy Alternatives: Swap cotija cheese for feta, or try a dairy-free cream cheese for a creamy topping. Each option provides a different flavor profile while still celebrating the rich, cheesy essence.

  • Smoky Surprise: Incorporate smoked paprika or chipotle powder into your seasoning mix for a deeper smoky flavor. This twist adds an unexpected depth while still connecting with that beloved elotes taste!

  • BBQ Twist: Brush some BBQ sauce over the corn ribs right before serving for a sweet and smoky variation. Paired with a sprinkle of chopped green onions, you’ll redefine corn snacking.

  • Herbal Infusion: Replace cilantro with fresh basil or chives for a fragrant twist. Each herb brings its own delightful taste, giving your corn ribs a fresh perspective.

  • Zesty Citrus: Mix lemon juice into the mayo topping instead of lime for a refreshing zing. This will lighten the dish while ensuring it bursts with bright flavor.

  • Italian Style: Add Italian seasoning to the butter mix for a different flavor journey. Top with shredded parmesan instead of cotija for an Italian homage to these street food gems!

For more delicious twists, check out my recipes like Roasted Corn Fried and Corn Furikake Fried Rice!

How to Store and Freeze Air Fryer Corn Ribs

  • Fridge: Store leftover air fryer corn ribs in an airtight container in the refrigerator for up to 2 days. Crispiness may diminish, so reheat before enjoying.

  • Freezer: For longer storage, freeze the unfried corn ribs for up to 3 months. Wrap individual portions tightly in plastic wrap and place them in a freezer bag.

  • Reheating: To restore the crispiness after refrigeration, reheat in the air fryer for about 5 minutes at 375°F. This way, your air fryer corn ribs retain their delightful crunch.

  • Preparation Tip: If you plan to make a batch ahead of time, consider cutting the corn and mixing the seasoned butter, then freeze before frying for easy meal prep later!

Expert Tips for Air Fryer Corn Ribs

  • Sharp Knife Use: Always use a sharp knife for slicing corn. Dull knives can cause injury and uneven cuts, which can affect cooking.

  • Soaking Corn: Soaking the corn for 10-15 minutes before cutting can help retain moisture and prevent dryness during air frying.

  • Air Fryer Capacity: Avoid overcrowding the air fryer basket to ensure maximum air circulation. This results in evenly cooked and crispy Air Fryer Corn Ribs.

  • Seasoning Balance: Taste your seasoned butter before coating the corn. Adjust spices to your preference; too much Tajín can overpower the dish.

  • Vegan Substitutions: For a plant-based version, use vegan butter and nutritional yeast instead of cotija cheese for a delicious, dairy-free snack.

Make Ahead Options

These Air Fryer Corn Ribs are a fantastic option for meal prep enthusiasts looking to save time during busy weeknights! You can slice the fresh corn into ribs and prepare the seasoned butter up to 24 hours in advance; just keep the components refrigerated in airtight containers. To maintain freshness and prevent drying out, wrap the cut corn in a damp paper towel. When you're ready to enjoy, simply air fry the prep for 10-12 minutes until crisp. Finish by adding the creamy mayonnaise topping and toppings just before serving to ensure maximum flavor and quality. With these simple make-ahead tips, you’ll have a quick and delicious snack ready whenever your cravings hit!

Air Fryer Corn Ribs, Elotes Style Recipe FAQs

How do I choose fresh corn for this recipe?
When selecting fresh corn, look for ears with bright green husks that are tightly wrapped around the kernels. The silk should be slightly sticky and golden. Avoid corn with dark spots or dry husks, as these can indicate that the corn is past its prime. Fresh corn should feel firm and have plump kernels.

How should I store leftovers of Air Fryer Corn Ribs?
Leftover corn ribs should be kept in an airtight container in the refrigerator for up to 2 days. To maintain their crispiness, I recommend reheating them in the air fryer for about 5 minutes at 375°F. This technique will refresh their delightful crunch and flavor, making it feel like you just made them!

Can I freeze Air Fryer Corn Ribs?
Absolutely! You can freeze the uncooked corn ribs for up to 3 months. First, wrap each portion tightly in plastic wrap and place them in a freezer bag to prevent freezer burn. When you're ready to enjoy them, there’s no need to thaw—simply air fry for a few extra minutes to ensure they cook through!

What should I do if my corn ribs aren't crispy?
If your corn ribs come out soggy, it could be due to overcrowding the air fryer basket. To resolve this, make sure the ribs have enough space for air to circulate freely. Also, try increasing the cooking time by a couple of minutes or flipping them halfway through to promote even crispiness. Remember, each air fryer operates a bit differently, so keep an eye on them for that perfect golden brown!

Can I make this recipe vegan-friendly?
Yes, you can easily customize this recipe for a vegan diet! Simply swap the butter for vegan butter and replace the cotija cheese with nutritional yeast. These substitutions will still provide that rich and tangy flavor we all love. Additionally, check the mayonnaise or use a dairy-free alternative. It’s very adaptable to suit your preferences!

Is it safe to give corn ribs to pets?
While corn itself isn’t toxic to pets, it’s important to avoid giving them corn ribs that contain seasonings, butter, or other toppings. Plain, cooked corn is generally safe for pets in moderation. However, always consult your veterinarian before introducing new foods into your pet's diet to ensure it’s suitable for their individual health needs.

Air Fryer Corn Ribs

Air Fryer Corn Ribs: Crispy, Cheesy Elotes Bliss at Home

Discover the crispy and cheesy delight of Air Fryer Corn Ribs, perfect for a quick and tasty snack.
Print Recipe Pin Recipe
Prep Time 10 minutes mins
Cook Time 12 minutes mins
Total Time 30 minutes mins
Servings: 4 ribs
Course: Snacks
Cuisine: Mexican
Calories: 150
Ingredients Equipment Method Nutrition Notes

Ingredients
  

For the Corn Ribs
  • 4 cobs Fresh Corn The heart of the recipe, providing natural sweetness.
  • 4 tablespoons Butter (or Vegan Butter) Adds richness to each rib.
For the Sauce
  • 1/2 cup Mayonnaise Can substitute with Greek yogurt for a lighter option.
  • 1/2 cup Cotija Cheese (or Feta) For a dairy-free option, nutritional yeast works.
  • 1 cup Roasted Poblano Brings a smoky kick; chipotle powder is an alternative.
For Seasoning
  • 1/4 cup Chopped Cilantro Fresh flavor, parsley can be a substitute.
  • 1 tablespoon Lime Juice Fresh juice for optimal taste.
  • 1 tablespoon Tajín Chili powder or paprika can be used if out.
  • 1 tablespoon Taco Seasoning Robust blend, can make a homemade mix.
  • 1 teaspoon Smoked Salt or Kosher Salt Adjust based on salt potency.
  • 1 teaspoon Garlic Powder Fresh garlic can replace the powder.
  • 1 teaspoon Lemon Pepper

Equipment

  • Air fryer

Method
 

Step-by-Step Instructions
  1. Prepare the corn by slicing fresh corn cobs lengthwise into quarters.
  2. In a mixing bowl, combine butter with taco seasoning, garlic powder, lemon pepper, Tajín, and smoked salt.
  3. Preheat air fryer to 375°F. Place coated corn ribs in a single layer and air fry for 10-12 minutes.
  4. Mix mayonnaise with chopped roasted poblano. Brush over corn ribs after air frying and sprinkle with cotija cheese, cilantro, and lime juice.

Nutrition

Serving: 1ribCalories: 150kcalCarbohydrates: 20gProtein: 3gFat: 7gSaturated Fat: 3gCholesterol: 15mgSodium: 350mgPotassium: 200mgFiber: 2gSugar: 3gVitamin A: 10IUVitamin C: 5mgCalcium: 5mgIron: 2mg

Notes

These corn ribs are quick to prepare and cater to various dietary preferences, including vegan options.

Tried this recipe?

Let us know how it was!

Steak & Cheddar Potato Casserole: Ultimate Comfort Food Delight

August 28, 2025 by Grace Snow Leave a Comment

As the comforting scent of simmering steak dances through your kitchen, I can’t help but feel a wave of nostalgia hit me. This Slow Cooker Steak & Cheddar Potato Casserole is more than just a meal; it's a cozy embrace on a plate, perfect for those chilly evenings when you crave something truly satisfying. With effortless preparation, this hearty dish layers tender steak, creamy potatoes, and gooey cheddar cheese, bringing joy to both cooking enthusiasts and busy weeknight warriors alike. It’s not just a crowd-pleaser; it's a dish that invites family and friends to gather around the table, creating memories over each gooey bite. Ready to dive into pure comfort? Let’s create a warm, delicious masterpiece together!

Why is this dish so irresistible?

Simplicity in preparation makes this casserole a go-to for any home cook. Comforting flavors of tender steak and melty cheddar create an irresistible harmony. Family-friendly and hearty, it satisfies even the pickiest eaters. Versatile enough for customization, try adding sautéed mushrooms for an extra gourmet touch, or enjoy it alongside a fresh arugula salad. If you're searching for more hearty meal ideas, be sure to check out Sweet Potato Casserole or Cornbread Breakfast Casserole for delightful variations!

Steak & Cheddar Potato Casserole Ingredients

This dish is a delightful medley of flavors and textures, perfectly designed to create a comforting experience.

  • For the Casserole
  • Sirloin or ribeye steak (1½ lbs) – Provides rich flavor and protein; substitute with flank steak for a leaner option.
  • Russet or Yukon Gold potatoes (4 large) – Adds heartiness and texture; sweet potatoes can offer a sweeter profile.
  • Sharp cheddar cheese (2 cups, shredded) – Offers creamy, melty goodness; consider Gruyère for a gourmet twist.
  • Heavy cream (1 cup) – Creates a luscious sauce; evaporated milk is a lighter alternative.
  • Beef broth (1 cup, low-sodium) – Adds depth of flavor; vegetable broth works for a lighter option.
  • Medium onion (1, finely diced) – Provides sweetness and a flavor base; yellow or sweet onions can be used instead.
  • Garlic (2 cloves, minced) – Enhances flavor; garlic powder can be used if fresh isn’t on hand.
  • Butter (2 tbsp) – Essential for searing the steak; substitute with olive oil for a lighter approach.
  • Smoked paprika (½ tsp) – Adds a delightful smokiness; sweet paprika can be used for no heat.
  • Salt & pepper to taste – Essential for bringing all flavors together.

This Steak & Cheddar Potato Casserole truly brings comfort to your table. Enjoy preparing this hearty meal that promises to warm hearts and fill bellies!

Step‑by‑Step Instructions for Steak & Cheddar Potato Casserole

Step 1: Sear the Steak
Start by melting 2 tablespoons of butter in a large skillet over medium heat. Once the butter is bubbling, pat your 1½ lbs of steak dry with a paper towel and carefully place it in the pan. Sear the steak for about 2–3 minutes on each side until it's beautifully browned. This caramelization enhances the flavor of your Steak & Cheddar Potato Casserole, so don’t skip this step!

Step 2: Prepare the Potatoes and Onions
While the steak sears, slice 4 large russet or Yukon Gold potatoes thinly, aiming for about 1/8-inch thickness to ensure even cooking later. Dice 1 medium onion finely to create a sweet flavor base that complements the creamy layers of the casserole. Gather these ingredients together for easy assembly.

Step 3: Layer the Ingredients
In your slow cooker, layer half of the sliced potatoes across the bottom. Follow with half of the diced onions, half of the seared steak, and 1 cup of shredded sharp cheddar cheese. Sprinkle with a pinch of salt, pepper, and ½ teaspoon of smoked paprika to add depth to your Steak & Cheddar Potato Casserole.

Step 4: Repeat the Layering
Continue building your casserole by adding the remaining half of the potatoes, onions, and steak on top. Finish this layer with the remaining cheese. The combination of tender beef, creamy potatoes, and gooey cheddar will make this dish impossible to resist!

Step 5: Whisk the Creamy Mixture
In a mixing bowl, whisk together 1 cup of heavy cream and 1 cup of low-sodium beef broth with 2 minced garlic cloves. This mixture will create a luscious sauce that seeps into the layers. Pour it evenly over the layered ingredients in the slow cooker, ensuring all components are well-coated.

Step 6: Slow Cook to Perfection
Cover the slow cooker and set it to cook on low for 6–7 hours or high for 3–4 hours. The goal is to have the potatoes become fork-tender and soak in all the flavors. Resist the urge to lift the lid during cooking, as this prolongs the process!

Step 7: Rest and Serve
Once your Steak & Cheddar Potato Casserole is finished cooking, take the lid off and let it rest for about 10 minutes before serving. This resting time allows the flavors to meld beautifully. For a delightful garnish, consider adding fresh herbs or an extra sprinkle of cheddar cheese on top!

Steak & Cheddar Potato Casserole Variations

Feel free to personalize this comforting dish with these fun twists and swaps!

  • Tex-Mex: Swap cheddar for pepper jack, sprinkle in corn and diced jalapeños, and top with fresh avocado and cilantro for a flavorful kick. This variation adds vibrancy to your casserole, making it a fiesta on a plate!

  • Mushroom Lover’s: Incorporate sautéed cremini mushrooms and Gruyère cheese for an earthy flavor that elevates your casserole experience. The combination of mushrooms and melted cheese will have everyone coming back for seconds.

  • Lightened-Up Version: Opt for lean flank steak, use evaporated milk instead of cream, and reduce the cheese by half for a lighter take. It’s a way to enjoy your favorite dish while keeping it a bit healthier.

  • Breakfast-for-Dinner: Ditch the steak, add breakfast sausage, and layer in scrambled eggs instead. This delightful morning twist makes for a cozy and hearty dinner perfect for any time of day.

  • Potato Swap: Replace traditional potatoes with sweet potatoes, and add a touch of cinnamon for a unique flavor profile. The sweetness will create an unexpected depth that you’ll love.

As you put your own spin on this delightful recipe, consider pairing it with a fresh arugula salad for a refreshing contrast. And if you're looking for more hearty meals, check out Cocoa Crusted Steak or Grilled Balsamic Steak Salad for more delicious options!

How to Store and Freeze Steak & Cheddar Potato Casserole

  • Room Temperature: Allow the casserole to cool completely before serving and storing. Do not leave it out for more than 2 hours to ensure food safety.
  • Fridge: Store leftovers in an airtight container in the fridge for up to 3 days. When ready to enjoy, simply reheat in the microwave or oven until warmed through.
  • Freezer: To freeze, portion the casserole into individual servings in airtight containers. It can be frozen for up to 3 months.
  • Reheating: Thaw overnight in the fridge before reheating. Reheat in the oven at 350°F, adding a splash of beef broth to restore moisture to your Steak & Cheddar Potato Casserole.

Make Ahead Options

These Steak & Cheddar Potato Casserole preparations are perfect for busy weeknights! To save time, you can slice the potatoes and onions up to 24 hours in advance, storing them in a bowl of cold water to prevent browning. Additionally, you can sear the steak and layer the ingredients in the slow cooker a day ahead; simply cover and refrigerate. When you’re ready to enjoy your casserole, pour the creamy mixture over the layers, cover, and cook on low for 6–7 hours or high for 3–4 hours. This way, you’ll experience just as delicious a meal with minimal effort, allowing you to spend more time with family!

What to Serve with Steak & Cheddar Potato Casserole

As you dig into this hearty masterpiece, consider these delightful pairings to elevate your meal experience.

  • Simple Arugula Salad: A light, peppery salad adds a refreshing crunch to balance the creamy casserole. Top with a zesty vinaigrette for extra flavor.

  • Crusty Baguette: Perfect for mopping up the savory, cheesy sauce, a warm baguette adds a satisfying texture and serves as a comforting companion.

  • Roasted Brussels Sprouts: The caramelized edges of lightly roasted Brussels sprouts offer a nutty depth of flavor that complements the richness of the casserole beautifully.

  • Garlic Breadsticks: These buttery, garlic-infused sticks provide an irresistible crunch and buttery warmth alongside your savory dish, inviting dunking and delight.

  • Creamy Coleslaw: The crunchy, tangy slaw juxtaposes the richness of the Steak & Cheddar Potato Casserole, making each bite an exploration of contrasting flavors.

  • Sweet Tea or Lemonade: A glass of refreshing sweet tea or tangy lemonade adds brightness, cutting through the richness of the dish while creating a comforting experience together.

  • Chocolate Chip Cookies: For dessert, indulgent chocolate chip cookies are a delightful finish, bringing the comforting meal full circle with a touch of sweetness at the end.

Expert Tips for Steak & Cheddar Potato Casserole

  • Use Quality Meat: Choose fresh sirloin or ribeye steak for rich flavor. Avoid tougher cuts to ensure tenderness in your Steak & Cheddar Potato Casserole.
  • Even Potato Slices: Slice potatoes uniformly to 1/8-inch thickness; this promotes even cooking and ensures a creamy texture.
  • Don’t Peek: Avoid lifting the lid while cooking! Each time you do, you lose heat and extend the cooking time significantly.
  • Thaw Frozen Meat: If using frozen steak, make sure it's completely thawed and patted dry before searing; excess moisture can result in steaming rather than browning.
  • Personalize It: Feel free to adapt the recipe! Adding sautéed mushrooms or extra veggies can elevate your Steak & Cheddar Potato Casserole.

Steak & Cheddar Potato Casserole Recipe FAQs

What type of steak is best for this casserole?
I recommend using sirloin or ribeye steak for rich flavor and tenderness. If you're looking for a leaner option, flank steak can work too! Just be cautious with cooking time, as lean cuts can become tougher if overcooked.

How do I know when my potatoes are ripe and ready to use?
Look for firm potatoes without any dark spots or blemishes. If they feel soft or have sprouting eyes, they’re past their prime and might not yield the best texture in your Steak & Cheddar Potato Casserole.

How should I store leftovers of this casserole?
Once cooled, transfer your leftovers into an airtight container and store them in the fridge for up to 3 days. Reheat them in the microwave or oven until heated through, and enjoy the comforting flavors again!

Can I freeze the casserole for later?
Absolutely! Portion your Steak & Cheddar Potato Casserole into individual servings in airtight containers and freeze them for up to 3 months. When ready, thaw overnight in the fridge. Reheat in an oven preheated to 350°F, adding a splash of broth to retain its creamy texture.

What should I do if my casserole is too watery?
If you find your casserole comes out a bit watery, here’s a simple fix: After it's cooked, uncover your slow cooker and let it cook on high for an additional 20-30 minutes to allow excess moisture to evaporate. You can also mix in a little cornstarch slurry (1 tablespoon cornstarch mixed with 2 tablespoons of cold water) directly into the casserole to help thicken it up.

Is this casserole suitable for someone with dairy allergies?
While this particular Steak & Cheddar Potato Casserole contains dairy, there are ways to adapt it! You can substitute the heavy cream with a non-dairy alternative like coconut milk, and use dairy-free cheese options to enjoy a similar flavor without the dairy. Just ensure all ingredients align with dietary needs!

Steak & Cheddar Potato Casserole

Steak & Cheddar Potato Casserole: Ultimate Comfort Food Delight

This Steak & Cheddar Potato Casserole is more than just a meal; it's comforting and satisfying for chilly evenings.
Print Recipe Pin Recipe
Prep Time 30 minutes mins
Cook Time 7 hours hrs
Resting Time 10 minutes mins
Total Time 7 hours hrs 40 minutes mins
Servings: 6 servings
Course: Dinner
Cuisine: Comfort Food
Calories: 650
Ingredients Equipment Method Nutrition Notes

Ingredients
  

For the Casserole
  • 1.5 lbs Sirloin or ribeye steak Provides rich flavor; substitute with flank steak for a leaner option.
  • 4 large Russet or Yukon Gold potatoes Adds heartiness; sweet potatoes can offer a sweeter profile.
  • 2 cups Sharp cheddar cheese, shredded Offers creamy, melty goodness; consider Gruyère for a gourmet twist.
  • 1 cup Heavy cream Creates a luscious sauce; evaporated milk is a lighter alternative.
  • 1 cup Beef broth, low-sodium Adds depth of flavor; vegetable broth works for a lighter option.
  • 1 Medium onion, finely diced Provides sweetness; yellow or sweet onions can be used.
  • 2 cloves Garlic, minced Enhances flavor; garlic powder can substitute if fresh isn’t on hand.
  • 2 tbsp Butter Essential for searing the steak; substitute with olive oil for a lighter approach.
  • 0.5 tsp Smoked paprika Adds smokiness; sweet paprika can be used for no heat.
  • Salt & pepper to taste Essential for bringing flavors together.

Equipment

  • Skillet
  • Slow Cooker
  • Mixing Bowl

Method
 

Step-by-Step Instructions
  1. Melt 2 tablespoons of butter in a large skillet over medium heat. Sear 1½ lbs of steak for about 2–3 minutes on each side.
  2. Slice 4 large russet or Yukon Gold potatoes thinly to about 1/8-inch thickness. Dice 1 medium onion finely.
  3. In the slow cooker, layer half of the potatoes, half of the onions, half of the seared steak, and 1 cup of shredded sharp cheddar cheese.
  4. Continue layering with the remaining potatoes, onions, and steak, finishing with the remaining cheese.
  5. Whisk together 1 cup of heavy cream and 1 cup of beef broth with 2 minced garlic cloves. Pour evenly over the layers.
  6. Cover and cook on low for 6–7 hours or high for 3–4 hours until potatoes are fork-tender.
  7. Let the casserole rest for about 10 minutes before serving. Garnish with fresh herbs or extra cheddar cheese.

Nutrition

Serving: 1servingCalories: 650kcalCarbohydrates: 45gProtein: 35gFat: 40gSaturated Fat: 20gPolyunsaturated Fat: 2gMonounsaturated Fat: 15gCholesterol: 100mgSodium: 800mgPotassium: 800mgFiber: 5gSugar: 2gVitamin A: 500IUVitamin C: 20mgCalcium: 400mgIron: 4mg

Notes

This dish is perfect for cold evenings and allows for personal customization with additional ingredients.

Tried this recipe?

Let us know how it was!

Braised Short Ribs with Charred Scallion Risotto for Comfort

August 28, 2025 by Grace Snow Leave a Comment

The aroma hit me like a warm embrace, wrapping me in its savory embrace as I walked into the kitchen. Braised Short Ribs with Charred Scallion Risotto is not just a meal; it’s an experience, transporting your senses with its melt-in-your-mouth tenderness and rich, comforting flavors. What I adore about this dish is how effortlessly it transforms any ordinary evening into something special, making it perfect for cozy nights in or impressing friends at gatherings. Plus, it offers a gluten-free option to accommodate all dinner guests! Trust me, the creamy risotto paired with smoky scallions takes comfort food to a whole new level. Are you ready to indulge in a plateful of heartfelt goodness? Let’s dive into the recipe!

Why Are Braised Short Ribs So Irresistible?

Comforting and homey, this dish is perfect for cozy nights, warming not just your palate but your soul. Flavor-packed with slow-braised beef, it boasts tender meat that melts in your mouth, complemented by creamy risotto. Quick prep, with just a few steps required, means that you can impress your guests without the stress! Versatile, you can serve it on special occasions or simply as a comforting weeknight dinner. Plus, its gluten-free option ensures that everyone can enjoy it, making it an all-around crowd-pleaser! If you love comforting dishes like Chicken Salad Apples or Buffalo Tofu Caesar, then this recipe is a must-try!

Braised Short Ribs Ingredients

• This recipe for braised short ribs with charred scallion risotto is sure to warm your heart!

For the Ribs

  • Bone-in Beef Short Ribs – The star of the dish; rich, flavorful meat that becomes incredibly tender during the braising process.
  • Oil (Canola or Avocado) – Perfect for searing; avocado oil is a great choice for its high smoke point.
  • All-Purpose Flour – A light coating for browning; rice flour can be used for a gluten-free option.
  • Beef or Chicken Stock – Adds moisture and depth; using homemade stock enhances the dish’s richness.
  • Salt & Pepper – Essential seasonings that highlight the meat's natural flavors.

For the Risotto

  • Arborio Rice – Key for creamy risotto, thanks to its high starch content; Carnaroli rice can be substituted for a firmer texture.
  • Unsalted Butter – Brings richness and a velvety texture; substitute with olive oil for a dairy-free version.
  • Grated Parmesan Cheese – Adds a salty depth; for a dairy-free option, try using nutritional yeast.
  • Green Onions (Scallions) – Infuse freshness and sweetness when charred; leeks or shallots make suitable alternatives.
  • Hot Stock (Beef or Chicken) – Gradually added to the risotto for that creamy consistency; always keep it hot for the best results.

Get ready to assemble these delightful ingredients and create a dish that's bound to impress and satisfy!

Step‑by‑Step Instructions for Braised Short Ribs with Charred Scallion Risotto

Step 1: Sear the Ribs
Preheat your oven to 325°F (160°C). Pat the bone-in beef short ribs dry, then season them generously with salt and pepper before dusting lightly with all-purpose flour. In a Dutch oven, heat a few tablespoons of oil over medium-high heat. Sear the ribs for 3-4 minutes on each side until they develop a rich, deep-brown crust. Once browned, remove the ribs and set them aside.

Step 2: Braise the Ribs
In the same Dutch oven, reduce the heat to medium and deglaze the pot by pouring in 1 cup of beef or chicken stock, scraping up all the delicious browned bits from the bottom. Return the ribs to the pot, adding enough stock to cover three-quarters of the meat. Cover with a lid and braise in the preheated oven for 2.5-3 hours, or until the ribs are fork-tender and irresistible.

Step 3: Char the Scallions
While the ribs are braising, prepare the charred scallions. Preheat your grill or broiler to high. Place the green onions directly on the grill or on a baking sheet under the broiler. Cook for 3-4 minutes, turning occasionally, until they're blistered and charred. Remove from heat and roughly chop the scallions to enhance their smoky flavor for your risotto.

Step 4: Make the Risotto
In a large saucepan, heat a splash of oil over medium heat and add Arborio rice, stirring constantly for about 2 minutes until the rice is lightly toasted. Gradually pour in hot beef or chicken stock, one ladle at a time, stirring continuously for about 25 minutes. The key here is to ensure each addition is absorbed before adding more. Once creamy, remove from heat and stir in butter, grated Parmesan, and the charred scallions for that comforting touch.

Step 5: Serve the Dish
To serve your Braised Short Ribs with Charred Scallion Risotto, spoon the creamy risotto into shallow bowls. Top generously with the tender short ribs and drizzle some of the reduced braising liquid over the top. This delightful combination of flavors and textures is sure to create a heartwarming dining experience that everyone will love!

Make Ahead Options

If you’re looking to streamline your cooking for the week, Braised Short Ribs with Charred Scallion Risotto is a fantastic option! You can easily braise the short ribs up to 2 days in advance; simply allow them to cool in their liquid before refrigerating. This method helps to enhance the flavors while keeping the meat moist. The risotto, however, is best made fresh to avoid becoming gluey. When you’re ready to serve, reheat the short ribs gently in their braising liquid and prepare the risotto from scratch for that creamy texture. With this prep strategy, you’ll enjoy a delicious, stress-free meal that tastes just as wonderful as if it were freshly made!

How to Store and Freeze Braised Short Ribs with Charred Scallion Risotto

Fridge: Store leftover braised short ribs in an airtight container for up to 3 days. Keep the risotto separate to maintain its creamy texture.

Freezer: For longer storage, freeze the short ribs in their braising liquid for up to 3 months. Risotto is best prepared fresh as it can become gluey when frozen.

Reheating: Reheat the ribs gently on the stovetop over low heat, adding a splash of stock if needed. Reheat the risotto slowly, adding a little extra hot broth or water to restore creaminess.

Make-Ahead Tips: Braise the short ribs up to 2 days in advance; just store them in their liquid for maximum flavor retention.

What to Serve with Braised Short Ribs with Charred Scallion Risotto

Elevate your dining experience with delectable sides that harmonize beautifully and complement the rich flavors of your main dish.

  • Crisp Garden Salad: A refreshing mix of greens and vegetables adds a crunch that balances the meat’s richness and creamy risotto.

  • Garlic Roasted Vegetables: Roasted carrots, Brussels sprouts, and potatoes bring earthy flavors, enhancing the savory notes of the short ribs.

  • Creamy Mashed Potatoes: Silky potatoes provide a comforting contrast to the tender ribs, offering a luscious texture to savor with each bite.

  • Herbed Bread Rolls: These warm rolls are perfect for mopping up sauce, making every last bit of the braising liquid unforgettable.

  • Steamed Asparagus: Bright green asparagus adds a fresh, lightly crisp element, providing a vibrant contrast to the hearty dish.

  • Red Wine Pairing: A glass of full-bodied red wine elevates the meal, pairing wonderfully with the bold flavors of the short ribs.

  • Chocolate Molten Cake: End on a sweet note with a rich dessert that complements the savory dinner, offering a spectacular finish to your cozy meal.

Expert Tips for Braised Short Ribs

  • Dry Ribs First: Ensure the ribs are thoroughly dried before searing to get that beautiful caramelization, which enhances the overall flavor.

  • Check for Tenderness: If the ribs aren't falling apart after the initial braising time, don't hesitate to continue braising. They may need an extra hour for that perfect tenderness.

  • Instant Pot Option: For a speedier approach, consider utilizing an Instant Pot. Cook on high pressure for about 45 minutes to achieve tender, flavorful braised short ribs.

  • Add Stock Gradually: When making the risotto, ensure to add the hot stock slowly—this helps achieve that creamy consistency crucial for the perfect Braised Short Ribs with Charred Scallion Risotto.

  • Avoid Cold Stock: If you’re aiming for a smooth risotto, never add cold stock; it shocks the rice and disrupts the cooking process.

  • Serve Fresh: For the best experience, serve the risotto right after making it. Leftovers can become gummy, so prepare it fresh if possible.

Braised Short Ribs with Charred Scallion Risotto Variations

Feel free to explore these delightful twists on the classic dish that will inspire your culinary creativity!

  • Slow Cooker Option: Transfer seared ribs to a slow cooker, adding stock and cook on low for 8 hours for easy, tender meat that’s perfect for busy days.

  • Add Flavor: Mix in a tablespoon of tomato paste or soy sauce to the braising liquid for a depth of umami that elevates the overall flavor profile.

  • Dairy-Free Adjustments: Swap out the unsalted butter for olive oil and use nutritional yeast instead of Parmesan cheese to keep it rich yet dairy-free.

  • Spicy Kick: For those who crave heat, sprinkle in a pinch of red pepper flakes when making the risotto or serve with a bit of sriracha on top.

  • Herb Boost: Stir in fresh herbs like parsley or thyme at the end of cooking to brighten up the rich flavors and add a lovely aromatic touch.

  • Vegetable Risotto: Consider adding sautéed mushrooms, zucchini, or peas to your risotto for a boost of nutrition and flavor, making it even heartier.

  • Red Wine Braising: For an even deeper flavor, replace half of the stock with a robust red wine during the braising process. Just let it cook down to enhance that rich taste!

  • Grain Swap: If you're looking for a twist on texture, try substituting Arborio rice with farro or barley for a nutty flavor and a chewy bite that complements the ribs beautifully.

Feel free to pair your delicious creation with a crisp salad or a side of roasted vegetables for well-rounded meals that everyone will adore!

Braised Short Ribs with Charred Scallion Risotto Recipe FAQs

How do I choose the right beef short ribs?
Absolutely! Look for short ribs with good marbling; the fat will melt during cooking, ensuring tenderness and flavor. Fresh ribs will have a bright red color and moist appearance. Stay away from any that have dark spots or a dry look, as these can indicate spoilage.

How should I store leftovers?
After enjoying your delightful meal, store your leftover braised short ribs in an airtight container in the fridge for up to 3 days. For the best results, keep the risotto separate to prevent it from becoming gluey and losing its creamy texture.

Can I freeze the braised short ribs?
Yes, you can! To freeze Braised Short Ribs with Charred Scallion Risotto, place the ribs in an airtight container along with their braising liquid. They can be frozen for up to 3 months. I recommend thawing the ribs overnight in the fridge before reheating. However, avoid freezing the risotto as it doesn't hold up well; it’s much better made fresh.

What should I do if my risotto is too sticky?
If your risotto turns out too gluey, don’t worry! You can try adding a splash of warm broth or water while stirring gently, which can help loosen it up. For future efforts, remember to add the stock gradually, allowing each addition to absorb before adding more.

Are there any dietary considerations for this recipe?
Definitely! This recipe can easily accommodate dietary restrictions. For a gluten-free option, use rice flour instead of all-purpose flour. If you're looking to make it dairy-free, substitute the butter with olive oil and the Parmesan with nutritional yeast. As for pets, the ingredients are not safe for dogs due to the rich seasoning and fats, so be sure to keep them away from leftovers.

What is the best way to reheat the short ribs?
To reheat your delicious Braised Short Ribs, gently warm them in a saucepan over low heat, adding a splash of their braising liquid to keep them moist and flavorful. This method allows the flavors to re-infuse into the meat, making each bite as tender and juicy as when you first cooked them!

Braised Short Ribs with Charred Scallion Risotto

Braised Short Ribs with Charred Scallion Risotto for Comfort

Braised Short Ribs with Charred Scallion Risotto is a comforting dish with melt-in-your-mouth tenderness and rich flavors.
Print Recipe Pin Recipe
Prep Time 15 minutes mins
Cook Time 3 hours hrs
Total Time 3 hours hrs 15 minutes mins
Servings: 4 servings
Course: Dinner
Cuisine: American
Calories: 850
Ingredients Equipment Method Nutrition Notes

Ingredients
  

For the Ribs
  • 4 pieces Bone-in Beef Short Ribs Rich, flavorful meat
  • 2 tablespoons Oil (Canola or Avocado) For searing
  • 1/4 cup All-Purpose Flour For browning
  • 3 cups Beef or Chicken Stock Adds moisture and depth
  • 1 teaspoon Salt
  • 1 teaspoon Pepper
For the Risotto
  • 1 cup Arborio Rice Key for creamy risotto
  • 2 tablespoons Unsalted Butter Brings richness
  • 1/2 cup Grated Parmesan Cheese For salty depth
  • 4 pieces Green Onions (Scallions) To be charred
  • 4 cups Hot Stock (Beef or Chicken) For creamy consistency

Equipment

  • Dutch oven
  • Grill or broiler
  • Large saucepan

Method
 

Step-by-Step Instructions
  1. Preheat your oven to 325°F (160°C). Pat the bone-in beef short ribs dry, then season them generously with salt and pepper before dusting lightly with all-purpose flour.
  2. In a Dutch oven, heat a few tablespoons of oil over medium-high heat. Sear the ribs for 3-4 minutes on each side until they develop a rich, deep-brown crust.
  3. Once browned, remove the ribs and set them aside. In the same Dutch oven, reduce the heat to medium and deglaze the pot by pouring in 1 cup of beef or chicken stock.
  4. Return the ribs to the pot, adding enough stock to cover three-quarters of the meat. Cover with a lid and braise in the preheated oven for 2.5-3 hours.
  5. While the ribs are braising, prepare the charred scallions. Preheat your grill or broiler to high.
  6. Place the green onions directly on the grill or on a baking sheet under the broiler. Cook for 3-4 minutes until they're blistered and charred.
  7. Remove from heat and roughly chop the scallions. In a large saucepan, heat a splash of oil over medium heat and add Arborio rice.
  8. Stir constantly for about 2 minutes until the rice is lightly toasted. Gradually pour in hot beef or chicken stock, one ladle at a time, stirring continuously for about 25 minutes.
  9. Once creamy, remove from heat and stir in butter, grated Parmesan, and the charred scallions.
  10. To serve, spoon the creamy risotto into shallow bowls. Top generously with the tender short ribs and drizzle some of the reduced braising liquid over the top.

Nutrition

Serving: 1servingCalories: 850kcalCarbohydrates: 50gProtein: 60gFat: 40gSaturated Fat: 15gPolyunsaturated Fat: 5gMonounsaturated Fat: 20gCholesterol: 120mgSodium: 800mgPotassium: 900mgFiber: 3gSugar: 2gVitamin A: 500IUVitamin C: 10mgCalcium: 150mgIron: 4mg

Notes

Serve the risotto fresh for the best experience; leftovers can become gummy.

Tried this recipe?

Let us know how it was!

Cozy Pumpkin Polenta with Roasted Vegetables Delight

August 28, 2025 by Grace Snow Leave a Comment

As autumn sweeps in with its golden hues, I can’t help but get excited about my favorite seasonal ingredients. This Creamy Pumpkin Polenta with Roasted Vegetables is a delightful celebration of fall's bounty, combining sweet pumpkin purée with tender roasted vegetables like butternut squash and Brussels sprouts. Not only is this dish gluten-free and ready in just 40 minutes, but it also transforms humble ingredients into a comforting meal that warms the soul. Imagine serving this luscious polenta topped with caramelized veggies on a chilly evening—what could be better? Trust me, your taste buds will thank you! Are you ready to bring a touch of autumn magic into your kitchen?

Why is Pumpkin Polenta a Must-Try?

Comforting and Creamy: There’s something so satisfying about a smooth, creamy polenta dish. This recipe showcases pumpkin purée, providing a warm hug for your taste buds.
Quick to Prepare: In just 40 minutes, you’ll transform simple ingredients into a spectacular meal, perfect for busy weeknights.
Versatile Veggies: Customize it! Swap roasted vegetables according to your preferences, like using sweet potatoes or bell peppers for a different flavor kick.
Crowd-Pleaser: This comforting dish is sure to impress family and friends, making it ideal for gatherings or a cozy dinner at home. Plus, it pairs beautifully with a side salad or warm crusty bread!
Don't forget to check out my follow-up recipes like Pumpkin Cinnamon Roll Muffins for more seasonal delights!

Pumpkin Polenta with Roasted Vegetables Ingredients

For the Polenta
• Instant polenta – This is quick and easy to prepare; feel free to use regular polenta for a creamier texture.
• Water or vegetable broth – Using vegetable broth enhances the dish’s overall taste, making it even more flavorful.
• Pumpkin purée – Provides sweetness and creaminess to the polenta; canned unsweetened works wonderfully.
• Butter or olive oil – Adds richness; olive oil is an excellent vegan substitute.
• Nutmeg (or cinnamon/pumpkin spice) – Brings warmth and depth; switch out for cinnamon for a different twist.
• Salt & black pepper – Essential for seasoning; don’t hesitate to adjust to your taste.

For the Roasted Vegetables
• Diced butternut squash (or sweet potato) – Adds wonderful sweetness and texture; feel free to swap with sweet potato if desired.
• Chopped carrots – Contributes color and a hint of sweetness; substitute with other root vegetables for variety.
• Brussels sprouts – These offer a slight bitterness to balance the sweetness; cauliflower or bell peppers can be a nice alternative.
• Olive oil – Essential for roasting vegetables; it helps achieve that perfect caramelization.
• Dried thyme (or rosemary/sage) – Imparts aromatic herbal flavors; use what you have on hand or prefer.

Optional Toppings
• Parmesan shavings – Adds a savory, salty finish; skip for a vegan option or use nutritional yeast as a substitute.
• Fresh parsley or sage – Perfect for garnish, enhancing the dish’s visual appeal.
• Toasted pepitas or walnuts – Offers a delightful crunch and extra nutrition; these are optional but highly recommended for added texture.

Step‑by‑Step Instructions for Pumpkin Polenta with Roasted Vegetables

Step 1: Preheat the Oven
Begin by preheating your oven to 400°F (200°C). This step is crucial as it sets the stage for perfectly roasted vegetables. While the oven is heating, gather your baking sheets and prepare the vegetables for roasting that will complement the creamy pumpkin polenta.

Step 2: Prepare the Vegetables
On a large baking sheet, toss together diced butternut squash, chopped carrots, and halved Brussels sprouts. Drizzle with olive oil, and sprinkle with dried thyme, salt, and pepper. Ensure the vegetables are well-coated for optimal flavor and caramelization, making them a delightful topping for your pumpkin polenta.

Step 3: Roast the Vegetables
Spread the vegetable mixture in a single layer on the baking sheet. Place it in the preheated oven and roast for 25-30 minutes, flipping halfway through. You’ll know they are ready when they are golden brown and tender, releasing a sweet aroma that fills your kitchen and hints at the delicious meal to come.

Step 4: Simmer the Liquid
While the vegetables roast, pour water or vegetable broth into a medium saucepan and bring it to a gentle simmer over medium heat. This warmed liquid is essential for the next step, ensuring the polenta cooks smoothly and absorbs flavors, creating the perfect base for your comforting pumpkin polenta.

Step 5: Whisk in the Polenta
Once simmering, gradually whisk in the instant polenta. Continue whisking vigorously for about 2-3 minutes to prevent any lumps from forming. The mixture will start to thicken and become creamy; this texture is essential for the satisfying base of your pumpkin polenta with roasted vegetables.

Step 6: Mix in Pumpkin & Spices
Remove the pan from heat and stir in the pumpkin purée, butter or olive oil, and a pinch of nutmeg, along with salt and pepper to taste. This step brings a delightful creaminess and autumnal flavor to your polenta, ensuring it perfectly complements the sweetness of the roasted vegetables topping.

Step 7: Serve the Dish
To serve, scoop the creamy pumpkin polenta into bowls and generously top with the roasted vegetables. For an extra touch, garnish with Parmesan shavings, fresh parsley or sage, and sprinkle with toasted pepitas or walnuts for added crunch. Enjoy this warm, comforting meal that beautifully showcases the essence of fall.

Pumpkin Polenta with Roasted Vegetables Variations

Feel free to get creative and make this comforting dish your own with these simple swaps and twists!

  • Gluten-Free: Ensure to use certified gluten-free polenta for those with dietary restrictions, making this dish safe for everyone.

  • Vegan: Swap butter for olive oil or vegan butter, and skip the Parmesan, or use nutritional yeast for that cheesy flavor without dairy.

  • Spicy Kick: Add a pinch of red pepper flakes or a drizzle of hot sauce to elevate the heat and bring a zesty twist to your creamy polenta.

  • Texture Boost: Fold in some cooked quinoa or black beans into the polenta for an extra protein punch and delightful texture contrast.

  • Herb Infusion: Swap out dried thyme for fresh herbs like parsley, sage, or rosemary for a fragrant, vibrant finish. The fresh notes will brighten up the dish beautifully.

  • Sweet Surprise: For a hint of sweetness, drizzle some maple syrup or honey over the finished dish, complementing the roasted vegetables and pumpkin flawlessly.

  • Flavorful Broth: Instead of water, use a fragrant broth, like mushroom or garlic broth, while cooking polenta for an added depth of flavor. It pairs wonderfully with the earthy vegetables.

  • Mix It Up: Feel adventurous? Try using different vegetables like zucchini or beets for roasting, or bake a layer of roasted corn for a twist that adds sweetness and a fun crunch. Exploring flavors is half the fun!

For even more delicious ideas, you might want to check out my recipe for Maple Roasted Sweet Potatoes with Pecans to enjoy a different seasonal taste!

What to Serve with Creamy Pumpkin Polenta with Roasted Vegetables

Imagine the warmth of your kitchen filled with delightful aromas, as you prepare a comforting meal perfect for autumn evenings.

  • Crispy Garlic Bread: Its buttery, garlicky goodness is perfect for scooping up the creamy pumpkin polenta, adding a crunchy contrast.
  • Mixed Greens Salad: A light salad with vinaigrette brightens the meal, offering refreshing crispness that balances the polenta’s richness. It’s a delightful way to include some greens!
  • Roasted Beetroot: Roasted beets add a sweet, earthy flavor and vibrant color, beautifully complementing the pumpkin's sweetness while enhancing the dish's visual appeal.
  • Creamy Coleslaw: A tangy slaw adds crunch and zest, providing a fun contrast to the smooth, cozy polenta; a classic side choice!
  • Herbed Quinoa: This nutty, fluffy grain complements the comfort of the polenta while boosting nutritional value with protein and fiber.
  • Warm Apple Crisp: For dessert, this sweet, spiced treat adds the perfect finishing touch to your autumn-inspired meal, capturing the essence of the season.
  • Chai Tea or Apple Cider: Cozy drinks that pair beautifully with the flavors of pumpkin, warming you from the inside out and enhancing the overall experience.

How to Store and Freeze Pumpkin Polenta with Roasted Vegetables

Fridge: Store leftover pumpkin polenta with roasted vegetables in an airtight container for up to 3 days. This helps maintain freshness and flavor.

Freezer: If you’d like to keep it longer, freeze the polenta and roasted vegetables in separate containers for up to 2 months. Label them with dates for easy identification.

Reheating: When ready to enjoy, thaw the frozen polenta overnight in the fridge. Reheat polenta on the stovetop over low heat, adding a splash of broth for creaminess, and reheat the roasted vegetables in the oven to restore their crispness.

Make Ahead Options

These Creamy Pumpkin Polenta with Roasted Vegetables are perfect for meal prep enthusiasts! You can roast the vegetables up to 3 days in advance, storing them in an airtight container in the refrigerator to maintain their texture and flavor. Simply reheat the veggies in the oven or a skillet before serving. For the polenta, prepare it up to 24 hours ahead, then refrigerate and reheat with a splash of broth or water to restore its creamy consistency. When ready to serve, simply spoon the polenta into bowls, top with the reheated roasted vegetables, and garnish as desired. This way, you can enjoy a delightful meal with minimal effort on busy weeknights!

Expert Tips for Pumpkin Polenta with Roasted Vegetables

  • Use Instant Polenta: Instant polenta cooks quickly, making it the perfect choice for a speedy meal. If using regular polenta, remember to increase the liquid to 4 cups and cook longer.

  • Don’t Crowd the Veggies: When roasting, give your vegetables plenty of space on the baking sheet. Crowding can lead to steaming instead of roasting, preventing that desired caramelization.

  • Whisk Vigorously: To avoid lumps in your polenta, whisk vigorously as you add it to simmering liquid. This ensures a smooth and creamy base for your pumpkin polenta with roasted vegetables.

  • Adjust Consistency: If your polenta thickens too much, simply whisk in warm vegetable broth or milk to achieve your desired creamy texture before serving.

  • Personalize Your Veggies: Feel free to mix and match your roasted vegetables for added flavor! Sweet potatoes, bell peppers, or even zucchini can be fantastic substitutes, enhancing the dish’s versatility.

Pumpkin Polenta with Roasted Vegetables Recipe FAQs

What type of pumpkin purée should I use?
I recommend using canned unsweetened pumpkin purée for the best results in this recipe. Fresh pumpkin can also be used, but make sure to cook and purée it until smooth. Look for a vibrant orange color with no added sugars or spices for the best flavor integration!

How long can I store leftover pumpkin polenta?
You can store leftover pumpkin polenta with roasted vegetables in an airtight container in the fridge for up to 3 days. To maintain freshness, make sure it's completely cooled before refrigerating. When reheating, add a splash of broth or water to restore its creaminess.

Can I freeze pumpkin polenta with roasted vegetables?
Absolutely! To freeze, allow the polenta and roasted vegetables to cool completely, then freeze them in separate airtight containers for up to 2 months. When you’re ready to enjoy, thaw the polenta in the fridge overnight and reheat it on low heat, adding a splash of broth for the desired consistency. For the vegetables, reheat in the oven to restore their caramelized texture.

What can I do if my polenta turns out lumpy?
If you encounter lumps in your polenta, don’t fret! Simply whisk it vigorously while adding warm broth or milk to smooth it out. If it thickens too much, you can also add a bit more liquid gradually until it reaches the creamy consistency you desire.

Are there any dietary considerations for this recipe?
This pumpkin polenta with roasted vegetables is gluten-free and can be easily made vegan by using olive oil instead of butter and skipping the Parmesan. If you have nut allergies, you can omit the toasted pepitas or walnuts and still enjoy a deliciously creamy dish! Always check ingredient labels to ensure they meet your dietary needs.

How can I ensure perfectly caramelized vegetables?
To achieve that beautiful caramelization, it's important not to overcrowd the baking sheet. Spread the vegetables in a single layer and make sure to flip them halfway through roasting, which usually takes about 25-30 minutes at 400°F (200°C). This allows all sides to brown evenly and develop that irresistible flavor.

Pumpkin Polenta with Roasted Vegetables

Cozy Pumpkin Polenta with Roasted Vegetables Delight

This Creamy Pumpkin Polenta with Roasted Vegetables is a delightful celebration of fall's bounty, combining sweet pumpkin purée with tender roasted vegetables.
Print Recipe Pin Recipe
Prep Time 10 minutes mins
Cook Time 30 minutes mins
Total Time 40 minutes mins
Servings: 4 servings
Course: Dinner
Cuisine: American
Calories: 350
Ingredients Equipment Method Nutrition Notes

Ingredients
  

For the Polenta
  • 1 cup Instant polenta Feel free to use regular polenta for a creamier texture.
  • 4 cups Water or vegetable broth Using vegetable broth enhances flavor.
  • 1 cup Pumpkin purée Canned unsweetened works wonderfully.
  • 2 tbsp Butter or olive oil Olive oil is a good vegan substitute.
  • 1/4 tsp Nutmeg Or cinnamon/pumpkin spice.
  • to taste Salt & black pepper Essential for seasoning.
For the Roasted Vegetables
  • 2 cups Diced butternut squash Or sweet potato.
  • 1 cup Chopped carrots Substitute with other root vegetables if desired.
  • 1 cup Brussels sprouts Cauliflower or bell peppers can be alternatives.
  • 2 tbsp Olive oil Essential for roasting.
  • 1 tsp Dried thyme Or rosemary/sage.
Optional Toppings
  • 1/4 cup Parmesan shavings Skip for vegan option or use nutritional yeast.
  • 2 tbsp Fresh parsley or sage For garnish.
  • 1/4 cup Toasted pepitas or walnuts Optional, but highly recommended.

Equipment

  • Baking Sheet
  • Medium saucepan
  • Whisk

Method
 

Step-by-Step Instructions
  1. Preheat your oven to 400°F (200°C).
  2. On a large baking sheet, toss together diced butternut squash, chopped carrots, and halved Brussels sprouts with olive oil, dried thyme, salt, and pepper.
  3. Spread the vegetable mixture in a single layer and roast for 25-30 minutes, flipping halfway.
  4. While the vegetables roast, pour water or vegetable broth into a medium saucepan and bring to a gentle simmer over medium heat.
  5. Gradually whisk in the instant polenta and continue whisking for 2-3 minutes until thickened.
  6. Remove from heat and stir in pumpkin purée, butter or olive oil, nutmeg, and salt and pepper to taste.
  7. Serve by scooping the creamy pumpkin polenta into bowls and topping with roasted vegetables, garnished with Parmesan, parsley, and toasted pepitas or walnuts.

Nutrition

Serving: 1cupCalories: 350kcalCarbohydrates: 50gProtein: 10gFat: 15gSaturated Fat: 5gPolyunsaturated Fat: 2gMonounsaturated Fat: 8gCholesterol: 10mgSodium: 500mgPotassium: 800mgFiber: 6gSugar: 8gVitamin A: 100IUVitamin C: 50mgCalcium: 15mgIron: 10mg

Notes

Store leftover pumpkin polenta with roasted vegetables in an airtight container for up to 3 days. Freeze for up to 2 months. Thaw and reheat before serving.

Tried this recipe?

Let us know how it was!

Comforting Carrot-Ginger Soup for Cozy Nights In

August 28, 2025 by Grace Snow Leave a Comment

As the autumn leaves begin to swirl outside, I find myself dreaming of the warming comfort that only a bowl of cozy carrot-ginger soup can offer. With its vibrant orange hue and the delightful aroma of roasted vegetables mingling with zesty ginger, this soup is like a gentle hug on a chilly day. Not only is this Carrot-Ginger Soup easy to prepare, making it a hassle-free choice for busy evenings, but it's also a healthy, satisfying option for anyone looking to embrace home-cooked goodness over fast food. With a few simple ingredients, you can create a nourishing dish that’s packed with flavor and perfect for sharing around the table. Are you ready to discover the secrets to making this heartwarming soup? Let’s dive in!

Why Is This Soup So Irresistible?

Comforting, this Carrot-Ginger Soup is the ultimate hug-in-a-bowl, ideal for cool nights. Easy to make, it requires minimal prep—perfect for busy weeknights or leisurely weekends. Healthy too, packed with vibrant veggies and zesty ginger, it’s a nourishing alternative to takeout. Adaptable, feel free to swap sweet potato for butternut squash or toss in sautéed spinach for extra greens. Plus, serve it with a side of crusty bread or a fresh salad to make it a complete meal! This soup really can transform any night into a cozy dining experience.

Carrot-Ginger Soup Ingredients

For the Soup
• Carrots – Provide sweetness and vibrant color; use peeled and chopped for even cooking.
• Sweet Potato – Adds creaminess and extra sweetness; can be substituted with butternut squash.
• Parsnip (Optional) – Contributes earthiness; omit if preferred.
• Onion – Enhances flavor and sweetness when roasted; use yellow or white onion for best results.
• Olive Oil – Essential for roasting—helps to caramelize vegetables; can substitute with coconut oil for added flavor.
• Fresh Ginger – Provides a zingy kick and warmth; grate freshly for optimal flavor.
• Vegetable Broth – Acts as the soup base and enhances flavor; opt for low-sodium broth if desired.
• Salt & Pepper – Crucial for seasoning; adjust to taste.
• Optional Spices (Cumin or Turmeric) – Offers warmth and depth; add according to your preference.

For Serving
• Coconut Milk – Adds creaminess and richness; can be substituted with Greek yogurt for a non-vegan option.
• Chopped Parsley or Cilantro – Fresh herbs for garnish—adds brightness to your bowl.
• Toasted Pumpkin Seeds – Provides a crunchy texture and nutty flavor as a delightful topping.

Dive into these ingredients and prepare to create a bowl of Carrot-Ginger Soup that’s sure to warm you from the inside out!

Step‑by‑Step Instructions for Cozy Carrot-Ginger Soup with Roasted Vegetables

Step 1: Roast the Veggies
Preheat your oven to 425°F (220°C). In a large mixing bowl, toss the peeled and chopped carrots, sweet potatoes, parsnips, and onion with olive oil, salt, and pepper until well-coated. Spread the mixture out evenly on a baking sheet and roast for 25-30 minutes, or until the vegetables are tender and golden, stirring halfway through for even browning.

Step 2: Sauté Ginger
While the vegetables are roasting, heat a tablespoon of olive oil in a soup pot over medium heat. Add the freshly grated ginger and sauté for 1-2 minutes, stirring frequently until fragrant. The aroma will fill your kitchen, setting the stage for the delightful flavors to come in your Carrot-Ginger Soup.

Step 3: Simmer
Once the veggies are roasted, transfer them into the soup pot with the sautéed ginger. Pour in enough vegetable broth to cover the vegetables, typically around 4 cups, and bring the mixture to a gentle simmer. Allow it to cook for about 10 minutes, stirring occasionally, to let the flavors meld beautifully together. If desired, stir in optional spices like cumin or turmeric for an added depth.

Step 4: Blend
Remove the soup from heat and use an immersion blender to blend the mixture until it's smooth and creamy. If you’re using a stand blender, allow the soup to cool slightly before blending in batches. Adjust the soup’s thickness by adding more broth if needed, until you reach a velvety consistency that’s just right for your warm bowl of Carrot-Ginger Soup.

Step 5: Season & Serve
Taste the soup and adjust the seasoning with salt and pepper as needed. Ladle the steaming soup into bowls and drizzle with coconut milk for an added layer of creaminess. Garnish with freshly chopped parsley or cilantro and sprinkle toasted pumpkin seeds on top for a delightful crunch, making your cozy Carrot-Ginger Soup the perfect dish for sharing on a chilly evening.

What to Serve with Cozy Carrot-Ginger Soup with Roasted Vegetables

As the warm aroma of carrot-ginger soup wafts through your kitchen, you might be wondering what delightful sides can enhance this comforting dish.

  • Crusty Bread:
    Freshly baked, crusty bread is perfect for dipping and adds a delightful texture contrast to the smooth soup.

  • Green Salad:
    A crisp green salad with a zesty vinaigrette brightens the palate, balancing the rich flavors of the soup beautifully.

  • Savory Grilled Cheese:
    The gooey comfort of a grilled cheese sandwich pairs perfectly, making each bite a nostalgic experience.

  • Roasted Brussels Sprouts:
    Their earthy flavor and crispy edges create a delicious complement, enhancing the overall warmth of the meal.

  • Stuffed Sweet Potatoes:
    Filled with black beans and topped with avocado, stuffed sweet potatoes add heartiness and nutrients to your dinner.

  • Herb-Infused Rice:
    Fluffy rice with fresh herbs provides a light, fragrant base that harmonizes nicely with the soup's flavors.

  • Chilled Cucumber Soup:
    For a refreshing touch, a chilled cucumber soup offers a bright contrast that excites the taste buds and enhances the meal.

  • Sparkling Water with Lemon:
    A refreshing drink option, sparkling water with a squeeze of lemon cleanses the palate, complementing the zing of ginger.

  • Butter Pecan Pie:
    For dessert, a slice of buttery pecan pie serves as a sweet ending, perfectly balancing the comforting notes of the soup.

How to Store and Freeze Carrot-Ginger Soup

Fridge: Store your Carrot-Ginger Soup in an airtight container for up to 2 days. This way, you can enjoy the deepening flavors of the soup as they meld together.

Freezer: For longer storage, freeze the soup in airtight containers or freezer bags for up to 3 months. Leave some space for expansion as it freezes, and label with the date for easy tracking.

Reheating: When you're ready to enjoy your soup, thaw overnight in the fridge and reheat on the stovetop over low heat, stirring occasionally. If the soup thickens, add a splash of broth until it reaches your desired consistency.

Carrot-Ginger Soup Variations & Substitutions

Feel free to explore these delightful twists that will elevate your Carrot-Ginger Soup, adding personal flair and flavor!

  • Sweet Potato Swap: Substitute sweet potatoes with butternut squash for a different, but equally sweet flavor profile. This lovely swap maintains that creamy texture while offering a unique sweetness.

  • Add a Twist: Toss in an apple along with the other veggies while roasting. The gradual caramelization brings an extra layer of sweetness, perfect for those chilly fall days, making every bite even more delightful!

  • Spice it Up: Introduce some heat by adding chopped jalapeño or a sprinkle of cayenne pepper. Just a pinch can turn up the zing, creating a warm, comforting bowl that dances on your palate.

  • Protein Boost: For a heartier meal, top your soup with chickpeas or white beans after blending. This not only adds protein but gives a lovely contrast in texture—making each spoonful even more satisfying.

  • Coconut Cream Alternate: If you're looking for a dairy option, replace coconut milk with Greek yogurt for a tangy twist. The creaminess holds beautifully, while creating a delightful richness, a perfect balance to the ginger's warmth.

  • Herb Infusion: Add fresh spinach or kale during the simmering phase. It enhances both nutritional value and color, making your Carrot-Ginger Soup visually striking and extra nourishing!

  • Nutty Flavor: Toasted pumpkin seeds are fantastic, but consider pecans or walnuts for a different crunch. Chop them finely and sprinkle on top—offering an earthy and nutty flavor that complements the sweetness of the soup beautifully.

  • Zesty Citrus: A squeeze of lemon or orange juice before serving can brighten up the flavors. It provides a refreshing contrast that rounds out the heartiness of the dish, making your cozy creation even more delightful.

For more comforting soup recipes, check out our Lemon Chicken Soup for a zesty flavor feast or try the Zuppa Toscana Soup for a hearty option! Enjoy experimenting with your soup!

Expert Tips for Carrot-Ginger Soup

  • Roast for Flavor: Roasting vegetables until they have crispy edges enhances the sweetness and depth of flavor in your Carrot-Ginger Soup.

  • Scrape the Pan: Always scrape the bottom of the roasting pan into the soup; those caramelized bits are full of wonderful flavor that will elevate your dish.

  • Cool Before Blending: If using a stand blender, let the soup cool slightly before blending to avoid hot splatters. An immersion blender keeps things easy and safe!

  • Taste & Adjust: Season your soup after blending; flavors can develop and deepen as it sits, so tasting is key before serving.

  • Spice It Up: Don’t hesitate to experiment with spices! A pinch of cayenne or a dash of cumin can add an exciting kick to your comforting Carrot-Ginger Soup.

Make Ahead Options

Making this Carrot-Ginger Soup ahead of time is a wonderful way to save yourself some precious moments during busy weeknights! You can roast the vegetables and store them in the fridge for up to 3 days. Just allow them to cool completely before placing them in an airtight container to maintain their flavor and freshness. Alternatively, you can prepare the soup entirely and refrigerate it for up to 2 days, allowing the flavors to meld beautifully. When you're ready to enjoy your soup, simply reheat it on the stovetop over medium heat, stirring occasionally, and adjust the consistency with additional broth if needed for that velvety finish!

Carrot-Ginger Soup Recipe FAQs

How do I choose the best carrots for this soup?
Absolutely! Look for vibrant orange carrots that are firm without any soft spots or visible blemishes. Ideally, choose medium-sized carrots as they tend to have a sweeter flavor. If you notice dark spots or wrinkling, those are signs of age—grab those fresh ones instead!

What’s the best way to store leftover Carrot-Ginger Soup?
Very! Store your Carrot-Ginger Soup in an airtight container in the fridge for up to 2 days. The flavors often get even better as they meld. Just be sure to let it cool to room temperature before sealing it. If you want to keep it longer, freezing is your best option!

Can I freeze Carrot-Ginger Soup? If so, how?
Absolutely, freezing is a great option! Pour the cooled soup into airtight containers or freezer bags, leaving some space at the top for expansion. Seal tightly, label with the date, and freeze for up to 3 months. When you’re ready to enjoy, thaw it in the refrigerator overnight and reheat on the stove for a cozy treat!

What if my soup is too thick after blending?
Not a problem at all! If you find your Carrot-Ginger Soup is too thick, simply add a bit of vegetable broth or water to loosen it up. Start with a small amount and stir, continuing to add liquid until you reach your desired consistency. This way, you can enjoy a beautifully silky soup!

Is this soup safe for those with allergies?
Definitely! This Carrot-Ginger Soup is inherently gluten-free and vegetarian. However, always check ingredient labels, especially for vegetable broth or any store-bought items. If anyone in your household has allergies, feel free to substitute ingredients as needed—like using Greek yogurt instead of coconut milk or skipping the peanuts if desired.

Can I use other vegetables in this soup?
Very! You can absolutely customize your soup. Consider adding parsnips for earthiness or even some sweet apple for a hint of sweetness. Don’t hesitate to get creative with seasonal vegetables—like squash or zucchini—just keep in mind the roasting time may vary!

Carrot-Ginger Soup

Comforting Carrot-Ginger Soup for Cozy Nights In

This Carrot-Ginger Soup is a warming, healthy dish perfect for cozy nights in.
Print Recipe Pin Recipe
Prep Time 15 minutes mins
Cook Time 40 minutes mins
Total Time 55 minutes mins
Servings: 4 bowls
Course: Soups
Cuisine: American
Calories: 220
Ingredients Equipment Method Nutrition Notes

Ingredients
  

For the Soup
  • 4 cups chopped Carrots peeled and chopped
  • 2 cups Sweet Potato peeled and chopped
  • 1 cup Parsnip optional, contributes earthiness
  • 1 medium Onion yellow or white for best results
  • 2 tbsp Olive Oil or coconut oil for added flavor
  • 2 tbsp Fresh Ginger grated for optimal flavor
  • 4 cups Vegetable Broth low-sodium preferred
  • to taste Salt adjust seasoning as needed
  • to taste Pepper adjust seasoning as needed
  • to taste Optional Spices (Cumin or Turmeric) add according to preference
For Serving
  • 1 cup Coconut Milk or Greek yogurt for a non-vegan option
  • 1/4 cup Chopped Parsley or Cilantro for garnish
  • 1/4 cup Toasted Pumpkin Seeds for topping

Equipment

  • Mixing Bowl
  • Baking Sheet
  • Soup Pot
  • Immersion blender

Method
 

Step-by-Step Instructions
  1. Preheat your oven to 425°F (220°C). Toss carrots, sweet potatoes, parsnips, and onion with olive oil, salt, and pepper. Spread on a baking sheet and roast for 25-30 minutes.
  2. Heat a tablespoon of olive oil in a soup pot over medium heat. Add grated ginger and sauté for 1-2 minutes until fragrant.
  3. Transfer roasted veggies to the pot, pour in enough vegetable broth to cover, and simmer for about 10 minutes.
  4. Blend the mixture until smooth using an immersion blender. Adjust thickness by adding more broth if needed.
  5. Taste and adjust seasoning. Serve hot, drizzled with coconut milk, garnished with parsley or cilantro and pumpkin seeds.

Nutrition

Serving: 1bowlCalories: 220kcalCarbohydrates: 40gProtein: 4gFat: 8gSaturated Fat: 3gPolyunsaturated Fat: 2gMonounsaturated Fat: 3gSodium: 400mgPotassium: 600mgFiber: 6gSugar: 10gVitamin A: 18000IUVitamin C: 25mgCalcium: 70mgIron: 1.5mg

Notes

Roasting enhances flavor; always scrape the pan for caramelized bits. Taste and adjust seasoning before serving.

Tried this recipe?

Let us know how it was!

Curried Mussels with Butternut Squash & Leeks: A Cozy One-Pot Meal

August 28, 2025 by Grace Snow Leave a Comment

As I was rummaging through my pantry last week, I stumbled upon a bag of plump, fresh mussels just waiting for the spotlight. That’s when the idea for Curried Mussels with Butternut Squash & Leeks struck me like a bolt of inspiration! This one-pot recipe is a game-changer, effortlessly blending the creamy richness of coconut milk with the sweetness of roasted butternut squash and the delicate flavor of leeks. It’s not just about ease; this dish is perfect for those evenings when only a warm, cozy meal will do, ready in just 30 minutes! Whether you’re whipping it up for a quick family dinner or hosting friends, the vibrant colors and fragrant spices are sure to impress. Want to turn heads at your next gathering? Let's dive into this delightful recipe that'll leave your kitchen smelling divine!

Why are Curried Mussels a must-try?

Exciting flavors: The blend of coconut milk and curry powder creates a warming broth that's both aromatic and comforting.

Simple preparation: This one-pot meal is perfect for busy weekdays or elegant gatherings, taking just 30 minutes from pot to plate.

Dairy-free delight: Using coconut milk ensures everyone can enjoy this dish, making it a family-friendly option.

Versatile options: Mix and match ingredients like substituting butternut squash with sweet potatoes or adding smoked paprika for an extra depth of flavor.

Crowd pleaser: The beautiful presentation with fresh cilantro and lime wedges will surely wow your guests, making it ideal for entertaining.

Whether served with a side of crusty bread or paired with a crisp white wine, the Curried Mussels with Butternut Squash & Leeks is an unforgettable dish!

Curried Mussels with Butternut Squash & Leeks Ingredients

For the Broth
• Extra-Virgin Olive Oil – Adds richness and enhances flavor; substitute with any neutral oil if desired.
• Curry Powder – Infuses the dish with aromatic spices; use Madras for a milder flavor or Thai red curry for heat.
• Fresh Grated Ginger (or Ground Ginger) – Enhances the dish with warmth and zest; fresh is preferred for a robust flavor.
• Lime Zest and Juice of 2 Limes – Brightens the dish and balances richness; fresh lime juice is crucial for flavor.
• Heavy Cream (or Full-Fat Coconut Milk) – Creates a creamy texture; coconut milk makes the dish dairy-free.
• Salt & Black Pepper – Essential for seasoning to taste.

For the Veggies
• Butternut Squash (4 cups, cubed into ½-inch pieces) – Provides sweetness and texture; can substitute with sweet potatoes.
• Leeks (4, sliced and rinsed) – Adds depth of flavor; ensure leeks are well-cleaned to remove grit.

For the Main Event
• Fresh Mussels (4 lbs, scrubbed & debearded) – Adds the meal’s protein; discard any that don't close when tapped.
• Chopped Fresh Cilantro (or Parsley) – Offers a fresh finish; substitute parsley if you dislike cilantro.

For Serving
• Crusty Bread (sourdough or baguette, toasted) – Ideal for dipping into the broth.
• Lime Wedges – For serving, providing extra zing.

This Curried Mussels with Butternut Squash & Leeks recipe is not only delicious but also a feast for the senses, making it a must-try for your next dinner occasion!

Step‑by‑Step Instructions for Curried Mussels with Butternut Squash & Leeks

Step 1: Heat the Oil
In a large pot, heat 2 tablespoons of extra-virgin olive oil over medium heat until shimmering, which should take about 1-2 minutes. This will create a warm base for your Curried Mussels with Butternut Squash & Leeks. Make sure the oil coats the bottom of the pot evenly before moving on to the next step.

Step 2: Cook the Butternut Squash
Add 4 cups of cubed butternut squash to the pot and sauté for 5 minutes, stirring occasionally. You want the squash to begin softening and pick up a golden hue, which will infuse your dish with sweetness and color. Keep an eye on it to avoid any sticking.

Step 3: Sauté the Leeks
Next, toss in 4 sliced and rinsed leeks with a pinch of salt, gently stirring them in. Cook for an additional 5-6 minutes until the leeks are soft and fragrant. Their delicate flavor will meld beautifully with the butternut squash, creating a aromatic foundation for your Curried Mussels.

Step 4: Add Spices
Stir in 2 tablespoons of curry powder, along with 2 tablespoons of fresh grated ginger (or 1 teaspoon ground ginger) and 2 teaspoons of lime zest. Cook for about 1 minute until the spices are fragrant, making sure to stir continuously. This is where the magic happens, transforming the mixture into a fragrant base for your broth.

Step 5: Incorporate Lime and Cream
Pour in the juice of 2 limes and ½ cup of heavy cream or full-fat coconut milk, stirring to combine thoroughly. Season to taste with salt and pepper, and let this luscious mixture simmer for a minute or two. The creamy texture pairs perfectly with the aromatic spices, creating a lovely broth for the mussels.

Step 6: Add the Mussels
Carefully add 4 pounds of cleaned and debearded mussels to the pot, ensuring they are evenly distributed. Cover the pot with a lid and steam for 6-8 minutes, without lifting the lid. The mussels are done when they open wide, releasing their juices into the broth and adding depth to the dish.

Step 7: Final Touches
Once the mussels are cooked, remove the lid and stir in ½ cup of chopped fresh cilantro just before serving. This fresh herb will brighten the dish, enhancing its overall flavor profile. Check one last time for seasoning, adjusting if needed.

Step 8: Serve and Enjoy
Ladle the Curried Mussels with Butternut Squash & Leeks into wide, shallow bowls, ensuring a generous amount of broth accompanies each serving. Serve alongside slices of crusty bread and lime wedges for an extra zing. Your warm, fragrant meal is now ready to impress!

Make Ahead Options

These Curried Mussels with Butternut Squash & Leeks are perfect for meal prep enthusiasts! To save time, you can chop the butternut squash and leeks up to 24 hours in advance, storing them in airtight containers in the refrigerator. Additionally, scrub and debeard the mussels ahead of time, keeping them covered and chilled (though cook them fresh, as mussels lose quality when pre-cooked). When you're ready to serve, simply heat olive oil, sauté the veggies, and follow the remaining steps to cook. This way, you'll enjoy a cozy, restaurant-quality meal with minimal effort, making busy weeknights feel manageable and satisfying!

How to Store and Freeze Curried Mussels with Butternut Squash & Leeks

Fridge: Store leftovers in an airtight container for up to 3 days. Make sure to cool the dish before refrigerating to maintain freshness.

Freezer: Unfortunately, this dish doesn't freeze well due to the delicate texture of mussels. It's best enjoyed fresh!

Reheating: If you have any broth left, gently reheat it in a pot over low heat and add any remaining mussels just until warmed through. Enjoy your Curried Mussels with Butternut Squash & Leeks warm!

Freshness Check: Always give stored mussels a good look and smell before use. Discard any that don't appear fresh or have an off odor.

What to Serve with Curried Mussels with Butternut Squash & Leeks

Looking to create a heartwarming meal around these delightful curried mussels? Let's explore some perfect pairings that will elevate your dining experience.

  • Crispy Crusty Bread: The toasted edges make it perfect for soaking up the rich coconut curry broth. A must-have to complete the dish!

  • Cilantro Lime Rice: Fluffy rice with fresh cilantro and a squeeze of lime complements the flavors beautifully, adding a refreshing touch to every bite.

  • Garden Salad with Citrus Vinaigrette: A crisp salad featuring mixed greens and citrus dressing provides a bright, fresh contrast to the creamy broth.

  • Roasted Vegetables: Colorful roasted veggies, like carrots and bell peppers, bring sweetness and texture, creating a delightful contrast to the soft mussels.

  • Chilled White Wine: A glass of crisp Sauvignon Blanc or Chardonnay enhances the spices while keeping the meal light and refreshing.

  • Mango Chutney: A sweet-spicy chutney on the side adds a burst of flavor, balancing the savory curry notes with a touch of sweetness.

  • Lime Sorbet: For dessert, this light and zesty treat cleanses the palate and leaves a refreshing finish after the hearty mussels.

Pair these selections with your curried mussels, and you'll have a cozy, satisfying meal that warms the heart and delights the senses!

Expert Tips for Curried Mussels with Butternut Squash & Leeks

  • Fresh Mussel Check: Ensure mussels smell like the ocean and close when tapped. Discard any that don’t, as they could be unsafe to eat.

  • Soak Leeks: To eliminate grit, soak leeks in water and rinse thoroughly before slicing. This simple step improves the dish's texture.

  • Perfectly Cooked Mussels: Be cautious with cooking time; 6-8 minutes is ideal. Overcooking makes them rubbery, while undercooked mussels can be unappetizing.

  • Creamy Broth Tips: For a thicker broth, let it simmer uncovered for a few minutes before adding mussels. If too thick, thin it with a splash of broth or wine.

  • Substitution Versatility: Feel free to swap butternut squash with sweet potatoes for a different sweetness level. Experimenting keeps the Curried Mussels with Butternut Squash & Leeks exciting!

Curried Mussels with Butternut Squash & Leeks Variations

Feel free to put your spin on this delightful recipe to suit your taste preferences or dietary needs!

  • Sweet Potato: Substitute cubed butternut squash with sweet potatoes for a different sweetness and texture. Their creamy consistency will enhance the dish beautifully.

  • Smoked Paprika: Add a sprinkle of smoked paprika for a delightful smoky flavor that complements the curry and deepens the broth's richness.

  • Caramelized Fennel: Swap leeks for caramelized fennel for a wonderfully sweet and anise-like twist. This change beautifully contrasts the curry spices and adds a different depth to the dish.

  • Lime Lovers: Increase lime zest and juice for a brighter flavor punch. This extra zing can elevate the dish, making it refreshing, especially alongside rich ingredients like cream.

  • Chili Kick: Spice things up! Add fresh chopped chilies or a pinch of cayenne pepper to amp up the heat level and add an exciting warmth to each bite of mussels.

  • Coconut Creamy: Replace heavy cream with full-fat coconut milk for a richer, creamier texture that remains entirely dairy-free. It enhances the tropical notes of the curry!

  • Herb Variations: Swap cilantro for parsley or basil if you find cilantro's flavor too strong. Each herb brings its own aromatic flair, creating a uniquely delicious finish.

  • Vegetable Boost: For additional nutrition and crunch, toss in some spinach or kale towards the end of cooking. This adds a pop of color and a touch of healthy greens to your meal.

By incorporating these variations, you can create an ever-evolving dish that keeps the excitement alive every time you cook! And if you're looking for more inspiration, check out recipes for Smoky Sweet Corn or Pan Fried Shrimp. Enjoy exploring the limitless possibilities!

Curried Mussels with Butternut Squash & Leeks Recipe FAQs

What’s the best way to choose fresh mussels?
Absolutely! When selecting fresh mussels, make sure they have a subtle ocean smell—this indicates freshness. Any mussel that remains open when tapped should be discarded, as this typically means they are dead and not safe to eat.

How should I store leftover Curried Mussels with Butternut Squash & Leeks?
Leftovers can be stored in an airtight container in the fridge for up to 3 days. It’s important to allow the dish to cool before refrigerating to maintain its quality. However, I recommend enjoying this dish fresh, as it’s best when just made.

Can I freeze Curried Mussels with Butternut Squash & Leeks?
Unfortunately, this dish does not freeze well due to the delicate texture of the mussels and the broth. Freezing can make the mussels rubbery upon reheating, so for the best experience, aim to enjoy it fresh.

What if I find grit in my leeks?
Very! To avoid any grit, soak the sliced leeks in a bowl of cold water for about 10 minutes. Gently swish them around to help loosen any dirt, then rinse them well under running water. This simple step ensures a pleasant texture in your dish.

Can my pet have coconut milk if I use it in the recipe?
Check with your vet first! While coconut milk is generally considered safe for pets in moderation, it’s best to avoid giving them any of the Curried Mussels with Butternut Squash & Leeks due to the spices and salt. Always prioritize your pet’s health over sharing human food.

How can I adjust this recipe for dietary preferences?
The great thing about the Curried Mussels with Butternut Squash & Leeks is its versatility! For a vegan option, you can substitute mussels with hearty vegetables like cauliflower or chickpeas. You can also use a dairy-free yogurt instead of cream for a creaminess without the dairy.

Curried Mussels with Butternut Squash & Leeks

Curried Mussels with Butternut Squash & Leeks: A Cozy One-Pot Meal

A delightful one-pot recipe for Curried Mussels with Butternut Squash & Leeks, ready in 30 minutes and perfect for any gathering.
Print Recipe Pin Recipe
Prep Time 10 minutes mins
Cook Time 20 minutes mins
Total Time 30 minutes mins
Servings: 4 servings
Course: Dinner
Cuisine: Asian, Seafood
Calories: 450
Ingredients Equipment Method Nutrition Notes

Ingredients
  

For the Broth
  • 2 tablespoons Extra-Virgin Olive Oil Adds richness and enhances flavor; substitute with any neutral oil if desired.
  • 2 tablespoons Curry Powder Infuses the dish with aromatic spices; use Madras for a milder flavor or Thai red curry for heat.
  • 2 tablespoons Fresh Grated Ginger Enhances the dish with warmth and zest; fresh is preferred for a robust flavor.
  • 2 pieces Lime Zest and Juice of Limes Brightens the dish and balances richness; fresh lime juice is crucial for flavor.
  • 0.5 cups Heavy Cream Creates a creamy texture; coconut milk makes the dish dairy-free.
  • to taste Salt & Black Pepper Essential for seasoning to taste.
For the Veggies
  • 4 cups Butternut Squash, cubed Provides sweetness and texture; can substitute with sweet potatoes.
  • 4 Leeks, sliced and rinsed Adds depth of flavor; ensure leeks are well-cleaned to remove grit.
For the Main Event
  • 4 lbs Fresh Mussels, scrubbed & debearded Adds the meal’s protein; discard any that don't close when tapped.
  • 0.5 cups Chopped Fresh Cilantro Offers a fresh finish; substitute parsley if you dislike cilantro.
For Serving
  • to taste Crusty Bread, toasted Ideal for dipping into the broth.
  • to taste Lime Wedges For serving, providing extra zing.

Equipment

  • Large pot

Method
 

Step-by-Step Instructions
  1. In a large pot, heat 2 tablespoons of extra-virgin olive oil over medium heat until shimmering, which should take about 1-2 minutes.
  2. Add 4 cups of cubed butternut squash to the pot and sauté for 5 minutes, stirring occasionally.
  3. Toss in 4 sliced and rinsed leeks with a pinch of salt, cooking for an additional 5-6 minutes until the leeks are soft and fragrant.
  4. Stir in 2 tablespoons of curry powder, along with 2 tablespoons of fresh grated ginger and 2 teaspoons of lime zest.
  5. Pour in the juice of 2 limes and ½ cup of heavy cream, seasoning to taste with salt and pepper, and let this mixture simmer for a minute or two.
  6. Carefully add 4 pounds of cleaned mussels to the pot, cover with a lid, and steam for 6-8 minutes.
  7. Once the mussels are cooked, remove the lid and stir in ½ cup of chopped fresh cilantro before serving.
  8. Ladle the dish into wide bowls, serve alongside slices of crusty bread and lime wedges.

Nutrition

Serving: 1bowlCalories: 450kcalCarbohydrates: 35gProtein: 30gFat: 25gSaturated Fat: 10gPolyunsaturated Fat: 5gMonounsaturated Fat: 5gCholesterol: 60mgSodium: 800mgPotassium: 600mgFiber: 6gSugar: 3gVitamin A: 100IUVitamin C: 70mgCalcium: 15mgIron: 20mg

Notes

Ensure mussels smell like the ocean and close when tapped. This dish is best enjoyed fresh and does not freeze well.

Tried this recipe?

Let us know how it was!

Chick-fil-A’s Classic Coleslaw: Creamy, Crunchy Delight at Home

August 28, 2025 by Grace Snow Leave a Comment

As I stood in my kitchen, the crisp scent of freshly shredded cabbage filled the air, instantly transporting me to sunny picnics and backyard BBQs. This Chick-fil-A’s Classic Coleslaw recipe is my go-to for creating that nostalgic crunch and creamy goodness that pairs perfectly with everything from sandwiches to ribs. In just 10 minutes of prep, you can whip up this delightful dish with minimal fuss—perfect for anyone tired of the fast-food scene and longing for a homemade touch. Whether you enjoy it straight from the bowl or as a colorful side, it promises to become a staple in your culinary repertoire. Curious about how to make it your own with unique variations? Let’s dive into the details!

Why is this coleslaw a game-changer?

Quick and Easy: In just 10 minutes, you can prepare a homemade coleslaw that’s fresher and tastier than any fast-food alternative.

Versatile Variations: Feeling adventurous? You can jazz it up with options like spicy jalapeños for a kick or enjoy a sweet crunch with apple walnuts—the choice is yours!

Crowd-Pleasing Flavor: This coleslaw is creamy and tangy, featuring a delightful crunch that pairs beautifully with your favorite dishes, from BBQ pulled pork to crispy fried chicken.

Wholesome Ingredients: With real mayo and fresh veggies, this recipe keeps the goodness local and eliminates unwanted preservatives, ensuring that every bite is pure joy!

Make-Ahead Friendly: Whip it up ahead of time and let the flavors meld—perfect for entertaining, just like the refreshing Mini Tropical Pavlovas or Quinoa Tabbouleh you may serve alongside.

Customizable for Everyone: Whether you're vegan, keto, or just a fan of unique flavors, this coleslaw recipe can adapt easily to fit your dietary preferences!

Chick-fil-A’s Classic Coleslaw Ingredients

For the Dressing

  • ¼ cup sugar – Adds sweetness; substitute with 3 tablespoons honey or maple syrup for a unique twist.
  • 4 tsp apple cider vinegar – Provides tanginess; white vinegar can be used if needed.
  • ¼ tsp dry mustard – Enhances flavor depth; replace with ½ tsp Dijon mustard for a bolder taste.
  • ¼ tsp salt – Elevates flavors; adjust according to your taste preference.
  • 1 cup real mayonnaise – Creates a creamy base; avoid Miracle Whip for an authentic taste or opt for vegan mayo for a dairy-free option.

For the Slaw

  • 2 (10 oz) bags finely shredded cabbage – Delivers essential texture and crunch; fine-shredding mimics the Chick-fil-A experience perfectly.
  • ¼ cup finely chopped carrots – Adds color and sweetness; consider grating for finer pieces!

For Variations

  • Spices for a Kick: Add ¼ tsp cayenne for heat and 2 tbsp minced pickled jalapeños for extra flavor.
  • Fruity Surprise: Include ½ cup grated Granny Smith apple and ⅓ cup toasted walnuts for a delightful crunch.
  • Dairy-Free Option: Use vegan mayo with 1 tsp lemon juice to brighten it up.
  • Colorful Twist: Swap for tri-color cabbage and use ¼ cup diced red bell pepper instead of carrots.
  • Keto-Friendly Swap: Replace sugar with 2 tbsp powdered erythritol with an extra tsp of vinegar for sweetness.

This Chick-fil-A’s Classic Coleslaw is the perfect foundation to make your culinary adventures delicious and special!

Step‑by‑Step Instructions for Chick-fil-A’s Classic Coleslaw

Step 1: Make the Dressing
In a large mixing bowl, whisk together ¼ cup of sugar, 4 teaspoons of apple cider vinegar, ¼ teaspoon of dry mustard, and ¼ teaspoon of salt. Mix until the sugar fully dissolves, which takes about 1-2 minutes. If the sugar is stubborn, heat the vinegar in the microwave for 10 seconds to help dissolve it.

Step 2: Mayo Magic
Add 1 cup of real mayonnaise to the bowl with the dressing. Vigorously whisk the mayonnaise until the mixture is smooth and creamy, resembling a pourable pancake batter. If the dressing appears too thick, blend in a splash of milk or more mayonnaise until you reach the desired consistency.

Step 3: Combine with Slaw
Carefully fold in 2 bags (10 oz each) of finely shredded cabbage and ¼ cup of finely chopped carrots using a rubber spatula. Gently mix until the vegetables are coated with the dressing without overmixing; this helps maintain that delightful crunch characteristic of Chick-fil-A’s Classic Coleslaw.

Step 4: Chill
Cover the bowl tightly with plastic wrap, pressing the wrap directly onto the surface of the slaw to prevent air exposure. Chill the coleslaw in the refrigerator for at least 2 hours, but overnight is preferable. This chilling time allows the flavors to meld beautifully, enhancing the final taste.

Step 5: Serve
Before serving, give the coleslaw a gentle stir to redistribute the dressing. Check for any excess liquid; if there is too much, drain it off. Serve the Chick-fil-A’s Classic Coleslaw piled high on sandwiches, as a colorful side dish, or simply enjoy it straight from the bowl!

What to Serve with Chick-fil-A’s Classic Coleslaw

Elevate your meal with delightful pairings that enhance the creamy, tangy goodness of this coleslaw.

  • Crispy Fried Chicken: The crunchy and juicy textures contrast beautifully; it’s a classic combo that never fails to please!

  • BBQ Pulled Pork Sliders: The sweetness in the slaw cuts through the richness of the pork, adding a refreshing crunch to every bite.

  • Grilled Sausages: Smoky flavors from the sausages complement the coleslaw, making this a perfect backyard BBQ pairing that guests will love.

  • Fish Tacos: The zesty fish paired with creamy slaw creates an irresistible balance of flavors, ideal for a casual yet delicious meal.

  • Sweet Potato Fries: The natural sweetness of crispy fries balances the tanginess of the coleslaw, making for a wonderfully satisfying side.

  • Mini Mason Jar Servings: Serve coleslaw in mini mason jars for festive gatherings. They look adorable and are easy to grab for guests!

With these tasty ideas, your Chick-fil-A’s Classic Coleslaw will shine as the perfect complement to any meal!

Make Ahead Options

These Chick-fil-A’s Classic Coleslaw are perfect for meal prep enthusiasts! You can make the dressing up to 24 hours in advance, allowing the flavors to deepen beautifully. Combine the sugar, vinegar, dry mustard, salt, and mayonnaise, then cover and refrigerate. Additionally, you can chop the cabbage and carrots ahead of time, storing them in an airtight container for up to 3 days. When you're ready to serve, simply fold the prepared vegetables into the dressing and chill for at least 2 hours or overnight for optimal flavor. This way, you’ll have a delicious, homemade coleslaw ready to go with minimal last-minute effort, making your busy weeknights a little sweeter!

Storage Tips for Chick-fil-A’s Classic Coleslaw

Fridge: Store your coleslaw covered in the refrigerator for up to 3-4 days. As it sits, it may become juicier, so drain excess liquid if necessary before serving.

Freezer: If storing for longer, freeze the coleslaw in an airtight container for up to 1 month. Note that freezing may alter the texture, making it less crunchy upon thawing.

Make Ahead: For best results, prepare the coleslaw at least 2 hours before serving to allow the flavors to meld beautifully. Chilling it overnight is even better!

Reheating: There’s no need to reheat coleslaw, as it is best enjoyed cold. Simply stir before serving to revive its fresh taste and texture.

Chick-fil-A’s Classic Coleslaw Variations

Get ready to unleash your creativity in the kitchen—this coleslaw is ready for delightful twists that will tantalize your taste buds!

  • Spicy Southern Kick: Add ¼ tsp cayenne and 2 tbsp minced pickled jalapeños for a fiery explosion of flavor. This twist is perfect for those who love a bit of heat in their slaw!

  • Apple Walnut Fancy-Pants: Fold in ½ cup grated Granny Smith apple and ⅓ cup toasted walnuts for a sweet crunch. This variation brings a delightful sweetness and texture, making every bite a surprise.

  • Dairy-Free Dream: Opt for vegan mayo with 1 tsp lemon juice for a zesty twist. It’s a perfect way to enjoy this classic without dairy, keeping every guest happy at your table.

  • Rainbow Confetti: Mix it up with tri-color cabbage and substitute carrots for ¼ cup diced red bell pepper to brighten things up. The colors alone will draw your loved ones in, making it a feast for the eyes as well!

  • Keto Crunch: Replace sugar with 2 tbsp powdered erythritol and add an extra tsp of vinegar. This version is a guilt-free indulgence for those following a keto lifestyle while still delivering on taste.

If you're feeling inspired to explore more side dishes, why not check out the tasty Chicken Dumplings Cozy for a comforting pairing? With these fun variations, you're bound to find a favorite that fits your mood!

Helpful Tricks for Chick-fil-A’s Classic Coleslaw

  • Shredding Technique: Use a sharp knife or food processor to finely shred the cabbage. This ensures the right texture and crunch, just like the original version.

  • Flavor Boosting: Let your coleslaw chill for at least 2 hours, or even better, overnight. This resting time allows the flavors to meld beautifully, so don’t rush it!

  • Consistency Check: If your dressing is too thick, add milk a little at a time until you reach a smooth, pourable consistency. This trick keeps your coleslaw creamy and delectable.

  • Avoid Sogginess: Be gentle when folding in the cabbage and carrots to avoid overmixing, which can lead to a watery, soggy texture. Preserve that signature crunch!

  • Creative Variations: Don’t hesitate to customize your coleslaw! Spice it up with jalapeños or add fruit for a unique twist—explore different variations to make this Chick-fil-A’s Classic Coleslaw truly your own.

Chick-fil-A’s Classic Coleslaw Recipe FAQs

How do I select fresh cabbage for coleslaw?
When picking cabbage, opt for heads that feel heavy for their size, with firm and tightly packed leaves. Avoid any that have dark spots, wilting, or brown edges. Fresh cabbage should be vibrant in color, which guarantees a crisp texture in your coleslaw.

How can I store leftover coleslaw?
To keep your coleslaw fresh, store it in an airtight container in the refrigerator for up to 3-4 days. It's normal for it to become juicier as it sits, so if you notice excess liquid before serving, just drain it off to maintain the right consistency.

Can I freeze coleslaw, and how do I do it?
Absolutely! To freeze Chick-fil-A’s Classic Coleslaw, transfer it to a freezer-safe container and make sure it’s airtight. It can be frozen for up to 1 month. However, keep in mind that the texture may change after thawing, and it may not be as crunchy. When you're ready to eat it, let it thaw in the refrigerator and give it a good stir before serving.

What should I do if my coleslaw dressing is too thick?
If you find your dressing is too thick, no worries! Gradually add a little milk while whisking until you achieve your desired consistency. This will help keep it creamy and spreadable without compromising flavor.

Can my pet eat coleslaw?
While coleslaw contains ingredients like cabbage and carrots that are safe for pets, it's best to avoid giving them anything containing mayonnaise or sugar. Always consult with your veterinarian about the best dietary practices for your pets.

Are there any common issues when making coleslaw?
One common issue is creating a watery coleslaw. To prevent this, avoid overmixing after combining the slaw with the dressing. Gently fold the ingredients together to maintain that delightful crunch. Additionally, ensure that you chill the coleslaw for at least 2 hours, or preferably overnight, so that the flavors meld and the texture remains intact. This patience is key for the best flavor!

Chick-fil-A’s Classic Coleslaw

Chick-fil-A’s Classic Coleslaw: Creamy, Crunchy Delight at Home

This Chick-fil-A’s Classic Coleslaw recipe offers a creamy, crunchy delight that brings nostalgic flavor to your meals.
Print Recipe Pin Recipe
Prep Time 10 minutes mins
Chilling Time 2 hours hrs
Total Time 2 hours hrs 10 minutes mins
Servings: 6 servings
Course: Salads
Cuisine: American
Calories: 180
Ingredients Equipment Method Nutrition Notes

Ingredients
  

Dressing
  • 0.25 cup sugar Substitute with 3 tablespoons honey or maple syrup for a unique twist
  • 4 tsp apple cider vinegar White vinegar can be used if needed
  • 0.25 tsp dry mustard Replace with ½ tsp Dijon mustard for a bolder taste
  • 0.25 tsp salt Adjust according to your taste preference
  • 1 cup real mayonnaise Avoid Miracle Whip for an authentic taste or opt for vegan mayo for a dairy-free option
Slaw
  • 2 bags (10 oz) finely shredded cabbage Fine-shredding mimics the Chick-fil-A experience perfectly
  • 0.25 cup finely chopped carrots Consider grating for finer pieces
Variations
  • 0.25 tsp cayenne For heat
  • 2 tbsp minced pickled jalapeños For extra flavor
  • 0.5 cup Granny Smith apple Grated for a fruity surprise
  • 0.33 cup toasted walnuts For delightful crunch
  • 1 tsp lemon juice To brighten up if using vegan mayo
  • 0.25 cup diced red bell pepper Use instead of carrots for a colorful twist
  • 2 tbsp powdered erythritol Keto-friendly swap for sugar

Equipment

  • Mixing Bowl
  • Whisk
  • rubber spatula
  • plastic wrap

Method
 

Make the Dressing
  1. In a large mixing bowl, whisk together ¼ cup of sugar, 4 teaspoons of apple cider vinegar, ¼ teaspoon of dry mustard, and ¼ teaspoon of salt. Mix until the sugar fully dissolves, which takes about 1-2 minutes. If the sugar is stubborn, heat the vinegar in the microwave for 10 seconds to help dissolve it.
Mayo Magic
  1. Add 1 cup of real mayonnaise to the bowl with the dressing. Vigorously whisk the mayonnaise until the mixture is smooth and creamy, resembling a pourable pancake batter. If the dressing appears too thick, blend in a splash of milk or more mayonnaise until you reach the desired consistency.
Combine with Slaw
  1. Carefully fold in 2 bags (10 oz each) of finely shredded cabbage and ¼ cup of finely chopped carrots using a rubber spatula. Gently mix until the vegetables are coated with the dressing without overmixing; this helps maintain that delightful crunch characteristic of Chick-fil-A’s Classic Coleslaw.
Chill
  1. Cover the bowl tightly with plastic wrap, pressing the wrap directly onto the surface of the slaw to prevent air exposure. Chill the coleslaw in the refrigerator for at least 2 hours, but overnight is preferable. This chilling time allows the flavors to meld beautifully, enhancing the final taste.
Serve
  1. Before serving, give the coleslaw a gentle stir to redistribute the dressing. Check for any excess liquid; if there is too much, drain it off. Serve the Chick-fil-A’s Classic Coleslaw piled high on sandwiches, as a colorful side dish, or simply enjoy it straight from the bowl!

Nutrition

Serving: 1cupCalories: 180kcalCarbohydrates: 14gProtein: 1gFat: 13gSaturated Fat: 2gPolyunsaturated Fat: 1gMonounsaturated Fat: 10gCholesterol: 5mgSodium: 150mgPotassium: 200mgFiber: 1gSugar: 6gVitamin A: 500IUVitamin C: 10mgCalcium: 20mgIron: 0.5mg

Notes

Let your coleslaw chill for at least 2 hours, or even better, overnight to allow the flavors to meld beautifully. Use a sharp knife or food processor to finely shred the cabbage for the right texture and crunch.

Tried this recipe?

Let us know how it was!

Hearty Potato-Leek Soup with Mini Pierogi for Cozy Nights

August 28, 2025 by Grace Snow Leave a Comment

As I stood stirring a bubbling pot of potato-leek soup, the savory aroma filled the kitchen, conjuring memories of cozy family dinners. This Creamy Potato-Leek Soup with Mini Pierogi is the epitome of comfort food, perfect for those chilly evenings when you crave something warm and satisfying. It brings together a silky, rich blend of tender potatoes and leeks, elevated by the crunch of crispy mini pierogi that add a delightful texture. Not only is this dish quick enough to whip up on a busy weeknight, but it’s also an impressive crowd-pleaser that will leave your guests asking for seconds. Are you ready to dive into this heartwarming bowl of goodness? Let’s get cooking!

Why is this soup a must-try?

Comforting warmth: This Creamy Potato-Leek Soup feels like a hug in a bowl, perfect for any chilly night.
Flavor explosion: The heavenly combination of leeks and garlic creates an aromatic base, while crispy mini pierogi add depth and texture.
Quick preparation: With easy steps, you’ll have this delicious meal ready in no time, making it an excellent choice for busy weeknights.
Customizable goodness: Switch up your pierogi fillings for unique flavors or toss in some spinach for added nutrition, just like in my Asparagus Soup Healthy.
Crowd-pleaser: Whether for a cozy family meal or entertaining guests, this soup will impress everyone at the table.

Potato-Leek Soup with Mini Pierogi Ingredients

For the Soup

  • Butter – Adds richness and flavor; use olive oil for a dairy-free option.
  • Leeks – Provide a mild, sweet onion flavor; thoroughly clean to remove grit between layers.
  • Garlic – Adds depth and aroma; optionally use garlic powder if fresh is unavailable.
  • Yukon Gold Potatoes – Create creaminess while holding their shape; substitute with Russet potatoes for a fluffier texture.
  • Low-Sodium Broth – Forms the soup base without overwhelming saltiness; use vegetable broth for a vegetarian option.
  • Heavy Cream – Introduces a luscious finish; substitute with whole milk or coconut cream for a lighter option.
  • Salt & Pepper – Essential for seasoning to taste; adjust based on broth salinity.

For the Mini Pierogi

  • Mini Frozen Pierogi – Adds texture and heartiness; can replace with frozen gnocchi or tater tots in a pinch.
  • Bacon – Provides savory depth and crunch; use crispy shallots as a vegetarian alternative.

This hearty Potato-Leek Soup with Mini Pierogi is not only comforting but full of depth and flavor!

Step‑by‑Step Instructions for Potato-Leek Soup with Mini Pierogi

Step 1: Sauté leeks
In a large pot, melt 2 tablespoons of butter over medium heat. Add 2 chopped leeks along with a pinch of salt, stirring often for about 5 minutes until they become softened and translucent. Introduce 2 minced garlic cloves, cooking for an additional minute until fragrant, which will lay a flavorful foundation for your creamy Potato-Leek Soup.

Step 2: Simmer potatoes
Next, add 4 cups of chopped Yukon Gold potatoes and 6 cups of low-sodium broth to the pot. Increase the heat to high to bring it to a rolling boil. Once boiling, reduce the heat to a gentle simmer, covering the pot and letting it cook for 15-20 minutes, or until the potatoes are fork-tender and easily break apart, enriching the soup's texture.

Step 3: Blend soup
Once the potatoes are tender, carefully remove the pot from the heat and allow it to cool slightly for about 5 minutes to prevent splattering. Using an immersion blender or a regular blender, puree the soup until it reaches a smooth consistency. Stir in 1 cup of heavy cream, adjusting the seasoning with salt and pepper to taste, ensuring the flavors of your Potato-Leek Soup harmonize beautifully.

Step 4: Cook pierogi
While the soup is blending, prepare the mini pierogi. In a separate skillet, heat 2 tablespoons of bacon fat (or butter) over medium heat. Add the mini frozen pierogi and cook for about 4-5 minutes, turning them occasionally until they are golden brown and crispy on the outside, perfectly complementing the velvety soup.

Step 5: Serve
To present your Potato-Leek Soup with Mini Pierogi, ladle the creamy soup into deep bowls. Top generously with the crisp fried pierogi, a sprinkle of crumbled bacon bits, and freshly chopped chives. For an extra indulgent touch, add a dollop of sour cream on top, transforming this dish into a comforting meal that warms the heart and soul.

Make Ahead Options

Preparing this Creamy Potato-Leek Soup with Mini Pierogi ahead of time is a game-changer for busy weeknights! You can make the soup base and refrigerate it for up to 3 days. Simply sauté the leeks and garlic, simmer the potatoes in broth, and blend the mixture until smooth—store it in an airtight container. For optimal flavor, hold off on adding the cream; incorporate it just before serving to maintain the soup's luscious texture. The mini pierogi can be cooked fresh, keeping their crispy texture intact. When you're ready to enjoy, reheat the soup gently on the stove, then top it with the freshly pan-fried pierogi for a delightful, comforting meal that tastes just as delicious as when it was first made.

Potato-Leek Soup with Mini Pierogi Variations

Feel free to explore these delightful twists and substitutions that can make your creamy potato-leek soup even more exciting!

  • Dairy-Free: Substitute heavy cream with coconut cream for a rich, vegan-friendly option that adds a hint of tropical flavor.
  • Herb-Infused: Stir in fresh thyme or dill for a fragrant touch; these herbs beautifully enhance the earthy flavors of the leeks.
  • Extra Crunch: Top with crispy fried onions in place of bacon bits for a satisfying crunch without the meat.
  • Savory Additions: Incorporate sautéed mushrooms or fresh spinach into the soup for an extra nutritional boost and unexpected depth.
  • Spicy Kick: Add a pinch of red pepper flakes to the soup for a warming, spicy twist that brings some heat to your cozy meal.
  • Cheesy Delight: Sprinkle grated Parmesan or smoked Gouda into the soup just before serving for an indulgent, creamy finish that melts beautifully.
  • Thicker Texture: Mash some of the potatoes instead of blending them to create a chunkier soup that offers a hearty bite.
  • Pierogi Variations: Experiment with fillings such as sweet potato, cheese, or sauerkraut for a unique take on the traditional mini pierogi.

For more inspiration, check out my recipe for Zuppa Toscana Soup or try adding some delicious components from Santa Soup Savory. Embrace your creativity!

How to Store and Freeze Potato-Leek Soup with Mini Pierogi

  • Room Temperature: Let the soup cool completely before storing it at room temperature for up to 2 hours to avoid bacterial growth.
  • Fridge: Store leftover Potato-Leek Soup in an airtight container in the fridge for up to 3 days; reheat on the stove over low heat for the best texture.
  • Freezer: Freeze the soup for up to 3 months in a freezer-safe container. Omit the cream before freezing; stir it in during reheating for a fresh taste.
  • Reheating: To reheat, warm the soup gently on the stove or in the microwave, adding cream if desired, and stir well to combine.

Expert Tips for Potato-Leek Soup

  • Sautéing Leeks: Start with low heat to prevent burning and develop sweetness; a pinch of salt helps soften them faster.
  • Blending Safety: Allow the soup to cool slightly before blending to avoid splattering hot soup everywhere.
  • Texture Matters: For a creamier soup, strain it through a fine-mesh sieve after blending to remove any lumps—silky smoothness makes all the difference!
  • Cooking Pierogi: If using frozen mini pierogi, do not overcrowd the pan; this ensures they crisp up nicely rather than steam.
  • Storage Tip: This Potato-Leek Soup freezes well, but skip adding cream until you reheat it to maintain the best flavor and texture.

What to Serve with Creamy Potato-Leek Soup with Crispy Mini Pierogi

Looking to round out your meal with delightful sides? Here are some perfect pairings that will elevate your dining experience.

  • Garlic Breadsticks:
    Warm, buttery, and aromatic, these breadsticks add a satisfying crunch to balance your creamy soup. Perfect for dipping!

  • Crisp Side Salad:
    A refreshing mix of greens with a tangy vinaigrette complements the richness of the soup, adding a vibrant pop of flavor.

  • Roasted Vegetables:
    Caramelized, tender veggies like carrots and Brussels sprouts bring earthy sweetness to the table and harmonize beautifully with the soup's flavors.

  • Herbed Rice Pilaf:
    Fluffy rice seasoned with fresh herbs provides a delightful texture contrast, soaking up the delicious broth with each bite.

  • Bacon-Wrapped Asparagus:
    This savory, crunchy side pairs exceptionally well with the smoky flavors of the pierogi, adding an elegant touch to your meal.

  • Chilled White Wine:
    A chilled glass of crisp sauvignon blanc or chardonnay complements the creamy soup, enhancing the overall culinary experience with its refreshing notes.

  • Dessert Option:
    End the meal with a light fruit sorbet, cleansing the palate after the rich soup and leaving a delightful, refreshing finish.

Each of these pairings will not only round out your dining experience but also create memorable moments around your table. Enjoy!

Potato-Leek Soup with Mini Pierogi Recipe FAQs

How do I choose the best leeks for my soup?
Absolutely! Look for leeks that are firm to the touch and have a vibrant green color, as these indicate freshness. Avoid leeks with wilting or dark spots, as they may be past their prime. When cleaning, slice them lengthwise to thoroughly rinse away any grit that hides between the layers.

How should I store leftover Potato-Leek Soup?
Very simply! Allow the soup to cool completely, then transfer it to an airtight container and refrigerate for up to 3 days. Reheat on the stove over low heat, stirring often to maintain its creamy texture. Avoid high heat settings to prevent it from separating.

Can I freeze Potato-Leek Soup?
Absolutely! To freeze, pour the cooled soup into freezer-safe containers, leaving some space at the top for expansion. For the best flavor, omit the heavy cream when freezing; you can add that in during reheating. It will keep well for up to 3 months! Just thaw overnight in the fridge before reheating.

What should I do if my soup is too thick?
If your Potato-Leek Soup turns out thicker than desired, no worries! You can easily adjust the consistency by stirring in more broth or water, a little at a time, until you reach your preferred smoothness. Just remember to taste and adjust the seasoning afterward, as you might dilute the flavors.

Is this soup safe for my pet?
It's best to avoid sharing any soup with your pet, especially if it contains ingredients like onions, which are toxic to dogs and cats. Always check the ingredients and consult your veterinarian before introducing new foods to your pet's diet.

What if I have a dairy allergy — can I still enjoy this soup?
Absolutely! You can easily make the Potato-Leek Soup dairy-free. Just substitute heavy cream with coconut cream or a non-dairy milk like almond or cashew milk. Use olive oil instead of butter, and check that your broth is also free from dairy products to keep it safe for your dietary needs.

Potato-Leek Soup with Mini Pierogi

Hearty Potato-Leek Soup with Mini Pierogi for Cozy Nights

This Potato-Leek Soup with Mini Pierogi is perfect for chilly nights, offering a warm and comforting experience.
Print Recipe Pin Recipe
Prep Time 10 minutes mins
Cook Time 30 minutes mins
Cooling Time 5 minutes mins
Total Time 45 minutes mins
Servings: 4 bowls
Course: Soups
Cuisine: American
Calories: 450
Ingredients Equipment Method Nutrition Notes

Ingredients
  

For the Soup
  • 2 tablespoons Butter Use olive oil for a dairy-free option.
  • 2 pieces Leeks Thoroughly clean to remove grit.
  • 2 cloves Garlic Optionally use garlic powder if fresh is unavailable.
  • 4 cups Yukon Gold Potatoes Substitute with Russet potatoes for fluffier texture.
  • 6 cups Low-Sodium Broth Use vegetable broth for a vegetarian option.
  • 1 cup Heavy Cream Substitute with whole milk or coconut cream for a lighter option.
  • to taste Salt
  • to taste Pepper
For the Mini Pierogi
  • 1 package Mini Frozen Pierogi Can replace with frozen gnocchi or tater tots.
  • 2 tablespoons Bacon Use crispy shallots as vegetarian alternative.

Equipment

  • Large pot
  • Skillet
  • Immersion blender

Method
 

Step-by-Step Instructions
  1. Melt 2 tablespoons of butter in a large pot over medium heat. Add 2 chopped leeks and a pinch of salt, stirring often for 5 minutes until softened. Add 2 minced garlic cloves, cooking for an additional minute.
  2. Add 4 cups of chopped Yukon Gold potatoes and 6 cups of low-sodium broth. Bring to a boil, then reduce heat to simmer and cover for 15-20 minutes.
  3. Once potatoes are tender, carefully remove from heat and cool for 5 minutes. Blend the soup until smooth, then stir in 1 cup of heavy cream and season with salt and pepper.
  4. In a skillet, heat 2 tablespoons of bacon fat over medium heat. Cook mini frozen pierogi for 4-5 minutes until golden and crispy.
  5. Ladle soup into bowls, top with fried pierogi, crumbled bacon, and chopped chives. Optionally add a dollop of sour cream.

Nutrition

Serving: 1bowlCalories: 450kcalCarbohydrates: 50gProtein: 12gFat: 22gSaturated Fat: 12gPolyunsaturated Fat: 1gMonounsaturated Fat: 8gCholesterol: 70mgSodium: 800mgPotassium: 800mgFiber: 6gSugar: 4gVitamin A: 600IUVitamin C: 15mgCalcium: 100mgIron: 2mg

Notes

This soup is customizable. Add different fillings to your pierogi or some spinach for added nutrition.

Tried this recipe?

Let us know how it was!
  • « Previous Page
  • 1
  • …
  • 48
  • 49
  • 50
  • 51
  • 52
  • …
  • 67
  • Next Page »

Welcome!

Hi, I’m Grace, a Sydney-based home cook with a passion for bold flavors and trending ingredients. Whether you’re a busy beginner or a seasoned foodie, you’ll find dishes here that are fresh, fun, and full of flavor.

More about me

Popular Recipes

  • Autumn Harvest Grain Salad with Cranberries
    Autumn Harvest Grain Salad with Cranberries for Cozy Nights
  • Ground Beef Hot Honey Bowl
    Ground Beef Hot Honey Bowl for a Flavor-Packed Dinner Enjoyment
  • Autumn Harvest Grain Salad with Cranberries
    Autumn Harvest Grain Salad with Cranberries for Cozy Nights
  • Ground Beef Hot Honey Bowl
    Ground Beef Hot Honey Bowl for a Flavor-Packed Dinner Enjoyment

Footer

↑ back to top

About

  • Privacy Policy
  • Disclaimer
  • Terms & Conditions

Newsletter

  • Sign Up! for emails and updates

Contact

  • About me
  • Contact me

Copyright © 2025 TastyTrendIngredients