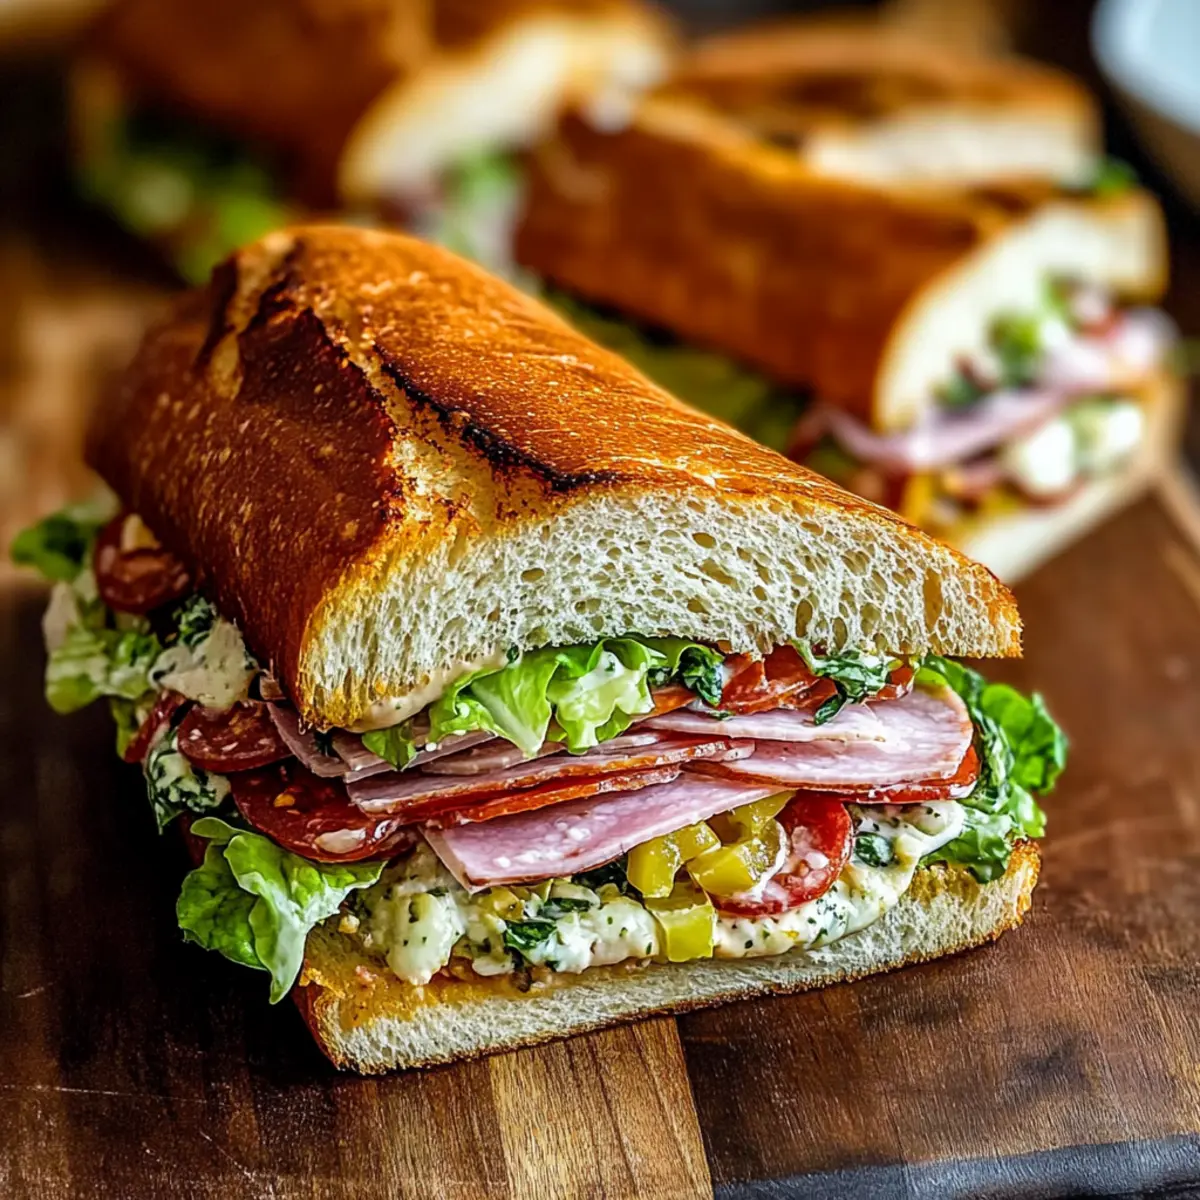
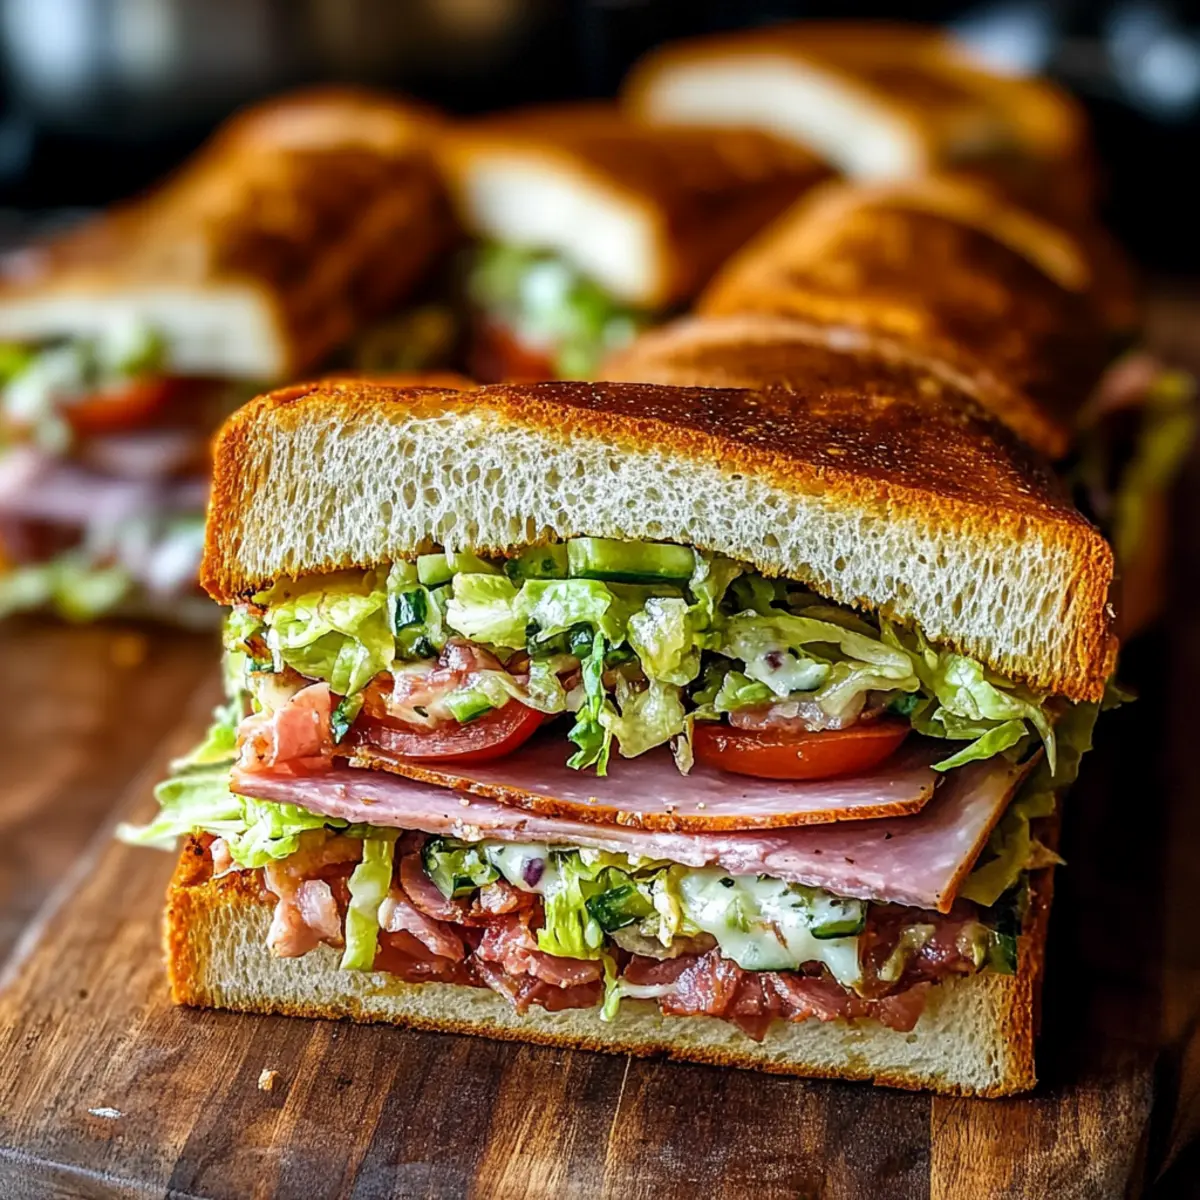
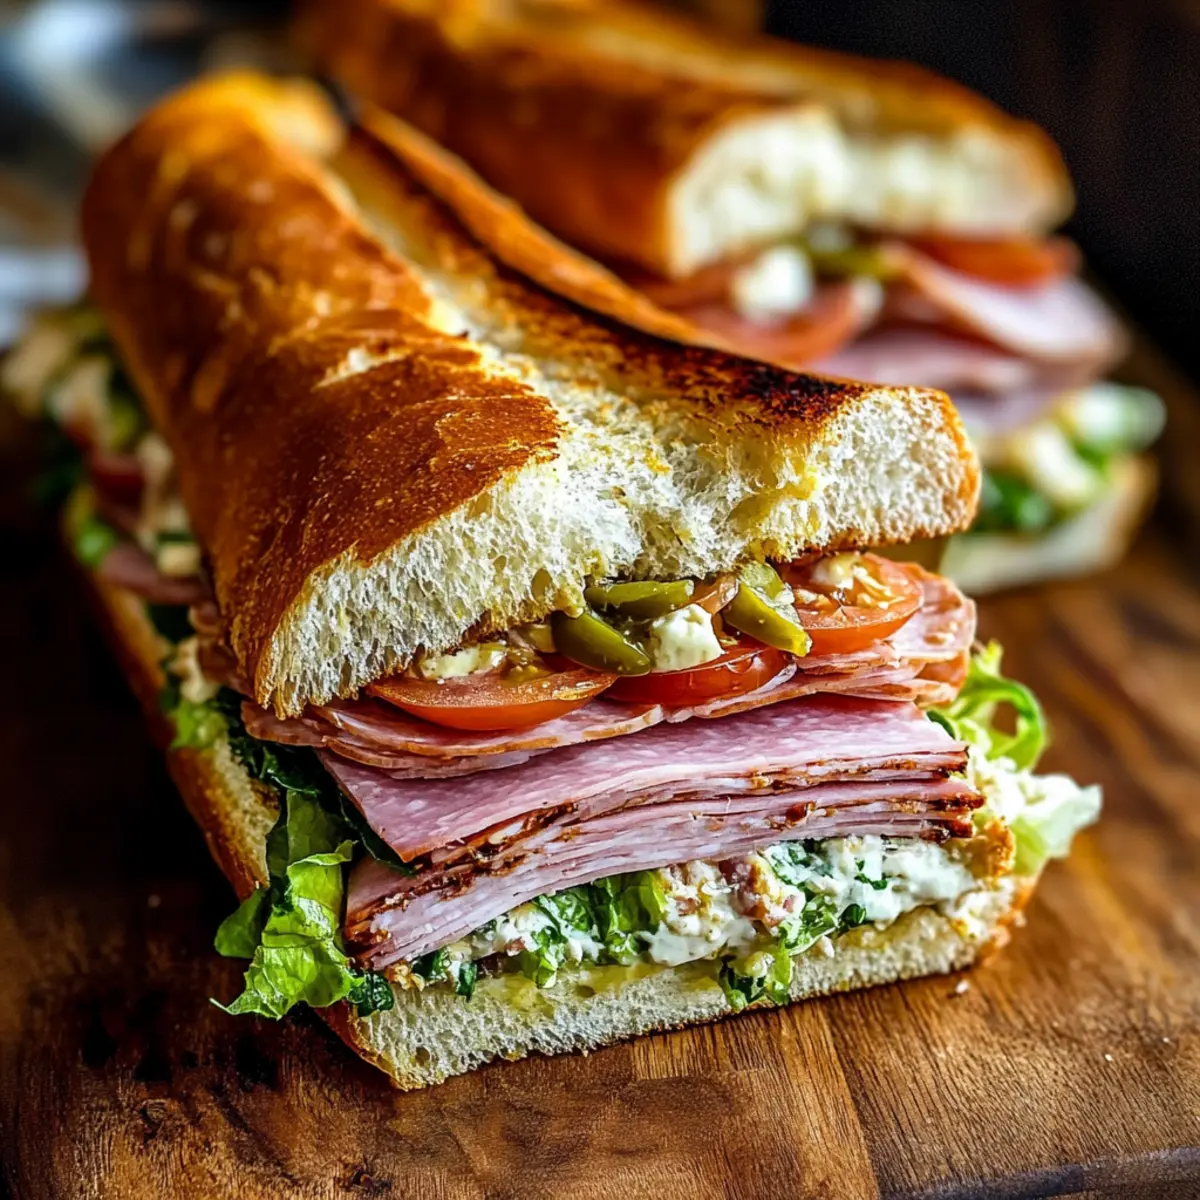
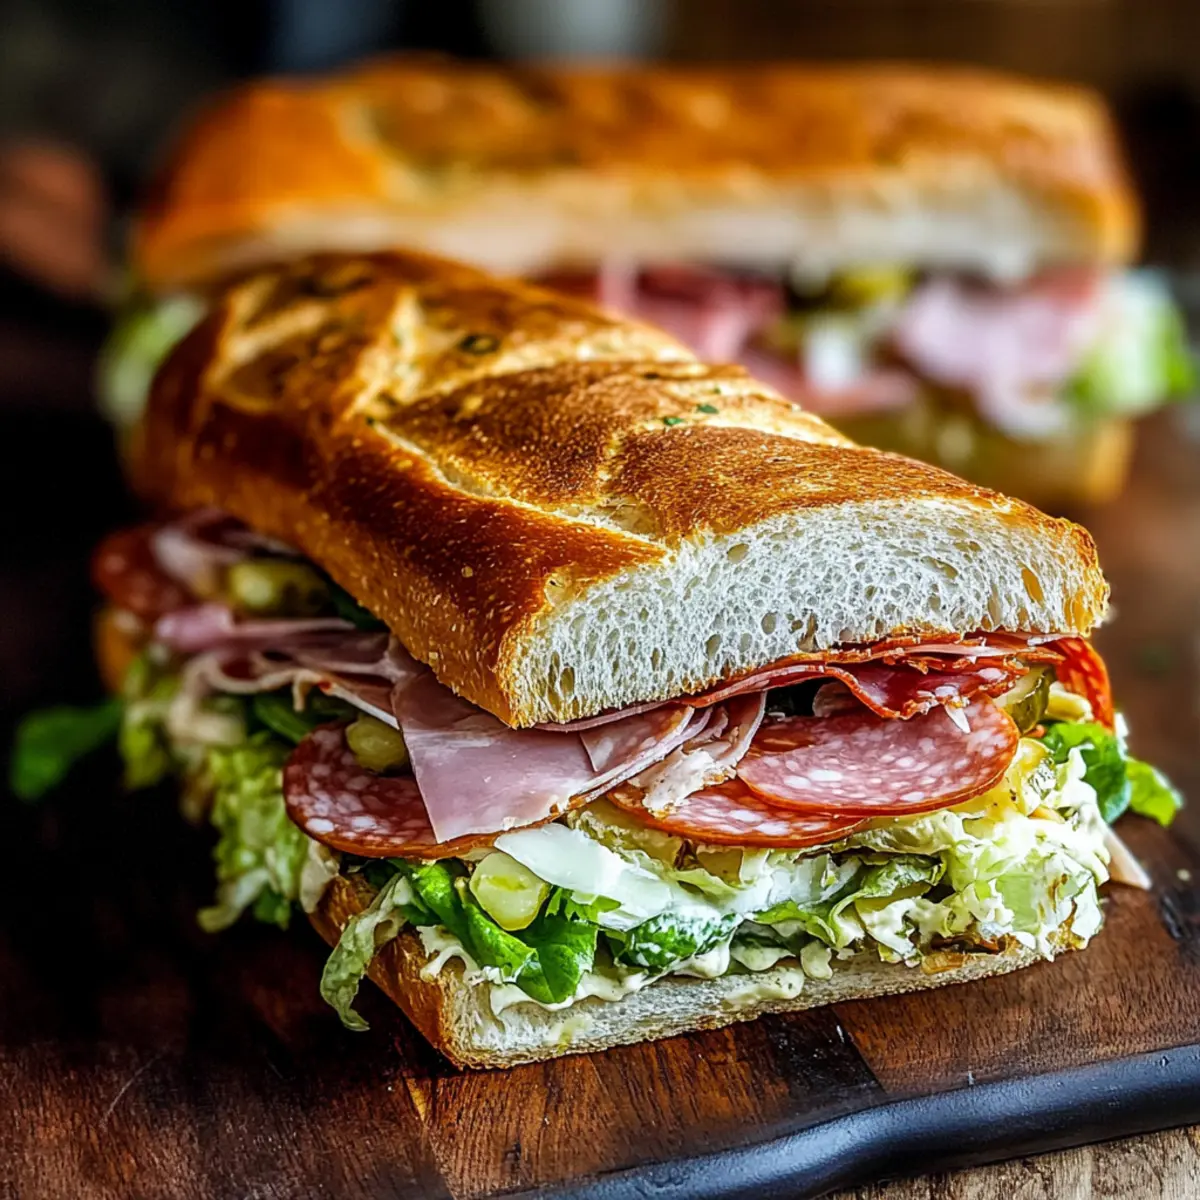
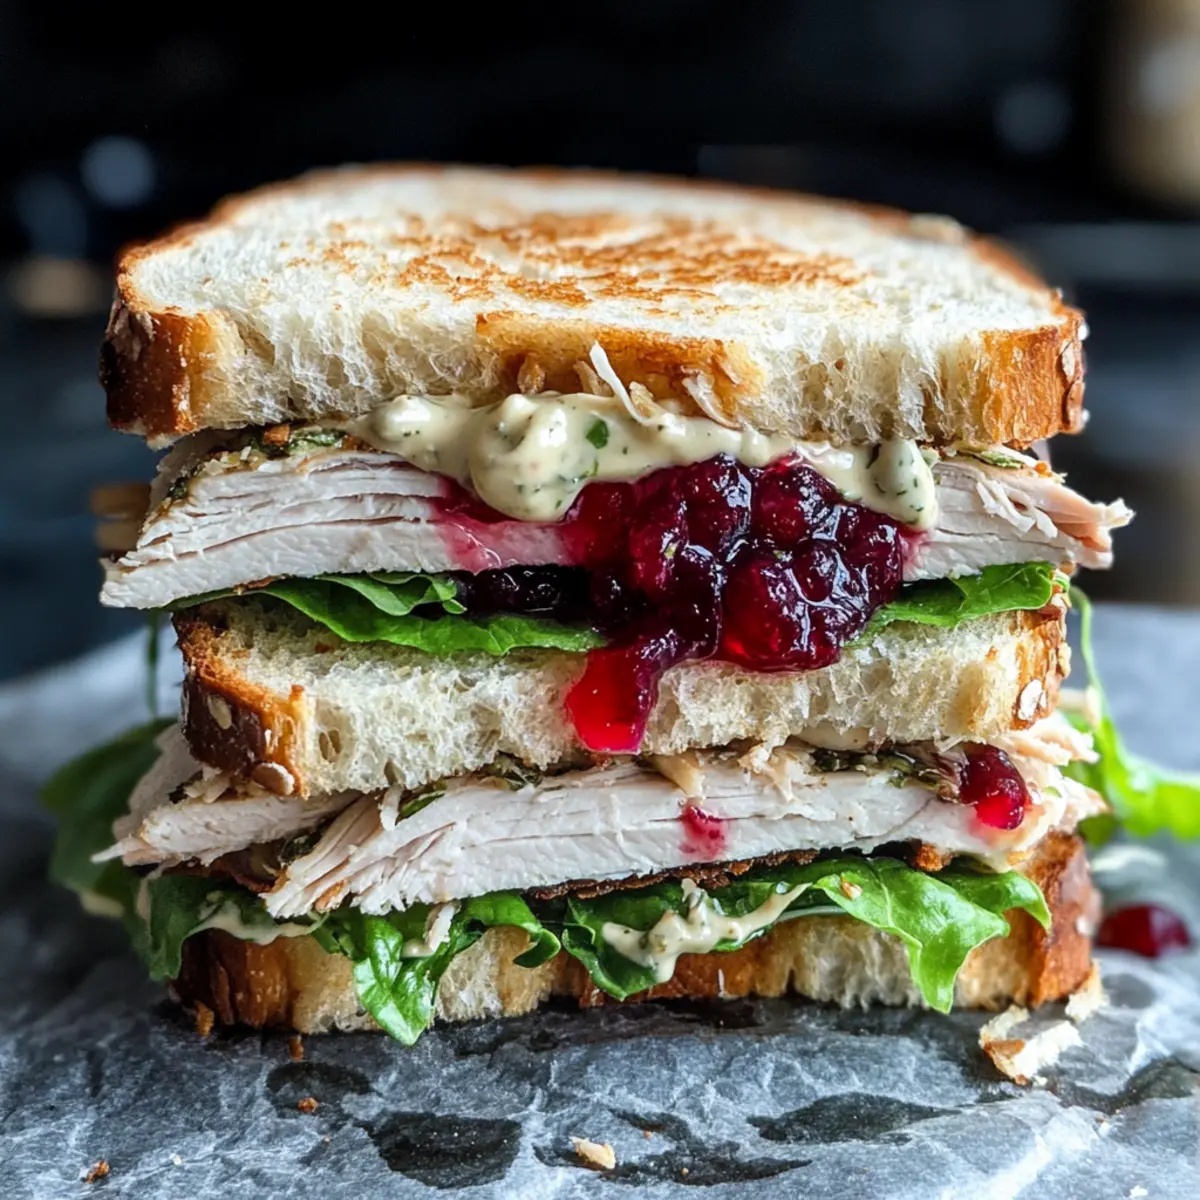
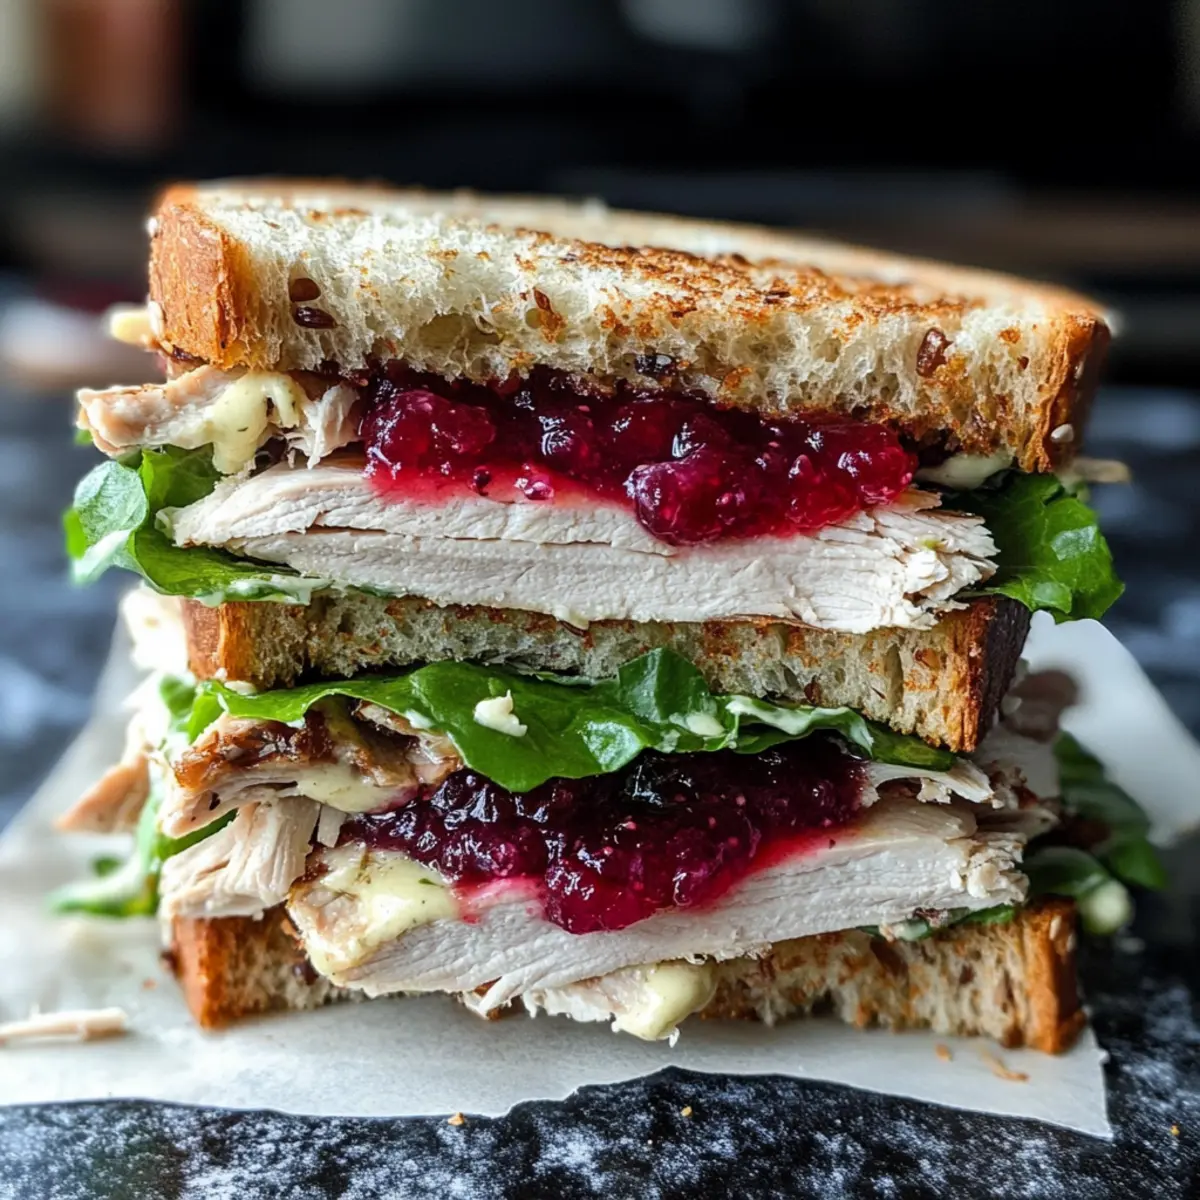
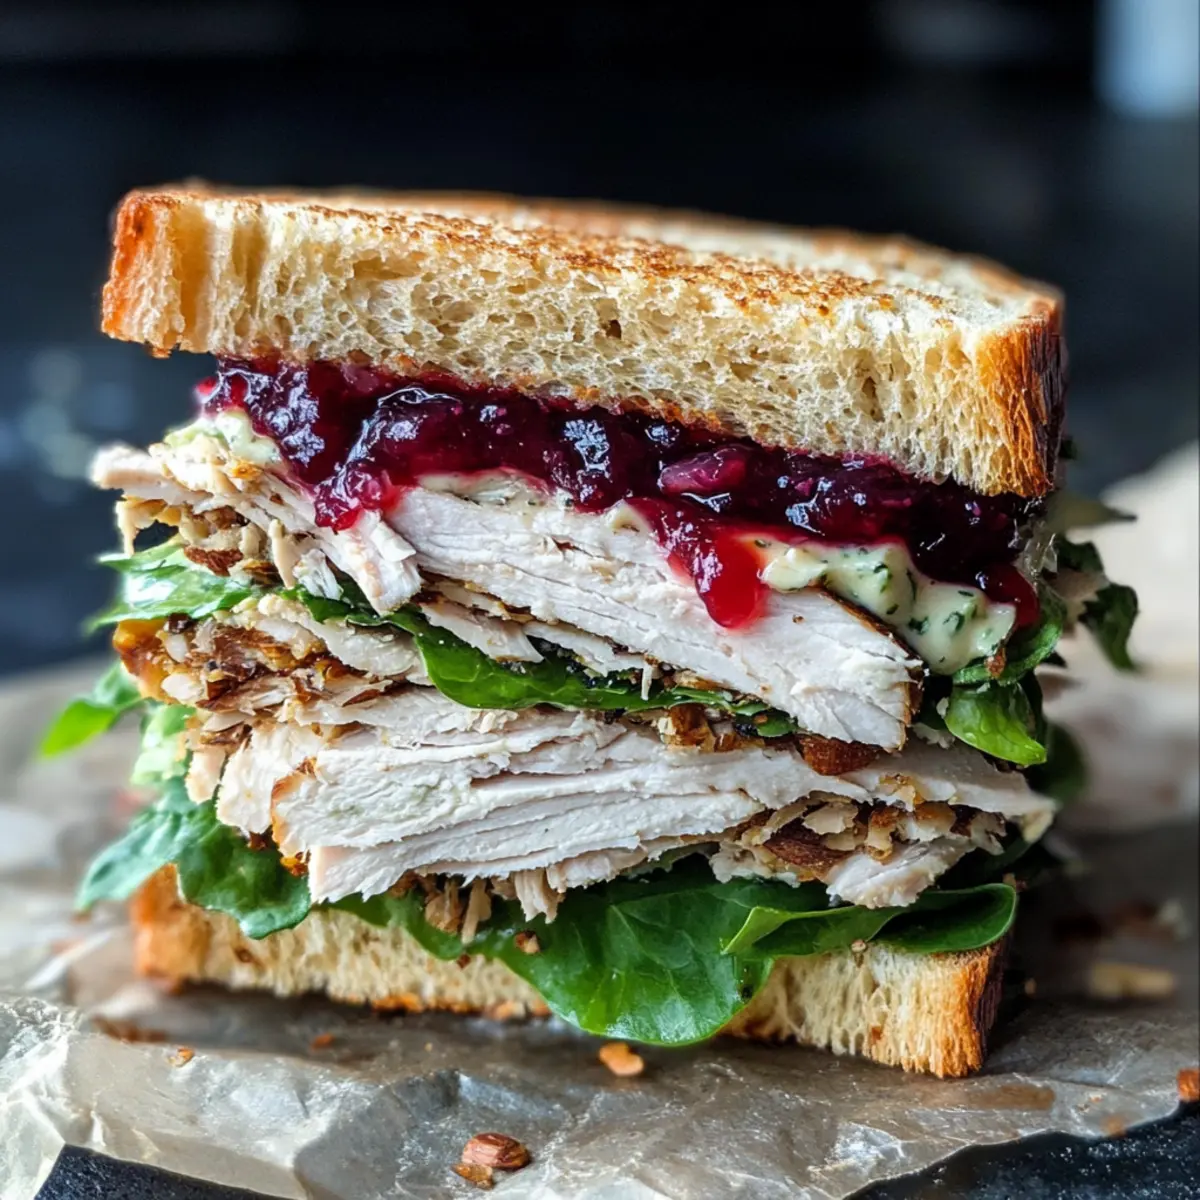
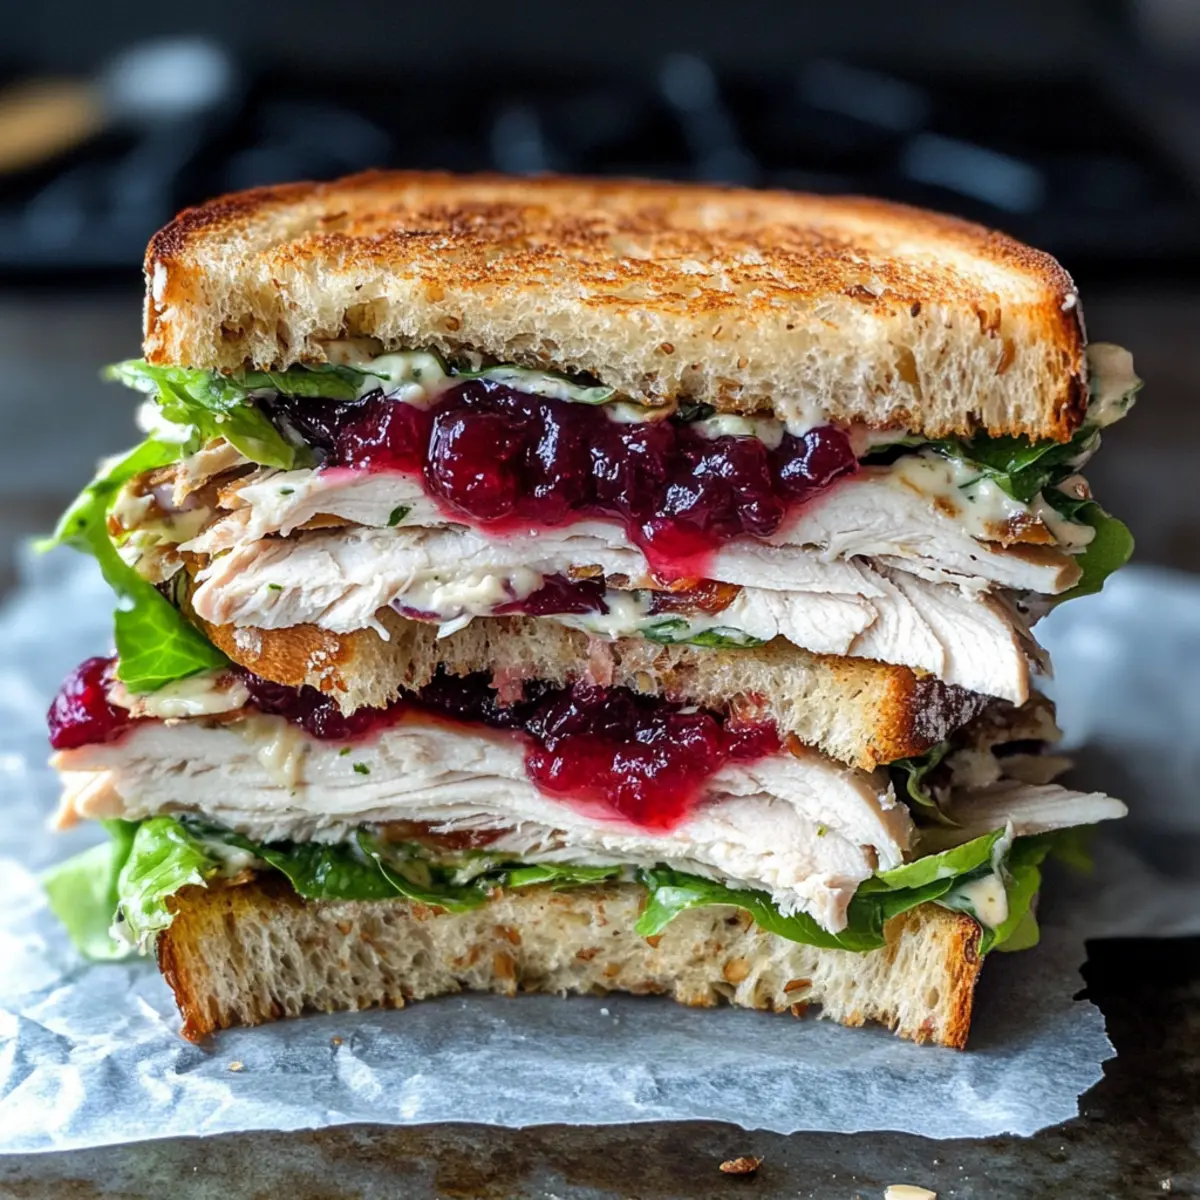
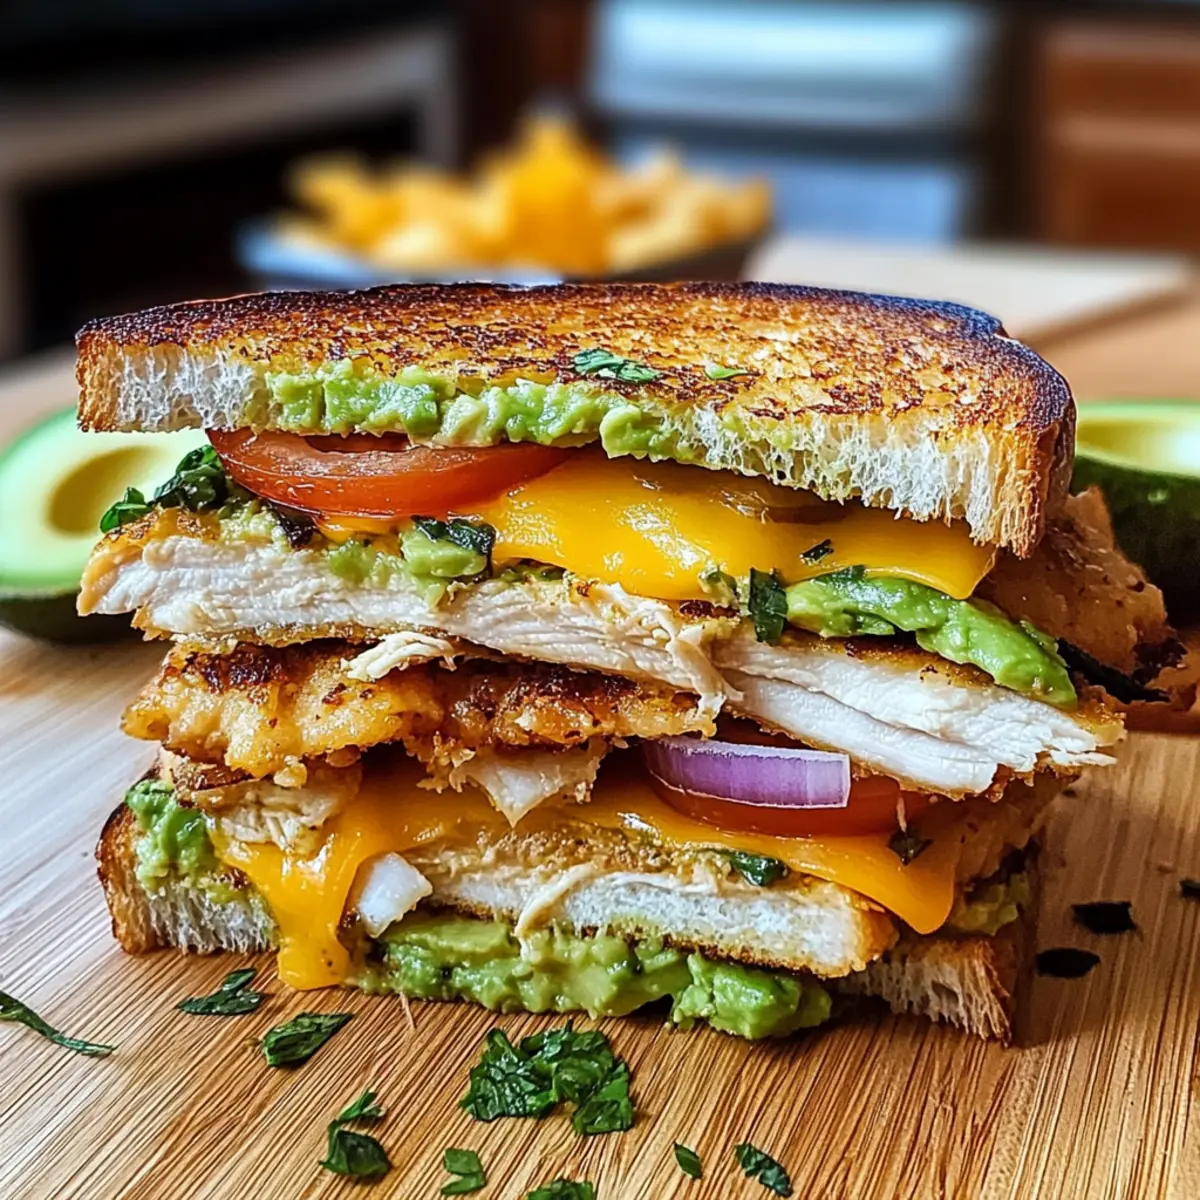
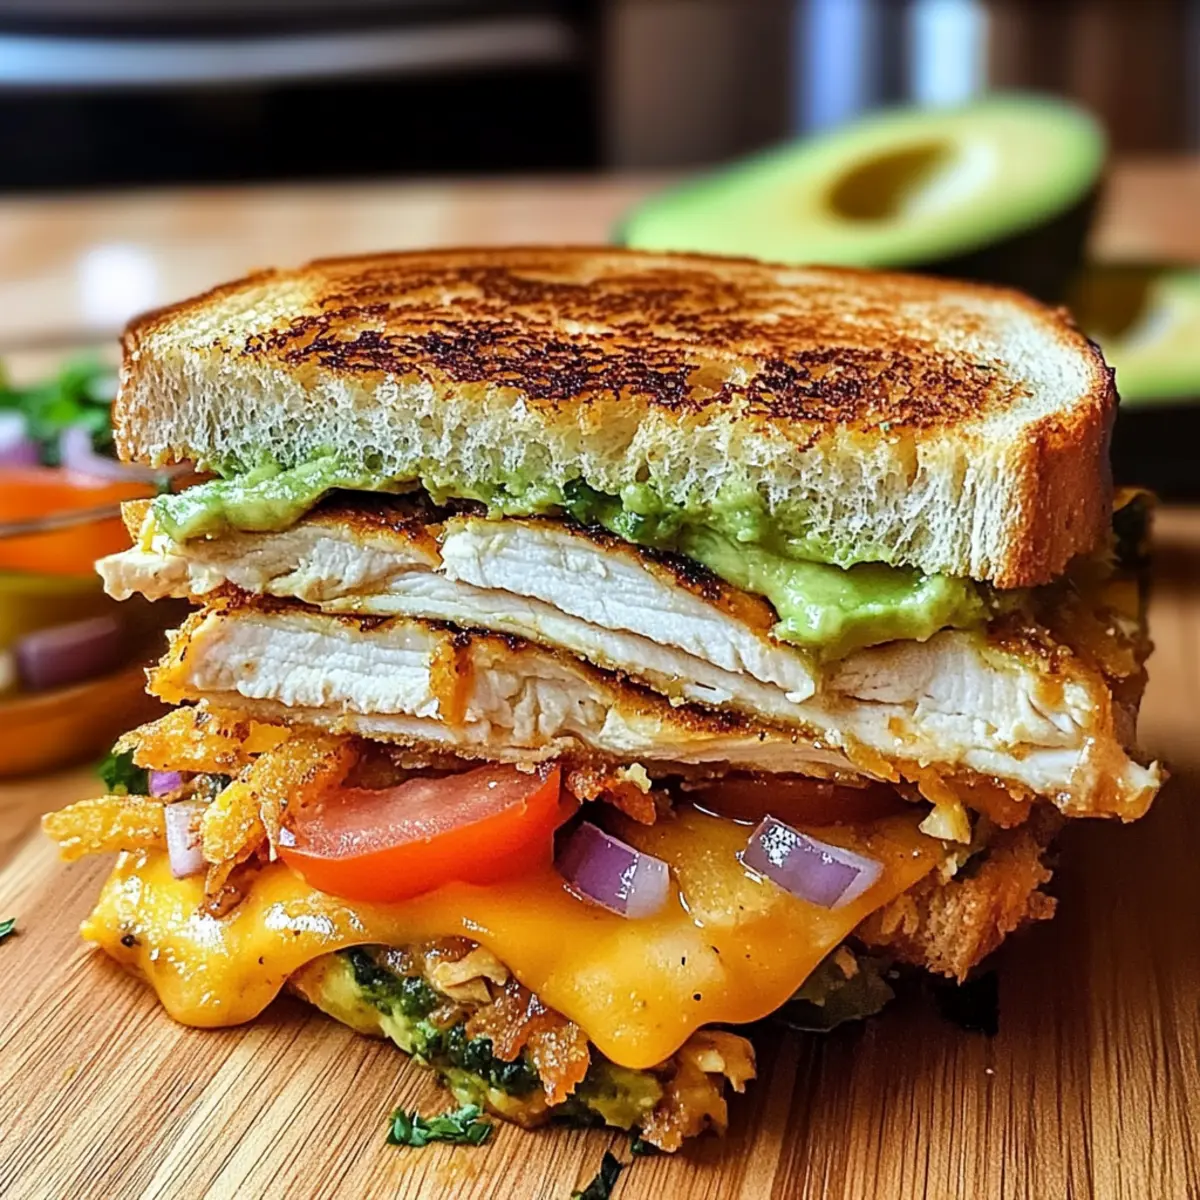
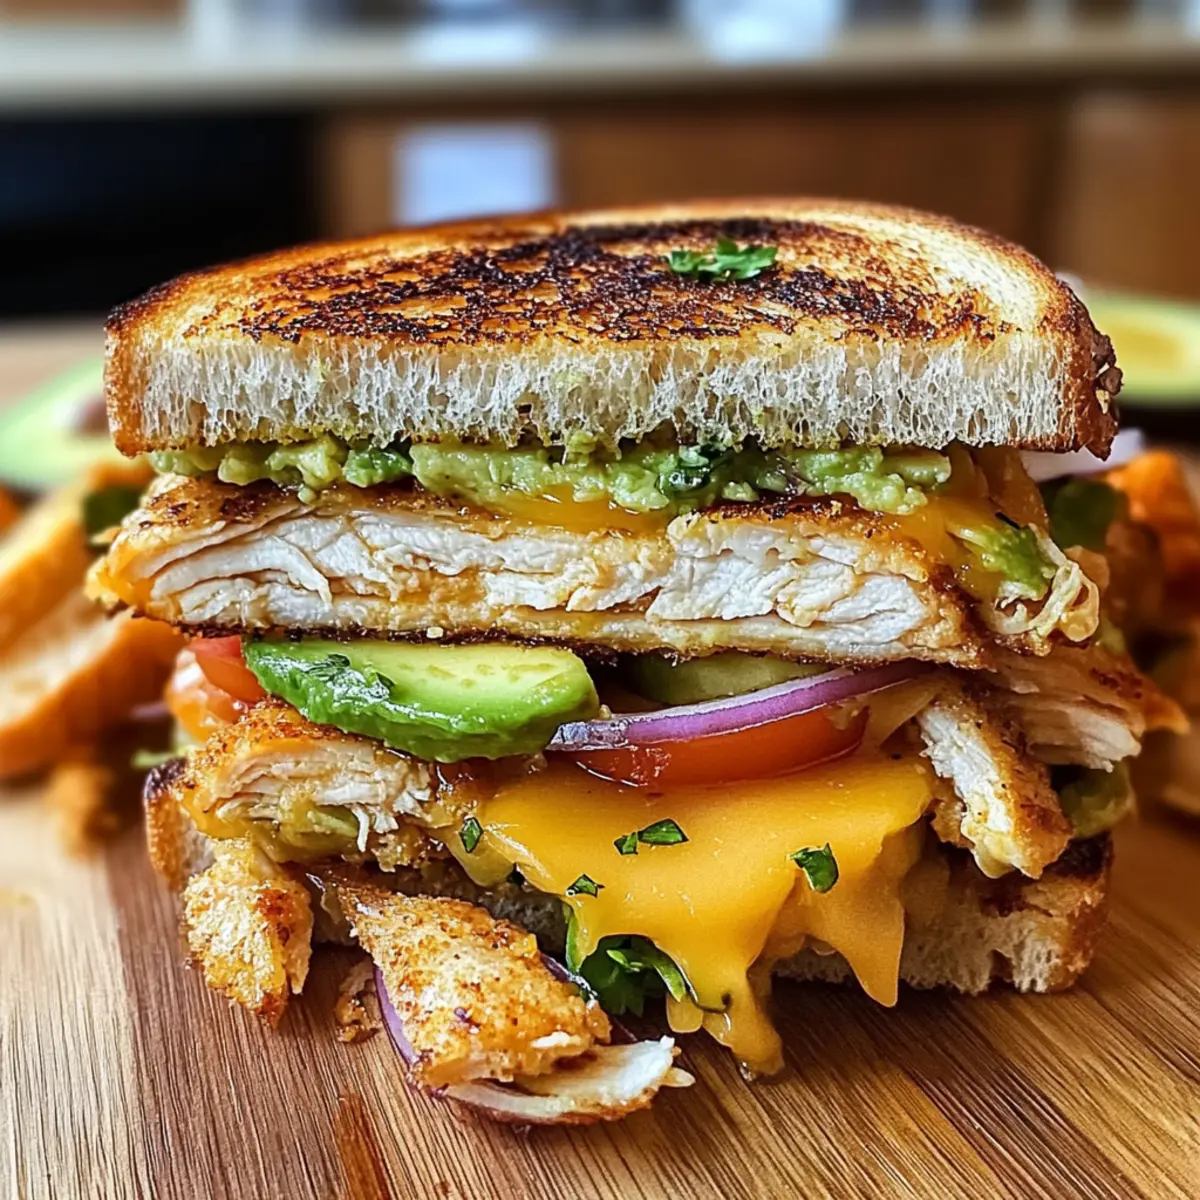
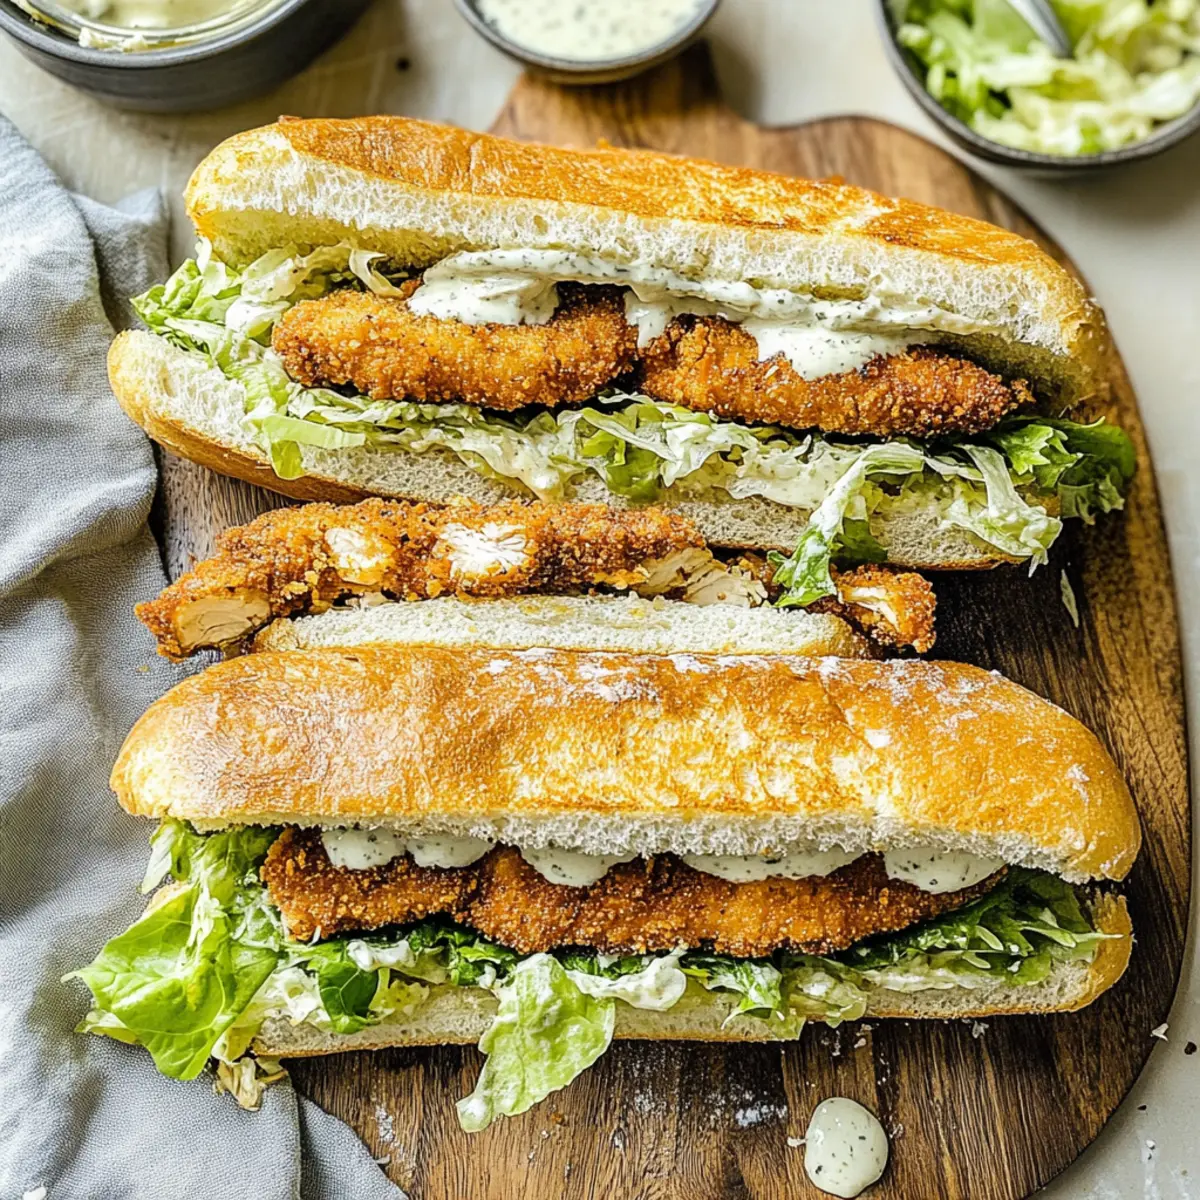
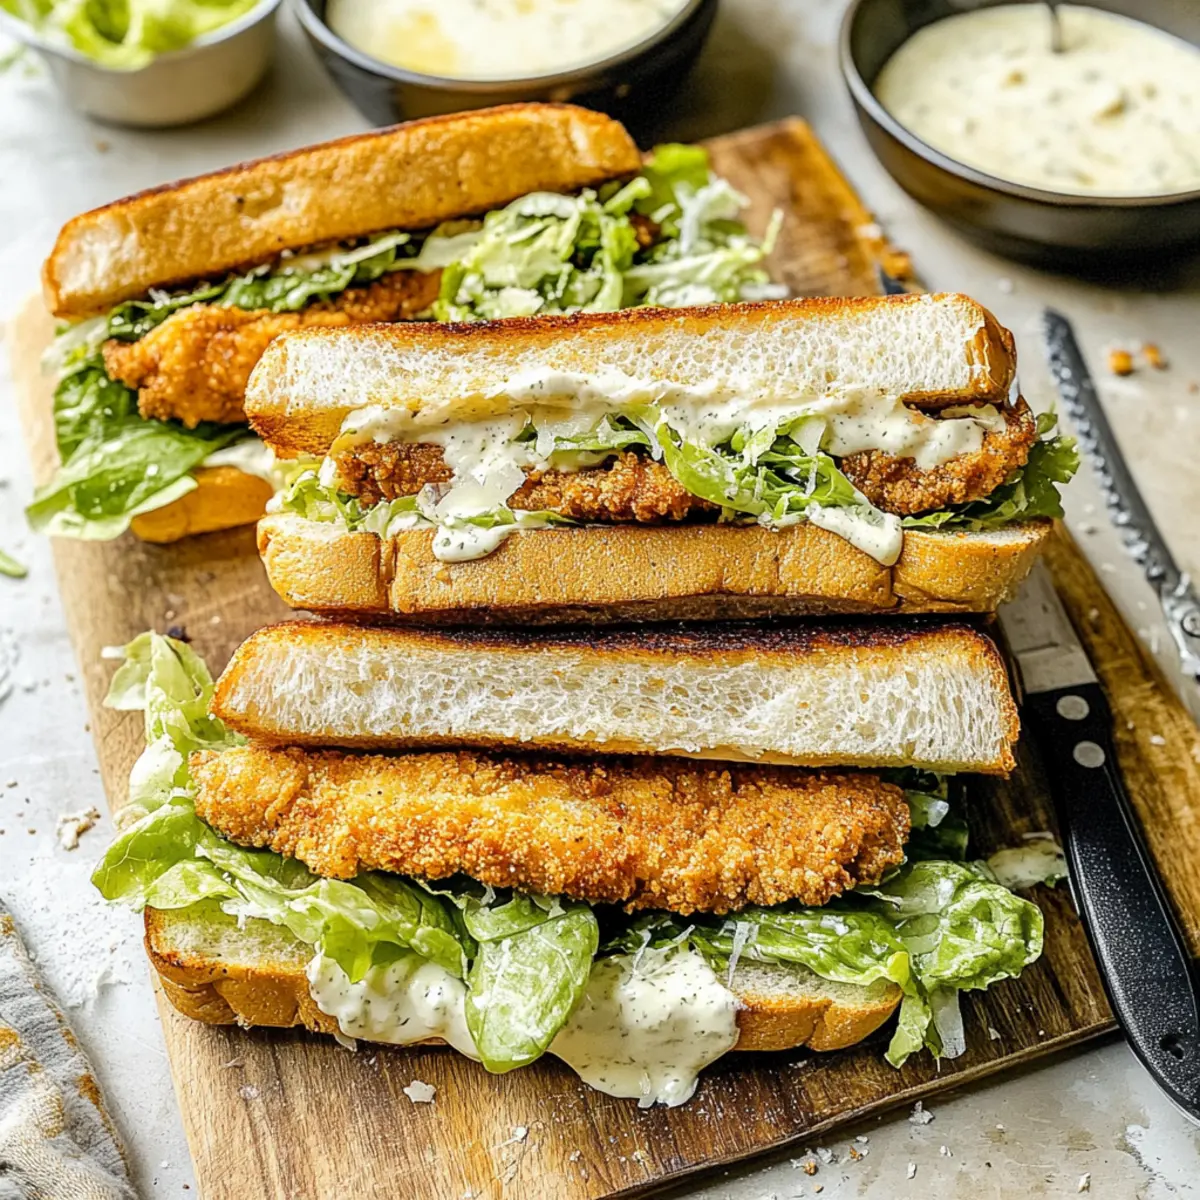
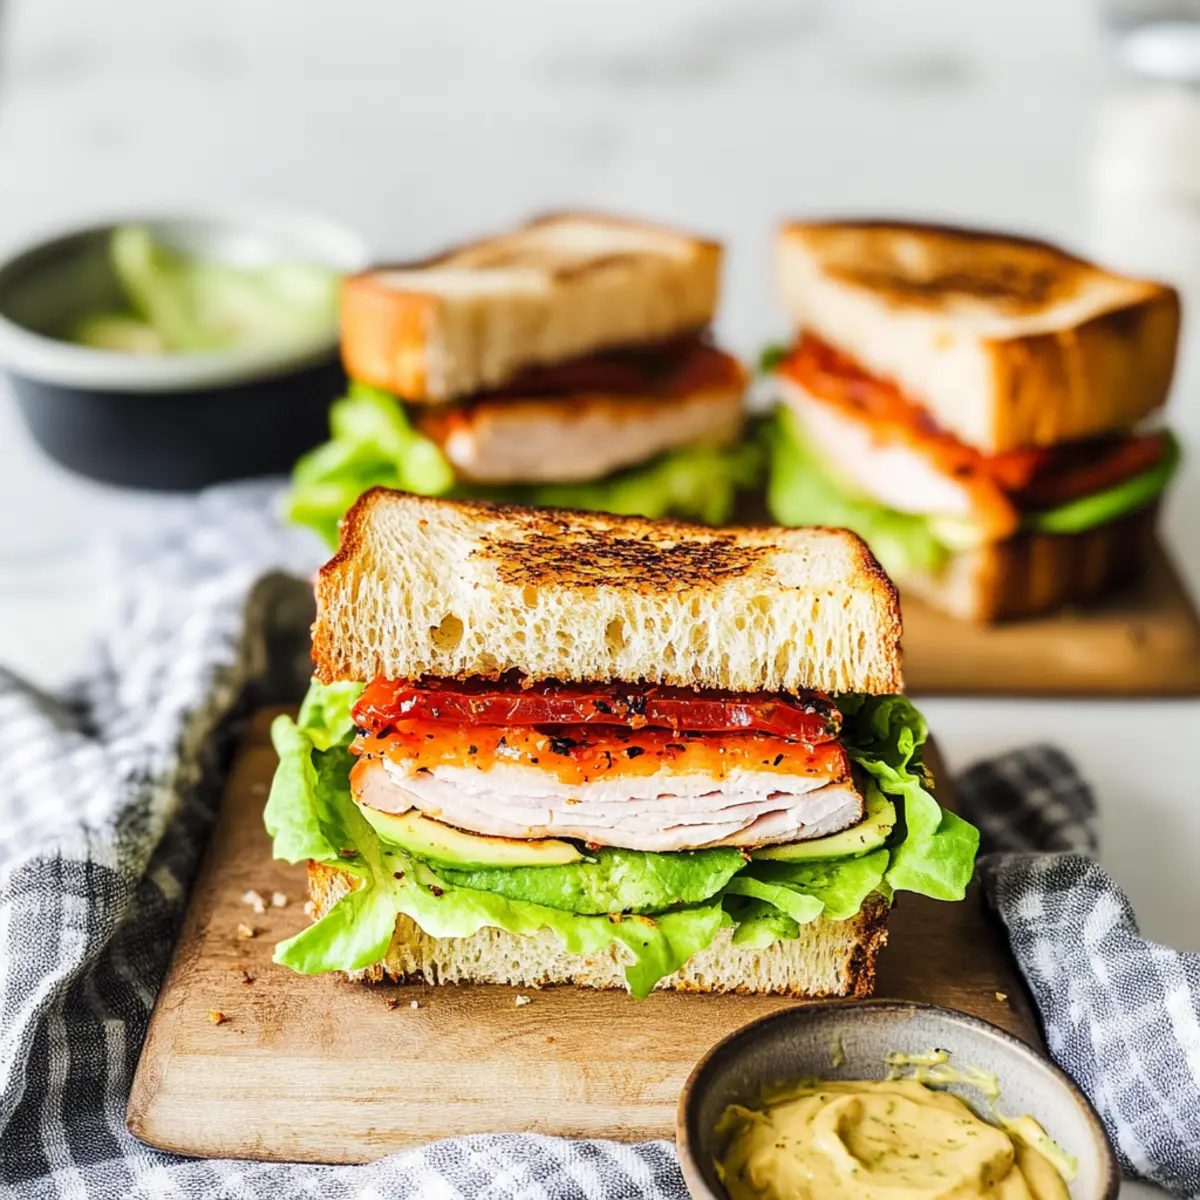
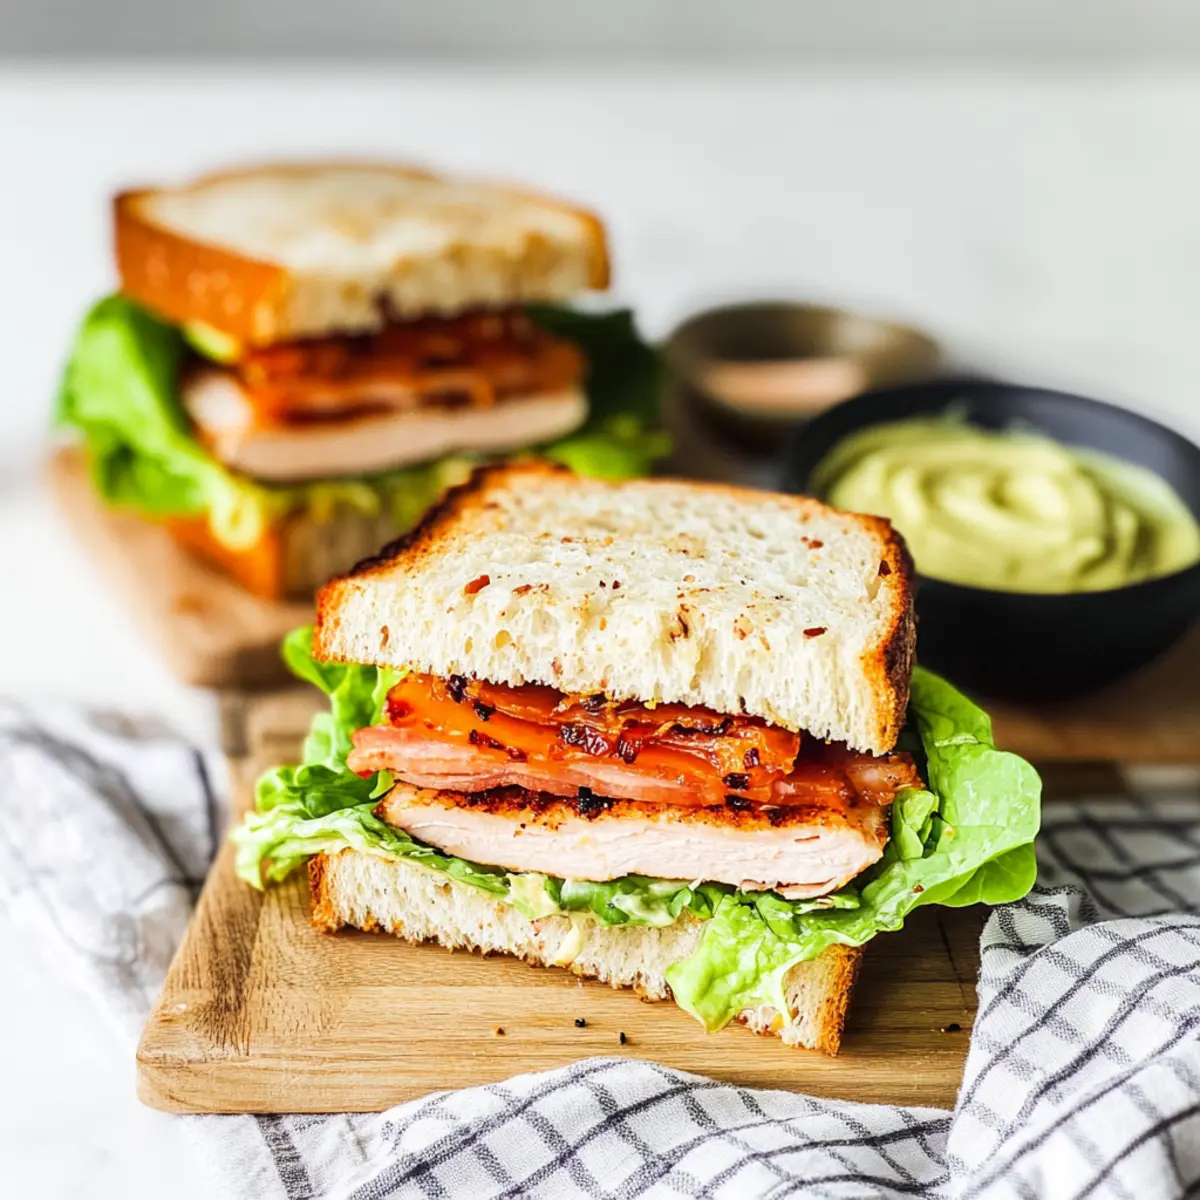
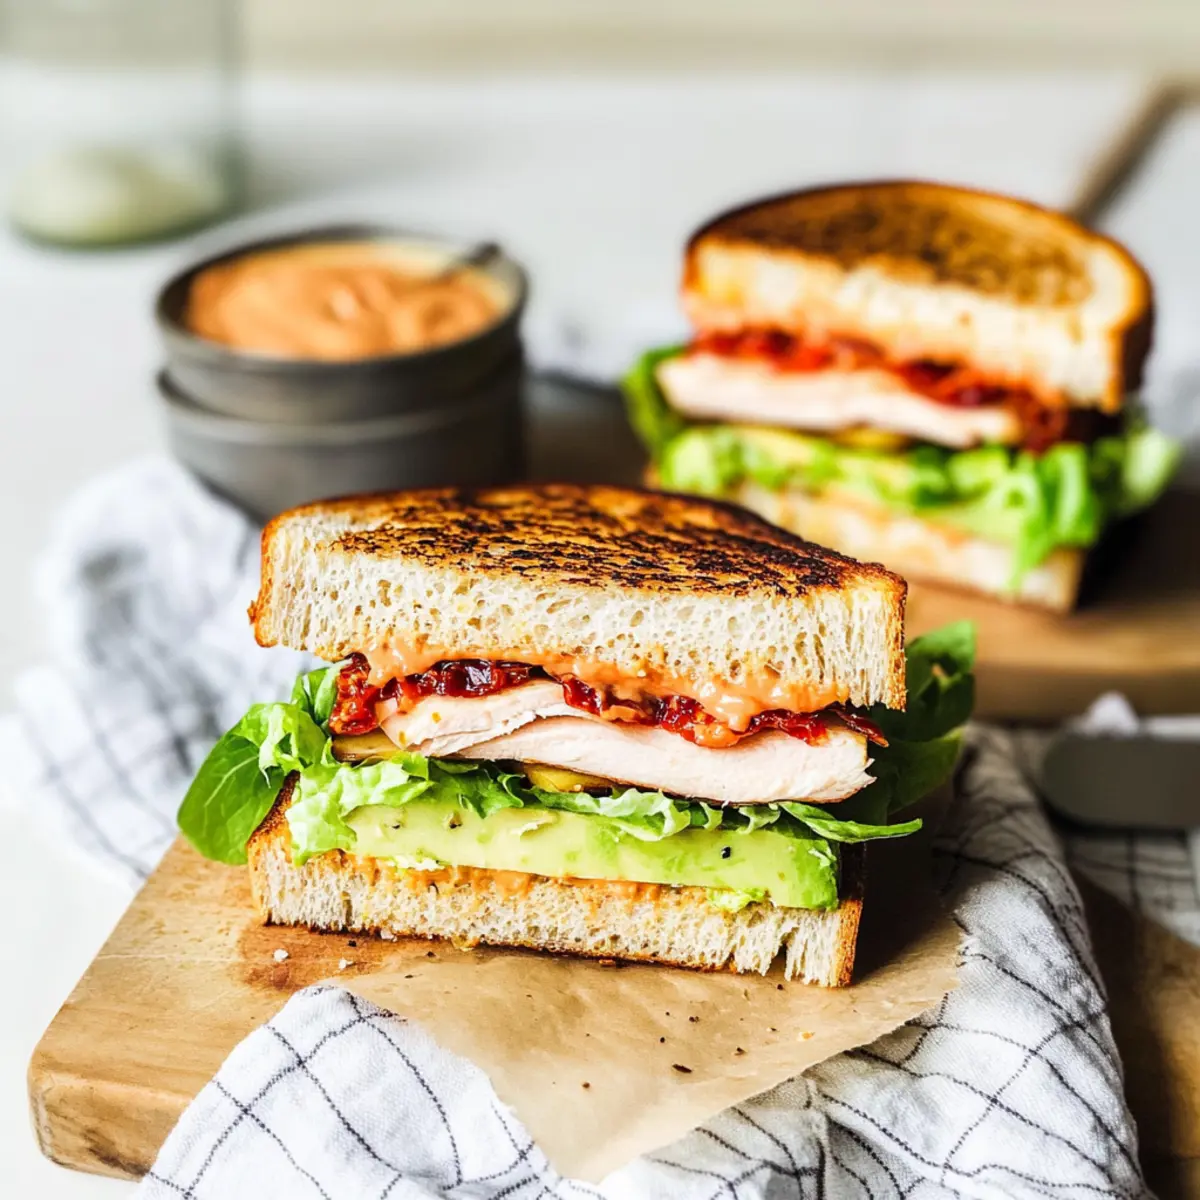
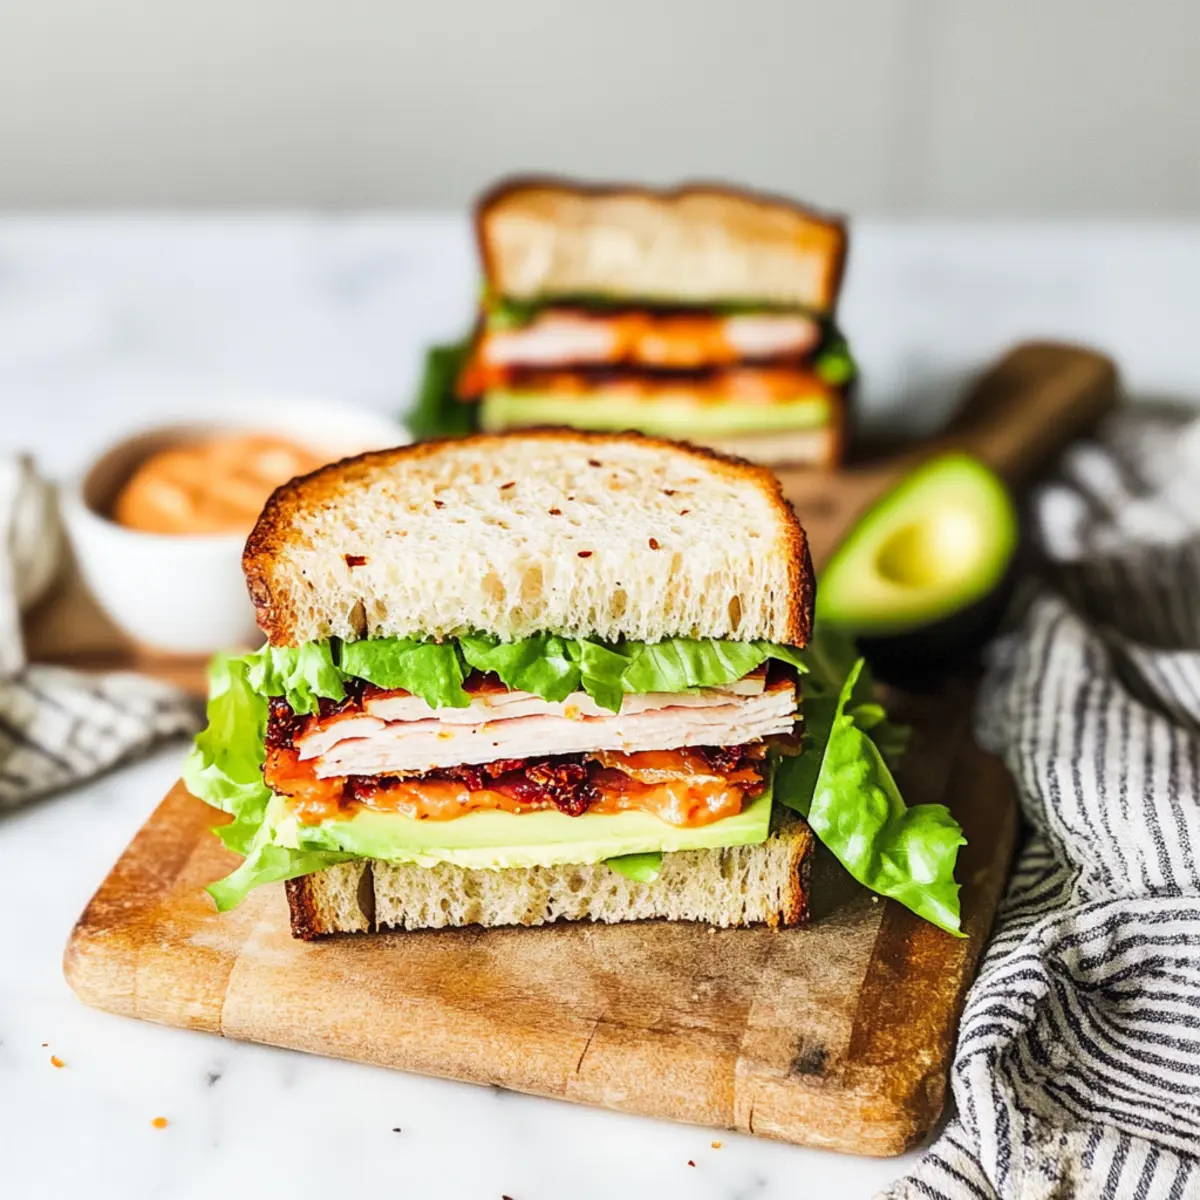
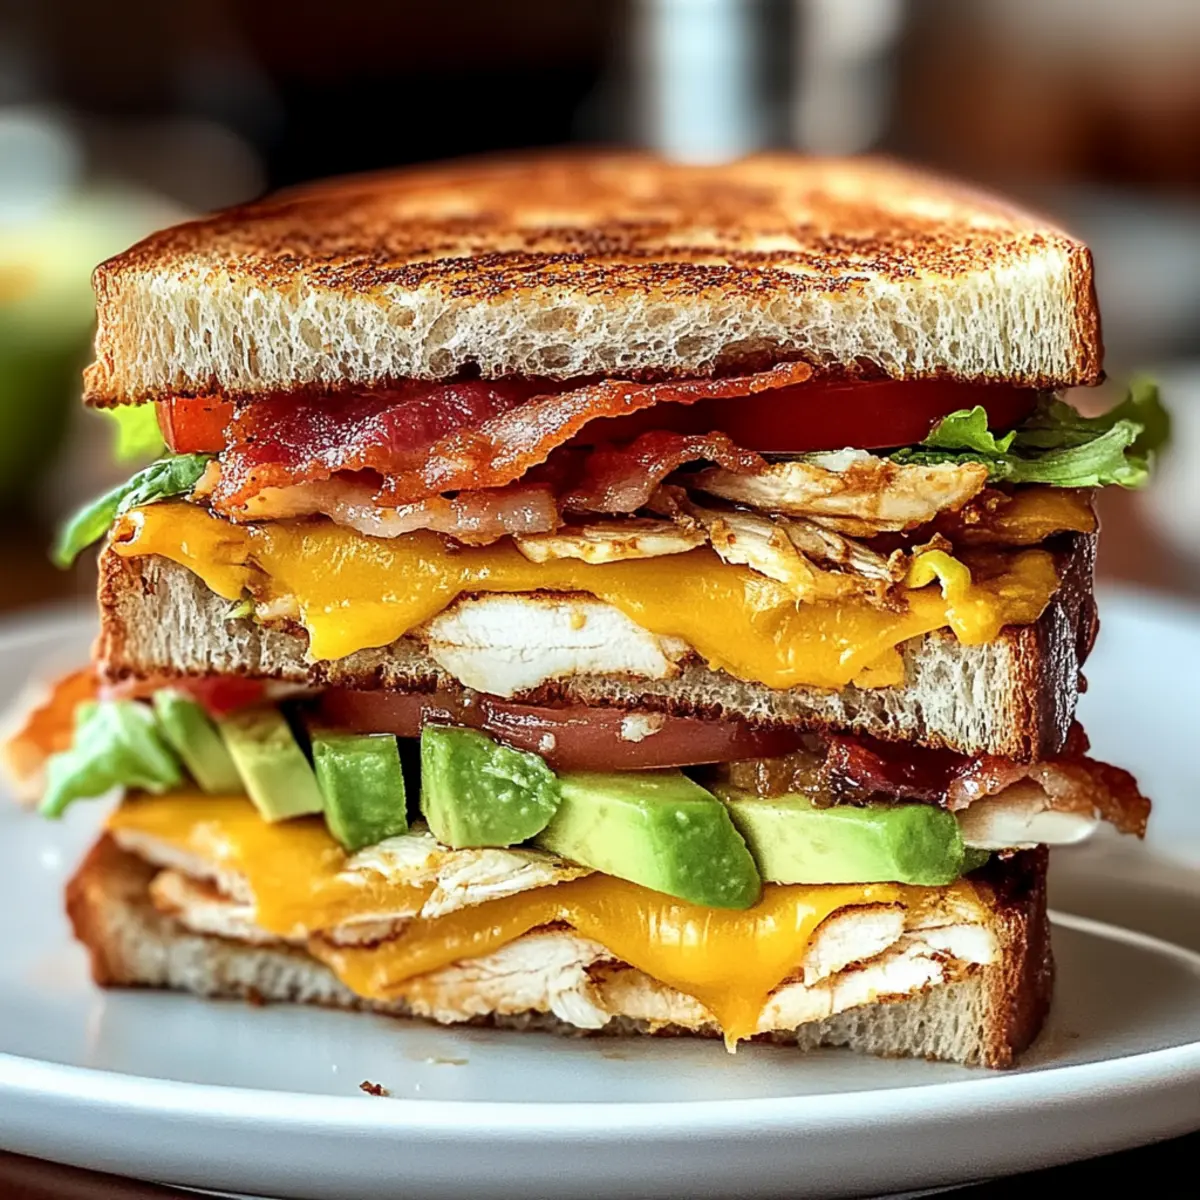
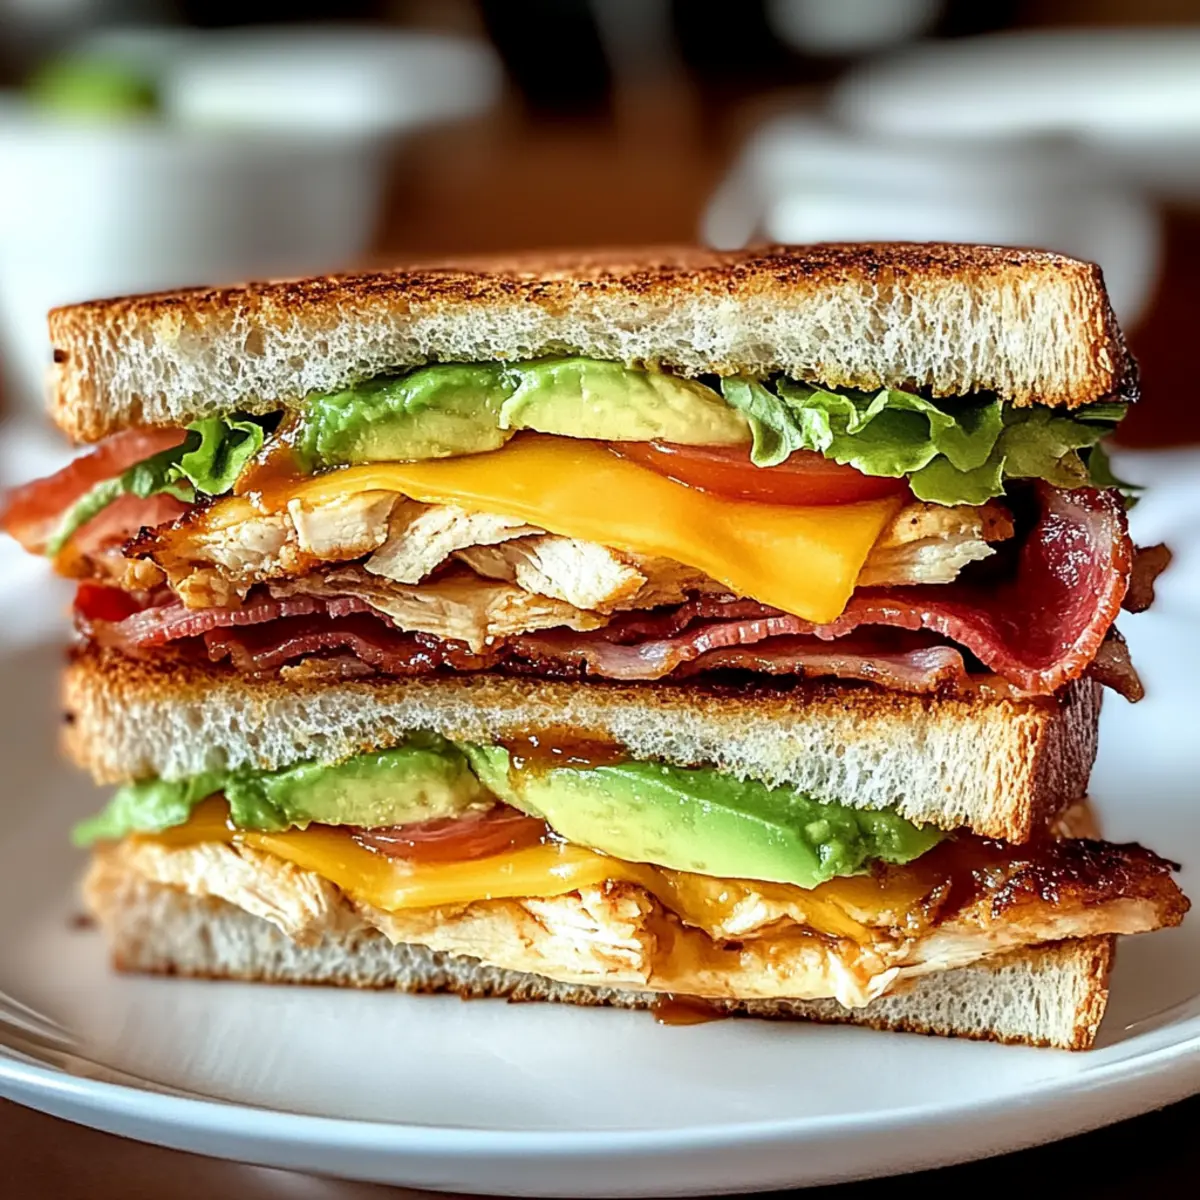
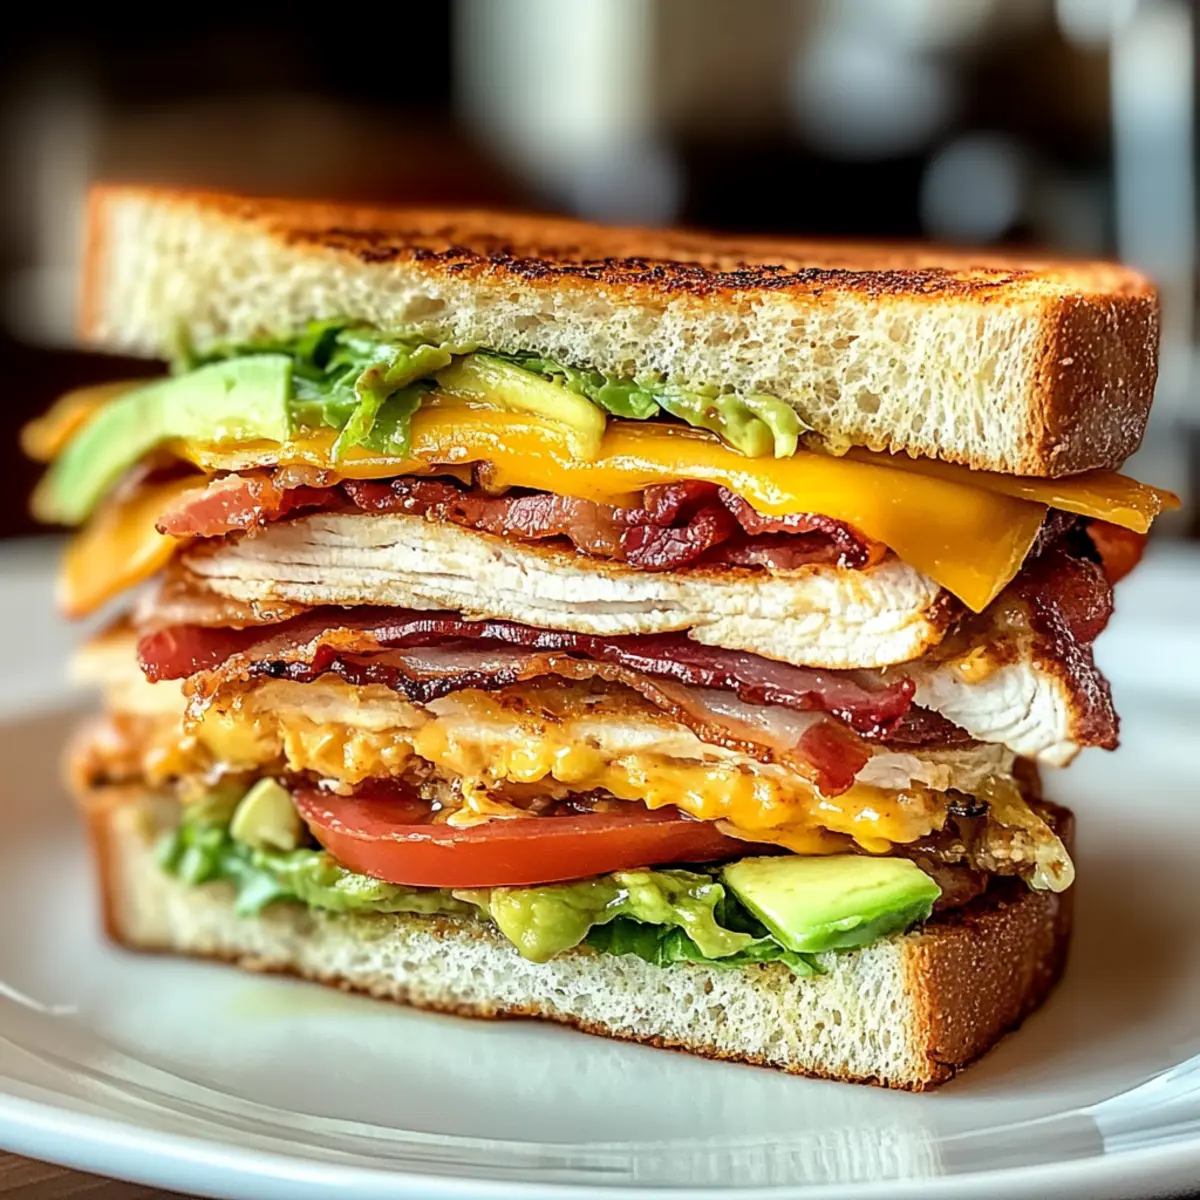
There’s nothing quite like that satisfying crunch when you take a bite of a perfectly assembled sandwich. Enter the Cowboy Club Sandwich, a hearty delight that brings together crispy bacon, creamy avocado, and a zesty BBQ-mayo spread. Perfect for lunch or dinner, this sandwich is not only customizable to fit your tastes but also quickly assembled, making it an ideal choice for weeknight meals or casual gatherings. With layers of flavors and textures, you’ll feel like a gourmet chef each time you serve it. Ready to discover how to craft this comforting classic that may just become the highlight of your mealtime? Let’s dive in!
Why is Cowboy Club Sandwich so special?
Hearty, Flavorful Ingredients: This Cowboy Club Sandwich combines layers of deliciousness that tantalize your taste buds with every bite. Customizable Options: Easily swap proteins or veggies to cater to your preferences, allowing for a personal touch. Quick Assembly: With minimal prep time, you can whip it up in no time, perfect for busy weekdays. Crowd-Pleasing Delight: Serve it at gatherings, and watch as it disappears—it's a surefire hit! Satisfying Crunch: Toasted sourdough delivers a delightful crispy texture that complements the rich fillings, making it a comforting classic. Enjoy it with homemade sweet potato fries for a sensational meal!
Cowboy Club Sandwich Ingredients
For the Sandwich
• Thick-Cut Bacon – Provides that essential smokiness and crunch; substitute with turkey bacon for a lighter option.
• BBQ Sauce – Adds a tangy kick; feel free to use your favorite brand or a homemade version for a personal touch.
• Mayonnaise – Serves as the creamy base for the BBQ spread; swap with Greek yogurt for a healthier twist.
• Sourdough Bread – Forms the sturdy base of the sandwich, offering distinct flavor; other hearty breads can also work well as substitutes.
• Cooked Chicken Breast – Adds protein and moisture; can be swapped with smoked turkey or pulled pork for variety.
• Cheddar Cheese – Melts beautifully, enhancing overall flavor; pepper jack is great if you desire a spicy kick.
• Avocado – Brings in creaminess; you can substitute it with hummus for a lighter alternative.
• Tomatoes – Provides freshness and acidity; heirloom tomatoes can add a splash of color.
• Romaine Lettuce – Contributes a refreshing crunch; spinach or arugula can also be used for a different texture.
• Butter – Ensures that golden, crispy bread; olive oil can be used for a dairy-free option.
• Salt and Pepper – Essential for seasoning to taste; adjust according to your preference.
For Assembly
• Optional Spicy Mustard – Adds an extra layer of flavor and heat, perfect for those who crave bold tastes.
• Pickles or Jalapeños – Great toppings to include for a tangy or spicy touch to the classic Cowboy Club Sandwich.
Step‑by‑Step Instructions for Cowboy Club Sandwich
Step 1: Bake the Bacon
Preheat your oven to 400°F (200°C) and line a baking sheet with parchment paper. Arrange the thick-cut bacon in a single layer on the sheet, ensuring they are not overlapping. Bake for 15-20 minutes until the bacon is crispy and golden, monitoring towards the end to prevent overcooking. Once done, remove and let it drain on paper towels to absorb excess grease.
Step 2: Prepare the BBQ-Mayo Spread
In a small mixing bowl, combine your favorite BBQ sauce with mayonnaise until well blended. This creamy BBQ-mayo spread will elevate your Cowboy Club Sandwich with its tangy flavor. Set the mixture aside to allow the flavors to meld while you prepare the other ingredients for assembly.
Step 3: Butter the Sourdough
Take your slices of sourdough bread and lightly butter one side of each slice. Ensure the butter is evenly spread for a golden and crispy finish. This step is crucial as it will provide a beautiful crust once grilled, enhancing the overall texture of your Cowboy Club Sandwich.
Step 4: Assemble the Sandwich Layers
Heat a skillet over medium heat and place the buttered side of the sourdough down in the pan. Add a slice of cheddar cheese to each piece of bread, allowing it to begin melting slightly. Next, layer cooked chicken breast over the cheese on two slices, making sure to distribute it evenly for a balanced bite.
Step 5: Add the Avocado and Toppings
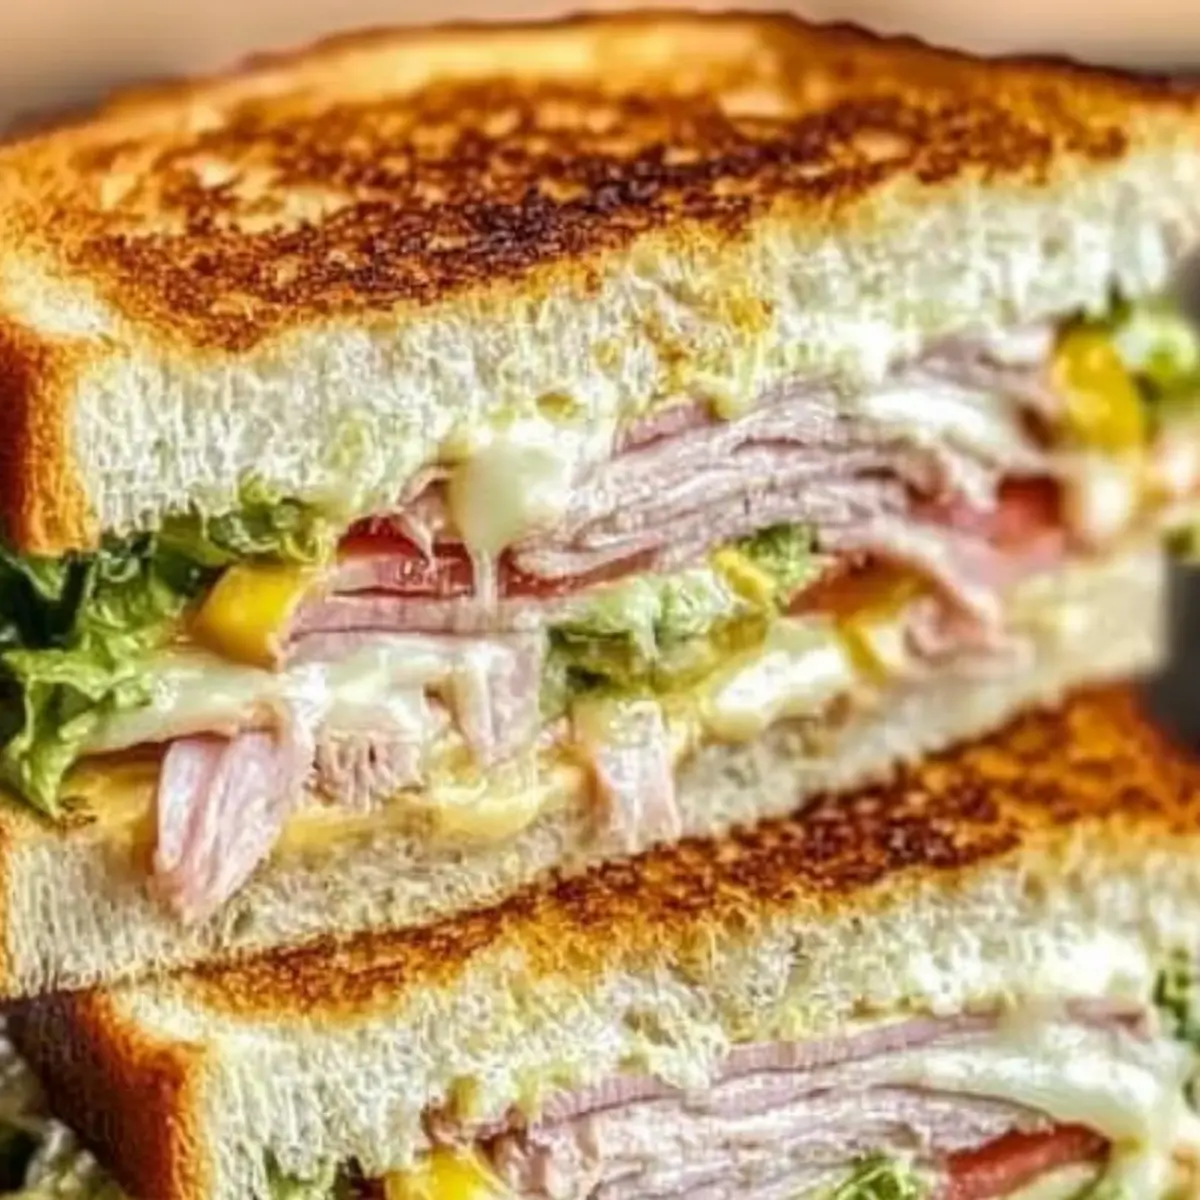
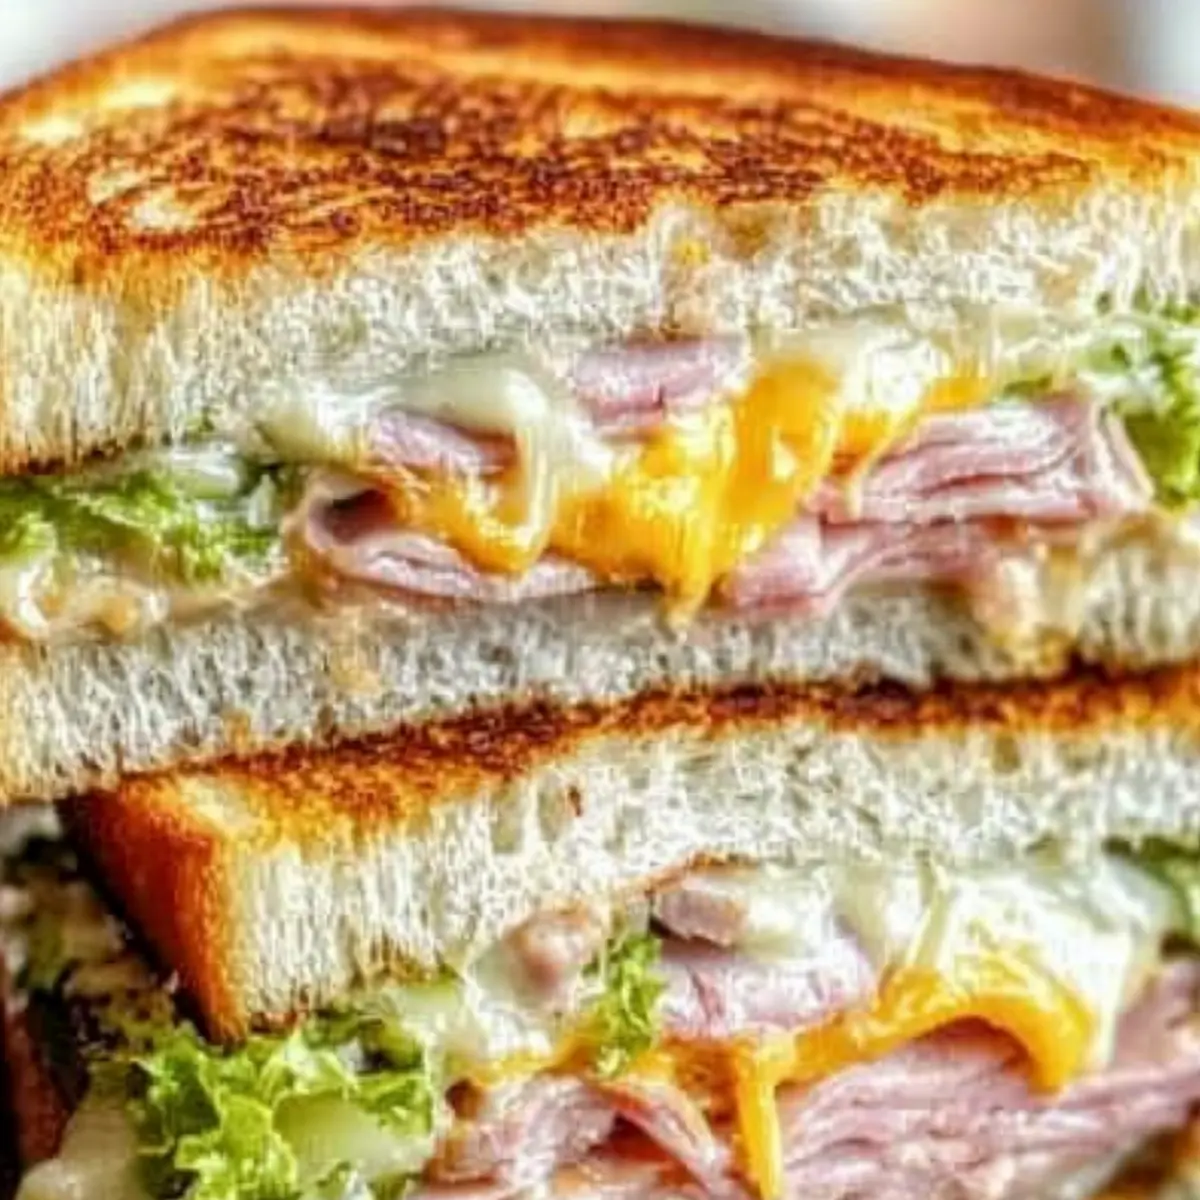
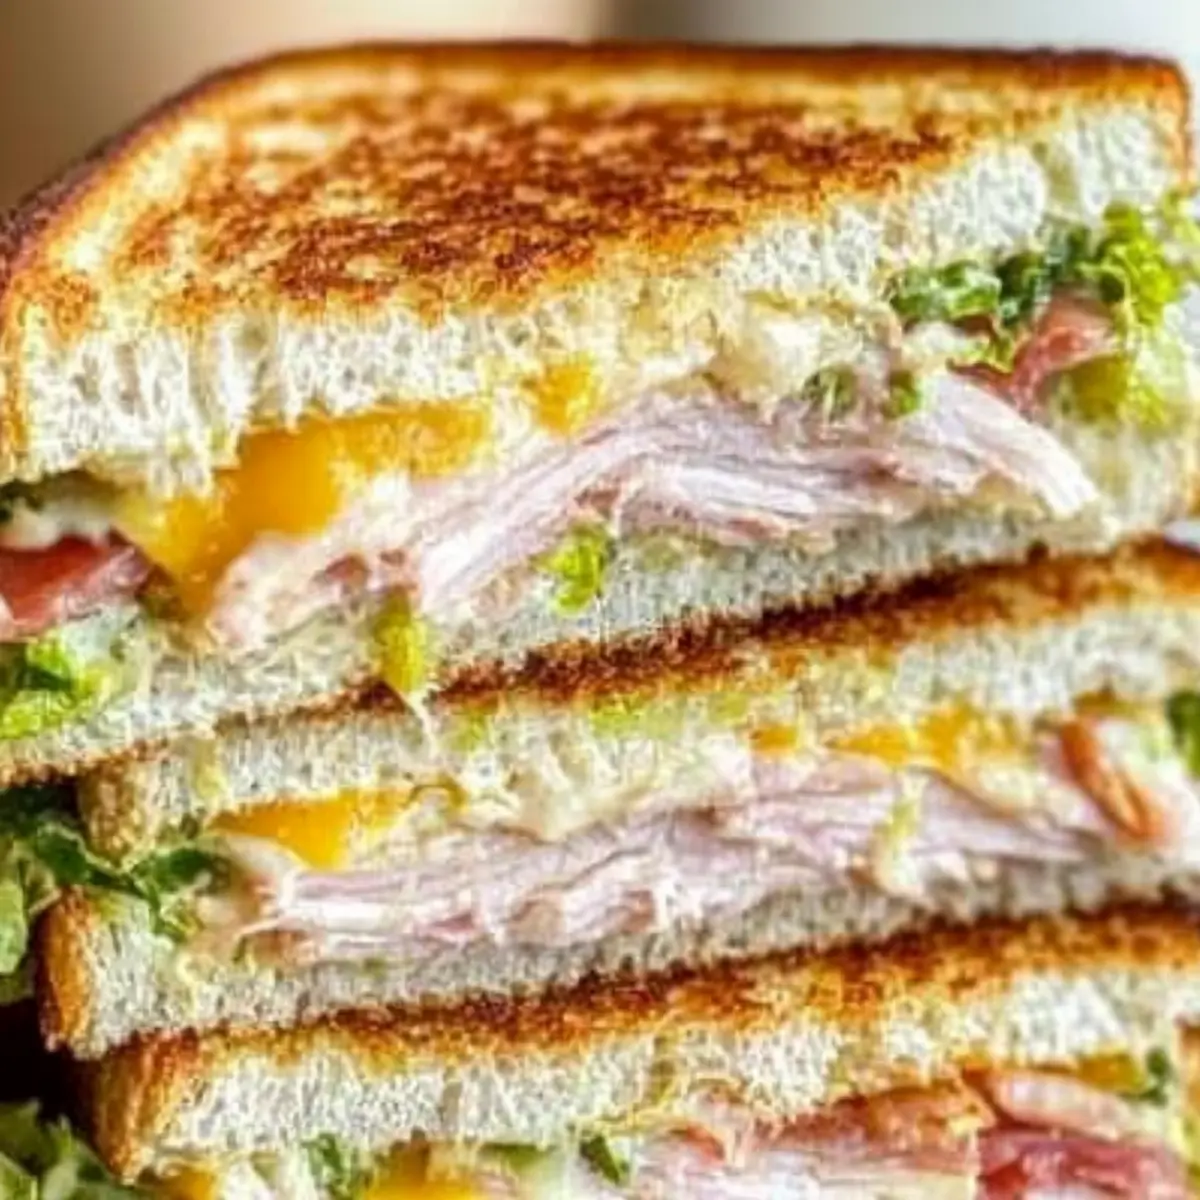
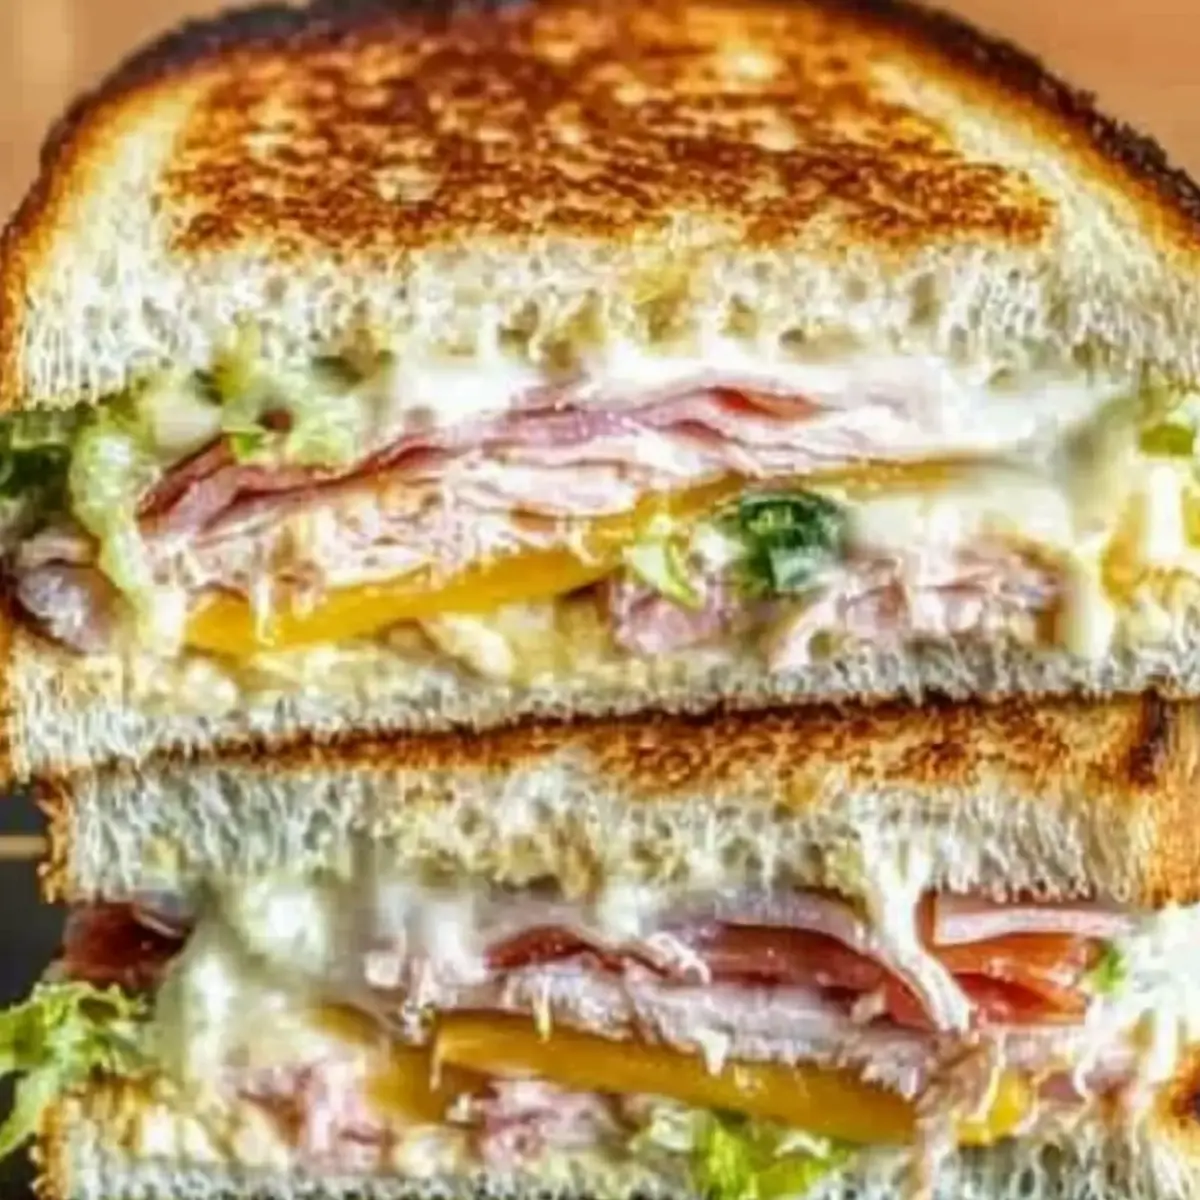
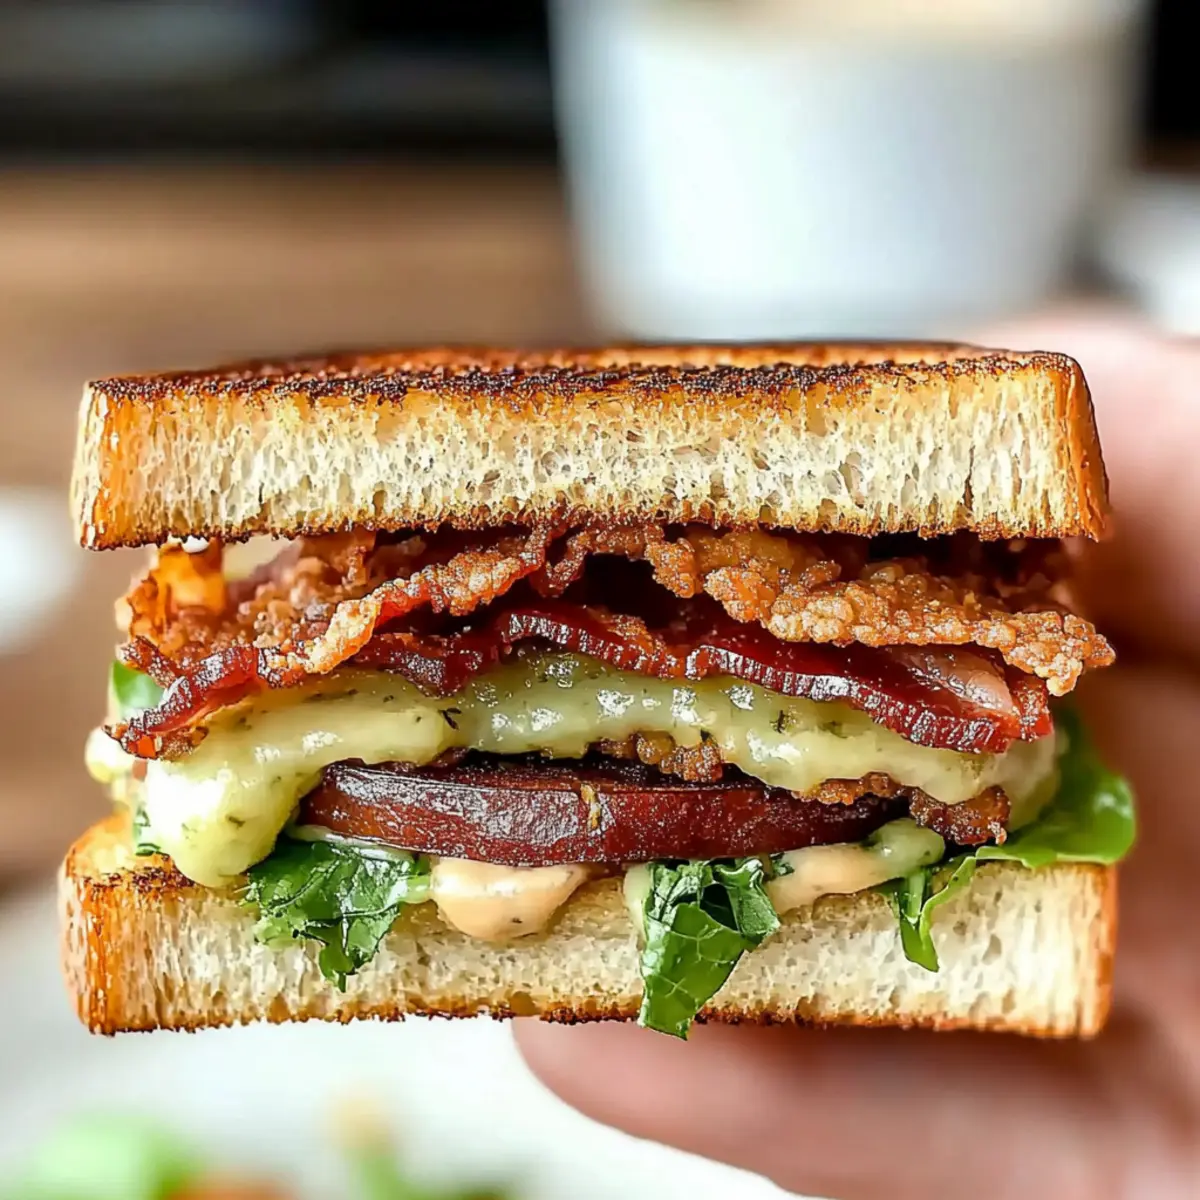
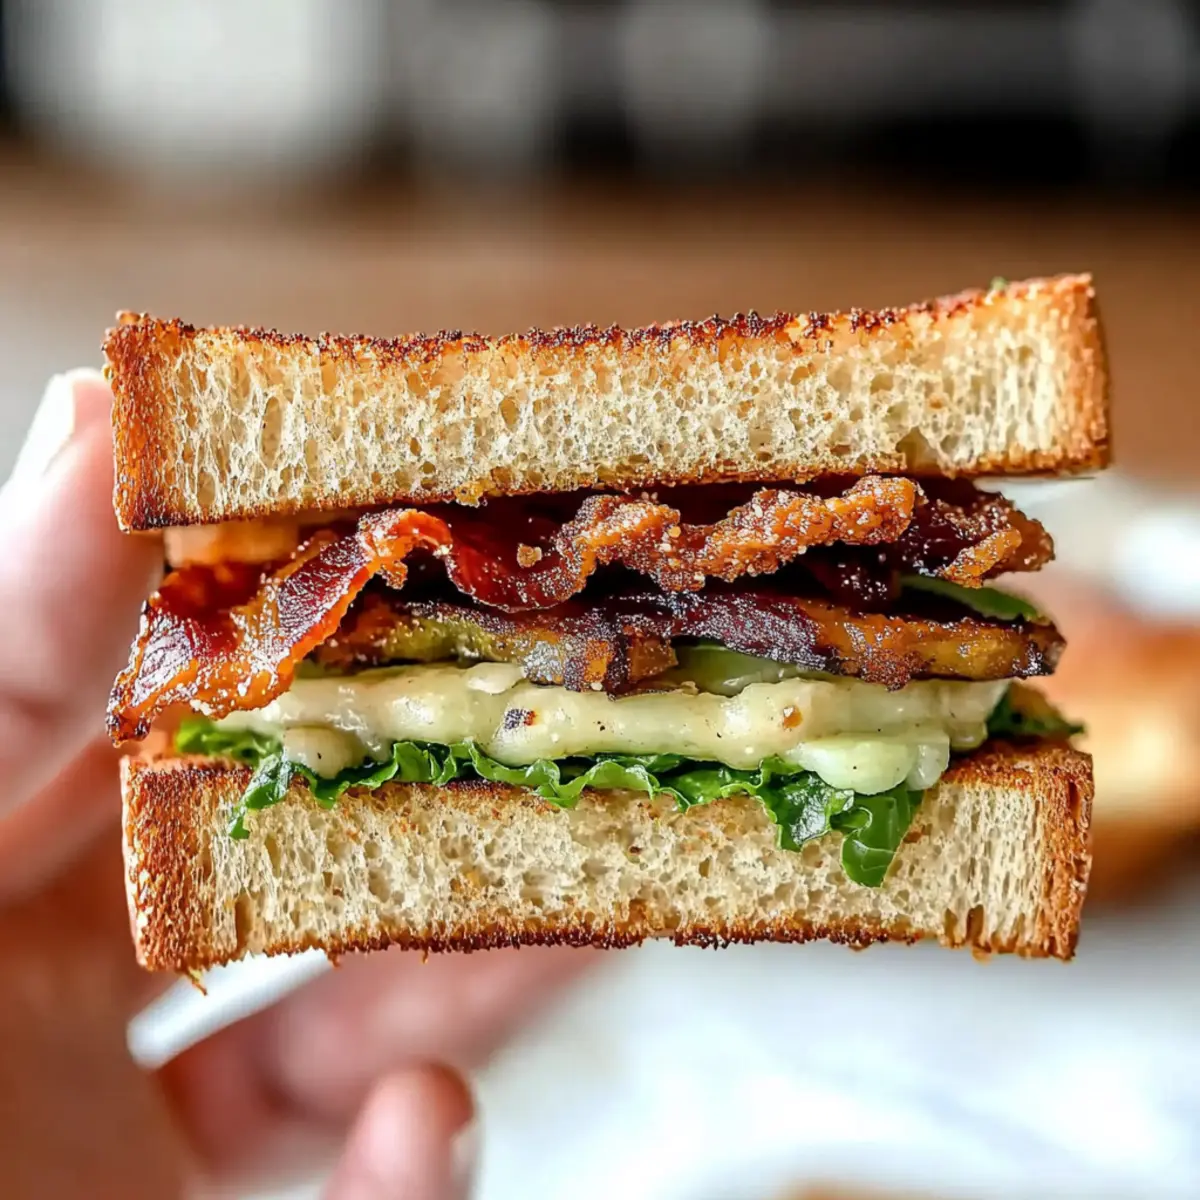
Spread the BBQ-mayo mix generously on the other two slices of bread. Then, build your toppings by layering sliced avocado, fresh tomato, crispy bacon, and crunchy romaine lettuce over the chicken. This layered approach adds depth to your Cowboy Club Sandwich while ensuring every ingredient shines through.
Step 6: Season the Sandwich
Sprinkle a pinch of salt and freshly cracked pepper over the top layers of the sandwich for added flavor. This step enhances the taste of the fresh ingredients and ties together the savory elements of your Cowboy Club Sandwich beautifully.
Step 7: Complete the Sandwich
Place the remaining slices of sourdough bread on top, buttered side up. Press down gently to compact the sandwich, ensuring that all the delicious layers meld together. This step is vital for achieving a well-structured Cowboy Club Sandwich that holds up during grilling.
Step 8: Grill the Sandwich
Carefully flip the assembled sandwiches in the skillet so that the buttered side is down. Cook for about 2-3 minutes until the bread is golden brown and crispy. Once the first side is beautifully toasted, flip the sandwich again and grill the other side for an additional 2-3 minutes, ensuring that the cheese is melted and the bread is uniformly crispy.
Step 9: Slice and Serve
Once both sides are perfectly browned, remove the sandwiches from the skillet. Use a sharp knife to slice each Cowboy Club Sandwich diagonally for a visually appealing presentation. Serve warm, and enjoy this hearty delight with your favorite sides!

Expert Tips for Cowboy Club Sandwich
• Crisp Bacon Essential: Ensure your bacon is fully cooked and crispy to avoid a soggy sandwich, maintaining that delightful crunch.
• Knife Skills: Use a sharp knife for slicing to achieve clean cuts and preserve the layers in your Cowboy Club Sandwich.
• Layer Wisely: Balance flavors by layering ingredients evenly; the harmonious blend makes every bite satisfying and delicious.
• Experiment with Heat: Consider adding jalapeños or spicy mustard to your sandwich for an extra kick, enhancing the overall flavor experience.
• Toasting Technique: Don't rush the grilling process—take your time to achieve a golden, crispy exterior for both slices of bread.
Cowboy Club Sandwich Variations
Feel free to get creative and tailor your Cowboy Club Sandwich to fit your taste buds! Each twist offers unique flavors and textures that can make mealtime even more exciting.
-
Spicy Kick: Add sliced jalapeños or a dash of hot sauce for a delightful heat that elevates your sandwich experience.
-
Vegetarian Delight: Substitute the meat with grilled vegetables such as zucchini and bell peppers, or chickpeas for a hearty, plant-based version.
-
Smoky Flavor: Use smoked turkey or pulled pork in place of chicken for an extra layer of richness and flavor.
-
Cheese Swap: Try using gouda or pepper jack cheese instead of cheddar for a smoky undertone or spicier finish.
-
Herbaceous Twist: Mix fresh herbs, like basil or cilantro, into your mayo for a refreshing flavor boost.
-
Creamy Swaps: For a lighter touch, swap avocado with Greek yogurt or a plant-based spread to maintain creaminess without the calories.
-
Crunchy Upgrade: Add crunchy pickles or crispy fried onions for an unexpected, satisfying crunch in every bite.
-
Bready Alternatives: Experiment with different types of bread like ciabatta or focaccia, which can add a unique texture and flavor profile to your Cowboy Club Sandwich.
With these variations, you'll never get bored of your Cowboy Club Sandwich. I also recommend pairing it with my Sweet Potato Fries or a light Crispy Salad to round out a meal that's sure to impress!
What to Serve with Cowboy Club Sandwich
There's something truly delightful about creating a well-rounded meal that perfectly complements the sumptuous flavors of your sandwich.
-
Sweet Potato Fries: The natural sweetness enhances the savory elements of the sandwich while providing a satisfying crunch with every bite. They’re a familiar pairing that guests will love!
-
Crispy Potato Chips: Their classic crunch offers a light, salty contrast, making them an effortless side that pairs well with any sandwich. Feel free to select your favorite flavor for a fun twist.
-
Fresh Garden Salad: A refreshing mix of greens and vegetables adds a vibrant crunch and acidity to balance the richness of the Cowboy Club Sandwich. Try drizzling a tangy vinaigrette for extra zest!
-
Coleslaw: Creamy coleslaw brings a cool and crunchy contrast, balancing the warmth of the sandwich wonderfully. It also offers a delightful crunch that will please any guest.
-
Pickle Chips: Their tangy crunch cuts through the richness of the sandwich, adding a delightful flavor pop that works wonders on the palate. A perfect, nostalgic pairing!
-
Iced Tea: A refreshing drink like iced tea pairs beautifully with the Cowboy Club Sandwich, enhancing the overall experience with its coolness and slight sweetness. Enjoy it while unwinding with friends or family!
Make Ahead Options
These Cowboy Club Sandwiches are fantastic for meal prep, allowing you to enjoy a hearty meal anytime! You can cook the bacon and chicken breast up to 3 days in advance, refrigerating them in airtight containers to maintain their crispness and juiciness. Prepare the BBQ-mayo spread and store it in the fridge overnight to let the flavors meld together. Just before serving, assemble the sandwiches by layering the bacon, chicken, sliced avocado, and toppings between the buttered sourdough slices. Grill them for about 2-3 minutes on each side until golden and crispy, ensuring you get that delightful crunch with minimal effort. This makes for an easy, flavorful meal that’s just as delicious when you prepare ahead!
How to Store and Freeze Cowboy Club Sandwich
Fridge: Store leftover Cowboy Club Sandwich in an airtight container in the fridge for up to 3 days. To maintain freshness, wrap the sandwich tightly in plastic wrap or aluminum foil.
Freezer: If you want to freeze the sandwich, wrap it securely in plastic wrap followed by a layer of aluminum foil to protect it from freezer burn. It will stay good for up to 1 month.
Reheating: To reheat, thaw in the fridge overnight, then toast in a skillet or oven until warmed through and crispy. Avoid using the microwave to maintain its crunchy texture.
Component Storage: Alternatively, you can store individual components separately (cooked bacon, chicken, veggies) in the fridge for effective assembly when ready to serve.
Cowboy Club Sandwich Recipe FAQs
How do I choose ripe avocados for my Cowboy Club Sandwich?
Absolutely! Look for avocados that yield slightly to gentle pressure when you squeeze them. They should be dark green and free of dark spots, indicating ripeness. If they're too firm, give them a few days to ripen on the countertop, and once ripened, store them in the fridge to extend their freshness.
How should I store the Cowboy Club Sandwich leftovers?
You can store leftover Cowboy Club Sandwich in an airtight container in the fridge for up to 3 days. To keep it as fresh as possible, wrap it tightly in plastic wrap or aluminum foil. If you want to enjoy it later, consider storing individual components separately and assembling them right before serving.
Can I freeze the Cowboy Club Sandwich?
Definitely! To freeze, wrap the sandwich securely in plastic wrap, then in aluminum foil to prevent freezer burn. You can freeze it for up to 1 month. When you’re ready to eat it, thaw it in the fridge overnight. Reheat in a skillet or oven until warmed through, aiming for that crunchy texture again.
What common issues should I be aware of when making this sandwich?
One common issue is sogginess, primarily due to undercooked bacon. Ensure your bacon is crispy before assembly. Additionally, be mindful of layering; if you overload the sandwich with ingredients, it may spill over. To avoid this, keep the layers balanced and ample but not excessive.
Are there any dietary considerations for the Cowboy Club Sandwich?
Yes! If you’re making this sandwich for someone with allergies, be cautious about common allergens like dairy (from the cheese and mayonnaise) and gluten (from the bread). You can use dairy-free cheese, Greek yogurt instead of mayonnaise, and gluten-free bread as alternatives. Unfortunately, this sandwich isn’t ideal for pets due to high sodium levels in bacon and other ingredients.
What’s the best way to enhance the flavors of my Cowboy Club Sandwich?
The more the merrier when it comes to flavors! Consider adding spicy mustard or jalapeños for a kick. You might also experiment with different types of BBQ sauce or incorporating fresh herbs like basil or cilantro for a fresher flavor profile. Layering the ingredients thoughtfully will also ensure each bite is bursting with flavor!
Irresistibly Crunchy Cowboy Club Sandwich for Food Lovers
Ingredients
Equipment
Method
- Preheat your oven to 400°F (200°C) and line a baking sheet with parchment paper. Arrange the thick-cut bacon in a single layer on the sheet, ensuring they are not overlapping. Bake for 15-20 minutes until crispy and golden, monitoring towards the end to prevent overcooking.
- In a small mixing bowl, combine your favorite BBQ sauce with mayonnaise until well blended. Set aside.
- Take your slices of sourdough bread and lightly butter one side of each slice.
- Heat a skillet over medium heat and place the buttered side of the sourdough down in the pan. Add a slice of cheddar cheese to each piece.
- Spread the BBQ-mayo mix on the other two slices of bread. Layer sliced avocado, fresh tomato, crispy bacon, and crunchy romaine lettuce over the chicken.
- Sprinkle a pinch of salt and freshly cracked pepper over the top layers of the sandwich.
- Place the remaining slices of sourdough on top, buttered side up. Press down gently to compact the sandwich.
- Carefully flip the assembled sandwiches in the skillet so that the buttered side is down. Cook for about 2-3 minutes until golden brown and crispy. Flip again and grill the other side.
- Once both sides are browned, remove the sandwiches from the skillet and slice each Cowboy Club Sandwich diagonally.