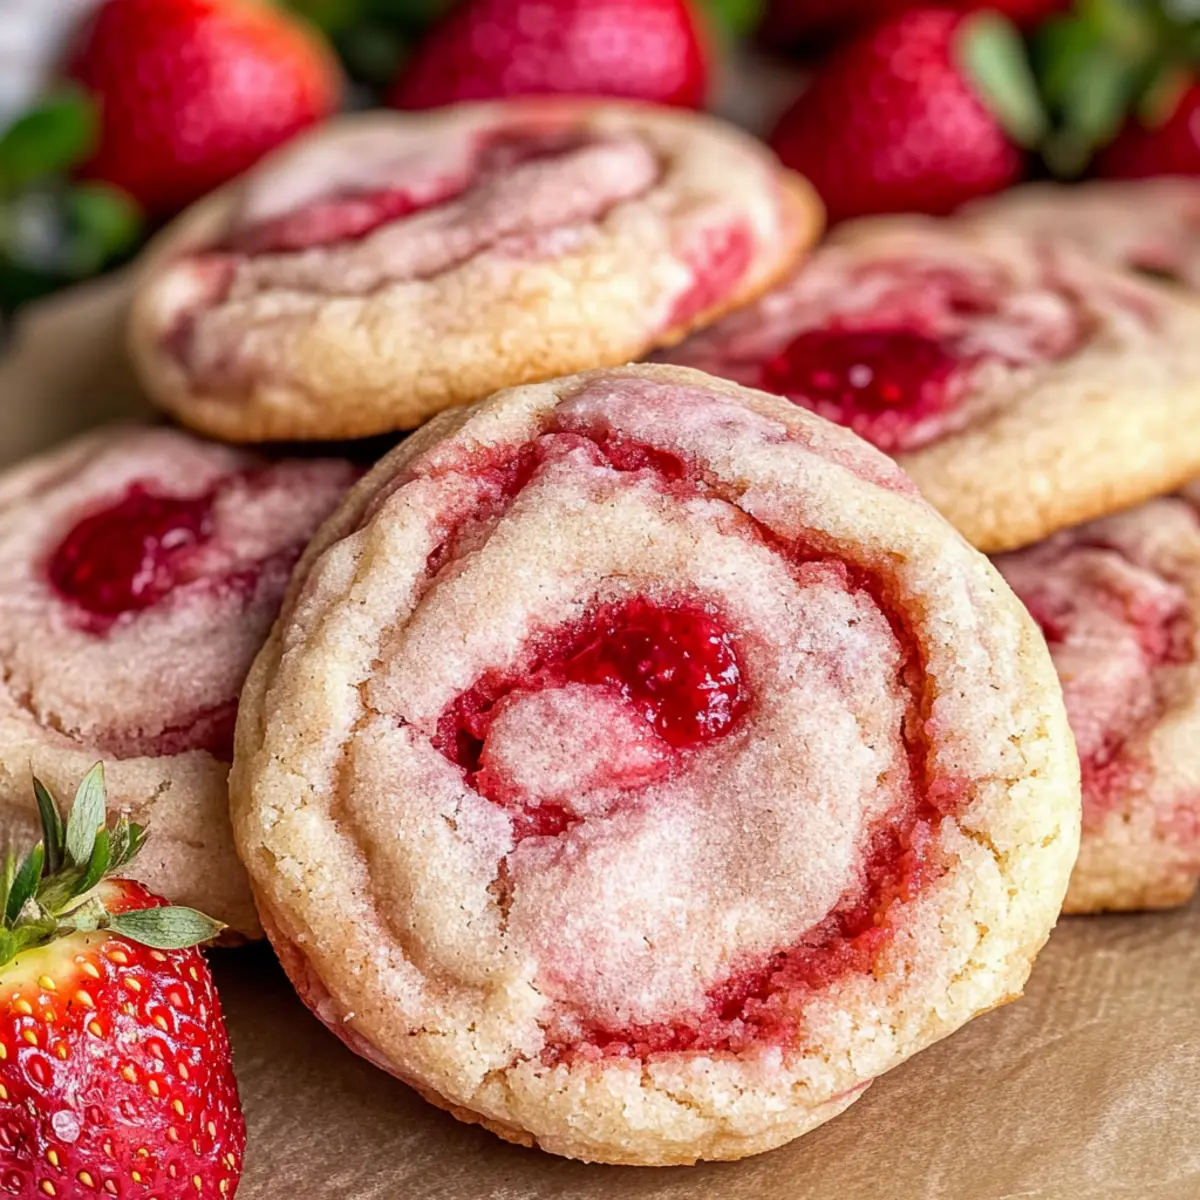
There’s something genuinely magical when strawberries meet creamy cheesecake. As I set out to create my Soft Strawberry Cheesecake Cookies, the anticipation of that perfect bite filled with jammy swirls and a luscious cheesecake filling drove me to the kitchen. These delightful cookies are not only irresistibly delicious but also wonderfully soft, making them ideal for anyone yearning to stray from fast food. Plus, they’re a show-stopping dessert that will have your friends and family begging for the recipe! With minimal prep time and the ability to impress at any gathering, these strawberry cheesecake cookies are truly a culinary triumph. Are you ready to embark on this sweet baking adventure with me?
Why Are These Cookies So Magical?
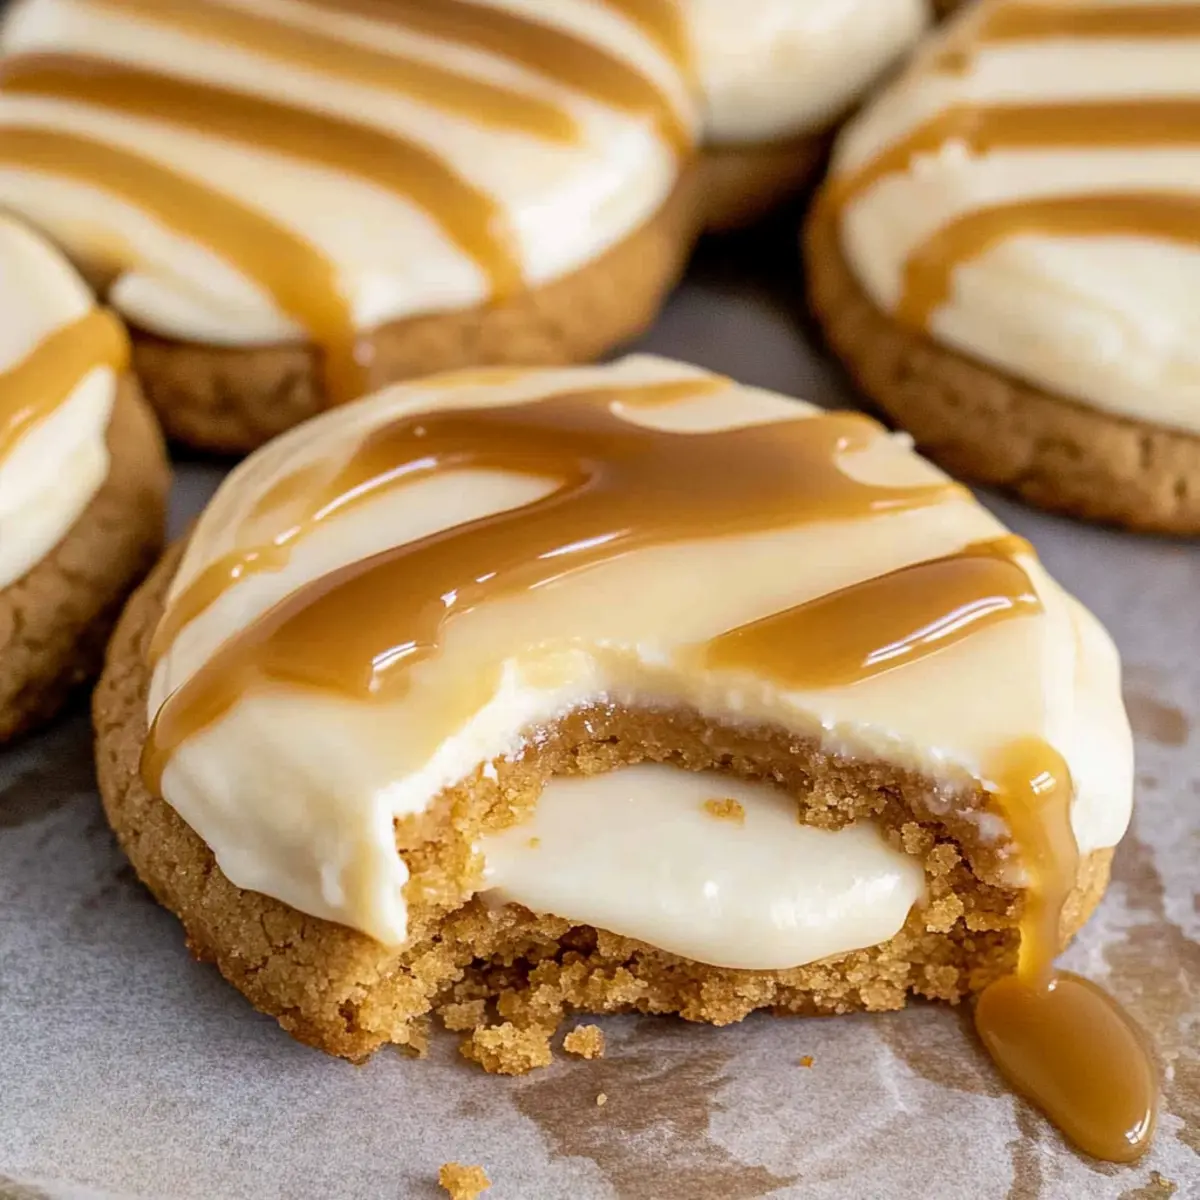
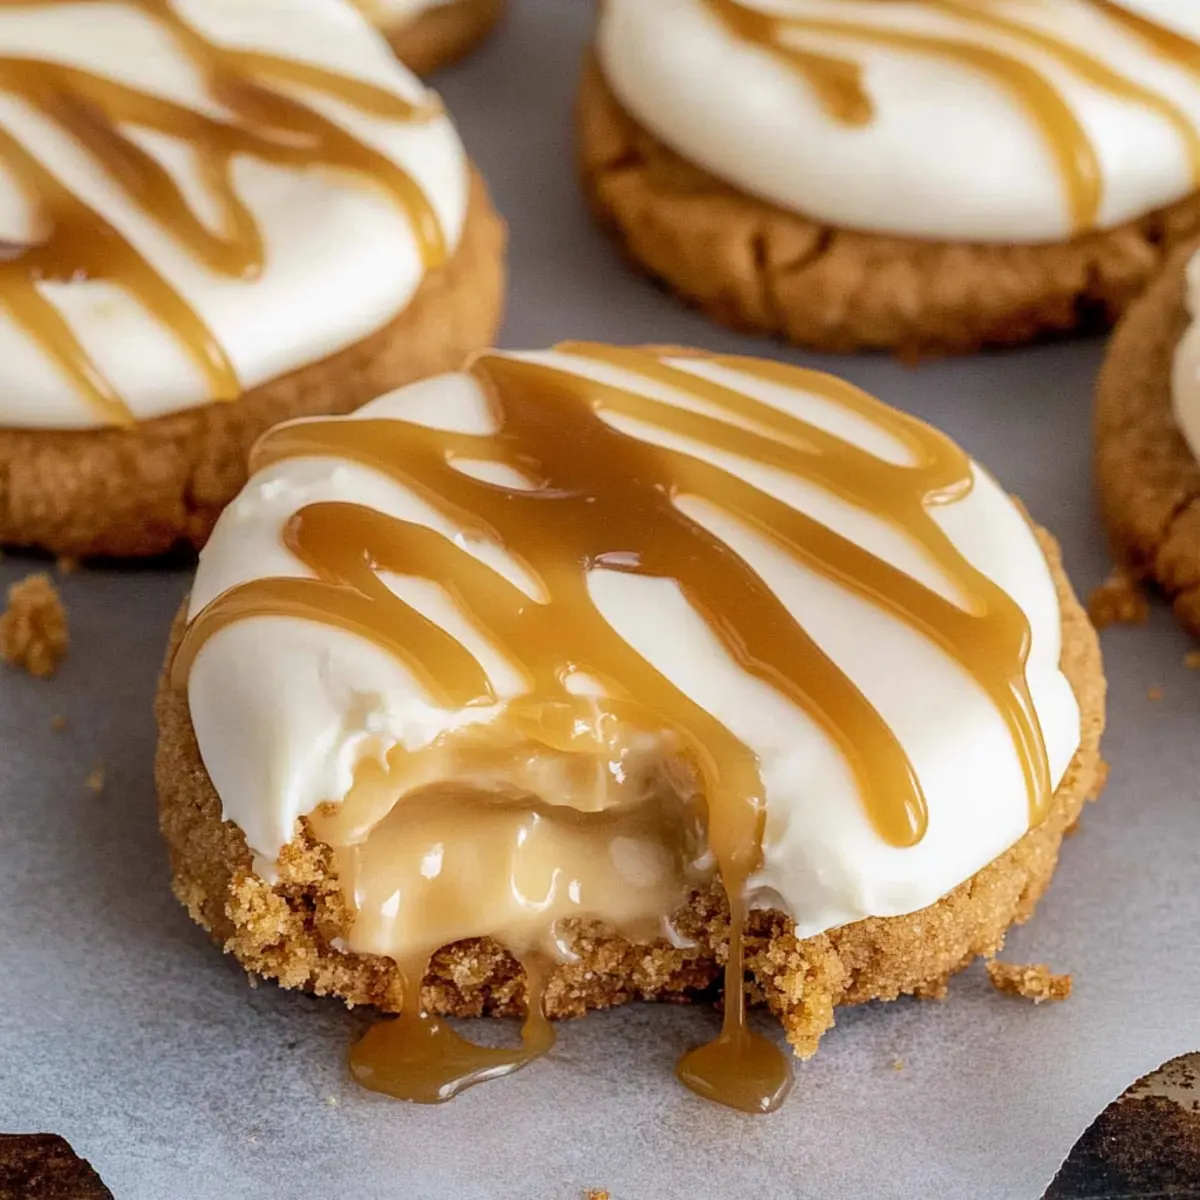
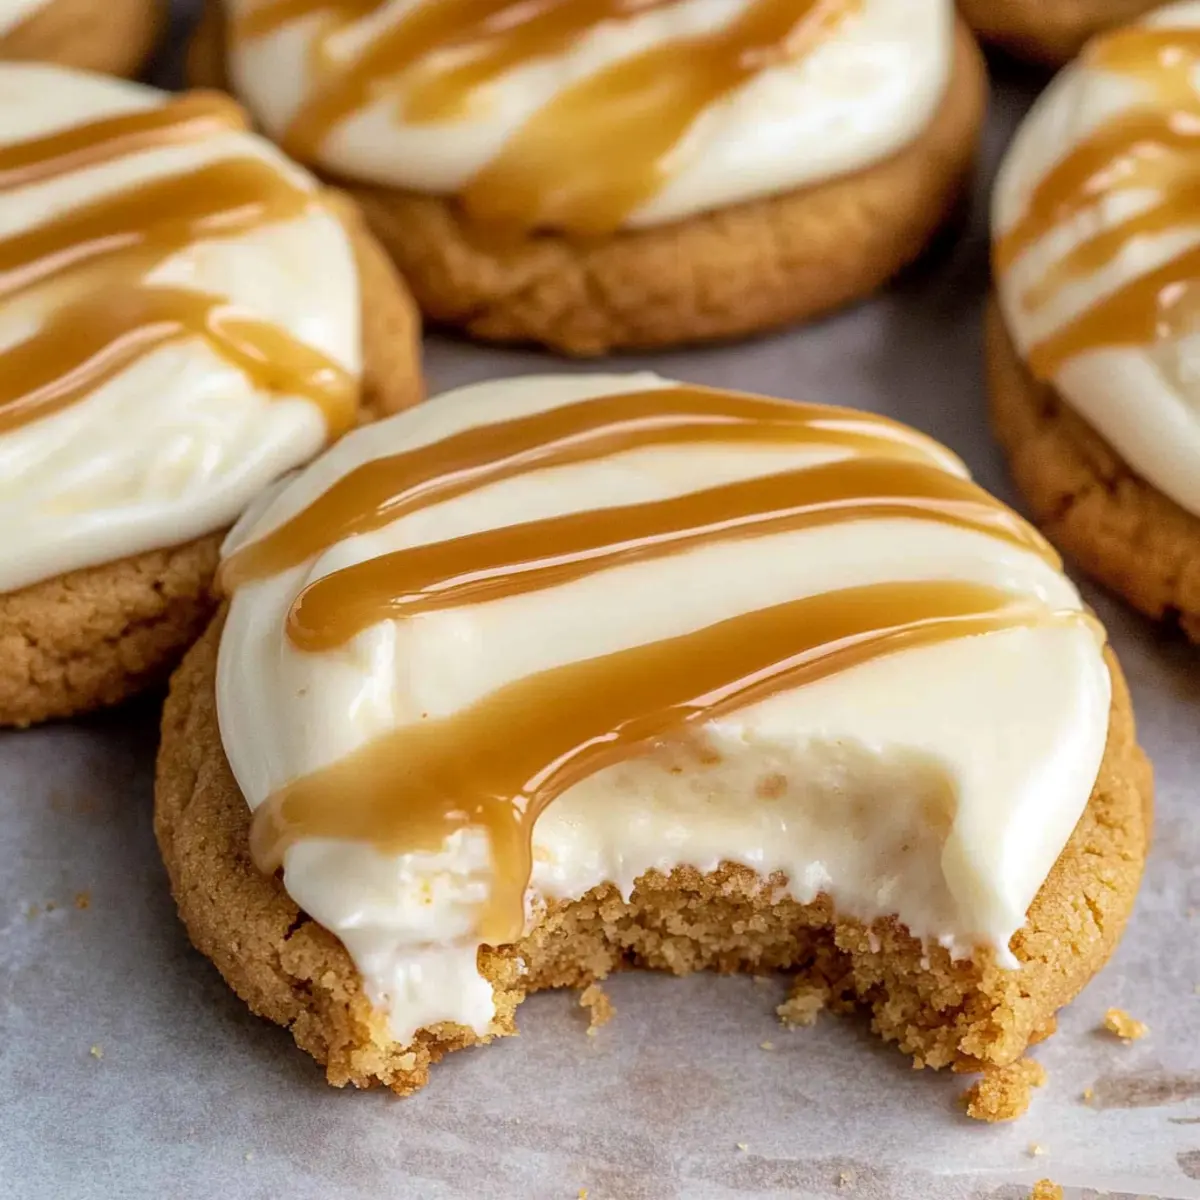
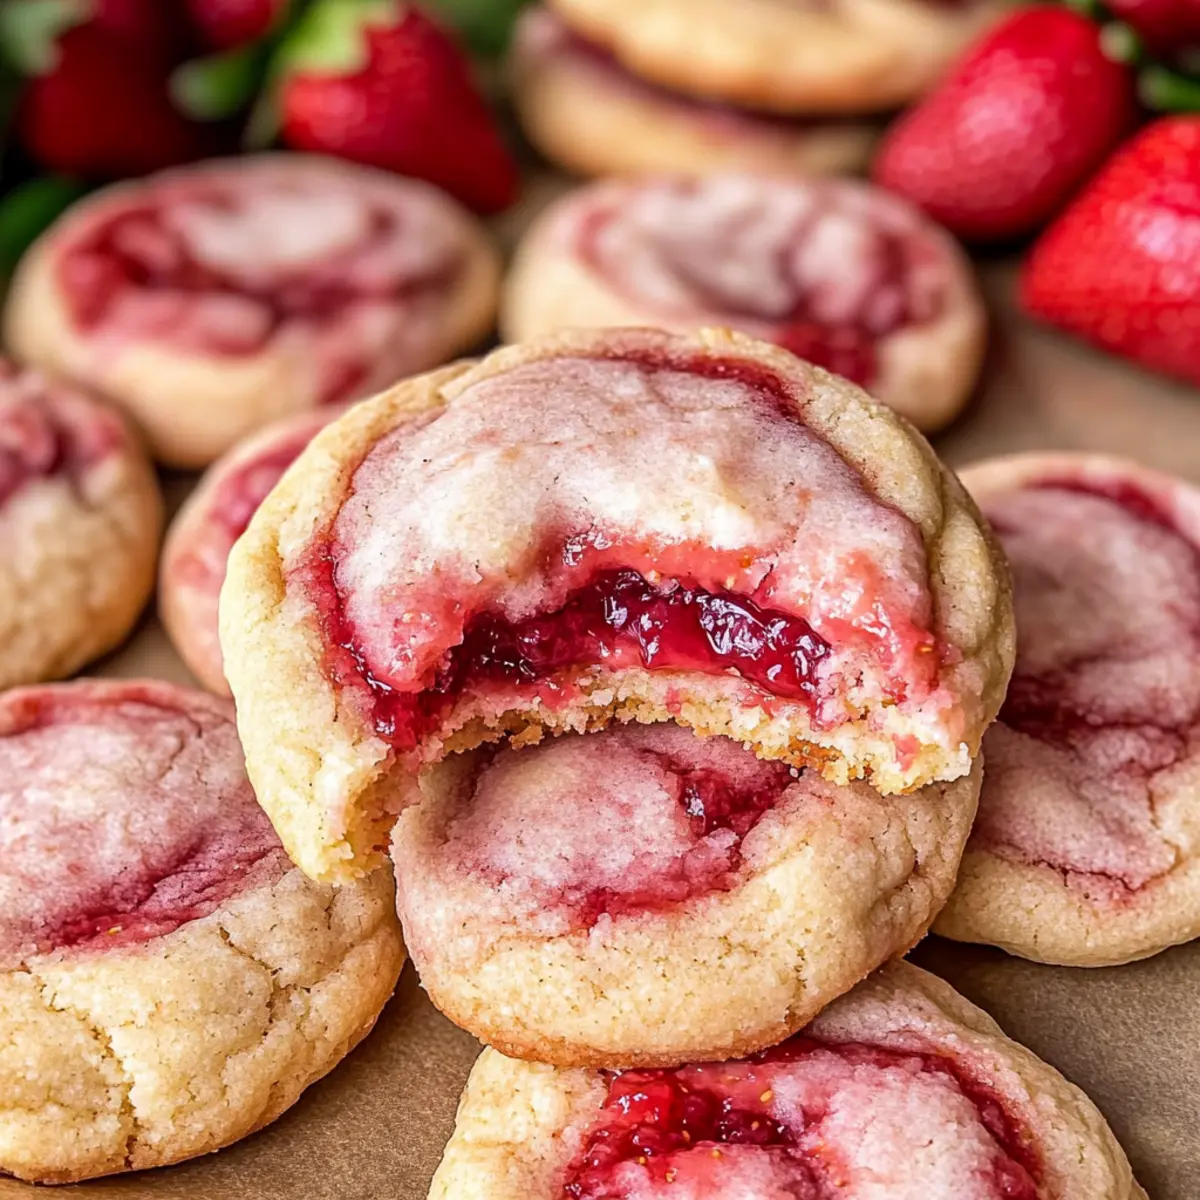
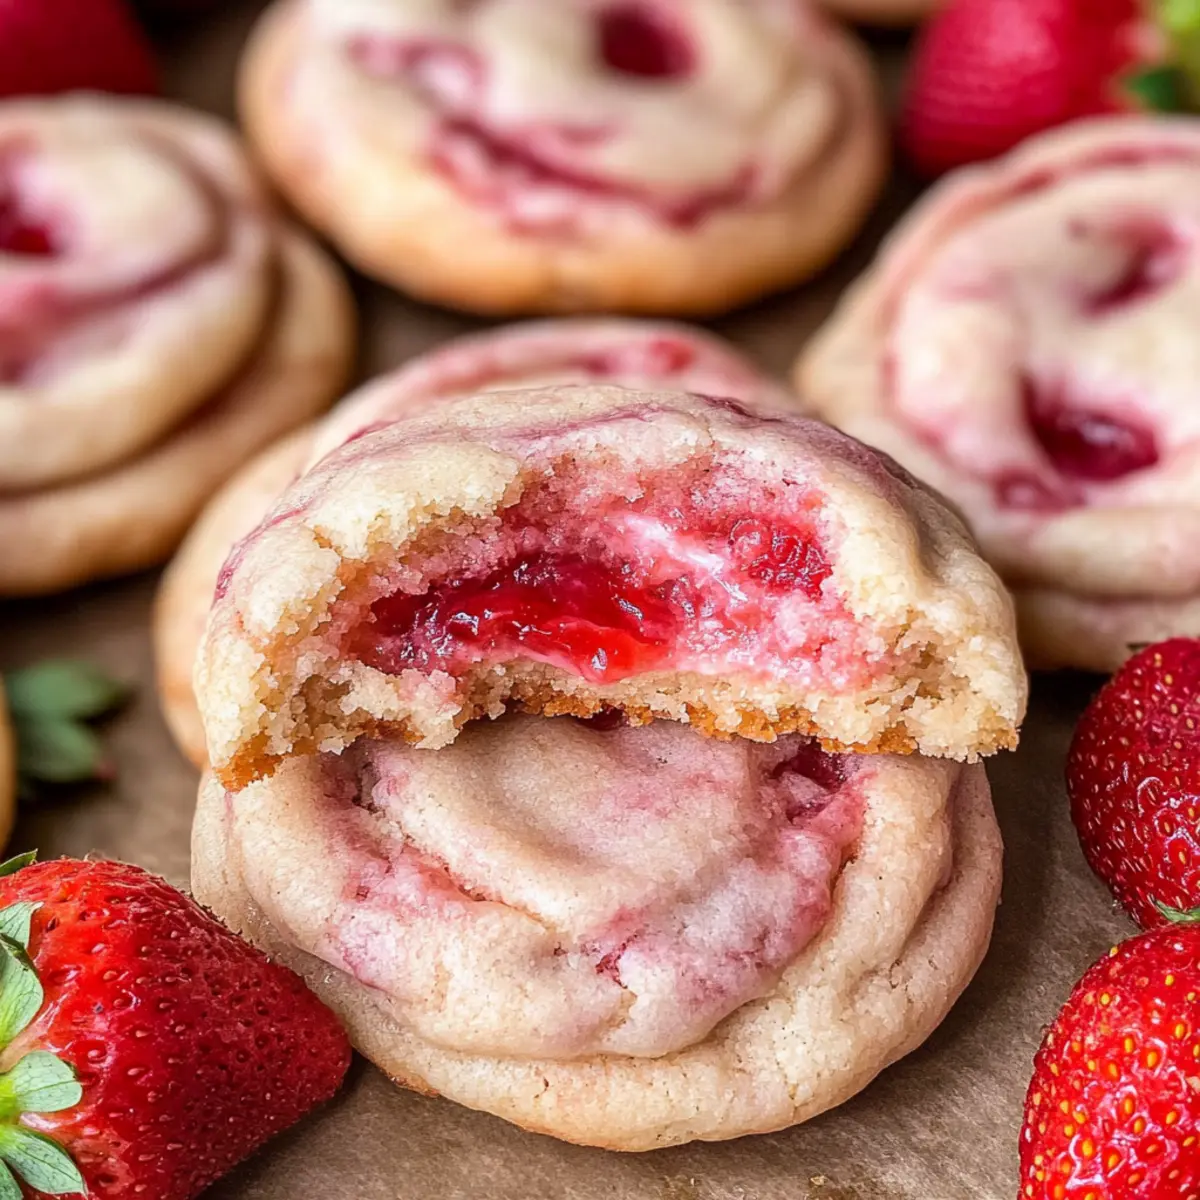
Irresistibly soft, these Strawberry Cheesecake Cookies offer a blissful bite that feels like a hug in cookie form. Jammy swirls of homemade strawberry jam elevate each cookie, delivering a burst of natural sweetness. Creamy filling made with rich cream cheese adds a delightful surprise in every munch. Perfectly chewy texture means they won’t crumble on you. Quick prep time is a win for busy bakers, allowing you to whip these up in no time. Pair them with a cup of tea or a glass of milk, and you're set for a delightful treat that can beat any fast food!
Strawberry Cheesecake Cookies Ingredients
For the Cheesecake Filling
- Cream Cheese – Provides the creamy cheesecake filling; use cold cream cheese for best mixing.
- Granulated White Sugar – Sweetens both the cheesecake filling and cookie; no direct substitution recommended.
- Vanilla Extract – Adds warmth and depth; use pure vanilla for the best flavor.
For the Strawberry Jam
- Fresh Strawberries – Essential for that homemade jammy swirl; frozen strawberries can be used if fresh are unavailable.
- Granulated Sugar – Helps to sweeten the jam; adjust according to your taste sweetness preference.
For the Cookie Dough
- All-Purpose Flour – Forms the structure of the cookies; be sure to spoon and level for accurate measurement.
- Baking Powder – A leavening agent that helps the cookies rise while maintaining a soft texture.
- Baking Soda – Works with baking powder to ensure a wonderfully chewy cookie.
- Salt – Enhances the flavors of the cookie.
- Unsalted Butter – Key for a rich buttery flavor; should be very softened for optimal creaming with sugar.
- Egg – Binds the dough and gives the cookies a chewy texture; use at room temperature for effective mixing.
- Sugar for Rolling – Provides a sweet outer coating that enhances flavor and texture; perfect for that adorable sparkle outside.
These Strawberry Cheesecake Cookies are a delightful treat that brings together the tangy flavor of cream cheese and the sweetness of strawberries, ready to impress at any occasion!
Step‑by‑Step Instructions for Strawberry Cheesecake Cookies
Step 1: Prepare Cheesecake Filling
In a mixing bowl, blend cold cream cheese, granulated sugar, and vanilla extract until fluffy and smooth, about 2-3 minutes. Scoop the mixture into small discs on a lined baking sheet, approximately 1 inch in diameter. Pop these discs in the freezer for about 30 minutes, or until solid, to ensure they maintain their shape during baking.
Step 2: Make Strawberry Jam
Take fresh strawberries and chop them into small pieces. In a saucepan over medium heat, combine the diced strawberries with sugar, cooking for about 45 minutes while stirring occasionally until you achieve a thick, jam-like consistency. Once cooked, transfer the jam to a bowl and chill in the refrigerator until cool, allowing it to set properly for the cookies.
Step 3: Mix Cookie Dough
Preheat your oven to 350°F (175°C) and line baking sheets with parchment paper. In a bowl, whisk together all-purpose flour, baking powder, baking soda, and salt. In a separate large mixing bowl, cream softened unsalted butter with granulated sugar until light and fluffy, about 4-5 minutes. Then, add one egg and vanilla extract, mixing until well combined before folding in the dry ingredients gently.
Step 4: Combine
Gradually add the flour mixture to the buttery mixture, folding it in just until combined. Carefully swirl in the homemade strawberry jam to maintain beautiful, visible swirls throughout the cookie dough—not fully mixing it in. This will give each Strawberry Cheesecake Cookie a burst of strawberry goodness.
Step 5: Assemble Cookies
Scoop about two tablespoons of cookie dough and flatten it into a disk shape in your hand. Place a frozen cheesecake disc in the center and wrap the dough around it, ensuring complete coverage. Roll the filled cookies in granulated sugar and shape them into neat discs before placing them on the prepared baking sheets for a sweet exterior.
Step 6: Bake
Bake the assembled Strawberry Cheesecake Cookies in the preheated oven for 11-12 minutes or until the edges are golden and the centers look slightly underbaked. After baking, use a cookie cutter to reshape the cookies while they’re warm, if desired, to achieve a perfect shape.
Step 7: Cool
Allow the cookies to cool on the baking sheets for about 5 minutes before transferring them to a wire rack to cool completely. This step is essential for letting the cheesecake filling set, ensuring your Strawberry Cheesecake Cookies are perfectly soft and creamy.

Expert Tips for Strawberry Cheesecake Cookies
- Chill Filling: Ensure your cheesecake filling is thoroughly frozen before assembling the cookies. This keeps the filling from leaking during baking.
- Measure Flour Properly: Use the spoon and level method for flour measurements. Too much flour can lead to dry cookies.
- Quality Strawberries: Choose the freshest strawberries for your homemade jam. They make a significant difference in flavor for these strawberry cheesecake cookies.
- Cool Cookies Completely: Let the cookies cool fully on a wire rack to allow the cheesecake filling to firm up, ensuring that perfect creamy bite.
- Adjust Baking Time: Keep an eye on cookies while baking; larger ones may need extra time. The edges should be golden, but the centers look slightly underbaked for best texture.
Storage Tips for Strawberry Cheesecake Cookies
Room Temperature: Store cookies in an airtight container at room temperature for up to 3 days to maintain their soft texture.
Fridge: If you prefer a chilled treat, keep the cookies in the fridge for up to a week. Just ensure they're in an airtight container to prevent drying out.
Freezer: For longer storage, freeze unbaked cookie dough balls for up to 2 weeks. When ready to bake, simply add a couple of extra minutes to the baking time.
Reheating: To enjoy warm cookies, microwave them for about 10-15 seconds for a soft, melty experience—perfect for a cozy snack!
What to Serve with Soft Strawberry Cheesecake Cookies?
There's nothing quite like enjoying these delicious treats alongside delightful pairings that enhance their sweet, creamy goodness.
-
Creamy Vanilla Ice Cream: The cool creaminess complements the warm cookies, creating a delightful contrast. A scoop next to those soft strawberry cheesecake cookies feels like a summer dream!
-
Fresh Fruit Salad: Bright, juicy fruits like blueberries and kiwi enhance the fruity flavors of the cookies. Plus, the freshness cuts through the sweetness, making every bite refreshing.
-
Chocolate Sauce: Drizzle some rich, melted chocolate on top for a decadent treat that adds a luscious feel. This combination is perfect for chocolate lovers seeking an extra indulgent experience.
-
Coffee or Espresso: A warm cup of coffee or espresso brings out the cheesecake flavor beautifully. The bitterness of the coffee perfectly balances the sweetness of the cookies for an exquisite dessert moment.
-
Whipped Cream: Light, airy whipped cream adds an exquisite touch; a dollop on each cookie delivers a dreamy texture that makes your taste buds sing!
-
Lemonade or Iced Tea: Refreshing beverages like lemonade or iced tea cleanse the palate between bites, making for a bright and cheerful complement to the cookies.
-
Dark Chocolate-Covered Strawberries: These decadent bites enhance the strawberry flavor, creating a sweet and slightly tart experience that pairs perfectly with the cookies’ creamy filling.
-
Milk: A classic pairing, a tall glass of cold milk works wonders. It softens the cookie with each bite, reminding you of childhood snack times.
Make Ahead Options
These delightful Strawberry Cheesecake Cookies are perfect for meal prep enthusiasts! You can prepare the cheesecake filling and homemade strawberry jam up to 3 days in advance. Simply mix the cream cheese, sugar, and vanilla, then scoop and freeze the filling discs (this prevents leaking during baking). For the jam, refrigerate it after cooking until cool. When you’re ready to enjoy these cookies, simply mix the cookie dough and assemble them with the frozen filling and jam swirls. Bake according to the instructions, and you'll have soft Strawberry Cheesecake Cookies fresh from the oven with minimal last-minute effort! Enjoy the satisfaction of homemade sweetness without the rush!
Strawberry Cheesecake Cookies Variations
Feel free to personalize your Strawberry Cheesecake Cookies with these fun and delightful twists!
-
Berry Swap: Substitute fresh strawberries with raspberries or blueberries for a tasty fruit variation. Each berry brings its unique flavor to your cookie.
-
Flavored Cream Cheese: Use flavored cream cheese, like strawberry or vanilla, to elevate your cheesecake filling. It adds that extra zing that can really surprise your taste buds.
-
Chocolate Twist: Incorporate cocoa powder into the dough or dip the finished cookies in melted chocolate for a rich, decadent treat. Chocolate and strawberry are a timeless pairing!
-
Nutty Crunch: Mix in chopped nuts, like pecans or walnuts, for added texture and a nutty flavor. This twist creates a satisfying crunch that complements the softness of the cookies.
-
Cinnamon Sugar Roll: Roll the cookie dough balls in a blend of cinnamon and sugar for a warm flavor boost. It’s a delightful twist that pairs wonderfully with the strawberry sweetness.
-
Vegan Friendly: Replace the cream cheese with vegan cream cheese, use flax eggs, and substitute dairy butter with coconut oil. You’ll have a plant-based version that retains all the magic.
-
Zesty Lemon: Add a teaspoon or two of lemon zest to the dough for a refreshing citrus brightness. Lemon and strawberry together create a burst of summer flavor!
-
Spicy Kick: If you're feeling adventurous, consider incorporating a pinch of cayenne pepper or chili powder into the dough for a surprising spicy note that elevates your cookies in a delightful way.
These variations can keep the magic alive and ensure there’s always a new cookie experience waiting for you. And if you're looking for more indulgent recipes, don't forget to check out these delicious Matcha Cookies Soft or delightful Thumbprint Cookies Melt. Happy baking!
Strawberry Cheesecake Cookies Recipe FAQs
How do I choose ripe strawberries for the jam?
Absolutely! Look for strawberries that are vibrant red, with no green or white patches, and have a sweet fragrance. Avoid any berries with dark spots or mold, as these indicate overripeness. If you find perfectly ripe strawberries, they will yield a sweeter and more flavorful jam.
What’s the best way to store leftover Strawberry Cheesecake Cookies?
Very! Keep your cookies in an airtight container at room temperature, and they'll remain delicious for up to 3 days. If you prefer them chilled, refrigerate them in a sealed container, where they can last for an entire week. That way, you can savor the delightful flavors whenever you fancy a treat!
Can I freeze the cookie dough for later use?
Absolutely! You can freeze unbaked cookie dough balls for up to 2 weeks. To do this, scoop the dough and shape it into balls, then place them on a baking sheet lined with parchment paper and freeze until solid. Once frozen, transfer them to a freezer-safe bag or container. When ready to bake, just add an extra couple of minutes to the baking time!
What can I do if my cheesecake filling leaks out during baking?
If you notice the cheesecake filling leaking, it's likely because it wasn’t frozen solid enough. In the future, ensure that your filling is frozen for at least 30 minutes before assembling the cookies. Also, wrapping the dough completely around the filling can help protect it during baking. Don’t worry, though; even if it leaks a bit, those cookies will still taste amazing!
Are these cookies suitable for people with dairy allergies?
Unfortunately, these Strawberry Cheesecake Cookies contain cream cheese, making them unsuitable for those with dairy allergies. However, you could experiment with dairy-free cream cheese alternatives that are now available in many supermarkets. Just make sure the substitute will maintain a similar texture and flavor profile in the filling!
How do I tell if the cookies are baked perfectly?
For that perfect bake, keep an eye on the edges while they're in the oven. They should be golden brown while the centers look slightly underbaked. This will help maintain that soft, chewy texture we all love in Strawberry Cheesecake Cookies. It's a bit of an art, but practice makes perfect!
Irresistibly Soft Strawberry Cheesecake Cookies to Savor
Ingredients
Equipment
Method
- In a mixing bowl, blend cold cream cheese, granulated sugar, and vanilla extract until fluffy and smooth, about 2-3 minutes.
- Scoop the mixture into small discs on a lined baking sheet, approximately 1 inch in diameter.
- Pop these discs in the freezer for about 30 minutes, or until solid.
- Chop fresh strawberries into small pieces, and combine with sugar in a saucepan over medium heat.
- Cook for about 45 minutes while stirring until thick, then cool and chill the jam.
- Preheat your oven to 350°F (175°C) and line baking sheets with parchment paper.
- In a bowl, whisk together flour, baking powder, baking soda, and salt.
- Cream softened butter with granulated sugar for about 4-5 minutes, then add egg and vanilla.
- Gradually fold in the dry ingredients and carefully swirl in the strawberry jam.
- Scoop about two tablespoons of dough, flatten it, and wrap it around a cheesecake disc.
- Roll in sugar and shape into discs before placing them on baking sheets.
- Bake for 11-12 minutes until edges are golden, using a cookie cutter for shape if desired.
- Cool on sheets for about 5 minutes, then transfer to a wire rack.