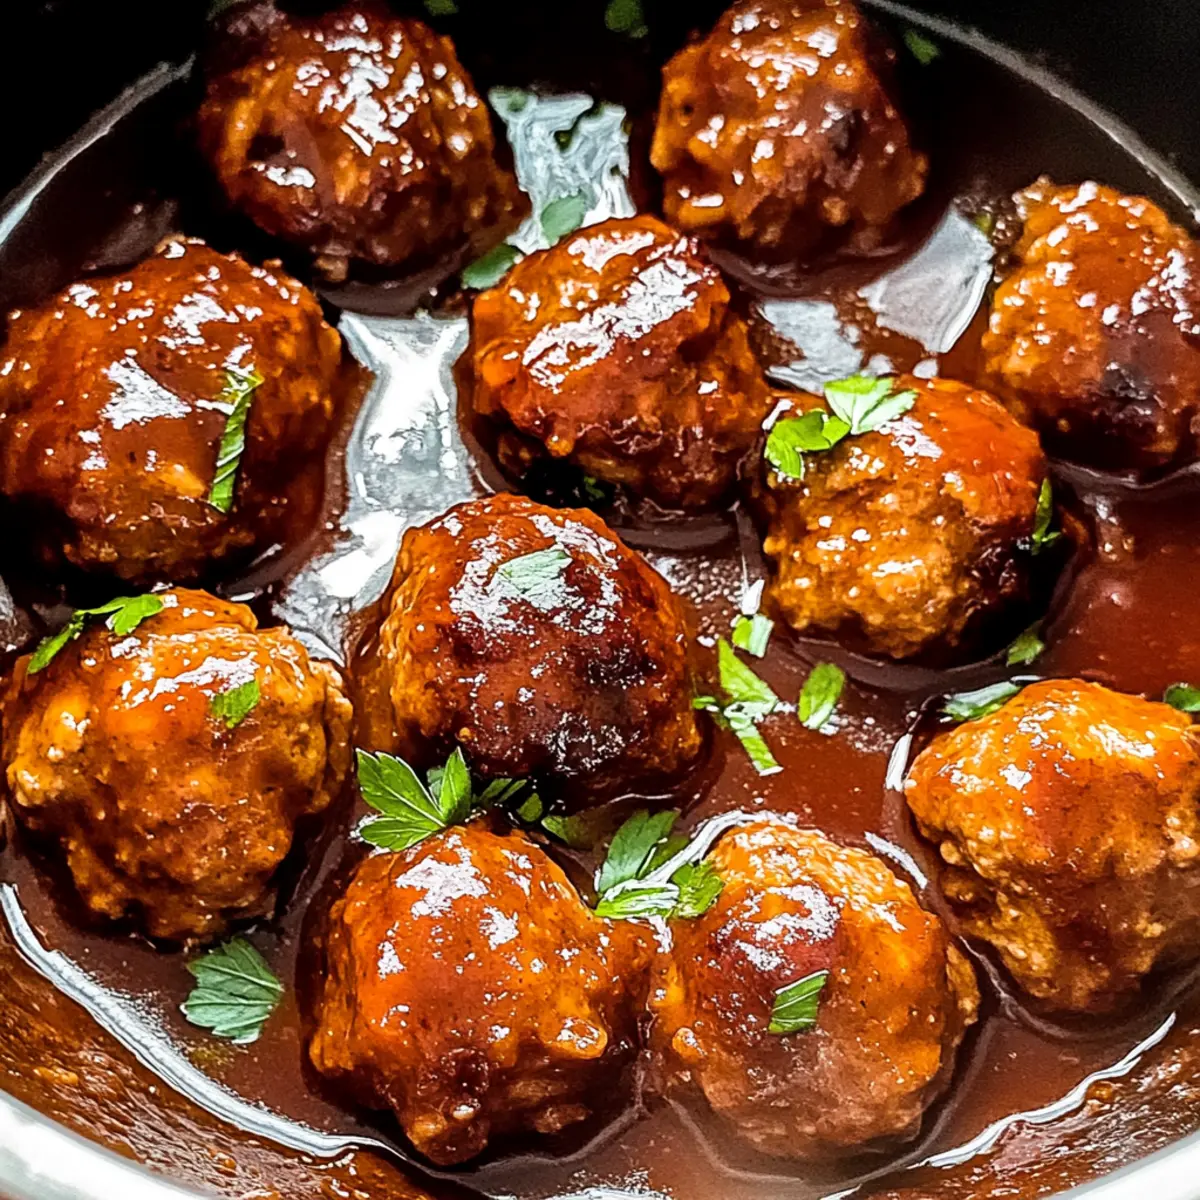
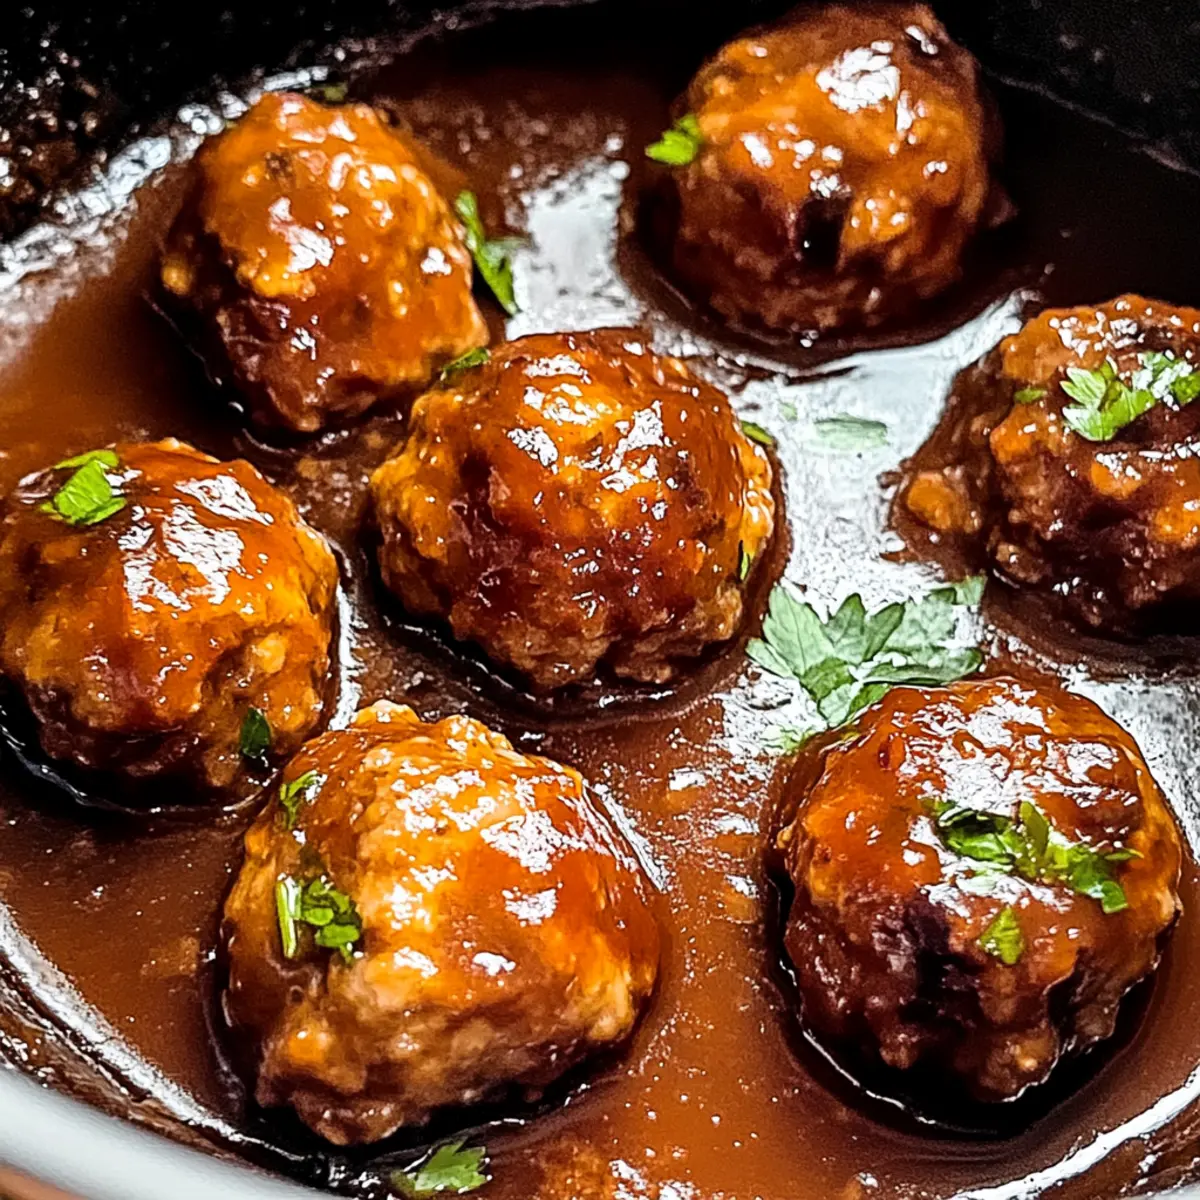
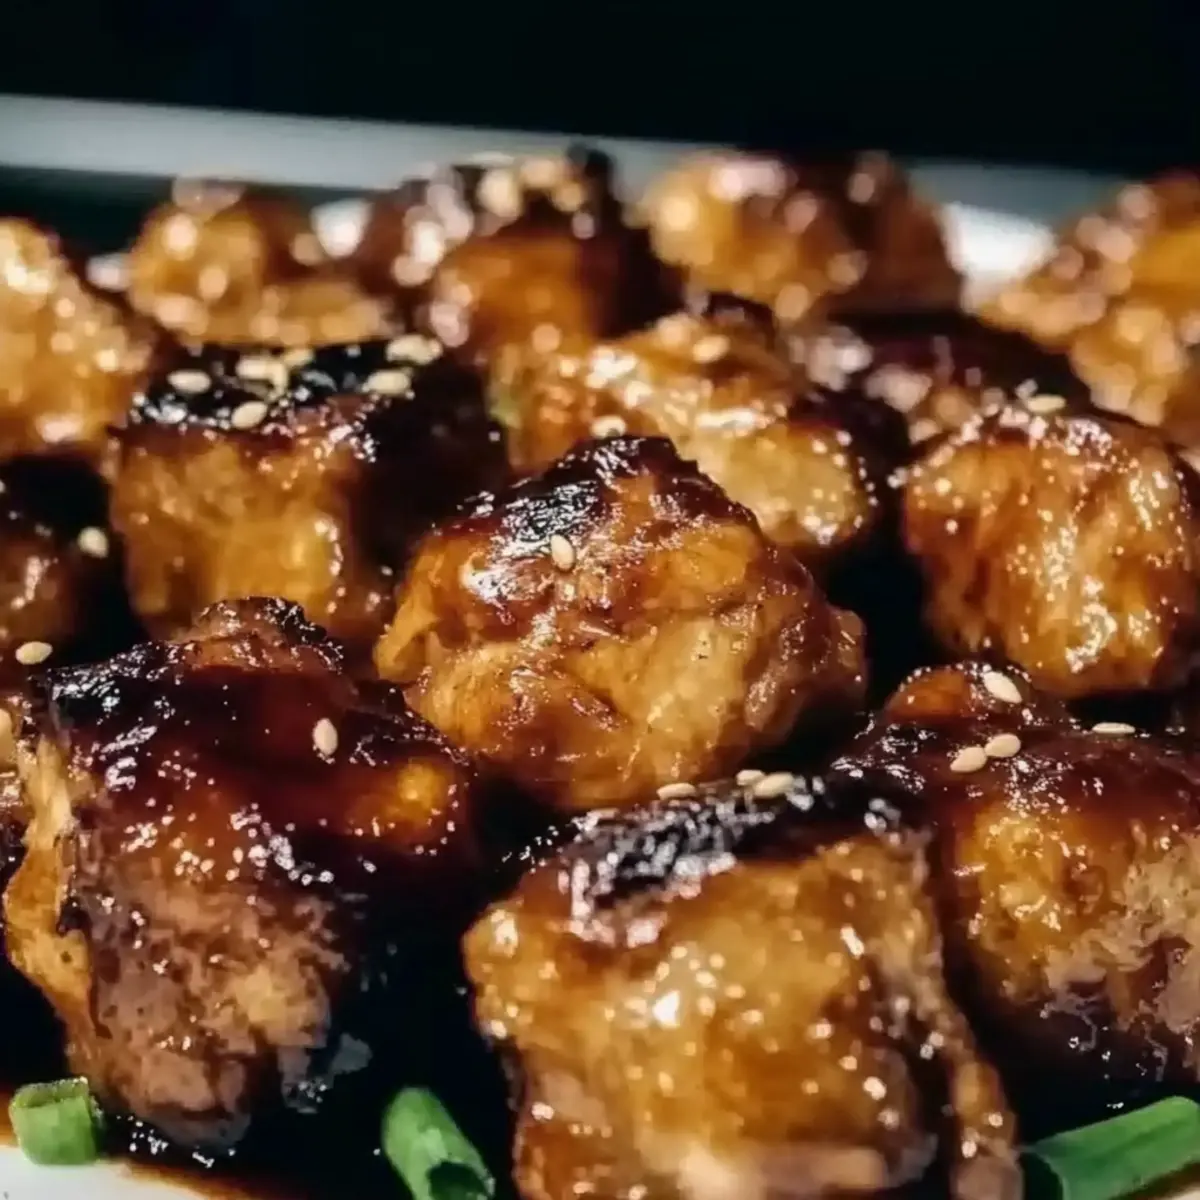
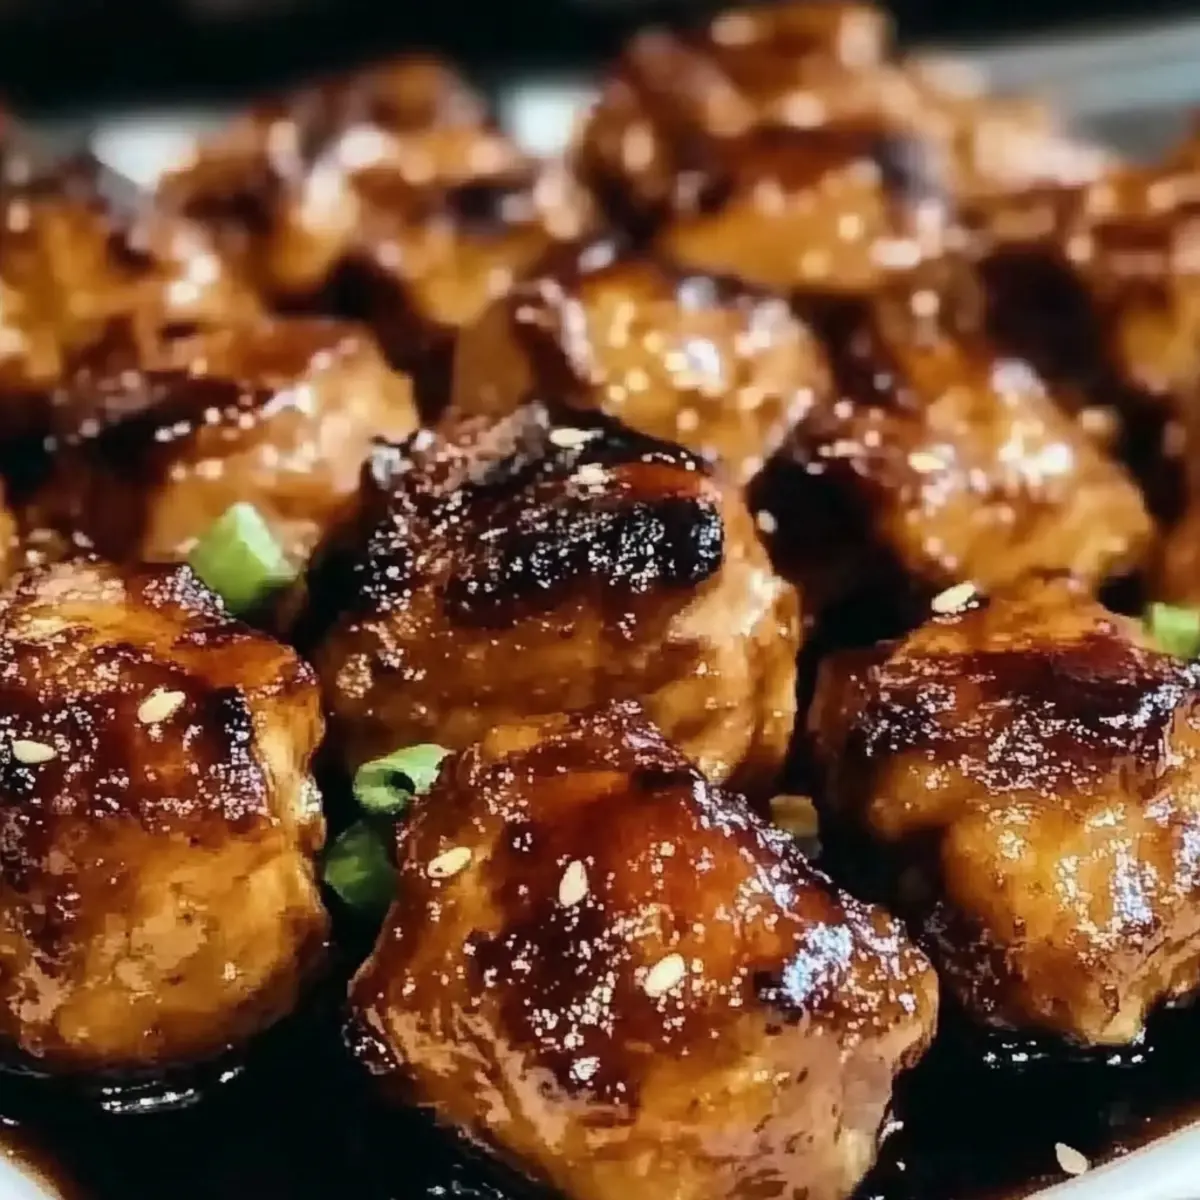
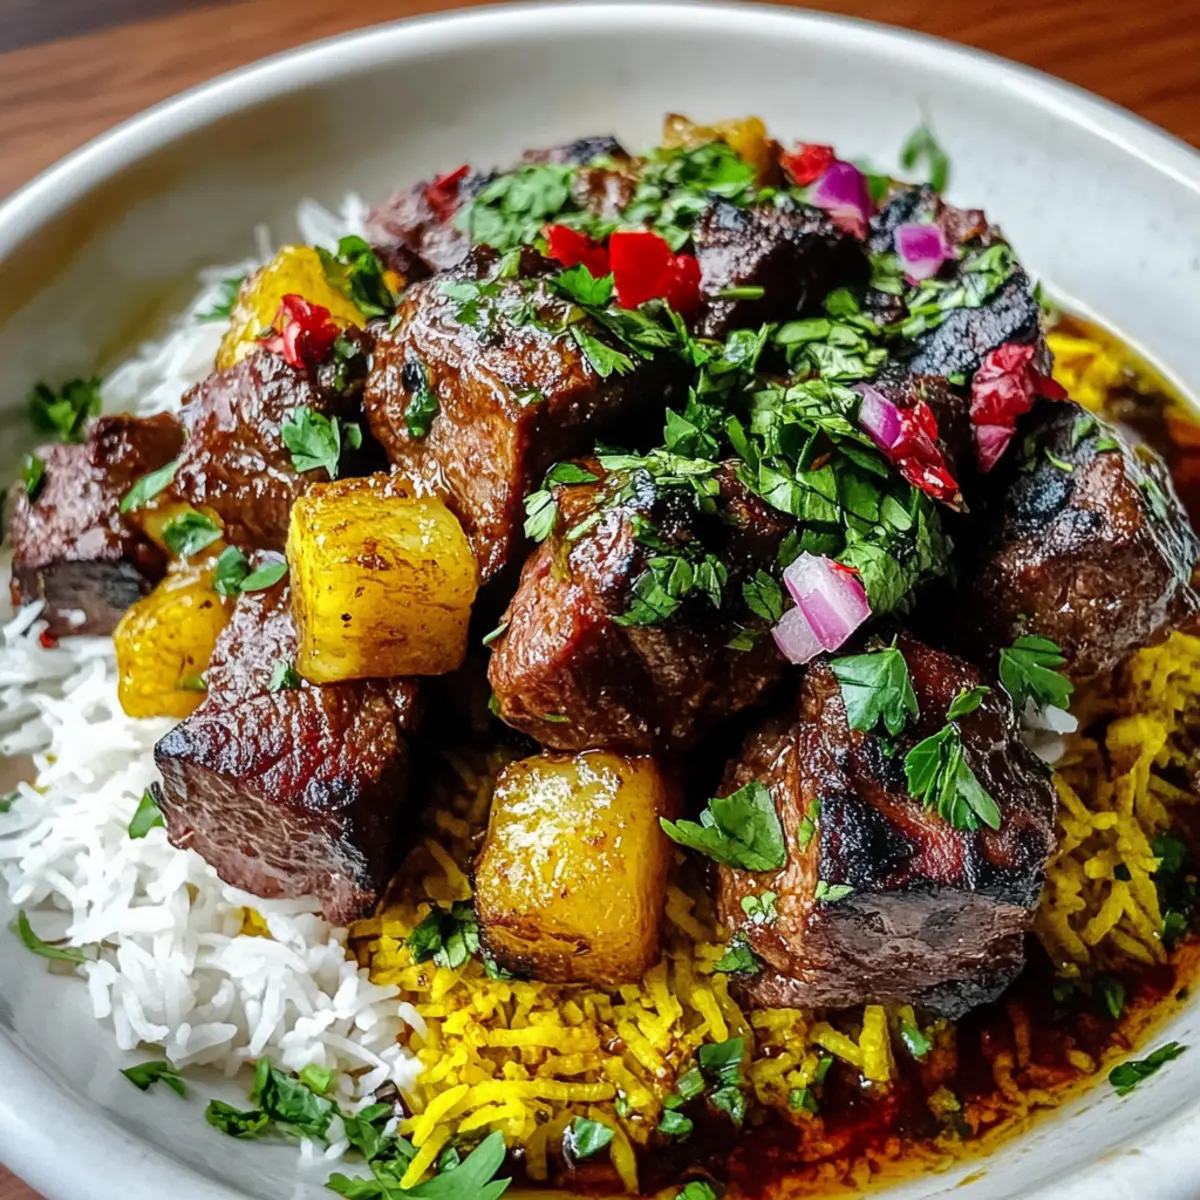
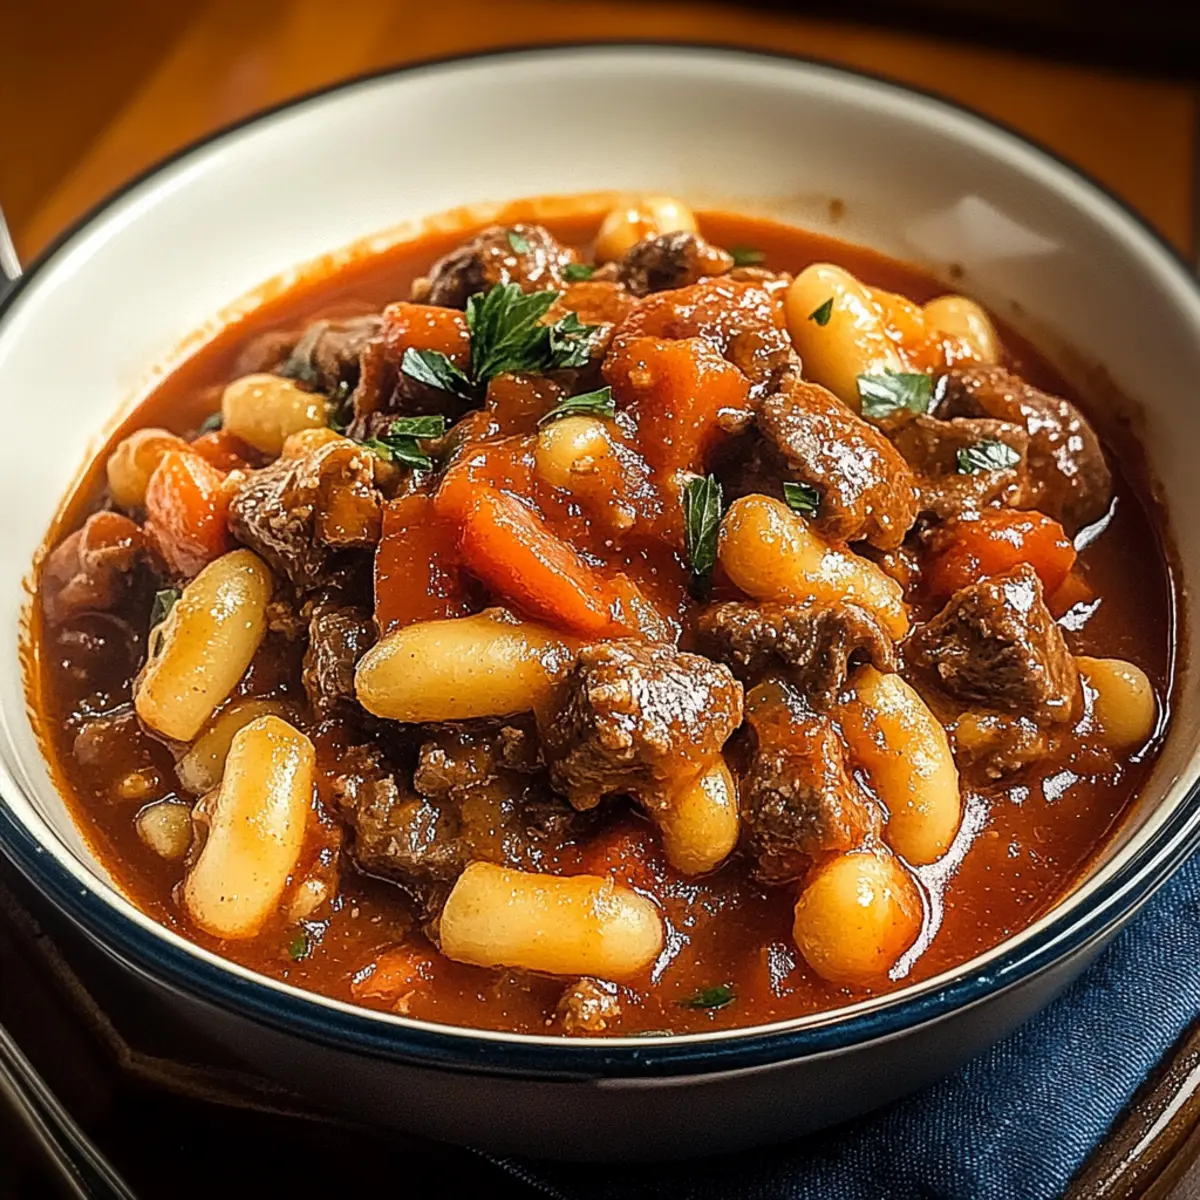
The aroma hit me like a warm embrace as I stepped into the kitchen, promising comfort and indulgence. Today, I'm excited to share my favorite twist on a classic—Korean Style Pot Roast with Gochujang Glaze. This recipe delivers all the heartiness you crave from a traditional pot roast while introducing the vibrant, spicy-sweet flavors of Korean cuisine. Not only is it a one-pot meal that makes cleanup a breeze, but it’s also an absolute crowd-pleaser, perfect for family dinners or meal prep for the week ahead. Imagine sinking your fork into meltingly tender beef, coated in a glossy, savory glaze that dances on your taste buds. Ready to explore this delicious fusion? Let’s dive in!

Why Will You Adore This Dish?
Unforgettable Flavor: The unique combination of gochujang and soy sauce creates a rich, savory glaze that elevates the traditional pot roast experience.
Effortless Cooking: With a simple one-pot method, this dish promises minimal cleanup, making it perfect for busy weeknights or relaxing weekends.
Meal Prep Friendly: Create a batch that tastes even better as leftovers, ensuring you have satisfying meals ready to go—a definite win for those hectic days.
Versatile Serving Options: Whether you enjoy it over rice, nestled in lettuce wraps, or alongside buttery mashed potatoes, your dining experience can be tailored to your preference.
Crowd-Pleasing Comfort: This hearty dish caters to everyone, making it an excellent choice for family dinners or gatherings. It's comfort food at its finest! Dive into this flavor-packed Korean Style Pot Roast for a warm meal that never disappoints.
Korean Style Pot Roast Ingredients
• Here's what you'll need:
For the Beef
- Chuck Roast – The main protein that yields tender, flavorful meat when slow-cooked.
- Salt & Pepper – Essential for seasoning the roast before searing to build a rich flavor base.
For the Vegetables
- Carrots – Adds natural sweetness and texture; cut them into chunks for even cooking.
- Onion – Serves as the aromatic base; slice for uniform cooking.
- Garlic – Minced garlic enhances the aroma and taste significantly.
- Fresh Ginger – Minced ginger provides a warm spice that complements the dish.
For the Sauce
- Soy Sauce – Adds umami depth and saltiness; consider low-sodium for a healthier choice.
- Gochujang – This spicy-sweet paste is the star ingredient that gives the roast its Korean flair; substitute with red chili paste if needed.
- Brown Sugar – Balances the heat from the gochujang perfectly with a touch of sweetness.
- Rice Vinegar – Contributes acidity and brightness to the overall flavor.
- Sesame Oil – Drizzled before serving, it adds a delightful nuttiness to finish the dish.
For the Braising Liquid
- Beef Broth – Provides moisture; essential for braising the roast until tender.
For Garnish
- Green Onions – Sliced for a fresh, vibrant top note.
- Fresh Cilantro – Adds a fresh contrast that brightens every bite.
This Korean Style Pot Roast is a delightful fusion of flavors and textures, bringing comfort food to life with every tender bite!
Step‑by‑Step Instructions for Korean Style Pot Roast
Step 1: Prepare the Roast
Begin by patting your chuck roast dry with paper towels, then season it generously with salt and pepper on all sides. This step is crucial for enhancing the flavor of the Korean Style Pot Roast. Allow the seasoned roast to sit for about 15 minutes at room temperature while you prep the other ingredients, ensuring even cooking.
Step 2: Sear the Roast
In a large Dutch oven, heat a tablespoon of oil over medium-high heat. Add the chuck roast once the oil is shimmering, and sear it for about 5-7 minutes on each side until it's deeply browned. This caramelization adds richness to the dish. Once seared, remove the roast from the pot and set it aside on a plate.
Step 3: Sauté the Aromatics
In the remaining drippings of the Dutch oven, add the sliced onion, minced garlic, and minced ginger. Sauté these ingredients over medium heat for 3-4 minutes, stirring frequently, until they are fragrant and the onion becomes translucent. This aromatic base will infuse the Korean Style Pot Roast with savory depth.
Step 4: Create the Sauce
Stir in the gochujang, soy sauce, brown sugar, and rice vinegar. Mix thoroughly for about a minute, allowing the ingredients to meld and creating a beautiful sauce that will coat the roast. You'll notice the vibrant colors and enticing aromas already filling the kitchen at this point!
Step 5: Add the Braising Liquid
Pour in the beef broth, using a wooden spoon to scrape up any browned bits stuck to the bottom of the pot. These bits are packed with flavor and will enhance the braising liquid, making your Korean Style Pot Roast even more delicious. Stir well to combine all the ingredients.
Step 6: Return the Roast
Carefully place the seared roast back into the Dutch oven, allowing it to rest in the flavorful sauce. Add the chopped carrots around the roast, which will soak up the savory essence as they cook. Ensure the carrots are nestled well to cook evenly as everything braises together.
Step 7: Braise the Roast
Cover the Dutch oven with a lid and transfer it to a preheated oven set at 325°F. Let it braise for about 3 to 3.5 hours. You'll know it's done when the meat is fork-tender and shreds easily. This low and slow cooking method ensures your Korean Style Pot Roast is infused with the bold flavors of the sauce.
Step 8: Finish and Garnish
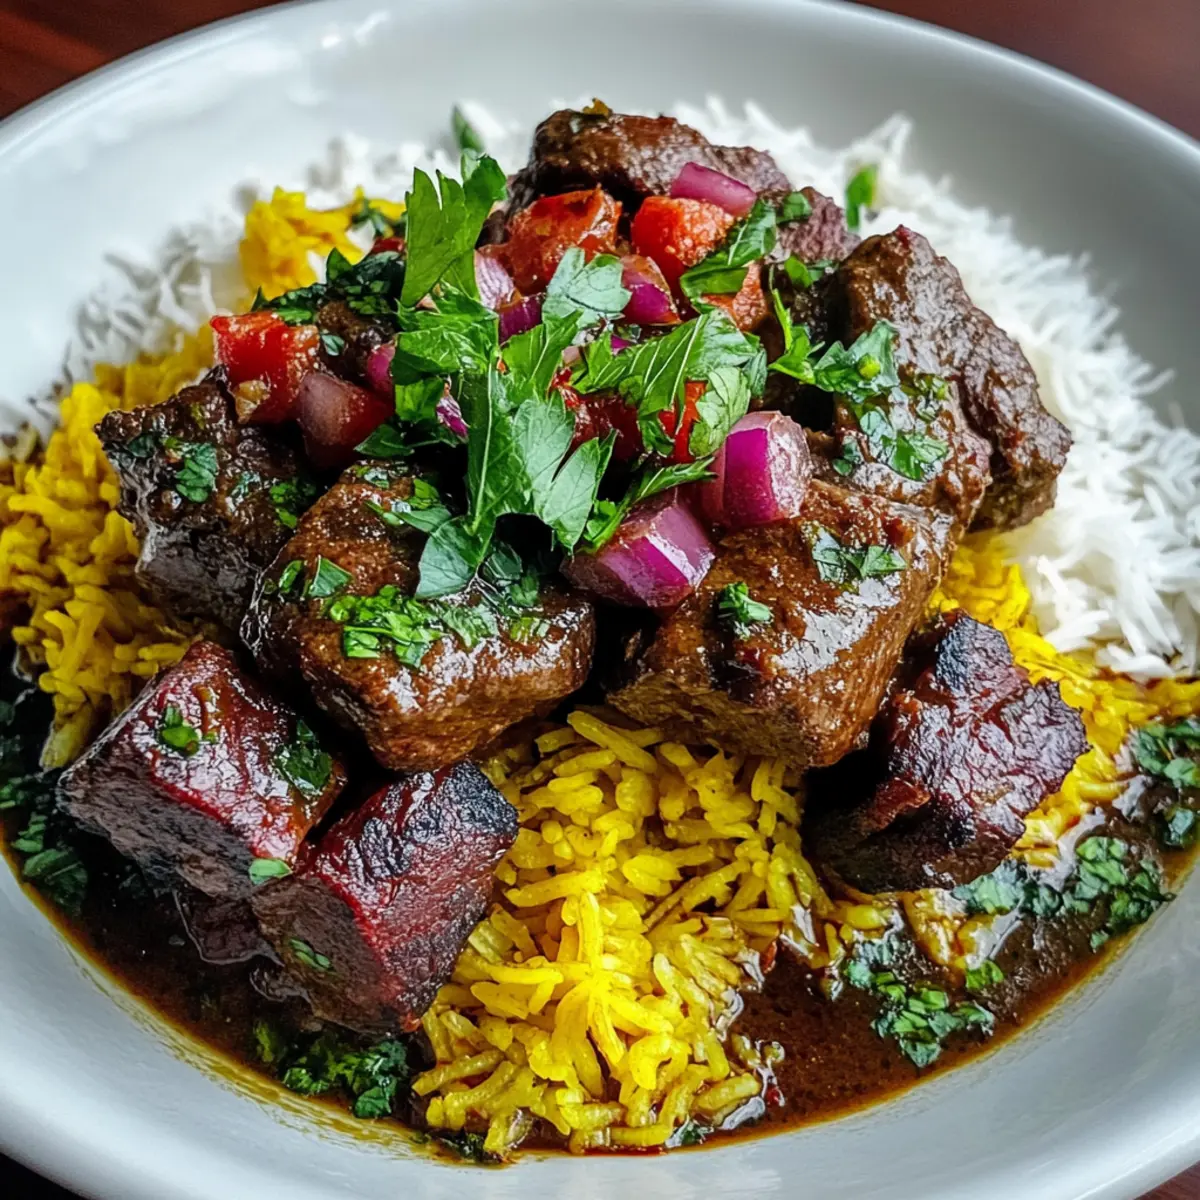
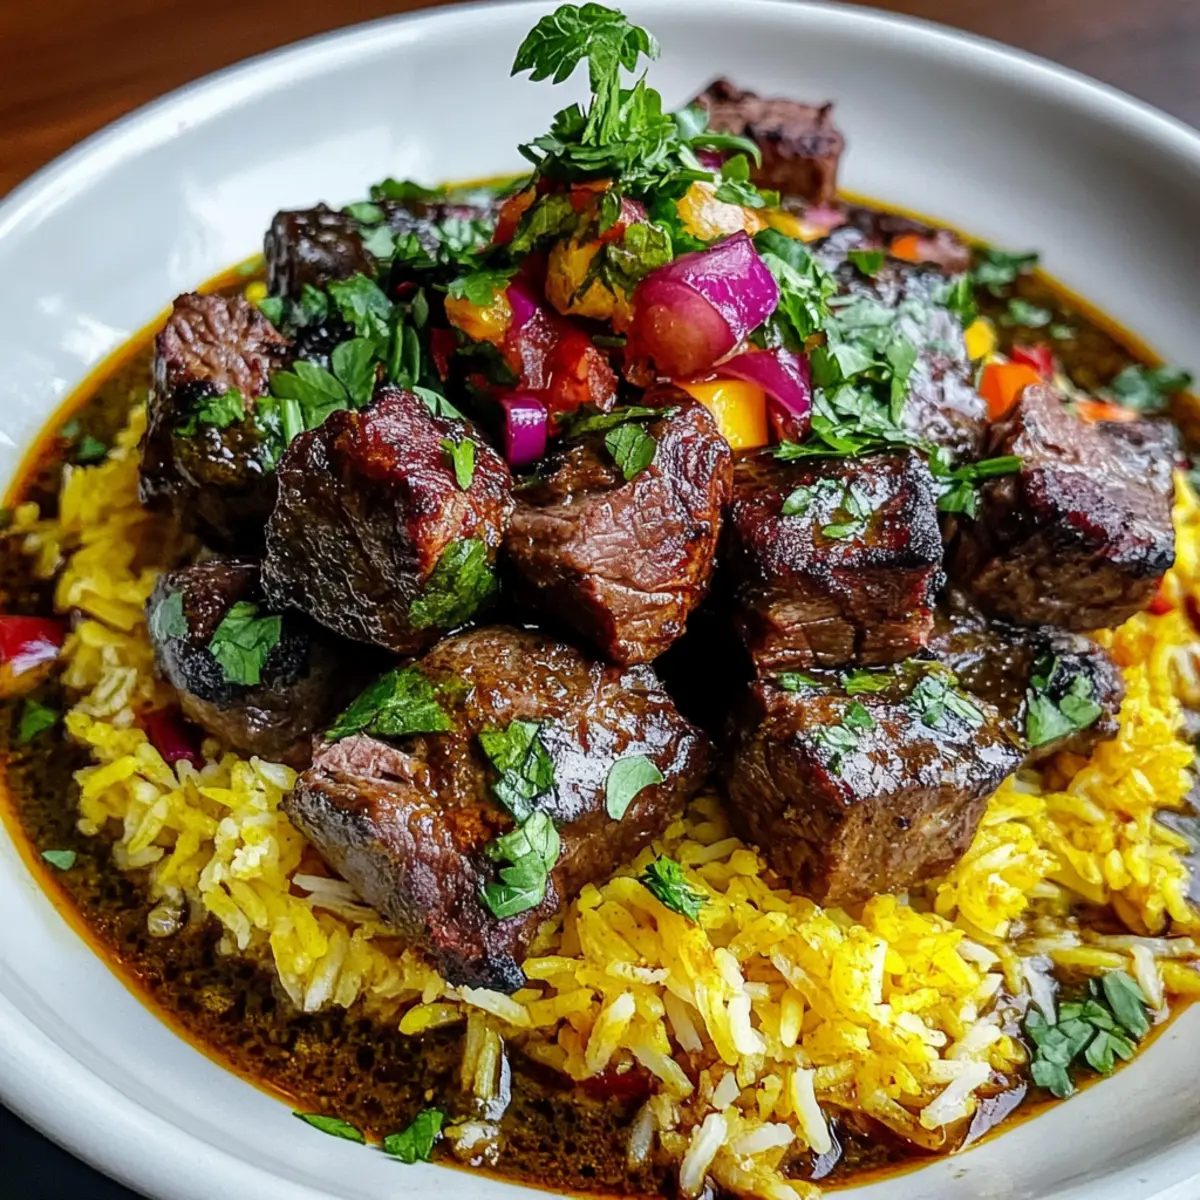
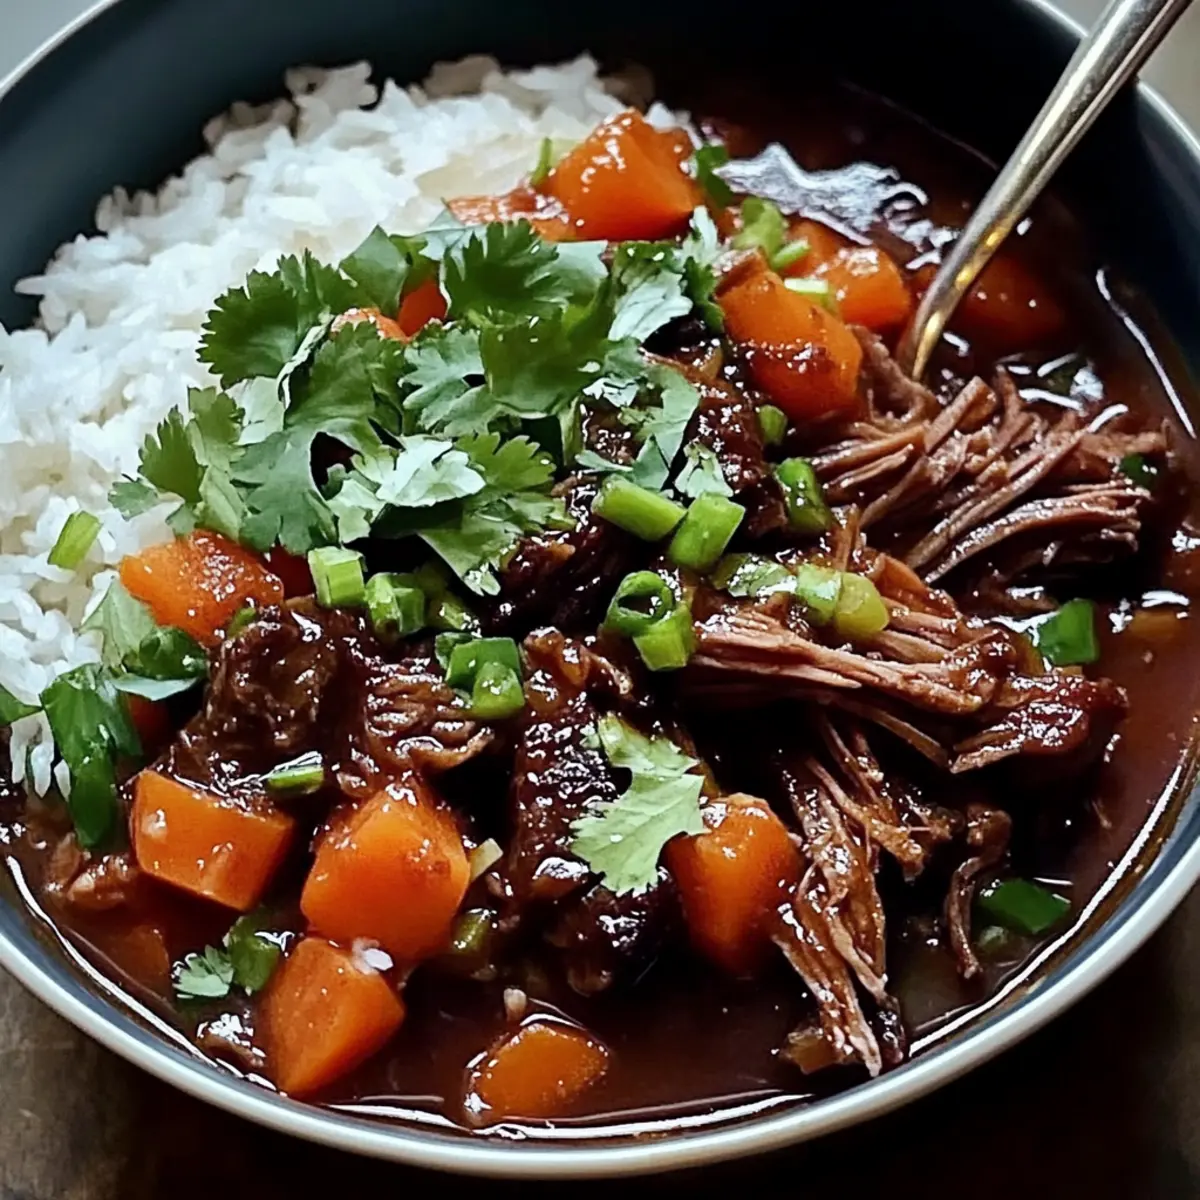
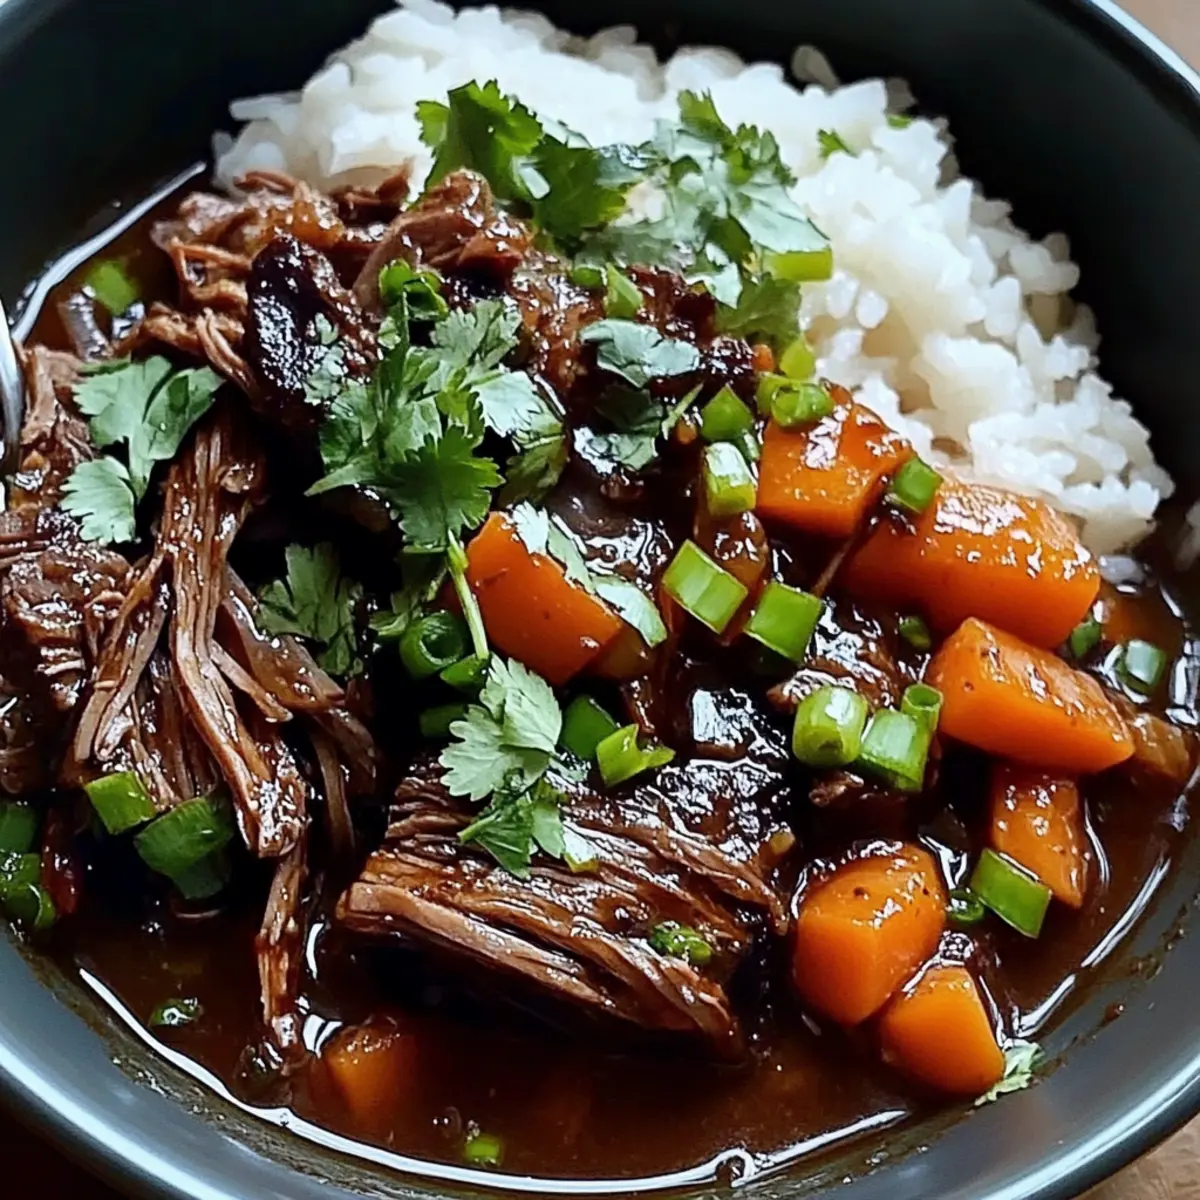
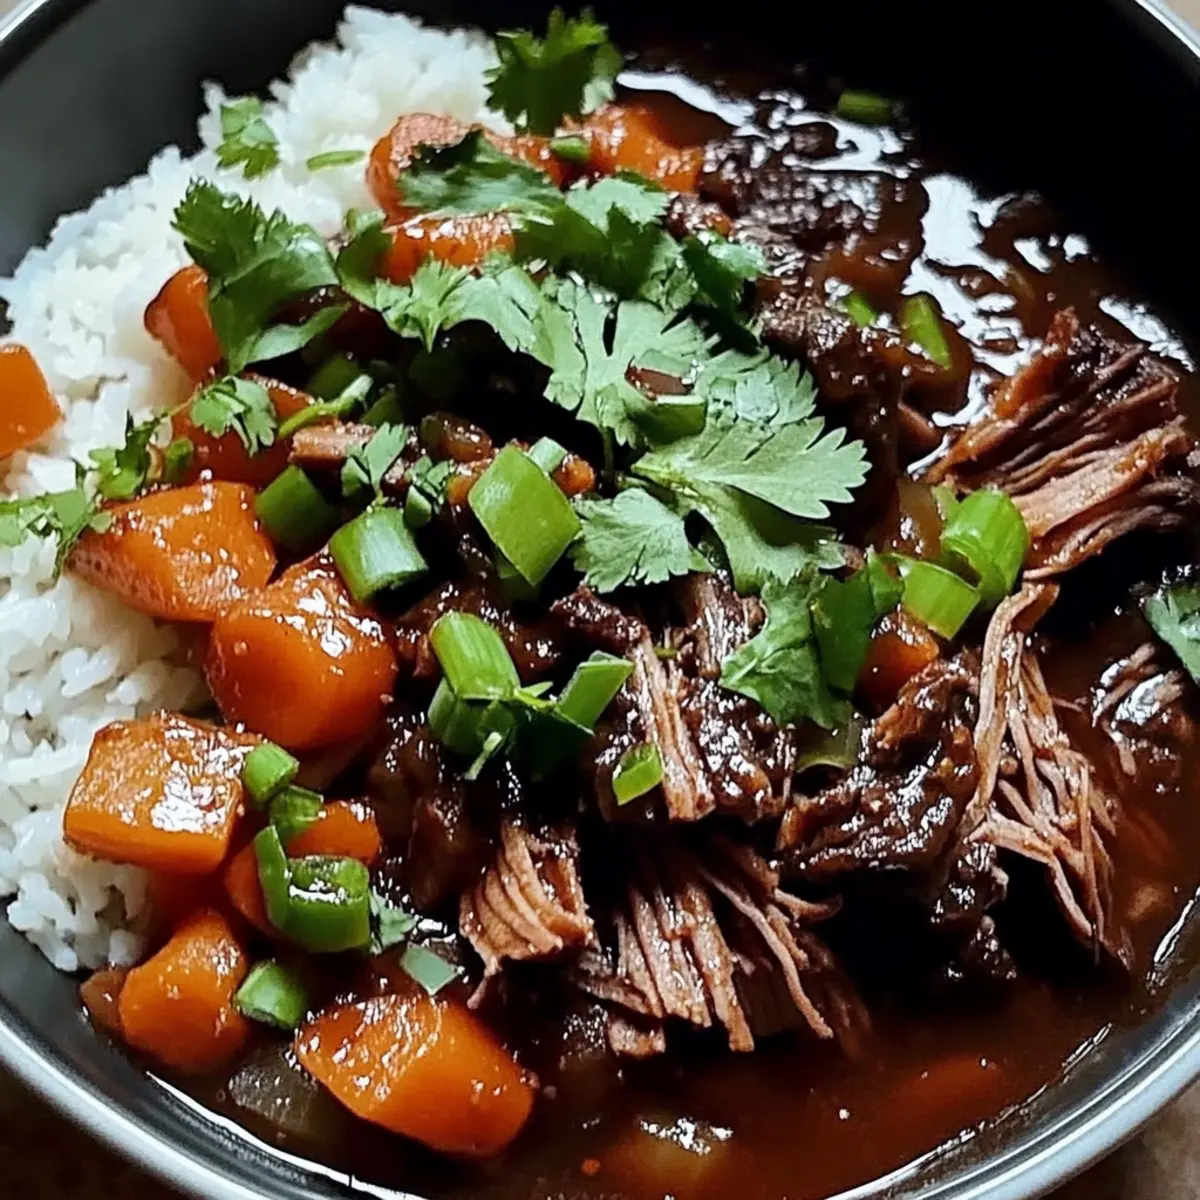
After braising, remove the pot from the oven and skim off any excess fat from the top of the sauce. Drizzle the roast with sesame oil for a final touch of flavor and richness. Sprinkle sliced green onions and fresh cilantro on top for a bright finish that balances the robust flavors of the dish.
Step 9: Serve
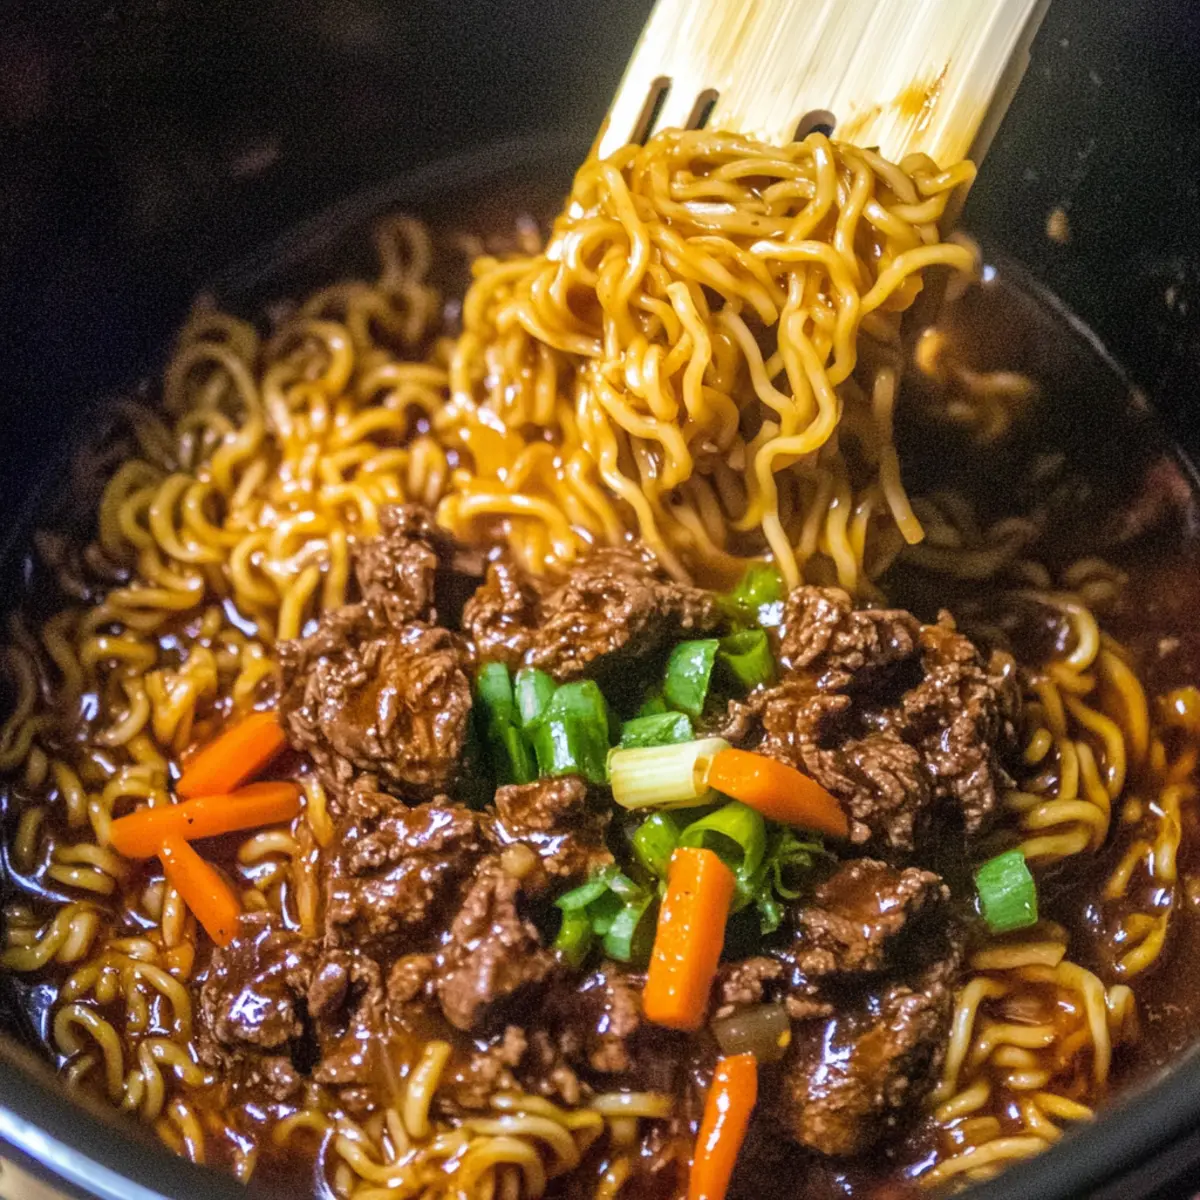
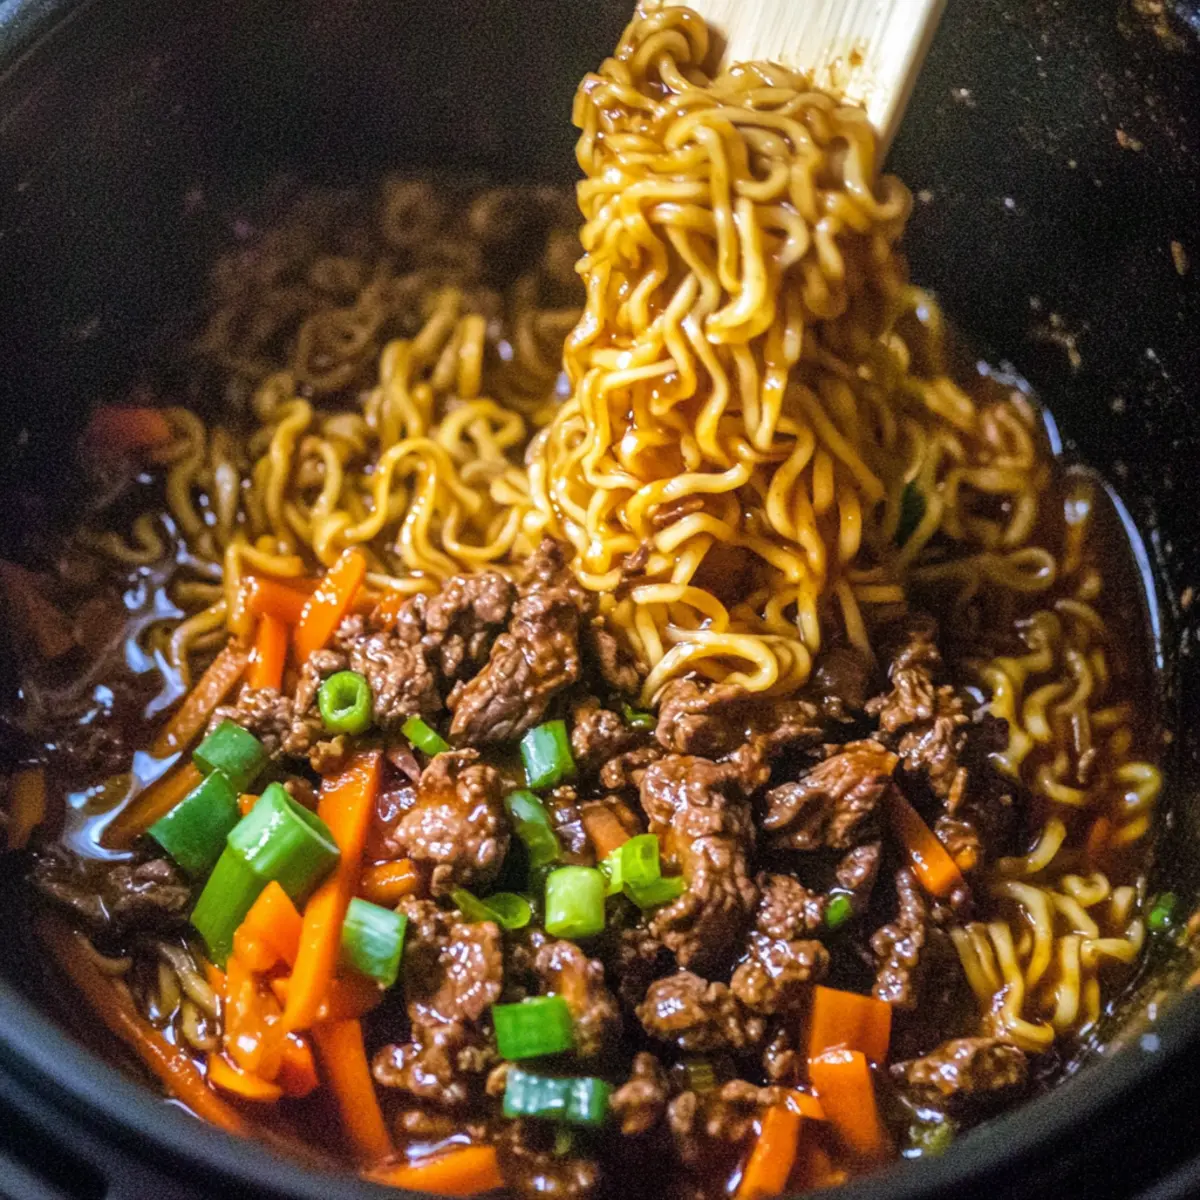
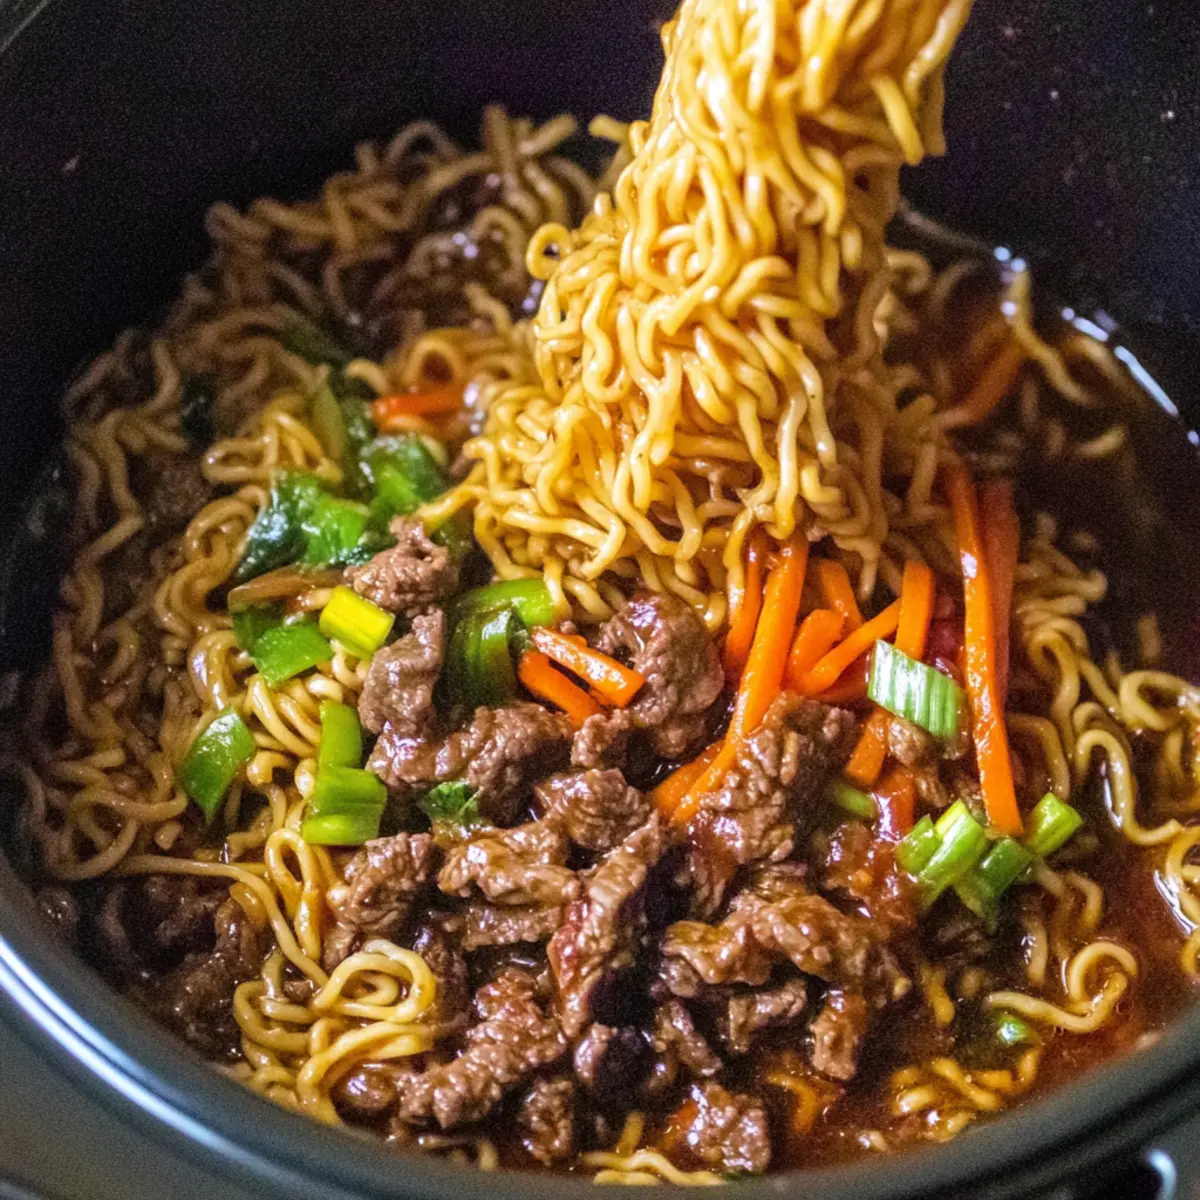
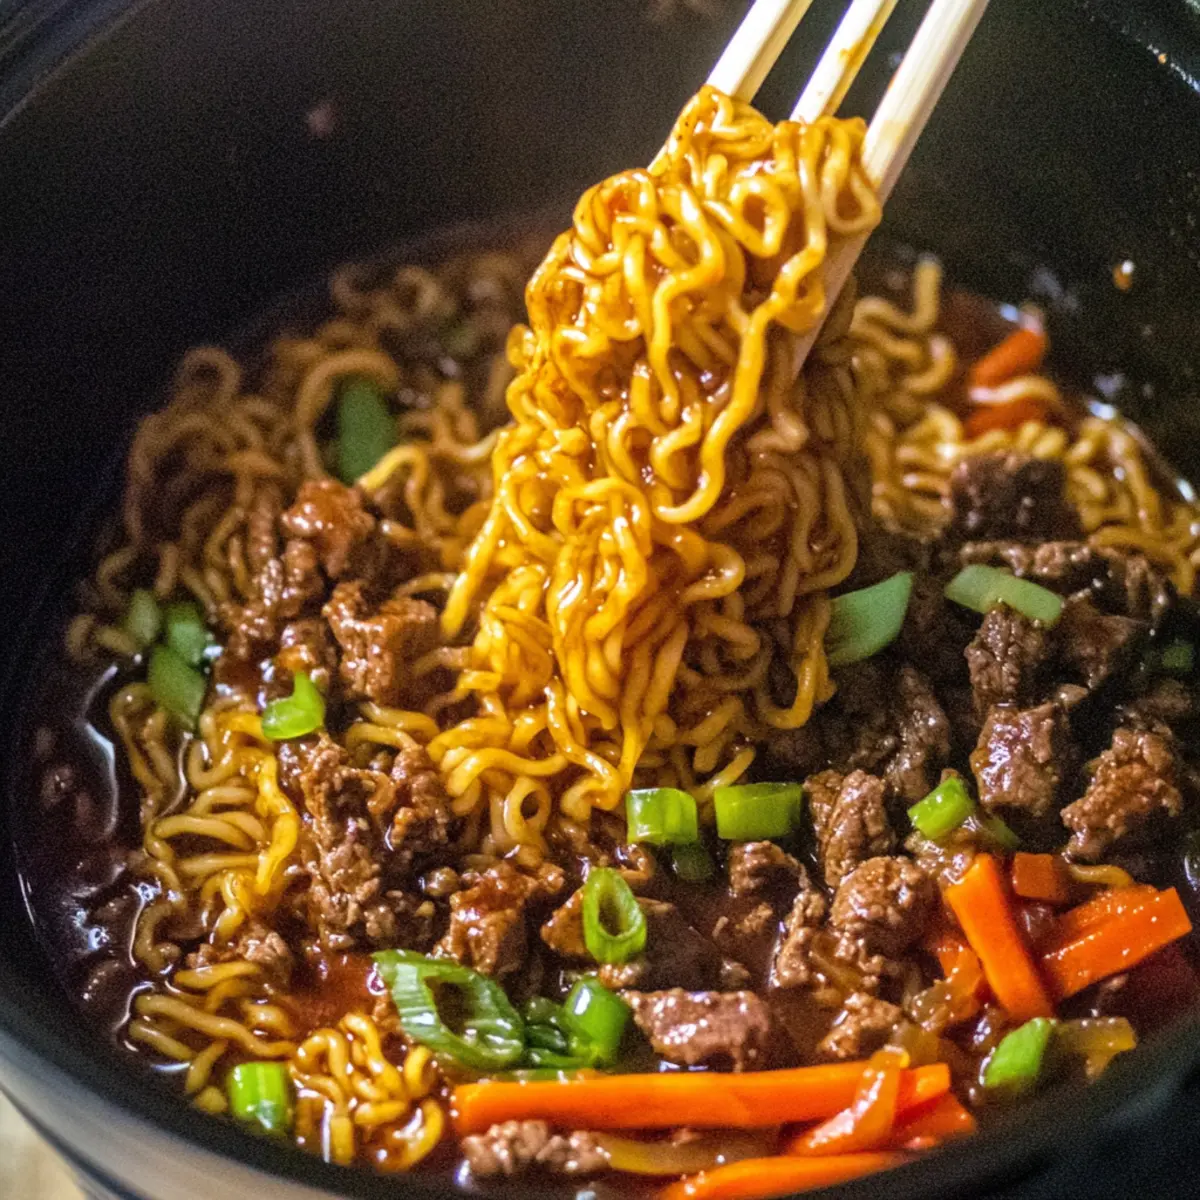
Now, it's time to serve your Korean Style Pot Roast! Ladle generous portions over steamed rice, or serve it alongside buttery mashed potatoes for a comforting meal. It also works beautifully tucked into crisp lettuce wraps for a fresh and exciting alternative.
Korean Style Pot Roast Variations
Feel free to customize your pot roast with these fun and tasty ideas to suit your taste buds!
-
Vegetable Twist: Add potatoes or bell peppers for extra texture and flavor. Each bite will offer a delightful surprise as these veggies soak up the rich sauce.
-
Spice Level: Adjust the gochujang to increase or decrease the heat. Start with a little, and gradually add more until you find your perfect balance of spicy goodness.
-
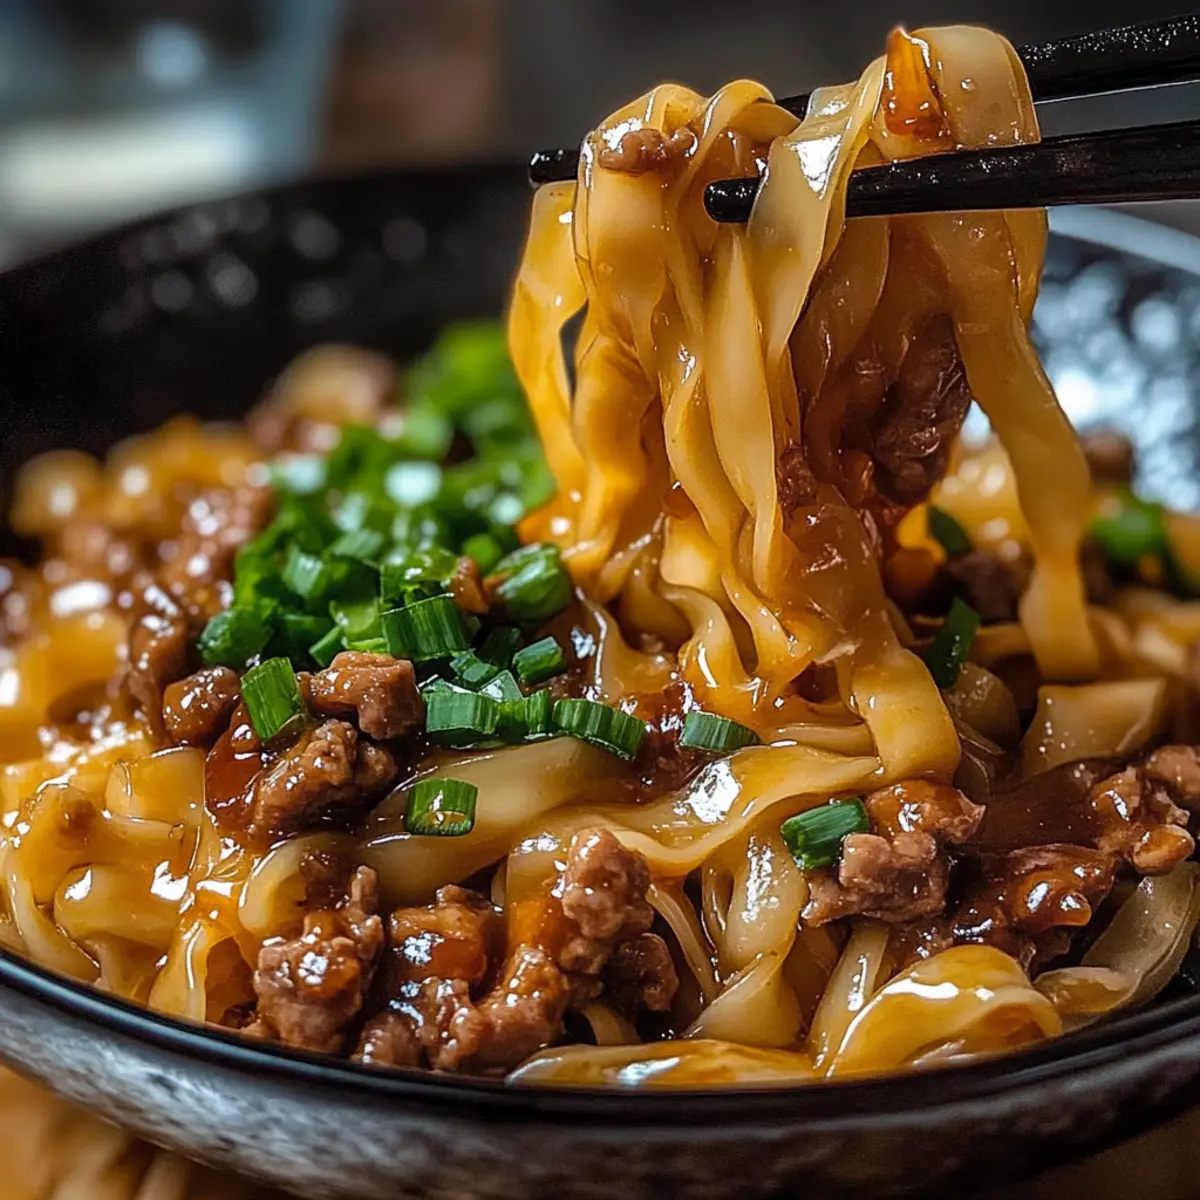
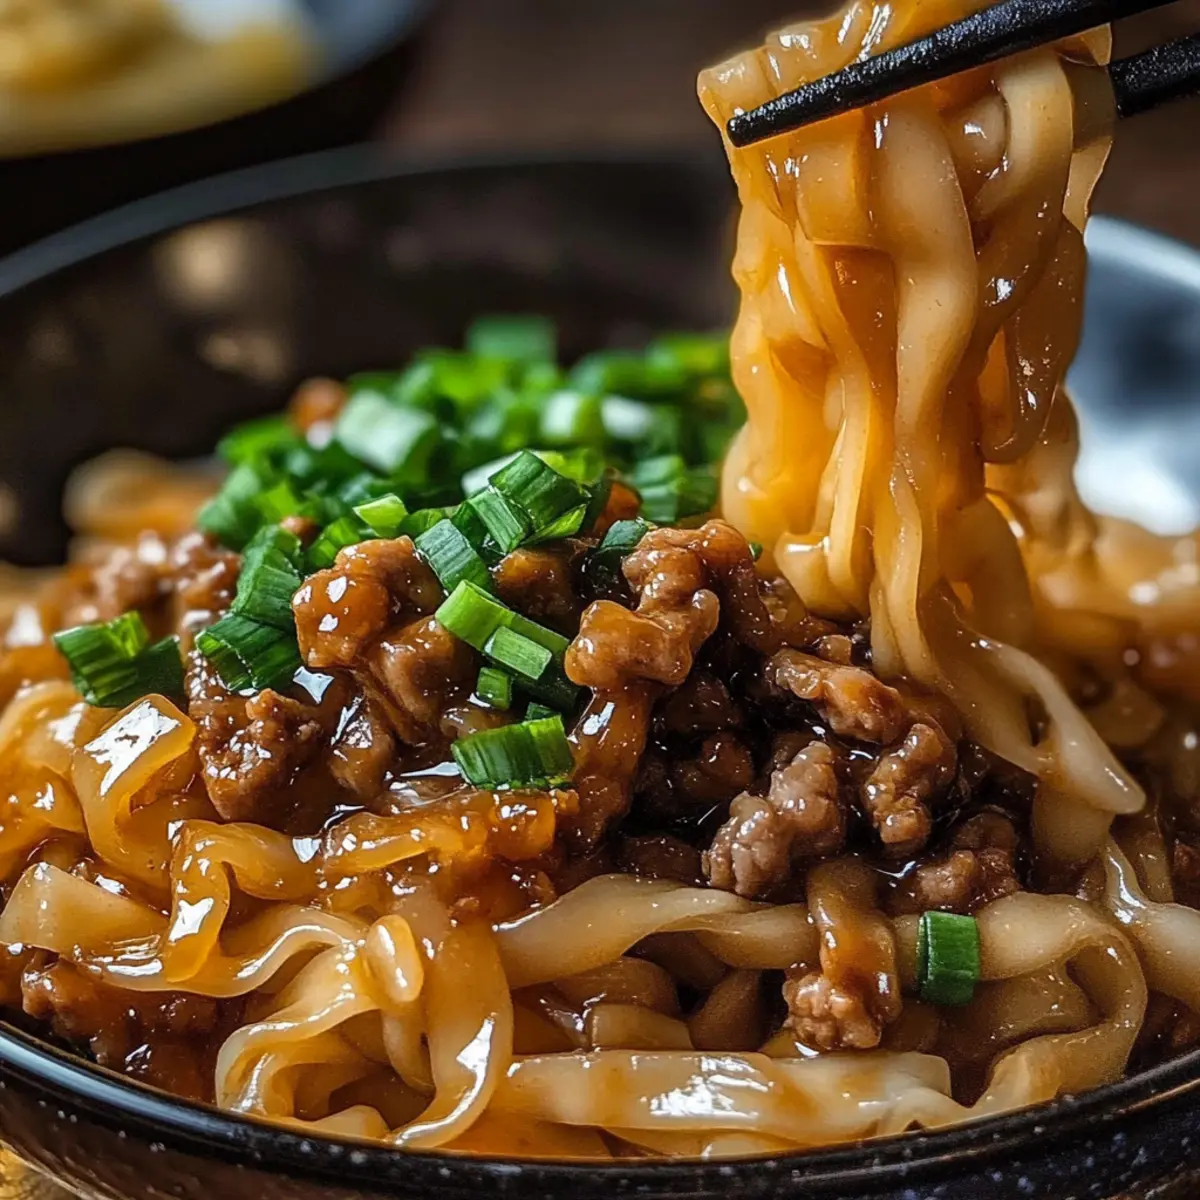
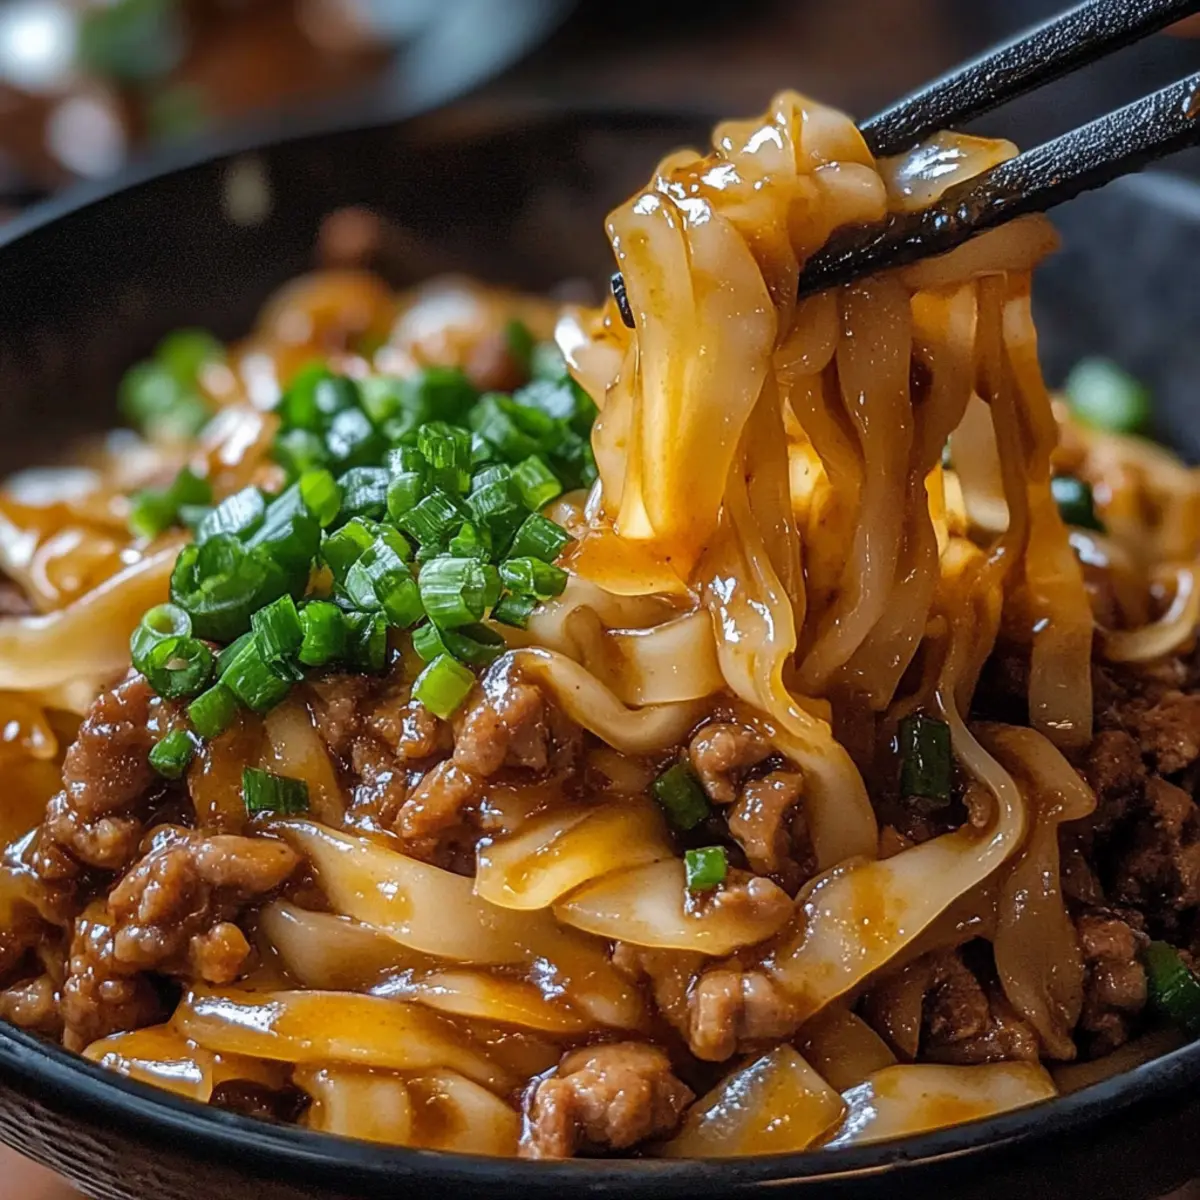
Noodle Alternative: Swap out rice for noodles. The savory sauce coats the noodles beautifully, creating a delightful twist on the classic dish.
-
Taco Inspiration: Serve the pot roast in tacos. Use soft tortillas to wrap the tender beef and add a drizzle of sesame sauce, taking your taste buds on a flavor-packed adventure!
-
Slow Cooker Ease: If you're short on time, after searing, you can transfer the ingredients to a slow cooker and set it to low for 8 hours. This hands-off method yields tender results with pocket-friendly convenience.
-
Rice Vinegar Swap: Use apple cider vinegar instead of rice vinegar for a fruity tang. It adds a unique layer of flavor, making the dish even more memorable.
-
Herb Garnish: Experiment with added herbs like mint or basil for garnish. This touch adds freshness and takes the dish to new heights, enhancing that comforting feel while introducing an unexpected flair.
-
One-Pot Variation: Try the recipe by adding some quinoa or barley in place of rice to soak up the delicious sauce. This switch not only changes the texture but also makes the dish a complete meal packed with nutrients.
These variations allow you to embrace your creativity while savoring the mouthwatering flavors of your Korean Style Pot Roast! For inspiration, you might also enjoy trying out this One Pot Salmon or these delightful Roasted Corn Fried options. Happy cooking!
How to Store and Freeze Korean Style Pot Roast
Fridge: Store leftovers in an airtight container for up to 3 days. Reheating it will enhance the flavors as they deepen overnight.
Freezer: For longer storage, freeze the Korean Style Pot Roast in an airtight container or heavy-duty freezer bag for up to 3 months.
Reheating: Thaw overnight in the fridge before reheating. Warm gently on the stovetop or in the microwave until heated through, adding a splash of broth if needed to moisten.
Serving Freshness: Garnish with fresh green onions and cilantro after reheating to brighten the dish before serving.
Expert Tips for Korean Style Pot Roast
- Sear for Flavor: Always sear the beef well to develop a rich, flavorful base. This step enhances the overall taste of your Korean Style Pot Roast.
- Slow Cooker Option: If you're pressed for time, transfer the pot to a slow cooker after searing. Cook on low for 8 hours or high for 4-5 hours for a hands-free approach.
- Authentic Ingredients: For true Korean flavor, using gochujang is key. If unavailable, consider a mix of red chili paste, miso, and sugar as a substitute.
- Resting Time Matters: After cooking, let the roast rest for about 10-15 minutes before serving. This allows the juices to redistribute, resulting in a tender, juicy outcome.
- Perfect Storage: This dish stores well in an airtight container in the refrigerator for up to 3 days. Reheating it will enhance the flavors even further!
Make Ahead Options
These Korean Style Pot Roast preparations are perfect for busy home cooks looking to save time during the week! You can season and sear the chuck roast up to 24 hours in advance, just make sure to store it in the refrigerator to maintain quality. Additionally, you can chop the vegetables (carrots, onion, garlic, and ginger) a day ahead and keep them refrigerated in an airtight container. When you're ready to enjoy this comforting dish, simply return the seared roast to the pot, add the sautéed aromatics, and proceed with the braising instructions. This thoughtful meal prep ensures your Korean Style Pot Roast is just as delicious, offering rich flavors with minimal effort on your busy nights!
What to Serve with Korean Style Pot Roast
This comforting dish creates the perfect opportunity to build a nourishing and delightful meal for your loved ones.
- Steamed White Rice: The classic pairing that soaks up the delicious gravy, providing a neutral base that allows the flavors of the pot roast to shine.
- Creamy Mashed Potatoes: Buttery and fluffy, these mashed potatoes offer a rich contrast to the tangy, spicy glaze of the roast, making every bite indulgent.
- Stir-Fried Green Beans: Crisp and colorful, these add a fresh crunch and a touch of sweetness that beautifully complements the savoriness of the beef.
- Kimchi Salad: A spicy, tangy side that enhances the overall meal with its crunchy texture and probiotic benefits, creating a vibrant balance with the rich pot roast.
- Sesame Cucumber Salad: Refreshing and light, this salad introduces a crisp crunch that cuts through the richness of the dish, bringing a delightful medley of textures.
- Lettuce Wraps: For a fun twist, serve the pot roast wrapped in crisp lettuce leaves; this adds a fresh, interactive element to the meal.
- Soft Dinner Rolls: Perfect for soaking up any leftover glaze on your plate; serve warm for an irresistible finish to each meal.
- Chilled Soju or Makgeolli: For beverage options, these traditional Korean drinks offer a refreshing counterpoint to the dish's rich flavors, enhancing your dining experience.
Korean Style Pot Roast Recipe FAQs
What type of chuck roast should I use for the best results?
Absolutely! Choose a well-marbled chuck roast, as the fat will render during cooking, making the meat beautifully tender and flavorful. Look for cuts that are deep red with a good amount of visible fat—this is key to achieving that melt-in-your-mouth texture we all crave.
How long can I store leftovers of Korean Style Pot Roast in the refrigerator?
You can store your delicious leftovers in an airtight container in the refrigerator for up to 3 days. I often find that the flavors deepen overnight, making each subsequent meal even more scrumptious!
Can I freeze Korean Style Pot Roast?
Definitely! To freeze, place your cooled pot roast in an airtight container or a heavy-duty freezer bag, making sure to squeeze out any excess air. It will keep well for up to 3 months. When you're ready to enjoy it again, thaw it overnight in the fridge and reheat gently on the stovetop or in the microwave.
What if my pot roast isn’t tender after cooking?
If your Korean Style Pot Roast isn’t tender after the recommended cooking time, it likely needs more time to braise. Check it at the 3-hour mark; if it’s still tough, cover and return it to the oven for 30-minute intervals until the beef shreds easily with a fork. Patience is key here for that perfect tenderness!
Are there any dietary considerations I should be aware of?
Very! If you're cooking for someone with soy allergies, you can easily substitute the soy sauce with a gluten-free option or use coconut aminos. Additionally, if anyone in your household has an aversion to spice, consider reducing the amount of gochujang or using a milder chili paste instead.
How do I know if my vegetables are fresh enough for the pot roast?
When selecting your carrots and onions, look for vibrant colors and firm textures—avoid any that show signs of wilting, discoloration, or dark spots. Fresh ingredients contribute significantly to the overall flavor, enhancing your Korean Style Pot Roast into the comfort food masterpiece it’s meant to be!
Delicious Korean Style Pot Roast to Warm Your Soul
Ingredients
Equipment
Method
- Pat your chuck roast dry with paper towels, then season it generously with salt and pepper on all sides. Allow to sit for about 15 minutes.
- In a large Dutch oven, heat a tablespoon of oil over medium-high heat. Add the chuck roast and sear for about 5-7 minutes on each side until deeply browned.
- In the remaining drippings, add the sliced onion, minced garlic, and minced ginger. Sauté over medium heat for 3-4 minutes until fragrant.
- Stir in the gochujang, soy sauce, brown sugar, and rice vinegar. Mix thoroughly for about a minute to form the sauce.
- Pour in the beef broth, scraping any browned bits from the pot. Stir well to combine all ingredients.
- Return the seared roast to the Dutch oven, adding chopped carrots around it. Ensure the carrots are nestled well.
- Cover the Dutch oven and transfer it to a preheated oven at 325°F. Let it braise for about 3 to 3.5 hours until fork-tender.
- Remove the pot from the oven and skim off excess fat. Drizzle the roast with sesame oil and sprinkle with green onions and cilantro.
- Serve over steamed rice or alongside mashed potatoes. Enjoy tucked into lettuce wraps if desired.