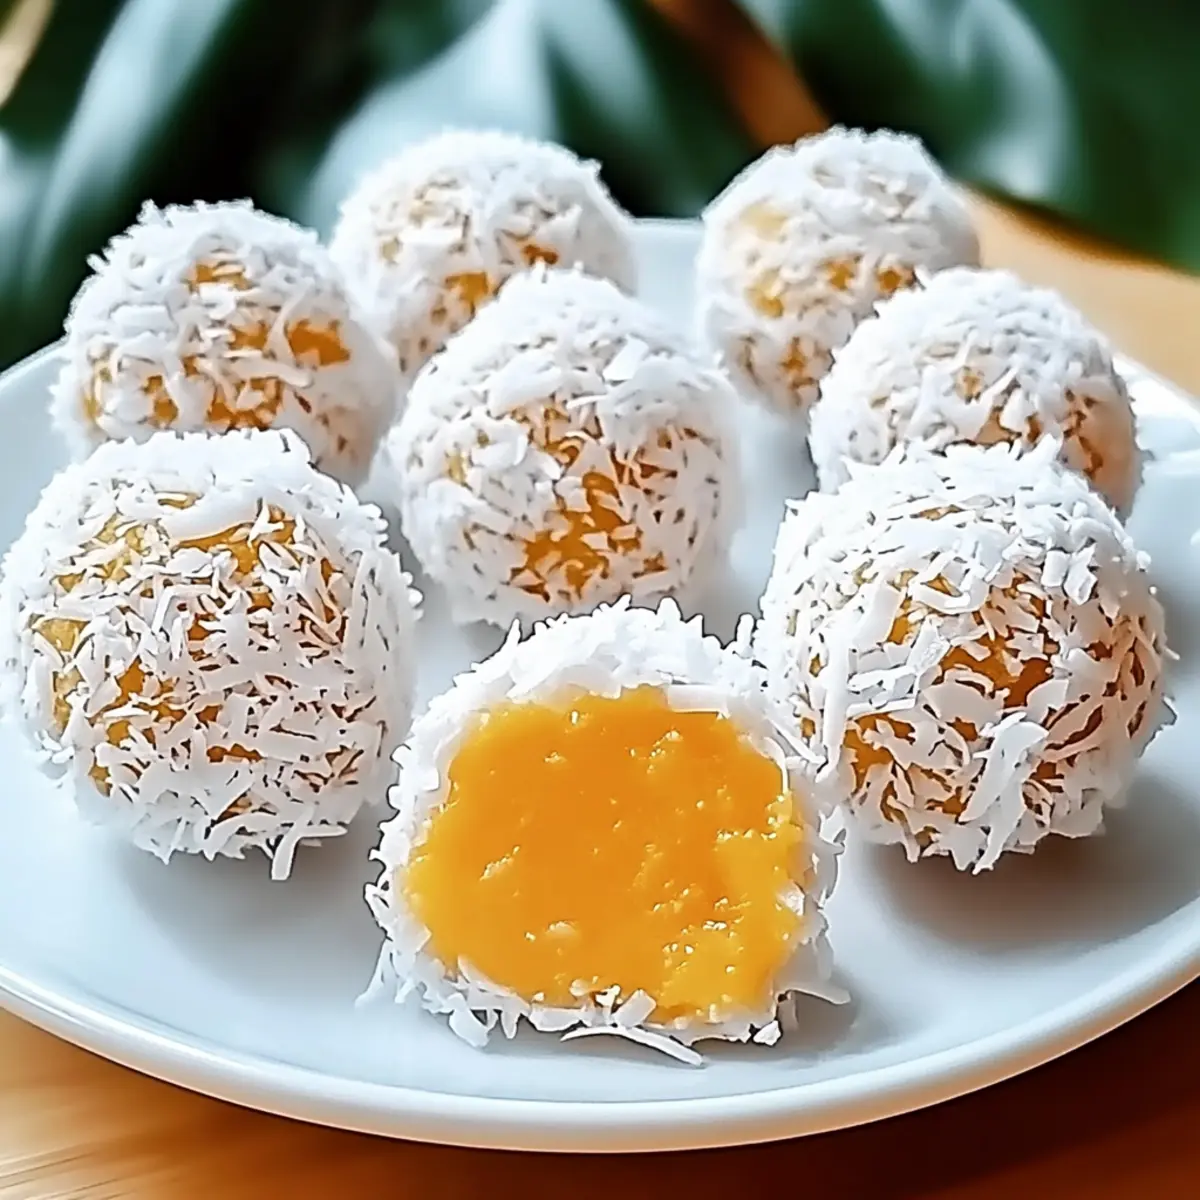
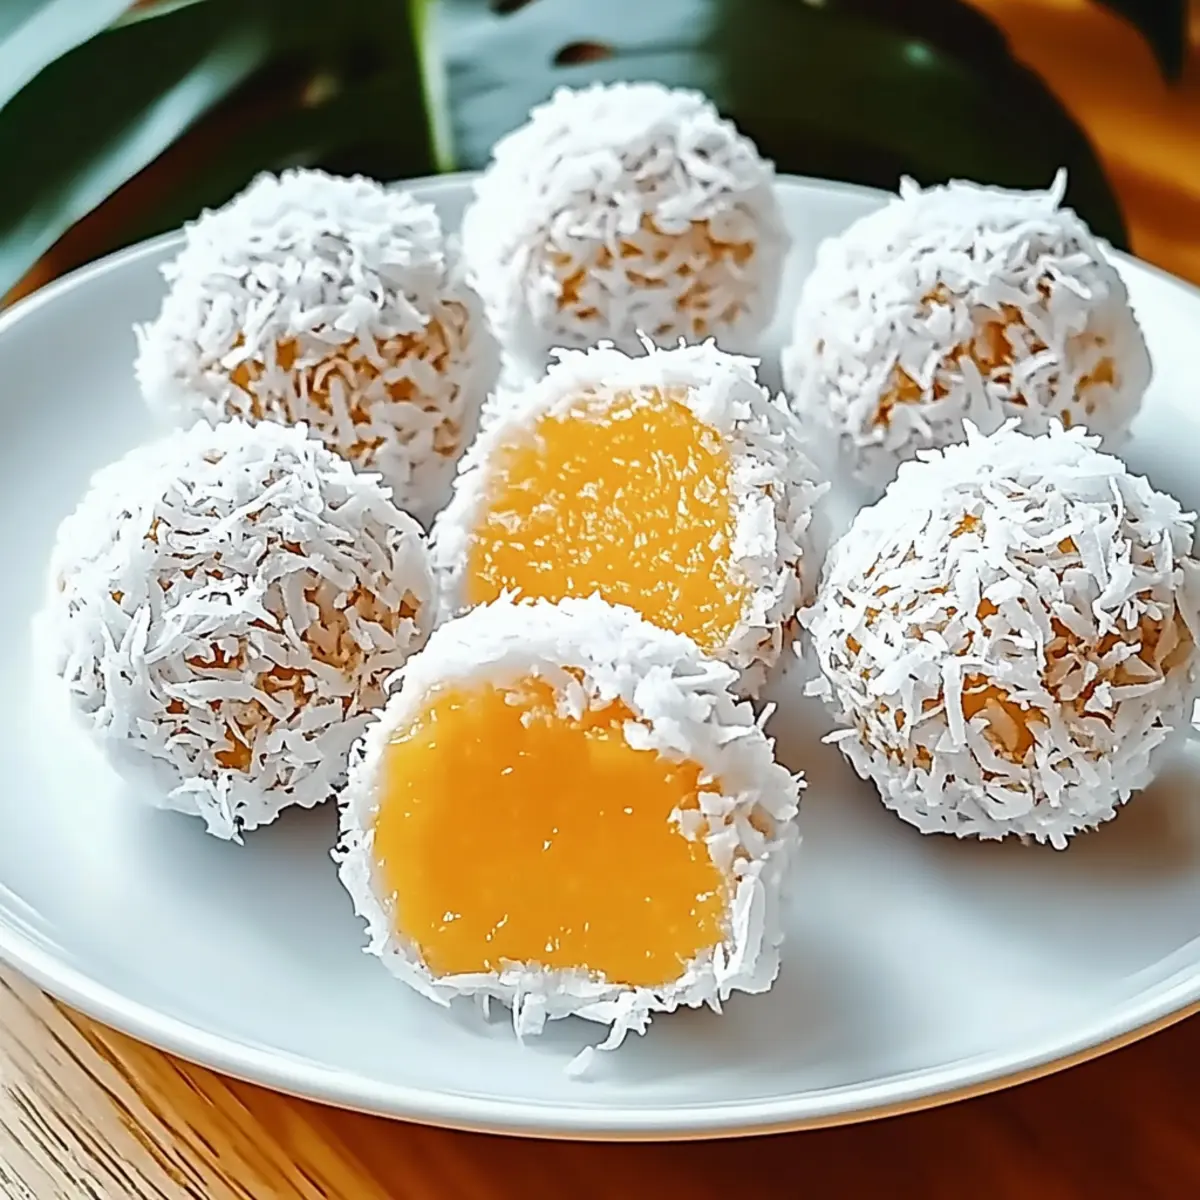
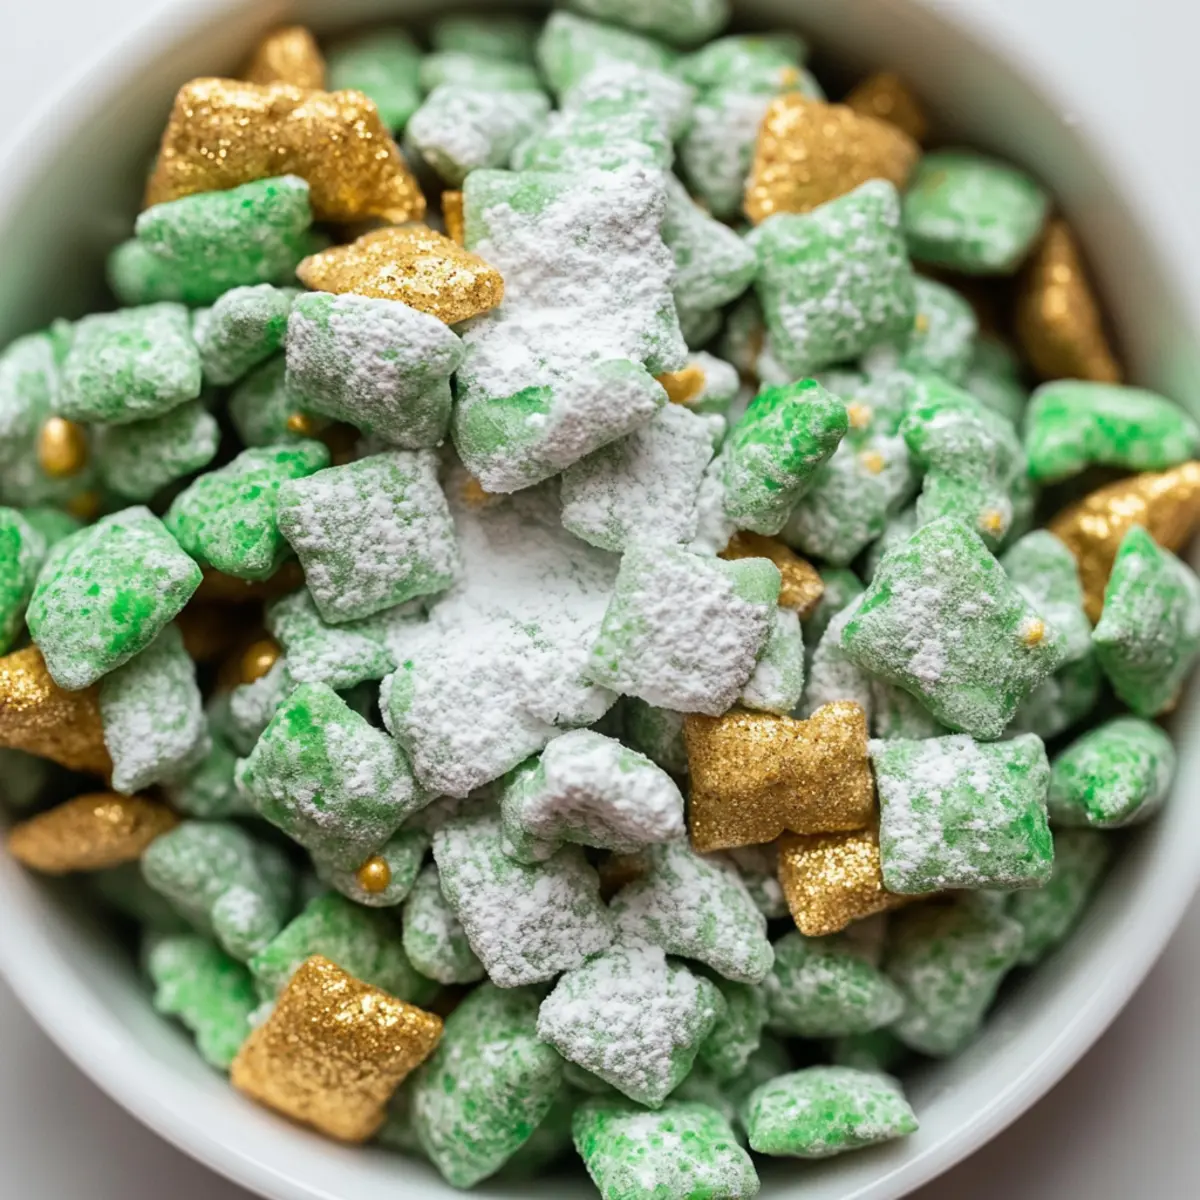
While rummaging through my pantry the other day, I stumbled upon a bag of Medjool dates, and an idea began to form. What if I turned these sweet treats into something extraordinary? Enter my Quinoa Crunch Stuffed Dates—an irresistible no-bake snack that checks all the boxes for healthy eating. Creamy peanut butter meets crunchy puffed quinoa, all elegantly coated in rich vegan chocolate. It’s a fantastic combination that satisfies cravings while keeping your health goals in sight. These delightful gems are not just quick to prepare; they're also vegan, gluten-free, and refined sugar-free, making them perfect for anyone looking to ditch fast food for something wholesome and delicious. So, are you ready to elevate your snack game with a sweet twist?
Why are Quinoa Crunch Stuffed Dates irresistible?
Flavorful, Nutritious Snack: Enjoy a perfect mix of sweet and savory with rich peanut butter and dark chocolate.
Easy Preparation: No baking means anyone can whip these up in under 30 minutes!
Health Boost: Packed with fiber, antioxidants, and natural sugars, they’re a guilt-free way to satisfy cravings.
Customizable Delight: Switch up nut butters or chocolate types to make them your own. Just like my Herby Ricotta Stuffed Peppers, these treats are versatile for any taste.
Crowd-Pleaser: Perfectly bite-sized, they are a hit at parties or family gatherings. Everyone will love them!
No-Fuss Storage: Make ahead and store in your fridge for a quick snack anytime—just like my Taco Bell Crunchwrap recipe!
Quinoa Crunch Stuffed Dates Ingredients
For the Filling
- Medjool Dates – These are naturally sweet, adding an enticing texture to your snack.
- Peanut Butter – A creamy base that adds richness; swap for almond or sunflower seed butter for alternatives.
For the Chocolate Coating
- Vegan Chocolate Chips – Adds a luscious chocolate flavor; try Hu Chocolate for a premium touch.
- Refined Coconut Oil – Essential for melting the chocolate smoothly, ensuring even coating.
For the Crunch
- Puffed Quinoa – Provides a delightful crunch; opt for pre-puffed or easily make your own for those Quinoa Crunch Stuffed Dates!
Step‑by‑Step Instructions for Quinoa Crunch Stuffed Dates
Step 1: Prepare the Dates
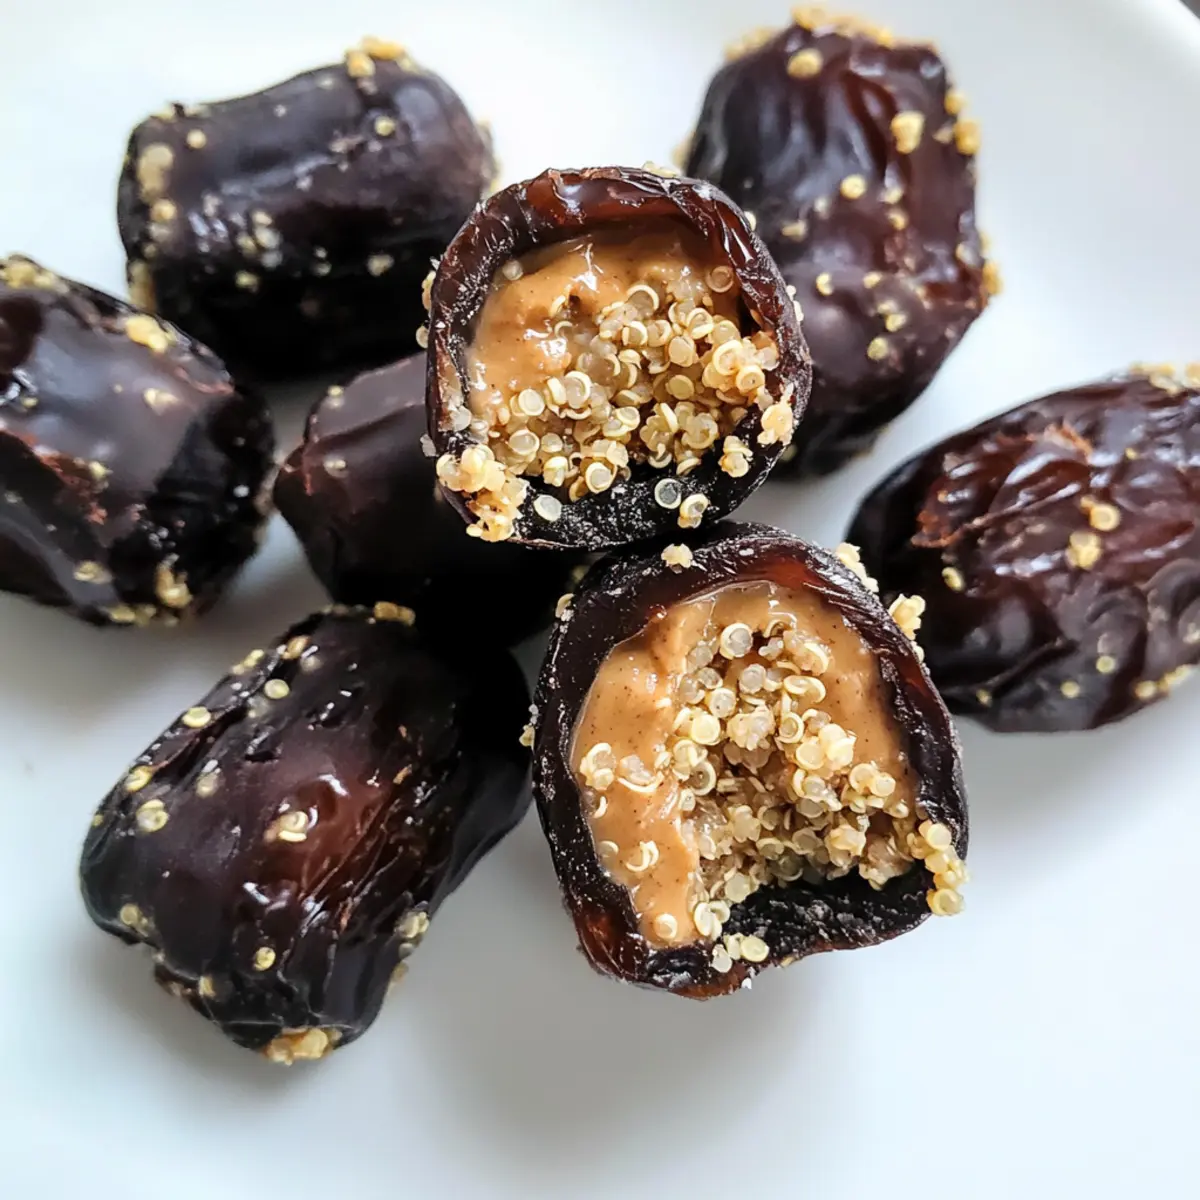
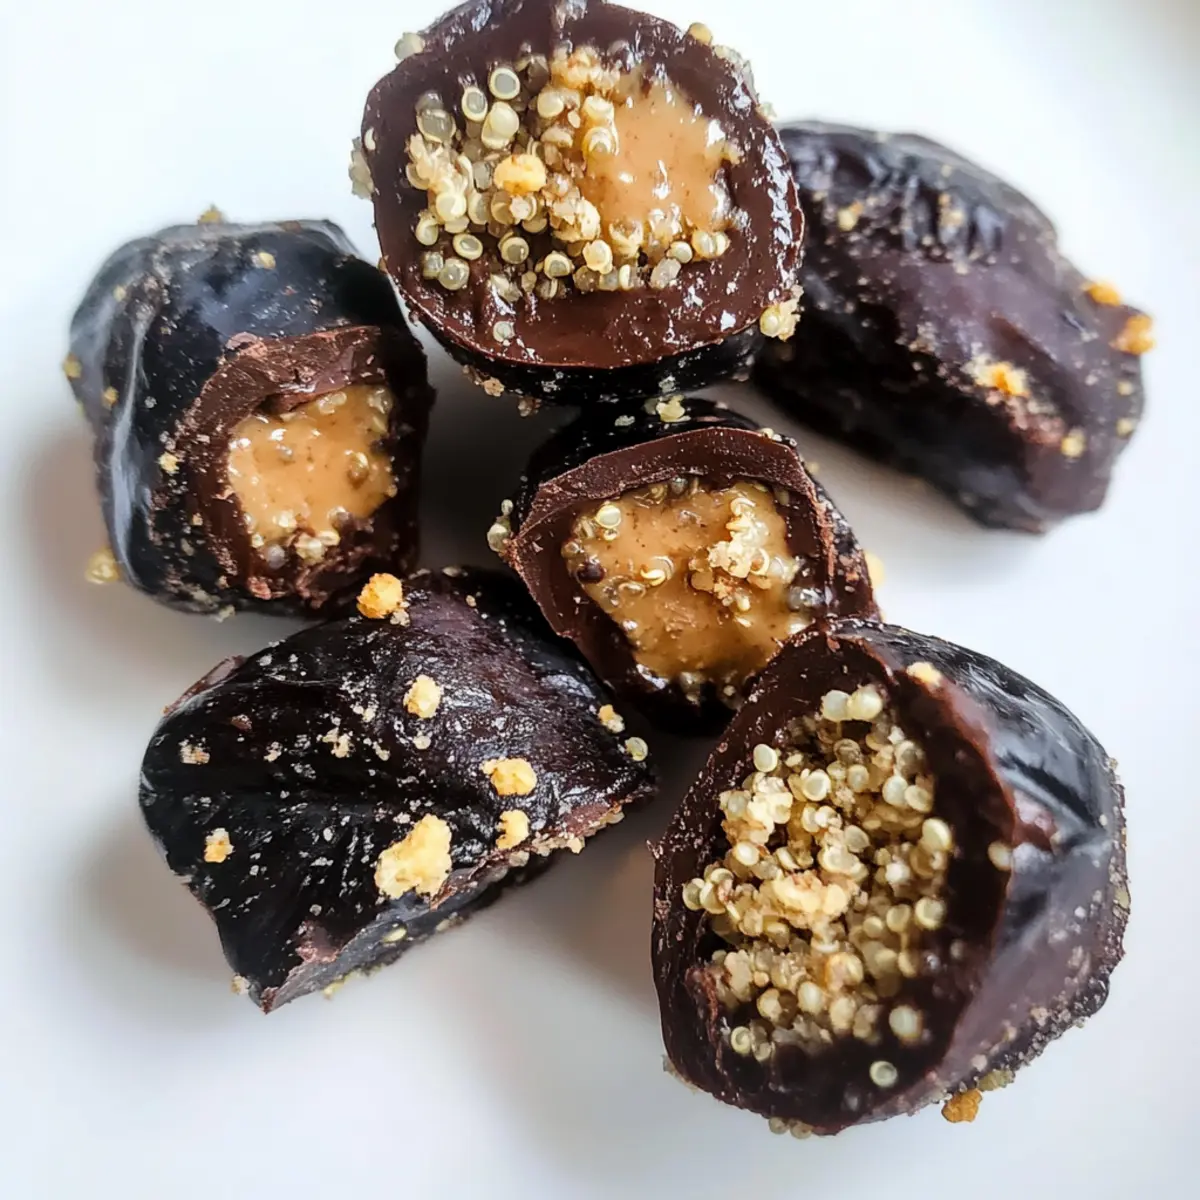
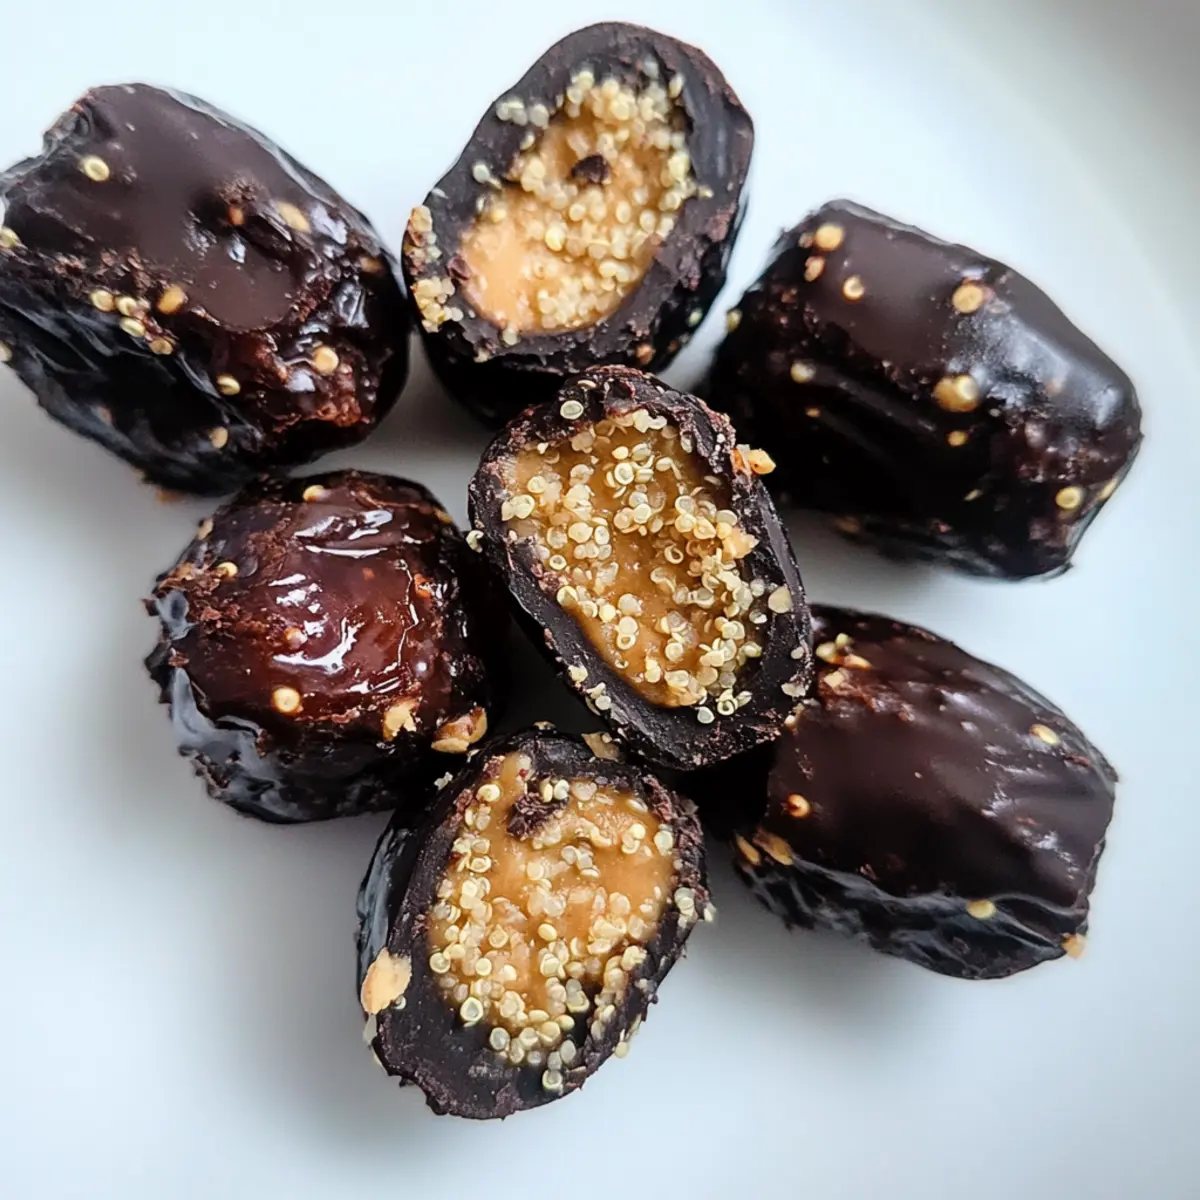
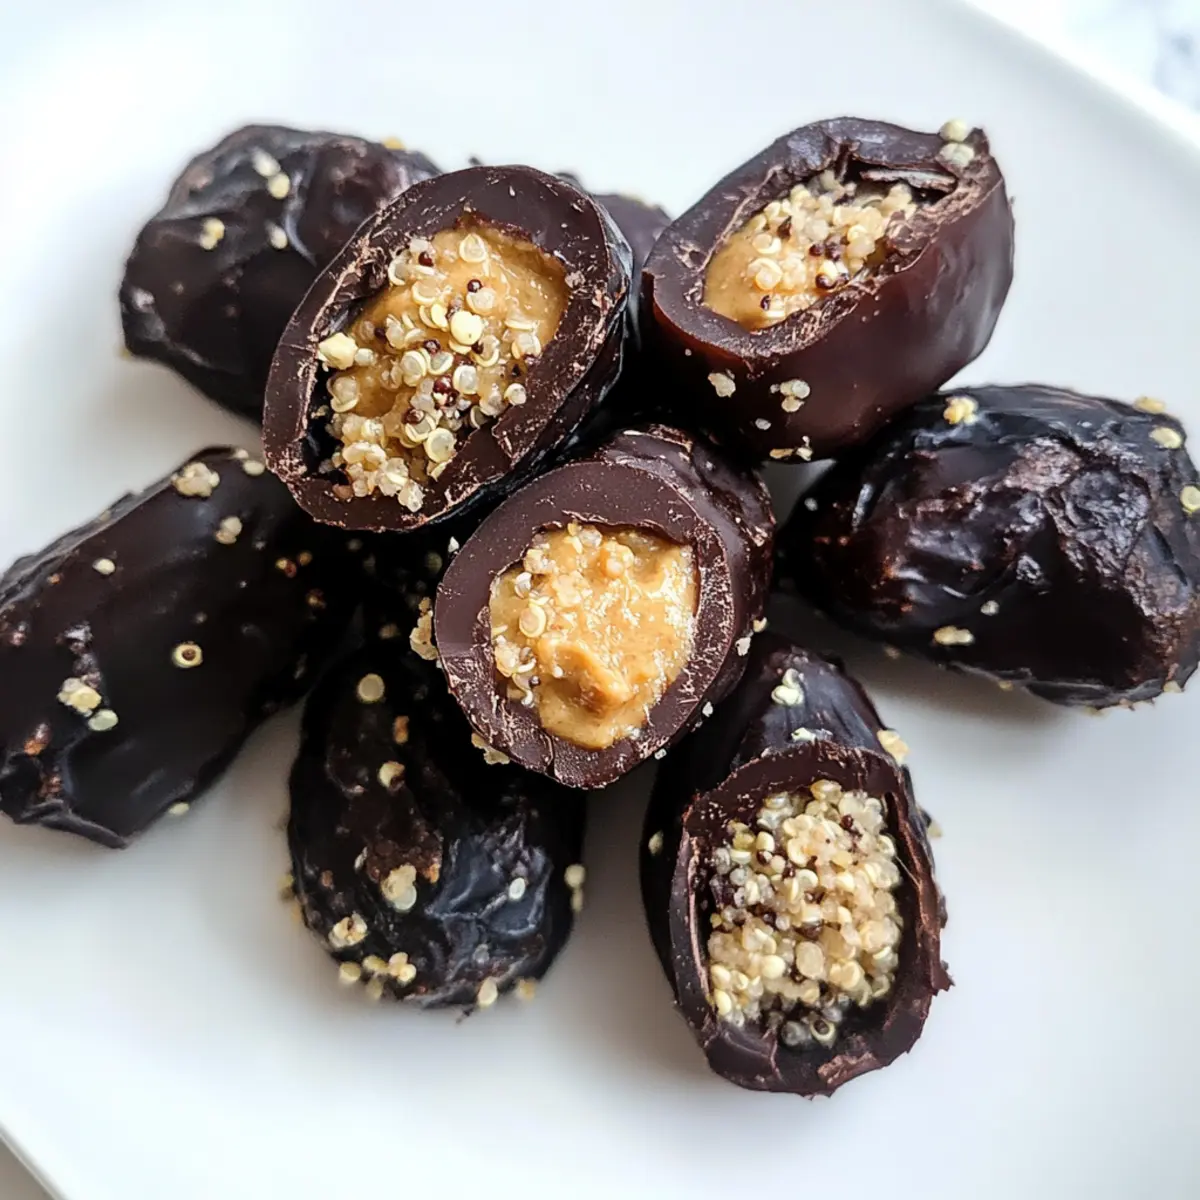
Start by slicing each Medjool date down the middle, taking care not to slice all the way through. Remove the pit and gently open the date, creating a pocket to hold the filling. Once all the dates are prepared, arrange them on a parchment-lined baking sheet, ready to be filled with that creamy peanut butter.
Step 2: Fill the Dates
Spoon about 1 teaspoon of peanut butter into each date, pressing it down gently to ensure it stays in place. Once filled, carefully close each date around the peanut butter. This combination will create a delightful sweet base for your Quinoa Crunch Stuffed Dates, making them irresistible from the get-go.
Step 3: Firm Up the Filling
To ensure the peanut butter holds its shape, place the filled dates in the freezer for about 30 minutes. This will firm up the filling, allowing for easy coating later on. Use this time to prepare your workspace and gather the ingredients for the chocolate coating!
Step 4: Optional - Make Puffed Quinoa
If you're making your own puffed quinoa, heat a saucepan over high heat. Add ¼ cup of rinsed quinoa and shake the pan continuously for about 3-5 minutes, or until you hear the quinoa start to pop. Once puffed and golden, remove from heat and let it cool before mixing into the chocolate coating.
Step 5: Melt the Chocolate
In a microwave-safe bowl, combine vegan chocolate chips and refined coconut oil. Heat in the microwave in 30-second intervals, stirring between each, until fully melted and smooth, about 1-2 minutes total. The addition of coconut oil will create a lovely glossy finish for your Quinoa Crunch Stuffed Dates.
Step 6: Coat the Dates
Once your chocolate mixture is ready, stir in the cooled puffed quinoa until well-coated. Take each frozen date and dip it into the chocolate-quinoa mix, ensuring it is fully covered. Place the coated dates back onto the parchment-lined baking sheet, allowing the excess chocolate to drip off for a perfect coating.
Step 7: Chill and Serve
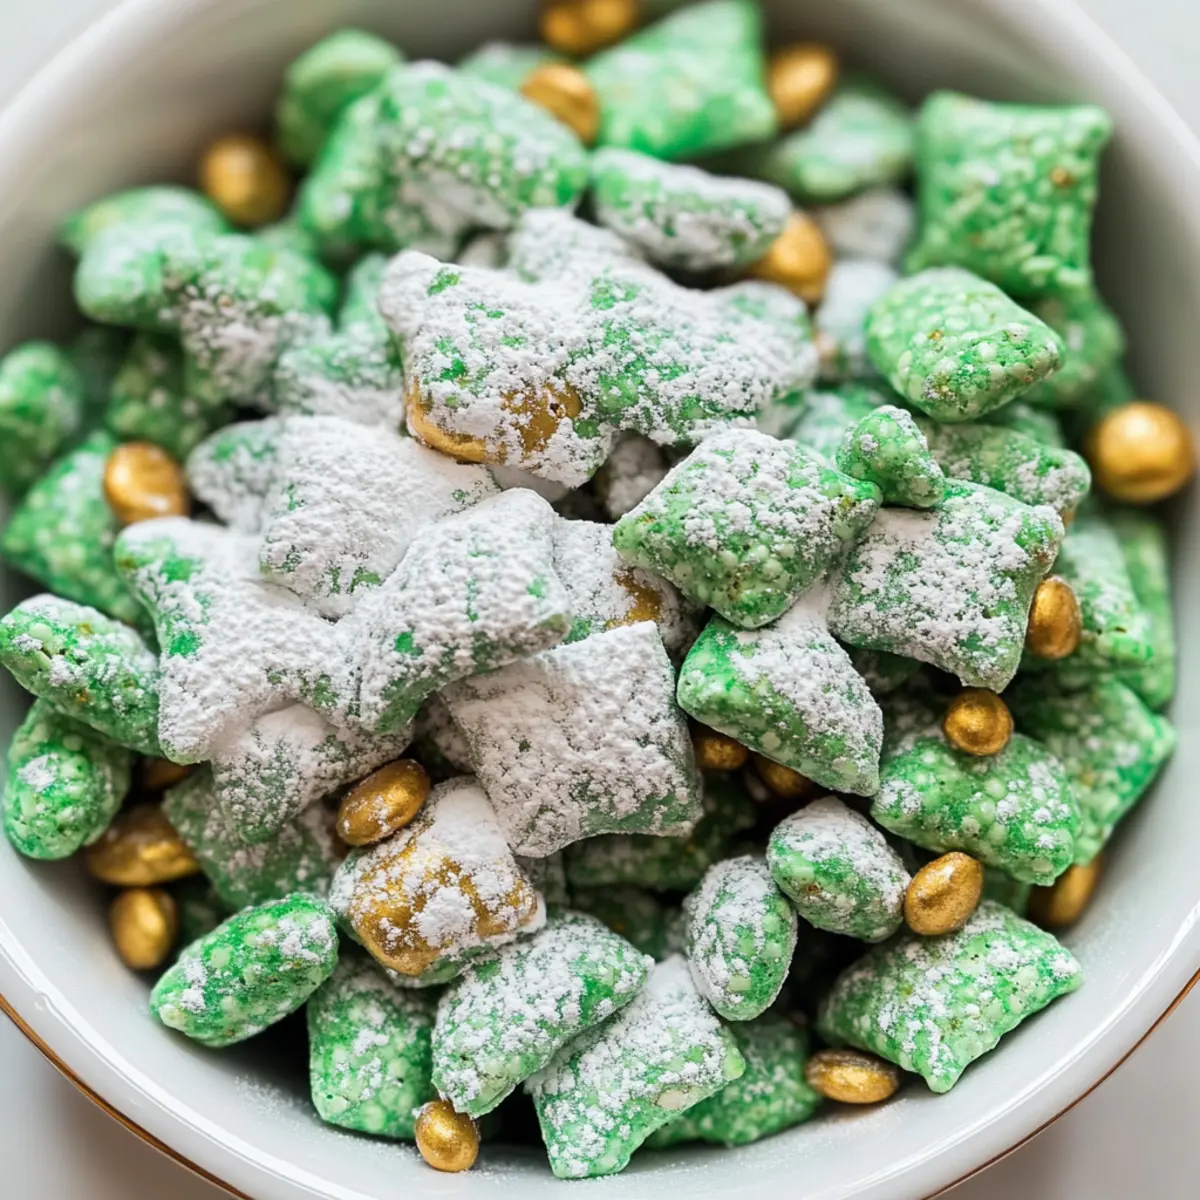
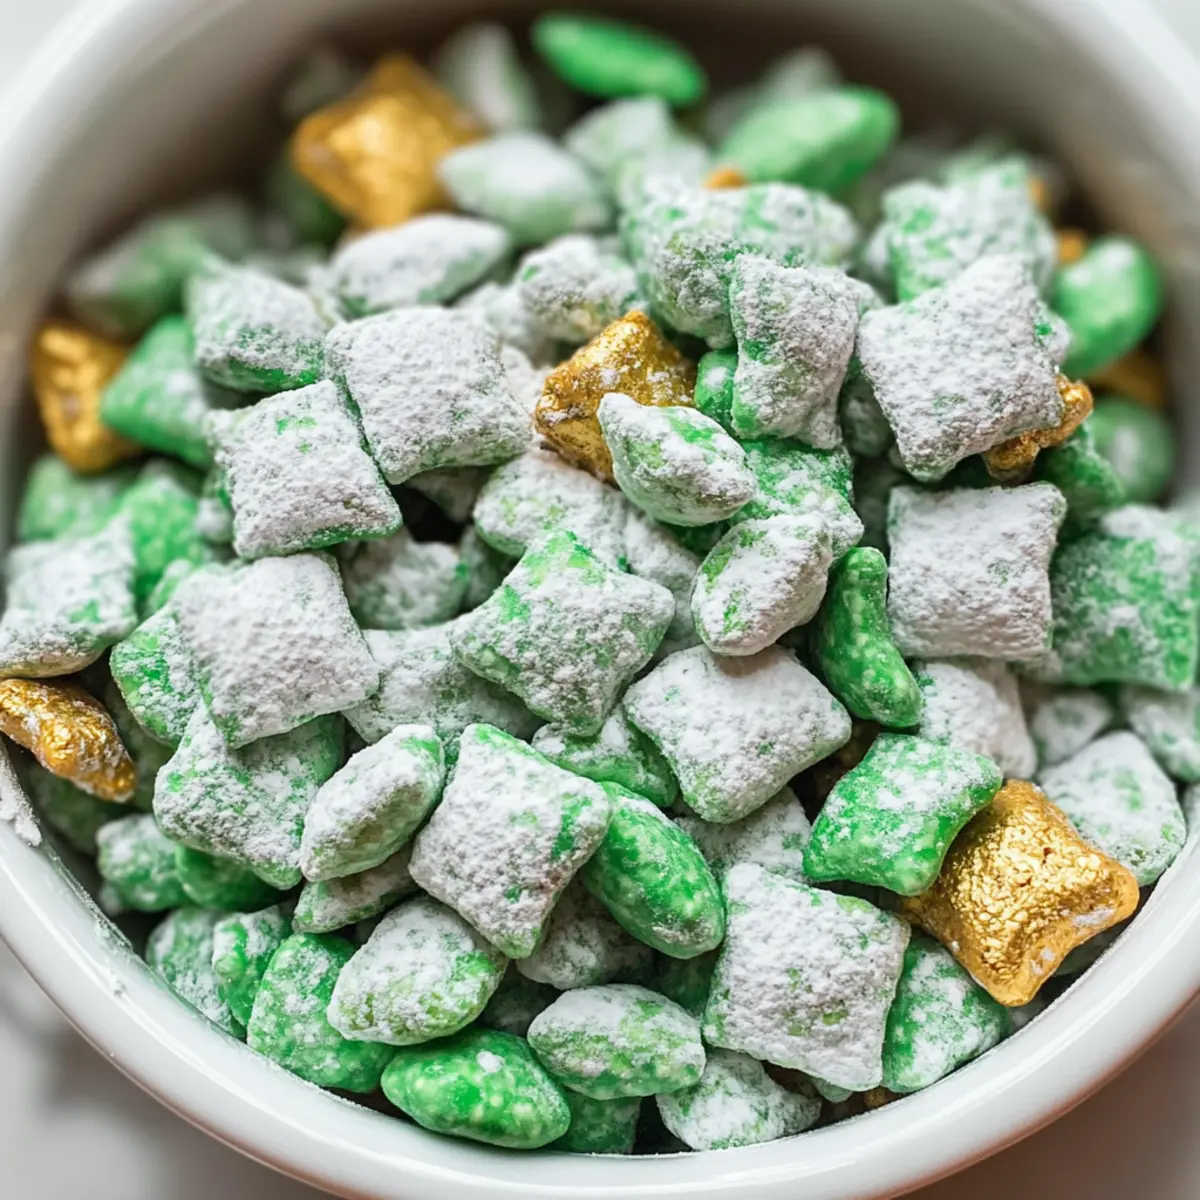
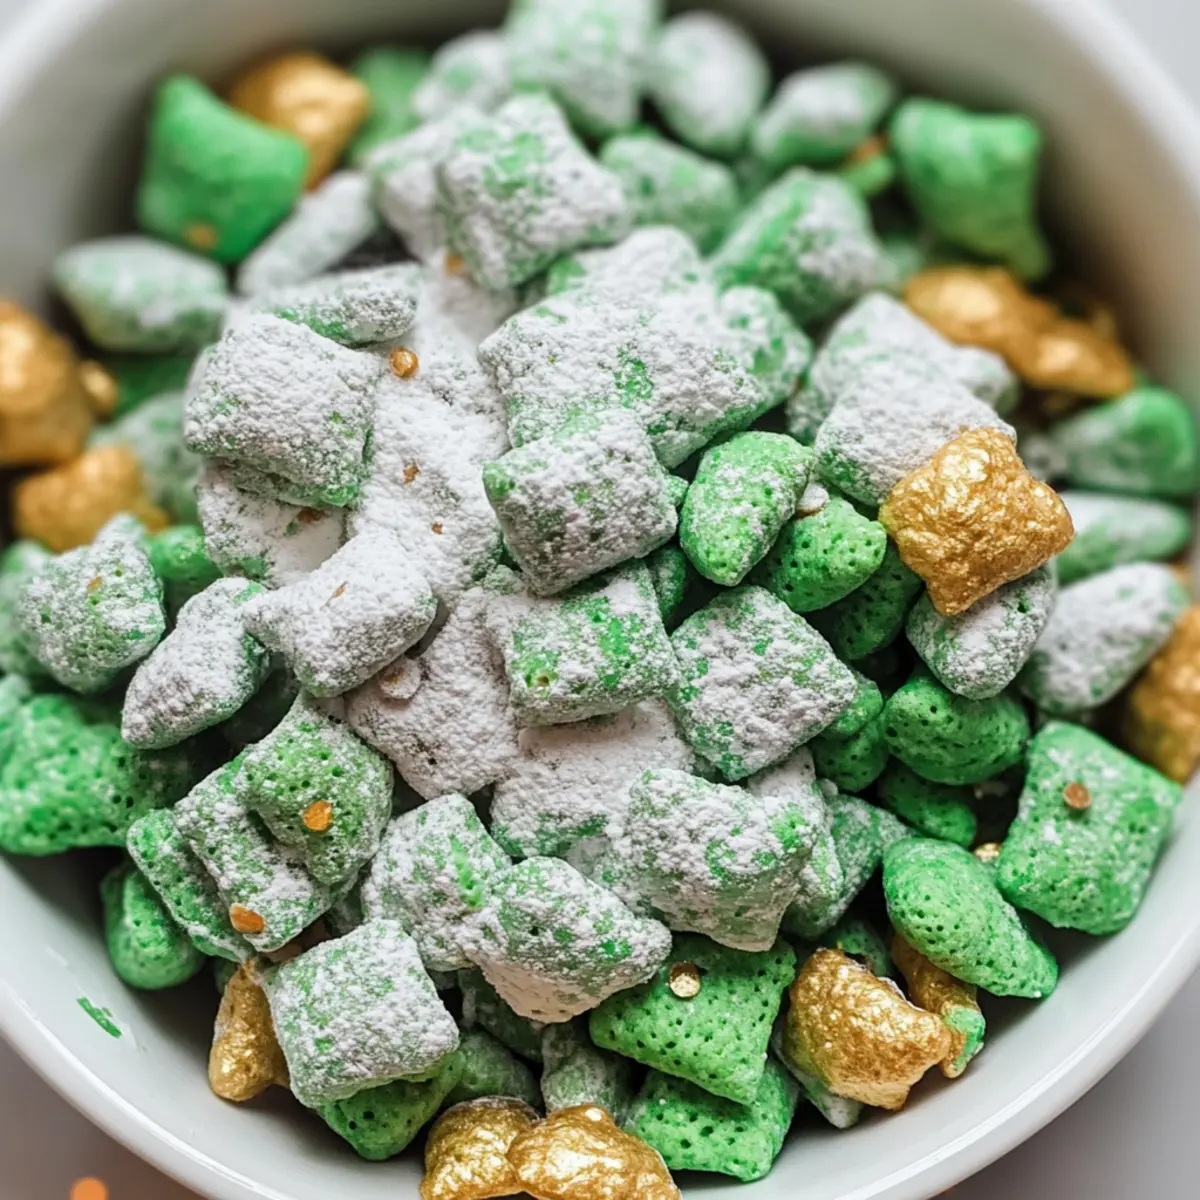
Finally, place the coated Quinoa Crunch Stuffed Dates in the refrigerator for about 15-20 minutes, or until the chocolate hardens completely. Once set, serve them as a delightful snack or dessert! Keep any leftovers in an airtight container in the fridge for a treat whenever you like.
How to Store and Freeze Quinoa Crunch Stuffed Dates
Room Temperature: Store at room temperature for up to 1 day, but it's best to refrigerate them to maintain freshness.
Fridge: Keep your Quinoa Crunch Stuffed Dates in an airtight container in the fridge for up to 1 week. They make for a perfect quick snack!
Freezer: For longer storage, freeze the stuffed dates in an airtight container for up to 2 months. Thaw in the fridge or at room temperature before enjoying.
Reheating: Enjoy them cold or let them sit at room temperature for about 10 minutes before serving for a softer bite.
Expert Tips for Quinoa Crunch Stuffed Dates
-
Fresh Dates Matter: Ensure you use fresh Medjool dates; dried ones won't provide that gooey, delightful texture essential for these Quinoa Crunch Stuffed Dates.
-
Timing is Key: Allow the filled dates to freeze for a full 30 minutes. This helps the peanut butter set, preventing it from oozing when dipped in chocolate.
-
Coating Consistency: Make sure your chocolate mixture is smooth and well-mixed. If it's too thick, it won't coat the dates properly.
-
Don’t Overheat Quinoa: If you choose to puff your quinoa, keep a close watch during the popping process. Overheating can lead to burnt quinoa, ruining that lovely crunch.
-
Storage Tips: For optimal freshness, store your Quinoa Crunch Stuffed Dates in an airtight container in the fridge and enjoy them within a week for the best flavor.
Make Ahead Options
These Quinoa Crunch Stuffed Dates are perfect for meal prep enthusiasts looking to save time on busy days! You can fill and freeze the dates with peanut butter up to 24 hours ahead of time. Simply prepare the filled dates, place them on a parchment-lined tray, and freeze them until solid. Once frozen, transfer them to an airtight container and store in the freezer. When you're ready to indulge, make the chocolate coating and dip the frozen dates directly—let them sit in the fridge for about 15-20 minutes until the chocolate hardens. This approach ensures that your treats remain just as delicious while allowing for quick enjoyment whenever a sweet craving hits!
Quinoa Crunch Stuffed Dates Variations
Let your creativity soar as you customize these delightful snacks to fit your taste and dietary needs!
-
Nut Butter Swap: Try almond or sunflower seed butter for allergies or flavor variations. Each nut brings its own unique blend of nutrients and taste.
-
Chocolate Variety: Experiment with dark, milk, or white chocolate for a personal twist. Each type holds a different sweetness and richness that can change the entire vibe of your treat.
-
Spiced Up: Add a pinch of cinnamon or a drop of vanilla extract to the peanut butter filling for an aromatic boost. This simple twist can elevate the overall flavor profile and surprise your taste buds.
-
Crunch Factor: Instead of puffed quinoa, you can use crushed nuts or seeds for added texture. Walnuts or almonds will add a delightful crunch without losing the nutritious aspect.
-
Fruit Fusion: Insert a small piece of banana or dried fruit like apricots into the filling for a burst of flavor. Mixing fruit with the nut butter creates an explosion of taste in every bite!
-
Protein Punch: Blend in a scoop of your favorite protein powder with the nut butter for an extra health boost. It’s a great way to satisfy hunger while keeping your energy levels up throughout the day.
-
Sweet Dipping: Drizzle with agave or maple syrup after coating in chocolate for a touch of extra sweetness. This will give your Quinoa Crunch Stuffed Dates a stunning, glossy finish and a catering appeal.
-
Savory Twist: For a unique take, replace the chocolate with a savory herb-infused nut spread. This offers a whole new experience, transforming them from sweet treats to a savory snack.
With these variations, your Quinoa Crunch Stuffed Dates can be tailored perfectly to any occasion! And if you're in the mood for other delicious healthy snacks, don't forget to check out my Quinoa Tabbouleh Vibrant or the delightful Taco Bell Crunchwrap.
What to Serve with Quinoa Crunch Stuffed Dates?
Elevate your snacking experience with complementary flavors and textures to these delightful treats.
- Creamy Hummus: A savory contrast that adds rich flavor; perfect for dipping fresh veggies alongside your sweet dates.
- Fresh Fruit Salad: Bright, juicy fruits bring freshness and balance to the sweet, rich dates, creating a light, vibrant pairing.
- Assorted Nuts: Crunchy nuts like almonds or cashews provide a satisfying texture variance, enhancing the delight of your quinoa-stuffed treats.
- Mint Tea: The refreshing notes of mint tea provide a cooling counterpart to the sweetness, making for a delightful afternoon break.
- Dark Chocolate Drizzle: Add another layer of richness by drizzling dark chocolate over your dates for an extra dose of indulgence.
- Coconut Yogurt: A luscious dairy-free yogurt gives a creamy element that complements the dates perfectly, enhancing the overall experience.
- Chia Seed Pudding: Pair with a light, creamy chia pudding for a delightful contrast in textures that will excite your palate.
- Almond Milk Smoothie: A dairy-free smoothie with bananas and spinach offers a nutritious complement while keeping the feel light and healthful.
- Spiced Roasted Chickpeas: The warm spices of roasted chickpeas bring a savory crunch that balances out the sweetness, creating a satisfying snack platter.
Quinoa Crunch Stuffed Dates Recipe FAQs
What type of dates should I use?
It's best to choose fresh Medjool dates for this recipe, as they are naturally sweet and have a deliciously soft texture. Avoid dried dates, as they won't provide the same delightful chewiness and flavor as fresh ones.
How should I store the Quinoa Crunch Stuffed Dates?
Store your Quinoa Crunch Stuffed Dates in an airtight container in the refrigerator for up to 1 week. For longer storage, you can freeze them in an airtight container for up to 2 months. This way, you always have a delicious snack on hand!
Can I make these stuffed dates ahead of time and freeze them?
Absolutely! To freeze your stuffed dates, simply lay them in a single layer on a parchment-lined baking sheet and freeze until solid. Once frozen, transfer them to an airtight container. When you're ready to enjoy, just thaw them in the refrigerator or let them sit at room temperature for about 10 minutes.
What should I do if the chocolate coating is too thick?
No worries! If your chocolate mixture is too thick for dipping, you can add a little more refined coconut oil to the melted chocolate. Stir well until you reach the desired consistency that clings nicely to the dates without being overly thick or clumpy.
Can I use different nut or seed butters?
Yes! Feel free to substitute the peanut butter with almond or sunflower seed butter to accommodate allergies or preferences. Each alternative brings its unique flavor and will create a delightful twist on your Quinoa Crunch Stuffed Dates.
What dietary considerations should I keep in mind?
This recipe is vegan, gluten-free, and refined sugar-free, making it suitable for a variety of dietary needs. However, ensure that any alternative nut or seed butters are also free from allergens if you're serving these to guests with allergies.
Quinoa Crunch Stuffed Dates: Satisfy Your Sweet Cravings
Ingredients
Equipment
Method
- Start by slicing each Medjool date down the middle, taking care not to slice all the way through. Remove the pit and gently open the date, creating a pocket to hold the filling. Arrange them on a parchment-lined baking sheet.
- Spoon about 1 teaspoon of peanut butter into each date, pressing it down gently. Close each date around the peanut butter.
- Place the filled dates in the freezer for about 30 minutes to firm up the filling.
- To make puffed quinoa, heat a saucepan over high heat. Add 1/4 cup of rinsed quinoa and shake continuously for about 3-5 minutes until it pops. Let it cool.
- In a microwave-safe bowl, combine vegan chocolate chips and refined coconut oil. Heat in the microwave in 30-second intervals until fully melted.
- Stir the cooled puffed quinoa into the melted chocolate until well-coated. Dip each frozen date into the mix and place back on the baking sheet.
- Place the coated dates in the refrigerator for about 15-20 minutes or until the chocolate hardens. Serve as a snack or dessert!