tastytrendingredients

  • Home
  • Recipes
    • Appetizers
    • Breakfast
    • Dessert
    • Dinner
    • Drinks
    • Salads
    • Snacks
    • Soups
  • About me
  • Contact
menu icon
go to homepage
  • Home
  • Recipes
    • Appetizers
    • Breakfast
    • Dessert
    • Dinner
    • Drinks
    • Salads
    • Snacks
    • Soups
  • About me
  • Contact
search icon
Homepage link
  • Home
  • Recipes
    • Appetizers
    • Breakfast
    • Dessert
    • Dinner
    • Drinks
    • Salads
    • Snacks
    • Soups
  • About me
  • Contact
×

Spicy Brazilian Coconut Chicken for a Tropical Dinner Bliss

May 31, 2026 by Grace Snow Leave a Comment

The aroma of sautéing onions and spices fills the air, reminiscent of my favorite Brazilian restaurant, where each bite transports me to a lively street market. Today, I can't wait to share my take on Spicy Brazilian Coconut Chicken—a dish that promises to turn any weeknight dinner into a vibrant feast. With tender chicken thighs swimming in a creamy coconut sauce, this recipe is not only quick to prepare but also accommodates various taste preferences with easy ingredient swaps. Whether you’re craving a spicy kick or a comforting plate to share with family, this recipe has you covered. Are you ready to bring the bold flavors of Brazil into your kitchen and impress your loved ones?

Why is This Recipe a Must-Try?

Simplicity: This Spicy Brazilian Coconut Chicken is incredibly easy to prepare, making it a fantastic choice for busy weeknights.

Bold Flavors: The combination of fresh chilies, garlic, and ginger creates a deliciously vibrant taste that transports you straight to Brazil.

Versatile Options: You can easily swap chicken thighs for shrimp, adjust the spice level, or toss in seasonal vegetables, catering to your unique preferences.

Crowd-Pleaser: Adults and kids alike will love this dish, making it perfect for family dinners or gatherings.

Comforting: The creamy coconut milk sauce envelops the tender chicken, providing a cozy and satisfying meal that feels indulgent yet healthy.

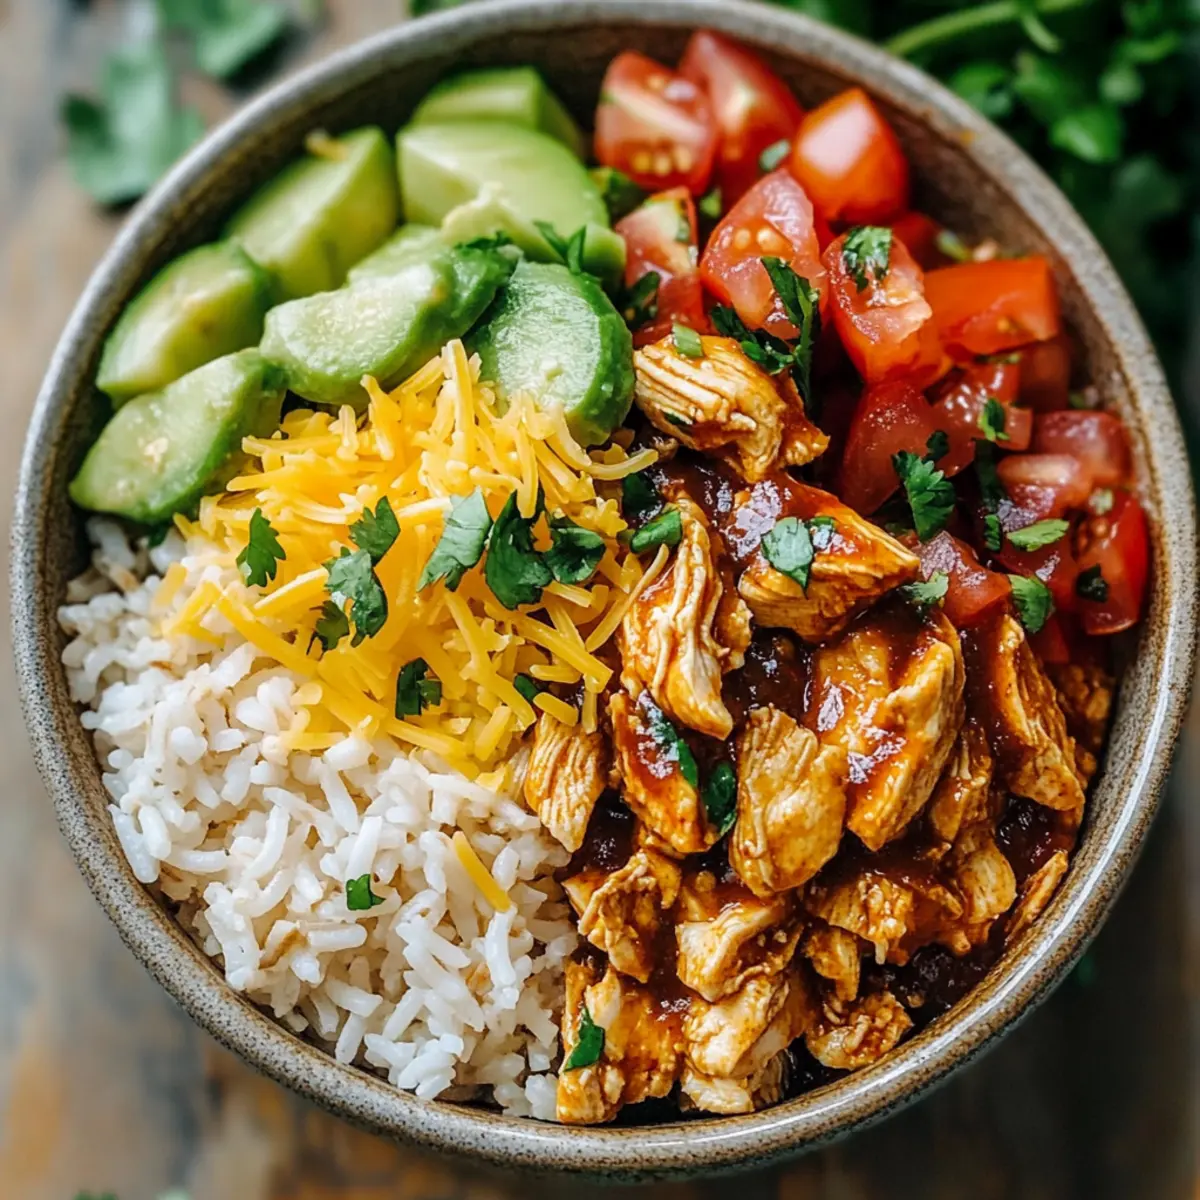
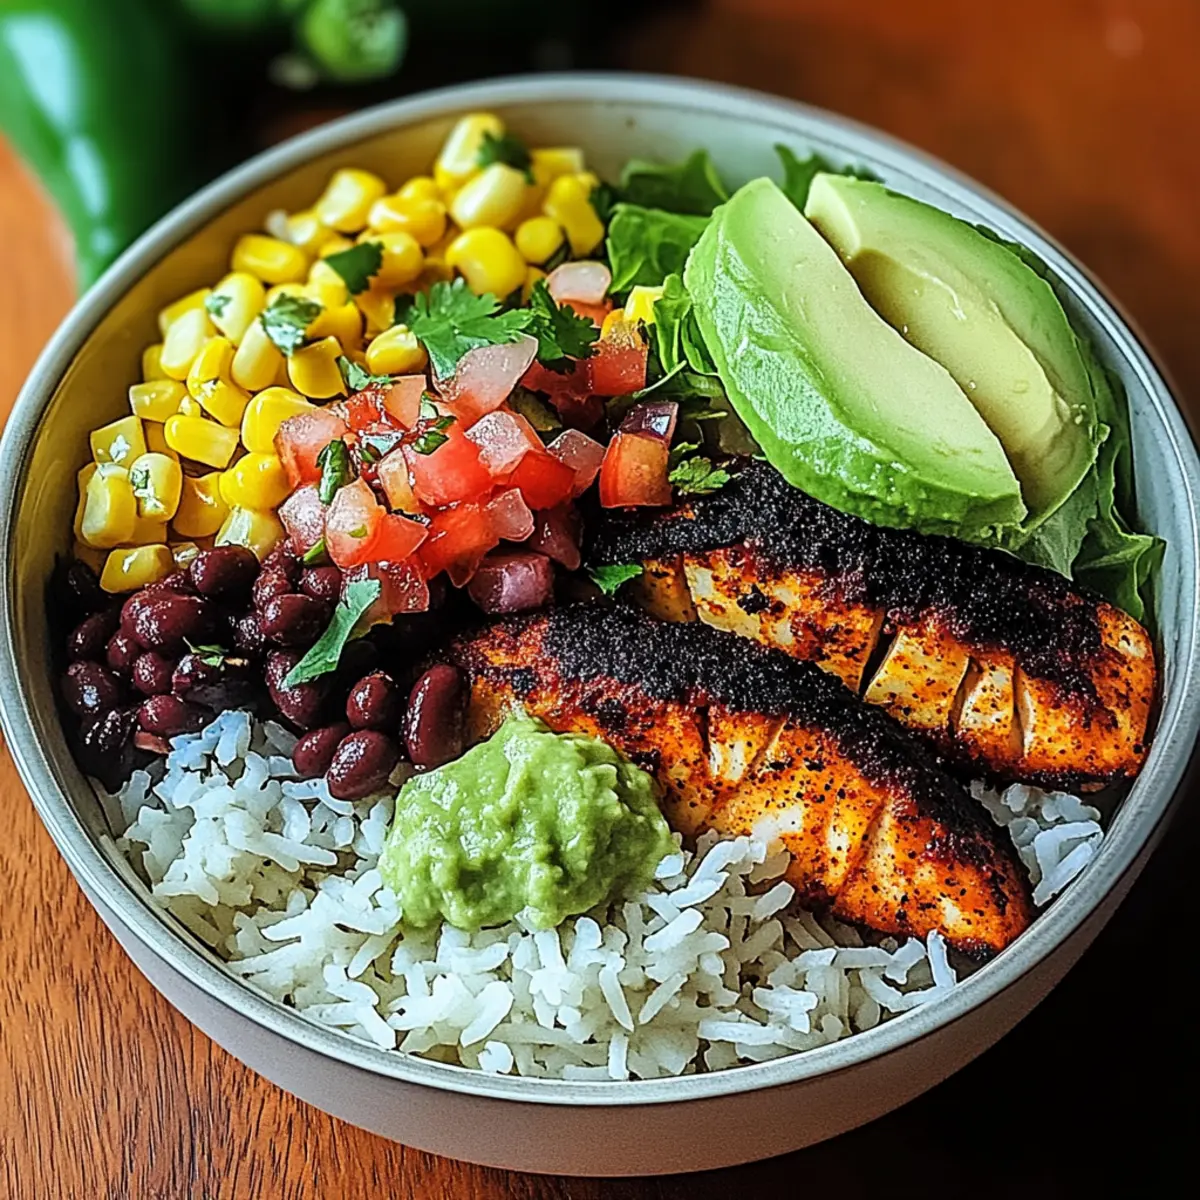
Pair it with fluffy rice or a refreshing avocado salad to round out your meal, much like my favorite Crock Pot Chicken recipe that’s perfect for busy days!

Spicy Brazilian Coconut Chicken Ingredients

For the Chicken
• Chicken Thighs – Tender cuts that soak up the rich sauce beautifully; consider using chicken breasts for a leaner option.
• Kosher Salt – Essential for seasoning the chicken and enhancing flavors.
• Black Pepper – Adds subtle warmth to the dish.
• Smoked Paprika – Gives depth and a smoky essence.
• Olive Oil – A healthy fat for searing the chicken, enhancing flavor.

For the Aromatics
• Yellow Onion – Finely chopped to add a base sweetness to the dish.
• Garlic – Minced; a must for aromatic quality.
• Fresh Ginger – Grated; introduces a fresh and zesty quality.
• Red Chili Peppers – Sliced (jalapeño or Fresno); heat level can be adjusted to taste.
• Red Bell Pepper – Adds sweetness and beautiful color.

For the Sauce
• Full-Fat Coconut Milk – Provides creaminess and richness; this is key for the Spicy Brazilian Coconut Chicken.
• Chicken Broth (or Water) – Contributes to flavor depth in the sauce.
• Tomato Paste – Adds an extra layer of richness to the dish.
• Ground Cumin – A warm spice that pairs well with coconut.
• Turmeric Powder – Adds subtle earthiness and vibrant color.
• Cayenne Pepper (optional) – Spices things up for those who desire more heat.
• Lime (zest and juice) – Brightens the overall flavor of the dish.

For the Finishing Touches
• Fresh Cilantro – Chopped, used for garnishing.
• Cooked White or Brown Rice – The perfect base to soak up the sauce.
• Lime Wedges – For serving, enhances freshness.
• Toasted Coconut Flakes (optional) – Adds texture and visual appeal.

Step‑by‑Step Instructions for Spicy Brazilian Coconut Chicken

Step 1: Prepare the Chicken
Begin by patting the chicken thighs dry with paper towels to ensure a good sear. Season both sides liberally with kosher salt, black pepper, and smoked paprika. This will enhance the flavor of the chicken in your Spicy Brazilian Coconut Chicken. Set the seasoned thighs aside while you heat the olive oil.

Step 2: Sear the Chicken
In a large skillet, heat 2 tablespoons of olive oil over medium-high heat. Once the oil shimmers, carefully add the chicken thighs to the pan, ensuring they are not overcrowded. Sear for 3-4 minutes on each side until they turn a beautiful golden brown. This step locks in moisture and flavor, so once browned, set the chicken aside on a plate.

Step 3: Sauté the Aromatics
In the same skillet, reduce the heat to medium and add the finely chopped yellow onion along with a pinch of salt. Sauté the onion for 2-3 minutes until it becomes translucent and fragrant. The fond left in the pan from the chicken will add depth, setting a flavorful base for your Spicy Brazilian Coconut Chicken.

Step 4: Add Garlic and Spices
Stir in the minced garlic, grated fresh ginger, and sliced red chili peppers. Cook for about 1 minute until fragrant, stirring continuously to prevent burning. The aromas will fill the air, hinting at the deliciousness to come. This step infuses the dish with vibrant flavors that define Spicy Brazilian Coconut Chicken.

Step 5: Incorporate Bell Pepper and Tomato Paste
Next, add the chopped red bell pepper and 2 tablespoons of tomato paste to the skillet. Sauté for an additional 1-2 minutes until the bell pepper softens slightly and the tomato paste darkens, deepening the flavors. This will create a hearty base for the sauce that envelopes your chicken.

Step 6: Mix in the Spices
Now, add 1 teaspoon of ground cumin and 1 teaspoon of turmeric powder to the skillet. Optionally, sprinkle in cayenne pepper if you want extra heat. Cook for about 30 seconds, stirring to allow the spices to bloom. You’ll notice the mixture becoming aromatic, setting the stage for the creamy sauce.

Step 7: Create the Sauce
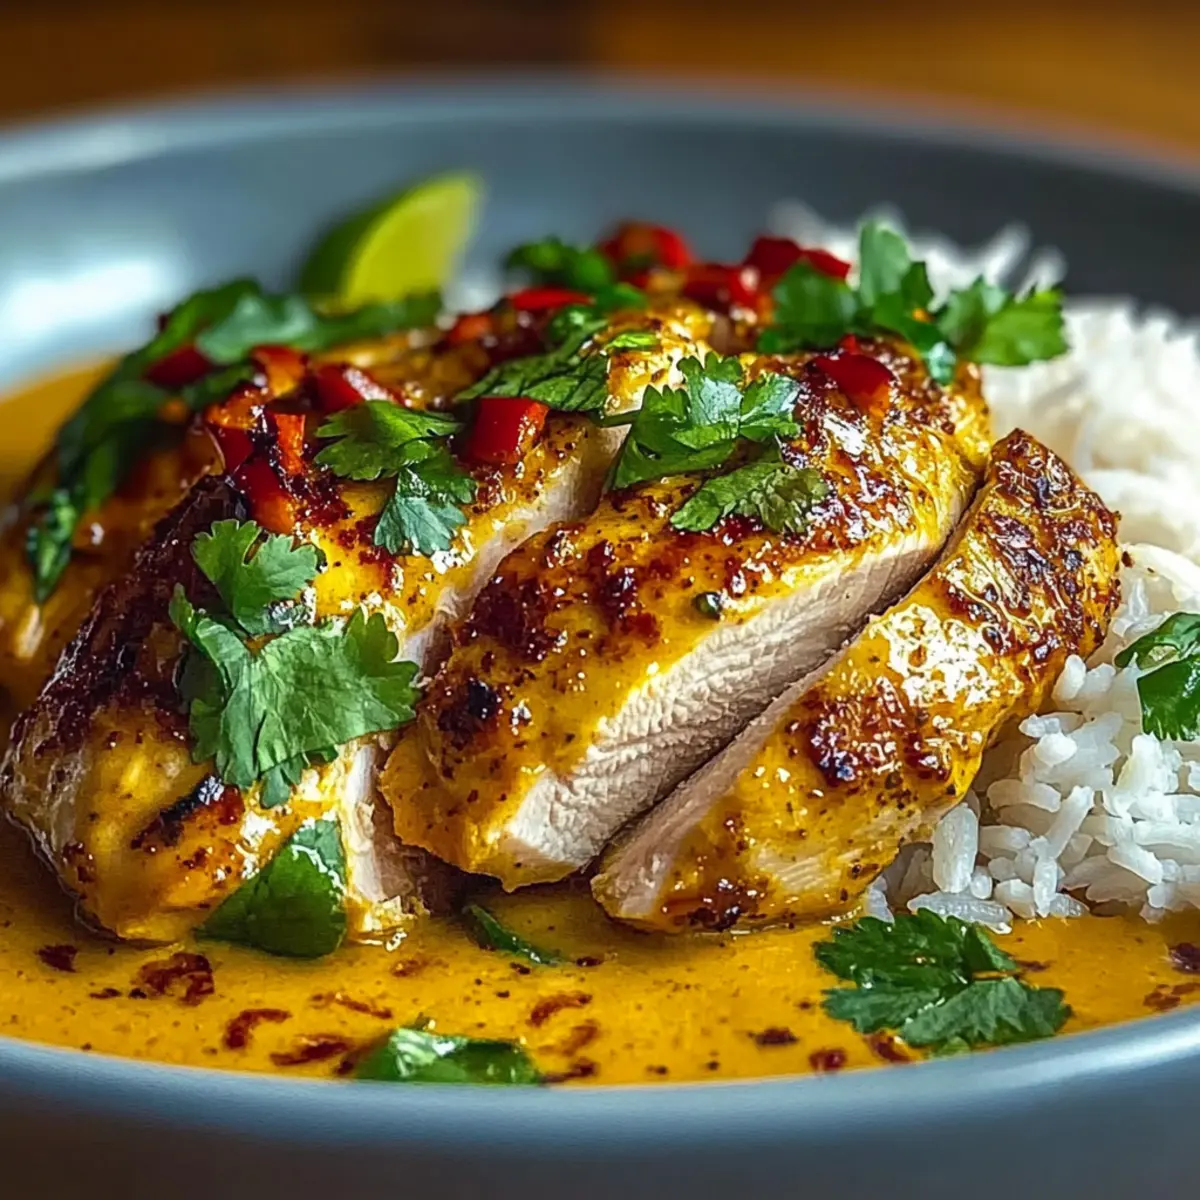
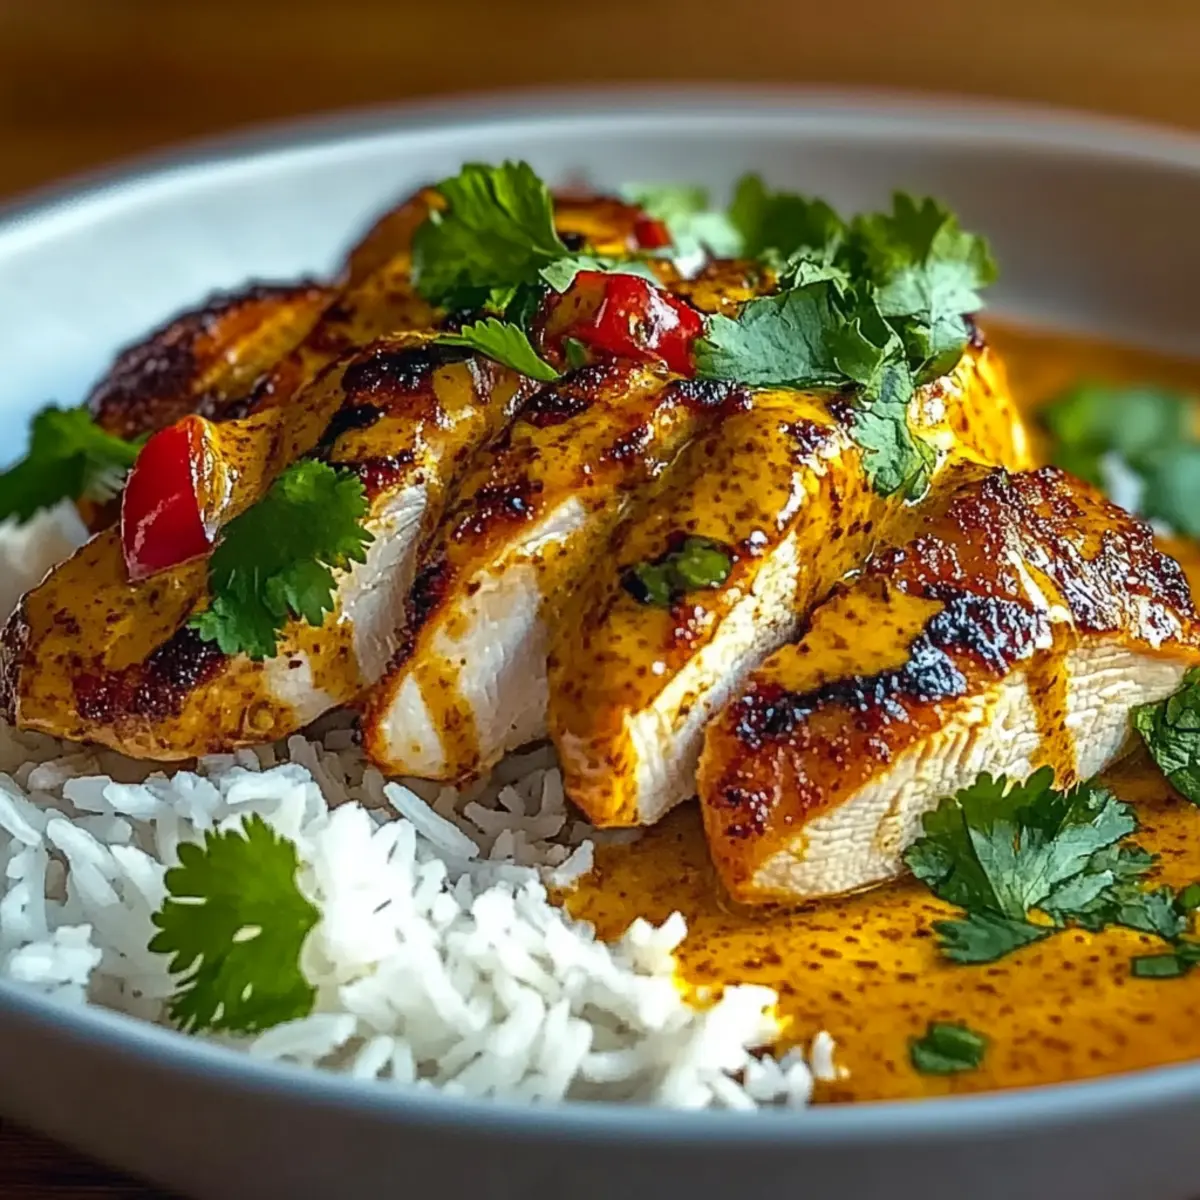
Pour in 1 cup of chicken broth while scraping the bottom of the pan to lift any flavorful bits. Then add 1 can of full-fat coconut milk along with lime zest and juice. Stir everything together and taste for seasoning, adjusting salt and pepper as needed. The sauce should be rich and inviting for your Spicy Brazilian Coconut Chicken.

Step 8: Simmer the Chicken
Return the seared chicken thighs to the skillet, ensuring they are submerged in the sauce. Cover the pan and reduce the heat to low. Let it simmer for 15 minutes, allowing the chicken to absorb all the flavors. After this time, uncover and cook for another 5-10 minutes until the chicken is cooked through and the sauce has thickened.

Step 9: Final Adjustments and Serving
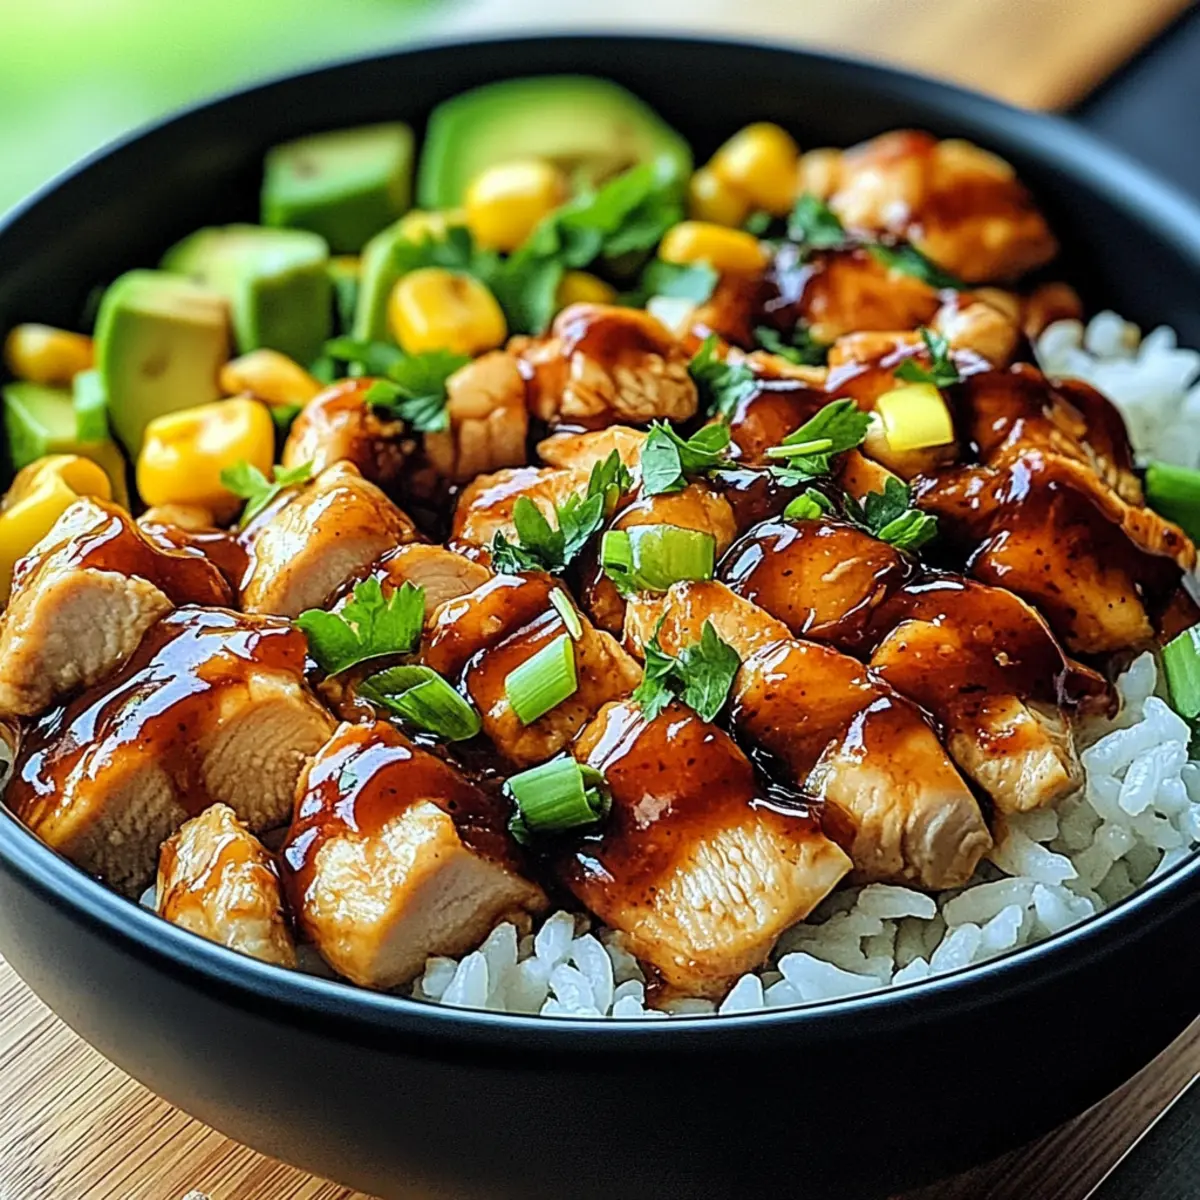
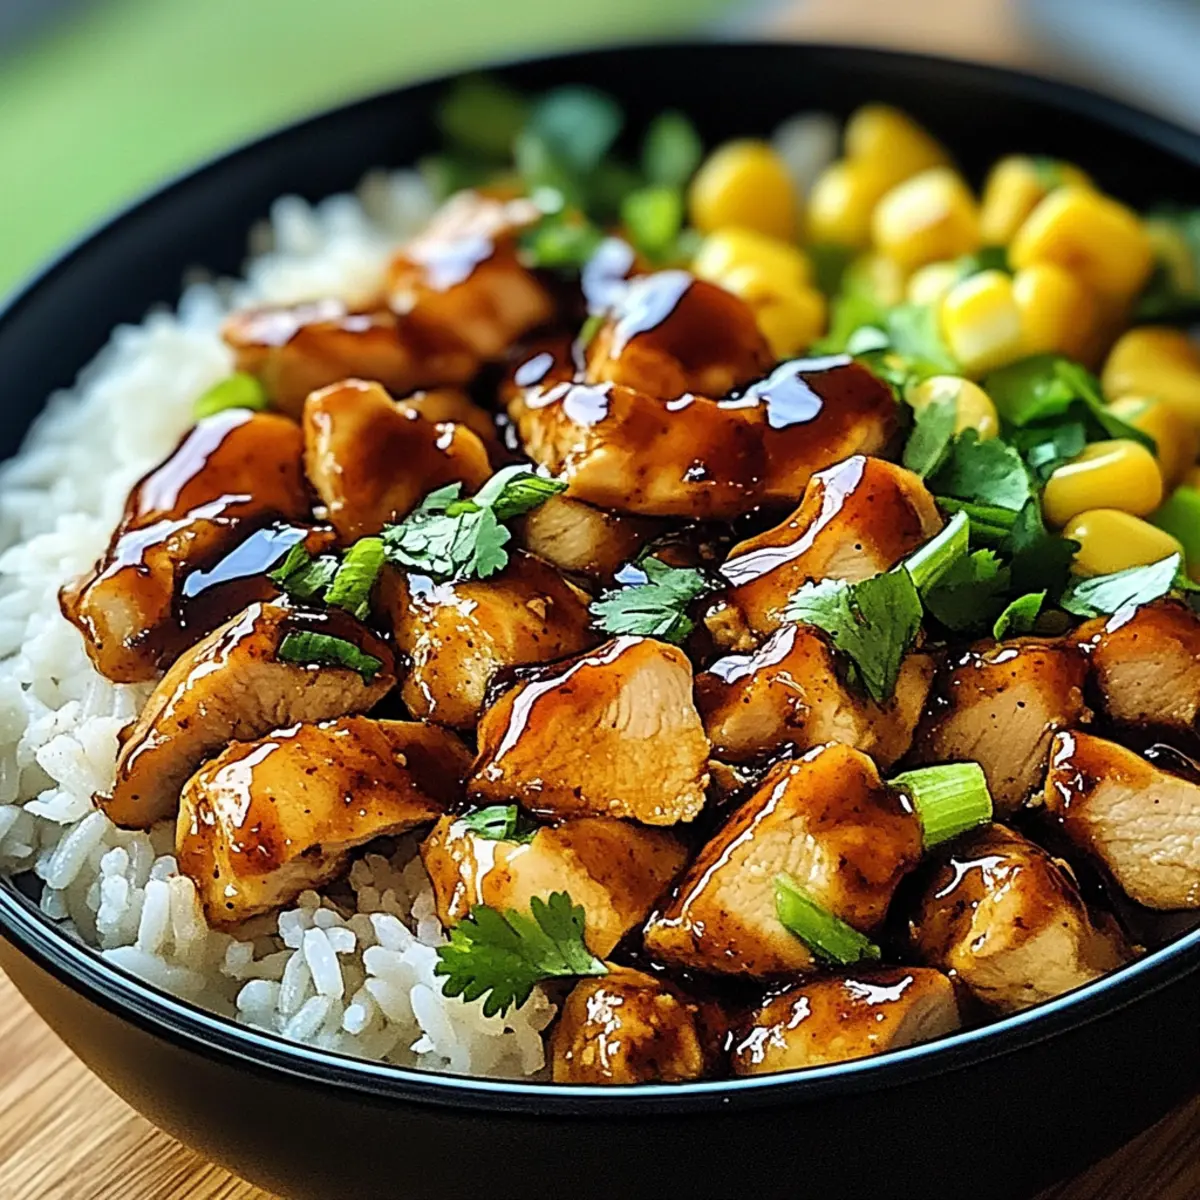
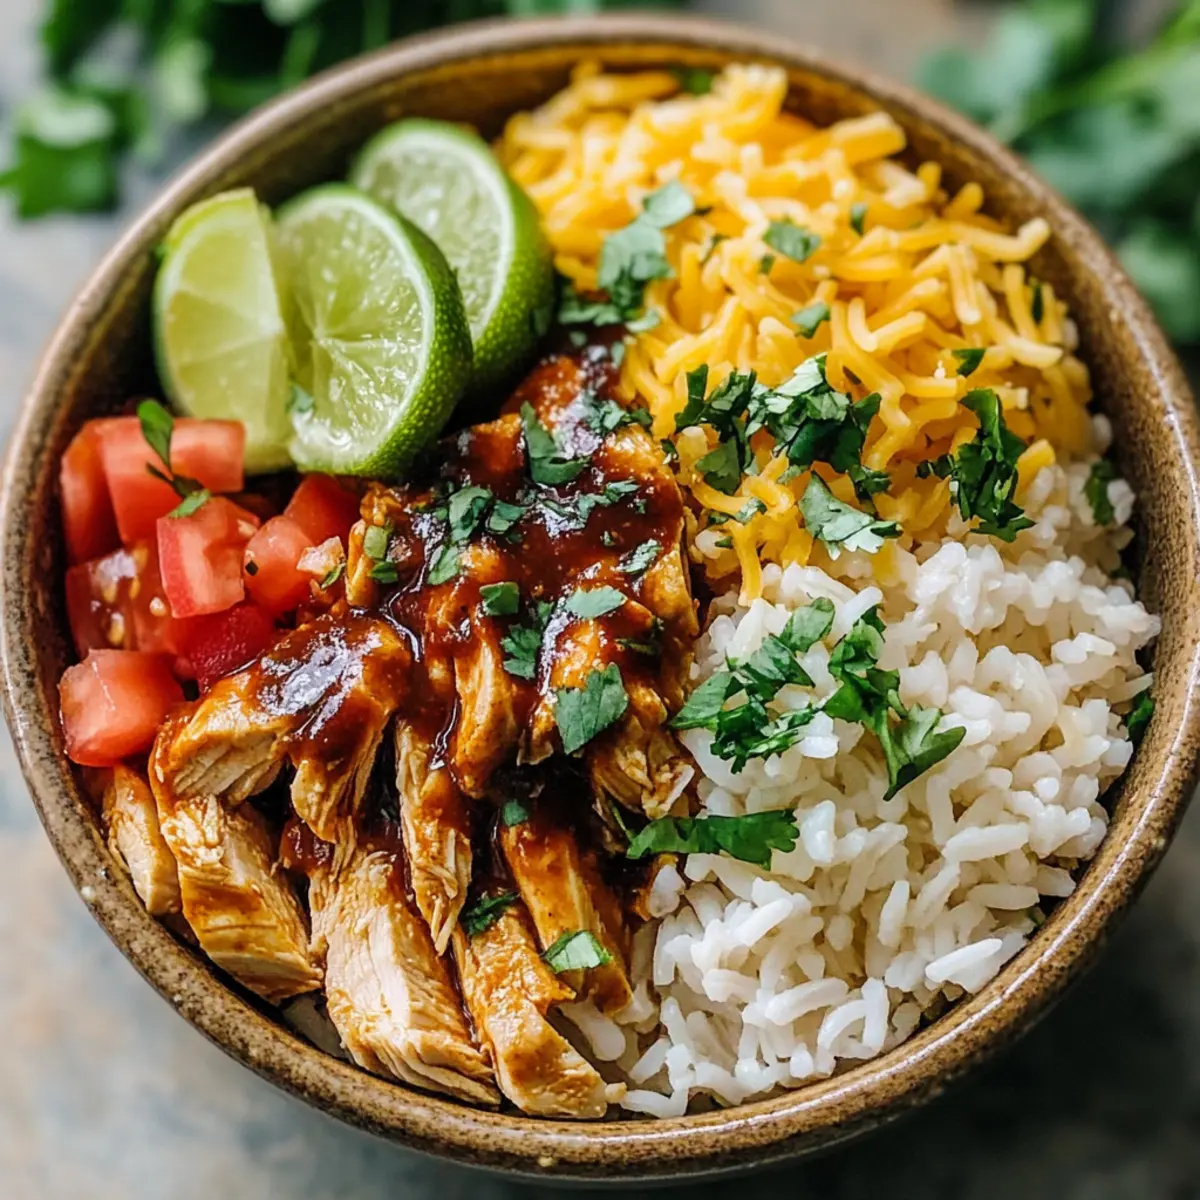
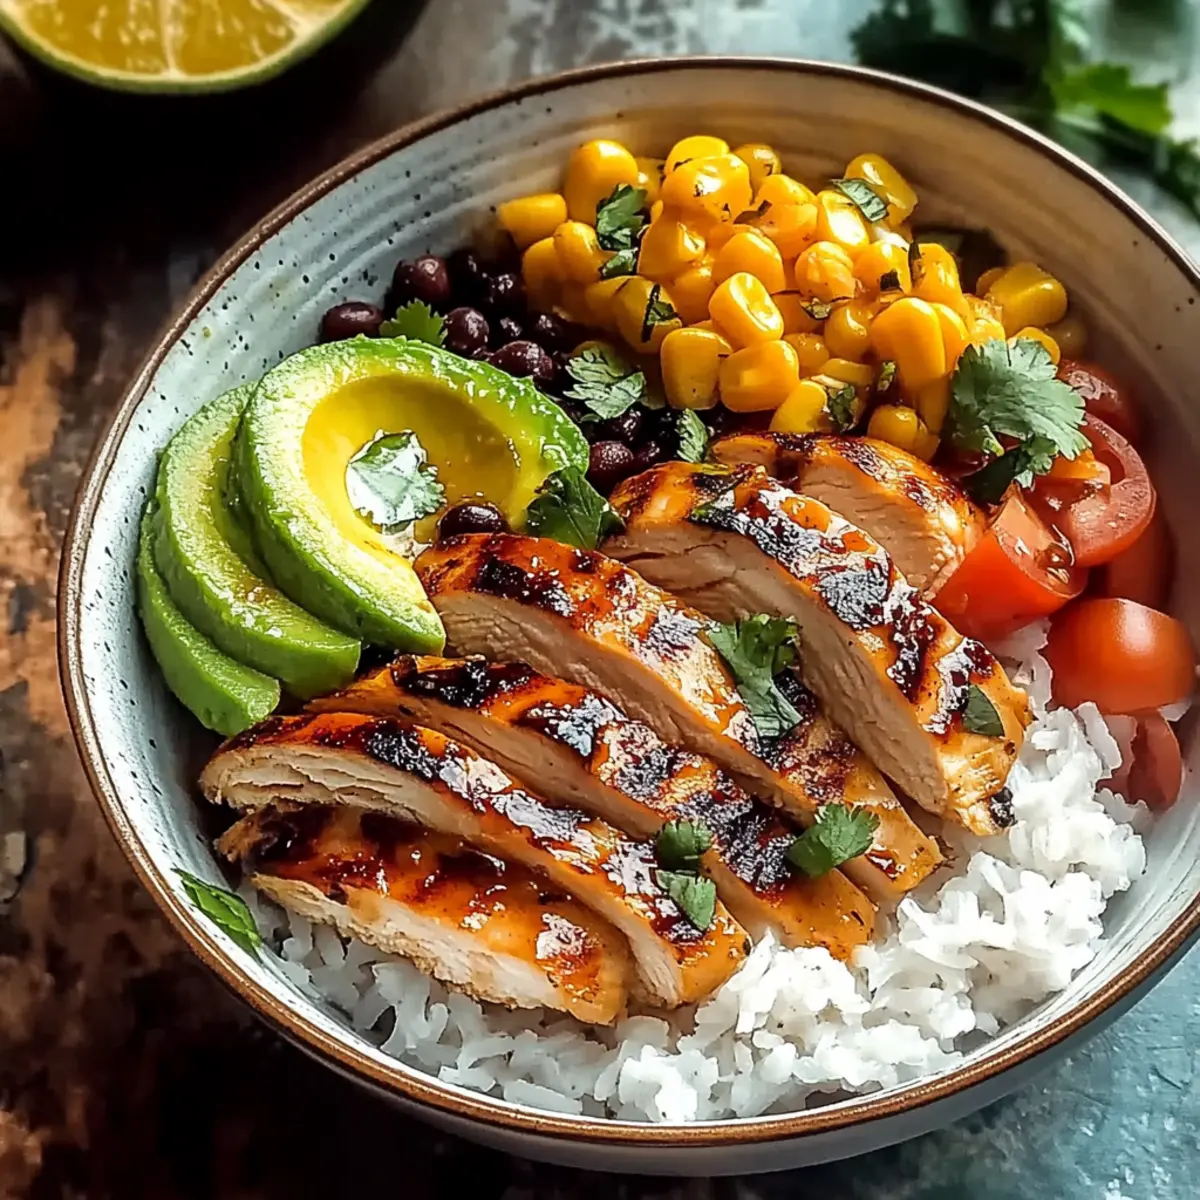
Taste the sauce once more, adjusting the lime juice and salt if necessary. Before serving, garnish the Spicy Brazilian Coconut Chicken with freshly chopped cilantro for a pop of color and flavor. Serve it over a bed of cooked white or brown rice with lime wedges on the side, and enjoy a comforting meal that’s sure to be a hit!

Make Ahead Options

These Spicy Brazilian Coconut Chicken components are perfect for meal prep, allowing you to save time during busy weeknights! You can marinate the chicken thighs in salt, pepper, and smoked paprika up to 24 hours ahead to enhance their flavor. Additionally, pre-chop all the vegetables—onion, bell pepper, garlic, ginger, and chili peppers—and store them in the refrigerator for up to 3 days. When you're ready to cook, simply follow the recipe as instructed; there’s no need to change any steps. This prep not only streamlines your cooking process but ensures that your dish is just as delicious when you serve it, making dinner a breeze!

What to Serve with Spicy Brazilian Coconut Chicken

The warmth of friendly conversation fills the air as you prepare a delightful meal that embodies flavors of the tropics.

  • Fluffy White Rice: Perfect for soaking up the creamy sauce, white rice adds substance and balance to your vibrant dish.

  • Brown Rice: For a wholesome touch, brown rice delivers a nutty flavor and chewy texture that pairs wonderfully with the chicken.

  • Avocado Salad: The cool creaminess of avocado salad provides a fresh contrast to the spiciness of the chicken while introducing a delightful crunch.

  • Sauteed Greens: Add sautéed spinach or kale to your plate to bring a burst of color and nutrition, complementing the richness of the coconut milk.

  • Mango Salsa: This sweet and tangy salsa adds a refreshing kick to your meal, enhancing the tropical vibe of your Spicy Brazilian Coconut Chicken.

  • Tropical Fruit Salad: Mix mango, pineapple, and a sprinkle of chili powder for a refreshing dessert that brightens your taste buds after the spicy main course.

  • Toasted Coconut Flakes: A sprinkle on top lends an extra layer of texture, elevating both taste and visual appeal to your dish.

  • Lime Wedges: Serving lime wedges allows guests to add a zesty pop to the chicken, enhancing the overall flavor profile and bringing bright freshness to the meal.

Expert Tips for Spicy Brazilian Coconut Chicken

Marination Magic: Consider marinating the chicken thighs for at least 30 minutes before cooking to enhance depth of flavor in your Spicy Brazilian Coconut Chicken.

Proper Searing: Avoid overcrowding the skillet while searing; this ensures each piece gets that delicious golden crust, locking in moisture.

Adjusting Spice Levels: Be mindful of your spice preferences—start with fewer chilies and add more if desired, especially if serving to children who may be sensitive to heat.

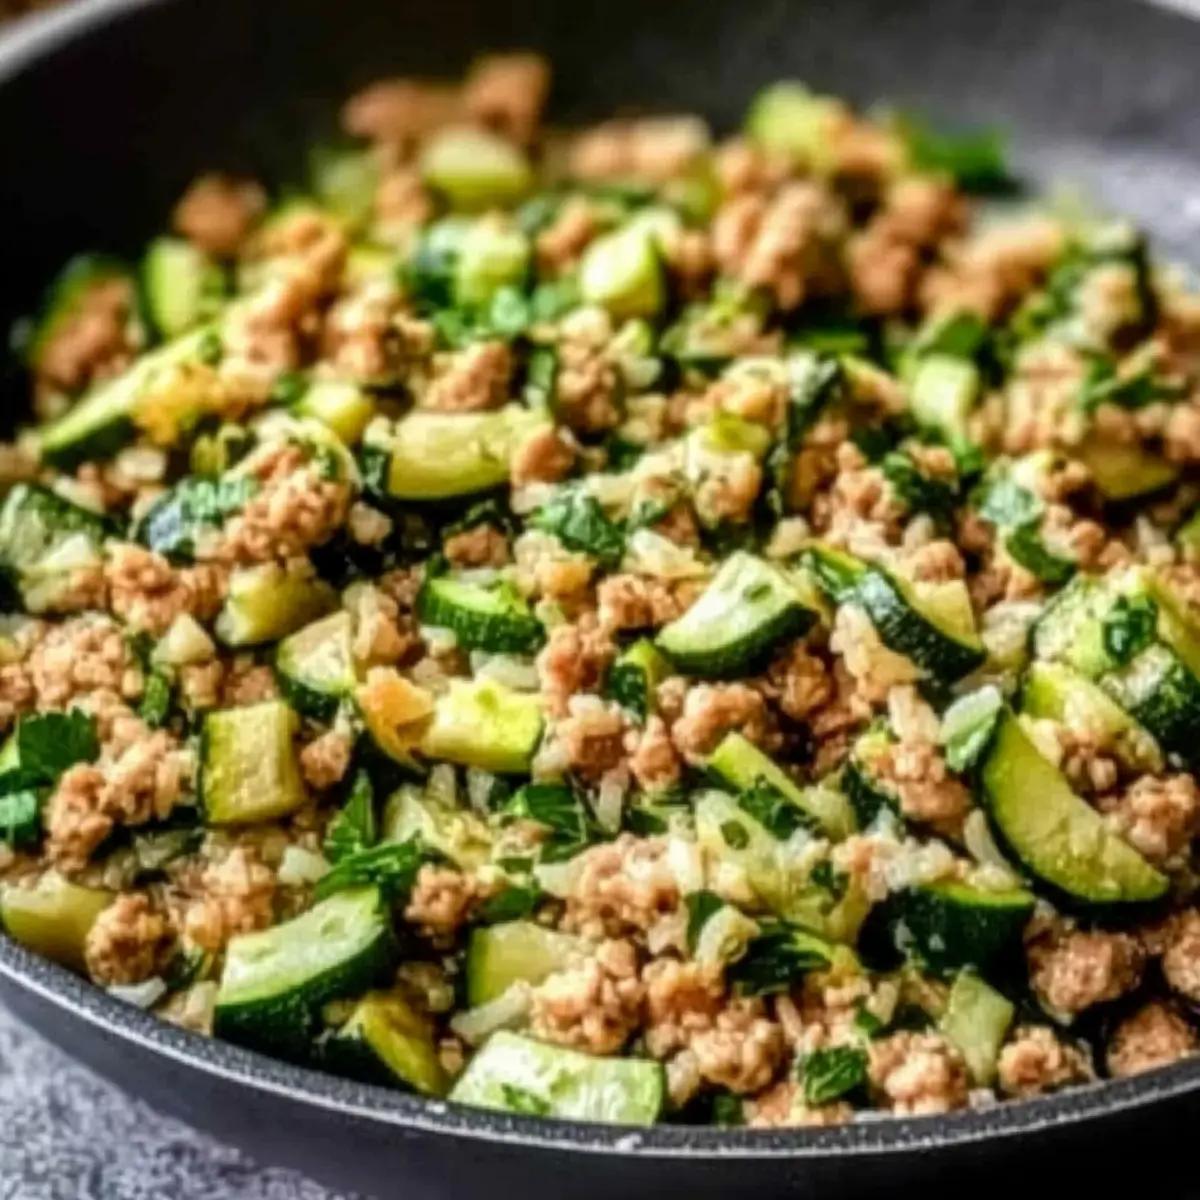
Vegetable Boost: Feel free to toss in extra vegetables like zucchini or carrots to boost nutrition and color; they complement the dish beautifully and add more texture.

Reheating Tips: When reheating leftovers, do so gently on the stove with a splash of water or broth; this prevents the sauce from thickening too much.

Garnish Wisely: Top with fresh cilantro and lime wedges right before serving—it brightens flavors and adds a delightful finish to your Spicy Brazilian Coconut Chicken.

How to Store and Freeze Spicy Brazilian Coconut Chicken

Fridge: Store leftovers in an airtight container for up to 3 days. Ensure the chicken is completely cooled before sealing to maintain freshness.

Freezer: You can freeze Spicy Brazilian Coconut Chicken for up to 3 months. Portion it into freezer-safe containers, letting it cool fully to avoid ice crystals.

Reheating: Thaw overnight in the fridge before reheating gently on the stove. Add a splash of chicken broth if the sauce has thickened.

Serving Tips: Reheat only what you plan to serve, and garnish with fresh cilantro and lime for an extra flavor boost!

Variations for Spicy Brazilian Coconut Chicken

Embrace your culinary creativity and personalize this delightful dish with these tasty substitutions and variations!

  • Shrimp Delight: Swap chicken thighs for shrimp for a lighter, quicker option. Simply cook until they’re pink and tender—fast and fabulous!

  • Veggie Medley: Toss in colorful veggies like zucchini, eggplant, or carrots for added nutrition and vibrant hues. These not only enhance the dish but bring in a delightful crunch that complements the creamy sauce.

  • Dairy-Free: For a vegan alternative, replace coconut milk with unsweetened almond or cashew milk. The flavors might shift, but you'll discover a fresh take on this dish!

  • Heat It Up: If you crave more spice, amp up the cayenne or add a pinch of crushed red pepper flakes. Adjust according to your family’s taste preferences to create the perfect heat level.

  • Citrus Twist: Incorporate orange zest along with the lime for a bright, zesty profile that enhances the tropical experience. This small addition can transform your meal into a citrusy escape.

  • Brown Rice or Quinoa: Swap out white rice for brown rice or quinoa to make the dish heartier and healthier. This change adds a nutty flavor and a satisfying texture that pairs well with the creamy sauce.

  • Herbed Variation: Experiment by mixing in fresh herbs like basil or mint along with cilantro for an aromatic boost. The flavor depths can elevate your dish into something unexpected and delightful.

Try any of these variations and pick those that resonate with your family’s taste buds! Don’t forget to explore the flavors with delicious sides like Crock Pot Chicken or Honey Garlic Chicken for a complete meal experience.

Spicy Brazilian Coconut Chicken Recipe FAQs

How do I know if my ingredients are ripe or fresh?
Absolutely! For the vegetables, look for vibrant colors and firm textures. Avoid any soft spots or dark blemishes on bell peppers and onions. When selecting chicken, fresh thighs should be pink and moist, without any off odors.

How should I store leftovers of Spicy Brazilian Coconut Chicken?
Store any leftovers in an airtight container in the fridge for up to 3 days. Make sure the dish is completely cooled before transferring it to keep the flavors fresh. Reheat gently on the stove to maintain the creamy sauce's texture.

Can I freeze Spicy Brazilian Coconut Chicken?
Yes! You can freeze this flavorful dish for up to 3 months. To do so, let the chicken cool completely, then transfer it to freezer-safe containers. When ready to enjoy, thaw in the fridge overnight and reheat on the stove with a splash of chicken broth for the best results.

What should I do if the sauce is too thick after reheating?
No worries! If your sauce thickens too much during reheating, simply add a splash of water or chicken broth. Stir while simmering until it reaches your desired consistency. This keeps the dish creamy and delicious.

Are there any dietary considerations for Spicy Brazilian Coconut Chicken?
Very! If serving to guests with dietary restrictions, substitute chicken thighs with shrimp or tofu. If allergies are a concern, check for coconut intolerance and adjust ingredients accordingly. The dish can easily adapt to vegetarian diets by removing chicken and using vegetable broth instead.

Honey BBQ Chicken Rice Bowl: A Sweet & Smoky Family Delight

May 31, 2026 by Grace Snow Leave a Comment

“Dinner’s almost ready!” my friend exclaimed, rummaging through her fridge for ingredients. It reminded me of those hectic weeknights where you want something delicious but don’t have hours to spare. Enter the Honey BBQ Chicken Rice Bowl—a quick weeknight meal that packs a flavorful punch! In just under 40 minutes, you can whip up tender chicken glazed in a sticky honey BBQ sauce, all served over a bed of fluffy rice. This recipe is not only meal prep-friendly but also effortlessly customizable, making it the perfect solution for busy families or anyone craving a comforting homemade dish. So, why settle for takeout when you can indulge in a warm, hearty bowl? Are you ready to elevate your dinner game?

Why is this recipe a must-try?

Simplicity at its core: This Honey BBQ Chicken Rice Bowl is incredibly easy to prepare, requiring only basic cooking skills.

Flavor explosion: The sweet and smoky glaze marries beautifully with tender chicken, ensuring every bite is a tantalizing experience.

Customizable to your taste: Feel free to add your favorite veggies or swap in different sauces to make it your own.

Meal prep-friendly: Make a big batch for a week’s worth of quick, satisfying dinners, similar to our popular Honey Garlic Chicken or Crock Pot Chicken.

Family-approved: Kids and adults alike will love digging into this comforting dish, making it a great choice for busy weeknights.

Quick to serve: Ready in under 40 minutes, it’s the ideal solution to tame those hectic evenings without sacrificing flavor or quality.

Honey BBQ Chicken Rice Bowl Ingredients

  • For the Chicken

  • Boneless, Skinless Chicken Breasts – The main protein source; substitute with chicken thighs for added juiciness.

  • Olive Oil – For cooking the chicken to golden perfection; can be replaced with avocado oil or omitted if grilling.

  • For the Rice

  • Long-Grain White Rice – Provides a fluffy texture; can be swapped with jasmine, basmati, or brown rice for different flavors or healthier options.

  • Chicken Broth – Enhances flavor during rice cooking; can use water as a substitute, but broth adds depth.

  • For the Sauce

  • BBQ Sauce – Brings the sweet and smoky flavor; choose your favorite brand or consider a homemade version for a healthier alternative.

  • Honey – Adds sweetness and helps create a sticky glaze; maple syrup can replace honey for a similar flavor profile.

  • Smoked Paprika – Enhances the BBQ flavor with subtle smokiness; regular paprika can be used instead.

  • Garlic Powder – Adds aromatic depth; fresh garlic can be substituted if desired.

  • Onion Powder – Complements the garlic; fresh onion can replace it but adjust the quantity accordingly.

  • Salt and Black Pepper – Essential for seasoning; adjust to taste.

  • For Garnishing

  • Fresh Parsley (optional) – Adds a pop of freshness; can swap for cilantro or omit entirely.

  • Green Onions (optional) – Adds crunch and flavor; can be omitted or replaced with chives if preferred.

This Honey BBQ Chicken Rice Bowl is designed to be as uncomplicated as it is delicious, making it the perfect addition to your weeknight meal rotation!

Step‑by‑Step Instructions for Honey BBQ Chicken Rice Bowl

Step 1: Rinse and Cook Rice
Begin by rinsing 1 cup of long-grain white rice under cold water until the water runs clear, eliminating excess starch. In a medium saucepan, combine the rinsed rice with 2 cups of chicken broth and bring it to a boil over medium-high heat. Once boiling, reduce the heat to low, cover, and let it simmer gently for 18-20 minutes until the rice is tender and fluffy.

Step 2: Prepare the Chicken
While the rice is cooking, take 1 pound of boneless, skinless chicken breasts and flatten them slightly for even cooking. Season both sides generously with smoked paprika, garlic powder, onion powder, salt, and black pepper. Heat 2 tablespoons of olive oil in a large skillet over medium-high heat until shimmering, preparing to give your chicken that golden crust.

Step 3: Cook the Chicken
Carefully place the seasoned chicken breasts into the hot skillet. Cook for 6-7 minutes on each side, allowing the chicken to develop a lovely golden-brown sear and reaching an internal temperature of 165°F (75°C). Once cooked through, transfer the chicken to a cutting board to rest and keep the drippings in the skillet for added flavor.

Step 4: Make the Honey BBQ Sauce
In a small bowl, whisk together ½ cup of BBQ sauce and 2 tablespoons of honey until well combined. Pour this sweet mixture over the cooked chicken in the skillet and reduce the heat to low. Simmer for 2-3 minutes, turning the chicken to thoroughly coat it in the sticky honey BBQ sauce, allowing the flavors to meld beautifully.

Step 5: Assemble the Rice Bowl
Slice the glazed chicken into strips and set it aside for serving. Fluff the cooked rice with a fork, then divide the rice among bowls. Layer the sliced honey BBQ chicken on top of each serving, drizzling any remaining sauce from the pan over the chicken for an extra burst of flavor.

Step 6: Garnish and Serve
For an optional touch of freshness, sprinkle chopped fresh parsley and sliced green onions over the Honey BBQ Chicken Rice Bowl. Serve immediately while everything is warm and inviting. Enjoy this quick and comforting meal with loved ones, reveling in the delicious fusion of sweet and savory tastes!

What to Serve with Honey BBQ Chicken Rice Bowl

Creating the perfect meal means pairing complementary flavors and textures that elevate your main dish.

  • Crisp Garden Salad: A refreshing mix of greens and veggies balances the richness of the chicken, offering a light and vibrant contrast. Toss with a zesty vinaigrette for added brightness.

  • Roasted Vegetables: Colorful, caramelized veggies like bell peppers and zucchini provide a sweet earthy complement that harmonizes with the BBQ sauce. They add an inviting crunch to your meal.

  • Cornbread Muffins: These sweet, fluffy delights bring a comforting, Southern flair to your dinner. Serve warm with a pat of butter for the ultimate indulgence.

  • Iced Tea: A glass of unsweetened iced tea perfectly cuts the richness of the honey BBQ chicken, offering a refreshing sip between bites.

  • Creamy Coleslaw: The cool, crunchy coleslaw offers a delightful contrast. With its tangy dressing, it brightens the meal and adds delightful texture.

  • Fruit Salad: A medley of fresh fruits adds a layer of sweetness and juiciness that pairs beautifully with the savory elements of the rice bowl.

  • Chocolate Pudding: To finish the meal on a sweet note, serve a small dish of rich chocolate pudding. Its creaminess is the perfect way to conclude your dining experience.

Expert Tips for Honey BBQ Chicken Rice Bowl

  • Rinse Rice Thoroughly: Remove excess starch by rinsing your rice under cold water until clear, ensuring a fluffier texture in the final dish.

  • Cook Chicken Evenly: Flatten chicken breasts slightly before cooking. This helps them cook evenly, preventing any undercooked areas, and will ensure they reach an internal temperature of 165°F (75°C).

  • Simmer Sauces Gently: Allowing the honey BBQ sauce to simmer gently after glazing the chicken will enhance the glaze consistency, making it stick beautifully to the chicken without burning.

  • Customize with Veggies: Incorporate your favorite vegetables like bell peppers or broccoli to add nutrition and balance to the Honey BBQ Chicken Rice Bowl, tailoring it for your family’s tastes.

  • Use Airtight Storage: When meal prepping, store your leftovers in airtight containers to maintain freshness and flavor for up to 4 days in the refrigerator.

  • Reheat with Care: To reheat leftovers, consider microwaving or warming them in a skillet with a splash of water. This will keep the rice from drying out while reviving its original flavors.

Make Ahead Options

These Honey BBQ Chicken Rice Bowls are perfect for meal prep enthusiasts looking to save time during busy weeknights! You can marinate the chicken in BBQ sauce and honey up to 24 hours in advance to enhance the flavors. Additionally, you can cook the rice and refrigerate it for up to 3 days, ensuring it's ready to go when needed. When it's time to serve, simply reheat the rice and chicken in a skillet over medium heat until warmed through. Drizzling any remaining sauce over the chicken just before serving will ensure you have those restaurant-quality results with minimal effort. Enjoy the convenience of homemade goodness without the last-minute rush!

How to Store and Freeze Honey BBQ Chicken Rice Bowl

Fridge: Store leftovers in airtight containers for up to 4 days. This keeps your Honey BBQ Chicken Rice Bowl fresh and ready for quick meals throughout the week.

Freezer: For longer storage, freeze chicken and rice separately in airtight containers for up to 2 months. Thaw overnight in the fridge before reheating to maintain texture and flavor.

Reheating: When you're ready to enjoy leftovers, microwave until warm or heat gently in a skillet with a splash of water to keep the rice fluffy and moist.

Room Temperature: Avoid leaving the dish out for more than 2 hours to ensure food safety and prevent spoilage. Always refrigerate any leftovers promptly.

Honey BBQ Chicken Rice Bowl Variations

Feel free to get creative and tailor this recipe to your family's tastes!

  • Veggie-Packed: Add sautéed bell peppers, roasted broccoli, or grilled corn for a nutritious crunch. These vibrant veggies not only boost nutrients but also make your bowl visually appealing.
  • Cheesy Delight: Incorporate shredded cheddar or crumbled feta for a creamy touch that adds richness. Cheese can elevate the dish, turning it into a gooey indulgence.
  • Heat Wave: Drizzle sriracha or your favorite hot sauce over the top for a spicy kick. This simple addition transforms the profile of the dish, making it exciting for heat lovers.
  • Healthy Grain: Swap the long-grain white rice for brown rice or quinoa to increase fiber and nutrients. This brings a delightful nutty flavor while keeping the dish hearty and wholesome.
  • Herb Swap: Use fresh cilantro instead of parsley for a different flavor dimension. Cilantro adds a bright, earthy quality that pairs beautifully with the smoky BBQ flavor.
  • Bowl of Bliss: Top with a dollop of sour cream or Greek yogurt for a cool contrast to the warmth of the dish. This creamy element rounds out the textures wonderfully.
  • Nutty Toast: Sprinkle with toasted sesame seeds or chopped nuts like cashews or almonds for an added crunch. These crunchy additions will surprise you with their delightful texture.
  • Flavorful Marinade: Marinade the chicken in a mixture of soy sauce and honey for an Asian twist. This variation pairs beautifully with Chipotle Lime Chicken and Rice for a zingy flavor bomb.

No need for fast food when you can have a homemade meal bursting with flavor!

Honey BBQ Chicken Rice Bowl Recipe FAQs

How do I choose ripe chicken breasts for this recipe?
Absolutely! Look for boneless, skinless chicken breasts that are plump and firm to the touch. They should also have a light pink color without any dark spots. If you're considering chicken thighs instead, make sure they are equally fresh, as they can add a juicier texture to your dish.

What’s the best way to store leftovers of the Honey BBQ Chicken Rice Bowl?
Very! You can store your leftovers in airtight containers in the refrigerator for up to 4 days. To reheat, simply microwave until warm or use a covered skillet with a splash of water to prevent the rice from drying out.

Can I freeze the Honey BBQ Chicken Rice Bowl? If so, how?
Yes, you can! To freeze, separate the chicken and rice into airtight containers. This way, they can maintain their textures better. They will last in the freezer for up to 2 months. For reheating, just thaw in the refrigerator overnight, and when you’re ready, warm the chicken and rice together in a skillet for best results.

What if my chicken isn't cooking evenly?
If this happens, it may be because the chicken breasts are too thick. I recommend flattening them slightly before cooking. This helps ensure even cooking and makes it easier to reach an internal temperature of 165°F (75°C). Using a meat mallet or rolling pin can help with this!

Can I make this dish allergy-friendly?
Absolutely! If you need to avoid specific allergens, try using a gluten-free BBQ sauce or swapping the honey for maple syrup for an allergy-friendly sweetener. Always check ingredient labels for any pre-packaged products to ensure they meet your dietary needs.

What should I do if my BBQ sauce is too thick?
Very! If you find your BBQ sauce is too thick when glazing the chicken, you can add a little water or chicken broth, a tablespoon at a time, while stirring on low heat. This will help achieve a smoother, more pourable consistency for that perfect glaze!

Street Corn Chicken Rice Bowl: Quick, Creamy Delight at Home

May 31, 2026 by Grace Snow Leave a Comment

As I stood in the kitchen, the sizzle of chicken meeting a hot skillet brought a smile to my face—there’s just something magical about home cooking. This Street Corn Chicken Rice Bowl combines juicy seasoned chicken with smoky charred corn and a delightfully creamy chili-lime sauce, all served atop fluffy rice. In just about 30 minutes, this recipe transforms a mundane weeknight meal into a fiesta of flavors that will have everyone coming back for seconds. Not only is it a crowd-pleaser, perfect for lazy evenings, but it’s also wonderfully adaptable for meal prep, making your week smoother without sacrificing taste. Curious about how to elevate your weeknight dinners? Let’s dive into this mouthwatering journey together!

Why Is This Recipe a Game Changer?

Quick and Effortless: Within just 30 minutes, you’ll have a flavorful meal that beats takeout, giving you more time to relax.
Versatile Base Options: You can easily swap out rice for couscous or quinoa, ensuring everyone at the table gets their preference.
Creamy Indulgence: The rich, creamy chili-lime sauce adds a delightful twist that takes this bowl to the next level!
Meal Prep Friendly: Perfect for stocking your fridge; portion it out for quick lunches throughout the week—no boring meals here! If you love easy meal rotations, also check out my Lime Chicken Rice and Bbq Chicken Rice recipes for more variety.
Crowd-Pleasing Flavor: Your family and guests will rave about it—it's like bringing a food truck right into your kitchen!

No need to settle for fast food when you can whip up this stunning dish that’s just as delicious as it is uncomplicated.

Street Corn Chicken Rice Bowl Ingredients

For the Chicken
• Boneless Skinless Chicken Thighs – This is the primary protein source for a juicy bite; you can also use chicken breasts or rotisserie chicken for quicker prep.
• Chili Powder – This adds heat and flavor to the chicken; adjust to match your spice preference.
• Smoked Paprika – It introduces a smoky depth to the dish; for a milder flavor, sweet paprika makes an excellent substitute.
• Garlic Powder – This enhances the overall flavor; if you prefer a more intense taste, opt for fresh garlic instead.
• Cumin – Provides an earthy note; feel free to omit or reduce for a milder profile.
• Salt – Essential for seasoning; adjust according to your taste.
• Olive Oil – A must for cooking chicken; substitute with avocado oil for a higher smoke point.

For the Corn Topping
• Corn Kernels (fresh or frozen) – This core topping creates that signature smoky flavor; avoid canned corn unless properly drained and dried.
• Mayonnaise – Creates creaminess in the sauce; swap in Greek yogurt for a healthier twist.
• Sour Cream – Adds that delightful tang; try plant-based sour cream for a dairy-free version.
• Fresh Lime Juice – Brightens flavors and balances richness; don’t skip this crucial ingredient!
• Cotija Cheese – A salty topping that elevates the street corn flavor; feta cheese can be used as a similar alternative.
• Fresh Cilantro – Adds freshness; feel free to omit if it’s not your style.

For the Base
• Cooked White Rice – The main base of the bowl; you can swap in couscous, quinoa, or cauliflower rice for a delightful twist.
• Ripe Avocado – It introduces a creamy texture and healthy fats; slice fresh to keep from browning.
• Lime Wedges – For serving; a squeeze enhances flavor upon eating.

With these ingredients assembled, you’re on your way to enjoying a sensational Street Corn Chicken Rice Bowl that will captivate everyone at your table!

Step‑by‑Step Instructions for Street Corn Chicken Rice Bowl

Step 1: Season Chicken
In a small bowl, combine chili powder, smoked paprika, garlic powder, cumin, and salt. Evenly coat the boneless skinless chicken thighs with the spice mixture, ensuring all sides are well-seasoned. Let the seasoned chicken sit for about 5 minutes, allowing the spices to infuse their flavors.

Step 2: Cook Chicken
Heat a skillet over medium-high heat and add a drizzle of olive oil. Once the oil is hot, place the seasoned chicken in the skillet and cook for 6-7 minutes on each side until the chicken is nicely charred and cooked through (internal temperature should reach 165°F). Remove the chicken from the skillet and let it rest before slicing.

Step 3: Char Corn
In the same skillet, without adding oil, add the corn kernels to the hot surface. Cook the corn undisturbed for 2-3 minutes until it begins to char, then stir and cook for another minute. This charring will enhance the flavor, giving your Street Corn Chicken Rice Bowl a delicious smoky taste.

Step 4: Make Sauce
In a mixing bowl, whisk together mayonnaise, sour cream, fresh lime juice, chili powder, and smoked paprika until smooth. Gently fold in the charred corn and half of the cotija cheese. This creamy mixture will serve as the delightful topping for your bowl, tying all the flavors together beautifully.

Step 5: Assemble Bowls
Start with a warm base of cooked rice in each bowl, creating a comfortable nest for your toppings. Layer sliced chicken over the rice, then generously spoon the creamy corn mixture on top. Garnish with slices of ripe avocado, sprinkled cotija cheese, fresh cilantro, and a lime wedge to complete your flavorful Street Corn Chicken Rice Bowl.

Expert Tips for Street Corn Chicken Rice Bowl

  • Prep Ahead: Invest a little time on weekends to prep ingredients; marinate chicken and chop veggies in advance for an effortless weeknight cook experience.
  • Perfectly Charred Corn: Always use a dry, high-heat skillet for charring corn. This helps create those delicious caramelized flavors; avoid crowding the pan for optimal results.
  • Season to Taste: Adjust the lime juice and chili powder amount in the sauce based on your heat preference; don’t forget to taste as you go for a perfect balance.
  • Storage Savvy: Store components separately in airtight containers; rice, chicken, and toppings can be mixed fresh each day to maintain quality and prevent sogginess.
  • Avocado Freshness: Slice avocado just before serving and sprinkle with a bit of lime juice to keep it from browning and looking appealing in your bowl.

Make Ahead Options

These Street Corn Chicken Rice Bowls are perfect for meal prep, making busy weeknights a breeze! You can season and cook the chicken up to 3 days in advance; keep it tightly sealed in the refrigerator to maintain its juicy flavor. The corn mixture can also be prepared ahead and refrigerated for up to 24 hours—just fold in the charred corn and cheese right before serving for maximum freshness. When you're ready to enjoy your bowls, simply reheat the chicken and rice, assemble as directed, and add fresh avocado slices to prevent browning. This way, you’ll savor all the deliciousness of your Street Corn Chicken Rice Bowl with minimal effort!

Street Corn Chicken Rice Bowl Variations

Feel free to mix and match the flavors of this delightful dish to make it your own!

  • Couscous Swap: Use fluffy couscous in place of rice for a lighter, quicker-to-cook base. It adds a delightful texture that really compliments the other ingredients.

  • Quinoa Alternative: Substitute with quinoa for a protein-packed twist. With its nutty flavor, it elevates the dish and adds a satisfying crunch.

  • Cauliflower Rice: For a low-carb option, use cauliflower rice. It absorbs flavors beautifully and keeps the bowl light but filling!

  • Shrimp Instead of Chicken: Choose shrimp for a seafood twist! Cook them for just 4 minutes on high heat until pink. The result? A fresh, zesty flavor everyone will love.

  • Spicy Kick: Add a pinch of cayenne pepper to the corn sauce for an extra layer of warmth. A little heat can really elevate the flavor and awaken your taste buds!

  • Fresh Salsa: To make it lighter, swap the creamy topping for chunky fresh salsa. The burst of freshness balances the smoky corn like sunshine on your palate.

  • Mexican Crema: Instead of sour cream or mayonnaise, use Mexican crema for a richer flavor. It adds tanginess and creaminess, creating a decadent experience.

  • Green Onions: Sprinkle fresh green onions on top for an added crunch and a mild onion flavor. They provide a delightful contrast to the creamy elements of the dish.

Feeling inspired? You can take a delicious detour by trying out these variations or even pair your bowl with Corn Furikake Fried Rice for an inventive twist on this classic meal. With these options, your Street Corn Chicken Rice Bowl will never become boring!

How to Store and Freeze Street Corn Chicken Rice Bowl

Fridge: Store prepared chicken and components in airtight containers for up to 4 days. This keeps your Street Corn Chicken Rice Bowl fresh and ready for quick meals.

Freezer: For longer storage, freeze cooked chicken separately in an airtight container for up to 3 months. Reheat thoroughly before adding to your bowl.

Reheating: Warm up rice and chicken in the microwave or on the stovetop until heated through, then assemble with fresh toppings. Enjoy the delightful flavors without losing any quality!

Prevent Sogginess: To maintain crispiness, store the creamy corn topping separately and mix just before serving.

What to Serve with Street Corn Chicken Rice Bowl

A vibrant meal deserves delightful companions to amplify its flavors and textures.

  • Crispy Tortilla Chips: Perfect for scooping up that creamy corn topping, adding crunch to each bite.
  • Zesty Black Bean Salad: A refreshing side that introduces fiber and complements the chicken's spice with its tangy dressing.
  • Grilled Vegetables: Seasonal veggies like bell peppers and zucchini provide a smoky contrast to the delicious bowl.
  • Cilantro-Lime Rice: This fragrant side mirrors the flavors of the main dish, creating a cohesive meal experience.

For a delicious finale, consider adding:

  • Churros with Chocolate Sauce: Sweet and crispy, they allow for a delightful sweet ending to the meal.
  • Margaritas or Horchata: Sip these classic drinks to cool down the spiciness and elevate your dining experience.

A combination of these sides can turn your Street Corn Chicken Rice Bowl into an unforgettable feast!

Street Corn Chicken Rice Bowl Recipe FAQs

How do I choose the best corn for this recipe?
Absolutely! For the best flavor, I recommend using fresh corn kernels, which can be grilled or charred to enhance sweetness. If using frozen corn, ensure it’s thawed and drained. Canned corn can work in a pinch as well, but make sure to drain and dry it well to avoid excess moisture.

How should I store leftovers of the Street Corn Chicken Rice Bowl?
To keep everything fresh, store the prepared chicken, rice, and corn mixture in separate airtight containers. This way, the flavors stay intact and the components don't get soggy. Refrigerate for up to 4 days for the best quality.

Can I freeze this recipe? If so, how?
Yes, you can freeze components of the Street Corn Chicken Rice Bowl for convenience! Store the cooked chicken in an airtight container for up to 3 months. When you’re ready to enjoy, thaw it in the fridge overnight and reheat before assembling your bowl with fresh toppings.

What if I don't like spicy food?
Very! If spice isn't your friend, simply reduce or omit the chili powder in both the chicken seasoning and the corn sauce. You can also replace the mayonnaise and sour cream with a cooler, creamier yogurt for a milder flavor. Remember, the lime adds brightness without heat!

How do I prevent browning on my avocado?
To keep your avocado slices looking fresh, slice them just before serving. A handy trick is to squeeze a bit of fresh lime juice over the exposed flesh, as the citric acid helps slow the browning process!

Is this dish suitable for meal prep?
Absolutely! The Street Corn Chicken Rice Bowl is perfect for meal prepping. Prepare the ingredients in advance, store them separately, and simply combine on busy days for a quick and tasty meal. This ensures you can enjoy fresh flavors throughout the week without getting bored.

Savory Sticky Chicken Rice Bowls for Effortless Weeknight Meals

May 30, 2026 by Grace Snow Leave a Comment

As I stood at my kitchen counter, the aroma of marinated chicken wafted around me, evoking memories of cozy dinners and laughter shared with family. These Delicious Sticky Chicken Rice Bowls are my go-to recipe for busy weeknights, blending succulent chicken with fluffy jasmine rice and a tangy, sticky sauce that elevates every bite. Not only are they incredibly easy to whip up—perfect for anyone tired of fast food—but this dish also satisfies cravings for comforting, homemade meals. What I love most is how flexible it is; you can easily make it gluten-free with simple substitutions! Ready to discover a comforting bowl of joy that will become your new family favorite? Keep reading to find out how to create this quick and flavorful delight!

Why are these Sticky Chicken Rice Bowls a hit?

Flavor-packed comfort: You’ll absolutely adore the combination of sweet, savory, and slightly spicy flavors that create a delightful symphony in every bite.
Quick & easy: This dish comes together in no time, making it the perfect solution for busy weeknights when you crave homemade goodness over fast food.
Versatile options: Feel free to switch up the veggies or try different marinades to suit your taste; this recipe's flexibility ensures you’ll never get bored.
Nutritious & satisfying: Combining protein, carbs, and vegetables, these bowls offer a well-rounded meal that leaves everyone feeling full and happy. Whether paired with a side of steamed veggies or served solo, it’s both a crowd-pleaser and a comforting treat. If you're looking for more delicious chicken ideas, check out my Honey Garlic Chicken for another irresistible flavor experience!

Sticky Chicken Rice Bowls Ingredients

• You won't believe how simple these Sticky Chicken Rice Bowls are to make!

For the Chicken

  • Chicken Thighs – A tender and flavorful choice; can substitute with chicken breast but adjust cooking time to prevent dryness.
  • Low-Sodium Soy Sauce – Provides umami and saltiness; use gluten-free soy sauce or tamari for a gluten-free option.
  • Honey – Adds sweetness and helps with caramelization; substitute with maple syrup if needed.
  • Apple Cider Vinegar – Balances sweetness with acidity; rice vinegar works as a good alternative.
  • Sesame Oil – Adds a rich, nutty flavor; replace with olive oil for a milder taste.
  • Garlic (minced) – Provides aromatic flavor; fresh is best, but garlic powder is fine in a pinch.
  • Ginger (grated) – Essential for warmth and depth of flavor; ground ginger can substitute, but use less.
  • Red Pepper Flakes – Adds heat; feel free to omit if you prefer a milder dish.

For the Rice

  • Jasmine Rice – The perfect base for these bowls, providing a fluffy texture; long-grain rice can be used if necessary.
  • Chicken Broth or Water – Cooking liquid for the rice adds richness; vegetable broth can replace water for a vegetarian version.

For the Sauce

  • Cornstarch & Water Mixture – Optional for thickening the sauce; use if you desire a stickier glaze.

For Garnish

  • Green Onions – Adds freshness and crunch; feel free to sprinkle on top just before serving.
  • Sesame Seeds – Enhance flavor and presentation; fresh cilantro can be included for extra flair.

Step‑by‑Step Instructions for Sticky Chicken Rice Bowls

Step 1: Marinate Chicken
In a mixing bowl, combine chicken thighs with low-sodium soy sauce, honey, apple cider vinegar, sesame oil, minced garlic, grated ginger, and red pepper flakes. Stir until the chicken is well-coated, then cover and refrigerate for at least 30 minutes. For an even more flavorful experience, marinate the chicken overnight.

Step 2: Cook Rice
Rinse 1 cup of jasmine rice under cold water until the water runs clear to remove excess starch. In a saucepan, combine the rinsed rice and 2 cups of chicken broth. Bring to a boil over medium-high heat, then reduce the heat to low, cover, and simmer for about 15 minutes until the liquid is absorbed and the rice is fluffy.

Step 3: Cook Chicken
Heat a large skillet or frying pan over medium-high heat. Add the marinated chicken thighs and cook for 6-8 minutes per side, or until the chicken is golden brown and cooked through, reaching an internal temperature of 165°F. Once cooked, remove the chicken from the pan and let it rest while preparing the sauce.

Step 4: Prepare Sauce
In the same pan used for the chicken, pour in the remaining marinade. Bring it to a simmer over medium heat, stirring occasionally. Mix 1 tablespoon of cornstarch with 2 tablespoons of water, then gradually add this mixture to the sauce. Cook for about 3-5 minutes until the sauce thickens and becomes glossy, stirring constantly.

Step 5: Serve
Slice the rested chicken thighs into bite-sized pieces. Serve the chicken over a fluffy bed of jasmine rice, drizzling the sticky sauce generously on top. Garnish with sliced green onions and sesame seeds for an added crunch and flavor. Enjoy your homemade Sticky Chicken Rice Bowls!

How to Store and Freeze Sticky Chicken Rice Bowls

Fridge: Store leftover Sticky Chicken Rice Bowls in an airtight container for up to 3 days. Keep the chicken and rice separate if possible to maintain texture.

Freezer: For longer storage, freeze fully cooked bowls in airtight containers or freezer bags for up to 3 months. Thaw in the fridge overnight before reheating.

Reheating: To reheat, microwave the bowls in 1-minute intervals until heated through. Add a splash of water to the rice if it seems dry to help steam back moisture.

Make-Ahead: Marinate the chicken a day in advance to save time during busy weeknights. Cooked rice can also be made ahead and refrigerated until ready to serve.

What to Serve with Delicious Sticky Chicken Rice Bowls

As you dive into the delightful flavors of your Sticky Chicken Rice Bowls, consider what will complement this comforting dish for a fabulous full meal experience.

  • Steamed Broccoli: The bright green florets provide a fresh crunch and a pop of color, balancing the richness of the chicken and sauce.

  • Cucumber Salad: A cool, crisp salad with a light vinaigrette offers a refreshing contrast to the warm, sticky rice bowls.

  • Garlic Naan: Soft, fluffy naan bread serves as a delightful side for mopping up delicious sauce—it’s a great way to enjoy every last bite!

  • Miso Soup: This warm, savory soup adds a light, umami-rich element that pairs beautifully with the chicken and goes well with rice.

  • Fried Rice: For a twist, serve with a side of fried rice. The varied textures and flavors create a more filling and fun meal.

  • Chili Garlic Green Beans: The slight spice and crunch of these green beans can enhance your overall dining experience, adding depth of flavor that resonates well.

  • Peach Iced Tea: A refreshing drink option that complements the sweet and savory notes of the dish, offering a cool respite from the savory flavors.

  • Chocolate Mousse: For dessert, a rich chocolate mousse provides a satisfying end to your meal, contrasting beautifully with the bold flavors of the chicken.

Expert Tips for Sticky Chicken Rice Bowls

• Marinate Longer: The longer you marinade the chicken, the more flavor it absorbs. Aim for a minimum of 30 minutes, but overnight is even better!

• Watch Cooking Time: If using chicken breasts, monitor cooking time closely to avoid dryness. Cook just until the internal temperature reaches 165°F.

• Rinse Rice: Always rinse the jasmine rice before cooking to remove excess starch. This ensures a nice, fluffy texture without stickiness.

• Thickening Sauce: For a stickier glaze, mix cornstarch with water and add it gradually to the sauce. Keep stirring until it reaches your desired consistency.

• Add Veggies: For a boost in nutrition, add veggies like broccoli or snap peas either to the marinade or as a side. This makes your Sticky Chicken Rice Bowls even heartier!

Make Ahead Options

These Sticky Chicken Rice Bowls are perfect for busy home cooks looking to save time during hectic weeknights! You can marinate the chicken up to 24 hours in advance, allowing the flavors to deepen and ensuring delicious results. The jasmine rice can be cooked and refrigerated for up to 3 days, making it easy to heat and serve. When you’re ready to enjoy your meal, simply sauté the marinated chicken and prepare the sauce according to the recipe. Reheat the rice in the microwave or on the stove, and drizzle that sticky sauce over the top for a quick, satisfying dinner that tastes just as good as if you made it fresh!

Sticky Chicken Rice Bowls Variations

Unlock your kitchen creativity and tailor these Sticky Chicken Rice Bowls to your whims!

  • Brown Rice: Swap jasmine rice with brown rice for a heartier, healthier option; just lengthen the cooking time.
  • Vegetable Boost: Toss in veggies like bell peppers, snap peas, or broccoli to the marinade or serve alongside for added nutrition and color.
  • Teriyaki Twist: Swap the sauce with a homemade teriyaki blend for a sweeter, thicker flavor profile that everyone will love.
  • Cilantro Lime: Add freshly chopped cilantro and lime juice just before serving for a bright, zesty kick. It’s a flavor explosion that pairs beautifully with the sticky sauce!
  • Spicy version: Increase the red pepper flakes or add some sriracha to the marinade for an extra kick of heat. Perfect for those who crave a spicy thrill!
  • Honey Mustard Glaze: For a unique twist, mix honey with Dijon mustard in the marinade for a sweet-tangy flavor; it’s a delightful change!
  • Grilled Variation: Grill the marinated chicken for a smoky flavor and irresistible char; serve over rice with a drizzle of the sauce for an outdoor vibe.
  • Vegetarian Delight: Replace chicken with cubed tofu, marinating and cooking it just like the chicken. This will yield a deliciously satisfying vegetarian bowl.

For even more exciting meal ideas, don’t miss my Crock Pot Chicken for an effortless, flavorful dish!

Sticky Chicken Rice Bowls Recipe FAQs

What kind of chicken is best for Sticky Chicken Rice Bowls?
I always recommend using chicken thighs for this recipe due to their tenderness and flavor. They stay juicy during cooking. If you prefer boneless, skinless chicken breasts, that works too—just be mindful to reduce cooking time to about 5-7 minutes per side to prevent drying out.

How should I store leftovers of Sticky Chicken Rice Bowls?
Leftover sticky chicken rice bowls can be stored in an airtight container in the fridge for up to 3 days. It’s best to keep the rice and chicken separate to maintain their textures. When ready to enjoy, simply reheat gently in the microwave or on the stove.

Can I freeze Sticky Chicken Rice Bowls?
Absolutely! You can freeze fully cooked bowls in airtight containers or heavy-duty freezer bags for up to 3 months. When you're ready to eat, thaw the container overnight in the fridge, then reheat in the microwave or on the stove, adding a splash of water to the rice if it seems dry.

What should I do if the chicken is overcooked?
If you accidentally overcook the chicken and it turns out dry, there’s no need to worry! To salvage, slice the chicken and serve it with a generous drizzle of the sticky sauce. This extra sauce can help infuse moisture and flavor back into the chicken.

Are there any dietary considerations for this dish?
Yes! For a gluten-free option, simply choose gluten-free soy sauce or tamari. If you're serving this to someone with allergies, be sure to check ingredient labels, especially for soy sauce and sesame oil, as they might contain allergens.

How can I make this recipe more nutritious?
You can easily enhance the nutritional profile by adding steamed or sautéed vegetables, like broccoli, bell peppers, or snap peas to the bowls before serving. This not only adds color but also boosts the vitamins and minerals in your Sticky Chicken Rice Bowls!

Savor the Flavor: Taco Chicken Rice Bowl Made Your Way

May 30, 2026 by Grace Snow Leave a Comment

As I stirred the bubbling pot of Spanish rice, the aroma wafted through my kitchen, instantly transporting me to the bustling streets of Mexico. My latest obsession? The Taco Chicken Rice Bowl—a quick meal that transforms busy weeknights into a flavorful fiesta. With juicy, seasoned chicken and a warm, fluffy rice base, this dish is incredibly satisfying, and the best part is how easily customizable it is. Whether it’s a sprinkle of fresh cilantro or a handful of crunchy tortilla chips, everyone can tailor it to their liking, making it not just kid-friendly but a delightful crowd-pleaser too. Intrigued by how you can turn everyday ingredients into a tantalizing dinner? Let’s dive in!

Why Make Taco Chicken Rice Bowl?

Customization Galore: This Taco Chicken Rice Bowl is incredibly versatile; you can mix and match toppings for endless flavor combinations.
Quick and Easy: With minimal prep time, this recipe is perfect for busy evenings when you crave something delicious without the fuss.
Kid-Approved: It's a family favorite! Kids love building their own bowls, making mealtime fun and engaging.
Nutritious Options: Easily make it gluten-free or dairy-free by choosing rice and topping alternatives that suit your dietary needs.
Meal Prep Friendly: Preparing chicken and rice in advance allows for easy weeknight dinners; just assemble and enjoy! Enhance your dinner repertoire with options like Crock Pot Chicken or discover new flavors through Fish Taco Bowls.

Taco Chicken Rice Bowl Ingredients

For the Chicken
• Chicken Breast – Lean protein that cooks quickly; for juiciness, consider substituting with chicken thighs.
• Chili Powder – Adds a warm, smoky flavor that gives the taco profile; alternatively, use taco seasoning for a different taste.
• Lime Juice – Brightens the dish with a fresh, citrusy kick; freshly squeezed juice enhances the overall flavor.

For the Rice
• Spanish Rice – Provides a hearty base for the bowl; swap for brown rice or cauliflower rice to lighten it up.

For the Toppings
• Shredded Cheese – Adds creaminess and enhances flavor; Monterey Jack or a Mexican cheese blend can be used as a substitution.
• Chopped Tomatoes – Fresh and juicy, these add a nice pop of color; feel free to switch to diced avocados for creaminess.
• Chopped Onions – Offers a crunchy texture and sharpness; green onions can be a milder alternative.
• Crushed Tortilla Chips – Provides a satisfying crunch; use baked chips for a healthier twist.
• Fresh Cilantro – Bright and aromatic, it enhances flavor; omit if you're not a fan or try parsley instead.

With these ingredients, your Taco Chicken Rice Bowl becomes a versatile culinary canvas, inviting customization to suit every taste!

Step‑by‑Step Instructions for Taco Chicken Rice Bowl

Step 1: Prepare the Rice
Begin by cooking the Spanish rice according to package instructions, typically 15-20 minutes until fluffy. Bring a pot of water to a boil, add the rice, cover, and let it simmer. Once the rice is cooked, fluff it with a fork and keep it warm until you’re ready to assemble your Taco Chicken Rice Bowl.

Step 2: Season the Chicken
While the rice is cooking, take your chicken breast and cut it into bite-sized pieces for quick cooking. Sprinkle chili powder generously over the chicken to ensure even seasoning. This not only enhances the flavor but also gives the chicken a vibrant color that kicks off the tasty Taco Chicken Rice Bowl.

Step 3: Cook the Chicken
Heat a large skillet over medium-high heat and add a splash of olive oil. Once the oil is shimmering, add the seasoned chicken pieces. Sauté the chicken for about 5-7 minutes, stirring occasionally until it is browned and no longer pink in the center. Ensure the internal temperature reaches 165°F (75°C) for safe consumption and perfect juiciness.

Step 4: Add Lime Juice
Once the chicken is cooked, reduce the heat to low and add freshly squeezed lime juice to the skillet. Stir the chicken well, allowing the citrusy flavor to coat each piece evenly. The lime juice will brighten the flavors in your Taco Chicken Rice Bowl, making it even more delicious.

Step 5: Assemble the Bowl
In a serving bowl, create a warm base by spooning in your cooked Spanish rice. Top the rice with the sautéed Taco Chicken, making sure to distribute it evenly for a balanced bite. This combination of rice and chicken serves as the hearty foundation of the bowl.

Step 6: Add Toppings
Now comes the fun part—customizing your Taco Chicken Rice Bowl! Sprinkle a generous amount of shredded cheese over the hot chicken, followed by fresh chopped tomatoes, crunchy onions, and crushed tortilla chips for added texture. Feel free to adjust the toppings to suit your preferences and let your creativity shine!

Step 7: Serve
For a delightful finish, serve your Taco Chicken Rice Bowl with optional sides like guacamole or fresh salsa. These additions not only enhance the flavor but also make your meal more enjoyable. Gather everyone around, and let them dive into their delightful creations, celebrating the warmth and zest of homemade cooking!

How to Store and Freeze Taco Chicken Rice Bowl

Fridge: Store leftover Taco Chicken Rice Bowl in an airtight container for up to 3 days. Keep toppings separate to maintain freshness and crunch.

Freezer: For longer storage, freeze the chicken and rice mixture in a freezer-safe container for up to 2 months. Reheat directly from frozen for a quick meal.

Reheating: To reheat, use the microwave or stovetop. If using the microwave, cover loosely and heat in short intervals, stirring in between, until heated through.

Room Temperature: Do not leave the Taco Chicken Rice Bowl at room temperature for more than 2 hours to ensure food safety and freshness.

What to Serve with Taco Chicken Rice Bowl

Elevate your Taco Chicken Rice Bowl into a complete meal experience with these delightful pairing ideas, sure to entice your taste buds!

  • Crispy Tortilla Chips: Perfect for dipping, they add extra crunch to each bite and are great for scooping up delicious toppings.

  • Mexican Street Corn Salad: This zesty side, packed with flavors of lime and cotija, complements the taco spices beautifully and adds fresh texture.

  • Guacamole: Creamy and rich, this avocado dip not only enhances the bowl but also adds a smooth, satisfying contrast to the crispy elements.

  • Pico de Gallo: Fresh and vibrant, this chunky salsa brings a burst of flavor and brightness that cuts through the richness of the chicken and cheese.

  • Black Beans: Adding protein and fiber, seasoned black beans offer a hearty component that pairs well with the meal's flavors while maximizing nutritional value.

  • A Citrus Salad: A light salad with oranges and grapefruit balances the spices of the Taco Chicken Rice Bowl, refreshing your palate between bites.

  • Sangria: A fruity, chilled drink complements the flavors perfectly, enhancing the festive vibe of your taco-themed dinner.

  • Churros: End the meal on a sweet note with these warm, cinnamon-sugar-coated treats—a perfect indulgence that ties the meal together.

Variations for Taco Chicken Rice Bowl

Customize your Taco Chicken Rice Bowl and create a unique culinary experience that delights every taste bud.

  • Dairy-Free: Omit cheese or use cashew cream for creaminess without dairy. Your bowl will still be rich in flavor.
  • Zesty Kick: Add jalapeños or diced green chilies for a spicy touch. The heat elevates the dish, making it a bold experience!
  • Flavor Boost: Incorporate fresh herbs like cilantro or parsley to enhance freshness. A little sprinkle can transform your meal into a garden of flavors.
  • Loaded Veggies: Toss in sautéed bell peppers and zucchini for added nutrition and a colorful presentation. They not only enrich the texture but also create a visual feast.
  • Extra Protein: Include black beans or corn for added texture and nutrition. This combination adds heartiness, making your bowl even more satisfying.
  • Healthier Rice Option: Substitute Spanish rice with quinoa for a protein-packed base. It's a delicious way to keep the bowl filling and nutritious!
  • Sweet Touch: Top with a spoonful of mango salsa for a hint of sweetness. This unexpected twist brings a fun contrast to your savory ingredients.
  • Savory Salsa: Serve with homemade pico de gallo for an extra layer of flavor. You can explore other options, such as pairing it with Fish Taco Bowls to enjoy fresh seafood vibes!

With these variations, your Taco Chicken Rice Bowl will never be boring—it'll keep getting better with every twist!

Make Ahead Options

These Taco Chicken Rice Bowls are ideal for meal prep enthusiasts! You can prepare the Spanish rice and cook the chicken up to 3 days in advance, allowing for quick assembly during busy weeknights. To maintain quality, refrigerate the cooked chicken and rice separately in airtight containers. When ready to serve, simply reheat the chicken in a skillet or the microwave until warmed through, and fluff the rice before combining. Top with your favorite ingredients—prepare toppings like chopped tomatoes and shredded cheese in advance to save time. With everything prepped ahead, you’ll enjoy delicious, fresh Taco Chicken Rice Bowls with minimal effort!

Expert Tips for Taco Chicken Rice Bowl

• Uniform Chicken Pieces: Cut your chicken into even-sized pieces to ensure they cook evenly and avoid any undercooked bites.

• Prepare Toppings Ahead: Chop your toppings in advance and store them separately to speed up assembly and maintain their freshness when serving the Taco Chicken Rice Bowl.

• Fresh Ingredients Matter: Use freshly squeezed lime juice for the best flavor; it adds a vibrant kick that enhances the entire dish.

• Experiment with Rice: Don’t hesitate to swap Spanish rice for brown or cauliflower rice for a different texture and health boost while keeping it gluten-free.

• Leftover Savvy: Store any leftovers in an airtight container to enjoy your Taco Chicken Rice Bowl within three days, but keep toppings separate to prevent sogginess.

Taco Chicken Rice Bowl Recipe FAQs

How do I know if my chicken is cooked properly?
Absolutely important! To ensure your chicken is fully cooked, use a meat thermometer to check that the internal temperature has reached 165°F (75°C). The chicken should also appear white throughout, with no pink juices when you cut into it. This method guarantees juiciness while avoiding undercooked portions.

How should I store leftovers?
Leftover Taco Chicken Rice Bowl can be stored in an airtight container in the refrigerator for up to 3 days. It’s best to keep toppings separate—like cheese, tomatoes, and chips—to preserve their freshness and crunch. When you're ready to enjoy it again, simply reheat the rice and chicken mixture while keeping the toppings cool until serving.

Can I freeze my Taco Chicken Rice Bowl?
Certainly! To freeze, allow the chicken and rice to cool completely before transferring them to a freezer-safe container. For the best quality, consume within 2 months. When you're ready to eat, reheat directly from frozen in the microwave or stovetop, and add your fresh toppings just before serving for that delightful crunch!

What should I do if my rice is sticky or undercooked?
If your rice turns out sticky, it may have been overcooked or had too much water added. For future batches, ensure the water-to-rice ratio is correct (typically 1 part rice to 2 parts water for Spanish rice) and avoid stirring the rice while it's cooking. For undercooked rice, simply add a little more water and continue cooking on low heat until tender.

Are there any allergen considerations for this recipe?
Very important! If you’re cooking for someone with allergies, consider substituting ingredients like shredded cheese with dairy-free alternatives. Additionally, ensure that the taco seasoning or any other pre-packaged items are gluten-free if that’s a concern. Always check labels to accommodate dietary needs, especially when it comes to gluten and dairy.

What ingredients can I customize to suit my family's taste?
Feel free to make this Taco Chicken Rice Bowl your own! You can swap chicken breasts for chicken thighs for more juiciness, replace Spanish rice with brown rice or cauliflower rice for a health boost, or mix in other toppings like black beans, corn, or avocado. The more, the merrier—tailor it to your family's preferences for a perfect dinner!

Greek Chicken Burgers with Creamy Tzatziki Magic

May 29, 2026 by Grace Snow Leave a Comment

As I flipped through my travel snapshots from Greece, the vibrant colors of fresh ingredients and the mouthwatering aromas danced in my mind. That’s the inspiration behind my Greek Chicken Burgers, a delightful way to bring a taste of the Mediterranean right to your kitchen. These healthy, grilled burgers are not only beginner-friendly but also quick to whip up, making them a perfect choice for busy weeknights or relaxed weekend brunches. Juicy herb-infused patties, topped with a creamy cucumber-dill tzatziki, crisp lettuce, and juicy tomato, create a harmony of flavors that's irresistibly tempting. Are you ready to take your taste buds on a sun-soaked holiday? Let’s dive into this delicious recipe!

Why Choose Greek Chicken Burgers?

Flavor Explosion: Each bite of these Greek Chicken Burgers is packed with vibrant Mediterranean flavors, thanks to fresh herbs and tangy feta.

Easy to Make: The straightforward method makes this recipe perfect for beginners—no culinary degree required!

Healthy Choice: Ground chicken keeps these burgers lower in calories without sacrificing flavor, making them a guilt-free indulgence.

Versatile Pairing: Serve with a Greek salad or sweet potato fries for a complete meal that caters to all taste buds.

Freezer Friendly: Make a double batch and freeze extras—perfect for those busy nights when you crave home-cooked goodness!

Get ready to delight your family with these mouthwatering burgers; they're sure to become a new favorite!

Greek Chicken Burgers Ingredients

For the Patties

  • Ground Chicken – Provides the primary protein for juicy, flavorful patties and can be swapped with ground turkey.
  • Minced Garlic – Adds depth and aroma; fresh garlic will elevate the taste significantly.
  • Grated Onion – Introduces moisture and sweetness; consider using onion powder if fresh isn’t handy.
  • Fresh Parsley – Contributes a burst of color and freshness; dried parsley works if fresh isn’t available.
  • Fresh Mint – Imparts a bright, aromatic flavor, characteristic of Greek cuisine; use less dried mint if substituting.
  • Dried Oregano – Key for that Mediterranean flavor; Italian seasoning can be a handy swap.
  • Feta Cheese – Offers a creamy texture with a tangy bite; goat cheese is a great alternative if desired.
  • Breadcrumbs – Help bind the patties and fortify their structure; use gluten-free breadcrumbs if needed.
  • Salt & Black Pepper – Essential for perfect seasoning; adjust to your taste preference.
  • Olive Oil – Used for sautéing the patties, ensuring richness; extra virgin olive oil enhances flavor.

For the Assembly

  • Burger Buns – Choose whole grain or gluten-free versions to encase these delicious patties.
  • Lettuce Leaves & Tomato Slices – Add a refreshing crunch; swap out any leafy greens or veggies you prefer.

For the Tzatziki Sauce

  • Greek Yogurt – The creamy base for tzatziki, adding a tangy richness; sour cream can be a quick substitute.
  • Grated Cucumber – Essential for freshness; pressing it to remove excess moisture ensures a thicker sauce.
  • Lemon Juice – Brightens the overall flavor; vinegar can work as a stand-in if you're in a pinch.
  • Fresh Dill – Introduces aromatic notes to the tzatziki; dried dill may replace fresh but should be less in quantity.

This delightful recipe for Greek Chicken Burgers not only uplifts your meals but also takes you on a splendid culinary journey right at home!

Step‑by‑Step Instructions for Greek Chicken Burgers

Step 1: Prepare the Chicken Mixture
In a large mixing bowl, combine the ground chicken, minced garlic, grated onion, chopped parsley, mint, dried oregano, crumbled feta, breadcrumbs, salt, and black pepper. Use your hands or a spatula to thoroughly blend these ingredients until well incorporated, about 2-3 minutes. This careful mixing ensures that the flavors meld beautifully in your Greek Chicken Burgers.

Step 2: Form the Patties
Once the mixture is well combined, divide it into four equal portions. Gently shape each portion into a patty about ¾ inch thick, ensuring an even thickness for uniform cooking. As you form the patties, make a slight indentation in the center to prevent them from puffing up during cooking. Place the patties on a plate and refrigerate them for 15-30 minutes to firm up and enhance the flavors.

Step 3: Cook the Patties
Heat a large skillet over medium heat and add about 1 tablespoon of olive oil. Once the oil shimmers, carefully add the chilled chicken patties. Cook for about 5-6 minutes on each side until they develop a golden-brown crust and reach an internal temperature of 165°F. Use a meat thermometer to check the doneness, ensuring your Greek Chicken Burgers are cooked perfectly.

Step 4: Make the Tzatziki Sauce
While the patties are cooking, prepare the tzatziki sauce. In a medium bowl, mix together the Greek yogurt, grated cucumber (after pressing to remove excess moisture), minced garlic, lemon juice, chopped fresh dill, salt, and black pepper. Stir until all ingredients are well combined and the sauce is creamy. Set the tzatziki aside in the refrigerator to let the flavors meld as you finish cooking the patties.

Step 5: Toast the Burger Buns
With the patties cooked, lower the heat and remove them from the skillet. In the same skillet, lightly toast the burger buns, cut side down, for about 2-3 minutes until they are golden and crisp. This step adds texture to your assembly while infusing the buns with the savory essence of the skillet.

Step 6: Assemble the Burgers
To assemble your Greek Chicken Burgers, start by spreading a generous amount of tzatziki sauce on the bottom half of each toasted bun. Layer a patty on top, then add fresh lettuce leaves and a slice of tomato. Finally, place the top bun over the tower of flavors. Your Greek Chicken Burgers are now ready to serve, offering a delicious Mediterranean experience in every bite.

Expert Tips for Greek Chicken Burgers

  • Chill Before Cooking: Letting the patties firm up in the fridge for 15-30 minutes prevents them from falling apart while cooking, ensuring perfect Greek Chicken Burgers.

  • Use Fresh Ingredients: Fresh herbs like parsley and mint greatly enhance flavor. If using dried, remember to use less, as dried herbs are more potent.

  • Check for Doneness: Always use an instant-read thermometer to ensure that the patties reach an internal temperature of 165°F for safety.

  • Toast Your Buns: Lightly toasting the burger buns until golden gives extra texture and keeps them from becoming soggy, allowing the flavors of the Greek Chicken Burgers to shine.

  • Customize Your Toppings: Feel free to swap lettuce, tomatoes, or add other fresh veggies to cater to your taste—this simple change can transform your burger.

How to Store and Freeze Greek Chicken Burgers

Fridge: Store leftover Greek Chicken Burgers in an airtight container for up to 3 days. Reheat them gently in a skillet or microwave, adding a splash of water or olive oil to keep them moist.

Freezer: Freeze cooked patties individually wrapped in plastic wrap or in a freezer-safe bag. They’ll stay fresh for up to 3 months. Thaw in the fridge overnight before reheating.

Reheating: For best results, reheat in the oven at 350°F for 10-15 minutes or until heated through. This method helps maintain their juicy texture and flavor.

Make-Ahead: Prepare the patties ahead of time and store them uncooked in the fridge for up to 24 hours or freeze them for quick meals later.

What to Serve with Greek Chicken Burgers

Imagine a sunny patio, laughter among friends, and the delightful aroma of your Mediterranean feast filling the air as you savor each delicious bite.

  • Greek Salad: Fresh, crunchy greens tossed with juicy tomatoes, cucumbers, and tangy feta create a refreshing complement to the rich flavor of the burgers.
  • Sweet Potato Fries: Crispy and slightly sweet, these golden fries add a satisfying crunch that pairs beautifully with the juicy chicken patties.
  • Grilled Vegetables: Smoky, charred veggies like zucchini and bell peppers offer a vibrant balance to the creamy tzatziki sauce on your burgers.
  • Pita Bread: Soft, warm pita pockets serve as a delightful canvas for any leftover tzatziki or a fun way to serve sides like olives.
  • Rice Pilaf: Fluffy, herb-infused rice with a hint of lemon elevates your meal, perfectly absorbing the flavors of your burgers and tzatziki.
  • Lemonade or Iced Tea: Refreshing drinks like homemade lemonade or a cool iced tea with mint enhance the Mediterranean vibe, satisfying your thirst on a warm day.
  • Baklava: For dessert, indulge in sweet, flaky baklava with honey and nuts to end your Mediterranean meal on a delightful note.

Make Ahead Options

These Greek Chicken Burgers are a fantastic choice for meal prep! You can prepare the chicken mixture up to 24 hours in advance; simply combine all the ingredients and form the patties, then refrigerate them in an airtight container. The tzatziki sauce can also be made and stored in the fridge for up to 3 days; just be sure to press the cucumber to remove excess moisture to keep it creamy. When you're ready to enjoy your Greek Chicken Burgers, cook the patties in a skillet and assemble the burgers with fresh toppings. This prep-ahead strategy saves time and ensures that your meals remain just as delicious as if you made them fresh!

Greek Chicken Burgers Variations & Substitutions

Feel free to let your culinary creativity shine by making these delightful tweaks to your Greek Chicken Burgers!

  • Turkey Swap: Use ground turkey instead of chicken for a leaner burger option. Both options will still pack a flavor punch!

  • Goat Cheese Twist: Replace feta cheese with goat cheese for a creamy, tangy richness that elevates the patty. This twist adds a unique dimension to your burger.

  • Herb Alternatives: Fresh mint not available? Swap it with fresh basil or oregano for a different herbaceous note. Each herb brings its own charm!

  • Gluten-Free Option: Use gluten-free breadcrumbs and buns to accommodate dietary needs without compromising flavor or texture. Enjoy the joy of burgers, gluten-free!

  • Veggie Delight: For a veggie version, substitute ground chicken with a plant-based meat alternative, or mix in finely chopped vegetables like bell peppers or zucchini.

  • Spicy Kick: Add a pinch of cayenne pepper or some chopped jalapeños to the chicken mixture for a heat that tantalizes your taste buds. Spice it up if you dare!

  • Zesty Tzatziki: Incorporate a dash of hot sauce or a sprinkle of smoked paprika into the tzatziki for an unexpected flavor layer that brings excitement to the classic sauce.

  • Flavorful Buns: Opt for whole grain or pistolet-style buns to bring extra texture and a heartier taste to your Greek Chicken Burgers. The bun truly enhances the overall experience!

Feel free to experiment! These variations will keep your meals exciting, and don’t forget to check out recipes like Honey Garlic Chicken Thighs for more inspiration!

Greek Chicken Burgers Recipe FAQs

What is the best way to choose ripe ingredients for this recipe?
Absolutely! For the freshest flavor, look for bright green parsley and mint that are vibrant and fragrant. When selecting cucumbers, choose firm ones without soft spots or dark blemishes. As for tomatoes, opt for ones that are rich in color and slightly firm to the touch, ensuring they’ll add that perfect burst of freshness to your burgers.

How should I store leftover Greek Chicken Burgers?
Leftover Greek Chicken Burgers can be stored in an airtight container in the refrigerator for up to 3 days. To maintain their moisture, consider adding a splash of water or olive oil when reheating to avoid them drying out. Gently reheat them in a skillet over low heat or in the microwave, checking frequently to ensure they stay juicy.

Can I freeze cooked Greek Chicken Burgers?
Of course! To freeze your cooked Greek Chicken Burgers, wrap each patty individually in plastic wrap or place them in a freezer-safe bag. They will remain fresh for up to 3 months. When you're ready to enjoy them, simply thaw them in the refrigerator overnight and reheat them gently. For the best results, consider reheating in the oven at 350°F for 10-15 minutes to retain their juicy texture.

What should I do if my chicken patties fall apart while cooking?
Very! If your patties crumble, it's often due to not enough binding agent or being too loose. Be sure to properly incorporate breadcrumbs into the mixture—without them, the patties may not hold together well. If your mixture feels overly wet, try adding a bit more breadcrumbs. Additionally, chilling the formed patties in the fridge for 15-30 minutes before cooking helps them firm up and stay intact during cooking.

Are there any dietary considerations I should keep in mind?
Certainly! If cooking for someone with allergies, be cautious with feta cheese, as it contains dairy. For gluten-free options, simply substitute regular breadcrumbs with gluten-free breadcrumbs. Always double-check all ingredients and make sure your burger buns are also gluten-free if needed. If preparing for picky eaters or those with dietary restrictions, feel free to customize the toppings or adjust herbs based on preferences!

Greek Chicken Burgers

Greek Chicken Burgers with Creamy Tzatziki Magic

Enjoy these Greek Chicken Burgers, a flavorful twist on a classic dish, infused with Mediterranean herbs and served with tzatziki.
Print Recipe Pin Recipe
Prep Time 30 minutes mins
Cook Time 12 minutes mins
Chilling Time 30 minutes mins
Total Time 1 hour hr 12 minutes mins
Servings: 4 burgers
Course: Dinner
Cuisine: Greek
Calories: 400
Ingredients Equipment Method Nutrition Notes

Ingredients
  

For the Patties
  • 1 lb Ground Chicken Can be swapped with ground turkey
  • 2 cloves Minced Garlic Fresh garlic elevates flavor
  • 1 medium Grated Onion Consider onion powder if fresh isn’t handy
  • 1/4 cup Fresh Parsley Dried parsley works if fresh isn’t available
  • 1/4 cup Fresh Mint Use less dried mint if substituting
  • 1 tsp Dried Oregano Italian seasoning can be a handy swap
  • 1/2 cup Feta Cheese Goat cheese is a great alternative
  • 1/2 cup Breadcrumbs Use gluten-free breadcrumbs if needed
  • 1 tsp Salt Adjust to taste
  • 1 tsp Black Pepper Adjust to taste
  • 1 tbsp Olive Oil Extra virgin olive oil enhances flavor
For the Assembly
  • 4 pieces Burger Buns Whole grain or gluten-free versions
  • 4 leaves Lettuce Leaves Any leafy greens or veggies can be added
  • 1 large Tomato Sliced
For the Tzatziki Sauce
  • 1 cup Greek Yogurt Sour cream can be a quick substitute
  • 1 cup Grated Cucumber Press to remove moisture for thicker sauce
  • 2 tbsp Lemon Juice Vinegar can work as a stand-in
  • 2 tbsp Fresh Dill Dried dill may replace fresh but should be less in quantity
  • 1 tsp Salt
  • 1 tsp Black Pepper

Equipment

  • Skillet
  • Mixing Bowl
  • Meat Thermometer

Method
 

Preparation of Patties
  1. In a large mixing bowl, combine ground chicken, minced garlic, grated onion, chopped parsley, mint, dried oregano, crumbled feta, breadcrumbs, salt, and black pepper. Mix well for 2-3 minutes.
  2. Divide the mixture into four equal portions. Shape into patties about ¾ inch thick. Refrigerate for 15-30 minutes.
Cooking the Patties
  1. Heat a skillet over medium heat and add 1 tablespoon of olive oil. Add the chilled patties and cook for about 5-6 minutes on each side until golden-brown.
Preparing Tzatziki Sauce
  1. In a medium bowl, mix Greek yogurt, grated cucumber, minced garlic, lemon juice, chopped dill, salt, and black pepper until creamy.
Assembling the Burgers
  1. Spread tzatziki sauce on the bottom half of each toasted bun. Layer a patty, lettuce, and tomato, then top with the other bun.

Nutrition

Serving: 1burgerCalories: 400kcalCarbohydrates: 30gProtein: 30gFat: 20gSaturated Fat: 5gPolyunsaturated Fat: 0.5gMonounsaturated Fat: 15gCholesterol: 75mgSodium: 500mgPotassium: 800mgFiber: 2gSugar: 3gVitamin A: 20IUVitamin C: 15mgCalcium: 10mgIron: 8mg

Notes

Use fresh ingredients for better flavor. Customize toppings to your preference.

Tried this recipe?

Let us know how it was!

Comforting Chicken Mashed Potato Bowls for Cozy Nights

May 29, 2026 by Grace Snow Leave a Comment

There’s something incredibly soothing about a hearty dish that warms you from the inside out, and that’s exactly what you'll find with these Chicken Mashed Potato Bowls. This easy recipe combines tender chicken, creamy mashed potatoes, and a rich, savory gravy, making it perfect for busy weeknights or cozy weekend meals. Packed with flavor and designed to please even the pickiest eaters, you’ll love how quickly it comes together—especially if you opt for rotisserie chicken to save time. Not only is this dish a comforting crowd-pleaser, but it also allows you to sneak in some veggies if you desire. So, are you ready to dive into a delicious bowl of comfort? Let’s get cooking!

Why are Chicken Mashed Potato Bowls a must-try?

Comforting, indulgent flavors: Each bite of these Chicken Mashed Potato Bowls brings you the classic combination of tender chicken and creamy mashed potatoes. Quick and easy: With the option to use rotisserie chicken, you can whip this meal up in no time. Versatile options: Feel free to add sautéed vegetables, making it a family-friendly dinner that everyone will love. Crowd-pleaser: The melted cheese on top adds an irresistible touch to this hearty dish that will have everyone asking for seconds. Whether it's a busy weeknight or a cozy weekend, these bowls are guaranteed to warm you up!

Chicken Mashed Potato Bowls Ingredients

• Create the perfect comfort dish with these essential ingredients!

For the Chicken

  • Chicken Breasts – Tender and juicy; swap with rotisserie chicken for a quicker meal.
  • Garlic Powder – Enhances flavor with earthy notes; fresh garlic works well too.
  • Onion Powder – Adds savory depth; can be replaced with finely chopped fresh onions.
  • Paprika – Brings warmth and color; consider smoked paprika for an extra kick.
  • Salt and Pepper – Essential for flavor enhancement; adjust to your taste.
  • Olive Oil – Helps brown chicken and prevents sticking; vegetable oil is a good substitute.

For the Mash

  • Mashed Potatoes – Creamy base for this dish; store-bought or homemade, it's your choice!
  • Corn Kernels – Adds sweetness and crunch; use canned or frozen for convenience.
  • Cheddar Cheese – Gives a rich, gooey texture; pepper jack is a spicy alternative.

For the Gravy

  • Gravy (chicken or brown) – Ties everything together with a savory sauce; use homemade for more flavor.

For Garnish

  • Fresh Parsley (optional) – Brightens the dish with color; can be omitted as desired.

Now that you have all the essential ingredients for your Chicken Mashed Potato Bowls, let’s get cooking and bring some warmth to your table!

Step‑by‑Step Instructions for Chicken Mashed Potato Bowls

Step 1: Season the Chicken
In a mixing bowl, combine the chicken breasts with garlic powder, onion powder, paprika, salt, and pepper. Make sure the chicken is evenly coated with these spices to enhance the flavor. This step will take about 5 minutes and sets the stage for a tasty filling in your Chicken Mashed Potato Bowls.

Step 2: Cook the Chicken
Heat a large skillet over medium-high heat and add olive oil, allowing it to warm for about 1 minute. Once the oil is shimmering, add your seasoned chicken breasts to the skillet. Cook for 7-9 minutes or until golden brown and cooked through, reaching an internal temperature of 165°F. Remove the chicken from the skillet and let it rest.

Step 3: Prepare the Gravy
In a separate saucepan, gently heat your gravy over low heat, stirring occasionally until it’s warmed through, which should take about 5 minutes. This step ensures that the gravy is ready to bring the flavors together in your Chicken Mashed Potato Bowls. Set it aside once heated.

Step 4: Cook the Corn
If using fresh or frozen corn, cook according to the package instructions until tender, which typically takes about 5 minutes. If using canned corn, simply drain and warm it in a small saucepan for 2-3 minutes. Keeping it warm helps maintain its sweetness and crunch to complement the dish.

Step 5: Prepare the Mashed Potatoes
While the corn is cooking, prepare or reheat your mashed potatoes in a large pot or microwave until smooth and creamy. If using store-bought, follow package instructions, or you can whip up a homemade batch. Adjust the consistency with milk or butter as needed to achieve that perfect creamy base for your Chicken Mashed Potato Bowls.

Step 6: Assemble the Bowls
To create your chicken mashed potato bowls, start by adding a generous scoop of the creamy mashed potatoes to the bottom of each bowl. Next, layer the warm corn on top, followed by the sliced or shredded chicken pieces. This beautifully layered presentation will ensure that every bite is balanced with flavors!

Step 7: Add Gravy and Cheese
Drizzle a warm, rich gravy over the layered chicken and corn, allowing it to cascade down the sides of the potatoes. Finish each bowl by sprinkling a handful of shredded cheddar cheese on top, letting it melt slightly from the warmth of the gravy—a delightful touch for your Chicken Mashed Potato Bowls.

Step 8: Garnish and Serve
If desired, sprinkle some fresh parsley over the top for a pop of color and freshness. Serve these comforting Chicken Mashed Potato Bowls immediately while hot and enjoy the delightful combination of flavors as each bite warms your soul.

What to Serve with Hearty Chicken Mashed Potato Bowls

Indulging in a warm bowl of comfort feels even better when paired with delightful sides and beverages that complement its rich flavors.

  • Steamed Broccoli: A crisp green side to balance the creaminess; its slight bitterness adds depth to your meal.

  • Garlic Bread: With its crunchy texture and buttery goodness, this classic pair brings an irresistible aroma to the table.

  • Roasted Carrots: Sweet and caramelized, roasted carrots provide a flavorful contrast while adding a pop of color to your plate.

  • Side Salad: A refreshing mix of greens, tomatoes, and cucumber drizzled with vinaigrette can brighten each bite.

  • Coleslaw: This crunchy, creamy side offers a delightful texture and tang that perfectly complements the hearty mash.

  • Red Wine: A glass of smooth red pairs beautifully, enhancing the rich flavors of the chicken and gravy.

  • Apple Crisp: Cap off your comforting meal with a warm dessert whose sweet and tart profile will keep everyone smiling.

Make Ahead Options

These Chicken Mashed Potato Bowls are perfect for busy home cooks looking to save time during the week! You can prepare the seasoned chicken and store it in the refrigerator for up to 3 days, ensuring the spices infuse for deeper flavor. Similarly, the mashed potatoes can be made in advance; just refrigerate them in an airtight container. To reheat, gently warm the potatoes and chicken separately, adding a splash of milk to the potatoes if needed to keep them creamy. When ready to serve, simply assemble the bowls with warm corn and gravy; you’ll have a heartwarming meal ready in minutes without sacrificing quality or taste!

How to Store and Freeze Chicken Mashed Potato Bowls

Fridge: Store in airtight containers for up to 3 days. Keep chicken, corn, and mashed potatoes separate to maintain their textures during storage.

Freezer: For longer storage, freeze in individual portions. Wrap tightly in plastic wrap and then place in a freezer-safe container for up to 2 months.

Reheating: Thaw overnight in the fridge before reheating. Gently heat each component separately in the microwave or on the stovetop for the best Chicken Mashed Potato Bowls experience.

Tip: To prevent sogginess, avoid adding gravy until you're ready to serve, especially if storing leftovers.

Expert Tips for Chicken Mashed Potato Bowls

  • Uniform Chicken: Ensure chicken is cut into small, even pieces to guarantee even cooking and tenderness throughout.

  • Storage Strategy: Keep all components in separate containers during storage to prevent sogginess and maintain texture when reheating.

  • Reheating Method: Reheat components such as mashed potatoes, corn, and chicken separately to preserve their unique flavors and qualities for the best Chicken Mashed Potato Bowls experience.

  • Enhance Flavors: Consider adding herbs like thyme or rosemary to the chicken seasoning for extra depth in flavor that complements the hearty feel of this dish.

  • Vegetable Variety: Get creative with veggie additions; sautéed bell peppers, peas, or green beans can add nutrition and texture to this comforting meal.

Chicken Mashed Potato Bowls Variations

Feel free to get creative with these Chicken Mashed Potato Bowls and make them truly yours!

  • Rotisserie Chicken: For a quicker meal, use pre-cooked rotisserie chicken to save time while keeping flavors intact.
  • Vegetable Boost: Add sautéed bell peppers, onions, or kale for a nutritious twist that gives your bowls extra color and flavor.
  • Cauliflower Mash: Swap mashed potatoes with creamy mashed cauliflower for a lighter and healthier option without sacrificing satisfaction.
  • Cheese Variations: Experiment with different cheeses like pepper jack for a spicy kick, or try crispy bacon bits for added crunch.
  • Herb Flavoring: Infuse fresh herbs like thyme or rosemary into the chicken seasoning for an aromatic layer that elevates the entire dish.
  • Spicy Kick: Stir in jalapeños or crushed red pepper flakes to the gravy for a delightful heat that warms you from the inside out.
  • Sweet Potato Mash: For a sweeter alternative, use mashed sweet potatoes instead of regular potatoes; the flavor profile will pleasantly surprise you!
  • Homemade Gravy: Make a homemade gravy using flavorful drippings and fresh herbs for depth and richness, enhancing your Chicken Mashed Potato Bowls.

Whichever variations you choose, remember that adding personal touches makes this comforting dish even more heartwarming. If you're interested in spicing up your meals further, check out my recipes for Chipotle Lime Chicken or Honey Garlic Chicken for inspiration!

Chicken Mashed Potato Bowls Recipe FAQs

What type of chicken is best for the recipe?
Absolutely! While the recipe calls for chicken breasts, you can easily substitute with rotisserie chicken for a quicker meal. Alternatively, turkey works well too if you're looking to switch things up while maintaining tenderness and juiciness.

How should I store leftover Chicken Mashed Potato Bowls?
Store your Chicken Mashed Potato Bowls in airtight containers in the fridge for up to 3 days. I recommend keeping the components separate—chicken, corn, and mashed potatoes—to preserve their textures when reheating.

Can I freeze Chicken Mashed Potato Bowls?
Yes! For longer storage, freeze the components in individual portions. Wrap each portion tightly in plastic wrap, then place them in a freezer-safe container. They can last up to 2 months in the freezer. When you're ready to enjoy them, thaw overnight in the fridge and gently reheat each component separately.

What can I do if my mashed potatoes are too lumpy?
No worries! If your mashed potatoes are a little lumpy, try reheating them with a splash of milk in a pot over low heat and vigorously whisking until smooth. If you're using a microwave, add milk and mash them with a fork or potato masher until creamy. You can also use an immersion blender for an ultra-smooth texture!

Are there any dietary considerations for this recipe?
Very! This recipe is versatile; you can easily make it gluten-free by using gluten-free gravy and ensuring that all condiments are certified gluten-free. Additionally, keep in mind any allergies related to dairy if you're using cheese in your bowls, and consider substituting with dairy-free options like vegan cheese for a lactose-free version.

Can I add more vegetables to my Chicken Mashed Potato Bowls?
Absolutely! Feel free to mix in sautéed vegetables like bell peppers, peas, or mushrooms for an extra nutritional boost. Simply sauté them in the skillet after cooking the chicken, then layer them into your bowls before adding corn and gravy. The more, the merrier!

Chicken Mashed Potato Bowls

Comforting Chicken Mashed Potato Bowls for Cozy Nights

Enjoy these Chicken Mashed Potato Bowls, a perfect dish for cozy nights with tender chicken, creamy mashed potatoes, and rich gravy.
Print Recipe Pin Recipe
Prep Time 15 minutes mins
Cook Time 25 minutes mins
Total Time 40 minutes mins
Servings: 4 bowls
Course: Dinner
Cuisine: American
Calories: 550
Ingredients Equipment Method Nutrition Notes

Ingredients
  

For the Chicken
  • 2 pieces Chicken Breasts Tender and juicy; swap with rotisserie chicken for a quicker meal.
  • 1 teaspoon Garlic Powder Enhances flavor with earthy notes; fresh garlic works well too.
  • 1 teaspoon Onion Powder Adds savory depth; can be replaced with finely chopped fresh onions.
  • 1 teaspoon Paprika Brings warmth and color; consider smoked paprika for an extra kick.
  • to taste Salt Essential for flavor enhancement; adjust to your taste.
  • to taste Pepper Essential for flavor enhancement; adjust to your taste.
  • 2 tablespoons Olive Oil Helps brown chicken and prevents sticking; vegetable oil is a good substitute.
For the Mash
  • 4 cups Mashed Potatoes Creamy base for this dish; store-bought or homemade, it's your choice!
  • 1 cup Corn Kernels Adds sweetness and crunch; use canned or frozen for convenience.
  • 1 cup Cheddar Cheese Gives a rich, gooey texture; pepper jack is a spicy alternative.
For the Gravy
  • 2 cups Gravy (chicken or brown) Ties everything together with a savory sauce; use homemade for more flavor.
For Garnish
  • 1 tablespoon Fresh Parsley optional; brightens the dish with color.

Equipment

  • Large skillet
  • Saucepan
  • Mixing Bowl
  • Large pot

Method
 

Step-by-Step Instructions
  1. In a mixing bowl, combine the chicken breasts with garlic powder, onion powder, paprika, salt, and pepper. Make sure the chicken is evenly coated.
  2. Heat a large skillet over medium-high heat and add olive oil. Once the oil is shimmering, add your seasoned chicken breasts and cook for 7-9 minutes until golden brown and cooked through. Remove the chicken and let it rest.
  3. In a separate saucepan, gently heat your gravy over low heat, stirring until warmed through. Set aside once heated.
  4. Cook corn according to package instructions until tender, or drain and warm canned corn.
  5. Prepare or reheat your mashed potatoes until smooth and creamy, adjusting with milk or butter if necessary.
  6. To assemble, add a scoop of mashed potatoes to each bowl, layer the corn, and then add sliced or shredded chicken.
  7. Drizzle warm gravy over the layered chicken and corn, and sprinkle with shredded cheddar cheese to melt slightly.
  8. Garnish with fresh parsley if desired. Serve immediately and enjoy!

Nutrition

Serving: 1bowlCalories: 550kcalCarbohydrates: 45gProtein: 35gFat: 25gSaturated Fat: 10gPolyunsaturated Fat: 2gMonounsaturated Fat: 5gCholesterol: 100mgSodium: 800mgPotassium: 900mgFiber: 4gSugar: 3gVitamin A: 500IUVitamin C: 10mgCalcium: 200mgIron: 3mg

Notes

Use uniform chicken pieces for even cooking and keep components separate during storage to maintain texture.

Tried this recipe?

Let us know how it was!

Ground Chicken Zucchini Rice Skillet: A One-Pan Marvel!

May 29, 2026 by Grace Snow Leave a Comment

As the aroma of sizzling garlic and sautéing vegetables wafts through my kitchen, I can feel the day's stresses melting away. There’s something undeniably comforting about whipping up a one-pan meal, and this Ground Chicken Zucchini Rice Skillet is my go-to for those busy weeknights when time is short but we still crave something wholesome. Packed with lean protein and vibrant zucchini, this dish marries nutrition with convenience—ready in under 30 minutes and sure to please every palate at the table, even the picky eaters! Plus, it’s gluten-free and versatile enough for endless ingredient swaps. What variations will you create for your family?

Why Is This Skillet a Game Changer?

Simplicity at its finest! This Ground Chicken Zucchini Rice Skillet comes together in a single pan, allowing for easy cleanup and hassle-free cooking on busy nights. Nourishing ingredients mean you can feel good about serving it to your loved ones, with lean ground chicken as a delightful protein source. Flavor-packed spices elevate the taste, making it irresistible even for picky eaters. Versatility shines as you can swap in vegetables like bell peppers or carrots or even try cauliflower rice for a low-carb twist. Plus, you can always pair this dish with a fresh salad or some hearty bread to soak up those delicious flavors. Don't miss the chance to explore other tasty recipes like Lime Chicken Rice or Crock Pot Chicken for more home-cooked goodness!

Ground Chicken Zucchini Rice Skillet Ingredients

• Get ready to gather these essentials for a nourishing one-pan dish!

For the Skillet

  • Ground Chicken – a lean protein that brings a hearty flavor; you can swap it for ground turkey or tofu if desired.
  • Zucchini – provides freshness and a pop of color; feel free to use bell peppers, carrots, or broccoli for variation.
  • Rice – the perfect base for this dish; brown rice increases nutrition but requires more cooking time.
  • Onion – adds sweetness and depth; use yellow or sweet onion for the best result.
  • Garlic – enhances flavor; freshly minced is ideal, but powder can work as a quick substitute.
  • Chicken Broth – infuses moisture and rich taste; opt for low-sodium versions for a healthier choice.
  • Olive Oil – essential for sautéing; avocado oil is a wonderful alternative for an extra flavor kick.

For Seasoning

  • Salt – enhances every flavor; adjust to taste preferences.
  • Black Pepper – adds a subtle warmth; freshly cracked is always best.
  • Paprika – brings a smoky note; feel free to add more for extra depth.
  • Cumin – lends an earthy flavor; a must-try for that unique twist in your Ground Chicken Zucchini Rice Skillet!

Now, let the cooking adventure begin as you create this deliciously comforting meal!

Step‑by‑Step Instructions for Ground Chicken Zucchini Rice Skillet

Step 1: Heat the Oil
Begin by heating 2 tablespoons of olive oil in a large skillet over medium heat. Allow the oil to shimmer, which usually takes about 1-2 minutes. This will prepare your skillet for the lean ground chicken, creating a perfect base for the Ground Chicken Zucchini Rice Skillet.

Step 2: Cook the Chicken
Add 1 pound of ground chicken to the skillet, breaking it apart with a wooden spoon. Cook for 5-7 minutes, stirring occasionally, until it is fully browned and no longer pink. The chicken should have a nice golden color, enhancing the flavor of your hearty skillet dish.

Step 3: Sauté Onion and Garlic
Stir in one diced onion and 2 minced garlic cloves to the skillet, sautéing for about 3-4 minutes. Continue cooking until the onion turns translucent and fragrant, adding depth to the Ground Chicken Zucchini Rice Skillet. This step will infuse the dish with rich, savory aromas that fill your kitchen.

Step 4: Add Zucchini
Incorporate 2 medium diced zucchinis into the skillet, cooking for an additional 2 minutes. Sauté the zucchini until it starts to soften but remains tender-crisp, accentuating the colorful and nutritious components of your one-pan meal.

Step 5: Mix in Rice and Broth
Now, add 1 cup of rice and 1 cup of chicken broth along with salt, pepper, paprika, and cumin to the skillet. Stir well to combine all the ingredients, allowing the flavors to meld together. This mixture will be the foundation of your Ground Chicken Zucchini Rice Skillet, ready to absorb all the wonderful flavors.

Step 6: Simmer the Skillet
Bring the mixture to a boil, then reduce the heat to low and cover the skillet. Allow it to simmer for 15-20 minutes until the rice absorbs the liquid. Keep an eye on it; the rice should be fluffy and tender, soaking up the delicious flavors of the chicken and spices.

Step 7: Rest and Fluff
Once cooked, remove the skillet from the heat and let it sit covered for an additional 5 minutes. This resting period helps the flavors deepen. Afterward, fluff the rice and ingredients with a fork to enhance the texture of your Ground Chicken Zucchini Rice Skillet.

Step 8: Serve and Enjoy
Finally, garnish your skillet with freshly chopped parsley for a pop of color and freshness. Serve the Ground Chicken Zucchini Rice Skillet warm, and enjoy the comforting and nutritious one-pan meal that your family will love!

How to Store and Freeze Ground Chicken Zucchini Rice Skillet

Fridge: Keep your Ground Chicken Zucchini Rice Skillet in an airtight container for up to 3 days. Reheat on the stovetop over medium heat or in the microwave until heated through.

Freezer: For longer storage, freeze the skillet in airtight containers for up to 3 months. Thaw in the fridge before reheating for best results.

Reheating: To reheat, add a splash of chicken broth or water to bring back moisture. Warm on the stovetop over low heat, stirring occasionally, until heated through.

Make-ahead: Prepare the dish up to the simmering stage and store in the fridge for up to 24 hours before completing the cooking process for a quick weeknight meal.

What to Serve with Ground Chicken Zucchini Rice Skillet

Pairing this delightful skillet dish with complementary sides elevates your meal and rounds out the flavors beautifully.

  • Light Salad: A fresh garden salad dressed in tangy vinaigrette offers a crisp contrast to the warmth of the skillet.
  • Crusty Bread: Serve with crusty bread to soak up the delicious juices. This adds a satisfying crunch and heartiness to your meal.
  • Roasted Vegetables: Roasted seasonal veggies bring additional flavors and textures, enhancing the comforting nature of the skillet. Try carrots or bell peppers for extra sweetness.
  • Creamy Mashed Potatoes: The silky texture of creamy mashed potatoes pairs well with the skillet's flavors, creating a heartwarming experience at the table.
  • Steamed Broccoli: Lightly steamed broccoli adds a vibrant green element, enhancing the dish's color while providing a healthy crunch.
  • Iced Tea or Lemonade: Refreshing beverages like iced tea or lemonade complement the savory notes of the dish, balancing the meal with their zestiness.
  • Fruit Sorbet: End the meal on a sweet note with a light fruit sorbet. Its coolness will cleanse the palate after enjoying the hearty skillet.

Expert Tips for Ground Chicken Zucchini Rice Skillet

Avoid Overcooking:
Ensure the chicken is cooked just until browned to maintain its tenderness and prevent dryness.

Correct Broth Measurement:
Accurate chicken broth measurement is crucial; too much can lead to mushy rice. Stick to the recommended ratio for perfect results.

Let It Rest:
After cooking, allow the skillet to rest covered for about 5 minutes. This helps flavors meld beautifully, enhancing the overall taste of your Ground Chicken Zucchini Rice Skillet.

Taste Before Serving:
Always sample your dish before serving to adjust any seasoning. A little extra salt or spice can elevate the flavors significantly.

Explore Variations:
Feel free to experiment with different vegetables or protein options like ground turkey or tofu to keep things exciting in your Ground Chicken Zucchini Rice Skillet.

Ground Chicken Zucchini Rice Skillet Variations

Feel free to get creative with this dish—it’s all about making it your own!

  • Ground Turkey: Substitute ground chicken with ground turkey for a lighter take, keeping the flavors intact. The cooking time remains the same, ensuring a straightforward swap.

  • Tofu Option: For a vegetarian twist, replace ground chicken with crumbled tofu. Just sauté it until golden before adding the veggies for a satisfying, protein-rich meal.

  • Cauliflower Rice: Want to make it lower-carb? Swap traditional rice for cauliflower rice. This change will reduce cook time, so sauté it for just a few minutes at the end.

  • Add More Greens: Boost nutrition by tossing in fresh spinach or kale during the last few minutes of cooking. They'll wilt down beautifully, adding vibrant color and vitamins.

  • Spicy Kick: Kick up the heat by adding crushed red pepper flakes or a dash of cayenne. Start with a small amount and adjust according to your family’s spice preference.

  • Vegetable Mix: Experiment with different vegetables like bell peppers, carrots, or even corn. Each will lend a new texture and flavor, keeping the dish exciting meal after meal.

  • Rice Variety: Try using brown rice or quinoa instead of white rice for added nutritional benefits. Just keep in mind that this may require slight adjustments in cooking time and liquid.

  • Seasoning Swap: Add a touch of Italian flair by incorporating Italian seasoning or fresh herbs like basil and oregano. This fusion will surely become a delightful surprise at the dinner table.

There’s always room to personalize your Ground Chicken Zucchini Rice Skillet! For more ideas, don’t forget to check out Crock Pot Chicken for easy, hearty options or explore the rich flavor of Spatchcock Chicken Flavor for your next family meal.

Make Ahead Options

These Ground Chicken Zucchini Rice Skillet is a fantastic meal prep solution for busy home cooks! You can chop the vegetables (zucchini, onion, and garlic) and store them in an airtight container in the refrigerator up to 3 days in advance. Additionally, you can brown the ground chicken and let it cool before refrigerating it for up to 24 hours. When you're ready to serve, simply sauté the prepped vegetables, add the chicken back to the skillet, and then mix in the rice and broth. This way, you’ll enjoy a delicious, comforting meal with minimal effort, preserving the dish's flavors and textures just as if it were freshly made!

Ground Chicken Zucchini Rice Skillet Recipe FAQs

What type of zucchini is best for this recipe?
Absolutely! When choosing zucchini, look for ones that are firm and free of dark spots. Smaller zucchinis tend to be sweeter and less bitter, making them ideal for the Ground Chicken Zucchini Rice Skillet. Typically, you want them to be a vibrant green, indicative of freshness.

How should I store leftovers of the Ground Chicken Zucchini Rice Skillet?
To maintain freshness, transfer any leftovers to an airtight container and refrigerate. They can be stored for up to 3 days. When you’re ready to enjoy it again, simply reheat in a skillet over medium heat or in the microwave, making sure it’s heated all the way through.

Can I freeze the Ground Chicken Zucchini Rice Skillet?
Very! This dish freezes beautifully. Portion it into airtight containers or freezer bags, ensuring as much air as possible is removed. It can last in the freezer for up to 3 months. When ready to serve, thaw it in the refrigerator overnight and reheat gently on the stove with a splash of chicken broth for added moisture.

What if I used too much broth and my rice is mushy?
No worries! If you find your rice a bit mushy, try to rescue the texture by spreading the mixture on a baking sheet and baking it at 350°F for about 10-15 minutes. This can help dry it out slightly. Alternatively, you can serve it as a flavorful filling in tacos or lettuce wraps, disguising the texture while still enjoying the lovely flavors of the Ground Chicken Zucchini Rice Skillet.

Can pets eat this dish?
It's best to avoid giving this dish to pets. Ground chicken and vegetables like zucchini are generally safe, but the added salt and spices could upset their stomachs. Always check with your veterinarian if you’re unsure about specific ingredients.

Can I substitute ground chicken with another protein?
Absolutely! Ground turkey works well as a lean alternative, and tofu can be a great choice for a vegetarian option. If using tofu, make sure to press it to drain excess moisture and sauté it until crispy for the best results in your Ground Chicken Zucchini Rice Skillet.

Ground Chicken Zucchini Rice Skillet

Ground Chicken Zucchini Rice Skillet: A One-Pan Marvel!

Ground Chicken Zucchini Rice Skillet is a comforting one-pan meal, ready in under 30 minutes, featuring lean protein and vibrant zucchini.
Print Recipe Pin Recipe
Prep Time 10 minutes mins
Cook Time 20 minutes mins
Resting Time 5 minutes mins
Total Time 35 minutes mins
Servings: 4 servings
Course: Dinner
Cuisine: American
Calories: 400
Ingredients Equipment Method Nutrition Notes

Ingredients
  

For the Skillet
  • 1 pound Ground Chicken can swap for ground turkey or tofu
  • 2 medium Zucchini diced
  • 1 cup Rice brown rice for more nutrition
  • 1 medium Onion diced; yellow or sweet onion recommended
  • 2 cloves Garlic freshly minced preferred
  • 1 cup Chicken Broth low-sodium preferred
  • 2 tablespoons Olive Oil can use avocado oil
For Seasoning
  • 1 teaspoon Salt to taste
  • 1/2 teaspoon Black Pepper freshly cracked recommended
  • 1 teaspoon Paprika adds smoky flavor
  • 1 teaspoon Cumin for unique flavor

Equipment

  • Large skillet

Method
 

Cooking Steps
  1. Heat 2 tablespoons of olive oil in a large skillet over medium heat for 1-2 minutes.
  2. Add 1 pound of ground chicken and cook for 5-7 minutes until browned.
  3. Stir in 1 diced onion and 2 minced garlic cloves, sautéing for 3-4 minutes.
  4. Add 2 medium diced zucchinis and cook for an additional 2 minutes.
  5. Mix in 1 cup of rice and 1 cup of chicken broth along with salt, pepper, paprika, and cumin.
  6. Bring to a boil, reduce heat to low, cover, and simmer for 15-20 minutes.
  7. Remove from heat, cover, and let it rest for 5 minutes.
  8. Fluff with a fork, garnish with parsley, and serve warm.

Nutrition

Serving: 1servingCalories: 400kcalCarbohydrates: 45gProtein: 30gFat: 10gSaturated Fat: 2gPolyunsaturated Fat: 1gMonounsaturated Fat: 6gCholesterol: 90mgSodium: 600mgPotassium: 800mgFiber: 4gSugar: 3gVitamin A: 1000IUVitamin C: 20mgCalcium: 50mgIron: 3mg

Notes

Feel free to swap in other vegetables or proteins to customize the dish to your family's tastes.

Tried this recipe?

Let us know how it was!

Delicious Honey Lime Chicken & Rice Bowls in Just 30 Minutes

May 29, 2026 by Grace Snow Leave a Comment

As I tossed the vibrant ingredients into the bowl, the sweet and zesty aroma of Honey Lime Chicken & Rice Bowls wrapped around me like a warm hug. This delightful recipe, packed with high-protein goodness, is a game changer for those evenings when you crave something quick yet satisfying. Within just 30 minutes, you can relish succulent chicken marinated in a tangy honey-lime sauce, served atop fluffy rice and complemented by colorful corn, hearty black beans, and creamy avocado. Whether you’re cooking for yourself or a small gathering, this dish offers both convenience and flavor that will leave everyone asking for seconds. Are you ready to savor this delicious experience? Let’s dive in!

Why Choose Honey Lime Chicken & Rice Bowls?

Quick and Easy: This recipe comes together in just 30 minutes, perfect for busy weeknights when you need a hearty meal without a hassle.

Vibrant Flavors: With the sweetness of honey and tanginess of lime, each bite bursts with excitement that your taste buds will thank you for.

Protein-Packed: Featuring high-protein chicken, this dish not only satisfies but also fuels your day.

Colorful and Nutritious: The addition of black beans, corn, and avocado doesn’t just make it look great; it enhances nutrition, making every bowl a feast for the eyes.

Versatile Options: Feel free to swap in shrimp or tofu for your protein or even use quinoa instead of rice for a gluten-free twist. You'll find the perfect balance that suits your cravings.

If you're a fan of quick, delicious meals, you might also love the Honey BBQ Chicken or the Fiesta Lime Chicken with Avocado for more tasty inspiration!

Honey Lime Chicken & Rice Bowls Ingredients

For the Rice
• Long-grain white rice – This fluffy base provides a perfect contrast to the flavorful toppings; replace with brown rice for added fiber.

For the Chicken
• Boneless, skinless chicken thighs or breasts – Chicken thighs bring more flavor, while breasts are leaner for a lighter option.

For the Marinade
• Honey – Adds delightful sweetness to the marinade; maple syrup can be a vegan substitute.
• Fresh lime juice – Imparts a bright and zesty flavor; bottled lime juice works in a pinch, but fresh is best!
• Soy sauce – Delivers umami richness; opt for tamari to keep it gluten-free.
• Lime zest – Enhances the lime flavor profile; can be easily replaced with more lime juice if desired.
• Garlic powder – A convenient seasoning for depth; fresh garlic works well, too—just adjust to taste.
• Onion powder – Adds savory notes; consider using fresh onion for extra flavor.
• Salt and black pepper – Essential for seasoning; adjust to your taste preferences.

For Cooking
• Olive oil – Ideal for sautéing chicken; avocado oil can work in its place for higher heat cooking.

For Toppings
• Corn (fresh, frozen, or canned) – Adds sweetness and crunch; frozen corn is often a quick and easy option.
• Black beans – Boost fiber and protein; rinsing canned beans helps reduce sodium content.
• Avocado – Provides creaminess and healthy fats; bell peppers can be swapped for a different texture.
• Fresh cilantro – Optional garnish that perks up the dish with freshness.
• Lime wedges – Serve on the side for an extra zing; can be left out if you prefer.

This delicious blend of ingredients combines in the ultimate Honey Lime Chicken & Rice Bowls, ensuring a meal you’ll love every time!

Step‑by‑Step Instructions for Honey Lime Chicken & Rice Bowls

Step 1: Cook the Rice
Begin by rinsing 2 cups of long-grain white rice under cold water to remove excess starch. In a medium pot, combine the rinsed rice with 4 cups of water, a pinch of salt, and bring it to a rolling boil. Once boiling, reduce the heat to low, cover, and let it simmer for 18-20 minutes until the rice is tender and water is absorbed. Fluff the rice with a fork and set aside.

Step 2: Prep Marinade
In a medium mixing bowl, whisk together 1/4 cup of honey, the juice and zest of 2 fresh limes, 1/4 cup of soy sauce, 1 teaspoon of garlic powder, 1 teaspoon of onion powder, and a pinch of salt and black pepper. This flavorful marinade will perfectly complement the chicken, infusing it with a delightful sweetness and acidity that embodies the Honey Lime Chicken & Rice Bowls.

Step 3: Marinate Chicken
Take 1.5 pounds of boneless, skinless chicken thighs or breasts and place them in a large mixing bowl. Pour half of the prepared marinade over the chicken, making sure to coat each piece evenly. Cover the bowl with plastic wrap and let it marinate in the refrigerator for at least 15 minutes. This step not only tenderizes the chicken but enhances its flavor.

Step 4: Cook Chicken
Heat 2 tablespoons of olive oil in a large skillet over medium-high heat until shimmering. Carefully add the marinated chicken pieces to the skillet, cooking them for about 5-7 minutes on each side until they are golden brown and reach an internal temperature of 165°F. Once cooked, remove the chicken from the skillet and discard the leftover marinade.

Step 5: Add Extras
In the same skillet with the remaining drippings, add 1 cup of corn and 1 can of rinsed black beans over medium heat. Stir to combine and cook for about 3-4 minutes until heated through, allowing the flavors to meld beautifully. This colorful mix will elevate your Honey Lime Chicken & Rice Bowls with additional texture and nutrition.

Step 6: Slice Chicken
Let the chicken rest for a couple of minutes so that the juices can redistribute, ensuring it remains moist and tender. Once rested, slice the chicken thinly against the grain. This technique helps retain tenderness, making each bite delightful as you layer it in your bowls.

Step 7: Assemble Bowls
To serve, scoop a generous portion of the fluffed rice into individual bowls as the base. Top each bowl with sliced chicken, followed by the heated corn and black bean mixture. Finally, add fresh, sliced avocado for creaminess, balancing the flavors of the Honey Lime Chicken & Rice Bowls beautifully.

Step 8: Garnish and Serve
Drizzle the remaining marinade across the assembled bowls for a punch of flavor. If desired, add freshly chopped cilantro for a burst of freshness and serve each bowl with lime wedges on the side for an extra zesty kick. Enjoy your delicious and vibrant Honey Lime Chicken & Rice Bowls!

What to Serve with Honey Lime Chicken & Rice Bowls

Envision a vibrant spread that elevates these delightful Honey Lime Chicken & Rice Bowls into a full meal experience, perfect for sharing with loved ones.

  • Creamy Avocado Salad: A cool, refreshing avocado salad adds a creamy texture and balances the zesty flavors, making each bite of chicken even more enjoyable. Toss fresh greens with lime juice, diced avocado, and a pinch of salt for a quick side.

  • Zesty Corn Salsa: This lively salsa brings a burst of flavor that enhances the sweetness of the dish. Simply mix fresh corn, diced tomatoes, cilantro, and lime juice for a bright contrast to the savory chicken.

  • Spicy Black Bean Tacos: Taking the black beans a step further, filling soft tortillas with spicy black beans provides a crunchy texture and delightful kick. Top with fresh cilantro and avocado for a wonderful pairing.

  • Grilled Vegetable Skewers: Lightly charred seasonal veggies add both a smokey depth and vibrant color to your meal. Pair them right alongside your bowls for a feast that’s visually appealing and nutritionally complete.

  • Cilantro Lime Rice: For extra emphasis on those bright lime flavors, serve a side of fluffy cilantro lime rice. This base harmonizes beautifully with the chicken and beans, appealing to all senses.

  • Chilled Sangria: Sip on a refreshing glass of fruity sangria. The sweet and citrusy notes of the drink complement the dish while adding a festive touch to your meal, perfect for a gathering.

  • Mango Sorbet: End your meal with a light and fruity mango sorbet. Its sweetness and chilling effect create the perfect finish after enjoying the savory and zesty Honey Lime Chicken & Rice Bowls.

Honey Lime Chicken & Rice Bowls Variations

Feel free to put your unique twist on these delectable bowls with these appetizing ideas!

  • Protein Swap: Substitute chicken with shrimp or tofu for a different protein experience. Both pair beautifully with the honey-lime flavors.

  • Quinoa Base: Replace rice with quinoa for a gluten-free and protein-packed alternative. It’s a fantastic way to enhance the dish’s nutritious value!

  • Add Veggies: Toss in diced bell peppers or seasonal vegetables for an extra color boost and fiber. Fresh veggies elevate the nutritional profile while adding crunch.

  • Tropical Twist: Incorporate pineapple or mango chunks to add a sweet, tropical flair. The fruit's juiciness complements the honey-lime sauce perfectly!

  • Spice it Up: If you're a fan of heat, sprinkle in some red pepper flakes or add sliced jalapeños. Feel the spicy kick contrast beautifully with the sweet marinade.

  • Herb Infusion: Enhance the fresh flavors by mixing in chopped fresh basil or mint along with cilantro. These herbs will brighten the dish even more!

  • Creamy Variations: Swap avocado for a dollop of Greek yogurt or sour cream. This twist provides a rich and creamy element that balances the citrus zing.

  • Veggie Rice: Try cauliflower rice as a low-carb option. It’s light, fluffy, and a delightful alternative that soaks up the marinade’s flavor wonderfully.

If you're craving an even more vibrant chicken dish, consider trying the Honey Garlic Chicken Thighs next!

Make Ahead Options

These Honey Lime Chicken & Rice Bowls are perfect for meal prep enthusiasts! You can marinate the chicken up to 24 hours in advance to allow the flavors to fully infuse, just remember to store it in an airtight container in the refrigerator. Additionally, cooking the rice can be done up to 3 days ahead; simply let it cool, then refrigerate. When you're ready to serve, reheat the rice and chicken in a skillet over medium heat until warmed through, adding a splash of water if needed to keep the rice from drying out. This way, you save time during busy weeknights while still enjoying delicious, flavorful Honey Lime Chicken & Rice Bowls!

Expert Tips for Honey Lime Chicken & Rice Bowls

  • Marinate Wisely: Ensure chicken is immersed in the marinade for at least 15 minutes. This key step infuses flavor into the meat, elevating your Honey Lime Chicken & Rice Bowls.

  • Cooking Temperature: Use medium-high heat when cooking the chicken for a golden-brown crust. Avoid overcrowding the skillet to ensure even cooking and prevent steaming.

  • Resting Time: Allow the chicken to rest for a few minutes after cooking. This helps keep the juices locked in, resulting in tender bites in your bowls.

  • Flavor Adjustments: Feel free to tweak the marinade ingredients to suit your palate—add more honey for sweetness or extra lime for zing. Customization makes for a satisfying meal!

  • Rice Substitutions: If you prefer a gluten-free option, substitute the soy sauce with tamari and enjoy a wholesome meal without compromising on taste.

  • Add Crunchy Toppings: Don’t hesitate to throw on some fresh radishes or sliced jalapeños for an added crunch and a pop of flavor on your Honey Lime Chicken & Rice Bowls!

How to Store and Freeze Honey Lime Chicken & Rice Bowls

Fridge: Store leftovers in an airtight container for up to 3 days. This will keep your Honey Lime Chicken & Rice Bowls fresh and ready to enjoy again!

Freezer: For longer storage, freeze the chicken and rice mixture in airtight containers or freezer bags for up to 3 months. Just be sure to label them!

Reheating: To reheat, simply microwave or warm on the stovetop with a splash of water to maintain moisture. Heat until warmed through, approximately 2–3 minutes in the microwave.

Assembly: If you prefer, store components separately (rice, chicken, and toppings) to maintain texture and flavor when reheating. Enjoy your Honey Lime Chicken & Rice Bowls at their best!

Honey Lime Chicken & Rice Bowls Recipe FAQs

What is the best way to choose ripe avocados for this recipe?
Absolutely! Look for avocados that feel slightly soft when gently squeezed but are not overly mushy. They should have a consistent dark green color without dark spots or blemishes. If you can only find underripe avocados, you can leave them at room temperature for a few days until they soften.

How should I store leftovers of the Honey Lime Chicken & Rice Bowls?
You can store leftovers in an airtight container in the refrigerator for up to 3 days. Make sure to keep the rice, chicken, and toppings (like avocado) separate for best taste and texture. When you're ready to enjoy, just give it a quick reheat on the stovetop or in the microwave!

Can I freeze Honey Lime Chicken & Rice Bowls?
Yes! To freeze, allow the chicken and rice to cool completely before placing them in airtight containers or freezer bags. They can be stored for up to 3 months. When you're ready to enjoy them, thaw overnight in the refrigerator and reheat on the stovetop for best results.

What should I do if my chicken isn’t cooking evenly?
To avoid uneven cooking, ensure you don’t overcrowd the skillet. If the chicken pieces are too close together, they will steam rather than brown. Cook in batches if necessary, and let the chicken rest for a few minutes after cooking to seal in the juices and enhance tenderness.

Are there any dietary considerations for allergies or pets?
If you or someone you’re serving has soy allergies, opt for gluten-free tamari as a substitute for soy sauce. Always check the specific brands of canned corn and beans to ensure they don't contain allergens. As for pets, it’s best not to share human food unless it's safe and specially prepared for them. So, while the Honey Lime Chicken is delicious for you, keep it away from furry friends!

How can I make this dish vegan or vegetarian?
Very! You can swap the chicken for firm tofu or chickpeas to maintain the protein content. For a vegan marinade, replace the honey with maple syrup and ensure your soy sauce is gluten-free. This simple switch lets everyone enjoy the vibrant flavors of Honey Lime Chicken & Rice Bowls!

Honey Lime Chicken & Rice Bowls

Delicious Honey Lime Chicken & Rice Bowls

Enjoy flavorful Honey Lime Chicken & Rice Bowls, ready in just 30 minutes.
Print Recipe Pin Recipe
Prep Time 15 minutes mins
Cook Time 15 minutes mins
Total Time 30 minutes mins
Servings: 4 bowls
Course: Dinner
Cuisine: American
Calories: 450
Ingredients Equipment Method Nutrition Notes

Ingredients
  

For the Rice
  • 2 cups long-grain white rice Replace with brown rice for added fiber
For the Chicken
  • 1.5 pounds boneless, skinless chicken thighs or breasts Thighs bring more flavor; breasts are leaner
For the Marinade
  • 1/4 cup honey Maple syrup can be a vegan substitute
  • 2 tablespoons fresh lime juice Bottled lime juice works in a pinch
  • 1/4 cup soy sauce Opt for tamari to keep it gluten-free
  • 1 teaspoon lime zest Replace with more lime juice if desired
  • 1 teaspoon garlic powder Fresh garlic works well, too
  • 1 teaspoon onion powder Consider using fresh onion for extra flavor
  • to taste salt Essential for seasoning
  • to taste black pepper Essential for seasoning
For Cooking
  • 2 tablespoons olive oil Avocado oil can work for higher heat cooking
For Toppings
  • 1 cup corn (fresh, frozen, or canned) Frozen corn is often a quick option
  • 1 can black beans Rinsing helps reduce sodium content
  • 1 avocado Provides creaminess and healthy fats
  • fresh cilantro Optional garnish for freshness
  • lime wedges Serve on the side for extra zing

Equipment

  • Medium pot
  • Large skillet
  • Mixing Bowl
  • Fork

Method
 

Step-by-Step Instructions
  1. Rinse the rice under cold water to remove excess starch. In a medium pot, combine the rinsed rice with water and salt, then bring to boil. Reduce heat, cover, and simmer until rice is tender.
  2. In a mixing bowl, whisk together honey, lime juice, lime zest, soy sauce, garlic powder, onion powder, salt, and black pepper to prepare the marinade.
  3. Take the chicken and marinate it with half the prepared marinade for at least 15 minutes in the refrigerator.
  4. Heat olive oil in a skillet over medium-high heat and sauté the marinated chicken until golden brown and cooked through.
  5. In the same skillet, add corn and black beans, cooking until heated through.
  6. Let chicken rest, then slice it thinly against the grain.
  7. Assemble the bowls with rice, topped with chicken, corn, black beans, and avocado.
  8. Drizzle remaining marinade over and serve with cilantro and lime wedges.

Nutrition

Serving: 1bowlCalories: 450kcalCarbohydrates: 56gProtein: 30gFat: 12gSaturated Fat: 2gPolyunsaturated Fat: 3gMonounsaturated Fat: 7gCholesterol: 85mgSodium: 930mgPotassium: 750mgFiber: 8gSugar: 12gVitamin A: 300IUVitamin C: 30mgCalcium: 45mgIron: 3mg

Notes

Ensure chicken is marinated for at least 15 minutes for best flavor. Customize the dish with shrimp or tofu as desired.

Tried this recipe?

Let us know how it was!

Savor Homemade Blackened Fish Taco Bowls in 25 Minutes

May 29, 2026 by Grace Snow Leave a Comment

The scent of spices sizzling in a hot skillet can only mean one thing: dinner is about to become something special! My Blackened Fish Taco Bowls bring a burst of flavor and vibrancy to your table, combining perfectly seasoned fish with fresh toppings and a zesty creamy sauce. This recipe isn't just quick—taking only 25 minutes from prep to plate—it's also completely customizable, making it a fantastic choice for both busy weeknights and casual weekend gatherings. With plenty of healthy ingredients, you'll satisfy your cravings while impressing family and friends alike. Ready to dive into a delicious twist on taco night? Let’s get started!

Why Will You Love These Taco Bowls?

Quick Preparation: In just 25 minutes, you can whip up a meal that's perfect for busy weeknights or spontaneous gatherings.

Flavor Explosion: The smoky spice blend and zesty sauce deliver a punch that will impress even the pickiest eaters.

Customizable Goodness: Mix and match toppings like avocado, pico de gallo, or sprinkle of cheese for a personalized touch at every meal.

Healthy Ingredients: Packed with protein and fiber, these bowls are a guilt-free indulgence that everyone will enjoy, making them perfect for family dinners.

Crowd-Pleasing Appeal: Whether you're having friends over or dining with family, Blackened Fish Taco Bowls are guaranteed to be a hit, just like my Shrimp Tacos Zesty.

Texture Delight: Enjoy the delightful contrast of crispy fish, creamy sauce, and crunchy veggies in every bite, bringing a satisfying experience to your dining table.

Blackened Fish Taco Bowls Ingredients

• Just what you need for deliciousness!

For the Fish

  • White Fish (e.g., tilapia, mahi-mahi) – Fresh or fully thawed is key for the best flavor.
  • Olive Oil – Ensures you get that perfect crispy exterior.
  • Spice Blend (smoked paprika, chili powder, cumin, garlic powder, onion powder, salt, black pepper, cayenne pepper) – This combination of spices gives the fish its signature blackened flavor; adjust cayenne for your spice preference.
  • Fresh Lime Juice – Brightens up the entire dish and enhances the sauce.

For the Sauce

  • Greek Yogurt (or sour cream) – Provides a creamy base with a tangy kick, helping to balance the spices.

For the Bowls

  • Rice (white or brown) – Acts as a filling base and adds fiber; swap with quinoa or cauliflower rice for a low-carb option.
  • Shredded Lettuce or Cabbage – Adds a satisfying crunch and freshness to each bite.
  • Black Beans – Great source of protein and fiber to keep you feeling full.
  • Corn – Offers a pop of sweetness and texture to the dish.
  • Avocado Slices – Brings a creamy richness that complements the fish beautifully.
  • Pico de Gallo – A fresh salsa that adds vibrant flavor to your bowls.
  • Fresh Cilantro – Adds a refreshing herbaceous note as a finishing touch.
  • Crumbled Cheese (optional) – For creaminess; feta works well too, or skip it for a dairy-free option.

This ingredients list for your Blackened Fish Taco Bowls is just the start of your culinary adventure—time to get cooking!

Step‑by‑Step Instructions for Blackened Fish Taco Bowls

Step 1: Prepare the Spice Blend
In a small bowl, combine smoked paprika, chili powder, cumin, garlic powder, onion powder, salt, black pepper, and cayenne pepper. Use a whisk or fork to blend the spices evenly, ensuring there are no clumps. This vibrant spice blend will give your fish its signature blackened flavor, setting the stage for delicious Blackened Fish Taco Bowls.

Step 2: Season the Fish
Pat the white fish dry with paper towels to remove excess moisture, which helps the spices adhere better. In a separate bowl, drizzle olive oil over the fish and rub it in for an even coating. Generously sprinkle the spice blend over the fish, then squeeze fresh lime juice on top, allowing the flavors to meld.

Step 3: Cook the Fish
Heat a skillet over medium-high heat and add a splash of olive oil. Once the oil is shimmering, gently place the seasoned fish in the skillet. Cook for 3-4 minutes on each side, until the fish becomes golden and blackened, and flakes easily with a fork. Remove the fish from the skillet and set it aside to rest while you prepare the creamy sauce.

Step 4: Make the Creamy Sauce
In a medium bowl, whisk together Greek yogurt, a squeeze of lime juice, garlic powder, chili powder, and a pinch of salt. Taste and adjust the seasoning as needed. This creamy sauce will add a delightful tang to your Blackened Fish Taco Bowls, balancing the spiciness of the fish beautifully.

Step 5: Assemble Bowls
Start by dividing cooked rice into individual bowls as the base. Next, layer in shredded lettuce or cabbage, followed by black beans and corn. Gently flake the blackened fish and add it on top of the delicious layers. This assembly process creates a beautiful, colorful presentation filled with fresh ingredients.

Step 6: Finish Toppings
Top each bowl with creamy avocado slices, a generous spoonful of pico de gallo, and fresh cilantro for a burst of freshness. If desired, sprinkle crumbled cheese on top for extra creaminess. Finish with a drizzle of the prepared creamy sauce and serve with lime wedges on the side for a zesty touch. Enjoy your flavorful Blackened Fish Taco Bowls!

Blackened Fish Taco Bowls Variations

Feel free to let your creativity shine as you customize these delightful bowls to suit your taste!

  • Seafood Swap: Replace white fish with shrimp for a quick, succulent option. Shrimp cooks faster and adds a sweet flavor that pairs perfectly with the spices.
  • Vegan Delight: Swap fish for crispy tofu marinated in the same spices. This not only adds protein but offers a lovely texture that complements all the fresh toppings.
  • Grain Variety: Use quinoa or farro instead of rice for a nutty flavor and an extra dose of nutrition. It's a fantastic way to alter the texture while keeping the meal wholesome.
  • Spice Up the Heat: Add sliced jalapeños or a sprinkle of crushed red pepper to kick the heat up a notch. A little extra warmth can elevate that sense of flavor and excitement!
  • Texture Twist: Switch out shredded lettuce for crunchy radishes or even pickled red onions to add a surprising zing. Each bite will introduce a new twist that keeps everyone guessing.
  • Cheese Variation: Try feta or queso fresco instead of crumbled cheese for a different creamy texture. Each cheese brings its own unique flavor to the table.
  • Pico de Gallo Boost: Amp up the freshness by adding diced mango or pineapple to your pico de gallo for a delightful sweet-tangy contrast. It truly brightens the dish!

For more inspiration, consider making these delicious Fish Taco Bowls for a fun twist or try my Air Fryer Fish for a healthier version! Don't forget to explore my Taco Spaghetti Cheesy if you're in the mood for a pasta spin. Your culinary journey is limitless!

What to Serve with Blackened Fish Taco Bowls?

A colorful table enhances the joy of a delicious meal, elevating your taco night to a feast for the senses!

  • Mexican Street Corn Salad: This creamy, zesty corn salad brings a refreshing contrast to the spiced fish, enhancing the overall flavor profile. The sweetness of corn paired with lime and cilantro makes it a perfect companion.

  • Chilled Avocado Soup: This creamy, cool soup adds a silky element, balancing the heat from the blackened fish while offering a vibrant, refreshing flavor.

  • Mango Salsa: Fresh mango salsa with lime and jalapeño provides a sweet and spicy explosion, perfectly complementing the bold flavors of your taco bowls.

  • Crispy Tortilla Chips: These crunchy chips create a delightful contrast to the bowls. Serve with a side of the cheesy sauce for dipping, ensuring a crunchy, indulgent treat!

  • Cilantro Lime Rice: Soft, fluffy rice with zesty lime and fresh cilantro is an excellent base. It effortlessly absorbs the flavors of the fish and sauce, adding another layer of deliciousness.

  • Cucumber Tomato Salad: A light salad featuring crisp cucumber and juicy tomatoes offers a refreshing, crunchy texture, enhancing the meal while keeping things light and fresh.

  • Lime-Ginger Sparkler: Refresh your palate with a zesty, sparkling drink that lifts the vibrant flavors and complements the spices of the dish. It's a party in a glass!

  • Key Lime Pie: End your meal on a sweet note with this creamy pie, its tanginess perfectly echoing the fresh lime notes found in your taco bowls.

With these delightful pairings, your Blackened Fish Taco Bowls will transform into a remarkable dining experience, inviting smiles and satisfied appetites all around.

Make Ahead Options

These Blackened Fish Taco Bowls are perfect for meal prep enthusiasts looking to save time during busy weeks! You can season and marinate the white fish up to 24 hours in advance (just be sure to refrigerate it in an airtight container). Additionally, prepare the creamy sauce and store it separately in the fridge for up to 3 days to maintain its fresh flavor. Assemble all the bowl components, like rice, beans, and veggies, in advance, keeping them refrigerated, but wait to add the avocado to prevent browning. When ready to serve, simply reheat the fish in a skillet until warmed through, and assemble the bowls with your prepped ingredients for a delightful, delicious family meal!

Expert Tips for Blackened Fish Taco Bowls

  • Choose Fresh Fish: Ensure you use the freshest white fish available for the best flavor and texture; frozen is okay if fully thawed and properly prepared.
  • Master the Spice Blend: Mix spices well to avoid clumps; this ensures a uniform coating on the fish, delivering that essential blackened flavor throughout your Blackened Fish Taco Bowls.
  • Don’t Overcrowd the Skillet: Cook the fish in batches if necessary; overcrowding leads to steaming instead of searing, impacting the crispiness of the fish.
  • Adjust Spice Level: Feel free to modify the amount of cayenne pepper to suit your heat preference, ensuring your taco bowls appeal to all taste buds.
  • Prep Ahead: For quicker assembly, prepare ingredients like chopped veggies, sauce, and cooked rice earlier in the day; simply combine right before serving for freshness.

How to Store and Freeze Blackened Fish Taco Bowls

Fridge: Store assembled bowls in airtight containers for up to 3 days. Keep toppings separate until you’re ready to serve for maximum freshness.

Freezer: Freeze cooked fish and rice separately for up to 3 months. When ready to enjoy, thaw overnight in the fridge and reheat in the oven for best results.

Reheating: To reheat the fish, place in a preheated oven at 350°F (175°C) for about 10 minutes or until warmed through. Avoid microwaving to maintain texture.

Ingredient Storage: Store leftover toppings like avocado and pico de gallo separately in airtight containers to maintain their quality and freshness.

Blackened Fish Taco Bowls Recipe FAQs

How do I choose the best fish for my Blackened Fish Taco Bowls?
Absolutely! When selecting white fish like tilapia or mahi-mahi, look for fillets with a firm texture and a fresh, clean scent. Avoid fish that appears dull or has dark spots all over, as this indicates spoilage. If using frozen fish, ensure it's fully thawed and patted dry before seasoning to achieve the crispy texture you want.

What is the best way to store leftover Blackened Fish Taco Bowls?
For storing, place any leftovers in airtight containers in the fridge, where they can last up to 3 days. It's best to keep toppings like avocado and pico de gallo separate to prevent sogginess. When ready to eat, simply reassemble the bowls for a fresher taste!

Can I freeze Blackened Fish Taco Bowls?
Absolutely! You can freeze the cooked fish and rice separately for up to 3 months. To do this, let them cool completely, then place them in freezer-safe containers. When you're ready to enjoy them, thaw overnight in the refrigerator and reheat the fish in the oven at 350°F (175°C) for about 10 minutes to keep that delicious texture.

What if my fish doesn’t get a nice blackened exterior?
Don’t worry! If your fish isn’t blackening well, it could be due to moisture on the fillet. Make sure to pat the fillets dry thoroughly before seasoning. Additionally, avoid overcrowding the skillet while cooking; this can lower the pan's temperature and result in steaming rather than searing. Always preheat your skillet until the oil shimmers before adding the fish for the best results.

Can I make this recipe gluten-free or cater to allergies?
Very! This recipe is naturally gluten-free, but always check the spice blend and yogurt for any additives. For dairy-free, simply swap Greek yogurt for a plant-based yogurt alternative. If there are any specific allergies or dietary restrictions among your guests, feel free to customize toppings with alternatives like coconut cream, dairy-free cheese, or different beans.

Are there any good substitutions for the ingredients?
The more the merrier! You can easily swap out the white fish for shrimp, portobello mushrooms, or even tofu for a vegetarian option. For grains, try quinoa or farro, and if you prefer different toppings, consider adding jalapeños, radishes, or even different lettuce mixes. The key is to have fun and make these taco bowls your own!

Blackened Fish Taco Bowls

Savor Homemade Blackened Fish Taco Bowls in 25 Minutes

Blackened Fish Taco Bowls bring bold flavors and healthy ingredients to a customizable dinner option.
Print Recipe Pin Recipe
Prep Time 10 minutes mins
Cook Time 15 minutes mins
Total Time 25 minutes mins
Servings: 4 bowls
Course: Dinner
Cuisine: Mexican
Calories: 450
Ingredients Equipment Method Nutrition Notes

Ingredients
  

For the Fish
  • 1 pound White Fish (e.g., tilapia, mahi-mahi) Fresh or fully thawed
  • 2 tablespoons Olive Oil For coating the fish
  • 1 tablespoon Spice Blend Smoked paprika, chili powder, cumin, garlic powder, onion powder, salt, black pepper, cayenne pepper
  • 1 tablespoon Fresh Lime Juice Brightens the dish
For the Sauce
  • 1 cup Greek Yogurt (or sour cream) Creamy base
For the Bowls
  • 2 cups Rice (white or brown) Filling base
  • 2 cups Shredded Lettuce or Cabbage Adds crunch
  • 1 can Black Beans Protein source
  • 1 cup Corn Sweetness and texture
  • 1 Avocado Slices Creamy richness
  • 1 cup Pico de Gallo Fresh salsa
  • 0.5 cup Fresh Cilantro For garnish
  • 0.5 cup Crumbled Cheese Optional, for creaminess

Equipment

  • Skillet
  • Mixing Bowl
  • Whisk

Method
 

Cooking Instructions
  1. Step 1: Prepare the Spice Blend by mixing smoked paprika, chili powder, cumin, garlic powder, onion powder, salt, black pepper, and cayenne pepper in a small bowl.
  2. Step 2: Season the fish with olive oil, spice blend, and lime juice.
  3. Step 3: Cook the fish in a heated skillet for 3-4 minutes on each side.
  4. Step 4: Make the creamy sauce by whisking Greek yogurt, lime juice, garlic powder, chili powder, and salt.
  5. Step 5: Assemble bowls with rice, lettuce, black beans, corn, and flaked fish.
  6. Step 6: Finish with avocado, pico de gallo, cilantro, and drizzle the sauce on top.

Nutrition

Serving: 1bowlCalories: 450kcalCarbohydrates: 50gProtein: 30gFat: 15gSaturated Fat: 4gPolyunsaturated Fat: 1gMonounsaturated Fat: 8gCholesterol: 60mgSodium: 800mgPotassium: 700mgFiber: 12gSugar: 2gVitamin A: 20IUVitamin C: 30mgCalcium: 10mgIron: 15mg

Notes

For best results, use fresh fish and adjust spice levels according to your preference.

Tried this recipe?

Let us know how it was!
  • « Previous Page
  • 1
  • …
  • 6
  • 7
  • 8
  • 9
  • 10
  • …
  • 87
  • Next Page »

Welcome!

Hi, I’m Grace, a Sydney-based home cook with a passion for bold flavors and trending ingredients. Whether you’re a busy beginner or a seasoned foodie, you’ll find dishes here that are fresh, fun, and full of flavor.

More about me

Popular Recipes

  • One Pot Keto Tuna Casserole
    One Pot Keto Tuna Casserole: Creamy Comfort in Minutes
  • Ultimate Jalapeno Popper Chicken Salad
    Ultimate Jalapeno Popper Chicken Salad That'll Wow Your Tastebuds
  • Green Chile Cheese Dip
    Mouthwatering Green Chile Cheese Dip for Cozy Gatherings
  • Easy Chimichurri Sauce
    Fresh and Zesty Easy Chimichurri Sauce in Just Minutes

Footer

↑ back to top

About

  • Privacy Policy
  • Disclaimer
  • Terms & Conditions

Newsletter

  • Sign Up! for emails and updates

Contact

  • About me
  • Contact me

Copyright © 2025 TastyTrendIngredients