tastytrendingredients

  • Home
  • Recipes
    • Appetizers
    • Breakfast
    • Dessert
    • Dinner
    • Drinks
    • Salads
    • Snacks
    • Soups
  • About me
  • Contact
menu icon
go to homepage
  • Home
  • Recipes
    • Appetizers
    • Breakfast
    • Dessert
    • Dinner
    • Drinks
    • Salads
    • Snacks
    • Soups
  • About me
  • Contact
search icon
Homepage link
  • Home
  • Recipes
    • Appetizers
    • Breakfast
    • Dessert
    • Dinner
    • Drinks
    • Salads
    • Snacks
    • Soups
  • About me
  • Contact
×

Mouthwatering Chicago Dog Recipe for Your Dinner Cravings

June 6, 2026 by Grace Snow Leave a Comment

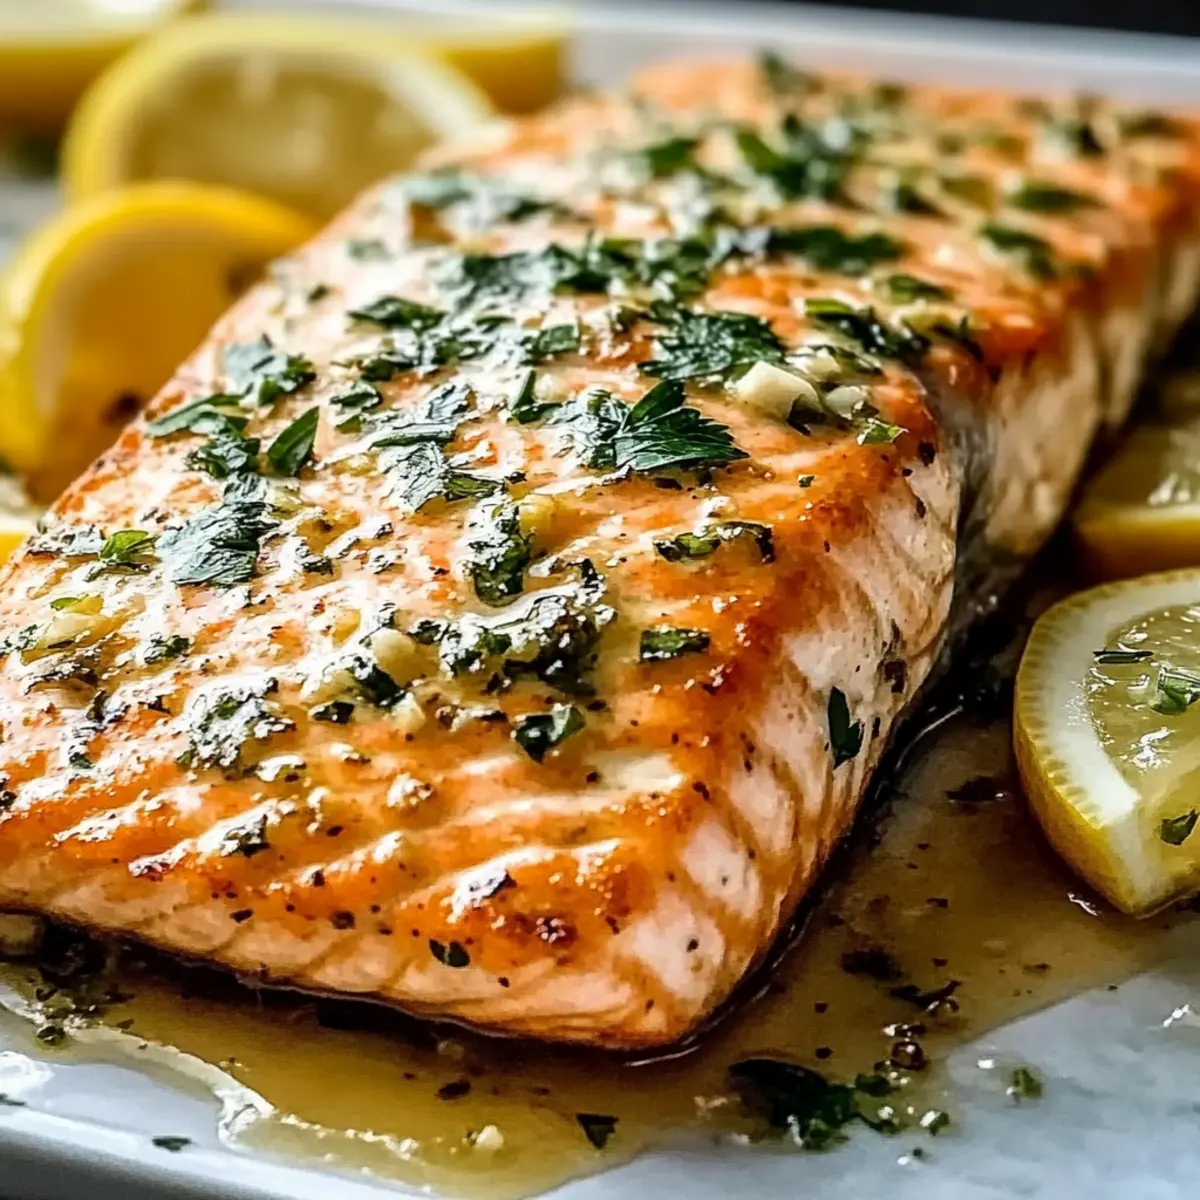
The sizzle of grilling meat and the aroma of toasted buns transport me straight to the vibrant streets of Chicago. My Classic Chicago Dog Recipe captures that summer essence any time of year, creating a delightful escape for your taste buds! With juicy all-beef hot dogs nestled in buttery toasted poppy seed buns, this dish not only satisfies but brings friends and family together. It’s quick to prepare, making it perfect for those busy weeknights or casual gatherings. You'll find each bite layered with the crunch of fresh toppings like dill pickle spears and the zing of yellow mustard, delivering a flavor combo that’s simply unmatched. So, are you ready to relish making one of the city’s finest hot dogs right at home? Let’s dive in!

Why is the Chicago Dog a Must-Try?

Irresistible Flavor: The classic Chicago dog packs a punch with its harmonious blend of tangy, sweet, and savory toppings. Quick and Easy: With minimal prep and cook time, this recipe gives you gourmet taste without the fuss. Crowd-Pleasing: Perfect for gatherings, it’s sure to impress friends and family alike. Unique Twist: Customize your hot dog by swapping in spicy brown mustard or even avocado slices for a modern flair. If you're in the mood for more mouthwatering sandwiches, be sure to check out my recipes for Spatchcock Chicken Flavor and Chicken Adobo Again as delightful side options!

Chicago Dog Recipe Ingredients

For the Hot Dogs

  • All-Beef Hot Dogs – These provide that juicy, savory goodness; choose bun-length for best fit.

For the Buns

  • Poppy Seed Hot Dog Buns – Their distinctive texture and flavor shine when toasted with butter.
  • Unsalted Butter – A must for achieving a golden, buttery toast that enhances the bun’s flavor.

For the Toppings

  • Yellow Mustard – This sharp condiment is essential, giving your Chicago dog the traditional zest it craves.
  • Sweet Pickle Relish – Adds that sweet and tangy kick that completes your Chicago dog’s flavor profile.
  • Small White Onion – Finely diced, it gives a nice crunch and a bite of sharpness with each mouthful.
  • Tomato – Thick slices add freshness and moisture; be sure to use ripe ones for the best flavor.
  • Dill Pickle Spears – These crunchy spears introduce a tangy bite that complements other toppings beautifully.
  • Sport Peppers – They bring mild heat; feel free to adjust based on your spice preference.
  • Celery Salt – This finishing touch enhances the overall flavor perfectly, so don’t skip it!

Now that we have our key ingredients down, it's time to start crafting your very own Chicago Dog Recipe that will have everyone raving!

Step‑by‑Step Instructions for Chicago Dog Recipe

Step 1: Toast the Buns
Melt 1 tablespoon of unsalted butter in a skillet over medium heat. Once melted, gently add the poppy seed hot dog buns, cut side down, and press them lightly to flatten. Toast for about 2-3 minutes or until they turn lightly golden brown. The aroma of butter will fill the air, signaling that it’s time to set them aside.

Step 2: Cook the Hot Dogs
In the same skillet, increase the heat to medium-high and add another tablespoon of butter. Once it’s sizzling, add the all-beef hot dogs, cooking them for about 5-7 minutes. Turn them occasionally until they’re browned and crispy all around. The hot dogs should be plump and cooked through, making them the star of your Chicago Dog Recipe.

Step 3: Assemble the Hot Dog
Take each toasted bun and place a hot dog inside. Make sure the bun wraps snugly around the juicy hot dog, creating a perfect vessel for the toppings. The combination of the crispy bun and the hot dog should create an inviting visual that makes your taste buds tingle with anticipation.

Step 4: Add Toppings
Generously drizzle yellow mustard over the hot dog, followed by spoonfuls of sweet pickle relish. Next, sprinkle finely diced small white onion and layer thick slices of fresh tomato on top. Finish this vibrant assembly with dill pickle spears and sport peppers for that traditional touch you'd expect from a classic Chicago Dog.

Step 5: Serve
Finally, sprinkle a dash of celery salt over the assembled Chicago Dog for that perfect finishing touch. Serve immediately while everything is still warm and fresh, allowing the flavors to meld beautifully. Your Chicago Dog Recipe is sure to impress, delivering that iconic taste directly to your dining table!

What to Serve with Classic Chicago Dog Recipe?

The perfect hot dog deserves an equally amazing array of sides and sips to build a memorable meal experience.

  • Crispy French Fries: Hot, salty, and perfectly crispy, these classic fries complement the juicy hot dog, making it a beloved pairing.

  • Coleslaw: A tangy, crunchy coleslaw adds freshness and contrasts beautifully with the savory flavors of the Chicago dog, balancing the meal perfectly.

  • Potato Salad: Creamy and hearty, potato salad enriches the overall experience, providing a comforting side that everyone will love.

  • Grilled Corn on the Cob: Sweet and smoky, this seasonal staple adds a burst of flavor and a fun, festive touch to your backyard meal.

  • Chips and Dip: Serve some tortilla chips with a zesty salsa or guacamole for an easy, crunchy side that brings great texture to the table.

  • Iced Tea or Lemonade: Refreshing beverages like sweet iced tea or tart lemonade cleanse the palate between bites, enhancing the flavors of the Chicago Dog Recipe.

Whether you’re hosting a summer BBQ or enjoying a cozy dinner, these sides will elevate your meal to new heights!

How to Store and Freeze Chicago Dog Recipe

Fridge: Store leftover Chicago dogs in an airtight container for up to 3 days. Assemble them without toppings to keep the buns from getting soggy.

Freezer: For longer storage, freeze cooked hot dogs (without buns) wrapped tightly in plastic wrap for up to 2 months. Thaw in the fridge before reheating.

Reheating: Warm the hot dogs in a skillet over medium heat or microwave them until heated through. Toast the buns fresh for optimal texture before serving.

Expert Tips for the Best Chicago Dog

  • Control the Heat: Avoid splitting hot dogs by cooking them over medium heat, allowing even browning without overcooking.

  • Perfectly Toasted Buns: Toast buns until lightly golden for the best texture; too dark, and they may become soggy when served.

  • Fresh Toppings: Add your toppings just before serving to maintain their crunch and freshness, making every bite of your Chicago Dog Recipe delightful.

  • Layer Smartly: Arrange toppings in a way that balances flavors; for instance, place tomatoes beneath the onions to help keep everything together.

  • Customize Wisely: Feel free to swap toppings like sport peppers for banana peppers based on your personal taste without losing the Chicago dog authenticity.

Make Ahead Options

These Classic Chicago Dogs are perfect for busy home cooks looking to save time! You can prepare the toppings, like diced onions, tomato slices, and sweet pickle relish, up to 3 days ahead. Simply store them in airtight containers in the refrigerator to maintain freshness. Additionally, you can cook the all-beef hot dogs up to 24 hours in advance; let them cool, then refrigerate them. To finish, just reheat the hot dogs in a skillet until heated through, toast the buns, and assemble with the prepped toppings. With this method, you'll have delightful Chicago Dogs ready to enjoy with minimal effort on busy weeknights!

Chicago Dog Recipe Variations

Feel free to get creative and customize your Chicago Dog to suit every taste and occasion!

  • Spicy Brown Mustard: Swap regular yellow mustard for spicy brown to kick up the tangy flavor.
  • Creamy Avocado: Add slices of avocado for a rich, creamy contrast to the zesty toppings.
  • Jalapeños: For an extra kick, toss in jalapeño slices to amp up the heat and flavor.
  • Banana Peppers: Swap sport peppers with banana peppers for a milder, slightly sweet touch instead.
  • Veggie Dog: Use a plant-based hot dog alternative to cater to vegetarian or vegan diets without compromising on flavor.
  • Coleslaw Topping: Top with a zesty coleslaw for a delightful crunch and refreshing creaminess.
  • Sweet Relish Variations: Experiment with different types of relishes, like mango or beet, to bring a unique sweetness to your Chicago Dog.
  • Cheese Addition: Melt some cheese on top of the hot dog before assembling for a creamy, savory twist.

As you explore these variations, remember that each one adds its own story to the classic Chicago dog experience. Happy cooking!

Classic Chicago Dog Recipe FAQs

What should I look for when selecting all-beef hot dogs?
Absolutely! When choosing all-beef hot dogs, look for ones that are labeled as 100% beef and preferably bun-length to ensure they fit perfectly in the poppy seed buns. The color should be a rich deep red without any dark spots or discoloration, indicating freshness.

How should I store leftover Chicago dogs?
Store any leftover Chicago dogs in an airtight container for up to 3 days. It’s best to keep the ingredients separate, especially the buns, to prevent them from getting soggy. When ready to eat, reassemble with fresh toppings to recreate that delightful crunch!

Can I freeze the hot dogs for later use?
Very! To freeze cooked hot dogs, wrap them tightly in plastic wrap or foil and place them in a freezer-safe bag. They can be stored for up to 2 months. When you’re ready to enjoy them, thaw in the fridge overnight and reheat in a skillet for the best texture!

Why did my hot dogs split while cooking?
The most likely culprit is cooking them on too high a heat. To avoid splitting, cook your hot dogs on medium heat. This allows them to brown evenly without overcooking. I often find that turning them gently every minute or so helps achieve that perfect crispy exterior without any splits.

Are there any allergens in the Chicago dog recipe?
Be mindful! The classic Chicago dog recipe contains common allergens such as gluten (from the buns) and possibly sulfites in some hot dogs. If you're cooking for someone with specific dietary restrictions, you can substitute the buns with gluten-free alternatives or ensure you use allergen-free hot dogs. Always check the labels for specific dietary needs!

Can I make the toppings in advance?
Definitely! You can prepare the toppings such as diced onions, relish, or sliced tomatoes a day in advance. Just remember to store them in separate airtight containers in the refrigerator. This way, when you're ready to serve, all you need to do is assemble your Chicago Dog and enjoy the flavors without any fuss!

Irresistible Cajun Honey Butter Salmon Ready in 25 Minutes

June 4, 2026 by Grace Snow Leave a Comment

As I stood in my kitchen, the scent of sizzling salmon filled the air, transporting me to a sun-soaked Southern bayou. This isn’t just any dish; it's my take on Cajun Honey Butter Salmon—a delightful fusion of spicy Cajun seasoning and a sweet, buttery sauce. What I love most about this recipe is how quickly it comes together, making it perfect for those hectic weeknights when I crave something scrumptious yet effortless. In just 25 minutes, I can plate a restaurant-quality meal that impresses family and friends alike. Plus, it’s gluten-free and loaded with flavor, ensuring everyone at the table will be reaching for seconds. Curious how to whip up this delightful dish and bring a little Southern charm to your dinner table? Let’s dive in!

Why is Cajun Honey Butter Salmon a must-try?

Quick Preparation: This dish comes together in just 25 minutes, making it a fantastic option for those busy weeknights.

Flavor Explosion: The spicy Cajun seasoning mingles with the creamy honey-butter sauce, creating a taste sensation that’s both bold and sweet.

Versatile Ingredients: With easy substitutions, such as opting for tilapia instead of salmon, you can customize this recipe to fit your pantry and preferences.

Crowd-Pleasing Appeal: Whether for a family dinner or entertaining friends, this meal guarantees smiling faces and satisfied appetites. Pair it with Honey Garlic Chicken Thighs for an unforgettable feast!

Comfort Food Joy: This dish captures the essence of comfort food, inviting you to savor each bite while bringing warmth to your dining experience.

Cajun Honey Butter Salmon Ingredients

For the Salmon
• Salmon Fillets – The star of the dish that offers a flaky, rich texture; can substitute with thawed frozen salmon.
• Olive Oil – Ideal for searing, adding richness and preventing sticking; can swap with canola or vegetable oil if needed.
• Cajun Seasoning – Provides a spicy kick and depth of flavor; try a homemade blend for a personal touch.
• Salt – Enhances the salmon's natural flavors; adjust according to your taste preference.

For the Sauce
• Butter – Creates a luscious, rich sauce and moisture; margarine can be used but may alter the flavor.
• Honey – Balances the spice with sweetness; maple syrup or agave nectar make great alternatives.
• Soy Sauce – Adds a deep umami flavor; use tamari for a gluten-free option.
• Garlic – Adds aromatic depth to the sauce; garlic powder can substitute if fresh isn’t available.
• Lemon Juice – Brightens the dish with a fresh acidity; lime juice can also work well.

For Garnish
• Fresh Parsley – Adds a pop of color and freshness to your dish; cilantro offers a different flavor option.
• Lemon Wedges – Enhance presentation and flavor, making each bite brighter.
• Black Sesame Seeds – Optional garnish that adds an enticing texture and visual appeal.

Step‑by‑Step Instructions for Cajun Honey Butter Salmon

Step 1: Prepare the Salmon
Begin by patting the salmon fillets dry with a paper towel to enhance crispiness. In a small bowl, drizzle the salmon with olive oil, ensuring it's well-coated. Generously rub the Cajun seasoning and salt over the fillets, creating a flavorful layer that will infuse during cooking.

Step 2: Sear the Salmon
Heat a non-stick skillet over medium-high heat for about 2 minutes until the surface is hot but not smoking. Place the seasoned salmon skin-side up in the skillet and sear for approximately 3 minutes until a golden crust forms. Carefully flip the fillets and continue cooking for an additional 2 minutes, ensuring they are cooked through but still tender.

Step 3: Make the Sauce
While the salmon cooks, prepare the honey butter sauce. In a separate saucepan over medium heat, melt the butter until bubbly, then stir in honey, soy sauce, and minced garlic. Allow this mixture to simmer for 2 minutes, letting the aromas meld together, before removing it from heat and adding fresh lemon juice for a bright finish.

Step 4: Combine and Cook
Once the salmon is seared, pour the honey butter sauce over the fillets in the skillet. Let it cook for another 3-5 minutes, frequently spooning the sauce over the salmon to soak in those delicious flavors. The salmon should be cooked thoroughly, with a flaky texture once done—aim for an internal temperature of 145°F (63°C).

Step 5: Garnish and Serve
After the salmon has reached perfection, remove it from the heat and transfer the fillets to a serving plate. Garnish generously with freshly chopped parsley, tuck in lemon wedges for zest, and sprinkle black sesame seeds for added crunch and visual appeal. Enjoy your restaurant-quality Cajun Honey Butter Salmon!

Storage Tips for Cajun Honey Butter Salmon

Fridge: Store leftovers in an airtight container for up to 3 days. Make sure the salmon is cooled before sealing to maintain texture.

Freezer: If you want to save your Cajun Honey Butter Salmon for later, freeze it in a well-sealed container for up to 2 months. Thaw overnight in the fridge before reheating.

Reheating: For best results, reheat salmon in a skillet over low heat to preserve moisture. Alternatively, use the microwave on a low setting, covered with a damp paper towel for even warmth.

Avoid Refreezing: Once thawed, do not refreeze the salmon to maintain taste and quality.

Tips for the Best Cajun Honey Butter Salmon

  • Perfect Temperature: Always ensure salmon reaches an internal temperature of 145°F (63°C) for safe and tender results.
  • Skillet Space: Don't overcrowd the skillet while searing; allowing space ensures a nice golden crust.
  • Season Generously: Be generous with the Cajun seasoning! A good rub will provide that burst of flavor in every bite.
  • Taste the Sauce: Before serving, always taste your honey butter sauce to balance sweetness and acidity to your liking.
  • Garnish for Appeal: Don’t skip the parsley and lemon wedges; they enhance both presentation and flavor, making your dish irresistible!

Variations & Substitutions for Cajun Honey Butter Salmon

Feel free to make this delectable dish your own with these fun twists and meaningful swaps that will tickle your taste buds!

  • Different Fish: Swap salmon for tilapia or trout for a lighter option. Each fish has its unique flavor but retains the deliciousness of the sauce.
  • Herb Twists: Use dill or chives instead of parsley for different herbal notes. This adds freshness and a delightful aroma that elevates the dish beautifully.
  • Spicy Kick: Add cayenne pepper for a bolder heat. Adjust according to your spice tolerance; for some, a tiny pinch will do, while others might crave a fiery explosion.
  • Sweet Alternatives: Use agave nectar in place of honey for a unique flavor. It offers a slightly different sweetness but blends wonderfully with the Cajun spices.
  • Vegetarian Version: Replace the salmon with grilled portobello mushrooms for a hearty, plant-based alternative. Marinate the mushrooms in the same sauce for an earthy twist.
  • Creamy Addition: Add a splash of heavy cream to the sauce for a rich, creamy version. This enhances the texture and adds a luxurious touch to your meal.
  • Garlic Lovers: Amp up the garlic flavor by adding roasted garlic or extra minced cloves. The sweet, caramelized tones will make the sauce absolutely irresistible!
  • Citrus Variations: Instead of lemon, try using lime or even orange juice to brighten the dish. Each citrus brings its character, creating a vibrant taste profile.

For even more mouthwatering inspiration, why not explore pairing this salmon with Honey BBQ Chicken for a delightful summer feast? Or, serve alongside a classic One Pot Salmon dish for a cozy family dinner. The possibilities are endless!

Make Ahead Options

These Cajun Honey Butter Salmon fillets are perfect for meal prep, allowing you to savor incredible flavors on those hectic nights! You can season and marinate the salmon up to 24 hours in advance, wrapping it tightly in cling film to keep it fresh. Additionally, the honey butter sauce can be prepared and stored in the refrigerator for up to 3 days in an airtight container; just remember to give it a good stir before using. When you're ready to serve, simply sear the marinated salmon, pour the reheated sauce over it, and enjoy a dish that is just as delightful as when freshly made—all with minimal effort!

What to Serve with Cajun Honey Butter Salmon

A vibrant meal experience awaits you when you pair this beautifully spiced salmon with complementary sides and sips.

  • Garlic Mashed Potatoes: Creamy and buttery, these potatoes provide a comforting base that soaks up the luscious honey-butter sauce perfectly. They're a classic pairing that never disappoints.

  • Sautéed Green Beans: Fresh and slightly crispy, these green beans add a pop of color and crunch. Their subtle earthiness balances the richness of the salmon.

  • Quinoa Salad: This light and nutritious salad, with fresh veggies and a citrus dressing, brings a refreshing contrast to the dish. It's a great way to add some extra fiber and nutrients.

  • Roasted Sweet Potatoes: Their natural sweetness complements the spicy notes of the Cajun seasoning. The tender texture also contrasts beautifully with the flaky salmon.

  • Coleslaw: A zesty, tangy coleslaw garnished with apple or carrot provides a crunchy, refreshing side that offsets the richness of the salmon. It makes for a perfect summer pairing!

  • Chilled Rosé Wine: This fruity and refreshing wine matches beautifully with the flavorful salmon, enhancing its taste while providing a lovely cool sip.

  • Lemon Sorbet: For dessert, this light and citrusy sorbet cleanses the palate nicely. Its refreshing sweetness echoes the lemon in the salmon dish, providing a harmonious ending.

Each pairing will ensure your dinner is not just a meal, but a delightful culinary adventure!

Cajun Honey Butter Salmon Recipe FAQs

How do I know if my salmon is fresh?
Absolutely! Look for vibrant, shiny skin and a moist, translucent appearance. The flesh should be firm to the touch, and it should not have any dark spots or an overly fishy smell. Fresh salmon typically has a light, clean aroma of the ocean, not a strong fishy scent.

How should I store leftovers of Cajun Honey Butter Salmon?
Very! Leftovers can be kept in an airtight container in the refrigerator for up to 3 days. Make sure the salmon cools to room temperature before sealing to maintain its texture and flavor. For longer storage, wrap it tightly and freeze for up to 2 months; just thaw in the fridge before reheating.

Can I freeze Cajun Honey Butter Salmon?
Absolutely! To freeze, place the salmon in a well-sealed container or freezer bag; make sure to remove as much air as possible. When ready to enjoy it again, thaw the salmon overnight in the refrigerator. For best quality, do not refreeze after thawing to preserve its taste and freshness.

What if my salmon is overcooked and dry?
Very common! If your salmon ends up dry, consider making a quick sauce or broth to rejuvenate it. Combine equal parts broth (chicken or vegetable) and water, then gently heat it with some additional honey and spices. Slice the salmon and let it simmer briefly in the mixture to moisten and infuse it with flavor before serving.

Are there any dietary considerations for Cajun Honey Butter Salmon?
Indeed! This recipe is naturally gluten-free when using tamari instead of regular soy sauce. Additionally, if you're cooking for pets or individuals with allergies, be mindful of substituting ingredients accordingly. For example, opt for a honey alternative like agave if someone is vegan or watch out for any seafood allergies.

Can I use frozen salmon in this recipe?
Absolutely! If using frozen salmon, it's best to thaw it first for even cooking. Place the salmon in the refrigerator overnight prior to cooking or run it under cold water for about 30 minutes. Make sure to pat it dry before seasoning and cooking to ensure a nice sear.

Delicious Creamy Salmon Broccoli Pasta for Cozy Nights

June 4, 2026 by Grace Snow Leave a Comment

The mesmerizing aroma of sautéed garlic and fresh herbs wafts through my kitchen, making my stomach rumble with anticipation. This Creamy Salmon Broccoli Pasta is my go-to for those busy weeknights when I crave something nourishing yet indulgent. Not only does this dish come together in a snap, but it also offers a delightful fusion of high-protein salmon and vibrant broccoli, making it a hearty meal that’s surprisingly heart-healthy too! Rich in omega-3 fatty acids and customizable to your taste, this creamy pasta dish will surely impress your loved ones and keep you feeling great. So, who’s ready to whip up some culinary magic that transforms simple ingredients into a comforting bowl of joy?

Why is this pasta recipe a must-try?

Quick and Easy: In just 30 minutes, you can create a restaurant-quality meal that's perfect for busy weeknights or special gatherings.

Nutrient-Packed: This Creamy Salmon Broccoli Pasta is loaded with high-protein salmon and vibrant broccoli, providing you with essential omega-3 fatty acids and vitamins.

Customizable Delight: Feel free to add your favorite veggies or experiment with different pasta shapes for a unique twist.

Comforting and Indulgent: The rich, velvety sauce clings beautifully to the pasta, making every bite a comforting experience.

Appeals to Everyone: Even those who typically shy away from healthy options will be begging for seconds! Pair it with a fresh salad or some crusty bread for a complete meal.

Elevate your weeknight dinners with this nourishing dish, or check out our Seafood Pasta Savory for another delightful recipe.

Creamy Salmon Broccoli Pasta Ingredients

For the Pasta
• Penne Pasta – The main carbohydrate source; try whole wheat or gluten-free options for a healthier alternative.

For the Salmon
• Salmon Fillet – Offers rich flavor and high protein; wild-caught salmon is ideal for optimal taste.

For the Vegetables
• Broccoli – Adds a crunchy texture and is vitamin-rich; fresh broccoli is best, but frozen can work in a pinch.

For the Sauce
• Heavy Cream – Provides that luscious creaminess; swap with half-and-half or Greek yogurt for a lighter twist.
• Parmesan Cheese – Enhances the sauce's flavor; freshly grated is preferable for best melting qualities.

For Cooking
• Olive Oil – Essential for cooking the salmon; substitute with butter for a rich taste.

For Seasoning
• Garlic Powder – A vibrant addition for flavor; fresh garlic can be used for a more aromatic kick.
• Salt and Pepper – Vital for seasoning; adjust to taste for that perfect finish.

Embrace the deliciousness of this Creamy Salmon Broccoli Pasta that effortlessly balances health and flavor!

Step‑by‑Step Instructions for Creamy Salmon Broccoli Pasta

Step 1: Prepare Ingredients
Start by measuring out 8 ounces of penne pasta and chopping 1 cup of fresh broccoli into small florets. Flake the cooked salmon fillet into bite-sized pieces, ensuring no skin or bones remain. Having these ingredients prepped will make the process smooth, letting you easily bring together the elements of your Creamy Salmon Broccoli Pasta.

Step 2: Cook Pasta
In a large pot, bring water to a boil and add a generous tablespoon of salt. Once boiling, add the penne pasta and cook according to package instructions, usually about 8-10 minutes, until al dente. About two minutes before draining, reserve ½ cup of the pasta water. This starchy water will help create the creamy consistency later on.

Step 3: Cook Salmon
While the pasta cooks, season the salmon fillet with garlic powder, salt, and pepper. In a skillet over medium heat, add 2 tablespoons of olive oil. Once hot, place the salmon in the skillet and cook for 4-5 minutes on each side or until it flakes easily with a fork. Remove the salmon from the skillet and let it cool slightly before flaking it into smaller pieces.

Step 4: Combine Ingredients
In the same skillet used for the salmon, add the chopped broccoli and sauté for 2-3 minutes until it turns bright green and slightly tender. Then, pour in 1 cup of heavy cream and add ½ cup of freshly grated Parmesan cheese. Stir the mixture gently until the cheese melts and the sauce is creamy and heated through, creating the base for your Creamy Salmon Broccoli Pasta.

Step 5: Mix Everything Together
Add the cooked penne pasta and the flaked salmon to the creamy broccoli mixture in the skillet. Gently toss everything together, ensuring the pasta is well-coated in the luscious sauce. If the mixture appears too thick, gradually add the reserved pasta water until you reach your desired consistency, making every mouthful of your Creamy Salmon Broccoli Pasta delightful.

Step 6: Serve
Plate the pasta into shallow bowls for an inviting presentation. Optionally garnish with fresh herbs or additional Parmesan cheese to enhance visual appeal and flavor. This Creamy Salmon Broccoli Pasta is perfect for a cozy dinner, paired with a fresh salad or warm crusty bread to soak up the creamy sauce.

Creamy Salmon Broccoli Pasta Variations

Feel free to get creative with this recipe! Each twist adds a unique flavor that delights your palate.

  • Gluten-Free: Swap penne for gluten-free pasta made from rice or chickpeas for a deliciously accommodating dish. Gluten-free options maintain heartiness without compromising flavor.
  • Dairy-Free: Use coconut cream or a dairy-free sour cream alternative to achieve a creamy texture without dairy; it adds a subtle tropical twist!
  • Veggie Power: Add a medley of vegetables like spinach, bell peppers, or cherry tomatoes for extra nutrition and vibrant colors; they’ll enhance both taste and visual appeal.
  • Spice it Up: Toss in red pepper flakes or a splash of hot sauce to give the dish a delightful kick; this can be adjusted to suit your heat preference.
  • Herb Infusion: Stir in fresh herbs like basil, dill, or parsley for an aromatic burst; they bring freshness that complements the creamy sauce beautifully.
  • Citrus Zest: Add lemon zest or a squeeze of fresh lemon juice for brightness, balancing the richness of the cream and elevating the overall flavor.
  • Nutty Twist: Incorporate toasted pine nuts or walnuts for added crunch and a nutty flavor that gives extra depth to the dish; they add a lovely texture contrast.
  • Seafood Medley: Mix in some shrimp or calamari to enhance the seafood experience; it turns your pasta into a delightful seafood feast.

Transform your Creamy Salmon Broccoli Pasta with these adaptations or discover our Skillet Pasta Sun for even more delightful inspirations!

What to Serve with Creamy Salmon Broccoli Pasta

Elevate your dining experience with delightful sides that complement this indulgent pasta dish, making it a full meal feast!

  • Garlic Bread: Soft, buttery slices are perfect for sopping up the creamy sauce, delivering a heavenly bite with each mouthful.

  • Mixed Green Salad: A refreshing blend of greens dressed with a light vinaigrette adds a crisp, tangy contrast to the richness of the pasta. The crunchiness of the salad refreshes your palate, balancing the creamy flavors beautifully.

  • Roasted Asparagus: Tender, slightly charred stalks offer a subtle earthy flavor, enhancing the nutrient profile and providing a delightful crunch. It also adds vibrant color to your plate.

  • Lemon Zest: A simple sprinkle on top brightens every bite, cutting through the creaminess and adding a fresh burst of flavor that awakens the palate.

  • Chardonnay: A chilled glass of this white wine harmonizes the dish’s creamy richness while enhancing the natural flavors of salmon.

  • Chocolate Mousse: For dessert, this luxurious treat is a sweet finale that contrasts beautifully with the savory pasta, promising satisfied smiles all around.

Expert Tips for Creamy Salmon Broccoli Pasta

  • Taste as You Go: Regularly taste your dish while cooking to adjust seasoning, ensuring your Creamy Salmon Broccoli Pasta is perfectly seasoned.

  • Don’t Overcook Salmon: Remove the salmon from heat as soon as it flakes easily; overcooking can dry it out and diminish its flavor.

  • Use Fresh Ingredients: Opt for fresh broccoli and wild-caught salmon for the best flavor and nutrients, enhancing the overall dish.

  • Adjust Creaminess: If the sauce is too thick, gradually incorporate reserved pasta water to achieve the desired creamy consistency.

  • Serve Immediately: Serve your pasta right after mixing to enjoy it at its best; if stored, reheat gently to avoid separation of the sauce.

How to Store and Freeze Creamy Salmon Broccoli Pasta

Fridge: Store leftover Creamy Salmon Broccoli Pasta in an airtight container in the refrigerator for up to 3 days.

Freezer: For longer storage, freeze portions in freezer-safe containers for up to 2 months. Thaw overnight in the fridge before reheating.

Reheating: Gently reheat the pasta on the stove over low heat, adding a splash of reserved pasta water to restore creaminess and prevent drying out.

Avoid Room Temperature: Do not leave the cooked pasta out at room temperature for more than 2 hours to maintain freshness and prevent spoilage.

Make Ahead Options

These Creamy Salmon Broccoli Pasta are fantastic for meal prep, making dinner time a breeze! You can chop the broccoli and flake the salmon up to 24 hours in advance, storing them separately in airtight containers in the fridge. The pasta can also be cooked ahead, but for the best texture, it's ideal to store it with just a splash of olive oil. When you're ready to enjoy, simply combine the prepped ingredients and reheating the sauce over medium heat, adding a bit of reserved pasta water if needed to refresh the creaminess. This way, you'll have a delightful and nourishing meal ready with minimal effort!

Creamy Salmon Broccoli Pasta Recipe FAQs

What type of salmon should I use for this recipe?
I recommend using wild-caught salmon for the best flavor and quality. It's rich in omega-3 fatty acids and has a fantastic texture that enhances the Creamy Salmon Broccoli Pasta. If wild-caught is unavailable, farmed salmon can be used, but be sure to check for freshness.

How can I store leftovers of Creamy Salmon Broccoli Pasta?
Leftover Creamy Salmon Broccoli Pasta should be stored in an airtight container in the refrigerator for up to 3 days. Make sure to cool it to room temperature before storing to prevent condensation, which can affect texture and taste.

Can I freeze Creamy Salmon Broccoli Pasta?
Absolutely! To freeze, portion the pasta into freezer-safe containers, making sure to leave some space as it expands. It can be frozen for up to 2 months. When you're ready to enjoy it again, thaw it overnight in the fridge and gently reheat it on the stove, adding a splash of reserved pasta water to restore its creamy consistency.

What if my sauce is too thick?
If the sauce turns out too thick, don’t worry! Gradually add the reserved pasta water, a tablespoon at a time, while stirring. This will help loosen the sauce while keeping it creamy. Remember, the water also adds flavor and helps the sauce adhere to the pasta better!

Is this recipe suitable for those with dairy allergies?
For a dairy-free version of Creamy Salmon Broccoli Pasta, substitute the heavy cream with coconut cream or a non-dairy cream alternative. You can omit the Parmesan or use a plant-based cheese for added flavor. Always check ingredient labels to ensure they're dairy-free.

How long can I leave cooked pasta out at room temperature?
To keep your dish safe, avoid leaving cooked Creamy Salmon Broccoli Pasta out at room temperature for more than 2 hours. This helps prevent spoilage and maintains the quality of your delicious meal!

Garlic Butter Baked Salmon: Quick, Flavorful, and Healthy Delight

June 4, 2026 by Grace Snow Leave a Comment

As I pulled the beautifully cooked salmon from the oven, the rich aroma of garlic butter enveloped my kitchen, instantly lifting my spirits. This Garlic Butter Baked Salmon has become my go-to for those busy weeknight dinners when I crave something healthy yet indulgent. In just 30 minutes, you can treat yourself to a restaurant-quality dish that’s not only brimming with the goodness of omega-3 fatty acids but is also incredibly simple to prepare. Whether you’re entertaining guests or just looking to elevate your weeknight meals, this recipe is a guaranteed crowd-pleaser. Curious how such a quick and easy recipe can taste so good? Let me show you!

Why is Garlic Butter Baked Salmon a Must-Try?

Quick and Easy: This Garlic Butter Baked Salmon can be ready in just 30 minutes, making it perfect for busy weeknights or last-minute gatherings.

Flavor Explosion: The luscious garlic butter creates a rich, savory sauce that elevates everyday salmon into a gourmet dish your family will rave about.

Health Benefits: Packed with omega-3 fatty acids, this recipe not only satisfies your cravings but also supports your overall well-being.

Versatile Pairings: Serve it alongside steamed vegetables or a refreshing garden salad for a balanced meal—feel free to mix it up with options like Cheesy Garlic Bread to complete your dining experience!

Meal Prep-Friendly: Leftovers are just as delicious and can be enjoyed the next day, making it an ideal choice for meal prep fans. Get ready to impress with this quick, flavorful, and healthy delight!

Garlic Butter Baked Salmon Ingredients

• For the Salmon

  • Salmon Fillets – Choose fresh or thawed frozen salmon for the best results, as it is the main protein in this Garlic Butter Baked Salmon.

• For the Garlic Butter Sauce

  • Unsalted Butter – Adds richness and depth to the dish; if using salted butter, remember to adjust salt levels.
  • Garlic (minced) – Fresh garlic is recommended for the most robust flavor; don’t skimp on this aromatic ingredient!
  • Fresh Parsley – Provides a pop of color and freshness; dried parsley can be a suitable substitute if needed.
  • Lemon Juice – Brightens the flavors; zested lemon adds an extra layer of zest if you’re feeling fancy.
  • Salt & Pepper – Essential seasonings; feel free to adjust them to fit your taste preference.

• For Serving

  • Lemon Wedges – Brighten up your dish when serving; though optional, they certainly add a nice touch.
  • Fresh Herbs (for garnish) – Choose herbs like dill or chives for an elegant presentation; they enhance both flavor and aesthetics.

Step‑by‑Step Instructions for Garlic Butter Baked Salmon

Step 1: Preheat the Oven
Begin by preheating your oven to 350°F (175°C). This temperature will ensure your Garlic Butter Baked Salmon cooks evenly, resulting in tender and flaky fish. While the oven heats, gather your baking dish and grease it lightly with butter or cooking spray to prevent sticking.

Step 2: Prepare the Garlic Butter Sauce
In a mixing bowl, combine two tablespoons of melted unsalted butter with minced garlic, freshly chopped parsley, lemon juice, salt, and pepper. Stir well to blend the flavors beautifully, creating a savory mixture. This garlic butter sauce is what makes your salmon deliciously rich and aromatic, so be sure to mix it thoroughly.

Step 3: Arrange the Salmon Fillets
Place your salmon fillets skin-side down in the greased baking dish. Drizzle the flavorful garlic butter mixture generously over each fillet, ensuring they are well-coated. The salmon should glisten with the buttery goodness, and you’ll immediately start to smell the enticing aroma of garlic as it seeps into the fish.

Step 4: Bake the Salmon
Transfer the baking dish to the preheated oven and bake for about 20 minutes. Keep an eye on the salmon, as it should turn a beautiful pink hue and flake easily with a fork when done. The internal temperature should reach 145°F (63°C); this ensures the salmon is perfectly cooked without drying out.

Step 5: Serve and Garnish
Once baked, carefully remove the Garlic Butter Baked Salmon from the oven. Serve the fillets immediately, garnished with fresh herbs like dill or chives for an added burst of flavor. Accompany your dish with lemon wedges for squeezing over the salmon, enhancing its brightness and flavor. Your meal is now ready to be savored!

Garlic Butter Baked Salmon Variations

Feel free to elevate your dish with these delightful twists that can transform your Garlic Butter Baked Salmon into something uniquely yours.

  • Herb Swap: Try fresh dill or thyme instead of parsley for a different aromatic experience. Each herb brings a unique flavor profile that can brighten the dish beautifully.

  • Sp spice it Up: Add a sprinkle of paprika or red pepper flakes for a subtle kick. This not only enhances the flavor but adds a pop of color to your dish, making it visually appealing too.

  • Fish Alternatives: Use cod or tilapia instead of salmon if you’re looking for variety. Each fish has its flavor and texture, bringing something special to the table.

  • Citrus Boost: Experiment with lime or orange juice for a refreshing twist. The bright flavors of citrus can lighten the dish, enhancing the overall summer feel.

  • Creamy Addition: Consider adding a dollop of cream cheese or sour cream mixed with herbs atop the salmon before baking. This provides a luscious, creamy texture that will wow your taste buds.

  • Nutty Crunch: Top with chopped pecans or walnuts just before serving for added crunch. The nuttiness complements the rich butter without overpowering the delicate flavors.

  • Zest Appeal: Incorporate lemon zest into the garlic butter sauce for extra brightness. Zesting enhances the citrus flavor and adds a fragrant aroma while baking.

  • Sweet Touch: Drizzle with a touch of honey before serving for a sweet contrast. This can balance the savory garlic butter, adding complexity and a hint of sweetness that will linger beautifully.

And if you're looking for the perfect side to accompany your salmon, why not whip up some Cheesy Garlic Bread or a light garden salad to complement this gorgeous dish? Enjoy your culinary adventure!

Make Ahead Options

Garlic Butter Baked Salmon is a fantastic choice for meal prep enthusiasts looking to save time without sacrificing flavor! You can prepare the garlic butter sauce up to 24 hours in advance; simply combine melted unsalted butter, minced garlic, parsley, lemon juice, salt, and pepper, and store it in an airtight container in the refrigerator. Additionally, you can season the salmon fillets and keep them in the fridge for up to 3 days before cooking. When ready to serve, just drizzle the prepared garlic butter mixture over the fillets and bake as directed. This way, you’ll enjoy a delicious, restaurant-quality meal with minimal effort on busy nights!

What to Serve with Garlic Butter Baked Salmon

When you're looking to elevate your meal moments, a melody of flavors and textures can create a delicious harmony.

  • Creamy Mashed Potatoes: The velvety texture of mashed potatoes provides a comforting balance to the flaky salmon. Add a sprinkle of garlic or herbs to tie everything together.

  • Steamed Asparagus: This vibrant veggie adds a crisp texture and slight bitterness, complementing the rich garlic butter sauce beautifully. Toss with a hint of lemon for brightness.

  • Quinoa Salad: A light, nutty quinoa salad loaded with fresh veggies offers a nutritious and crunchy side that enhances the overall meal experience. Consider a lemon vinaigrette to mirror the salmon's flavors.

  • Garlic Bread: Incorporate a delightful crunch with warm, toasty garlic bread, which acts as the perfect vessel to soak up any leftover garlic butter. It's a beloved companion that adds heartiness to the table.

  • Crisp Garden Salad: A refreshing salad featuring mixed greens, cherry tomatoes, and a citrus dressing lightens the palate and provides a fresh counterpoint to the richness of the salmon.

  • Chardonnay: A glass of chilled Chardonnay complements the dish’s richness and enhances the delicate flavors of the fish. Choose an unoaked version for the best pairing effect.

Expert Tips for Garlic Butter Baked Salmon

  • Use Fresh Ingredients: Fresh garlic and parsley elevate the flavors. Avoid pre-minced garlic, as it tends to have a less vibrant taste.

  • Watch the Cooking Time: Salmon is done when it flakes easily with a fork. Overcooking can lead to a dry texture, so keep an eye on it!

  • Customize the Flavor: Try adding spices like paprika or chili flakes for a bit of heat in your Garlic Butter Baked Salmon.

  • Garnish Creatively: Fresh herbs like dill or chives can enhance both flavor and presentation. Don’t skip this step for a touch of elegance!

  • Pairing Ideas: Combine with sides like steamed vegetables or quinoa for a complete meal, making sure all elements complement the delicious flavors of the salmon.

How to Store and Freeze Garlic Butter Baked Salmon

Fridge: Store leftover Garlic Butter Baked Salmon in an airtight container for up to 2 days. This helps maintain its moisture and flavor; reheat gently to avoid drying out.

Freezer: For longer storage, wrap the salmon tightly in plastic wrap and then in aluminum foil. It can be frozen for up to 3 months; when ready to enjoy, thaw overnight in the fridge before reheating.

Reheating: Reheat the salmon in a preheated oven at 350°F (175°C) for about 10-15 minutes, or until warmed through. This method ensures the salmon retains its flaky texture and delicious garlic butter flavor.

Make-Ahead: Prepare the garlic butter mixture a day in advance and store it in the refrigerator. This way, you can save time on busy nights!

Garlic Butter Baked Salmon Recipe FAQs

How do I choose the best salmon fillets?
Absolutely! When selecting salmon fillets, look for vibrant color and shiny skin. Fresh salmon should have a mild scent, not overly fishy. I recommend asking for the freshest catch at your local fish market or grocery store.

What is the best way to store leftover Garlic Butter Baked Salmon?
For the best longevity, store your leftover Garlic Butter Baked Salmon in an airtight container in the refrigerator for up to 2 days. This helps maintain its moisture and flavor. When reheating, do so gently to avoid drying out the fish.

Can I freeze Garlic Butter Baked Salmon? How?
Yes, you can absolutely freeze your Garlic Butter Baked Salmon! To do this, carefully wrap the cooled salmon fillets in plastic wrap, ensuring they're tightly sealed to avoid freezer burn. Then wrap them again with aluminum foil or place them in a freezer-safe container. It can be frozen for up to 3 months. When you’re ready to enjoy, simply thaw overnight in the refrigerator before reheating.

What should I do if the salmon is overcooked and dry?
Very! If you find that your salmon has overcooked and become dry, there are a few tricks to salvage your meal. You can prepare a quick sauce, such as mixing a tablespoon of olive oil with fresh lemon juice and drizzling it over the salmon. Adding moisture with a bit of garlic butter can also help bring some flavor back!

Can I use frozen salmon for this recipe?
Absolutely! If you're using frozen salmon, ensure it’s fully thawed before preparing the Garlic Butter Baked Salmon. This will allow for even cooking and the best possible texture. Thaw the salmon in the refrigerator overnight or use the quick-thaw method by placing it in a sealed bag submerged in cold water for about an hour.

Is there a way to make this dish gluten-free?
Yes, the original Garlic Butter Baked Salmon recipe is naturally gluten-free! Just make sure all ingredients, particularly any butter or seasonings, are verified gluten-free. This means you can enjoy this delightful dish without worry, making it perfect for gluten-sensitive diners.

Oven Baked Salmon with Sweet Garlic Butter Glaze

June 4, 2026 by Grace Snow Leave a Comment

As I pulled the salmon fillets from the fridge, their fresh, vibrant color sparked a craving that wouldn't wait. This Oven Baked Salmon with Garlic Butter and Brown Sugar Spice is the answer to those busy weeknights when you want something healthy yet utterly satisfying. In just 30 minutes, you’ll have a perfectly flaky, high-protein dish that boasts omega-3 richness without sacrificing flavor. The garlic butter melds seamlessly with a whisper of sweetness, transforming your kitchen into a cozy haven where delicious aromas reign. Whether you're hosting friends or winding down after a hectic day, this salmon recipe is a go-to that pleases every palate. Ready to savor a dinner that feels gourmet but is deceptively simple? Let’s dive in!

Why is Oven Baked Salmon a Must-Try?

Quick and Easy: This Oven Baked Salmon recipe is your solution for busy nights, ready in just 30 minutes!

Nutritious Goodness: Packed with omega-3s and high-quality protein, it delivers a health boost without compromising on flavor.

Irresistible Flavor: The luscious garlic butter and brown sugar glaze create a delightful balance of sweet and savory, making every bite memorable.

Versatile Recipe: Customize it with spices or herbs to suit your taste; it’s just as delicious with roasted vegetables or a fresh salad.

Crowd-Pleasing Delight: Whether you're impressing guests or treating yourself, this recipe guarantees satisfaction.

Discover even more delightful meal ideas like Oven Baked Salmon or treat yourself to a delightful dessert with Matcha Baked Doughnuts. Enjoy the culinary journey!

Oven Baked Salmon Ingredients

For the Salmon

• Salmon Fillets – A fresh and flaky protein source; look for bright, firm fillets for the best flavor.

For the Garlic Butter Mixture

• Garlic – Minced to infuse rich flavor; add more for a bolder garlic taste.
• Butter – Use salted or unsalted based on your preference; unsalted allows for better control over seasoning.

For the Sweet Glaze

• Brown Sugar – Offers a sweet balance to the savory salmon; easily substitute with honey or maple syrup for varied sweetness.
• Paprika – Adds a lovely color and a mild kick; feel free to experiment with smoked paprika for an extra depth of flavor.
• Salt – Enhances the overall taste; adjust according to your dietary needs.
• Pepper – Freshly cracked for the best flavor; a little heat can elevate the dish without overpowering it.

For Cooking

• Aluminum Foil – Essential for wrapping the salmon; keeps it moist and makes for easy cleanup.

Dive into this scrumptious Oven Baked Salmon recipe and enjoy a meal that's quick, easy, and loaded with nutrients!

Step‑by‑Step Instructions for Oven Baked Salmon with Sweet Garlic Butter Glaze

Step 1: Preheat Oven
Begin by preheating your oven to 350°F (175°C). This temperature will allow your salmon to cook evenly, ensuring it retains moisture and flavor. While the oven heats, prepare your baking dish; lining it with aluminum foil will facilitate easy cleanup and protect the salmon's texture during baking.

Step 2: Prepare Salmon Fillets
Once the oven is preheated, take your salmon fillets and lay them skin-side down in the prepared baking dish. Make sure to choose fresh, vibrant fillets for the best flavor. Position them with enough space between each piece to promote even cooking and allow the glaze to cover them adequately.

Step 3: Make Garlic Butter Mixture
In a small saucepan over low heat, melt the butter and stir in the freshly minced garlic. Cook this mixture for about 1-2 minutes, just until the garlic becomes fragrant but does not brown. Once ready, drizzle the garlic butter evenly over the salmon, ensuring a luscious layer is applied to enhance the flavor of your Oven Baked Salmon.

Step 4: Add Brown Sugar and Spices
Next, sprinkle the brown sugar generously over the salmon fillets. This will create a sweet glaze that balances the richness of the fish. Follow this with a sprinkle of paprika, salt, and freshly cracked pepper to enhance the overall flavor profile. The colors will brighten, hinting at the delightful taste to come.

Step 5: Bake the Salmon
Cover the baking dish with a piece of aluminum foil to keep the salmon moist as it bakes. Place it in your preheated oven and let the salmon cook for about 20 minutes. Keep an eye on the fillets; they should flake easily with a fork and reach an internal temperature of 145°F (63°C) when done.

Step 6: Serve Your Dish
Once the salmon is perfectly baked, carefully remove it from the oven and let it rest for a few minutes. This brief pause allows the juices to settle, ensuring moist and flaky salmon. Serve your delicious Oven Baked Salmon with your choice of sides, such as roasted vegetables or a fresh salad, for a satisfying meal.

Oven Baked Salmon Variations & Substitutions

Feel free to get creative with this Oven Baked Salmon recipe and customize it to your taste—let your culinary imagination flourish!

  • Dairy-Free: Swap butter with olive oil or a vegan butter alternative for a delicious plant-based option.

  • Sugar-Free: Use a sugar substitute like erythritol or monk fruit sweetener for a low-calorie alternative without sacrificing sweetness.

  • Citrus Twist: For a bright touch, add zest from a lemon or orange to the garlic butter for an aromatic boost.

  • Herb-Infused: Mix in fresh herbs like dill or thyme for added freshness; these flavors beautifully complement the salmon.

  • Spice It Up: Add a pinch of cayenne pepper or a drizzle of sriracha for a delightful kick that will awaken your taste buds.

  • Nutty Flavor: Crushed nuts like pecans or walnuts provide a crunchy topping that pairs wonderfully with the flaky salmon.

  • Fish Variation: Try using trout or tilapia instead of salmon for a delicious twist; both options are equally satisfying and flavorful.

  • Asian Fusion: Incorporate soy sauce and ginger into the garlic butter for an Asian-inspired dish; serve with steamed rice for a complete meal.

Enjoy making this recipe your own, and don't forget to explore more delightful meal ideas like Oven Baked Salmon or sweet treats with Matcha Baked Doughnuts. Bon appétit!

Make Ahead Options

These Oven Baked Salmon fillets are perfect for meal prep enthusiasts! You can prepare the garlic butter mixture and season the salmon up to 24 hours in advance, keeping them refrigerated in an airtight container to preserve freshness. Simply lay the salmon fillets skin-side down in your baking dish, drizzle the garlic butter over them, and sprinkle the brown sugar and spices on top. When you're ready to enjoy, just bake from the fridge without the need to bring them to room temperature. This strategy saves time on busy weeknights while ensuring your dinner is just as delicious and flavorful as if you made it fresh!

Expert Tips for Oven Baked Salmon

Cooking Doneness: Use a food thermometer to ensure your salmon reaches an internal temperature of 145°F (63°C) for perfectly flaky results.

Freshness Matters: Choose bright, firm salmon fillets to enhance flavor and texture; older fillets may not yield the same delicious outcome.

Flavor Variations: Don't hesitate to experiment with spices or herbs—adding dill or lemon zest can elevate your Oven Baked Salmon even further.

Avoid Overcooking: Keep a close watch during baking; remove the salmon as soon as it flakes easily with a fork to prevent dryness.

Cleaning Up Made Easy: Lining your baking dish with aluminum foil not only helps retain moisture but also makes for effortless cleanup afterward.

How to Store and Freeze Oven Baked Salmon

Refrigerate: Keep leftover Oven Baked Salmon in an airtight container in the fridge for up to 3 days to maintain freshness and flavor.

Freeze: To save individual portions, wrap them tightly in plastic wrap or aluminum foil and place in a freezer-safe bag. They can be frozen for up to 3 months.

Reheat: For best results, reheat your salmon in the oven at 350°F (175°C) until warmed through, adding a splash of water or broth to retain moisture. Alternatively, use a microwave on medium power.

What to Serve with Oven Baked Salmon

Pairing delicious sides with your salmon can transform a simple meal into a culinary celebration.

  • Roasted Asparagus: This crisp and tender vegetable adds a nutty flavor that beautifully complements the richness of the salmon.
  • Garlic Mashed Potatoes: Creamy mashed potatoes infused with garlic provide comfort and a hearty side that pairs perfectly with the flaky fish.
  • Steamed Broccoli: The bright green color and subtle crunch of steamed broccoli add a fresh contrast to the buttery salmon.
  • Citrus Quinoa Salad: A refreshing blend of quinoa, citrus, and herbs offers a zesty balance to the dish, enhancing its overall lightness.
  • Cauliflower Rice: Low-carb and fluffy, cauliflower rice absorbs the savory juices from the salmon, making each bite delightful.
  • White Wine Spritzer: A crisp white wine spritzer refreshes the palate and complements the flavors of the salmon without overpowering them.
  • Chocolate Mousse: For dessert, a light, airy chocolate mousse delivers a sweet ending that balances the savory goodness of the meal.

Crafting the perfect meal around your Oven Baked Salmon invites newfound excitement to your dining experience!

Oven Baked Salmon with Sweet Garlic Butter Glaze Recipe FAQs

What type of salmon should I choose for this recipe?
Absolutely! Look for fresh, firm salmon fillets with vibrant color and no dark spots. The best choices are wild-caught salmon, like sockeye or king salmon, as they tend to be more flavorful than farmed varieties.

How should I store leftover Oven Baked Salmon?
You can store leftovers in an airtight container in the fridge for up to 3 days. It’s best to cool the salmon to room temperature first before sealing it up, which helps retain its moisture and flavor.

Can I freeze Oven Baked Salmon?
Yes, you can! Wrap individual portions tightly in plastic wrap or aluminum foil, then place them in a freezer-safe bag. These can be frozen for up to 3 months. Just make sure to label the bag with the date so you can keep track!

What should I do if my baked salmon is drying out?
Very! To avoid dryness, be sure to monitor your baking time closely. Remove the salmon from the oven as soon as it flakes easily with a fork. Additionally, consider covering it with foil while baking to help retain moisture, and using a food thermometer to check for doneness.

Is this recipe safe for those with seafood allergies?
Unfortunately not! This recipe is not suitable for individuals with seafood allergies. However, if you have friends or family who can enjoy fish, consider customizing the recipe for grilled chicken or tofu as a high-protein alternative for those with dietary restrictions.

What should I serve with my Oven Baked Salmon?
Delicious suggestions include pairing it with roasted vegetables, steamed rice, or a fresh green salad. The sweetness of the glaze makes it versatile enough to complement a variety of sides for a well-rounded meal!

Mango Teriyaki Salmon Recipe: A Healthy Takeout Delight

June 4, 2026 by Grace Snow Leave a Comment

The moment the sweet aroma of mango mingles with a savory teriyaki glaze fills my kitchen, I’m instantly transported to a bustling Asian street market. My Easy 30-Minute Mango Teriyaki Salmon recipe takes the best elements of this vibrant culinary scene and brings them to your home—no tickets required! Perfect for busy evenings, this dish is not only a quick healthy dinner option, but it also combines the delightful flavors of fresh mango and tender salmon into a meal that’s both satisfying and nutritious. Packed with protein and healthy fats, this recipe ensures you won’t have to sacrifice flavor for health. Who’s ready to add a touch of gourmet flair to their weeknight dinners?

Why is this salmon recipe unforgettable?

Quick and Easy: In just 30 minutes, you’ll have a delicious dinner that rivals your favorite takeout!

Vibrant Flavors: The sweet mango and savory teriyaki glaze offer a festival of tastes that dance on your palate.

Nutrient-Rich: Packed with protein and omega-3 fatty acids, this dish not only delights the senses but also fuels your body.

Versatile Options: Feel free to swap mango for pineapple or serve over rice for a complete meal. Cooking for a crowd? This recipe can easily be doubled!

Gourmet Feel: Impress your family or guests with flavors that evoke fine dining—all from your own kitchen. Don't miss trying it with Chicken Teriyaki Noodles for a savory pairing!

Mango Teriyaki Salmon Recipe Ingredients

For the Salmon
• Salmon – Fresh salmon is ideal for this dish, but frozen can work in a pinch.

For the Teriyaki Glaze
• Soy Sauce – Use low-sodium soy sauce if you prefer a healthier option.
• Honey – Balances the salty soy; maple syrup is a great vegan alternative.
• Garlic – Fresh garlic maximizes flavor; minced garlic from a jar can save time.
• Ginger – Fresh ginger adds zing; powdered can substitute in a hurry.
• Vinegar/Lime Juice – Rice vinegar adds acidity, but feel free to use apple cider vinegar as an alternative.
• Cornstarch – This thickens your glaze efficiently; arrowroot is a good gluten-free substitute.
• Mango – A fresh mango creates the best glaze; frozen mango or mango nectar can stand in if needed.

Optional Toppings
• Green Onions – They bring a fresh crunch that enhances the overall dish.
• Sesame Seeds – Add a delightful nutty crunch and visual appeal when sprinkled on top.

This Mango Teriyaki Salmon Recipe will elevate your dinner game and leave everyone asking for seconds!

Step‑by‑Step Instructions for Mango Teriyaki Salmon Recipe

Step 1: Make the Glaze
In a small bowl, combine soy sauce, honey, minced garlic, grated ginger, and vinegar or lime juice. Whisk these ingredients together until well blended, ensuring the honey is fully dissolved. Next, add diced mango and use a fork to mash it slightly for a smoother consistency. This fruity mixture will become the delicious glaze for your Mango Teriyaki Salmon.

Step 2: Thicken the Glaze
Pour the mango mixture into a small saucepan over medium heat. Bring it to a gentle simmer while stirring occasionally. In a separate small bowl, mix cornstarch with a splash of water to create a slurry. Gradually whisk this slurry into the simmering glaze until it thickens and becomes glossy, about 3–5 minutes. The glaze should now be perfect for drizzling over the salmon.

Step 3: Cook the Salmon
Pat the salmon fillets dry with paper towels to ensure a good sear. Season both sides generously with salt and pepper. Heat a non-stick skillet over medium-high heat and add a splash of oil. Once hot, carefully place the salmon in the skillet and sear for 3–4 minutes on each side. Look for a golden-brown crust; the center should still be slightly soft for the best texture.

Step 4: Glaze the Salmon
When the salmon is nearly cooked through, spoon the thick mango teriyaki glaze over each fillet. Allow it to bubble for about 30 seconds, coating the fish well. This will caramelize the glaze slightly, enhancing the flavors of your Mango Teriyaki Salmon and giving it a beautiful, sticky finish.

Step 5: Serve
Once coated, carefully remove the salmon from the skillet and place it on a serving plate. Garnish with chopped green onions and a sprinkle of sesame seeds for added freshness and crunch. If desired, add an extra squeeze of lime over the top for a zesty finish. Your gorgeous Mango Teriyaki Salmon is ready to enjoy!

What to Serve with Easy 30-Minute Mango Teriyaki Salmon

Elevate your meal to culinary delight with vibrant pairings that enhance the sweet and savory notes of your salmon.

  • Jasmine Rice: This fragrant rice absorbs the teriyaki glaze beautifully, balancing the flavors for a satisfying bite.
  • Steamed Broccoli: The crisp-tender texture of broccoli complements the salmon while adding a nutritious green touch to your plate.
  • Quinoa Salad: A nutty quinoa salad with diced veggies can add a spin of freshness, creating a delightful contrast to the rich fish.
  • Cucumber Salad: A refreshing cucumber salad with a light vinaigrette adds a crisp, cooling element that pairs perfectly with the warm salmon.
  • Sesame Noodles: Serve the salmon alongside chilled sesame noodles dressed in soy sauce for an Asian-inspired twist that’s both delicious and satisfying.
  • Mango Salsa: For a bold flavor kick, a zesty mango salsa topped with cilantro would add a vibrant, fruity flair that echoes your main dish.
  • Sparkling Water: A chilled sparkling water with a splash of lime creates an invigorating drink that refreshes your palate between bites.

Make Ahead Options

These Mango Teriyaki Salmon recipes are perfect for busy weeknights! You can prepare the teriyaki glaze up to 3 days in advance by mixing all the ingredients and storing it in an airtight container in the refrigerator. To maintain freshness, keep the salmon fillets uncooked in a sealed container until you’re ready to cook. When ready to enjoy your meal, simply sear the salmon and reheat the glaze for a delightful finish—all in under 30 minutes! This way, you save valuable time without compromising on quality, delivering restaurant-style results right at home. Enjoy your deliciously convenient weeknight dinner!

Mango Teriyaki Salmon Recipe Variations

Feel free to explore these fun variations to make this dish perfect for your taste buds!

  • Pineapple Twist: Substitute mango with pineapple for a tangy and vibrant twist. This adds a juicy sweetness that amplifies the teriyaki flavor.

  • Quinoa Base: Serve your salmon over fluffy quinoa instead of rice. This gives a nutty flavor and extra protein to your meal.

  • Spicy Kick: Mix in sriracha or red pepper flakes to the glaze for those who crave a little heat. This will awaken your taste buds and add a delightful zing.

  • Veggie Loaded: Toss in some bell peppers, snap peas, or asparagus while cooking the salmon for added nutrition and vibrant colors on your plate.

  • Herb Flavors: Enhance the dish with fresh herbs like cilantro or basil, adding a fresh layer of flavor that complements the teriyaki sauce beautifully.

  • Taco Style: Flake leftover salmon and serve it as fish tacos with cabbage slaw and avocado. It makes for a fun, interactive meal that everyone will love.

  • Noodle Pairing: Try serving the salmon alongside or over Chicken Teriyaki Noodles for a delicious Asian-inspired feast.

  • Zesty Lime: Sprinkle fresh lime juice over the finished dish for an additional citrusy kick that brightens up the flavors.

Whatever variation speaks to you, it’s all about making this dish your own and enjoying every delightful bite.

Expert Tips for Mango Teriyaki Salmon

  • Pat Dry Salmon: Ensure your salmon fillets are patted dry before cooking; this helps achieve that coveted crispy sear and prevents sticking.

  • Check Doneness: Don't overcook the salmon; it should flake easily yet remain moist. Aim for a hint of softness in the center for optimum tenderness.

  • Perfect Glaze Thickness: Thicken the mango teriyaki glaze until it coats the back of a spoon; if it thickens too much, adjust with a splash of water.

  • Experiment with Flavors: Want a kick? Feel free to add a sprinkle of sriracha to your glaze for a spicy twist to this mango teriyaki salmon recipe!

  • Sautéed Veggies: Serve alongside sautéed vegetables for a complete and healthy dinner. Broccoli or snap peas are delicious options!

Storage Tips for Mango Teriyaki Salmon Recipe

Fridge: Store leftovers in an airtight container for up to 3 days to maintain freshness and flavor.

Freezer: For longer storage, freeze cooked mango teriyaki salmon in a freezer-safe container for up to 3 months. Thaw overnight in the fridge before reheating.

Reheating: Gently reheat the salmon in a skillet over low heat to preserve moisture, or microwave for 30-second intervals until warmed through.

Separate Storage: If serving with rice or quinoa, store salmon and grains in separate containers to prevent sogginess and enjoy your mango teriyaki salmon recipe at its best!

Mango Teriyaki Salmon Recipe FAQs

How do I choose ripe mango for this recipe?
Absolutely! For the best flavor, select a mango that is slightly soft to the touch, indicating ripeness. Look for a fruit with a vibrant color; avoid those with dark spots or blemishes. If mango is unavailable, frozen mango is a great substitute!

What’s the best way to store leftovers?
Very! Store any leftover Mango Teriyaki Salmon in an airtight container in the fridge, where it will stay fresh for up to 3 days. To maintain the best flavor and texture, I recommend not mixing it with rice or grains until you're ready to enjoy it.

Can I freeze Mango Teriyaki Salmon?
Of course! To freeze, let the cooked salmon cool completely. Then, place it in a freezer-safe container or a sealable plastic bag, removing as much air as possible. It can be stored for up to 3 months. Thaw it overnight in the fridge before reheating for the most enjoyable taste.

What if my glaze is too thick?
No worries! If your glaze thickens too much, simply whisk in a small amount of water, a tablespoon at a time, until it reaches your desired consistency. Remember, you want it thick enough to cling to the salmon, but not so thick that it becomes gelatinous.

Are there any dietary considerations for this recipe?
Absolutely! This Mango Teriyaki Salmon recipe is a healthy choice for most, but be sure to check for allergies related to soy or seafood. For a gluten-free alternative, use tamari instead of soy sauce, and arrowroot as a cornstarch substitute. If you're preparing meals for pets, do not share the salmon glazed with teriyaki sauce, as it contains ingredients that may not be safe for them.

How can I make this dish spicier?
Very simple! If you like some heat, consider adding a teaspoon of sriracha or chili flakes to the glaze. You can also sprinkle some sliced fresh jalapeños over the finished dish for an extra kick. Enjoy experimenting!

Savory High-Protein Creamy Beef Pasta for Busy Nights

June 3, 2026 by Grace Snow Leave a Comment

As I stirred the bubbling pot, the rich aroma of garlic and tomatoes filled my kitchen, transporting me straight to a Mediterranean sunset. This High-Protein Creamy Beef Pasta is not just a meal; it’s a delightful escape from the ordinary, designed for those of us who crave both comfort and nourishment. With just one pan and about 30 minutes of your time, you can whip up a dish that's as fulfilling for the body as it is for the soul. It beautifully balances creamy textures with lean protein, transforming a classic favorite into a health-conscious option you'll want on repeat. Plus, it’s perfect for meal prep—making your busy week nights a breeze! Ready to elevate your dining experience and discover how delicious health can be?

Why Is This Pasta So Amazing?

Simplicity is key: With just one pan and 30 minutes, you can create a satisfying meal, making dinner a breeze on busy nights.

Creamy Texture: The use of Greek yogurt offers a rich creaminess without the heaviness of traditional sauces, making each bite both indulgent and nutritious.

Customizable: Whether you're looking to enjoy a low-carb variation with zucchini noodles or need a vegetarian twist using lentils, this recipe adapts easily to your dietary preferences.

High in Protein: Packed with lean ground beef and enriched pasta, this dish supports your fitness goals without compromising on flavor.

Meal Prep Ready: Prepare it ahead of time and store leftovers for an easy reheat during your busy week. Whether topped with fresh herbs or bursting with Parmesan, this dish is sure to become a staple in your kitchen.

High-Protein Creamy Beef Pasta Ingredients

For the Beef
• Lean Ground Beef (90% lean) – Provides high-quality protein and essential nutrients for muscle repair. Opt for ground turkey for a lighter option.

For the Pasta
• Whole Wheat or High-Protein Pasta – Adds complex carbs and fiber to enhance digestion. Use protein-enriched pasta if increasing protein intake is a priority.

For the Sauce
• Tomatoes – Contribute natural sweetness and are packed with antioxidants. Use canned tomatoes for convenience and quick prep.
• Greek Yogurt or Light Cream – Creates a creamy texture while boosting protein. For a dairy-free option, substitute with cashew cream or unsweetened plant-based yogurt.

For Flavor
• Olive Oil – Supplies heart-healthy fats and helps absorb nutrients. Can use avocado oil if desired.
• Garlic – Builds flavor and supports digestion. Shallots can be a milder alternative if preferred.
• Onion – Enhances taste naturally. Try red onions for a slightly sweeter flavor.

Now that we've gathered everything you need for your High-Protein Creamy Beef Pasta, let’s get cooking!

Step‑by‑Step Instructions for High-Protein Creamy Beef Pasta

Step 1: Sauté Aromatics
Heat 1 tablespoon of olive oil in a large skillet over medium heat. Once shimmering, add 1 diced onion and 2 minced garlic cloves. Sauté for about 3-4 minutes, stirring occasionally, until the onions become translucent and fragrant, creating a delicious base for your High-Protein Creamy Beef Pasta.

Step 2: Brown the Beef
Add 1 pound of lean ground beef to the skillet, breaking it apart with a wooden spoon. Cook for approximately 5-7 minutes, stirring frequently, until the beef is browned and cooked through. Make sure there is no pink remaining, as this indicates it’s ready to infuse with flavor.

Step 3: Add Tomatoes and Season
Stir in one 14-ounce can of diced tomatoes, along with your favorite herbs and spices—think oregano or basil. Let the mixture simmer for 5-7 minutes, allowing the flavors to meld. You'll know it's ready once the sauce thickens slightly and bubbles with inviting aroma.

Step 4: Cook the Pasta
While the sauce simmers, bring a large pot of salted water to a boil. Add 8 ounces of whole wheat or high-protein pasta and cook according to package instructions until al dente, usually about 7-9 minutes. Drain the pasta but reserve a little pasta water for adjusting the sauce if needed.

Step 5: Combine and Creamify
Reduce the heat to low and slowly stir in 1 cup of Greek yogurt or light cream into the beef and tomato mixture. Mix thoroughly until everything is well combined and creamy. If the sauce seems too thick, add a splash of the reserved pasta water to reach your desired consistency.

Step 6: Fold in the Pasta
Gently mix the cooked pasta into the creamy beef sauce, ensuring every noodle is coated in the delicious layers of flavor. Allow the dish to warm through for about 2 minutes, giving the pasta a chance to absorb flavors while keeping the mixture warm for serving.

Step 7: Final Adjustments
Taste the High-Protein Creamy Beef Pasta for seasoning and adjust with salt and pepper as needed. Let it rest for a couple of minutes before serving. This brief pause enhances the flavors and allows the dish to settle, ensuring you achieve that perfect creamy texture.

Expert Tips for High-Protein Creamy Beef Pasta

  • Pasta Perfection: Cook pasta slightly al dente, as it continues to absorb sauce when stored or reheated, maintaining the perfect texture.

  • Moisture Control: Let pasta cool briefly before storing to prevent excess moisture, which can make the dish watery when reheating.

  • Finishing Touches: Boost flavor just before serving by adding freshly grated Parmesan or a sprinkle of fresh herbs to enhance the dish’s Mediterranean vibes.

  • Meal Prep Magic: When prepping ahead, keep the pasta and sauce separate until you’re ready to serve, which helps maintain creaminess and texture.

  • Flavor Alternatives: Feel free to experiment with different herbs or spices that suit your taste, but remember to use quality ingredients to aid the overall flavor profile of the High-Protein Creamy Beef Pasta.

Make Ahead Options

These High-Protein Creamy Beef Pasta are perfect for busy weeknights! You can prepare the beef and tomato mixture up to 3 days in advance; simply cook the beef and mix in the tomatoes and seasonings, then refrigerate in an airtight container. The pasta, however, is best cooked fresh to prevent it from getting soggy. Just before serving, reheat the beef sauce on low heat, stirring in the Greek yogurt or light cream and the freshly cooked pasta until heated through. This way, you'll enjoy a meal that's just as delicious and creamy with minimal effort, allowing you to savor that comforting taste without the last-minute rush!

How to Store and Freeze High-Protein Creamy Beef Pasta

Fridge: Store the High-Protein Creamy Beef Pasta in an airtight container for up to 4 days. Ensure it's cooled before sealing to maintain freshness and prevent moisture buildup.

Freezer: This dish can be frozen for up to 2 months. Divide into portions, allow to cool completely, and use freezer-safe containers or bags, removing as much air as possible.

Reheating: To bring the pasta back to life, thaw in the fridge overnight as needed. Reheat gently in a skillet over low heat, adding a splash of water or broth to reacquaint the sauce with its creamy goodness.

Reminder: For the best texture, let the pasta cool briefly before storing to avoid excess moisture—this helps keep your meal delightful upon reheating!

High-Protein Creamy Beef Pasta Variations

Feel free to get creative with your High-Protein Creamy Beef Pasta; there’s something for everyone!

  • Low-Carb: Substitute zucchini noodles or spaghetti squash in place of traditional pasta for a lighter option. This twist adds a refreshing crunch, making it a perfect fit for those cutting carbs.

  • Vegetarian: Swap ground beef for cooked lentils and sautéed mushrooms. This adaptation not only enhances taste but also introduces a hearty texture, ensuring your meal remains filling and satisfying.

  • Gluten-Free: Use certified gluten-free pasta to make this dish accessible for those avoiding gluten. This simple change allows everyone to enjoy the creamy goodness without any concerns.

  • Dairy-Free: Replace Greek yogurt with cashew cream or a plant-based yogurt alternative for a creamy, delicious result. With this substitution, the dish remains extremely rich without any dairy products, perfect for lactose-sensitive appetites.

  • Increased Protein: Consider using protein-enriched pasta or bump up beef to 150g per serving. Adding these protein-packed ingredients creates a powerful dish ideal for those focused on muscle-building and fitness.

  • Spicy Kick: Add red pepper flakes or diced jalapeños to the sauce for an extra kick. This twist brings an exciting heat, perfect for spice enthusiasts who crave adventure in their meals.

  • Herb Infusion: Experiment with fresh herbs like basil or thyme stirred directly into the sauce or sprinkled on top before serving. These flavor additions not only enhance the dish's aroma but also elevate its visual appeal.

  • Seafood Delight: For a Mediterranean twist, consider incorporating shrimp or scallops instead of beef. This provides a luxurious yet lighter alternative while maintaining that beloved creamy texture—perfect for those seafood lovers!

For more pasta inspiration, check out my delicious Skillet Pasta Sun recipe or explore the unique flavors of Cauliflower Pasta Ready. The world of pasta is vast; find your new favorites today!

What to Serve with High-Protein Creamy Beef Pasta

Elevate your dining experience with delightful accompaniments that balance flavors and textures alongside your creamy pasta.

  • Garlic Bread: The crunch of toasted garlic bread pairs perfectly with the creamy pasta, soaking up extra sauce and enhancing every bite.

  • Crispy Side Salad: A crisp salad filled with mixed greens, cucumbers, and a lemon vinaigrette adds freshness and a burst of flavor to your meal.

  • Roasted Vegetables: Serve with a medley of roasted vegetables; their caramelized sweetness beautifully complements the savory richness of the pasta.

  • Steamed Broccoli: Tender steamed broccoli is not only nutritious but adds a vibrant pop of color and a bit of crunch to your plate.

  • Herb-Infused Rice: Fluffy rice seasoned with herbs brings a gentle boost of flavor, rounding out the dish without overpowering the pasta's creamy texture.

  • Sparkling Water with Lemon: Refresh your palate with a glass of sparkling water infused with lemon; it acts as a palate cleanser after each rich bite.

  • Chocolate Mousse: For dessert, a light chocolate mousse feels indulgent yet airy, perfectly concluding your Mediterranean-inspired meal.

  • Red Wine: A glass of light red wine, like Pinot Noir, complements the beef while enhancing the overall dining experience with its fruity notes.

High-Protein Creamy Beef Pasta Recipe FAQs

What type of pasta should I use for this recipe?
Whole wheat or high-protein pasta is recommended to add complex carbohydrates and fiber, making it a nutritious choice. If you’re focused on increasing protein, you can substitute regular pasta with protein-enriched pasta. If you’re looking for a gluten-free version, opt for certified gluten-free pasta to keep it delicious and satisfying.

How do I store leftover High-Protein Creamy Beef Pasta?
Store your leftover pasta in an airtight container in the refrigerator for up to 4 days. Make sure the pasta has cooled completely before sealing the container to keep it fresh and prevent moisture buildup, which can lead to sogginess when reheated.

Can I freeze High-Protein Creamy Beef Pasta?
Absolutely! You can freeze this dish for up to 2 months. Divide the pasta into portions, allow it to cool completely, and place it in freezer-safe containers or bags. Be sure to remove as much air as possible to prevent freezer burn. For the best results, thaw it in the fridge overnight before reheating.

What should I do if my sauce is too thick?
If your creamy sauce ends up too thick, no worries! Simply add a splash of reserved pasta water or broth to loosen it up. Stir it in gradually while reheating, and you'll achieve that creamy consistency without compromising flavor. This simple trick can transform your meal back to its luscious state!

Are there any dietary considerations or substitutions I should be aware of?
Yes! If you’re crafting this recipe for someone with specific dietary needs, you have plenty of options. For a dairy-free alternative, you can use cashew cream or unsweetened plant-based yogurt instead of Greek yogurt or light cream. Additionally, if you're aiming for a vegetarian dish, swap out the lean ground beef for lentils and mushrooms for increased protein and a hearty texture.

Chicken and Sweet Potato Recipe for a Cozy Weeknight Feast

June 3, 2026 by Grace Snow Leave a Comment

As I stood in my kitchen, the delightful aroma of the One-Pan Chicken and Sweet Potato Delight began to waft through the air, instantly transporting me to a cozy evening filled with laughter and warmth. This Chicken and Sweet Potato Recipe transforms supper into something special, combining wholesome ingredients into an easy weeknight masterpiece. With minimal cleanup and the added perk of a one-pan dinner, I can whip up a satisfying meal that checks all the boxes—comfort, nutrition, and flavor. The tender chicken pairs beautifully with the naturally sweet, caramelized potatoes, creating a dish that's both filling and exciting. So, are you ready to elevate your weeknight dinner game and treat yourself to a comforting experience that your whole family will love?

Why is this Chicken and Sweet Potato Recipe a Must-Try?

Simplicity at its finest: This one-pan wonder allows you to create a delicious meal with minimal effort and time.

Flavor explosion: The smoky spices perfectly complement the sweetness of the potatoes, making every bite a taste sensation.

Versatile and customizable: Swap out sweet potatoes for butternut squash or add your favorite herbs for a personal touch.

Family-friendly: This dish caters to all palates, making it an ideal choice for busy weeknights with kids.

Easy cleanup: One pan means less time scrubbing dishes and more time enjoying your cozy feast.

Elevate your cooking game with this wholesome meal that not only fills the belly but warms the heart! If you're a fan of sweet potatoes, consider checking out my recipes for Roasted Sweet Potatoes or Smoky Sweet Potatoes for more delightful options!

Chicken and Sweet Potato Recipe Ingredients

For the Chicken
• Boneless Chicken Breasts or Thighs – The main protein source, yielding a juicy and flavorful dish.
• Garlic – Adds aromatic depth that enhances the overall flavor profile.

For the Sweet Potatoes
• Sweet Potatoes – Provides natural sweetness and lots of nutritional value; dice uniformly for even cooking.
• Red Onion – Adds a layer of sweetness and depth to your lovely one-pan dinner.

For Cooking
• Olive Oil – Essential for sautéing and bringing out the flavors of the ingredients.
• Smoked Paprika – Adds a warm, smoky flavor that beautifully complements sweet potatoes.
• Cumin – Gives an earthy note that enhances the wholesome meal experience.
• Salt and Pepper – Basic seasoning to elevate the overall taste of your dish.

Optional Enhancements
• Chili Flakes – Add for a touch of heat if you're feeling adventurous!
• Lemon Juice – A squeeze at the end brightens up the dish, taking your Chicken and Sweet Potato Recipe to the next level.

Step‑by‑Step Instructions for One-Pan Chicken and Sweet Potato Delight

Step 1: Prep Ingredients
Start by dicing your boneless chicken breasts or thighs and sweet potatoes into even-sized pieces, roughly 1-inch cubes. This ensures that everything cooks uniformly, enhancing the flavor and texture of your Chicken and Sweet Potato Recipe. Take a moment to gather your ingredients and set your workspace, as this will make your cooking experience more enjoyable!

Step 2: Mix Seasoning
In a large mixing bowl, combine the diced chicken and sweet potatoes with olive oil, smoked paprika, cumin, salt, and pepper. Toss everything together until the chicken and sweet potatoes are evenly coated with the spices, which will create an enticing flavor base for your one-pan dinner. This step should take about 2–3 minutes, so don’t rush.

Step 3: Sear Chicken
Heat a large skillet over medium-high heat and drizzle in a little olive oil. Once hot, add the seasoned chicken to the skillet in a single layer, allowing it to sear for about 5–6 minutes until golden brown on both sides. Use tongs to turn the chicken pieces halfway through, creating enticing crispy edges. Once seared, remove the chicken from the skillet and set it aside.

Step 4: Cook Vegetables
In the same skillet, add the diced sweet potatoes and sliced red onion, stirring them around to pick up any leftover seasoning from the chicken. Cook for approximately 8–10 minutes, stirring occasionally, until the sweet potatoes are tender and caramelized, and the onions are translucent. You’ll know it’s ready when the sweet potatoes are slightly golden and a lovely aroma fills your kitchen.

Step 5: Combine and Finish
Add the seared chicken back to the skillet along with minced garlic, stirring gently to combine. Cook everything together for an additional 3–4 minutes, allowing the chicken to cook through and the flavors to meld beautifully. Just before serving, consider giving your dish a bright squeeze of lemon juice to enhance the flavors in your Chicken and Sweet Potato Recipe. Enjoy your cozy meal!

Expert Tips for One-Pan Chicken and Sweet Potato Recipe

Even Sizing: Ensure all ingredients are cut into uniform pieces. This helps chicken and sweet potatoes cook evenly and enhances your wholesome meal.

Don’t Overcrowd: Avoid placing too many ingredients in the pan at once. This can prevent proper searing and lead to uneven cooking in your easy weeknight dinner.

Measure Spices: Be cautious with smoked paprika; using too much can overpower the sweet potato flavor. Stick to the recommended amounts for the best balance.

Sear Technique: Searing the chicken properly creates a delightful crust. Spend enough time on this step for a satisfying texture in your one-pan dinner.

Cool Down Leftovers: When storing any leftovers, let them cool to room temperature before sealing in an airtight container to keep them fresh longer.

How to Store and Freeze Chicken and Sweet Potato Recipe

Fridge: Store leftovers in an airtight container in the refrigerator for up to 3 days to maintain freshness and flavor.

Freezer: For longer storage, freeze individual portions in airtight containers or freezer bags for up to 3 months. Label with the date for easy tracking.

Reheating: When ready to enjoy again, thaw in the refrigerator overnight, then reheat gently on the stovetop or in the microwave until heated through. Enjoy your cozy Chicken and Sweet Potato Recipe!

Room Temperature: Avoid leaving the dish out for more than 2 hours to prevent spoilage.

Chicken and Sweet Potato Recipe Variations

Feel free to let your creativity shine and customize this dish to suit your taste buds!

  • Butternut Squash: Swap sweet potatoes for butternut squash for a silky texture and a slightly different flavor profile.

  • Hearty Greens: Add kale or spinach during the last few minutes of cooking for a nutritional boost that adds color and flavor.

  • Spicy Twist: Incorporate jalapeños or a dash of hot sauce for a fiery kick that contrasts beautifully with the sweetness.

  • Herbed Chicken: Use fresh herbs like thyme or rosemary to elevate the dish with fragrant flavors that sing of home-cooked goodness.

  • Crispy Chicken Skin: For extra indulgence, leave the skin on your chicken for a crispy finish that adds richness to your one-pan dinner.

  • Citrusy Flavor: Add orange or lime juice instead of lemon for a refreshing twist that brightens up the dish even further.

  • Creamy Addition: Stir in a splash of coconut milk or heavy cream after cooking for a rich, creamy consistency that envelops every bite.

  • Savory Mushrooms: Toss in some sliced mushrooms while cooking the sweet potatoes for an earthy flavor that complements the chicken wonderfully.

Don't forget to explore other delicious options like Smoky Sweet Potatoes or a comforting Chicken Dumplings Cozy if you're looking for more inspiration in your kitchen!

What to Serve with One-Pan Chicken and Sweet Potato Delight

This meal is delightful on its own, but pairing it with the right sides and beverages can elevate your dining experience to a whole new level.

  • Simple Green Salad: Fresh greens drizzled with lemon vinaigrette offer a vibrant contrast, bringing a burst of freshness to the meal.
  • Steamed Broccoli: The crunchy texture and earthy flavor of broccoli complement the tender chicken and sweet potatoes perfectly, adding a wholesome touch.
  • Quinoa Pilaf: This nutty, fluffy grain makes a fantastic pairing, adding a lightness and additional protein to your dinner plate. It’s a wonderful way to make the meal even heartier!
  • Garlic Bread: Warm, crusty garlic bread serves as the perfect vessel for soaking up the delicious juices from the chicken, completing the cozy feel of the dinner.
  • Cranberry Sauce: A dollop of tart cranberry sauce adds a sweet and tangy balance to the savory flavors, enhancing the overall taste of the meal.
  • Chardonnay or Rosé: A glass of chilled Chardonnay or refreshing Rosé provides a lovely pairing that balances the dish's smokiness and sweetness beautifully.
  • Apple Crisp: End your meal with a warm apple crisp, offering comforting sweetness that complements the flavors of the main dish superbly.
  • Herb-Infused Couscous: Fluffy couscous served with fresh herbs adds a delightful texture and a flavor contrast with the chicken, enriching your overall dining experience.
  • Fruit-Infused Iced Tea: A refreshing glass of iced tea with a hint of fruit keeps the dinner light and flavorful, complementing the comforting main dish.
  • Chocolate Mousse: For dessert, a silky chocolate mousse brings a touch of indulgence and is a perfect finish to your wholesome meal.

Make Ahead Options

These Chicken and Sweet Potato Recipe components are perfect for meal prep enthusiasts! You can dice the sweet potatoes and chicken up to 24 hours in advance, storing them in an airtight container in the refrigerator to maintain freshness. For added convenience, mix the spices and coat the chicken and sweet potatoes ahead of time; this allows the flavors to deepen as they marinate. When you're ready to cook, simply sauté the prepped ingredients according to the main instructions, ensuring a delightful meal in minutes. Just remember, to prevent the chicken from drying out, avoid freezing after seasoning—this way, you get delicious, juicy results with minimal effort after a busy day!

Chicken and Sweet Potato Recipe FAQs

How do I select the right sweet potatoes for this recipe?
Absolutely! Look for sweet potatoes that are firm and have smooth skin without dark spots or bruises. The ideal sweet potato should feel heavy for its size. If you notice any soft spots or have irregular shapes, it's best to choose another one, as they may not be fresh enough for your delicious chicken and sweet potato recipe.

What is the best way to store leftovers?
Great question! To store leftovers, place them in an airtight container and keep them in the refrigerator for up to 3 days. It's important to allow the dish to cool to room temperature before sealing it, as this helps maintain its texture and flavor. When you're ready to reheat, simply warm it up in a skillet or microwave until heated through.

Can I freeze the Chicken and Sweet Potato Recipe?
Yes, absolutely! To freeze, portion the cooled dish into airtight containers or freezer bags. Make sure to label them with the date. You can freeze them for up to 3 months. When you’re ready to enjoy, transfer to the refrigerator for overnight thawing, then reheat gently on the stovetop. This allows the flavors to meld back together beautifully.

What should I do if the chicken is dry?
If you find that your chicken is dry, it can be due to overcooking or using chicken breasts instead of thighs, which are juicier. To avoid this in the future, use a meat thermometer to check doneness; chicken should reach an internal temperature of 165°F (74°C) but be careful to remove it from heat just before it hits that mark, as residual heat will continue cooking it.

Are there any dietary considerations for this recipe?
Absolutely! This chicken and sweet potato recipe is naturally gluten-free and can cater to various dietary needs. If you're serving it to someone with a food allergy, be cautious with additions like chili flakes, which might be too spicy for some. Additionally, always ensure any seasoning blends are free from gluten or allergens. Feel free to adapt the recipe to include your favorite vegetables or protein substitutes as needed.

How can I check if the sweet potatoes are cooked properly?
For perfectly cooked sweet potatoes, you should be able to pierce them easily with a fork or a knife. They should be tender and slightly caramelized on the edges when ready to serve. If they're still firm in the center after the suggested cooking time, give them a few more minutes in the skillet to ensure they reach that delightful, soft texture that complements the chicken beautifully.

Easy Chicken Burrito Casserole: A Cheesy, Cozy Delight

June 3, 2026 by Grace Snow Leave a Comment

"Can you believe how simple yet satisfying a homemade dinner can be?" That’s the beauty of my Easy Chicken Burrito Casserole. It brings together the vibrant flavors of your favorite Mexican burritos in a cozy casserole that’s ready to nourish you after a busy day. This dish is not only gluten-free, but it also takes minimal prep time, allowing you to spend more precious moments with your loved ones instead of slaving away in the kitchen. Imagine the joy of serving a hearty meal that fills both bellies and hearts, all while being flexible enough for you to throw in whatever leftover or seasonal ingredients you have on hand. Ready to elevate your weeknight routine? Let’s dive into this warm, cheesy delight that’s sure to be a hit at your dinner table!

Why is this casserole a must-try?

Simplicity at Its Best: This Easy Chicken Burrito Casserole offers a straightforward approach to dinner, requiring minimal prep and cooking time.

Hearty Comfort Food: Packed with shredded chicken, black beans, and a cheesy topping, this dish delivers warmth in every bite.

Flavorful Fusion: A delightful combination of Mexican-inspired ingredients brings an explosion of flavor, reminiscent of your favorite burritos.

Endless Variation: Feel free to mix and match ingredients, whether it’s using quinoa instead of rice or tossing in extra veggies for a health boost.

Crowd-Pleasing Appeal: Perfect for family dinners or gatherings, it’s a dish that everyone will love, making it a staple in your recipe rotation.

Meal Prep Friendly: With easy storage options, leftovers can be enjoyed throughout the week – a win-win for busy nights! Don’t forget to check out related recipes like Crock Pot Chicken for more convenient meal ideas!

Easy Chicken Burrito Casserole Ingredients

Get ready to whip up this delightful dish!

For the Casserole
• Onion – Adds flavor and aromatic depth; yellow or white onion works beautifully.
• Red Bell Pepper – Provides sweetness and color; feel free to substitute with green bell pepper for a slightly different taste.
• Parboiled Long-Grain Brown Rice – Serves as the hearty base; long grain white rice also works as an alternative.
• Fajita Seasoning – Bursts with spice and flavor; homemade or store-bought can be used, and taco seasoning is a quick substitute.
• Cayenne Pepper (optional) – For a little heat and depth; omit if you prefer a milder flavor.
• Corn Kernels – Adds sweetness and texture; frozen corn is convenient, but fresh corn can be used for a vibrant alternative.
• Black Beans – A high-protein ingredient that makes the dish more filling; you can use pinto beans if preferred.
• Shredded Chicken – The star protein, best when pre-cooked; consider rotisserie chicken for an easy shortcut.
• Reduced Sodium Chicken Broth – Provides moisture and flavor; vegetable broth is a great substitute for a vegetarian twist.
• Green Chiles (canned) – Infuses mild heat and flavor; fresh chiles can provide a different zest.
• Olive Oil – Enhances flavor in the broth mixture; you can use canola oil as an alternative if desired.
• Tomato Paste – Thickens the mix and adds acidity; while it doesn't have a direct substitute, extra diced tomatoes can work in a pinch.
• Monterey Jack Cheese – Supplies creaminess and plenty of flavor; swap it out for cheddar if you’re feeling cheesy!

Let your culinary adventure begin with these ingredients for your Easy Chicken Burrito Casserole. Enjoy every delicious moment!

Step‑by‑Step Instructions for Easy Chicken Burrito Casserole

Step 1: Preheat the Oven
Begin by preheating your oven to 400°F (200°C). This ensures that the Easy Chicken Burrito Casserole bakes evenly and reaches the perfect temperature for a bubbly, delicious finish. While the oven warms up, gather all your ingredients and cooking tools like a 9x13 inch baking dish and mixing bowl to streamline your cooking process.

Step 2: Prepare the Veggies
In your baking dish, combine the chopped onion, red bell pepper, parboiled long-grain brown rice, and fajita seasoning. Stir these ingredients until they are well mixed, adding a splash of vibrant color and flavor to your dish. The raw veggies will soften beautifully as they bake alongside the rice, infusing the casserole with delicious aromas.

Step 3: Mix the Liquid Ingredients
In a separate bowl, whisk together the reduced sodium chicken broth, canned green chiles, tomato paste, and olive oil until smooth. Pour this flavorful mixture evenly over the rice and veggie blend in the baking dish. This step is crucial for ensuring that the rice absorbs all the wonderful flavors while cooking, creating a satisfying casserole.

Step 4: Combine the Main Ingredients
Gently fold in the shredded chicken, black beans, and corn, mixing until everything is evenly distributed throughout the casserole. Each bite of your Easy Chicken Burrito Casserole will be packed with protein and texture. Be careful not to stir too vigorously; you want to maintain the integrity of the rice and beans.

Step 5: Bake with Foil
Cover the baking dish tightly with aluminum foil, sealing in the moisture. Bake in the preheated oven for 65-70 minutes, or until the liquid is almost entirely absorbed. You’ll know it’s ready when the rice looks fluffy and tender. This step is key for getting that perfectly cooked texture in your casserole.

Step 6: Add Cheese and Create a Crust
After baking, remove the foil and sprinkle a generous amount of Monterey Jack cheese over the top. Return the dish to the oven and bake uncovered for an additional 5-10 minutes, until the cheese is melted and lightly golden. The gooey, cheesy topping elevates the dish, making your Easy Chicken Burrito Casserole truly irresistible.

Step 7: Let it Rest and Serve
Once out of the oven, let the casserole sit for 5-10 minutes to allow the flavors to meld and the cheese to set. This resting time makes serving easier and enhances the overall taste. When ready, garnish with fresh cilantro, green onions, salsa, or avocado for extra color and flavor, and enjoy a heartwarming meal with your loved ones.

Easy Chicken Burrito Casserole Variations

Ready to customize your casserole delight? Let your creativity and cravings guide you to fantastic new flavors!

  • Quinoa Swap: Replace rice with cooked quinoa for a protein-packed, gluten-free alternative.
  • Veggie Boost: Add sautéed zucchini or extra bell peppers for more colorful veggies and delicious textures.
  • Spicy Kick: Toss in diced jalapeños or a splash of hot sauce for an extra dimension of heat.
  • Cheese Variation: Swap Monterey Jack for sharp cheddar or even pepper jack for a spicier twist.
  • Beans Switch: Substitute black beans with refried beans to create a creamier, indulgent texture.
  • Herb Infusion: Sprinkle in fresh cilantro or green onions before serving for a fresh burst of flavor.
  • Seasoning Play: Explore with different seasoning blends; try taco seasoning for a more vibrant flavor profile.
  • Protein Alternatives: Use ground turkey or beef in place of chicken for a different type of hearty base.

Don't miss the chance to explore delicious combinations with your Easy Chicken Burrito Casserole. And if you’re looking for other scrumptious ideas, consider recipes like Honey Garlic Chicken or Chicken Adobo Again for additional family favorites!

How to Store and Freeze Easy Chicken Burrito Casserole

Fridge: Store leftovers in an airtight container for up to 3-4 days. This ensures your Easy Chicken Burrito Casserole stays fresh and delicious for your next meal.

Freezer: For longer storage, freeze portions in a freezer-safe container for up to 3 months. Make sure to label the container with the date for better tracking.

Reheating: When ready to enjoy, reheat individual portions in the microwave for about 3-4 minutes, or bake in the oven at 350°F until warmed through, ensuring it’s hot and comforting.

Preparation Ahead: Feel free to assemble the casserole ahead of time and store it in the fridge before baking. This makes weeknight dinners super convenient!

What to Serve With Easy Chicken Burrito Casserole

Looking to create a memorable meal that perfectly complements the vibrant flavors of your casserole?

  • Crispy Tortilla Chips: Their crunchiness contrasts beautifully with the soft casserole, adding a delightful texture and additional dipping fun for salsas or guacamole.

  • Fresh Salad: A light side salad with mixed greens, cherry tomatoes, and a zesty lime dressing balances the rich flavors and adds freshness to the meal.

  • Guacamole: Creamy and rich, this avocado dip enhances the dish with richness and complements the spices in the casserole.

  • Mexican Street Corn: Sweet corn on the cob brushed with lime and chili powder offers a unique flavor pairing that harmonizes with the casserole's Mexican-inspired ingredients.

  • Pico de Gallo: This refreshing salsa adds a burst of freshness, perfectly lifting the spice notes of your Easy Chicken Burrito Casserole.

  • Chilled Beverage: Pair with a light, refreshing drink like a sparkling agua fresca or lemonade to cleanse the palate amid all those hearty flavors.

  • Flan or Churros: For a sweet ending, serve traditional flan or churros for dessert. Their smoothness and sweetness are the perfect way to conclude a comforting meal.

  • Sour Cream: A dollop of sour cream not only adds creamy goodness but also tempers the heat, making every bite even more enjoyable.

Make Ahead Options

These Easy Chicken Burrito Casseroles are perfect for busy home cooks looking to save time without sacrificing flavor! You can prepare the casserole up to 24 hours in advance. Simply follow the initial steps and assemble the casserole in your baking dish, covering it tightly with foil and refrigerating it until you're ready to bake. To maintain quality, ensure it’s well sealed to prevent drying out. When you’re ready to enjoy your meal, simply bake it straight from the fridge, adding an extra 10-15 minutes to the baking time to ensure it’s heated through. This way, you’re just moments away from a hearty dinner that will impress your family!

Expert Tips for Easy Chicken Burrito Casserole

• Moisture Control: Ensure you cover the casserole tightly with foil while baking to retain moisture and avoid a dry dish.

• Cooking Time Check: If the casserole still appears liquidy after the initial baking time, stir and bake for additional time until the liquid is absorbed for perfect texture.

• Seasoning Customization: Mix and match your seasonings; combining homemade and store-bought fajita seasoning enhances flavor while personalizing the dish to your liking.

• Chicken Preparation: For quickest prep, use pre-cooked rotisserie chicken or leftover shredded chicken; this speeds up your Easy Chicken Burrito Casserole creation.

• Non-Traditional Substitutes: Feel free to swap black beans for refried beans for creaminess and try quinoa instead of rice for a gluten-free twist.

• Presentation Matters: Let the casserole rest before serving to allow flavors to meld, making it easier to serve and enhancing its inviting appearance.

Easy Chicken Burrito Casserole Recipe FAQs

What should I look for when selecting onions and bell peppers?
When choosing onions, look for firm onions with a dry, papery skin. Avoid ones with dark spots or soft spots, as these indicate spoilage. For bell peppers, choose vibrant, firm ones without wrinkles or blemishes. The colors can vary, so pick bell peppers based on your desired flavor - green is more bitter, while red is sweeter!

How can I store leftovers from the Easy Chicken Burrito Casserole?
Absolutely! Store leftovers in an airtight container in the fridge for up to 3-4 days. Make sure to let the casserole cool to room temperature before sealing it in to maintain its flavors and texture.

Can I freeze the Easy Chicken Burrito Casserole for later use?
Yes, you can freeze it! Portion the casserole into a freezer-safe container and seal tightly, then label it with the date. It will stay fresh for up to 3 months. To reheat, simply thaw in the fridge overnight and bake at 350°F until warmed through, or microwave individual portions for about 3-4 minutes.

What should I do if my casserole is still liquidy after baking?
If your casserole appears liquidy at the end of the baking time, don't fret! simply stir it gently to incorporate the liquid evenly, then return it to the oven, covered, to bake for an additional 10-15 minutes or until the liquid is absorbed. This extra time ensures a perfect, fluffy texture!

Are there any dietary considerations for the Easy Chicken Burrito Casserole?
Definitely! This recipe is gluten-free, but always double-check the labels of your ingredients, especially the fajita seasoning and chicken broth. For those with dairy allergies, you could use vegan cheese or omit the cheese altogether. Additionally, feel free to swap black beans with other legumes if you have bean allergies!

What variations can I make with the ingredients?
Very, you can personalize this casserole by swapping black beans for refried beans or using quinoa instead of rice for an extra protein boost. Toss in sautéed veggies like zucchini or spinach, or add jalapeños for a spicy kick. The more the merrier when it comes to adding your favorite flavors!

Easy Broccoli Chickpea Pasta for a Quick Vegan Meal

June 3, 2026 by Grace Snow Leave a Comment

As I waited for the water to boil, the aroma of garlic wafting from the pan sparked a little joy in my heart. This Broccoli Chickpea Pasta with Garlic Olive Oil is a dish that makes weeknight dinners feel special without demanding hours of my time. In under 30 minutes, you’ll have a vibrant, wholesome meal that's not just quick to prepare but also bursting with plant-based goodness—perfect for everyone at the table, from kids who might shy away from their greens to adults craving comfort. With the versatility of swapping ingredients, you can customize this dish to whatever you have on hand, ensuring it's always as satisfying as it is delightful. Curious how a handful of ingredients can create such magic? Let’s dive in!

Why is Broccoli Chickpea Pasta a Must-Try?

Quick and Easy: In just 30 minutes, you can create a vibrant vegan meal that even the pickiest eaters will love.

Packed with Flavor: The garlic-infused olive oil adds aromatic depth, while the fresh broccoli and chickpeas provide a delightful contrast that keeps each bite interesting.

Nutritionally Rich: High in plant-based proteins and fiber, this dish nourishes your body without compromising on taste or satisfaction.

Endless Customization: Swap in seasonal veggies like asparagus or even zucchini—this recipe adapts beautifully to what you have on hand, making it perfect for improvisation.

Crowd-Pleasing Appeal: Ideal for busy weeknights when you want to impress without the fuss! Pair it with a light salad or even consider trying it alongside some delicious Chickpea Spinach Curry for a complete meal experience.

Broccoli Chickpea Pasta Ingredients

Experience the magic of Broccoli Chickpea Pasta with this thoughtfully curated list!

For the Pasta
• Pasta – Your main carbohydrate source; feel free to substitute gluten-free pasta for a gluten-free dish.

For the Veggies
• Broccoli – Adds nutrients and vibrant color; you can use asparagus or zucchini as excellent alternatives.
• Chickpeas – Offers a hearty dose of protein and fiber; white beans or lentils work well if you want a swap.
• Garlic – Provides that aromatic flavor; roasted garlic can offer a sweeter taste if preferred.

For the Cooking Base
• Olive Oil – Acts as the foundation for sautéing, contributing healthy fats that enrich the dish.
• Red Pepper Flakes – Introduces just the right amount of heat; adjust for spiciness or omit for a milder option.
• Vegetable Broth – Creates a rich sauce base; you can use water or homemade broth as alternatives.

For Flavor Balance
• Lemon Juice – Brightens the dish with acidity; lime juice is a nice substitute for a different twist.
• Salt & Pepper – Essential for seasoning; always adjust to taste for the perfect flavor.

Optional Finishing Touch
• Parmesan (optional) – Adds a savory umami richness; nutritional yeast is a great dairy-free alternative.

Each ingredient plays a crucial role in elevating your Broccoli Chickpea Pasta to delightful new heights!

Step‑by‑Step Instructions for Broccoli Chickpea Pasta

Step 1: Cook the Pasta
Begin by bringing a large pot of salted water to a rolling boil. Add your choice of pasta and cook according to the package instructions, usually about 8-10 minutes, stirring occasionally to prevent sticking. Aim for al dente, allowing the pasta to maintain a slight firmness. Once cooked, reserve ½ cup of the pasta water and drain the rest, then set the pasta aside for later.

Step 2: Sauté the Garlic
In a large skillet, heat 2 tablespoons of olive oil over medium heat. Once the oil shimmers, add 3-4 minced garlic cloves and a pinch of red pepper flakes. Sauté for about 1 minute until the garlic is fragrant and just beginning to turn golden, stirring continuously to avoid burning. This garlic-infused oil will serve as the flavorful base for your Broccoli Chickpea Pasta.

Step 3: Cook the Broccoli
Add 2 cups of fresh broccoli florets to the skillet, stirring well to coat them in the garlic oil. Sauté the broccoli for 5-7 minutes, until it becomes tender-crisp and vibrant green. If needed, slightly lower the heat to prevent the garlic from burning while allowing the broccoli to soften to your desired texture, creating a beautiful contrast in this pasta dish.

Step 4: Add the Chickpeas and Broth
Next, introduce 1 can (15 ounces) of drained and rinsed chickpeas to the skillet. Pour in ½ cup of vegetable broth and 2 tablespoons of fresh lemon juice. Stir to combine all the ingredients, ensuring the chickpeas absorb the flavors. Let this mixture simmer for 2-3 minutes, allowing it to warm through and develop a rich sauce that complements the veggies and pasta beautifully.

Step 5: Combine Pasta and Sauce
After simmering, add the drained pasta to the skillet, tossing everything together gently. If the mixture appears too dry, add some of the reserved pasta water a little at a time until you reach the desired sauce consistency. The lush garlic oil will coat the pasta, creating a delightful fusion of flavors in your Broccoli Chickpea Pasta.

Step 6: Season and Serve
Finally, taste your creation and season generously with salt and pepper to enhance all the flavors. Optionally, sprinkle on some grated Parmesan cheese or nutritional yeast for a nutty savory finish. Once seasoned, serve immediately, allowing everyone to enjoy this vibrant, comforting dish while it's hot, bursting with plant-based goodness.

What to Serve with Broccoli Chickpea Pasta

As you savor the garlicky perfection of this vibrant dish, consider pairing it with a few delightful accompaniments to elevate your meal experience.

  • Fresh Garden Salad: A crisp salad brings a refreshing crunch, balancing the richness of the garlic-infused pasta and adding a burst of color to your table.

  • Lemon-Herb Quinoa: This nutty quinoa side enhances the dish's flavors, while the herb notes echo the lemony zest found in the pasta.

  • Roasted Veggies: Sweet and smoky, roasted vegetables, such as bell peppers and zucchini, create a comforting harmony that aligns perfectly with the dish's textures.

  • Crispy Garlic Bread: The fragrance of garlic bread complements the pasta beautifully, adding crunch and indulgence that enhances the overall experience.

  • Chickpea Spinach Curry: For a heartier spread, serve a warm chickpea spinach curry as a side. The spices contrast delightfully with the simple, clean flavors of the pasta.

  • Vegan Garlic Knots: Soft and doughy, these knots make the perfect carb companion. Their flavorful twist on garlic echoes the pasta, creating a cohesive meal.

  • Lime & Mint Sorbet: To finish on a refreshing note, serve a light sorbet. It's a delightful way to cleanse the palate and provides a sweet contrast to the savory pasta.

  • Sparkling Water with Citrus: A zesty drink helps to keep your meal light and refreshing. The effervescence can highlight the dish's vibrant flavors beautifully.

Make Ahead Options

These Broccoli Chickpea Pasta bowls are ideal for meal prep enthusiasts! You can cook the pasta and sauté the garlic oil mixture up to 24 hours in advance, helping to save precious time on busy weeknights. Simply store the cooked pasta in an airtight container in the refrigerator, and keep the veggie mix (broccoli, chickpeas, broth, and seasonings) separate for optimal freshness. When you're ready to serve, just reheat the broccoli chickpea mixture in a skillet, add the reserved pasta, and a splash of water to maintain moisture, ensuring your dish is just as delicious as when first prepared! This way, you can enjoy a quick, wholesome meal even on the most hectic days.

Expert Tips for Broccoli Chickpea Pasta

  • Pasta Don't Overcook: Cook the pasta al dente to avoid mushiness; it will continue to cook slightly when combined with the sautéed vegetables.

  • Sauté Garlic Wisely: Keep an eye on the garlic; sauté just until fragrant to prevent burning. Burnt garlic can ruin the flavor of your Broccoli Chickpea Pasta.

  • Freshness Matters: Use vibrant, fresh broccoli for the best texture and nutrients. Avoid overcooking it to retain its color and crunch.

  • Adjust Spice Levels: If you're unsure about the heat, start with a pinch of red pepper flakes. You can always add more if you prefer your Broccoli Chickpea Pasta spicy!

  • Reserve Pasta Water: Remember to save some pasta water before draining! This starchy liquid can help loosen the sauce if it gets too thick.

  • Flavor Upgrade: For an extra twist, try adding some lemon zest along with the juice. It gives a refreshing zing that enhances the overall flavor.

How to Store and Freeze Broccoli Chickpea Pasta

  • Fridge: Store leftovers in an airtight container for up to 3 days to keep the flavors fresh and vibrant.

  • Freezer: For longer storage, place cooled portions in freezer-safe bags, removing as much air as possible. Enjoy within 2-3 months for best taste.

  • Reheating: When ready to enjoy, thaw overnight in the fridge or use the microwave. Add a splash of water and cover to retain moisture while reheating for the best results.

  • Texture Tip: Best when reheated gently; ensure the broccoli is warm but still maintains some of its vibrant green color for a delightful experience.

Broccoli Chickpea Pasta Variations

Feel free to sprinkle some creativity into your dish and make it your own!

  • Gluten-Free: Use gluten-free pasta to cater to dietary needs; it will still deliver hearty flavors.

  • Veggie Swap: Substitute broccoli with asparagus, spinach, or zucchini for a fresh twist. Each option brings its unique flavor and texture to the meal.

  • Creamy Addition: Stir in a spoonful of vegan cream cheese for a luxurious sauce that adds richness to every bite. This twist will make your dish even more indulgent and satisfying.

  • Extra Protein: Add fried tofu or tempeh for additional plant-based protein, making your meal even heartier and more filling.

  • Spice it Up: Increase the heat by adding cayenne pepper or diced jalapeños for a spicy kick. Adjust according to your taste buds’ adventure!

  • Zesty Flavor: Incorporate orange juice or zest along with lemon for a vibrant citrusy brightness that elevates the dish with a refreshing zing.

  • Seasonal Twist: Use seasonal vegetables like bell peppers or peas to embrace fresh flavors. They’ll add a splash of color along with a delightful crunch.

For more inspired recipes, don't forget to check out our scrumptious White Bean Pasta or for a heartier option, our Seafood Pasta Savory which can complement your culinary adventures wonderfully!

Broccoli Chickpea Pasta Recipe FAQs

What type of pasta should I use for Broccoli Chickpea Pasta?
You can use any type of pasta you enjoy, such as spaghetti, penne, or fusilli. If you're following a gluten-free diet, I recommend a high-quality gluten-free pasta made from brown rice or chickpeas. This ensures that your Broccoli Chickpea Pasta retains its delightful texture without compromising on taste.

How do I store leftover Broccoli Chickpea Pasta?
Absolutely! Store any leftovers in an airtight container in the refrigerator for up to 3 days. If you want to keep it fresh for longer, try not to add any additional sauces or toppings until you’re ready to reheat. This will help maintain the dish's flavor and texture.

Can I freeze Broccoli Chickpea Pasta?
Yes, you can freeze this dish! Allow the Broccoli Chickpea Pasta to cool completely first, then transfer it to freezer-safe bags or containers, making sure to remove as much air as possible to prevent freezer burn. It will keep well for about 2-3 months. When you're ready to enjoy it again, simply thaw in the refrigerator overnight before reheating.

How can I reheat Broccoli Chickpea Pasta without losing flavor?
To reheat, add your frozen or refrigerated pasta back to a pan over low heat. Pour in a splash of vegetable broth or water and cover the pan to retain moisture. Stir occasionally to heat evenly. This will help keep the broccoli vibrant and the pasta from drying out.

What if I have allergies or dietary restrictions?
You can definitely adapt this Broccoli Chickpea Pasta to suit dietary needs! To keep it vegan and gluten-free, use gluten-free pasta and omit cheese or substitute it with nutritional yeast for a cheesy flavor. If you're allergic to chickpeas, feel free to replace them with another legume like lentils or white beans. Just be sure to check your alternative ingredients for potential allergens.

How do I know if my broccoli is fresh enough to use?
For the best texture and flavor, choose broccoli that's bright green with firm florets. Avoid any that has dark spots or yellowing, as these are signs of aging. Fresh broccoli should feel crisp to the touch, ensuring a delightful crunch in your Broccoli Chickpea Pasta!

  • « Previous Page
  • 1
  • …
  • 4
  • 5
  • 6
  • 7
  • 8
  • …
  • 87
  • Next Page »

Welcome!

Hi, I’m Grace, a Sydney-based home cook with a passion for bold flavors and trending ingredients. Whether you’re a busy beginner or a seasoned foodie, you’ll find dishes here that are fresh, fun, and full of flavor.

More about me

Popular Recipes

  • One Pot Keto Tuna Casserole
    One Pot Keto Tuna Casserole: Creamy Comfort in Minutes
  • Ultimate Jalapeno Popper Chicken Salad
    Ultimate Jalapeno Popper Chicken Salad That'll Wow Your Tastebuds
  • Green Chile Cheese Dip
    Mouthwatering Green Chile Cheese Dip for Cozy Gatherings
  • Easy Chimichurri Sauce
    Fresh and Zesty Easy Chimichurri Sauce in Just Minutes

Footer

↑ back to top

About

  • Privacy Policy
  • Disclaimer
  • Terms & Conditions

Newsletter

  • Sign Up! for emails and updates

Contact

  • About me
  • Contact me

Copyright © 2025 TastyTrendIngredients