tastytrendingredients

  • Home
  • Recipes
    • Appetizers
    • Breakfast
    • Dessert
    • Dinner
    • Drinks
    • Salads
    • Snacks
    • Soups
  • About me
  • Contact me
menu icon
go to homepage
  • Home
  • Recipes
    • Appetizers
    • Breakfast
    • Dessert
    • Dinner
    • Drinks
    • Salads
    • Snacks
    • Soups
  • About me
  • Contact me
search icon
Homepage link
  • Home
  • Recipes
    • Appetizers
    • Breakfast
    • Dessert
    • Dinner
    • Drinks
    • Salads
    • Snacks
    • Soups
  • About me
  • Contact me
×

Delicious Seafood Pasta Salad for Ultimate Summer Refreshment

January 24, 2026 by Grace Snow Leave a Comment

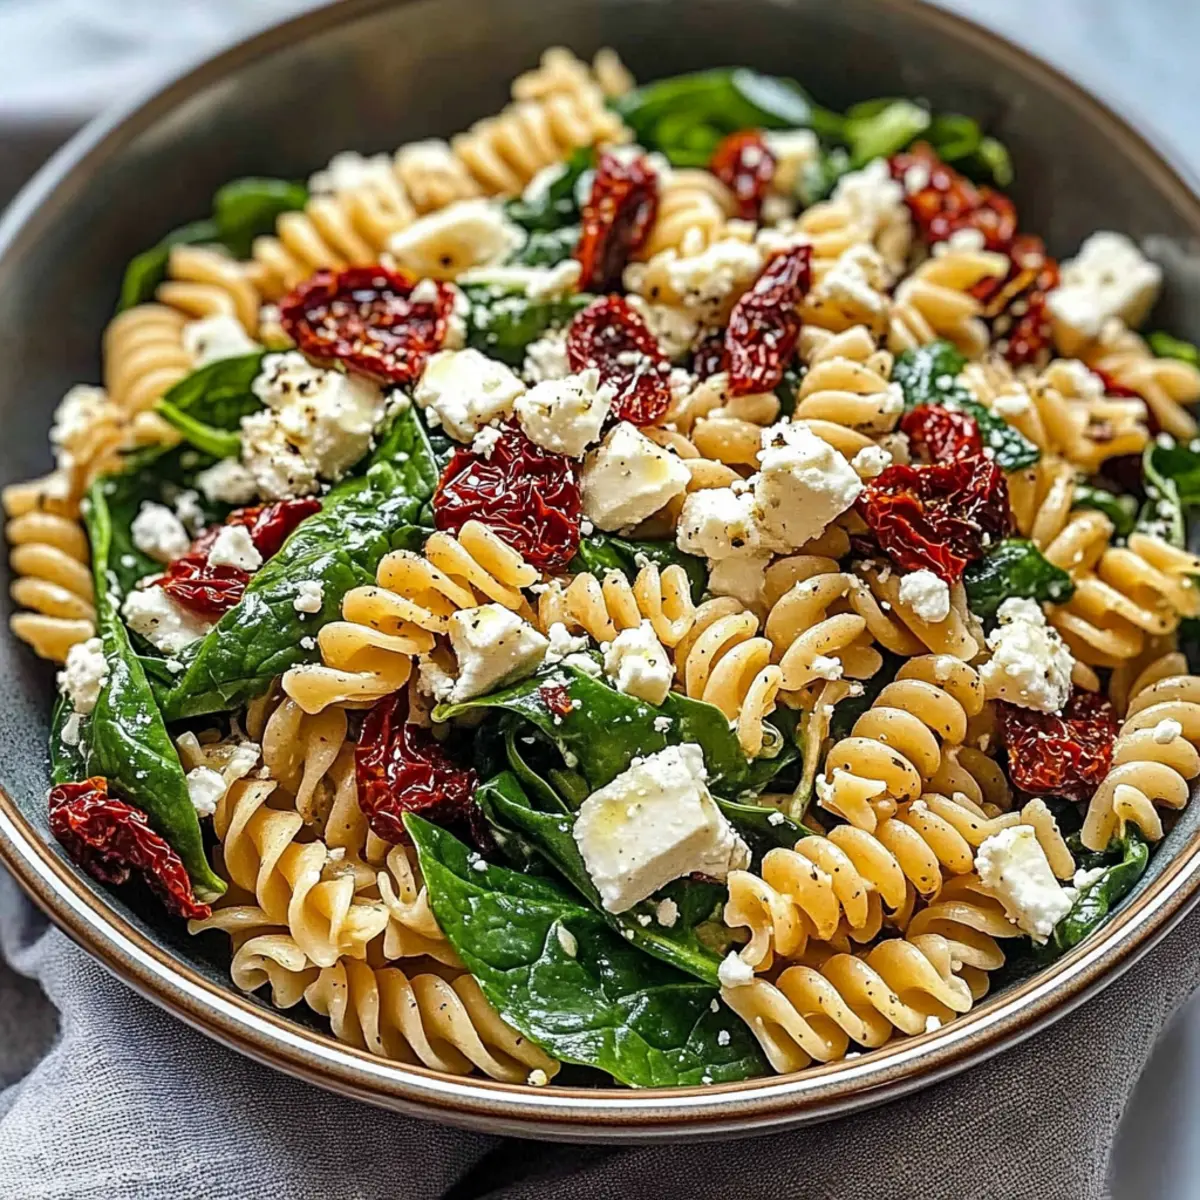
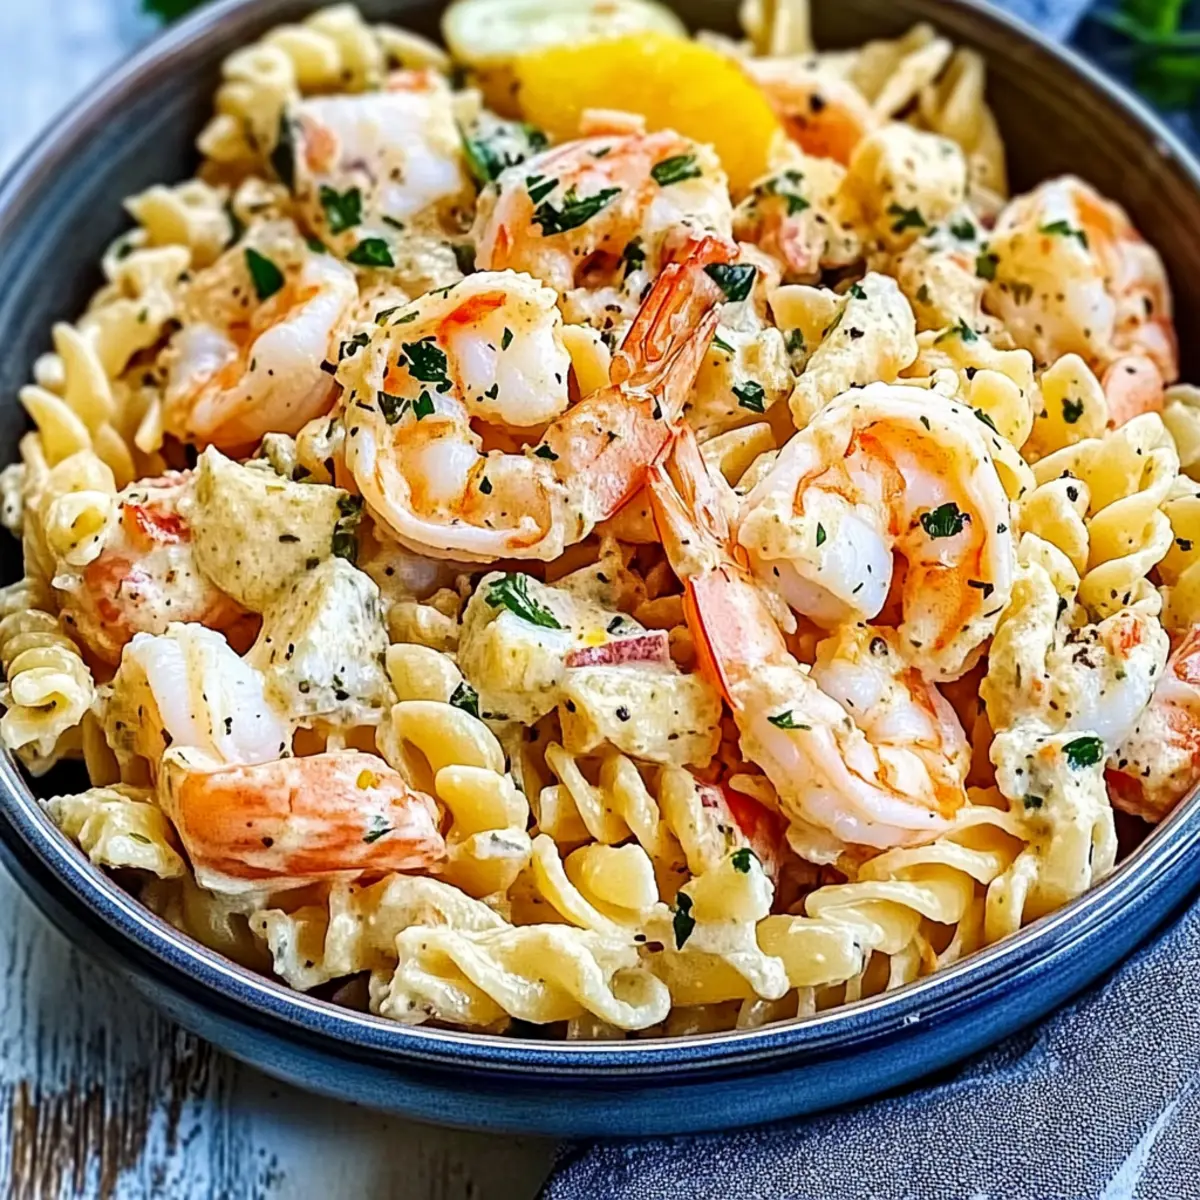
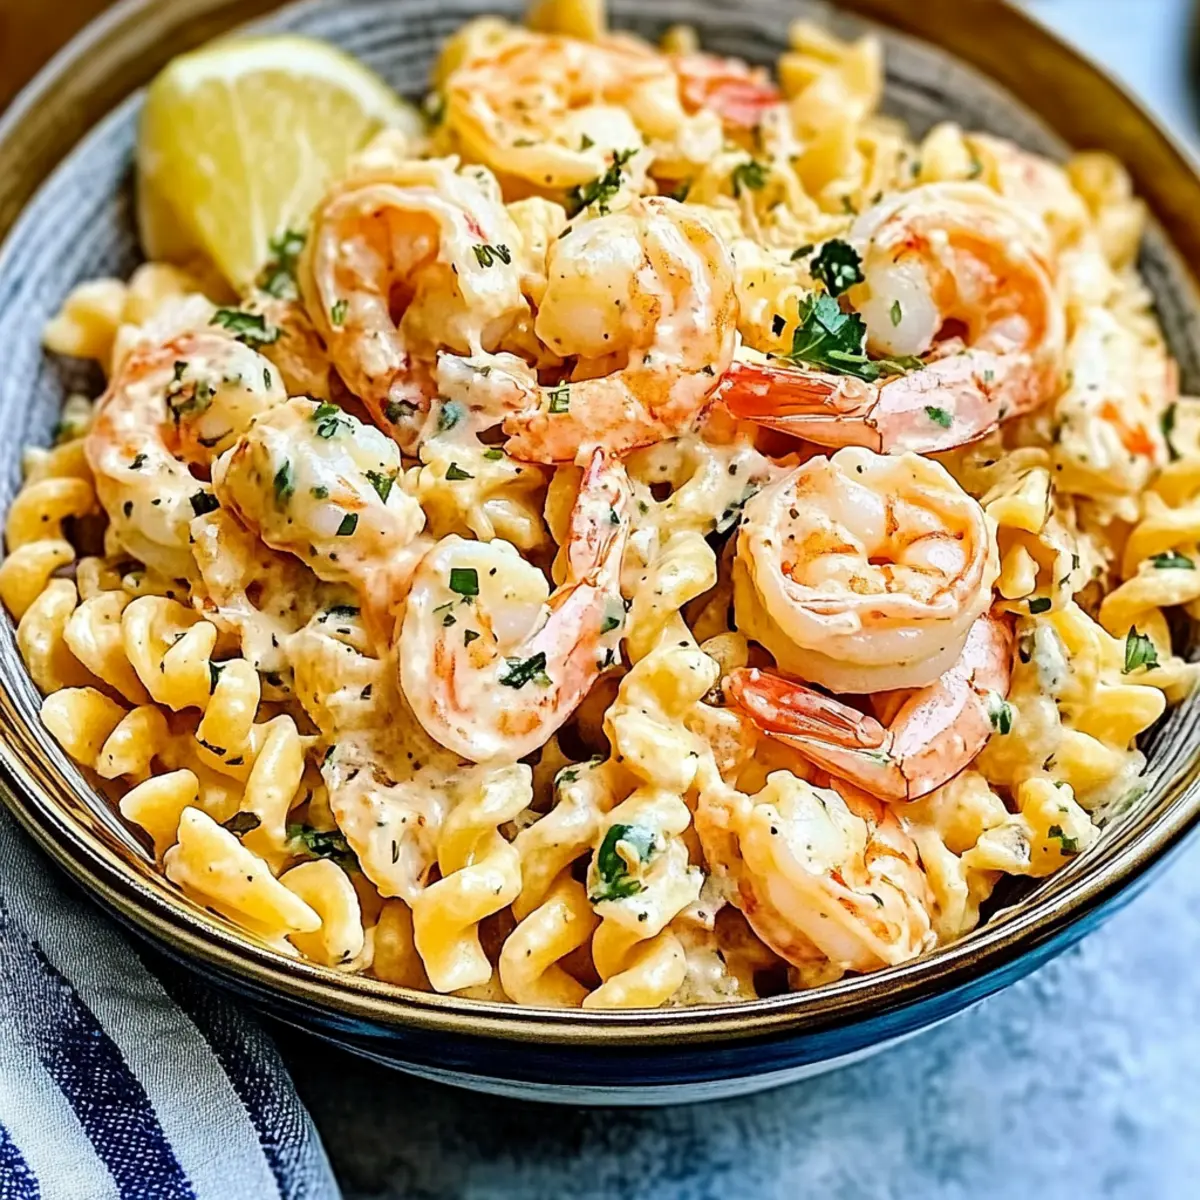
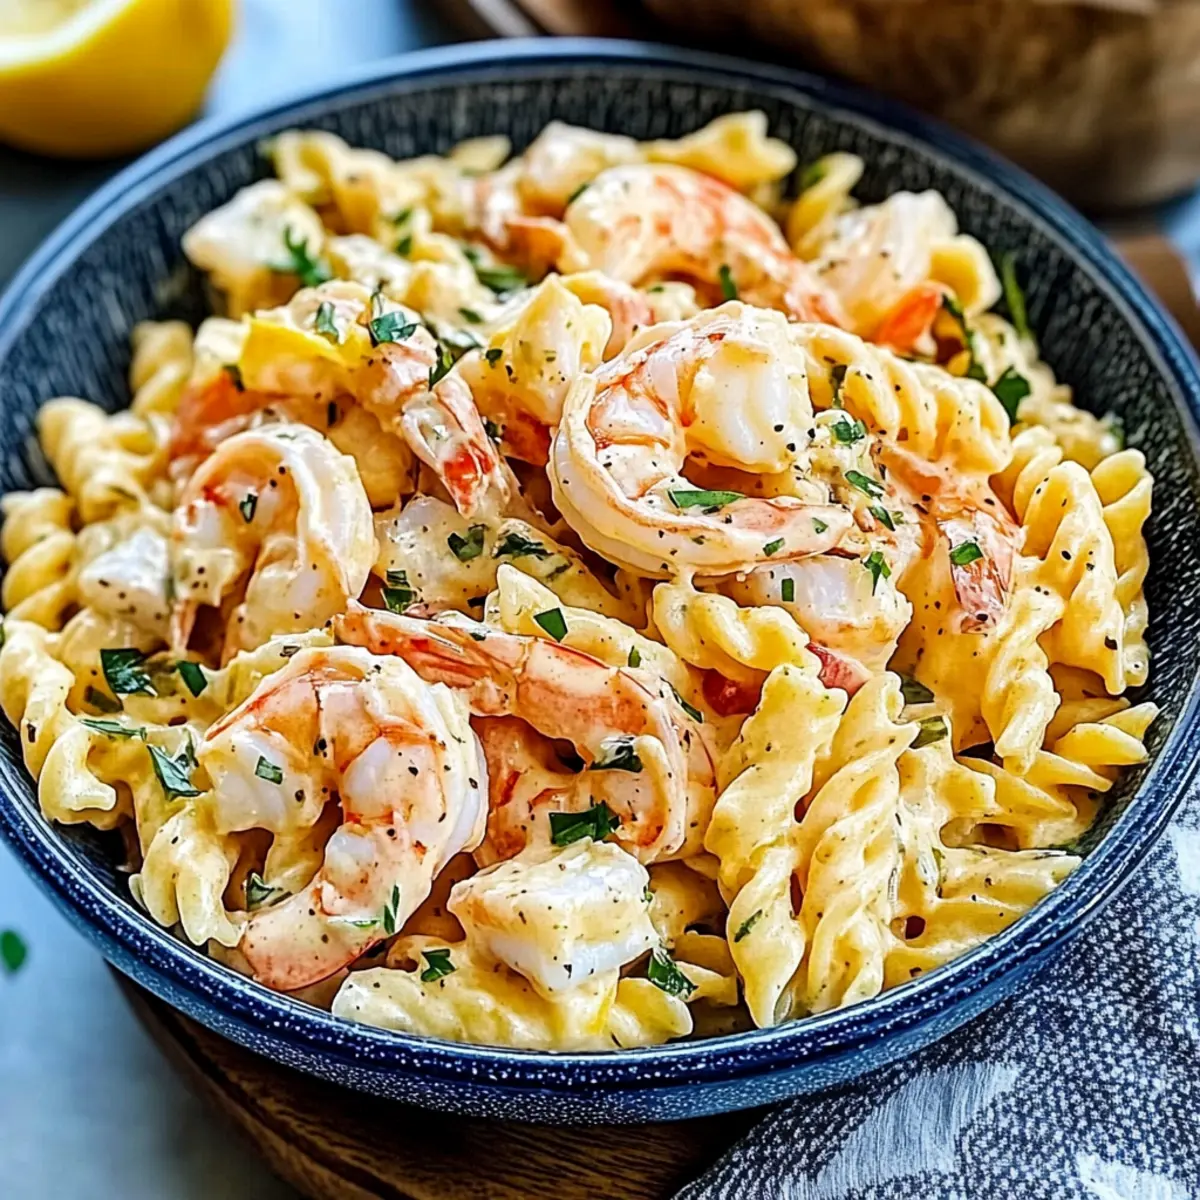
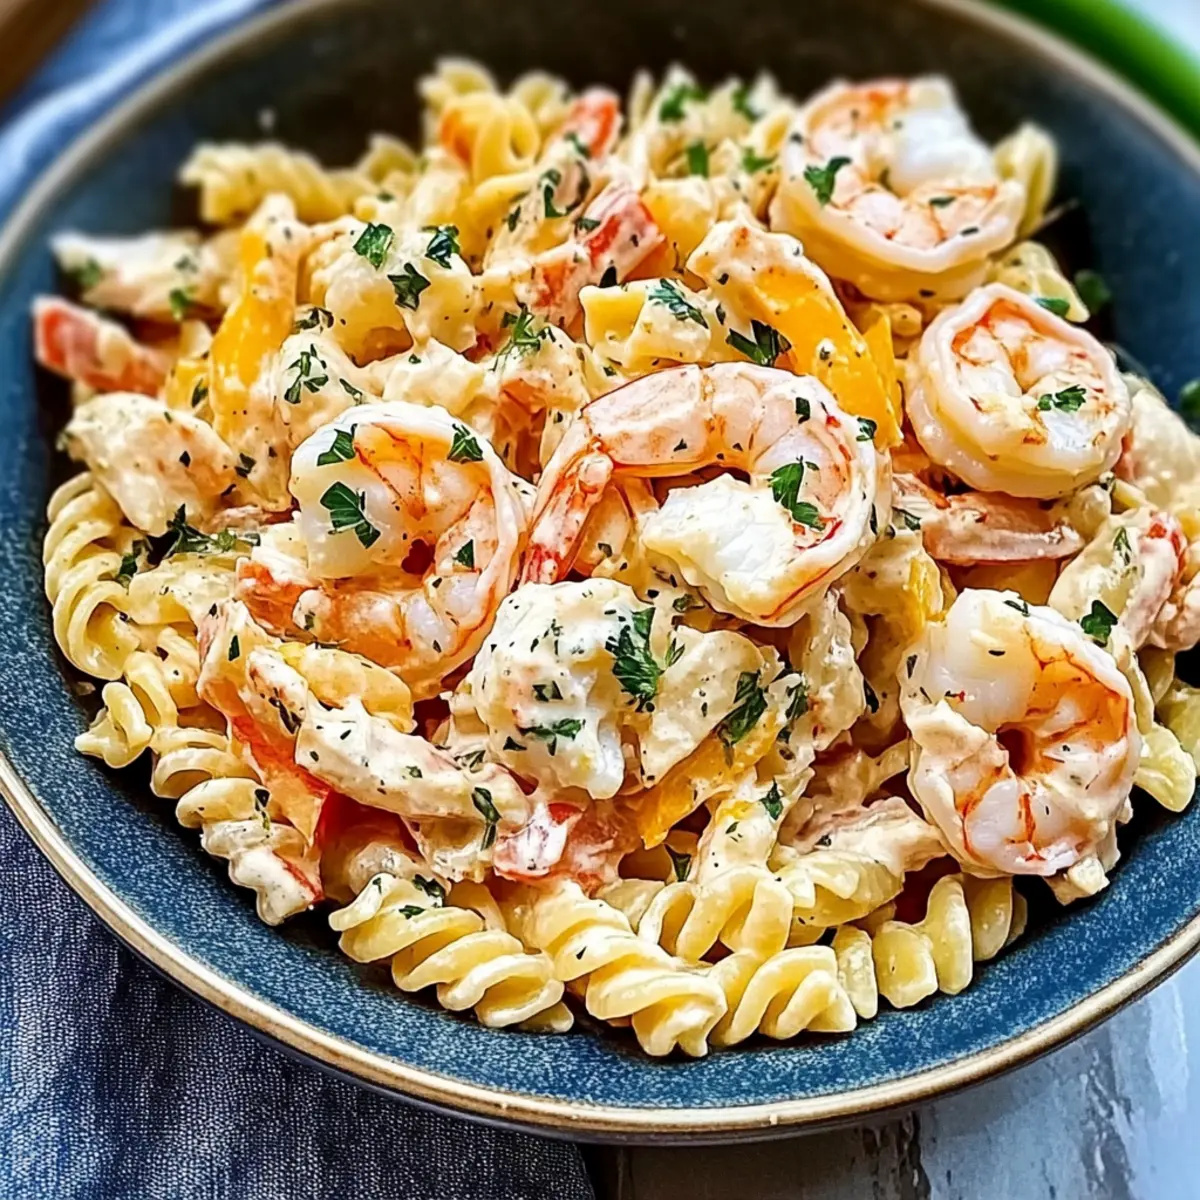
Savoring a sunny afternoon with the sound of waves crashing nearby is one of life’s little joys. Nothing complements that vibe quite like a bowl of Seafood Pasta Salad, a vibrant blend of tender shrimp, imitation crab, and crisp vegetables enveloped in a creamy dressing. This dish stands out as an easy-to-prepare crowd-pleaser, perfect for your summer gatherings or casual beach picnics. Plus, it’s customizable—feel free to play with ingredients to match your taste or whatever's in your pantry. Picture yourself diving into this refreshing summer delight that not only fills your stomach but also brings a splash of coastal flavor to your table. What unique twist would you add to make it your own?

Why is Seafood Pasta Salad a must-try?

Simplicity: Preparing this dish is a breeze, perfect for those sunny days when you want something tasty without spending hours in the kitchen.

Fresh Flavors: With succulent shrimp, sweet imitation crab, and vibrant veggies, every bite bursts with refreshing taste, making it an ideal dish to enjoy outdoors.

Customizable Delight: Whether you want to swap in real crab, add a spicy kick with jalapeños, or even mix in diced avocado for creaminess, the options are endless!

Perfect for Sharing: This Seafood Pasta Salad is a true crowd-pleaser, perfect for potlucks or beach days where everyone will want a second serving.

Nostalgic Feel: Reminiscent of classic summer picnics, each bowl brings back cherished memories of laughter and joy under the sun.

For an extra treat, consider serving it on a bed of lettuce for a touch of elegance or pairing it with a refreshing Avocado Egg Salad to elevate your meal. Enjoy!

Seafood Pasta Salad Ingredients

For the Pasta

  • Pasta – Small shapes like shells or elbow macaroni work best for holding the creamy dressing.

For the Seafood

  • Shrimp – Use fresh or pre-cooked shrimp; adjust cooking time accordingly for fresh shrimp.
  • Imitation Crab – Sweet and flaky, or substitute with real crab for a luxurious upgrade.

For the Vegetables

  • Celery – Adds vital crunch and freshness to the salad.
  • Red Bell Pepper – Offers a pop of color and sweetness; green bell pepper can be a milder alternative.
  • Red Onion – Provides a sharp bite to balance the sweetness; swap for green onions for a milder flavor.

For the Dressing

  • Mayonnaise – The base of our creamy dressing; Greek yogurt is a great low-calorie substitute.
  • Sour Cream – Adds tanginess and smoothness; contributes to the creaminess of the dish.
  • Dijon Mustard – Introduces zest and depth to the dressing.
  • Lemon Juice – Freshly squeezed brings brightness and acidity to enhance flavors.
  • Old Bay Seasoning – A classic for seafood; adjust to your taste to elevate the seafood profile.
  • Salt & Pepper – Essentials for seasoning; tailor to improve the overall flavor balance.
  • Parsley – Adds freshness and a touch of color; perfect for garnishing the dish.

Feel free to use these ingredients in your Seafood Pasta Salad and enjoy making it your own!

Step-By-Step Instructions for Seafood Pasta Salad

Step 1: Cook the Pasta
Begin by bringing a large pot of salted water to a rolling boil. Add in your chosen small pasta, such as shells or elbow macaroni, and cook until al dente, around 8-10 minutes. Once done, drain the pasta in a colander and rinse it under cold water to cool it down quickly. This helps stop the cooking process and prevents it from becoming mushy in your Seafood Pasta Salad.

Step 2: Prepare the Shrimp
If you're using fresh shrimp, now's the time to cook them. Bring a small pot of water to a boil, add in the shrimp, and cook for about 2-3 minutes until they turn pink and opaque. Drain and let cool, then chop them into bite-sized pieces. If using pre-cooked shrimp, simply chop them and set aside for the Seafood Pasta Salad.

Step 3: Chop the Veggies
While the pasta and shrimp are cooling, prepare your vegetables. Finely chop the celery, red bell pepper, and red onion, ensuring they're roughly the same size for even distribution in your Seafood Pasta Salad. Also, roughly chop a handful of fresh parsley for garnish, adding a touch of color and flavor to the dish.

Step 4: Make the Dressing
In a mixing bowl, combine the mayonnaise, sour cream, Dijon mustard, and freshly squeezed lemon juice. Add Old Bay seasoning, salt, and pepper to taste. Whisk everything together until smooth and creamy, ensuring that all ingredients are well incorporated. This creamy dressing will elevate your Seafood Pasta Salad's flavors beautifully.

Step 5: Combine Ingredients
In a large mixing bowl, combine the cooled pasta, chopped shrimp, imitation crab, and the diced vegetables. Pour the creamy dressing over the top and gently toss everything together until the pasta and seafood are nicely coated. Aim for an even distribution of dressing throughout the Seafood Pasta Salad.

Step 6: Chill the Salad
Cover the large bowl with plastic wrap or a lid and place the Seafood Pasta Salad in the refrigerator. Allow it to chill for at least 1 hour. This resting time is crucial as it allows the flavors to meld together, creating a more delicious and refreshing dish for your gathering.

Step 7: Garnish and Serve
Before serving, give your Seafood Pasta Salad another gentle toss. For an elegant presentation, serve it on a bed of fresh lettuce. Garnish with the reserved parsley and sprinkle with optional paprika for extra color. Enjoy this delightful salad that perfectly captures the essence of summer!

Expert Tips for Seafood Pasta Salad

  • Choose the Right Pasta: Use small pasta shapes like shells or elbow macaroni, as they hold the creamy dressing better and enhance the overall texture of the Seafood Pasta Salad.

  • Chill for Flavor: Refrigerating the salad for at least 1 hour allows all the delicious flavors to meld together, making each bite more flavorful.

  • Customize to Your Taste: Don't hesitate to experiment with the ingredients. Try adding diced cucumbers or swapping imitation crab for real crab to elevate your Seafood Pasta Salad.

  • Mind the Shrimp: If using fresh shrimp, ensure you don’t overcook them. They should be pink and opaque, cooked just until done to avoid a rubbery texture.

  • Season Thoughtfully: Adjust the Old Bay seasoning and salt & pepper to your liking. Remember, tasting is key to a perfectly balanced Seafood Pasta Salad!

  • Serve on Lettuce: For an elegant touch, serve the salad on a bed of lettuce. It adds freshness and looks beautiful for gatherings!

What to Serve with Seafood Pasta Salad?

Savoring this seafood delight opens the door to countless pairing possibilities that can elevate your summer meals.

  • Garlic Bread: Perfectly toasted with a hint of garlic, it adds a crunchy texture that contrasts beautifully with the creamy salad.

  • Mixed Green Salad: A simple salad with a light vinaigrette adds a refreshing contrast, bringing brightness and crunch to the table.

  • Grilled Veggies: Smoky, charred vegetables like bell peppers and zucchini can enhance the dish's flavor profile and add a lovely summer essence.

  • Chilled White Wine: A crisp, chilled white wine like Sauvignon Blanc balances the richness of the pasta salad and enhances the seafood flavors.

  • Fruit Salad: A light fruit salad, bursting with fresh seasonal fruit, introduces a natural sweetness and refreshing note to complement the seafood.

  • Lemon Sorbet: This palate-cleansing dessert is a delightful finish to your meal, cleansing the taste buds while echoing citrus notes from the salad.

  • Caprese Skewers: Skewered tomatoes, mozzarella, and basil offer a visually appealing and flavorful appetizer that pairs nicely with the rich salad.

  • Potato Salad: A cool, creamy potato salad provides a classic side that will have everyone reminiscing about summer picnics.

Each of these pairings adds a unique flavor or texture, creating a well-rounded meal that celebrates the joys of summer dining!

Seafood Pasta Salad Variations & Substitutions

Feel free to get creative with your Seafood Pasta Salad—there’s so much more you can try to make it uniquely yours!

  • Dairy-Free: Substitute the mayo and sour cream with a vegan alternative or avocado for a creamy texture.
  • Spicy Kick: Add diced jalapeños or a splash of your favorite hot sauce for an extra layer of heat. This adds a bold twist that tantalizes the taste buds.
  • Real Crab Delight: Swap imitation crab for fresh crab or lobster for a more luxurious seafood experience, elevating your dish to gourmet levels.
  • Vegetable Medley: Stir in green peas, diced cucumber, or shredded carrots for added crunch and vibrant color; they enhance the freshness beautifully.
  • Avocado Creaminess: Mix in cubed avocado right before serving for a rich, creamy consistency that adds depth to your salad.
  • Asian Twist: Swap the creamy dressing for an Asian-style version using sesame oil, soy sauce, and sliced green onions, adding a delightful twist.
  • Herb Boost: Experiment with different fresh herbs like dill or basil for a refreshing, aromatic flavor profile that complements the seafood perfectly.
  • Nutty Crunch: Toss in some toasted walnuts or slivered almonds for a satisfying crunch that also introduces healthy fats.

As you explore these variations, think about pairing your Seafood Pasta Salad with a light Jello Salad or a refreshing Tofu Caesar Salad to create a colorful, summer spread that everyone will love!

Make Ahead Options

These Seafood Pasta Salad components are perfect for busy home cooks looking to save time during meal prep! You can prepare the pasta and chop the vegetables up to 24 hours in advance, keeping them refrigerated in airtight containers. To maintain fresh flavors and textures, store the creamy dressing separately and whisk it together just before serving. When you're ready to enjoy your Seafood Pasta Salad, simply combine the prepped pasta, greens, shrimp, and crab with the dressing, tossing everything gently to coat. This way, you’ll have a delicious, crowd-pleasing meal that's just as refreshing and vibrant as if you made it fresh that day!

How to Store and Freeze Seafood Pasta Salad

Fridge: Keep your Seafood Pasta Salad refrigerated in an airtight container for up to 2-3 days to maintain freshness and flavor.

Room Temperature: Avoid leaving the salad at room temperature for more than 2 hours, especially on warm days, to prevent spoilage.

Freezer: Freezing is not recommended due to the mayonnaise and seafood, which do not thaw well together and can negatively affect texture and taste.

Reheating: This dish is best served cold; simply stir and enjoy directly from the fridge without reheating for the ultimate refreshing taste.

Seafood Pasta Salad Recipe FAQs

What type of pasta works best for Seafood Pasta Salad?
Absolutely! Small pasta shapes like shells, elbow macaroni, or rotini are ideal as they hold the creamy dressing better, providing an even flavor throughout the salad. Using small shapes also means each bite gets a satisfying texture, making your Seafood Pasta Salad even more enjoyable!

How should I store leftover Seafood Pasta Salad?
Make sure to store your Seafood Pasta Salad in an airtight container in the refrigerator. It will stay fresh for about 2-3 days, so you can enjoy those delicious flavors a little longer. Just remember to give it a quick toss before serving it again!

Can I freeze Seafood Pasta Salad?
No, I do not recommend freezing Seafood Pasta Salad. The mayonnaise and seafood don’t thaw well together, which can lead to an unappetizing texture and flavor. It’s best enjoyed fresh or chilled!

What if my shrimp overcooks in the salad?
Very! If your shrimp become rubbery from overcooking, there's a trick to save it. However, prevention is key; cook them just until pink and opaque—about 2-3 minutes if fresh. If they do end up overcooked, try cutting them into smaller pieces to blend more seamlessly into your Seafood Pasta Salad, where they won’t stand out as much.

Can I substitute any ingredients for dietary restrictions?
Certainly! You can easily make adjustments to cater to dietary needs. For instance, swap out mayonnaise for Greek yogurt for a lighter version or use tofu-based alternatives if you need a dairy-free dressing. Plus, if anyone is allergic to shellfish, feel free to omit shrimp and crab while adding more veggies or even chicken for protein.

How can I enhance the flavor of my Seafood Pasta Salad?
To elevate the flavor, consider adding a squeeze of fresh lemon juice right before serving for added brightness. You can also mix in some hot sauce or diced jalapeño for a spicy kick. Additionally, letting the salad chill for an hour before serving allows all the flavors to meld beautifully, making each bite a burst of deliciousness!

Seafood Pasta Salad

Delicious Seafood Pasta Salad for Ultimate Summer Refreshment

Enjoy a refreshing Seafood Pasta Salad, packed with shrimp, imitation crab, and vibrant vegetables, perfect for summer gatherings.
Print Recipe Pin Recipe
Prep Time 20 minutes mins
Cook Time 10 minutes mins
Chill Time 1 hour hr
Total Time 1 hour hr 30 minutes mins
Servings: 6 servings
Course: Salads
Cuisine: American
Calories: 350
Ingredients Equipment Method Nutrition Notes

Ingredients
  

For the Pasta
  • 2 cups Small pasta (shells or elbow macaroni)
For the Seafood
  • 1 lb Shrimp (fresh or pre-cooked)
  • 8 oz Imitation crab
For the Vegetables
  • 1 cup Celery (chopped)
  • 1 cup Red bell pepper (chopped)
  • 1 cup Red onion (chopped)
  • 1/4 cup Parsley (chopped) for garnish
For the Dressing
  • 1 cup Mayonnaise
  • 1/2 cup Sour cream
  • 2 tbsp Dijon mustard
  • 2 tbsp Lemon juice (freshly squeezed)
  • 1 tbsp Old Bay seasoning adjust to taste
  • to taste Salt & pepper to taste

Equipment

  • large mixing bowl
  • small pot
  • Colander
  • Mixing Bowl

Method
 

Preparation
  1. Cook the pasta in boiling salted water until al dente, about 8-10 minutes, then drain and rinse under cold water.
  2. If using fresh shrimp, cook them in boiling water for 2-3 minutes until pink. Drain, cool, and chop.
  3. Chop celery, red bell pepper, and red onion to similar sizes. Add parsley for garnish.
Making the Dressing
  1. In a bowl, mix mayonnaise, sour cream, Dijon mustard, and lemon juice. Add Old Bay seasoning, salt, and pepper. Whisk until smooth.
Combining Ingredients
  1. In a large bowl, combine cooled pasta, chopped shrimp, imitation crab, and vegetables. Pour the dressing over and toss gently to coat.
Chilling
  1. Cover and refrigerate for at least 1 hour for flavors to meld together.
Serving
  1. Toss before serving and serve on a bed of lettuce. Garnish with parsley and optional paprika.

Nutrition

Serving: 1cupCalories: 350kcalCarbohydrates: 40gProtein: 20gFat: 15gSaturated Fat: 2gCholesterol: 95mgSodium: 800mgPotassium: 400mgFiber: 2gSugar: 2gVitamin A: 15IUVitamin C: 50mgCalcium: 5mgIron: 10mg

Notes

Feel free to customize with ingredients like real crab or diced avocado for added flavor and texture.

Tried this recipe?

Let us know how it was!

Creamy Pumpkin Pudding Pie: Your No-Bake Thanksgiving Bliss

January 24, 2026 by Grace Snow Leave a Comment

As I stood in the kitchen, sifting through the spices, the scent of cinnamon and nutmeg wafted through the air like a warm hug. My quest for the perfect Thanksgiving dessert led me to a delightful creation: No-Bake Pumpkin Pudding Pie. This creamy masterpiece is a game changer, eliminating the need for baking while still delivering all those beloved seasonal flavors. It comes together in just 10 minutes of hands-on time, making it an effortless choice for gatherings or cozy nights at home. Plus, the graham cracker crust adds a satisfying crunch that beautifully contrasts the smooth pudding filling. Curious how this no-fuss dessert will become your new favorite holiday treat? Let’s dive into the recipe!

Why choose no-bake pumpkin pudding pie?

Time-Saving Delight: With just 10 minutes of prep, this recipe is perfect for busy home cooks.

Creamy Texture: Experience the luscious smoothness that rivals traditional pumpkin pie.

No Baking Required: Skip the oven hassle and still impress your guests with this stunning dessert.

Versatile Toppings: Customize with whipped cream, caramel drizzle, or even a sprinkle of gingersnap crumbs for extra flair.

A Crowd Favorite: This pie is sure to be the highlight of your Thanksgiving gathering, making it a must-try.

Pair it with a cup of coffee or our easy Pumpkin Cinnamon Roll Muffins for a delicious autumn feast!

Pumpkin Pudding Pie Ingredients

Get ready to whip up a creamy Pumpkin Pudding Pie that'll steal the spotlight!

For the Crust
• Ready-to-use Graham Cracker Crust – This provides the perfect structure, so pick a standard 6 oz size for best results.

For the Filling
• French Vanilla Instant Pudding (2 boxes, 3.4 oz each) – Enjoy a rich sweetness; you can swap in plain vanilla or cheesecake pudding if desired.
• Pumpkin Pie Spice (1 teaspoon) – This warm spice blend elevates the flavor, giving your pie that classic taste.
• Heavy Cream (1¼ cups) – The secret to richness; don’t substitute unless you want to compromise the texture.
• Pure Pumpkin (1 cup) – Essential for that signature pumpkin flavor—stay away from pumpkin pie filling!

Optional Topping
• Heavy Cream with Powdered Sugar – Whip this up for a delightful topping, or opt for store-bought whipped cream or Cool Whip for convenience.

Step‑by‑Step Instructions for No-Bake Pumpkin Pudding Pie

Step 1: Mix the Dry Ingredients
In a large mixing bowl, whisk together the two boxes of French vanilla instant pudding and 1 teaspoon of pumpkin pie spice. Ensure all lumps are broken down and the spices are evenly distributed. This step builds the foundation of flavor for your Pumpkin Pudding Pie, so take your time and mix thoroughly.

Step 2: Combine with Wet Ingredients
Next, pour in 1¼ cups of heavy cream and 1 cup of pure pumpkin, then use an electric hand mixer to blend until the mixture is thick and smooth, about 1-2 minutes. Scrape down the sides of the bowl to fully incorporate all ingredients. You should achieve a rich, creamy consistency that showcases the beautiful orange hue of the pumpkin.

Step 3: Fill the Crust
Carefully spoon the luscious pumpkin mixture into the ready-to-use graham cracker crust, smoothing the top with a spatula for an even finish. Make sure the filling spreads evenly and reaches the edges of the crust. This ensures each slice of your Pumpkin Pudding Pie has a perfect ratio of filling to crust.

Step 4: Chill the Pie
Cover the pie with its plastic lid or plastic wrap to prevent any air exposure. Place it in the refrigerator to chill for at least 8 hours or preferably overnight. This chilling time allows the flavors to meld and the filling to set to a perfect creamy texture, making it ready for serving.

Step 5: Serve with Optional Toppings
When you're ready to serve your delightful Pumpkin Pudding Pie, remove it from the refrigerator. If desired, whip up additional heavy cream with powdered sugar for a fluffy topping. Spoon or pipe the whipped cream onto the pie to add an extra touch of sweetness and presentation. Enjoy this creamy treat refreshed from the fridge, perfect for your Thanksgiving gathering!

What to Serve with Pumpkin Pudding Pie

Elevate your dessert experience by pairing this creamy delight with complementary flavors and textures that warm the soul.

  • Spiced Apple Cider: A warm, comforting drink that harmonizes with the autumn spices in the pie, enhancing the seasonal mood.
  • Whipped Cream Clouds: Light and airy, a dollop of freshly whipped cream on top adds texture and sweetness, making each bite divine.
  • Ginger Snap Cookies: The crunch and spiciness of ginger snaps provide a delightful contrast to the silky pudding, creating a flavor explosion.
  • Roasted Pecans: These nutty bites bring a satisfying crunch, perfectly balancing the smoothness of the pie and deepening the flavor profile.
  • Vanilla Ice Cream: A scoop of velvety vanilla ice cream delivers a creamy coolness, enhancing the rich pumpkin taste while adding another layer of enjoyment.
  • Pumpkin Spice Latte: This iconic fall beverage pairs exquisitely, echoing the flavors of the pie and creating a cozy coffee break experience.
  • Chocolate Drizzle: A light drizzle of melted chocolate not only adds elegance but also provides a delightful contrast to the spiced pumpkin flavor.
  • Caramel Sauce: Elevate each slice with a sweet touch of caramel, offering a luscious finish that dances on the palate and invites seconds.
  • Pecan Pie Bars: As a delightful side, these bars offer a chewy texture and nutty sweetness that perfectly complements the creamy pudding pie.
  • Pear and Almond Salad: A fresh, zingy salad with ripe pears and slivered almonds adds brightness and a refreshing contrast to the richness of the pie.

Make Ahead Options

Prepare your No-Bake Pumpkin Pudding Pie in advance to save time and make your Thanksgiving planning effortless! You can assemble the pie and refrigerate it up to 24 hours ahead of serving. Simply follow the instructions to mix the filling and spoon it into the graham cracker crust. After covering with plastic wrap, refrigerate to allow the flavors to meld while ensuring the filling sets perfectly. To maintain the crust's crispness, avoid excessive chilling beyond a day, as it can become soggy. When ready to serve, add your desired whipped cream topping and enjoy this creamy delight with minimal last-minute effort!

How to Store and Freeze Pumpkin Pudding Pie

Fridge: Store the pie in the refrigerator covered with plastic wrap or its plastic lid for up to 3-4 days. This keeps it fresh and delicious while the flavors continue to meld.

Freezer: If you'd like to freeze the pie, it can be wrapped tightly and stored for up to 1 month. Thaw in the fridge overnight before serving to maintain its creamy texture.

Serving: When ready to enjoy, slice and serve chilled. If desired, top with whipped cream for an extra touch of elegance.

Make-Ahead: You can prepare this Pumpkin Pudding Pie a day in advance, making it ideal for Thanksgiving or special gatherings. Just remember to store it well covered!

Expert Tips for Pumpkin Pudding Pie

• Ingredient Quality Matters: Use pure pumpkin, not pumpkin pie filling, to ensure the best flavor in your Pumpkin Pudding Pie.

• Chill Well: Allow the pie to chill for at least 8 hours to achieve the right creamy texture; avoid cutting corners here for optimal results.

• Smoothing the Filling: When pouring the mixture into the crust, use a spatula to gently smooth the top, ensuring an even finish before refrigerating.

• Whipped Cream Perfection: For luxurious whipped cream topping, whip heavy cream until stiff peaks form, making your dessert not just delicious but visually stunning too.

• Avoid Soggy Crust: To prevent a soggy crust, keep the pie refrigerated for no longer than 24 hours before serving, ensuring that it maintains crispness.

Pumpkin Pudding Pie Variations & Substitutions

Feel free to get creative and personalize your Pumpkin Pudding Pie to suit your taste buds!

  • Dairy-Free: Substitute heavy cream with coconut cream and use dairy-free pudding for a vegan-friendly dessert. It will still be rich and indulgent!

  • Gluten-Free: Opt for a gluten-free graham cracker crust or a nut-based crust, like almond flour, ensuring everyone can enjoy this treat.

  • Spiced Up: Add a pinch of nutmeg and ground ginger to the pumpkin mixture for an extra layer of warmth and flavor. This twist accentuates the seasonal spices beautifully!

  • Pumpkin Spice Variations: Use chai spice or apple pie spice in place of pumpkin pie spice for a delightful flavor twist. It’s a fun way to experiment with different spice profiles.

  • Chocolate Lovers: Incorporate a layer of chocolate pudding beneath the pumpkin filling for a deliciously decadent dessert. The combo is heavenly, offering a surprise in every bite!

  • Caramel Drizzle: Top with a homemade or store-bought caramel sauce before serving for an enticing sweet finish. The sweet caramel complements the creamy pumpkin beautifully!

  • Auto-Store Alternatives: Instead of Cool Whip, try whipped coconut cream for a lighter, dairy-free option. Whip it up just before serving for a fresh touch.

For those in need of more pumpkin inspiration, consider our easy Pumpkin Cinnamon Roll Muffins as a delightful pairing!

Pumpkin Pudding Pie Recipe FAQs

How do I know if my pumpkin is ripe for this recipe?
Absolutely! For this recipe, always choose pure pumpkin that is a vibrant orange color, without dark spots all over. Check for firmness and a smooth texture, as blemishes can indicate overripeness. Ensure that you're using canned pure pumpkin, as fresh pumpkin often requires cooking and mashing, which isn’t necessary here.

What’s the best way to store leftover Pumpkin Pudding Pie?
Very! Store your Pumpkin Pudding Pie in the refrigerator, covered with plastic wrap or its plastic lid. It can last up to 3-4 days, ensuring the flavors are preserved. Just make sure to keep the covering tight to avoid any absorption of odors from the fridge!

Can I freeze Pumpkin Pudding Pie?
Of course! If you're looking to store it longer, wrap the pie tightly in plastic wrap and aluminum foil, and it can be frozen for up to 1 month. To thaw, just place it in the refrigerator overnight before you're ready to serve, preserving that creamy texture. Avoid refreezing once thawed for the best consistency.

What should I do if my pudding mixture is lumpy?
No worries! If you notice lumps in your mixture, it often results from not fully mixing in the dry ingredients. Use an electric mixer and ensure you scrape the sides of the bowl thoroughly to break up those pesky lumps. Mix for 1-2 minutes until everything is smooth and well combined, giving your pie the perfect texture.

Are there any dietary considerations for pets or allergies?
Absolutely! Keep in mind that this Pumpkin Pudding Pie contains heavy cream and pure pumpkin, which aren’t suitable for pets like dogs and cats. Additionally, it’s important to check for any allergies related to dairy or gluten since the crust contains wheat. If you're making this for someone with allergies, consider alternatives like a gluten-free crust or dairy-free pudding options.

Can I make this pie ahead of time for Thanksgiving?
Very! This Pumpkin Pudding Pie is an ideal make-ahead dessert. You can prepare it a day in advance. Just ensure you refrigerate it well covered, and serve it chilled for the best flavor and texture. Making it ahead means you'll have more time to enjoy the festivities without any last-minute cooking!

Pumpkin Pudding Pie

Creamy Pumpkin Pudding Pie: Your No-Bake Thanksgiving Bliss

Delicious Pumpkin Pudding Pie made without baking. A creamy delight perfect for Thanksgiving gatherings.
Print Recipe Pin Recipe
Prep Time 10 minutes mins
Chilling Time 8 hours hrs
Total Time 8 hours hrs 10 minutes mins
Servings: 8 slices
Course: Dessert
Cuisine: American
Calories: 320
Ingredients Equipment Method Nutrition Notes

Ingredients
  

For the Crust
  • 1 standard 6 oz Ready-to-use Graham Cracker Crust
For the Filling
  • 2 boxes (3.4 oz each) French Vanilla Instant Pudding Can swap with plain vanilla or cheesecake pudding
  • 1 teaspoon Pumpkin Pie Spice
  • 1.25 cups Heavy Cream Do not substitute
  • 1 cup Pure Pumpkin Not pumpkin pie filling
Optional Topping
  • Heavy Cream with Powdered Sugar For topping; can use store-bought

Equipment

  • Mixing Bowl
  • Electric hand mixer
  • Spatula
  • Refrigerator

Method
 

Step-by-Step Instructions
  1. In a large mixing bowl, whisk together the two boxes of French vanilla instant pudding and 1 teaspoon of pumpkin pie spice.
  2. Pour in 1¼ cups of heavy cream and 1 cup of pure pumpkin, then blend until thick and smooth.
  3. Carefully spoon the pumpkin mixture into the graham cracker crust, smoothing the top.
  4. Cover the pie and refrigerate for at least 8 hours or preferably overnight.
  5. When ready to serve, top with whipped cream if desired.

Nutrition

Serving: 1sliceCalories: 320kcalCarbohydrates: 40gProtein: 3gFat: 18gSaturated Fat: 10gPolyunsaturated Fat: 1gMonounsaturated Fat: 4gCholesterol: 75mgSodium: 280mgPotassium: 160mgFiber: 1gSugar: 20gVitamin A: 2500IUVitamin C: 1mgCalcium: 50mgIron: 1mg

Notes

Use pure pumpkin for best flavor and allow to chill for optimal results.

Tried this recipe?

Let us know how it was!

Creamy Pumpkin Pudding Pie: Your No-Bake Thanksgiving Bliss

January 24, 2026 by Grace Snow Leave a Comment

As I stood in the kitchen, sifting through the spices, the scent of cinnamon and nutmeg wafted through the air like a warm hug. My quest for the perfect Thanksgiving dessert led me to a delightful creation: No-Bake Pumpkin Pudding Pie. This creamy masterpiece is a game changer, eliminating the need for baking while still delivering all those beloved seasonal flavors. It comes together in just 10 minutes of hands-on time, making it an effortless choice for gatherings or cozy nights at home. Plus, the graham cracker crust adds a satisfying crunch that beautifully contrasts the smooth pudding filling. Curious how this no-fuss dessert will become your new favorite holiday treat? Let’s dive into the recipe!

Why choose no-bake pumpkin pudding pie?

Time-Saving Delight: With just 10 minutes of prep, this recipe is perfect for busy home cooks.

Creamy Texture: Experience the luscious smoothness that rivals traditional pumpkin pie.

No Baking Required: Skip the oven hassle and still impress your guests with this stunning dessert.

Versatile Toppings: Customize with whipped cream, caramel drizzle, or even a sprinkle of gingersnap crumbs for extra flair.

A Crowd Favorite: This pie is sure to be the highlight of your Thanksgiving gathering, making it a must-try.

Pair it with a cup of coffee or our easy Pumpkin Cinnamon Roll Muffins for a delicious autumn feast!

Pumpkin Pudding Pie Ingredients

Get ready to whip up a creamy Pumpkin Pudding Pie that'll steal the spotlight!

For the Crust
• Ready-to-use Graham Cracker Crust – This provides the perfect structure, so pick a standard 6 oz size for best results.

For the Filling
• French Vanilla Instant Pudding (2 boxes, 3.4 oz each) – Enjoy a rich sweetness; you can swap in plain vanilla or cheesecake pudding if desired.
• Pumpkin Pie Spice (1 teaspoon) – This warm spice blend elevates the flavor, giving your pie that classic taste.
• Heavy Cream (1¼ cups) – The secret to richness; don’t substitute unless you want to compromise the texture.
• Pure Pumpkin (1 cup) – Essential for that signature pumpkin flavor—stay away from pumpkin pie filling!

Optional Topping
• Heavy Cream with Powdered Sugar – Whip this up for a delightful topping, or opt for store-bought whipped cream or Cool Whip for convenience.

Step‑by‑Step Instructions for No-Bake Pumpkin Pudding Pie

Step 1: Mix the Dry Ingredients
In a large mixing bowl, whisk together the two boxes of French vanilla instant pudding and 1 teaspoon of pumpkin pie spice. Ensure all lumps are broken down and the spices are evenly distributed. This step builds the foundation of flavor for your Pumpkin Pudding Pie, so take your time and mix thoroughly.

Step 2: Combine with Wet Ingredients
Next, pour in 1¼ cups of heavy cream and 1 cup of pure pumpkin, then use an electric hand mixer to blend until the mixture is thick and smooth, about 1-2 minutes. Scrape down the sides of the bowl to fully incorporate all ingredients. You should achieve a rich, creamy consistency that showcases the beautiful orange hue of the pumpkin.

Step 3: Fill the Crust
Carefully spoon the luscious pumpkin mixture into the ready-to-use graham cracker crust, smoothing the top with a spatula for an even finish. Make sure the filling spreads evenly and reaches the edges of the crust. This ensures each slice of your Pumpkin Pudding Pie has a perfect ratio of filling to crust.

Step 4: Chill the Pie
Cover the pie with its plastic lid or plastic wrap to prevent any air exposure. Place it in the refrigerator to chill for at least 8 hours or preferably overnight. This chilling time allows the flavors to meld and the filling to set to a perfect creamy texture, making it ready for serving.

Step 5: Serve with Optional Toppings
When you're ready to serve your delightful Pumpkin Pudding Pie, remove it from the refrigerator. If desired, whip up additional heavy cream with powdered sugar for a fluffy topping. Spoon or pipe the whipped cream onto the pie to add an extra touch of sweetness and presentation. Enjoy this creamy treat refreshed from the fridge, perfect for your Thanksgiving gathering!

Pumpkin Pudding Pie Variations & Substitutions

Feel free to get creative and personalize your Pumpkin Pudding Pie to suit your taste buds!

  • Dairy-Free: Substitute heavy cream with coconut cream and use dairy-free pudding for a vegan-friendly dessert. It will still be rich and indulgent!

  • Gluten-Free: Opt for a gluten-free graham cracker crust or a nut-based crust, like almond flour, ensuring everyone can enjoy this treat.

  • Spiced Up: Add a pinch of nutmeg and ground ginger to the pumpkin mixture for an extra layer of warmth and flavor. This twist accentuates the seasonal spices beautifully!

  • Pumpkin Spice Variations: Use chai spice or apple pie spice in place of pumpkin pie spice for a delightful flavor twist. It’s a fun way to experiment with different spice profiles.

  • Chocolate Lovers: Incorporate a layer of chocolate pudding beneath the pumpkin filling for a deliciously decadent dessert. The combo is heavenly, offering a surprise in every bite!

  • Caramel Drizzle: Top with a homemade or store-bought caramel sauce before serving for an enticing sweet finish. The sweet caramel complements the creamy pumpkin beautifully!

  • Auto-Store Alternatives: Instead of Cool Whip, try whipped coconut cream for a lighter, dairy-free option. Whip it up just before serving for a fresh touch.

For those in need of more pumpkin inspiration, consider our easy Pumpkin Cinnamon Roll Muffins as a delightful pairing!

How to Store and Freeze Pumpkin Pudding Pie

Fridge: Store the pie in the refrigerator covered with plastic wrap or its plastic lid for up to 3-4 days. This keeps it fresh and delicious while the flavors continue to meld.

Freezer: If you'd like to freeze the pie, it can be wrapped tightly and stored for up to 1 month. Thaw in the fridge overnight before serving to maintain its creamy texture.

Serving: When ready to enjoy, slice and serve chilled. If desired, top with whipped cream for an extra touch of elegance.

Make-Ahead: You can prepare this Pumpkin Pudding Pie a day in advance, making it ideal for Thanksgiving or special gatherings. Just remember to store it well covered!

Expert Tips for Pumpkin Pudding Pie

• Ingredient Quality Matters: Use pure pumpkin, not pumpkin pie filling, to ensure the best flavor in your Pumpkin Pudding Pie.

• Chill Well: Allow the pie to chill for at least 8 hours to achieve the right creamy texture; avoid cutting corners here for optimal results.

• Smoothing the Filling: When pouring the mixture into the crust, use a spatula to gently smooth the top, ensuring an even finish before refrigerating.

• Whipped Cream Perfection: For luxurious whipped cream topping, whip heavy cream until stiff peaks form, making your dessert not just delicious but visually stunning too.

• Avoid Soggy Crust: To prevent a soggy crust, keep the pie refrigerated for no longer than 24 hours before serving, ensuring that it maintains crispness.

Make Ahead Options

Prepare your No-Bake Pumpkin Pudding Pie in advance to save time and make your Thanksgiving planning effortless! You can assemble the pie and refrigerate it up to 24 hours ahead of serving. Simply follow the instructions to mix the filling and spoon it into the graham cracker crust. After covering with plastic wrap, refrigerate to allow the flavors to meld while ensuring the filling sets perfectly. To maintain the crust's crispness, avoid excessive chilling beyond a day, as it can become soggy. When ready to serve, add your desired whipped cream topping and enjoy this creamy delight with minimal last-minute effort!

What to Serve with Pumpkin Pudding Pie

Elevate your dessert experience by pairing this creamy delight with complementary flavors and textures that warm the soul.

  • Spiced Apple Cider: A warm, comforting drink that harmonizes with the autumn spices in the pie, enhancing the seasonal mood.
  • Whipped Cream Clouds: Light and airy, a dollop of freshly whipped cream on top adds texture and sweetness, making each bite divine.
  • Ginger Snap Cookies: The crunch and spiciness of ginger snaps provide a delightful contrast to the silky pudding, creating a flavor explosion.
  • Roasted Pecans: These nutty bites bring a satisfying crunch, perfectly balancing the smoothness of the pie and deepening the flavor profile.
  • Vanilla Ice Cream: A scoop of velvety vanilla ice cream delivers a creamy coolness, enhancing the rich pumpkin taste while adding another layer of enjoyment.
  • Pumpkin Spice Latte: This iconic fall beverage pairs exquisitely, echoing the flavors of the pie and creating a cozy coffee break experience.
  • Chocolate Drizzle: A light drizzle of melted chocolate not only adds elegance but also provides a delightful contrast to the spiced pumpkin flavor.
  • Caramel Sauce: Elevate each slice with a sweet touch of caramel, offering a luscious finish that dances on the palate and invites seconds.
  • Pecan Pie Bars: As a delightful side, these bars offer a chewy texture and nutty sweetness that perfectly complements the creamy pudding pie.
  • Pear and Almond Salad: A fresh, zingy salad with ripe pears and slivered almonds adds brightness and a refreshing contrast to the richness of the pie.

Pumpkin Pudding Pie Recipe FAQs

How do I choose the right pumpkin for this recipe?
Absolutely! When selecting pumpkin for your Pumpkin Pudding Pie, make sure to pick up a can of pure pumpkin, not pumpkin pie filling. Look for one marked "100% pure pumpkin," with a smooth texture and deep orange color. Check the expiration date to ensure freshness—this is key for flavor!

What’s the best way to store the Pumpkin Pudding Pie?
I recommend storing your pie in the refrigerator, well-covered, for up to 3-4 days. This keeps it fresh and maintains that luscious creamy texture. Just make sure to cover it tightly with plastic wrap or a lid to avoid drying out.

Can I freeze the Pumpkin Pudding Pie?
Certainly! You can freeze this pie for up to 2 months. To do so, wrap it tightly in plastic wrap followed by foil to minimize freezer burn. When you're ready to enjoy, simply thaw it overnight in the refrigerator. No need to reheat—serve it chilled for the best experience!

What if my filling doesn’t thicken?
Very! If you find your mixture hasn’t thickened as expected, try mixing it for a bit longer, 1-2 more minutes with an electric hand mixer should do the trick. Also, ensure that you've added the correct amount of heavy cream—using less can affect the thickness. It’s essential to let it chill for the full time to allow the filling to set properly.

Are there any dietary considerations I should be aware of?
Definitely! If you have allergies, watch out for the heavy cream and graham cracker crust as they may contain gluten or dairy. You can make this dessert gluten-free by using a gluten-free graham cracker crust. Additionally, check the pudding mix for any potential allergens to cater to your guests' dietary needs, and feel free to reach out for alternative suggestions if needed!

Pumpkin Pudding Pie

Creamy Pumpkin Pudding Pie: Your No-Bake Thanksgiving Bliss

Indulge in this Creamy Pumpkin Pudding Pie that's a no-bake delight for Thanksgiving, combining classic flavors and a crunchy crust.
Print Recipe Pin Recipe
Prep Time 10 minutes mins
Chilling Time 8 hours hrs
Total Time 8 hours hrs 10 minutes mins
Servings: 8 slices
Course: Dessert
Cuisine: American
Calories: 320
Ingredients Equipment Method Nutrition Notes

Ingredients
  

For the Crust
  • 6 oz Ready-to-use Graham Cracker Crust Standard size for best results
For the Filling
  • 2 boxes French Vanilla Instant Pudding 3.4 oz each
  • 1 teaspoon Pumpkin Pie Spice
  • 1.25 cups Heavy Cream Essential for richness
  • 1 cup Pure Pumpkin Do not use pumpkin pie filling
Optional Topping
  • Heavy Cream with Powdered Sugar For a delightful topping

Equipment

  • Mixing Bowl
  • Electric hand mixer
  • Spatula
  • Refrigerator

Method
 

Step-by-Step Instructions for No-Bake Pumpkin Pudding Pie
  1. In a large mixing bowl, whisk together the two boxes of French vanilla instant pudding and 1 teaspoon of pumpkin pie spice until lumps are broken down.
  2. Pour in 1¼ cups of heavy cream and 1 cup of pure pumpkin, then blend with an electric hand mixer until thick and smooth, about 1-2 minutes.
  3. Spoon the pumpkin mixture into the graham cracker crust, smoothing the top with a spatula.
  4. Cover the pie with plastic wrap and refrigerate for at least 8 hours or overnight to chill.
  5. When serving, whip additional heavy cream with powdered sugar to top the pie if desired.

Nutrition

Serving: 1sliceCalories: 320kcalCarbohydrates: 30gProtein: 4gFat: 22gSaturated Fat: 13gCholesterol: 80mgSodium: 200mgPotassium: 200mgFiber: 1gSugar: 15gVitamin A: 1800IUVitamin C: 2mgCalcium: 100mgIron: 1mg

Notes

Use pure pumpkin for best flavor and chill well for optimal creamy texture. Avoid cutting corners when chilling to prevent a soggy crust.

Tried this recipe?

Let us know how it was!

Spinach Pasta Salad with Feta: Fresh, Flavorful, and Fun!

January 24, 2026 by Grace Snow Leave a Comment

As I tossed a bowl of vibrant greens with the rich scent of sun-dried tomatoes wafting through my kitchen, I experienced one of those delightful "aha!" moments that make cooking such a joy. This Spinach Pasta Salad combines a medley of tastes and textures, featuring creamy feta and nutrient-packed spinach that’ll make healthy eating feel like a celebration. It's a quick prep dish, perfect for those busy weeknights or outdoor gatherings, and marries well to your personal preferences—feel free to customize it with roasted veggies or grilled chicken! Whether you're serving it as a side or making it the main star of your meal, this salad brings a Mediterranean flair to your table. Ready to learn how to whip up this deliciously healthy dish in just a few simple steps? Let’s dive in!

Why is Spinach Pasta Salad a Must-Try?

Freshness at its Finest: This spinach pasta salad offers a burst of garden flavors, thanks to the vibrant spinach and tangy sun-dried tomatoes.

Customizable Delight: With numerous options like grilled chicken, assorted cheeses, or roasted veggies, you can tailor this dish to fit your cravings.

Quick and Easy: Perfect for busy weeknights, this salad comes together in a snap, allowing you to spend less time cooking and more time enjoying.

Nutrient-Dense: Packed with vitamins from spinach, and protein from feta, this dish balances health and taste in every bite.

Crowd-Pleaser: Whether it’s a picnic or a potluck, this salad is sure to please and impress your family and friends, making it a go-to recipe any time.

Looking for other delicious salad ideas? Try this Jello Salad Cottage or the Spinach Pie Deliciously for more options to elevate your meals!

Spinach Pasta Salad Ingredients

For the Salad
• Spinach – a nutrient-dense base providing vitamins A, C, and K; kale or arugula can be great alternatives.
• Sun-Dried Tomatoes – adds intense tangy and sweet flavors; fresh tomatoes or roasted red peppers could also work.
• Feta Cheese – delivers a creamy and salty note; consider goat cheese or vegan cheese for a dairy-free option.
• Pasta – serves as the filling foundation; rotini, penne, or gluten-free pasta can substitute based on dietary preferences.

For the Dressing
• Olive Oil – the primary dressing base adding richness; avocado oil is a suitable alternative.
• Balsamic Vinegar – gives a tangy balance; red wine vinegar or lemon juice can be good substitutes.
• Dijon Mustard – adds depth and a slight kick; feel free to omit or replace it with yellow mustard.
• Garlic – enhances flavor; fresh minced garlic is recommended, but garlic powder can be used in a pinch.

Elevate your Spinach Pasta Salad with these fresh, vibrant ingredients, and let your creativity shine as you make it uniquely yours!

Step‑by‑Step Instructions for Spinach Pasta Salad

Step 1: Cook the Pasta
Bring a large pot of salted water to a rolling boil. Add pasta and cook according to package instructions until al dente, typically around 8-10 minutes. Once cooked, drain the pasta in a colander and rinse it under cold water to stop the cooking process and cool it down quickly, ensuring it will blend well in your Spinach Pasta Salad.

Step 2: Prepare the Dressing
In a medium-sized bowl, whisk together the olive oil, balsamic vinegar, Dijon mustard, minced garlic, and a pinch of salt and pepper until well combined. The dressing should be a smooth emulsion; a good visual cue is the mixture starting to slightly thicken and coat the back of a spoon. Set it aside to let the flavors meld while you prepare the salad ingredients.

Step 3: Mix the Salad Ingredients
In a large mixing bowl, combine the cooled pasta, fresh spinach leaves, chopped sun-dried tomatoes, and crumbled feta cheese. Gently toss the ingredients together using tongs or a large spoon, ensuring the spinach is evenly distributed and the feta crumbles throughout for that delicious flavor in every bite of your Spinach Pasta Salad.

Step 4: Combine Salad and Dressing
Drizzle the prepared dressing over the salad mixture, and use a gentle folding motion to coat all the ingredients evenly. Aim for an even distribution of the dressing without crushing the feta or wilting the spinach. This ensures every bite of your Spinach Pasta Salad is flavorful and refreshing.

Step 5: Chill the Salad
For enhanced flavor integration, cover the bowl with plastic wrap or transfer the salad to an airtight container, then refrigerate for at least 30 minutes. This will allow the vibrant flavors of the sun-dried tomatoes and feta to meld beautifully with the spinach and pasta, turning your salad into an irresistible dish ready to impress!

How to Store and Freeze Spinach Pasta Salad

Fridge: Store your Spinach Pasta Salad in an airtight container for up to 3 days. Add a splash of extra dressing before serving to refresh the flavors.

Freezer: For best results, freeze parts of the salad separately, like the pasta and the dressing, as spinach and feta don't freeze well. Use within 1 month for optimal taste.

Reheating: If you have frozen components, thaw them overnight in the fridge. Gently warm the pasta if desired, and toss everything together just before serving.

Room Temperature: It's best not to leave the salad at room temperature for more than 2 hours to maintain freshness and safety.

Spinach Pasta Salad Customization Options

Get ready to personalize your Spinach Pasta Salad and make it truly your own with these delightful variations!

  • Hearty Addition: Add grilled chicken or shrimp for a protein boost and a heartier salad. The savory flavors meld beautifully with the existing ingredients.

  • Cheese Swap: Try using goat cheese or a sprinkle of Parmesan for varied flavors and a different texture. Each cheese brings its own unique twist to the dish!

  • Roasted Veggies: Incorporate roasted vegetables like bell peppers, zucchini, or even asparagus for extra nutrition and a caramelized sweetness that elevates the salad.

  • Crunch Factor: Toss in some nuts or seeds, such as toasted pine nuts or sunflower seeds, to add a satisfying crunch and a nutrient boost.

  • Vegan Version: Skip the feta cheese or replace it with a plant-based version to create a refreshing vegan Spinach Pasta Salad that everyone can enjoy.

  • Pasta Varieties: Experiment with different pasta shapes like rotini, penne, or even chickpea pasta for a gluten-free option, allowing for personal preference and dietary needs.

  • Zingy Twist: Add a squeeze of fresh lemon juice or zest for brightness, enhancing the overall flavor and making the salad even more refreshing.

  • Spicy Kick: If you crave heat, sprinkle in some red pepper flakes or diced jalapeños for a vibrant zing that complements the salad beautifully.

Feel free to mix and match these ideas as you create your perfect Spinach Pasta Salad! If you're looking for more colorful recipe inspirations, check out the Cauliflower Pasta Ready or the indulgent Seafood Pasta Savory to bring excitement to your dining experience!

What to Serve with Spinach Pasta Salad?

This vibrant dish pairs beautifully with a variety of sides and drinks, creating a delightful, satisfying meal experience.

  • Grilled Chicken: Succulent grilled chicken adds protein and heartiness, complementing the freshness of spinach and feta.
  • Garlic Breadsticks: Crunchy yet tender breadsticks bring an irresistible crunch, perfect for dipping into salad juices.
  • Mediterranean Quinoa: This nutty, flavorful quinoa dish enhances the Mediterranean theme and adds extra nutrients and texture.
  • Roasted Vegetables: Seasoned, roasted bell peppers or zucchini deliver earthy sweetness, creating a harmonious balance with the salad.
  • Crispy Croutons: Adding croutons enhances texture with a delightful crunch, making each bite even more enjoyable.
  • White Sangria: A refreshing white sangria with citrus and mint elevates the meal, perfectly complementing the flavors of your salad.
  • Fresh Fruit Salad: A light, sweet fruit salad brings brightness to the table, offering a sweet contrast to the savory dish.
  • Hummus and Veggie Platter: This adds a healthy, additional nibble that pairs wonderfully with the Mediterranean flavors of the salad.
  • Lemon Sorbet: Light and refreshing, this dessert washes down the meal beautifully, cleansing the palate between bites.

Make Ahead Options

These Spinach Pasta Salad preparations are perfect for busy home cooks looking to save time during hectic weeknights! You can prepare the pasta and the dressing up to 24 hours in advance; just store them separately to maintain their textures (the pasta can become too soft if left in dressing). Additionally, you can wash and chop the spinach and sun-dried tomatoes up to 3 days ahead for easy assembly. When you’re ready to serve, simply mix everything together with the dressing, toss gently, and chill in the refrigerator for a quick refresh before serving—this way, you’ll still enjoy that delicious, vibrant flavor without the rush!

Expert Tips for Spinach Pasta Salad

  • Chill for Flavor: Letting your Spinach Pasta Salad chill for at least 30 minutes intensifies the flavors, making every bite more enjoyable.

  • Perfect Pasta Shape: Opt for pasta shapes like fusilli or farfalle that hold the dressing well, ensuring every forkful is packed with flavor.

  • Balance Your Dressing: Adjust the amount of balsamic vinegar based on your taste preference—start with less if you're unsure, as you can always add more.

  • Let It Rest: For even better results, consider allowing the salad to rest overnight in the fridge. This helps the flavors develop and yields a tastier dish.

  • Mix and Match: Don’t hesitate to customize your salad with grilled vegetables or different cheeses—make this Spinach Pasta Salad uniquely your own!

Spinach Pasta Salad with Sun-Dried Tomatoes & Feta Recipe FAQs

How do I know if my spinach is fresh?
Absolutely! Look for vibrant green leaves without any dark spots or wilting. Fresh spinach should feel crisp and have a clean, earthy scent. If you see any slimy or yellowing leaves, it's time to toss them out.

What’s the best way to store leftovers of Spinach Pasta Salad?
For storage, keep your Spinach Pasta Salad in an airtight container in the refrigerator for up to 3 days. To refresh the flavors after a day or two, add a splash of olive oil or balsamic vinegar before serving.

Can I freeze Spinach Pasta Salad?
Sure! To freeze, consider portioning the pasta and dressing separately, as spinach and feta don’t freeze well. Place them in freezer-safe bags and enjoy them within a month. When ready to eat, thaw overnight in the fridge and mix in the chilled spinach and feta just before serving.

What should I do if my dressing is too thick?
If your dressing ends up too thick, just whisk in a little more olive oil or balsamic vinegar until it reaches the desired consistency. Start with one teaspoon at a time, mixing thoroughly after each addition until it’s nice and pourable!

Are there any dietary considerations for this recipe?
Very! This Spinach Pasta Salad is vegetarian-friendly and can easily be made vegan by swapping out feta for a dairy-free cheese option. If you're allergenic to wheat, simply choose gluten-free pasta. Always be sure to check the label on store-bought items to avoid any unwanted ingredients.

Can I make this salad in advance?
Absolutely! Preparing your Spinach Pasta Salad a day ahead not only saves time but also enhances the flavors as they meld together overnight. Just store it in the refrigerator in an airtight container, and it'll be ready to serve when you are!

Spinach Pasta Salad

Spinach Pasta Salad with Feta: Fresh, Flavorful, and Fun!

This Spinach Pasta Salad combines vibrant spinach and creamy feta, making healthy eating feel like a celebration. Perfect for busy weeknights or outdoor gatherings!
Print Recipe Pin Recipe
Prep Time 15 minutes mins
Cook Time 10 minutes mins
Chill Time 30 minutes mins
Total Time 55 minutes mins
Servings: 4 servings
Course: Salads
Cuisine: Mediterranean
Calories: 320
Ingredients Equipment Method Nutrition Notes

Ingredients
  

For the Salad
  • 4 cups fresh spinach can substitute with kale or arugula
  • 1 cup sun-dried tomatoes or fresh tomatoes or roasted red peppers
  • 1 cup feta cheese consider goat cheese or vegan cheese for a dairy-free option
  • 2 cups pasta any preferred type like rotini, penne, or gluten-free
For the Dressing
  • 1/2 cup olive oil or avocado oil as an alternative
  • 1/4 cup balsamic vinegar or red wine vinegar or lemon juice
  • 1 tablespoon Dijon mustard can be omitted or replaced with yellow mustard
  • 2 cloves garlic fresh minced is recommended but garlic powder can be used

Equipment

  • Large pot
  • Colander
  • Medium-sized Bowl
  • Whisk
  • large mixing bowl
  • Tongs

Method
 

Cooking Instructions
  1. Bring a large pot of salted water to a rolling boil. Add pasta and cook according to package instructions until al dente, typically around 8-10 minutes.
  2. Once cooked, drain the pasta in a colander and rinse it under cold water to stop the cooking process and cool it down quickly.
  3. In a medium-sized bowl, whisk together the olive oil, balsamic vinegar, Dijon mustard, minced garlic, and a pinch of salt and pepper until well combined.
  4. In a large mixing bowl, combine the cooled pasta, fresh spinach, chopped sun-dried tomatoes, and crumbled feta. Gently toss together.
  5. Drizzle the prepared dressing over the salad mixture and fold gently to coat all ingredients evenly.
  6. Cover the bowl with plastic wrap or transfer to an airtight container, then refrigerate for at least 30 minutes before serving.

Nutrition

Serving: 1servingCalories: 320kcalCarbohydrates: 30gProtein: 10gFat: 20gSaturated Fat: 3gPolyunsaturated Fat: 1gMonounsaturated Fat: 15gCholesterol: 15mgSodium: 400mgPotassium: 400mgFiber: 4gSugar: 3gVitamin A: 50IUVitamin C: 20mgCalcium: 15mgIron: 10mg

Notes

This salad is perfect for customizing with additional ingredients like grilled vegetables or different cheeses.

Tried this recipe?

Let us know how it was!

Lemon Basil Parmesan Pasta Salad for a Refreshing Summer Bite

January 24, 2026 by Grace Snow Leave a Comment

As I was prepping for a sun-soaked weekend gathering, an idea struck: what could be more inviting than a bowl of Lemon Basil Parmesan Pasta Salad? This dish dances on your taste buds with a scrumptious medley of tender bowtie pasta, peppery arugula, and nutty pine nuts, all mingled together in a bright lemon vinaigrette. Not only is this salad a delightful addition to any summer spread, but it's also a quick prep that can be made ahead of time, saving you the last-minute rush. With its refreshing zing and customizable nature, whether you add grilled chicken or keep it light, this pasta salad is a keeper. Ready to whisk up some summer vibes? Let’s dive into the recipe that will elevate your next outdoor feast!

Why is this pasta salad a must-try?

Vibrant and Fresh: This Lemon Basil Parmesan Pasta Salad is bursting with a refreshing citrus flavor and a colorful array of ingredients that scream summer.
Customizable Delight: Whether you stick to the classic recipe or add grilled chicken for protein, it perfectly adapts to your taste.
Quick and Easy: In just a few simple steps, you’ll have a stunning side dish ready to impress your guests.
Ideal for Meal Prep: Prepare it in advance, and let the flavors meld together—perfect for busy weekdays or last-minute get-togethers!
Crowd-Pleaser: With its appealing textures and tantalizing taste, it complements everything from a BBQ spread to a cozy family dinner.
Don’t miss out on the vibrant flavors of summer; this salad can easily become a go-to just like my Cauliflower Pasta Ready or Seafood Pasta Savory.

Lemon Basil Parmesan Pasta Salad Ingredients

• A delightful mix of flavors awaits you!

For the Vinaigrette

  • Garlic (2 cloves, grated) – Adds a robust flavor to the vinaigrette; fresh garlic provides the most potency.
  • Kosher Salt (1/2 teaspoon) – Enhances overall flavor; adjust to your taste preference.
  • Black Pepper (1/4 teaspoon) – Provides subtle heat; use freshly ground for the best flavor.
  • Lemon Zest (1 teaspoon) – Adds a bright citrus aroma; ensure you only use the yellow part of the peel.
  • Lemon Juice (2 tablespoons, freshly squeezed) – Contributes acidity and a fresh flavor; avoid bottled juice for maximum taste.
  • White Balsamic Vinegar (2 tablespoons) – Offers a lovely sweetness and tang; can be replaced with regular balsamic vinegar if needed.
  • Dijon Mustard (1/2 teaspoon) – Acts as an emulsifier in the vinaigrette; yellow mustard makes a fine substitute.
  • Extra Virgin Olive Oil (3 tablespoons) – Provides richness and smooth texture; opt for high-quality oil for the best results.

For the Salad

  • Bowtie Pasta (1 pound) – The base of the salad; feel free to substitute with any small pasta shape you prefer.
  • Fine Sea Salt (for cooking pasta) – Essential for seasoning the pasta water properly.
  • Pine Nuts (1/3 cup) – Adds a delicious crunch and nutty flavor; try walnuts or sunflower seeds as alternatives.
  • Baby Arugula (2 handfuls) – Offers a peppery bite; spinach can be used if you prefer a milder taste.
  • Parmesan Cheese (1/3 cup, freshly grated) – Infuses savory depth into the salad; Pecorino Romano works too if desired.
  • Fresh Basil (1/4 cup, thinly sliced) – A must for that fresh flavor; adjust quantity based on how much you love basil!

Make this Lemon Basil Parmesan Pasta Salad the highlight of your next gathering!

Step‑by‑Step Instructions for Lemon Basil Parmesan Pasta Salad

Step 1: Make the Vinaigrette
In a medium-sized jar, combine 2 grated garlic cloves, 1/2 teaspoon kosher salt, and 1/4 teaspoon black pepper. Add 1 teaspoon lemon zest, 2 tablespoons freshly squeezed lemon juice, 2 tablespoons white balsamic vinegar, and 1/2 teaspoon Dijon mustard. Pour in 3 tablespoons of high-quality extra virgin olive oil, then shake vigorously until well combined. Set your delicious vinaigrette aside to let the flavors meld while you prepare the pasta salad.

Step 2: Cook the Pasta
Bring a large pot of salted water to a rolling boil over medium-high heat. Once boiling, add 1 pound of bowtie pasta and cook according to the package instructions, which usually takes around 8-10 minutes. Stir occasionally to prevent sticking. When al dente, drain the pasta in a colander and rinse it with cold water to stop the cooking process and cool it down for your Lemon Basil Parmesan Pasta Salad.

Step 3: Toast the Pine Nuts
In a dry skillet over medium heat, add 1/3 cup of pine nuts. Toast them, stirring frequently for about 4-6 minutes, until they are golden and fragrant. Keep a close eye, as they can burn quickly! Once toasted, remove the skillet from the heat and transfer the pine nuts to a plate to cool—this will enhance their nutty flavor, complementing your pasta salad beautifully.

Step 4: Combine Salad Ingredients
In a large mixing bowl, combine the cooled pasta, 2 handfuls of baby arugula, the toasted pine nuts, and 1/3 cup of freshly grated Parmesan cheese. Gently fold in 1/4 cup of thinly sliced fresh basil to retain its vibrant color and flavor. This combination will create a delightful medley that serves as the base for your Lemon Basil Parmesan Pasta Salad.

Step 5: Dress the Salad
Give the vinaigrette a quick shake to re-emulsify the ingredients, then pour it generously over the pasta salad mixture. Toss everything together gently until well combined, ensuring each ingredient is coated with the zesty dressing. Taste and adjust seasoning with additional kosher salt and freshly ground black pepper, making the flavors pop even more.

Step 6: Serve
Transfer the finished Lemon Basil Parmesan Pasta Salad to a serving bowl. For a beautiful presentation, garnish with extra basil leaves, lemon slices, or additional Parmesan cheese, if desired. This vibrant salad is best enjoyed slightly chilled or at room temperature and makes a refreshing side dish for any gathering!

What to Serve with Lemon Basil Parmesan Pasta Salad

As you gather around the table for a delightful meal, let the vibrant flavors of summer inspire your side dishes, creating a feast that's truly inviting.

  • Grilled Chicken: Juicy and tender, grilled chicken enhances this pasta salad, making it a hearty meal that will satisfy any appetite. Marinate it with lemon and herbs for added zest!
  • Savory Garlic Bread: Warm, crusty garlic bread is perfect for sopping up any leftover vinaigrette, offering a delightful contrast to the refreshing salad.
  • Caprese Skewers: These colorful bites of mozzarella, tomatoes, and fresh basil echo the flavors of your pasta salad, providing a fresh, vibrant touch to your meal.
  • Roasted Vegetables: Add an earthiness to your spread with roasted seasonal veggies like zucchini and bell peppers, their caramelized sweetness beautifully balancing the zesty pasta.
  • Chilled White Wine: A crisp, chilled white wine such as Sauvignon Blanc or Pinot Grigio pairs excellently, enhancing the citrus notes in the salad and rounding out the meal.
  • Berry Salad: A light, refreshing mixed berry salad topped with a honey vinaigrette provides a fruity, sweet contrast, keeping the summer vibes alive on your plate.
  • Fruit Sorbet: For dessert, serve a refreshing fruit sorbet that echoes the citrusy notes in the pasta salad, cleansing the palate and leaving a light, happy ending to your meal.

How to Store and Freeze Lemon Basil Parmesan Pasta Salad

Fridge: Store any leftover Lemon Basil Parmesan Pasta Salad in an airtight container in the refrigerator for up to 3 days. This way, the flavors can continue to develop.
Freezer: While not recommended for long-term freezing due to potential texture changes of the pasta and veggies, you can freeze the dressing separately for up to 2 months.
Reheating: If chilled, serve the salad cold. If you prefer warmth, you can gently reheat the pasta in the microwave; however, fresh flavors are best enjoyed cold.
Prep Ahead: For optimal freshness, prepare the salad hours in advance but keep the dressing separate. Combine just before serving to keep the ingredients vibrant and crisp.

Make Ahead Options

These Lemon Basil Parmesan Pasta Salad preparations are perfect for busy weeknights or last-minute gatherings! You can cook the pasta and prepare the vinaigrette up to 24 hours in advance; just remember to store them separately in the refrigerator to maintain their freshness—this helps prevent the pasta from absorbing too much dressing or becoming soggy. Additionally, you can toast the pine nuts ahead of time and keep them in an airtight container for up to three days. When you’re ready to serve, simply combine all the ingredients, toss them with the dressing, and garnish. This will ensure that your pasta salad is just as delicious and refreshing as when freshly made!

Expert Tips for Lemon Basil Parmesan Pasta Salad

  • Rinse for Cold Salads: Rinse the pasta in cold water after cooking to stop the cooking process and prevent sticking, essential for a refreshing pasta salad.
  • Quality Ingredients: Use fresh basil and high-quality extra virgin olive oil. They make a significant difference in the flavors of your Lemon Basil Parmesan Pasta Salad.
  • Toast Pine Nuts Carefully: Keep a close eye while toasting pine nuts, as they can burn quickly; stir them regularly for even cooking.
  • Adjust the Dressing: Feel free to tweak the dressing; add more lemon juice for brightness or extra Dijon mustard for a kick—tailor it to your taste!
  • Make Ahead Tip: Prepare the pasta salad a few hours in advance, but keep the dressing separate until just before serving to maintain its freshness.

Lemon Basil Parmesan Pasta Salad Variations

Make this refreshing dish truly your own with these delightful twists and substitutions!

  • Grilled Chicken: Add marinated grilled chicken for heartiness. Just a simple lemon juice and garlic marinade will elevate the protein in this salad.

  • Cherry Tomatoes: Toss in halved cherry tomatoes for a burst of color and sweetness. They add a delightful juiciness that complements the tangy vinaigrette beautifully.

  • Bell Peppers: Crunchy bell peppers can provide an additional layer of flavor and color. Try a mix of red, yellow, and orange for a stunning display!

  • Vegan Option: Skip the cheese and incorporate chickpeas for a protein boost. The creamy texture of mashed chickpeas enhances the dish's richness without dairy.

  • Squash Strips: For a unique touch, add roasted zucchini or squash ribbons. They can bring an earthy depth while keeping your salad light.

  • Nutty Twists: Swap pine nuts for chopped walnuts or sunflower seeds. Each nut adds its unique crunch and flavor profile; feel free to experiment!

  • Extra Heat: Add red pepper flakes for a little kick! A pinch can elevate the flavors, making it exciting and vibrant.

  • Herb Infusion: Experiment with different herbs such as parsley or dill instead of basil for an exciting new flavor. The variations are endless and will keep this salad feeling fresh!

For more delicious inspiration, check out my Lemon Ricotta Protein Pancakes to add in some breakfast delights or mix it with a side of Avocado Egg Salad for a brunch crowd-pleaser!

Lemon Basil Parmesan Pasta Salad Recipe FAQs

How do I choose ripe and fresh basil?
Absolutely! When selecting basil, look for vibrant green leaves with no dark spots or wilting. Fresh basil should feel tender and fragrant—if it smells strongly, you're on the right track! I always recommend using it soon after purchase for the best flavor.

How should I store leftover pasta salad?
To store your Lemon Basil Parmesan Pasta Salad, place any leftovers in an airtight container in the refrigerator. It should keep well for up to 3 days; the flavors may even improve as they meld together. Make sure to give it a good toss again before serving!

Can I freeze this pasta salad?
Very! However, I advise against freezing the salad itself due to the texture of the pasta and vegetables upon thawing. Instead, you can freeze the dressing in an airtight container for up to 2 months. Just mix it into fresh pasta and ingredients when you're ready to serve!

What should I do if my pasta is sticky?
If your pasta turns out sticky, it may be due to overcooking or not rinsing it after draining. Ensure to cook it al dente, then thoroughly rinse it under cold water to stop the cooking process. Adding a drizzle of olive oil can also help keep it separate!

Is this recipe suitable for someone with nut allergies?
Of course! If you’re making this Lemon Basil Parmesan Pasta Salad for someone with nut allergies, simply omit the pine nuts or replace them with seeds, like sunflower seeds, for that crunch without the risk. Your guests will still enjoy a delicious, nut-free salad!

What variations can I try for dietary preferences?
For a vegan version of the Lemon Basil Parmesan Pasta Salad, omit the cheese entirely and consider adding chickpeas for a protein boost! You can also play around with ingredients—try cherry tomatoes or bell peppers for extra flavor and color. More options mean more fun!

Lemon Basil Parmesan Pasta Salad

Lemon Basil Parmesan Pasta Salad for a Refreshing Summer Bite

This Lemon Basil Parmesan Pasta Salad is a must-try for summer gatherings, combining vibrant flavors and textures in a refreshing dish.
Print Recipe Pin Recipe
Prep Time 15 minutes mins
Cook Time 10 minutes mins
Total Time 25 minutes mins
Servings: 6 servings
Course: Salads
Cuisine: American
Calories: 320
Ingredients Equipment Method Nutrition Notes

Ingredients
  

For the Vinaigrette
  • 2 cloves Garlic, grated Adds a robust flavor
  • 0.5 teaspoon Kosher Salt Enhances overall flavor
  • 0.25 teaspoon Black Pepper Provides subtle heat
  • 1 teaspoon Lemon Zest Adds a bright citrus aroma
  • 2 tablespoons Lemon Juice, freshly squeezed Contributes acidity
  • 2 tablespoons White Balsamic Vinegar Offers sweetness and tang
  • 0.5 teaspoon Dijon Mustard Acts as an emulsifier
  • 3 tablespoons Extra Virgin Olive Oil Provides richness
For the Salad
  • 1 pound Bowtie Pasta The base of the salad
  • Fine Sea Salt For cooking pasta
  • 1/3 cup Pine Nuts Adds a delicious crunch
  • 2 handfuls Baby Arugula Offers a peppery bite
  • 1/3 cup Parmesan Cheese, freshly grated Infuses savory depth
  • 1/4 cup Fresh Basil, thinly sliced A must for that fresh flavor

Equipment

  • medium-sized jar
  • Large pot
  • dry skillet
  • large mixing bowl

Method
 

Instructions
  1. In a medium-sized jar, combine 2 grated garlic cloves, 1/2 teaspoon kosher salt, and 1/4 teaspoon black pepper. Add 1 teaspoon lemon zest, 2 tablespoons freshly squeezed lemon juice, 2 tablespoons white balsamic vinegar, and 1/2 teaspoon Dijon mustard. Pour in 3 tablespoons of high-quality extra virgin olive oil, then shake vigorously until well combined. Set aside.
  2. Bring a large pot of salted water to a rolling boil. Add 1 pound of bowtie pasta and cook according to package instructions, typically 8-10 minutes. Drain in a colander and rinse with cold water to stop cooking.
  3. In a dry skillet over medium heat, toast 1/3 cup of pine nuts, stirring frequently for about 4-6 minutes until golden and fragrant. Remove from heat and cool on a plate.
  4. In a large mixing bowl, combine the cooled pasta, 2 handfuls of baby arugula, the toasted pine nuts, and 1/3 cup of freshly grated Parmesan cheese. Gently fold in 1/4 cup of thinly sliced fresh basil.
  5. Give the vinaigrette a quick shake, then pour it over the pasta salad mixture. Toss gently until well combined and adjust seasoning as necessary.
  6. Transfer the finished salad to a serving bowl. Garnish with extra basil leaves, lemon slices, or additional Parmesan if desired, and serve slightly chilled or at room temperature.

Nutrition

Serving: 1servingCalories: 320kcalCarbohydrates: 40gProtein: 10gFat: 16gSaturated Fat: 2gPolyunsaturated Fat: 4gMonounsaturated Fat: 8gCholesterol: 6mgSodium: 400mgPotassium: 250mgFiber: 2gSugar: 1gVitamin A: 10IUVitamin C: 15mgCalcium: 120mgIron: 1mg

Notes

Store leftovers in an airtight container in the fridge for up to 3 days. Freeze the dressing separately for up to 2 months if needed.

Tried this recipe?

Let us know how it was!

Fluffy Japanese Cotton Cheesecake Cupcakes for Sweet Bliss

January 24, 2026 by Grace Snow Leave a Comment

As I stood in my kitchen, the warm scent of vanilla and sugar started to swirl around the room, instantly lifting my spirits. Today, I'm excited to share my version of Fluffy Japanese Cotton Cheesecake Cupcakes—a dessert that seems almost ethereal in its lightness. These cupcakes promise an airy texture and a soft, melt-in-your-mouth experience that makes them the perfect sweet treat for cozy gatherings or a relaxing afternoon. Not only are they incredibly simple to make, but they also add a delightful twist to your dessert repertoire, ensuring you can impress anyone—whether it's a casual tea party or a special celebration. Ready to channel your inner pastry chef and indulge in a taste of Japan? Let's see how these little delights come together!

Why are these cupcakes a must-try?

Light, Fluffy Texture: Each bite of these cupcakes offers a cloud-like experience that melts in your mouth.

Simple Ingredients: With everyday items like cream cheese and eggs, you can whip these up without a fuss.

Versatile Flavors: Customize them with lemon zest or serve with fresh berries to elevate the taste!

Perfect for Any Occasion: Be it a cozy tea time or a festive gathering, they’re sure to impress your guests!

Low-Calorie Option: At around 150 kcal each, they're a delightful treat that won't derail your diet.

These Fluffy Japanese Cotton Cheesecake Cupcakes are a true delight; they might just become your new favorite dessert!

Fluffy Japanese Cotton Cheesecake Cupcakes Ingredients

• Get ready to create these delightful treats!

For the Batter

  • Cream Cheese – Creates a rich base and provides creaminess; use full-fat for better texture.
  • Granulated Sugar – Adds sweetness and helps with batter structure.
  • Milk – Incorporates moisture and helps blend ingredients smoothly.
  • Eggs (Separated) – Yolks contribute richness; whipped egg whites provide lift for a fluffy texture.
  • Vanilla Extract – Enhances flavor complexity; can be substituted with almond extract for variation.
  • All-Purpose Flour – Provides structure and absorbs moisture; gluten-free flour can be used for a GF version.
  • Cornstarch – Lightens the texture and improves stability.
  • Salt – Balances sweetness and enhances flavor.

For Dusting

  • Powdered Sugar – Adds a decorative finish; optional but adds a sweet touch to your Fluffy Japanese Cotton Cheesecake Cupcakes.

Step‑by‑Step Instructions for Fluffy Japanese Cotton Cheesecake Cupcakes

Step 1: Preheat the Oven and Prepare Muffin Tin
Start by preheating your oven to 320°F (160°C). While the oven warms up, line a muffin tin with cupcake liners to prevent sticking and ensure easy removal after baking. This little step sets the stage for your Fluffy Japanese Cotton Cheesecake Cupcakes to rise beautifully and come out perfectly shaped!

Step 2: Mix Cream Cheese and Wet Ingredients
In a mixing bowl, use a handheld mixer to beat softened cream cheese and granulated sugar together until the mixture is smooth and creamy. This should take about 2-3 minutes. Next, add in the milk, separate the egg yolks from the whites, and include the yolks along with vanilla extract. Mix everything until well combined and silky.

Step 3: Incorporate Dry Ingredients
Sift in the all-purpose flour and cornstarch into the creamy mixture to lighten the batter. Using a spatula, mix gently until no lumps remain. The batter should be thick yet smooth, ready to create that airy texture that makes the Fluffy Japanese Cotton Cheesecake Cupcakes so irresistible.

Step 4: Whip Egg Whites
In a clean, dry mixing bowl, take the reserved egg whites and add a pinch of salt. Beat them with a hand mixer on high speed until soft peaks form, which usually takes about 3-5 minutes. Gradually add in sugar while continuing to beat until you achieve stiff peaks—this is key for achieving the fluffiness you want in your cupcakes!

Step 5: Fold in Whipped Egg Whites
Gently fold the whipped egg whites into the cream cheese mixture in three additions. Use a spatula to carefully combine, making sure not to deflate the air you’ve just whipped into the egg whites. This step is crucial for ensuring your Fluffy Japanese Cotton Cheesecake Cupcakes have that light and airy structure.

Step 6: Fill Cupcake Liners
Once your batter is well combined, divide it evenly among the prepared cupcake liners, filling each about ⅔ full to allow space for rising. This method ensures they bake evenly and rise properly, giving each cupcake its delightful fluffy shape.

Step 7: Bake Cupcakes
Place the muffin tin in the the preheated oven and bake for about 30 minutes, or until the tops are lightly golden and the centers feel set to the touch. Your kitchen will be filled with a warm, sweet aroma as they bake, signaling that your delicious Fluffy Japanese Cotton Cheesecake Cupcakes are on their way!

Step 8: Cool and Serve
Once baked, allow the cupcakes to cool completely in the tin to prevent them from collapsing. After about 20-30 minutes, you can dust them with powdered sugar for a beautiful finish. Now they’re ready to be served and enjoyed, perfect for a sweet occasion!

Fluffy Japanese Cotton Cheesecake Cupcakes Variations

Embrace your creativity in the kitchen and discover exciting twists to make these cupcakes uniquely yours!

  • Citrus Zest: Add lemon or orange zest to the cream cheese mixture for a refreshing burst of flavor that brightens each bite. The zing of citrus beautifully complements the sweetness of the cupcakes!

  • Dairy-Free Option: Substitute the cream cheese and milk with vegan cream cheese and almond milk for a dairy-free delight that still delivers on creaminess. Your friends won’t even know the difference!

  • Gluten-Free: Swap all-purpose flour with a 1:1 gluten-free blend for a gluten-free version that maintains that beloved airy texture. Baking gluten-free can be just as blissful!

  • Flavor Extravaganza: Experiment with various extracts—try almond or coconut instead of vanilla to turn your cupcakes into tropical treats that whisk you away on a flavor vacation.

  • Chocolate Lovers: Fold in cocoa powder or melted chocolate to the batter for a delightful chocolate twist on the classic version. Who can resist chocolate?

  • Textural Contrast: Add in crushed nuts or chocolate chips for added crunch. This lovely surprise in every bite elevates the overall eating experience!

  • Fruity Filling: Fill the cupcakes with fruit preserves or fresh fruit puree before baking for a sweet surprise as you bite into them. Strawberry or raspberry fillings are simply heavenly!

  • Spiced Flavor: Incorporate a dash of cinnamon or nutmeg into the batter for a warm, cozy twist. Spices can transform your Fluffy Japanese Cotton Cheesecake Cupcakes into seasonal sensations.

Let your imagination soar as you blend these variations into your baking adventure!

What to Serve with Fluffy Japanese Cotton Cheesecake Cupcakes

Imagine a cozy afternoon where delightful flavors and comforting textures come together to create an unforgettable meal experience.

  • Fresh Berries: A medley of strawberries, blueberries, and raspberries adds a tangy contrast that beautifully balances the sweetness of the cupcakes. The juicy pop of each berry enhances the overall tasting experience.

  • Green Tea: A light, fragrant cup of green tea complements the airy texture of these cupcakes, offering a refreshing cleanse to the palate. The subtle earthy notes harmonize perfectly with the sweet creaminess of the dessert.

  • Whipped Cream: A dollop of freshly whipped cream on top adds a luxurious touch, enhancing the overall indulgence. It creates a creamy, rich layer that perfectly contrasts the fluffy cupcakes.

  • Sweet Mango Sauce: Drizzling a mango puree over your cupcakes introduces a tropical sweetness that elevates each bite, making them feel even more decadent. The fruity addition adds a vibrant color to the plate as well!

  • Matcha Powder: A light dusting of matcha on top not only adds a unique flavor twist but also gives the cupcakes a pop of color, creating an inviting visual appeal. The slightly bitter taste of matcha contrasts wonderfully with the sweetness.

  • Coconut Flakes: Lightly toasted coconut flakes can add a delightful crunch and a hint of tropical flavor, making each bite an adventure. They bring a toasty warmth that perfectly complements the cupcakes’ lightness.

  • Mint Tea: For a refreshing drink option, ice-cold mint tea can uplift the meal, providing a soothing flavor that pairs wonderfully with the sweetness of the cupcakes. It’s a simple yet effective choice for a light afternoon delight.

  • Chocolate Drizzle: A drizzle of dark chocolate can create a rich, bold flavor contrast that pairs unexpectedly well with the light texture of the cupcakes, offering a delightful balance in every bite.

  • Lemon Zest: Sprinkling lemon zest over the cupcakes offers an extra boost of citrus flavor, brightening the overall dessert and enhancing the rich cream cheese notes. It’s a fresh touch that invites more exploration!

Make Ahead Options

These Fluffy Japanese Cotton Cheesecake Cupcakes are an excellent choice for meal prep enthusiasts! You can prepare the batter up to 24 hours in advance by mixing the cream cheese, wet ingredients, and dry ingredients, then refrigerating the mixture in an airtight container. Additionally, the cupcakes can be baked and stored in the fridge for up to 3 days, but be sure to let them cool completely before covering them to prevent moisture buildup. When you're ready to serve, simply dust with powdered sugar and enjoy fresh flavors that taste just as delightful! This way, you'll have dreamy desserts ready to impress your guests without the last-minute rush.

How to Store and Freeze Fluffy Japanese Cotton Cheesecake Cupcakes

Fridge: Store your Fluffy Japanese Cotton Cheesecake Cupcakes in an airtight container for up to 2 days. This keeps them fresh and moist while preserving their delightful texture.

Freezer: For longer storage, wrap the cupcakes individually in plastic wrap and place them in an airtight container; they can be frozen for up to 1 month. This way, you can enjoy their fluffiness at a later date.

Reheating: To enjoy them warm, simply thaw at room temperature, then pop them in a preheated oven at 300°F (150°C) for about 5-10 minutes. This helps refresh their light, airy texture, making them feel freshly baked!

Expert Tips for Fluffy Japanese Cotton Cheesecake Cupcakes

Room Temperature Ingredients: Use ingredients like cream cheese and eggs at room temperature. This helps them blend more easily, ensuring a uniform batter.

Whip It Right: When beating egg whites, ensure your bowl is completely grease-free. Any residue can hinder the formation of stiff peaks, compromising the texture of your Fluffy Japanese Cotton Cheesecake Cupcakes.

Gentle Folding: Always fold the whipped egg whites into the batter gently. Overmixing here will deflate the air you’ve meticulously whipped in, leading to denser cupcakes.

Monitor Baking Time: Keep a close eye on the cupcakes as they bake. Oven temperatures can vary, so start checking at the 25-minute mark to avoid overbaking.

Chill for Stability: After cooling, my secret tip is to refrigerate the cupcakes for an hour. This helps firm up the texture, making them easier to handle and more delightful to eat!

Fluffy Japanese Cotton Cheesecake Cupcakes Recipe FAQs

How do I select ripe ingredients for this recipe?
Absolutely! For the best results, ensure your cream cheese is at room temperature—slightly softened but not melted. Eggs should be fresh; you can test them by placing them in a bowl of water—fresh eggs sink, while old ones float! It's a little tip I always use to guarantee quality in my recipes.

What is the best way to store leftover cupcakes?
To keep your Fluffy Japanese Cotton Cheesecake Cupcakes fresh, store them in an airtight container in the refrigerator for up to 2 days. If you want to save them longer, they can be frozen for up to a month. Just make sure to wrap them individually in plastic wrap before placing them in a freezer-safe container.

Can I freeze these cupcakes? If so, how?
Yes, you can! To freeze your Fluffy Japanese Cotton Cheesecake Cupcakes, wrap each one tightly in plastic wrap and then place them inside an airtight container. This method helps to preserve their sweetness and fluffy texture. When you’re ready to enjoy them, just let them thaw at room temperature, and reheat them in a 300°F (150°C) oven for about 5-10 minutes to restore their delightful fluffiness!

What should I do if my egg whites don’t whip properly?
No worries! If your egg whites aren't whipping to stiff peaks, ensure your mixing bowl is completely dry and free from grease—any residue can prevent the egg whites from whipping properly. If they’re still falling flat, try adding a pinch of cream of tartar to stabilize and help them whip up better. Remember, patience is key, and slowly building the peaks creates the best texture!

Are there any dietary considerations for these cupcakes?
Definitely! If you're catering to dietary restrictions, you can make these Fluffy Japanese Cotton Cheesecake Cupcakes gluten-free by substituting all-purpose flour with a gluten-free blend. Also, be mindful of cream cheese allergies; dairy-free cream cheese is widely available and can make a lovely alternative that still maintains that creamy texture. Enjoy baking with confidence knowing you can adapt this recipe for everyone!

Fluffy Japanese Cotton Cheesecake Cupcakes

Fluffy Japanese Cotton Cheesecake Cupcakes for Sweet Bliss

Indulge in Fluffy Japanese Cotton Cheesecake Cupcakes that promise an airy texture and melt-in-your-mouth experience, perfect for any occasion.
Print Recipe Pin Recipe
Prep Time 15 minutes mins
Cook Time 30 minutes mins
Cooling Time 30 minutes mins
Total Time 1 hour hr 15 minutes mins
Servings: 12 cupcakes
Course: Dessert
Cuisine: Japanese
Calories: 150
Ingredients Equipment Method Nutrition Notes

Ingredients
  

For the Batter
  • 8 oz Cream Cheese full-fat for better texture
  • 1 cup Granulated Sugar
  • 1/2 cup Milk
  • 4 large Eggs (Separated) yolks and whites separated
  • 1 tbsp Vanilla Extract can substitute with almond extract
  • 1 cup All-Purpose Flour gluten-free flour can be used
  • 2 tbsp Cornstarch
  • 1/4 tsp Salt
For Dusting
  • 1 cup Powdered Sugar optional

Equipment

  • Oven
  • Muffin tin
  • hand mixer
  • Mixing bowls

Method
 

Step-by-Step Instructions
  1. Preheat your oven to 320°F (160°C) and line a muffin tin with cupcake liners.
  2. Beat softened cream cheese and granulated sugar together until smooth and creamy.
  3. Add milk, egg yolks, and vanilla extract to the mixture and blend until silky.
  4. Sift in all-purpose flour and cornstarch into the mixture and gently mix until smooth.
  5. In a clean bowl, beat egg whites with a pinch of salt until soft peaks form, then gradually add sugar until stiff peaks form.
  6. Fold the whipped egg whites into the cream cheese mixture in three additions.
  7. Divide the batter among the cupcake liners, filling each about ⅔ full.
  8. Bake for about 30 minutes until tops are lightly golden and centers feel set.
  9. Allow cupcakes to cool completely in the tin before dusting with powdered sugar.

Nutrition

Serving: 1cupcakeCalories: 150kcalCarbohydrates: 19gProtein: 3gFat: 7gSaturated Fat: 3gPolyunsaturated Fat: 0.5gMonounsaturated Fat: 1.5gCholesterol: 65mgSodium: 100mgPotassium: 70mgSugar: 8gVitamin A: 5IUVitamin C: 1mgCalcium: 50mgIron: 1mg

Notes

Use room temperature ingredients for better blending. Monitor baking time to avoid overbaking and refrigerate after cooling for better texture.

Tried this recipe?

Let us know how it was!

Light and Fluffy Vanilla Cupcakes You’ll Love to Bake

January 24, 2026 by Grace Snow Leave a Comment

As I sifted flour in my kitchen one rainy afternoon, a sudden urge to bake hit me like a wave. The sweet scent of vanilla lingered in the air as I prepared to whip up a batch of Vanilla Cupcakes—those light and fluffy morsels that make any day feel like a celebration. Crafted from everyday ingredients, these delightful cupcakes are ridiculously simple to make, turning any gathering into a sweet affair, whether it's a cozy brunch or a festive birthday. With a luscious buttercream frosting that's as dreamy as it sounds, these treats will charm everyone at your table. Curious about how to elevate your homemade dessert game? Let’s dive into this recipe!

Why are these Vanilla Cupcakes irresistible?

Light and Fluffy: Experience the airy texture that melts in your mouth, making each bite feel like a hug!

Effortless Baking: With simple ingredients and straightforward steps, these cupcakes are perfect for both beginners and seasoned bakers.

Endless Variations: Feel free to experiment with flavors, like almond or citrus extracts, to keep your cupcake game fresh and exciting.

Crowd Pleaser: Suitable for any occasion, these cupcakes are sure to impress guests at brunches or parties, becoming the star of the dessert table.

Quick Treat: Ready in just 30 minutes, you won’t have to wait long to indulge in your sweet creations—ideal for spontaneous cravings!

With these delightful Vanilla Cupcakes, you'll elevate your baking repertoire and satisfy any sweet tooth.

Vanilla Cupcake Ingredients

• Let’s gather everything you need to create these scrumptious Vanilla Cupcakes!

For the Cupcake Batter

  • All-purpose Flour – Provides structure to the cupcakes; for gluten-free options, use a gluten-free flour blend.
  • Baking Powder – Ensures the cupcakes rise beautifully, keeping them light and fluffy.
  • Salt – Enhances flavor; never skip it, even in sweet recipes.
  • Eggs (room temperature) – Adds rich moisture; tip: room temperature eggs incorporate better into the batter.
  • Sugar – Sweetens your cupcakes, assisting in achieving that lovely golden-brown color.
  • Unsalted Butter (melted) – Adds flavor and moisture; can be swapped with melted coconut oil for a unique twist.
  • Vanilla Extract – The star of the show for essential flavor; pure vanilla extract will deliver the best results.
  • Milk – Adds moisture to your batter; feel free to use any milk variety you prefer, like 2% or whole milk.

For the Frosting

  • Confectioners Sugar – A must-have for frosting, providing a smooth and sweet finish.
  • Unsalted Butter (softened) – Forms the creamy base for the frosting, ensuring it’s rich and delicious.
  • Heavy Whipping Cream – Adds lightness and richness to the frosting; can be replaced with milk for a lighter texture.

Now that you have all the ingredients, you're well on your way to creating delightful Vanilla Cupcakes!

Step‑by‑Step Instructions for Vanilla Cupcakes

Step 1: Preheat the Oven and Prepare the Pan
Preheat your oven to 350°F (175°C) and line a muffin tin with cupcake liners, ensuring each liner is snug in the cups. This step sets the stage for perfectly baked Vanilla Cupcakes, creating a warm environment that encourages them to rise beautifully.

Step 2: Sift the Dry Ingredients
In a large mixing bowl, sift together the all-purpose flour, baking powder, and salt. The sifting process aerates the flour and ensures an even distribution of the leavening agent, which is essential for achieving light and fluffy cupcakes. Set this mixture aside for later.

Step 3: Beat the Eggs and Sugar
In another bowl, combine the room-temperature eggs and granulated sugar. Using an electric mixer, beat on medium speed for about 1-2 minutes until the mixture is pale yellow and slightly thickened. This adds air to the batter, an important factor in making your Vanilla Cupcakes airy and soft.

Step 4: Incorporate the Butter and Vanilla
Slowly pour in the melted unsalted butter and the fragrant vanilla extract while continuing to mix on low speed. This will create a creamy, luscious base for your batter, enriching the flavor profile of your Vanilla Cupcakes and giving them that delightful buttery goodness.

Step 5: Combine the Wet and Dry Ingredients
Gradually add the sifted dry ingredients to the wet mixture, alternating with milk. Start and end with the dry ingredients, mixing just until combined. Be cautious not to overmix; the goal is a smooth batter that retains some airiness, leading to that coveted fluffy texture.

Step 6: Fill the Cupcake Liners
Spoon the batter into each cupcake liner, filling them about 3/4 full to allow for proper rising. A small cookie scoop can help ensure uniform portions, leading to evenly baked Vanilla Cupcakes that are visually appealing and consistent in size.

Step 7: Bake the Cupcakes
Carefully place the muffin tin in the preheated oven and bake for 15-18 minutes, or until a toothpick inserted into the center comes out clean. The tops should be lightly golden and spring back when touched gently, indicating the perfect level of doneness.

Step 8: Cool the Cupcakes
Once baked, remove the cupcakes from the oven and allow them to cool in the tin for about 5 minutes. Then, transfer them to a wire rack to cool completely. This prevents them from becoming soggy and prepares them for the luscious frosting that will follow.

Step 9: Make the Buttercream Frosting
In a mixing bowl, cream together the softened unsalted butter and confectioners sugar until smooth. Add in the vanilla extract and heavy whipping cream, continuing to mix until the frosting is light and fluffy. This frosting will beautifully complement your Vanilla Cupcakes.

Step 10: Frost the Cupcakes
Once the Vanilla Cupcakes have cooled completely, use a piping bag to frost them with the creamy buttercream. Feel free to get creative with the frosting design, whether it’s a classic swirl or a fun pattern—this is your chance to showcase these delightful treats!

Expert Tips for Vanilla Cupcakes

  • Room Temperature Ingredients: Always use room temperature eggs and milk for a smoother batter that mixes evenly and yields light and fluffy vanilla cupcakes.

  • Don’t Overmix: Gently combine your wet and dry ingredients to avoid developing gluten, which can lead to denser cupcakes. Aim for a smooth batter without lumps.

  • Check for Doneness: Use a toothpick to test if the cupcakes are done; it should come out clean or with a few crumbs, but not wet batter. This ensures they maintain their lightness.

  • Cool Completely Before Frosting: Let the cupcakes cool completely on a wire rack to prevent the frosting from melting off. This step is crucial for the perfect presentation!

  • Experiment with Flavors: To elevate your vanilla cupcakes, feel free to add a splash of almond extract or citrus zest. These tweaks can make a delightful difference in flavor!

Enjoy your baking journey with these expert tips ensuring your vanilla cupcakes are always a hit!

What to Serve with Perfectly Light and Fluffy Vanilla Cupcakes

Indulging in sweet, fluffy cupcakes opens up a world of delightful accompaniments to enhance your dessert experience.

  • Fresh Berries: Juicy strawberries or raspberries add a pop of brightness and acidity, balancing the sweetness of the cupcakes beautifully. Consider garnishing your plate with a few for a stunning presentation.

  • Whipped Cream: A generous dollop of freshly whipped cream brings a light and airy texture that echoes the cupcakes’ fluffiness, making every bite feel indulgent.

  • Chocolate Sauce: Drizzling warm chocolate sauce over your cupcakes creates an irresistible sweet-salty contrast that's perfect for chocolate lovers. Each bite will be a decadent treat!

  • Coffee or Tea: A warm cup of coffee or tea complements the sweetness of the cupcakes, enhancing their flavor while providing a comforting contrast that's perfect for an afternoon break.

  • Lemon Curd: This tangy addition cuts through the sweetness, adding a bright and refreshing element that elevates the overall experience of your dessert. Serve it alongside for dipping!

  • Ice Cream: A scoop of vanilla or even a fruity sorbet serves as a delightful contrast in temperature and texture, making an unforgettable dessert combo that will satisfy any sweet tooth.

  • Fruit Salad: A colorful fruit salad filled with seasonal fruits adds freshness and a nutritional component, creating a light contrast that keeps the dessert feeling balanced and joyful.

  • Chocolate Chip Cookies: For a nostalgic twist, serve mini chocolate chip cookies alongside your cupcakes for a delightful assortment of baked treats that everyone will love.

  • Sparkling Lemonade: This refreshing drink will elevate your dessert experience with its sparkly texture and citrus notes, making it a fun and festive pairing for gatherings!

Make Ahead Options

These Vanilla Cupcakes are ideal for busy home cooks looking to save time during hectic weeks! You can prepare the cupcake batter and refrigerate it for up to 24 hours prior to baking. Just be sure to store it in an airtight container to maintain freshness. Additionally, you can bake and cool the cupcakes ahead of time; they'll stay delicious in an airtight container at room temperature for up to 3 days. For the frosting, feel free to make it in advance and keep it refrigerated; just re-whip it before frosting the cooled cupcakes. This way, when you're ready to serve, you simply frost and enjoy freshly made Vanilla Cupcakes with minimal effort!

How to Store and Freeze Vanilla Cupcakes

Room Temperature: Store your cupcakes in an airtight container at room temperature for up to 3 days. This keeps them fresh and soft, ready for indulgence anytime!

Fridge: If you want to extend their life, place them in the refrigerator for up to a week. Just be sure to keep them covered to prevent drying out.

Freezer: For longer storage, freeze unfrosted cupcakes in an airtight container for up to 3 months. Thaw in the fridge overnight before frosting and enjoying!

Reheating: If you prefer them warm, pop cupcakes in the microwave for about 10-15 seconds. This will bring back that fresh-baked sensation, especially delightful with a bit of buttercream on top!

Vanilla Cupcake Variations & Substitutions

Feel the freedom to make these Vanilla Cupcakes your own—get creative and let your taste buds lead the way!

  • Almond Extract: Swap vanilla extract with almond extract for a nutty twist that adds warmth to the flavor profile. This variant can transport you to a quaint bakery with each bite!
  • Citrus Zest: Add lemon or orange zest to the batter for a refreshing zesty finish that brightens the flavors and adds a lovely aroma. Perfect for a sunny day!
  • Chocolate Chips: Mix in mini chocolate chips to the batter for a delightful surprise in every bite, turning your vanilla staple into a chocolate lover's dream.
  • Dairy-Free: Substitute milk with almond milk or coconut milk and use dairy-free butter for a deliciously inclusive treat everyone can enjoy. The lightness remains intact while accommodating dietary needs!
  • Funfetti Style: Incorporate colorful sprinkles into the batter to create vibrant, festive cupcakes that will bring joy to any celebration or gathering. Everyone loves a pinch of whimsy!
  • Nutty Crunch: Fold in some finely chopped nuts, such as pecans or walnuts, for added texture and flavor. Their crunchiness blends beautifully with the soft cupcakes for a delightful contrast.
  • Cream Cheese Frosting: For a tangy twist, swap butter in frosting with cream cheese. It pairs beautifully with the sweet vanilla and adds a richness that's hard to resist.
  • Spicy Kick: Incorporate a pinch of cinnamon or even a touch of cayenne pepper in the batter for a surprisingly delicious warm spice that pairs wonderfully with vanilla. Feel free to explore flavors beyond traditional limits!

These variations can elevate your baking experience and keep the joy of Vanilla Cupcakes alive no matter the occasion! If you're looking for more creative ideas, check out my guide on frosting varieties and add-ins for sweetness.

Vanilla Cupcakes Recipe FAQs

How do I choose the perfect eggs for my cupcakes?
Absolutely! When selecting eggs for your Vanilla Cupcakes, go for large, fresh eggs, preferably organic. Fresh eggs will provide better flavor and moisture, leading to fluffier results. Keep in mind that eggs should be at room temperature for the best incorporation into your batter, so take them out of the fridge about 30 minutes before baking.

What’s the best way to store leftover cupcakes?
Certainly! To store your cupcakes, keep them in an airtight container at room temperature for up to 3 days. If you want to keep them fresher for longer, place them in the refrigerator for up to a week. Just make sure they're covered to prevent drying out and losing that delightful texture!

Can I freeze Vanilla Cupcakes?
Very much! To freeze your Vanilla Cupcakes, first ensure they are unfrosted. Place them in an airtight container or wrap them tightly in plastic wrap, then pop them into the freezer for up to 3 months. When you're ready to enjoy them, thaw cupcakes in the refrigerator overnight, and then frost as desired for freshness.

What if my cupcake batter is too thick?
If you find that your batter is thicker than intended, don’t worry! Simply add a tablespoon or two of milk gradually until you achieve a smooth, pourable consistency. Mix gently to blend the milk in without overworking the batter; this will help you maintain those fluffy cupcakes.

Are these Vanilla Cupcakes safe for pets or people with allergies?
While these Vanilla Cupcakes are delicious for humans, they aren’t suitable for pets, especially dogs, due to sugar and potential high-fat content. For those with allergies, you can modify the recipe using gluten-free flour, dairy-free milk, and egg substitutes; just be mindful of specific ingredients that might pose a risk. Always check for cross-contamination if you're baking for someone with food allergies.

How do I know when my cupcakes are done baking?
To check if your Vanilla Cupcakes are done, insert a toothpick into the center of one. If it comes out clean or with a few crumbs, they’re ready! Avoid opening the oven door too soon, as this can cause them to sink. Wait until about 15 minutes of baking has passed for best results!

Vanilla Cupcakes

Light and Fluffy Vanilla Cupcakes You’ll Love to Bake

Delightful Vanilla Cupcakes that are light and fluffy, perfect for any occasion.
Print Recipe Pin Recipe
Prep Time 15 minutes mins
Cook Time 18 minutes mins
Cooling Time 5 minutes mins
Total Time 38 minutes mins
Servings: 12 cupcakes
Course: Dessert
Cuisine: Baking
Calories: 210
Ingredients Equipment Method Nutrition Notes

Ingredients
  

For the Cupcake Batter
  • 1 cup All-purpose Flour For gluten-free options, use a gluten-free flour blend.
  • 1 tbsp Baking Powder Ensures the cupcakes rise beautifully.
  • 1/4 tsp Salt Enhances flavor.
  • 2 large Eggs Use room temperature eggs.
  • 3/4 cup Sugar Sweetens your cupcakes.
  • 1/2 cup Unsalted Butter Melted for flavor and moisture.
  • 2 tsp Vanilla Extract Pure vanilla extract delivers the best results.
  • 1/2 cup Milk Can use 2% or whole milk.
For the Frosting
  • 2 cups Confectioners Sugar Provides a smooth and sweet finish.
  • 1/2 cup Unsalted Butter Softened for a creamy base.
  • 2 tbsp Heavy Whipping Cream Adds lightness and richness.

Equipment

  • Muffin tin
  • Mixing bowls
  • Electric mixer
  • piping bag

Method
 

Baking Instructions
  1. Preheat your oven to 350°F (175°C) and line a muffin tin with cupcake liners.
  2. In a large mixing bowl, sift together the all-purpose flour, baking powder, and salt.
  3. In another bowl, combine the room-temperature eggs and granulated sugar, and beat until pale yellow and slightly thickened.
  4. Slowly pour in the melted unsalted butter and vanilla extract while mixing on low speed.
  5. Gradually add the sifted dry ingredients to the wet mixture, alternating with milk, mixing until just combined.
  6. Spoon the batter into each cupcake liner, filling them about 3/4 full.
  7. Bake for 15-18 minutes, or until a toothpick inserted comes out clean.
  8. Allow to cool in the tin for about 5 minutes, then transfer to a wire rack to cool completely.
  9. For the frosting, cream together the softened butter and confectioners sugar until smooth, then add vanilla and heavy cream.
  10. Frost the cooled cupcakes using a piping bag.

Nutrition

Serving: 1cupcakeCalories: 210kcalCarbohydrates: 28gProtein: 2gFat: 10gSaturated Fat: 6gCholesterol: 40mgSodium: 200mgPotassium: 85mgSugar: 18gVitamin A: 300IUCalcium: 30mgIron: 0.5mg

Notes

Ensure that all ingredients are at room temperature for best results.

Tried this recipe?

Let us know how it was!

Dulce de Leche Cupcakes: Irresistibly Soft & Sweet Treats

January 24, 2026 by Grace Snow Leave a Comment

As I pulled my head out of the chaos of daily life, the sweet aroma of baking dulce de leche cupcakes filled my kitchen, instantly whisking me away to a celebration of flavors. These cupcakes are more than just a dessert; they’re fluffy brown sugar delights that boast a tantalizing salty-sweet center. Perfect for fiestas like Cinco de Mayo, they're not only a feast for the taste buds but also a visual delight that’s sure to wow your guests. Whipping up these moist cupcakes means diving into a world of comfort food, while the luscious buttercream frosting adds a creamy twist that can turn any ordinary day into a festive occasion. Who doesn’t want a reason to celebrate with a sweet treat? So, are you ready to bring the joy of homemade dulce de leche cupcakes into your kitchen? Let’s get started!

What makes dulce de leche cupcakes special?

Irresistible Flavor Profile: The combination of rich dulce de leche and brown sugar creates a cupcake that tantalizes your taste buds with every bite.
Satisfies Sweet Cravings: Whether it's a cozy afternoon or a festive gathering, these cupcakes are a cherished crowd-pleaser.
Festive Appeal: Perfect for celebrations like Cinco de Mayo, they bring a festive touch to any occasion.
Versatile Options: Feel free to experiment with different cake flavors or frostings, catering to every palate.
Quick and Easy: Simple steps ensure even beginner bakers can whip these up in no time—no more fast food!
Treat yourself to a delightful homemade experience, and don't forget to try out other sweet delights like Chocolate Cupcakes or Vanilla Bean Frosting for variety.

Dulce de Leche Cupcake Ingredients

For the Cupcakes
• All-Purpose Flour – Provides structure for the cupcakes; you can substitute whole wheat flour for a heartier texture.
• Baking Powder – Acts as a leavening agent for lightness; make sure it's fresh for the best rise.
• Baking Soda – Works in tandem with baking powder to give extra lift; don’t skip this!
• Salt – Enhances flavor and balances the sweetness of the cupcakes.
• Unsalted Butter – Adds richness and moisture; keep it at room temperature to mix easily.
• Light Brown Sugar – Infuses moisture and depth of flavor; granulated sugar can be a lighter alternative.
• Eggs – Contribute to moisture and structure; it's best if they're at room temperature.
• Full-Fat Sour Cream – Makes the cupcakes moist and rich; Greek yogurt can work as a substitute.
• Vegetable Oil – Ensures a tender crumb; melted coconut oil is a lovely alternative.
• Vanilla Extract – Deepens the flavor profile; opt for pure vanilla for the best taste.
• Whole Milk – Adds creaminess; almond or oat milk are great alternatives as well.
• Dulce de Leche – For both filling and frosting, it delivers that sweet, caramel-like flavor, and can be store-bought or homemade.

For the Buttercream Frosting
• Unsalted Butter – The base of your frosting; it should be softened for easy blending.
• Powdered Sugar – Sweetens the frosting; adjust the amount based on your desired sweetness level.
• Dulce de Leche – Boosts the creamy, caramel flavor in your frosting; use it generously!
• Salt – Just a pinch enhances the overall flavor, balancing the sweetness perfectly.

With these ingredients, your Dulce de Leche Cupcakes will be irresistible!

Step‑by‑Step Instructions for Dulce de Leche Cupcakes

Step 1: Preheat and Prepare the Muffin Tin
Begin by preheating your oven to 350°F (175°C). As the oven warms up, line a 12-cup muffin tin with colorful cupcake liners, ensuring they are securely placed inside each cup. This prep step is essential for easy removal later, allowing your delicious dulce de leche cupcakes to shine.

Step 2: Whisk the Dry Ingredients
In a medium-sized mixing bowl, whisk together 1 ½ cups of all-purpose flour, 1 ½ teaspoons of baking powder, ½ teaspoon of baking soda, and ½ teaspoon of salt until well combined. This mixture will create a light and fluffy texture in your cupcakes, so keep an eye out for any lumps and break them up gently for a smoother batter.

Step 3: Cream Butter and Sugar
In a large mixing bowl, use an electric mixer to beat ¾ cup of softened unsalted butter and 1 cup of light brown sugar together until creamy and fluffy, which should take about 2 minutes. You’ll know it’s ready when the mixture is a pale golden color and smooth—this will add richness to your dulce de leche cupcakes.

Step 4: Incorporate the Eggs and Wet Ingredients
Add in 2 large eggs, one at a time, mixing well after each addition to ensure they’re fully incorporated. Then, blend in 1 teaspoon of vanilla extract, ½ cup of full-fat sour cream, and ¼ cup of vegetable oil until everything is well combined. The batter will be rich and glossy, creating the base for your delectable cupcakes.

Step 5: Combine Dry and Wet Mixtures
Gradually mix in the flour mixture you prepared earlier, alternating with ½ cup of whole milk. Start and end with the dry ingredients, blending until just combined. Be mindful not to overmix; a few streaks of flour are perfectly okay. This step ensures your dulce de leche cupcakes remain soft and tender.

Step 6: Fill and Bake
Spoon the batter into the lined muffin tin, filling each cup about ¾ full. Slide the muffin tin into the preheated oven and bake for 15-18 minutes. You’ll know they’re done when a toothpick inserted in the center comes out clean and the tops are lightly golden, an inviting sight signaling deliciousness.

Step 7: Cool the Cupcakes
Once baked, remove the muffin tin from the oven and let it cool for about 5 minutes. Then, gently transfer the cupcakes to a wire rack to cool completely. This crucial step helps maintain the moist texture of your dulce de leche cupcakes, preventing them from becoming soggy.

Step 8: Make the Frosting
In a clean mixing bowl, beat together ½ cup of softened unsalted butter and 2 cups of powdered sugar until light and fluffy. Gradually add in ½ cup of dulce de leche and a pinch of salt, mixing until smooth and creamy. The frosting should be thick but spreadable—perfect for topping your finished cupcakes.

Step 9: Core and Fill the Cupcakes
Once the cupcakes are completely cool, use a cupcake corer or a knife to remove a small core from the center of each cupcake. Fill the hole with more dulce de leche, allowing that rich, sweet treat to sink in, creating a delightful surprise in every bite of your cupcakes.

Step 10: Frost and Garnish
Using a piping bag fitted with your favorite tip, generously frost each cooled cupcake with the luscious dulce de leche buttercream frosting. If you’re feeling extra festive, consider garnishing with toasted coconut or fresh strawberries for a touch of flair and flavor that complements your dulce de leche cupcakes beautifully.

Make Ahead Options

These Dulce de Leche Cupcakes are perfect for busy home cooks who want to save time without sacrificing flavor! You can prepare the cupcake batter up to 24 hours in advance; simply store it in the fridge before baking to keep everything fresh. Alternatively, bake the cupcakes and, once cooled, store them un-frosted in an airtight container at room temperature for up to 3 days or refrigerate for 5 days. If you want to go even further, freeze the un-frosted cupcakes for up to 3 months; just thaw them before frosting. To maintain that moist texture, ensure they are completely cool before filling with dulce de leche and adding the buttercream frosting right before serving—this way, you'll have the same delicious experience as if they were freshly made!

Dulce de Leche Cupcakes: Exciting Variations

Feel free to unleash your creativity and customize these delightful cupcakes to craft the perfect treat for any occasion!

  • Chocolate Base: Swap half of the all-purpose flour with cocoa powder for a rich chocolate experience. Every bite will feel indulgent and decadent, perfect for chocolate lovers.
  • Vegan Alternative: Use flax eggs and replace dairy items with almond milk and coconut oil to create a vegan twist, so everyone can indulge!
  • Cinnamon Spice: Add a teaspoon of ground cinnamon to the batter for a warm flavor that transports your taste buds to cozy dessert evenings.
  • Nutty Finesse: Stir in chopped pecans or walnuts into the batter for a delightful crunch, elevating texture and satisfaction in each bite.
  • Fruit-Filled Delight: Substitute the dulce de leche filling with a fruit preserves like raspberry or strawberry to balance sweetness with a fruity tartness.
  • Cream Cheese Frosting: Replace butter with cream cheese for the frosting to create a richer and tangy topping that perfectly complements the sweetness.
  • Toasted Coconut Garnish: Top each cupcake with toasted coconut flakes for an added tropical flair that enhances the flavor and presentation.
  • Spicy Kick: Incorporate a pinch of cayenne pepper to the batter for an unexpected hint of heat, creating a surprising depth and complexity!

Looking to enhance your baking repertoire? Try our Chocolate Cupcakes or explore making a delightful Vanilla Bean Frosting for more sweet creations!

How to Store and Freeze Dulce de Leche Cupcakes

Room Temperature: Store un-frosted cupcakes in an airtight container at room temperature for up to 3 days to keep them fresh and delicious.

Fridge: If you have frosted cupcakes, keep them in the fridge for up to 5 days. Make sure they're covered to prevent drying out.

Freezer: Unassembled dulce de leche cupcakes can be frozen for up to 3 months. Just thaw them completely before frosting or filling.

Reheating: To enjoy your cupcakes warm, microwave for 10-15 seconds before serving, ensuring they retain their delightful moisture.

Expert Tips for Dulce de Leche Cupcakes

  • Room Temperature Ingredients: Ensure all ingredients like eggs, butter, and dairy are at room temperature for even mixing and a fluffy texture in your dulce de leche cupcakes.

  • Avoid Overmixing: When combining the wet and dry ingredients, mix until just combined. Overmixing can lead to dense cupcakes, so a light hand is key!

  • Cool Before Filling: Allow your cupcakes to cool completely before coring and filling them with dulce de leche to prevent sogginess and preserve texture.

  • Frosting Consistency: Adjust your frosting by adding milk to thin it out or powdered sugar to thicken it, achieving the perfect texture for your dulce de leche cupcakes.

  • Use a Cupcake Corer: For a clean filling, consider using a cupcake corer. If you don’t have one, a small knife can work, too—just be gentle to make a neat pocket.

What to Serve with Dulce de Leche Cupcakes

Treat your guests to an enchanting meal that pairs perfectly with these delightful desserts.

  • Rich Coffee: A steaming cup of dark roast coffee balances the sweetness and enhances the cupcake's flavors, making every bite even more satisfying.

  • Creamy Ice Cream: Vanilla or caramel ice cream adds a cold, creamy contrast to the warm dulce de leche cupcakes. The melting ice cream mingles with the cupcake’s buttery frosting, creating luscious bites.

  • Fresh Fruit Salad: A refreshing mix of berries, melons, and citrus brightens the palate, providing a light and zesty complement to the rich, sweet cupcakes.

  • Chocolate-Covered Strawberries: Indulge further with chocolate-covered strawberries; their tartness enhances the sweetness of the cupcakes, making for a delightful fusion of flavors.

  • Sparkling Wine or Champagne: For a festive touch, pair these cupcakes with bubbly sparkling wine. The effervescence cuts through the richness and adds a celebratory feel to your gathering.

  • Homemade Whipped Cream: A dollop of lightly sweetened whipped cream adds a creamy texture that beautifully contrasts the moist cupcake, elevating the overall dessert experience.

Embrace the joy of these pairings to create a feast that leaves everyone swooning!

Dulce de Leche Cupcakes Recipe FAQs

How do I choose the best dulce de leche for my cupcakes?
Absolutely! When selecting dulce de leche, look for a smooth, creamy texture without any graininess. You can choose between store-bought options or homemade. If making it at home, simmer sweetened condensed milk for about 1.5 to 2 hours until it reaches a golden-brown color. The flavor should be rich and sweet, enhancing your cupcakes perfectly!

How should I store my dulce de leche cupcakes?
To keep your cupcakes fresh, store un-frosted ones in an airtight container at room temperature for up to 3 days. If frosted, they can stay in the fridge for 5 days; just cover them to prevent drying out. For optimal enjoyment, allow them to sit at room temperature for a short while before serving.

Can I freeze dulce de leche cupcakes?
Yes, indeed! Unassembled dulce de leche cupcakes can be frozen for up to 3 months. To freeze, place them in an airtight container or zip-lock bag after they have cooled completely. When you're ready to indulge, simply thaw them at room temperature before frosting or filling. It’s a convenient way to enjoy your treats later!

What should I do if my cupcakes are dense?
Very! If your cupcakes turned out dense, check a couple of things: ensure your baking powder and soda are fresh, as old leavening agents won’t provide the necessary lift. Also, be cautious not to overmix the batter when combining wet and dry ingredients. Mixing until just combined can yield that light, fluffy texture we love.

Are there any dietary considerations for dulce de leche cupcakes?
Absolutely! If you're concerned about allergies, note that this recipe includes gluten (all-purpose flour), dairy (butter, milk, sour cream), and eggs. For a gluten-free version, use a gluten-free flour blend, and you can substitute non-dairy milk or plant-based butter for lactose-free options. Always check the labels of packaged dulce de leche for allergens if purchasing.

How can I make my frosting the right consistency?
To achieve the perfect frosting consistency, whisk together softened butter and powdered sugar, adjusting as needed. If it's too thick, gradually add a teaspoon of milk until it’s spreadable. If too thin, simply add more powdered sugar. A smooth, creamy texture makes for the best frosting experience on your delightful dulce de leche cupcakes!

Dulce de Leche Cupcakes

Dulce de Leche Cupcakes: Irresistibly Soft & Sweet Treats

Delight in Dulce de Leche Cupcakes, a sweet and soft treat with a salty-sweet center.
Print Recipe Pin Recipe
Prep Time 20 minutes mins
Cook Time 18 minutes mins
Cooling Time 5 minutes mins
Total Time 43 minutes mins
Servings: 12 cupcakes
Course: Dessert
Cuisine: Mexican
Calories: 250
Ingredients Equipment Method Nutrition Notes

Ingredients
  

For the Cupcakes
  • 1 ½ cups all-purpose flour Can substitute with whole wheat flour.
  • 1 ½ teaspoons baking powder Ensure freshness for best rise.
  • ½ teaspoon baking soda Essential for extra lift.
  • ½ teaspoon salt Enhances flavor.
  • ¾ cup unsalted butter Must be at room temperature.
  • 1 cup light brown sugar Granulated sugar can be used as a substitute.
  • 2 large eggs Best at room temperature.
  • ½ cup full-fat sour cream Greek yogurt can be a substitute.
  • ¼ cup vegetable oil Melted coconut oil is also good.
  • 1 teaspoon vanilla extract Opt for pure for best flavor.
  • ½ cup whole milk Almond or oat milk are alternatives.
  • ½ cup dulce de leche For filling and frosting.
For the Buttercream Frosting
  • ½ cup unsalted butter Should be softened.
  • 2 cups powdered sugar Adjust for desired sweetness.
  • ½ cup dulce de leche Add generously for flavor.
  • a pinch salt Balances sweetness.

Equipment

  • Muffin tin
  • Mixing bowls
  • Electric mixer
  • measuring cups
  • Measuring Spoons
  • piping bag

Method
 

Step-by-Step Instructions for Dulce de Leche Cupcakes
  1. Preheat your oven to 350°F (175°C) and line a 12-cup muffin tin with cupcake liners.
  2. In a medium bowl, whisk together flour, baking powder, baking soda, and salt until combined.
  3. In a large bowl, beat together butter and brown sugar until creamy and fluffy.
  4. Add eggs one at a time, mixing well. Then blend in vanilla, sour cream, and vegetable oil.
  5. Gradually mix in the flour mixture and whole milk, alternating as you blend.
  6. Fill each muffin cup about ¾ full with batter and bake for 15-18 minutes.
  7. Let the cupcakes cool in the tin for 5 minutes, then transfer to a wire rack.
  8. Beat together butter and powdered sugar to make frosting, then add dulce de leche and salt.
  9. Core the cooled cupcakes and fill with dulce de leche.
  10. Frost with buttercream and garnish as desired.

Nutrition

Serving: 1cupcakeCalories: 250kcalCarbohydrates: 35gProtein: 3gFat: 12gSaturated Fat: 7gPolyunsaturated Fat: 1gMonounsaturated Fat: 4gCholesterol: 40mgSodium: 150mgPotassium: 100mgFiber: 1gSugar: 18gVitamin A: 200IUCalcium: 30mgIron: 0.5mg

Notes

Use room temperature ingredients for best results and avoid overmixing to keep cupcakes light and fluffy.

Tried this recipe?

Let us know how it was!

Dulce de Leche Cupcakes: Irresistibly Soft & Sweet Treats

January 24, 2026 by Grace Snow Leave a Comment

As I pulled my head out of the chaos of daily life, the sweet aroma of baking dulce de leche cupcakes filled my kitchen, instantly whisking me away to a celebration of flavors. These cupcakes are more than just a dessert; they’re fluffy brown sugar delights that boast a tantalizing salty-sweet center. Perfect for fiestas like Cinco de Mayo, they're not only a feast for the taste buds but also a visual delight that’s sure to wow your guests. Whipping up these moist cupcakes means diving into a world of comfort food, while the luscious buttercream frosting adds a creamy twist that can turn any ordinary day into a festive occasion. Who doesn’t want a reason to celebrate with a sweet treat? So, are you ready to bring the joy of homemade dulce de leche cupcakes into your kitchen? Let’s get started!

What makes dulce de leche cupcakes special?

Irresistible Flavor Profile: The combination of rich dulce de leche and brown sugar creates a cupcake that tantalizes your taste buds with every bite.
Satisfies Sweet Cravings: Whether it's a cozy afternoon or a festive gathering, these cupcakes are a cherished crowd-pleaser.
Festive Appeal: Perfect for celebrations like Cinco de Mayo, they bring a festive touch to any occasion.
Versatile Options: Feel free to experiment with different cake flavors or frostings, catering to every palate.
Quick and Easy: Simple steps ensure even beginner bakers can whip these up in no time—no more fast food!
Treat yourself to a delightful homemade experience, and don't forget to try out other sweet delights like Chocolate Cupcakes or Vanilla Bean Frosting for variety.

Dulce de Leche Cupcake Ingredients

For the Cupcakes
• All-Purpose Flour – Provides structure for the cupcakes; you can substitute whole wheat flour for a heartier texture.
• Baking Powder – Acts as a leavening agent for lightness; make sure it's fresh for the best rise.
• Baking Soda – Works in tandem with baking powder to give extra lift; don’t skip this!
• Salt – Enhances flavor and balances the sweetness of the cupcakes.
• Unsalted Butter – Adds richness and moisture; keep it at room temperature to mix easily.
• Light Brown Sugar – Infuses moisture and depth of flavor; granulated sugar can be a lighter alternative.
• Eggs – Contribute to moisture and structure; it's best if they're at room temperature.
• Full-Fat Sour Cream – Makes the cupcakes moist and rich; Greek yogurt can work as a substitute.
• Vegetable Oil – Ensures a tender crumb; melted coconut oil is a lovely alternative.
• Vanilla Extract – Deepens the flavor profile; opt for pure vanilla for the best taste.
• Whole Milk – Adds creaminess; almond or oat milk are great alternatives as well.
• Dulce de Leche – For both filling and frosting, it delivers that sweet, caramel-like flavor, and can be store-bought or homemade.

For the Buttercream Frosting
• Unsalted Butter – The base of your frosting; it should be softened for easy blending.
• Powdered Sugar – Sweetens the frosting; adjust the amount based on your desired sweetness level.
• Dulce de Leche – Boosts the creamy, caramel flavor in your frosting; use it generously!
• Salt – Just a pinch enhances the overall flavor, balancing the sweetness perfectly.

With these ingredients, your Dulce de Leche Cupcakes will be irresistible!

Step‑by‑Step Instructions for Dulce de Leche Cupcakes

Step 1: Preheat and Prepare the Muffin Tin
Begin by preheating your oven to 350°F (175°C). As the oven warms up, line a 12-cup muffin tin with colorful cupcake liners, ensuring they are securely placed inside each cup. This prep step is essential for easy removal later, allowing your delicious dulce de leche cupcakes to shine.

Step 2: Whisk the Dry Ingredients
In a medium-sized mixing bowl, whisk together 1 ½ cups of all-purpose flour, 1 ½ teaspoons of baking powder, ½ teaspoon of baking soda, and ½ teaspoon of salt until well combined. This mixture will create a light and fluffy texture in your cupcakes, so keep an eye out for any lumps and break them up gently for a smoother batter.

Step 3: Cream Butter and Sugar
In a large mixing bowl, use an electric mixer to beat ¾ cup of softened unsalted butter and 1 cup of light brown sugar together until creamy and fluffy, which should take about 2 minutes. You’ll know it’s ready when the mixture is a pale golden color and smooth—this will add richness to your dulce de leche cupcakes.

Step 4: Incorporate the Eggs and Wet Ingredients
Add in 2 large eggs, one at a time, mixing well after each addition to ensure they’re fully incorporated. Then, blend in 1 teaspoon of vanilla extract, ½ cup of full-fat sour cream, and ¼ cup of vegetable oil until everything is well combined. The batter will be rich and glossy, creating the base for your delectable cupcakes.

Step 5: Combine Dry and Wet Mixtures
Gradually mix in the flour mixture you prepared earlier, alternating with ½ cup of whole milk. Start and end with the dry ingredients, blending until just combined. Be mindful not to overmix; a few streaks of flour are perfectly okay. This step ensures your dulce de leche cupcakes remain soft and tender.

Step 6: Fill and Bake
Spoon the batter into the lined muffin tin, filling each cup about ¾ full. Slide the muffin tin into the preheated oven and bake for 15-18 minutes. You’ll know they’re done when a toothpick inserted in the center comes out clean and the tops are lightly golden, an inviting sight signaling deliciousness.

Step 7: Cool the Cupcakes
Once baked, remove the muffin tin from the oven and let it cool for about 5 minutes. Then, gently transfer the cupcakes to a wire rack to cool completely. This crucial step helps maintain the moist texture of your dulce de leche cupcakes, preventing them from becoming soggy.

Step 8: Make the Frosting
In a clean mixing bowl, beat together ½ cup of softened unsalted butter and 2 cups of powdered sugar until light and fluffy. Gradually add in ½ cup of dulce de leche and a pinch of salt, mixing until smooth and creamy. The frosting should be thick but spreadable—perfect for topping your finished cupcakes.

Step 9: Core and Fill the Cupcakes
Once the cupcakes are completely cool, use a cupcake corer or a knife to remove a small core from the center of each cupcake. Fill the hole with more dulce de leche, allowing that rich, sweet treat to sink in, creating a delightful surprise in every bite of your cupcakes.

Step 10: Frost and Garnish
Using a piping bag fitted with your favorite tip, generously frost each cooled cupcake with the luscious dulce de leche buttercream frosting. If you’re feeling extra festive, consider garnishing with toasted coconut or fresh strawberries for a touch of flair and flavor that complements your dulce de leche cupcakes beautifully.

What to Serve with Dulce de Leche Cupcakes

Treat your guests to an enchanting meal that pairs perfectly with these delightful desserts.

  • Rich Coffee: A steaming cup of dark roast coffee balances the sweetness and enhances the cupcake's flavors, making every bite even more satisfying.

  • Creamy Ice Cream: Vanilla or caramel ice cream adds a cold, creamy contrast to the warm dulce de leche cupcakes. The melting ice cream mingles with the cupcake’s buttery frosting, creating luscious bites.

  • Fresh Fruit Salad: A refreshing mix of berries, melons, and citrus brightens the palate, providing a light and zesty complement to the rich, sweet cupcakes.

  • Chocolate-Covered Strawberries: Indulge further with chocolate-covered strawberries; their tartness enhances the sweetness of the cupcakes, making for a delightful fusion of flavors.

  • Sparkling Wine or Champagne: For a festive touch, pair these cupcakes with bubbly sparkling wine. The effervescence cuts through the richness and adds a celebratory feel to your gathering.

  • Homemade Whipped Cream: A dollop of lightly sweetened whipped cream adds a creamy texture that beautifully contrasts the moist cupcake, elevating the overall dessert experience.

Embrace the joy of these pairings to create a feast that leaves everyone swooning!

Expert Tips for Dulce de Leche Cupcakes

  • Room Temperature Ingredients: Ensure all ingredients like eggs, butter, and dairy are at room temperature for even mixing and a fluffy texture in your dulce de leche cupcakes.

  • Avoid Overmixing: When combining the wet and dry ingredients, mix until just combined. Overmixing can lead to dense cupcakes, so a light hand is key!

  • Cool Before Filling: Allow your cupcakes to cool completely before coring and filling them with dulce de leche to prevent sogginess and preserve texture.

  • Frosting Consistency: Adjust your frosting by adding milk to thin it out or powdered sugar to thicken it, achieving the perfect texture for your dulce de leche cupcakes.

  • Use a Cupcake Corer: For a clean filling, consider using a cupcake corer. If you don’t have one, a small knife can work, too—just be gentle to make a neat pocket.

Make Ahead Options

These Dulce de Leche Cupcakes are perfect for busy home cooks who want to save time without sacrificing flavor! You can prepare the cupcake batter up to 24 hours in advance; simply store it in the fridge before baking to keep everything fresh. Alternatively, bake the cupcakes and, once cooled, store them un-frosted in an airtight container at room temperature for up to 3 days or refrigerate for 5 days. If you want to go even further, freeze the un-frosted cupcakes for up to 3 months; just thaw them before frosting. To maintain that moist texture, ensure they are completely cool before filling with dulce de leche and adding the buttercream frosting right before serving—this way, you'll have the same delicious experience as if they were freshly made!

How to Store and Freeze Dulce de Leche Cupcakes

Room Temperature: Store un-frosted cupcakes in an airtight container at room temperature for up to 3 days to keep them fresh and delicious.

Fridge: If you have frosted cupcakes, keep them in the fridge for up to 5 days. Make sure they're covered to prevent drying out.

Freezer: Unassembled dulce de leche cupcakes can be frozen for up to 3 months. Just thaw them completely before frosting or filling.

Reheating: To enjoy your cupcakes warm, microwave for 10-15 seconds before serving, ensuring they retain their delightful moisture.

Dulce de Leche Cupcakes: Exciting Variations

Feel free to unleash your creativity and customize these delightful cupcakes to craft the perfect treat for any occasion!

  • Chocolate Base: Swap half of the all-purpose flour with cocoa powder for a rich chocolate experience. Every bite will feel indulgent and decadent, perfect for chocolate lovers.
  • Vegan Alternative: Use flax eggs and replace dairy items with almond milk and coconut oil to create a vegan twist, so everyone can indulge!
  • Cinnamon Spice: Add a teaspoon of ground cinnamon to the batter for a warm flavor that transports your taste buds to cozy dessert evenings.
  • Nutty Finesse: Stir in chopped pecans or walnuts into the batter for a delightful crunch, elevating texture and satisfaction in each bite.
  • Fruit-Filled Delight: Substitute the dulce de leche filling with a fruit preserves like raspberry or strawberry to balance sweetness with a fruity tartness.
  • Cream Cheese Frosting: Replace butter with cream cheese for the frosting to create a richer and tangy topping that perfectly complements the sweetness.
  • Toasted Coconut Garnish: Top each cupcake with toasted coconut flakes for an added tropical flair that enhances the flavor and presentation.
  • Spicy Kick: Incorporate a pinch of cayenne pepper to the batter for an unexpected hint of heat, creating a surprising depth and complexity!

Looking to enhance your baking repertoire? Try our Chocolate Cupcakes or explore making a delightful Vanilla Bean Frosting for more sweet creations!

Dulce de Leche Cupcakes Recipe FAQs

How do I choose the best dulce de leche for my cupcakes?
Absolutely! When selecting dulce de leche, look for a smooth, creamy texture without any graininess. You can choose between store-bought options or homemade. If making it at home, simmer sweetened condensed milk for about 1.5 to 2 hours until it reaches a golden-brown color. The flavor should be rich and sweet, enhancing your cupcakes perfectly!

How should I store my dulce de leche cupcakes?
To keep your cupcakes fresh, store un-frosted ones in an airtight container at room temperature for up to 3 days. If frosted, they can stay in the fridge for 5 days; just cover them to prevent drying out. For optimal enjoyment, allow them to sit at room temperature for a short while before serving.

Can I freeze dulce de leche cupcakes?
Yes, indeed! Unassembled dulce de leche cupcakes can be frozen for up to 3 months. To freeze, place them in an airtight container or zip-lock bag after they have cooled completely. When you're ready to indulge, simply thaw them at room temperature before frosting or filling. It’s a convenient way to enjoy your treats later!

What should I do if my cupcakes are dense?
Very! If your cupcakes turned out dense, check a couple of things: ensure your baking powder and soda are fresh, as old leavening agents won’t provide the necessary lift. Also, be cautious not to overmix the batter when combining wet and dry ingredients. Mixing until just combined can yield that light, fluffy texture we love.

Are there any dietary considerations for dulce de leche cupcakes?
Absolutely! If you're concerned about allergies, note that this recipe includes gluten (all-purpose flour), dairy (butter, milk, sour cream), and eggs. For a gluten-free version, use a gluten-free flour blend, and you can substitute non-dairy milk or plant-based butter for lactose-free options. Always check the labels of packaged dulce de leche for allergens if purchasing.

How can I make my frosting the right consistency?
To achieve the perfect frosting consistency, whisk together softened butter and powdered sugar, adjusting as needed. If it's too thick, gradually add a teaspoon of milk until it’s spreadable. If too thin, simply add more powdered sugar. A smooth, creamy texture makes for the best frosting experience on your delightful dulce de leche cupcakes!

Dulce de Leche Cupcakes

Dulce de Leche Cupcakes: Irresistibly Soft & Sweet Treats

Indulge in these dulce de leche cupcakes, a fluffy treat with a salty-sweet center, perfect for any celebration.
Print Recipe Pin Recipe
Prep Time 20 minutes mins
Cook Time 18 minutes mins
Total Time 38 minutes mins
Servings: 12 cupcakes
Course: Dessert
Cuisine: Mexican
Calories: 250
Ingredients Equipment Method Nutrition Notes

Ingredients
  

For the Cupcakes
  • 1 ½ cups all-purpose flour or whole wheat flour
  • 1 ½ teaspoons baking powder ensure it's fresh
  • ½ teaspoon baking soda
  • ½ teaspoon salt
  • ¾ cup unsalted butter softened
  • 1 cup light brown sugar or granulated sugar
  • 2 large eggs room temperature
  • ½ cup full-fat sour cream or Greek yogurt
  • ¼ cup vegetable oil or melted coconut oil
  • 1 teaspoon vanilla extract preferably pure
  • ½ cup whole milk or almond/oat milk
  • ½ cup dulce de leche for filling and frosting
For the Buttercream Frosting
  • ½ cup unsalted butter softened
  • 2 cups powdered sugar adjust for sweetness
  • ½ cup dulce de leche to enhance flavor
  • a pinch salt

Equipment

  • Oven
  • Muffin tin
  • Mixing bowls
  • Electric mixer
  • piping bag

Method
 

Step‑by‑Step Instructions
  1. Preheat your oven to 350°F (175°C) and line a 12-cup muffin tin with cupcake liners.
  2. Whisk together the flour, baking powder, baking soda, and salt in a bowl.
  3. Beat the butter and brown sugar together until creamy and fluffy.
  4. Add eggs, vanilla, sour cream, and vegetable oil; mix well.
  5. Gradually mix in the flour mixture, alternating with milk until combined.
  6. Fill each muffin cup ¾ full with batter and bake for 15-18 minutes.
  7. Let cupcakes cool in the tin for 5 minutes then transfer to a wire rack.
  8. Beat butter and powdered sugar for frosting, then mix in dulce de leche and salt.
  9. Core and fill each cupcake with dulce de leche, then frost with the buttercream.
  10. Garnish as desired, such as with toasted coconut or strawberries.

Nutrition

Serving: 1cupcakeCalories: 250kcalCarbohydrates: 35gProtein: 3gFat: 12gSaturated Fat: 7gPolyunsaturated Fat: 0.5gMonounsaturated Fat: 4gCholesterol: 50mgSodium: 200mgPotassium: 150mgFiber: 1gSugar: 18gVitamin A: 250IUCalcium: 30mgIron: 1mg

Notes

Ensure all ingredients are at room temperature for best results. Avoid overmixing to maintain fluffy texture.

Tried this recipe?

Let us know how it was!

Decadent Chocolate Tiramisu Cupcakes for Irresistible Indulgence

January 24, 2026 by Grace Snow Leave a Comment

As I strolled through my local bakery, the rich aroma of chocolate and espresso pulled me in like a warm hug on a chilly day. That lingering essence sparked an idea: why not create my own Decadent Chocolate Tiramisu Cupcakes? With the velvety texture of traditional tiramisu transformed into an easy-to-hold cupcake, each bite is a blissful fusion of soft chocolate cake and luscious mascarpone filling, perfect for any celebration or simply a cozy night in. The best part? These delightful cupcakes can be adapted for gluten-free diets without sacrificing an ounce of flavor. Are you ready to take your dessert game to the next level with this indulgent treat? Let’s dive into the recipe!

What Makes This Tiramisu Unique?

Indulgence Redefined: These Decadent Chocolate Tiramisu Cupcakes merge two beloved desserts into one delightful bite, making them a perfect choice for any occasion.

Easy to Make: With straightforward instructions, you’ll be whipping up these beauties in no time!

Gluten-Free Option: Adapt the recipe with a gluten-free flour blend, so everyone can enjoy this indulgence.

Crowd-Pleasing Flavor: The rich chocolate and espresso flavor will leave your guests raving. Pair them with a cup of Homemade Hot Chocolate for a complete dessert experience.

Showstopper Looks: Dusting these cupcakes with cocoa powder gives an elegant touch that’s sure to impress at any gathering.

Get ready to share the love with these fabulous creations!

Decadent Chocolate Tiramisu Cupcakes Ingredients

For the Cupcakes

  • All-Purpose Flour – Provides structure to the cupcake; for gluten-free, use a suitable blend.
  • Cocoa Powder – Enhances the chocolate flavor; Dutch-processed gives a richer taste.
  • Baking Powder – Helps the cupcakes rise; ensure freshness for optimal results.
  • Granulated Sugar – Adds sweetness and moisture; substitute with coconut sugar for a lower glycemic index.
  • Eggs – Bind ingredients together and provide moisture; best not to substitute for texture.
  • Milk – Adds richness; non-dairy milk works well for a vegan option.
  • Vegetable Oil – Keeps the cupcakes moist; melted coconut oil is a great alternative.

For the Filling

  • Mascarpone Cheese – Creates a creamy filling; cream cheese can be used as an alternative.
  • Espresso or Strong Coffee – Infuses flavor and moisture; any strong brewed coffee is effective.

For Dusting

  • Cocoa Powder – Adds the final touch of flavor and visual appeal; essential for that tiramisu look.

Each bite of these Decadent Chocolate Tiramisu Cupcakes is an indulgent delight, perfect for any celebration or cozy night in!

Step‑by‑Step Instructions for Decadent Chocolate Tiramisu Cupcakes

Step 1: Preheat the Oven
Start by preheating your oven to 350°F (175°C). While the oven heats, line a muffin tin with cupcake liners to prepare for your Decadent Chocolate Tiramisu Cupcakes. This step is essential to ensure that your cupcakes bake evenly and don’t stick to the tin.

Step 2: Mix Dry Ingredients
In a large mixing bowl, whisk together your all-purpose flour, cocoa powder, baking powder, and granulated sugar until well combined. This step should take about 1-2 minutes, and you want to see a uniform mixture with no clumps. The rich cocoa powder will deepen the chocolate flavor in your cupcakes.

Step 3: Combine Wet Ingredients
In another bowl, whisk the eggs, milk, and vegetable oil together until smooth and creamy, approximately 1-2 minutes. This blend will help create a moist batter for your cupcakes. Make sure all the ingredients are well incorporated to ensure the cupcakes rise properly.

Step 4: Combine Mixtures
Gradually pour the wet ingredients into the dry mixture, gently folding them together. This should take about 1-2 minutes. Be cautious to avoid overmixing, which can lead to dense cupcakes. You’re looking for a smooth batter with a slight sheen, indicating that it’s ready for baking.

Step 5: Bake the Cupcakes
Use a spoon or an ice cream scoop to fill the cupcake liners about two-thirds full with the batter. Bake in your preheated oven for 18-20 minutes. To check for doneness, insert a toothpick into the center of a cupcake; it should come out clean or with a few moist crumbs, signaling a perfect bake.

Step 6: Prepare the Filling
While your cupcakes cool, whip the mascarpone cheese with the espresso in a mixing bowl until you achieve a light and fluffy consistency. This will take about 2-3 minutes. The mascarpone filling brings that classic tiramisu flavor to your cupcakes, making it a star component of this recipe.

Step 7: Assemble the Cupcakes
Once the cupcakes have cooled completely, carefully cut off the tops to create a small cap. Scoop out a bit of the center to make room for the luscious mascarpone filling. Fill each cupcake generously with the whipped mascarpone mixture, placing the tops back on afterward.

Step 8: Dust with Cocoa
Finally, dust the tops of your Decadent Chocolate Tiramisu Cupcakes with cocoa powder using a fine sieve. This step not only adds a beautiful finish but also enhances the chocolate flavor. Present them on a lovely platter, and they’re ready to impress your friends and family!

Expert Tips for Decadent Chocolate Tiramisu Cupcakes

  • Avoid Overmixing: Gently fold the wet and dry ingredients to keep your cupcakes light and fluffy; overmixing can lead to a dense texture.

  • Cooling Time: Ensure your cupcakes are completely cool before filling; this helps maintain their shape and prevents the filling from becoming runny.

  • Chilling the Filling: Refrigerate the mascarpone mixture before filling the cupcakes to keep it firm and easier to pipe.

  • Presentation Matters: Use a fine sieve to dust cocoa powder on top for an elegant finish; it enhances both flavor and visual appeal.

  • Flavor Variations: Consider adding flavored liqueurs or espresso-soaked ladyfingers for an exciting twist on your Decadent Chocolate Tiramisu Cupcakes.

Make Ahead Options

These Decadent Chocolate Tiramisu Cupcakes are perfect for meal prep enthusiasts looking to save time without sacrificing taste! You can prepare the cupcake batter up to 24 hours in advance and store it in an airtight container in the refrigerator, ensuring freshness and flavor. The mascarpone filling can also be whipped and refrigerated for up to 3 days; simply cover it tightly to maintain its creamy texture. When you're ready to serve, bake the cupcakes and fill them with the mascarpone just before guests arrive. This method allows you to enjoy restaurant-quality results with minimal effort, making your celebrations or weeknight desserts just as delightful as ever!

How to Store and Freeze Decadent Chocolate Tiramisu Cupcakes

Fridge: Store leftover cupcakes in an airtight container in the fridge for up to 3 days to maintain freshness. This keeps the creamy mascarpone filling delightful and intact.

Freezer: For longer storage, freeze the assembled cupcakes by wrapping them in plastic wrap and then placing them in an airtight container. They can be frozen for up to 2 months without compromising flavor.

Reheating: When ready to enjoy, thaw cupcakes in the fridge overnight. For a warm treat, briefly microwave for about 10-15 seconds—just enough to soften without melting the filling.

Assembly Tips: If you plan to freeze them, consider filling the cupcakes just before serving to maintain their perfect texture. Enjoy the indulgent experience of your Decadent Chocolate Tiramisu Cupcakes when the craving strikes!

What to Serve with Decadent Chocolate Tiramisu Cupcakes

Savoring a cupcake this rich deserves thoughtful pairings to create a memorable meal.

  • Rich Espresso: A classic pairing, the bold flavor of espresso complements the chocolate and coffee notes in each bite.
  • Vanilla Ice Cream: The creamy, cool contrast of vanilla ice cream brings balance to the rich, indulgent flavors of the cupcakes.
  • Chocolate Ganache Dip: Enhance the chocolate experience with a warm ganache, perfect for dipping or drizzling over each cupcake.
  • Fresh Berries: Juicy raspberries or strawberries add a bright, tart element that cuts through the sweetness beautifully.
  • Whipped Cream: Light and fluffy whipped cream serves as a delightful topping, adding a touch of elegance to your dessert presentation.
  • Coffee Liqueur: A splash of coffee liqueur in your drink elevates the dessert experience, highlighting the espresso flavors already present.
  • Chocolate Mint Cookies: For an added crunch, serve alongside chocolate mint cookies, offering a textural contrast and refreshing taste.
  • Hazelnut Praline: Crushed hazelnut praline sprinkled on top adds a delightful crunch and nutty flavor that enhances the cupcakes.

Decadent Chocolate Tiramisu Cupcakes Variations

Feel free to let your creativity shine by customizing these delicious cupcakes to suit your taste preferences!

  • Gluten-Free: Substitute all-purpose flour with a gluten-free flour blend for a delightful gluten-free treat that everyone can enjoy.
  • Vegan Touch: Use non-dairy milk and replace mascarpone with vegan cream cheese to make these cupcakes plant-based friendly.
  • Extra Espresso: Add a tablespoon of espresso powder into the dry ingredients for an intensified coffee flavor that complements the chocolate beautifully.
  • Flavor Twists: Try incorporating flavored liqueurs like amaretto or hazelnut into the frosting for a delightful adult twist on traditional flavors.
  • Texture Boost: Mix in crushed espresso-soaked ladyfingers into the batter for an irresistible texture that mirrors the classic tiramisu experience.
  • Sugar Swap: For a healthier version, replace granulated sugar with coconut sugar, offering a lower glycemic index without losing sweetness.
  • Nutty Variation: Fold in finely chopped walnuts or hazelnuts into the batter for a nutty crunch that contrasts wonderfully with the creamy filling.
  • Frosting Delight: Instead of dusting with cocoa, top the cupcakes with a light layer of whipped cream for added richness and a divine presentation.

With so many options, there's a variation for everyone! If you’re also interested in a cozy drink to pair with your cupcakes, consider making a cup of Homemade Hot Chocolate for the ultimate indulgence.

Decadent Chocolate Tiramisu Cupcakes Recipe FAQs

What type of flour should I use for gluten-free Decadent Chocolate Tiramisu Cupcakes?
You can substitute all-purpose flour with a good-quality gluten-free flour blend. Look for a blend that includes xanthan gum to ensure the cupcakes hold together nicely. I often recommend brands like Bob's Red Mill or King Arthur Flour for a reliable texture.

How long can I store leftover cupcakes?
Store any leftover Decadent Chocolate Tiramisu Cupcakes in an airtight container in the fridge for up to 3 days. This helps keep the mascarpone filling creamy and delicious. If you find them getting a bit stale, just pop them in the microwave for 10-15 seconds to revive their moisture!

Can I freeze the cupcakes?
Absolutely! To freeze, carefully wrap each assembled cupcake in plastic wrap and place them in an airtight container. They can be stored in the freezer for up to 2 months. When you're ready to enjoy, thaw them in the fridge overnight, and for an extra treat, microwave them briefly to warm through.

What should I do if my cupcakes sink in the middle?
If your cupcakes sink, it could be due to overmixing the batter or underbaking. To avoid this, mix just until the ingredients are combined and ensure your oven is properly preheated. If they sink despite your efforts, try checking the oven temperature with an oven thermometer for accuracy, and adjust the baking time based on your specific oven.

Are there any dietary considerations for pets or allergies?
Yes! These Decadent Chocolate Tiramisu Cupcakes contain ingredients that are not safe for pets, specifically chocolate and sugar. Additionally, they include gluten (unless using a gluten-free blend) and dairy, which could pose issues for those with allergies. Always double-check ingredient labels and consult with your guests if dietary restrictions are a concern.

What's the best way to keep the filling from making the cupcakes soggy?
To prevent sogginess, keep the components separate. I recommend filling the cupcakes just before serving. If you need to prepare ahead, consider whipping the mascarpone filling a few hours in advance and chilling it until you’re ready to assemble. This will help maintain their structure and texture!

Decadent Chocolate Tiramisu Cupcakes

Decadent Chocolate Tiramisu Cupcakes for Irresistible Indulgence

Indulge in rich and easy Decadent Chocolate Tiramisu Cupcakes that combine two classic desserts into an irresistible treat.
Print Recipe Pin Recipe
Prep Time 20 minutes mins
Cook Time 20 minutes mins
Cooling Time 30 minutes mins
Total Time 1 hour hr 10 minutes mins
Servings: 12 cupcakes
Course: Dessert
Cuisine: Italian
Calories: 250
Ingredients Equipment Method Nutrition Notes

Ingredients
  

For the Cupcakes
  • 1 cup All-Purpose Flour Use gluten-free blend for gluten-free option
  • 1/3 cup Cocoa Powder Dutch-processed for richer taste
  • 1 teaspoon Baking Powder Ensure freshness
  • 1 cup Granulated Sugar Substitute with coconut sugar for lower glycemic index
  • 2 large Eggs Best not substituted for texture
  • 1/2 cup Milk Non-dairy milk works for vegan option
  • 1/3 cup Vegetable Oil Melted coconut oil is a great alternative
For the Filling
  • 1 cup Mascarpone Cheese Cream cheese can be used as an alternative
  • 1/2 cup Espresso or Strong Coffee Any strong brewed coffee is effective
For Dusting
  • 2 tablespoons Cocoa Powder Essential for that tiramisu look

Equipment

  • Muffin tin
  • Mixing bowls
  • Whisk
  • sieve
  • Spoon or Ice Cream Scoop

Method
 

Step-by-Step Instructions
  1. Preheat your oven to 350°F (175°C) and line a muffin tin with cupcake liners.
  2. In a large mixing bowl, whisk together the flour, cocoa powder, baking powder, and sugar until well combined.
  3. In another bowl, whisk the eggs, milk, and vegetable oil together until smooth and creamy.
  4. Gradually pour the wet ingredients into the dry mixture, gently folding them together until you have a smooth batter.
  5. Fill the cupcake liners about two-thirds full with the batter and bake for 18-20 minutes.
  6. While cupcakes cool, whip mascarpone cheese with espresso until light and fluffy.
  7. Once cool, cut off the tops of the cupcakes, scoop out a bit of the center, and fill with mascarpone mixture.
  8. Dust the tops with cocoa powder and serve on a platter.

Nutrition

Serving: 1cupcakeCalories: 250kcalCarbohydrates: 30gProtein: 3gFat: 15gSaturated Fat: 5gMonounsaturated Fat: 10gCholesterol: 40mgSodium: 200mgPotassium: 150mgFiber: 2gSugar: 15gVitamin A: 2IUCalcium: 4mgIron: 8mg

Notes

Cupcakes can be made gluten-free and are ideal for any celebration or cozy night in.

Tried this recipe?

Let us know how it was!
  • « Previous Page
  • 1
  • …
  • 40
  • 41
  • 42
  • 43
  • 44
  • …
  • 179
  • Next Page »

Welcome!

Hi, I’m Grace, a Sydney-based home cook with a passion for bold flavors and trending ingredients. Whether you’re a busy beginner or a seasoned foodie, you’ll find dishes here that are fresh, fun, and full of flavor.

More about me

Popular Recipes

  • Cheesy Chicken Garlic Bread Sandwich
    Cheesy Chicken Garlic Bread Sandwich for Cozy Family Moments
  • Easy Chicken Ranch Wraps
    Easy Chicken Ranch Wraps: Quick, Creamy & Totally Satisfying
  • Chicken Caesar Sandwiches
    Delicious Chicken Caesar Sandwiches for Quick Comfort Food
  • best Cuban sandwich
    The Best Cuban Sandwich You’ll Want Every Weeknight!

Footer

↑ back to top

About

  • Privacy Policy
  • Disclaimer
  • Terms & Conditions

Newsletter

  • Sign Up! for emails and updates

Contact

  • About me
  • Contact me

Copyright © 2025 TastyTrendIngredients