tastytrendingredients

  • Home
  • Recipes
    • Appetizers
    • Breakfast
    • Dessert
    • Dinner
    • Drinks
    • Salads
    • Snacks
    • Soups
  • About me
  • Contact me
menu icon
go to homepage
  • Home
  • Recipes
    • Appetizers
    • Breakfast
    • Dessert
    • Dinner
    • Drinks
    • Salads
    • Snacks
    • Soups
  • About me
  • Contact me
search icon
Homepage link
  • Home
  • Recipes
    • Appetizers
    • Breakfast
    • Dessert
    • Dinner
    • Drinks
    • Salads
    • Snacks
    • Soups
  • About me
  • Contact me
×

Red Snapper with Creamy Creole Sauce: A Home Chef's Delight

January 29, 2026 by Grace Snow Leave a Comment

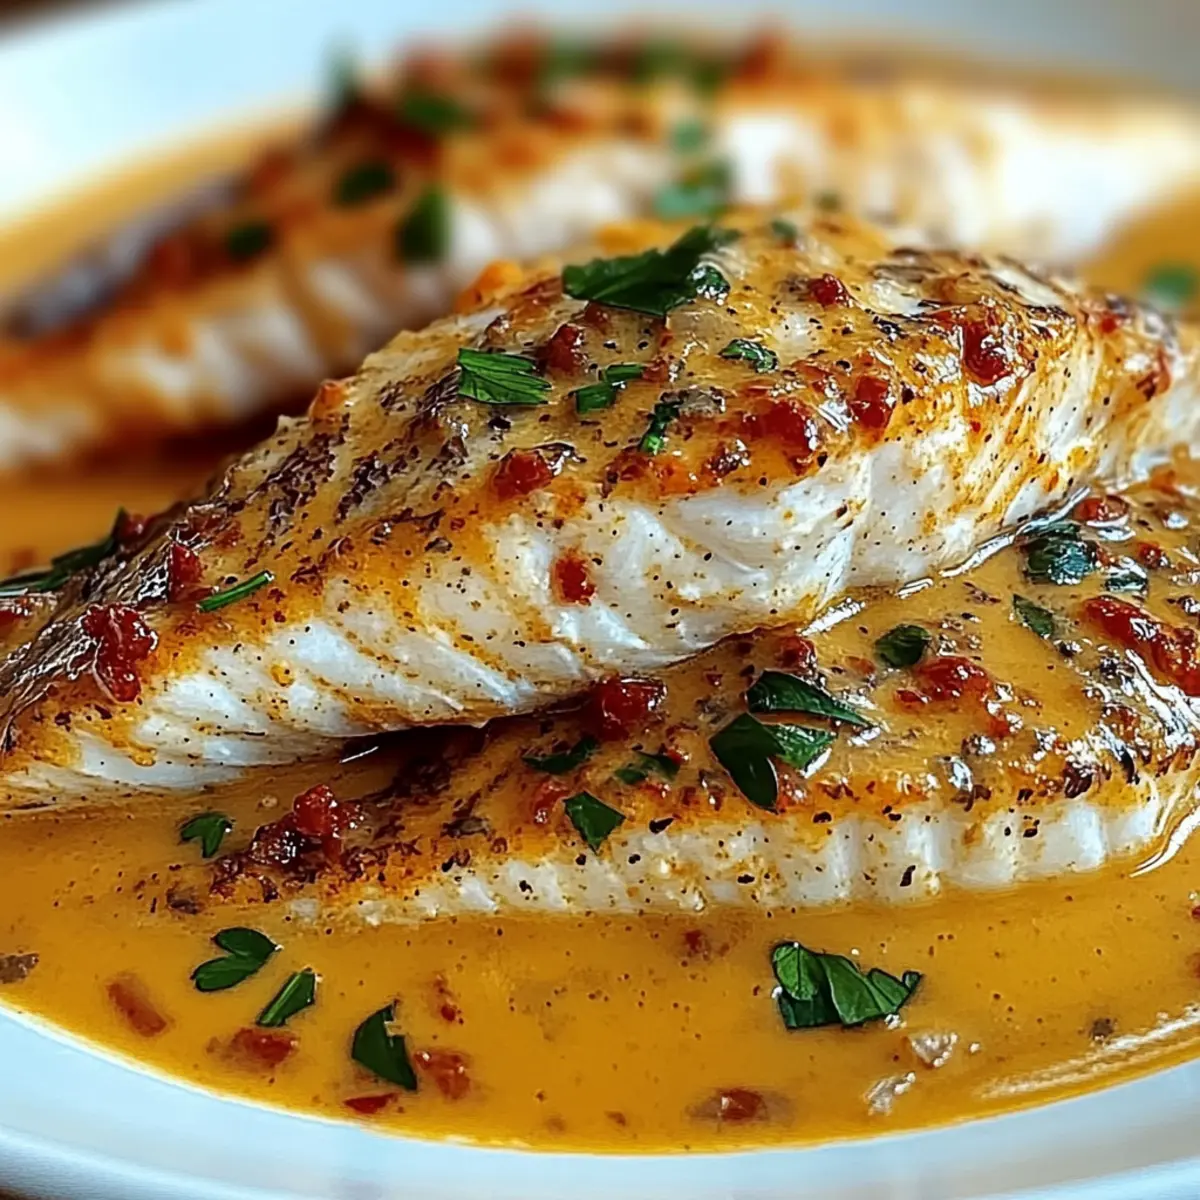
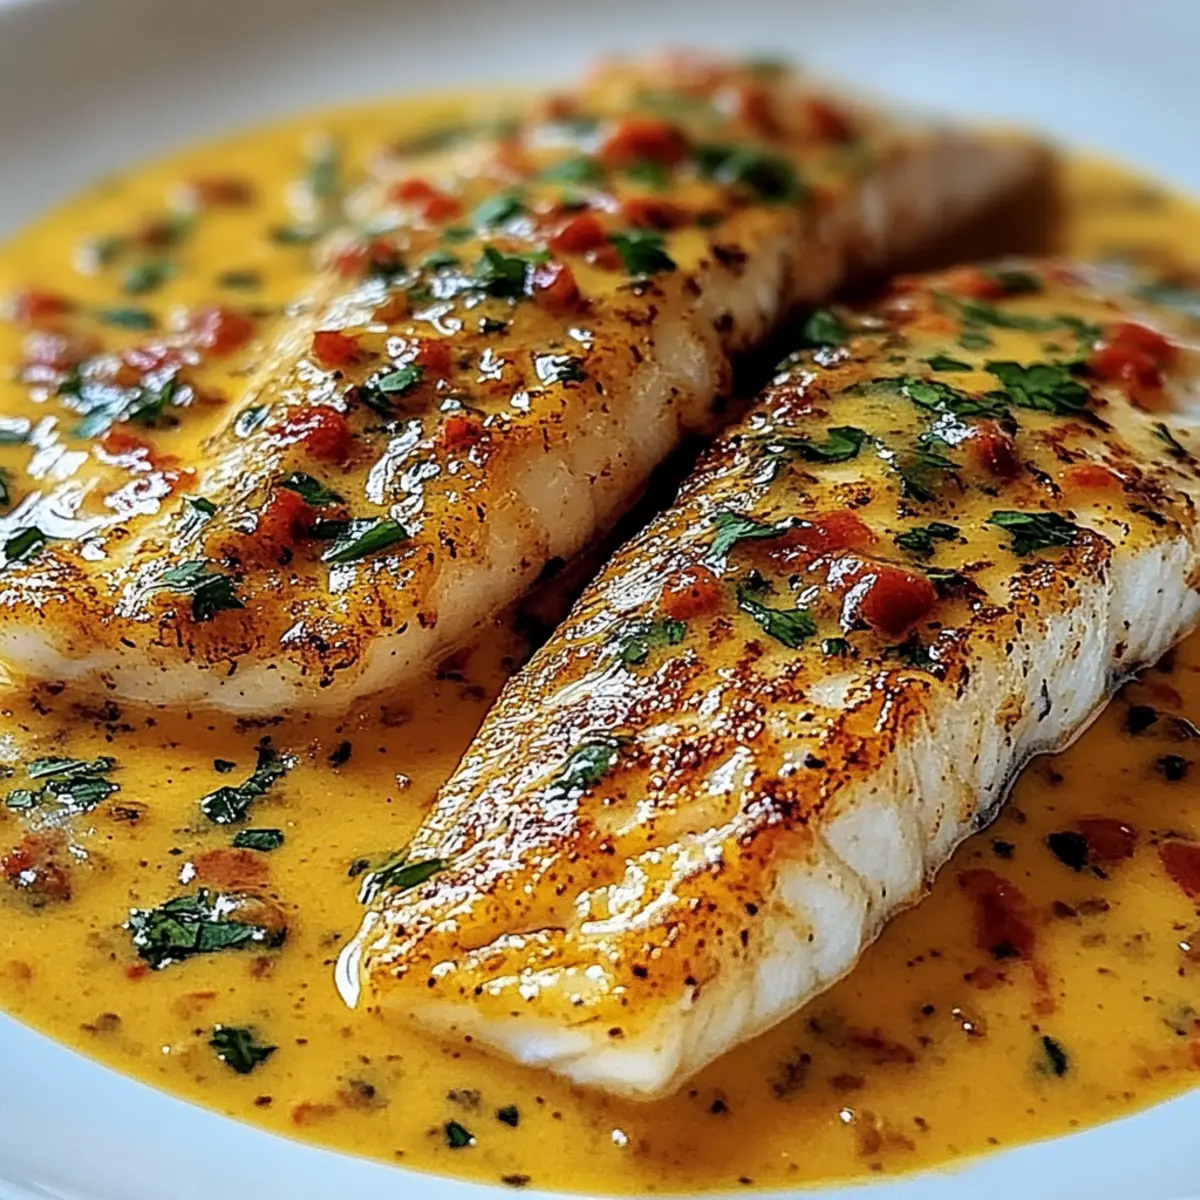
A culinary journey awaits as you explore the vibrant flavors of the bayou with my Red Snapper with Creamy Creole Sauce. This dish is a delightful celebration of flaky red snapper, harmoniously ensconced in a luscious, creamy sauce that dances with aromatic Creole spices and just the right kick of heat. The beauty of this recipe is twofold: it’s not only a showstopper for any gathering but also surprisingly simple to prepare, making it accessible for cooks of all skill levels. Whether you're looking to impress guests or treat yourself to a comforting meal, this seafood masterpiece serves as a perfect canvas for customization, allowing you to tailor the spice levels to suit your taste. Ready to dive into this flavorful adventure? Let’s get cooking!

Why is this dish a must-try?

Vibrant, Flavorful Experience: Each bite of this dish bursts with the bold flavors of the bayou, making it a journey for your taste buds.

Easy and Accessible: Don’t worry if you’re new to cooking; this recipe is simple and perfect for home chefs of all levels.

Customizable Spice Levels: Adjust the heat to your preference by modifying the cayenne for a kick that suits you best!

Crowd-Pleasing Appeal: Impress your family or guests with a stunning presentation that’s sure to spark conversations.

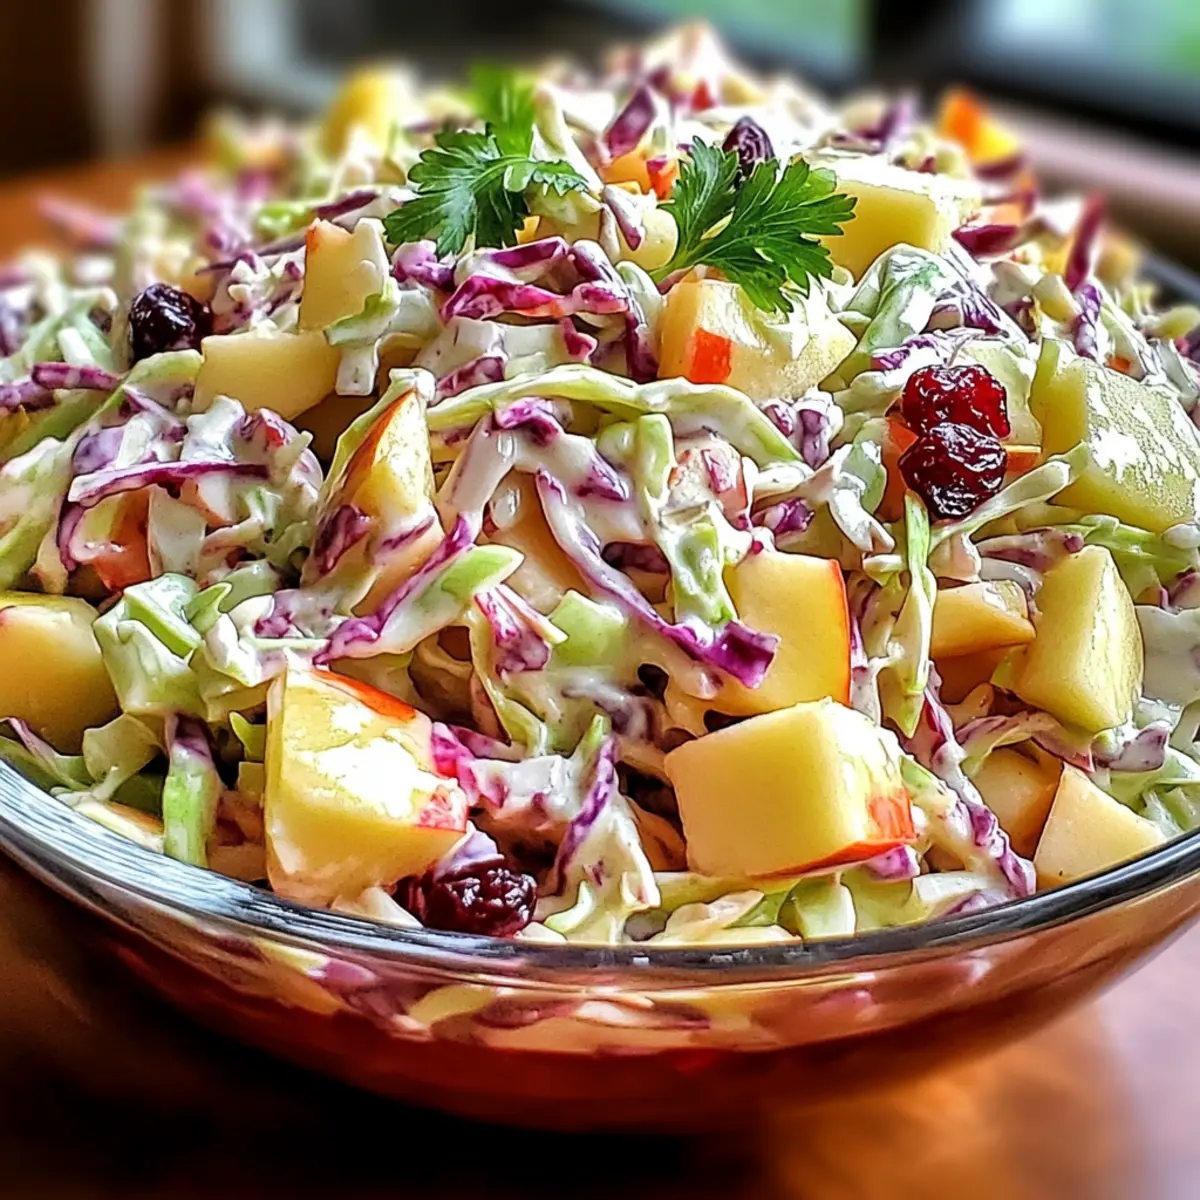
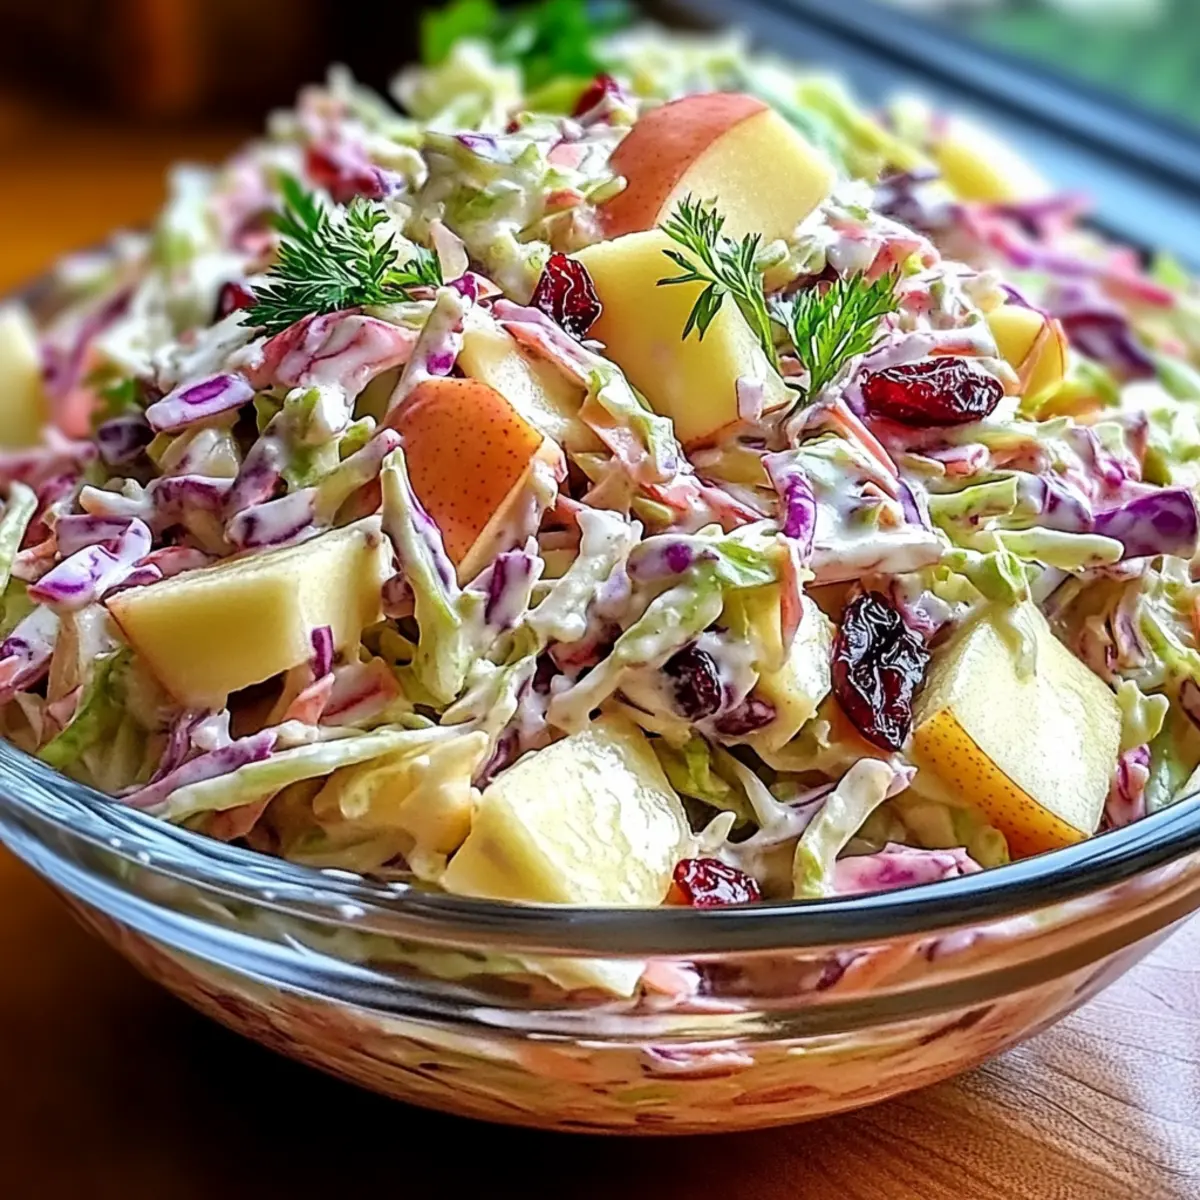
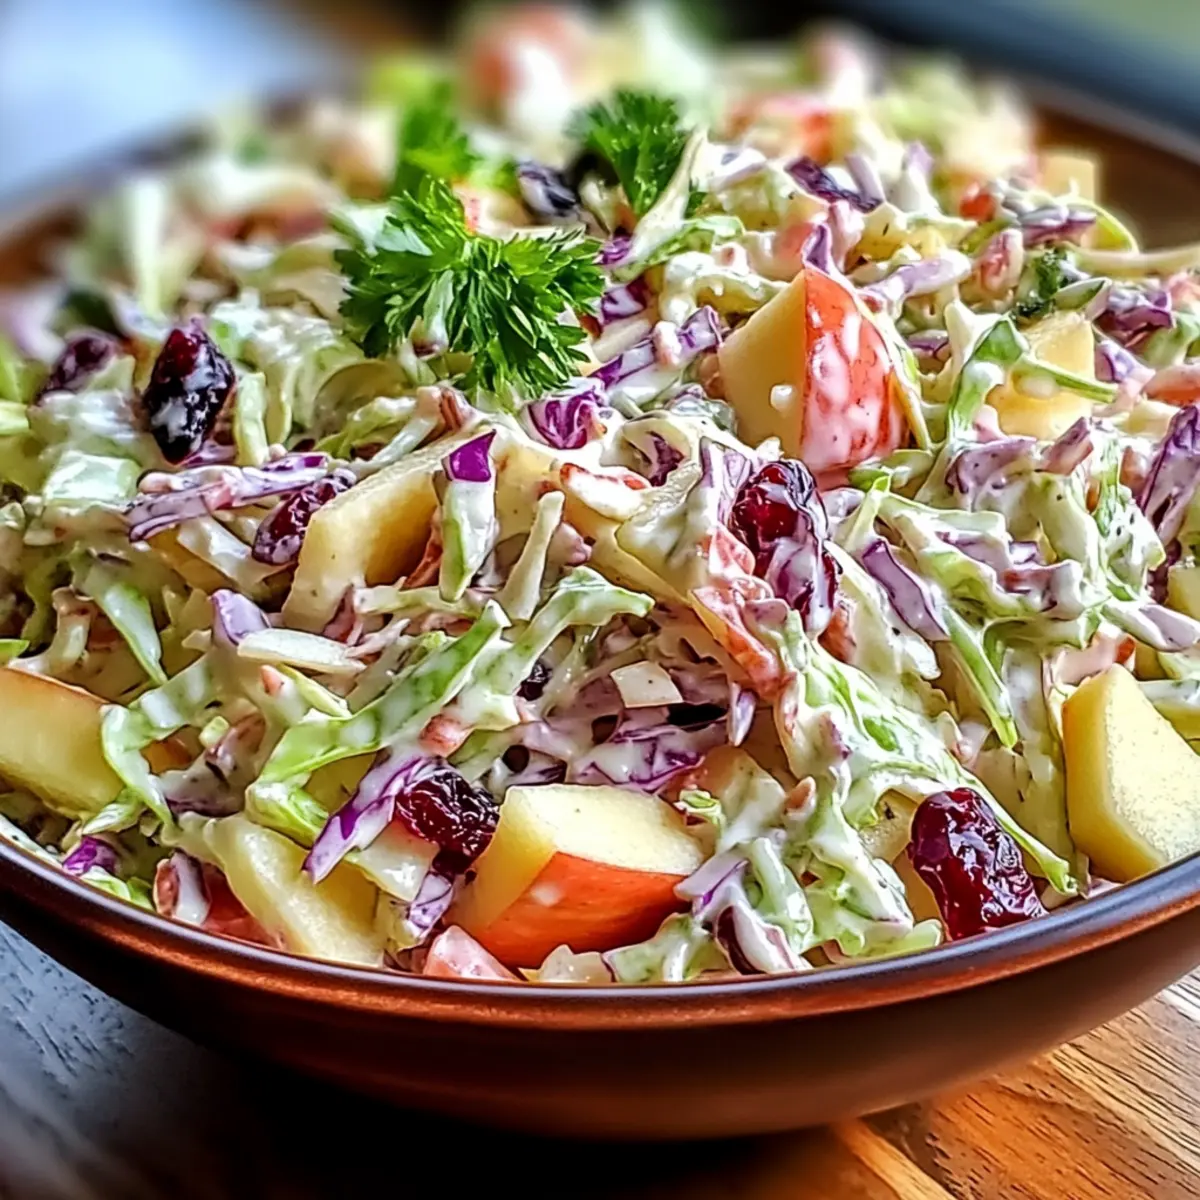
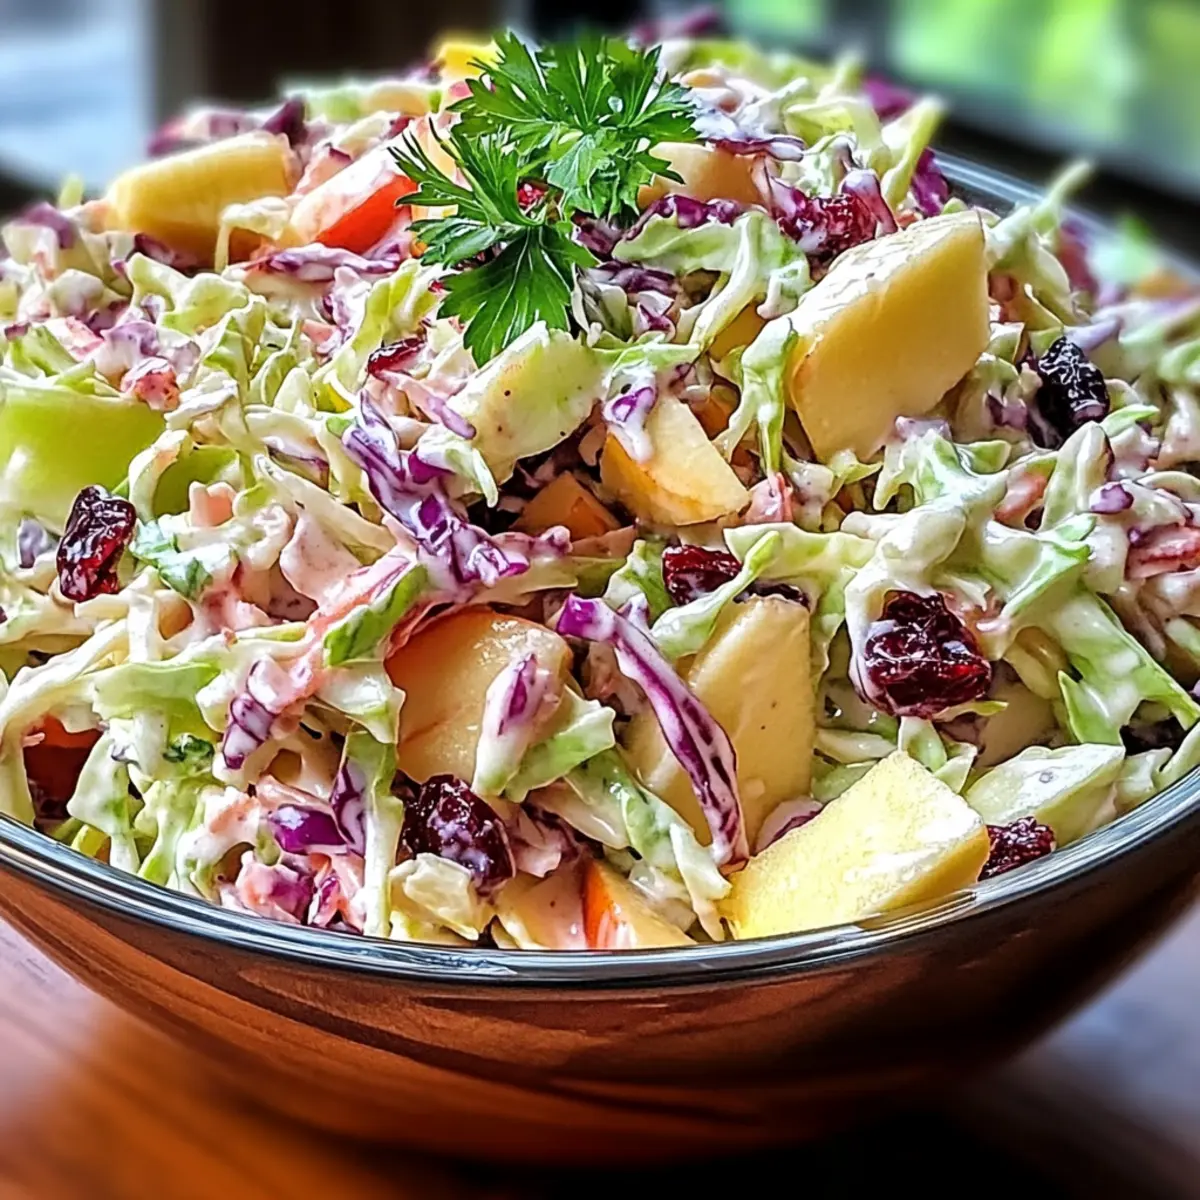
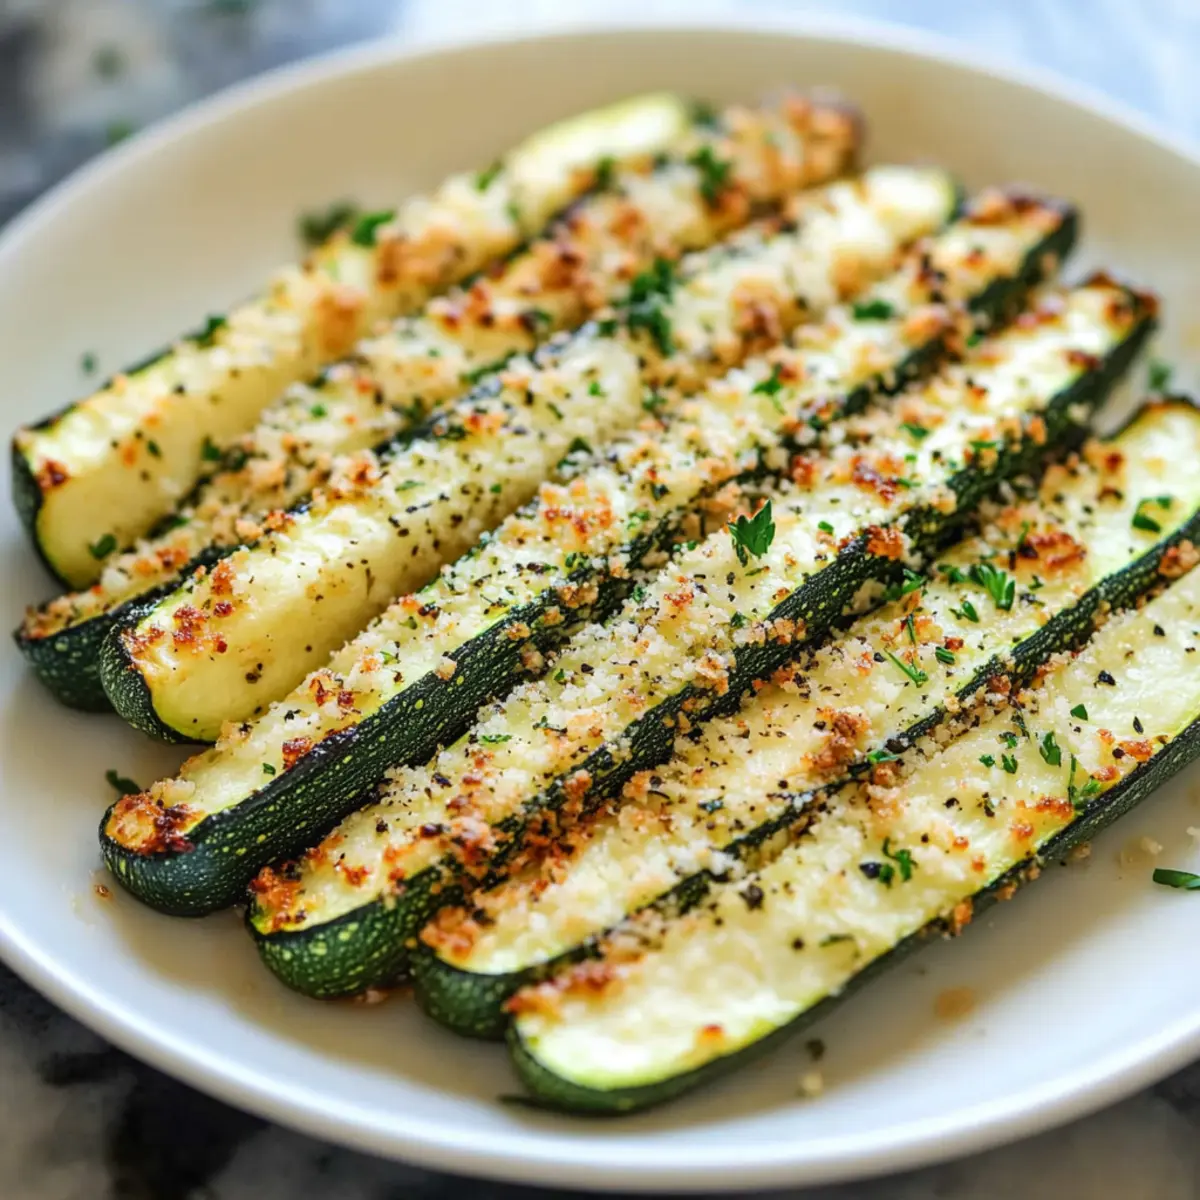
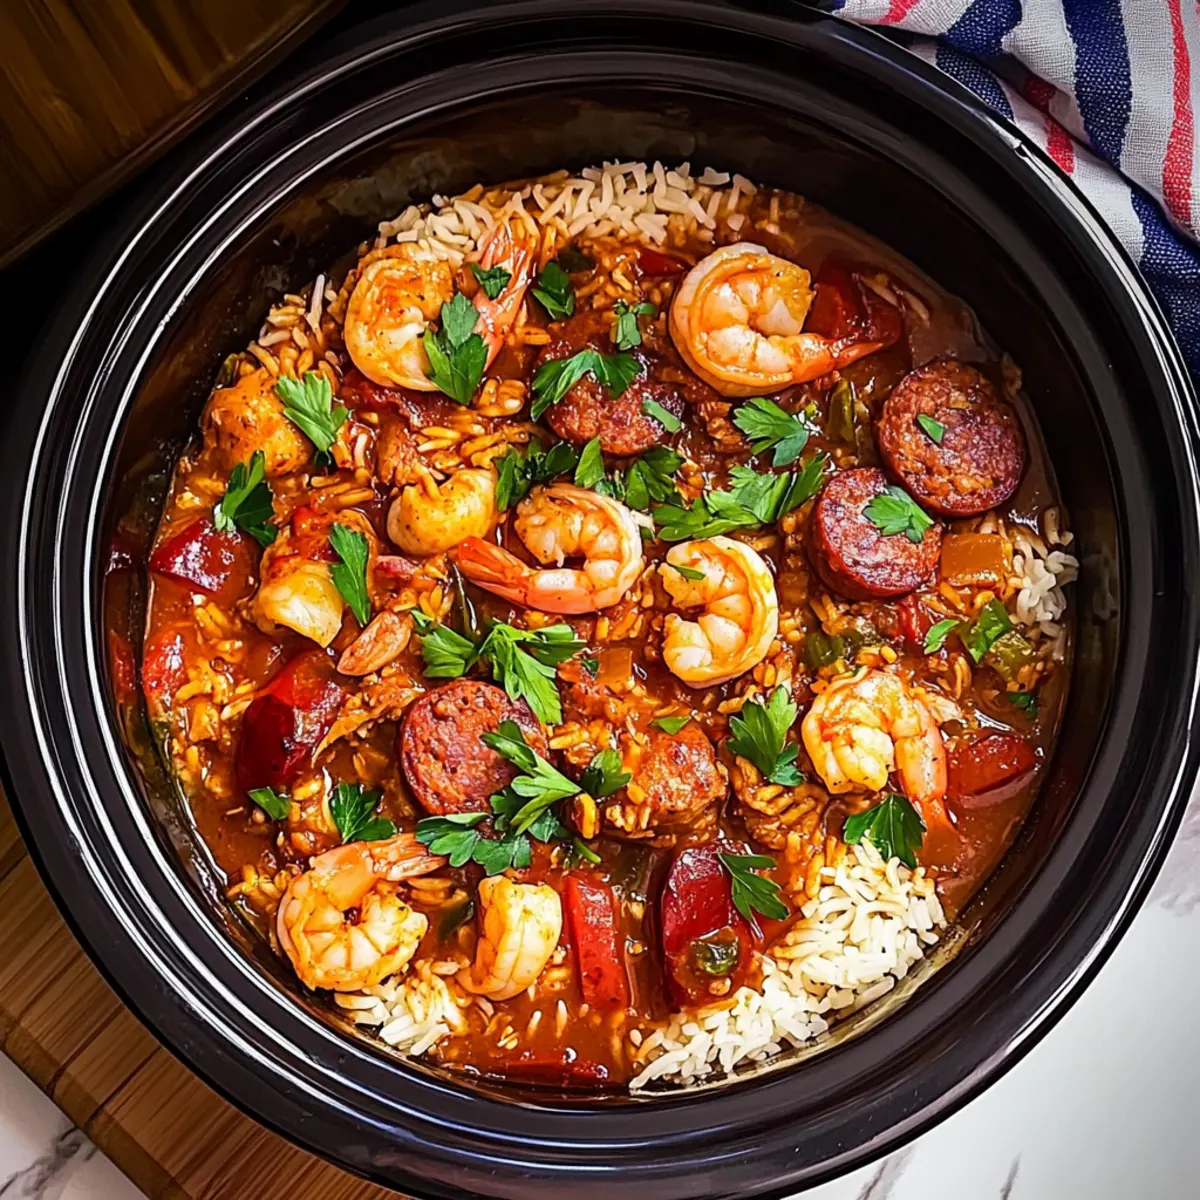
Versatile Ingredients: Feel free to swap in other white fish like cod or try adding vegetables for even more depth. Pair it beautifully with side dishes like Chicken Salad Apples to complete your meal!

Healthy and Wholesome: Rich in omega-3 fatty acids, this dish not only delights the palate but also supports heart health.

Red Snapper with Creamy Creole Sauce Ingredients

For the Fish

• Red Snapper Fillets – The star protein; provides a delicate texture and mild flavor. You can substitute with cod, halibut, or mahi-mahi.

For the Sauce

• Olive Oil – Essential for sautéing vegetables, no direct substitutes required.
• Onion – Adds sweetness and depth to the sauce.
• Green Bell Pepper – Contributes crunch and sweetness; can be substituted with other bell peppers or omitted entirely.
• Celery – Infuses aromatic flavor and adds texture.
• Garlic – Use fresh, minced garlic for the best aroma and flavor enhancement.
• All-Purpose Flour – Helps thicken the sauce (roux); use gluten-free flour for a gluten-free version.
• Chicken Broth – Acts as the base liquid; consider fish stock for a richer flavor profile.
• Heavy Cream – Delivers richness; for a lighter option, use half-and-half or try coconut cream for a vegan version.
• Creole Seasoning – A flavor powerhouse; adjust to taste for your perfect blend.
• Worcestershire Sauce – Adds complexity; don’t overlook this ingredient for depth.
• Cayenne Pepper – Optional for a kick of heat; adjust according to personal preference.
• Salt and Black Pepper – Fundamental seasonings that balance and elevate flavors.
• Butter – Optional, enriches the sauce; can be omitted for a lighter dish.

For Serving

• Cooked Rice – Serves as a delightful base; pair with either white or brown rice for a satisfying meal.
• Fresh Parsley – For garnish, enhancing freshness and visual appeal.

Step‑by‑Step Instructions for Red Snapper with Creamy Creole Sauce

Step 1: Prepare Sauce Base
Begin by heating 2 tablespoons of olive oil in a large skillet over medium heat. Once hot, add a diced onion, a chopped green bell pepper, and chopped celery. Sauté these vegetables for about 5-7 minutes until they are softened and fragrant, creating a flavorful foundation for your Red Snapper with Creamy Creole Sauce.

Step 2: Create Roux
After the vegetables are softened, stir in 3 minced garlic cloves and cook for an additional minute, ensuring they become aromatic. Next, sprinkle in ¼ cup of all-purpose flour, stirring constantly for 1-2 minutes until the mixture turns a light golden brown. This roux thickens the sauce and adds a rich flavor to your dish.

Step 3: Incorporate Liquids
Gradually whisk in 2 cups of chicken broth, ensuring there are no lumps from the roux. Once incorporated, stir in 1 cup of heavy cream, 2 teaspoons of Creole seasoning, 1 tablespoon of Worcestershire sauce, and a pinch of cayenne pepper for heat according to your tolerance. Allow the sauce to simmer for 5-7 minutes, stirring occasionally until it thickens nicely.

Step 4: Cook Red Snapper
Gently place the red snapper fillets into the creamy sauce, ensuring they are fully submerged. Cover the skillet with a lid and let the fish cook for about 5-7 minutes, or until the fillets flake easily with a fork. Avoid overcrowding the pan to ensure even cooking and perfect doneness of the fish.

Step 5: Garnish and Serve
Once the red snapper is cooked to perfection, stir in a handful of chopped fresh parsley for a burst of color and freshness. Serve your delicious Red Snapper with Creamy Creole Sauce immediately over a bed of fluffy cooked rice, letting the vibrant flavors of the dish shine through.

Make Ahead Options

Preparing your Red Snapper with Creamy Creole Sauce in advance is a fantastic way to save time and ensure a stress-free meal! You can make the creamy sauce up to 3 days ahead of time. Simply prepare it as instructed, let it cool, and then refrigerate it in an airtight container. When you're ready to serve, gently reheat the sauce on the stovetop over low heat, and then add fresh, uncooked red snapper fillets, cooking until the fish flakes easily. This method not only allows for a flavorful dish but also helps maintain the creamy texture of the sauce, making mealtime a breeze for busy weeknights!

Expert Tips for Red Snapper with Creamy Creole Sauce

  • Fresh Ingredients: Use fresh garlic and parsley for vibrant flavors. Dried alternatives may lack the richness this dish deserves.

  • Perfect Roux: Stir the roux constantly to prevent burning. A well-made roux is the key to a luscious creamy sauce.

  • Adjusting Spices: Taste as you go! Modify the cayenne pepper to achieve your ideal heat level for an enjoyable experience.

  • Don’t Overcrowd: When adding red snapper to the sauce, avoid overcrowding the pan. This ensures even cooking and flaky texture for your fish.

  • Make Ahead: Prep the sauce in advance and refrigerate it for up to 2 days. Reheat gently before bringing it all together for a quick dinner!

How to Store and Freeze Red Snapper with Creamy Creole Sauce

Fridge: Store leftovers in an airtight container for up to 3 days. Make sure to cool the dish completely before sealing to preserve its creamy texture.

Freezer: This dish can be frozen for up to 2 months. However, it's best to freeze the sauce separately from the fish to maintain quality.

Reheating: Thaw overnight in the fridge, and gently reheat the sauce on the stovetop over low heat, adding a splash of broth or cream to restore creaminess before adding the cooked fish.

Make-Ahead Tip: The creamy sauce can be made ahead of time and stored for up to 2 days in the fridge for easy prep when making your Red Snapper with Creamy Creole Sauce.

Red Snapper with Creamy Creole Sauce Variations

Feel free to explore these delightful twists and substitutes that will elevate your culinary adventure!

  • Fish Substitute: Swap red snapper for cod or mahi-mahi for a different texture while maintaining a similar flavor profile.

  • Gluten-Free Option: Use gluten-free flour instead of all-purpose flour to keep it deliciously compliant for gluten-sensitive diners.

  • Extra Veggie Delight: Add diced tomatoes or sliced mushrooms to the sauce for added nutrition and a burst of flavor. These additions truly enhance the dish!

  • Herb Infusion: Experiment with fresh herbs like thyme or fresh basil to give the sauce a unique twist and aromatic depth. Each herb brings its personality that can change the whole dish!

  • Cream Alternatives: For a lighter version, use half-and-half, or if you need a vegan option, coconut cream works beautifully, providing richness without the dairy.

  • Spice it Up: Adjust the heat by adding more cayenne pepper or try a splash of hot sauce for those who crave a punchy kick. Spice levels can transform the dish entirely!

  • Butter Swap: For a dairy-free alternative, use olive or avocado oil instead of butter for a healthier option that still keeps the sauce delectable.

Dive into these variations to create a Red Snapper with Creamy Creole Sauce that speaks to your personal taste! Pair it with complementary dishes like Sweet Potatoes Black or Buffalo Tofu Caesar Salad for a complete meal experience. Enjoy experimenting!

What to Serve with Red Snapper with Creamy Creole Sauce

There’s nothing quite like a well-paired meal to elevate your dining experience to new heights.

  • Creamy Mashed Potatoes: They provide a rich, buttery contrast to the flavorful sauce, perfect for soaking up every last drop.
  • Garlic Butter Green Beans: Crunchy, vibrant green beans sautéed in garlic butter add freshness and a delightful crunch to each bite.
  • Coconut Rice: This subtly sweet and fragrant dish complements the savory, spicy notes of the red snapper beautifully.
  • Caesar Salad: Crisp romaine lettuce with tangy dressing offers a refreshing balance against the creamy richness of your main.
  • Roasted Asparagus: Tender, roasted asparagus brings an earthy note that brightens the entire plate and pairs wonderfully with seafood.
  • Crisp White Wine: A chilled Sauvignon Blanc enhances the dish’s flavors, making it a perfect accompaniment for a light, elegant meal.
  • Key Lime Pie: To finish, a slice of tangy key lime pie offers a zesty, refreshing contrast that lightens up the meal beautifully.
  • Cornbread: Soft, buttery cornbread adds a comforting, slightly sweet element, enriching your meal’s overall texture profile.
  • Grilled Vegetable Skewers: Colorful skewers of seasonal vegetables provide a smokey flavor and satisfying char that complements the pan-seared fish.

Red Snapper with Creamy Creole Sauce Recipe FAQs

How do I select ripe ingredients for this recipe?
Absolutely! When choosing red snapper, look for fillets that are bright in color and have a fresh, ocean-like scent. The flesh should feel firm to the touch with no dark spots. For vegetables, select onions with smooth, unblemished skins and crisp bell peppers that are bright and vibrant.

How can I store leftovers?
Very good question! Store any leftover Red Snapper with Creamy Creole Sauce in an airtight container in the refrigerator for up to 3 days. Make sure to let it cool completely before sealing to retain that creamy texture. When ready to enjoy again, gently reheat on the stovetop.

Can I freeze this dish?
Indeed, you can! To freeze, it's best to separate the sauce from the fish. The creamy sauce can be frozen for up to 2 months, while the fish can be kept in the freezer as well. When you're ready to enjoy, let the sauce thaw overnight in the fridge and heat it gently on the stovetop, adding a splash of broth or cream to bring back its rich consistency.

What should I do if my sauce is too thick?
If you find your sauce is too thick, don’t worry! Simply whisk in a little bit of chicken broth or cream, a tablespoon at a time, until it reaches your desired consistency. Remember to heat it gently to maintain the creaminess, and stir continuously to blend it well.

Can I make this dish for someone with dietary restrictions?
Absolutely! This recipe is versatile. For a gluten-free version, substitute all-purpose flour with a gluten-free blend. If you need it dairy-free, use coconut cream instead of heavy cream. Just be sure to check for allergies to specific spices, especially with the Creole seasoning, as it can contain various spices.

Red Snapper with Creamy Creole Sauce

Red Snapper with Creamy Creole Sauce: A Home Chef's Delight

Experience the vibrant flavors of the bayou with Red Snapper in a creamy Creole sauce, a delicious and simple dish perfect for any occasion.
Print Recipe Pin Recipe
Prep Time 15 minutes mins
Cook Time 30 minutes mins
Total Time 45 minutes mins
Servings: 4 servings
Course: Dinner
Cuisine: Creole, Seafood
Calories: 450
Ingredients Equipment Method Nutrition Notes

Ingredients
  

For the Fish
  • 4 fillets Red Snapper Can substitute with cod, halibut, or mahi-mahi.
For the Sauce
  • 2 tablespoons Olive Oil Essential for sautéing vegetables.
  • 1 medium Onion Adds sweetness and depth.
  • 1 medium Green Bell Pepper Can be substituted or omitted.
  • 2 stalks Celery Infuses aromatic flavor.
  • 3 cloves Garlic Use fresh, minced for best flavor.
  • 1/4 cup All-Purpose Flour Use gluten-free flour for a gluten-free version.
  • 2 cups Chicken Broth Consider fish stock for richer flavor.
  • 1 cup Heavy Cream Try half-and-half or coconut cream for lighter options.
  • 2 teaspoons Creole Seasoning Adjust to taste.
  • 1 tablespoon Worcestershire Sauce Adds complexity.
  • 1 pinch Cayenne Pepper Adjust according to personal preference.
  • to taste Salt Fundamental seasoning.
  • to taste Black Pepper Fundamental seasoning.
  • 2 tablespoons Butter Optional for enriching the sauce.
For Serving
  • 2 cups Cooked Rice Pair with either white or brown rice.
  • 1/4 cup Fresh Parsley For garnish.

Equipment

  • Large skillet

Method
 

Step‑by‑Step Instructions
  1. Heat 2 tablespoons of olive oil in a large skillet over medium heat. Add diced onion, chopped green bell pepper, and chopped celery. Sauté for 5-7 minutes.
  2. Stir in 3 minced garlic cloves and cook for an additional minute. Sprinkle in 1/4 cup of all-purpose flour and stir constantly for 1-2 minutes.
  3. Gradually whisk in 2 cups of chicken broth, followed by 1 cup of heavy cream, 2 teaspoons of Creole seasoning, 1 tablespoon of Worcestershire sauce, and a pinch of cayenne pepper. Simmer for 5-7 minutes.
  4. Place the red snapper fillets into the sauce, cover, and cook for 5-7 minutes or until the fillets flake easily.
  5. Stir in chopped fresh parsley and serve immediately over a bed of cooked rice.

Nutrition

Serving: 1servingCalories: 450kcalCarbohydrates: 35gProtein: 30gFat: 20gSaturated Fat: 10gPolyunsaturated Fat: 5gMonounsaturated Fat: 5gCholesterol: 100mgSodium: 800mgPotassium: 700mgFiber: 2gSugar: 3gVitamin A: 500IUVitamin C: 20mgCalcium: 50mgIron: 1mg

Notes

Use fresh ingredients for the best flavor and stir the roux constantly to avoid burning. Adjust spices according to personal preference. Leftovers can be stored in an airtight container for up to 3 days.

Tried this recipe?

Let us know how it was!

Cranberry Apple Coleslaw: A Crunchy Twist You'll Love

January 29, 2026 by Grace Snow Leave a Comment

The warm crunch of cabbage paired with the bright zing of apples and the sweet-tart burst of cranberries—this isn’t just any coleslaw! My recipe for Cranberry Apple Coleslaw redefines traditional sides, bringing a delightful twist that’s perfect for everything from backyard barbecues to festive gatherings. Not only is this dish a stunning addition to your table, but it’s also incredibly versatile and easy to prepare, making it a go-to for both casual meals and special occasions. Plus, with options for lighter dressings and accommodating variations, everyone can dig in—health-conscious friends and family included! Curious about how to whip up this vibrant standout? Let’s dive into the details!

Why is Cranberry Apple Coleslaw a Must-Try?

Bright, Colorful Presentation: This coleslaw isn’t just delicious; it’s a feast for the eyes! The vibrant colors of apples and cranberries create a stunning contrast against the green cabbage.

Versatile Options: With suggestions for vegan and low-calorie dressings, this recipe fits a variety of dietary preferences, making it perfect for gatherings.

Easy Prep: A straightforward recipe means you can whip it up in no time—even on busy days!

Crowd-Pleasing Flavor: The sweet-tart combination will leave your guests raving, whether served alongside grilled meats or as a fresh filling in wraps.

Make-Ahead Convenience: Prep it ahead of time! The flavors deepen as it chills, making it a perfect dish to prepare for parties.

Nutritious Benefits: Packed with fiber and vitamins, this coleslaw supports health without sacrificing flavor. For a delightful spin on salads, try pairing it with my delicious Chicken Salad with Apples.

Cranberry Apple Coleslaw Ingredients

For the Slaw
• Cabbage – a crisp base that provides the perfect crunch, opt for finely shredded for an ideal texture.
• Apples – choose firm varieties like Granny Smith or Honeycrisp for added sweetness and freshness that complements the slaw beautifully.
• Dried Cranberries – these chewy morsels bring a sweet and tart flavor burst, making each bite delightful!

For the Dressing
• Mayonnaise (or Greek yogurt) – a creamy base for your dressing; if you’re looking for a lighter option, try a vinaigrette instead.
• Honey (or maple syrup) – provides subtle sweetness; adjust to taste based on the tartness of your cranberries.
• Apple Cider Vinegar – adds a tangy element to the dressing; for a zesty twist, you can swap it for fresh lemon juice.

Optional Add-Ins
• Chopped Nuts (walnuts/sunflower seeds) – these add an extra crunch and texture; sprinkle them in right before serving to keep them crisp.
• Seasonings – consider a dash of celery seed to enhance the flavor profile and add a hint of warmth.

Elevate your Cranberry Apple Coleslaw by personalizing it with these variations to suit your taste buds!

Step‑by‑Step Instructions for Cranberry Apple Coleslaw

Step 1: Prepare Cabbage
Begin by finely shredding about four cups of fresh cabbage. Use a sharp knife or mandoline for even, thin strips. Once shredded, lightly sprinkle the cabbage with salt to draw out excess moisture and enhance its crunchiness. Allow it to sit for 10 minutes before transferring it to a large mixing bowl.

Step 2: Chop Apples
Next, take two firm apples, such as Granny Smith or Honeycrisp. Core and slice them into thin matchsticks or small cubes, ensuring they are uniform for even distribution in the coleslaw. Add these vibrant apple pieces directly to the bowl with the cabbage, allowing their sweetness to intermingle.

Step 3: Mix Dressing
In a separate mixing bowl, combine half a cup of mayonnaise (or Greek yogurt) with two tablespoons of honey and three tablespoons of apple cider vinegar. Whisk these ingredients together until the mixture is smooth and creamy, with a glossy appearance. This dressing will provide a tangy balance to the sweetness of the cranberry apple coleslaw.

Step 4: Combine Ingredients
Pour the creamy dressing over the cabbage and apples, then add one cup of dried cranberries to the mix. Using a large spatula or wooden spoon, gently toss all the ingredients together until everything is well coated in the dressing. Aim for an even distribution of textures and flavors, resulting in a deliciously vibrant mixture.

Step 5: Chill (Optional)
For optimal flavor blending, cover the bowl with plastic wrap and place it in the refrigerator for at least 30 minutes. This chilling step allows the ingredients to marinate, enhancing the taste of your cranberry apple coleslaw. If you prefer a fresh, crisp texture, serve it immediately instead.

Step 6: Serve
When ready to serve, give the coleslaw a quick toss to redistribute the dressing. If desired, sprinkle in some chopped nuts or seeds like walnuts or sunflower seeds just before serving to maintain their crunch. This colorful and flavorful cranberry apple coleslaw is now perfect for complementing any meal!

Cranberry Apple Coleslaw Variations

Customize your cranberry apple coleslaw to match your tastes and dietary preferences—let your creativity shine through with these fun ideas!

  • Lighter Dressing: Swap mayonnaise for a tangy lemon vinaigrette for a refreshing twist.
  • Vegan Option: Use a dairy-free yogurt instead of mayo for a creamy, plant-based dressing.
  • Nutty Crunch: Add chopped walnuts, almonds, or sunflower seeds for extra texture and flavor!
  • Spicy Kick: Sprinkle in a pinch of cayenne pepper or chili powder for a satisfying heat.
  • Herb Infusion: Incorporate fresh herbs like cilantro or parsley to elevate the flavor profile.
  • Additional Veggies: Mix in finely shredded carrots or bell peppers for added color and crunch.
  • Fruity Twist: Include diced pineapple or orange segments for a sweet and tropical flair.
  • Substituting Apples: Experiment with different apple varieties, such as Fuji or Gala, for varied sweetness in every bite.

Don't forget to pair your coleslaw with something special like my delicious Chicken Salad with Apples for a wholesome meal! Have fun exploring these variations, and relish the delightful flavors that come from your kitchen!

Expert Tips for Cranberry Apple Coleslaw

  • Cabbage Crunch: Always salt the cabbage lightly before adding the dressing to remove excess moisture and keep the coleslaw crisp.

  • Apple Choices: Use firm apples such as Granny Smith or Honeycrisp, as they hold their shape well and contribute a refreshing sweetness to your cranberry apple coleslaw.

  • Dressing Prep: Consider making the dressing ahead of time and storing it separately until serving. This keeps the coleslaw from becoming too soggy.

  • Flavor Variations: Don’t hesitate to experiment with different dried fruits or add-ins to personalize your coleslaw; a handful of sunflower seeds can give it an exciting twist!

  • Make-Ahead Magic: Prepare your cranberry apple coleslaw a few hours in advance. It tastes even better after chilling, allowing the flavors to meld beautifully!

  • Healthy Substitutes: For a lighter dressing, swap mayo for Greek yogurt or a tangy vinaigrette, maintaining the dish's creamy texture while reducing calories.

How to Store and Freeze Cranberry Apple Coleslaw

Fridge: Store your cranberry apple coleslaw in an airtight container for up to 3 days. This keeps it fresh while allowing the flavors to meld together beautifully.

Freezer: While not recommended for long-term freezing due to potential texture changes, you can freeze the dressing separately for up to 1 month. Just make sure to thaw it before mixing with fresh ingredients.

Reheating: If you’ve made a batch ahead of time, simply let it sit at room temperature for about 15 minutes before serving. Avoid reheating as that can make the coleslaw wilt and lose its delightful crunch.

Serving Tips: Always add any crunchy toppings, like nuts or seeds, just before serving to maintain their texture and add that satisfying crunch you love in this cranberry apple coleslaw!

Make Ahead Options

These Cranberry Apple Coleslaw are perfect for busy cooks looking to save time during hectic weeknights! You can prepare the shredded cabbage and sliced apples, storing them together in an airtight container for up to 24 hours in the refrigerator. For optimum freshness, store the dressing separately to prevent the cabbage from becoming soggy. When you're ready to serve, simply combine the veggies with the cranberries and dressing. This way, you’ll benefit from a coleslaw that’s just as delicious, with flavors melding beautifully, while maintaining a crisp texture. Enjoy this vibrant side dish with minimal effort!

What to Serve with Cranberry Apple Coleslaw

Transform your meal from simple to sensational with these delightful pairings!

  • Grilled Chicken: Juicy and tender, grilled chicken complements the crunchiness of the coleslaw, enhancing its vibrant flavors. The smoky notes marry beautifully with the dish's refreshing sweetness.

  • Pork Tenderloin: The savory richness of pork tenderloin balances the tangy notes of the coleslaw, making it a match made in culinary heaven. Pair them together for a hearty family dinner.

  • Baked Salmon: The flaky texture and rich taste of baked salmon harmonizes with the crisp crunch of the coleslaw, providing a healthy yet indulgent side-by-side experience.

  • Quinoa Salad: A protein-packed quinoa salad adds another layer of texture alongside the coleslaw, creating an appealing medley of flavors and nutrients on your plate.

  • Sweet Potato Fries: Crispy sweet potato fries offer a delightful contrast to the crunch of the coleslaw, adding sweetness and coziness that everyone will love.

  • Sparkling Water with Lime: Refreshing and zesty, this drink cleanses the palate beautifully between bites, enhancing the culinary experience.

  • Apple Pie: For dessert, a slice of warm apple pie echoes the flavors of the coleslaw, completing your meal on a sweet note that your family will adore!

Cranberry Apple Coleslaw Recipe FAQs

What type of apples should I use for the best flavor?
I highly recommend using firm varieties like Granny Smith or Honeycrisp apples. Their crisp texture holds up well in the coleslaw and their slight tartness complements the sweetness of the cranberries beautifully.

How should I store leftovers of my cranberry apple coleslaw?
You can store your cranberry apple coleslaw in an airtight container in the refrigerator for up to 3 days. This allows the flavors to meld together while keeping the cabbage crunchy—definitely a win!

Can I freeze cranberry apple coleslaw?
While it’s not ideal to freeze the coleslaw itself due to texture changes in the cabbage, you can freeze the dressing separately for up to 1 month. Thaw the dressing in the fridge overnight before mixing with fresh, crisp ingredients when you’re ready to enjoy the dish.

What can I do if my coleslaw appears too soggy?
If your coleslaw ends up too soggy, try salting the cabbage lightly beforehand to draw out excess moisture before mixing with the dressing. Additionally, you may store the dressing separately and add it just before serving to keep everything fresh and crunchy.

Are there any dietary considerations for the cranberry apple coleslaw?
Absolutely! This recipe can easily be adapted for various dietary needs. To make it vegan, swap the mayonnaise for a plant-based alternative or a light vinaigrette. If you have nut allergies, simply omit the nuts or use seeds instead for that extra crunch without the worry.

Can I prepare the cranberry apple coleslaw ahead of time?
Yes! In fact, I often make my coleslaw a few hours ahead of serving. Leaving it in the refrigerator for about 30 minutes allows the flavors to meld, enhancing the overall taste. Just remember to add any crunchy toppings just before serving to maintain their delightful texture.

Cranberry apple coleslaw

Cranberry Apple Coleslaw: A Crunchy Twist You'll Love

Cranberry apple coleslaw redefines traditional sides with a vibrant mix of cabbage, apples, and cranberries, making it a delightful addition to any meal.
Print Recipe Pin Recipe
Prep Time 20 minutes mins
Chilling Time 30 minutes mins
Total Time 50 minutes mins
Servings: 6 cups
Course: Salads
Cuisine: American
Calories: 200
Ingredients Equipment Method Nutrition Notes

Ingredients
  

For the Slaw
  • 4 cups finely shredded cabbage use fresh cabbage
  • 2 medium firm apples like Granny Smith or Honeycrisp
  • 1 cup dried cranberries chewy for sweet-tart flavor
For the Dressing
  • 1/2 cup mayonnaise or Greek yogurt for a lighter option
  • 2 tablespoons honey or maple syrup to taste
  • 3 tablespoons apple cider vinegar or fresh lemon juice for zesty flavor
Optional Add-Ins
  • 1/2 cup chopped nuts such as walnuts or sunflower seeds
  • seasonings consider a dash of celery seed

Equipment

  • Mixing Bowl
  • Sharp Knife
  • mandoline
  • Whisk
  • Spatula

Method
 

Step-by-Step Instructions
  1. Finely shred about four cups of fresh cabbage and sprinkle with salt. Let sit for 10 minutes.
  2. Core and slice two firm apples into thin matchsticks or small cubes and add to the bowl with the cabbage.
  3. In a separate bowl, combine half a cup of mayonnaise, two tablespoons of honey, and three tablespoons of apple cider vinegar. Whisk until smooth.
  4. Pour the dressing over cabbage and apples, then add one cup of dried cranberries. Toss gently until well coated.
  5. Cover and chill in the refrigerator for at least 30 minutes or serve immediately.
  6. Before serving, toss again and add optional chopped nuts or seeds for extra crunch.

Nutrition

Serving: 1cupCalories: 200kcalCarbohydrates: 25gProtein: 2gFat: 10gSaturated Fat: 1gPolyunsaturated Fat: 2gMonounsaturated Fat: 5gCholesterol: 5mgSodium: 150mgPotassium: 200mgFiber: 3gSugar: 10gVitamin A: 200IUVitamin C: 15mgCalcium: 30mgIron: 1mg

Notes

This coleslaw can be made ahead of time and tastes best after chilling, as flavors meld beautifully.

Tried this recipe?

Let us know how it was!

Crunchy Asian Peanut Slaw with Creamy Dressing You’ll Love

January 29, 2026 by Grace Snow Leave a Comment

In the bustling world of quick meals, who doesn’t crave a vibrant, refreshing side that can transform any dinner into a feast? Enter my Easy Asian Peanut Slaw with Creamy Peanut Dressing—a tantalizing blend of crunchy vegetables that delivers a delightful crunch in every bite. This slaw isn’t just easy to whip up in just 15 minutes; it’s also a guilt-free, low-calorie treat that’s bursting with plant-based goodness. Tossed in a rich peanut dressing infused with zesty lime and spicy ginger, this dish is the ultimate crowd-pleaser, whether served alongside grilled meats or as the star of a picnic spread. Ready to elevate your meal and enjoy a fabulous burst of flavor? Let’s get started on this colorful journey!

Why is this slaw so irresistible?

Bold flavors: The creamy peanut dressing, with its zesty lime and ginger notes, elevates the fresh crunch of the vegetables.
Quick preparation: Whipping this up takes just 15 minutes—perfect for busy weeknights or impromptu gatherings.
Healthy indulgence: With only 134 calories per serving, this Asian Peanut Slaw is a guilt-free treat, rich in vitamins and minerals.
Versatile side dish: Whether paired with grilled chicken or enjoyed as a standalone meal, it adapts beautifully to any occasion! You might also love this alongside grilled dishes like Fried Shrimp Cabbage.
Colorful presentation: Its vibrant hues make it a feast for the eyes, sure to impress family and friends!

Asian Peanut Slaw Ingredients

For the Slaw
• Red Cabbage – Adds crunch and color; substitute with green cabbage or Brussels sprouts for a different flavor.
• Green Cabbage – Provides a fresh, mild flavor ideal for pairing with the dressing.
• Carrots – Contributes sweetness and crunch; try shredded beets for extra color and sweetness if you’d like.
• Scallions – Offers a mild onion flavor; can be replaced with chives if needed.
• Fresh Cilantro (optional) – Introduces a fresh herbaceous note; feel free to omit if cilantro isn’t your favorite.

For the Creamy Peanut Dressing
• Creamy Peanut Butter – The base of the dressing that adds richness; almond or sunflower butter can substitute easily.
• Soy Sauce – Boosts umami and saltiness; use tamari for a gluten-free adaptation.
• Coconut Milk (or plant milk) – Adds creaminess to the dressing; any non-dairy milk will work well.
• Lime Juice – Provides acidity and brightness; lemon juice can be an excellent alternative.
• Maple Syrup – Sweetens the dressing; agave nectar serves as a great substitute.
• Fresh Ginger – Infuses warmth and spice; ground ginger is a suitable alternative if fresh isn’t available.
• Sesame Seeds – Adds crunch and nuttiness; omit for a lighter dish.
• Red Pepper Flakes – Offers heat; adjust to your spice preference for this Asian Peanut Slaw.

Step‑by‑Step Instructions for Asian Peanut Slaw

Step 1: Make the Peanut Dressing
In a mixing bowl, combine ½ cup of creamy peanut butter, 2 tablespoons of lime juice, and ¼ cup of coconut milk. Whisk the mixture together vigorously for about 1-2 minutes until smooth and creamy. Then, add 2 tablespoons of soy sauce, 1 tablespoon of maple syrup, 1 teaspoon of grated fresh ginger, ¼ teaspoon of red pepper flakes, and 1 tablespoon of sesame seeds. Mix until everything is well incorporated, creating a luscious dressing.

Step 2: Prepare the Vegetables
While the dressing rests, take a large bowl and start shredding your vegetables. Begin with 2 cups of shredded red cabbage and 2 cups of shredded green cabbage—look for vibrant colors! Next, add 1 cup of shredded carrots for sweetness and crunch, followed by ¼ cup of chopped scallions for mild onion flavor. Toss the vegetables with your hands to combine those colorful ingredients, making sure they look inviting and fresh.

Step 3: Combine Dressing and Veggies
Now it’s time to bring it all together! Drizzle your creamy peanut dressing over the prepared slaw mixture in the large bowl. Carefully toss the vegetables with the dressing for about 1-2 minutes until they are all well coated and glistening. Watch as the vibrant colors of the slaw transform into a stunning, glossy salad, highlighting the appealing crunch that makes this Asian Peanut Slaw so delightful.

Step 4: Serve or Store
For best results, serve your Asian Peanut Slaw immediately to preserve the crunchy texture. If you prefer to store it, let it chill in the refrigerator in an airtight container for up to 2 days. Garnish with optional fresh cilantro, black sesame seeds, or chopped peanuts right before serving for an extra layer of flavor and visual appeal. Enjoy this refreshing side with your favorite dishes!

What to Serve with Easy Asian Peanut Slaw

Transform your vibrant slaw into a delightful meal with these complementary dishes that enhance every flavor!

  • Grilled Chicken Skewers: The savory char of grilled chicken pairs perfectly with the creamy peanut dressing, making each bite a flavor explosion.

  • Shrimp Tacos: Fresh shrimp tacos, drizzled with lime, bring a zesty contrast to the slaw's richness. Together, they create a satisfying and vibrant meal.

  • Coconut Rice: This soft, fragrant rice not only balances the crunch of the Asian Peanut Slaw but also adds a hint of tropical sweetness that rounds out your plate beautifully.

  • Spicy Miso Soup: The warm umami flavors of miso soup complement the tangy slaw, making for a comforting and nourishing combination any time of year.

  • Sesame Noodles: Serve your slaw alongside chilled sesame noodles, bringing an irresistible nutty flavor that echoes the slaw dressing and enhances the overall dining experience.

  • Fruit Salad: A colorful bowl of seasonal fruits adds a refreshing sweetness that cuts through the richness of the slaw—a perfect palate cleanser.

  • Crispy Spring Rolls: These crunchy bites are a delightful way to embrace the Asian theme while adding a fun texture contrast to your meal. They can be dipped alongside the slaw’s dressing for an added zing.

  • Cucumber Salad: A cool cucumber salad dressed in rice vinegar adds a zingy freshness to the plate, highlighting the crisp vegetables in the Asian Peanut Slaw.

  • Cold Brewed Iced Tea: Refresh yourself with a glass of lightly sweetened iced tea that enhances the slaw's flavors without overpowering them. It's a perfect drink that pairs beautifully with the meal!

  • Mango Sorbet: For dessert, a light mango sorbet brings a fruity finish to your meal, cleansing the palate and leaving you refreshed after all those vibrant flavors.

Expert Tips for Asian Peanut Slaw

  • Perfect Shreds: Use a mandolin or sharp knife to achieve uniform shreds of cabbage and carrots for a visually appealing dish.
  • Keep it Crunchy: Toss the salad just before serving to ensure the veggies remain crisp and fresh.
  • Taste and Adjust: Don’t hesitate to tweak the dressing’s ingredients to suit your preferences, whether it’s adding more lime for zing or extra maple syrup for sweetness.
  • Vibrant Presentation: Enhance the visual appeal by garnishing with fresh cilantro or chopped peanuts, making your Asian Peanut Slaw look as good as it tastes!
  • Healthy Variations: Consider experimenting with different vegetables like Brussels sprouts or shredded beets for unique flavors while keeping the slaw plant-based.

Make Ahead Options

These Asian Peanut Slaw ingredients are perfect for meal prep, saving you time on busy weeknights! You can prepare the slaw vegetables—like shredded red and green cabbage, carrots, and scallions—up to 3 days in advance. Simply store them in an airtight container in the refrigerator to maintain their crunch. For the creamy peanut dressing, make it up to 24 hours ahead and refrigerate separately to keep the flavors fresh and vibrant. When you're ready to enjoy your Asian Peanut Slaw, just toss the prepared veggies with the dressing, and add any final touches like cilantro or sesame seeds. This approach ensures you’ll have a delicious, hassle-free side dish ready to elevate any meal!

Asian Peanut Slaw Variations & Substitutions

Get ready to make your delicious slaw even more exciting with these creative twists and substitutions!

  • Dairy-Free: Use almond or sunflower butter instead of peanut butter for a nut-free option.
    Enhance the flavor with a dash of citrus or spice; the dressing will still be creamy and delicious.

  • Gluten-Free: Substitute tamari for soy sauce to keep the dish gluten-friendly.
    This small switch won't compromise flavor but ensures everyone can enjoy your vibrant slaw.

  • Spicy Kick: Add finely chopped jalapeños or a few dashes of sriracha to the dressing for some heat.
    The zesty flavor will give your slaw an exciting edge, perfect for those who love a good spice!

  • Sweet & Fruity: Incorporate diced mango or pineapple for a tropical twist on your slaw.
    The added sweetness will beautifully contrast the tangy peanut dressing, creating layers of flavor.

  • Herb Boost: Toss in fresh mint or basil along with the cilantro for an aromatic touch.
    These herbs will brighten the slaw, adding a fresh vibrancy to your already colorful dish.

  • Crunchy Additions: Include toasted almonds or cashews for extra texture and richness.
    Their crunchiness complements the slaw’s refreshing veggies, intensifying the pleasure with each bite.

  • Vegetable Variety: Try swapping Brussels sprouts for cabbage or adding shredded kale for a nutrient boost.
    This makes the slaw unique and showcases different textures while remaining deliciously crunchy.

  • Raw or Cooked: Lightly steam the cabbage and carrots to soften their crunch and enhance sweetness.
    This twist creates a different eating experience, catering to those who enjoy cooked vegetables in their slaw.

Feel free to explore these variations to make your Asian Peanut Slaw uniquely yours! And if you're seeking additional inspiration, you might enjoy pairing it with Fried Shrimp Cabbage for a delightful meal!

How to Store and Freeze Asian Peanut Slaw

  • Fridge: Store any leftover Asian Peanut Slaw in an airtight container for up to 2 days to maintain freshness and crunch.
  • Make-Ahead Dressing: Prepare the creamy peanut dressing ahead of time and refrigerate it for up to 1 week. Just give it a good whisk before using!
  • Freezer: While it’s best fresh, you can freeze the dressing in small portions for up to 1 month. Thaw in the fridge overnight before using.
  • Reheating: If you must reheat, warm the dressing gently on the stove and toss with freshly shredded veggies to revive the crunch.

Asian Peanut Slaw Recipe FAQs

What are the best ingredients for the freshest Asian Peanut Slaw?
Absolutely! For the freshest slaw, look for vibrant heads of red and green cabbage—aim for ones that feel heavy for their size and have no dark spots. When choosing carrots, opt for firm, crisp ones without blemishes. Fresh ginger should be firm and fragrant, while scallions should have bright green tops and a crisp white base.

How do I store leftover Asian Peanut Slaw?
To maintain the slaw's delicious crunch, store any leftovers in an airtight container in the refrigerator for up to 2 days. If you can, separate the dressing from the slaw—this helps keep the vegetables crisp. Enjoy it as a refreshing side dish or a quick snack later on!

Can I freeze my Asian Peanut Slaw?
While it's generally best to enjoy fresh, you can freeze the creamy peanut dressing separately in small, labeled portions for up to 1 month! Just let it thaw in the fridge overnight before use. When you’re ready, whip up some fresh vegetables to mix with the thawed dressing for an easy salad fix that’s still flavorful!

How can I troubleshoot if my slaw is too salty?
If your slaw turns out too salty, a simple fix is to add some additional shredded vegetables like carrots or cabbage to balance the saltiness. You could also mix in a touch of natural sweetener like maple syrup or a splash of lime juice to help neutralize the flavors. Remember, tasting as you go is key to finding that perfect balance!

Is this Asian Peanut Slaw suitable for dietary restrictions?
Very! This recipe is vegan and plant-based, catering to those avoiding animal products. If you have nut allergies, try substituting peanut butter with sunflower seed butter or tahini for a nut-free alternative. Always double-check your other ingredients to ensure they align with dietary needs!

Asian Peanut Slaw

Crunchy Asian Peanut Slaw with Creamy Dressing You’ll Love

Discover the vibrant and refreshing Asian Peanut Slaw, a perfect blend of crunchy vegetables tossed in a creamy dressing.
Print Recipe Pin Recipe
Prep Time 15 minutes mins
Total Time 15 minutes mins
Servings: 4 servings
Course: Salads
Cuisine: Asian
Calories: 134
Ingredients Equipment Method Nutrition Notes

Ingredients
  

For the Slaw
  • 2 cups shredded red cabbage Adds crunch and color; substitute with green cabbage or Brussels sprouts for a different flavor.
  • 2 cups shredded green cabbage Provides a fresh, mild flavor.
  • 1 cup shredded carrots Contributes sweetness and crunch; try shredded beets for extra color and sweetness if you’d like.
  • ¼ cup chopped scallions Offers a mild onion flavor; can be replaced with chives if needed.
  • optional fresh cilantro Introduces a fresh herbaceous note; feel free to omit if cilantro isn’t your favorite.
For the Creamy Peanut Dressing
  • ½ cup creamy peanut butter The base of the dressing that adds richness; almond or sunflower butter can substitute easily.
  • 2 tablespoons lime juice Provides acidity and brightness; lemon juice can be an excellent alternative.
  • ¼ cup coconut milk Adds creaminess to the dressing; any non-dairy milk will work well.
  • 2 tablespoons soy sauce Boosts umami and saltiness; use tamari for a gluten-free adaptation.
  • 1 tablespoon maple syrup Sweetens the dressing; agave nectar serves as a great substitute.
  • 1 teaspoon grated fresh ginger Infuses warmth and spice; ground ginger is a suitable alternative if fresh isn’t available.
  • ¼ teaspoon red pepper flakes Offers heat; adjust to your spice preference.
  • 1 tablespoon sesame seeds Adds crunch and nuttiness; omit for a lighter dish.

Equipment

  • Mixing Bowl
  • Sharp Knife
  • mandolin

Method
 

Step-by-Step Instructions
  1. In a mixing bowl, combine the peanut butter, lime juice, and coconut milk. Whisk until smooth and creamy.
    Asian Peanut Slaw
  2. Add soy sauce, maple syrup, grated ginger, red pepper flakes, and sesame seeds. Mix until well incorporated.
    Asian Peanut Slaw
  3. In a large bowl, shred the red cabbage, green cabbage, and carrots. Toss to combine.
    Asian Peanut Slaw
  4. Drizzle the dressing over the vegetables and toss until well coated.
    Asian Peanut Slaw
  5. Serve immediately or store in an airtight container for up to 2 days.
    Asian Peanut Slaw

Nutrition

Serving: 1cupCalories: 134kcalCarbohydrates: 15gProtein: 4gFat: 7gSaturated Fat: 1gPolyunsaturated Fat: 4gMonounsaturated Fat: 1gSodium: 300mgPotassium: 350mgFiber: 3gSugar: 3gVitamin A: 180IUVitamin C: 40mgCalcium: 4mgIron: 8mg

Notes

For best results, serve immediately to preserve the crunchy texture. Garnish with fresh cilantro or chopped peanuts if desired.

Tried this recipe?

Let us know how it was!

Cranberry Apple Coleslaw: A Festive Twist on a Classic!

January 29, 2026 by Grace Snow Leave a Comment

As the leaves turn crisp and golden, I can’t help but think of the vibrant colors that Thanksgiving brings to the table, especially that stunning bowl of cranberry apple coleslaw. This delightful and refreshing side dish is more than just a palate cleanser; it's a crunchy, slightly sweet twist on the classic. Packed with healthy ingredients and ready in just minutes, this cranberry apple coleslaw is a must-have for your holiday gatherings. Not only does it brighten up the plate, but it also complements rich main courses beautifully, making it a true crowd-pleaser. Whether you’re looking to impress guests or simply craving something homemade, you'll soon find yourself reaching for this recipe time and again. So, what’s your favorite way to add a little crunch to your meals?

Why is Cranberry Apple Coleslaw a must-try?

Vibrant Colors: This dish not only looks stunning on the table but also brightens up any meal.

Crisp, Fresh Flavor: The combination of tart cranberries and sweet apples creates a balanced crunch that elevates your taste buds.

Quick Preparation: Ready in just minutes, it's perfect for those busy holiday gatherings when time is of the essence.

Versatile Side Dish: Pair it with your favorite roasted turkey or serve it alongside any main course for a delightful contrast. For a bit of flair, check out my Chicken Salad with Apples recipe to keep your meals exciting!

Healthy Ingredients: Packed with nutrients, each bite supports your wellness journey while being indulgent enough for special occasions.

Crowd-Pleaser: Whether at Thanksgiving or a summer barbecue, this cranberry apple coleslaw is sure to impress family and friends alike!

Cranberry Apple Coleslaw Ingredients

For the Slaw
• Green cabbage – adds a refreshing crunch; feel free to substitute with purple cabbage for a pop of color.
• Shredded carrots – provides sweetness and vibrant color; use pre-shredded for quick prep.
• Fresh cranberries – the star of the show; use dried cranberries in a pinch for a sweeter touch.
• Apples – choose tart varieties like Granny Smith for a balanced flavor; you could also use sweet apples for a different twist.

For the Dressing
• Greek yogurt – a healthier alternative to mayo, adding creaminess without the guilt; you can use sour cream if preferred.
• Honey – enhances the sweetness; maple syrup makes a great vegan substitution.
• Apple cider vinegar – provides tanginess that brightens the slaw; white wine vinegar works as a delicious alternative.
• Salt and pepper – season to taste; don’t skip these as they enhance all the flavors in your cranberry apple coleslaw!

Optional Toppings
• Chopped nuts – walnuts or pecans will add a delightful crunch; you can toast them for extra flavor.
• Additional herbs – fresh parsley or mint can elevate your slaw’s flavor profile; consider using these for a fresh garnish!

Step‑by‑Step Instructions for Cranberry Apple Coleslaw

Step 1: Prepare Cabbage
Start by finely shredding half a head of green cabbage and place it in a large mixing bowl. Lightly sprinkle with salt and let it sit for about 10 minutes. This process helps to remove excess moisture, resulting in perfect texture for your cranberry apple coleslaw. After 10 minutes, give the cabbage a gentle squeeze to release moisture before moving on.

Step 2: Chop Apples
While the cabbage is resting, core and slice two firm apples into thin matchsticks or small cubes, as you prefer. Aim for a mix of textures and flavors; tart varieties like Granny Smith enhance the overall taste. As you chop, you’ll want the apples to be vibrant and fresh, lending a lovely crunch to your coleslaw.

Step 3: Mix Dressing
In a separate bowl, combine ½ cup of Greek yogurt, 2 tablespoons of honey, and 2 tablespoons of apple cider vinegar. Whisk the ingredients together until the dressing is smooth and creamy, ensuring all flavors meld together. This homemade dressing creates the perfect balance of sweetness and tanginess for your cranberry apple coleslaw.

Step 4: Combine Ingredients
Add the shredded cabbage, chopped apples, and 1 cup of dried cranberries into your large mixing bowl. Pour the creamy dressing over the top and toss everything together until all ingredients are evenly coated. This step infuses your cranberry apple coleslaw with delightful flavors and creates a wonderfully colorful dish.

Step 5: Chill (Optional)
For the best flavor, let your cranberry apple coleslaw sit in the refrigerator for at least 30 minutes before serving. This resting period allows the flavors to meld beautifully, creating a more cohesive taste profile. Cover it with plastic wrap to keep it fresh and let the anticipation build for your delicious side dish.

Step 6: Serve
Just before serving, give the coleslaw a gentle toss and add in ½ cup of chopped nuts, like walnuts or pecans, if desired. This addition brings extra crunch and a nutty flavor contrast to the sweet and tangy elements of your cranberry apple coleslaw, making it an even more delightful accompaniment to your meal.

Cranberry Apple Coleslaw Variations & Substitutions

Feel free to mix and match these ideas to create a cranberry apple coleslaw that's perfect for your taste and dietary preferences!

  • Vegan Option: Substitute Greek yogurt with a creamy plant-based yogurt for a completely vegan version without sacrificing texture.
  • Low-Calorie Twist: Use a light vinaigrette instead of the creamy dressing to cut down on calories while keeping the dish vibrant and fresh.
  • Additional Crunch: Toss in some sunflower seeds or toasted almonds for an extra layer of texture that adds delightful crunch.
  • Flavor Boost: Add a sprinkle of cinnamon for warmth, or consider a touch of ginger to enhance the fruity flavors.
  • Spicy Kick: Mix in a small diced jalapeño or a sprinkle of red pepper flakes for those who enjoy a bit of heat in their coleslaw.
  • Herb Infusion: Fresh herbs like dill or cilantro can elevate your coleslaw; try adding them in for a unique twist!
  • Fruit Variations: Swap cranberries for raisins or add fresh oranges for a citrusy pop, providing a refreshing contrast in flavors.

Want to expand your culinary repertoire? Try applying some of these ideas in my Chicken Salad with Apples and discover even more delightful combinations that suit your palate!

Expert Tips for Cranberry Apple Coleslaw

  • Choose Fresh Ingredients: Always opt for firm apples and crisp cabbage to ensure your cranberry apple coleslaw maintains its delightful crunch.

  • Salt the Cabbage: Lightly salting the shredded cabbage helps draw out moisture, preventing the coleslaw from becoming soggy.

  • Dress on Serving Day: To keep nuts crunchy and flavors fresh, dress your cranberry apple coleslaw just before serving.

  • Experiment with Variations: Don’t hesitate to mix in other ingredients like leafy greens or seasonal fruits for a twist on the traditional recipe.

  • Adjust Sweetness: Depending on your crowd, taste the dressing and adjust the honey or maple syrup to balance the tartness of cranberries.

Storage Tips for Cranberry Apple Coleslaw

Fridge: Store any leftover cranberry apple coleslaw in an airtight container for up to 3 days. This helps retain freshness while flavors meld beautifully.

Make-Ahead: If preparing in advance, consider storing the dressing separately. Mix it in right before serving to keep the vegetables crisp and prevent sogginess.

Freezer: For best results, avoid freezing once dressed; however, you can freeze the cabbage and apples separately for up to 2 months. Thaw and dress fresh for maximum flavor.

Reheating: This dish is best enjoyed cold or at room temperature, so there’s no need to reheat. Just give it a gentle toss before serving to reintroduce flavors.

What to Serve with Cranberry Apple Coleslaw

Cranberry apple coleslaw is a vibrant and refreshing side that pairs beautifully with a variety of dishes, making your meals even more delightful.

  • Grilled Chicken: The smoky flavor of grilled chicken complements the sweetness of the coleslaw, creating a perfect balance.
  • Roasted Turkey: A staple at gatherings, the rich taste of roasted turkey is beautifully offset by the bright, crispy notes of your coleslaw.
  • BBQ Ribs: The tangy sweetness of ribs pairs perfectly with the fresh crunch of the slaw, enhancing each bite.
  • Fish Tacos: A zesty fish taco becomes even more exciting when brightened by the crunch of cranberry apple slaw, adding layers of texture and flavor.
  • Pulled Pork Sandwiches: The creamy dressing of the coleslaw adds a refreshing contrast to the savory richness of pulled pork, making each bite irresistible.
  • Pasta Salad: Enhance a hearty pasta salad with a scoop of coleslaw on top, offering a crunchy texture that harmonizes beautifully.
  • Sparkling Water: Keep it light and refreshing! Sparkling water brings a bubbly aspect that’s a lovely companion to the flavors of the coleslaw.
  • Apple Crisp: For dessert, a warm apple crisp echoes the flavors of the coleslaw while adding a sweet finish to your meal.
  • Cheese Plate: Create a charcuterie board that includes cheeses that will complement the ingredients in the slaw, bringing a gourmet touch to the table.
  • Lemonade: A glass of chilled lemonade adds a citrusy zing that pairs nicely with the sweet and tangy notes of your coleslaw.

Make Ahead Options

This cranberry apple coleslaw is ideal for meal prep, saving you valuable time on busy days. You can prepare all the components—cabbage, apples, and cranberries—up to 24 hours in advance. Simply shred the cabbage, chop the apples, and mix them with dried cranberries, then store them in an airtight container in the refrigerator. To maintain freshness, store the dressing separately and add it just before serving to prevent the cabbage from wilting. When ready to serve, toss everything together with the dressing and enjoy a refreshing side that tastes just as delicious as when freshly made!

Cranberry Apple Coleslaw Recipe FAQs

What type of apples should I use for the best flavor?
Absolutely! I recommend using firm, tart varieties like Granny Smith or Honeycrisp. They add a delightful sweetness and crispness to the coleslaw while maintaining their shape, providing that satisfying crunch. If you're looking for a sweeter profile, feel free to experiment with sweeter apple varieties!

How should I store leftover cranberry apple coleslaw?
Store any leftover cranberry apple coleslaw in an airtight container in the refrigerator for up to 3 days. This helps maintain its flavors and freshness. If you're preparing it ahead of time, keep the dressing separate until you're ready to serve to avoid sogginess from the cabbage.

Can I freeze cranberry apple coleslaw?
While it's not ideal to freeze the dressed coleslaw due to the textures, you can freeze the cabbage and chopped apples separately for up to 2 months. To do this, simply place the shredded cabbage and chopped apples in a freezer-safe bag or container. When you’re ready to serve, thaw in the refrigerator overnight, then dress fresh at serving time!

What if my coleslaw turns out too salty?
If you’ve accidentally salted the cabbage too much, don’t fret! You can balance it out by adding more shredded cabbage or extra chopped apples. This’ll help dilute the saltiness. Another tip is to add a bit more honey or sweetness to counteract the saltiness and blend the flavors!

Is this coleslaw a good option for someone with dietary restrictions?
Yes, indeed! This cranberry apple coleslaw is quite versatile. For a vegan option, you can substitute Greek yogurt with a plant-based yogurt and use maple syrup instead of honey. It’s also gluten-free as long as you stick with gluten-free ingredients. Just be sure to double-check the labels to ensure everything meets your dietary needs!

How can I enhance the crunchiness of my coleslaw?
To maintain that satisfying crunch, opt to add chopped nuts or seeds just before serving. This way, they stay crisp and don't get soggy. Additionally, lightly salting your cabbage ahead of time helps draw out excess moisture, ensuring your coleslaw remains fresh and crunchy, even days later!

Cranberry Apple Coleslaw: A Festive Twist on a Classic!

Cranberry apple coleslaw is a refreshing side dish that brightens your holiday table with vibrant flavors and textures.
Print Recipe
Prep Time 15 minutes mins
Chill Time 30 minutes mins
Total Time 45 minutes mins
Servings: 6 servings
Course: Salads
Cuisine: American
Calories: 150
Ingredients Equipment Method Nutrition Notes

Ingredients
  

For the Slaw
  • 1/2 head green cabbage can substitute with purple cabbage for color
  • 1 cup shredded carrots use pre-shredded for quick prep
  • 1 cup fresh cranberries dried cranberries can be used for a sweeter touch
  • 2 medium apples choose tart varieties like Granny Smith for balanced flavor
For the Dressing
  • 1/2 cup Greek yogurt can use sour cream as a substitute
  • 2 tablespoons honey maple syrup is a great vegan substitution
  • 2 tablespoons apple cider vinegar white wine vinegar works as an alternative
  • to taste salt
  • to taste pepper
Optional Toppings
  • 1/2 cup chopped nuts walnuts or pecans, can toast for extra flavor
  • additional herbs fresh parsley or mint can elevate flavors

Equipment

  • large mixing bowl
  • Whisk

Method
 

Step-by-Step Instructions
  1. Start by finely shredding half a head of green cabbage and place it in a large mixing bowl. Lightly sprinkle with salt and let it sit for about 10 minutes.
  2. While the cabbage is resting, core and slice two firm apples into thin matchsticks or small cubes.
  3. In a separate bowl, combine ½ cup of Greek yogurt, 2 tablespoons of honey, and 2 tablespoons of apple cider vinegar. Whisk until smooth and creamy.
  4. Add the shredded cabbage, chopped apples, and 1 cup of dried cranberries into your large mixing bowl. Pour the creamy dressing over the top and toss everything together.
  5. For the best flavor, let your cranberry apple coleslaw sit in the refrigerator for at least 30 minutes before serving.
  6. Just before serving, give the coleslaw a gentle toss and add in ½ cup of chopped nuts, if desired.

Nutrition

Serving: 1cupCalories: 150kcalCarbohydrates: 20gProtein: 3gFat: 6gSaturated Fat: 2gPolyunsaturated Fat: 1gMonounsaturated Fat: 2gCholesterol: 5mgSodium: 180mgPotassium: 200mgFiber: 2gSugar: 10gVitamin A: 500IUVitamin C: 15mgCalcium: 30mgIron: 0.5mg

Notes

This coleslaw is best enjoyed cold or at room temperature. Dress just before serving for optimal freshness and crunch.

Tried this recipe?

Let us know how it was!

Sweet & Spicy Pickle Slaw: A Refreshing BBQ Essential

January 29, 2026 by Grace Snow Leave a Comment

Every bite of Sweet & Spicy Pickle Slaw feels like a summer festival right on your plate. With the crunch of fresh cabbage and carrots mingling with the zesty twist of pickles and a hint of heat, this slaw is sure to be the star of your next barbecue or family gathering. The best part? It’s quick and easy to make, perfect for those busy weeknights or spontaneous cookouts. Versatile enough to serve as a refreshing side dish or a light salad, the Sweet & Spicy Pickle Slaw is a delightful addition that everyone will savor. Are you ready to give your meals a vibrant boost? Let’s get started on this delicious journey!

Why is Sweet & Spicy Pickle Slaw a must-try?

Quick and Easy: This slaw comes together in just a few simple steps, making it perfect for any cook, whether you're a seasoned chef or a kitchen newbie.

Bursting with Flavor: Each bite offers a delightful combination of crunch, sweetness, and spice, elevating your meals from ordinary to extraordinary.

Versatile Delight: Serve it as a side for BBQ pulled pork sandwiches or enjoy it solo as a light salad for a refreshing meal.

Health-Packed: Rich in fiber from fresh veggies, this slaw is not just delicious but also a smart choice for a health-conscious diet.

Perfect for Gatherings: Its crowd-pleasing flavor and vibrant presentation make it an essential dish for summer get-togethers or family dinners. Don’t forget to check out our other delicious sides like Smoky Sweet Potatoes to complement your meal!

Sweet & Spicy Pickle Slaw Ingredients

For the Slaw
• Green Cabbage – Use about four cups of shredded cabbage for a crunchy base; choose firm heads without bruises.
• Carrots – A cup of grated fresh carrots adds beautiful color and sweetness.
• Pickles – Half a cup of chopped dill pickles brings tangy goodness; bread-and-butter pickles can be used for a sweeter twist.
• Red Onion – A quarter cup thinly sliced gives zest; soak in cold water for a milder flavor if preferred.

For the Dressing
• Mayonnaise – Half a cup provides creaminess; Greek yogurt is a lighter alternative.
• Sriracha Sauce – Two tablespoons deliver a kick of heat; adjust based on your spice tolerance.
• Honey – One tablespoon balances the heat with sweetness; local honey enhances flavor.
• Apple Cider Vinegar – One tablespoon adds acidity; opt for unfiltered for added health benefits.

This Sweet & Spicy Pickle Slaw is a simple yet vibrant addition to your table, promising a joyful experience with each bite!

Step‑by‑Step Instructions for Sweet & Spicy Pickle Slaw

Step 1: Prep Your Vegetables
Begin by shredding about four cups of green cabbage and grating one cup of fresh carrots. In a large mixing bowl, combine the shredded cabbage and grated carrots with half a cup of chopped dill pickles and a quarter cup of thinly sliced red onion. Make sure the vegetables are evenly mixed for a delightful crunch in your Sweet & Spicy Pickle Slaw.

Step 2: Whip Up the Dressing
In a separate medium-sized bowl, mix half a cup of mayonnaise, two tablespoons of Sriracha sauce, one tablespoon of honey, and one tablespoon of apple cider vinegar. Stir until the mixture is smooth and creamy, ensuring all the ingredients blend well together. This tangy dressing will add a zesty kick to your Sweet & Spicy Pickle Slaw.

Step 3: Combine Everything
Pour the prepared dressing over the vegetable mixture in your large bowl. Using a spatula, gently toss the veggies and dressing until everything is thoroughly coated. Take a moment to admire the vibrant colors of your Sweet & Spicy Pickle Slaw and ensure each bite will be bursting with flavor.

Step 4: Chill Out
Cover the bowl with plastic wrap or transfer the slaw into an airtight container. Refrigerate for at least one hour, allowing the flavors to meld beautifully. Not only will chilling enhance the taste of your Sweet & Spicy Pickle Slaw, but it will also make every bite refreshingly crisp.

Step 5: Serve It Up
Once the slaw has chilled, give it a good toss to redistribute the dressing before serving. Dish out generous portions into bowls or plates, showcasing the lovely crunch and vibrant hues. Your Sweet & Spicy Pickle Slaw is now ready to be enjoyed alongside your favorite barbecue dishes.

Step 6: Enjoy!
If desired, drizzle a bit of extra dressing over each serving for an added flavor boost. This lively slaw is sure to be the highlight of your meal, full of sweet and spicy goodness. Indulge in every crunchy bite of your refreshing Sweet & Spicy Pickle Slaw!

Make Ahead Options

Sweet & Spicy Pickle Slaw is a fantastic choice for meal prep, allowing you to enjoy its delightful flavors even on your busiest days. You can prep all the vegetables—shredded cabbage, grated carrots, chopped pickles, and sliced onion—up to 24 hours in advance; simply store them in an airtight container in the refrigerator to maintain their crispness. To keep the dressing fresh, mix it separately and refrigerate for up to 3 days. When you’re ready to serve, just toss the prepared vegetables with the dressing, let it chill for about 30 minutes to enhance the flavors, and enjoy your delicious Sweet & Spicy Pickle Slaw with minimal effort!

Sweet & Spicy Pickle Slaw Variations & Substitutions

Feel free to get creative with your slaw—options abound for adding personal flair and flavor!

  • Kale Twist: Replace green cabbage with kale for a hearty, nutrient-rich base. Kale brings a vibrant green hue and a wonderfully chewy texture.
  • Jalapeño Kick: Add chopped jalapeños for an extra spicy punch. This will elevate the heat level and add a delightful crunch.
  • Maple Sweetness: Swap honey for maple syrup in the dressing for a unique flavor twist. This gives a different, yet pleasing sweetness perfect for a cozy dinner.
  • Bell Pepper Crunch: Toss in some diced bell peppers for additional color and crunch. This vibrant addition can provide a lovely sweetness as well!
  • Creamy Substitute: Use Greek yogurt instead of mayonnaise for a lighter, tangy option. The yogurt gives creaminess without the extra calories and fat.
  • Add Fresh Herbs: Incorporate fresh herbs like cilantro or dill for an aromatic boost. These herbs will not only enhance the flavor but also bring a fresh note to the slaw.
  • Pickle Juice Splash: Drizzle a bit of pickle juice into the dressing to intensify the tangy flavor. It’s a wonderful way to elevate every bite of your slaw.
  • Vegan Option: Use vegan mayo and agave syrup instead of honey for a fully plant-based version. This keeps the delight while catering to dietary preferences.

For more delicious side options, don't forget to explore our recipes for Maple Roasted Sweet Potatoes and Sweet Potato Casserole. Each variation adds another layer of fun and flavor to your cooking adventures!

What to Serve with Sweet & Spicy Pickle Slaw

Every meal deserves a delightful companion, and this vibrant slaw pairs beautifully with a variety of dishes to create a memorable feast.

  • BBQ Pulled Pork Sandwiches: The slaw's crunch and zing wonderfully balance the rich flavors of pulled pork, making each bite a festival of taste.

  • Grilled Chicken: Pairing Sweet & Spicy Pickle Slaw with juicy grilled chicken not only brightens the plate but also adds a refreshing contrast.

  • Fish Tacos: The slaw's sweetness and heat complement the delicate flavors of fish tacos, offering a crispy twist that enhances every bite.

  • Baked Beans: Serve alongside savory baked beans for a hearty meal where the slaw provides a refreshing crunch to balance the creamy beans.

  • Corn on the Cob: The juicy sweetness of corn on the cob pairs seamlessly, making for a classic summer combo that invokes sunny days.

  • Chilled White Wine: Enjoy a glass of chilled white wine, such as Sauvignon Blanc, to enhance the slaw’s fresh flavors while complementing your main dish.

  • Chocolate Chip Cookies: For dessert, treat yourself to classic chocolate chip cookies, offering a sweet finish that contrasts nicely with the spiciness of the slaw.

  • Watermelon Salad: A tropical watermelon salad offers a sweet and juicy contrast, keeping everything light and refreshing as you savor each bite.

  • Homemade Lemonade: Quench your thirst with a pitcher of homemade lemonade, blending tanginess with sweetness that mirrors your slaw’s delightful notes.

Storage Tips for Sweet & Spicy Pickle Slaw

Fridge: Store your Sweet & Spicy Pickle Slaw in an airtight container for up to five days. This keeps it fresh and delicious, ready to accompany any meal.

Freezer: For longer storage, you can freeze the slaw, but be aware that the texture may change. Use within three months for the best quality; thaw in the fridge before serving.

Serving: Enjoy your slaw chilled! No reheating necessary—just give it a good stir before serving to redistribute the zesty dressing.

Preparation: If you plan to make this a day in advance, keep the extra dressing separate until serving to maintain the crunch of the veggies.

Expert Tips for Sweet & Spicy Pickle Slaw

  • Taste First: Always sample your dressing before mixing it into the slaw. Adjust sweetness or spiciness to your preference, ensuring a balanced flavor in your Sweet & Spicy Pickle Slaw.

  • Chill for Flavor: Allow the slaw to chill for at least one hour after mixing, as this helps the flavors meld beautifully and enhances the overall taste.

  • Freshness Matters: Use the freshest vegetables possible; it truly elevates your Sweet & Spicy Pickle Slaw from good to spectacular. Bruised or wilted veggies can result in an unappealing texture.

  • Add a Crunch: For extra texture, toss in some fresh herbs like cilantro or dill, or consider a splash of pickle juice for added flavor depth.

  • Customize Your Heat: Adjust the amount of Sriracha based on your spice tolerance. Don't hesitate to add jalapeños for an extra kick if you're feeling adventurous!

Sweet & Spicy Pickle Slaw Recipe FAQs

How do I choose ripe and fresh ingredients for the slaw?
Absolutely! When selecting your green cabbage, look for firm heads without bruises or dark spots. The carrots should be vibrant and crisp, while pickles should be freshly opened without any signs of spoilage. If you're using red onion, opt for a bulb that's firm and smooth to avoid bitterness. Fresh ingredients not only taste better but also elevate your Sweet & Spicy Pickle Slaw!

What is the best way to store Sweet & Spicy Pickle Slaw?
Very good question! Store your Sweet & Spicy Pickle Slaw in an airtight container in the refrigerator for up to five days. This keeps the slaw fresh and ready to complement your meals. Just remember to give it a good stir before serving to redistribute the dressing!

Can I freeze Sweet & Spicy Pickle Slaw? How?
Yes, you can freeze it! However, freezing may alter the texture of the veggies. To freeze your slaw, place it in an airtight container or a freezer-safe bag, making sure to remove as much air as possible. It’s best used within three months. When you're ready to enjoy, simply thaw it in the refrigerator overnight. Be sure to stir well after thawing to refresh the flavors.

What should I do if my slaw is too spicy?
If your Sweet & Spicy Pickle Slaw ends up spicier than you expected, don’t worry! You can balance the heat by adding more mayonnaise or Greek yogurt to the dressing, which will help mellow the spice. Alternatively, incorporating more shredded cabbage or grated carrots into the slaw can dilute the spiciness while adding more texture and flavor.

Is this recipe suitable for people with dietary restrictions?
Absolutely! This recipe can be adapted for various dietary needs. For those with allergies to soy or eggs, use a vegan mayonnaise or Greek yogurt. If you’re looking for a gluten-free option, this slaw is naturally gluten-free as long as your Sriracha is verified gluten-free. Always double-check your ingredients for hidden allergens, especially if serving guests!

How can I enhance the flavor of my slaw?
For an additional kick, consider tossing in some chopped fresh herbs, like cilantro or dill. You can also add a splash of pickle juice or lemon juice to brighten the flavors further. If you enjoy a little extra sweetness, you could opt for maple syrup instead of honey in the dressing. The more, the merrier!

Sweet & Spicy Pickle Slaw

Sweet & Spicy Pickle Slaw: A Refreshing BBQ Essential

Sweet & Spicy Pickle Slaw is a vibrant, crunchy dish perfect for barbecues and gatherings.
Print Recipe Pin Recipe
Prep Time 15 minutes mins
Chill Time 1 hour hr
Total Time 1 hour hr 15 minutes mins
Servings: 4 servings
Course: Salads
Cuisine: American
Calories: 150
Ingredients Equipment Method Nutrition Notes

Ingredients
  

For the Slaw
  • 4 cups shredded green cabbage choose firm heads without bruises
  • 1 cup grated carrots adds color and sweetness
  • 0.5 cup chopped dill pickles or bread-and-butter pickles for sweetness
  • 0.25 cup thinly sliced red onion soak in cold water for milder flavor
For the Dressing
  • 0.5 cup mayonnaise or Greek yogurt for a lighter alternative
  • 2 tablespoons Sriracha sauce adjust based on spice tolerance
  • 1 tablespoon honey local honey enhances flavor
  • 1 tablespoon apple cider vinegar opt for unfiltered for health benefits

Equipment

  • Mixing Bowl
  • Cutting Board
  • Knife
  • Spatula

Method
 

Preparation
  1. Shred the green cabbage and grate the carrots. In a large bowl, combine shredded cabbage, grated carrots, chopped dill pickles, and sliced red onion.
  2. In a separate bowl, mix mayonnaise, Sriracha sauce, honey, and apple cider vinegar until smooth.
  3. Pour the dressing over the vegetable mixture and toss until coated.
  4. Cover and refrigerate for at least one hour to meld flavors.
  5. Toss again before serving and enjoy your Sweet & Spicy Pickle Slaw.

Nutrition

Serving: 1cupCalories: 150kcalCarbohydrates: 13gProtein: 2gFat: 10gSaturated Fat: 1gPolyunsaturated Fat: 1gMonounsaturated Fat: 8gCholesterol: 5mgSodium: 300mgPotassium: 200mgFiber: 2gSugar: 3gVitamin A: 2500IUVitamin C: 15mgCalcium: 40mgIron: 1mg

Notes

Serve chilled and stir before serving to redistribute the dressing.

Tried this recipe?

Let us know how it was!

Quick and Easy Mango Slaw: A Refreshing Tropical Crunch

January 29, 2026 by Grace Snow Leave a Comment

In just 15 minutes, you can elevate any meal with a splash of tropical flair! My Quick and Easy Mango Slaw is a delightful mix of juicy mangoes, crisp cabbage, and vibrant carrots, all tossed in a zesty lime dressing. It’s the kind of side dish that turns weeknight dinners or summer barbecues into something special. The best part? Not only is this slaw incredibly simple to whip up, but it also adds a refreshing and healthy crunch that’s hard to resist. Plus, it’s versatile enough to complement everything from grilled meats to tacos. So, are you ready to bring a burst of sunshine to your table?

Why is Mango Slaw a must-try?

Vibrant Flavors: This Mango Slaw brings together sweet mangoes and crunchy vegetables, delivering a delightful burst of taste.

Quick Prep: With just 15 minutes from start to finish, it's perfect for busy weeknights or last-minute gatherings, allowing you to focus on what really matters.

Health Boost: Packed with vitamins and dietary fiber, it's a refreshing side that can easily elevate any meal.

Versatile Pairing: Serve it alongside grilled meats, tacos, or even fold it into a wrap for a satisfying lunch, making it an ideal companion for just about any dish.

Customizable: Feel free to add nuts for crunch or avocados for creaminess, ensuring every serving can be unique.

Quick And Easy Mango Slaw Ingredients

For the Slaw
• Ripe Mangoes – Enjoy the sweetness and juicy texture; can substitute with pineapple if needed.
• Green Cabbage – Provides that all-important crunch; Napa cabbage can lighten it up perfectly.
• Large Carrot – Adds lovely color and natural sweetness; shredded zucchini is a great alternative.
• Red Bell Pepper – Offers a sweet bite and vibrant color; feel free to use any sweet pepper available.
• Red Onion – Contributes a sharp, pungent flavor; substitute with green onions for a milder option.
• Fresh Cilantro – Brings a refreshing herbal note; parsley is a good substitute if you prefer less flavor.

For the Dressing
• Lime Juice – Provides acidity and a bright zing; in a pinch, lemon juice works just as well.
• Honey or Maple Syrup – Adds balance with sweetness; choose maple syrup for a vegan version.
• Sesame Oil – Infuses the slaw with a nutty richness; any neutral oil can work, but olive oil adds more flavor.
• Salt and Pepper – Essential for seasoning; adjust according to taste to enhance your Quick And Easy Mango Slaw.

Step‑by‑Step Instructions for Quick And Easy Mango Slaw:

Step 1: Prepare the Vegetables
In a large mixing bowl, combine 2 cups of diced ripe mangoes, 2 cups of shredded green cabbage, 1 grated large carrot, 1 sliced red bell pepper, 1 sliced red onion, and 1/2 cup of chopped fresh cilantro. Use a sharp knife and a cutting board for safety and precision. Ensure the veggies are vibrant and fresh for a colorful Quick And Easy Mango Slaw.

Step 2: Make the Dressing
In a small bowl, whisk together 1/4 cup of fresh lime juice, 2 tablespoons of honey (or maple syrup), and 2 tablespoons of sesame oil. Add a pinch of salt and pepper to taste, mixing well until the dressing is smooth and blended. The vibrant colors of the dressing will complement the slaw beautifully, adding an enticing zing.

Step 3: Combine the Slaw and Dressing
Pour the dressing over your mango and vegetable mixture. Using salad tongs or two large spoons, gently toss everything together, ensuring each piece is evenly coated in the zesty dressing. This step should take about 1 to 2 minutes, and you’ll want to see the colors pop as they come together in this Quick And Easy Mango Slaw.

Step 4: Allow Flavors to Meld
Let the slaw sit at room temperature for 5 to 10 minutes, allowing the flavors to meld beautifully. During this time, you’ll notice the cabbage starts to soften slightly while still retaining its crunch. This resting period enhances the overall taste and makes the slaw even more delightful when served.

Step 5: Serve and Enjoy
Serve the mango slaw chilled or at room temperature, perfect for picnics or gatherings. You can garnish with extra cilantro and lime wedges for a fresh presentation. This Quick And Easy Mango Slaw makes a vibrant side dish to accompany grilled meats, tacos, or even as a light lunch on its own.

Expert Tips for Quick And Easy Mango Slaw

  • Fresh Ingredients: Always use ripe mangoes and fresh vegetables for the best flavor and texture. Avoid using limp produce to maintain the slaw's vibrant crunch.

  • Adjust the Dressing: Taste and adjust the lime juice and sweetness to your liking. Too much acidity? Add a bit more honey or maple syrup to balance it out in your Quick And Easy Mango Slaw.

  • Chill for Flavor: Allow the slaw to sit for at least 10 minutes before serving. This resting time helps the flavors meld, enhancing the overall taste experience.

  • Prep Ahead: If you're short on time, prepare the veggies and dressing in advance, but don’t combine them until just before serving to keep everything crisp.

  • Add a Kick: For those who enjoy a bit of heat, sprinkle some chili flakes or add diced jalapeños. This twist can elevate your Quick And Easy Mango Slaw to a whole new level!

Make Ahead Options

These Quick and Easy Mango Slaw options are a lifesaver for busy cooks! You can chop and mix all the vegetables (mangoes, cabbage, carrots, bell peppers, onions, and cilantro) up to 24 hours in advance. Store them in an airtight container in the refrigerator to maintain their freshness and crunch. As for the dressing, prepare it a day before—just whisk together the lime juice, honey or maple syrup, sesame oil, salt, and pepper, then refrigerate. When you’re ready to serve, simply toss the slaw with the dressing, allowing it to meld for about 5-10 minutes at room temperature. This way, you’ll enjoy vibrant flavors and a delightful crunch without any last-minute stress!

Quick And Easy Mango Slaw Variations

Feel free to make this delightful slaw your own with these fun and easy twists!

  • Avocado Addition: Creamy avocado slices can be folded in just before serving for an irresistible richness.

  • Crunchy Sesame Seeds: Toss in a sprinkle of toasted sesame seeds to add nutty flavor and extra texture. It’s a simple upgrade that gives depth to every bite.

  • Spicy Kick: Add diced jalapeños or a sprinkle of chili flakes for a touch of heat, giving your slaw an exciting flavor boost.

  • Nutty Twist: Chopped peanuts or cashews sprinkled on top will give extra crunch and a hint of earthy flavor. This combo not only enhances texture but adds a satisfying bite.

  • Tropical Fusion: Throw in some diced pineapple to amplify the tropical vibes and sweetness, creating a more refreshing blend with every mouthful.

  • Wrap it Up: Use this slaw as a filling in wrap sandwiches with grilled chicken or shredded tofu. Drizzle yogurt or a creamy dressing for a heartier meal.

  • Lime Chicken Rice: Serve alongside a delightful Lime Chicken Rice for a beautifully balanced meal.

  • Chickpea Spinach Curry: Enjoy this mango slaw paired with a comforting dish of Chickpea Spinach Curry to add a refreshing contrast to the warm flavors.

Feel inspired to let your creativity shine and whip up your personalized version of Quick And Easy Mango Slaw!

What to Serve with Quick and Easy Mango Slaw

Elevate your next meal with delightful sides that complement the vibrant flavors of this refreshing slaw.

  • Grilled Chicken: The smokiness of charred chicken juxtaposes the sweet and tangy slaw, creating a comforting and satisfying balance.
  • Fish Tacos: Pairing slaw with crispy or grilled fish tacos adds an exciting crunch and refreshing contrast to the rich flavors.
  • Quinoa Salad: A protein-packed, nutty quinoa salad rounds out your meal, adding a hearty, wholesome component to the light slaw.
  • Pork Tenderloin: The savory and juicy nature of pork tenderloin complements the sweetness of the mangoes, providing a balance of flavors and textures.
  • Asian Noodle Bowl: A heavenly combination of noodle dishes brings together the freshness of the slaw and the warmth of cooked noodles, enhancing your dining experience.
  • Chilled White Wine: A crisp, chilled white wine brings a refreshing vibe and echoes the citrus notes of lime in your slaw, perfect for summer nights.
  • Coconut Rice: This gentle sweetness and creaminess showcase summer flavors alongside the crunchy mango slaw, harmonizing tropical elements beautifully.
  • Chocolate Mousse: For dessert, a light and airy chocolate mousse makes for an indulgent finish, contrasting the crispness of your slaw with its velvety richness.

How to Store and Freeze Quick And Easy Mango Slaw

Room Temperature: Enjoy your slaw fresh! If left out, consume within 2 hours to maintain its vibrant taste and crunch.

Fridge: Store any leftovers in an airtight container for up to 2 days. The flavors may deepen, but the slaw will lose some crunch, so enjoy it soon!

Freezer: While not recommended for freezing due to texture changes from the water content in the mango and veggies, you can freeze the dressing separately for up to 1 month.

Reheating: For best results, serve the Quick And Easy Mango Slaw cold. If you want to warm it, do so gently in a pan, but freshness is key!

Quick And Easy Mango Slaw Recipe FAQs

What is the best way to select ripe mangoes for my slaw?
Absolutely! Look for mangoes that yield slightly to gentle pressure, indicating ripeness. A ripe mango will have a vibrant color and sweet aroma at the stem. Avoid those with dark spots or wrinkles, as they may be overripe.

How should I store leftovers of the Quick And Easy Mango Slaw?
To keep your slaw fresh, transfer any leftovers into an airtight container and store it in the refrigerator. It should stay good for up to 2 days. Just a heads up, the slaw’s crunch may soften the longer it sits, but the flavors will continue to meld and become even tastier!

Can I freeze the Quick And Easy Mango Slaw?
While freezing isn’t ideal due to potential texture issues once thawed, you can freeze the dressing separately for up to 1 month. Just whisk it back together when you’re ready to use it! For the slaw mix, it’s best enjoyed fresh.

What if my dressing is too acidic or sweet?
If you find the dressing too tangy, simply whisk in a bit more honey or maple syrup to balance it out. Conversely, if it’s too sweet, a squeeze of lime juice can perk up the flavors. Adjusting these elements to your taste is key for the perfect Quick And Easy Mango Slaw!

Is there a way to make this recipe pet-friendly?
Yes! If you're looking to share a little slaw with your furry friend, skip the dressing and offer plain diced mango and shredded cabbage without added sauces or seasonings. Always consult your vet before introducing new foods into your pet’s diet to ensure it’s safe for them.

Can I use different vegetables in this slaw?
Very! This recipe is flexible. Feel free to substitute with veggies like shredded zucchini or thinly sliced bell peppers. You can also add chopped nuts for a delightful crunch or make it heartier with some diced avocado! The more the merrier when it comes to customization!

Quick And Easy Mango Slaw:

Quick and Easy Mango Slaw: A Refreshing Tropical Crunch

Quick And Easy Mango Slaw is a vibrant, healthy side dish combining sweet mangoes, crunchy vegetables, and zesty lime dressing.
Print Recipe Pin Recipe
Prep Time 15 minutes mins
Resting Time 10 minutes mins
Total Time 25 minutes mins
Servings: 4 servings
Course: Salads
Cuisine: Tropical
Calories: 150
Ingredients Equipment Method Nutrition Notes

Ingredients
  

For the Slaw
  • 2 cups diced ripe mangoes Substitute with pineapple if needed.
  • 2 cups shredded green cabbage Napa cabbage can be used.
  • 1 large grated carrot Shredded zucchini is a great alternative.
  • 1 large sliced red bell pepper Any sweet pepper can be used.
  • 1 large sliced red onion Substitute with green onions for a milder flavor.
  • 1/2 cup chopped fresh cilantro Parsley is a good substitute if preferred.
For the Dressing
  • 1/4 cup fresh lime juice Lemon juice can be used in a pinch.
  • 2 tablespoons honey or maple syrup Choose maple syrup for a vegan version.
  • 2 tablespoons sesame oil Any neutral oil can work.
  • salt and pepper Adjust according to taste.

Equipment

  • large mixing bowl
  • small bowl
  • Whisk
  • salad tongs
  • Cutting Board
  • Sharp Knife

Method
 

Step-by-Step Instructions
  1. In a large mixing bowl, combine 2 cups of diced ripe mangoes, 2 cups of shredded green cabbage, 1 grated large carrot, 1 sliced red bell pepper, 1 sliced red onion, and 1/2 cup of chopped fresh cilantro.
  2. In a small bowl, whisk together 1/4 cup of fresh lime juice, 2 tablespoons of honey (or maple syrup), and 2 tablespoons of sesame oil. Add a pinch of salt and pepper to taste.
  3. Pour the dressing over the mango and vegetable mixture. Using salad tongs, gently toss everything together.
  4. Let the slaw sit at room temperature for 5 to 10 minutes.
  5. Serve the mango slaw chilled or at room temperature, garnished with extra cilantro and lime wedges.

Nutrition

Serving: 1servingCalories: 150kcalCarbohydrates: 30gProtein: 2gFat: 5gSaturated Fat: 0.5gPolyunsaturated Fat: 0.2gMonounsaturated Fat: 4gSodium: 50mgPotassium: 300mgFiber: 4gSugar: 10gVitamin A: 3000IUVitamin C: 60mgCalcium: 45mgIron: 0.5mg

Notes

Always use fresh ingredients for the best flavor. Adjust the dressing to your liking and allow the slaw to sit to enhance flavors.

Tried this recipe?

Let us know how it was!

Crunchy Asian Cabbage Slaw That Will Wow Your Taste Buds

January 29, 2026 by Grace Snow Leave a Comment

The vibrant crunch of fresh vegetables in my Crunchy Asian Cabbage Slaw is like a delightful symphony of textures and flavors dancing on my tongue. This salad isn’t just a feast for the eyes; it’s an easy, healthy choice perfect for those who crave a break from fast food. With its addictive sesame dressing, this dish offers a sweet, tangy, and slightly nutty flavor that elevates any meal. The best part? It’s not only vegetarian and vegan-friendly but also gluten-free with simple substitutions. Whether you’re hosting a barbecue, bringing a dish to a potluck, or just looking for a refreshing side to your dinner, this slaw is the answer. Are you ready to toss together this colorful bowl of goodness? Let’s get started!

Why is this slaw a must-try?

Vibrant Colors: This Crunchy Asian Cabbage Slaw adds a pop of color to any meal, making it visually appealing for gatherings or family dinners.
Fresh & Flavorful: Each bite is a refreshing burst of crisp vegetables, perfectly complemented by an addictive homemade sesame dressing.
Quick to Prepare: In just about 15 minutes, you can whip up this tasty side, saving you from the hassle of fast food!
Versatile Dish: Pair it with grilled chicken, use it as a taco topping, or enjoy it on its own – it fits into countless meals.

For more easy salad inspiration, check out my delicious Sweet Potato Casserole or try the deliciously crunchy Fried Shrimp Cabbage for a wholesome dinner!

Crunchy Asian Cabbage Slaw Ingredients

This Crunchy Asian Cabbage Slaw comes together with fresh ingredients that enhance both flavor and nutrition.

For the Slaw
• Green Cabbage – Provides a crisp texture; substitute with napa cabbage for a different flavor.
• Red Cabbage – Adds vibrant color and mild flavor; use more green cabbage if unavailable.
• Carrots – Introduces natural sweetness for contrast; replace with shredded zucchini for a lower-carb option.
• Broccoli – Adds crunch and nutritional value; substitute with bell peppers for a sweeter touch.
• Green Onions – Offer a mild onion flavor; use red onions for a bolder taste.
• Crispy Chow Mein Noodles – Contribute delightful crunch; fried wonton strips or toasted nuts are great alternatives.

For the Dressing
• Sesame Seeds – Add a nutty finish; can be omitted if preferred.
• Rice Vinegar – Provides essential tanginess; substitute with apple cider vinegar for a different profile.
• Soy Sauce (or Tamari) – Adds umami depth; use coconut aminos for a soy-free version.
• Honey (or Maple Syrup) – Sweetens the dressing; adjust as necessary or use agave syrup for a vegan alternative.
• Toasted Sesame Oil – Infuses a rich, nutty flavor; regular sesame oil can also be used.
• Neutral Oil – Balances the dressing, such as canola or vegetable oil.
• Ginger (grated) – Provides warmth and a hint of spice; fresh is best, but powdered works too.
• Garlic (minced) – Adds depth; shallots are a suitable substitute.
• Lime Juice – Brightens flavors; use lemon juice if limes are not on hand.
• Sriracha (optional) – Adds heat to the dressing; omit for a milder taste.

Now you're all set to create this beautiful bowl of Crunchy Asian Cabbage Slaw that will amaze your taste buds!

Step‑by‑Step Instructions for Crunchy Asian Cabbage Slaw

Step 1: Prepare the Vegetables
Start by shredding the green and red cabbage, and grate the carrots. Finely chop the broccoli into small, bite-sized pieces, and slice the green onions. For a colorful and crunchy Crunchy Asian Cabbage Slaw, aim for uniform sizes to ensure even mixing. This should take about 10 minutes, and don’t forget to have a large mixing bowl ready for the next steps.

Step 2: Make the Dressing
In a medium bowl or jar, whisk together all the dressing ingredients: sesame seeds, rice vinegar, soy sauce, honey, toasted sesame oil, neutral oil, grated ginger, minced garlic, and lime juice. For an extra kick, add sriracha if desired. This step should take around 5 minutes, and it's important to mix until you achieve a smooth, well-combined dressing that glistens invitingly.

Step 3: Combine the Slaw and Dressing
In your large mixing bowl, add the shredded vegetables and drizzle the dressing over them. Toss gently using tongs or your hands, ensuring every piece is well-coated with that addictive sesame dressing. This crucial step helps blend all the flavors together while maintaining the brightness and crunch of your Crunchy Asian Cabbage Slaw. This should take about 3-5 minutes.

Step 4: Add the Crunchy Toppings
Right before serving, sprinkle crispy chow mein noodles or fried wonton strips on top of the slaw, and add a generous sprinkle of sesame seeds for that perfect finish. This last step adds delightful texture and visual appeal, making your slaw irresistible. Aim to serve immediately to preserve that satisfying crunch.

Step 5: Serve and Enjoy
Gather your friends or family around as you transfer the slaw to a beautiful serving bowl. For optimal crunch, it’s best to serve immediately. If you need to prepare ahead, store the dressed slaw in the fridge for up to 3 days, making sure to add your crispy toppings just before serving. Enjoy this vibrant Crunchy Asian Cabbage Slaw!

What to Serve with Crunchy Asian Cabbage Slaw

Enjoy the vibrant crunch of this salad alongside an array of delicious accompaniments that enhance your dining experience.

  • Grilled Chicken Skewers: Juicy and smoky, these skewers add a satisfying protein element that pairs beautifully with the refreshing slaw.
  • Rice Noodles: Light and chewy, these noodles serve as a delightful base, bringing an additional texture that complements the crunchy vegetables.
  • Sesame Ginger Tofu: Marinated and sautéed tofu echoes the salad’s flavors, offering a plant-based protein option that’s both hearty and delicious.
  • Miso Soup: This warm and comforting broth adds a soothing element, balancing out the bright and crisp flavors of the slaw.
  • Fresh Spring Rolls: Stuffed with veggies and paired with a savory dipping sauce, these rolls are a crunchy, fresh counterpart that feels light and refreshing.
  • Chilled Sake: This smooth and slightly sweet drink beautifully matches the sesame dressing's nuttiness, elevating the meal experience.
  • Coconut Rice: Creamy and subtly sweet, coconut rice offers a perfect contrast to the tartness of the slaw, creating a harmonious balance on the plate.
  • Lychee Sorbet: As a light dessert, this refreshing treat rounds off your meal with a sweet, tropical finish that echoes the slaw’s zing and zest.

Make Ahead Options

These Crunchy Asian Cabbage Slaw preparations are perfect for busy weeknights! You can chop and combine all the vegetables—green cabbage, red cabbage, carrots, broccoli, and green onions—up to 24 hours in advance, storing them in an airtight container in the refrigerator to maintain freshness. The addictive sesame dressing can also be whipped up and refrigerated for up to 3 days; just remember to give it a good shake before mixing. When ready to serve, simply combine the prepped vegetables with the dressing, then top with crispy chow mein noodles or fried wonton strips for that satisfying crunch. Serving this vibrant slaw will be a breeze while keeping it just as delicious!

Storage Tips for Crunchy Asian Cabbage Slaw

Fridge: Store the dressed slaw in an airtight container in the refrigerator for up to 3 days to maintain its freshness and flavor.

Crispy Toppings: Keep the crispy chow mein noodles or wonton strips in a separate container to ensure they remain crunchy and do not get soggy.

Make-Ahead: For optimal texture, prepare the slaw and dressing separately. Combine them just before serving to enjoy the vibrant crunch of your Crunchy Asian Cabbage Slaw!

Refrigeration Reminder: If you're making this slaw in advance, remember to add the toppings just prior to serving for the best experience.

Expert Tips for Crunchy Asian Cabbage Slaw

  • Keep It Crisp: Make sure to add the crispy toppings right before serving to maintain their delightful crunch in your Crunchy Asian Cabbage Slaw.

  • Customize Your Dressing: Adjust the sesame dressing thickness by adding a little water if too thick, ensuring it coats the slaw perfectly without overpowering the vegetables.

  • Prep Ahead Wisely: If you're making this slaw in advance, store the dressing and vegetables separately to retain freshness and crunch for up to 3 days.

  • Mix and Match: Feel free to experiment with additional proteins, like grilled chicken or tofu, for a heartier salad that still keeps the fresh essence of your slaw.

  • Balance Flavors: Taste the dressing and adjust the sweetness or acidity as needed. A little extra lime juice or honey can enhance the overall flavor profile beautifully.

Crunchy Asian Cabbage Slaw Variations

Feel free to let your creativity shine as you customize this delightful slaw to your own taste!

  • Dairy-Free: Use olive oil instead of sesame oil for a lighter flavor without any dairy.
    Embrace the lightness while still enjoying that crunch!

  • Nut-Free: Skip the sesame seeds and use sunflower seeds for a similar texture without the nuts.
    This keeps it allergy-friendly and just as tasty!

  • Extra Crunch: Add roasted chickpeas to bring in a hearty crunch and a protein boost.
    These will add a delightful texture and make the dish even more satisfying!

  • Spicy Kick: Mix in fresh sliced jalapeños or a dash more sriracha for a fiery punch.
    This variation perfectly complements the slaw's freshness while tantalizing your taste buds.

  • Citrus Zing: Substitute some lime juice with orange juice for a sweet, tangy twist.
    This adds a refreshing brightness that pairs wonderfully with the other flavors.

  • Creamy Addition: Stir in a tablespoon of Greek yogurt or vegan yogurt for a richer dressing experience.
    This twist will give your slaw a creamy texture without losing that vibrant flavor!

  • Herbed Up: Throw in some fresh cilantro or mint for an herby freshness that elevates the dish.
    This simple addition can transform your slaw into a more vibrant, aromatic experience.

For readers looking for more flavor boosts, give our deliciously crunchy Parmesan Artichoke Hearts a try to complement your slaw perfectly!

Crunchy Asian Cabbage Slaw Recipe FAQs

How do I select the best cabbage for the slaw?
Absolutely! When choosing green and red cabbage, look for heads that feel heavy for their size and have tightly packed leaves without dark spots or wilting. Fresh cabbage will feel crisp and firm to the touch. If you're looking for a slightly sweeter flavor, napa cabbage is a wonderful alternative for your Crunchy Asian Cabbage Slaw.

What’s the best way to store the slaw?
To preserve the freshness of your Crunchy Asian Cabbage Slaw, store it in an airtight container in the refrigerator for up to 3 days. Be sure to keep the crispy toppings separate, as storing them together can lead to sogginess. They'll maintain their delightful crunch longer this way!

Can I freeze my Crunchy Asian Cabbage Slaw?
I wouldn't recommend freezing the dressed slaw as the vegetables may lose their crisp texture. However, if you want to prep ahead, you can freeze the shredded cabbage and mixed veggies in a freezer-safe bag for up to 3 months. Just remember to thaw them in the fridge and enjoy fresh toppings for added crunch when you serve!

What if my dressing is too thick?
Very! If your sesame dressing turns out thicker than desired, simply whisk in a small amount of water, one tablespoon at a time, until you achieve your preferred consistency. This will ensure the dressing glides smoothly over your slaw, enhancing those vibrant flavors without overpowering the vegetables.

Are there any dietary considerations for this recipe?
You bet! This Crunchy Asian Cabbage Slaw is suitable for vegetarian and vegan diets. If you're avoiding gluten, make sure to substitute regular soy sauce with tamari or coconut aminos. Also, for those with food allergies, be cautious with toppings like sesame seeds and crispy noodles. Using toasted nuts instead can add a delightful crunch without the allergy concerns!

Crunchy Asian Cabbage Slaw

Crunchy Asian Cabbage Slaw That Will Wow Your Taste Buds

This Crunchy Asian Cabbage Slaw is a healthy, vibrant, and easy side salad, perfect for any meal.
Print Recipe Pin Recipe
Prep Time 15 minutes mins
Total Time 15 minutes mins
Servings: 4 servings
Course: Salads
Cuisine: Asian
Calories: 150
Ingredients Equipment Method Nutrition Notes

Ingredients
  

For the Slaw
  • 4 cups Green Cabbage Provides a crisp texture; substitute with napa cabbage for a different flavor.
  • 2 cups Red Cabbage Adds vibrant color and mild flavor; use more green cabbage if unavailable.
  • 2 medium Carrots Introduces natural sweetness for contrast; replace with shredded zucchini for a lower-carb option.
  • 1 cup Broccoli Adds crunch and nutritional value; substitute with bell peppers for a sweeter touch.
  • 4 tablespoons Green Onions Offer a mild onion flavor; use red onions for a bolder taste.
  • 1 cup Crispy Chow Mein Noodles Contribute delightful crunch; fried wonton strips or toasted nuts are great alternatives.
For the Dressing
  • 2 tablespoons Sesame Seeds Add a nutty finish; can be omitted if preferred.
  • 1/4 cup Rice Vinegar Provides essential tanginess; substitute with apple cider vinegar for a different profile.
  • 3 tablespoons Soy Sauce (or Tamari) Adds umami depth; use coconut aminos for a soy-free version.
  • 1 tablespoon Honey (or Maple Syrup) Sweetens the dressing; adjust as necessary or use agave syrup for a vegan alternative.
  • 2 tablespoons Toasted Sesame Oil Infuses a rich, nutty flavor; regular sesame oil can also be used.
  • 1/4 cup Neutral Oil Balances the dressing, such as canola or vegetable oil.
  • 1 tablespoon Ginger (grated) Provides warmth and a hint of spice; fresh is best, but powdered works too.
  • 1 clove Garlic (minced) Adds depth; shallots are a suitable substitute.
  • 2 tablespoons Lime Juice Brightens flavors; use lemon juice if limes are not on hand.
  • 1 teaspoon Sriracha (optional) Adds heat to the dressing; omit for a milder taste.

Equipment

  • Mixing Bowl
  • Whisk

Method
 

Instructions
  1. Step 1: Prepare the Vegetables. Start by shredding the green and red cabbage, and grate the carrots. Finely chop the broccoli into small, bite-sized pieces, and slice the green onions. This should take about 10 minutes.
  2. Step 2: Make the Dressing. In a medium bowl or jar, whisk together all the dressing ingredients until you achieve a smooth, well-combined dressing that glistens invitingly. This step should take around 5 minutes.
  3. Step 3: Combine the Slaw and Dressing. In your large mixing bowl, add the shredded vegetables and drizzle the dressing over them. Toss gently ensuring every piece is well-coated. This should take about 3-5 minutes.
  4. Step 4: Add the Crunchy Toppings. Right before serving, sprinkle crispy chow mein noodles or fried wonton strips on top of the slaw, and add a generous sprinkle of sesame seeds.
  5. Step 5: Serve and Enjoy. Serve immediately for optimal crunch, or store the dressed slaw in the fridge for up to 3 days, adding toppings just before serving.

Nutrition

Serving: 1servingCalories: 150kcalCarbohydrates: 10gProtein: 3gFat: 10gSaturated Fat: 1gPolyunsaturated Fat: 2gMonounsaturated Fat: 7gSodium: 180mgPotassium: 200mgFiber: 3gSugar: 2gVitamin A: 500IUVitamin C: 30mgCalcium: 50mgIron: 1mg

Notes

Expert tips include keeping the crispy toppings right before serving and storing dressing and veggies separately if made in advance.

Tried this recipe?

Let us know how it was!

Crispy Baked Parmesan Zucchini Sticks You'll Crave

January 29, 2026 by Grace Snow Leave a Comment

The other day, while hosting a casual gathering, I overheard a friend rave about how much they loved zucchini, yet had no clue it could be this addictive. Enter my Crispy Oven-Roasted Zucchini Sticks with Parmesan, a delightful way to transform a simple vegetable into a crowd-pleasing snack. These oven-roasted gems are not only healthy but also incredibly easy to prepare, making them the perfect answer for those tired of fast food. With the savory kick of Parmesan combined with fragrant herbs, you’ll find yourself reaching for seconds, or even thirds! How will you enjoy yours—dipped in marinara or simply on their own?

Why are these Zucchini Sticks a Must-try?

Irresistible Flavor: The combination of savory Parmesan and fragrant herbs elevates ordinary zucchini into a delectable snack. Healthy Choice: Packed with nutrients, these baked zucchini sticks satisfy your cravings without the guilt. Quick Preparation: With just a few simple steps, you can create a crispy treat in no time! Versatile Delight: Enjoy them as a side dish, a snack, or even as a fun appetizer for your next gathering. Plus, if you love veggie-centric recipes, don't miss out on these Cheesy Zucchini Bake or the tasty Parmesan Artichoke Hearts for more delicious options.

Baked Parmesan Zucchini Ingredients

For the Zucchini Sticks
• Zucchini – Fresh, firm zucchini brings the perfect crunch and nutrition; avoid soft ones for the best texture.
• Olive oil – Essential for roasting, ensuring crispiness; avocado oil can be used as a smokier alternative.

For the Parmesan Mixture
• Parmesan cheese – Freshly grated cheese adds rich flavor and creaminess; stay away from pre-grated for maximum taste.
• Dried thyme – This herb adds a lovely flavor; substitute with Italian seasoning if desired.
• Dried oregano – Another great herb for depth; dried rosemary can work as a bolder substitution.
• Dried basil – A mild, sweet flavor enhancer; feel free to switch with fresh basil if you have it on hand.
• Garlic powder – Gives a savory kick; you can use fresh garlic to taste for an extra burst of flavor.
• Kosher salt – Use for seasoning; adjust according to your personal preference.
• Freshly ground black pepper – Adds a touch of warmth; season to taste as well.

For Garnish
• Chopped fresh parsley – Adds freshness and vibrant color; it’s optional but highly recommended for that extra flair.

These delightful ingredients come together to create baked Parmesan zucchini sticks that are sure to impress everyone at your table!

Step‑by‑Step Instructions for Crispy Baked Parmesan Zucchini Sticks

Step 1: Preheat the Oven
Begin by preheating your oven to 350°F (175°C). This temperature ensures that your zucchini sticks cook through while achieving that perfect crispy texture. While the oven heats up, gather your baking sheet and a cooling rack—you'll use these in the following steps to help your zucchini achieve maximum crispiness.

Step 2: Prepare the Baking Sheet
Coat a cooling rack with nonstick spray and place it atop a baking sheet. This setup allows hot air to circulate around the zucchini sticks, promoting even cooking and browning. It’s key to achieving those crunchy edges for your baked Parmesan zucchini sticks that everyone will love!

Step 3: Mix the Parmesan Coating
In a small bowl, combine the freshly grated Parmesan cheese with the dried thyme, oregano, basil, garlic powder, kosher salt, and freshly ground black pepper. Stir these ingredients together until well mixed, creating a savory blend. This Parmesan mixture adds wonderful flavor to your baked zucchini sticks, making them irresistible.

Step 4: Cut the Zucchini
Take fresh, firm zucchinis and cut them into quarters lengthwise. Aim for uniform sizes to ensure even cooking. As you slice, admire the vibrant green color; this will be the base of your crispy baked Parmesan zucchini sticks! Arrange the cut zucchini on the prepared baking sheet without overlapping.

Step 5: Add Olive Oil and Seasoning
Drizzle the cut zucchini with olive oil, ensuring each piece is lightly coated to help the cheese adhere. After that, generously sprinkle the Parmesan mixture over the top, pressing slightly to ensure it sticks. This combination of oil and seasoning will make your zucchini sticks not only flavorful but also deliciously crispy when baked.

Step 6: Bake to Perfection
Place the zucchini sticks in the preheated oven and bake for about 15 minutes. At this point, you want the zucchini to become tender but still firm. Keep an eye on them; you'll know they're ready when they begin to turn golden and deliciously fragrant.

Step 7: Broil for Extra Crisp
After baking, switch your oven to broil and let them cook for an additional 2-3 minutes. This last step creates a golden brown crust and adds an extra crunch to your crispy baked Parmesan zucchini sticks. Be sure to watch carefully, as broilers can cook quickly!

Step 8: Serve and Enjoy
Once broiling is complete, carefully take your crispy baked Parmesan zucchini sticks out of the oven. Let them cool for a moment, then transfer them to a serving platter. For a fresh touch, garnish with chopped fresh parsley if desired. Serve immediately and watch them disappear as everyone enjoys this healthy treat!

Expert Tips for Baked Parmesan Zucchini

• Drying Zucchini: Ensure the zucchini is thoroughly dried after cutting. Extra moisture can lead to sogginess instead of crispiness when baking.

• Single Layer Cooking: Arrange zucchini sticks in a single layer without overlapping on the baking sheet. This helps achieve an even bake and crispy texture for your baked Parmesan zucchini.

• Broil Wisely: Keep a close eye while broiling; it can quickly turn from golden brown to burnt. Just a couple of extra minutes makes a big difference for those irresistible crispy edges!

• Fresh Cheese Matters: Use freshly grated Parmesan cheese for the best flavor. Pre-grated cheese often contains anti-caking agents that can hinder crispiness.

• Easy Variations: Feel free to experiment with spices! Adding crushed red pepper flakes can elevate the flavor profile and give your baked Parmesan zucchini a delightful kick.

How to Store and Freeze Baked Parmesan Zucchini

Fridge: Store leftover baked Parmesan zucchini sticks in an airtight container for up to 2 days. This keeps them fresh but may reduce their crispiness.

Freezer: For longer storage, place cooled zucchini sticks in a single layer on a baking sheet and freeze until solid. Transfer to a freezer-safe bag and store for up to 3 months.

Reheating: To restore crispiness, reheat the zucchini sticks in a preheated oven at 350°F (175°C) for about 10 minutes. Avoid microwave reheating, as it can make them soggy.

Room Temperature: If serving leftover zucchini sticks at a gathering, avoid leaving them out for more than 2 hours to ensure safety and freshness.

Baked Parmesan Zucchini Variations

Feel free to sprinkle your creativity into these delicious zucchini sticks and make them your own!

  • Dairy-Free: Use nutritional yeast in place of Parmesan for a cheese-like flavor that keeps it creamy without the dairy. It adds an umami punch too!

  • Spicy Kick: Add crushed red pepper flakes to the Parmesan mixture for a spicy twist. This will elevate your zucchini sticks with a delightful heat that both surprises and delights.

  • Different Veggies: Swap zucchini with eggplant, bell peppers, or even sweet potatoes for a totally new texture and flavor experience. Each vegetable brings its own unique charm to this dish!

  • Herb-Blended: Experiment with other herbs like fresh rosemary or dill instead of the classic thyme and oregano. This can bring bright and vibrant notes that complement the Parmesan beautifully.

  • Cheese Variety: Feel free to switch out Parmesan for mozzarella or feta, both offering tasty alternatives that change the flavor profile dramatically. Mozzarella gives a gooey contrast, while feta introduces a tangy bite.

  • Crunchy Coating: For added texture, mix in breadcrumbs or panko with the Parmesan to create a wonderfully crunchy crust. The extra crunch really brings that deep-fried feel without the guilt.

  • Garlic Lovers: Enhance the savory goodness by adding freshly crushed garlic to the olive oil before drizzling it over the zucchini. A little garlic goes a long way in enriching the flavor!

  • Herbed Oil Drizzle: Swap regular olive oil for infused oils like garlic or chili oil to elevate the taste. The richness of the infused oils will add depth while keeping things exciting.

If you’re looking for more inspiration with zucchini, I recommend trying out these delightful Cheesy Zucchini Bake or crispy and satisfying Parmesan Artichoke Hearts. Happy cooking!

Make Ahead Options

These Crispy Baked Parmesan Zucchini Sticks are ideal for busy home cooks looking to save time without sacrificing flavor! You can slice and coat the zucchini up to 24 hours in advance. Simply prepare them as per the recipe, then cover tightly and refrigerate. When you're ready to enjoy, pop them in the oven straight from the fridge—there’s no need to bring them to room temperature. This method helps maintain their quality and ensures they bake up just as crispy and delicious. For an even quicker option, you might consider baking them ahead and reheating them in the oven for just a few minutes before serving. Enjoy restaurant-quality results with minimal effort!

What to Serve with Crispy Baked Parmesan Zucchini Sticks?

Enhance your culinary experience by pairing these crispy, flavorful bites with a variety of delicious accompaniments.

  • Creamy Ranch Dip: A classic choice that adds a rich, tangy flavor, perfectly complementing the savory zucchini.

  • Savory Marinara Sauce: The acidity and herbs in marinara create a delightful contrast, making each bite even more delicious. Dip them for a satisfying snack or appetizer!

  • Grilled Chicken or Fish: Juicy grilled meats enhance the healthy nature of zucchini, transforming your meal into a comforting feast that everyone can enjoy.

  • Quinoa Salad: This hearty salad adds a fresh, nutritious element to your plate, balancing the crispy texture of the zucchini sticks with a wholesome grain.

  • Chilled Rosé Wine: A light, fruity wine pairs beautifully, making your meal feel special and perfect for gatherings on warm evenings.

  • Fresh Tomato and Mozzarella Salad: The brightness of ripe tomatoes and creamy mozzarella elevates the flavors of your dish, bringing lightness to the meal overall.

  • Herb-Garlic Bread: Enjoy warm, buttery garlic bread on the side, adding a delicious crunch with a fresh herb flavor that complements your zucchini perfectly.

  • Chocolate Mousse for Dessert: End on a sweet note with a rich mousse that offsets the savory zucchini sticks, leaving you with a balanced and satisfying meal experience.

Baked Parmesan Zucchini Recipe FAQs

How do I choose ripe zucchini?
Absolutely! When selecting zucchini, opt for fresh, firm ones that feel heavy for their size. Look for smooth skin without dark spots or blemishes. A well-ripe zucchini will be about 6-8 inches long for ideal texture when roasted.

How do I store leftover baked Parmesan zucchini?
After enjoying your delicious zucchini sticks, place any leftovers in an airtight container and store them in the refrigerator for up to 2 days. While this method keeps them relatively fresh, be aware that they may lose some of their crispiness. To enjoy them again, reheat in the oven to bring back some crunch!

Can I freeze baked Parmesan zucchini?
Yes, you can! To freeze, first ensure your zucchini sticks have cooled completely. Lay them out in a single layer on a baking sheet and freeze until solid, about 1-2 hours. Then, transfer them to a freezer-safe bag, labeling it with the date. They can stay in the freezer for up to 3 months. When you're ready to eat them, bake from frozen at 350°F (175°C) for about 15-20 minutes to heat through and regain some crunch.

What if my zucchini sticks turn out soggy?
Very! To avoid sogginess, ensure the zucchini is completely dried after cutting. Excess moisture will hinder crispiness during baking. Also, arrange the sticks in a single layer without overlapping on the baking sheet—the hot air circulation is essential for that perfectly baked texture!

Are there any dietary considerations for baked Parmesan zucchini?
If you're serving these zucchini sticks to friends or family with dietary restrictions, it's good to know that they are vegetarian-friendly! However, please check for cheese allergies as Parmesan can cause issues for some. For a dairy-free alternative, consider using nutritional yeast or a vegan cheese substitute that melts well.

Baked Parmesan Zucchini

Crispy Baked Parmesan Zucchini Sticks You'll Crave

Enjoy these addictive baked Parmesan zucchini sticks for a healthy snack that's easy to prepare and irresistible.
Print Recipe Pin Recipe
Prep Time 10 minutes mins
Cook Time 15 minutes mins
Broiling Time 3 minutes mins
Total Time 28 minutes mins
Servings: 4 sticks
Course: Snacks
Cuisine: American
Calories: 90
Ingredients Equipment Method Nutrition Notes

Ingredients
  

For the Zucchini Sticks
  • 2 medium Zucchini Fresh and firm
  • 1 tablespoon Olive oil For roasting
For the Parmesan Mixture
  • 1 cup Parmesan cheese Freshly grated
  • 1 teaspoon Dried thyme Substitute with Italian seasoning if desired
  • 1 teaspoon Dried oregano Substitute with dried rosemary if desired
  • 1 teaspoon Dried basil Substitute with fresh basil if available
  • 1 teaspoon Garlic powder Or fresh garlic to taste
  • 1 teaspoon Kosher salt Adjust to taste
  • 1/2 teaspoon Freshly ground black pepper Adjust to taste
For Garnish
  • 2 tablespoons Chopped fresh parsley Optional but recommended

Equipment

  • Oven
  • Baking Sheet
  • cooling rack
  • Mixing Bowl

Method
 

Step-by-Step Instructions
  1. Preheat your oven to 350°F (175°C).
  2. Coat a cooling rack with nonstick spray and place it atop a baking sheet.
  3. In a small bowl, combine Parmesan cheese, dried thyme, oregano, basil, garlic powder, kosher salt, and pepper.
  4. Cut the fresh zucchinis into quarters lengthwise and arrange them on the prepared baking sheet without overlapping.
  5. Drizzle olive oil over the zucchini and sprinkle the Parmesan mixture on top, pressing slightly to adhere.
  6. Bake for about 15 minutes until tender and slightly golden.
  7. Switch to broil and cook for an additional 2-3 minutes for extra crispiness.
  8. Remove from oven, garnish with parsley if desired, and serve immediately.

Nutrition

Serving: 1stickCalories: 90kcalCarbohydrates: 7gProtein: 5gFat: 5gSaturated Fat: 2gMonounsaturated Fat: 3gCholesterol: 10mgSodium: 200mgPotassium: 220mgFiber: 2gSugar: 2gVitamin A: 250IUVitamin C: 5mgCalcium: 200mgIron: 1mg

Notes

Ensure zucchini is thoroughly dried after cutting for maximum crispiness. Store leftovers in an airtight container for up to 2 days, or freeze for longer storage.

Tried this recipe?

Let us know how it was!

Crock Pot Street Tacos: Easy, Flavorful Beef Chuck Success

January 28, 2026 by Grace Snow Leave a Comment

As I savored the last bite of these delightful tacos, I couldn’t help but marvel at how a simple ingredient like beef chuck roast unlocks a world of flavor in my Crock Pot Street Tacos. This easy recipe transforms busy weeknights into relaxed gatherings, combining rich, tender beef with the light, warmth of corn tortillas. The beauty of Crock Pot Street Tacos lies not just in their authentic taste, but in their beginner-friendly preparation, making them a go-to choice for anyone tired of fast food and craving homemade comfort. Imagine filling your home with the comforting aroma of spices as you effortlessly whip up this crowd-pleasing dish. Ready to explore the magic of slow cooking? Let’s dive in!

Why Are These Tacos a Must-Try?

Flavor Explosion: With tender beef chuck roast slow-cooked to perfection, each bite is packed with vibrant spices that elevate your taco experience.

Effortless Preparation: Simply season and sear, then let the crock pot do all the work—perfect for busy nights or relaxed weekends.

Versatile Toppings: Customize your tacos with fresh cilantro, zesty salsa, or crumbled queso fresco for added flair.

Crowd-Approved: These tacos are a guaranteed hit at gatherings—serve them alongside sides like Crock Pot Chicken or a refreshing Mexican slaw for a full fiesta.

Beginner-Friendly: No expert skills required! Just follow the simple steps and impress your friends and family.

Get ready to enjoy a deliciously easy dinner that will make you forget all about fast food!

Crock Pot Street Tacos Ingredients

• For the Beef

  • Beef Chuck Roast – Rich and well-marbled, making it ideal for slow cooking; can substitute with brisket or shoulder roast for different flavors.

• For Searing

  • Olive Oil – Essential for locking in flavors; any neutral oil works as a great alternative.
  • Salt – Enhances the meat and spices; kosher or sea salt provides the best results.
  • Black Pepper – Adds depth and mild heat; freshly cracked gives a stronger flavor.

• For the Spice Blend

  • Ground Cumin – Provides an earthy, warm backbone that is essential for authentic flavor.
  • Chili Powder – Adds subtle smokiness and heat; adjustable based on your spice preference.
  • Smoked Paprika – Deepens the flavor profile with a hint of smokiness; a must-have for this dish.
  • Garlic Powder – Concentrates garlic flavor seamlessly among the spices; no fresh cloves needed.
  • Onion Powder – Adds sweet and savory notes; useful if fresh onions aren’t available.
  • Cayenne Pepper – For an extra kick; adjust according to desired spice levels.

• For Cooking Liquid

  • Beef Broth – Provides moisture and additional flavor; vegetable broth can lighten the flavor if you prefer.
  • Lime Juice – Brightens the dish with acidity; freshly squeezed is always best for maximum flavor.

• For Assembly

  • Corn Tortillas – Traditional and gluten-free for wrapping the beef; flour tortillas can be used as a substitute if desired.
  • Fresh Cilantro – Adds a burst of freshness before serving to round out the flavors.

• Optional Toppings

  • Diced Onions – For a crunch and added flavor.
  • Chopped Cilantro – Extra freshness to complement the beef.
  • Sliced Radishes – A crisp texture addition that balances the richness.
  • Salsa – Choose your favorite for added zest.
  • Crumbled Queso Fresco – Adds creamy texture and flavor contrast.

Dive into this flavorful world of Crock Pot Street Tacos and prepare for a delightful cooking experience!

Step‑by‑Step Instructions for Crock Pot Street Tacos

Step 1: Season the Beef
Generously season the beef chuck roast on all sides with kosher salt and freshly cracked black pepper. Allow the meat to sit for about 15 minutes at room temperature so the seasoning penetrates. This step enhances the flavor of your Crock Pot Street Tacos, giving the beef a savory depth when slow-cooked.

Step 2: Sear the Beef
In a large skillet, heat 2 tablespoons of olive oil over medium-high heat until shimmering. Carefully place the seasoned roast in the skillet, searing it for about 3 minutes on each side until it develops a rich, brown crust. This process locks in the juices and adds a beautiful color to your Crock Pot Street Tacos.

Step 3: Transfer to the Crock Pot
Once the roast is nicely seared, transfer it to the crock pot. This step ensures that all the flavors from the sear are captured in the slow cooker. Avoid cutting into the meat; it should remain whole to retain moisture and tenderness during the cooking process.

Step 4: Add the Spice Blend
In a small bowl, combine ground cumin, chili powder, smoked paprika, garlic powder, onion powder, and cayenne pepper. Sprinkle the spice mixture evenly over the beef roast in the crock pot, ensuring every part is covered. The spices will infuse the meat with authentic flavor as it cooks for your Crock Pot Street Tacos.

Step 5: Pour in the Cooking Liquid
Gently pour 1 cup of beef broth and 2 tablespoons of freshly squeezed lime juice over the roast, partially submerging the meat. This combination not only keeps the meat hydrated but also adds a zesty kick, enhancing the overall taste of your tacos.

Step 6: Slow Cook the Roast
Cover the crock pot and set it to cook on low for 8–10 hours or high for 4–5 hours. The beef is ready when it is fork-tender and easily shreds apart. The aromas will fill your kitchen, signaling that your Crock Pot Street Tacos are nearly complete.

Step 7: Shred the Beef
After the cooking time is complete, carefully remove the roast from the crock pot and place it on a cutting board. Using two forks, shred the beef into bite-sized pieces. For ultimate flavor, return the shredded beef to the pot and let it soak in the juices for an additional 15-20 minutes before serving.

Step 8: Warm the Tortillas
While the beef is soaking up the juices, warm the corn tortillas according to package instructions—typically on a skillet over medium heat for about 30 seconds on each side. You want them soft and pliable for easy assembly of your delicious Crock Pot Street Tacos.

Step 9: Assemble the Tacos
To assemble the tacos, take a warm tortilla and fill it generously with the shredded, flavorful beef from the crock pot. Top with your choice of optional toppings like diced onions, chopped cilantro, sliced radishes, salsa, or crumbled queso fresco for a burst of freshness and added flavor.

Step 10: Serve Immediately
Serve your Crock Pot Street Tacos immediately with lime wedges on the side for an extra zing. Gather your loved ones around the table, savor the warm flavors, and enjoy the delightful textures that make this meal a comforting family favorite!

Crock Pot Street Tacos Variations

Customize your dining experience and let your creativity shine as you explore these delicious twists on the traditional recipe!

  • Beef Variant: Substitute beef chuck with brisket or flank steak for a different flavor profile. Each cut brings its unique tenderness and taste to the table!

  • Chicken Option: Use chicken thighs for a lighter version. Simply adjust the cooking time to ensure a juicy result—everyone will love this twist!

  • Vegetarian Delight: Replace meat with sautéed mushrooms and black beans. The earthy flavors of mushrooms add rich depth, while beans offer a hearty bite.

  • Smoky Kick: Add chipotle peppers in adobo sauce for a smoky, spicy burst. This depth will elevate your Crock Pot Street Tacos with an exciting new layer of flavor!

  • Add More Heat: Adjust cayenne pepper levels to suit your spice preference. Don’t hesitate to add more for fiery tacos that will delight those who love a kick!

  • Flavor Boost: Incorporate fresh herbs like oregano or thyme into the spice blend. Just a sprinkle adds freshness, creating a flavorful balance for your tacos.

  • Topping Variations: Experiment with toppings like spicy pickled onions or grilled corn. These additions provide refreshing crunch and vibrant bursts of flavor!

  • Different Tortilla: Swap corn tortillas for flour tortillas if you prefer a softer texture. They’re equally delicious and can add a different appeal to your tacos.

For more delightful recipes, consider trying out Shrimp Tacos Zesty or some comforting Crockpot Butter Chicken. Enjoy crafting your perfect taco experience!

Make Ahead Options

These Crock Pot Street Tacos are a lifesaver for meal prep enthusiasts! You can season and marinate the beef chuck roast up to 24 hours in advance, letting the spices penetrate for even richer flavor. Simply wrap the seasoned meat in plastic wrap and refrigerate until ready to cook. Additionally, you can prepare the spice blend and store it in an airtight container, ready to sprinkle on the beef when it goes into the crock pot. When it's time to cook, just sear the roast, place it in the slow cooker with the broth and lime juice, and let it work its magic. This prep method saves you time and ensures your tacos are just as delicious as if made fresh!

How to Store and Freeze Crock Pot Street Tacos

Fridge: Store leftover shredded beef in an airtight container for up to 3 days to maintain freshness and flavor.

Freezer: If you want to keep your Crock Pot Street Tacos longer, freeze the shredded beef in airtight containers or freezer bags for up to 3 months. Make sure to squeeze out any excess air.

Reheating: When ready to enjoy the leftovers, thaw in the fridge overnight, then gently reheat the beef on the stove over low heat, adding a splash of beef broth to keep it moist.

Tortilla Tips: Wrap any remaining corn tortillas tightly in plastic wrap or foil and store in the fridge for up to a week, or freeze for longer storage.

What to Serve with Crock Pot Street Tacos

Transform your taco night into a feast with delightful sides that'll elevate each bite of tender beef!

  • Mexican Slaw: A crisp mix of cabbage, carrots, and lime juice adds a refreshing crunch that balances the rich flavors of the tacos.

  • Guacamole: Creamy avocado dip with lime and cilantro provides a luscious contrast to the spicy beef, enhancing each mouthful.

  • Elote (Mexican Street Corn): This grilled corn on the cob topped with creamy mayo, chili powder, and cheese harmonizes beautifully with the tacos’ flavors.

  • Pico de Gallo: Fresh diced tomatoes, onions, and cilantro create a zesty salsa that adds brightness and freshness to your meal.

  • Refried Beans: Creamy, seasoned beans offer a hearty side that pairs well with the tender meat, rounding out your dining experience.

  • Chips and Salsa: Crispy tortilla chips served with zesty salsa provide a fun, crunchy element perfect for dipping between taco bites.

  • Margaritas: A classic lime margarita brings a refreshing zing to your meal, making every bite even more enjoyable.

  • Churros: Finish your meal with these warm, crispy pastries coated in cinnamon sugar for a sweet treat that everyone will love.

Expert Tips for Crock Pot Street Tacos

• Sear for Flavor: Make sure to sear the beef chuck roast until it's deeply browned. This step locks in flavors and elevates your tacos.

• Timing is Key: Use a meat thermometer to check for doneness; aim for an internal temperature of 195°F for perfectly shreddable beef.

• Balance Spices: Adjust the spice levels in your blend to suit your preference; start with less cayenne and add more for heat.

• Rest the Meat: Let the shredded beef sit in the cooking juices for 15-20 minutes before serving. This ensures maximum flavor for your Crock Pot Street Tacos.

• Tortilla Technique: Warm your corn tortillas properly to avoid tearing. A quick toast on a skillet enhances their flavor and makes them pliable.

Crock Pot Street Tacos Recipe FAQs

What type of beef should I use for Crock Pot Street Tacos?
Absolutely! I recommend using beef chuck roast for its rich marbling and tenderness when cooked low and slow. It shreds beautifully, making it perfect for tacos. If you're looking for alternatives, brisket or shoulder roast can also provide delicious results.

How do I store leftover Crock Pot Street Tacos?
To keep your leftovers fresh, store the shredded beef in an airtight container in the refrigerator for up to 3 days. This way, you can enjoy your delicious tacos later in the week without compromising flavor!

Can I freeze the shredded beef?
Yes, you can! For long-term storage, place the shredded beef in airtight containers or freezer bags, making sure to remove as much air as possible. You can freeze it for up to 3 months. When you're ready to enjoy it again, simply thaw it in the fridge overnight and reheat it gently on the stove, adding a splash of beef broth for moisture.

What if my beef isn't shredding easily?
If your beef isn't shredding easily, it may need more time in the slow cooker. If it hasn't reached an internal temperature of about 195°F, it could be undercooked. To fix this, return the meat to the crock pot and continue cooking on low for another 30-60 minutes. The key is patience; the longer it cooks, the tender it becomes!

Can I make this recipe vegetarian-friendly?
Very! If you want a vegetarian version of Crock Pot Street Tacos, I often substitute the beef with sautéed mushrooms and black beans. Sauté mushrooms with spices like cumin and chili powder until tender, then follow the same slow-cooking process with vegetable broth for a hearty filling.

How do I know if my ingredients are fresh?
For the best-tasting tacos, always choose fresh ingredients. Look for beef that’s bright red with no dark spots; for spices, check their expiry dates and ensure they have a potent aroma. Fresh cilantro should be bright green, while lime should feel firm yet slightly yielding when squeezed. Freshness elevates your Crock Pot Street Tacos to a whole new level!

Crock Pot Street Tacos

Crock Pot Street Tacos: Easy, Flavorful Beef Chuck Success

Crock Pot Street Tacos offer a flavorful way to enjoy beef chuck roast in a simple, beginner-friendly recipe.
Print Recipe Pin Recipe
Prep Time 30 minutes mins
Cook Time 10 hours hrs
Resting Time 20 minutes mins
Total Time 10 hours hrs 50 minutes mins
Servings: 6 tacos
Course: Dinner
Cuisine: Mexican
Calories: 300
Ingredients Equipment Method Nutrition Notes

Ingredients
  

For the Beef
  • 2 pounds Beef Chuck Roast can substitute with brisket or shoulder roast
For Searing
  • 2 tablespoons Olive Oil or any neutral oil
  • 1 teaspoon Salt kosher or sea salt preferred
  • 1 teaspoon Black Pepper freshly cracked for better flavor
For the Spice Blend
  • 1 teaspoon Ground Cumin essential for authentic flavor
  • 1 tablespoon Chili Powder adjustable for spice preference
  • 1 teaspoon Smoked Paprika adds depth and smokiness
  • 1 teaspoon Garlic Powder no fresh cloves needed
  • 1 teaspoon Onion Powder useful for flavor if fresh onion is unavailable
  • 1/2 teaspoon Cayenne Pepper for adjusting spice levels
For Cooking Liquid
  • 1 cup Beef Broth or vegetable broth for lighter flavor
  • 2 tablespoons Lime Juice freshly squeezed is best
For Assembly
  • 12 pieces Corn Tortillas or flour tortillas as a substitute
  • 1 bunch Fresh Cilantro for garnish before serving
Optional Toppings
  • 1 cup Diced Onions for added flavor
  • 1/2 cup Chopped Cilantro extra freshness
  • 1 cup Sliced Radishes for crisp texture
  • 1 cup Salsa choose your favorite variety
  • 1 cup Crumbled Queso Fresco adds creamy texture

Equipment

  • Crock-pot
  • Skillet
  • Cutting Board
  • Forks

Method
 

Step-by-Step Instructions for Crock Pot Street Tacos
  1. Generously season the beef chuck roast on all sides with kosher salt and freshly cracked black pepper. Allow to sit for 15 minutes.
  2. In a skillet, heat olive oil over medium-high heat and sear the beef for 3 minutes on each side.
  3. Transfer the seared roast to the crock pot, keeping it whole to retain moisture.
  4. Combine cumin, chili powder, smoked paprika, garlic powder, onion powder, and cayenne pepper and sprinkle over the roast.
  5. Pour beef broth and lime juice over the roast, partially submerging it.
  6. Cover and cook on low for 8–10 hours or high for 4–5 hours until fork-tender.
  7. Once cooked, shred the beef with two forks and let it soak in the juices for 15-20 minutes.
  8. Warm corn tortillas on a skillet over medium heat for about 30 seconds on each side.
  9. Assemble the tacos with tortillas, shredded beef, and optional toppings.
  10. Serve immediately with lime wedges on the side.

Nutrition

Serving: 1tacoCalories: 300kcalCarbohydrates: 30gProtein: 20gFat: 15gSaturated Fat: 5gCholesterol: 80mgSodium: 600mgPotassium: 400mgFiber: 3gSugar: 1gVitamin A: 200IUVitamin C: 10mgCalcium: 50mgIron: 2mg

Notes

Sear for optimal flavor and let the shredded beef rest in juices for maximum flavor.

Tried this recipe?

Let us know how it was!

Savory Crockpot Jambalaya for Effortless Comfort Food Bliss

January 28, 2026 by Grace Snow Leave a Comment

A whiff of Creole spices and simmering goodness wafts through the kitchen, transporting me straight to the vibrant streets of New Orleans. This Easy Slow Cooker Crockpot Jambalaya is not just a meal; it’s an experience filled with layers of flavor and comfort. With its rich blend of proteins like chicken and andouille sausage, this dish is designed for those who cherish cooking from scratch but appreciate a hassle-free approach. The best part? It’s incredibly easy to customize—swap in your favorite veggies or adjust the spices to fit your family’s taste. Plus, you can prep it in no time, making it a perfect weeknight dinner that everyone will love. So, are you ready to discover how to create a bowl of happiness that captures the heart of Cajun cooking?

Why is Jambalaya a Family Favorite?

Irresistible Flavor: Each bite of this Crockpot Jambalaya bursts with authentic Creole spices, creating a dish that’s both comforting and satisfying.

Easy Customization: You can swap proteins or add your favorite veggies, making it a versatile meal that caters to everyone’s preferences.

Minimal Prep: Spend less time in the kitchen and more time enjoying the moments with your family. With just a few minutes of prep, the slow cooker does the heavy lifting for you.

Crowd-Pleaser: Perfect for gatherings, this dish catches the attention of every guest at the table, sparking smiles and good conversations.

Nutritious Goodness: Packed with protein and colorful veggies, it’s a wholesome option that fits into any balanced diet—just like our delightful Crockpot Butter Chicken.

Dive into a dish that truly brings everyone together!

Crockpot Jambalaya Ingredients

For the Proteins
• Chicken Breast – A lean protein that can be substituted with turkey for a different flavor profile.
• Andouille Sausage – Adds a smoky essence; you can use smoked sausage or kielbasa if you prefer.
• Shrimp – Tossed in for a delightful seafood twist—ensure it's thawed before adding.

For the Vegetables
• Celery – Brings a satisfying crunch; can be omitted if you're in a pinch.
• Bell Peppers (red and yellow) – Offers sweetness and color; any bell pepper variety works!
• Onion – Essential for building flavor; white or yellow onions are best, but shallots are a good alternative.
• Garlic (minced) – Enhances aroma; fresh is ideal, but garlic powder can fill in.

For the Sauce
• Crushed Tomatoes – Forms the base, adding rich acidity; feel free to substitute with diced tomatoes if needed.
• Chicken Broth – Necessary for moisture; vegetable broth is a great alternative for a vegetarian version.

For Seasonings
• Creole Seasoning – The star for authentic flavor; adjust to taste or whip up your own blend.
• Oregano & Thyme – Contributes herbal notes; you can swap in Italian seasoning if you prefer.
• Cayenne Pepper – Adds heat; adjust according to your spice tolerance or omit it for a milder dish.
• Salt & Pepper – Fundamental for seasoning; use to taste and elevate the dish’s overall flavor.

Dive into making a delicious Crockpot Jambalaya that’s simple yet bursting with flavor!

Step‑by‑Step Instructions for Crockpot Jambalaya

Step 1: Prep Ingredients
Begin by cubing the chicken breast into bite-sized pieces and slicing the andouille sausage. Next, chop the celery, red and yellow bell peppers, and onion, then mince the garlic. Place all these prepared ingredients into your crockpot, creating a vibrant base that promises delightful flavors in your Crockpot Jambalaya.

Step 2: Season
Sprinkle the Creole seasoning, oregano, thyme, cayenne pepper, salt, and pepper over your chopped ingredients in the crockpot. Use a wooden spoon to mix everything thoroughly, ensuring the meats and vegetables are well coated with spices. This crucial step will infuse the jambalaya with a rich, authentic flavor.

Step 3: Add Liquids
Pour the crushed tomatoes and chicken broth over the seasoned mixture in the crockpot. Carefully stir to combine all ingredients, ensuring that the tomatoes and broth envelop the chicken and vegetables. This liquid component is essential, adding moisture and creating a delicious sauce for your Crockpot Jambalaya.

Step 4: Cook
Secure the lid on your crockpot and set it to low heat. Allow the jambalaya to cook for 6 hours, or if you're in a hurry, set it to high for 4–6 hours. The slow cooking process will blend the flavors beautifully, resulting in tender meat and hearty vegetables.

Step 5: Add Shrimp
About 30 minutes before serving, add the thawed shrimp to the crockpot. Stir gently to ensure the shrimp are submerged in the cooking liquid. Cover the crockpot again, allowing the shrimp to heat through until they turn pink and opaque, perfectly completing your Crockpot Jambalaya.

Step 6: Serve
While the jambalaya finishes cooking, prepare rice according to package instructions. Once cooked, serve the delicious Cajun-inspired Crockpot Jambalaya over or mixed with the rice, garnishing with fresh parsley for a pop of color. This hearty dish is now ready to bring warmth to your family table!

Expert Tips for Crockpot Jambalaya

  • Spice It Up: Adjust the Creole seasoning to your heat preference. Start with less and gradually add more to avoid overwhelming flavors.

  • Thickening Magic: For a thicker jambalaya, cook with the lid slightly ajar during the last hour to let excess liquid evaporate.

  • Cooking Rice Right: If using brown rice, add it to the crockpot at the start, since it requires a longer cooking time than white rice.

  • Seafood Sensitivity: If adding seafood like shrimp, do so towards the end of cooking to prevent overcooking, which results in chewy shrimp.

  • Avoid Soupy Results: Ensure you’re measuring broth accurately; too much broth can lead to a soupy consistency instead of a thick, rich jambalaya.

  • Creative Customization: Feel free to add seasonal vegetables like zucchini or corn to your Crockpot Jambalaya for extra flavor and nutrition.

What to Serve with Easy Slow Cooker Crockpot Jambalaya

Prepare to elevate your Cajun culinary experience with mouthwatering sides that harmonize perfectly with the robust flavors of your jambalaya!

  • Creamy Garlic Mashed Potatoes: The smooth, buttery texture provides a comforting contrast to the hearty jambalaya, making each bite a delightful experience.
  • Garlic Bread: Crispy and warm, this bread is perfect for soaking up the flavorful sauce, enhancing the meal's overall enjoyment.
  • Coleslaw: A refreshing crunch balances the spiciness of the jambalaya, adding a cool, creamy element to your plate.
  • Cornbread: Slightly sweet and fluffy, cornbread adds a southern twist that complements the dish’s rich flavors beautifully.
  • Sauteed Greens: Nutrient-packed greens, like spinach or kale, add a vibrant color and freshness to the meal, enhancing its healthy aspect.
  • Simple Green Salad: Tossed with a light vinaigrette, a fresh salad brings brightness and cuts through the richness of the jambalaya.
  • Sweet Tea: The sweetness of this classic drink pairs wonderfully with the heat of the dish, creating a well-rounded dining experience.
  • Pecan Pie: For dessert, this traditional southern favorite offers a sweet, nutty finish that lingers pleasantly after the savory jambalaya.

How to Store and Freeze Crockpot Jambalaya

Room Temperature: Leftover jambalaya can stay out for up to 2 hours after cooking—be sure to refrigerate it promptly to ensure freshness.

Fridge: Store in an airtight container for up to 4 days, keeping leftovers tasty and ready for quick meals throughout the week.

Freezer: For longer storage, freeze your jambalaya in a freezer-safe container for up to 3 months. Thaw overnight in the fridge before reheating.

Reheating: Reheat on the stove or in the microwave, adding a splash of broth as needed to restore moisture and avoid dryness in your delightful Crockpot Jambalaya.

Make Ahead Options

Busy weeknights don’t have to mean sacrificing flavor with this Crockpot Jambalaya! You can prep the ingredients, such as cubing the chicken and slicing the sausage, up to 24 hours in advance. Simply store the prepared vegetables and meats in an airtight container in the refrigerator to maintain freshness. When you’re ready to cook, add everything to the crockpot along with the liquids and seasonings, then let it simmer as directed. For best results, avoid adding the shrimp until about 30 minutes before serving to ensure it remains tender and juicy. With these make-ahead steps, you’ll enjoy a cozy, homemade meal with minimal effort!

Crockpot Jambalaya Variations

Feel free to let your creativity shine as you customize this comforting dish with exciting twists and substitutions!

  • Dairy-Free: Omit any dairy products such as cream or cheese if included. This jambalaya is naturally creamy from the other ingredients.

  • Gluten-Free: Use gluten-free sausage and broth to make this dish suitable for gluten-sensitive diets, ensuring everyone can enjoy it.

  • Vegetarian: Replace the chicken and sausage with hearty vegetables like mushrooms and zucchini for a tasty plant-based option.

  • Spice Level: Increase the heat by adding diced jalapeños or a dash of hot sauce. Feel free to play with flavor balance until it’s just right for your palate.

  • Rice Variety: Experiment with brown rice or cauliflower rice for a lower-carb alternative. Keep in mind that cooking times may vary, so adjust accordingly.

  • Extra Veggies: Get creative with colorful bell peppers, corn, or even spinach for added nutrition and vibrant presentation that echoes the spirit of a Cajun feast.

  • Seafood Boost: Add crab or crawfish for an authentic taste of Louisiana, ensuring to adjust cooking times to keep seafood tender.

Don’t forget, this dish is all about the joy of cooking for your loved ones—like our delectable Crockpot Butter Chicken, the options are endless and sure to delight!

Crockpot Jambalaya Recipe FAQs

What type of chicken is best for Crockpot Jambalaya?
Using boneless, skinless chicken breast is ideal for Crockpot Jambalaya as it cooks evenly and stays tender. You can also substitute it with turkey or omit the protein altogether for a vegetarian version—just make sure to balance it with plenty of veggies.

How do I store leftover Crockpot Jambalaya?
Absolutely! To keep your leftovers fresh, store them in an airtight container in the refrigerator. They’ll stay good for up to 4 days. Just let them cool before sealing the container to avoid condensation which can lead to sogginess.

Can I freeze Crockpot Jambalaya?
Yes, you can freeze it! Allow the jambalaya to cool completely and then transfer it to a freezer-safe container. It can be kept for up to 3 months. When you’re ready to enjoy it, just thaw it overnight in the fridge and reheat on the stove or microwave for a quicker meal.

Why is my Crockpot Jambalaya too soupy?
If your jambalaya turns out too soupy, it might be due to too much broth added. For a thicker consistency, you can cook the jambalaya uncovered in the final stages or add a bit more rice. Thickening it will help achieve that hearty stew-like texture that everyone loves!

Can pets eat leftover Crockpot Jambalaya?
It’s not advisable to share jambalaya with pets. While chicken and many veggies are safe, ingredients like onion and garlic can be harmful to dogs and cats. It's best to keep their diet strictly to pet-safe food to prevent any health risks.

What kind of vegetables can I add to customize my jambalaya?
The more the merrier! You can add seasonal favorites like okra, corn, or even diced zucchini for added texture and flavor. Feel free to get creative—making it your own will bring in new tastes while still keeping it delicious!

Crockpot Jambalaya

Savory Crockpot Jambalaya for Effortless Comfort Food Bliss

This Crockpot Jambalaya is a comforting and flavorful meal packed with Creole spices, proteins, and veggies.
Print Recipe Pin Recipe
Prep Time 15 minutes mins
Cook Time 6 hours hrs
Total Time 6 hours hrs 15 minutes mins
Servings: 6 servings
Course: Dinner
Cuisine: Cajun, Creole
Calories: 350
Ingredients Equipment Method Nutrition Notes

Ingredients
  

For the Proteins
  • 1 pound Chicken Breast cubed
  • 1 pound Andouille Sausage sliced
  • 1 pound Shrimp thawed
For the Vegetables
  • 2 stalks Celery chopped
  • 2 medium Bell Peppers (red and yellow) chopped
  • 1 medium Onion chopped
  • 4 cloves Garlic minced
For the Sauce
  • 28 ounces Crushed Tomatoes
  • 2 cups Chicken Broth
For Seasonings
  • 2 tablespoons Creole Seasoning adjust to taste
  • 1 teaspoon Oregano
  • 1 teaspoon Thyme
  • 1/2 teaspoon Cayenne Pepper adjust to taste
  • 1 teaspoon Salt to taste
  • 1/2 teaspoon Pepper to taste

Equipment

  • Crockpot

Method
 

Step-by-Step Instructions for Crockpot Jambalaya
  1. Begin by cubing the chicken breast into bite-sized pieces and slicing the andouille sausage. Next, chop the celery, red and yellow bell peppers, and onion, then mince the garlic. Place all these prepared ingredients into your crockpot, creating a vibrant base that promises delightful flavors in your Crockpot Jambalaya.
  2. Sprinkle the Creole seasoning, oregano, thyme, cayenne pepper, salt, and pepper over your chopped ingredients in the crockpot. Use a wooden spoon to mix everything thoroughly, ensuring the meats and vegetables are well coated with spices. This crucial step will infuse the jambalaya with a rich, authentic flavor.
  3. Pour the crushed tomatoes and chicken broth over the seasoned mixture in the crockpot. Carefully stir to combine all ingredients, ensuring that the tomatoes and broth envelop the chicken and vegetables. This liquid component is essential, adding moisture and creating a delicious sauce for your Crockpot Jambalaya.
  4. Secure the lid on your crockpot and set it to low heat. Allow the jambalaya to cook for 6 hours, or if you're in a hurry, set it to high for 4–6 hours. The slow cooking process will blend the flavors beautifully, resulting in tender meat and hearty vegetables.
  5. About 30 minutes before serving, add the thawed shrimp to the crockpot. Stir gently to ensure the shrimp are submerged in the cooking liquid. Cover the crockpot again, allowing the shrimp to heat through until they turn pink and opaque, perfectly completing your Crockpot Jambalaya.
  6. While the jambalaya finishes cooking, prepare rice according to package instructions. Once cooked, serve the delicious Cajun-inspired Crockpot Jambalaya over or mixed with the rice, garnishing with fresh parsley for a pop of color. This hearty dish is now ready to bring warmth to your family table!

Nutrition

Serving: 1servingCalories: 350kcalCarbohydrates: 32gProtein: 25gFat: 15gSaturated Fat: 4gPolyunsaturated Fat: 1gMonounsaturated Fat: 2gCholesterol: 90mgSodium: 800mgPotassium: 800mgFiber: 3gSugar: 5gVitamin A: 500IUVitamin C: 50mgCalcium: 50mgIron: 3mg

Notes

Adjust the seasoning according to your spice tolerance and use seasonal vegetables for added nutrition.

Tried this recipe?

Let us know how it was!
  • « Previous Page
  • 1
  • …
  • 34
  • 35
  • 36
  • 37
  • 38
  • …
  • 179
  • Next Page »

Welcome!

Hi, I’m Grace, a Sydney-based home cook with a passion for bold flavors and trending ingredients. Whether you’re a busy beginner or a seasoned foodie, you’ll find dishes here that are fresh, fun, and full of flavor.

More about me

Popular Recipes

  • Cheesy Chicken Garlic Bread Sandwich
    Cheesy Chicken Garlic Bread Sandwich for Cozy Family Moments
  • Easy Chicken Ranch Wraps
    Easy Chicken Ranch Wraps: Quick, Creamy & Totally Satisfying
  • Chicken Caesar Sandwiches
    Delicious Chicken Caesar Sandwiches for Quick Comfort Food
  • best Cuban sandwich
    The Best Cuban Sandwich You’ll Want Every Weeknight!

Footer

↑ back to top

About

  • Privacy Policy
  • Disclaimer
  • Terms & Conditions

Newsletter

  • Sign Up! for emails and updates

Contact

  • About me
  • Contact me

Copyright © 2025 TastyTrendIngredients