tastytrendingredients

  • Home
  • Recipes
    • Appetizers
    • Breakfast
    • Dessert
    • Dinner
    • Drinks
    • Salads
    • Snacks
    • Soups
  • About me
  • Contact me
menu icon
go to homepage
  • Home
  • Recipes
    • Appetizers
    • Breakfast
    • Dessert
    • Dinner
    • Drinks
    • Salads
    • Snacks
    • Soups
  • About me
  • Contact me
search icon
Homepage link
  • Home
  • Recipes
    • Appetizers
    • Breakfast
    • Dessert
    • Dinner
    • Drinks
    • Salads
    • Snacks
    • Soups
  • About me
  • Contact me
×

Cheeseburger French Fry Casserole: Comfort Food Delight

February 8, 2026 by Grace Snow Leave a Comment

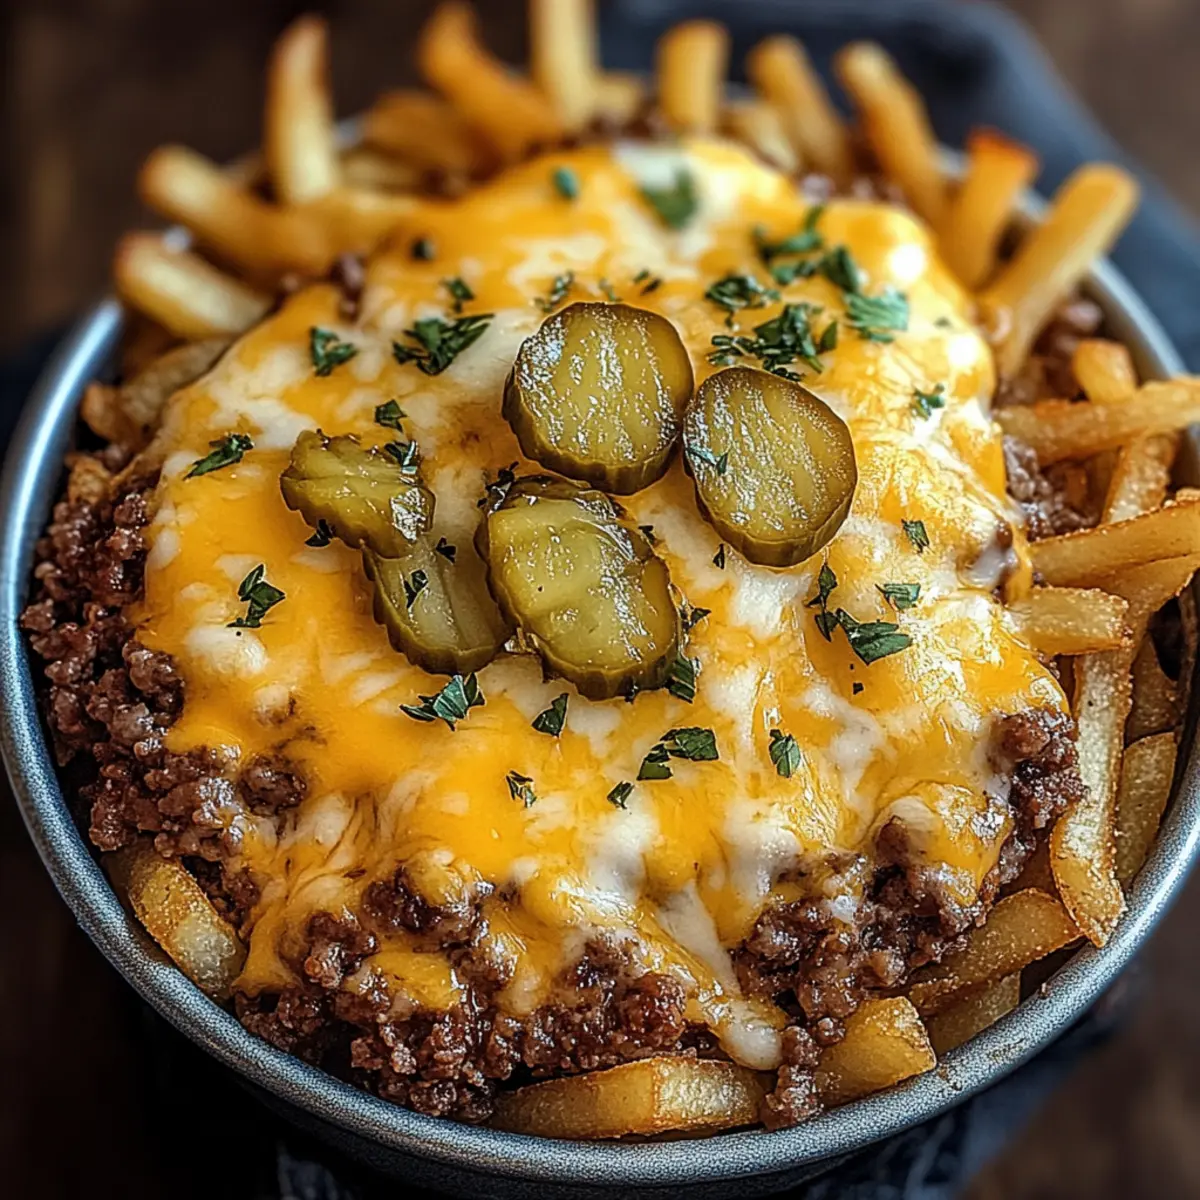
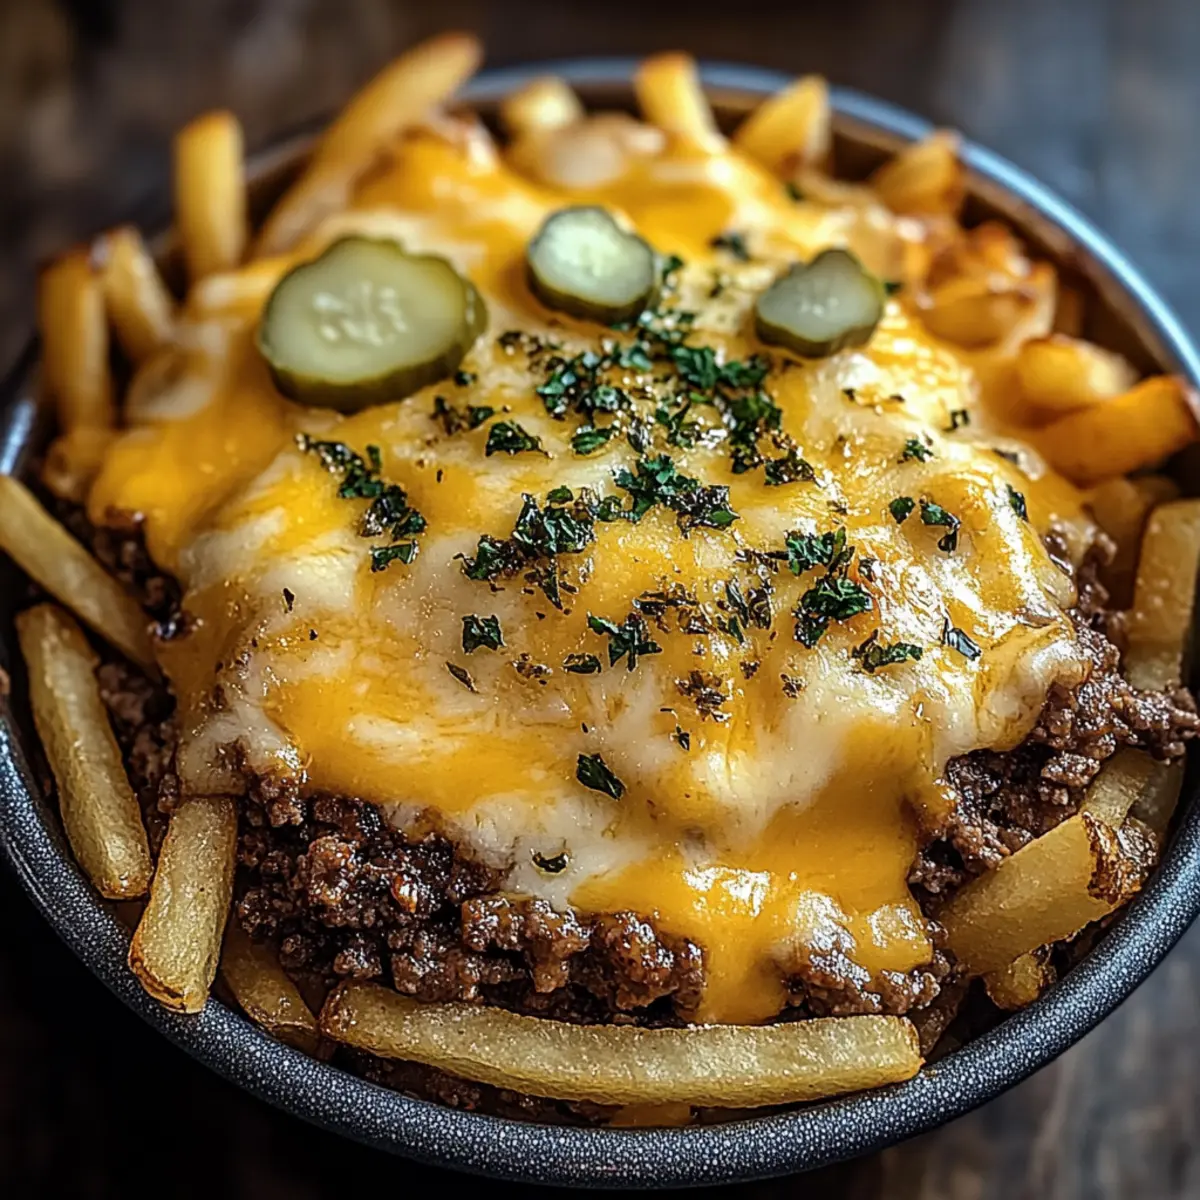
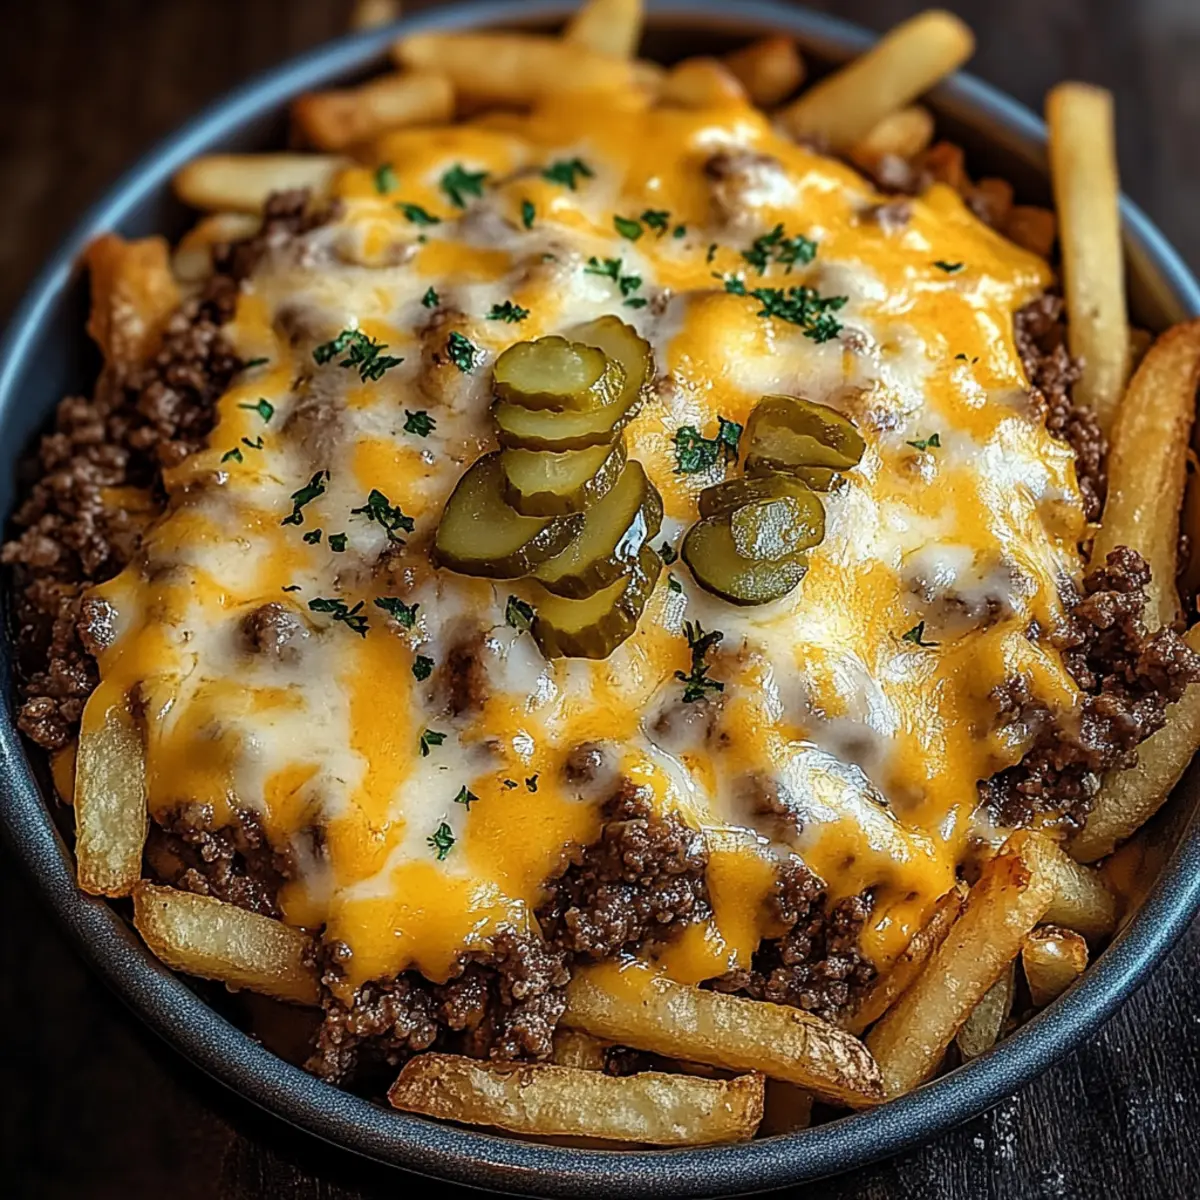
The fresh aroma of ground beef sizzling in the skillet takes me back to carefree childhood days when a cheeseburger was the ultimate satisfaction. Today, I’m excited to share my twist on that classic comfort food with my Cheeseburger French Fry Casserole. This dish combines juicy ground beef, gooey melted cheese, and crispy French fries into a hearty meal that’s perfect for busy weeknights or lazy weekends. Not only is it incredibly quick to prepare, making it a lifesaver for families on the go, but it's also fully customizable to suit everyone’s tastes—add extra veggies, switch up the cheese, or make it your very own! So, whether you’re looking to please picky eaters or simply want a delicious make-ahead option, this casserole is sure to become a new favorite. Ready to dig into a comforting dish that brings everyone together? Let’s get cooking!

Why is this casserole a family favorite?

Easy Preparation: You can whip this casserole together in no time, making it an ideal option for busy weeknights. Just layer, bake, and serve!

Customizable Delight: Whether you prefer bacon, extra veggies, or different cheese blends, this recipe easily adapts to suit your family’s taste.

Kid-Approved: With the classic flavors of a cheeseburger wrapped in a delicious casserole, picky eaters will be begging for seconds.

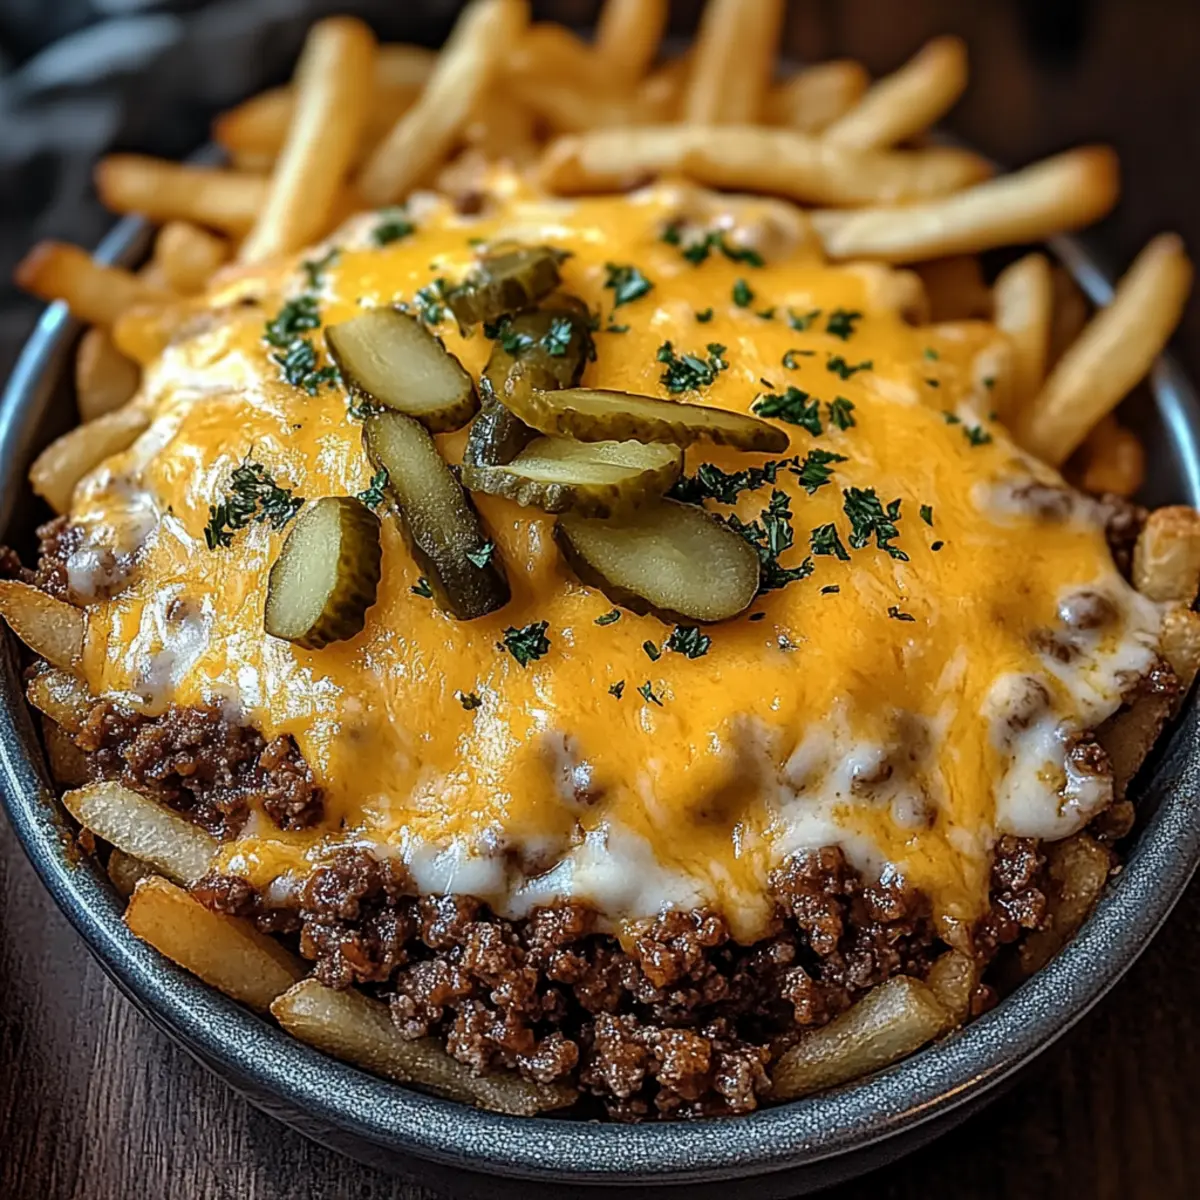
Comforting Texture: Dive into the satisfying crunch of crispy French fries topped with gooey cheese and juicy beef, creating a comforting dinner experience.

Make-Ahead Option: Prepare it in advance and pop it in the oven when you’re ready to eat, giving you more time to relax with family!

Explore more delicious recipes like Cornbread Breakfast Casserole or Sweet Potato Casserole for more family-friendly meals!

Cheeseburger French Fry Casserole Ingredients

For the Beef Base
• Ground Beef – the primary protein source that brings savory flavor and hearty texture; ground turkey or chicken can be excellent lighter substitutes.
• Diced Onions (optional) – they enhance flavor; sauté for added sweetness if desired.
• Ketchup & Mustard – essential condiments that replicate the classic cheeseburger flavor profile.

For the Casserole
• Frozen French Fries – the base layer that ensures ease and speed; crinkle-cut or tater tots add fun twist.
• Shredded Cheese – brings creaminess and flavor; cheddar or American is preferred, but Monterey Jack offers a unique taste.
• Milk – provides moisture and creaminess; for a different touch, you can replace it with sour cream or Greek yogurt.
• Mayonnaise – adds richness; substitute with Greek yogurt or sour cream if desired.

For Seasoning
• Garlic Powder & Onion Powder (optional) – seasonings to boost flavor; adjust according to your taste.
• Salt & Pepper to taste – basic seasoning for overall flavor enhancement.

For Garnish
• Diced Pickles (optional) – adds tang and authenticity to the cheeseburger flavor; use dill for best results.
• Fresh Parsley (optional) – for a pop of color and a touch of freshness as a garnish.

Get ready to create a comforting Cheeseburger French Fry Casserole that will warm hearts and satisfy appetites!

Step‑by‑Step Instructions for Cheeseburger French Fry Casserole

Step 1: Preheat & Cook Beef
Begin by preheating your oven to 375°F (190°C). While it's heating, heat a large skillet over medium heat and add the ground beef. Cook for about 6-7 minutes, breaking it up with a spatula until it’s browned and no longer pink. Drain excess grease and season with salt, pepper, garlic powder, and onion powder to enhance the flavor of your Cheeseburger French Fry Casserole.

Step 2: Mix Condiments
Incorporate the flavors of a burger by mixing ketchup, mustard, and mayonnaise into the cooked beef mixture. If you’re using them, add diced onions and pickles to infuse extra texture and flavor. Stir until all the ingredients are well combined, allowing the sauce to meld with the beef; this will create a savory base for your casserole.

Step 3: Layer Ingredients
Grease a 9x13-inch baking dish with cooking spray or butter, then evenly spread the frozen French fries across the bottom. Use a spatula to ensure an even layer. Next, pour the beef and condiment mixture over the fries, spreading it out to cover them completely. This layered approach will ensure every bite of the Cheeseburger French Fry Casserole is packed with flavor.

Step 4: Add Cheese & Bake
Sprinkle a generous layer of shredded cheese across the top of the beef and fries. This will melt into a gooey, delicious topping. Place the casserole in the preheated oven and bake for 25-30 minutes, or until the cheese is perfectly melted and bubbly, and the fries are crispy. Keep an eye on it so nothing burns, as you want a beautifully golden crust.

Step 5: Serve
Once baked, carefully remove your Cheeseburger French Fry Casserole from the oven and let it cool for about 5 minutes. This cooling time allows the layers to set beautifully. For a touch of freshness, garnish with chopped parsley before serving. Feel free to offer additional condiments on the side for that extra burst of cheeseburger flavor!

Helpful Tricks for Cheeseburger French Fry Casserole

  • Crispier Fries: Pre-bake your frozen French fries for 10 minutes before layering them in the casserole to prevent sogginess during baking.
  • Cheese Variations: Try mixing different cheeses, like mozzarella for stretch or pepper jack for an extra kick, to elevate the Cheeseburger French Fry Casserole experience.
  • Flavor Boosters: Don’t forget to taste and adjust the seasoning! Adding a dash of Worcestershire sauce to the beef mixture can enhance flavor depth.
  • Layer Smartly: Ensure even layering for every bite; spread the beef mixture evenly over the fries for a consistent flavor throughout the casserole.
  • Freeze for Later: If you want to make it ahead of time, assemble the casserole and freeze it unbaked. When ready, bake directly from the freezer with an extra 10-15 minutes.

Make Ahead Options

These Cheeseburger French Fry Casseroles are a true lifesaver for busy weeknights! You can prepare the beef mixture and layer it with frozen French fries in advance—up to 24 hours before baking. Simply cook the ground beef, mix in the condiments, and spread it over the fries in a greased baking dish, then cover tightly with plastic wrap to keep everything fresh. To maintain quality, refrigerate it until you're ready to cook. When it's time to serve, uncover the casserole, sprinkle with cheese, and bake in the preheated oven for 25-30 minutes until golden and bubbly. Enjoy the deliciousness with minimal effort and maximum satisfaction!

Storage Tips for Cheeseburger French Fry Casserole

  • Room Temperature: Leftovers should not be left at room temperature for more than 2 hours to avoid foodborne illnesses.

  • Fridge: Store any leftover Cheeseburger French Fry Casserole in an airtight container in the refrigerator for up to 3 days. Reheat in the microwave or oven for the best texture.

  • Freezer: For longer storage, wrap the casserole tightly in plastic wrap and aluminum foil, then freeze for up to 2-3 months. Thaw overnight in the refrigerator before reheating.

  • Reheating: To serve leftovers, reheat at 350°F (175°C) until heated through, ensuring the cheese remains melty and delicious.

Cheeseburger French Fry Casserole Variations

Embrace your culinary creativity and make this dish uniquely yours with a few delightful twists!

  • Dairy-Free: Substitute regular cheese with plant-based cheese to enjoy the flavors without the dairy. You'll still relish that melty texture!
  • Vegetarian: Replace ground beef with lentils or a plant-based meat alternative for a hearty, meat-free version that’s just as satisfying.
  • Spicy Kick: Add diced jalapeños or a sprinkle of chili powder to the beef mixture for a mouthwatering heat that’ll thrill spice lovers. Consider pairing it with a fresh salsa on the side!
  • Bacon Lover’s Delight: Layer crispy bacon bits over the cheese before baking for an unforgettable smoky flavor that everyone will rave about. Bacon makes everything better!
  • Veggie Boost: Toss in some sautéed bell peppers, mushrooms, or spinach for added nutrition and texture. Not only will it taste great, but it also enhances the dish’s vibrant colors.
  • Sweet & Savory: For a fun sweet twist, mix in some shredded carrots or sweet corn into the ground beef. It adds a lovely flavor contrast that kids will adore.
  • Creamy Sauce: Create a cheeseburger sauce by mixing in a little ranch dressing or creamy thousand island dressing into the beef. This adds a delightful tang to each bite!
  • Homemade Fries: For an exciting homemade element, swap frozen fries for your freshly fried or homemade versions. They’ll have a unique taste that elevates the dish even more!

Feeling inspired? If you're interested in other hearty casseroles, you might enjoy the flavorful Spicy Miso Casserole or the comforting Cornbread Breakfast Casserole. Dive in and create a meal everyone will cherish!

What to Serve with Cheeseburger French Fry Casserole

Creating a delicious meal isn't just about the main dish; it’s about delightful pairings that complement your flavors and add freshness.

  • Fresh Side Salad: A crunchy mix of romaine, cherry tomatoes, and cucumbers brings a refreshing contrast to the cheesy casserole. The crisp veggies provide a bright, zesty flavor that balances the richness.
  • Coleslaw: This creamy side adds a tangy crunch that perfectly cuts through the heaviness of the casserole. Choose a vinegar-based slaw for a tangy twist that complements the flavors beautifully.
  • Garlic Bread: Buttery, toasted slices of garlic bread not only enhance the comfort factor but also soak up any delicious, cheesy sauce left on your plate. Ideal for a cozy family meal!
  • Pickle Slices: Offer a bowl of dill pickle slices on the side to evoke that classic cheeseburger experience. They bring a juicy crunch and a tangy bite that pairs well with the rich casserole.
  • Roasted Vegetables: A medley of seasonal veggies roasted to perfection adds color, flavor, and a healthy element to your plate. Think about incorporating bell peppers, zucchini, or even carrots for variety.
  • Sweet Potato Fries: For a unique twist, serve some crispy sweet potato fries alongside the casserole. The sweetness and crunch contrast wonderfully with the savory beef and cheese.
  • Melty Cheese Topper: For the cheese lovers, a small bowl of extra melted cheese on the side can be a fun dunking accessory to enhance the gooeyness in every bite!
  • Fizzy Root Beer Float: To drink, consider a nostalgic root beer float. The creamy vanilla ice cream juxtaposes the savory casserole, creating a kid-approved sweet end to your meal.

Cheeseburger French Fry Casserole Recipe FAQs

What type of ground beef should I use for this casserole?
Absolutely! Ground beef is the traditional choice for this recipe, providing that savory flavor. I often use 80/20 (meat to fat ratio) for a juicy result, but feel free to substitute with ground turkey, chicken, or even plant-based crumbles for a lighter or vegetarian option.

How should I store leftover Cheeseburger French Fry Casserole?
Leftover casserole can be stored in an airtight container in the refrigerator for up to 3 days. When you're ready to enjoy it again, simply reheat in the microwave or oven until warmed through—this helps maintain that delicious texture.

Can I freeze Cheeseburger French Fry Casserole?
Yes, you can! To freeze, wrap the cooled casserole tightly in plastic wrap and then in aluminum foil. It will keep well for 2-3 months. When you're ready to eat, simply thaw it overnight in the refrigerator and reheat at 350°F (175°C) until hot and bubbly—approximately 30-40 minutes.

What should I do if my fries turn out soggy?
For crispier fries, try pre-baking them for about 10 minutes before layering them into the casserole. This prevents them from becoming too soft during cooking. Additionally, ensure that you’re using a baking dish that allows for even heat distribution and gives those fries a chance to crisp up!

Can I make adjustments for dietary restrictions?
Very! This Cheeseburger French Fry Casserole is highly customizable. If you're making it for someone with allergies, you might consider using gluten-free fries, or oat flour instead of breadcrumbs for added texture. You can also skip the dairy by using vegan cheese alternatives or Greek yogurt and mayonnaise substitutes.

How can I adjust the flavors to suit my family's taste?
Feel free to be creative! You might want to add sautéed bell peppers or mushrooms to the beef mixture for added flavor and nutrition. You can also adjust the cheese variety—pepper jack will add heat or mozzarella for extra gooeyness! The more, the merrier when it comes to customizing this comforting dish!

Cheeseburger French Fry Casserole

Cheeseburger French Fry Casserole: Comfort Food Delight

This Cheeseburger French Fry Casserole combines meat, cheese, and fries for a delightful meal sure to satisfy.
Print Recipe Pin Recipe
Prep Time 15 minutes mins
Cook Time 30 minutes mins
Cooling Time 5 minutes mins
Total Time 50 minutes mins
Servings: 6 servings
Course: Dinner
Cuisine: American
Calories: 450
Ingredients Equipment Method Nutrition Notes

Ingredients
  

For the Beef Base
  • 1 pound Ground Beef Ground turkey or chicken can be used as substitutes.
  • 1 medium Diced Onions Optional; sauté for extra sweetness.
  • 2 tablespoons Ketchup
  • 1 tablespoon Mustard
For the Casserole
  • 4 cups Frozen French Fries Crinkle-cut or tater tots can be used.
  • 2 cups Shredded Cheese Cheddar or American preferred.
  • 1 cup Milk Can substitute with sour cream or Greek yogurt.
  • 1/2 cup Mayonnaise Can substitute with Greek yogurt or sour cream.
For Seasoning
  • 1 teaspoon Garlic Powder Optional; adjust to taste.
  • 1 teaspoon Onion Powder Optional; adjust to taste.
  • Salt To taste.
  • Pepper To taste.
For Garnish
  • 1/2 cup Diced Pickles Optional; use dill for best results.
  • 2 tablespoons Fresh Parsley Optional; for garnish.

Equipment

  • Large skillet
  • Oven
  • 9x13-inch baking dish

Method
 

Step-by-Step Instructions
  1. Begin by preheating your oven to 375°F (190°C). While it's heating, heat a large skillet over medium heat and add the ground beef. Cook for about 6-7 minutes, breaking it up with a spatula until it’s browned and no longer pink. Drain excess grease and season with salt, pepper, garlic powder, and onion powder.
  2. Incorporate the flavors of a burger by mixing ketchup, mustard, and mayonnaise into the cooked beef mixture. If you’re using them, add diced onions and pickles. Stir until all ingredients are well combined.
  3. Grease a 9x13-inch baking dish and evenly spread the frozen French fries across the bottom. Pour the beef mixture over the fries, spreading to cover them completely.
  4. Sprinkle a generous layer of shredded cheese across the top of the beef and fries. Place the casserole in the preheated oven and bake for 25-30 minutes, until the cheese is melted and bubbly.
  5. Once baked, carefully remove from the oven and let cool for about 5 minutes. Garnish with chopped parsley before serving.

Nutrition

Serving: 1servingCalories: 450kcalCarbohydrates: 35gProtein: 25gFat: 25gSaturated Fat: 10gPolyunsaturated Fat: 2gMonounsaturated Fat: 3gCholesterol: 70mgSodium: 800mgPotassium: 600mgFiber: 3gSugar: 5gVitamin A: 300IUVitamin C: 5mgCalcium: 200mgIron: 3mg

Notes

This casserole is customizable; feel free to add extra veggies or a different cheese blend as per preference.

Tried this recipe?

Let us know how it was!

Hawaiian Roll Grilled Cheese: A Tropical Twist on Comfort Food

February 8, 2026 by Grace Snow Leave a Comment

As I stood in my kitchen, a sudden craving for something cheesy and comforting struck me. That’s when I decided to whip up a Hawaiian Roll Grilled Cheese, a recipe that transforms ordinary moments into extraordinary bites. With sweet, fluffy Hawaiian rolls cradling oozing cheese, this dish balances deliciously crispy exteriors with melty interiors, making it the ultimate comfort food. What I love most is its versatility—customize it to your taste for a unique twist each time; whether you’re in the mood for a spicy pepper jack kick or a classic cheddar melt, it never disappoints! Plus, it's quick enough to prepare for those casual gatherings or lazy nights at home. What delicious combinations will you explore with this delightful grilled cheese?

Why is this grilled cheese irresistible?

Uniqueness: The Hawaiian roll adds a delightful sweetness that pairs remarkably with savory cheese, elevating a classic recipe to new heights.

Customizable: Feel free to tailor this dish to your taste buds! Experiment with various cheeses or toppings like jalapeños or avocado for a twist that keeps every meal exciting.

Easy to Make: With just a few simple steps, you’ll have a delectable grilled cheese ready in no time, ideal for those who crave comfort without the fuss.

Crowd-Pleaser: This dish is perfect for gatherings, working as a talking point that delights both friends and family, making it a memorable addition to any meal.

Pair it with a light salad or tomato soup for a hearty feast that everyone will love!

Hawaiian Roll Grilled Cheese Ingredients

For the Sandwich
• Hawaiian Rolls – These sweet and fluffy rolls are the backbone of the sandwich, providing a delightful contrast to the savory cheese. Substitution: Brioche or sourdough can also work wonderfully for different flavor profiles.
• Cheese of Choice – Use your favorite cheese to add creaminess and depth; cheddar or pepper jack can enhance the flavor. Notes: Don’t hesitate to mix and match cheeses for a customized Hawaiian Roll Grilled Cheese experience.

Optional Add-Ons
• Caramelized Onions – They add a sweet and savory twist that'll elevate your sandwich to gourmet status.
• Jalapeños – For a spicy kick, sliced jalapeños make a great addition to your melty creation.
• Avocado – Creamy slices of avocado provide freshness and richness, balancing the flavors beautifully.

With these ingredients, you’re just a few steps away from creating a tropical twist on comfort food!

Step‑by‑Step Instructions for Hawaiian Roll Grilled Cheese

Step 1: Prepare Ingredients
Begin by gathering your Hawaiian rolls and cheese of choice, ensuring you have everything ready for assembly. Carefully slice each roll in half, being cautious not to cut all the way through, as you'll create a pocket for the deliciously gooey cheese. This step is essential for achieving that perfect melt when crafting your Hawaiian Roll Grilled Cheese.

Step 2: Heat Pan
Next, preheat a non-stick skillet over medium heat. While the skillet warms up, generously butter the insides of each roll to ensure a crisp, golden exterior. The butter will not only add flavor but also help create that beautiful crunch that complements the rich, melted cheese.

Step 3: Assemble Sandwiches
Once your skillet is ready, lay one half of each buttered Hawaiian roll directly in the pan. Pile on your chosen cheese, allowing it to ooze slightly over the sides for an enticing look. Top each sandwich with the other roll half, perfectly encasing the cheese to form your Hawaiian Roll Grilled Cheese masterpiece.

Step 4: Grill Contents
Cook the sandwiches on one side for about 3-4 minutes, or until they turn a lovely golden brown. Keep an eye on them to ensure they don’t burn, and then carefully flip each sandwich using a spatula. Cook the other side for an additional 3-4 minutes until it reaches that same delicious, crispy color.

Step 5: Melt Cheese
If you notice the cheese isn’t melting quite as well, grab a lid to cover the skillet briefly. This simple trick helps trap heat and steam, encouraging the cheese to soften and become ooey-gooey. Check the sandwiches frequently to make sure they’re not overcooking.

Step 6: Slice and Serve
Once both sides are perfectly golden and crispy, remove the Hawaiian Roll Grilled Cheese from the skillet. Let them cool for a minute, then slice each sandwich in half to reveal the melty, gooey cheese inside. Now you’re ready to serve your delightful creation hot, perhaps with a fun dipping sauce for an extra treat!

How to Store and Freeze Hawaiian Roll Grilled Cheese

Fridge: Store leftover Hawaiian Roll Grilled Cheese in an airtight container for up to 2 days to keep them fresh and delicious.

Freezer: For longer storage, wrap individual sandwiches tightly in plastic wrap and store them in a freezer-safe bag for up to 1 month.

Reheating: When ready to enjoy, thaw in the fridge overnight, then reheat in a skillet over low heat for a perfectly melty result. Avoid microwaving, as it may make the bread soggy.

Room Temperature: Serve freshly made sandwiches immediately for the best taste and texture, as they are best enjoyed warm and gooey!

Hawaiian Roll Grilled Cheese Variations

Feel free to get creative with your Hawaiian Roll Grilled Cheese, adding your special twist to this delicious comfort classic!

  • Cheese Options: Switch up the cheese with gouda, mozzarella, or pepper jack for different flavor profiles. Each cheese brings a unique melting quality that enhances this dish beautifully.

  • Herb Infusion: Add fresh herbs like basil or cilantro to the inside for a refreshing twist. The fragrant herbs elevate the taste and make each bite more vibrant.

  • Heat Level: Incorporate spicy toppings like jalapeños or crushed red pepper flakes for a fiery kick. If you love heat, these additions will add a delightful zing and keep your taste buds dancing.

  • Savory Additions: Consider sautéed mushrooms or spinach for a heartier sandwich. The earthy mushrooms add depth, while spinach brings a lovely color and nutrition boost.

  • Sweet and Savory: Try adding a layer of fig jam or sliced apples for a sweet contrast to the savory cheese. The added sweetness perfectly complements the creamy melted cheese, creating an indulgent treat.

  • Nuts and Crunch: Toss in some chopped walnuts or pecans for an unexpected crunch. They'll provide a contrasting texture that elevates the grilled cheese experience.

Pair your grilled cheese with a light salad or tomato soup for a satisfying meal that everyone will enjoy!

Expert Tips for Hawaiian Roll Grilled Cheese

• Perfect Heat: Keep it medium-low: Cooking on too high of a heat will burn the rolls before the cheese melts.

• Experiment Wisely: Try combinations: Mix different cheeses like gouda and mozzarella for a unique Hawaiian Roll Grilled Cheese every time.

• Avoid Sogginess: Butter generously: Ensuring even butter coverage on the rolls creates a crispy exterior and prevents sogginess during cooking.

• Keep it Fresh: Reheat carefully: To maintain the melty goodness, reheat leftovers in a skillet over low heat instead of using the microwave.

• Customize Flavor: Add toppings: Elevate your sandwich with caramelized onions or fresh herbs to enhance the flavor of your Hawaiian Roll Grilled Cheese.

Make Ahead Options

These Hawaiian Roll Grilled Cheese sandwiches are perfect for meal prep enthusiasts! You can assemble the sandwiches without grilling them and then refrigerate them for up to 24 hours. To keep them fresh, wrap each sandwich tightly in plastic wrap or store them in an airtight container. When you’re ready to enjoy, simply heat a non-stick skillet over medium heat, grill the sandwiches for about 3-4 minutes on each side until golden brown and crispy, covering them briefly with a lid to ensure the cheese melts beautifully. This method allows you to savor the same deliciousness with minimal effort, making weeknight dinners a breeze!

What to Serve with Hawaiian Roll Grilled Cheese

Elevate your meal experience with comforting sides and delightful pairings that complement this tropical twist on a classic favorite.

  • Tomato Soup: The acidity and warmth of tomato soup perfectly balance the richness of the cheese, creating a deliciously nostalgic combo.

  • Crispy Kale Salad: This fresh salad with a zesty dressing adds crunch and fiber, making it a light counterpoint to the gooey sandwich. The flavors will awaken your palate!

  • Sweet Potato Fries: Their natural sweetness and crispy texture provide a delightful contrast to the savory, melted goodness of the grilled cheese.

  • Pickles or Pickled Vegetables: Adding a tangy crunch, pickles cut through the richness and enhance the overall flavor profile of your meal.

  • Fruit Salad: A refreshing medley of fruits adds a seasonal touch, enhancing the sweetness found in the Hawaiian rolls.

  • Sparkling Water: For a refreshing drink option, sparkling water's effervescence cleanses the palate after each bite of the melty sandwich.

  • Chocolate Chip Cookies: End your meal on a sweet note; warm cookies offer a comforting dessert that pairs beautifully with a glass of milk.

Make your Hawaiian Roll Grilled Cheese experience even more memorable by choosing the perfect accompaniments!

Hawaiian Roll Grilled Cheese Recipe FAQs

What is the best way to choose ripe Hawaiian rolls?
Absolutely! When selecting Hawaiian rolls, look for ones that are soft and lightly golden without any dark spots or signs of dryness. Freshness is key, so purchasing from a bakery or well-stocked grocery store will ensure the best quality. If possible, check the expiration date to pick the freshest rolls available.

How should I store leftover Hawaiian Roll Grilled Cheese?
Very! To store leftovers, place the Hawaiian Roll Grilled Cheese in an airtight container in the refrigerator. They will remain fresh for up to 2 days. When you’re ready to enjoy them again, I recommend reheating them in a skillet over low heat for the best results, as this keeps the exterior crisp and the cheese melty!

Can I freeze Hawaiian Roll Grilled Cheese?
Certainly! If you're looking to save some for later, wrap individual sandwiches tightly in plastic wrap and place them in a freezer-safe bag. They can be frozen for up to 1 month. When you’re ready to eat, thaw them in the fridge overnight, then reheat them in a skillet over low heat for a deliciously gooey outcome.

What do I do if the cheese isn’t melting properly?
Don't worry! If you find that your cheese isn’t melting as you’d like, try covering the skillet with a lid for a minute or two while cooking. This helps trap heat and steam inside, promoting a lovely melt. Keep an eye on the sandwiches to ensure they don’t burn while the cheese reaches that perfect gooey consistency.

Are there any dietary considerations for Hawaiian Roll Grilled Cheese?
Absolutely! If you or someone you’re serving has dietary restrictions, there are plenty of options. For a vegetarian-friendly dish, simply use your favorite cheese without meat add-ons. If gluten is a concern, you can substitute Hawaiian rolls with gluten-free bread. Always check ingredient labels for allergens, especially if using pre-packaged cheeses or toppings!

Hawaiian Roll Grilled Cheese

Hawaiian Roll Grilled Cheese: A Tropical Twist on Comfort Food

Experience the delightful Hawaiian Roll Grilled Cheese, a recipe that combines sweet rolls and gooey cheese for an irresistible comfort food.
Print Recipe Pin Recipe
Prep Time 5 minutes mins
Cook Time 10 minutes mins
Total Time 15 minutes mins
Servings: 2 sandwiches
Course: Snacks
Cuisine: Hawaiian
Calories: 350
Ingredients Equipment Method Nutrition Notes

Ingredients
  

For the Sandwich
  • 4 rolls Hawaiian Rolls Substitution: Brioche or sourdough can also work wonderfully for different flavor profiles.
  • 1 cup Cheese of Choice Notes: Mix and match cheeses for a customized experience.
Optional Add-Ons
  • 1 cup Caramelized Onions
  • 1/2 cup Jalapeños sliced
  • 1 medium Avocado sliced

Equipment

  • non-stick skillet

Method
 

Step‑by‑Step Instructions
  1. Begin by gathering your Hawaiian rolls and cheese of choice, ensuring you have everything ready for assembly. Carefully slice each roll in half, creating a pocket for the cheese.
  2. Preheat a non-stick skillet over medium heat. Generously butter the insides of each roll to ensure a crisp, golden exterior.
  3. Lay one half of each buttered Hawaiian roll directly in the pan, pile on your chosen cheese, and top with the other roll half.
  4. Cook the sandwiches on one side for about 3-4 minutes, until golden brown. Flip and cook the other side for an additional 3-4 minutes.
  5. If the cheese isn’t melting well, cover the skillet briefly to trap heat and steam.
  6. Remove the sandwiches from the skillet once golden and crispy, let cool for a minute, then slice in half to reveal the melted cheese.

Nutrition

Serving: 1sandwichCalories: 350kcalCarbohydrates: 30gProtein: 12gFat: 20gSaturated Fat: 10gMonounsaturated Fat: 8gCholesterol: 40mgSodium: 600mgPotassium: 200mgFiber: 2gSugar: 4gVitamin A: 10IUVitamin C: 6mgCalcium: 20mgIron: 6mg

Notes

Best enjoyed warm and gooey. Pair with a light salad or tomato soup for a complete meal.

Tried this recipe?

Let us know how it was!

Delicious Spaghetti Garlic Bread: A Cozy Comfort Food Twist

February 8, 2026 by Grace Snow Leave a Comment

The aroma of sizzling garlic fills the kitchen, pulling me back to family dinners where comfort food ruled. Today, I’m thrilled to share my Spaghetti Garlic Bread recipe—a delightful twist that combines two beloved Italian classics into one irresistible dish. This easy-to-make comfort food is perfect for those hectic weeknights when you crave something warm and satisfying without spending hours in the kitchen. Plus, it’s vegetarian-friendly, inviting everyone to join in on the deliciousness! As the golden-brown, crispy crust envelopes the tender spaghetti in a rich, garlicky embrace, you’ll discover a crowd-pleaser that transforms your dining table into a cozy Italian trattoria. Are you ready to elevate your weeknight dinners with a bite of this scrumptious fusion?

Why Is Spaghetti Garlic Bread Amazing?

Unique Fusion: This recipe masterfully blends two favorites—spaghetti and garlic bread—into one delicious dish that’ll leave everyone wanting more.
Incredibly Easy: With minimal ingredients and quick prep time, you can whip this up in a flash. Perfect for those busy weeknights!
Flavor Explosion: Rich garlic and savory Parmesan meld beautifully, creating an irresistible taste sensation that you won’t soon forget.
Customizable: Want to spice it up? Experiment with toppings like veggies or different cheeses, or try my Honey Garlic Chicken on the side for a complete meal.
Crowd-Pleasing Appeal: Whether it’s a family dinner or a gathering with friends, this dish is sure to impress and satisfy everyone at the table!

Spaghetti Garlic Bread Ingredients

• Prepare your taste buds with this easy, delicious recipe for Spaghetti Garlic Bread.

For the Pasta

  • Spaghetti – Acts as the heart of this dish; feel free to swap it for any pasta you love!
  • Water – Essential for boiling the pasta; stick to plain tap water.
  • Salt – A crucial flavor enhancer for both the pasta and the garlic butter; adjust to your liking.

For the Garlic Sauce

  • Olive Oil – Adds richness and is perfect for sautéing garlic; avocado oil is a great alternative.
  • Garlic (minced) – The star ingredient, providing that robust flavor; increase for a more intense garlic punch.
  • Red Pepper Flakes (optional) – For those who like heat; leave out for a milder dish.
  • Chopped Fresh Parsley – Brings freshness and color; substitute with basil or oregano for a different flavor.
  • Grated Parmesan Cheese – Adds umami and creaminess; mozzarella or asiago can also work here.
  • Black Pepper – Provides earthy undertones; freshly ground is always best.

For the Garlic Bread

  • Italian Bread – The base that becomes your crispy garlic bread; French or sourdough also works beautifully.
  • Unsalted Butter (softened) – Makes the garlic butter rich and creamy; margarine stands in for a dairy-free version.
  • Garlic (minced) – An extra kick in the garlic butter is always a good idea; adjust based on your taste preference.
  • Garlic Powder (optional) – For double the garlic goodness; skip it if you have enough minced garlic.
  • Black Pepper – A dash complements all the flavors; fresh ground enhances the experience.

You are just a few ingredients away from making a delightful Spaghetti Garlic Bread that’s sure to impress your family and friends!

Step‑by‑Step Instructions for Spaghetti Garlic Bread

Step 1: Boil the Pasta
Begin by bringing 4 quarts of water to a rolling boil in a large pot. Add 2 tablespoons of salt for flavor and then carefully add the spaghetti. Stir occasionally to prevent sticking, and cook for about 8-10 minutes until the spaghetti is al dente. Once cooked, reserve 1 cup of the starchy pasta water for later, then drain the spaghetti and set it aside.

Step 2: Sauté the Garlic
In a large skillet, heat 2 tablespoons of olive oil over medium heat. Once the oil shimmers, add 4 cloves of minced garlic and ½ teaspoon of red pepper flakes if desired. Sauté for 1-2 minutes, stirring frequently, until the garlic is fragrant and just beginning to turn golden. Be careful not to burn the garlic, as it can turn bitter, and then remove the skillet from heat.

Step 3: Combine Spaghetti and Sauce
Add the drained spaghetti directly into the skillet with the sautéed garlic. Gradually mix in the reserved pasta water, about ¼ cup at a time, until you achieve your desired sauce consistency. Toss in ¼ cup of chopped fresh parsley and ½ cup of grated Parmesan cheese, ensuring everything is well-combined and heated through. The spaghetti should be glistening and flavorful.

Step 4: Prepare Garlic Butter
In a small mixing bowl, combine ½ cup of softened unsalted butter with 4 cloves of minced garlic, 2 tablespoons of fresh parsley, ¼ cup of grated Parmesan, and a pinch of salt and pepper. Use a fork to mix until everything is integrated into a smooth, creamy garlic butter. Set this mixture aside while you prepare the bread.

Step 5: Prep the Bread
Take a loaf of Italian bread and slice it in half lengthwise. Use a spatula to generously spread the garlic butter mixture over the cut sides of each half. Make sure to coat them well for maximum flavor. Once done, arrange the prepared bread on a baking sheet, cut-side up, ready for baking.

Step 6: Bake the Garlic Bread
Preheat your oven to 375°F (190°C). When it reaches temperature, place the baking sheet with the garlic bread on the center rack. Bake for 10-12 minutes, or until the bread is golden brown and bubbly. The edges should look crispy, signaling that it's time to take the bread out of the oven!

Step 7: Broil for Extra Crispness
For an added crunch, switch your oven to broil. Place the garlic bread under the broiler for an additional 1-2 minutes, keeping a close eye to prevent burning. The tops should turn beautifully crispy and a deep golden brown, boosting the flavor and texture of your Spaghetti Garlic Bread delight.

Step 8: Serve and Enjoy
Allow the garlic bread to cool slightly before slicing into individual pieces. Serve your delicious Spaghetti Garlic Bread immediately, piping hot, alongside the spaghetti. The crispy, buttery garlic bread pairs perfectly with the rich, garlicky pasta for a truly comforting dish that will delight everyone at your table!

Make Ahead Options

Preparing Spaghetti Garlic Bread in advance is a brilliant way to save time during busy weeknights! You can cook the spaghetti and prepare the garlic butter mixture up to 24 hours ahead. Simply store the cooked spaghetti in an airtight container and refrigerate. For the garlic butter, mix all the ingredients, then keep it covered in the fridge. When you're ready to serve, just reheat the spaghetti in a skillet with a splash of reserved pasta water, spread the garlic butter on the sliced bread, and bake as directed. This way, your meal remains just as delicious while cutting down on your evening workload!

How to Store and Freeze Spaghetti Garlic Bread

Fridge: Store leftover Spaghetti Garlic Bread in an airtight container for up to 2 days. This keeps it fresh without compromising flavor.

Freezer: Wrap individual pieces tightly in plastic wrap and foil, then place in an airtight container. You can freeze for up to 1 month for future craving satisfaction!

Reheating: For the best results, reheat in a preheated oven at 350°F (175°C) for about 10-15 minutes, restoring crispiness while warming the spaghetti.

Freezer Tips: If making ahead, prepare the garlic butter and bread but bake right before serving. This way, you enjoy optimal freshness with your Spaghetti Garlic Bread!

Spaghetti Garlic Bread Variations

Feel free to unleash your creativity and explore these delicious twists on Spaghetti Garlic Bread!

  • Pizza Spaghetti: Top your spaghetti with pepperoni and mozzarella before baking for an exciting pizza-inspired dish. It's a fun mix that will remind you of your favorite pizza nights!

  • Pesto Twist: Swap out marinara for vibrant pesto to create a fresh, herbal flavor profile. This adds a delightful twist and brightens up the entire dish beautifully.

  • Spicy Garlic Bread: Mix red pepper flakes into your garlic butter for an added kick. If you adore heat, this will elevate your dish to a whole new level of zest!

  • Vegetable Boost: Fortify your spaghetti with sautéed veggies like mushrooms or spinach for an earthy touch. This variation not only enhances nutrition but also adds vibrant colors and textures.

  • Cheesy Garlic Bread: Sprinkle extra mozzarella or even a blend of cheeses on top of the garlic bread before baking. Who can resist that melty goodness paired with the garlicky flavor?

  • Creamy Spinach: Combine cream cheese or ricotta with your spaghetti for a rich, creamy experience. This sumptuous version is fantastic for those cozy nights in.

  • Herb Infusion: Experiment with different herbs like thyme or rosemary mixed into your garlic butter. A simple change can make all the difference in flavor!

For a more indulgent meal, consider serving this with a side of Cheesy Garlic Bread or pair it with my Taco Spaghetti Cheesy for a comforting feast that keeps everyone happy. The possibilities are endless!

What to Serve with Spaghetti Garlic Bread

Indulging in the comforting flavors of this delightful dish is just the beginning—pair it with delicious sides to create a memorable meal experience.

  • Simple Side Salad: A fresh mix of greens with a zesty vinaigrette will brighten up your plate and balance the richness of the spaghetti.

  • Warm Marinara Sauce: Serving a small bowl of marinara alongside offers a perfect dip for the garlic bread, enhancing its already savory flavor.

  • Roasted Vegetables: Caramelized veggies like zucchini, bell peppers, or asparagus add a crunchy contrast, and their charred sweetness complements the garlic bread beautifully.

  • Creamy Risotto: A spoonful of creamy mushroom risotto provides an extra layer of comfort, creating a lush and satisfying meal that sings of Italian flavors.

  • Garlic Butter Shrimp: Elevate the feast with succulent garlic butter shrimp, which echoes the dish’s flavors while adding a protein-rich delight to the table.

  • Dessert Charcuterie Board: Round off your meal with an assortment of cheeses, fruits, and sweets to share. It’s a fun way to keep the casual vibes going while indulging your sweet tooth!

Expert Tips for Spaghetti Garlic Bread

  • Pasta Perfection: When boiling spaghetti, ensure not to overcook it. Aim for al dente for the best texture when mixing with the sauce.
  • Garlic Love: Fresh minced garlic offers superior flavor. If you opt for garlic powder, start with a smaller amount to avoid overpowering the dish.
  • Watch the Broil: Broiling the garlic bread can go from golden to burnt in seconds. Stay nearby to monitor its progress for an ideal crunch.
  • Reserve Right: Always remember to save that cup of pasta water! It’s a secret ingredient for achieving a silky sauce consistency in your Spaghetti Garlic Bread.
  • Mix it Up: Don’t hesitate to add your favorite toppings or veggies to the spaghetti for a personalized twist. This recipe is versatile and encourages your creative flair!

Spaghetti Garlic Bread Recipe FAQs

What type of spaghetti should I use?
Absolutely! You can use any pasta variety you like in this recipe. While spaghetti is the traditional choice, feel free to swap it out for penne, linguine, or whatever you have on hand. Just adjust the cooking time according to the pasta shape.

How should I store leftover Spaghetti Garlic Bread?
Store any leftover Spaghetti Garlic Bread in an airtight container in the refrigerator for up to 2 days. I recommend reheating it in the oven at 350°F (175°C) for about 10-15 minutes to keep the garlic bread crispy while warming the spaghetti.

Can I freeze Spaghetti Garlic Bread?
Absolutely! For freezing, wrap individual pieces tightly in plastic wrap and then in aluminum foil, and store them in an airtight container. This way, you can enjoy your Spaghetti Garlic Bread for up to 1 month. When you’re ready to eat, just reheat in a preheated oven at 350°F (175°C) for 10-15 minutes.

What can I do if my garlic bread is soggy?
If your garlic bread turns out soggy, it could be due to excess moisture. To fix this, try slicing the bread thicker and toasting it for a longer period during baking. You can also broil it for an extra minute or two to achieve a crispy texture. Additionally, make sure to spread the garlic butter evenly, leaving no areas too soaked.

Is this recipe suitable for vegetarians?
Yes, the Spaghetti Garlic Bread is a glorious vegetarian dish! To make it even more nutritious, consider loading your spaghetti with vegetables like zucchini, spinach, or bell peppers. Just sauté them along with the garlic to enhance the flavors beautifully!

What type of bread works best for this recipe?
While Italian bread is the go-to for this recipe, you can absolutely use French bread or even sourdough for a delightful twist. Each bread offers a unique flavor and texture, so feel free to experiment based on your taste preferences!

Spaghetti Garlic Bread

Delicious Spaghetti Garlic Bread: A Cozy Comfort Food Twist

This Spaghetti Garlic Bread recipe merges two beloved Italian classics into one irresistible dish, perfect for weeknight dinners.
Print Recipe Pin Recipe
Prep Time 15 minutes mins
Cook Time 20 minutes mins
Cooling Time 5 minutes mins
Total Time 40 minutes mins
Servings: 4 slices
Course: Dinner
Cuisine: Italian
Calories: 350
Ingredients Equipment Method Nutrition Notes

Ingredients
  

For the Pasta
  • 1 pound Spaghetti Feel free to swap it for any pasta you love!
  • 4 quarts Water Plain tap water for boiling pasta
  • 2 tablespoons Salt Adjust to taste
For the Garlic Sauce
  • 2 tablespoons Olive Oil Avocado oil is a great alternative
  • 4 cloves Garlic (minced) Increase for more garlic flavor
  • 0.5 teaspoon Red Pepper Flakes (optional) For those who like heat
  • 0.25 cup Chopped Fresh Parsley Substitute with basil or oregano for different flavor
  • 0.5 cup Grated Parmesan Cheese Mozzarella or asiago can also work
  • 1 teaspoon Black Pepper Freshly ground is best
For the Garlic Bread
  • 1 loaf Italian Bread French or sourdough also works
  • 0.5 cup Unsalted Butter (softened) Margarine can be used for a dairy-free version
  • 4 cloves Garlic (minced) Adjust based on taste preference
  • 0.5 teaspoon Garlic Powder (optional) Skip if enough minced garlic is used
  • 1 teaspoon Black Pepper Fresh ground enhances the experience

Equipment

  • Large pot
  • Large skillet
  • Mixing Bowl
  • Baking Sheet

Method
 

Step-by-Step Instructions
  1. Begin by bringing 4 quarts of water to a rolling boil in a large pot. Add 2 tablespoons of salt and then carefully add the spaghetti. Cook for about 8-10 minutes until al dente, reserving 1 cup of pasta water before draining.
  2. In a large skillet, heat 2 tablespoons of olive oil. Add 4 cloves of minced garlic and ½ teaspoon of red pepper flakes. Sauté for 1-2 minutes until fragrant, then remove from heat.
  3. Add the drained spaghetti to the skillet. Gradually mix in reserved pasta water until desired consistency. Toss in ¼ cup of chopped parsley and ½ cup of Parmesan, mixing well.
  4. In a small bowl, combine ½ cup softened butter, 4 cloves minced garlic, 2 tablespoons parsley, ¼ cup Parmesan, and season with salt and pepper. Mix until smooth.
  5. Slice the Italian bread in half and spread the garlic butter mixture on each half. Place the bread cut-side up on a baking sheet.
  6. Preheat the oven to 375°F (190°C) and bake the garlic bread for 10-12 minutes until golden and bubbly.
  7. Broil the garlic bread for an additional 1-2 minutes for extra crispness, watching closely.
  8. Allow the garlic bread to cool slightly before slicing. Serve immediately alongside the spaghetti for a delightful meal.

Nutrition

Serving: 1sliceCalories: 350kcalCarbohydrates: 45gProtein: 10gFat: 15gSaturated Fat: 8gPolyunsaturated Fat: 0.5gMonounsaturated Fat: 5gCholesterol: 30mgSodium: 600mgPotassium: 150mgFiber: 2gSugar: 1gVitamin A: 300IUCalcium: 150mgIron: 1.5mg

Notes

This recipe is a fusion of two Italian favorites, making it versatile for different toppings and ingredients. Perfect for family dinners or gatherings with friends.

Tried this recipe?

Let us know how it was!

Savor the Comfort with Chili Cheese Dog Bake Tonight

February 8, 2026 by Grace Snow Leave a Comment

As the aroma of melting cheese mingles with the savory scent of chili wafts through the kitchen, I can't help but feel that familiar spark of excitement. Today, I’m diving into the Ultimate Chili Cheese Dog Bake, a quick weeknight dinner that’s as cozy as it is delicious. This comforting casserole not only brings the classic elements of hot dogs and chili together but also makes for a fantastic family-friendly feast that’s easily customizable for everyone’s taste buds. Whether you're preparing for a game day gathering or simply trying to shake off the fast-food blues, this dish is sure to win over hearts and appetites alike. Curious how to assemble this cheesy delight? Let’s get cooking!

Why is Chili Cheese Dog Bake a Must-Try?

Unmatched Comfort: The warmth from cheesy goodness and savory chili makes this bake a delightful comfort food that warms the soul.

Quick Prep Time: This dish comes together in under 30 minutes, making it the ideal solution for busy weeknights or spontaneous cravings.

Customizable Delight: Feel free to swap out hot dogs for turkey or plant-based options, or experiment with different cheeses—each variation sparks a new flavor adventure!

Family Appeal: Kids and adults alike will adore this crowd-pleaser, ensuring clean plates all around. It’s perfect for game day gatherings or family dinners.

Effortless Clean-Up: With just one baking dish, you'll spend less time cleaning and more time enjoying your meal with family and friends. If you love comforting casseroles, don’t miss out on the amazing Cheesy Zucchini Bake for another hit!

Chili Cheese Dog Bake Ingredients

Explore the key components for this delicious dish!

For the Bake
• Hot Dogs – The main protein that brings savory flavor; try bratwurst or turkey dogs for a twist.
• Crescent Roll Dough – Forms the flaky crust; substitute with biscuit dough or puff pastry if desired.
• Shredded Cheddar Cheese – Adds creamy richness and flavor; experiment with pepper jack for a spicy kick.
• Chili – The heartiness springs from chili; choose homemade or canned, depending on your preference.
• Melted Butter – Adds a touch of richness and helps create a golden crust for the bake.
• Minced Parsley – Provides a pop of freshness and color to elevate the dish.
• Garlic Salt – Enhances the flavor profile and adds a wonderful depth to your bake.

This Chili Cheese Dog Bake will never disappoint, promising a delightful experience for every bite!

Step‑by‑Step Instructions for Chili Cheese Dog Bake

Step 1: Preheat the Oven
Start by preheating your oven to 375°F (190°C). While the oven heats up, line a large baking sheet with parchment paper to prevent sticking. This will ensure that your Chili Cheese Dog Bake has a perfect golden crust when it's ready to serve, guaranteeing a warm and inviting presentation.

Step 2: Prepare the Dough
Unroll the crescent roll dough carefully on your workspace. Separate it into individual triangles, keeping them close together but not overlapping. Each triangle will form the base for your savory Chili Cheese Dog Bake, so ensure they’re ready for the assembly of hot dogs and cheese shortly.

Step 3: Assemble the Rolls
On each crescent roll triangle, place a generous amount of shredded cheddar cheese, then add a hot dog at the wide end. Carefully roll the dough from the wide end to enclose the hot dog and cheese completely. This step is crucial to achieving that comforting, cheesy goodness in every bite of your bake.

Step 4: Bake the Hot Dogs
Arrange the rolled-up hot dogs seam-side down on the prepared baking sheet. Bake in the preheated oven for approximately 15 minutes or until the rolls are puffed up and golden brown. Keep an eye on them; the delightful aroma of baking crescent rolls will let you know they’re nearing perfection!

Step 5: Add the Chili
While the rolls are baking, pour your choice of chili into a large baking dish, spreading it evenly. Once the hot dogs are perfectly baked, carefully place them side by side in the chili. Return the dish to the oven and bake for an additional 10 minutes, allowing the flavors to meld wonderfully together in your Chili Cheese Dog Bake.

Step 6: Finish & Serve
As the baking time concludes, combine melted butter with garlic salt and minced parsley in a small bowl. Brush this flavorful mixture over the crescent rolls right before serving for an added shine and taste. This final touch elevates your Chili Cheese Dog Bake, making it irresistible to your family and friends!

What to Serve with Chili Cheese Dog Bake

The ultimate family-friendly meal deserves equally delightful accompaniments to elevate your dining experience.

  • Crunchy Coleslaw: A refreshing, tangy coleslaw adds a crisp texture that perfectly contrasts the warm comfort of the bake. The crunchiness alongside the softness of the bake is simply divine!

  • Sweet Potato Fries: These lightly seasoned fries offer a dash of sweetness that balances the savory chili flavor. Serve them hot, and watch your family devour them alongside the chili cheese dog bake.

  • Classic Potato Salad: A creamy potato salad brings a cool and comforting element to the table. It’s a beloved side that complements the bold flavors of the chili cheese dog bake seamlessly.

  • Grilled Corn on the Cob: Charred and buttery corn on the cob introduces a smoky, sweet flavor that enhances the festive feel of your meal. Fresh and vibrant, it screams summer vibes!

  • Zesty Pickles: Tangy pickles add a burst of flavor and crunch, slicing through the richness of the bake. They are a fantastic contrast that elevates every bite, making it a great pairing!

  • Ice-cold Lemonade: For a refreshing drink option, serve ice-cold lemonade to balance the richness of your dish. The zesty notes are perfect for quenching thirst and bringing the meal together!

  • Mini Brownies: To end on a sweet note, serve up fudgy mini brownies. Their rich chocolate flavor provides a delightful contrast to the savory notes of the chili cheese dog bake, leaving everyone satisfied.

  • Caesar Salad: A crisp Caesar salad with crunchy croutons and creamy dressing is always a hit. It adds freshness and variety, making your meal even more enjoyable.

Whether you're hosting friends or enjoying a cozy family dinner, these sides promise to create a wholesome dining experience sure to leave everyone smiling!

Expert Tips for Chili Cheese Dog Bake

• Even Distribution: Ensure that the hot dogs are evenly spaced and securely rolled up to cook uniformly throughout the bake.

• Perfectly Golden: Use a thermometer or visual cues; golden-brown crescent rolls indicate they are fully cooked and deliciously flaky.

• Chili Consistency: If using canned chili, select a brand with a texture you enjoy. You can also add extra beans for more heartiness.

• Air-tight Storage: Store leftovers in airtight containers to maintain moisture and flavor, extending the life of your Chili Cheese Dog Bake.

• Make-Ahead Magic: You can prepare the rolls in advance, store them in the fridge, and bake them just before serving for convenience.

Make Ahead Options

These Chili Cheese Dog Bake components are perfect for meal prep enthusiasts! You can prepare the crescent roll dough and assemble the hot dogs up to 24 hours in advance; simply store them packed tightly in the refrigerator to maintain freshness. If you’re short on time, you can also prepare the chili a couple of days ahead (it can be kept in the fridge for up to 3 days). When ready to bake, just lay your hot dogs in the chili and bake as directed. This way, you’ll have a hearty, delicious dinner ready to go with minimal effort on busy weeknights!

Chili Cheese Dog Bake Variations

Feel free to unleash your creativity and add your personal touch to this delicious dish!

  • Spicy Kick: Add sliced jalapeños or diced red onions to the chili for a flavor explosion. The heat pairs beautifully with the creaminess of cheese.

  • Crunchy Topping: Sprinkle crushed tortilla chips or Fritos over the chili before baking for unexpected texture and additional crunch. It gives each bite a satisfying crunch!

  • Healthier Option: Swap out hot dogs for turkey dogs or plant-based alternatives for a lighter twist. You can still enjoy all the savory flavors without the extra calories.

  • Different Cheeses: Try using pepper jack for a zesty kick or gouda for a smoky flavor. A cheese blend can create extra creaminess and depth! Just imagine the taste infusion from each cheese melting together.

  • Chili Variations: Experiment with different types of chili. Homemade, vegetarian, or even a beanless chili can cater to various dietary preferences while delivering comfort. You can also check out flavorful options like Cheesy Zucchini Bake as a different rustic dish.

  • Dressing It Up: Drizzle with BBQ sauce, your favorite hot sauce, or even a dollop of sour cream before serving for an extra layer of flavor! Each sauce brings its own flair, enhancing your meal.

  • Biscuit Crust: Instead of crescent rolls, use biscuit dough for a heartier and even more doughy base. A comforting alternative that adds great flavor to the dish!

  • Vegetable Medley: Incorporate finely chopped bell peppers or mushrooms into the chili for extra nutrients and flavor. It’s a delightful surprise and takes this comfort food to another level!

How to Store and Freeze Chili Cheese Dog Bake

Fridge: Store leftovers in an airtight container for up to 3 days to maintain freshness. This way, you can enjoy your Chili Cheese Dog Bake again soon!

Freezer: Wrap individual pieces tightly in plastic wrap or aluminum foil and place in a freezer-safe container. They will last for up to 2 months.

Reheating: To enjoy again, thaw in the fridge overnight, then reheat in a 350°F oven for 10-15 minutes until warmed through. Alternatively, microwave in 30-second intervals for convenience.

Chili Cheese Dog Bake Recipe FAQs

What type of hot dogs should I use for Chili Cheese Dog Bake?
Absolutely! You can use regular beef hot dogs for that classic taste, but I often recommend experimenting with bratwurst or turkey dogs for a healthier twist. For a plant-based option, there are some fantastic veggie dogs available that will keep this dish satisfying and delicious!

How should I store leftovers of this Chili Cheese Dog Bake?
To keep your leftovers fresh, simply transfer them to an airtight container and store them in the fridge for up to 3 days. This ensures you can relish those comforting flavors again without compromising on taste!

Can I freeze the Chili Cheese Dog Bake?
Yes, you can! Wrap each piece tightly in plastic wrap or aluminum foil, then store them in a freezer-safe container. They’ll stay good for up to 2 months. When you're ready to enjoy, just thaw in the fridge overnight and reheat in a 350°F oven for about 10-15 minutes.

What should I do if my crescent rolls come out soggy?
Very often, soggy rolls can occur if the chili is too watery. To fix this, try using a thicker chili or even draining off excess liquid before adding it to the baking dish. Additionally, ensure your crescent rolls are baked until golden brown and fully cooked for the best texture.

Are there any dietary considerations for this recipe?
Of course! If you have allergies, consider using turkey dogs or plant-based hot dogs to accommodate different dietary needs. Always check labels for potential allergens, and remember that this dish can easily be made gluten-free by swapping in gluten-free crescent roll dough.

How can I add extra flavor to my Chili Cheese Dog Bake?
I recommend getting creative! Add toppings like diced jalapeños or chopped onions before baking for an extra kick. You can also season your chili with spices like cayenne pepper or cumin to elevate the overall flavor. The more, the merrier in terms of customizing this delicious bake!

Chili Cheese Dog Bake

Savor the Comfort with Chili Cheese Dog Bake Tonight

Enjoy the ultimate Chili Cheese Dog Bake, a quick weeknight dinner that combines cheesy goodness and savory chili.
Print Recipe Pin Recipe
Prep Time 15 minutes mins
Cook Time 25 minutes mins
Total Time 40 minutes mins
Servings: 4 servings
Course: Dinner
Cuisine: American
Calories: 380
Ingredients Equipment Method Nutrition Notes

Ingredients
  

For the Bake
  • 6 pieces Hot Dogs Try bratwurst or turkey dogs for a twist.
  • 1 can Crescent Roll Dough Substitute with biscuit dough or puff pastry if desired.
  • 2 cups Shredded Cheddar Cheese Experiment with pepper jack for a spicy kick.
  • 1 can Chili Choose homemade or canned.
  • 3 tablespoons Melted Butter
  • 2 tablespoons Minced Parsley
  • 1 teaspoon Garlic Salt

Equipment

  • Baking Sheet
  • Parchment Paper
  • Large baking dish
  • small bowl

Method
 

Step-by-Step Instructions for Chili Cheese Dog Bake
  1. Preheat your oven to 375°F (190°C) and line a large baking sheet with parchment paper.
  2. Unroll the crescent roll dough and separate it into individual triangles.
  3. On each triangle, place shredded cheddar cheese, then add a hot dog and roll them up.
  4. Arrange the rolled-up hot dogs seam-side down on the baking sheet and bake for approximately 15 minutes.
  5. While the rolls bake, pour chili into a large baking dish and spread it evenly. Once the hot dogs are baked, place them in the chili and bake for an additional 10 minutes.
  6. Combine melted butter with garlic salt and minced parsley, then brush this over the crescent rolls before serving.

Nutrition

Serving: 1servingCalories: 380kcalCarbohydrates: 28gProtein: 16gFat: 24gSaturated Fat: 10gPolyunsaturated Fat: 1gMonounsaturated Fat: 5gCholesterol: 55mgSodium: 950mgPotassium: 400mgFiber: 1gSugar: 2gVitamin A: 400IUVitamin C: 2mgCalcium: 250mgIron: 2mg

Notes

Ensure even distribution of hot dogs and bake until golden-brown for the best results. Store leftovers in airtight containers.

Tried this recipe?

Let us know how it was!

Stuffed Italian Meatloaf: Comforting Flavor in Every Bite

February 8, 2026 by Grace Snow Leave a Comment

In a moment of kitchen chaos, I found myself flipping through old family recipes, yearning for something hearty yet comforting. That’s when I stumbled upon the ultimate crowd-pleaser: Stuffed Italian Meatloaf. This genius creation is more than just a comforting dinner; it's an easy dinner recipe that wraps together rich ground beef, creamy mozzarella, and a symphony of aromatic herbs in every slice. Perfect for busy weeknights or an inviting family gathering, this stuffed meatloaf stands out with its cheesy center and beautifully crusted exterior. Best of all, it’s a forgiving recipe that allows you to customize based on your pantry staples or dietary needs. Are you ready to bring a slice of Italy into your kitchen?

Why is This Meatloaf So Special?

Comforting, This Stuffed Italian Meatloaf is the ultimate cozy dinner that brings everyone to the table.

Flavor-Packed, Each slice bursts with savory ground beef and rich mozzarella, making it a crowd favorite.

Versatile, Easily adapt the recipe to suit dietary preferences—whether you go with turkey or add in veggies, the possibilities are endless!

Simple Preparation, With straightforward steps, you’ll have this delectable dish ready in no time.

Impressive Presentation, Serve it warm, drizzling with marinara sauce for a restaurant-quality meal that looks as good as it tastes—perfect for impressing guests!

For a delightful twist, consider pairing it with these Herby Ricotta Stuffed peppers as a side. Your family will be asking for seconds!

Stuffed Italian Meatloaf Ingredients

• You’ll love cooking with these ingredients!

For the Meatloaf

  • Ground Beef – The main protein that can be substituted with 50% ground pork for a flavor boost.
  • Breadcrumbs – Acts as a binder; use gluten-free breadcrumbs if needed.
  • Grated Parmesan Cheese – Adds a richness; replace with pecorino for a sharper bite.
  • Fresh Parsley – Brings a pop of color; fresh basil works in its place if desired.
  • Fresh Basil – Enhances the Italian essence; dried basil can suffice but use 1/3 the amount.
  • Onion – Provides sweetness; shallots are a great substitute.
  • Garlic – Infuses aroma; garlic powder can replace it, but it’s less pungent.
  • Eggs – Acts as a binder; for a vegan option, try flaxseed meal mixed with water.
  • Italian Seasoning – A blend of herbs that enhances flavor; a mix of oregano and thyme can be used instead.
  • Salt and Pepper – Essential for seasoning; adjust according to your taste preferences.

For the Stuffing

  • Mozzarella Cheese – Offers gooey creaminess; fresh mozzarella heightens the flavor even more.
  • Marinara Sauce – Adds moisture and flavor; use homemade or your favorite store-bought variety.
  • Sliced Pepperoni or Prosciutto (Optional) – Provides a savory touch to the stuffing; feel free to skip for a leaner dish.

With these key ingredients, you can whip up a delicious and satisfying stuffed Italian meatloaf that will have everyone asking for seconds!

Step‑by‑Step Instructions for Stuffed Italian Meatloaf

Step 1: Preheat the Oven
Begin by preheating your oven to 350°F (175°C), ensuring it’s at the perfect temperature for the Stuffed Italian Meatloaf. While it heats, line a baking sheet with parchment paper to prevent sticking and simplify cleanup.

Step 2: Sauté the Aromatics
In a skillet over medium heat, sauté the finely chopped onion and minced garlic for about 5-7 minutes, or until they become translucent and fragrant. This step builds a deep flavor base for your meatloaf. Once done, remove from heat and allow it to cool slightly before adding it to the mixture.

Step 3: Combine the Meat Mixture
In a large mixing bowl, combine the ground beef with breadcrumbs, grated Parmesan, fresh parsley, basil, the sautéed onion and garlic, eggs, marinara sauce, Italian seasoning, salt, and pepper. Use your hands to mix gently, ensuring all ingredients are evenly incorporated without overworking the mixture, which helps keep the meatloaf tender.

Step 4: Shape the Meatloaf
On the prepared parchment paper, shape the meat mixture into a rectangle, about 1 inch thick. This size is ideal for rolling and ensures even cooking. Aim for a smooth surface and even thickness for consistent results in your Stuffed Italian Meatloaf.

Step 5: Add the Filling
Sprinkle the mozzarella cheese evenly over the top of the meat rectangle, allowing room around the edges. For an extra layer of flavor, add slices of pepperoni or prosciutto, if desired. This will create a delicious melty surprise in the center as it bakes.

Step 6: Roll the Meatloaf
Using the parchment paper as a guide, carefully roll the meat mixture away from you, starting on the long side. Gently but firmly roll until you form a log shape, ensuring the cheese and fillings are sealed inside. Pinch the edges to secure the contents, creating a beautiful stuffed meatloaf.

Step 7: Prepare for Baking
Place the rolled stuffed meatloaf seam side down onto the prepared baking sheet. At this point, you’ll want to top it with additional marinara sauce for flavor and moisture. Spread an even layer across the top, letting some drizzled down the sides.

Step 8: Bake the Meatloaf
Transfer the stuffed meatloaf to the preheated oven and bake for about 60 minutes, or until its internal temperature reaches 160°F (70°C) when checked with a meat thermometer. Look for a beautifully browned crust as a visual cue for doneness.

Step 9: Rest Before Slicing
Once out of the oven, let the Stuffed Italian Meatloaf rest for 15-20 minutes. This crucial step allows the juices to redistribute, ensuring each slice remains moist. Patience will reward you with a much tastier result when you finally slice into it.

Step 10: Serve and Enjoy
Slice your Stuffed Italian Meatloaf and serve warm, drizzling with additional marinara sauce if desired. Pair it with fresh salad and garlic bread for a complete meal that’s sure to impress your family and friends. Enjoy the artisanal flavors from the comfort of your kitchen!

Stuffed Italian Meatloaf Variations

Customize your Stuffed Italian Meatloaf to delight your taste buds with exciting twists and swaps!

  • Turkey Meatloaf: Replace ground beef with ground turkey for a leaner, equally delicious alternative. This option keeps the rich flavor while lightening up the dish.

  • Vegetable-Loaded: Add finely chopped bell peppers, carrots, or spinach to the meat mixture for added nutrition and flavor. It’s a great way to sneak in those veggies!

  • Cheesy Delight: Swap mozzarella for provolone or fontina cheese for a different cheesy experience. Each cheese offers a unique flavor profile that enhances the meatloaf.

  • Spicy Kick: Add a pinch of red pepper flakes or chopped jalapeños to the meat mixture for a spicy twist. This will add a bold flavor to your comforting meal.

  • Pesto Surprise: Use pesto instead of marinara in the stuffing for a burst of herby flavor. It adds a lovely twist, making each bite an adventure.

  • Gluten-Free: Substitute breadcrumbs with crushed gluten-free crackers or oats for a gluten-free option while maintaining the binding and texture.

  • Italian Sausage Mix: Mix in half ground Italian sausage with the beef for an extra layer of flavor and spice. The sausage will bring additional deliciousness to your meatloaf!

For an Italian-inspired side, try these delightful Herby Ricotta Stuffed peppers that complement your meatloaf beautifully. Your family won’t be able to resist asking for more!

Make Ahead Options

These Stuffed Italian Meatloaf are perfect for busy home cooks looking to save time! You can prepare the meat mixture and shape it into a log up to 24 hours in advance; just wrap it tightly in plastic wrap and refrigerate to maintain its flavors and prevent drying out. Alternatively, you can assemble the entire meatloaf with the stuffing and refrigerate up to 3 days before baking. When it’s time to serve, simply top it with marinara sauce and bake as directed, adding a few extra minutes to your cooking time if it's been refrigerated. This way, you’ll enjoy a delicious, stress-free dinner with minimal effort!

What to Serve with Stuffed Italian Meatloaf

The aroma of this stuffed Italian delight fills your kitchen, inviting you to create a full, satisfying meal.

  • Garlic Bread: Crispy and buttery, it complements the meatloaf's flavors perfectly while providing a delightful crunch.
  • Caesar Salad: The fresh greens and tangy dressing balance the hearty meatloaf, adding a light and refreshing contrast to your meal.
  • Roasted Vegetables: An assortment of seasonal veggies roasted until tender adds a lovely caramelized sweetness and vibrant color to your plate.
  • Creamy Mashed Potatoes: Smooth and buttery, they soak up the juicy marinara sauce from the meatloaf, creating a comforting, savory experience.
  • Steamed Asparagus: The slight bitterness of asparagus pairs beautifully with the richness of the meatloaf, providing a lovely textural contrast.
  • Italian-Style Risotto: Creamy and infused with umami flavors, this dish complements the Italian theme while adding a luxurious touch.
  • Red Wine: A glass of full-bodied red wine enhances the robust flavors of the meatloaf and brings warmth to the table.
  • Tiramisu: End your meal on a sweet note with this classic Italian dessert that offers a coffee-flavored lightness to balance the savory meatloaf.
  • Marinara Sauce Dip: Serve extra sauce on the side for dipping, allowing guests to savor each bite with that classic Italian flavor.

Expert Tips for Stuffed Italian Meatloaf

  • Finely Chop Veggies: Make sure to finely chop the onions and garlic for even distribution in the meatloaf. Large chunks can affect the texture and taste.

  • Don’t Overmix: When combining ingredients, mix just until combined. Overworking the meat can lead to a tough meatloaf, so handle the mixture gently for the best stuffed Italian meatloaf.

  • Let It Rest: After baking, allow the meatloaf to rest for 15-20 minutes before slicing. This step is crucial for moisture retention and enhances each slice's flavor.

  • Adjust Seasonings: Taste as you go! Adjust the seasoning with salt and pepper based on the saltiness of your marinara sauce to achieve a balanced flavor.

  • Experiment with Fillings: Don’t hesitate to get creative! Add extra veggies or different cheeses in the center to craft your unique version of this stuffed meatloaf.

  • Use a Meat Thermometer: Invest in a meat thermometer to ensure the meatloaf is cooked to perfection, reaching an internal temperature of 160°F (70°C) for ideal doneness.

Storage Tips for Stuffed Italian Meatloaf

Fridge: Store leftovers in an airtight container for up to 3 days. Be sure to let the meatloaf cool completely before sealing to prevent condensation.

Freezer: For longer storage, wrap the stuffed Italian meatloaf tightly in plastic wrap and then foil, or place it in a freezer-safe bag. It can be frozen for up to 3 months.

Reheating: To reheat, thaw in the fridge overnight. Bake in a preheated oven at 350°F (175°C) for about 20-25 minutes, or until heated through, ensuring the center is warm.

Before Baking: If you prefer to freeze before baking, simply follow the filling and shaping steps, then freeze. Bake directly from frozen, increasing the baking time to 75-90 minutes.

Stuffed Italian Meatloaf Recipe FAQs

What should I look for when selecting ground beef?
When choosing ground beef for your stuffed Italian meatloaf, opt for meat that is bright red with minimal visible fat. Aim for a blend with about 80% lean meat, as it will provide the right balance of flavor and moisture without being overly greasy. Freshness is key; check for a sell-by date to ensure you're getting high-quality beef.

How should I store leftover stuffed Italian meatloaf?
Absolutely! Store any leftovers in an airtight container in the refrigerator for up to 3 days. Make sure it has cooled completely before sealing to avoid excess moisture accumulation. For optimal taste, reheat in the oven rather than the microwave to keep the texture nice and cozy.

Can stuffed Italian meatloaf be frozen?
Yes! Place your stuffed Italian meatloaf tightly wrapped in plastic wrap, followed by aluminum foil. This will prevent freezer burn, keeping the flavors intact. It can be frozen for up to 3 months. For reheating, thaw in the fridge overnight, then bake in a preheated oven at 350°F (175°C) for about 20-25 minutes until heated through.

What can I do if my meatloaf is too dry?
If you find your meatloaf turns out dry, don't fret! Next time, consider incorporating more moisture by adding a splash of broth or an extra egg. You might also want to cover it with foil during baking to retain steam, which helps keep it juicy. And remember, letting it rest before slicing ensures better moisture retention.

Is stuffed Italian meatloaf suitable for dietary restrictions?
Very much so! This dish is quite versatile. To accommodate dietary needs, you can use ground turkey or chicken instead of beef for a leaner option. Substitute the breadcrumbs with gluten-free variants and opt for vegan cheese to fit a plant-based diet. Feel free to adjust the herbs and seasonings based on your preferences or any allergies.

What if I don’t have marinara sauce?
If marinara sauce isn’t on hand, you can create a quick substitute using crushed tomatoes, a bit of garlic powder, and Italian herbs like basil and oregano. This mixture will add delicious moisture and flavor to your stuffed Italian meatloaf, ensuring a satisfying result even without the traditional sauce.

Stuffed Italian meatloaf

Stuffed Italian Meatloaf: Comforting Flavor in Every Bite

Stuffed Italian meatloaf combines rich ground beef, creamy mozzarella, and aromatic herbs into a comforting dinner perfect for any occasion.
Print Recipe Pin Recipe
Prep Time 30 minutes mins
Cook Time 1 hour hr
Resting Time 20 minutes mins
Total Time 1 hour hr 50 minutes mins
Servings: 6 slices
Course: Dinner
Cuisine: Italian
Calories: 360
Ingredients Equipment Method Nutrition Notes

Ingredients
  

For the Meatloaf
  • 1 lb Ground Beef can be substituted with 50% ground pork
  • 1 cup Breadcrumbs use gluten-free if needed
  • 1/2 cup Grated Parmesan Cheese can substitute with pecorino
  • 1/4 cup Fresh Parsley or replace with fresh basil
  • 1 tbsp Fresh Basil can use dried basil (1/3 amount)
  • 1 medium Onion can substitute with shallots
  • 2 cloves Garlic or garlic powder as a substitute
  • 2 large Eggs can use flaxseed meal with water for vegan option
  • 1 tbsp Italian Seasoning can substitute with oregano and thyme
  • to taste Salt and Pepper adjust according to preference
For the Stuffing
  • 1 cup Mozzarella Cheese fresh mozzarella offers better flavor
  • 1 cup Marinara Sauce use homemade or store-bought
  • optional Sliced Pepperoni or Prosciutto can omit for a leaner dish

Equipment

  • Oven
  • Skillet
  • Mixing Bowl
  • Baking Sheet
  • Parchment Paper
  • Meat Thermometer

Method
 

Step‑by‑Step Instructions for Stuffed Italian Meatloaf
  1. Preheat your oven to 350°F (175°C) and line a baking sheet with parchment paper.
  2. Sauté chopped onion and minced garlic in a skillet over medium heat for 5-7 minutes until translucent.
  3. In a bowl, combine ground beef, breadcrumbs, Parmesan, parsley, basil, onion, garlic, eggs, marinara sauce, Italian seasoning, salt, and pepper.
  4. Shape the meat mixture into a rectangle about 1 inch thick on parchment.
  5. Sprinkle mozzarella cheese over the meat rectangle and add optional pepperoni or prosciutto.
  6. Carefully roll the meat mixture using the parchment as a guide into a log shape.
  7. Place the rolled meatloaf seam side down on the baking sheet and top with marinara sauce.
  8. Bake in the oven for about 60 minutes, or until the internal temperature reaches 160°F (70°C).
  9. Let the meatloaf rest for 15-20 minutes before slicing.
  10. Serve warm, drizzling with more marinara sauce if desired.

Nutrition

Serving: 1sliceCalories: 360kcalCarbohydrates: 15gProtein: 28gFat: 22gSaturated Fat: 9gPolyunsaturated Fat: 1gMonounsaturated Fat: 8gCholesterol: 120mgSodium: 680mgPotassium: 550mgFiber: 2gSugar: 3gVitamin A: 8IUVitamin C: 2mgCalcium: 15mgIron: 15mg

Notes

Finely chop veggies for better distribution and avoid overmixing to keep meatloaf tender. Allow it to rest for moisture retention and adjust seasonings to taste.

Tried this recipe?

Let us know how it was!

Flavorful Jailhouse Rice: Your New Go-To Comfort Meal

February 8, 2026 by Grace Snow Leave a Comment

The earthy aroma of spices mingles with the sizzle of sausage as I dive into making this Flavorful Jailhouse Rice, a budget-friendly one-pot wonder! Packed full of fluffy rice, vibrant bell peppers, and hearty beans, this dish is a comforting embrace after a long day. What I love most is how easily it adapts to my cravings — think of it as a culinary canvas where you can swap ingredients based on what’s in your pantry! Not only is it a crowd-pleaser that will delight your family and friends, but it also comes together in a snap, making dinner stress a thing of the past. Ready to fill your kitchen with warmth and deliciousness? Let's explore this easy-to-make recipe together!

Why is Jailhouse Rice a must-try?

Versatile and Customizable: This dish is your culinary playground, perfect for swapping in different proteins or veggies based on what you have on hand.

Hearty and Filling: A combination of rice, beans, and sausage ensures each serving provides a satisfying meal that will keep hunger at bay.

Budget-Friendly Delight: With affordable ingredients, this recipe proves that delicious home-cooked meals don’t have to strain your wallet.

One-Pot Convenience: Say goodbye to lengthy cleanups! Everything cooks together in one pot, making it easier than ever to create a comforting dinner.

Crowd-Pleaser: Whether it’s a family dinner or a cozy gathering, this Flavorful Jailhouse Rice will impress everyone at the table. Pair it with a refreshing side salad or some homemade cornbread for a complete meal!

Looking for more ideas? This easy-to-make dish is just as delightful as Furikake Fried Rice or Lime Chicken Rice.

Flavorful Jailhouse Rice Ingredients

For the Base

  • Smoked Sausage – Adds savory, rich flavor; substitute with chorizo or turkey sausage for a lighter option.
  • Olive Oil – Provides fats for cooking and flavor; can be swapped for vegetable oil if needed.
  • Onion – Adds sweetness and depth; yellow or white onion is preferred, or can be omitted for a milder taste.
  • Green Bell Pepper – Contributes freshness and texture; substitute with other colorful bell peppers or zucchini for variety.
  • Red Bell Pepper – Enhances sweetness and color; optional if unavailable.
  • Garlic – Infuses aroma and flavor; fresh garlic is best, but powdered garlic can be used in a pinch.
  • Diced Tomatoes (undrained) – Brings moisture and acidity; fresh tomatoes can be used, adjusting the liquid content accordingly.
  • Tomato Sauce – Adds a smooth texture and flavor; swap with marinara sauce for added herbs.
  • Kidney Beans – Provides protein and fiber; other canned beans, like black beans, can work as well.
  • Pinto Beans – Offers creaminess and flavor; any beans on hand can be used.
  • Long-Grain White Rice – The primary carbohydrate base; alternative with brown rice or quinoa but adjust cooking times.
  • Chicken Broth – Adds flavor; vegetable broth works well for a vegetarian option.

For Spice & Seasoning

  • Chili Powder – Adds warmth and spice; can be replaced with paprika for a milder flavor.
  • Smoked Paprika – Adds depth and smokiness; use regular paprika as a substitute if necessary.
  • Cayenne Pepper – Provides heat; adjust according to spice preference or replace with red pepper flakes.
  • Dried Oregano – Brings herbal notes; Italian seasoning can be a substitute.
  • Black Pepper & Salt – Essential for basic seasoning; adjust to taste.

Optional Garnishes

  • Hot Sauce – For additional heat, add to taste.
  • Chopped Green Onions – For a fresh garnish to brighten up the dish.

Enjoy crafting this Flavorful Jailhouse Rice, a dish that not only fills your kitchen with mouthwatering scents but also caters to your culinary creativity!

Step‑by‑Step Instructions for Flavorful Jailhouse Rice

Step 1: Sauté the Sausage
In a large pot, heat 2 tablespoons of olive oil over medium heat. Once hot, add the sliced smoked sausage and cook for about 5-7 minutes, stirring occasionally until browned and caramelized. This will infuse your kitchen with a savory aroma. Once browned, remove the sausage from the pot and set aside.

Step 2: Sauté the Vegetables
Using the same pot, add the diced onion and green bell peppers. Cook over medium heat for 5-7 minutes, stirring frequently until the vegetables are softened and the onion turns translucent. This step builds a flavorful base for your Flavorful Jailhouse Rice, enhancing the overall taste of the dish.

Step 3: Add Garlic
Next, stir in 3 minced garlic cloves and sauté for about 30 seconds until fragrant. Be careful not to let the garlic burn, as it can develop a bitter taste. This aromatic addition will elevate the flavor profile of your Jailhouse Rice beautifully.

Step 4: Incorporate Tomatoes
Mix in one can of undrained diced tomatoes and 8 ounces of tomato sauce, stirring well to combine. Allow the mixture to bubble gently for about 2 minutes. This will create a rich and tangy foundation for your dish, melding all those wonderful flavors together.

Step 5: Add Beans
Stir in one can each of rinsed kidney and pinto beans. Mix thoroughly to incorporate the beans into the tomato mixture. Cook for another 2-3 minutes to warm the beans through, adding texture and heartiness to your Flavorful Jailhouse Rice.

Step 6: Introduce Rice
Now, add 1½ cups of uncooked long-grain white rice to the pot, stirring to combine with the vegetables and beans. Cook for about 1 minute, allowing the rice to toast slightly. This helps to create a nutty flavor in the final dish.

Step 7: Pour in Broth
Slowly pour in 3 cups of chicken broth, ensuring that all ingredients are submerged. Increase the heat to high and bring the mixture to a boil. This step is crucial for cooking the rice evenly and allowing it to soak up all the delicious flavors of the Jailhouse Rice.

Step 8: Season
Once boiling, add 1 teaspoon each of chili powder, smoked paprika, dried oregano, and a pinch of cayenne pepper. Stir well to combine, tasting and adjusting the seasoning with salt and black pepper as needed. Seasoning is key for making this dish come alive!

Step 9: Return Sausage
Fold the browned sausage back into the pot, distributing it evenly among the rice mixture. Reduce the heat to low, cover the pot, and let it simmer gently for 20-25 minutes. This allows the flavors to meld beautifully, and the rice to absorb all the moisture.

Step 10: Check Doneness
After simmering, check the rice to ensure it's tender and the liquid has been absorbed. If it’s still too firm or chewy, cover and cook for an additional 5 minutes. This visual cue will let you know when your Flavorful Jailhouse Rice is perfectly cooked.

Step 11: Resting Period
Once the rice is fully cooked, remove the pot from the heat and let it sit covered for 5-10 minutes. This resting period allows the flavors to settle and the rice to fluff up nicely, enhancing the final texture of your dish.

Step 12: Fluff and Serve
Using a fork, gently fluff the rice to separate the grains. Serve the Flavorful Jailhouse Rice hot, garnished with chopped green onions and hot sauce if desired. This comforting one-pot meal is ready to be enjoyed!

How to Store and Freeze Flavorful Jailhouse Rice

Fridge: Store leftover Flavorful Jailhouse Rice in an airtight container for up to 3-4 days. Make sure to let it cool completely before sealing to preserve freshness.

Freezer: Freeze portions in airtight containers or freezer bags for up to 3 months. To avoid freezer burn, remove as much air as possible before sealing.

Reheating: Reheat in a microwave or on the stovetop. For even heating, add a splash of broth or water to restore moisture while reheating.

Make-Ahead: Prepare the dish in advance and store it in the fridge for quick meals during the week. Simply reheat when ready to enjoy!

Expert Tips for Flavorful Jailhouse Rice

  • Browning the Sausage: Ensure the sausage is browned well for maximum flavor. This caramelization adds depth to the entire dish.

  • Stir Occasionally: Stirring the mixture occasionally while it simmers will help prevent sticking and ensure even cooking of the rice.

  • Cook Time Adjustments: If you opt for brown rice or quinoa, remember to adjust the cooking time as these grains may require longer to cook through.

  • Avoid Garlic Bitterness: Be cautious not to overcook the garlic; it should be fragrant but not browned to avoid a bitter taste in your Flavorful Jailhouse Rice.

  • Taste as You Go: Always taste for seasoning! Adjust the spice levels to your preference, ensuring your dish has the flavor that suits your palate.

  • Let it Rest: Allow the dish to rest after cooking. This helps flavors meld and gives the rice a chance to fluff up for perfect texture.

What to Serve with Flavorful Jailhouse Rice

Transform your cozy dinner into a delightful feast by pairing your flavorful dish with these complementary sides.

  • Cornbread: This sweet and fluffy staple perfectly balances the savory flavors of the rice. Serve it warm, slathered with butter for extra comfort.

  • Coleslaw: A refreshing, crunchy slaw adds a crisp texture that enhances the hearty rice. Its tangy dressing cuts through the warmth, providing a delightful contrast.

  • Simple Green Salad: Toss together mixed greens, cucumber, and cherry tomatoes with a light vinaigrette. This bright, fresh dish lightens up the meal and brings color to your plate.

  • Fried Egg: Top your Jailhouse Rice with a perfectly fried egg for added protein and rich flavor. The runny yolk creates a luscious sauce that elevates the entire dish!

  • Roasted Vegetables: Assorted roasted vegetables add a touch of sweetness and vibrant color. Their caramelized edges create a tasty contrast with the rice's hearty texture.

  • Hot Sauce: A few dashes of your favorite hot sauce will introduce a spicy kick that will excite your taste buds and sent your dish soaring to new heights!

  • Garlic Bread: The crispy, buttery goodness of garlic bread is an irresistible companion. It's perfect for scooping up every last bit of that flavorful rice!

  • Creamy Avocado Dip: A scoop of creamy avocado dip provides a cool, rich element that balances the savory, spicy notes. Serve it alongside for a lovely flourish.

  • Iced Tea: For a soothing drink, pair this meal with a glass of iced tea; its refreshing qualities and slight sweetness are the perfect backdrop for the bold flavors of Jailhouse Rice.

These thoughtful pairings elevate your meal while allowing the Flavorful Jailhouse Rice to shine!

Flavorful Jailhouse Rice Variations

Personalize this dish with exciting twists that will take your Flavorful Jailhouse Rice to new heights!

  • Vegetarian Twist: Omit the sausage and add more veggies like zucchini, mushrooms, or spinach for a hearty, meat-free option. This vibrant variety will satisfy anyone seeking plant-based goodness.

  • Spicy Kick: For those who love heat, toss in sliced jalapeños or increase the cayenne pepper to intensify the flavors. This fiery twist will definitely elevate your entree!

  • Grain Swap: Use brown rice or quinoa instead of white rice for added fiber and a nuttier taste. The health benefits are plentiful, making your dish even more nourishing.

  • Protein Boost: Substitute smoked sausage with lean chicken or turkey, creating a lighter meal option that’s equally delicious. This swap doesn’t skimp on flavor and keeps it healthy!

  • Tomato Upgrade: Instead of plain tomato sauce, try using your favorite spicy marinara for an extra flavor infusion. This adds an Italian flair and enhances the zest of your Jailhouse Rice.

  • Creamy Delight: Mix in a dollop of cream cheese or sour cream at the end for a rich and creamy texture. It’ll take this dish to a comfort food level you won’t forget!

  • Herb Infusion: Replace dried oregano with fresh herbs like thyme or cilantro for a fresher taste. This simple change can change the whole flavor profile and add a delightful aroma.

  • Flavorful Add-ins: Experiment with tossing in corn or peas for extra sweetness and color. These additions make your dish visually appealing and even more delicious!

With these variations, you can customize your Jailhouse Rice with flavorful twists that suit your preferences. Whether it’s a cozy weeknight dinner or a gathering with friends, you can make this dish uniquely yours. Want more meal inspiration? Check out our One Pot Salmon and Shiitake Rice or BBQ Chicken Rice for delightful ideas!

Make Ahead Options

Preparing Flavorful Jailhouse Rice ahead of time is a fantastic way to save precious minutes on those busy weeknights! You can chop your vegetables and slice the sausage up to 24 hours in advance; just store them in airtight containers in the fridge to maintain their freshness. Additionally, you can cook the rice and the entire mixture, allowing it to cool before refrigerating for up to 3 days. When you're ready to serve, simply reheat the rice on the stovetop or microwave, adding a splash of broth to restore moisture. This way, you'll achieve just as delicious results with minimal effort, making mealtime a breeze!

Flavorful Jailhouse Rice Recipe FAQs

What type of sausage should I choose for optimal flavor?
Absolutely! I recommend using smoked sausage for its rich, savory flavor, but feel free to substitute with chorizo or turkey sausage for a lighter option. The key is to choose a sausage that you enjoy, as it will significantly influence the dish's overall taste.

How should I store my leftover Jailhouse Rice?
To keep your Flavorful Jailhouse Rice fresh, store it in an airtight container in the refrigerator for up to 3-4 days. Make sure to let it cool completely before sealing to maintain the best texture and flavor.

Can I freeze this dish?
Yes! You can freeze portions of your Flavorful Jailhouse Rice in airtight containers or freezer bags for up to 3 months. To avoid freezer burn, try to remove as much air as possible before sealing. When ready to enjoy, simply thaw in the fridge overnight and reheat with a splash of broth for best results.

What if my rice isn’t cooking properly?
No worries! If the rice is still firm or chewy after the initial simmering, cover the pot and cook for an additional 5 minutes, checking it regularly. It should be tender and the liquid fully absorbed by the end. Stir occasionally as well to ensure even cooking and prevent sticking.

Are there any dietary considerations I should be aware of?
Absolutely! If you’re cooking for someone with allergies, consider swapping kidney and pinto beans with other canned beans such as chickpeas or black beans. For a vegetarian option, use vegetable broth and omit the sausage, incorporating more veggies for a nutritious twist. Always check ingredient labels for hidden allergens!

Can I use brown rice instead of white rice?
Yes, you can substitute long-grain white rice with brown rice or quinoa. Just remember that brown rice generally requires a longer cooking time, about 40-45 minutes total, so adjust your simmering time accordingly. Keep an eye on the liquid levels as well since brown rice absorbs more.

Flavorful Jailhouse Rice

Flavorful Jailhouse Rice: Your New Go-To Comfort Meal

Flavorful Jailhouse Rice is a budget-friendly, one-pot meal bursting with spices, sausage, rice, and beans, perfect for a comforting dinner.
Print Recipe Pin Recipe
Prep Time 15 minutes mins
Cook Time 45 minutes mins
Resting Time 10 minutes mins
Total Time 1 hour hr 10 minutes mins
Servings: 6 servings
Course: Dinner
Cuisine: American
Calories: 450
Ingredients Equipment Method Nutrition Notes

Ingredients
  

For the Base
  • 12 ounces Smoked Sausage can be substituted with chorizo or turkey sausage
  • 2 tablespoons Olive Oil can be swapped for vegetable oil
  • 1 medium Onion yellow or white onion is preferred
  • 1 medium Green Bell Pepper or other colorful bell peppers or zucchini
  • 1 medium Red Bell Pepper optional
  • 3 cloves Garlic fresh is best, powdered can be used in a pinch
  • 1 can Diced Tomatoes (undrained) fresh tomatoes can be used, adjusting liquid
  • 8 ounces Tomato Sauce swap with marinara sauce for added herbs
  • 1 can Kidney Beans other beans like black beans can be used
  • 1 can Pinto Beans any beans on hand can be used
  • 1.5 cups Long-Grain White Rice or brown rice/quinoa with adjusted cooking times
  • 3 cups Chicken Broth vegetable broth works for vegetarian option
For Spice & Seasoning
  • 1 teaspoon Chili Powder can be replaced with paprika
  • 1 teaspoon Smoked Paprika regular paprika can be used
  • 1 pinch Cayenne Pepper adjust for spice preference
  • 1 teaspoon Dried Oregano Italian seasoning can be substituted
  • to taste Black Pepper adjust to taste
  • to taste Salt adjust to taste
Optional Garnishes
  • to taste Hot Sauce for additional heat
  • to taste Chopped Green Onions for garnish

Equipment

  • Large pot

Method
 

Step‑by‑Step Instructions for Flavorful Jailhouse Rice
  1. In a large pot, heat olive oil over medium heat. Add sliced smoked sausage and cook for 5-7 minutes until browned, then set aside.
  2. In the same pot, add diced onion and green bell peppers. Cook for 5-7 minutes until softened.
  3. Stir in minced garlic and sauté for 30 seconds until fragrant.
  4. Mix in diced tomatoes and tomato sauce, allowing to simmer for 2 minutes.
  5. Add rinsed kidney and pinto beans, mixing thoroughly and cooking for another 2-3 minutes.
  6. Add uncooked long-grain white rice to the pot, stirring to combine.
  7. Pour in chicken broth, increase heat to high, and bring to a boil.
  8. Once boiling, add chili powder, smoked paprika, oregano, cayenne pepper, salt, and black pepper.
  9. Fold the browned sausage back into the pot, reduce heat to low, cover, and let simmer for 20-25 minutes.
  10. Check the rice for doneness; if firm, cover and cook for an additional 5 minutes.
  11. Remove from heat and let sit covered for 5-10 minutes.
  12. Fluff the rice with a fork, serve hot, and garnish as desired.

Nutrition

Serving: 1cupCalories: 450kcalCarbohydrates: 60gProtein: 20gFat: 15gSaturated Fat: 5gPolyunsaturated Fat: 2gMonounsaturated Fat: 8gCholesterol: 50mgSodium: 900mgPotassium: 700mgFiber: 8gSugar: 5gVitamin A: 10IUVitamin C: 90mgCalcium: 5mgIron: 15mg

Notes

Allow flavors to meld by letting the dish rest after cooking. Adjust seasoning to personal preference for best results.

Tried this recipe?

Let us know how it was!

Savory Garlic Parmesan Chicken Meatloaf Everyone Will Love

February 8, 2026 by Grace Snow Leave a Comment

As I sliced into the warm, golden-hued Garlic Parmesan Chicken Meatloaf, the rich aromas wafted through my kitchen, creating a scene reminiscent of family gatherings and cherished recipes passed down through generations. This delightful twist on a classic comfort food is not only easy to prepare, making it perfect for those busy weeknights, but it doubles as a stunning centerpiece for dinner parties. Each bite is a perfect balance of savory roasted garlic and creamy Parmesan, bringing a sense of warmth and happiness to the table. Plus, with lean protein from ground chicken, this dish assures you can indulge without guilt. Ready to transform your mealtime routine? Let's dive into making this irresistible Garlic Parmesan Chicken Meatloaf together!

Why is Garlic Parmesan Chicken Meatloaf a Must-Try?

Flavor Explosion: Each slice boasts a harmonious blend of savory roasted garlic and creamy Parmesan, creating a taste sensation that will often have everyone going back for seconds.

Easy Prep: With just a few simple steps, you'll have a hearty meal ready in no time—perfect for busy weeknights!

Versatile Dish: This meatloaf pairs beautifully with classic sides like mashed potatoes or fresh salads, making it ideal for any occasion.

Family-Friendly: Packed with lean protein, this dish is both healthy and delicious, appealing to everyone from kids to adults.

Make-Ahead Magic: Prepare it in advance and reheat for a quick dinner option throughout the week, just like my Crock Pot Chicken for easy meals anytime.

Comfort Score: Nothing says comfort like a warm slice of meatloaf, evoking feelings of home and happiness at every gathering.

Garlic Parmesan Chicken Meatloaf Ingredients

For the Meatloaf
• Ground Chicken – This lean protein is the star of the dish, keeping it light yet satisfying; ground turkey can be used as a substitute.
• Garlic – Fresh garlic is key for that deep, aromatic flavor; garlic powder is an option if you're in a pinch.
• Grated Parmesan Cheese – Adds creaminess and a rich, savory taste; feel free to swap with Pecorino Romano for a different twist.
• Breadcrumbs – They provide structure and texture; opt for plain or Italian-seasoned versions, or use gluten-free breadcrumbs for a GF dish.
• Eggs – Work as a binder to hold everything together; a flax egg can replace them for a vegan version.
• Onion – Enhances flavor and moisture in the meatloaf; shallots or leeks make a lovely substitution if desired.
• Soy Sauce – Brings umami richness; choose low-sodium options to keep it healthier or use tamari for gluten-free needs.
• Salt & Pepper – Essential basic seasonings; adjust according to your taste preferences for optimal flavor.

Optional Topping
• Extra Parmesan Cheese – Sprinkling more cheese on top creates a delicious golden crust as it bakes; consider adding some herbs for freshness.

Step‑by‑Step Instructions for Garlic Parmesan Chicken Meatloaf

Step 1: Preheat the Oven
Begin by preheating your oven to 375°F (190°C). While the oven heats, grab a baking dish and lightly grease it with nonstick spray to ensure an easy release of the meatloaf later. This initial preparation step is crucial for achieving that beautifully golden crust on your Garlic Parmesan Chicken Meatloaf.

Step 2: Sauté the Onions
In a medium skillet over medium heat, add diced onions and sauté for about 5 minutes, or until they become soft and translucent. Stir occasionally to prevent sticking and ensure even cooking. The aromatic scent of sautéing onions will fill your kitchen, setting the stage for the flavorful meatloaf to come.

Step 3: Combine the Ingredients
In a large mixing bowl, combine the ground chicken, the sautéed onions, minced garlic, breadcrumbs, eggs, soy sauce, salt, pepper, and half of the grated Parmesan. Mix everything thoroughly until well combined, using your hands or a spatula. The mixture should be moist yet firm, preparing it for the next step in crafting your delicious Garlic Parmesan Chicken Meatloaf.

Step 4: Shape the Meatloaf
Transfer the meat mixture into the prepared baking dish, shaping it into a classic loaf shape. Use your hands to form a smooth surface and ensure it’s evenly compacted. This step is key for achieving a well-structured Garlic Parmesan Chicken Meatloaf that holds together beautifully during baking.

Step 5: Add the Topping
Sprinkle the remaining grated Parmesan cheese on top of the shaped meatloaf. For an extra flavor dimension, consider adding a dash of paprika or Italian seasoning to the cheese before baking. This topping will create a delightful golden crust as it bakes, enhancing both the flavor and presentation of your dish.

Step 6: Bake to Perfection
Place the baking dish in the preheated oven and bake for 45 to 50 minutes. The Garlic Parmesan Chicken Meatloaf is done when it reaches an internal temperature of 165°F (74°C) and is golden brown on top. Keep an eye on it during the last few minutes to ensure it doesn’t overcook, resulting in a moist and tender meatloaf.

Step 7: Rest and Slice
Once baked, remove the meatloaf from the oven and allow it to rest for at least 10 minutes before slicing. This resting period helps retain the juices within the meatloaf, leading to a succulent texture in each slice. As it cools, the enticing aroma will continue to waft through your kitchen, making it hard to resist.

Step 8: Serve Warm
Now that your Garlic Parmesan Chicken Meatloaf is rested and beautifully sliced, serve it warm with your favorite sides like mashed potatoes or a fresh salad. This easy and comforting dish is sure to impress your family and friends, making it a wonderful addition to any meal!

Expert Tips for Garlic Parmesan Chicken Meatloaf

  • Use Fresh Garlic: Fresh garlic significantly enhances flavor. Avoid garlic powder if possible, as it lacks the depth that fresh offers and may make your Garlic Parmesan Chicken Meatloaf taste flat.

  • Don't Overmix: Mix your ingredients just until combined to maintain a tender texture. Overmixing can lead to a dense meatloaf—nobody wants that!

  • Rest Before Slicing: Allow your meatloaf to rest for at least 10 minutes after baking. This crucial step ensures juices are retained, preventing dryness and enhancing flavor in your Garlic Parmesan Chicken Meatloaf.

  • Check Temperature: Always confirm the internal temperature reaches 165°F (74°C) to ensure safe consumption. An accurate thermometer is a helpful kitchen tool to prevent any food safety mishaps.

  • Variations Welcome: Feel free to add veggies like spinach or bell peppers to boost nutrition and flavor. It's a great way to customize your Garlic Parmesan Chicken Meatloaf to suit your family's taste!

How to Store and Freeze Garlic Parmesan Chicken Meatloaf

Fridge: Store leftover Garlic Parmesan Chicken Meatloaf in an airtight container for up to 3 days. This helps maintain its moisture and flavor, ready for your next meal.

Freezer: For longer storage, wrap the cooled meatloaf tightly in plastic wrap and aluminum foil, or place it in a freezer-safe container for up to 3 months. Label with the date for easy tracking.

Thawing: When you're ready to enjoy it again, thaw the frozen meatloaf in the refrigerator overnight. This ensures even thawing and preserves the texture.

Reheating: Reheat in an oven set to 350°F (175°C) for about 15-20 minutes, or until warmed through. This method helps restore its moist and tender qualities.

Garlic Parmesan Chicken Meatloaf Variations

Feel free to get creative with this delicious recipe and customize it to suit your taste buds!

  • Lean Turkey Substitute:
    Swap ground chicken for ground turkey for a similar flavor profile, maintaining the dish's lightness.

  • Veggie Boost:
    Add in chopped spinach or bell peppers to the meat mixture for added nutrition and vibrant color.

  • Cheese Alternatives:
    Try cheddar or Gouda instead of Parmesan for a different cheesy twist that adds rich flavor.

  • Herbal Infusion:
    Mix in fresh herbs like parsley or basil for a fragrant burst of freshness in every bite.

  • Zesty Kick:
    Incorporate red pepper flakes into the meat mixture to give your meatloaf a delightful kick of heat, perfect for spice lovers.

  • Onion Variation:
    Use shallots or leeks instead of traditional onions for a unique flavor twist that elevates the dish.

  • BBQ Sauce Glaze:
    Spread a layer of your favorite BBQ sauce over the meatloaf during the last 10 minutes of baking for a sweet and smoky flavor finale.

  • Make-Ahead Magic:
    Prepare and shape the meatloaf ahead of time, then refrigerate before baking—perfect for those busy weeknights!

Stir up your culinary adventures with these variations, and don’t forget to check out my delightful Honey Garlic Chicken or our version of Crock Pot Chicken for more family-friendly meals!

What to Serve with Garlic Parmesan Chicken Meatloaf

Elevate your mealtime experience by pairing delightful sides that harmonize with the comforting flavors of this dish.

  • Creamy Mashed Potatoes: The rich, buttery texture complements the savory meatloaf, making every bite feel indulgent and satisfying. Top with a sprinkle of chives for a pop of color!

  • Fresh Garden Salad: A crisp salad with mixed greens and a light vinaigrette adds a refreshing crunch, balancing out the heartiness of the meatloaf. The bright flavors also help cleanse the palate.

  • Roasted Vegetables: Seasoned with olive oil and herbs, roasted vegetables provide a sweet contrast to the savory meatloaf while adding nutritional punch. Carrots, zucchini, and bell peppers work wonderfully together.

  • Quinoa Pilaf: This nutty grain offers a delightful texture that contrasts well with the moist meatloaf. Toss in some fresh herbs and lemon zest for an extra layer of flavor.

  • Garlic Bread: Enhance the garlic journey with warm, buttery garlic bread. Its crispy texture adds crunch, making your meal feel cozy and complete.

  • Red Wine: A glass of smooth red wine, like Merlot or Pinot Noir, complements the meatloaf's rich flavors. This pair enriches the entire dining experience, perfect for special occasions.

  • Apple Crisp: For dessert, a warm apple crisp offers a sweet and slightly tart finish after the savory meal, leaving everyone with a comforting sense of home and nostalgia.

Make Ahead Options

These Garlic Parmesan Chicken Meatloaf is perfect for busy home cooks looking to save time during the week! You can prepare the meatloaf mixture up to 24 hours in advance; simply combine the ground chicken, sautéed onions, garlic, breadcrumbs, eggs, soy sauce, and seasonings in a bowl, then cover and refrigerate. To maintain quality, be sure to keep it airtight to prevent drying out. When ready to bake, shape it into a loaf in your greased baking dish, sprinkle with Parmesan, and pop it in the oven for about 45-50 minutes. You'll enjoy a delicious, home-cooked meal with minimal effort!

Garlic Parmesan Chicken Meatloaf Recipe FAQs

How do I choose the right garlic?
Absolutely! For the best flavor, opt for fresh garlic cloves. Look for firm, plump bulbs without any dark spots or sprouting. If you only have garlic powder, it can work in a pinch, but be sure to use less since it's more concentrated—about 1/8 teaspoon for each clove.

How should I store leftover Garlic Parmesan Chicken Meatloaf?
Very simple! Store any leftover meatloaf in an airtight container in the refrigerator for up to 3 days. Ensure it's fully cooled before sealing to retain moisture and flavor. It’s perfect for quick meals during the week!

Can I freeze Garlic Parmesan Chicken Meatloaf?
Absolutely! To freeze, first let the meatloaf cool completely. Then, tightly wrap it in plastic wrap followed by aluminum foil, or place it in a freezer-safe container. It will keep for up to 3 months. Don’t forget to label it with the date for future reference!

What’s the best way to reheat meatloaf?
Great question! For the best texture, preheat your oven to 350°F (175°C) and place the meatloaf in a baking dish covered with foil. Heat for about 15-20 minutes, or until warmed through. This method helps maintain its moisture and prevents it from drying out.

Are there any dietary considerations I should be aware of?
Yes! If you or someone in your household has allergies, be cautious of the ingredients used. For a gluten-free option, substitute regular breadcrumbs with gluten-free breadcrumbs. If making this dish for pets, avoid ingredients like onion and garlic, as they can be harmful to them.

What if my meatloaf is too dry?
No worries! If you find that your meatloaf is dry, it's likely due to overcooking or overmixing. To avoid this in the future, ensure your meatloaf reaches the correct internal temperature of 165°F (74°C) without exceeding it. Also, letting it rest for 10 minutes before slicing helps maintain moisture, so give that a try next time!

Garlic Parmesan Chicken Meatloaf

Savory Garlic Parmesan Chicken Meatloaf

Garlic Parmesan Chicken Meatloaf is a delicious and easy-to-prepare dish that balances savory garlic and creamy Parmesan.
Print Recipe Pin Recipe
Prep Time 15 minutes mins
Cook Time 50 minutes mins
Resting Time 10 minutes mins
Total Time 1 hour hr 15 minutes mins
Servings: 6 slices
Course: Dinner
Cuisine: American
Calories: 320
Ingredients Equipment Method Nutrition Notes

Ingredients
  

For the Meatloaf
  • 1 pound Ground Chicken Ground turkey can be used as a substitute.
  • 3 cloves Garlic Minced; fresh garlic is recommended.
  • 1 cup Grated Parmesan Cheese Consider Pecorino Romano for a variation.
  • 1 cup Breadcrumbs Plain or Italian-seasoned; gluten-free options available.
  • 2 large Eggs Can be replaced with a flax egg for a vegan version.
  • 1 medium Onion Diced; shallots or leeks are good substitutes.
  • 2 tablespoons Soy Sauce Opt for low-sodium for a healthier choice.
  • 1 teaspoon Salt Adjust to taste.
  • 1 teaspoon Pepper Adjust to taste.
Optional Topping
  • 1/2 cup Extra Parmesan Cheese For a delicious golden crust.

Equipment

  • Baking Dish
  • Skillet
  • Mixing Bowl

Method
 

Step-by-Step Instructions for Garlic Parmesan Chicken Meatloaf
  1. Preheat your oven to 375°F (190°C) and lightly grease a baking dish.
  2. In a medium skillet over medium heat, sauté diced onions for about 5 minutes until soft.
  3. In a large mixing bowl, combine ground chicken, sautéed onions, minced garlic, breadcrumbs, eggs, soy sauce, salt, pepper, and half of the grated Parmesan.
  4. Transfer the mixture into the prepared baking dish and shape it into a loaf.
  5. Sprinkle the remaining Parmesan cheese on top of the meatloaf.
  6. Bake for 45 to 50 minutes, until it reaches an internal temperature of 165°F (74°C).
  7. Allow the meatloaf to rest for at least 10 minutes before slicing.
  8. Serve warm with your favorite sides like mashed potatoes or a fresh salad.

Nutrition

Serving: 1sliceCalories: 320kcalCarbohydrates: 20gProtein: 27gFat: 15gSaturated Fat: 6gPolyunsaturated Fat: 2gMonounsaturated Fat: 7gCholesterol: 120mgSodium: 450mgPotassium: 500mgFiber: 1gSugar: 2gVitamin A: 5IUVitamin C: 2mgCalcium: 15mgIron: 10mg

Notes

For best flavor, use fresh garlic. Resting the meatloaf ensures juicy slices.

Tried this recipe?

Let us know how it was!

Savor the Flavor with Easy High-Protein Chicken Ranch Quesadilla

February 8, 2026 by Grace Snow Leave a Comment

There’s nothing quite like the satisfying crunch of a freshly made quesadilla—especially when it’s loaded with the delightful flavors of my Easy High-Protein Chicken Ranch Quesadilla. This quick and simple recipe is perfect for those hectic weeknights when you want something delicious without spending hours in the kitchen. Packed with protein and zesty ranch seasoning, it’s a meal that will leave both kids and adults asking for seconds. Plus, with options ranging from spicy to vegetarian, you can easily customize it to fit your family’s tastes. Don’t you just love meals that bring everyone together? Let’s dive into the delightful layers of flavor waiting for you!

Why Is This Quesadilla So Special?

Quick and Easy: This recipe is designed for busy individuals, requiring minimal prep and just a few simple steps to create a flavorful meal.

Protein-Packed Delight: Loaded with high-quality chicken and cheese, it's a nutritious choice that keeps you full and satisfied without sacrificing taste.

Customizable Variations: Whether you're craving something spicy, vegetarian, or a cheesy twist, this quesadilla adapts beautifully. Try making a Cheesy Garlic Chicken Quesadilla for a savory twist!

Family Appeal: The delightful ranch flavor makes it a sure hit with kids and adults alike, promoting family-style dinners that everyone will enjoy.

Perfect for Leftovers: Easy to prepare in bulk and great for meal prep, leftover quesadillas can be reheated for quick lunches, saving you time during the week.

Crispy Exterior, Gooey Inside: Achieve that perfect balance of textures that leaves everyone coming back for more!

Easy High-Protein Chicken Ranch Quesadilla Ingredients

For the Filling

  • Cooked Chicken Breast – Provides essential protein; opt for organic for the best flavor.
  • Shredded Cheese (Cheddar or Mozzarella) – Adds creamy richness; substitute with low-fat cheese for a lighter option.
  • Ranch Dressing – Enhances flavor with a zesty kick; use homemade for a healthier twist.
  • Diced Green Onions – Offers a fresh crunch; chives can be an excellent alternative.
  • Diced Bell Pepper – Adds vibrant color and sweetness; choose any variety you like.
  • Black Pepper – Boosts flavor; adjust according to your taste preference.

For the Tortilla

  • Flour Tortillas – Serves as the wrap for all delicious fillings; whole wheat tortillas are a nutritious choice.

For Cooking

  • Olive Oil – Ensures a golden crust; avocado oil can be used for a different flavor profile.

This Easy High-Protein Chicken Ranch Quesadilla is not just a delightful dish but also a fantastic way to satisfy your taste buds while packing in protein for a healthy meal!

Step‑by‑Step Instructions for Easy High-Protein Chicken Ranch Quesadilla

Step 1: Combine Ingredients
In a large mixing bowl, combine the cooked chicken breast, shredded cheese, ranch dressing, diced green onions, diced bell pepper, and black pepper. Mix well until all ingredients are evenly distributed and coated in ranch dressing. This flavorful filling will be the star of your Easy High-Protein Chicken Ranch Quesadilla, setting the foundation for a delicious meal.

Step 2: Heat Oil
Heat a non-stick pan over medium heat and add a tablespoon of olive oil. Swirl the oil around the pan to ensure it coats the bottom evenly. This step is crucial for achieving that perfectly crispy exterior on your quesadilla while keeping the insides warm and gooey. Wait until the oil shimmers before proceeding to the next step.

Step 3: Assemble Quesadilla
Place a flour tortilla into the preheated pan, letting it warm for about 30 seconds. Spoon a quarter of the chicken mixture onto one half of the tortilla, spreading it evenly. Carefully fold the tortilla over the filling, creating a half-moon shape. Ensure it's well-sealed to contain all that delicious stuffing as it cooks.

Step 4: Cook
Sear the quesadilla for 3-4 minutes until the bottom is golden brown and crispy. Use a spatula to gently lift the edge and check the color. Once it’s achieved that perfect hue, flip the quesadilla and cook for an additional 2-3 minutes. When both sides are golden and the cheese is melted, it’s time to take it off the heat.

Step 5: Rest & Slice
Remove the cooked quesadilla from the pan and let it rest for about 2 minutes on a cutting board. This brief rest allows the cheese to set slightly, preventing it from spilling out when sliced. Once ready, use a sharp knife to cut the quesadilla into wedges, making it easy to serve and enjoy.

Step 6: Serve
Serve your Easy High-Protein Chicken Ranch Quesadilla hot, optionally with extra ranch dressing on the side for dipping. Pair it with a fresh side salad or some tortilla chips for a complete meal. Transform your dining experience as you savor each crunchy bite filled with delicious flavors and protein-rich goodness!

Easy High-Protein Chicken Ranch Quesadilla Variations

Take your Easy High-Protein Chicken Ranch Quesadilla to the next level by exploring these delightful variations, tailored just for you!

  • Spicy Twist: Add diced jalapeños and a sprinkle of smoked paprika for a fiery kick. The heat balance will awaken your taste buds, making each bite a flavor-packed explosion.

  • Vegetarian Delight: Swap out the chicken for black beans and roasted vegetables such as zucchini and bell peppers. Not only will it cater to meatless preferences, but it'll also create a heartwarming dish full of color and flavor.

  • Cheesy Garlic Goodness: Mix minced garlic into your cheese blend before melting to add depth and aroma. This twist will have you dreaming of cheesy, garlicky goodness in every cheesy bite.

  • Breakfast Style: Substitute chicken with scrambled eggs, and toss in some diced tomatoes and spinach. Top it off with fresh salsa or avocado for a wonderful breakfast-for-dinner option that the whole family will appreciate.

  • Gluten-Free Option: Use corn tortillas instead of flour to accommodate gluten-free diets. They maintain the same crispy deliciousness while being a fantastic option for those avoiding gluten.

  • Herbed Quesadilla: Mix in fresh herbs like cilantro, basil, or even rosemary to the filling. This little addition provides a refreshing burst of flavor, whisking your taste buds away on a herbaceous adventure.

  • Crispy Bake: Instead of frying, bake the quesadilla in the oven for a healthier, hands-off approach. Spray both sides lightly with oil, place on a baking sheet, and bake at 400°F (200°C) for 15-20 minutes until golden.

  • Zesty Ranch Remix: Elevate your ranch dressing by adding a splash of hot sauce or lime juice for a zesty twist. This not only amps up the flavor but gives your quesadilla an extra zing that won’t go unnoticed.

Don’t forget, you can also pair these quesadillas with unique side dishes like a fresh salad or a creamy Honey Garlic Chicken for an extraordinary dinner that brings joy to the table. Whether you're choosing a Chipotle Lime Chicken option or a savory Crock Pot Chicken side, these recommendations will surely enhance your dining experience!

What to Serve with High-Protein Chicken Ranch Quesadilla

Elevate your dining experience by exploring delicious sides that perfectly complement this delightful dish.

  • Fresh Side Salad: A light, crunchy salad made with mixed greens and a tangy vinaigrette enhances the savory flavors of your quesadilla.
  • Creamy Guacamole: Rich, creamy guacamole adds creamy texture and a fresh taste, contrasting beautifully with the warm, cheesy quesadilla.
  • Chips and Salsa: Light and crispy tortilla chips paired with a zesty salsa provide a fun and festive experience alongside your meal.
  • Spicy Black Beans: A side of perfectly seasoned black beans brings a hearty protein boost and a flavorful punch that pairs well with the quesadilla.
  • Mexican Street Corn: Sweet and smoky street corn adds a delightful burst of flavor, making it a perfect savory complement to your main dish.
  • Cilantro Lime Rice: Fluffy cilantro lime rice adds lightness and zest, creating harmony with the savory ranch and chicken filling.
  • Pineapple Agua Fresca: Refreshing and slightly sweet, this drink pairs wonderfully to balance the savory and spicy flavors, enhancing the whole meal experience.
  • Chocolate Chip Cookies: For dessert, warm, gooey chocolate chip cookies offer a delightful sweet ending to contrast with the savory quesadilla.

Make Ahead Options

These Easy High-Protein Chicken Ranch Quesadillas are perfect for meal prep enthusiasts! You can prepare the filling—mixing the cooked chicken, cheese, ranch dressing, green onions, bell pepper, and black pepper—up to 3 days in advance. Simply store the mixture in an airtight container in the refrigerator to keep it fresh. When you're ready to serve, just assemble and cook as per the original instructions, ensuring a crispy exterior while keeping the insides gooey and delicious. To maintain that delightful texture, warm the tortillas briefly in a dry pan before filling; this helps prevent them from becoming soggy. With this make-ahead option, you’ll enjoy a fantastic meal with minimal effort, perfect for busy weeknights!

Helpful Tricks for Easy High-Protein Chicken Ranch Quesadilla

  • Prep Ahead: Prepare your filling in advance and store it in the fridge. This makes it quick and easy to whip up quesadillas on busy nights.

  • Avoid Soggy Tortillas: Briefly preheat the tortillas before adding the filling to create a moisture barrier and maintain that crispy texture in your Easy High-Protein Chicken Ranch Quesadilla.

  • Control the Heat: Cook on medium heat to ensure even cooking. Too high and the outside may burn while the inside remains cold; nobody wants that!

  • Customize with Ease: Don’t be afraid to swap in your favorite veggies or proteins! Use cooked beans for a vegetarian option or add some diced jalapeños for a spicy kick.

  • Storage Tips: Keep leftovers in an airtight container, layered with parchment paper. This prevents sticking and helps them stay fresh in the refrigerator for up to 3 days.

  • Crispy Finish: For an extra crispy quesadilla, after flipping, cover the pan briefly with a lid to help the cheese melt thoroughly while still achieving that golden exterior.

How to Store and Freeze Easy High-Protein Chicken Ranch Quesadilla

Room Temperature: Up to 2 hours is ideal for serving, as quesadillas are best enjoyed fresh and warm.

Fridge: Store in an airtight container for up to 3 days. Separate layers with parchment paper to prevent sticking and maintain crispness.

Freezer: Wrap tightly in foil or plastic wrap for up to 3 months. For best results, reheat directly from the freezer using a skillet for a crispy finish.

Reheating: Reheat in a non-stick skillet over medium heat for about 5 minutes on each side, ensuring the cheese melts and the exterior remains crispy. Enjoy your Easy High-Protein Chicken Ranch Quesadilla!

Easy High-Protein Chicken Ranch Quesadilla Recipe FAQs

What type of chicken is best for this quesadilla?
I recommend using cooked chicken breast, preferably organic or free-range, for the best flavor and quality. You can also use leftover roasted chicken or even store-bought rotisserie chicken to save time.

How should I store leftover quesadillas?
Store leftover quesadillas in an airtight container in the refrigerator for up to 3 days. To keep them fresh, it's important to separate layers with parchment paper to prevent them from sticking together.

Can I freeze the quesadillas?
Absolutely! To freeze, wrap each quesadilla tightly in foil or plastic wrap to prevent freezer burn. They can be stored for up to 3 months. For reheating, I suggest using a non-stick skillet over medium heat for about 5 minutes on each side to regain that crispy texture.

What if my quesadilla turns out soggy?
To avoid sogginess, try preheating the tortillas briefly before adding the filling; this creates a barrier against moisture. Also, keep cooking over medium heat to ensure that the exterior crisps without burning while the cheese melts evenly.

Are there any dietary considerations for allergies?
Yes, if you or anyone in your family has allergies, check the labels on your ranch dressing and tortillas, as they can sometimes contain gluten or dairy. For a gluten-free option, look for gluten-free tortillas and a dairy-free ranch dressing alternative to make this dish suitable for various dietary needs.

Can I customize the filling?
Certainly! Feel free to swap the chicken for black beans and grilled vegetables for a vegetarian option, or spice things up with diced jalapeños for a spicy twist. The beauty of this Easy High-Protein Chicken Ranch Quesadilla is in its versatility!

Easy High-Protein Chicken Ranch Quesadilla

Savor the Flavor with Easy High-Protein Chicken Ranch Quesadilla

Enjoy the Easy High-Protein Chicken Ranch Quesadilla packed with flavor and protein, perfect for quick weeknight dinners.
Print Recipe Pin Recipe
Prep Time 10 minutes mins
Cook Time 10 minutes mins
Resting Time 2 minutes mins
Total Time 22 minutes mins
Servings: 4 quesadillas
Course: Dinner
Cuisine: Mexican
Calories: 400
Ingredients Equipment Method Nutrition Notes

Ingredients
  

For the Filling
  • 2 cups Cooked Chicken Breast Provides essential protein; opt for organic for the best flavor.
  • 1 cup Shredded Cheese (Cheddar or Mozzarella) Adds creamy richness; substitute with low-fat cheese for a lighter option.
  • 1/2 cup Ranch Dressing Enhances flavor with a zesty kick; use homemade for a healthier twist.
  • 1/4 cup Diced Green Onions Offers a fresh crunch; chives can be an excellent alternative.
  • 1 medium Diced Bell Pepper Adds vibrant color and sweetness; choose any variety you like.
  • 1/2 teaspoon Black Pepper Boosts flavor; adjust according to your taste preference.
For the Tortilla
  • 4 pieces Flour Tortillas Serves as the wrap for all delicious fillings; whole wheat tortillas are a nutritious choice.
For Cooking
  • 1 tablespoon Olive Oil Ensures a golden crust; avocado oil can be used for a different flavor profile.

Equipment

  • Non-Stick Pan
  • Mixing Bowl
  • Spatula
  • Knife
  • Cutting Board

Method
 

Step-by-Step Instructions
  1. In a large mixing bowl, combine the cooked chicken breast, shredded cheese, ranch dressing, diced green onions, diced bell pepper, and black pepper. Mix well until all ingredients are evenly distributed and coated in ranch dressing.
  2. Heat a non-stick pan over medium heat and add a tablespoon of olive oil. Swirl the oil around the pan to ensure it coats the bottom evenly.
  3. Place a flour tortilla into the preheated pan, letting it warm for about 30 seconds. Spoon a quarter of the chicken mixture onto one half of the tortilla, spreading it evenly. Carefully fold the tortilla over the filling, creating a half-moon shape.
  4. Sear the quesadilla for 3-4 minutes until the bottom is golden brown and crispy. Flip the quesadilla and cook for an additional 2-3 minutes.
  5. Remove the cooked quesadilla from the pan and let it rest for about 2 minutes on a cutting board. Use a sharp knife to cut the quesadilla into wedges.
  6. Serve your Easy High-Protein Chicken Ranch Quesadilla hot, optionally with extra ranch dressing on the side for dipping.

Nutrition

Serving: 1quesadillaCalories: 400kcalCarbohydrates: 30gProtein: 30gFat: 20gSaturated Fat: 8gPolyunsaturated Fat: 2gMonounsaturated Fat: 8gCholesterol: 70mgSodium: 800mgPotassium: 300mgFiber: 2gSugar: 2gVitamin A: 500IUVitamin C: 30mgCalcium: 300mgIron: 2mg

Notes

Great for meal prep; can be stored in the fridge for up to 3 days.

Tried this recipe?

Let us know how it was!

Savory Chicken Pillows: Comforting Bites of Creamy Goodness

February 8, 2026 by Grace Snow Leave a Comment

As I stood in my kitchen, a wave of nostalgia washed over me when I thought of the comforting Chicken Pillows my mom used to make. These delightful bites are not only a family favorite, they also bring together creamy chicken filling and flaky crescent dough for the ultimate comfort food experience. Whipping up Chicken Pillows is a breeze, perfect for anyone looking to swap out fast food for something homemade and satisfying. Plus, you can customize them with your favorite toppings or even opt for brown or mushroom gravy for a fun twist. Are you ready to dive into this mouthwatering journey of flavor? Let’s get cooking!

Why are Chicken Pillows a must-try?

Comfort Food Reinvented: These Chicken Pillows redefine classic comfort food with their creamy filling and flaky exterior.

Simplicity Rules: The straightforward preparation makes them perfect for busy weeknights, showing that homemade doesn't have to mean complicated.

Customization Potential: With options for different cheeses or gravy types, these pillows can cater to various tastes, ensuring everyone at the table is satisfied, much like the flavors in Honey Garlic Chicken Thighs.

Crowd-Pleasing Delight: They make a fantastic addition to potluck gatherings or family dinners, offering a familiar taste that's hard to resist.

Quick and Freezable: Prepare a batch ahead of time and freeze them, making future meals even easier and more accessible. You can bake them straight from the freezer, which is a lifesaver on hectic days!

Chicken Pillows Ingredients

For the Filling
• Cooked, shredded chicken breast – The heart of the dish, providing a satisfying protein boost. Substitute with rotisserie chicken for an effortless option.
• Cream cheese – Adds creaminess and richness to the filling; can be replaced with Greek yogurt for a lighter alternative.
• Salted butter – Enhances flavor and contributes to a luscious filling; unsalted butter works just as well.
• Dried chives – Imparts a mild onion flavor and a pop of color; fresh chives elevate the taste even further.
• Dried minced onion – Adds savory depth; fresh minced onions are a great option but may require slight adjustments in cooking time.
• Salt and pepper – Essential for flavor; adjust to taste based on your preference.

For the Dough
• Refrigerated Pillsbury crescent roll dough – The perfect flaky outer layer that holds it all together; puff pastry is a great substitute if desired.
• Italian breadcrumbs – Creates a crispy texture; use panko breadcrumbs for an extra crunch.

For the Gravy
• Cream of chicken soup – Acts as a flavorful base for the gravy; consider cream of mushroom soup for a twist.
• Chicken gravy mix – A quick and tasty way to prepare gravy; homemade gravy options can enhance the flavor more personally.
• Water – Necessary for combining with the gravy mix and soup to achieve the right consistency.

These Chicken Pillows promise to bring comfort to your table, making every bite a delightful treat!

Step‑by‑Step Instructions for Chicken Pillows

Step 1: Preheat the Oven
Start by preheating your oven to 350°F (175°C). While the oven warms up, prepare a baking sheet by spraying it lightly with non-stick spray. This will ensure that your Chicken Pillows bake evenly and don't stick to the sheet, giving them that coveted golden-brown finish.

Step 2: Prepare the Filling
In a mixing bowl, combine softened cream cheese and salted butter, mixing until smooth and creamy. Next, gently fold in the shredded chicken, dried chives, minced onion, salt, and pepper until all ingredients are well incorporated. This flavorful mixture will create a delicious filling for your Chicken Pillows.

Step 3: Form the Dough Rectangles
Unroll the refrigerated Pillsbury crescent roll dough on a clean surface. Take two dough triangles and press them together to form a rectangle, making sure to seal the seams gently. Repeat this process until you have a total of four rectangles, which will house your creamy chicken filling.

Step 4: Fill the Dough
Divide the creamy chicken filling evenly among the prepared rectangles, placing the mixture in the center of each one. Carefully fold the corners of the dough over the filling, pinching the seams to ensure they are well sealed. This step is crucial for preventing any delicious filling from escaping while they bake.

Step 5: Coat with Butter and Breadcrumbs
Melt a small amount of butter in a microwave-safe dish. Dip each sealed Chicken Pillow in the melted butter, allowing excess to drip off. Then, roll each one in Italian breadcrumbs to coat thoroughly. This will add a wonderfully crispy texture to the outside of your Chicken Pillows.

Step 6: Bake the Chicken Pillows
Place the coated Chicken Pillows on the greased baking sheet, ensuring they are spaced appropriately apart. Bake them in the preheated oven for 22-25 minutes, or until they are golden brown and perfectly crisp. The aroma will fill your kitchen, signaling that your comfort food is nearly ready.

Step 7: Make the Gravy
While the Chicken Pillows are baking, prepare the savory gravy. In a saucepan, combine cream of chicken soup, chicken gravy mix, and water. Heat over medium-high heat, stirring until the mixture comes to a gentle boil. Once boiling, reduce the heat to low and let it simmer until you’re ready to serve.

Step 8: Serve with Gravy
Once the Chicken Pillows are golden brown and crisp, remove them from the oven. Allow them to rest for a few minutes before serving, which will help the fillings set. Drizzle the warm gravy generously over the Chicken Pillows for a final touch of flavor before serving these delightful bites to your family.

Make Ahead Options

These Chicken Pillows are fantastic for meal prep, allowing you to whip up a cozy dinner with minimal fuss during busy weeknights! You can prepare the creamy chicken filling and assemble the pillows up to 24 hours in advance; simply refrigerate them until you’re ready to bake. For longer storage, they can also be frozen before baking for up to 3 months. To maintain quality, ensure they are well-sealed in an airtight container or wrapped tightly to prevent freezer burn. When it's time to serve, bake them from frozen, adding an extra 5-10 minutes to the baking time, and you’ll have effortlessly delicious Chicken Pillows ready to delight your family!

Chicken Pillows: Customization Ideas

Enjoy expressing your culinary creativity with these delightful Chicken Pillows! Each twist brings something special to the table, making every bite an exciting new experience.

  • Cheese Variations: Swap out cream cheese for ranch or garlic herb spreads for a kick of flavor. Each brings a different creaminess that'll turn heads at your dinner table!

  • Veggie Boost: Incorporate spinach, diced bell peppers, or even some sautéed mushrooms into the filling. This not only enhances nutrition but offers a fresh crunch in each heavenly bite.

  • Gravy Lovers: Try using brown gravy or mushroom gravy instead of the traditional chicken gravy for a personalized touch. It’s a simple change that adds a delicious depth that you'll crave.

  • Protein Alternatives: If chicken isn’t your thing, consider using shredded turkey or even jackfruit for a vegetarian option. Both provide satisfying textures while keeping the spirit of these pillows intact.

  • Herb Infusion: Add fresh herbs like basil or thyme to your filling for an aromatic surprise. Fresh herbs elevate the classic flavors and make each pillow a fragrant delight.

  • Heat Factor: For those who enjoy a little spice, add diced jalapeños or a splash of your favorite hot sauce to the filling. This heat can bring your Chicken Pillows to a whole new level of excitement!

  • Crispy Coating: Want extra crunch? Try using crushed tortilla chips instead of breadcrumbs for a zesty twist. It adds an unexpected flavor that pairs beautifully with the creamy filling.

  • Homemade Gravy: Elevate your sauce game by whipping up a quick homemade gravy to pour over your pillows. A rich, savory gravy will enhance the flavors and make it feel like a special occasion.

These variations ensure that your Chicken Pillows never get boring! If you're craving more chicken inspiration, don't forget to check out Honey BBQ Chicken Rice or experience the tender flavors in Crock Pot Chicken for a comforting meal anytime.

Expert Tips for Chicken Pillows

  • Seal the Dough: Ensure all seams of the crescent dough are thoroughly sealed to prevent any delicious filling from leaking out during baking.

  • Rest Before Serving: Let the Chicken Pillows rest for a few minutes after baking. This allows the filling to settle, making them easier to serve and eat.

  • Breadcrumb Tip: For an even crunchier texture, feel free to swap the Italian breadcrumbs for panko breadcrumbs. This small change can elevate your Chicken Pillows.

  • Filling Customization: Don't hesitate to mix in some sautéed vegetables, like spinach or peppers, into the chicken filling for added flavor and nutrition.

  • Ideal Gravy Choices: While a classic cream of chicken soup is recommended for the gravy, consider trying a homemade version to enhance the taste profile of your Chicken Pillows.

How to Store and Freeze Chicken Pillows

Fridge: Store leftover Chicken Pillows in an airtight container for up to 3 days. This keeps them fresh while allowing you to enjoy them a second time.

Freezer: To freeze Chicken Pillows, place them uncooked in a single layer on a baking sheet, then transfer to a freezer-friendly container once frozen. They can last up to 3 months.

Reheating: To reheat, bake frozen Chicken Pillows straight from the freezer at 350°F (175°C) for 30-35 minutes, or until heated through and crispy. Perfect for a quick homemade meal!

Make-Ahead Tip: Prepare a batch of Chicken Pillows ahead of time and freeze them unbaked, so you can easily pull them out for a cozy, comforting dinner!

What to Serve with Chicken Pillows

Elevate your cozy dinner with delightful sides that bring out the flavors of these creamy, savory bites.

  • Steamed Vegetables: A vibrant medley of steamed broccoli, carrots, and snap peas adds color and nutrients, balancing the richness of the Chicken Pillows.
  • Garden Salad: A fresh garden salad with crisp greens and a light vinaigrette offers a refreshing contrast, making every bite that much more enjoyable.
  • Garlic Bread: Crunchy, buttery garlic bread provides additional texture and flavors that complement the creamy filling perfectly, perfect for sopping up any leftover gravy.
  • Mashed Potatoes: Creamy, buttery mashed potatoes are the classic comfort food pairing, adding extra warmth and heartiness to your meal.
  • Coleslaw: A tangy coleslaw brings a bit of crunch and zest, cutting through the richness of the Chicken Pillows to create a delightful contrast.
  • Brown Gravy or Mushroom Gravy: Enhance your dish with a generous drizzle of brown or mushroom gravy for an added layer of flavor that pairs beautifully with the chicken filling.
  • Apple Crisp: For dessert, an apple crisp with warm spices offers a sweet finish to your meal, rounding it off with cozy, comforting flavors.

With these delightful accompaniments, you’ll create a warm and inviting meal sure to please everyone at your table!

Chicken Pillows Recipe FAQs

How do I select the best chicken for the filling?
Absolutely! For the best results, use cooked, shredded chicken breast. You can opt for fresh, leftover roasted chicken or even grab a rotisserie chicken for convenience. Just make sure it's tender and juicy, as that will enhance the overall flavor of your Chicken Pillows.

How should I store leftover Chicken Pillows?
To maintain their taste and texture, store any leftover Chicken Pillows in an airtight container in the fridge for up to 3 days. When you're ready to indulge again, simply reheat them in your oven at 350°F (175°C) until warmed through.

Can I freeze Chicken Pillows?
Very! You can freeze Chicken Pillows before baking. Arrange them in a single layer on a baking sheet, freeze until solid, then transfer them to a freezer bag or container. They can last up to 3 months. When you're ready to eat, bake them from frozen at 350°F (175°C) for 30-35 minutes, until golden and crispy.

What if my Chicken Pillows leak during baking?
No worries! This can happen if the seams of the crescent dough aren't tightly sealed. Ensure you pinch the seams firmly and press the corners together well before baking. Should they still leak, don’t fret too much—just add a little extra gravy when serving!

Are Chicken Pillows suitable for people with dietary restrictions?
Definitely! For gluten-free options, you might consider using gluten-free crescent or puff pastry. If you're concerned about dairy, substitute cream cheese with a non-dairy cream cheese or Greek yogurt. Just keep an eye on allergies—you'll want to ensure no one at your table has an allergy to any of the ingredients like chicken or cream of chicken soup.

Can I add vegetables to the Chicken Pillows?
Absolutely! Incorporating sautéed vegetables, such as spinach or bell peppers, is an excellent way to enhance nutrition and add flavor to your Chicken Pillows. Just be cautious—you may need to adjust the filling consistency by reducing some of the cream cheese or butter to accommodate the additional moisture from the vegetables.

Chicken Pillows

Savory Chicken Pillows: Comforting Bites of Creamy Goodness

These Chicken Pillows redefine comfort food with creamy filling and flaky dough, perfect for homemade meals.
Print Recipe Pin Recipe
Prep Time 15 minutes mins
Cook Time 25 minutes mins
Resting Time 5 minutes mins
Total Time 45 minutes mins
Servings: 4 pillows
Course: Dinner
Cuisine: American
Calories: 320
Ingredients Equipment Method Nutrition Notes

Ingredients
  

For the Filling
  • 2 cups cooked, shredded chicken breast Substitute with rotisserie chicken for convenience.
  • 8 oz cream cheese Can be replaced with Greek yogurt for lighter version.
  • 2 tbsp salted butter Unsalted butter can be used.
  • 1 tbsp dried chives Fresh chives can enhance the flavor.
  • 1 tbsp dried minced onion Fresh minced onions can be used.
  • to taste salt and pepper Adjust according to preference.
For the Dough
  • 1 tube refrigerated Pillsbury crescent roll dough Puff pastry can be used as a substitute.
  • 1 cup Italian breadcrumbs Panko breadcrumbs can be used for extra crunch.
For the Gravy
  • 1 can cream of chicken soup Cream of mushroom soup can be used as an alternative.
  • 1 packet chicken gravy mix Homemade gravy option can enhance flavor.
  • 1 cup water

Equipment

  • Oven
  • Mixing Bowl
  • Baking Sheet
  • Saucepan
  • Microwave-safe dish

Method
 

Step-by-Step Instructions
  1. Preheat your oven to 350°F (175°C) and prepare a baking sheet by spraying lightly with non-stick spray.
  2. In a mixing bowl, combine softened cream cheese and salted butter until smooth. Fold in shredded chicken, dried chives, minced onion, salt, and pepper.
  3. Unroll the crescent roll dough and combine two dough triangles to form a rectangle, sealing seams. Repeat to create four rectangles.
  4. Divide the chicken filling evenly among the rectangles, fold corners of the dough over the filling, and pinch seams to seal.
  5. Melt a small amount of butter and dip each Chicken Pillow, then roll in Italian breadcrumbs until coated.
  6. Place Chicken Pillows on the baking sheet and bake for 22-25 minutes until golden brown and crisp.
  7. To prepare gravy, combine cream of chicken soup, gravy mix, and water in a saucepan. Heat until boiling and simmer until ready to serve.
  8. Let Chicken Pillows rest for a few minutes after baking. Serve drizzled with warm gravy.

Nutrition

Serving: 1pillowCalories: 320kcalCarbohydrates: 30gProtein: 15gFat: 18gSaturated Fat: 10gPolyunsaturated Fat: 1gMonounsaturated Fat: 6gTrans Fat: 0.5gCholesterol: 60mgSodium: 750mgPotassium: 300mgFiber: 1gSugar: 2gVitamin A: 500IUCalcium: 100mgIron: 1mg

Notes

For best results, seal all dough seams thoroughly before baking. Let rest for a few minutes after baking to set the filling.

Tried this recipe?

Let us know how it was!

Hidden Heart Chocolate Loaf Cake: A Sweet Surprise Inside

February 3, 2026 by Grace Snow Leave a Comment

As I preheat the oven and gather my ingredients, excitement builds for the Hidden Heart Chocolate Loaf Cake—a delightful showstopper perfect for Valentine’s Day. Each slice reveals a charming pink heart nestled within a rich chocolate exterior, transforming dessert into a heartfelt love note. This cake not only impresses with its striking appearance but also boasts a moist texture paired with silky dark chocolate buttercream, ensuring it’s a crowd-pleaser at any gathering. Plus, it offers the flexibility of gluten-free and dairy-free options, making it an inclusive treat for all. Ready to create a memorable moment with this lovely cake? Let’s get baking!

Why Is This Cake So Special?

Delightful Surprise: The Hidden Heart Chocolate Loaf Cake is more than just a dessert; it’s a heartfelt gesture that brings smiles with every slice.

Beautiful Presentation: Featuring a stunning pink heart hidden inside a rich chocolate exterior, it’s perfect for impressing loved ones or guests.

Versatile Options: Tailor it to your guests' needs with gluten-free or dairy-free variations, ensuring everyone can enjoy this sweet treat.

Easy to Make: With straightforward instructions and common ingredients, this recipe is accessible even for novice bakers.

Crowd Favorite: The combination of rich chocolate flavor and a charming hidden design makes it ideal for celebrations—think Valentine’s Day or anniversaries!

Consider pairing this lovely cake with fresh strawberries or whipped cream for an extra touch, and if you're looking for more chocolate delights, check out our Chocolate Pudding Cake for a classic finish to your meal!

Hidden Heart Chocolate Loaf Cake Ingredients

For the Pink Sponge

  • Baking spread (175g) – Provides fat and moisture; you can substitute with unsalted butter.
  • Caster sugar (175g) – Sweetens and contributes to the cake's texture; regular granulated sugar works too.
  • Eggs (3 large) – Binds ingredients while adding richness; ensure they're at room temperature.
  • Vanilla extract (1 tsp) – Adds flavor complexity; using pure vanilla extract will give the best results.
  • Self-raising flour (175g) – Gives structure and lightness; substitute with plain flour and add baking powder (2 tsp per 200g).
  • Pink food coloring – Creates the vibrant color for the heart; opt for professional-grade gel for best results.

For the Chocolate Sponge

  • Cocoa powder (35g) – Provides richness and deep chocolate flavor; make sure to use unsweetened cocoa powder.
  • Milk (1 ½ tbsp) – Adds moisture to the chocolate sponge; you can use dairy or non-dairy milk.
  • Baking powder (½ tsp) – Adds leavening when using plain flour.

For the Buttercream

  • Butter (100g, softened and unsalted) – The main fat for the buttercream; it’s best if at room temperature.
  • Icing sugar (200g) – Sweetens and thickens the buttercream; sift for a smoother finish.

For Decoration

  • Heart sprinkles – Optional decoration to enhance visual appeal and celebrate the hidden heart feature.

With these ingredients in hand, you're all set to create your very own Hidden Heart Chocolate Loaf Cake, a centerpiece sure to delight and surprise!

Step‑by‑Step Instructions for Hidden Heart Chocolate Loaf Cake

Step 1: Preheat the Oven
Begin by preheating your oven to 160°C fan/180°C/350°F/Gas Mark 4. While the oven warms up, prepare a 2lb loaf tin by greasing it or lining it with parchment paper to ensure easy removal later. This initial step sets the foundation for baking the perfect Hidden Heart Chocolate Loaf Cake, so make sure your oven reaches the desired temperature.

Step 2: Make the Pink Sponge
In a mixing bowl, cream together 175g of baking spread and 175g of caster sugar for about 3 minutes until the mixture is light and fluffy. Next, add 3 large room-temperature eggs and 1 teaspoon of vanilla extract, mixing well to incorporate. Gradually fold in 175g of self-raising flour and a few drops of pink food coloring until combined, achieving a smooth batter. Pour this into the prepared loaf tin and bake for approximately 50 minutes, or until a skewer inserted in the center comes out clean. Let it cool completely before trimming the ends, scoring the top, and cutting out hearts from the sponge.

Step 3: Create the Chocolate Sponge
Using the same mixing technique, cream another 175g of baking spread and 175g of caster sugar for about 3 minutes. Incorporate the 3 large eggs and 1 ½ tablespoons of milk, blending until fully combined. Gradually fold in 175g of self-raising flour, 35g of cocoa powder, and ½ teaspoon of baking powder, ensuring a smooth chocolate batter. Spread a layer of this delightful mixture into the bottom of the loaf tin, arrange the heart-shaped cutouts of pink sponge on top, and cover them with the remaining chocolate batter. Bake for another 50 minutes, and once cooled completely, remove it from the tin.

Step 4: Prepare the Buttercream
In a clean mixing bowl, beat 100g of softened unsalted butter until fluffy and light in color. Gradually add in 200g of sifted icing sugar along with 1 teaspoon of vanilla extract and 1 ½ tablespoons of milk, mixing until smooth. For an indulgent touch, mix in melted dark chocolate until the buttercream reaches a silky, spreadable consistency. This rich buttercream will perfectly complement your Hidden Heart Chocolate Loaf Cake.

Step 5: Frost and Decorate the Cake
Once the cake layers have cooled completely, generously frost the top and sides with the luscious buttercream. If desired, add heart sprinkles on top to enhance the visual appeal of your Hidden Heart Chocolate Loaf Cake. Slice into this enchanting dessert to reveal the charming pink heart inside; it's sure to delight everyone who gets a taste!

Hidden Heart Chocolate Loaf Cake Variations

Feel free to let your creativity shine by customizing your Hidden Heart Chocolate Loaf Cake—there’s a world of delightful twists and substitutions to explore!

  • Gluten-Free: Use a 1:1 gluten-free baking flour blend and ensure all other ingredients are gluten-free too.

  • Dairy-Free: Substitute the baking spread with a plant-based alternative and swap the milk for almond or oat milk.

  • Different Colors: For a vibrant twist, try using red food coloring instead of pink to match different celebrations or preferences.

  • Flavored Buttercream: Add a hint of almond or orange extract to the buttercream for an exciting flavor boost.

  • Additions: Stir in mini chocolate chips or nuts into the chocolate batter for extra texture and flavor.

  • Alternative Shapes: Instead of hearts, use cookie cutters to create different hidden shapes, such as stars or flowers.

  • Spiced Cake: Incorporate a teaspoon of cinnamon or even chili powder into the chocolate batter for a warm, spicy kick.

By trying out these variations, you can make this cake uniquely yours! If you’re craving more chocolatey goodness, consider checking out our Chocolate Pudding Cake for another delicious treat. Enjoy the baking journey!

Expert Tips for Hidden Heart Chocolate Loaf Cake

Room Temperature Ingredients: Use room temperature butter and eggs for a smoother batter and improved texture in your Hidden Heart Chocolate Loaf Cake.

Don’t Overmix: When incorporating flour into the batter, mix just until combined to maintain a light and airy texture.

Think Ahead: Refrigerate your cut-out hearts before baking the chocolate sponge; this helps them hold their shape better during baking.

Use Quality Cocoa: For a richer chocolate flavor, opt for high-quality unsweetened cocoa powder in your chocolate batter.

Proper Cooling: Allow the cake to cool completely before frosting, ensuring the buttercream doesn’t melt and the cake holds its shape beautifully.

What to Serve with Hidden Heart Chocolate Loaf Cake

Indulge your senses and create the ultimate dessert experience by pairing this delightful cake with these fabulous accompaniments.

  • Whipped Cream: A dollop of freshly whipped cream adds a light and creamy contrast, enhancing the cake's rich chocolate flavor.
  • Fresh Strawberries: Juicy, ripe strawberries bring a burst of freshness that perfectly complements the indulgent chocolate, making for a beautiful presentation.
  • Vanilla Ice Cream: Creamy vanilla ice cream melts into the warm cake, providing a delightful contrast in temperature and a luscious mouthfeel.
  • Chocolate Ganache: Drizzling smooth chocolate ganache over the top amplifies the chocolate experience, making it even more decadent.
  • Mint Leaves: A sprinkle of chopped fresh mint brightens the dish and adds a refreshing herbal note, creating a lovely balance with the sweetness.
  • Decadent Hot Chocolate: Pairing with a rich, creamy hot chocolate makes for an ultimate chocolate lover’s dream, perfect for cozy evenings.
  • Espresso or Coffee: A warm cup of espresso or coffee enhances and complements the chocolate flavor, perfect for rounding out a sweet indulgence.
  • Sparkling Wine: For celebrations, a bit of sparkling wine adds a festive touch, making every bite feel like a special occasion.
  • Chocolate-Covered Strawberries: As an extra treat, chocolate-covered strawberries mirror the flavors of the cake, making it a delightful addition to your dessert spread.

How to Store and Freeze Hidden Heart Chocolate Loaf Cake

Room Temperature: Keep the cake in an airtight container at room temperature for up to 3 days to maintain its moisture and flavor.

Fridge: If you need to store it longer, place the cake in the refrigerator for up to a week, ensuring it's well-wrapped to prevent drying out.

Freezer: For longer storage, freeze the cake, either decorated or undecorated, for up to 3 months. Make sure to wrap it tightly with plastic wrap and then with aluminum foil.

Reheating: When ready to enjoy, thaw the cake in the fridge overnight and allow it to come to room temperature before serving. Enjoy the delightful surprise of the Hidden Heart Chocolate Loaf Cake!

Make Ahead Options

Preparing the Hidden Heart Chocolate Loaf Cake in advance is a fantastic way to save time, especially for busy weeknights or special occasions. You can make the pink sponge and chocolate sponge up to 24 hours ahead; simply bake them, let them cool completely, and then wrap each layer tightly in plastic wrap to maintain moisture. The buttercream can also be made up to 3 days in advance and stored in an airtight container in the refrigerator. When you’re ready to serve, just frost the cake and add the heart sprinkles for that finishing touch. By prepping these components ahead, your cake will be just as delightful and fresh, allowing you to focus on enjoying the moment!

Hidden Heart Chocolate Loaf Cake Recipe FAQs

How do I select ripe and fresh ingredients for this cake?
Absolutely! For the best results, choose fresh eggs, ideally free-range, as they provide better flavor and richer color. Look for baking spreads and butter that are at room temperature for easy creaming with sugar. Be sure to check the expiry dates on the baking powder and flour so that they are still effective for leavening.

How should I store the Hidden Heart Chocolate Loaf Cake?
You can store your cake in an airtight container at room temperature for up to 3 days. If you want it to last longer, it can be refrigerated for up to a week. Just make sure it's well-wrapped to prevent it from drying out. It’s so lovely to take out a slice on a special occasion!

Can I freeze the cake, and how should I do it?
Absolutely! To freeze the Hidden Heart Chocolate Loaf Cake, wrap it tightly in plastic wrap and then in aluminum foil to prevent freezer burn. You can freeze it for up to 3 months. When you’re ready to enjoy, thaw it in the fridge overnight, then let it come to room temperature before serving. This way, the flavors will remain rich and delicious!

What should I do if the cake doesn't rise properly?
Very! If your cake doesn't rise, ensure that your baking powder is fresh and that you haven't overmixed the batter. Overmixing can create a dense cake by developing gluten in the flour. Also, remember to preheat your oven correctly to the temperature specified in the recipe to achieve that perfect rise.

Are there any dietary considerations for the Hidden Heart Chocolate Loaf Cake?
Absolutely! You can make a gluten-free version by substituting gluten-free self-raising flour. For a dairy-free option, simply swap out the butter for a plant-based spread and use dairy-free chocolate in the buttercream. Just make sure to double-check all ingredients for hidden allergens to cater to anyone with allergies!

Is this cake pet-friendly?
No! Chocolate is toxic to pets, especially dogs and cats, so it's best to keep it out of their reach. Always opt for pet-friendly treats for your furry friends to ensure their health and happiness!

Hidden Heart Chocolate Loaf Cake

Hidden Heart Chocolate Loaf Cake: A Sweet Surprise Inside

The Hidden Heart Chocolate Loaf Cake is a delightful dessert revealing a charming pink heart within a rich chocolate exterior, perfect for Valentine’s Day.
Print Recipe Pin Recipe
Prep Time 20 minutes mins
Cook Time 1 hour hr 40 minutes mins
Cooling Time 1 hour hr
Total Time 3 hours hrs
Servings: 8 slices
Course: Dessert
Cuisine: American
Calories: 320
Ingredients Equipment Method Nutrition Notes

Ingredients
  

For the Pink Sponge
  • 175 g baking spread Can substitute with unsalted butter.
  • 175 g caster sugar Regular granulated sugar works too.
  • 3 large eggs Ensure they're at room temperature.
  • 1 tsp vanilla extract Using pure vanilla extract is best.
  • 175 g self-raising flour Can substitute with plain flour and add baking powder (2 tsp per 200g).
  • pink food coloring Opt for professional-grade gel for best results.
For the Chocolate Sponge
  • 35 g cocoa powder Ensure to use unsweetened cocoa powder.
  • 1.5 tbsp milk Can use dairy or non-dairy milk.
  • 0.5 tsp baking powder Used when using plain flour.
For the Buttercream
  • 100 g butter Softened and unsalted, best at room temperature.
  • 200 g icing sugar Sift for a smoother finish.
For Decoration
  • heart sprinkles Optional decoration.

Equipment

  • loaf tin
  • Mixing Bowl
  • Silicone Spatula
  • Whisk

Method
 

Preparation Steps
  1. Step 1: Preheat the oven to 160°C fan/180°C/350°F/Gas Mark 4. Prepare a 2lb loaf tin by greasing it or lining it with parchment paper.
  2. Step 2: Make the pink sponge: Cream together baking spread and caster sugar, add eggs and vanilla, then fold in self-raising flour with pink food coloring. Bake for approx. 50 mins.
  3. Step 3: Create the chocolate sponge: Cream baking spread and caster sugar, add eggs and milk, then fold in self-raising flour, cocoa powder, and baking powder. Layer in the loaf tin and bake for another 50 mins.
  4. Step 4: Prepare the buttercream: Beat softened butter until fluffy, add icing sugar, vanilla, and milk to mix until smooth. Optionally mix in melted dark chocolate.
  5. Step 5: Frost and Decorate the Cake: Once cooled, frost the cake with buttercream and top with heart sprinkles if desired.

Nutrition

Serving: 1sliceCalories: 320kcalCarbohydrates: 45gProtein: 4gFat: 15gSaturated Fat: 9gCholesterol: 80mgSodium: 200mgPotassium: 150mgFiber: 1gSugar: 25gVitamin A: 500IUCalcium: 50mgIron: 2mg

Notes

Use room temperature ingredients for a smoother batter. Don’t overmix to maintain texture. Refrigerate heart cutouts before baking for better shape retention.

Tried this recipe?

Let us know how it was!
  • « Previous Page
  • 1
  • …
  • 28
  • 29
  • 30
  • 31
  • 32
  • …
  • 179
  • Next Page »

Welcome!

Hi, I’m Grace, a Sydney-based home cook with a passion for bold flavors and trending ingredients. Whether you’re a busy beginner or a seasoned foodie, you’ll find dishes here that are fresh, fun, and full of flavor.

More about me

Popular Recipes

  • Cheesy Chicken Garlic Bread Sandwich
    Cheesy Chicken Garlic Bread Sandwich for Cozy Family Moments
  • Easy Chicken Ranch Wraps
    Easy Chicken Ranch Wraps: Quick, Creamy & Totally Satisfying
  • Chicken Caesar Sandwiches
    Delicious Chicken Caesar Sandwiches for Quick Comfort Food
  • best Cuban sandwich
    The Best Cuban Sandwich You’ll Want Every Weeknight!

Footer

↑ back to top

About

  • Privacy Policy
  • Disclaimer
  • Terms & Conditions

Newsletter

  • Sign Up! for emails and updates

Contact

  • About me
  • Contact me

Copyright © 2025 TastyTrendIngredients