tastytrendingredients

  • Home
  • Recipes
    • Appetizers
    • Breakfast
    • Dessert
    • Dinner
    • Drinks
    • Salads
    • Snacks
    • Soups
  • About me
  • Contact
menu icon
go to homepage
  • Home
  • Recipes
    • Appetizers
    • Breakfast
    • Dessert
    • Dinner
    • Drinks
    • Salads
    • Snacks
    • Soups
  • About me
  • Contact
search icon
Homepage link
  • Home
  • Recipes
    • Appetizers
    • Breakfast
    • Dessert
    • Dinner
    • Drinks
    • Salads
    • Snacks
    • Soups
  • About me
  • Contact
×

Delicious Mongolian Ground Beef Noodles Recipe in 30 Minutes

May 8, 2026 by Grace Snow Leave a Comment

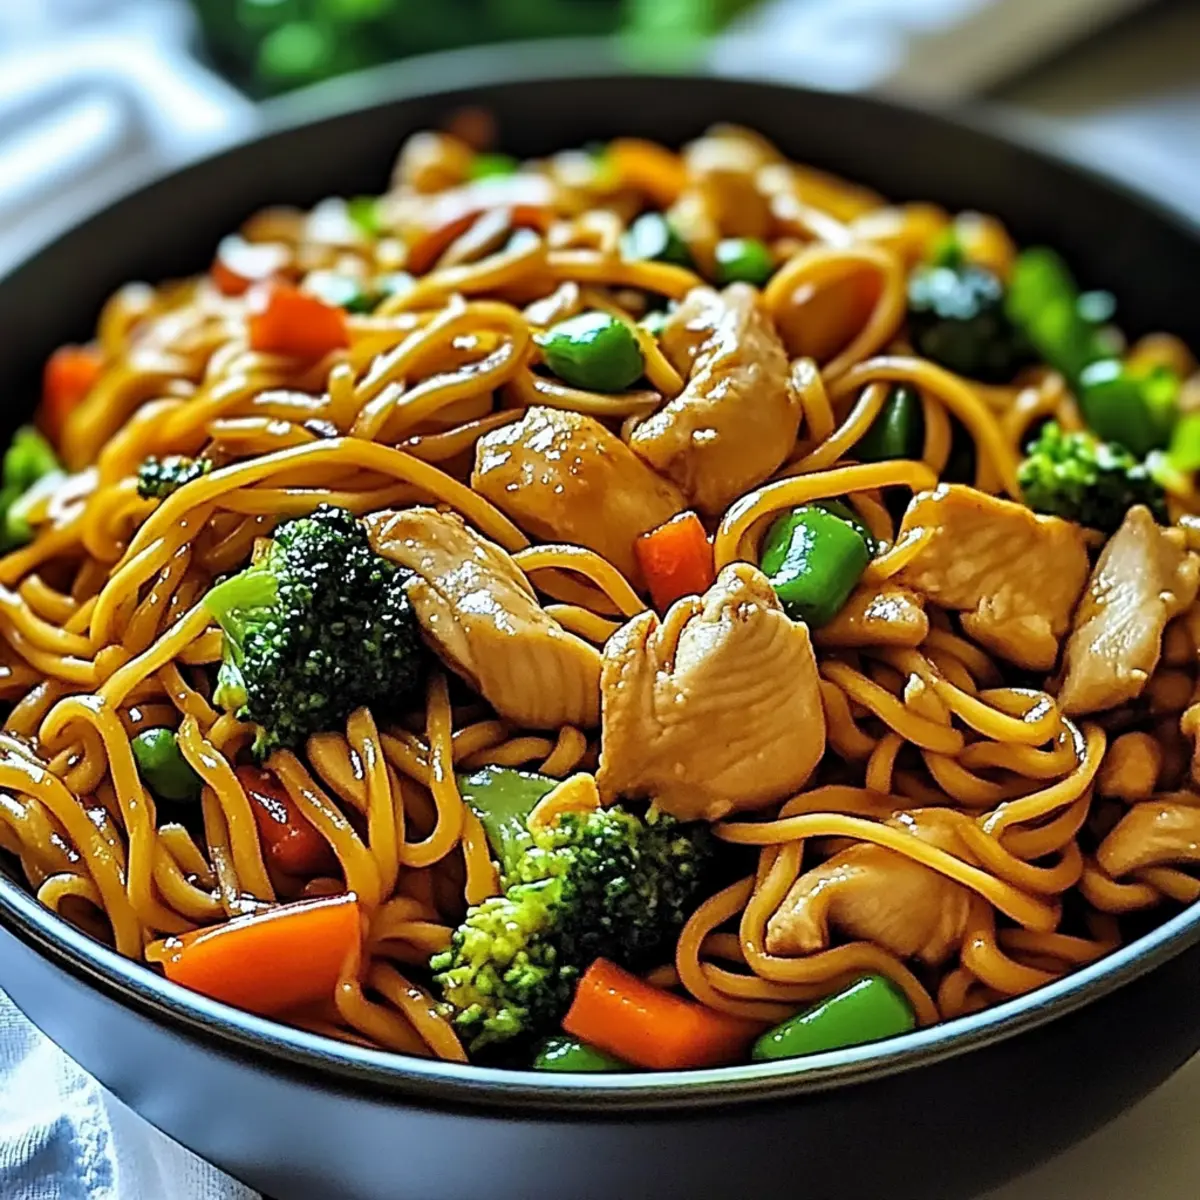
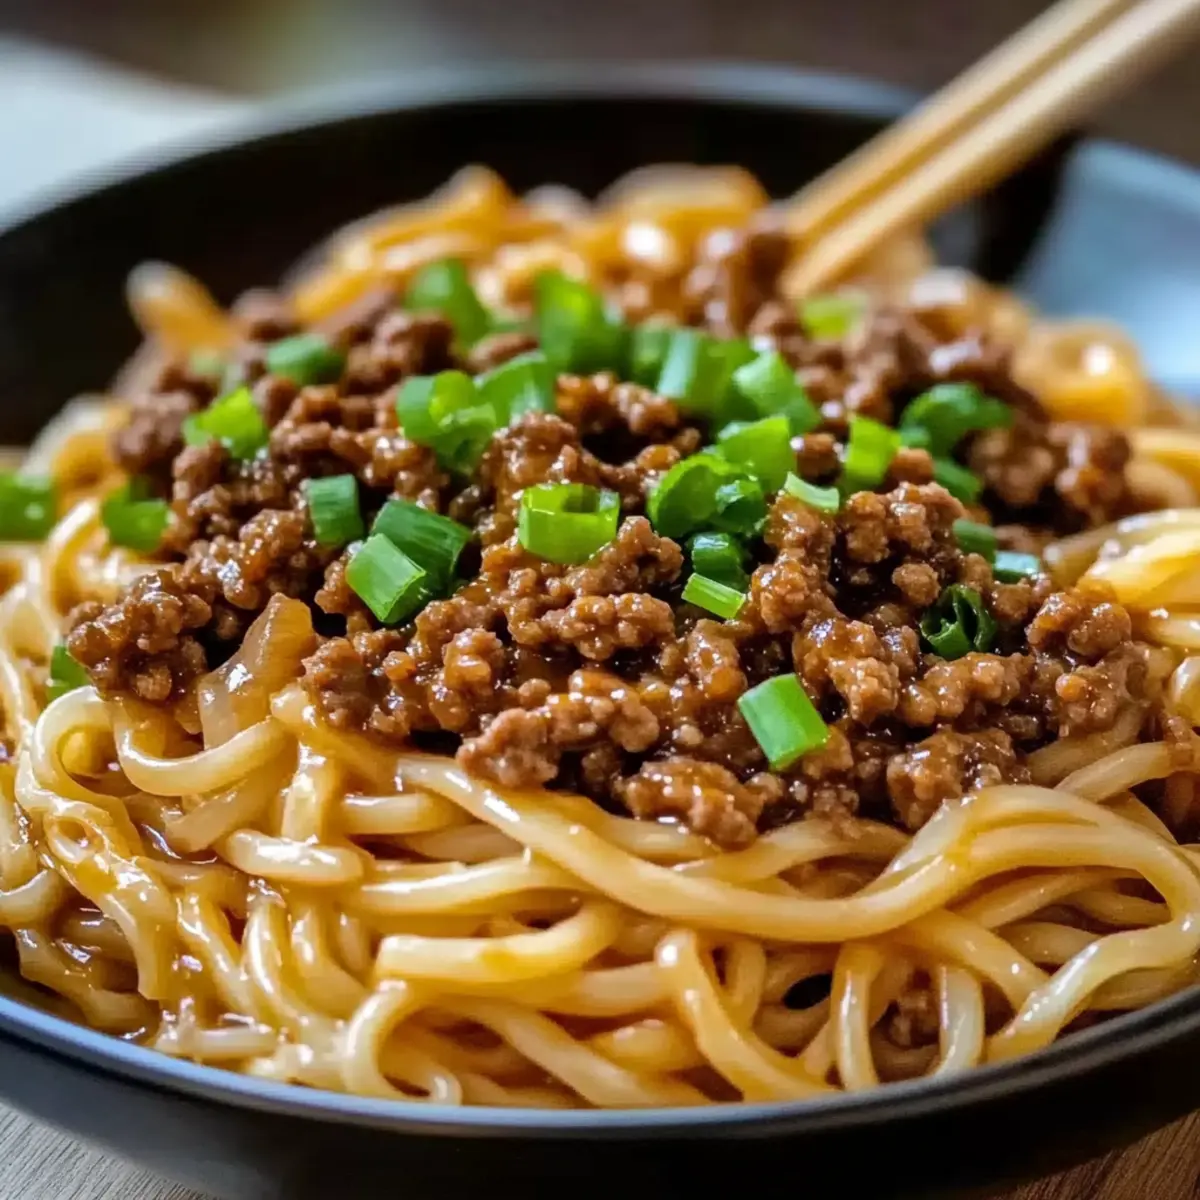
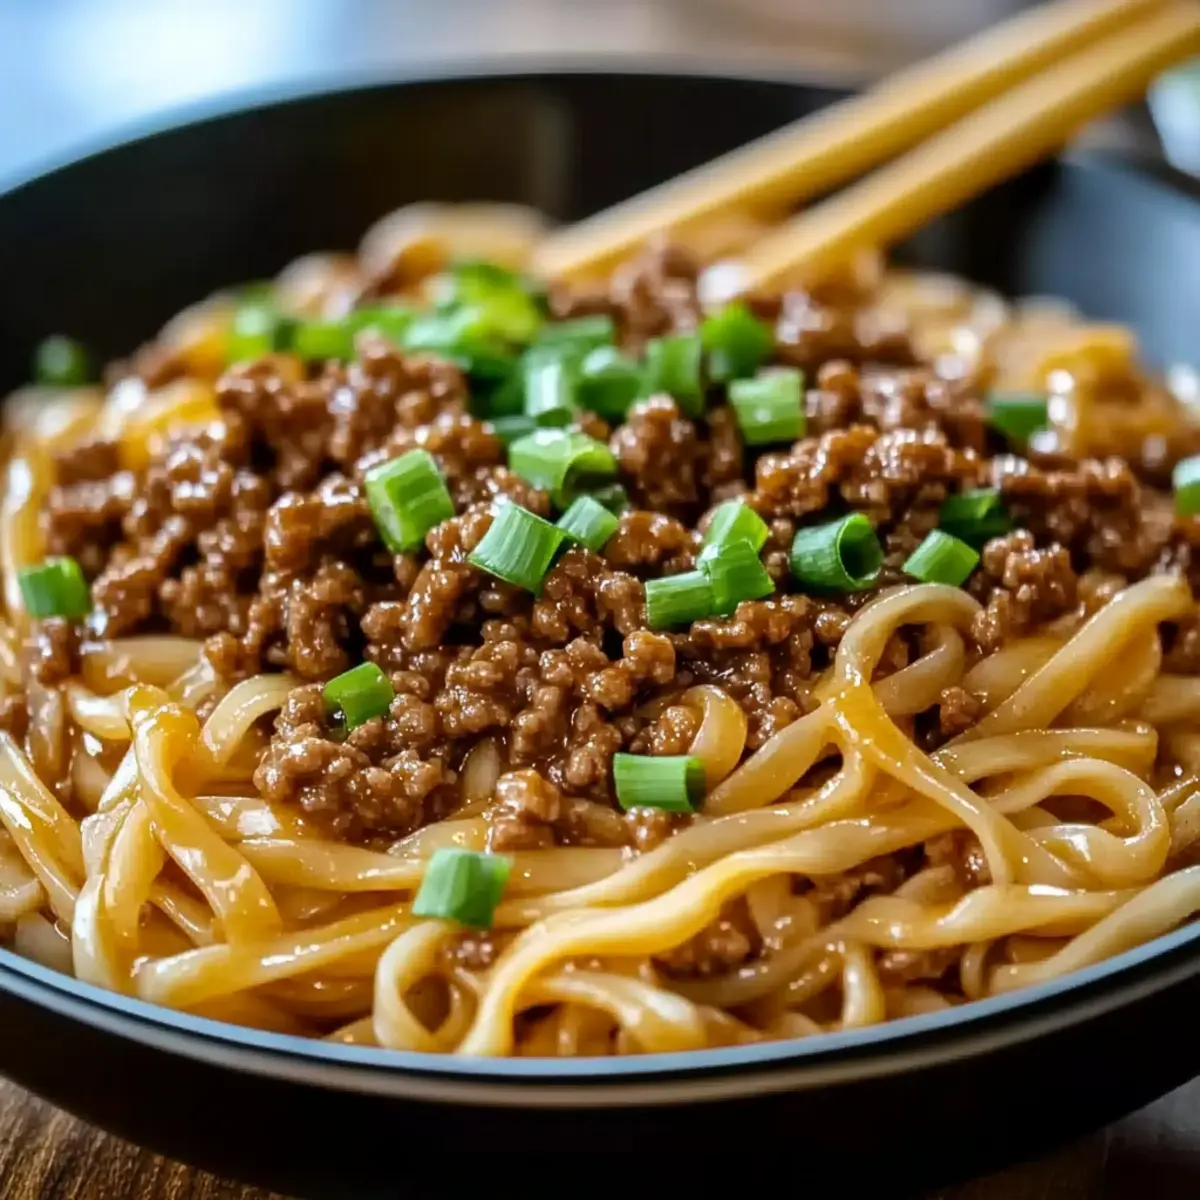
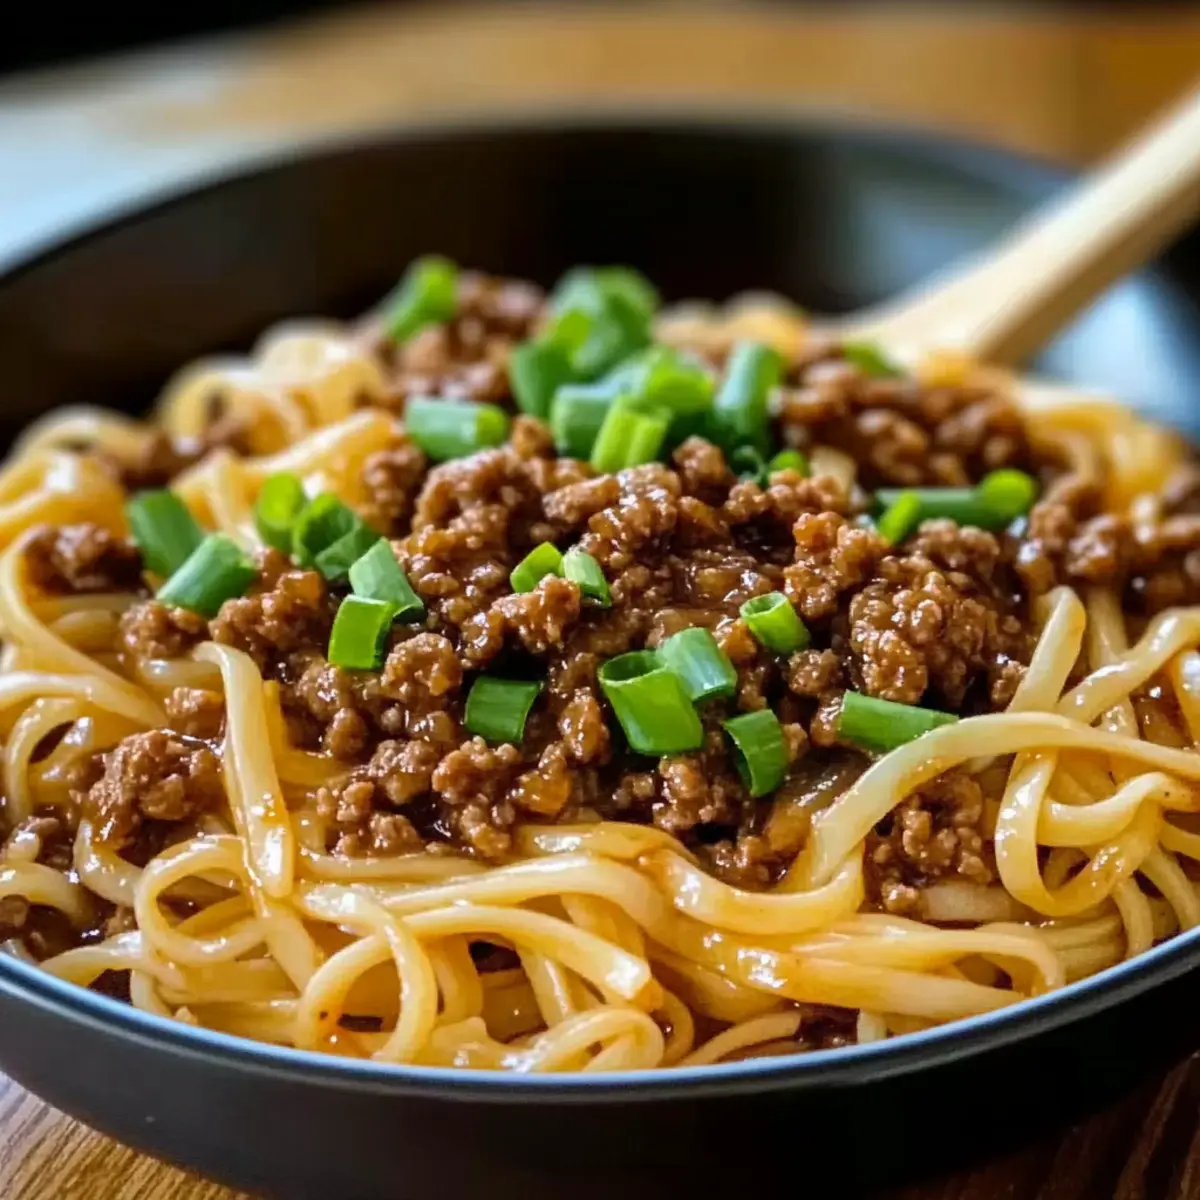
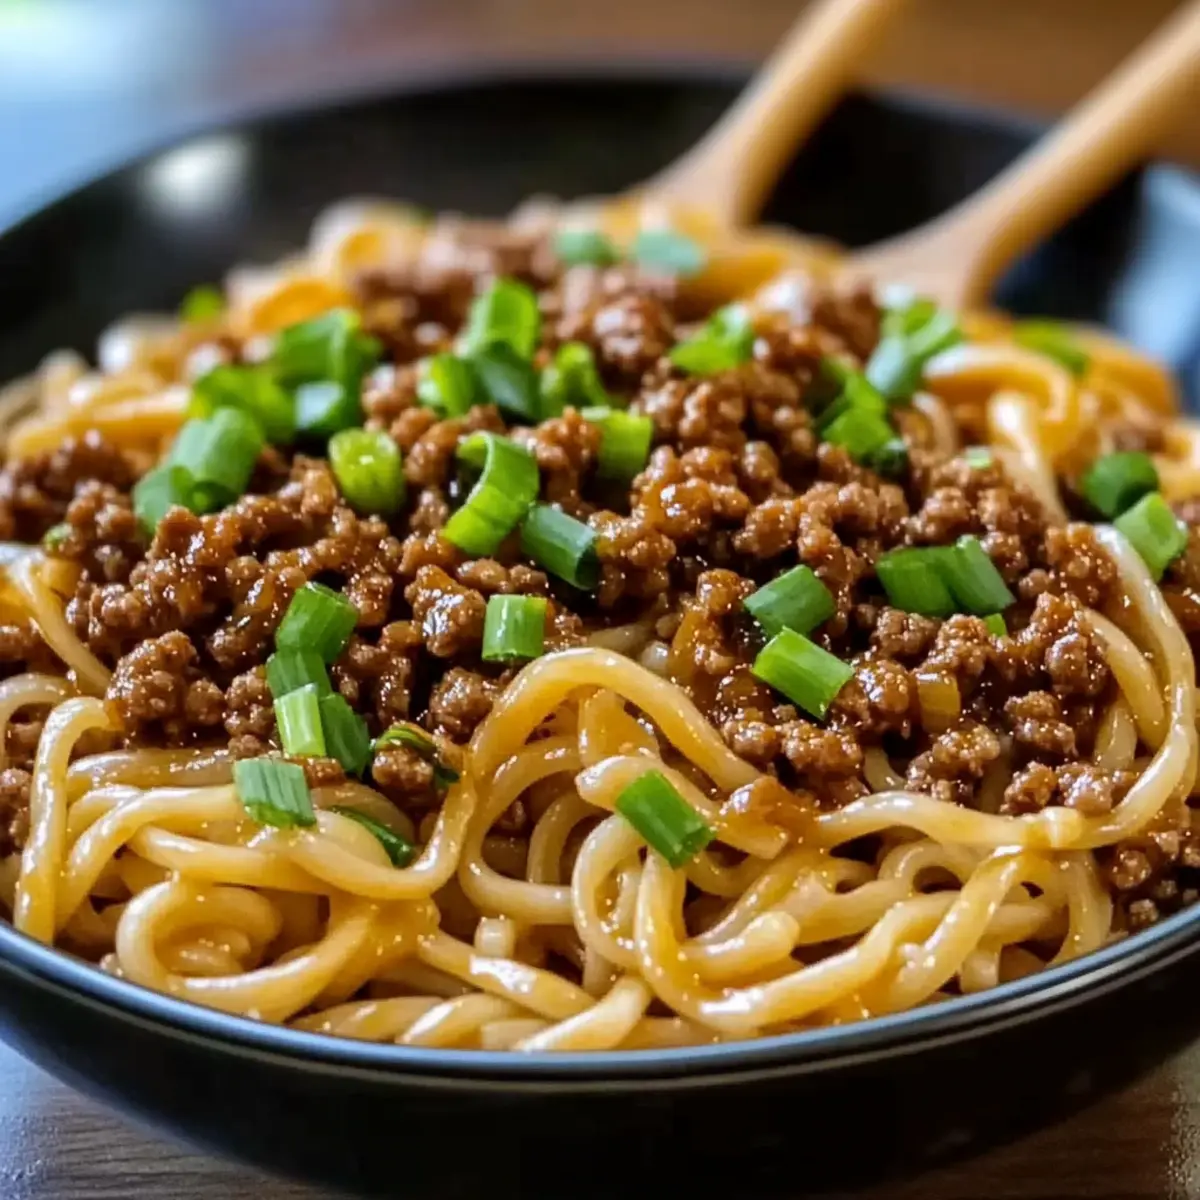
Whispers of sizzling garlic and savory broth filled the air as I turned the corner into my kitchen, with thoughts of dinner looming large. My go-to solution for those bustling weeknights? The delightful Mongolian Ground Beef Noodles Recipe. This dish is a time-saver, ready in under 30 minutes yet bursting with sweet and salty flavors that charm every palate. And with such versatility, you can play with spice levels or swap in your favorite proteins as you wish. You'll love how this comforting meal can transform your dinner routine from mundane to marvelous! Curious to see just how easy it is to whip up this delectable bowl tonight? Let’s dive in!

Why Make Mongolian Ground Beef Noodles?

Quick and Easy: This recipe is a lifesaver on busy weeknights, taking just 30 minutes from start to finish!

Savory Bliss: The incredible blend of sweet and salty flavors offers a delicious experience that will leave everyone asking for seconds.

Versatile Ingredients: Feel free to swap out ingredients or tailor the spice level to create your ideal version. Whether you stick with ground beef or try ground turkey, the possibilities are endless!

Crowd-Pleasing Appeal: Perfect for family dinners or gatherings, everyone will be delighted with this delightful comfort food option.

Mouthwatering Aroma: Get ready for your kitchen to fill with the enticing scent of garlic and savory broth as you cook—it's pure magic! For a change of pace, check out my delicious Gochujang Sesame Noodles or try the rich flavors in my Chicken Teriyaki Noodles.

Mongolian Ground Beef Noodles Ingredients

For the Base
• Ground Beef – A hearty base for protein; consider ground turkey or chicken for a lighter meal.
• Linguine – Main carbohydrate; can substitute with rice noodles or spaghetti.

For the Flavor
• Garlic – Adds aromatic flavor; use fresh minced garlic for the best taste.
• Brown Sugar – Balances savory flavors with a hint of sweetness; can substitute with honey or agave syrup.
• Soy Sauce – Essential for umami flavor; low-sodium soy sauce is a healthier alternative.
• Hoisin Sauce – Provides depth and sweetness; replace with teriyaki sauce if needed.
• Ground Ginger – Adds warmth and spice; fresh ginger can substitute for a bolder flavor.
• Ground Black Pepper – A basic seasoning to enhance flavors.
• Red Pepper Flakes – Optional for heat; adjust to personal preference.

For the Sauce
• Beef Broth – Rich flavor enhancer; substitute with vegetable broth for a vegetarian option.
• Cornstarch – Thickens the sauce; alternative: arrowroot powder.
• Water – Required for cornstarch slurry.

For Garnishing
• Green Onions – Garnish for freshness; can replace with scallions.

This amazing Mongolian Ground Beef Noodles recipe highlights the perfect balance of flavors while being quick and adaptable to fit your family's tastes!

Step‑by‑Step Instructions for Mongolian Ground Beef Noodles Recipe

Step 1: Cook Linguine
Begin by bringing a large pot of salted water to a boil. Add linguine and cook according to package instructions, usually around 8-10 minutes, until al dente. Once cooked, drain the noodles in a colander, giving them a quick rinse under cold water to prevent sticking, then set them aside while you prepare the sauce.

Step 2: Brown Beef
In a large skillet or wok, heat a drizzle of oil over medium heat. Once hot, add the ground beef, breaking it apart with a spatula. Cook for about 5-7 minutes, stirring occasionally, until the beef is browned and fully cooked with no pink remaining. Drain any excess fat from the skillet and prepare to add the garlic.

Step 3: Add Garlic
Take the cooked ground beef and lower the heat to medium-low. Stir in 3-4 cloves of freshly minced garlic, sautéing for about 1 minute until fragrant. This step infuses your Mongolian Ground Beef Noodles with a mouthwatering aroma, so keep an eye on it to ensure the garlic doesn’t burn.

Step 4: Combine Sauces
Now, it’s time to create that luscious sauce! Pour in ¼ cup of soy sauce, ¼ cup of hoisin sauce, 1 tablespoon of brown sugar, ½ cup of beef broth, 1 teaspoon of ground ginger, and a pinch of red pepper flakes for heat. Stir well and let this mixture simmer for about 3-5 minutes to blend all those tasty flavors together.

Step 5: Thicken Sauce
In a small bowl, mix 1 tablespoon of cornstarch with 2 tablespoons of water to create a slurry. Slowly add this mixture to the skillet, stirring continuously as it cooks. After about 2-3 minutes, you’ll see the sauce thicken beautifully, coating the beef and creating a glossy finish for your Mongolian Ground Beef Noodles.

Step 6: Combine Noodles
Gently toss the drained linguine into the skillet with the sauce. Using tongs or a large fork, carefully mix the noodles until they are well coated, absorbing all the delicious flavors from the sauce. Allow everything to cook together for another minute on low heat to ensure the noodles are warm.

Step 7: Garnish and Serve
Once everything is combined, remove the skillet from heat. Slice some fresh green onions and sprinkle them generously over your dish for a burst of freshness. Serve your Mongolian Ground Beef Noodles hot, and get ready to enjoy a delightful meal that transforms your dinner into a truly special occasion!

Make Ahead Options

These Mongolian Ground Beef Noodles are a fantastic choice for meal prep! You can cook the ground beef and prepare the sauce up to 3 days in advance, then refrigerate them in airtight containers to keep the flavors fresh. Just before serving, reheat the beef and sauce on the stove, adding a splash of beef broth to loosen it up if needed. Cook the linguine fresh on the day of serving for the best texture. Alternatively, you can cook the noodles ahead and toss them in a drizzle of oil to prevent sticking. This way, you’ll have a delicious, homemade meal ready in no time, saving you precious evening minutes on busy days!

Storage Tips for Mongolian Ground Beef Noodles

Fridge: Store leftover Mongolian Ground Beef Noodles in an airtight container for up to 3 days. This helps maintain flavor while keeping the dish fresh.

Freezer: For longer storage, freeze the beef mixture separately from the noodles for up to 2 months. Reheat the beef in a skillet and cook fresh noodles when ready to serve.

Reheating: When reheating, add a splash of broth or water to the skillet to revive the sauce, ensuring everything heats evenly and remains moist.

What to Serve with Mongolian Ground Beef Noodles

Elevate your dinner experience with vibrant side dishes that perfectly complement the rich flavors of your savory noodles.

  • Stir-Fried Vegetables: A colorful medley of bell peppers, broccoli, and snap peas adds crunch and freshness, making each bite even more delightful. The slight crispiness contrasts beautifully with the tender noodles, enhancing the overall meal.

  • Crispy Spring Rolls: These golden, flaky treats loaded with veggies offer a delightful crunch that will create a wonderful textural contrast on your plate. Served with a sweet and sour dipping sauce, they enhance the Asian flair of your Mongolian dish.

  • Garlic Breadsticks: Perfect for sopping up any leftover sauce, these warm, buttery breadsticks can add a comforting element to your meal. Their soft texture and warm flavor balance the savory richness of the noodles beautifully.

  • Asian Cucumber Salad: A refreshing side made with thinly sliced cucumbers, sesame oil, and rice vinegar provides a tangy note that cuts through the savory goodness of the beef. It also adds a lovely crunch and a hint of acidity, making for a perfect palate cleanser.

  • Coconut Rice: This subtly sweet rice cooked in coconut milk enhances the dish's flavor profile and adds a creamy element that pairs elegantly with the savory noodles. Its light, fragrant essence transports your palate to an exotic escape.

  • Iced Matcha Latte: For a drink, an iced matcha latte brings a soothing balance of flavors, with its earthy quality echoing the umami of the noodles. It’s both refreshing and subtly sweet, making it a great accompaniment for your meal.

  • Mango Sticky Rice: As a dessert, this classic treat offers a sweet end to your meal that complements the savory flavor of the noodles. The creamy coconut sauce and sweet mango create a warm, comforting finish that's both satisfying and indulgent.

  • Fruit Platter: A vibrant selection of seasonal fruits such as mango, kiwi, and strawberries can cleanse the palate and add a touch of brightness to the meal. The sweetness of the fruit offers a refreshing contrast that everyone will adore.

Expert Tips for Mongolian Ground Beef Noodles

Perfect Meat Choice: Use ground beef for a rich flavor, but don't hesitate to try ground turkey or chicken for a lighter twist.

Garlic Timing: Stir in minced garlic only after browning the beef to avoid burning it for optimal aroma and taste.

Sauce Thickness: Ensure your cornstarch slurry is well mixed before adding it to prevent lumps in your Mongolian Ground Beef Noodles.

Heat Control: Adjust red pepper flakes to your preference; start with a small amount if you’re cautious about spice.

No Sticky Noodles: Rinse the cooked linguine under cold water briefly to keep it from sticking together while you prepare the sauce.

Mongolian Ground Beef Noodles Variations

Feel free to make this dish your own with some delightful twists and substitutions!

  • Spicy Twist: Increase red pepper flakes or add Sriracha for an extra kick. The rich sauce becomes even more exciting with a bit of heat that tantalizes your taste buds.

  • Meat Swap: Ground chicken or turkey can be used instead for a lighter option. It’s a wonderful way to still enjoy great flavor while keeping it a bit healthier.

  • Veggie Boost: Incorporate colorful vegetables like broccoli or bell peppers for added nutrition. This not only makes the dish more vibrant but also packs in essential vitamins.

  • Noodle Variations: Swap linguine for rice noodles or whole wheat spaghetti. Different noodles bring unique textures that'll keep your family excited for dinner.

  • Sweetener Swap: Substitute brown sugar with honey or agave syrup for a natural sweetness. Experimenting with these options can add a whole new dimension to the sauce.

  • Gluten-Free: Use gluten-free soy sauce and rice noodles for a tasty gluten-free meal. Savoring a classic dish while accommodating dietary needs is absolutely achievable.

  • Coconut Cream: For a creamy twist, add a splash of coconut cream while mixing the sauce. This makes for an indulgent, rich sauce that complements the savory beef perfectly.

  • Pineapple Flair: Toss in some fresh pineapple chunks during the last minute of cooking. The sweet and tart addition gives a delightful tropical note that pairs beautifully with the savory elements.

For even more noodle inspirations, consider trying my delicious Gochujang Sesame Noodles or my flavorful Chicken Teriyaki Noodles. The options are endless, and each variation brings your kitchen to life!

Mongolian Ground Beef Noodles Recipe FAQs

What type of ground beef should I use?
Absolutely! Ground beef is the traditional choice for this recipe, as it offers a rich, hearty flavor. However, feel free to opt for ground turkey or chicken for a lighter version without sacrificing taste. Just ensure you cook it thoroughly until no pink remains.

How should I store leftovers?
Store leftover Mongolian Ground Beef Noodles in an airtight container in the fridge for up to 3 days. This method retains freshness and taste, making it easy to enjoy the next day.

Can I freeze the dish?
Yes! To freeze, separate the beef mixture from the noodles. Place the beef in a freezer-safe container, and it will last for up to 2 months. When ready to eat, simply reheat the beef in a skillet and prepare fresh noodles for that just-cooked flavor!

What should I do if my sauce is too thick?
If your sauce turns out thicker than you'd like, just whisk a little water or broth into the sauce over low heat until you reach the desired consistency. This will help loosen it up beautifully without compromising on flavor!

Are there any dietary considerations?
If anyone in your household has allergies, be mindful of the soy sauce; opt for gluten-free versions if necessary. For pets, ensure all ingredients used are safe for them, as some spices (like garlic and onion) can be harmful to certain animals.

How do I know if my noodles are cooked perfectly?
Cook the linguine according to the package instructions, generally around 8-10 minutes, until al dente. Check for a slight firmness when biting into a noodle; this indicates they’re perfectly cooked and ready for tossing with the sauce!

Mongolian Ground Beef Noodles Recipe

Delicious Mongolian Ground Beef Noodles Recipe in 30 Minutes

This Mongolian Ground Beef Noodles Recipe is a quick and flavorful meal ready in under 30 minutes, perfect for busy weeknights.
Print Recipe Pin Recipe
Prep Time 10 minutes mins
Cook Time 20 minutes mins
Total Time 30 minutes mins
Servings: 4 servings
Course: Dinner
Cuisine: Mongolian
Calories: 450
Ingredients Equipment Method Nutrition Notes

Ingredients
  

For the Base
  • 1 lb Ground Beef Or ground turkey or chicken for a lighter meal.
  • 8 oz Linguine Can substitute with rice noodles or spaghetti.
For the Flavor
  • 3-4 cloves Garlic Use fresh minced garlic for the best taste.
  • 1/4 cup Brown Sugar Can substitute with honey or agave syrup.
  • 1/4 cup Soy Sauce Low-sodium soy sauce is a healthier alternative.
  • 1/4 cup Hoisin Sauce Replace with teriyaki sauce if needed.
  • 1 teaspoon Ground Ginger Fresh ginger can substitute for a bolder flavor.
  • 1 teaspoon Ground Black Pepper A basic seasoning to enhance flavors.
  • 1/2 teaspoon Red Pepper Flakes Optional for heat; adjust to personal preference.
For the Sauce
  • 1/2 cup Beef Broth Substitute with vegetable broth for a vegetarian option.
  • 1 tablespoon Cornstarch Alternative: arrowroot powder.
  • 2 tablespoons Water Required for cornstarch slurry.
For Garnishing
  • 2 stalks Green Onions Can replace with scallions.

Equipment

  • Large pot
  • skillet or wok
  • Colander
  • small bowl

Method
 

Step-by-Step Instructions
  1. Begin by bringing a large pot of salted water to a boil. Add linguine and cook according to package instructions, usually around 8-10 minutes, until al dente. Once cooked, drain the noodles in a colander, giving them a quick rinse under cold water to prevent sticking, then set them aside while you prepare the sauce.
  2. In a large skillet or wok, heat a drizzle of oil over medium heat. Once hot, add the ground beef, breaking it apart with a spatula. Cook for about 5-7 minutes, stirring occasionally, until the beef is browned and fully cooked with no pink remaining. Drain any excess fat from the skillet and prepare to add the garlic.
  3. Take the cooked ground beef and lower the heat to medium-low. Stir in the minced garlic, sautéing for about 1 minute until fragrant.
  4. Pour in soy sauce, hoisin sauce, brown sugar, beef broth, ground ginger, and red pepper flakes. Stir well and let this mixture simmer for about 3-5 minutes.
  5. In a small bowl, mix cornstarch with water to create a slurry. Slowly add this mixture to the skillet, stirring continuously as it cooks. After about 2-3 minutes, the sauce will thicken.
  6. Gently toss the drained linguine into the skillet with the sauce. Mix the noodles until they are well coated and allow everything to cook together for another minute on low heat.
  7. Once combined, remove the skillet from heat. Slice green onions and sprinkle them over your dish for freshness. Serve hot.

Nutrition

Serving: 1servingCalories: 450kcalCarbohydrates: 40gProtein: 30gFat: 20gSaturated Fat: 7gPolyunsaturated Fat: 2gMonounsaturated Fat: 8gCholesterol: 80mgSodium: 800mgPotassium: 600mgFiber: 3gSugar: 5gVitamin A: 500IUVitamin C: 2mgCalcium: 50mgIron: 2mg

Notes

Feel free to swap out ingredients or tailor the spice level to create your ideal version. This recipe helps transform your dinner routine from mundane to marvelous!

Tried this recipe?

Let us know how it was!

Gluten-Free Chicken Lo Mein: Quick and Comforting Delight

May 8, 2026 by Grace Snow Leave a Comment

As I tossed fresh vegetables into the skillet, a wave of nostalgia washed over me, transporting me back to bustling takeout joints filled with sizzling woks and tantalizing aromas. My Gluten-Free Chicken Lo Mein captures all that essence in a wonderfully comforting bowl, all while being a quick weeknight meal ready in just about 30 minutes. Perfect for when the family craves something hearty yet healthy, this dish features tender chicken, a medley of crisp veggies, and a savory sauce that can be tailored to even the pickiest of eaters. Plus, you’ll love how simple it is to whip together, ensuring you never have to reach for fast food again. What creative twists will you add to make it your own?

Why is this Chicken Lo Mein special?

Simplicity at its finest: This recipe takes only 30 minutes, making it an easy choice for busy weeknights.
Customizable flavors: You can mix in your favorite vegetables or protein, ensuring everyone at the table gets what they love.
Healthier alternative: Unlike takeout, you control the ingredients, making it gluten-free while bursting with nutrients.
Comforting nostalgia: Each bite transports you back to your favorite takeout era, but with wholesome ingredients that you made at home!
Combine this dish with a Light and Tangy Cucumber Salad for a refreshing contrast!

Gluten-Free Chicken Lo Mein Ingredients

Prepare to create a delightful and satisfying meal right at home with these simple ingredients!

For the Chicken
• Chicken Breast – Provides protein and substance; for variety, substitute with thinly sliced beef, shrimp, or baked tofu.

For the Noodles
• Lo Mein Noodles – The base of the dish; opt for brown rice spaghetti or dedicated gluten-free lo mein noodles, cooking them al dente to prevent mushiness.

For the Vegetables
• Vegetables (cabbage, carrots, etc.) – Adds a delightful crunch and flavor; feel free to use any leftover veggies for a customized twist.

For the Sauce
• Gluten-Free Soy Sauce or Tamari – Adds savory depth to the dish; swap with gluten-free hoisin sauce for an even richer flavor profile.
• Ginger – Infuses aromatic flavor; freshly grated is best for better integration, or use garlic powder for simplicity.
• Garlic – A must for added zest; opt for freshly minced for optimal flavor.
• Chicken Broth – Helps adjust the sauce consistency; use vegetable broth for a vegetarian alternative.

For Cooking
• Cooking Oil – Essential for stir-frying; canola or sesame oil will lend additional flavor to the dish.

With these wholesome ingredients, your Gluten-Free Chicken Lo Mein is just a stir-fry away!

Step‑by‑Step Instructions for Gluten-Free Chicken Lo Mein

Step 1: Prep Ingredients
Begin by gathering your ingredients. Chop the vegetables, such as cabbage and carrots, into bite-sized pieces, and set them aside. Slice the chicken breast into thin strips, ensuring even cooking. This preparation ensures a smooth cooking process, allowing you to easily transition to the next steps without any disruptions.

Step 2: Cook Chicken
In a large skillet or wok, heat 1-2 tablespoons of cooking oil over medium-high heat until shimmering. Add the sliced chicken and stir-fry for about 5-7 minutes, or until it turns golden brown and is cooked through. The chicken should have no pink remaining; this creates a flavorful base for your Gluten-Free Chicken Lo Mein.

Step 3: Sauté Vegetables
Once the chicken is cooked, remove it from the skillet and set it aside. In the same skillet, add a bit more oil if needed and toss in your chopped vegetables. Stir-fry for about 3-4 minutes, until the veggies are just tender but still crisp. Look for vibrant colors, as this indicates they're cooked perfectly and ready to mingle with the flavors.

Step 4: Make Sauce
While the vegetables are sautéing, prepare the sauce. In a medium bowl, whisk together ¼ cup of gluten-free soy sauce, minced ginger, minced garlic, and ½ cup of chicken broth. This mixture will serve as your flavor powerhouse, bringing that savory depth to your Gluten-Free Chicken Lo Mein.

Step 5: Combine
Return the cooked chicken to the skillet with the sautéed vegetables. Next, add the cooked lo mein noodles, ensuring they are al dente. Pour the sauce over the entire mixture and toss everything together for about 2-3 minutes, allowing the noodles to absorb the flavors and heat through thoroughly.

Step 6: Serve
Once everything is well combined and heated through, remove the skillet from heat. Plate your steaming Gluten-Free Chicken Lo Mein, and if desired, garnish with sesame seeds or sliced green onions for an extra pop of flavor. Serve it hot and enjoy a comforting and delicious meal that rivals your favorite takeout!

What to Serve with Gluten-Free Chicken Lo Mein

You'll love creating a full meal around this satisfying dish, elevating it to an unforgettable culinary experience.

  • Light and Tangy Cucumber Salad: This refreshing salad balances the savory flavors of the lo mein, adding a crisp texture and a burst of tanginess.

  • Crispy Spring Rolls: These delightful rolls offer a satisfying crunch, filled with fresh vegetables, perfectly complementing the tender noodles and chicken.

  • Garlic Butter Edamame: Tender edamame tossed in garlic and butter provides a protein-packed side that enhances the umami experience of the meal.

  • Sesame Broccoli: Lightly steamed or sautéed broccoli drizzled with sesame oil completes the dish with a nutty flavor and vibrant color.

  • Miso Soup: A warm bowl of miso soup aids in digestion and adds a comforting touch, making it a perfect starter before your main course.

  • Chilled Green Tea: Pairing with this soothing beverage cleanses the palate, enhancing the flavors of your meal while promoting relaxation.

  • Mango Sticky Rice: For dessert, the sweet, creamy notes of coconut and ripe mango provide a delightful contrast to the savory lo mein, ending your meal on a high note.

Make your dinner unforgettable by choosing complementary flavors and textures that will delight your family's taste buds!

How to Store and Freeze Gluten-Free Chicken Lo Mein

Fridge: Store leftovers in an airtight container for up to 3 days. Make sure to let the dish cool before sealing to prevent condensation.

Freezer: For longer storage, freeze portions in freezer-safe containers for up to 3 months. Allow to cool completely before freezing to maintain texture.

Reheating: Thaw in the fridge overnight and reheat gently in a skillet over low heat, adding a splash of chicken broth if needed to revitalize the sauce.

Customizing: When reheating, feel free to toss in extra fresh vegetables to elevate your Gluten-Free Chicken Lo Mein and keep it fresh and vibrant.

Gluten-Free Chicken Lo Mein Variations

Feel free to add your personal touch and explore delightful twists with your Gluten-Free Chicken Lo Mein!

  • Tofu Option: Swap chicken for marinated baked tofu for a flavorful vegetarian alternative. Tofu absorbs the savory sauce beautifully, giving you a hearty bite.

  • Shrimp Delight: Change it up by using shrimp instead of chicken for a seafood variation; sauté until just pink for a deliciously light meal. The subtle seafood flavor complements the rich sauce perfectly.

  • Zucchini Noodles: Replace lo mein noodles with spiralized zucchini for a refreshing low-carb twist that adds a vibrant color to your dish. Sauté them briefly to keep some crunch and retain their brightness.

  • Vegetable Boost: Add more nutrition by tossing in extra vegetables like bell peppers, broccoli, or snap peas. This colorful mix brings different textures and flavors that make every bite intriguing.

  • Hoisin Sauce Swap: Use gluten-free hoisin sauce in place of soy sauce for a sweeter, more robust flavor profile. This gives your dish a delightful twist while keeping it gluten-free.

  • Heat It Up: For a spicy kick, add a dash of red pepper flakes or some sriracha to your sauce. This will elevate the heat level, perfect for those who love a little extra excitement in their meals.

  • Nutty Flavor: Incorporate a sprinkle of toasted sesame seeds or chopped peanuts for added texture and a nutty depth. This simple addition can elevate your dish to new heights!

  • Citrus Zest: Enhance your dish by squeezing fresh lime or lemon juice before serving. This brightens the flavors beautifully and ties everything together in a refreshing way.

With all these ideas, your Gluten-Free Chicken Lo Mein will never be boring! For other delicious ideas, check out my recipes for Honey Garlic Chicken Thighs or Crock Pot Chicken, both of which offer creative ways to enjoy chicken.

Make Ahead Options

These Gluten-Free Chicken Lo Mein are perfect for busy weeknights, allowing for helpful meal prep! You can chop your vegetables and slice the chicken up to 24 hours in advance, storing them in airtight containers in the refrigerator to maintain freshness. Additionally, you can prepare the sauce ahead of time—just whisk together the soy sauce, ginger, garlic, and chicken broth, and refrigerate it for up to 3 days. When you're ready to enjoy this comforting dish, simply stir-fry the chicken and vegetables, add the noodles and sauce, and heat through for a delicious meal that's just as satisfying as when made fresh!

Expert Tips for Gluten-Free Chicken Lo Mein

• Mise en Place: Have all ingredients prepped and ready before you start cooking. This ensures a seamless cooking experience, preventing any kitchen chaos.

• Noodle Timing: Be cautious not to overcook gluten-free noodles, as they can become mushy. Aim for al dente to maintain the right texture.

• Adjust Sauce Consistency: If your sauce thickens too much during cooking, don’t hesitate to add a splash of chicken broth to achieve the desired consistency.

• Flavor Boost: Enhance the umami by adding a dash of sesame oil or a sprinkle of chili flakes to your sauce for an extra layer of flavor in your Gluten-Free Chicken Lo Mein.

• Leftover Magic: If you have any leftover cooked chicken or vegetables, toss them in for a delightful twist, minimizing food waste and maximizing flavor!

Gluten-Free Chicken Lo Mein Recipe FAQs

What kind of chicken should I use for Gluten-Free Chicken Lo Mein?
Absolutely! For this dish, I recommend using chicken breast because it provides a tender, protein-rich base that cooks quickly. You can also substitute it with thinly sliced beef, shrimp, or even baked tofu to cater to different preferences or dietary needs.

How long can I store leftovers of Gluten-Free Chicken Lo Mein in the fridge?
Leftovers can be stored in an airtight container in the refrigerator for up to 3 days. Be sure to let the dish cool completely before sealing it up. When ready to eat, reheat gently on the stove or in the microwave to enjoy your delicious creation again!

Can I freeze Gluten-Free Chicken Lo Mein? If so, how?
Yes, you can freeze this delightful dish! To do this, let your cooked Chicken Lo Mein cool completely, then portion it into freezer-safe containers. It will stay good for up to 3 months. When you’re ready to enjoy it, thaw in the refrigerator overnight and reheat in a skillet over low heat, adding a splash of chicken broth to revive the flavors.

How do I avoid mushy gluten-free noodles in my Chicken Lo Mein?
Very good question! To prevent mushiness, cook the gluten-free noodles al dente according to package instructions. Since they will absorb additional moisture from the sauce, be sure not to overcook them in boiling water. If they do become too soft when reheating, you can add a tiny bit of broth to help restore some firmness.

Are there any dietary considerations for Gluten-Free Chicken Lo Mein?
Absolutely! This recipe is naturally gluten-free when you use gluten-free soy sauce or tamari. If you have allergies to soy, consider using coconut aminos as a soy sauce substitute. Additionally, make sure to check that the noodles you choose are certified gluten-free. If you’re making it vegan, simply swap chicken for tofu and use vegetable broth instead!

Gluten-Free Chicken Lo Mein

Gluten-Free Chicken Lo Mein: Quick and Comforting Delight

A quick and comforting Gluten-Free Chicken Lo Mein that's perfect for busy weeknights.
Print Recipe Pin Recipe
Prep Time 10 minutes mins
Cook Time 20 minutes mins
Total Time 30 minutes mins
Servings: 4 servings
Course: Dinner
Cuisine: Asian
Calories: 350
Ingredients Equipment Method Nutrition Notes

Ingredients
  

For the Chicken
  • 1 pound Chicken Breast Thinly sliced
For the Noodles
  • 8 ounces Lo Mein Noodles Or gluten-free alternative
For the Vegetables
  • 2 cups Vegetables (cabbage, carrots, etc.) Chopped
For the Sauce
  • 1/4 cup Gluten-Free Soy Sauce or Tamari Substitute with hoisin sauce if desired
  • 1 tablespoon Ginger Minced or freshly grated
  • 2 cloves Garlic Minced
  • 1/2 cup Chicken Broth Or vegetable broth for a vegetarian option
For Cooking
  • 1-2 tablespoons Cooking Oil Canola or sesame oil

Equipment

  • Skillet
  • Wok
  • medium bowl

Method
 

Step-by-Step Instructions
  1. Gather your ingredients. Chop the vegetables and slice the chicken breast into thin strips.
  2. Heat 1-2 tablespoons of cooking oil in a large skillet or wok over medium-high heat. Add the sliced chicken and stir-fry until golden brown, about 5-7 minutes.
  3. Remove the chicken and sauté your chopped vegetables in the same skillet for about 3-4 minutes.
  4. In a medium bowl, whisk together the gluten-free soy sauce, minced ginger, minced garlic, and chicken broth.
  5. Return the chicken to the skillet, add the cooked lo mein noodles and pour the sauce over. Toss everything together for 2-3 minutes.
  6. Plate your Gluten-Free Chicken Lo Mein, optionally garnish with sesame seeds or sliced green onions, and serve hot.

Nutrition

Serving: 1servingCalories: 350kcalCarbohydrates: 40gProtein: 30gFat: 10gSaturated Fat: 1gPolyunsaturated Fat: 1gMonounsaturated Fat: 6gCholesterol: 70mgSodium: 800mgPotassium: 600mgFiber: 3gSugar: 5gVitamin A: 500IUVitamin C: 10mgCalcium: 30mgIron: 2mg

Notes

Experiment with your favorite vegetables or proteins to customize this dish further.

Tried this recipe?

Let us know how it was!

Sourdough Pesto Grilled Cheese that's Unbelievably Gooey and Crispy

May 8, 2026 by Grace Snow Leave a Comment

As I stood in my kitchen, the aroma of freshly toasted bread filled the air, bringing a wave of nostalgia. Today, I'm excited to share my twist on a beloved classic: the Sourdough Pesto Grilled Cheese. This charming sandwich combines the crispy texture of artisan sourdough with the vibrant flavors of homemade basil pesto and melty mozzarella, creating an irresistible comfort food experience. Not only is this recipe quick to whip up, making it perfect for those busy lunch breaks, but it also elevates your typical grilled cheese into a gourmet delight that friends and family will rave about. Plus, the flexibility in ingredients means you can customize it to your taste! Ready to dive into this deliciousness? Let’s get cooking!

Why is this dish a must-try?

Comforting and Gooey: This Sourdough Pesto Grilled Cheese melts in your mouth, blending the gooeyness of mozzarella with the vibrant taste of fresh basil pesto.

Quick Gourmet Delight: Perfect for busy days, this recipe transforms everyday ingredients into a luxurious sandwich that's ready in minutes.

Customizable to Taste: Feel free to swap in your favorite add-ins, like sun-dried tomatoes or crispy bacon, for a personal touch.

Perfect for All Ages: This sandwich is a crowd-pleaser, appealing to both kids and adults alike. Pair it with a classic tomato soup or a refreshing salad to complete your meal.

Elevated Flavor Profile: By using artisan sourdough, you're not just having a sandwich; you're indulging in a culinary experience that speaks to your palate. For more delicious creations, check out my recipes for Grilled Balsamic Steak or Potato Blue Cheese!

Sourdough Pesto Grilled Cheese Ingredients

• This ingredient list is key to mastering your Sourdough Pesto Grilled Cheese!

For the Bread and Cheese

  • Sourdough Bread – Opt for thickly sliced, fresh artisan sourdough for the best crunch and flavor.
  • Mozzarella Cheese – Use fresh mozzarella, drained and patted dry, to prevent a soggy sandwich.

For the Herbed Spread

  • Basil Pesto – Whether homemade or store-bought, this adds a delightful herby touch (spread it sparingly to manage moisture).
  • Sun-Dried Tomatoes (optional) – These add a burst of umami flavor and moisture.

For the Optional Crunch

  • Bacon (optional) – Crispy, crumbled bacon enhances the savory profile of the sandwich.

For Grilling

  • Butter – Generously spread on the outside of each slice to achieve a golden, crispy exterior.

Step‑by‑Step Instructions for Sourdough Pesto Grilled Cheese

Step 1: Preheat the Skillet
Begin by placing a non-stick skillet over medium-low heat. Allow it to warm for about 3-5 minutes, ensuring you have a gentle temperature that will melt the cheese evenly without burning the bread. This careful preheating is essential for achieving that perfectly crispy exterior while keeping your Sourdough Pesto Grilled Cheese deliciously gooey inside.

Step 2: Butter the Bread
Take your thickly sliced artisan sourdough and generously spread butter on one side of each slice. This butter layer should be ample to create that golden-brown crispiness as it grills. Be thorough to ensure even coverage, as this will help enhance the rich flavors once the sandwich is fully cooked, making your Sourdough Pesto Grilled Cheese irresistible.

Step 3: Assemble the Sandwich
With the skillet ready, place the slices of sourdough butter-side down into the pan. Lay 3-4 slices of fresh mozzarella on each slice, ensuring you cover the bread completely for an even melt. This crucial layer of cheese provides that melty goodness we all crave in a grilled cheese sandwich, elevating your Sourdough Pesto Grilled Cheese to comfort food perfection.

Step 4: Add Flavorful Ingredients
Spread about a tablespoon of basil pesto onto each cheese-covered slice, followed by your optional sun-dried tomatoes or crumbled bacon if desired. These ingredients not only add flavor but also moisture, balancing the textures beautifully. Layer another slice of mozzarella on top of the toppings, sealing in the goodness and preparing for a satisfying melt.

Step 5: Press and Finish Assembly
Gently press down on the sandwich to keep all the fillings intact before placing another slice of sourdough on top, buttered side facing out. This press helps all the layers meld together while grilling. By ensuring your Sourdough Pesto Grilled Cheese is well assembled, you reduce the risk of stray ingredients escaping during cooking.

Step 6: Butter the Top Slice
Once assembled, spread additional butter on the top slice of the sandwich. This will help crisp it up wonderfully as it grills and provides that delightful, golden-brown color and deep flavor that defines the best comfort food. Just a thin layer is ideal; you want enough to encourage crisping without overwhelming the sandwich.

Step 7: Grill Until Golden
Carefully transfer your sandwich back into the skillet. Grill for about 3-4 minutes, or until the bottom is golden brown and crispy. Keep an eye on it and adjust the heat if necessary to prevent burning. This step is crucial for achieving the perfect texture in your Sourdough Pesto Grilled Cheese, with a beautifully crusty outside and melty inside.

Step 8: Flip and Continue Cooking
Using a spatula, gently flip the sandwich over to grill the other side, adding another 3-4 minutes to achieve that same lovely golden crust. The cheese should be melting beautifully at this point, creating an enticing aroma that fills your kitchen. Don’t hurry this part; patience pays off in flavor and texture!

Step 9: Serve and Enjoy
Once both sides are crispy and the cheese is ooey-gooey, carefully remove the Sourdough Pesto Grilled Cheese from the skillet. Let it cool for a minute, then slice it in half to reveal the melty layers inside. Serve warm, paired with your favorite sides like tomato soup or salad, and savor every bite of this elevated comfort food experience.

What to Serve with Sourdough Pesto Grilled Cheese

A delightful grilled cheese experience deserves equally delicious companions to create the perfect meal.

  • Classic Tomato Soup: The bright acidity of the soup balances the richness of the grilled cheese, creating a comforting duo.

  • Light Arugula Salad: This refreshing salad adds crispness and a peppery note that cuts through the sandwich's creaminess beautifully.

  • Crispy Sweet Potato Fries: Their natural sweetness and crunchy texture provide an enticing contrast to the gooey, savory grilled cheese.

  • Pickles or Marinated Vegetables: These add a zesty punch that complements the flavors of the sandwich, refreshing your palate with every bite.

  • Roasted Red Pepper Soup: The smokiness enhances the pesto and cheese, offering a warm, inviting bowl that pairs perfectly with the sandwich.

  • Sparkling Lemonade: A fizzy, citrusy drink that cleanses the palate and complements the herby notes from the pesto.

  • Chocolate Chip Cookies: A sweet finish to your meal, these cookies add a nostalgic touch that everyone loves after a comforting lunch.

Make Ahead Options

These Sourdough Pesto Grilled Cheese sandwiches are perfect for busy weeknights when you need a delicious meal in a pinch! You can assemble the sandwiches without cooking them and refrigerate them for up to 24 hours—just wrap them tightly in plastic wrap to prevent the bread from drying out. If you're feeling extra efficient, you can even cook them in advance; cooked sandwiches can be stored in the fridge for up to 2 days. To reheat, simply place them in a skillet over medium-low heat to restore that crispy exterior while making the cheese wonderfully melty. Trust me, they'll taste just as delicious as when freshly made!

Expert Tips for Sourdough Pesto Grilled Cheese

  • Mozzarella Matters: Always pat the mozzarella dry before use to prevent a soggy Sourdough Pesto Grilled Cheese; this ensures a perfectly crispy texture.

  • Mind the Heat: Cook on medium-low heat to allow the cheese to melt evenly without burning the bread; high heat may result in an undercooked center.

  • Don’t Overstuff: Avoid piling on too many ingredients; overcrowding can lead to a messy sandwich that slides apart while grilling.

  • Butter Both Sides: For ultimate crispiness, generously butter both the top and bottom of the bread instead of just the pan surface.

  • Press Gently: Lightly pressing down while grilling helps keep the fillings intact and ensures an even melt, enhancing the delightful experience of your Sourdough Pesto Grilled Cheese.

Sourdough Pesto Grilled Cheese Variations

Feel free to experiment and make this delightful sandwich truly your own!

  • Whole Wheat: Swap sourdough for whole wheat bread for a healthier twist. The nuttiness will complement the flavors beautifully.

  • Vegetarian: omit bacon and replace with roasted red peppers or sautéed spinach. These veggies add color and a satisfying crunch without losing flavor.

  • Spicy Kick: Add thin slices of jalapeños or a sprinkle of red pepper flakes for a zesty heat that elevates your grilled cheese experience.

  • Herb Boost: Mix additional herbs like thyme or oregano into the pesto for an aromatic profile. This little twist can awaken your palate and make each bite even more delightful!

  • Cheese Variety: Experiment with different cheeses, such as sharp cheddar or creamy gouda. Each type brings its unique flavor and texture, transforming your grilled cheese adventure.

  • Flavorful Fats: Instead of butter, try using olive oil or a flavored herb butter for grilling. This will add depth to your crust while giving a hint of extra richness.

  • Savory Add-Ins: Consider adding caramelized onions for a sweet and savory balance that pairs wonderfully with the gooey texture of your grilled cheese.

  • Creamy Upgrade: Drizzle some balsamic reduction inside the sandwich before grilling. It adds a luxurious tang and pairs perfectly with the basil pesto for a flavorful surprise!

For more irresistible options, don’t forget to check out my delectable recipe for Grilled Mushrooms Savory that works wonderfully in any sandwich!

How to Store and Freeze Sourdough Pesto Grilled Cheese

Fridge: Store cooked sandwiches in an airtight container for up to 2 days. Reheat them in a skillet over medium heat for best results, bringing back that crispy exterior and melted cheese.

Freezer: Assembled but uncooked sandwiches can be wrapped tightly in plastic wrap and frozen for up to 1 month. Thaw in the fridge overnight before cooking.

Make-Ahead: Uncooked, assembled Sourdough Pesto Grilled Cheese can be refrigerated for up to 24 hours. Just be sure to wrap them tightly to prevent drying out.

Reheating: For maximum crispiness, reheat cooked sandwiches in a skillet, flipping occasionally until they’re heated through and golden on both sides.

Sourdough Pesto Grilled Cheese Recipe FAQs

What type of sourdough bread should I use for this recipe?
It's best to choose fresh, thickly sliced artisan sourdough bread that's about ½ inch thick. Avoid bread that's too airy or overly sour, as it can result in a less than ideal texture and flavor. Opt for something that has a nice crust to create that perfect crispy exterior.

How long can I store my leftover Sourdough Pesto Grilled Cheese?
You can store cooked sandwiches in an airtight container in the fridge for up to 2 days. When you're ready to enjoy them again, reheat in a skillet over medium heat for maximum crispiness. This method helps restore that lovely golden crust and gooey interior.

Can I freeze Sourdough Pesto Grilled Cheese?
Absolutely! You can freeze assembled but uncooked sandwiches wrapped tightly in plastic wrap for up to 1 month. To cook, simply thaw them in the fridge overnight before grilling as usual, ensuring that you maintain the freshness and flavors of the ingredients.

What if my sandwich falls apart while grilling?
If your Sourdough Pesto Grilled Cheese is sliding apart, it may be due to overcrowding with ingredients or not pressing down gently enough. Next time, keep toppings minimal and remember to press your sandwich down lightly while it grills to help all the ingredients meld together for a satisfying bite.

Are there any dietary considerations I should keep in mind?
If you're accommodating allergies or dietary restrictions, feel free to omit the optional bacon to make this sandwich vegetarian-friendly. Additionally, ensure that all ingredients, like the pesto, fit the dietary needs of your guests, especially for gluten or dairy sensitivities.

How do I avoid a soggy sandwich?
To prevent sogginess, be sure to pat your mozzarella dry before adding it to your sandwich. Use a moderate amount of basil pesto and ensure everything is assembled correctly, with the butter on the outside helping to crisp the bread as it grills. Keeping an eye on the heat is also crucial; too high can burn the bread before the cheese has melted!

Sourdough Pesto Grilled Cheese

Sourdough Pesto Grilled Cheese that's Unbelievably Gooey and Crispy

Indulge in the Sourdough Pesto Grilled Cheese, a comfort food classic featuring gooey mozzarella and vibrant basil pesto.
Print Recipe Pin Recipe
Prep Time 10 minutes mins
Cook Time 10 minutes mins
Total Time 20 minutes mins
Servings: 2 sandwiches
Course: Snacks
Cuisine: American
Calories: 450
Ingredients Equipment Method Nutrition Notes

Ingredients
  

For the Bread and Cheese
  • 4 slices Sourdough Bread Thickly sliced, fresh artisan
  • 6 oz Mozzarella Cheese Fresh, drained and patted dry
For the Herbed Spread
  • 4 tbsp Basil Pesto Homemade or store-bought
  • 1/4 cup Sun-Dried Tomatoes Optional
For the Optional Crunch
  • 4 slices Bacon Crispy, crumbled
For Grilling
  • 4 tbsp Butter Generously spread on the outside

Equipment

  • non-stick skillet

Method
 

Step-by-Step Instructions for Sourdough Pesto Grilled Cheese
  1. Preheat a non-stick skillet over medium-low heat for about 3-5 minutes.
  2. Spread butter on one side of each slice of sourdough bread.
  3. Place bread slices butter-side down into the pan and add mozzarella.
  4. Spread basil pesto on bread, then add optional sun-dried tomatoes or bacon.
  5. Press down on the sandwich, then place another slice of sourdough on top, buttered side facing out.
  6. Spread butter on the top slice of the sandwich.
  7. Grill for 3-4 minutes until the bottom is golden brown.
  8. Flip the sandwich and grill the other side for another 3-4 minutes.
  9. Remove the sandwich, let it cool for a minute, then slice and serve.

Nutrition

Serving: 1sandwichCalories: 450kcalCarbohydrates: 37gProtein: 18gFat: 29gSaturated Fat: 16gPolyunsaturated Fat: 1gMonounsaturated Fat: 10gCholesterol: 70mgSodium: 800mgPotassium: 250mgFiber: 2gSugar: 3gVitamin A: 500IUVitamin C: 2mgCalcium: 400mgIron: 1.5mg

Notes

For maximum crispiness, ensure to pat the mozzarella dry and don't overcrowd the sandwich with fillings.

Tried this recipe?

Let us know how it was!

Mouthwatering Flavor-Packed Chicken Torta Sandwich to Savor

May 8, 2026 by Grace Snow Leave a Comment

Just the other day, as I rummaged through my pantry, I stumbled upon a treasure trove of oats and cocoa powder. Suddenly, the idea for my 4-Ingredient No-Bake Chocolate Oat Cookies came to life! These delightful little bites are not only incredibly easy to whip up, but they are also gluten-free and ready in under 15 minutes. Perfect for those of us who want a sweet treat without the hassle of baking. With the chewy texture and rich cocoa flavor, these cookies quickly become a go-to recipe for snacking, dessert, or even an afternoon pick-me-up. Plus, the flexibility to swap in your favorite nut butter and sweeteners opens the door to endless variations. So, if you’re ready to treat yourself, why not join me in this delicious adventure? What mix-ins will you choose to elevate your cookies?

Why Are These Cookies a Must-Try?

Quick and Easy: Whipping up these cookies takes just 15 minutes, making them an ideal choice for busy days.

Gluten-Free Goodness: Made with oats, these treats cater to those who prefer gluten-free options without sacrificing flavor.

Versatile Mix-Ins: Customize your creation with nuts, dried fruits, or chocolate chips for an exciting twist each time you make them.

Healthy Indulgence: Packed with fiber and healthy fats, these cookies provide a guilt-free energy boost—perfect for when cravings strike.

No-Bake Convenience: Say goodbye to the oven! These no-bake cookies are great for warm weather or impromptu gatherings.

Dive into these delicious bites and enjoy a moment of indulgence without the fuss! Want to explore more variations? Check out my Honey Garlic Chicken for flavorful inspiration.

4-Ingredient No-Bake Chocolate Oat Cookie Ingredients

For the Base
• Oats – A key ingredient providing structure and chewiness; select rolled or globe oats for the best results.
• Cocoa Powder – This is your chocolatey hero, adding rich flavor; choose unsweetened for a balanced taste.

For the Binding
• Nut Butter – Creamy and essential for cohesion; almond or peanut butter works wonderfully, but sunflower seed butter is a great nut-free option.
• Sweetener – Choose maple syrup or honey to enhance sweetness; for a vegan version, opt for agave syrup.

Feel free to experiment with additional mix-ins for your 4-Ingredient No-Bake Chocolate Oat Cookies!

Step-by-Step Instructions for 4-Ingredient No-Bake Chocolate Oat Cookies

Step 1: Combine Dry Ingredients
In a large mixing bowl, combine 1 cup of rolled oats and ¼ cup of unsweetened cocoa powder. Stir them together using a fork or whisk until the mixture is uniform and well combined. Take a moment to appreciate the rich chocolate aroma filling the air—this is the base for your delicious 4-Ingredient No-Bake Chocolate Oat Cookies!

Step 2: Mix Wet Ingredients
In a separate bowl, add ½ cup of nut butter and ⅓ cup of your chosen sweetener. Whisk together until the mixture is smooth and creamy, ensuring there are no lumps. This should take about 1-2 minutes. The consistency should resemble a thick sauce, which will help bind the cookies together beautifully.

Step 3: Combine Mixtures
Pour the wet mixture into the bowl with the dry ingredients. Using a spatula, stir these together until every oat is coated in the rich chocolateed affair. This should take approximately 2-3 minutes. Look for a thick, cohesive dough that holds together when pressed—this will make your 4-Ingredient No-Bake Chocolate Oat Cookies delightfully chewy.

Step 4: Shape Cookies
Scoop tablespoon-sized amounts of the mixture and roll them into small patties with your hands. Each cookie should be about the size of a golf ball. Place them on a parchment-lined tray, ensuring they are evenly spaced apart. This fun shaping process should take about 5-7 minutes and leave you with a fantastic lineup of potential snacks!

Step 5: Chill
Once all your cookies are shaped, place the tray in the refrigerator. Allow them to chill for at least 30 minutes, or until set. This step is crucial for achieving a firm texture. After chilling, they will hold their shape and be ready to satisfy your sweet tooth—just wait until you take the first bite of these flavor-packed delights!

How to Store and Freeze 4-Ingredient No-Bake Chocolate Oat Cookies

Fridge: Store your cookies in an airtight container and they will stay fresh for up to one week, allowing you to enjoy these delightful treats throughout the week.

Freezer: For longer preservation, freeze the cookies by placing them in a single layer in a freezer-safe bag or container. They can last for up to three months.

Thawing: To enjoy frozen cookies, simply transfer them to the fridge to thaw overnight or let them sit at room temperature for about 30 minutes.

Reheating: If you prefer them slightly warm, a quick 10-second zap in the microwave will enhance their fudgy texture without compromising all that rich chocolate flavor!

Flavor-Packed Chicken Torta Sandwich Variations

Feel free to get creative with this recipe—there are endless options to suit your taste buds!

  • Spicy Kick: Add sliced jalapeños or pepper jack cheese for a fiery twist that will ignite your palate.

  • Veggie Boost: Load your sandwich with fresh avocado, crunchy lettuce, or grilled bell peppers to enhance flavor and texture.

  • Herb Explosion: Mix in fresh cilantro or parsley into the chicken for an aromatic burst that elevates your torta experience.

  • Creamy Upgrade: Spread a layer of guacamole or lime-infused yogurt for a rich, creamy touch that complements the chicken perfectly.

  • Cheesy Delight: Top your sandwich with a slice of melty cheese, such as queso fresco or Monterey jack, to elevate the overall indulgence.

  • Sweet and Savory: Consider adding a drizzle of honey or a fig jam spread for a delightful contrast to the savory chicken.

  • Flavor Fusion: Swap the classic tomatillo sauce for a spicy chipotle mayo to give your torta a smoky, rich flavor. Want even more delicious chicken ideas? Check out my Honey BBQ Chicken to shake things up!

Dive in and tailor your Flavor-Packed Chicken Torta Sandwich to make every bite a delightful surprise!

What to Serve with 4-Ingredient No-Bake Chocolate Oat Cookies

These delightful cookies can create a heartwarming and satisfying meal experience with the right pairings.

  • Almond Milk: A deliciously creamy counterpart that balances the rich cocoa flavor, making for a wholesome snack.

  • Fresh Berries: Juicy strawberries or raspberries add a bright, tangy contrast that perfectly complements the sweetness of the cookies.

  • Greek Yogurt Dip: A protein-packed dip that introduces creaminess and a tart note, enhancing the overall texture and flavor profile.

  • Banana Slices: Soft and sweet, banana slices provide a wonderful contrast to the chewy texture of the cookies while adding natural sweetness.

  • Nutty Trail Mix: Crunchy nuts and dried fruits provide a satisfying crunch, contrasting with the fudgy mouthfeel of the cookies.

  • Chilled Herbal Tea: Refreshing and light, herbal tea rounds out the meal while offering a floral note that lifts the rich chocolate flavor.

Pairing these cookies with different elements not only enhances the dessert experience, but it also transforms them into a delightful snack or a wholesome meal suitable for any time of the day!

Make Ahead Options

These 4-Ingredient No-Bake Chocolate Oat Cookies are perfect for meal prep, saving you time during busy weeks! You can prepare the cookie mixture up to 24 hours in advance by combining the dry ingredients and mixing them with the wet ingredients, then refrigerate the mixture in an airtight container. When you're ready to shape and serve, simply scoop out the mixture and form it into patties before chilling them for at least 30 minutes. This will ensure the cookies maintain their delightful texture and flavor, making them just as delicious as if they were freshly made. Enjoy having these sweet bites ready to satisfy your cravings at a moment's notice!

Expert Tips for 4-Ingredient No-Bake Chocolate Oat Cookies

  • Room Temperature Nut Butter: Ensure your nut butter is at room temperature for smoother mixing and better incorporation into the dough.

  • Sift Cocoa Powder: Sifting cocoa powder helps eliminate clumps, ensuring a consistent chocolate flavor throughout your cookies.

  • Fix Crumbly Cookies: If your cookies crumble after chilling, simply mix in an extra tablespoon of nut butter or sweetener to improve cohesion and texture.

  • Taste Test Mix-Ins: Don't hesitate to taste your mixture before shaping your cookies; adjust sweetness or add favorite extras like chocolate chips for an even more flavor-packed experience.

  • Chill Time Matters: Cooling the cookies for at least 30 minutes is essential for achieving that perfect chewy texture—resist the urge to skip this step!

4-Ingredient No-Bake Chocolate Oat Cookies Recipe FAQs

What type of oats should I use?
For the best texture, I recommend using rolled or globe oats. These types provide that delightful chewiness and are a perfect base for these cookies, giving you the right consistency and flavor.

How should I store my chocolate oat cookies?
Store your cookies in an airtight container in the fridge, where they’ll remain delicious for about one week. Make sure to check for any excess moisture in the container that could affect their texture!

Can I freeze these cookies? How?
Absolutely! To freeze your 4-Ingredient No-Bake Chocolate Oat Cookies, layer them in a single layer inside a freezer-safe container or bag. Seal it tightly and label it with the date. They can last up to three months! When you’re ready to enjoy them, place them in the fridge overnight to thaw or at room temperature for about 30 minutes.

What if my cookies crumble after chilling?
If you find that your cookies are crumbly, don’t worry! You can mix an extra tablespoon of nut butter or sweetener into the mixture to improve cohesion. Once incorporated, reshape and chill them again. This will help bind them together nicely.

Are these cookies suitable for people with nut allergies?
Yes, absolutely! You can replace nut butter with seed-based alternatives like sunflower seed butter to ensure that anyone with nut allergies can enjoy these tasty treats. Just be sure to check labels for cross-contamination where necessary.

How do I choose the right sweetener for my cookies?
You can use maple syrup, honey, or agave syrup based on your dietary preference. If you're looking for a vegan option, agave syrup is a great choice. Adjust the quantity based on your desired sweetness level, as different sweeteners have varying levels of sweetness.

Flavor-Packed Chicken Torta Sandwich

Mouthwatering Flavor-Packed Chicken Torta Sandwich to Savor

Enjoy a mouthwatering flavor-packed chicken torta sandwich that's easy to prepare and perfect for any meal.
Print Recipe Pin Recipe
Prep Time 15 minutes mins
Chill Time 30 minutes mins
Total Time 45 minutes mins
Servings: 4 sandwiches
Course: Dinner
Cuisine: Mexican
Calories: 120
Ingredients Equipment Method Nutrition Notes

Ingredients
  

For the Base
  • 1 cup rolled oats use rolled or globe oats for best results
  • 1/4 cup unsweetened cocoa powder choose unsweetened for balanced taste
For the Binding
  • 1/2 cup nut butter almond or peanut butter works well
  • 1/3 cup sweetener maple syrup, honey, or agave syrup for vegan option

Equipment

  • Mixing Bowl
  • Spatula
  • Parchment Paper

Method
 

Step-by-Step Instructions
  1. In a large mixing bowl, combine 1 cup of rolled oats and 1/4 cup of unsweetened cocoa powder. Stir until well combined.
  2. In a separate bowl, whisk together 1/2 cup of nut butter and 1/3 cup of your chosen sweetener until smooth and creamy.
  3. Pour the wet mixture into the bowl with the dry ingredients and stir until every oat is coated.
  4. Scoop tablespoon-sized amounts of the mixture and roll them into small patties. Place them on a parchment-lined tray.
  5. Chill the tray in the refrigerator for at least 30 minutes, or until set, to achieve firm texture.

Nutrition

Serving: 1cookieCalories: 120kcalCarbohydrates: 15gProtein: 3gFat: 6gSaturated Fat: 1gPolyunsaturated Fat: 2gMonounsaturated Fat: 3gSodium: 5mgPotassium: 100mgFiber: 2gSugar: 4gCalcium: 20mgIron: 1mg

Notes

Ensure your nut butter is at room temperature for smoother mixing. Sift cocoa powder for consistency. If cookies crumble, mix in extra nut butter or sweetener. Chill for at least 30 minutes for best texture.

Tried this recipe?

Let us know how it was!

Delicious Chocolate Cake Pops That Wow Every Dessert Lover

May 7, 2026 by Grace Snow Leave a Comment

As I stood in my kitchen, the scent of chocolate wafting through the air, I couldn’t help but smile at the thought of these fudgy Chocolate Cake Pops waiting to be enjoyed. They’re the perfect blend of rich, moist cake and a delightful creamy frosting, all wrapped in a crunchy chocolate shell. What’s even better is that they're easy to make, making them a go-to option for both celebrations and cozy evenings at home. Whether you're a seasoned baker or just looking to delight your loved ones, these cake pops promise to impress without overwhelming you in the kitchen. Curious about how to whip up this sweet treat that’s sure to satisfy your cravings? Let’s dive into the recipe!

Why Are These Cake Pops So Irresistible?

Deliciously Fudgy: The rich, moist cake center is perfectly combined with creamy frosting, creating a melt-in-your-mouth experience that tantalizes the taste buds.

Effortless Preparation: Using chocolate cake mix, you can whip up these pops in no time, making them a wonderful choice for busy bakers or unexpected guests.

Customizable Joy: Personalize your pops by swapping out sprinkles or using chocolate frosting for an even richer flavor. Check out our Chocolate Pudding Cake for more creative ideas!

Crowd-Pleasing Treat: Whether served at a birthday party or just a cozy movie night, these cake pops are sure to be a star attraction, captivating both kids and adults alike.

Perfect for Any Occasion: From holidays to casual get-togethers, they fit seamlessly into every celebration, bringing joy to every table.

Chocolate Cake Pops Ingredients

• You'll be surprised how simple these are!

For the Cake

  • Chocolate Cake Mix – This forms the delicious base; substitute water with milk for extra richness.
  • Eggs – Follow the package instructions for the perfect texture.
  • Water – Essential for preparing the cake mix as directed.

For the Frosting

  • Salted Butter – Use softened butter for easy mixing into the frosting.
  • Plain Cream Cheese – For a creamy, rich texture—ensure it’s softened beforehand.
  • Vanilla Extract – Deepens the flavor profile of your frosting.
  • Powdered Sugar – Sweetens the frosting while helping it achieve that smooth consistency.

For Coating

  • Chocolate Melting Wafers – Ideal for a smooth coating; melt them at low intervals to avoid burning.
  • Sprinkles – Use your favorite colors to add a personal touch and extra crunch.

Step‑by‑Step Instructions for Chocolate Cake Pops

Step 1: Bake the Cake
Preheat your oven to the temperature specified on the chocolate cake mix box. Prepare the cake batter according to the instructions, substituting water with milk for added richness. Pour the batter into a greased baking pan and bake until a toothpick inserted in the center comes out clean, typically around 30-35 minutes. Once baked, allow the cake to cool completely on a wire rack.

Step 2: Make Frosting
While the cake cools, prepare the creamy frosting. In a mixing bowl, beat together the softened salted butter, plain cream cheese, vanilla extract, and powdered sugar until you achieve a smooth and creamy texture. This rich frosting will elevate your Chocolate Cake Pops and create a delightful surprise within each bite. Set aside the frosting to let the flavors meld.

Step 3: Combine Cake and Frosting
Once the cake is completely cooled, crumble it into a large bowl using your hands or a fork. Mix in about one cup of the prepared frosting, blending until the mixture is fully combined and can hold its shape when rolled into a ball. Adjust the frosting amount if needed to achieve a fudgy consistency, perfect for your chocolate cake pop center.

Step 4: Chill Cake Mixture
Cover the bowl with plastic wrap and refrigerate the cake and frosting mixture for 30-45 minutes. Chilling firms up the mixture, making it easier to shape into balls. This step is essential for ensuring your Chocolate Cake Pops maintain their shape once they’re on the sticks.

Step 5: Shape Cake Balls
Remove the chilled mixture from the refrigerator and scoop out about 1.5 tablespoons of the cake mixture. Roll each portion into a smooth ball, aiming for a uniform size for even baking. Place each ball onto a parchment-lined baking sheet for easy coating later. This step is where your fudgy chocolate cake pops begin to take shape!

Step 6: Melt Chocolate
In a microwave-safe bowl, melt the chocolate wafers in 30-second intervals, stirring between each interval until smooth. Be careful not to overheat the chocolate, as this can cause it to seize. The melted chocolate will serve as the delicious outer layer of your cake pops, giving them that irresistible crunchy coating.

Step 7: Insert Sticks
Dip the tip of each cake pop stick into the melted chocolate, then gently insert it into the center of each cake ball. This will help secure the stick in place, ensuring a perfect finish once coated. After inserting the sticks, return the cake balls to the parchment-lined baking sheet for the next step.

Step 8: Chill Again
Place the baking sheet with the inserted cake pop sticks back in the fridge for another 30-45 minutes. Alternatively, you can freeze them for 20-30 minutes. This chilling step allows the chocolate to harden slightly, creating a better coating experience during the next step of dipping.

Step 9: Coat Cake Pops
Once chilled, dip each cake ball in the melted chocolate, ensuring it's fully covered. Allow any excess chocolate to drip off back into the bowl. If desired, sprinkle your favorite decorations or sprinkles on top while the chocolate is still wet, adding a pop of color to your Chocolate Cake Pops.

Step 10: Set and Enjoy
Finally, let the coated cake pops sit at room temperature until the chocolate sets completely, which usually takes about 30 minutes. For quicker results, you can place them back in the refrigerator to firm up. Once set, your delicious chocolate cake pops are ready to be enjoyed at any gathering or as a sweet treat for yourself!

Expert Tips for Chocolate Cake Pops

  • Chill Thoroughly: Make sure to chill the cake and frosting mixture adequately to prevent the cake pops from falling apart when inserted with sticks.

  • Smooth Coating: For a flawless finish, melt the chocolate wafers slowly and stir frequently to maintain a smooth consistency, avoiding any clumps.

  • Choose the Right Stick: Opt for sturdy cake pop sticks to ensure they can hold the weight of the fudgy cake pops without bending or breaking.

  • Use Fresh Ingredients: Always use fresh cream cheese and other ingredients for the best flavor and creaminess in your frosting.

  • Experiment with Flavors: Don’t hesitate to mix things up! Add flavor extracts like almond or peppermint to the frosting for unique Chocolate Cake Pops that stand out.

What to Serve with Fudgy Chocolate Cake Pops

Indulging in these delightful treats creates an atmosphere of sweetness and joy, perfect for any occasion.

  • Milkshakes: Creamy, thick milkshakes make a nostalgic pairing, enhancing the rich chocolate flavors of the cake pops.
  • Fresh Berries: Bright, tart berries cut through the sweetness, providing a refreshing contrast that balances the richness of the chocolate.
  • Vanilla Ice Cream: The classic pairing of warm cake pops with cold, creamy vanilla ice cream creates a delightful flavor harmony with every bite.
  • Coffee: A cup of freshly brewed coffee complements the sweetness and richness, adding an adult touch to your dessert experience.
  • Chocolate Dipped Fruit: For a fun twist, serve alongside chocolate-dipped strawberries or bananas to reinforce that delicious chocolate theme.
  • Sparkling Water: The light fizz of sparkling water refreshes the palate, making each cake pop even more enjoyable.
  • Caramel Sauce: Drizzling warm caramel over the cake pops adds another layer of sweetness and flavor, perfect for those with a sweet tooth.
  • Nutty Brownies: If you're feeling adventurous, pair them alongside nutty brownies for a dessert platter that will wow your guests.
  • Whipped Cream: A dollop of whipped cream on the side gives a lovely textural contrast and an extra touch of creaminess.

Chocolate Cake Pops Variations & Substitutions

Feel free to get creative and make these chocolate cake pops your own with these delightful twists!

  • Dairy-Free: Substitute plain cream cheese with vegan cream cheese and use plant-based butter for a dairy-free version.
    You won't miss the creaminess at all. Coconut or almond milk would work beautifully in the cake mix, too!

  • Gluten-Free: Use a gluten-free chocolate cake mix instead. It’s easy and delicious, ensuring everyone can enjoy these treats!
    By making this simple swap, you'll create a dessert that welcomes all your loved ones, no matter their dietary needs.

  • Flavor Infusion: Add flavored extracts like raspberry or orange to your frosting for an unexpected burst of flavor.
    Watch as your cake pops transform into an explosion of delightful taste, bringing new life to this classic dessert!

  • Texture Twist: Instead of sprinkles, roll the cake pops in crushed nuts or cookie crumbs for an extra crunch.
    This adds a delightful textural contrast that will have everyone asking how you made them so special!

  • Chocolate Variations: Replace standard chocolate wafers with white chocolate or colored melting wafers for a fun twist.
    This brings a playful touch and makes them perfect for themed occasions like weddings, birthdays, or holidays.

  • Peanut Butter Joy: Mix in peanut butter or Nutella into the frosting for a deliciously nutty layer of flavor.
    This indulgence takes these chocolate cake pops to new heights of yumminess, satisfying both chocolate and nut lovers alike!

  • Elevation of Sweetness: Drizzle caramel or chocolate sauce over set cake pops for an overloaded, decadent experience.
    This delightful step elevates your dessert to irresistible heights, making each pop even more drool-worthy!

  • Dessert Platter Idea: Serve these pops alongside other sweet treats like our Chocolate Pudding Cake for a dessert spread that impresses.
    A little mix and match can delight your guests, transforming any gathering into a memorable feast!

Make Ahead Options

These Chocolate Cake Pops are perfect for meal prep, allowing you to enjoy their deliciousness even on hectic days! You can prepare the cake and make the frosting up to 24 hours in advance. Just bake the cake, cool it completely, and crumble it before mixing in the frosting; then, shape the cake balls and refrigerate them to maintain their firmness. For optimal quality, make sure to cover them tightly to prevent drying out. When you’re ready to serve, simply melt your chocolate coating, dip the chilled cake balls, and let them set. With these steps, you’ll have delightful Chocolate Cake Pops ready in no time, freeing you up to savor their sweetness without the stress!

How to Store and Freeze Chocolate Cake Pops

Fridge: Store Chocolate Cake Pops in an airtight container in the refrigerator for up to 7 days. This keeps them fresh while allowing the flavors to meld beautifully.

Freezer: For longer storage, place the cake pops in a freezer-safe container, separating layers with parchment paper. They can be frozen for up to 3 months, preserving their fudgy goodness.

Thawing: When ready to enjoy, simply transfer the pops from the freezer to the fridge and allow them to thaw overnight. This helps maintain their texture and flavor.

Reheating: If you prefer a warm treat, microwave each pop for just 10-15 seconds to slightly soften the chocolate shell before indulging.

Chocolate Cake Pops Recipe FAQs

What type of chocolate cake mix should I use?
Absolutely! You can use any brand of chocolate cake mix that you prefer. The key is to substitute water with milk to achieve a richer flavor and a moist texture, which enhances the fudgy center of your Chocolate Cake Pops.

How long do Chocolate Cake Pops last once made?
These delightful treats can be stored in an airtight container in the refrigerator for up to 7 days. Storing them properly will keep their moist texture intact while allowing the flavors to develop beautifully.

Can I freeze Chocolate Cake Pops for later?
Yes, you can! To freeze your cake pops, place them in a freezer-safe container, separating layers with parchment paper to prevent sticking. They can be kept in the freezer for up to 3 months. When you're ready to enjoy, simply transfer them to the fridge to thaw overnight.

What should I do if my cake pops are falling apart?
It sounds like your cake mixture may not be chilled enough or could use more frosting. Make sure to refrigerate the cake and frosting mixture for at least 30-45 minutes before shaping. If they still feel too crumbly, mix in an additional tablespoon of frosting until they hold together better.

Are there any dietary considerations for Chocolate Cake Pops?
Certainly! If you have dietary restrictions, you can use gluten-free chocolate cake mix and dairy-free cream cheese for a vegan version. Just double-check all ingredients for allergens if serving to others. And remember, these pops are not suitable for pets due to chocolate content, so keep them safely out of reach!

What’s the best way to achieve a smooth coating on the cake pops?
For a perfect coating, melt your chocolate wafers slowly in a microwave-safe bowl at 30-second intervals, stirring in between. This helps avoid burning the chocolate. When coating the cake pops, dip quickly to achieve an even layer, allowing any excess to drip off before the chocolate hardens.

Chocolate Cake Pops

Delicious Chocolate Cake Pops That Wow Every Dessert Lover

Indulge in these Chocolate Cake Pops, a delightful treat that combines rich cake and creamy frosting in a crunchy chocolate shell.
Print Recipe Pin Recipe
Prep Time 45 minutes mins
Cook Time 35 minutes mins
Chilling Time 45 minutes mins
Total Time 2 hours hrs 5 minutes mins
Servings: 12 pops
Course: Dessert
Cuisine: American
Calories: 150
Ingredients Equipment Method Nutrition Notes

Ingredients
  

For the Cake
  • 1 box Chocolate Cake Mix Substitute water with milk for extra richness.
  • 3 large Eggs Follow the package instructions.
  • 1 cup Water Essential for preparing the cake mix as directed.
For the Frosting
  • 1/2 cup Salted Butter Use softened for easy mixing.
  • 8 oz Plain Cream Cheese Ensure it’s softened beforehand.
  • 1 tsp Vanilla Extract Deepens the flavor.
  • 2 cups Powdered Sugar Sweetens the frosting.
For Coating
  • 1 package Chocolate Melting Wafers Ideal for a smooth coating.
  • 1 cup Sprinkles Use your favorite colors.

Equipment

  • Mixing Bowl
  • Baking Sheet
  • Parchment Paper
  • Microwave-safe bowl
  • Cake Pop Sticks

Method
 

Step-by-Step Instructions
  1. Preheat your oven to the temperature specified on the chocolate cake mix box. Prepare the cake batter according to the instructions, substituting water with milk for added richness. Pour the batter into a greased baking pan and bake until a toothpick inserted in the center comes out clean, typically around 30-35 minutes. Allow the cake to cool completely on a wire rack.
  2. While the cake cools, prepare the creamy frosting. In a mixing bowl, beat together the softened salted butter, plain cream cheese, vanilla extract, and powdered sugar until smooth and creamy. Set aside.
  3. Once the cake is completely cooled, crumble it into a large bowl. Mix in about one cup of the prepared frosting, blending until fully combined.
  4. Cover the bowl with plastic wrap and refrigerate the mixture for 30-45 minutes.
  5. Remove the chilled mixture and scoop out about 1.5 tablespoons. Roll into smooth balls and place them on a parchment-lined baking sheet.
  6. Melt the chocolate wafers in a microwave-safe bowl in 30-second intervals until smooth.
  7. Dip the tip of each cake pop stick into the melted chocolate, then insert it into the center of each cake ball.
  8. Chill the cake pops in the fridge for another 30-45 minutes.
  9. Once chilled, dip each ball in the melted chocolate, coating fully and letting any excess drip off.
  10. Let the coated cake pops sit at room temperature until the chocolate sets completely.

Nutrition

Serving: 1popCalories: 150kcalCarbohydrates: 20gProtein: 2gFat: 7gSaturated Fat: 4gPolyunsaturated Fat: 1gMonounsaturated Fat: 2gCholesterol: 20mgSodium: 90mgPotassium: 60mgFiber: 1gSugar: 12gVitamin A: 200IUCalcium: 20mgIron: 1mg

Notes

Ensure to use fresh ingredients for the best flavor.

Tried this recipe?

Let us know how it was!

Caribbean-Style Beef Stew with Rice That Warms Your Soul

May 7, 2026 by Grace Snow Leave a Comment

As the rich aroma of spices fills the kitchen, a wave of nostalgia sweeps over me—it's the scent of my grandmother's Caribbean-Style Beef Stew. This comforting dish is a celebration of tender beef, simmered to perfection alongside vibrant vegetables and a symphony of island flavors. What makes this recipe truly irresistible is not just its depth of flavor but also its effortless, crowd-pleasing nature—perfect for family dinners or a cozy gathering with friends. Plus, it's incredibly adaptable: you can easily add sweet potatoes for a touch of sweetness or explore a creamy twist with coconut milk. Are you ready to whip up a pot of this heartwarming stew that dances between tradition and creativity? Let’s dive in!

Why You’ll Crave This Beef Stew

Irresistible Comfort: This Caribbean-Style Beef Stew offers warmth and goodness in every bite, making it a beloved family dish perfect for chilly evenings.

Flavor Explosion: With a mix of herbs and spices like allspice and ginger, each serving bursts with island-inspired flavors that will transport your taste buds straight to the Caribbean.

Adaptable Delight: Want to customize? You can easily substitute ingredients, such as using coconut milk for creaminess or adding sweet potatoes for an unexpected twist, giving you flexibility in your kitchen.

Easy to Prepare: Even if you’re pressed for time, this recipe allows for a simple, one-pot process that keeps dishes to a minimum—ideal for weeknight meals or when entertaining guests.

Filling and Nutritious: Packed with protein and fiber from vegetables, this dish serves as a wholesome main course, often paired beautifully with rice, steamed plantains, or even a side of Furikake Fried Rice to elevate your dining experience!

With every spoonful, you’ll feel comforted and satisfied, leaving your diners asking for seconds.

Caribbean-Style Beef Stew Ingredients

• Get ready for the ultimate family favorite!

For the Stew

  • Beef Stew Meat – Chuck roast or stew beef is perfect for that tender melt-in-your-mouth quality.
  • Salt – Essential for enhancing flavors, adjust to your taste preference.
  • Black Pepper – Freshly ground adds a nice kick to your stew.
  • Paprika – Provides color and a mild pepper flavor; smoked paprika adds an extra layer of depth.
  • Garlic – Fresh cloves deliver a delightful savory depth that elevates the dish.
  • Onion – Yellow or white onions contribute sweetness and texture, grounding your stew's base.
  • Scallions – Adds a fresh onion flavor; feel free to skip if you don’t have any!
  • Fresh Thyme – Offers aromatic qualities; dried thyme can work as a substitute.
  • Allspice – Infuses warmth and complexity into every mouthful—don't skip out on this one!
  • Ginger – Fresh ginger brightens the stew; dried can be used in a pinch.
  • Tomato Paste – A key thickener that adds richness to your Caribbean-Style Beef Stew.
  • Beef Broth – The flavorful base to simmer your ingredients; opt for low-sodium if preferred.
  • Yukon Gold or Baby Potatoes – These varieties provide delightful texture; sweet potatoes work well too!
  • Bell Peppers – Colorful and sweet; any variety will brighten your dish.
  • Carrots – Natural sweetness and vibrant color for a nutrient boost.
  • Oil – For sautéing, any neutral oil will do just fine.
  • Bay Leaves – Add a layer of flavor but remember to remove them before serving.
  • Scotch Bonnet (Optional) – Brings some heat, adjust to your spice preference by removing the seeds.
  • Long Grain White Rice – Completes the meal beautifully and can be swapped with other rice varieties if desired.

With these ingredients on hand, you're well on your way to creating a dish that embodies the spirit of the Caribbean right in your kitchen!

Step‑by‑Step Instructions for Caribbean-Style Beef Stew with Rice

Step 1: Sauté Aromatics
In a large pot, heat 2 tablespoons of oil over medium heat. Add 1 diced onion, 3 minced garlic cloves, and 2 chopped scallions, stirring continuously until they become softened and fragrant, about 5 minutes. This aromatic base is essential for your Caribbean-Style Beef Stew, as it sets the stage for rich flavors to develop.

Step 2: Brown the Beef
Once the aromatics are softened, add 2 pounds of beef stew meat to the pot. Sear the beef on all sides for about 8–10 minutes, allowing it to develop a nice brown crust. This browning process deepens the flavor of your stew and creates the perfect foundation for the aromatic sauce that will follow.

Step 3: Season and Add Tomato Paste
Next, sprinkle in 1 teaspoon each of paprika, fresh thyme, allspice, and ginger. Add 2 tablespoons of tomato paste, stirring everything together for 1–2 minutes until the spices are fragrant and the tomato paste is well incorporated. This step enhances the depth and aroma of your Caribbean-Style Beef Stew, creating a delightful flavor explosion.

Step 4: Add Broth and Vegetables
Pour in 4 cups of beef broth, scraping up any browned bits from the bottom of the pot. Then add 2 cups of chopped Yukon Gold potatoes, 1 cup of diced bell peppers, and 2 sliced carrots. Season the mixture with salt and pepper to taste, then bring everything to a gentle simmer over high heat while stirring occasionally.

Step 5: Simmer the Stew
Once the stew reaches a simmer, reduce the heat to low and cover the pot. Allow it to cook for about 2 hours, stirring occasionally to ensure even cooking. Keep an eye on the liquid levels; adding more broth or water as needed to maintain a thick yet soupy consistency is key to achieving the perfect Caribbean-Style Beef Stew.

Step 6: Fluff the Rice
While the stew simmers, prepare 2 cups of long-grain white rice according to the package instructions. Typically, this involves rinsing the rice, bringing water to a boil, adding the rice, and simmering until fluffy—about 15-20 minutes. This fluffy rice will act as a wonderful base for your hearty beef stew.

Step 7: Serve and Garnish
Once the beef is tender and the flavors have melded beautifully, taste and adjust seasonings if necessary. Remove any bay leaves and ladle the warm Caribbean-Style Beef Stew over the fluffy rice. Garnish with fresh herbs, such as chopped cilantro or parsley, to add a pop of color and fresh flavor before serving.

Make Ahead Options

These Caribbean-Style Beef Stew with Rice components are perfect for meal prep, saving you time on busy weeknights! You can prep the stew itself up to 24 hours in advance; simply sauté the aromatics, brown the beef, and add the remaining ingredients. Cool and refrigerate the pot until you’re ready to cook. When you're ready to serve, just bring the stew to a simmer on the stove and let it cook until the beef is tender. To maintain quality, avoid freezing the rice; instead, prepare it fresh while the stew simmers, ensuring a fluffy texture. Enjoy the convenience of a delicious, home-cooked meal with minimal effort!

Expert Tips for Caribbean-Style Beef Stew

  • Flavor Development: Allow the stew to sit overnight in the fridge; this enhances the flavors significantly, making your Caribbean-Style Beef Stew even tastier.

  • Slow Cooker Option: Using a slow cooker? Set it on low for 8 hours or high for 4-5 hours for perfectly tender beef without the fuss.

  • Thickening Trick: Prefer a thicker stew? Simmer uncovered for the last 20 minutes of cooking or mash a few potatoes against the side of the pot for added texture.

  • Spice It Up: Adjust the heat by including or excluding the Scotch bonnet pepper; remember to remove the seeds for a milder flavor!

  • Veggie Variations: Feel free to swap in sweet potatoes or yams for a delightful sweetness and a different texture in your Caribbean-Style Beef Stew.

Caribbean-Style Beef Stew Variations

Feel free to let your creativity shine with these delightful twists that can elevate your stew experience!

  • Sweet Potatoes: Add diced sweet potatoes for a hint of sweetness and beautiful color contrast. Their natural creaminess pairs perfectly with the tender beef.

  • Coconut Cream: Swap in coconut milk instead of beef broth for a rich, creamy flavor that deepens the dish’s calypso vibes. It’ll give the stew a tropical flair!

  • Heat Level: Omit the Scotch bonnet for a milder stew, or start with just half for a friendly touch of spice. Adjust according to your heat preference—dancing on the edge of flavor!

  • Vegetable Medley: Toss in additional veggies like zucchini or peas for extra color and nutrition. It’s a fantastic way to clean out the fridge while boosting the dish’s veggie count.

  • Different Protein: Substitute the beef with lamb or chicken for an alternate take on this hearty stew. Each protein brings a unique flavor profile to the table!

  • Spice Blend: Experiment with a curry powder mix for a different flavor dimension. This twist will infuse your stew with exotic taste notes that make the kitchen come alive.

  • Grain Alternatives: Serve your stew over quinoa or farro instead of rice. They add a delightful nuttiness and boost the nutritional benefits of your meal.

  • Herb Infusion: Try adding fresh herbs like cilantro or parsley just before serving for an extra burst of freshness. It brightens up the stew delightfully!

Looking for something different to try? Don’t forget to pair this stew with a side of Coconutty Beans and Greens Stew for a flavorful vegetarian option or enjoy it alongside Furikake Fried Rice for a delicious contrast!

How to Store and Freeze Caribbean-Style Beef Stew

Fridge: Store leftovers in an airtight container for up to 4 days. Allow the stew to cool completely before sealing to lock in freshness.

Freezer: Freeze the stew in a labeled, airtight container for up to 2 months. Portioning into smaller servings can make it easier to thaw and reheat later.

Reheating: To reheat, thaw overnight in the fridge and warm on medium heat in a pot, stirring occasionally until heated through. If frozen, reheat on low heat until fully cooked.

Airtight Storage: Always ensure the stew is cooled before placing it in the fridge or freezer to prevent condensation and maintain the quality of your Caribbean-Style Beef Stew.

What to Serve with Caribbean-Style Beef Stew with Rice

Complementing your hearty beef stew elevates your dining experience into something truly memorable.

  • Creamy Coconut Rice: Offers a luscious texture that balances the richness of the stew, adding tropical flavors that perfectly blend with the Caribbean essence.
  • Steamed Plantains: Their natural sweetness pairs wonderfully, providing a satisfying contrast to the savory stew and enhancing the tropical vibe of the meal.
  • Caribbean Dumplings: These delightful, fluffy fried or boiled dumplings soak up the rich sauce, making each bite a delicious experience full of flavor.
  • Fresh Mango Salsa: A zesty and refreshing addition that cuts through the stew's richness, this salsa adds a burst of color and tropical sweetness.
  • Crispy Coleslaw: The crunch and tanginess of coleslaw act as a bright, refreshing contrast, complementing the warm spices in your Caribbean-Style Beef Stew.
  • Garlic Bread: Soft and warm, this classic side is perfect for dipping into the stew, balancing the flavors while satisfying any carb cravings.
  • Chilled Pineapple Juice: This tropical drink provides a refreshing contrast, enhancing your meal's Caribbean theme with its vibrant sweetness.
  • Chocolate Cake: For dessert, indulge in a rich chocolate cake that contrasts beautifully with the flavors of the stew, leaving you with a harmonious finish to your meal.

Caribbean-Style Beef Stew with Rice Recipe FAQs

How do I select the best beef for my stew?
Absolutely! For your Caribbean-Style Beef Stew, I recommend using chuck roast or stew beef. These cuts have enough marbling to remain tender during the slow cooking process. Look for beef that has a bright red color with some fat marbling to ensure flavor and tenderness.

What’s the best way to store leftovers of the stew?
Very good question! To store leftovers, transfer your Caribbean-Style Beef Stew into an airtight container once cooled. It will stay fresh for up to 4 days in the refrigerator. Just remember, letting it cool completely before sealing is crucial for maintaining its rich flavor!

Can I freeze the Caribbean-Style Beef Stew?
Yes! To freeze your stew, let it cool down and then portion it into airtight containers, leaving some room for expansion. It can be frozen for up to 2 months. When you're ready to enjoy it again, just thaw it overnight in the refrigerator and reheat on medium heat in a pot until warmed through.

What should I do if my stew is too thick?
If your Caribbean-Style Beef Stew turns out thicker than desired, don’t worry! Simply add a bit of additional beef broth or water gradually until you achieve the preferred consistency. Stir it well and let it simmer for another few minutes. This way, you retain all those delicious flavors while reaching the perfect texture!

Can I adjust this recipe to be pet-friendly?
Absolutely! If you want to share a little bit with your furry friend, omit the salt and spices from the portions you serve to them. However, I’d recommend giving them just the beef and veggies, as some spices and ingredients could be harmful to pets. Always be mindful of what they can safely eat!

Are there any allergies to consider with this dish?
Great point! The ingredients in Caribbean-Style Beef Stew generally don’t contain common allergens like gluten or dairy, but you should check for any specific allergies regarding beef, certain vegetables, or spices in your household. Always tailor the recipe to your loved ones’ needs for a safe and enjoyable meal!

Caribbean-Style Beef Stew with Rice

Caribbean-Style Beef Stew with Rice That Warms Your Soul

This Caribbean-Style Beef Stew with Rice is a comforting dish, full of vibrant vegetables and island flavors.
Print Recipe Pin Recipe
Prep Time 15 minutes mins
Cook Time 2 hours hrs
Total Time 2 hours hrs 15 minutes mins
Servings: 6 servings
Course: Dinner
Cuisine: Caribbean
Calories: 450
Ingredients Equipment Method Nutrition Notes

Ingredients
  

  • 2 tablespoons Oil for sautéing
  • 1 medium Onion diced
  • 3 cloves Garlic minced
  • 2 scallions Scallions chopped
  • 2 pounds Beef Stew Meat chuck roast or stew beef
  • 1 teaspoon Salt to taste
  • 1 teaspoon Black Pepper freshly ground
  • 1 teaspoon Paprika smoked for extra depth
  • 1 teaspoon Fresh Thyme or dried
  • 1 teaspoon Allspice
  • 1 teaspoon Ginger fresh or dried
  • 2 tablespoons Tomato Paste
  • 4 cups Beef Broth low-sodium preferred
  • 2 cups Yukon Gold or Baby Potatoes chopped
  • 1 cup Bell Peppers diced
  • 2 medium Carrots sliced
  • 2 cups Long Grain White Rice
  • 1 leaf Bay Leaves remove before serving
  • 1 optional Scotch Bonnet for heat, adjust to preference

Equipment

  • Large pot
  • Cutting Board
  • Knife

Method
 

Step-by-Step Instructions
  1. In a large pot, heat oil over medium heat. Add diced onion, minced garlic, and chopped scallions, stirring until softened and fragrant, about 5 minutes.
  2. Add beef stew meat to the pot and sear on all sides for 8–10 minutes until browned.
  3. Sprinkle in paprika, fresh thyme, allspice, and ginger. Add tomato paste and stir for 1–2 minutes until fragrant.
  4. Pour in beef broth, scraping up browned bits. Add chopped potatoes, diced bell peppers, and sliced carrots. Season with salt and pepper.
  5. Bring to a gentle simmer over high heat. Cover and reduce heat to low, cooking for about 2 hours.
  6. While the stew simmers, prepare long-grain white rice according to package instructions.
  7. Taste and adjust seasonings. Remove bay leaves and serve the stew over rice.

Nutrition

Serving: 1bowlCalories: 450kcalCarbohydrates: 50gProtein: 30gFat: 15gSaturated Fat: 5gPolyunsaturated Fat: 1gMonounsaturated Fat: 10gCholesterol: 90mgSodium: 700mgPotassium: 800mgFiber: 5gSugar: 3gVitamin A: 500IUVitamin C: 30mgCalcium: 40mgIron: 4mg

Notes

Allow the stew to sit overnight in the fridge for enhanced flavors. You can use a slow cooker to prepare this dish as well.

Tried this recipe?

Let us know how it was!

Healthy Crockpot Beef Stew for Cozy Weeknight Dinners

May 7, 2026 by Grace Snow Leave a Comment

As I pulled into my driveway after a long day, the familiar aroma of my Healthy Crockpot Beef Stew danced through the air, wrapping around me like a cozy blanket. This isn’t just another stew; it's a celebration of wholesome ingredients that provide both nourishment and comfort. Packed with lean beef and a vibrant array of veggies, it’s the ultimate meal prep-friendly dish for hectic weeknights. With minimal fuss and maximum flavor, preparing dinner becomes a breeze—perfect for those evenings when you’re hungry but don’t want to compromise on health. Ready to indulge in a homemade classic that builds warmth and satisfaction in every bowl? Let’s dive into this heartwarming recipe together!

Why Is This Stew a Must-Try?

Healthier Alternatives: This Healthy Crockpot Beef Stew swaps out fatty cuts for lean beef, making indulgence guilt-free!
Effortless Preparation: Simply toss everything into the slow cooker and let it work its magic while you go about your day.
Nutrient-Rich Goodness: With a variety of colorful vegetables, this stew is packed with vitamins and minerals.
Versatility at Its Best: Customize it by adding seasonal veggies or switching up the protein; it’s your stew after all!
Family Favorite Appeal: A warm bowl of stew is a crowd-pleaser, perfect for gatherings or cozy nights in. Enjoy it paired with a side salad or some crusty bread for a complete meal experience!

Healthy Crockpot Beef Stew Ingredients

For the Stew

  • Beef Stew Meat – Use lean cuts for a healthier option that still delivers rich flavor.
  • Olive Oil – Ideal for browning the beef; you can substitute with avocado or canola oil if preferred.
  • Yellow Onion – Adds sweetness and depth; shallots or leeks work well as tasty alternatives.
  • Carrots – Offer sweetness and vibrant texture; feel free to use parsnips for a unique twist.
  • Celery – Contributes crunch and a balanced flavor; optional if it’s not your favorite.
  • Red Potatoes – Provides heartiness; any waxy potatoes can be used as a substitute.
  • Garlic – Adds an aromatic depth; fresh garlic is recommended over powdered for the best taste.
  • Low-Sodium Crushed Tomatoes – Forms a flavorful base for the broth; tomato puree or passata are excellent alternatives.
  • Low-Sodium Beef Broth – Deepens the flavor; vegetable broth is a great option for those seeking a lighter stew.
  • Non-Alcoholic Red Wine Substitute – Adds acidity and complexity; extra broth can be used in its place.
  • Bay Leaves – Infuse herbal notes; remember to remove them before serving for a clean finish.
  • Dried Thyme – Enhances earthy flavors; switch to fresh thyme for a burst of vibrant taste.
  • Dried Rosemary – Provides a robust flavor; feel free to omit if you have allergies or don’t love it.
  • Smoked Paprika – Adds a subtle smokiness; regular paprika can be used if that's what you have on hand.
  • Cornstarch & Cold Water (optional) – For thickening the stew; can be omitted for a brothier consistency.
  • Fresh Parsley – A beautiful garnish that adds freshness; chives can be substituted or omitted as desired.

This Healthy Crockpot Beef Stew is truly a joy to prepare—gather your ingredients and let the slow cooker transform them into a delightful dinner!

Step‑by‑Step Instructions for Healthy Crockpot Beef Stew

Step 1: Prep Ingredients
Start by trimming any excess fat from the beef stew meat, then cut it into bite-sized cubes. Season the beef generously with salt and pepper, allowing the flavors to penetrate. While the beef rests, chop the yellow onion, carrots, celery, and red potatoes into uniform pieces to ensure even cooking later in the Healthy Crockpot Beef Stew.

Step 2: Brown Beef
In a large skillet, heat a splash of olive oil over medium-high heat. Once the oil shimmers, add the seasoned beef cubes in a single layer, browning them for about 4-5 minutes on each side until golden. This step builds a rich flavor foundation for your stew. Once browned, transfer the beef to the slow cooker and get ready for the next layer.

Step 3: Layer in Slow Cooker
Begin layering by placing the chopped onions, carrots, celery, and cubed potatoes into the bottom of the slow cooker. These vegetables will infuse the Healthy Crockpot Beef Stew with sweetness and depth. Next, add the browned beef and minced garlic, spreading them evenly over the vegetables to ensure every bite is flavorful.

Step 4: Add Liquids and Spices
Pour in the low-sodium crushed tomatoes and beef broth, ensuring all ingredients are covered. If you're using the non-alcoholic red wine substitute, add it now for a complex flavor boost. Toss in the bay leaves, dried thyme, dried rosemary, and smoked paprika, then gently season with additional salt and pepper. Stir everything together for an even mix.

Step 5: Cook
Cover the slow cooker with its lid and set the temperature to LOW for 6-8 hours or HIGH for 3-4 hours, depending on your schedule. The Healthy Crockpot Beef Stew is ready when the beef is tender and easily flaked with a fork, making for a rich and satisfying meal after a long day.

Step 6: Thicken if Desired
If you prefer a thicker consistency for your stew, combine cornstarch and cold water in a small bowl to create a slurry. Stir it into the stew during the last 2-3 minutes of cooking, allowing it to thicken and cling to the ingredients beautifully, enhancing the stew's heartiness.

Step 7: Finish and Serve
Before serving, remove the bay leaves that have infused flavor during cooking. Stir in half of the fresh parsley for a touch of brightness, and reserve the rest for garnish. Ladle the Healthy Crockpot Beef Stew into bowls, topping each serving with the remaining parsley for a lovely presentation that adds warmth and freshness.

Healthy Crockpot Beef Stew Variations

Feel free to explore these exciting twists to make this recipe even more delightful for your taste buds!

  • Lamb Twist: Swap beef for lamb shoulder for a rich, slightly gamey flavor that elevates this stew.
  • Vegetable Medley: Add seasonal veggies like bell peppers, zucchini, or kale for extra nutrition and color.
  • Spaetzle: Serve with homemade or store-bought spaetzle for something truly comforting and hearty.
  • Spicy Kick: Stir in some diced jalapeños or a dash of cayenne pepper to give your stew a mild heat.
  • Herb Boost: Experiment with fresh herbs like rosemary, cilantro, or basil for a fresh twist on the classic flavor profile.

Additionally, if you like a touch of sweetness, why not add some diced sweet potatoes or butternut squash? These will not only enhance the taste but also add a beautiful color to your stew.

If you need more ideas for cozy family meals, check out delicious recipes like Crockpot Butter Chicken or the hearty Lamb Stew Hearty.

How to Store and Freeze Healthy Crockpot Beef Stew

Refrigerator: Store leftover Healthy Crockpot Beef Stew in an airtight container for up to 3-4 days. This keeps the flavors intact and ensures the stew remains fresh.

Freezer: To extend its life, freeze the stew in a freezer-safe container for up to 3 months. Make sure to leave some space at the top for expansion.

Reheating: When ready to enjoy, thaw overnight in the fridge and reheat in a saucepan over low heat, stirring occasionally. You can also microwave it, but be sure to cover it to retain moisture.

Serving Suggestions: For a quick meal, serve the reheated stew with crusty bread or a fresh side salad to round out your dinner.

What to Serve with Healthy Crockpot Beef Stew?

There's nothing quite like a warm bowl of stew to bring comfort to your table, so let’s explore delightful pairings that elevate your dining experience.

  • Crusty Bread: A must-have to soak up every drop of delicious broth, making each bite even more satisfying.
  • Mixed Green Salad: A refreshing crunch balances the stew’s richness, offering a burst of color and nutrients to your meal.
  • Buttery Mashed Potatoes: These creamy potatoes enhance the hearty texture, bringing a classic comfort food vibe to your dinner.

Pairing this stew with these offerings transforms a simple meal into a cozy gathering. Each option adds layers of flavor, texture, and a feeling of warmth that makes every dinner a cherished memory.

  • Acoustic Wine: A glass of non-alcoholic red wine adds sophistication while enhancing the stew’s complex flavors, making it perfect for special occasions.
  • Roasted Brussels Sprouts: Their slight bitterness contrasts beautifully with the stew’s sweetness, creating a balanced plate that appeals to diverse palates.
  • Savory Cornbread: This sweet and crumbly delight complements the stew's savoriness, making every spoonful of stew a delightful experience.

Choose any of these suggestions to accompany your Healthy Crockpot Beef Stew and create an unforgettable meal that friends and family will rave about!

Expert Tips for Healthy Crockpot Beef Stew

  • Brown the Beef: Take your time browning the beef; it enhances the flavor of the stew dramatically and sets a rich base.

  • Prep Ahead: For convenience, chop your vegetables and beef a day in advance. This not only saves time but also allows flavors to meld better.

  • Flavor Variations: If you want to experiment, add a splash of Worcestershire sauce or a dash of hot sauce for an extra kick in your Healthy Crockpot Beef Stew.

  • Thicken to Your Taste: If you prefer a brothier stew, skip the cornstarch slurry. It’s easy to adjust the consistency based on your family’s preferences.

  • Extra Veggies: Toss in some spinach or kale during the last 30 minutes of cooking for added nutrients and vibrant color.

Make Ahead Options

These Healthy Crockpot Beef Stew is perfect for meal prep enthusiasts! You can chop the vegetables and cube the beef up to 24 hours in advance, storing them in separate airtight containers in the refrigerator to maintain their freshness and quality. For even more convenience, consider browning the beef ahead of time and refrigerating it; this step deepens flavors and saves you precious minutes when it's time to cook. When you're ready to enjoy your hearty stew, simply layer the ingredients in the slow cooker, add your liquids and spices, and let it cook on LOW for 6-8 hours or HIGH for 3-4 hours. This way, you can come home to a delicious, hassle-free meal that's just as satisfying as if you made it from scratch that day!

Healthy Crockpot Beef Stew Recipe FAQs

How do I choose the right beef for stew?
Absolutely! For the healthiest option, opt for lean cuts like chuck or round roast. Look for meat with minimal visible fat, and ensure it has a vibrant red color. Avoid any cuts with dark spots, which may indicate that they’re not fresh.

What’s the best way to store leftovers?
Leftovers of your delicious Healthy Crockpot Beef Stew can be stored in an airtight container in the refrigerator for up to 3-4 days. Make sure it cools completely before sealing to preserve its flavors!

Can I freeze Healthy Crockpot Beef Stew?
Yes, you can! Transfer cooled stew into freezer-safe containers, leaving a little room at the top for expansion. It should stay good for up to 3 months. When you're ready to enjoy it, thaw it overnight in the refrigerator and reheat on the stove until warmed through.

What if my stew is too thin?
If you find that your Healthy Crockpot Beef Stew turned out a bit thin, don’t worry! You can easily thicken it by making a slurry with 1-2 tablespoons of cornstarch mixed with an equal amount of cold water. Stir the mixture into the stew during the last 2-3 minutes of cooking; it will quickly thicken into a luscious consistency.

Are there any dietary considerations I should keep in mind?
Very! If you’re preparing this stew for someone with dietary restrictions, always check for allergies to common ingredients like garlic or certain spices. For gluten-free options, ensure your broth and any substitutes you use are labeled as gluten-free. This Healthy Crockpot Beef Stew can easily be made vegetarian by swapping out the beef for hearty vegetables or legumes.

Can I add more vegetables to the stew?
Absolutely! The more, the merrier! You can easily customize your stew with additional veggies like bell peppers, mushrooms, or even greens like kale or spinach. Just add those heartier vegetables during the last 30 minutes of cooking to keep their vibrant color and nutrients intact.

Healthy Crockpot Beef Stew

Healthy Crockpot Beef Stew for Cozy Weeknight Dinners

Enjoy a hearty and nourishing Healthy Crockpot Beef Stew packed with lean beef and vibrant veggies for a comforting dinner experience.
Print Recipe Pin Recipe
Prep Time 15 minutes mins
Cook Time 6 hours hrs
Total Time 6 hours hrs 15 minutes mins
Servings: 6 servings
Course: Dinner
Cuisine: American
Calories: 350
Ingredients Equipment Method Nutrition Notes

Ingredients
  

For the Stew
  • 2 pounds Beef Stew Meat Use lean cuts for a healthier option
  • 2 tablespoons Olive Oil Can substitute with avocado or canola oil
  • 1 medium Yellow Onion Adds sweetness and depth
  • 3 medium Carrots Feel free to use parsnips
  • 2 stalks Celery Optional
  • 4 medium Red Potatoes Any waxy potatoes can be used
  • 4 cloves Garlic Fresh recommended
  • 28 ounces Low-Sodium Crushed Tomatoes Forms a flavorful base
  • 4 cups Low-Sodium Beef Broth Vegetable broth can be used
  • 1 cup Non-Alcoholic Red Wine Substitute Extra broth can be used instead
  • 2 leaves Bay Leaves Remove before serving
  • 1 teaspoon Dried Thyme Switch to fresh thyme if desired
  • 1 teaspoon Dried Rosemary Omit if allergic
  • 1 teaspoon Smoked Paprika Can use regular paprika
  • 2 tablespoons Cornstarch Optional thickening agent
  • 2 tablespoons Cold Water For thickening
  • 2 tablespoons Fresh Parsley For garnish

Equipment

  • Slow Cooker
  • Skillet
  • Cutting Board
  • Knife

Method
 

Step-by-Step Instructions
  1. Trim excess fat from beef and cut into bite-sized cubes. Season with salt and pepper.
  2. Heat olive oil in a skillet, brown beef cubes for 4-5 minutes on each side, then transfer to slow cooker.
  3. Layer onions, carrots, celery, and potatoes in slow cooker, followed by browned beef and minced garlic.
  4. Pour in crushed tomatoes and broth. Add wine substitute, bay leaves, thyme, rosemary, and paprika. Stir.
  5. Cover and cook on LOW for 6-8 hours or HIGH for 3-4 hours.
  6. Combine cornstarch and cold water in a bowl, stir into stew during last 2-3 minutes if a thicker consistency is desired.
  7. Remove bay leaves, stir in half of the parsley, serve garnished with remaining parsley.

Nutrition

Serving: 1bowlCalories: 350kcalCarbohydrates: 30gProtein: 40gFat: 10gSaturated Fat: 2gPolyunsaturated Fat: 0.5gMonounsaturated Fat: 5gCholesterol: 80mgSodium: 250mgPotassium: 800mgFiber: 5gSugar: 4gVitamin A: 100IUVitamin C: 25mgCalcium: 40mgIron: 3.5mg

Notes

This stew can be customized with seasonal vegetables and can be made ahead for convenience. Serve with crusty bread or a side salad for a complete meal.

Tried this recipe?

Let us know how it was!

Crispy Chicken Tacos for the Perfect Taco Tuesday Night

May 7, 2026 by Grace Snow Leave a Comment

The aroma wafting through the kitchen is a surefire sign that a family favorite is in the works. Today, I’m thrilled to share my Baked Crispy Chicken Tacos recipe—your ticket to a delicious meal that’s as satisfying as it is easy to prepare. With tender, seasoned chicken nestled in golden taco shells, these Crispy Chicken Tacos deliver the perfect crunch without the guilt of frying. They’re not just a feast for the taste buds; they’re a crowd-pleaser that’ll leave everyone craving seconds. Plus, this recipe is a breeze to whip up, making it ideal for busy nights or casual gatherings with friends. Are you ready to discover how simple and scrumptious homemade tacos can be? Let’s dive in!

Why Choose Baked Crispy Chicken Tacos?

Simplicity. These tacos come together with minimal effort, making them a go-to for weeknight dinners. Mouthwatering Flavor. Juicy chicken seasoned to perfection combined with melted cheese ensures each bite is packed with taste. Healthier Alternative. Baked instead of fried, they satisfy cravings without the extra calories. Crowd-Pleasing. Perfect for gatherings, everyone will appreciate this delightful twist on traditional tacos. Versatile. You can easily customize fillings, whether by adding veggies or switching proteins to suit your family’s preferences. These Crispy Chicken Tacos might just become your new favorite meal!

Crispy Chicken Tacos Ingredients

Elevate your taco night with these delightful, easy-to-make ingredients!

For the Chicken Filling

  • Cooking Oil – Adds moisture and helps achieve crispiness on the taco shells. Substitution: Avocado or olive oil works best; adjust based on preference.
  • Chicken Breast – The main protein source, boneless and skinless, for a tender filling. Prep Note: Use fresh or thawed chicken.
  • Taco Seasoning – Provides essential Mexican flavor. Substitution: Homemade or store-bought varieties can be used.
  • Salsa – Contributes moisture and flavor to the chicken. Note: Use mild or medium salsa based on spice preference.
  • Chicken Broth – Adds additional moisture and enhances flavor during cooking. Prep Note: Ensure there’s enough liquid for the sauce consistency.

For the Taco Shells

  • Corn Tortillas – Forms the crispy taco shells after baking. Recommendation: Warming them beforehand prevents cracking during folding.
  • Mexican Blend Cheese – Melts into the filling, binding the ingredients while adding creamy texture. Substitution: Any shredded cheese can be used; however, a blend gives better flavor.

This Chicken Tacos recipe is all about simplicity and flavor! Enjoy your cooking adventure!

Step‑by‑Step Instructions for Crispy Chicken Tacos

Step 1: Preheat Oven
Begin by preheating your oven to 425°F (220°C). Position the oven racks in the middle and upper thirds to ensure even cooking. This step is crucial for achieving those perfectly golden, crispy taco shells that are the hallmark of your delicious Crispy Chicken Tacos.

Step 2: Cook Chicken
In a large skillet, heat a tablespoon of cooking oil over medium-high heat. Once the oil is shimmering, add the chicken breasts, along with half of the taco seasoning. Cook until the chicken is golden on one side, about 5-6 minutes, then flip it over. Add the remaining seasoning, salsa, and a splash of chicken broth, cover, and simmer for 10-12 minutes or until the chicken is cooked through and tender.

Step 3: Warm Tortillas
While the chicken is cooking, warm each corn tortilla. To do this, place them in a dry skillet over medium heat, warming each side for about 10 seconds. Keep the tortillas covered with a clean kitchen towel to retain warmth and prevent them from cracking when you fill and fold your Crispy Chicken Tacos.

Step 4: Shred Chicken
Once the chicken has finished cooking, remove it from the skillet and allow it to cool slightly. Using two forks, shred the chicken into bite-sized pieces, ensuring it remains juicy and mixed with the salsa and seasoning from the pan. Now your filling is ready for these delectable tacos!

Step 5: Assemble Tacos
Prepare two baking sheets by lining them with parchment paper. Take a warmed tortilla and sprinkle a layer of cheese on one half, followed by a generous scoop of the shredded chicken. Drizzle a touch of the reserved sauce for extra moisture, then top with more cheese before folding the tortilla in half. Lightly brush the tops with cooking oil to ensure they crisp beautifully.

Step 6: Bake Tacos
Place the assembled tacos on the baking sheets and bake in the preheated oven for 20-25 minutes. Rotate the baking sheets halfway through cooking, and keep an eye out for that perfect golden color on the taco shells—they should be wonderfully crispy and crispy to perfection.

Step 7: Serve
After baking, allow the Crispy Chicken Tacos to cool slightly on a wire rack or a plate. This brief resting time helps prevent the filling from spilling out. Serve warm with your favorite sides, like guacamole or sour cream, and watch your family enjoy every delightful bite!

What to Serve with Baked Crispy Chicken Tacos?

When crafting the perfect taco night experience, complement your crispy creations with delightful sides and beverages that elevate every bite.

  • Guacamole: This creamy avocado dip adds richness and balances the crunch of the tacos, making every bite even more delightful.

  • Mexican Street Corn Salad: Bright, fresh, and zesty, this salad offers a refreshing contrast, bursting with flavors that harmonize beautifully with the tacos.

  • Pico de Gallo: This fresh salsa adds a vibrant burst of flavor, with the crunch of diced tomatoes, onions, and cilantro enhancing the overall taste experience.

  • Refried Beans: Creamy with a touch of smokiness, refried beans provide a satisfying dip that perfectly pairs with the crispy chicken filling.

  • Spanish Rice: Fluffy and fragrant, seasoned rice complements the meal, adding delicious texture and a comforting element to your taco night.

  • Chilled Horchata: This sweet, creamy rice milk is a refreshing drink that cools the palate, making it a perfect match for spicy or savory tacos.

  • Churros: End your meal on a sweet note with these crispy, cinnamon-sugar-covered pastries. They offer the perfect crunchy contrast to the savory tacos!

As you put together your meal, each of these pairings will amplify the flavors of your Baked Crispy Chicken Tacos, creating a true fiesta on your table.

Crispy Chicken Tacos: Flavorful Twists Await!

Feel free to let your creativity shine with these delightful variations for your crispy chicken tacos, enhancing every bite with excitement!

  • Vegetable Boost: Add sautéed onions and bell peppers to the chicken filling for a colorful and nutritious twist.

  • Protein Swap: Substitute chicken with ground beef or turkey for a hearty, savory alternative that satisfies different palates.

  • Spicy Kick: Toss in jalapeños or use a zesty salsa to heat things up if you're seeking a fiery bite!

  • Cheesy Delight: Experiment with different cheese blends or even a spicy pepper jack for an extra layer of flavor.

  • Crunchy Topping: Add crushed tortilla chips or a sprinkle of crispy fried onions on top before baking for a delightful crunch.

  • Fresh Herbs: Incorporate chopped cilantro or green onions into the filling for an aromatic freshness that brightens each taco.

  • Creamy Sauce: Drizzle your tacos with a homemade chipotle sauce or ranch dressing to bring a creamy texture that pairs wonderfully with the crunch.

  • Sweet Twist: For a unique twist, mix in some diced pineapple or mango with the chicken for a hint of sweetness that balances the savory flavors.

As you explore these variations, don’t hesitate to serve your tacos alongside classic sides like guacamole or refried beans, ensuring a delightful meal that caters to every taste bud!

Expert Tips for Crispy Chicken Tacos

  • Preheat Properly: Always preheat your oven thoroughly to ensure even cooking for your Crispy Chicken Tacos. A hot oven is key for achieving that perfect crunch!

  • Chicken Shred Technique: Use two forks to shred your chicken for a tender filling. This ensures even distribution of flavors in your tacos and avoids large chunks.

  • Tortilla Care: Warm your corn tortillas before assembling; this helps prevent cracking and makes folding much easier. Trust me, you'll thank yourself later!

  • Oil Brushing: Don’t skip brushing the tops of your tacos with oil. It not only prevents burning but gives your Crispy Chicken Tacos that irresistible golden color.

  • Watch for Browning: Keep an eye on your tacos as they bake. If any start to open up, simply press them closed gently—no one wants a filling explosion!

Make Ahead Options

These Crispy Chicken Tacos are a fantastic choice for meal prep, saving you valuable time during busy weeknights! You can prepare the shredded chicken filling up to 3 days in advance by cooking and shredding the chicken with salsa and spices, then storing it in an airtight container in the refrigerator. Additionally, you can warm the corn tortillas and assemble the tacos a day ahead—just layer the ingredients and store them in the fridge with parchment paper between layers to maintain crispness. When you're ready to serve, simply bake the assembled tacos for about 20-25 minutes until golden, and they’ll be just as delicious as if made fresh!

How to Store and Freeze Crispy Chicken Tacos

Fridge: Store cooled Crispy Chicken Tacos in an airtight container for up to 3 days. They’ll maintain their flavor but may lose some crispiness.

Freezer: For longer storage, freeze the chicken filling separately in an airtight container for up to 3 months. Thaw overnight in the fridge before use for easy taco assembly.

Reheating: To enjoy them warmed, reheat baked tacos in a 350°F (175°C) oven for about 10-15 minutes, ensuring they regain their crunch.

Make-Ahead: Prepare the chicken filling ahead of time and assemble the tacos just before baking for a quick dinner option.

Crispy Chicken Tacos Recipe FAQs

How do I choose the right chicken for this recipe?
Always opt for boneless, skinless chicken breasts for the filling. Fresh chicken will yield the best flavor and texture, but if you're pressed for time, thawed frozen chicken works too. Look for chicken without dark spots or an unpleasant odor to ensure freshness.

What’s the best way to store leftovers?
Store cooled Crispy Chicken Tacos in an airtight container in the refrigerator for up to 3 days. To maintain flavor, consider reheating in a preheated oven at 350°F (175°C) for about 10-15 minutes—this helps them regain some of that original crispiness.

Can I freeze the chicken filling?
Absolutely! You can freeze the shredded chicken filling in an airtight container for up to 3 months. To do this, let the filling cool completely before portioning, then seal well. Thaw overnight in the fridge before using it to make quick tacos on busy nights.

What if my tacos don’t turn out crispy?
If your tacos aren't crispy, it could be due to insufficient oil brushing or overcrowding on the baking sheet. Make sure to lightly brush the tops with oil to enhance crispness, and arrange them in a single layer on the sheet—this allows hot air to circulate evenly. Also, rotating the baking sheets halfway through baking is essential for uniform crisping.

Is this recipe suitable for any dietary restrictions?
While these Crispy Chicken Tacos are not gluten-free due to the corn tortillas, they can easily be adapted. Opt for gluten-free tortillas, and check your taco seasoning for hidden gluten if necessary. Additionally, for dairy-free options, you can use dairy-free cheese alternatives without sacrificing flavor.

What can I do to spice them up?
If you're looking to add a kick to your tacos, consider mixing diced jalapeños or adding a splash of hot sauce to the chicken filling before assembling. Also, using spicy salsa or sprinkling some cayenne pepper into the taco seasoning can elevate the heat to your liking!

Crispy Chicken Tacos

Crispy Chicken Tacos for the Perfect Taco Tuesday Night

Enjoy delicious Crispy Chicken Tacos, a baked alternative that delivers satisfying crunch and flavor for your Taco Tuesday.
Print Recipe Pin Recipe
Prep Time 15 minutes mins
Cook Time 30 minutes mins
Cooling Time 5 minutes mins
Total Time 50 minutes mins
Servings: 4 tacos
Course: Dinner
Cuisine: Mexican
Calories: 250
Ingredients Equipment Method Nutrition Notes

Ingredients
  

For the Chicken Filling
  • 1 tablespoon Cooking Oil Substitution: Avocado or olive oil works best; adjust based on preference.
  • 1 pound Chicken Breast Prep Note: Use fresh or thawed chicken.
  • 2 tablespoons Taco Seasoning Substitution: Homemade or store-bought varieties can be used.
  • 1 cup Salsa Note: Use mild or medium salsa based on spice preference.
  • 1/2 cup Chicken Broth Prep Note: Ensure there’s enough liquid for the sauce consistency.
For the Taco Shells
  • 8 pieces Corn Tortillas Recommendation: Warming them beforehand prevents cracking during folding.
  • 2 cups Mexican Blend Cheese Substitution: Any shredded cheese can be used; however, a blend gives better flavor.

Equipment

  • Oven
  • Large skillet
  • Baking Sheets
  • Parchment Paper
  • Kitchen Towel

Method
 

Step‑by‑Step Instructions
  1. Preheat your oven to 425°F (220°C) and position the oven racks in the middle and upper thirds.
  2. In a large skillet, heat a tablespoon of cooking oil over medium-high heat. Add the chicken breasts and half of the taco seasoning. Cook until golden, about 5-6 minutes, then flip. Add remaining seasoning, salsa, and chicken broth. Cover and simmer for 10-12 minutes until cooked through.
  3. Warm each corn tortilla in a dry skillet over medium heat, about 10 seconds per side. Keep them covered with a towel to retain warmth.
  4. Remove chicken from skillet and shred it into bite-sized pieces using two forks, mixing it with salsa and seasoning.
  5. Prepare baking sheets with parchment paper. On a warmed tortilla, sprinkle cheese on one half, add shredded chicken, drizzle with sauce, top with more cheese, and fold.
  6. Bake tacos on baking sheets for 20-25 minutes, rotating halfway through. They should be golden and crispy.
  7. Allow tacos to cool slightly on a wire rack or plate before serving warm with sides like guacamole or sour cream.

Nutrition

Serving: 1tacoCalories: 250kcalCarbohydrates: 30gProtein: 20gFat: 10gSaturated Fat: 4gPolyunsaturated Fat: 1gMonounsaturated Fat: 4gCholesterol: 70mgSodium: 500mgPotassium: 300mgFiber: 2gSugar: 1gVitamin A: 500IUVitamin C: 5mgCalcium: 200mgIron: 2mg

Notes

Enjoy your cooking adventure with these delicious and easy-to-make Crispy Chicken Tacos! Perfect for any gathering or family dinner.

Tried this recipe?

Let us know how it was!

Slow Cooked Scottish Beef Stew That Warms Your Soul

May 7, 2026 by Grace Snow Leave a Comment

As the chilly wind outside howls, there's something irresistibly comforting about the thought of a slow-cooked Scottish Beef Stew simmering away on the stove. It’s that glorious aroma of tender Aberdeen Angus beef mingling with earthy root vegetables, laced with a splash of rich red wine, that has the power to lift spirits and warm hearts. This recipe is perfect for both cozy family dinners and meal prepping for those busy weeknights. Not only does it provide hearty nourishment, but it also allows for make-ahead convenience, letting you savor the warming flavors without the stress. So, are you ready to dive into this homestyle dish that will have everyone asking for seconds? Let's get cooking!

Why is Slow Cooked Beef Stew Special?

Hearty Comfort: This Traditional Scottish Beef Stew is perfect for chilly days, warming you from the inside out.

Easy Meal Prep: Ideal for batch cooking, you can make a big pot ahead for busy weeknights.

Flavor Explosion: The combination of Aberdeen Angus beef, root vegetables, and red wine creates a complex, mouthwatering profile.

Crowd-Pleaser: Perfect for family gatherings, this stew is bound to have everyone coming back for more.

Versatile Base: Feel free to substitute the beef or add different root veggies, making it your own!

Why not check out our Lamb Stew Hearty or Beans Greens Stew for additional comforting options on a chilly evening?

Slow Cooked Scottish Beef Stew Ingredients

For the Stew
• Vegetable Oil – Essential for sautéing the beef and vegetables, enhancing the overall flavor.
• Aberdeen Angus Braising/Stewing Beef (1 kg / 2.2 lbs) – The star of the dish, bringing richness and heartiness to the stew.
• Plain (All-Purpose) Flour (2 tbsp) – Coats the beef for browning, which adds a thicker texture to the final dish.
• Onions (2 large) – Provides sweetness and depth, key for a well-rounded flavor.
• Garlic (3 cloves) – Infuses the stew with wonderful aromatic qualities.
• Red Currant Jelly (2 tbsp) – Adds a hint of sweetness and acidity; cranberry sauce works as a perfect substitute.
• Red Wine (500 ml / about 2 cups + 1 tbsp) – Brings depth and complexity to the flavor profile; substitute with extra beef stock and balsamic vinegar for a non-alcoholic version.
• Carrots (2 large) – Contributes natural sweetness and texture, balancing the savory elements.
• Potatoes (2 medium) – Adds heartiness and helps to thicken the stew as it cooks.
• Swede (½ small / Rutabaga) – Introduces earthiness and a unique texture to the stew.
• Beef Stock (700 ml / about 3 cups - 1 tbsp) – Provides a rich base; homemade or stock cubes can be used.
• Tomato Puree (2 tbsp) – Enhances the stew's color and boosts its flavor depth.
• Worcestershire Sauce (1 tbsp) – Adds a tangy, complex note to the overall flavor.
• Bay Leaves (4) – Infuse the stew with aromatic flavors during the cooking process.
• Dark Brown Sugar (2 tsp) – Balances out the dish, particularly the acidity from the tomatoes and wine.
• Salt (¾ tsp) & Black Pepper (¾ tsp freshly ground) – Essential for seasoning, they amplify the dish's flavors.

To Serve
• Fresh Thyme Sprigs – Perfect for garnishing, adding a fresh herbal note.
• Crusty Bread or Rolls – Complements the dish beautifully, ideal for dipping into the rich broth.

Embrace this delightful Slow Cooked Scottish Beef Stew that not only nourishes but warms your soul!

Step‑by‑Step Instructions for Slow Cooked Scottish Beef Stew

Step 1: Prepare Beef
Begin by heating a tablespoon of vegetable oil in a large pot over medium-high heat. While the oil warms, coat the 1 kg of Aberdeen Angus beef with 2 tablespoons of plain flour. Once the oil is shimmering, add the beef in batches, browning each piece for 3-4 minutes until golden brown. This step infuses your stew with rich flavors, so don’t rush!

Step 2: Sauté Vegetables
With the beef browned, reduce the heat to medium and add two large, chopped onions along with three minced garlic cloves to the pot. Sauté these aromatic vegetables for about 5 minutes, stirring occasionally, until the onions turn translucent and fragrant. This combination provides the flavorful foundation for your Slow Cooked Scottish Beef Stew.

Step 3: Combine Ingredients
Add the next set of ingredients into the pot: stir in 2 tablespoons of red currant jelly, 500 ml of red wine, and your chopped root vegetables, including two large carrots, two medium potatoes, and half a small swede. Next, pour in 700 ml of beef stock, followed by 2 tablespoons of tomato puree, 1 tablespoon of Worcestershire sauce, and 4 bay leaves. This mix will create a hearty, aromatic base for the stew.

Step 4: Simmer
Bring the stew mixture to a gentle boil over high heat, then reduce the heat to low. Cover the pot with a lid and let it simmer for 2-3 hours, stirring occasionally, until the beef is fork-tender and flavors meld beautifully. For a hands-off approach, transfer the stew to a slow cooker and cook on low for 6-8 hours for ultimate tenderness.

Step 5: Finishing Touches
Once cooked, taste the stew for seasoning and adjust with salt and freshly ground black pepper as needed. Remove the bay leaves and discard them, then allow the stew to rest for a few minutes. This final step allows the flavors to settle, ensuring each spoonful of your Slow Cooked Scottish Beef Stew is rich and satisfying.

Expert Tips for Slow Cooked Scottish Beef Stew

• Well-Browned Beef: Always brown the beef properly; this adds a deep, rich flavor that enhances the overall stew.

• Flavor Development: Make the stew a day ahead! Letting it sit overnight allows the flavors to marry for an even more delicious dish.

• Veggie Variations: Don’t hesitate to experiment! Adding different root vegetables, like parsnips or turnips, can elevate the slow cooked Scottish beef stew experience.

• Thickening Considerations: If your stew is too thin, mash a few potato pieces and stir them in to naturally thicken the broth without altering the flavor.

• Freezing Guidance: Let the stew cool completely before freezing it in airtight containers, keeping it fresh for up to 3 months—perfect for busy nights!

What to Serve with Traditional Scottish Beef Stew

As winter evenings call for warmth and comfort, delightful side dishes can make your hearty stew even more satisfying.

  • Creamy Mashed Potatoes: Their buttery texture soaks up the rich broth of the stew, creating a delightful meld of flavors.
  • Crusty Bread or Rolls: Perfect for dipping, the warm, crusty exterior and soft interior complements the stew’s robust flavor wonderfully.
  • Simple Green Salad: A fresh, crisp salad balances the richness of the stew, adding a refreshing crunch that brightens the meal.
  • Roasted Root Vegetables: Enhance the rustic theme with tender, caramelized root vegetables that echo the flavors in the stew.
  • Savory Bread Pudding: This comforting side pairs beautifully with the stew, soaking up the savory juices and adding a new texture.
  • Peas and Carrots: A classic combination, the sweetness of peas contrasts with the savory stew while the carrots maintain the root vegetable theme.
  • Red Wine: Pouring a glass of the same red you used for cooking can elevate the dining experience, allowing flavors to dance together beautifully.
  • Apple Crumble for Dessert: As a sweet finish, this warm dessert complements the meal with its delightful warmth and sweetness, making it a cozy ending.

How to Store and Freeze Slow Cooked Scottish Beef Stew

Fridge: Store in an airtight container for up to 3 days. This allows the flavors to develop while keeping the beef tender and delicious.

Freezer: Freeze the stew in airtight containers for up to 3 months. Make sure to let it cool completely before packing it away to maintain its rich flavor and texture.

Reheating: Thaw overnight in the fridge, then reheat gently on the stovetop or in the microwave until heated through. Stir occasionally to ensure even warming.

Make-Ahead Tip: This slow cooked Scottish beef stew tastes even better the next day, making it perfect for meal prep!

Slow Cooked Scottish Beef Stew Variations

Feel free to play with this recipe and make it truly yours with these delightful twists!

  • Substitute Beef: Swap Aberdeen Angus for any stewing beef like chuck or brisket; each brings its unique flavor to the mix.

  • Root Veggie Medley: Add parsnips or turnips for a fun twist! The varying textures and flavors elevate the dish beautifully.

  • Spicy Kick: Stir in a teaspoon of smoked paprika or chili flakes to add heat and depth; it's a wonderful way to awaken your taste buds.

  • Herbal Infusion: Toss in fresh herbs like rosemary or thyme during cooking. Their aromatic notes will infuse the stew with a fragrant twist.

  • Mushroom Magic: Incorporate sliced mushrooms for an earthy addition that complements the beef stunningly; they'll soak up the rich broth.

  • Gluten-Free Option: Use cornstarch instead of flour to thicken the stew while ensuring it's entirely gluten-free; perfect for those with dietary restrictions.

  • Vegetarian Delight: For a meatless version, replace beef with hearty beans and lentils, allowing the flavors to shine through with less time in the pot.

  • For a Comforting Finish: Serve with a dollop of sour cream or a sprinkle of cheese on top; it creates a creamy contrast that your family will love!

If you're looking for more stews to warm your heart, be sure to check out our Crock Pot Chicken Stew or Ground Beef Enchiladas for equally delicious options!

Make Ahead Options

These Slow Cooked Scottish Beef Stew preparations are perfect for busy home cooks looking to save time without sacrificing flavor! You can chop the vegetables (onions, carrots, potatoes, and swede) up to 3 days in advance; store them in airtight containers to keep them fresh. Additionally, you can brown the beef and prepare the sauce (combining the red currant jelly, red wine, and Worcestershire sauce) up to 24 hours ahead. Just refrigerate the cooled beef mixture until you're ready to simmer. When it's time to serve, simply combine all components in your pot or slow cooker, and let it simmer as directed for the ultimate homemade comfort dish, just as delicious and hearty as if freshly made!

Slow Cooked Scottish Beef Stew Recipe FAQs

What type of beef is best for slow-cooked beef stew?
Absolutely! For the best results, I recommend using Aberdeen Angus braising or stewing beef. This cut is well-marbled, making it rich and tender when slow-cooked. Alternatively, chuck roast or any well-marbled stewing beef works wonderfully too!

How should I store leftovers of slow-cooked Scottish beef stew?
Store your stew in an airtight container in the fridge for up to 3 days. Allow it to cool completely before placing it in the container to retain its rich flavors. It's ideal for those cozy leftovers!

Can I freeze slow-cooked Scottish beef stew?
Yes, you can! Simply let the stew cool completely, then transfer it into airtight containers. It can be stored in the freezer for up to 3 months. When you're ready to enjoy it again, thaw overnight in the fridge and reheat gently.

What if my stew is too thin?
Very! If your stew is not thick enough after cooking, try mashing a few potato pieces against the side of the pot and stirring them back in. This not only thickens the stew but also keeps the flavor just right without needing additional thickeners.

Can I use wine alternatives in this recipe?
Certainly! If you prefer a non-alcoholic version, simply replace the red wine with additional beef stock and add a splash of balsamic vinegar. This will still provide a lovely depth of flavor without the alcohol!

Is this recipe suitable for people with dietary restrictions?
Before serving, check for any allergies! While the slow-cooked Scottish beef stew is typically safe for most diners, some may have sensitivities to gluten (from the flour) or certain vegetables. Feel free to substitute gluten-free flour if needed and tailor the recipe to your needs!

Slow Cooked Scottish Beef Stew

Slow Cooked Scottish Beef Stew That Warms Your Soul

A comforting Slow Cooked Scottish Beef Stew that features tender Aberdeen Angus beef and earthy root vegetables.
Print Recipe Pin Recipe
Prep Time 30 minutes mins
Cook Time 3 hours hrs
Resting Time 10 minutes mins
Total Time 3 hours hrs 40 minutes mins
Servings: 6 servings
Course: Dinner
Cuisine: Scottish
Calories: 450
Ingredients Equipment Method Nutrition Notes

Ingredients
  

For the Stew
  • 1 tablespoon Vegetable Oil Essential for sautéing the beef and vegetables.
  • 1000 grams Aberdeen Angus Braising/Stewing Beef The star of the dish.
  • 2 tablespoons Plain (All-Purpose) Flour Coats the beef for browning.
  • 2 large Onions Provides sweetness and depth.
  • 3 cloves Garlic Infuses the stew with aromatic qualities.
  • 2 tablespoons Red Currant Jelly Adds a hint of sweetness and acidity.
  • 500 milliliters Red Wine Brings depth and complexity.
  • 2 large Carrots Contributes natural sweetness.
  • 2 medium Potatoes Adds heartiness.
  • 0.5 small Swede (Rutabaga) Introduces earthiness.
  • 700 milliliters Beef Stock Provides a rich base.
  • 2 tablespoons Tomato Puree Enhances the stew's color.
  • 1 tablespoon Worcestershire Sauce Adds a tangy note.
  • 4 pieces Bay Leaves Infuse aromatic flavors.
  • 2 teaspoons Dark Brown Sugar Balances acidity.
  • 0.75 teaspoon Salt Essential for seasoning.
  • 0.75 teaspoon Black Pepper Essential for seasoning.
To Serve
  • Fresh Thyme Sprigs Perfect for garnishing.
  • Crusty Bread or Rolls Complements the dish beautifully.

Equipment

  • Large pot

Method
 

Cooking Steps
  1. Begin by heating a tablespoon of vegetable oil in a large pot over medium-high heat. Coat the beef with flour and brown in batches for 3-4 minutes.
  2. Reduce the heat to medium and add chopped onions and minced garlic. Sauté for about 5 minutes until onions turn translucent.
  3. Stir in red currant jelly, red wine, chopped carrots, potatoes, swede, beef stock, tomato puree, Worcestershire sauce, and bay leaves.
  4. Bring to a gentle boil, then reduce the heat to low. Cover and let simmer for 2-3 hours, or transfer to a slow cooker for 6-8 hours.
  5. Taste for seasoning and adjust with salt and pepper. Remove bay leaves and let it rest for a few minutes before serving.

Nutrition

Serving: 1bowlCalories: 450kcalCarbohydrates: 35gProtein: 40gFat: 20gSaturated Fat: 8gPolyunsaturated Fat: 2gMonounsaturated Fat: 8gCholesterol: 100mgSodium: 800mgPotassium: 1100mgFiber: 5gSugar: 5gVitamin A: 500IUVitamin C: 15mgCalcium: 70mgIron: 5mg

Notes

This stew tastes better the next day, making it perfect for meal prep!

Tried this recipe?

Let us know how it was!

Cottage Cheese Banana Bread: Moist, Healthy Perfection Awaits

May 6, 2026 by Grace Snow Leave a Comment

Every bite of fresh, warm Cottage Cheese Banana Bread transports me to cozy mornings filled with delicious anticipation. It’s surprising how this simple twist on a classic can come together in no time. With its gluten-free nature and added protein from cottage cheese, this recipe transforms banana bread into a guilt-free snack or a wholesome breakfast option. Not only does it fill your kitchen with an irresistible aroma, but it's also perfect for those seeking healthier alternatives without sacrificing flavor. Imagine indulging in a soft, moist slice that still fits into a balanced lifestyle! Are you ready to whip up a loaf that’s both nutritious and delicious?

Why is Cottage Cheese Banana Bread so special?

Decadent, Yet Healthy: This Cottage Cheese Banana Bread combines the moistness you crave with a protein boost, making it a smart choice for snacking or breakfast.

Guilt-Free Indulgence: With lower sugar content and gluten-free ingredients, it’s perfect for those mindful of their diet but still wanting to enjoy delicious flavors.

Time-Saving Delight: Whip this recipe up in no time, allowing you to savor warm slices fresh from the oven without hours in the kitchen.

Versatile and Fun: Customize your loaf by adding nuts, chocolate chips, or even seasonal flavors like pumpkin for a delightful surprise.

Kitchen Aromas: As it bakes, your home will fill with the sweet, comforting scent that brings everyone running to the kitchen!

Try serving it warm topped with a bit of butter, just like with my popular Cheesy Garlic Bread, or pair it with a fresh fruit spread for an elevated treat. This Cottage Cheese Banana Bread is bound to be the new star of your breakfast table!

Cottage Cheese Banana Bread Ingredients

• Every ingredient plays a crucial role in creating this moist, gluten-free delight!

For the Batter

  • Ripe Bananas – Adds natural sweetness and moisture; substitute with unsweetened applesauce for lower sugar.
  • Eggs – Binds ingredients together and provides structure; for a vegan option, use flax eggs (1 tbsp flaxseed + 2.5 tbsp water = 1 egg).
  • Cottage Cheese – Enhances moisture and boosts protein; you can opt for low-fat or smooth blended cottage cheese for a creamier texture.
  • Maple Syrup – Infuses sweetness and depth; for reduced sugar, try honey or sugar-free syrup.
  • Vanilla Extract – Elevates the overall flavor profile; no substitutions necessary here.
  • Almond Flour – A gluten-free base that adds nutrition; be cautious not to replace it 1:1 with other flours due to its density.
  • Baking Soda – Ensures the bread rises; check freshness for the best results.
  • Ground Cinnamon – Provides warmth and depth; optional, but highly recommended for spice enthusiasts.

With these simple ingredients, the Cottage Cheese Banana Bread will become a household favorite that you'll enjoy making and sharing!

Step‑by‑Step Instructions for Cottage Cheese Banana Bread

Step 1: Preheat the Oven
Begin by preheating your oven to 350°F (175°C). While it warms up, take a moment to grease a loaf pan to ensure your Cottage Cheese Banana Bread slides out easily after baking. This step is crucial for achieving that perfect, tender crust.

Step 2: Mash the Bananas
In a large mixing bowl, mash 2-3 ripe bananas until smooth, leaving some small chunks for texture. Next, add in 2 eggs, 1 cup of cottage cheese, 1/3 cup of maple syrup, and 1 teaspoon of vanilla extract. Mix all the wet ingredients together until they’re well incorporated and creamy, creating a lovely base for your banana bread.

Step 3: Prepare the Dry Ingredients
In a separate medium bowl, whisk together 1 and 1/2 cups of almond flour, 1 teaspoon of baking soda, and 1 teaspoon of ground cinnamon (if using). This mixture is essential for the bread to rise properly and achieve a delightful flavor. Ensure there are no lumps for an even texture throughout your Cottage Cheese Banana Bread.

Step 4: Combine Wet and Dry Ingredients
Gradually add the dry ingredients to the wet mixture, folding them together with a spatula or wooden spoon. Mix just until combined; be careful not to overmix—it’s okay if there are a few small lumps. This technique will keep your Cottage Cheese Banana Bread tender and moist.

Step 5: Transfer to the Loaf Pan
Pour the prepared batter into the greased loaf pan, using a spatula to spread it evenly. By this point, your kitchen should be filled with the sweet aroma of bananas! Make sure the batter reaches the edges of the pan for uniform baking, which helps ensure each slice will be deliciously moist.

Step 6: Bake the Bread
Place your loaf pan in the preheated oven and bake for 50-60 minutes. To check for doneness, insert a toothpick into the center of the bread—if it comes out clean or with a few moist crumbs, it’s ready! The top should be golden brown and spring back gently when pressed.

Step 7: Cool the Bread
Once baked, remove the Cottage Cheese Banana Bread from the oven and let it cool in the pan for 10 minutes. Then, carefully transfer it to a wire rack to cool completely. This cooling period helps set the bread's texture, making it easier to slice without falling apart.

What to Serve with Cottage Cheese Banana Bread

Every slice of this delightful treat can be transformed into an exquisite meal when paired with the right accompaniments.

  • Creamy Yogurt: A dollop of Greek yogurt on the side adds a rich creaminess that balances the banana bread’s sweetness.
  • Fresh Berries: Add a burst of freshness with strawberries, blueberries, or raspberries—these fruits pair beautifully with the banana flavor.
  • Nut Butter Spread: A smear of almond or peanut butter not only enhances the protein content but creates a lovely nutty contrast.
  • Cinnamon Sugar Topping: Sprinkle a light mixture of cinnamon and sugar on toasted slices for a sweet, aromatic treat that's hard to resist!

For a perfect breakfast ensemble, enjoy your Cottage Cheese Banana Bread with a side of lightly scrambled eggs. The fluffy texture of the eggs complements the moist banana goodness and makes for a satisfying morning.

  • Herbal Tea or Coffee: A warm cup of chamomile or a bold brew offers a comforting pairing, enhancing the cozy experience of enjoying the bread.
  • Honeyed Cottage Cheese: Serve a small bowl of cottage cheese drizzled with honey for a nutritious side that complements the bread’s texture.
  • Warm Compote: A spoonful of homemade fruit compote elevates the entire dish, adding warmth and another layer of flavor perfect for weekend brunches.

With these pairings, each bite becomes a delightful experience, inviting family and friends to gather around the breakfast table!

How to Store and Freeze Cottage Cheese Banana Bread

Room Temperature: Store leftover Cottage Cheese Banana Bread in an airtight container for up to 3 days to maintain its delicious moisture and flavor.

Fridge: For slightly longer freshness, you can refrigerate the bread for up to a week, but expect a slight change in texture.

Freezer: Slice the bread and wrap each piece tightly in plastic wrap, then place in a freezer-safe bag for up to 2 months. Thaw in the fridge overnight before enjoying.

Reheating: To serve warm, simply place slices in a toaster or microwave for about 10-15 seconds until heated through—perfect for a quick, comforting snack!

Make Ahead Options

These Cottage Cheese Banana Bread loaves are perfect for meal prep, making busy mornings a breeze! You can mash the ripe bananas and combine them with the wet ingredients (eggs, cottage cheese, maple syrup, and vanilla extract) up to 24 hours in advance, refrigerating the mixture in an airtight container to maintain freshness. The dry ingredients can also be whisked together ahead of time and stored in a separate container for up to 3 days. When you're ready to bake, simply combine the wet and dry ingredients, pour the batter into the prepared loaf pan, and bake as instructed. This way, you'll savor that delicious, freshly-baked Cottage Cheese Banana Bread with minimal effort, even on your busiest days!

Expert Tips for Cottage Cheese Banana Bread

  • Use Ripe Bananas: The sweeter and more speckled the bananas, the better your bread will taste. They contribute natural sweetness, enhancing your Cottage Cheese Banana Bread.

  • Don’t Overmix: Mix just until combined to keep the bread fluffy and moist. Overmixing can lead to a dense texture that no one wants!

  • Check Baking Time: Ovens vary, so start checking for doneness around 50 minutes. Insert a toothpick—it should come out clean but not dry to ensure perfect moisture.

  • Store Properly: Keep leftovers in an airtight container; this helps maintain freshness for up to 3 days. Alternatively, slice and freeze for easy grab-and-go snacks!

  • Customize with Toppings: For added flavor, fold in nuts or dark chocolate chips into the batter. These not only enhance taste, but also provide delightful crunch!

  • Cover if Browning: If the top is browning too fast, cover loosely with foil for the last 15 minutes of baking to prevent burning.

Cottage Cheese Banana Bread Variations

Feel free to get creative with your Cottage Cheese Banana Bread, enhancing flavors and textures to suit your palate!

  • Vegan Option: Replace eggs with flax eggs (1 tbsp ground flaxseed + 2.5 tbsp water per egg) for a plant-based treat. This keeps the deliciousness intact while accommodating dietary preferences.

  • Lower Sugar: Swap maple syrup for honey or a sugar-free syrup, allowing you to enjoy the same delightful taste while keeping sugar levels low.

  • Pumpkin Spice Twist: Substituting some of the bananas for pumpkin puree delivers a cozy seasonal flavor. Add in nutmeg to elevate that autumn-inspired goodness!

  • Nutty Goodness: Fold in walnuts or pecans for an added crunch and lovely nuttiness. The texture contrast enhances each bite, making it perfectly satisfying.

  • Berry Burst: Toss in fresh blueberries for a fruity explosion. These little gems will burst with flavor, complementing the sweetness of the banana beautifully.

  • Chocolatey Delight: Add dark chocolate chips or cacao nibs for a deliciously indulgent twist. This chocolatey addition makes for a delightful surprise in every slice!

  • Flour Alternatives: Try oat or coconut flour instead of almond flour for a different taste and texture, keeping in mind that you may need to adjust the liquid ingredients.

  • Cinnamon Swirl: For a delicious spin, create a simple cinnamon sugar filling by mixing cinnamon and sugar, and swirling it through the batter before baking. A new layer of flavor awaits!

Explore these delightful variations, and don't forget to enjoy your Cottage Cheese Banana Bread warm with a spread of butter or alongside my yummy Cornbread Breakfast Casserole! Let your imagination run wild in the kitchen!

Cottage Cheese Banana Bread Recipe FAQs

How do I select ripe bananas for my Cottage Cheese Banana Bread?
Absolutely! Look for bananas that are fully yellow with brown spots; that’s a sign they’re ripe and sweet! The more brown spots, the sweeter they will be in your bread. If you need a low-sugar option, unsweetened applesauce can also substitute the bananas effectively.

What’s the best way to store leftover Cottage Cheese Banana Bread?
For optimal freshness, keep your leftovers in an airtight container at room temperature for up to 3 days. If you plan to keep it longer, you can refrigerate the bread for up to a week, but be aware that refrigeration can change the texture slightly.

Can I freeze Cottage Cheese Banana Bread? How should I do it?
Yes, you can! To freeze, slice the bread and wrap each piece tightly in plastic wrap. Place them inside a freezer-safe bag, and your Cottage Cheese Banana Bread will be good for up to 2 months. When you're ready to enjoy it, simply thaw slices in the fridge overnight and reheat them in the toaster or microwave!

What if my Cottage Cheese Banana Bread comes out too dense?
No worries! If your bread turns out dense, it may be due to overmixing when combining wet and dry ingredients. Mix just until incorporated and use the right amount of baking soda. Ensure it’s fresh and properly measured for the best rise. Also, be cautious about how much almond flour you use, as other flours behave differently.

Is there a gluten-free alternative for almond flour if I have allergies?
Definitely! If you're allergic to almonds or need a different flour, consider using coconut flour or oat flour. However, remember that coconut flour absorbs more moisture than almond flour, so you’ll need to adjust the liquid in your recipe (about 1/4 cup less bread for each 1/4 cup of coconut flour used).

Is this recipe suitable for pets?
That’s an excellent question! While the ingredients like bananas and eggs are generally safe in small quantities for dogs, other ingredients like maple syrup and cottage cheese should be avoided or limited. Always consult with your vet before sharing human food with your pets!

Cottage Cheese Banana Bread

Cottage Cheese Banana Bread: Moist, Healthy Perfection Awaits

Cottage Cheese Banana Bread is a moist, gluten-free treat packed with protein, perfect for guilt-free snacking or breakfast.
Print Recipe Pin Recipe
Prep Time 15 minutes mins
Cook Time 1 hour hr
Cooling Time 10 minutes mins
Total Time 1 hour hr 25 minutes mins
Servings: 10 slices
Course: Breakfast
Cuisine: American
Calories: 150
Ingredients Equipment Method Nutrition Notes

Ingredients
  

For the Batter
  • 2-3 pieces ripe bananas Adds natural sweetness and moisture; substitute with unsweetened applesauce for lower sugar.
  • 2 large eggs Binds ingredients together; for a vegan option, use flax eggs (1 tbsp flaxseed + 2.5 tbsp water = 1 egg).
  • 1 cup cottage cheese Enhances moisture and boosts protein; opt for low-fat or smooth blended for creaminess.
  • 1/3 cup maple syrup Infuses sweetness; for reduced sugar, try honey or sugar-free syrup.
  • 1 teaspoon vanilla extract Elevates flavor; no substitutions necessary.
  • 1.5 cups almond flour A gluten-free base; do not replace 1:1 with other flours due to density.
  • 1 teaspoon baking soda Ensures the bread rises; check for freshness.
  • 1 teaspoon ground cinnamon Optional, but recommended for spice enthusiasts.

Equipment

  • Loaf pan
  • Mixing Bowl
  • Whisk
  • Spatula

Method
 

Step-by-Step Instructions
  1. Preheat your oven to 350°F (175°C) and grease a loaf pan.
  2. Mash 2-3 ripe bananas in a large bowl, then add 2 eggs, 1 cup cottage cheese, 1/3 cup maple syrup, and 1 teaspoon vanilla extract. Mix until creamy.
  3. In a separate bowl, whisk together 1.5 cups almond flour, 1 teaspoon baking soda, and 1 teaspoon ground cinnamon until no lumps remain.
  4. Gradually fold the dry ingredients into the wet mixture until just combined.
  5. Pour the batter into the greased loaf pan, ensuring it reaches the edges for even baking.
  6. Bake for 50-60 minutes, checking with a toothpick for doneness. Remove once clean or with a few moist crumbs.
  7. Cool in the pan for 10 minutes before transferring to a wire rack to cool completely.

Nutrition

Serving: 1sliceCalories: 150kcalCarbohydrates: 25gProtein: 5gFat: 4gSaturated Fat: 1gPolyunsaturated Fat: 1gMonounsaturated Fat: 2gCholesterol: 50mgSodium: 200mgPotassium: 200mgFiber: 2gSugar: 8gVitamin A: 10IUVitamin C: 15mgCalcium: 6mgIron: 4mg

Notes

Store leftovers in an airtight container for up to 3 days or refrigerate for up to a week. Slice and freeze for up to 2 months.

Tried this recipe?

Let us know how it was!
  • « Previous Page
  • 1
  • …
  • 27
  • 28
  • 29
  • 30
  • 31
  • …
  • 245
  • Next Page »

Welcome!

Hi, I’m Grace, a Sydney-based home cook with a passion for bold flavors and trending ingredients. Whether you’re a busy beginner or a seasoned foodie, you’ll find dishes here that are fresh, fun, and full of flavor.

More about me

Popular Recipes

  • One Pot Keto Tuna Casserole
    One Pot Keto Tuna Casserole: Creamy Comfort in Minutes
  • Ultimate Jalapeno Popper Chicken Salad
    Ultimate Jalapeno Popper Chicken Salad That'll Wow Your Tastebuds
  • Green Chile Cheese Dip
    Mouthwatering Green Chile Cheese Dip for Cozy Gatherings
  • Easy Chimichurri Sauce
    Fresh and Zesty Easy Chimichurri Sauce in Just Minutes

Footer

↑ back to top

About

  • Privacy Policy
  • Disclaimer
  • Terms & Conditions

Newsletter

  • Sign Up! for emails and updates

Contact

  • About me
  • Contact me

Copyright © 2025 TastyTrendIngredients