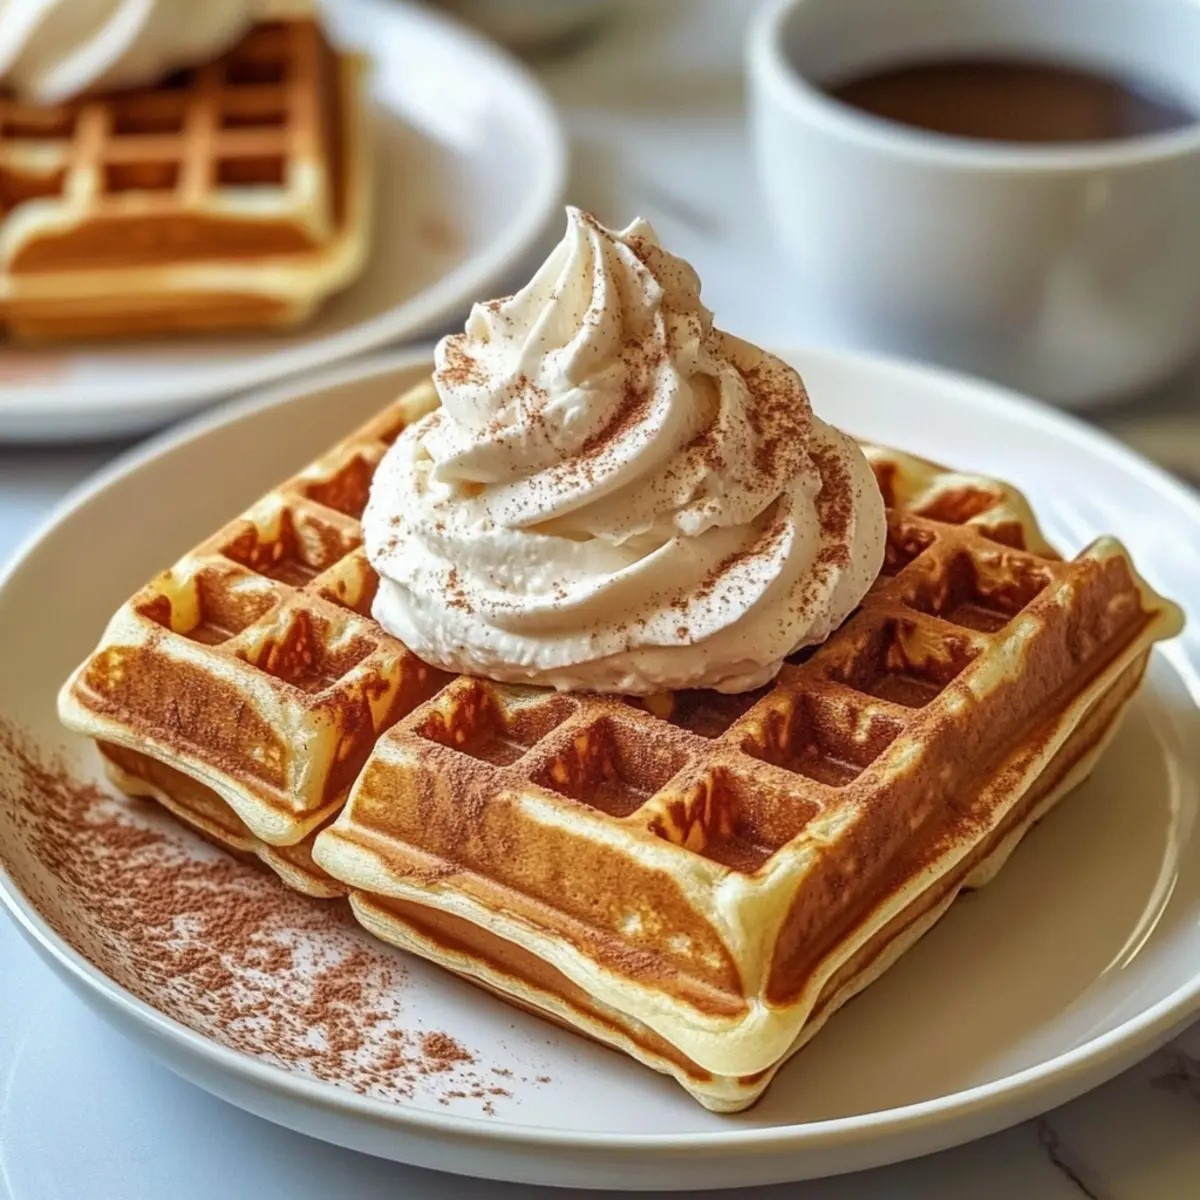
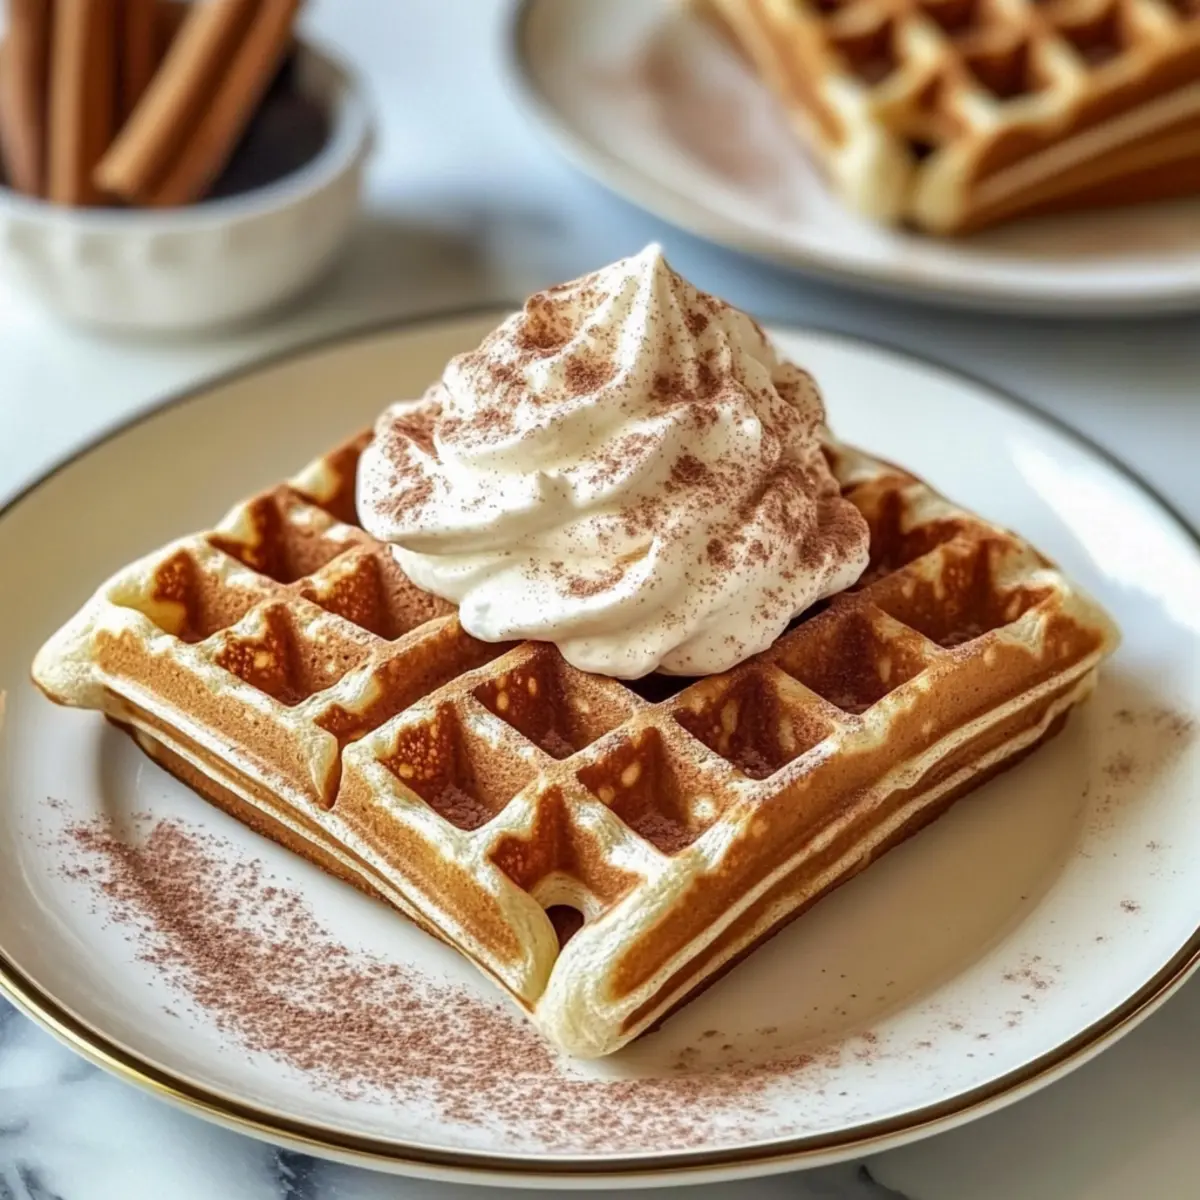
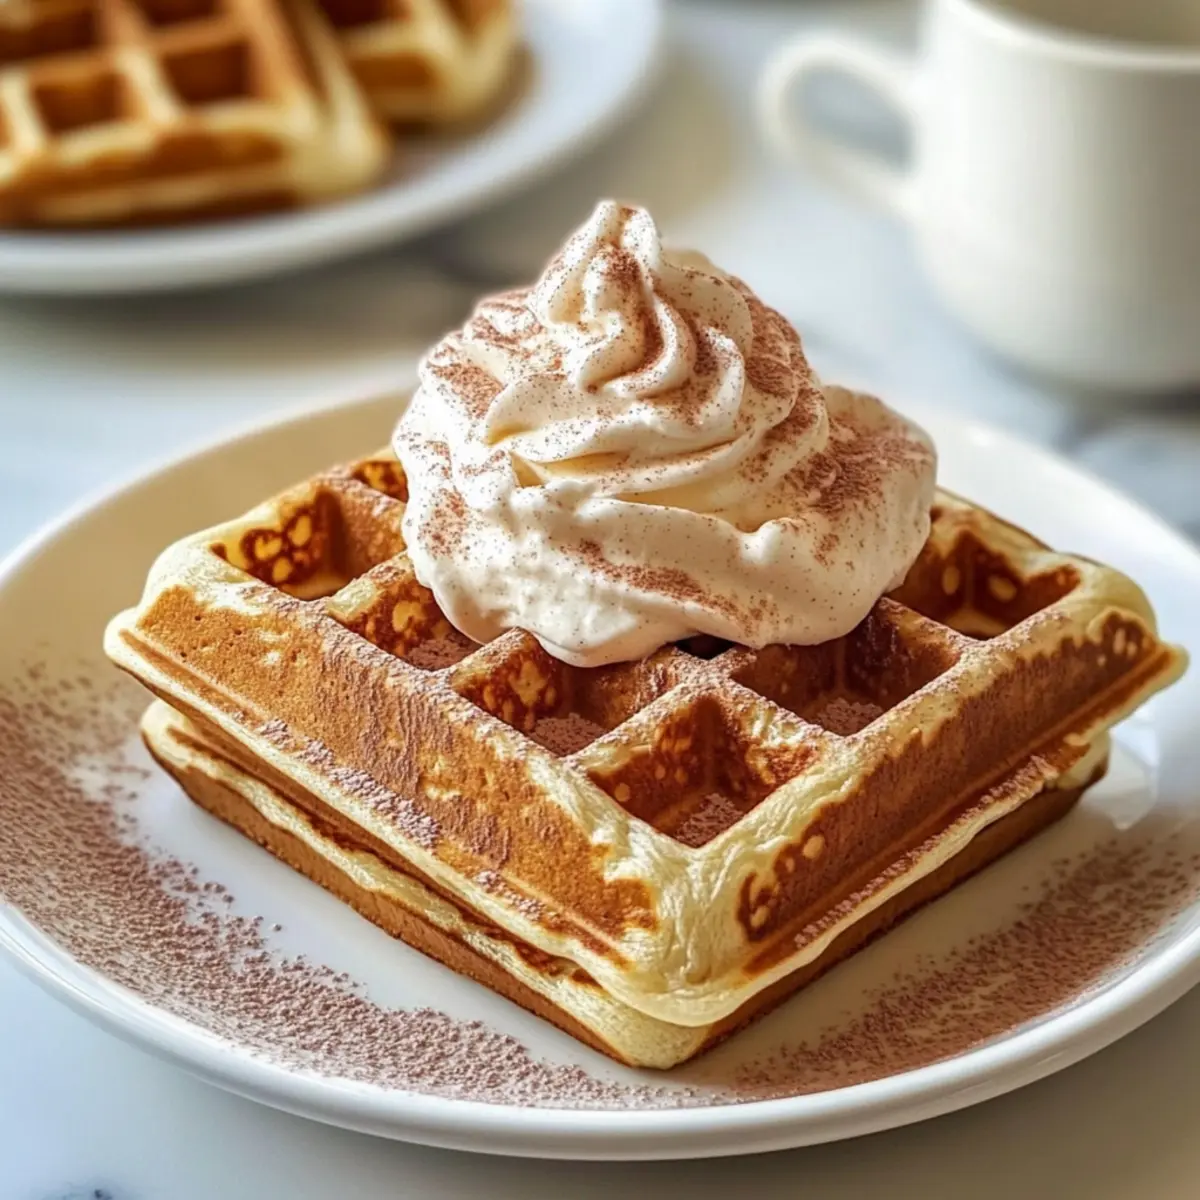
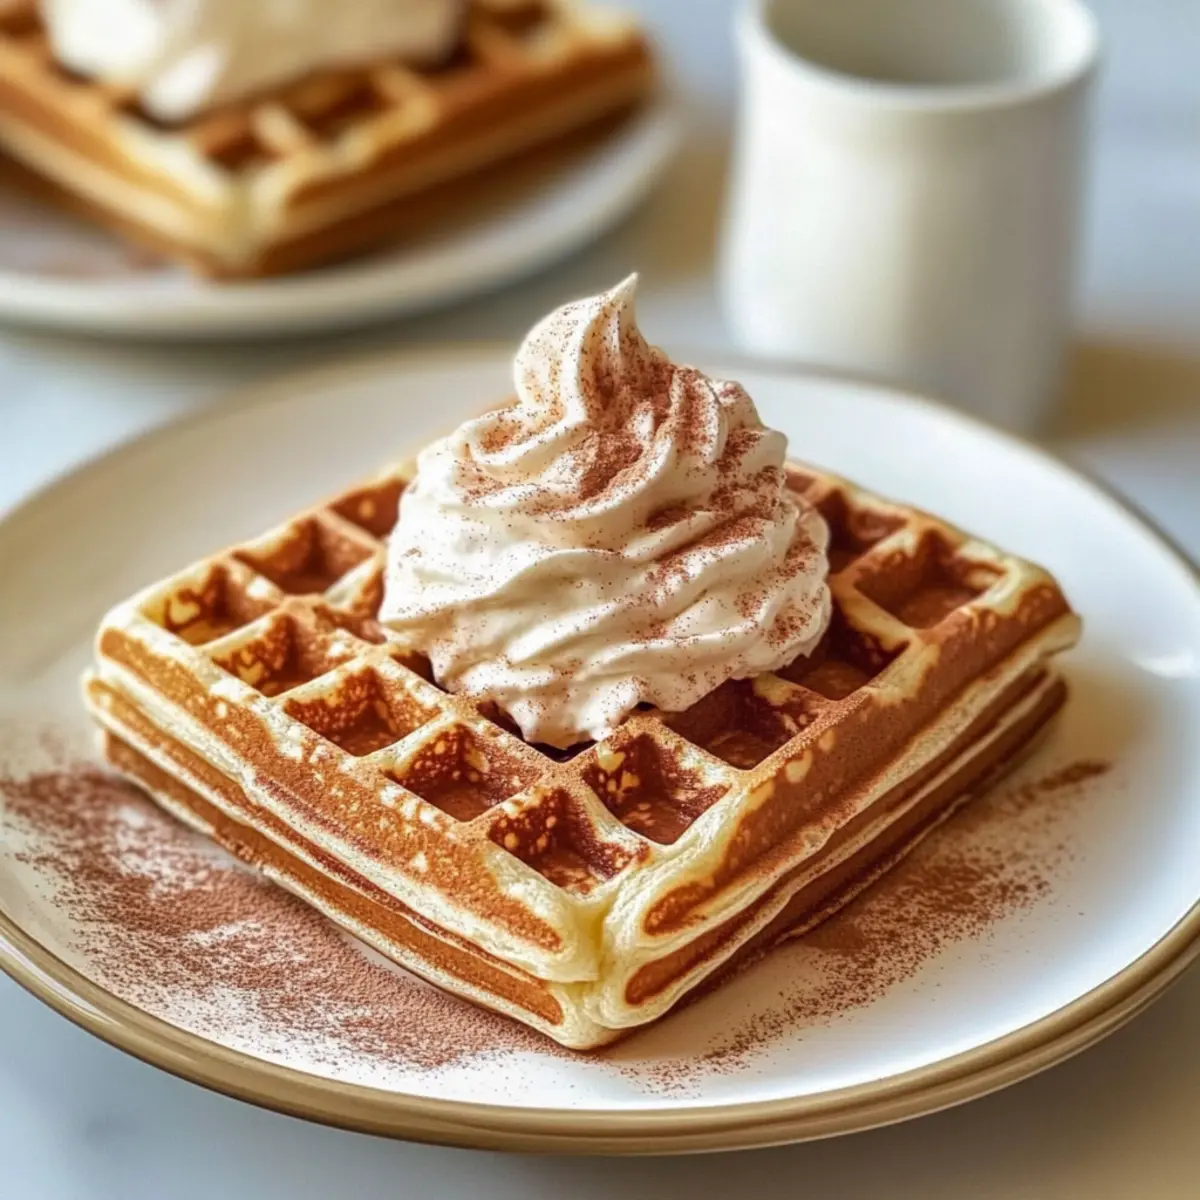
tastytrendingredients

  • Home
  • Recipes
    • Appetizers
    • Breakfast
    • Dessert
    • Dinner
    • Drinks
    • Salads
    • Snacks
    • Soups
  • About me
  • Contact me
menu icon
go to homepage
  • Home
  • Recipes
    • Appetizers
    • Breakfast
    • Dessert
    • Dinner
    • Drinks
    • Salads
    • Snacks
    • Soups
  • About me
  • Contact me
search icon
Homepage link
  • Home
  • Recipes
    • Appetizers
    • Breakfast
    • Dessert
    • Dinner
    • Drinks
    • Salads
    • Snacks
    • Soups
  • About me
  • Contact me
×

Creamy Herb Chicken with Mashed Potatoes & Glazed Carrots Bliss

March 29, 2026 by Grace Snow Leave a Comment

As I stirred the pot, a delightful aroma filled my kitchen, instantly transporting me back to my grandmother’s home where love was served alongside every meal. Today, I’m excited to share my recipe for Creamy Herb Chicken with Mashed Potatoes & Glazed Carrots—a comforting one-pot meal that combines tender chicken in a luscious herb sauce with fluffy mashed potatoes and sweet, buttery carrots. This dish not only delivers incredible flavor but also offers the convenience of quick preparation, making it perfect for busy weeknights when you crave something truly nourishing without the fuss of multiple pots and pans. Whether you’re cooking for family or enjoying a cozy dinner for one, this recipe is adaptable and even budget-friendly. So, are you ready to whisk up some comfort and warmth in your kitchen? Let’s dive in!

Why is this comfort dish a favorite?

Simplicity at its Core: This recipe is truly a breeze, allowing you to create a delicious home-cooked meal in just one pot.

Adaptable for All: Easily tailor it to fit your dietary needs—swap ingredients for gluten-free or lighter options without sacrificing flavor.

Rich, Creamy Goodness: The creamy herb sauce envelops the chicken, making every bite a burst of savory delight that everyone will love.

Perfectly Balanced: Fluffy mashed potatoes and sweet, glazed carrots complement the dish, creating a complete and satisfying meal that brings comfort to your table.

Why not pair this with some Roasted Sweet Potatoes for an added touch of sweetness? This dish is a crowd-pleaser that guarantees smiles around the dinner table!

Creamy Herb Chicken Ingredients

Indulge in the heartwarming flavors of this comforting dish with these key ingredients.

For the Chicken

  • Chicken Breasts (or Thighs) – Boneless, skinless pieces cook quickly and remain juicy.
  • Salt & Pepper – Essential for enhancing the flavor profile; adjust based on preference.
  • Garlic Powder (1/2 tsp) – This adds savory depth; fresh minced garlic can be used instead for more zing.
  • Dried Thyme (1/2 tsp) and Dried Rosemary (1/2 tsp) – These herbs bring aromatic warmth; fresh herbs can substitute beautifully.
  • Olive Oil (1 tbsp) and Butter (1 tbsp) – A lovely combination for browning the chicken while adding rich flavor.
  • Garlic (3 cloves, minced) – Provides an aromatic foundation for the creamy sauce; fresh garlic boosts flavor potency.
  • Chicken Broth (1/2 cup) – Vital for flavor depth; vegetable broth works for a lighter option.
  • Heavy Cream (1/2 cup or half-and-half) – This creates the luscious creaminess in the sauce; Greek yogurt can lighten it up.
  • Parmesan Cheese (1/3 cup) – Adds a rich, cheesy component to the sauce; nutritional yeast is a good dairy-free alternative.
  • Dijon Mustard (1/2 tsp, optional) – An optional tangy kick that beautifully contrasts the richness; feel free to omit it.
  • Parsley or Chives (1 tbsp, for garnish) – Fresh herbs add a pop of color and freshness to the final presentation.

For the Mashed Potatoes

  • Yukon Gold or Russet Potatoes (1.5 lbs) – These potatoes create the perfect creamy texture; sweet potatoes can be a flavorful swap.
  • Milk or Cream (1/2 cup) – Achieve a silky consistency; non-dairy milk keeps it light and versatile.
  • Butter (2-3 tbsp) – Adds richness and flavor; olive oil can substitute for a dairy-free variant.

For the Glazed Carrots

  • Baby Carrots (3 cups) – Their natural sweetness complements the meal; regular carrots can be sliced into sticks.
  • Brown Sugar or Honey (1 tbsp) – This sweetener enhances the glaze; maple syrup can be a delightful replacement.
  • Salt (1/4 tsp) – Boosts the flavor in the glazed carrots.
  • Cinnamon or Thyme (pinch, optional) – A subtle addition that can elevate the glaze with warm notes.

With these ingredients on hand, you’re set to create a mouthwatering Creamy Herb Chicken with Mashed Potatoes & Glazed Carrots that will surely warm hearts and fill stomachs!

Step‑by‑Step Instructions for Creamy Herb Chicken with Mashed Potatoes & Glazed Carrots

Step 1: Prepare Mashed Potatoes
Begin by peeling and cubing the Yukon Gold or Russet potatoes. Place them in a large pot, cover with cold salted water, and bring to a boil over high heat. Cook for 15–20 minutes, or until fork-tender. Drain and return to the pot, then mash with butter and milk until smooth, keeping them warm while you prepare the rest of the dish.

Step 2: Glaze Carrots
In a medium saucepan, combine the baby carrots, butter, brown sugar, and a splash of water. Cover and simmer over medium heat for 10–12 minutes, stirring occasionally, until the carrots are tender. Remove the lid for the last 2-3 minutes to thicken the glaze, allowing the sweet aroma to fill your kitchen as you prepare your other components.

Step 3: Cook Chicken
Season your chicken breasts or thighs generously with salt, pepper, garlic powder, dried thyme, and rosemary. In a large skillet, heat the olive oil and butter over medium-high heat. Sear the seasoned chicken for 4–5 minutes per side until golden brown and cooked through. Use a meat thermometer to ensure an internal temperature of 165°F (75°C). Once done, set the chicken aside on a plate.

Step 4: Make Herb Cream Sauce
Using the same skillet, reduce the heat to medium and sauté the minced garlic for about 30 seconds, until fragrant. Pour in the chicken broth and stir, scraping any browned bits from the bottom of the pan for added flavor. Slowly add the heavy cream, Parmesan cheese, and optional Dijon mustard. Let this simmer for 3–5 minutes until the sauce is slightly thickened and creamy.

Step 5: Return Chicken to Pan
Place the cooked chicken back into the skillet, ensuring it's coated in the delicious creamy herb sauce. Spoon the sauce over the chicken and let it simmer for an additional 2 minutes. This allows the chicken to absorb the rich flavors, creating a mouthwatering Creamy Herb Chicken that pairs perfectly with the sides.

Step 6: Assemble and Serve
On each plate, heap the fluffy mashed potatoes and add a generous portion of glazed carrots alongside the creamy herb chicken. Drizzle any remaining sauce over the chicken and potatoes. Garnish with fresh parsley or chives for an inviting touch. Serve immediately and revel in the comforting flavors of your homemade dinner.

Creamy Herb Chicken Variations

Feel free to transform this hearty dish and make it your own with these delightful options!

  • Gluten-Free: Use gluten-free flour or cornstarch as a thickener for the sauce, allowing everyone to enjoy this meal without worry.
  • Creamy and Light: Swap heavy cream for Greek yogurt for a lighter, tangy twist that still offers a rich texture.
  • Vegetable Boost: Toss in spinach or sautéed mushrooms into the cream sauce for extra nutrition and vibrant color. They add earthy flavors that complement the dish beautifully.
  • Herb Alternatives: Experiment with fresh basil or dill instead of thyme and rosemary for a refreshing take on this classic dish.
  • Heat Up the Flavor: Add a pinch of crushed red pepper flakes to the sauce for a spicy kick that balances the creaminess beautifully.
  • Sweet Potato Delight: Use sweet potatoes instead of Yukon Gold for the mashed potatoes to introduce a subtle sweetness that pairs well with the savory chicken.
  • Zesty Kick: Stir in a dash of lemon juice or zest when finishing the sauce for a bright, zesty note that dances on the palate.
  • Nutty Flavor: Incorporate toasted pine nuts or walnuts into your mashed potatoes for added texture and a nutty flavor that's truly irresistible.

Looking to keep it cozy? Pair this with some Lemon Chicken Soup for a beautifully comforting meal, or try the Fiesta Lime Chicken with Avocado for a fresh twist on your family’s dinner table. The possibilities are endless!

Expert Tips for Creamy Herb Chicken

  • Season Generously: Always season your chicken well with salt and pepper before cooking. This enhances the flavor of the creamy herb chicken, ensuring each bite is savory and satisfying.

  • Deglaze for Flavor: Don’t skip the deglazing step! Scraping the browned bits from the skillet adds depth to your herb cream sauce, making it rich and flavorful.

  • Watch the Potatoes: For perfectly creamy mashed potatoes, avoid overcooking them, which can make them gluey. Use a potato ricer for extra fluffiness—your family will thank you!

  • Use Fresh Ingredients: Fresh herbs elevate the dish significantly. If you have access, opt for fresh thyme and rosemary over dried to really capture that aroma in your creamy chicken.

  • Control Creaminess: Adjust the creaminess of the sauce by using Greek yogurt instead of heavy cream for a lighter version, perfect for those mindful of their diets while still being comforting.

How to Store and Freeze Creamy Herb Chicken

Fridge: Refrigerate leftovers in airtight containers for up to 3-4 days, ensuring each item is well-covered to maintain freshness.

Freezer: For long-term storage, freeze the creamy herb chicken and sauce separately from mashed potatoes and glazed carrots in airtight containers for up to 3 months.

Reheating: Thaw frozen chicken and sauce in the fridge overnight before reheating. Gently warm in a skillet over low heat, adding a splash of chicken broth if needed to maintain creaminess.

Mashed Potatoes: If freezing mashed potatoes, consider adding a little extra milk or cream when reheating to restore their creamy texture.

Make Ahead Options

These Creamy Herb Chicken with Mashed Potatoes & Glazed Carrots are ideal for meal prep, saving you valuable time on busy evenings! You can prepare the mashed potatoes and glazed carrots up to 24 hours in advance; simply store them in airtight containers in the refrigerator to maintain their freshness. For the chicken, season and brown it a day ahead—just reheat gently in the skillet before adding the creamy herb sauce. Ensure the sauce is made fresh to serve, as it retains the best flavor and texture. When ready to enjoy, warm up your potatoes and carrots, complete the dish, and relish a homemade meal without the hassle!

What to Serve with Creamy Herb Chicken with Mashed Potatoes & Glazed Carrots

Create a satisfying meal that warms the heart and delights the palate, complementing this comforting dish beautifully.

  • Garlic Bread: The crispy, buttery texture adds a delightful crunch, perfect for mopping up that luscious creamy sauce.
  • Caesar Salad: Crisp romaine, tangy dressing, and crunchy croutons provide a refreshing contrast to the rich flavors of the chicken.
  • Steamed Green Beans: These bright, green veggies add a fresh crunch, complementing the creamy potatoes and sweet carrots beautifully.
  • Roasted Brussels Sprouts: Earthy flavors and caramelized edges bring a savory twist, enhancing the comforting elements of the dish.
  • Honey-Glazed Beets: Sweet and slightly earthy, these vibrant veggies offer a colorful presentation and a delicious contrast to the savory chicken.
  • Red Wine: A glass of Pinot Noir or Merlot enhances the meal experience, balancing the creaminess and enriching the overall flavor profile.
  • Dessert: Finish the meal with a light, fruity dessert like berry sorbet to cleanse the palate after the indulgent main course.

With these options, you’ll create a dynamic, comforting table that celebrates the heartwarming vibes of homemade cooking.

Creamy Herb Chicken with Mashed Potatoes & Glazed Carrots Recipe FAQs

What type of chicken should I use for this recipe?
I recommend using boneless, skinless chicken breasts or thighs for convenience and to ensure they cook quickly and stay juicy. If you prefer dark meat, thighs are a great option as they tend to be more flavorful.

How should I store leftovers of Creamy Herb Chicken with Mashed Potatoes & Glazed Carrots?
Refrigerate your leftovers in airtight containers for up to 3-4 days. Be sure to separate the components (chicken, sauce, and mashed potatoes) to maintain their textures and flavors. When stored correctly, you can enjoy this comforting meal even after a busy day!

Can I freeze this dish?
Absolutely! For freezing, I suggest packaging the creamy herb chicken and sauce separately from the mashed potatoes and glazed carrots. This way, everything freezes well individually. Use airtight containers and you can store them for up to 3 months. When ready to enjoy, simply thaw in the refrigerator overnight.

What should I do if my sauce turns out too thick?
If you find your herb cream sauce is too thick, don’t worry! You can gently whisk in a bit of chicken broth or milk over low heat until reaching your desired consistency. Alternatively, if your sauce is too thin, let it simmer a little longer to reduce and thicken up.

Is this recipe suitable for those with dietary restrictions?
Yes! This Creamy Herb Chicken recipe is quite adaptable. You can make it gluten-free by ensuring that all your ingredients, especially broth and sauces, are gluten-free. Moreover, you can substitute heavy cream with Greek yogurt for a lighter version, and if you have dairy allergies, try using non-dairy milk and nutritional yeast instead of Parmesan cheese.

How can I tell if my potatoes are properly cooked for mashing?
To check if your potatoes are cooked just right for mashing, insert a fork into a piece—if it easily breaks apart or slides off the fork, they're done! Typically, this takes about 15-20 minutes of boiling. Avoid overcooking them to prevent a gluey texture in your mashed potatoes.

Creamy Herb Chicken with Mashed Potatoes & Glazed Carrots

Creamy Herb Chicken with Mashed Potatoes & Glazed Carrots Bliss

A comforting one-pot meal featuring tender chicken in a creamy herb sauce, served with fluffy mashed potatoes and glazed carrots.
Print Recipe Pin Recipe
Prep Time 15 minutes mins
Cook Time 40 minutes mins
Total Time 55 minutes mins
Servings: 4 servings
Course: Dinner
Cuisine: American
Calories: 660
Ingredients Equipment Method Nutrition Notes

Ingredients
  

For the Chicken
  • 1 lbs Boneless, skinless chicken breasts or thighs
  • 1 tsp Salt
  • 1 tsp Pepper
  • 0.5 tsp Garlic powder
  • 0.5 tsp Dried thyme
  • 0.5 tsp Dried rosemary
  • 1 tbsp Olive oil
  • 1 tbsp Butter
  • 3 cloves Garlic, minced
  • 0.5 cup Chicken broth
  • 0.5 cup Heavy cream or half-and-half
  • 0.33 cup Parmesan cheese
  • 0.5 tsp Dijon mustard optional
  • 1 tbsp Parsley or chives for garnish
For the Mashed Potatoes
  • 1.5 lbs Yukon Gold or Russet potatoes
  • 0.5 cup Milk or cream
  • 2-3 tbsp Butter
For the Glazed Carrots
  • 3 cups Baby carrots
  • 1 tbsp Brown sugar or honey
  • 0.25 tsp Salt
  • pinch Cinnamon or thyme optional

Equipment

  • Large pot
  • Skillet
  • Medium saucepan
  • potato masher

Method
 

Step-by-Step Instructions
  1. Step 1: Prepare Mashed Potatoes - Peel and cube the potatoes, cover with cold salted water in a large pot, bring to a boil, and cook until fork-tender. Drain, mash with butter and milk.
  2. Step 2: Glaze Carrots - Combine baby carrots, butter, brown sugar, and a splash of water in a saucepan. Cover and simmer until tender, uncovering for the last few minutes to thicken the glaze.
  3. Step 3: Cook Chicken - Season chicken with salt, pepper, garlic powder, thyme, and rosemary. Heat oil and butter in a skillet, sear chicken until golden and cooked through.
  4. Step 4: Make Herb Cream Sauce - Sauté minced garlic, add chicken broth, reduce heat, then stir in cream, Parmesan, and optional mustard. Simmer until thickened.
  5. Step 5: Return Chicken to Pan - Place chicken back in the skillet, coat with sauce, and simmer for an additional two minutes.
  6. Step 6: Assemble and Serve - Serve mashed potatoes with the chicken and glazed carrots, drizzle sauce over, and garnish with parsley or chives.

Nutrition

Serving: 1servingCalories: 660kcalCarbohydrates: 45gProtein: 40gFat: 34gSaturated Fat: 19gPolyunsaturated Fat: 1gMonounsaturated Fat: 13gTrans Fat: 1gCholesterol: 160mgSodium: 900mgPotassium: 800mgFiber: 6gSugar: 8gVitamin A: 10000IUVitamin C: 15mgCalcium: 200mgIron: 2mg

Notes

This dish allows for ingredient substitutions for dietary preferences, making it versatile and easy to adapt.

Tried this recipe?

Let us know how it was!

Deviled Egg Potato Salad: A Tangy Twist Everyone Will Love

March 29, 2026 by Grace Snow Leave a Comment

As the sizzling sun brings life to our backyard barbeques, I’m reminded of the tantalizing flavors of summer gatherings. That’s when I perfected my Deviled Egg Potato Salad—a delightful blend that nods to childhood nostalgia while inviting fresh creativity. This creamy and tangy side dish promises to win hearts with ease, making it a kid-friendly crowd-pleaser that’s perfect for potlucks and cookouts alike. With just a quick preparation and the added perk of being make-ahead-friendly, you’ll have more time to mingle with loved ones. So, why not add a twist to your classic potato salad today? Are you ready to discover the savory fun that awaits in each bite?

Why Choose Deviled Egg Potato Salad?

Nostalgic Flavor: This dish combines the beloved taste of deviled eggs with creamy potato salad, taking you on a delightful trip down memory lane.

Versatile Additions: Want to get creative? You can easily mix in ingredients like crispy bacon or grilled chicken, tailoring it to your taste.

Make-Ahead Wonder: Perfect for busy schedules, this salad tastes even better the next day, making it an effortless option for gatherings.

Crowd Favorite: Whether at a summer barbecue or festive potluck, this dish will be the star of the show—just like a classic German Potato Salad.

Kid-Friendly: Your little ones will love the creamy texture and scrumptious flavors, putting an end to fast food boredom!

Easy Prep: With a simple preparation process, you can whip this up in no time, allowing you to focus on enjoying the occasion.

Deviled Egg Potato Salad Ingredients

  • For the Salad Base
    • Eggs – 10 large eggs provide creaminess and protein; using older eggs makes peeling easier.
    • Russet Potatoes – 2 lbs, peeled and cubed; they form the salad base, offering delightful texture. Consider Yukon Gold potatoes as a fantastic alternative.
    • Celery – 3 stalks, diced; they add a wonderful crunch and freshness to the dish, and cucumbers can be swapped in if desired.

  • For the Flavor
    • Red Onion – ½, finely diced; introduces a mild sharpness, while shallots or green onions can give a gentler flavor.
    • Green Onions – ⅓ cup, diced; they enhance flavor with a hint of bite; chives can be a suitable substitute.
    • Mayonnaise – 1 ¼ cup; this is key for creaminess and body; swap for Greek yogurt for a lighter twist.
    • Dijon Mustard – 1 tablespoon; adds a delightful tang; yellow mustard is a perfect substitute if needed.
    • Stone-Ground Mustard – 1 teaspoon; for a textured element; use more Dijon if stone-ground isn't available.
    • Sweet Pickle Relish – ½ cup; brings in sweetness and tang; use dill relish for a less sweet option.
    • Salt and Pepper – To taste; these will elevate the overall flavor profile.
    • Paprika – ½ teaspoon; for garnish and a subtle hint of flavor.
    • Fresh Dill – Diced, for garnish; it's optional but gives a nice touch, while parsley can stand in if you prefer.

This Deviled Egg Potato Salad is a perfect blend of flavors that can be enjoyed in many ways!

Step‑by‑Step Instructions for Deviled Egg Potato Salad

Step 1: Boil Eggs
Start by placing 10 large eggs in a pot and covering them with cold water. Bring the water to a full boil over medium-high heat, then cover the pot with a lid and turn off the heat. Let the eggs sit in the hot water for 15 minutes before transferring them to an ice bath. Once cooled, peel the eggs, ensuring the shells come off cleanly.

Step 2: Boil Potatoes
In a separate pot, fill with water and add 2 lbs of peeled, cubed russet potatoes. Salt the water for added flavor and bring it to a boil. Cook the potatoes for 8-10 minutes until they are tender but not falling apart. Drain the potatoes and rinse them with cold water to stop cooking, then set aside to cool completely.

Step 3: Prepare Dressing
While the eggs and potatoes are cooling, cut the boiled eggs in half and carefully separate the yolks from the whites. In a mixing bowl, mash the yolks with 1 ¼ cups of mayonnaise, 1 tablespoon of Dijon mustard, 1 teaspoon of stone-ground mustard, ½ cup of sweet pickle relish, and salt and pepper to taste. Aim for a smooth consistency to create the creamy dressing for your Deviled Egg Potato Salad.

Step 4: Combine Ingredients
Chop the egg whites and add them to a large mixing bowl along with the cooled potatoes, diced celery, ½ finely diced red onion, and ⅓ cup of diced green onions. Pour the prepared dressing over the mixture, gently stirring everything together until each ingredient is evenly coated. The combination of flavors will make your Deviled Egg Potato Salad truly delightful.

Step 5: Chill and Serve
Once combined, garnish your Deviled Egg Potato Salad with a sprinkle of paprika and additional egg halves if desired. Cover the bowl and refrigerate for at least one hour before serving to allow the flavors to meld beautifully. This dish can be prepared a day in advance, making it perfect for summer gatherings or potlucks.

Deviled Egg Potato Salad Variations

Feel free to explore these scrumptious variations that will elevate your Deviled Egg Potato Salad to new heights!

  • Add Meat: Incorporate cooked ham, grilled chicken, or turkey for a heartier salad. The savory flavors will meld beautifully, making every bite satisfying.

  • Bacon Addition: Mix in crispy bacon for a delightful crunch and smoky flavor. This twist adds a dimension of richness, perfect for meat lovers.

  • Spicy Version: Spice things up by adding chopped jalapeños or a sprinkle of cayenne. The kick will harmonize with the creamy base, giving a fiery touch that’s unforgettable.

  • Ranch Flavor: Substitute ranch seasoning for the mustard to create a creamy, herbaceous dressing. This change brings a tasty twist that will please ranch lovers!

  • Mexican-Inspired: Add taco seasoning, fresh lime juice, and chopped cilantro for a zesty variation. This bright flavor combination takes your taste buds on a delightful adventure.

  • Fresh Herbs: Instead of dill, try using parsley or basil for a vibrant fresh touch. The new herbs will impart a different aroma and flavor profile, enhancing the dish's complexity.

  • Cheesy Addition: Stir in some shredded cheddar or crumbled feta for a cheesy kick. The creaminess will align perfectly with the potatoes and eggs for a comfort dish.

  • Nutty Crunch: Add toasted walnuts or pecans for a fantastic crunch and depth of flavor. The nuts will add earthy notes that bring a satisfying texture contrast.

These variations are great opportunities to experiment and make the dish your own. If you're looking for something lighter, you can always check out my recipes for Avocado Egg Salad or for a fun side, consider making a Jello Salad Cottage! Each variation offers its unique flair, complementing the classic charm of Deviled Egg Potato Salad, ensuring everyone at your table finds something to love. Enjoy your culinary journey!

How to Store and Freeze Deviled Egg Potato Salad

Airtight Container: Store your Deviled Egg Potato Salad in an airtight container in the fridge for up to 3 days to keep it fresh and tasty.

Prepping Ahead: If preparing in advance, mix all ingredients and store the dressing separately until ready to serve for the best flavor and texture.

Freezer Tips: While freezing isn't ideal for creamy salads, if needed, freeze in a sealed container for up to 1 month; defrost in the fridge overnight for best results.

Reheating: For best enjoyment, this salad is best served cold and does not require reheating; serve straight from the fridge for a refreshing treat!

What to Serve with Deviled Egg Potato Salad

As you gather around the table, this creamy side dish is the perfect base for building a memorable meal that brings everyone together.

  • Grilled Chicken: The smoky, savory flavors of grilled chicken beautifully complement the creamy salad, creating a satisfying harmony of tastes.

  • Corn on the Cob: Sweet, tender corn is a classic summer pairing. The juicy bites contrast beautifully with the richness of the potato salad.

  • Pulled Pork Sandwiches: The tangy sweetness of pulled pork sandwiches offers a delightful contrast, making every bite a celebration of flavor.

  • Crispy Potato Chips: For added crunch, serve with crispy potato chips. They not only enhance the texture but also make for a fun side to munch on.

  • Caprese Salad: A fresh, vibrant Caprese salad brings bright flavors and a refreshing touch to round out your meal beautifully.

  • Fruit Salad: A light and refreshing fruit salad provides a sweet contrast, helping to cleanse the palate amidst the creaminess of your Deviled Egg Potato Salad.

  • Lemonade or Iced Tea: Cool, citrusy lemonade or refreshing iced tea makes for the perfect drink pairing, balancing the richness of the salad with a burst of freshness.

  • Brownie Bites: End your meal on a sweet note with bite-sized brownies for a delightful chocolate contrast to a savory feast.

Each pairing brings its unique flavors to the table, ensuring your meal with Deviled Egg Potato Salad is a delightful experience!

Expert Tips for Deviled Egg Potato Salad

  • Perfect Eggs: Start with cold water for boiling eggs to avoid cracking. This helps them cook evenly and peel easily.

  • Cool Ingredients: Ensure both the potatoes and eggs are thoroughly cooled before mixing. Warm ingredients can lead to a runny dressing!

  • Taste Test: Adjust seasoning at the end! After mixing, taste the salad and add kosher salt and black pepper as needed for the best flavors.

  • Texture Balance: Combine softened potatoes gently to maintain texture—over-mixing can make the salad too mushy.

  • Flavor Enhancements: Experiment with ingredients—a dash of vinegar in boiled water can help make eggs easier to peel, adding a zing to your Deviled Egg Potato Salad!

Make Ahead Options

Preparing this Deviled Egg Potato Salad ahead of time is a fantastic way to save precious minutes during busy weeknights or gatherings! You can boil the eggs and potatoes up to 24 hours in advance, ensuring they are completely cool before refrigerating them separately. The dressing can also be prepared ahead of time and stored in an airtight container for up to 3 days. When you’re ready to assemble, simply chop the egg whites and combine all ingredients, tossing everything in the dressing until evenly coated. To maintain the salad's delightful creaminess, refrigerate it for at least an hour before serving, allowing the flavors to meld beautifully. Just as delicious, this make-ahead option frees you up to enjoy your time with loved ones!

Deviled Egg Potato Salad Recipe FAQs

What type of eggs should I use for this salad?
I recommend using large eggs for the best results; older eggs are easier to peel after boiling, making your prep process smoother.

How long can I store Deviled Egg Potato Salad in the fridge?
You can store this delicious salad in an airtight container in the refrigerator for up to three days. Keeping it sealed helps maintain its freshness and flavor.

Can I freeze Deviled Egg Potato Salad?
Freezing is generally not recommended for creamy salads like this one due to their texture. However, if you must freeze, place the salad in a sealed container, and it should last up to one month. When you're ready to enjoy it, defrost it in the refrigerator overnight.

What should I do if my potatoes become mushy?
To avoid mushy potatoes, ensure you boil them just until tender, about 8-10 minutes, and then rinse in cold water immediately to stop cooking. If they mush up despite your best efforts, try using a firmer potato variety like Yukon Gold next time!

Are there any dietary considerations I should keep in mind?
Absolutely! This salad is generally kid-friendly, but keep an eye on the ingredients if serving to friends with allergies. For a lighter option, you can substitute mayonnaise with Greek yogurt. Always check for allergens in mustards or pickles as well.

Can I add different ingredients to my Deviled Egg Potato Salad?
Very much so! You can mix in extras like cooked ham, grilled chicken, or crispy bacon for heartiness. Feel free to explore flavors with jalapeños for a spicy kick or ranch seasoning for a twist—cooking is all about creativity!

Deviled Egg Potato Salad

Deviled Egg Potato Salad: A Tangy Twist Everyone Will Love

Deviled Egg Potato Salad is a creamy and tangy side dish, ideal for summer gatherings and kid-friendly potlucks.
Print Recipe Pin Recipe
Prep Time 20 minutes mins
Cook Time 25 minutes mins
Chilling Time 1 hour hr
Total Time 1 hour hr 45 minutes mins
Servings: 8 cups
Course: Salads
Cuisine: American
Calories: 300
Ingredients Equipment Method Nutrition Notes

Ingredients
  

For the Salad Base
  • 10 large eggs provides creaminess and protein; using older eggs makes peeling easier.
  • 2 lbs russet potatoes peeled and cubed; consider Yukon Gold as an alternative.
  • 3 stalks celery diced; adds crunch and freshness, cucumbers can be swapped in.
For the Flavor
  • 0.5 red onion finely diced; introduces mild sharpness.
  • 0.33 cup green onions diced; enhances flavor with a hint of bite.
  • 1.25 cups mayonnaise key for creaminess; swap for Greek yogurt for a lighter twist.
  • 1 tablespoon Dijon mustard adds a delightful tang.
  • 1 teaspoon stone-ground mustard for a textured element; use more Dijon if stone-ground isn't available.
  • 0.5 cup sweet pickle relish brings sweetness and tang; use dill relish for a less sweet option.
  • salt and pepper to taste; elevate overall flavor.
  • 0.5 teaspoon paprika for garnish and subtle flavor.
  • fresh dill diced; optional garnish.

Equipment

  • pot
  • Mixing Bowl
  • Ice Bath

Method
 

Step-by-Step Instructions
  1. Boil 10 large eggs in a pot covered with cold water; bring to a boil, cover, turn off heat, and sit for 15 minutes before transferring to an ice bath.
  2. In a separate pot, boil 2 lbs of peeled, cubed russet potatoes in salted water for 8-10 minutes until tender. Drain and cool completely.
  3. Mash the yolks of the boiled eggs with 1 ¼ cups mayonnaise, 1 tablespoon Dijon mustard, 1 teaspoon stone-ground mustard, ½ cup relish, and season with salt and pepper.
  4. Chop the egg whites and mix with cooled potatoes, diced celery, ½ red onion, and ⅓ cup green onions. Combine with the dressing.
  5. Garnish with paprika and additional egg halves if desired. Refrigerate for at least one hour before serving.

Nutrition

Serving: 1cupCalories: 300kcalCarbohydrates: 35gProtein: 8gFat: 15gSaturated Fat: 3gPolyunsaturated Fat: 1gMonounsaturated Fat: 10gCholesterol: 180mgSodium: 300mgPotassium: 600mgFiber: 3gSugar: 2gVitamin A: 10IUVitamin C: 20mgCalcium: 2mgIron: 8mg

Notes

This dish can be prepared a day in advance and is perfect for summer gatherings or potlucks.

Tried this recipe?

Let us know how it was!

Crack Corn Salad: Irresistibly Creamy & Customizable Delight

March 29, 2026 by Grace Snow Leave a Comment

Under the sweltering sun, I found myself at a summer barbecue surrounded by laughter, vibrant colors, and the delightful aroma of grilling delights. Suddenly, a bowl of what seemed like pure joy caught my eye—the Creamy Crack Corn Salad. Fluffy corn, crispy bacon, and a touch of tangy cheddar mingled together to create a dish that was not just easy on the eyes but delectable too. This Corn Salad is the ultimate summer side dish, perfect for potlucks and picnics. It’s make-ahead friendly and adapts effortlessly to your taste, inviting you to add your special twist. You won’t just please a crowd; you’ll earn the title of BBQ hero! So, what fun additions will you sprinkle into your own version of this crowd-pleaser?

What makes this salad so irresistible?

Creamy Delight: This Crack Corn Salad is not only rich and decadent but also incredibly easy to whip up, making it a time-saver for busy cooks.
Customizable Goodness: Feel free to get creative with add-ins like diced bell peppers or a spicy kick from jalapeños!
Crowd-Pleasing Appeal: It's the perfect side dish for summer barbecues or potlucks, guaranteed to be a hit!
Make-Ahead Friendly: Prepare it in advance for an effortless gathering meal; it tastes even better after a few hours in the fridge!
Flavor Fusion: The blend of sweet corn, crispy bacon, and tangy cheddar creates a delightful harmony of flavors that keeps everyone coming back for more. Consider pairing it with Tofu Caesar Salad or Chicken Salad Apples for a complete spread.

Crack Corn Salad Ingredients

For the Salad
• Corn Kernels – the sweet base for this creamy Crack Corn Salad; you can use fresh, frozen, or canned varieties.
• Mayonnaise – brings richness and creaminess to the dressing; for a lighter twist, Greek yogurt is a great substitute.
• Sour Cream – adds tangy depth and creaminess; opt for low-fat versions if you're looking for a healthier choice.
• Ranch Dressing Mix – infuses herbal flavors throughout the salad; homemade seasoning provides better ingredient control.
• Garlic Powder – enhances the savory notes; fresh minced garlic can be swapped in for a bolder flavor.
• Onion Powder – rounds out the seasoning; fresh onions lend a stronger taste but use them sparingly.
• Paprika – beautifies the salad and adds a subtle smokiness; smoked paprika can give it an exciting twist.
• Cheddar Cheese – a key flavor element; dairy-free cheese works well for a vegan alternative.
• Bacon – crunchy goodness that contributes umami; consider turkey bacon for a lighter option or skip for a vegetarian dish.
• Green Onions – fresh flavor and a mild bite; substitute with regular onions, but adjust the quantity to taste.
• Salt and Pepper – essential for balancing flavors; adjust to your liking before serving.

For Extra Flavor
• Additional Veggies – feel free to toss in diced red bell peppers or cherry tomatoes for a fresh crunch.
• Spicy Elements – add jalapeños or a dash of hot sauce to bring some heat and excitement to the mix.
• Herbs – sprinkle in chopped cilantro, chives, or parsley for a fresh, herbaceous touch.
• Southwestern Twist – black beans and chili powder can lend a hearty richness to your version.

Step‑by‑Step Instructions for Crack Corn Salad

Step 1: Prepare the Creamy Base
In a large mixing bowl, whisk together 1 cup of mayonnaise, 1 cup of sour cream, 1 packet of ranch dressing mix, 1 teaspoon of garlic powder, 1 teaspoon of onion powder, and 1 teaspoon of paprika until smooth and creamy. Ensure there are no lumps for a delightful texture. This rich mixture serves as the flavorful base for your Crack Corn Salad.

Step 2: Combine Salad Ingredients
Add 4 cups of corn kernels, 1 cup of shredded cheddar cheese, 8 slices of crispy bacon (crumbled), and 1/4 cup of chopped green onions to the creamy mixture. Gently toss all the ingredients together until well-coated. You want to see vibrant colors blending harmoniously for an inviting visual that promises deliciousness in each bite.

Step 3: Chill for Flavor Fusion
Cover the bowl tightly with plastic wrap or a lid, and place it in the refrigerator for at least 2 hours, or preferably overnight. Chilling allows the flavors of the Crack Corn Salad to meld beautifully, resulting in a creamy taste that’s even more enticing. This step is crucial for developing that signature tangy flavor profile.

Step 4: Final Touches Before Serving
Once ready to serve, uncover the salad and give it a gentle stir to mix any settled ingredients. Taste the salad and adjust the seasoning with salt and pepper as desired, enhancing the balance of flavors. The Crack Corn Salad should be creamy, slightly sweet, and bursting with flavor, perfect for any summer occasion.

What to Serve with Creamy Crack Corn Salad?

Elevate your summer gatherings with delightful sides and drinks that perfectly complement this creamy creation, ensuring a full feast of flavors.

  • BBQ Ribs: The smoky, tender ribs harmonize beautifully with the creamy sweetness of the salad, offering a satisfying contrast.

  • Grilled Chicken: Juicy, marinated chicken adds a savory note that pairs exceptionally well with the tangy flavors of the corn salad.

  • Cornbread Muffins: These soft and slightly sweet muffins provide a perfect pairing, echoing the corn in the salad while adding a lovely texture.

  • Cold Beverages: Refreshing lemonade or iced tea enhances the summer vibe, washing down every bite with a citrusy zing.

  • Fresh Fruit Salad: A mix of seasonal fruits adds a bright, refreshing contrast to the creamy salad, balancing flavors while adding a burst of color.

  • Potato Chips or Tortilla Chips: The crunchy texture offers a delightful contrast to the creaminess of the salad, perfect for scooping!

  • Dessert Option: Pair with a light strawberry shortcake for a sweet ending that echoes the salad’s summer theme beautifully.

  • Pickled Vegetables: Tangy pickles or quick-pickled onions brighten the meal, adding acidity that cuts through the creaminess perfectly.

  • Herbed Focaccia: This soft, fragrant bread works wonderfully to soak up any leftover bits of salad dressing, making for an irresistible combination.

Make Ahead Options

These Creamy Crack Corn Salad are perfect for busy cooks looking to save time! You can prepare the creamy dressing (1 cup mayonnaise, 1 cup sour cream, ranch seasoning, garlic powder, onion powder, and paprika) up to 24 hours in advance, storing it in the fridge to keep it fresh. The corn, cheese, bacon, and green onions can be added just before serving to maintain their crunch and flavor. For best results, chill the combined salad for at least 2 hours (or overnight) to allow the flavors to meld beautifully. Just give it a gentle stir and adjust seasoning with salt and pepper before serving, ensuring you enjoy this delightful dish at its best!

How to Store and Freeze Crack Corn Salad

Fridge: Store your Crack Corn Salad in an airtight container for up to 3–4 days. It not only stays fresh but tastes even better after a day in the fridge!

Freezer: For longer storage, consider freezing the salad without add-ins like bacon or cheese. It can be frozen for up to 2 months. Thaw in the refrigerator and add fresh ingredients before serving.

Reheating: If refrigerated, simply stir well before serving. If frozen, ensure to let it thaw completely and adjust seasoning as needed before enjoying.

Traveling: If you're taking this salad to a potluck, use an insulated carrier to keep it chilled during transport.

Crack Corn Salad Variations

Feel free to get creative with your Crack Corn Salad and make it truly yours! The possibilities are endless, with variations that can add new textures and flavors.

  • Lighter Option: Replace sour cream with Greek yogurt and use low-fat mayonnaise for a creamy but lighter salad. It’s a great way to keep the deliciousness without the guilt!

  • Spicy Kick: Mix in diced jalapeños or a dash of your favorite hot sauce for an exciting twist. The heat will make your taste buds dance and balance beautifully with the creamy dressing.

  • Fresh Add-ins: Incorporate diced red bell peppers, cherry tomatoes, or even cubed avocado for an extra burst of freshness. These vibrant colors and textures elevate the salad while adding a healthy crunch.

  • Herbaceous Twist: Blend in chopped cilantro, chives, or parsley for added freshness and aroma. Fresh herbs can bring your salad to life, creating a delightful herb-infused experience.

  • Southwestern Version: Add black beans, chopped red onions, and a sprinkle of chili powder for a hearty twist. It’s a fun way to give a classic dish a southwestern flair that everyone will love!

  • Cheese Variations: Experiment with different cheeses like feta or pepper jack to change the flavor profile. Each cheese brings a unique character that can truly change the game!

  • Nuts & Seeds: Toss in some sunflower seeds or chopped nuts for a delightful crunch and an added layer of flavor. This makes for a wonderful surprise in every bite, adding texture that takes this salad to new heights.

  • Fruit Infusion: Consider adding diced fruits like mango or pineapple for a sweet and tangy contrast. The sweetness complements the creaminess perfectly, making each mouthful a summer delight.

For more delightful salads, check out this refreshing Avocado Egg Salad or try the classic German Potato Salad for a perfect side dish pairing!

Expert Tips for Crack Corn Salad

  • Chill Time Matters: Allowing the salad to chill for several hours maximizes flavor infusion, making every bite more delectable.
  • Avoid Watery Add-Ins: Steer clear of adding watery ingredients like tomatoes or avocados until just before serving to keep the salad’s texture intact.
  • Stir Before Serving: Gently stir the salad just before serving, as the dressing may settle, ensuring every bite is creamy and delicious.
  • Customize to Your Taste: Don’t hesitate to experiment with different add-ins, but be mindful not to overcrowd the salad so each flavor shines through.
  • Quality Ingredients: Using fresh corn or high-quality dressings can elevate this Crack Corn Salad, taking it from ordinary to extraordinary.

Crack Corn Salad Recipe FAQs

What type of corn should I use for this salad?
Absolutely! You can use fresh corn on the cob, frozen corn, or even canned corn kernels for this salad. If using fresh corn, about 4 ears are perfect, while frozen or canned corn should be drained prior to mixing.

How should I store leftover Crack Corn Salad?
Store your Crack Corn Salad in an airtight container in the refrigerator for up to 3–4 days. Keeping it chilled will maintain its creamy texture and enhance the flavors over time. Just remember to stir well before serving!

Can I freeze Crack Corn Salad?
Yes, but I recommend freezing it without the bacon and cheese to preserve the texture. Pack it in a freezer-safe container for up to 2 months. To enjoy, simply thaw in the refrigerator and then mix in the fresh ingredients before serving to ensure optimal taste.

What should I do if my salad seems too watery?
If your salad ends up watery, it could be from watery ingredients or too much dressing. One approach is to drain excess liquid by using a fine mesh strainer. Then, add a little more corn or shredded veggies to absorb the moisture. Moreover, serve the salad chilled to prevent sogginess.

Are there any dietary considerations for this recipe?
Definitely! For gluten-free eaters, use a gluten-free ranch dressing mix. You can also make it vegetarian by omitting the bacon and opting for a dairy-free cheese. Always check the labels of store-bought ingredients to ensure they meet your dietary needs.

How can I make this salad healthier?
Very simple! Substitute the regular mayonnaise with Greek yogurt to reduce calories and add protein. You can also opt for low-fat sour cream and incorporate more fresh veggies, such as bell peppers or cucumbers, to boost the salad's nutritional profile while keeping it flavorful.

Crack Corn Salad

Crack Corn Salad: Irresistibly Creamy & Customizable Delight

Enjoy this Crack Corn Salad, a creamy summer side dish that is not only delicious but also customizable to your preferences.
Print Recipe Pin Recipe
Prep Time 20 minutes mins
Chill Time 2 hours hrs
Total Time 2 hours hrs 20 minutes mins
Servings: 8 servings
Course: Salads
Cuisine: American
Calories: 220
Ingredients Equipment Method Nutrition Notes

Ingredients
  

For the Salad
  • 4 cups corn kernels fresh, frozen, or canned varieties
  • 1 cup mayonnaise
  • 1 cup sour cream can substitute with Greek yogurt
  • 1 packet ranch dressing mix homemade seasoning recommended
  • 1 teaspoon garlic powder fresh minced garlic can be used
  • 1 teaspoon onion powder fresh onions may be used
  • 1 teaspoon paprika smoked paprika can add extra flavor
  • 1 cup cheddar cheese dairy-free cheese for vegan option
  • 8 slices bacon crumbled, consider turkey bacon for a lighter option
  • 1/4 cup green onions chopped
  • to taste salt
  • to taste pepper
For Extra Flavor
  • additional veggies diced red bell peppers or cherry tomatoes
  • spicy elements jalapeños or hot sauce
  • herbs chopped cilantro, chives, or parsley
  • southwestern twist black beans and chili powder

Equipment

  • Mixing Bowl
  • Whisk
  • Spatula
  • Airtight Container

Method
 

Step 1: Prepare the Creamy Base
  1. In a large mixing bowl, whisk together 1 cup of mayonnaise, 1 cup of sour cream, 1 packet of ranch dressing mix, 1 teaspoon of garlic powder, 1 teaspoon of onion powder, and 1 teaspoon of paprika until smooth and creamy.
Step 2: Combine Salad Ingredients
  1. Add 4 cups of corn kernels, 1 cup of shredded cheddar cheese, 8 slices of crispy bacon (crumbled), and 1/4 cup of chopped green onions to the creamy mixture. Gently toss all the ingredients together until well-coated.
Step 3: Chill for Flavor Fusion
  1. Cover the bowl tightly and place it in the refrigerator for at least 2 hours, or preferably overnight.
Step 4: Final Touches Before Serving
  1. Once ready to serve, gently stir the salad and adjust seasoning with salt and pepper.

Nutrition

Serving: 1cupCalories: 220kcalCarbohydrates: 18gProtein: 4gFat: 18gSaturated Fat: 3gPolyunsaturated Fat: 1gMonounsaturated Fat: 2gCholesterol: 15mgSodium: 310mgPotassium: 200mgFiber: 1gSugar: 4gVitamin A: 5IUVitamin C: 4mgCalcium: 10mgIron: 4mg

Notes

Chill the salad for optimal flavor and stir gently before serving to ensure even distribution of ingredients.

Tried this recipe?

Let us know how it was!

Loaded Veggie White Lasagna: Indulge in Comfort Food Bliss

March 29, 2026 by Grace Snow Leave a Comment

The aroma of bubbling cheese and roasted vegetables signals a cozy evening ahead, doesn’t it? My Loaded Veggie White Lasagna combines creamy layers of rich white sauce and hearty seasonal vegetables, creating a satisfying meal that warms both the heart and the stomach. With its vegetarian goodness, this dish is not only a perfect fit for family dinners but also a great way to impress guests. Plus, it’s quick to whip up—ideal for those busy weeknights when you need a bit of indulgence without the fuss. Whether you’re a seasoned home-chef or looking to explore new culinary horizons, this lasagna is sure to become a favorite. Isn’t it time to elevate your dinner game? Let’s dive into the recipe!

Why is Veggie White Lasagna a Must-Try?

Comforting, this Loaded Veggie White Lasagna warms the heart with every creamy, cheesy bite. Simple preparation makes it a breeze for both novice cooks and culinary experts alike. Nutritious ingredients like fresh veggies and ricotta cheese ensure a guilt-free indulgence. Versatile options allow you to mix in your favorite seasonal vegetables, making each lasagna unique. Plus, it's the perfect centerpiece for family gatherings, satisfying even the pickiest eaters. Looking for more delicious plant-based options? Check out our Tuscan White Bean for a delightful twist!

Loaded Veggie White Lasagna Ingredients

• Get ready to create a delicious masterpiece!

For the White Sauce

  • Butter – Adds richness to the white sauce; unsalted is preferred for better seasoning control.
  • All-purpose flour – Thickens the white sauce for a creamy texture; a gluten-free flour is a great substitute.
  • Milk – Forms the base of the white sauce; use whole or 2% for more creaminess, or unsweetened almond/oat milk for a dairy-free option.
  • Nutmeg – Enhances the flavor of the white sauce; just a pinch adds warmth and depth.
  • Salt – Elevates overall flavor; adjust according to dietary needs.
  • Black pepper – Introduces a mild heat; freshly ground offers the best flavor.

For the Vegetable Filling

  • Olive oil – Used for sautéing vegetables; can easily be replaced with vegetable or canola oil.
  • Onion – Provides sweetness and depth; yellow or white onions work best.
  • Garlic – Adds aromatic flavor; freshly minced is recommended for maximum potency.
  • Red bell pepper – Brings sweetness and vibrant color; swap with yellow or green bell peppers if desired.
  • Yellow bell pepper – Offers a mild flavor adding sweetness.
  • Zucchini – Gives a hearty texture; consider replacing it with spinach or mushrooms for diversity.
  • Frozen spinach – Nutrient-packed and convenient; fresh or sautéed spinach can work too, just remember to drain it well.
  • Ricotta cheese – The creamy base for the filling; cottage cheese is a lower-fat alternative.
  • Parmesan cheese – Adds salty depth; nutritional yeast can be a great vegan substitute.
  • Egg – Binds the filling together; for a vegan option, try using a flax egg (1 tbsp ground flaxseed + 2.5 tbsp water).

For Assembly

  • Lasagna noodles – Create the structure and layers; no-boil noodles can make assembly even easier.
  • Mozzarella cheese – Provides that delightful gooey texture; opt for low-fat mozzarella or dairy-free cheese if preferred.

Step‑by‑Step Instructions for Loaded Veggie White Lasagna

Step 1: Prepare the White Sauce
In a medium saucepan, melt 4 tablespoons of unsalted butter over medium heat. Whisk in 1/4 cup of all-purpose flour and cook for 1-2 minutes until lightly golden. Gradually stir in 3 cups of milk, ensuring no lumps form, then simmer for 5-7 minutes until thickened. Finally, add a pinch of nutmeg, salt, and pepper to taste, creating a creamy base for your Loaded Veggie White Lasagna.

Step 2: Cook the Vegetables
In a large skillet, heat 2 tablespoons of olive oil over medium heat. Add 1 diced onion and sauté until softened, about 3-4 minutes. Stir in 2 minced garlic cloves, 1 chopped red and 1 yellow bell pepper, and 1 sliced zucchini, cooking for an additional 5-7 minutes until the vegetables are tender-crisp. Finally, stir in 2 cups of thawed and drained frozen spinach, seasoning with salt and pepper, and allow the mixture to cool for layering.

Step 3: Mix the Filling
In a large mixing bowl, combine 15 ounces of ricotta cheese, 1/2 cup of grated Parmesan cheese, and 1 beaten egg. Gently fold in the cooled vegetable mixture, ensuring an even distribution of flavors throughout. This filling will provide a hearty and creamy layer in your Loaded Veggie White Lasagna, delivering both nutrition and taste. Set this bowl aside while you prepare the noodles.

Step 4: Cook Noodles
Bring a large pot of salted water to a boil and cook 10-12 lasagna noodles according to package instructions until al dente. This prevents them from becoming mushy when baked. Once cooked, drain the noodles and rinse them under cold water to stop the cooking process and cool them down, making them easier to handle during assembly.

Step 5: Assemble Lasagna
Preheat your oven to 375°F (190°C). In a 9x13 inch baking dish, spread a layer of your prepared white sauce on the bottom. Place a single layer of lasagna noodles over the sauce, followed by half of the vegetable filling and 1 cup of shredded mozzarella cheese. Repeat these layers, finishing with a final layer of noodles, white sauce, and a generous topping of remaining mozzarella.

Step 6: Bake
Cover the assembled Loaded Veggie White Lasagna with aluminum foil to prevent direct browning. Bake in the preheated oven for 25 minutes. After this time, remove the foil and bake for an additional 20-25 minutes until the cheese is melted, bubbly, and lightly golden on top. Allow the dish to cool for 10-15 minutes before slicing to help it set.

Make Ahead Options

These Loaded Veggie White Lasagna are perfect for meal prep enthusiasts looking to save time during busy weeknights! You can prepare the lasagna filling (including the creamy white sauce and sautéed vegetables) up to 24 hours in advance and refrigerate it, just ensure to store it in an airtight container to maintain freshness. Assemble the lasagna layers just before baking, which will help keep the noodles from becoming too soft. Simply layer the noodles, filling, and cheese, then bake directly from the fridge, adding a few extra minutes to the baking time for best results. Enjoy restaurant-quality flavors with minimal effort by prepping ahead!

Expert Tips for Loaded Veggie White Lasagna

  • Drain Spinach Well: Ensure the spinach is thoroughly drained; excess liquid can lead to a watery lasagna that compromises the dish’s integrity.
  • Watch Noodle Cook Time: Avoid overcooking the lasagna noodles; they should be al dente as they will cook more while baking, maintaining their texture.
  • Adjust Sauce Consistency: If your white sauce thickens too much, simply thin it with a little extra milk for the right creamy consistency.
  • Layer Wisely: For a well-balanced flavor in your Loaded Veggie White Lasagna, evenly layer vegetables and cheese between noodles, ensuring each slice is packed with delightful goodness.
  • Cover if Browning: If the top starts to brown too quickly during baking, cover it with foil to prevent burning and allow even cooking.

Loaded Veggie White Lasagna Variations

Feel free to personalize your lasagna with these delightful twists and substitutions that will elevate your dish!

  • Dairy-Free: Substitute ricotta and mozzarella with cashew cream and dairy-free cheese for a creamy vegan option.
  • Spinach Swap: Replace the frozen spinach with kale or arugula for a peppery flavor and extra nutrition.
  • Flavorful Additions: Toss in roasted garlic or sun-dried tomatoes to deepen the flavor profile and add a burst of tanginess.
  • Texture Twist: For a crunch, sprinkle toasted breadcrumbs on top before the final bake, giving it a delightful crispness.
  • Zucchini Alternative: Swap zucchini for roasted eggplant or cauliflower for a unique flavor and texture.
  • Extra Protein: Incorporate cooked lentils or chickpeas into the vegetable filling for a hearty boost in protein.
  • Seasonal Touch: Adjust with seasonal vegetables like asparagus in spring or butternut squash in fall for a refreshing change.
  • Herb Infusion: Enhance flavor with fresh herbs like basil or oregano, either in the filling or sprinkled on top before serving.

Why not try out these variations and give your Loaded Veggie White Lasagna a fun, delicious twist? If you're looking for more veggie-rich recipes, consider giving our Matcha Cookies a try for a sweet after-dinner treat!

What to Serve with Loaded Veggie White Lasagna

The perfect accompaniment can transform your delightful lasagna into a complete, unforgettable meal.

  • Garlic Bread: The crunchy, buttery goodness of garlic bread pairs wonderfully, offering a satisfying contrast to the creamy lasagna. Each bite encourages a swirl of sauce, enhancing the overall experience.

  • Fresh Green Salad: A crisp salad with mixed greens and a tangy vinaigrette brightens up your plate, balancing the rich flavors of the lasagna. Toss in seasonal veggies for extra color and crunch!

  • Roasted Vegetables: Enjoy a side of sweet, caramelized roasted vegetables to complement the earthy tones of the lasagna. Their mild flavors bring a delightful warmth to your dinner table.

  • Herbed Quinoa: Nutty quinoa seasoned with fresh herbs provides a hearty and nutritious side that stands up to the lasagna without stealing the show. It's a wonderful way to round out the meal with added protein!

  • Sparkling Water: A glass of sparkling water with a twist of lemon adds a refreshing touch, cleansing the palate between bites. It's the perfect drink to keep your meal lively.

  • Tiramisu: For dessert, a classic tiramisu offers a luscious finish, with its layers of creaminess and coffee flavors harmonizing beautifully after the lasagna's richness. It’s an elegant way to end your meal!

Storage Tips for Loaded Veggie White Lasagna

Fridge: Store leftovers in an airtight container in the refrigerator for up to 4 days. This will help keep the flavors fresh and delicious.

Freezer: You can freeze the lasagna for up to 3 months. Wrap it tightly in plastic wrap and then aluminum foil for best results.

Reheating: When ready to enjoy, thaw overnight in the fridge if frozen. Reheat in the oven at 350°F (175°C) for 25-30 minutes or until heated through, ensuring the cheese is bubbly.

Make-Ahead Option: Assemble your Loaded Veggie White Lasagna up to 24 hours in advance and store it in the refrigerator before baking. This allows for convenience on busy days!

Loaded Veggie White Lasagna Recipe FAQs

What is the best way to choose ripe vegetables for my lasagna?
Absolutely! Look for vegetables that are vibrant in color and firm to the touch. For bell peppers, avoid bruises and dark spots. Zucchini should be glossy with no soft spots. Fresh spinach should be bright green without yellowing leaves. Selecting seasonal produce ensures maximum flavor and nutrition!

How should I store leftover Loaded Veggie White Lasagna?
Store any leftovers in an airtight container in the refrigerator for up to 4 days. Let it cool before covering to prevent moisture build-up. Cold lasagna can be easily reheated in the oven or microwave, ensuring you savor every cheesy, veggie-packed bite!

Can I freeze Loaded Veggie White Lasagna for later use?
Yes! You can freeze it for up to 3 months. To do so, assemble the lasagna but don’t bake it yet. Wrap it tightly in plastic wrap followed by aluminum foil to protect it from freezer burn. When you’re ready to enjoy, thaw it in the refrigerator overnight, then bake as directed for a delicious meal!

What if my white sauce turns out lumpy?
No worries! If your sauce becomes lumpy, simply pour it through a fine mesh strainer into a bowl to achieve a smooth consistency. If it’s too thick, whisk in additional milk over low heat until it reaches your desired thickness. Remember, practice makes perfect, and even the best chefs have off days!

Are there any dietary considerations for pets or allergies with my Loaded Veggie White Lasagna?
It’s essential to keep pets away from lasagna due to the presence of garlic and onions, which can be harmful. For allergies, be mindful of substituting ingredients like ricotta cheese with dairy alternatives and gluten-free flour if needed. Always check the packaging for allergens to ensure safety for all diners!

Can I prepare Loaded Veggie White Lasagna in advance?
Very much so! You can assemble the lasagna up to 24 hours before baking. Just cover it tightly with foil or plastic wrap and store it in the refrigerator. This makes it perfect for busy weeknights or gatherings, allowing the flavors to meld beautifully while you focus on enjoying time with loved ones.

Loaded Veggie White Lasagna

Loaded Veggie White Lasagna: Indulge in Comfort Food Bliss

Savor the comfort of Loaded Veggie White Lasagna with creamy layers of white sauce and seasonal vegetables, perfect for family dinners and impressing guests.
Print Recipe Pin Recipe
Prep Time 30 minutes mins
Cook Time 50 minutes mins
Cooling Time 15 minutes mins
Total Time 1 hour hr 35 minutes mins
Servings: 8 slices
Course: Dinner
Cuisine: Italian
Calories: 350
Ingredients Equipment Method Nutrition Notes

Ingredients
  

For the White Sauce
  • 4 tablespoons unsalted butter Adds richness to the white sauce
  • 1/4 cup all-purpose flour Thickens the white sauce
  • 3 cups milk Use whole or 2% for creaminess
  • 1 pinch nutmeg Enhances the flavor
  • 1 teaspoon salt Adjust according to dietary needs
  • 1/2 teaspoon black pepper Freshly ground offers the best flavor
For the Vegetable Filling
  • 2 tablespoons olive oil Used for sautéing vegetables
  • 1 large onion Provides sweetness and depth
  • 2 cloves garlic Adds aromatic flavor
  • 1 large red bell pepper Brings sweetness and color
  • 1 large yellow bell pepper Offers a mild flavor
  • 1 medium zucchini Gives a hearty texture
  • 2 cups frozen spinach Nutrient-packed and convenient
  • 15 ounces ricotta cheese The creamy base for the filling
  • 1/2 cup grated Parmesan cheese Adds salty depth
  • 1 large egg Binds the filling together
For Assembly
  • 10-12 pieces lasagna noodles Create the structure and layers
  • 2 cups shredded mozzarella cheese Provides that delightful gooey texture

Equipment

  • Medium saucepan
  • Large skillet
  • large mixing bowl
  • Large pot
  • 9x13-inch baking dish

Method
 

Step-by-Step Instructions
  1. In a medium saucepan, melt the butter over medium heat. Whisk in the flour and cook for 1-2 minutes until lightly golden. Gradually stir in the milk, ensuring no lumps form, then simmer until thickened.
  2. In a large skillet, heat olive oil over medium heat. Add the diced onion and sauté until softened. Stir in garlic, bell peppers, and zucchini, cooking until tender-crisp. Stir in frozen spinach and season with salt and pepper.
  3. In a large mixing bowl, combine ricotta cheese, grated Parmesan, and the beaten egg. Fold in the cooled vegetable mixture.
  4. Bring a large pot of salted water to a boil and cook the lasagna noodles according to package instructions until al dente. Drain and rinse under cold water.
  5. Preheat your oven to 375°F (190°C). Spread a layer of white sauce on the bottom of a baking dish. Layer noodles, half of the vegetable filling, and mozzarella cheese. Repeat layers, finishing with noodles and remaining mozzarella.
  6. Cover with foil and bake for 25 minutes. Remove foil and bake for another 20-25 minutes until cheese is melted and golden. Allow to cool for 10-15 minutes before slicing.

Nutrition

Serving: 1sliceCalories: 350kcalCarbohydrates: 42gProtein: 18gFat: 15gSaturated Fat: 8gPolyunsaturated Fat: 1gMonounsaturated Fat: 4gCholesterol: 60mgSodium: 600mgPotassium: 450mgFiber: 3gSugar: 4gVitamin A: 1500IUVitamin C: 60mgCalcium: 250mgIron: 2mg

Notes

Ensure to drain spinach well and avoid overcooking the lasagna noodles to maintain texture. Adjust sauce consistency with extra milk if necessary.

Tried this recipe?

Let us know how it was!

Delicious Coconut Chicken Rice Bowl for Quick Tropical Comfort

March 29, 2026 by Grace Snow Leave a Comment

The moment I first tasted the Tropical Coconut Chicken Rice Bowl, it felt like a vacation on a plate. The sweet, creamy aroma of coconut mingled with tender chicken and zesty lime was an absolute delight. This dish isn’t just a quick and easy meal; it’s nutritious and incredibly customizable, perfect for those bustling weeknights when you crave both comfort and flavor. In just 20 minutes, you can whip up a vibrant meal that even the pickiest eaters will love. Whether you stick to the original recipe or throw in some of your favorite veggies, this Coconut Chicken Rice Bowl will transport you to a tropical paradise with every bite. Ready to dive in and bring a splash of fresh island vibes to your kitchen?

Why Is This Recipe a Must-Try?

Simplicity Made Delicious: This Coconut Chicken Rice Bowl comes together in just 20 minutes, making it an easy choice for busy weeknights.

Nutritious and Flavorful: Packed with healthy fats from coconut milk and lean protein from the chicken, it’s a meal that nourishes as much as it delights.

Customizable to Your Taste: With optional add-ins like shrimp or tofu, and veggies of your choice, you can easily adapt it to suit your palate, like in my delicious Honey Garlic Chicken variation.

Tropical Vibes at Home: Enjoy the exotic flavors that transport you to the tropics, all from your kitchen!

Crowd-Pleasing Appeal: This dish is loved by both kids and adults, offering something for everyone. It’s a fantastic way to excite your family’s taste buds while breaking away from monotonous fast food nights.

Coconut Chicken Rice Bowl Ingredients

• The flavors of this Coconut Chicken Rice Bowl start with fresh ingredients!

For the Chicken

  • Boneless, Skinless Chicken Breasts – the main protein source ensuring tenderness; feel free to swap with shrimp, tofu, or chickpeas for a different take.
  • Vegetable Oil (or Coconut Oil) – used for cooking; enhances the overall flavor and complements the tropical theme.

For the Sauce

  • Coconut Milk – adds creaminess and healthy fats; choose light coconut milk for a lower-fat version without sacrificing taste.
  • Soy Sauce (or Tamari) – contributes umami depth; use coconut aminos for a gluten-free alternative.
  • Lime Juice – brings acidity and brightness to balance the rich sauce; fresh lime is best for maximum zest.
  • Garlic – infuses the dish with aromatic flavor; fresh garlic cloves elevate the taste profile.
  • Ginger – provides a warm, spicy note; fresh ginger gives the best flavor.

For Serving

  • Cooked Rice – serves as a base; jasmine, basmati, or brown rice work wonderfully, while cauliflower rice is a perfect low-carb option.
  • Fresh Cilantro or Green Onions – for garnish, adding freshness; parsley can be an acceptable substitute.
  • Salt and Pepper to Taste – essential for seasoning and enhancing all the flavors.

Enjoy crafting your tropical escape with these Coconut Chicken Rice Bowl ingredients!

Step‑by‑Step Instructions for Coconut Chicken Rice Bowl

Step 1: Heat Oil
In a large skillet, add 1 tablespoon of either vegetable or coconut oil and heat over medium-high heat. Allow the oil to shimmer, which indicates it’s hot enough for cooking. This will be the base for your Tropical Coconut Chicken Rice Bowl, creating a flavorful backdrop for the chicken.

Step 2: Cook Chicken
Add 1 pound of diced boneless, skinless chicken breasts to the skillet. Season generously with salt and pepper. Sauté for about 5 to 7 minutes, stirring occasionally until the chicken is golden brown and reaches an internal temperature of 165°F. This ensures that the chicken remains juicy and tender while forming a delightful crust.

Step 3: Add Aromatics
Once the chicken is cooked, stir in 2 minced garlic cloves and 1 teaspoon of freshly grated ginger. Continue to cook for an additional minute until fragrant, stirring frequently to release the aromatic oils. This step enhances the dish’s flavor profile, infusing it with warm and spicy notes that complement the coconut.

Step 4: Make Sauce
Pour in 1 can of coconut milk, 1 tablespoon of soy sauce (or tamari for a gluten-free option), and the juice of 1 teaspoon of fresh lime. Stir the mixture and allow it to come to a gentle simmer for about 5 to 7 minutes. As it cooks, the sauce will thicken slightly, creating a creamy, delicious coating for your chicken.

Step 5: Prepare Rice
While the sauce is simmering, cook 2 cups of rice according to package instructions. Whether you choose jasmine, basmati, or a low-carb option like cauliflower rice, ensure the rice is fluffy and ready to soak up the flavors of your Coconut Chicken Rice Bowl.

Step 6: Assemble Bowls
Once everything is cooked, it’s time to assemble your Tropical Coconut Chicken Rice Bowl. Serve the creamy coconut chicken over a generous portion of the cooked rice. Finally, garnish with freshly chopped cilantro or sliced green onions for a pop of color and added freshness.

Coconut Chicken Rice Bowl Variations

Feel free to personalize your Tropical Coconut Chicken Rice Bowl with these delightful twists that add flavor and excitement!

  • Seafood Swap: Use shrimp for a lighter twist that pairs beautifully with the coconut flavor. Sauté just until they turn pink for a juicy bite that complements the dish perfectly.

  • Vegetarian Option: Substitute chicken with tofu or chickpeas to maintain protein content. Not only does this make it plant-based, but it also allows the coconut flavors to shine through wonderfully.

  • Cauliflower Rice: For a low-carb alternative, substitute regular rice with cauliflower rice. This keeps the dish light and gives you that airy texture, making it simple and satisfying.

  • Spice It Up: Add red pepper flakes or sriracha for spice enthusiasts. Just a hint of heat can elevate the tropical flavors and provide an exciting zing.

  • Fruity Toppings: Garnish with fresh mango or pineapple for a sweet contrast. The juicy fruit not only enhances the color but also adds a refreshing sweetness to every bite.

  • Nutty Crunch: Top with crushed peanuts or toasted coconut flakes for added texture. These small additions create a satisfying crunch, taking your dish to the next level!

Looking for more delicious chicken ideas? Dive into this flavorful Honey Garlic Chicken for another quick and easy dish your family will adore. Or, if you’re in the mood for something different, try my delightful Bbq Chicken Rice that brings a smoky sweetness to your table!

How to Store and Freeze Coconut Chicken Rice Bowl

Fridge: Store leftovers in an airtight container for up to 3 days. Reheat gently in the microwave to maintain the dish's creamy texture.

Freezer: This Coconut Chicken Rice Bowl can be frozen in a freezer-safe container for up to 3 months. Thaw it in the fridge overnight before reheating.

Make-Ahead: For convenience, cook the chicken and sauce up to 24 hours in advance and store in the fridge. Prepare the rice up to 3 days ahead for quick assembly at mealtime.

Expert Tips for Coconut Chicken Rice Bowl

  • Use Fresh Ingredients: Fresh garlic and ginger amplify the flavors significantly. Always choose fresh over powdered for the best Coconut Chicken Rice Bowl experience.
  • Check Chicken Temperature: Ensure the chicken reaches an internal temperature of 165°F for juicy meat and food safety—avoid undercooked chicken at all costs.
  • Adjust Sauce Thickness: If your sauce seems too thin, mix a tablespoon of cornstarch with water and stir it in—this will create a richer, creamier sauce.
  • Customize Wisely: Feel free to swap chicken for shrimp or tofu, but remember to adjust cooking times accordingly to keep everything tender and delicious.
  • Perfect Rice Cooking: Rinse rice before cooking to remove excess starch; it helps in achieving fluffy rice that beautifully complements the dish.
  • Garnish Generously: Don’t skimp on the fresh cilantro or green onions—they brighten the entire Coconut Chicken Rice Bowl and balance the rich flavors!

What to Serve with Tropical Coconut Chicken Rice Bowl

Elevate your meal with delightful pairings that enhance the comforting flavors of this tropical dish.

  • Mango Salad: The sweetness of ripe mango mixed with a tangy dressing creates a refreshing contrast to the creamy rice bowl.
  • Crispy Spring Rolls: These light and crunchy bites add a satisfying texture, making every mouthful a delightful experience. Enjoy with a dip for extra flavor.
  • Grilled Pineapple: Sweet, caramelized pineapple complements the coconut perfectly, enhancing the tropical vibe while adding a juicy burst of flavor.
  • Cucumber Dill Salad: Crisp cucumbers and fresh dill offer a cool, refreshing balance to the rich, creamy chicken in the rice bowl.
  • Toast with Hummus: Spread creamy hummus on warm toasted bread—it's a perfect side for dipping and adds a savory element to the meal.
  • Chilled Coconut Water: This hydrating drink echoes the coconut flavors in your dish while providing a refreshing and healthy beverage option.
  • Lime Sorbet: This light, zesty dessert is a perfect palate cleanser that rounds out the tropical experience with its bright flavors.
  • Savory Fried Rice: Stir-fried rice adds an extra layer of flavor that pairs harmoniously, offering a heartier twist on the traditional rice base of the Coconut Chicken Rice Bowl.

Make Ahead Options

These Tropical Coconut Chicken Rice Bowls are perfect for busy home cooks looking to simplify meal prep! You can prepare the chicken and sauce up to 24 hours in advance; just cook them, let the mixture cool, and refrigerate in an airtight container. The rice can be made up to 3 days ahead—store it in the fridge as well. To maintain quality, always let your cooked components cool before refrigerating and keep the rice separate until serving. When you're ready to enjoy your delicious Coconut Chicken Rice Bowl, simply reheat the chicken and sauce gently on the stovetop or microwave, and serve over the reheated rice. You’ll have a flavorful, tropical meal ready in minutes!

Tropical Coconut Chicken Rice Bowl Recipe FAQs

What type of chicken is best for this recipe?
I recommend using boneless, skinless chicken breasts for the best tenderness and flavor. If you're looking for a different protein source, shrimp, tofu, or chickpeas can serve as delicious substitutes.

How do I know if my coconut milk is fresh?
Always check the expiration date on the can. If you notice any separation or odd smell, it might be spoiled. For optimal freshness in your Tropical Coconut Chicken Rice Bowl, look for coconut milk that’s creamy without any clumps.

How should I store leftovers?
Store any leftover Coconut Chicken Rice Bowl in an airtight container in the fridge for up to 3 days. When ready to enjoy, reheat it gently in the microwave to maintain that luscious, creamy texture.

Can I freeze the Coconut Chicken Rice Bowl?
Absolutely! You can freeze this dish in a freezer-safe container for up to 3 months. For best results, thaw it in the fridge overnight before reheating. This tasty meal will be just as enjoyable on a busy day!

What if my sauce is too thin?
If your coconut sauce isn’t thickening as you'd like, create a slurry by mixing one tablespoon of cornstarch with two tablespoons of cold water. Stir it into the simmering sauce and continue to cook until it thickens to your desired consistency.

Are there any dietary considerations?
Yes! This recipe can be gluten-free by using tamari or coconut aminos instead of soy sauce. Additionally, if you’re serving this to pets, be cautious with the spices and avoid using any onion or garlic, as these can be harmful to them. Always check for food allergies when serving this dish.

Coconut Chicken Rice Bowl

Delicious Coconut Chicken Rice Bowl for Quick Tropical Comfort

A delightful Coconut Chicken Rice Bowl that offers a quick and nutritious meal bursting with tropical flavors.
Print Recipe Pin Recipe
Prep Time 10 minutes mins
Cook Time 10 minutes mins
Total Time 20 minutes mins
Servings: 4 bowls
Course: Dinner
Cuisine: Tropical
Calories: 450
Ingredients Equipment Method Nutrition Notes

Ingredients
  

For the Chicken
  • 1 pound Boneless, skinless chicken breasts Main protein source
  • 1 tablespoon Vegetable oil or Coconut oil Used for cooking
For the Sauce
  • 1 can Coconut milk Adds creaminess
  • 1 tablespoon Soy sauce or Tamari Contributes umami depth
  • 1 teaspoon Lime juice Fresh lime is best
  • 2 cloves Garlic Minced for flavor
  • 1 teaspoon Fresh ginger Grated for flavor
For Serving
  • 2 cups Cooked rice Jasmine, basmati, or cauliflower rice work well
  • to taste Fresh cilantro or green onions For garnish
  • to taste Salt and pepper For seasoning

Equipment

  • Large skillet

Method
 

Cooking Steps
  1. In a large skillet, add 1 tablespoon of either vegetable or coconut oil and heat over medium-high heat.
  2. Add 1 pound of diced boneless, skinless chicken breasts to the skillet. Season generously with salt and pepper. Sauté for about 5 to 7 minutes until golden brown and cooked through.
  3. Once the chicken is cooked, stir in 2 minced garlic cloves and 1 teaspoon of freshly grated ginger. Continue to cook for an additional minute until fragrant.
  4. Pour in 1 can of coconut milk, 1 tablespoon of soy sauce, and the juice of 1 teaspoon of fresh lime. Allow it to simmer for about 5 to 7 minutes.
  5. While the sauce simmers, cook 2 cups of rice according to package instructions.
  6. Serve the creamy coconut chicken over a portion of the cooked rice and garnish with freshly chopped cilantro or sliced green onions.

Nutrition

Serving: 1bowlCalories: 450kcalCarbohydrates: 45gProtein: 30gFat: 20gSaturated Fat: 12gPolyunsaturated Fat: 3gMonounsaturated Fat: 5gCholesterol: 90mgSodium: 800mgPotassium: 700mgFiber: 4gSugar: 3gVitamin A: 250IUVitamin C: 20mgCalcium: 50mgIron: 2mg

Notes

Ensure to use fresh garlic and ginger for the best flavor. Customize with shrimp or tofu as desired.

Tried this recipe?

Let us know how it was!

Delicious Honey Glazed Salmon Bowl Ready in 30 Minutes

March 29, 2026 by Grace Snow Leave a Comment

With a crispy exterior and a sweet, sticky glaze, it’s hard to resist the allure of a perfectly cooked salmon. This Honey Glazed Salmon Bowl is not just a meal; it’s a vibrant celebration of flavors and textures that will have you questioning why you ever reached for fast food. In just 30 minutes, you can whip up this gluten-free delight that features succulent salmon paired with creamy avocado and refreshing cucumber—a quick weeknight dinner that tastes like a gourmet feast. Plus, the customizable nature of this dish means you can easily switch in chicken or tofu for a personal touch. So why not elevate your dinner routine and savor a healthier option that your taste buds will adore? Ready to discover how to bring this delicious bowl to your table?

Why is this bowl a must-try?

Quick and Convenient: This Honey Glazed Salmon Bowl comes together in just 30 minutes, making it the ideal choice for busy weeknights.

Flavor Explosion: The sweet honey glaze paired with savory soy sauce creates an irresistible combination that you'll crave again and again.

Versatile Options: Whether you want salmon, chicken, or tofu, the recipe easily adapts to your preferences, ensuring everyone at the table is happy!

Nutritious and Filling: Packed with healthy fats from avocado and protein from salmon, you’ll feel satisfied and energized after each bite.

Stunning Presentation: The vibrant colors of the ingredients make this dish as visually appealing as it is delicious, perfect for impressing family or guests.

Elevate your dining experience by serving it alongside a refreshing fruit salad, or for another delightful meal idea, check out my Acai Bowl Nutritious.

Honey Glazed Salmon Bowl Ingredients

For the Salmon
• Salmon – Main protein providing rich flavor; use skinless fillets for a lighter texture. Substitute with chicken for a different protein option.
• Avocado Oil – Enhances flavor when roasting; can be replaced with olive oil if needed.
• Honey – Adds sweetness and creates a glaze; maple syrup serves as a vegan alternative.
• Soy Sauce (or Tamari) – Adds depth and umami flavor; tamari is gluten-free.
• Sriracha – Introduces heat; adjust to taste or omit for milder flavor.

For the Base and Toppings
• Brown Rice – Serves as the hearty base for the bowl; quinoa or cauliflower rice can be used for a lower-carb option.
• Avocado – Adds creaminess and healthy fats; ensure it’s ripe for optimal texture.
• Cucumber – Provides freshness; any variety works, but English cucumber is preferred.

For the Dressing
• Olive Oil – Used in the cucumber salad for flavor enhancement; extra virgin is recommended.
• Cilantro – Fresh herb that adds brightness; parsley can substitute if desired.
• Lime Juice – Offers a zesty kick; fresh lime juice is preferred, but lemon can be used in a pinch.
• Light Mayo – Base for the sauce; plain yogurt can be a lighter option.
• Paprika – Adds color and a subtle smokiness to the dressing.

Step‑by‑Step Instructions for Honey Glazed Salmon Bowl

Step 1: Preheat the Oven
Begin by preheating your oven to 425°F (220°C). This high heat will allow for a perfect roast on your salmon, giving it a desirable crispiness. Make sure your oven rack is positioned in the middle to ensure even cooking.

Step 2: Prepare Marinade
In a medium mixing bowl, combine cubed salmon with avocado oil, honey, soy sauce, and sriracha. Use a spatula to gently toss the ingredients until the salmon is thoroughly coated in the sweet and savory marinade. Set it aside to let the flavors mingle while you prepare the next steps.

Step 3: Roast Salmon
Line a baking sheet with parchment paper for easy cleanup, then spread the marinated salmon evenly on the sheet. Place it in your preheated oven and roast for about 10 minutes, or until the salmon is opaque and flakes easily with a fork. The glossy, caramelized honey glaze will begin to form during this time.

Step 4: Broil for Crispiness
Once the salmon is roasted, switch your oven to broil. Broil the salmon for an additional 2-3 minutes, keeping a close eye to avoid burning. Look for a slight char on the edges, which adds a delightful texture and enhances the flavor of your Honey Glazed Salmon Bowl.

Step 5: Make Sauce
While the salmon is broiling, prepare the creamy sauce. In a small bowl, whisk together light mayo, lime juice, and paprika until smooth and well combined. Taste it and adjust the lime juice or paprika based on your preference for tanginess and smokiness.

Step 6: Prepare Cucumber Salad
In another mixing bowl, combine diced avocado, cucumber, olive oil, cilantro, and lime juice. Gently toss everything to coats the ingredients with the oil and lime. This refreshing cucumber salad will add a nice crunch to your Honey Glazed Salmon Bowl while balancing the richness of the salmon.

Step 7: Assemble Bowls
Now, it’s time to create your delicious Honey Glazed Salmon Bowl. Start with a generous portion of fluffy brown rice as the base. Layer on the roasted salmon, followed by the cucumber salad. Finally, drizzle the creamy sauce over the top for a burst of flavor, and your bowl is ready to impress!

Expert Tips for Honey Glazed Salmon Bowl

• Fresh Ingredients Matter: Always use the freshest fish and veggies to enhance the flavors of your Honey Glazed Salmon Bowl. Taste the difference!

• Uniform Salmon Cuts: Cut your salmon into uniform cubes to ensure even cooking. This prevents some pieces from being overcooked while others remain underdone.

• Watch the Broiling Time: Keep a close eye while broiling; salmon can burn quickly. A couple of minutes can make all the difference in achieving that perfect crispy glaze.

• Prep Ahead: Make your cucumber salad and sauce ahead of time. This not only saves you time during assembly but also lets the flavors develop beautifully.

• Adjust Spice Level: Customize your dish's heat by adjusting the sriracha or omitting it entirely for a milder flavor profile.

• Experiment with Proteins: Don’t hesitate to switch up the protein in this recipe! Chicken or tofu can offer delightful alternatives while keeping this bowl just as delicious.

What to Serve with Honey Glazed Salmon Bowl

Elevate your dinner experience with delightful pairings that complement the vibrant flavors of your bowl.

  • Creamy Mashed Potatoes: Gently whipped with butter, these potatoes offer a cozy, comforting base that pairs beautifully with the sweetness of the honey glaze.

  • Garlic Sautéed Greens: Bright, garlicky greens like spinach or kale add a nutritious, earthy element, enhancing the freshness of your bowl.

  • Refreshing Fruit Salad: A medley of juicy fruits like watermelon, pineapple, and berries can cleanse the palate and balance the richness of the salmon.

  • Quinoa Salad: Fluffy quinoa tossed with lemon, cherry tomatoes, and cucumbers provides a nutty complement and a healthy boost to your meal.

  • Honey-Citrus Dressing: Drizzle some over extra greens or a simple side salad for a zesty twist that echoes the honey glaze on the salmon.

  • Chilled White Wine: A crisp Chardonnay or light Sauvignon Blanc enhances the meal's sophistication, while balancing the dish's savory and sweet notes.

  • Sesame Noodles: Cold noodles tossed in sesame oil and garnished with green onions make a delightful, slightly nutty side that pairs wonderfully with the flavors of the bowl.

  • Toasted Pita Chips: For a satisfying crunch alongside your meal, serve pita chips with a light dip, bringing additional texture and flavor contrasts.

  • Coconut Rice: This subtly sweet and creamy rice complements the dish's tropical vibes, making every bite more exciting.

  • Ginger Lemonade: A refreshing drink that plays off the sweet honey glaze while providing a zesty freshness, perfect for a warm evening.

How to Store and Freeze Honey Glazed Salmon Bowl

Fridge: Store leftovers in an airtight container for up to 3-4 days to keep the flavors fresh while preventing spoilage.

Freezer: For longer storage, freeze the components separately—salmon, rice, and salad—up to 2 months. Thaw overnight in the fridge before reheating.

Reheating: To reheat, warm the salmon in the oven at 350°F (175°C) for about 10 minutes. Microwave the rice for 1-2 minutes until heated through. Enjoy your Honey Glazed Salmon Bowl like new!

Meal Prep: If prepping in advance, consider marinating the salmon and preparing the cucumber salad up to three days ahead.

Make Ahead Options

These Honey Glazed Salmon Bowls are fantastic for meal prep, allowing you to enjoy a gourmet meal even on your busiest nights! You can marinate the salmon up to 24 hours in advance to let those flavors develop beautifully. Additionally, the cucumber salad can be prepped up to 3 days ahead; just toss everything together and refrigerate in an airtight container to keep it fresh and flavorful. When it's time to serve, simply roast the marinated salmon and assemble your bowls with a base of brown rice, the vibrant cucumber salad, and a drizzle of the creamy sauce. With these make-ahead steps, you’ll save precious time and enjoy a delicious, wholesome dinner effortlessly!

Honey Glazed Salmon Bowl Variations

Feel free to get creative with your Honey Glazed Salmon Bowl and make it uniquely yours!

  • Chicken Swap: Substitute salmon with skinless chicken thighs for a hearty twist. The marinade will give it a delightful flavor; just roast until cooked through.

  • Tofu Alternative: Replace the protein with firm tofu, marinating it before roasting. It soaks up the flavors beautifully, offering a satisfying vegetarian option.

  • Veggie Boost: Add extra veggies like bell peppers or steamed broccoli to the mix. It not only enhances the nutrition but adds a delightful crunch and color!

  • Quinoa Base: Swap brown rice for quinoa for an additional protein kick. Quinoa also brings a nutty flavor that pairs perfectly with the salmon.

  • Cauliflower Rice: For a low-carb version, opt for cauliflower rice. It’s light, grain-free, and perfectly absorbs the glaze!

  • Spicy Kick: If you crave more heat, increase the sriracha or sprinkle some red pepper flakes on top. You’ll enjoy a fiery finish that awakens your taste buds!

  • Nutty Crunch: Toss in some toasted sesame seeds for a nutty crunch. They add texture and a hint of richness that elevates the dish.

  • Herbal Variation: Substitute cilantro with fresh parsley or even basil for a different herbaceous touch. Each herb will impart a unique flavor profile to your bowl.

These variations allow you to tailor the Honey Glazed Salmon Bowl to your liking! Whether you’re in the mood for something spicy or want to enhance its health factor, the possibilities are endless. If you're looking for more recipe inspiration, try my delicious Honey Garlic Chicken or our flavorful Pitaya Smoothie Bowl. Enjoy your culinary adventure!

Honey Glazed Salmon Bowl Recipe FAQs

How do I choose ripe salmon?
Absolutely! When selecting salmon, look for bright, shiny skin and firm, moist flesh. Fresh salmon should have a mild, ocean-like scent, while overly fishy odors are a sign of age. If you're purchasing fillets, check that there are no dark spots all over, as these indicate spoilage.

How should I store leftover Honey Glazed Salmon Bowl?
Very good question! Store any leftovers in an airtight container in the fridge for up to 3-4 days. Be sure to keep the salmon separate from the rice and salad if possible, to maintain their individual textures and flavors. When ready to enjoy, simply reheat the components until warmed through.

Can I freeze the Honey Glazed Salmon Bowl?
Absolutely! To freeze, separate the components—salmon, brown rice, and cucumber salad—into individual airtight containers. This allows for easy reheating later. You can freeze each component for up to 2 months. When you're ready to eat, thaw them overnight in the fridge, and reheat in the oven or microwave.

What can I do if my salmon is overcooked?
Oh no! If you find your salmon has turned out a bit overcooked and dry, there's hope. Try serving it with the creamy sauce to add moisture back into each bite. You can also flake the salmon and toss it into a salad or mix it into a grain bowl with some extra sauce or avocado for a delightful dish.

Is this recipe suitable for people with allergies?
Certainly! When considering allergies, be cautious of substitutions. Use tamari instead of soy sauce for a gluten-free option, and swap honey for maple syrup to make it vegan. Always double-check ingredient labels for any hidden allergens, especially in condiments like mayonnaise or sriracha. Enjoy making this bowl safe and delicious for everyone!

Can I use chicken or tofu instead of salmon?
Very much! Feel free to switch things up! For chicken, use skinless thighs marinated in the same honey glaze, cooking them until they reach an internal temperature of 165°F (75°C). If opting for tofu, press it to remove excess water, marinate it just like the salmon, then roast or grill until golden. Both alternatives will create a great variation of the Honey Glazed Salmon Bowl!

Honey Glazed Salmon Bowl

Delicious Honey Glazed Salmon Bowl Ready in 30 Minutes

This Honey Glazed Salmon Bowl is a quick, delicious dish featuring salmon, avocado, and cucumber.
Print Recipe Pin Recipe
Prep Time 10 minutes mins
Cook Time 20 minutes mins
Total Time 30 minutes mins
Servings: 2 bowls
Course: Dinner
Cuisine: American
Calories: 530
Ingredients Equipment Method Nutrition Notes

Ingredients
  

For the Salmon
  • 2 fillets Salmon Skinless fillets for lighter texture.
  • 1 tablespoon Avocado Oil Can be replaced with olive oil.
  • 2 tablespoons Honey Maple syrup can be used as a vegan alternative.
  • 2 tablespoons Soy Sauce Tamari is gluten-free.
  • 1 teaspoon Sriracha Adjust to taste or omit.
For the Base and Toppings
  • 1 cup Brown Rice Quinoa or cauliflower rice for lower-carb.
  • 1 medium Avocado Ensure ripe for optimal texture.
  • 1 cup Cucumber English cucumber preferred.
For the Dressing
  • 2 tablespoons Olive Oil Extra virgin recommended.
  • 2 tablespoons Cilantro Parsley can be substituted.
  • 2 tablespoons Lime Juice Fresh lime preferred.
  • 2 tablespoons Light Mayo Plain yogurt can be a lighter option.
  • 1 teaspoon Paprika

Equipment

  • Oven
  • Mixing Bowl
  • Baking Sheet
  • Spatula
  • Whisk

Method
 

Step-by-Step Instructions
  1. Preheat your oven to 425°F (220°C).
  2. Combine cubed salmon with avocado oil, honey, soy sauce, and sriracha in a medium bowl.
  3. Spread the marinated salmon on a lined baking sheet and roast for about 10 minutes.
  4. Switch to broil and broil the salmon for an additional 2-3 minutes.
  5. Prepare the creamy sauce by whisking together light mayo, lime juice, and paprika.
  6. In another bowl, combine diced avocado, cucumber, olive oil, cilantro, and lime juice for the cucumber salad.
  7. Assemble your bowl by starting with brown rice, adding salmon, cucumber salad, and drizzle sauce.

Nutrition

Serving: 1bowlCalories: 530kcalCarbohydrates: 42gProtein: 35gFat: 25gSaturated Fat: 4gPolyunsaturated Fat: 2gMonounsaturated Fat: 15gCholesterol: 60mgSodium: 850mgPotassium: 800mgFiber: 6gSugar: 8gVitamin A: 1200IUVitamin C: 10mgCalcium: 50mgIron: 2mg

Notes

Fresh ingredients enhance flavors; uniform cuts of salmon ensure even cooking; consider meal prepping ingredients in advance.

Tried this recipe?

Let us know how it was!

Homemade Spicy Tuna Rice Bowl – Quick, Flavor-Packed Delight

March 29, 2026 by Grace Snow Leave a Comment

“Quick! What’s for dinner?” This is the scenario I find myself in more often than I’d like to admit. Enter my Homemade Spicy Tuna Rice Bowl—a lifesaver for those chaotic weeknights when time is short, but a satisfying meal is still non-negotiable. With flavors that transport you to a cozy Japanese eatery, this recipe is not just quick and easy; it’s completely customizable, allowing you to tailor toppings to your cravings. Picture tender, fluffy rice cradling a creamy, zesty tuna mix, while crunchy cucumbers and savory nori enhance every comforting bite. In just minutes, you can whip up a filling dish that feels indulgent but keeps things simple. Ready to ditch the takeout menu and serve up your new favorite weeknight dinner? Let’s dive into the delicious details!

Why is this recipe a must-try?

Quick and Easy: When time is tight, this recipe comes to the rescue, delivering a delicious meal in under 30 minutes.

Customizable Toppings: Tailor your rice bowl to suit your taste; whether you love crunchy vegetables or creamy avocado, the options are endless.

Savory Comfort: Enjoy a hearty, umami-packed dish that rivals your favorite restaurant fare, right from your kitchen.

Healthful Ingredients: Packed with protein and flavor, it’s a nutritious choice for anyone looking to step away from fast food.

Crowd-Pleaser: Ideal for family dinners or gatherings, everyone will want to dig into this vibrant dish, making it a hit at any table!

Homemade Spicy Tuna Rice Bowl Ingredients

For the Rice
• White Rice – Stick with Nishiki medium grain for perfect texture and stickiness.

For the Tuna Mix
• Tuna – Use canned tuna for easy prep or sushi-grade tuna for a fresh touch.
• Mayonnaise – Kewpie is recommended for an authentic, creamy flavor.
• Sriracha – Adjust the amount based on your heat preference.
• Rice Vinegar – Essential for that tangy balance in your tuna mix.
• Sesame Oil – A little goes a long way in enhancing flavor and aroma.
• Soy Sauce – Different brands have varied saltiness; taste before adding.
• Honey – Balances out the spice; feel free to omit if you prefer.

For Garnishing
• Cucumber – Provides a refreshing crunch; slice thinly for texture.
• Nori – Adds an oceanic flavor; tear it into bite-sized pieces for ease.
• Green Onions – Brightens up the dish; slice on a bias for style.
• Black Sesame Seeds – Great for a crunchy finish and visual appeal.
• Furikake – Sprinkle for added umami depth and flavor.

This Homemade Spicy Tuna Rice Bowl is not only satisfying, but also allows you to get creative with your toppings!

Step‑by‑Step Instructions for Homemade Spicy Tuna Rice Bowl

Step 1: Prepare the Rice
Rinse 1.5 cups of white rice under cold running water until the water is clear, removing excess starch. In a medium saucepan, combine the rinsed rice with 2 cups of water, bring to a boil over medium heat, then reduce to low, cover, and let simmer for 15 minutes. Once done, remove from heat and let the rice rest for 5 minutes, allowing it to become fluffy and sticky.

Step 2: Make the Tuna Mixture
While the rice is cooking, drain and flake your canned tuna into a mixing bowl. Add in 2 tablespoons of mayonnaise, 1-2 tablespoons of sriracha (adjust to your heat preference), 1 tablespoon of rice vinegar, 1 teaspoon of sesame oil, 1 tablespoon of soy sauce, and a drizzle of honey. Gently mix with a fork until the ingredients are well combined, without mashing the tuna too much, maintaining a nice texture.

Step 3: Assemble the Bowl
Once the rice is cooked and rested, divide it evenly among serving bowls, creating a small well in the center of the rice. Spoon the spicy tuna mixture into each well, ensuring an even distribution of those delicious flavors. The creamy tuna should beautifully contrast with the fluffy rice for your Homemade Spicy Tuna Rice Bowl.

Step 4: Add Toppings
Now, let’s add the finishing touches! Layer sliced cucumber around the tuna and on top of the rice for that refreshing crunch. Sprinkle sliced green onions, torn nori pieces, black sesame seeds, and a dash of furikake over everything, adding flavor and visual appeal. Each topping brings its unique texture, enhancing your spicy tuna rice bowl.

Step 5: Serve Immediately
Your Homemade Spicy Tuna Rice Bowl is ready to be enjoyed! Serve it warm, so the flavors meld beautifully and the rice maintains its heat. The perfect cozy dinner awaits you, showcasing a medley of flavors and textures. Don’t wait too long—dive in while the rice is still warm and comforting!

What to Serve with Homemade Spicy Tuna Rice Bowl

Imagine a cozy dinner where vibrant flavors mingle and delight your senses, creating a meal that feels both indulgent and comforting.

  • Miso Soup: A warm, savory complement that enhances the umami experience, helping to round out your meal beautifully.

  • Seaweed Salad: Crisp and refreshing, this salad adds a delightful contrast to the bowl’s creaminess while bringing extra nutrients to your dinner table.

  • Edamame: Lightly salted and packed with protein, these tender pods add a satisfying crunch, making for a perfect snack or side.

  • Pickled Ginger: This zesty addition cleanses your palate between bites, brightening up every mouthful and transporting you to your favorite sushi restaurant.

  • Japanese Pickles (Tsukemono): Their tangy and crunchy texture provides a delicious contrast to the soft rice and creamy tuna, enriching the experience.

  • Sushi Rolls: For a more complete sushi-themed meal, pair with your favorite rolls, offering additional flavors to enhance your dining adventure.

  • Sake or Green Tea: Sip on a chilled sake or a steaming cup of green tea to elevate your meal. Both pair exceptionally well with Japanese flavors, enhancing your overall experience!

Expert Tips for Homemade Spicy Tuna Rice Bowl

  • Perfect Rice Texture: Always rinse the rice until the water runs clear to remove excess starch, ensuring fluffy, sticky rice for your bowl.

  • Tuna Drainage: Don’t drain canned tuna too thoroughly; leaving a bit of moisture helps the mayo blend smoothly without becoming pasty.

  • Heat Adjustment: Tailor the sriracha level to your personal taste. Start with a smaller amount and increase if you prefer more heat in your Homemade Spicy Tuna Rice Bowl.

  • Layering Toppings: Add toppings like cucumber and nori around the edges of the bowl for a colorful presentation. This not only looks appealing, but also creates a wonderful medley of textures with each bite.

  • Chill the Rice: Allow the rice to cool slightly before assembly. Hot rice can cause mayonnaise to separate, compromising that creamy texture you want in your tuna mix.

How to Store and Freeze Homemade Spicy Tuna Rice Bowl

Fridge: Store the spicy tuna mixture in an airtight container for up to 2 days. Keep the rice in a separate container for freshness and to prevent sogginess.

Freezer: While it's best enjoyed fresh, you can freeze the tuna mix for up to 1 month. Thaw in the fridge overnight before using, but it's not recommended to freeze the rice.

Reheating: For the rice, reheat in the microwave with a splash of water to prevent drying out. Warm the tuna mix gently on the stovetop or in the microwave, stirring occasionally.

Serving Tips: Assemble your Homemade Spicy Tuna Rice Bowl just before serving for optimal texture and flavor. Enjoy it warm for the best experience!

Homemade Spicy Tuna Rice Bowl Variations

Feel free to play with this recipe and make it your own; the possibilities are as exciting as they are delicious!

  • Protein Boost: Add edamame for an extra hit of protein and vibrant green color.
  • Creamy Avocado: Top with slices of ripe avocado for a buttery texture and rich flavor.
  • Veggie Crunch: Incorporate shredded carrots or crunchy radishes to up the freshness and crunch.
  • Spice It Up: Toss in a sprinkle of chili flakes or chopped jalapeños for an extra spicy kick.
  • Savory Miso: Mix in a teaspoon of miso paste in your tuna for a deeper umami flavor, akin to my Homemade Hot Chocolate warm up.
  • Herb Galore: Add fresh cilantro or mint to brighten the dish with herbal notes. Pair this with a refreshing Pitaya Smoothie Bowl for a full meal experience.
  • Noodle Twist: Serve the spicy tuna over cooked soba noodles instead of rice for a unique take that’s just as filling and flavorful.
  • Seaweed Variety: Experiment with different types of seaweed, such as wakame, to create a new flavor dimension.

These ideas are just the beginning! Don't hesitate to get creative with toppings and enjoy a delightful journey of flavors.

Make Ahead Options

These Homemade Spicy Tuna Rice Bowls are perfect for meal prep enthusiasts! You can prepare the tuna mixture up to 3 days in advance. Simply combine the drained tuna, mayonnaise, sriracha, rice vinegar, sesame oil, soy sauce, and honey in a bowl, mixing gently to maintain texture, and refrigerate in an airtight container. Additionally, you can cook the rice in advance and store it in the fridge for up to 4 days. When you're ready to serve, reheat the rice in the microwave, assemble the bowl with the chilled tuna mixture, and top with fresh garnishes like cucumber, green onions, and nori. This way, you’ll enjoy a delicious meal that’s just as satisfying, all while saving precious time on busy weeknights!

Homemade Spicy Tuna Rice Bowl Recipe FAQs

What type of rice should I use for the best texture?
For the most optimal stickiness, I highly recommend using Nishiki medium grain rice. This type of rice cooks beautifully, giving you that fluffy texture essential for your Homemade Spicy Tuna Rice Bowl. It's like a warm hug of comfort in every bite!

How do I store leftovers?
To keep things fresh, store the spicy tuna mixture in an airtight container in the fridge for up to 2 days. Make sure to keep the rice in a separate container to prevent it from getting soggy. Properly stored, the rice can last for up to 4 days, making it great for meal prep!

Can I freeze the tuna mixture?
Absolutely! You can freeze the spicy tuna mix for up to 1 month. Simply transfer it to a freezer-safe container, ensuring it’s well-sealed to avoid freezer burn. When you're ready to enjoy, thaw it in the fridge overnight. Just note that it’s best not to freeze the rice, as it tends to lose texture.

What if my tuna mixture is too dry?
If your tuna mix ends up a bit dry, don't worry! You can add a little extra mayonnaise or a dash of soy sauce to bring moisture back. Mix it gently until you achieve the desired creaminess. Just remember, it should flow nicely but still hold its form!

Are there any dietary considerations for this recipe?
Yes, if you're concerned about allergies, note that fish (tuna), soy (in soy sauce), and sesame (in oil and seeds) are common allergens. For a gluten-free version, opt for tamari instead of regular soy sauce. If you have a dietary restriction regarding mayo, you can substitute it with a vegan mayo option.

Can I customize the toppings?
Very! This dish is all about creativity. Feel free to add any veggies or toppings you like—edamame, avocado, or even pickled radish can elevate your Homemade Spicy Tuna Rice Bowl even more! The more, the merrier when it comes to customization!

Homemade Spicy Tuna Rice Bowl

Homemade Spicy Tuna Rice Bowl – Quick, Flavor-Packed Delight

Enjoy a quick and customizable Homemade Spicy Tuna Rice Bowl, a satisfying meal ready in under 30 minutes.
Print Recipe Pin Recipe
Prep Time 15 minutes mins
Cook Time 15 minutes mins
Resting Time 5 minutes mins
Total Time 35 minutes mins
Servings: 2 bowls
Course: Dinner
Cuisine: Japanese
Calories: 500
Ingredients Equipment Method Nutrition Notes

Ingredients
  

For the Rice
  • 1.5 cups white rice Nishiki medium grain recommended
For the Tuna Mix
  • 1 can tuna canned or sushi-grade for freshness
  • 2 tablespoons mayonnaise Kewpie recommended
  • 1-2 tablespoons sriracha adjust based on heat preference
  • 1 tablespoon rice vinegar for tangy balance
  • 1 teaspoon sesame oil enhances flavor
  • 1 tablespoon soy sauce taste before adding; varies by brand
  • 1 teaspoon honey omit if preferred
For Garnishing
  • 1 medium cucumber sliced thinly
  • 1 sheet nori torn into pieces
  • 2 tablespoons green onions sliced on a bias
  • 1 tablespoon black sesame seeds
  • 1 tablespoon furikake optional for umami flavor

Equipment

  • Medium saucepan
  • Mixing Bowl

Method
 

Preparation Steps
  1. Rinse the white rice under cold running water until the water is clear. Combine the rinsed rice with 2 cups of water in a medium saucepan, bring to a boil over medium heat, then reduce to low, cover, and simmer for 15 minutes. Remove from heat and let it rest for 5 minutes.
  2. Drain and flake the canned tuna into a mixing bowl. Add 2 tablespoons of mayonnaise, 1-2 tablespoons of sriracha, 1 tablespoon of rice vinegar, 1 teaspoon of sesame oil, 1 tablespoon of soy sauce, and a drizzle of honey. Mix gently with a fork until combined.
  3. Divide the cooked rice among serving bowls, creating a well in the center. Spoon the spicy tuna mixture into each well evenly.
  4. Layer sliced cucumber around the tuna and on top of the rice. Sprinkle with sliced green onions, torn nori, black sesame seeds, and furikake.
  5. Serve the bowl warm, ensuring the flavors meld beautifully.

Nutrition

Serving: 1bowlCalories: 500kcalCarbohydrates: 60gProtein: 25gFat: 20gSaturated Fat: 3gPolyunsaturated Fat: 5gMonounsaturated Fat: 5gCholesterol: 30mgSodium: 800mgPotassium: 500mgFiber: 3gSugar: 2gVitamin A: 500IUVitamin C: 5mgCalcium: 40mgIron: 2mg

Notes

Allow the rice to cool slightly before assembling to maintain the creamy texture of the tuna mix. Serve immediately for the best experience.

Tried this recipe?

Let us know how it was!

Savory Street Corn Chicken Rice Bowl for Flavorful Meals

March 29, 2026 by Grace Snow Leave a Comment

“Hey, what’s that delicious smell?” my friend exclaimed as I stirred a vibrant mixture in the kitchen. The aroma of smoky spices wafted through the air, instantly transporting us to the bustling streets of Mexico. This Smoky Street Corn Chicken Rice Bowl is the perfect blend of comforting home cooking and the zesty freshness of street food. With juicy marinated chicken thighs as the hearty base and a creamy, lime-infused corn topping, it's a dish that's not only a feast for the senses but also incredibly versatile. Ideal for quick meal prep and customizable to suit your taste, you'll love how this recipe makes dinnertime both simple and exciting. Are you ready to mix up your routine and explore this delightful fusion? Let’s dive in!

Why is this recipe a must-try?

Vibrant Flavors: The Smoky Street Corn Chicken Rice Bowl brings a fiesta of flavors to your dinner table, combining smoky, tangy, and creamy elements that create an unforgettable taste experience.

Customizable Toppings: With endless options for toppings like jalapeños or avocado, you can easily adapt this dish to suit everyone’s preferences.

Quick Meal Prep: Perfect for busy weeknights, this recipe allows you to whip up a satisfying meal in no time while still providing wholesome ingredients.

Healthy Alternatives: Whether you're swapping rice for quinoa or choosing grilled shrimp over chicken, this bowl is flexible enough to cater to various dietary needs without sacrificing flavor.

Crowd-Pleasing Delight: Impress family and friends with this colorful dish, reminiscent of delightful street food yet crafted in the comfort of your kitchen. Enjoy with a side of Bbq Chicken Rice for variety!

Street Corn Chicken Rice Bowl Ingredients

For the Chicken
• Chicken thighs – Juicy and flavorful protein; substitute with chicken breasts for a leaner option.
• Lime juice – Adds bright acidity and enhances overall flavor; use fresh for the best taste.
• Avocado oil – Keeps the chicken moist and adds subtle flavor; can be replaced with olive oil.
• Chili powder – Provides warmth and depth; adjust spice level as needed.
• Garlic powder – Adds savory depth; fresh garlic can be used as an alternative.
• Salt – Enhances all flavors in the dish.
• Black pepper – Adds mild heat and complexity.

For the Street Corn Topping
• Sweet corn kernels – Essential for the street corn topping; charring boosts smoky flavor. Frozen corn can be used if fresh is unavailable.
• Red onion – Adds crunch and pungency; can substitute with scallions for a milder taste.
• Sour cream – Provides creaminess and tang; use Greek yogurt for a lighter option.
• Mayonnaise – Adds richness; can omit or use a dairy-free alternative.
• Cotija cheese – Offers a salty, crumbly texture; substitute with feta or Parmesan if needed.
• Fresh cilantro – Garnish for freshness; omit if not preferred.

For the Base
• Cooked rice – The base for the bowl; replace with quinoa or cauliflower rice for a healthier alternative.

Step‑by‑Step Instructions for Street Corn Chicken Rice Bowl

Step 1: Marinate the Chicken
In a mixing bowl, combine fresh lime juice, avocado oil, chili powder, garlic powder, salt, and black pepper to create a marinade. Add the chicken thighs, ensuring they are evenly coated. Cover and let them marinate for 15-30 minutes at room temperature, allowing the flavors to infuse and the chicken to become tender.

Step 2: Cook the Chicken
Heat a large skillet over medium-high heat and add the marinated chicken thighs, cooking for about 8-10 minutes per side. Look for a golden brown crust and ensure the internal temperature reaches 165°F (75°C) for safe eating. Once cooked, remove from the heat and let the chicken rest before slicing it into strips.

Step 3: Prepare the Street Corn Topping
While the chicken rests, prepare the street corn topping by combining grilled or charred sweet corn kernels with diced red onion in a mixing bowl. Add sour cream, mayonnaise, Cotija cheese, and a sprinkle of chili powder. Mix well and season with salt, pepper, and a splash of lime juice for that delicious zesty kick typical of the Street Corn Chicken Rice Bowl.

Step 4: Reheat the Rice
In a small saucepan, add your cooked rice with a splash of water to help steam it. Warm the rice over low heat for about 5 minutes, stirring occasionally, until it’s fluffy and heated through. This will create a perfect base for your rice bowl to complement the chicken and street corn topping.

Step 5: Assemble the Bowls
Gather your ingredients and start layering your Street Corn Chicken Rice Bowl! In a bowl, add a generous scoop of warm rice, followed by sliced chicken on top, and generously spoon the street corn mixture over the chicken. For extra flair, sprinkle additional Cotija cheese and fresh cilantro, and serve with lime wedges for squeezing on top.

Make Ahead Options

These Smoky Street Corn Chicken Rice Bowls are perfect for meal prep enthusiasts! You can marinate the chicken thighs up to 24 hours in advance, ensuring maximum flavor infusion. Additionally, the street corn topping can be prepared and refrigerated for up to 3 days to keep that delightful smokiness intact. For best results, assemble the rice bowl just before serving to maintain the textures—reheat the rice with a splash of water until fluffy and warm. This way, when dinnertime rolls around, you’ll have a delicious, comforting meal ready with minimal effort, just as satisfying as if you made it from scratch!

Expert Tips for Street Corn Chicken Rice Bowl

  • Marinate for More Flavor: Longer marination, ideally up to 2 hours, enhances the chicken's flavor. Just keep an eye on the time to avoid mushiness.

  • Use a Meat Thermometer: This ensures your chicken thighs are cooked perfectly, with an internal temperature of 165°F (75°C), avoiding dry meat.

  • Char Your Corn: Grilling or charring the sweet corn kernels adds smoky depth. If using frozen corn, thaw it first for the best results.

  • Reheat Rice Properly: To maintain texture, reheat cooked rice with a splash of water and cover to steam it while warming.

  • Customize to Taste: Feel free to adjust the heat level with more or less chili powder, and experiment with toppings like jalapeños or avocado to make your Street Corn Chicken Rice Bowl unique!

Street Corn Chicken Rice Bowl Variations

Feel free to get creative with this recipe and adapt it to suit your taste buds while exploring delightful twists!

  • Shrimp Swap: Replace chicken with tender, grilled shrimp; they cook in just minutes and add a seafood flair to your bowl.

  • Tofu Alternative: For a plant-based option, use roasted tofu cubes instead of chicken; it absorbs flavors beautifully and provides a great texture.

  • Quinoa Base: Swap traditional rice with fluffy quinoa for a nutritious boost; it’s gluten-free and packed with protein, making your bowl even heartier.

  • Cauliflower Rice: For a lower-carb alternative, use cauliflower rice; it’s quick to prepare and gives a fresh lightness to the dish.

  • Pico de Gallo Topping: Add fresh pico de gallo on top for a burst of flavor; it brings a refreshing twist and colorful presentation to your bowl.

  • Zesty Avocado: Top with slices of creamy avocado to enhance the richness; you can also sprinkle some chili powder on top for an extra kick.

  • Spicy Kick: Include sliced jalapeños for a spicy flair; you can roast them beforehand for a smoky flavor that pairs well with the other ingredients.

  • Black Bean Boost: Mix in black beans for added protein and fiber; this transforms your bowl into a complete meal that’s comforting and filling.

If you're looking for even more flavor combinations, try out some other ideas like BBQ Chicken Rice with this Bbq Chicken Rice or dive into the crispy goodness of Corn Furikake Fried Rice.

Storage Tips for Street Corn Chicken Rice Bowl

Room Temperature: Keep any leftovers at room temperature for no longer than 2 hours to avoid bacteria growth, especially with the chicken.

Fridge: Store components separately in airtight containers for up to 3 days. This helps maintain the freshness of the chicken, rice, and street corn topping.

Freezer: You can freeze the marinated chicken for up to 3 months. Thaw in the fridge overnight before cooking for the best texture.

Reheating: When reheating, warm rice with a splash of water and cover to maintain moisture. The Street Corn Chicken Rice Bowl is best served fresh, but reheated leftovers can be delicious too!

What to Serve with Smoky Street Corn Chicken Rice Bowl

This colorful bowl bursting with flavors pairs beautifully with a variety of sides to create a memorable meal.

  • Crispy Tortilla Chips: These crunchy delights add texture and a satisfying crunch, perfect for scooping up the vibrant toppings.
  • Refreshing Cucumber Salad: A cool, zesty cucumber salad balances the hearty flavors and keeps the meal light and fresh.
  • Zesty Black Bean Salad: Packed with protein and fiber, this salad complements the smokiness of the chicken with its tangy dressing and fresh veggies.
  • Grilled Veggies: Lightly charred zucchini, bell peppers, and corn provide a smoky flavor that harmonizes with the main dish, enhancing its street food essence.
  • Guacamole with Fresh Lime: Creamy and rich, guacamole brings a smooth texture and a hit of freshness to round out the flavors of the bowl.
  • Agua Fresca: Pair your meal with a refreshing aqua fresca, like hibiscus or watermelon, to cleanse the palate and complement the dish's bold tastes.
  • Pineapple Salsa: Sweet and tangy, this topping adds a tropical twist that brightens every bite while echoing the lime notes in the rice bowl.
  • Roasted Sweet Potatoes: Their natural sweetness and creamy texture create a delightful contrast to the spiced chicken and rich street corn topping.
  • Churros for Dessert: End the meal on a sweet note with churros dusted in cinnamon sugar, a perfect homage to the Mexican street food culture.

Street Corn Chicken Rice Bowl Recipe FAQs

What type of chicken works best for this recipe?
Absolutely! While this recipe calls for juicy chicken thighs for their flavor and tenderness, you can easily substitute them with chicken breasts for a leaner option. Just keep in mind that chicken breasts may cook a bit faster, so adjust the cooking time accordingly.

How should I store leftovers from the Street Corn Chicken Rice Bowl?
Store any remaining components separately in airtight containers in the refrigerator for up to 3 days. This method keeps the chicken, rice, and street corn topping fresher for your next meal. I recommend reassembling your bowls just before serving to enjoy the perfect textures!

Can I freeze the components of this recipe?
Absolutely! You can freeze the marinated chicken for up to 3 months. Just place it in a freezer-safe bag, squeezing out excess air. To cook, thaw it in the fridge overnight before preparing. The cooked rice and street corn topping don’t freeze as well, but you can store them in the fridge to enjoy later.

What if my corn kernels aren’t sweet or the street corn topping is too tangy?
If your corn lacks sweetness, I recommend adding a pinch of sugar when mixing the street corn topping to balance the flavors. For too much tang, reduce the lime juice and sour cream slightly. Taste as you mix to customize the flavor to your liking!

Are there any dietary substitutes I can make for this dish?
Very! You can easily make the Street Corn Chicken Rice Bowl gluten-free by ensuring that your ingredients are certified gluten-free, such as using specific brands of mayonnaise. For dairy-free options, substitute the sour cream and Cotija cheese with Greek yogurt and a dairy-free cheese or nutritional yeast. The choices are endless!

What's the best way to prevent the chicken from drying out while cooking?
The key to juicy chicken is not only the marinade but also keeping an eye on the cooking time. Use a meat thermometer to check for the internal temperature, which should reach 165°F (75°C). I often let the chicken rest for a few minutes after cooking to help retain its juices before slicing. Enjoy!

Street Corn Chicken Rice Bowl

Savory Street Corn Chicken Rice Bowl for Flavorful Meals

This Smoky Street Corn Chicken Rice Bowl blends comforting home cooking with zesty street food for a versatile meal.
Print Recipe Pin Recipe
Prep Time 30 minutes mins
Cook Time 20 minutes mins
Marination Time 30 minutes mins
Total Time 1 hour hr 20 minutes mins
Servings: 4 bowls
Course: Dinner
Cuisine: Mexican
Calories: 600
Ingredients Equipment Method Nutrition Notes

Ingredients
  

For the Chicken
  • 1 lb chicken thighs substitute with chicken breasts for a leaner option
  • 3 tbsp lime juice use fresh for best taste
  • 2 tbsp avocado oil can be replaced with olive oil
  • 1 tbsp chili powder adjust spice level as needed
  • 1 tsp garlic powder fresh garlic can be used as an alternative
  • 1 tsp salt enhances all flavors in the dish
  • 1 tsp black pepper adds mild heat and complexity
For the Street Corn Topping
  • 2 cups sweet corn kernels charring boosts smoky flavor; frozen corn can be used
  • 1 small red onion can substitute with scallions for a milder taste
  • 1/2 cup sour cream use Greek yogurt for a lighter option
  • 1/4 cup mayonnaise can omit or use a dairy-free alternative
  • 1/2 cup Cotija cheese substitute with feta or Parmesan if needed
  • 1/4 cup fresh cilantro omit if not preferred
For the Base
  • 3 cups cooked rice replace with quinoa or cauliflower rice for a healthier alternative

Equipment

  • Mixing Bowl
  • Skillet
  • small saucepan

Method
 

Preparation
  1. In a mixing bowl, combine fresh lime juice, avocado oil, chili powder, garlic powder, salt, and black pepper to create a marinade. Add the chicken thighs, ensuring they are evenly coated. Cover and let them marinate for 15-30 minutes at room temperature.
  2. Heat a large skillet over medium-high heat and add the marinated chicken thighs, cooking for about 8-10 minutes per side until cooked through. Look for a golden brown crust and ensure the internal temperature reaches 165°F (75°C). Let the chicken rest before slicing.
  3. While the chicken rests, prepare the street corn topping by combining grilled or charred sweet corn kernels with diced red onion in a mixing bowl. Add sour cream, mayonnaise, Cotija cheese, and chili powder. Mix well, seasoning with salt, pepper, and lime juice.
  4. In a small saucepan, add your cooked rice with a splash of water. Warm the rice over low heat for about 5 minutes, stirring occasionally until fluffy and heated through.
  5. Layer your Street Corn Chicken Rice Bowl by adding a scoop of warm rice, followed by sliced chicken, and spooning the street corn mixture over the top. Garnish with Cotija cheese, fresh cilantro, and serve with lime wedges.

Nutrition

Serving: 1bowlCalories: 600kcalCarbohydrates: 70gProtein: 30gFat: 25gSaturated Fat: 5gPolyunsaturated Fat: 5gMonounsaturated Fat: 10gCholesterol: 100mgSodium: 800mgPotassium: 600mgFiber: 8gSugar: 6gVitamin A: 500IUVitamin C: 10mgCalcium: 15mgIron: 2mg

Notes

For best results, marinate the chicken longer and char the corn. Customize toppings to your preference.

Tried this recipe?

Let us know how it was!

Savory Taco Rice Bowl: Comfort Food with a Twist

March 29, 2026 by Grace Snow Leave a Comment

The kitchen buzzed with excitement as I chopped fresh ingredients, anticipation thick in the air. Everyone deserves a cozy, hearty meal that packs a punch, and nothing delivers quite like my Taco Rice Bowl. This recipe effortlessly marries comfort food with vibrant flavors, featuring seasoned ground beef, fluffy rice, and fresh toppings—a feast for both the eyes and the taste buds. Whether you're whipping this up for a busy weeknight or impressing guests, this dish is quick to prepare and fully customizable to cater to different tastes. Plus, if you’re going for a veggie twist, swapping in mushrooms or plant-based crumbles is a breeze. Curious to dive into this delicious creation? Let’s get cooking!

Why is Taco Rice Bowl a Must-Try?

Hearty, this Taco Rice Bowl is the ultimate comfort food that brings warmth and satisfaction in every bite. Customizable, easily switch ingredients to create your perfect meal, whether you prefer beef or a vegetarian option. Quick preparation means you can enjoy this dish without spending hours in the kitchen. Vibrant toppings elevate the bowl with color and flavor, making it not just delicious, but visually appealing too. Leftovers? They store perfectly and can be enjoyed for an easy lunch. Pair it with Furikake Fried Rice for a delightful experience, or serve alongside some tortilla chips and salsa for a fun twist!

Taco Rice Bowl Ingredients

Experience hearty flavors in every bite with these Taco Rice Bowl ingredients!

For the Beef

  • Ground Beef – Provides protein and richness; use seasoned sautéed mushrooms for a vegetarian option.
  • Olive Oil – Essential for cooking the beef and aromatics, enhancing flavor without substitutes.
  • Onion – Adds sweetness; shallots can be a milder substitute if preferred.
  • Garlic – Enhances flavor; garlic powder can work in a pinch (1/4 tsp per clove).
  • Chili Powder – Provides heat; substitute with taco seasoning or cayenne for a spicy kick.
  • Ground Cumin – Gives earthiness; skip if unavailable, but flavor will be less complex.
  • Paprika – Offers mild sweetness and color; use smoked paprika for a rich flavor.
  • Oregano (dried) – Adds herbal notes; Italian seasoning can be an adequate substitute.
  • Salt and Black Pepper – Enhance overall flavor; adjust to taste preferences.
  • Water – Use for simmering; substitute with beef or vegetable broth for added depth.

For the Rice Base

  • Long Grain White Rice – The backbone of the dish; swap with brown rice for more fiber and a nutty taste.

For Fresh Toppings

  • Cherry Tomatoes – Bring freshness and acidity; can be swapped with regular diced tomatoes or salsa.
  • Shredded Lettuce – Adds crunch; try spinach for a different texture.
  • Corn Kernels – Sweetness; fresh or frozen is perfect—no substitutes needed.
  • Black Beans – Provide fiber and protein; pinto beans are a suitable alternative.
  • Cheddar Cheese – Adds creaminess and tang; use dairy-free cheese for a vegan twist.
  • Fresh Cilantro – Lifts the dish with freshness; omit if preferred, parsley can work too.
  • Lime – Brightens the dish; always opt for fresh lime for the best flavor.
  • Sour Cream – Creamy finish; for a healthier alternative, Greek yogurt works wonderfully.

Enjoy crafting your Taco Rice Bowl, where every ingredient sings in harmony!

Step‑by‑Step Instructions for Taco Rice Bowl

Step 1: Prepare the Rice
Begin by rinsing 1 cup of long grain white rice under cold water until the water runs clear, removing excess starch. Next, cook the rice in a rice cooker or pot with 3 cups of water, bringing it to a boil. Once boiling, lower the heat, cover, and let it simmer for about 18 minutes or until all the water is absorbed. Remove from heat and let it stand covered for 5 minutes.

Step 2: Cook the Taco Beef
While the rice is cooking, heat 1 tablespoon of olive oil in a large skillet over medium heat. Add one chopped onion and sauté for 3-4 minutes until softened and translucent. Stir in 2 cloves of minced garlic and cook for another minute. Then, add 1 pound of ground beef, breaking it apart with a spatula. Cook for 6-8 minutes until browned and cooked through. Drain excess fat.

Step 3: Season the Meat
Once the beef is cooked, return the skillet to medium heat. Sprinkle in 1 tablespoon of chili powder, 1 teaspoon of ground cumin, 1 teaspoon of paprika, 1 teaspoon of dried oregano, and salt and pepper to taste. Mix well to coat the meat evenly with the spices. Pour in ½ cup of water, stirring to combine. Let it simmer for 5 minutes, allowing the flavors to meld and the mixture to thicken slightly.

Step 4: Assemble the Bowl
Take the perfectly fluffy rice and fluff it with a fork. Divide the rice evenly among three or four serving bowls, creating a generous base. Top each bowl with a hearty portion of the seasoned beef mixture, allowing it to nestle into the rice.

Step 5: Add Fresh Toppings
Now, let your creativity shine as you add fresh toppings. Scatter halved cherry tomatoes, a handful of shredded lettuce, corn kernels, and black beans over each bowl. Sprinkle on shredded cheddar cheese and fresh cilantro for an extra burst of flavor.

Step 6: Finish with Lime and Cream
For a zesty finish, squeeze fresh lime juice over each Taco Rice Bowl, adding brightness that enhances the flavors. If you desire a creamy element, add a dollop of sour cream or Greek yogurt on top. Serve with lime wedges on the side for extra flavor, and enjoy the vibrant and hearty Taco Rice Bowl!

What to Serve with Hearty Taco Rice Bowl?

Bring your friends and family together over a cozy meal that’s just begging to be enjoyed!

  • Tortilla Chips and Salsa: A crunchy pair that adds texture and a burst of flavor, perfect for scooping up all the delicious elements of the bowl.

  • Guacamole: Creamy and rich, this dip complements the Taco Rice Bowl beautifully while adding a refreshing twist with every bite.

  • Mexican Street Corn: Grilled, sweet, and slathered in lime, chili, and cotija, it enhances the bowl's flavors and creates a true fiesta on your plate.

  • Pico de Gallo: Fresh and zesty, it's a fantastic, vibrant topping that adds a crispy bite to your hearty meal.

  • Cilantro Lime Rice: A fragrant side that echoes the lime notes in the bowl, providing a lovely harmony of flavors. It’s lightweight and versatile.

  • Chili Lime Roasted Vegetables: Roasting brings out the natural sweetness, and the chili-lime seasoning elevates these veggies, making them a colorful complement.

  • Mexican Hot Chocolate: For a sweet finish, this rich beverage with hints of cinnamon and chili spice will warm hearts and stomachs, rounding off your meal perfectly.

  • Flan: This creamy caramel dessert adds a decadent touch to your meal, offering a delightful contrast to the savory rice bowl.

  • Margaritas: Celebrate your meal with this refreshing cocktail that pairs wonderfully with the spices in your Taco Rice Bowl, enhancing the whole dining experience!

Make Ahead Options

These Taco Rice Bowls are ideal for busy weeknights, allowing you to savor delicious home-cooked meals without the last-minute rush! You can prepare the seasoned taco beef and cook the rice up to 24 hours in advance; just store them in separate airtight containers in the refrigerator to maintain quality. When you're ready to serve, simply reheat the beef on the stovetop over medium heat while fluffing the rice in the microwave for a few minutes. Assemble the bowls with your favorite fresh toppings just before serving to keep everything vibrant and crisp. This way, you enjoy all the delightful flavors of your Taco Rice Bowl without the fuss on hectic days!

Taco Rice Bowl Variations

Unlock an exciting world of flavors by customizing your Taco Rice Bowl to fit your tastes and dietary needs!

  • Vegetarian Delight: Replace ground beef with a hearty mix of sautéed mushrooms or plant-based crumbles for a satisfying dish full of umami flavor.

  • Spicy Kick: Add diced jalapeños or a dash of hot sauce to the beef mixture, turning up the heat for those who crave a fiery experience.

  • Brown Rice Switch: Swap out long grain white rice for brown rice to add nuttiness and extra fiber, making this bowl heartier and more nutritious.

  • Fresh Greens: Replace shredded lettuce with fresh spinach or arugula; not only do they bring a peppery flavor, but they also add a vibrant touch to your bowl.

  • Cheesy Varieties: Experiment with different cheeses, like pepper jack for a spicy twist or a creamy queso fresco to elevate the dish's richness.

  • Creamy Alternatives: For a dairy-free option, use avocado or cashew cream as a topping—these additions provide creaminess without dairy.

  • Nutty Crunch: Top with chopped nuts like pistachios or almonds to add an unexpected crunch and a rich flavor profile that contrasts wonderfully with other ingredients.

  • Flavorful Broth: Instead of water, use beef or vegetable broth while cooking the rice for an added depth of flavor that complements every bite.

Dive into your kitchen and create your own version of this comforting dish! If you're looking for more delicious ideas, consider trying out my Acai Bowl Nutritious for breakfast or pairing this meal with some crispy Fish Taco Bowls for a delightful dinner experience!

How to Store and Freeze Taco Rice Bowl

Fridge: Store leftovers in an airtight container for up to 3 days. Make sure the dish cools to room temperature before sealing to maintain freshness.

Freezer: For longer storage, freeze the seasoned beef and rice separately in airtight containers for up to 3 months. Thaw in the fridge overnight before reheating.

Reheating: Reheat gently in the microwave or on the stovetop over low heat, adding a splash of water for moisture if needed. Enjoy your Taco Rice Bowl warm!

Room Temperature: It's best to avoid keeping this dish at room temperature for more than 2 hours to ensure food safety.

Expert Tips for Taco Rice Bowl

  • Perfect Rice: Always rinse the rice until the water runs clear to remove excess starch, ensuring fluffy, non-sticky rice.

  • Don't Overcrowd: When cooking the beef, avoid overcrowding the skillet to promote even browning and prevent steaming, enhancing flavor.

  • Taste and Adjust: Start with the basic amount of spices listed and adjust according to taste preferences, ensuring your Taco Rice Bowl hits the right notes for your palate.

  • Vegetarian Substitutions: If opting for a vegetarian Taco Rice Bowl, consider seasoning your mushrooms or plant-based crumbles well to maintain the flavor profile of the original dish.

  • Fresh Ingredients: Use fresh lime and toppings for the best flavor; they elevate the whole bowl, making your meal even more vibrant and satisfying.

  • Storage Tip: Store any leftovers in an airtight container in the fridge for up to 3 days, making it easy to reheat for a quick and comforting meal.

Taco Rice Bowl Recipe FAQs

What is the best way to select ripe ingredients for my Taco Rice Bowl?
Absolutely! When choosing your cherry tomatoes, look for vibrant, glossy ones without dark spots or blemishes. Fresh cilantro should be bright green and fragrant, while lettuce should have crisp leaves with no wilting. For the lime, choose one that feels slightly heavy for its size, which indicates juiciness.

How should I store my Taco Rice Bowl leftovers?
You can store leftover Taco Rice Bowl in an airtight container in the fridge for up to 3 days. Be sure to let it cool completely before sealing to maintain its freshness. When ready to enjoy, reheat gently in the microwave or on the stovetop, adding a splash of water if necessary to keep it moist.

Can I freeze my Taco Rice Bowl?
Certainly! You can freeze the seasoned beef and rice separately in airtight containers for up to 3 months. To do this, once cooked and cooled, portion the beef and rice into individual servings, label with the date, and place them in the freezer. Thaw in the fridge overnight before reheating thoroughly.

What if my rice turns out sticky or mushy?
To avoid sticky rice, be sure to rinse it well under cold water before cooking to remove excess starch. If it does become mushy, it means too much water was used or it was overcooked. In the future, ensure the water is fully absorbed before letting it sit covered without the heat.

Are there any dietary considerations I should keep in mind?
Yes! For those with dairy allergies or following a vegan diet, you can easily substitute the cheddar cheese with a dairy-free option or omit it altogether. Similarly, if you're making this dish for pets, make sure to avoid ingredients like onion and garlic, which are harmful to dogs and cats.

How can I make this Taco Rice Bowl spicier or milder?
Very! Adjust the heat level by using more or less chili powder during cooking. If you prefer mild flavors, start with a smaller amount and gradually increase until it meets your taste. On the other hand, for extra heat, add diced jalapeños or hot sauce as toppings before serving.

Taco Rice Bowl

Savory Taco Rice Bowl: Comfort Food with a Twist

This Taco Rice Bowl delivers hearty comfort food with vibrant flavors, perfect for easy weeknight dinners.
Print Recipe Pin Recipe
Prep Time 10 minutes mins
Cook Time 30 minutes mins
Resting Time 5 minutes mins
Total Time 45 minutes mins
Servings: 4 bowls
Course: Dinner
Cuisine: Mexican
Calories: 600
Ingredients Equipment Method Nutrition Notes

Ingredients
  

For the Beef
  • 1 lb Ground Beef Can substitute with seasoned sautéed mushrooms for a vegetarian option.
  • 1 tbsp Olive Oil For cooking.
  • 1 dashed Onion Chopped; shallots can be a milder substitute.
  • 2 cloves Garlic Minced; can use garlic powder (1/4 tsp per clove).
  • 1 tbsp Chili Powder For heat; can substitute with taco seasoning or cayenne.
  • 1 tsp Ground Cumin Earthy flavor.
  • 1 tsp Paprika Smoked paprika adds richness.
  • 1 tsp Oregano (dried) Can substitute with Italian seasoning.
  • Salt and Black Pepper To taste.
  • 1/2 cup Water Or use beef or vegetable broth.
For the Rice Base
  • 1 cup Long Grain White Rice Can substitute with brown rice.
For Fresh Toppings
  • 1 cup Cherry Tomatoes Halved; can substitute with diced tomatoes or salsa.
  • 2 cups Shredded Lettuce Can substitute with spinach.
  • 1 cup Corn Kernels Fresh or frozen.
  • 1 cup Black Beans Can substitute with pinto beans.
  • 1 cup Cheddar Cheese Or use dairy-free cheese for a vegan option.
  • 1 cup Fresh Cilantro Can omit or replace with parsley.
  • 1 juiced Lime For brightness.
  • 1/2 cup Sour Cream Can substitute with Greek yogurt.

Equipment

  • Rice cooker
  • Large skillet
  • measuring cups
  • Measuring Spoons
  • Spatula

Method
 

Step-by-Step Instructions for Taco Rice Bowl
  1. Rinse rice under cold water until water runs clear. Cook rice in a rice cooker or pot with 3 cups of water until absorbed, approximately 18 minutes. Let stand for 5 minutes covered.
  2. Heat olive oil in a large skillet. Sauté chopped onion for 3-4 minutes. Add minced garlic and cook for another minute. Add ground beef, cooking until browned, about 6-8 minutes, and drain excess fat.
  3. Return skillet to medium heat. Add chili powder, cumin, paprika, oregano, salt, and pepper. Stir in water and let simmer for 5 minutes.
  4. Fluff the cooked rice with a fork. Divide among serving bowls and top evenly with seasoned beef.
  5. Add fresh toppings: halved cherry tomatoes, shredded lettuce, corn, and black beans. Top with cheddar cheese and cilantro.
  6. Squeeze fresh lime juice over each bowl, adding sour cream or Greek yogurt. Serve with lime wedges.

Nutrition

Serving: 1bowlCalories: 600kcalCarbohydrates: 70gProtein: 35gFat: 20gSaturated Fat: 8gPolyunsaturated Fat: 2gMonounsaturated Fat: 8gTrans Fat: 1gCholesterol: 85mgSodium: 800mgPotassium: 800mgFiber: 10gSugar: 5gVitamin A: 2000IUVitamin C: 25mgCalcium: 300mgIron: 3.5mg

Notes

Store leftovers in an airtight container for up to 3 days. Freezing instructions available for longer storage.

Tried this recipe?

Let us know how it was!

Delicious Sticky Chicken Rice Bowls: A Flavorful Weeknight Delight

March 29, 2026 by Grace Snow Leave a Comment

As I stood in my kitchen savoring the aroma of garlic and soy sauce swirling together, I couldn’t help but feel a sense of triumph. I’ve just whipped up these Delicious Sticky Chicken Rice Bowls, a recipe that seamlessly blends convenience and flavor in under 30 minutes! One of the best parts of this dish is how customizable it is—you can switch up the protein with juicy chicken thighs, succulent shrimp, or even tofu for a delightful vegetarian twist. Plus, it’s meal-prep-friendly, making it a perfect option for busy weeknights. Imagine a comforting bowl filled with tender chicken glazed in lusciousness over fluffy jasmine rice, topped with fresh green onions and sesame seeds. Ready to dive into a flavor-packed adventure that will have everyone asking for seconds? Let’s get cooking!

Why Are These Chicken Rice Bowls Unique?

Convenience at Your Fingertips: This recipe comes together in just 30 minutes—perfect for busy weeknights when time is of the essence!
Customizable Goodness: You can effortlessly swap proteins like chicken thighs, tofu, or shrimp, tailoring the dish to your family’s preferences.
Meal Prep Hero: Ideal for batch cooking, these Sticky Chicken Rice Bowls can be stored separately for easy weekday lunches or dinners.
Rich, Layers of Flavor: The sweet and savory combination of soy sauce, honey, and garlic delivers an irresistible glaze that keeps everyone coming back for more.
Healthy Choices: Packed with protein and the option to add colorful veggies, this bowl not only satisfies but nourishes, making it a fantastic weeknight meal solution.
If you're looking for other meal prep options, don't forget to check out my Honey Garlic Chicken for another delicious take that’s sure to please!

Delicious Sticky Chicken Rice Bowls Ingredients

• Here’s everything you need for your delicious sticky chicken rice bowls that are sure to delight!

For the Chicken

  • 1 lb boneless skinless chicken thighs – Juicy and flavorful; can substitute with chicken breasts, tofu, or shrimp for varied tastes.
  • 1 tbsp vegetable oil – For sautéing; any neutral oil will do just fine.
  • Salt and black pepper to taste – Enhances the flavor; adjust according to your preference.

For the Sauce

  • 1/3 cup low-sodium soy sauce – Provides savory depth; use tamari for a gluten-free option.
  • 1/4 cup honey – Adds sweetness and stickiness; maple syrup can stand in for a vegan option.
  • 3 cloves garlic (minced) – Infuses the dish with aroma and flavor; fresh garlic is highly recommended.
  • 1 tbsp rice vinegar – Balances the flavors with its acidity; can be replaced with apple cider vinegar.
  • 1 tbsp sriracha (optional) – Adds a kick of spice; adjust based on your personal heat preference.
  • 1 tbsp cornstarch – Thickens the sauce; ensure to mix it with water for a slurry before adding to the pan.
  • 2 tbsp water – Used to create the cornstarch slurry for an excellent sauce texture.

For the Rice Bowl

  • 2 cups cooked jasmine rice – A fluffy base for your bowls; brown rice or cauliflower rice can be substituted.
  • 2 green onions (sliced) – For garnish; adds freshness and a nice crunch.
  • 1 tbsp toasted sesame seeds – For finishing touches; can be swapped with crushed peanuts or omitted if desired.

Gather these ingredients and you're all set to create these delicious sticky chicken rice bowls that will surely wow your family!

Step‑by‑Step Instructions for Delicious Sticky Chicken Rice Bowls

Step 1: Heat the Oil
Begin by heating 1 tablespoon of vegetable oil in a large skillet over medium-high heat. Allow the oil to shimmer for about 1 minute, signaling it's ready for cooking. This will create a perfect base for our delicious sticky chicken rice bowls, ensuring the chicken gets a nice sear and locks in that juicy flavor.

Step 2: Sauté the Chicken
Season 1 pound of diced boneless skinless chicken thighs with salt and black pepper. Add the chicken to the hot skillet and sauté for 6-7 minutes, stirring occasionally, until the chicken is golden brown and cooked through. You'll know it’s ready when it reaches an internal temperature of 165°F and has a delightful golden hue.

Step 3: Prepare the Sauce
While the chicken cooks, whisk together in a small bowl 1/3 cup low-sodium soy sauce, 1/4 cup honey, 3 minced garlic cloves, 1 tablespoon rice vinegar, and 1 tablespoon sriracha if using. Once the chicken is cooked, pour this flavorful sauce mixture over the chicken in the skillet, ensuring every bite of the chicken will be packed with flavor.

Step 4: Thicken the Sauce
Mix 1 tablespoon of cornstarch with 2 tablespoons of water in a separate bowl to create a slurry. Stir this slurry into the pan with the chicken and sauce. Cook for an additional 2-3 minutes, stirring frequently until the sauce thickens and becomes glossy, enveloping the chicken in a sweet, sticky coating that is key to these delicious sticky chicken rice bowls.

Step 5: Assemble the Bowls
Spoon 2 cups of cooked jasmine rice into your serving bowls as the base. Top each bowl generously with the sticky chicken, ensuring to drizzle some of that luscious sauce from the pan over the rice. The contrast of fluffy rice and the sticky chicken creates an appealing texture that will make your meal truly satisfying.

Step 6: Garnish and Serve
Finish off the sticky chicken rice bowls by garnishing with sliced green onions and a sprinkle of toasted sesame seeds. This not only adds a pop of color but also enhances the overall flavor profile. Serve the bowls immediately, and watch as everyone digs in, captivated by the burst of tastes and textures!

What to Serve with Delicious Sticky Chicken Rice Bowls?

Imagine transforming your delicious sticky chicken rice bowls into a feast that tantalizes all the senses and satisfies every craving.

  • Steamed Broccoli: A vibrant green side, it adds crunch and nutrients, perfectly balancing the sweetness of the chicken.
  • Pickled Cucumbers: Their tangy bite cuts through the richness, providing a refreshing contrast that makes each bite of chicken even more enjoyable.
  • Crispy Egg Rolls: These golden delights bring a crispy texture to the meal; filled with veggies or protein, they complement the sticky rice bowls splendidly.
  • Miso Soup: Warm, umami-rich soup that soothes the soul, it adds depth and tradition, enhancing your Asian-inspired feast.
  • Garlic Noodles: Enhance your meal with silky noodles tossed in garlic and soy, harmonizing beautifully with the flavors of the chicken.
  • Sesame Ginger Dressing Salad: A fresh, crisp salad drizzled with a sesame ginger dressing offers a delightful contrast, adding a splash of brightness to the meal.
  • Chilled Sake: A bottle of chilled sake pairs wonderfully; its smoothness complements the rich flavors of the chicken dish beautifully.
  • Chocolate Mousse: End on a sweet note with a light and creamy dessert that melts in your mouth, serving as a delightful endcap to the meal.

Delicious Sticky Chicken Rice Bowls: Customize Your Dish

Feel free to take liberties with this recipe, adding your favorite ingredients for a truly personal touch!

  • Quinoa Swap: Replace jasmine rice with quinoa for a nutty flavor and extra protein boost. The fluffy texture perfectly complements the sticky chicken.
  • Vegan Delight: Use crispy tofu instead of chicken if you’re aiming for a vegetarian meal that’s just as satisfying and flavorful. It will soak up the delicious sauce wonderfully!
  • Extra Veggies: Toss in broccoli, bell peppers, or snap peas for a vibrant, nutritious pop of color and crunch in every bite. Adding veggies not only boosts health but makes it visually appealing!
  • Gluten-Free Twist: Swap out the soy sauce for tamari, keeping the dish gluten-free without sacrificing flavor. This simple change can make all the difference for dietary needs.
  • Spicy Kick: If you crave heat, add sliced fresh chili peppers during cooking or increase the amount of sriracha in the sauce for an extra kick that enhances the whole experience.
  • Rice Variety: Consider using brown rice or cauliflower rice for a healthier alternative. Both options provide unique flavors and textures, making the dish exciting!
  • Sweet Substitution: Trade the honey for maple syrup to create a vegan-friendly glaze that doesn’t compromise on the sweet stickiness we love in this dish!
  • Nutty Finish: Crushed peanuts or sunflower seeds make a great topping alternative to sesame seeds for a delightful crunch and added richness to your flavor profile.

For more delicious options, check out my Honey Garlic Chicken or indulge in the flavor of the Crock Pot Chicken for more family-friendly meals!

How to Store and Freeze Delicious Sticky Chicken Rice Bowls

  • Fridge: Refrigerate leftovers in an airtight container for up to 4 days. This ensures your delicious sticky chicken rice bowls stay fresh and flavorful for easy weekday meals.
  • Freezer: For longer storage, freeze the chicken and rice separately in airtight bags for up to 2 months. This helps maintain the textures when you're ready to enjoy them again.
  • Reheating: To reheat, defrost overnight in the fridge, then warm on the stove or in the microwave until heated through. A splash of water can help revive the rice’s fluffiness!
  • Meal Prep Tip: Packing chicken and rice separately prevents sogginess and allows for quick assembly when you're ready to enjoy your meal!

Expert Tips for Delicious Sticky Chicken Rice Bowls

  • Cooking Chicken: Ensure your chicken pieces are uniform in size for even cooking; this helps avoid any undercooked bits.
  • Perfect Sauce: Always mix the cornstarch with water beforehand to prevent clumps in your sticky sauce, ensuring smooth and glossy results.
  • Meal Prep Friendly: To maintain freshness, store the sticky chicken and rice separately in airtight containers; this keeps the rice fluffy and prevents sogginess.
  • Customizable Heat: Adjust the amount of sriracha based on your family's spice tolerance; starting with less can help gauge the right level of heat.
  • Vegetable Additions: Incorporate veggies like bell peppers or broccoli during the sautéing process for added nutrients and color, making your delicious sticky chicken rice bowls even more delightful!

Make Ahead Options

These Delicious Sticky Chicken Rice Bowls are a fantastic choice for busy home cooks looking to save time! You can prep the chicken and sauce components up to 24 hours in advance, storing them separately in airtight containers in the refrigerator. For best results, cook the chicken but leave it unglazed, then combine with the sauce just before reheating to maintain that sticky quality. Additionally, the rice can be cooked a day ahead and kept in the refrigerator. When you're ready to serve, simply reheat everything in a skillet over medium heat, warm the rice, and assemble your bowls with fresh toppings for a satisfying meal that feels just as delicious as when freshly made!

Delicious Sticky Chicken Rice Bowls Recipe FAQs

What is the best way to choose ripe ingredients for this recipe?
Absolutely! When picking your chicken, look for thighs that are plump and pink without any dark spots or unpleasant odors. For garlic, choose firm, unblemished bulbs, and make sure your green onions are bright green and crisp for the best flavor and presentation.

How should I store leftovers of the sticky chicken rice bowls?
To keep your Delicious Sticky Chicken Rice Bowls fresh, refrigerate leftovers in an airtight container for up to 4 days. This helps retain their tasty goodness for your next meal! Just remember, it's best to store the chicken and rice separately to prevent the rice from becoming soggy.

Can I freeze this dish for later?
Yes, you can! For optimal freezing, pack the sticky chicken and rice in airtight containers or freezer bags, keeping them separated. They can be frozen for up to 2 months. When you're ready to enjoy them again, simply defrost in the fridge overnight, then reheat on the stove or in the microwave until heated through!

What should I do if my sauce is too thin?
No worries! If your sauce isn't thickening as desired, make a cornstarch slurry by mixing an additional tablespoon of cornstarch with two tablespoons of cold water. Stir this mixture into the sauce and cook for another couple of minutes while stirring constantly. This will help achieve that delicious sticky consistency we love!

Are there any dietary considerations for allergies or pets regarding this recipe?
Very good question! For those managing gluten sensitivities, opt for tamari instead of soy sauce as your gluten-free alternative. If you have a soy allergy, consider using coconut aminos for a similar flavor without the soy. As for pets, it’s best to avoid sharing this dish, especially due to the honey content and seasoning, as many spices aren’t pet-friendly. Always keep their diet in mind when cooking!

Can I add other vegetables to the sticky chicken rice bowls?
The more, the merrier! You can absolutely enhance your bowls with colorful veggies like bell peppers, broccoli, or snap peas. Simply sauté them with the chicken during the cooking process for added nutrients and texture. This makes your Delicious Sticky Chicken Rice Bowls not only more vibrant but also more nutritious!

Delicious Sticky Chicken Rice Bowls

Delicious Sticky Chicken Rice Bowls: A Flavorful Weeknight Delight

These Delicious Sticky Chicken Rice Bowls are a quick, customizable meal that's packed with flavor, perfect for busy weeknights.
Print Recipe Pin Recipe
Prep Time 10 minutes mins
Cook Time 20 minutes mins
Total Time 30 minutes mins
Servings: 4 bowls
Course: Dinner
Cuisine: Asian
Calories: 450
Ingredients Equipment Method Nutrition Notes

Ingredients
  

For the Chicken
  • 1 lb boneless skinless chicken thighs Juicy and flavorful; can substitute with chicken breasts, tofu, or shrimp for varied tastes.
  • 1 tbsp vegetable oil For sautéing; any neutral oil will do just fine.
  • Salt and black pepper to taste; enhances the flavor; adjust according to your preference.
For the Sauce
  • 1/3 cup low-sodium soy sauce Provides savory depth; use tamari for a gluten-free option.
  • 1/4 cup honey Adds sweetness and stickiness; maple syrup can stand in for a vegan option.
  • 3 cloves garlic minced; infuses the dish with aroma and flavor; fresh garlic is highly recommended.
  • 1 tbsp rice vinegar Balances the flavors with its acidity; can be replaced with apple cider vinegar.
  • 1 tbsp sriracha optional; adds a kick of spice; adjust based on your personal heat preference.
  • 1 tbsp cornstarch Thickens the sauce; ensure to mix it with water for a slurry before adding to the pan.
  • 2 tbsp water Used to create the cornstarch slurry for an excellent sauce texture.
For the Rice Bowl
  • 2 cups cooked jasmine rice A fluffy base for your bowls; brown rice or cauliflower rice can be substituted.
  • 2 stalks green onions sliced; for garnish; adds freshness and a nice crunch.
  • 1 tbsp toasted sesame seeds For finishing touches; can be swapped with crushed peanuts or omitted if desired.

Equipment

  • Large skillet

Method
 

Step-by-Step Instructions
  1. Heat the Oil. Begin by heating 1 tablespoon of vegetable oil in a large skillet over medium-high heat. Allow the oil to shimmer for about 1 minute, signaling it's ready for cooking.
  2. Sauté the Chicken. Season 1 pound of diced boneless skinless chicken thighs with salt and black pepper. Add the chicken to the hot skillet and sauté for 6-7 minutes, stirring occasionally, until golden brown and cooked through. Ensure it reaches an internal temperature of 165°F.
  3. Prepare the Sauce. While the chicken cooks, whisk together in a bowl 1/3 cup low-sodium soy sauce, 1/4 cup honey, 3 minced garlic cloves, 1 tablespoon rice vinegar, and 1 tablespoon sriracha if using. Pour this mixture over the cooked chicken.
  4. Thicken the Sauce. Mix 1 tablespoon of cornstarch with 2 tablespoons of water in a separate bowl to create a slurry. Stir this slurry into the pan with the chicken and sauce, cooking for an additional 2-3 minutes until the sauce thickens.
  5. Assemble the Bowls. Spoon 2 cups of cooked jasmine rice into your serving bowls. Top each bowl with the sticky chicken and drizzle some of the sauce over the rice.
  6. Garnish and Serve. Finish the bowls by garnishing with sliced green onions and toasted sesame seeds. Serve immediately.

Nutrition

Serving: 1bowlCalories: 450kcalCarbohydrates: 60gProtein: 25gFat: 15gSaturated Fat: 3gPolyunsaturated Fat: 1gMonounsaturated Fat: 10gCholesterol: 80mgSodium: 600mgPotassium: 500mgFiber: 2gSugar: 15gVitamin A: 500IUVitamin C: 2mgCalcium: 25mgIron: 2mg

Notes

For best results, ensure chicken pieces are of uniform size for even cooking. Adjust spice levels to personal preference and store leftovers separately for meal prep.

Tried this recipe?

Let us know how it was!
  • « Previous Page
  • 1
  • …
  • 29
  • 30
  • 31
  • 32
  • 33
  • …
  • 216
  • Next Page »

Welcome!

Hi, I’m Grace, a Sydney-based home cook with a passion for bold flavors and trending ingredients. Whether you’re a busy beginner or a seasoned foodie, you’ll find dishes here that are fresh, fun, and full of flavor.

More about me

Popular Recipes

  • Chocolate Cake Pops
    Delightful Chocolate Cake Pops for Your Sweet Cravings
  • Cottage Cheese Banana Bread
    Cottage Cheese Banana Bread: Moist, Protein-Packed Delight
  • Flourless Oat Waffles
    Flourless Oat Waffles for a Quick, Healthy Breakfast Boost
  • Cinnamon Waffles
    Fluffy Cinnamon Waffles with Dreamy Whipped Cream Bliss

Footer

↑ back to top

About

  • Privacy Policy
  • Disclaimer
  • Terms & Conditions

Newsletter

  • Sign Up! for emails and updates

Contact

  • About me
  • Contact me

Copyright © 2025 TastyTrendIngredients