tastytrendingredients

  • Home
  • Recipes
    • Appetizers
    • Breakfast
    • Dessert
    • Dinner
    • Drinks
    • Salads
    • Snacks
    • Soups
  • About me
  • Contact
menu icon
go to homepage
  • Home
  • Recipes
    • Appetizers
    • Breakfast
    • Dessert
    • Dinner
    • Drinks
    • Salads
    • Snacks
    • Soups
  • About me
  • Contact
search icon
Homepage link
  • Home
  • Recipes
    • Appetizers
    • Breakfast
    • Dessert
    • Dinner
    • Drinks
    • Salads
    • Snacks
    • Soups
  • About me
  • Contact
×

Cozy Turkey Lentil Soup to Warm Your Heart and Soul

October 25, 2025 by Grace Snow Leave a Comment

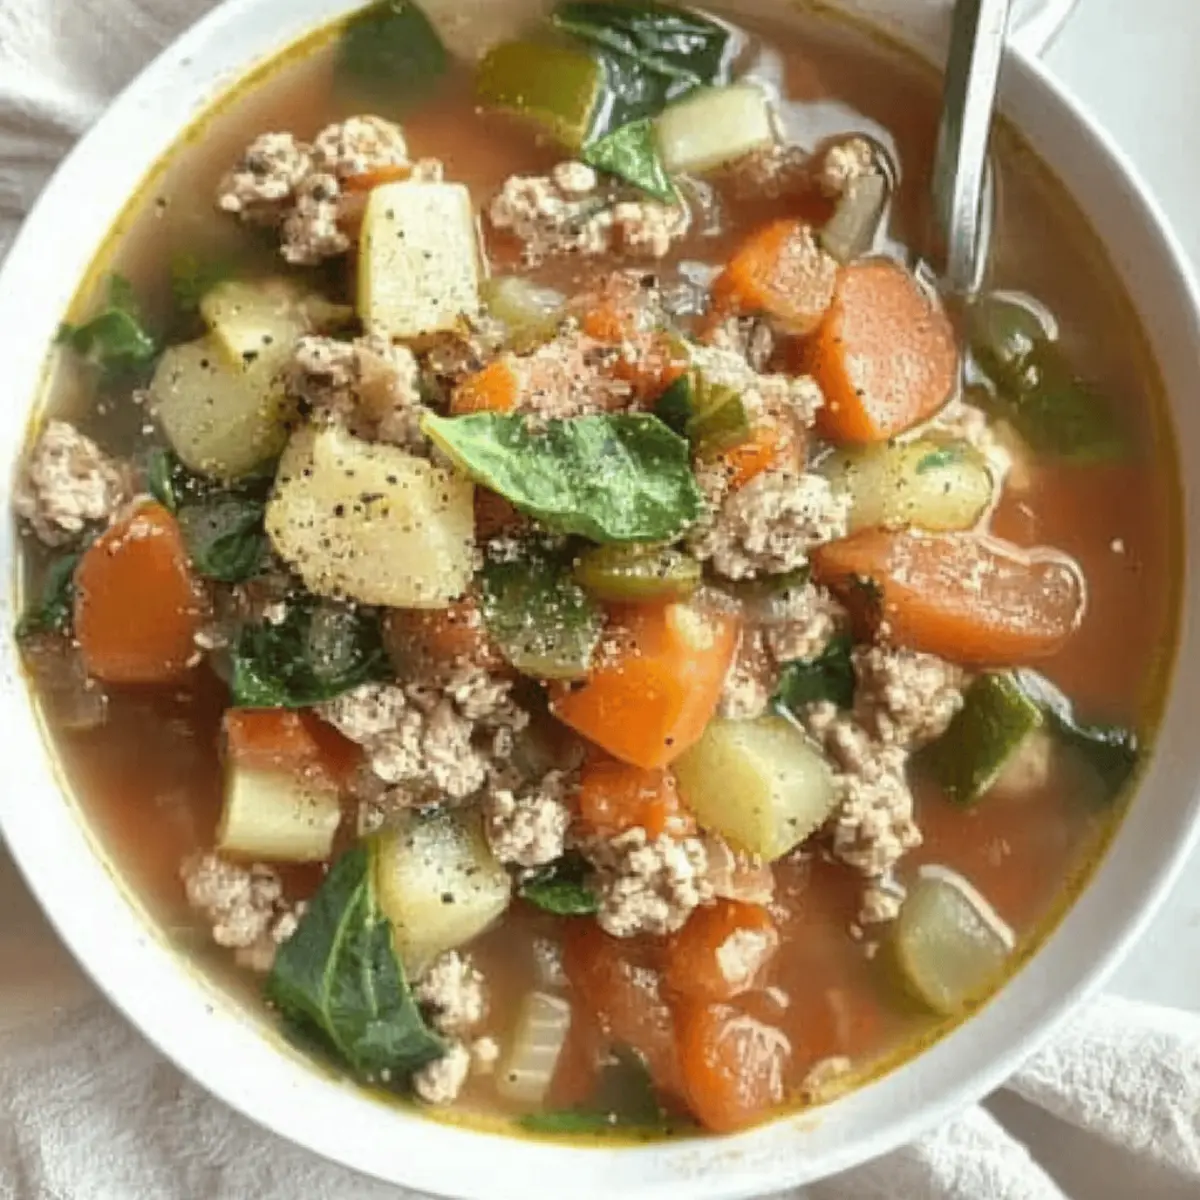
As I stood in my kitchen, the aromatic lure of simmering herbs and spices enveloped me, drawing me in like a warm hug on a chilly day. This Cozy Leftover Turkey Lentil Soup is my go-to recipe for turning those Thanksgiving leftovers into a comfort-food masterpiece. Not only is it a delightful way to use up extra turkey, but its nourishing combination of lentils and vegetables also ensures you’ll feel good while enjoying every spoonful. With a prep time that won’t take longer than the first holiday movie you plan to watch, this recipe offers both convenience and satisfaction, making it perfect not just for the holidays, but for any weeknight craving. Curious about how a few simple ingredients can transform into a bowl of cozy goodness? Let’s dive in!

Why is Turkey Lentil Soup the ultimate comfort meal?

Comfort in a Bowl: This Turkey Lentil Soup is your go-to for that cozy experience, blending leftovers into something utterly delicious.
Endless Flavor Potential: Customize it easily with spicy jalapeños or fresh herbs for a twist that shakes things up!
Perfectly Hearty: Each spoonful offers a satisfying mix of tender turkey, rich lentils, and creamy potatoes, making it deliciously filling.
Quick and Easy: With a simple preparation method and minimal cooking time, it’s a speedy solution for any night.
Crowd-Pleasing Appeal: Serve it to family or friends, and watch everyone gather around the table, just like a classic homemade meal.
For more comforting soup ideas, don’t miss out on our Asparagus Soup Healthy and Santa Soup Savory for even more cozy recipes!

Turkey Lentil Soup Ingredients

Are you ready to create a cozy masterpiece? Here are the ingredients you'll need!

For the Soup

  • Extra-Virgin Olive Oil – Adds richness and helps sauté the aromatics; feel free to use any cooking oil you have on hand.
  • Yellow Onion – Provides a foundational flavor base; shallots or leeks work as great substitutes.
  • Garlic Cloves – Enhances flavor with a fragrant aroma; always opt for fresh for the best result.
  • Fire-Roasted Rotel Tomatoes – Adds a spicy and smoky dimension; for a milder flavor, substitute with plain diced tomatoes plus hot sauce.
  • Green Lentils – Forms the heart of the soup, packed with protein and fiber; brown lentils can also be used as an alternative.
  • Leftover Turkey – Key protein source that absorbs all those lovely flavors; ground turkey or chicken can be used in a pinch.
  • Chicken Broth – Provides a liquid base and depth of flavor; you can choose low-sodium options or even vegetable broth for a vegetarian twist.
  • Bay Leaf – Adds depth to the flavor profile; remember to remove it before serving!
  • Yukon Gold Potatoes – Contributes comforting texture and thickness; other waxy potatoes like red potatoes will work just as well.
  • Salt and Black Pepper – Essential for seasoning; adjust to your taste for maximum flavor!

Feel the warmth as you gather these ingredients, and get ready to embrace the comfort of your very own Turkey Lentil Soup!

Step‑by‑Step Instructions for Cozy Leftover Turkey Lentil Soup

Step 1: Heat the Oil
In a large Dutch oven, heat 2 tablespoons of extra-virgin olive oil over medium heat until it shimmers, about 2 minutes. This will create a rich base for your Turkey Lentil Soup. Observe the oil closely as it warms up; it should not smoke but rather glisten, indicating it’s ready for the next step.

Step 2: Sauté Aromatics
Add one chopped yellow onion to the pot and sauté for 5 minutes until it becomes translucent, stirring occasionally. The aroma will start to fill your kitchen! Then, add 3 minced garlic cloves and continue sautéing for another minute, ensuring they become fragrant but do not brown.

Step 3: Incorporate the Tomatoes
Stir in one can of fire-roasted Rotel tomatoes, ensuring they combine well with the onion and garlic mixture. This adds a delicious smoky flavor that complements the turkey. Next, include 1 cup of green lentils, 2 cups of shredded leftover turkey, and 4 cups of chicken broth. Mix everything together thoroughly.

Step 4: Simmer the Soup
Toss in one bay leaf, which will infuse the soup with depth. Bring the mixture to a gentle simmer over medium heat, then reduce to low and cover partially. Allow it to cook for about 50 minutes, stirring occasionally, until the lentils are tender but not mushy.

Step 5: Add Potatoes
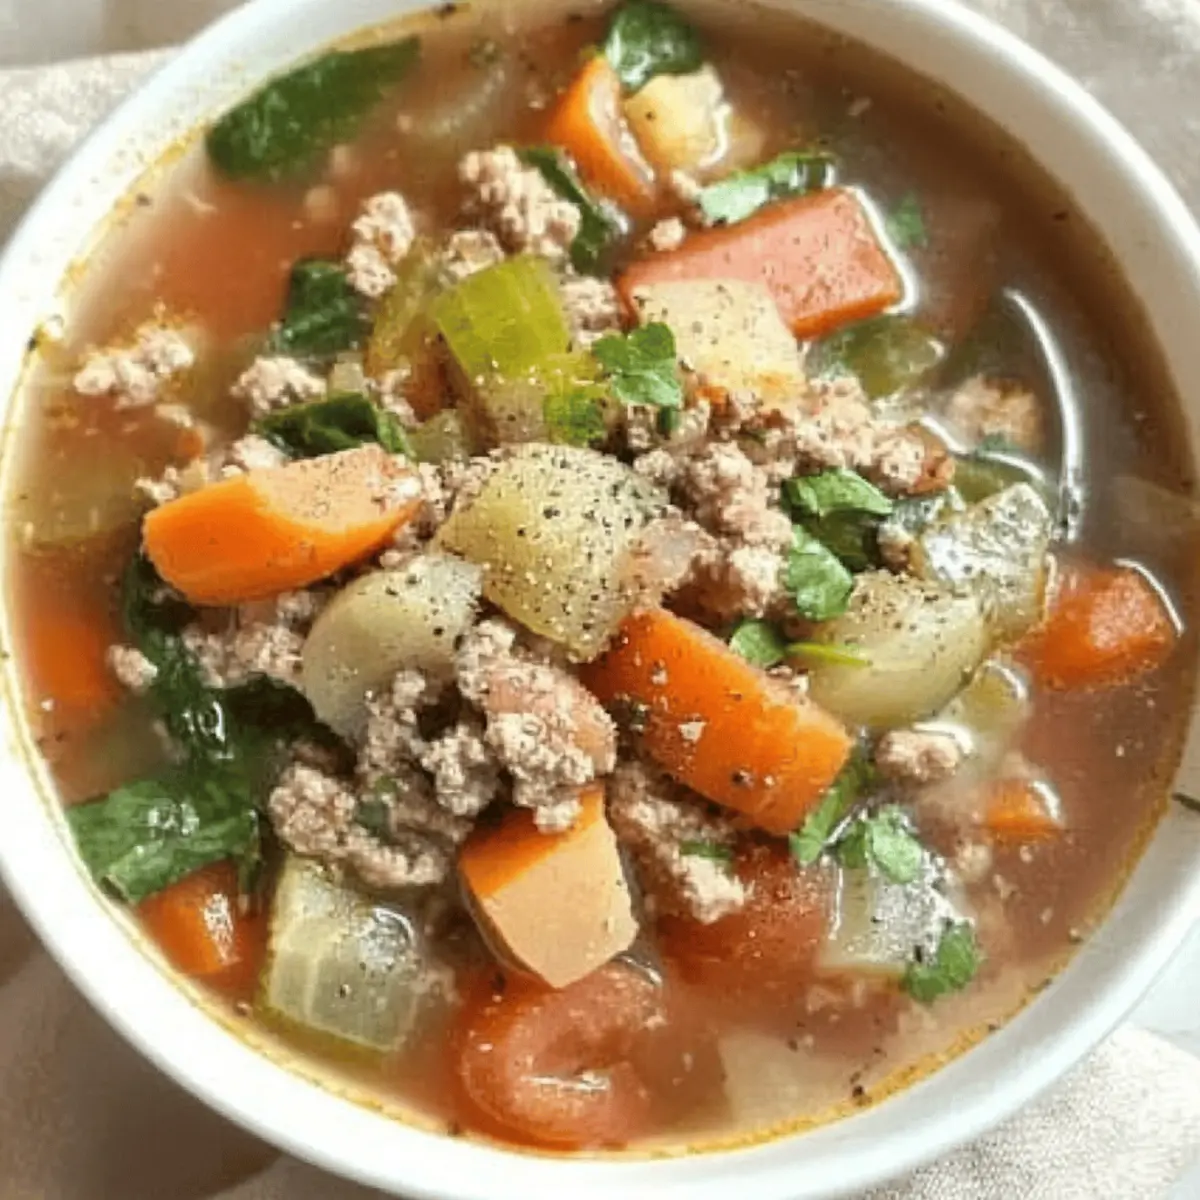
After the lentils are cooked to perfection, add 2 diced Yukon Gold potatoes to the soup. Continue simmering uncovered for another 10 minutes. The potatoes will soften and thicken the soup slightly, enhancing that comforting texture we love in a cozy Turkey Lentil Soup.

Step 6: Final Seasoning
Once the potatoes are tender, remove the bay leaf from the pot. Season your soup generously with salt and black pepper to taste. Give it a good stir to make sure the flavors meld together beautifully. Taste the soup and adjust the seasoning according to your preference.

Step 7: Serve the Soup
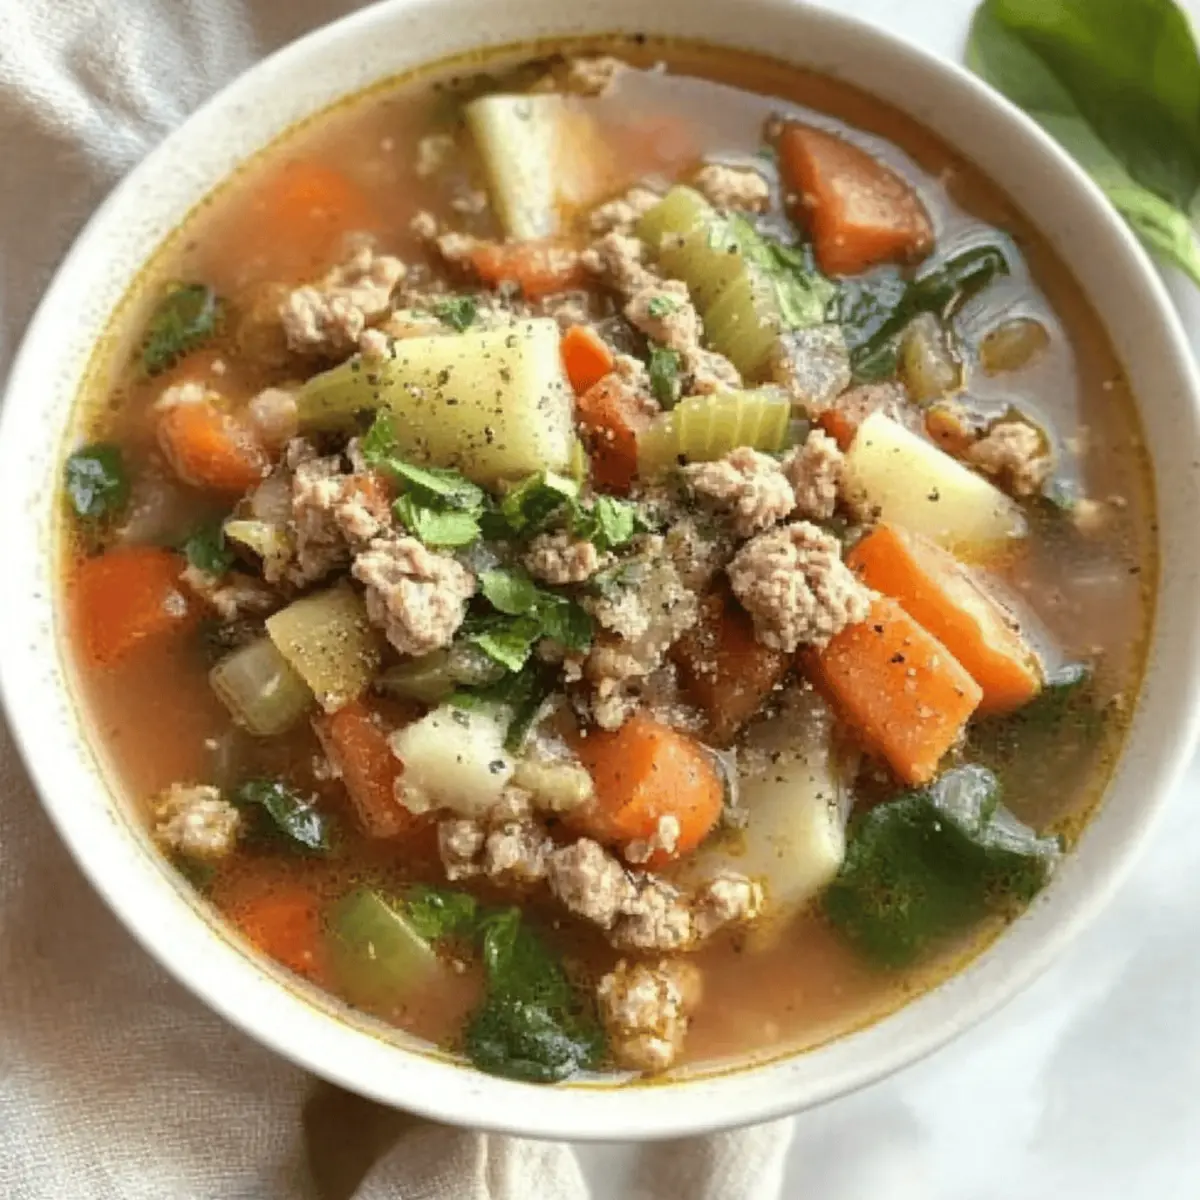
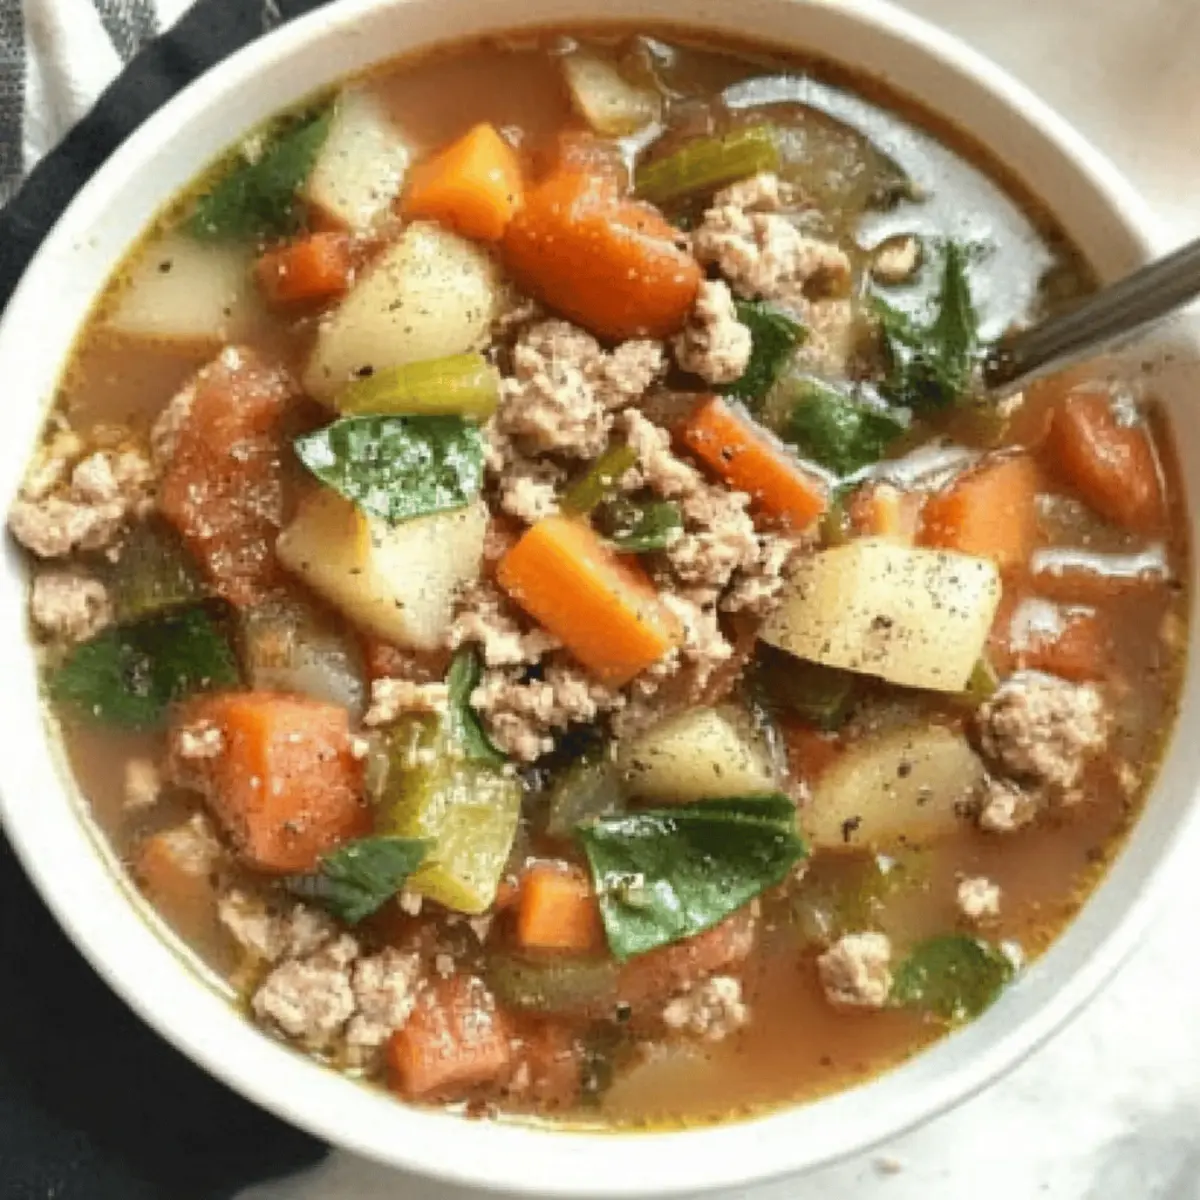
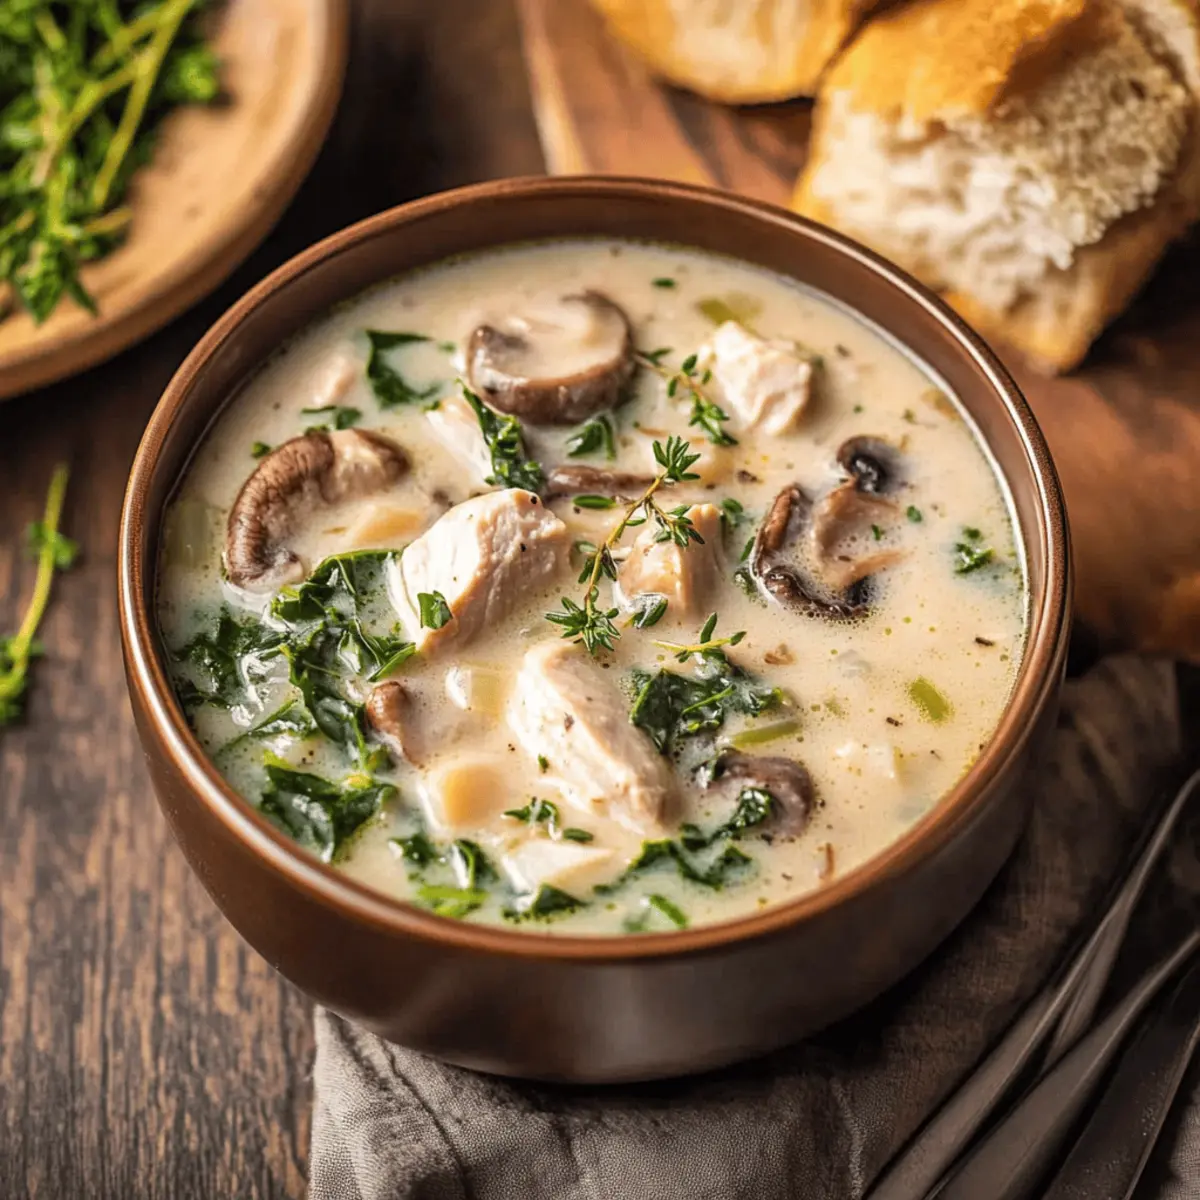
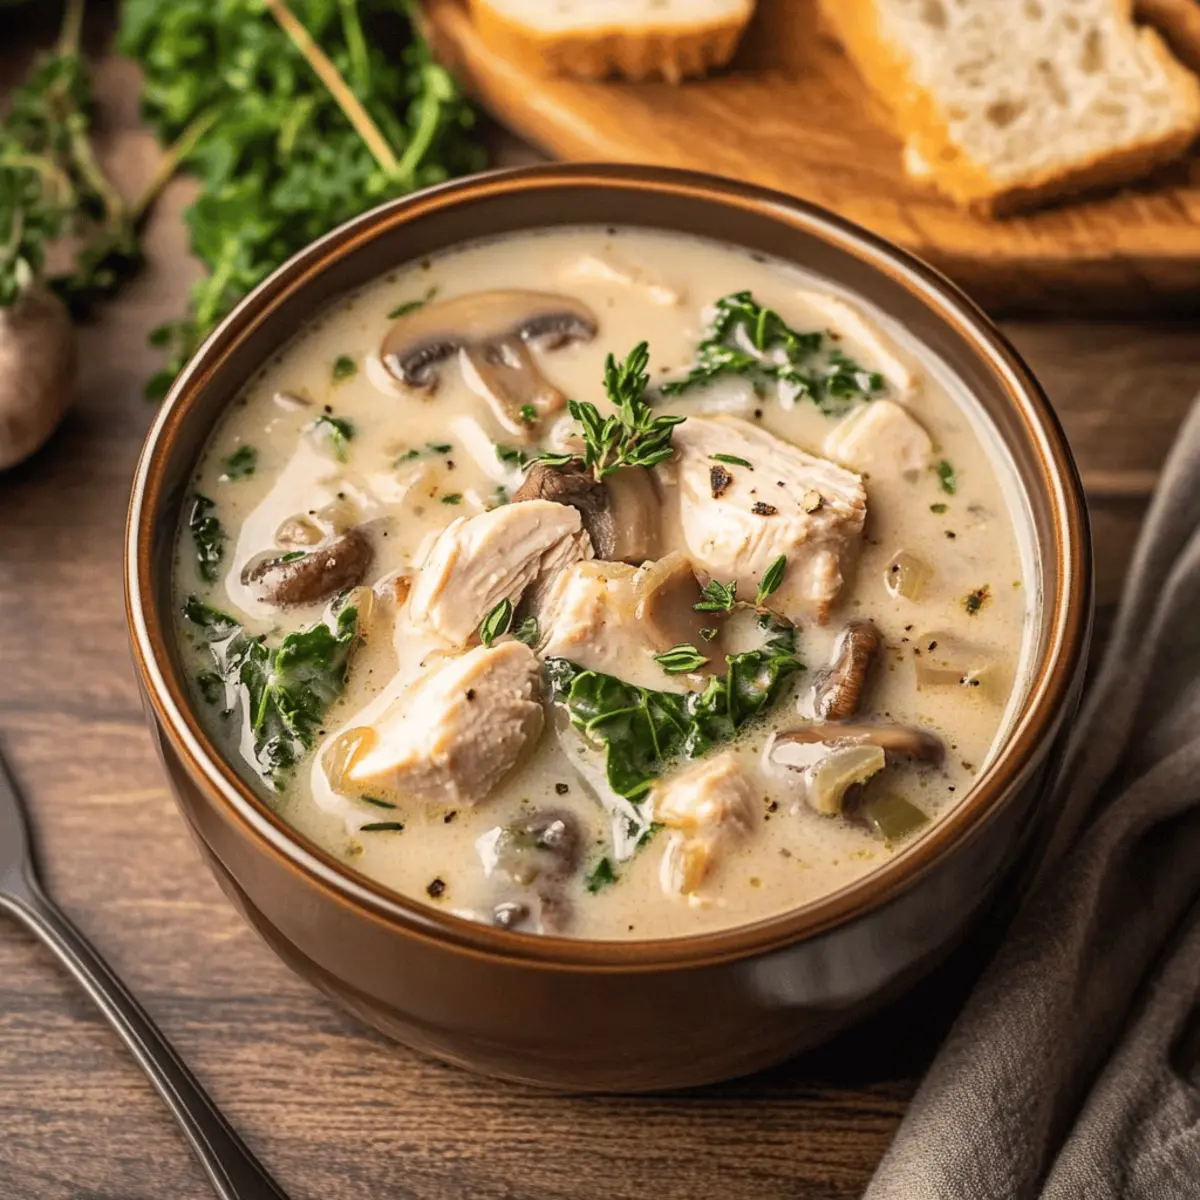
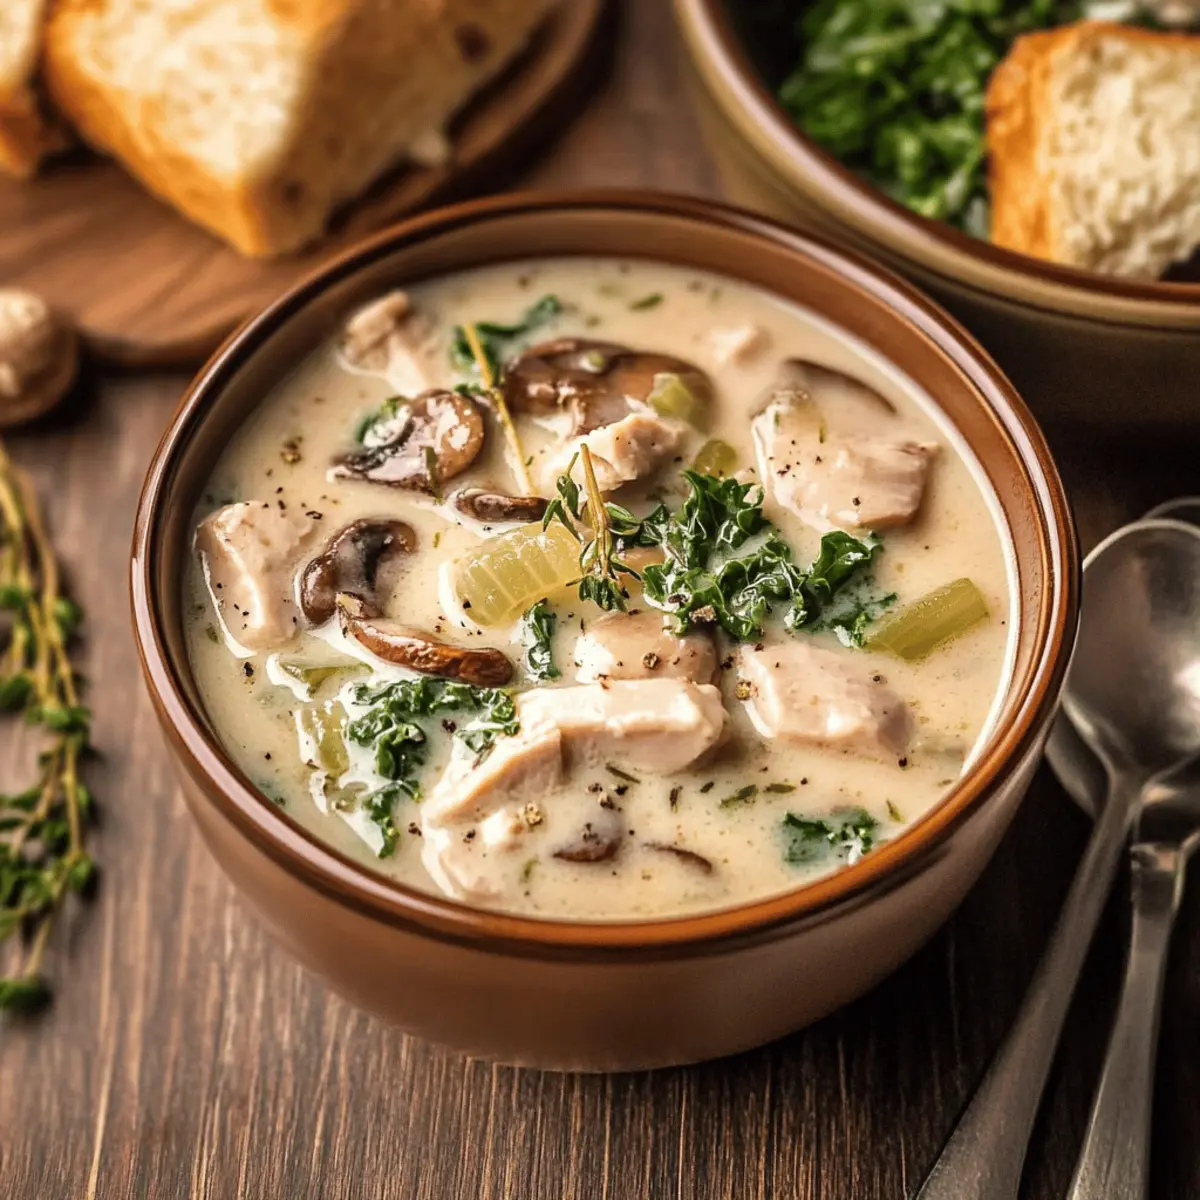
Ladle the warm, comforting Turkey Lentil Soup into bowls and serve hot. This delicious soup pairs perfectly with crusty bread or crackers for dipping, bringing a satisfying conclusion to your cooking adventure. Enjoy the cozy embrace of this hearty dish with family or friends!

Make Ahead Options

These Cozy Leftover Turkey Lentil Soup is perfect for meal prep enthusiasts! You can chop your vegetables and measure out all the dry ingredients up to 24 hours in advance, storing them in the refrigerator for optimal freshness. Additionally, the soup can be fully cooked and refrigerated for up to 3 days or frozen for 3-6 months. To maintain quality, let the soup cool completely before refrigerating or freezing, then store it in airtight containers. When you’re ready to enjoy, simply reheat on the stovetop over medium heat until warmed through, and savor every delicious spoonful without any fuss on a busy weeknight!

What to Serve with Cozy Leftover Turkey Lentil Soup

Pair your warm bowl of soup with these delightful accompaniments to create a heartwarming meal that nourishes both body and soul.

  • Crusty Artisan Bread: Perfect for dipping, this bread enhances the soup’s comforting texture while adding a satisfying crunch with every bite.
  • Buttery Grilled Cheese: A classic pairing, the gooey cheese melts into the soup, offering a delightful contrast of flavors and textures that will make your heart sing.
  • Garden Salad: Crisp greens with a light vinaigrette provide a refreshing balance to the rich, hearty nature of the soup. Toss in some seasonal fruits for added sweetness.
  • Savory Cheese Biscuits: These fluffy, cheesy bites are exceptional for scooping up the soup, adding a cheesy twist to your cozy meal experience.
  • Roasted Veggies: Seasoned vegetables like carrots and Brussels sprouts contrast beautifully with the soup’s warm flavors. Serve them on the side for a nutty, savory addition.
  • Crispy Tortilla Chips: Adding a crunchy element, these chips are perfect for pairing with the soup, enhancing every spoonful with an extra layer of texture and taste.
  • Chardonnay or a Light Beer: A smooth white wine or light lager will complement the savory flavors of the turkey lentil soup, creating a balanced and satisfying dining experience.

Expert Tips for Turkey Lentil Soup

  • Enhance with Roasted Aromatics: Roasting the garlic and onion before adding them to the pot can deepen the flavors of your Turkey Lentil Soup.

  • Adjust Thickness Easily: If your soup ends up too thick, simply mash some of the potatoes and lentils or add extra broth for a lighter consistency.

  • Slow Cooker Convenience: For those busy nights, use a slow cooker! Cook on low for 8-9 hours or high for 5-6 hours, adding the potatoes during the last hour.

  • Reheat Without Overcooking: When reheating leftover soup, do so gently on the stovetop or microwave to preserve the flavors and avoid overcooking the lentils.

  • Mix Up the Spice Level: Want a little kick? Add fresh jalapeños or red pepper flakes to the soup for a delightful spicy twist that fits your taste!

Turkey Lentil Soup Variations & Substitutions

Feel free to play around with this recipe and make it uniquely yours, bringing exciting new flavors to your family table!

  • Spicy Kick: Add fresh jalapeños or red pepper flakes for a sultry heat that will keep everyone coming back for more. Just a little bit can elevate the entire dish, delivering satisfaction with each spoonful.

  • Vegetable Medley: Incorporate seasonal vegetables such as carrots, celery, or spinach to add a nutritional boost. This is a great way to use whatever is in your fridge and cater to your taste!

  • Herbal Infusion: Toss in fresh herbs like thyme or rosemary for aromatic depth. Their bright, fragrant notes can transform the soup into a delightful culinary experience, making every bite memorable.

  • Creamy Version: Stir in a splash of coconut milk or heavy cream at the end for a luscious, creamy texture. It adds a rich mouthfeel that balances the hearty turkey and lentils beautifully.

  • Quick Cooking: Swap out dried lentils for canned lentils. This will reduce cooking time significantly, making the soup ready in a hurry without sacrificing flavor!

  • Protein Variations: Not a fan of turkey? Use ground turkey or chicken instead, or even cooked bacon for a smoky flavor profile. Every protein offers a unique twist that can reinvigorate this comforting dish.

  • Broth Switch: For a deeper flavor, substitute chicken broth with beef broth. It pairs surprisingly well and creates a heartier base—perfect for those chilly nights.

By embracing these variations, your Turkey Lentil Soup can continually surprise and delight, keeping every meal fresh and enjoyable! And if you're looking for more cozy soup options, our Lemon Chicken Soup and Zuppa Toscana Soup are perfect companions. Enjoy experimenting!

How to Store and Freeze Turkey Lentil Soup

Fridge: Store your Turkey Lentil Soup in an airtight container for up to 5 days. Be sure to let it cool completely before sealing to maintain freshness.

Freezer: For long-term storage, freeze the soup in freezer-safe containers or resealable bags for 3-6 months. Leave some space in the container for expansion as it freezes.

Reheating: To enjoy your soup again, reheat gently on the stovetop or in the microwave until warmed through. Stir occasionally to ensure even heating and prevent sticking.

Labeling: If you freeze the soup, label the container with the date and type of soup. This way, you can easily track how long it’s been stored and enjoy your Turkey Lentil Soup at its best!

Turkey Lentil Soup Recipe FAQs

How do I choose the right lentils for Turkey Lentil Soup?
I recommend using green lentils for this soup as they hold their shape well during cooking and provide a hearty texture. If you can't find green lentils, brown lentils are also a fantastic alternative. Just avoid red lentils, as they become mushy and don't work well in soups.

What’s the best way to store leftover Turkey Lentil Soup?
Store your Turkey Lentil Soup in an airtight container in the refrigerator for up to 5 days. After letting it cool completely, transfer the soup to keep it fresh longer. Ensure you seal the container tightly to avoid any odors from other food seeping in.

Can I freeze Turkey Lentil Soup?
Absolutely! Freezing the soup is a great way to save any leftovers. Pour the cooled soup into freezer-safe containers or resealable bags, leaving some space for expansion. It can last in the freezer for 3-6 months. When you're ready to enjoy it again, simply thaw it overnight in the fridge and reheat on the stovetop or in the microwave.

What if my soup is too thick?
No worries! If your Turkey Lentil Soup turns out thicker than you prefer, you can easily fix it. Simply mash some of the potatoes and lentils against the pot to create a creamier base, or add a bit of chicken broth or water to thin it out to your desired consistency. Stir well and let it simmer for a few minutes to blend the flavors perfectly.

Are there any dietary considerations for this recipe?
Yes! If you're vegetarian or wish to reduce meat intake, you can substitute the leftover turkey with your favorite vegetables or plant-based protein sources, like tofu or chickpeas. Additionally, be mindful of any allergies; if you're serving this dish to others, be sure to check for common allergens present in ingredients like broth or tomatoes.

How do I spice up my Turkey Lentil Soup?
To add a little kick to your soup, consider incorporating diced jalapeños or a pinch of red pepper flakes during the cooking process. You can also add fresh herbs like thyme or rosemary for an aromatic touch. Personalizing it with these spices can transform the flavor profile to suit your taste while keeping the cozy essence of the dish intact.

Turkey Lentil Soup

Cozy Turkey Lentil Soup to Warm Your Heart and Soul

This Turkey Lentil Soup transforms leftovers into a comforting masterpiece, packed with nourishing ingredients.
Print Recipe Pin Recipe
Prep Time 10 minutes mins
Cook Time 1 hour hr
Total Time 1 hour hr 10 minutes mins
Servings: 6 servings
Course: Soups
Cuisine: American
Calories: 350
Ingredients Equipment Method Nutrition Notes

Ingredients
  

For the Soup
  • 2 tablespoons Extra-Virgin Olive Oil Feel free to use any cooking oil.
  • 1 medium Yellow Onion Shallots or leeks work as substitutes.
  • 3 cloves Garlic Fresh is best.
  • 1 can Fire-Roasted Rotel Tomatoes Substitute with plain diced tomatoes plus hot sauce for milder flavor.
  • 1 cup Green Lentils Brown lentils can be used as an alternative.
  • 2 cups Leftover Turkey Ground turkey or chicken can be used.
  • 4 cups Chicken Broth Low-sodium options or vegetable broth can be utilized.
  • 1 Bay Leaf Remove before serving.
  • 2 medium Yukon Gold Potatoes Other waxy potatoes can also work.
  • Salt and Black Pepper Adjust to taste.

Equipment

  • Dutch oven

Method
 

Step-by-Step Instructions
  1. Heat the oil in a large Dutch oven over medium heat until it shimmers, about 2 minutes.
  2. Add the chopped yellow onion and sauté for 5 minutes until translucent. Then, add minced garlic and sauté for another minute.
  3. Stir in the fire-roasted Rotel tomatoes, green lentils, shredded turkey, and chicken broth, mixing everything together.
  4. Add the bay leaf and bring the mixture to a gentle simmer; cover partially and cook for about 50 minutes.
  5. Add diced Yukon Gold potatoes and simmer uncovered for another 10 minutes.
  6. Remove the bay leaf and season with salt and pepper to taste, stirring well.
  7. Ladle the soup into bowls and serve hot.

Nutrition

Serving: 1bowlCalories: 350kcalCarbohydrates: 45gProtein: 25gFat: 10gSaturated Fat: 2gPolyunsaturated Fat: 3gMonounsaturated Fat: 3gCholesterol: 60mgSodium: 800mgPotassium: 800mgFiber: 15gSugar: 5gVitamin A: 600IUVitamin C: 10mgCalcium: 50mgIron: 4mg

Notes

This soup pairs beautifully with crusty bread or crackers for dipping. Enjoy warm with loved ones!

Tried this recipe?

Let us know how it was!

Cozy Leftover Turkey and Wild Rice Soup for Chilly Nights

October 25, 2025 by Grace Snow Leave a Comment

As the chill of autumn sets in and the scent of Thanksgiving lingers, I often find myself with an abundance of turkey leftovers, craving something warm and comforting. That’s where my Healthy Leftover Turkey and Wild Rice Soup comes into play! Not only does this creamy delight help reduce food waste, but it also delivers a hearty, nutritious meal that’s packed with vegetables. The combination of tender turkey, wild rice, and seasonal flavors creates a cozy bowl that feels like a warm blanket on a chilly day. Plus, it’s an easy way to impress your loved ones while embracing the magical moments of fall. Ready to transform your leftover turkey into something extraordinary? Let’s dive into this delightful recipe that’s sure to make your taste buds sing!

Why make Leftover Turkey and Wild Rice Soup?

Comforting, creamy goodness: This soup brings together the warmth of Thanksgiving with a rich, velvety texture that feels indulgent yet healthy.

Nutritious and hearty: Loaded with vibrant vegetables, you’ll enjoy nourishing flavors in every spoonful.

Easy to create: With just a few simple ingredients, this recipe is both straightforward and quick to whip up, making it a weeknight dinner champion.

Perfect for meal prep: Make a big batch and enjoy it throughout the week, or freeze some for a rainy day. You'll love having a warm meal at your fingertips!

For more creative ways to use up leftovers, check out my delightful Asparagus Soup Healthy recipe, or if you're in the mood for something heartier, try the Zuppa Toscana Soup!

Leftover Turkey and Wild Rice Soup Ingredients

For the Soup Base
• Onion – Adds sweetness and depth; can substitute with shallots for a milder flavor.
• Celery – Provides crunch and a fresh taste; no direct substitutes, though zucchini can work for a different texture.
• Garlic – Enhances the overall flavor; fresh garlic is preferred over powdered.
• Carrots – Adds natural sweetness and color; substitute with parsnips for a different flavor profile.
• Poultry Seasoning – Brings that aromatic Thanksgiving flavor; if unavailable, blend thyme, sage, and rosemary for a similar taste.
• Wild Rice Blend – Provides a chewy texture; can swap in brown rice but watch the cooking time.
• Chicken or Turkey Broth – Serves as the soup's flavorful base; homemade broth adds a special touch, while low-sodium canned broth works in a pinch.
• Water – Lightens the broth for a more delicate soup.

For the Creamy Element
• Butter/Ghee/Vegan Butter – Adds richness and is used for the roux; ensure vegan butter is chosen for a dairy-free alternative.
• Whole Wheat Pastry Flour or Gluten-Free 1:1 Flour – Thicken the soup with a roux; gluten-free options are ideal for those avoiding gluten.
• Milk – Creates that comforting creaminess; any type of milk (dairy or non-dairy) will do.

For the Turkey and Garnish
• Turkey – The star ingredient; leftover turkey should be shredded or cubed, with amounts varying based on what you have.
• Chopped Parsley – A fresh, colorful garnish that adds a hint of brightness to your dish.

This Leftover Turkey and Wild Rice Soup is the perfect way to turn your holiday leftovers into a cozy culinary masterpiece!

Step‑by‑Step Instructions for Leftover Turkey And Wild Rice Soup

Step 1: Prepare the Vegetables
Finely chop the onion and mince the garlic. For uniform slices, use a mandolin or food processor to slice the celery and carrots. Aim for bite-sized pieces to ensure even cooking. This will create a delicious base for your Leftover Turkey And Wild Rice Soup.

Step 2: Sauté the Aromatics
In a large stockpot, heat 2 tablespoons of avocado oil over medium-high heat. Once the oil shimmers, add the chopped onions and minced garlic, sautéing them until they turn translucent, about 5 minutes. The aromas will start to fill your kitchen, setting the stage for a comforting soup.

Step 3: Add More Vegetables
Stir in the chopped celery and sauté for an additional 2 minutes until it begins to soften. Next, add the carrots and cook for another 2 minutes, allowing the flavors to meld together. This will enhance the broth of your Leftover Turkey And Wild Rice Soup, making it rich and hearty.

Step 4: Combine Broth and Rice
Pour in 6 cups of chicken or turkey broth along with 2 cups of water. Add 1 tablespoon of poultry seasoning and 1 cup of wild rice blend. Bring the mixture to a boil, then reduce the heat to low, cover the pot, and let it simmer for 45 minutes. The rice will absorb the flavorful broth.

Step 5: Make the Roux
In a separate saucepan, melt 4 tablespoons of butter over medium heat. Once melted, whisk in ½ cup of whole wheat pastry flour or gluten-free flour to create a roux. Stir constantly for about 2-3 minutes until it turns a light golden color, ensuring a smooth texture for your soup.

Step 6: Add Creaminess
Gradually whisk in 2 cups of milk, continuing to stir until the mixture is smooth and bubbly. This creamy roux will help thicken your Leftover Turkey And Wild Rice Soup and give it a velvety finish, enhancing the overall richness.

Step 7: Combine and Heat Through
After the soup has simmered for 45 minutes, stir in the roux along with 3-4 cups of shredded or cubed leftover turkey. Mix well and let it heat through on low for about 5-10 minutes. The turkey will warm up, and the flavors will combine beautifully, creating a satisfying dish.

Step 8: Garnish and Serve
Ladle the soup into bowls and garnish with chopped parsley for a pop of color and freshness. Serve your Leftover Turkey And Wild Rice Soup hot, and enjoy the comforting, wholesome flavors that will warm your soul on a chilly day!

How to Store and Freeze Leftover Turkey And Wild Rice Soup

Fridge: Store the soup in an airtight container for up to 3 days. Reheat gently on the stove, adding a splash of broth or milk if needed.

Freezer: Freeze the soup in portions for up to 3 months. Allow to cool completely before sealing in airtight freezer bags or containers to prevent freezer burn.

Reheating: Thaw overnight in the fridge before reheating. Heat on the stovetop over medium-low heat, stirring occasionally to prevent sticking, until warmed through.

Texture Check: Keep in mind that the wild rice may soften slightly upon reheating, but the delicious flavors of the leftover turkey and wild rice soup will still shine!

Leftover Turkey and Wild Rice Soup Variations

Feel free to put your personal twist on this scrumptious soup! The comforting flavors are just waiting to be customized.

  • Dairy-Free: Use coconut milk or a nut milk instead of regular milk for a creamy, dairy-free version.
    A touch of coconut adds an exotic flavor, enhancing the overall experience while keeping it soothing and delicious.

  • Hearty Greens: Toss in a couple of handfuls of fresh spinach or kale for an extra dose of nutrients.
    These greens wilt beautifully, merging into the soup while providing vibrant color and texture.

  • Swap Protein: Replace the turkey with leftover roasted chicken or even ham for a new, delicious take.
    By changing up the protein, you'll create a whole new flavor profile that keeps your taste buds engaged.

  • Add Spice: For a kick, sprinkle in red pepper flakes or a few dashes of hot sauce.
    This simple addition transforms the soup into a warming delight, perfect for chilly nights when you seek a little heat.

  • Vegetable Medley: Incorporate other vegetables like sweet potatoes or peas for added sweetness and color.
    These options infuse the soup with sweetness, giving it a delightful twist that makes every bowl feel special.

  • Flavored Broth: Try using turkey stock made from your leftovers instead of standard chicken broth.
    It's like capturing all the flavors from your Thanksgiving feast and enhancing your soup, making it even more sumptuous.

  • Nutty Texture: Sprinkle in some chopped almonds or walnuts before serving for a crunchy contrast.
    These nuts provide not only a delightful crunch but also an earthy flavor that beautifully complements the creamy soup.

Explore even more unique ideas for your cozy meals with my Furikake Fried Rice or try serving your soup alongside a flavorful Santa Soup Savory to create a complete comfort food experience!

What to Serve with Healthy Leftover Turkey and Wild Rice Soup

As comforting as a warm embrace, this creamy soup deserves delightful companions to create a memorable meal experience.

  • Warm Cornbread: The sweet, buttery crunch of cornbread is the perfect match, soaking up the rich flavors of the soup.
  • Simple Green Salad: A crisp salad with mixed greens and a light vinaigrette brings freshness and a nice contrast to the creamy texture.
  • Garlic Breadsticks: These soft, buttery sticks add a deliciously savory element, perfect for dipping into your soup.
  • Roasted Vegetables: Seasonal vegetables like carrots and Brussels sprouts add depth and heartiness, elevating your meal further.

Imagine pairing your cozy soup with a salad that has crunchy cucumbers and juicy tomatoes, creating a blend of textures that will tantalize your taste buds. For dessert, consider serving homemade apple pie or warm chocolate chip cookies to round out the autumnal experience with a sweet finish.

Make Ahead Options

These Healthy Leftover Turkey and Wild Rice Soup preparations are perfect for busy home cooks looking to save time! You can chop the vegetables (onion, celery, carrots) and store them together in an airtight container in the fridge up to 3 days in advance. The wild rice can also be pre-cooked up to 24 hours prior, allowing you to enhance the soup's flavor and texture. When you’re ready to enjoy your soup, simply sauté the prepped veggies, add the pre-cooked wild rice, broth, and turkey, and finish with the roux and milk. This ensures your soup remains creamy and delicious without compromising on quality. Enjoy a hearty and comforting meal with minimal effort on busy weeknights!

Expert Tips for Leftover Turkey and Wild Rice Soup

Evenly Cut Veggies: Use a mandolin or food processor for uniform sizes to ensure even cooking and tenderness throughout the soup.

Watch the Turkey: Avoid overcooking by monitoring closely during the final heating stage; turkey should be heated through, not boiled.

Whisk Away Lumps: When making the roux, whisk continuously while adding milk to achieve that creamy texture without any lumps in your leftover turkey and wild rice soup.

Flavorful Broth: For an even richer taste, consider making homemade broth from your leftover turkey carcass; it's a game changer!

Store Properly: Keep leftovers in an airtight container in the fridge for up to 3 days. For freeze-friendly soup, ensure the rice is fully cooked before freezing!

Healthy Leftover Turkey and Wild Rice Soup Recipe FAQs

How do you choose ripe vegetables for this soup?
Absolutely! When selecting vegetables like onions and carrots, look for ones that are firm to the touch and have no soft spots or blemishes. Onions should be free of dark spots, while carrots should have a vibrant orange color. For celery, choose stalks that are crisp and firm, avoiding any that appear wilty or discolored. Fresh garlic should have tight, unblemished skins and be plump.

How should I store leftover turkey and wild rice soup?
Very simply! You can store the soup in an airtight container in the fridge for up to 3 days. Make sure the soup cools completely before sealing, as this prevents condensation that could make it watery. When ready to reheat, do so on the stove over medium heat, adding a splash of broth or milk for a creamier texture.

Can I freeze leftover turkey and wild rice soup?
Absolutely! This soup freezes beautifully. Allow it to cool completely, then portion it into airtight freezer bags or containers. It will keep well for up to 3 months in the freezer. To reheat, thaw overnight in the refrigerator, and heat on the stove over medium-low heat, stirring occasionally to evenly distribute the heat.

What should I do if my soup turns out too thick?
If you find your soup is too thick after cooking, don’t worry! Just gradually add more broth or water until it reaches your desired consistency. Stir well, and let it simmer for a few minutes to blend the flavors. Always taste and adjust for seasonings, as you may need to add a pinch more poultry seasoning.

Are there dietary considerations to keep in mind?
Definitely! For those with gluten sensitivities, you can replace the whole wheat pastry flour with gluten-free 1:1 flour, ensuring a deliciously thick soup. If you have lactose intolerance or are following a vegan diet, opt for vegan butter and non-dairy milk, which will still give you that creamy texture that's so satisfying without any dairy.

Can I add other vegetables to this soup?
The more the merrier! Feel free to incorporate additional vegetables like fresh spinach or kale for extra nutrition. You can also add potatoes for heartiness, but make sure to dice them small so they cook through in the same time as the rice. Just remember to adjust cook times accordingly based on the ingredients you decide to include!

Leftover Turkey And Wild Rice Soup

Cozy Leftover Turkey and Wild Rice Soup for Chilly Nights

Transform your leftover turkey into a comforting Leftover Turkey and Wild Rice Soup, perfect for chilly nights and packed with nutritious vegetables.
Print Recipe Pin Recipe
Prep Time 15 minutes mins
Cook Time 1 hour hr
Total Time 1 hour hr 15 minutes mins
Servings: 6 bowls
Course: Soups
Cuisine: American
Calories: 350
Ingredients Equipment Method Nutrition Notes

Ingredients
  

For the Soup Base
  • 1 medium Onion Adds sweetness and depth; can substitute with shallots for a milder flavor.
  • 2 stalks Celery Provides crunch and a fresh taste; no direct substitutes.
  • 3 cloves Garlic Enhances overall flavor; fresh garlic preferred.
  • 2 medium Carrots Adds natural sweetness and color; substitute with parsnips if desired.
  • 1 tablespoon Poultry Seasoning Brings aromatic flavor; blend thyme, sage, and rosemary if unavailable.
  • 1 cup Wild Rice Blend Provides chewy texture; can swap for brown rice.
  • 6 cups Chicken or Turkey Broth Homemade broth adds a special touch.
  • 2 cups Water Lightens the broth for a delicate soup.
For the Creamy Element
  • 4 tablespoons Butter Adds richness; use vegan butter for dairy-free.
  • ½ cup Whole Wheat Pastry Flour Thickens the soup; gluten-free options are ideal.
  • 2 cups Milk Any type of milk will do.
For the Turkey and Garnish
  • 3-4 cups Shredded Leftover Turkey Amounts vary based on leftovers.
  • ¼ cup Chopped Parsley Fresh garnish adds brightness.

Equipment

  • Large Stockpot
  • saupan
  • mandolin or food processor

Method
 

Step-by-Step Instructions
  1. Finely chop the onion and mince the garlic. Slice celery and carrots into bite-sized pieces.
  2. Heat 2 tablespoons of avocado oil in a large stockpot over medium-high heat. Add chopped onions and minced garlic, sautéing until translucent, about 5 minutes.
  3. Stir in the chopped celery, sautéing for an additional 2 minutes. Add carrots and cook for another 2 minutes.
  4. Pour in the chicken or turkey broth and 2 cups of water. Add poultry seasoning and wild rice blend, bring to a boil, then simmer for 45 minutes.
  5. In a separate saucepan, melt 4 tablespoons of butter over medium heat. Whisk in ½ cup of flour to create a roux, cooking for 2-3 minutes.
  6. Gradually whisk in 2 cups of milk until smooth and bubbly.
  7. After the soup has simmered, stir in the roux and the turkey. Heat through for 5-10 minutes on low.
  8. Ladle into bowls and garnish with chopped parsley before serving.

Nutrition

Serving: 1bowlCalories: 350kcalCarbohydrates: 40gProtein: 25gFat: 10gSaturated Fat: 5gPolyunsaturated Fat: 1gMonounsaturated Fat: 3gCholesterol: 45mgSodium: 800mgPotassium: 600mgFiber: 5gSugar: 6gVitamin A: 3000IUVitamin C: 15mgCalcium: 150mgIron: 2mg

Notes

Store leftovers in an airtight container for up to 3 days. Freeze portions for up to 3 months.

Tried this recipe?

Let us know how it was!

Cozy Turkey Pot Pie Soup Perfect for Holiday Leftovers

October 25, 2025 by Grace Snow Leave a Comment

The rich aroma of turkey simmering away in a savory broth harks back to cozy family gatherings, doesn’t it? Enter my Creamy Turkey Pot Pie Soup, a delightful one-pot wonder that transforms holiday leftovers into a heartwarming meal. Not only is this soup a brilliant way to use up that leftover turkey, but it also comes together quickly using simple ingredients you likely have on hand. Easy to make and incredibly comforting, this soup wraps you in its creamy embrace after a long day. Whether you're a seasoned home chef or just looking to craft something warm and inviting, this Turkey Pot Pie Soup is here to coax you into the kitchen. Are you ready to stir up some deliciousness and create a bowl of comfort? Let’s dive in!

Why is Turkey Pot Pie Soup So Irresistible?

Comforting warmth: There’s nothing like a bowl of creamy goodness to wrap you in a hug! This Turkey Pot Pie Soup is your go-to recipe for cozy nights in.

Simple ingredients: With just common pantry staples, preparing this soup is a breeze.

Waste not, want not: Perfect for using up leftover turkey or chicken, this dish minimizes waste while maximizing flavor.

One pot wonder: All the magic happens in a single pot, saving you time on cleanup.

Family favorite: Its hearty texture and rich taste are sure to please everyone at the table, making it a crowd-pleaser.

Whether you're enjoying it alongside a fresh salad or with crusty bread, this soup is a delicious way to bring comfort home.

Turkey Pot Pie Soup Ingredients

Transform your holiday leftovers into a cozy bowl of comfort with these easy ingredients!

For the Soup Base

  • Flour – Thickens the soup for a creamy texture. Substitute with cornstarch for gluten-free.
  • Unsalted Butter – Adds richness and flavor. Can be replaced with olive oil for a dairy-free option.
  • Yellow Onion – Provides a savory base flavor. Shallots can also be used if desired.
  • Minced Garlic – Enhances the overall flavor profile; fresh is preferred, but garlic powder can be a substitute.
  • Kosher Salt – Essential for seasoning; sea salt works as an alternative.
  • Pepper – Adds a mild heat; freshly cracked black pepper enhances the taste.
  • Italian Seasoning – Provides aromatic herbal notes; adjust based on personal preference.
  • White Wine Vinegar – Brightens the flavors; lemon juice can serve as a substitute.

For the Heartiness

  • Yukon Potatoes – Contributes structure and heartiness; russet or red potatoes can be used as substitutes.
  • Chicken Broth – Forms the soup base; using low-sodium is preferable for salt control.
  • Shredded Cooked Turkey – The main protein source adding substance; leftover chicken works excellently as a substitute.

For a Nutrient Boost

  • Frozen Vegetables Mix – Conveniently adds nutrition; feel free to use fresh vegetables for added flavor.

For Creamy Goodness

  • Heavy Cream – Adds creaminess and richness; half-and-half or coconut cream can be used for a lighter option.

Gather these components for a delightful Turkey Pot Pie Soup that’s sure to become a cherished family favorite!

Step‑by‑Step Instructions for Turkey Pot Pie Soup

Step 1: Create the Slurry
In a small bowl, whisk together ¼ cup of flour with ½ cup of cold water or broth until smooth to form a slurry. Set this aside for later to ensure your Turkey Pot Pie Soup has the creamy texture you desire.

Step 2: Sauté Aromatics
In a large pot, melt 3 tablespoons of unsalted butter over medium heat. Once melted, add 1 diced yellow onion and 2 cloves of minced garlic. Sauté for about 4-5 minutes, stirring occasionally, until the onion becomes translucent and fragrant, creating a savory foundation for your soup.

Step 3: Season and Deglaze
Stir in 1 teaspoon of kosher salt, ½ teaspoon of freshly cracked black pepper, and 1 teaspoon of Italian seasoning. Pour in 2 tablespoons of white wine vinegar to deglaze the pot, scraping up any flavorful bits stuck to the bottom, for an added depth of flavor in your Turkey Pot Pie Soup.

Step 4: Add Base Ingredients
Mix in 2 cups of diced Yukon potatoes and 4 cups of chicken broth to the pot. Then, add the prepared slurry, stirring thoroughly to combine all ingredients. This will create the base for the heartiness and creaminess of the soup as it cooks.

Step 5: Simmer Until Tender
Cover the pot and bring the soup to a gentle boil over medium-high heat. Once boiling, reduce the heat to low for a simmer and let it cook for about 30 minutes. Stir occasionally; when the potatoes are fork-tender, the soup is at the perfect stage to incorporate the turkey and vegetables.

Step 6: Incorporate Turkey and Vegetables
Add 2 cups of shredded cooked turkey and 1 cup of frozen vegetable mix to the pot. Stir gently, allowing the flavors to meld, and let it simmer for another 5 minutes, or until everything is heated through and the soup is rich and inviting.

Step 7: Finish with Cream
Finally, stir in 1 cup of heavy cream, ensuring it blends well with the Turkey Pot Pie Soup. Allow the soup to simmer for an additional 2-3 minutes, thickening gracefully while ensuring it’s perfectly creamy and luxuriously smooth.

Step 8: Serve and Enjoy
Ladle the Turkey Pot Pie Soup into warm bowls and serve it hot. For an extra touch of indulgence, consider topping with puff pastry or crusty bread on the side, inviting everyone at the table to enjoy a comforting and hearty meal.

How to Store and Freeze Turkey Pot Pie Soup

Fridge: Store leftover Turkey Pot Pie Soup in an airtight container for up to 3–4 days. Make sure it cools to room temperature before sealing to maintain freshness.

Freezer: You can freeze the soup for up to three months. Portion it into freezer-safe containers, leaving some space at the top for expansion as it freezes.

Reheating: Reheat gently on the stovetop or in the microwave until warmed through. Stir occasionally; adding a splash of broth or cream can restore its creamy texture.

To note: Enjoy your Turkey Pot Pie Soup again without sacrificing flavor or quality!

What to Serve with Turkey Pot Pie Soup

There's no better way to elevate your cozy culinary experience than to pair your hearty soup with delicious accompaniments.

  • Crusty Bread: Perfect for dipping, the crunch of fresh bread contrasts beautifully with the creamy soup, making each bite a delight.
  • Simple Green Salad: A light, fresh salad with a tangy vinaigrette balances the richness of the soup, adding a refreshing crunch.
  • Buttery Puff Pastry: Placing a flaky puff pastry on top not only adds a gourmet feel but creates a delightful crispy texture with every spoonful.
  • Garlic Breadsticks: Soft and warm, they’re perfect for soaking up every last bit of the flavorful broth, making them a sumptuous side.
  • Mashed Potatoes: A side of creamy mashed potatoes can enhance the comfort factor, offering a hearty bite to complement the soup's flavors.
  • Roasted Vegetables: Seasoned and caramelized veggies add a sweet and savory touch that harmonizes beautifully with the soup's robust tones.
  • Savory Fruit Chutney: A dollop of tangy chutney brings a pop of sweetness that contrasts nicely with the rich turkey flavors, enhancing the overall taste.
  • Sparkling Apple Cider: This bubbly drink adds a festive flair that brightens the meal while its sweetness complements the savory notes of the soup.
  • Chocolate Chip Cookies: For dessert, warm cookies offer a comforting finish; their rich sweetness is the perfect way to round out your cozy meal.

Expert Tips for Turkey Pot Pie Soup

  • Sauté Until Soft: Make sure the onions and garlic are nice and translucent; this builds a robust flavor base for your Turkey Pot Pie Soup.

  • Adjust Thickness: If you prefer a thicker soup, let it simmer longer or gradually add the slurry. Stir well to avoid any lumps!

  • Perfect Veggies: Avoid overcooking the frozen vegetables; add them near the end of cooking to keep that vibrant texture and nutritional value intact.

  • Ingredient Substitutions: If you're out of a specific ingredient, feel free to switch! For instance, use olive oil for butter or lemon juice instead of vinegar.

  • Timing Matters: Allow the soup to simmer just long enough—about 30 minutes—to ensure the potatoes are fork-tender without becoming mushy.

  • Leftover Love: Don’t hesitate to experiment by using leftover chicken or adding extra vegetables. It’s a flexible recipe that loves to adapt!

Turkey Pot Pie Soup Variations & Substitutions

Feel free to get creative with this recipe and make it your own, tailoring it to your taste and dietary needs!

  • Dairy-Free: Replace heavy cream with coconut milk for a vegan twist that maintains creaminess without dairy.

  • Vegetarian Option: Swap shredded turkey for chickpeas or lentils to create a hearty vegetarian version that’s packed with protein.

  • Spicy Kick: Add diced jalapeños or a pinch of cayenne pepper for a flavorful heat that warms you right up. Imagine the comforting aroma mingling with a pleasant spice that tantalizes your taste buds.

  • Flavor Boost: Incorporate a splash of balsamic vinegar or a teaspoon of soy sauce to deepen the savory profile of the soup; this subtle change can elevate the overall flavor experience.

  • Chunky Veggies: Instead of frozen mixed vegetables, opt for fresh, chopped veggies like carrots, celery, or bell peppers for a vibrant textural twist.

  • Potato Alternatives: Replace Yukon potatoes with sweet potatoes for a different, slightly sweet flavor, adding a nutritious flair to this comforting dish.

  • Herb Swap: Experiment with fresh herbs like thyme or rosemary in place of Italian seasoning for a delightful aroma that enhances the cozy vibes.

  • Hearty Grains: Add cooked barley or quinoa for an extra layer of texture, turning it into a robust meal that’s satisfying and filling.

Whichever variation you choose, your customized Turkey Pot Pie Soup is sure to become a beloved staple in your kitchen! For additional comforting inspiration, check out One Pot Salmon or try a delightful Asparagus Soup Healthy for a seasonal twist.

Make Ahead Options

These Turkey Pot Pie Soup preparations are perfect for busy home cooks looking to save time during the week! You can chop your vegetables (like onion and Yukon potatoes) and store them in an airtight container in the refrigerator for up to 3 days. Additionally, you can prepare the flour slurry and keep it refrigerated for 24 hours, ensuring it remains smooth when you’re ready to cook. When you’re set to enjoy your comforting soup, simply follow the instructions starting from sautéing the aromatics, and stir in the prepared ingredients. This way, you’ll have a homemade meal that’s just as delicious with minimal effort—perfect for those hectic weeknights!

Turkey Pot Pie Soup Recipe FAQs

What kind of turkey is best for this soup?
Absolutely! For the best flavor, use leftover turkey from your holiday feast. If you don’t have any, poached turkey breast works great too, adding a lovely tenderness to your soup. Leftover chicken is also an excellent substitute if turkey isn’t available. The key is to make sure the meat is shredded or chopped into bite-sized pieces for even distribution throughout the soup.

How long can I store Turkey Pot Pie Soup in the refrigerator?
You can safely store your Turkey Pot Pie Soup in an airtight container in the refrigerator for up to 3 to 4 days. Be sure to let the soup cool completely before sealing it to help maintain its flavor and freshness. When you're ready to enjoy it again, simply reheat gently on the stovetop or in the microwave.

Can I freeze Turkey Pot Pie Soup? How do I do that?
Yes, you can freeze this soup for up to three months! To do so, portion it into freezer-safe containers or resealable bags, leaving a little space at the top to allow for expansion as it freezes. Make sure to label the containers with the date so you can keep track. When it’s time to enjoy it again, thaw it overnight in the fridge and reheat gently on the stove, adding a splash of broth or cream to restore its creamy texture if needed.

What should I do if my soup is too thick?
Very good question! If your Turkey Pot Pie Soup ends up thicker than you’d like, don’t worry. Just add a little chicken broth or water, stirring it in gradually until you reach your desired consistency. It's best to do this over low heat to warm the soup back up without cooking it further. Taste and adjust the seasonings as needed to keep those delicious flavors coming!

Are there any dietary considerations for this soup?
Certainly! If you or your family members have dietary restrictions, there are plenty of adaptations available. For a gluten-free option, substitute the flour with cornstarch to thicken the soup. If you're looking for a dairy-free choice, use olive oil instead of butter and opt for coconut cream or a non-dairy milk alternative to replace the heavy cream. Always ensure that any mixed vegetables used are free from common allergens if needed.

Can I add more vegetables to this soup?
The more, the merrier! Feel free to add additional vegetables like carrots, peas, or green beans for extra nutrition and flavor. This recipe is quite versatile—just remember to add fresh veggies towards the end of cooking to maintain their color and crunch, and make sure to chop them into small, uniform pieces for even cooking. Enjoy the flexibility and creativity in your kitchen!

Turkey Pot Pie Soup

Cozy Turkey Pot Pie Soup Perfect for Holiday Leftovers

A warm and comforting Turkey Pot Pie Soup that makes great use of holiday leftovers.
Print Recipe Pin Recipe
Prep Time 10 minutes mins
Cook Time 45 minutes mins
Total Time 55 minutes mins
Servings: 6 cups
Course: Soups
Cuisine: American
Calories: 350
Ingredients Equipment Method Nutrition Notes

Ingredients
  

Soup Base
  • ¼ cup flour or cornstarch for gluten-free
  • 3 tablespoons unsalted butter or olive oil for dairy-free
  • 1 medium yellow onion diced
  • 2 cloves minced garlic fresh preferred
  • 1 teaspoon kosher salt or sea salt
  • ½ teaspoon freshly cracked black pepper
  • 1 teaspoon Italian seasoning
  • 2 tablespoons white wine vinegar or lemon juice
Heartiness
  • 2 cups diced Yukon potatoes or russet/red potatoes
  • 4 cups chicken broth low-sodium preferred
  • 2 cups shredded cooked turkey or leftover chicken
Nutrient Boost
  • 1 cup frozen vegetable mix or fresh vegetables
Creamy Goodness
  • 1 cup heavy cream or half-and-half/coconut cream

Equipment

  • Large pot
  • small bowl

Method
 

Preparation
  1. In a small bowl, whisk together ¼ cup of flour with ½ cup of cold water or broth until smooth to form a slurry. Set aside.
  2. In a large pot, melt 3 tablespoons of unsalted butter over medium heat. Then, add 1 diced yellow onion and 2 cloves of minced garlic. Sauté for 4-5 minutes until onion is translucent.
  3. Stir in 1 teaspoon of kosher salt, ½ teaspoon of freshly cracked black pepper, and 1 teaspoon of Italian seasoning. Pour in 2 tablespoons of white wine vinegar to deglaze the pot.
  4. Mix in 2 cups of diced Yukon potatoes and 4 cups of chicken broth. Then, add the prepared slurry, stirring thoroughly.
  5. Cover the pot and bring the soup to a gentle boil. Once boiling, reduce the heat to low and let it simmer for about 30 minutes.
  6. Add 2 cups of shredded cooked turkey and 1 cup of frozen vegetable mix to the pot. Stir gently and let it simmer for another 5 minutes.
  7. Stir in 1 cup of heavy cream and allow the soup to simmer an additional 2-3 minutes, thickening it.
  8. Ladle the soup into warm bowls and serve it hot, optionally topping with puff pastry or crusty bread.

Nutrition

Serving: 1cupCalories: 350kcalCarbohydrates: 30gProtein: 22gFat: 18gSaturated Fat: 10gPolyunsaturated Fat: 3gMonounsaturated Fat: 5gCholesterol: 70mgSodium: 800mgPotassium: 600mgFiber: 3gSugar: 2gVitamin A: 500IUVitamin C: 20mgCalcium: 80mgIron: 2mg

Notes

Great for using leftover turkey; feel free to substitute ingredients as needed.

Tried this recipe?

Let us know how it was!

Savory Slow Cooker Ground Turkey Vegetable Soup for Cozy Nights

October 25, 2025 by Grace Snow Leave a Comment

The aroma of garlic and simmering vegetables wafts through my kitchen, transporting me back to cozy family dinners filled with laughter and warmth. Today, I’m excited to share my recipe for Hearty Slow Cooker Ground Turkey Vegetable Soup—a dish that brilliantly marries convenience and wellness. With just a few simple steps, this hearty soup promises to be a delightful centerpiece for your table, perfect for anyone seeking a comforting yet healthy meal. Packed with wholesome vegetables and lean turkey, it’s not only filling but also an inviting way to embrace the art of home cooking. Plus, the slow cooker does all the hard work, allowing you to savor the enticing flavors without stress. So, are you ready to discover how easy it is to whip up this nourishing bowl of goodness? Let’s dive in!

Why Is This Soup So Special?

Comforting, Hearty Taste: This Slow Cooker Ground Turkey Vegetable Soup gives you a warm hug in a bowl with its savory flavors and chunky texture.

Nutritious Ingredients: Bursting with vibrant vegetables, this soup is a powerhouse of nutrients that focuses on your health without sacrificing flavor.

Complete Convenience: Just toss everything into your slow cooker, and let it work its magic while you enjoy the day. It's an excellent option for busy schedules!

Universal Appeal: Perfect for family dinners or cozy gatherings, this soup is sure to impress guests and family alike, even on the coldest nights.

If you’re in the mood for more warming recipes, check out my delicious Lemon Chicken Soup or the nourishing Zuppa Toscana Soup. They are perfect for those craving homemade comfort food!

Slow Cooker Ground Turkey Vegetable Soup Ingredients

This delightful soup is not only simple to make but also packed with flavor and nutrition!

For the Base

  • Olive Oil – Adds richness and helps sauté the turkey; can be substituted with any neutral cooking oil.
  • Ground Turkey – The protein base that makes it filling; ground chicken or lean beef can be used if preferred.
  • Garlic Cloves (minced) – Infuses the soup with aromatic depth; fresh garlic is ideal, garlic powder serves as a quick alternative.
  • Onion (diced) – Enhances sweetness and flavor; feel free to use any variety of onion or substitute with shallots.
  • Celery Sticks (diced) – Contributes crunch and flavor; bell pepper is a tasty alternative.
  • Carrots (diced) – Provide a hint of sweetness and vibrant color; frozen carrots can be a convenient substitute.
  • White Potatoes (peeled and chopped) – Adds heartiness to the soup; other potatoes or even sweet potatoes may also work.

For the Flavor

  • Diced Tomatoes (drained, one 28 oz can) – Boosts flavor and texture; fresh or crushed tomatoes are great substitutes.
  • Chicken Broth – Acts as the soup's base providing moisture; vegetable broth is perfect for a vegetarian version.
  • Salt, Pepper, Garlic Powder, Dried Oregano, Ground Thyme – These seasonings elevate the taste; adjust according to your preference, using fresh herbs for a burst of flavor.

For the Finish

  • Spinach (fresh or frozen) – Enhances nutrition and adds vibrant color; kale or Swiss chard can be used instead.
  • Fresh Parsley – Optional garnish for presentation and a fresh touch.

This hearty soup is perfect for cozy nights, bringing warmth and comfort to your dining table. Enjoy crafting your Slow Cooker Ground Turkey Vegetable Soup!

Step‑by‑Step Instructions for Slow Cooker Ground Turkey Vegetable Soup

Step 1: Sauté Turkey
In a large skillet, heat 2 tablespoons of olive oil over medium-high heat. Add 1 pound of ground turkey and cook for about 5-10 minutes, stirring frequently, until it’s no longer pink and browned. This crucial step enhances the flavor of your Slow Cooker Ground Turkey Vegetable Soup and ensures tender meat before adding it to the slow cooker.

Step 2: Combine Ingredients
Transfer the cooked turkey into your slow cooker. Add 3 diced celery sticks, 2 diced carrots, 3 peeled and chopped white potatoes, 1 diced onion, and 4 minced garlic cloves. Stir in one 28-ounce can of drained diced tomatoes, 4 cups of chicken broth, and season with salt, pepper, garlic powder, dried oregano, and ground thyme. Mix everything well to combine the vibrant flavors.

Step 3: Slow Cook
Cover the slow cooker with the lid and set it to low heat. Cook for 8-10 hours, allowing the soup to bubble gently until the vegetables are tender and the flavors meld beautifully. You’ll know it's done when your kitchen fills with the delightful aroma of your Slow Cooker Ground Turkey Vegetable Soup, inviting everyone to the table.

Step 4: Add Spinach
Approximately 30 minutes before serving, add 2 cups of fresh or frozen spinach to the slow cooker. Gently fold it into the soup, so it wilts perfectly, boosting nutrition and adding a pop of color. This step enriches the hearty texture, making your soup even more satisfying.

Step 5: Final Adjustments
Before serving, taste your soup and adjust seasoning as needed. Feel free to add more salt, pepper, or herbs to match your preferences. Allow the Slow Cooker Ground Turkey Vegetable Soup to sit for a few minutes, allowing the flavors to settle. This final touch ensures a taste that's truly comforting.

Step 6: Serve and Enjoy
Ladle the hearty soup into warm bowls and garnish with fresh parsley for a vibrant finish. Pair your Slow Cooker Ground Turkey Vegetable Soup with hearty bread or crushed saltine crackers for a complete meal. Your cozy dinner is ready to serve, bringing warmth and comfort to your dining table!

How to Store and Freeze Slow Cooker Ground Turkey Vegetable Soup

Fridge: Store leftovers in an airtight container for up to 5 days. This allows you to enjoy the cozy flavors of your Slow Cooker Ground Turkey Vegetable Soup throughout the week.

Freezer: For longer storage, freeze in individual portions in freezer-safe containers or bags for up to 3 months. Be sure to label each container with the date.

Reheating: Thaw overnight in the fridge before reheating. Gently warm on the stove or in the microwave, adding a splash of broth to refresh the soup's texture if needed.

Room Temperature: Avoid leaving the soup at room temperature for more than 2 hours. Keeping it stored safely ensures it remains delicious and ready to warm up when you are!

What to Serve with Hearty Slow Cooker Ground Turkey Vegetable Soup

Warm your heart and enrich your table with delightful pairings that elevate the experience of your cozy soup.

  • Crusty Bread: A slice of toasted sourdough or a warm baguette is perfect for soaking up the delicious broth. The contrast of crunchy crust and soft inside complements the soup’s texture beautifully.

  • Side Salad: A fresh garden salad with mixed greens, cucumbers, and a light vinaigrette adds a crisp and refreshing element. The crunch and acidity balance out the hearty flavors perfectly.

  • Savory Grilled Cheese: A classic combo, grilled cheese melts seamlessly into the soup, making every bite indulgently satisfying. Opt for a sharp cheddar or a flavor-packed gouda for extra richness!

  • Steamed Veggies: Lightly steamed broccoli, carrots, or green beans introduce a fresh taste and vibrant color to your meal. They offer a complementary crunch and elevate the overall nutrition profile.

  • Herb-Infused Rice: Serve a scoop of rice seasoned with fresh herbs like parsley or cilantro alongside the soup. The rice absorbs the delicious broth while adding an additional layer of flavor and comfort.

  • Wine Selection: A glass of Pinot Noir or a crisp Sauvignon Blanc pairs wonderfully, enhancing the meal experience with aromatic notes that contrast deliciously with the soup’s savory tones.

Each pairing creates a unique touch that harmonizes with your Hearty Slow Cooker Ground Turkey Vegetable Soup, inviting warmth and joy to your dining table.

Expert Tips for Delicious Soup

  • Don’t Overcook Turkey: Sauté just until no longer pink; overcooking can make it tough and dry. A perfectly cooked turkey elevates your Slow Cooker Ground Turkey Vegetable Soup.

  • Layer Your Flavors: For a deeper taste, let the sautéed turkey cool slightly before adding it to the slow cooker; this enhances the overall flavor.

  • Perfect Veggie Texture: Cut your vegetables into uniform sizes to ensure they cook evenly, giving you a delightful bite in every spoonful.

  • Season to Taste: Always taste your soup before serving; adjusting seasoning at the end ensures every bowl is flavorful and satisfying.

  • Cool Before Storing: Allow leftover soup to cool completely before transferring it to the fridge; this helps prevent condensation and keeps it tasting fresh.

Slow Cooker Ground Turkey Vegetable Soup Variations

Feel free to play with this recipe and make it your own—let your culinary creativity shine!

  • Dairy-Free: Omit any dairy ingredients and use plant-based alternatives for broth or garnishes for a comforting yet vegan version.

  • Spicy Kick: Add red pepper flakes or diced jalapeños for a delightful heat that elevates the soup's flavor. Spice lovers will appreciate that extra burst!

  • Vegetable Boost: Swap in seasonal vegetables like zucchini or add green beans for a vibrant twist; each bite will surprise your palate with freshness.

  • Legume Lover: Throw in a can of drained chickpeas or kidney beans for a protein boost and extra fiber that complements the turkey beautifully.

  • Herbaceous Delight: Freshen the soup with a handful of fresh basil or dill added just before serving for an herbaceous aroma that invigorates the dish.

  • Comforting Grain: Stir in cooked quinoa or brown rice for added texture and heartiness, perfect for those who love a fibrous element in their soup.

  • Creamy Variation: Blend a portion of the soup to create a creamy texture while keeping it nutritious—ideal for those cold nights when you crave something cozy.

If you're also looking for more delicious soup alternatives, check out my warming Asparagus Soup Healthy or the soul-soothing Santa Soup Savory. They are sure to brighten your dinner table!

Make Ahead Options

These Slow Cooker Ground Turkey Vegetable Soup components are perfect for meal prep enthusiasts! You can sauté the turkey and chop the vegetables up to 24 hours in advance. Simply store the browned turkey and diced veggies in separate airtight containers in the refrigerator. When you’re ready to cook, just add the prepped ingredients to the slow cooker along with the remaining items, and let it work its magic. For maximum freshness, avoid adding the spinach until about 30 minutes before serving. This way, your soup retains its vibrant color and nutritional value, ensuring it’s just as delicious when it’s time to enjoy your comforting meal.

Slow Cooker Ground Turkey Vegetable Soup Recipe FAQs

How do I choose ripe vegetables for my soup?
Absolutely! When selecting vegetables, look for those that are vibrant in color and firm to the touch. For instance, bell peppers should be shiny without any dark spots, while potatoes should feel solid and smooth. Avoid any soft or blemished veggies, as they may not provide the best flavor and can spoil faster.

How should I store leftovers from the soup?
Very simply! Store your Slow Cooker Ground Turkey Vegetable Soup in an airtight container in the refrigerator for up to 5 days. Make sure it’s completely cool before sealing to avoid condensation, which can make the soup watery. This way, you can enjoy those delightful flavors for lunch or dinner all week!

Can I freeze the soup, and if so, how?
Yes, you can! Pour the cooled soup into freezer-safe containers or resealable bags, leaving a bit of space for expansion. Make sure to label them with the date too! It will keep in the freezer for up to 3 months. When you’re ready to enjoy it again, thaw it overnight in the refrigerator and heat gently on the stove or in the microwave.

What if the soup turns out too watery?
No worries! If you find your soup is too watery, a simple fix is to mix a tablespoon of cornstarch with a bit of cold water to create a slurry. Stir this mixture into the soup while it's simmering on the stove and let it cook for a few more minutes until it thickens. Additionally, simmering uncovered for a bit can help evaporate excess liquid.

Is this soup safe for my pets?
While the ingredients in this Slow Cooker Ground Turkey Vegetable Soup are generally healthy for humans, it's best to avoid sharing it with pets, especially if you're using seasonings like garlic and onions. These can be harmful to dogs and cats. Always check with your vet before introducing any new food items to your pet’s diet.

How can I adjust the soup for dietary restrictions?
Definitely! For gluten-free diets, substitute chicken broth with a gluten-free version, and make sure your diced tomatoes do not contain any additives. If you're looking for a vegetarian option, simply replace the ground turkey with lentils or beans, and use vegetable broth instead of chicken broth to maintain that hearty flavor!

Slow Cooker Ground Turkey Vegetable Soup

Savory Slow Cooker Ground Turkey Vegetable Soup for Cozy Nights

Hearty Slow Cooker Ground Turkey Vegetable Soup is a comforting and nutritious dish perfect for cozy nights.
Print Recipe Pin Recipe
Prep Time 15 minutes mins
Cook Time 10 hours hrs
Spinach Cooking Time 30 minutes mins
Total Time 10 hours hrs 45 minutes mins
Servings: 6 bowls
Course: Soups
Cuisine: American
Calories: 250
Ingredients Equipment Method Nutrition Notes

Ingredients
  

For the Base
  • 2 tablespoons Olive Oil Can be substituted with any neutral cooking oil.
  • 1 pound Ground Turkey Can substitute with ground chicken or lean beef.
  • 4 cloves Garlic (minced) Fresh garlic is ideal; garlic powder is an alternative.
  • 1 cup Onion (diced) Any onion variety or shallots can be used.
  • 3 sticks Celery (diced) Bell pepper is a tasty alternative.
  • 2 cups Carrots (diced) Frozen carrots can be a convenient substitute.
  • 3 medium White Potatoes (peeled and chopped) Other potatoes or sweet potatoes may work.
For the Flavor
  • 1 can (28 oz) Diced Tomatoes (drained) Fresh or crushed tomatoes are good substitutes.
  • 4 cups Chicken Broth Vegetable broth is perfect for a vegetarian version.
  • to taste Salt Adjust according to your preference.
  • to taste Pepper Adjust according to your preference.
  • to taste Garlic Powder Adjust according to your preference.
  • to taste Dried Oregano Adjust according to your preference.
  • to taste Ground Thyme Adjust according to your preference.
For the Finish
  • 2 cups Spinach (fresh or frozen) Kale or Swiss chard can be used instead.
  • to taste Fresh Parsley Optional garnish for presentation.

Equipment

  • Slow Cooker
  • Skillet
  • Cutting Board
  • Knife

Method
 

Step-by-Step Instructions
  1. Heat 2 tablespoons of olive oil over medium-high heat in a skillet. Add 1 pound of ground turkey and cook for about 5-10 minutes until it's browned. Then transfer to the slow cooker.
  2. In the slow cooker, add 3 diced celery sticks, 2 diced carrots, 3 chopped white potatoes, 1 diced onion, and 4 minced garlic cloves. Stir in 1 can of drained diced tomatoes and 4 cups of chicken broth. Season with salt, pepper, garlic powder, oregano, and thyme.
  3. Cover the slow cooker and set it to low heat. Cook for 8-10 hours until the vegetables are tender and flavors meld.
  4. About 30 minutes before serving, add 2 cups of spinach to the cooker and gently fold it in to wilt.
  5. Taste and adjust seasoning before serving. Let it sit for a few minutes for flavors to settle.
  6. Ladle the soup into bowls and garnish with fresh parsley. Serve with hearty bread or crackers.

Nutrition

Serving: 1bowlCalories: 250kcalCarbohydrates: 30gProtein: 20gFat: 8gSaturated Fat: 1gPolyunsaturated Fat: 2gMonounsaturated Fat: 3gCholesterol: 70mgSodium: 600mgPotassium: 800mgFiber: 5gSugar: 4gVitamin A: 300IUVitamin C: 25mgCalcium: 80mgIron: 3mg

Notes

This soup can be stored in an airtight container for up to 5 days and frozen for up to 3 months. Thaw overnight in the fridge before reheating.

Tried this recipe?

Let us know how it was!

Creamy Mushroom Kale Turkey Soup to Warm Your Soul

October 25, 2025 by Grace Snow Leave a Comment

“Have you ever found yourself staring down a fridge full of holiday leftovers, wondering how to transform them into something delicious?” This creamy mushroom kale turkey soup is my favorite way to breathe new life into leftover turkey, making it not only a comforting meal but a nourishing bowl that the whole family will love. With its velvety texture and rich flavors, this recipe is super easy to whip up, turning weeknight dinners into a soothing culinary hug. Plus, it’s a fantastic way to pack in nutrients and use up those extra greens! So, what do you say—are you ready to dive into a bowl of cozy goodness?

Why is this soup a must-try?

Comfort in a bowl: This Creamy Mushroom Kale Turkey Soup is the ultimate comfort food, perfect for chilly nights.

Quick and easy: Whip it up in no time with simple ingredients, making it ideal for busy weeknights.

Versatile options: Feel free to swap ingredients; leftover chicken or any greens will work beautifully!

Nutritionally balanced: Packed with protein from turkey and vitamins from kale, it’s a meal that nourishes without guilt.

Crowd pleaser: With its rich, creamy texture and delightful flavors, it’s sure to impress your family or guests.

Perfectly paired with homemade soda bread or a fresh salad like shaved asparagus and fennel, this recipe guarantees satisfaction!

Creamy Mushroom Kale Turkey Soup Ingredients

• Here’s everything you need to create this delightful soup!

For the Soup Base

  • Turkey (leftovers, cubed) – Provides hearty protein; use shredded cooked chicken as a substitute if needed.
  • Kale (baby) – Adds color, texture, and nutrients; spinach or Swiss chard can be used as alternatives.
  • Red onion (diced) – Adds sweetness and depth; any onion variety can work.
  • Mushrooms (baby bella, sliced) – Contributes earthy flavor; cremini or shiitake mushrooms can be great alternatives.
  • Celery (chopped) – Brings a savory note; aged or bell pepper can be a good replacement.
  • Garlic (thinly sliced) – Offers a fragrant, savory boost.
  • Butter – Used for sautéing vegetables; can substitute with olive oil for a dairy-free option.

For the Creaminess

  • Cream cheese – Provides richness and creamy texture; opt for a plant-based alternative for a dairy-free version.
  • All-purpose flour – Acts as a thickening agent; cornstarch works for a gluten-free option.

For Flavor

  • Chicken broth – Forms the flavorful base of the soup; high-quality broth is recommended for the best taste.
  • White wine – Adds complexity; substitute with extra broth or an alcohol-free wine if preferred.
  • Thyme (fresh) – Provides herbal notes; dried thyme can be used if fresh isn’t available.
  • Salt – Enhances flavor; adjust according to your preference.
  • Black pepper – Adds warmth and spice to the dish.

This Creamy Mushroom Kale Turkey Soup is not just comforting; it’s also a wonderful way to take advantage of holiday leftovers without sacrificing taste or health!

Step‑by‑Step Instructions for Creamy Mushroom Kale Turkey Soup

Step 1: Sauté the Aromatics
In a large Dutch oven, melt 2 tablespoons of butter over medium heat. Once the butter is bubbling, add 1 diced red onion, 1 chopped celery stalk, and 3 thinly sliced garlic cloves. Sauté for about 5 minutes until the onions are translucent and fragrant, stirring occasionally to prevent burning.

Step 2: Cook the Mushrooms
Stir in 8 ounces of sliced baby bella mushrooms and continue cooking for another 5 minutes. As the mushrooms soften, they will release their moisture, creating a savory base for your creamy mushroom kale turkey soup. Ensure they are tender and reduced, then drain any excess liquid back into the pot.

Step 3: Incorporate the Cream Cheese
Add 4 ounces of softened cream cheese to the pot, stirring until it melts completely into the mixture. This will create a rich and creamy foundation for your soup. Keep stirring gently until the cream cheese is fully blended and there are no lumps, about 2 minutes.

Step 4: Prepare the Broth Mixture
In a separate bowl, whisk together 4 cups of chicken broth, 1/4 cup all-purpose flour, 1 teaspoon salt, and 1/2 teaspoon black pepper until smooth. Gradually pour this mixture into the Dutch oven, stirring constantly to avoid lumps, and bring it to a simmer over medium heat.

Step 5: Add Turkey and Simmer
Once simmering, add in 2 cups of cubed leftover turkey and 1/2 cup of white wine. Stir well, then cover the pot and let it simmer on low heat for about 20 minutes. This step allows the flavors to meld together beautifully, creating a nourishing broth for your creamy mushroom kale turkey soup.

Step 6: Stir in the Greens
After simmering, stir in 3 cups of chopped baby kale and 1 teaspoon of fresh thyme. Cook uncovered for an additional 10 minutes, allowing the kale to wilt and soften while retaining its vibrant color. The soup should now be both aromatic and visually appealing.

Step 7: Serve and Garnish
Ladle the creamy mushroom kale turkey soup into bowls and garnish with fresh cracked pepper and additional thyme leaves, if desired. Serve hot alongside homemade soda bread or a light salad for a complete, comforting meal that everyone will enjoy.

Expert Tips for Creamy Mushroom Kale Turkey Soup

  • Quality Broth Matters: Use high-quality chicken broth for a richer flavor. Lower-quality broths can lead to a bland soup.

  • Uniform Chopping: Chop your vegetables uniformly to ensure even cooking. This prevents some veggies from being undercooked while others are mushy.

  • Leafy Greens Timing: Add kale towards the end of cooking to maintain its texture and vibrant color. Overcooked kale can become limp and lose its appeal.

  • Substitutions: Don't hesitate to swap ingredients based on what you have. Leftover chicken or other greens work beautifully in this creamy mushroom kale turkey soup.

  • Reheating Tips: When reheating leftovers, do it gently on the stove or in the microwave to preserve the creamy texture; avoid boiling to prevent curdling.

What to Serve with Creamy Mushroom Kale Turkey Soup

There's nothing quite like a warm, hearty meal to bring everyone together, especially when it's complemented by the perfect side dishes.

  • Garlic Bread: The buttery, savory flavors of garlic bread will harmonize beautifully with the creamy soup, adding a satisfying crunch to each bite.

  • Homemade Soda Bread: This rustic bread complements the soup's richness, providing a delightful contrast to its velvety texture. Dip it into the soup for a truly comforting experience.

  • Fresh Salad: A bright, zesty salad, like shaved asparagus with a lemon vinaigrette, adds a refreshing element, cutting through the creaminess while introducing a crisp texture.

  • Roasted Vegetables: Silky roasted carrots, Brussels sprouts, or any root vegetables can enhance the earthy flavors of the soup, creating a balanced plate full of nourishing goodness.

  • Cheese Platter: Add a simple platter of assorted cheeses and crackers for a fun appetizer before the main event. Creamy brie or sharp cheddar can make a delicious pairing.

  • White Wine: A chilled glass of Chardonnay elevates the dining experience, echoing the wine cooked within the soup, creating a delightful synergy of flavors.

  • Fruit Tart: For dessert, consider a light seasonal fruit tart, which brings a touch of sweetness to round out the meal while keeping things fresh and light.

Each of these pairings not only complements the rich and creamy nature of the Creamy Mushroom Kale Turkey Soup but also invites conversation and warmth to the table.

Storage Tips for Creamy Mushroom Kale Turkey Soup

Fridge: Store leftovers in an airtight container for up to 3 days. This creamy mushroom kale turkey soup stays flavorful and ready to enjoy when you need a quick meal.

Freezer: Avoid freezing due to the cream cheese; it can change texture and become grainy once thawed.

Reheating: When you’re ready to enjoy your soup again, reheat gently on the stove over low to medium heat, stirring often to maintain its creamy consistency. Alternatively, use a microwave in short intervals, ensuring it’s evenly heated.

Make Ahead Options

These Creamy Mushroom Kale Turkey Soup is perfect for meal prep enthusiasts! You can chop all your vegetables (onion, celery, kale, and mushrooms) up to 24 hours in advance and store them in an airtight container in the refrigerator to save precious time during busy weeknights. Additionally, you can cook the soup base—everything except the turkey and kale—up to 3 days ahead; just allow it to cool before refrigerating. When you're ready to serve, reheat the soup gently on the stove, adding in your turkey and fresh greens just before serving to maintain the kale’s vibrant texture. This way, you're ensuring a deliciously comforting bowl that tastes just as fresh as if it were made that day!

Variations & Substitutions for Creamy Mushroom Kale Turkey Soup

Feel free to customize this comforting creamy mushroom kale turkey soup to suit your taste and ingredient availability!

  • Dairy-Free: Swap cream cheese with a plant-based cream or coconut cream for a creamy texture without dairy.
  • Protein Swap: Use shredded cooked chicken or even sautéed tofu for a fantastic alternative to turkey.
  • Greens Galore: Try using spinach or Swiss chard instead of kale. They add a lovely color and flavor boost to your soup.
  • Veggie-Loaded: For a heartier soup, toss in diced potatoes, green beans, or peas, enhancing the nutritional profile and texture.
  • Gluten-Free: Substitute all-purpose flour with cornstarch mixed in cold water for a gluten-free thickening option.
  • Extra Creamy: Just before serving, stir in a splash of heavy cream or half-and-half for a more opulent finish.
  • Herb Variations: Experiment with fresh herbs like rosemary or parsley for different aromatic notes. They can elevate the flavor experience!
  • Hearty Heat: For a spicy kick, add a dash of red pepper flakes or a teaspoon of hot sauce while simmering.

With these creative options, you'll never run out of ways to enjoy this delicious soup! And if you're looking for more comforting soup recipes, check out my Zuppa Toscana Soup or Lemon Chicken Soup. Happy cooking!

Creamy Mushroom Kale Turkey Soup Recipe FAQs

What should I look for when selecting kale?
Absolutely! When picking kale, look for bright green leaves that are crisp and free from yellowing or dark spots. Baby kale is tender and great for soups, but if you choose mature kale, ensure it’s fresh and not overly wilted.

How should I store leftover creamy mushroom kale turkey soup?
Store leftovers in an airtight container in the refrigerator for up to 3 days. Keeping it sealed helps maintain the soup's flavor. When reheating, warm it on the stove over low to medium heat, so you don’t compromise its creamy texture.

Can I freeze creamy mushroom kale turkey soup?
I recommend avoiding freezing this soup because the cream cheese can change texture and become grainy after thawing. If you must freeze it, consider omitting the cream cheese from the recipe, cooling the soup completely, and then transferring it into freezer-safe containers for up to 3 months. When ready to enjoy, thaw it in the refrigerator overnight and reheat gently.

What if my soup is too thick?
No worries! If your creamy mushroom kale turkey soup turns out thicker than you'd like, simply add a splash of chicken broth or water while reheating. Stir well until you achieve your desired consistency. It’s all about personal preference!

Are there any dietary considerations with this recipe?
Very! This creamy mushroom kale turkey soup is a delightful option for families. However, for anyone with dairy allergies, feel free to substitute the cream cheese with a plant-based cream alternative. Always double-check ingredient labels if you’re catering to specific dietary needs.

Creamy Mushroom Kale Turkey Soup

Creamy Mushroom Kale Turkey Soup to Warm Your Soul

This creamy mushroom kale turkey soup is a delicious, nourishing way to use leftover turkey, perfect for cozy dinners.
Print Recipe Pin Recipe
Prep Time 15 minutes mins
Cook Time 45 minutes mins
Total Time 1 hour hr
Servings: 6 bowls
Course: Soups
Cuisine: American
Calories: 350
Ingredients Equipment Method Nutrition Notes

Ingredients
  

For the Soup Base
  • 2 cups Turkey (leftovers, cubed) Use shredded cooked chicken as a substitute if needed.
  • 3 cups Kale (baby) Spinach or Swiss chard can be used as alternatives.
  • 1 medium Red onion (diced) Any onion variety can work.
  • 8 ounces Mushrooms (baby bella, sliced) Cremini or shiitake mushrooms can be great alternatives.
  • 1 cup Celery (chopped) Aged or bell pepper can be a good replacement.
  • 3 cloves Garlic (thinly sliced) Offers a fragrant, savory boost.
  • 2 tablespoons Butter Can substitute with olive oil for a dairy-free option.
For the Creaminess
  • 4 ounces Cream cheese Opt for a plant-based alternative for a dairy-free version.
  • 1/4 cup All-purpose flour Cornstarch works for a gluten-free option.
For Flavor
  • 4 cups Chicken broth Use high-quality broth for the best taste.
  • 1/2 cup White wine Substitute with extra broth or alcohol-free wine if preferred.
  • 1 teaspoon Thyme (fresh) Dried thyme can be used if fresh isn’t available.
  • 1 teaspoon Salt Adjust according to your preference.
  • 1/2 teaspoon Black pepper Adds warmth and spice to the dish.

Equipment

  • Dutch oven

Method
 

Step-by-Step Instructions
  1. In a large Dutch oven, melt 2 tablespoons of butter over medium heat. Once the butter is bubbling, add 1 diced red onion, 1 chopped celery stalk, and 3 thinly sliced garlic cloves. Sauté for about 5 minutes until the onions are translucent and fragrant, stirring occasionally to prevent burning.
  2. Stir in 8 ounces of sliced baby bella mushrooms and continue cooking for another 5 minutes. As the mushrooms soften, they will release their moisture, creating a savory base for your soup.
  3. Add 4 ounces of softened cream cheese to the pot, stirring until it melts completely into the mixture. Keep stirring gently until there are no lumps, about 2 minutes.
  4. In a separate bowl, whisk together 4 cups of chicken broth, 1/4 cup all-purpose flour, 1 teaspoon salt, and 1/2 teaspoon black pepper until smooth. Gradually pour this mixture into the Dutch oven, stirring constantly to avoid lumps, and bring it to a simmer.
  5. Once simmering, add in 2 cups of cubed leftover turkey and 1/2 cup of white wine. Stir well, then cover the pot and let it simmer on low heat for about 20 minutes.
  6. After simmering, stir in 3 cups of chopped baby kale and 1 teaspoon of fresh thyme. Cook uncovered for an additional 10 minutes.
  7. Ladle the soup into bowls and garnish with fresh cracked pepper and additional thyme leaves, if desired.

Nutrition

Serving: 1bowlCalories: 350kcalCarbohydrates: 30gProtein: 25gFat: 15gSaturated Fat: 8gPolyunsaturated Fat: 1gMonounsaturated Fat: 6gCholesterol: 70mgSodium: 800mgPotassium: 900mgFiber: 5gSugar: 3gVitamin A: 1200IUVitamin C: 45mgCalcium: 90mgIron: 3mg

Notes

Quality broth matters for a richer flavor. Swap ingredients based on what you have, and avoid freezing due to the cream cheese, which can change texture when thawed.

Tried this recipe?

Let us know how it was!

Cozy Turkey Pumpkin Curry Soup with Rice for Fall Vibes

October 25, 2025 by Grace Snow Leave a Comment

As I stirred the pot, the fragrant aroma of spices filled my kitchen, wrapping around me like a warm hug. There's something incredibly comforting about a bowl of Turkey Pumpkin Curry Soup with Rice, especially as the temperatures drop and fall sets in. This quick recipe is not just a delightful way to use leftover turkey; it also brings that cozy, autumnal flavor we crave in a meal. Made in just 20 minutes, it combines the subtle sweetness of pumpkin with aromatic curry spices and a luscious coconut milk finish. Not only is this soup a fantastic meal on chilly nights, but it’s also gluten-free, making it suitable for various diets. Curious about how this cozy dish comes together? Let’s dive into the recipe!

Why is this soup a must-try?

Comforting warmth: This Turkey Pumpkin Curry Soup is like a hug in a bowl, perfect for chilly fall evenings. Rich flavors come together in just 20 minutes, allowing you to quickly create a satisfying meal after a long day.

Versatile ingredients: Feel free to use up leftover turkey or substitute with chicken or tofu for a vegetarian twist. Plus, it's a wonderfully gluten-free option that accommodates various dietary needs, just like my favorite Chickpea Spinach Curry.

Easy preparation: The simplicity of this recipe makes it ideal for beginner cooks, ensuring anyone can whip up a delightful dish without fuss. Serve it with crusty bread or a side salad for a wholesome dinner—after all, a bowl of cozy soup can be the perfect comfort food!

Turkey Pumpkin Curry Soup Ingredients

  • For the Soup Base

  • Turkey Broth – Use homemade or low-sodium for better control over the saltiness.

  • Pumpkin Puree – Whether canned or fresh, it adds the essential sweetness and creaminess to the soup.

  • Curry Powder – Provides depth and warmth; feel free to blend your own spices for a personalized enhancement.

  • Cayenne Powder – Adds a delightful heat; adjust according to your spice preference.

  • Fresh Grated Ginger – Enhances the flavor profile beautifully; ground ginger serves as a decent alternative.

  • Pumpkin Pie Spice – This aromatic blend complements the pumpkin perfectly; swap it with extra cinnamon and nutmeg if needed.

  • Salt – Essential for enhancing flavors; remember to adjust based on the broth you use.

  • Water – Modify the soup's consistency; you can add more if you prefer a thinner soup.

  • For the Main Ingredients

  • Shredded Cooked Turkey – A wonderful way to use leftover turkey, adding heartiness and protein to the dish.

  • Coconut Milk – Makes the soup delightfully creamy; opt for light coconut milk for a lower-fat alternative.

  • Minute Instant White Rice – Such a convenient ingredient that cooks quickly, providing a complete meal in no time.

This Turkey Pumpkin Curry Soup with Rice is not just a recipe; it’s an experience waiting to warm your soul!

Step‑by‑Step Instructions for Turkey Pumpkin Curry Soup with Rice

Step 1: Prepare the Soup Base
In a large saucepan, combine 4 cups of turkey broth, 1 cup of pumpkin puree, and 2 tablespoons of curry powder. Add ¼ teaspoon of cayenne powder, 1 tablespoon of freshly grated ginger, 1 teaspoon of pumpkin pie spice, and salt to taste. Pour in 1 cup of water and stir well. Heat the mixture over medium heat, bringing it to a gentle boil for about 5 minutes, allowing the flavors to develop.

Step 2: Add Turkey and Coconut Milk
Once the soup base is bubbling, stir in 2 cups of shredded cooked turkey and 1 can (about 14 ounces) of coconut milk. Return the mixture to a boil, ensuring everything is well combined. You’ll notice the soup becoming creamy and slightly thicker, with a rich aroma wafting through your kitchen. This should take around 2-3 minutes.

Step 3: Simmer for Richness
Reduce the heat to medium-low and let the Turkey Pumpkin Curry Soup simmer for 5-8 minutes. Keep an eye on it, stirring occasionally until the turkey is heated through and the soup is fragrant. By this time, the colors should be vibrant, and the texture velvety, making it inviting for a cozy meal.

Step 4: Finish with Rice
Stir in 1 cup of Minute Instant white rice, ensuring it's evenly distributed throughout the soup. Cover the saucepan and remove it from the heat. Let it stand for about 5 minutes; this will allow the rice to absorb the wonderful flavors and soften, turning your Turkey Pumpkin Curry Soup with Rice into a hearty meal.

Step 5: Serve and Enjoy
After resting, give the soup a gentle stir to combine everything. Check the consistency and season again if necessary, adding a touch more salt or sprinkle of cayenne for heat. Ladle the warm soup into bowls, and if desired, accompany it with crusty bread or a fresh salad for a delightful, cozy meal.

Storage Tips for Turkey Pumpkin Curry Soup with Rice

Fridge: Store the soup in an airtight container for up to 3 days. Make sure it’s completely cooled before sealing to prevent condensation.

Freezer: This soup freezes beautifully for up to one month. Portion it into freezer-safe containers, leaving space for expansion.

Reheating: When ready to enjoy, thaw overnight in the fridge if frozen. Reheat gently on the stovetop over low heat, stirring occasionally to maintain the creamy texture.

Serving Suggestion: Consider adding a splash of coconut milk while reheating for extra creaminess in your Turkey Pumpkin Curry Soup with Rice.

Make Ahead Options

These delightful Turkey Pumpkin Curry Soup with Rice are perfect for busy home cooks looking to save time without sacrificing flavor! You can prepare the soup base (broth, pumpkin puree, spices, and water) up to 24 hours in advance; simply store it in an airtight container in the refrigerator. The shredded turkey can also be added early on, as it reheats beautifully. When you're ready to enjoy the soup, just bring the mixture to a boil, stir in the coconut milk, and finish by adding the rice; let it rest for about 5 minutes off the heat. This way, the soup remains just as delicious while keeping you on schedule during hectic weeknights!

Turkey Pumpkin Curry Soup with Rice Variations

Feel free to get creative and make this cozy soup your own with these delightful twists and substitutions!

  • Rotisserie Chicken: Swap shredded turkey for rotisserie chicken for an even quicker option. Shred and toss it in for a hearty treat.
  • Vegetarian Tofu: Replace turkey with cubed tofu or chickpeas to enjoy a protein-packed vegetarian version. This change introduces a different texture while still keeping the soup's heartiness.
  • Dairy-Free Creaminess: Use cashew cream or almond milk in place of coconut milk for a nutty flavor, making this perfect for those avoiding dairy.
  • Extra Greens: Toss in fresh spinach, kale, or bell peppers to boost the veggie quotient and add vibrant color. These additions not only enhance the nutrient profile but also offer a fresh crunch that contrasts beautifully with the creamy soup.
  • Quinoa Twist: Replace the instant rice with cooked quinoa for a delightful nutty flavor and extra fiber. This change creates a unique texture that complements the soup wonderfully.
  • Spice It Up: For more heat, elevate the cayenne powder or add fresh chopped chilies. The extra kick will warm you up even on the coldest days!
  • Seasonal Variations: Embrace fall flavors by adding diced apples or pears for a sweet undertone. The fusion of sweet and savory will surprise and delight your palate, reminiscent of a festive harvest meal.
  • Herbs Galore: Fresh herbs like cilantro or basil can be stirred in just before serving to add brightness and depth to the soup. This will enhance the aromatic experience, making every spoonful feel freshly crafted.

By trying out these variations, you can create a soup that speaks to your tastes while enjoying the delicious foundation of my Turkey Pumpkin Curry Soup with Rice. If you're in the mood for other comforting recipes as well, check out my Zuppa Toscana Soup or try a warm bowl of my Asparagus Soup Healthy!

What to Serve with Turkey Pumpkin Curry Soup with Rice

As the warm aroma of spices fills your kitchen, imagine enhancing your comforting bowl of soup with delightful pairings that bring a sense of home to your meal.

  • Crusty Bread: The perfect companion for dipping, its crunchy exterior contrasts beautifully with the creamy soup, making each bite comforting.

  • Fresh Salad: A light, crisp salad adds a refreshing crunch. Consider using mixed greens, cherry tomatoes, and a tangy vinaigrette to balance the richness of the soup.

  • Roasted Vegetables: Seasoned and caramelized veggies lend a delicious smoky flavor, complementing the pumpkin while providing a satisfying texture.

  • Garlic Naan: Soft and pillowy, this Indian flatbread is perfect for scooping up the soup, infusing your meal with a touch of cultural flair that enhances every spoonful.

  • Simple Rice Pilaf: A subtly flavored rice dish boasts the same comforting warmth as the main soup and is excellent for soaking up every bit of the curry goodness.

  • Pumpkin Spice Latte: Enjoying a warm latte alongside your meal can amplify the cozy vibes. The familiar flavors of fall will tie together your dining experience.

  • Apple Crisp: End your meal on a sweet note with this warm dessert. The spices and sweetness resonate with the flavors in the soup, delivering a perfect autumn finale.

Expert Tips for Turkey Pumpkin Curry Soup

  • Quality Ingredients: Use homemade or low-sodium turkey broth for the best flavor. Fresh pumpkin puree elevates your Turkey Pumpkin Curry Soup with Rice well beyond basic canned options.

  • Spice Control: Adjust the cayenne powder to suit your family's taste. A little can go a long way; start with a small amount and add more if desired to avoid overwhelming heat.

  • Rice Timing: For perfectly tender rice, remember to let the soup sit off the heat after adding the Minute Instant white rice. This ensures it absorbs the flavors without becoming mushy.

  • Prevent Separating Coconut Milk: Stir the soup thoroughly after adding the coconut milk. This helps create a smooth and creamy texture, avoiding any unpleasant separation.

  • Storage Savvy: If you have leftovers, store them in an airtight container in the fridge for up to three days. Reheat gently to maintain the soup's creamy consistency.

Turkey Pumpkin Curry Soup with Rice Recipe FAQs

How do I select the right pumpkin puree?
Absolutely! If you're choosing between homemade and canned pumpkin puree, aim for 100% pumpkin without added sugars or spices for the best flavor. Canned pumpkin can save time, but if you're up for the challenge, roasting a fresh pumpkin brings out a lovely sweetness. Just slice it, roast it at 400°F for about 30-40 minutes until tender, scoop out the flesh, and blend until smooth!

How should I store leftovers of the Turkey Pumpkin Curry Soup?
Very easy! Store the soup in an airtight container in the refrigerator for up to 3 days. Make sure it's completely cooled before sealing to keep it fresh. If you're looking to save it for later, consider freezing it!

Can I freeze the Turkey Pumpkin Curry Soup?
Absolutely! This soup freezes well for up to 3 months. To freeze, portion it into freezer-safe containers, leaving a little space at the top for expansion. When you're ready to enjoy, thaw it overnight in the refrigerator and reheat on the stovetop over low heat for a creamy texture.

What if my soup is too thick after cooking?
It’s no trouble at all! If you find that your Turkey Pumpkin Curry Soup with Rice is thicker than you’d like, just add a little water or extra turkey broth to loosen it up. Start with ½ cup, stir well, and assess if you need more. Heat it gently while stirring to ensure everything is well combined.

Is this soup dog-friendly or safe for pets?
While the ingredients are primarily healthy, it’s best to keep this soup away from pets. The spices, especially cayenne and salt, aren’t suitable for dogs or cats. If you want to treat your furry friend, share some plain turkey or pumpkin without the spices!

What can I substitute if I have allergies to some ingredients?
Certainly! If you have allergies, consider these alternatives: use vegetable broth instead of turkey broth for a vegetarian option, or substitute shredded turkey with tofu or chickpeas for added protein. For a dairy-free twist, coconut milk can be replaced with almond or cashew milk, but check the flavors to ensure they complement the dish!

Turkey Pumpkin Curry Soup with Rice

Cozy Turkey Pumpkin Curry Soup with Rice for Fall Vibes

A comforting Turkey Pumpkin Curry Soup with Rice, made in 20 minutes, combining pumpkin sweetness and aromatic spices. Perfect for fall.
Print Recipe Pin Recipe
Prep Time 10 minutes mins
Cook Time 20 minutes mins
Resting Time 5 minutes mins
Total Time 30 minutes mins
Servings: 4 bowls
Course: Soups
Cuisine: American
Calories: 350
Ingredients Equipment Method Nutrition Notes

Ingredients
  

For the Soup Base
  • 4 cups Turkey Broth Use homemade or low-sodium
  • 1 cup Pumpkin Puree Canned or fresh
  • 2 tablespoons Curry Powder Adjust to taste
  • 1/4 teaspoon Cayenne Powder Adjust to taste
  • 1 tablespoon Fresh Grated Ginger Ground ginger can be used
  • 1 teaspoon Pumpkin Pie Spice Can substitute with cinnamon and nutmeg
  • to taste Salt Adjust based on broth used
  • 1 cup Water Modify for desired consistency
For the Main Ingredients
  • 2 cups Shredded Cooked Turkey Use leftover turkey
  • 1 can (14 ounces) Coconut Milk Light coconut milk can be used
  • 1 cup Minute Instant White Rice Cooks quickly

Equipment

  • Large saucepan

Method
 

Step‑by‑Step Instructions
  1. In a large saucepan, combine 4 cups of turkey broth, 1 cup of pumpkin puree, and 2 tablespoons of curry powder. Add ¼ teaspoon of cayenne powder, 1 tablespoon of freshly grated ginger, 1 teaspoon of pumpkin pie spice, and salt to taste. Pour in 1 cup of water and stir well. Heat the mixture over medium heat, bringing it to a gentle boil for about 5 minutes.
  2. Once the soup base is bubbling, stir in 2 cups of shredded cooked turkey and 1 can of coconut milk. Return the mixture to a boil, ensuring everything is well combined.
  3. Reduce the heat to medium-low and let the soup simmer for 5-8 minutes, stirring occasionally.
  4. Stir in 1 cup of Minute Instant white rice, cover the saucepan, and remove from heat. Let it stand for about 5 minutes.
  5. After resting, give the soup a gentle stir to combine everything. Serve warm.

Nutrition

Serving: 1bowlCalories: 350kcalCarbohydrates: 40gProtein: 25gFat: 15gSaturated Fat: 10gPolyunsaturated Fat: 1gMonounsaturated Fat: 2gCholesterol: 40mgSodium: 800mgPotassium: 900mgFiber: 6gSugar: 5gVitamin A: 2000IUVitamin C: 5mgCalcium: 30mgIron: 2mg

Notes

Ideal for using leftover turkey. Perfect for meal prep and can be stored in the fridge for up to 3 days or frozen for up to 1 month.

Tried this recipe?

Let us know how it was!

Lemon Raspberry Cupcakes That Burst with Flavor and Fun

October 24, 2025 by Grace Snow Leave a Comment

The moment you pop the oven door, a wave of citrusy sweetness drifts through your kitchen, instantly lifting your spirits. I have to say, there's something utterly rewarding about creating your own desserts, especially when they come together as effortlessly as these Easy Lemon Raspberry Cupcakes. With just a simple cake mix, you can whip up moist and fluffy cupcakes that surprise everyone with their delightful tart and sweet flavor combination. Whether you’re celebrating a special occasion or just indulging your sweet tooth, these little gems are sure to impress. Plus, they’re a quick dessert option that allows you to impress friends and family without spending all day baking. Curiosity piqued? Let’s dive into this delicious recipe!

Why Are These Cupcakes So Irresistible?

Ease of Preparation: Quick and simple, these Lemon Raspberry Cupcakes come together in no time using a convenient cake mix, making them perfect for any busy home cook.

Flavor Explosion: Tart yet sweet, the refreshing lemon pairs beautifully with the raspberry jam center, ensuring every bite bursts with flavor.

Perfect for Any Occasion: Versatile and crowd-pleasing, these cupcakes are lovely for birthdays, brunches, or casual gatherings—everyone will ask for seconds!

Customizable Options: Experiment freely with different jam flavors or add lemon zest to elevate the taste to new heights—your creativity can shine!

Impressive Presentation: Garnished with fresh fruit, these cupcakes look as good as they taste, making them a fantastic centerpiece for your dessert table.

Craving more citrusy goodness? You can try pairing these cupcakes with a warm bowl of Lemon Chicken Soup for a delightful meal!

Lemon Raspberry Cupcake Ingredients

• Capture the vibrant flavors in every bite!

For the Cupcakes

  • Cake Mix – The base for these Lemon Raspberry Cupcakes; a gluten-free cake mix can be used if needed.
  • Water – Keeps the cupcakes moist; substitute with milk for enhanced flavor.
  • Vegetable Oil – Adds tenderness; melted coconut oil or unsweetened applesauce are great alternatives.
  • Eggs – Essential for structure; for a vegan option, use flaxseed meal (1 tbsp flaxseed + 2.5 tbsp water = 1 egg).

For the Filling

  • Raspberry Jam – Provides a lovely surprise center; opt for sugar-free jam to cut down on sweetness.

For the Frosting

  • Butter – Key for richness; dairy-free butter works well for those with dietary restrictions.
  • Vanilla Extract – Brightens the frosting’s flavor; almond extract offers a unique twist.
  • Powdered Sugar – Sweetens the frosting; use granular erythritol for a low-calorie version.
  • Half and Half or Milk – Adjusts consistency; non-dairy milk can be substituted.

With these ingredients at hand, you're well on your way to crafting Lemon Raspberry Cupcakes that will truly delight your taste buds!

Step‑by‑Step Instructions for Lemon Raspberry Cupcakes

Step 1: Preheat and Prepare
Preheat your oven to 350°F (175°C) and prepare a muffin tin by lining it with cupcake liners or greasing it lightly with cooking spray. This ensures that your Lemon Raspberry Cupcakes will release easily after baking. If using liners, choose vibrant colors to add a fun touch to your presentation!

Step 2: Mix the Batter
In a large mixing bowl, combine the cake mix, water, vegetable oil, and eggs. Using an electric mixer on medium speed, blend the ingredients for about 2 minutes until the batter is smooth and well combined. You should see a lovely lemon-yellow mixture forming, indicating it’s ready for the next step!

Step 3: Fill the Muffin Tin
Carefully pour the batter into the prepared muffin tin, filling each cup about two-thirds full to allow room for rising. This ensures your Lemon Raspberry Cupcakes will have a perfect dome shape when baked. Use a measuring cup or a spoon for consistent filling, making the process mess-free and easy.

Step 4: Bake and Cool
Bake the cupcakes in the preheated oven for 18-20 minutes, or until a toothpick inserted into the center comes out clean. Once they are golden and springy to the touch, remove them from the oven and allow them to cool in the tin for about 5 minutes before transferring them to a wire rack to cool completely.

Step 5: Prepare the Jam Filling
Once the cupcakes are completely cooled, use a melon baller or a sharp knife to remove a small section from the center of each cupcake. This creates a lovely little well for your raspberry jam. Ensure to be gentle to maintain the integrity of the cupcake.

Step 6: Add the Raspberry Jam
Fill each well with raspberry jam, making sure to add a generous amount for that burst of flavor in every bite. After filling, replace the cupcake “plug” that you removed earlier, gently pressing it back into place to keep the jam hidden.

Step 7: Make the Frosting
For the frosting, cream the butter in a mixing bowl until light and fluffy, which usually takes about 2-3 minutes. Gradually add the powdered sugar, continuing to mix, and pour in the half and half until achieving a creamy, smooth consistency. The frosting should be easy to spread and hold its shape.

Step 8: Frost and Garnish
Frost the cooled Lemon Raspberry Cupcakes generously, creating a beautiful swirl on top. For added flair, garnish each cupcake with fresh raspberries and a small lemon wedge. This not only enhances the visual appeal but also adds a refreshing touch to every delicious bite.

Lemon Raspberry Cupcakes Variations & Substitutions

Feel free to mix it up and add your own twist to these delightful cupcakes!

  • Gluten-Free: Use a gluten-free cake mix to accommodate those with gluten sensitivities and enjoy the same scrumptious flavors.
  • Milk Instead of Water: Replace the water with milk for a richer and creamier batter that elevates each bite.
  • Coconut Oil: Swap vegetable oil for melted coconut oil for a subtle tropical flavor and added moisture.
  • Vegan Option: Use flaxseed meal mixed with water as an egg substitute for a plant-based version that doesn’t compromise taste.
  • Sweet Filling: Trade raspberry jam for strawberry or blueberry preserves to create a different fruity surprise in the center. Imagine the contrasting flavors dancing on your palate!
  • Lemon Zest: Add freshly grated lemon zest to the batter for an extra zesty kick that enhances the lemon flavor beautifully.
  • Cream Cheese Frosting: Replace the butter with cream cheese for your frosting for a tangier and creamier texture that pairs perfectly with the sweetness.
  • Flavor Twist: Consider using almond extract instead of vanilla in the frosting to introduce a unique aromatic profile that complements the flavors delightfully.

And if you’re looking for a delightful partner to these cupcakes, why not try them alongside a comforting bowl of Lemon Chicken Soup to balance out the sweetness? Enjoy your baking adventure!

Expert Tips for Lemon Raspberry Cupcakes

  • Cool Completely: Ensure cupcakes are completely cooled before injecting jam and frosting to prevent melting and maintaining the structure.

  • Enhance Flavor: Add zest from a fresh lemon to the cupcake batter or frosting for an extra pop of lemony goodness, enhancing your Lemon Raspberry Cupcakes.

  • Avoid Overflow: When filling the muffin tins, only fill each cup two-thirds full. This prevents overflow during baking and results in beautifully dome-shaped cupcakes.

  • Perfect Consistency: If your frosting seems too thick, gradually add more half and half or milk until it reaches the desired creamy consistency, ensuring an easy spread on your cupcakes.

  • Presentation Matters: For a stunning look, decorate your cupcakes with additional fresh raspberries and lemon wedges right before serving. This makes them visually appealing and enticing!

Storage Tips for Lemon Raspberry Cupcakes

Room Temperature: Store your cupcakes in an airtight container at room temperature for up to 3 days to maintain their moist texture and flavor.

Fridge: For longer freshness, keep them in the fridge for up to a week. Ensure they’re well covered to prevent drying out.

Freezer: Freeze Lemon Raspberry Cupcakes for up to 3 months. Place them in a single layer in a freezer-safe container, separated by parchment paper.

Reheating: To enjoy them warm, let cupcakes thaw in the fridge overnight, then microwave briefly for 10-15 seconds before serving.

Make Ahead Options

These Lemon Raspberry Cupcakes are perfect for meal prep enthusiasts! You can prepare the cupcake batter and fill the muffin tins up to 24 hours in advance; just cover them tightly with plastic wrap and refrigerate to keep them fresh. Alternatively, bake the cupcakes and let them cool completely, then store them in an airtight container for up to 3 days at room temperature or a week in the fridge. To maintain quality, frost them just before serving—this way, the frosting remains creamy and delightful, and the cupcakes stay moist. When ready to enjoy, simply inject the raspberry jam and frost the cupcakes, providing a fresh dessert experience with minimal effort!

What to Serve with Easy Lemon Raspberry Cupcakes

Elevate your dessert experience by exploring delightful pairings that enhance the magic of these cupcakes.

  • Lemonade Splash: A refreshing glass of lemonade complements the zesty flavor of the cupcakes, enhancing their bright, citrusy notes. The combination is perfect for warm afternoons or festive gatherings.

  • Berry Medley Salad: Combining fresh strawberries, blueberries, and raspberries creates a colorful, sweet salad that echoes the flavors within the cupcakes. Serve it alongside for a fresh, light contrast.

  • Vanilla Ice Cream: The creamy richness of vanilla ice cream is a classic pairing, balancing the tartness of the raspberry jam beautifully. Each bite of cupcake topped with a scoop of ice cream creates a dreamy dessert experience.

  • Herbal Tea: Opt for a fragrant herbal tea such as chamomile or mint to offer a soothing contrast. The gentle flavors of the tea will harmonize perfectly with the sweet and tart notes of the cupcakes.

  • Coconut Whipped Cream: A dollop of light and airy coconut whipped cream adds a tropical twist. Its creamy texture pairs delightfully with the lemony frosting and jam, creating a tropical finish.

  • Sparkling Water with Berries: Infuse your sparkling water with a handful of fresh berries for a fizzy, flavorful drink. It keeps things light and refreshing, enhancing the cupcakes’ delightful sweetness.

  • Cream Cheese Frosting: If you're feeling adventurous, try these cupcakes again with a rich cream cheese frosting. The tangy flavor of cream cheese adds depth, taking the cupcakes to the next level.

Indulging in any of these options will not only enhance your dessert but also bring joy to your whole meal!

Lemon Raspberry Cupcakes Recipe FAQs

How do I know if my lemons are ripe and ready to use?
Absolutely! When selecting lemons, look for ones that are bright yellow with a smooth, firm texture. Avoid any that have dark spots all over or feel soft. A ripe lemon should feel heavy for its size, indicating juiciness and freshness.

What’s the best way to store Lemon Raspberry Cupcakes?
It's very easy! Store your cupcakes in an airtight container at room temperature for up to 3 days, maintaining their moist texture. If you want them to last longer, keep them in the fridge for up to a week, but make sure they're covered to prevent drying out.

Can I freeze these cupcakes for later?
Absolutely! You can freeze Lemon Raspberry Cupcakes for up to 3 months. Start by placing them in a single layer in a freezer-safe container, separated by sheets of parchment paper to prevent sticking. When you're ready to enjoy them, thaw them in the fridge overnight and microwave for 10-15 seconds to warm them.

What should I do if my cupcakes overflow during baking?
If your cupcakes overflow, don't worry; it happens to the best of us! Next time, simply fill the cups about two-thirds full instead of completely. This gives them space to rise without spilling over. If some did overflow, allow them to cool before gently cutting away any excess, ensuring they stay beautifully shaped.

Are there any allergies I should consider with this recipe?
Very importantly! If you're serving these Lemon Raspberry Cupcakes to guests, be aware of common allergens. This recipe includes eggs and dairy; for a vegan option, use flaxseed meal instead of eggs and dairy-free butter. Also, if you're making them gluten-free, simply swap in a gluten-free cake mix and double-check all other ingredients before baking.

Lemon Raspberry Cupcakes

Lemon Raspberry Cupcakes That Burst with Flavor and Fun

These Lemon Raspberry Cupcakes are a delightful dessert that combines tart lemon flavor with sweet raspberry, perfect for any occasion.
Print Recipe Pin Recipe
Prep Time 20 minutes mins
Cook Time 20 minutes mins
Total Time 40 minutes mins
Servings: 12 cupcakes
Course: Dessert
Cuisine: American
Calories: 200
Ingredients Equipment Method Nutrition Notes

Ingredients
  

Cupcake Ingredients
  • 1 box cake mix gluten-free option available
  • 1 cup water can substitute with milk
  • 1/2 cup vegetable oil melted coconut oil or unsweetened applesauce can be used
  • 3 large eggs 1 tbsp flaxseed + 2.5 tbsp water can substitute for each egg
Filling Ingredients
  • 1 jar raspberry jam sugar-free option available
Frosting Ingredients
  • 1/2 cup butter dairy-free butter works for dietary restrictions
  • 1 tsp vanilla extract almond extract can be used for a twist
  • 3 cups powdered sugar granular erythritol can be used for a low-calorie version
  • 2 tbsp half and half non-dairy milk can be substituted to adjust consistency

Equipment

  • Muffin tin
  • Electric mixer
  • measuring cups
  • Mixing Bowl
  • Knife

Method
 

Baking Instructions
  1. Preheat your oven to 350°F (175°C) and prepare a muffin tin by lining it with cupcake liners or greasing it lightly.
  2. In a large mixing bowl, combine the cake mix, water, vegetable oil, and eggs, and mix on medium speed for about 2 minutes until smooth.
  3. Pour the batter into the prepared muffin tin, filling each cup about two-thirds full.
  4. Bake in the preheated oven for 18-20 minutes or until a toothpick comes out clean.
  5. Once cooled, remove the center of each cupcake to create a well for the raspberry jam.
  6. Fill each well with raspberry jam and replace the top of the cupcake.
  7. For frosting, cream the butter until fluffy, add powdered sugar gradually, and mix in half and half for desired consistency.
  8. Frost the cooled cupcakes and garnish with fresh raspberries and lemon wedges.

Nutrition

Serving: 1cupcakeCalories: 200kcalCarbohydrates: 30gProtein: 2gFat: 8gSaturated Fat: 4gPolyunsaturated Fat: 1gMonounsaturated Fat: 3gCholesterol: 30mgSodium: 200mgPotassium: 80mgFiber: 1gSugar: 15gVitamin A: 200IUVitamin C: 1mgCalcium: 20mgIron: 0.5mg

Notes

Store in an airtight container at room temperature for up to 3 days, refrigerated for up to a week, or freeze for up to 3 months. Reheat briefly before serving if desired.

Tried this recipe?

Let us know how it was!

Delightful Thanksgiving Punch: Festive Fun for Everyone!

October 24, 2025 by Grace Snow Leave a Comment

As the leaves turn and the air grows crisp, I find myself craving the festive flavors of fall. This is the perfect time to whip up a batch of Thanksgiving Punch, a delightful blend that captures the essence of the season. With its fruity and refreshing notes, this drink promises to be the highlight of your holiday gatherings—especially with both an alcoholic and non-alcoholic option to please everyone at the table. Not only is it simple to prepare, but it also adds a festive touch that elevates any Thanksgiving feast. Imagine your guests sipping on this vibrant punch, garnished with slices of fresh fruit, as they revel in the warmth of togetherness. Curious to discover how to create this centerpiece drink that will leave everyone clamoring for more? Let’s get started!

Why is Thanksgiving Punch a Must-Have?

Festive Flair: This Thanksgiving Punch brings the celebration to life with its vibrant colors and heavenly aroma, making your gathering feel special.

Easy to Customize: With both alcoholic and non-alcoholic versions available, it’s perfect for guests of all ages. You can easily adjust the flavors by swapping ingredients or adding seasonal spices.

Kid-Friendly Option: Children will love the non-alcoholic variation, ensuring no one feels left out during the festivities!

Crowd-Pleaser: Its fruity and slightly spicy flavor profile appeals to a wide range of tastes, making it a drink everyone can enjoy.

Make-Ahead Magic: You can prepare the punch mixture a day in advance, giving you more time to focus on the rest of your Thanksgiving feast.

Thanksgiving Punch Ingredients

For the Punch Base

  • Apple Cider – Provides a sweet and tart base; substitute with pear cider for a different flavor twist.
  • Cranberry Juice – Adds a slight tanginess; use 100% cranberry juice for the best color and flavor—avoid cocktail blends.
  • Orange Juice – Offers a citrusy sweetness; freshly squeezed is preferable for optimal taste, though bottled can be used in a pinch.

For the Alcoholic Variation

  • Fireball Whiskey – Infuses a cinnamon kick; if unavailable, a different whiskey can be used, but the flavor will vary.
  • Apricot Brandy – Enhances fruitiness; can be replaced with other fruit-flavored brandies like peach or apple.

For the Non-Alcoholic Variation

  • Lemon-Lime Soda – Adds carbonation and sweetness; club soda can substitute for a less sweet version—adjust sweetness by using ginger ale instead.

For Serving

  • Ice – Chills the punch and keeps it refreshing.
  • Garnishes – Apple slices, orange slices, cranberries, and cinnamon sticks add visual appeal and enhance flavor while inviting curiosity about this festive drink.

Step‑by‑Step Instructions for Thanksgiving Punch

Step 1: Mix the Fruit Juices
In a large punch bowl, pour together 4 cups of apple cider, 2 cups of cranberry juice, and 1 cup of freshly squeezed orange juice. Stir the mixture gently with a ladle until well combined, creating a beautiful base for your Thanksgiving Punch. The vibrant colors of the juices should blend harmoniously, evoking the warm hues of fall.

Step 2: Add the Alcohol
Pour in 1 cup of Fireball whiskey and ½ cup of apricot brandy to the juice mixture. Stir again to ensure the alcohol is evenly distributed throughout the punch, adding a touch of sweetness and warmth. The spices from the whiskey will create a delightful scent that fills the air, instantly elevating the festive vibe.

Step 3: Chill the Mixture
Cover the punch bowl with plastic wrap or a lid and place it in the refrigerator to chill for at least 4 hours. This resting period allows the flavors of the Thanksgiving Punch to meld beautifully. You’ll know it’s ready when the mixture is cold and the aromas have deepened, inviting you to take a taste.

Step 4: Add the Fizz
Just before serving, carefully add 2 cups of lemon-lime soda to the chilled punch mixture. This will give your Thanksgiving Punch a refreshing burst of effervescence, perfect for that festive sparkle. Stir gently to combine, ensuring the carbonation remains intact, and enjoy the delightful fizziness that enhances the entire drink.

Step 5: Prepare for Serving
Fill a serving glass with ice and ladle the punch over it to ensure each guest receives a refreshing, chilled drink. The punch should have a vibrant color and inviting sparkle, making it an appealing centerpiece for your table.

Step 6: Garnish with Festive Touches
Before serving, garnish the Thanksgiving Punch with slices of fresh apples and oranges, along with a handful of cranberries and a few cinnamon sticks. These beautiful garnishes not only elevate the drink’s presentation but also enhance its inviting flavors, enticing everyone to indulge in your delicious concoction.

Thanksgiving Punch: Endless Possibilities

Feel free to put your personal spin on this delicious Thanksgiving Punch, making it uniquely yours!

  • Alcohol-Free Delight: Omit the whiskey and brandy. Add a splash more ginger ale to keep that fizzy fun alive!

  • Sparkling Alternative: Swap lemon-lime soda with sparkling apple cider for an extra touch of festive sweetness. Imagine serving a drink that sparkles as brightly as your holiday spirit!

  • Juice Variations: Replace cranberry juice with pomegranate juice for a gorgeous color and subtle tartness. It’ll make your punch even more beautiful and exciting!

  • Herb Infusion: Add a few sprigs of fresh rosemary or mint for an aromatic twist. These herbs will brighten up the flavors and create an unexpected, refreshing layer to the punch.

  • Autumn Spices: Stir in a pinch of ground cinnamon or nutmeg for warming spices that embrace the season fully. This simple addition will invoke memories of cozying up by the fire!

  • Tropical Twist: Incorporate pineapple juice for a tropical flair that complements the fall fruits beautifully. It's a fun way to surprise your guests with a taste of sunshine amid the autumn chill!

  • Heightened Heat: If you like a spicier punch, add a splash of ginger beer or a small dose of hot sauce for an unexpected kick. Your guests will be intrigued, and it’s sure to spark conversations!

  • Keep it Smooth: For a creamier texture, consider adding a splash of coconut milk or cream. This will also give your punch an alluring, tropical vibe that would be a hit at any holiday gathering!

Playing with these variations will bring out new flavors that can harmonize perfectly with your unique Thanksgiving feast. If you're looking for more inspiration, check out this delightful non-alcoholic option or learn how to elevate your holiday gatherings with our festive drinks collection!

Expert Tips for Thanksgiving Punch

  • Chill Time: Refrigerate the punch mixture without soda for at least 4 hours. This step allows the flavors of your Thanksgiving Punch to meld together beautifully.
  • Mix It Up: Consider offering the alcohol on the side. This way, guests can customize their drinks, especially those wanting the non-alcoholic option.
  • Avoid Dilution: Serve the punch over ice instead of letting it sit with ice for too long. This helps maintain the punch's vibrant flavor without becoming watered down.
  • Garnish Smartly: Use fresh fruit slices and cinnamon sticks for garnishes; they not only enhance visual appeal but also elevate the overall drinking experience.
  • Flavor Variations: Don’t hesitate to experiment with seasonal spices like nutmeg or cloves for a unique twist on your Thanksgiving Punch that reflects your personal taste.

Make Ahead Options

These Thanksgiving Punch variations are perfect for busy home cooks who want to enjoy more time with their guests! You can prepare the punch base, excluding the lemon-lime soda and ice, up to 24 hours in advance to let the flavors meld beautifully in the refrigerator. Simply mix together the apple cider, cranberry juice, orange juice, Fireball whiskey, and apricot brandy, then cover and refrigerate. To maintain the punch's vibrant taste, avoid adding the soda until just before serving. When it’s time to celebrate, simply stir in the soda, add ice, and garnish with fresh fruit for a stunning presentation that will impress everyone at your Thanksgiving gathering!

How to Store and Freeze Thanksgiving Punch

Fridge: Keep the punch mixture (without soda and ice) in an airtight container in the refrigerator for up to 3 days. This ensures the flavors remain fresh and vibrant.

Freezer: If you want to prepare ahead, freeze the punch mixture (again, without soda) in ice cube trays or freezer-safe containers for up to 1 month. Thaw and add soda just before serving.

Avoid Dilution: When serving, always add ice to individual glasses instead of the entire punch bowl. This keeps the Thanksgiving Punch from becoming watered down during the festivities.

Refrigerate Leftovers: If you have leftover punch with soda, consume it within 2 hours for the best taste and effervescence; carbonation will decrease over time.

What to Serve with Thanksgiving Punch

As you prepare to delight your guests with this festive concoction, consider these delectable pairings to create a memorable meal experience.

  • Savory Stuffing: This stuffing's rich flavors complement the punch's fruity notes, bridging savory and sweet beautifully. A warm side dish invites the comfort of the season and pairs perfectly with your beverage.

  • Roasted Turkey: The classic centerpiece of any Thanksgiving meal, turkey’s savory flavor harmonizes with the punch’s sweet acidity, balancing the palate with every sip.

  • Cranberry Sauce: Enhance the fruitiness of the punch with homemade cranberry sauce that mirrors its flavor profile, creating a delightful synergy on the plate.

  • Sweet Potato Casserole: This dish's natural sweetness and earthy spices elevate the warm notes of the Thanksgiving Punch, creating a wonderfully cohesive dining experience.

  • Pumpkin Pie: A holiday favorite, the spice-forward profile of pumpkin pie complements the cinnamon kick in the punch, making for a harmonious finish as you celebrate together.

  • Cheese Platter: Offering a mix of sharp and creamy cheeses will provide a delightful contrast and keep your guests snacking happily while enjoying their drinks.

  • Apple Crisp: This warm dessert infused with cinnamon and apples resonates beautifully with the punch’s flavors, offering a cozy and satisfying end to the meal.

  • Mulled Wine: For a delightful drink pairing, serve mulled wine alongside your punch to enhance the festive spirit, with its warm spices echoing the fall theme.

  • Fresh Fruit Salad: A light and refreshing side that echoes the fruity elements of the punch, offering a burst of freshness and color that brightens the table.

Thanksgiving Punch Recipe FAQs

What type of apple cider should I use for the punch?
I recommend using fresh, unfiltered apple cider for a richer flavor. If you can't find it, a quality store-bought apple cider will work too—just avoid clear apple juice, as it won’t provide the same depth of taste!

How should I store leftovers of the Thanksgiving Punch?
Store the punch mixture (without soda) in an airtight container in the fridge for up to 3 days. If you’ve added soda, try to consume it within 2 hours to ensure the fizz stays fresh!

Can I freeze Thanksgiving Punch?
Absolutely! To freeze, pour the punch mixture (without soda) into ice cube trays or a freezer-safe container. It can last up to a month in the freezer. When you’re ready to serve, thaw it out and mix in the soda just before serving for that refreshing effervescence!

What if my punch tastes too sweet or too strong?
No worries at all! If it's too sweet, adjust the flavor by adding more cranberry juice or even a splash of lemon juice to balance it out. If it's too strong, simply dilute it with a bit more club soda or lemon-lime soda.

Is there a non-alcoholic option available?
Yes! For a non-alcoholic Thanksgiving Punch, simply omit the whiskey and brandy. You can replace those spirits with an additional splash of ginger ale or club soda to maintain the festive fizz and flavor!

Thanksgiving Punch

Delightful Thanksgiving Punch: Festive Fun for Everyone!

Thanksgiving Punch is a festive and fruity drink perfect for holiday gatherings.
Print Recipe Pin Recipe
Prep Time 15 minutes mins
Chill Time 4 hours hrs
Total Time 4 hours hrs 15 minutes mins
Servings: 10 drinks
Course: Drinks
Cuisine: American
Calories: 150
Ingredients Equipment Method Nutrition Notes

Ingredients
  

For the Punch Base
  • 4 cups apple cider substitutable with pear cider
  • 2 cups cranberry juice use 100% juice, avoid cocktail blends
  • 1 cup orange juice freshly squeezed preferred
For the Alcoholic Variation
  • 1 cup Fireball whiskey substitutable with other whiskey
  • 1/2 cup apricot brandy substitutable with other fruit-flavored brandies
For the Non-Alcoholic Variation
  • 2 cups lemon-lime soda can substitute with club soda
For Serving
  • as needed cups ice to chill the punch
  • as desired garnishes apple slices, orange slices, cranberries, cinnamon sticks

Equipment

  • Large punch bowl
  • Ladle

Method
 

Step-by-Step Instructions for Thanksgiving Punch
  1. In a large punch bowl, pour together 4 cups of apple cider, 2 cups of cranberry juice, and 1 cup of freshly squeezed orange juice. Stir gently until well combined.
  2. Pour in 1 cup of Fireball whiskey and 1/2 cup of apricot brandy to the juice mixture. Stir to ensure the alcohol is evenly distributed.
  3. Cover the punch bowl and place it in the refrigerator to chill for at least 4 hours.
  4. Just before serving, carefully add 2 cups of lemon-lime soda to the chilled punch mixture. Stir gently to combine.
  5. Fill a serving glass with ice and ladle the punch over it.
  6. Garnish the punch with slices of fresh apples and oranges, along with cranberries and cinnamon sticks.

Nutrition

Serving: 8ozCalories: 150kcalCarbohydrates: 35gSodium: 10mgPotassium: 200mgSugar: 30gVitamin C: 10mgCalcium: 1mgIron: 1mg

Notes

Prepare the punch mixture ahead of time to allow flavors to meld. Adjust sweetness with additional soda if needed.

Tried this recipe?

Let us know how it was!

Zesty Lemon Lime Cupcakes for a Refreshing Summer Treat

October 24, 2025 by Grace Snow Leave a Comment

As I watched summer's warmth blanket my backyard, I couldn't help but crave the light and zesty refreshment of summer desserts. Enter these delightful Lemon Lime Cupcakes! Made with lemon-lime soda, these cupcakes rise effortlessly, giving you a soft, moist texture without the hassle of heavy mixing. Perfect for picnics or backyard gatherings, these treats are not only a crowd-pleaser but also incredibly quick to whip up using a simple cake mix. Topped with a tangy cream cheese frosting, they're just the vibrant burst of citrus you've been dreaming of on hot days. Ready to add a zesty twist to your baking routine? Let’s dive into this refreshing recipe together!

Why are Lemon Lime Cupcakes special?

Refreshing and light, these cupcakes capture the essence of summer in every bite. Ease of preparation makes them perfect for both novice bakers and seasoned chefs alike. Moist from the soda and topped with a creamy frosting, they are the ideal dessert for picnics or casual gatherings. Plus, the citrus zing brightens any event! For another delicious summer treat, be sure to try my Lemon Chicken Soup or take a look at these easy Lemon Ricotta Protein Pancakes.

Lemon Lime Cupcake Ingredients

Note: Gather these ingredients to create your delicious lemon lime cupcakes!

For the Batter

  • White Cake Mix – This provides structure and base flavor; feel free to swap with another flavor of box cake mix if you desire.
  • Vegetable Oil – Adds a rich moisture; try melted coconut oil for a unique twist.
  • Egg Whites – Contributes to the lightness of the cupcakes; whole eggs will work, but the texture may be denser.
  • Lemon Lime Soda – Acts as a leavening agent and boosts flavor; any clear citrus soda can be used for these lemon lime cupcakes.
  • Lime Gelatin Mix – Elevates the citrus flavor and moisture; you can omit this if it's not on hand, but the cupcakes will be less zesty.

For the Frosting

  • Salted Butter – Provides a creamy richness to the frosting; unsalted butter is fine, just add a pinch of salt.
  • Cream Cheese – Gives the frosting its signature tangy creaminess; vegan cream cheese is a fantastic dairy-free alternative.
  • Powdered Sugar – Sweetens and stabilizes the frosting; coconut sugar can be a less processed option.
  • Vanilla Extract – Adds a depth of flavor; this ingredient is optional but enhances the frosting's taste.
  • Half and Half – Achieves a smooth consistency in your frosting; substitute with milk or a non-dairy option if needed.
  • Green Food Coloring – Use for a fun, vibrant appearance; it's optional, so feel free to skip if you prefer a more natural look.
  • Green Sprinkles – These give your cupcakes a festive touch; swap with any color sprinkles based on your preference.

Now that you’ve got everything ready, let’s whip up a batch of zesty lemon lime cupcakes that will delight everyone!

Step‑by‑Step Instructions for Lemon Lime Cupcakes

Step 1: Preheat the Oven
Begin by preheating your oven to 350°F (175°C). While it heats, prepare a standard muffin tin by lining it with cupcake liners, giving you a cheerful base for your lemon lime cupcakes. This ensures easy removal later and a neat presentation for your delightful treats.

Step 2: Mix the Batter
In a large mixing bowl, combine one box of white cake mix, 1/3 cup of vegetable oil, 3 egg whites, and 12 ounces of lemon-lime soda. Stir these ingredients together gently until just incorporated, being careful not to overmix. For enhanced citrus flavor, fold in a packet of lime gelatin, making sure it blends seamlessly into the batter.

Step 3: Fill the Cups
With your batter ready, pour it into the prepared cupcake liners, filling each about two-thirds full. This allows ample room for the lemon lime cupcakes to rise beautifully while baking. As you fill the liners, take a moment to admire the vibrant color of the batter; it's a quick reminder of the zesty flavor awaiting you!

Step 4: Bake to Perfection
Place the muffin tin in your preheated oven and bake for 18 to 20 minutes. Keep an eye on them; they're done when the tops are light golden and a toothpick inserted into the center comes out clean. This is the moment to experience the delightful aroma of lemon lime filling your kitchen!

Step 5: Cool Down
Once baked, remove the cupcakes from the oven and let them cool in the muffin tin for about 5 minutes. After this, transfer them to a wire rack to cool completely. This step is crucial for ensuring that your lemon lime cupcakes remain moist, providing the perfect base for creamy frosting.

Step 6: Prepare the Frosting
While the cupcakes cool, it’s time to whip up the frosting. In a large bowl, beat together 8 ounces of cream cheese and 1/2 cup of salted butter until fluffy. Gradually add in 3 to 4 cups of powdered sugar and 2 tablespoons of half and half, mixing until smooth. Add a dash of vanilla extract for depth and a little lime gelatin if you wish for extra zest.

Step 7: Frost the Cupcakes
Once the cupcakes are cooled completely, use a piping bag to frost each one generously with your creamy mixture. Feel free to get creative with your technique; a swirl or rosette can add an artistic flair! To finish, sprinkle on green sprinkles for an eye-catching touch that complements the look of your vibrant lemon lime cupcakes.

Expert Tips for Lemon Lime Cupcakes

  • Mix Gently: To achieve the light texture in your lemon lime cupcakes, mix the batter only until just combined. Overmixing can lead to dense cupcakes.
  • Rest Before Frosting: Ensure your cupcakes are completely cool before frosting to prevent the cream cheese frosting from melting.
  • Add Citrus Zest: For an extra burst of flavor, consider adding fresh lime or lemon zest to the batter or frosting. It elevates the citrus notes beautifully.
  • Soda Variations: Feel free to experiment with different citrus sodas! Limeade or lemon soda can lend a unique twist to your lemon lime cupcakes.
  • Frosting Consistency: If your frosting is too thick, add a splash of milk or half and half to achieve a smooth, spreadable consistency. Adjust to your preference!

Lemon Lime Cupcakes Variations & Substitutions

Feel free to get creative and make these lemon lime cupcakes your own with these delightful twists!

  • Dairy-Free: Substitute cream cheese with vegan cream cheese and use coconut milk in the frosting for a deliciously creamy, dairy-free option.
  • Flavor Twist: Experiment with different flavored sodas like orange or grapefruit to add an unexpected zing to your cupcakes.
  • Homemade Cake: Swap the store-bought cake mix for a homemade vanilla cake recipe to create a richer base for these lemon lime cupcakes.
  • Natural Sweetener: Use coconut sugar instead of powdered sugar in the frosting for a less processed sweetness that’s still fabulously creamy.
  • Zesty Frosting: Add lime zest to your frosting for an extra burst of citrus flavor that complements the cupcake beautifully.
  • Texture Variety: Top your cupcakes with crushed graham crackers for a delightful crunch contrasted with the creamy frosting—like a summer pie!
  • Sprinkled Heat: For a spicy kick, mix a pinch of cayenne or chili powder into the frosting to balance the sweetness with heat.
  • Fruit Addition: Fold chopped fresh berries or citrus segments into the batter for added freshness and bursts of flavor in each bite.

These variations are perfect for customizing your cupcakes to fit your taste! If you’re in the mood for more zest, check out my Chipotle Lime Chicken or try the vibrant flavors of Fiesta Lime Chicken with Avocado.

Storage Tips for Lemon Lime Cupcakes

Fridge: Store your lemon lime cupcakes in an airtight container for up to 5 days to maintain their freshness and moisture.

Freezer: You can freeze the cupcakes for up to 2 months. Wrap each cupcake individually in plastic wrap and place them in a freezer-safe bag for easy serving later.

Reheating: Thaw frozen cupcakes in the fridge overnight, then enjoy them at room temperature or pop them in the microwave for 10-15 seconds for a warm treat.

Frosting Storage: If you have leftover frosting, store it in the fridge in an airtight container for up to a week and re-whip before using again on your lemon lime cupcakes.

Make Ahead Options

These Lemon Lime Cupcakes are a fantastic option for meal prep, saving you time on busy days! You can prepare the cupcake batter and refrigerate it for up to 24 hours before baking. Just mix all your ingredients together, cover the bowl, and store it in the fridge. Additionally, feel free to make the cream cheese frosting in advance and keep it in an airtight container in the fridge for up to 3 days. When you're ready to bake, pour the chilled batter into the prepared muffin tin and bake as directed. Once the cupcakes are cool, simply frost them, and you’ll have delicious, fresh lemon lime cupcakes with minimal effort!

What to Serve with Lemon Lime Cupcakes

These delightful treats are the highlight of any summer gathering, inviting smiles and sweet memories with every bite.

  • Fresh Fruit Salad: A mix of berries, melons, and citrus brings bright flavors that pair wonderfully with the tangy cupcakes, enhancing the overall freshness of your dessert spread.

  • Iced Tea Lemonade: This refreshing drink offers the perfect balance of sweetness and tartness, complementing the citrus notes of the cupcake and keeping everyone cool.

  • Coconut Macaroons: These chewy, tropical treats add a contrasting texture and sweetness, creating a delightful dessert duo that feels both indulgent and light.

  • Lemon Sorbet: Light and refreshing, this frozen dessert mirrors the cupcake's bright flavor profile, providing a palate-cleansing counterpoint that is oh-so-satisfying.

  • Creamy Coleslaw: This crunchy, tangy side adds a savory element to your meal, balancing the sweetness of the cupcakes while celebrating summer's vibrant colors.

  • Sparkling Water with Lime: An invigorating, bubbly drink that enhances the lemonade vibes, sparkling water refreshes the palate and keeps the gathering lively.

  • Key Lime Pie: A classic companion that echoes the citrus theme; its creamy tartness creates a delightful contrast to the light texture of the cupcakes, ensuring your dessert table shines bright.

  • Mini Cheesecakes: These luscious bites add a rich and creamy texture while keeping to the citrus theme—they’re another showstopper that will leave taste buds dancing!

Lemon Lime Cupcakes Recipe FAQs

What type of soda is best for Lemon Lime Cupcakes?
Absolutely! The ideal choice for these cupcakes is lemon-lime soda, as it provides the perfect balance of flavor and carbonation. However, you can also use any clear citrus-flavored soda like 7UP or Sprite. If you're feeling adventurous, experimenting with other sodas like orange can create the same delightful texture with a unique twist!

How should I store Lemon Lime Cupcakes?
To keep your lemon lime cupcakes fresh, store them in an airtight container in the fridge for up to 5 days. This will help maintain their moisture and light texture. If you prefer to make them ahead of time, freeze the cupcakes individually wrapped in plastic wrap for up to 2 months. When you're ready to enjoy them, just thaw overnight in the fridge!

Can I freeze the cupcakes?
Very! Freezing your lemon lime cupcakes is a wonderful way to save leftovers. Here’s how: After they’ve cooled completely, wrap each cupcake in plastic wrap securely and place them in a freezer-safe bag or container. This helps prevent freezer burn. When ready to indulge, remove a cupcake and leave it in the fridge to thaw overnight.

My cupcakes turned out dense. What did I do wrong?
Common culprit alert! Dense cupcakes can result from overmixing the batter, which develops the gluten in the flour. To avoid this, mix the ingredients until just combined—no more! Also, double-check your oven temperature; an oven that is too hot can hinder proper rising. Ensuring that your egg whites are fresh and correctly measured will also make a difference in achieving that light texture.

Are Lemon Lime Cupcakes safe for my pets?
It's best to keep these cupcakes away from your furry friends. The ingredients, particularly the sugar and cream cheese frosting, can be harmful to pets, especially dogs. If you're looking for pet-friendly treats, there are plenty of recipes designed specifically for them. Always consult with your vet before sharing any human food with your pets to ensure their safety!

Can I make these cupcakes gluten-free?
Absolutely! To make gluten-free lemon lime cupcakes, simply swap the regular white cake mix with a gluten-free cake mix. Many brands have delicious options that will yield equally moist and fluffy cupcakes. Just be sure to check the label to ensure all other ingredients you use are gluten-free as well!

Lemon Lime Cupcakes

Zesty Lemon Lime Cupcakes for a Refreshing Summer Treat

Delightful Lemon Lime Cupcakes are a light and refreshing treat perfect for summer gatherings.
Print Recipe Pin Recipe
Prep Time 15 minutes mins
Cook Time 20 minutes mins
Cooling Time 5 minutes mins
Total Time 40 minutes mins
Servings: 12 cupcakes
Course: Dessert
Cuisine: American
Calories: 190
Ingredients Equipment Method Nutrition Notes

Ingredients
  

For the Batter
  • 1 box White Cake Mix Feel free to swap with another flavor of box cake mix.
  • 1/3 cup Vegetable Oil Try melted coconut oil for a unique twist.
  • 3 large Egg Whites Whole eggs can be used but may make the texture denser.
  • 12 ounces Lemon Lime Soda Any clear citrus soda can be used.
  • 1 packet Lime Gelatin Mix Can be omitted if not available.
For the Frosting
  • 1/2 cup Salted Butter Unsalted butter is fine, just add a pinch of salt.
  • 8 ounces Cream Cheese Vegan cream cheese is a dairy-free alternative.
  • 3-4 cups Powdered Sugar Coconut sugar can be a less processed option.
  • 1 teaspoon Vanilla Extract Optional but enhances flavor.
  • 2 tablespoons Half and Half Substitute with milk or a non-dairy option if needed.
  • Green Food Coloring Optional for appearance.
  • Green Sprinkles Swap with any color sprinkles if preferred.

Equipment

  • Muffin tin
  • Mixing Bowl
  • Whisk
  • piping bag

Method
 

Step-by-Step Instructions
  1. Preheat your oven to 350°F (175°C) and line a muffin tin with cupcake liners.
  2. In a large mixing bowl, combine white cake mix, vegetable oil, egg whites, and lemon-lime soda. Mix gently until just incorporated.
  3. Fold in the lime gelatin until fully combined.
  4. Pour the batter into the cupcake liners, filling each about two-thirds full.
  5. Bake for 18 to 20 minutes until the tops are golden and a toothpick inserted comes out clean.
  6. Let the cupcakes cool in the muffin tin for 5 minutes before transferring them to a wire rack.
  7. In a large bowl, beat together cream cheese and salted butter until fluffy. Gradually add powdered sugar and half and half until smooth.
  8. Frost the cooled cupcakes with the cream cheese mixture and add green sprinkles.

Nutrition

Serving: 1cupcakeCalories: 190kcalCarbohydrates: 24gProtein: 2gFat: 9gSaturated Fat: 5gPolyunsaturated Fat: 0.5gMonounsaturated Fat: 2gCholesterol: 30mgSodium: 160mgPotassium: 60mgSugar: 15gVitamin A: 200IUVitamin C: 2mgCalcium: 20mgIron: 0.5mg

Notes

Mix gently to avoid dense cupcakes and ensure the cupcakes are completely cool before frosting.

Tried this recipe?

Let us know how it was!

Pineapple Upside Down Cupcakes that Spark Joy in Every Bite

October 24, 2025 by Grace Snow Leave a Comment

As I was rummaging through old recipe cards, the vibrant memories of family gatherings came rushing back—those glorious moments spent savoring each slice of pineapple upside-down cake. This love for nostalgia inspired me to reinvent a classic into something even more fun: Easy Pineapple Upside Down Cupcakes! These delightful mini treats bring that familiar comfort in a portable form, perfect for any celebration, from backyard barbecues to cozy movie nights. With just a handful of ingredients and minimal prep time, you'll whip up a batch that's light, fluffy, and topped with caramelized pineapple and cherries. They're not only a delicious homage to the original but also a sweet, easy-to-make dessert that everyone will adore. Ready to sprinkle some joy into your kitchen? Let’s dive into this scrumptious recipe together!

Why are Pineapple Upside Down Cupcakes a must-try?

Nostalgic Comfort: Each bite brings back warm memories of family gatherings, offering that familiar sweetness we all love.
Easy to Make: With simple ingredients and minimal prep, anyone can master these delightful treats—even if you’re short on time!
Portable Pleasure: Perfect for picnics or parties, these cupcakes make it easy to enjoy dessert on the go without the mess.
Flavorful Twist: The combination of caramelized pineapple and fluffy vanilla cake creates a deliciously unique dessert experience.
Endless Variations: Don’t hesitate to experiment! Try swapping pineapple for other fruits or adding a splash of rum for the adults. These cupcakes truly shine in any setting!

Pineapple Upside Down Cupcakes Ingredients

For the Batter

  • Butter – Provides richness and moisture. Substitution: Can use margarine for a dairy-free option.
  • Sugar – Adds sweetness and helps create a caramelized crust. Note: Large granulated sugar is typically used for optimal texture.
  • Flour – The structure of the cupcakes. Substitution: For gluten-free, use almond or a gluten-free flour blend.
  • Pineapple Juice – Enhances flavor and adds moisture to the batter. Substitution: Fresh juice can be used for a fresher taste.
  • Eggs – Binds ingredients together and provides lift. Note: For egg-free, consider using flaxseed meal or a commercial egg substitute.
  • Brown Sugar – Adds sweetness and a hint of molasses flavor, enhances caramelization.

For the Topping

  • Pineapple Rings – The signature topping that caramelizes during baking. Note: If they don’t fit, slice them in half to fit the cupcake pan.
  • Heavy Whipping Cream – Used to whip up into fresh cream for topping. Substitution: Coconut cream can be used for a dairy-free version.
  • Powdered Sugar – Sweetens and stabilizes the whipped cream.
  • Maraschino Cherries – Decorative topping that adds a classic touch. Substitution: Fresh cherries can also be used for a natural option.

Get ready to create magical Pineapple Upside Down Cupcakes that not only celebrate tradition but also add a dash of fun to your dessert table!

Step‑by‑Step Instructions for Pineapple Upside Down Cupcakes

Step 1: Preheat the Oven
Begin by preheating your oven to 350°F (180°C). This temperature is perfect for creating a golden, caramelized top on your Pineapple Upside Down Cupcakes. Make sure your oven rack is positioned in the center for even baking, as you want those delightful mini cakes to rise beautifully.

Step 2: Prepare the Cupcake Pan
In a small saucepan, melt ⅓ cup of butter over low heat. Once melted, stir in brown sugar until combined, then evenly distribute this mixture into each section of a lined cupcake pan. Nestle a pineapple ring – or half rings, if needed – into each section, ensuring they sit flat for even caramelization while baking.

Step 3: Mix the Cake Batter
In a large mixing bowl, whisk together the remaining melted butter and granulated sugar until smooth. Add pineapple juice and eggs to the mix, then continue whisking until fully blended. Gradually incorporate the flour until just combined – be careful not to overmix, as this could affect the lightness of your Pineapple Upside Down Cupcakes.

Step 4: Fill the Cupcake Pan
Now it's time to fill the prepared cupcake sections! Pour the batter into each section, filling them about ¾ full. This allows room for the cupcakes to rise without overflowing. The contrast of the batter against the caramelized pineapple will make for a stunning and tasty treat once they’re baked.

Step 5: Bake to Perfection
Place the cupcake pan in your preheated oven and bake for about 20 minutes. Keep an eye on them, and check for doneness by inserting a toothpick into the center of a cupcake; if it comes out clean, they’re ready to come out of the oven. The tops should be lightly golden and slightly spring back when touched.

Step 6: Cool and Invert
Once baked, remove the cupcakes from the oven and let them cool in the pan for about 5-10 minutes. This is a crucial step to ensure they release easily. To invert, carefully run a knife around the edges and flip them onto a serving platter, revealing the beautiful caramelized pineapple topping.

Step 7: Whip the Cream Topping
While the cupcakes cool completely, prepare the whipped cream. In a mixing bowl, combine heavy whipping cream and powdered sugar. Using a hand mixer or whisk, beat until soft peaks form. The whipped cream will complement the sweetness of your Pineapple Upside Down Cupcakes perfectly, adding a light and airy touch to each bite.

Step 8: Serve and Garnish
Once cooled and inverted, pipe the freshly whipped cream onto each cupcake generously. Top with a maraschino cherry for that classic look. Now your Pineapple Upside Down Cupcakes are ready to be served, making for a delightful treat at any gathering or simply to enjoy at home!

What to Serve with Easy Pineapple Upside Down Cupcakes

As you savor the tropical sweetness of these delightful mini cakes, consider pairing them with delicious sides and treats to enhance your dessert experience.

  • Vanilla Ice Cream: The creamy, rich flavor of vanilla ice cream perfectly complements the fruity sweetness of the cupcakes, creating a delightful contrast.
  • Coconut Whipped Cream: Light and fluffy, this tropical twist on traditional whipped cream adds a luxurious finish that harmonizes with the pineapple.
  • Fresh Berries: A medley of strawberries, blueberries, or raspberries introduces a refreshing acidity that balances the sweetness of the cupcakes.

Pairing a scoop of coconut whipped cream with these cupcakes turns a simple treat into a tropical dessert fantasy. As you indulge in the flavors, you'll feel like you're on a beach getaway.

  • Melon Agua Fresca: This refreshing drink made from fresh melons and lime brings a sweet, fruity flavor that enhances the tropical vibes of your dessert.

A chilled glass of Melon Agua Fresca makes for a delightful contrast to the warmth of the cupcakes, ensuring every bite is a refreshing delight.

  • Pineapple Salsa: This zesty and savory salsa amplifies the pineapple flavor while providing a surprising twist, making it a fantastic side to experiment with.

Enjoying your cupcakes alongside pineapple salsa transforms this dessert into an adventurous pairing that surprises the palate and invites fun feelings.

  • Chocolate Dipping Sauce: A warm, rich chocolate sauce offers an indulgent option for drizzling over each cupcake. The pairing of chocolate and pineapple is a hidden gem worth exploring.

Each bite dipped in chocolate creates a whimsical dessert experience that your friends and family will adore.

  • Chilled Sweet Tea: The refreshing elements of sweet tea provide a perfect balance to the cupcakes, making it an ideal drink for summer gatherings or picnics.

Its cooling effect makes sweet tea a delightful contrast that enhances the tropical flavors of the Pineapple Upside Down Cupcakes and keeps everyone feeling refreshed.

Pineapple Upside Down Cupcakes Variations

Feel free to unleash your creativity and customize these cupcakes to suit your taste buds!

  • Fruit Swap: Substitute pineapple rings with peaches or cherries for a delicious twist. Each fruit brings its own unique sweetness to the cupcakes.
  • Boozy Upgrade: Add a splash of rum to the batter for an adult-friendly version. The rum enhances the flavor while making each bite a little more exciting!
  • Gluten-Free: For gluten-free cupcakes, swap regular flour for almond flour or a gluten-free flour blend. This makes it easy for everyone to enjoy this delightful treat.
  • Vegan Delight: Replace eggs with flaxseed meal or a commercial egg substitute and use coconut cream instead of heavy whipping cream. You'll still achieve that fluffy, satisfying texture!
  • Creamy Infusion: Whip in a bit of vanilla extract or almond extract into the batter for an extra layer of flavor. These enhancements will elevate the cupcake's profile beautifully.
  • Coconut Crunch: Top your cupcakes with toasted coconut flakes along with the caramelized pineapple. This adds a new texture and a delightful, tropical flavor.
  • Extra Caramel: Drizzle some warm caramel sauce over the assembled cupcakes for an indulgent touch. This sweet addition is sure to impress your guests!
  • Nuts for Texture: Fold in chopped walnuts or pecans into the batter for a delightful crunch. The nuttiness pairs well against the sweetness of the cupcakes.

So, whether you're inspired by the season, dietary needs, or simply your cravings, don’t hesitate to make these Pineapple Upside Down Cupcakes your own. For even more ideas, check out my guide on Dessert Substitutions and Creative Cupcake Variations!

Make Ahead Options

These Pineapple Upside Down Cupcakes are a fantastic choice for meal prep, making your dessert planning a breeze! You can prepare the cupcake batter up to 24 hours in advance; simply mix all the wet and dry ingredients, cover the bowl, and refrigerate. Additionally, you can caramelize the pineapple and brown sugar mixture in the cupcake pans a day ahead as well. When you're ready to bake, simply fill the pans and pop them in the oven. This keeps the cupcakes just as delicious and fluffy, with that perfect caramelized topping. Once baked, allow them to cool properly before storing in an airtight container for up to 3 days—this ensures every bite remains fresh and flavorful. Just whip up your cream and garnish just before serving for a delightful treat that saves you time without sacrificing taste!

How to Store and Freeze Pineapple Upside Down Cupcakes

Fridge: Store any leftover Pineapple Upside Down Cupcakes in an airtight container in the fridge for up to 4-5 days to maintain their freshness and avoid drying out.

Freezer: For longer storage, freeze the cupcakes individually wrapped in plastic wrap and then placed in a freezer-safe bag for up to 2 months. This helps preserve their delightful flavor and texture.

Thawing: When ready to enjoy, thaw the frozen cupcakes in the fridge overnight. Reheat in the microwave for a few seconds to restore their warmth and softness, if desired.

Serving Tip: Always add whipped cream fresh when serving after storage for the best taste and presentation.

Expert Tips for Pineapple Upside Down Cupcakes

  • Cool Well: Allow your cupcakes to cool for at least 5-10 minutes before inverting. This helps prevent sticking and ensures a clean release from the pan.
  • Knife Trick: Running a knife around the edges can ease the removal process. It’s a simple step that drastically reduces the chance of broken cupcakes!
  • Perfect Toppings: For a fruity twist, swap the pineapple for other fruits like peaches or cherries. Just ensure they’re firm enough to hold their shape while baking.
  • Keep an Eye on Baking: Every oven is different! Start checking for doneness a few minutes early, as baking times can vary.
  • Whipped Cream Magic: Use chilled tools when whipping the cream for the best results. This helps achieve the light and fluffy texture that perfectly complements your pineapple upside down cupcakes.

Pineapple Upside Down Cupcakes Recipe FAQs

How do I choose ripe pineapple for the topping?
Absolutely! When selecting pineapple rings, look for fruit that is firm, fragrant, and free of dark spots or blemishes. A ripe pineapple will smell sweet at the base and feel slightly soft when gently squeezed. If you're using canned pineapple, choose slices packed in juice rather than syrup for a fresher taste.

What is the best way to store Pineapple Upside Down Cupcakes?
Very! To keep your cupcakes fresh, store them in an airtight container in the refrigerator for up to 4-5 days. First, let them cool completely if they’ve just been baked. If you're stacking them, consider placing parchment paper between layers to prevent sticking.

Can I freeze Pineapple Upside Down Cupcakes?
Yes, you can! To freeze, individually wrap the cooled cupcakes in plastic wrap, then place them in a freezer-safe bag. They can hold up in the freezer for up to 2 months. When you're ready to enjoy them, simply thaw them in the fridge overnight and warm them slightly in the microwave if you'd like.

What if the cupcakes stick to the pan?
No worries! If this happens, it could be due to insufficient cooling. Make sure to let them cool in the pan for 5-10 minutes. To help ease them out, gently run a knife around the edges. If you suspect they’re still stuck, you can place the pan in a shallow dish of warm water for a minute to loosen the edges further.

Are Pineapple Upside Down Cupcakes safe for people with allergies?
Definitely! Be mindful of everyone’s dietary needs. To make these cupcakes more allergy-friendly, use gluten-free flour and substitute eggs with flaxseed meal or a commercial egg replacer. Also, consider using coconut cream instead of dairy whipped cream for a delicious dairy-free topping option.

How should I serve Pineapple Upside Down Cupcakes?
The more the merrier! For a delightful presentation, top each cupcake with freshly whipped cream and a maraschino cherry right before serving. If you're feeling adventurous, pair them with a scoop of vanilla ice cream for a truly indulgent treat that your guests will adore!

Pineapple Upside Down Cupcakes

Pineapple Upside Down Cupcakes that Spark Joy in Every Bite

These Pineapple Upside Down Cupcakes offer a nostalgic taste experience in mini treat form, perfect for any celebration.
Print Recipe Pin Recipe
Prep Time 15 minutes mins
Cook Time 20 minutes mins
Cooling Time 10 minutes mins
Total Time 45 minutes mins
Servings: 12 cupcakes
Course: Dessert
Cuisine: American
Calories: 180
Ingredients Equipment Method Nutrition Notes

Ingredients
  

For the Batter
  • ⅓ cup Butter Can use margarine for a dairy-free option.
  • 1 cup Granulated Sugar Large granulated sugar is typically used for optimal texture.
  • 1 cup Flour For gluten-free, use almond or a gluten-free flour blend.
  • ½ cup Pineapple Juice Fresh juice can be used for a fresher taste.
  • 2 large Eggs For egg-free, consider using flaxseed meal or a commercial egg substitute.
  • ½ cup Brown Sugar Enhances caramelization.
For the Topping
  • 12 slices Pineapple Rings If they don’t fit, slice them in half to fit the cupcake pan.
  • 1 cup Heavy Whipping Cream Coconut cream can be used for a dairy-free version.
  • 2 tablespoons Powdered Sugar
  • 12 pieces Maraschino Cherries Fresh cherries can also be used for a natural option.

Equipment

  • Oven
  • Cupcake pan
  • Mixing Bowl
  • Whisk
  • hand mixer
  • Saucepan

Method
 

Step‑by‑Step Instructions
  1. Preheat your oven to 350°F (180°C).
  2. Melt ⅓ cup of butter over low heat and stir in brown sugar until combined. Distribute evenly in a lined cupcake pan.
  3. Whisk together remaining melted butter and granulated sugar until smooth. Add pineapple juice and eggs, then combine with flour until just mixed.
  4. Fill the cupcake sections about ¾ full with batter.
  5. Bake for about 20 minutes or until a toothpick comes out clean.
  6. Let them cool in the pan for 5-10 minutes, then invert onto a serving platter.
  7. Whip together heavy whipping cream and powdered sugar until soft peaks form.
  8. Pipe whipped cream onto each cupcake and garnish with a maraschino cherry.

Nutrition

Serving: 1cupcakeCalories: 180kcalCarbohydrates: 30gProtein: 2gFat: 6gSaturated Fat: 4gMonounsaturated Fat: 2gCholesterol: 40mgSodium: 150mgPotassium: 70mgSugar: 20gVitamin A: 300IUVitamin C: 5mgCalcium: 20mgIron: 0.5mg

Notes

Allow cupcakes to cool well in the pan for easier removal. Experiment with different fruits for toppings!

Tried this recipe?

Let us know how it was!
  • « Previous Page
  • 1
  • …
  • 180
  • 181
  • 182
  • 183
  • 184
  • …
  • 244
  • Next Page »

Welcome!

Hi, I’m Grace, a Sydney-based home cook with a passion for bold flavors and trending ingredients. Whether you’re a busy beginner or a seasoned foodie, you’ll find dishes here that are fresh, fun, and full of flavor.

More about me

Popular Recipes

  • Delicious Keto Philly Cheesesteak Bowls You’ll Crave Daily
  • twice baked potato casserole
    Indulge in This Creamy Twice Baked Potato Casserole Delight
  • Red Potato Casserole
    Irresistible Red Potato Casserole with Crunchy Topping
  • Cowboy Potato Casserole
    Comforting Cowboy Potato Casserole for Cozy Nights

Footer

↑ back to top

About

  • Privacy Policy
  • Disclaimer
  • Terms & Conditions

Newsletter

  • Sign Up! for emails and updates

Contact

  • About me
  • Contact me

Copyright © 2025 TastyTrendIngredients